
Resident Evil 4 (PS5 Remake) — Complete Campaign Walkthrough
Step-by-step campaign walkthrough for the PlayStation 5 remake of Resident Evil 4 (Capcom, 2023). This guide covers every main-chapter objective, major landmarks, essential progression items, Merchant stops, boss objectives, recovery from failure, and a clear completion checklist to reach the game's ending.


Find a copy
Resident Evil 4 Sony PlayStation 5
We may earn a commission if you buy through these links, at no extra cost to you. As an Amazon Associate I earn from qualifying purchases.
Opens retailer search results. Check the model, edition, seller, availability and current price before buying.
Before you begin
This guide is written to get you from the title screen to the credits: chapter-by-chapter directions, what to pick up and what to leave behind, how to use the Merchant smartly, and how to recover if you run out of resources.
Play how you like, but follow the chapter subgoals to avoid missing required progression items that block later areas.
I assume you are playing the PS5 release of Capcom’s 2023 remake.
Chapters are the primary progress markers — Village (early chapters), Castle (midgame), Island (final stretch).
Use the Merchant and inventory expansions to smooth combat; prioritize weapon upgrades that suit your playstyle.
If you want a faster or more cautious run, the preparation checklist below will help set you up for either.
Set yourself up for the run
Set controls and accessibility options before starting.
Choose a difficulty on a new save. Story objectives remain the same across difficulties, but combat pressure, resource behavior, and some puzzle solutions can differ.
Use typewriters for manual saves and storage.
Keep a balanced case with healing, handgun ammunition, a close-range weapon, crafting materials, and at least one crowd-control option.
Repair the Combat Knife when its durability is low, especially before parry-heavy encounters.
Spend Pesetas on capacity, repairs, and upgrades for weapons you actually use; Merchant requests and most treasures are optional.
Save before major boss arenas and one-way transitions.
When a route is unclear, search nearby rooms for the required key, lever, crank, terminal, or puzzle item before advancing.
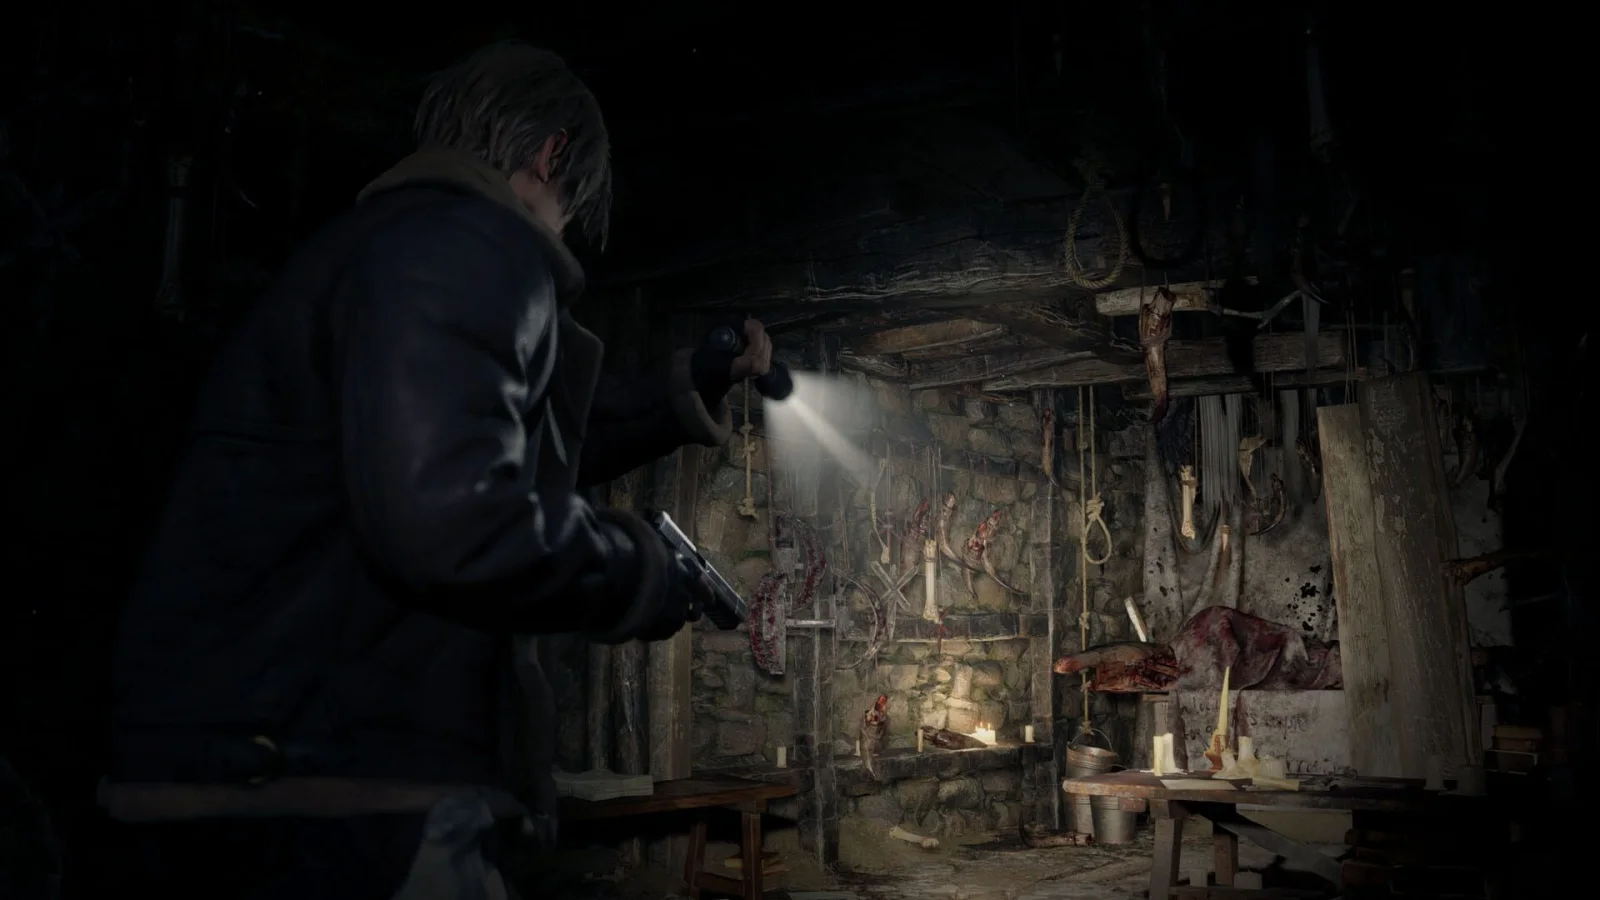
Chapter 1 — The Village: Arrival and Initial Survival
Investigate the Hunter’s Lodge, escape through the upper floor, and follow the marked route toward the lake. Save at the ruined house before entering the Village Square, where the goal is to survive until the church bell rings rather than defeat every villager. Collect the W-870 if you can reach it safely, then sweep the square and continue north through the Farm. In the Farm, use the typewriter, handle the tripwire and Brute, recover the Wooden Cog, and raise the portcullis. Push the cart beyond the gate, cross the Lakeside Settlement, and investigate the body bag in the basement. That cutscene marks the end of Chapter 1.
1. Investigate the Hunter’s Lodge
Follow the only open forest path from the starting point. Enter the illuminated lodge and continue down the main hallway until the villager attacks. Defeat him, then pick up the Hunter’s Lodge Key beside the body. Return to the corridor and unlock the red-marked door on the right.
Go downstairs and follow the basement passage to its end. After the scene, retrace your route. The villager returns, so use the handgun to stop him, then leave through the door the second villager used to enter. Go upstairs and exit through the upper-floor route when the next scene begins.
- Collect the Hunter’s Lodge Key after the first lodge encounter.
- Use it on the red-marked door in the hallway.
- Leave the lodge through the upper floor after the basement scene.
2. Save before the Village Square
Outside the lodge, follow the forest trail toward the next ruined building. Break the yellow-marked barrel outside, then enter and collect the nearby supplies. This building contains the first typewriter, so make a manual save before continuing. The official PS5 manual confirms that typewriters provide manual saving and storage functions.
Proceed along the path and use the handgun against ordinary villagers. A head or leg shot can create a stagger for a melee follow-up, conserving ammunition. Search the small hut on the left for supplies, but watch for the bear trap on the path. Open the large gate with the severed heads to enter the Village Square.
- Make a manual save at the first typewriter.
- Search the ruined building and nearby hut for ammunition and healing items.
- Avoid or disable the bear trap before reaching the Village Square.
3. Survive the Village Square assault
After entering the square, identify the entrance gate and the surrounding buildings before the villagers fully engage. The assault ends automatically when the church bell rings; you do not need to kill every enemy. Keep moving through the square and use buildings, ladders, windows, and open paths to avoid being surrounded.
The W-870 shotgun is mounted upstairs in the two-story building near the tall tower. Collect it if you can reach the house without being trapped. Use shotgun shells or a grenade to clear a path when several villagers block an exit, then keep moving. Dr. Salvador can kill Leon with a single chainsaw attack, so never let him pin you against a wall or dead-end doorway. If you stagger him, use the opening to escape unless finishing him is safe.
- Treat the bell as the objective, not a full enemy clear.
- Keep a route around the square open at all times.
- Collect the W-870 only when doing so does not trap you upstairs.
4. Sweep the square and enter the Farm
When the bell rings, search the square for missed ammunition, crafting materials, healing items, and pesetas. The W-870 building has a rooftop Velvet Blue, and the shed on the route toward the northern exit contains a Ruby in a locked chest. These are optional valuables. If Dr. Salvador was defeated, he can drop an Emerald, but defeating him is not required for progress.
Leave through the northern route past the tower. The first small Farm building contains another typewriter; save again before entering the field. Villagers are initially spread through the area, so use the walls, barn, and buildings to separate them rather than fighting in the open.
- Search the Village Square after the bell.
- Collect the optional Velvet Blue and Ruby only if the route is safe.
- Save at the Farm typewriter before working through the field.
5. Raise the Farm portcullis
At the Farm, find the blue request note near the northern gate if you want the optional Destroy the Blue Medallions task. The request is not required for campaign progress. Continue to the windmill and watch for the tripwire explosive. Disarm it or leave it active and avoid triggering it while fighting.
Enter the windmill and climb to the upper mechanism. The gear is missing. Leave through one of the available routes and enter the large farmhouse. Search the lower floor for the Wooden Cog, but prepare for a Brute to break through and attack. Use the shotgun, melee staggers, or the tripwire to create space. Return to the windmill, place the Wooden Cog in the mechanism, and pull the lever to raise the portcullis.
- Locate the Wooden Cog in the farmhouse.
- Handle the Brute without allowing it to trap you in a corner.
- Install the cog and operate the windmill mechanism.
6. Cross the route to Lakeside Settlement
After the portcullis opens, do not attempt to enter the large house across the bridge yet. Move around its left side and push the wooden cart blocking the next path. Continue through the route while watching for falling debris and villagers who drop down from the left.
At the Lakeside Settlement, enemies use explosives and elevated positions. Shoot a lit explosive while it is in an enemy’s hand when you have a clear angle, or use cover and advance between attacks. Search the accessible buildings for supplies, but do not spend too long in the open. The first Clockwork Castellan is in the rafters of a building in this area; destroying it is optional and does not affect the chapter route.
- Push the cart to open the path beyond the Farm.
- Use cover against explosive throwers and elevated villagers.
- Reach the Lakeside Settlement and collect supplies before entering the final house.
7. Investigate the basement and confirm completion
Continue northeast through the Lakeside Settlement to the house where the objective leads. Break the exterior lock and enter. Collect the handgun ammunition in the cupboard, then move through the corridor and disarm the tripwire before crossing it.
Push the damaged bookshelf aside to reach the next room. Kill the villager attacking inside, then inspect the exposed trapdoor and descend. At the end of the basement, interact with the moving body bag. The following cutscene completes Chapter 1 and advances the game to Chapter 2. If you fail earlier, reload the most recent typewriter save and prioritize the route over optional treasure.
- Enter the final Lakeside Settlement house.
- Disarm the interior tripwire and move the broken bookshelf.
- Interact with the body bag in the basement and wait for the Chapter 2 transition.
Before you move on
- Leon has escaped the Hunter’s Lodge and entered the Village Square.
- The church bell has rung and the Village Square assault has ended.
- Leon has crossed the Farm, obtained the Wooden Cog, and raised the portcullis.
- Leon has pushed the cart beyond the Farm and reached the Lakeside Settlement.
- Leon has entered the final house, descended into the basement, and interacted with the body bag.
- The following cutscene begins Chapter 2.
Chapter 2 — Village Outer: Key Gates and First Merchant Contact
Chapter 2 starts in the Abandoned Factory after Leon recovers his equipment. Meet the Merchant, enter the Valley, collect the Hexagonal Emblem and the nearby Small Key, then use the emblem to open the blocked gate. The Small Key is optional for story progress but can open the locked drawer in the factory for an Elegant Mask. After the gate, follow the route through the wooded village outskirts to the Village Chief’s Manor. Chapter 2 ends only after you solve the manor cabinet and Crystal Marble puzzles, retrieve the Insignia Key, and trigger the next story sequence.
Recover Leon’s equipment and prepare at the Abandoned Factory
After the opening scene, search the room where Leon wakes up and collect the weapons and equipment placed around the work area. Check nearby containers for ammunition, gunpowder, healing items, and other supplies before moving on. This is a good place to become familiar with the knife parry, but do not spend handgun ammunition unnecessarily on isolated enemies if you can safely move past them.
Follow the factory route until you reach the exterior Merchant area. A typewriter is nearby, so save before entering the Valley if you want a reliable restart point. The factory drawer cannot be opened yet unless you already have a Small Key, so remember this location when you obtain one later.
- Recover Leon’s handgun, knife, and attaché case equipment.
- Search the factory for nearby supplies before leaving.
- Save at the typewriter near the Merchant if desired.
Use the first Merchant without exhausting your Pesetas
Speak with the Merchant outside the factory and review his stock. Sell valuables that are clearly marked for sale, but keep herbs, gunpowder, ammunition, grenades, and crafting materials. The Village Treasure Map is an optional Spinel purchase that marks many treasures in the region; it is useful for exploration but not required to finish the chapter.
Spend conservatively. A modest upgrade to the weapon you use most often and a knife repair are generally more useful than buying several weapons at once. The Merchant may also provide the Pest Control request in this area. Completing that request is optional and does not affect the route to the manor.
- Sell surplus valuables rather than combat or crafting supplies.
- Repair the knife if its durability is low.
- Accept the Pest Control request only if you want its optional reward.
Enter the Valley and manage the dynamite threat
Follow the route from the Merchant into the Valley. Ganados occupy the open area, and at least one enemy uses dynamite. Deal with explosive attackers early when possible, because their throws can damage Leon, destroy cover, and stagger nearby enemies. Use buildings, doorways, corners, and elevation changes to prevent the group from surrounding you.
You do not have to defeat every Ganado before collecting the required items. If the fight becomes crowded, retreat toward the entrance or into a building, then re-enter once the immediate pressure drops. Break visible crates and search accessible rooms, but avoid chasing enemies into the middle of the Valley when your health or ammunition is low.
- Prioritize enemies carrying or throwing dynamite.
- Use buildings and corners as fallback positions.
- Collect supplies after the area becomes quieter rather than fighting in the open unnecessarily.
Collect the Small Key and Hexagonal Emblem
Reach the large southern building in the Valley. Enter through its accessible opening and search the lower floor for a Small Key in a container. This key is optional for the main route. If you intend to collect the nearby factory treasure, carry it back to the Abandoned Factory and use it on the locked drawer to obtain the Elegant Mask before advancing too far.
Climb through the building to the roof and take the Hexagonal Emblem from the small structure near the weather vane. The emblem is required for the chapter’s main route. From the upper area, follow the path toward the northeastern side of the Valley. A crank there opens the barrier that previously prevented a convenient return to the Merchant and factory side.
- Take the Small Key from the lower floor of the southern Valley building.
- Collect the Hexagonal Emblem from the roof structure.
- Turn the northeastern crank to open the return barrier.
Return to the factory gate and open the route forward
If you want the Elegant Mask, return to the Abandoned Factory before using the emblem. Go back to the room where Leon recovered his equipment and unlock the drawer with the Small Key. The treasure is optional and can be sold to the Merchant later; it is not a required key item.
Return to the gate near the Merchant and place the Hexagonal Emblem into the hexagonal slot. Adjust the emblem until its design aligns with the slot, then flip it into position when prompted. A successful placement reveals the mechanism that opens the gate. Save or resupply before continuing if your ammunition or healing stock is low.
- Use the Small Key on the factory drawer if collecting the optional Elegant Mask.
- Insert and align the Hexagonal Emblem at the blocked gate.
- Open the gate and follow the newly accessible path.
Cross the wooded route and reach the Village Chief’s Manor
Proceed through the area beyond the gate. Crouch through the low passage where necessary and search the optional side route for treasure if you have enough supplies to deal with the enemies. Continue uphill through the wooded section, checking huts and containers as you go. You may encounter additional Ganados, so keep a fallback route in mind instead of stopping in the middle of the path.
Enter the Village Chief’s Manor and search the ground floor. A locked cabinet uses a three-symbol combination: crop, pig, and baby. Set those symbols in that order to open the cabinet and obtain the Crystal Marble. Take the marble upstairs to the locked door. Insert it and rotate it until the internal shape matches the village insignia shown by the lock. Enter the room and collect the Insignia Key from the drawer. The following scene confirms the chapter’s progression and leads into Chapter 3.
- Reach the Village Chief’s Manor after opening the factory gate.
- Open the cabinet with the crop, pig, and baby symbols.
- Use the Crystal Marble on the upstairs door.
- Take the Insignia Key from the room beyond and trigger the next story sequence.
Before you move on
- Leon has recovered his equipment and passed the first Merchant and typewriter area.
- The Hexagonal Emblem has been taken from the Valley and used to open the gate near the Abandoned Factory.
- The Valley Small Key has either been used on the factory drawer or intentionally left unused.
- Leon has reached the Village Chief’s Manor, opened the crop-pig-baby cabinet, and obtained the Crystal Marble.
- The Crystal Marble has opened the upstairs manor door, Leon has collected the Insignia Key, and the next story sequence has begun.
Chapter 3 — Village Interior: The Church Route, Fish Farm, and Del Lago
Chapter 3 begins in the Village Chief’s Manor after the previous chapter’s Insignia Key and Crystal Marble sequence. Leave through the front door, unlock the gate with the Insignia Key, and travel through Village Square, Town Hall, the Graveyard, and the Church approach. The Church itself remains locked; enter through the side route, use the save room, and descend through the hatch to reach the Quarry and the Merchant near the lake. From there, follow the lake route into the Fish Farm, collect Boat Fuel from the locked building at the back, and return to the dock. Optional Fish Farm rewards include a Small Key, Hexagon Piece B, treasures, and Blue Medallions. Fuel the boat and defeat Del Lago with the boat’s unlimited harpoons. The chapter ends after the lake monster is defeated and the game advances to Chapter 4.
Leave the Village Chief’s Manor and reach Village Square
Chapter 3 begins upstairs in the Village Chief’s Manor after the previous chapter’s Insignia Key and Crystal Marble sequence. Go downstairs and leave through the front door. Before following the main route, check around the side of the manor for the dog caught in a bear trap. Freeing it is optional, but the dog can assist Leon during the El Gigante encounter in Chapter 4. This rescue is not required for Chapter 3 completion.
Use the Insignia Key on the gate opposite the manor. This opens the route back toward Village Square. In the square, the tower collapses and blocks the straightforward path. Enter the accessible building on the right, pass through it, and climb out through the window so you can reach the Town Hall entrance. Search accessible crates and rooms for supplies, but keep some case space available for the Fish Farm’s Boat Fuel and optional key items.
- Leave the manor through the front door.
- Free the trapped dog if you want its later Chapter 4 assistance.
- Unlock the gate with the Insignia Key.
- Use the building-and-window detour after the tower collapses.
- Keep space available in the attaché case.
Pass the Town Hall, Graveyard, and locked Church
Enter the Town Hall and continue through the opposite exit. The Merchant is beyond it, so this is a useful point to sell duplicate treasures, repair the Combat Knife, buy or upgrade a weapon, and save at the nearby typewriter if available. A handgun remains useful for conserving ammunition, while a shotgun gives you a reliable answer to enemies that reach close range. Do not spend all of your shells before the Fish Farm, where a Hammer Brute and several villagers may appear.
Follow the path beyond the Merchant through the Graveyard and toward the Church. The main Church entrance is locked in this chapter. Walk around the right side of the building and use the side route to reach the small save room. Read the map or interact with the available documents if desired, then use the hatch in the floor. This is the required way forward; do not search the Church exterior for a key that is not available yet.
After descending, follow the tunnel and unlock the gate that connects back toward the earlier platforms. Return to the wooden bridge and cross it. Watch for villagers, thrown fire, and the tripwire near the cave route. Fight from narrow approaches and use melee follow-ups after staggering an enemy instead of firing repeatedly into crowded groups.
- Visit the Merchant beyond Town Hall.
- Cross the Graveyard and approach the Church.
- Use the side route because the main Church entrance is locked.
- Enter the save room and descend through the hatch.
- Unlock the connecting gate after leaving the tunnel.
- Cross the bridge and proceed toward the Quarry.
Cross the Quarry and prepare at the lakefront Merchant
Continue through the cave and Quarry until you reach the Merchant’s larger shop near the lake. This is the main preparation stop before the Fish Farm. Sell valuables you do not need, repair the knife if its durability is low, and improve the weapons you rely on most. A close-range weapon, a dependable handgun, and at least one healing item provide a flexible loadout. If you carry grenades, preserve one for a dangerous group or the Hammer Brute rather than using every explosive on ordinary villagers.
Use the typewriter in the Merchant area if you want a secure restart point. Check the lakefront buildings for ordinary supplies, then approach the boat. It cannot leave until you recover fuel. Climb the ladder leading into the Fish Farm. The route is one-way enough that organizing the case before entering is worthwhile, especially if you intend to collect the optional Small Key, Hexagon Piece B, or treasures.
- Reach the Merchant near the lake.
- Sell surplus valuables and repair the knife if needed.
- Upgrade practical weapons rather than spreading funds across everything.
- Save before entering the Fish Farm.
- Leave room for Boat Fuel and optional items.
Cross the Fish Farm and collect Boat Fuel
The Fish Farm begins on lower, flooded platforms. Move from stable boards and raised walkways, keeping a retreat route behind Leon. Villagers can approach from several directions, and a Hammer Brute may enter the fight. Use fences, ladders, tripwires, and narrow platforms to prevent enemies from surrounding you. Shoot legs or heads to create openings, then use a melee attack when the immediate area is safe. If the route is clear, running past an enemy is acceptable and saves ammunition.
Continue toward the far end of the Fish Farm. The required Boat Fuel is inside the building at the back; break the lock on the entrance, enter, and collect it. Before leaving, optional items can be gathered from nearby platforms. The Small Key is in a small building near the Boat Fuel route, and Hexagon Piece B is in a chest beneath the raised platform route. Treasures and Blue Medallions are also present. These rewards are not required for Del Lago, so do not stay in an unsafe area solely to collect them.
After taking the fuel, use the ladder outside the building to reach the raised platforms. Follow the wooden route back toward the entrance, dropping down where necessary and climbing the ladder that returns you to the lakefront. Enemies can reappear during the return trip. Either clear those blocking the path or sprint past them while preserving health and ammunition.
- Enter the Fish Farm through the lake route.
- Use platforms, ladders, and tripwires to control the fight.
- Collect Boat Fuel from the locked building at the back.
- Take the Small Key and Hexagon Piece B only if desired.
- Return to the lakefront dock.
Fuel the boat and defeat Del Lago
Before boarding, return to the Merchant if you need to sell Vipers, spend currency, repair equipment, or save. Heal if Leon is badly injured and organize the case. Normal firearms do not damage Del Lago during this encounter; the boat provides an unlimited supply of harpoons.
Interact with the boat to install the Boat Fuel. During the first phase, steer around floating debris while the monster drags the boat. On the default PS5 control layout, hold L1 to ready a harpoon and press R2 to throw it; customized control schemes may use different inputs. Throw harpoons at Del Lago’s exposed body whenever it surfaces and the angle is safe. Do not sacrifice control of the boat just to force an awkward shot.
When Del Lago stops dragging the boat and disappears beneath the water, watch the water ahead. The monster will surface and charge toward Leon with its mouth open. Ready a harpoon and throw it into the open mouth as it approaches. This interrupts the charge and prevents the attack from landing. Afterward, the dragging phase resumes. Repeat the pattern of steering around obstacles, striking the exposed body, and hitting the open mouth during each charge.
Continue until the defeat scene begins. The post-battle sequence confirms that Del Lago is dead and Chapter 3 is complete. The game then advances to Chapter 4, where the lake can be explored more extensively and the Church route can finally progress toward obtaining the Church Insignia.
- Install Boat Fuel at the dock.
- Use harpoons instead of firearm ammunition.
- Steer around floating debris during the dragging phase.
- Hit Del Lago’s exposed body when it surfaces.
- Strike the open mouth during every charge.
- Wait for the defeat scene and Chapter 4 transition.
Before you move on
- Leon has left the Village Chief’s Manor and unlocked the route with the Insignia Key.
- Leon has passed through the Church side route, descended through the hatch, crossed the Quarry, and reached the lakefront.
- Boat Fuel has been collected from the locked building at the back of the Fish Farm.
- The boat has been fueled at the dock.
- Del Lago has been defeated with the boat’s harpoons.
- The post-battle sequence has played and the game has advanced to Chapter 4.
- The dog has been freed only if its later assistance is desired; this is optional.
Chapter 4 — The Church and Village Heights: Stone Heads, El Gigante, and the Church Puzzle
Chapter 4 begins at the boathouse after Del Lago and ends when Leon reaches the upper floor of the village church. Explore the lake’s two marked cave shrines, solve their symbol panels, and recover the Blasphemer’s Head and Apostate’s Head. Return both heads to the Mural Cave and place them in the corresponding hand slots in either order to obtain the Church Insignia. Optional lake detours include the Old Wayshrine Key and extra treasures. Return through the Merchant’s area, resupply, save, and defeat El Gigante in the quarry by exposing the parasite on his back and using the knife prompt when he falls. Enter the church with the insignia, collect the Small Key and Blue Dial, then solve the stained-glass mechanism. Climb to the upper floor and pass through the door to begin Chapter 5.
1. Leave the boathouse and inspect the Mural Cave
After the Del Lago fight, leave the boathouse and follow the route into the Mural Cave. This is the central waypoint for Chapter 4. Examine the large mural and the stone mechanism with two empty hand slots. The mural indicates the two boat-accessible cave shrines on the lake, and both stone heads are required before the Church Insignia can be collected.
The nearby route may contain enemies that expose Plaga parasites. Keep moving through narrow passages, use melee attacks only after a stagger, and avoid spending your entire shotgun or grenade supply on ordinary Ganados. The quarry fight later is the chapter’s main combat check, so preserve high-damage ammunition and at least one reliable healing item.
- Reach the Mural Cave.
- Inspect the mural and confirm the two marked shrine locations.
- Keep sufficient ammunition and healing for the lake return route and El Gigante.
2. Visit the two cave shrines and recover both heads
Take the boat to the marked cave shrines. You may complete them in either order. At each shrine, follow the climbable path until you reach a symbol panel. The yellow-painted symbols around the cave are the clues; some markings only form a complete symbol when viewed from the correct angle. Press the three matching symbols on the panel to open the shrine door.
The Small Cave Shrine contains the Blasphemer’s Head. The Large Cave Shrine contains the Apostate’s Head. This distinction matters because the two shrine locations are easy to confuse when navigating the lake. After each door opens, enter the room and take the stone head from the statue. Check the Key Items inventory if you are unsure whether both items were collected.
The Old Wayshrine Key is an optional detour found at a Wayshrine near the lake. It opens Wayshrines in the village region and provides optional rewards, but it is not required for the Church Insignia. Skip optional exploration if your health or ammunition is low.
- Obtain the Blasphemer’s Head from the Small Cave Shrine.
- Obtain the Apostate’s Head from the Large Cave Shrine.
- Collect the Old Wayshrine Key only if you want optional Wayshrine rewards.
- Confirm both heads are in the Key Items inventory.
3. Return to the Mural Cave and obtain the Church Insignia
Return by boat to the Mural Cave. Place the Apostate’s Head and Blasphemer’s Head in the two corresponding hand slots. The order does not matter. Once both heads are inserted, the mechanism releases the Church Insignia. Take the insignia before leaving; it is the required key item for the church gate.
Return to the lower dock and travel toward the Merchant’s area on the southwest side of the lake. This is the best preparation point before the quarry. Repair the knife if necessary, upgrade a primary weapon, sell surplus valuables, organize healing items, and save at the nearby typewriter. Optional lake treasures can also be collected now, but none is needed to complete the chapter.
- Place both heads in the corresponding hand slots; either order is valid.
- Collect the Church Insignia.
- Visit the Merchant, reorganize supplies, and save before entering the quarry route.
4. Cross the quarry and defeat El Gigante
Follow the route from the Merchant’s area toward the quarry. El Gigante attacks and blocks the way to the church. Keep circling the arena instead of standing directly in front of him. His grab, stomp, and thrown-object attacks are easier to avoid when Leon stays to the side. The small structures around the arena provide brief opportunities to break line of approach and gather yourself, but they are not permanent cover.
Shoot El Gigante’s head until the parasite on his back emerges. Once it is visible, shift your attacks to the parasite. When El Gigante drops to one knee or falls forward, approach only when the prompt is safe and perform the knife attack. Repeat the sequence until the boss is defeated. If you rescued the dog from the bear trap in Chapter 3, it will distract the giant and create additional openings; the fight remains possible without the dog.
The boss drops a Yellow Diamond, but collecting it is optional. After El Gigante dies, the quarry route opens. Continue toward the church entrance and watch for the dog encounter near the approach before using the Church Insignia on the gate.
- Expose the parasite by damaging El Gigante’s head.
- Attack the parasite whenever it is exposed.
- Use the knife prompt whenever El Gigante falls.
- Use the Church Insignia to open the church gate.
5. Enter the church and collect the optional Small Key
Inside the church, move toward the altar. A Small Key is on the table beside it. The key is optional for story progression, but it opens the locked drawer in the nearby church save room. Leave through the entrance, enter the save room, and use the key on the drawer to collect the Yellow Diamond. If you skip this detour, the drawer can still be opened during the following chapter.
Return to the church’s main room after collecting the optional reward. Do not leave the church permanently before solving the stained-glass mechanism, because the upper-floor route is the chapter’s required continuation.
- Enter the church with the Church Insignia.
- Collect the Small Key beside the altar if desired.
- Use it on the save-room drawer for the optional Yellow Diamond.
6. Collect the Blue Dial and solve the church puzzle
From the main church room, follow the right-hand passage to the cabinet at the end and collect the Blue Dial. Return to the altar and pull the lever on the wall to the left. This opens the altar mechanism and provides the socket for the Blue Dial. Insert the dial to activate the stained-glass puzzle.
Rotate the blue, green, and red sections around the gold emblem until the entire design is filled with colored glass and no white gaps remain. Use the fixed emblem as your reference rather than relying on a remembered button sequence. The green section’s small triangular gap should align with the upper portion of the emblem, the blue section’s curved point should fit the lower-right shape, and the red section should complete the lower-center area. If the arrangement nearly fits, adjust one color at a time instead of rotating all three repeatedly.
When the glass pattern is accepted, the gate on the left side of the church opens. Climb the stairs to the upper floor and interact with the door. The following scene advances the game into Chapter 5, completing Chapter 4.
- Collect the Blue Dial from the cabinet at the end of the right-hand passage.
- Pull the lever left of the altar.
- Insert the Blue Dial.
- Align all three colored sections so the emblem is completely filled without overlap or white gaps.
- Climb to the upper floor and pass through the door.
Before you move on
- Both stone heads have been placed in the Mural Cave hand slots and the Church Insignia has been collected.
- The Church Insignia has opened the church gate.
- El Gigante has been defeated and the quarry route is open.
- The Blue Dial has been inserted into the altar mechanism.
- The stained-glass sections form one complete emblem without white gaps or overlapping colors.
- Leon has reached the church’s upper floor and passed through the door that advances to Chapter 5.
Chapter 5 — Escape the Church and Survive the Cabin Siege
Chapter 5 begins immediately after Ashley is rescued from the Church. Escape through the attic, cross the graveyard, and return through the Village Square and Farm toward the extraction point. Ashley can now open the previously inaccessible Village Square house, and she can help Leon reach the Village Chief’s Manor attic for optional treasure and the A Savage Mutt request. Before crossing the bridge beyond the Farm, visit the Merchant in the windmill, repair equipment, organize the Attaché Case, and save. The chapter’s required climax is the cabin defense with Luis. Board the lower windows, control the upstairs ladder, manage the Hammer Brute, and continue surviving until Ashley opens the escape route. The chapter ends when Leon and Luis leave the cabin.
Escape from the Church and collect the Yellow Diamond
When Chapter 5 starts, turn around instead of immediately following the exit route. Enter the room where Ashley was held at the end of Chapter 4 and shoot the hanging metal container. It drops the Yellow Diamond, which is optional treasure and not required for progression.
Return to the main upper-floor route and use the marked interaction point to boost Ashley. She moves through the upper area and lowers a ladder. Climb into the attic, collect the available supplies if your inventory has space, then leave through the attic window. Outside, pull the cabinet blocking the church exit out of the way so the route into the church grounds is open.
- Shoot down the hanging container and collect the Yellow Diamond.
- Boost Ashley to make her lower the attic ladder.
- Collect attic supplies if useful, then exit through the window.
- Move the cabinet blocking the church exit.
Cross the graveyard and reach the Town Hall Merchant
Take Ashley through the church grounds and into the graveyard. You can fight the villagers or move through the central route while avoiding unnecessary combat. Keep Ashley close enough to follow, but if an enemy carries her away, shoot the carrier immediately. Do not fire through Ashley while attempting the rescue.
Continue toward the Village Square and the Town Hall area. The Merchant outside Town Hall provides a useful checkpoint before the optional Village detours. Pick up the blue request note for A Savage Mutt if you intend to complete that request during this chapter. Make a manual save if you want a reliable retry point before exploring the reopened areas.
- Reach the Merchant outside Town Hall.
- Rescue Ashley immediately if a villager carries her away.
- Accept A Savage Mutt if you plan to complete the request.
Use Ashley in the Village Square and decide on optional detours
In the Village Square, go to the previously locked house in the northwest section. Find the high opening marked for Ashley and boost her through it. She unlocks the door from inside, allowing Leon to enter and open the chest containing the Elegant Bangle. This treasure is optional and can be sold or combined later.
For additional optional rewards, return to the Village Chief’s Manor. Go upstairs to the bedroom where the Insignia Key was found and interact with the crooked wall painting. The revealed lever opens the attic hatch. Boost Ashley so she lowers the ladder, then search the attic for the Clockwork Castellan and Antique Camera. After leaving the attic, return to the Village Square if you accepted A Savage Mutt; the special Colmillos appears there and must be defeated to complete the request. Do these detours before crossing the Farm bridge.
- Boost Ashley through the Village Square house opening.
- Open the Elegant Bangle chest if you want the optional treasure.
- Search the Village Chief’s Manor attic for its optional rewards.
- Complete A Savage Mutt before leaving the Village if you accepted it.
Return through the Farm and handle the Wayshrine
From the Village Square, take the route toward the Farm. The collapsed tower blocks the direct path, so use either the nearby house or the raised western platform and ladder to go around it. Keep Ashley behind Leon while dealing with enemies and avoid backing her into the Brute’s charge path.
The Farm contains a Brute without a hammer. Give it room to rush, sidestep the charge, and attack only when the area around Ashley is safe. If you obtained the Old Wayshrine Key in Chapter 4, use it at the Wayshrine near the windmill gate to collect the Antique Pipe. The Wayshrine reward is optional and does not affect the extraction route.
- Use the alternate route around the collapsed tower.
- Keep Ashley out of the Brute’s charge path.
- Open the Farm Wayshrine only if you have the Old Wayshrine Key.
Prepare at the Farm Merchant before crossing the bridge
Enter the windmill and visit the Merchant before crossing the bridge toward the cabin. This is the last convenient preparation point in the chapter. Repair the Combat Knife if its durability is low, organize the Attaché Case, and carry a handgun, a close-range weapon such as the shotgun, healing items, and any grenades or other crowd-control tools available. A rifle is useful but not mandatory.
Sell valuables only after checking whether you want to preserve them for combination bonuses. Spend money on practical damage, capacity, or durability improvements rather than emptying your funds on unnecessary ammunition. Make a manual save here. Once you cross the bridge and enter the cabin sequence, do not expect to return freely to the earlier Village areas during the chapter.
- Visit the Farm Merchant in the windmill.
- Repair the knife and organize weapons, healing items, and grenades.
- Save before crossing the bridge.
- Finish desired Village Square, Manor, and request detours first.
Survive the cabin defense with Luis
Cross the bridge and continue until Luis brings Leon into the cabin. When the defense begins, board the downstairs windows with the available shelves and wooden planks. Prioritize the window beside the stairs so enemies have fewer ways to reach the upper floor. Stay downstairs during the opening phase, use the furniture and stairwell as obstacles, and shoot enemies as they commit to a window or doorway rather than standing in the open.
When villagers place a ladder at an upstairs window, go upstairs and kick it down. The ladder can be restored, so repeat this whenever necessary while watching the stairway and the remaining downstairs openings. Hand Grenades are effective in the cabin’s confined rooms, but keep enough ammunition and explosive power for the later escalation.
A Hammer Brute eventually breaks into the cabin. Do not let it pin Leon against a wall or staircase. You can draw it toward the stairs, move around the railing, and use the lower floor to create distance while attacking it. Shotgun blasts, grenades, and well-timed close-range attacks are useful when it is exposed, but ordinary villagers remain dangerous while your attention is on the Brute. Continue controlling the room instead of searching for Ashley; she hides during the defense.
After the required waves and the Brute sequence, Ashley opens an escape route. Follow the prompt and leave the cabin with Luis. The transition scene and departure complete Chapter 5.
- Board the downstairs windows as soon as the defense begins.
- Control the upstairs ladder and prevent enemies from surrounding Leon.
- Use the stairs and furniture to create space from the Hammer Brute.
- Continue until Ashley opens the escape route.
- Leave the cabin with Luis to finish the chapter.
Before you move on
- The cabin defense has ended after the required enemy waves and Hammer Brute sequence.
- Ashley opens the escape route from the cabin.
- Leon and Luis follow the escape route and the transition scene begins.
- The game advances to Chapter 6, confirming Chapter 5 completion.
Chapter 6 — Departure from Village: Checkpoint, Méndez, and the Castle Approach
Chapter 6 is the final Village chapter in the PlayStation 5 remake. Leon and Ashley leave the church, pass through the fortified Checkpoint, escape a pursuing group of villagers, defeat Chief Bitores Méndez, and cross the drawbridge to the Castle. The Village cannot be freely revisited after this chapter, so use the two Merchant stops to repair equipment, sell completed-use valuables, upgrade your main weapons, and save at the nearby Typewriters. The Checkpoint Crank is obtained by defeating the two Chainsaw Sisters, not by simply operating the crank. Before leaving the Slaughterhouse, collect Méndez’s False Eye; after exiting, the hanging cage near the road contains an optional Emerald.
1. Follow the northern route and use the first Merchant
Chapter 6 begins after the church sequence. Follow the only open path north with Ashley. The route is effectively one-way, and the wider Village areas from earlier chapters are no longer available for a normal return, so finish any Village errands you consider important before moving through the opening gate.
Continue through the first enemy area, using cover and the surrounding structures to control the fight. Molotov throwers and enemies on higher platforms can make the approach dangerous; eliminate ranged attackers first if they have a clear angle on Leon. Search the huts, crates, and obvious side rooms for ammunition and healing, but do not spend all your resources trying to clear every corner.
The path leads to a Merchant. Repair the Combat Knife if it is damaged, reorganize the Attaché Case, and upgrade the weapons you use most. Keep a dependable close-range weapon, a handgun or comparable general-purpose firearm, and a longer-range option if one is available. Leave space for dropped ammunition and key items.
- Repair the Combat Knife if you rely on parries or knife attacks.
- Keep healing, ammunition, and at least one grenade or flash grenade if available.
- Save at the nearby Typewriter before entering the next large combat area.
2. Clear the approach to the Checkpoint
Pass through the gate and advance toward the fortified Checkpoint. The area contains villagers, supplies, and enemies positioned on elevated platforms. Move from cover to cover rather than standing in the central path, and deal with enemies who can throw Molotovs or otherwise attack from above.
Search the small houses and corners after the immediate threat is under control. The Yellow Diamond and the Chalice of Atonement are optional treasures in this route, and the Wayshrine in the Checkpoint approach can also provide an optional reward if you still have the Wayshrine Key. None of these items is required to finish the chapter, so prioritize ammunition and safe positioning if resources are low.
Enter the Checkpoint building and clear enough of the upper floor to move safely. The exit gate cannot be opened yet because the Checkpoint Crank is obtained during the next encounter.
- Do not confuse the Checkpoint approach with the later escape route.
- Use upper-floor cover and doorways to avoid being surrounded.
- Treat treasures and the Wayshrine reward as optional rather than required progress.
3. Hide Ashley and obtain the Checkpoint Crank
From the upper floor of the Checkpoint building, direct Ashley into the yellow-marked locker. She remains safe there while Leon handles the next fight, removing the risk of having to protect her while dealing with the strongest enemies in the room.
Go to the lower floor and interact with the crank on the south wall. This triggers the Chainsaw Sisters and additional villagers. The Sisters are the priority because one of them drops the Checkpoint Crank. Use the building’s narrow entrances and corners to separate them instead of allowing both to attack from opposite sides. Explosives are especially useful when the Sisters first appear together, while shotgun fire is effective at close range after creating distance.
Once both Chainsaw Sisters and the supporting villagers are defeated, collect the Checkpoint Crank. Pick up the Sapphire dropped by the other Sister if you want the optional sellable treasure, then call Ashley out of the locker. Return to the southern gate and use the crank to open it.
- Place Ashley in the locker before activating the crank.
- Defeat both Chainsaw Sisters and collect the crank from the fallen enemy.
- Recall Ashley only after the room is safe enough to leave.
4. Escape the pursuing villagers
Continue through the opened gate and search the accessible house on the route for supplies. Leave through the rear exit and proceed toward the next gate. A cutscene then starts the escape, with Méndez and villagers pursuing Leon and Ashley.
This section is about reaching the exit, not clearing the entire area. Run forward whenever the route is open. Stagger enemies that physically block the path, and use a flash grenade if a group surrounds Leon. When villagers gather near the red explosive barrel, shoot it to clear the cluster before attempting to pass. Méndez does not need to be defeated here; damaging him only creates a brief opening.
At the end of the route, deal with the enemies blocking the way near the cart if necessary, then turn left and follow the path beneath the damaged bridge. The cutscene confirms that Leon and Ashley have escaped the immediate pursuit.
- Do not stop to fully clear the escape route.
- Use the red barrel when the villagers are grouped beside it.
- Keep moving left after reaching the cart and damaged bridge area.
5. Save and prepare at the final Village Merchant
The path leads to the final Merchant stop of the chapter, positioned before the Slaughterhouse. A Typewriter is nearby, giving you a reliable retry point before the boss. Sell completed-use valuables, including the Old Wayshrine Key if you have already used every Wayshrine it opens. Do not sell healing items, ammunition, grenades, or weapons merely to create temporary case space.
Prioritize damage upgrades for your main weapon and capacity upgrades that immediately create room for reserve ammunition. A shotgun is useful during Méndez’s close-range phase, while a rifle or other accurate firearm helps during the second phase. Carry at least one healing item and keep some room in the Attaché Case for Méndez’s False Eye and supplies found after the fight.
Save at the Typewriter before going upstairs into the Slaughterhouse. This is the practical recovery point if the boss defeats you.
- Sell only valuables and keys that have no remaining use.
- Repair the Combat Knife and armor if available and affordable.
- Save before entering the Slaughterhouse.
6. Defeat Chief Bitores Méndez
Enter the Slaughterhouse and begin the two-phase Méndez fight. During the first phase, climb to the upper platform using either ladder. Méndez can still reach the platform, so watch for his attacks and use the evade prompt when it appears. Shoot his body and head area until he staggers; when the game presents the melee opportunity, drop down and stab the large eye on the back of his neck for strong damage. Shotgun fire is effective when he is close, but do not remain in a corner or beside burning debris.
After enough damage, Méndez loses his legs and hangs from the rafters. Keep moving across the upper platform. When he throws burning wooden beams, run to avoid their path. When he grabs an explosive barrel, shoot the barrel before it reaches Leon to damage Méndez. If he swings close and attacks the platform, move to the opposite side rather than trying to stand beneath him. Continue firing at his exposed body and use the melee prompt whenever he is staggered.
The arena contains supplies, including healing items, so collect them between attack patterns if necessary. Do not stand beside an explosive barrel when shooting it. The fight ends after enough damage, followed by Méndez’s defeat sequence.
- Use the upper platform and evade prompts during the first phase.
- Stab the eye on the back of Méndez’s neck when the melee prompt appears.
- Shoot explosive barrels while Méndez is holding them, but keep Leon away from the blast.
7. Leave the Village and confirm Chapter 7
After Méndez is defeated, approach his body and collect Méndez’s False Eye before leaving. It is a valuable sellable item, not the key required to open the Castle route. Search the Slaughterhouse for remaining ammunition and healing, then exit through the window Ashley breaks open.
Follow the linear path toward the Castle. Near the road and the vehicle, look up for the hanging metal cage and shoot it down if you want the optional Emerald. Continue forward after collecting it, cross the drawbridge, and approach the Castle. The transition cutscene marks the end of Chapter 6.
When Chapter 7 loads, save again if you want a clean restore point for the Castle. Reorganize your Attaché Case before the first Castle combat sequence; the Village area is no longer available for normal backtracking.
- Collect Méndez’s False Eye before jumping through the window.
- Shoot down the hanging cage near the road for the optional Emerald.
- Cross the drawbridge and wait for Chapter 7 to load.
Before you move on
- The Chainsaw Sisters have been defeated and the Checkpoint Crank has been used to open the southern gate.
- Leon and Ashley have escaped the pursuing villagers and reached the final Merchant and Typewriter.
- Chief Bitores Méndez has been defeated.
- Méndez’s False Eye has been collected and Leon has exited through Ashley’s window.
- The hanging-cage Emerald has been collected if desired.
- Leon and Ashley have crossed the drawbridge, the Castle transition has played, and Chapter 7 has loaded.
Chapter 7 — Castle Approach: Gatehouse and Narrow Corridors
Leon and Ashley enter the Castle and must cross the outer approach under catapult fire before reaching the Audience Chamber. After raising a cannon and destroying the Castle Gate, fight through shielded and helmeted Zealots, boost Ashley through the northeastern gate, and retrieve the Dungeon Key. The key drops Leon into a Garrador encounter, after which the Treasury sword puzzle opens the upper Audience Chamber route. In Water Hall, recover the Halo Wheel, use it at the lower and upper mechanisms, and protect Ashley while she raises the remaining bridge sections. The chapter ends when Leon crosses the bridge and boosts Ashley over the final wall. The Castle Treasure Map, Blue Medallions request, treasures, and Clockwork Castellan are optional.
Resupply at the Castle entrance
Chapter 7 begins immediately after the village escape. Enter the first door on the right to find the Merchant. This is the first Castle resupply point, so repair the Combat Knife if its durability is low, sell valuables you do not need to keep, and upgrade your main weapons if you have the funds. The Blacktail, Stingray, and Broken Butterfly are available here, but none is required for campaign progress. Trading three Spinels for the Castle Treasure Map is optional and useful only if you want treasure locations marked on the map.
Use the Typewriter in the Merchant area if you want a fresh save before the Castle approach. Break the nearby containers for ammunition, gunpowder, healing supplies, and Pesetas. After leaving, crouch behind the wall while the Zealots pass, then deal with the parasite-mutated enemy in the next corridor. Keep a shotgun or another close-range option ready because the first Castle fights take place around narrow stairs and doorways.
- Visit the first Castle Merchant before advancing.
- Repair the Combat Knife if needed and keep at least one healing item.
- Save before the catapult approach if you want a safe retry point.
Cross the catapult approach and raise the cannon
Leave the opening rooms and follow the Castle approach toward the gate. Crossbow-wielding Zealots cover the route, so use walls and ruined structures as cover and eliminate archers before exposing yourself on the stairs. When the catapults begin firing flaming projectiles, move between covered positions rather than standing in the open to trade shots. Ashley follows Leon through this section, so do not leave her in the bombardment zone while searching for the cannon route.
Follow the path to the right and enter the roofless ruins. Continue through the ruins until you find the large opening in the floor. Drop through it and shoot the yellow counterweight connected to the cannon. The cannon rises to the upper level. Return through the ruins and use the elevated route to reach clear firing angles on the catapults. The red explosive barrels beside the catapult positions can destroy them; use those barrels when you have a safe shot, especially if the bombardment is making the return trip difficult.
- Use cover during every catapult barrage.
- Shoot the counterweight below the ruins to raise the cannon.
- Destroy catapults with their nearby red barrels when practical.
Destroy the Castle Gate and enter the Audience Chamber
Return to the cannon after clearing or bypassing the nearest threats. Man it, turn it toward the large Castle Gate, and fire once to destroy the gate. Move through the rubble and break containers for supplies. The Blue Request Note for Destroy the Blue Medallions 3 is in this approach area. The request and its six medallions are optional and do not affect the required route.
After passing through the gate, you can visit another Merchant and use a Typewriter before entering the main hall. A cutscene with Ramón Salazar is followed by a Zealot ambush in the Audience Chamber. Shielded Zealots block frontal handgun fire; break their shields with sustained attacks, flank them, or use a shotgun blast to stagger them. Zealots wearing metal helmets cannot be reliably stopped with headshots, so target their bodies. Use grenades when several enemies gather, but keep enough healing and ammunition for the Dungeon and Water Hall sections.
- Fire the cannon at the Castle Gate.
- Use the second Merchant and Typewriter if you need to resupply.
- Use flanking attacks or a shotgun against shielded Zealots.
- Aim at the bodies of helmeted Zealots.
Boost Ashley and retrieve the Dungeon Key
When the Audience Chamber fight is over, search the large pots and containers for supplies. Open the map and move to the northeastern corner of the chamber. Boost Ashley through the opening so she can unlock the metal gate. On the other side of the gap, turn right for an optional treasure, then squeeze through the opening and collect the nearby Ruby if you want the extra value.
Follow the right-hand route toward the Dungeon. Enter the prison area and take the left-hand path to the body at the end. Pick up the Dungeon Key. The floor gives way immediately afterward, dropping Leon into a lower cell with the first Garrador encounter. The Dungeon Key is mandatory; the nearby treasures are not.
- Boost Ashley in the northeastern corner of the Audience Chamber.
- Follow the right-hand route after passing through the gate.
- Take the left-hand prison path and collect the Dungeon Key.
Defeat or bypass the Garrador and reach the Treasury
The Garrador is blind and tracks Leon by sound. Crouch and move around the wooden partitions, avoiding the hanging chains because striking them creates noise. Let the Garrador commit to a swing or charge, then circle behind it and attack the exposed parasite on its back. Move away after each attack rather than remaining beside it for a follow-up hit. If the Garrador charges, break line of sight around the partitions and wait for a safer opening. A flash grenade can create an escape opportunity, but ordinary firearms are also sufficient if you maintain distance and attack the parasite.
After the Garrador is defeated, turn the crank to open the exit and climb back toward the Dungeon entrance. Use the Dungeon Key on the locked middle door. Climb the ladder into the storage room. The Spinel, Clockwork Castellan, and other supplies in this room are optional. Continue through the next doorway to reach the Treasury.
- Crouch near the Garrador and avoid the hanging chains.
- Attack the parasite on its back, then immediately reposition.
- Use the Dungeon Key on the locked middle door after leaving the cell.
- Treat the storage-room collectible as optional.
Solve the Treasury sword puzzle
In the Treasury, remove the three swords already mounted in the wall: the Golden Sword, Rusted Sword, and Iron Sword. The fourth sword is behind the barred display. Pull the chain on the left side of the room, then shoot the snake and bird symbols shown on the gate. The bars open, allowing you to take the Bloodied Sword.
Place the swords in the four wall displays from left to right in this order: Iron Sword, Golden Sword, Bloodied Sword, Rusted Sword. The mechanism clicks as each sword is placed correctly. When all four positions are correct, the central gate opens. Collect the Gold Bangle in the corridor if you want the extra Pesetas, then continue through the exit to return to the upper level of the Audience Chamber.
- Take the Golden, Rusted, and Iron Swords from their displays.
- Pull the chain and shoot the snake and bird symbols to obtain the Bloodied Sword.
- Place the swords left to right: Iron, Golden, Bloodied, Rusted.
- Continue after the central Treasury gate opens.
Cross the upper Audience Chamber and activate Water Hall
On the upper level of the Audience Chamber, proceed to the end of the walkway and kick down the ladder. This creates a return route to the lower floor. Swing across the chandeliers to reach the opposite side; if you drop into the small side room, collect the Golden Hourglass if desired, then climb back to the upper level.
The western gate is controlled by two matching symbol plates. Shoot the first plate from the upper walkway, then use the chandelier to reach the angle for the second plate. Go through the opened gate and descend toward Water Hall. A Typewriter is available in the room to the south before the Water Hall encounter, making this a good point to save.
- Kick down the ladder on the upper Audience Chamber route.
- Use the chandeliers to cross the gap.
- Shoot both matching symbol plates to open the western gate.
- Save at the Typewriter before entering Water Hall.
Raise the Water Hall bridge and finish the chapter
Water Hall begins with a raised drawbridge and several Zealots, including enemies that may mutate. Clear the enemies threatening your immediate route, then drop to the lower level using the left-hand stairs or ledge. Move to the central statue and take the Halo Wheel. Carry it to the mechanism on the right side of the lower level and use it to raise the stairs back to the upper floor.
Return to the upper level and use the Halo Wheel at the central pedestal to lower the next section of the drawbridge. Continue across the newly accessible route and use the wheel at the far mechanism to raise the first bridge section. Boost Ashley over the ledge on the left so she can operate the two remaining cranks.
Zealots will attack Ashley while she works, and additional enemies can appear on Leon’s level. Prioritize anyone approaching Ashley or firing from a position that can interrupt her. A rifle such as the Stingray is useful for distant targets, but use whichever accurate weapon you have stocked. Do not waste time trying to clear every balcony if the enemy is not threatening Ashley or Leon’s route. When both bridge sections are raised, Ashley returns to Leon. Cross the completed bridge, continue to the exit, and boost Ashley over the final wall. The Chapter 8 transition appears after this action.
- Take the Halo Wheel from the lower-level statue.
- Use it at the right-side mechanism, central pedestal, and far mechanism.
- Protect Ashley while she operates both remaining cranks.
- Cross the completed bridge and boost Ashley over the final wall.
Before you move on
- The cannon has destroyed the Castle Gate and Leon has entered the Audience Chamber.
- Ashley has opened the northeastern gate and Leon has collected the Dungeon Key.
- The Garrador encounter is complete and the locked Dungeon door has been opened.
- The Treasury gate has opened after placing the swords left to right as Iron, Golden, Bloodied, and Rusted.
- Leon has used the Halo Wheel, Ashley has raised both remaining Water Hall bridge sections, and Leon has crossed the bridge.
- Ashley has been boosted over the final wall and the transition to Chapter 8 has appeared.
Chapter 8 — Castle Interior: Traps, Doors, and Key Items
Leon searches the Castle after Ashley is taken away. Chapter 8 begins in the Wine Cellar, continues through the Bindery, and ends on the Castle Battlements. The required progression items are the Crimson Lantern, four Lithographic Stones for the Bindery door, and the cannon mechanism used against the Armored Gigante. Three Lithographic Stones are collected in the room; the fourth is already fitted into the puzzle. The chapter is primarily a route-and-puzzle section rather than a boss battle. Control the Wine Cellar enemies by prioritizing the red-robed Zealot, use the visual markings to solve the Bindery door, and move between solid cover during the battlement bombardment. The Armored Gigante is not meant to be defeated with ordinary gunfire: raise the cannon by destroying its two counterweights, then fire it at the giant and the blocked exit.
1. Enter the Wine Cellar and take the Crimson Lantern
Ashley is missing at the beginning of the chapter, leaving Leon to continue alone. Use the nearby Merchant before entering the Wine Cellar if you need to repair the Combat Knife, reorganize the case, or sell valuables. Keep a reliable close-range weapon, a firearm for accurate shots, and at least one healing item. The chapter can be completed without spending high-damage ammunition on ordinary Zealots.
Enter the Wine Cellar and identify the red-robed Zealot. He is the priority because his presence causes Plaga parasites to appear in other enemies. Use the room edges and railings to prevent the surrounding Zealots from trapping you, then shoot the red-robed enemy whenever he is exposed. You do not need to clear the entire room before attacking him. Once he is defeated, collect the Crimson Lantern from his body.
Return to the adjoining room with the two statues and place the Crimson Lantern on the appropriate statue. This opens the locked route forward. If you are carrying a Small Key, the Wine Cellar also contains an optional locked drawer; opening it is not required for chapter progression. Do not confuse that optional reward with the Crimson Lantern objective.
- Visit the Merchant if you need repairs or inventory management.
- Defeat the red-robed Zealot before spending time on the remaining enemies.
- Take the Crimson Lantern and place it on the statue in the adjoining room.
2. Solve the Bindery Lithographic Stone door
Follow the opened route until Leon reaches the Bindery. Search the room before interacting with the locked door. Three Lithographic Stones are collected here: one is near the entrance, one is behind a glass-fronted case, and one is on or near the bookcase. The fourth Lithographic Stone is already inserted into the door mechanism. You therefore need to collect three stones, not four.
Place the stones into the four slots and rotate them until the symbol, color, and border shape match the markings shown on the door. The verified arrangement is: top, the orange or red shield inside a square; right, the blue sword inside a square; bottom, the blue armor inside a hexagon; and left, the orange or red helmet inside a hexagon. The game may describe the colors differently depending on display settings, so use the symbol and border together rather than relying on color alone.
After the door opens, continue through the corridor and collect the Small Key on the route. A hostile creature may move along the wall in the next section; you can avoid wasting ammunition on it while continuing toward the battlements. Use the map to identify the exterior route and nearby return doors before jumping or dropping to a lower platform.
- Collect the three loose Lithographic Stones.
- Leave the stone that is already installed in the puzzle door in place.
- Set shield-square at top, sword-square at right, armor-hexagon at bottom, and helmet-hexagon at left.
- Collect the Small Key after opening the Bindery door.
3. Cross the Castle Battlements using cover and the switches
On the Castle Battlements, follow the connected towers and exterior walkways rather than trying to fight every enemy. The route uses sun-and-moon switches to change which gates are open. Whenever you pull one, immediately check the nearby passage whose gate has changed. If the next route appears blocked, consult the map and return to the switch instead of repeatedly crossing the same exposed walkway.
The Armored Gigante begins throwing large rocks from a distant tower. When it raises its arm, move behind solid stone cover; the open walkways are unsafe during the throw. Advance between cover points during the pauses and only fight enemies that block a ladder, doorway, or switch. Flash Grenades can create an opening against groups, but they are optional and should not replace the main objective of reaching the cannon.
A Small Key drawer is available near the battlements route. It is optional and can be opened if you still have the key, but do not risk a death for the treasure while the giant is attacking. The required objective is reaching the cannon tower, not clearing every tower or collecting every item.
- Use the sun-and-moon switches to open the next gates.
- Move behind solid cover whenever the Armored Gigante prepares a rock throw.
- Fight only enemies that obstruct the route, ladders, or switches.
- Treat the battlement drawer and other valuables as optional.
4. Raise the cannon and remove the Armored Gigante
Continue through the towers until you reach the cannon structure. Two counterweights hold the cannon down. Shoot the visible counterweight on the current level, then climb to the higher platform and destroy the second one. If an enemy is threatening the ladder or preventing you from lining up a shot, deal with that enemy first; otherwise, conserve ammunition and continue upward.
When both counterweights are destroyed, climb to the top platform and interact with the cannon. Aim at the Armored Gigante and fire. This removes the giant from the battlement route. Ordinary handgun, shotgun, and rifle fire is an inefficient way to handle this encounter, so do not spend your strongest ammunition trying to defeat it before the cannon is ready.
After firing at the giant, rotate the cannon toward the blocked exit at the far end of the battlements and fire again. The blast destroys the obstruction and opens the required way out. Reload, heal if necessary, and leave the cannon platform rather than lingering for optional combat.
- Destroy the lower cannon counterweight.
- Climb and destroy the upper counterweight.
- Fire the cannon at the Armored Gigante.
- Fire the cannon at the blocked exit.
5. Leave the battlements and confirm Chapter 8 is complete
Use the newly opened route beyond the cannon and follow the remaining battlement walkway. You may collect nearby items if the path is safe, but there is no requirement to defeat every remaining enemy. Keep a weapon ready while crossing the final exterior section, and avoid returning into the bombardment area after the exit has opened.
Chapter 8 is complete when Leon leaves the battlements and the game transitions to the Chapter 9 results or title sequence. The progression items that confirm the chapter’s required route are the Crimson Lantern used in the statue mechanism, the opened Lithographic Stone door in the Bindery, and the cannon fired at both the Armored Gigante and the blocked exit. Save after the chapter transition if you want a secure point before continuing with Ashley in Chapter 9.
- Follow the route through the exit opened by the cannon.
- Confirm that the game advances to Chapter 9.
- Save after the chapter transition if you want a retry point.
Before you move on
- The Crimson Lantern was taken from the red-robed Wine Cellar Zealot and placed on the statue in the adjoining room.
- The Bindery door opened after the three loose Lithographic Stones were fitted around the stone already in the mechanism.
- Leon crossed the Castle Battlements by using the sun-and-moon switches and reached the cannon tower.
- Both cannon counterweights were destroyed.
- The cannon was fired at the Armored Gigante and then at the blocked exit.
- The game advanced to Chapter 9 after Leon left the battlements.
Chapter 9 — Castle Halls: Puzzle Rooms and Merchant Resupply
Chapter 9 starts in the Courtyard maze and ends after Ashley returns the Salazar Family Insignia to the shield-shaped slot near Leon. Raise the three Courtyard flags to open the Grand Hall, then collect the Serpent Head from the Dining Hall, the Lion Head from the Armory, and the Goat Head from the Gallery. Place all three heads in the Chimera statue to begin Ashley’s playable section. In the Library, obtain the Bunch of Keys, use the correct grandfather-clock time, pass the four-chain Mausoleum gate, solve the three-lantern puzzle, and carry the Insignia back to Leon. Merchant visits, requests, treasures, and the Library lockboxes are optional. Chapter 9 contains no boss encounter; save and resupply before Chapter 10.
1. Raise the three Courtyard flags
From the starting area, enter the Courtyard hedge maze and open the map. The three small towers containing levers are spread around the maze. Reach each tower, pull its lever, and use the surrounding walls and gates as landmarks rather than repeatedly circling the garden. Clear enemies only when they block a lever, trap you in a narrow path, or threaten Ashley.
The last lever requires Ashley to operate a nearby switch so Leon can reach the tower. Command her to use the switch, move through the opened route, pull the lever, and return to Ashley immediately. Zealots rush her after the final flag is raised. Once all three flags are visible over the exit gate, escort Ashley through the gate and enter the Grand Hall. Optional treasure, supplies, and the Clockwork Castellan can be collected if your resources allow, but none is needed for progression.
- All three Courtyard levers have been pulled.
- The three flags are raised above the exit gate.
- Ashley is with Leon before entering the Grand Hall.
2. Save and prepare in the Grand Hall
The Merchant and typewriter are in the room to the right of the Grand Hall entrance. Save before starting the three-head sequence. Repair the Combat Knife if its durability is low, improve weapons you already use, and leave space in the Attaché Case for key items. A dependable close-range weapon, a precision weapon, healing, and at least one grenade or Flash Grenade are useful for the Armory and Gallery encounters.
Requests, treasures, and the Shooting Range are optional. You can sell ordinary treasures, but retain key items and crafting materials you expect to use. There is no boss fight in this chapter, so the relevant preparation is a stable loadout and a save before the Ashley section begins.
- The game is saved at the Grand Hall typewriter.
- The knife and main weapons are in usable condition.
- Healing and a crowd-control option remain available.
3. Solve the Dining Hall seating puzzle and take the Serpent Head
Enter the Dining Hall from the Grand Hall and examine the portraits at the north end. They show the correct table settings. When facing north toward the portraits, seat Ashley in the upper-right chair at the southern table. Then seat Leon in the upper-left chair at the northern table. Ring the bell after both are seated. The cage opens and reveals the Serpent Head.
If the seating interaction does not appear, reposition Ashley beside the chair and use the command prompt before taking Leon’s seat. A rat and Blue Medallion for the More Pest Control request are optional. Take the Serpent Head and return to the Grand Hall.
- Ashley is seated in the upper-right chair at the southern table when facing north toward the portraits.
- Leon is seated in the upper-left chair at the northern table.
- The bell has been rung and the Serpent Head has been collected.
4. Recover the Lion Head from the Armory
Use the upper Grand Hall route to reach the Armory. Collect nearby supplies before dropping to the lower floor, because taking the Lion Head activates the Armadura. Their vulnerable Plaga is exposed around the neck. Shoot the parasite until an enemy is staggered, then use the melee opportunity to knock away its helmet and continue attacking the exposed Plaga.
Flash Grenades are effective against groups. Keep moving around the room, avoid being surrounded, and use Ashley’s blue lantern attacks when they expose or stun the armor. The exit does not open until the required Armadura are defeated. Stand beneath Ashley so she can drop down, then operate the two statue mechanisms to leave. The Cubic Device in the corridor afterward is useful for optional treasures but is not required for chapter completion.
- The Lion Head has been removed from the statue.
- The Armadura blocking the Armory exit have been defeated.
- The exit mechanism has been operated and Leon has returned to the Grand Hall route.
5. Restore the Gallery bridge and take the Goat Head
Enter the Gallery through the upper route on the opposite side of the Grand Hall. When Leon begins crossing the central bridge, a Zealot lowers it. A red-robed summoner can create additional pressure, so attack that enemy first when you have a safe shot. If the bridge is down, use the ladder to reach the balcony and pull the crank that raises it.
After the bridge is restored, cross to the far end and collect the Goat Head. Use the surrounding stairs to return to the Grand Hall. Grenades and the shotgun are useful in the Gallery, but avoid chasing enemies into open areas if Ashley is exposed. The Blue Medallions, Yellow Diamond, and other treasures are optional.
- The Gallery bridge has been raised.
- The summoner and immediate threats no longer block the route.
- The Goat Head has been collected.
6. Install the three heads and begin Ashley’s section
Return to the headless Chimera statue in the Grand Hall and place the Serpent, Lion, and Goat Heads. The order does not matter. Before placing the final head, use the Merchant and typewriter and complete any optional Grand Hall activities you want, because the next sequence changes control to Ashley.
After the cutscene, take the lantern from its pedestal and follow the revealed passage to the Library. Place the lantern on the Library pedestal to move the shelves and expose a crank. Turn the crank fully to lower the stairs, retrieve the lantern, climb the stairs, and take the Bunch of Keys from the table. The keys open optional chests and the Library elevator door. The correct clock code can bypass portions of this route, but collecting the keys is the straightforward intended path.
- All three heads are installed in the Chimera statue.
- Control has changed to Ashley.
- Ashley has obtained the Bunch of Keys.
7. Use the clocks and reach the Mausoleum
Return through the Library while crouched. Shine Ashley’s lantern at moving armor to interrupt it, then pass while it is disabled. Use the third key from the left on the Library elevator door and activate the elevator. Climb from the elevator to the upper room and read the note on the table.
Set the grandfather clock to 11:04 on Assisted or Standard difficulty, or 7:00 on Hardcore or Professional. The same difficulty-specific time applies to both clocks. Follow the opened passage, use the crank to reconnect the Library route, and set the second grandfather clock to the same time. Take the next elevator down to the Mausoleum.
- The elevator door has been opened with the required key.
- The first clock uses the correct difficulty-specific time.
- The second clock opens the route to the Mausoleum.
8. Open the Mausoleum gate, solve the lantern puzzle, and return the Insignia
In the Mausoleum’s first room, activate all four gongs or chains around the room to open the gate. The armor becomes active, so keep moving and use the lantern to interrupt a suit that blocks your path. Once the gate opens, continue to the three-lantern puzzle.
Match the projected symbols as follows: Half-Moon on the left, Star on the right, and Full Moon at the back or top position. Interact with the pedestals to swap lanterns until the projections match. The compartment opens and contains the Salazar Family Insignia.
Take the Insignia and return through the Library immediately. Ashley loses the lantern and the armor pursues her, so do not stop for optional chests. Follow the opened clock route back toward Leon and place the Insignia in the shield-shaped slot. The following cutscene and transition to Chapter 10 confirm completion.
- All four Mausoleum chains or gongs have been activated.
- The lanterns are set to Half-Moon left, Star right, and Full Moon back or top.
- The Salazar Family Insignia has been placed in the shield-shaped slot near Leon.
Before you move on
- The three Courtyard flags were raised and the Grand Hall was opened.
- The Serpent, Lion, and Goat Heads were installed in the Chimera statue.
- Ashley obtained the Bunch of Keys or otherwise opened the clock route.
- Both grandfather clocks were set to the correct difficulty-specific time.
- The four Mausoleum chains or gongs were activated.
- The lantern puzzle was solved with Half-Moon left, Star right, and Full Moon at the back or top.
- The Salazar Family Insignia was inserted into the shield-shaped slot near Leon.
- A cutscene begins and the game advances toward Chapter 10.
References for this chapter
- Resident Evil 4 Remake Chapter 9 Walkthrough — PowerPyx
- Resident Evil 4 Remake: Chapter 9 Walkthrough — Push Square
- Resident Evil 4 Remake Chapter 9: 100% Walkthrough — Vandal
- Resident Evil 4 Remake Mausoleum Lamp Puzzle Solution — PowerPyx
- Dining Room Table Puzzle Solution in Resident Evil 4 Remake — Gamer Guides
Chapter 10 — The Keep: Major Confrontation and Clear-Out
Chapter 10 begins when control returns to Leon after Ashley’s escape through the Library. Complete any optional Library or Mausoleum cleanup first, then cross the Ballroom, activate both gate levers, and reach the Throne Room route. Shoot both drawbridge counterweights and survive the Antechamber, where Zealots fight alongside two Garradors. Defeating both Garradors provides the two Unicorn Horns needed to open the gate. Leon is then thrown into the Depths and must follow the route to the Underground Laboratory. Restore power at the circuit breaker, survive Verdugo while the elevator arrives, and use liquid-nitrogen showers to create safe attack windows or simply evade the creature. Killing Verdugo is optional; reaching the elevator completes the chapter and begins Chapter 11.
1. Regain control and prepare in the upper Castle
After the cutscene, Leon resumes control near the upper Castle. Save at the nearby typewriter and reorganize before committing to the required route. If you want optional rewards, this is a good time to revisit the Library and Mausoleum as Leon. The Library’s mechanisms are now usable, and the Mausoleum contains the Merciless Knight request encounter and additional treasure opportunities. These activities are optional and are not needed to open the path through the Ballroom.
Use the Merchant near the Grand Hall if you need repairs, ammunition, or an inventory adjustment. Keep a shotgun or another reliable close-range weapon, a handgun or rifle, healing items, and at least one grenade if possible. The next required areas contain flying Novistadors, numerous Zealots, and two Garradors, so avoid filling the case with low-value items before leaving.
- Save before entering the required Ballroom route.
- Complete optional Library or Mausoleum errands only if your supplies allow it.
- Leave space for the Unicorn Horns and later ammunition pickups.
2. Cross the Ballroom and activate both levers
Enter the Ballroom and descend toward the lower floor. Novistadors occupy the room, including camouflaged individuals that can be difficult to see until they move or attack. Fight from the edge of the room or near the stairs so you have a retreat route; do not remain surrounded in the center. Search the lower floor after the immediate swarm is under control, but do not waste ammunition chasing every enemy across open ground if you can safely reach the mechanisms.
From the lower floor, move to the northern side and climb the ladder. Go around the ladder’s right side if you want the nearby chest, then return and climb to the upper walkway. Follow it to the first lever and pull it. Return toward the central Ballroom, go beneath the fallen scaffolding, and use the ladder to reach the second-floor route. Continue toward the southwest side of the second floor and pull the second lever. Both levers are required before the gate toward the Throne Room can be used.
- Defeat or bypass enough Novistadors to move safely between mechanisms.
- Pull the first lever from the upper walkway.
- Pull the second lever from the southwest second-floor route.
3. Lower the drawbridge and enter the Antechamber
Proceed through the opened gate toward the Throne Room. Before the drawbridge, aim at the yellow counterweight visible near the upper structure and shoot it. The bridge will not lower completely. Move to the left side of the structure and look underneath the stone platform for the second yellow counterweight. Shoot it, then cross the lowered bridge.
The Antechamber contains several Zealots and two chained Garradors. The Garradors soon break free, so avoid lingering in the entrance or trying to remain crouched for the entire encounter. Eliminate nearby Zealots first when you have a clear shot, then keep moving around the room. If the Garradors are close to the Zealots, their sound-based attacks can hit the cultists as well. Use the room’s space to separate the two Garradors rather than letting both charge at once.
- Shoot both yellow drawbridge counterweights.
- Cross the bridge only after the route is open.
- Prioritize nearby Zealots and avoid being trapped between both Garradors.
4. Defeat the Garradors and open the Throne Room gate
Garradors take their meaningful damage from the exposed parasite growths on their backs. Wait for a charge or slash to carry one past Leon, then circle behind it and fire at the parasite. Shotgun blasts, rifle rounds, or other high-damage attacks are effective when the creature is committed to an attack animation. Do not stand directly in front of a Garrador, and be ready to evade if its claws begin sweeping the area.
A grenade can create space or damage several enemies, but preserve some explosives if possible for later Island encounters. Once both Garradors are defeated, loot a Unicorn Horn from each corpse. Place one horn in each matching statue beside the sealed gate at the far end of the Antechamber. The gate opens to the Throne Room route. Heal and reload before entering because the following cutscene sends Leon into the Depths, where the route continues without returning to this combat arena.
- Defeat both Garradors.
- Collect both Unicorn Horns from their corpses.
- Place the horns in the two matching statues.
5. Follow the Depths route to the Underground Laboratory
After the cutscene, follow the linear Depths route. Novistadors appear along the path, but you do not need to stop and fight every one if you can move past safely. Search the building area for supplies and the Elegant Crown, then kick through the marked wall to reach the Yellow Herb and ladder. Climb out into the sewage section and continue through the corridors.
The route leads to a Merchant and typewriter. Use both before entering the Underground Laboratory sequence. Repair the Combat Knife if its durability is low, reload your main weapons, and carry healing into the next area. The elevator is out of service when you first reach it, so continue through the laboratory rather than treating the first elevator room as the chapter endpoint.
- Follow the linear route through the Depths.
- Collect the Elegant Crown only if you want the optional treasure.
- Save and resupply at the Merchant before entering the laboratory.
6. Activate the circuit breaker and escape Verdugo
Enter the Underground Laboratory and follow the corridors while watching for Verdugo’s attacks from the ceiling, walls, and floor. Use the indicated evasive prompts when its tail strikes across the passage. Continue to the circuit-breaker area and activate the breaker to restore power to the elevator. Afterward, use the crank at the exit of the breaker room to open the way back out.
Verdugo becomes fully active during the return route. Liquid-nitrogen shower panels are positioned along the corridors. Wait until Verdugo is close, activate a shower, and attack only while it is frozen. A frozen Verdugo can be damaged much more effectively, but killing it is not required. If ammunition is limited, keep moving between the shower points and avoid unnecessary exchanges. The elevator takes time to arrive, so use the rooms and corridors to create distance rather than standing in one place.
- Activate the circuit breaker.
- Use the crank to leave the breaker room.
- Freeze Verdugo with liquid-nitrogen showers when it blocks the route.
- Do not spend all ammunition trying to kill Verdugo unless you specifically want its optional treasure.
7. Take the elevator and confirm Chapter 11
Return to the elevator room after restoring power. Verdugo continues attacking until the lift is ready unless you have defeated it. Use the liquid-nitrogen panels to interrupt attacks, then sprint through the opened route. When the elevator arrives, enter immediately. Do not remain in the laboratory to collect optional items while Verdugo is active.
Killing Verdugo rewards the Gold Monocle and causes the elevator to become available immediately, but evading the creature until the elevator arrives is sufficient for main-campaign progression. The elevator cutscene marks the end of Chapter 10 and begins Chapter 11. Save at the next available typewriter before continuing.
- Reach the elevator after restoring power.
- Enter the elevator when it arrives.
- Confirm the Chapter 11 transition begins.
- Save at the next available opportunity.
Before you move on
- Both Ballroom levers have been activated and the gate toward the Throne Room has opened.
- Both drawbridge counterweights have been destroyed.
- Both Garradors are defeated, both Unicorn Horns have been collected, and the Antechamber gate has opened.
- Leon has followed the Depths route, activated the Underground Laboratory circuit breaker, and escaped the breaker room using the crank.
- Leon has entered the elevator after the Verdugo sequence.
- The elevator cutscene has played and the game has advanced to Chapter 11.
References for this chapter
Chapter 11 — Castle Escape: Mines, Minecarts, the Hive and Krauser
Chapter 11 starts with Leon and Luis trapped beneath the Castle. Resupply at the opening Merchant, cross the Mines, lower the bridge, collect Dynamite and clear the blocked passage. In the Blast Furnace, defeat the unarmored and armored El Gigantes, using the lava mechanism and Luis’s Dynamite to reduce the ammunition cost. Two minecart rides follow: steer through bends, shoot debris and track switches, and suppress the Chainsaw Villager riding alongside the second cart. At the Hive, watch for camouflaged Novistadors while following the route to the elevator. The Insect Hive request, Gold Bar (L), Flagon and Clockwork Castellan 11 are optional. After the elevator cutscene, fight Krauser with the Combat Knife. Parry his attacks, evade attacks that display a prompt, counter during openings and continue until he retreats. The following cutscene advances the game to Chapter 12.
1. Prepare at the opening Merchant and lower the Mines bridge
Chapter 11 begins beside a Merchant, Typewriter and the elevator for Shooting Range 3. Make a manual save if you want a clean retry point, repair the Combat Knife if its durability is low, and arrange a handgun, close-range weapon, healing items and any explosives you intend to use against the giants. The Shooting Range is optional and does not advance the story.
Climb the ladder opposite the Typewriter and follow the mine track until the route is blocked by fallen rock. Turn into the larger Mines area and deal with the Ganados before attempting the mechanism. Enter the building on the south side through its upper route, then use the control panel on the second floor to lower the bridge. Once the bridge is down, cross it and enter the room on the left to collect Dynamite.
Before returning to the blockage, search the route for supplies. A hanging metal cage near the upper stairs contains a Sapphire, and a chest in the far section contains a Golden Hourglass. These are optional treasures. Return to the fallen rock, interact with it to place the Dynamite, then stand well away from the blast and falling debris. Continue through the opening after the explosion.
- Save and resupply at the opening Merchant if needed.
- Use the south building’s upper control panel to lower the bridge.
- Collect Dynamite from the room beyond the lowered bridge.
- Stand clear after placing the Dynamite.
2. Defeat both El Gigantes in the Blast Furnace
The Blast Furnace contains an unarmored El Gigante and an armored El Gigante. Concentrate first on the unarmored giant while Luis distracts the armored one. Damage the unarmored giant until the Plaga protrudes from its back, then shoot the parasite to stagger it. When the giant is positioned over the central lava opening, use the nearby control panel to drop it into the furnace. You can also damage the parasite and perform knife attacks, but the environmental method saves ammunition.
The armored El Gigante cannot be handled normally at first. Keep moving around the arena and avoid its attacks while Luis leaves to find Dynamite. When Luis returns, position yourself so the armored giant approaches him. Luis attaches the Dynamite to its armor; shoot the charge to remove the plating and expose the Plaga. Stagger the giant over the central opening and activate the control panel to drop it into the lava. Alternatively, continue attacking its exposed parasite, but the furnace is the safer resource-saving option.
After both giants are defeated, search the arena for dropped valuables and supplies. Then go to the southeastern side and boost Luis over the wall. Follow him through the mine route to the first minecart section.
- Use the central furnace against the unarmored giant when it is staggered.
- Wait for Luis to attach Dynamite to the armored giant.
- Shoot the Dynamite, expose the armored giant’s Plaga and use the furnace.
- Boost Luis over the wall after the arena is clear.
3. Complete both minecart rides and use the Stopover safely
The minecart sections provide Leon with a Red9 and unlimited ammunition. Steering and shooting are separate tasks: when the track bends, lean the control stick in the direction of the turn, then release the lean when the track straightens. During shooting portions, clear debris from the rails, shoot enemies that can damage the cart and hit track switches when the route requires a change. You do not need to kill every enemy; protecting the cart and avoiding collisions are the priorities.
At the end of the first ride, Leon reaches the Stopover. Defeat the enemies before exploring. The Flagon is in a chest on the outer walkway, and Clockwork Castellan 11 is on the wall of the Stopover structure near that route. Collecting either item is optional and does not affect campaign progression. Use the Typewriter if you want to preserve a retry point before the second cart ride.
Board the second minecart after resupplying. The route again requires leaning through turns, clearing obstacles and shooting track switches. A Chainsaw Villager, also described in some guides as Dr Salvador, rides alongside the cart at points. Keep firing at the attacker, especially when the chainsaw is raised, to stagger it and prevent damage to the cart. If the cart is destroyed or you take damage during a no-damage attempt, reload the relevant autosave and repeat the ride.
- Lean with each bend and stop leaning on straight track.
- Shoot rail debris and track switches promptly.
- Clear the Stopover before collecting the Flagon or Castellan.
- Suppress the Chainsaw Villager during the second ride.
4. Cross the Hive and reach the final Merchant and elevator
The second cart crashes into the Hive, where Novistadors attack from the walkways and walls. Some are camouflaged, so inspect unusual shapes and movement before crossing exposed platforms. Follow the route around the Hive rather than trying to return to the collapsed section. When the bridge or platform gives way, drop to the lower path and continue around the chamber.
The Insect Hive request is optional. Pick up its blue request note near the eastern side if you want to complete it, then destroy the four yellow hive entrances visible above the central area. The first two are encountered near the request route; the remaining entrances can be shot after passing through the tunnel. Do not spend time searching for them while Novistadors are attacking if your only goal is campaign completion.
For optional treasure, use the red explosive barrel in the western tunnel to clear the rubble, then open the chest behind it for the Gold Bar (L). Continue around the Hive and crouch beneath the low obstruction to reach the final Merchant and Typewriter. This is the best place in the chapter to heal, reorganize and save before the Krauser encounter. Afterward, take the elevator.
- Check ceilings, walls and platforms for camouflaged Novistadors.
- Follow the lower route after the Hive platform collapses.
- Destroy all four yellow hive entrances only if pursuing the request.
- Use the final Merchant and Typewriter before taking the elevator.
5. Win the Krauser knife confrontation and confirm Chapter 12
After the elevator sequence and cutscene, Krauser attacks Leon. This encounter is a forced knife fight, so firearms are unavailable. Use the Combat Knife’s normal slash to attack, and use the guard or parry input when Krauser swings. Successful parries create openings for follow-up slashes and, after enough damage, a finishing melee prompt.
Krauser can jump over Leon and attack from behind, so turn quickly when he disappears from view. Some attacks must be avoided with the on-screen evade prompt rather than blocked. If Leon is knocked over the edge, follow the recovery prompts to climb back up. Keep moving around the platform and avoid allowing Krauser to pin Leon against the perimeter.
Continue parrying, attacking after openings and responding to evade prompts until the scripted cutscene begins. Krauser retreats after taking enough damage; this is not the later mutated Krauser boss fight in Chapter 14. When the cutscene finishes, the game advances to Chapter 12. Save again when control returns or when the next chapter’s save opportunity appears.
- Use the Combat Knife throughout the forced duel.
- Parry ordinary strikes and evade attacks that display an evade prompt.
- Turn quickly after Krauser jumps over Leon.
- Continue until Krauser retreats and Chapter 12 begins.
Before you move on
- The Dynamite has cleared the blocked mine route.
- Both El Gigantes are defeated and Luis has been boosted over the wall.
- Both minecart rides are complete and Leon has entered the Hive.
- Leon has reached the elevator after the Hive route and the Krauser cutscene has started.
- Krauser has retreated, the knife confrontation has ended, and the game has advanced to Chapter 12.
Chapter 12 — From Castle to Island: Final Castle Events and Transition
Chapter 12 begins after the Krauser encounter and takes Leon from the underground area back to the Castle. Luis’s Key is obtained automatically, then Leon reaches the Merchant area beside the Gondola to the Clock Tower. Complete any Castle requests, treasure collection, or upgrades you still want before boarding the Gondola, because that ride ends Castle free-roaming. Climb the Clock Tower, survive its fire statue and falling-boulder hazards, defend the elevator, and use the Merchant near the top before entering Ramón Salazar’s arena. Shoot Salazar’s exposed human body inside the creature’s mouth, use cover against the black liquid attacks, and perform the melee follow-up when he is staggered. After collecting the Lip Rouge, leave through the Ancient Chantry, ride down to the docks, and interact with the boat to begin Chapter 13.
1. Leave the underground area and return to the Castle
Chapter 12 starts after the Krauser sequence. Leon receives Luis’s Key during the opening scene, so there is no separate search required for it. Sweep the room for supplies, then use the elevator and follow the route back toward the Castle. This opening return route is required progress; do not spend resources searching for a different exit.
After the elevator ride, Leon reaches the Castle room north of the Ballroom. A Merchant, typewriter, and two optional Blue Request Notes are nearby: Jewel Thief and The Disgrace of the Salazar Family. Save here before making decisions about your remaining Castle objectives.
This area is a preparation point, but it is not the final Merchant stop of the chapter. A second Merchant appears near the top of the Clock Tower before the Salazar fight. Use the current Merchant for repairs, storage, upgrades, and optional request planning, but keep enough resources for the tower climb.
- Confirm that Luis’s Key was added automatically.
- Save at the typewriter near the Castle Merchant.
- Repair the Combat Knife if you depend on parries or melee follow-ups.
- Keep a handgun, a close-range weapon, healing items, and ammunition for the tower climb.
2. Finish optional Castle business before boarding the Gondola
The Gondola beside the Merchant takes Leon to the Clock Tower. Boarding it is the Castle point of no return: after the ride, you cannot freely return to the earlier Castle areas. Complete any Castle requests, treasure collection, locked-drawer searches, or upgrades you still want before interacting with the Gondola.
Jewel Thief requires the Scratched Emerald from a crow’s nest in the Castle courtyard area. The Disgrace of the Salazar Family requires defacing Ramón Salazar’s portrait in the Throne Room. Both requests are optional and are not needed to reach the Island. Castle treasures and the Clockwork Castellan in the tower are also optional collectibles.
When ready, board the Gondola and enter the Clock Tower. Do not confuse this Gondola with the elevator inside the tower. The Gondola commits you to the remaining Castle sequence; the later elevator is part of the Clock Tower climb and its defense encounter.
- Complete optional Castle requests only if you want their rewards.
- Collect any Castle treasures you still intend to obtain.
- Make a manual save before boarding the Gondola.
- Board the Gondola to begin the one-way Clock Tower section.
3. Climb the Clock Tower and handle its hazards
Enter the Clock Tower and clear the initial Zealots while collecting visible supplies. The lower floor contains optional items, including a Gold Bar, and the Chapter 12 Clockwork Castellan can be found in the lower Clock Tower area. These pickups are not required for story progress, so do not risk a death to retrieve them if your resources are poor.
Continue upward through the machinery and scaffolding. The Salazar statue breathes fire across parts of the route. Move behind it or use the openings in the structure to approach safely, then shoot the explosive mechanism at the back of its head when it is exposed. Do not remain in the flames while trying to line up a shot; reposition until the statue’s movement gives you a clear angle.
Higher in the tower, large metal balls roll down the stairs. Use the recessed side balconies as shelter, wait for a ball to pass, and continue upward. Defeat the Zealot operating the mechanism, then pull the lever yourself. Before activating the elevator, collect any nearby optional treasure you want, including the Mirror with Pearls & Rubies and Extravagant Clock.
The elevator rises while enemies enter the tower and attempt to land on the platform. Shoot approaching enemies before they can remain on the elevator. Use red explosive barrels when they are positioned safely, and keep a shotgun or grenade available for enemies that reach the platform. If an enemy remains aboard long enough, the elevator can stop, so prioritize anything that lands beside Leon rather than distant targets.
- Use cover and recesses against the fire statue and rolling boulders.
- Pull the upper lever to activate the elevator.
- Collect nearby supplies before starting the elevator ride.
- Prevent enemies from staying on the elevator.
4. Cross the upper walkway and prepare for Salazar
At the top of the elevator, follow the exterior route toward the area where Salazar takes Ashley. Parts of the wooden walkway are unstable. Walk across the shaking sections instead of sprinting; falling is fatal. Shoot the hanging cage containing the Yellow Diamond if you want the optional treasure, then continue along the path.
Deal with the Zealots ahead and enter the Merchant room on the left. This is the final convenient resupply point before Salazar. Save, repair equipment, sell surplus valuables, and reorganize the case. Prioritize reliable firepower and healing over buying equipment you will not use immediately.
When ready, leave the Merchant area, descend the exterior stairs, and enter the building through the route Salazar used. The door leads to the Ancient Chantry and the boss arena. There is no puzzle needed to open the boss route, so enter only after preparing your weapons and healing.
- Walk across unstable boards instead of running.
- Use the final Clock Tower Merchant before the boss.
- Save immediately before entering the Ancient Chantry.
- Keep at least one healing item for an unexpected arena hit.
5. Defeat Ramón Salazar
Salazar’s transformed body moves around the arena and attacks with tentacles, lunges, and black liquid. The liquid can remain on the floor and explode when Leon approaches, so avoid crossing dark pools while repositioning. When Salazar pauses and faces Leon, use the arena’s solid structures to block the incoming attack rather than trading damage in the open.
The effective target is Salazar’s exposed human body inside the creature’s open mouth. Fire only when that target is visible; shooting the surrounding shell wastes ammunition. A shotgun is effective at close range, while a rifle or other accurate weapon can damage the target when Salazar is farther away. Adjust the weapon to the distance instead of chasing him through the arena.
When sufficient damage is dealt, Salazar can be staggered and fall low enough for a melee follow-up. Approach only after the black liquid and tentacles are no longer threatening the path, perform the prompted melee attack, and then retreat to cover. Repeat the process while preserving healing items for mistakes or late-fight damage.
Throwing a grenade directly into the exposed human body can earn the optional You Talk Too Much! challenge and deal substantial damage, but it is not required for campaign completion. If grenades are scarce, keep them for crowd control or use the normal firearm-and-melee strategy.
- Aim at the human body inside Salazar’s mouth.
- Use the arena structures to block attacks.
- Avoid the black liquid pools on the floor.
- Perform the melee follow-up only when the route is safe.
- Do not spend all healing before the fight is finished.
6. Leave the Castle and take the boat
After Salazar is defeated, search the arena and collect the Lip Rouge from his body. It is a valuable sellable item, not a required key item, but leaving it behind wastes an easy source of pesetas. Collect obvious supplies, then exit the Ancient Chantry using the newly available route and drawbridge.
Continue through the post-boss path and take the elevator down. Break visible containers and collect supplies while moving toward the dock, but do not attempt to backtrack into inaccessible Castle areas. The story route is now forward to the boat house.
At the dock, interact with the boat. The departure triggers the end of Chapter 12 and begins Chapter 13 on the Island. Reorganize Leon’s inventory after the transition when the next Merchant or typewriter becomes available; the preparation is useful, but it is not an additional Chapter 12 requirement.
- Collect Salazar’s Lip Rouge.
- Leave through the Ancient Chantry and use the drawbridge route.
- Ride the elevator down to the dock.
- Interact with the boat to complete Chapter 12.
Before you move on
- Leon has returned from the underground area and reached the Castle’s Clock Tower route.
- The Gondola has carried Leon from the Castle to the Clock Tower.
- Leon has climbed the tower, completed the elevator defense, and passed the upper walkway.
- Ramón Salazar has been defeated.
- The Lip Rouge has been collected from Salazar’s body.
- Leon has exited through the Ancient Chantry and reached the dock.
- Leon has interacted with the boat and the game has advanced to Chapter 13 on the Island.
Chapter 13 — Island Landing: New Enemy Types and Resource Stress
Chapter 13 begins on the Island’s Wharf after Ada leaves Leon behind. Advance through turret-covered coastal defenses, reach the facility, and open Ashley’s holding area by creating a Level 3 Keycard. The route requires obtaining the Level 1 card in Dissection, restoring power, upgrading it to Level 2 in Freezer, collecting the Biosensor Scope in Incubation Lab, and recovering a wrench from one of the Regeneradors. The scope reveals the parasites inside these enemies, allowing you to kill them instead of merely staggering them. The optional LE 5 is available in Freezer, but it is not required. The chapter ends after the Level 3 card opens the route back to Ashley’s holding cell.
1. Reach the Wharf Merchant and prepare for the Island
When control returns to Leon, follow the path through the opening cave and climb toward the Wharf. Before entering the main turret-covered section, take the route around to the right and use the control panel behind the first automated gun. This changes the direction of the turret’s laser coverage and opens the safe approach to the nearby Merchant.
Use this Merchant to repair body armor if necessary, reorganize the Attaché Case, and sell valuables that are not needed for crafting. The Island Treasure Map is optional and can help locate nearby treasures, but it is not needed for story progress. Keep an accurate weapon available for distant soldiers and retain a close-range weapon for enemies that reach cover.
- Reach the Merchant before committing to the main Wharf fight.
- Repair armor and restock healing items if your reserves are low.
- Keep rifle or other accurate ammunition available for the facility and Regeneradors.
2. Cross the Wharf without entering turret fire
Return to the Wharf and use cover to move between buildings, crates, and machinery. The red laser lines indicate where a turret will fire; crossing them can cause severe damage or kill Leon immediately. Whenever a turret blocks the route, circle around its structure and use the control panel from behind. The panel redirects the laser rather than universally disabling every turret, so check the new firing lane before moving on.
Soldiers will attack from cover and elevated positions. Eliminate ranged attackers first, then handle shielded soldiers by shooting exposed legs, attacking from the side, or using explosives when several enemies are grouped. A Brute with a minigun can enter the fight; create distance and attack it from cover rather than trying to trade damage at close range. After the area is secure, search the Wharf for ammunition and valuables, then use the next turret control to open the route toward the facility.
- Treat every red laser as an active hazard.
- Use turret control panels from the rear and verify the redirected beam.
- Prioritize rocket-launcher and other ranged soldiers when they appear.
- Do not remain in the open while healing or reloading.
3. Enter Surveillance and locate Ashley’s locked holding cell
Continue through the opened metal doors, the cave passage, and the next exterior combat area. Expect additional soldiers, including rocket-launcher users. Use cover and take the launcher carriers out before they can fire. Tripwires guard parts of the facility entrance and interior; crouch or approach carefully, and avoid triggering one while enemies are pressing you.
Proceed into Surveillance and clear the soldiers on the lower floor before climbing. In the control room, operate the release mechanism that opens the door below. This reveals Ashley’s holding cell, but the cell cannot yet be opened because Leon needs a Level 3 Keycard. From the cell area, take the available ladder and follow the facility route through Utilities toward the card locks.
- Clear or bypass the rocket-launcher soldiers before pushing forward.
- Watch for tripwires at the facility entrance and inside Surveillance.
- Confirm Ashley’s cell is located before leaving to search for the keycard upgrade route.
4. Obtain the Level 1 Keycard in Dissection
Most of the facility’s card doors are unavailable at first. Follow the accessible route until you reach Dissection. In the power-control room, read the nearby instructions if needed, then use the electronic panel to redirect electricity to the required circuit. The exact arrangement depends on the current difficulty, so follow the socket and power indicators displayed on the panel rather than using a solution from another mode.
Use the newly powered lever to raise the gate, then enter the room containing the electronic lock terminal. Solve the terminal by matching the circuit connections shown on the display. The rear compartment contains the Level 1 Keycard. Take it and leave promptly: a Regenerador appears outside. You do not yet have the Biosensor Scope, so avoid wasting ammunition on blind body shots. Stagger it if necessary, break its pursuit with doors and corners, and retreat toward the next card-upgrade area.
- Restore power in Dissection.
- Solve the Dissection electronic lock.
- Collect the Level 1 Keycard.
- Evade the first Regenerador if you lack the scope.
5. Upgrade to Level 2 in Freezer and take the optional LE 5
After obtaining the Level 1 card, return to the power-control area and redirect electricity to Freezer. Enter Freezer with the card and use the Overwrite Terminal to begin the Level 2 upgrade. The process takes time, and another Regenerador attacks while it runs. Keep moving around the room, use obstacles to prevent a direct approach, and shoot its legs if you need to slow it down. You do not need to kill it to complete the upgrade.
Freezer also contains an electronic lock terminal that opens a compartment with the optional LE 5 submachine gun. Take it only if you have room and can safely solve the terminal while the area is secure. It is not required for the campaign. When the rewrite finishes, remove the Level 2 Keycard and use it on the Level 2 lock leading to Systems.
- Redirect power to Freezer.
- Complete the Level 2 Keycard rewrite.
- Collect the LE 5 only if it does not compromise your supplies or positioning.
- Use the Level 2 card to enter Systems.
6. Collect the Biosensor Scope and identify the wrench Regenerador
Fight through Systems and follow the route into Incubation Lab. Four Regeneradors are held in containment tanks. Before releasing them, enter the small room at the rear and open the case containing the Biosensor Scope. Attach it to a compatible weapon, such as a rifle or the LE 5 if you collected it.
Aim through the scope at the Regeneradors to reveal the parasite clusters inside their bodies. Destroying the parasites is the dependable way to kill them permanently; ordinary shots may stagger them but will not prevent regeneration. One of the Regeneradors contains the wrench required for the final card upgrade. Examine the enemies through the scope before releasing them when possible, identify the one with the wrench, then release and kill that target. The other tanks can be left alone unless you need their drops or space to move.
- Collect the Biosensor Scope from the rear room of Incubation Lab.
- Equip it to a compatible weapon.
- Identify the Regenerador containing the wrench before engaging unnecessarily.
- Destroy the parasite clusters rather than relying on body damage.
7. Complete the Level 3 Keycard and reunite with Ashley
Take the wrench to the Overwrite Terminal in Incubation Lab and use it to open the machine. Insert the Level 2 Keycard to begin the Level 3 rewrite. Soldiers enter while the process runs, so use the lab’s equipment and doorways as cover, eliminate enemies that can interrupt your movement, and keep the Biosensor-equipped weapon ready in case a Regenerador reaches the room. Do not stand directly beside a terminal with no escape route.
When the rewrite completes, collect the Level 3 Keycard and leave the lab. Use the Level 3 door on the route outside to open the shortcut back toward Ashley’s holding area. Follow the unlocked passage, swipe the card at the cell, and allow the scene to play. The chapter is complete once Leon reaches Ashley and the game transitions to the next chapter.
- Use the wrench at the Incubation Lab terminal.
- Finish the Level 3 Keycard rewrite.
- Open the Level 3 security door and take the shortcut toward Ashley.
- Swipe the card at Ashley’s holding cell and trigger the chapter transition.
Before you move on
- The Level 3 Keycard has been removed from the Incubation Lab rewrite terminal.
- The Level 3 security door and shortcut toward Ashley’s holding cell are open.
- Leon has swiped the Level 3 card at Ashley’s cell and the chapter-ending scene or transition has begun.
- The next chapter becomes available after the Ashley reunion sequence.
Chapter 14 — Island Facilities: Machines, Labs and Heavy Combat
Chapter 14 begins with Ashley’s rescue in the Holding Cell and sends Leon through the Cargo Depot and Waste Disposal before returning to the Amber Storeroom. The required route includes helping Ashley operate the bridge, rerouting power at a terminal, surviving a Regenerador encounter and taking the elevator to the Amber Storeroom. After Ashley is captured again, Leon crosses the Campsite and enters Krauser’s trapped ruins. The chapter ends with Krauser’s mutated boss fight. The optional Wandering Dead request leads back to the Incubation Lab and an Iron Maiden variant; complete it before advancing beyond the early Chapter 14 route if you want its reward. Before the ruins, repair the knife, save at the typewriter, and carry a reliable close-range weapon, an accurate firearm and healing.
Leave the Holding Cell and reach the Cargo Depot
At the start of the chapter, search the Holding Cell before leaving. The Crystal Ore is in the cell, near the door. Have Ashley boost you to the upper access point so she can open the way, then follow the newly available route into the Cargo Depot. Break nearby containers and collect useful ammunition, gunpowder and healing, but do not spend resources clearing every enemy if you can safely move past them.
Use the Merchant and typewriter in the early facility area. Repair the Combat Knife if its durability is low, because the chapter contains several mandatory knife-parry situations. Keep one accurate weapon ready for parasite targets and distant soldiers. If you want to complete The Wandering Dead, pick up its request note in the Cargo Depot before leaving this section.
- The Crystal Ore has been collected if desired.
- Ashley has opened the Holding Cell exit.
- The knife is repaired or has enough durability for the upcoming encounters.
- The Wandering Dead request has been collected if you intend to complete it.
Cross the Cargo Depot and solve the Waste Disposal route
Continue through the Cargo Depot until you reach the control mechanism that opens the next passage. When operating the timed lever, pull it when the moving indicator is entering the red section; the mechanism has a short delay, so do not wait until the indicator is already centered. After the passage opens, continue into Waste Disposal and keep Ashley with you until the bridge section.
In the dark Waste Disposal area, use the valve and command Ashley to operate the nearby support mechanism when prompted. Cross to the far side and reroute the power at the terminal. The panel is solved by rotating the connections until all four power symbols are active; the display changes from 0/4 to 4/4 when complete. A group of enemies attacks after power is restored, so position yourself where you can protect Ashley and use the rifle or another accurate weapon to stop threats before they reach her.
Return across the bridge after restoring power. A Regenerador will approach. You can fight it with the Biosensor Scope by targeting its visible parasites, but the safer required route is to draw it onto the bridge and have Ashley release the support so it falls away. Once the enemy is gone, use the opened control panel and proceed to the elevator route.
- The Cargo Depot lever has opened the Waste Disposal route.
- All four power symbols are active at the Waste Disposal terminal.
- Ashley has crossed safely.
- The Regenerador has been defeated or dropped through the bridge.
Complete the optional Wandering Dead request before taking the elevator
If you accepted The Wandering Dead, use the open route back toward the earlier facility rooms and return to the Incubation Lab. The target is an unusually durable Regenerador that becomes an Iron Maiden. Use the Biosensor Scope to identify the parasites, then fire only when you have a clear shot. Its armor makes body shots inefficient, and the Iron Maiden can release damaging spikes even during its death animation, so keep your distance and avoid standing directly in front of it.
After the target dies, collect the request reward and return to the Chapter 14 elevator route. This request is optional and is not required to reach the Amber Storeroom or finish the chapter. Do not remain in the previous facility searching for additional objectives once the request is complete.
- The Iron Maiden variant is defeated if the optional request was attempted.
- The request reward has been collected.
- You have returned to the elevator route.
Reach the Amber Storeroom and prepare for the Campsite
Take the elevator to the upper level and follow the control-room route into the Amber Storeroom. Search the room for supplies, then interact with the large amber formation to trigger the story event. Ashley is captured again, and the large gates open toward the Campsite.
Before continuing through the gates, finish any preparation that requires the earlier route. Once outside, take the first path on the right into the small office area. Search the office and surrounding containers, then drop to the lower campsite. The Chapter 14 Clockwork Castellan is on top of lockers in the small upper building; listen for its clicking sound and look upward. The Gold Bar (L) is in a chest inside the tent below.
Continue through the campsite and use the Merchant and typewriter before entering the ruins. Sell unnecessary treasure, repair the knife, organize the case and carry healing. A rifle or another accurate weapon helps during the first Krauser sequence, while a shotgun or other close-range weapon is useful when enemies press into the ruins.
- The Amber Storeroom event has occurred.
- The Campsite supplies and Gold Bar (L) have been collected if desired.
- The Chapter 14 Castellan has been collected if desired.
- The Merchant and typewriter have been used before entering the ruins.
Cross Krauser’s trapped ruins
Krauser attacks from elevated positions as you enter the ruins. Move from cover to cover and fire when he exposes himself, then advance after he retreats. When you reach the upper section, operate the crank to open the route, but expect Krauser to continue attacking while you do so. Do not rush up the stairs immediately afterward; he throws grenades into the approach. Wait for the explosions to finish, then continue.
Watch the floor and walls for bear traps, laser tripwires and mounted turrets. Shoot or avoid the traps before crossing narrow passages. When Krauser fires explosive arrows from the far end of the road, use the available debris as cover and advance only after the blast has passed. Fire at him when he exposes himself to force the next transition. The goal in this portion is to survive and push forward; do not spend all high-damage ammunition trying to end the fight before the arena encounter.
- The crank has opened the next route.
- Bear traps, tripwires and turrets have been avoided or disabled.
- Krauser has retreated into the transformation sequence.
- You still have healing and knife durability for the final arena.
Defeat mutated Krauser
During the rubble escape, follow the visible route instead of stopping to fight every attack. Block the first direct blade strike, then use the evade prompt near the exit when it appears. Climb the ladder to enter the arena. Krauser’s transformed body blocks many frontal shots with his enlarged arm, so aim at his exposed feet to stagger him. Once he is staggered, fire again or close in for a knife attack.
Parry his blade strikes when you have enough knife durability, then counterattack. If he pulls his arm back at close range, move sideways immediately to avoid the grab. When he climbs or jumps toward the upper cliff, climb one of the arena ladders. His ground slam damages the lower level, so leave the lower floor before the impact. Fire while he is recovering above, then return to the lower level when safe and repeat the elevation change.
Keep moving around the platforms and do not allow yourself to be pinned against an edge. Use healing before a mistake leaves you vulnerable to a second attack. After the cutscene confirms the kill, collect the Fighting Knife.
- Krauser’s transformed form has been defeated.
- The Fighting Knife has been collected.
- You have not remained on the lower level during the ground slam.
Cross the drawbridge and finish Chapter 14
After collecting the Fighting Knife, leave the arena by the upper route and cross the drawbridge toward the tower. Follow the open path into the tower transition. There is no required reason to return to the completed ruins, and backtracking only risks losing time or resources.
If you fail the boss, reload the save made at the Campsite typewriter. Reorganize around knife durability, healing and accurate shots aimed at Krauser’s feet. During the rematch, prioritize survival over damage during the rubble escape and change levels whenever the ground-slam animation begins. Chapter 14 is complete when the drawbridge and tower transition carry the game into Chapter 15.
- The drawbridge has been crossed.
- The tower transition has begun.
- The game has advanced to Chapter 15.
Before you move on
- Leon and Ashley have passed through the Cargo Depot and Waste Disposal.
- The Waste Disposal power terminal has been completed and the elevator to the Amber Storeroom has been used.
- The Amber Storeroom event has occurred and Ashley has been captured again.
- Krauser has been defeated in the transformed arena and the Fighting Knife is in Leon’s inventory.
- Leon has crossed the drawbridge and entered the tower transition toward Chapter 15.
- The optional Wandering Dead request, Chapter 14 Castellan and campsite treasure have been completed if desired.
References for this chapter
Chapter 15 — Final Approach: Last Supplies and Boss Prep
Chapter 15 takes Leon from the Island fortifications to Luis’s Laboratory. Use Mike’s helicopter support to conserve ammunition, disable the anti-aircraft gun through the nearby building, and search the Cliffside Ruins before entering Specimen Storage. Specimen Storage contains the chapter’s Clockwork Castellan and Splendid Bangle, but its body bags can release Regeneradors if disturbed. After the storage section, visit the final Merchant and optional Shooting Range before fighting through Sanctuary Approach. Disable the second security turret, enter the Sanctuary, reunite with Ashley, and carry her to Laboratory B. Chapter 15 ends when Leon places Ashley in the chair; the parasite-removal procedure and the final boss belong to Chapter 16.
1. Leave the starting tower and use the first Merchant
At the beginning of Chapter 15, climb to the top of the tower from Chapter 14, then drop down on the far side. Follow the path to the nearby Merchant and typewriter. This is a useful place to save, repair damaged equipment, reorganize the attaché case, and create room for ammunition or grenades.
Keep a dependable handgun or other accurate general-purpose weapon, a close-range weapon such as a shotgun, healing items, and at least one crowd-control option if your inventory allows. A rifle with the Biosensor Scope is useful later against Regeneradors, but it is not mandatory if you plan to avoid most of them. Do not treat this as the final Merchant stop: another Merchant appears after Specimen Storage and is the better place for final preparation.
- Save at the typewriter if you want a checkpoint before the fortification sequence.
- Repair essential weapons and the Combat Knife if you rely on parries.
- Leave enough attaché-case space for ammunition, treasure, and key items.
2. Advance through the fortifications with Mike’s support
Move downhill toward the fortified area, but remain behind walls and ruined structures when soldiers begin firing. Mike’s helicopter arrives and attacks exposed enemies and emplacements. Let him remove or weaken enemies in the open instead of starting a prolonged firefight yourself.
Advance in short stages. Collect drops only after the immediate firing lanes are safe, and prioritize enemies with firearms, rocket launchers, or elevated positions when they threaten your route. Standard soldiers can often be bypassed once the path forward is clear. Conserve magnum ammunition and other high-damage resources for later encounters rather than spending them to finish every weakened enemy.
- Use cover against overlapping gunfire and elevated shooters.
- Allow Mike to draw enemy attention before crossing exposed ground.
- Loot the area only after the route forward is secure.
3. Disable the anti-aircraft gun from the building
Continue toward the anti-aircraft gun until the direct route becomes exposed. Enter the building on the right side of the stair approach and climb upward rather than standing in the open below the gun. From the upper level, cross toward the building on the left. A Brute may be positioned near this route, so damage it from a safer angle before committing to the crossing if necessary.
Clear the room containing the rear controls, then interact with the mechanism behind the anti-aircraft gun. When the gun is disabled, the helicopter can support the next part of the advance and the route toward the summit opens. Heavy Grenades can provide an alternate shortcut against the gun, but the building route is the standard progression method and does not require a rare explosive.
- Use the right-hand building for cover and elevation.
- Clear enemies near the control room before interacting.
- Confirm the anti-aircraft fire has stopped before leaving the area.
4. Search Cliffside Ruins before entering Specimen Storage
After the anti-aircraft sequence, continue toward the Cliffside Ruins. Mike is lost during the following story sequence, and Novistadors appear when control returns. Eliminate or evade them, then search the lower route for supplies and the Staff of Royalty. If you are completing requests, the Blue Request Note for Destroy the Blue Medallions 6 is available along the route before Specimen Storage; it is optional and does not affect campaign progression.
Enter the Specimen Storage building only after finishing the nearby exploration you want to do. The Clockwork Castellan and Splendid Bangle are not in the open Cliffside Ruins. They are in a small side room inside Specimen Storage, where the Castellan sits on a wooden beam above the treasure chest. Locate these before using the handle that begins the one-way passage.
- Collect the Staff of Royalty if you want the optional treasure.
- Complete or skip the final Blue Medallions request before progressing.
- Find the Specimen Storage side room containing the Splendid Bangle and Clockwork Castellan.
5. Use the handles in Specimen Storage without releasing extra Regeneradors
Specimen Storage contains hanging body bags, and some can release Regeneradors if Leon repeatedly bumps or disturbs them. Move around the bags instead of pushing through them. The first handle opens the route deeper into the storage area; continue carefully until you reach the second handle that raises the exit barrier.
Once the second handle is turned, move through the opened passage without delaying. The door closes after a short interval, and the section beyond is effectively one-way. If a Regenerador blocks the route, use the Biosensor Scope to identify its parasites with a compatible weapon, or create distance and sprint past it if the route is clear. Avoid fighting every creature in the room unless it is directly blocking progress.
- Do not deliberately strike or repeatedly brush against hanging body bags.
- Collect the Castellan and treasure before committing to the one-way passage.
- Turn the second handle, then move quickly through the raised exit.
6. Make the final Merchant visit and prepare for Chapter 16
The room after Specimen Storage contains the final Merchant opportunity in the main campaign and a nearby Shooting Range elevator. Save at the typewriter, sell completed treasures, repair weapons, and reorganize the attaché case. The Shooting Range is optional; it is the last opportunity to attempt its available challenges during the campaign, but skipping it does not prevent completion.
Prioritize upgrades that improve the weapons you actually use. Keep a reliable general-purpose weapon, a close-range option, healing items, and ammunition for the final chapter. The Merchant’s discounted Killer7 is optional, as are other purchases. Do not sell the Biosensor Scope solely to make a small amount of space if you still intend to fight or identify Regeneradors later.
- Save before entering Sanctuary Approach.
- Repair essential weapons and body armor if applicable.
- Keep healing items and at least one effective answer to heavy enemies.
- Use or skip the final Shooting Range deliberately.
7. Cross Sanctuary Approach and reach Luis’s Laboratory
Leave the Merchant area and advance through Sanctuary Approach. Soldiers, Novistadors, ranged attackers, and a Brute can occupy the route. Use the buildings and stairways as cover, and retreat down the stairs if the group surrounds you. Prioritize rocket-launcher or other ranged threats, then clear the enemies blocking the upper route.
Use the building on the right side of the stairs to reach the upper crossing toward the building on the left. Enter the left building, clear the enemy inside, and interact with the rear of the security turret to turn it away from the route. Continue upward into the Sanctuary for the reunion scene with Ashley.
After the scene, carry Ashley through the marked path toward Laboratory B. This section is linear. When you reach the locked laboratory door, use Luis’s Key, enter the laboratory, and place Ashley in the chair. That event confirms Chapter 15 completion. The parasite-removal procedure continues as part of Chapter 16, so do not wait for the full cure sequence before considering this chapter finished.
- Disable the Sanctuary Approach turret from the rear controls.
- Enter the Sanctuary and trigger the Ashley scene.
- Use Luis’s Key at Laboratory B.
- Place Ashley in the laboratory chair to finish Chapter 15.
Before you move on
- The anti-aircraft gun has been disabled and Leon has passed through the Island fortifications.
- Leon has crossed Specimen Storage and reached the final Merchant area.
- The final Merchant visit and Shooting Range have been completed or deliberately skipped.
- The Sanctuary scene with Ashley has occurred.
- Leon has used Luis’s Key and placed Ashley in the chair at Laboratory B, triggering the transition to Chapter 16.
Chapter 16 — Final Boss and Escape: Defeat and Ending Sequence
Chapter 16 starts in Luis’s Laboratory after Leon and Ashley have been cured. Leave through the warehouse, cross the ruined Sanctuary, pass through the cave, and use the final Merchant before taking the elevator to Saddler’s arena. In the first boss phase, destroy the eyes on Saddler’s limbs to stagger him, then use the knife prompt on his exposed weak point. Watch for black-fluid attacks, leaps, Novistadors, and sections of arena that collapse. Saddler then transforms and restricts the fight to a smaller area. Shoot the large central eye while avoiding horizontal tentacle swipes and vertical slams until Ada throws Leon a Special Rocket Launcher. Fire it at the central eye to finish the boss. The final escape is a linear timed run to the water scooter, followed by a hazardous ride through collapsing caves. Reaching open water begins the ending sequence and credits.
1. Leave Luis’s Laboratory and cross the ruined Sanctuary
At the beginning of Chapter 16, Leon and Ashley are already together in Luis’s Laboratory. Exit through the same doors used to enter the laboratory, then boost Ashley up to the ladder in the warehouse. She lowers the ladder from above, allowing Leon to climb to the upper walkway and continue toward the Sanctuary.
The hanging cage above the walkway contains a Velvet Blue. Shoot it down only if you want the optional treasure; it is not needed for progression. Continue into the ruined Sanctuary and follow the rubble route through the area. A camouflaged Novistador can blend into the debris, so scan the path before moving through open sections. Drop down and climb through the broken route toward the cave rather than trying to return to earlier Sanctuary rooms.
- Ashley is accompanying Leon.
- You have left the laboratory through the warehouse route.
- You have crossed the ruined Sanctuary and entered the route toward the cave.
2. Reach the final Merchant and prepare for Saddler
Continue through the cave, dealing with Novistadors or moving past them when the path is clear. Collect nearby treasure only when it does not expose Leon to an attack. The route eventually reaches a final Merchant area before an elevator. This is the last dependable opportunity to reorganize before the Saddler encounter.
Sell unwanted treasures, repair or upgrade the weapons you intend to use, and place healing items and ammunition in the case. A close-range weapon is useful when Saddler is staggered, while a rifle, handgun, shotgun, or other dependable firearm can damage the exposed eyes. Keep at least one strong healing item available for mistakes during the boss fight. Make a manual save at the nearby typewriter if you want a clean retry point.
- You have used the last Merchant if you need repairs, upgrades, or inventory management.
- Healing items and suitable ammunition are in the active case.
- A save exists before taking the elevator, if you want to preserve a retry point.
3. Destroy Saddler’s limb eyes and exploit the stagger
Take the elevator down to the arena and move along the raised path until you reach the main fighting area. Saddler’s first form has large eyes on his limbs. Shoot an exposed eye until it is destroyed. Repeat this against the other visible limb eyes; when enough have been broken, Saddler is staggered and exposes his weak point.
Close in only after the stagger is clear and perform the prompted knife attack. This close attack deals substantial damage and conserves ammunition. Repeat the eye-destruction and knife-attack cycle while continuing to reposition around the arena. Saddler can leap, strike with his limbs, and fire a stream of black liquid that can deal severe damage, so do not remain beneath him or stand still during a reload.
The arena changes as the fight continues. Saddler can destroy sections of the platforms, reducing the space available for circling. Novistadors may also appear. Kill one only when it blocks movement or creates an immediate threat; otherwise, keep Saddler as the priority and preserve ammunition for the boss.
- You are firing at exposed eyes on Saddler’s limbs.
- You are using the knife prompt after a successful stagger.
- You are avoiding the black-fluid stream, leaps, and damaged sections of the arena.
4. Survive Saddler’s transformed phase
After several successful stagger cycles, Saddler transforms and the battle moves into a smaller arena surrounded by tentacles. The central glowing eye is now the main target. Shoot it whenever it is exposed, using your strongest reliable firearm and taking safe shots rather than standing in the open during an attack animation.
Watch the tentacles carefully. A horizontal swipe can require a dodge, while a tentacle raised vertically signals a slam on one side of the arena. Move toward the opposite side when the slam is telegraphed. Keep Leon moving between attacks and reload during safer openings rather than while a tentacle is already descending.
The transformed phase ends when Ada throws Leon a Special Rocket Launcher. Pick it up and aim at Saddler’s large central eye. Fire the Special Rocket Launcher to complete the boss fight. The normal Rocket Launcher is an optional weapon that can alter the earlier phase, but it is not required for the campaign ending.
- Saddler’s transformed body is active.
- You are targeting the large central eye.
- The Special Rocket Launcher has been collected and fired at the eye.
5. Run through the collapsing island route
After the boss cutscene, Leon is reunited with Ashley and the island escape begins. Follow the obvious underground route without stopping for ordinary combat or deep exploration. The path is linear and time-limited, so prioritize doors, ramps, and the next passage. Scripted hazards and collapsing sections can interrupt progress, but there is no reason to turn around after moving forward.
The Chapter 16 Clockwork Castellan is an optional collectible. Near the end of the underground escape, after a door sequence and in the room with flashing red lights, look above the green forklift toward the storage containers. The Castellan is on top of the containers in the northwest portion of the room. Shoot it only if you already know the location and can spare the time; it is not needed to finish the story.
Continue to the end of the passage and interact with the water scooter. If the escape fails, reload the latest autosave or retry from the available checkpoint rather than returning to the boss arena.
- Leon and Ashley have left Saddler’s arena.
- You have stayed on the forward route during the timed escape.
- The water scooter interaction has started.
6. Steer the water scooter to open water
During the water-scooter sequence, steer around rock walls, falling debris, and sharp turns. Begin turning before narrow passages instead of waiting until Leon is beside an obstacle. Slow down when necessary; a cautious line is safer than attempting to hug the inside of every corner. Collisions damage the scooter, and repeated damage can fail the sequence.
Follow the cave route toward daylight. When the scooter exits the collapsing passages and reaches open water, the active campaign objectives are complete. The ending cutscene follows, then the credits begin. Let the ending sequence and credits play before checking the resulting save or results screen.
- The scooter survives the cave route.
- Leon and Ashley reach open water.
- The ending sequence and credits appear.
Before you move on
- Osmund Saddler has been defeated with the Special Rocket Launcher finishing sequence.
- Leon and Ashley have reached open water on the water scooter.
- The ending sequence and credits have appeared.
- A completed campaign result or post-completion save state is available after returning from the ending sequence.
Finishing up
All 16 campaign chapters have been completed in sequence.
The final boss has been defeated, the water-scooter escape has been completed, and Leon and Ashley have reached open water.
The ending sequence and credits have appeared.
A completed campaign save or post-completion result is available after returning from the ending sequence.
Choose your next gameScreenshots & video
Game imagery for reference. Follow the written chapters above for the route and strategies.
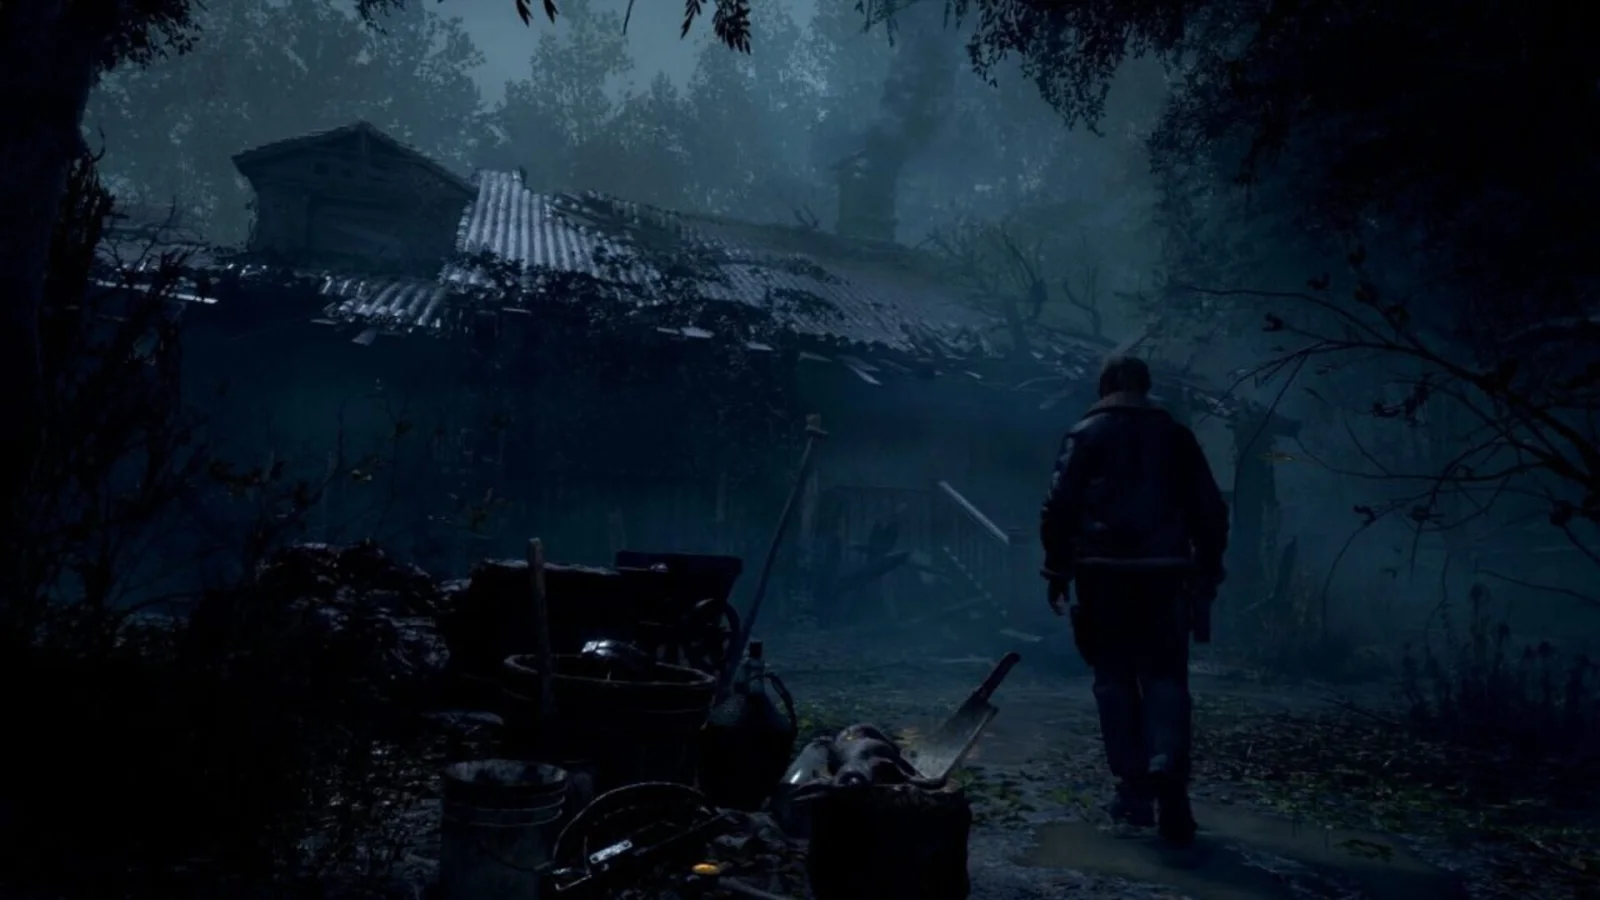
Sources & references
Our original guide draws on the references below. Check the edition at the top of this page before following controls or unlock requirements.
- Resident Evil 4 Remake Chapter 1 Walkthrough
- Resident Evil 4 Remake: Chapter 1 Walkthrough
- Typewriters | Resident Evil 4 Official Web Manual
- Controls | Resident Evil 4 Official Web Manual
- Resident Evil 4 Remake: Chapter 2 Walkthrough
- Chapter 2 Guide - Resident Evil 4 Remake (2023)
- Resident Evil 4 Remake Gameplay Walkthrough - Chapter 2 (The Valley)
- Resident Evil 4 Remake Chapter 3 Walkthrough
- Resident Evil 4 Remake: Chapter 3 Walkthrough | Push Square
- Chapter 3 Guide - Resident Evil 4 Remake (2023) - Neoseeker
- Resident Evil 4 Remake Chapter 4 Walkthrough
- Resident Evil 4 Remake Chapter 4 Collectibles Locations
- Resident Evil 4 Remake Puzzle Solutions by Chapter
- Resident Evil 4 Remake Chapter 4: 100% walkthrough
- Resident Evil 4 Remake Chapter 5 Walkthrough — PowerPyx
- Resident Evil 4 Remake: Chapter 5 Walkthrough — Push Square
- Chapter 5 Guide — Resident Evil 4 Remake (2023) — Neoseeker
- Resident Evil 4 Remake Chapter 5: 100% Walkthrough — Vandal
- Resident Evil 4 Remake: Chapter 6 Walkthrough
- Resident Evil 4 Remake Chapter 6 Walkthrough
- Resident Evil 4 Remake Chapter 6 Guide
- The Merchant | Resident Evil 4 Official Web Manual
- Resident Evil 4 Remake Chapter 7 Walkthrough — PowerPyx
- Resident Evil 4 Remake: Chapter 7 Walkthrough — Push Square
- Resident Evil 4 Remake: How to Solve the Sword Puzzle in the Treasury — Push Square
- Resident Evil 4 Remake Chapter 8 Walkthrough
- Resident Evil 4 Remake Chapter 8 Walkthrough
- Chapter 8 Guide - Resident Evil 4 Remake (2023)
- Player Actions | Resident Evil 4 Official Web Manual
- Resident Evil 4 Remake Chapter 9 Walkthrough — PowerPyx
- Resident Evil 4 Remake: Chapter 9 Walkthrough — Push Square
- Resident Evil 4 Remake Chapter 9: 100% Walkthrough — Vandal
- Resident Evil 4 Remake Mausoleum Lamp Puzzle Solution — PowerPyx
- Dining Room Table Puzzle Solution in Resident Evil 4 Remake — Gamer Guides
- Resident Evil 4 Remake: Chapter 10 Walkthrough
- Chapter 10 Guide - Resident Evil 4 Remake (2023)
- Resident Evil 4 Remake Walkthrough: All 16 Chapters
- Resident Evil 4 Remake: How to defeat or avoid boss Verdugo?
- Make Your Way to the Surface - Resident Evil 4 Remake Walkthrough
- Resident Evil 4 Remake Chapter 11 Walkthrough — PowerPyx
- Resident Evil 4 Remake: Chapter 11 Walkthrough — Push Square
- Resident Evil 4 Remake Chapter 11: 100% walkthrough — Vandal
- Chapter 11 Guide — Resident Evil 4 Remake (2023) — Neoseeker
- Resident Evil 4 Remake Chapter 12 Walkthrough
- Resident Evil 4 Remake: Chapter 12 Walkthrough
- Resident Evil 4 Remake: Chapter 13 Walkthrough
- Chapter 13 Guide - Resident Evil 4 Remake (2023)
- Resident Evil 4 Remake Chapter 13 Walkthrough
- Resident Evil 4 Remake: Wrench location
- Resident Evil 4 Remake Chapter 14 Walkthrough
- Resident Evil 4 Remake: Chapter 14 Walkthrough
- Waste Disposal Power Puzzle Solution in Resident Evil 4 Remake
- RE4 Remake Chapter 14 Walkthrough - Map, Request, and Castellans
- Resident Evil 4 Remake The Wandering Dead Request Guide
- Resident Evil 4 Remake Chapter 15 Walkthrough
- Resident Evil 4 Remake: Chapter 15 Walkthrough
- Chapter 15 Guide - Resident Evil 4 Remake (2023)
- Resident Evil 4 Remake Chapter 15 Collectibles Locations
- RE4 Remake | Chapter 15 Walkthrough - Map, Request, & Castellans
- Resident Evil 4 Remake Chapter 16 Walkthrough
- Resident Evil 4 Remake: Chapter 16 Walkthrough
- How to Defeat Saddler in Resident Evil 4 Remake - Chapter 16 - Walkthrough
- Resident Evil 4
About the game & collecting notes
- Platform
- Sony PlayStation 5
Step-by-step campaign walkthrough for the PlayStation 5 remake of Resident Evil 4 (Capcom, 2023). This guide covers every main-chapter objective, major landmarks, essential progression items, Merchant stops, boss objectives, recovery from failure, and a clear completion checklist to reach the game's ending.
Darryl Polo
Darryl Polo writes about emulation and retro games. What changes when an old favorite moves to another setup? That question connects his interest in tinkering with the games that made the hardware worth keeping.
Our editorial standardsFound a step that needs another look? Help us improve this guide.