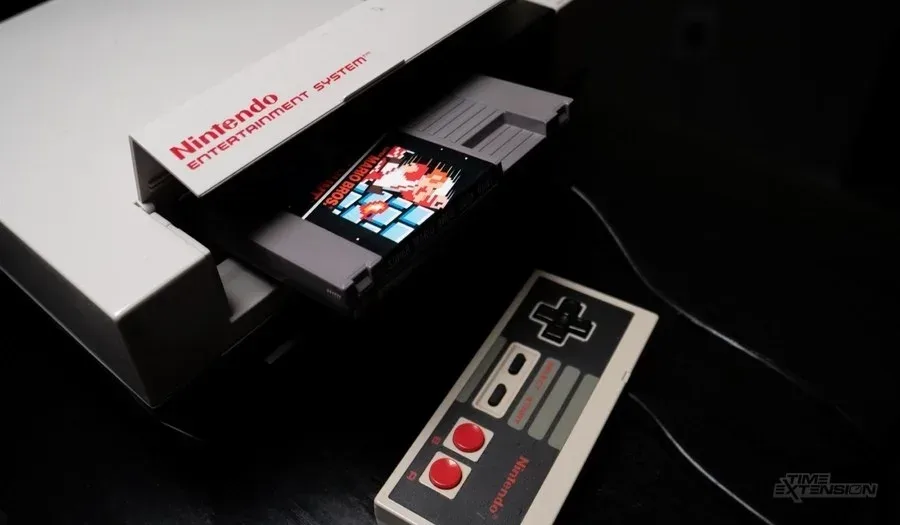
Rambo (NES) — Complete Campaign Walkthrough (North American original release)
Detailed, step-by-step campaign walkthrough for the original North American NES release of Rambo (Pack-In Video; published by Acclaim). Covers controls, systems, inventory and leveling, every major area and boss, reliable routes, mandatory keys and items, useful farming spots, boss tactics, and a concrete completion checklist to defeat Mil-21, return to the original base, use the S-tile route, and trigger the campaign’s final Trautman sequence. Preserving Co and confronting Murdock are optional variations or closure scenes, not additional completion requirements.

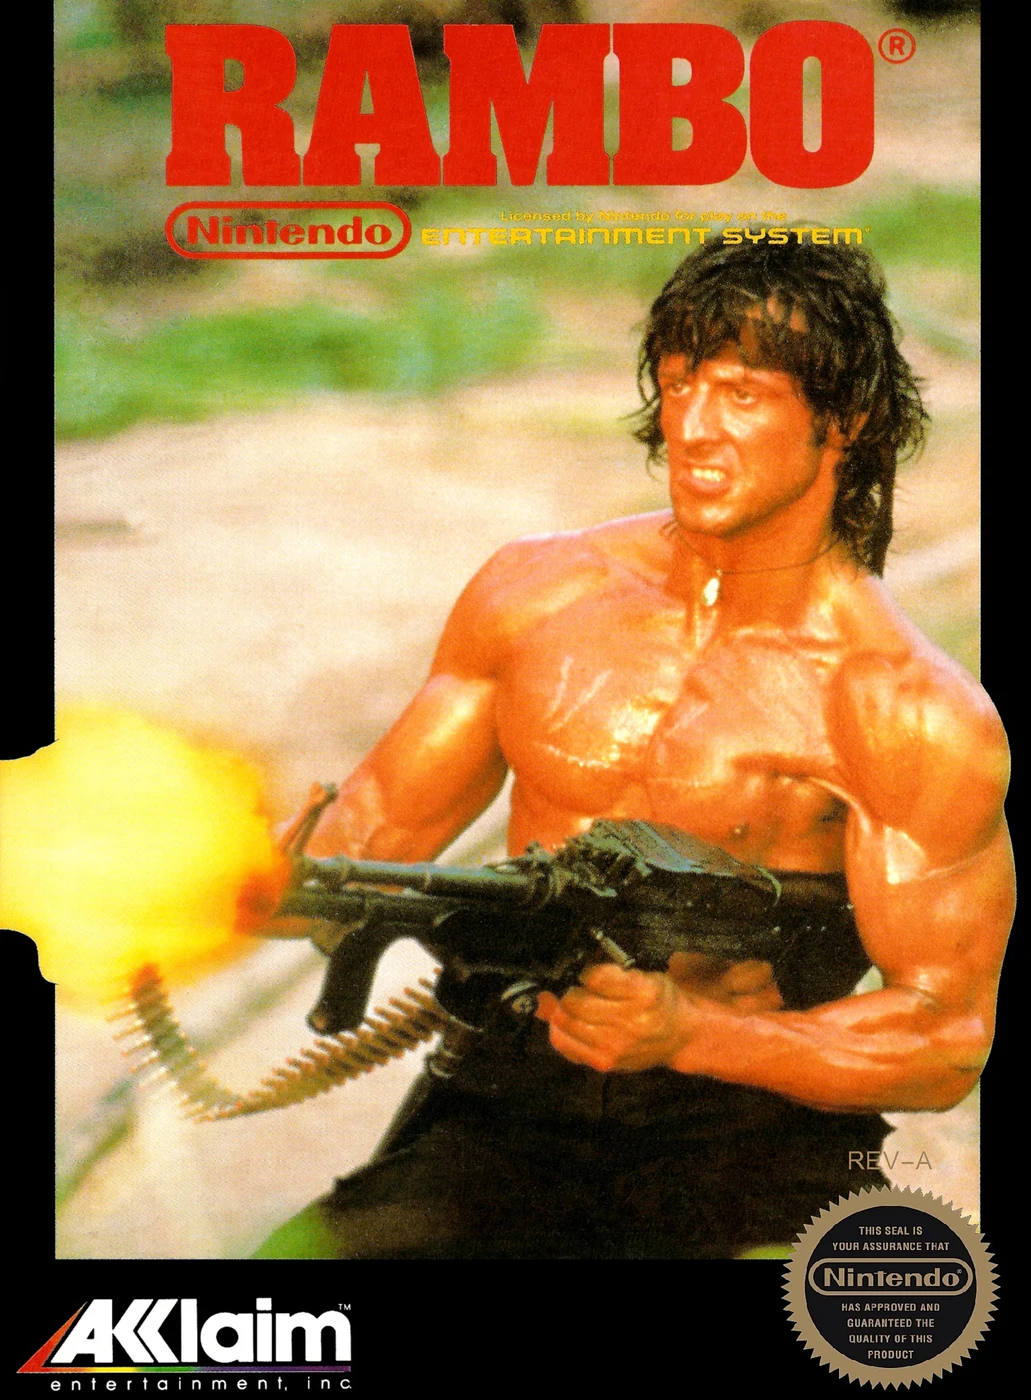
Find a copy
Rambo Nintendo Entertainment System
We may earn a commission if you buy through these links, at no extra cost to you. As an Amazon Associate I earn from qualifying purchases.
Opens retailer search results. Check the model, edition, seller, availability and current price before buying.
Before you begin
This walkthrough guides you step-by-step through the original North American NES release of Rambo.
You will learn the controls, how the experience and item systems work, where to find critical items and keys, routes through each major area, reliable boss tactics, and how to avoid common soft-death traps.
Follow the area objectives in order and use the recommended farming points when you are low on medicine or ammunition.
Rambo is built around exploration on an overworld map plus side-scrolling action segments with RPG-like experience and inventory management.
Expect backtracking, compass-based navigation, and several opaque gates that require specific items, conversations, or route triggers.
I assume you are playing the original NES cartridge published by Acclaim for the North American market; chapter routes are written for the original USA Rev A edition.
Set yourself up for the run
Familiarize yourself with the controls and HUD: movement, jump, attack, item selection, and how Start and Select show status information.
Practice dodging and timing vertical jumps in side-scrolling segments.
Keep Medicine Bottles stocked for long routes and boss attempts; each bottle fully restores Rambo’s lost health.
Use early-game areas and repeatable enemy drops to replenish arrows, machine-gun ammunition, exploding arrows, grenades, and medicine when needed.
Track Combat Knife experience and level. Level 4 is recommended before the Russian warehouses because it makes the section easier, but it is not a verified hard requirement for progression.
Have paper and draw a small map of overworld junctions as you play.
The game uses compass-style screen transitions and several similar-looking screens; record landmarks and N/S transfer points.
Press Start during dialogue to display and record the current password.
Use passwords and conversation checkpoints to avoid repeating long sections after a game over.
Conserve lives, medicine, and grenades before boss rooms, especially the Mil-21 encounter.
Before the final helicopter battle, use the Area 4 medicine cache and preserve grenades for the Mil-21.
Controls, HUD and Basic Systems
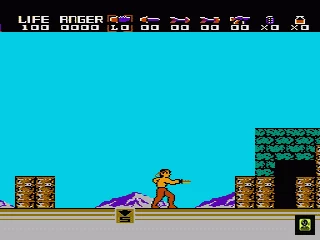
Rambo uses simple controls, but its North/South transfer points and vertical platform movement are easy to misread. Left and Right move across the current screen, Down makes Rambo duck, and Up enters doors, talks to characters, or activates a transfer point marked N or S. A performs a fixed-height jump. Pressing A with Up or Down changes the vertical platform transition when the terrain provides one; A plus Down lets Rambo drop through an available platform, while A plus Up moves through an upward route when possible. B attacks with the selected weapon or uses medicine, and Select cycles through weapons and items. Start pauses the game and, during conversations, opens the status display with life, experience, supplies, timer, and password information. Medicine fully restores lost health, so reserve it for dangerous routes and boss attempts. Hearts from major enemies restore life and increase maximum life. Experience raises Rambo’s strength level and improves knife damage. Use ranged weapons against distant gunfire, but rely on ducking, retreating, and the knife when ammunition is scarce.
Move through action screens and identify transfer points
Use Left and Right to move horizontally across the current action screen. Press Down to make Rambo duck. Ducking is useful against many low, waist-level shots from armed enemies, but it does not protect against contact damage, attacks from above, or every projectile. Keep moving rather than crouching in place when an enemy is close enough to collide with you.
Press Up beside a closed door to enter it. Press Up while standing on a transfer point marked N or S to move to the connected North or South layer. These letters identify route connections, not decorative signs. If a path appears to end at a cliff, bridge, or empty edge, search the nearby platforms for an N or S point before assuming the route is blocked. Press Up directly in front of a character to begin a conversation. Some NPCs require Rambo to be positioned close and facing them.
- Use Left and Right for horizontal movement.
- Press Down to duck beneath suitable low shots.
- Press Up at doors, characters, and N or S transfer points.
- Stand directly in front of NPCs when a conversation does not begin.
Jump and change vertical platform levels
Press A to jump. The normal jump has a fixed height; holding A longer does not make Rambo rise higher. Pressing A with a direction changes how Rambo interacts with vertical platforms when the terrain supports that movement. This is a platform transition rule, not a variable-height jump system.
Press A with Up when the current terrain provides an upward platform route. Press A with Down to drop through an available platform and land on the level below. The transition only works where the platforms are designed to connect, so do not expect the input to pass through every ledge or bridge. If Rambo remains on the same level, reposition him over the correct platform and try again.
Use downward transitions deliberately. Dropping through a platform can place Rambo among enemies, over damaging water, or away from the N or S point needed to return. Some enemies release a red J power-up. That item temporarily gives Rambo a higher jump and is different from pressing A with Up; it is useful when a bridge or lower route would otherwise leave him unable to climb back.
- Press A for the fixed-height normal jump.
- Use A with Up for an upward platform transition when the terrain permits it.
- Use A with Down to drop through an available platform.
- Do not expect A plus Up to make the ordinary jump higher.
- Use a red J power-up when the game provides one for a genuinely higher jump.
Select weapons and attack with B
Press Select during action screens to cycle through the available weapons and items. The highlighted choice appears in the item display at the top of the screen. Press B to attack with the selected weapon. The regular combat knife is always available, while throwing knives, arrows, exploding arrows, machine-gun ammunition, and grenades require at least one unit in stock.
If a ranged weapon is empty, pressing B will not produce a useful attack. Cycle back to the knife or choose another stocked weapon instead. The knife is short-ranged but costs no ammunition, making it the safest option against isolated enemies that can be approached without crossing gunfire or hazardous ground. Use arrows or the machine gun when distance matters, especially against enemies firing from the opposite side of a screen.
Medicine is also activated with B. Check the highlighted item before pressing the button so that you do not accidentally use a bottle during combat. After one medicine use, the selection returns to the combat knife. Select the intended ranged weapon again before continuing an attack.
- Press Select until the intended weapon or item is highlighted.
- Press B to attack or activate the selected item.
- Switch away from empty ammunition instead of repeatedly pressing B.
- Check the selection before pressing B near a dangerous enemy.
- Remember that using medicine returns the selection to the combat knife.
Read the HUD and record passwords
The action-screen display shows Rambo’s current life, experience, strength or knife level, and available supplies. Monitor life rather than waiting for the character sprite to give an obvious warning. Damage accumulates quickly in caves, water routes, enemy camps, and boss areas, and falling from bridges can combine with enemy fire to drain the meter rapidly.
Press Start during a conversation to open the status screen. The display includes the current password along with life, experience, inventory, and timer information. Write the password down exactly before turning off the NES or attempting a difficult section. Similar-looking letters and numbers can be difficult to distinguish, so compare the complete record against the screen before leaving the conversation.
The timer appears in the status information, but it is not the practical objective of ordinary campaign play. Do not take an unsafe shortcut merely because the timer is visible. Learn the N and S connections, keep a route note or map, and use passwords at conversation checkpoints.
- Monitor life, experience, strength level, and supplies on the HUD.
- Press Start during dialogue to view the password and status information.
- Copy the complete password before quitting.
- Treat the timer as background information rather than a reason to rush into hazards.
Use medicine and collect heart rewards
Select a medicine bottle, then press B to use it. A medicine bottle fully restores Rambo’s lost health. Because the recovery is complete, medicine is most valuable after substantial damage or immediately before a dangerous route when no reliable recovery point is nearby. Do not waste a bottle after a minor hit if you can safely reach a checkpoint or supply source without further damage.
Healing does not make Rambo invulnerable. Use a bottle during a safe opening, after moving away from an enemy, or before entering a boss pattern rather than standing directly in an attack. Once the bottle is used, confirm that the knife is selected and cycle back to your intended ranged weapon if necessary.
Major enemies and bosses can leave hearts. Collect a heart before leaving the area: it restores Rambo’s health and raises his maximum life. The reward is a permanent campaign improvement, not merely a temporary pickup. A larger life meter still requires careful movement because contact damage, projectiles, pits, and water hazards remain dangerous.
- Select medicine and press B to use it.
- Remember that medicine fully restores lost health.
- Heal during a safe opening or before a hazardous route.
- Collect every major-enemy heart before leaving its area.
- Treat hearts as permanent maximum-life upgrades as well as full recovery.
Gain experience and improve knife strength
Defeated enemies provide experience, including enemies finished with ranged weapons or grenades. As the experience total reaches the game’s progression thresholds, Rambo’s strength level rises. The level is displayed with the knife information and improves the damage dealt by the combat knife. The knife becomes increasingly useful later, when ammunition may be needed for specific enemies or aerial encounters.
Do not fight every enemy automatically. Experience and item drops are valuable, but taking repeated damage from a safe-to-ignore enemy can cost more life and medicine than the reward is worth. Fight enemies that provide useful supplies or block the route, and avoid unnecessary contact when the screen can be crossed safely.
Against ranged soldiers, duck under suitable low shots, attack during their recovery window, and retreat before the next volley. Against isolated creatures, the knife conserves ammunition. Against distant or heavily protected targets, select arrows or the machine gun and keep moving. Reserve grenades for encounters where their stronger damage or area effect is worth the limited supply.
- Watch the experience total and strength-level indicator.
- Remember that experience improves knife damage rather than granting a new movement control.
- Use safe kills for experience instead of forcing every encounter.
- Use distance, ducking, and repositioning against gunfire.
- Conserve grenades for difficult targets and boss encounters.
Before you move on
- You can move horizontally, duck under suitable low shots, enter a door, and talk to a character.
- You can identify N and S transfer points and activate them with Up.
- You understand that A performs a fixed-height jump.
- You can use A with Up for an upward platform transition when the terrain allows it.
- You can use A with Down to drop through an available platform.
- You can select the knife, a stocked ranged weapon, or medicine with Select and activate it with B.
- You know that one medicine bottle fully restores lost health and that using it returns selection to the knife.
- You can identify life, experience, strength level, item quantities, and timer information on the HUD or status display.
- You can open the status screen during dialogue with Start and record a complete password.
- You understand that experience raises strength level and improves knife damage.
- You understand that major-enemy hearts restore life and increase maximum life.
- You can distinguish a red J power-up’s temporary higher jump from the ordinary fixed-height jump.
Inventory, Weapons, Experience and Leveling
Rambo always carries the Combat Knife, while Throwing Knives, Bow and Arrows, Exploding Arrows, Machine Gun ammunition, Hand Grenades and Medicine Bottles are limited supplies. Defeated enemies provide Combat Experience, regardless of which weapon delivers the final hit. Reaching experience thresholds raises the Combat Knife level from 0 to a maximum of 7, increasing knife damage. One Medicine Bottle fully restores all of Rambo’s lost health. A boss Heart permanently adds 100 maximum life and restores life to the new maximum. Use ranged weapons when distance or enemy fire makes knife attacks unsafe, but conserve Hand Grenades for vehicles, difficult bosses and especially the final Mil-21 encounter.
1. Recognize each weapon and its purpose
The Combat Knife is Rambo’s permanent weapon. It never runs out of ammunition, but its overhead swing has short reach and delayed timing. Use it against ordinary enemies when you can safely approach them, especially after your Combat Knife level has increased. It is not merely a backup weapon: later in the campaign, a strengthened knife can defeat many enemies efficiently without spending ranged ammunition.
Throwing Knives are short-range projectiles. Bow and Arrows travel farther and are useful against early soldiers, insects and enemies positioned across gaps. Exploding Arrows create an impact blast and are useful against groups or enemies that are unsafe to approach. The Machine Gun fires rapidly and is useful for suppressing soldiers or dealing sustained damage at close and medium range. Hand Grenades are powerful explosives, but their small carrying limit makes them a resource for major threats rather than routine enemies.
Medicine Bottles are recovery items, not weapons. Select the bottle with Select, then press B to use it. One bottle completely restores all health Rambo has lost at that moment, so its value increases as Rambo’s maximum life grows. After using medicine, the game automatically returns the selection to the Combat Knife.
- Combat Knife: permanent close-range weapon with no ammunition cost.
- Throwing Knife: limited short-range projectile.
- Bow and Arrow: long-range standard projectile.
- Exploding Arrow: ranged explosive attack with area damage.
- Machine Gun: rapid-fire weapon for soldiers and dangerous approaches.
- Hand Grenade: powerful limited explosive weapon.
- Medicine Bottle: fully restores all lost health when used.
2. Track the practical carrying limits
The documented practical limit is 99 for Throwing Knives, Bow and Arrows, Exploding Arrows and Machine Gun ammunition. Hand Grenades and Medicine Bottles cap at 9. These limits mean that a drop is wasted when its category is already full, so collect supplies with an eye on what you actually need. If you are already carrying 99 arrows, for example, do not clear a dangerous room merely to reach another regular-arrow drop.
Medicine is particularly important because one bottle completely refills lost health. Do not spend a bottle on every minor hit during ordinary exploration if the current route is safe. Save a reserve before the first POW camp, the Russian warehouse section and the final helicopter route. A full stock can recover damage that would otherwise force a long retreat, while a full-health bottle is not wasted if the game gives you no other way to carry more than the nine-bottle limit.
Keep ammunition below its cap when practical so useful drops are not discarded. Standard arrows are often sufficient for distant enemies, while Exploding Arrows and Machine Gun ammunition are better reserved for crowded screens, resistant targets and dangerous approaches.
- Throwing Knives, Bow and Arrows, Exploding Arrows and Machine Gun ammunition: practical cap of 99 each.
- Hand Grenades: practical cap of 9.
- Medicine Bottles: practical cap of 9.
- Use a bottle when it prevents death or saves a hazardous return trip.
- Avoid collecting ammunition from dangerous positions if that category is already full.
3. Gain Combat Experience from every defeated enemy
Enemies provide Combat Experience when they are defeated. The experience is credited even when the killing blow comes from a Hand Grenade or another ranged weapon, so you do not need to finish every enemy with the Combat Knife. Numbers appearing after defeated enemies represent experience being added to Rambo’s total.
The Combat Knife level begins at 0 and can rise to 7. The level is shown beneath the knife symbol on the action-screen status display. Each increase improves the damage dealt by the Combat Knife. The game does not require you to reach level 7 before continuing. Fight enemies that are safe to approach, and use ranged attacks when closing in would cost more health than the experience is worth.
A good early habit is to practice the knife against isolated insects, snakes and other enemies whose attacks are easy to read. Against soldiers firing across gaps or enemies positioned beside pits, use a projectile instead. Experience is useful, but surviving with medicine and ammunition is more important than defeating every enemy.
- Confirm the current Combat Knife level on the status display during a conversation.
- Earn experience with any weapon; ranged kills still count.
- Use the knife against safe, isolated enemies to conserve ammunition.
- Treat level 7 as the maximum, not as a mandatory early-game objective.
4. Level naturally through required areas
Defeat most ordinary enemies encountered on required routes, then bypass enemies that offer little reward or occupy a hazardous position. The early jungle is a good place to become accustomed to the Combat Knife’s overhead swing. The knife becomes increasingly valuable in later Russian sections, where ammunition can be consumed quickly and enemies may require repeated ranged hits.
If health or ammunition is low, do not turn a difficult screen into a farming route. Instead, return to a known supply area when the current section allows it. In Area 2, the medicine-dropping gorilla near the OSO landmark, the tiger carrying Machine Gun ammunition and other nearby enemy drops provide practical restocking opportunities. The route also includes useful sources of Exploding Arrows and regular Arrows around the boat, bats and floating skulls. Farming is optional, but filling Medicine and at least one reliable ranged weapon before the caves and POW camp makes recovery attempts much safer.
Because Medicine Bottles fully restore lost health, use the farm route to refill both the bottle count and Rambo’s current life. Do not waste a bottle immediately before returning to a refill location unless the damage would make the trip unsafe.
- Fight safe enemies while progressing instead of grinding every screen.
- Use Area 2’s known medicine and ammunition drops when supplies are low.
- Do not trade several Medicine Bottles for a small amount of experience.
- Restock before caves, POW camps, warehouses and helicopter encounters.
5. Use Hearts and Medicine correctly
A defeated major boss leaves a Heart. Collecting it permanently increases maximum life by 100 and restores Rambo’s life to the new maximum. This is different from a Medicine Bottle: the Heart improves survivability for the rest of the campaign, while a Medicine Bottle completely restores currently lost health without increasing the maximum.
After a boss, verify that the Heart was collected before leaving the victory area. Because the Heart restores life to the increased maximum, avoid using a Medicine Bottle immediately before a boss if you can survive the approach without it. After the fight, check the increased life total and count the bottles remaining before proceeding. A larger maximum is most useful when paired with a reserve of Medicine for the next long route.
If you enter a boss area already damaged, use medicine only when necessary to survive the fight. The post-boss Heart supplies a full restoration after victory, but it cannot help if Rambo dies before the reward appears.
- Collect every required boss Heart.
- Confirm the 100-point maximum-life increase after the pickup.
- Remember that Medicine fully restores lost health but does not raise the maximum.
- Preserve bottles before bosses when current health is safe enough.
- Do not leave a boss reward area until the Heart has been collected.
6. Preserve Hand Grenades for the Mil-21
Hand Grenades are useful against difficult enemies, vehicles and helicopter encounters, but the final Mil-21 battle is the most important reason to conserve them. The Mil-21 takes grenade damage, while ordinary weapons do not provide a dependable substitute for finishing the encounter. The fight also introduces continuous missile pressure and soldiers who must be dealt with while you attack the helicopter.
Enter the final approach with as many Hand Grenades as the 9-item cap allows whenever the route permits, and keep Medicine available for mistakes. During the battle, move laterally to reduce missile hits, eliminate soldiers when they threaten to surround you, and throw grenades at the Mil-21 during openings. Do not spend the entire reserve clearing ordinary infantry before the helicopter is vulnerable. The soldier appearing on the left can replenish grenades, so prioritize that opportunity when your supply becomes low.
If an attempt fails, use the available checkpoint and pre-final supply route to rebuild Medicine and explosives before trying again. Do not assume ordinary arrows or Machine Gun ammunition will replace grenades as a dependable Mil-21 strategy.
- Reserve Hand Grenades for major vehicles and the Mil-21.
- Enter the final sequence with up to 9 grenades when possible.
- Keep several Medicine Bottles for the missile-and-soldier fight.
- Use lateral movement and soldier control to create safe grenade opportunities.
- Use the left-side soldier’s grenade refill when the encounter provides it.
Before you move on
- The Combat Knife level has increased through normal enemy defeats; level 7 is the documented maximum, but reaching it is optional.
- Inventory tracking reflects the practical limits: 99 Throwing Knives, 99 Bow and Arrows, 99 Exploding Arrows, 99 Machine Gun ammunition, 9 Hand Grenades and 9 Medicine Bottles.
- Using a Medicine Bottle fully restores Rambo’s lost health, while collected boss Hearts have increased maximum life by 100 each and refilled life to the new maximum.
- The final approach begins with a substantial Medicine reserve and as many Hand Grenades as practical, rather than relying on ordinary ammunition alone.
- The player understands that the Combat Knife remains available at all times and that ranged attacks consume limited ammunition.
Area 1 — Military Base, Conversations and First Moves
Complete the opening military-base preparation, collect the initial supplies, report back to Trautman, and locate Co in the jungle. The base uses marked N and S tiles instead of ordinary stairs: stand on one and press Up to move between connected layers. After the jungle transition, first check the boat dock so you understand that passage is blocked, then return west, use the next N tile, and follow the upper jungle route to Co. Once you finish her conversation, return through the S tile and use the one-way shortcut back to the boat. Co pays the operator, allowing Rambo to move east through the water and begin Area 2.
1. Accept Trautman’s mission
Begin by speaking with Colonel Trautman in the northern section of the military base. Advance the conversation and accept the mission. The opening route does not proceed until this briefing has been completed.
Before leaving the northern section, identify the marked N and S tiles. These are vertical route points, not ordinary doors. Stand on the appropriate tile and press Up to move between connected sections. The same system controls much of the game’s later map, so learn to recognize the letter on the ground.
- Finish Trautman’s opening briefing.
- Identify the N and S tiles in the base.
2. Travel to the southern base section
Find the S tile in the base and stand on it. Press Up to move to the southern section. Search this area for Marshall Murdock, who is moving around the base in a green uniform.
Speak with Murdock and advance all of his dialogue. He explains the Vietnam mission and directs Rambo to the weapon center. Do not leave the base for the field yet; the weapon-center visit is part of the required opening sequence.
- Use the S tile to reach the southern base section.
- Speak with Murdock until his instructions are complete.
3. Visit the weapon center
The weapon center is an easily missed gray door near the southern base area. It does not look especially distinctive, so check the nearby gray entrances if the first one you try is not correct. The attendant inside is Ericson.
Speak with Ericson to receive the opening equipment: 20 throwing knives and 5 medicine vials. These supplies are added at the weapon center and are not an unlimited combat pickup. Medicine is more valuable in the next area than it is during the short base sequence, so avoid using it to repair only a small amount of damage.
- Find the gray weapon-center entrance.
- Speak with Ericson.
- Confirm that the 20 throwing knives and 5 medicine vials have been awarded.
4. Return to Trautman
After the weapon-center conversation, return to the vertical route and use the N tile to go back to the northern side of the base. Locate Trautman near the right side and speak with him again.
Advance the complete conversation. Trautman now gives the instruction to find Co, the contact who can lead Rambo toward the enemy camp. The scene then sends Rambo into the jungle. If Trautman repeats the initial mission briefing, revisit Murdock and confirm that Ericson’s weapon-center conversation was completed.
- Return to the northern base section.
- Speak with Trautman after visiting Ericson.
- Finish the conversation that sends Rambo to the jungle.
5. Check the boat dock, then turn back
Rambo lands at the far-left side of the opening jungle route. Move east through the screens and fight only as necessary. Flying insects eventually descend into knife range, while snakes are safest to attack while crouching. This is a good place to practice the knife rather than spending throwing knives on routine enemies.
Continue east until you reach the first N tile, then press Up to enter the section above. From there, move all the way right to inspect the boat dock. The boat operator refuses to let Rambo use the boat because Co has not yet been found. This is expected; the dock is an orientation point, not the immediate route forward.
Return west through the upper section. Find the next N tile and press Up to reach the higher jungle route. This second vertical transition is the route toward Co.
- Reach the first N tile from the jungle entrance.
- Confirm that the boat operator blocks passage before Co is found.
- Return west and use the next N tile.
6. Follow the upper jungle route to Co
From the higher jungle section, move east across the rocky screens. Use the knife against snakes and insects, and jump over the rock formations rather than trying to fight every enemy in a crowded position. A tiger may leap over Rambo, followed by another attack at ground level, so keep the knife ready after each jump.
Continue through the wooden-wall section and pass the S tile when the route first presents it. That tile is a one-way shortcut for the return journey, so leaving it unused now prevents unnecessary backtracking. Proceed east, handle the tiger and falling snakes, and find the N tile farther along the route. Press Up to reach the screen where Co is waiting.
Speak with Co and advance the conversation. Her response to the optional question does not prevent progress; complete the conversation so that she joins the route and the boat can be used.
- Reach Co through the upper jungle route.
- Finish Co’s conversation.
- Leave the one-way S shortcut available for the return.
7. Return to the boat and enter Area 2
After speaking with Co, use the nearby S tile to return to the previous section. Continue west until you reach the S tile that was passed earlier. Use it to take the one-way shortcut back toward the boat dock instead of retracing the entire upper route.
At the dock, walk right until you meet the boat operator. Co pays him, and he allows the crossing. Continue right through the water at the end of the stage to board the boat and trigger the transition into Area 2.
Before entering the water, check that the opening throwing knives and medicine are available through the item-selection controls. Do not waste the medicine on minor damage from the opening jungle screens. The next area is longer and introduces more dangerous terrain, so arriving with the full starting supply is the safest preparation.
- Use the S shortcut after Co joins you.
- Reach the boat operator with Co present.
- Move right through the water and trigger the Area 2 transition.
Before you move on
- Murdock has explained the mission and directed Rambo to the weapon center.
- Ericson has supplied 20 throwing knives and 5 medicine vials.
- Trautman has been contacted again and has sent Rambo to find Co.
- Co has been found and has completed her conversation with Rambo.
- The boat operator accepts Co’s payment, and Rambo moves right through the water into Area 2.
Area 2 — Jungle: Village, Lamp, and Cave Sequence
After speaking with Co. at the boat and again in the field, cross into Area 2 and follow the east, north, north, east route to the village. Enter the hut to establish the missing-child objective and checkpoint, then speak with the villager east of the hut to receive the Lamp. Before entering the rescue caves, use the boat, gorilla valley, tiger, bat, and floating-skull screens to replenish medicine and ranged ammunition. Return to the village, travel east and north into the cave route, then continue through the fire-snake and falling-stalactite sections. Follow the forward passages until you reach the long vertical pit and deliberately fall. In the lower cave, go east to reach the missing child, then return west to the Giant Spider’s chamber. The spider fight is covered in the next chapter, so arrive with enough life and arrows to continue.
1. Cross into Area 2 and reach the village
First speak with Co. on the boat. Leave the boat area and travel east into the field, where you meet Co. again. After this conversation, continue east through the jungle. Follow the north transition twice, including the dark cave connector, then move east from the screen with the floating skulls. This route leads to the village.
The first dark cave is a connector rather than the rescue route. Without the Lamp, its hazards are difficult to see, so do not attempt to search every passage there yet. Use the village as your first major Area 2 landmark: the boat is to the west, gorilla valley is reached by returning toward the boat and then moving north, and the village is the checkpoint for the missing-child section.
- Speak with Co. at the boat.
- Speak with Co. again in the field.
- Reach the village through the east, north, north, east route.
- Use the village as your reference point for the upcoming cave route.
2. Establish the missing-child objective and receive the Lamp
Enter the hut in the village. The conversation establishes that a child is missing and creates the Area 2 checkpoint. Leave the hut and speak with the villager immediately east of it. Answer his question to receive the Lamp.
The Lamp is the required light source for the cave interiors. Once you have it, the previously dark cave passages become navigable. Do not leave the village for the rescue route before completing both conversations; reaching the village alone is not enough to establish the objective or obtain the light.
- Enter the village hut.
- Confirm that the missing-child objective has been established.
- Speak with the villager east of the hut.
- Verify that the Lamp has been added to your inventory.
3. Farm supplies from the village checkpoint
Farming is optional, but the cave route is much safer with medicine and ranged ammunition. Return all the way to the boat area. Leave the boat screen to the left, then travel back to the right; this unusual transition effectively moves you several screens west before the return route becomes available. From there, go north to reach gorilla valley.
In gorilla valley, the first gorilla to the right of the OSO landmark can provide medicine. Continue east to the tiger area, where the first tiger can provide machine-gun ammunition. Move between these screens and defeat the relevant enemies until you have a comfortable supply. The walkthrough identifies nine medicine bottles and 99 bullets as a strong preparation target, but you can proceed with less if you prefer not to grind.
Return to the boat area and travel as far east as possible. The second bat on that screen can provide exploding arrows. Then return to the floating-skull screen outside the village; one of the skulls can provide regular arrows. If you want grenades, a nearby wasp one screen east of the field with Co. is one available source. These are convenient farming points, not mandatory requirements.
- Restore your life before starting the cave route.
- Collect medicine from the gorilla valley route if needed.
- Collect machine-gun ammunition from the tiger screen if needed.
- Bring regular or exploding arrows for the Giant Spider approach.
- Keep grenades available if you choose to farm them.
4. Enter the rescue caves from the village
Return to the village after farming. From the village, move east, then take the north transition into the caves. Continue north again to reach the cave route, then proceed east. The Lamp lets you see the cave layout and hazards that were hidden in the earlier dark passage.
The first cave section contains bats and skulls. The side exits can loop you around, so do not treat every screen edge as forward progress. Look for and use the N transition to advance. In the following cave, long snakes emerge from openings and launch fireballs. The left side returns toward the previous section, while the right side is the forward route. Move through the right-hand passage and use arrows if a snake blocks a narrow approach.
- Return to the village after preparing supplies.
- Take the east route, then the north transitions into the caves.
- Use the N transition in the bat-and-skull cave.
- Advance through the right-hand passage beyond the fire snakes.
5. Cross the stalactite cave and take the vertical fall
Continue east into the cave containing bats and hanging pink stalactites. The stalactites drop when Rambo approaches their trigger distance. Move forward in short advances, allowing each immediate hazard to fall before crossing beneath it. Avoid rushing while bats are active, because a hit near a stalactite can cost substantial life.
Keep moving east through this section until you reach the long vertical pit. The fall is the intended route to the lower cave; it is not a mistake or an automatic death. Deliberately drop through it and regain control in the lower section. If your life is too low after the descent, retreat through the cave route and recover at the village rather than trying to force the child sequence with no healing available.
- Reach the stalactite section.
- Trigger and pass the falling stalactites one at a time.
- Find the long vertical pit at the end of the forward route.
- Drop through the pit deliberately.
6. Reach the missing child and return to the spider chamber
After landing in the lower cave, travel east. The missing child is beyond the vertical fall, so continue in that direction until you reach the child and complete the rescue objective. Do not turn back immediately after landing; the eastward path is required before the Giant Spider encounter can be handled correctly.
Once the child has been reached, turn around and travel west. This takes you back toward the Giant Spider’s chamber. Keep arrows selected or readily available and use medicine before entering the encounter if your life is low. The next chapter covers the fight itself; this chapter ends when you are positioned west of the child and ready to approach the spider.
- Reach the missing child east of the vertical landing.
- Complete the child rescue objective.
- Return west toward the Giant Spider chamber.
- Confirm that medicine and arrows are available before the boss encounter.
Before you move on
- The village hut has established the missing-child objective.
- The Lamp is in your inventory.
- You have reached the lower cave by falling through the long vertical pit.
- The missing child has been reached east of the landing point.
- You are back west of the child at the Giant Spider approach with medicine and arrows available.
Boss 1 — Giant Cave Spider and Life Reward
Begin this chapter in the lower cave after Chapter 4 has already reached the child and completed the rescue conversation. Move back toward the Giant Spider, pass it safely, and defeat it to receive the first heart reward. The spider’s rotating orbs can interfere with ranged attacks, so use the opening to get to its left side and attack from a controlled position. Knife strikes are effective at close range when you are standing at the proper distance; arrows are useful when the projectile pattern leaves a clear firing lane. The heart increases maximum life by 100 and restores Rambo to the new maximum. Afterward, leave through the west side, use the cave’s one-way S tiles to return outside, then go back to the village hut and report the rescued child. The hut becomes a repeatable healing point, making it the correct recovery stop before the first POW route.
Start in the lower cave with the child rescue already complete
This chapter begins after the previous route has taken Rambo through the Lamp-lit cave, across the fire-snake and stalactite section, down the long vertical opening, and east to the missing child. The child conversation has already been completed, so do not search for him again or repeat the earlier cave route.
From the lower chamber, turn back toward the boss approach. Keep enough life or medicine for the encounter, but avoid spending resources on enemies that can simply be passed. The objective now is to get past the Giant Spider, defeat it, and collect its heart before returning to the village.
- Rambo is in the lower cave beneath the vertical opening.
- The missing child has already been spoken to in Chapter 4.
- Medicine or a usable attack weapon remains available for the boss attempt.
Position Rambo at the Giant Spider approach
Move toward the Giant Spider from the child’s chamber. The boss emits rotating orb projectiles that hover around its body and can obstruct attacks. Do not remain directly in front of it trading hits. Wait for a usable opening, then jump over the spider and move to its left side, where the fight is easier to control.
If the crossing is mistimed and Rambo is pinned against a wall, do not repeatedly jump into the boss. Back away when possible, wait for the orb pattern to move, and try again. The goal is to establish room on the left rather than absorb contact damage while trapped.
- Rambo has reached the spider encounter.
- The first attempt is focused on getting to the spider’s left side.
- Rambo is not standing motionless in front of the boss’s rotating orbs.
Defeat the Giant Spider from the safer side
Once Rambo is on the left side, attack while watching the rotating orbs. The combat knife is a reliable option when Rambo is positioned slightly in front of the spider without touching it. Strike repeatedly, then adjust position if the boss or its projectiles close the gap. This method avoids trying to force ranged shots through the orb pattern.
Arrows or exploding arrows can also be used when the spider’s projectiles leave a clear firing lane. Fire during those openings, then pause or reposition rather than wasting ammunition against an orb. Ranged attacks are not automatically safer here because the rotating orbs can block them. Use medicine during a genuine safe interval if life becomes dangerously low; surviving the fight is more important than preserving every bottle.
- The spider has been approached from the left side whenever possible.
- Knife attacks are made from controlled distance, not while touching the boss.
- Ranged attacks are fired only through clear openings in the orb pattern.
- Medicine has been used only when necessary to survive.
Collect the heart immediately after victory
When the Giant Spider is defeated, remain in the lower chamber and collect the heart it leaves behind. This is the first major life upgrade. The heart raises maximum life by 100 and restores Rambo to full health at the new maximum, so there is no reason to leave it on the screen or delay collecting it.
Confirm the life display after picking it up. The restored health is part of the reward and gives Rambo the recovery needed for the return trip and the next area. The heart is required progress for this chapter; ordinary enemy drops are optional.
- The Giant Spider has been defeated.
- The heart has been collected.
- Maximum life has increased by 100.
- Current life has been restored to the new maximum.
Return through the cave and use the one-way exits
Leave the boss chamber through the west side. This returns Rambo to the cave route near the fire-snake section. Continue back without lingering in unnecessary fights. The previously encountered hazards remain dangerous, so move through their screens carefully rather than assuming the new life total makes contact harmless.
Use the one-way S tile in the cave to shorten the return toward the entrance. At the next appropriate S tile near the entrance, use it to leave the cave and return to the outdoor route. If Rambo takes damage on the way out, the heart’s full-health restoration should provide a cushion, but avoid spending medicine unless the return becomes unsafe.
- The boss chamber has been exited west.
- The cave’s one-way S tile has been used for the return.
- Rambo has reached the outdoor village route.
Return the child at the village hut
Retrace the route to the village and enter the first hut. Speak with the inhabitant to complete the child-return event. This conversation is separate from the earlier conversation with the child in the cave: Chapter 4 handled the rescue, while this visit reports the child’s safe return to the village.
After the return conversation, revisit the hut whenever Rambo needs recovery. The inhabitant restores health on visits, making this the safest preparation point before proceeding toward the first POW camp. If additional experience or supplies are needed, nearby enemies can be handled between visits, but do not delay the next objective merely to clear every screen.
- Rambo has entered the first village hut.
- The rescued child has been returned to the inhabitant.
- The hut restores health when revisited.
- Rambo is healed and ready to continue toward the first POW camp.
Before you move on
- The child rescue conversation was completed before this chapter began.
- The Giant Spider has been defeated.
- The first heart has been collected.
- Maximum life has increased by 100 and current life is full.
- Rambo has exited the cave through the west route and returned to the village.
- Rambo has spoken with the inhabitant in the first hut to report the child’s return.
- The hut can be revisited for healing before starting the first POW route.
Area 2 — Waterways, Bubble Bridges and Entering the POW Camp
After rescuing the child and defeating the Giant Spider, return to the village and speak with Co. Her warning that the enemy camp lies south begins the first POW route. Before descending, use the nearby water screens to build a reserve of medicine, arrows, and exploding arrows. One fish in the fourth water screen repeatedly provides medicine when the screen is re-entered, making this the safest preparation point for the camp. The route uses N and S tiles: stand on one and press Up to change between the game’s vertical layers. Cross the bubble bridges carefully, because a steam bubble striking Rambo while he stands on a bridge knocks him into the water below. After the final eastward stretch, Co remains behind and Rambo enters the camp alone. Inside, use ranged attacks against soldiers, avoid fighting on narrow bridges when possible, and preserve medicine for the return trip with the rescued POW.
Return to the village and speak with Co
This route begins after the child and Giant Spider sequence, not from the original Area 2 arrival. Return to the village, restore your health if the village provides the recovery opportunity, and speak with Co. Her dialogue identifies the enemy camp to the south and provides the trigger for this section.
From the village, move toward the nearby water route and locate the S tile that leads downward. N and S are not decorative signs. Stand on the marked tile and press Up to change layers. If the route seems to end, search the current screen for one of these tiles instead of attempting an improvised jump between levels.
- Rescue the child and defeat the Giant Spider first.
- Return to the village and speak with Co.
- Locate the S tile south of the village.
Farm medicine before descending deeper
Before committing to the camp route, travel through the water screens to the fourth screen of the upper water section. Near the far right side is a fish that drops a medicine vial. The pickup can be repeated by using the nearby S tile to descend, walking a short distance left to find the N tile, and returning to the fish’s screen. Repeat this loop until you have a strong medicine reserve; nine vials is the practical target given the camp and the later escape.
Use the same area to collect arrows or exploding arrows from available enemy drops, but do not spend medicine repairing small amounts of damage during the farming loop. The purpose of this preparation is to enter the camp with healing available after several ranged attacks or a bridge knockback. If you are already carrying enough medicine, proceed rather than turning the loop into unnecessary grinding.
- Reach the fourth water screen and find the medicine-dropping fish.
- Use the nearby S and N tiles to reset the screen.
- Build a reserve of medicine and keep arrows available.
Descend and cross the first water section
When preparation is complete, use the S tile to move to the lower water layer. Continue through the water screens toward the left side of the route. Flamingos and fish can interrupt jumps, so clear enemies from a distance when they block a narrow ledge. Do not treat a damaged jump as harmless: being hit while standing on a ledge can send Rambo into the water and force a return through the layer transitions.
At the far side of this section, use the next S tile. You are now on the lower approach to the first bridge sequence. Keep track of the direction you entered from, because the N tile is the recovery route if you fall and need to return to the higher layer.
- Use the S tile after farming.
- Move through the lower water route toward the first bridge.
- Keep the N tile in mind as the recovery route.
Cross the first bubble bridge
On the bridge screen, steam bubbles rise from the water and damage Rambo on contact. Watch the pattern before stepping onto the bridge. Move across rather than waiting in the middle, and jump when a bubble is about to reach your position. A jump can prevent the hit from knocking you through the bridge surface.
If a bubble catches you and you fall, do not keep searching below for a hidden way up. Use the N transition to return to the upper layer, then retrace the approach to the bridge. This recovery costs time but is more reliable than attempting a blind jump from the water. Deal with flamingos before starting a crossing whenever they can strike Rambo during a jump.
- Observe the bubble pattern before committing.
- Keep moving across the bridge and jump over incoming bubbles.
- Use the N tile to recover from a fall.
Reach and cross the second bridge
After the first bridge, continue through the route until the next layer transition, then use the S tile as directed by the route. The path now turns back toward the right. Continue across the water screens until you reach the second bridge section.
The second crossing is the important one: Rambo must make it across the full bridge without being knocked down. Clear nearby enemies first, wait for a favorable bubble opening, and advance in controlled movements. Do not rely on a last-second leap from the edge. If you fall, use the S transition available from the lower route to return toward the bridge and repeat the approach.
- Follow the next S transition after the first bridge route.
- Turn back toward the right on the lower layer.
- Cross the second bridge without taking a bubble hit.
Enter the first POW camp
After the second bridge, continue east through the remaining water screens. When you reach the next hut and N transition, use the N tile as the route requires, then continue through the upper approach. Ignore an unnecessary S tile if the path continues east; the camp entrance is reached by following the far-right route rather than turning back toward the village.
Co stops before the enemy base, leaving Rambo to enter the camp alone. This is the completion point for the waterway section. Do not begin this final approach with critically low health or no arrows. If necessary, retreat through the same transitions and use the medicine loop before trying again.
- Continue east after the second bridge.
- Use the required N transition near the huts.
- Confirm that Co stays behind while Rambo enters alone.
Fight through the camp entrance
The camp introduces soldiers who use guns, clubs, jump kicks, and knockback. Use arrows from the greatest practical distance and avoid standing on the center of a narrow bridge while an enemy is firing. A hit can send Rambo down to the lower water route, causing both damage and backtracking.
Your immediate objective is to reach the POW, not to defeat every soldier for experience. Proceed east from the entrance, use the north transition at the first major junction, then work west through the upper portion before heading north again. Cross the bridge carefully and continue east until you reach the POW’s fenced cell. In the next chapter, cut a gap in the fence with the knife and speak with him to begin the escape.
- Use arrows against soldiers before they reach melee range.
- Avoid taking gunfire while standing on narrow bridges.
- Reach the fenced POW cell to complete this chapter’s objective.
Before you move on
- The child has been rescued and the Giant Spider has been defeated.
- You have returned to the village and spoken with Co about the enemy camp to the south.
- The water route and both bubble-bridge sections have been crossed.
- Co remains behind while Rambo enters the first POW camp alone.
- Rambo has reached the fenced POW cell, ready to cut the fence and begin the rescue in the next chapter.
First POW Camp Rescue and Escape Route
Begin at the fenced POW cell in the first POW camp. Cut through the fence with the combat knife, enter the opening and speak with the prisoner to activate the rescue. The return route is more dangerous than the approach because armed soldiers and bombardments now occupy the path. Near the cell, take the southern route instead of repeating the westward bridge crossing. Continue down to the lower waterway and use the underwater connection that leads back toward the first bubble-bridge area. From there, follow the returning water and field route to the original boat. Speak with Co. only when ready to begin the next boss encounter; that conversation triggers the Mercenary Leader fight. This chapter ends at the encounter trigger, before the battle and mountain route.
1. Start at the fenced POW cell
This chapter begins in the northern part of the first POW camp, beside the fenced prisoner cell. You do not need to repeat the approach through the camp, revisit the water screens, or farm supplies here. Face the fence and use the combat knife until you have opened a usable passage. The objective is to create enough space to enter the cell, not to destroy every piece of fencing on the screen.
Once the opening is available, walk to the prisoner and speak with him. The conversation activates the rescue and changes the return journey. Cutting the fence without talking to the POW does not complete the objective, so do not leave the cell immediately after making the opening.
Before moving away, confirm that the dialogue has finished. If you recorded a password at an earlier conversation, keep it available as a recovery option, but do not assume that a password made before the rescue includes this new objective.
- Open the fenced cell with the combat knife.
- Enter the cell and speak with the POW.
- Wait for the rescue conversation to finish before leaving.
2. Take the southern shortcut near the cell
After the POW has joined the escape sequence, move back toward the camp route. At the section just west of the cell, do not automatically cross the bridge to repeat the upper approach. Take the southern route instead. This drops you into the lower part of the camp and removes part of the path that was required on the way in.
The return screens contain armed enemies, so advance one screen at a time. Use the combat knife when a soldier is close enough to punish a missed projectile, and use arrows or another ranged weapon when an enemy is positioned across a narrow platform. When a gunner raises his weapon, duck under the shot if the ground is secure, then attack before he fires again.
Do not attempt to force Rambo through a packed group on a bridge. If several enemies approach together, back into a wider area, separate them, and clear the nearest threat before continuing. A hit on a narrow crossing can knock Rambo into the lower area or cost enough health to make the later water route unsafe.
- At the split near the POW cell, go south instead of west across the earlier bridge.
- Use the lower camp route to bypass part of the approach.
- Separate soldiers before entering narrow bridge sections.
3. Reach the lower waterway
Continue downward through the shortcut until you reconnect with the water section below the camp-side bridges. The route is not a normal straight retreat through the camp; keep looking for the lower connection rather than trying to return through every upper screen.
Enemies can occupy the same spaces used during the approach, and bombardment hazards may appear during the retreat. Keep moving when the next landing area is clear, but stop to eliminate an enemy that controls a bridge or blocks the only safe jump. Do not spend medicine merely to restore a small amount of health if the next screen is safe; reserve healing for a failed crossing, a crowded soldier screen or the final return stretch.
When you reach the water, position Rambo over the lower passage and enter it. The underwater connection leads upward toward the first bubble-bridge area and is the main shortcut for the escape. If you reach a dead-end water screen, retrace the immediate section and look for the vertical connection rather than continuing blindly east.
- Follow the southern camp route down to the lower water section.
- Enter the underwater connection below the bubble-bridge route.
- Use the passage that leads back toward the first bubble-bridge area.
4. Reconnect with the first bubble-bridge area
After using the underwater passage, resume the familiar water route near the first bubble bridge. The shortcut does not complete the escape by itself; it places you back into the earlier approach network so you can travel toward the field and boat.
Follow the connected screens through the return route, using the required vertical transitions instead of trying to walk directly through blocked edges. Bubble sections still damage Rambo, and the return may also include enemies that were absent or less threatening on the approach. Wait for an opening, then make the crossing decisively. Avoid repeated short jumps into a moving bubble pattern.
Use ranged attacks before stepping onto a narrow bridge when a soldier or other enemy is visible on the far side. If an enemy is already close, a quick knife strike is safer than stopping in the middle of the crossing. The goal is to preserve enough health and medicine to reach the boat, not to defeat every enemy on every screen.
- Reconnect with the first bubble-bridge area through the underwater passage.
- Cross the returning water screens without falling or wasting healing.
- Continue through the connected route toward the field near the boat.
5. Return to the original boat area
Continue through the water and field screens until the route reconnects with the original boat area from the beginning of Area 2. Use the landmarks you saw before entering the POW route: the boat-side field, the water approach and the screens where Co. was present earlier. If the map appears to loop, follow the established vertical connections rather than repeatedly exiting through the same side.
The rescue is complete only when Rambo and the POW have made it back to the boat-side area. Reaching a familiar screen is not by itself the completion trigger, so do not stop in the water route or at the camp exit. Check your health before approaching Co. and use medicine if a remaining enemy or hazard could otherwise kill you.
Avoid starting the next event while still trying to restock. The conversation with Co. begins the Mercenary Leader encounter immediately, so make your resource check first.
- Reach the original boat area where Co. was first encountered.
- Confirm that the POW rescue route has been completed.
- Restore health or adjust equipment before speaking with Co.
6. Speak with Co. to trigger the Mercenary Leader encounter
When Rambo is back at the boat and you are ready to begin the next boss sequence, speak with Co. The dialogue changes into the betrayal encounter and starts the Mercenary Leader fight. This is the required handoff from the POW rescue chapter to the next chapter.
Do not count the boss as defeated merely because the conversation has begun. The Mercenary Leader battle, the heart reward and the route toward the boulder cliff are separate progression steps. Keep the combat knife selected or have a useful ranged weapon ready before activating the conversation.
If you are low on health or ammunition, delay the conversation while you make the final safe preparations available in the boat-side route. Once the encounter begins, the chapter’s escape objective is finished and the next section should handle the battle itself.
- Stand at the boat with the rescued POW returned.
- Speak with Co. after completing your final preparation.
- Confirm that the Mercenary Leader encounter has started.
7. Handoff to the next chapter
The next chapter begins with the Mercenary Leader battle. After that fight, progression continues toward the gorilla-valley side and the boulder-cliff route. Falling from the cliff sends Rambo back toward the earlier area, so the health and medicine preserved during this escape remain valuable.
For this chapter, stop once Co.’s conversation has triggered the encounter. Do not mix the boss strategy, heart collection or helicopter approach into the POW rescue instructions; those objectives belong to the following section and require their own combat and platforming directions.
- Leave the Mercenary Leader fight for the next chapter.
- Keep the rescue and escape objectives separate from the boss objectives.
- Proceed only after the encounter trigger is visible.
Before you move on
- The POW is at the fenced cell and the fence has been opened with the combat knife.
- Rambo has entered the cell and spoken with the POW.
- Rambo has taken the southern shortcut near the cell instead of simply repeating the upper bridge route.
- Rambo has reached the lower waterway and used the underwater connection toward the first bubble-bridge area.
- Rambo has returned through the water and field screens to the original boat area.
- Speaking with Co. at the boat has triggered the Mercenary Leader encounter.
Boss 2 — Mercenary Leader (Boat) and Boulder Cliff
The first POW rescue is complete, Co has been met at the original boat, and the Mercenary Leader encounter is active. Defeat the support mercenaries and the leader with the combat knife, then collect the second boss heart. Move west and north to Gorilla Valley to restore life and replenish medicine before attempting the boulder cliff. Cross the rock platforms by waiting for safe openings between falling boulders. A collision or missed jump returns Rambo to Gorilla Valley, allowing another preparation attempt. After crossing, continue west, leave Co behind, run beneath the missile bombardment, and jump toward the extraction helicopter. Press Up only after the jump connects with the aircraft. This contact does not finish the mission; it triggers Rambo’s capture and advances the campaign to the Russian prison sequence.
1. Defeat the Mercenary Leader encounter
The Mercenary Leader encounter is already active when this chapter begins. Co has triggered it at the original boat after the first POW rescue, so do not leave the area to start another conversation. Step off the boat to the left and deal with the support mercenaries before concentrating on the leader.
The combat knife is the safest resource-saving choice. The support enemies can fire quickly and restrict the space around the boat, so avoid standing between several opponents. Move a short distance away to separate them, then slash when one enemy reaches knife range. Jump to reposition if gunfire is about to pin Rambo against the boat or push him toward a hazardous edge.
After the support mercenaries are cleared, face the Mercenary Leader and use short knife attacks rather than holding position in front of him. The leader is vulnerable to close-range slashes and should require only a small number of successful hits. Exploding arrows can end the encounter quickly if the fight becomes unstable, but grenades should be preserved for later helicopter encounters.
- The Mercenary Leader encounter is active.
- The support mercenaries have been defeated.
- The Mercenary Leader has been defeated.
- The second boss heart is visible at the battle site.
2. Collect the heart and prepare for the mountain route
Pick up the heart before leaving the boat area. It is the second boss heart and increases Rambo’s maximum life. The added capacity is especially useful during the boulder section and the missile-bombarded approach that follows.
After collecting the heart, leave the boat area by traveling west and then north toward Gorilla Valley. This is the earlier preparation area, so use it as a recovery point rather than rushing directly to the cliff. Restore life and replenish medicine wherever the available supplies allow.
If you need ammunition, farm only long enough to establish a practical reserve. Medicine is the priority because a failed boulder crossing sends Rambo back here. Ordinary jungle enemies do not justify grenade use, and explosive ammunition should remain available for later aerial fights. Machine-gun ammunition or arrows are useful for enemies along the approach, but do not delay the campaign indefinitely trying to fill every weapon category.
- The heart has been collected.
- Rambo has left the boat area westward and then northward.
- Gorilla Valley has been reached.
- Life and medicine have been restored as far as practical.
- Grenades have been reserved for later helicopter encounters.
3. Reach the boulder cliff
From Gorilla Valley, follow the route east, then north, then west. This leads to the boulder cliff. The route is a platforming section across rock platforms with falling boulders moving through the crossing. The boulders are hazards, not targets, so do not stop to attack them.
Treat each platform as a separate jump. Watch the boulder’s movement, wait for the next landing area to open, and then jump across. After landing, release the movement direction or make only a small correction; holding the direction through the entire crossing can carry Rambo off a ledge before the next hazard has passed.
Do not attempt to outrun every boulder. A short pause on a secure platform is safer than forcing a jump beneath a descending rock. The objective is to keep moving left across the cliff until the route opens on the far side. The section rewards controlled timing rather than speed.
- The route from Gorilla Valley has been followed east, north and west.
- Rambo has entered the boulder-cliff section.
- Jumps are being made between clear landing points.
- The boulders are being avoided rather than attacked.
4. Recover after falling from the cliff
If a boulder strikes Rambo or a jump is missed, the game returns him to Gorilla Valley. This is a local setback, not a campaign reset. The POW rescue and Mercenary Leader battle do not need to be repeated.
Use the return to restore life and medicine before trying again. On the next attempt, change the timing of the failed jump: wait longer for the boulder to pass, begin from a safer part of the platform, or stop immediately after landing instead of continuing forward.
If several attempts have consumed your supplies, restock before making another crossing. The cliff is the final preparation point before the extraction approach, and entering the next screens with no medicine is more dangerous than spending a little extra time in Gorilla Valley.
- A failed crossing has returned Rambo to Gorilla Valley rather than restarting the campaign.
- The failed jump has been retimed or repositioned.
- Medicine has been restored before the next attempt when necessary.
- The cliff has eventually been crossed.
5. Reach and contact the extraction helicopter
After clearing the boulder cliff, continue west. Co is left behind as Rambo advances toward the extraction point. The following screens include missile bombardment, so keep moving and use ranged attacks only when an enemy blocks the route. This is an extraction sequence, not the final Mil-21 battle.
When the helicopter comes into view, move directly beneath it and jump. Press Up in mid-air after the jump has connected with the aircraft. Do not hold Up before jumping; the interaction is triggered by pressing Up during the jump at the helicopter. If the contact does not register, reposition directly below the aircraft and repeat the jump followed by the mid-air Up input.
Once the contact registers, the helicopter does not extract Rambo safely. The game advances into the capture sequence and the Russian prison section. Preserve any remaining grenades and medicine rather than spending them to clear every enemy on the missile route.
- The cliff has been crossed without another fall.
- Rambo has continued west to the extraction approach.
- Co has been left behind at the mountain route.
- Rambo has reached the helicopter beneath the missile bombardment.
- Rambo has jumped and pressed Up in mid-air.
- The capture sequence or next-area transition has begun.
Before you move on
- The support mercenaries have been defeated.
- The Mercenary Leader has been defeated.
- The second boss heart has been collected and Rambo’s maximum life has increased.
- Gorilla Valley has been used as the preparation and recovery point.
- The boulder cliff has been crossed.
- Rambo has reached the missile-bombarded extraction point.
- Rambo has jumped beneath the helicopter and pressed Up during the jump.
- The capture sequence or Russian prison area has begun.
Area 3 — Capture, Co. Escape and Russian Prison Infiltration
After Rambo is captured, control changes to Co. Enter the village hut to obtain the medicine needed to revive him, then speak with the villager farther right and exchange Co.’s rifle for the dress. Use the disguise to enter the Russian prison camp, accept the official’s mistaken assumption that Co. is the general’s wife, and obtain the prison key. Free Rambo, collect the equipment outside his cell and escape east. Defeat Biker Clown, recover at the village hut, cross the waterfall and defeat Fire Tiger. Continue through the green-muck cave, decide whether to speak with Co. at the waterfall, and enter the Russian base. This chapter ends with Rambo ready to proceed toward the Flying Robot.
1. Finish the capture sequence and take control of Co.
Continue through the interrogation and capture scenes until control changes from Rambo to Co. This opening section has little combat; Co.’s route depends on collecting the correct item and changing her appearance before approaching the prison camp.
Co. begins in the village. Enter the hut and speak with the person inside to obtain the medicine for Rambo. This is the required first step after control changes. Do not leave the village before collecting it, because Co. needs the medicine when she reaches Rambo’s cell.
- The capture and interrogation scenes are complete.
- Control has changed to Co.
- Co. has entered the village hut.
- Co. has obtained the medicine for Rambo.
2. Exchange Co.’s rifle for the dress
After leaving the hut, move to the villager farther right and speak with him. Choose the exchange that gives up Co.’s rifle in return for the dress. Accept the exchange; the dress is required for the disguised-entry route into the Russian prison camp.
Once Co. is wearing the dress, leave the village through the west side. Do not try to preserve the rifle or search for a combat solution. Co. is not meant to fight through the camp. Her disguise is what allows her to pass the guard and reach the official who holds the prison key.
- Co. has spoken with the villager farther right.
- The rifle has been exchanged for the dress.
- Co. is wearing the dress.
- Co. has left the village through the west route.
3. Enter the prison camp and obtain the key
Approach the prison-camp entrance while Co. is wearing the dress and speak with the guard. The disguise allows her to enter. Inside, avoid pressing Up on the S tile unless you intentionally want to return toward the gate; using it sends Co. back outside and does not advance the rescue.
Move through the camp to the large building. A nearby man can point out the torture-room area, but that conversation is not the objective. Enter the large house and speak with the official. When he mistakes Co. for the general’s wife, accept the assumption instead of correcting him. The conversation awards the prison key.
Leave the building and search the row of prison huts. Use the key on the hut containing Rambo. You do not need to defeat every guard before reaching him. Move directly to the cell so Co. can use the medicine.
- The disguised guard has allowed Co. into the camp.
- Co. has reached the large building.
- Co. accepted the official’s mistaken identity.
- Co. received the prison key.
- The key opened Rambo’s cell.
4. Revive Rambo and recover the escape equipment
At the cell, Co. uses the medicine obtained in the village to restore Rambo. Control then returns to Rambo. Immediately collect the weapons and ammunition placed outside the cell. These supplies restore Rambo’s fighting capability after the capture sequence and are important for the escape.
Move east through the prison camp. Use the combat knife on enemies that are safe to approach, switching to arrows or the machine gun when soldiers are separated by gaps or firing from a distance. Some stationary soldiers become more dangerous if damaged with a projectile instead of being finished with the knife, so do not linger to clear every guard. Advance as soon as the route is open.
- Rambo has been revived.
- Control has returned to Rambo.
- The weapons and ammunition outside the cell have been collected.
- Rambo is moving east through the prison camp.
5. Escape east and defeat Biker Clown
Continue east until you reach the S tile and press Up. This transfers Rambo into the territory outside the prison camp. An N tile nearby can return you toward the camp, but there is no reason to use it. Continue east through the damaged-wall and forest screens.
Grenadiers throw explosives along the ground. Jump over the bombs instead of stopping in front of them, and attack only when a soldier blocks the route or can be reached safely. When the music changes, continue right far enough to trigger Biker Clown.
Keep Biker Clown at a manageable distance. Crouch and fire as he approaches, then jump over him when he passes. Turn around, crouch and fire again after landing. Repeat this approach-and-jump pattern while eliminating grenadiers that could trap you. After Biker Clown is defeated, collect the heart he leaves behind. The heart increases Rambo’s maximum life.
- Rambo has escaped the prison camp through the east route.
- Biker Clown has been defeated.
- Biker Clown’s heart has been collected.
6. Recover in the village and defeat Fire Tiger
Continue east through the forest after Biker Clown. Enter the village hut when you reach it. The hut restores Rambo’s health, making it the safest recovery point before the waterfall and cave sequence. Use this recovery instead of spending medicine on damage that can be removed for free.
Leave the village to the east and cross the waterfall platforms. Avoid taking hits during the crossing because knockback can drop Rambo to a lower route and force him to repeat part of the approach. Near the center of the waterfall, use the platforms to reach the N tile leading into the cave.
Enter the cave and move left far enough to trigger Fire Tiger. Fire Tiger moves quickly and launches fireballs, so arrows or machine-gun fire are safer than standing beside him with the combat knife. Fire from a short distance, retreat when he closes in, and heal only when necessary. After Fire Tiger is defeated, collect the heart before continuing east through the cave.
- Rambo has used the village hut for recovery.
- The waterfall crossing is complete.
- The N tile into the cave has been reached.
- Fire Tiger has been defeated.
- Fire Tiger’s heart has been collected.
7. Cross the green-muck cave and handle the Co. scene
After defeating Fire Tiger, continue east through the cave above the green muck. Falling into the muck knocks Rambo down and sends him back toward the lower route, forcing you to repeat part of the approach. Prioritize safe landings over aggressive attacks, jump between the platforms, avoid bats when possible and eliminate snakes before they reach a narrow landing area.
At the outdoor waterfall basin, Co. is waiting near Russian soldiers. Speaking with her triggers the scene in which she asks to go to America and is shot. If you want to preserve Co. for later scenes, walk past her without speaking. The conversation is not required to reach the Russian base. It functions as a checkpoint but changes the later Co. outcome.
From the waterfall basin, continue east. The Russian base begins beyond this route.
- The green-muck cave has been crossed.
- Rambo has reached the upper waterfall basin.
- The optional Co. conversation has been handled according to the desired outcome.
- Rambo is proceeding east toward the Russian base.
8. Enter the Russian base and prepare for the Flying Robot
Enter the Russian base from the waterfall route. The opening screens contain soldiers and turrets. Use ranged weapons against exposed enemies, but rely more heavily on the combat knife against soldiers that resist projectile attacks. Cut through fences with the knife when they block the route.
Check medicine and ammunition before pushing deeper. A combat knife level of 4 is a practical recommendation for surviving the later warehouse route with less difficulty, but it is not a mandatory gate for entering the base. Gain experience naturally by using the knife on safe targets and avoid spending all medicine on optional fights.
The chapter is complete once Rambo has entered the Russian base after the Biker Clown, village, waterfall and Fire Tiger sequence. From here, continue east, cut the required fence, defeat the guarding soldiers and begin the Flying Robot encounter in the next chapter. Do not count the boss as defeated merely because the base has been entered.
- Rambo has entered the Russian base.
- The equipment recovered outside the prison cell is available.
- Medicine and ranged ammunition have been preserved for the base.
- Knife level 4 has been considered as a recommendation before the warehouse section.
- Rambo is ready to proceed east toward the Flying Robot.
Before you move on
- The capture scene has ended and control has changed to Co.
- Co. entered the village hut and obtained the medicine for Rambo.
- Co. spoke with the villager farther right, exchanged her rifle for the dress and left through the west route.
- Co. entered the Russian prison camp, received the prison key and opened Rambo’s cell.
- Rambo was revived, recovered the equipment outside his cell and escaped east.
- Rambo defeated Biker Clown and collected the heart reward.
- Rambo used the village hut for recovery, crossed the waterfall and defeated Fire Tiger.
- Rambo crossed the green-muck cave and handled the Co. scene according to the desired outcome.
- Rambo entered the Russian base and is ready to proceed toward the Flying Robot in ch10.
Area 3 — Flying Robot, Russian Warehouses, Keys and Predators
From the waterfall basin, travel east into the Russian base and fight the Flying Robot before entering either warehouse. Cut the fence with the combat knife, clear the foot soldiers, then jump onto the mid-level barrel and use the machine gun while the robot moves diagonally. Collect the heart after victory. Continue east to the helicopter and press Up when Rambo reports that he needs a key; this establishes the warehouse checkpoint. Warehouse 1 is optional and contains ammunition and medicine. Warehouse 2 is mandatory. Follow its upper entrance, descend through the spiky-ball room to the bottom door, collect the helicopter key and defeat Sergeant Yashin from behind crate cover. After the fight, descend through the central route, return to the entrance, leave the warehouse and use the helicopter to reach Area 4.
1. Enter the Russian base and defeat the Flying Robot
Begin at the waterfall basin where Co. and the Russian soldiers are waiting after the Fire Tiger section. Move east into the Russian base. Most of the soldiers in this stretch are better handled with the combat knife, so select it before advancing and cut through the fence when the route is blocked.
Continue east and clear the foot soldiers around the boss approach. Do not rush directly into the Flying Robot while the soldiers remain active; eliminating them first gives you room to jump and aim without being interrupted.
When the Flying Robot encounter begins, jump onto the mid-level barrel. The robot travels diagonally up and down, and the barrel gives Rambo a useful height from which to connect repeated machine-gun shots as it passes. Keep firing as it crosses your level and avoid abandoning the barrel merely to chase it. The encounter ends when the robot is destroyed. Collect the heart it leaves behind before leaving the screen.
- Enter the Russian base from the waterfall basin.
- Select the combat knife and cut the fence.
- Defeat the foot soldiers before concentrating on the boss.
- Jump onto the mid-level barrel.
- Use the machine gun against the diagonally moving Flying Robot.
- Defeat the robot and collect its heart.
2. Activate the helicopter checkpoint
After collecting the heart, continue all the way east through the Russian base. The helicopter is at the far eastern end, beyond the warehouse approaches. Stand in front of it and press Up.
Rambo will report that a key is required. This interaction is important: it establishes the useful checkpoint for the warehouse section before you begin the hazardous search for the key. Once the message appears, turn around and travel west toward the buildings.
Warehouse 1 is the optional building on the Flying Robot side of the area. Warehouse 2 is farther east, near the spiky-ball hazards, and contains the required helicopter key. You must complete Warehouse 2 to leave Area 3.
- Reach the helicopter after the Flying Robot fight.
- Press Up and confirm the key-required message.
- Return west toward the warehouse entrances.
- Identify Warehouse 1 as optional and Warehouse 2 as mandatory.
3. Use Warehouse 1 only when supplies are needed
Warehouse 1 contains ammunition and a medicine cache, but it is not required for progression. If your medicine or ammunition is already adequate, skip it and proceed to Warehouse 2. Area 4 also contains supplies, so entering this building is mainly a recovery choice rather than a story requirement.
The side of Warehouse 1 that you reach depends on the direction from which you enter the surrounding screen. To reach the more useful skeleton-side route, cross back across the outdoor screen after leaving the helicopter side, then enter the building from the appropriate approach. This route leads west, down to the lower section, and then through the orange platform to the barrel-filled room.
Advance slowly when soldiers occupy narrow platforms. Lure them toward Rambo instead of allowing a hit to knock him down before the medicine area. In the barrel room, the second skeleton to the right is associated with the medicine drop. Collect the bottle, heal if necessary, and leave by returning west, dropping down and exiting east past the machete enemies. Do not spend lives clearing every room for ammunition if the key route is still waiting.
- Skip Warehouse 1 if supplies are sufficient.
- Use the skeleton-side entrance if you want its medicine route.
- Lure soldiers away from narrow ledges.
- Collect the medicine in the barrel room.
- Return to the outdoor area and continue to Warehouse 2.
4. Descend through Warehouse 2 and collect the helicopter key
Enter Warehouse 2 near the spiky-ball hazards. From the entrance, move east and climb the steps. Go south on the next section, drop to the lower level and head west. Take the northern junction rather than continuing across the lowest path.
Continue west into the room with spiky hazards, several doors and multiple ledges. The helicopter key is not on the upper route. Drop through the middle of the room until Rambo reaches the bottom level. Break the nearby crates if needed, then enter the lower door.
Move carefully around the spiky hazards and Predator enemies. Use the knife against enemies that reach your platform, and use ranged attacks across gaps when a close approach would expose Rambo to a fall. The goal is the lower key room, not complete destruction of every enemy.
Collect the helicopter key. Sergeant Yashin appears after the key objective is completed, so select a ranged weapon before leaving the room and prepare for the nearby boss fight.
- Enter Warehouse 2 by the spiky-ball area.
- Go east and up the steps.
- Go south, drop down and head west.
- Take the northern junction.
- Reach the spiky-hazard room.
- Descend to its bottom level and use the lower door.
- Collect the helicopter key.
- Prepare for Sergeant Yashin.
5. Defeat Sergeant Yashin from behind crate cover
After taking the key, fight Sergeant Yashin in the nearby warehouse section. Do not pursue him across the open floor if you can avoid it. Remove only enough crates to create a firing lane while preserving a barrier between Rambo and the boss.
Stay behind the crates and attack with the machine gun, arrows or another suitable ranged weapon when Yashin moves into range. The cover limits the danger from his close attack and prevents the battle from becoming an unnecessary medicine drain. If he retreats, hold your position and let him return rather than exposing Rambo by chasing him.
Use medicine only when necessary because the next area contains additional combat and hazards. Continue attacking until Yashin is defeated, then collect the heart he leaves behind. The heart is part of the required boss progression and increases Rambo’s life capacity.
- Preserve a crate barrier.
- Create a firing lane without clearing every crate.
- Attack Yashin with ranged weapons from cover.
- Avoid chasing him into the open.
- Defeat Yashin and collect his heart.
6. Return through the warehouse and fly to Area 4
After defeating Yashin, drop through the central opening. Continue downward through the next section, then head east. At the first junction, go north, and then travel west to return to the entrance area with the fence and Predator enemies.
Use the central descent rather than trying to climb back through the upper warehouse routes. The east, north, west sequence brings Rambo back toward the exit. Cut through any remaining fence section with the combat knife and leave the warehouse.
Once outside, travel east across the Russian base to the helicopter. Stand at the transfer point and press Up. The key now allows the helicopter interaction to succeed, and Rambo is taken to Area 4. The chapter is complete when he arrives at the second POW-camp section.
- Drop through the center after the Yashin fight.
- Descend through the next section.
- Head east, then north at the first junction.
- Go west to the warehouse entrance area.
- Cut through the remaining fence and exit.
- Return east to the helicopter.
- Press Up and confirm the transfer to Area 4.
Before you move on
- The Russian base was entered from the waterfall basin after Fire Tiger.
- The fence and foot soldiers were cleared before the Flying Robot fight.
- The Flying Robot was defeated from the mid-level barrel with the machine gun.
- The Flying Robot’s heart was collected.
- The eastern helicopter was activated and displayed the key-required message.
- Warehouse 1 was skipped or searched only for supplies.
- The helicopter key was collected from the lower room in Warehouse 2.
- Sergeant Yashin was defeated and his heart was collected.
- Rambo used the central post-boss descent and exited the warehouse.
- The helicopter was activated with the key.
- Rambo arrived in Area 4 at the second POW-camp section.
Area 4 — Second POW Camp, Padovsky and Pre-final Build-up
After stealing the helicopter in Area 3, Rambo lands in Area 4 beside the route to a second POW camp. First enter the southern combat screen and break the central crate stack to collect medicine, then return to the junction, go west and north, cross east over the bridge, and continue east to the POW cell. Cut the fence with the combat knife and speak to the prisoner. Retrace the camp route west, go north, and move east to Lieutenant Colonel Padovsky. Use the machine gun against him, collect the seventh heart, and confirm that maximum life has reached 800. Then travel east and turn south to begin the Mil-21 approach. Preserve grenades for that fight; ordinary camp soldiers should be handled with the knife or regular ammunition whenever practical.
Land and secure the Area 4 medicine cache
When Area 4 begins, Rambo is beside the helicopter. Move south into the first screen containing enemy soldiers. Do not rush onward. Break the central stack of crates and collect the medicine bottle there. This is the key preparation point for the area, and the route back to it is useful if the final approach goes badly. Restore life and refill your medicine supply as far as the available items allow before attempting the camp route.
After collecting the cache, use ordinary attacks against the soldiers. The combat knife is suitable for enemies within safe melee range, while arrows or the machine gun are preferable when a soldier can shoot Rambo from an elevated or narrow position. Avoid spending grenades on routine infantry. The Mil-21 encounter later is the part of Area 4 that demands a large explosive reserve.
- Enter the first southern combat screen.
- Break the central crate stack and collect its medicine.
- Heal before crossing the camp route if Rambo is badly injured.
- Keep grenades for the helicopter encounter.
Follow the bridge route to the second POW
From the medicine screen, return toward the junction and go west. At the junction, move north. From the upper route, travel east across the bridge. The bridge is exposed to enemy fire, so clear or avoid nearby soldiers before committing to the crossing. Move in controlled steps rather than jumping blindly; a hit can knock Rambo from the elevated route and force him to repeat part of the approach.
Continue east after crossing the bridge and follow the connected screens until you reach the second POW’s cell. The prisoner is behind a fence. Equip the combat knife and attack the fence until it is cut open. The knife is the required tool for this barrier. Cutting the fence alone is not enough: speak to the POW after the opening appears so the rescue is registered and the route to Padovsky becomes available.
- Go west from the landing route, then north at the junction.
- Cross east over the bridge.
- Continue east to the POW cell.
- Cut the fence with the combat knife.
- Speak to the freed POW.
Retrace the camp route toward Padovsky
After speaking with the POW, return west through the camp. The verified Area 4 route sends Rambo back across three screens before he goes north. Do not leave the area through the helicopter route yet; Padovsky must be defeated before the final aerial encounter can begin.
When you reach the northern route, move east one screen to enter Lieutenant Colonel Padovsky’s area. Keep your life and medicine in mind before triggering the fight. If Rambo is already near defeat, return to the southern medicine cache and prepare again rather than gambling on the boss. The camp soldiers can be bypassed or defeated with regular weapons, so preserve grenades for the Mil-21.
- The second POW has been spoken to and rescued.
- Return west through the camp before going north.
- Move east from the northern route to reach Padovsky.
- Enter the boss screen with medicine available.
Defeat Lieutenant Colonel Padovsky
Padovsky is best handled with the machine gun. Stand close enough for consistent hits, keep firing, and watch for his return fire. The available walkthrough evidence supports a direct machine-gun strategy when Rambo enters with adequate life. Do not waste grenades merely to shorten this fight; they are substantially more important in the next boss sequence.
Use medicine during a safe opening if the life bar becomes dangerous. Padovsky’s defeat is confirmed when he disappears and leaves a heart. Do not leave the screen before collecting it. This is heart number seven, and collecting it raises Rambo’s maximum life to 800. Check the expanded life maximum before continuing so you know the reward registered.
- Select the machine gun before engaging Padovsky.
- Use medicine before a fatal hit if necessary.
- Confirm that Padovsky has disappeared.
- Collect the seventh heart.
- Confirm that maximum life is 800.
Take the final route toward the Mil-21
After collecting Padovsky’s heart, move east through the next screens. Several soldiers remain, but they are not the main objective. Use the knife, arrows, or machine gun according to distance and enemy placement, and avoid taking unnecessary contact damage. Do not spend grenades on enemies that can be bypassed or defeated with regular ammunition.
Continue east until the route sends you south. Take the southern exit to begin the Mil-21 sequence. Before entering, refill life with medicine if necessary and make sure your grenade supply has not been consumed by the camp. The final craft is damaged by grenades, while the arriving soldiers and missile attacks create the immediate defensive pressure. Entering this sequence with low life or too few grenades makes the next chapter substantially harder.
- Move east after collecting the heart.
- Take the southern route when the path turns downward.
- Carry medicine into the aerial sequence.
- Preserve as many grenades as possible for Mil-21.
Before you move on
- The medicine from the central crate stack in the first southern combat screen has been collected.
- The second POW’s fence has been cut and the prisoner has been spoken to.
- Lieutenant Colonel Padovsky has been defeated.
- The seventh heart has been collected.
- Maximum life displays 800.
- Rambo has moved east from Padovsky’s area and taken the southern route into the Mil-21 approach.
Boss 8 (Final Approach) — Mystery Helicopter and the Mil-21 Final Boss
Begin after rescuing the second POW and defeating Lieutenant Colonel Padovsky. Collect Padovsky’s heart, continue east, then turn south to reach the final approach. Before entering the confrontation, use the south-side camp screen and its returning medicine cache to restore life and build a reserve. Mil-21 moves across the upper part of the screen, launches repeated missiles and sends soldiers in from both sides. Grenades are the dependable weapon against the helicopter; ordinary knife, arrow and machine-gun attacks should not be treated as reliable damage. Clear the nearest dangerous soldier, prioritize the left-side soldier when you need replacement grenades, throw grenades during openings and keep moving to avoid missile impacts. Heal before damage becomes critical. If Rambo dies or enters the fight without enough grenades, resume from the second-POW checkpoint, restock at the south-side cache and approach again. After Mil-21 is destroyed, board Rambo’s helicopter to begin the return-to-base sequence.
1. Confirm the route into the final approach
Start here only after the second POW has been rescued and Lieutenant Colonel Padovsky has been defeated. Collect Padovsky’s heart, which restores Rambo’s life and raises his maximum, then leave the battle area by continuing east. From the following screens, turn south to reach the helicopter encounter route. Do not go back toward the POW cell or repeat Padovsky’s battle.
The final confrontation is reached by using the S tile on the approach route after the rescue has been completed. If the tile sends Rambo somewhere unexpected, check that the second POW rescue and Padovsky’s defeat were both completed before trying again. Select grenades before activating the confrontation so the first attack does not require an unsafe weapon change.
- The second POW has been rescued.
- Padovsky is defeated and his heart has been collected.
- Rambo has moved east from Padovsky’s area and turned south.
- Grenades are selected before using the final approach tile.
2. Restore life and medicine before committing
Use the south-side camp screen near the helicopter landing area as the preparation point. A medicine bottle is hidden among the crates in this area. Break the relevant crate stack to collect it, then leave and re-enter the screen to make the cache available again. Repeat this as needed to restore life and increase the medicine reserve before attempting Mil-21.
A full supply is helpful but should not be treated as a mandatory fixed number. Entering with high life and several medicine bottles matters more than reaching an exact total. If enemies damage Rambo while he is crossing the approach, retreat and refill rather than beginning the boss with a depleted life bar. Clear only the enemies that block the route; avoid unnecessary fights that consume health before the encounter.
After a failed attempt, the useful recovery point is the progress associated with rescuing the second POW. Return to the south-side camp cache, restore life and medicine, then retrace the east-and-south route. This is the dependable recovery method when the first attempt used too many bottles or grenades.
- The south-side medicine cache has been collected.
- Life is restored before entering the boss screen.
- A reserve of medicine is available for missile damage.
- A death is followed by restocking from the second-POW checkpoint.
3. Understand Mil-21’s attack pattern
Mil-21 stays across the upper portion of the screen and repeatedly sends missiles downward. Enemy soldiers enter from the left and right, adding gunfire, grenades and contact danger while Rambo is trying to attack. The helicopter cannot be reliably damaged with the knife, arrows or machine gun. Select grenades and use them as the required offensive weapon against the craft.
Do not run continuously from one edge of the screen to the other. Make short lateral movements, watch the missile paths and leave room to retreat after each attack. A missile can strike Rambo during a jump or hit the landing position, so check the space above and in front of him before jumping. When a soldier is directly threatening Rambo, deal with that soldier first and then return to the helicopter.
- Grenades are equipped for Mil-21.
- Missiles are treated as the primary hazard.
- Soldiers are watched from both sides of the screen.
- Movement is controlled rather than constant blind running.
4. Damage the helicopter with repeated grenade throws
Jump and throw a grenade when Rambo is high enough for the projectile to reach Mil-21. Attack only after checking that a missile is not crossing the jump path and that a soldier is not close enough to interrupt the throw. After releasing the grenade, land and move laterally rather than remaining directly below the helicopter.
Mil-21 takes a sustained barrage. Walk the fight forward in repeated short exchanges: create space, throw grenades, land, avoid the next missile and prepare another throw. Walkthrough references commonly estimate roughly 40 to 50 successful grenade hits, but treat that as a practical estimate rather than a guaranteed universal count. The important requirement is to continue supplying and throwing grenades until the helicopter is destroyed.
Do not waste the fight trying to damage Mil-21 with ordinary ranged attacks. Arrows and machine-gun fire can help against ground soldiers, but they should not be presented as a dependable way to finish the boss.
- Grenades are thrown from jump height.
- Each jump is checked against incoming missiles.
- The fight is handled as a sustained barrage.
- No ordinary weapon is relied on as a substitute for grenades.
5. Maintain the grenade supply
Prioritize the soldier arriving from the left whenever he can be reached without crossing an immediate missile path. This soldier is the important source of replacement grenades. Defeat him, collect the refill when it is safe and return to attacking Mil-21. Spending grenades to remove him is acceptable because the resulting refill keeps the boss fight going.
The soldier on the right provides arrows rather than the grenade replenishment needed for the helicopter. Defeat him if he is firing, blocking Rambo or creating a direct threat, but do not chase him across the screen merely for ammunition. If both soldiers are active, remove the enemy most likely to hit Rambo, then use the next safe opening to eliminate or reach the left-side soldier.
Do not wait for every enemy to disappear before attacking. The goal is to control the immediate danger long enough to create repeated grenade openings. Clear, refill, attack and reposition. This cycle is safer and more sustainable than spending all grenades at once or switching repeatedly to weapons that cannot damage Mil-21.
- The left-side soldier is prioritized for grenade refills.
- The right-side soldier is treated as a secondary threat.
- Grenades are replenished before the supply is exhausted.
- Rambo returns to Mil-21 after each defensive exchange.
6. Heal, recover and board the helicopter
Use medicine before Rambo’s life reaches a critical level. The safest healing window is immediately after clearing a nearby soldier and before beginning the next grenade barrage. Do not wait for a completely safe screen; create a brief opening, heal and resume moving. Missile damage is difficult to avoid entirely, so the purpose of medicine is to survive the unavoidable mistakes while keeping the attack consistent.
If Rambo dies or runs out of grenades, use the second-POW checkpoint and return to the south-side camp. Refill life and medicine from the returning cache, then approach Mil-21 again. During the rematch, depend on the left-side soldier’s grenade refill and conserve grenades for the helicopter. Do not expect arrows, machine-gun fire or the knife to finish the boss.
Victory is confirmed when Mil-21 is destroyed and the boss scene ends. Rambo must then enter his own helicopter. Boarding it starts the return-to-base sequence; defeating Mil-21 without entering the helicopter is not the complete objective for this chapter. The later base sequence handles the final Trautman conversation and campaign ending.
- Medicine is used before life becomes critical.
- A failed attempt is recovered through the second-POW checkpoint and south-side cache.
- Mil-21 is destroyed through sustained grenade damage.
- The boss scene ends.
- Rambo enters his helicopter and the return-to-base sequence begins.
Before you move on
- The second POW was rescued and Padovsky’s heart was collected before this chapter began.
- Rambo reached the final approach through the completed east-then-south route.
- Mil-21 was destroyed with sustained grenade attacks.
- The boss scene ended.
- Rambo boarded his helicopter and the return-to-base sequence started.
Post-final: Return to Base, Triggering the Ending and Optional Closure
Destroying the Mil-21 is the final combat victory, but the campaign does not end until Rambo returns to the original base and speaks with Colonel Trautman. After the helicopter brings you home, visit the base area where Murdock appears and handle the optional kanji attack if you want the game’s frog gag. If Co survived the waterfall scene, find and speak with her before visiting Trautman; if you spoke with her at the waterfall earlier, the game has already set the death variation and she will not appear in the later ending. Finally, use the S tile to reach the opposite side of the base and speak with Trautman. That conversation triggers the closing sequence. Watch the final text and dialogue instead of resetting immediately after the boss.
1. Complete the Mil-21 battle and take the return helicopter
Continue the final battle until the Mil-21 is destroyed. The helicopter is the last combat encounter, but its defeat is not the campaign completion check. Let the defeat animation and transition finish; do not reset the NES when the boss disappears or when control briefly changes.
When Rambo is back at the extraction area, move to the helicopter and press Up to board it. This sends him back to the military base from the opening section. There is no additional objective in the final combat area after the Mil-21 is destroyed, so do not spend resources searching for another route or enemy there.
- The Mil-21 has been destroyed.
- The post-battle transition has finished.
- Rambo has boarded the helicopter and returned to the original base.
2. Handle the base area before using the S tile
The returned base contains the final character interactions. Do not immediately use the S tile to reach Colonel Trautman if you want the complete available closure. First inspect the base screen where Murdock is moving and look for Co if you preserved her earlier.
The game’s Co variation was decided at the waterfall after the prison escape. If you opened the conversation with Co there, the attack scene occurs and she dies. If you left the conversation unopened, she survives and can appear during the later helicopter and ending scenes. This decision cannot be changed after the Mil-21 battle; use an earlier password or replay the relevant section if you want the alternate Co ending.
- You are at the original military base.
- You have not yet completed the Trautman conversation.
- You know whether Co survived the waterfall event.
3. Speak with Co if she is present
If Co survived the waterfall scene, find her on the base and press Up to speak with her. Allow the conversation to finish before leaving the screen. This preserves the Co-specific version of the closing sequence and is the correct way to see her final appearance.
If Co is absent because she died earlier, there is no replacement conversation to find. Continue with Murdock and then Trautman. The campaign can still reach its ending without the surviving-Co scene; the earlier death variation changes the presentation rather than creating a new mission.
- Co’s available final conversation has finished.
- If Co is absent, you have confirmed that the earlier waterfall choice caused the alternate variation.
- You have not yet spoken with Colonel Trautman.
4. Confront Murdock for the optional closure scene
Murdock runs across the base screen after Rambo returns. Attack him with Rambo’s normal weapon while he is on screen. The game responds by sending the glowing kanji symbol toward him; striking him changes him into a frog-like figure. This is the game’s unusual revenge gag, not a conventional boss battle.
The Murdock attack is optional flavor and is not the documented trigger for the true ending. The ending is triggered later by reaching Trautman through the S tile. For the most complete presentation, handle Murdock before leaving for Trautman, but do not keep attacking him as though you must reduce a health bar. If you leave and return to the screen, he can reappear in his normal form and the gag can be repeated.
- Murdock has been confronted if you want the optional gag.
- You have not mistaken the frog transformation for the campaign ending.
- Co’s conversation has been completed when Co is present.
5. Use the S tile and speak with Colonel Trautman
After checking Co and Murdock, locate the S tile in the base and press Up while standing on it. The tile transfers Rambo to the other side of the installation; Trautman is reached through this route rather than by continuing to walk around the Murdock screen.
Find Colonel Trautman and press Up to begin the conversation. Let the complete exchange play. Strategy guides identify this conversation as the true-ending trigger, so defeating Mil-21 alone, attacking Murdock, or returning by helicopter is not enough to finish the campaign.
- The S tile has transferred Rambo to the opposite base area.
- Colonel Trautman is visible.
- You have initiated his final conversation and allowed it to continue.
6. Verify the campaign completion
Remain on the ending sequence until the final dialogue, message, or closing presentation has finished. Do not reset immediately after the Trautman conversation begins. The exact appearance varies according to whether Co survived, but both variations represent the completed North American NES campaign once the final closing sequence has played.
The reliable completion order is: destroy Mil-21, board the return helicopter, speak with Co if she survived, optionally attack Murdock, use the S tile, and complete Trautman’s conversation. If Trautman has not been reached through the S tile, the game has not yet reached its ending even if every combat area has been cleared.
- Mil-21 is destroyed.
- Rambo returned to the original base by helicopter.
- Co’s available final scene was completed.
- The S tile was used to reach Trautman.
- Trautman’s conversation and the closing sequence have finished.
Before you move on
- The Mil-21 has been destroyed.
- Rambo has boarded the helicopter and returned to the original base.
- Co’s final conversation has been completed if she survived.
- Murdock has been confronted if the optional closure gag is desired.
- Rambo used the S tile to reach Colonel Trautman.
- Trautman’s final conversation and the game’s closing sequence have played.
Optional: Efficient Farming, Robust Save/Password Use, and Common Recovery Tricks
Rambo has no battery save, so use conversation checkpoints and carefully copied passwords to limit repeated travel. The most reliable preparation loop is in Area 2: move between the medicine-dropping gorilla in Gorilla Valley and the first tiger that drops machine-gun ammunition, then collect exploding arrows near the boat and regular arrows near the village. Farm until the next objective feels safe rather than chasing maximum supplies everywhere. Press Start during an active conversation to display the password, inventory, life and EXP. After a death, Continue returns you to the last conversation, with health restored to the amount you had there while experience and weapons reflect the state at death. A password returns you to the conversation where it was recorded. Before Mil-21, use the second-POW checkpoint and the southern camp medicine cache to rebuild your health and medicine.
1. Build the dependable Area 2 farming loop
After reaching the village and speaking with the villager who gives Rambo the lamp, return toward the boat and prepare before entering the cave route. From the boat screen, leave to the left, then work back east as needed and go north to reach Gorilla Valley. Use the OSO marker as your landmark. The first gorilla to the right of that marker is the useful medicine drop, so remember its position rather than defeating every enemy on the screen.
Travel east from the medicine gorilla to the tiger screens. The first tiger encountered there provides machine-gun ammunition. Move between the gorilla and tiger, collecting the drops and crossing the screen boundary so the route can be repeated. This is the main Area 2 supply loop: medicine repairs damage taken during farming and movement, while machine-gun ammunition gives you a safer answer to tougher enemies and bosses. The documented practical target is up to 9 medicine bottles, 99 machine-gun rounds and full health, but stop earlier if the next section is already secure.
- Obtain the lamp before spending time on extended preparation.
- Use the OSO marker to locate the medicine gorilla.
- Locate the first machine-gun-dropping tiger and repeat the two-screen route.
- Prioritize medicine when your health falls during the loop.
2. Collect arrows along the boat and village approaches
Return to the boat after the Gorilla Valley loop and travel as far east as the route allows. On the relevant screen, the second of the two bats can drop exploding arrows. Re-enter the screen as necessary and collect the drop when it appears. Exploding arrows are valuable for removing groups from a distance, especially on the approach to the first POW camp and during other crowded screens where standing still for knife attacks is risky.
Near the village, use the floating-skull area to obtain regular arrows. One of the two skulls provides the drop. Again, repeat the screen transition rather than wandering through the map looking for unrelated enemies. If you want grenades, a nearby documented source is a wasp one screen east of the field with Co., although grenade farming is optional at this stage. Preserve grenades whenever possible for vehicles, helicopter encounters and the final Mil-21 battle.
The same reset principle applies when checking later cave or water sections: if you are testing a known drop-bearing enemy, clear the screen, cross into an adjacent screen, return and check whether the enemy has reset. Do not assume every enemy in a cave or water route supplies an item, and do not risk health merely to force an additional drop.
- Farm exploding arrows near the boat route.
- Farm regular arrows near the floating-skull area outside the village.
- Treat grenade farming as optional and preserve the resulting stock.
- Use screen transitions to test repeatable drops instead of clearing entire areas aimlessly.
3. Stop farming when it has served the next objective
Medicine is the most useful preparation resource because it repairs mistakes during platforming, ranged firefights and long return routes. Machine-gun ammunition and arrows should support difficult screens, not replace movement and positioning. The combat knife gains experience whenever enemies are defeated, regardless of which weapon dealt the finishing blow, so ordinary progress gradually improves it. You do not need to grind indefinitely for an arbitrary knife level.
Leave the Area 2 loop when you can cross the water and reach the first POW camp without spending most of your medicine. If you are entering the caves to rescue the child, keep enough arrows to attack the Giant Spider from a safer distance. After the first POW rescue, restock again at Gorilla Valley before the return journey and boulder-cliff approach. If a route repeatedly costs more health than the supply loop restores, improve the route and enemy handling instead of simply increasing the inventory.
- Make medicine the first preparation priority.
- Use ranged weapons to reduce damage in crowded screens.
- Let normal combat provide knife experience.
- Leave the loop once the next objective is reliably manageable.
4. Record passwords at active conversation checkpoints
Press Start while Rambo is in the middle of a conversation. The status screen displays the current inventory, life, EXP and password. This is the correct time to record a code; pressing Start during ordinary action does not provide the same password display. Record a password after an important character conversation, before entering a cave, camp, dangerous platforming route or boss approach.
Copy every character exactly as shown. The password font can make 1 resemble lowercase l, 0 resemble capital O, and 5 resemble capital S. Write the code twice and compare both copies with the screen before closing the conversation. A password is tied to the location and state associated with that conversation, so a code recorded after a newly completed objective is normally more useful than one taken at the beginning of the area.
When entering a password from the title screen, confirm that Rambo appears at the expected conversation location before committing to another attempt. Keep more than one password for a difficult section when possible, especially if one code gives a better supply state or checkpoint.
- Press Start during active dialogue.
- Copy the complete code, including ambiguous letters and numbers.
- Verify the written copy against the screen.
- Record a new code after major objectives and before dangerous routes.
5. Recover correctly after death or a failed boss
When Rambo dies, choose Continue if the last conversation is a useful checkpoint. Continue returns him to the location where he last spoke with someone. His health is restored to the amount he had when that conversation occurred, but his experience and weapons match what he had at the time of death. Therefore, Continue may save travel while still leaving you short on ammunition or progress toward a knife level. Check the status screen before immediately retrying.
If a recorded password gives a more useful location, enter it from the title screen instead. The password returns Rambo to the same place where that conversation occurred. In either case, restock before repeating the dangerous section. For ordinary Area 2 failures, return to Gorilla Valley for medicine and machine-gun ammunition, then use the boat and village routes to rebuild arrows if necessary.
For the final sequence, the useful recovery point is the conversation associated with rescuing the second POW. If Mil-21 defeats you, return to the southern part of the camp where you entered and use the medicine cache to restore health and rebuild medicine before advancing again. Do not spend all of your grenades on the soldiers before the helicopter battle. During Mil-21, eliminate soldiers promptly, use the grenades they provide when available, keep moving against missile patterns and heal before your life becomes critical.
- Choose Continue only after checking whether the latest conversation is useful.
- Use a password when it provides a better checkpoint or supply state.
- Rebuild medicine and ammunition before retrying a failed route.
- After the second POW rescue, use the southern camp cache before reattempting Mil-21.
Before you move on
- You can reach Gorilla Valley from the Area 2 boat route and identify the medicine gorilla near the OSO marker.
- You can repeat the gorilla-to-tiger loop and obtain medicine and machine-gun ammunition without losing more health than the route restores.
- You have collected practical arrow supplies near the boat and village approaches while preserving grenades for major targets.
- You have recorded and verified a password from an active conversation, then confirmed that entering it returns Rambo to the expected checkpoint.
- Before a difficult route, you can decide whether Continue or a password offers the better restart point and can restock afterward.
- After rescuing the second POW, you know how to return to the southern camp medicine cache and prepare another Mil-21 attempt.
Finishing up
Defeat the required boss sequence: Giant Spider, Mercenary Leader, Biker Clown, Fire Tiger, Flying Robot, Sergeant Yashin, Lieutenant Colonel Padovsky, and Mil-21.
Collect the required progression items, including the Lamp, the first and second POW rescues, the boss hearts, and the helicopter key.
After defeating Mil-21, enter Rambo’s helicopter and return to the original base.
At the base, speak with Co if her survival route makes her available, then use the S tile to reach Colonel Trautman and complete his final conversation.
Remain through the closing sequence. The Murdock confrontation and the surviving-Co variation are optional and are not required for campaign completion.
Choose your next gameScreenshots & video
Game imagery for reference. Follow the written chapters above for the route and strategies.
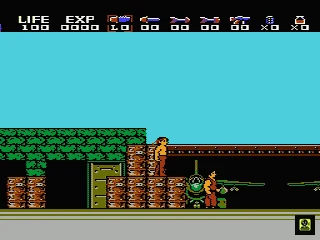
Sources & references
Our original guide draws on the references below. Check the edition at the top of this page before following controls or unlock requirements.
- Rambo - Nintendo NES - Manual
- Rambo (NES)/Gameplay — StrategyWiki
- Rambo - Guide and Walkthrough - NES - By BossBird - GameFAQs
- Rambo (NES)/Walkthrough — StrategyWiki
- Rambo — Nintendo NES Instruction Manual
- Rambo (NES) — Finding Co
- Rambo — Walkthrough — NES — KGifford — GameFAQs
- NES Directory — Rambo — USA Revision A
- Rambo (NES)/First POW — StrategyWiki
- Rambo — Game Map — NES — By arocoun — GameFAQs
- Rambo (NES)/Escaping Prison — StrategyWiki
- Rambo (NES)/Enemy Base — StrategyWiki
- Rambo Release Details — NES-RV-USA
- NesCartDB — Rambo USA Rev-A
- Rambo Cheats, Codes, and Secrets for NES — GameFAQs
About the game & collecting notes
- Platform
- Nintendo Entertainment System
Detailed, step-by-step campaign walkthrough for the original North American NES release of Rambo (Pack-In Video; published by Acclaim). Covers controls, systems, inventory and leveling, every major area and boss, reliable routes, mandatory keys and items, useful farming spots, boss tactics, and a concrete completion checklist to defeat Mil-21, return to the original base, use the S-tile route, and trigger the campaign’s final Trautman sequence. Preserving Co and confronting Murdock are optional variations or closure scenes, not additional completion requirements.
Darryl Polo
Darryl Polo loves tinkering with emulation and revisiting retro games. He enjoys exploring how old favorites play on different setups and sharing what he learns along the way. At Joking Joystick, he writes about the games, hardware, and small discoveries that keep the hobby fun.
Our editorial standardsFound a step that needs another look? Help us improve this guide.