
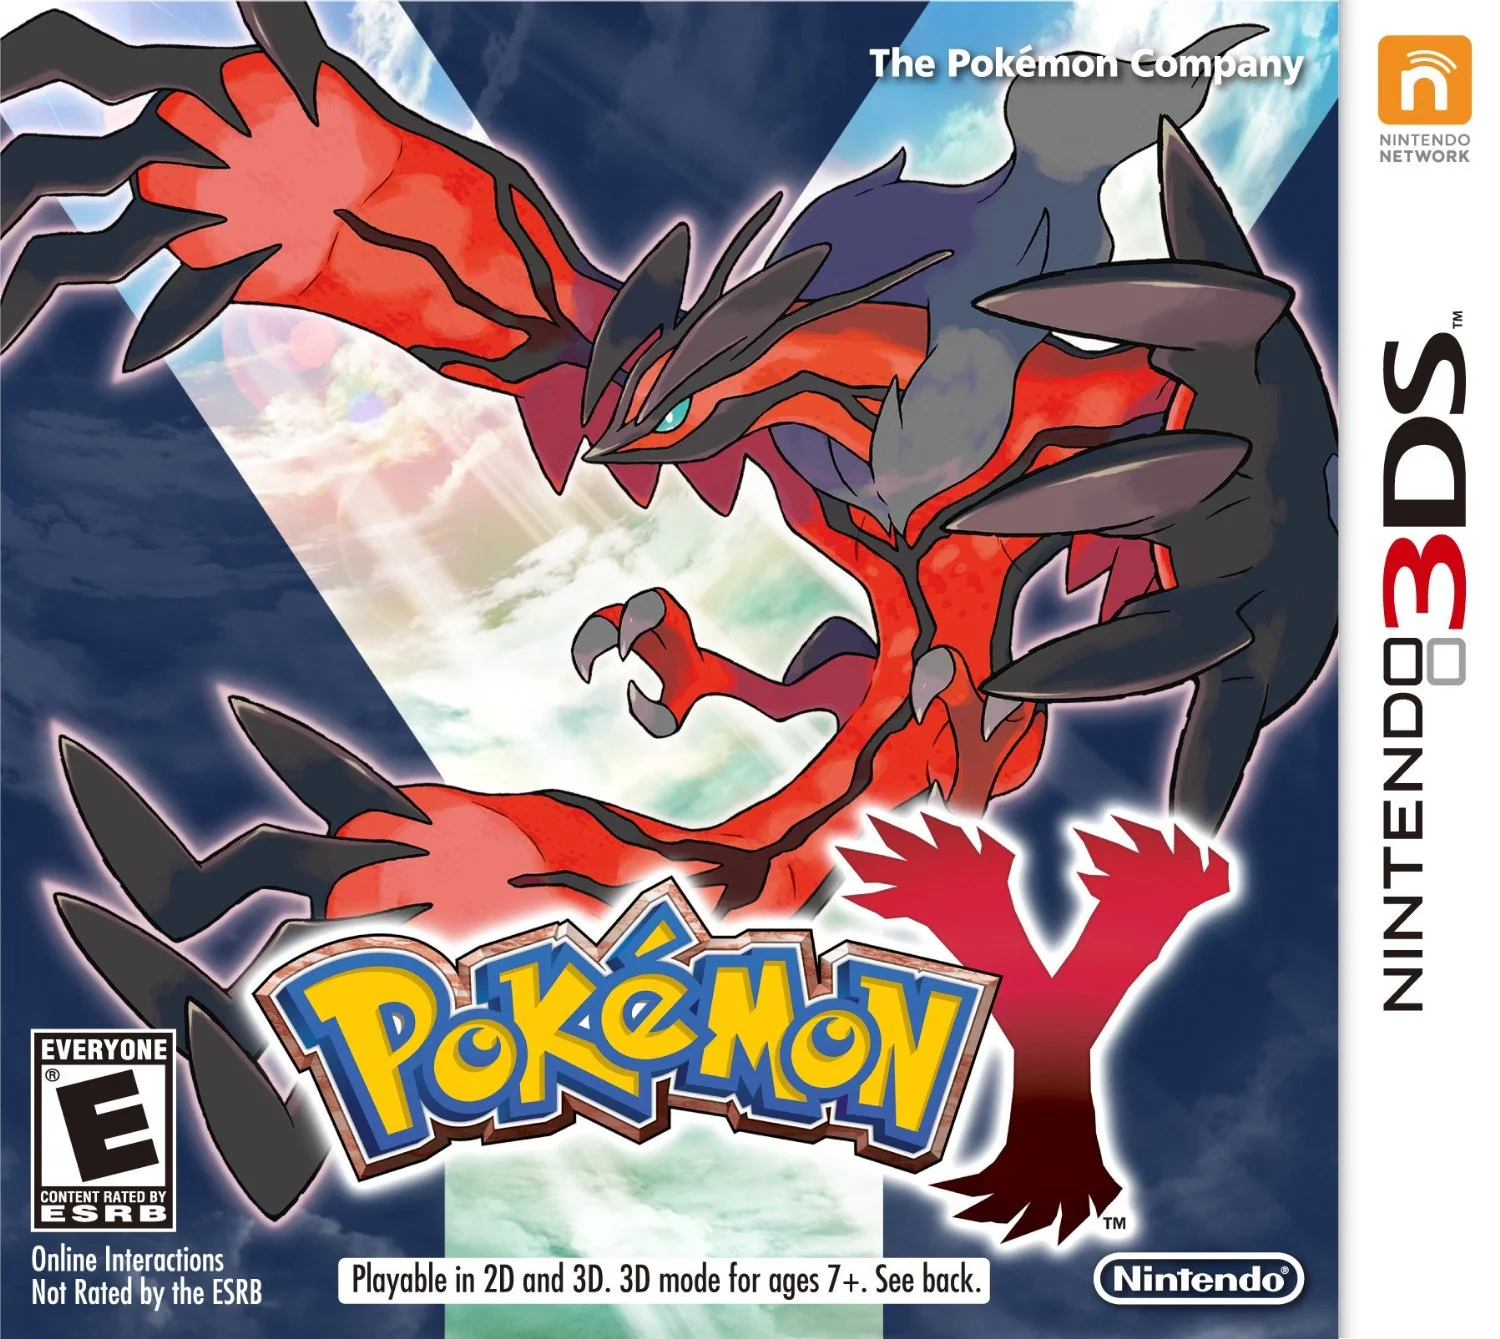
Pokémon Y (Nintendo 3DS) — Complete Main Campaign Walkthrough
A chronological, original-edition Pokémon Y campaign walkthrough covering every required route, Gym, Team Flare facility, the Yveltal encounter, Victory Road, the Pokémon League, the pre-credits AZ battle and the immediate postgame route to Kiloude City and the Mega Ring upgrade.

Find a copy
Pokemon Y Nintendo 3DS
We may earn a commission if you buy through these links, at no extra cost to you. As an Amazon Associate I earn from qualifying purchases.
Opens retailer search results. Check the model, edition, seller, availability and current price before buying.
Before you begin
This guide covers the original 2013 Pokémon Y release on Nintendo 3DS from Vaniville Town through the eight Kalos Gym Badges, the complete Team Flare story, the mandatory Level 50 Yveltal encounter, Victory Road, the Elite Four, Champion Diantha, Hall of Fame registration and the Lumiose parade battle against AZ before the credits.
Follow the assembled chapters in this required order: ch01, ch02, ch03, ch04, ch05, ch06, ch07, ch08, ch09, ch10, ch12, ch11, ch13, ch14, ch15 and ch16. The Team Flare Secret HQ and Yveltal sequence must occur after Olympia and before Route 18, Couriway Town, Route 19, Snowbelle City and Wulfric.
Required areas include the Poké Ball Factory, Frost Cavern, the full Team Flare operation in Lysandre Labs and Geosenge Town, Route 18, Couriway Town, Route 19, Snowbelle City and Victory Road.
The guide assumes the original Nintendo 3DS Pokémon Y edition and does not transplant mechanics from remakes, later versions or other Pokémon releases.
Set yourself up for the run
Use the field-menu Save command regularly. Pokémon Y does not provide a dependable automatic save before every major event, so manual saving is the recovery method for Gym Leaders, Team Flare facilities, the Yveltal encounter, the Pokémon League and other one-time battles.
Save before the Yveltal encounter, but do not claim that an empty party slot is required. If the party is full, the captured Yveltal can be sent to the PC.
Choose a starter and build a balanced party with several trained members rather than relying on one Pokémon. Type coverage, healing items and status recovery are more important than a fixed team species list.
Before the League, stock strong healing items, Revives and status cures, restore move PP and keep multiple answers for Fire, Water, Steel, Dragon, Psychic and Fairy opponents.
Mega Ring upgrading is postgame content. It requires the Hall of Fame, access to Kiloude City, a Battle Maison victory and the first rival battle in northern Kiloude City before visiting Professor Sycamore at the Anistar Sundial.
Online 3DS services are not required for the main campaign or the core postgame route. Treat trading, Friend Safari access and version-exclusive collection as optional goals.
Start, Save Protocols and First Decisions
Create an original Pokémon Y save, establish a dependable manual-save routine, and travel from Vaniville Town to Aquacorde Town. This chapter ends when the opening group is assembled and the starter-selection scene is ready to begin. Starter choice, the first rival battle, the letter to your mother, and the return trip through Vaniville Town are handled in ch02.
Create the Pokémon Y campaign and finish the bedroom setup
Start the original Nintendo 3DS release of Pokémon Y and complete the opening character setup. Choose the player character’s appearance, gender, and name when Professor Sycamore prompts you. These choices identify the player character for the entire save and cannot be casually changed later, so confirm each one before continuing.
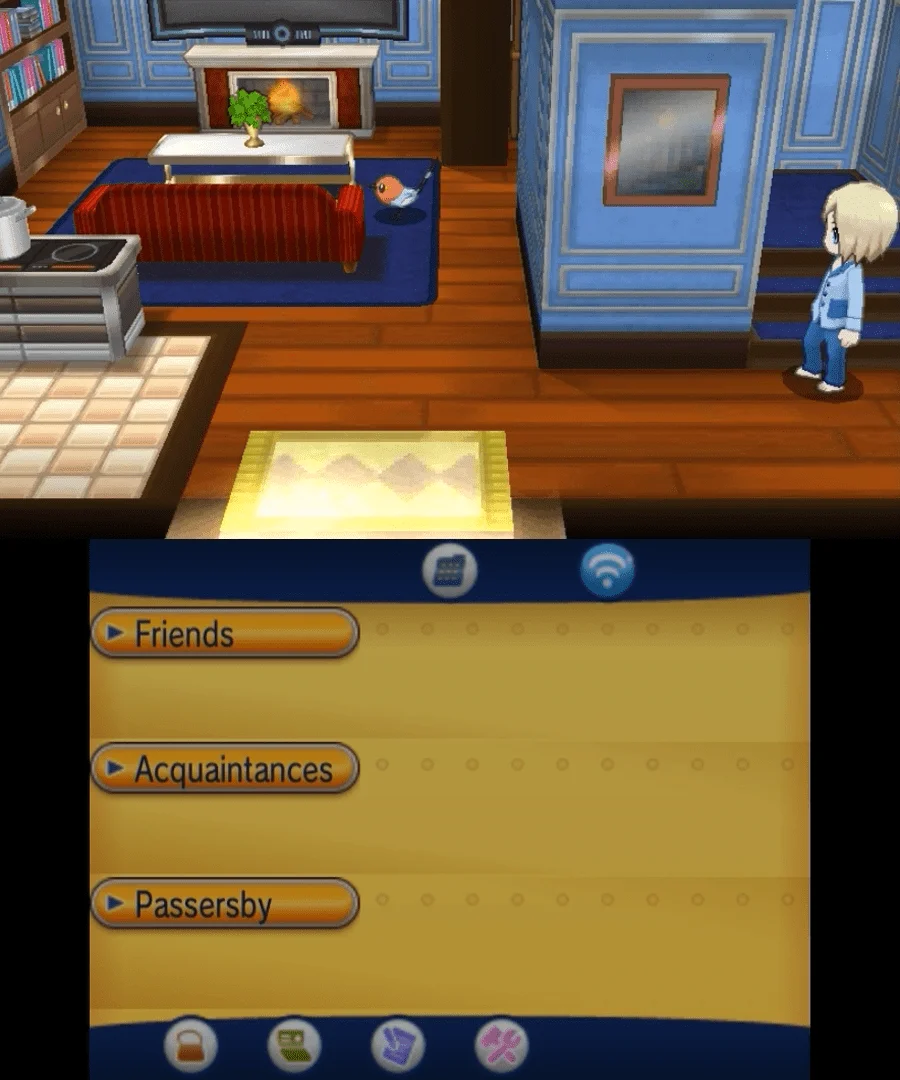
After the opening scene, you regain control in your bedroom in Vaniville Town. Walk to the mirror and press A to change out of your pajamas. You do not need to inspect the computer, television, or other room objects for campaign progress. Once you are dressed, leave the bedroom and go downstairs.
Speak with your mother, then leave the house and follow the opening conversation outside. The nearby characters direct you toward the northern exit of Vaniville Town. At this stage there are no meaningful battles, catches, or required items to manage, so follow the group rather than searching for an alternate route.
Before leaving town, review the Options menu if you want to change text speed or Battle Style. Press X to open the field menu, choose Options, and confirm any changes. Shift Battle Style is the more forgiving setting for a new player because the game offers a free switch after an opponent’s Pokémon faints; Set removes that prompt and requires you to choose every switch yourself. Either setting is valid, and it can be changed later.
- Create the player character and name.
- Reach the bedroom in Vaniville Town.
- Use the mirror to change out of pajamas.
- Speak with the player’s mother.
- Review Text Speed and Battle Style in Options if needed.
- Leave Vaniville Town through the northern exit.
Learn and test the manual-save command
Once you have control outside the house, press X to open the field menu. Select Save, choose Yes at the confirmation prompt, and wait until the game finishes recording the adventure. The Pokémon Y electronic manual identifies Save on the field menu as the command that records your progress.
Pokémon Y provides one main saved-game file. A later manual save replaces the previous state, so do not treat multiple field saves as separate backup slots. Starting a new game also risks replacing the current campaign, and deleting the saved data from the title screen cannot be undone. If this is an existing cartridge or digital copy, confirm that you are prepared to overwrite its current adventure before beginning a new one.
Test the procedure now rather than waiting for the first Gym. Move a short distance, press X again, select Save, and confirm. This second save is not required for progression; it simply verifies that you know how to record progress and that the menu command is easy to find during play.
Do not use closing the software, putting the Nintendo 3DS into sleep mode, removing the Game Card, or powering off the system as a substitute for saving. Sleep mode pauses the software but does not create a new save. If the system loses power before a manual save, progress since the previous save can be lost.
- Press X while standing in the field.
- Choose Save from the field menu.
- Confirm the save prompt and wait for the operation to finish.
- Perform a second test save after moving briefly.
- Remember that Pokémon Y has one main campaign save file.
- Do not rely on sleep mode or closing the software to record progress.
Follow Route 1 to Aquacorde Town
After the opening conversation in Vaniville Town, take the northern route toward Aquacorde Town. Route 1 is also called Vaniville Pathway. It is a short, straightforward opening path with no complicated puzzle, so continue north until the scenery changes and you enter Aquacorde Town.
You do not need to train before reaching Aquacorde, and there is no required wild-Pokémon capture on this stretch. Keep the party and supplies situation simple: the starter has not yet been selected, and the next major sequence is a set of conversations rather than a demanding battle.
When you arrive in Aquacorde Town, follow the voices and conversation toward the group gathered near the tables. This is the opening meeting with the player’s friends and the point where the game prepares to present the three Kalos starter Pokémon.
Before speaking to the group and advancing the scene, open the field menu and make a manual save. This is the best stopping point for this chapter because the next chapter will cover the starter decision and the events that follow it. Saving here gives you a clean position at the beginning of that decision sequence without repeating the opening walk from Vaniville Town.
- Leave Vaniville Town after the opening conversation.
- Travel north along Route 1, Vaniville Pathway.
- Enter Aquacorde Town.
- Follow the conversation toward the group at the tables.
- Reach the starter-selection scene without choosing a starter yet.
- Save before advancing the starter conversation if you want a clean decision point.
Know the early recovery locations and future save points
Aquacorde Town does not contain the first standard Pokémon Center. It has a local healing service in a building near the town’s central fountain. Use that service if your party needs recovery after the opening sequence, but do not expect the full Pokémon Center facilities there, such as the usual shop-and-healing hub.
The first standard Pokémon Center is in Santalune City. The route to it continues through Route 2, Santalune Forest, and Route 3 after the events covered in ch02. Once you reach Santalune City, heal immediately and treat it as the first reliable recovery hub for the campaign.
Adopt a manual-save routine from the start. Save after arriving at a major town, after receiving a Gym Badge, before entering a long cave or Team Flare facility, and before any forced battle or unique capture that you would not want to repeat. The game does not provide a dependable automatic save before every critical story event, so the field-menu command is the protection you control.
Later in Pokémon Y, save manually immediately before the forced Level 50 Yveltal encounter in Team Flare’s Secret HQ. Heal the party, prepare capture supplies, and save before initiating the encounter. The same rule applies before the Pokémon League, Champion Diantha, and the narrative AZ battle near the end of the main story. These saves reduce repeated travel if a battle goes badly or a capture attempt needs to be retried.
- Use Aquacorde’s local healer if necessary.
- Remember that the first standard Pokémon Center is in Santalune City.
- Save after reaching major towns and completing major objectives.
- Save before caves, Team Flare facilities, forced battles, and unique captures.
- Plan a manual save before the later Level 50 Yveltal encounter.
- Plan another manual save before the Pokémon League and other final story battles.
Before you move on
- The original Pokémon Y campaign has been created on Nintendo 3DS.
- The player has reached the bedroom in Vaniville Town and changed out of pajamas.
- The player has reviewed the basic Options settings.
- The player has pressed X in the field, selected Save, confirmed the prompt, and completed a manual save.
- The player understands that the game has one main campaign save file.
- The player has left Vaniville Town and traveled north on Route 1, Vaniville Pathway.
- The player has entered Aquacorde Town and reached the group preparing the starter presentation.
- The player has not yet selected Chespin, Fennekin, or Froakie.
- The player knows that Aquacorde has a local healer and that Santalune City contains the first standard Pokémon Center.
- The player has a manual-save plan for future forced encounters, including the later Level 50 Yveltal battle.
Vaniville Village and Choosing Your Starter
Choose your first Pokémon in Aquacorde Town, defeat Shauna, deliver Professor Sycamore’s Letter to your mother in Vaniville Town, and return through Aquacorde Town to begin the first proper routes. Catch a useful partner on Route 2, use Shauna’s healing support while crossing Santalune Forest, cross Route 3, and finish in Santalune City with a balanced party prepared for Viola.
Choose your starter in Aquacorde Town
Travel from Vaniville Town along Route 1 to Aquacorde Town and join the meeting with Tierno, Trevor, Shauna and your other neighbor. Examine the three Poké Balls and choose Chespin, Fennekin or Froakie. Give it a nickname if you want one; the choice cannot be changed later without starting another save.
Chespin is the Grass-type choice and suits players who prefer a sturdier physical attacker. Its early advantages are strongest against Water- and Ground-type Pokémon, while Bug- and Flying-type attacks are common problems. Fennekin is the Fire-type choice and has the simplest natural matchup against the first Gym’s Bug Pokémon. It develops toward special offense, but it should not be left in against Water-, Rock- or Ground-type attacks. Froakie is a fast Water-type choice that is useful against Fire-, Rock- and Ground-type opponents. It does not have a direct type advantage against Viola, so plan to add a Flying- or Fire-type partner.
After you choose, battle Shauna. She uses the starter with a type disadvantage against your selection. Use your starter’s damaging move and attack normally; this is an introductory fight and does not require special preparation. Afterward, speak with Tierno again to receive Professor Sycamore’s Letter. Shauna heals your Pokémon after the battle, so you can leave immediately.
- Choose Chespin, Fennekin or Froakie.
- Defeat Shauna’s first rival battle.
- Receive Professor Sycamore’s Letter from Tierno.
Deliver the letter in Vaniville Town
Leave Aquacorde Town through the southern exit and follow Route 1, also called Vaniville Pathway, back to Vaniville Town. Route 1 is a short connecting path with no wild Pokémon or trainer battles, so follow it directly rather than looking for training opportunities.
Enter your house and speak with your mother. Give her Professor Sycamore’s Letter when the conversation prompts you to do so. She provides a change of clothes, a Potion and the Town Map. The Town Map is the useful progression item because it lets you review Kalos and check the position of towns and routes.
When you leave the house, the family Rhyhorn appears during the departure scene. It is part of the story presentation and is not available to add to your party at this point. Return to Route 1 and walk south to Aquacorde Town. You must complete the letter conversation before proceeding north toward Route 2.
- Return to Vaniville Town through Route 1.
- Deliver Professor Sycamore’s Letter to your mother.
- Receive the Town Map, Potion and clothing change.
- Return south to Aquacorde Town.
Use Aquacorde Town’s services
Back in Aquacorde Town, speak with the person beside the central fountain to receive another Potion. The building near the fountain contains a free healing service, so use it if your team needs recovery. Aquacorde also has a Poké Ball shop and a shop selling Potions.
The catching demonstration on Route 2 supplies additional Poké Balls, but buy a modest number before leaving if you want to catch several Pokémon immediately. Do not spend all your money on supplies at once; the early routes provide free healing and several useful items. A few Potions are enough for emergencies, especially because Shauna will heal the party inside Santalune Forest.
Leave Aquacorde Town through its northern exit. Route 2 is the first route with regular wild Pokémon and trainer battles.
- Collect the Potion near the Aquacorde fountain.
- Heal at Aquacorde’s free healing service if needed.
- Carry a modest supply of Poké Balls and Potions.
- Exit north onto Route 2.
Catch a partner on Route 2
Follow the Route 2 catching demonstration. After it ends, use the tall grass to catch Pokémon for your party. In Pokémon Y, Route 2 contains Bunnelby, Fletchling, Scatterbug, Zigzagoon, Pidgey and Caterpie. The wild Pokémon are at low levels, so weaken them carefully with your starter before throwing Poké Balls.
Fletchling is the most direct recommendation for the upcoming Gym because its Flying typing and Flying attacks are effective against Bug Pokémon. Pidgey is another available Flying-type answer. Bunnelby gives you a physical attacker and can later provide Ground-type coverage. Scatterbug or Caterpie can also contribute early, although they are less useful as a direct answer to Viola than a Flying- or Fire-type partner.
Pansear is available in Santalune Forest and can serve as another Fire-type option, but it is not necessary to search for it if you already caught Fletchling or Pidgey. Catch at least one additional Pokémon and battle the Route 2 trainers so that your party does not depend entirely on the starter.
The Route 2 encounter difference matters in Pokémon Y: Caterpie is the version-specific Bug encounter on this route. Weedle is not a Route 2 encounter in Y; look for Weedle in Santalune Forest instead.
- Complete the catching demonstration.
- Catch at least one additional Pokémon.
- Prefer Fletchling or Pidgey if you need a direct answer to Viola.
- Consider Bunnelby for physical and future Ground-type coverage.
- Remember that Caterpie, not Weedle, is the version-specific Route 2 encounter in Pokémon Y.
Cross Santalune Forest with Shauna
Continue north from Route 2 into Santalune Forest. Shauna joins you at the entrance and remains with you until you leave through the northern exit. Speak with her whenever your party needs recovery; she restores your Pokémon during the forest sequence. This lets you train and explore without consuming all your Potions.
Follow the main route north while battling the trainers in your path. Santalune Forest contains Weedle, Caterpie, Metapod, Fletchling, Scatterbug, Pikachu, Pansage, Pansear and Panpour in Pokémon Y. These catches are optional. Weedle is worth considering if you want an early Poison-type line, while Fletchling or Pansear are the most useful forest choices for preparing against Bug Pokémon.
Train at least your starter and one partner before leaving. A practical goal is to bring the Pokémon you expect to use against Viola toward the upper single-digit levels, with your main battler potentially reaching around level 10 or a little higher. Exact levels are not mandatory, but do not leave the forest with only a starter that has gained experience while every other party member remains at its catching level.
Collect nearby items when they are on your route, and use Shauna’s healing before continuing after difficult fights or poison damage. Finish any forest catching or training before taking the northern exit. Shauna leaves when you reach Route 3, so you will no longer have her free healing afterward.
- Enter Santalune Forest from Route 2.
- Use Shauna’s healing service between battles.
- Train the starter and at least one additional Pokémon.
- Look for Weedle, Fletchling or Pansear only if they fit your intended team.
- Complete optional forest catching before exiting north to Route 3.
Cross Route 3 and prepare in Santalune City
After leaving Santalune Forest, cross Route 3 toward Santalune City. Battle the trainers along the route to give your newer Pokémon experience, and switch between party members rather than using only the starter. If a newly caught Pokémon is too weak to fight safely, lead with a stronger partner and switch it in only when the matchup is favorable.
Enter Santalune City and visit the Pokémon Center immediately. Heal the party, review each Pokémon’s moves and place your intended Gym candidates near the front of the party. A balanced core around levels 8 to 10 is a practical preparation point, with your best counter allowed to be slightly higher. The purpose is not to reach an exact number but to avoid entering the Gym with one overtrained starter and several untested, low-level catches.
If you chose Fennekin, its Fire attacks provide the easiest direct route through Bug-type opponents. If you chose Chespin or Froakie, use Fletchling or Pidgey as the primary counter. Pansear is another option if you caught one in the forest. Keep a second usable Pokémon available in case your lead is weakened, receives a status condition or encounters an unfavorable move.
Buy a few Potions and Poké Balls before moving on, then stop at the Pokémon Center once more if you have fought additional trainers. End this chapter in Santalune City with the team healed and ready to enter Santalune Gym. The Experience Share and the first Gym’s reward are handled after defeating Viola, so do not include them as objectives for this chapter.
- Cross Route 3 and reach Santalune City.
- Heal at the Santalune City Pokémon Center.
- Have the starter and at least one trained partner ready.
- Aim for a balanced party core around levels 8 to 10.
- Prepare a Fire-, Flying- or other effective answer for Viola.
- Stop before entering Santalune Gym; the next chapter begins with the Gym challenge.
Before you move on
- The starter has been selected in Aquacorde Town.
- The first Shauna battle has been won.
- Professor Sycamore’s Letter has been delivered to the player’s mother in Vaniville Town.
- The Town Map and early supplies have been received.
- The Potion near the Aquacorde Town fountain has been collected or the free healing service has been used.
- The Route 2 catching demonstration is complete.
- The party contains the starter and at least one additional Pokémon.
- The player has crossed Santalune Forest with Shauna and exited onto Route 3.
- The player has crossed Route 3 and reached Santalune City.
- The party is healed and prepared to enter Santalune Gym in the next chapter.
References for this chapter
Santalune City — Viola (Bug Gym) and Early Route Targets
Leave Santalune Forest through its northern exit onto Route 3, then continue east to Santalune City. Heal, collect the Roller Skates if desired, prepare Flying- or Electric-type attacks, and work through the Santalune Gym’s web layout to reach Viola. Defeat her Surskit and Vivillon to earn the Bug Badge and TM83 Infestation. After the battle, exit through the staircase behind Viola, speak with Alexa at the northern Route 4 gate, receive the Exp. Share, and continue toward Lumiose City.
Leave Santalune Forest and reach Santalune City
When you are ready to leave Santalune Forest, travel to its northern exit. This places you on Route 3; the forest does not lead directly into Santalune City. Once outside, follow Route 3 east until the path reaches Santalune City. This is the required progression route after the forest. Route 22, which branches south from Santalune City, is optional and is not needed for the first Gym.
Route 3 contains several Trainers and wild Pokémon, so use it to gain experience if your team is still developing. If Shauna accompanied you through Santalune Forest, she stops following you once you reach Route 3. In Santalune City, enter the Pokémon Center before visiting the Gym and restore the entire party.
Viola’s highest-level Pokémon is level 12. A practical preparation target is to have your intended battlers in the upper single digits or low double digits, with at least two healthy Pokémon available. You do not need a perfectly specialized team, but a party consisting only of moves resisted by Bug types can make the fight unnecessarily slow. Buy Potions if your supply is low, and carry a few Antidotes for route battles.
- Exit Santalune Forest through the northern exit.
- Follow Route 3 east to Santalune City.
- Heal at the Santalune City Pokémon Center.
- Bring at least two healthy Pokémon into the Gym.
- Buy Potions if your existing supply is low.
Collect the Roller Skates and prepare a counter
Roller Skater Rinka stands outside Santalune Gym. Battle her and win to receive the Roller Skates. They are not required for the Gym or the main story, but they are an immediate city reward and can make movement through Kalos more convenient.
Fletchling is one of the most useful early answers to Viola because it is available before Santalune City and can use Flying-type attacks against both of her Pokémon. Keep it at a reasonable level alongside your starter rather than depending on an injured or severely underleveled Fletchling to carry the entire battle.
Pikachu is another strong option. It can be found in Santalune Forest, and Electric-type attacks are super effective against both of Viola’s Pokémon because Surskit is Bug/Water and Vivillon is Bug/Flying. If you chose Fennekin, Fire attacks remain useful against Vivillon, but they are only neutral against Surskit. Surskit can also use Water Sport, which temporarily reduces Fire damage.
Dunsparce is available on Route 3 and can contribute with neutral attacks or Rock-type options such as Rollout. Route 22, south of Santalune City, is an optional detour where Litleo can be found. Do not postpone the Gym solely to visit Route 22 if Fletchling, Pikachu, Dunsparce, or a trained starter already gives you a reliable plan.
A strong neutral attacker can win at suitable levels, but keep a second battler healed. Critical hits, accumulated damage, and Infestation can force a switch even when your lead appears to have the matchup advantage.
- Battle Rinka if you want the Roller Skates.
- Use Fletchling as a convenient early Flying-type counter.
- Consider Pikachu for Electric-type coverage.
- Treat Route 22 and Litleo as optional.
- Keep a second healthy Pokémon ready for the leader battle.
Navigate the Santalune Gym web
Enter Santalune Gym and move toward the central pole in the entrance room. Use the pole to descend into the lower web chamber. Gym Trainers can be fought for experience, but most are optional if your party is already prepared.
The lower chamber is a web-based movement puzzle. Follow the connected, thicker strands and use the bright water-drop markers as junction guides. When a dark gap blocks the route, turn back and choose another connected strand rather than attempting to cross it. The web is not timed, so stop and check your position whenever necessary.
The Gym Trainers use Bug-type Pokémon and can help bring a newly caught counter up to level. If your party is already healthy and adequately trained, bypassing some of them preserves healing items for Viola. Continue following the usable strands until you reach the wooden platform at the rear of the chamber.
Heal before speaking with Viola if the Gym Trainers reduced your party’s health. You can save before the battle if you want a clean retry point.
- Use the central pole to enter the web chamber.
- Follow the thicker connected strands.
- Use the water-drop markers to identify useful junctions.
- Turn around when a dark gap blocks the path.
- Reach the rear platform where Viola is waiting.
Defeat Gym Leader Viola
In Pokémon Y, Viola uses Surskit at level 10 followed by Vivillon at level 12. Lead with a healthy Pokémon that knows a Flying- or Electric-type attack, or use a dependable neutral move if your coverage is limited.
Surskit is Bug/Water. Flying and Electric attacks are super effective, while Fire attacks deal neutral damage. If Surskit uses Water Sport, Fire attacks become weaker for the remainder of that effect. Do not assume a Fire starter will defeat Surskit quickly; switch to Flying, Electric, or neutral damage when appropriate.
Vivillon is Bug/Flying and is the more dangerous member because it can use Infestation. Fire, Flying, and Electric attacks are super effective against it. Infestation inflicts continuing damage and temporarily prevents the affected Pokémon from switching. Ordinary medicine does not remove the trapping effect, so defeat Vivillon quickly or switch before the trapped Pokémon is reduced to critical health.
After both Pokémon are defeated, Viola awards the Bug Badge and TM83 Infestation. The Bug Badge raises the obedience limit for traded Pokémon to level 30. These are the required Gym rewards.
- Lead with Flying, Electric, or reliable neutral damage.
- Remember that Surskit is Bug/Water.
- Do not rely exclusively on Fire against Surskit.
- Respond quickly if Vivillon uses Infestation.
- Receive the Bug Badge and TM83 Infestation.
Exit the Gym and receive the Exp. Share
After the victory dialogue, the web structure behind Viola retracts and reveals a staircase. Follow it through the passage to return to the Gym entrance without retracing the entire web.
Heal at the Pokémon Center, then leave Santalune City through the northern exit toward Route 4. Alexa, Viola’s sister, stops you near the Route 4 entrance after Viola has been defeated and gives you the Exp. Share.
In the original Nintendo 3DS Pokémon X and Pokémon Y release, the Exp. Share is a Key Item that can be turned on or off from the Bag. When active, Pokémon that did not participate directly in a battle receive experience while the active battler also receives its normal experience. Leaving it active helps keep a varied party near the same level. Turn it off if you want stricter control over individual levels.
- Use the staircase behind Viola.
- Heal at the Pokémon Center.
- Leave through the northern exit toward Route 4.
- Speak with Alexa at the gate.
- Receive and configure the Exp. Share.
Continue through Route 4 toward Lumiose City
After Alexa gives you the Exp. Share, enter Route 4. This is the required route toward Lumiose City. Route 22 remains an optional branch south of Santalune City and is not needed for the Bug Badge, the Exp. Share, or the next story destination.
Use the Exp. Share to raise new captures while traveling, but continue rotating your party rather than relying on one counter. Before proceeding, confirm that the Bug Badge is recorded, TM83 Infestation is in the Bag, Alexa has given you the Exp. Share, and the party is healed.
The next major progression point is Lumiose City. Leave Santalune City through Route 4 once these checks are complete.
- Confirm the Bug Badge is recorded.
- Confirm TM83 Infestation is in the Bag.
- Confirm the Exp. Share was received.
- Heal before entering Route 4.
- Enter Route 4 from Santalune City’s northern exit.
- Continue toward Lumiose City.
Before you move on
- Santalune Forest was exited through its northern exit onto Route 3.
- Route 3 was followed east to Santalune City.
- Viola’s level 10 Surskit and level 12 Vivillon were defeated.
- The Bug Badge is visible in the Trainer Card or badge case.
- TM83 Infestation was received from Viola.
- The staircase behind Viola was used to exit the Gym.
- Alexa was spoken to at the northern Route 4 entrance.
- The Exp. Share was received.
- The party is healed and ready to enter Route 4 toward Lumiose City.
Early Exploration, Lumiose Basics and Key Tools
After Santalune Gym, cross Route 4 to Lumiose City, collect the early Return TM from Dexio, complete the required Professor Sycamore visit, and establish South Boulevard as your main city landmark. Lumiose offers useful capture items, early customization, Poké Miles services, and optional training facilities. The Battle Chateau on Route 7 is the dependable way to repeat trainer battles in Pokémon Y, since ordinary route trainers do not use a normal Vs. Seeker rematch system.
Cross Route 4 and collect TM27 Return
Leave Santalune City through the northern gate and follow Route 4’s paved path through the flower gardens. Battle the route Trainers while moving north, and check the side paths for item balls if your party needs supplies or experience. Route 4 is a good point to begin rotating weaker team members into battles, then switching them out safely if they cannot handle the opponent.
Before entering Lumiose City, go into the Route 4 gatehouse and speak with Dexio. He gives you TM27 Return. This is the correct early location for Return in Pokémon Y. Return is a Normal-type physical attack whose power increases with the user’s friendship, so teach it to a compatible physical attacker that you expect to keep. Do not use it on a temporary team member unless you are comfortable replacing the move later.
- Clear the Route 4 Trainers if your party needs experience.
- Speak with Dexio in the Route 4 gatehouse.
- Confirm that TM27 Return is in your bag before entering Lumiose City.
Use South Boulevard and Vernal Avenue as your first Lumiose landmarks
The first visit to Lumiose City is restricted by a blackout. South Boulevard and Vernal Avenue are the areas you can explore initially; most other boulevards, plazas, and facilities remain blocked until the story later restores the city’s power. The city is arranged like a wheel, with boulevards around the outside and avenues leading toward the central area, so it is easy to lose direction if you wander without a landmark.
The South Boulevard Pokémon Center is beside the inner street near Vernal Avenue. Heal there immediately and use it as your reset point whenever you return to the city. Its integrated Poké Mart sells ordinary Poké Balls, Great Balls, Potions, Super Potions, and other supplies according to your current badge access. Spend first on capture supplies and healing items. Save cosmetic purchases for later, especially if your party still needs Revives, status cures, or additional Poké Balls.
The South Boulevard Poké Miles representative also exchanges Poké Miles for useful items. The available stock includes recovery items and other supplies, but Poké Miles are limited early, so treat this as a supplement rather than a replacement for the Poké Mart.
- Heal at the South Boulevard Pokémon Center.
- Identify the Route 4 gate, Route 5 gate, Sycamore Pokémon Lab, and Pokémon Center.
- Buy supplies before spending money on fashion, salon services, or restaurants.
Complete the required lab visit and collect early items
Enter Professor Sycamore’s laboratory on South Boulevard when Sina and Dexio direct you there. Go to the third floor and speak with Professor Sycamore. He evaluates your Pokédex and battles you with the three Kanto starter Pokémon at low levels. Use type advantage where possible, but heal beforehand if Route 4 left your team weakened.
Before leaving the laboratory, speak with the female Scientist on the second floor to receive five Luxury Balls. These are useful for Pokémon you intend to raise because a Luxury Ball improves friendship gains. The lab also becomes the source of your second starter choice, so select a Kanto starter that adds coverage your current party lacks rather than duplicating your main starter’s role.
On the third floor, a female Scientist can give you TM54 False Swipe after you have registered at least 30 different Pokémon species in the Pokédex. This is optional at this point, but it is one of the most useful long-term capture tools in the game because it leaves a target at one HP instead of knocking it out. Register species by seeing Pokémon in battles and catching common wild Pokémon as you travel; you do not need to own all 30.
- Battle Professor Sycamore after healing.
- Take the five Luxury Balls from the Scientist on the second floor.
- Return for TM54 False Swipe once at least 30 species are registered.
Visit the PR Video Studio and collect the free Lens Case
The PR Video Studio is west of Sycamore’s laboratory on South Boulevard. Enter and complete the introductory Trainer PR Video if you want to unlock the feature. You can choose a general style and later edit the video’s poses, expressions, music, backgrounds, and camera effects. The first video is not a story requirement, and it does not function as a reliable money-making activity.
After recording the first video, speak with the Punk Girl on the set to receive the Lens Case. The case allows later eye-color changes at fitting rooms. PR Videos and other style activities can raise Lumiose’s style value, which may improve access to some services and reduce certain prices, but they do not provide badges, open the next Gym, or replace normal Trainer battles for experience.
- Record the introductory PR Video if you want the feature available.
- Speak with the Punk Girl afterward to receive the Lens Case.
- Leave the studio and continue the required story route rather than treating customization as progression.
Collect practical capture items before leaving the city
In the building opposite Shutterbug Café, speak with the girl in the lobby to receive a Quick Claw. On the second floor, two men give you three Quick Balls and three Timer Balls. Quick Balls are strongest when thrown at the beginning of an encounter, while Timer Balls become more useful as a battle lasts longer. Save at least some of these for difficult catches instead of using them on every common wild Pokémon.
You can also visit Shutterbug Café. After earning the first badge, the Photo Guy feature is available at Photo Spot signs around Kalos, and the Backpacker in the café gives lens items based on how many photographs you have taken. These rewards are optional and do not affect the campaign.
Vernal Avenue contains the Stone Emporium and Herboriste, but their services are not required for the next story objective. Evolution stones and bitter herbal medicines can be useful, yet early money is better reserved for Poké Balls, healing items, and Revives unless you have a specific team need.
- Collect Quick Claw from the lobby of the building opposite Shutterbug Café.
- Collect three Quick Balls and three Timer Balls upstairs.
- Keep capture and healing funds ahead of optional fashion and restaurant spending.
Open Route 5, then use the Battle Chateau on Route 7
After visiting Professor Sycamore and completing the Café Soleil story scene, return to South Boulevard and use the Route 5 gate. Mr. Bonding introduces O-Powers there, and the route to Camphrier Town becomes available. Do not expect the Route 5 gate to open during the first few minutes of Lumiose exploration; the lab and story conversation must occur first.
Once the story opens Route 7, enter the Battle Chateau, the large building beside the route. Viola explains the facility when you first arrive. Trainers inside can be battled again when they return, and new opponents appear over time. This makes the Chateau the main repeatable trainer-battle location in Pokémon X and Y. It provides experience and prize money while allowing you to keep several Pokémon near the same level.
You begin as a Baron or Baroness. Defeating Chateau Trainers raises your rank and eventually brings stronger opponents. Use the early battles to bring a newly caught Pokémon up to the rest of the team, not to push one Pokémon far beyond the levels of its partners. Writs can alter the number or level of available opponents, but they cost money and are unnecessary for ordinary story preparation. Enter the Chateau whenever you pass Route 7, battle opponents you can handle, then heal at a Pokémon Center when the team is worn down.
- Complete the Sycamore and Café Soleil sequence before using the Route 5 gate.
- Visit the Battle Chateau on Route 7 when that route becomes available.
- Use repeatable Chateau battles for balanced training and money, not as a required story objective.
Before you move on
- TM27 Return is in your bag after speaking with Dexio in the Route 4 gatehouse.
- You have healed at the South Boulevard Pokémon Center and can identify the Route 5 gate and Sycamore Pokémon Lab.
- You have completed the required Sycamore visit and Café Soleil scene before attempting to leave through Route 5.
- You have collected the five Luxury Balls, and preferably the Quick Claw, three Quick Balls, and three Timer Balls.
- You know that TM54 False Swipe becomes available from the Scientist in Sycamore’s lab after registering 30 species.
- You have visited the Battle Chateau on Route 7 or deliberately chosen to continue without its optional training.
- Your money is reserved primarily for capture supplies, healing items, and required battles.
References for this chapter
- Walkthrough: Pokémon X and Y/Part 3 — Bulbapedia
- Appendix: X and Y walkthrough/Section 3 — Bulbapedia
- List of TM and HM locations in Generation VI — Bulbapedia
- Pokémon X & Y — Battle Chateau — Serebii.net
- Lumiose City — Bulbapedia
- Pokémon X and Y — Route 4 — StrategyWiki
- Pokémon X & Y — Trainer PR Video — Serebii.net
Cyllage City — Grant (Rock Gym) and Glittering Cave
Travel from Ambrette Town through Route 9 and Glittering Cave, stop Team Flare from stealing fossils, choose and later restore one fossil, collect the useful local items, then defeat Cyllage Gym Leader Grant for the Cliff Badge and TM39 Rock Tomb.
Ride through Route 9 to Glittering Cave
From Ambrette Town, leave through the route entrance leading to Route 9, also called Spikes Passage. Mount the waiting Rhyhorn and ride east along the marked path. Press the A Button when large rocks block the route; Rhyhorn smashes them automatically. Continue until the cave entrance appears. Press the B Button if you need to dismount.
Before entering, heal in Ambrette Town and check that you have enough Poké Balls, Potions or Super Potions, and status cures. Glittering Cave contains several trainer battles, regular wild encounters, and special shadow encounters. The shadow spots are visible on the ground and trigger a battle when you walk into them; Repels do not prevent these encounters.
You do not need Strength or Rock Smash to complete the initial story passage through the cave. If you want to preserve your current supplies and avoid unnecessary battles, use Repels for the normal grass-like encounters but still expect the fixed shadow encounters to appear.
- Heal in Ambrette Town before riding into Route 9.
- Carry Poké Balls and enough healing items for the cave and Team Flare battles.
- Remember that Repels do not stop the cave’s shadow encounters.
- Use the Rhyhorn’s A Button action to break rocks blocking Route 9.
Navigate the entrance section of Glittering Cave
The first part of Glittering Cave is a narrow passage with several branches. The first branch leads to a dead end. The second branch leads to a Hard Stone. The third branch leads to TM65 Shadow Claw. These detours are optional, but collect them if you want useful resources before the Gym.
After checking a branch, return to the main passage and continue toward the larger chamber. Use the glowing green crystals as visual landmarks. The cave can feel disorienting because the entrance section contains multiple turns, but the side passages do not create a permanent maze; dead ends return you to the main route.
Wild Pokémon in the cave include Rock-, Ground-, and Fighting-oriented species. Water, Grass, Fighting, Ground, and Steel attacks are generally more useful here than relying on Fire, Flying, Bug, or ordinary Normal attacks. Keep a healthy lead Pokémon available because the cave’s wild encounters can wear down a team before the required battles.
- Collect the Hard Stone if you want a defensive or Rock-type item for the area.
- Collect TM65 Shadow Claw from the optional branch if a compatible Pokémon can use it.
- Return to the central route after checking each dead-end passage.
- Use healing items before your party becomes too weak to handle the Team Flare sequence.
Defeat Team Flare and choose the fossil
In the larger inner section, Team Flare Grunts are searching for fossils. Defeat the Grunts as you advance. Their teams are not limited to Rock types, so use your normal type coverage rather than leading with a single specialist. Fighting moves are useful against several of their Pokémon, while Water, Grass, Ground, and Steel moves remain practical against many cave encounters.
Near the end of the cave, two Team Flare Grunts block the route. Your rival arrives and joins you for a tag battle. The rival’s assistance means your side has two Pokémon active, but heal beforehand because the fight follows the earlier cave battles and can leave one or both of your active Pokémon weakened.
After the tag battle, continue to the Fossil Lab assistant at the deepest section. Speak with him and choose one fossil. The Jaw Fossil restores into Tyrunt, a Rock/Dragon Pokémon, while the Sail Fossil restores into Amaura, a Rock/Ice Pokémon. This is a choice between the two fossil Pokémon for the initial story visit; the other fossil is not handed over at this point.
An Escape Rope is available near the fossil assistant. Use it if you want to leave immediately, then return through Route 9 to Ambrette Town. Go back to the Fossil Lab and speak with the appropriate scientist to restore the fossil into a level 20 Pokémon. Fossil restoration is separate from selecting the fossil in Glittering Cave.
- Defeat the Team Flare Grunts in the inner chamber.
- Complete the rival-assisted tag battle near the cave’s end.
- Choose either the Jaw Fossil for Tyrunt or the Sail Fossil for Amaura.
- Use the Escape Rope or walk back to Ambrette Town.
- Restore the fossil at the Ambrette Fossil Lab before moving on.
Travel from Ambrette Town to Cyllage City
After finishing the Fossil Lab visit, return to Route 8 and take the lower beach route east. This is the route section that connects Ambrette Town with Cyllage City; Glittering Cave itself does not lead directly into the city. Follow the shoreline path northward, battling or avoiding trainers as needed, until you reach Cyllage City.
Heal immediately at the Cyllage City Pokémon Center. The Center is the dependable recovery point for the route, cave, and Gym. The city also has a Poké Mart for additional Potions, Super Potions, Antidotes, Paralyze Heals, and Poké Balls.
Cyllage has several useful optional resources. The bicycle shop can provide the Bicycle after its quiz, the city’s Pokémon Center area includes a possible Luvdisc-for-Steelix trade, and a house offers a daily Pokémon massage. These are not required for the badge. The important progression item is HM04 Strength, which Grant gives you on the paved road near the cliffside course before you enter the Gym. Strength cannot be used outside battle until Grant is defeated.
- Take the lower beach section of Route 8 after returning from Ambrette Town.
- Heal at the Cyllage Pokémon Center.
- Buy Paralyze Heals and additional healing items if your supplies are low.
- Accept HM04 Strength from Grant before entering the Gym.
- Treat the Bicycle and Luvdisc-for-Steelix trade as optional conveniences.
Prepare for Grant’s Rock-type team
Grant uses Amaura at level 25 followed by Tyrunt at level 25. Rock is weak to Fighting, Ground, Steel, Water, and Grass attacks, but the Pokémon’s secondary typings make their individual threats different. Amaura is Rock/Ice, while Tyrunt is Rock/Dragon. Fighting and Steel attacks are especially effective against Amaura, and Fighting, Ground, Steel, Ice, Dragon, and Fairy attacks are effective against Tyrunt.
Amaura can use Thunder Wave to remove your speed advantage. It also knows Aurora Beam, Rock Tomb, and Take Down. Its Refrigerate Ability changes its Normal-type Take Down into an Ice-type attack, so a Pokémon that appears safe against ordinary Normal damage may still take significant damage. Carry Paralyze Heals, or use a Pokémon that can continue functioning even after losing Speed.
Tyrunt can use Rock Tomb, Bite, and Stomp. Its Strong Jaw Ability strengthens Bite, so avoid switching a frail Psychic- or Ghost-type into it without a clear reason. Rock Tomb also lowers Speed, which can allow Tyrunt to move first after one successful hit. A sturdy Water, Grass, Fighting, Ground, or Steel Pokémon is a safer answer than an exposed Fire-, Flying-, or Bug-type.
Aim for a balanced party in the low-to-mid twenties rather than training only one Pokémon. Pokémon from Route 9, Glittering Cave, and the surrounding routes can supply the needed coverage. A reliable Fighting, Ground, Water, or Grass move is more important than adding another neutral attacker.
- Bring at least one dependable Water, Grass, Fighting, Ground, or Steel attack.
- Carry Paralyze Heals for Amaura’s Thunder Wave.
- Do not make a fragile Fire-, Flying-, or Bug-type your only answer.
- Keep more than one Pokémon battle-ready in case Rock Tomb lowers your lead’s Speed.
Climb the Cyllage Gym
Enter the Gym and move to the right of the nearby trainer. Step onto the blue tiles to grab the first rock-climbing handholds. Climb upward and to the right, then continue across the upper section to reach the Gym trainers.
After battling Rising Star Didier, do not use the rock wall immediately to his right; that route is a dead end. Use the wall behind him instead. Continue across the platform and pass the slope rather than sliding down it if you want to keep progressing toward the summit.
The route then brings you to Hiker Craig, followed by Rising Star Manon and Hiker Bernard. Continue using the climbing walls after each battle. The final narrow climbing wall near Hiker Bernard leads to Grant. The Gym has no healing station, so leave and return to the Cyllage Pokémon Center if your main counters are damaged or paralyzed.
Save before speaking to Grant. The game does not require you to repeat the Gym trainers after a defeat, but a manual save gives you a clean retry point before the leader battle.
- Use the blue tiles to begin climbing.
- Take the wall behind Didier, not the immediate dead-end wall.
- Pass the slope instead of sliding down if you are following the route upward.
- Heal at the Pokémon Center if your counters are damaged or paralyzed.
- Save immediately before challenging Grant.
Defeat Grant and unlock the next route tools
Lead with your safest answer to Amaura. Fighting and Steel moves exploit its major weaknesses, while Water, Grass, and Ground moves are also effective. If Amaura uses Thunder Wave, cure paralysis promptly when the loss of Speed could cost the battle. Avoid assuming that a Fire or Flying Pokémon is safe simply because Amaura is part Rock type; Amaura’s Ice typing and Refrigerate-powered Take Down can punish those choices.
Use a sturdy switch or a super-effective move against Tyrunt. Fighting, Ground, Steel, Ice, Dragon, and Fairy attacks are effective, but Tyrunt’s Rock Tomb and Strong Jaw-boosted Bite make careless switches dangerous. Heal rather than gambling on a weakened attacker surviving another physical hit.
After the victory, Grant awards the Cliff Badge and TM39 Rock Tomb. The Cliff Badge allows Pokémon up to level 40 to obey and permits Strength to be used outside battle. Rock Tomb deals Rock-type damage and lowers the target’s Speed, making it useful for controlling future battles with slower physical attackers.
Before leaving Cyllage, you can use Strength north of the Gym at the Connecting Cave entrance. Push the nearby boulder into the hole to open a shortcut toward the earlier route area and access TM40 Aerial Ace. This shortcut is optional for immediate story progress. The required next direction is north from Cyllage City toward Route 10, Menhir Trail.
- Defeat Amaura while managing Thunder Wave and Refrigerate-powered Take Down.
- Defeat Tyrunt without exposing frail Pokémon to boosted Bite or Rock Tomb.
- Confirm that the Cliff Badge is recorded on your Trainer Card.
- Confirm that TM39 Rock Tomb is in your Bag.
- Use Strength at the Connecting Cave only if you want the optional shortcut and TM40.
- Leave Cyllage through the northern exit toward Route 10 when ready.
Before you move on
- The Team Flare encounter and rival-assisted tag battle in Glittering Cave are complete.
- You chose either the Jaw Fossil or Sail Fossil and restored it at the Ambrette Fossil Lab if desired.
- You traveled through lower Route 8 and reached Cyllage City.
- Grant has been defeated in Cyllage Gym.
- The Cliff Badge is visible on your Trainer Card.
- HM04 Strength can now be used outside battle.
- TM39 Rock Tomb is in your Bag.
- You can proceed north from Cyllage City to Route 10: Menhir Trail.
Shalour City and Korrina (Fighting Gym) — Mobility and the Tower
After Cyllage City, travel north through Route 10 to Geosenge Town, then continue east through Route 11 and Reflection Cave to reach Shalour City. Handle the Team Flare battles and Korrina’s two-Lucario fight on the way, then visit the Tower of Mastery and defeat Calem or Serena before entering the Shalour Gym. Clear the roller-skate rail puzzle, defeat Korrina for the Rumble Badge, and return to the tower to receive the Mega Ring and complete the Lucario Mega Evolution tutorial.
Travel from Cyllage City through Route 10
Leave Cyllage City by its northern exit and enter Route 10, also called Menhir Trail. This is the required route after Grant’s Gym; do not skip directly toward Route 11. Follow the path north between the standing stones. The route contains ordinary trainers, several Team Flare Grunts and useful experience for a team preparing for opponents around the mid-20s.
The Team Flare Grunts use Pokémon such as Houndour, Golbat, Electrike, Croagunk and Gulpin. Water, Ground, Fighting and Psychic attacks cover much of this group, but watch for Golbat’s Poison typing and Houndour’s Dark typing. Battle the Grunts blocking or investigating the path, collect any desired items, and continue north until Route 10 opens into Geosenge Town. Route 10 directly connects Cyllage City and Geosenge Town in Pokémon X and Y.
Heal and save in Geosenge Town before continuing. The Pokémon Center is near the center of town and is the best recovery point before the next required battle. Buy a few Super Potions, Revives and status-healing items if your supplies are low. A Psychic, Flying or Fairy Pokémon remains useful for the coming routes, while a Fire, Fighting or Ground attacker is particularly valuable against Korrina’s Lucario.
- Leave Cyllage City through the northern exit.
- Cross Route 10 rather than treating it as an earlier route.
- Defeat the required Team Flare Grunts on Route 10.
- Reach Geosenge Town and heal at its Pokémon Center.
Clear the Geosenge Town events
Explore Geosenge Town briefly, then head toward the standing stones and the town’s northern or northwestern side when the story directs you. Team Flare members are investigating the stones and will battle you. These encounters are part of the route’s story progression, not a reason to turn back to Cyllage City.
Before the eastern exit to Route 11, Korrina challenges you to a double battle using two Level 25 Lucario. Both are Fighting- and Steel-type Pokémon. Fire, Fighting and Ground moves are effective, but avoid relying on a single frail attacker: two opponents can focus fire on it, and Lucario can use Power-Up Punch or set up with Swords Dance. Lead with two Pokémon that can survive a physical hit, concentrate attacks on one Lucario at a time, and heal afterward if necessary.
After the battle, Korrina leaves for Shalour City. Restore your party at the Pokémon Center, then take Geosenge Town’s eastern exit onto Route 11. Optional town items and hotel services can wait; they are not required for the Gym.
- Defeat the Team Flare encounters in Geosenge Town.
- Defeat Korrina’s two Level 25 Lucario.
- Heal before entering Route 11.
- Leave Geosenge Town through the eastern exit.
Cross Route 11 and Reflection Cave
Route 11, also called Miroir Way, runs east from Geosenge Town to Reflection Cave. Battle or avoid the route trainers according to your party’s condition. Psychic- and Fighting-type opponents appear here, along with a Sky Trainer, so keep a Pokémon with reliable Electric, Rock, Dark or Bug coverage if available. Route 11 also offers useful encounters such as Staravia, Hariyama, Sawk in Pokémon Y and other Pokémon that can strengthen a developing team.
Enter Reflection Cave at the far end of Route 11. The cave contains multiple floors, reflective walls and several trainers, but the main route is straightforward if you keep moving through the connected passages. On the first floor, follow the path past the trainers and stairs. Use the Pokémon Breeder’s healing service on B1F when needed, then continue downward and across the lower floors. Collecting items such as Flash, Gyro Ball, the Earth Plate and defensive items is optional; none is required to reach Shalour City.
At the lower part of the cave, use the visible stairs and ledges to work back toward the upper exit. One apparent dead end contains a hidden passage revealed by checking the reflection on the wall; this shortcut is useful for collecting an item but is not the only route through the cave. Exit from the upper level on the far side and enter Shalour City.
Heal immediately at the Shalour City Pokémon Center. The city’s Poké Mart sells healing supplies, Great Balls and optional TMs such as Dig and Poison Jab. If your team lacks a suitable answer to Fighting types, train Fletchinder or another Flying Pokémon, raise Abra or Kadabra from an earlier route, or use Flabébé’s Fairy attacks. Staravia from Route 11 is another practical Flying option.
- Travel east across Route 11.
- Enter Reflection Cave from Route 11.
- Use the cave’s healing opportunity if necessary.
- Exit Reflection Cave into Shalour City.
- Prepare at least two Pokémon for Fighting-type battles.
Complete the Tower of Mastery rival battle
Go north through Shalour City to the beach and the Tower of Mastery. Speak with Korrina, Gurkinn and the other characters inside. After the Mega Evolution discussion, Calem or Serena challenges you for the chance to receive the Mega Ring. This battle must be completed before the Shalour Gym becomes available.
The rival uses Meowstic at Level 28, Absol at Level 28 and the evolved form of the starter weak to your chosen starter at Level 30. If you chose Chespin, expect Braixen; if you chose Fennekin, expect Frogadier; if you chose Froakie, expect Quilladin. A Dark-type Pokémon can switch into Meowstic’s Psychic attacks, although Disarming Voice gives Meowstic Fairy coverage. Fighting, Bug or Fairy attacks work well against Absol, while the final starter evolution should be handled according to its actual type.
Heal after the battle. The rival fight does not restore your party, and the Gym trainers can still wear down an unprepared team. The tower’s upper floors remain inaccessible until Korrina’s Gym battle is complete, so return to the city and enter the Shalour Gym.
- Reach the Tower of Mastery.
- Defeat Calem or Serena.
- Confirm that the Shalour Gym is now accessible.
- Heal before starting the Gym challenge.
Navigate the Shalour Gym’s roller-skate rails
The Shalour Gym is a roller-skating arena with elevated platforms, traffic cones and rails. Move around the lower floor and battle the Roller Skaters you encounter. Each defeated trainer raises another section of the rail system. Once all four trainers are beaten, the completed rail leads to Korrina, and a separate rail opens a shortcut back toward the entrance. The game does not require a fixed trainer order; follow whichever accessible rail leads to the next opponent.
Roller Skater Shun uses Pancham, Throh and Machoke at Level 27. Dash uses Heracross at Level 30. Rolanda uses Sawk at Level 27 and Hariyama at Level 29. Kate uses Meditite and Mienfoo at Level 28. Psychic and Fairy attacks are excellent against most of these Pokémon, while Flying attacks help against the Fighting types and Heracross. Keep a second answer ready because Heracross, Sawk and Hariyama can punish a fragile counter with strong physical attacks.
If a counter is badly injured, leave through the opened shortcut or use items before challenging Korrina. Do not continue with only one low-health Flying or Psychic Pokémon; the Gym trainers are separate battles, and damage carries forward.
- Defeat all four Roller Skater trainers.
- Use the raised rails to reach Korrina.
- Keep a second Fighting counter available.
- Heal before the leader battle if necessary.
Defeat Gym Leader Korrina
Korrina uses Mienfoo at Level 29, Machoke at Level 28 and Hawlucha at Level 32. Mienfoo can open with Fake Out and then use Power-Up Punch, so defeat it quickly before its Attack rises. Psychic and Fairy attacks are reliable answers.
Machoke also knows Power-Up Punch and carries Rock Tomb. Do not switch a fragile Flying Pokémon into Machoke without checking its health, because Rock Tomb is super effective and lowers Speed. Use a Psychic or Fairy attacker when possible, or weaken Machoke first and bring in the Flying counter afterward.
Hawlucha is Fighting- and Flying-type. It is weak to Electric, Ice, Psychic, Flying and Fairy attacks. Its Flying Press deals Fighting-type damage while using the move’s Fighting/Flying interaction, and it can use Hone Claws followed by Power-Up Punch. Keep your healthiest answer for Hawlucha, attack consistently and switch if your counter is close to being knocked out. Korrina does not use held healing items in this battle, so steady type-effective damage is more dependable than repeated low-accuracy attacks.
- Defeat Mienfoo before repeated Power-Up Punch uses become a problem.
- Respect Machoke’s Rock Tomb when using a Flying Pokémon.
- Save a healthy counter for Hawlucha.
- Defeat Hawlucha and receive the Rumble Badge.
Receive the Mega Ring and finish the Lucario tutorial
Korrina awards the Rumble Badge and TM98, Power-Up Punch. The badge raises the obedience limit to Level 50 and permits Surf outside battle. Save after the Gym battle, then return to the Tower of Mastery as Korrina requests.
Climb through the tower to the upper floor. An Ace Trainer on the fourth floor gives TM47, Low Sweep, as an optional reward. On the top floor, Korrina gives you the Mega Ring and begins a one-on-one tutorial battle using a borrowed Level 32 Lucario against her other Lucario. Mega Evolve the borrowed Lucario when prompted and use Power-Up Punch to finish the tutorial. The Lucario is then offered to you; accepting it is optional, but it is a strong Steel/Fighting addition for the remainder of the story.
After leaving the tower, go to the east gate of Shalour City. Calem or Serena gives you HM03, Surf, which becomes the next field-progression tool. Heal and save before continuing onto Route 12.
- Receive the Rumble Badge.
- Obtain TM98, Power-Up Punch.
- Return to the Tower of Mastery.
- Receive the Mega Ring.
- Complete the borrowed Lucario Mega Evolution tutorial.
- Decide whether to accept the offered Lucario.
- Receive Surf at Shalour City’s east gate.
- Save before entering Route 12.
Before you move on
- Route 10 has been crossed from Cyllage City to Geosenge Town.
- The Team Flare encounters on Route 10 and in Geosenge Town have been cleared.
- Korrina’s two Level 25 Lucario in Geosenge Town have been defeated.
- Route 11 and Reflection Cave have been crossed, and Shalour City has been reached.
- Calem or Serena has been defeated at the Tower of Mastery.
- All four Shalour Gym Roller Skaters have been defeated.
- The Rumble Badge is displayed on the Trainer Card.
- TM98, Power-Up Punch, is in the Bag.
- The Mega Ring has been received from Korrina.
- The Lucario Mega Evolution tutorial has been completed.
- Surf has been received from Calem or Serena at Shalour City’s east gate.
- The party is healed and the game is saved before continuing to Route 12.
Ramos (Grass Gym) and Midgame Team Building
Cross Route 12 from Shalour City to Coumarine City, prepare Fire, Flying, Ice, Poison or Bug attacks, clear the Coumarine Gym treehouse and defeat Ramos for the Plant Badge. Afterward, stabilize the party for the next stretch of the story: keep the core evenly trained, maintain reliable switch options and use Route 12’s remaining trainers or optional Lapras reward to cover team weaknesses. This chapter ends before Route 13 and the Kalos Power Plant operation, which belong to chapter 08.
1. Cross Route 12 and prepare in Coumarine City
Leave Shalour City through the eastern exit to enter Route 12, also called Fourrage Road. Follow the main path past the Baa de Mer Ranch toward Coumarine City. The route contains ordinary trainers, grass encounters and optional side paths; battle the trainers you have not already defeated if your team needs experience, but do not spend time clearing every optional item before the Gym.
Near the Shalour-side gate, a Pokémon Breeder offers a level 30 Lapras after you have earned the Rumble Badge. An empty party slot is required to accept it. Lapras is optional, but it gives a developing team a sturdy Water/Ice option and can be useful against later Ground, Flying and Dragon targets. It is not required to defeat Ramos, so use the PC first if your party is full.
When you reach Coumarine City, heal at the Pokémon Center in the upper district. The city has a lower seaside district and an upper cliffside district connected by the monorail. The Coumarine Gym is in the upper district near the Pokémon Center. If your party lacks an appropriate attack, adjust a moveset before entering rather than relying on a Pokémon’s species alone; a neutral move on a suitable attacker is safer than sending a Water-, Ground- or Rock-type Pokémon into a Grass Gym without a plan.
- Heal at the upper-district Coumarine City Pokémon Center.
- Accept the optional Route 12 Lapras only if you have a free party slot and want a Water/Ice team member.
- Carry healing items and at least one status cure before entering the Gym.
- Prepare more than one Pokémon that can contribute damage.
2. Build answers to Ramos’s Grass team
Ramos specializes in Grass Pokémon, so Fire-, Flying-, Ice-, Poison- and Bug-type attacks are super effective. Fire and Flying are the simplest answers for most teams. Ice is especially valuable against Jumpluff because Jumpluff is Grass/Flying and has a double weakness to Ice. Poison and Bug attacks are valid alternatives when they are attached to a Pokémon that can survive the battle.
Do not make Water-, Ground- or Rock-type Pokémon your primary attackers. Grass attacks are super effective against those types, and Ramos’s team can punish an unplanned switch. A Fennekin-line starter is naturally comfortable here, while Chespin and Froakie should be supported by a teammate with Fire, Flying, Ice, Poison or Bug coverage. Judge the matchup by the move’s type and the target’s complete typing, not only by the attacker’s species.
A practical preparation point is to have the main team around the low-to-mid 30s, with the core reasonably close together. Ramos’s strongest Pokémon is level 34. There is no need to overtrain one lead far beyond the rest of the party; a balanced group is more useful for the rival, Team Flare and multi-trainer battles that follow. If you need experience, finish the unbattled Route 12 trainers, then use Coumarine’s Pokémon Center before returning to the Gym.
- Prepare at least one accurate Fire, Flying, Ice, Poison or Bug attack.
- Keep a second usable attacker available in case the first is poisoned, slowed or knocked out.
- Avoid relying only on Water-, Ground- or Rock-type attacks.
- Keep the party’s levels reasonably close instead of carrying one heavily overleveled Pokémon.
3. Navigate the Coumarine Gym treehouse
At the Gym entrance, climb the rope beside the central tree. At the first platform, go right and use the footprint marker to swing across the net to Pokémon Ranger Chaise. Defeat Chaise, then climb the nearby rope.
At the next level, swing left across the first net and then across the second net. Climb the rope at the end. Do not take the upward branch immediately above if it leads to a dead end. The right-hand branch from this area is optional and leads to Pokémon Ranger Maurice, whose battle is useful experience but is not required to reach Ramos.
From the central upper area, go left and descend the rope to Pokémon Ranger Brooke. After defeating Brooke, climb the nearby rope and swing left. Climb again at the end of the platform. The left branch is a dead end; go right to reach Pokémon Ranger Twiggy.
Defeat Twiggy, climb the rope beside her, and swing right across the final two nets. This leads to Ramos. The required landmarks are Chaise first, then the Brooke section, followed by Twiggy and the final rope route. If your main counter is badly injured after the Gym trainers, leave through the entrance, heal at the Pokémon Center and climb again; the Gym route does not need to be solved again after the trainers are defeated.
- Climb the first rope and swing right to Chaise.
- Treat Maurice as an optional trainer on the upper branch.
- Descend to Brooke, then climb and swing left toward Twiggy.
- After Twiggy, climb and swing right twice to reach Ramos.
4. Defeat Ramos and claim the Plant Badge
Ramos’s team in Pokémon Y is Jumpluff at level 30, Weepinbell at level 31 and Gogoat at level 34. Lead with an accurate super-effective attack if possible. Jumpluff is fast and knows Acrobatics, so a fragile Fire Pokémon that is slower may be knocked out before it attacks. Ice attacks are especially effective; a strong Flying attack is also reliable.
Weepinbell is Grass/Poison and can use Poison Powder. If it poisons your attacker, switch to a healthy teammate or use an Antidote, Full Heal or similar cure before the damage forces a retreat. Because Weepinbell is also Poison-type, Poison attacks are not super effective against it; Fire, Flying, Ice and Bug attacks are generally better choices.
Save a healthy answer for Gogoat. Its listed Gym-battle moves are Grass Knot, Bulldoze and Take Down, and its Sap Sipper ability prevents Grass attacks from dealing damage while raising its Attack. Bulldoze is Ground-type, lowers the target’s Speed and is super effective against Fire Pokémon, so do not leave a weakened Fire counter in simply because it has type advantage over Grass. Switch when necessary, then return with a faster or sturdier attacker.
Ramos can use Hyper Potions, so continue attacking after reducing one of his Pokémon to low health rather than assuming the next hit will end the fight. After all three Pokémon are defeated, Ramos awards the Plant Badge and TM86, Grass Knot. The Plant Badge raises the obedience limit for traded Pokémon to level 60 and allows Fly to be used outside battle. It does not unlock Surf; Surf was made usable outside battle by the Rumble Badge from Korrina.
Use the wooden door and slide near Ramos to return quickly to the Gym entrance. Heal before continuing the story, especially if Poison Powder or repeated Bulldoze attacks left the party weakened.
- Defeat Jumpluff, Weepinbell and Gogoat.
- Treat Poison Powder as a real threat instead of leaving poison untreated.
- Respect Gogoat’s Bulldoze, which is super effective against Fire Pokémon and lowers Speed.
- Confirm that the Plant Badge and TM86, Grass Knot, are recorded.
- Remember that the Plant Badge enables Fly, not Surf.
5. Strengthen the midgame team before the next chapter
After the Gym, use Route 12 as a safe place to finish unbattled trainers and bring weaker members toward the rest of the team’s level range. The route’s ordinary trainers include Water, Normal, Bug, Poison and Fighting-adjacent matchups, so rotate the party rather than allowing the same lead to take every battle. If you accepted Lapras, add it to the rotation only after checking that your existing Water or Ice coverage is not already overcrowding the team.
For a team that lacks a Fire or Flying answer, revisit earlier available areas and use any suitable teammate already caught there rather than immediately replacing the entire party. For a team lacking Ice or Water utility, the optional Lapras on Route 12 is the most direct local addition. The goal is not to catch a fixed roster; it is to maintain at least two practical answers to common weaknesses and at least one safe switch when the current attacker is threatened.
The Exp. Share distributes experience to the party, which makes it easy for one favorite to remain the only properly trained Pokémon. Rotate the lead during ordinary battles, then switch to a weaker teammate only when the matchup is safe. If a Pokémon is too fragile to enter directly, begin with a suitable lead and switch after the opponent has revealed a harmless move or has been weakened.
Prioritize dependable attacks, healing and status recovery over elaborate setup. Stat-boosting moves are useful when the opponent cannot threaten the booster, but spending several turns setting up against a Pokémon with status, Speed reduction or a super-effective attack is risky. Entry hazards are not required for the main story; consistent damage and safe switching matter more.
When the Plant Badge is secured and the party is healed, leave Coumarine City through the southern gate to begin the next chapter’s Route 13 and Kalos Power Plant operation. Do not search Route 13 for the Power Plant Pass in this chapter; that required sequence begins in chapter 08.
- Finish useful trainer battles on Route 12 if the party needs experience.
- Keep the core at roughly even levels instead of overleveling one Pokémon.
- Maintain at least two answers to major type matchups and one dependable switch option.
- Carry healing items and status cures before leaving Coumarine City.
- Stop this chapter at the southern Coumarine exit; Route 13 and the Power Plant belong to chapter 08.
Before you move on
- The Plant Badge appears on the Trainer Card.
- TM86, Grass Knot, is in the Bag after Ramos’s battle.
- Fly can now be used outside battle, subject to the game’s normal field-use requirements.
- Ramos’s Gym team has been defeated and the wooden exit route is available.
- The party has at least two usable answers to Grass-type opponents and no single Pokémon is carrying the entire team’s level burden.
- The party is healed and ready to leave through southern Coumarine City for the Route 13 and Kalos Power Plant material in chapter 08.
- The Power Plant Pass has not been incorrectly treated as a chapter 07 objective; obtaining it and clearing the facility are reserved for chapter 08.
Clemont (Lumiose City — Electric Gym) and Technology Hubs
Clear Team Flare from the Kalos Power Plant, restore northern Lumiose City, prepare Ground, Rock, or Fighting coverage for Clemont, solve the Prism Tower silhouette quiz, and earn the Voltage Badge and TM24 Thunderbolt.
Restore Lumiose City's power
After defeating Ramos in the Coumarine City Gym and receiving the Holo Clip about the Kalos Power Plant, leave Coumarine City through Route 13. Follow the route toward the Lumiose City entrance. Team Flare has occupied the power plant, and the Power Plant Pass found on Route 13 is required to enter the facility.
Use the pass at the power plant entrance, then follow the interior path and battle the Team Flare members blocking the workers and machinery. Continue until the Team Flare operation has been stopped. The power plant workers then restore power to northern Lumiose City. Return through the Lumiose City gate and head to Centrico Plaza, where Prism Tower is located.
Do not try to complete the Gym while the blackout is active. The Prism Tower Gym becomes available only after the Kalos Power Plant sequence is finished. Heal at a Pokémon Center before entering the tower, because the quiz route contains several optional or required trainer battles before Clemont.
- The Power Plant Pass has been obtained on Route 13.
- Team Flare has been cleared from the Kalos Power Plant.
- Northern Lumiose City and Prism Tower are accessible.
Prepare counters for Clemont
Clemont uses Emolga at level 35, Magneton at level 35, and Heliolisk at level 37. A Ground-type Pokémon is the best general answer to Magneton and Heliolisk, but it cannot hit Emolga because Emolga is Electric/Flying. Bring a Rock move, Ice move, or dependable neutral attack for Emolga before relying on Ground attacks.
Route 13 is the most convenient nearby source of additional Ground coverage. Dugtrio, Trapinch, and Gible can be encountered in the route's dirt areas, while other Ground-capable Pokémon obtained earlier can also work. Bunnelby, if trained and evolved into Diggersby, can provide useful Ground damage. Check the actual moves in your party: owning a Ground-type Pokémon is not enough if it has no Ground attack.
Magneton is especially vulnerable to Ground moves because its Electric/Steel typing gives it a double weakness. Heliolisk is Electric/Normal and is weak to Ground and Fighting attacks. Its Dry Skin ability causes Water attacks to restore its HP, so do not use Water moves as your main plan against it. Heliolisk can also use Grass Knot, which is dangerous for heavy Ground types, so keep a second attacker or a switch option ready.
Stock healing items and a few Paralyze Heals. Clemont's Electric attacks can cause paralysis, and the Gym contains enough trainer battles that entering with a weakened lead can make the final fight unnecessarily difficult.
- At least one party member has a reliable Ground move.
- A second party member can damage Emolga with Rock, Ice, Fighting, or strong neutral attacks.
- The party is healed and has recovery items and Paralyze Heals.
Solve the Prism Tower quiz
Enter Prism Tower in Centrico Plaza and speak with Bonnie. The Gym's challenge uses a silhouette quiz on floors two through five. On each floor, examine the three displayed choices, then speak to the Gym Trainer standing by the elevator that corresponds to your answer. You must defeat that trainer before using the elevator.
The correct answers in the original Nintendo 3DS Pokémon Y release are as follows: floor 2 is Pikachu, choice 3; floor 3 is Fletchling, choice 1; floor 4 is Panpour, choice 3; and floor 5 is Vivillon, choice 2. The silhouette on the fifth floor is numbered rather than labeled with the Pokémon's name, so select number 2.
Choosing an incorrect answer does not permanently block progress. You will be sent back to the quiz and can try another elevator, although the incorrect route may lead to another trainer battle. You can deliberately fight the other trainers for experience and prize money, but defeating every trainer is optional. Once the correct elevator on floor five is used, it takes you to the sixth floor and Clemont's battle platform.
- Floor 2: choose Pikachu, number 3.
- Floor 3: choose Fletchling, number 1.
- Floor 4: choose Panpour, number 3.
- Floor 5: choose Vivillon, number 2.
- The elevator reaches Clemont on the sixth floor.
Defeat Gym Leader Clemont
Clemont leads with Emolga, level 35. Do not use Ground attacks against it. Emolga can use Volt Switch to deal damage and return to Clemont's party, so a Rock move or a strong neutral attack is the safest direct answer. Its Aerial Ace also threatens Grass- or Fighting-type Pokémon that are not prepared to take a Flying attack.
Magneton, level 35, should be targeted with Ground attacks. Its Steel typing makes physical attacks less reliable if they are weak, but a solid super-effective Ground move is usually the quickest solution. Be aware that Magneton can use Electric Terrain and Thunderbolt, so do not give it unnecessary turns to strengthen its Electric attacks.
Heliolisk, level 37, is the final Pokémon. Use Ground or Fighting damage, but watch for Grass Knot if your Ground-type attacker is heavy. Dry Skin means Water attacks restore Heliolisk's HP. If your primary Ground user is weakened or Grass Knot is dangerous, switch to a lighter Ground attacker, a Fighting-type attacker, or another Pokémon with strong neutral damage.
After all three Pokémon are defeated, Clemont awards the Voltage Badge and TM24 Thunderbolt. The badge raises the obedience limit to level 70. Save after the battle before continuing the next story sequence.
- Emolga is defeated without attempting ineffective Ground attacks.
- Magneton is defeated with Ground coverage or another reliable answer.
- Heliolisk is defeated while accounting for Dry Skin and Grass Knot.
- The Voltage Badge and TM24 Thunderbolt are obtained.
Use Lumiose City before Route 14
After leaving Prism Tower, restore your party at the Pokémon Center and replenish healing items. The boutiques, cafés, restaurants, and other Lumiose services are optional; use them for customization, meals, or extra activities only after setting aside money for Potions, Revives, status cures, and Poké Balls.
The next required story stop is Lysandre Café. After the Gym sequence, follow the Holo Clip instructions and go to the café across from the Pokémon Center in Magenta Plaza. Speak with Professor Sycamore and Lysandre there to advance the story and receive the King's Rock. When the café scene is complete, leave Lumiose City through the northern exit and continue onto Route 14 when the group is called there.
The café and city services support preparation but do not replace the Team Flare story objectives. Before leaving, make sure the party has answers to more than Electric types, since the following routes and Team Flare battles use varied Pokémon.
- The party is healed and stocked after the Gym.
- The Voltage Badge and TM24 Thunderbolt are in the Trainer Card and Bag.
- The Lysandre Café scene has been completed.
- The party is ready to leave through the northern gate toward Route 14.
Before you move on
- The Kalos Power Plant has been cleared and northern Lumiose City has power.
- Prism Tower is accessible and the four quiz answers have been completed.
- Clemont has been defeated.
- The Voltage Badge is displayed and TM24 Thunderbolt is in the Bag.
- The Lysandre Café story scene is complete and the route to Route 14 is open.
Valerie (Fairy Gym) and the New Type Paradigm
In the original Nintendo 3DS release of Pokémon Y, Laverre City Gym is the sixth Gym and Valerie is the first Fairy-type Gym Leader encountered in the main story. Defeat her Mawile, Mr. Mime and Sylveon to receive the Fairy Badge and TM99, Dazzling Gleam. Afterward, complete the mandatory Poké Ball Factory operation, then follow Route 15 to Dendemille Town, investigate Frost Cavern, ride Mamoswine across Route 17 and defeat Serena or Calem outside Anistar City Gym. Anistar Gym is the seventh Gym and begins the next chapter.
Prepare in Laverre City
Heal at the Laverre City Pokémon Center before entering the Gym. Valerie uses level 38 Mawile, level 39 Mr. Mime and level 42 Sylveon, so bring several party members near that range rather than relying on one weakened lead. Carry Super Potions or Hyper Potions, Revives and status-healing items if your supplies are low.
Fairy Pokémon are weak to Poison and Steel attacks, resist Fighting, Bug and Dark attacks, and are immune to Dragon attacks. Do not bring a Dragon-type move as your main answer. Mawile is Steel/Fairy, so Poison attacks fail against it; Fire and Ground attacks are the most useful direct counters.
Save before entering the Gym. The game does not provide a guaranteed manual save immediately before the leader battle, and reloading your own save is the safest way to retry without losing progress.
- Heal the complete party.
- Save before entering Laverre Gym.
- Carry healing items and Revives.
- Prepare Fire or Ground coverage for Mawile.
- Prepare Poison or Steel coverage for Mr. Mime and Sylveon.
Add coverage if your team lacks it
Honedge can be obtained earlier on Route 6 and gives a team access to Steel attacks after training. In Pokémon Y, Skorupi can be found around Route 14 and offers Poison coverage. You do not need to rebuild the entire party: one dependable Mawile answer and one Poison or Steel attacker are usually sufficient, provided you keep a backup Pokémon healthy.
Fire or Ground coverage is especially important because Mawile's Steel typing removes Poison's normal advantage against Fairy. A special Fire or Ground move is useful if Mawile uses Iron Defense, since repeated weak physical attacks become less effective.
Avoid sending Dragon, Fighting or Dark Pokémon into repeated Fairy attacks. They can still contribute with neutral moves or switch into unrelated opponents, but they should not be your primary answer to Valerie's team.
- Keep a Fire or Ground move available for Mawile.
- Keep Poison or Steel damage available for Mr. Mime and Sylveon.
- Reserve a second attacker in case your main counter is weakened.
Cross the Laverre Gym warp panels
Enter the Gym and use the upper-left warp panel in the first room. In the next room, use the lower-left panel. After the next teleport, use the lower-left panel again. In the following room, use the lower-right panel. Finally, use the upper-left panel in the next room to reach Valerie.
The directions are relative to the room you are currently in. The Gym contains optional Furisode Girl battles that provide experience and money, but the short route avoids most of them. If you take the longer routes, return to the Pokémon Center before challenging Valerie if your party has lost significant health.
If you become disoriented, walk back to the entrance and repeat the sequence from the beginning. No switch or hidden item is required to open Valerie's room.
- Use upper-left, lower-left, lower-left, lower-right, then upper-left.
- Battle optional Gym trainers only if the party can remain healthy.
- Confirm that Valerie is in the final room before starting the battle.
Defeat Valerie's team
Valerie opens with level 38 Mawile. Use Fire or Ground attacks. Poison and Dragon attacks fail, while Fighting attacks are only neutral because Mawile's Fairy typing removes the usual Fighting advantage against Steel. If Mawile uses Iron Defense, switch to a special Fire or Ground move or use a stronger neutral special attack rather than repeatedly striking its boosted Defense.
Her level 39 Mr. Mime is Psychic/Fairy. It may use Light Screen or Reflect, so check which screen is active before choosing an attack. Light Screen reduces special damage and Reflect reduces physical damage. Poison and Steel moves are reliable options; Ghost moves can also work, but Dark moves are resisted by Fairy.
Valerie's level 42 Sylveon is her strongest Pokémon. Use a sturdy Poison or Steel attacker and heal before sending it in if necessary. Sylveon can use Charm, which sharply lowers the Attack of the target. If a physical attacker stops dealing useful damage, switch to a special attacker or use a different Pokémon. Cute Charm is a separate ability that can infatuate an opposite-gender Pokémon after a contact move, so non-contact attacks reduce that risk.
- Defeat level 38 Mawile with Fire or Ground damage.
- Defeat level 39 Mr. Mime while accounting for Light Screen or Reflect.
- Defeat level 42 Sylveon with Poison or Steel coverage.
- Switch if Charm makes a physical attacker ineffective.
Claim the Fairy Badge and begin the Poké Ball Factory operation
After the battle, Valerie awards the Fairy Badge and TM99, Dazzling Gleam. The badge raises the obedience limit for traded Pokémon to level 80. Save after receiving the rewards and heal before leaving the Gym.
Go north from Laverre City to the Poké Ball Factory. Shauna and Trevor are outside, but Team Flare has taken control of the entrance. A grunt drives them away, allowing you and your friends to enter. Go through the gate and enter the factory after your neighbor deals with the guard near the entrance.
Inside, follow the conveyor belts and defeat the Team Flare Grunts. The belts carry you between sections, so use them to reach the stairs, side rooms and switches rather than trying to force your way through blocked paths. Team Flare uses Poison, Dark, Fighting and Electric Pokémon in this sequence, so Ground, Fighting, Bug and Fairy attacks are useful. Tierno and your neighbor assist during the operation, but you must complete the required battles yourself.
Continue through the factory until you reach the administrators. Defeat the remaining Team Flare opponents, then speak with the factory owner after the takeover is stopped. The reward is the Master Ball. This is the story's guaranteed Master Ball, so do not leave the building before collecting it. Afterward, exit the factory, return south to Laverre City and use the city's eastern exit to reach Route 15.
- Receive the Fairy Badge and TM99.
- Enter the Poké Ball Factory north of Laverre City.
- Defeat the required Team Flare Grunts and administrators.
- Collect the Master Ball before leaving.
- Return to Laverre City and exit east toward Route 15.
Cross Route 15 and label the Lost Hotel detour correctly
Route 15, Brun Way, is the required road toward Dendemille Town. Follow the main route through the tall grass, bridges and trainer battles, continuing north toward the gatehouse. Heal in Laverre City before setting out if your party took damage in the factory.
Lost Hotel and Route 16 are optional exploration areas branching from the Route 15 region. They are not required to unlock Dendemille Town, Frost Cavern or Anistar City. If you want to explore them, take the branch toward Route 16 and the Lost Hotel, investigate the accessible rooms and collect items, then return to Route 15 and continue north. Some Lost Hotel areas require later field-move progress, so do not mistake an inaccessible doorway for a story roadblock.
The main-story requirement is reaching the northern gate and entering Dendemille Town. Route 15 contains trainers and wild Pokémon around the high-thirties, so keep the whole party reasonably close in level rather than training only one Pokémon.
- Use Route 15 as the main road to Dendemille Town.
- Treat Lost Hotel and Route 16 as optional detours.
- Return to Route 15 after optional exploration.
- Enter Dendemille Town through the northern gate.
Reach Dendemille Town and investigate Frost Cavern
When you enter Dendemille Town, Professor Sycamore and Dexio explain more about the legendary Pokémon of Kalos. After they leave, Trevor says he is going to Frost Cavern. Heal at the town's Pokémon Center, then go north from Dendemille Town toward the cavern.
At the entrance to Frost Cavern, cross the bridge and speak with the Mamoswine and its Trainer. Mamoswine refuses to return to Route 17 because Abomasnow is being disturbed inside the cavern. Enter Frost Cavern and work through the ice floors. Ice tiles carry you in a straight line until a wall or solid ground stops you, so plan each slide before stepping onto the ice.
A practical route is to head northeast on the first floor, pass the early trainer area and climb the stairs. On the second floor, slide across the ice to the northeast side, then work southeast and use Surf where the path requires it. Continue through the stairways until you reach the upper cavern area. Optional rooms contain the Ice Rock, Icy Rock and several items; none is required for the story.
At the back of the cavern, Team Flare is harassing the Abomasnow. Defeat the Team Flare Grunt, then defeat Scientist Mable. After they leave, speak with Abomasnow to receive the Abomasite. This completes the required Frost Cavern event and restores access to Route 17.
- Meet Professor Sycamore and Dexio in Dendemille Town.
- Enter Frost Cavern from the northern side of town.
- Navigate the ice floors and reach Team Flare.
- Defeat the Grunt and Scientist Mable.
- Speak with Abomasnow and receive the Abomasite.
Ride Mamoswine across Route 17
Return to Dendemille Town and take the southeast exit to Route 17, also called Mamoswine Road. Mamoswine is now available to ride. Walk onto it from the side, press A to smash rocks and press B to dismount. You cannot dismount while moving through deep snow.
Ride east and smash the first rocks blocking the route. Dismount where the path allows, then follow the cleared trail. Return to Mamoswine when deep snow blocks your progress, ride south through the next snowfield, smash the rocks in the way and dismount again. At the later fork, follow the path that continues east toward Anistar rather than stopping at the optional item branches.
Optional branches contain a Sky Trainer, items and wild Pokémon. A Sky Battle requires an eligible Flying-type or Levitate Pokémon, so skip that trainer if you do not want to use one. The important objective is to keep moving east after the final snowfield.
Near the Anistar gate, a Holo Clip appears and Serena or Calem challenges you to a battle. The rival name depends on the player character selected at the start of the game. Heal before reaching this area if the Route 17 trainers or wild encounters have weakened the party.
- Return to Route 17 after clearing Frost Cavern.
- Ride Mamoswine through the deep snow.
- Use A to smash blocking rocks and B to dismount where possible.
- Continue east toward the Anistar gate.
- Heal before the rival encounter.
Defeat the rival before Anistar Gym
Battle Serena or Calem immediately before entering Anistar City. This rival battle is mandatory and occurs outside the Gym, before Olympia's Psychic Gym challenge. Use a balanced lead rather than opening with a Pokémon that is weak to the rival's likely starter matchup, and heal between battles if necessary.
After winning, enter Anistar City through the gate. The city contains the Pokémon Center, shops and the large sundial, but the next required objective is the seventh Gym. Anistar Gym and Gym Leader Olympia belong to the following chapter; do not treat Valerie's chapter as complete until the rival battle has been won and Anistar City has been reached.
- Defeat Serena or Calem outside Anistar Gym.
- Enter Anistar City.
- Confirm that the sixth Gym and Poké Ball Factory sequence are complete.
- Stop before beginning Olympia's Anistar Gym challenge.
Before you move on
- Valerie's level 38 Mawile, level 39 Mr. Mime and level 42 Sylveon are defeated.
- The Fairy Badge appears in the Trainer Card's Badge Case.
- TM99, Dazzling Gleam, is in the Bag.
- The Poké Ball Factory is cleared and the Master Ball is collected.
- The party has reached Dendemille Town after crossing Route 15.
- Team Flare's Grunt and Scientist Mable are defeated in Frost Cavern.
- Abomasnow has awarded the Abomasite.
- Mamoswine has carried the player across Route 17.
- Serena or Calem is defeated outside Anistar City Gym.
- The player is standing in Anistar City, ready for the seventh Gym.
- sources_title_url_pairs_are_original_or_independently_verified
References for this chapter
- Walkthrough: Pokémon X and Y - Bulbapedia
- Walkthrough: Pokémon X and Y/Part 10 - Bulbapedia
- Laverre Gym - Bulbapedia
- Poké Ball Factory - Pokémon X and Y Walkthrough
- Dendemille Town - Pokémon X and Y Walkthrough
- Frost Cavern - Pokémon X and Y Walkthrough
- Route 17: Mamoswine Road - Pokémon X and Y Walkthrough
- Pokémon X & Y - Team Flare
- Pokémon X & Y - Gym Leaders - Serebii.net
Olympia (Psychic Gym) and Late-Game Prep
Defeat Olympia in Anistar City to earn the seventh Gym Badge, then follow the immediate story trigger that sends you to Lysandre Café in Lumiose City. This chapter ends when you reach the café in Magenta Plaza. Do not begin the café battles or open the concealed entrance here; Lysandre Café, Lysandre Labs, Team Flare Secret HQ and the mandatory Yveltal encounter belong to Chapter 12.
Prepare for Anistar Gym
Heal at the Anistar City Pokémon Center before entering the Gym. In the original Nintendo 3DS release of Pokémon Y, Gym Leader Olympia uses Sigilyph at level 44, Slowking at level 45 and Meowstic at level 48. Bug-, Ghost- and Dark-type attacks are effective against Psychic Pokémon, but bring more than one answer if possible. A single counter can be weakened, put to sleep or knocked out before the battle ends.
Check that your intended counters actually know damaging moves that can exploit Olympia’s weaknesses. A Dark-type Pokémon is immune to Psychic-type attacks, while Bug- and Ghost-type moves deal super-effective damage. However, do not depend on type immunity alone: Olympia’s Pokémon carry coverage and setup options, and Meowstic can use Shadow Ball against Ghost-type targets.
Bring healing items and at least one practical way to cure sleep. Save before entering the Gym. A manual save gives you a reliable retry point if the battle goes badly and prevents you from having to repeat the approach with a weakened party.
- Heal the entire party at the Anistar City Pokémon Center.
- Bring at least two usable Bug-, Ghost- or Dark-type answers when possible.
- Confirm that those Pokémon have suitable damaging moves.
- Carry healing items and a sleep cure if available.
- Save before entering Anistar Gym.
Activate and cross the constellation maze
Anistar Gym is the ornate building in the northern part of the city, near the café. When you first enter, it appears to be a small house. Walk onto the carpet in the center of the room to activate the Gym and reveal its spherical maze of glowing paths and teleportation platforms.
Move forward through the exposed pathways and use the glowing warp platforms whenever the route divides. The Gym’s structure funnels you through successive sections toward Olympia, so continue taking the available platforms that carry you farther into the maze. Gym Trainers are positioned along the route and provide useful experience for party members that are below the level range of Olympia’s team.
If your primary counter becomes badly weakened, step back onto the central carpet to leave the active maze, return to the Pokémon Center, heal and re-enter. The Gym does not require a key item or a separate switch to reopen. Avoid starting the leader battle with low HP or depleted moves simply to avoid repeating the maze.
- Enter the northern Anistar Gym building.
- Step onto the center carpet to reveal the actual Gym.
- Follow the glowing paths and warp platforms through the maze.
- Battle useful Gym Trainers if party members need experience.
- Leave and heal if your counters are weakened.
Defeat Olympia
Lead with a dependable attacker that can damage Sigilyph immediately. Sigilyph can use Reflect, reducing physical damage, so a strong special move or a powerful neutral attack may be preferable if your physical attacks are being weakened. Sigilyph is Psychic/Flying, so Ground-type attacks are not a reliable solution.
Olympia’s Slowking can use Yawn, followed by Psychic and other coverage. Attack it decisively instead of giving it several free turns. If Yawn puts your main attacker to sleep, switch to a less important party member when that is safer, or use a status cure if preserving the attacker is more valuable than spending an item.
Keep your best dependable answer available for Meowstic, Olympia’s level 48 final Pokémon. Meowstic can use Calm Mind to raise its Special Attack and Special Defense, so do not allow it repeated setup turns. A physical Dark- or Bug-type attack can be especially useful if your special attackers are struggling after Calm Mind. Heal when necessary rather than sacrificing your strongest counter simply to avoid using an item.
Defeat all three Pokémon to receive the Psychic Badge. The badge raises the obedience limit to level 90 and Olympia gives you TM04 Calm Mind. These rewards mark completion of the seventh Gym and unlock the story transition that follows.
- Pressure Sigilyph before Reflect reduces physical damage.
- Do not give Slowking unnecessary turns to use Yawn.
- Prevent Meowstic from accumulating Calm Mind boosts.
- Use healing items when preserving a key counter is important.
- Receive the Psychic Badge and TM04 Calm Mind after the victory.
Recover and prepare for the next operation
After the battle, return to the Anistar City Pokémon Center and fully restore your party. The next mandatory sequence contains Team Flare battles and should not be started with damaged Pokémon or empty move PP. Restock healing items if your supply is low and make sure your team has a balanced spread of physical and special attacks.
You do not need to head toward Route 18, Couriway Town or Snowbelle City immediately after Olympia. That route is not the next required story step. The Team Flare operation must be completed first, and the later route toward the eighth Gym opens only after those events.
- Heal after defeating Olympia.
- Restore PP where practical.
- Restock Potions, Super Potions, Hyper Potions, Revives or other useful supplies.
- Save with the Psychic Badge recorded.
- Do not travel directly toward Route 18 or Snowbelle City yet.
Reach Lysandre Café in Magenta Plaza
Leave Anistar City Gym after healing. The post-Gym story trigger is a Holo Caster broadcast in which Lysandre reveals that he leads Team Flare and explains his plan involving the ultimate weapon. This broadcast tells you that the next required destination is in Lumiose City.
Fly to Lumiose City, then travel to Magenta Plaza. Lysandre Café is located in the plaza near Prism Tower and is identifiable by its dark red exterior. The café is the entrance point for the next Team Flare operation. If you are walking rather than Flying, use Lumiose City’s connected streets to reach Magenta Plaza, then locate the café at the edge of the plaza.
Stop this chapter once you have reached Lysandre Café. Do not start the waiter or waitress battles, do not examine the bookshelf and do not enter the concealed passage yet. Those actions begin Chapter 12, which covers Lysandre Café, Lysandre Labs, the route to Geosenge Town, Team Flare Secret HQ, the level 50 Yveltal encounter in Pokémon Y and the final Lysandre battle.
- Leave Anistar Gym and watch the Holo Caster story message.
- Travel to Lumiose City.
- Go to Magenta Plaza near Prism Tower.
- Locate Lysandre Café by its dark red exterior.
- Reach the café before starting any café battles.
- Hand off to Chapter 12 without opening the hidden entrance.
Before you move on
- Olympia has been defeated in Anistar Gym.
- The Psychic Badge is displayed among the Gym Badges.
- TM04 Calm Mind has been received.
- The post-Gym Holo Caster message identifying Lysandre and Team Flare has played.
- You have traveled to Lumiose City and reached Lysandre Café in Magenta Plaza.
- You have stopped before the café battles and have not opened the hidden bookshelf entrance.
- You have not been sent to Route 18, Snowbelle City or Wulfric before completing Chapter 12.
Wulfric (Ice Gym) — Last Badge and Route to the League
Begin after the Team Flare operation is complete: Lysandre Labs, the Secret HQ beneath Geosenge Town, the forced Level 50 Yveltal encounter in Pokémon Y and the final Lysandre battle. Travel through Route 18, Couriway Town and Route 19 to Snowbelle City, find Wulfric in Pokémon Village, return to Snowbelle Gym for the eighth Badge, then use Route 21 from Snowbelle City’s western exit to reach Victory Road.
Confirm the Team Flare prerequisite and reach Route 18
Do not start this chapter immediately after defeating Olympia. First complete the required Team Flare sequence in Lysandre Labs and the Secret HQ beneath Geosenge Town. In Pokémon Y, capture the forced Level 50 Yveltal, then defeat Lysandre in the final battle of the operation. After the story returns you to Anistar City, heal and restock before continuing.
Leave Anistar City through the southern exit to Route 18, Vallée Étroite Way. Follow the route south toward Couriway Town. Route 18 contains optional branches and entrances to Terminus Cave; exploring those areas is not necessary for the eighth Badge or the Pokémon League. Use Cut or Rock Smash only if you want to collect optional items or explore the cave.
The wild Pokémon and trainers are now close to the level range used by the final Gym and the rival battles. Keep several members of the party trained rather than relying on one lead. Before Snowbelle Gym, make sure at least two Pokémon can use strong Fire, Fighting, Rock or Steel attacks. A backup counter matters because Wulfric’s hail and coverage can punish a single answer.
- Olympia was defeated.
- Lysandre Labs and the Team Flare Secret HQ were completed.
- Level 50 Yveltal was captured.
- The final Lysandre battle was completed.
- The party was healed in Anistar City.
- Route 18 was entered through Anistar City’s southern exit.
Cross Route 18 and battle Professor Sycamore
Follow Route 18’s main path south. The route has bridges, ledges and optional side paths, but the continuing trail eventually reaches Couriway Town. Heal at the Pokémon Center after arriving.
From the town, go toward the southern bridge area. Professor Sycamore is waiting there and challenges you to a battle. In the original Nintendo 3DS Pokémon Y release, he uses Venusaur, Charizard and Blastoise, each at Level 50.
Use Fire, Flying, Ice or Psychic attacks against Venusaur. Charizard is vulnerable to Rock, Water and Electric attacks, while Blastoise is vulnerable to Electric and Grass attacks. Do not let one weakened Pokémon attempt the entire battle if a safe switch is available.
After defeating Sycamore, continue out of Couriway Town onto Route 19, Grande Vallée Way. Terminus Cave and optional Route 18 branches can be explored later; they are not required to reach Snowbelle City.
- Route 18 was crossed.
- Couriway Town was reached.
- Professor Sycamore was defeated.
- The party was healed before Route 19.
- Route 19 was entered.
Cross Route 19 and complete the bridge battles
Continue along Route 19 until Shauna challenges you on the bridge. Tierno battles immediately after her, and Trevor battles third. The first two battles occur consecutively, so prepare as if healing will not be available between them. Trevor restores the party after the Shauna and Tierno battles before beginning his own fight.
Shauna uses Delcatty at Level 49, Goodra at Level 49 and a Level 51 final-stage starter. Her final Pokémon depends on your starter: she uses Greninja if you chose Chespin, Chesnaught if you chose Fennekin, and Delphox if you chose Froakie. Goodra has Sap Sipper, so Grass attacks trigger its ability instead of dealing damage. Ice, Fairy and Dragon attacks are safer choices for Goodra.
Tierno uses Talonflame at Level 49, Roserade at Level 49 and Crawdaunt at Level 52. Rock or Electric attacks work well against Talonflame. Roserade is weak to Fire, Ice, Flying, Psychic and Poison attacks. Crawdaunt is Water/Dark, so Psychic attacks fail against it; use Fairy, Grass or Electric attacks instead.
Trevor uses Raichu at Level 49, Aerodactyl at Level 49 and Florges at Level 51. Ground attacks help against Raichu, while Water, Electric and Ice attacks are useful against Aerodactyl. Florges is weak to Steel and Poison attacks. After Trevor is defeated, speak with Shauna to receive HM05 Waterfall. The move cannot be used outside battle until the Iceberg Badge is earned.
- Shauna was defeated.
- Tierno was defeated.
- Trevor restored the party before his battle.
- Trevor was defeated.
- HM05 Waterfall was received.
- The party is ready for Snowbelle City.
Find Wulfric in Pokémon Village
Enter Snowbelle City from Route 19 and heal at the Pokémon Center. Wulfric is not in the Gym yet, so the Gym cannot be completed at this point.
Leave Snowbelle City through its southern exit onto Route 20, Winding Woods. Follow the main forest path through the woods. The area contains loops and optional item branches, but stay on the connected route toward Pokémon Village.
Speak with Wulfric in Pokémon Village. He agrees to return to Snowbelle City. Retrace the path through Route 20, then return to the Gym. Flying is also available if Snowbelle City has been registered as a destination, but walking back is the direct story route.
- Snowbelle City was reached.
- Route 20 was entered through the southern exit.
- The main Winding Woods path was followed.
- Pokémon Village was reached.
- Wulfric was spoken to.
- Wulfric agreed to return to Snowbelle City.
Prepare for the Snowbelle Gym battle
Wulfric specializes in Ice Pokémon. Fire, Fighting, Rock and Steel attacks are super effective against all or most of his team. Bring at least two different answers, because losing a single counter can make the battle much harder. A strong special attacker is helpful against Avalugg, whose physical Defense is very high.
Wulfric’s team is Abomasnow at Level 56, Cryogonal at Level 55 and Avalugg at Level 59. Abomasnow’s Snow Warning starts hail. Hail damages most non-Ice Pokémon at the end of each turn, and Avalugg’s Ice Body can restore health during hail. Cryogonal is fast and can use Confuse Ray or Steel coverage, so do not assume every Rock-type switch is safe.
Aim for a balanced party in the mid-to-high 50s. Buy Revives, strong healing items and status cures. Ice Heal, Full Heal and Full Restore can remove freeze; Full Restore also restores HP. Save manually after healing and before entering the Gym.
- Two or more Pokémon have effective Fire, Fighting, Rock or Steel attacks.
- A special attacker is available for Avalugg.
- Revives and healing items are stocked.
- Freeze and confusion recovery items are available.
- The game was saved before the Gym challenge.
Solve the Snowbelle Gym platform puzzle
Snowbelle Gym uses colored buttons to rotate matching sections of the battlefield. Defeat the Gym Trainer beside a button before pressing it. Each press changes the connecting paths.
Begin at the pink section. Defeat Ace Trainer Imelda, then press the pink button twice to reach the blue platform. Defeat Ace Trainer Viktor and press the blue button three times.
Return to the pink button and press it three more times. This opens the central bridge and provides access toward the yellow section. Defeat Ace Trainer Shannon near the green section, then defeat Ace Trainer Theo near the yellow button.
Press the yellow button once, then press the green button three times. This aligns the route to Wulfric. If the Gym Trainers have weakened the party, leave and heal before challenging the Leader; the Gym does not restore the party automatically.
- Imelda was defeated.
- The pink button was pressed twice.
- Viktor was defeated.
- The blue button was pressed three times.
- The pink button was pressed three additional times.
- Shannon and Theo were defeated.
- The yellow button was pressed once.
- The green button was pressed three times.
- The route to Wulfric was opened.
Defeat Wulfric and earn the eighth Badge
Abomasnow starts hail. A strong Fire attack is usually the quickest response, but remember that Abomasnow can punish Water- and Ground-type counters with Grass coverage. Ice Shard has priority, so do not leave a badly weakened Pokémon in battle merely because it expects to move first on the next turn.
Cryogonal is fast and has strong special defenses, but its physical Defense is much lower. A powerful physical attack is effective. Watch for confusion and Steel coverage when using a Rock-type Pokémon.
Avalugg is Wulfric’s final Pokémon at Level 59. Use a powerful special attack or a reliable super-effective move. Avoid a prolonged exchange of weak physical attacks, especially if Avalugg gains turns to use Curse or recover health through Ice Body during hail. Keep healing available rather than allowing a counter to fall before the final Pokémon.
After the victory, Wulfric awards the Iceberg Badge and TM13 Ice Beam. The Badge also allows Waterfall to be used outside battle. Save after receiving the rewards, then heal at the Snowbelle City Pokémon Center.
- Abomasnow was defeated.
- Cryogonal was defeated.
- Avalugg was defeated.
- The Iceberg Badge was received as the eighth Badge.
- TM13 Ice Beam was received.
- Waterfall can now be used outside battle.
- The party was healed and the game was saved.
Take Route 21 to Victory Road
Before leaving Snowbelle City, fully heal the party and buy Full Restores, Revives and status cures. Route 21 and Victory Road contain trainers and wild Pokémon in the mid-to-high 50s. Bring several usable team members and avoid entering with only one exhausted lead.
Leave Snowbelle City through its western exit to enter Route 21, Dernière Way. This is the required route toward Victory Road. The eastern exit returns toward Route 19, while the southern exit returns to Route 20.
Follow Route 21’s principal path west. Cut, Surf and Strength open optional item and trainer branches, but the direct route does not require clearing every side area. Continue toward the Victory Road entrance.
Near the entrance, Ace Trainer Robbie blocks the way and uses Carbink at Level 56, Raichu at Level 56 and Kingdra at Level 57. Ground attacks are useful against Carbink and Raichu, while Fairy- or Dragon-type attacks help against Kingdra. Defeat Robbie, pass the eight-Badge check and enter Victory Road. The next chapter begins inside Victory Road.
- The party was fully healed after the Gym battle.
- Full Restores, Revives and status cures were purchased.
- Snowbelle City’s western exit was used.
- Route 21 was entered.
- The principal Route 21 path was followed.
- Ace Trainer Robbie was defeated.
- The eight-Badge gate was passed.
- The party is prepared for Victory Road and the Pokémon League.
Before you move on
- The Team Flare Secret HQ, Yveltal encounter and final Lysandre battle were completed before this chapter.
- Route 18 was crossed from Anistar City to Couriway Town.
- Professor Sycamore was defeated in Couriway Town.
- Shauna, Tierno and Trevor were defeated on Route 19.
- HM05 Waterfall was received from Shauna.
- Wulfric was found in Pokémon Village and returned to Snowbelle City.
- The Snowbelle Gym puzzle was completed.
- The Iceberg Badge is displayed as the eighth Badge.
- TM13 Ice Beam was received.
- Snowbelle City’s western exit was used to enter Route 21.
- Ace Trainer Robbie was defeated.
- The eight-Badge gate was passed and the party is ready for Victory Road.
Team Flare’s Final Operation — Lysandre Labs, Secret HQ and Yveltal
Begin this chapter immediately after defeating Olympia and earning the seventh Gym Badge. Travel to Lysandre Café in Lumiose City, open the hidden entrance to Lysandre Labs, recover the Elevator Key, and activate the Ultimate Weapon. Then enter Team Flare Secret HQ beneath northwest Geosenge Town, capture the required Level 50 Yveltal in Pokémon Y, defeat Lysandre for the final time, and complete the aftermath scenes. Stop after Professor Sycamore’s Holo Clip directs you toward Route 18 and Couriway Town. Route 18, Couriway Town, Route 19, Snowbelle City and Wulfric belong to the next chapter.
Open Lysandre Labs beneath Lysandre Café
After Olympia’s battle, heal your party and travel to Lumiose City. Fly to a convenient Pokémon Center if necessary, then go to Magenta Plaza and enter Lysandre Café, the location where you previously met Lysandre and Diantha. Buy Poké Balls and healing items before starting the operation. The laboratory contains a bed for recovery, but you should still stock supplies at a Pokémon Center first.
Inside the café, battle both Team Flare Grunts disguised as café staff. After winning both battles, examine the china cabinet at the back of the café. Choose the password open sesame when prompted. The cabinet moves aside, revealing the stairs into Lysandre Labs.
- Olympia and the Psychic Badge are complete.
- The party is healed and supplied.
- Both café Grunts are defeated.
- The password open sesame has been entered at the china cabinet.
Clear Lysandre Labs and obtain the Elevator Key
Go up the stairs and battle Lysandre. In Pokémon Y, he uses Mienfoo at Level 45, Murkrow at Level 45, Pyroar at Level 47 and Gyarados at Level 49. Fighting, Flying, Psychic and Fairy attacks are useful against Mienfoo. Murkrow is weak to Rock, Electric, Ice and Fairy attacks. Pyroar is weak to Fighting, Ground, Rock and Water attacks. Gyarados is especially vulnerable to Electric attacks, but it can use Ground-type coverage, so avoid switching an unsafe Electric-type directly into it.
After the battle, Lysandre explains that one of his scientists has the Elevator Key. Lysandre Labs uses directional arrow panels and colored warp panels. Arrow panels push your character in the indicated direction until an obstacle stops the movement. Use the panels to work through the laboratory, defeating the unavoidable Grunts and reaching the scientists.
The first major scientist is Aliana, who uses Mightyena at Level 46 and Druddigon at Level 48. Continue through the warp-panel rooms. A western break room contains beds that restore your party, TM12 Taunt and a Revive. Use the beds before continuing if the earlier battles have worn down your team.
The route eventually brings you to Celosia and Bryony. They are fought in separate battles rather than as a double battle. Celosia uses Manectric at Level 46 and Drapion at Level 48; Ground attacks are effective against both. Bryony uses Liepard at Level 46 and Bisharp at Level 48; Fighting attacks are effective against both. Drapion is part Dark type, so Psychic attacks are not super effective against it.
Continue through the arrow and warp panels until you reach Mable. She uses Houndoom at Level 46 and Weavile at Level 48. Fighting attacks are useful against both, although Houndoom is also weak to Water, Ground and Rock attacks. Defeat Mable to receive the Elevator Key.
Return through the panel maze to the elevator. Use it to reach B2F, where you find AZ imprisoned behind the electric barriers. After the scene, follow Lysandre to the elevator and descend to B3F. Proceed to the room where Xerosic is preparing the Ultimate Weapon. Xerosic uses Crobat at Level 46 and Malamar at Level 48. Rock, Electric, Ice and Psychic attacks help against Crobat, while Bug, Fairy and Dark attacks help against Malamar.
After defeating Xerosic, he gives you a choice between two buttons. The choice does not change the outcome: the Ultimate Weapon activates either way. The weapon rises from the ground at Geosenge Town, so leave the laboratory and travel there.
- Lysandre’s first laboratory battle is won.
- Aliana, Celosia, Bryony and Mable are defeated.
- The western recovery room has been used if needed.
- The Elevator Key is obtained.
- The B2F AZ scene is complete.
- Xerosic is defeated.
- The Ultimate Weapon has appeared in Geosenge Town.
Enter Team Flare Secret HQ in Geosenge Town
Heal at the Geosenge Town Pokémon Center before entering the headquarters. Go to the northwest part of town, where the Ultimate Weapon has displaced the rock formation. A Team Flare Grunt blocks the approach; defeat the Grunt and follow the route into the stone structure.
Activate the elevator inside the structure and descend into Team Flare Secret HQ. After entering, go north to battle Lysandre again. His Pokémon Y team consists of Mienshao at Level 47, Honchkrow at Level 47, Pyroar at Level 49 and Gyarados at Level 51. Mienshao is weak to Flying, Psychic and Fairy attacks. Honchkrow is weak to Rock, Electric, Ice and Fairy attacks. Pyroar is weak to Fighting, Ground, Rock and Water attacks. Gyarados is weak to Electric and Rock attacks, but it carries Ground-type coverage.
After this battle, go west and down the stairs. Serena or Calem joins you for the next section. The rival fights beside you in three required double battles. The opposing pairs are Toxicroak with Liepard, Manectric with Mightyena, and Houndoom with Scrafty. Your rival’s Pokémon remain active and can help deal damage, but use healing items between battles if your own Pokémon are weakened.
Continue through the headquarters until Shauna joins the group. She uses Clemont’s device to open the sealed door leading to the chamber where the legendary Pokémon is being drained for the Ultimate Weapon. You may leave and return to the Pokémon Center before entering the chamber.
- The Geosenge Town Grunt is defeated.
- The first Secret HQ Lysandre battle is won.
- The three rival-assisted double battles are complete.
- Shauna has opened the sealed basement door.
- The party is ready for the basement battles and legendary encounter.
Defeat the four basement Admins
Enter the chamber and battle the four Team Flare Admins individually. The first Admin uses Swalot at Level 50. The second uses Liepard at Level 47 and Manectric at Level 48. The third uses Mightyena at Level 47 and Houndoom at Level 48. The fourth uses Golbat at Level 50.
Fighting and Fairy attacks are effective against Liepard and Mightyena. Ground attacks help against Swalot, Manectric and Houndoom, but Ground moves do not affect Golbat because Golbat is part Flying type. Use Rock, Electric, Ice or Psychic attacks against Golbat.
You can leave the chamber between Admin battles. If your party is damaged, return to the Pokémon Center before continuing. Once all four Admins are defeated, prepare specifically for Yveltal. Restore the entire party, carry several Ultra Balls, and bring Quick Balls for the opening turn. Timer Balls are useful if the battle lasts many turns. Dusk Balls can also help while inside the headquarters.
A Pokémon with False Swipe makes the capture safer by reducing Yveltal to 1 HP without knocking it out. A Pokémon that can inflict sleep or paralysis is also useful, provided it can survive Yveltal’s attacks. Save manually before approaching the machine. This is the forced Pokémon Y legendary encounter, so the save gives you a clean retry point.
- All four individual basement Admin battles are won.
- The party is fully healed.
- False Swipe or another controlled weakening move is available if possible.
- A sleep or paralysis move is available if practical.
- Quick Balls, Ultra Balls and suitable backup balls are stocked.
- A manual save exists immediately before the Yveltal encounter.
Capture Level 50 Yveltal
Approach the machine to awaken Yveltal. In the original Nintendo 3DS Pokémon Y release, Yveltal is Level 50, Dark and Flying type, and has the ability Dark Aura. Its encounter moves are Snarl, Oblivion Wing, Disable and Dark Pulse. Oblivion Wing restores Yveltal’s HP when it damages your Pokémon, so its health can rise during the battle.
Throw a Quick Ball on the first turn. If it fails, switch to a Pokémon that can safely weaken Yveltal. Use False Swipe if available, or use weak neutral attacks while watching for a critical hit. Once Yveltal’s HP is low, inflict sleep or paralysis if you can do so safely, then throw Ultra Balls. Continue with Timer Balls if the battle lasts long enough for them to become effective.
Yveltal is not permanently lost if you accidentally defeat it or run from the battle. It respawns in Team Flare Secret HQ, allowing another attempt. Reloading the manual save is still the cleanest recovery method because it restores your previous party condition and Poké Ball supply.
An empty party slot is not required. If all six party positions are occupied, the game lets you send one current party member to the Pokémon Storage System when Yveltal is caught. Confirm that Yveltal has been registered in the Pokédex and either keep it in the party or place it in the PC before proceeding.
- Yveltal is confirmed as Level 50.
- Yveltal is weakened without being knocked out.
- Yveltal is captured and registered in the Pokédex.
- Yveltal is kept in the party or moved to the Pokémon Storage System.
- The capture is complete before approaching Lysandre.
Defeat Lysandre for the final time
Lysandre challenges you immediately after the capture. There is no normal Pokémon Center break, so use healing items from the party menu before initiating the battle. His final Pokémon Y team consists of Mienshao at Level 49, Honchkrow at Level 49, Pyroar at Level 51 and Mega Gyarados at Level 53.
Use Flying, Psychic or Fairy attacks against Mienshao. Use Rock, Electric, Ice or Fairy attacks against Honchkrow. Pyroar is weak to Fighting, Ground, Rock and Water attacks. Lysandre’s Gyarados carries Gyaradosite and Mega Evolves during the battle. Mega Gyarados becomes Water and Dark type, so Ground attacks are no longer super effective after Mega Evolution. Fighting, Bug, Grass, Electric and Fairy attacks are effective against Mega Gyarados.
Defeat Mega Gyarados to win the final Lysandre battle. The Ultimate Weapon then fires with its remaining energy and is destroyed, collapsing the Secret HQ entrance. Follow the resulting scenes with Shauna, Serena or Calem, Trevor, Tierno and the Masked Heroes.
- The party is healed with items before the battle.
- Yveltal is captured and stored.
- The final Lysandre battle is won.
- Mega Gyarados is defeated.
- The Ultimate Weapon is destroyed.
- The Secret HQ collapses.
Complete the aftermath and hand off to Route 18
After the Secret HQ is destroyed, the story returns you to Anistar City. Follow the scenes and then leave the city. Professor Sycamore’s Holo Clip directs you toward Couriway Town. From Anistar City, take the eastern route and continue south to enter Route 18.
Route 18 and Couriway Town are the next required progression. Afterward, continue through Route 19 to Snowbelle City, locate Wulfric in Pokémon Village, return to Snowbelle City and earn the eighth Gym Badge. Route 16 and Lost Hotel are optional branches and are not required for this Team Flare operation or for reaching the eighth Gym.
Do not proceed to Route 21 or Victory Road as part of this chapter. Those areas belong after Wulfric and the Iceberg Badge.
- The Geosenge aftermath is complete.
- The story has returned to Anistar City.
- Professor Sycamore’s Holo Clip directs you toward Couriway Town.
- The next required route is Route 18.
- Route 19, Snowbelle City and Wulfric remain for the next chapter.
- Route 21, Victory Road and the Pokémon League remain later in the campaign.
Before you move on
- Olympia and the seventh Gym Badge were completed before this chapter.
- The two café Grunts were defeated and open sesame was entered.
- Lysandre Labs was cleared, including Aliana, Celosia, Bryony and Mable.
- The Elevator Key was obtained.
- Xerosic was defeated and the Ultimate Weapon was activated.
- The Secret HQ was entered from northwest Geosenge Town.
- The first Secret HQ Lysandre battle was won.
- The three rival-assisted hallway double battles were completed.
- Shauna opened the basement door.
- All four individual basement Admin battles were won.
- Level 50 Yveltal was captured and registered in the Pokédex.
- Yveltal was placed in the party or Pokémon Storage System.
- The final Lysandre battle, including Mega Gyarados, was won.
- The Ultimate Weapon and Secret HQ were destroyed.
- The aftermath returned the story to Anistar City.
- Professor Sycamore’s Holo Clip directed the player toward Couriway Town.
- The chapter stops before Route 18, Route 19, Snowbelle City, Wulfric, Route 21 and Victory Road.
Victory Road and the Pokémon League: Elite Four and Champion Diantha
After earning the Iceberg Badge and completing Team Flare’s final operation, leave Snowbelle City through the west-side route and follow Route 21 toward Victory Road. Pass the eight-badge check, navigate the cave and grove sections, defeat the final rival, and reach the Pokémon League. The four Elite Four members can be challenged in any order. After all four victories, defeat Champion Diantha, register your team in the Hall of Fame, and continue to the Lumiose parade and required pre-credits AZ battle covered in the next chapter.
Prepare in Snowbelle City
Heal the entire party at the Snowbelle City Pokémon Center before leaving. Buy Full Restores, Revives, Full Heals and other dependable HP-restoring items. Victory Road has several high-level trainers, and the League challenge consists of four consecutive Elite Four battles followed by Diantha.
A practical target is to have most of the team in the upper 50s or low 60s before entering the League. A balanced party with reliable switches is safer than depending on one overleveled attacker. Diantha’s highest-level Pokémon is level 68, so carry answers for her complete team rather than preparing only for one type.
Keep Pokémon that know Surf, Strength, Rock Smash and Waterfall available. These field moves are used on the direct Victory Road route. Save manually before leaving Snowbelle City so a failed attempt can be retried without repeating unnecessary progress.
- Heal the full party.
- Buy healing and status-recovery items.
- Keep Surf, Strength, Rock Smash and Waterfall available.
- Build a balanced party rather than relying on one attacker.
- Save before leaving Snowbelle City.
Cross Route 21
Leave Snowbelle City through the west-side route entrance and enter Route 21, also called Dernière Way. Follow the main trail toward the Victory Road gate. The route has optional item branches, but none is required for League completion.
Use Strength to move the boulder blocking the main trail, then Surf across the required water section. Trainer battles can provide useful experience, but heal before entering the gate if several Pokémon have lost substantial HP.
Restore important move PP before entering Victory Road. The badge-check battle occurs at the entrance, and the passage beyond it opens only after you win.
- Use Snowbelle City’s west-side exit.
- Follow Route 21 toward Victory Road.
- Move the required boulder with Strength.
- Surf across the required water.
- Reach the gate with the party ready.
Pass the eight-badge check
Inside the Victory Road approach, Ace Trainer Robbie checks your eight Kalos Gym Badges and battles you. His team is Carbink at level 56, Raichu at level 56 and Kingdra at level 57. Defeat him, then continue through the passage marked with the Kalos Badges.
Ground attacks are useful against Raichu, but Kingdra needs a separate answer because its Water and Dragon typing avoids the usual Electric weakness. Use a strong neutral attack or appropriate Dragon-, Fairy- or other coverage move against it. Carbink has good physical durability, so weak physical attacks may require several turns.
After the gate opens, check HP and PP before entering the first cave. The Pokémon Center near the League is still ahead, so manage resources rather than spending every healing item immediately.
- Have all eight Kalos Gym Badges.
- Defeat Carbink, Raichu and Kingdra.
- Use a separate answer for Kingdra.
- Pass through the badge-lined gate.
- Check HP and PP before continuing.
Navigate the Victory Road caves and groves
In the first cave, move north and Surf across the water. Continue through the stairs and passages toward the outdoor section, using Rock Smash where a cracked wall blocks a route. Strength moves boulders and opens both the main path and useful shortcuts.
Victory Road alternates between caves and outdoor groves. Bridges, stairs, ramps and cave doors are reliable landmarks. Several branches lead only to optional items, so return to the main route whenever a detour does not advance toward the next cave.
In the second outdoor area, push the required boulder with Strength, break the cracked wall with Rock Smash, and continue northeast to the Pokémon Ranger who heals the party. From the Ranger, collect the Quick Ball near the stone ruins, then head south. The rival battle begins shortly afterward.
- Surf across the first cave’s required water.
- Use Strength on main-route boulders.
- Use Rock Smash on required cracked walls.
- Find the healing Pokémon Ranger in the second outdoor area.
- Collect the Quick Ball landmark and prepare for the rival.
Defeat the final rival
The final rival battle occurs in the second outdoor area after the healing Ranger and Quick Ball landmark. The rival is Serena when the player character is male and Calem when the player character is female. This battle is mandatory.
The rival uses Meowstic at level 57, a starter-dependent Eevee evolution at level 57, Altaria at level 58, Absol at level 59 and the fully evolved starter with a type advantage over your original starter at level 61. The Eevee evolution is Jolteon if you chose Chespin, Flareon if you chose Fennekin, and Vaporeon if you chose Froakie.
Use Dark-, Ghost- or Bug-type attacks against Meowstic. Ice coverage is valuable against Altaria. Fighting, Fairy or Bug attacks can handle Absol, but switch carefully because Absol can use Swords Dance and strong critical-hit moves. Ground coverage is useful against Jolteon. Against Flareon, use Water-, Ground- or Rock-type attacks. Against Vaporeon, use Grass- or Electric-type attacks.
The final starter evolution is Delphox after Chespin, Greninja after Fennekin, or Chesnaught after Froakie. Preserve a dependable answer for it. The Absol in this Victory Road battle is not Mega Evolved; Mega Absol is associated with a later postgame rival encounter. After winning, the rival gives you two Max Revives. Return to the nearby Pokémon Ranger and heal before continuing.
- Trigger the rival battle in the second outdoor area.
- Expect Meowstic at level 57.
- Expect Jolteon, Flareon or Vaporeon at level 57, depending on your starter.
- Expect Altaria at level 58 and Absol at level 59.
- Expect Delphox, Greninja or Chesnaught at level 61.
- Use Ice coverage against Altaria.
- Preserve a reliable answer for the level 61 starter evolution.
- Collect the two Max Revives and heal at the Ranger.
Complete the waterfall route
After healing, travel south and west from the rival area. Break the cracked wall with Rock Smash, then continue east into the next cave. Follow the stairs, ramps and passages through the later cave and grove sections, moving boulders with Strength when they block the main route.
In the third outdoor section, cross the bridge and move west to the water. Surf to the waterfall, climb it with Waterfall, and continue north across the upper land. The waterfall traversal is part of the direct route. Items in the upper area, including TM02 Dragon Claw, are optional.
Return to the water and descend the same waterfall. Enter the nearby cave beside the lower pool. In the final cave, Surf north to land, then follow the Veterans, stairways and ledges toward the northern exit and the Pokémon League.
- Break the post-rival cracked wall with Rock Smash.
- Continue through the later caves and groves.
- Surf to the waterfall in the third outdoor section.
- Climb and descend the waterfall.
- Enter the cave beside the lower pool.
- Follow the final cave north to the League.
Use the Pokémon League facilities
The Pokémon League entrance contains a Pokémon Center and Poké Mart. Heal completely, restore move PP and replenish Full Restores, Revives and Full Heals before beginning the challenge. Once you reach this building, there is no need to return to Snowbelle City for supplies.
Arrange a dependable lead and keep important counters healthy. Electric, Ground, Ice, Fighting, Rock, Fire, Water, Fairy and Steel coverage can all matter across the League. Save manually before entering the first Elite Four chamber and save again after the Elite Four if you want a separate recovery point before Diantha.
- Heal at the League Pokémon Center.
- Buy final supplies.
- Restore move PP.
- Arrange the party order.
- Save before the first Elite Four battle.
Defeat the Elite Four in any order
The four Elite Four chambers may be challenged in any order. Return to the central hall after each victory and heal before selecting the next chamber. Diantha’s room becomes available only after all four members have been defeated.
Malva uses Pyroar, Torkoal and Chandelure at level 63, followed by Talonflame at level 65. Water-, Ground- and Rock-type attacks are useful, but Torkoal has Ground and Rock coverage.
Siebold uses Clawitzer, Starmie and Gyarados at level 63, followed by Barbaracle at level 65. Grass and Electric attacks are useful, especially Electric coverage against Gyarados.
Wikstrom uses Klefki and Probopass at level 63, followed by Scizor and Aegislash at level 65. Fire attacks are strong against Scizor, while Ground attacks help against Probopass. Use a durable answer for Aegislash and be ready for its King's Shield.
Drasna uses Dragalge, Altaria and Druddigon at level 63, followed by Noivern at level 65. Ice and Fairy attacks cover much of the team, but Dragalge is Poison and Dragon, so Fairy attacks are not super effective against it. Ground or Psychic coverage is useful against Dragalge. Heal and restore PP after the fourth victory before entering Diantha’s room.
- Challenge the Elite Four in any order.
- Use Water, Ground or Rock coverage against Malva.
- Use Grass or Electric coverage against Siebold.
- Use Fire or Ground coverage against Wikstrom.
- Use Ice or Fairy coverage against most of Drasna’s team.
- Bring Ground or Psychic coverage for Dragalge.
- Heal and restore PP before Diantha.
Defeat Champion Diantha
Save before entering Diantha’s chamber. Her team is Hawlucha at level 64, Tyrantrum at level 65, Aurorus at level 65, Gourgeist at level 65, Goodra at level 66 and Gardevoir at level 68. Gardevoir holds Gardevoirite and Mega Evolves when it enters battle.
Electric, Ice, Flying, Psychic or Rock attacks can handle Hawlucha. Tyrantrum is vulnerable to Fighting, Ground, Steel, Ice, Dragon and Fairy coverage, but Head Smash and Earthquake make careless switches dangerous. Gourgeist is weak to Fire, Ice, Flying, Dark and Ghost attacks.
Aurorus is vulnerable to Fighting, Ground, Steel, Rock and Water attacks and may set Reflect or Light Screen. Goodra is specially bulky and carries varied coverage, so use a strong Ice, Fairy or Dragon attack. Mega Gardevoir is Fairy and Psychic; a healthy Steel-type is a strong defensive answer because Steel resists both types, but account for its Focus Blast. Poison attacks exploit Fairy typing, but Poison Pokémon must survive Psychic coverage. Do not send a Dragon type into Mega Gardevoir.
After defeating all six Pokémon, allow Hall of Fame registration to finish. The successful League sequence advances to the Lumiose parade and the required pre-credits AZ battle covered in the next chapter.
- Save before Diantha’s battle.
- Prepare answers for all six Pokémon.
- Keep a healthy Steel-type answer for Mega Gardevoir.
- Defeat Diantha’s level 68 Mega Gardevoir.
- Allow Hall of Fame registration to complete.
Before you move on
- All eight Kalos Gym Badges are displayed on the Trainer Card.
- Route 21 has been crossed from Snowbelle City.
- Ace Trainer Robbie has been defeated.
- The required Victory Road route has been completed using Surf, Strength, Rock Smash and Waterfall.
- The third outdoor-section waterfall has been climbed and descended.
- The final rival has been defeated inside Victory Road.
- All four Elite Four members have been defeated.
- Champion Diantha’s level 68 Mega Gardevoir has been defeated.
- The team has been registered in the Hall of Fame.
- The Lumiose victory celebration begins, confirming completion of the Pokémon League campaign.
Hall of Fame, Lumiose Parade and AZ Before the Credits
This chapter begins after Champion Diantha has already been defeated and the winning team has been registered in the Kalos Hall of Fame. The game automatically advances to a celebration in Lumiose City, where AZ challenges the new Champion. Defeat AZ, watch the remaining story scenes and credits, then load the completed save to resume inside the player’s house in Vaniville Town. Stop there. Lumiose Station, the National Pokédex, the TMV Pass, Kiloude City and Battle Maison progression are covered in the next chapter.
Let the Lumiose City celebration begin
After Hall of Fame registration is complete, the game advances through several scenes before returning control to you. A few days have passed, and a crowd has gathered in Lumiose City to celebrate the new Champion and the five defenders of Kalos.
The friends proceed to a stage where Professor Sycamore and his assistants are waiting. Sycamore presents the Honor of Kalos, then the celebration is interrupted by AZ. You do not need to navigate through Lumiose City or select a destination during this sequence; continue through the scenes until AZ issues his challenge.
This is the beginning of the final pre-credits encounter. It is not a postgame rematch, an optional event or a second trip through the Pokémon League.
- Hall of Fame registration has finished.
- The Lumiose City celebration scene has begun.
- Continue through the parade sequence until AZ challenges you.
Prepare for AZ’s battle
AZ uses three level 60 Pokémon in Pokémon Y: Torkoal, Golurk and Sigilyph. Your party is the team that completed the League, so use the party order and available moves that give you reliable answers to Fire, Ground, Ghost, Psychic and Flying types.
Torkoal is a Fire-type Pokémon. Water-, Ground- and Rock-type attacks are effective choices, although remember that AZ’s Torkoal carries Stone Edge, so a Fire counter that is also weak to Rock can take heavy damage.
Golurk is Ground/Ghost. Water, Grass, Ice, Ghost and Dark attacks are super effective. Avoid relying on Normal- or Fighting-type attacks, which do not damage Golurk because of its Ghost typing. If Golurk uses Phantom Force, it becomes untargetable for that turn; attack normally after it returns rather than wasting a move during the invulnerable turn.
Sigilyph is Psychic/Flying. Electric, Ice, Rock, Ghost and Dark attacks are effective. It can use Cosmic Power to raise its defenses, so prioritize strong super-effective attacks instead of allowing it several turns to boost. Keep more than one usable Pokémon available because AZ’s three Pokémon have different defensive matchups.
- Have a Water, Ground or Rock attack ready for Torkoal.
- Have a Water, Grass, Ice, Ghost or Dark attack ready for Golurk.
- Have an Electric, Ice, Rock, Ghost or Dark attack ready for Sigilyph.
- Do not depend on one fragile attacker for the entire battle.
Defeat AZ
AZ’s team is Torkoal at level 60, Golurk at level 60 and Sigilyph at level 60. Lead with a Pokémon that can pressure Torkoal safely, then switch according to the matchup rather than keeping one Pokémon in against every member of his team.
Against Torkoal, use a strong Water-, Ground- or Rock-type move and watch for Stone Edge and Lava Plume. Against Golurk, use a super-effective move that can hit through its Ground/Ghost typing. Against Sigilyph, use Electric, Ice, Rock, Ghost or Dark coverage and try to finish the battle before repeated Cosmic Power boosts make it difficult to break through.
The battle ends the story confrontation with AZ. After you win, the game continues directly into more scenes. There is no return to the Pokémon League entrance or optional exploration between the AZ battle and the ending presentation.
- Defeat level 60 Torkoal.
- Defeat level 60 Golurk.
- Defeat level 60 Sigilyph.
- Allow the story scenes after the battle to continue.
Watch the final pre-credits scenes
After AZ is defeated, he notices Floette and the story resolves their reunion. Continue through the scenes without resetting. The credits begin after the reunion sequence, confirming that AZ’s battle is part of the ending before the credits rather than an encounter unlocked afterward.
The parade battle is the final required narrative battle of the main story. Once it is complete, there are no additional Gym Badges, Team Flare objectives or League battles required for the story completion goal in this chapter.
- AZ’s post-battle scenes have finished.
- The reunion with Floette has occurred.
- The credits have started and played normally.
Load the completed save in Vaniville Town
After the credits finish, return to the title screen and choose Continue. The completed Pokémon Y save resumes inside the player’s house in Vaniville Town. This is the expected post-credits starting point and does not undo the League victory or Hall of Fame registration.
Do not treat the return to Vaniville Town as a loss of progress. The Hall of Fame result is stored in the completed save, and the next chapter begins from this location. Shauna’s postgame interaction, the National Pokédex update, Lumiose Station, the TMV Pass and the train to Kiloude City are deliberately not covered here.
The chapter is complete once the save has loaded inside the Vaniville Town house. Stop before beginning the Lumiose Station and Kiloude City route.
- The credits have finished.
- Continue has loaded the completed Pokémon Y save.
- The player character is inside the house in Vaniville Town.
- No Lumiose Station or Kiloude City instructions have been started.
Before you move on
- The chapter began after the winning team was registered in the Kalos Hall of Fame.
- The Lumiose City celebration and parade occurred.
- AZ was defeated using his level 60 Torkoal, Golurk and Sigilyph.
- The Floette reunion scenes played.
- The credits finished normally.
- Continue loaded the completed save.
- The player character resumed inside the house in Vaniville Town.
- The guide stopped before the Lumiose Station and Kiloude City postgame route.
Kiloude City, Battle Maison and Post-Game Hubs
After Hall of Fame registration, the AZ battle and the credits, load the completed Pokémon Y save in Vaniville Town. Travel to Lumiose Station, receive the National Pokédex update from Sina and Dexio, obtain the TMV Pass from Professor Sycamore and ride the train to Kiloude City. Win at least one Battle Maison battle, then defeat the rival near Kiloude City’s northern pond. The rival awards Absolite and directs you to Professor Sycamore at the Anistar Sundial. Stop there; the Mega Ring upgrade and hidden Mega Stone search belong to the next chapter.
1. Resume in Vaniville Town and reach Lumiose Station
Begin this chapter only after Champion Diantha has been defeated, your team has been registered in the Hall of Fame, the AZ battle has taken place and the credits have finished. Load the completed save. You resume at your house in Vaniville Town.
Leave the house and travel to Lumiose City. You can use Fly if Lumiose City is already registered, or travel through the routes you previously opened. Enter Lumiose Station on North Boulevard. This station is the required starting point for the postgame train to Kiloude City; Kiloude City is not reached by an ordinary route from the mainland.
Shauna may be outside and can offer an optional trade involving one of the other first-partner Pokémon. The trade is not needed for the National Pokédex, TMV Pass, Battle Maison or rival events, so decline it if you want to keep your current team unchanged.
- Load the completed save in Vaniville Town.
- Treat Shauna’s starter trade as optional.
- Reach Lumiose City.
- Enter Lumiose Station on North Boulevard.
2. Receive the National Pokédex and TMV Pass
Inside Lumiose Station, speak with Sina and Dexio and let their conversation finish. They update your Pokédex to the National Pokédex. This is a separate interaction from obtaining the train pass.
After Sina and Dexio have finished, speak with Professor Sycamore in the station. He gives you the TMV Pass, which permits travel between Lumiose City and Kiloude City. If the train is unavailable, confirm that both conversations have been completed rather than assuming that the Pokédex update automatically granted the pass.
Use the orange ticket machine beside the platform after receiving the pass. Select Kiloude City and board the TMV. The ticket machine is the actual departure point; there is no route from Lumiose to Kiloude that can be walked or cycled.
- Receive the National Pokédex update from Sina and Dexio.
- Speak with Professor Sycamore.
- Obtain the TMV Pass.
- Use the orange ticket machine to ride to Kiloude City.
3. Heal and prepare in Kiloude City
When the train arrives, visit the Kiloude City Pokémon Center and heal your party. The Battle Maison is in the central-western part of town. The rival event occurs at the northern end of the city, near the pond on the northern hill.
The Battle Maison uses special battle formats and awards Battle Points, or BP, rather than ordinary experience. For a first attempt, Single Battles are the simplest format because they avoid partner management and field-position complications. Bring dependable type coverage, at least one sturdy switch and reliable answers to fast opponents.
The postgame rival battle uses Pokémon from level 66 through level 70, so heal again before approaching the northern pond. Save before starting the Battle Maison and save again before speaking with the rival.
The Friend Safari in northeastern Kiloude City is optional. It is useful for catching additional Pokémon and building teams, but it is not required for the Battle Maison trigger, the rival battle or Absolite. Battle Chateau activity on Route 7 is also optional and does not replace the Battle Maison requirement.
- Heal at the Kiloude Pokémon Center.
- Save before entering the Battle Maison.
- Prepare a balanced team for facility battles and the rival fight.
- Treat Friend Safari and Battle Chateau activity as optional.
4. Win at least one Battle Maison battle
Enter the Battle Maison and speak with an attendant to register for a challenge. Select Single Battles if you want the most straightforward first attempt.
Complete and win at least one battle. Entering the facility, registering for a challenge or losing after one fight does not satisfy the requirement. After a successful battle, the Maison awards BP and records the victory needed for the next event.
You may leave after that victory. You do not need a five-win streak, a long winning streak or a Battle Chatelaine victory. BP can later be exchanged for battle-related prizes, but those purchases are optional for this chapter.
If you lose, heal at the Pokémon Center and start another challenge. Continue until you have completed at least one successful Battle Maison battle and received BP.
- Choose a Battle Maison format.
- Win one complete battle.
- Confirm that BP has been awarded.
- Do not pursue a five-win streak or Battle Chatelaine victory for this objective.
5. Defeat Serena or Calem at the northern pond
After the successful Battle Maison battle, leave the facility and walk to the northernmost part of Kiloude City. Go up the hill toward the pond. The rival waits there after the Maison victory. If the rival is absent, return to the Battle Maison and confirm that you won a battle rather than merely entering the facility. If necessary, leave Kiloude City and return before checking the northern area again.
The rival’s name depends on the player character. Serena appears when the male player character was selected, while Calem appears when the female player character was selected. Save before speaking with the rival.
The rival’s team includes Meowstic at level 66, Clefable at level 68, an Eeveelution at level 66, Altaria at level 67, the final evolution of the rival’s first-partner Pokémon at level 70 and Mega Absol at level 68. The Eeveelution is determined by your original starter: Chespin leads to Jolteon, Fennekin leads to Flareon and Froakie leads to Vaporeon. The rival’s starter evolution is the one with a type advantage over your original choice, and Absol Mega Evolves during the battle.
Prepare for several different matchups instead of relying on one lead. Ground-type attacks help against Jolteon, while Water-, Ground- or Rock-type attacks can pressure Flareon. Grass- or Electric-type attacks are useful against Vaporeon. Steel- or Poison-type attacks are useful against Clefable, while Ice-, Rock- or Fairy-type attacks pressure Altaria. Fighting- or Fairy-type attacks are effective against Absol. Preserve enough of your team to handle Mega Absol after the earlier Pokémon have weakened your party.
After you win, the rival gives you Absolite and tells you to meet Professor Sycamore at the Anistar Sundial. This reward and instruction complete the required progression for this chapter. Later rival battles in Kiloude City are optional.
- Save before speaking with the rival.
- Go to the northern Kiloude pond after winning at the Battle Maison.
- Defeat Serena or Calem according to the player character’s gender.
- Account for the corrected Eeveelution mapping: Chespin/Jolteon, Fennekin/Flareon and Froakie/Vaporeon.
- Receive Absolite.
- Read the instruction to meet Professor Sycamore at the Anistar Sundial.
6. End at the Anistar Sundial handoff
The Battle Maison and Battle Chateau are separate facilities. The Battle Maison is in Kiloude City, uses specialized battle formats and awards BP. The Battle Chateau is on Route 7 and provides ordinary trainer battles, experience and prize money. A Battle Chateau victory does not substitute for the required Battle Maison victory.
The Friend Safari in northeastern Kiloude City is optional. It supports Pokémon collection and team building, but it is not required for the National Pokédex update, TMV Pass, Battle Maison trigger or Absolite reward. Later rival rematches are optional as well.
Stop this chapter after the rival awards Absolite and directs you to Professor Sycamore at the Anistar Sundial. Do not perform the Sundial conversation yet if following the chapter order. The next chapter begins with the Mega Ring upgrade after the postgame prerequisites are complete. The 8:00 p.m. to 9:00 p.m. period applies to detecting certain hidden Mega Stones after the upgrade; it is not a waiting period or requirement for obtaining the upgrade itself.
- Use the Battle Maison for the required victory and BP.
- Do not substitute the Battle Chateau for the Battle Maison.
- Treat Friend Safari and later rival rematches as optional.
- End after the Absolite reward and Anistar Sundial instruction.
- Leave the Mega Ring upgrade and hidden Mega Stone search for ch16.
Before you move on
- The completed save has been loaded in Vaniville Town.
- Sina and Dexio have upgraded the Pokédex to the National Pokédex.
- Professor Sycamore has given the TMV Pass at Lumiose Station.
- Kiloude City is reachable by TMV.
- At least one Battle Maison battle has been won and BP has been awarded.
- The correct gender-dependent rival has been defeated near Kiloude City’s northern pond.
- The rival’s Eeveelution mapping was accounted for correctly: Chespin/Jolteon, Fennekin/Flareon or Froakie/Vaporeon.
- Absolite has been received.
- The rival has directed the player to meet Professor Sycamore at the Anistar Sundial.
- The chapter ends before the Mega Ring upgrade and hidden Mega Stone search.
Mega Ring Upgrade, Finding Mega Stones and Postgame Checklist
Begin after the Hall of Fame, the TMV Pass, one Battle Maison victory, and the first postgame rival battle in northern Kiloude City. Travel to the Anistar Sundial to upgrade the Mega Ring, then search for optional Mega Stones. The 8:00 p.m. to 9:00 p.m. period applies only to the later hidden-stone detection feature, not to the upgrade conversation. Pokémon Y has its own version-specific stones, shared hidden stones, fixed-reward stones, and Mewtwonite Y from the postgame Mewtwo encounter.
Upgrade the Mega Ring at the Anistar Sundial
Start this chapter after defeating Serena or Calem near the northern pond in Kiloude City. That battle must be won, not merely started. The earlier postgame requirements are also necessary: the game must be completed, the TMV Pass obtained, and at least one Battle Maison battle won. The first rival victory awards Absolite and directs you to Professor Sycamore.
Travel to Anistar City and go north to the large pink Sundial. Professor Sycamore appears there after the Kiloude rival battle. Speak with him to hear his explanation of the Sundial and Mega Stones. When he asks you to touch the Sundial, interact with it. This scene combines the Sundial’s power with the energy already stored in your Mega Ring and upgrades it.
Do not wait for the evening detection period before beginning this conversation. The upgrade takes place during the daytime dialogue and Sundial interaction. If Sycamore is absent, return to Kiloude City and verify that the northern rival battle was actually completed and that you have progressed through the required postgame scenes.
- The Hall of Fame has been entered.
- The TMV Pass has been received.
- At least one Battle Maison battle has been completed.
- Serena or Calem has been defeated at the northern end of Kiloude City.
- Absolite has been received.
- The Sundial interaction with Professor Sycamore has completed.
- The Mega Ring upgrade has been confirmed.
Understand the hidden-stone detection window
After the upgrade, the Mega Ring can react to certain hidden Mega Stones only while the Anistar Sundial is active. In the original Pokémon Y release, use the Nintendo 3DS system time from 8:00 p.m. to 9:00 p.m. The window is a daily search period; it is not a prerequisite for upgrading the ring.
During that hour, travel to a listed location and inspect the relevant stone location. The game’s Mega Ring detection identifies the nearby hidden stone, so the Dowsing Machine is not required and should not be treated as part of the procedure. Depending on the location, the stone is found by approaching or interacting with the appropriate visible or detectable spot.
If a stone is not available, first check the system time, confirm that the Mega Ring was upgraded, and verify that you are in the correct area or floor. These stones are optional. None is needed for the League, the AZ battle, access to Kiloude City, or the Mega Ring upgrade itself.
- The Mega Ring has already been upgraded.
- The Nintendo 3DS clock is within the 8:00 p.m. to 9:00 p.m. search period.
- The correct location and floor have been confirmed.
- The Dowsing Machine is not being treated as a requirement.
- The search is being handled as optional postgame content.
Collect Pokémon Y’s version-specific stones
Pokémon Y’s timed version-specific stones are Aggronite, Heracronite, and Houndoominite. During the active 8:00 p.m. to 9:00 p.m. period, visit the Pokémon Gym in Cyllage City for Aggronite, Santalune Forest for Heracronite, and Route 16 for Houndoominite. Approach the relevant areas and interact when the upgraded Mega Ring detects the stone.
The Pokémon X counterparts are Tyranitarite in Cyllage Gym, Pinsirite in Santalune Forest, and Manectite on Route 16. Do not search for those three as though they were standard Pokémon Y pickups. They require another version or a trade if you want them in a Pokémon Y collection.
The official collection guide marks Aggronite, Heracronite, and Houndoominite as Pokémon Y stones. Record them separately from shared stones so that a missing X-exclusive item does not look like an unfinished Y objective.
- Aggronite has been checked in Cyllage Gym.
- Heracronite has been checked in Santalune Forest.
- Houndoominite has been checked on Route 16.
- Tyranitarite, Pinsirite, and Manectite are correctly identified as Pokémon X stones.
- Each timed search is attempted only after the Mega Ring upgrade.
Search the shared hidden Mega Stones
The shared timed targets include Alakazite in the deepest part of Reflection Cave, Banettite in the Chamber of Emptiness, Garchompite in Victory Road’s specified grove area, Gyaradosite near the waterfalls in Couriway Town, Kangaskhanite in Glittering Cave, Mawilite in Shabboneau Castle, Medichamite near the well in Laverre City, and Scizorite in Frost Cavern where Abomasnow was previously attacked.
Visit each location during the 8:00 p.m. to 9:00 p.m. window with the upgraded Mega Ring. Follow the local landmark rather than searching every tile: the official guide identifies the cave section, waterfall area, castle, well, or Abomasnow encounter site associated with each stone. Some locations were visited during the main story, but the postgame stone is easy to miss if you only follow the original route.
The stones can be collected in any order. If one does not respond, check the clock first, then confirm the Mega Ring upgrade and the exact floor or landmark. Do not use the Dowsing Machine as a prerequisite; the upgraded ring and the correct time window are the relevant requirements.
- Reflection Cave has been checked for Alakazite.
- The Chamber of Emptiness has been checked for Banettite.
- Victory Road has been checked for Garchompite.
- Couriway Town’s waterfall area has been checked for Gyaradosite.
- Glittering Cave has been checked for Kangaskhanite.
- Shabboneau Castle has been checked for Mawilite.
- Laverre City’s well area has been checked for Medichamite.
- Frost Cavern’s Abomasnow area has been checked for Scizorite.
Collect fixed-reward and story-linked stones
Some stones do not use the evening detection system. Absolite comes from the first postgame Serena or Calem battle in Kiloude City. Gardevoirite is obtained through the postgame exchange with Diantha at Café Soleil in Lumiose City. The interaction involves trading a Pokémon with her; it is not a timed hidden-stone pickup.
Gengarite is obtained in Laverre City from a Hex Maniac after you show her a Gastly, Haunter, or Gengar. This reward also does not depend on the Sundial hour. Mawilite is a timed hidden stone in Shabboneau Castle, so keep it separate from the Laverre City Gengarite interaction.
The Kanto starter stones are connected to the Kanto starter choice in Professor Sycamore’s laboratory. The stone for the starter you select is provided with that choice. The other two corresponding stones can be purchased at the Stone Emporium on Vernal Avenue in Lumiose City. These are optional collection goals and are independent of the Mega Ring upgrade.
- Absolite has been received from the first Kiloude rival battle.
- Gardevoirite has been obtained from the Café Soleil exchange if wanted.
- Gengarite has been obtained from the Laverre City Hex Maniac if wanted.
- The Kanto starter stone situation has been recorded separately from timed hidden stones.
- No fixed-reward stone is being searched for during the 8:00 p.m. to 9:00 p.m. window.
Catch Mewtwo and obtain Mewtwonite Y
After entering the Hall of Fame, return to Pokémon Village and use Surf to reach the cave entrance west of the village. This is the Unknown Dungeon. The cave is available only after the Hall of Fame condition is met, and Surf is required to reach it.
Heal before entering and make a manual save before approaching Mewtwo. In Pokémon Y, Mewtwo is Level 70. Bring a controlled-damage plan such as False Swipe, and use a reliable status move such as sleep or paralysis if available. Carry suitable Poké Balls and enough healing items for a long capture attempt. Avoid uncontrolled damage that could cause a critical hit or accidental knockout.
Mewtwo leaves behind Mewtwonite Y after it is caught. The stone is not a timed hidden pickup. If Mewtwo is defeated or you run from it, the encounter returns after the relevant Hall of Fame condition is fulfilled; reloading the save made before the battle is the cleanest immediate retry. Once Mewtwo has been caught in that save, the encounter is finished, but the captured Pokémon and Mewtwonite Y remain available.
- The Hall of Fame condition has been met.
- Surf is available and the Unknown Dungeon entrance can be reached.
- The party is healed.
- A manual save has been made before the encounter.
- Controlled damage and status support are prepared.
- Mewtwo has been caught if desired.
- Mewtwonite Y has been received after the capture.
Separate optional collection from required completion
The Mega Ring upgrade is the only required objective in this chapter. The timed stones, fixed-reward stones, Mewtwo, training, and Pokédex work are optional postgame goals. Track them in separate lists so that a missing Mega Stone does not appear to block the story.
The Battle Maison and Battle Chateau are different facilities. Battle Maison battles award BP and can be used for competitive resources, but no five-win streak or Battle Chatelaine victory is required for the Mega Ring upgrade after the first postgame rival battle. The Battle Chateau, Friend Safari, online trading, online battling, version-exclusive collection, and later rival rematches are also optional.
For a clean stopping point, confirm the Mega Ring upgrade first. Then mark timed stones, fixed rewards, Mewtwonite Y, training plans, and trade-dependent goals as complete, pending, or unavailable in the current Pokémon Y file. No remaining required objective should depend on Nintendo 3DS online services.
- Mega Ring progression is complete.
- Timed hidden stones are tracked separately from fixed rewards.
- Mewtwo and Mewtwonite Y are listed as optional goals.
- Battle Maison and Battle Chateau are not confused with one another.
- Trade-dependent, event-dependent, and version-exclusive goals are separated.
- No mandatory campaign objective remains.
Before you move on
- Professor Sycamore has upgraded the Mega Ring at the Anistar Sundial.
- The player understands that 8:00 p.m. to 9:00 p.m. applies only to hidden Mega Stone detection afterward.
- Aggronite, Heracronite, and Houndoominite are recorded as Pokémon Y targets.
- Shared hidden stones are collected or tracked as optional goals.
- Absolite and any desired fixed-reward stones are collected.
- Mewtwo is caught and Mewtwonite Y is obtained if that optional objective is wanted.
- Abomasite and Scizorite are correctly treated as separate Frost Cavern objectives.
- Battle Maison, Battle Chateau, Friend Safari, online content, trade goals, and later rematches remain optional.
- No required objective remains after the Mega Ring upgrade.
Finishing up
You have obtained all eight Kalos Gym Badges.
You have completed the required Team Flare sequence in Lysandre Labs and Team Flare Secret HQ, captured the Level 50 Yveltal in Pokémon Y and defeated Lysandre for the final time.
You have cleared Victory Road, defeated the Elite Four and Champion Diantha, and seen your party registered in the Hall of Fame.
You have completed the Lumiose parade battle against AZ before the credits.
Optional postgame completion includes reaching Kiloude City, winning a Battle Maison battle, defeating the postgame rival, upgrading the Mega Ring at the Anistar Sundial and pursuing Mega Stones or other postgame goals.
Choose your next gameScreenshots & video
Game imagery for reference. Follow the written chapters above for the route and strategies.
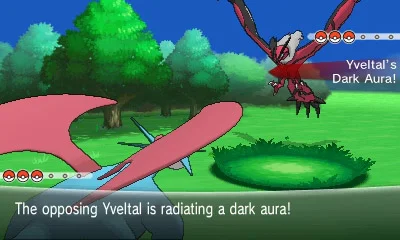
Sources & references
Our original guide draws on the references below. Check the edition at the top of this page before following controls or unlock requirements.
- Pokémon Y Electronic Manual — Nintendo
- Walkthrough: Pokémon X and Y - Bulbapedia
- Pokémon X and Y Walkthrough, Part 1: Vaniville Village and Aquacorde Town
- Pokémon X & Pokémon Y Walkthrough - Aquacorde Town - PokeDream
- Route 2 - Kalos - Serebii Pokéarth
- Walkthrough: Pokémon X and Y/Part 2 - Bulbapedia
- Pokémon X and Y/Aquacorde Town - StrategyWiki
- Pokémon X and Y Walkthrough, Part 2: Route 2 and Santalune Forest
- Walkthrough: Pokémon X and Y — Part 2
- Pokémon X & Y - Gym Leaders - Serebii.net
- Pokémon X and Y/Santalune City — StrategyWiki
- Pokémon X and Y/Santalune Forest — StrategyWiki
- Walkthrough: Pokémon X and Y/Part 3 — Bulbapedia
- Appendix: X and Y walkthrough/Section 3 — Bulbapedia
- List of TM and HM locations in Generation VI — Bulbapedia
- Pokémon X & Y — Battle Chateau — Serebii.net
- Lumiose City — Bulbapedia
- Pokémon X and Y — Route 4 — StrategyWiki
- Pokémon X & Y — Trainer PR Video — Serebii.net
- Walkthrough: Pokémon X and Y/Part 5
- Glittering Cave — Bulbapedia
- Cyllage City — Pokémon X and Y Walkthrough
- Cyllage City Gym — Pokémon X and Y Walkthrough
- Gym Leader Grant — Pokémon X and Y Walkthrough
- Walkthrough: Pokémon X and Y/Part 6 — Bulbapedia
- Shalour Gym — Bulbapedia
- Tower of Mastery — Bulbapedia
- Shalour City — Bulbapedia
- Pokémon X and Y Walkthrough, Part 15: Geosenge Town and Route 11 — ArrPeeGeeZ
- Walkthrough: Pokémon X and Y/Part 7 — Bulbapedia
- Coumarine Gym: Ramos — Pokémon X and Y Walkthrough
- Kalos Route 12 — Bulbapedia
- Lumiose Gym — Bulbapedia
- Walkthrough: Pokémon X and Y, Part 8 — Bulbapedia
- Lumiose City North — Pokémon X and Y Walkthrough — Thonky
- Pokémon X and Y — Official Pokémon Website
- Walkthrough: Pokémon X and Y/Part 10 - Bulbapedia
- Laverre Gym - Bulbapedia
- Poké Ball Factory - Pokémon X and Y Walkthrough
- Dendemille Town - Pokémon X and Y Walkthrough
- Frost Cavern - Pokémon X and Y Walkthrough
- Route 17: Mamoswine Road - Pokémon X and Y Walkthrough
- Pokémon X & Y - Team Flare
- Olympia - Bulbapedia
- Anistar Gym - Bulbapedia
- Pokémon X and Y Walkthrough, Part 33: Anistar City Gym
- Pokémon X and Y Walkthrough - Anistar City
- Walkthrough: Pokémon X and Y/Part 11 - Bulbapedia
- Walkthrough: Pokémon X and Y/Part 13
- Snowbelle Gym
- Kalos Route 18
- Route 21 - Kalos - Serebii Pokéarth
- Pokémon X and Y Walkthrough: Victory Road
- Pokemon X and Y Full Walkthrough, Part 8
- Lysandre Labs — Pokémon X and Y Walkthrough — Thonky
- Team Flare Secret HQ — Pokémon X and Y Walkthrough — Thonky
- Lysandre Labs — Bulbapedia
- Team Flare Secret HQ — Bulbapedia
- Walkthrough: Pokémon X and Y, Part 11 — Bulbapedia
- Walkthrough: Pokémon X and Y, Part 14
- Pokémon X and Y Elite Four and Champion Data
- Kalos Victory Road
- Kalos Route 21
- Victory Road Part 2, Pokémon X and Y Walkthrough
- Walkthrough: Pokémon X and Y/Part 15 - Bulbapedia
- Pokémon X and Y Walkthrough: Post-Game
- Pokemon X & Pokemon Y Walkthrough - Pokemon League - PokeDream
- Pokémon X and Y Walkthrough: Kiloude City
- Mega Evolutions List and Mega Stone Locations
- Pokémon X / Pokémon Y Mega Stone Collection Guide — The Pokémon Company
- Walkthrough: Pokémon X and Y, Part 16 — Bulbapedia
- Anistar City — Bulbapedia
- Unknown Dungeon (Kalos) — Bulbapedia
About the game & collecting notes
- Platform
- Nintendo 3DS
A chronological, original-edition Pokémon Y campaign walkthrough covering every required route, Gym, Team Flare facility, the Yveltal encounter, Victory Road, the Pokémon League, the pre-credits AZ battle and the immediate postgame route to Kiloude City and the Mega Ring upgrade.
Darryl Polo
Darryl Polo loves tinkering with emulation and revisiting retro games. He enjoys exploring how old favorites play on different setups and sharing what he learns along the way. At Joking Joystick, he writes about the games, hardware, and small discoveries that keep the hobby fun.
Our editorial standardsFound a step that needs another look? Help us improve this guide.