
Pokémon X — Complete Walkthrough (Nintendo 3DS, North American retail)
Step-by-step campaign walkthrough for the original North American retail release of Pokémon X on Nintendo 3DS. Follow the playable route in this order: ch01, ch02, ch03, ch04, ch05, ch07, ch08, ch09, ch15, ch10, ch11, ch12, ch13, and ch14. Skip ch06 as a reference-only continuity note because ch03 already completes the first Lumiose City, Professor Sycamore, Café Soleil, and Route 5 opening. Treat ch16 as optional post-game material. The main campaign requires all eight Kalos Gym Badges, Team Flare’s Power Plant and Lumiose operations, Team Flare Secret HQ, the level 50 Xerneas encounter, final Lysandre, Snowbelle Gym, Victory Road, the Elite Four, Champion Diantha, the Hall of Fame, the Lumiose celebration, and AZ’s battle.

Find a copy
Pokemon X Nintendo 3DS
We may earn a commission if you buy through these links, at no extra cost to you. As an Amazon Associate I earn from qualifying purchases.
Opens retailer search results. Check the model, edition, seller, availability and current price before buying.
Before you begin
This walkthrough covers the original Pokémon X Nintendo 3DS retail release in the verified main-story order.
Follow the playable chapters in this order: ch01, ch02, ch03, ch04, ch05, ch07, ch08, ch09, ch15, ch10, ch11, ch12, and ch13, then ch14.
Skip ch06 as a reference-only continuity note. The first Lumiose laboratory, Kanto starter choice, Café Soleil scene, and Route 5 departure are already completed in ch03 and must not be replayed after ch05.
The main-story Xerneas encounter occurs in Team Flare Secret HQ after ch09 and before Snowbelle Gym. The Chamber of Emptiness, Looker Bureau, Mewtwo, Zygarde, Battle Maison, and other post-game activities are optional.
The main-story completion check is the first Hall of Fame entry, the Lumiose City celebration, AZ’s battle, and the ending credits.
Set yourself up for the run
Use the in-game Options menu to set Text Speed and Battle Style to your preference. Pokémon X uses manual saving; do not rely on an autosave feature or a second in-game save slot.
Save manually before Gym Leaders, major Team Flare battles, the Xerneas encounter, the Pokémon League, and AZ’s post-League battle.
Choose Chespin, Fennekin, or Froakie and build a balanced team rather than relying on one starter.
Keep Potions, status cures, Revives, and later Full Restores available before long route and Team Flare sections.
Mega Evolution, Pokémon-Amie, Super Training, trading, and other optional systems are not required for campaign completion.
Use the Pokémon Center and in-game healing NPCs regularly; no online feature is required for the main story.
Vaniville & Professor Sycamore — Your First Steps
Begin Pokémon X in Vaniville Town, meet Shauna and your rival, travel through the encounter-free Route 1 to Aquacorde Town, choose a starter, defeat Shauna, deliver Professor Sycamore’s letter to your mother, and complete the Route 2 catching tutorial. In the original Nintendo 3DS release, Professor Sycamore is not physically met in Vaniville; his laboratory is in Lumiose City and appears later in the story.
Leave your room and meet your new neighbors
You begin upstairs in your house in Vaniville Town. Examine the mirror to change out of your pajamas, then go downstairs and speak with your mother. Leave the house when she tells you to greet the neighboring children.
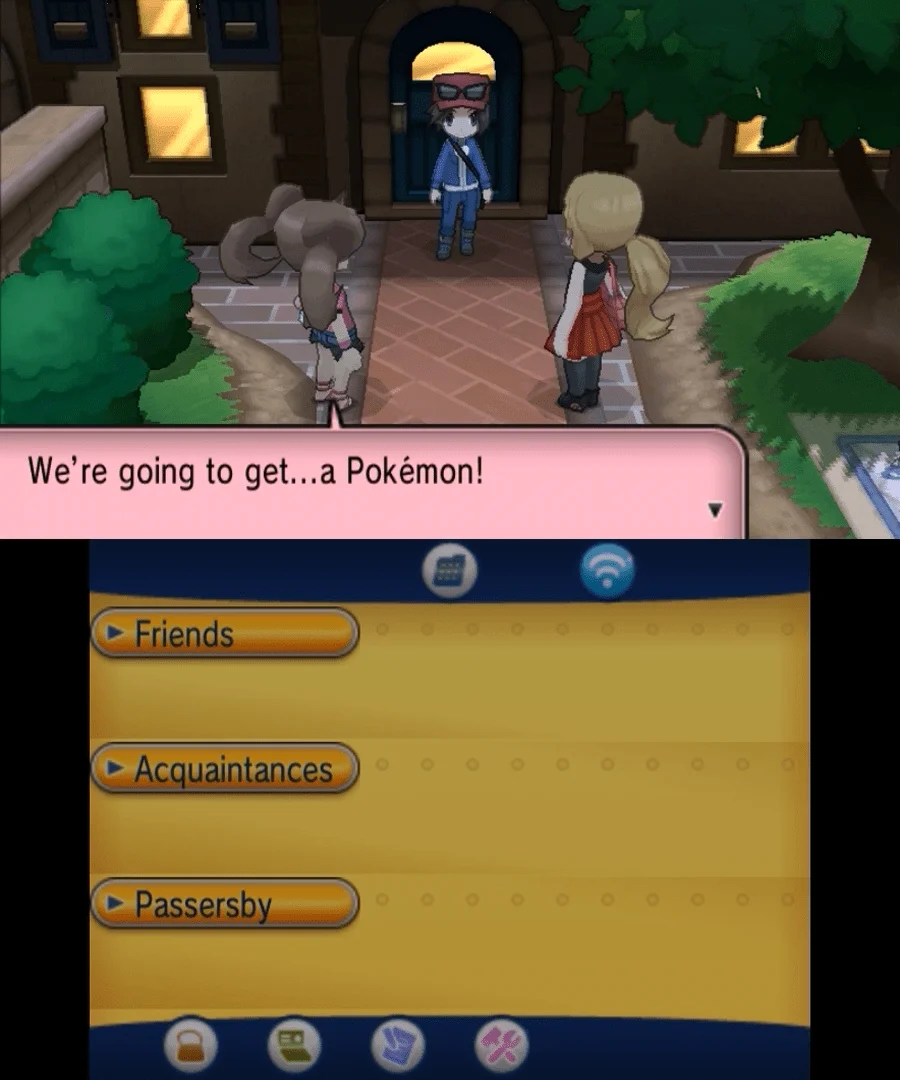
Outside, you meet Shauna and the other child from Vaniville. This character is Calem if you chose the female player character or Serena if you chose the male player character. They explain that Professor Sycamore is looking for young Trainers, then leave through the town gate. Follow them when you are ready.
You may look around Vaniville Town, but there is no required item or battle here. Leave through the gate to Route 1, also called Vaniville Pathway. Route 1 is a short, straight connection to Aquacorde Town with no normal wild Pokémon encounters and no required trainer battles.
- Change out of your pajamas at the bedroom mirror.
- Speak with your mother.
- Meet Shauna and Calem or Serena outside.
- Leave Vaniville through Route 1 toward Aquacorde Town.
Choose your first Pokémon in Aquacorde Town
Continue along Route 1 until you reach Aquacorde Town. The group is gathered near the town plaza. Speak with Shauna, Calem or Serena, Tierno, and Trevor to begin the starter selection sequence.
Choose one of the three offered Pokémon: Chespin, a Grass type; Fennekin, a Fire type; or Froakie, a Water type. You can give the Pokémon a nickname immediately afterward. Shauna receives the starter with a type disadvantage against your choice. The other starter is assigned to the remaining friend for later story battles.
Trevor gives you the Pokédex, and Tierno gives you Professor Sycamore’s letter for your mother. This letter is the opening connection to Sycamore. Do not search Vaniville for his laboratory; that building is located in Lumiose City and is reached later.
- Choose Chespin, Fennekin, or Froakie.
- Nickname the starter or decline the nickname option.
- Receive the Pokédex from Trevor.
- Receive Professor Sycamore’s letter from Tierno.
Defeat Shauna on the way home
Leave Aquacorde by the southern path to return through Route 1 toward Vaniville Town. Shauna stops you before you can continue and initiates the first Pokémon battle. This is not the first battle against your main rival; it is a battle against Shauna.
Shauna uses the starter that is weak to yours. Your Pokémon begins at a low level, but it has access to its type-based damaging move, so select that move from the Fight menu whenever it is available. If your HP becomes low, use a Potion from the Bag rather than risking a knockout.
After defeating Shauna, continue south to Vaniville Town. The battle awards prize money and experience, and your starter may gain a level. If you lose, return to the most recent save and repeat the battle; there is no permanent story penalty.
- Defeat Shauna on Route 1.
- Use the starter’s type-based attack when practical.
- Return to Vaniville Town after the battle.
Deliver the letter and configure the game
Enter your house and speak with your mother. Give her Professor Sycamore’s letter when she asks for it. She gives you a Town Map, a Potion, and the Holo Caster, then sends you back outside. Your mother’s Rhyhorn appears during the departure scene.
Before leaving, open the main menu with the X Button and select Options. Set Text Speed to Fast if you prefer quicker dialogue. Choose Battle Style according to your preference: Shift lets you switch after an opposing Pokémon faints, while Set removes that prompt. These settings can be changed later, but setting them now avoids interrupting the next route section.
Save after making your choices. If you are still deciding whether to keep your starter, save before the selection in Aquacorde rather than after the first battle; otherwise, the new save is a useful checkpoint before the catching tutorial.
- Give Professor Sycamore’s letter to your mother.
- Receive the Town Map, Potion, and Holo Caster.
- Set Text Speed and Battle Style in Options.
- Save before returning to Aquacorde Town.
Return to Aquacorde and begin Route 2
Walk back through Route 1 to Aquacorde Town. Aquacorde does not have a standard Pokémon Center, but its rest house can restore your party. The town also has separate shops for Poké Balls and Potions. Use the rest house before continuing if your starter lost HP in the Shauna battle, and buy supplies if you want extra Poké Balls beyond those provided by the story.
Leave Aquacorde through the northern exit and cross the bridge to Route 2, known as Avance Trail. Shortly after entering the route, Serena or Calem demonstrates how to catch a wild Pokémon. The demonstration uses a Bunnelby and is followed by a gift of ten Poké Balls.
Once the tutorial ends, wild encounters become available normally. Catch at least one additional Pokémon if you want early type coverage, but do not feel required to fill the party immediately. Keep the starter and any new team members healed, and save before continuing toward the forest entrance. A trainer battle stands near the end of Route 2, so be ready to fight or heal before entering Santalune Forest.
- Use Aquacorde’s rest house if your party needs healing.
- Buy Poké Balls or Potions if desired.
- Enter Route 2 from the north side of Aquacorde Town.
- Complete the Serena or Calem catching tutorial.
- Receive the ten Poké Balls from the tutorial.
- Catch an additional Pokémon if desired and save before Santalune Forest.
Before you move on
- Your party contains one chosen starter: Chespin, Fennekin, or Froakie.
- The Pokédex and Professor Sycamore’s letter have been obtained.
- Shauna has been defeated on Route 1.
- Your mother has received the letter, and you have obtained the Town Map, Potion, and Holo Caster.
- Text Speed and Battle Style have been configured in Options.
- You have returned to Aquacorde, passed through Route 2, completed the catching tutorial, and received ten Poké Balls.
- You can proceed toward the Route 2 trainer and Santalune Forest.
Route 2, Santalune Forest and Santalune City
Continue from the Route 2 catching demonstration, build a practical early party, cross Santalune Forest and Route 3, then defeat Viola in Santalune Gym. In Pokémon X, Route 2 includes Weedle rather than Caterpie, while Santalune Forest contains both Weedle and Kakuna. After earning the Bug Badge and TM83 Infestation, leave Santalune City through Route 4 and receive the Exp. Share from Alexa.
1. Finish the Route 2 catching lesson
Begin on Route 2 immediately after the catching demonstration with your neighbor and Shauna. Accept the ten Poké Balls you receive, then use the tall grass to catch at least one additional Pokémon. Route 2 contains Bunnelby, Fletchling, Pidgey, Scatterbug, Zigzagoon and, in Pokémon X, Weedle. Fletchling is a convenient early choice because its Flying-type attacks are useful against Viola’s Bug Pokémon. Bunnelby is another solid choice if you want a physical attacker rather than another Flying-type.
Continue north after the demonstration. A Youngster blocks the route and challenges you when you enter his line of sight; he uses a level 5 Zigzagoon. Put your new Pokémon into the lead when it is safe so several team members gain experience. Do not let the starter take every battle, because the first Gym is easier when you have more than one healthy attacker available.
After defeating the Youngster, continue north into Santalune Forest. You can return to Route 2 later, so there is no need to stop and grind extensively here. If you need additional Poké Balls beyond the ten you were given, buy them only after deciding which encounters you actually want to keep.
- Complete the Route 2 catching demonstration.
- Receive ten Poké Balls.
- Catch at least one additional Pokémon.
- Defeat the level 5 Zigzagoon trainer.
- Enter Santalune Forest.
2. Use Shauna’s healing and collect the forest supplies
Shauna joins you when you enter Santalune Forest and follows you until the northern exit. Speak to her whenever the party needs recovery; she restores your Pokémon for free. This lets you fight the forest trainers and explore the grass without spending your early Potions on every injury.
From the entrance, go left and search the area west of the entrance for an Antidote. Continue north through the nearby grass to collect a Potion, then return toward the entrance and follow the northern path. A second Potion is positioned along the route. Continue east and north past the group of characters. In the grass near the isolated trainer, Shauna can point out a Paralyze Heal; collect it before moving on.
The forest contains Caterpie, Fletchling, Kakuna, Panpour, Pansage, Pansear, Pikachu, Scatterbug and Weedle in the original X and Y encounter tables, with Kakuna being available in Pokémon X and Metapod replacing it in Pokémon Y. Pansear is optional but useful because it learns Incinerate at level 10. Fletchling is usually the simplest early answer to Bug Pokémon, while Pikachu can exploit the shared Electric weakness of Viola’s Surskit and Vivillon.
Battle the trainers you encounter unless you are deliberately avoiding optional fights. The experience and prize money help prepare the party, and Shauna can heal afterward. Near the southern portion of the forest, follow the path toward the exit. Your rival gives you a Poké Ball during the story sequence, and the group provides basic adventure advice before you leave for Route 3.
- Use Shauna’s free healing instead of wasting Potions.
- Collect the Antidote, two Potions and Paralyze Heal if desired.
- Consider catching Fletchling, Pansear or Pikachu for Gym coverage.
- Fight enough forest trainers to keep several Pokémon battle-ready.
- Exit through the northern path to Route 3.
3. Cross Route 3 and prepare in Santalune City
Route 3, also called Ouvert Way, is the short route between Santalune Forest and Santalune City. Battle the trainers along the path if your party needs experience, then continue east toward the city. Dunsparce can be found on Route 3 and may know Rollout early, making it an optional Rock-type answer for Viola. You do not need a specific species to win; a trained Fletchling, Pansear, Pikachu, starter or another dependable Pokémon is sufficient.
Heal at the Pokémon Center as soon as you arrive in Santalune City. The Boutique, Trainers’ School and other city facilities are optional at this stage. Before entering the Gym, make sure several Pokémon are healthy and that your lead Pokémon is not badly weakened. Fire, Flying, Rock and Electric attacks are useful, but neutral damage is enough if your levels and move power are reasonable.
The Gym entrance is initially blocked by Rinka, a Roller Skater. Battle her to receive the Roller Skates. You can move faster with them using the Circle Pad, although the D-pad removes them and returns you to normal movement. After receiving them, enter the Gym.
- Cross Route 3 and reach Santalune City.
- Heal at the Pokémon Center.
- Train more than one usable party member.
- Battle Rinka and receive the Roller Skates.
- Enter Santalune Gym.
4. Follow the web route to Viola
The first Gym room is a photograph gallery. Slide down the rope in the center to reach the lower room, where large spider webs connect the platforms. The wider, lighter sections of web are walkable; darker sections are blocked. Several routes can reach the back, but large water droplets mark the quickest route with fewer trainer battles.
Fight the Gym Trainers if you want the experience, or follow the droplets and avoid unnecessary detours. The Gym Trainers use low-level Bug Pokémon, so a Flying-, Fire-, Rock- or Electric-type move should handle them efficiently. Heal at the Pokémon Center before entering if the party took substantial damage; there is no healing station inside the Gym.
Reach the large wooden platform at the back and speak to Viola. In Pokémon X, she uses Surskit at level 10 and Vivillon at level 12. Surskit is Water/Bug and knows Quick Attack, Bubble and Water Sport. Water Sport weakens Fire-type attacks while active, so do not rely on a Fire move as your only answer. Use Electric attacks, Flying attacks, neutral damage or another strong move to defeat it.
Vivillon is Bug/Flying and knows Harden, Infestation and Tackle. Infestation causes continuing damage and prevents switching, while Harden reduces physical damage. Attack it decisively rather than allowing repeated Harden uses. A Flying- or Electric-type move is especially useful, but any healthy Pokémon with reliable damage can finish the battle.
- Slide down the central rope into the web room.
- Use the water droplets to identify the shortest route.
- Defeat or bypass the Gym Trainers as preferred.
- Defeat Viola’s level 10 Surskit.
- Defeat Viola’s level 12 Vivillon.
5. Claim the badge and continue toward Route 4
After the battle, Viola awards the Bug Badge and TM83 Infestation. The Bug Badge makes Pokémon up to level 30 obey you. Exit through the staircase behind Viola; it carries you back to the gallery and out of the Gym.
Heal at the Pokémon Center if necessary, then leave Santalune City through the western route toward Route 4. At the city’s exit, Alexa, Viola’s older sister, stops you and gives you the Exp. Share. It distributes experience to party members that did not participate in battle and can be switched on or off from the Bag.
Do not continue directly toward Cyllage City. Route 4 and Lumiose City are the next required destinations, and the first Lumiose visit belongs to the following chapter.
- Receive the Bug Badge.
- Receive TM83 Infestation.
- Exit through the staircase behind Viola.
- Meet Alexa at the Route 4 exit.
- Receive the Exp. Share.
- Proceed toward Route 4 and Lumiose City.
Before you move on
- Route 2 has been cleared after the catching demonstration and the level 5 Zigzagoon trainer has been defeated.
- Santalune Forest has been crossed, with Shauna’s healing used as needed.
- Route 3 has been crossed and Santalune City has been reached.
- Rinka has been defeated and the Roller Skates are in the Key Items pocket.
- Viola’s level 10 Surskit and level 12 Vivillon have been defeated.
- The Bug Badge and TM83 Infestation are in the inventory.
- Alexa has delivered the Exp. Share at the Route 4 exit.
- The next destination is Route 4 and then the first Lumiose City sequence, not Cyllage City.
References for this chapter
Route 4 to Ambrette Town — Lumiose, Camphrier and the Fossil Coast
Leave Santalune City through Route 4, complete the first required visit to Lumiose City and Professor Sycamore’s laboratory, then follow the story through Route 5, Camphrier Town, Route 7, Route 6, Parfum Palace, Connecting Cave, Route 8, and Ambrette Town. The chapter ends after the Ambrette Fossil Lab directs you toward Glittering Cave and Route 9. The Lumiose Gym, Lysandre Café, and Lysandre Labs are not available during this section.
Cross Route 4 and enter southern Lumiose City
From Santalune City, take the northern exit onto Route 4, also called Parterre Way. The route is a formal garden with branching paths, flower patches, and several trainers. Follow the main path north toward Lumiose City, battling trainers as needed for experience and money. The wild Pokémon here include Flabébé, Budew, Combee, Ralts, Skitty, Ledyba, and other low-level species, so this is a useful point to add a Fairy-, Grass-, or Psychic-capable team member if your party still lacks coverage.
Route 4 leads directly to Lumiose City’s southern entrance. Save or heal at the Pokémon Center once you arrive. The city is experiencing a blackout, so you cannot freely use the northern districts, Prism Tower, or the Lumiose Gym yet. Treat this as a story stop rather than a full city visit. The boutiques, cafés, and other services are optional and can be ignored while you complete the required laboratory sequence.
- Leave Santalune City through the north exit.
- Cross Route 4 and enter Lumiose City from the south.
- Heal at the southern Lumiose Pokémon Center.
- Do not attempt to reach the Lumiose Gym or Prism Tower during the blackout.
Visit Professor Sycamore’s laboratory
Sina meets you on South Boulevard and leads you to Professor Sycamore’s laboratory, a small building west of the Pokémon Center. Heal before entering if necessary. On the second floor, speak with the female Scientist to receive five Luxury Balls, then go to the third floor and speak with Professor Sycamore.
Professor Sycamore evaluates your Pokédex and challenges you to a battle. In Pokémon X, he uses level 10 Bulbasaur, Charmander, and Squirtle. His team covers three different types but has modest levels and straightforward moves. Use type advantages where convenient, but a normally trained team from Route 4 is sufficient. This is the required battle associated with the laboratory visit; do not confuse it with a later rival battle elsewhere in Kalos.
After the battle, Sycamore allows you to choose a second Kanto starter from Bulbasaur, Charmander, or Squirtle. The choice is optional for team planning, but it is a permanent gift opportunity, so select a type that complements your current starter. He also gives the corresponding Mega Stone. Mega Evolution is not yet available; the Mega Ring and the usable story tutorial come later in Shalour City.
Before leaving, speak to the female Scientist on the third floor if you have registered at least 30 different Pokémon species to receive TM54 False Swipe. This is an optional capture aid, not a requirement for the story. On the first floor, speak with Lysandre when he appears, then follow your rival into Café Soleil for the required conversation with Lysandre and Diantha. There is no Gym battle here.
- Battle Professor Sycamore on the third floor.
- Choose one of Bulbasaur, Charmander, or Squirtle.
- Receive the corresponding Mega Stone.
- Complete the Café Soleil conversation with Lysandre and Diantha.
- Leave Lumiose through the gate leading southwest to Route 5.
Travel across Route 5 to Camphrier Town
Exit Lumiose through the southwest gate and enter Route 5, also called Versant Road. Mr. Bonding explains Attack Power and Defense Power in the gate; these O-Powers are optional. Route 5 has a skate park and grind rails. Use the rails for items if you want them, but the main route continues southwest toward Camphrier Town.
Route 5 trainers include Twins Faith and Joy with Plusle and Minun, Rising Star Hamish with Kadabra, Roller Skaters Winnie and Florin, and several other trainers using Pokémon around levels 9 to 13. Kadabra is fragile but fast, while Plusle and Minun can punish Water- or Flying-type choices with Electric attacks. Keep a Ground-type move or a sturdy neutral attacker available. The route also offers useful catches such as Skiddo, Pancham, Doduo, Bunnelby, Gulpin, and Abra, although none is required.
In Camphrier Town, heal at the Pokémon Center and speak with the man outside Shabboneau Castle. He explains that a Snorlax is blocking the bridge on Route 7 and that the Poké Flute needed to wake it is currently at Parfum Palace. This conversation starts the required palace errand. You can collect optional items and visit Cassius, the Name Rater, and Hotel Camphrier, but none of these services advances the story.
- Cross Route 5 and complete the required trainer encounters or use them for experience.
- Reach Camphrier Town and heal.
- Speak with the castle caretaker about the sleeping Snorlax.
- Confirm that the Poké Flute is at Parfum Palace.
Trigger the Snorlax problem and visit Parfum Palace
From Camphrier Town, travel west along Route 7. The route contains Berry Fields and several optional facilities, but the required landmark is the bridge where the castle caretaker is standing beside the sleeping Snorlax. Speak with him to learn that you must retrieve the Poké Flute from Parfum Palace.
Turn north from Route 7 onto Route 6, also called Palais Lane. The central road takes you directly to Parfum Palace. Route 6 has trainers and tall grass; Pokémon include Honedge, Espurr, Oddish, Sentret, Nincada, and Kecleon, with Venipede appearing from rustling bushes. Stay on the center road while approaching the palace, then explore the side paths later if you want the optional items.
At the palace entrance, the owner demands an admission fee. Pay it and enter. Shauna is already involved in the search for the owner’s missing Furfrou. Go through the palace and into the courtyard. In the hedge maze, approach the Furfrou from the correct side with Shauna so it cannot escape, then corner it against the palace wall. After the Furfrou is returned, go upstairs and speak to Shauna on the balcony. The fireworks scene follows, and the palace owner gives you access to the Poké Flute. The butler also gives TM17 Protect. The Furfrou search and balcony conversation are required; the palace’s other items, including the Amulet Coin and HM01 Cut, are optional.
- Enter Route 7 and speak with the caretaker beside Snorlax.
- Take Route 6 north to Parfum Palace.
- Pay the palace entrance fee.
- Find and return the missing Furfrou.
- Speak to Shauna on the second-floor balcony.
- Receive the Poké Flute from the palace owner and TM17 Protect from the butler.
Wake Snorlax and pass through Connecting Cave
Return south to the Route 7 bridge. Heal before interacting with Snorlax, especially if you intend to catch it. Give the Poké Flute to the caretaker and agree to battle. Snorlax is level 15, holds a Sitrus Berry, and knows Tackle, Defense Curl, Amnesia, and Lick. Fighting-type attacks are the most effective offensive option, but do not rely on a single fragile counter because Defense Curl and Amnesia can make the battle longer. Lower its HP carefully and use Great Balls or other available Poké Balls if you want to catch it. If you defeat it or catch it, the bridge opens and the story continues.
Continue west on Route 7. The Pokémon Day Care and Battle Chateau are visible but optional at this stage. At the western end, enter Connecting Cave, also called Zubat Roost. The northern passage is blocked by boulders, so use the southern shortcut. A Scientist inside can heal your party, making this a convenient recovery point. The cave’s common encounters include Zubat, Whismur, Meditite, and Axew. A Pokémon Breeder with Ducklett, Pikachu, Litleo, and Oddish provides the main trainer battle.
- Heal before waking Snorlax.
- Battle or capture the level 15 Snorlax.
- Cross the newly opened bridge on Route 7.
- Use Connecting Cave’s southern passage.
- Heal with the Scientist if needed.
Reach Ambrette Town and complete the Fossil Lab setup
Exit Connecting Cave onto the upper section of Route 8, Muraille Coast. Follow the cliffside path south toward Ambrette Town. Route 8 contains trainers with Pokémon such as Axew, Pancham, Skiddo, Goldeen, Machop, Drifloon, and Pidgeotto. Battle enough of them to keep the party prepared for the upcoming Route 9 and Glittering Cave section, but do not continue into Route 9 yet if you are following this chapter boundary.
When you reach Ambrette Town, your rival meets you near the stairs and tells you to visit the Fossil Lab. Go to the southeastern Fossil Lab and speak with the scientists. They explain that the relevant researcher is working at the Glittering Cave dig site on Route 9. This conversation is the required conclusion of the Ambrette setup and opens the next chapter’s route.
Several Ambrette rewards are optional. The girl near the Pokémon Center gives TM94 Rock Smash, the Aquarium fisherman gives the Old Rod, and Hotel Ambrette contains TM96 Nature Power. The eastern gate also gives a Rocky Helmet. These items are useful, but the chapter’s mandatory endpoint is the Fossil Lab conversation directing you toward Route 9. The fossil choice, Aerodactylite, and fossil restoration occur only after the Glittering Cave sequence in the next chapter.
- Cross the upper Route 8 path from Connecting Cave.
- Reach Ambrette Town and heal.
- Visit the Fossil Lab in the southeastern part of town.
- Speak with the scientists and learn that the researcher is in Glittering Cave.
- Leave Route 9, the fossil choice, and fossil restoration for the next chapter.
Before you move on
- Route 4 has been crossed from Santalune City to Lumiose City.
- Professor Sycamore has been defeated in his laboratory, and a second Kanto starter has been chosen.
- The Café Soleil scene with Lysandre and Diantha has been completed.
- Route 5 and Camphrier Town have been cleared, and the caretaker’s request has been triggered.
- The missing Furfrou has been returned at Parfum Palace, and the Poké Flute has been received.
- Snorlax has been defeated or captured, allowing passage across the Route 7 bridge.
- Connecting Cave and the upper section of Route 8 have been crossed.
- Ambrette Town has been reached, and the Fossil Lab scientists have directed the player to the Glittering Cave researcher on Route 9.
- The player is ready to begin the next chapter at Route 9 without having repeated Santalune Forest, Santalune Gym, or Viola.
Cyllage City — Rock-type gym and cliff routes
Travel from Ambrette Town through Route 9 and Glittering Cave, choose a Kalos fossil, reach Cyllage City, and defeat Grant for the Cliff Badge. Then follow the required route north through Route 10, Geosenge Town, Route 11, and Reflection Cave until you arrive in Shalour City. The chapter ends before the Shalour Gym and Tower of Mastery sequence.
Ride through Route 9 and enter Glittering Cave
After finishing the Fossil Lab events in Ambrette Town, leave through the eastern exit to enter Route 9, also called Spikes Passage. Heal at the Pokémon Center and carry Potions, because wild encounters and trainer battles can wear down the party before the cave.
Approach the Rhyhorn near the route entrance and mount it. Ride across the rough, spiked ground and use Rhyhorn’s charge to smash the boulders blocking the passage. Follow the main route toward Glittering Cave. Side paths contain optional items, but none is required to reach the cave entrance.
Dismount when you reach ordinary ground so you can collect items or speak with nearby people, then mount Rhyhorn again whenever the jagged terrain blocks your way. You do not need to explore every side passage before entering Glittering Cave.
- Heal in Ambrette Town before leaving.
- Mount Rhyhorn at the Route 9 entrance.
- Break the blocking boulders and reach Glittering Cave.
Clear Glittering Cave and select a fossil
Glittering Cave is a branching area with wild Pokémon and Team Flare Grunts. Follow the corridors deeper into the cave, defeating the Grunts who block the route. Keep a few healing items available instead of battling every optional wild Pokémon, since the cave’s required fights can leave a single lead Pokémon weakened.
Near the back of the cave, the story presents a choice between the Jaw Fossil and the Sail Fossil. In Pokémon X, the Jaw Fossil becomes Tyrunt and the Sail Fossil becomes Amaura. Choose one, then continue through the remaining story sequence and leave the cave with your neighbor.
The fossil decision is permanent for that choice, but it does not affect the campaign route, the Cyllage Gym, or later badge progression. You can return to Ambrette Town to revive the selected fossil, but revival is optional and should not delay the main route.
When you exit, follow Route 8’s coastal path north. Continue through the route gate to reach Cyllage City.
- Defeat the mandatory Team Flare battles in Glittering Cave.
- Choose either the Jaw Fossil or Sail Fossil.
- Exit to Route 8 and follow the coast north.
- Reach Cyllage City.
Receive Strength and prepare for Grant
Restore the party at Cyllage City’s Pokémon Center. The city has a Poké Mart, Boutique, hotel, Bicycle Shop, and a large bicycle track climbing the eastern cliff. If you do not already have a Bicycle, speak with the attendant in the Bicycle Shop to receive one.
Follow the bicycle track uphill. Grant appears on the track and gives you HM04 Strength after explaining the race. You may teach Strength immediately, but it cannot be used outside battle until you defeat Grant and receive the Cliff Badge.
Prepare at least one reliable attacker with Water-, Grass-, Fighting-, Ground-, or Steel-type damage. Grant specializes in Rock Pokémon, and both of his Pokémon are vulnerable to several of these attacking types. Amaura’s Ice typing means that Grass and Ground users must also respect its Ice attacks, so Fighting or Steel damage is especially dependable if available.
- Heal the full party.
- Restock Potions and status cures if needed.
- Receive HM04 Strength from Grant on the bicycle track.
- Bring a strong Water, Grass, Fighting, Ground, or Steel attacker.
Climb the Cyllage Gym
The Cyllage Gym stands on the eastern hill above the city. Enter and use the climbable rock walls to move upward. Work around the central formation, using ledges to change sides when a wall ends. The route is straightforward once you recognize that each wall leads to the next platform rather than directly to the summit.
Battle the Gym Trainers if your party needs experience or money. Their teams are built around the Gym’s Rock theme, but Grant’s battle is the important test, so heal before challenging him if several Pokémon are already damaged.
Continue climbing until you reach the upper platform and Grant. The Gym does not restore your party automatically, so use items before speaking to him if necessary.
- Enter the Gym on Cyllage’s eastern hill.
- Use the climbing walls and ledges to gain height.
- Defeat or bypass the Gym Trainers as appropriate.
- Reach Grant with your main counters healthy.
Defeat Grant for the Cliff Badge
Grant uses Amaura at level 25 followed by Tyrunt at level 25. Amaura is Rock/Ice and knows Aurora Beam, Rock Tomb, Thunder Wave, and Take Down. Tyrunt is Rock/Dragon and knows Rock Tomb, Bite, Stomp, and Take Down.
Use super-effective attacks instead of relying on Fire-, Flying-, or Bug-type moves. Fighting and Steel attacks are particularly effective against Amaura. Water, Grass, Fighting, Ground, and Steel attacks can all help against the two Pokémon, although Tyrunt’s Dragon typing removes its normal weakness to Water and Grass.
Watch for Thunder Wave from Amaura. If your main attacker becomes paralyzed, use a Paralyze Heal or switch to another healthy Pokémon rather than allowing paralysis to decide the battle. Tyrunt’s Rock Tomb lowers Speed, so a Pokémon that begins the fight faster may lose that advantage after being hit.
After both Pokémon are defeated, Grant awards the Cliff Badge and TM39 Rock Tomb. The badge raises the obedience limit to level 40 and allows Strength to be used outside battle.
- Defeat level 25 Amaura.
- Defeat level 25 Tyrunt.
- Receive the Cliff Badge.
- Receive TM39 Rock Tomb.
- Confirm that Strength now works outside battle.
Optional Connecting Cave rewards, then Route 10
After the Gym, heal again. If you want optional items, use the upper entrance beside the Cyllage bicycle track to enter Connecting Cave and push the boulder with Strength. This opens a shortcut toward Route 7. The cave also contains TM40 Aerial Ace and a Hiker who gives TM21 Frustration. Neither reward is required for the campaign, and the shortcut is not a replacement for the required northern route.
For the main story, leave Cyllage City through its northern exit and enter Route 10, also called Menhir Trail. Follow the path through the standing stones. The route contains ordinary trainers and several Team Flare encounters, including Grunts using Pokémon around the low-to-mid 20s. Use the battles for experience, but heal before leaving Cyllage if your party is already worn down.
Some boulders on Route 10 can be moved with Strength. Push aside the first obstruction and place the next boulder into the nearby hole if you want access to the side item area, including TM73 Thunder Wave. These actions are optional; the main path continues north toward Geosenge Town.
- Optionally open the Connecting Cave shortcut.
- Optionally collect TM40 Aerial Ace and TM21 Frustration.
- Leave Cyllage through the northern exit.
- Defeat the required Team Flare Grunts on Route 10.
- Reach Geosenge Town.
Cross Geosenge Town and battle Korrina
Geosenge Town connects Route 10 with Route 11. Heal at the Pokémon Center and use the town’s services if needed, but no optional hotel, item, or trade event is necessary for progression.
A Team Flare Grunt in the northern part of town examines the standing stones and then runs toward the northwest side. Follow the event to the northwest corner, where the Grunt disappears near an unusual rock formation. Continue toward the Route 11 exit.
Before you can leave for Route 11, Korrina challenges you to a battle. She uses two level 25 Lucario. Fire-, Fighting-, and Ground-type attacks are effective choices, but avoid allowing either Lucario to build momentum with Power-Up Punch or Swords Dance. Defeat both Pokémon, then proceed east from Geosenge onto Route 11.
- Heal in Geosenge Town.
- Follow the Team Flare event from the northern stones to the northwest corner.
- Defeat both of Korrina’s level 25 Lucario.
- Enter Route 11.
Cross Route 11 and navigate Reflection Cave
Route 11, also called Miroir Way, is the rugged path between Geosenge Town and Reflection Cave. Battle the trainers or avoid optional fights according to your party’s condition. Psychic- and Fighting-type opponents are common, so keep a Dark-, Flying-, Fairy-, or other suitable answer available if your team needs it.
Near the approach to Reflection Cave, Professor Sycamore sends a Holo Clip explaining that Shalour City is just ahead and suggesting that you visit the Mega Evolution guru there. Continue east and enter the cave.
Inside Reflection Cave, follow the main route through the first floor and take the stairs down to B1F. On B1F, speak with Tierno in the southwest area to receive TM70 Flash, then continue through the trainer-filled passages toward the lower stairs. The cave has many side items, including a Black Belt, Hyper Potion, Iron, and Escape Rope, but they are optional.
On B2F, reach the northeast stairs and climb over the central rise to obtain the Earth Plate if desired. A hidden passage can be found by checking the reflection on the north wall near the apparent dead end; it leads to TM74 Gyro Ball. These are optional rewards. Return to the main route, move back through B1F, and use the northwest stairs to return to 1F.
Near the final section, defeat or pass Hiker Dunstan and use Strength to move the boulder into position. This opens the final route toward the northern exit. Leave Reflection Cave and enter Shalour City.
- Receive the Holo Clip near Reflection Cave.
- Enter Reflection Cave from Route 11.
- Use Tierno’s rest stop and optional TM70 Flash pickup if desired.
- Follow the stairs through B1F and B2F.
- Use Strength near the final 1F section.
- Exit into Shalour City.
Before you move on
- Route 9 and Glittering Cave have been cleared.
- A Jaw Fossil or Sail Fossil has been selected.
- Cyllage City has been reached.
- HM04 Strength has been received from Grant.
- Grant’s level 25 Amaura and level 25 Tyrunt have been defeated.
- The Cliff Badge and TM39 Rock Tomb are in the inventory.
- The northern route from Cyllage through Route 10 is open.
- The Team Flare events in Route 10 and Geosenge Town have been completed.
- Korrina’s two level 25 Lucario have been defeated.
- Route 11 and Reflection Cave have been crossed.
- The player has arrived in Shalour City, ready for the Tower of Mastery and Shalour Gym sequence.
Shalour City and Mega Evolution — Korrina’s Gym and the Tower of Mastery
Begin this chapter in Shalour City after chapter 4 has carried you through Route 10, Geosenge Town, Route 11, and Reflection Cave. Complete the Shalour City rival and Gym sequence, earn the Rumble Badge, return to the Tower of Mastery for the Mega Evolution tutorial, receive the Mega Ring and Lucario, then collect HM03 Surf at the Route 12 gate. Route 12 is the next required destination.
1. Arrive in Shalour City and prepare for the required sequence
Enter Shalour City from Reflection Cave after completing the intervening Route 10, Geosenge Town, Route 11, and cave route. Heal at the Pokémon Center before beginning the city events. The upcoming rival and Gym battles use Pokémon around levels 28 to 32, so a party with several Pokémon in that range is suitable. Carry healing items and at least a few Revives if your supplies are low.
The city’s required destination is the Tower of Mastery, north of the main streets on the beach. When you enter the large beach area, Tierno gives you the Intriguing Stone. It is not the Key Stone, the Mega Ring, or a Mega Stone. The Hiker east of the Pokémon Center can later exchange it for a Sun Stone, but that trade is optional and does not affect the story.
You can also collect optional city items, including the hidden X Sp. Atk behind the bench near the Gym and the Max Ether near the Tower of Mastery. These pickups are useful but are not needed to continue.
- Start in Shalour City after the complete chapter 4 route, not directly after Santalune City.
- Heal and restock before the rival and Gym battles.
- Treat the Intriguing Stone, Sun Stone trade, and city items as optional.
2. Enter the Tower of Mastery and defeat your rival
Enter the Tower of Mastery through the entrance in the Lucario statue and speak with Gurkinn, Korrina, and the other members of your group. The conversation explains that Mega Evolution requires a Key Stone worn by the Trainer and a compatible Mega Stone held by the Pokémon. Because only one Mega Ring is available, your rival challenges you for the right to receive it.
Speak to the rival when you are ready. The battle uses Meowstic at level 28, Absol at level 28, and the evolved form of the starter that has a type advantage over your chosen starter at level 30. Meowstic can use Fake Out and Light Screen, while Absol is a physical attacker with Dark-type moves. The final starter is the highest-level opponent, so keep a reliable answer healthy for it.
After the victory, Korrina tells you that you must defeat her at the Shalour Gym before the Mega Ring can be awarded. The upper tower route remains blocked until the Gym battle is complete. Leave the tower, heal, and enter the Gym.
- Defeat the rival’s level 28 Meowstic and Absol.
- Defeat the rival’s level 30 evolved starter.
- Remember that the Mega Ring is not awarded after this first Tower battle.
3. Navigate Shalour Gym and defeat Korrina
Shalour Gym is a roller-skating course. Skaters and rails divide the rink into sections. Battle the trainers that block the available lanes, then use the rails to reach the next open section. If a rail sends you past the intended junction, move around the rink and approach the next lane from its accessible side. Continue until you reach Korrina at the far end.
Korrina uses Fighting-type Pokémon, so Flying-, Psychic-, and Fairy-type attacks are effective. Avoid relying on fragile Pokémon that are weak to Fighting or Flying. Her team is Mienfoo at level 29, Machoke at level 28, and Hawlucha at level 32.
Mienfoo can use Fake Out and Power-Up Punch. Machoke also knows Power-Up Punch and Rock Tomb, which can lower Speed. Hawlucha is the main danger: it can use Flying Press, Hone Claws, and Power-Up Punch. Flying Press deals Fighting- and Flying-type damage, so a Pokémon that resists Fighting may still take heavy damage if it is weak to Flying. Use a strong super-effective attack before Hawlucha has time to increase its stats.
Winning awards the Rumble Badge and TM98 Power-Up Punch. The badge permits the use of Surf outside battle and raises the obedience limit for traded Pokémon to level 50. Heal before returning to the Tower of Mastery.
- Use the roller-skate routes to reach Korrina.
- Defeat Mienfoo, Machoke, and Hawlucha.
- Receive the Rumble Badge and TM98 Power-Up Punch.
4. Complete the Mega Evolution trial
Return to the Tower of Mastery after earning the Rumble Badge. The previously blocked route is now open. Climb the tower’s interior stairs to the upper level. The tower contains optional trainers and TM47 Low Sweep, but neither is required for the story.
Speak with Korrina at the top. Gurkinn gives you the Mega Ring, the Key Item that allows Mega Evolution during battle. Korrina then challenges you to a one-on-one battle using one of her Lucario. Select the Mega Evolution command before choosing your attack. This battle is a tutorial, so use Mega Evolution to complete the demonstration rather than treating it as a normal Lucario battle.
After the tutorial, Korrina allows you to take the Lucario you used. Make room in your party if necessary. The received Lucario is level 32 and holds Lucarionite, the Mega Stone that allows Lucario to become Mega Lucario. The Lucario and its Mega Stone are useful but are not mandatory for completing the rest of the campaign.
After the Tower event, leave Shalour City through the eastern gate toward Route 12. Your rival, Calem or Serena depending on your character, stops you near the gate and gives you HM03 Surf. The gift requires both the Rumble Badge and completion of the Tower of Mastery Mega Evolution event. Route 12 is the next required route and uses Surf to cross its waterways.
- Reach the top of the Tower of Mastery after defeating Korrina.
- Receive the Mega Ring.
- Complete the Lucario-versus-Lucario battle with Mega Evolution.
- Accept the level 32 Lucario holding Lucarionite if you have room.
- Receive HM03 Surf from Calem or Serena at the Route 12 gate.
Before you move on
- The Rumble Badge is recorded on your Trainer Card.
- TM98 Power-Up Punch is in your Bag.
- The Mega Ring is in your Key Items pocket.
- The Lucario tutorial battle has been completed using Mega Evolution.
- A level 32 Lucario holding Lucarionite has been accepted or otherwise resolved at the Tower of Mastery.
- HM03 Surf is in your Bag after speaking with Calem or Serena at the Route 12 gate.
- You are standing at the start of Route 12 or are ready to enter it as the next required destination.
References for this chapter
- Shalour City — Bulbapedia
- Shalour City Gym — Bulbapedia
- Tower of Mastery — Thonky Pokémon X and Y Walkthrough
- Route 12: Fourrage Road — Pokémon X and Y Walkthrough — Thonky
- Pokémon X and Y Walkthrough, Part 17: Shalour City and Shalour City Gym
- Pokémon X and Y Walkthrough, Part 18: Tower of Mastery and Route 12
- Pokémon X & Y Gym Leaders — Serebii.net
Reference Note — First Lumiose Sequence Already Completed
This chapter is a non-playable continuity note. It must not repeat the first Lumiose City visit or publish Route 5, Camphrier Town, Parfum Palace, the Poké Flute, or the Snorlax progression as current objectives. Those events are already completed in ch03. After finishing ch05 in Shalour City, skip this chapter and continue directly to ch07, beginning on Route 12 and proceeding to Coumarine City.
Treat the first Lumiose and Route 5 sequence as completed
Ch03 is the sole chapter responsible for the first visit to Lumiose City. Its completed objectives include entering Professor Sycamore’s laboratory, battling Professor Sycamore, choosing one of the Kanto starter Pokémon, receiving the matching Mega Stone, and viewing the Café Soleil scene with Lysandre and Diantha. Do not return to the laboratory to repeat any of these events.
Ch03 also includes the departure from Lumiose City through Route 5 and the connected progression through Camphrier Town. The King’s request, the trip through Route 6 to Parfum Palace, the search involving the missing Poké Flute, and the Snorlax roadblock are already resolved in that earlier chapter. These are not pending tasks for ch06.
The chapter structure deliberately separates this material from the later route progression. Bulbapedia’s original-release walkthrough places Lumiose City, Route 5, and Camphrier Town before Parfum Palace and Connecting Cave, then places the Cyllage, Shalour, and Tower of Mastery sequence afterward. That ordering supports treating all of those early events as finished before the player reaches the Shalour-to-Coumarine portion of the adventure.
- Professor Sycamore’s first laboratory visit is complete.
- The Professor Sycamore battle is complete.
- One Kanto starter and its matching Mega Stone have been received.
- The Café Soleil scene with Lysandre and Diantha is complete.
- The Route 5 departure has already occurred.
- Camphrier Town and the King’s request are complete.
- Parfum Palace, the Poké Flute objective, and the Snorlax progression are complete.
Do not play this chapter as a route section
There is no new destination, battle, item pickup, or story trigger to perform in ch06. Do not instruct the player to travel from Lumiose City to Route 5, revisit Camphrier Town, investigate the King’s request, enter Parfum Palace, obtain the Poké Flute, or clear the Snorlax. Publishing those directions here would duplicate the completed material from ch03 and send the player backward in the guide’s intended order.
Do not add another Professor Sycamore battle, another Kanto starter choice, another Mega Stone gift, or another Café Soleil scene. Those rewards and conversations are one-time progression events in the first Lumiose sequence. The chapter exists only to prevent a continuity error between the surrounding guide chapters.
The Route 5 O-Power introduction, the early Korrina and Lucario appearance, the Tierno and Trevor encounter, Camphrier Town’s request, the Parfum Palace sequence, and the Snorlax clearance all belong to the earlier part of the campaign. They are useful reference points for checking a save file, but they are not current objectives here.
- Do not enter Route 5 as the next playable destination.
- Do not revisit Camphrier Town for a new story trigger.
- Do not repeat Parfum Palace or the Poké Flute objective.
- Do not repeat the Snorlax progression.
- Do not present the chapter as a travel route or dungeon walkthrough.
Continue directly from ch05 to ch07
After completing ch05, the player should be in Shalour City with the Rumble Badge, the Mega Ring, the Tower of Mastery sequence completed, and Surf available. Skip ch06 entirely as a playable chapter. The next active chapter is ch07.
Begin ch07 by leaving Shalour City for Route 12, also called Fourrage Road. Route 12 connects Shalour City with Coumarine City and contains the Baa de Mer Ranch. The route’s Skiddo riding section and the coastal path lead toward Coumarine City. Azure Bay branches north as an optional area and should not be treated as mandatory progression.
In Coumarine City, use the lower and upper districts as needed, then prepare for the rival battle outside the Gym. The Coumarine Gym is the next required Gym objective in ch07, followed by Route 13 and the Kalos Power Plant. This is the correct forward route after the Shalour and Tower of Mastery chapter.
The guide should therefore move from the end of ch05 directly into the Route 12 and Coumarine City instructions of ch07. No intervening return to Lumiose City’s first-visit locations is required.
- Finish ch05 in Shalour City.
- Skip ch06 as a playable route chapter.
- Start ch07 on Route 12 after leaving Shalour City.
- Reach Coumarine City through Route 12.
- Treat Azure Bay as optional.
- Continue to the Coumarine Gym, Route 13, and the Kalos Power Plant in ch07.
Before you move on
- Ch06 is identified as a non-playable continuity note.
- Ch03 is identified as the sole chapter covering the first Lumiose City and Route 5 sequence.
- Professor Sycamore’s laboratory, the Professor Sycamore battle, the Kanto starter choice, and the matching Mega Stone are explicitly treated as completed.
- The Café Soleil scene with Lysandre and Diantha is explicitly treated as completed.
- The Route 5 departure is explicitly treated as completed.
- Camphrier Town and the King’s request are explicitly treated as completed.
- Parfum Palace, the Poké Flute objective, and the Snorlax progression are explicitly treated as completed.
- The player is told to skip ch06 rather than follow it as a route chapter.
- The next playable destination is Route 12 after leaving Shalour City.
- The next story hub is Coumarine City.
- The handoff to ch07 is explicit and does not send the player to ch11 or ch12.
Coumarine City, Route 13 and the Lumiose Gym
Travel from Shalour City through Route 12 to Coumarine City, defeat Ramos for the Plant Badge, cross Route 13 to stop Team Flare at the Kalos Power Plant, restore Lumiose City’s power, and defeat Clemont inside Prism Tower. Finish with the Voltage Badge and the southern route toward Laverre City.
1. Enter Coumarine City and prepare for the fourth Gym
Leave Shalour City through the eastern exit and follow Route 12, also called Fourrage Road, until you reach Coumarine City. Battle the Route 12 Trainers you skipped if your party needs experience, and use the Pokémon Center as soon as you arrive.
Coumarine has a lower coastal district and an upper cliff district connected by a monorail. The coastal area contains the docks, hotel, Seaside Station, and several optional services. The upper district contains the Pokémon Center and Coumarine Gym. If you arrive at the docks and cannot find the Gym, take the monorail to the upper area.
Before challenging Ramos, visit Seaside Station in the upper district and speak with Professor Sycamore to receive HM02 Fly. Fly cannot be used outside battle until you earn the Plant Badge, so this is preparation rather than an immediate travel shortcut. A rival battle also occurs near the Gym entrance when you first arrive in the upper district; heal before triggering it.
- Reach Coumarine City through Route 12.
- Use the monorail to reach the upper district.
- Receive HM02 Fly from Professor Sycamore in Seaside Station.
- Heal before the rival battle and Gym challenge.
2. Treat Azure Bay as optional
Azure Bay is reached by Surf from the coastal side of Route 12. It contains optional Trainers, wild Pokémon, and items, but it is not required for Ramos, Route 13, the Kalos Power Plant, or the Lumiose Gym. Sea Spirit’s Den is also optional and should not be confused with the Power Plant objective.
If your team needs experience or you want an additional Water-type Pokémon, explore the accessible islands before returning to Coumarine. Otherwise, go directly to the upper district and begin the Gym sequence.
- Use Surf to visit Azure Bay only if you want optional battles or items.
- Do not treat Sea Spirit’s Den as part of the main route.
- Return to Coumarine Gym when ready.
3. Defeat Ramos in Coumarine Gym
Coumarine Gym specializes in Grass-type Pokémon. Fire- and Flying-type attacks are the clearest answers, while Ice-, Poison-, and Bug-type moves are also effective. Keep a second suitable attacker ready because status effects or a critical hit can leave your first counter unable to finish the battle.
The Gym is built around a large tree. Climb the rope near the entrance, swing right, and continue using the hanging ropes and vines to move between platforms. The route rises through the tree and includes Gym Trainers; if a vine takes you to a dead-end platform, use the nearby branch to return and choose the next route upward.
Ramos uses Jumpluff, Weepinbell, and Gogoat. Jumpluff is fast and especially vulnerable to Ice attacks, but it can disrupt your lead. Weepinbell is weak to Fire and Flying attacks and may inflict status. Gogoat is Ramos’s strongest Pokémon, so use your healthiest counter and a reliable super-effective move rather than weak neutral attacks.
After winning, Ramos gives you the Plant Badge and TM86 Grass Knot. The badge allows Pokémon up to level 60 to obey you and is the fourth Kalos Gym Badge.
- Climb the tree using the ropes and vines.
- Defeat Jumpluff, Weepinbell, and Gogoat.
- Receive the Plant Badge.
- Receive TM86 Grass Knot.
4. Cross Route 13 and obtain the Power Plant Pass
Heal in Coumarine, then leave through the southern gate. Sina and Dexio stop you at the gate, explain that the Lumiose City power outage has closed the direct connection, and upgrade your Pokédex to include the Mountain Kalos section.
Route 13 is the Lumiose Badlands. Wild Pokémon emerge from dirt trails and may chase you, while strong wind can slow movement and interfere with the grind rails. Most item branches are optional, so follow the broad central route toward the southern and southwestern part of the area. Rock Smash opens optional detours but is not needed to reach the Power Plant.
A Team Flare Grunt is near the southwest approach. Defeat the Grunt, who uses Houndoom and Golbat, then inspect the large boulder nearby to obtain the Power Plant Pass. The Pass is found after the battle; it is not handed over by the Grunt. Use it at the Power Plant entrance to begin the mandatory Team Flare operation.
- Receive the Mountain Kalos Pokédex upgrade.
- Reach the southwest area of Route 13.
- Defeat the Team Flare Grunt.
- Inspect the nearby large boulder for the Power Plant Pass.
- Enter the Kalos Power Plant.
5. Clear the Kalos Power Plant and restore Lumiose’s power
Inside the Power Plant, follow the corridors and defeat the Team Flare Grunts blocking the way. The plant contains several consecutive battles, so restore your party before entering and carry healing items. Fighting- and Psychic-type attacks are useful against many of Team Flare’s Dark- and Poison-type Pokémon, but use whatever reliable counters your team has available.
Continue through the plant until you reach the upper Team Flare members. Defeat the administrator and then Aliana. After the final battle, the story characters restore your party and provide recovery items, allowing you to continue without returning to a Pokémon Center.
Before leaving, revisit the room where the plant workers are being held. Speak with the available NPCs to receive TM43 Flame Charge and a Magnet. Then take the southern Route 13 exit into Lumiose City. The northern sections remain inaccessible until you enter Lumiose through this restored connection.
- Defeat the Team Flare battles inside the Power Plant.
- Defeat the administrator and Aliana.
- Collect the available post-operation rewards if desired.
- Exit through the southern Route 13 gate into Lumiose City.
6. Navigate Prism Tower and defeat Clemont
When you enter Lumiose City, Shauna directs you to Prism Tower. Go to the tower in the city center and watch Clemont restore the lights. Prism Tower is also the Lumiose Gym, so enter the elevator after the story scene.
Bonnie presents a Pokémon silhouette quiz on each floor. Each correct answer sends you upward, while an incorrect answer leads to another Gym Trainer battle before you can continue. The silhouettes progress as Pikachu, Fletchling, Panpour, and Vivillon. You may deliberately choose an incorrect answer if you want the additional experience, but selecting the correct answer is the faster route.
Clemont uses Electric-type Pokémon: Emolga, Magneton, and Heliolisk. Ground-type attacks are effective against Magneton and Heliolisk, but Emolga is immune to Ground because it is part Flying-type. Use a Rock- or Ice-type attack, or a strong neutral move, against Emolga, then switch to a Ground-type counter for the Pokémon vulnerable to it. Be careful with Magneton’s Steel typing and Heliolisk’s special attacks.
Victory awards the Voltage Badge and TM24 Thunderbolt. The badge raises the obedience limit to level 70. Heal at the Lumiose Pokémon Center after the battle, then leave through the western or southwestern side of the city to reach Route 14 and continue toward Laverre City.
- Reach Prism Tower after Lumiose’s power is restored.
- Complete the four silhouette quiz floors.
- Defeat Clemont’s Emolga, Magneton, and Heliolisk.
- Receive the Voltage Badge.
- Receive TM24 Thunderbolt.
- Leave Lumiose toward Route 14 and Laverre City.
Before you move on
- The Plant Badge is in your case.
- TM86 Grass Knot is in your bag or has been used.
- The Power Plant Pass has been obtained from Route 13.
- Team Flare has been defeated inside the Kalos Power Plant.
- Lumiose City’s power has been restored and Prism Tower is accessible.
- Clemont has been defeated.
- The Voltage Badge and TM24 Thunderbolt are in your possession.
- Your next required destination is Route 14 on the way to Laverre City.
References for this chapter
Laverre to Anistar — Fairy Badge, Frost Cavern and the Seventh Gym
After defeating Clemont in Lumiose City, take Route 14 to Laverre City, earn Valerie’s Fairy Badge, and stop Team Flare at the Poké Ball Factory. Continue through Routes 15 and 16 to Dendemille Town, clear Frost Cavern to restore Mamoswine’s cooperation, and cross Route 17 to Anistar City. Defeat the rival and Olympia to earn the Psychic Badge, then follow the threatening Holo Caster message toward the next Team Flare operation.
1. Leave Lumiose City through Route 14
Begin this chapter after defeating Clemont at the Lumiose Gym and receiving the Voltage Badge. From Lumiose City, use the northern exit toward Route 14, also called Laverre Nature Trail. The route is a marshy trail with tall grass, wooden walkways, shallow water and patches of deep mud. Move along the marked path rather than trying to cut across every swamp tile, and bring status-healing items because wild Pokémon and route trainers can slow the journey.
Trevor and your rival, Calem or Serena, wait near the Lumiose entrance to Route 14. Speak to them and accept the rival battle before continuing. The rival uses Meowstic and Absol at level 35, followed by the fully evolved starter that has a type advantage over your original starter at level 37. Dark-, Bug- or Ghost-type attacks help against Meowstic, while a strong Fighting-, Fairy- or Bug-type move is useful against Absol. After the battle, continue north through the marshes. The Scary House is optional; it does not advance the Gym or Team Flare story.
Follow Route 14 to Laverre City. Heal at the Pokémon Center, replace depleted moves and buy supplies before challenging Valerie. The route’s trainers provide useful experience, but do not spend all of your healing items before reaching town.
- Leave Lumiose City after Clemont’s defeat.
- Defeat Calem or Serena on Route 14.
- Reach Laverre City and heal.
- Treat the Scary House as optional.
2. Defeat Valerie in Laverre Gym
Laverre Gym is in the eastern part of the city. The interior uses a dollhouse-style series of rooms connected by warp points. Step onto the visible warp entrances and keep taking the paths that lead into new rooms; trainers along the way indicate that you are moving toward Valerie rather than backtracking. Fairy-type Pokémon are weak to Poison and Steel, so bring at least one Pokémon with a reliable move of either type. Dragon-type moves do not affect Fairy Pokémon.
In Pokémon X, Valerie uses Mawile at level 38, Mr. Mime at level 39 and Sylveon at level 42. Mawile’s Steel typing means it does not share all of the weaknesses of pure Fairy Pokémon, so a strong Fire- or Ground-type attack is also useful if your Poison or Steel option struggles. Mr. Mime can create problems with screens, while Sylveon is the most durable member of the team. Defeat Valerie to receive the Fairy Badge and TM99 Dazzling Gleam. The badge allows traded Pokémon up to level 80 to obey you.
Heal again before leaving the Gym. The next objective is immediately north of Laverre City, where Team Flare has taken over the Poké Ball Factory.
- Navigate the Laverre Gym warp rooms.
- Defeat Valerie’s Mawile, Mr. Mime and Sylveon.
- Receive the Fairy Badge.
- Receive TM99 Dazzling Gleam.
3. Clear the Poké Ball Factory
Go north from Laverre City to the Poké Ball Factory. Shauna and Trevor are outside, but a Team Flare Grunt prevents normal entry. Watch the short sequence, then enter through the opening created when the guard is distracted. The exterior hedges contain optional items; you can ignore them and enter the factory when ready.
Inside, follow the walkways and conveyor belts. Conveyor belts carry you in their marked direction, so step off onto side platforms whenever you need to change course. Defeat the Team Flare Grunts on the production floor and search side rooms only if your party is healthy enough to handle the extra battles. Your rival helps during the factory sequence, including a battle against the administrators.
Fight Celosia and Bryony after reaching the deeper part of the factory. Ground-type attacks are effective against Celosia’s Manectric, while Fighting-, Bug- or Fairy-type attacks are useful against Bryony’s Liepard. After Team Flare retreats, speak with the factory president. He presents a choice between a Master Ball and a Big Nugget, but the original Pokémon X and Y event awards both items after the conversation. Leave the factory, watch the Holo Caster report, and return to Laverre City.
Use the city’s eastern exit to enter Route 15, also called Brun Way. The Lost Hotel on Route 15 is optional and can be skipped.
- Enter the Poké Ball Factory after the guard is distracted.
- Defeat the factory’s Team Flare Grunts.
- Defeat Celosia and Bryony.
- Speak with the president and obtain both the Master Ball and Big Nugget.
- Leave through Laverre’s eastern exit toward Route 15.
4. Cross Routes 15 and 16 to Dendemille Town
Travel east along Route 15. The route includes tall grass, water, bridges and optional side paths. Continue toward Route 16, also called Mélancolie Path. The Lost Hotel is available as an optional exploration area, but it is not required for the main story and can be left for later.
Follow Route 16 north until you reach Dendemille Town. Stop at the Pokémon Center, restore the team and restock Potions, Super Potions, status cures and Repels. Professor Sycamore and Dexio provide a legendary-lore scene in town involving Xerneas in Pokémon X. This is background information and is not the ultimate-weapon revelation.
Before leaving, make sure the party has answers to Ice-type opponents and Team Flare’s Fire- and Dark-type Pokémon. Frost Cavern is north of Dendemille Town and contains slippery ice, multiple floors and several trainer battles. The route to Anistar cannot be completed until the disturbance there is resolved.
- Cross Route 15.
- Use Route 16 to reach Dendemille Town.
- Heal and restock at the Pokémon Center.
- Treat Lost Hotel as optional.
- Prepare for Frost Cavern.
5. Rescue Abomasnow in Frost Cavern
Enter Frost Cavern from the northern side of Dendemille Town. Follow the main passages through the cave’s floors, using stairs and ice-slide sections to reach the upper area. The slippery ice sends you in a straight line until a wall, rock or obstacle stops you, so inspect the landing point before stepping onto each patch. Optional rooms contain items, but the required route leads toward the Abomasnow encounter.
At the deepest story area, Team Flare is harassing Abomasnow. Trevor assists during the battles against the Grunts. After those battles, confront Admin Mable. In Pokémon X, her Frost Cavern Pokémon is a level 48 Houndoom. Water-, Ground-, Rock- and Fighting-type attacks are effective, although a Water or Ground Pokémon should watch for Fire- and Dark-type coverage.
Defeat Mable and speak to the rescued Abomasnow. It gives you Abomasite. The Mega Stone is optional for completing the campaign, but defeating Team Flare here is mandatory because it restores the Mamoswine route on Route 17. If your party is damaged, use the healing trainer inside the cavern or return to Dendemille’s Pokémon Center before continuing.
- Reach the upper story area of Frost Cavern.
- Defeat the Team Flare Grunts with Trevor’s assistance.
- Defeat Admin Mable.
- Speak with Abomasnow and receive Abomasite.
- Confirm that the path to Route 17 is available.
6. Cross Route 17 on Mamoswine
Return to Dendemille Town and take the southeastern exit to Route 17, Mamoswine Road. The large Mamoswine that previously blocked the route now allows you to ride through the deep snow. Speak to its handler and mount it; walking on foot is not a substitute for this section.
Ride east through the snow. Mamoswine can break the rocks that block side paths, so you may dismount to collect optional items and then return to it. The direct route continues east toward the Anistar gate. Fighting- and Fire-type attacks are useful against the Ice-type wild Pokémon found along the road.
At the eastern end, dismount and enter Anistar City. Sina gives you ten Repeat Balls near the city entrance. Heal at the Pokémon Center before approaching the Gym because the rival battle occurs outside it.
- Return to Dendemille Town after Frost Cavern.
- Mount Mamoswine on Route 17.
- Reach the Anistar gate.
- Heal before approaching Anistar Gym.
7. Defeat the rival and Olympia in Anistar
Before the Gym, you can visit the house north of the boutique to hear the local legendary-history explanation. In Pokémon X, the discussion concerns Xerneas and ancient Kalos. The large sundial is a landmark, but its Mega Ring upgrade event belongs to the post-game and is not required here.
Approach Anistar Gym and defeat Calem or Serena outside. The rival uses Meowstic, an Eeveelution, Absol and the fully evolved starter at levels 44, 44, 44 and 46. After the battle, the rival restores your team, allowing you to enter the Gym without spending healing items.
The Anistar Gym puzzle uses floating platforms and warp points. Step onto each platform and follow the linked paths until you reach Olympia. Bug-, Ghost- and Dark-type attacks are effective against her Psychic team. Dark Pokémon are immune to Psychic attacks, but keep a second counter available because Olympia’s Pokémon carry coverage moves and Slowking can use Yawn or defensive tactics. Olympia uses Sigilyph at level 44, Slowking at level 45 and Meowstic at level 48.
Defeat Olympia to receive the Psychic Badge and TM04 Calm Mind. The badge raises the obedience limit for traded Pokémon to level 90. When you leave the Gym, a threatening Holo Caster message announces Team Flare’s next move. Speak with the nearby Team Flare members and follow the resulting direction back to Lumiose City. The Lysandre Café and Lysandre Labs sequence belongs to the next chapter, not this one.
- Hear the optional Xerneas history in the house north of the boutique.
- Defeat the rival outside Anistar Gym.
- Complete the floating-platform puzzle.
- Defeat Olympia’s Sigilyph, Slowking and Meowstic.
- Receive the Psychic Badge and TM04 Calm Mind.
- Follow the Holo Caster lead toward Lumiose City.
Before you move on
- The Voltage Badge from Lumiose and Fairy Badge from Laverre are visible on the Trainer Card.
- The Route 14 rival battle has been completed.
- Valerie has been defeated and TM99 Dazzling Gleam is in the Bag.
- The Poké Ball Factory has been cleared, Celosia and Bryony have been defeated, and both the Master Ball and Big Nugget have been received.
- Frost Cavern has been cleared, Mable has been defeated and Abomasite is in the Bag.
- Mamoswine has carried the player across Route 17 into Anistar City.
- The rival outside Anistar Gym has been defeated and the team has been restored.
- Olympia has been defeated, the Psychic Badge and TM04 Calm Mind have been received, and the Holo Caster directs the player toward the next Team Flare operation in Lumiose City.
References for this chapter
- Walkthrough: Pokémon X and Y
- Walkthrough: Pokémon X and Y/Part 9
- Walkthrough: Pokémon X and Y/Part 10
- Kalos Route 14
- Frost Cavern
- Poké Ball Factory — Pokémon X and Y Walkthrough
- Gym Leader Olympia — Pokémon X and Y Walkthrough
- Pokémon X and Y Walkthrough, Part 32: Route 17 and Anistar City
- Pokémon X & Y Gym Leaders — Serebii.net
Lysandre Café and Lysandre Labs — The Ultimate Weapon Is Activated
Begin immediately after Olympia’s defeat, the Mind Badge, and the Holo Caster announcement exposing Lysandre as Team Flare’s leader. Investigate Lysandre Café in Lumiose City, clear Lysandre Labs, defeat Xerosic, and follow the activated ultimate weapon to Geosenge Town. Stop outside the unlocked Team Flare Secret HQ entrance. The next playable chapter is ch15: Team Flare Secret HQ, the level 50 Xerneas encounter, the final Lysandre battle, and the weapon’s destruction. Do not travel to Snowbelle City or Victory Road yet.
Return to Lumiose City and open Lysandre Café’s hidden entrance
After defeating Olympia and receiving the Mind Badge, complete the post-Gym story scene and the Holo Caster announcement. Return to Lumiose City by Fly or by the normal routes. Fly to the central Pokémon Center, then cross Magenta Plaza to reach Lysandre Café. Heal before entering and carry recovery items because the café and laboratory contain several consecutive battles.
Inside the café, battle the two disguised Team Flare Grunts. The first uses a level 46 Scrafty and the second uses a level 46 Liepard. Fighting- and Fairy-type attacks are useful against both, although any well-trained neutral attacker can handle them.
After the two Grunts are defeated, they reveal the password: open sesame. Examine the china cabinet at the far wall. It slides aside and exposes the stairs into Lysandre Labs. This is the required entrance; do not search the other cafés in Lumiose City.
- Olympia has been defeated and the Mind Badge is registered.
- The Holo Caster announcement has played.
- Both disguised café Grunts have been defeated.
- The password open sesame has been used on the china cabinet.
Defeat Lysandre and reach Aliana
Lysandre battles you immediately after you enter the laboratory. His Pokémon are a level 45 Mienfoo, level 45 Murkrow, level 47 Pyroar, and level 49 Gyarados. Use Flying, Psychic, or Fairy attacks against Mienfoo; Electric, Rock, Ice, or Fairy attacks against Murkrow; and Water, Ground, Rock, or Fighting attacks against Pyroar. Gyarados has Intimidate, so a special attacker or a strong Electric move is preferable. Be cautious of its physical attacks and Outrage.
After Lysandre leaves, use the laboratory’s arrow and warp panels. Arrow panels push you until an obstacle stops you, while round panels teleport you. From the entrance, take the upper-left arrow panel, move north, and defeat the unavoidable Grunt using a level 46 Swalot. Continue to the round warp panel and battle scientist Aliana, who uses a level 46 Mightyena and level 48 Druddigon.
After Aliana’s defeat, use the green warp panel to continue. The yellow panel returns you toward the entrance. Follow the next arrow route and defeat the Grunt near the following room, then enter the room to the north. Sina and Dexio are inside; speak with them to receive three Revives.
- Lysandre’s four Pokémon have been defeated.
- Aliana has been defeated.
- The green warp panel beyond Aliana has been used.
- Sina and Dexio have been found and their Revives collected if desired.
Use the recovery room before the consecutive scientist battles
Leave Sina and Dexio’s room and follow the arrow panels south. Enter the western break room when you reach it. A Grunt there gives you TM12 Taunt, and a Revive can be collected in the room. Check either bed to restore the party. This is the important recovery point before the next scientist sequence.
Leave the break room and follow the route northeast. Several Grunts block the path. You can use the beds again if necessary before entering the northeastern room. Celosia and Bryony are fought one after another, with no normal healing break between them.
Celosia uses a level 46 Manectric and level 48 Drapion. Both are weak to Ground attacks. Bryony follows with a level 46 Liepard and level 48 Bisharp; Fighting attacks are especially effective against both. If your Ground or Fighting attacker is weakened, use a backup before entering the room.
- TM12 Taunt has been collected if wanted.
- The party has been healed at the break-room bed.
- Celosia has been defeated.
- Bryony has been defeated.
Defeat Mable and claim the Elevator Key
After the Celosia and Bryony battles, leave the northeastern room and take the leftmost downward arrow panel. Walk southwest without stepping on unwanted arrow panels until you reach the warp panel. Use it to enter the next section of the maze.
The remaining route contains optional items, including Black Glasses, a Rare Candy, and a Hyper Potion. Collect them if useful, but none is required. Continue through the warp panels and arrow panels, defeating the Grunts who block the path. Ground attacks remain useful against Electric and Poison Pokémon, while Fighting attacks are reliable against Dark types.
Use the warp panel that leads to the room containing Mable. She uses a level 46 Houndoom and level 48 Weavile. Fighting attacks are effective against both. Water, Ground, Rock, or Fighting attacks are good choices against Houndoom; Fire, Rock, Steel, or Fighting attacks can handle Weavile.
Mable gives you the Elevator Key after losing. Leave her room, use the left-pointing arrow panel, then take the rightmost downward arrow panel. Walk left toward the elevator and step on the downward arrow that leads to it. You may exit the laboratory and heal at Lumiose City’s Pokémon Center before using the elevator.
- The optional laboratory items have been collected only if wanted.
- Mable has been defeated.
- The Elevator Key has been received from Mable.
- The elevator has been reached.
Descend to Xerosic and activate the ultimate weapon
Use the Elevator Key and descend to B2F. Walk west to find AZ imprisoned behind bars. Watch the story scene, then follow Lysandre east to the elevator. Take it down to B3F.
On B3F, go west and then north to find Lysandre and Xerosic. Defeat Xerosic’s level 46 Crobat and level 48 Malamar. Crobat is weak to Electric, Ice, Rock, and Psychic attacks. Malamar is weak to Bug and Fairy attacks. Defeat it promptly rather than allowing it multiple turns to use stat-changing moves.
After the battle, Xerosic forces you to choose between a red button and a blue button. The choice does not branch the story: the ultimate weapon activates either way. The blue button is presented as the favorable choice, but either selection is safe for progression. Watch the activation scene showing the weapon rising beneath Geosenge Town.
Return to the surface and heal before leaving Lumiose City. Your next destination is Geosenge Town, not Snowbelle City or Victory Road.
- AZ’s B2F story scene has played.
- Xerosic has been defeated.
- One of the two buttons has been selected.
- The ultimate weapon activation scene has played.
Follow the weapon to the Secret HQ entrance
Travel to Geosenge Town after the activation scene. The town has changed, and a Team Flare Grunt is waiting in the northwest area. He uses a level 45 Manectric, level 45 Scrafty, and level 45 Golbat. Use Ground attacks against Manectric, Fighting, Flying, or Fairy attacks against Scrafty, and Rock, Electric, Ice, or Psychic attacks against Golbat.
After the Grunt is defeated, follow him northwest through the altered town. Your neighbor catches up and insists on accompanying you. Continue north to the stone formation at the town’s northwest edge. The entrance to Team Flare Secret HQ is now accessible because the ultimate weapon has been activated.
Stop before proceeding into the headquarters. The immediate next playable chapter is ch15, which covers the Secret HQ interior, the required level 50 Xerneas encounter in Pokémon X, the final Lysandre battle, and the destruction of the ultimate weapon. Do not skip directly to Snowbelle City, the eighth Gym, Victory Road, or the Pokémon League.
- The Geosenge Town Grunt has been defeated.
- The fleeing Grunt has been followed northwest.
- Your neighbor has joined the pursuit.
- The stone entrance to Team Flare Secret HQ is accessible.
- You are ready to begin ch15 immediately.
Before you move on
- Olympia’s Mind Badge and the post-Gym Holo Caster announcement are complete.
- The two Lysandre Café Grunts have been defeated and open sesame has been used.
- Lysandre, Aliana, Celosia, Bryony, Mable, and Xerosic have been defeated.
- The Elevator Key has been obtained and used.
- The ultimate weapon activation scene has played.
- The level 45 Geosenge Town Grunt has been defeated.
- Your neighbor has joined you at the northwest entrance.
- Team Flare Secret HQ is accessible, but you have not yet entered its interior.
- Ch15 is the immediate next chapter; Snowbelle City and Victory Road come later.
Route 18 to Snowbelle City — Pokémon Village and the Eighth Badge
After Team Flare Secret HQ and the ultimate-weapon finale, return to Anistar City and leave through the southern exit for Route 18. Continue through Couriway Town and Route 19 to Snowbelle City, then follow Route 20 into Pokémon Village to find Wulfric. Once he returns to Snowbelle Gym, solve the rotating-platform puzzle and defeat him for the Iceberg Badge, TM13 Ice Beam, and permission to use Waterfall outside battle. The next required route is Route 21, followed by Victory Road and the Pokémon League.
1. Leave Anistar City and cross Route 18
When the Team Flare Secret HQ destruction sequence ends and you regain control, heal your party and restock basic supplies. Return to Anistar City if necessary. From the city, take the southern exit onto Route 18, also called Vallée Étroite Way.
Follow the main mountain path southeast through Route 18 until you reach Couriway Town. The route has several trainer battles and wild encounters, but no mandatory side objective. Terminus Cave is beside the route and can be explored for optional items; its deepest post-game area is not needed for the eighth Badge. Do not detour there unless you specifically want extra battles or items.
Keep a supply of Paralyze Heals, Full Heals, and Potions available. The route is long enough that a party weakened by consecutive trainer battles may arrive in Couriway Town unable to handle the next rival sequence comfortably.
- Complete the Secret HQ finale before beginning this chapter.
- Return to Anistar City.
- Take the southern exit to Route 18.
- Reach Couriway Town without treating Terminus Cave as required.
2. Defeat Professor Sycamore in Couriway Town
Heal at the Couriway Town Pokémon Center, then walk toward the bridge and waterfalls in the central part of town. Professor Sycamore challenges you to a friendly battle. In Pokémon X, his team is Venusaur, Charizard, and Blastoise, each at level 50.
Use a Fire, Flying, or Psychic move against Venusaur, an Electric, Rock, or Water move against Charizard, and an Electric or Grass move against Blastoise. A balanced party is safer than trying to sweep all three with one Pokémon because the team covers several different weaknesses.
This battle is required for the route sequence, but Couriway’s extra rewards are optional. The woman at the train station can give TM89 U-turn, and the quiz in the Couriway Hotel can award TM55 Scald. Collect them now only if they benefit your team, then heal before entering Route 19 through the southern exit.
- Heal in Couriway Town.
- Defeat Professor Sycamore’s level 50 Venusaur, Charizard, and Blastoise.
- Collect the optional Couriway rewards only if wanted.
- Take the southern exit to Route 19.
3. Cross Route 19 and win the three consecutive battles
Route 19, Grande Vallée Way, leads southwest from Couriway Town to Snowbelle City. Follow the main path toward the long bridge. Side paths through the swamp contain optional items and trainers, while the bridge is the required route.
Before the bridge sequence begins, restore your party as much as possible. You will battle Shauna, Tierno, and Trevor in succession. The game does not return you to a Pokémon Center between all three fights, although Trevor heals your party before his own battle. Bring answers for Water, Electric, Flying, Fire, Grass, Rock, and Fairy Pokémon. Ground attacks are useful against Raichu, Rock or Electric attacks help against Talonflame and Aerodactyl, and Poison or Steel attacks are effective against Florges.
After the final battle, Shauna gives you HM05 Waterfall. Waterfall is not needed to reach Wulfric, but keep a Pokémon that can learn it available because it is useful on the route beyond Snowbelle City. Continue west into Snowbelle City and heal immediately.
- Reach the bridge on Route 19.
- Defeat Shauna, Tierno, and Trevor in sequence.
- Receive HM05 Waterfall from Shauna.
- Enter Snowbelle City and heal.
4. Find Wulfric in Route 20 and Pokémon Village
Visit Snowbelle Gym as soon as you arrive. Wulfric is absent, so leave through the southern city exit and enter Route 20, the Winding Woods. The forest loops back on itself, so use the clearings, bridges, and trainer positions as landmarks rather than turning randomly whenever a path seems to repeat.
Follow the forest route south and east until you reach Pokémon Village. Cut is useful for optional items but is not required for the main path. You may ignore the side rewards from the Pokémon living in the village.
Speak with Wulfric in Pokémon Village. After he confirms that you are a friend of the local Pokémon, he returns to Snowbelle City and the Gym becomes available. The Unknown Dungeon entrance near the waterfall is restricted to the Champion and is post-League content, so do not search it for the Gym objective.
Return to Snowbelle City by retracing Route 20 or using Fly. Heal and prepare a party with strong Fire, Fighting, Rock, or Steel attacks.
- Enter Route 20 from Snowbelle City.
- Navigate the looping Winding Woods.
- Reach Pokémon Village.
- Speak with Wulfric and trigger his return to the Gym.
- Ignore the Champion-only Unknown Dungeon.
5. Solve Snowbelle Gym and defeat Wulfric
Enter Snowbelle Gym after Wulfric returns. The colored buttons rotate sections of the Gym, and each button becomes available after you defeat the nearby Ace Trainer. Use the following sequence: defeat Ace Trainer Imelda and press the pink button twice; defeat Ace Trainer Viktor and press the blue button three times; return to the pink side and press the pink button three more times; defeat Ace Trainer Shannon near the green platform; defeat Ace Trainer Theo near the yellow platform; press the yellow button once; then press the green button three times. This aligns the route to Wulfric.
Wulfric’s team in Pokémon X is Abomasnow at level 56, Cryogonal at level 55, and Avalugg at level 59. Abomasnow’s Snow Warning starts hail, and its Energy Ball can punish Water- or Rock-based answers. Defeat it quickly with a strong Fire attack if possible. Cryogonal has Ice Beam, Confuse Ray, Flash Cannon, and Hail; physical attacks are generally preferable because Cryogonal’s Defense is much lower than its Special Defense. Avalugg has very high Defense and can use Curse, Crunch, Avalanche, and Gyro Ball. Use a strong special Fire, Fighting, or Rock attack when available, and do not give Avalugg several turns to use Curse.
After winning, Wulfric awards the Iceberg Badge and TM13 Ice Beam. The Badge allows all Pokémon to obey you and permits Waterfall outside battle. Heal at the Pokémon Center, teach Waterfall if needed, and leave Snowbelle City through the west exit onto Route 21. Route 21 and Victory Road are the next required objectives.
- Defeat Imelda and press pink twice.
- Defeat Viktor and press blue three times.
- Press pink three more times.
- Defeat Shannon and Theo.
- Press yellow once and green three times.
- Defeat Abomasnow level 56, Cryogonal level 55, and Avalugg level 59.
- Receive the Iceberg Badge and TM13 Ice Beam.
- Confirm that all eight Kalos Gym Badges are recorded.
Before you move on
- The Team Flare Secret HQ finale is complete and the player has returned to normal travel.
- Route 18 has been crossed from Anistar City to Couriway Town.
- Professor Sycamore has been defeated in Couriway Town.
- Shauna, Tierno, and Trevor have been defeated on Route 19.
- HM05 Waterfall has been received from Shauna.
- Wulfric has been found in Pokémon Village and has returned to Snowbelle Gym.
- The Snowbelle Gym puzzle has been completed.
- Wulfric has been defeated and the Iceberg Badge and TM13 Ice Beam are in the inventory.
- All eight Kalos Gym Badges are recorded.
- The player can leave Snowbelle City through Route 21 and begin the Victory Road chapter.
Preparing for the Pokémon League — final training and team composition
After defeating Wulfric in Snowbelle City and earning the Iceberg Badge, you have access to the final route toward the Kalos Pokémon League. Confirm that all eight Kalos Gym Badges are recorded before committing to Victory Road. The Elite Four use Pokémon from level 63 to 65, while Champion Diantha’s team reaches level 68. A practical story-mode target is roughly level 64–66 for your main battlers, adjusted upward if your team lacks type advantages or reliable recovery. Optional facilities are not required.
Confirm all eight badges and prepare field moves
Open your Trainer Card and verify that you have all eight Kalos Gym Badges: Bug, Cliff, Rumble, Plant, Voltage, Fairy, Psychic, and Iceberg. The Iceberg Badge from Snowbelle City is mandatory. Victory Road’s badge gate will not let you proceed without the complete set.
Travel from Snowbelle City through Route 21 or Route 22 toward the Victory Road entrance. Bring Pokémon that can use Surf and Strength for the main route. Rock Smash and Waterfall open side paths and additional item areas, including the path to TM02 Dragon Claw, so carry all four field moves if you want to clear the route without returning to a Pokémon Center. They are preparation tools, not a requirement to collect every item.
Heal before approaching the first trainer at the entrance. Ace Trainer Robbie battles you with Carbink at level 56, Raichu at level 56, and Kingdra at level 57. After defeating him, pass through the badge-check gate and enter Victory Road proper.
- All eight Kalos Gym Badges are displayed on the Trainer Card.
- The Iceberg Badge has been earned from Wulfric.
- Surf and Strength are available for the required route.
- Rock Smash and Waterfall are available if you want optional paths and items.
- The party is healed before Ace Trainer Robbie.
Set a realistic level target
The first three Pokémon used by each Elite Four member are level 63, and each member’s final Pokémon is level 65. Diantha’s team ranges from level 64 to level 68, with Mega Gardevoir as her final Pokémon. These levels are guidance, not mandatory caps. For an ordinary first completion, bring your principal attackers and defensive pivots to about level 64–66. A lower-level Pokémon can still contribute if it has a strong matchup, useful immunities, or a dependable support role.
Victory Road contains wild Pokémon around levels 57–59 and trainers whose teams provide useful final experience. Battle trainers you meet rather than fleeing from every encounter, but do not spend all your healing items while training. In the second outside area, a Pokémon Ranger heals your party without charge. After the rival battle there, return to that Ranger before continuing.
If only one or two Pokémon are behind, lead with one of them and switch safely into a stronger partner. The Battle Chateau is an optional source of experience and money. Super Training is optional and should be used for a specific stat or role, not treated as a League requirement. The Battle Maison in Kiloude City is a post-game facility and does not belong in this preparation sequence.
- Main League battlers are approximately level 64–66 or have strong matchup advantages.
- No intended team member is severely underleveled without a deliberate support role.
- Victory Road trainers have been used for final experience where practical.
- The healing Pokémon Ranger has been located.
- Battle Maison and maximum Super Training have been left optional.
Plan for the Elite Four
Kalos lets you challenge Malva, Wikstrom, Drasna, and Siebold in any order. Choose an order based on your team’s strongest matchups rather than assuming one fixed sequence. Malva specializes in Fire, so Water, Rock, and Ground attacks are useful. Wikstrom specializes in Steel, making Fire, Ground, and Fighting attacks valuable. Drasna uses Dragon Pokémon; Ice and Fairy attacks are dependable answers, especially against her Dragon- and Flying-type members. Siebold specializes in Water, so Electric and Grass attacks should be available.
Do not build the entire plan around one Pokémon or one Mega Evolution. A critical hit, status condition, immunity, or unfavorable matchup can remove that option. Keep at least one backup attacker for each important matchup and include both physical and special damage when possible. Status moves, priority attacks, and stat boosts can help, but every League Pokémon should still have a reliable damaging move.
- The team has answers to Fire, Steel, Dragon, and Water Pokémon.
- Ice or Fairy coverage is available for Drasna’s Dragon-focused team.
- Electric or Grass coverage is available for Siebold.
- Fire, Ground, or Fighting coverage is available for Wikstrom.
- The plan includes backup attackers rather than one essential Pokémon.
Prepare for Champion Diantha
Diantha uses a mixed team: Hawlucha, Tyrantrum, Aurorus, Gourgeist, Goodra, and Gardevoir. Her Gardevoir is level 68, appears last, and Mega Evolves. Prepare a Steel or Poison attack for Mega Gardevoir, while remembering that it can use Fairy, Psychic, Electric, and Ghost attacks.
Bring answers for the rest of her roster as well. Tyrantrum and Aurorus appreciate strong Fighting, Ground, Water, Grass, or other suitable super-effective attacks, while Goodra is best handled with strong Ice or Fairy coverage. Gourgeist can be pressured by Fire, Ice, Flying, Ghost, or Dark attacks. Keep a fast Pokémon or priority move available for finishing weakened targets, but do not expect one Pokémon to sweep the entire championship match.
- A Steel or Poison move is available for Mega Gardevoir.
- The team can answer Diantha’s Rock-based Pokémon.
- Goodra has a planned Ice or Fairy response.
- Gourgeist has a planned offensive response.
- A backup remains available if the intended Gardevoir counter is knocked out.
Repair movesets, items, and supplies
Visit a Pokémon Center before entering Victory Road. Replace weak early-game attacks, restore all move PP, and keep useful coverage instead of filling every moveset with attacks of one type. Equip held items that support each Pokémon’s role, and verify that the correct Mega Stone is held by the Pokémon you intend to Mega Evolve.
Buy Potions or Max Potions, Full Heals, Revives, and Full Restores. Full Restores are especially useful because they restore HP and remove status together. Ethers or Elixirs help preserve limited PP on moves you expect to use repeatedly. Escape Ropes and Repels are conveniences rather than requirements.
After reaching the Pokémon League building, use the final Pokémon Center, restore PP, check held items, and save before entering the Elite Four chambers. There is no normal Pokémon Center between Elite Four battles and Diantha, so treat the challenge as one continuous run. Use healing items between battles and conserve limited PP on moves needed for later specialists.
- Every intended League Pokémon has usable moves and a defined role.
- Held items and the intended Mega Stone are equipped correctly.
- Move PP is restored before the League.
- Full Heals, Revives, Full Restores, and other recovery items are stocked.
- The game is saved after final preparation and before entering the League.
Before you move on
- All eight Kalos Gym Badges, including the Iceberg Badge, are recorded.
- Ace Trainer Robbie has been defeated at the Victory Road gate.
- Surf and Strength are available for the core route; Rock Smash and Waterfall are ready if optional paths are wanted.
- The principal League Pokémon are generally around levels 64–66 or have strong type advantages that compensate.
- The team has reliable plans for Malva, Wikstrom, Drasna, Siebold, and Diantha’s mixed roster.
- A Steel or Poison attack and a backup plan are available for Mega Gardevoir.
- Moves, PP, held items, recovery supplies, and the pre-League save are ready for one continuous challenge.
Victory Road and entering the Pokémon League
After earning the Iceberg Badge from Wulfric in Snowbelle City, take Route 21, Dernière Way, northwest to Victory Road. The route connects Route 21 and Route 22 and requires all eight Kalos Gym Badges. Surf, Strength, Waterfall, and Rock Smash are used throughout the full route, although only some of the obstacles are required for the quickest trip to the Pokémon League. Expect wild Pokémon around levels 57–59 and trainer battles reaching level 61, so heal before entering and keep recovery items available.
1. Leave Snowbelle City through Route 21
After Wulfric awards the Iceberg Badge, leave Snowbelle City by the western exit and enter Route 21, also called Dernière Way. Follow the main path northwest toward Victory Road. Route 21 has optional trainers and a Strength puzzle that leads to items, but neither the optional item area nor the route’s side paths are required to enter Victory Road.
Use this approach to check your party before the dungeon begins. Bring a team with reliable answers to Water, Rock, Steel, Fighting, Dragon, and Flying Pokémon. A balanced party around the high 50s is appropriate for the route’s opponents, but there is no mandatory level requirement. Make sure at least one party member can use Surf, Strength, Waterfall, and Rock Smash if you intend to explore every section and collect the optional items.
- The Iceberg Badge is in the case.
- All eight Kalos Gym Badges have been earned.
- The party is healed before leaving Snowbelle City.
- Surf, Strength, Waterfall, and Rock Smash are available if full exploration is planned.
2. Defeat Ace Trainer Robbie before the badge check
Enter Victory Road from Route 21. In the entrance area, go west to find Ace Trainer Robbie. This battle occurs before the badge-check gate. Robbie uses Carbink at level 56, Raichu at level 56, and Kingdra at level 57. Use Ground or Fighting attacks against Carbink when safe, a Ground-type or other strong answer against Raichu, and Fairy, Dragon, or a strong neutral attacker against Kingdra. Do not rely on Electric attacks against Kingdra without checking its typing and your move coverage.
After Robbie is defeated, go north to the badge-check station. The attendant confirms that you possess all eight Badges, then opens the route ahead. Continue north through the outdoor section and climb the stairs into the first cave. If the attendant refuses you, return to the Gym Badge case and confirm that the Iceberg Badge was actually awarded.
- Ace Trainer Robbie has been defeated.
- The badge attendant confirms all eight Kalos Badges.
- The northern passage into Victory Road is open.
3. Clear Cave 1 and reach Grove 2
In the first cave, move north to battle or pass Ace Trainer Alanza, who uses a level 60 Weavile. Continue west, then Surf across the water. The hidden X Attack is on a stalagmite west of the first lake, while the Dusk Ball is in the southwest water area near Battle Girl Veronique. Both items are optional.
Return toward the central stairs and proceed through the upper part of the cave. Ace Trainer Bence can be avoided by taking the stair route and using Rock Smash, but battling him gives useful experience. Black Belt Markus and Battle Girl Veronique occupy side paths; their Fighting-type Pokémon are vulnerable to Flying, Psychic, and Fairy attacks. Follow the western exit to Grove 2, the outdoor section with bridges and the next cave entrance.
- The first cave’s western exit has been found.
- Surf has been used across the first water section.
- The optional X Attack and Dusk Ball have been ignored or collected without losing the main path.
4. Work through Cave 2 and open the return shortcut
In Cave 2, follow the stepping-stone route and ledges through the chamber. Some branches lead to optional items and the waterfall-access area containing TM03 Psyshock, but the main route continues through the cave and back outdoors. Use Rock Smash where a cracked wall blocks a side connection.
In the next outdoor section, use Strength to push the boulder into its hole. Continue through the opened path and enter the following cave. Push the second boulder into its hole to create a shortcut back toward the earlier part of Victory Road. Open this shortcut before moving on; it gives you a safer retreat route if the party needs healing or you decide to restock in Snowbelle City.
- The Cave 2 stepping-stone section has been crossed.
- The required cracked-wall passage has been opened.
- The Strength boulder shortcut has been created.
5. Use the Pokémon Ranger healing point and defeat the rival
Continue through the outdoor section toward the ruined altar and the next gate. A Pokémon Ranger in this part of Victory Road restores the party. Speak to the Ranger before proceeding, especially if the team has lost health or move points during the earlier caves.
The rival stops you shortly afterward. In Pokémon X, the rival is Calem if the player character is female and Serena if the player character is male. The team always includes Meowstic at level 57, Altaria at level 58, and Absol at level 59. The remaining two Pokémon depend on the starter chosen: after Chespin, the rival uses Jolteon at level 57 and Delphox at level 61; after Fennekin, the rival uses Flareon at level 57 and Greninja at level 61; after Froakie, the rival uses Vaporeon at level 57 and Chesnaught at level 61.
Prepare for Altaria with Ice-, Fairy-, or Rock-type attacks, and do not give Absol time to use Swords Dance. Use Ground moves against Jolteon, Water or Ground moves against Flareon, and Grass or Electric moves against Vaporeon. The final starter evolution should be handled with its type weaknesses rather than a single fixed strategy. After the battle, the rival gives Max Revives. Return to the Pokémon Ranger and heal again before continuing.
- The Pokémon Ranger has healed the party before the rival battle.
- The rival battle is complete.
- The correct starter-dependent rival team has been accounted for.
- The Ranger has healed the party again after the battle.
6. Cross Cave 3, Grove 4, and the waterfall section
After healing, continue through the gate and take the western branch first when the route splits. Use Rock Smash on the cracked wall for the optional Zinc, then return to the split and take the eastern path into the next cave. Pokémon Ranger Petra is found in this cave and can be challenged for experience. Use the ledges and stairs to reach the outdoor upper area, then follow the route back toward the eastern cave exit.
In the next cave, Pokémon Ranger Ralf, Veteran Inga, and Veteran Gerard guard different branches. The route includes a Full Restore and other optional items. Defeat trainers if you need experience, but preserve your strongest moves and healing items for the League. Use Strength on the boulders near Veteran Gerard to open another return shortcut.
Exit into Grove 4 and cross the bridge. Surf from the bridge area, move northeast across the water, and use Waterfall to reach the upper ledge. Hiker Corwin is on the upper route with Torkoal and Golem. The nearby Dragon Claw and hidden Max Ether are optional. Descend the waterfall and enter the final cave beside it.
- The healing Ranger section has been cleared.
- The second return shortcut has been opened where possible.
- The eastern outdoor area has been reached.
- Waterfall has been used to reach the upper ledge.
- The final cave entrance beside the waterfall is visible.
7. Finish the final cave and prepare at the League
The final cave is shorter and more direct. Surf north to the first landing, then continue past Veteran Timeo, Veteran Catrina, and Veteran Gilles. Their teams include Ghost, Rock, Ice, Normal, Steel, Psychic, and Dark Pokémon, so switch rather than allowing one poorly matched lead to absorb repeated super-effective hits.
At the end of the cave, climb the final stairs to the Pokémon League. Before entering the challenge rooms, use the Pokémon Center and Poké Mart in the League complex. Fully heal the party, restore important moves, buy Revives, Max Potions or Full Restores, and carry status cures. Save after preparation. The Elite Four can be challenged in any order, but leaving the League after beginning the challenge requires losing or completing the run, so make this the final preparation point.
- The final cave has been cleared.
- The Pokémon League building has been reached.
- The party is fully healed at the League Pokémon Center.
- The bag contains enough recovery items for the Elite Four and Champion.
- A fresh save has been made before entering the League challenge rooms.
Before you move on
- The Iceberg Badge and all other seven Kalos Gym Badges are registered.
- Ace Trainer Robbie has been defeated and the badge gate has opened.
- The rival battle in Victory Road has been completed.
- The Pokémon Ranger has restored the party after the rival battle.
- The final Waterfall section and last cave have been cleared.
- The Pokémon League entrance, Pokémon Center, and Poké Mart have been reached.
- The party, move points, recovery items, and save file are ready for the Elite Four chapter.
The Elite Four — order, strategies and recovery
After earning all eight Kalos Gym Badges, enter the Pokémon League east of Victory Road. Prepare completely at the Pokémon Center outside the League, then begin a continuous run through Malva, Wikstrom, Drasna, Siebold, and Champion Diantha. The four Elite Four members may be challenged in any order, but Diantha becomes available only after all four victories. Because you should not return to the exterior Pokémon Center after entering the challenge, carry enough healing, revival, and PP-restoring items for the entire run.
Prepare outside the Pokémon League
Use the Pokémon Center beside the League building immediately before entering. Heal every Pokémon, restore important move PP, and arrange the party so your intended lead and emergency counters are easy to select. Buy a substantial supply of Full Restores, Max Potions, Revives, and, if necessary, Hyper Potions. Carry Ethers or Elixirs for attacks that are central to your plan. Full Heals can supplement Full Restores if your budget is limited, but do not enter with a nearly empty recovery bag.
Aim to have your main team in the low-to-mid 60s or higher. This is guidance rather than a mandatory level requirement, but the Elite Four use level 63 Pokémon followed by level 65 closers. Bring dependable answers to Fire, Steel, Dragon, and Water opponents. Do not build the entire plan around one Pokémon: a critical hit, status condition, or unexpected coverage move can force you to rely on the rest of the party.
Save outside the League before entering. Once the run begins, plan to complete all four Elite Four battles and Diantha without returning to the exterior Pokémon Center. Use recovery items from the Bag between battles and restore PP before a depleted move becomes necessary.
- Heal the party completely at the exterior Pokémon Center.
- Restore important move PP.
- Buy Full Restores, Max Potions, and Revives.
- Carry Ethers or Elixirs for essential low-PP attacks.
- Save before entering the League.
- Confirm that the party has answers for Fire, Steel, Dragon, and Water types.
Defeat Malva in the Blazing Chamber
Malva is the Fire-type specialist in the upper-right chamber. Her team is Pyroar at level 63, Torkoal at level 63, Chandelure at level 63, and Talonflame at level 65. Water, Ground, and Rock attacks are useful, but check the matchup before switching. Pyroar knows Wild Charge, so a Water-type sent in carelessly can take heavy damage. Torkoal carries Flame Wheel, Curse, Stone Edge, and Earthquake. Chandelure uses Flamethrower, Confuse Ray, Confide, and Shadow Ball.
Talonflame is Malva’s final Pokémon and can deal severe damage with Brave Bird and Flare Blitz. Defeat it quickly instead of allowing repeated attacks to exhaust the team. If confusion or burn affects a Pokémon needed later, use a Full Restore during the between-battle recovery period. Malva does not use Mega Evolution in this original Pokémon X League battle, so save your own Mega Evolution for the opponent it helps you handle most safely.
- Use Water, Ground, or Rock attacks when the switch is safe.
- Account for Pyroar’s Wild Charge.
- Watch Torkoal’s Earthquake and Stone Edge.
- Remove confusion or burn before the next chamber if the affected Pokémon is important.
- Use items rather than leaving the League to recover.
Challenge Wikstrom in the Ironworks Chamber
Wikstrom is the Steel-type specialist in the upper-left chamber. He uses Klefki at level 63, Probopass at level 63, Scizor at level 63, and Aegislash at level 65. Fire, Ground, and Fighting attacks provide the best general coverage. Scizor is especially vulnerable to Fire, while Probopass is weak to both Ground and Fighting. Klefki can use Spikes and Torment, so defeating it early reduces the danger of repeated switching and move restrictions.
Aegislash is the closer. Its moves are Sacred Sword, Iron Head, King’s Shield, and Shadow Claw. Do not use a physical attack into King’s Shield unless you accept the risk of a sharp Attack reduction. Wait with a safe action, use a special attack, apply an appropriate status effect, or switch to a Pokémon that can withstand the next hit. Heal and restore PP with items before selecting the next chamber.
- Use Fire against Scizor when possible.
- Bring Ground or Fighting coverage for Probopass.
- Defeat Klefki before Spikes complicate the run.
- Avoid striking directly into Aegislash’s King’s Shield with a physical attacker.
- Restore the party with Bag items before continuing.
Handle Drasna in the Dragonmark Chamber
Drasna occupies the lower-left chamber and specializes in Dragon Pokémon. Her team is Dragalge at level 63, Altaria at level 63, Druddigon at level 63, and Noivern at level 65. Ice, Dragon, and Fairy attacks are useful against much of the team, but Dragalge is also Poison-type and knows Sludge Bomb, Surf, Thunderbolt, and Dragon Pulse. A Fairy Pokémon is therefore not automatically safe. Ground, Psychic, Steel, or strong neutral attacks can be more dependable answers for Dragalge.
Altaria can use Cotton Guard. If its Defense rises, switch to a special attacker rather than repeatedly using weak physical attacks. Druddigon carries Dragon Tail, Revenge, Retaliate, and Chip Away, and its Rough Skin punishes contact attacks. Keep a reasonably fast Ice- or Fairy-capable Pokémon ready for Noivern. Noivern knows Flamethrower, Boomburst, Air Slash, and Dragon Pulse, so a frail counter may still be defeated by a neutral or super-effective coverage move.
- Respect Dragalge’s Poison typing and Sludge Bomb.
- Use Steel, Ground, or Psychic coverage when safer than Fairy attacks.
- Switch to special attacks after Altaria uses Cotton Guard.
- Avoid unnecessary contact attacks against Druddigon.
- Preserve a durable Ice- or Fairy-capable answer for Noivern.
Finish with Siebold in the Flood Chamber
Siebold is in the lower-right chamber and uses Clawitzer at level 63, Starmie at level 63, Gyarados at level 63, and Barbaracle at level 65. Electric and Grass attacks are the main super-effective options. Clawitzer knows Dragon Pulse, Water Pulse, Aura Sphere, and Dark Pulse, so an otherwise favorable Electric- or Grass-type switch may still be unsafe if that Pokémon is fragile. Starmie carries Psychic, Light Screen, Surf, and Dazzling Gleam; account for those moves before committing to a counter.
Gyarados activates Intimidate, reducing the Attack of a physical attacker. Use an Electric attack if possible, or use a special attacker that ignores the Attack reduction. Gyarados can use Dragon Dance, so defeat it before it gains multiple boosts. Barbaracle is the level 65 closer and knows Stone Edge, Razor Shell, Cross Chop, and X-Scissor in this battle. It does not use Shell Smash here. Electric or Grass attacks are preferable, while a sturdy neutral attacker is a safer fallback than a slow setup exchange.
- Use Electric or Grass attacks against the Water-type team.
- Respect Clawitzer’s Aura Sphere, Dark Pulse, and Dragon Pulse.
- Use special attacks after Gyarados’s Intimidate.
- Prevent Gyarados from accumulating Dragon Dance boosts.
- Do not plan around Barbaracle using Shell Smash in this encounter.
Use items and enter Diantha’s chamber
After each Elite Four victory, use the Bag to repair the party for the next fight. Use Max Potions for ordinary damage, Full Restores for serious damage combined with status, and Revives when a fainted Pokémon provides essential coverage. Restore PP with Ethers or Elixirs on attacks that remain necessary. Do not spend every Full Restore on one badly damaged Pokémon if another party member can safely cover the next specialist.
Do not return to the exterior Pokémon Center once the League challenge has begun. Complete the four Elite Four battles with the resources carried inside, then proceed directly to Champion Diantha. When all four members are defeated, the central route to the Champion’s chamber opens. Before speaking to Diantha, use the remaining items to put the intended lead and emergency counters in usable condition, then save if the game allows you to do so at that point.
Diantha follows immediately after the four Elite Four victories. This chapter ends when you are ready to enter her chamber; continue with the Champion Diantha chapter for her team and the Hall of Fame sequence.
- Heal HP and status with Bag items after every chamber.
- Restore PP on important attacks.
- Keep Full Restores and Revives available for Diantha.
- Confirm that all four Elite Four members are defeated.
- Do not return to the exterior Pokémon Center after entering the challenge.
- Enter Diantha’s chamber with the strongest remaining resources.
Before you move on
- Malva, Wikstrom, Drasna, and Siebold have each been defeated in Pokémon X.
- The four Elite Four battles were completed without returning to the exterior Pokémon Center.
- The party has been restored with items and important moves still have usable PP.
- Full Restores, Max Potions, Revives, and any needed PP-restoring items remain available for Diantha.
- The central doors to the Champion’s chamber are open.
- The player is ready to continue immediately into Champion Diantha’s battle.
Champion Diantha — composition and finishing tactics
After defeating all four Kalos Elite Four members, enter the Radiant Chamber and defeat Champion Diantha. Her Pokémon range from level 64 to level 68 and cover a wide spread of types, so preserve answers for Tyrantrum, Goodra, and Mega Gardevoir rather than relying on one attacker. After Diantha falls, complete the Hall of Fame, return to Lumiose City for the Honor of Kalos celebration, defeat AZ, witness Floette’s return, and watch the credits. The Chamber of Emptiness is optional post-game content and is not part of Pokémon X’s main ending.
Heal after the fourth Elite Four battle and enter the Radiant Chamber
The four Elite Four members may be challenged in any order. Once Malva, Wikstrom, Drasna, and Siebold have all been defeated, return to the Great Hall. The north door is now open. Walk through it and take the elevator at the end of the passage to reach the Radiant Chamber, where Champion Diantha is waiting.
There is no Pokémon Center between the League chambers and Diantha. Before starting the Champion battle, use Potions, Full Restores, Revives, and status-healing items as needed. Restore important move PP with Ethers, Elixirs, or other PP-restoring items if those moves are nearly empty. You cannot change to a different team through the PC during the League challenge, so make sure the six Pokémon you brought can cover the Champion as well as the Elite Four.
Diantha’s highest level is 68. A team in the low-to-mid 60s is a practical preparation target, but there is no mandatory level requirement beyond having all eight Badges. Save before entering the battle if you want a recovery point before attempting the League again.
- Defeat all four Elite Four members.
- Use healing and status-restoring items before Diantha.
- Restore critical move PP with PP-restoring items if necessary.
- Keep a healthy Steel, Poison, Ghost, Ice, Fairy, or fast neutral attacker available.
- Save before beginning the Champion battle if desired.
Defeat Hawlucha before it uses Swords Dance
Diantha opens with level 64 Hawlucha, a Fighting- and Flying-type Pokémon with Limber. Its moves are Swords Dance, Flying Press, X-Scissor, and Poison Jab. Attack immediately if your lead can deal heavy damage. If Hawlucha receives a free Swords Dance, its boosted physical attacks can quickly overwhelm a frail team member.
Electric, Ice, Flying, Psychic, and Fairy attacks are super effective. A bulky Electric or Flying Pokémon is useful because Hawlucha’s listed attacks are physical. Psychic and Fairy Pokémon must still respect X-Scissor and Poison Jab, so do not switch in a fragile counter unless it can survive a hit or move first. Limber prevents paralysis, making paralysis a poor primary plan against this opener.
- Use Electric, Ice, Flying, Psychic, or Fairy damage when possible.
- Prevent a free Swords Dance turn.
- Do not depend on paralysis because of Limber.
- Protect a frail Psychic- or Fairy-type switch-in from X-Scissor and Poison Jab.
Handle Tyrantrum’s Head Smash and Earthquake
Level 65 Tyrantrum is Rock and Dragon type and has Strong Jaw. It knows Head Smash, Dragon Claw, Earthquake, and Crunch. Ice, Fighting, Ground, Dragon, Steel, and Fairy attacks are super effective.
A strong Fairy or Steel Pokémon can attack without relying on Dragon-type damage. Ground and Fighting moves also work if the user can survive Head Smash and Earthquake. Do not assume a Fire-, Electric-, or Flying-type Pokémon is safe: Head Smash is a powerful Rock attack, and Earthquake covers those switches. If your counter cannot knock Tyrantrum out immediately, use dependable damage rather than spending a turn on unnecessary setup. Head Smash inflicts recoil, so a sturdy Pokémon that survives the hit may allow Tyrantrum to wear itself down.
- Use Ice, Fighting, Ground, Dragon, Steel, or Fairy attacks.
- Avoid vulnerable switches into Head Smash or Earthquake.
- Exploit Head Smash recoil only if your Pokémon can safely survive it.
Break Aurorus’s screens quickly
Diantha’s level 65 Aurorus is Rock and Ice type. Its moves are Thunder, Blizzard, Reflect, and Light Screen. Fighting and Steel attacks are especially effective, while Water, Grass, Ground, and Rock attacks are also super effective.
Aurorus can reduce physical damage with Reflect and special damage with Light Screen. Attack promptly so it cannot leave both screens active for the rest of the battle. If Reflect is active, prefer a special attacker; if Light Screen is active, prefer physical damage when practical. A Fighting-type Pokémon is strong offensively but must be able to withstand Blizzard. Water and Grass Pokémon are not automatically safe because Thunder and Blizzard punish those matchups.
- Use Fighting or Steel damage whenever practical.
- Prevent Aurorus from establishing both screens.
- Use special damage through Reflect and physical damage through Light Screen when possible.
- Do not leave a fragile counter exposed to Blizzard or Thunder.
Manage Gourgeist and Goodra’s coverage
Level 65 Gourgeist is Ghost and Grass type. It knows Trick-or-Treat, Phantom Force, Seed Bomb, and Shadow Sneak. Fire, Ice, Flying, Ghost, and Dark attacks are super effective. Trick-or-Treat adds Ghost typing to its target, which can change how later attacks interact with that Pokémon.
When Gourgeist uses Phantom Force, it disappears for one turn and most attacks cannot hit it. Use that turn to switch, heal, or choose a safer action instead of wasting a damaging move. Shadow Sneak has priority, so a weakened Pokémon can be finished before it acts; do not leave a low-HP attacker in merely because Gourgeist is also weakened.
Goodra is level 66 and has Sap Sipper. Its moves are Dragon Pulse, Muddy Water, Fire Blast, and Focus Blast. Ice, Dragon, and Fairy attacks are super effective. Grass attacks do not damage Goodra normally in this situation; Sap Sipper absorbs them and raises Goodra’s Attack. A Fairy-type attacker is a strong answer because it threatens Goodra and resists Dragon Pulse, but check its ability to survive Fire Blast, Focus Blast, and Muddy Water before switching.
- Do not attack Gourgeist during the vanished turn of Phantom Force.
- Use Fire, Ice, Flying, Ghost, or Dark attacks against Gourgeist.
- Do not use Grass attacks as your plan against Goodra.
- Keep an Ice- or Fairy-capable Pokémon healthy for Goodra.
- Respect Shadow Sneak when Gourgeist is nearly defeated.
Save your best answer for Mega Gardevoir
Diantha always sends out her level 68 Gardevoir last. It holds Gardevoirite and Mega Evolves immediately, becoming Mega Gardevoir with Psychic and Fairy typing. Its moves are Moonblast, Psychic, Shadow Ball, and Thunderbolt.
Poison, Ghost, and Steel attacks are super effective. Steel is a particularly useful answer because it resists Moonblast and Psychic, although Shadow Ball and Thunderbolt still provide coverage. Do not switch a weakened Steel Pokémon into Mega Gardevoir without checking its remaining HP. Poison and Ghost attackers can also work if they can withstand its special attacks.
Fairy typing makes Dragon and Fighting attacks ineffective against Mega Gardevoir. Dark attacks are neutral rather than super effective, so use them as ordinary damage or to finish a weakened target, not as the preferred weakness. Preserve your healthiest reliable counter instead of spending it unnecessarily against an earlier member of Diantha’s team.
- Expect Gardevoir to Mega Evolve as soon as it enters battle.
- Use Poison, Ghost, or Steel attacks when available.
- Keep a healthy Steel or special-defense answer for the final Pokémon.
- Do not rely on Dragon or Fighting attacks.
- Treat Dark attacks as neutral damage.
Complete the mandatory ending after Diantha
After all six of Diantha’s Pokémon are defeated, the game takes you to the Kalos Hall of Fame. Your party is recorded, and the League victory sequence continues automatically. The story then moves to Lumiose City, where crowds gather for the celebration. Continue through the event until Professor Sycamore presents the Honor of Kalos for defeating Team Flare.
The celebration is interrupted when AZ challenges you. This is a separate battle against three level 60 Pokémon: Torkoal, Golurk, and Sigilyph. Torkoal is Fire type and is vulnerable to Water, Ground, and Rock attacks, but it also knows Stone Edge and Body Slam. Golurk is Ground and Ghost type and is vulnerable to Water, Grass, Ice, Ghost, and Dark attacks; Phantom Force can make it untargetable for a turn. Sigilyph is Psychic and Flying type and is vulnerable to Electric, Ice, Rock, Ghost, and Dark attacks. It can use Cosmic Power, so defeat it before it has time to build excessive defenses.
After AZ loses, his long-lost Floette returns to him. The reunion is followed by the closing scenes and credits. This completes the main campaign goal. Xerneas was encountered earlier during the Team Flare Secret HQ finale in Pokémon X, before the League. The Chamber of Emptiness is optional post-game content and is not required for the Hall of Fame, AZ battle, Floette reunion, or credits.
- Diantha’s six Pokémon are defeated, including level 68 Mega Gardevoir.
- Your team is recorded in the Kalos Hall of Fame.
- You continue through the Lumiose City celebration and receive the Honor of Kalos.
- You defeat AZ’s level 60 Torkoal, Golurk, and Sigilyph.
- AZ is reunited with Floette.
- The closing scenes and credits begin.
Before you move on
- The north door in the League Great Hall opened after all four Elite Four victories.
- Diantha’s full six-Pokémon team was defeated in the Radiant Chamber.
- The party was recorded in the Kalos Hall of Fame.
- The Lumiose City celebration occurred and Professor Sycamore presented the Honor of Kalos.
- AZ was defeated in the post-League battle.
- AZ’s Floette returned to him.
- The closing scenes and credits began.
Team Flare Secret HQ — Xerneas and the Pre-League Finale
After completing Lysandre Labs, go to the ruined Geosenge Town and enter Team Flare Secret HQ from the northwest edge. In Pokémon X, this headquarters contains the required level 50 Xerneas encounter. Serena or Calem assists at the entrance, Shauna joins during the corridor section, and the group clears the base before you capture Xerneas and fight Lysandre for the final time. His Mega Gyarados is the main threat. After the ultimate weapon destroys itself, the game returns the story to Anistar City and then directs you toward Route 18, Couriway Town, Route 19, Snowbelle City, Route 20, and Pokémon Village.
Prepare in Geosenge Town and enter the headquarters
Begin immediately after the Lysandre Labs sequence and the ultimate weapon’s activation. Fly or travel to Geosenge Town, heal at the Pokémon Center, and stock Poké Balls, healing items, and status recovery. A balanced party around the upper forties is suitable for the trainers ahead. Fighting moves help against Mienshao, while Electric, Rock, Water, Ground, and Fairy coverage gives useful answers to Lysandre’s Pokémon. Bring a Pokémon that can weaken or inflict status on Xerneas if you plan to capture it with ordinary Poké Balls.
Travel to the northwest edge of Geosenge Town and approach the large stone structure associated with the ultimate weapon. Defeat the single Team Flare Grunt outside. Serena or Calem then arrives and insists on accompanying you. Enter the headquarters after the scene. The base is available only during this story sequence and is destroyed after the final Lysandre battle, so finish any preparation in Geosenge before going inside.
- Heal at the Geosenge Town Pokémon Center.
- Buy Poké Balls and recovery items.
- Defeat the Grunt at the northwest entrance.
- Confirm that the party has answers for Fighting, Dark, Fire, Water, and Flying Pokémon.
Defeat Lysandre in the main room
Proceed through the entrance until Lysandre confronts you in the main room. In Pokémon X, his first Secret HQ team is Mienshao at level 47, Honchkrow at level 47, Pyroar at level 49, and Gyarados at level 51. Use Flying, Psychic, or Fairy attacks against Mienshao. Honchkrow is vulnerable to Electric, Ice, Rock, and Fairy attacks. Water, Ground, Rock, and Fighting attacks pressure Pyroar. Gyarados is Water and Flying with Intimidate, so a strong special attacker avoids the worst of its Attack reduction; Electric attacks are especially effective before it can Mega Evolve.
After winning, take the northwest door from the main room. You can briefly see the legendary Pokémon being drained by the weapon before continuing. Follow the route into the headquarters corridor. Do not expect a healing station inside, so use items between battles when necessary.
- Defeat Lysandre’s first Secret HQ battle.
- Use the northwest door after the battle.
- Restore weakened Pokémon before the corridor battles.
Cross the corridor with your companions
The corridor contains several paired Team Flare battles. Serena or Calem fights beside you as the temporary partner, so make sure the two Pokémon you want active are positioned before each battle. The corridor pairings include a Team Flare Admin with Toxicroak, a Grunt with Liepard, an Admin with Manectric, a Grunt with Mightyena, an Admin with Houndoom, and a Grunt with Scrafty. Their levels are generally 48 to 50.
About halfway through the corridor, Shauna catches up and joins the operation. Continue through the remaining double battles. Concentrate attacks on one opposing Pokémon at a time unless a spread move is clearly safe, since your partner’s Pokémon can be caught in the effect of some attacks. At the basement door, Shauna uses the device Clemont gave her to open the electronic lock. This is the required transition into the basement; there is no separate key item for you to find.
- Complete the paired corridor battles.
- Keep Serena’s or Calem’s temporary team in mind when choosing your active Pokémon.
- Allow Shauna to join the group.
- Reach the locked basement door and let Shauna open it.
Clear the basement Administrators
The basement changes back to single battles. Team Flare Administrators guard the route to the legendary chamber. The verified teams are Liepard at level 47 and Manectric at level 48; Swalot at level 50; Mightyena at level 47 and Houndoom at level 48; and Golbat at level 50. Fighting or Fairy attacks work well against the Dark Pokémon, Ground attacks are useful against Manectric and Houndoom, and Psychic or Ground attacks can pressure Swalot. Use caution with Ground moves against Golbat, which is part Flying type.
Serena or Calem and Shauna draw some of the other Administrators away, leaving you to defeat the remaining battles one at a time. Heal the party after the final Administrator if needed. Walk to the legendary chamber only when the Pokémon intended to weaken Xerneas is ready and your capture supplies are sufficient.
- Defeat all required basement Administrators.
- Remember that these are single battles, not double battles.
- Heal before approaching Xerneas.
- Place the intended capture Pokémon at the front of the party.
Capture Xerneas
In the legendary chamber, interact with Xerneas to begin the required story encounter. Pokémon X’s Xerneas is level 50, is a pure Fairy type, has Fairy Aura, and knows Gravity, Psychic, Geomancy, Moonblast, and Megahorn. Its Fairy attacks become more dangerous because of Fairy Aura, and Geomancy can sharply raise its Special Attack, Special Defense, and Speed after its charging turn.
Lower its HP carefully. False Swipe is helpful if available, but weak attacks are safer than a critical hit from a stronger move. Sleep or paralysis improves the capture chance. Poison and Steel attacks are super effective against Fairy Pokémon, but use them cautiously because a high-powered hit can knock Xerneas out. Throw Ultra Balls while its HP is low; Timer Balls become useful if the encounter lasts many turns. Capture Xerneas before leaving the chamber. You may place it in the party or send it to the PC if the party is full.
- Start the level 50 Xerneas encounter.
- Lower its HP without knocking it out.
- Use sleep or paralysis if available.
- Capture Xerneas and confirm that it is in the party or PC.
Win the final Lysandre battle
After Xerneas is captured, Shauna and Serena or Calem rejoin you, and Lysandre begins his final battle. His Pokémon X team is Mienshao at level 49, Honchkrow at level 49, Pyroar at level 51, and Gyarados at level 53 holding Gyaradosite. The first three can be handled with the same coverage used in the opening battle.
Lysandre Mega Evolves Gyarados. Mega Gyarados becomes Water and Dark, so Electric attacks are neutral rather than super effective after the transformation. Use strong Grass, Fighting, Bug, or Fairy attacks where available, or rely on solid neutral damage from a healthy Pokémon. Its listed moves include Aqua Tail, Earthquake, Iron Head, and Outrage, so avoid leaving a weakened Pokémon in against it. Heal or switch as needed; this is the last required battle inside the headquarters.
- Defeat Mienshao, Honchkrow, and Pyroar.
- Prepare for level 53 Mega Gyarados.
- Do not rely only on Electric attacks after Mega Evolution.
- Win the final Lysandre battle.
Watch the aftermath and hand off to the Snowbelle section
After Lysandre loses, the ultimate weapon fires once more, destroys itself, and collapses underground. The Secret HQ and its entrance are destroyed, leaving a crater in Geosenge Town. Watch the aftermath until control returns. The group then leaves for Anistar City, while AZ explains more about the ultimate weapon and his identity as the former king who built it.
Once you can leave Anistar City, Professor Sycamore contacts you and asks you to meet him in Couriway Town. Continue through Route 18 to Couriway Town, then follow the Route 19 sequence toward Snowbelle City. Wulfric is not initially at the Snowbelle Gym, so continue through Route 20 to Pokémon Village, speak with him there, and return to Snowbelle City for the eighth Gym Badge. Do not go directly to Victory Road yet; the next chapter covers the Snowbelle objective first.
- The ultimate weapon destroys itself.
- The Secret HQ is no longer accessible.
- Return to Anistar City after the crater sequence.
- Follow Professor Sycamore’s direction toward Route 18 and Couriway Town.
- Continue to Snowbelle City, Route 20, and Pokémon Village for the eighth Gym Badge.
Before you move on
- Xerneas at level 50 is captured and recorded in the Pokédex, party, or PC.
- The first Lysandre battle in the Secret HQ is won.
- The corridor’s required paired battles are cleared.
- The basement Administrators are defeated.
- The final Lysandre battle, including Mega Gyarados, is won.
- The ultimate weapon destroys itself and the Secret HQ entrance is destroyed.
- The post-battle scenes return the story to Anistar City.
- Professor Sycamore’s direction toward Couriway Town and the Route 18 continuation is available.
References for this chapter
Immediate post-game: essential tasks and closure
Pokémon X’s mandatory campaign is complete only after Champion Diantha is defeated, the first Hall of Fame entry is recorded, the Lumiose City celebration is completed, AZ is defeated, and the credits finish. Once normal control returns in Vaniville Town, all content in this chapter is optional post-game play. The National Pokédex, TMV Pass, Kiloude City, Battle Maison, rival rematch, Mega Ring upgrade, Looker Bureau investigation, legendary encounters, Mega Stone collection, Pokédex work, Friend Safari, Poké Radar, and Battle Maison streaks are not required for the main-story completion goal.
1. Finish and verify the mandatory ending
Defeat Champion Diantha at the Pokémon League and continue through the Hall of Fame sequence. Do not reset or leave before the game records your team in the Hall of Fame. The game then moves through the Lumiose City celebration, where AZ challenges you to a battle. Defeat AZ and let the ending scenes and credits play.
After the credits, the game returns you to normal play in Vaniville Town. Save your file at this point. This is the complete mandatory ending for Pokémon X: Diantha defeated, Hall of Fame entered, Lumiose celebration completed, AZ defeated, and credits watched. Everything that follows is optional post-game content.
- Defeat Champion Diantha.
- Enter the Hall of Fame for the first time.
- Complete the Lumiose City celebration.
- Defeat AZ.
- Allow the credits to finish and regain normal control.
- Save after returning to Vaniville Town.
2. Obtain the National Pokédex and TMV Pass
From Vaniville Town, travel to Lumiose City and enter Lumiose Station on North Boulevard. Sina and Dexio meet you inside and upgrade your Pokédex to the National Pokédex. This upgrade is optional and does not change the mandatory campaign completion status.
After Sina and Dexio finish, speak with Professor Sycamore in the station. He gives you the TMV Pass. Use the orange machine beside the station platform to ride the train to Kiloude City. If you do not have a Pokémon that knows Fly, use the normal routes from Vaniville or Santalune to reach Lumiose before beginning this trip.
- Reach Lumiose Station on North Boulevard.
- Receive the National Pokédex from Sina and Dexio.
- Speak with Professor Sycamore.
- Receive the TMV Pass.
- Use the orange station machine to travel to Kiloude City.
3. Unlock the rival rematch and Mega Ring upgrade
In Kiloude City, enter the Battle Maison and begin a standard battle challenge. One Battle Maison victory is sufficient for the story-linked unlock; a long winning streak or a special facility rank is not required. Heal afterward at the Kiloude Pokémon Center.
Go to the northern part of Kiloude City and battle your rival, Serena or Calem depending on your character. Defeat the rival to receive Absolite and the instruction to meet Professor Sycamore at the Anistar City sundial. If the rival is not present, leave Kiloude, return, and check the northern area again after confirming that you have won a Battle Maison battle.
Travel to Anistar City and speak with Professor Sycamore at the large sundial. He supercharges your Mega Ring. This upgrade is optional, but it is the prerequisite for the later Looker Bureau investigation and for detecting certain hidden Mega Stones during the relevant time window.
- Win at least one Battle Maison battle.
- Defeat the rival in northern Kiloude City.
- Receive Absolite.
- Meet Professor Sycamore at the Anistar City sundial.
- Receive the powered-up Mega Ring.
4. Begin and complete the Looker Bureau investigation
After the Mega Ring is upgraded, return to Lumiose City. Looker sends a Holo Caster message directing you to the Looker Bureau in Rouge Plaza. The bureau is in the building across from Sushi High Roller. If the message does not appear immediately, leave Lumiose City, re-enter, and walk around until the Holo Clip triggers.
Agree to help Looker, then collect the five Looker Tickets. The tickets are in the Pokémon Center in Magenta Plaza, inside Prism Tower in Centrico Plaza, inside the Herboriste shop on Vernal Avenue, inside Hotel Richissime on North Boulevard, and on the first floor of the Lumiose Museum on North Boulevard. Return to the bureau after collecting all five.
Follow Looker’s case instructions through the South Boulevard alley investigation, the Lumiose Station incidents, the searches for Emma’s Espurr Mimi, and the battles against the Lumiose Gang members. Use Pokémon Centers between cases when convenient. The cases are sequential, so return to the bureau whenever the Holo Caster or the dialogue directs you there rather than trying to skip ahead to Lysandre Labs.
When the investigation sends you to Hotel Richissime, battle Malva in the Royal Suite. Follow her directions to Lysandre Labs and enter the hidden floor that becomes accessible during this mission. Navigate the hidden floor, battle the scientists and Lumiose Gang members, and inspect the evidence concerning Xerosic’s Expansion Suit. Essentia appears in four required battles during this section, not three. Heal between battles whenever possible and use the bureau’s story healing when it is provided.
For the concluding case, return to the bureau after Emma’s message. Investigate the Lumiose Museum, then travel to Lysandre Café in Magenta Plaza. Follow the final scenes involving Looker, Emma, and Xerosic. The Looker Bureau story is complete when the closing conversation at the café and bureau has ended and Emma assumes responsibility for the agency.
- Receive Looker’s Holo Caster message after upgrading the Mega Ring.
- Collect all five Looker Tickets.
- Complete the South Boulevard and Lumiose Station investigations.
- Resolve the Emma and Mimi sequence.
- Battle Malva at Hotel Richissime.
- Clear the hidden floor of Lysandre Labs.
- Defeat Essentia in all four required battles there.
- Complete the Museum and Lysandre Café finale.
5. Pursue optional legendary Pokémon
Mewtwo is optional. Travel to Pokémon Village and enter the Unknown Dungeon. Save before interacting with Mewtwo, weaken it carefully, use status effects if available, and carry enough Poké Balls. Capturing Mewtwo is not required for the campaign, National Pokédex unlock, or Looker Bureau completion.
Zygarde is also optional. Enter Terminus Cave from Route 18 and work through the dungeon to its bottom floor. Save before the encounter and bring recovery items, status moves, and Poké Balls. The roaming Legendary bird is determined by your original Kalos starter: Chespin leads to Articuno, Fennekin leads to Zapdos, and Froakie leads to Moltres. Encounter the bird repeatedly as it moves between routes; after enough encounters, it settles in Sea Spirit’s Den north of Azure Bay, where it can be challenged and caught.
- Save before challenging Mewtwo.
- Reach the bottom floor of Terminus Cave if pursuing Zygarde.
- Identify the roaming bird from your original starter.
- Track the bird until it appears in Sea Spirit’s Den.
- Treat all three legendary projects as optional.
6. Continue optional collection and challenge goals
After the Mega Ring upgrade, collect additional Mega Stones where desired. Some are version-specific, some are tied to locations or NPCs, and some hidden stones can only be detected during the relevant evening time window. Pokémon X has its own version availability, so do not assume that every stone listed for Pokémon Y can be obtained in the same save.
Visit the scientist on the second floor of Professor Sycamore’s laboratory in Lumiose City to receive the Poké Radar. Use it for optional species registration and shiny-hunting chains. Kiloude City’s Friend Safari is another optional collection resource, while the Battle Maison can be used for longer streaks and Battle Points. Battle Chateau progress, Super Training, additional Kalos starter collection, and full National Pokédex completion are also optional goals.
The campaign completion check does not require the National Pokédex, TMV Pass, rival rematch, Mega Ring upgrade, Looker Bureau, Mewtwo, Zygarde, the roaming bird, Mega Stones, Friend Safari, Poké Radar, or Battle Maison streaks.
- Collect only Pokémon X-compatible Mega Stones you want.
- Receive the Poké Radar if pursuing collection or shiny hunting.
- Use Friend Safari for optional species registration.
- Continue Battle Maison streaks if desired.
- Keep all collection and challenge goals separate from the mandatory ending.
Before you move on
- Mandatory: Champion Diantha has been defeated.
- Mandatory: the player has entered the Hall of Fame for the first time.
- Mandatory: the Lumiose City celebration has been completed.
- Mandatory: AZ has been defeated.
- Mandatory: the credits have played and normal post-game control has returned.
- Optional: the National Pokédex and TMV Pass have been received.
- Optional: at least one Battle Maison battle has been won and the Kiloude rival has been defeated.
- Optional: Professor Sycamore has supercharged the Mega Ring at the Anistar sundial.
- Optional: the Looker Bureau investigation has been completed through its final Lysandre Café and bureau scenes.
- Optional: Mewtwo, Zygarde, the roaming Legendary bird, Mega Stones, Friend Safari, Poké Radar, Pokédex registration, and Battle Maison streaks remain available for further play.
Finishing up
The eight Kalos Gym Badges are recorded: Santalune, Cyllage, Shalour, Coumarine, Lumiose, Laverre, Anistar, and Snowbelle.
Team Flare’s Power Plant, Lysandre Café, Lysandre Labs, and Secret HQ operations are complete.
Xerneas has been captured in Team Flare Secret HQ, and Lysandre has been defeated in the following battle.
Snowbelle Gym and Wulfric have been cleared, Victory Road has been crossed, and the Pokémon League entrance is available.
Malva, Wikstrom, Drasna, Siebold, and Champion Diantha have been defeated.
The Hall of Fame sequence, Lumiose City celebration, and AZ’s final battle have been completed. The Chamber of Emptiness and other post-game locations are optional.
Choose your next gameScreenshots & video
Game imagery for reference. Follow the written chapters above for the route and strategies.
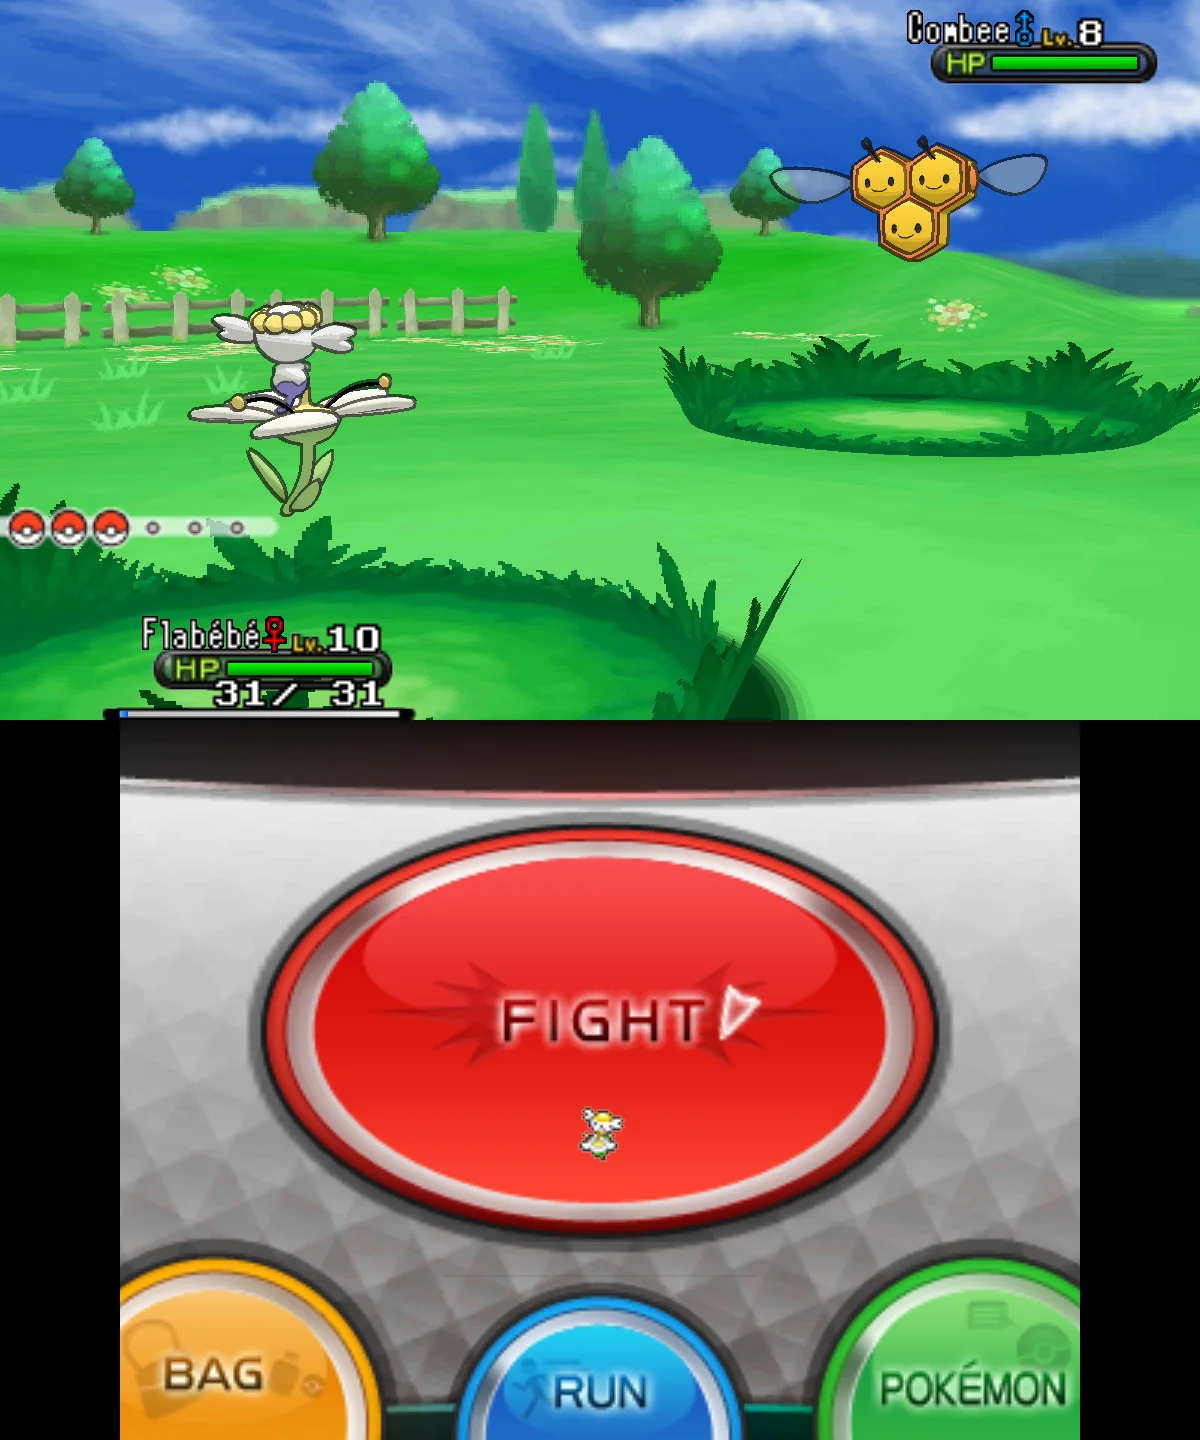
Sources & references
Our original guide draws on the references below. Check the edition at the top of this page before following controls or unlock requirements.
- Walkthrough: Pokémon X and Y — Bulbapedia
- Pokémon X — Guide and Walkthrough — GameFAQs
- Pokémon X and Y — Vaniville Town — StrategyWiki
- Starting your Journey — Pokémon X Walkthrough — Neoseeker
- Walkthrough: Pokémon X and Y/Part 2
- Santalune Gym
- Pokémon X & Y Kalos Region Guide
- Walkthrough: Pokémon X and Y
- Walkthrough: Pokémon X and Y/Part 3 — Bulbapedia
- Pokemon X & Pokemon Y Walkthrough - Ambrette Town — PokeDream
- Walkthrough: Pokémon X and Y, Section 6 — Bulbapedia
- Pokémon X and Y: Cyllage City — StrategyWiki
- Pokémon X and Y Walkthrough — Part 12: Route 8 and Cyllage City — ArrPeeGeeZ
- Shalour City — Bulbapedia
- Shalour City Gym — Bulbapedia
- Tower of Mastery — Thonky Pokémon X and Y Walkthrough
- Route 12: Fourrage Road — Pokémon X and Y Walkthrough — Thonky
- Pokémon X and Y Walkthrough, Part 17: Shalour City and Shalour City Gym
- Pokémon X and Y Walkthrough, Part 18: Tower of Mastery and Route 12
- Pokémon X & Y Gym Leaders — Serebii.net
- Walkthrough: Pokémon X and Y/Part 7 — Bulbapedia
- Pokémon X and Y Walkthrough, Part 20: Coumarine City and Coumarine City Gym — ArrPeeGeeZ
- Walkthrough: Pokémon X and Y/Part 7 — Bulbapedia
- Coumarine City — Serebii Pokéarth
- Pokémon X and Y Walkthrough, Part 21: Route 13 and Kalos Power Plant
- Pokémon X and Y Walkthrough — Lumiose City north — PokeDream
- Walkthrough: Pokémon X and Y/Part 9
- Walkthrough: Pokémon X and Y/Part 10
- Kalos Route 14
- Frost Cavern
- Poké Ball Factory — Pokémon X and Y Walkthrough
- Gym Leader Olympia — Pokémon X and Y Walkthrough
- Pokémon X and Y Walkthrough, Part 32: Route 17 and Anistar City
- Walkthrough: Pokémon X and Y/Part 11
- Lysandre Labs - Pokémon X and Y Walkthrough
- Geosenge Town - Bulbapedia
- Team Flare Secret HQ - Bulbapedia
- Walkthrough: Pokémon X and Y/Part 12 — Bulbapedia
- Appendix: X and Y walkthrough/Section 13 — Bulbapedia
- Snowbelle City — Kalos — Serebii.net Pokéarth
- Victory Road - Pokémon X and Y Walkthrough
- Walkthrough: Pokémon X and Y, Part 14 - Bulbapedia
- Victory Road - Kalos - Serebii Pokéarth
- Pokémon X & Y - Elite Four
- Pokémon League (Kalos) - Bulbapedia
- Victory Road (Part 2) - To the Elite Four - Pokémon X and Y
- Elite Four - Bulbapedia
- Elite Four and Champion: Pokémon League - Pokémon X and Y Walkthrough
- Walkthrough: Pokémon X and Y/Part 15
- Team Flare Secret HQ — Kalos — Serebii.net Pokéarth
- Pokémon X & Y — Team Flare
- Pokémon X and Y Walkthrough: Post-Game
- Pokémon X & Y: The Looker Detective Agency
- Looker Bureau - Bulbapedia
- Pokémon X / Pokémon Y Mega Stone Collection Guide
About the game & collecting notes
- Platform
- Nintendo 3DS
Step-by-step campaign walkthrough for the original North American retail release of Pokémon X on Nintendo 3DS. Follow the playable route in this order: ch01, ch02, ch03, ch04, ch05, ch07, ch08, ch09, ch15, ch10, ch11, ch12, ch13, and ch14. Skip ch06 as a reference-only continuity note because ch03 already completes the first Lumiose City, Professor Sycamore, Café Soleil, and Route 5 opening. Treat ch16 as optional post-game material. The main campaign requires all eight Kalos Gym Badges, Team Flare’s Power Plant and Lumiose operations, Team Flare Secret HQ, the level 50 Xerneas encounter, final Lysandre, Snowbelle Gym, Victory Road, the Elite Four, Champion Diantha, the Hall of Fame, the Lumiose celebration, and AZ’s battle.
Darryl Polo
Darryl Polo loves tinkering with emulation and revisiting retro games. He enjoys exploring how old favorites play on different setups and sharing what he learns along the way. At Joking Joystick, he writes about the games, hardware, and small discoveries that keep the hobby fun.
Our editorial standardsFound a step that needs another look? Help us improve this guide.