
Pokémon Ultra Sun — Complete Nintendo 3DS Walkthrough (USA edition)
Step-by-step campaign walkthrough for Pokémon Ultra Sun (Nintendo 3DS, North America). Covers every required island trial, the Ultra Recon / Necrozma story thread, Mount Lanakila and the newly established Alola League, plus post-game targets (Ultra Beasts, Battle Tree, version exclusives). Practical strategies, recovery tips and clear completion checks to finish the main story and immediate postgame goals.

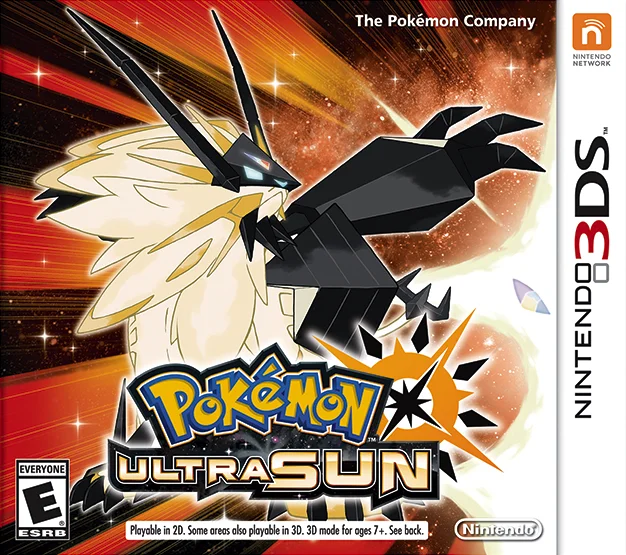
Find a copy
Pokemon Ultra Sun Nintendo 3DS
We may earn a commission if you buy through these links, at no extra cost to you. As an Amazon Associate I earn from qualifying purchases.
Opens retailer search results. Check the model, edition, seller, availability and current price before buying.
Before you begin
This guide is written for the original Pokémon Ultra Sun release on Nintendo 3DS (North America, November 17, 2017).
It assumes you want one coherent route to finish the entire main campaign and the immediately required post‑game encounters tied to the Ultra Recon/Necrozma arc, then practical next steps for the Alola League and post‑story activities.
Follow the chapters in order if you want a clean single-playthrough route from first steps to the Champion’s chair.
Each chapter lists exact objectives and where to go next, plus common hazards and recovery steps if you fail a key trial or boss.
Optional side content and version-exclusive notes are grouped later so you can finish the story without being forced to complete optional tasks first.
Set yourself up for the run
Use the original Pokémon Ultra Sun save system: each copy supports one normal in-game save file. Save deliberately before trials, Grand Trials, major story battles and one-time encounters.
If you use downloadable software and your system still offers Nintendo 3DS Save-Data Backup, verify its exact support limitations before relying on it. Retail Game Card saves do not gain a second in-game slot from this feature.
Familiarize yourself with controls and touchscreen shortcuts from the official manual, including the X-button menu, Party and Bag screens, Rotom Pokédex, Town Map, Ride Pager and Poké Ride functions.
Choose a starter with your playstyle in mind: Rowlet, Litten or Popplio.
Keep a balanced core team with physical and special damage, useful status or recovery options, and coverage for common weaknesses.
Treat discontinued Nintendo 3DS online services as unavailable. Use local wireless trading or battles with compatible nearby systems where appropriate, and treat Pokémon Bank or other transfer plans separately from Battle Spot and online Festival Plaza functions.
If you plan to finish the Alola Pokédex or obtain version exclusives, prepare legitimate local trades or another compatible-game route.
Getting Started and UI Basics
Set up the original Nintendo 3DS release of Pokémon Ultra Sun, install its final listed software update if available, establish the one-save-file rule, and learn the controls and menu features needed for the Alola campaign. This chapter covers the X-button menu, Party, Bag, Pokédex, Town Map, Rotom Pokédex, Poké Finder, Pokémon Centers, and the Ride Pager without repeating the opening story route.
Confirm the game and install the available update
From the Nintendo 3DS HOME Menu, verify that the software is Pokémon Ultra Sun. Do not begin from Pokémon Sun, Pokémon Ultra Moon, or a demo, because those releases have different story material, version-linked Pokémon, and encounter details. This guide is for the original Pokémon Ultra Sun release on the Nintendo 3DS family, including the North American edition.
Connect the 3DS to the Internet and check for the Pokémon Ultra Sun software update before starting a long play session. Nintendo lists Version 1.1, released December 13, 2017, and Version 1.2, released February 6, 2018. Version 1.1 addressed an occasional freeze after choosing Litten during the prologue, while Version 1.2 contains additional gameplay fixes. When the update is installed, the newest version number appears on the title screen.
Nintendo ended online play and other Nintendo 3DS communication features on April 8, 2024. That shutdown does not prevent offline story play. It also does not remove the value of installing the game update if your system still offers the update data. Do not delete installed update data after downloading it.
- Confirm that the HOME Menu icon and title screen identify Pokémon Ultra Sun.
- Install the newest update available to the system before beginning the adventure.
- Check the title screen again and note the displayed version number.
- Keep the console charged while downloading or installing update data.
Choose the language and trainer settings
Start the game and continue through the opening sequence until the trainer passport setup appears. Select the language you intend to use before confirming. The game supports English, Japanese, French, German, Spanish, Italian, Korean, Simplified Chinese, and Traditional Chinese. Treat the language choice as permanent for this save file.
Choose the available trainer appearance, gender, and name settings. These initial choices do not alter the starter selection, island order, story battles, wild Pokémon, or difficulty. The starter choice comes later during the Iki Town festival, so do not expect to select Rowlet, Litten, or Popplio during the passport setup.
Verify the Nintendo 3DS date, time, and time zone before continuing. The game’s flow of time is linked to the system clock. Changing the clock later can temporarily interfere with time-based features and daily events, so leave the system settings alone during the adventure unless you have a genuine hardware or clock-setting problem.
- Select the intended language before confirming the passport.
- Choose the trainer settings and name you want to keep.
- Verify the 3DS date, time, and time zone before playing.
- Do not alter the system clock to manipulate daily events.
Understand the single normal save file
Pokémon Ultra Sun permits one in-game save file per copy. You cannot create a primary run and a recovery slot from the game’s menu. Starting a new game requires erasing the existing saved data, and the instruction manual warns that erased Pokémon, items, progress, and settings cannot be recovered through normal game functions.
To save, press X while you are free to move, select Save, and confirm with A. Make a deliberate save after receiving an important key item, before entering a trial area, before each Grand Trial, and before major story battles. Saving before an optional wild encounter is also sensible when you want to catch that Pokémon without risking an accidental defeat.
Nintendo’s Save-Data Backup feature is not a universal second save slot. It supports downloadable Nintendo 3DS software and most Virtual Console games, but Nintendo states that retail Nintendo 3DS Game Card software cannot use that feature. If you are playing a retail Pokémon Ultra Sun Game Card, ordinary in-game saving is your normal protection. A separate copy of the game would have separate hardware save media, but it is not a second slot within the same adventure.
- Press X, choose Save, and confirm that saving works before leaving the opening area.
- Save before trials, Grand Trials, major story battles, and difficult one-time encounters.
- Remember that each copy has one normal in-game save file.
- Do not rely on Save-Data Backup for a retail Nintendo 3DS Game Card.
Use the X-button menu and touchscreen functions
Press X during normal movement to open the main menu. Party lets you inspect your six active Pokémon, current HP, status conditions, moves, held items, abilities, and experience. Use it to reorder the party, inspect summaries, or manage held items. The Bag separates healing items, Poké Balls, battle items, key items, and other supplies into different pockets.
The Pokédex records Pokémon you have seen and caught. The Town Map shows islands, towns, routes, and major destinations. After a story scene, check the map and the current Rotom Pokédex objective before backtracking. Pokémon Centers restore the whole party for free, so use one before every trial or Grand Trial rather than relying only on Potions.
The manual identifies X as the menu button, A as talk or examine, the Circle Pad as movement, and the Circle Pad plus B as running. Most actions can be performed with buttons, although the lower screen provides touch access to features such as the X menu and Town Map.
- Open Party and inspect each Pokémon’s HP, status, and moves.
- Open Bag and identify Potions, Poké Balls, Antidotes, and Revives.
- Open the Town Map after major story scenes.
- Heal at a Pokémon Center before each trial or major battle.
Use the Rotom Pokédex and Poké Finder
Rotom’s Pokédex features are introduced through story progress. Once the relevant functions are available, the lower screen can show a live map, destinations, and points of interest. Some icons and functions are locked early; an unavailable feature is not evidence that you missed an item or trigger.
The Poké Finder is a separate camera feature used at designated photo spots. When Rotom or the environment indicates a photo spot, activate the Poké Finder with the control shown on screen and aim at the Pokémon. Photography is optional for the main campaign and does not block trials, Grand Trials, the Elite Four, or the Ultra Recon Squad storyline.
- Use the Rotom map to confirm the next destination when a marker is available.
- Expect some Rotom features to unlock later.
- Treat Poké Finder photography as optional campaign content.
- Use the Town Map and Rotom objective instead of wandering through earlier routes.
Learn the Ride Pager when it becomes available
Poké Ride is not available during the opening minutes. After you complete Hala’s Grand Trial later on Melemele Island, Hala gives you the Ride Pager. Ride Pokémon do not occupy a battle Party slot, do not need to be caught, and do not gain experience like normal Party Pokémon.
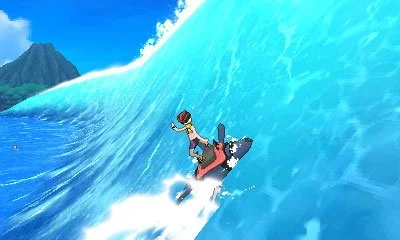
After obtaining the pager, press Y in the field to open the Ride Pager and choose an available Ride Pokémon. You can also register rides to directions on the Control Pad for quicker access. Tauros Charge breaks certain rocks and provides fast ground movement. Lapras Paddle crosses water, Sharpedo Jet moves quickly across water and breaks certain obstacles, and Stoutland Search locates hidden items. Additional Ride Pokémon become available as the story advances.
Poké Ride replaces the traditional overworld HM system in Alola. If a path is blocked, check whether the required Ride Pokémon has been unlocked instead of searching for a Party Pokémon that knows an HM. Practice calling, changing, and dismissing rides in a safe area before using them around narrow ledges, rocks, or water routes.
- Wait until Hala’s Grand Trial grants the Ride Pager.
- Press Y to open the Ride Pager after it is obtained.
- Remember that Ride Pokémon are separate from the battle Party.
- Check for a missing Ride upgrade when a route appears blocked.
Before you move on
- The title screen identifies Pokémon Ultra Sun for Nintendo 3DS and shows the newest installed update available to the system.
- The intended language, trainer settings, trainer name, and 3DS clock settings have been confirmed.
- You can control the character and open the X-button menu.
- You can inspect Party, Bag, Pokédex, and Town Map, and you have saved successfully.
- You understand that the copy has one normal in-game save file and have adopted a routine of saving before trials and major battles.
- You know that Poké Ride is unlocked later through story progress and that the Ride Pager is separate from the battle Party.
References for this chapter
Melemele Island — Opening, Iki Town and the Trainers’ School
Complete the opening section of Pokémon Ultra Sun on Nintendo 3DS: leave Hau’oli Outskirts, choose your starter on Route 1, rescue Nebby at Mahalo Trail, receive the Pokédex and Trainer Passport, win the Iki Town festival battle against Hau, obtain the Z-Ring, visit Kukui’s laboratory, clear the Trainers’ School, calm Tauros, and enter Hau’oli City. This chapter ends before the Hau’oli City Team Skull battle, Captain Ilima’s battle, Route 2, and the Verdant Cavern trial.
Leave home and choose your starter on Route 1
After the opening language, Passport photo, and name setup, climb out of bed and speak with your mother in the main room. Return to your bedroom and interact with the clothing rack to collect your hat and Bag. Leave the house and follow the path west and uphill through Hau’oli Outskirts toward Route 1.
At the first tall-grass area, a wild Yungoos appears and the three starter Pokémon arrive with Professor Kukui. This is the starter-selection scene in Pokémon Ultra Sun. Choose Rowlet, Litten, or Popplio. Rowlet is Grass/Flying, Litten is Fire, and Popplio is Water. Any choice is suitable for the main story, so choose based on the team you want to use rather than trying to optimize the entire campaign at this point.
Continue along Route 1 toward Iki Town. Hau challenges you to your first battle. The game restores your Pokémon before the fight, so accept the battle when prompted or continue exploring briefly and then face him before entering town. Hau uses the starter with a type disadvantage to your choice at level 5. Use your starter’s damaging move and do not worry about conserving resources for this battle.
- Collect the hat and Bag from your room.
- Choose Rowlet, Litten, or Popplio on Route 1.
- Defeat Hau’s level 5 disadvantaged starter.
- Reach Iki Town.
Rescue Nebby at Mahalo Trail
When you arrive in Iki Town, Kukui explains that Kahuna Hala is missing and asks you to investigate the Ruins of Conflict at the end of Mahalo Trail. Walk up the central stairs, pass the festival stage, and follow the path north. The route is linear, so continue uphill until you find Lillie and the Pokémon she is protecting in her bag.
A cutscene shows Nebby escaping and landing on the Plank Bridge. Three Spearow attack it. Walk onto the bridge and approach Nebby to trigger the rescue scene. The bridge collapses, but Tapu Koko saves you and Nebby. You do not need to catch or battle anything during this sequence.
Return to Iki Town after the bridge scene. Hala has returned, and Lillie explains what happened. Kukui gives you the Pokédex and Trainer Passport. Hala examines the Sparkling Stone in your Bag and asks to borrow it for the festival. Follow the instructions to return home and rest. The story will advance to the next day before the festival sequence begins.
- Reach the Ruins of Conflict through Mahalo Trail.
- Rescue Nebby from the Plank Bridge.
- Receive the Pokédex from Kukui.
- Receive the Trainer Passport from Kukui.
- Return home when instructed.
Win the Iki Town festival battle and receive the Z-Ring
The next day, leave home with Kukui and follow him toward Iki Town. Before the festival, Kukui demonstrates how to catch Pokémon on Route 1 with his Rockruff. After the tutorial, he gives you 10 Poké Balls and 5 Potions. You may catch team members now, but this is optional; the story can be completed with your starter and a small supporting team.
Continue to the festival stage in Iki Town. Hau challenges you again. This time he uses a level 6 Pichu and the starter with a type disadvantage to your choice at level 7. Pichu knows Thunder Shock, Charm, and Tail Whip, and its Static Ability can paralyze a Pokémon that makes physical contact. Defeat Pichu first with your most reliable attack, then use the move that is super effective against Hau’s starter. If your lead becomes paralyzed, use the Paralyze Heal found west of the final grass patch on Route 1 or return to a healing point after the battle.
After Hau loses, Hala uses your Sparkling Stone to create the Z-Ring and returns it to you as part of the ceremony. Kukui and Hala explain the Island Challenge. You receive the Z-Ring here, before visiting Kukui’s laboratory. Follow Kukui and Lillie back toward your home when the festival scene ends.
- Complete Kukui’s catching tutorial.
- Receive 10 Poké Balls and 5 Potions.
- Defeat Hau’s level 6 Pichu.
- Defeat Hau’s level 7 starter.
- Receive the Z-Ring.
Visit Kukui’s laboratory and reach the Trainers’ School
After the festival sequence, the story advances to the following day. Lillie comes to your house and leads you toward Professor Kukui’s Pokémon Research Lab. Before leaving, your mother gives you 30,000 Poké Dollars. Follow Lillie south along the road and down toward the beach, where the laboratory is located.
Inside the lab, Kukui upgrades your Pokédex so Rotom can inhabit it. This creates the Rotom Pokédex, which provides navigation help and additional functions during the adventure. Lillie also explains that Nebby is a Cosmog and asks you to keep its identity private.
Leave the lab and follow Lillie to the Pokémon Center. Speak with the nurse to learn that the Pokémon Center restores your party for free. The Poké Mart is also available for basic supplies. After the tour, leave the Pokémon Center and follow Lillie west. A Tauros blocks the road, so enter the Trainers’ School instead. Speak with Kukui outside. He gives you the Exp. Share and asks you to battle four students.
- Visit Kukui’s Pokémon Research Lab.
- Receive the Rotom Pokédex.
- Learn the basic Pokémon Center and Poké Mart functions.
- Receive the Exp. Share from Kukui outside the Trainers’ School.
- Enter the Trainers’ School.
Defeat the four students and Teacher Emily
The four required student battles can be completed in any practical order, although Rising Star Joseph will not battle until the other three students are defeated. Youth Athlete Hiromi is outside near the school building and uses level 7 Bonsly. Preschooler Mia is inside a classroom and uses level 7 Metapod. Youngster Joey is in the western grassy area and uses level 7 Alolan Grimer. After those three victories, battle Rising Star Joseph on the courts in front of the school; he uses a level 8 Ekans and gives you TM01 Work Up after losing.
Speak with Lillie whenever you need a free party heal during this sequence. You can also collect useful optional items inside the school, including a Quick Claw, three Oran Berries from Mia, and a Potion on the second floor. These are not required for story progress.
After Joseph is defeated, go upstairs when the school announcement calls you. Teacher Emily challenges you with the starter that has a type advantage over your chosen starter, at level 10. Lead with a different Pokémon if your starter has a disadvantage, or use Growl and healing items if the matchup is unavoidable. After winning, Emily gives you five Great Balls.
Kukui and Captain Ilima arrive after the battle. Ilima introduces himself and says he will be waiting for you to take his trial. Do not follow the later Ilima battle or Verdant Cavern material yet; those belong to the next chapter.
- Defeat Youth Athlete Hiromi and her level 7 Bonsly.
- Defeat Preschooler Mia and her level 7 Metapod.
- Defeat Youngster Joey and his level 7 Alolan Grimer.
- Defeat Rising Star Joseph and his level 8 Ekans.
- Receive TM01 Work Up.
- Defeat Teacher Emily and her level 10 advantaged starter.
- Receive five Great Balls.
Calm Tauros and enter Hau’oli City
After the Trainers’ School sequence, the students gather outside. Lillie offers to show you more of the city, but Tauros is still blocking the road west. Hau and Hala are waiting nearby. When Hala asks you to approach Tauros, walk up to it and interact with it to calm it down.
Hala then leads Tauros away. Follow Lillie and Hau through the newly opened road into Hau’oli City. Stop once you have entered the city and the next area loads. The later Team Skull encounter near the malasada shop, the battle with Ilima, Route 2, and Verdant Cavern are not part of this chapter.
- Interact with Tauros when Hala directs you to it.
- Watch Hala lead Tauros away.
- Enter Hau’oli City with Lillie and Hau.
Before you move on
- The player has chosen Rowlet, Litten, or Popplio on Route 1.
- Nebby has been rescued at Mahalo Trail and the Plank Bridge.
- The Pokédex, Trainer Passport, Z-Ring, and Rotom Pokédex have been received.
- Hau’s level 6 Pichu and level 7 starter have been defeated at the Iki Town festival.
- The Exp. Share has been received from Kukui.
- All four Trainers’ School students and Teacher Emily have been defeated.
- TM01 Work Up and five Great Balls have been obtained.
- Tauros has been calmed and led away by Hala.
- The player has entered Hau’oli City, with the next objective still ahead.
Melemele Island — Hau’oli City, Ilima’s Trial and Hala’s Grand Trial
Begin in Hau’oli City after completing the Trainers’ School and calming the Tauros outside town. Travel across Route 2, clear Captain Ilima’s trial in Verdant Cavern, follow Route 3 to Melemele Meadow and Seaward Cave, then return to Iki Town for Kahuna Hala’s Grand Trial. Completing this section awards the Normalium Z, Fightinium Z, Tauros Ride Pager, and TM54 False Swipe, and opens the route to Akala Island.
Leave Hau’oli City and reach Route 2
Start in Hau’oli City with your starter, Rotom Pokédex, and Exp. Share already obtained. Visit the Pokémon Center if your team needs healing, then follow the road north and speak with the people near the route entrance as the story directs. Continue through the northern exit of Hau’oli City toward Route 2.
On Route 2, approach Kahuna Hala and the Tauros blocking the way. Interact with Tauros when prompted, then continue north. The route contains optional trainer battles, wild Pokémon, and item pickups; none are required beyond the story encounters. A Flying- or Psychic-type Pokémon is useful to prepare for Hala later, while a Pokémon with reliable Water, Grass, or Fighting damage can help against the Normal-type Pokémon inside the first trial area.
Continue to Big Wave Beach. Defeat the Team Skull Grunts who are causing trouble there, then inspect the nearby area if you want the available items. Return to the Route 2 road and continue north toward the Pokémon Center. Hau appears there and explains the next objective. Heal your party before moving on, because the trial site contains several battles and the Totem encounter follows without a normal Pokémon Center between them.
From the Pokémon Center, follow the path to the entrance of Verdant Cavern. Captain Ilima is waiting outside. Speak with him to begin the trial. The trial cannot be completed until the required Route 2 story events and the Team Skull encounter at Big Wave Beach are finished.
- Begin in Hau’oli City after the Trainers’ School sequence.
- Meet Hala and interact with Tauros on Route 2.
- Defeat the Team Skull Grunts at Big Wave Beach.
- Speak with Hau at the Route 2 Pokémon Center.
- Heal before entering Verdant Cavern.
- Speak with Captain Ilima at the cavern entrance.
Complete Ilima’s Verdant Cavern trial
Enter Verdant Cavern and follow the trial guide’s instructions. Your objective is to investigate the Pokémon dens and defeat the Pokémon hiding inside them. In Ultra Sun, the trial uses Yungoos and Gumshoos rather than the Alolan Rattata and Alolan Raticate used in Ultra Moon. Examine each marked den, battle the Pokémon that emerges, and follow the newly opened paths through the cave.
Team Skull Grunts appear during the trial. Defeat them to clear the route forward, then continue examining the remaining dens. Wild encounters are possible while walking through the cavern, so keep your party healthy and use Potions between battles if necessary. After the required den battles, move to the back room and approach the pedestal holding the Z-Crystal.
Taking the crystal begins the Totem battle. Ultra Sun’s Totem Pokémon is level 12 Gumshoos. Its aura raises its Defense at the start of the battle, and it can call a level 11 Yungoos as an SOS ally. Defeat the ally when it creates a dangerous combination of damage, Sand Attack, or stat pressure; otherwise concentrate on Gumshoos while using super-effective Fighting-type attacks when available. Bug-, Rock-, and Steel-type attacks are not ideal choices against Gumshoos, while strong neutral damage is still effective if your team lacks Fighting coverage. Avoid relying on a low-health physical attacker because Gumshoos can use Super Fang and Bite.
When both opponents are defeated, collect the Normalium Z from the pedestal. Ilima then gives you 10 Great Balls and heals your party. The trial also unlocks Pokémon encounters inside Verdant Cavern and expands the Poké Mart inventory. Leave through the cavern entrance after the story conversation. Professor Kukui demonstrates Z-Powers outside, then asks you to search Route 3 for Lillie.
- Defeat the required Pokémon in the marked Verdant Cavern dens.
- Defeat the Team Skull Grunts inside the trial area.
- Defeat level 12 Totem Gumshoos.
- Defeat the level 11 Yungoos SOS ally if it appears.
- Receive the Normalium Z.
- Receive 10 Great Balls and the post-trial heal.
Cross Route 3, Melemele Meadow, and Seaward Cave
Exit Verdant Cavern and take the newly opened path toward Route 3. Follow the route north and east toward Melemele Meadow. Route 3 contains optional trainers and useful wild Pokémon, including Flying-type choices that can help in the upcoming Grand Trial. Battle trainers for experience if your main team is below the mid-teens, but do not spend all of your healing items before the later battles.
Enter Melemele Meadow and trigger the conversation with Lillie. Continue through the meadow to Seaward Cave, following the path toward the cave entrance. In Ultra Sun, the Ultra Recon Squad member Dulse challenges you inside Seaward Cave. Dulse uses a level 13 Furfrou. Defeat it, then continue through the cave and complete the scene involving Nebby.
After the Seaward Cave events, return to Route 3. Hau challenges you before you can leave the area. His team consists of level 11 Noibat, level 12 Pikachu, and a level 13 starter whose identity depends on your choice at the festival. Use Ice-, Rock-, or Electric-type attacks against Noibat when available, Ground-type attacks against Pikachu, and the appropriate super-effective move against Hau’s starter. Heal before this battle if the Seaward Cave fight left your party weakened.
Once Hau is defeated, travel south through Route 1 and return to Iki Town. Do not go directly to Akala Island yet. The Grand Trial must be started in Iki Town after the Route 3 and Seaward Cave events are complete.
- Reach Melemele Meadow through Route 3.
- Enter Seaward Cave and defeat Dulse’s level 13 Furfrou.
- Complete the Nebby scene in Seaward Cave.
- Defeat Hau’s level 11 Noibat, level 12 Pikachu, and level 13 starter.
- Return to Iki Town through Route 1.
Defeat Kahuna Hala in the Grand Trial
In Iki Town, speak with Professor Kukui and then approach Kahuna Hala at the back of town. Confirm that you are ready when prompted. Hala’s Grand Trial is a straightforward three-Pokémon battle; there is no separate cave puzzle or collection objective.
Hala uses level 15 Machop, level 15 Makuhita, and level 16 Crabrawler. All three are Fighting-type Pokémon. Flying- and Psychic-type attacks are the most direct answers, while Fairy-type attacks are also effective. If you chose Popplio, Disarming Voice gives your starter useful coverage. A Ghost-type Pokémon can avoid ordinary Fighting-type attacks, but beware of coverage moves and do not assume the battle is safe if the Ghost-type is poorly trained.
Hala saves his Z-Move for Crabrawler. Keep your healthiest answer available for the final Pokémon, and avoid wasting your strongest healing items on Machop or Makuhita unless necessary. If you lose, heal at the Pokémon Center, adjust your lead Pokémon, and return to Hala; the Grand Trial can be attempted again without repeating the earlier route events.
After Hala is defeated, receive the Fightinium Z and the Tauros Ride Pager. The Ride Pager lets you summon Tauros Charge to smash certain obstacles and opens previously blocked paths. Hala also gives you TM54 False Swipe, which is useful for weakening Pokémon during captures without reducing them below 1 HP. Follow the subsequent instructions to use Tauros Charge and continue toward Hau’oli City and the next island departure.
- Speak with Kukui and Hala in Iki Town after the Route 3 events.
- Defeat level 15 Machop.
- Defeat level 15 Makuhita.
- Defeat level 16 Crabrawler and survive its Z-Move.
- Receive the Fightinium Z.
- Receive the Tauros Ride Pager.
- Receive TM54 False Swipe.
- Use Tauros Charge when the story directs you toward the next departure.
Before you move on
- Hau’oli City has been left and the Route 2 story events are complete.
- Team Skull has been defeated at Big Wave Beach.
- Ilima’s Verdant Cavern trial has been completed.
- Level 12 Totem Gumshoos and its level 11 Yungoos ally have been defeated.
- The Normalium Z and 10 Great Balls have been received.
- Dulse has been defeated in Seaward Cave and the Nebby scene is complete.
- Hau’s Route 3 battle has been won.
- Kahuna Hala has been defeated in Iki Town with Machop, Makuhita, and Crabrawler.
- The Fightinium Z, Tauros Ride Pager, and TM54 False Swipe have been received.
- The player is ready to use Tauros Charge and proceed toward Hau’oli City and Akala Island.
Akala Island — Trials, Olivia and the Grand Trial
Complete Akala Island’s three trials, defeat Kahuna Olivia at the Ruins of Life, then follow the required story through Hano Beach, Hano Grand Resort, and the first guided visit to Aether Paradise. This chapter ends when the ferry delivers you to Malie City on Ula’ula Island. Do not confuse this initial tour with the later Aether Paradise rescue after Nanu’s Grand Trial.
Reach Akala Island and prepare for the island trials
After completing Hala’s Grand Trial on Melemele, return to Big Wave Beach when the story sends you there. Speak to the attendant and ride Mantine to Akala Island. The crossing is required, but improving your score or learning advanced Mantine tricks is optional. Once you reach Heahea Beach, walk east into Heahea City and heal at the Pokémon Center.
Follow Route 4 north to Paniola Town, then continue through Paniola Ranch and Route 5. Hau challenges you along the route, and Gladion appears during the story sequence. Use the Route 5 Pokémon Center before entering Brooklet Hill. Before the first Totem battle, it is useful to have at least one reliable Electric- or Grass-type attack, although level advantage and neutral damage can also carry the fight.
- Mantine has carried you from Big Wave Beach to Heahea Beach.
- Heahea City, Paniola Town, Paniola Ranch, and Route 5 are accessible.
- The party is healed before entering Brooklet Hill.
Complete Lana’s trial at Brooklet Hill
Enter Brooklet Hill from Route 5 and speak with Captain Lana. Follow her along the first waterway. At the next pool, Lana registers Lapras Paddle in the Ride Pager. Use Lapras to cross the water and investigate each disturbance. Continue following the splashes until you reach the Totem’s Den. The trial Pokémon and wild encounters before the den are not the main objective, so conserve healing items if your party is already ready.
In Ultra Sun, the Totem is Araquanid at level 20. Its aura raises its Speed, it holds a Wacan Berry, and its Water Bubble ability strengthens its Water-type attacks. It uses Leech Life, Bubble, Bite, and Aurora Beam, and it calls a level 18 Dewpider. Dewpider can use Sticky Web and Rain Dance, so remove it if those effects are causing the battle to spiral. Electric and Grass attacks are effective, but the Wacan Berry reduces the damage from the first super-effective Electric attack that connects. A second attack or a strong neutral move may be necessary.
After defeating Araquanid and its ally, Lana gives you the Waterium Z, the Fishing Rod, and ten Dive Balls. Heal at a Pokémon Center before traveling to the next trial area.
- Lapras Paddle is registered in the Ride Pager.
- Totem Araquanid and the summoned Dewpider are defeated.
- Waterium Z, the Fishing Rod, and ten Dive Balls have been received.
Clear Kiawe’s trial at Wela Volcano Park
Travel through Royal Avenue and Route 7 to Wela Volcano Park. Speak with Kiawe to begin the trial. Watch each Alolan Marowak dance and identify the change between performances. An incorrect answer starts a battle, but winning that battle lets you continue the observation sequence. Heal at the Royal Avenue Pokémon Center before entering and carry several Potions or Super Potions.
The Ultra Sun Totem is Alolan Marowak at level 22. Its aura raises its Speed by two stages, it holds a Thick Club, and it uses Hex, Flame Wheel, Brick Break, and Detect. It calls a level 20 Salazzle on its first turn. Salazzle can inflict poison and use Venoshock, and its Corrosion ability allows it to poison targets that normally resist Poison. Water-, Ground-, Rock-, and certain Dark-type attacks are useful, but fragile Rock Pokémon can take heavy damage from Brick Break. If Salazzle begins applying poison or Torment, defeat it before returning your full attention to Marowak.
Kiawe awards the Firium Z, ten Quick Balls, and Charizard Glide. Charizard Glide is a fast-travel Ride Pager option and is useful for revisiting Akala, but it is not part of the battle itself.
- The dance observations and required intervening battles are complete.
- Totem Alolan Marowak and the summoned Salazzle are defeated.
- Firium Z, ten Quick Balls, and Charizard Glide are obtained.
Complete Mallow’s trial in Lush Jungle
From Route 7, follow Route 8 into Lush Jungle and speak with Captain Mallow. She gives you a Forage Bag and asks you to gather a Mago Berry, Honey, and Big Root. Examine the correct gathering points in the jungle and return to Mallow after collecting all three ingredients. The correct Mago Berry is beneath the western tree, the correct Honey is at the southwestern bush, and the correct Big Root is at the distinctive tree in the southeastern area.
Several incorrect gathering points are claimed by wild Pokémon. Taking one of those items triggers a battle, so you can avoid extra fights by using the distinctive descriptions and locations above. After you return, the cooking scene begins and Totem Lurantis appears immediately afterward. Heal before delivering the ingredients because there is no normal Pokémon Center between the preparation scene and the Totem battle.
Totem Lurantis is level 24, receives a two-stage Speed boost, holds a Power Herb, and uses Low Sweep, X-Scissor, Solar Blade, and Synthesis. It calls Kecleon first. Kecleon can use Sunny Day, which allows Solar Blade to fire without its usual charge turn. If Kecleon is defeated and Lurantis is sufficiently weakened, Lurantis can call Comfey, whose Floral Healing and support moves can extend the fight. Fire, Flying, Poison, and Bug attacks are strong choices. A Fire-type attack is especially valuable while sunlight is active.
- Mago Berry, Honey, and Big Root have been collected and delivered.
- The party is healed before the cooking sequence.
- Totem Lurantis and any summoned Kecleon or Comfey are defeated.
Finish the three trials and challenge Olivia
After Lurantis is defeated, Mallow awards the Grassium Z and ten Nest Balls. Professor Kukui then gives you TM67 Smart Strike. The three Akala trials are now complete. Kukui directs you toward the Dimensional Research Lab in Heahea City, so return through Route 5 and use the city’s Pokémon Center before continuing.
Follow the story through the Dimensional Research Lab, Diglett’s Tunnel, Route 9, Konikoni City, Memorial Hill, and the Akala Outskirts. At Memorial Hill, help the Aether Foundation employee against the Team Skull Grunts who are harassing a Slowpoke. This event is the reason Faba later invites you to Hano Grand Resort. At the Ruins of Life, Machamp Shove clears the entrance path. Burnet and Lillie are present, and Lillie heals your party before Olivia’s Grand Trial begins.
Olivia uses Anorith at level 27, Lileep at level 27, and Midnight Form Lycanroc at level 28. Anorith is Rock/Bug and carries Battle Armor; its moves include Bug Bite, Smack Down, and Metal Claw. Lileep is Rock/Grass and can use Giga Drain, Ancient Power, and Brine. Lycanroc has Vital Spirit, carries Rockium Z, and uses Continental Crush once after turning Rock Tomb into its Z-Move. Water, Grass, Fighting, Ground, and Steel attacks are dependable answers. Do not rely only on Fire- or Flying-type Pokémon, and reserve a strong answer for Lycanroc rather than spending your strongest attack on Anorith.
- All three Akala trials are complete before entering the Ruins of Life.
- Anorith, Lileep, and Lycanroc are defeated.
- Rockium Z and the Akala Trial Completion stamp are received.
Complete the first Hano Beach and Hano Grand Resort sequence
After Olivia’s Grand Trial, Hau tells you that Faba wants you to visit Hano Grand Resort. Return to Heahea City and cross the bridge east of the Dimensional Research Lab. Hano Beach is optional exploration at this point. You can speak with the lifeguard to start the Pyukumuku activity and return the Pyukumuku to the sea, but this is not required for the island challenge or the story route.
Enter the Hano Grand Resort lobby. Faba is waiting inside and introduces himself as the Aether Foundation branch chief. Speak with him to trigger the invitation to Aether Paradise. Hau joins you, and the game takes you to the ferry automatically. This is the first guided tour of Aether Paradise; it is not the later rescue mission that occurs after Nanu’s Grand Trial.
- Olivia has directed you to Hano Grand Resort.
- The optional Hano Beach activities may be skipped.
- Faba has invited you to Aether Paradise and the ferry sequence has begun.
Finish the initial Aether Paradise visit and reach Malie City
At Aether Paradise, follow Faba’s tour and speak with Wicke when instructed. The tour proceeds to the Conservation Area, where you meet President Lusamine. Watch the story scenes and remain with Hau and the Aether Foundation staff as the Ultra Wormhole opens. The unidentified Ultra Beast that emerges is Nihilego. Battle it when prompted; this is a mandatory story battle, but Nihilego is not a capture encounter here and you should not waste Poké Balls trying to catch it.
After the battle and the following conversations, the game ferries you to Malie City on Ula’ula Island. Heal at the Malie City Pokémon Center and save before beginning the next chapter’s route. The later Aether Paradise rescue, including the battles against Faba, Guzma, Dulse, and Lusamine, belongs after Nanu’s Grand Trial and must not be counted as complete here.
- The guided first visit to Aether Paradise is complete.
- The mandatory Nihilego battle has been won.
- The player has arrived in Malie City and is ready to begin the Ula’ula sequence.
Before you move on
- Mantine Surf has carried the player from Big Wave Beach to Heahea Beach.
- Lapras Paddle and Charizard Glide are available in the Ride Pager.
- Waterium Z, Firium Z, and Grassium Z have been received.
- Totem Araquanid, Totem Alolan Marowak, and Totem Lurantis have been defeated.
- Olivia has been defeated at the Ruins of Life.
- Rockium Z and the Akala Trial Completion stamp are recorded.
- The player has completed the first guided Aether Paradise visit and defeated the scripted Nihilego encounter.
- The player has arrived in Malie City, with the Ula’ula sequence ready to begin.
References for this chapter
- Pokémon Ultra Sun and Ultra Moon Walkthrough: Part 8
- Pokémon Ultra Sun and Ultra Moon Walkthrough: Part 9
- Lush Jungle
- Pokémon Ultra Sun and Ultra Moon Walkthrough: Part 12
- Aether Paradise
- Pokémon Ultra Sun and Ultra Moon — Aether Foundation
- Hano Beach - Pokémon Ultra Sun and Ultra Moon Walkthrough
- Heahea City - Pokemon Ultra Sun Walkthrough & Guide
Ula'ula Island — Trials, Po Town and the Road to Aether Paradise
Begin after the first Hano Grand Resort and Aether Paradise sequence has already been completed. Travel from Malie City to Mount Hokulani, clear Sophocles’s trial, complete Acerola’s trial at the abandoned Thrifty Megamart, invade Team Skull’s Po Town base, defeat Guzma and Gladion, then finish Kahuna Nanu’s Grand Trial. The chapter ends when you depart from the Malie City Ferry Terminal for the later Aether Paradise rescue sequence.
Confirm the starting point and reach Mount Hokulani
This chapter assumes that you have already completed the first Hano Grand Resort visit and the initial Aether Paradise sequence from the previous chapter. You should now be in Malie City with the Ula’ula portion of the Island Challenge ready to continue. Heal at the Malie City Pokémon Center and keep several healing items in the Bag before leaving.
Visit Malie Garden and the tea house, then return to Malie City and follow the story scenes involving Lillie at the library. When the route opens, leave Malie City through Route 10. Team Skull Grunts block the bus stop; defeat them, then board the bus with Professor Kukui for Mount Hokulani.
At the Hokulani Observatory, follow Molayne and speak with Sophocles. Molayne gives you the Steelium Z before the trial. Save and heal before beginning, especially if your team is near the mid-30s. Sophocles’s Ultra Sun trial is the Charjabug power-platform version, not the audio-question trial used in the original Pokémon Sun and Moon.
- The initial Hano Grand Resort and Aether Paradise visit is complete.
- Malie Garden, the tea house and the library scenes are complete.
- The Team Skull Grunts at the Route 10 bus stop are defeated.
- You have ridden the bus to Mount Hokulani.
- Steelium Z has been received from Molayne.
Clear Sophocles’s Charjabug trial
Inside the observatory, push or direct the Charjabug units onto the marked electrical platforms so they power Sophocles’s machine. Use the switches at the sides and corners to rotate the platform sections and create a continuous path. The trial includes battles while you increase the machine’s power, so restore your team before the final activation if necessary.
The Totem Pokémon in Ultra Sun is Togedemaru. It is level 33, receives a Defense boost, and can call Skarmory and Dedenne as allies. Ground attacks are especially effective against Togedemaru, while Fire and Fighting attacks can also deal useful damage. Electric attacks are a poor choice because of Togedemaru’s Steel and Electric typing. Ground moves are also useful against Dedenne, but remember that Skarmory is immune to Ground attacks.
Togedemaru can use Zing Zap, Iron Head, Spiky Shield and Bounce. Break through its boosted Defense with a strong Ground move or a suitable Z-Move. If an ally remains on the field, consider defeating it before it creates additional pressure or supports Togedemaru. After the battle, Sophocles awards the Electrium Z and the trial is complete.
- All Charjabug platform sections have been powered.
- The intervening trial battles are complete.
- Totem Togedemaru is defeated.
- Electrium Z has been received.
Finish the Malie Garden story and open the southern routes
Return to Malie Garden when the story directs you there. Guzma challenges you near the garden. Defeat him, then receive the Z-Crystal connected to your chosen starter: Decidium Z if you chose Rowlet, Incinium Z if you chose Litten, or Primarium Z if you chose Popplio. Complete the following Professor Kukui scene before leaving Malie Garden.
Go south through Malie City and show the starter-related Z-Crystal at the Route 11 checkpoint. The guard allows you to continue once the crystal has been presented. Proceed through Route 11 and Route 12. Hapu registers Mudsdale as a Poké Ride option, allowing you to cross the rocky sections that block the road.
Continue through Route 13 to Tapu Village. Heal there before moving on. The next sequence covers several routes, a trial location without a conventional Pokémon Center, Team Skull battles and the approach to Po Town. You can also use Charizard Glide to return to a Pokémon Center if your party needs more preparation.
- Guzma is defeated in Malie Garden.
- The starter-related Z-Crystal has been received.
- Professor Kukui’s mask scene is complete.
- The Route 11 checkpoint has been passed.
- Mudsdale is registered and Tapu Village has been reached.
Complete Acerola’s trial at the abandoned Thrifty Megamart
From Tapu Village, go west to Aether House on Route 15 and speak with Acerola when the story permits. After the required scenes, travel to Route 14 and enter the abandoned Thrifty Megamart. Heal in Tapu Village before entering because the trial involves several encounters and the Totem battle.
Inside the Megamart, investigate the objects and follow the strange movements through the building. The trial’s clues lead you to the back of the store, where you use the camera to reveal Totem Mimikyu. Its Disguise ability protects it from the first damaging hit, so do not waste your strongest attack expecting immediate damage.
Ghost- and Dark-type attacks are effective against Mimikyu. Normal- and Fighting-type moves cannot damage it because of its Ghost typing. Defeat Totem Mimikyu and any ally it calls. When the battle ends, Acerola awards Ghostium Z. There is no separate required Acerola battle after the Totem fight; proceed with the story transition back toward Aether House.
- Acerola’s trial assignment has been received.
- The abandoned Thrifty Megamart has been entered from Route 14.
- The trial clues and camera sequence are complete.
- Totem Mimikyu and its ally are defeated.
- Ghostium Z has been received.
Battle Plumeria and obtain Sharpedo
Return to Aether House after completing Acerola’s trial. Plumeria and Team Skull members are involved in the confrontation outside the house. In Ultra Sun, Plumeria uses a level 37 Golbat and a level 38 Salazzle. Electric- or Ice-type attacks are useful against Golbat. Water- or Ground-type attacks are effective against Salazzle, although Ground attacks should be used carefully if your chosen Pokémon is vulnerable to its attacks.
After the battle and the kidnapping scene, go to the nearby beach and speak with Grimsley. He registers Sharpedo as a Poké Ride Pokémon. Ride Sharpedo across the water and break the rocks blocking the route. Continue through Route 16 and Ula’ula Meadow, then follow Route 17 toward Po Town.
At Ula’ula Meadow, complete the required story scene before continuing north. Heal before entering Po Town. The abandoned Pokémon Center there can restore your party, but it charges money, so carrying Potions or using Charizard Glide beforehand may be more convenient.
- Plumeria is defeated outside Aether House.
- Sharpedo is registered as a Poké Ride option.
- The water rocks blocking the route have been broken.
- Route 16, Ula’ula Meadow and the approach to Route 17 are complete.
- Po Town has been reached with a prepared party.
Enter Po Town and clear the Shady House
Team Skull has taken over Po Town. Move through the barricades by using the available openings and defeat the Grunts who block the route. Continue to the Shady House at the rear of town. Search the building for the notes that reveal the password sequence, then use the passwords at the upstairs checkpoints.
The required answers are Beat Up, Golisopod, Tapu Cocoa and No. The final response matters: when the game asks whether you are sure about the selected password, choose No. If you enter an answer incorrectly, inspect the notes again before trying the sequence a second time.
The Shady House contains Dark- and Poison-oriented Team Skull opponents. Fighting-, Fairy- and Bug-type attacks are generally useful, but keep a Ground- or Psychic-type answer available for Poison Pokémon. When you reach the boss room, save if the game permits it and challenge Guzma.
Guzma’s Ultra Sun team here is level 41 Golisopod, level 41 Masquerain and level 41 Pinsir. Electric or Flying attacks pressure Golisopod and Masquerain, while Fire, Flying or Rock attacks are useful against Pinsir. Protect against Golisopod’s opening First Impression when possible, and remember that Emergency Exit can force it to switch away after it loses enough HP.
- The Po Town Team Skull barricades have been cleared.
- The Shady House notes have been found.
- The passwords Beat Up, Golisopod, Tapu Cocoa and No have been entered.
- Guzma’s Golisopod, Masquerain and Pinsir are defeated.
- The Nanu and Acerola scene outside the mansion has occurred.
Return to Aether House and defeat Gladion
After defeating Guzma, follow the story instructions and return to Aether House on Route 15. Speak with the people inside to trigger the scene involving Hau, Lillie and Cosmog. Gladion then challenges you.
Gladion uses level 42 Golbat, level 42 Zoroark and level 43 Type: Null. Electric- or Ice-type attacks are useful against Golbat. Fighting-type attacks are effective against Zoroark and Type: Null, but Golbat is immune to Fighting because of its Flying typing. Type: Null is Normal-type during this battle, so Ghost attacks do not affect it.
After the battle, Gladion directs you to meet him and Hau at the Malie City Ferry Terminal. Heal and restock before going there. Do not begin the Aether Paradise rescue yet. The story requires Nanu’s Grand Trial before the ferry can depart.
- The return to Aether House is complete.
- The Lillie and Cosmog story scene has triggered.
- Gladion’s Golbat, Zoroark and Type: Null are defeated.
- You are ready to travel to the Malie City Ferry Terminal.
- The later Aether Paradise rescue has not begun.
Complete Nanu’s Grand Trial and depart for Aether Paradise
Travel to the Malie City Ferry Terminal and speak with Gladion and Hau. Before the group can leave, Kahuna Nanu challenges you to Ula’ula’s Grand Trial. This battle is required; it is not optional and cannot be replaced by simply boarding the ferry.
Nanu uses level 43 Sableye, level 43 Krokorok and level 44 Alolan Persian. Fairy attacks are the cleanest answer to Sableye, which is Dark/Ghost and therefore immune to Normal and Fighting moves. Krokorok is vulnerable to Water, Grass, Ice, Bug and Fairy attacks. Alolan Persian is weak to Bug, Fighting and Fairy, although its Fur Coat ability reduces damage from physical attacks. Use special attacks or a strong Z-Move if your physical Fighting Pokémon is struggling.
Nanu’s Alolan Persian holds Darkinium Z for the battle and can use a powerful Dark-type Z-Move. Keep a healthy answer available for the final Pokémon and do not spend your only reliable counter too early. After the victory, Nanu awards Darkinium Z and adds the Ula’ula Trial Completion stamp to your Trainer Passport. The stamp raises the obedience limit for traded Pokémon to level 65.
Speak with Hau at the ferry terminal and board the boat with Hau and Gladion. The next chapter begins with the later Aether Paradise rescue sequence, including the Aether Foundation battles and the confrontation with Lusamine. Stop once the ferry departure has been triggered.
- Gladion and Hau have been met at the Malie City Ferry Terminal.
- Nanu’s Sableye, Krokorok and Alolan Persian are defeated.
- Darkinium Z has been received.
- The Ula’ula Trial Completion stamp has been added.
- The ferry to Aether Paradise has been boarded or its departure scene has begun.
Before you move on
- The chapter began after the first Hano Grand Resort and initial Aether Paradise visit.
- Sophocles’s Charjabug platform trial is complete.
- Totem Togedemaru has been defeated and Electrium Z has been received.
- Guzma has been defeated in Malie Garden and the starter-related Z-Crystal has been obtained.
- Mudsdale and Sharpedo are registered Poké Ride options.
- Acerola’s trial is complete, Totem Mimikyu has been defeated and Ghostium Z has been received.
- Plumeria has been defeated outside Aether House.
- Po Town and the Shady House are cleared.
- The password sequence Beat Up, Golisopod, Tapu Cocoa and No has been entered.
- Guzma has been defeated in the Shady House.
- Gladion has been defeated at Aether House.
- Nanu has been defeated at the Malie City Ferry Terminal.
- Darkinium Z and the Ula’ula Trial Completion stamp have been received.
- The ferry departure to Aether Paradise has begun, but the later Aether rescue remains for the next chapter.
References for this chapter
- Pokémon Ultra Sun and Ultra Moon - Island Trials
- Pokémon Ultra Sun & Ultra Moon - Grand Trials
- Pokémon Ultra Sun & Ultra Moon — Team Skull
- Ula’Ula Island: Walkthrough Directory
- Ulaula Island Sophocles’s Trial: Walkthrough
- Ulaula Island Acerola’s Trial: Walkthrough
- Chapter 18: Po Town & Team Skull — Pokémon Ultra Sun / Ultra Moon walkthrough
Aether Paradise, Seafolk Village and the Poni Island Approach
Begin immediately after Nanu’s Grand Trial and the Po Town aftermath. This chapter covers the later rescue visit to Aether Paradise, the battle with Lusamine, the trip to Poni Island, the Moon Flute retrieval, and the route through Vast Poni Canyon. The chapter ends at the Altar of the Sunne before the flute ceremony and scripted Ultra Warp Ride. The earlier Aether Paradise tour from Hano Grand Resort is already complete and is not repeated here.
Return to Aether Paradise
After defeating Guzma in the Shady House and returning to Aether House, follow the story to the docks. Gladion explains that Lillie has been taken to Aether Paradise. Board the boat with Hau and Gladion. This is the required rescue visit after Nanu’s Grand Trial, separate from the earlier introductory visit arranged through Hano Grand Resort.
At the Aether Paradise docks, move north toward the elevator. The surrounding Aether Foundation employees are optional battles, but fighting them provides useful experience before the required sequence. When you examine the elevator controls, Branch Chief Faba challenges you with a level 43 Hypno. Dark- and Ghost-type attacks are effective, while a Pokémon that can prevent or cure sleep is useful against Hypnosis and Nightmare.
Defeat Faba and accept Gladion’s prompt to use the elevator. Hau gives you a Max Revive during the transition. You may return to the docks or Malie City if you need supplies, but the required destination is the lower level containing Secret Lab B.
- Leave the Po Town and Aether House aftermath.
- Board the boat with Hau and Gladion.
- Defeat Faba’s level 43 Hypno at the elevator.
- Use the elevator to reach the lower level and receive Hau’s Max Revive.
Clear Secret Lab B
From the lower-level elevator, go east into the laboratory route. The required Aether Foundation battles use level 41 Alolan Muk, Magneton, and Porygon2. Ground attacks are particularly useful against Magneton. Alolan Muk is Poison/Dark, so Psychic attacks are ineffective; use Ground, Fighting, or reliable neutral damage instead.
Continue east through the laboratory and enter the room at the end. Hau joins you for a double battle against level 41 Huntail and level 41 Gorebyss, with his level 42 Raichu assisting. Electric- and Grass-type attacks are useful against both opponents. Examine the book and computer afterward if you want the Cosmog and Ultra Beast research details, then leave the room.
Return to the elevator and go back to the entrance floor. Hau and Gladion join you for another required double battle against level 41 Lileep and level 41 Anorith. Wicke heals the party after the battle. Use the nearby PC to rearrange your team before continuing north.
- Defeat the required Secret Lab B employees.
- Win the Huntail and Gorebyss double battle with Hau.
- Return to the entrance floor.
- Defeat the Lileep and Anorith double battle.
- Use Wicke’s healing and the nearby PC.
Reach the mansion and defeat Guzma
Go north with Gladion. You and Gladion face two Aether Foundation employees in a double battle. Their Pokémon are level 42 Electabuzz, Magmar, Houndoom, and Manectric. Ground attacks are valuable against the Electric types and also work against Magmar and Houndoom, though Water attacks are another option for the Fire types.
Continue to the next double battle with Hau. The employee uses level 42 Ledian and Pupitar, while Faba uses level 44 Claydol, level 44 Bruxish, and level 45 Hypno. This is Faba’s second battle in the rescue sequence, not the level 43 Hypno battle at the elevator. Dark- or Ghost-type attacks help against Hypno; Electric- or Grass-type attacks pressure Bruxish.
Go outside and follow the path north. Two Team Skull Grunts must be defeated before the mansion: one uses a level 42 Golbat and the other uses a level 42 Raticate. Heal at the station near the PC before entering the mansion. Inside, Ultra Recon Squad member Dulse challenges you in Ultra Sun with a level 47 Poipole. Ground- and Psychic-type attacks are effective choices.
- Win the Electabuzz, Magmar, Houndoom, and Manectric double battle.
- Win the Hau-and-Faba double battle.
- Defeat the two Team Skull Grunts using Golbat and Raticate.
- Heal before entering the mansion.
- Defeat Dulse’s level 47 Poipole.
Defeat Lusamine and leave for Poni Island
After Dulse, continue north through the mansion. Walk into the glowing rings to trigger the confrontation with Lusamine. Your party is restored before the battle. Lusamine uses five level 47 Pokémon: Clefable, Lopunny, Bewear, Milotic, and Lilligant.
Use Steel or Poison attacks against Clefable, Fighting attacks against Lopunny and Bewear, and Electric or Grass coverage against Milotic. Fire, Ice, Flying, or Bug attacks are useful against Lilligant. Bewear can survive physical attacks, while Lopunny carries varied elemental coverage, so avoid relying on one Pokémon unless it has a safe matchup.
After the battle and the following scenes, Ultra Sun awards the Moon Flute and the Master Ball. Return through the main building and take the elevator down to B1F: Docks. Speak with Gladion and agree to leave. The boat takes you to Seafolk Village on Poni Island.
- Defeat Lusamine’s five level 47 Pokémon.
- Receive the Moon Flute.
- Receive the Master Ball.
- Speak with Gladion at the docks.
- Arrive in Seafolk Village.
Travel from Seafolk Village to the Ruins of Hope
In Seafolk Village, go north to find Lillie. Follow her into Poni Wilds. The wilds contain optional trainers, items, and side paths; the required exit is south into Ancient Poni Path.
In Ancient Poni Path, go east to Hapu’s house and watch the story scene. Machamp Shove is added to the Ride Pager. While riding Machamp, press B beside a large square boulder to push it. The Miltank inside Hapu’s house can restore your party if you need healing.
From Hapu’s house, follow the southeastern route down to Poni Breaker Coast. Continue along the coast, pass the geyser, and follow the path between the stone statues into the Ruins of Hope. Enter the ruins and approach the door to begin the ceremony scene.
Inside the boulder puzzle, push the bottom-left stone all the way upward. Push the bottom-right stone all the way right, then push that same stone upward into the opening. If you make an error, leave the ruins and re-enter; the puzzle resets. Continue north after solving it and watch the Hapu scene. Return to Seafolk Village when the story sends you back.
- Find Lillie in Seafolk Village.
- Pass through Poni Wilds and Ancient Poni Path.
- Obtain Machamp Shove.
- Reach Poni Breaker Coast and the Ruins of Hope.
- Solve the Ruins of Hope boulder puzzle.
- Return to Seafolk Village.
Retrieve the Moon Flute from Exeggutor Island
After the return scene in Seafolk Village, go west from the large tree and follow the village directions to the boat for Exeggutor Island. Three Exeggutor block the initial route. Speak to each one and defeat or catch its level 42 Pinsir. These are ordinary encounters, not Totem battles.
Continue north until you reach the Exeggutor that lifts you to the higher part of the island. Use Tauros Charge to break the boulders on the upper route. Optional items and a Totem Sticker are nearby, but the required path continues west and then north to the pedestal.
Interact with the pedestal and choose Yes to take the flute. In Ultra Sun, the item is the Moon Flute. After the cutscene, return to Seafolk Village. Do not begin Mina’s Trial, Hapu’s Grand Trial, or the altar ceremony yet; those events belong later in the route.
- Travel to Exeggutor Island.
- Defeat or catch the three level 42 Pinsir.
- Use the lifting Exeggutor and Tauros Charge.
- Take the Moon Flute from the pedestal.
- Return to Seafolk Village.
Enter Vast Poni Canyon and complete the Dragon Trial
Return through Seafolk Village to Ancient Poni Path and try to travel north. Two Team Skull battles block the way. The first Grunt uses a level 45 Ekans. The second uses level 45 Fomantis, Raticate, Houndour, Golbat, and Mareanie. After both victories, Plumeria gives you Poisonium Z and Lillie heals the party. A hidden Max Potion is behind the stone pillar northeast of the route entrance.
Enter Vast Poni Canyon and proceed north toward Hapu. Ultra Recon Squad member Dulse challenges you in Ultra Sun with a level 49 Poipole. Afterward, speak with Lillie when prompted; she gives you a Max Revive and heals the team. Continue through the caves, ledges, bridges, and Machamp boulder sections. Lillie heals you again near the trial entrance, so use that opportunity to prepare your final team.
Enter the trial when ready. Defeat the uncatchable level 42 Jangmo-o and level 44 Hakamo-o. At the pedestal, take the Dragon-type Z-Crystal to start the Totem battle. Totem Kommo-o is level 49 and can summon Hakamo-o or Noivern. Fairy attacks are the strongest general answer; Ice, Dragon, and Psychic coverage can also help. Watch for Poison or Steel coverage if you use a Fairy-type Pokémon. Victory awards Dragonium Z.
Continue north through the canyon to the Altar of the Sunne. Lillie heals the party before the final stairs. Reach the altar and stop there. Do not choose to play the Moon Flute. The next chapter begins with the altar ceremony and the scripted Ultra Warp Ride.
- Defeat the level 45 Ekans Grunt.
- Defeat the five-Pokémon Grunt.
- Receive Poisonium Z and Lillie’s healing.
- Defeat Dulse’s level 49 Poipole.
- Complete the Dragon Trial.
- Defeat level 49 Totem Kommo-o.
- Receive Dragonium Z.
- Reach the Altar of the Sunne without starting the flute ceremony.
Before you move on
- The post-Nanu Aether Paradise rescue is complete.
- Faba, the required Aether Foundation employees, Guzma, Dulse, and Lusamine have been defeated.
- The Moon Flute and Master Ball are in the Bag.
- The player has arrived in Seafolk Village on Poni Island.
- Machamp Shove is available in the Ride Pager.
- The Ruins of Hope puzzle has been solved.
- The Moon Flute has been collected from Exeggutor Island.
- Both returning Team Skull battles in Ancient Poni Path are complete.
- Plumeria has awarded Poisonium Z and Lillie has healed the party.
- Dulse’s level 49 Poipole has been defeated.
- The Dragon Trial is complete and Totem Kommo-o has been defeated.
- Dragonium Z is in the Bag.
- The player is standing at the Altar of the Sunne, ready for the next chapter’s flute ceremony and scripted Ultra Warp Ride.
References for this chapter
- Aether Paradise - Pokémon Ultra Sun and Ultra Moon Walkthrough
- Pokémon Ultra Sun and Ultra Moon — Aether Foundation
- Poni Wilds - Pokémon Ultra Sun and Ultra Moon Walkthrough
- Ruins of Hope and Exeggutor Island - Pokémon Ultra Sun and Ultra Moon Walkthrough
- Vast Poni Canyon - Pokémon Ultra Sun and Ultra Moon Walkthrough
- Pokémon Ultra Sun and Ultra Moon - Island Trials
Initial Ultra Warp Ride — Altar of the Sunne and Ultra Megalopolis Access
This chapter covers the story-required Ultra Warp Ride in the original Nintendo 3DS release of Pokémon Ultra Sun. Begin at the Altar of the Sunne after the Poni approach is complete. After the flute ceremony and the scripted confrontation involving Necrozma and Solgaleo, the Ultra Recon Squad lends you Lunala. Ride through Ultra Space and enter a white wormhole to reach Ultra Megalopolis. This first trip is a story route, not the start of free legendary or Ultra Beast hunting. Stop as soon as you arrive in Ultra Megalopolis; the Megalo Tower approach and Ultra Necrozma battle belong to the next chapter.
Begin at the Altar of the Sunne
Start this chapter at the Altar of the Sunne on Poni Island. The required approach through Seafolk Village, Poni Wilds, Ancient Poni Path, Exeggutor Island, and Vast Poni Canyon should already be finished. Do not return to those areas for this chapter, and do not begin Mina’s Trial or Hapu’s Grand Trial here.
At the altar, follow the story prompts involving Lillie and the Sun Flute. Nebby evolves into Solgaleo in Pokémon Ultra Sun. Necrozma then appears, absorbs Solgaleo, and takes the Dusk Mane Necrozma form. The game includes a scripted confrontation with Dusk Mane Necrozma before the pursuit continues. You are not capturing Necrozma during this sequence, and this chapter does not require winning the later Ultra Necrozma battle.
After the altar scene, the Ultra Recon Squad explains that its Lunala can carry you through the Ultra Wormhole. Accept the offer to begin the Ultra Warp Ride. This Lunala is supplied for the story sequence and is not added to your party as a catchable Pokémon.
- Be at the Altar of the Sunne after the complete pre-altar Poni route.
- Complete the flute ceremony and the Solgaleo-Necrozma story scene.
- Finish the scripted altar confrontation.
- Accept the Ultra Recon Squad’s offer to ride Lunala.
Handle the mandatory motion controls
The first Ultra Warp Ride uses the Nintendo 3DS motion sensors. Hold the system securely with both hands and tilt it in the direction you want Lunala to fly. Make gradual adjustments rather than swinging the system sharply. Clear space around you before starting so you can move the system without striking anything.
During the ride, floating energy orbs increase Lunala’s speed and help it travel farther. Collect orbs that are already near your flight path, but do not make a risky turn for one. Electrified obstacles reduce speed when struck, so avoiding collisions is more useful than collecting every orb.
If the gyro position drifts, place the 3DS in a neutral, level position and press A to reset the motion alignment. This is a calibration action, not a command that changes the destination. If the ride pulls you toward a nearby wormhole after a collision, continue steering toward the required white portal when possible.
You cannot choose the Circle Pad method for the first ride before it begins. After this initial ride, an Aether Foundation employee in the Game Freak building in Heahea City can change later Ultra Warp Ride attempts to Circle Pad controls. That option is for future rides and is not needed for this chapter.
- Use motion controls for the first ride.
- Tilt gently and keep both hands on the 3DS.
- Collect nearby energy orbs without making dangerous turns.
- Avoid electrified obstacles.
- Press A while holding the 3DS level if the gyro becomes misaligned.
Enter a white wormhole
Fly through Ultra Space until the wormholes appear. For this first story visit, enter any white wormhole. Before Ultra Megalopolis has been reached, white wormholes lead to Ultra Megalopolis rather than to the later Ultra Beast home worlds. You do not need a particular number of halos, a flower-shaped aura, or a specific travel distance.
Colored wormholes are not required. Red, blue, green, and yellow portals can divert you to optional Ultra Space Wild areas with a wild Pokémon encounter, but landing in one does not permanently block the story. If you enter a colored portal, finish or leave that area and use the Ultra Warp Ride again to search for white.
The game makes recovery easier if you miss the destination. White wormholes become more frequent after an incorrect colored-wormhole landing, and after four landings in other wormholes, the next trip contains only white wormholes. You therefore do not need to restart your save or reload an earlier chapter because of one wrong portal.
While approaching the target, prioritize staying clear of obstacles and lining up with the portal. Losing speed can make a nearby wormhole pull Lunala in automatically, so do not veer sharply toward a final energy orb when a white wormhole is already within reach.
- Aim for any white wormhole.
- Do not search for a particular colored portal or aura tier.
- If you land in a colored portal, use another ride rather than restarting the game.
- Use the guaranteed white-wormhole recovery after four incorrect landings if necessary.
Stop immediately after reaching Ultra Megalopolis
Entering the white wormhole places you in Ultra Megalopolis, the Ultra Recon Squad’s world. The arrival itself is the completion point for this chapter. Once the transition and arrival dialogue have placed you in the city, stop and save if you want a recovery point before continuing.
Do not treat this first arrival as free Ultra Space exploration. At this stage, the white wormhole is serving the main story route to Necrozma. Broader Ultra Warp Ride access, Ultra Beast home worlds, and Legendary Pokémon hunting are later activities that become relevant after the Ultra Necrozma sequence.
Do not climb Megalo Tower yet if you are following the chapter boundaries. The next chapter begins in Ultra Megalopolis and covers the route through the city, the elevator and Megalo Tower, and the mandatory Ultra Necrozma battle. This chapter is complete before those events begin.
- Pass through a white wormhole.
- Arrive in Ultra Megalopolis.
- Stop before beginning the Megalo Tower approach.
- Defer Ultra Beast and Legendary wormhole hunting until after the Necrozma storyline.
Before you move on
- The Altar of the Sunne flute ceremony has occurred.
- Nebby has evolved into Solgaleo and Necrozma has taken the Dusk Mane form.
- The scripted altar confrontation has been completed.
- The Ultra Recon Squad has lent you Lunala for the pursuit.
- You completed the first Ultra Warp Ride and entered a white wormhole.
- You have arrived in Ultra Megalopolis.
- You have not counted Ultra Necrozma, Ultra Beast hunting, Legendary hunting, or the Megalo Tower climb as completed in this chapter.
Ultra Necrozma, Mina’s Trial and Hapu’s Grand Trial
Begin in Ultra Megalopolis after the scripted Ultra Warp Ride from the Altar of the Sunne. Reach the top of Megalo Tower and defeat the mandatory level 60 Ultra Necrozma battle. After the light is restored, return to Alola, collect the petals for Mina’s Trial, defeat Totem Ribombee and receive Fairium Z. Then travel from Seafolk Village to Exeggutor Island, defeat Kahuna Hapu in her Grand Trial and receive Groundium Z and the Poni Trial Completion stamp. At the end of this chapter, all eight standard trials and all four Grand Trials are complete, making Mount Lanakila the next required destination.
1. Start in Ultra Megalopolis and reach Megalo Tower
This chapter begins immediately after the scripted Ultra Warp Ride from the Altar of the Sunne. You are already in Ultra Megalopolis, and Lunala has carried you there in Pokémon Ultra Sun. Do not return to the Altar or repeat the earlier Dusk Mane Necrozma sequence.
Follow the accessible route through the dark city toward Megalo Tower. The surrounding buildings are not required destinations. Enter the tower and continue upward through the stairway until the story places you before Necrozma. Arrange your party and items before starting the battle. If you need to heal, use any available recovery point before proceeding.
- Begin in Ultra Megalopolis after the scripted ride.
- Enter Megalo Tower.
- Reach the Ultra Necrozma confrontation without repeating the altar approach.
2. Defeat Ultra Necrozma
At the top of Megalo Tower, Dusk Mane Necrozma becomes Ultra Necrozma. The opponent is level 60, has Psychic and Dragon typing, and receives an aura that raises its battle performance. Its known moves are Photon Geyser, Smart Strike, Power Gem and Dragon Pulse. This is a mandatory defeat, not a capture encounter, so Poké Balls cannot be used to obtain it.
Ultra Necrozma is weak to Bug, Ghost, Dark, Ice, Dragon and Fairy attacks. A Fairy-type Pokémon avoids Dragon Pulse, but Smart Strike is super effective against Fairy types, so do not rely on one Fairy counter alone. Ice, Ghost and Dark attacks are useful if the attacker can survive Photon Geyser and Power Gem. A strong Z-Move can remove a large portion of its health, but use it with a Pokémon that can withstand the retaliation.
Bring several healing items and have at least two reliable attackers. If the lead Pokémon is knocked out immediately, revive another attacker rather than repeatedly sending the same weakened Pokémon into battle. After a failed attempt, heal, adjust the party or train nearby before trying again. The story cannot continue until Ultra Necrozma’s HP reaches zero.
- Use super-effective Bug, Ghost, Dark, Ice, Dragon or Fairy damage where practical.
- Keep at least two Pokémon capable of dealing heavy damage.
- Use healing items and Revives between knockouts if necessary.
- Defeat level 60 Ultra Necrozma.
- Do not attempt to capture Ultra Necrozma.
3. Finish the Megalopolis sequence and return to Poni Island
After Ultra Necrozma is defeated, the story restores the light to Ultra Megalopolis. The Ultra Recon Squad offers Poipole at level 40. Accept it if you have room in the party or want to use it. If your party is full, you can postpone the gift and collect Poipole later in Ultra Megalopolis.
When the remaining scenes finish, the game returns you to the Altar of the Sunne. Follow the established route back to Seafolk Village. Mina’s Trial is now the next required trial. Heal at the Pokémon Center and restock before entering Mina’s house, the Whiscash-shaped boat in Seafolk Village.
- Complete the light-restoration scenes.
- Accept level 40 Poipole or deliberately postpone the gift.
- Return to Seafolk Village.
- Heal and restock before starting Mina’s Trial.
4. Begin Mina’s Trial and collect every petal
Enter Mina’s house in Seafolk Village and speak with Mina. Defeat her level 51 Mawile, Granbull and Ribombee to receive the first petal. This battle begins the trial; it does not complete it.
Travel to Hau’oli Cemetery on Melemele Island and battle Ilima. In Ultra Sun, his team is level 51 Gumshoos, Smeargle and Komala. After receiving his petal, continue to Lush Jungle on Akala Island and battle Mallow. Her Ultra Sun team is level 51 Trevenant, Tsareena and Shiinotic. Mallow provides another petal.
Go to Wela Volcano Park and challenge Kiawe. His team is level 51 Arcanine, Talonflame and Alolan Marowak. After Kiawe’s battle, defeat Hiker David’s level 48 Magmar as part of the same route. Continue to Hokulani Observatory and battle Sophocles, whose team is level 51 Togedemaru, Magnezone and Alolan Golem.
For the final petal in Ultra Sun, go to Aether House on Route 15. Nanu gives you the petal without a battle because Acerola is away helping Professor Kukui. Do not follow Ultra Moon instructions that send you into an Acerola battle.
- Defeat Mina and obtain her petal.
- Defeat Ilima in Hau’oli Cemetery.
- Defeat Mallow in Lush Jungle.
- Defeat Kiawe and Hiker David at Wela Volcano Park.
- Defeat Sophocles at Hokulani Observatory.
- Receive the final petal from Nanu at Aether House.
5. Return to Mina and defeat Totem Ribombee
Return to Seafolk Village and speak with Mina after collecting all six petals. Mina combines them into the Rainbow Flower and summons Totem Ribombee. Heal the whole party before speaking with her because the Totem battle follows the petal collection sequence.
Totem Ribombee is level 55 and can call Blissey or Pelipper as an ally. Target Ribombee first unless the ally is creating an immediate survival problem. Poison- and Steel-type attacks are particularly effective. Ribombee holds an Occa Berry, so Fire attacks may be reduced in power. Keep a Pokémon ready to handle the ally without losing sight of the Totem’s damage output.
Defeating Ribombee completes Mina’s Trial. Mina then gives you Fairium Z. Collecting the petals alone is not enough; the trial is incomplete until the Totem is defeated and the Z-Crystal is received.
- Give all collected petals to Mina.
- Defeat level 55 Totem Ribombee.
- Manage Blissey or Pelipper if it appears as an ally.
- Receive Fairium Z.
6. Travel to Exeggutor Island for Hapu’s Grand Trial
After Mina’s Trial, Hapu tells you to meet her on Exeggutor Island. Return to the chief’s boat in the southwest part of Seafolk Village and choose Exeggutor Island. Use the island’s path to reach the upper area near the altar where Hapu is waiting. In Pokémon Ultra Sun, this is the location of Hapu’s Grand Trial; do not search Vast Poni Canyon for the battle.
Heal and organize the party before speaking with Hapu. Her team consists of level 53 Golurk, level 53 Gastrodon, level 53 Flygon and level 54 Mudsdale. Grass and Water attacks are useful against several members. Flygon is especially vulnerable to Ice attacks and is immune to Ground attacks. Grass attacks are effective against Gastrodon and Mudsdale, while Mudsdale’s Groundium Z can produce a powerful Tectonic Rage. Avoid leaving a weakened Pokémon in front of Mudsdale.
- Travel from Seafolk Village to Exeggutor Island.
- Reach Hapu in the upper section of the island.
- Heal before starting the Grand Trial.
- Prepare Grass, Water or Ice coverage where available.
7. Defeat Hapu and confirm the completed island challenge
Speak with Hapu when ready and defeat Golurk, Gastrodon, Flygon and Mudsdale. After the battle, Hapu awards Groundium Z and the Poni Trial Completion stamp. This completes the fourth and final Grand Trial and raises the relevant obedience limit for traded Pokémon.
The eight completed standard trials are Ilima’s Verdant Cavern Trial, Lana’s Brooklet Hill Trial, Kiawe’s Wela Volcano Park Trial, Mallow’s Lush Jungle Trial, Sophocles’s Hokulani Observatory Trial, Acerola’s Thrifty Megamart Trial, the Vast Poni Canyon Dragon Trial with Totem Kommo-o, and Mina’s Trial with Totem Ribombee.
The four completed Grand Trials are Hala’s on Melemele Island, Olivia’s on Akala Island, Nanu’s in Malie City and Hapu’s on Exeggutor Island. With Groundium Z and the Poni Trial Completion stamp obtained, Mount Lanakila is the next required destination. The optional level 65 Necrozma encounter on Mount Lanakila belongs to the next chapter.
- Defeat Hapu’s level 53 Golurk.
- Defeat her level 53 Gastrodon.
- Defeat her level 53 Flygon.
- Defeat her level 54 Mudsdale.
- Receive Groundium Z.
- Receive the Poni Trial Completion stamp.
- Confirm that all eight standard trials are complete.
- Confirm that all four Grand Trials are complete.
- Leave with Mount Lanakila as the next destination.
Before you move on
- Ultra Necrozma was defeated in Megalo Tower.
- The light-restoration sequence finished.
- Poipole was accepted or deliberately postponed.
- Mina’s petals were collected from Mina, Ilima, Mallow, Kiawe, Sophocles and Nanu.
- Totem Ribombee was defeated and Fairium Z was received.
- Hapu’s Grand Trial was completed on Exeggutor Island.
- Groundium Z and the Poni Trial Completion stamp were received.
- The eight standard trials are complete: Ilima, Lana, Kiawe, Mallow, Sophocles, Acerola, Vast Poni Canyon’s Dragon Trial and Mina.
- The four Grand Trials are complete: Hala, Olivia, Nanu and Hapu.
- Mount Lanakila is unlocked and is the next required destination.
Mount Lanakila and the Alola League Approach
After Mina’s Trial, the Vast Poni Canyon Dragon Trial, and all four Grand Trials are complete, return to Tapu Village and travel north into Mount Lanakila. Gladion challenges you at the mountain entrance, then the route climbs through elevators, caves, icy passages, trainer battles, and Machamp Shove boulder puzzles. An optional level 65 Necrozma encounter appears during the climb. Continue to the summit Pokémon Center, restore the party, buy supplies, and reach the League entrance. Stop before entering the Elite Four sequence covered in Chapter 10.
1. Confirm all eight standard trials and four Grand Trials
Before leaving Tapu Village, verify that all eight standard trials are complete: Ilima’s Normal Trial in Verdant Cavern, Lana’s Water Trial at Brooklet Hill, Kiawe’s Fire Trial at Wela Volcano Park, Mallow’s Grass Trial in Lush Jungle, Sophocles’s Electric Trial at Hokulani Observatory, Acerola’s Ghost Trial in the Abandoned Thrifty Megamart, the Dragon Trial in Vast Poni Canyon, and Mina’s Fairy Trial on Poni Island. The Vast Poni Canyon trial has no trial captain; its Totem Pokémon is Kommo-o, and its reward is the Dragonium Z. Mina’s Trial is the eighth standard trial and ends with Totem Ribombee, awarding the Fairium Z.
Also confirm that the four Grand Trials are complete: Hala on Melemele Island, Olivia on Akala Island, Nanu on Ula’ula Island, and Hapu on Poni Island. Hapu’s Grand Trial awards the Groundium Z and completes the Poni Island challenge. If the Dragon Trial, Mina’s Trial, or Hapu’s Grand Trial is unfinished, Mount Lanakila is premature; complete those objectives before proceeding.
Heal at the Tapu Village Pokémon Center. Review the party’s moves, held items, and levels. The League opponents cover Steel, Rock, Ghost, and Flying specialties, while Hau uses a mixed team. Bring multiple answers rather than relying on one Pokémon or one attack type. A team in the mid-to-high 50s is a practical preparation target, but type coverage, recovery items, and reliable moves matter more than reaching one exact level.
- Ilima’s trial is complete.
- Lana’s trial is complete.
- Kiawe’s trial is complete.
- Mallow’s trial is complete.
- Sophocles’s trial is complete.
- Acerola’s trial is complete.
- The Vast Poni Canyon Dragon Trial and Totem Kommo-o are complete.
- Mina’s Trial and Totem Ribombee are complete.
- Hala, Olivia, Nanu, and Hapu’s Grand Trials are complete.
- The party is healed at Tapu Village.
2. Defeat Gladion at the mountain entrance
Leave Tapu Village through the northern exit and enter Mount Lanakila. Gladion arrives by elevator and challenges you before you can ascend. His team includes Crobat at level 53, Zoroark at level 53, Silvally at level 55, and Lucario. In Ultra Sun, Lucario is level 55 if you chose Rowlet and level 53 if you chose Litten or Popplio.
Zoroark uses Illusion and initially appears as Lucario. Treat the apparent Lucario as a possible disguise until Zoroark reveals itself. Once identified, Zoroark is a Dark-type Pokémon and is weak to Fighting-, Bug-, and Fairy-type attacks. It carries Darkinium Z, so keep a healthy Pokémon available to withstand its single Blackhole Eclipse.
Silvally holds a Memory selected to oppose your starter. It is Fire-type against Rowlet, Water-type against Litten, and Grass-type against Popplio. Its Multi-Attack uses that same type, so switch to a Pokémon that resists the displayed type rather than assuming Silvally is Normal-type. Crobat is vulnerable to Electric-, Ice-, Rock-, and Psychic-type attacks. Lucario can be pressured with Fire-, Ground-, and Fighting-type moves.
Gladion does not restore your party after the battle. He gives you a PP Max in Ultra Sun and Ultra Moon. If several Pokémon are weakened, return to Tapu Village, heal, and come back before using the elevator.
- Gladion has been defeated.
- Zoroark’s Illusion has been accounted for.
- Silvally’s type has been identified from your starter choice.
- The PP Max has been received.
- The party has been healed again if necessary.
3. Climb through the first Mount Lanakila section
Use the elevator after Gladion’s battle and get off at the upper platform. The route continues into the cave ahead. The first section contains tall grass, trainer battles, side paths, and an exit leading to TM84 Poison Jab. Optional trainers such as Ace Trainer Seth, Ace Trainer Kailee, and Veteran Alonsa provide useful experience, but none is required for League access.
Continue through the cave until you reach the Machamp boulders. Use Machamp Shove to move the lower-left boulder into the hole and open the path. Push the nearby boulders as needed to collect the Max Revive and Max Elixir, then use the cleared route to continue toward the exterior section. The first boulder placement also creates a shortcut back toward the earlier elevator, which is useful if you need to return to Tapu Village for healing.
Follow the exterior path north through the trainer area and re-enter the mountain. Fight optional trainers if you need experience, but avoid exhausting your healing supplies before the final cave section. The wild Pokémon and side items are optional; the required objective is to keep following the connected caves, ledges, and elevators toward the summit.
- The first elevator has been used.
- Machamp Shove has cleared the required boulder passage.
- The shortcut has been opened if a return trip is needed.
- The route continues north through the exterior and cave sections.
4. Handle the optional Necrozma encounter
After progressing through the mountain, you reach a crater containing a weakened Necrozma. Interact with it to begin the level 65 encounter. In Ultra Sun, this is a catchable, pure Psychic-type Necrozma with Prism Armor. It holds an Ultranecrozium Z.
This encounter is separate from the mandatory Ultra Necrozma battle in Ultra Megalopolis and from the earlier Dusk Mane Necrozma story confrontation. Those story battles are defeats, not capture encounters. The Mount Lanakila Necrozma is optional and is not required to enter the League.
Save before interacting with Necrozma if you intend to catch it. Lower its HP carefully, apply sleep or paralysis if available, and avoid using a move that may cause an accidental critical knockout. Ultra Balls are a dependable general choice, while Dusk Balls are useful in the mountain’s cave areas. The Master Ball is unnecessary for this encounter unless you specifically want a guaranteed capture.
If you are not ready to catch Necrozma, postpone the encounter and continue only if you have confirmed that your intended save and encounter state are safe. After Necrozma is caught, Colress appears and gives you the N-Solarizer and N-Lunarizer. In Ultra Sun, the N-Solarizer can fuse Necrozma with Solgaleo into Dusk Mane Necrozma. Neither the capture nor the fusion items is required for League access.
- A save has been made if a capture is intended.
- The level 65 Mount Lanakila Necrozma is distinguished from the story battles.
- Necrozma has been caught or deliberately postponed.
- The N-Solarizer and N-Lunarizer have been collected if Necrozma was caught.
5. Complete the final cave route
Return to the main route after the crater. Follow the connected paths through the icy cave, using the narrow passages, ramps, one-way ledges, and trainer locations as landmarks. An Icy Rock marks the section where Eevee can evolve into Glaceon; this is optional and does not affect progression.
Continue past the side paths containing items such as X Sp. Def, Full Restore, TM13 Ice Beam, Icium Z, and a Max Revive. The Icium Z and other items are optional rewards. Trainer battles in this area include Backpacker Peren, Collector Minty, Hiker Anuhea, Veteran Ella, Ace Trainer Jada, and the double battle against Breon and Kaimana. They can supply experience but may consume healing resources, so use the mountain’s shortcuts when returning to recover.
After the final trainer section, take the last elevator upward. The route emerges at the summit area, where the Mount Lanakila Pokémon Center and the Alola League entrance are located.
- The icy cave route has been completed.
- The final elevator has been reached.
- Optional items have been collected only if they are useful.
- The Mount Lanakila summit area is visible.
6. Heal, restock, and stop before the League battles
Enter the Mount Lanakila Pokémon Center and heal completely. The shop sells Poké Balls, healing items, status cures, and battle-use items, so restock before approaching the League. Restore PP with items or berries if important moves have been depleted.
Madam Memorial is inside the summit Pokémon Center. For Heart Scales, she can restore forgotten level-up moves and teach eligible moves that a Pokémon could have learned by level. Use this service before the League if a team member lacks a useful move.
Reorganize the party and choose held items. Prepare answers for Molayne’s Steel team, Olivia’s Rock team, Acerola’s Ghost team, Kahili’s Flying team, and Hau’s mixed team. Fire-, Ground-, or Fighting-type attacks are useful against Steel; Water-, Grass-, Fighting-, or Ground-type attacks help against Rock; Dark- or Ghost-type attacks answer Ghost; and Electric-, Ice-, or Rock-type attacks help against Flying. Also keep a plan for Hau’s Alolan Raichu, Noivern, Crabominable, starter-dependent Eeveelution, and final starter evolution.
The League entrance is north of the summit Pokémon Center. Professor Kukui waits at the entrance. Once you enter, you cannot leave to use a Pokémon Center or PC until the challenge ends through defeat or victory, so buy Revives, Full Restores, status cures, and PP recovery before crossing the threshold. Save at the summit Pokémon Center, walk to the League entrance, and stop there. The Elite Four and Hau belong to Chapter 10.
- The summit Pokémon Center has been reached.
- The party has been fully healed.
- Held items and the final party have been selected.
- Healing items, status cures, and PP recovery are stocked.
- Madam Memorial has restored any needed moves.
- The player is standing at the League entrance without beginning the Elite Four challenge.
Before you move on
- All eight standard trials are complete: Ilima, Lana, Kiawe, Mallow, Sophocles, Acerola, Vast Poni Canyon’s Dragon Trial, and Mina’s Trial.
- Totem Kommo-o and Totem Ribombee have been defeated.
- All four Grand Trials are complete: Hala, Olivia, Nanu, and Hapu.
- The Groundium Z from Hapu’s Grand Trial has been received.
- Gladion has been defeated at the Mount Lanakila entrance.
- Machamp Shove has been used to clear the required mountain boulders.
- The optional level 65 Mount Lanakila Necrozma has been caught or deliberately postponed.
- The summit Pokémon Center has been reached.
- The party has been healed, reorganized, and supplied for the League.
- The player is ready at the Alola League entrance.
- The Elite Four and Hau have not yet been defeated.
- The Hall of Fame has not yet been registered.
Elite Four and Champion Match (Hau) — Step-by-Step Battles
After completing all eight standard trials and all four Grand Trials, including Mina’s Trial and Hapu’s Grand Trial, enter the Pokémon League at the summit of Mount Lanakila. Molayne, Olivia, Acerola and Kahili can be challenged in any order. After all four are defeated, use the central rainbow platform to reach the Champion’s chamber. In Pokémon Ultra Sun, Kukui steps aside and Hau becomes the final opponent. Hau’s team ranges from Level 58 to Level 60 and includes Alolan Raichu, an Eevee evolution chosen to have a type advantage over your starter, Tauros, Noivern, Crabominable and a final-stage starter chosen to have a type disadvantage against your starter. Defeating Hau in the first League challenge begins Hall of Fame registration and establishes you as Alola’s first Champion.
1. Prepare at the Pokémon League
Before entering the League challenge, confirm that all eight standard trials are complete: Ilima’s Verdant Cavern trial, Lana’s Brooklet Hill trial, Kiawe’s Wela Volcano Park trial, Mallow’s Lush Jungle trial, Sophocles’s Hokulani Observatory trial, Acerola’s Thrifty Megamart trial, the Vast Poni Canyon Dragon trial, and Mina’s Trial. Also confirm that Hala, Olivia, Nanu and Hapu’s four Grand Trials are complete.
Heal at the Pokémon Center outside the League entrance, restore PP, clear status conditions and save. There is no ordinary Pokémon Center between the Elite Four rooms and Hau’s chamber. You can use Bag items between battles, but every Pokémon must be healed manually.
Carry Full Restores, Max Potions or Hyper Potions, and several Revives. Keep some recovery items available for Hau instead of spending everything against the first Elite Four member. Bring both physical and special attackers, Ground or Fighting coverage for Steel targets, Water, Grass, Fighting or Ground coverage for Rock targets, Dark or Ghost coverage for Acerola, and Electric, Ice or Rock coverage for Kahili.
The four Elite Four members may be challenged in any order. Start with the room your team handles most reliably and preserve at least one healthy answer for Hau’s Alolan Raichu, Noivern, Crabominable and final starter. A party around the low-to-mid 60s is a practical target, although type coverage, held items and healing discipline matter more than an exact level.
- All eight standard trials and all four Grand Trials are complete.
- Heal, restore PP and save before entering.
- Bring recovery items and Revives for five consecutive battles.
- Prepare both physical and special damage options.
- Keep a dedicated answer for Hau’s final starter.
2. Defeat Molayne’s Steel team
Molayne uses Level 56 Klefki, Bisharp, Magnezone and Metagross, followed by a Level 57 Alolan Dugtrio holding Steelium Z. Ground- and Fighting-type attacks are effective general answers, while Fire attacks are useful against several members.
Klefki knows Flash Cannon, Spikes, Thunder Wave and Reflect. Defeat it quickly so entry hazards, paralysis and Reflect do not complicate the room. Bisharp uses Iron Head, Night Slash, X-Scissor and Metal Sound; a strong Fighting move is especially effective.
Magnezone carries Flash Cannon, Thunderbolt, Tri Attack and Screech. Ground attacks are excellent, but do not switch a Flying-type into it expecting immunity from Thunderbolt. Metagross uses Meteor Mash, Hammer Arm, Bullet Punch and Zen Headbutt, so preserve a healthy super-effective attacker rather than relying on a weakened Pokémon.
Alolan Dugtrio has Earthquake, Fissure, Sucker Punch and Iron Head. Use a bulky Water-type or another Pokémon that can survive Earthquake. A frail, slower attacker may be finished by Sucker Punch, so heal or switch before taking that risk. Its Steelium Z can turn Iron Head into Corkscrew Crash once during the battle.
- Remove Klefki before Spikes and paralysis accumulate.
- Use Ground or Fighting attacks where possible.
- Keep a safe switch for Magnezone’s Thunderbolt.
- Save a healthy Pokémon for Alolan Dugtrio’s Steelium Z attack.
3. Defeat Olivia’s Rock team
Olivia’s initial team is Level 56 Armaldo, Cradily, Gigalith and Probopass, followed by a Level 57 Midnight Form Lycanroc holding Rockium Z. Her initial team uses Rock Blast and Crush Claw on Armaldo; Rock Tomb, Energy Ball and Stealth Rock on Cradily; Stone Edge, Iron Head and Bulldoze on Gigalith; and Earth Power, Power Gem, Thunder Wave and Sandstorm on Probopass.
Use Water, Grass, Fighting or Ground attacks according to the target. Do not treat Cradily as a simple Water matchup: its Grass typing and Energy Ball punish Water-types. Fighting and Ground attacks are more dependable against Cradily, Gigalith and Probopass, although Probopass’s bulk makes a strong super-effective attack preferable.
Lycanroc uses Rock Climb, Crunch, Stone Edge and Counter. Its Rockium Z turns Stone Edge into Continental Crush. Use a healthy Water-, Grass- or Fighting-capable Pokémon. Avoid striking it with a weak physical attack if Counter could finish your attacker.
- Do not rely on Water alone against Cradily.
- Use Fighting or Ground damage against Probopass.
- Watch for Stealth Rock and Sandstorm.
- Keep a healthy counter for Lycanroc’s Rockium Z attack.
4. Defeat Acerola’s Ghost team
Acerola uses Level 56 Banette, Drifblim, Dhelmise and Froslass, followed by a Level 57 Palossand holding Ghostium Z. Dark- and Ghost-type attacks are useful, but several Pokémon carry coverage that punishes careless switches.
Banette has Shadow Claw, Feint Attack, Infestation and Screech. Drifblim uses Baton Pass, Ominous Wind, Amnesia and Focus Energy, so defeat it before it can pass defensive boosts. Dhelmise carries Shadow Ball, Energy Ball, Whirlpool and Slam; do not assume that Water- or Ground-types are automatically safe.
Froslass uses Shadow Ball, Blizzard, Ice Shard and Confuse Ray. It is fast enough to disrupt a slower attacker, so use a strong Dark, Ghost, Steel or Fire attack. Palossand has Shadow Ball, Earth Power, Giga Drain and Iron Defense. Giga Drain makes a weakened Water-type a poor answer, so preserve a strong Dark or Ghost attacker for Palossand and its Ghostium Z attack.
- Defeat Drifblim before Baton Pass creates a difficult setup.
- Treat Confuse Ray and Blizzard as immediate threats.
- Avoid careless Water or Ground switches against Dhelmise and Palossand.
- Reserve a reliable answer for Palossand’s Ghostium Z attack.
5. Defeat Kahili’s Flying team
Kahili uses Level 56 Braviary, Hawlucha, Baile Style Oricorio and Mandibuzz, followed by a Level 57 Toucannon holding Flyinium Z. Electric, Ice and Rock attacks are effective against much of the room, but Hawlucha’s Fighting typing changes its weaknesses and Oricorio’s Fire typing affects its matchups.
Braviary carries Brave Bird, Crush Claw, Air Slash and Scary Face. Hawlucha uses Flying Press, Dual Chop, Throat Chop and Poison Jab, so Fairy-types must respect Poison Jab. Oricorio has Air Slash, Revelation Dance, Teeter Dance and Feather Dance; recover or switch if confusion or lowered Attack makes your current attacker unreliable.
Mandibuzz uses Brave Bird, Bone Rush, Punishment and Flatter. Electric or Ice damage is a dependable way to bypass its bulk. Toucannon carries Beak Blast, Rock Blast, Bullet Seed and Screech. Beak Blast can burn a contact attacker, while Rock Blast threatens Ice- and Flying-types.
- Use Electric, Ice or Rock coverage where appropriate.
- Do not expose Fairy-types carelessly to Hawlucha.
- Respond quickly to Oricorio’s Teeter Dance.
- Keep a healthy counter for Toucannon’s Flyinium Z attack.
6. Reach the Champion’s chamber
After defeating the fourth Elite Four member, return to the central chamber. Stand on the rainbow circle in the center to activate the platform, ride it upward and approach the Champion’s throne.
Kukui appears first and jokes that he will be the final opponent, but he steps aside and Hau takes the battle. Before interacting with the throne, heal the party, restore PP and review held items. Once Hau’s battle begins, you cannot return to the outside Pokémon Center.
Place a reliable answer to Alolan Raichu, Noivern and Crabominable in the party. Preserve a healthy Pokémon and, if possible, your strongest Z-Move for Hau’s final starter.
- All four Elite Four rooms are cleared.
- The party is healed and PP is restored.
- A plan is ready for Raichu, Noivern, Crabominable and the final starter.
- Save before sitting on the Champion’s throne.
7. Defeat Champion Hau
Hau’s first Champion battle uses Level 59 Alolan Raichu, a Level 58 Eevee evolution, Level 58 Tauros, Level 58 Noivern, Level 59 Crabominable and a Level 60 final-stage starter. The Eevee evolution has the type advantage over your chosen starter. His final starter has the type disadvantage against your chosen starter.
The starter-dependent lineups are exact. If you chose Rowlet, Hau uses Flareon and Primarina. If you chose Litten, he uses Vaporeon and Decidueye. If you chose Popplio, he uses Leafeon and Incineroar. Prepare for these two Pokémon separately: the Eevee evolution is chosen to counter your starter, while the final starter is chosen to lose the type matchup against it.
Alolan Raichu uses Thunderbolt, Psychic, Quick Attack and Focus Blast. Ground attacks exploit its Electric typing, but Focus Blast can punish Dark-types. Tauros carries Earthquake, Iron Head, Double-Edge and Zen Headbutt, so Fighting attacks are useful while still requiring respect for its coverage.
Noivern has Dragon Pulse, Dark Pulse, Air Slash and Super Fang. Ice attacks are especially strong because Noivern is four times weak to Ice; Fairy and Rock attacks are also useful. Crabominable uses Ice Hammer, Power-Up Punch, Dizzy Punch and Stone Edge. Defeat it before repeated Power-Up Punch uses make it difficult to stop.
Against the final starter, use the appropriate coverage. Primarina is weak to Electric, Grass and Poison attacks. Decidueye is weak to Fire, Ice, Flying, Ghost and Dark attacks. Incineroar is weak to Water, Ground, Rock and Fighting attacks. Hau’s final Pokémon holds the Z-Crystal associated with its type, so expect one powerful Z-Move and do not leave a weakened counter in range. Use your own Z-Move when it secures a knockout rather than spending it on an earlier target.
- Rowlet player: prepare for Flareon, then Primarina.
- Litten player: prepare for Vaporeon, then Decidueye.
- Popplio player: prepare for Leafeon, then Incineroar.
- Use Ground or another suitable answer against Alolan Raichu while respecting Focus Blast.
- Use Ice or Fairy coverage against Noivern.
- Stop Crabominable before Power-Up Punch snowballs.
- Keep a healthy counter for Hau’s final starter and its Z-Move.
Before you move on
- Ilima, Lana, Kiawe, Mallow, Sophocles, Acerola, the Vast Poni Canyon Dragon Trial and Mina’s Trial have all been completed.
- Hala, Olivia, Nanu and Hapu’s four Grand Trials have all been completed.
- Molayne, Olivia, Acerola and Kahili have all been defeated in the initial League challenge.
- The rainbow platform has carried the player to the Champion’s chamber.
- Hau’s complete six-Pokémon team has been defeated.
- Hall of Fame registration and the ending sequence begin.
- The credits and Champion celebration conclude, establishing the player as Alola’s first Champion.
- For the first Title Defense after the initial victory, Hau is the challenger; later defenses use the available challenger system.
Immediate Post-Game: Poni Revisited and High-Level Encounters
After becoming Alola Champion, Pokémon Ultra Sun opens a required post-game event on Poni Island. Complete the Ultra Recon Squad’s Blacephalon operation in Poni Grove, receive Type: Null and its Memory items from Wicke, then cross Poni Gauntlet to reach the Battle Tree. Ultra Warp Ride exploration, Tapu encounters, the Mount Lanakila Necrozma, Zygarde activities and Episode RR are separate optional goals.
Trigger the post-Champion Poni event
Load the save created after the Hall of Fame and ending credits. Leave your room in Iki Town, then leave your house. The Ultra Recon Squad will contact you about an incident on Poni Island. Follow the prompt to travel there, or return to Poni Island through the Ferry Terminal if you postpone the trip.
Before entering the post-game routes, heal your party and stock healing items, status cures, Ultra Balls and suitable capture supplies. Wild Pokémon and trainers in the northern Poni areas are much stronger than most earlier routes. A Pokémon with False Swipe, a sleep or paralysis move, and a dependable type spread will make the Blacephalon encounters safer.
Save before important gift scenes and before each Blacephalon encounter. Type: Null is a gift, not a wild encounter, so decide beforehand whether you want to accept it immediately or use the full-storage fallback described below.
- Load the post-credits Champion save.
- Leave the room and then leave the house in Iki Town.
- Trigger the Ultra Recon Squad’s Poni Island event.
- Heal and prepare a capture-focused party.
Reach Ancient Poni Path and receive Type: Null
Travel to Poni Island and go to Ancient Poni Path. Follow the path toward the entrance to Poni Grove. Hau and Wicke are waiting near the grove entrance. Speak with them to begin the post-game handoff.
Wicke normally gives you a level 60 Type: Null on Gladion’s behalf. She also gives you the Memory items used to change Silvally’s type through its RKS System. Make room in your party or PC before approaching her if you intend to accept the gift immediately.
If your party and every PC box are full, Wicke cannot place Type: Null into storage at Ancient Poni Path. In that situation, she relocates to Aether Paradise and offers the gift there after you make room. Do not waste time repeatedly searching the entrance to Poni Grove. Clear a box or party slot, then visit Wicke at Aether Paradise to collect Type: Null and the Memory items.
Once the handoff is complete, continue north into Poni Grove. The route was inaccessible before becoming Champion.
- Reach Ancient Poni Path after becoming Champion.
- Speak with Hau and Wicke near the Poni Grove entrance.
- Receive Type: Null and the Memory items, either at Ancient Poni Path or, if storage was full, at Aether Paradise.
- Enter Poni Grove.
Complete the Ultra Sun Blacephalon operation
Inside Poni Grove, the Ultra Recon Squad explains that Ultra Beasts are causing trouble. In Ultra Sun, the version-specific Ultra Beast here is Blacephalon; Pokémon Ultra Moon has Stakataka instead. The Ultra Recon Squad gives you five Beast Balls for the operation and explains that additional Beast Balls can be purchased at Aether Paradise.
Search the tall grass in Poni Grove until Blacephalon appears. You must capture two Blacephalon in Ultra Sun. Weaken each one carefully, apply sleep or paralysis if available, and use Beast Balls or another suitable Poké Ball. Avoid strong critical-hit-prone attacks, recoil effects and poison damage that could cause an accidental knockout.
Save before starting an encounter if you are preparing for a particular capture attempt. If an encounter fails, use your prepared save rather than assuming that every defeated or fled encounter will behave identically. Continue until two Blacephalon have been captured and the Ultra Recon Squad confirms that the operation is complete.
The route toward Poni Coast and Poni Gauntlet remains blocked until the Poni Grove objective is resolved. Capturing only one Blacephalon is not enough to open the route.
- Receive the five Beast Balls in Poni Grove.
- Capture the first Blacephalon.
- Capture the second Blacephalon.
- Confirm that both Blacephalon are in the party or PC.
- Verify that the route beyond Poni Plains is open.
Cross Poni Coast and Poni Gauntlet
Return through Poni Plains and follow the newly opened route to Poni Coast. Continue toward Poni Gauntlet. You may encounter post-game characters and side events along the way, but they are not substitutes for the required Blacephalon operation.
Heal in Seafolk Village before entering Poni Gauntlet. Restore move PP and carry Full Restores, Revives or Max Revives. The gauntlet contains high-level trainers and varied teams, so bring a balanced party rather than relying on one sweeper or one type.
Enter Poni Gauntlet from Poni Coast and follow the main path north. You can avoid some optional trainers, but several battles and route sections must be crossed. Continue to the far end of the gauntlet, where the Battle Tree entrance is located.
- Return to Poni Plains after completing the Blacephalon event.
- Follow the opened route to Poni Coast.
- Heal and restore PP in Seafolk Village.
- Cross Poni Gauntlet and reach the Battle Tree entrance.
Enter the Battle Tree and unlock its formats
When you first enter the Battle Tree area, Red and Blue introduce themselves. You are given a choice of which one to battle for the introductory fight. In Ultra Sun and Ultra Moon, Blue restores your party before this battle, making Blue the safer choice if you want a full recovery immediately beforehand.
After the introductory battle, the regular Single, Double and Multi formats are available. These facilities are optional post-game challenges and do not replace the Pokémon League or change your Champion status. Regular Battle Tree victories award Battle Points, which can be spent on useful items and battle resources.
Each corresponding Super format requires a 20-win streak in the regular version and a victory against its Battle Legend. Red is associated with Single formats, while Blue is associated with Double formats; Multi progression has its own Battle Legend requirement. Super formats are substantially more difficult, so begin with a balanced team, reliable damage, speed control, priority or protection options, and answers to setup strategies.
A lost streak does not damage the save. Heal, adjust the team and begin another challenge when ready.
- Enter the Battle Tree after crossing Poni Gauntlet.
- Choose Red or Blue for the introductory battle.
- Complete the introductory battle.
- Confirm that regular Single, Double and Multi formats are available.
- Earn Battle Points if desired.
- Attempt Super formats only after meeting their regular-format requirements.
Collect the optional Kukui reward and pursue further post-game goals
After visiting the Battle Tree, return to Professor Kukui’s laboratory to receive TM90 Substitute. This reward is separate from the introductory Red-or-Blue battle and is optional for completing the immediate post-game route.
Ultra Warp Ride is available for free exploration from the Altar of the Sunne. This is different from the mandatory story ride to Ultra Megalopolis. Wormhole color, distance, destination world, version and encounter requirements determine which Ultra Beasts and legendary Pokémon can appear. Check the requirements for a specific target before beginning a long search, and save before entering a desired legendary encounter.
Other optional targets include the Tapu encounters at their island ruins, the level 60 Necrozma encounter at Mount Lanakila if it has not already been captured, Zygarde-related activities and additional rewards connected with Colress. Episode RR is a separate extended post-game story. It becomes available after the Champion route and Ultra Beast event, but it is not required to reach the Battle Tree or complete this chapter’s immediate objective.
Keep separate lists for gift Pokémon, wild captures, version exclusives, trade requirements and event-only Pokémon. In Ultra Sun, Poni Grove contains Blacephalon, while Stakataka is the corresponding Ultra Moon exclusive.
- Return to Professor Kukui’s laboratory for TM90 Substitute if desired.
- Use Ultra Warp Ride for optional Ultra Beast and legendary encounters.
- Record Tapu, Necrozma, Zygarde and Colress objectives separately.
- Treat Episode RR as optional extended post-game content.
- Track trade-dependent and version-exclusive Pokémon separately.
Before you move on
- The post-Champion event has been triggered by leaving the house in Iki Town.
- Ancient Poni Path has been visited after becoming Champion.
- Type: Null and the Memory items have been received from Wicke, either at Ancient Poni Path or Aether Paradise after making storage space.
- Both Ultra Sun Blacephalon have been captured in Poni Grove.
- The route from Poni Plains toward Poni Coast is open.
- Poni Coast and Poni Gauntlet have been crossed.
- The Battle Tree has been entered and the introductory Red-or-Blue battle has been completed.
- Regular Battle Tree formats are available.
- TM90 Substitute has been collected from Professor Kukui if desired.
- Ultra Warp Ride, Tapu, Necrozma, Zygarde, Colress and Episode RR objectives have been recorded separately from the required post-game route.
References for this chapter
- Post-Game — Pokémon Ultra Sun and Ultra Moon Walkthrough
- Poni Grove — Pokémon Ultra Sun and Ultra Moon Walkthrough
- Pokémon Ultra Sun and Ultra Moon — Aether Foundation
- Pokémon Ultra Sun and Ultra Moon — Battle Tree
- Battle Tree — Bulbapedia
- Type: Null - Bulbapedia
- Episode RR - Pokémon Ultra Sun and Ultra Moon Walkthrough
Legendary and Mythical Targets — Solgaleo, Lunala, Necrozma and Version-Exclusive Legendaries
Pokémon Ultra Sun separates its mandatory Necrozma battles from its optional Necrozma capture, Solgaleo encounter and post-game Cosmog event. Dusk Mane Necrozma at the Altar of the Sunne and Ultra Necrozma in Ultra Megalopolis must be defeated and cannot be captured. A different level 65 Necrozma waits in the Mount Lanakila crater during the Pokémon League approach. After capturing it, you obtain the Ultranecrozium Z and Colress provides the N-Solarizer and N-Lunarizer. The level 60 Solgaleo at Mahalo Trail becomes available before the League after the late-game Gladion battle. After becoming Champion, an unfused Solgaleo lets you enter the reverse world at night through the Altar of the Sunne; in Ultra Sun, travel from the reverse-world altar through Ula’ula Meadow to Lake of the Sunne to receive a second Cosmog automatically.
Separate the three Necrozma encounters
At the Altar of the Sunne, Nebby becomes Solgaleo and Necrozma absorbs it. The resulting Dusk Mane Necrozma is a scripted level 50 opponent. It is a required battle, not a capture encounter, so do not waste the Master Ball or other Poké Balls there.
The next required fight occurs at the top of Megalo Tower in Ultra Megalopolis. Necrozma uses Ultra Burst and becomes Ultra Necrozma, a level 60 story opponent with boosted stats. It cannot be captured; defeat it to continue the story.
The catchable Necrozma is separate from both story battles. During the Mount Lanakila climb toward the Pokémon League, enter the crater and interact with the weakened Pokémon. When it asks you to share light from your Z-Power Ring, accept. The level 65 battle begins afterward. Save before the interaction, then use controlled damage and status support if available.
- Defeat Dusk Mane Necrozma at the Altar of the Sunne.
- Defeat Ultra Necrozma in Megalo Tower.
- Reach the Mount Lanakila crater during the League approach.
- Save before giving Z-Power to the weakened Necrozma.
Catch Solgaleo at Mahalo Trail before the League
After the Aether and Poni storyline, begin the Mount Lanakila approach. Battle Gladion near the mountain entrance. After the battle, he tells you that Lillie is waiting at Mahalo Trail.
Return to Melemele Island and enter Mahalo Trail from Iki Town. Follow the rebuilt bridge toward the Ruins of Conflict. Lillie and Solgaleo are waiting near the end of the trail. Speak with Lillie, then interact with Solgaleo to begin the level 60 encounter.
Save before interacting with Solgaleo. Lower its HP carefully and use sleep or paralysis if you can apply status without risking a knockout. False Swipe is useful. If you knock it out, reload the save made before the encounter instead of saving afterward.
This Solgaleo is available before the Pokémon League and is not restricted to post-game play. After you catch it, speak with Lillie to receive the Solganium Z.
- Defeat Gladion at the Mount Lanakila approach.
- Return to Mahalo Trail after Gladion directs you there.
- Save before interacting with Solgaleo.
- Catch or postpone the level 60 Solgaleo encounter.
- Receive the Solganium Z from Lillie.
Capture the separate Necrozma on Mount Lanakila
Continue through Mount Lanakila toward the League and enter the crater area. This encounter is not the Dusk Mane Necrozma fought at the Altar and is not Ultra Necrozma from Ultra Megalopolis.
Save before interacting with the weakened Necrozma. Accept the request to share Z-Power, then begin the level 65 battle. Bring controlled damage, a status move and healing items. Avoid poison and burn if possible because residual damage can defeat a one-time encounter between turns.
Use Ultra Balls as a general option and consider Timer Balls during a prolonged battle. The Master Ball is optional. If Necrozma is knocked out or the battle is otherwise lost, reload the pre-battle save.
After the capture, obtain the Ultranecrozium Z left beneath Necrozma. Colress then provides the N-Solarizer and N-Lunarizer, allowing the captured Necrozma to fuse with Solgaleo or Lunala.
- Save before activating the crater encounter.
- Capture the level 65 Mount Lanakila Necrozma.
- Obtain the Ultranecrozium Z.
- Receive the N-Solarizer and N-Lunarizer from Colress.
Fuse your own Dusk Mane Necrozma
Place the captured Mount Lanakila Necrozma and the Mahalo Trail Solgaleo in your party, or make both available through the Pokémon Storage System. Use the N-Solarizer from the Bag and select Necrozma and Solgaleo when prompted.
The result is your own Dusk Mane Necrozma. It is distinct from the Dusk Mane Necrozma defeated at the Altar: the story opponent never joins your party, while your fused Pokémon uses the separately captured Necrozma and Solgaleo.
Use the N-Solarizer again if you need to separate the fusion. Separation is required for the second Cosmog event because that event needs an unfused Solgaleo in the party. The Ultranecrozium Z can later enable Ultra Burst, but this is optional and is not needed to become Champion.
- Own the Mount Lanakila Necrozma.
- Own the Mahalo Trail Solgaleo.
- Use the N-Solarizer to create your own Dusk Mane Necrozma.
- Separate the fusion before attempting the second Cosmog event.
- Keep the Ultranecrozium Z if you want to use Ultra Burst.
Prepare for Ultra Beasts, Legendary Pokémon and Mythicals
Save before each one-time Legendary encounter. Carry controlled damage, status support, healing items and several types of capture Ball. Ultra Balls and Timer Balls are suitable general choices for Solgaleo, Necrozma and most ordinary Legendary Pokémon. Beast Balls should not be your default choice for ordinary Legendaries; they are designed for Ultra Beasts.
In Ultra Sun, Blacephalon is obtained through the post-game Ultra Beast mission connected with Poni Grove, not through ordinary white-wormhole exploration. Complete the required post-Champion dialogue and follow the mission route if you want this Ultra Sun-exclusive target.
Mythical Pokémon are generally not ordinary in-game encounters in Ultra Sun. A particular Mythical may require a trade, a prior distribution or another legitimate external acquisition method. Keep Mythical collection separate from the story and normal Ultra Warp Ride objectives.
- Bring controlled damage and status support.
- Carry Ultra Balls, Timer Balls and healing items.
- Complete the post-game Blacephalon mission if pursuing the Ultra Sun Ultra Beast targets.
- Plan trades or legitimate distributions for Mythical Pokémon.
Use Ultra Warp Ride for optional version-linked targets
After the story unlocks free Ultra Warp Ride exploration, use the portal at the Altar of the Sunne to enter Ultra Space. Collect energy during the ride, avoid obstacles and choose wormholes according to the Legendary or Ultra Beast target you want to pursue. These encounters are optional and are not required to become Champion.
Notable Ultra Sun version-linked Legendary targets include Ho-Oh, Raikou, Groudon, Latios, Dialga, Heatran, Reshiram, Tornadus and Xerneas. Ultra Moon has the corresponding version-linked targets such as Lugia, Entei, Kyogre, Latias, Palkia, Regigigas, Zekrom, Thundurus and Yveltal. Other targets are shared between versions.
Some encounters require specific partner Pokémon. Suicune requires Raikou and Entei; Kyurem requires Reshiram and Zekrom; Rayquaza requires Kyogre and Groudon; Landorus requires Tornadus and Thundurus; and Giratina requires Dialga and Palkia. Obtain or trade for those partners before searching for the dependent encounter.
Notable Ultra Sun exclusives include Alolan Vulpix, Houndour, Cottonee, Passimian, Turtonator, Buzzwole, Kartana and Blacephalon. Trade with Ultra Moon for missing version exclusives, opposite-version Legendaries and trade evolutions.
- Unlock free Ultra Warp Ride exploration.
- Obtain required partner Pokémon for conditional Legendary encounters.
- Save before entering a Legendary encounter area.
- Trade for Ultra Moon exclusives when needed.
Obtain the second Cosmog in Ultra Sun
First become Champion by defeating the Elite Four and Hau. The second Cosmog is unavailable during the pre-League portion of the game.
Make sure the level 60 Mahalo Trail Solgaleo is unfused and in your party. If you combined it with your captured Necrozma, use the N-Solarizer to separate the fusion before continuing.
After Champion registration, return to the Altar of the Sunne at night. Interact with the reverse-world portal and choose to enter the reverse world. Solgaleo must be in your party for the event to function. The reverse world has its own inverted time cycle, so entering at the required nighttime condition in Alola is important.
From the reverse-world altar, travel to Ula’ula Meadow and continue to Lake of the Sunne. Follow the path to the altar at the end of the lake. In Ultra Sun, Lake of the Sunne is the correct destination for the second-Cosmog event; do not substitute Lake of the Moone.
At the altar, the event triggers automatically while Solgaleo remains in your party. Cosmog joins at level 5 without a capture battle. It can later evolve into Cosmoem and then Solgaleo in Ultra Sun.
- Register as Champion by defeating the Elite Four and Hau.
- Place the unfused level 60 Solgaleo in the party.
- Return to the Altar of the Sunne at night.
- Enter the reverse world through the altar portal.
- Travel from the reverse-world altar through Ula’ula Meadow to Lake of the Sunne.
- Receive the level 5 Cosmog automatically.
Track other optional Legendary encounters
After becoming Champion, pursue optional encounters such as Zygarde in Resolution Cave and the guardian deities at their respective ruins if desired. These are separate from the Necrozma, Solgaleo and Cosmog sequence.
For collection tracking, separate targets into four groups: mandatory story battles, the Mount Lanakila Necrozma and Mahalo Trail Solgaleo, Ultra Warp Ride targets, and version- or event-only Pokémon. This prevents optional collection work from being mistaken for requirements to complete the island challenge or become Champion.
The completed story does not require every Ultra Beast, wormhole Legendary, Tapu, version exclusive or Mythical Pokémon. Choose a personal endpoint such as Champion registration, a complete Ultra Sun collection, a traded collection or a competitive post-game team.
- Catch Zygarde if desired.
- Challenge the guardian deities if desired.
- Track Ultra Warp Ride targets separately.
- Trade for missing version exclusives and trade evolutions.
- Mark Mythical Pokémon as external collection goals when no ordinary encounter exists.
Before you move on
- Dusk Mane Necrozma has been defeated at the Altar of the Sunne.
- Ultra Necrozma has been defeated in Ultra Megalopolis.
- Gladion has been defeated at the Mount Lanakila approach.
- The level 60 Solgaleo encounter at Mahalo Trail has been completed or intentionally postponed.
- The separate level 65 Necrozma has been caught on Mount Lanakila, if desired.
- The Ultranecrozium Z has been obtained after the Mount Lanakila Necrozma encounter.
- Colress has provided the N-Solarizer and N-Lunarizer.
- Your captured Necrozma can be fused with Solgaleo to form your own Dusk Mane Necrozma.
- The post-game Blacephalon mission is complete, if pursuing the Ultra Sun Ultra Beast targets.
- Desired Ultra Warp Ride Legendary and Ultra Beast encounters have been captured or recorded for later.
- Champion registration is complete before attempting the second Cosmog event.
- The unfused level 60 Solgaleo is in the party when entering the reverse world.
- The reverse-world route from the Altar of the Sunne through the reverse-world altar, Ula’ula Meadow and Lake of the Sunne has been completed.
- The second Cosmog has joined automatically at level 5 in Ultra Sun.
- Ultra Moon exclusives, trade evolutions and event-only Mythical Pokémon have been traded for or intentionally excluded from the collection goal.
References for this chapter
- Pokémon Ultra Sun & Ultra Moon — The Reverse World
- Pokémon Ultra Sun & Pokémon Ultra Moon – Legendary Pokémon
- Mahalo Trail — Alola — Serebii Pokéarth
- Mount Lanakila — Alola — Serebii Pokéarth
- N-Solarizer — Serebii ItemDex
- List of in-game event Pokémon in Pokémon Ultra Sun and Ultra Moon
- Ultra Space — Bulbapedia
- Version-exclusive Pokémon in Ultra Sun & Ultra Moon
Battle Tree, Battle Spot and Competitive Basics
After becoming Alola League Champion in Pokémon Ultra Sun, travel through Poni Gauntlet to reach the Battle Tree. The facility provides Single, Double and Multi Battles, Battle Points, Battle Legend encounters and competitive move tutors. Begin with the Normal courses to learn the opponent pool and unlock the matching Super courses. Festival Plaza still supports local wireless Link Battles, but official Nintendo 3DS online services, including Battle Spot matchmaking, ended on April 8, 2024.
Reach the Battle Tree on Poni Island
Complete the main story and defeat the Elite Four and Champion Hau. Once you have entered the Hall of Fame, travel to Poni Island and proceed through Poni Gauntlet. Follow the route to its far end, clearing the trainer battles and using the available field obstacles and Ride Pokémon to continue forward. The Battle Tree is located beyond Poni Gauntlet.
When you first enter the Battle Tree area, Red and Blue introduce the facility. You choose one of them for an introductory battle: Red is associated with Single Battles and Blue with Double Battles. In Ultra Sun and Ultra Moon, Blue heals your party before this first battle. Treat this encounter as the facility introduction rather than as a separate unlock requirement for every format. Afterward, speak with the receptionist and select the format you want to challenge.
The Battle Tree restores your Pokémon between facility battles, but heal before entering Poni Gauntlet and carry recovery items for the route itself. The gauntlet is still a normal exploration area with trainer battles, and arriving with fainted or weakened Pokémon can force an unnecessary retreat.
- Become Alola League Champion.
- Cross Poni Gauntlet and reach its far end.
- Complete the introductory battle against either Red or Blue.
- Confirm that the Battle Tree receptionist offers the challenge formats.
Clear Normal courses and unlock Super courses
The Battle Tree has three formats: Single, Double and Multi. A Single challenge uses three Pokémon. A Double challenge uses four Pokémon. In Multi Battles, each trainer contributes two Pokémon, and you can either use a local wireless partner or select an AI partner. Start with Normal Singles if you are learning the facility, because the smaller team makes it easier to identify threats and preserve a winning Pokémon.
Each format has a Normal Course and a Super Course. A Normal Course consists of 20 consecutive battles. The twentieth battle is against the format’s Battle Legend: Red in Singles, Blue in Doubles, or both Red and Blue in Multi Battles. Completing a Normal Course unlocks the corresponding Super Course; clearing Normal Singles unlocks Super Singles, not every Super format at once.
Ultra Sun and Ultra Moon have different Normal-course rules from Sun and Moon. In an Ultra Sun Normal Course, your Pokémon are not forced down to level 50 and special Pokémon are permitted. Duplicate species and duplicate held items are still prohibited. Super courses use the stricter level-50 format and prohibit special Pokémon, in addition to retaining the duplicate-species and duplicate-item restrictions. Check your party before entering so an otherwise valid story team does not fail the facility’s rules.
Super Courses use tougher opponent sets and are intended for long streaks. They continue past the first 20 battles. The Super Battle Legend appears on battle 50, so reaching that point requires a reliable team rather than a single favorable matchup.
- Choose one format and clear its 20-battle Normal Course.
- Defeat the correct Battle Legend at battle 20.
- Verify that the matching Super Course is now available.
- For Super mode, prepare a legal level-50 team without special Pokémon, duplicate species or duplicate held items.
Build a reliable Singles or Doubles team
For Super Singles, use a three-Pokémon structure with defined jobs. A lead should either deal immediate damage, set up safely or control Speed. A second Pokémon should exploit openings and finish weakened opponents. The third should cover important weaknesses and provide a dependable answer when the first plan fails. Do not build three attackers that all lose to the same type or status effect.
Priority attacks such as Extreme Speed, Sucker Punch, Aqua Jet and Bullet Punch can finish faster targets, but priority is not a complete Speed plan. Abilities, typing, protection effects and disruptive moves can prevent a priority attack from working. Pair priority with natural Speed, Choice Scarf, Tailwind, paralysis support or another form of Speed control appropriate to the team.
For Super Doubles, select four Pokémon as working pairs. Protect is especially valuable because it lets a partner absorb attention, scout an attack or allow a field effect to take hold. Fake Out, Intimidate, Tailwind, Trick Room, redirection and Wide Guard are useful examples of support tools. Include at least one spread attack, but remember that spread moves deal reduced damage to each target and may miss important knockouts.
Every format needs an answer to bulky recovery and status tactics. Taunt, Substitute, strong setup, status immunity, reliable super-effective damage or a way to remove harmful status can prevent a long battle from becoming a streak-ending loss. Give each Pokémon a purpose and avoid assigning the same held item to multiple team members.
- Give every Pokémon a defined role.
- Include a Speed-control plan or carefully chosen priority.
- Carry an answer to recovery, paralysis, sleep or other disabling effects.
- For Doubles, test the team as pairs rather than only as individual Pokémon.
Train and test the team before a long streak
For repeated Super battles, use deliberate natures, abilities, moves and effort-value spreads. Individual values also matter when you are trying to survive specific attacks or secure specific knockouts. A tournament-perfect team is not required to begin, but a party with random effort values, weak moves and mismatched held items will be much less consistent.
Use Festival Plaza facilities, Poké Pelago, Isle Evelup and ordinary battles to prepare. Check the team’s actual damage and survival behavior in a Normal Course first. Normal opponents are still useful for finding flaws in the opening matchup, poor type coverage or a Pokémon that depends too heavily on inaccurate attacks.
Favor reliable moves when two options perform a similar job. A move with slightly less power but dependable accuracy can preserve a long streak. Give sweepers enough Speed for the opposing targets you expect to face, and give defensive Pokémon enough bulk to survive the super-effective attacks that threaten the team. A Z-Crystal or Mega Stone should support a planned win condition rather than being included only for appearance.
The Battle Tree heals the party after each completed battle, so damage between matches is not the main concern. The real risks are losing a key Pokémon, suffering an unexpected critical hit, missing a crucial move or entering the next battle without a way to handle the opponent’s set. When a run ends, review the exact cause of defeat before changing the entire team.
- Check nature, ability, moves, held item and effort values.
- Test the team in Normal mode first.
- Replace unreliable attacks when a consistent alternative exists.
- Record why a failed streak ended before making changes.
Earn Battle Points and use the Battle Tree rewards
The Battle Tree awards BP after every victory. In Normal mode, battles 1 through 10 award 1 BP each, battles 11 through 19 award 2 BP each, and defeating the Battle Legend on battle 20 awards 20 BP. In Super mode, the reward increases as the streak grows: battles 1 through 10 award 2 BP, battles 11 through 19 award 3 BP, battles 21 through 30 award 4 BP, battles 31 through 40 award 5 BP, battles 41 through 49 award 6 BP, and later wins award 7 BP. Defeating the Super Battle Legend on battle 50 awards 50 BP.
Use Normal mode to learn the format and collect your first BP. Once the team is stable, Super mode is the better sustained source because the rewards increase with the streak. The facility also provides special streak rewards on later visits, so check the receptionist after building a sufficiently long run.
The Battle Tree area has services for spending BP on competitive items and move tutors. Prioritize purchases that complete a specific team set: for example, a needed held item, a tutor move that fixes a coverage gap or a support move that makes a Doubles pairing function. Do not spend BP on an item with no role in the team you are currently building.
Mantine Surfing can also provide BP without risking a Battle Tree streak. Use it when you need a small amount for a particular purchase, but prepared Super-course victories are the more direct repeatable method for players pursuing larger BP totals.
- Use Normal mode for initial practice and BP.
- Attempt Super mode after the team has a clear plan.
- Defeat battle 20 in Normal mode for the larger Normal-course reward.
- Work toward battle 50 in Super mode for the Super Battle Legend and 50 BP.
- Spend BP on an item or move tutor that completes a planned team upgrade.
Use Festival Plaza for available multiplayer options
Festival Plaza contains the Battle menu. During the original service period, Battle Spot provided online matchmaking and Link Battle handled direct battles. Nintendo discontinued Nintendo 3DS online play and other online communication functions at 5 p.m. Pacific time on April 8, 2024. Therefore, official Battle Spot matchmaking, online competitions and other online-dependent Festival Plaza battle functions are not available through Nintendo’s current service.
Local wireless Link Battles remain the practical multiplayer option when another compatible Nintendo 3DS and game are nearby. Open Festival Plaza, choose Battle, select Link Battle and follow the connection instructions on both systems. Agree on the battle format and restrictions before starting; this prevents confusion between a local battle’s settings and the Battle Tree’s Super-course rules.
For solo practice, use the Battle Tree or Battle Agency. For local testing, reproduce the rules you intend to practice, including team size, held-item limits and any level restrictions. Do not treat modern online formats from later Pokémon games as if they were Ultra Sun Battle Tree rules.
- Use the Battle Tree for solo battles and BP.
- Use Festival Plaza Link Battle for nearby local wireless play.
- Do not rely on official Battle Spot matchmaking in 2026.
- Match local battle settings to the format you are practicing.
Before you move on
- The Battle Tree is accessible at the far end of Poni Gauntlet after becoming Alola Champion.
- You have completed at least one 20-battle Normal Course and defeated its Battle Legend.
- The corresponding Super Course is unlocked.
- You have a legal, tested three-Pokémon Singles team or four-Pokémon Doubles team with assigned roles and held items.
- You have earned BP and used it on at least one planned item or move-tutor upgrade.
- You can start a local Festival Plaza Link Battle with another nearby compatible Nintendo 3DS, while understanding that official online Battle Spot access is unavailable.
Version Exclusives, Trading and Completing the Alola Pokédex
Pokémon Ultra Sun’s expanded Alola Pokédex contains 403 numbered entries. The normal in-game completion target covers entries 001 through 400, ending with Necrozma. Magearna, Marshadow and Zeraora occupy entries 401 through 403 and should be tracked separately as optional Mythical collection goals. Completing the standard target requires more than catching wild Pokémon: you must evolve families, revive fossils, obtain version-exclusive species, register Ultra Beasts and wormhole legends, and complete legitimate trades for Ultra Moon counterparts. Keep ordinary species, Totem-sized rewards, legendary encounters and Mythicals on separate checklists so a special form or event Pokémon is not mistaken for a required ordinary entry.
1. Set the correct completion target
Open the Rotom Pokédex and review the Melemele, Akala, Ula’ula and Poni sections. For the standard Alola Pokédex completion goal, register entries 001 through 400 as caught, with entry 400 being Necrozma. A seen registration is not enough. Capture the Pokémon, evolve it, receive it in a trade, or obtain it through a legitimate in-game gift so the Pokédex marks it as caught.
Entries 401 Magearna, 402 Marshadow and 403 Zeraora are outside the ordinary 400-entry target. Track them on a separate Mythical checklist. Magearna can be obtained through the special QR-based gift process after becoming Champion. Marshadow and Zeraora were distributed through limited events rather than normal wild encounters, so their availability depends on an official distribution, an existing legitimate transfer or a legitimate trade. Do not postpone the standard Pokédex completion while looking for an expired event.
- Use the Rotom Pokédex to identify missing entries and habitats.
- Confirm that needed entries are marked caught rather than merely seen.
- Track Magearna, Marshadow and Zeraora separately from entries 001 through 400.
2. Register Ultra Sun’s ordinary exclusives and five fossil families
The main ordinary families available specifically in Ultra Sun include Alolan Vulpix and Ninetales, Houndour and Houndoom, Cottonee and Whimsicott, Red-Striped Basculin, Golett and Golurk, Rufflet and Braviary, Clauncher and Clawitzer, Turtonator, Passimian, and the Tyrunt and Tyrantrum line.
Ultra Sun’s listed fossil families are five: Omanyte and Omastar, Anorith and Armaldo, Cranidos and Rampardos, Tirtouga and Carracosta, and Tyrunt and Tyrantrum. The fossil items or restoration availability are version-linked, but the Pokémon can be received by trading the relevant fossil or revived Pokémon from another compatible game. Visit the Fossil Restoration Center on Route 8 after obtaining a fossil, then evolve each restored Pokémon if you want every entry in its family.
Ultra Sun also has version-linked legendary and Ultra Beast targets. Record Raikou, Ho-Oh, Latios, Groudon, Dialga, Heatran and Xerneas in a separate wormhole checklist. Its version-specific Ultra Beasts are Buzzwole, Kartana and Blacephalon. These encounters are not ordinary route exclusives, so catching one does not automatically complete the other version-linked entries.
- Catch or trade for each Ultra Sun ordinary-exclusive family.
- Complete all five Ultra Sun fossil families: Omanyte, Anorith, Cranidos, Tirtouga and Tyrunt.
- Revive each fossil and evolve the resulting Pokémon where necessary.
- Track Ultra Sun legendary and Ultra Beast encounters separately.
3. Keep Totem-sized rewards separate from ordinary entries
Do not call regular Alolan Marowak an Ultra Sun-only species. Ordinary Alolan Marowak is a normal Pokédex species; the version-linked difference concerns special Totem-sized rewards and certain encounter tables.
After collecting 20 Totem Stickers, go to Heahea Beach and speak with Samson Oak when he contacts you. Ultra Sun awards Totem Gumshoos, while Ultra Moon awards Totem Alolan Raticate. Totem-sized Pokémon have enlarged models and special Totem status, but they do not replace the ordinary Gumshoos or Alolan Raticate entries.
Further sticker milestones provide additional Totem-sized rewards. Ultra Sun’s reward list includes Alolan Marowak, Lurantis, Vikavolt, Mimikyu, Ribombee and Kommo-o. Treat these as optional collection targets unless your personal goal is to obtain every Totem reward. Keep Totem Gumshoos separate from ordinary Gumshoos and from ordinary Alolan Marowak in your records.
- Record ordinary species separately from Totem-sized versions.
- Collect Totem Gumshoos from Samson Oak at the 20-sticker milestone if desired.
- Do not count a Totem reward as a replacement for an ordinary Pokédex entry.
4. Trade for Ultra Moon counterparts
The major Ultra Moon counterpart families include Alolan Sandshrew and Sandslash, Electrike and Manectric, Baltoy and Claydol, Vullaby and Mandibuzz, Skrelp and Dragalge, Drampa, Oranguru and the Amaura and Aurorus fossil line. Ultra Moon also supplies Kabuto, Lileep, Shieldon and Archen fossil families. Ultra Moon’s version-linked legendary and Ultra Beast targets include Entei, Lugia, Latias, Kyogre, Palkia, Regigigas, Yveltal, Pheromosa, Celesteela and Stakataka, subject to the relevant Ultra Warp Ride requirements.
Prepare a specific trade list from the Rotom Pokédex instead of requesting random Pokémon. A duplicate Ultra Sun exclusive, a bred starter, a spare fossil Pokémon or an extra fossil item is useful trade material. For trade evolutions, attach the required item before trading and use a trusted partner who will return the evolved Pokémon. Check the Pokédex immediately after the exchange.
Nintendo 3DS online communication features for compatible games, including GTS, Wonder Trade and online Festival Plaza trading, ended on April 8, 2024. Current players should use local wireless trading with another compatible Nintendo 3DS and game, or arrange a trusted in-person exchange. Do not build a completion plan around the old online GTS.
- List every missing Ultra Moon counterpart before arranging trades.
- Use local wireless trading or another legitimate compatible-game method.
- Confirm each received entry is registered as caught.
5. Fill evolution, breeding and fossil gaps
Many missing entries can be completed without another version. Level up Pokémon that evolve normally, use the correct evolutionary stones, raise friendship when required and check special location rules. Crabrawler, for example, evolves when leveled up at the correct location on Mount Lanakila rather than through an ordinary level threshold alone.
For trade evolutions, write down the required held item before beginning. Breed or catch a duplicate whenever possible so the original remains in your PC. This is especially useful for rare Pokémon, a Pokémon with a preferred nature or a specimen carrying a move or form you want to preserve.
Fossil items can be traded locally as held items. The receiving player can take the item to the Route 8 Fossil Restoration Center and revive it in the other version. This is a practical way to obtain missing fossil families without surrendering your only restored specimen. Remember that the Ultra Sun fossil checklist contains five families, not four: Omanyte, Anorith, Cranidos, Tirtouga and Tyrunt.
- Check each family’s exact evolution method before using an item or arranging a trade.
- Breed or catch a duplicate before exchanging a valuable Pokémon.
- Trade fossil items when possible, then revive them in the receiving version.
- Register both base and evolved fossil species.
6. Track legends and Ultra Beasts individually
After the story unlocks the Ultra Warp Ride, revisit the wormholes to search for legendary Pokémon and Ultra Beasts. Ultra Sun’s version-specific Ultra Beasts are Buzzwole, Kartana and Blacephalon. The opposite version’s Pheromosa, Celesteela and Stakataka require a trade from Ultra Moon or another legitimate compatible source.
Some legendary wormholes require another specific legendary in the party. Check the requirement before repeatedly searching for the portal. Save before entering a one-time encounter, bring a move that can inflict sleep or paralysis, and lower HP carefully. False Swipe is useful when the target is vulnerable to it, but status and HP-control plans still need to account for each Pokémon’s abilities and moves.
Beast Balls are appropriate for Ultra Beasts. For ordinary legendary Pokémon, standard Poké Balls combined with status and careful HP reduction may be more practical. Record each caught legendary and Ultra Beast separately because completing the story does not register every wormhole encounter automatically.
- Unlock the Ultra Warp Ride before beginning the wormhole checklist.
- Check party requirements for paired legendary encounters.
- Save immediately before one-time legendary or Ultra Beast battles.
- Trade for opposite-version entries through a legitimate local method.
7. Handle Mythicals and Bank transfers carefully
Magearna is obtained through a special QR-based gift encounter rather than a normal wild battle. After scanning the appropriate code and meeting the game’s requirement to become Champion, collect Magearna at the Hau’oli City Shopping Mall. Marshadow and Zeraora are not standard Ultra Sun captures; pursue them only through documented official distributions, legitimate transfers or trusted trades. Avoid modified Pokémon if you plan to preserve the collection or transfer it later.
Pokémon Ultra Sun can transfer compatible Pokémon to Pokémon Bank, and Pokémon Bank can transfer compatible Pokémon to Pokémon HOME. The Bank-to-HOME transfer is one-way: a Pokémon moved to HOME cannot return to Pokémon Bank or Pokémon Ultra Sun. Complete local evolution, form, move and Pokédex checks before transferring anything important. Remove held items and verify that the destination supports the form you intend to keep.
Nintendo lists Pokémon Bank service as ending Thursday, February 25, 2027, at 7:00 p.m. Pacific Time. Transfers from Bank to HOME will also stop after that deadline. A Pokémon HOME Premium Plan is required for Bank-to-HOME transfers, and Pokémon Bank is no longer available for new download. If you already have access, treat the transfer as time-sensitive.
- Keep Mythical Pokémon outside the required 400-entry target.
- Finish local form, evolution and move checks before transferring.
- Remember that Bank-to-HOME transfers cannot be reversed to Ultra Sun.
- Complete any intended Bank-to-HOME transfer before February 25, 2027, at 7:00 p.m. Pacific Time.
Before you move on
- The Rotom Pokédex records entries 001 through 400 as caught, ending with Necrozma.
- Ultra Sun’s ordinary exclusive families have been caught, evolved or obtained through legitimate trades.
- All five Ultra Sun fossil families have been completed: Omanyte, Anorith, Cranidos, Tirtouga and Tyrunt, including their evolved forms.
- Totem Gumshoos is recorded separately from ordinary Gumshoos and ordinary Alolan Marowak.
- Ultra Moon counterpart families have been registered through local wireless trading or another legitimate compatible-game method.
- Trade evolutions, fossil lines, version-linked legendary encounters and Ultra Beast entries have been checked individually.
- Magearna, Marshadow and Zeraora are tracked separately as optional Mythical goals.
- Important Pokémon remain in Ultra Sun, or a deliberate Bank-to-HOME transfer has been completed after checking compatibility and the February 25, 2027 service deadline.
References for this chapter
- Pokémon Ultra Sun & Pokémon Ultra Moon – Version Exclusives
- Pokémon Ultra Sun & Pokémon Ultra Moon – Miscellaneous Version Exclusives
- Pokémon Ultra Sun & Pokémon Ultra Moon – Alola Pokédex
- Pokémon Ultra Sun & Pokémon Ultra Moon – Legendary Pokémon
- Pokémon Ultra Sun & Pokémon Ultra Moon – Ultra Wormholes
- Pokémon Ultra Sun & Pokémon Ultra Moon – Totem Stickers
- Pokémon Ultra Sun & Pokémon Ultra Moon – Gift Pokémon
- Announcement of Discontinuation of Online Services for Nintendo 3DS and Wii U Software
- Pokémon Bank End of Service
- About connecting Pokémon HOME to different games
Side Activities: Mantine Surfing, Alola Photo Club and Useful Mini-games
Pokémon Ultra Sun includes several optional activities that can provide Beach Points, affection, items, services, cosmetic rewards and extra practice. Mantine Surf is the most useful during the story because it provides the required route from Melemele Island to Akala Island and later supplies BP for optional purchases. Alola Photo Club raises a participating Pokémon’s affection and unlocks photographs, backgrounds and decorations. Poké Pelago, Festival Plaza, Rotom powers, Poké Finder, Battle Royal and Battle Agency can be used whenever convenient, but none is required to clear the Ultra Recon Squad storyline, defeat the Elite Four or become Champion.
Complete the required Mantine Surf trip to Akala
After you defeat Hala in the Melemele Grand Trial, complete the introductory Alola Photo Club visit in Hau'oli City. Follow the next story instructions until Hau directs you to Big Wave Beach on Melemele Island. Speak to the staff there and begin the Mantine Surf course. This first run carries you across the water to Heahea Beach on Akala Island; it is the only Mantine Surf run required for the main campaign.
During a run, guide Mantine across the waves, avoid obstacles and perform tricks when you launch from a wave. The game rewards successful tricks and landings with a higher score. Do not treat the opening course as a high-score examination. If you fall or finish with a modest score, continue normally: the story route still advances when you arrive at Heahea Beach.
After reaching Akala, the other Mantine Surf spots become available as you reach their islands. The four courses are Big Wave Beach on Melemele Island, Heahea Beach on Akala Island, Ula'ula Beach on Ula'ula Island and Poni Beach on Poni Island. They can be replayed later, so you can postpone serious score attempts until your main team is established or until after becoming Champion.
- Finish the Melemele Grand Trial before expecting the story Mantine Surf trip to open.
- Use Big Wave Beach to travel from Melemele to Heahea Beach when Hau directs you there.
- Do not repeat the course merely to improve the opening score.
Earn BP and claim the optional Surfing Pikachu reward
Completed Mantine Surf courses award Beach Points, generally referred to as BP in guides and in post-game planning. The amount depends on the quality of the run. These points are useful for optional Battle Tree purchases and move-tutor services, but they are not needed to pay for trials, Grand Trials or the Pokémon League.
If you want the special Surfing Pikachu, beat the recorded high score at each of the four Mantine Surf spots. Once all four course records have been beaten, go to the Surfing Association office in Heahea City and speak with the appropriate staff member. The reward is a Pikachu that knows Surf. This is an optional completion goal and has no role in unlocking the Ultra Megalopolis events or the League.
For routine play, learn the basic trick timing, avoid forcing a trick near an obstacle and prioritize finishing the course. For score chasing, practice each course separately and use repeat runs to learn where the larger waves and obstacles appear. There is no need to delay the next trial while accumulating BP.
- Replay courses when you want BP, practice or a score challenge.
- Beat all four course records only if you want the Surfing Pikachu reward.
- Visit the Surfing Association office in Heahea City after meeting the four-record requirement.
Use Alola Photo Club for affection and cosmetic rewards
The Alola Photo Club has locations in Hau'oli City and Konikoni City. The first visit is part of the early story transition before the Mantine Surf trip to Akala. Enter the club, choose a Pokémon in your party, select a scene and take the requested photographs. You can finish the introductory session without spending time on detailed editing.
After the introduction, return whenever you want to photograph a party Pokémon. Simple Mode provides quick choices for the pose and framing. Advanced Mode lets you adjust more of the composition, including the Pokémon’s position, the player character’s pose and the camera angle. You can decorate selected photographs with stickers and frames, then review them in the in-game Photo Album.
Taking photographs with a Pokémon raises that Pokémon’s affection. This is optional and does not replace battle preparation, but it can be useful if you want affection-based battle effects or simply want to build a relationship with a story partner. New backgrounds and decorative options become available through normal exploration, story progress and certain Pokémon-related conditions. There is no need to collect every background during the first campaign.
- Complete the first Hau'oli City Photo Club session before traveling to Akala by Mantine Surf.
- Use a regular team member if you want the affection benefit on a Pokémon you plan to keep.
- Review or edit photographs from the Photo Album when convenient.
Set up Poké Pelago for gradual supplies
Poké Pelago becomes accessible through the menu and uses Pokémon stored in your PC. Its different isles support gradual activities such as growing Berries, collecting items, hatching Eggs and training Pokémon through timed sessions. Start an activity before entering a long route, trial sequence or dungeon, then return later to collect the results.
Poké Pelago is most useful as background support. Berry cultivation can supply healing or battle items, Isle Aphun can produce items, Isle Evelup can provide slow training benefits and Isle Avue can help with Egg hatching. These activities are not immediate replacements for leveling, healing at a Pokémon Center or preparing a team for a Totem Pokémon.
You may ignore Poké Pelago until after the main story without losing mandatory progress. Use it when you have spare PC Pokémon and want gradual benefits rather than when you need an urgent solution before the next battle.
- Begin a Berry, item, Egg or training activity before returning to the story.
- Collect completed activities when you next visit the menu.
- Do not wait for Pelago results when a trial or Grand Trial is ready.
Use Festival Plaza, Rotom powers and optional battle facilities
Festival Plaza provides multiplayer functions, shops and facilities that can exchange Festival Coins for optional services and items. Its usefulness depends on how you develop the Plaza and whether you use local or online features. It is safe to postpone if you are playing offline or concentrating on the story.
Rotom Dex can offer Roto Powers after you interact with it. Depending on the power, these can improve experience gains, increase prize money, restore PP or assist with catching Pokémon. Accept a useful power when it appears, but do not stop the campaign waiting for one specific result.
The Poké Finder lets you take pictures of Pokémon at designated photo spots and is optional. Improving its version unlocks stronger photo effects and can be a fun side goal, but it is not needed for the Pokédex or island challenge. Battle Royal at the Battle Royal Dome provides battle practice and optional rewards. After it becomes available, Battle Agency in Festival Plaza offers another optional battle mode with Festival Coin and rank-related rewards. Neither facility is required to become Champion.
- Use Festival Plaza when you want optional shops, services or multiplayer functions.
- Accept convenient Rotom Powers without reorganizing your campaign around them.
- Treat Poké Finder, Battle Royal and Battle Agency as optional practice or reward activities.
Before you move on
- You completed the introductory Alola Photo Club visit in Hau'oli City.
- You used Mantine Surf at Big Wave Beach to reach Heahea Beach on Akala Island.
- You know the locations of the four replayable Mantine Surf courses: Big Wave Beach, Heahea Beach, Ula'ula Beach and Poni Beach.
- You have earned or deliberately postponed Beach Points and understand that the four-course high-score challenge is optional.
- You claimed Surfing Pikachu from the Surfing Association in Heahea City if you defeated all four course records.
- You used or postponed the Photo Club, Poké Pelago, Festival Plaza, Rotom Powers, Poké Finder, Battle Royal and Battle Agency according to your preferred play style.
- You have not mistaken any of these activities for a requirement to clear the Ultra Recon Squad storyline, defeat the Elite Four or become Alola Champion.
References for this chapter
Common Sticking Points, Recovery and Final Checklist
Most failed trials and Grand Trials can be retried after healing, correcting the matchup and changing the party plan. Pokémon Ultra Sun has one normal save file, so save deliberately before trials, difficult battles and one-time or limited encounters. After becoming Champion, revisit Ancient Poni Path to receive Type: Null and the Memory items, then enter Poni Grove to pursue the two Ultra Sun Blacephalon. Save before beginning that encounter sequence: the game provides two available Blacephalon for the assignment, but a failed or knocked-out encounter should not be treated as automatically recoverable. Team Rainbow Rocket, Tapu encounters, Ultra Warp Ride legendary hunting and Battle Tree streaks are optional beyond the stated main-campaign checkpoint.
Recover after losing a trial or Grand Trial
A defeat does not erase completed trials, Grand Trials, opened routes, received Z-Crystals or other permanent progression. Heal at the Pokémon Center where you resume, restore Power Points, cure status conditions and reorder the party before trying again. Pokémon Ultra Sun has one normal save file, so it cannot provide a primary run and an in-game recovery slot. Save before a rematch only after your party and supplies are ready; that single file is the save you will continue using.
For a Totem battle, identify the immediate threat before choosing targets. Its ally may provide weather, Intimidate, stat boosts, status effects or extra damage. Defeat the ally first when it is creating the dangerous condition; otherwise focus on the Totem if it is about to use a powerful move or gain another boost. For a Grand Trial, bring at least two attackers with useful coverage and a dependable switch-in instead of relying on one starter matchup.
If you lose to Hala, Olivia, Nanu or Hapu, return to the nearest Pokémon Center, adjust the lead and review the opponent’s weaknesses. A resistant switch, reliable status move, priority attack or more accurate move often fixes the problem more effectively than adding one level to every Pokémon.
- Heal at a Pokémon Center after the defeat.
- Restore PP and cure poison, paralysis, sleep and burn.
- Identify the Totem ally, move or matchup that caused the loss.
- Add a second attacker or defensive switch-in before retrying.
- Remember that there is only one normal save file.
Train efficiently when the difficulty rises
Use the newest route or post-trial area that you can reach safely. Later wild Pokémon and trainers provide more useful experience than repeatedly returning to Melemele. The Exp. Share can keep the party close in level, while safe switches let a weaker Pokémon participate without exposing it to a dangerous hit.
Do not grind automatically after every loss. First determine whether the problem was type coverage, speed, status, an inaccurate move, a poor held item or an opponent’s setup. Replace a weak move, teach coverage, change the lead or add a Pokémon that resists the troublesome attack. These changes can matter more than several additional levels.
If items were consumed before the defeat, only an earlier save can restore those exact items. Otherwise, replace them through shops or exploration, retrain through ordinary battles and attempt the fight again. Do not depend on glitches or external exploits for required progression.
- Train in the latest safe area available.
- Replace a bad matchup instead of grinding only one level.
- Carry healing and status-recovery items.
- Review moves, abilities and held items before the rematch.
- Save deliberately because there is no second in-game slot.
Unblock a missing post-game story event
After defeating the Elite Four and Hau, allow the Champion registration sequence to finish. When control returns, leave your room and then leave your house. The Ultra Recon Squad will direct you toward Poni Island. You may follow that prompt immediately or travel there later, but the post-game event must be triggered after the League victory rather than merely after reaching the League.
At Ancient Poni Path, go northeast to find Hau and Wicke. Speak with them to receive a Big Malasada, Type: Null and the Memory items. Type: Null is the gift from Gladion, and it is received before entering Poni Grove. If your party and PC boxes are full, Wicke moves the offer to Aether Paradise instead, so clear space or collect it there later.
If the scene does not start, confirm that the Elite Four and Hau were both defeated and that the Champion registration completed. Leave and re-enter your house, then revisit Ancient Poni Path. Rechecking the last story location and restarting the software are sensible troubleshooting steps; deleting the save is not.
- Finish the Elite Four, Hau battle and Champion registration.
- Return home and leave the house after the credits sequence.
- Revisit Ancient Poni Path and speak with Hau and Wicke.
- Receive Type: Null and the Memory items before entering Poni Grove.
- If the party and boxes are full, collect Type: Null at Aether Paradise.
Complete the Poni Grove Ultra Sun checkpoint carefully
From Ancient Poni Path, take the northeast exit into Poni Grove after becoming Champion. During the opening scene, the Ultra Recon Squad gives you Beast Balls and explains the Ultra Beast assignment. In Ultra Sun, the version-exclusive encounter is Blacephalon; Stakataka belongs to Ultra Moon. Two Blacephalon are available for the assignment, while Hau handles the third Ultra Beast involved in the scene.
Before searching the tall grass, heal, place a Pokémon with False Swipe or another safe damage option in front and prepare sleep or paralysis if available. Blacephalon is Fire/Ghost and can deal heavy special damage. A Pokémon with Damp can also prevent the self-damaging effect of Mind Blown, but do not build the entire plan around one ability if you have safer capture options.
Save before beginning the encounter sequence. Catch both available Blacephalon if you want the complete Ultra Sun target or one specimen to keep and one to trade. The game’s assignment is limited to those two catches, so do not assume that a knockout, fleeing encounter or other failed attempt will automatically restore the encounter. If preserving the encounter matters, use the pre-encounter save rather than proceeding on the assumption that the game will provide another chance.
When the Poni Grove assignment has ended, the game returns you home and the next post-game scene becomes available. Ultra Warp Ride hunting, Tapu encounters and legendary wormhole targets are separate optional goals.
- Visit Ancient Poni Path after becoming Champion.
- Receive Type: Null and the Memory items from Wicke.
- Enter Poni Grove and receive the Beast Balls.
- Save before beginning the Blacephalon encounter sequence.
- Catch both available Ultra Sun Blacephalon if they are part of your target.
- Confirm that the Poni Grove assignment has ended before moving to later post-game activities.
Treat Team Rainbow Rocket as optional Episode RR content
After the Poni Grove sequence, leaving your house can trigger Sophocles’s report that Festival Plaza has been taken over. Enter Festival Plaza and follow his instructions to restore control. The initial Battle Agency encounter uses the Battle Agency setup rather than your ordinary story party. Defeat the required Team Rainbow Rocket Grunt, then follow the remaining scenes if you want to continue Episode RR.
Episode RR is optional for this guide’s completion goal. It is not required to become Champion, receive Type: Null, complete the Poni Grove Blacephalon assignment or reach the Battle Tree. Complete it for the additional post-game story, battles and Festival Plaza content; otherwise, leave it for later without affecting the main checklist.
Do not substitute the motel-based Looker and Anabel Ultra Beast mission from the original Pokémon Sun and Moon. Ultra Sun uses its own post-game structure, including the Poni Grove Ultra Beast assignment and Episode RR.
- Start Episode RR after the Poni Grove event is complete.
- Restore Festival Plaza by defeating the required Team Rainbow Rocket Grunt.
- Treat the rest of Episode RR as optional for this guide’s completion goal.
- Do not confuse Ultra Sun’s Episode RR structure with the original Sun and Moon post-game mission.
Reach the Battle Tree and choose longer-term goals
After completing the League and the required Poni Grove Ultra Beast assignment, travel through the northern Poni areas to Poni Gauntlet. Heal before entering and carry Revives, Full Restores and status cures. Clear Poni Gauntlet to reach the Battle Tree. Its trainers use strong teams, so a fast attacker, a sturdy switch-in, reliable type coverage and an answer to status or setup are better starting points than a party built only for the story.
The Battle Tree offers Single, Double and Multi formats. Each format begins with a standard course of 20 consecutive battles. Win the twentieth battle and defeat that format’s Battle Legend to unlock its corresponding Super format. Super Single, Super Double and Super Multi therefore require separate preparation and separate standard-course victories; one 20-win streak does not unlock every Super format.
Battle Points are awarded for victories and can support later item, tutor and competitive-preparation goals. For completionism, finish the Alola Pokédex and trade for Ultra Moon exclusives. For collection, pursue Tapu Pokémon, Ultra Warp Ride legendaries and alternate forms. For competitive preparation, build a small roster around dependable held items, speed control, priority and consistent damage rather than training every species at once.
- Reach Poni Gauntlet after becoming Champion and completing the Poni Grove assignment.
- Clear Poni Gauntlet and enter the Battle Tree.
- Win 20 consecutive standard battles in a chosen format and defeat its Battle Legend.
- Earn BP through consecutive victories.
- Choose a next project: Pokédex completion, Ultra Warp Ride hunting, Episode RR or Battle Tree preparation.
Before you move on
- The Ultra Megalopolis sequence and Ultra Necrozma confrontation are cleared, and the credits have played.
- The Elite Four and Hau have been defeated, and the player is registered as Alola Champion.
- Ancient Poni Path has been revisited after the credits.
- Type: Null and the Memory items have been received from Wicke, either at Ancient Poni Path or through the full-box fallback at Aether Paradise.
- Poni Grove has been entered and the two available Ultra Sun Blacephalon have been caught if the complete post-game target is being pursued.
- The Poni Grove Ultra Beast assignment has concluded without requiring Episode RR.
- If desired, Festival Plaza has been restored after the optional Team Rainbow Rocket takeover.
- If desired, the Battle Tree has been reached through Poni Gauntlet and a chosen format has been prepared.
- Desired Ultra Sun exclusives are caught, while missing Ultra Moon species are obtained through legitimate trades.
- A next project has been selected: Alola Pokédex completion, Ultra Warp Ride legendaries, Episode RR, Battle Tree preparation or casual collection.
References for this chapter
- Pokémon Ultra Sun Official Instruction Booklet
- How to Save Your Game: Pokémon Sun, Moon, Ultra Sun, and Ultra Moon — Nintendo Support
- Post-Game — Pokémon Ultra Sun and Ultra Moon Walkthrough
- Poni Grove — Pokémon Ultra Sun and Ultra Moon Walkthrough
- Pokémon Ultra Sun and Ultra Moon — Ultra Beasts
- Pokémon Ultra Sun and Ultra Moon — Battle Tree
- Ancient Poni Path — Bulbapedia
- Pokémon Ultra Sun and Ultra Moon — Aether Foundation
Finishing up
You have defeated the Elite Four on Mount Lanakila, defeated Hau in the first Champion battle, and viewed the ending and credits.
You have completed the Poni Island progression: Exeggutor Island, Hapu’s Grand Trial, the Altar of the Sunne sequence, the Dusk Mane Necrozma battle, Ultra Megalopolis, Ultra Necrozma, Mina’s Trial and the route to Mount Lanakila.
You have cleared the required Melemele, Akala, Ula’ula and Poni trials and Grand Trials, including Mina’s Trial and Hapu’s Grand Trial.
You have unlocked the primary post-game facilities covered here, including the Poni Grove Blacephalon event, Ultra Warp Ride hunting and the Battle Tree. Battle Spot and other Nintendo 3DS online services are not required and are unavailable through Nintendo’s discontinued online service.
Optional completion goals include catching Mount Lanakila Necrozma, desired Ultra Beasts and wormhole Legendaries, completing Alola Pokédex entries 1–400, obtaining the second Cosmog at Lake of the Sunne in Ultra Sun’s reverse world, and obtaining version exclusives through legitimate local trades. Magearna, Marshadow and Zeraora are optional Mythical collection targets.
Choose your next gameScreenshots & video
Game imagery for reference. Follow the written chapters above for the route and strategies.
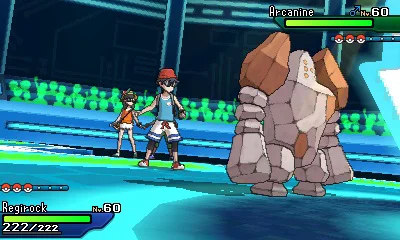
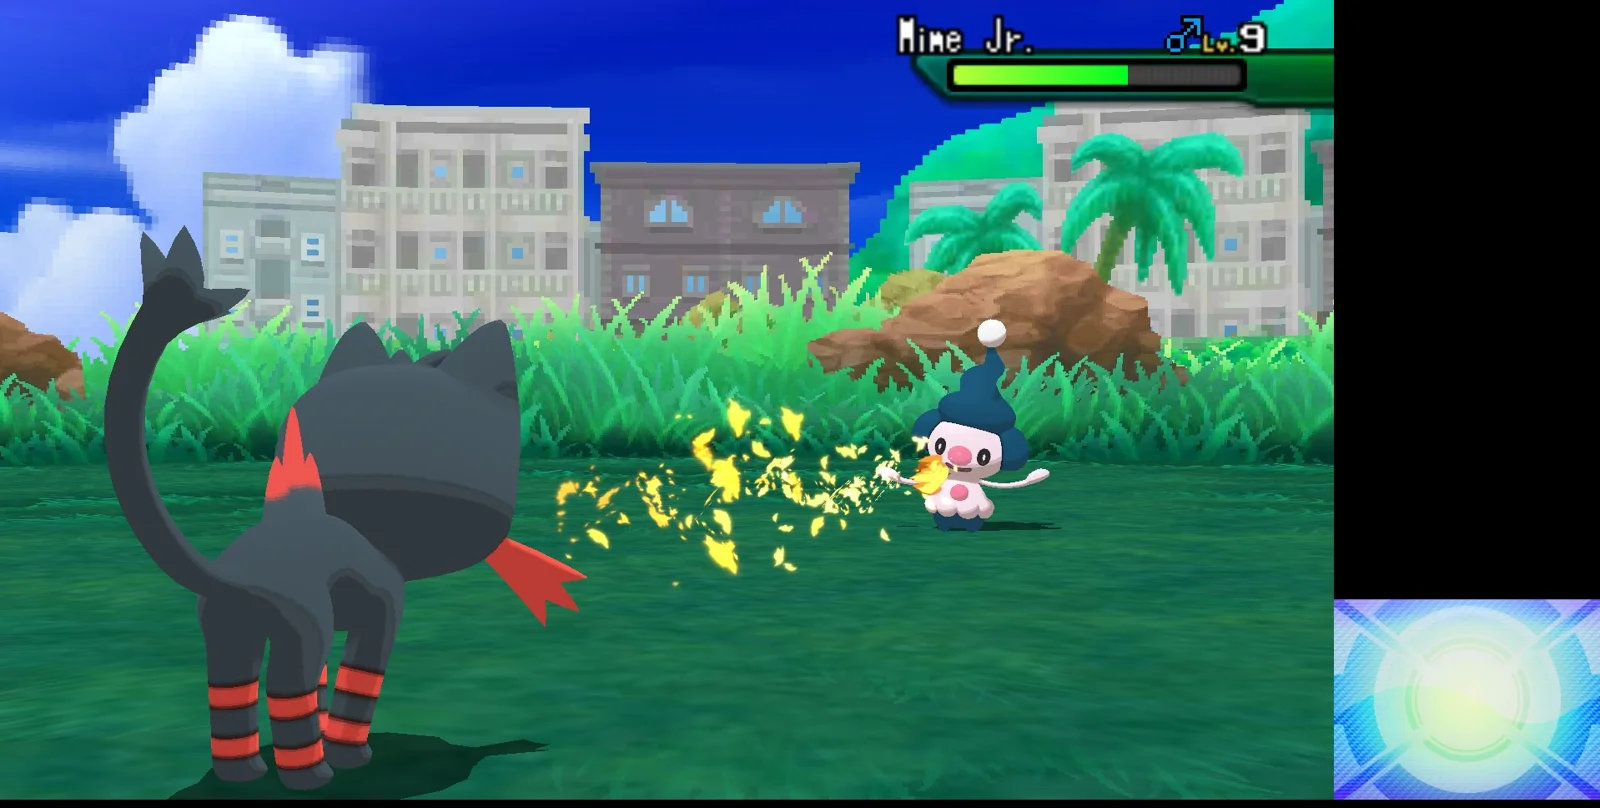
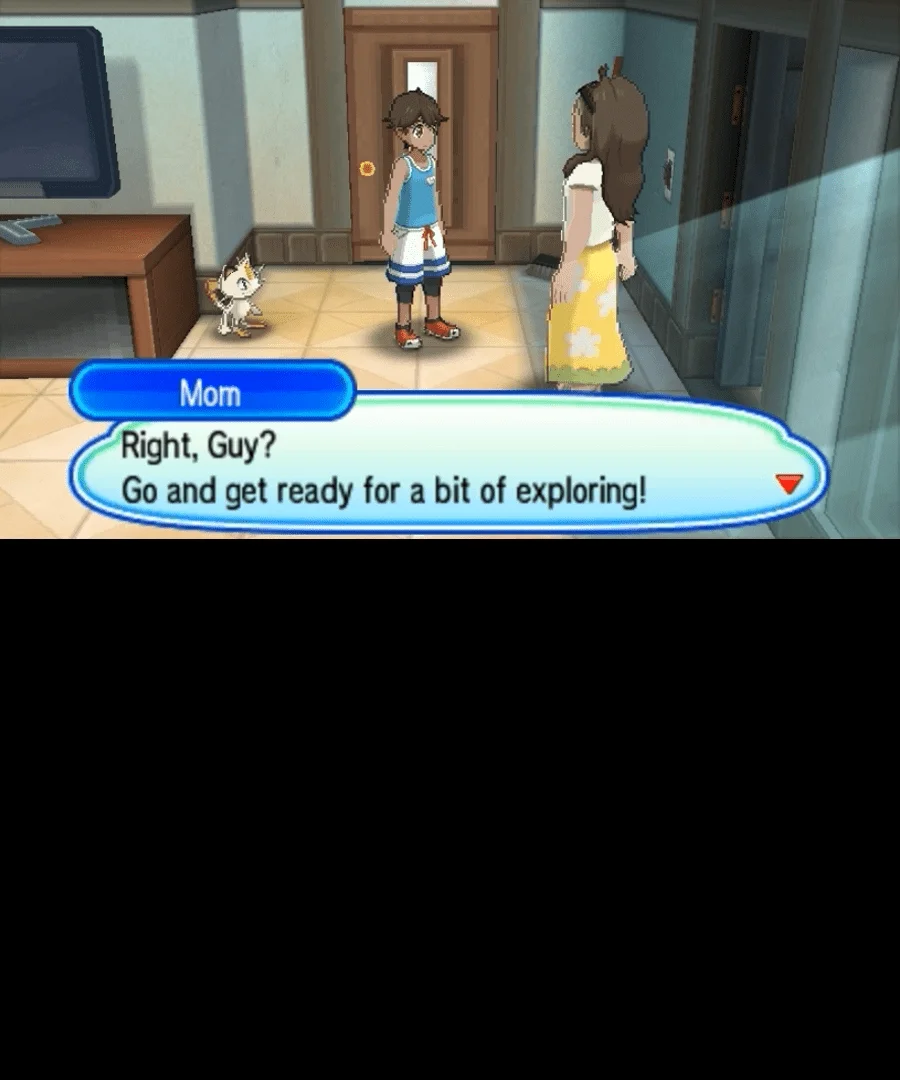
Sources & references
Our original guide draws on the references below. Check the edition at the top of this page before following controls or unlock requirements.
- Pokémon Ultra Sun Official Instruction Booklet
- How to Update Pokémon Ultra Sun and Pokémon Ultra Moon
- How to Back Up Save Data on a Nintendo 3DS Family System
- Do Nintendo 3DS Games Save to the SD Card/microSD Card/System Memory?
- Poké Ride
- Controls - Pokémon Ultra Sun Walkthrough and Guide
- Walkthrough: Pokémon Ultra Sun and Ultra Moon/Part 1 — Bulbapedia
- Walkthrough: Pokémon Ultra Sun and Ultra Moon/Part 2 — Bulbapedia
- Melemele Island Ilima’s Trial: Walkthrough — Samurai Gamers
- Pokémon Ultra Sun and Ultra Moon - Island Trials
- Verdant Cavern - Pokémon Ultra Sun and Ultra Moon Walkthrough — Thonky
- Pokémon Ultra Sun and Ultra Moon Walkthrough: Part 8
- Pokémon Ultra Sun and Ultra Moon Walkthrough: Part 9
- Lush Jungle
- Pokémon Ultra Sun and Ultra Moon Walkthrough: Part 12
- Aether Paradise
- Pokémon Ultra Sun and Ultra Moon — Aether Foundation
- Hano Beach - Pokémon Ultra Sun and Ultra Moon Walkthrough
- Heahea City - Pokemon Ultra Sun Walkthrough & Guide
- Pokémon Ultra Sun & Ultra Moon - Grand Trials
- Pokémon Ultra Sun & Ultra Moon — Team Skull
- Ula’Ula Island: Walkthrough Directory
- Ulaula Island Sophocles’s Trial: Walkthrough
- Ulaula Island Acerola’s Trial: Walkthrough
- Chapter 18: Po Town & Team Skull — Pokémon Ultra Sun / Ultra Moon walkthrough
- Aether Paradise - Pokémon Ultra Sun and Ultra Moon Walkthrough
- Poni Wilds - Pokémon Ultra Sun and Ultra Moon Walkthrough
- Ruins of Hope and Exeggutor Island - Pokémon Ultra Sun and Ultra Moon Walkthrough
- Vast Poni Canyon - Pokémon Ultra Sun and Ultra Moon Walkthrough
- Ultra Warp Ride - Bulbapedia
- Walkthrough: Pokémon Ultra Sun and Ultra Moon - Bulbapedia
- Ultra Megalopolis - Pokémon Ultra Sun Walkthrough & Guide - GameFAQs
- Island challenge and Mina’s Trial
- Pokémon Ultra Sun & Pokémon Ultra Moon – Legendary Pokémon
- Mina Trial Guide - Pokémon Ultra Sun and Ultra Moon
- Mount Lanakila - Pokemon Ultra Sun Walkthrough and Guide
- Mount Lanakila - Pokémon Ultra Sun and Ultra Moon Walkthrough
- Pokémon Ultra Sun and Ultra Moon - Gladion
- Mount Lanakila - Pokémon Ultra Sun and Ultra Moon
- Pokémon Ultra Sun Walkthrough — Pokémon League
- Pokémon Ultra Sun and Ultra Moon overview and story progression
- Pokémon League (Alola)/Title Defense
- Pokémon Ultra Sun & Ultra Moon — Elite Four
- Post-Game — Pokémon Ultra Sun and Ultra Moon Walkthrough
- Poni Grove — Pokémon Ultra Sun and Ultra Moon Walkthrough
- Pokémon Ultra Sun and Ultra Moon — Battle Tree
- Battle Tree — Bulbapedia
- Type: Null - Bulbapedia
- Episode RR - Pokémon Ultra Sun and Ultra Moon Walkthrough
- Pokémon Ultra Sun & Ultra Moon — The Reverse World
- Mahalo Trail — Alola — Serebii Pokéarth
- Mount Lanakila — Alola — Serebii Pokéarth
- N-Solarizer — Serebii ItemDex
- List of in-game event Pokémon in Pokémon Ultra Sun and Ultra Moon
- Ultra Space — Bulbapedia
- Version-exclusive Pokémon in Ultra Sun & Ultra Moon
- Pokémon Ultra Sun instruction manual — Nintendo
- Announcement of Discontinuation of Online Services for Nintendo 3DS and Wii U Software
- Pokémon Ultra Sun & Pokémon Ultra Moon – Version Exclusives
- Pokémon Ultra Sun & Pokémon Ultra Moon – Miscellaneous Version Exclusives
- Pokémon Ultra Sun & Pokémon Ultra Moon – Alola Pokédex
- Pokémon Ultra Sun & Pokémon Ultra Moon – Ultra Wormholes
- Pokémon Ultra Sun & Pokémon Ultra Moon – Totem Stickers
- Pokémon Ultra Sun & Pokémon Ultra Moon – Gift Pokémon
- Pokémon Bank End of Service
- About connecting Pokémon HOME to different games
- Pokémon Ultra Sun & Ultra Moon - Mantine Surf
- Mantine Surf - Bulbapedia
- Pokémon Ultra Sun and Ultra Moon - Bulbapedia
- Pokémon Ultra Sun & Ultra Moon - Alola Photo Club
- Photography - Bulbapedia
- Festival Plaza - Smogon University
- Walkthrough: Pokémon Ultra Sun and Ultra Moon/Part 7
- How to Save Your Game: Pokémon Sun, Moon, Ultra Sun, and Ultra Moon — Nintendo Support
- Pokémon Ultra Sun and Ultra Moon — Ultra Beasts
- Ancient Poni Path — Bulbapedia
About the game & collecting notes
- Platform
- Nintendo 3DS
Step-by-step campaign walkthrough for Pokémon Ultra Sun (Nintendo 3DS, North America). Covers every required island trial, the Ultra Recon / Necrozma story thread, Mount Lanakila and the newly established Alola League, plus post-game targets (Ultra Beasts, Battle Tree, version exclusives). Practical strategies, recovery tips and clear completion checks to finish the main story and immediate postgame goals.
Darryl Polo
Darryl Polo loves tinkering with emulation and revisiting retro games. He enjoys exploring how old favorites play on different setups and sharing what he learns along the way. At Joking Joystick, he writes about the games, hardware, and small discoveries that keep the hobby fun.
Our editorial standardsFound a step that needs another look? Help us improve this guide.