
Pokémon Sun (Nintendo 3DS) — Complete Main-Story Walkthrough (USA)
Step-by-step walkthrough for the original Pokémon Sun (North American Nintendo 3DS release). This guide takes the player through all seven island trials, including six captain-led trials and the captainless Dragon trial, all four island Grand Trials, the Aether Foundation and Team Skull story, the Poni Island flute and Dragon trial sequence, the Altar of the Sunne and Solgaleo encounter, Mount Lanakila, the Elite Four, Professor Kukui's Champion battle, and the ending. Optional immediate postgame content, including the Looker and Anabel Ultra Beast investigation, is clearly separated from the main-story completion route.

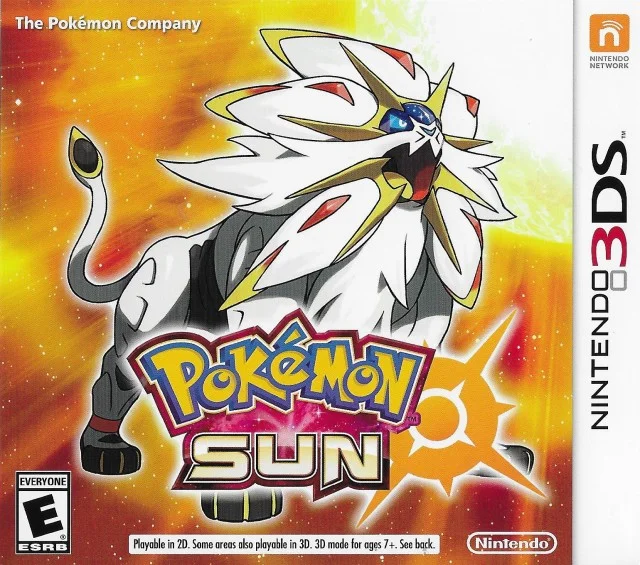
Find a copy
Pokémon Sun Nintendo 3DS
We may earn a commission if you buy through these links, at no extra cost to you. As an Amazon Associate I earn from qualifying purchases.
Opens retailer search results. Check the model, edition, seller, availability and current price before buying.
Before you begin
This guide covers the original 2016 Pokémon Sun for Nintendo 3DS, not Ultra Sun or Ultra Moon.
It follows all seven island trials in progression order, including six captain-led trials and the captainless Dragon trial, then covers all four Grand Trials, the Aether Foundation crisis, Poni Island, the Altar of the Sunne, the mandatory Solgaleo capture, Mount Lanakila, the Elite Four, Professor Kukui, and the ending.
The main-story completion point is becoming Alola Champion and finishing the ending sequence.
Solgaleo’s level 55 Altar encounter is a required story capture in Pokémon Sun. If you defeat or flee from it, the encounter immediately returns at the altar so you can try again; the story does not advance until it is caught.
The Looker and Anabel Ultra Beast investigation is included as optional immediate postgame content, not as a prerequisite for becoming Champion.
Set yourself up for the run
Confirm you are playing Pokémon Sun, not Ultra Sun or Ultra Moon.
The story, version legendary, trial rosters, and some encounters differ in the Ultra releases.
Keep frequent manual saves and save before major kahuna, altar, and legendary battles.
Use the standard in-game save function before important story encounters.
Bring a balanced team covering common weaknesses, including useful Water, Fire, Electric, Grass, Fighting, Flying, Psychic, Fairy, Ground, and Dark options as your team develops.
Trials and kahuna teams vary by type; versatility reduces retracing after a failed battle.
Learn the core Gen VII mechanics used throughout Sun: Totem Pokémon can call allies, Ride Pokémon are required for some navigation, and Z-Moves are integrated into trials and major battles.
Practice switching, status removal, and PP management.
Collect Poké Balls, healing items, status cures, and Repels if you want to reduce random encounters while traveling.
Solgaleo is the story legendary tied to Pokémon Sun.
Carry enough Poké Balls for the Altar encounter, but do not reserve a party slot; a captured Solgaleo can be sent to the party or a Box.
Start and Melemele Basics — Hau'oli Outskirts to Verdant Cavern
Complete Pokémon Sun’s opening sequence, choose your first partner, receive the Rotom Pokédex and Z-Ring, clear the Trainers’ School, and travel through Route 2 to Captain Ilima’s trial at Verdant Cavern. In Pokémon Sun, the trial uses Yungoos and Gumshoos. This chapter ends when the three preliminary den encounters are defeated and the path to the Totem’s den is open.
Rescue Nebby and choose your first partner
After naming your character, leave the house and follow the path toward Mahalo Trail. Continue across the bridge when the game directs you and approach Nebby, Lillie’s Cosmog, to trigger the rescue scene. The bridge collapses during this sequence and Tapu Koko intervenes; this is a story event rather than a normal battle you must win.
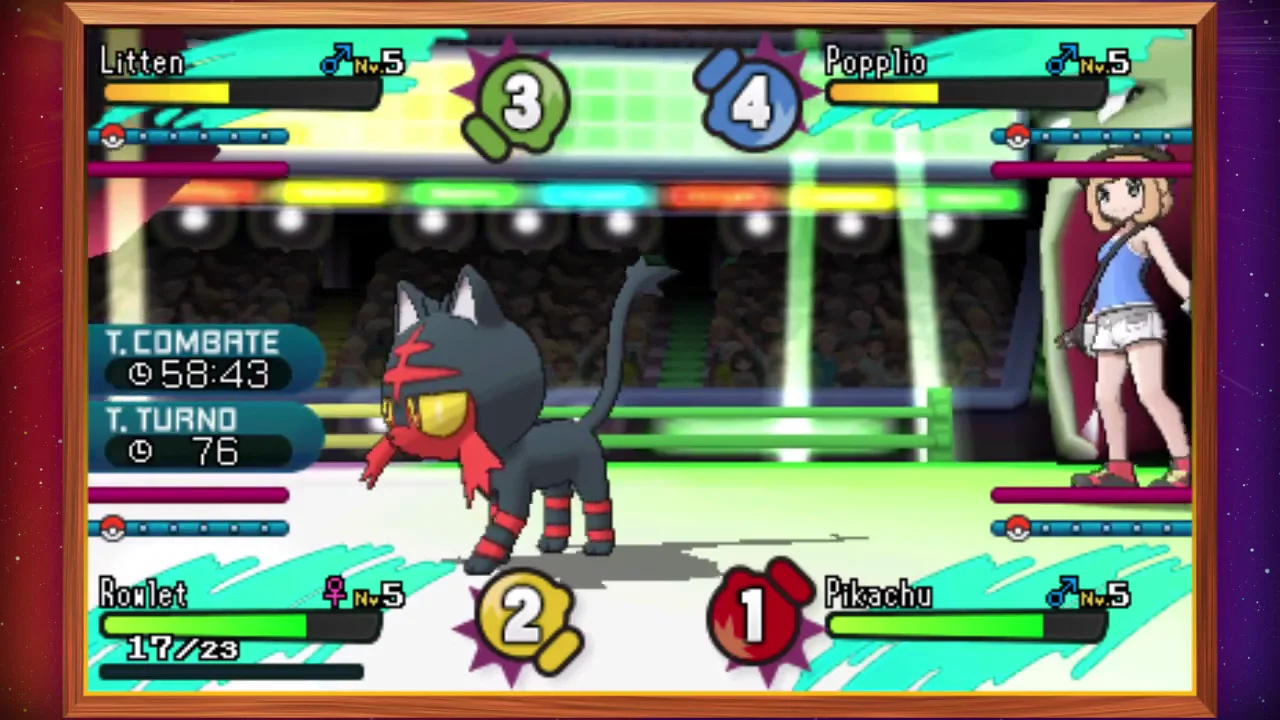
Return to Iki Town for the island festival. Professor Kukui explains the island challenge, and Kahuna Hala presents the three starter Pokémon: Rowlet, Litten, and Popplio. Choose one, then battle Hau immediately. Use your starter’s damaging move and check its summary if you want to confirm its moves before the fight. The battle is the first regular player-controlled battle of the adventure.
Follow the story back to your house, then leave again when the next morning begins. On Route 1, Kukui demonstrates catching a wild Pokémon. During a normal encounter, weaken the target, select Bag, choose a Poké Ball, and wait for the capture result. You may catch extra team members here, but no particular species is required for the main story.
- Rescue Nebby on Mahalo Trail.
- Choose Rowlet, Litten, or Popplio.
- Defeat Hau in Iki Town.
- Complete Kukui’s catching tutorial.
Receive the Rotom Pokédex and reach the Trainers’ School
Continue through the festival and the visit to Kukui’s laboratory. The story gives you the Rotom Pokédex, which records Pokémon information and becomes your main map and progress device. Visit the Pokémon Center once it becomes available so your team is fully healed before the school sequence.
At the Trainers’ School, speak with Kukui to begin the required challenge. Defeat the four student opponents around the school grounds. The students use low-level Pokémon, but this is a good opportunity to practice switching, move effectiveness, and checking the opposing Pokémon’s type before choosing an attack. If your team takes damage, speak with Lillie when she is available; she can restore your party during this section.
After the four students are defeated, report back as directed and battle Teacher Emily. Her team includes Magnemite and Alolan Meowth, so Ground- or Fighting-type attacks are useful when available. Winning completes the school challenge and rewards you with five Great Balls. Professor Kukui then gives you the Z-Ring. You cannot use a Z-Move until you obtain a compatible Z-Crystal later in Ilima’s trial.
- Receive the Rotom Pokédex.
- Defeat the four required Trainers’ School students.
- Defeat Teacher Emily.
- Receive the Z-Ring and five Great Balls.
Clear Hau’oli City and open Route 2
Follow Lillie through Hau’oli City and complete the required city scenes. The game guides you past the Pokémon Center, shops, Tourist Bureau, beachfront, and the Tauros blocking the route. Speak to the highlighted characters and follow the flags rather than trying to force your way through blocked streets.
At the marina, approach the Team Skull Grunt involved in the disturbance. Defeat the grunt, then battle Captain Ilima when he tests you. In Pokémon Sun, Ilima uses a Normal-type Smeargle. A Fighting-type move is especially effective, but any properly leveled starter can win with ordinary attacks. Ilima heals your party after the encounter.
Once the city sequence is complete, the northern route opens. Travel onto Route 2 and follow the road north. A Delibird leads you into the Berry Fields, where Team Skull is harassing the caretaker. Defeat the required grunt’s single Pokémon, then receive the Oran Berry from the caretaker. Continue north to the Pokémon Center, where Hau gives you three Revives.
Heal at this Pokémon Center before entering Verdant Cavern. Buy Potions and Poké Balls if needed. A useful optional preparation is trading a Route 2 Spearow to the Lass near the Poké Mart for Machop; this is not required, but a Fighting-type Pokémon can help against the Normal-type trial enemies.
- Complete the Hau’oli City story scenes.
- Defeat Ilima’s Smeargle battle.
- Defeat the required Team Skull grunt in the Berry Fields.
- Reach and use the Route 2 Pokémon Center.
- Stock Potions and Poké Balls before the trial.
Enter Verdant Cavern and start Ilima’s trial
Verdant Cavern is at the northeast end of Route 2. Speak to Ilima outside the entrance to begin the trial. Once the trial starts, you cannot leave the cavern until the trial is complete, and the wild Pokémon inside cannot be captured during the active trial. Finish your catching, healing, and item preparation first.
Pokémon Sun uses Yungoos in the preliminary dens and Gumshoos for the final preliminary encounter. Moon uses the corresponding Alolan Rattata and Alolan Raticate instead, while Ultra Sun and Ultra Moon have different trial arrangements. The directions here apply to the original 2016 Pokémon Sun release.
Save before entering if you want a clean recovery point. The save should be made before speaking to Ilima, because the cavern locks you into the trial route. Bring a team with reliable damage and avoid relying on a single weakened Pokémon; the den battles are separate encounters, but the Totem fight follows immediately after the preliminary section.
- Speak to Ilima outside Verdant Cavern.
- Confirm that your team is healed.
- Save before starting the trial.
- Remember that wild Pokémon cannot be caught until the trial is complete.
Defeat the three den Pokémon and unlock the Totem area
Enter the cavern and inspect the nearby den to fight the first Level 11 Yungoos. After winning, move east to collect the Super Potion, then continue north and inspect the mossy rock in the path for a hidden Revive. The second den is just beyond the rock; inspect it and defeat the second Yungoos.
From there, climb west to the fork. Take the southern branch first to collect TM31, Brick Break, then return to the fork and continue north and east across the wooden bridge. Follow the upper route to the crawlspace and collect the Super Potion beyond it. Inspect the den there, but the Pokémon will have moved.
Continue through the upper path and inspect the next den. The fleeing Pokémon moves again to the western side. Collect the X Defense near the western den and inspect it, then chase the Pokémon back toward the earlier part of the cavern. Cross the wooden bridge again to trigger the Team Skull interruption.
Battle the required Team Skull Grunt, who uses Drowzee. After the battle, continue east through the crawlspace and return to the first den area. Inspect the den there to fight the final preliminary Pokémon, a Level 11 Gumshoos in Pokémon Sun. Defeating it completes the three-den objective.
The trial guide then allows access to the cavern’s northwest exit and the Totem’s den. Do not attempt the Totem battle with a damaged party. Heal with items, arrange your lead Pokémon, and save before examining the pedestal or entering the den. The next chapter begins with Totem Gumshoos, followed by Normalium Z and the Melemele Grand Trial.
- Defeat the first Yungoos.
- Defeat the second Yungoos.
- Defeat the Team Skull Grunt with Drowzee.
- Defeat the final Gumshoos.
- Confirm that the guide has opened the path to the Totem’s den.
- Heal and save before the Totem encounter.
Before you move on
- The Rotom Pokédex and Z-Ring have been received.
- The Trainers’ School challenge and Teacher Emily have been defeated.
- Ilima’s Hau’oli City Smeargle battle is complete.
- The Berry Fields Team Skull encounter and the Route 2 Pokémon Center visit are complete.
- All three preliminary Verdant Cavern den Pokémon have been defeated.
- The Team Skull Grunt inside Verdant Cavern has been defeated.
- The trial guide has moved aside and the northwest path to the Totem’s den is accessible.
- Your party is healed, your Poké Balls and Potions are stocked, and the game is saved before the Totem encounter.
Melemele Trial — Totem Gumshoos and Hala Grand Trial
Begin at the opened Totem’s Den route in Verdant Cavern. Defeat Pokémon Sun’s Totem Gumshoos and its summoned Yungoos, receive the Normalium Z and Great Balls from Ilima, complete the required Route 3 and Melemele Meadow sequence, then return to Iki Town for Kahuna Hala’s Grand Trial. Winning Hala’s battle awards the Fightinium Z, the Melemele Trial Completion stamp, Tauros Charge, and TM54 False Swipe, opening the route toward Akala Island.
Prepare at the opened Totem’s Den route
This chapter begins after the three preliminary den encounters and the Team Skull battle in Verdant Cavern have already been completed. Do not return to those dens or attempt to repeat the Grunt sequence. Your immediate objective is the raised path leading into the Totem’s Den and the Normalium Z pedestal.
Heal before taking the crystal if possible. Totem Gumshoos is only level 12, but its aura raises its Defense by one stage, and Super Fang can remove half of a Pokémon’s current HP. Bring a few Potions and at least one status-healing item. Fighting-type attacks are especially effective, while special attacks also help bypass Gumshoos’s boosted physical Defense.
Save before examining the pedestal if you want a convenient retry point. The Totem battle cannot be captured, and the ally it calls cannot be captured either.
- Start at the opened route leading to the Totem’s Den.
- Do not repeat the three preliminary den battles.
- Do not repeat the Team Skull Grunt battle.
- Heal and carry recovery items.
- Save before taking the Normalium Z.
Defeat Totem Gumshoos
Walk up the hill, enter the Totem’s Den, and take the Normalium Z from the pedestal. In Pokémon Sun, Totem Gumshoos appears at level 12. Its aura raises its Defense by one stage, and it holds a Pecha Berry. It uses Super Fang, Bite, Leer, and Scary Face, so a fragile lead can be worn down quickly even if it avoids a knockout.
Totem Gumshoos can call a Yungoos ally. Defeat the ally early unless Gumshoos is already one hit from defeat. The Yungoos can lower your Defense with Leer and may use Pursuit when you switch, while Bide can punish attacks if you continue striking without watching its timing. Once the ally is defeated, it cannot be called again in this battle.
Use a Fighting-type move whenever practical. Makuhita, Mankey, the traded Machop from Route 2, or a Pokémon with early Fighting coverage can handle the Normal-type targets. If you lack Fighting moves, use your strongest dependable attacks and avoid spending several turns on unnecessary setup. Special attacks are useful because Gumshoos’s aura affects Defense rather than Special Defense.
Use a Potion whenever Super Fang leaves your active Pokémon in danger of being finished by Bite or the ally’s attack. Paralysis or sleep can create a safer opening, but status is not required. After both opponents are defeated, the trial is complete.
- Defeat level 12 Totem Gumshoos.
- Defeat the summoned Yungoos.
- Use Fighting-type or special damage when available.
- Watch for Super Fang, Scary Face, and Leer.
- Do not throw Poké Balls during the Totem battle.
Claim Ilima’s trial rewards
Ilima arrives after the battle and gives you the Normalium Z. He also teaches the pose used for Breakneck Blitz, gives you ten Great Balls, and restores your party to full health. The Normalium Z can power up a Normal-type damaging move once per battle, provided the Pokémon holding it knows a compatible move.
The Totem battle also introduces SOS battles for ordinary wild encounters. From this point onward, wild Pokémon may call allies during battle. You do not need to pursue that mechanic here; it is enough to understand that an additional wild Pokémon can appear and must be defeated before you can safely continue catching or fleeing.
Leave the Totem’s Den by the same route. Ilima opens the barricade outside Verdant Cavern, allowing you to proceed northeast onto Route 3. The cave’s ordinary wild Pokémon become available after the trial, so optional catching can be done later if you want it. None of those catches is required for the story handoff.
- Receive the Normalium Z.
- Learn the Breakneck Blitz pose.
- Receive ten Great Balls.
- Confirm that the party has been healed.
- Leave through the newly opened Verdant Cavern barricade.
Follow Route 3 and find Nebby
After you leave the cavern, Professor Kukui meets you on Route 3 and explains Z-Moves. Continue along the route until the story stops you because Lillie is missing. Do not return to Verdant Cavern; the next required location is Melemele Meadow.
Enter Melemele Meadow and follow the path through the flowers toward the northern part of the area. Find Nebby and speak with it and Lillie. The scene resolves the obstruction on Route 3, and Lillie restores your party afterward.
Return toward the meadow’s entrance. Hau challenges you before you can finish the route. His team has Pikachu at level 13 and a level 14 starter that is weak to your chosen starter. Defeat Hau, then continue along Route 3 and take the southern route back toward Iki Town.
This sequence is mandatory. You cannot proceed directly to Hala after the Totem battle without finding Nebby and completing the Hau battle.
- Receive Kukui’s Z-Move explanation.
- Enter Melemele Meadow when the route is blocked.
- Find Nebby and Lillie.
- Use Lillie’s party recovery before continuing.
- Defeat Hau’s Pikachu and level 14 starter.
- Return to Iki Town.
Prepare for Hala’s Grand Trial
Heal and arrange your party before speaking to Kahuna Hala in Iki Town. Hala specializes in Fighting-type Pokémon, so Flying-, Psychic-, and Fairy-type attacks are super effective. A sturdy neutral attacker can also succeed, but having at least one super-effective option makes the battle safer.
Hala’s team in the original Pokémon Sun is Mankey at level 14, Makuhita at level 14, and Crabrawler at level 15. Mankey knows Karate Chop, Pursuit, and Focus Energy. Makuhita can use Fake Out, Sand Attack, and Arm Thrust. Crabrawler knows Power-Up Punch, Pursuit, and Leer and holds the Fightinium Z.
Do not rely on a Ghost-type as your only answer. Hala’s Pokémon know Pursuit, which can punish a switch, and Crabrawler’s Fighting-type Z-Move can remove a weakened target. Keep one healthy Pokémon in reserve for Crabrawler rather than allowing your first answer to be worn down by Fake Out, Sand Attack, or repeated Power-Up Punch boosts.
- Heal in Iki Town before the battle.
- Bring Flying, Psychic, or Fairy coverage if available.
- Expect Fake Out from Makuhita.
- Watch your accuracy after Sand Attack.
- Prevent Crabrawler from gaining repeated Power-Up Punch boosts.
- Keep a healthy Pokémon available for Crabrawler.
Defeat Kahuna Hala
Speak to Hala and accept the Grand Trial. Defeat Mankey first with a super-effective attack or a reliable neutral move. If it uses Focus Energy, avoid giving it several free turns. Be cautious when switching because Pursuit is designed to punish a Pokémon that leaves battle.
Makuhita usually creates trouble through Fake Out and Sand Attack rather than raw speed. Expect the opening flinch, then attack while your accuracy is intact. If repeated misses begin to decide the battle, switch to another healthy Pokémon rather than wasting turns on low-accuracy moves.
Crabrawler is Hala’s final Pokémon and can use its Fightinium Z for a powerful Fighting-type attack. Power-Up Punch raises its Attack when it connects, so defeat it quickly with Flying, Psychic, Fairy, or another strong super-effective move. If a knockout is not available, use a defensive switch or healing item before Crabrawler accumulates boosts. After Hala’s team is defeated, the Melemele Grand Trial is complete.
- Defeat Mankey at level 14.
- Defeat Makuhita at level 14.
- Defeat Crabrawler at level 15.
- Survive Hala’s Fighting-type Z-Move.
- Confirm that the Grand Trial battle has ended.
Collect the Melemele rewards and leave for Akala
Hala awards the Fightinium Z and records the Melemele Trial Completion stamp in your Trainer Passport. The stamp raises the obedience limit for traded Pokémon to level 35. Hala also gives you the Ride Pager and registers Tauros Charge.
Tauros Charge lets you ride across land at high speed and smash the large cracked boulders found on earlier routes. It is required for later progression and opens optional item paths on Melemele. You may backtrack for those items, but none is required before leaving.
Professor Kukui gives you TM54, False Swipe, after the Grand Trial. False Swipe is useful for catching wild Pokémon because it cannot reduce a target below 1 HP when it would otherwise cause a knockout. It is optional for story progress, but worth keeping for later captures.
Heal once more, organize the Normalium Z and Fightinium Z, and prepare for the journey to Akala Island. The next chapter begins with the travel and early route objectives after Melemele’s island challenge is complete.
- Receive the Fightinium Z.
- Confirm the Melemele Trial Completion stamp.
- Register Tauros Charge on the Ride Pager.
- Receive TM54, False Swipe, from Kukui.
- Heal before beginning the Akala transition.
- Confirm that the route toward Akala Island is open.
Before you move on
- Totem Gumshoos and its summoned Yungoos have been defeated.
- Ilima has awarded the Normalium Z, taught the Breakneck Blitz pose, given ten Great Balls, and healed the party.
- The Verdant Cavern barricade is open.
- Nebby has been found in Melemele Meadow.
- Hau has been defeated on Route 3.
- Hala’s Mankey, Makuhita, and Crabrawler have been defeated in Iki Town.
- The Fightinium Z and Melemele Trial Completion stamp have been received.
- Tauros Charge is registered on the Ride Pager.
- TM54, False Swipe, has been received from Kukui.
- The route toward the Akala Island departure sequence is available.
Travelling to Akala Island — Paniola Ranch and Early Route Tasks
After the Melemele Grand Trial, sail with Professor Kukui and Hau to Akala Island. Follow the route through Heahea City, Route 4, Paniola Town, Paniola Ranch, and Route 5. Defeat Dexio, Hau, and Gladion, receive the Zygarde Cube and Ride Pager upgrades, and reach Brooklet Hill. This chapter ends after Lana registers Lapras; the two preliminary Wishiwashi encounters and Lana’s Water trial begin in the next chapter.
Sail from Melemele to Heahea City
Return to the Marina in Hau’oli City after completing the Melemele Grand Trial. Speak with Professor Kukui and Hau, confirm that you are ready to leave, and board the boat for Akala Island. You arrive in Heahea City and meet Kahuna Olivia and Captain Mallow, who explain that Akala has three trials.
Follow the main street and visit the Pokémon Center before continuing. The woman across from the apparel shop gives you a Rare Candy. These early city items are optional, but healing before the next rival battle is useful.
Go north toward the Tide Song Hotel. In Pokémon Sun, Dexio stops you outside and challenges you. He uses a level 15 Slowpoke and a level 16 Espeon. Grass- or Electric-type moves are effective against Slowpoke. Espeon is vulnerable to Bug-, Dark-, and Ghost-type attacks, although a strong neutral attack also works if those types are unavailable.
After the battle, Dexio restores your party and gives you the Zygarde Cube. Enter the Tide Song Hotel and check the sparkle in the upper-left part of the lobby to collect the Zygarde Cell there. Zygarde Cells are optional and do not affect the island challenge.
When you are ready to proceed, leave the hotel, travel south, then turn east onto Route 4.
- Reach Heahea City by boat.
- Defeat Dexio in Pokémon Sun.
- Receive the Zygarde Cube.
- Collect the hotel’s Zygarde Cell if desired.
- Heal before entering Route 4.
Cross Route 4 to Paniola Town
Route 4 is a winding path leading northeast from Heahea City to Paniola Town. Follow the main trail, battling trainers for experience and collecting visible items if you need extra supplies. There is no alternate story route to unlock here; continue northeast until you reach town.
If your team needs additional coverage, Route 4 and the areas around Paniola provide several useful choices. Mudbray’s Ground typing can help against Electric-, Fire-, Rock-, and Steel-type opponents. Eevee is another flexible option, but neither Pokémon is required for the story.
Use the Pokémon Center in Paniola Town before approaching Hau. The town also contains optional pickups, including items inside nearby houses and around the streets. Collect them if useful, but do not delay the story objective unnecessarily.
- Reach Paniola Town through Route 4.
- Battle route trainers as needed.
- Add Mudbray, Eevee, or another species only if your team needs coverage.
- Heal at the Paniola Town Pokémon Center.
Defeat Hau in Paniola Town
Move north through Paniola Town and Hau will challenge you. He heals your party before the battle, so you can accept immediately even if the route trainers have caused damage. His team depends on your chosen starter: he uses a level 16 Pikachu and a level 17 starter evolution with the type advantage against your starter.
Use the matchup that suits the Pokémon Hau sends out, and switch rather than leaving a poorly matched Pokémon in danger. After you win, Hau gives you a Dire Hit. The item raises critical-hit chance during a battle but does not restore health.
When the battle and dialogue are finished, leave Paniola Town through the northern exit toward Paniola Ranch.
- Defeat Hau in Paniola Town.
- Receive the Dire Hit.
- Use the town’s Pokémon Center if necessary before entering the ranch.
Complete the Paniola Ranch objectives
Enter Paniola Ranch and follow the main path. Battle the nearby trainer, then continue until you meet Captain Mallow and the ranch workers. Mallow registers Stoutland Search to your Ride Pager.
Stoutland Search is optional for story progress. While riding Stoutland, hold B to search. A blue exclamation mark indicates a hidden item is nearby; continue moving until the mark becomes red, then press A to uncover the item. The ranch contains optional supplies such as Repels, Moomoo Milk, Fresh Water, and an Ether.
The Pokémon Nursery is on the ranch. It is used for breeding and eggs, not for healing or leveling Pokémon. A Miltank outside the Nursery can restore your party, so use it if you need recovery before continuing. The Nursery also provides an optional Eevee egg and TM10 Hidden Power through its attendants.
The Amulet Coin is an optional item near the red truck by the Nursery. Give it to a Pokémon that participates in battles if you want to increase prize money. After exploring or healing, continue north from the ranch to Route 5.
- Meet Mallow and receive Stoutland Search.
- Use the Miltank for healing if needed.
- Visit the Nursery only for optional breeding or item rewards.
- Collect the Amulet Coin if desired.
- Continue north to Route 5.
Clear Route 5 and defeat Gladion
Route 5 contains several optional trainer battles and item pickups. At the beginning of the route, a trainer asks you to defeat the other trainers in the area. This challenge is optional; if you later defeat every listed trainer and return, you can fight Trial Guide Bronson for an additional reward.
Follow the path upward and around the rocky ledges. Collect the Super Potion, TM41 Torment, berries, and TM57 Charge Beam if they benefit your party. The route does not begin with a required double battle, so you can choose your lead and battle each trainer individually.
Team Skull blocks the northern grass, so return along the route and take the lower-left path. You will find Twins Isa and Nico, followed by Hau. Hau has just lost to Gladion and challenges you. Gladion uses a level 17 Zubat and a level 18 Type: Null. Electric-, Ice-, Psychic-, or Rock-type attacks are effective against Zubat. Type: Null is Normal-type, so use your strongest dependable attacks and avoid leaving a weakened Pokémon exposed.
After the battle, a Team Skull scene occurs and Hau gives you three Revives. Continue through the remaining route section to the Pokémon Center. The fisherman there gives you a Dire Hit. A nearby trainer offers an optional trade: give him a Lillipup to receive the Bounsweet named Bouncee, which holds Bright Powder.
The Pokémon Center researcher offers an optional reward for showing him a Feebas in your Pokédex. Heal fully before leaving. The girl at the counter also points out that Grass-type Pokémon are useful in Brooklet Hill, so add Grass coverage or stock suitable healing items if your team lacks a good answer to Water types.
- Battle Route 5 trainers as needed.
- Defeat Gladion.
- Receive three Revives from Hau.
- Heal at the Route 5 Pokémon Center.
- Complete the Lillipup-for-Bounsweet trade only if desired.
- Prepare Grass- or Electric-type coverage for Brooklet Hill.
Reach Brooklet Hill and register Lapras
From the Route 5 Pokémon Center, leave through the southern or southwestern cave entrance on the left side of the area. This leads directly to Brooklet Hill. Do not try to continue north through the blocked grass; the route to Lana is through this lower entrance.
At Brooklet Hill, speak with Lana near the entrance and follow her across the wooden bridge. Continue down the path. You can battle the fisherman and other trainers or collect items such as the Net Ball, Elixir, and X Sp. Atk before moving on.
Lana eventually stops farther down Brooklet Hill and registers Lapras to your Ride Pager. Lapras is a Ride Pokémon service, not a Pokémon that you catch or add to your party. It will allow you to travel across the water during the next chapter.
Stop as soon as Lapras has been registered. Do not ride onto the water, investigate the first or second disturbance, battle the ordinary Wishiwashi, or enter the Totem’s Den. Those actions begin the next chapter, which starts by following Lana farther down Brooklet Hill to investigate the two preliminary Wishiwashi disturbances.
Heal your party, restock Poké Balls and status-healing items, and save before beginning the Water trial sequence.
- Leave Route 5 through the southern or southwestern cave entrance.
- Reach Brooklet Hill and follow Lana across the bridge.
- Receive Lapras on the Ride Pager.
- Stop before investigating either Wishiwashi disturbance.
- Heal, restock, and save for the next chapter.
Before you move on
- Dexio has been defeated in Heahea City and the Zygarde Cube is in your Key Items.
- Hau has been defeated in Paniola Town and the Dire Hit has been received.
- Mallow has registered Stoutland Search to the Ride Pager.
- Gladion has been defeated on Route 5 and Hau has given you three Revives.
- Your party has been healed at the Route 5 Pokémon Center.
- You have taken the southern or southwestern Route 5 entrance into Brooklet Hill.
- Lana has registered Lapras to the Ride Pager.
- You have stopped before investigating the first Wishiwashi disturbance and are ready to begin the Brooklet Hill trial sequence in the next chapter.
Akala Island — Brooklet Hill, Wela Volcano Park and Lush Jungle
Begin immediately after registering Lapras at Brooklet Hill. Follow Lana down the route, investigate the two preliminary Wishiwashi disturbances, pass through the Captain’s Gate, and defeat Totem Wishiwashi. Then complete Kiawe’s trial at Wela Volcano Park, Mallow’s ingredient trial and Totem Lurantis battle in Lush Jungle, and Olivia’s Grand Trial at the Ruins of Life. These directions apply to the original 2016 Pokémon Sun release on Nintendo 3DS, not Ultra Sun or Ultra Moon.
Investigate Brooklet Hill and defeat Totem Wishiwashi
Start at the upper part of Brooklet Hill after Lapras has been registered as a Ride Pokémon. Follow the path downhill through the water routes. Lana directs you to investigate splashing or rippling water, so use Lapras to reach each pool and examine the disturbances rather than heading directly to the trial gate.
The first two required disturbances lead to battles with wild Wishiwashi. Defeat both Wishiwashi encounters, then continue downstream. These are part of the original Pokémon Sun trial approach and must be completed in this chapter; they are not assumed to have been cleared during the earlier Paniola Ranch or Lapras-registration sequence. After the second Wishiwashi has been driven away, continue to the lower end of Brooklet Hill and enter Lana’s Captain’s Gate.
Heal at the nearby Route 5 Pokémon Center before entering if necessary. Once inside the Totem’s Den, inspect the large disturbance in the water to begin the actual trial battle. Totem Wishiwashi is level 20, appears in School Form, has its Defense raised by one stage, and fights in rain. Grass- and Electric-type attacks are the best choices. Fire- and Rock-type attacks are poor options, while Ground-type moves do not affect Wishiwashi.
Totem Wishiwashi uses Water Gun, Growl, Rain Dance, and Soak and holds a Sitrus Berry. It can call a level 18 Wishiwashi ally and can call a level 18 Alomomola after an ally has been defeated or when its health reaches the relevant threshold. Alomomola is the immediate support threat because Helping Hand increases damage and Heal Pulse restores the Totem. Defeat an ally if it is disrupting the battle, then return attacks to the Totem.
When Wishiwashi’s health becomes low, Schooling ends and it returns to Solo Form. Preserve a strong Grass- or Electric-type attack for this stage if possible. If you lose, heal at the Route 5 Pokémon Center and return to the Totem’s Den. The preliminary Wishiwashi encounters do not need to be repeated after a failed Totem attempt.
After the victory scene, Lana gives you Waterium Z, the Fishing Rod, and ten Dive Balls. Check that all three rewards were received before leaving Brooklet Hill. Continue through Route 6 toward Royal Avenue and Route 7 for Kiawe’s trial.
- Begin after Lapras registration at Brooklet Hill.
- Defeat the first preliminary Wishiwashi encounter.
- Defeat the second preliminary Wishiwashi encounter.
- Enter Lana’s Captain’s Gate at the lower end of Brooklet Hill.
- Defeat level 20 Totem Wishiwashi in the rain.
- Remove Alomomola quickly if it appears and uses support moves.
- Collect Waterium Z, the Fishing Rod, and ten Dive Balls.
Complete Kiawe’s trial at Wela Volcano Park
Travel through Route 6 and Route 7 to Wela Volcano Park. The Trial Guide outside the trial site can heal your party, so use that service before speaking with Kiawe. The trial includes two battles before the Totem encounter.
Kiawe’s trial asks you to identify differences in dances performed by Alolan Marowak. For the first dance, choose the middle Marowak. The selected Marowak then battles at level 18. Afterward, watch the second dance and select the Hiker as the unusual addition. This starts a battle against Hiker David and his level 19 Magmar.
The final dance introduces the Totem Pokémon. In the original Pokémon Sun release, the Totem is Salazzle. Totem Alolan Marowak belongs to Ultra Sun and Ultra Moon and must not be substituted here. The final answer is not a serious progression trap because the choices all point toward the Totem encounter.
Totem Salazzle is level 22, has its Special Defense raised by one stage, and holds a Petaya Berry. Its moves are Torment, Venom Drench, Toxic, and Flame Burst. It can call level 20 Salandit allies. Water-, Ground-, Rock-, and Psychic-type attacks are effective against Salazzle. Ground attacks are especially valuable, but protect the user from Flame Burst and poison.
Bring Antidotes or Full Heals. Toxic is especially dangerous because Salazzle’s Corrosion ability allows it to poison targets that would normally be immune. If a Salandit is summoned while Salazzle is close to defeat, attack Salazzle directly unless the ally is preventing a safe finishing turn.
Kiawe awards Firium Z, ten Quick Balls, and access to Charizard Glide after the Totem battle. Use Charizard Glide to return to a Pokémon Center, heal, and restock before starting Mallow’s trial.
- Use the Trial Guide’s healing service.
- Choose the middle Marowak in the first dance.
- Choose the Hiker in the second dance.
- Prepare for repeated Salandit summons and poison effects.
- Use super-effective Water, Ground, Rock, or Psychic attacks.
- Collect Firium Z and ten Quick Balls.
- Confirm that Charizard Glide is available.
Gather Mallow’s ingredients in Lush Jungle
Enter Lush Jungle from the northern end of Route 5 and speak with Mallow. She gives you a Forage Bag and asks you to collect four ingredients for the Mallow Special: a Tiny Mushroom, a Mago Berry, a Revival Herb, and a Miracle Seed. These are the original Pokémon Sun and Moon ingredients; the Honey and Big Root sequence belongs to Ultra Sun and Ultra Moon.
Use Stoutland Search to locate the Tiny Mushroom in the central area, west of the entrance near the illuminated mushroom spot. When prompted, choose Tiny Mushroom rather than Big Mushroom. A wild Parasect attacks after the ingredient is collected in Pokémon Sun.
Move to the northwest area and search the tree containing the Mago Berry. A wild Fomantis ambushes you when the correct tree is disturbed. Continue north to the shorter grass among the taller grass and search there for the Revival Herb. Several hidden objects can be checked, but only one is the required ingredient.
Go to the eastern area and use Tauros Charge to break the small rocks. Search beneath the western small breakable rock for the Miracle Seed. The four ingredients are stored in the Forage Bag for the trial and are not ordinary copies placed in the main Bag.
Return to Mallow after all four ingredients have been collected. Lana and Kiawe arrive to help prepare the dish. Follow the on-screen prompts during the cooking sequence. The aroma summons Totem Lurantis, so make sure the party is healed before completing the preparation. Leaving before all ingredients are collected resets the trial, but once the ingredients are secured, the collection portion is complete.
- Receive the Forage Bag from Mallow.
- Collect the Tiny Mushroom.
- Collect the Mago Berry.
- Collect the Revival Herb.
- Use Tauros Charge to reach and collect the Miracle Seed.
- Return to Mallow only after all four ingredients are secured.
- Heal before finishing the cooking sequence.
Defeat Totem Lurantis
Totem Lurantis is level 24, has its Speed raised by one stage, and holds a Power Herb. Its moves are Razor Leaf, X-Scissor, Solar Blade, and Synthesis. Fire-, Flying-, Ice-, Poison-, and Bug-type attacks are super effective. Fire is particularly useful because it resists Lurantis’s Grass- and Bug-type attacks and benefits when sunlight is active.
Lurantis can call a level 22 Trumbeak. Trumbeak uses Rock Blast, Pluck, Supersonic, and Screech, so a Flying-type counter can still take serious damage from Rock Blast. Defeat Trumbeak if it is creating too much pressure or confusion, then return your focus to Lurantis.
Lurantis can later call a level 22 Castform. Castform uses Sunny Day, Water Gun, Headbutt, and Weather Ball. Sunlight makes Solar Blade immediate and improves Synthesis, but also increases the power of Fire-type attacks. If Castform appears while Lurantis is close to defeat, finish Lurantis rather than spending unnecessary turns clearing every ally.
Use strong attacks to prevent repeated Synthesis recovery. A Fire-type Z-Move can end the battle quickly, but do not sacrifice a healthy counter if Lurantis can survive and retaliate. If Trumbeak’s Screech or Supersonic has made the lead unreliable, switch to a healthy backup rather than relying on a weakened or confused attacker.
Mallow rewards victory with Grassium Z and ten Nest Balls. Professor Kukui then gives you TM67 Smart Strike. Wild Pokémon become available in Lush Jungle after the trial. The three Akala trials are now complete.
- Use Fire, Flying, Ice, Poison, or Bug attacks.
- Watch for Trumbeak’s Rock Blast, Pluck, and Screech.
- Expect Castform to set Sunny Day if it is summoned.
- Prevent repeated Synthesis recovery with strong damage.
- Collect Grassium Z, ten Nest Balls, and TM67 Smart Strike.
Cross Akala and challenge Olivia
After Mallow’s trial, follow Professor Kukui out of Lush Jungle and continue through the Dimensional Research Lab sequence in Heahea City. Proceed through Diglett’s Tunnel, Route 9, and Konikoni City. Restock in Konikoni City before entering Memorial Hill and the Akala Outskirts, because the route to the Ruins of Life includes additional battles and wild encounters.
At the Ruins of Life, speak with the story characters outside and continue into the ruins. Lillie restores your party before Olivia’s Grand Trial, but it is still useful to buy healing items and status cures in Konikoni City before making the approach.
Olivia’s original Pokémon Sun team is level 26 Nosepass, level 26 Boldore, and level 27 Midnight Lycanroc. All three are Rock type and are vulnerable to Water-, Grass-, Fighting-, Ground-, and Steel-type attacks. Nosepass and Boldore have Sturdy, so a full-health attack may leave them at 1 HP instead of defeating them. Nosepass knows Rock Slide, Spark, and Thunder Wave. Boldore uses Rock Blast, Mud-Slap, and Headbutt.
Midnight Lycanroc knows Bite, Rock Throw, and Continental Crush, and holds Rockium Z. Its Vital Spirit ability prevents sleep, so direct damage or another status condition is more useful than a sleep strategy. Keep a reliable counter healthy for Lycanroc and be ready for its Rockium Z attack.
Defeating Olivia awards Rockium Z and the Akala Trial Completion stamp in the Trainer Passport. The stamp raises the obedience limit for traded Pokémon to level 50. After the post-battle dialogue, Olivia directs you toward Hano Grand Resort. Travel back toward Heahea City and continue east to begin the Aether Foundation sequence in the next chapter.
- Resupply in Konikoni City before Memorial Hill.
- Bring Water-, Grass-, Fighting-, Ground-, or Steel-type coverage.
- Defeat level 26 Nosepass, level 26 Boldore, and level 27 Midnight Lycanroc.
- Prepare for Sturdy, Thunder Wave, Rock Blast, and Continental Crush.
- Collect Rockium Z and the Akala Trial Completion stamp.
- Continue toward Hano Grand Resort after Olivia’s post-battle scenes.
Before you move on
- Lapras registration is complete and both preliminary Brooklet Hill Wishiwashi encounters have been defeated.
- Lana’s Captain’s Gate has been cleared and Totem Wishiwashi is defeated.
- Waterium Z, the Fishing Rod, and ten Dive Balls are in the inventory.
- Kiawe’s trial is complete, Totem Salazzle is defeated, and Firium Z, ten Quick Balls, and Charizard Glide are available.
- Mallow’s trial is complete, Totem Lurantis is defeated, and Grassium Z, ten Nest Balls, and TM67 Smart Strike have been received.
- Olivia is defeated at the Ruins of Life, Rockium Z is obtained, and the Akala Trial Completion stamp is visible in the Trainer Passport.
- The next required destination is Hano Grand Resort and the first Aether Foundation sequence.
Konikoni City and Hano Grand Resort — Akala Resources and First Aether Visit
Olivia’s Akala Grand Trial is already complete when this chapter begins. Finish any optional Konikoni City errands, then return to Heahea City and travel east to Hano Grand Resort. Faba will take you and Hau to Aether Paradise, where Wicke gives the tour, Lusamine explains the foundation’s mission, and an unidentified Ultra Beast emerges in the Conservation Area. Battle it to protect Lusamine; the creature cannot be caught during this scripted encounter and flees afterward. Wicke gives you TM29 Psychic before the group leaves for Ula’ula Island. End when you arrive in Malie City, before starting Hau’s battle or any other Ula’ula objectives.
Finish optional Konikoni City errands after Olivia’s trial
You should already have defeated Kahuna Olivia at the Ruins of Life and received the Rockium Z before beginning this chapter. Do not return to the Ruins of Life to trigger the Grand Trial, and do not follow instructions that tell you to obtain Olivia’s letter as though the battle were still pending.
Konikoni City remains available for optional preparation. The Pokémon Center and Poké Mart are useful places to heal and restock Poké Balls, healing items, status cures, and Repels. The Technical Machine stall sells optional moves including Bulk Up, Venoshock, Double Team, Low Sweep, Shadow Claw, and Dragon Tail in the original Pokémon Sun and Moon release. None is required for the upcoming Aether sequence.
In Olivia’s jewelry shop, Probopass can provide a Max Potion, while the shop sells evolution stones and fossils. These purchases are optional. Do not spend all your money on stones, fossils, or TMs if your party still needs recovery items for later trials.
- Confirm that Olivia’s Grand Trial and the Rockium Z reward are already complete.
- Heal and restock if your party needs supplies.
- Treat the Konikoni shops, fossils, stones, and TMs as optional.
Collect optional Konikoni pickups
At the northern end of Konikoni City, speak with the woman accompanied by Pikachu to receive Pikanium Z. This is a Pikachu-specific Z-Crystal and is not the general Electric-type crystal used for ordinary Electric Z-Moves. If you later teach Pikachu Volt Tackle, Pikanium Z enables its exclusive Z-Move, Catastropika. This has no bearing on the main story.
Collect the Eviolite behind the bench near the water if you use an unevolved Pokémon that benefits from improved defenses. A Zygarde Cell is also available in the city for players tracking Zygarde components. Both pickups are optional.
After Olivia’s trial, you can enter the back room of Lana’s house and battle Twins Harper and Sarah. Their Double Battle is separate from the main route. If you win, Lana can be challenged at Brooklet Hill, and defeating her awards a Muscle Band. This is a side reward, not a prerequisite for Hano Grand Resort or Aether Paradise.
The restaurant and other city stalls also provide optional items or consumables. Complete these errands now only if you want them; otherwise, use Charizard Glide to return to Heahea City.
- Receive Pikanium Z if you want the optional Pikachu equipment.
- Pick up Eviolite and the Zygarde Cell if desired.
- Complete the Lana house and Brooklet Hill battles only for the optional Muscle Band.
- Return to Heahea City when ready to resume the story.
Travel from Heahea City to Hano Grand Resort
From Heahea City, take the eastern road past the Dimensional Research Lab and cross the bridge toward Hano Grand Resort. The resort is on the southeast side of Akala Island. Olivia’s post-trial instructions and Hau’s dialogue point you toward Faba, the Aether Foundation administrator you encountered during the Memorial Hill incident.
Explore the beach or hotel area before entering the story sequence if you want to collect optional items and battle optional trainers. These activities are not needed to unlock the ferry. When you are ready, enter the hotel and speak with Faba in the foyer.
Accept Faba’s invitation to visit Aether Paradise. Hau joins the trip, and Olivia appears for the departure scene. Professor Kukui also appears during the send-off and indicates that he expects to meet you again on Ula’ula Island. Follow Faba and Hau to the marina; the ferry automatically carries the group to Aether Paradise.
- Reach Hano Grand Resort from Heahea City by crossing the bridge east of the Dimensional Research Lab.
- Speak with Faba inside the hotel.
- Accept the tour and board the ferry with Faba and Hau.
Follow Wicke through Aether Paradise
When the ferry arrives, Faba explains that Aether Paradise is a protected facility for Pokémon. The area uses a signal that prevents Poké Balls from being used, so do not expect to catch wild Pokémon during this visit. Follow Faba through the entrance area and listen to his explanation of the facility.
Wicke takes over the tour after meeting you and Hau. The entrance level includes an Aether employee who can restore your party, so use that healing point before continuing if you arrived with damage. Follow Wicke to the elevator and ride it to the Conservation Area.
In the Conservation Area, follow the path toward the open garden. Wicke says that the Aether Foundation’s president should be there. Continue along the western side and then toward the clearing to meet Lusamine. Watch the conversation rather than trying to leave; the meeting is required to advance the story.
- Follow Faba through the entrance area.
- Speak with Wicke and use the Aether healing service if necessary.
- Ride to the Conservation Area and reach Lusamine in the garden.
Defeat the scripted Ultra Beast encounter
A wormhole opens during Lusamine’s presentation, and an unidentified jellyfish-like Ultra Beast appears. Interact with it to begin the mandatory battle. In the original Pokémon Sun, this creature is presented as an unknown Pokémon during the scene and is later identified as Nihilego.
You cannot capture it here. Aether Paradise’s Poké Ball jamming signal prevents capture, and the encounter is scripted to end with the Ultra Beast fleeing after the battle. Weaken it normally and use reliable super-effective attacks where available, but do not waste turns searching for a capture option. Its boosted defenses can make physical attacks less efficient, so a strong special attack or a Pokémon that can safely endure its hits is useful.
After the battle, continue the dialogue with Lusamine, Wicke, Faba, and Hau. Wicke gives you TM29 Psychic as the group prepares to leave. This is the completion reward for the visit, not a replacement for a capture.
- Battle the unidentified Ultra Beast in the Conservation Area.
- Do not attempt to catch it; the encounter cannot be captured.
- Finish the post-battle dialogue and receive TM29 Psychic from Wicke.
Arrive in Malie City and stop for the next chapter
Follow Faba and Hau back to the ferry after the Aether Paradise scenes. The boat carries you to Ula’ula Island and deposits the group in Malie City. This arrival is the transition into the next chapter.
Stop once you reach Malie City and before accepting or triggering Hau’s battle. Do not continue into Malie Garden, Malie Library, Route 10, Mount Hokulani, or Molayne’s observatory encounter here. Those objectives belong to the next chapter and should be handled there in order.
If you want an immediate safety check, confirm that your party is healed or ready to heal at the Malie City Pokémon Center. The chapter is complete when the ferry has delivered you to Malie City and the next Malie City story sequence is available.
- Return from Aether Paradise by ferry.
- Arrive in Malie City.
- Stop before Hau’s battle and before all Malie City and Mount Hokulani objectives.
Before you move on
- Olivia’s Grand Trial and Rockium Z are already complete.
- Any desired Konikoni City shopping and optional pickups are finished or deliberately postponed.
- The optional Lana house and Brooklet Hill battles are either complete or intentionally skipped.
- Faba has taken you from Hano Grand Resort to Aether Paradise.
- You followed Wicke to the Conservation Area and met Lusamine.
- You defeated the scripted unidentified Ultra Beast, which fled instead of being captured.
- You received TM29 Psychic from Wicke.
- You returned by ferry and arrived in Malie City.
- You stopped before Hau’s battle and before the Malie City, Route 10, Mount Hokulani, and Molayne objectives.
Ula'ula Island Approach — Malie City and Hokulani Observatory
Progress through the original Pokémon Sun sequence from arrival in Malie City to the entrance of Sophocles’s trial at Hokulani Observatory. Defeat Hau, complete the required Malie Garden and Malie Library scenes, clear the Team Skull blockade on Route 10, ride the Exeggutor Express to Mount Hokulani, and defeat Molayne outside the observatory. Stop before answering Sophocles’s first audio question.
Arrive in Malie City and defeat Hau
After the ferry arrives in Malie City from Aether Paradise, walk forward until Hau challenges you. The game restores both teams to full health immediately before this battle, so you do not need to heal beforehand. This fight occurs before the rest of Malie City’s required progression opens.
Hau’s team in the original Pokémon Sun depends on your chosen starter. If you chose Rowlet, he uses Alolan Raichu at level 28, Flareon at level 28, and Brionne at level 29. If you chose Litten, he uses Alolan Raichu at level 28, Vaporeon at level 28, and Dartrix at level 29. If you chose Popplio, he uses Alolan Raichu at level 28, Leafeon at level 28, and Torracat at level 29.
The Alolan Raichu is Electric/Psychic and knows Psychic, so do not assume a Fighting-type lead will be safe against it. Ground-type attacks are effective against Raichu, but remember that Hau’s Eeveelution may punish the same team member with Water, Grass, or Fire attacks depending on your starter. The middle-stage starter is also holding the Z-Crystal associated with that Pokémon’s type, so avoid leaving a weakened counter in front of it.
After winning, use the Malie City Pokémon Center if you need supplies, then go west from the Pokémon Center and enter Malie Garden. Do not try to leave town through the other routes yet.
- Enter Malie City from the Aether Paradise ferry.
- Complete Hau’s required battle.
- Confirm that Hau’s team contains Alolan Raichu, an opposing Eeveelution, and the middle evolution of the starter line.
- Heal and restock at the Malie City Pokémon Center if needed.
- Enter Malie Garden.
Visit Malie Garden and speak with Professor Kukui
In Malie Garden, follow the paths toward the tea shop in the central area. Hau is looking for Professor Kukui, who is waiting near the tea shop. Speak with Kukui and let the conversation finish. He explains that your next trial is at Hokulani Observatory on Mount Hokulani and that the mountain must be reached by bus from Route 10.
The garden’s trainers and items are optional. You may collect the Luxury Ball, Rage Candy Bar, Big Mushroom, Grassy Seed, or Zygarde Cell and battle the local trainers for experience, but none of these actions is required for the story. When you are ready, leave the garden and return to Malie City.
The next required scene is in Malie Library. If you go directly toward Route 10 before completing the library sequence, the Team Skull blockade will not yet be active.
- Reach the tea shop in Malie Garden.
- Speak with Professor Kukui and Hau.
- Receive the direction to Hokulani Observatory.
- Leave the garden and return to Malie City.
Complete the Malie Library story scene
Travel north through Malie City toward Malie Library. Lillie is waiting outside the library. Hapu and Mudsdale appear during the approach; allow that scene to finish, then follow Lillie inside.
Go upstairs after entering the library. Lillie finds the book titled The Light of Alola and reads from it while Acerola listens. The passage describes Alola’s legendary Pokémon and beings that came through a wormhole. This is a required story trigger, not optional dialogue.
When Lillie finishes reading, the sequence is complete. You may collect optional library rewards, including TM76 Fly from the Sightseer on the lower floor. Fly is useful later but is not needed to reach Mount Hokulani. Leave the library and head west through Malie City toward Route 10.
If the Team Skull Grunts are not present on Route 10, return to the library and verify that the upstairs reading scene has fully concluded before trying the route again.
- Find Lillie outside Malie Library.
- Enter the library and go upstairs.
- Finish the The Light of Alola reading scene.
- Collect TM76 Fly if desired.
- Return to Malie City’s western Route 10 exit.
Cross Route 10 and defeat the Team Skull Grunts
Leave Malie City through the western exit to enter Route 10. Follow the road north. The route’s regular trainers are optional, but battling them can provide useful experience before the observatory fight. Wild Pokémon and trainers here are generally in the mid-to-high twenties.
Continue to the northern end of Route 10, where two Team Skull Grunts are attempting to steal the bus-stop sign. Defeat them one after the other. In the original Pokémon Sun, the first Grunt uses Golbat at level 27 and the second uses Alolan Raticate at level 27. Electric-, Rock-, and Ice-type attacks are useful against Golbat, while Fighting- and Bug-type attacks work well against Alolan Raticate.
After both Grunts are defeated, Professor Kukui appears and explains that the bus is the only practical way to reach the mountain summit. Inspect the bus-stop sign to call the Exeggutor Express. The bus then carries you to Mount Hokulani and drops you near the observatory.
A Paralyze Heal is available on Route 10. Pick it up if convenient, since Electric-type opponents in the next chapter can inflict paralysis, but it is optional. Heal at the Mount Hokulani Pokémon Center after arriving if your team took damage on the route.
- Reach Route 10 through Malie City’s western exit.
- Travel north to the bus stop.
- Defeat both Team Skull Grunts.
- Inspect the bus-stop sign.
- Ride the Exeggutor Express to Mount Hokulani.
- Heal at the mountain Pokémon Center if necessary.
Cross Mount Hokulani and prepare for Molayne
The Exeggutor Express drops you at the summit area outside Hokulani Observatory. Professor Kukui speaks with you near the observatory and discusses Mount Lanakila and the future Pokémon League. Let the scene finish before entering the observatory approach.
Mount Hokulani contains optional trainers, items, and wild Pokémon. The area’s wild encounters are around levels 25 to 28, and the regular trainers are in a similar range. A balanced party is more useful than relying on one damaged attacker. Fire-, Fighting-, and Ground-type moves will help against Molayne’s Steel Pokémon, although his Alolan Dugtrio can retaliate with Ground- and Dark-type attacks.
You can use the Pokémon Center beside the observatory before facing Molayne. Arrange your party so that your best reliable Fire-, Fighting-, or Ground-type attacker is healthy, but keep a second answer available in case Skarmory’s Sturdy ability prevents a one-hit knockout or Metang survives your first attack.
- Finish Professor Kukui’s Mount Hokulani scene.
- Reach the observatory entrance.
- Use the nearby Pokémon Center if required.
- Prepare Fire-, Fighting-, Ground-, or other effective coverage for Molayne.
Defeat Molayne and stop at Sophocles’s Captain’s Gate
Molayne is standing outside Hokulani Observatory. He is no longer the island’s captain, but he tests whether you are ready to attempt Sophocles’s trial. In the original Pokémon Sun, Molayne uses Skarmory at level 29, Metang at level 29, and Alolan Dugtrio at level 30.
Use Fire-, Fighting-, or Ground-type moves against Skarmory and Metang. Metang is also vulnerable to Dark-type attacks. Alolan Dugtrio is Ground/Steel, so Water-, Grass-, Fighting-, Fire-, and Ground-type attacks can all be useful, but watch for its Mud Bomb and Sucker Punch. Its Tangling Hair ability lowers the Speed of Pokémon that make contact with it, so a physical attacker may become slower after striking it.
After defeating Molayne, enter Hokulani Observatory. The scientist behind the reception desk can give you an optional Comet Shard. Do not collect Electrium Z, Steelium Z, or Professor Kukui’s Mask yet; those rewards come after Sophocles’s trial and belong to the next chapter.
Pass through the door behind the reception desk and stop at Sophocles’s Captain’s Gate. Heal and organize the party before entering. The next chapter begins when you pass through the gate and Sophocles starts the audio-question sequence. Do not answer the first question or begin the intervening battles if you are following this chapter boundary.
- Defeat Molayne’s level 29 Skarmory.
- Defeat Molayne’s level 29 Metang.
- Defeat Molayne’s level 30 Alolan Dugtrio.
- Enter Hokulani Observatory.
- Collect the optional Comet Shard if desired.
- Heal and prepare at Sophocles’s Captain’s Gate.
- Stop before the first audio question.
Before you move on
- Hau has been defeated immediately after arrival in Malie City.
- The Malie Garden tea-shop meeting with Professor Kukui is complete.
- The upstairs The Light of Alola scene in Malie Library has finished.
- Both Team Skull Grunts at the northern Route 10 bus stop have been defeated.
- The Exeggutor Express has carried you to Mount Hokulani.
- Molayne has been defeated outside Hokulani Observatory.
- The party is healed and prepared at Sophocles’s Captain’s Gate.
- The first audio question has not been answered and Totem Vikavolt has not been fought.
Ula'ula Trials — Sophocles’s Electric Trial and Acerola’s Ghost Trial
Begin at Sophocles’s Captain’s Gate in Hokulani Observatory after the Mount Hokulani approach. Complete the original Pokémon Sun audio-quiz trial and defeat Totem Vikavolt, then follow the required route through Malie Garden, Route 11, Route 12, Blush Mountain, Route 13, Tapu Village, Aether House, and Route 14. Complete Acerola’s abandoned Thrifty Megamart trial against Totem Mimikyu, then return to Aether House to trigger the stolen-Yungoos and Plumeria sequence that leads into the next chapter.
Begin Sophocles’s trial at Hokulani Observatory
Heal before entering the Captain’s Gate and save outside it. Speak with Sophocles in the trial room to activate the Ping Totem Pokémon 2.0. In the original Pokémon Sun and Pokémon Moon release, this is an audio-quiz trial. Do not confuse it with the Charjabug-rotation puzzle used by Sophocles in Ultra Sun and Ultra Moon.
The trial locks you into the room until it is completed or failed. Sophocles presents four audio questions. Each correct answer opens the security system briefly and brings in a Pokémon battle. Keep a Fire-, Rock-, or strong neutral attacker healthy, and carry a few healing items plus a Paralyze Heal or Full Heal. If you lose to Totem Vikavolt and retry the trial, the game allows you to resume at the final security question rather than repeating the entire sequence.
- Heal before entering the Captain’s Gate.
- Save outside the trial room.
- Prepare a Fire-, Rock-, or strong neutral attacker.
- Carry healing and status-curing items.
- Remember that this is the original audio-quiz trial, not the Ultra-series Charjabug puzzle.
Answer the four audio questions
Choose the answers in this order: Pokémon Center, Rotom Pokédex, Charjabug, and Totem Pokémon. The first correct answer leads to a level 27 Grubbin. The second and third correct answers each lead to a level 27 Charjabug. The fourth answer summons Totem Vikavolt.
A wrong choice does not permanently fail the trial. Sophocles is shocked and repeats the question, so select the correct answer when it returns. Use the three preliminary battles to manage experience and positioning, but avoid spending all of your strongest moves or consumables before the Totem encounter.
- Answer Pokémon Center for the first question.
- Answer Rotom Pokédex for the second question.
- Answer Charjabug for the third question.
- Answer Totem Pokémon for the fourth question.
- Defeat Grubbin and both Charjabug encounters.
Defeat Totem Vikavolt
Totem Vikavolt is level 29, Bug/Electric, and has Levitate. Its aura raises its stats at the start of battle. Ground-type moves do not work because of Levitate, so use Fire-, Rock-, or strong neutral attacks instead. Electric attacks can paralyze your lead, making a backup attacker and a status-curing item useful.
Vikavolt can call a level 27 Charjabug. Charjabug’s Battery ability strengthens the power of an ally’s special moves, so remove it if the extra damage or Thunder Wave becomes dangerous. If your team can safely withstand the ally, continuing to attack Vikavolt may shorten the fight. Totem Vikavolt itself cannot be caught.
After the Totem faints, speak with Sophocles to receive Electrium Z. Molayne then gives you Steelium Z and Professor Kukui’s Mask. These rewards confirm that the trial is complete.
- Do not use Ground attacks against Vikavolt.
- Use Fire, Rock, or reliable neutral damage.
- Defeat Charjabug if Battery or Thunder Wave is creating danger.
- Receive Electrium Z from Sophocles.
- Receive Steelium Z and Professor Kukui’s Mask from Molayne.
Leave the observatory and clear Malie Garden
Exit Hokulani Observatory and return down Mount Hokulani to Malie City. Go to Malie Garden and follow the required meeting with Professor Kukui and Lillie. Guzma appears and challenges you. Defeat Guzma, then complete the remaining dialogue in the garden. This scene is the required transition from Sophocles’s trial into the southern Ula’ula routes.
Do not go directly to Acerola’s trial from the observatory. The route gates and story scenes ahead are opened in sequence, and the next destination is Route 11 on the south side of Malie City.
- Leave Hokulani Observatory.
- Return to Malie City.
- Enter Malie Garden.
- Complete the required Kukui and Lillie scene.
- Defeat Guzma in Malie Garden.
- Finish the post-battle dialogue before leaving.
Travel through Route 11, Route 12, Blush Mountain, and Route 13
From Malie City, take the southern exit into Route 11. Follow the route east to Route 12. A Trial Guide on Route 11 can heal your party, so use that service or return to a Pokémon Center before continuing if the Guzma battle caused damage.
On Route 12, follow Hapu and Mudsdale when the story requires it. Continue through the route’s branching paths until you reach Blush Mountain. Visit the Geothermal Power Plant area as required, then return to the route and proceed toward the Secluded Shore and Route 13. These areas contain optional trainers, items, and wild Pokémon, but none are required beyond the story scenes and the route passage.
On Route 13, Hau greets you and gives you a Max Potion. Gladion then appears and warns you to protect Cosmog from Team Skull. Complete both conversations, then continue north into Tapu Village. Do not enter Haina Desert or attempt Nanu’s Grand Trial yet; those objectives belong after Acerola’s trial and the Team Skull sequence.
- Cross Route 11 from Malie City.
- Use the Route 11 healing service if needed.
- Follow Hapu’s Mudsdale scene on Route 12.
- Pass through Blush Mountain and the Geothermal Power Plant area.
- Continue through the Secluded Shore to Route 13.
- Complete Hau’s Route 13 scene.
- Complete Gladion’s Cosmog warning.
- Reach Tapu Village.
Visit Tapu Village and Aether House before Acerola’s trial
At Tapu Village, heal at the Pokémon Center and continue west toward Route 15. Enter Aether House. Hau is inside, and the two of you are challenged by the children. Defeat the required preschooler battles, then complete the dialogue with Hau and Acerola.
Acerola confirms that she is the next Trial Captain and explains that her trial is in the abandoned Thrifty Megamart on Route 14. This is the pre-trial Aether House visit. The stolen-Yungoos and Plumeria confrontation does not occur yet, so do not wait for that event before entering the trial.
Leave Aether House and travel back through Tapu Village to Route 14. On the way to the abandoned Thrifty Megamart, complete the required scene in which Lillie is confronted by Team Skull. Continue to Acerola at the Captain’s Gate, heal at the Route 14 Pokémon Center, and save before entering.
- Heal in Tapu Village or at the Route 14 Pokémon Center.
- Enter Aether House after reaching the area from Tapu Village.
- Complete the required battles against the children.
- Speak with Hau and Acerola.
- Leave Aether House after Acerola confirms the trial.
- Travel to Route 14.
- Complete the required Team Skull scene involving Lillie.
- Save before Acerola’s Captain’s Gate.
Investigate the abandoned Thrifty Megamart
Enter the abandoned Thrifty Megamart and follow the disturbances inside. Acerola modifies the Poké Finder for this trial. When the game indicates suspicious movement, use the Poké Finder to photograph Gastly, then battle it. Continue through the building, photograph Haunter, and battle it. Photograph Gengar next and defeat it as well. These encounters are required; taking a photograph starts the battle rather than merely recording an optional image.
The Gastly, Haunter, and Gengar encounters are level 30 in the original Sun and Moon games. Keep your party healthy because each photograph leads directly into combat. Dark-type attacks are useful against the Ghost Pokémon, but avoid relying on a single attacker if confusion, sleep, or damage leaves it unable to act.
After the three encounters, follow the moving object toward the rear of the building. Use the Poké Finder when prompted to reveal the apparent Pikachu-like figure and begin the Totem battle.
- Photograph and defeat Gastly.
- Photograph and defeat Haunter.
- Photograph and defeat Gengar.
- Continue toward the rear of the building.
- Use the Poké Finder on the final moving figure.
Defeat Totem Mimikyu
Totem Mimikyu is level 33, Ghost/Fairy, and begins with all of its stats raised by its aura. Its Disguise ability absorbs the first damaging move that hits, so your opening attack breaks Disguise without dealing its normal damage. Follow with Steel-, Ghost-, or Poison-type attacks when available. Fairy attacks are not super effective against Mimikyu, and Dark attacks deal neutral damage, so do not treat either as the primary answer unless your team lacks better coverage.
Mimikyu can call Haunter or Gengar as an SOS ally. The possible allies are level 27. Remove an ally if Hypnosis, Shadow Ball, confusion, or repeated damage is putting the party at risk. Otherwise, concentrate on Mimikyu to end the two-on-one situation quickly. Switch to a second attacker if your lead is put to sleep, confused, or knocked out.
Totem Mimikyu cannot be captured. After it faints, the game returns you outside and Acerola confirms completion of the trial.
- Break Disguise with the first damaging move.
- Use Steel, Ghost, or Poison coverage when possible.
- Defeat Haunter or Gengar if its status moves or damage are dangerous.
- Keep a second attacker ready.
- Do not throw Poké Balls at Totem Mimikyu.
Collect the Ghostium Z and trigger the next story sequence
After the battle, Acerola awards Ghostium Z and ten Dusk Balls. Check your bag to confirm that Electrium Z, Steelium Z, and Ghostium Z have been received. Wild Pokémon and additional items in the abandoned site are optional and do not affect story completion.
Return to Aether House on Route 15 after Acerola’s trial. This time, the stolen-Yungoos scene occurs. Team Skull has taken one of the children’s Yungoos, and Plumeria is present with the grunts. Complete the required battles and dialogue. This is the correct point for the stolen-Yungoos and Plumeria trigger; it happens after the abandoned Thrifty Megamart trial, not before it.
The chapter ends after this Aether House sequence, with the Po Town, Team Skull, Nanu, and Aether Paradise objectives ready for the next chapter. Heal and save before leaving. Nanu’s later Grand Trial uses a Dark-focused team, so prepare Fighting, Bug, or Fairy coverage; remember that Sableye is Dark/Ghost and is immune to Fighting moves.
- Receive Ghostium Z from Acerola.
- Receive ten Dusk Balls.
- Return to Aether House after clearing the trial.
- Complete the stolen-Yungoos scene.
- Battle Plumeria and the required Team Skull grunts.
- Save and heal before continuing toward Po Town and Nanu’s Grand Trial.
- Prepare Fairy, Bug, or another reliable answer to Sableye.
Before you move on
- Electrium Z has been received from Sophocles.
- Steelium Z and Professor Kukui’s Mask have been received from Molayne.
- The four Sophocles audio answers have been completed in order.
- Grubbin and both Charjabug encounters have been defeated.
- Totem Vikavolt has been defeated.
- The Malie Garden Guzma scene has been completed.
- The party has traveled through Route 11, Route 12, Blush Mountain, Route 13, and Tapu Village.
- The pre-trial Aether House scenes with Hau, the children, and Acerola have been completed.
- The required Route 14 scene involving Lillie and Team Skull has been completed.
- Gastly, Haunter, and Gengar have been photographed and defeated.
- Totem Mimikyu has been revealed and defeated.
- Ghostium Z and ten Dusk Balls have been received from Acerola.
- The post-trial stolen-Yungoos and Plumeria sequence at Aether House has been completed.
- The next Po Town, Nanu, and Aether Paradise sequence is available.
- The party is healed and has a dependable answer to Sableye before Nanu’s Grand Trial.
References for this chapter
Aether Foundation, Team Skull, and the Memorial Hill Sequence
After Acerola’s Ghost trial, return to Aether House, recover the stolen Yungoos, and follow Team Skull to Po Town. Clear the Shady House, defeat Guzma and Gladion, complete Nanu’s Ula’ula Grand Trial, then raid Aether Paradise with Hau and Gladion. Defeat Guzma’s full original Pokémon Sun rematch team and Lusamine. Finish by receiving the Moon Flute and Master Ball and taking the ferry to Seafolk Village on Poni Island.
Return to Aether House and defeat Plumeria
After completing Acerola’s trial at the abandoned Thrifty Megamart, travel north along Route 15 to Aether House. Speak to the people outside to trigger the Team Skull scene. Plumeria appears with two Grunts; Hau and Acerola deal with the Grunts while you battle Plumeria.
In the original Pokémon Sun encounter, Plumeria uses Golbat at level 34 and Salazzle at level 35. Rock- and Psychic-type attacks are useful against Golbat, while Ground-type attacks are especially effective against Salazzle. Carry status recovery because Poison Fang, Toxic, or other poison effects can consume your healing items before the next required battles.
After Plumeria is defeated, speak to the child inside Aether House. The child explains that Yungoos has been taken and gives you a Rare Candy. Return outside and speak with Grimsley on the beach. Complete his short dialogue sequence and he registers Sharpedo Jet on the Ride Pager. Sharpedo Jet lets you cross water and smash breakable rocks, opening the route toward Po Town.
- Return to Aether House after Acerola’s trial.
- Defeat Plumeria on Route 15.
- Speak with the child whose Yungoos was stolen.
- Receive Sharpedo Jet from Grimsley.
- Heal and prepare before entering the Po Town route.
Travel through Routes 16 and 17 to Po Town
Use Sharpedo Jet from Route 15 to reach Route 16, then pass through the Aether House area and Ula’ula Meadow. Continue north along Route 17 toward Po Town. Team Skull Grunts block the approach, including a required Double Battle near the town entrance. Defeat the blocking Grunts, then speak to the guard at the gate and enter Po Town.
Po Town’s Pokémon Center remains available, although the Team Skull attendant charges 10 Poké Dollars for healing. Use it before entering the Shady House if your party is damaged. Optional battles and item pickups can wait; the required destination is the Shady House at the north end of town.
Inside the Shady House, inspect the rooms and notes to find the three password clues. The answers are Golisopod, Tapu Cocoa, and Beat Up. When the game asks whether you are certain about each answer, choose No. That negative confirmation is part of the correct sequence. After all three passwords are entered, continue upstairs through the remaining Grunts and reach Guzma’s room.
- Cross Route 16 with Sharpedo Jet.
- Pass through Ula’ula Meadow and Route 17.
- Defeat the Team Skull Grunts at Po Town’s entrance.
- Heal at the paid Pokémon Center if necessary.
- Enter Golisopod, Tapu Cocoa, and Beat Up.
- Choose No when confirming each password.
Defeat Guzma and recover the stolen Yungoos
Guzma’s Shady House team in the original Pokémon Sun release consists of Golisopod at level 37 and Ariados at level 36. Fire-, Flying-, and Rock-type attacks are effective against this Bug-focused team. Lead with a Pokémon that can survive Golisopod’s opening First Impression, then deal immediate damage. Emergency Exit can force Golisopod to switch out after it loses enough HP, so be ready for the battle’s order to change.
Ariados can use priority attacks such as Sucker Punch or Shadow Sneak. Do not leave a weakened attacker in front of it merely because you expect to finish the fight. Fire- or Rock-type damage is generally safer than relying on a fragile Psychic-type attacker.
After Guzma is defeated, the stolen Yungoos is returned. Leave the Shady House and go back to Aether House. Lillie and Nebby are missing, and Gladion challenges you outside. Heal at the Po Town Pokémon Center before leaving, or use another available recovery point before starting the battle.
- Defeat Guzma’s level 37 Golisopod and level 36 Ariados.
- Recover the stolen Yungoos.
- Return to Aether House.
- Heal before battling Gladion.
Defeat Gladion and complete Nanu’s Grand Trial
Gladion’s Aether House team is Golbat at level 37, Sneasel at level 37, and Type: Null at level 38. Rock- or Electric-type attacks are useful against Golbat. Fighting-, Bug-, and Fairy-type attacks work well against Sneasel. Type: Null has strong neutral attacks and good durability, so use dependable direct damage rather than a fragile setup plan.
After Gladion loses, follow him to the Malie City ferry terminal. Speak to him at the dock, then talk to Nanu to begin the Ula’ula Grand Trial. Heal and reorganize the party before speaking to Nanu because the story proceeds directly toward Aether Paradise once the trial sequence is complete.
Nanu uses Sableye at level 38, Krokorok at level 38, and Alolan Persian at level 39. Sableye has no ordinary type weakness in this generation, so use strong neutral attacks or Fairy-type moves. Fighting-, Bug-, and Fairy-type attacks are useful across the rest of the team. Keep your best answer for Alolan Persian, which can use Fake Out and its Darkinium Z-Move. Krokorok’s Ground typing also makes an Electric-only plan unreliable.
After winning, receive the Ula’ula stamp and Darkinium Z. Follow the post-trial instructions back to the ferry terminal to begin the Aether Paradise raid.
- Defeat Gladion’s Golbat, Sneasel, and Type: Null.
- Reach the Malie City ferry terminal.
- Defeat Nanu’s Sableye, Krokorok, and Alolan Persian.
- Receive the Ula’ula stamp and Darkinium Z.
- Heal before boarding the ferry.
Board the ferry and investigate Aether Paradise
Board the ferry from the Malie City terminal with Gladion and Hau. At Aether Paradise, move through the dock and storage areas, defeating the Aether Foundation Employees who block the route. Your immediate objective is to reach the central elevator; optional item pickups can be collected later.
Faba confronts you on the first floor with Hypno. Dark- and Bug-type attacks are effective, but prepare for sleep or disabling moves. Continue with Gladion and Hau after the battle. The group obtains the access needed to reach the lower level, and Hau gives you a Max Revive during the transition.
Enter Secret Lab B, the laboratory on the right. Secret Lab A is optional and is not required for the story. Defeat the required Aether Employees in Secret Lab B, then complete the required Double Battle with Hau against two Foundation Employees. Examine the computers and research material to learn about Cosmog and the Ultra Beasts. Return to the elevator after the laboratory scenes.
Continue through the required Employee and Faba encounters on the upper level. Some battles are Double Battles with Gladion or Hau. Faba’s later team includes Slowbro, Bruxish, and Hypno, so Electric-, Grass-, Dark-, and Bug-type moves provide useful coverage. Wicke heals the party during the raid. Treat that recovery as the starting point for the Guzma and Lusamine battles.
- Defeat the Employees at the Aether Paradise docks.
- Defeat Faba’s first Hypno.
- Reach the lower level with Gladion and Hau.
- Enter Secret Lab B.
- Inspect the Cosmog and Ultra Beast research.
- Complete the required Double Battles.
- Use Wicke’s healing before continuing.
Defeat Guzma’s full Aether Paradise rematch team
After the laboratory sequence, return toward the outside area of Aether Paradise. Defeat the required Team Skull Grunts and continue north until Gladion confronts Guzma. In the original Pokémon Sun release, this is not a single-Golisopod battle. Guzma uses Golisopod at level 41, Ariados at level 40, Masquerain at level 40, and Pinsir at level 40.
Golisopod is Bug/Water type and can use strong physical attacks. Fire-, Flying-, Electric-, and Rock-type moves are effective, but Emergency Exit can make it switch out after it loses enough HP. Avoid spending your strongest move on a setup turn if Golisopod is already close to its ability threshold.
Ariados is Bug/Poison type, so Fire-, Flying-, Rock-, and Psychic-type attacks are useful, although priority attacks can punish a weakened attacker. Masquerain is Bug/Flying type and is especially vulnerable to Rock-type attacks; Electric-, Ice-, and Fire-type moves are also useful. Pinsir is pure Bug type and can be handled with Fire-, Flying-, or Rock-type attacks. Keep at least one reliable answer for Pinsir rather than exhausting all of your Flying- or Rock-type damage on the first three Pokémon.
This battle is more demanding than Guzma’s Shady House fight because the full four-Pokémon roster can spread damage across the party. Use the recovery from Wicke before entering, carry healing items, and switch rather than sacrificing a low-health counter. After Guzma is defeated, prepare for the President’s Room and Lusamine.
- Defeat Guzma’s level 41 Golisopod.
- Defeat his level 40 Ariados.
- Defeat his level 40 Masquerain.
- Defeat his level 40 Pinsir.
- Use the recovery opportunity before Lusamine’s battle.
Defeat Lusamine
Follow Lusamine through the mansion and collection area. The story reveals her relationship to Lillie and Gladion, and she uses Cosmog’s power to open Ultra Wormholes. After the cutscene, battle her in the President’s Room.
Lusamine’s original Pokémon Sun team consists of five level 41 Pokémon: Clefable, Lilligant, Mismagius, Milotic, and Bewear. Steel- or Poison-type attacks are useful against Clefable. Lilligant is vulnerable to Fire-, Flying-, Ice-, Bug-, and Poison-type attacks. Use Dark- or Ghost-type moves against Mismagius, Electric- or Grass-type moves against Milotic, and Fighting-type attacks against Bewear.
Do not rely on one type to sweep the entire team. Milotic can absorb substantial damage, while Bewear is bulky and can punish a weakened physical attacker. Save your Z-Move for the opponent that threatens the greatest portion of your remaining party. After Lusamine is defeated, the story scenes continue automatically, and your party is restored during the post-battle sequence.
- Enter the President’s Room after Guzma’s defeat.
- Defeat Clefable, Lilligant, Mismagius, Milotic, and Bewear.
- Complete the post-battle scenes.
- Confirm that the party has been restored.
Receive the Moon Flute and depart for Poni Island
After Lusamine’s defeat, follow Lillie and Gladion through the mansion and outside. In Pokémon Sun, Gladion gives you the Moon Flute. You also receive the Master Ball. The Moon Flute is required later for the Altar of the Sunne sequence, while the Master Ball is optional and can be saved for a target of your choice.
Return through Aether Paradise to the B1F docks. Take the elevator down and speak with Gladion near the ferry. Choose to leave when ready. The boat carries you directly to Seafolk Village on Poni Island.
End the chapter after arriving at Seafolk Village. Do not begin the Poni Wilds route, visit Exeggutor Island, follow Hapu’s succession, obtain the Sun Flute, or start the Altar of the Sunne sequence. Those objectives belong to the next chapters.
- Receive the Moon Flute.
- Receive the Master Ball.
- Reach the B1F docks.
- Speak with Gladion and depart for Poni Island.
- Arrive at Seafolk Village and stop the chapter.
Before you move on
- Plumeria has been defeated outside Aether House on Route 15.
- Sharpedo Jet has been registered and Po Town has been reached.
- The Shady House passwords Golisopod, Tapu Cocoa, and Beat Up have been entered with the negative confirmation response.
- Guzma’s Shady House team of Golisopod and Ariados has been defeated.
- The stolen Yungoos has been recovered.
- Gladion’s Golbat, Sneasel, and Type: Null have been defeated at Aether House.
- Nanu’s Grand Trial is complete and Darkinium Z has been received.
- The ferry from Malie City has taken the player to Aether Paradise.
- Faba and the required Aether Foundation Employees have been defeated.
- Secret Lab B has been entered and the Cosmog and Ultra Beast research has been examined.
- Wicke’s healing event has occurred.
- Guzma’s Aether Paradise rematch has been defeated: level 41 Golisopod, level 40 Ariados, level 40 Masquerain, and level 40 Pinsir.
- Lusamine’s five level 41 Pokémon have been defeated.
- The Moon Flute and Master Ball have been received.
- Gladion’s ferry at Aether Paradise can transport the player to Seafolk Village.
- No Poni Island route, Exeggutor Island, Sun Flute, Hapu succession, or Altar sequence has begun.
Poni Island Access — Exeggutor Island and Seafolk Village
In the original Pokémon Sun for Nintendo 3DS, Poni Island’s main-story route begins in Seafolk Village and leads through Poni Wilds, Ancient Poni Path, Poni Breaker Coast, and the Ruins of Hope. Hapu becomes Poni’s kahuna at the ruins, which unlocks the S.S. Magikarp trip to Exeggutor Island. Retrieve the Sun Flute, return to Poni, and defeat the Team Skull Grunts blocking the northern route. Plumeria then gives you Poisonium Z, while Lillie restores the party. The chapter ends at the entrance to Vast Poni Canyon, before Hapu’s Grand Trial and the later Dragon trial.
Leave Seafolk Village and follow the route to the Ruins of Hope
After arriving on Poni Island, heal at the Seafolk Village Pokémon Center and restock Poké Balls, healing items, and status cures. Seafolk Village is the most convenient supply point before the longer sequence ahead, although there is no requirement to complete optional village errands.
Follow the chief’s instructions and leave the village through the northern exit into Poni Wilds. Cross the area using the main path, then take the eastern exit into Ancient Poni Path. When you first reach this route, Hapu’s grandmother registers Machamp Shove to the Ride Pager. This Ride ability is required inside the Ruins of Hope.
Continue east from Ancient Poni Path to Poni Breaker Coast. Follow the coast toward the Ruins of Hope and enter the ruins after the story scene with Lillie. You cannot reach Exeggutor Island at this point; the boat trip is unlocked only after the ceremony at the ruins.
- Heal and restock in Seafolk Village.
- Cross Poni Wilds and Ancient Poni Path.
- Continue through Poni Breaker Coast to the Ruins of Hope.
- Obtain Machamp Shove before attempting the ruins puzzle.
Open the Ruins of Hope and witness Hapu’s succession
Walk down the coral-covered path inside the ruins until you reach Lillie and Mudsdale. Enter the shrine and use Machamp Shove to move the boulders. Push the nearest lower-left stone all the way north. Then push the middle stone east, walk around it, and push that same stone north into the floor opening. This clears the passage into the northern chamber.
If the boulders are left in an unusable position, exit the room and re-enter it. The puzzle resets when you leave. Once the route is open, go north into the next chamber and continue to the inner room.
Hapu receives a Sparkling Stone and is recognized as Poni’s new kahuna. During the scene, she explains that the ceremony at the Altar of the Sunne requires two flutes. Lillie carries one, and the other is on Exeggutor Island. This scene is the story trigger that makes the S.S. Magikarp trip available.
- Use Machamp Shove in the shrine.
- Push the three boulder positions into the northern passage.
- Watch the ceremony that establishes Hapu as Poni’s kahuna.
- Learn that the other flute is on Exeggutor Island.
Return to Seafolk Village and board the S.S. Magikarp
Leave the Ruins of Hope after the ceremony. The quickest return is to use Charizard Glide to fly back to Seafolk Village, although you can also retrace the route through Poni Breaker Coast, Ancient Poni Path, and Poni Wilds.
When you return, the story scene with Hapu, Lillie, and the village chief begins. After the conversation, go to the southwestern dock area of Seafolk Village. The chief takes you and Lillie to Exeggutor Island on the S.S. Magikarp.
Heal before boarding if necessary. The island contains a mandatory battle immediately after arrival, and the return trip does not occur until the island sequence is complete.
- Return to Seafolk Village after Hapu’s succession.
- Allow the village-chief scene to finish.
- Heal if needed and board the S.S. Magikarp from the southwestern dock.
Resolve the Alolan Exeggutor encounter and obtain the Sun Flute
When you arrive on Exeggutor Island, approach Lillie to begin the story event. An Alolan Exeggutor at Level 40 attacks. You may catch it or knock it out; either result advances the story. Save before the island sequence if you want to preserve the capture opportunity.
After the battle, go north toward Lillie. Follow the island path through the weather scene and continue upward. The optional Big Pearl, Prism Scale, and hidden Heart Scale can be collected, but none is required to finish the chapter.
Follow the route around the island until you reach the highest point. Inspect the pedestal to obtain the Sun Flute, the version-specific flute used in Pokémon Sun. After the story scene, the S.S. Magikarp returns you to Poni Island automatically.
- Complete the Level 40 Alolan Exeggutor battle.
- Continue north and around the island after the weather scene.
- Reach the highest point of Exeggutor Island.
- Take the Sun Flute from the pedestal.
- Return to Poni Island on the S.S. Magikarp.
Defeat the Team Skull blockade on Ancient Poni Path
After returning to Poni, travel back through Poni Wilds to Ancient Poni Path. Pass Hapu’s house and head north toward the entrance to Vast Poni Canyon. Team Skull is blocking the route while confronting Lillie, so two consecutive battles are required.
The first Team Skull Grunt uses a Level 44 Fomantis. The second Grunt uses five Pokémon: Level 43 Salandit, Level 43 Golbat, Level 44 Alolan Raticate, Level 43 Mareanie, and Level 44 Haunter. Bring reliable answers to Poison, Flying, Dark, Water, and Ghost threats. Ground- or Psychic-type attacks are useful, but avoid relying on one attacker if Mareanie’s defenses or status effects begin slowing the battle.
After the battles, Plumeria arrives and gives you Poisonium Z. Lillie heals the party separately, so you do not need to return to the Pokémon Center before entering the next area. Proceed north through the newly opened route and stop at the entrance to Vast Poni Canyon. The canyon, Hapu’s Grand Trial, and the later Dragon trial belong to the next chapter.
- Defeat the first Grunt’s Level 44 Fomantis.
- Defeat the second Grunt’s five-Pokémon team.
- Receive Poisonium Z from Plumeria.
- Confirm that Lillie has healed the party.
- Reach the entrance to Vast Poni Canyon without beginning its trial content.
Before you move on
- Hapu has received her Sparkling Stone and been recognized as Poni’s new kahuna.
- The Sun Flute is in the Key Items pocket.
- The Level 40 Alolan Exeggutor encounter has been resolved.
- Both Team Skull Grunts on Ancient Poni Path have been defeated.
- Plumeria has given you Poisonium Z.
- Lillie has healed the party.
- The northern route is open and you have reached the entrance to Vast Poni Canyon.
- Hapu’s Grand Trial and the Dragon trial have not yet been counted as complete.
Poni Grand Trial — Kahuna Hapu and the Final Trial Beat
Begin at the entrance to Vast Poni Canyon after the previous chapter’s Poni Island preparations. In the original Pokémon Sun for Nintendo 3DS, Hapu’s Grand Trial is fought before the canyon’s separate captainless Dragon trial. Defeat Hapu to obtain Groundium Z and the Poni Trial Completion stamp, then cross the canyon, complete the Jangmo-o and Hakamo-o encounters, defeat Totem Kommo-o and its allies, and collect Dragonium Z. Mina may appear during the canyon route, but she has no active trial in the original Sun and Moon release.
Start at Vast Poni Canyon and prepare for Hapu
Enter Vast Poni Canyon from Ancient Poni Path with the party healed. At the entrance, Lillie gives you a Max Revive and restores the team to full health. This is the correct starting point for this chapter; the Ruins of Hope, Exeggutor Island, Sun Flute, and Ancient Poni Path blockade have already been completed.
Follow the main route north through the first section of the canyon. Hapu and Mudsdale are waiting beneath a large dead tree. Speak to Hapu and choose the preparation option if you need to change your lead Pokémon, restore status conditions, or organize held items. Once you confirm that you are ready, the Grand Trial begins immediately.
Hapu is the Ground-type kahuna of Poni Island. Bring at least one dependable Grass- or Water-type attacker, and add Ice coverage if possible. A special attacker is particularly useful for the final Mudsdale because its Stamina ability raises its Defense whenever it is hit by an attack. Stock healing items before speaking to Hapu; the canyon remains a long route after the battle.
- The party is healed at the Vast Poni Canyon entrance.
- Hapu is waiting beneath the large dead tree.
- A Grass- or Water-type attack is available.
- Ice coverage or another reliable answer to Flygon is available.
- Healing items and status cures are in the Bag.
Defeat Hapu’s level 47-48 Grand Trial team
Hapu’s team is Alolan Dugtrio at level 47, Gastrodon at level 47, Flygon at level 47, and Mudsdale at level 48. Alolan Dugtrio is Ground and Steel, so Water, Grass, Fire, and Fighting attacks can work well. It can use Sandstorm, which causes residual damage and activates its Sand Veil ability. Use accurate attacks rather than relying on moves that can miss during the sandstorm.
Use Grass attacks against Gastrodon. Because Gastrodon is Water and Ground, Electric attacks do not work against it. Gastrodon can use Recover, so keep pressure on it instead of giving it several turns to restore health. Its Muddy Water can also reduce the accuracy of your active Pokémon.
Flygon has the Ground and Dragon types and the Levitate ability, so Ground attacks cannot hit it. Ice moves are especially effective. Dragon Breath can cause paralysis, so cure a Pokémon that you need for the next exchange or switch to a less important attacker if your main counter becomes unreliable.
Mudsdale has the Stamina ability, Heavy Slam, Earthquake, Double Kick, and Counter. Prefer special Grass- or Water-type attacks, since repeated physical hits raise its Defense. Mudsdale holds Groundium Z and can use Tectonic Rage once by upgrading Earthquake. Keep a healthy Flying-type, Levitate user, or other safe Ground-resistant Pokémon available, but do not depend on an immunity if that Pokémon is already weakened.
- Alolan Dugtrio is defeated without wasting too many turns in Sandstorm.
- Gastrodon is handled with Grass attacks rather than Electric attacks.
- Flygon is attacked with Ice, Fairy, Dragon, or another move that bypasses its Ground immunity.
- Mudsdale is pressured with special attacks where possible.
- Tectonic Rage has been survived or safely avoided.
Claim Groundium Z and the Poni completion stamp
After all four of Hapu’s Pokémon are defeated, you receive 7,680 Poké Dollars. Hapu gives you Groundium Z, teaches the Tectonic Rage pose, and stamps the Trainer Passport with the Poni Trial Completion stamp.
The stamp allows Pokémon up to level 80, including traded Pokémon, to obey you. This is the reward for the Grand Trial and is separate from the Dragonium Z obtained later in the canyon.
Before moving on, heal if necessary and restore the PP of the attacks you rely on most. Hapu directs you and Lillie toward the large cave opening to the east. Follow that direction to continue through Vast Poni Canyon. Do not leave the canyon expecting another kahuna battle; the next required objective is the separate captainless trial.
- Hapu is defeated.
- Groundium Z is in the Bag.
- Tectonic Rage is available for a compatible Ground-type move.
- The Poni Trial Completion stamp is recorded.
- The party is healed or ready for the canyon route.
Cross Vast Poni Canyon and reach the captainless trial
Enter the large cave opening east of Hapu and follow the marked route through the canyon. The area contains numerous trainers, wild Pokémon, Ride obstacles, ladders, bridges, cave sections, and boulder puzzles. Use Tauros Charge to break rocks, Machamp Shove to move boulders, and Lapras Paddle or Sharpedo Jet when water blocks an item or route. Optional items can be collected if your team needs them, but the main goal is to keep moving north and upward through the connected cave sections.
At the high wooden bridge, Lillie catches up and heals your party after crossing. This is the safest recovery point before the final trial approach. Continue past Mina, who introduces herself as Poni’s captain without an active trial in the original Sun and Moon games. She gives you Fairium Z as a meeting token, but you do not complete a Fairy trial here. Continue through the remaining trainers and follow the route to the trial gate.
When Lillie heals you near the trial gate, use the opportunity to check your lead Pokémon, restore PP if needed, and place your best Fairy, Ice, Flying, or Psychic attacker where it can act quickly. Enter the farthest tunnel and inspect the ancient monument. There is no captain present: this is the old Dragon trial site.
- The route through the canyon is open.
- Machamp Shove and the required Ride Pokémon are available.
- The mid-canyon healing point has been used if needed.
- Mina has been passed without searching for an active Fairy trial.
- The trial gate and ancient monument have been reached.
Complete the captainless Dragon trial
Proceed through the farthest tunnel. A level 40 Jangmo-o attacks you first. Defeat it and continue forward. A short distance later, a level 40 Hakamo-o attacks. Defeat that battle as well. These are required encounters in the trial sequence, not optional wild encounters that can be skipped.
After the Hakamo-o battle, continue to the pedestal holding Dragonium Z. Attempting to take the crystal triggers the Totem battle, so do not expect to collect the item and leave. If you need a final preparation point, heal before entering the tunnel or use the healing point near the trial gate; there is no normal Pokémon Center beside the pedestal.
Totem Kommo-o is level 45 and has its Attack, Defense, Special Attack, Special Defense, and Speed raised by one stage at the beginning of battle. It is Dragon and Fighting, making Fairy attacks the strongest option. Flying, Psychic, Ice, and Dragon attacks are also effective. Kommo-o uses Clanging Scales, Sky Uppercut, Flash Cannon, and Protect, so do not assume that one type of attacker will remain safe throughout the battle.
- The level 40 Jangmo-o encounter is defeated.
- The level 40 Hakamo-o encounter is defeated.
- The Dragonium Z pedestal has been reached.
- The party is prepared for an immediate Totem battle.
- A Fairy, Flying, Psychic, Ice, or Dragon attack is ready.
Defeat Totem Kommo-o and collect Dragonium Z
Begin by dealing as much reliable damage as possible to Totem Kommo-o before its allies create a two-on-one battle. Fairy attacks exploit its four-times weakness, but remember that the Totem’s boosted defenses can prevent an otherwise certain knockout. Use your strongest accurate move rather than setting up for several turns.
Kommo-o can call a level 32 Hakamo-o or a level 32 Scizor. Hakamo-o may use Sky Uppercut, Autotomize, Work Up, and Bide. Scizor uses Metal Claw, Pursuit, Leer, and Fury Cutter. Defeat an ally quickly if it begins raising its stats or if its presence prevents you from safely finishing Kommo-o. If Kommo-o is already near defeat, finish it rather than spending too many turns on a minor ally.
Once Kommo-o and any active allies are defeated, the trial ends. Take Dragonium Z from the pedestal. It allows a compatible Dragon-type damaging move to become Devastating Drake. The route beyond the trial is now open toward the Altar of the Sunne, which begins the next chapter.
- Totem Kommo-o is defeated.
- The level 32 Scizor and level 32 Hakamo-o allies have been defeated if called.
- Dragonium Z is collected from the pedestal.
- The captainless Dragon trial is complete.
- The route toward the Altar of the Sunne is open.
Before you move on
- Hapu has been defeated at the Vast Poni Canyon entrance with Alolan Dugtrio, Gastrodon, and Flygon at level 47 and Mudsdale at level 48.
- Groundium Z and the Poni Trial Completion stamp are recorded.
- The level 40 Jangmo-o and Hakamo-o encounters in the farthest tunnel are complete.
- Totem Kommo-o at level 45 and its level 32 allies have been defeated.
- Dragonium Z has been collected from the pedestal.
- The path toward the Altar of the Sunne is available.
The Altar of the Sunne — Nebby Evolves and the Solgaleo Sequence
After clearing the captainless Dragon trial, complete the Altar of the Sunne ceremony, follow Lillie through Ultra Space, defeat Lusamine, and capture the level 55 Solgaleo encounter. In the original Pokémon Sun, this capture is required for the story to continue. If Solgaleo is defeated or you flee, it respawns at the altar for another attempt. The chapter ends after Nanu directs you toward Tapu Village and Mount Lanakila.
Reach the altar from Vast Poni Canyon
When you leave the tunnel at the deepest end of Vast Poni Canyon, Lillie, Hapu, and Mudsdale are waiting outside. The preceding trial is complete, and Lillie heals your party before the altar sequence begins. This is the last convenient automatic recovery before the story battles, so check your team and carry additional healing items if needed.
Climb the large staircase beyond them to reach the Altar of the Sunne. The Sun version uses this altar; the Altar of the Moone belongs to Pokémon Moon. Save before starting the ceremony if you want a reset point for the later Lusamine battle or for preparation decisions.
- Exit the final Vast Poni Canyon tunnel.
- Confirm that Lillie has restored the party.
- Climb the staircase to the Altar of the Sunne.
- Save before beginning the ceremony if desired.
Complete the Sun Flute ceremony
At the top, Lillie moves to one side of the altar. Walk around the central platform to the opposite side and take the available position. The Sun Flute and Moon Flute are played, activating the altar and drawing Nebby into the beam of light.
Nebby evolves from Cosmoem into Solgaleo. This is a story scene, not the capture battle, so do not waste time trying to throw a Poké Ball during the evolution sequence. Solgaleo then opens an Ultra Wormhole and carries you and Lillie into Ultra Space.
- Stand opposite Lillie at the altar.
- Watch Nebby evolve into Solgaleo.
- Wait for the Ultra Wormhole to open.
- Do not confuse this sequence with Ultra Sun and Ultra Moon’s later Necrozma storyline.
Travel through Ultra Space and defeat Lusamine
In Ultra Space, follow Lillie north through the underwater-looking passage. Nebby remains nearby and can be spoken to if you need to return temporarily to Alola and prepare; otherwise, continue along the route until you meet Guzma.
After Guzma explains what happened to him, follow Lillie to the end of the area. Lusamine appears and begins the required battle. Her team consists of level 50 Pokémon with boosted statistics, so use a balanced party rather than relying on a single weakened attacker.
Poison attacks are useful against Clefable and Lilligant, Flying attacks are effective against Lilligant and Bewear, Ghost or Dark attacks help against Mismagius, and Grass or Electric attacks are strong against Milotic. Heal between battles if necessary, but there is no separate trainer battle between Guzma’s scene and Lusamine’s battle.
- Follow Lillie north through Ultra Space.
- Meet Guzma.
- Defeat Lusamine.
- Use varied type coverage and preserve several healthy Pokémon.
- Wait for the automatic return to the Altar of the Sunne.
Begin the required Solgaleo battle
After Lusamine is defeated, the story returns you to the Altar of the Sunne. Hapu and Guzma help Lusamine leave, and Lillie asks you to battle Nebby as a Trainer. After this dialogue, the level 55 Solgaleo encounter begins.
Solgaleo is Psychic and Steel type and has Full Metal Body, which prevents opposing moves or Abilities from lowering its stats. Its story moves are Sunsteel Strike, Cosmic Power, Crunch, and Zen Headbutt. Sunsteel Strike ignores the target’s Ability, so do not rely on an Ability-based defensive plan.
The encounter must end with a capture. Defeating Solgaleo or fleeing does not complete the story, but it also does not permanently remove it. The Pokémon respawns at the altar immediately, without requiring you to leave the area.
- Return to the altar after Lusamine’s defeat.
- Expect a level 55 Solgaleo.
- Plan around Full Metal Body and Sunsteel Strike.
- Do not treat the encounter as optional.
Weaken and capture Solgaleo
Use a controlled attack to lower Solgaleo’s HP. Ghost- and Dark-type moves are super effective because Solgaleo is part Psychic type, but a powerful hit can knock it out. Once its HP is reduced, switch to weaker neutral attacks or stop attacking and throw Poké Balls.
Sleep or paralysis can improve capture chances if you can apply either condition safely. Keep a sturdy Pokémon available because Sunsteel Strike, Crunch, and Zen Headbutt can quickly damage fragile targets. Heal rather than risking an accidental knockout.
The Master Ball works immediately, but it is not necessary. If your Bag contains no Poké Balls after a failed attempt, Lillie gives you ten Poké Balls; this gift can be received again after another defeat or escape when you have none. A caught Solgaleo goes into the party if space is available or into a Box if the party is full.
- Lower HP carefully without causing a knockout.
- Use sleep or paralysis when safe.
- Throw Poké Balls until the capture succeeds.
- Accept Lillie’s ten Poké Balls if your Bag is empty.
- Check the party or Box after capture.
Finish the handoff to Tapu Village
Once Solgaleo is captured, allow the altar dialogue to finish. Lillie entrusts Nebby’s evolved form to you, then leaves to check on Lusamine. Do not leave the area before this conversation concludes.
Nanu appears after Lillie leaves. He explains that the remaining challenge is the new Pokémon League, where the island kahunas will serve as the Elite Four. He directs you toward Mount Lanakila and invites you to travel with him to Tapu Village.
This is the end of the chapter. The next chapter begins at Tapu Village with League preparation. Gladion’s battle, the Mount Lanakila route, the summit Pokémon Center, Hau’s battle, and the League entrance are not part of this section.
- Solgaleo is recorded in the party or a Box.
- Lillie’s post-capture dialogue has ended.
- Nanu has appeared.
- Nanu has directed you toward Tapu Village and Mount Lanakila.
- Stop before beginning the Mount Lanakila approach.
Before you move on
- The final Vast Poni Canyon tunnel has been exited.
- The Altar of the Sunne has been reached.
- Nebby has evolved into Solgaleo.
- Lillie has been followed through Ultra Space.
- Lusamine has been defeated.
- The group has returned to the altar.
- The level 55 Solgaleo has been captured.
- Solgaleo appears in the party or a Box.
- Lillie’s post-capture dialogue has concluded.
- Nanu has directed the player toward Tapu Village and Mount Lanakila.
- The player has stopped before the Mount Lanakila approach covered in ch13.
Tapu Village — League Preparation
Begin this chapter in Tapu Village after the Altar of the Sunne sequence, Solgaleo capture, post-capture dialogue, and Nanu’s League direction have already been completed. Use the village Pokémon Center to heal, restock, adjust the party, and prepare for the long sequence ahead. Stop before entering Mount Lanakila; the next chapter covers Gladion, the mountain route, the summit Pokémon Center, Hau, and the Pokémon League entrance.
Start at Tapu Village and heal immediately
You should begin in Tapu Village, the ruined settlement at the foot of Mount Lanakila. The Altar of the Sunne and Ultra Space storyline is already complete, and the game has already directed you toward the Pokémon League. Do not return to the Altar, repeat the Solgaleo sequence, or search Poni Island for another trial.
Enter the only functioning building in the village: the Pokémon Center. Heal the entire party before making any further preparations. This building also contains the Poké Mart, so you can buy supplies without traveling to another island. Tapu Village has no separate shopping district, and the surrounding ruins do not contain a new story objective for this chapter.
Use the Poké Mart to replace supplies consumed during the Poni and Altar sequences. Carry enough healing for the mountain approach and the battles that follow. Potions or stronger healing items restore battle endurance, Revives recover a fainted team member, and Full Heals or individual status cures prevent paralysis, burns, sleep, poison, and confusion from carrying into an important fight. Buy Poké Balls only if you still intend to catch wild Pokémon on the approach; they are not needed to enter the League.
- Begin in Tapu Village after the Altar storyline is finished.
- Heal at the Pokémon Center.
- Restock healing items, Revives, and status cures.
- Use the attached Poké Mart rather than leaving the village for basic supplies.
Review the party for the entire League sequence
Prepare for a continuous series of battles rather than a normal trial stop. At the summit, the Pokémon League contains four Elite Four chambers, followed by Professor Kukui’s Champion battle. The Elite Four can be challenged in any order, but there is no ordinary Pokémon Center break between those matches. Your party must therefore survive several consecutive fights before you receive a chance to heal normally.
Build answers for the four original Pokémon Sun specialties: Hala uses Fighting types, Olivia uses Rock types, Acerola uses Ghost types, and Kahili uses Flying types. Bring more than one answer to a difficult type whenever possible. A Flying-, Psychic-, or Fairy-type attack helps against Hala; Water-, Grass-, Fighting-, Ground-, or Steel-type attacks can handle many of Olivia’s Pokémon; Dark- or Ghost-type attacks are valuable against Acerola; and Electric-, Ice-, or Rock-type attacks provide useful coverage against Kahili.
Do not build the party only around those four specialties. Professor Kukui uses a mixed team and is the final main-story opponent, so retain broad coverage and at least one dependable response to the starter Pokémon he brings. A fast attacker can finish weakened targets, while a durable Pokémon can absorb a dangerous hit and create a safe switch. Avoid carrying six Pokémon that share the same weakness, especially to Ground, Fighting, or Electric attacks.
Check levels, move PP, held items, and battle order. Replace weak or redundant moves if you have a stronger option available, and restore PP before beginning the mountain climb. Keep a Z-Crystal on a Pokémon with a compatible move and decide in advance which matchup deserves the Z-Move. Do not spend it casually on a routine trainer battle if a difficult Elite Four matchup is likely to require it.
- Cover Fighting, Rock, Ghost, and Flying opponents.
- Keep broad coverage for Professor Kukui’s mixed team.
- Restore all important move PP.
- Check held items, abilities, move order, and party levels.
- Equip a compatible Z-Crystal and reserve its Z-Move for a difficult battle.
Use the village for final adjustments
Inspect the party screen and decide whether every team member has a clear job. A Pokémon that knows only attacks of one type can become ineffective against a resistant opponent, so retain at least one neutral-damage option or a move from another category. Physical and special attackers should be supported by moves that match their stronger offensive stat whenever possible.
Heal status conditions before leaving. If a Pokémon is close to learning an important move, decide whether to replace an older move now rather than waiting until the mountain route. Also check held items after any recent story battles; a missing item or an item left on the wrong Pokémon can make the next sequence harder than necessary.
The café in the Pokémon Center can be used as an optional stop, but it is not required for story progression. The village’s Zygarde Cell is also optional and does not affect access to Mount Lanakila or the Pokémon League. Do not delay the main route for optional collection unless you specifically want to complete those side goals.
Save once the party and bag are ready. This gives you a clean recovery point before entering the mountain approach. If a battle on Mount Lanakila goes badly, return to this save or heal at the village Pokémon Center rather than wasting all of your Revives and expensive healing items.
- Confirm every party member has useful offensive coverage.
- Clear lingering status conditions.
- Correct held-item and move assignments.
- Ignore optional café and Zygarde activities unless desired.
- Save after completing preparations.
Stop at the entrance to Mount Lanakila
This chapter ends with your party healed, your supplies restored, and your preparations complete in Tapu Village. Do not enter Mount Lanakila yet if you are following the chapter order. The next chapter begins with the actual mountain approach and covers the required battle against Gladion, the route through the mountain, the summit Pokémon Center, Hau’s final rival battle, and the handoff into the League.
The Pokémon League is not a Champion’s Festival. The League battles must be completed first. In original Pokémon Sun, Professor Kukui serves as the final opponent because the Alola League has no reigning Champion at this point. The Iki Town Champion’s Festival happens only after you defeat the Elite Four and Kukui, so it remains pending at the end of this chapter.
Your concrete handoff point is the north side of Tapu Village, with the Pokémon Center behind you and the entrance to Mount Lanakila ahead. When you are ready to continue, move north into the mountain and follow the next chapter’s route instructions.
- The party is fully healed in Tapu Village.
- The bag contains sufficient healing and status-recovery items.
- Move PP, held items, and Z-Crystal assignments are ready.
- You have saved before entering the mountain.
- You have not yet fought Gladion or Hau.
- You have not yet entered Mount Lanakila or the Pokémon League.
- The Iki Town Champion’s Festival remains pending.
Before you move on
- The chapter began in Tapu Village after the altar and Nanu handoff were already complete.
- The player healed at the Tapu Village Pokémon Center.
- The player restocked healing items, Revives, and status cures.
- The party has coverage for Hala, Olivia, Acerola, Kahili, and Professor Kukui.
- Move PP, held items, and Z-Crystal assignments were reviewed.
- The player saved before entering Mount Lanakila.
- Gladion, Hau, the mountain route, the summit Pokémon Center, and the League entrance were not repeated.
- The Iki Town Champion’s Festival remains pending until after the Elite Four and Professor Kukui battle.
Mount Lanakila — The Pokémon League Preparation and Approach
After the Altar of the Sunne and Ultra Space storyline, return to Tapu Village and take the northern route to Mount Lanakila. In the original Pokémon Sun, this is the final approach to the newly completed Alola Pokémon League. Gladion battles you at the mountain base, the cave route leads to a summit Pokémon Center, and Hau challenges you near the peak. There are no required kahuna rematches on this route. Hala and Olivia are waiting inside the League as Elite Four members, while Nanu and Hapu are not fought again before League entry.
Return to Tapu Village and prepare for the climb
Begin from Tapu Village after the Lusamine and Ultra Space events have concluded and the story has directed you toward the Pokémon League. Heal at the Tapu Village Pokémon Center before walking north to Mount Lanakila. Restore move PP, remove unwanted status conditions, and buy Potions or stronger healing items, Revives, Full Heals, and Poké Balls if you still need them.
The approaching opponents use Pokémon from levels 52 through 55, so bring a balanced party near that range or higher. Give particular attention to Flying, Dark, Steel, Fire, Fighting, Ground, and Water coverage. Save before entering the mountain area if you want a reliable recovery point before the first rival battle. Do not spend every Full Restore or Revive during the approach; the League follows soon after Hau.
- Finish the Altar of the Sunne and Ultra Space storyline.
- Heal and restore PP in Tapu Village.
- Carry healing items, status cures, and Revives.
- Prepare answers to Gladion’s Crobat, Weavile, Lucario, and variable Silvally.
Defeat Gladion at the mountain base
Walk north from Tapu Village and approach the elevator platform at Mount Lanakila. The elevator descends with Gladion, who thanks you for helping Lillie and Lusamine before challenging you to one final full-power battle. His team is Crobat at level 52, Weavile at level 52, Lucario at level 52, and Silvally at level 53.
Rock attacks are useful against both Crobat and Weavile. Weavile is also especially vulnerable to Fighting, Fire, Bug, Steel, and Fairy attacks, but it is fast and can use Ice Shard or Night Slash against a weakened Pokémon. Lucario is weak to Fire, Fighting, and Ground moves. Its Metal Claw can be powered into Corkscrew Crash with Steelium Z, so avoid leaving a fragile Fairy- or Ice-type in front of it.
Silvally holds a Memory and changes type according to your first partner choice. It is Fire-type if you chose Rowlet, Water-type if you chose Litten, and Grass-type if you chose Popplio. Choose a counter for that actual type rather than treating Silvally as Normal-type. Gladion gives you a Max Elixir after the battle.
- Defeat Gladion before using the elevator.
- Remember the correct order: Crobat, Weavile, Lucario, Silvally.
- Prepare for Lucario’s Steelium Z attack.
- Use a type advantage against Silvally’s Fire, Water, or Grass form.
- Collect the Max Elixir after winning.
Use the elevators and cross the lower mountain
After the battle, step onto the elevator and press the button in the middle to ascend. In the first outdoor section, follow the path north through the grass. An Escape Rope is on the right side, and a Zygarde Cell is farther ahead near a rock on the left. The Zygarde Cell is optional and does not affect League access.
Continue north to the cave entrance. Wild Pokémon and several trainers occupy the route, but you can avoid many encounters if your party is already prepared. Use the area for experience only if you need to bring slower or newly added team members closer to the levels of the upcoming battles.
- Ride the first elevator after defeating Gladion.
- Collect the Escape Rope if useful.
- Collect the Zygarde Cell near the rock if desired.
- Enter the cave at the northern end of the lower mountain.
Cross the Icy Cave
Inside the cave, follow the main path north until the first major fork. Take the western branch to collect TM13 Ice Beam, then return to the intersection and continue along the route that climbs northward. At the next intersection, take the eastern branch and follow it south to a pedestal holding Icium Z.
Return to the main route and continue northeast, then north. A Full Restore is behind rocks along the northern path. Continue west past the ice-covered rock and leave through the northern exit. The ice-covered rock is optional; leveling up Eevee nearby can evolve it into Glaceon, but this is not required for the story.
- Take the western branch for TM13 Ice Beam if wanted.
- Use the eastern branch at the next intersection to reach Icium Z.
- Collect the Full Restore behind the rocks.
- Ignore the ice-covered rock unless you want to evolve Eevee into Glaceon.
- Exit through the northern cave opening.
Reach the summit Pokémon Center
In the upper outdoor section, move toward the next elevator. A Max Revive is on the left side near the grass. Collect it if you want an additional emergency recovery item, then continue north and use the elevator to reach the peak.
The Mount Lanakila Pokémon Center is immediately ahead. Heal completely here and restore all move PP. The Center includes Madam Memorial, who can reteach forgotten level-up moves in exchange for Heart Scales. This service is optional, but it can repair a missing move before the final rival battle.
Check held items and party order before leaving. A Ground-type attack or Pokémon is useful against Hau’s Alolan Raichu, although Raichu also carries Psychic and Focus Blast, so do not rely on a slow or fragile counter without a backup plan. A strong Fighting move helps against Komala, while coverage for Hau’s variable Eeveelution and opposing starter is also important.
- Collect the Max Revive outside the cave if desired.
- Heal fully at the summit Pokémon Center.
- Restore PP and review held items.
- Use Madam Memorial only if a specific relearned move improves your plan.
- Save emergency recovery items for the League.
Defeat Hau and enter the Pokémon League
Leave the Pokémon Center and climb the slope to the west. Hau catches up with you and starts the final pre-League rival battle. In Pokémon Sun, he uses Alolan Raichu at level 53, an Eeveelution at level 53, Komala at level 53, and the fully evolved starter that has a type advantage over your first partner at level 54.
If you chose Rowlet, Hau uses Flareon and Primarina. If you chose Litten, he uses Vaporeon and Decidueye. If you chose Popplio, he uses Leafeon and Incineroar. Use Electric or Grass attacks against Vaporeon, Fire or Fighting attacks against Leafeon, and Water, Ground, or Rock attacks against Flareon. Komala is Normal-type, making Fighting attacks effective, but it can use coverage such as Wood Hammer, Earthquake, Sucker Punch, and Shadow Claw. Alolan Raichu is vulnerable to Ground attacks, but its speed and mixed coverage can punish an unsafe switch.
Hau gives you three Max Revives after you win. Continue north to meet Professor Kukui. Speak with him to trigger the League entrance sequence, then enter the building. Do not expect another battle with Hala, Olivia, Nanu, or Hapu on the mountain approach. Hala and Olivia are Elite Four members inside the League; the Elite Four and Professor Kukui are covered in the next chapters.
- Defeat Hau at the summit.
- Identify the Eeveelution and opposing starter based on your chosen first partner.
- Collect three Max Revives from Hau.
- Speak with Professor Kukui.
- Enter the Alola Pokémon League building.
Before you move on
- Mount Lanakila is accessible from Tapu Village after the Ultra Space storyline.
- Gladion has been defeated at the base, and the first elevator has been used.
- The lower mountain and Icy Cave have been crossed, with TM13 Ice Beam and Icium Z collected or intentionally skipped.
- The summit Pokémon Center has been reached and used for a complete recovery.
- Hau has been defeated and the three Max Revives have been received.
- Professor Kukui has been spoken to at the summit.
- The Alola Pokémon League building has been entered, with no Elite Four or Champion battles included in this chapter.
Elite Four — Strategies for Multi-Fight Endurance
Enter the Pokémon League at the summit of Mount Lanakila after completing the island challenge. In the original Pokémon Sun, the four Elite Four members are Hala, Olivia, Acerola and Kahili, and you may defeat them in any order. After all four chambers are cleared, the central platform takes you to the Champion’s chamber, where Professor Kukui is the final battle. There is no free Pokémon Center between League battles, so preparation, healing and sensible party management are essential.
Prepare at the Mount Lanakila Pokémon Center
Heal your party and restore the PP of every move you expect to use before entering the League. Buy a substantial supply of Full Restores, Max Potions or Hyper Potions, Revives and status-curing items. Full Restores are useful between battles because they remove paralysis, poison, sleep, burn, freeze and confusion while restoring HP.
The initial Elite Four teams are around levels 54 and 55. Professor Kukui’s team ranges from level 56 to level 58, so a party concentrated in the upper 50s is a practical story-mode target, though type matchups and healing are more important than reaching one exact level. Prepare answers for Fighting, Rock, Ghost, Flying, Water, Ground, Electric, Ice, Fairy and Steel threats.
Give important Pokémon held items, check their move PP and save before entering the League. Once the challenge begins, you cannot return to a Pokémon Center or restock until the entire run is finished. You can use the Bag between victories and rearrange surviving Pokémon from the Party screen.
- Save before entering the Pokémon League.
- Restore HP and PP.
- Buy healing, revival and status-curing items.
- Bring reliable answers to Fighting, Rock, Ghost and Flying Pokémon.
- Keep at least one Ground, Electric, Water or Grass option for Kukui’s mixed team.
Choose a chamber order
The League’s four outer chambers can be challenged in any order. From the central room, Hala’s chamber is on the left, Olivia’s is to the northwest, Acerola’s is to the northeast and Kahili’s is to the east. After each victory, step onto the colored platform behind the defeated member to return to the central room.
A balanced order is Hala, Olivia, Acerola and Kahili, but there is no required sequence. Choose the first chamber based on your strongest available matchup, then heal and change your lead before each subsequent battle. Treat every defeated Pokémon as a resource-management opportunity: cure status, restore important HP and avoid carrying a weakened counter into the next room.
- Hala: left chamber.
- Olivia: northwest chamber.
- Acerola: northeast chamber.
- Kahili: east chamber.
- Heal and adjust the party after every victory.
Defeat Elite Four Hala
Hala uses Hariyama, Primeape, Bewear and Poliwrath at level 54, followed by level 55 Crabominable. Psychic-, Flying- and Fairy-type attacks are strong general choices against his Fighting-heavy team. A fast special attacker is particularly useful against Bewear, whose physical bulk and ability can make ordinary contact attacks less effective.
Poliwrath is vulnerable to Electric, Grass and Fairy attacks, so preserve at least one of those answers rather than letting it be worn down early. Crabominable holds Fightinium Z and is Hala’s most dangerous Pokémon. Do not leave a weakened neutral target in front of it. If confusion or another status condition affects a key Pokémon, use the Bag before leaving the chamber instead of beginning the next fight with an unreliable attacker.
- Use Psychic, Flying or Fairy damage against Hala’s Fighting types.
- Save a healthy Electric, Grass or Fairy answer for Poliwrath.
- Expect Fightinium Z from level 55 Crabominable.
- Cure confusion and restore HP before continuing.
Break through Olivia’s Rock team
Olivia uses Relicanth, Carbink, Alolan Golem and Probopass at level 54, followed by level 55 Lycanroc. Water- and Grass-type moves are effective against most of the team. Alolan Golem is Rock/Electric with a Ground weakness, so Electric attacks do not affect it; use Water, Grass, Fighting or Ground coverage instead. Ground- and Fighting-type moves are also effective against Probopass.
Relicanth can use Yawn, so switch or cure the sleep before it prevents your next action. Carbink may set Reflect, reducing physical damage; use special attacks if available. Olivia’s Lycanroc holds Rockium Z, so keep your Water- or Grass-type counter healthy before it appears. Sandstorm can reduce the value of weak attacks and chip fragile Pokémon, making decisive super-effective hits preferable to a long exchange.
- Use Water or Grass attacks against Relicanth and Lycanroc.
- Do not use Electric attacks on Alolan Golem.
- Use Ground or Fighting attacks against Probopass.
- Prepare for Yawn, Reflect, Sandstorm and Rockium Z Lycanroc.
Control Acerola’s Ghost team
Acerola uses Sableye, Drifblim, Dhelmise and Froslass at level 54, followed by level 55 Palossand. Dark- and Fairy-type attacks are useful against Sableye. Electric attacks are effective against Drifblim, while Fire, Dark and Ghost attacks can pressure Dhelmise. Froslass is fast and threatens fragile Pokémon with Ice- and Ghost-type attacks, so use a faster attacker or a Pokémon that can safely withstand its moves.
Palossand is Ground/Ghost and is weak to Water, Grass, Ice, Ghost and Dark attacks. It holds Ghostium Z, so preserve a healthy answer that can survive its Z-Move and retaliate. Drifblim can use Baton Pass after setting up, and Acerola’s team includes confusion and other disruptive moves. Do not continue attacking with an important Pokémon that is confused or badly weakened; use a Full Restore or switch to a safer member.
- Use Dark or Fairy attacks against Sableye.
- Use Electric attacks against Drifblim when its coverage is manageable.
- Keep a fast attacker for Froslass.
- Reserve a strong Water, Grass, Ice, Ghost or Dark answer for Palossand.
Finish the Elite Four against Kahili
Kahili uses Skarmory, Crobat, Oricorio, Mandibuzz and Toucannon, with the first four at level 54 and Toucannon at level 55. Electric, Rock and Ice attacks provide useful coverage against her Flying-focused team. Fire attacks are effective against Skarmory, but avoid relying on one slow Fire-type if Crobat can move first.
Skarmory can set Spikes, so avoid unnecessary switching after the hazard is active. Oricorio can use Teeter Dance, making confusion dangerous before a knockout. Mandibuzz can use Roost and Toxic; hit it with a strong super-effective attack rather than allowing a prolonged battle. Toucannon holds Flyinium Z and can use Beak Blast, which may burn Pokémon that make contact. Use a Rock- or Electric-type answer when possible and avoid contact attacks if Toucannon’s beak is glowing.
- Bring Electric, Rock, Ice or Fire coverage.
- Avoid unnecessary switching after Spikes is set.
- Cure confusion from Teeter Dance before relying on an important attack.
- Save a durable answer for Flyinium Z Toucannon.
Heal and prepare for Professor Kukui
After defeating the fourth Elite Four member, return to the central chamber and step onto the active central platform. It transports you to the Champion’s chamber. Before checking the throne, use the Bag, restore the party, rearrange your lineup, change held items and save if the game allows it. Sitting on the throne begins the final battle.
Kukui leads with level 57 Lycanroc, then uses level 56 Alolan Ninetales, Braviary, Magnezone and Snorlax. His sixth Pokémon is level 58 and depends on your starter: Incineroar if you chose Rowlet, Primarina if you chose Litten, or Decidueye if you chose Popplio.
Use Water or Grass attacks against Lycanroc, Fighting attacks against Snorlax and Ground attacks against Magnezone when safe. Alolan Ninetales is Ice/Fairy, so Steel- or Poison-type attacks are useful. Electric, Rock or Ice attacks can threaten Braviary. Prepare a specific answer for Kukui’s final starter and save your Z-Move for the Pokémon that most threatens your remaining win condition. Keep an emergency Revive and Full Restore available rather than spending everything during the Elite Four.
- Return to the central chamber after the fourth victory.
- Heal and restore PP before checking the throne.
- Rearrange the party for Lycanroc and Kukui’s starter-dependent final Pokémon.
- Confirm which starter you chose and prepare its counter.
- Keep emergency healing and revival items for the final battle.
Before you move on
- Hala, Olivia, Acerola and Kahili have all been defeated.
- A light from each of the four outer chambers is visible in the central room.
- The central platform has transported you to the Champion’s chamber.
- Professor Kukui’s six-Pokémon team has been defeated.
- The Hall of Fame registration and ending sequence begin, confirming completion of the main League challenge.
References for this chapter
Champion Match and Ending Sequence — Becoming Alola Champion
Defeat Professor Kukui after the Elite Four to become Alola’s first Champion. Complete the Iki Town celebration, travel with Lillie to the Ruins of Conflict, and finish the required Tapu Koko shrine encounter that forms part of the original Pokémon Sun ending sequence. Catching Tapu Koko is optional, but the battle must be resolved before the story returns to the festival, fireworks, and credits. After the credits, save at home, collect the remaining starter Z-Crystals and Enigmatic Card, and visit the Route 8 motel to begin the separate Looker and Anabel Ultra Beast investigation.
Sit on the Champion’s throne
After defeating Hala, Olivia, Acerola, and Kahili, continue to the Champion’s chamber at the top of the Pokémon League and sit on the throne. In the original Pokémon Sun for Nintendo 3DS, Professor Kukui appears and challenges you. Hau is not the final opponent in this edition; Hau fills that role in Ultra Sun and Ultra Moon.
There is no ordinary Pokémon Center between the Elite Four and Kukui. You must enter the Champion battle with the condition and PP remaining after the four preceding fights, so use healing items between Elite Four battles whenever necessary. Before beginning the League challenge, stock Full Restores, Revives, and other recovery items, and equip the held items and Z-Crystal you intend to use.
- All four Elite Four members are defeated.
- Your party is healed before entering the League.
- You are playing original Pokémon Sun rather than Ultra Sun or Ultra Moon.
Defeat Professor Kukui
Kukui’s fixed Pokémon are Midday Lycanroc, Alolan Ninetales, Braviary, Magnezone, and Snorlax. His sixth Pokémon depends on your first partner: he uses Incineroar if you chose Rowlet, Primarina if you chose Litten, and Decidueye if you chose Popplio. The team is in the upper 50s, with the final starter at level 58, so prepare answers for Rock, Ice and Fairy, Flying, Electric and Steel, Normal, and the starter-dependent final matchup.
Use Water, Grass, or Fighting attacks against Lycanroc, but beware of Stone Edge and priority Accelerock. Alolan Ninetales is Ice and Fairy type, making Steel, Poison, or strong neutral physical attacks useful. Electric, Ice, and Rock attacks pressure Braviary, although Brave Bird can punish frailer attackers. Ground attacks are strong against Magnezone, but its Sturdy ability can leave it at 1 HP when it begins the turn at full health; be ready to finish it rather than assuming one hit will always defeat it.
Snorlax is durable and uses Body Slam, Crunch, Heavy Slam, and High Horsepower. Fighting attacks are effective, but switch out a weakened attacker instead of allowing it to be worn down. Save your Z-Move for a Pokémon that threatens your team or for Kukui’s final starter. If paralysis, low health, or another status effect disrupts your plan, use a Full Restore or switch to a safer Pokémon rather than spending turns attacking at a disadvantage.
- You have a reliable Ground or Fighting answer for Magnezone and Snorlax.
- You have a response to Kukui’s starter-dependent sixth Pokémon.
- You have reserved recovery items and a Z-Move for the difficult part of the battle.
- Professor Kukui’s entire team is defeated.
Receive the Champion title and attend the Iki Town festival
When Kukui’s last Pokémon falls, the game recognizes you as Alola’s first Pokémon League Champion. The League staff and Elite Four acknowledge the result, and the story sends you to Iki Town for a celebration. There is no second Champion battle in original Pokémon Sun before the festival; Kukui is the final required League opponent.
Allow the Iki Town scenes to play out. Hala presents you to the gathered family, friends, captains, and kahunas. After the celebration begins, Lillie asks you to leave with her to visit the Ruins of Conflict. This transition is required to continue the ending.
- The game identifies you as Alola’s first Champion.
- The Iki Town celebration has begun.
- Lillie asks you to accompany her to the Ruins of Conflict.
Visit the Ruins of Conflict with Lillie
Follow Lillie from Iki Town to Mahalo Trail. The Plank Bridge has been repaired, allowing you to cross to the Ruins of Conflict. Continue into the inner chamber and approach Tapu Koko’s shrine when prompted.
Lillie thanks Tapu Koko for helping to save Nebby earlier in the adventure and asks you to show your appreciation as Alola’s new Champion. The game restores your party to full health before the shrine encounter. You may save before touching the statue if you want to make a capture attempt without risking an unwanted outcome.
- The repaired Plank Bridge is accessible.
- You reach the inner chamber of the Ruins of Conflict.
- Your party is healed before the shrine encounter.
Resolve the required Tapu Koko shrine battle
Touch the shrine to begin the level 60 Tapu Koko battle. This encounter is part of the post-Champion ending sequence and must be resolved before the festival can continue. Catching Tapu Koko is optional for story completion, but you must finish the battle by catching it, defeating it, or fleeing.
Tapu Koko is Electric and Fairy type and activates Electric Terrain with Electric Surge. Nature’s Madness cuts the target’s current HP in half, while Agility can make Tapu Koko faster and Electro Ball more dangerous afterward. Ground- and Poison-type attacks are effective for reducing its HP, but switch to weaker attacks once it is in capture range. Sleep or paralysis can improve the odds of catching it if you have a safe way to inflict either condition.
If you want to capture Tapu Koko, weaken it carefully and carry suitable Poké Balls before touching the shrine. The party is healed automatically before the battle, and Tapunium Z is awarded after the encounter. If you defeat or flee from Tapu Koko instead of catching it, the ending still proceeds, and the guardian becomes available again after you later defend your Champion title.
- The Tapu Koko shrine battle has been resolved.
- Tapu Koko has been caught, defeated, or escaped without blocking the ending.
- Tapunium Z has been obtained.
- The return to the Iki Town festival begins.
Finish the festival and watch Lillie leave from Hau’oli City Marina
Return to Iki Town with Lillie after the shrine encounter. The fireworks conclude the festival and the credits begin. Let the festival scenes and credits play without resetting the game if you want to see the complete ending sequence.
After the credits, the story advances to the following day. Hau comes to your home and hurries you to Hau’oli City Marina, where Professor Kukui and Lillie are waiting. Lillie explains that she is traveling to Kanto to seek treatment for Lusamine and become a Pokémon Trainer in her own right.
At the marina, Lillie gives you a Poké Doll as a keepsake before boarding the ship. Let the departure scene finish, then allow the credits to roll to completion. This is the canonical ending for original Pokémon Sun and does not include Necrozma’s expanded storyline, Episode RR, or the Ultra-edition Champion battle against Hau.
- The fireworks sequence has finished.
- Lillie gives you the Poké Doll.
- The ship leaves Hau’oli City Marina.
- The ending credits finish.
Save and begin the separate postgame investigation
After the credits, control returns to your room. Inspect the purple sparkle to collect the Zygarde Core if you have not already done so. Hau then arrives and gives you the signature Z-Crystals for the two first-partner Pokémon you did not choose, provided those crystals were not already obtained earlier.
When you step outside, a mysterious man gives you the Enigmatic Card and leaves. Read it in the Bag. It requests that you visit a guest room at the motel on Route 8 on Akala Island. Travel there and enter the indicated room to meet Looker and Anabel of the International Police.
Agree to assist them and complete the introductory conversation and battle sequence to begin the optional Ultra Beast investigation. The investigation later uses other motel locations, including the Route 2 motel, so do not confuse that later stop with the initial meeting point. You may begin the investigation immediately or leave it for later while pursuing Tapu Koko and the other guardian deities.
- You save after returning from the ending.
- You collect the remaining starter Z-Crystals if available.
- You receive and read the Enigmatic Card.
- You reach the Route 8 motel on Akala Island.
- Looker and Anabel’s optional investigation has begun.
Before you move on
- Professor Kukui has been defeated after the Elite Four.
- The game recognizes you as Alola’s first Champion.
- The Iki Town celebration and Ruins of Conflict sequence are complete.
- The Tapu Koko shrine battle has been resolved, whether or not Tapu Koko was captured.
- Tapunium Z has been obtained.
- Lillie has departed from Hau’oli City Marina and the credits have finished.
- You have saved after the credits and can reach the Route 8 motel for the optional Looker and Anabel investigation.
Immediate Postgame Tasks — Ultra Beasts, Looker, and Optional Catches
After becoming Alola Champion in the original Pokémon Sun for Nintendo 3DS, begin the International Police’s optional Ultra Beast investigation. Pokémon Sun requires one Nihilego, two Buzzwole, two Xurkitree, four Kartana, and one Guzzlord. After the five missions and the Aether Paradise report are complete, the optional Legendary Pokémon Necrozma becomes available in Ten Carat Hill’s Farthest Hollow. This chapter covers the Looker investigation, the optional Necrozma encounter, and useful postgame activities without importing Ultra Sun or Ultra Moon content.
1. Receive the Enigmatic Card and meet Looker
Load the save after completing the Champion ending. On the following day, after Lillie has left for Kanto, speak with your mother and Hau, then leave the house in Iki Town. A mysterious man outside gives you the Enigmatic Card and tells you to read it privately. The card directs you to the motel on Route 8 on Akala Island.
Fly to Route 8 and enter the motel. Go into the guest room to meet Looker and Anabel. Heal before entering because Anabel challenges you with five level 61 Pokémon: Alakazam, Weavile, Mismagius, Salamence, and Snorlax. Bring answers to Psychic, Dark, Ghost, Dragon, and Normal types. Dark- or Ghost-type attacks help against Alakazam and Mismagius, while Ice-, Fairy-, or Dragon-type coverage helps against Salamence.
After the battle, accept the request to investigate the Ultra Beasts. Looker and Anabel direct you to Aether Paradise for equipment and information about the first mission.
- Become Alola Champion.
- Receive the Enigmatic Card outside the Iki Town house.
- Defeat Anabel in the Route 8 motel guest room.
- Accept the Ultra Beast investigation.
2. Collect the Beast Balls at Aether Paradise
Travel to Aether Paradise and use the elevator to reach the B2F laboratory area. Enter Secret Lab B and speak with Wicke. She explains the operation and gives you ten Beast Balls. Beast Balls are especially effective against Ultra Beasts but are not specially effective against ordinary Pokémon, so reserve them for the assigned targets.
Return to the Route 8 motel and enter the guest room again to begin the first hunt. Heal the party, carry status-healing items, and consider saving before searching so you have a recovery point before the special encounter.
- Speak with Wicke in Secret Lab B.
- Receive ten Beast Balls.
- Return to Looker at the Route 8 motel.
3. Capture Nihilego on Akala Island
Looker identifies the first target as UB-01, Nihilego. Search Wela Volcano Park or Diglett’s Tunnel on Akala Island. Walk through the area until the special encounter appears.
Nihilego is level 55 and Rock/Poison type. Its aura raises its Special Defense, so a controlled physical attack can be preferable when available. Lower its HP carefully, apply a safe condition such as sleep or paralysis, and throw a Beast Ball. Avoid a powerful super-effective attack once its HP is low.
If Nihilego is defeated or you flee, leave the area and return to search again. After catching it, report back to Looker at the Route 8 motel.
- Capture one level 55 Nihilego.
- Search Wela Volcano Park or Diglett’s Tunnel.
- Report the capture at the Route 8 motel.
4. Capture both Buzzwole in Melemele Meadow
After the Nihilego report, travel to the motel on Route 2. Nanu provides information about UB-02, and Pokémon Sun’s target is Buzzwole. You receive another set of Beast Balls before the search.
Enter Melemele Meadow and walk through the flowers until Buzzwole appears. Pokémon Sun requires two Buzzwole, each at level 65. Buzzwole is Bug/Fighting type and its aura raises its Defense, so special attacks can be useful. Flying- and Fairy-type moves exploit its weaknesses, but weaken each specimen gradually rather than risking a knockout.
Catch the first Buzzwole, heal if needed, and continue searching until the second has been captured. Return to the Route 2 motel and report both captures before proceeding.
- Capture two level 65 Buzzwole in Melemele Meadow.
- Confirm that both Buzzwole are captured.
- Report both captures at the Route 2 motel.
5. Defeat Mina and capture both Xurkitree
Return to the Route 8 motel. Mina is waiting there and challenges you before the next mission begins. Heal before the battle and bring dependable answers to her team, which is around level 61.
After defeating Mina, Looker gives you more Beast Balls and identifies UB-03, Xurkitree. Search Memorial Hill or Lush Jungle on Akala Island. Pokémon Sun requires two level 65 Xurkitree. Xurkitree is Electric type and its aura raises its Special Attack.
Ground-type attacks are super effective, but do not use an attack strong enough to knock it out. A Ground-type Pokémon can block Electric attacks, while sleep, paralysis, or carefully controlled damage makes the captures safer. Catch both specimens, then return to the Route 8 motel and report the completed mission.
- Defeat Mina at the Route 8 motel.
- Capture two level 65 Xurkitree in Memorial Hill or Lush Jungle.
- Report both captures at Route 8.
6. Capture four Kartana on Ula’ula Island
After reporting the Xurkitree mission, travel to the motel on Route 13. Nanu explains the next sighting and identifies UB-04, Kartana. Pokémon Sun requires four Kartana; Pokémon Moon uses a different Ultra Beast and quantity.
Search Route 17 or Malie Garden. Kartana is level 60 and Grass/Steel type, with an aura that raises its Attack. Fire-type attacks are four times super effective, so use them only when you can control the damage. False Swipe, a carefully chosen special attack, or a safe status condition can make the captures easier.
Continue searching until all four have been caught. Return to the Route 13 motel and report the fourth capture to Looker.
- Receive the UB-04 briefing at Route 13.
- Capture four level 60 Kartana in Route 17 or Malie Garden.
- Report after the fourth capture.
7. Defeat Nanu and capture Guzzlord
After the Kartana report, travel to the floating restaurant in Seafolk Village. It is the large restaurant vessel on the left side of the docks. Heal your party before entering because Nanu battles you there. Restore HP, PP, and status conditions before this fight.
After defeating Nanu, the final assigned target is UB-05, Guzzlord. Reach Resolution Cave by traveling through Ancient Poni Path to Poni Grove, then Poni Plains and Poni Meadow. Enter the cave and follow the route to its basement, using the required Ride Pokémon to cross obstacles.
Guzzlord is level 70 and Dark/Dragon type. Its aura raises its Attack. Fairy-, Ice-, Fighting-, and Dragon-type attacks exploit its weaknesses, but use controlled damage because its high HP can make a knockout easy to misjudge. Inflict a safe condition, weaken it, and throw a Beast Ball. Return to the floating restaurant and report the capture to Looker.
- Defeat Nanu at the Seafolk Village restaurant.
- Reach the Resolution Cave basement.
- Capture the level 70 Guzzlord.
- Report the capture at the floating restaurant.
8. Finish the investigation and find optional Necrozma
After reporting Guzzlord at the Seafolk Village restaurant, travel to Aether Paradise and enter Secret Lab B. The International Police and Wicke close the Ultra Beast conservation operation, and you receive a reward of one million Poké Dollars. This completes the required Looker Ultra Beast investigation.
Looker then returns to the motel on Route 2. Speak with him there after the Aether Paradise report is complete. He mentions a mysterious black Pokémon seen over Melemele Island and points you toward Ten Carat Hill.
Before entering Farthest Hollow, place a Pokémon at the front of your party that is level 75 or lower. This level condition is required for the encounter to appear. You may use a Repel to suppress lower-level wild encounters, but the lead Pokémon must still be level 75 or lower; a lead above level 75 prevents the intended encounter from appearing.
Travel through Ten Carat Hill and reach Farthest Hollow. Search the tall grass until the level 75 Necrozma appears. Necrozma is Psychic type and is a Legendary Pokémon rather than an Ultra Beast, so Beast Balls do not receive their special Ultra Beast effectiveness. Weaken it carefully, use an ordinary Poké Ball suited to your supplies, and save before searching if you want a recovery point.
Necrozma respawns after being defeated or fled from. Leave the area and search the grass again if the encounter ends without a capture. Catching it is optional and is not required to complete the Looker episode, retain Champion status, or unlock the Battle Tree.
- Report Guzzlord at the Seafolk Village restaurant.
- Visit Secret Lab B at Aether Paradise.
- Receive the one-million-Poké-Dollar reward.
- Speak with Looker at the Route 2 motel after the Aether Paradise report.
- Place a level 75-or-lower Pokémon first before searching for Necrozma.
- Use an eligible lead with Repel if you want to suppress lower-level encounters.
- Search Farthest Hollow in Ten Carat Hill for the optional level 75 Necrozma.
9. Continue with optional postgame goals
The Battle Tree is located at the far end of Poni Gauntlet and is available after the main story. It offers Single, Double, and Multi Battles, Battle Points, and the ability to scout trainers as partners for later Multi Battles. It is separate from the Looker investigation and is not required for postgame completion.
Festival Plaza remains available for facilities, shops, Festival Coins, and communication features. Other independent goals include completing the Alola Pokédex, collecting missing Z-Crystals, gathering Zygarde Cells and Cores, training a competitive team, completing available Legendary encounters, and earning Battle Tree rewards.
Keep these activities separate from the required checklist. In the original Pokémon Sun, the Looker episode ends after the five assigned Ultra Beasts are captured, the Guzzlord report is made, and the Aether Paradise report is completed. Necrozma, the Battle Tree, Festival Plaza, Pokédex completion, Zygarde, and collection goals are additional objectives.
- Reach the Battle Tree through Poni Gauntlet if desired.
- Use Festival Plaza facilities if desired.
- Track Pokédex, Z-Crystal, Zygarde, and Legendary goals separately.
- Treat Necrozma as an optional Legendary encounter rather than a required Ultra Beast target.
Before you move on
- The Enigmatic Card was received after becoming Alola Champion and used to reach the Route 8 motel.
- Anabel was defeated and Wicke provided the first ten Beast Balls.
- One Nihilego, two Buzzwole, two Xurkitree, four Kartana, and one Guzzlord were captured in Pokémon Sun.
- The Guzzlord capture was reported at the Seafolk Village floating restaurant.
- Secret Lab B at Aether Paradise was visited and the one-million-Poké-Dollar reward was received.
- The required Looker Ultra Beast investigation is complete.
- After the Aether Paradise report, Looker was visited at the Route 2 motel if the Necrozma objective was pursued.
- Before searching Farthest Hollow, a level 75-or-lower Pokémon was placed first, or an eligible lead was used with Repel.
- Necrozma was optionally caught in the tall grass at Ten Carat Hill’s Farthest Hollow. If defeated or fled from, it was encountered again by searching the grass.
- Battle Tree, Festival Plaza, Pokédex, Zygarde, Z-Crystal, and other Legendary goals were tracked as optional activities rather than required story steps.
References for this chapter
Finishing up
You have completed all seven island trials, including six captain-led trials and the captainless Dragon trial, and defeated all four island kahunas: Hala, Olivia, Nanu, and Hapu.
You have completed the Altar of the Sunne ceremony, resolved the Ultra Space and Lusamine sequence, and captured the level 55 Solgaleo encounter. If Solgaleo was defeated or fled earlier, it has been caught after retrying at the altar.
You have defeated Hala, Olivia, Acerola, and Kahili in the Pokémon League, then defeated Professor Kukui and completed the Champion ending sequence.
The Aether Foundation, Team Skull, Lusamine, Guzma, and the Poni Island flute and Dragon trial story gates required for the League are complete.
The optional Looker and Anabel Ultra Beast investigation is tracked separately and is not required for main-story completion.
Choose your next gameScreenshots & video
Game imagery for reference. Follow the written chapters above for the route and strategies.
Sources & references
Our original guide draws on the references below. Check the edition at the top of this page before following controls or unlock requirements.
- Walkthrough: Pokémon Sun and Moon/Part 4 — Bulbapedia
- Pokémon Sun — Guide and Walkthrough, Hau’oli City and Verdant Cave sections
- Pokémon Sun & Moon — Island Trials — Serebii.net
- Pokémon Sun — Nintendo 3DS Instruction Manual
- Pokémon Sun & Moon — Grand Trials — Serebii.net
- Hala — Bulbapedia
- Walkthrough: Pokémon Sun and Moon/Part 7 — Bulbapedia
- Heahea City — Pokémon Sun and Moon Walkthrough — Thonky
- Paniola Town and Paniola Ranch — Pokémon Sun and Moon Walkthrough — Thonky
- Brooklet Hill — Pokémon Sun and Moon Walkthrough — Thonky
- Island challenge — Bulbapedia
- Brooklet Hill — Bulbapedia
- Walkthrough: Pokémon Sun and Moon/Part 10 — Bulbapedia
- Walkthrough: Pokémon Sun and Moon/Part 12
- Walkthrough: Pokémon Sun and Moon/Part 13
- Pokémon Sun & Moon - Aether Foundation
- Konikoni City - Bulbapedia
- Konikoni City - Alola - Serebii Pokéarth
- Pokémon Sun - Guide and Walkthrough - GameFAQs
- Walkthrough: Pokémon Sun and Moon/Part 14 — Malie City, Malie Garden, and Malie Library
- Walkthrough: Pokémon Sun and Moon/Part 15
- Pokémon Sun & Moon - Pokémon Trainer Hau
- Ula’ula Island Walkthrough Part 1: From Malie City up to Sophocles’ Trials — Pokémon Sun and Moon
- Walkthrough: Pokémon Sun and Moon/Part 16
- Walkthrough: Pokémon Sun and Moon/Part 17
- Pokémon Sun & Moon - Team Skull
- Hokulani Observatory - Bulbapedia
- Pokémon Sun and Moon Walkthrough
- Chapter 11: Aether Paradise - Pokémon Sun Moon Walkthrough
- Aether Paradise - Residence - Ula'ula Island - Walkthrough
- Walkthrough: Pokémon Sun and Moon/Part 22 — Bulbapedia
- Ruins of Hope and Exeggutor Island — Pokémon Sun and Moon Walkthrough
- Chapter 12: Kahuna Hapu — Pokémon Sun Moon Walkthrough
- Ancient Poni Path — Serebii Pokéarth
- Walkthrough: Pokémon Sun and Moon/Part 23 — Bulbapedia
- Walkthrough: Pokémon Sun and Moon/Part 24 — Bulbapedia
- Altar of the Sunne — Bulbapedia
- Solgaleo — Generation VII Pokédex — Serebii.net
- Altar of the Sunne — Alola Pokéarth — Serebii.net
- Appendix: Sun and Moon walkthrough/Section 25 — Bulbapedia
- Tapu Village
- Alola Pokémon League
- Pokémon Sun and Moon
- Pokémon Sun — Guide and Walkthrough, Altar of the Sunne/Moone and Mount Lanakila transition
- Mount Lanakila - Pokémon Sun and Moon Walkthrough
- Pokémon Sun & Moon — Pokémon Trainer Gladion — Serebii.net
- Pokémon Sun & Moon - Elite Four
- Walkthrough: Pokémon Sun and Moon/Part 27 — Guardians of Alola
- Walkthrough: Pokémon Sun and Moon/Part 28 — Tracking the Ultra Beasts
- Pokémon Sun Version
- Lillie
- Looker Episode — Bulbapedia
- Pokémon Sun & Moon — The Ultra Beasts — Serebii.net
- Pokémon Sun & Moon — The Legendary Pokémon — Serebii.net
- Chapter 16: Ultra Beast Missions — Pokémon Sun Moon Walkthrough
- Pokémon Sun and Moon Walkthrough — Farthest Hollow and Necrozma — Bulbapedia
About the game & collecting notes
- Platform
- Nintendo 3DS
Step-by-step walkthrough for the original Pokémon Sun (North American Nintendo 3DS release). This guide takes the player through all seven island trials, including six captain-led trials and the captainless Dragon trial, all four island Grand Trials, the Aether Foundation and Team Skull story, the Poni Island flute and Dragon trial sequence, the Altar of the Sunne and Solgaleo encounter, Mount Lanakila, the Elite Four, Professor Kukui's Champion battle, and the ending. Optional immediate postgame content, including the Looker and Anabel Ultra Beast investigation, is clearly separated from the main-story completion route.
Darryl Polo
Darryl Polo loves tinkering with emulation and revisiting retro games. He enjoys exploring how old favorites play on different setups and sharing what he learns along the way. At Joking Joystick, he writes about the games, hardware, and small discoveries that keep the hobby fun.
Our editorial standardsFound a step that needs another look? Help us improve this guide.