
Pokémon Omega Ruby (Nintendo 3DS) — Complete Campaign Walkthrough
Step-by-step Pokémon Omega Ruby campaign walkthrough for Nintendo 3DS, covering the complete Hoenn route from Littleroot Town through the eight Gyms, all required Team Magma stages, the Seafloor Cavern and Primal Groudon climax, Victory Road, the Pokémon League, and the full Delta Episode through the Deoxys battle. Optional postgame encounters are separated from required completion.

Find a copy
Pokemon Omega Ruby Nintendo 3DS
We may earn a commission if you buy through these links, at no extra cost to you. As an Amazon Associate I earn from qualifying purchases.
Opens retailer search results. Check the model, edition, seller, availability and current price before buying.
Before you begin
You are starting Pokémon Omega Ruby on the Nintendo 3DS.
This walkthrough is written for the North American release and follows the remake-specific Hoenn campaign: the same core story as Ruby with Generation VI updates (Mega Evolution, Primal Reversion, new encounters and the Delta Episode).
Follow the route and chapter steps in order to avoid missing required story triggers and to reach each major event cleanly.
Progress is mostly linear: key cutscenes and access to locations are unlocked by completing story milestones and specific Gym badges.
Use this guide to choose an opening starter that matches your preferred playstyle, prepare a balanced early team, and to recover from failed boss captures or unexpected losses without derailing the main story.
Set yourself up for the run
Update and read the game's e-manual on your 3DS for basic controls and system-dependent features; enable Sleep Mode and set system clock as you prefer (some features reference system time).
Choose a starter: Treecko (speed/physical), Torchic (easy early-game with later Blaziken), or Mudkip (strong early defensively).
Starter choice affects early Gym difficulty and recommended catches but does not lock endgame progress.
Bring basic supplies in your bag: abundant Poké Balls (Great/Ultra later), full-restoring items (Full Restore, Max Revive) for boss catches, Repels for long cave stretches, and an HM-capable Pokémon to carry Surf, Fly and other field moves when they are required.
Familiarize yourself with Mega Evolution (Mega Bracelets/Mega Stones) and the Primal Reversion mechanic — both alter major boss fights in this remake.
Expect version-exclusive Legendary events in Omega Ruby (Primal Groudon).
Plan for the Delta Episode as part of full campaign completion: it is a required postgame storyline unlocked after the Elite Four that concludes with Rayquaza and Deoxys encounters — prepare a slot for a strong Dragon/Flying counter and save before the Rayquaza/Deoxys sequence.
Keep regular manual save habits.
Key story encounters can be reset for nature/IV attempts if you intend to soft-reset for specific Legendary stats; if you faint a version Legendary during the first encounter, you can re-encounter it later but prepare accordingly.
If you use external guides, use official sources (manual, Nintendo support) and established walkthroughs (Bulbapedia/Serebii) to cross-check location names and event triggers — this guide uses those resources for accuracy.
Littleroot Town and Choosing Your Starter
Begin Pokémon Omega Ruby in Littleroot Town, rescue Professor Birch on Route 101, choose Treecko, Torchic, or Mudkip, defeat your rival on Route 103, and return to Birch’s laboratory for the Pokédex and Poké Balls. Only after that rival battle can you catch an additional Pokémon, so use the opening routes to gain experience before building your party.
Finish the moving-in sequence in Littleroot Town
After the opening scene at the back of the moving truck, enter your new house and go upstairs. Examine the wall clock and set the time when prompted. In Omega Ruby, the clock uses the Nintendo 3DS system time, so confirm the setting and then return downstairs.
Speak with your mother and watch the television conversation about Petalburg Gym. Leave your house and enter Professor Birch’s nearby home. Speak with Birch’s wife, then go upstairs and talk to Birch’s child, your rival. The rival is May if you selected the male player character and Brendan if you selected the female player character. Your rival leaves to help Professor Birch, which opens the way to Route 101.
You may visit Birch’s laboratory in the southern part of town, but the starter is not selected there at this point. The required next destination is Route 101, reached by taking the northern exit from Littleroot Town.
- Set the clock upstairs in your room.
- Speak with your mother after coming downstairs.
- Visit Professor Birch’s house and talk to the rival upstairs.
- Leave Littleroot Town through the northern exit.
Rescue Professor Birch and choose a starter
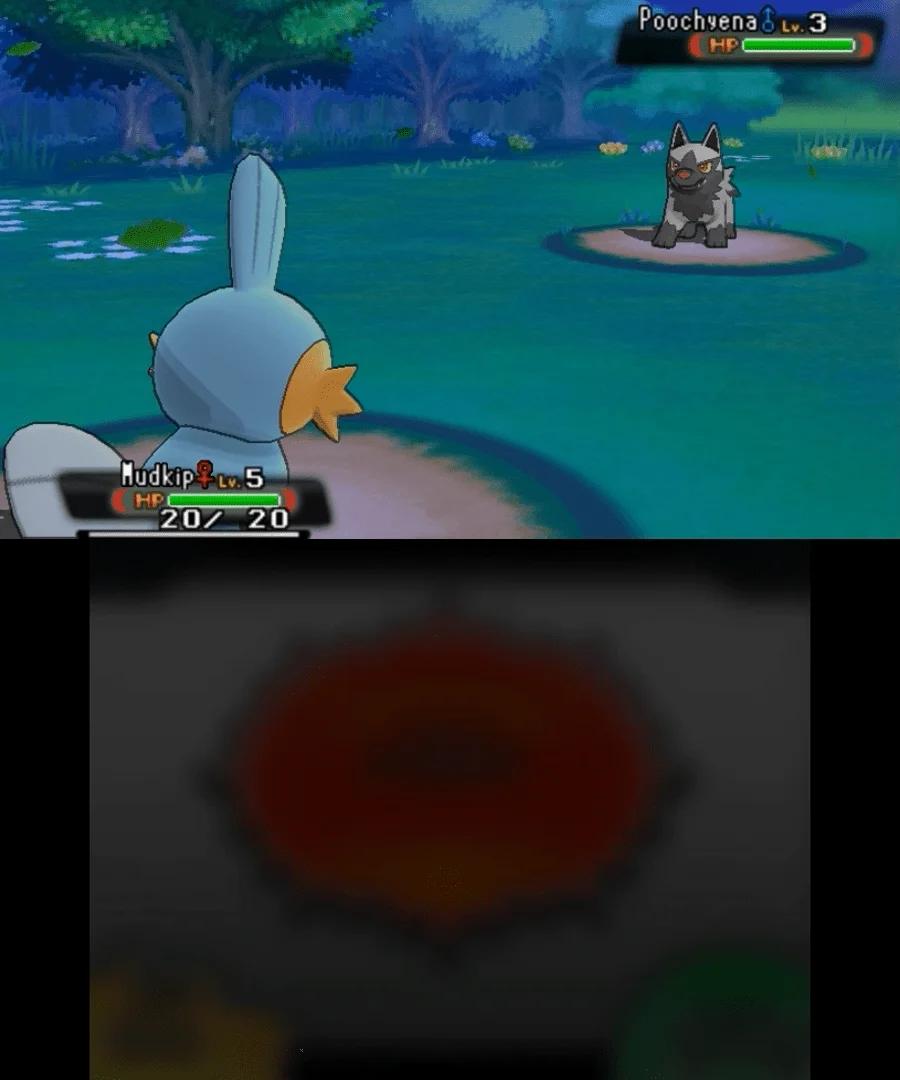
Enter Route 101 and walk north. Professor Birch will call for help while a wild Poochyena chases him. Examine the bag lying beside him to open the starter selection. The three Poké Balls contain Treecko, Torchic, and Mudkip, each at level 5.
Choose one Poké Ball to begin the required battle against the Poochyena. The encounter is scripted and the wild Poochyena cannot be captured. Use the damaging move available to your starter until the battle ends; there is no need to weaken the Pokémon carefully or use items during this introduction.
After the battle, Birch takes you to his laboratory and allows you to keep the starter you selected. He then tells you that your rival is waiting on Route 103. At this point you still do not have Poké Balls, so ordinary wild Pokémon cannot yet be added to your party.
- Reach Professor Birch on Route 101.
- Choose Treecko, Torchic, or Mudkip from the bag.
- Defeat the scripted wild Poochyena.
- Confirm that the selected starter remains in your party.
Select the starter that suits your playstyle
Treecko is a Grass-type starter with good Speed and early access to Grass damage. It is immediately useful against Water- and Ground-type Pokémon and can handle the first Gym’s Rock typing with Grass moves. Its main early limitation is that it is less durable than Mudkip if it takes repeated neutral hits.
Torchic begins as a Fire type and later evolves into Combusken, which adds the Fighting type. Torchic provides strong Fire coverage and eventually gains useful Fighting attacks for Normal-, Ice-, Rock-, and Steel-type opponents. Before evolving, it can be less comfortable against Rock-type targets, so give it support from another team member if necessary.
Mudkip is a Water-type starter that later evolves into the Water/Ground-type Marshtomp. It has strong early coverage, useful durability, and eventually becomes immune to Electric attacks. It is a forgiving choice for a first playthrough, but all three starters can complete the story.
- Choose Treecko for Speed and early Grass coverage.
- Choose Torchic for Fire offense and later Fighting coverage.
- Choose Mudkip for durability, Water attacks, and its later Water/Ground typing.
Travel through Oldale Town to Route 103
After leaving Birch’s laboratory, go north through Route 101 to Oldale Town. You cannot catch the wild Pokémon you encounter yet because you have not received Poké Balls. You can battle them for experience, but avoid unnecessary damage if your starter is already weakened.
Use Oldale Town’s Pokémon Center to restore your party. The local Poké Mart is also available, and its clerk gives you a supply of Potions when you first enter the town. From Oldale, take the northern exit to Route 103 and continue through the grass toward the far end of the western section.
Your rival waits at the northern end of this accessible section of Route 103. Speak with the rival to begin the first Trainer battle. The rival uses the starter with a type advantage over your choice, so heal first in Oldale if your starter has taken damage. Your recently selected starter should normally be the main battler, but use any available move that exploits the opposing starter’s weaknesses.
- Pass through Route 101 to Oldale Town.
- Heal at the Oldale Pokémon Center.
- Take the northern exit from Oldale to Route 103.
- Reach the rival at the northern end of the accessible Route 103 area.
Win the first rival battle and claim the Pokédex
Defeat Brendan or May in the Route 103 battle. If you lose, return to the Pokémon Center in Oldale, heal, and walk back to the same location; the rival remains there until the battle is completed.
After the victory, follow the return sequence to Littleroot Town and enter Birch’s laboratory. Professor Birch gives you the Pokédex, and your rival gives you Poké Balls. This is the first point at which you can legally catch wild Pokémon for your own party.
Before leaving town, speak with your mother if you need a full recovery. Then follow the route toward Route 101. At the Route 101 entrance, the game demonstrates the DexNav on the PokéNav Plus. Complete the demonstration so you understand the basic detection and sneaking functions. It is optional to use hidden-Pokémon encounters immediately, but the DexNav is a useful Omega Ruby feature for finding Pokémon and checking which species you have encountered.
- Defeat the rival on Route 103.
- Return to Littleroot Town after the battle.
- Receive the Pokédex from Professor Birch.
- Receive Poké Balls from Brendan or May.
- Complete the DexNav demonstration near Route 101.
Catch your first additional Pokémon
Once you have Poké Balls, return to Route 101 or continue through the nearby routes and look for a suitable second team member. Route 101 contains Zigzagoon, Wurmple, and Poochyena in the grass. Route 103 also offers Zigzagoon, Poochyena, and Wingull, while Route 102 provides further early options as you travel toward Petalburg City.
To catch one, weaken it with your starter without reducing its HP to zero, then choose Bag during battle and throw a Poké Ball. If the Pokémon breaks free, use another Ball or weaken it further while avoiding a critical knockout. Heal at home or at a Pokémon Center if your starter becomes low on HP.
Zigzagoon is a convenient early utility Pokémon and may remain useful for field moves later. Wurmple evolves quickly and provides early Bug-type attacks. Poochyena supplies early Dark-type damage, while Wingull offers Water/Flying coverage if you catch it on Route 103. None is mandatory, and you can replace the Pokémon later as stronger options become available.
When ready, leave Route 101 through Oldale and take Route 102 west toward Petalburg City. The opening chapter is complete once the rival battle is finished, the Pokédex and Poké Balls are in your possession, and you have either caught an additional Pokémon or deliberately chosen to continue with only the starter.
- Catch at least one Pokémon after receiving Poké Balls.
- Consider Zigzagoon, Wurmple, Poochyena, or Wingull for early coverage and utility.
- Heal before proceeding through Route 102.
- Take Route 102 west toward Petalburg City.
Before you move on
- Treecko, Torchic, or Mudkip is in your party as the first partner Pokémon.
- The scripted Route 101 Poochyena battle has been completed.
- The rival battle at the northern end of Route 103 is finished.
- You have returned to Birch’s laboratory and received the Pokédex.
- You have received Poké Balls from Brendan or May.
- The DexNav demonstration near Route 101 has been completed.
- At least one additional Pokémon has been caught after Poké Balls became available, unless you intentionally chose to continue with only the starter.
- You are ready to travel west from Oldale Town through Route 102 toward Petalburg City.
Routes 102–104, Petalburg Woods and Early Trainer Prep
Leave Oldale Town for Route 102, complete the required Petalburg City and Wally sequence, cross Route 104 and Petalburg Woods, defeat the first Team Magma Grunt, collect the Exp. Share and Wailmer Pail, and arrive in Rustboro City ready for Roxanne and the Devon Parts storyline.
Leave Oldale Town and cross Route 102
Begin this chapter in Oldale Town after the opening events from Chapter 1 are complete. Heal at the Pokémon Center if necessary, then leave through the western exit to Route 102. Follow the path west toward Petalburg City, battling the route Trainers you encounter. These battles provide useful experience for any Pokémon you caught before reaching Petalburg.
Route 102 is also a practical place to add another team member if you have not done so already. Omega Ruby can provide encounters such as Poochyena, Zigzagoon, Wurmple, Ralts, Surskit, and Seedot on this route. Lotad is not the normal version-exclusive encounter here in Omega Ruby; it belongs to Alpha Sapphire. A second Pokémon with a different attack type makes the upcoming route and forest battles safer, but catching one is optional for story progress.
Collect visible items and Berries as you go, but do not spend time searching for optional encounters if your party is already in good condition. Continue west until you enter Petalburg City.
- Leave Oldale Town through the western exit.
- Cross Route 102 and battle enough Trainers to keep the party developing.
- Catch an additional Pokémon if your team needs coverage or a safer switch.
Meet Norman and complete Wally’s capture tutorial
When you reach Petalburg City, heal at the Pokémon Center and visit the Petalburg Gym. Norman, your in-game father, explains that he will not accept your Gym challenge until you have earned four Badges. This is a story restriction, not a battle you can overcome early, so do not waste time trying to enter the official Gym challenge now.
Wally then arrives and asks for help catching a Pokémon before moving to Verdanturf Town. Follow Norman’s instructions and accompany Wally east to Route 102. The game handles the capture demonstration automatically: Wally uses Norman’s loaned Zigzagoon and catches a Ralts. You do not need to weaken or catch the Ralts yourself.
Return to the Petalburg Gym after the tutorial. Wally thanks you and upgrades the PokéNav Plus with the PlayNav app. PlayNav includes Pokémon-Amie, Super Training, and the Player Search System. These features are not required for the campaign, but the Wally event and the upgrade are required before the western route opens. Norman again points you toward Roxanne in Rustboro City as your next Gym objective.
- Visit Norman in the Petalburg Gym.
- Complete Wally’s automatic Ralts-catching tutorial on Route 102.
- Return to the Gym and receive the PlayNav upgrade.
- Confirm that Norman has explained the four-Badge restriction.
Prepare in Petalburg before going west
Use the Pokémon Center before leaving Petalburg. Review your party and place at least one dependable Pokémon in the lead. A starter plus two additional Pokémon is a comfortable setup, although the game does not require a particular party size or composition.
Buy Poké Balls if you intend to catch anything on Route 104 or in Petalburg Woods. Carry Potions and at least one status-healing item if possible. There is no Pokémon Center inside Petalburg Woods, so entering with a weakened team can force an unnecessary retreat.
The Petalburg Poké Mart is also useful for replacing supplies after the Route 102 battles. You do not need to complete an HM task here, and Surf is not available at this stage. Once your party is healed and supplied, leave Petalburg through the western exit onto southern Route 104.
- Heal in Petalburg.
- Restock Poké Balls and basic healing items.
- Leave through the western exit to southern Route 104.
Cross southern Route 104 and enter Petalburg Woods
Follow southern Route 104 north. Battle the Trainers along the path if your newer Pokémon need experience, and collect the visible items that are directly on your route. Taillow is available here and can provide useful Flying-type coverage, while Wurmple and other early Pokémon can fill gaps in a developing party. None of these encounters is required.
Continue north until the path enters Petalburg Woods. The woods are a required passage between Petalburg and Rustboro, so follow the main route rather than trying to clear the side paths. Optional branches and Cut-accessible areas can be left for a later return after you obtain HM01 and defeat Roxanne.
The forest contains several Trainers and wild Pokémon. If a new capture is underlevelled, use the early grass and trainer battles to raise it while keeping a healthier Pokémon ready to switch in. Avoid exhausting the party before reaching the story encounter near the northern part of the woods.
- Cross southern Route 104.
- Enter Petalburg Woods from the southern entrance.
- Use the forest for optional training without delaying the required story event.
Defeat the Team Magma Grunt and receive the Exp. Share
Continue north through Petalburg Woods until you find a Devon Corporation researcher. He explains that he is searching for a Shroomish, but a Team Magma Grunt confronts him. Speak to the Grunt to begin the required battle and defeat the Grunt’s Pokémon.
After the battle, the Grunt flees and hints that Team Magma has further business in Rustboro. The Devon researcher thanks you by giving you the Exp. Share, then heals your Pokémon before leaving for Rustboro. In Omega Ruby, this is a Team Magma event; do not substitute the Team Aqua version from Alpha Sapphire.
The Exp. Share is a Key Item. When enabled, it distributes experience to Pokémon traveling in your party, including Pokémon that did not participate directly in battle. It is useful for keeping a full story team close in level, but turning it off is also valid if you prefer to train only active battlers.
Continue north to the forest exit. A second Team Magma member appears on the northern side of Route 104 and reports on the failed operation. This encounter is part of the scene but does not require another battle.
- Find the Devon researcher in Petalburg Woods.
- Defeat the Team Magma Grunt.
- Receive the Exp. Share.
- Confirm that the researcher has restored your party.
- Exit through the northern side of the woods.
Collect the Wailmer Pail and reach Rustboro City
On northern Route 104, visit the Pretty Petal Flower Shop before continuing north. The eldest sister explains Berry planting, and the middle sister gives you the Wailmer Pail. The item is used for watering planted Berries and is optional for the campaign. The youngest sister can provide a daily Berry, but that reward is also optional.
Continue north along Route 104 to Rustboro City. Heal immediately at the Pokémon Center. If you need another party member, organize the team through the PC and retain varied attack types rather than several Pokémon with the same role.
Rustboro is the next required objective. Before entering Roxanne’s Gym, visit the Poké Mart to replenish Poké Balls and healing items. Grass- and Water-type moves are especially effective against Roxanne’s Rock-type Pokémon, and Fighting-type moves are also useful. If your starter lacks those options, train an appropriate teammate before beginning the Gym.
You can also explore Rustboro’s optional buildings, including the Pokémon Trainers’ School and the house offering a trade, but these activities are not needed to advance the campaign. The required next sequence begins with Roxanne’s Gym and the Devon Parts incident.
- Visit the Pretty Petal Flower Shop.
- Receive the Wailmer Pail.
- Reach Rustboro City and heal.
- Restock supplies before Roxanne’s Gym.
- Arrange a party with at least one Grass-, Water-, or Fighting-type attack ready for the next chapter.
Before you move on
- The Route 102 crossing is complete and Petalburg City has been reached.
- Wally’s capture tutorial has been completed and the PlayNav app is installed.
- Norman has explained that four Badges are required before his Gym challenge is available.
- The Team Magma Grunt in Petalburg Woods has been defeated.
- The Devon researcher has given you the Exp. Share and restored your party.
- The northern side of Route 104 has been crossed and the Wailmer Pail has been collected or intentionally skipped as an optional item.
- You are in Rustboro City with a healed party, replenished supplies, and reliable Grass-, Water-, or Fighting-type coverage ready for Roxanne.
Rustboro City and Roxanne (Gym 1)
Enter Rustboro City from Route 104, prepare a Grass-, Water-, or Fighting-type answer to Roxanne, win the Stone Badge, then follow the Team Magma theft through Route 116 and Rusturf Tunnel to recover the Devon Parts and open the next stage of the story.
Enter Rustboro City and heal
From the north side of Petalburg Woods, continue along Route 104 and cross the bridge into Rustboro City. Heal at the Pokémon Center before exploring the city. If your party took damage in Petalburg Woods or against the Team Magma Grunt there, restore everyone before entering the Gym.
The Poké Mart is near the southern part of town, while the Rustboro Gym is on the western side. The Devon Corporation is the large building in the northwest. You will return there after recovering the stolen Devon Parts, so do not worry about completing its main story sequence yet.
- Heal at the Pokémon Center.
- Check that your intended Gym Pokémon have enough HP and usable moves.
- Buy extra Potions and Poké Balls if your supplies are low.
Prepare a counter to Roxanne
Roxanne specializes in Rock-type Pokémon. Grass- and Water-type moves are the most direct answers: Treecko can use Absorb, Mudkip can use Water Gun, and Shroomish from Petalburg Woods is another useful Grass-type option. Torchic has a poor matchup before evolving, so give it support from another party member rather than relying on Ember alone.
Fighting-type damage is also effective, especially against Nosepass. Rustboro’s Pokémon Trainers' School contains an optional trade: a student will exchange a Makuhita holding an X Attack for a Slakoth caught in Petalburg Woods. This is a practical option for a Torchic-led team, although the trade is not required.
Roxanne’s highest-level Pokémon is level 14. Having your main counter near that range, plus a healthy backup, makes the battle safer without requiring a narrowly specialized team.
- Bring at least one Pokémon with Grass, Water, or Fighting damage.
- Keep a second Pokémon healthy in case Rock Tomb lowers your lead’s Speed.
- Catch Slakoth first if you want the optional Makuhita trade.
Collect Rustboro’s useful items
Before challenging the Gym, you can visit the house beside the Pokémon Center to receive HM01, Cut, from the Cutter. You may also collect TM54, False Swipe, from the businessman inside the Poké Mart and obtain the Quick Claw at the Pokémon Trainers' School. These rewards are optional for defeating Roxanne.
Receiving Cut does not mean you can use it in the field immediately. The Stone Badge, awarded by Roxanne, is required before Cut can clear the small trees blocking certain paths. Do not spend time trying to use it before the Gym battle.
- Obtain HM01 from the Cutter if you want it early.
- Collect optional Rustboro items that fit your team.
- Remember that Cut’s field use is locked until after the Stone Badge.
Navigate the Rustboro Gym
Enter the Gym on the west side of Rustboro. The building is arranged like a small fossil museum, with Gym Trainers placed along short paths. You can use the open route to reach Roxanne without fighting every Trainer, but battling them provides useful experience and money before the leader fight.
Use special Grass or Water attacks when possible because Rock Pokémon generally have strong physical Defense. Fighting moves are also effective. Avoid sending Fire-, Flying-, or Bug-type Pokémon into Rock Tomb unless you are switching safely or finishing a weakened target.
- Choose whether to battle the Gym Trainers for experience.
- Place your best counter at the front of the party.
- Heal again if the Gym Trainers leave your party weakened.
Defeat Roxanne
Roxanne uses a level 12 Geodude followed by a level 14 Nosepass. Open with a reliable super-effective move. Geodude has Sturdy, so a full-health Geodude can survive an attack that would otherwise knock it out and remain with 1 HP. Attack it again before switching targets.
Both Pokémon can use Rock Tomb. Besides dealing damage, Rock Tomb lowers the target’s Speed, so your counter may move second after being hit. If your Pokémon is badly weakened, heal or switch to your backup rather than risking a critical hit. Continue using Grass, Water, or Fighting attacks until Nosepass falls.
After the victory, Roxanne gives you the Stone Badge and TM39, Rock Tomb. The badge permits the use of Cut outside battle and raises the obedience limit for traded Pokémon to level 20. Rock Tomb is optional to teach; keep it if its damage and Speed-lowering effect help your team.
- Defeat Geodude and Nosepass.
- Receive the Stone Badge.
- Receive TM39, Rock Tomb.
- Confirm that Cut can now be used outside battle.
Follow the theft to Rusturf Tunnel
Leave the Gym after the victory. A Team Magma Grunt will flee from the Devon Corporation, and a Devon researcher will chase after him toward the northeast side of town. Follow the route to Route 116 rather than leaving Rustboro by the southern exit.
Continue east on Route 116 until you reach Rusturf Tunnel. At the entrance, Mr. Briney is present because the Grunt has also taken his Wingull, Peeko. Enter the tunnel, defeat the Team Magma Grunt’s level 13 Poochyena, and recover the Devon Parts. The battle is optional to avoid only in the sense that the story cannot progress without completing it.
After the rescue, return to the Devon Corporation in northwest Rustboro. Speak with the researcher outside, then go upstairs to meet Mr. Stone. He gives you a Great Ball and upgrades the PokéNav Plus with BuzzNav before assigning the next story task. Only after these events is the route toward Dewford properly opened.
- Follow the researcher from Rustboro to Route 116.
- Enter Rusturf Tunnel and defeat the Team Magma Grunt.
- Recover the Devon Parts and reunite Mr. Briney with Peeko.
- Return to Devon Corporation and speak with Mr. Stone.
- Confirm that BuzzNav has been added to the PokéNav Plus.
Before you move on
- Roxanne has been defeated and the Stone Badge appears in the Badge Case.
- TM39, Rock Tomb, has been received.
- HM01, Cut, has been obtained if desired and can now be used outside battle.
- The Team Magma Grunt has been defeated in Rusturf Tunnel and the Devon Parts have been recovered.
- Peeko has been rescued, and Mr. Stone has upgraded the PokéNav Plus with BuzzNav.
Dewford Town and Brawly (Gym 2)
Reach Dewford Town by Mr. Briney’s boat, prepare for the Fighting-type Gym, defeat Brawly, then return to Granite Cave to deliver Mr. Stone’s Letter to Steven. In Omega Ruby, the Knuckle Badge is required before the Ruin Maniacs move aside and allow access to Steven’s room. After the delivery, Mr. Briney opens the route to Route 109 and Slateport City.
Prepare in Dewford Town
After Mr. Briney lands at Dewford Town, heal at the Pokémon Center. The next required battle is Brawly’s Gym challenge, but you can make a few useful preparations first. The fisherman east of the Gym gives you the Old Rod when you speak with him and accept it. It can be used at any body of water, although fishing is optional for the story. A house near the pier also contains an optional item reward, but it is not needed to continue.
Leave Dewford through the north exit to Route 106 and battle the Fishermen if you want extra experience. Granite Cave is at the western end of the route. Pokémon such as Taillow, Wingull, Beautifly, and Ralts can provide useful Flying-, Psychic-, or Fairy-type attacks against Brawly. You do not need a particular species to win, but keep at least one Pokémon with a reliable attack that exploits Fighting-type weaknesses. Flying-type Pokémon also resist Fighting attacks, making them safer switches than Normal-, Rock-, Steel-, Ice-, or Dark-type Pokémon.
- Heal at the Dewford Pokémon Center.
- Receive the Old Rod from the fisherman east of the Gym.
- Bring a Pokémon with Flying-, Psychic-, or Fairy-type damage if possible.
- Train your intended Brawly counter before entering the Gym.
Check Granite Cave before the Gym
Enter Granite Cave from Route 106 and walk west from the entrance to find the Hiker who gives you TM70 Flash. In Omega Ruby and Alpha Sapphire, Flash is a TM rather than an HM. The Knuckle Badge is required before Flash can be used outside battle, so receiving the TM before defeating Brawly does not let you illuminate caves yet.
Continue only far enough to confirm the story obstruction. A group of Ruin Maniacs blocks the entrance to Steven’s room until you have the Knuckle Badge. The Omega Ruby and Alpha Sapphire layout places Steven’s room close to the entrance area after this obstruction is removed; you do not need to navigate the original games’ deep lower-floor route to complete the letter delivery. Return to Dewford once you have collected Flash and confirmed that the passage is blocked.
- Collect TM70 Flash from the Hiker in Granite Cave.
- Confirm that the Ruin Maniacs block Steven’s room.
- Return to Dewford without searching for an alternate lower-floor route.
Solve the Dewford Gym puzzle
Enter the Dewford Gym after healing. The Gym is a darkened training facility with conveyor belts and switches that temporarily illuminate sections of the path. Follow the visible central route to the first Gym Trainer, Battle Girl Laura, and defeat her. Step on the nearby switch, memorize the illuminated path, and walk through it after the lights go dark.
Continue to Black Belt Hideki, then use the next switch to reveal the following section. Battle Girl Tessa is farther along the route. After defeating her, activate the switch near her and examine the two illuminated paths. Take the left path to reach the area above the conveyor belt, then walk north onto the large switch that illuminates Brawly’s room. You can buy Fresh Water from the Gym’s vending machine if you need a quick healing item, but the Pokémon Center is the safer place to restore the whole party.
- Defeat the Gym Trainers blocking the switches.
- Memorize each temporary lighted path before stepping away from its switch.
- Use the left path at the final split and activate the switch outside Brawly’s room.
- Heal before speaking to Brawly.
Defeat Brawly
Brawly’s Omega Ruby team is a level 14 Machop followed by a level 16 Makuhita. Machop can use Leer, Karate Chop, Seismic Toss, and Bulk Up. Makuhita can use Arm Thrust, Knock Off, Sand Attack, and Bulk Up. Fighting-type moves are strong against Normal-, Rock-, Steel-, Ice-, and Dark-type Pokémon, so avoid leaving one of those targets in front unless it can safely withstand the attack.
Lead with your best Flying-, Psychic-, or Fairy-type attacker and prioritize immediate damage. If Brawly uses Bulk Up, do not allow the battle to become a prolonged exchange: switch to a sturdier Pokémon if necessary, then return to your counter when you have a safe opportunity. Makuhita’s Arm Thrust can strike more than once, Knock Off removes a held item, and Sand Attack can make repeated attacks unreliable. If accuracy has been lowered, switching to another Pokémon is usually safer than continuing to depend on missed attacks.
Defeating Brawly awards the Knuckle Badge and TM08 Bulk Up. The badge permits traded Pokémon up to level 30 to obey you and allows Flash to be used outside battle.
- Defeat Machop before it gains multiple Bulk Up boosts.
- Use super-effective damage rather than relying on a long neutral battle.
- Defeat Makuhita without allowing Sand Attack or repeated Arm Thrust hits to derail the fight.
- Receive the Knuckle Badge and TM08 Bulk Up.
Return to Granite Cave and deliver the Letter
Leave the Gym and return north through Route 106 to Granite Cave. The Ruin Maniacs have moved after your Gym victory. Enter the cave, walk west from the entrance toward the Hiker’s position, and take the newly accessible passage north of that area. Steven is in the room with the large ancient mural. Speak to him to trigger the letter conversation, then give him the Letter received from Mr. Stone at the Devon Corporation.
Steven thanks you and gives you TM51 Steel Wing. This completes the required Granite Cave objective for this chapter. Flash is optional for this specific visit because Steven’s room is reached through the newly opened entrance-area passage; the darker lower areas are not required for the story delivery. You may explore for optional items or encounters, but do not delay the delivery if you are following the main route.
- Reach Steven after obtaining the Knuckle Badge.
- Give Steven Mr. Stone’s Letter.
- Receive TM51 Steel Wing.
- Leave Granite Cave after the letter scene.
Unlock the Slateport route
Return to Dewford Town and speak with Mr. Briney at the pier or beside his boat. Once he learns that the Letter has been delivered, he explains that the Devon Parts must be taken to Captain Stern in Slateport City. Agree to travel with him and select Route 109 as the destination. This begins the next main-story section; the required destination after Dewford is Route 109 and then Slateport City, not a return to Rustboro or an attempt to cross the later water routes on foot.
- Speak with Mr. Briney after Steven accepts the Letter.
- Choose the trip to Route 109.
- Continue north from Route 109 toward Slateport City.
Before you move on
- The Knuckle Badge is displayed in the Badge case.
- TM08 Bulk Up is in the Bag after Brawly’s defeat.
- Flash can be used outside battle, and TM70 is in the Bag.
- Steven has accepted Mr. Stone’s Letter and awarded TM51 Steel Wing.
- Mr. Briney offers the trip to Route 109 and Slateport City.
Mauville City, Wattson (Gym 3) and Key Items
Reach Mauville City from Route 110, complete the required Wally event, obtain Rock Smash and a bicycle, solve the two-floor electrical-barrier puzzle, and defeat Wattson for the Dynamo Badge. The badge unlocks field use of Rock Smash and opens the northern route toward Route 111, Route 112, and Lavaridge Town.
Enter Mauville City and prepare your party
Continue north from Route 110 to enter Mauville City. The Pokémon Center and Poké Mart are in the central courtyard, so heal before exploring the city or entering the Gym. Wattson’s strongest Pokémon is level 21, making a team with several Pokémon around levels 19 to 23 suitable for a normal story playthrough.
Put a Ground-type Pokémon or a Pokémon with a reliable Ground move near the front of your party. Marshtomp is the easiest answer if you chose Mudkip, because its Water/Ground typing makes it immune to Electric attacks. Geodude is another strong option if you caught one in Granite Cave. The Poké Mart sells TM78 Bulldoze, which is an optional but effective answer if you can afford it. Stock healing items and a few Paralyze Heals because Thunder Wave and other status effects can slow the Gym battles.
- Heal at the Mauville Pokémon Center.
- Carry a Ground-type Pokémon or Ground-type move.
- Bring Paralyze Heals and enough healing items for the Gym trainers and Wattson.
Complete Wally’s challenge and receive Rock Smash
Approach the Mauville Gym entrance. Wally and his uncle are standing outside, and the game requires you to battle Wally before you can enter the Gym. Wally uses a level 17 Ralts. Defeat it with a strong neutral attack or with a move that exploits its Psychic/Fairy typing.
After Wally loses, he returns to Verdanturf Town. His uncle then gives you HM06 Rock Smash. Teach it to a suitable Pokémon only if you want field access later; Rock Smash is a weak Fighting-type attack and may not be worth replacing a useful battle move. You can teach it before fighting Wattson, but the Dynamo Badge is required before Rock Smash can be used outside battle.
- Battle Wally outside the Mauville Gym.
- Defeat his level 17 Ralts.
- Receive HM06 Rock Smash from Wally’s uncle.
Choose a bicycle and handle optional Mauville facilities
Visit Rydel’s Cycles in the northeastern district and receive either the Mach Bike or the Acro Bike. The choice is not permanent. Return to Rydel later if you want to exchange it for the other model. The Mach Bike is useful for speed and certain steep or collapsing paths, while the Acro Bike is useful for hopping over rails and performing bike tricks. Either one is sufficient for the immediate story route toward Lavaridge.
Mauville’s Game Corner is closed in Omega Ruby, so it does not provide required coins, HMs, or progression items. Treat the Game Corner, cafés, shops, O-Power NPCs, and other city facilities as optional. If you have enough money, TM78 Bulldoze from the Poké Mart is the most relevant optional purchase for the upcoming Gym.
- Receive a bicycle from Rydel’s Cycles.
- Choose Mach or Acro based on your preference.
- Do not search the closed Game Corner for a required story item.
- Consider buying TM78 Bulldoze if you need Ground coverage.
Navigate the Mauville Gym’s electrical barriers
Enter the Gym after preparing your team. The Gym has two floors and uses red and blue lightning-shaped switches. Each switch changes the direction of every barrier of its color, so the route is created by activating the switches in sequence rather than by searching for hidden doors.
On the first floor, move left and battle Guitarist Kirk, who uses Magnemite and Electrike. After the battle, step on the red switch near him, then use the blue switch to the right. This opens the path north. Walk through the opening and take the stairs to the second floor.
On the second floor, use the switches in this order: blue on the right side, red on the left side, then blue on the right side again. Move right and battle Youngster Ben, who uses Electrike. Activate the nearby blue switch, then go upward and battle Battle Girl Vivian, whose Meditite is level 19. After defeating her, step on the red switch near her, move to the northeast blue switch, and activate it. The southern route will then open into a northbound passage. Follow it, defeat Guitarist Shawn’s two Voltorb, and continue north to Wattson.
If the barriers do not match this arrangement, return to the most recent switch and repeat the color sequence. The switches affect all barriers of the same color, so changing one can close a route that was previously open.
- Defeat Guitarist Kirk on the first floor.
- Use red, then blue, to open the stairs.
- On the second floor, use blue, red, blue.
- Defeat Youngster Ben and Battle Girl Vivian.
- Use the red switch near Vivian, then the northeast blue switch.
- Defeat Guitarist Shawn and proceed to Wattson.
Defeat Wattson and claim the Dynamo Badge
Wattson’s team is Magnemite at level 19, Voltorb at level 19, and Magneton at level 21. Use Ground attacks whenever possible. Magnemite and Magneton are Electric/Steel types and are weak to Ground, Fire, and Fighting attacks. Ground Pokémon are immune to Wattson’s Electric attacks, although Magnemite’s Sturdy ability prevents it from being knocked out in one hit while it is at full HP.
Magnemite can use Thunder Wave, so cure paralysis or switch to a Pokémon that can continue fighting effectively while slowed. Voltorb knows Rollout, Charge, and Volt Switch. Rollout becomes stronger if it connects repeatedly, so defeat Voltorb promptly rather than allowing it several uninterrupted turns. Magneton can use Supersonic, Magnet Bomb, and Volt Switch. If confusion prevents your Ground attacker from acting, switch carefully or use a Paralyze Heal and healing item after the battle if necessary.
Wattson may use Super Potions, so do not assume that a weakened Pokémon will remain within knockout range. Keep your Ground attacker healthy for Magneton, his highest-level Pokémon, and use Fire or Fighting attacks as backups against the two Electric/Steel Pokémon.
- Defeat Magnemite, Voltorb, and Magneton.
- Expect Magnemite’s Sturdy ability to prevent a full-health one-hit knockout.
- Watch for Thunder Wave, Rollout, Supersonic, and Volt Switch.
- Receive the Dynamo Badge and TM72 Volt Switch.
- Confirm that traded Pokémon up to level 40 will obey you.
Leave Mauville and begin the Lavaridge route
After defeating Wattson, Rock Smash can be used outside battle. Teach it to a party member if you want to break rocks during optional exploration or on later routes, but it is not necessary to keep it on your strongest battler. Heal at the Pokémon Center before leaving.
For the main story, exit Mauville through the northern route. A Team Magma scene occurs as you proceed, and the route leads into the southern portion of Route 111. Continue through Route 111 toward Route 112 and the Fiery Path, which are the required approach to Lavaridge Town. Route 117 and Verdanturf Town are optional at this point, although Rock Smash now opens the shortcut through Rusturf Tunnel.
- Use Rock Smash outside battle after earning the Dynamo Badge.
- Heal and restock before leaving Mauville.
- Exit north toward Route 111 and Route 112.
- Treat Route 117, Verdanturf Town, and Rusturf Tunnel as optional exploration.
Before you move on
- The Dynamo Badge appears on the Trainer Card.
- TM72 Volt Switch is in the Bag.
- Wattson has been defeated and the Gym barriers no longer block the exit.
- Rock Smash works on breakable rocks outside battle.
- The player can leave Mauville north toward Route 111 and continue toward Route 112 and the Fiery Path.
Route Network and Lavaridge Town — Flannery (Gym 4)
Travel from Mauville through Route 111, Route 112, Fiery Path, Route 113, Fallarbor Town, Route 114, and Meteor Falls. Rescue Professor Cozmo from Team Magma, follow the stolen Meteorite to Mt. Chimney, defeat Maxie, descend Jagged Pass, and beat Flannery in Lavaridge Gym. Afterward, collect the Go-Goggles and prepare to return to Petalburg City for the fifth Gym.
Leave Mauville and collect Strength on Route 112
From Mauville City, go north onto Route 111 and continue toward Route 112. When you meet May or Brendan on Route 112, your rival restores your party and gives you HM04 Strength. You can teach Strength immediately if you want to move boulders, but it cannot be used outside battle until you earn the Heat Badge later in this chapter.
Continue past the Cable Car station. Team Magma Grunts are blocking the entrance, so the summit of Mt. Chimney is not available yet. Follow the accessible route into Fiery Path. The main tunnel leads to the northern section of Route 112; the side passages blocked by boulders can be revisited after you have the necessary field access.
- Heal before leaving Mauville.
- Receive HM04 Strength from May or Brendan on Route 112.
- Do not spend time trying to enter the blocked Cable Car station.
- Keep a Water-, Ground-, or Rock-type attack available for upcoming battles.
Cross Fiery Path, Route 113, and Fallarbor Town
Pass through Fiery Path and emerge on the northern side of Route 112. Continue east through the route and then north along Route 113. The volcanic routes contain wild Numel and Machop, while the trainers provide useful experience before the upcoming Team Magma battles.
Reach Fallarbor Town and heal at the Pokémon Center. Speak with the local characters to learn that Professor Cozmo has been taken to Meteor Falls. From Fallarbor, travel east through Route 114. Follow the route to Meteor Falls and enter the cave at its northern end.
- Heal in Fallarbor Town.
- Use Route 113 and Route 114 trainers for experience if your team is struggling.
- Carry healing items before entering Meteor Falls.
Rescue Professor Cozmo at Meteor Falls
Inside Meteor Falls, follow the path to the Team Magma confrontation. In Omega Ruby, you will battle Team Magma members while May or Brendan assists during the story encounter. After the battle and the accompanying scene, Team Magma escapes with Professor Cozmo’s Meteorite and retreats to Mt. Chimney.
Once the scene ends, leave Meteor Falls and retrace your route through Route 114, Route 113, and the northern section of Route 112. The Cable Car guards have now moved, so you can return to the station on the southern side of Route 112. If you want extra experience or items, finish those preparations before boarding.
- Complete the Team Magma encounter inside Meteor Falls.
- Confirm that the Meteorite theft scene has finished.
- Return to the Cable Car station through Route 112.
- Heal before riding to Mt. Chimney.
Ride the Cable Car to Mt. Chimney
Enter the Cable Car station on Route 112 and ride to the summit of Mt. Chimney. Team Magma and Team Aqua are fighting across the peak, but you do not need to battle every character in the area. Follow the summit path north and move through the groups until you reach the required Team Magma encounters.
In Omega Ruby, the required sequence includes a Team Magma Grunt, then Magma Admin Tabitha, followed by Team Magma Leader Maxie. Water- and Ground-type attacks are reliable choices against the Fire- and Ground-oriented Pokémon used by Team Magma. Rock attacks are also useful, but avoid relying on a single Pokémon if it is already weakened by the earlier battles.
- Place a healthy Water-, Ground-, or Rock-type Pokémon in the active party.
- Save or heal before entering the main summit battle route.
- Do not leave through Jagged Pass before completing the Maxie encounter.
Defeat Maxie and descend Jagged Pass
Continue across the summit until Tabitha stops you near the crater. Defeat Tabitha, then proceed to the crater and challenge Maxie. After you win, the story scene concludes with Maxie giving up the Meteorite and Team Magma leaving the summit. The southern path that was previously blocked is now open.
Take the southern exit from Mt. Chimney and descend Jagged Pass. Follow the ledges and winding paths downhill. Battle or avoid the trainers according to your party’s condition, then continue west on Route 112 to reach Lavaridge Town.
- Defeat Tabitha and Maxie in sequence.
- Confirm that Maxie has been defeated and the Meteorite scene has ended.
- Use the southern route through Jagged Pass after the battle.
- Heal as soon as you reach Lavaridge Town.
Prepare in Lavaridge Town
Heal at the Pokémon Center and restock Potions, Super Potions, and Poké Balls before entering the Gym. The Herb Shop near the Gym sells inexpensive but bitter healing items; an old man inside gives you Charcoal, which strengthens Fire-type moves when held. A Black Belt outside the Poké Mart gives you TM75 Swords Dance after you respond to his question appropriately. The hot springs also contain a hidden Ice Heal.
These rewards are optional, but the Pokémon Center and supplies are worth using before the Gym. You may also receive the Wynaut Egg from the Pokémon Breeder near the hot springs, but it is not required for story progress.
- Heal and restock before the Gym.
- Collect Charcoal if you want a Fire-type held-item boost.
- Treat the Wynaut Egg, TM75, and hidden Ice Heal as optional rewards.
Navigate Lavaridge Gym and defeat Flannery
Lavaridge Gym uses hot-spring vents and floor openings to move you between sections. Enter the vents and follow the connected rooms, battling the Gym Trainers who block the route. Continue using the vents until you reach Flannery at the rear of the Gym. There is no external field move requirement for solving this Gym; the puzzle is completed by choosing the available vents and clearing the trainer rooms.
Flannery specializes in Fire-type Pokémon. Water, Ground, and Rock attacks are the best general counters. Her Torkoal can use Sunny Day, which strengthens Fire attacks and reduces the power of Water attacks, and it can use Curse to improve its offensive and defensive capability. Keep your main counter healthy, switch out Grass-, Bug-, Ice-, and Steel-types when necessary, and heal before starting the leader battle.
Defeating Flannery earns the Heat Badge and TM50 Overheat. The Heat Badge raises the obedience limit to level 50 and allows Strength to be used outside battle. HM04 was already received on Route 112; the badge provides its field-use authorization.
- Bring Water, Ground, or Rock coverage.
- Heal before speaking with Flannery.
- Be ready for Sunny Day and Torkoal’s stronger Fire attacks.
- Collect the Heat Badge and TM50 Overheat after winning.
Receive the Go-Goggles and leave for Petalburg
Exit the Gym and speak with May or Brendan outside. After seeing your new badge, your rival gives you the Go-Goggles. They allow you to cross the sandstorm on Route 111 and explore the desert, but the desert is optional for the immediate story route.
May or Brendan suggests Petalburg City as your next destination and offers to travel with you. Accept the escort for the convenient return, or decline and make optional stops first. The next required Gym is Norman’s Petalburg Gym, and the game will now allow you to challenge him because you have earned the first four badges.
- Receive the Go-Goggles outside Lavaridge Gym.
- Confirm that the Heat Badge and TM50 Overheat are in your case or TM inventory.
- Return to Petalburg City for the fifth Gym.
- Use the desert only for optional exploration unless you need extra training or items.
Before you move on
- Professor Cozmo has been rescued at Meteor Falls and Team Magma has taken the Meteorite to Mt. Chimney.
- The Team Magma Grunt, Tabitha, and Maxie encounters at Mt. Chimney are complete.
- Maxie has been defeated, the Meteorite scene has ended, and Jagged Pass is open.
- Flannery has been defeated and the Heat Badge and TM50 Overheat have been received.
- May or Brendan has given you the Go-Goggles outside Lavaridge Gym.
- You have four badges and Petalburg City is the next required Gym destination.
References for this chapter
Petalburg City, Norman and Mid-Game Progression (Gym 5)
After defeating Flannery in Lavaridge Town, return to Petalburg City and defeat Norman, the Normal-type Gym Leader and your in-game father. Norman will not accept the challenge until you have the Stone, Knuckle, Dynamo, and Heat Badges. After earning the Balance Badge, collect TM67 Retaliate and HM03 Surf, then travel through Mauville City to Route 118. Surf across the route, complete the required Southern Island event against Team Magma, receive the Omega Ruby gift Latios, collect the Mega Bracelet from Steven, and finish at the northern entrance to Route 119.
Return to Petalburg after Flannery
After defeating Flannery, leave the Lavaridge Gym and follow the post-battle scene involving your rival. The game directs you back toward Petalburg City and Mauville City. If you leave the area without using the direct story travel, return through the normal western Hoenn routes until you reach Petalburg.
Heal at the Petalburg Pokémon Center before entering the Gym. Norman's challenge is available only after the first four Hoenn Badges are recorded: the Stone Badge from Roxanne, the Knuckle Badge from Brawly, the Dynamo Badge from Wattson, and the Heat Badge from Flannery. The desert on Route 111 and the Surf-accessible ponds around Petalburg are optional and do not need to be cleared first.
- The Stone, Knuckle, Dynamo, and Heat Badges are recorded.
- The party is healed in Petalburg City.
- The player is ready to challenge Norman.
Prepare for Norman's Gym
Norman uses Normal-type Pokémon, so Fighting-type attacks are the most direct answer. A Fighting-capable Pokémon such as Hariyama, Breloom, Combusken, or another team member with a reliable Fighting move can handle the battle efficiently. Rock- and Steel-type Pokémon can also help absorb Normal-type attacks, but remember that Norman's Pokémon carry Dark-type Feint Attack.
The Petalburg Gym consists of rooms labeled Speed, Accuracy, Zero Reduction, Defense, Recovery, Strength, and One-Hit KO. Read the signs at the entrance to each room and choose a route through the Trainers. You must defeat at least three Gym Trainers to reach Norman, although fighting more of them provides useful experience. The Defense Room's Linoone receives a Defense increase, so special attacks are useful there. The Recovery Room's Trainer can heal the Linoone during battle.
Bring healing items and at least one awakening item. The Gym Trainers and Norman can use disruptive moves, and a sleeping or confused primary attacker can make the final battle much harder.
- At least one Pokémon knows a dependable Fighting-type attack.
- Healing items are available.
- An awakening item or suitable status recovery is available.
- The Defense and Recovery rooms are approached with their item effects in mind.
Defeat Norman
Norman's team is a level 28 Slaking, a level 28 Vigoroth, and a level 30 Slaking. The two Slaking have Truant, causing them to act on alternating turns. Use their inactive turns to attack, switch safely, or heal, but do not treat every skipped turn as harmless: Yawn or Encore can still create problems before the next active turn.
The first Slaking knows Encore, Retaliate, Yawn, and Feint Attack. If it uses Yawn, switch to another Pokémon or use an awakening item rather than allowing your main counter to fall asleep. The level 28 Vigoroth has Vital Spirit and therefore does not use Truant. It knows Fury Swipes, Feint Attack, Retaliate, and Encore, so fight it as the consistently active member of the team.
The final level 30 Slaking knows Chip Away, Swagger, Retaliate, and Feint Attack. Keep a healthy attacker available for this Pokémon. Swagger raises your Pokémon's Attack while causing confusion, so switching is often safer than repeatedly risking confusion damage. All three of Norman's Pokémon know Retaliate, which is especially dangerous on the turn immediately after one of your Pokémon faints. Avoid sacrificing a weakened Pokémon just before Norman sends in his next Pokémon.
Fighting-type damage is super effective against all three targets. If you have Protect or Detect, these moves can help manage the Slaking turns, but they are not required. Focus on taking knockouts without allowing Norman to exploit a fainted Pokémon with Retaliate.
- Defeat the level 28 Slaking.
- Defeat the level 28 Vigoroth.
- Defeat the level 30 Slaking.
- Use Truant's inactive turns for attacks, switching, or recovery.
- Keep a healthy Pokémon available for the final Slaking.
Collect the Balance Badge, Retaliate, and Surf
Norman awards the Balance Badge and TM67 Retaliate after the battle. The Balance Badge permits the use of Surf outside battle and raises the obedience limit for traded Pokémon to level 60.
Follow Norman outside the Gym and continue through the scene with Wally and Wally's father. Wally's father gives you HM03 Surf. This is the required Surf reward; there is no separate Petalburg quest that must be completed before receiving it.
Teach Surf to a suitable Pokémon. You need it immediately to cross Route 118, and it is also a strong Water-type attack for ordinary battles. If your preferred Water-type is already carrying a full moveset, use another compatible team member for the route crossing.
- The Balance Badge appears on the Trainer Card.
- TM67 Retaliate is in the Bag.
- HM03 Surf has been received from Wally's father.
- A party Pokémon can use Surf.
- Surf works outside battle.
Travel from Mauville City to Route 118
Continue through the post-Gym travel sequence until you reach Mauville City. Heal and restock there if necessary. From Mauville, leave through the eastern exit to enter Route 118. The route is divided by a stretch of water, so walk to the western shoreline and use Surf to cross to the eastern beach.
On the eastern side, you may speak with the nearby Fisherman to receive the Good Rod. This is optional and does not affect the story. Continue east and then north through the grass. When you first approach the eastern grassy section, Steven appears and a distressed Eon Pokémon triggers the next cutscene.
Do not leave Route 118 before speaking with Steven. The encounter transports you and Steven to Southern Island, where the required Team Magma event takes place.
- Mauville City has been reached after Norman's defeat.
- Route 118 is entered from Mauville's eastern exit.
- Surf is used to cross from the western side to the eastern beach.
- Steven's Route 118 cutscene has started.
Complete the Southern Island Team Magma battle
On Southern Island, move north toward the Eon Pokémon. Team Magma Grunt and Admin Courtney arrive and demand that you leave. Refuse to leave to begin a tag battle with Steven as your partner.
In Omega Ruby, the Grunt uses a level 29 Koffing and Courtney uses a level 31 Camerupt. Koffing's Levitate prevents Ground-type attacks from hitting it, while Camerupt is weak to Water- and Ground-type attacks. Target Koffing with Psychic- or other super-effective damage if convenient, and use Water-type damage against Camerupt. Steven participates in the double battle, so you do not have to defeat both opponents alone.
After the battle, Steven heals your party. The story then gives you Latios automatically; you do not need to weaken or catch it. If your party has six Pokémon, choose one party member to send to a PC Box before accepting Latios. Latios arrives at level 30 and holds the Latiosite.
- The Team Magma Grunt and Courtney are defeated in the tag battle.
- Steven heals the party afterward.
- Latios has joined the party or has been placed in the PC if the party was full.
- Latiosite has been received with the gift Pokémon.
Receive the Mega Bracelet and continue to Route 119
After Latios joins you, Steven gives you the Mega Bracelet. The bracelet allows a compatible Pokémon holding its matching Mega Stone to Mega Evolve during battle. The Latiosite allows the newly received Latios to Mega Evolve, and other compatible Mega Stones can be used later as you obtain them.
The story returns you and Steven to Route 118. Steven leaves after explaining the next direction. From the eastern side of Route 118, travel north through the grass and follow the path past the Bird Keepers and other optional Trainers. You can collect the Hyper Potion and berry items if desired, but none of them is required.
At the northern exit, enter Route 119. This is the next required destination. The Weather Institute and the Team Magma occupation farther along Route 119 are covered by the next chapter; do not treat them as part of the Norman or Southern Island sequence.
- The Mega Bracelet is in the Key Items pocket.
- Latios and Latiosite are available.
- The player has returned to Route 118.
- The northern exit from Route 118 has been reached.
- Route 119 is entered as the next required destination.
Before you move on
- Norman has been defeated.
- The Balance Badge appears on the Trainer Card.
- TM67 Retaliate is in the Bag.
- HM03 Surf has been received from Wally's father.
- The western and eastern sides of Route 118 have been connected by Surf.
- Steven's Southern Island event has been completed.
- The Team Magma Grunt and Courtney have been defeated in the tag battle.
- Latios has joined the party or has been sent to the PC because the party was full.
- Latiosite and the Mega Bracelet have been received.
- The player has returned to Route 118 and reached the northern entrance to Route 119.
References for this chapter
- Petalburg Gym and Norman - Pokémon Omega Ruby and Alpha Sapphire Walkthrough
- Hoenn Route 118 - Pokémon Omega Ruby and Alpha Sapphire Walkthrough
- Southern Island: Pokémon ORAS Walkthrough (Part 11)
- Pokémon Omega Ruby and Alpha Sapphire - Team Aqua and Team Magma
- Pokémon Omega Ruby & Alpha Sapphire - Gym Leaders
- Pokémon Omega Ruby official e-manual
Fortree City, Winona, Route 119 Cleanup and the Lilycove Approach
Travel from Route 118 through Route 119 and the Weather Institute, defeat Team Magma’s administrator, receive HM02 Fly, and win the Feather Badge from Winona in Fortree City. Then follow the required Team Magma storyline through Route 120, Route 121, Mt. Pyre, Slateport Harbor, and the Team Magma Hideout. The chapter ends when the hideout is cleared and Route 124 toward Mossdeep is open.
1. Cross Route 119 from Route 118
From Route 118, continue north into Route 119. This is a long route with tall grass, bridges, stairs, and several trainer battles. You can use the small cabin in the northern half of the route to fully heal your party, so use it before entering the Weather Institute if your team has taken damage.
Follow the main route north. The immediate objective is the Weather Institute at the northern end, not the optional side paths. Route 119 contains trainers around levels 26 to 31, so keep a dependable Fire, Flying, Rock, or Electric attacker available for the Bug- and Grass-heavy encounters.
Several items and Secret Spots can be collected now, but the upper waterfall areas remain restricted until you have Waterfall later in the story. Do not spend time trying to complete Route 119 during this visit; cross the bridge toward the Weather Institute and deal with Team Magma first.
- Enter Route 119 from Route 118.
- Use the healing cabin if necessary.
- Follow the main northern path to the Weather Institute.
- Leave waterfall-locked items for a later return.
2. Clear Team Magma from the Weather Institute
Team Magma Grunts block the bridge beyond the facility, so enter the Weather Institute. On the first floor, move through the corridors and defeat the Grunts who block the stairs and upper rooms. In Omega Ruby, their teams include Mightyena, Golbat, Koffing, Numel, and additional Mightyena or Golbat combinations.
A bed and a PC are available inside the building. Heal and reorganize your party before the administrator battle. Ground- and Water-type attacks are useful against Koffing, Numel, and Camerupt, while Psychic- or Rock-type attacks help against Golbat. Be careful with Ground moves against Golbat because its Flying typing makes it immune.
Climb to the second floor and follow the occupied laboratory rooms until you reach Magma Admin Tabitha. Defeat his level 32 Camerupt. Water- and Ground-type attacks are reliable answers, but avoid sending a Grass-type into Camerupt’s Fire attacks. After the battle, the Weather Institute staff explain their research and give you Castform. If your party is full, use the PC downstairs before accepting it.
Before leaving, you can collect the Rocky Helmet and speak with the receptionist for a weather-related rock. These rewards are optional. The required action is defeating Tabitha so the bridge becomes accessible.
- Defeat every required Team Magma Grunt blocking the upper rooms.
- Heal at the beds before fighting Tabitha.
- Defeat Magma Admin Tabitha and his level 32 Camerupt.
- Receive Castform or move it to the PC if your party is full.
- Cross the bridge after Team Magma withdraws.
3. Defeat the rival and receive HM02 Fly
After crossing the bridge, continue south and then north along the cleared Route 119 path. Your rival, May or Brendan, will approach and start the required battle. The rival’s team depends on your starter, but it includes a level 31 Wailmer, a level 31 Shroomish, and a starter-counter evolution at level 33. If you chose Treecko, expect Combusken; if you chose Torchic, expect Marshtomp; if you chose Mudkip, expect Grovyle.
Use Electric or Grass attacks against Wailmer, Fire or Flying attacks against Shroomish, and choose a counter for the rival’s starter evolution. Heal before triggering the battle if several team members are weakened; there is no reason to enter it damaged after the Weather Institute fights.
After you win, your rival gives you HM02 Fly. Fly cannot be used outside battle until you defeat Winona and obtain the Feather Badge, but the HM is now permanently available. Teach it to a compatible Pokémon only if you want a travel option; teaching Fly is not itself required to continue.
- Trigger the rival battle on Route 119.
- Defeat May or Brendan.
- Receive HM02 Fly.
- Continue east into Fortree City.
4. Use Steven’s Devon Scope to open Fortree Gym
Heal in Fortree City and inspect the Gym. An invisible Kecleon blocks the entrance, so you cannot challenge Winona yet. Do not search the Gym for a hidden switch. Leave the city through the eastern path and enter Route 120.
Follow Route 120 north to the bridge, where Steven is investigating another invisible Pokémon. Speak to him and use the Devon Scope when prompted. The Kecleon is revealed; you may catch it or defeat it. Either choice advances the story. Steven then lets you keep the Devon Scope and gives you the Mega Stone corresponding to your chosen starter: Sceptilite, Blazikenite, or Swampertite.
Return west to Fortree City and approach the Kecleon blocking the Gym. Use the Devon Scope to clear the entrance. TM86 Grass Knot behind the Gym is an optional reward and can be collected now.
- Reach Steven on the Route 120 bridge.
- Catch or defeat the revealed Kecleon.
- Receive the Devon Scope and the appropriate starter Mega Stone.
- Return to Fortree and remove the Kecleon blocking the Gym.
5. Solve Fortree Gym and defeat Winona
Inside the Gym, pass through the rotating turnstiles. Move through the first two turnstiles, then approach the third from the west so it rotates into the useful position. Continue west, climb the ramp, and head north through the next trainer section. Proceed to the eastern wall, then go north through the fifth turnstile to reach Bird Keeper Bran.
Use the sixth turnstile to return toward the fifth. Because the fifth turnstile has already been moved, rotate it clockwise back to its original position before passing through it again. Go past Bran a second time, climb the final ramp, and reach Winona.
Winona uses Swellow at level 33, Pelipper at level 33, Skarmory at level 33, and Altaria at level 35. Electric, Rock, and Ice attacks are the main offensive answers. Swellow can use Double Team, so defeat it promptly or use a move that does not check accuracy. Pelipper can use Protect and Roost; do not waste your strongest attack into Protect, and Electric attacks are especially effective.
Skarmory’s Steel typing and high physical Defense make Fire or Electric attacks preferable to ordinary physical attacks. Altaria is Dragon and Flying, so Ground attacks cannot hit it. It can use Earthquake, Cotton Guard, and Roost; Ice attacks are strongest, while special attacks are safer than physical attacks after Cotton Guard.
After the battle, receive the Feather Badge and TM19 Roost. The badge permits field use of Fly and raises the obedience limit for traded Pokémon to level 70.
- Navigate the turnstiles and reach Winona.
- Keep Electric, Rock, Ice, Fire, or suitable special attackers healthy.
- Defeat Swellow, Pelipper, Skarmory, and Altaria.
- Receive the Feather Badge and TM19 Roost.
- Confirm that Fly can now be used outside battle.
6. Travel through Route 120 and Route 121 to Mt. Pyre
Leave Fortree through the southern route and cross Route 120. The southern section contains optional trainers, items, berries, Secret Spots, and Surf-accessible areas. The Safari Zone shortcut is also optional. Follow the eastern route exit into Route 121 rather than trying to collect everything now.
On Route 121, Team Magma members can be seen heading south toward Mt. Pyre. Continue east through the route, then go south to Route 122. A healing nurse is available near the Route 121 and Route 122 connection. Surf south on Route 122 to reach the entrance to Mt. Pyre.
At Mt. Pyre, the indoor floors are optional for the immediate plot, although they contain trainers and items such as TM30 Shadow Ball and Medichamite. The required route is outside: leave the interior through the southern exit, climb the mountainside, and follow the stairs to the summit.
At the summit, defeat the Team Magma Grunts in your way and watch the scene involving Maxie. Battle Magma Admin Courtney and her level 38 Camerupt. After the battle, Maxie steals the Red Orb. The elderly caretakers give you the Blue Orb, and the next objective becomes following Team Magma to Slateport City.
- Travel south from Fortree through Route 120.
- Continue through Route 121 and south to Route 122.
- Surf to Mt. Pyre.
- Climb to the summit and defeat Courtney.
- Watch Maxie steal the Red Orb and receive the Blue Orb.
7. Stop at Slateport Harbor and follow Team Magma to Lilycove
After the Mt. Pyre scene, use Fly to reach Slateport City. Go to the harbor and speak with Captain Stern while he is being interviewed. Enter the harbor building and approach him to trigger Team Magma’s submarine theft.
Battle the two required Team Magma Grunts inside the harbor. Their Pokémon are around the mid-30s, so heal before entering if you fought several trainers on Mt. Pyre. After the battles, Captain Stern asks whether you want to pursue Team Magma. Agree to travel to Lilycove City; if you decline, you can speak with him again when ready.
In Lilycove, go to the northeast edge of the city and Surf northeast. The entrance to Team Magma Hideout is in the water just beyond the city. This is the required story route. The Lilycove Department Store, Safari Zone, and most city side activities are optional.
- Fly to Slateport City after Mt. Pyre.
- Trigger the harbor scene with Captain Stern.
- Defeat the required Team Magma Grunts.
- Travel with Captain Stern to Lilycove or return to him when ready.
- Surf northeast from Lilycove to Team Magma Hideout.
8. Clear Team Magma Hideout and open the eastern sea route
Inside Team Magma Hideout, move north through the entrance rooms and use the green warp tiles to reach the basement. The hideout uses several warp-panel rooms, so mark each room mentally and check every accessible tile rather than repeatedly walking back through the entrance.
The beds in the upper section restore your party. In the basement, collect the optional TM97 Dark Pulse and navigate through the laboratory and library warp rooms. The Master Ball is also optional but must be collected before defeating the administrator: in the warp room with multiple tiles, use the route that leads northwest to the item room. The top-left item is the Master Ball; the bottom-left and top-right Poké Ball items are Electrode encounters, and the bottom-right item is a Nugget.
Return to the main warp route and continue downward. Defeat the required Grunts, then fight the horde of five level 18 Poochyena. Proceed to the final section and defeat Magma Admin Courtney, whose level 39 Camerupt is weak to Water and Ground attacks.
After Courtney’s defeat, follow the final warp tile and Surf out of the hideout. The Team Magma submarine has already departed for the Seafloor Cavern, so do not search the hideout for another battle with Maxie. The next required destination is Route 124, reached by Surfing east from Lilycove City toward Mossdeep.
- Navigate the Team Magma warp rooms.
- Heal at the hideout beds when needed.
- Collect the optional Master Ball before defeating Courtney if desired.
- Defeat the required Grunts and the five-Poochyena horde.
- Defeat Courtney’s level 39 Camerupt.
- Exit by Surf and confirm Route 124 is accessible east of Lilycove.
Before you move on
- HM02 Fly is in the Bag and the Feather Badge is recorded on the Trainer Card.
- Winona has been defeated and TM19 Roost is in the Bag.
- Team Magma has stolen the Red Orb from Mt. Pyre.
- The Slateport Harbor submarine-theft scene has occurred.
- Team Magma Hideout has been cleared and Courtney has been defeated.
- Surfing east from Lilycove reaches Route 124, so the route to Mossdeep is open.
References for this chapter
- Walkthrough: Pokémon Omega Ruby and Alpha Sapphire/Part 11 - Bulbapedia
- Hoenn Route 119 - Pokémon Omega Ruby and Alpha Sapphire Walkthrough - Thonky
- Hoenn Route 120 South - Pokémon Omega Ruby and Alpha Sapphire Walkthrough - Thonky
- Team Magma Hideout - Pokémon Omega Ruby and Alpha Sapphire Walkthrough - Thonky
- Pokémon Omega Ruby and Alpha Sapphire - Team Aqua and Team Magma
Mossdeep City, Tate & Liza, Dive and the Seafloor Cavern
After the Mt. Pyre and Lilycove Team Magma Hideout events, travel to Mossdeep City, defeat Tate and Liza, receive HM07 Dive and the Devon Scuba Gear from Steven, and enter the Seafloor Cavern through Route 128. Navigate the cavern’s Strength, Rock Smash, and current puzzles, defeat Team Magma Leader Maxie, and watch the scene in which Groudon is awakened. The next required destination is Sootopolis City and the Cave of Origin.
Begin in Mossdeep City
Start this chapter after recovering the Red Orb at Mt. Pyre and completing Team Magma’s Hideout in Lilycove City. The stolen submarine has departed, so the next required objective is in Mossdeep City and the waters east and south of it.
Fly to Mossdeep City if you have already registered the location, then heal and restock. Strength and Rock Smash are needed inside the Seafloor Cavern, while Surf is needed to reach the entrance. Dive becomes available only after the Mossdeep Gym battle, so you cannot enter the cavern before completing that Gym.
- Mt. Pyre’s Red Orb event is complete.
- Team Magma’s Lilycove Hideout is complete.
- Surf, Strength, and Rock Smash are available.
- The party is healed before entering the Mossdeep Gym.
Complete the Mossdeep Gym puzzle
Enter the Mossdeep Gym and use the glowing transport panels to move between the floating platforms. The glowing rocks alter the available destinations, so the path opens progressively as you defeat the Gym trainers and interact with each rock.
Follow the available panels to battle the Gym’s Psychic-type trainers. After each battle, activate the glowing rock on that trainer’s platform before returning to the transport panels. If Tate and Liza’s platform remains inaccessible, one of the trainer platforms or glowing rocks has not been completed.
The Gym Leader battle is a Double Battle. Tate and Liza use Lunatone and Solrock, both at level 45. Ground-type attacks do not work against either Pokémon because both have Levitate. Water, Grass, Dark, Bug, Ghost, Steel, and other super-effective options are more useful, although Solrock’s Sunny Day can weaken Water attacks during the battle.
Use two reliable active Pokémon rather than building your plan around one attacker. Solrock can use Rock Slide and Sunny Day, while Lunatone can use Hypnosis, Light Screen, Psychic, and Calm Mind. Defeat the pair to earn the Mind Badge and TM04, Calm Mind.
- Defeat the Gym trainers and activate their glowing platform rocks.
- Reach Tate and Liza through the opened central route.
- Use two dependable Pokémon for the Double Battle.
- Avoid Ground-type attacks against Lunatone and Solrock.
- Defeat both level 45 Pokémon.
- Receive the Mind Badge and TM04.
Receive Dive from Steven
After the battle, leave the Gym and watch the disturbance involving the waters near Route 128. Steven then asks you to meet him at his house in Mossdeep City. Go to the house in the northwestern part of town and speak with him.
Steven gives you HM07 Dive and the Devon Scuba Gear. The Mind Badge allows Dive to be used outside battle. Teach Dive to a Pokémon that can learn it if necessary. To dive, Surf to a dark patch of water and interact with it while facing the spot. To return to the surface, interact with a bright underwater patch.
- The Mind Badge is recorded.
- Steven’s conversation at his house is complete.
- HM07 Dive is in the Bag.
- The Devon Scuba Gear has been received.
- A Pokémon in the party or PC can use Dive.
Reach the Seafloor Cavern entrance
Leave Mossdeep through the southern route and Surf south across Route 127. Continue to Route 128, following the main waterway rather than stopping for optional detours.
On Route 128, look for the ring-shaped island surrounded by dark water. Dive at the dark patch on the southern side of the island. Underwater, move toward the cave opening instead of surfacing at the first available light patch. Enter the underwater cave and use Dive again at the light patch inside to surface in the Seafloor Cavern.
The stolen submarine is visible in the entrance chamber. Its presence confirms that you have reached the correct story location. Heal before entering the deeper rooms if your party has taken damage on the routes.
- Surf south from Mossdeep onto Route 127.
- Continue from Route 127 to Route 128.
- Find the ring-shaped island.
- Dive at the dark water near the island’s southern side.
- Enter the underwater cave.
- Resurface inside the Seafloor Cavern beside the stolen submarine.
Navigate the first Seafloor Cavern rooms
From the entrance, Surf past the submarine and enter the northern passage. Proceed through the first rooms, battling or avoiding Team Magma Grunts as necessary. Use Rock Smash on cracked rocks that block the route and Strength to move boulders into holes.
The early boulder rooms are designed to open a passage toward the upper and northwestern exits. Push the accessible boulders into the nearby holes instead of moving them randomly. If you place a boulder incorrectly, leave the room and re-enter to reset the puzzle.
When you reach the current room, let the water carry you north, then use the current leading toward the upper-right portion of the room. Continue through the northeastern exit. If a current deposits you on the wrong shore, re-enter the room and choose a different starting current rather than trying to cross the water manually.
- Pass the submarine and enter the northern passage.
- Use Rock Smash where a cracked rock blocks progress.
- Use Strength to place the required boulders in holes.
- Reset a boulder room by leaving and re-entering if necessary.
- Use the currents to reach the northeastern exit.
Clear the large boulder and corridor sections
In the next boulder area, push the accessible boulder to the right and continue around the remaining rocks. The larger puzzle room farther ahead contains several boulders and holes. Push the southern boulders into the nearby holes first, then move the central and upper boulders so that the middle route opens.
A practical order is to place the two southern boulders, move the southeastern boulder east, push the southwestern boulder east as needed, and then approach the remaining boulders from their open sides. Push the boulder blocking the upper route north into its hole only after the lower path is clear.
Once the boulder puzzle is solved, follow the corridor toward the deepest chamber. Continue east, then south, and descend the central staircase. Optional items such as TM26 Earthquake can be collected along the way, but they are not required to trigger the story.
- Open the second boulder section without trapping the route.
- Solve the larger boulder room from the lower section upward.
- Reach the northern exit of the puzzle room.
- Follow the corridor to the central staircase.
- Descend toward the deepest chamber.
Handle Team Magma battles and prepare for Maxie
Team Magma Grunts occupy several rooms in the cavern. Their teams include Pokémon such as Numel, Mightyena, Golbat, and Weezing, with levels in the high 30s and low 40s. You do not need to defeat every optional trainer, but any Grunt blocking a doorway or route must be beaten.
Water, Ground, Rock, Psychic, and Ice attacks can cover much of Team Magma’s roster. Remember that Weezing has Levitate, so ordinary Ground attacks fail against it. Keep an answer for Crobat as well; its Poison/Flying typing and Acrobatics can punish slower or fragile Pokémon.
Heal before approaching the deepest room. The final battle is followed by a mandatory story sequence, so there is no opportunity to leave and recover between Maxie and the Groudon-awakening scene.
- Defeat the Grunts blocking the route.
- Remember that Weezing’s Levitate prevents ordinary Ground attacks.
- Prepare for Crobat’s Flying-type attacks and Acrobatics.
- Heal before entering the deepest chamber.
- Collect optional TMs only if the party remains healthy.
Defeat Maxie in the deepest chamber
Approach Maxie in the deepest room to trigger the final Seafloor Cavern battle. In Omega Ruby, Maxie uses Mightyena at level 41, Weezing at level 41, Crobat at level 41, and Mega Camerupt at level 43. His Camerupt Mega Evolves during the battle.
Use Fighting- or Fairy-type attacks against Mightyena. Psychic attacks are useful against Weezing, although Levitate prevents Ground attacks. Crobat is vulnerable to Electric, Ice, Psychic, and Rock attacks; remove it with a reliable response rather than allowing Acrobatics or Poison Fang to wear down the team. Mega Camerupt is Fire/Ground, so Water and Ground attacks are normally effective, subject to the battle’s current conditions and your Pokémon’s ability to act safely.
Mega Camerupt can use Rock Slide and Yawn, so do not rely on one Pokémon if sleep or flinching would leave the party unable to respond. Defeat all four Pokémon to continue. There is no separate required boss battle against Tabitha in this chamber.
After Maxie loses, the cutscene continues automatically. Maxie uses the Red Orb to awaken Groudon, which escapes and creates extremely harsh sunlight across Hoenn. When control returns, the story points you toward Sootopolis City and the Cave of Origin.
- Defeat Mightyena at level 41.
- Defeat Weezing at level 41.
- Defeat Crobat at level 41.
- Defeat Mega Camerupt at level 43.
- Watch the Red Orb and Groudon-awakening cutscene.
- Confirm that the harsh sunlight has begun.
Leave for Sootopolis City
After the cavern sequence, follow the instructions given by the characters outside. Your immediate destination is Sootopolis City, not the Mossdeep Space Center. The Space Center’s major Team Magma story belongs to the post-League Delta Episode.
Surf north from the Route 128 area toward Route 127, then travel northwest to Route 126. Dive at the dark water surrounding Sootopolis City and look for the underwater passage into the city. Resurface inside Sootopolis.
The next chapter begins with the Cave of Origin sequence. Groudon’s awakening must be resolved there before the final Gym progression can continue.
- Maxie has been defeated.
- Groudon has awakened and left the Seafloor Cavern.
- The harsh sunlight is visible outside.
- Travel from Route 128 through Route 127 toward Route 126.
- Dive around Sootopolis City and enter through the underwater passage.
- Set the next objective to the Cave of Origin.
Before you move on
- The Mind Badge is displayed among the Badges.
- TM04, Calm Mind, has been awarded.
- HM07 Dive and the Devon Scuba Gear are in the Bag.
- The stolen submarine has been reached in the Seafloor Cavern entrance.
- The required Team Magma route-blocking battles are complete.
- Maxie has been defeated with his Mightyena, Weezing, Crobat, and Mega Camerupt team.
- The Groudon-awakening cutscene has played.
- Groudon has escaped and the harsh sunlight is active outside.
- The next destination is clearly identified as Sootopolis City and the Cave of Origin.
References for this chapter
Sootopolis City, Cave of Origin, Primal Groudon and Wallace
After clearing the Seafloor Cavern and watching Team Magma awaken Groudon, travel to Sootopolis City for the Cave of Origin climax. Resolve the level 45 Primal Groudon encounter by capture or defeat, then defeat Wallace to earn the Rain Badge and HM05 Waterfall. Groudon does not have to be captured for the main story, but fleeing or losing the battle does not resolve the crisis.
Reach Sootopolis after the Seafloor Cavern
Do not begin this chapter merely by arriving in Sootopolis. First complete the required Team Magma sequence in the Seafloor Cavern, including the battle with Maxie and the scene in which Groudon is awakened. After the submarine leaves and Steven directs you toward Sootopolis, travel through Route 126.
Dive in the deep water around the crater, enter the underwater opening, and surface inside Sootopolis City. The city is under severe weather conditions, and the Gym is closed at first. Surf east to reach the Pokémon Center, heal your party, and restock Poké Balls, status recovery and healing items before entering the Cave of Origin sequence.
- Complete the Team Magma Seafloor Cavern events first.
- Reach Sootopolis through Route 126.
- Heal and restock before approaching the Cave of Origin.
Meet Steven, Wallace and Team Magma
From the city entrance, Surf west toward the grassy shore near the Gym, then climb the stairs on the northern side. Continue north until you find Steven speaking with Wallace. Talk to them to trigger the next scene. Wallace identifies himself as Sootopolis Gym Leader and explains that Groudon is heading toward the Cave of Origin.
Follow Steven and Wallace to the cave entrance in the northern part of the city. Team Magma is waiting there. In Omega Ruby, Maxie and Tabitha provide the Magma Suit, which protects you during the descent. Enter the cave only after the scene has finished and the suit has been added to your Key Items.
- Find Steven and Wallace on the western side of Sootopolis.
- Follow them to the northern Cave of Origin entrance.
- Receive the Magma Suit from Team Magma.
Descend through the Cave of Origin
Proceed downward through the Cave of Origin by following the available stairways and passages. The ORAS version does not require Flash, Strength or a separate field-move puzzle. Optional hidden items include an X Attack and a Revive, but neither is needed for the story, so you can ignore them if your priority is reaching Groudon.
At the lowest section, the route changes to a lava-filled passage. Approach the lava when prompted. The Magma Suit activates and Groudon carries you through the lava toward the deepest chamber. This ride is a required story sequence; there is no alternate route to select.
- Follow the cave’s stairways to the lowest section.
- Ignore the optional hidden items if you want a direct route.
- Complete the Magma Suit lava ride.
Prepare for level 45 Primal Groudon
At the final chamber, the cutscene shows Groudon drawing power from the Cave of Origin and undergoing Primal Reversion. After the scene, save before interacting with Groudon. The PokéNav Plus is unavailable on the lowest floor, but the game still allows you to save. This is the safest retry point if you want to reset for a different nature or redo an unsuccessful capture attempt.
The encounter is Primal Groudon at level 45. Its move set is Lava Plume, Rest, Earthquake and Precipice Blades. Desolate Land creates extremely harsh sunlight and prevents damaging Water-type moves from working while the ability remains active, so do not depend on Water attacks. Bring Pokémon that can survive Ground- and Fire-type attacks, along with reliable healing items.
Use controlled neutral damage or a suitable status move to reduce the risk of an accidental knockout. Sleep or paralysis can improve capture attempts, and False Swipe is useful if available. Rest restores Groudon’s health and puts it to sleep, so be prepared to continue weakening it after it wakes.
- Save in the final chamber before starting the battle.
- Remember that Water attacks fail while Desolate Land is active.
- Plan around Lava Plume, Rest, Earthquake and Precipice Blades.
- Carry Ultra Balls and enough healing items for a prolonged attempt.
Resolve the Groudon encounter
Interact with Groudon to begin the battle. Capture is recommended if you want Groudon immediately, but it is not required for campaign progression. If you reduce its HP, apply a status condition and throw Ultra Balls, you can normally secure the capture without using the Master Ball. If your party is full, Groudon is sent to a PC Box after capture.
Defeating Groudon also advances the story. After the battle, the weather crisis is resolved and the cutscenes continue whether Groudon was captured or knocked out. If you flee from the encounter or your entire party is defeated, the story does not advance; return to the encounter point and complete the battle.
If Groudon is defeated instead of captured, or if it is missed after the main story, it becomes available again after you enter the Hall of Fame. Return to the Cave of Origin after that point and follow the cave route to the legendary chamber. This later opportunity is separate from the immediate story battle.
- Capture or defeat Groudon to resolve the crisis.
- If you flee or lose, return and complete the encounter.
- If Groudon was defeated or missed, enter the Hall of Fame before seeking its later encounter.
Open Sootopolis Gym and defeat Wallace
Leave the Cave of Origin after the Groudon scene and return to Sootopolis City. The Gym is now open. Heal before entering, then cross each ice-floor section by stepping on every required tile once. Cracked tiles break if crossed again and drop you to the lower level. If you fall, battle or pass the trainers below, use the stairs to return, and retry the unfinished section.
Wallace uses a Water-focused team consisting of Luvdisc, Whiscash, Sealeo, Seaking and Milotic. Their levels range from 44 to 46. Grass moves are effective against the team, while Electric moves are useful against every member except Whiscash, which is Water/Ground. Do not rely solely on an Electric attacker. Milotic can use Ice Beam and Recover, so a Grass Pokémon may need support or a second counter.
After defeating Wallace, receive the Rain Badge and HM05 Waterfall. The badge allows Waterfall to be used outside battle. Teach it to a suitable Pokémon, heal at the Pokémon Center, and leave Sootopolis through Route 126 or another available exit. Travel toward Route 128, then use Waterfall at the route’s waterfall to reach Ever Grande City and the Victory Road entrance.
- Solve the Sootopolis Gym ice puzzles.
- Defeat Wallace’s five Pokémon.
- Receive the Rain Badge and HM05 Waterfall.
- Use Waterfall on Route 128 to reach Ever Grande City and Victory Road.
Before you move on
- The Seafloor Cavern and Team Magma awakening sequence is complete.
- The Cave of Origin crisis has been resolved by capturing or defeating Primal Groudon.
- The Sootopolis Gym is open.
- Wallace has been defeated and the Rain Badge is displayed in the badge case.
- HM05 Waterfall has been received.
- Route 128 Waterfall can be used to reach Ever Grande City and Victory Road.
References for this chapter
- Walkthrough: Pokémon Omega Ruby and Alpha Sapphire/Part 17 - Bulbapedia
- Cave of Origin
- List of in-game event Pokémon in Pokémon Omega Ruby and Alpha Sapphire - Bulbapedia
- Cave of Origin - Pokémon Omega Ruby and Alpha Sapphire Walkthrough
- Sootopolis Gym and Wallace - Pokémon Omega Ruby and Alpha Sapphire Walkthrough
- Groudon generation 6 move learnset
Strategy for Story Legendary Battles (Primal Groudon)
In Pokémon Omega Ruby for Nintendo 3DS, the story encounter with level 45 Primal Groudon occurs in the deepest chamber of the Cave of Origin after the Seafloor Cavern events. Capturing Groudon is optional for completing the Sootopolis storyline: defeating it also allows the story to continue. If Groudon is defeated or you flee from the battle, it returns after you enter the Hall of Fame. Prepare your team, save at the correct location, and use the encounter’s Ground and Fire mechanics to control the battle safely.
1. Prepare before entering the Cave of Origin
Heal at the Sootopolis City Pokémon Center before beginning the final Cave of Origin sequence. Bring several healing items, Revives, status-healing items, and as many suitable Poké Balls as you can afford. Ultra Balls are a practical choice, while a Master Ball guarantees the capture if you decide to use it.
A Pokémon that can inflict sleep or paralysis is useful, and False Swipe is the safest way to reduce Groudon to 1 HP. Neither option is mandatory. If you do not have False Swipe, use weak neutral attacks and check the HP bar after every hit. Bring a durable backup Pokémon because Groudon can defeat frailer team members quickly.
The encounter is level 45 Primal Groudon. Its type is Ground/Fire, its ability is Desolate Land, and its moves are Lava Plume, Rest, Earthquake, and Precipice Blades. Desolate Land makes Water-type moves fail, so do not rely on Surf, Waterfall, or another Water attack to weaken it. Electric moves also fail because Groudon retains its Ground typing.
- Heal before entering the cave.
- Bring sleep or paralysis if available.
- Bring False Swipe if available, but do not treat it as required.
- Carry Poké Balls, healing items, Revives, and status cures.
- Do not build the capture plan around Water- or Electric-type attacks.
2. Reach the encounter point and save
Follow the required story route through the Cave of Origin until the Magma Suit carries you to the deepest chamber. The initial descent is linear: move through the upper floors, reach the lava section, and follow the story sequence that places you on Groudon’s back. The battle begins after Groudon completes its Primal Reversion in the final chamber.
You can save in the deepest section before interacting with Groudon. Save immediately before starting the encounter rather than saving at the cave entrance. This gives you a reliable retry point if Groudon knocks out your team, you accidentally use a critical hit, or you want to try for a different nature.
A full party is not a problem. If you catch Groudon while all six party positions are occupied, the game sends it to the PC. An open party slot is convenient but not required.
- Save immediately before interacting with Groudon.
- Confirm that your Poké Balls and healing items are ready.
- Decide before the battle whether you are using the Master Ball.
- Do not overwrite the pre-battle save if you want repeated attempts.
3. Control Groudon’s HP and status
Lead with your status user if it can survive Groudon’s opening attack. Sleep creates several useful capture turns, while paralysis is a dependable alternative. If the first Pokémon is in danger, switch to a sturdier member rather than sacrificing it just to reapply status.
After applying status, lower Groudon’s HP gradually. False Swipe cannot reduce it below 1 HP, making it the safest damage option. Without False Swipe, use a weak neutral attack and stop once Groudon reaches low yellow or red HP. Avoid repeated super-effective attacks near the knockout point because a critical hit can end the encounter.
Watch for Rest. Groudon can restore its HP and fall asleep, so the battle may last longer than expected. If Rest removes your paralysis or your status move has limited PP, continue with the capture plan rather than trying to force another risky damage sequence. You can throw Poké Balls once Groudon is at low HP even if the status condition is no longer active.
- Inflict sleep or paralysis early when practical.
- Use False Swipe or weak controlled attacks.
- Stop attacking when Groudon reaches safe capture range.
- Expect Rest to restore HP and extend the battle.
- Heal before Groudon can knock out the active Pokémon.
4. Capture Groudon or defeat it to continue
When Groudon’s HP is low, throw Ultra Balls or another suitable Poké Ball. A failed throw is normal; keep the party healthy and continue throwing rather than risking an accidental knockout. If you use the Master Ball, the capture succeeds immediately.
Capturing Groudon is optional for the main story. If you defeat it, the Sootopolis sequence still advances, allowing you to continue to Wallace, Victory Road, and the Pokémon League. You do not need to catch Groudon at this point to complete the campaign.
After a successful capture, check whether Groudon was placed in your party or PC and then save once you are satisfied with the result. If you are resetting for a preferred nature, return to the save made before the interaction and repeat the battle.
- Reduce Groudon to low HP before throwing repeatedly.
- Keep the active Pokémon healed.
- Capture Groudon if you want it immediately.
- Defeat Groudon if you prefer to continue without capturing it.
- Save after accepting the result.
5. Recover a defeated or missed encounter
If you accidentally knock out Groudon, flee from the battle, or otherwise leave the first encounter unresolved, the story encounter is not permanently lost. Reloading the pre-battle save is the fastest recovery method and lets you retry immediately.
If you save after defeating or fleeing from Groudon, complete the Pokémon League and enter the Hall of Fame. After that Hall of Fame entry, Groudon respawns in the Cave of Origin if it was not captured. The same recovery condition applies if you lost the battle and the original encounter was not completed.
When returning after the Hall of Fame, do not repeat the original Magma Suit route. Enter the Cave of Origin and use the side passage on the left side of the upper section, the route that was unavailable during the story descent. Follow that alternate route to the deepest chamber, where the level 45 Groudon encounter can be attempted again.
- Reload the pre-battle save if it is available.
- If Groudon was defeated or fled, enter the Hall of Fame.
- Return to the Cave of Origin after the Hall of Fame.
- Use the left-side side passage instead of the original story descent.
- Search the deepest chamber for the respawned Groudon.
6. Confirm completion of this chapter
This chapter is complete when Groudon has been captured and recorded in your party or PC, or when you have deliberately defeated it and the Sootopolis story has advanced. Defeating Groudon is sufficient for campaign progress, but it leaves the capture for the post-Hall-of-Fame recovery encounter.
If you postponed the capture, do not treat the first defeat as a permanent loss. Finish the Pokémon League, enter the Hall of Fame, return to the Cave of Origin, and use the alternate side route to reach Groudon. Once the encounter is captured, save again and confirm the Pokémon appears in the party or PC.
- Groudon was captured, or it was defeated to advance the story.
- The Sootopolis sequence continues after the encounter.
- If Groudon was defeated or fled, the player has entered the Hall of Fame before attempting recovery.
- The recovered Groudon is recorded in the party or PC if capture was postponed.
Before you move on
- The player has resolved the level 45 Primal Groudon encounter by capture or defeat.
- The Sootopolis story has advanced beyond the Groudon sequence.
- If Groudon was defeated or fled, the player has entered the Hall of Fame before attempting the respawn.
- If capture was postponed, the player has returned through the Cave of Origin side passage and confirmed the respawned Groudon encounter.
Victory Road, Pokémon League and Preparing for the Elite Four
After earning all eight Hoenn Badges and resolving the Groudon crisis in Sootopolis City, use Waterfall to reach Ever Grande City, cross Victory Road, defeat Wally near the exit, and prepare inside the Pokémon League building. The initial Omega Ruby League challenge is a fixed sequence: Sidney, Phoebe, Glacia, Drake, then Champion Steven.
Reach Ever Grande City and establish your final supply point
From Sootopolis City, travel east through Routes 126, 127, and 128 toward Ever Grande City. At the southern end of Route 128, use Waterfall to climb the large waterfall and reach Ever Grande City. Enter the Pokémon Center immediately and heal your party.
Ever Grande City has no ordinary town district. The Pokémon League building contains the Pokémon Center and Poké Mart that you need before the League. Deposit spare Pokémon, review held items, and keep the six battlers you intend to use. If a Pokémon is carrying an unnecessary field move, replace it before beginning the challenge when possible.
Victory Road’s required route uses Surf, Strength, and Rock Smash. Flash is useful in the darker sections but is not essential if you know the route. Waterfall reaches optional areas inside the cave but is not required for the main crossing.
- Use Waterfall from Route 128 to reach Ever Grande City.
- Heal at the Pokémon Center before entering Victory Road.
- Carry access to Surf, Strength, and Rock Smash.
- Arrange the party you actually intend to use in the League.
Cross Victory Road’s required route
Enter Victory Road from the Ever Grande City side. Follow the cave route across the bridges and stairways, using Surf to cross pools and Strength to move boulders away from stairs and corridors. Break the required cracked rocks with Rock Smash.
Victory Road contains optional side paths and items. One lower-floor outside exit leads to TM29 Psychic; it is not the Pokémon League route. If you take that detour, return to the cave and continue through the main passage. Waterfall also reaches an optional TM81 X-Scissor path, but you do not need it to finish the cave.
Use the trainers and wild Pokémon for final experience if your team is below the level range you want. If several Pokémon are injured or important moves have lost too much PP, return to the League building’s Pokémon Center. Victory Road progress is not lost when you leave.
- Surf across the required pools.
- Move Strength boulders from the correct side.
- Use Rock Smash on required broken rocks.
- Treat the TM29 and TM81 paths as optional.
- Return to the Pokémon Center if your party needs healing or PP recovery.
Reach Wally and win the final Victory Road battle
Continue through the upper sections of Victory Road, following the bridges toward the northern exit. Near the end of the cave, Wally stops you and begins a battle. His Omega Ruby team is Altaria level 46, Delcatty level 46, Roselia level 46, Magneton level 46, and Gallade level 48. Gallade Mega Evolves during the battle.
Use separate answers for Wally’s different Pokémon. Ground attacks are useful against Magneton, but they do not affect Flying-type Altaria. Ice, Fairy, Rock, or strong neutral attacks can handle Altaria, while Fire, Psychic, Flying, or Ground coverage helps against Roselia. Dark, Ghost, or Fairy attacks are useful against Mega Gallade, but watch for its strong Fighting and Psychic moves and its ability to use Swords Dance.
After you win, Wally gives you a Dawn Stone. The item is optional for the League itself, though it can evolve a male Kirlia into Gallade. Continue north after the conversation, cross the final bridge, leave Victory Road, and follow the stone path to the Pokémon League building.
- Reach Wally near the northern end of Victory Road.
- Prepare for his level 48 Mega Gallade.
- Use a Ground answer for Magneton and a separate plan for Altaria.
- Collect the Dawn Stone after the battle if desired.
- Cross the final bridge and enter the Pokémon League building.
Build a League-ready team
The initial Elite Four teams range from level 50 to level 58. Champion Steven’s first five Pokémon are level 57, and his final Pokémon, Mega Metagross, is level 59. A party in the upper 50s gives a practical margin for the consecutive battles, although lower-level teams can succeed with favorable matchups, switching, and item use.
For Sidney, bring Fighting-, Bug-, or Fairy-type attacks. Dark Pokémon are immune to Psychic attacks, so do not build your strategy around Psychic damage. Phoebe’s Ghost team is vulnerable to Dark- and Ghost-type attacks, but status effects, confusion, burns, Spite, and other disruption can extend the battle.
Fire, Fighting, and Rock attacks are valuable against Glacia’s Ice Pokémon. Her Walrein can survive ordinary hits and threaten the party with powerful attacks, so do not give it repeated free turns. Drake’s Dragon team makes Ice and Fairy coverage especially important. Altaria can use Cotton Guard, making strong special attacks safer than relying only on physical damage.
Steven uses a Steel- and Rock-focused team consisting of Skarmory, Aggron, Claydol, Cradily, Armaldo, and Mega Metagross. Fire, Ground, Fighting, Water, and strong neutral attacks are useful, but keep a dedicated answer for Mega Metagross because it has high offensive power and broad coverage. Choose one Pokémon to Mega Evolve and confirm that it is holding the correct Mega Stone.
- Aim for the upper 50s if you want a practical preparation level.
- Bring Fighting, Bug, or Fairy coverage for Sidney.
- Bring Dark or Ghost coverage for Phoebe.
- Bring Fire, Fighting, or Rock coverage for Glacia.
- Bring Ice or Fairy coverage for Drake.
- Bring Fire, Ground, Fighting, Water, or strong neutral coverage for Steven.
- Confirm your Mega Evolution choice and held Mega Stone.
Stock supplies and enter the League sequence
Use the Pokémon Center and Poké Mart inside the League building before entering. Buy Full Restores for combined healing and status recovery, Revives or Max Revives for emergencies, and additional healing items for restoring moderate damage without spending Full Restores. Carry PP-restoring items if you have them, especially for moves that handle Drake and Steven.
Review every move before starting. Replace unnecessary Surf, Strength, Rock Smash, or other field moves on League battlers when possible. Check held items, party order, and the first Pokémon you want to send out. A special attacker can avoid the Attack reduction from Sidney’s Intimidate, while a fast or sturdy lead may be preferable if your first matchup is unfavorable.
Two Ace Trainers check that you possess all eight Badges. After you pass through the central doors, the five battles begin in a fixed order: Sidney, Phoebe, Glacia, Drake, and Steven. You cannot leave to change your party during the sequence. Heal, restore PP, organize the bag, and save in the League lobby before entering.
- Buy Full Restores and Revives or Max Revives.
- Restore PP on essential attacks and recovery moves.
- Remove unnecessary field moves from League battlers where possible.
- Check party order and held items.
- Confirm the Mega Evolution plan.
- Save in the League lobby before passing through the central doors.
Before you move on
- You used Waterfall to reach Ever Grande City.
- You crossed the required Victory Road route and reached the Pokémon League building.
- You defeated Wally near the end of Victory Road, including his level 48 Mega Gallade.
- You collected Wally’s Dawn Stone if you want the optional reward.
- Your party has answers for Dark, Ghost, Ice, Dragon, Steel, Rock, Flying, and Water threats.
- Your bag contains Full Restores, Revives or Max Revives, and additional healing supplies.
- Your important moves have sufficient PP.
- Your party order, held items, and Mega Evolution choice are confirmed.
- You saved in the League lobby before entering the five-battle sequence.
Elite Four & Champion — Battle-by-Battle Checklist
After earning all eight Hoenn Badges, travel through Victory Road to Ever Grande City and enter the Pokémon League. In Omega Ruby, the fixed sequence is Sidney, Phoebe, Glacia, Drake, and Champion Steven. You may use items and change moves between battles, but there is no Pokémon Center between opponents. Prepare for five consecutive battles, then complete Hall of Fame registration and the credits. The optional final rival battle on Route 103 happens after the credits and does not block the Delta Episode.
1. Prepare at the Pokémon League
Use the Pokémon Center and Poké Mart in the League lobby before entering the central doors. Heal the entire party, restore move PP, check held items, and buy Full Restores, Revives, Full Heals, and additional healing items. Bring enough recovery for five battles rather than assuming every opponent will fall quickly. Ether or Elixir items are useful if your strongest attacks have limited PP.
A balanced team is more reliable than six Pokémon sharing one weakness. Fighting, Bug, or Fairy coverage handles Sidney. Dark, Ghost, or Fairy moves help against Phoebe. Fire, Fighting, Rock, Steel, Electric, or Grass coverage is useful against Glacia. Ice or Fairy moves are especially valuable against Drake. Steven's varied team demands several damage types, including a dependable answer to his final Mega Metagross.
Save before entering Sidney's chamber. You can heal and use items after each battle, but you cannot leave the gauntlet for outside assistance. After defeating Drake, heal completely and save in Drake's room before entering Steven's room, because the Champion battle begins immediately when you cross the entrance.
- Heal the party and restore PP.
- Buy Full Restores, Revives, Full Heals, and other needed supplies.
- Check held items, move coverage, and Mega Evolution options.
- Save before starting Sidney's battle.
2. Defeat Sidney first
Sidney uses Mightyena, Shiftry, Cacturne, Sharpedo, and Absol. The first four are level 50, and Absol is level 52. Fighting-, Bug-, and Fairy-type attacks are effective against his Dark-focused team. Psychic moves do not work against Dark-type Pokémon.
Mightyena opens with Intimidate, lowering the Attack of your active Pokémon, and can use Swagger to cause confusion. A special attacker avoids much of the Intimidate problem. Cure confusion if it threatens a key Pokémon. Shiftry can use Fake Out and Extrasensory, so do not automatically send a Fighting-type into it without checking your matchup.
Cacturne may use Leech Seed and Spiky Shield. Do not waste a contact attack into Spiky Shield, especially if Cacturne has already started draining your health. Sharpedo is quick and can use Aqua Jet for priority damage, while Absol's Night Slash, Psycho Cut, and Slash have increased critical-hit potential. Use decisive super-effective attacks and heal before leaving the room if your main counter has been weakened.
- Use Fighting, Bug, or Fairy attacks.
- Prefer special damage against Intimidate-affected Mightyena.
- Avoid attacking Cacturne during Spiky Shield.
- Heal before moving to Phoebe.
3. Defeat Phoebe second
Phoebe uses Dusclops, two Banette, Sableye, and Dusknoir. The first four are level 51, and Dusknoir is level 53. Dark and Ghost attacks are the most broadly useful. Fairy attacks are effective against Sableye in this generation because Fairy is super effective against its Dark typing.
The opening Dusclops is defensive and disruptive. Confuse Ray can make a strong attacker unreliable, Curse drains the active Pokémon each turn, and Future Sight resolves later even if you switch. Defeat it promptly or switch away from a cursed Pokémon before the curse continues to consume your health.
The two Banette use different disruption sets. One can burn a physical attacker with Will-O-Wisp and reduce PP with Spite; the other can use Toxic and Grudge. Cure a status condition when the affected Pokémon is needed against later members, but avoid spending several turns setting up while Banette is wearing down your team.
Sableye commonly begins with Fake Out and also carries Shadow Claw, Foul Play, and Power Gem. Foul Play uses the target's Attack, so a strong physical attacker can take surprising damage. Use Fairy or special damage when available. Dusknoir is Phoebe's final Pokémon and carries Hex, Fire Punch, Ice Punch, and Thunder Punch. Keep a healthy Dark- or Ghost-type attacker for it.
- Use Dark, Ghost, or Fairy coverage.
- Cure confusion, poison, or burns when they threaten later battles.
- Remember that Future Sight resolves after a switch.
- Save a strong answer for Dusknoir.
4. Defeat Glacia third
Glacia uses Glalie, Froslass, another Glalie, another Froslass, and Walrein. The first four are level 52, and Walrein is level 54. Fire, Fighting, Rock, and Steel moves are useful against the Ice-focused team. Grass and Electric moves are particularly useful against Walrein.
The first Glalie can establish Hail and Light Screen, reducing the effectiveness of special attacks. The second Glalie uses Protect instead of Light Screen and carries Freeze-Dry, which is especially dangerous to Water-type Pokémon. Do not waste attacks into Protect, and remove the Glalie before Hail and residual damage consume your resources.
The first Froslass uses Confuse Ray and Ominous Wind, while the second uses Draining Kiss and Shadow Ball. Both can use Hail and Blizzard, and Snow Cloak makes them harder to hit while Hail is active. Attack them quickly with a reliable super-effective move instead of allowing confusion and weather damage to accumulate.
Walrein is the final threat. It carries Surf, Body Slam, Blizzard, and Sheer Cold. Sheer Cold can instantly knock out a lower-level Pokémon if it hits, although its accuracy is poor. Use strong Grass or Electric attacks and do not give Walrein unnecessary turns. Heal and restore PP before entering Drake's room.
- Bring Fire, Fighting, Rock, or Steel coverage.
- Use Grass or Electric attacks against Walrein when appropriate.
- Avoid unnecessary setup against Froslass and Walrein.
- Restore health and PP before entering Drake's room.
5. Defeat Drake fourth
Drake uses Altaria, Flygon, Kingdra, another Flygon, and Salamence. The first four are level 53, and Salamence is level 55. Dragon and Fairy attacks work against the entire team, while Ice is especially effective against Altaria and both Flygon.
Altaria can use Cotton Guard, sharply increasing its Defense, so special Ice or Fairy damage is preferable. The first Flygon uses Earthquake, Dragon Claw, Rock Slide, and Supersonic. The second uses Flamethrower, Boomburst, Dragon Pulse, and Screech. Both Flygon are extremely vulnerable to Ice attacks.
Kingdra is Water/Dragon, so it does not share Flygon's four-times weakness to Ice. It uses Dragon Pulse, Surf, Yawn, and Ice Beam. Defeat it with Dragon or Fairy attacks, or with Freeze-Dry if you have that move. Do not send an unprepared Ice-type into Kingdra and assume it will win the exchange.
Salamence is Drake's final Pokémon and has Intimidate, Dragon Rush, Zen Headbutt, Crunch, and Thunder Fang. Use a special attacker or Fairy-type Pokémon so Intimidate does not undermine your main damage plan. After Drake falls, heal completely and save in his room before entering Steven's chamber.
- Keep Ice or Fairy coverage for Drake's team.
- Use special attacks against Cotton Guard Altaria and Intimidate Salamence.
- Do not treat Kingdra as four-times weak to Ice.
- Heal completely before entering Steven's room.
6. Defeat Champion Steven
Steven's first five Pokémon are level 57: Skarmory, Claydol, Aggron, Cradily, and Armaldo. His final Pokémon is level 59 Metagross, holding Metagrossite and Mega Evolving during the battle.
Skarmory has Sturdy, Toxic, Spikes, Aerial Ace, and Steel Wing. Physical attacks are poor against its high Defense, and Sturdy prevents a full-health one-hit knockout. Use a strong special Fire or Electric attack. If Spikes are active, avoid unnecessary switching with grounded Pokémon.
Claydol has Levitate and uses Reflect, Light Screen, Extrasensory, and Earth Power. Ground attacks do not affect it. Water, Grass, Dark, Ghost, or Bug attacks are better choices. Brick Break can remove Reflect and Light Screen before dealing damage if Claydol has established both barriers.
Aggron also has Sturdy and carries Stone Edge, Earthquake, Iron Tail, and Dragon Claw. Use a powerful special Fire, Water, Ground, or Fighting move. Steven has Full Restores available and may heal a weakened Aggron, so be prepared to attack it again rather than assuming the first low-health turn is decisive.
Cradily uses Giga Drain, Ancient Power, Sludge Bomb, and Confuse Ray. Fighting, Bug, Ice, or strong neutral attacks are safer than relying on ordinary Water damage. Armaldo carries X-Scissor, Rock Blast, Metal Claw, and Crush Claw; Water, Rock, or Steel attacks are effective answers.
Mega Metagross is the final battle. It uses Bullet Punch, Zen Headbutt, Meteor Mash, and Giga Impact. Reserve a healthy Fire, Ground, Dark, Ghost, or other reliable counter. Do not leave a weakened Pokémon in simply because Metagross has already lost health. If Meteor Mash raises its Attack, heal or switch before it can exploit the boost. Use your own Mega Evolution here if it gives you a decisive advantage.
- Use special Fire or Electric damage against Skarmory.
- Counter Levitate Claydol with Water, Grass, Dark, Ghost, or Bug moves.
- Use special Fire, Water, Ground, or Fighting attacks against Aggron.
- Keep a healthy counter and, if useful, your Mega Evolution for Mega Metagross.
- Retain an emergency Revive or Full Restore for the final battle.
7. Finish the League and begin the post-League sequence
After Steven is defeated, he leads you into the Hall of Fame. Register your party in the machine and wait for the registration sequence to finish. Professor Birch and Brendan or May appear, followed by the credits. Do not turn off the system before Hall of Fame registration is complete.
When the credits end, the game places you on Route 103, where Brendan or May challenges you to one final battle. This battle has no experience reward, and losing does not cause a game-over or block progression. It is part of the post-credits sequence, not a prerequisite for the Delta Episode.
After the Route 103 sequence, return home and allow the game to return control normally. Save the completed League file. When you next load the completed save, the Delta Episode opening begins with the Littleroot Town setup involving Norman and the Mossdeep Star Show tickets, followed by the meteor-shower warning and the events that lead to Zinnia. The Route 103 battle must be described in its actual order, but it should not be treated as a requirement for Delta Episode access.
- Sidney, Phoebe, Glacia, Drake, and Steven have been defeated.
- Hall of Fame registration has finished.
- The credits have completed.
- The post-credits Route 103 rival sequence has occurred or has been resolved after its outcome.
- The completed League save has been loaded and the Delta Episode opening has begun from Littleroot Town.
Before you move on
- Sidney, Phoebe, Glacia, and Drake have been defeated in that order.
- Champion Steven has been defeated.
- The Hall of Fame has recorded your party.
- The credits have completed.
- The post-credits Route 103 rival sequence has occurred or has been resolved.
- A completed League save has been loaded and the Delta Episode opening has started from Littleroot Town.
Unlocking the Delta Episode — Early Postgame Setup
After your first Pokémon League victory in Pokémon Omega Ruby, the Delta Episode begins the next time you load the completed save. Follow the chain from Littleroot Town to Petalburg City, Rustboro City, Granite Cave, Mossdeep City, Meteor Falls, Devon Corporation, and Team Magma’s Hideout. The chapter ends after Wallace opens the way to Route 131 and Sky Pillar. Omega Ruby has two distinct Courtney encounters: a solo level 53 Camerupt battle in Petalburg City, followed later by a Mossdeep Space Center Double Battle in which Courtney is accompanied by a Team Magma Grunt.
1. Begin the Delta Episode in Littleroot Town
Load the save created after the Hall of Fame sequence. After the opening meteor-shower scenes, go downstairs in your Littleroot Town house and speak with Norman and your mother. Norman gives you a Pair of Tickets for the Mossdeep Space Center star show and suggests inviting your rival.
Leave the house and meet Zinnia outside. When she departs, enter your rival’s house next door. The conversation explains that Zinnia took your rival’s Key Stone and is heading to Petalburg City. Travel there by Fly if Petalburg is available, or take the normal route.
In Petalburg City, enter Wally’s house beside the Gym. Courtney is confronting Wally and demands his Key Stone. Approach the scene to begin the required Omega Ruby battle. Courtney uses only one Pokémon: a level 53 Camerupt. Water- and Ground-type attacks are reliable choices, but beware of Camerupt’s Earthquake, Rock Slide, Yawn, and Eruption. There is no Team Magma Grunt in this Petalburg battle.
After winning, watch the conversation with Wally and wait for Steven’s PokéNav call. Steven directs you to Devon Corporation in Rustboro City. Heal and restock before leaving Petalburg.
- Load the post-Hall of Fame save and receive the Pair of Tickets from Norman.
- Visit your rival’s house after meeting Zinnia outside.
- Defeat Courtney’s level 53 Camerupt in a solo Petalburg City battle.
- Receive Steven’s instruction to go to Devon Corporation in Rustboro City.
2. Meet Steven at Devon Corporation and retrieve the Granite Cave shard
Fly to Rustboro City and go to the Devon Corporation entrance. Steven is waiting outside. Approach him to enter the building, then follow him to Mr. Stone’s office and listen to the explanation about the incoming meteoroid and Devon’s dimensional-shifter project.
Mr. Stone sends you to Granite Cave to obtain a Meteorite Shard. Fly to Dewford Town if convenient, enter Granite Cave, and return to the mural room where you met Steven earlier in the adventure. Zinnia is waiting there and challenges you to a battle. Her team in Omega Ruby consists of level 55 Tyrantrum, level 55 Altaria, and level 57 Salamence, so prepare for Dragon-, Fairy-, Rock-, and Ice-type threats.
Defeat Zinnia and receive the Meteorite Shard. You do not need to search another floor for this item. Steven then contacts you and directs you to the Mossdeep Space Center. The Granite Cave shard is the first shard required by the Delta Episode; it is separate from the later Meteor Falls sequence.
- Meet Steven at the Devon Corporation entrance.
- Listen to Mr. Stone’s request for the Granite Cave Meteorite Shard.
- Reach the Granite Cave mural room.
- Defeat Zinnia and obtain the shard.
- Receive Steven’s instruction to go to Mossdeep City.
3. Visit the Mossdeep Space Center and Meteor Falls
Travel to Mossdeep City and enter the Mossdeep Space Center. Speak with the staff and Professor Cozmo during the required upstairs conversation. Give them the Meteorite Shard and listen to the explanation of the proposed meteoroid countermeasure. Zinnia challenges the plan and leaves the group needing another shard from Meteor Falls.
Before leaving, place a Pokémon that knows Waterfall in your party. Fly to Meteor Falls and enter the main chamber. Use Waterfall to climb the large waterfall, then enter the upper passage. Follow the route through the cave: from the upper entrance, move northeast to the ladder, descend, travel southwest and west, then go north through the trainer area and climb the next ladder. Continue east past the Old Couple Double Battle and take the stairs toward the back room.
Speak with Steven and Zinnia’s grandmother, the Draconid elder. This scene supplies the lore needed for the next part of the Delta Episode. When the conversation ends, leave Meteor Falls by using an Escape Rope if you brought one, or retrace the passage to the waterfall and exit normally.
Return to Rustboro City and approach Devon Corporation. A cutscene begins outside the building. Defeat the three Team Magma Grunts who attack in succession. The Devon scientist explains that Team Magma stole the Link Cable and fled toward the Mossdeep Space Center.
- Complete the required Space Center briefing and hand over the Granite Cave shard.
- Bring Waterfall to Meteor Falls.
- Reach the upper back room and complete the Draconid conversation.
- Return to Devon Corporation.
- Defeat all three consecutive Team Magma Grunts outside Devon Corporation.
4. Complete the Mossdeep Space Center battles
Return to the Mossdeep Space Center after the Devon Corporation battle. Team Magma is moving through the building. Enter and approach the stairway used during the earlier Space Center visit. Before reaching the upper floor, you must fight a Horde Battle against five Team Magma Mightyena. Heal before entering and carry status-healing items if your team is vulnerable to Snarl or other disruptive attacks.
After the Horde Battle, go upstairs. Steven asks whether you are ready to fight alongside him. Confirm when your party is prepared. The required Double Battle is against Courtney and one Team Magma Grunt, with you and Steven fighting on the same side. Courtney uses a level 55 Mega Camerupt holding Cameruptite; the Grunt supplies the second opposing Pokémon.
Use strong Water- or Ground-type attacks against Mega Camerupt, while protecting Pokémon weakened by spread attacks or status moves. After the battle, watch the cutscene in which Zinnia takes the Key Stone and destroys the dimensional-shifter equipment. Steven then directs you to Team Magma’s Hideout in Lilycove City. This is the later Courtney-and-Grunt battle and must not be confused with the earlier solo Courtney battle in Petalburg.
- Defeat the five Team Magma Mightyena in the Space Center Horde Battle.
- Fight alongside Steven in the required Double Battle.
- Defeat Courtney and the Team Magma Grunt.
- Confirm that the story sends you to Team Magma’s Hideout in Lilycove City.
5. Re-enter Team Magma’s Hideout and receive Cameruptite
Enter Team Magma’s Hideout from Lilycove City. The Delta Episode adds a new sequence to the already-cleared base, so completing the main-story Hideout earlier is not enough. Follow the active warp-panel route and defeat the Grunts who block the way.
Use the northern warp panel near the entrance, continue through the rooms, and take the stairs and southern warp panels as the route opens. In the large warp-panel room, the Omega Ruby route uses the right-hand panel for the relevant row; if a panel returns you to an earlier room, inspect the surrounding tiles rather than repeatedly stepping on the same one. Continue until you reach Maxie’s office.
Zinnia confronts Maxie and the Team Magma members, defeats them, and takes Maxie’s Key Stone. After the scene, Maxie gives you Cameruptite in Omega Ruby. Check the Bag to confirm that the Mega Stone was received. Steven then calls and asks you to return to the second floor of the Mossdeep Space Center.
Use the Hideout’s exit warp route, heal at a Pokémon Center, and Fly to Mossdeep City. The Master Ball, Electrode encounters, and Nugget in the Hideout are optional; they are not needed to advance the Delta Episode.
- Clear the new Delta Episode route through Team Magma’s Hideout.
- Reach Maxie’s office.
- Watch Zinnia take Maxie’s Key Stone.
- Receive Cameruptite from Maxie.
- Return to the Mossdeep Space Center as Steven requests.
6. Finish the chapter at the Cave of Origin
Go to the second floor of the Mossdeep Space Center and complete the required conversation with Steven and Professor Cozmo. Steven explains that the next step is to contact Wallace in Sootopolis City. If the conversation does not advance, confirm that you defeated Zinnia in Granite Cave, delivered the shard at Devon Corporation, completed the Meteor Falls scene, defeated the three Devon Grunts, and cleared both Space Center battles.
Travel to Sootopolis City and reach the area outside the Cave of Origin. Wallace is waiting near the entrance. Speak with him to learn that the Sky Pillar’s seal can be opened and that Route 131 leads to the tower. Wallace does not send you directly into the Sky Pillar from Sootopolis; you must travel through the ocean routes to Route 131, where he will challenge you before allowing entry.
Save after Wallace gives the Route 131 objective. Heal your party, stock Poké Balls and healing items, and prepare for the next chapter’s Sky Pillar climb and Rayquaza sequence. The Rayquaza battle does not belong to this chapter.
- Complete the post-Hideout conversation on the second floor of the Mossdeep Space Center.
- Speak with Wallace outside the Cave of Origin in Sootopolis City.
- Receive Route 131 and Sky Pillar as the next destination.
- Save before beginning the Rayquaza chapter.
Before you move on
- The Pair of Tickets were received in Littleroot Town and Zinnia’s rival-house scene was completed.
- Courtney’s level 53 Camerupt was defeated alone in front of Wally’s house in Petalburg City.
- Steven’s Devon Corporation request was completed, Zinnia was defeated in the Granite Cave mural room, and the Meteorite Shard was delivered.
- The Mossdeep Space Center briefing and Meteor Falls Draconid scene were completed.
- All three Team Magma Grunts outside Devon Corporation were defeated.
- The five-Mightyena Mossdeep Space Center Horde Battle and the later Courtney-plus-Grunt Double Battle alongside Steven were completed.
- Team Magma’s Delta Episode Hideout route was cleared and Cameruptite was received.
- The upstairs Mossdeep Space Center conversation after the Hideout was completed.
- Wallace was spoken to outside the Cave of Origin, and he directed you toward Route 131 and Sky Pillar.
- The game has returned to normal control and is ready for the next chapter’s Wallace battle, Sky Pillar climb, and Rayquaza sequence.
Sky Pillar, Rayquaza and the Spaceflight Sequence
Complete the final Delta Episode sequence in Pokémon Omega Ruby. Defeat Wallace on Route 131, climb the Omega Ruby and Alpha Sapphire version of Sky Pillar, capture the required level 70 Rayquaza, place it in the active party, defeat Zinnia, and follow the Magma Suit flight into the level 80 Deoxys encounter. Rayquaza must be captured for the episode to continue. Deoxys may be captured or defeated, but the episode is not complete until the post-battle scenes, Aster’s letter, and the final closing sequence have finished.
Prepare on Route 131 before entering Sky Pillar
After the Delta Episode directs you to Sootopolis City, speak with Wallace beside the large tree near the Cave of Origin. He removes the seal blocking the Sky Pillar route and tells you to meet him on Route 131. Sail or Fly to Route 131, then travel to the cave entrance at the northern end of the route. Wallace challenges you before you can continue, so heal and arrange your party before speaking to him.
Bring a large supply of Poké Balls and healing items. Ultra Balls are reliable for a long legendary battle, and Timer Balls become useful after the encounter has lasted several turns. False Swipe is helpful for reducing Rayquaza without knocking it out, while sleep or paralysis improves the chance of a successful capture. Bring at least one Pokémon that can withstand Dragon-type attacks, since a fragile attacker may be defeated before it can weaken Rayquaza.
Save before interacting with Rayquaza at the summit if you want to retry the capture by resetting the game. Make your final party and held-item decisions before beginning the encounter. The game will require Rayquaza to be in your active party after you catch it, so leave a party slot available or be prepared to choose one current party Pokémon to send to the PC.
- Heal before challenging Wallace.
- Buy plenty of Poké Balls and healing items.
- Prepare a controlled-damage move such as False Swipe if available.
- Bring sleep or paralysis support if possible.
- Leave room for Rayquaza or decide which current party member can be sent to the PC.
- Save before starting the Rayquaza encounter.
Defeat Wallace and climb the Omega Ruby Sky Pillar
Defeat Wallace on Route 131. His team uses Water-type Pokémon with additional coverage, so Electric, Grass, and Ice attacks are useful, but do not rely on only one counter. Heal after the battle if necessary, then enter Sky Pillar through the opened passage.
The Sky Pillar in Omega Ruby and Alpha Sapphire uses a different layout from the original Ruby, Sapphire, and Emerald tower. Do not search for the old Mach Bike cracked-floor puzzle. You cannot use the original Mach Bike route here. Instead, follow the visible stairs and ladders upward, moving around damaged floor sections and gaps. Zinnia accompanies you through the tower and provides story dialogue as you ascend.
Continue through the floors until you reach the apex. Optional items can be collected on the way, but they are not needed for the Delta Episode. The critical objective is reaching the summit with your capture supplies intact. Once you are ready, approach the altar and allow the summoning sequence to begin.
- Defeat Wallace before entering the tower proper.
- Use the Omega Ruby and Alpha Sapphire Sky Pillar layout.
- Ignore Mach Bike instructions from original-generation Sky Pillar guides.
- Follow the stairs and ladders to the apex.
- Keep enough Poké Balls and healing supplies for Rayquaza.
Capture level 70 Rayquaza and place it in your active party
At the summit, Zinnia uses the gathered Key Stones to summon Rayquaza. Her attempt to trigger its Mega Evolution fails because Rayquaza lacks sufficient energy. The Meteorite in your possession restores that energy, and Rayquaza then challenges you at level 70.
Rayquaza knows Extreme Speed, Dragon Pulse, Dragon Dance, and Fly. Reduce its HP carefully and apply sleep or paralysis when possible. False Swipe is the safest way to reach low HP without causing an accidental knockout. Avoid strong Ice- or Dragon-type attacks after Rayquaza is weakened, particularly if your attacker has a high critical-hit chance.
Rayquaza must be captured. Defeating it, running from the battle, or losing the battle does not advance the Delta Episode, but Rayquaza will remain at the summit and be ready to battle again, fully restored. If you have no Poké Balls left, speak with Zinnia at the apex; she provides an Ultra Ball, and this assistance can be repeated while you lack Poké Balls.
After the successful capture, the game forces Rayquaza into your active party. If your party already contains six Pokémon, select one current party member and send it to the PC. Rayquaza is not merely stored automatically while the party remains full. Confirm that Rayquaza is in the active party before continuing. Zinnia then restores your party, teaches Rayquaza Dragon Ascent in place of Fly, and begins the next battle.
- Capture Rayquaza at level 70.
- Use controlled damage and status effects when possible.
- If Rayquaza is defeated, you flee, or your party loses, return to the summit and try again.
- If you have no Poké Balls, obtain an Ultra Ball from Zinnia.
- Place Rayquaza in the active party after capture.
- If the party is full, choose a current party member to send to the PC.
- Confirm that Rayquaza knows Dragon Ascent.
Defeat Zinnia after Rayquaza joins the party
Zinnia challenges you immediately after Rayquaza learns Dragon Ascent. Her team consists of Goodra at level 60, Tyrantrum at level 60, Altaria at level 60, Noivern at level 60, and Mega Salamence at level 62. Ice-, Fairy-, and Dragon-type attacks are effective against much of her team, but avoid depending on one fragile counter. Goodra carries Ice Beam and Thunderbolt, while Mega Salamence can punish an unprepared Ice-type.
Your Pokémon are restored before this battle, so you do not need to return to a Pokémon Center. Rayquaza can contribute strongly because Dragon Ascent enables its scripted Mega Evolution, but use whichever members of your restored party best handle Zinnia’s varied Dragon-type team. Defeat Zinnia to trigger the Magma Suit flight sequence.
- Defeat Zinnia at the Sky Pillar summit.
- Use Ice, Fairy, or Dragon coverage with suitable defensive support.
- Watch for Goodra’s Ice Beam and Thunderbolt.
- Use Rayquaza and Dragon Ascent if it is safe to do so.
- Expect the story to continue without a normal town or Pokémon Center break.
Complete the Magma Suit flight and resolve Deoxys
After Zinnia’s battle, the story equips you with the Magma Suit and begins the flight into space. This section is a cutscene-driven sequence; you do not manually navigate the flight. Mega Rayquaza destroys the meteoroid, but a black triangular fragment remains. Deoxys emerges from it and immediately challenges you.
Deoxys is level 80 and knows Cosmic Power, Recover, Psycho Boost, and Hyper Beam. The battle begins with Mega Rayquaza, so switch to a safer Pokémon if Rayquaza’s attacks are likely to knock Deoxys out. Steel- and Dark-type Pokémon can help against Psychic attacks, while False Swipe and a status move make a capture attempt more controlled. Avoid repeatedly using Dragon Ascent or another high-powered move once Deoxys is at low HP.
There is no normal save opportunity between the Rayquaza capture, Zinnia’s battle, the spaceflight, and the Deoxys encounter. Prepare for both legendary encounters before speaking to Rayquaza. You may capture Deoxys or defeat it; either result advances the Delta Episode. If Deoxys is defeated or escapes, complete the episode and defeat the Pokémon League again before returning to the Sky Pillar for another encounter.
- Expect the level 80 Deoxys battle after the meteoroid is destroyed.
- Switch away from Mega Rayquaza if its attacks are too powerful for a capture attempt.
- Use controlled damage and status effects when possible.
- Capture or defeat Deoxys to advance the story.
- Do not expect a manual save between Rayquaza and Deoxys.
Finish the Delta Episode and save
After the Deoxys battle, you return to the Sky Pillar summit. Aster gives you Zinnia’s letter, followed by the closing scenes involving the people connected to the Delta Episode. Let the scenes continue through their conclusions, including the events involving Team Magma, Steven, Wallace, Wally, Zinnia’s family, the Space Center, and your family.
Do not treat the Deoxys battle alone as the completion point. The chapter is complete only after Rayquaza has been captured and placed in the active party, Dragon Ascent has been taught, Zinnia has been defeated, the meteoroid has been destroyed, and the Deoxys encounter has ended by capture or defeat. Wait until Aster has delivered the letter and normal control returns. Then save the game before beginning optional postgame activities.
- Rayquaza is captured and present in the active party.
- Dragon Ascent has been taught to Rayquaza.
- Zinnia has been defeated.
- The Magma Suit flight has destroyed the meteoroid.
- The level 80 Deoxys encounter has ended by capture or defeat.
- Aster has delivered Zinnia’s letter.
- The closing Delta Episode scenes have finished.
- Normal control has returned and the completed episode has been saved.
Before you move on
- Wallace has been defeated on Route 131 and the Sky Pillar seal has been removed.
- Rayquaza has been captured at level 70.
- Rayquaza has been placed in the active party; if the party was full, a current party Pokémon was sent to the PC.
- Rayquaza has been taught Dragon Ascent.
- Zinnia has been defeated after the Rayquaza capture.
- The Magma Suit spaceflight sequence has destroyed the meteoroid.
- The level 80 Deoxys encounter has ended by capture or defeat.
- Aster has delivered Zinnia’s letter.
- The Delta Episode closing scenes have finished and normal control has returned.
- The completed episode has been saved.
References for this chapter
- Sky Pillar — Bulbapedia
- Delta Episode — Bulbapedia
- Walkthrough: Pokémon Omega Ruby and Alpha Sapphire, Part 23 - Bulbapedia
- Pokémon Omega Ruby & Alpha Sapphire — Delta Episode
- Pokémon Omega Ruby & Alpha Sapphire - Legendary Pokémon
- Sky Pillar - Pokémon Omega Ruby and Alpha Sapphire Walkthrough
- Delta Episode 2nd Phase: Pokémon ORAS Walkthrough
- Sky Pillar - Pokémon ORAS Wiki
Post-Delta Episode Recovery and Optional Aftermath
Begin this chapter only after the Delta Episode has ended, Aster has delivered Zinnia’s letter, the closing meteor-shower scenes have played and control has returned to normal postgame Hoenn. Deoxys may remain uncaught without blocking completion. A later Hall of Fame entry restores a defeated or fled-from Deoxys to the Dragonhark altar at the top of Sky Pillar. Optional areas and legendary encounters can then be handled at your own pace.
Confirm that the Delta Episode is finished
After the Deoxys battle, the game returns you to the summit of Sky Pillar. Aster gives you Zinnia’s letter, then the game presents the remaining resolution scenes involving the Mossdeep Space Center, Wally, Team Magma, Steven, Wallace, Zinnia and the player’s family. Continue through every scene until the meteor-shower conclusion has played and normal movement is restored.
Save as soon as you regain control. This save marks the practical beginning of post-Delta play. You do not need to reopen Sky Pillar through Wallace, defeat Wallace again or repeat the Rayquaza-to-Deoxys sequence. Those events belong to the preceding chapter and are not a second version of the Delta Episode climax.
- Aster has delivered Zinnia’s letter.
- The closing meteor-shower scenes have finished.
- Normal control has returned in postgame Hoenn.
- The game has been saved.
Recover Deoxys after a failed capture
If you caught Deoxys during the space sequence, no recovery step is needed. If you defeated it or fled from the battle, complete the Pokémon League again and enter the Hall of Fame. This is a full League completion requirement, not merely a return to the Pokémon League lobby.
After that additional Hall of Fame entry, travel to Route 131 and enter Sky Pillar. Climb to the Dragonhark altar at the summit. Deoxys will be available there for another battle, so prepare before interacting with it. Save at the summit, place a Pokémon with False Swipe or a reliable status move in the party if possible, and carry an ample supply of Poké Balls and healing items.
The rematch does not require Rayquaza, Zinnia, the Magma Suit flight or the meteoroid sequence again. If Deoxys is defeated or fled from during this later encounter, complete another Hall of Fame entry before checking the altar again. The rematch is optional for the Delta Episode completion state; it is only needed if you want to obtain Deoxys after missing the original battle.
- Complete another Pokémon League run if Deoxys was not caught.
- Return to the Sky Pillar summit after the Hall of Fame entry.
- Save before starting the restored Deoxys encounter.
- Capture Deoxys or repeat the Hall of Fame condition if it is defeated or fled from again.
Visit Scorched Slab and obtain optional Heatran
Heatran is optional and is not required for the campaign or Delta Episode. When the Groudon storyline has been resolved, return to Scorched Slab on Route 120. Surf across the lake to the cave entrance and enter the expanded Omega Ruby and Alpha Sapphire version of the area.
Go to B1F and speak with Flannery. After her dialogue about the rare Pokémon in the cave, continue downward through the basement floors. Use Flash if the dark sections make navigation difficult. Strength can move the boulder and provide a shortcut, but the main objective is reaching B3F. Interact with the portal there to begin the level 50 Heatran encounter.
Save before using the portal. Heatran is Fire- and Steel-type and carries a mixture of damaging and status moves, so avoid relying on a Pokémon vulnerable to Fire or Ground attacks. If you defeat Heatran or flee, it becomes available again after entering the Hall of Fame. This is separate from the Deoxys recovery condition.
- Reach Scorched Slab on Route 120.
- Speak with Flannery on B1F after the Groudon storyline.
- Descend to B3F.
- Save before entering the Heatran portal.
- Capture Heatran if desired.
Explore Mirage Spots and other optional content
After saving your completed Delta Episode file, use the Eon Flute to Soar over Hoenn and inspect available Mirage Spots. Their encounters depend on the specific spot and its requirements, so do not treat every Mirage Spot as a permanent fixed location or expect every rare Pokémon to appear at once. Record any target Pokémon you want and revisit the map as the available spots change.
Other optional postgame activities include the Battle Resort, additional legendary encounters, the expanded Scorched Slab area and further Pokédex work. These activities do not alter the Delta Episode completion state. The main campaign requirement is already satisfied once the required Deoxys battle has ended, Aster’s letter and the final scenes have played, control has returned and the file has been saved.
If you are collecting legendary Pokémon, use a separate save or save immediately before each stationary encounter. Keep a capture team with status support, controlled damage and enough recovery items. Do not assume that every defeated legendary returns under the same condition; check the individual encounter’s requirements before spending time searching for it.
- Save after the Delta Episode ending.
- Use Soaring to inspect Mirage Spots if desired.
- Treat Heatran, the Battle Resort and additional legendary encounters as optional.
- Use separate preparation and save points for stationary legendary encounters.
Before you move on
- The level 80 Deoxys battle has ended by capture or defeat.
- Aster has delivered Zinnia’s letter.
- The final Delta Episode scenes, including the meteor-shower conclusion, have played.
- Normal control has returned in postgame Hoenn.
- The completed file has been saved.
- If Deoxys was not captured, a later Hall of Fame entry has restored it to the Sky Pillar summit.
Optional: Postgame Exploration and Important Optional Encounters
After completing the Delta Episode, optional exploration can add Heatran, Mirage Spot legends, rare Pokémon, Mega Stones, and missing Pokédex entries to your collection. None of these objectives is required for the Omega Ruby campaign completion goal. Handle Groudon recovery separately: if the story Groudon was defeated or fled from, it can return after you enter the Hall of Fame, but a Groudon that was already captured does not create a second ordinary postgame encounter in the Cave of Origin.
Optional Heatran encounter at Scorched Slab
Travel to Route 120 and enter Scorched Slab. The expanded Omega Ruby and Alpha Sapphire version of the cave includes additional basement floors. Surf is needed to reach the entrance, while Flash improves visibility on the dark lower floors. Strength can help with the boulder puzzle and shortcuts, but it is not the condition that activates Heatran.
The Heatran event becomes available after the Primal Groudon story has been resolved. Go to B1F and speak with Flannery. She is the trigger for the optional event; entering the cave before completing the Groudon sequence will not make the portal active. After speaking with her, continue downward to B3F and examine the portal to begin the level 50 Heatran encounter.
Heatran is a Fire/Steel Pokémon with Flash Fire. Avoid Fire-type attacks, and bring a team that can lower its HP safely without knocking it out. Sleep or paralysis improves the capture attempt, but do not use damaging status such as poison or burn if you want time to throw Poké Balls. Save immediately before examining the portal, then carry healing items and more Poké Balls than you expect to need.
The Scorched Slab exploration and Heatran capture are optional. Charizardite Y is also available in Scorched Slab after the Groudon narrative has been resolved; obtaining it is a collection reward rather than a progression requirement.
If Heatran is defeated or you flee from the encounter, enter the Hall of Fame and return to Scorched Slab before trying again. If you captured Heatran, the portal will not provide another ordinary copy.
- Complete the Primal Groudon story first.
- Speak with Flannery on B1F.
- Use Surf to reach Scorched Slab and Flash if visibility is difficult.
- Use Strength only for navigation or optional item access.
- Save before the B3F portal.
- Treat Heatran and Charizardite Y as optional rewards.
Keep Cave of Origin and Groudon recovery separate
Do not revisit the Cave of Origin expecting a new postgame Groudon after successfully capturing the story encounter. The Cave of Origin remains accessible for exploration, but it does not generate a second normal Groudon event after capture.
If you defeated or fled from Groudon during the main story, complete the Pokémon League and enter the Hall of Fame. After that reset condition, return to the deepest chamber of the Cave of Origin and check the encounter point again. Groudon’s return is a recovery procedure for a failed story encounter, not an optional legendary-collection event.
Once you have confirmed that Groudon was captured or restored, move on to Scorched Slab and Mirage Spots. This prevents unnecessary trips to Sootopolis while searching for an encounter that is not present.
- Check your party or Pokédex to determine whether Groudon was captured.
- If Groudon was defeated or fled from, enter the Hall of Fame before returning.
- Do not expect a second ordinary Groudon after a successful capture.
- Treat Groudon recovery as separate from optional postgame collection.
Use Soaring to find daily and conditional Mirage Spots
After the Delta Episode, use the Eon Flute to Soar over Hoenn. Daily Mirage Spots appear at changing locations and may contain wild Pokémon, fossils, items, or other optional encounters. Their rotation is separate from the fixed-condition Mirage Spots, so inspect the overworld from the air rather than repeatedly checking one route.
Nameless Cavern appears northeast of Sootopolis City when you have three Pokémon with maximum Friendship in your party. Its portal gives one of the lake trio—Uxie, Mesprit, or Azelf—according to the Nintendo 3DS time of day. This is a party-condition encounter, not a daily Mirage Spot.
Fabled Cave appears on the large island north of Route 133 when at least one level 100 Pokémon is in your party. In Omega Ruby, its portal encounter is Reshiram. Gnarled Den is at Route 114 and requires both Reshiram and Zekrom in the party; its portal contains Kyurem.
Pathless Plain appears south of Route 131 when three Pokémon with maximumed-out EVs are in the party. Its encounter rotates among Cobalion, Terrakion, and Virizion according to the day on the Nintendo 3DS. Do not confuse this requirement with Nameless Cavern’s Friendship requirement.
Save before entering every legendary portal. If an eligible Mirage Spot legendary is defeated or fled from, enter the Hall of Fame and return after the location’s condition is active again. These encounters are optional and are not needed to finish the Delta Episode or campaign.
- Use Soaring to inspect the changing daily spots.
- Use three maximum-Friendship Pokémon for Nameless Cavern.
- Use a level 100 Pokémon for Fabled Cave.
- Carry Reshiram and Zekrom for Gnarled Den.
- Use three maximum-EV Pokémon for Pathless Plain.
- Save before every portal encounter.
- Enter the Hall of Fame after a failed eligible legendary encounter.
Plan DexNav and Pokédex completion work
Use the DexNav on routes, in caves, and at Mirage Spots to identify species you have not registered. Search by silhouette, approach carefully, and use the search information to confirm whether the Pokémon is available in the current area. DexNav does not bypass version exclusives, trade evolutions, or party conditions.
Divide your remaining entries into local Omega Ruby captures, evolutions, daily Mirage Spot species, conditional Mirage Spot encounters, trade evolutions, and Pokémon requiring another version. This list prevents wasted searches, especially for species that cannot appear naturally in Omega Ruby.
For rare captures, lead with a Pokémon that can reduce HP safely and apply sleep or paralysis. Carry healing items, status recovery, and enough Poké Balls for a long attempt. Save before static legendary encounters and before entering locations whose availability depends on several party members. Complete ordinary route captures and evolutions first, then arrange trades and attempt the conditional legends.
Pokédex completion is entirely optional for the assigned campaign goal. You can finish the Delta Episode, save the completed game, and leave Heatran, Mirage Spots, and trade-dependent entries for later.
- Use DexNav searches to identify missing local species.
- Separate local encounters from Mirage Spot, trade, and version-exclusive entries.
- Prepare a safe low-HP and status strategy.
- Record the party condition before travelling to each conditional spot.
- Arrange trades instead of searching for unavailable Omega Ruby species.
- Do not treat Pokédex completion as required campaign progress.
Before you move on
- The optional Heatran event has been completed, or you have confirmed that Scorched Slab is being left as optional content.
- You have checked whether Groudon was captured during the story; if not, you entered the Hall of Fame and verified the recovery encounter.
- You understand that the Cave of Origin does not provide a second ordinary Groudon after a successful capture.
- You have used Soaring to inspect daily Mirage Spots if optional collection is desired.
- Your party can satisfy the requirements for Nameless Cavern, Fabled Cave, Gnarled Den, and Pathless Plain.
- Your remaining Pokédex entries are divided into local captures, evolutions, Mirage Spots, trades, and version-exclusive Pokémon.
- The required campaign remains complete without Heatran, Mirage Spot encounters, or full Pokédex completion.
Finishing up
All eight Hoenn Gym Leaders have been defeated and the eight Badges are recorded.
The Route 119 Weather Institute, Mt. Pyre, Team Magma Hideout, Seafloor Cavern, Cave of Origin, and all other required Team Magma story stages are complete.
The Cave of Origin Groudon encounter has been resolved by capture or defeat. If Groudon was defeated or missed, its later Hall of Fame recovery condition is understood and documented.
The Elite Four and Champion Steven have been defeated, Hall of Fame registration has finished, and the post-League save is available.
The Delta Episode is complete through the Rayquaza capture, Zinnia battle, meteoroid destruction, Deoxys battle, closing letter, and final scenes. Deoxys may be captured or defeated.
Optional Mirage Spots, Heatran, the Battle Resort, and further legendary collection remain outside the required campaign completion check.
Choose your next gameScreenshots & video
Game imagery for reference. Follow the written chapters above for the route and strategies.
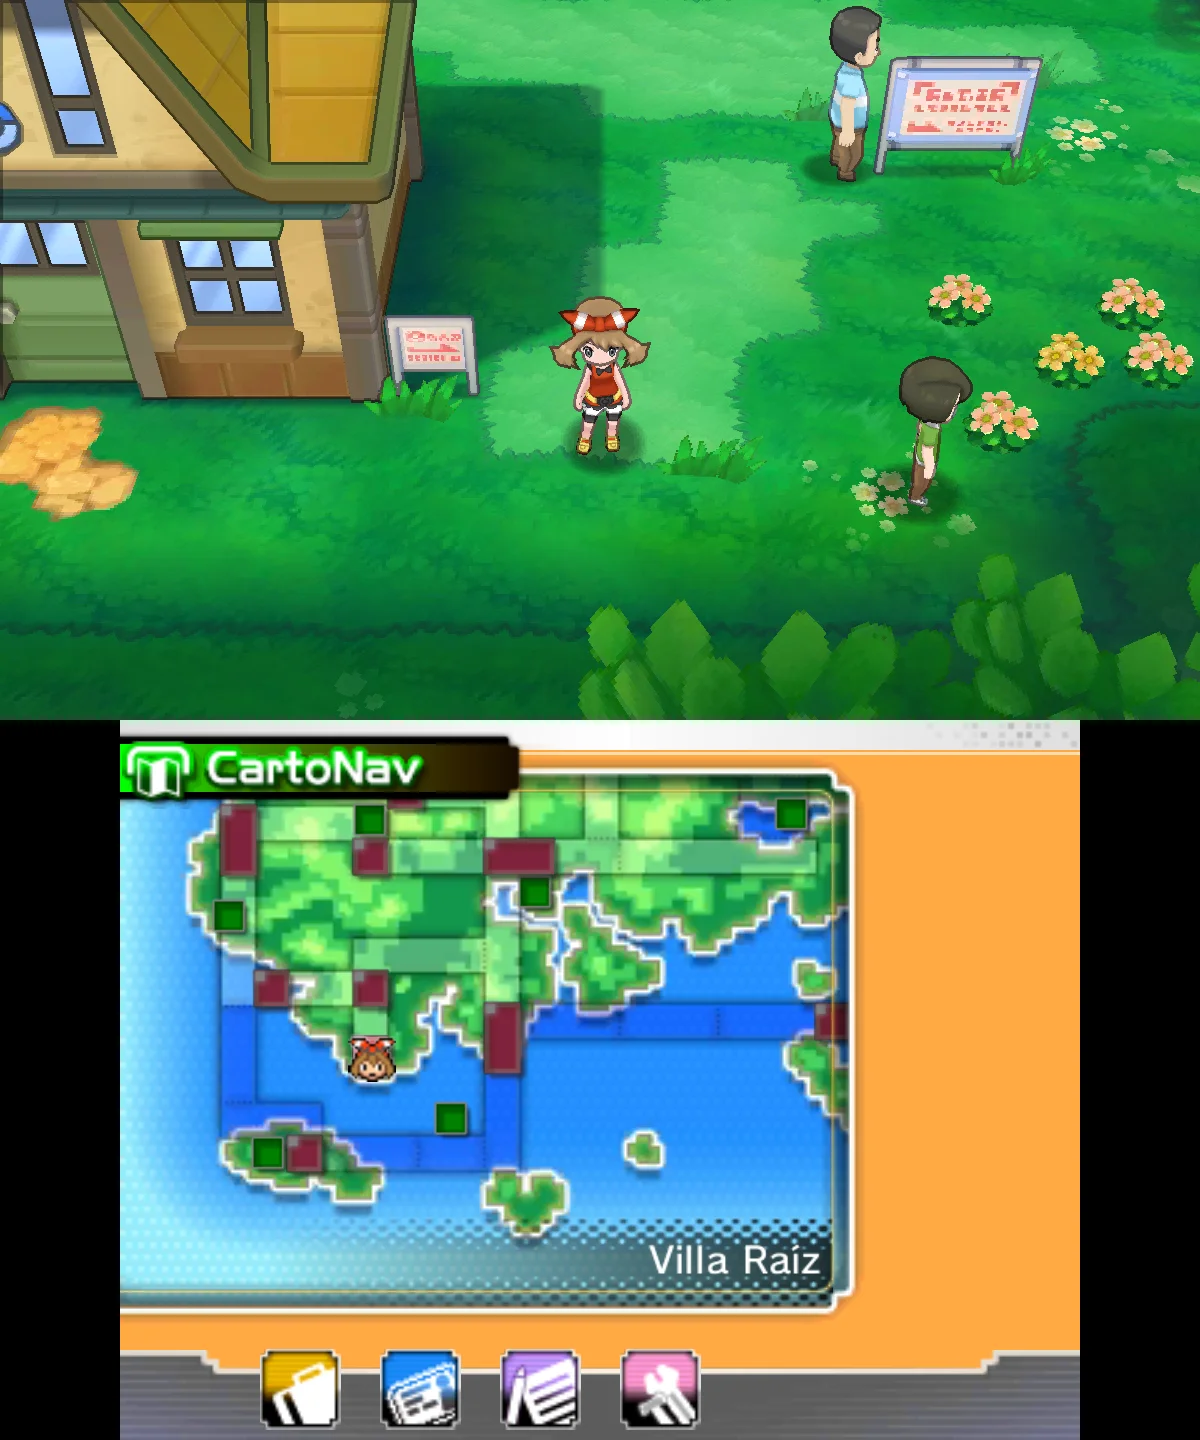
Sources & references
Our original guide draws on the references below. Check the edition at the top of this page before following controls or unlock requirements.
- Walkthrough: Pokémon Omega Ruby and Alpha Sapphire/Part 1
- Hoenn Route 101 — Bulbapedia
- Littleroot Town to Petalburg City: Pokémon ORAS Walkthrough — Pokémon ORAS Wiki
- Pokémon Omega Ruby official e-manual
- Walkthrough: Pokémon Omega Ruby and Alpha Sapphire/Part 2
- Petalburg Woods
- Pokémon Omega Ruby & Alpha Sapphire - Gym Leaders
- Walkthrough: Pokémon Omega Ruby and Alpha Sapphire, Part 3
- Dewford Gym and Brawly - Pokémon Omega Ruby and Alpha Sapphire Walkthrough
- Granite Cave - Bulbapedia
- Pokéarth - Hoenn - Dewford Town
- Walkthrough: Pokémon Omega Ruby and Alpha Sapphire, Part 5
- Mauville City Gym
- Mauville Gym and Wattson, Pokémon Omega Ruby and Alpha Sapphire Walkthrough
- Walkthrough: Pokémon Omega Ruby and Alpha Sapphire/Part 7 - Bulbapedia
- Walkthrough: Pokémon Omega Ruby and Alpha Sapphire/Part 9 - Bulbapedia
- Pokémon Omega Ruby and Alpha Sapphire - Bulbapedia
- Hoenn Route 112 - Bulbapedia
- Nintendo 3DS games electronic manuals - Nintendo Support
- Petalburg Gym and Norman - Pokémon Omega Ruby and Alpha Sapphire Walkthrough
- Hoenn Route 118 - Pokémon Omega Ruby and Alpha Sapphire Walkthrough
- Southern Island: Pokémon ORAS Walkthrough (Part 11)
- Pokémon Omega Ruby and Alpha Sapphire - Team Aqua and Team Magma
- Walkthrough: Pokémon Omega Ruby and Alpha Sapphire/Part 11 - Bulbapedia
- Hoenn Route 119 - Pokémon Omega Ruby and Alpha Sapphire Walkthrough - Thonky
- Hoenn Route 120 South - Pokémon Omega Ruby and Alpha Sapphire Walkthrough - Thonky
- Team Magma Hideout - Pokémon Omega Ruby and Alpha Sapphire Walkthrough - Thonky
- Seafloor Cavern - Pokémon Omega Ruby and Alpha Sapphire Walkthrough
- Walkthrough: Pokémon Omega Ruby and Alpha Sapphire
- Seafloor Cavern: Pokémon ORAS Walkthrough Part 17
- Pokémon Omega Ruby - Nintendo 3DS Instruction Manual
- Walkthrough: Pokémon Omega Ruby and Alpha Sapphire/Part 17 - Bulbapedia
- Cave of Origin
- List of in-game event Pokémon in Pokémon Omega Ruby and Alpha Sapphire - Bulbapedia
- Cave of Origin - Pokémon Omega Ruby and Alpha Sapphire Walkthrough
- Sootopolis Gym and Wallace - Pokémon Omega Ruby and Alpha Sapphire Walkthrough
- Groudon generation 6 move learnset
- Cave of Origin - Pokémon ORAS Wiki
- Pokémon Omega Ruby & Alpha Sapphire - Legendary Pokémon
- Walkthrough: Pokémon Omega Ruby and Alpha Sapphire/Part 21
- Wally (game)
- Pokémon Omega Ruby & Alpha Sapphire - Pokémon Trainer Wally
- Pokémon Omega Ruby & Alpha Sapphire — Elite Four
- Victory Road - Pokémon Omega Ruby and Alpha Sapphire Walkthrough
- Walkthrough: Pokémon Omega Ruby and Alpha Sapphire/Part 22
- Pokémon Omega Ruby & Alpha Sapphire — Delta Episode
- The Elite Four & Champion — Pokémon ORAS Wiki
- The Delta Episode - Pokémon Omega Ruby and Alpha Sapphire Walkthrough
- Delta Episode 1st Phase: Pokémon ORAS Walkthrough (Part 23)
- Walkthrough: Pokémon Omega Ruby and Alpha Sapphire, Part 23 - Bulbapedia
- Sky Pillar — Bulbapedia
- Delta Episode — Bulbapedia
- Sky Pillar - Pokémon Omega Ruby and Alpha Sapphire Walkthrough
- Delta Episode 2nd Phase: Pokémon ORAS Walkthrough
- Sky Pillar - Pokémon ORAS Wiki
- Rematch — Bulbapedia
- Scorched Slab
- Pokéarth - Hoenn - Scorched Slab
- Mirage Spots
- Fabled Cave
- Pokémon Omega Ruby & Alpha Sapphire - Mega Evolutions
- Heatran - Pokémon ORAS Wiki
About the game & collecting notes
- Platform
- Nintendo 3DS
Step-by-step Pokémon Omega Ruby campaign walkthrough for Nintendo 3DS, covering the complete Hoenn route from Littleroot Town through the eight Gyms, all required Team Magma stages, the Seafloor Cavern and Primal Groudon climax, Victory Road, the Pokémon League, and the full Delta Episode through the Deoxys battle. Optional postgame encounters are separated from required completion.
Darryl Polo
Darryl Polo loves tinkering with emulation and revisiting retro games. He enjoys exploring how old favorites play on different setups and sharing what he learns along the way. At Joking Joystick, he writes about the games, hardware, and small discoveries that keep the hobby fun.
Our editorial standardsFound a step that needs another look? Help us improve this guide.