
Pokémon Moon (Nintendo 3DS) — Complete Campaign Walkthrough
A start-to-finish walkthrough for Pokémon Moon (original Nintendo 3DS release). This guide walks you through every required island trial and grand trial, key story beats (Nebby/Lunala, Aether Foundation, Ultra Space), the Alola League run on Mount Lanakila and the Champion challenge. Practical tactics, recovery steps, and clear completion checks to finish the main campaign and access postgame content.


Find a copy
Pokémon Moon Nintendo 3DS
We may earn a commission if you buy through these links, at no extra cost to you. As an Amazon Associate I earn from qualifying purchases.
Opens retailer search results. Check the model, edition, seller, availability and current price before buying.
Before you begin
This guide leads you step-by-step through Pokémon Moon’s main story from your first arrival on Melemele Island through the Alola League on Mount Lanakila and the story-captured Legendary (Nebby evolving to Lunala).
It focuses on required progress: the island trials, grand trials, the Aether Foundation sequence, the Ultra Space events, and the final League run that yields the Champion ending.
Follow the sequence of chapters in order.
Each island section lists where to go, what trial tasks must be completed, how to handle Totem Pokémon and the island kahuna, recommended recovery options if you fail, and what optional activities you can safely delay until after the credits.
After the final chapter you’ll find concrete completion checks and the key postgame task (Looker’s Ultra Beast investigation).
Set yourself up for the run
Read the in-game manual and controls for movement, menus, the touchscreen map and Pokémon status screens.
Set communication options as desired; online features and Festival Plaza are optional and are not required for the campaign.
Choose a starter and build a mixed team with physical and special damage, useful resistances, coverage and at least one dependable switch-in.
Keep healing items, status cures and Revives available before trials, Grand Trials and the League. Save manually before difficult encounters and keep that single save intact until the immediate sequence is complete.
Pokémon Moon has one normal in-game save file. It does not provide a second ordinary save slot or an in-game backup slot.
Learn Z-Move basics and use Z-Moves as decisive tools against Totem Pokémon, Kahunas, Elite Four members or Kukui rather than spending them automatically.
Use Rotom’s map marker as a navigation aid, but follow current dialogue and cutscenes when objectives do not update.
Catch versatile Pokémon for coverage rather than trying to complete the Pokédex during the first campaign.
Expect many Totem battles to use SOS allies; prepare a fast attacker, status option or multi-target move where appropriate.
If trading version exclusives or using Pokémon Bank, postpone nonessential trades until after story-critical Pokémon and captures are secured.
Carry an adequate supply of Poké Balls for ordinary encounters and the later Lunala capture. The Master Ball is available before that encounter but is optional.
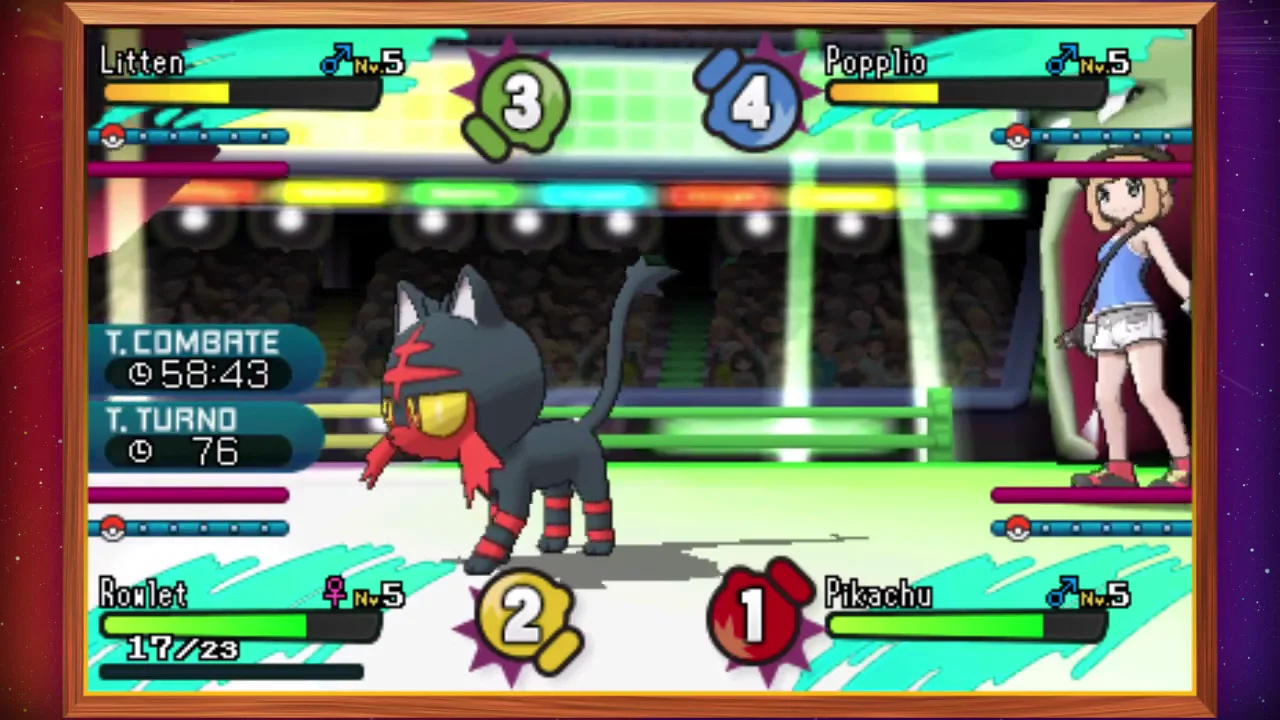
Getting Started: Controls, Menus and First Moves
Set up the original Nintendo 3DS Pokémon Moon adventure, learn the field controls, follow Rotom’s objective markers, manage your party and items, and establish a reliable save point before the first trial at Verdant Cavern.
Start the game and configure your trainer
At the title screen, begin a new game and select the language you want to use for this save file. Then choose your player appearance and enter your trainer name. Confirm these choices carefully before continuing, because the game does not provide a normal in-game option to change the selected language or trainer identity later.
The opening sequence teaches movement and interaction. Use the Circle Pad to move around the field. Press A to speak to characters or examine objects. Press B to cancel menu selections and, while moving, hold B to run after running is available. Once the opening scenes give you free control, press X to open the field menu.
- Select the intended language before confirming the new game.
- Choose the player appearance and trainer name.
- Use the Circle Pad for movement and A for interaction.
- Press X after gaining free movement to verify that the field menu opens.
Learn the controls used throughout Alola
The X Button opens the main field menu, where you can access your party, Bag, Trainer information, options and Save. The Circle Pad is the normal movement control. A confirms a choice or interacts with a character, while B backs out of menus and runs when held during field movement.
The lower touchscreen provides shortcuts that become important immediately after Rotom joins the Pokédex. In Pokémon Moon, the Minus Button opens the map, and Down on the Control Pad opens the Pokédex. You can also tap the lower screen to select available functions. Ride Pokémon and other travel features are introduced later, so do not expect every shortcut to work during the opening scenes.
Use the control layout shown in the original game rather than instructions from Pokémon Ultra Sun, Pokémon Ultra Moon or later Pokémon titles. The original Sun and Moon interface has fewer Rotom features than the Ultra games.
- Remember X for the field menu.
- Use the Minus Button for the map and Down on the Control Pad for the Pokédex.
- Hold B while moving when you need to run.
- Treat Ride Pokémon and later Rotom upgrades as story-unlocked features.
Read the Rotom Pokédex map and objective marker
After Professor Kukui gives you the Pokédex and Rotom becomes part of it, the lower screen displays a map of the area you are currently visiting. The red flag or red objective marker indicates the location associated with your next story goal. It identifies the destination area, not necessarily the exact door or walking route.
Tap the center of the Rotom map to hear Rotom repeat its current suggestion. Tap another part of the map to open the larger map view and inspect the surrounding island or town. Use the larger view to confirm whether the destination is in the current area, on another route or inside a nearby building.
The marker cannot account for every obstacle. Ledges, blocked roads, building entrances and one-way passages can require you to follow the visible path rather than walking directly toward the flag. Story dialogue is also part of the route. If the marker does not update after a conversation, finish the current cutscene, leave and re-enter the immediate area if necessary, and speak again with the most recently introduced story character.
Rotom’s marker is a navigation aid, not a replacement for dialogue. When Lillie, Hau, Kukui or another important character tells you to meet someone, the objective generally becomes active only after that conversation or scene has ended.
- Check the red flag before leaving the current area.
- Tap the center of the map for Rotom’s latest suggestion.
- Tap outside the center to inspect the larger map.
- Follow roads, doors and route entrances instead of treating the marker as a direct line.
- Complete nearby dialogue and cutscenes when the objective does not advance.
Manage Pokémon, summaries and items
Open the X-button menu and choose Pokémon to inspect your active party. Select a Pokémon to view its summary, including level, type, ability, moves, held item and current condition. Check this screen after catching a new Pokémon and before entering a trial so you know which moves and abilities are available.
The party order determines which Pokémon is sent out first in ordinary battles. Put your intended lead in the first position, especially if you plan to open with a fast attack, a type advantage or a status move. You can rearrange the party from the Pokémon screen when the game permits it.
Choose Bag from the X-button menu to use items outside battle. Potions restore HP, while status-healing items remove conditions such as poison or paralysis. During battle, choose Bag to use available healing or status items. A Revive returns a fainted Pokémon to battle but does not restore it to full HP, so heal that Pokémon afterward if you intend to use it again.
Keep healing items instead of selling them merely to increase your money. Trial areas can place several battles and scripted encounters close together, and a Totem fight may begin after a puzzle or sequence that prevents an immediate return to a Pokémon Center.
- Inspect important captures on their summary screens.
- Place the intended lead Pokémon in the first party slot.
- Check HP, status conditions and move PP before a trial.
- Keep Potions, status cures and Revives available.
Understand regular battles and Totem encounters
In a normal battle, choose Fight to select a move, Pokémon to switch, Bag to use an item or Run when escape is allowed. Switching uses your turn, so switch when the incoming Pokémon resists the opponent’s attacks or has a better type matchup. Status moves such as Sleep Powder, Thunder Wave and Growl do not directly damage the opponent, but they can reduce its effectiveness or create an opening for a slower teammate.
Move PP is tracked separately for every move. Avoid spending all uses of a key attack on weak wild Pokémon if a trial is nearby. If a move is especially useful against the next Totem, leave enough PP for that encounter.
A Totem battle is a powered-up wild encounter rather than an ordinary one-on-one fight. In Pokémon Moon’s first trial, Totem Raticate receives an aura that improves its defenses and can call an ally Rattata. The summoned ally remains an active opponent until defeated, and defeating the ally alone does not complete the battle.
If the ally has a dangerous attack or status move, remove it early. If the Totem is the greater immediate threat, concentrate damage on it while using a reliable resistance, status move or healing item to survive the extra opponent. Do not assume a summoned ally can be captured; treat the encounter as a required battle and focus on winning.
- Check type matchups before choosing a move.
- Switch with a clear defensive or offensive purpose.
- Preserve PP for important trial moves.
- Expect Totem Raticate to fight with a powered-up aura and an ally.
- Defeat the Totem itself to finish the encounter.
Create the correct save point before Verdant Cavern
Pokémon Moon has one in-game saved game file. There is no second normal save slot that can be created before Verdant Cavern. To save, make sure your character is not occupied by dialogue or a cutscene, press X, choose Save, select Yes, and wait until the save operation finishes.
Before entering Verdant Cavern, heal the party at a Pokémon Center, check move PP, arrange the party order, stock recovery items and save outside the cavern entrance. Entering Verdant Cavern starts the trial. If you leave before reaching the point where the trial guide permits you to proceed to the Totem’s Den, the trial resets, so the outside save is the cleanest retry point.
If you lose, reload the pre-trial save rather than overwriting it immediately. You can then change the lead Pokémon, use a different move order, buy more healing items or train briefly before trying again. A separate playthrough requires another cartridge or an external save-management procedure; it is not available as a second slot in the normal game menu.
Festival Plaza, trading and other communication features are optional. None is required to learn the controls, complete the Verdant Cavern trial or finish Pokémon Moon’s main story.
- Heal the entire party before entering Verdant Cavern.
- Check PP, party order and recovery items.
- Save from X, choose Save, select Yes and wait for completion.
- Keep the pre-trial save intact until the trial is finished.
- Do not expect a second in-game save slot.
Before you move on
- The player can open the X-button field menu and reach the Pokémon, Bag and Save entries.
- The player can use the Circle Pad, A, B and X controls and knows that holding B while moving runs.
- The player can open the map with the Minus Button and the Pokédex with Down on the Control Pad.
- The player can identify Rotom’s red objective marker and use the touchscreen map for a broader view.
- The party is healed, the lead Pokémon is selected, recovery items are stocked and a clean save exists outside Verdant Cavern.
- The player understands that Pokémon Moon has one save file and that Totem Raticate can summon Rattata.
References for this chapter
- Pokémon Moon — Official 3DS Instruction Manual
- How to Save Your Game: Pokémon Sun, Moon, Ultra Sun, and Ultra Moon — Nintendo Support
- Nintendo 3DS Family Manuals | Nintendo Support
- Rotom Pokédex — Bulbapedia
- Menu — Bulbapedia
- Verdant Cavern — Bulbapedia
- Pokémon Sun & Moon – Island Trials
- Pokémon Sun and Moon Controls — StrategyWiki
Melemele Island: Routes, Verdant Cavern Trial and Grand Trial (Hala)
Complete Melemele Island’s first island trial in Pokémon Moon, defeat Totem Raticate in Verdant Cavern, rescue Nebby from Seaward Cave, and return to Iki Town to defeat Kahuna Hala. The required rewards are the Normalium Z, ten Great Balls, the Fightinium Z, the Melemele Trial Completion stamp and the Ride Pager. This chapter follows the original 2016 Nintendo 3DS Pokémon Moon release, not Pokémon Ultra Moon.
1. Finish the opening route and reach Hau’oli City
Begin on Route 1, also called the Hau’oli Outskirts, and follow the opening story through Lillie’s house, Iki Town and Mahalo Trail. After the Iki Town festival and the first battle with Hau, return to Professor Kukui’s house and follow him to the Trainers’ School. Complete the required school sequence, including the teacher battle, then continue into Hau’oli City when the story opens the route.
In Hau’oli City, proceed through the shopping district toward the Marina. Speak to the characters who direct you toward Ilima. At the Marina, Ilima is confronted by two Team Skull Grunts. Defeat the Grunts, then battle Ilima when he tests your readiness for the island challenge. Heal at a Pokémon Center afterward, because the next required area is on Route 2 and contains several battles before the trial entrance.
- Complete the Route 1 and Trainers’ School story events.
- Defeat the two Team Skull Grunts at Hau’oli Marina.
- Defeat Ilima and receive access to his Verdant Cavern trial.
2. Travel through Route 2 to Verdant Cavern
Leave Hau’oli City by heading north onto Route 2. Continue past Hau’oli Cemetery toward the Berry Fields. A Delibird carries you into the Berry Fields, where Team Skull is harassing the Berry caretaker. Defeat the Team Skull Grunt there, then leave the fields and continue north.
The Route 2 Pokémon Center is directly before Verdant Cavern. Heal there and buy Potions or Super Potions before speaking with Ilima. The cavern entrance is at the northern end of Route 2. Ilima explains the trial after you enter. Before accepting the trial, make sure the team you intend to use is healthy and that you have enough healing items.
Pokémon Moon has one save file. Use the X menu’s Save command before starting the trial, but do not attempt to create a second in-game save slot. If you lose, reload that save or return to the Pokémon Center and prepare again.
- Heal at the Route 2 Pokémon Center.
- Restock basic healing items before entering Verdant Cavern.
- Save once before accepting Ilima’s trial.
3. Complete Ilima’s Verdant Cavern trial
The trial requires you to investigate dens throughout Verdant Cavern and battle three fixed trial Pokémon. In Moon, the first two encounters are level 11 Alolan Rattata, followed by a level 11 Alolan Raticate. These trial encounters cannot be captured. The cave’s normal wild Pokémon become available after the trial is completed, so do not enter the trial expecting to catch Pokémon during the required den sequence.
From the entrance, inspect the first den, then follow the Pokémon through the cavern to the next den. Continue across the central bridge and use the lower passage to reach the later dens. Team Skull interrupts the search. One Grunt battles you with a level 11 Drowzee, while the Grunts’ positions block some dens and leave the correct route open. Defeat the Grunt, follow the final fleeing Pokémon and battle the Alolan Raticate in its den.
After defeating all three trial Pokémon, speak with the Trial Guide at the rear of the cavern. He moves aside and opens the route into the Totem’s Den. The trial can be abandoned earlier, but leaving before this point resets the search. Once the Trial Guide has moved, heal with items before examining the Z-Crystal pedestal because the Totem battle begins immediately.
- Defeat two level 11 Alolan Rattata.
- Defeat the level 11 Alolan Raticate in the final den.
- Defeat the Team Skull Grunt using Drowzee.
- Speak with the Trial Guide and enter the Totem’s Den.
4. Defeat Totem Raticate
Examine the pedestal in the Totem’s Den to begin the battle against level 12 Totem Raticate. In Moon, Totem Raticate is Alolan Raticate, a Normal/Dark type. Its Totem aura raises its Defense, so physical attacks do less damage than they would against an ordinary Raticate. It can call a level 11 Alolan Rattata as an ally through the SOS battle system.
Fighting-type attacks are the most direct answer. Bug- and Fairy-type attacks are also super effective against Alolan Raticate’s Dark typing. If you chose Popplio, Disarming Voice is useful because it can damage both enemies; other moves that hit multiple targets can similarly reduce the pressure from the ally. A Makuhita caught on Route 2 is another practical option because it provides Fighting-type damage for both this battle and Hala’s Grand Trial.
Prioritize Totem Raticate if your team can survive the ally’s attacks, since defeating the Totem ends the battle and prevents further summons. If the ally is threatening a knockout, defeat it first, then immediately return damage to the Totem. Do not spend several turns on weak setup moves while both opponents are active. Use a Potion or Super Potion when a Pokémon would otherwise fall in the next turn, and use status such as sleep or paralysis if your team has a reliable move for it.
After Totem Raticate falls, Ilima awards the Normalium Z and ten Great Balls. The Totem battle is the final required battle of the trial. You can now catch wild Pokémon in the cavern and collect items that were inaccessible during the trial.
- Exploit Alolan Raticate’s Fighting, Bug or Fairy weakness.
- Account for the Totem aura’s Defense boost.
- Control or defeat the summoned Alolan Rattata when necessary.
- Receive the Normalium Z and ten Great Balls from Ilima.
5. Follow Route 3 and rescue Nebby
Leave the Totem’s Den and speak with Ilima outside. He clears the barricade at the end of Route 2, opening Route 3. Professor Kukui then demonstrates Z-Power and asks you to look for Lillie, who has gone ahead on Route 3.
Follow Route 3 around the mountain and enter Melemele Meadow. Continue through the meadow until the story directs you toward Seaward Cave. Enter the cave and follow Nebby. A short story battle occurs inside, after which Lillie retrieves Nebby and heals your party. Continue out through the cave and back onto Route 3.
After the rescue, Hau challenges you on Route 3. Defeat him, then follow the route back toward Iki Town. You may return to a Pokémon Center in Hau’oli City before the Grand Trial if your team has used items or lost move PP. This route segment is required: defeating Ilima alone does not immediately place you at Hala’s battle.
- Pass through Route 3 to Melemele Meadow.
- Follow Nebby into Seaward Cave and complete the rescue scene.
- Defeat Hau on Route 3.
- Return to Iki Town for the Grand Trial.
6. Defeat Kahuna Hala in Iki Town
In Iki Town, Professor Kukui and Lillie explain that Hala specializes in Fighting-type Pokémon. Speak with Hala near the central stage and accept the Grand Trial when prompted. Save before speaking to him so a failed attempt can be retried without repeating the route and story battles.
In the original Pokémon Moon release, Hala uses level 14 Mankey, level 14 Makuhita and level 15 Crabrawler. Flying-, Psychic- and Fairy-type attacks are effective against his Fighting team. Avoid relying on Normal-type Pokémon, which take super-effective damage from Fighting attacks. Mankey can use Pursuit, Makuhita has Fake Out and Sand Attack, and Crabrawler carries Power-Up Punch, so do not allow Crabrawler to boost repeatedly while you switch without attacking.
Lead with a Pokémon that can use a reliable super-effective move. If Hala’s Pokémon have a matchup advantage, switch to a safer counter rather than letting your main attacker faint. Use Potions or Super Potions during the battle when they preserve a useful counter. A Revive is worthwhile if it restores the only Pokémon with a Flying, Psychic or Fairy attack. The Normalium Z is generally less valuable here than ordinary super-effective coverage, so use it only if its attack secures a needed knockout.
Defeating Hala awards the Fightinium Z, adds the Melemele Trial Completion stamp to your Trainer Passport and gives you the Ride Pager. The stamp also raises the level at which traded Pokémon will obey. The cleared barricade and Ride Pager allow the story to move toward Akala Island; do not treat Ilima’s victory alone as completion of Melemele’s island challenge.
- Save immediately before Hala’s Grand Trial.
- Defeat level 14 Mankey, level 14 Makuhita and level 15 Crabrawler.
- Use Flying-, Psychic- or Fairy-type attacks where available.
- Receive the Fightinium Z, Melemele Trial Completion stamp and Ride Pager.
Before you move on
- Ilima has awarded the Normalium Z and ten Great Balls.
- The Route 2 barricade has been cleared and Route 3 is accessible.
- Nebby has been rescued from Seaward Cave and Hau has been defeated on Route 3.
- Hala has been defeated in Iki Town.
- The Trainer Passport shows the Melemele Trial Completion stamp.
- The Fightinium Z and Ride Pager have been awarded.
- The story no longer directs the player to complete Verdant Cavern or Hala’s Grand Trial, and progression toward Akala Island is open.
References for this chapter
- Pokémon Moon — Official 3DS Instruction Manual
- Pokémon Sun & Moon — Island Trials
- Pokémon Sun & Moon — Grand Trials
- Pokémon Sun and Moon walkthrough — Verdant Cavern and Route 3
- Walkthrough: Pokémon Sun and Moon – Original Games
- Pokémon Sun and Moon walkthrough — Part 6, Iki Town and Hala’s Grand Trial
Early Team Building and Version Exclusives
Build a compact, flexible team before leaving Melemele and adjust it as you enter Akala. The story does not require a specific species or a full six-Pokémon party. Four well-trained Pokémon with different jobs are enough for the early island challenge, provided they have reliable moves and can answer the next Totem encounter. Save before major battles, but remember that Pokémon Moon uses one save file rather than multiple save slots.
Choose complementary roles instead of collecting six similar attackers
Keep your starter as the team’s main anchor, then add Pokémon that cover different damage types or provide useful resistances. A practical early party contains a reliable physical attacker, a special attacker, a fast Pokémon, and a sturdier switch-in. A fifth or sixth member is useful when it provides a specific answer to an upcoming trial; it is not necessary to fill every party slot immediately.
Prioritize coverage for Water, Fire, Grass, Rock, Flying, and Normal opponents encountered on Akala. Electric- and Grass-type attacks are the important super-effective answers to Water Pokémon. Water, Rock, and Ground attacks help against Kiawe’s Fire trial, while Fire, Flying, Bug, Ice, and Poison attacks are useful for Mallow’s Grass trial.
- Keep at least one Pokémon with a dependable same-type damaging move.
- Add Electric or Grass coverage for Lana’s Water trial.
- Add Water, Rock, or Ground coverage before Kiawe’s Fire trial.
- Keep one reserve Pokémon close enough in level to replace a weakened team member.
Build the first four members on Melemele
Pikipek is a useful early physical Flying attacker and can remain valuable after evolving. Grubbin is available on Route 1 in both Sun and Moon and offers Bug typing early, with an eventual Electric/Bug evolution line. Its later evolution requires the appropriate special location, so do not plan around having Vikavolt immediately.
In Pokémon Moon, Alolan Rattata is available in early areas where Sun has Yungoos. Rattata provides Dark/Normal typing and can contribute against Ghost- and Psychic-type opponents once it has suitable Dark attacks. Wingull is another practical option if you want a Water/Flying Pokémon, but it should not be treated as an Electric-style answer to Water foes. If your starter already covers Water or Grass, choose a different role instead of duplicating that typing.
Use the Summary screen to inspect each capture’s ability, nature, current moves, and experience. Replace weak moves when stronger same-type or useful coverage attacks become available. A Pokémon with the correct type but poor moves or low survivability is not a dependable trial counter.
- Check the Summary screen after every important capture.
- Avoid carrying several Pokémon that all depend on the same type of attack.
- Keep at least one backup member trained near the active party’s level.
Prepare specifically for each Akala trial
After reaching Akala, use Route 4, Paniola, Route 5, Brooklet Hill, and the approaches to the trial sites to build the counters you actually need. Lana’s trial begins at Brooklet Hill and culminates in Totem Wishiwashi in the original Pokémon Moon release. Bring Grass- or Electric-type damage and a Pokémon that can survive a strong Water attack.
Kiawe’s trial takes place at Wela Volcano Park. Bring Water-, Rock-, or Ground-type attacks and avoid relying on Bug, Grass, or Steel damage. The trial includes battles before the Totem encounter, so restore HP and PP before entering the final area.
Mallow’s trial is in Lush Jungle. You gather ingredients, return to Mallow, and then face Totem Lurantis. Fire, Flying, Bug, Ice, and Poison attacks are valuable. If you lack a direct counter, use a sturdy Pokémon to absorb the first hit, apply a status condition when safe, and focus attacks on the Totem or its summoned ally rather than allowing both opponents to remain healthy.
- Use Brooklet Hill to obtain or train a Grass- or Electric-capable answer for Wishiwashi.
- Carry Water, Rock, or Ground coverage before entering Wela Volcano Park.
- Carry Fire, Flying, Bug, Ice, or Poison coverage before entering Lush Jungle.
- Heal before the Totem battle rather than spending all recovery items during the trial.
Handle Totem allies deliberately
Totem battles are wild SOS battles in which the Totem can call a predefined ally. In the original Sun and Moon games, Totem Pokémon generally cannot call the same defeated ally again. If the ally is frail and dangerous, defeat it first; if it provides healing, weather, or another major support effect, remove it before concentrating on the Totem. Do not use a slow setup strategy while two opponents are attacking unless your Pokémon can safely withstand the extra turns.
Use a strong same-type attack or a status move when it creates a clear advantage. Sleep or paralysis can buy a turn, but status is not a substitute for damage when the Totem is already boosted. A Z-Move is best saved for the Totem itself or for an ally that can otherwise prolong the fight.
- Identify which ally appears before choosing a target.
- Defeat the ally first if it supplies healing or creates an immediate damage threat.
- Use the Z-Move when it removes a dangerous opponent rather than opening against a weak trial trainer.
- Restore PP before retrying after a failed battle.
Train near the next challenge without overlevelling
A Melemele party in the low-to-mid teens is generally suitable for the first trial when its moves match the encounter. On Akala, keep the active team around the high teens to low twenties for the early trials, then raise the Pokémon intended for later trials into the low-to-mid twenties. These are practical ranges, not mandatory targets; matchup, move quality, and the ability to survive a Totem’s first attack matter more than one exact level.
Battle wild Pokémon on the current route, return to the nearest Pokémon Center when several members are injured, and repeat. This is safer and more efficient than repeatedly fighting very weak Pokémon on Melemele after reaching Akala. Rotate the party so one Pokémon does not become dramatically stronger than the others.
- Train the whole intended party instead of relying on one overlevelled lead.
- Stop when the next trial’s counter can survive and deal reliable damage.
- Use Pokémon Centers to preserve Potions and other limited healing supplies.
Plan version exclusives around trading
Moon’s version-exclusive lines include Alolan Sandshrew and Alolan Vulpix, while Sun has the corresponding Alolan Vulpix and Alolan Sandshrew counterparts. Moon also differs from Sun in several later encounter tables, including fossil and other species lines. These differences affect collection and team options, not the island challenge’s required progression.
Do not delay the story while waiting for an exclusive. Catch a comparable Pokémon available in Moon, complete the trials, and trade later if you want a particular species. Use local or online trading only after the relevant communication feature is available, and trade duplicates or nonessential captures rather than a Pokémon currently needed for the next trial. Nebby is story-critical and must remain available for the required late-game sequence.
- Write down the Sun-only species you want before arranging trades.
- Use a comparable Moon encounter if a trade is unavailable.
- Do not trade away Nebby or the only team member prepared for the next trial.
- Remember that version exclusives are not required for story completion.
Use the single save file correctly
Pokémon Moon allows only one in-game save file. You cannot create a second save slot before Verdant Cavern, an Akala Totem, or a Kahuna battle. Instead, save from the X menu immediately before the encounter, then keep that file intact until the fight is complete. If you lose, reload the same save and change the lead, moves, held item, or party order before trying again.
Saving before a trial preserves your trained team, inventory, and position. It does not create a backup copy, so do not erase the game or begin a new adventure unless you intend to replace the existing file.
- Save immediately before every Totem and Kahuna battle.
- Do not claim that multiple in-game save slots are available.
- Reload the pre-battle save after a failed attempt and adjust the team.
- Keep spare Poké Balls and healing items while exploring new routes.
Before you move on
- You have at least four usable Pokémon with distinct offensive or defensive roles.
- Your party includes a prepared answer for the next Akala trial rather than only a general-purpose lead.
- The party is trained near the next challenge’s level range without relying on a single dramatically overlevelled Pokémon.
- You know which Moon-exclusive or Sun-exclusive species you want and have either caught the Moon encounters, arranged a trade, or postponed collection deliberately.
- You have saved immediately before the next Totem or Kahuna battle and understand that this is the only in-game save file.
Akala Island: Three Trials, Totem Lurantis and the Kahuna Challenge
Complete Lana’s Brooklet Hill trial, Kiawe’s Wela Volcano Park trial and Mallow’s Lush Jungle trial in the original Nintendo 3DS release of Pokémon Moon. Then follow the story through Route 5, the Dimensional Research Lab, Diglett’s Tunnel, Memorial Hill and the Akala Outskirts to reach Olivia at the Ruins of Life. Finish with Olivia’s Grand Trial and continue toward Hano Grand Resort and Aether Paradise.
Complete Lana’s Brooklet Hill trial
After the opening Akala events, travel from Heahea City through Route 4, Paniola Town, Paniola Ranch and Route 5. The Route 5 Pokémon Center is the most convenient place to heal before entering Brooklet Hill. Enter Brooklet Hill from its southern Route 5 side and speak with Captain Lana near the water.
Follow Lana downhill and investigate the disturbances in the water. Several individual Wishiwashi appear during the approach. Continue through the water routes until the trial battle begins. In Pokémon Moon, Totem Wishiwashi is level 20 and receives a defensive aura boost. It can call a level 18 Wishiwashi ally, turning the battle into a two-on-one encounter.
Electric- and Grass-type attacks are the most direct answers. Remove the ally if it is using Helping Hand or adding enough damage to prevent safe switching, then concentrate on the Totem. A Pokémon with sleep, paralysis or another reliable status move can create an opening, but do not depend on status alone because the Totem can still overwhelm a weakened team. Save before entering the Totem’s den if you want a clean retry point.
After the battle, Lana awards the Waterium Z, registers Lapras as a Ride Pokémon and gives you a Fishing Rod and ten Dive Balls. She can also send you back to the Route 5 Pokémon Center. Use that return option unless you specifically want to continue exploring Brooklet Hill immediately.
- Speak with Lana at the Brooklet Hill trial entrance.
- Defeat Totem Wishiwashi and its summoned Wishiwashi ally.
- Receive the Waterium Z.
- Register Lapras as a Ride Pokémon.
- Collect the Fishing Rod and ten Dive Balls.
Travel to Kiawe’s trial at Wela Volcano Park
Return to Route 5, then travel south through Route 6 toward Royal Avenue. Complete the required Battle Royal Dome event before trying to leave the area. Heal at the Royal Avenue Pokémon Center and restock Super Potions, Revives and status-healing items.
Leave Royal Avenue through Route 7 and continue north toward Wela Volcano Park. Speak with Kiawe at the trial entrance. The trial attendant can restore your party before the trial begins, so use that service if any Pokémon took damage on Route 7.
Watch the Alolan Marowak dances and identify the detail that changes between performances. A wrong answer starts an extra battle, but it does not permanently fail the trial. The final sequence includes the Hiker interruption before the Totem fight.
In Pokémon Moon, Totem Salazzle is level 22 and receives a Special Defense boost. It can call a level 20 Salandit. Ground attacks are especially valuable, while Water, Rock and Psychic attacks also exploit Salazzle’s weaknesses. Be careful with a weakened team because Salazzle can use Toxic, Venom Drench, Torment and Flame Burst, while Salandit can spread poison or use Venoshock.
Defeating Salazzle completes Kiawe’s trial. You receive the Firium Z and Charizard becomes available as a Ride Pokémon. Heal at the attendant or at Royal Avenue before continuing.
- Complete the Battle Royal Dome requirement.
- Reach Wela Volcano Park through Route 7.
- Use the trial attendant’s healing service.
- Identify the changes in Kiawe’s dances.
- Defeat Totem Salazzle and its summoned Salandit.
- Receive the Firium Z and register Charizard as a Ride Pokémon.
Reach Lush Jungle from Route 5
After Kiawe’s trial, leave Wela Volcano Park and travel north on Route 7 to Route 8. In the original Pokémon Moon route layout, Route 8 connects back to the north side of Route 5. Follow Route 8 to that Route 5 entrance, then cross Route 5 northward and enter Lush Jungle from the Route 5 side.
Do not use Dividing Peak Tunnel as the route into Lush Jungle. That connection belongs to the Ultra Sun and Ultra Moon layout and should not be inserted into an original Sun or Moon walkthrough.
Captain Mallow waits near the Lush Jungle entrance and gives you the Forage Bag. Wild Pokémon do not appear in the jungle until the trial is complete. Use Stoutland Search to locate four trial ingredients: a Tiny Mushroom, a Mago Berry, a Revival Herb and a Miracle Seed.
Start by going west from the entrance to find the Tiny Mushroom. In Pokémon Moon, the mushroom ambush is a level 22 Shiinotic; Parasect is the corresponding encounter in Pokémon Sun. Defeat the ambusher, then continue north to the northwest area. Approach the rustling tree to trigger the first Fomantis encounter and collect the Mago Berry afterward.
Return through the central area and go north. In the north area, search the grass on the western side to find the Revival Herb. A second Fomantis attacks after the herb is located. For the final ingredient, return to the central area, travel south along the eastern side and climb the southeastern path. In the east area, use Tauros Charge to break the rocks, then collect the Miracle Seed in the depression beyond them.
Return to Mallow at the entrance only after healing. The cooking scene begins immediately, and the Totem battle follows without an ordinary Pokémon Center between the ingredient search and the fight.
- Travel from Route 7 to Route 8 and back to north Route 5.
- Enter Lush Jungle from Route 5.
- Receive Mallow’s Forage Bag.
- Collect the Tiny Mushroom, Mago Berry, Revival Herb and Miracle Seed.
- Defeat the Shiinotic and two Fomantis ambushes.
- Heal before returning to Mallow.
Defeat Totem Lurantis
Totem Lurantis is level 24 and begins with a Speed aura boost. Its ability is Leaf Guard, it holds a Power Herb and it knows Razor Leaf, X-Scissor, Solar Blade and Synthesis. Fire-, Flying-, Ice-, Poison- and Bug-type attacks are super effective, with Fire being especially useful because it resists Lurantis’s Grass and Bug attacks.
The original battle can involve two different SOS allies. Trumbeak is level 22 and can use Rock Blast, Pluck, Supersonic and Screech. Castform is also level 22 and can use Sunny Day, Water Gun, Headbutt and Weather Ball. The ally sequence can vary, so prepare for both rather than assuming only one partner will appear.
Castform is the urgent weather threat. Sunny Day lets Lurantis use Solar Blade without charging and makes Synthesis restore more health. It also changes Castform’s Weather Ball into a Fire attack. Defeating Castform removes the weather, while defeating Trumbeak prevents Rock Blast, Pluck and Screech from creating additional pressure. If both allies are present over the course of the encounter, prioritize the one currently threatening your active counter, then return to Lurantis.
A Fire-type holding the Firium Z can use Inferno Overdrive to deal decisive damage, and the sunlight from Sunny Day increases the power of that Fire attack. Salandit from Wela Volcano Park is a practical counter if it is trained near the Totem’s level, but protect it from Castform’s Water Gun and Weather Ball. Fletchinder, Trumbeak, a strong Ice-type or a bulky Pokémon with reliable status support can also help. Status is less dependable while sunlight is active because Leaf Guard prevents status conditions. Avoid weak attacks that allow Lurantis to recover repeatedly with Synthesis.
After all enemies are defeated, Mallow awards the Grassium Z and ten Nest Balls. Professor Kukui then gives you TM67 Smart Strike and directs you toward the Dimensional Research Lab.
- Bring a Fire-, Flying-, Ice-, Poison- or Bug-type attack.
- Prepare for both Trumbeak and Castform as possible SOS allies.
- Stop Castform’s Sunny Day support or defeat it when the weather becomes dangerous.
- Use a strong Z-Move before repeated Synthesis restores Lurantis’s health.
- Receive the Grassium Z, ten Nest Balls and TM67 Smart Strike.
Reach and defeat Kahuna Olivia
After Mallow’s trial, follow Kukui back to Route 5 and continue to Heahea City. Visit the Dimensional Research Lab as directed. From Heahea City, travel through Diglett’s Tunnel and emerge on Route 9. Continue into Konikoni City and heal at its Pokémon Center.
Restock Super Potions, Revives, Paralyze Heals or Full Heals, and Poké Balls before leaving. Take the southern route from Konikoni City through Memorial Hill and the Akala Outskirts. Continue toward the Ruins of Life while following the scenes involving Lillie, Nebby and Professor Burnet.
Lillie heals your party outside the Ruins of Life, giving you a recovery point immediately before the Grand Trial. Save before speaking with Olivia if you want a retry point. Olivia uses Nosepass at level 26, Boldore at level 26 and Midnight Form Lycanroc at level 27. Her first two Pokémon have Sturdy, so attacks that appear strong enough for a knockout may leave them with one HP.
Grass, Water, Fighting, Ground and Steel attacks are effective against the Rock-type team. Ground Pokémon are particularly useful against Nosepass because they avoid Spark and Thunder Wave. Special attacks work well against Nosepass and Boldore because both have higher physical Defense than Special Defense. Lycanroc holds the Rockium Z and can use Continental Crush once, so keep a healthy counter available for the final exchange. Lycanroc’s Vital Spirit prevents it from being put to sleep.
Defeating Olivia awards the Rockium Z and records Akala’s Grand Trial completion stamp. Pokémon up to level 50, including traded Pokémon, will now obey without question. After the following dialogue, Olivia directs you toward Hano Grand Resort and Aether Paradise.
- Visit the Dimensional Research Lab.
- Cross Diglett’s Tunnel to Route 9.
- Heal and restock in Konikoni City.
- Travel through Memorial Hill and the Akala Outskirts.
- Reach the Ruins of Life and use Lillie’s healing scene.
- Defeat Nosepass, Boldore and Lycanroc.
- Receive the Rockium Z and Akala Grand Trial stamp.
Before you move on
- Lana’s trial is complete and the Waterium Z, Fishing Rod and ten Dive Balls have been received.
- Lapras is registered as a Ride Pokémon.
- Kiawe’s trial is complete, Firium Z has been received and Charizard is registered as a Ride Pokémon.
- Mallow’s trial is complete with the Tiny Mushroom, Mago Berry, Revival Herb and Miracle Seed sequence finished.
- Totem Lurantis has been defeated, Grassium Z and ten Nest Balls have been received, and Kukui has provided TM67 Smart Strike.
- The story has returned to Route 5 and directed the player to the Dimensional Research Lab.
- Olivia has been defeated at the Ruins of Life, Rockium Z has been received and the Akala Grand Trial stamp is recorded.
- The next required destination is Hano Grand Resort and Aether Paradise; Mudsdale is not required for this chapter.
Ula’ula Island: Trials, Totem Mimikyu and the Aether Foundation Introduction
On Ula’ula Island in the original Nintendo 3DS Pokémon Moon, complete Sophocles’s Hokulani Observatory trial, Acerola’s abandoned Thrifty Megamart trial and the Team Skull operation in Po Town. After defeating Guzma, return to Aether House, battle Gladion, defeat Kahuna Nanu and board the ferry to Aether Paradise. Route 17 and Po Town contain several forced battles, so heal whenever possible and save before each major encounter.
Reach Mount Hokulani through Malie City and Route 10
When you arrive on Ula’ula Island, go to Malie Garden and speak with Professor Kukui. The Team Skull confrontation there leads to a battle with Guzma. After winning, Kukui gives you the Z-Crystal associated with your chosen starter. Leave Malie Garden and head north from Malie City onto Route 10.
Follow Route 10 to its northern end and use the bus stop to ride up Mount Hokulani. At the summit, approach the observatory and speak with Kukui and Molayne. Molayne tests whether you are ready for Sophocles’s trial, so defeat his Steel-focused team before entering the observatory. Heal at the Malie City Pokémon Center or use available healing services before making the climb.
- Guzma defeated at Malie Garden.
- Starter-specific Z-Crystal received from Kukui.
- Molayne defeated outside Hokulani Observatory.
- Party healed before entering Sophocles’s trial.
Complete Sophocles’s original Pokémon Moon trial
Enter the Captain’s Gate behind the observatory reception area and speak with Sophocles. His machine loses power after he activates it, trapping you inside the trial area. To restore the system, answer four audio questions and battle the Pokémon attracted after the door opens. The question subjects include a Pokémon Center sound, the sound for receiving an item, a Pokémon cry and the music that signals a wild Pokémon or Totem encounter. If you answer incorrectly, the question is repeated rather than ending the trial.
The final Totem in original Pokémon Moon is Vikavolt, not Togedemaru. Totem Vikavolt is Bug/Electric, has Levitate, begins with every stat raised and can call Charjabug allies. Ground attacks do not work because of Levitate. Fire- and Rock-type attacks are the safest direct counters, while a Pokémon with strong neutral damage can still succeed if it is fast enough and survives Spark or Bug Bite. Focus on Vikavolt first; once it falls, defeat any remaining Charjabug. Sophocles awards Electrium Z, and Molayne gives you Steelium Z afterward.
- Four audio questions completed.
- Totem Vikavolt defeated.
- Electrium Z obtained from Sophocles.
- Steelium Z obtained from Molayne.
Travel through Route 11, Route 12 and Tapu Village
Return from Mount Hokulani and proceed south through Route 11. At the Route 11 gate, show the Z-Crystal you received after defeating Guzma so the path opens. Continue through Route 12, where Mudsdale’s Ride ability lets you cross the rocky terrain. Route 13 leads west into Tapu Village.
Enter the Aether House in Tapu Village and speak with Hau and the people inside. A Team Skull Grunt troubles Lillie outside; defeat the Grunt, then return toward the southern part of Tapu Village. Acerola is waiting near the trial entrance. Speak with her to begin the abandoned Thrifty Megamart trial. Before leaving, heal at the Tapu Village Pokémon Center and buy healing items and Poké Balls.
- Route 11 gate opened with the appropriate Z-Crystal.
- Mudsdale Ride used on Route 12.
- Aether House scene completed.
- Acerola’s trial unlocked.
Solve Acerola’s abandoned Thrifty Megamart trial
Follow Acerola into the abandoned Thrifty Megamart. The trial proceeds in a fixed order. Inspect the moving conveyor belt to activate the Poké Finder and photograph Gastly. After the battle, follow the moving Pikachu toward the western checkout area and investigate the moving shopping cart to photograph Haunter. Continue toward the northeast section, where the dolls move; use the Poké Finder to photograph Gengar.
Follow the final Pikachu through the back door. In the apparent back room, the Poké Finder activates automatically. Turn around and photograph the Mimikyu behind you to begin the Totem battle. The room is a trial illusion; do not search for an ordinary permanent back room after the battle.
- Gastly photographed and defeated.
- Haunter photographed and defeated.
- Gengar photographed and defeated.
- Mimikyu photographed in the back room.
Defeat Totem Mimikyu without wasting your opening attack
Totem Mimikyu is Ghost/Fairy and begins with all of its stats raised. Its Disguise absorbs the first damaging move, so open with a safe attack rather than immediately spending your Z-Move. The move still consumes the turn, but the Z-Move remains available for a later turn after Disguise is broken. Steel- and Poison-type attacks are super effective; Ghost-type attacks also work well. Normal- and Fighting-type attacks cannot damage Mimikyu, while Dragon-type attacks are ineffective against its Fairy typing.
Mimikyu can call Haunter and later Gengar. These allies create the greatest danger through Ghost attacks and status moves such as Hypnosis. If an ally appears, prioritize the Totem first unless the ally is about to disable or defeat your active Pokémon. Use a status move, healing item or switch after Disguise is gone if Mimikyu is not in knockout range. If you lose, return to the Tapu Village Pokémon Center, restore PP and save before speaking with Acerola again. After victory, Acerola gives you Ghostium Z and ten Dusk Balls, and the Megamart becomes available for ordinary wild encounters.
- Disguise broken before committing the strongest attack.
- Mimikyu defeated before its allies overwhelm the party.
- Ghostium Z and Dusk Balls received.
- A clean save made after the trial.
Trigger the Aether House interruption and reach Po Town
After the trial, return to Aether House in Tapu Village. Speak with the occupants until the stolen Yungoos scene begins. Follow the Team Skull members outside and defeat Plumeria. Then speak with Grimsley on the beach west of Aether House. He gives you the Sharpedo Ride Pager, allowing you to smash the rocks blocking the water route.
Use Sharpedo to travel across Route 15, then continue through Route 16 and Ula’ula Meadow to Route 17. Route 17 is occupied by Team Skull and contains several trainer battles. At the northern entrance to Po Town, defeat the Team Skull guards in the required battle. You can use the Team Skull-controlled Pokémon Center in Po Town for healing, but the service costs money, so arrive with a healthy party and enough cash.
- Plumeria defeated near Aether House.
- Sharpedo Ride Pager obtained from Grimsley.
- Route 17 crossed.
- Po Town entrance guards defeated.
Clear Shady House and rescue the stolen Pokémon
Enter Po Town through the gaps in the barricades and travel north to Shady House. Search the rooms for the three password notes. In original Pokémon Moon, answer the guard’s questions in this order: Beat Up, Golisopod, Tapu Cocoa, then No. The last answer is the required response to the instruction about Team Skull members butting heads.
Explore the mansion’s first floor and second floor, defeating Grunts as needed. The third password is in the southwest second-floor room. After giving the answers, enter Guzma’s room and defeat him. His team is built around Bug types, so Fire-, Flying- and Rock-type attacks are useful, but watch for Golisopod’s strong physical attacks. Collect the Buginium Z from the chest after the battle, then leave Shady House.
- All three password notes found.
- Beat Up, Golisopod, Tapu Cocoa and No entered in order.
- Guzma defeated in Shady House.
- Stolen Yungoos recovered and Buginium Z collected.
Return to Aether House, defeat Nanu and start the Aether transition
After leaving Po Town, return to Aether House on Route 15. A cutscene begins, followed by a battle against Gladion. His team includes Golbat, Sneasel and Type: Null, so Rock-, Electric-, Fighting- and Fairy-type coverage can help, but keep a reliable answer for both Poison/Flying and Dark/Ice threats.
After defeating Gladion, follow him to the ferry terminal in Malie City. Kahuna Nanu appears and challenges you to the Ula’ula Grand Trial. Defeat his Dark-type team, then board the ferry with Gladion. The ferry carries you to Aether Paradise, which is the next required story destination. Optional exploration of Haina Desert, Ula’ula Meadow and side paths can be postponed until after the main story.
- Gladion defeated at Aether House.
- Nanu’s Ula’ula Grand Trial completed.
- Ferry terminal scene completed.
- Ferry to Aether Paradise boarded, confirming the Ula’ula sequence is complete.
Before you move on
- Sophocles’s trial is complete and Electrium Z is in the Bag.
- Acerola’s trial is complete, Ghostium Z and ten Dusk Balls were awarded, and the Megamart now allows ordinary wild encounters.
- Plumeria, Guzma, Gladion and Nanu have been defeated in the required sequence.
- The player has boarded the ferry to Aether Paradise after completing the Ula’ula Grand Trial. This confirms the chapter’s Po Town and Aether Foundation transition objectives are complete.
References for this chapter
- Pokémon Moon — Official 3DS Instruction Manual
- Walkthrough: Pokémon Sun and Moon – Original Games
- Walkthrough: Pokémon Sun and Moon, Section 15
- Pokémon Sun & Moon – Island Trials
- Bulbapedia — Pokémon Sun and Moon Walkthrough, Part 17: Abandoned Megamart
- Bulbapedia — Pokémon Sun and Moon Walkthrough, Part 19: Po Town and Shady House
- Bulbapedia — Shady House
- Samurai Gamers — Ula’ula Island Walkthrough 2: Pokémon Sun and Moon
Aether Paradise and the Nebby Rescue Sequence
This chapter begins immediately after the ferry arrives at Aether Paradise. Follow Gladion and Hau through the Foundation’s entrance, investigate Secret Lab B, survive the Foundation’s internal battles, and reach Lusamine’s mansion. Nebby is not captured in this chapter. Instead, the story forces Cosmog to evolve into Cosmoem. After defeating Lusamine, receive the Sun Flute and Master Ball, then board Gladion’s ship for Seafolk Village on Poni Island.
Arrive at Aether Paradise and use the entrance recovery point
You arrive at the B1F Docks with Gladion and Hau. Do not return to Aether House, Route 17, Po Town, Shady House, or Nanu’s Grand Trial; those events are already complete. Follow the opening dialogue, then take the central elevator to the Entrance level when the story directs you.
The Entrance has a service counter with a PC and an Aether Foundation employee who can fully restore your party. Use this recovery point before beginning the investigation. Aether Paradise also prevents the normal use of empty Poké Balls in the facility, so Nebby cannot be captured here and wild Pokémon are not the focus of this sequence.
From the Entrance, follow the route toward the Conservation Area. The Foundation employees are now obstructing the group and several will battle you. Optional employee battles provide experience but are not required. Keep a few status-healing items available because the coming battles include sleep, Disable, and other disruptive moves.
- Begin at the Aether Paradise B1F Docks.
- Heal at the Entrance service counter before proceeding.
- Do not search for a Nebby capture battle; none occurs in Aether Paradise.
- Save before accepting the next required battle if you want a clean retry point.
Defeat Branch Chief Faba at the Entrance
When you reach the Entrance floor, Branch Chief Faba confronts the group. In this first required Faba battle, he uses Hypno at level 39. Dark-, Bug-, and Ghost-type attacks are useful, but do not rely on a single Pokémon if Hypno puts it to sleep or disables its main attack.
After defeating Faba, continue with Gladion and Hau. Faba’s resistance opens the route toward the upper level and the laboratories. If the battle caused damage or status problems, return to the Entrance service counter before following the story onward.
The goal is not to clear every employee on the floor. Fight only when a trainer blocks the route or when you want the experience. Preserve PP on your strongest attacks because Secret Lab B contains more required battles.
- Defeat Faba’s level 39 Hypno.
- Use the Entrance healing employee if necessary.
- Keep at least one reliable Dark-, Bug-, or Ghost-type attack available.
- Do not waste rare healing items before reaching the later recovery point.
Investigate Secret Lab B
Follow Gladion and Hau to the laboratory level. Hau gives you a Max Revive after you enter the area. Move through the corridors toward Secret Lab B, defeating the required Aether employees along the way. Their teams include Pokémon such as Alolan Muk, Magneton, Porygon2, Machoke, and Vanillish, so Ground-, Fighting-, Fire-, and strong neutral attacks are practical choices.
When you reach Secret Lab B, Hau joins you for a required Double Battle against Aether Foundation employees. Concentrate attacks on one opposing Pokémon at a time unless a spread move can safely finish both targets. Hau acts as your partner, but you remain responsible for keeping your side of the field under control.
After the battle, examine the computer and research material inside the laboratory. The report explains that Cosmog is connected to Ultra Beasts and that its immense power can open Ultra Wormholes. This investigation is required to advance the rescue operation. Speak with the others after reading the information, then return to the elevator.
Secret Lab A is not required for the main route. If the game allows you to inspect its accessible rooms during this visit, you may do so for optional research notes or items, but do not delay the story looking for a second mandatory objective. The required investigation is Secret Lab B.
- Accept Hau’s Max Revive when you enter the laboratory level.
- Defeat the required researchers in the corridor.
- Complete the Double Battle with Hau in Secret Lab B.
- Read the computer or research report about Cosmog and Ultra Wormholes.
- Return to the elevator after the investigation.
Reach Wicke’s healing point and defeat Faba’s second group
Return to the Entrance level. Faba has called additional employees to stop the investigation. Follow the available route and complete the required battles, including the Double Battles in which Hau and Gladion assist you. The first group includes Pokémon around levels 37 and 38; the later battle against Faba’s group includes Slowbro, Bruxish, and Hypno around levels 39 and 40.
Wicke appears after the initial clashes and fully restores your party. Treat this as the main recovery point for the middle of the sequence. Heal here rather than spending Full Restores, Max Potions, or Revives unless a battle requires them.
Continue toward Hau and Gladion. You will face another set of Foundation opponents before confronting Faba’s group. Water-type Pokémon are vulnerable to Electric- and Grass-type attacks, while Hypno is easier to manage with Dark-, Bug-, or Ghost-type moves. After the battles, Faba gives up the key needed to reach the mansion area.
Use the PC near the recovered section if you need to replace a fainted Pokémon or change your team. Prepare at least one strong answer to Bug types before leaving for the exterior, because Guzma is the next major battle.
- Let Wicke restore the entire party.
- Complete the required battles with Hau and Gladion.
- Defeat Faba’s later group and obtain the mansion key.
- Use the nearby PC to rebalance the party if necessary.
- Prepare Fire-, Flying-, or Rock-type coverage for Guzma.
Cross the exterior and defeat Guzma
Leave the Foundation building through the newly opened route. In the exterior area, defeat the Team Skull Grunts who block the path. Collecting nearby optional items is safe, but the required destination is the mansion entrance.
Guzma then challenges you with a stronger Bug-focused team: Golisopod at level 41, Ariados at level 40, Masquerain at level 41, and Pinsir at level 40. Fire-, Flying-, and Rock-type attacks are effective against much of this lineup. Electric-type attacks are especially useful against Masquerain, while a strong Fire- or Flying-type attack can pressure Golisopod.
Golisopod can use Emergency Exit when its HP drops to half or below. If it leaves the field, identify the replacement before committing to a setup turn. Ariados and Pinsir can threaten frailer Pokémon with priority or strong physical attacks, so avoid leaving a weakened team member in battle merely to preserve a preferred matchup.
After Guzma falls, use the available healing employee and PC before entering the mansion. This is the last convenient preparation point before Lusamine’s battle.
- Defeat the required Team Skull Grunts.
- Defeat Guzma’s level 40–41 team.
- Plan around Golisopod’s Emergency Exit.
- Heal and use the PC after the battle.
- Save before entering the mansion if you want a reliable retry point.
Enter Lusamine’s mansion and defeat Lusamine
Enter the mansion after the story permits access. Follow the indicated route through the interior and into Lusamine’s collection room. The scene reveals that Lusamine intends to use Cosmog’s power to open an Ultra Wormhole, regardless of the danger to the Pokémon or the people around her.
Nebby evolves during this story sequence from Cosmog into Cosmoem. This is a scripted evolution, not a normal battle evolution that you control. You do not capture Nebby, Cosmog, or Cosmoem here. Do not use Poké Balls or search the mansion for a legendary encounter.
After the wormhole opens and the surrounding dialogue ends, Lusamine battles you. Her team consists of level 41 Clefable, Lilligant, Mismagius, Milotic, and Bewear. Steel- or Poison-type attacks help against Clefable; Fire-, Flying-, Ice-, or Bug-type attacks pressure Lilligant; Dark- or Ghost-type attacks are useful against Mismagius; Electric- or Grass-type attacks threaten Milotic; and Fighting-type attacks are effective against Bewear.
Clefable can use Cosmic Power, while Lilligant can inflict sleep with Stun Spore. Mismagius carries Ghost- and Fire-type coverage, Milotic can use Hydro Pump, and Bewear’s Hammer Arm is dangerous to frail Pokémon. Remove the most troublesome matchup promptly instead of setting up several turns. Use Full Heals or other status remedies if sleep, paralysis, or confusion begins to compromise your team.
After defeating Lusamine, finish every cutscene. Lusamine and Guzma disappear through the Ultra Wormhole, while Nebby remains Cosmoem under Lillie’s protection. The later Lunala event does not occur in this chapter.
- Enter Lusamine’s mansion after receiving the mansion key.
- Confirm that Nebby changes from Cosmog to Cosmoem in the cutscene.
- Defeat Lusamine’s five level 41 Pokémon.
- Do not attempt to capture Nebby or Lunala here.
- Complete the post-battle dialogue before leaving the mansion.
Receive the Sun Flute and Master Ball, then depart for Poni
After Lusamine’s defeat, follow Lillie and Gladion through the required scenes outside the mansion. In Pokémon Moon, the story uses the Sun Flute for your version’s altar sequence; Lillie receives and carries it. The Moon Flute belongs to the corresponding Pokémon Sun sequence.
Gladion gives you a Master Ball during the same post-battle progression. Keep it available for a future capture if you want the option, but it is not required to complete this chapter and it is not needed to capture Lunala later.
When the dialogue is complete, take the elevator back to B1F and go to the docks. Speak with Gladion at the ship. Agree to leave only after the Sun Flute scene and Master Ball gift have occurred. The ship then carries you to Seafolk Village on Poni Island, where the next chapter begins.
- Lillie has received the Sun Flute.
- The player has received the Master Ball.
- Return to the B1F Docks using the elevator.
- Speak with Gladion to board the ship.
- Arrive at Seafolk Village on Poni Island.
- Do not expect Lunala to be listed as captured yet.
Before you move on
- The player began this chapter at the Aether Paradise B1F Docks.
- The first Faba battle is complete and the route to the laboratory has opened.
- Secret Lab B has been entered, its required Double Battle has been completed, and the Cosmog research has been examined.
- Wicke has restored the party, the later Foundation battles are complete, and Faba’s mansion key has been obtained.
- The second Guzma battle is complete and Lusamine’s mansion is accessible.
- Lusamine has been defeated and Nebby’s story form is now Cosmoem.
- Lillie has received the Sun Flute and the player has received the Master Ball.
- Gladion has been spoken to at the B1F Docks and the ship has departed for Seafolk Village on Poni Island.
- Lunala should not yet be listed as captured; that occurs in the following Poni Island and Altar of the Moone sequence.
Poni Island and the Altar of the Moone: Nebby to Lunala and Ultra Space
In the original 2016 Nintendo 3DS release of Pokémon Moon, complete Poni Island in this order: visit the Ruins of Hope, travel to Exeggutor Island for the Moon Flute, return to Ancient Poni Path to defeat the Team Skull blockade, win Hapu’s Grand Trial, clear Vast Poni Canyon and the Captainless Trial, then climb to the Altar of the Moone. The ceremony evolves Nebby into Lunala, opens the linear original Ultra Space sequence, leads to the Lusamine battle, and ends with the level-55 Lunala capture. Ultra Sun and Ultra Moon content such as Ultra Warp Ride, Ultra Megalopolis, Necrozma fusion, and Dusk Mane or Dawn Wings Necrozma is not part of this chapter.
Visit the Ruins of Hope, then obtain the Moon Flute on Exeggutor Island
From Seafolk Village, travel through Poni Wilds, Ancient Poni Path, and Poni Breaker Coast to reach the Ruins of Hope. Follow Lillie down the path and enter the ruins. Inside, use Machamp Shove to solve the stone puzzle: push the lower-left stone north, push the lower-right stone east, then push the remaining stone north into the opening. Continue into the inner chamber and watch Tapu Fini recognize Hapu as Poni’s new kahuna.
Leave the ruins and return to Seafolk Village. The next story objective sends you to the southwest part of the village and the chief’s boat. Board the boat for Exeggutor Island. At the island, approach Lillie and battle the level-40 Alolan Exeggutor blocking the route. You may catch it or defeat it; catching it is optional and does not affect the story.
After the Exeggutor event, move north and follow the island path toward Lillie. Continue around the island to the pedestal at the northwestern end and take the flute. In Pokémon Moon, this is the Moon Flute. Lillie already possesses the Sun Flute, which she received earlier from Gladion. Both flutes are needed at the Altar of the Moone, but only the Moon Flute is collected during this Poni sequence.
Return by boat to Seafolk Village, heal at the Pokémon Center, and travel back toward Ancient Poni Path. Do not go directly to Vast Poni Canyon yet. The Team Skull blockade must be cleared before Hapu’s Grand Trial becomes available.
- Hapu has been recognized as Poni’s kahuna at the Ruins of Hope.
- The level-40 Alolan Exeggutor event on Exeggutor Island is complete.
- The Moon Flute has been taken from the pedestal.
- Lillie still has the Sun Flute from the earlier Aether Paradise sequence.
- You have returned to the mainland and are ready to clear the Team Skull blockade.
Clear Ancient Poni Path and defeat Hapu in the Grand Trial
From Seafolk Village, return to Ancient Poni Path and walk north toward the canyon entrance. Team Skull blocks the route. Defeat the first Grunt, then defeat the second Grunt and the required follow-up battle. When the blockade is cleared, collect the Poisonium Z from the nearby story event and let Lillie heal your party.
Continue north until you meet Hapu near the entrance to Vast Poni Canyon. You can accept the Grand Trial immediately or decline and prepare first. Save before speaking to Hapu if you want a clean retry point. Her original Pokémon Moon team consists of Alolan Dugtrio, Gastrodon, Flygon, and Mudsdale, with the battle ranging from level 47 to level 48. Water, Grass, and Ice attacks provide useful coverage, but remember that Flygon is Ground and Dragon, while Mudsdale’s Stamina ability raises its Defense whenever it is hit by a damaging move.
Lead with a Pokémon that can reliably damage the first matchup without depending on Electric attacks, because Ground-type opponents are immune to them. Use a strong special Water or Grass attack against Mudsdale when possible, since repeated physical attacks can make it harder to break through Stamina. Ice coverage is especially useful against Flygon, but do not leave a fragile Ice-type exposed to a Ground attack. Heal between attempts rather than spending all your Revives during the fight.
After winning, Hapu gives you Groundium Z and stamps your Trainer Passport. The trial-completion stamp raises the obedience limit to level 80. This is the correct point to proceed into Vast Poni Canyon; the canyon route and Captainless Trial come after the Grand Trial, not before it.
- The Team Skull blockade on Ancient Poni Path is cleared.
- Lillie has healed the party after the blockade sequence.
- Hapu’s four-Pokémon Grand Trial is defeated.
- Groundium Z and the Poni Trial Completion stamp have been received.
- Your party is healed before entering Vast Poni Canyon.
Cross Vast Poni Canyon and complete the Captainless Trial
Enter Vast Poni Canyon and follow the main path through the caves and upper canyon areas. The route uses Tauros Charge, Machamp Shove, and the other Ride Pokémon abilities you have acquired. Optional item branches can be skipped, but collect healing items if your party is running low on supplies. Trainers in the canyon reach the mid-to-high 40s, so keep the party near the level of Hapu’s team and heal before the trial gate.
The canyon includes several caves connected by exterior ledges, a wooden bridge where Lillie catches up and heals your party, and a boulder puzzle requiring Machamp Shove. In the upper section, speak with Mina on the wooden bridge to receive the optional Fairium Z. Continue past the trainers until Lillie heals you again near the entrance to the final tunnel.
Inside the Farthest Tunnel, there is no Captain. Walk forward and investigate the points that trigger the piercing-gaze events. You must defeat a level-40 Jangmo-o and then a level-40 Hakamo-o. After these battles, approach the pedestal to begin the Totem encounter.
Totem Kommo-o is level 45, Dragon and Fighting type, and begins with an aura that raises its Attack, Defense, Special Attack, Special Defense, and Speed by one stage. It can call a level-32 Hakamo-o and a level-32 Scizor. Fairy attacks are the strongest direct answer. Flying, Psychic, Ice, and Dragon attacks also deal super-effective damage to Kommo-o, but Scizor resists Fairy, Ice, and Dragon, so plan a separate answer for the ally. Defeat a dangerous ally quickly if it creates a two-on-one situation, then focus on Kommo-o before its boosted stats and moves overwhelm the party.
After Totem Kommo-o falls, take Dragonium Z from the pedestal. Exit the tunnel through the northern route. Hapu and Lillie are waiting outside, and the cleared path leads directly toward the altar staircase.
- The main route through Vast Poni Canyon is open.
- The level-40 Jangmo-o and Hakamo-o events are complete.
- The bridge and boulder sections have been cleared.
- Totem Kommo-o and its summoned Hakamo-o and Scizor are defeated.
- Dragonium Z has been collected.
Climb to the Altar of the Moone and perform the ceremony
After leaving the trial tunnel, continue north and climb the long staircase to the altar. Lillie heals the party after the Captainless Trial, but heal again with items if necessary before beginning the scripted sequence. Pokémon Moon uses the Altar of the Moone; the Altar of the Sunne is the corresponding location in Pokémon Sun.
Save before stepping into position for the ceremony. Pokémon Moon has a single save file, so this is a normal overwrite save rather than a second save slot. Make sure you have Poké Balls available. The story gives you a Master Ball earlier, but ordinary Poké Balls can also capture Lunala.
At the top platform, stand opposite Lillie when prompted. Lillie plays the Sun Flute and you play the Moon Flute. Nebby is drawn into the altar and evolves from Cosmoem into Lunala. This evolution is forced by the story and does not require a level, evolution stone, friendship value, or manual menu command.
Lillie asks Lunala to help find Lusamine. Lunala opens an Ultra Wormhole and carries you and Lillie into Ultra Space. This is the short, mostly linear story area from the original Pokémon Moon. There is no Ultra Warp Ride or Necrozma encounter here.
- You are at the Altar of the Moone.
- The game has been saved before the ceremony.
- You have Poké Balls available for the later Lunala encounter.
- Nebby has evolved into Lunala.
- Lunala has carried you and Lillie into the original Ultra Space sequence.
Follow Ultra Space and defeat Lusamine
In Ultra Space, speak with Lunala if you need to return temporarily to Alola and prepare. Otherwise, follow Lillie north through the undersea-like area. You meet Guzma first, then continue along the available route until Ultra Beasts disappear and Lusamine appears.
Lusamine sends out five level-50 Pokémon: Clefable, Lilligant, Mismagius, Milotic, and Bewear. Each has one stat raised by an aura and carries a move that can restore health. Use Poison attacks against Clefable and Lilligant, Flying attacks against Lilligant and Bewear, Ghost or Dark attacks against Mismagius, and Grass or Electric attacks against Milotic.
Do not spend several turns setting up while Lusamine can recover. Clefable has Moonlight, Lilligant has Leech Seed and Stun Spore, Mismagius has Pain Split, Milotic has Recover, and Bewear has Pain Split. If a Pokémon is badly weakened or seeded, switch rather than allowing recovery and residual damage to accumulate. Save your strongest reliable attacks for Milotic and Bewear if your team lacks safe type counters.
After Lusamine is defeated, the cutscene separates her from Nihilego. Lunala returns everyone to the Altar of the Moone. You do not need to retrace Ultra Space.
- You followed the linear Ultra Space route past Guzma.
- Lusamine’s five level-50 Pokémon are defeated.
- The Lusamine and Nihilego cutscene has finished.
- Lunala has returned the group to the Altar of the Moone.
Capture the level-55 Lunala and open the route to Mount Lanakila
After returning to the altar, Hapu and the others leave with Lusamine so she can receive medical attention. Lillie then asks you to battle Nebby. Interact with Lunala to begin the level-55 story encounter. Lunala is Psychic and Ghost type and has the Shadow Shield ability.
The Master Ball guarantees the capture and is the simplest option, but it is not required. If you use ordinary Balls, weaken Lunala carefully and apply sleep or paralysis when safe. Shadow Shield reduces damage while Lunala is at full HP, so breaking that first layer with a controlled attack makes subsequent turns more manageable. Avoid using a super-effective critical hit or a powerful Z-Move when Lunala is already near fainting.
If you defeat Lunala or run from the battle, the encounter can be attempted again at the altar. If you have no Poké Balls, Lillie gives you ten after you defeat or run from Lunala, allowing the capture to continue. After a successful capture, check your party or PC and confirm that Lunala is registered in the Pokédex.
When the altar sequence ends, Nanu appears and explains that the island challenge is complete. He directs you toward Tapu Village and Mount Lanakila. This does not finish the main story yet, but it confirms that the Poni progression required for the Pokémon League is complete. The next chapter begins with preparation for Mount Lanakila and the Elite Four.
- Lunala has been captured and registered in the Pokédex.
- Lunala appears in your party or PC.
- The post-capture altar dialogue has finished.
- Nanu has appeared and directed you toward Tapu Village and Mount Lanakila.
- The route to Mount Lanakila is open.
Before you move on
- Hapu’s Grand Trial is complete and Groundium Z has been received.
- The Captainless Trial is complete and Dragonium Z has been received.
- The Moon Flute has been collected on Exeggutor Island.
- Lillie’s Sun Flute and the player’s Moon Flute have been used at the Altar of the Moone.
- Nebby has evolved into Lunala.
- Lusamine has been defeated in the original Ultra Space sequence.
- Lunala has been captured and recorded in the Pokédex.
- Nanu has appeared and directed the player toward Tapu Village and Mount Lanakila.
- The route to Mount Lanakila is open for the next chapter.
References for this chapter
- Pokémon Moon — Official 3DS Instruction Manual
- Pokémon Sun and Moon Walkthrough, Part 22: Ruins of Hope, Exeggutor Island, Poni Grand Trial
- Pokémon Sun and Moon Walkthrough, Part 23: The Captainless Trial
- Pokémon Sun and Moon Walkthrough, Part 24: Altar of the Moone and Ultra Space
- Thonky, Ruins of Hope and Exeggutor Island Walkthrough
- GameFAQs, Pokémon Moon Guide and Walkthrough for Nintendo 3DS
Preparing for Mount Lanakila: Team Levels, Items and Poké Center Placement
After the Altar of the Moone, Ultra Space, and Lusamine sequences are complete, travel to Tapu Village and begin the final climb through Mount Lanakila. In Pokémon Moon, Gladion and Hau must be defeated before entering the Pokémon League. Most of the active party should be around levels 55–58, with Pokémon intended for difficult matchups preferably near the upper end of that range. The League then consists of four Elite Four battles in any order, followed immediately by Professor Kukui.
Reach Mount Lanakila and defeat Gladion
Fly to Tapu Village, heal at the Pokémon Center, and travel north into Mount Lanakila. Ride the lift from the lower platform and follow the route through the icy mountain area. Several useful items are available along the way, including TM13 Ice Beam, Icium Z, a Full Restore, and a Max Revive, but none is required to unlock the League.
Continue upward until you reach the Pokémon Center near the League approach. Heal every party member before advancing and save from the X menu. Gladion challenges you on the mountain route before you reach the League entrance. In Pokémon Moon, his team consists of Crobat at level 52, Silvally at level 53, Weavile at level 52, and Lucario at level 52. Silvally’s type is chosen in relation to your starter, so check your own starter’s weakness before deciding which Pokémon should answer it.
Bring a dependable response to Weavile’s Dark and Ice attacks and Lucario’s Steel and Fighting attacks. A bulky Fighting, Fairy, Ground, or Fire option can be useful depending on your team, but avoid sending a frail Pokémon into repeated super-effective attacks. After winning, continue toward the upper section of the mountain.
- Travel from Tapu Village into Mount Lanakila.
- Heal and save at the mountain Pokémon center before continuing.
- Defeat Gladion’s level 52–53 team.
- Prepare specific answers for Weavile, Lucario, and Gladion’s starter-dependent Silvally.
Heal, shop, and set a realistic level target
The Pokémon Center near the League approach is the main preparation point. Aim for most of the active party to be around levels 55–58, with key matchup Pokémon preferably near the upper end of that range. The story does not require perfect IVs, competitive EV training, or a prescribed team, but entering with several Pokémon in the mid-40s makes the five-battle sequence much less forgiving.
The Move Reminder is available at this Pokémon Center. If an important level-up move was replaced, restore it with a Heart Scale before beginning the League attempt. Open each Pokémon’s summary screen and check its current HP, move PP, ability, held item, and matchup coverage. Put a reliable general-purpose lead first, but do not depend on one Pokémon to defeat the entire League.
Hau waits farther up the approach after the Gladion sequence. His team includes Alolan Raichu at level 53, Komala at level 53, the starter evolution that is weak to your chosen starter at level 54, and a starter-related Eeveelution at level 55. After the battle, Hau gives you three Max Revives. These are bag items and do not heal the rest of the party automatically. Return to the Pokémon Center if the battle costs significant HP, PP, or status-healing items.
- Keep most of the party near levels 55–58.
- Use the Move Reminder for an essential lost attack or support move.
- Defeat Hau before entering the League.
- Do not mistake Hau’s three Max Revives for automatic party healing.
- Heal again after Hau if the battle leaves the team damaged.
Prepare coverage for all four Elite Four members
The League entrance is at the summit of Mount Lanakila. Speak with Professor Kukui and enter when the party is ready. The four Elite Four members can be challenged in any order, so choose the first opponent according to the team’s current health and strongest available matchup.
Hala specializes in Fighting types, making Fairy, Flying, and Psychic attacks useful. Olivia uses Rock types, so Water, Grass, Fighting, and Ground coverage is valuable, although Carbink and Probopass can punish careless attackers. Acerola uses Ghost types, including Sableye, Dhelmise, Froslass, Drifblim, and Palossand. Dark and Ghost attacks are direct answers, while Normal and Fighting attacks cannot hit Ghost Pokémon. Kahili uses Flying types, including Skarmory, Crobat, Oricorio, Mandibuzz, and Toucannon. Electric, Ice, and Rock coverage handles many of her threats, but Skarmory is resistant to several common physical attacks.
Carry at least one neutral-damage option for situations in which a specialist counter has fainted or been weakened. Use a Z-Move when it secures a dangerous knockout or removes a high-HP opponent before it can create a difficult endgame. Do not spend every high-power attack early if the same move is needed for Kukui.
- Bring answers to Fighting, Rock, Ghost, and Flying types.
- Include reliable neutral damage.
- Check move PP before every battle.
- Reserve a strong Z-Move for a dangerous target or Kukui’s final Pokémon.
Stock the bag for five League battles
Buy Revives or Max Revives, Full Restores, Max Potions, and Full Heals before entering. Full Restores are efficient when a Pokémon has both lost HP and suffered a status condition. Max Potions preserve Full Restores when only HP needs to be restored. Bring Ether or Elixir items if you have them, especially when your main answers use low-PP attacks.
There is no automatic healing between Hala, Olivia, Acerola, and Kahili, and Professor Kukui follows immediately after the fourth Elite Four victory. After each battle, use the recovery window in the central room to revive essential Pokémon, restore HP, cure status, and review PP. Do not spend the strongest items on minor damage if a weaker item is sufficient.
Kukui’s team includes Lycanroc at level 57, Alolan Ninetales, Snorlax, Magnezone, and Braviary at level 56, plus the fully evolved starter that is strong against yours at level 58. Plan for a mixed team rather than a single type specialist. Keep an answer for Magnezone’s Electric and Steel attacks, a method for damaging Snorlax reliably, and a response to the starter evolution’s Z-Move.
- Revives or Max Revives.
- Full Restores, Max Potions, and status-healing items.
- Ether or Elixir items when available.
- Enough supplies for four Elite Four fights and Kukui.
- Coverage for Kukui’s mixed team and level 58 starter evolution.
Save once and understand the League sequence
Pokémon Moon has one internal save file, not multiple in-game save slots. Make a deliberate preparation save after shopping, healing, checking moves, and arranging held items. A useful earlier fallback is the save at the Mount Lanakila Pokémon Center before the Gladion battle, but after defeating Hau you should make a fresh final preparation save if the party is in good condition.
Inside the League, choose any of the four outer platforms to challenge Hala, Olivia, Acerola, or Kahili. After each victory, use the platform behind that trainer to return to the central chamber. Once all four members are defeated, use the central platform to reach the upper chamber. Approach the Champion’s chair and Professor Kukui appears as the final challenger.
There is no established Champion waiting in the original Pokémon Sun and Moon story. Kukui is the immediate final battle after the four Elite Four victories. Defeating him allows the player to claim the Champion title and continues directly into the ending sequence.
- Keep one deliberate final preparation save.
- Choose the Elite Four order based on current health and matchup strength.
- Use the central chamber to heal and select the next opponent.
- Expect Professor Kukui immediately after the fourth Elite Four victory.
- Plan for Kukui’s level 58 final Pokémon and Z-Move pressure.
Before you move on
- All required island trials and Grand Trials are complete, and the story has made Mount Lanakila accessible.
- Gladion and Hau have been defeated on the Mount Lanakila approach.
- Most of the active party is around levels 55–58, with key matchup Pokémon preferably near the upper end.
- The party has reviewed moves, held items, abilities, HP, and usable PP.
- The bag contains Revives or Max Revives, Full Restores, Max Potions, status-healing items, and available PP-recovery items.
- A clean final preparation save exists, with the one-save-file limitation understood.
- The player knows that Hala, Olivia, Acerola, and Kahili can be fought in any order.
- The player has at least one dependable answer for Fighting, Rock, Ghost, and Flying types.
- The player expects Professor Kukui immediately after the fourth Elite Four victory and has prepared for his mixed team and level 58 starter evolution.
Elite Four: Strategies for Each Member
The Pokémon Moon Elite Four consists of Hala, Olivia, Acerola, and Kahili. You may challenge them in any order, but you cannot leave the League to heal between battles. Defeat all four, manage your party in the central chamber, and the platform will carry you to the Champion’s chamber for the immediate Professor Kukui battle. The initial teams are built around Levels 54 and 55, so a team in the mid-to-high 50s with complete movesets and broad type coverage is appropriate.
Prepare at the Pokémon League Pokémon Center
Before entering the League building at the summit of Mount Lanakila, use the Pokémon Center to fully heal your party, restore move PP, remove status conditions, and rearrange your team. The shop beside the Center is the last normal purchasing point during the challenge. Stock Revives, Max Potions or Hyper Potions, Full Restores, and a few items that restore PP if you have them. Full Heals are useful, but Full Restores cover both HP and status conditions in one turn.
Make a manual save outside the League entrance after preparing. The League itself does not give you a free recovery period after each battle. You can return to the central room and use your own items, but you cannot use the Pokémon Center or shop again until the League challenge has ended through victory or defeat.
Aim to have most of your active party around the mid-to-high 50s. The Elite Four members use teams whose regular Pokémon are generally Level 54 and whose final Pokémon are Level 55. Kukui’s team is stronger, so keep at least two reliable Pokémon healthy rather than allowing one attacker to carry every battle.
Only one Z-Move can be used per battle. Give a Z-Crystal to the Pokémon most likely to benefit from it, and do not spend the move automatically on an opening Pokémon that ordinary attacks can defeat. Check your held items, PP, and battle order before entering the first chamber.
- Heal and restore PP at the Pokémon League Pokémon Center.
- Buy recovery items before entering the building.
- Save outside the League entrance.
- Prepare answers for Fighting, Rock, Ghost, and Flying types.
- Keep at least one Z-Move available for a difficult final Pokémon.
Use the central chamber as an item-management checkpoint
The four Elite Four chambers branch from the League’s central room. You may select the members in any order. When you defeat one, light flows from that chamber toward the central platform. Return to the central room after every victory, open the party screen, heal with your own items, cure status conditions, and check remaining PP before choosing the next opponent.
A practical order is Hala, Olivia, Acerola, then Kahili, but there is no forced sequence. Use a different order if your team has a dangerous weakness. For example, if your best Rock or Electric counter is also needed against Kahili, fight her before that Pokémon has accumulated damage. Do not enter a new chamber just to inspect it: once you enter, the battle begins and the arena closes until you win or lose.
Do not rely on a free healing break after the fourth Elite Four victory. The completed platform moves you onward to the Champion’s chamber, so use your remaining items before entering the final chamber if the game gives you a brief opportunity to act. Treat the fourth Elite Four battle as the last chance to conserve a healthy core for Kukui.
- Return to the central room after each victory.
- Heal fainted Pokémon with Revives before continuing.
- Restore important PP with items when necessary.
- Move the correct counter into the lead position.
- Do not expect the Pokémon Center to be available between fights.
Defeat Hala with Flying, Psychic, or Fairy coverage
Hala’s original Pokémon Moon team is Hariyama, Primeape, Bewear, Poliwrath, and Crabominable. His team specializes in Fighting types, so Flying, Psychic, and Fairy attacks are the most dependable general answers. Use a sturdy attacker rather than a fragile sweeper if it cannot survive Fake Out, strong Fighting moves, or a critical hit.
Poliwrath is Water/Fighting, so Grass, Electric, Fairy, Flying, or Psychic attacks can work depending on your team. Do not use Water attacks against it expecting super-effective damage. Keep a separate answer for Crabominable because its Ice/Fighting typing changes the matchup compared with the rest of Hala’s team.
Crabominable is Hala’s Level 55 final Pokémon and holds Fightinium Z. Expect All-Out Pummeling when Hala has the opportunity to use it. Do not leave a weakened Normal-, Rock-, Ice-, or Dark-type Pokémon in front of Crabominable. A healthy Flying or Fairy attacker can often finish the battle quickly, while paralysis can reduce the danger if your counter is slower.
Use Hala as an opportunity to spend a Z-Move only if it secures a knockout on a threat that would otherwise force a revive or several healing turns. If ordinary super-effective attacks are sufficient, preserve the Z-Move for another member.
- Lead with a Flying, Psychic, or Fairy attacker that can survive a hit.
- Use Grass or Electric coverage for Poliwrath.
- Expect Crabominable to use a Fighting-type Z-Move.
- Keep your strongest counter healthy for the Level 55 ace.
- Do not leave a weakened Pokémon in against a possible Z-Move.
Break Olivia’s Rock team with special Water, Grass, Fighting, or Ground attacks
Olivia uses Relicanth, Carbink, Alolan Golem, Probopass, and Lycanroc. Water and Grass attacks are strong answers to Relicanth, while Fighting and Ground attacks handle Carbink, Alolan Golem, and Probopass effectively. A special attacker is useful because Carbink and Probopass can reduce the impact of physical attacks with defensive setup.
Relicanth may use Yawn, so switch out or cure sleep instead of allowing it to gain several free turns. Alolan Golem is Rock/Electric, which means it is dangerous for Flying- and Water-weak Pokémon and should not be approached with an Electric-only plan. Use Ground or Fighting coverage when available.
Probopass can create problems with defensive moves, paralysis, and Rock attacks. Hit it with a strong super-effective move rather than relying on slow chip damage. Lycanroc is Olivia’s Level 55 final Pokémon and carries Rockium Z. Keep a healthy Water, Grass, Fighting, or Ground counter available so Continental Crush does not remove your only answer.
- Use special Water or Grass attacks against Relicanth when possible.
- Bring a cure for sleep and paralysis.
- Keep Flying Pokémon away from Alolan Golem unless they can safely survive its attacks.
- Use Fighting or Ground coverage against Probopass and Lycanroc.
- Avoid spending all healing items before the final Pokémon.
Handle Acerola’s Ghost team and exploit Sableye’s Fairy weakness
Acerola’s team is Sableye, Drifblim, Dhelmise, Froslass, and Palossand. Dark-type attacks are useful against most of the team, but Sableye is not immune to Fairy attacks in this generation: Fairy is its ordinary type weakness. This makes a reliable Fairy move one of the safest ways to remove the opener. Sableye can also disrupt you with confusion or flinching effects, so do not allow it repeated turns if you have a clean knockout available.
Drifblim is Ghost/Flying and is vulnerable to Electric, Ice, Rock, Ghost, and Dark attacks. If it begins using defensive setup or attempting to pass boosts, defeat it promptly rather than switching repeatedly. Dhelmise is Ghost/Grass, making Fire, Flying, Ice, Ghost, and Dark attacks useful. Avoid letting a slow Pokémon take unnecessary damage while Dhelmise remains active.
Froslass is Ice/Ghost and can be defeated with Fire, Rock, Dark, Ghost, or Steel attacks. Keep its priority Ice move in mind if you leave it at low HP and try to finish it with a faster but fragile Pokémon.
Palossand is Acerola’s Level 55 final Pokémon and carries Ghostium Z. Grass attacks are especially effective. Avoid using Water attacks as your main plan when possible because Palossand’s Water Compaction ability raises its Defense when Water damage hits it. Expect Never-Ending Nightmare and keep a healthy Dark, Grass, or other strong counter ready.
- Use Fairy attacks against Sableye if available.
- Use Electric, Ice, Rock, Ghost, or Dark attacks against Drifblim.
- Use Fire or Dark coverage against Dhelmise and Froslass.
- Prefer Grass attacks against Palossand.
- Expect a Ghost-type Z-Move from Palossand.
Finish with Kahili and preserve a winning core for Kukui
Kahili’s Pokémon Moon team is Skarmory, Crobat, Oricorio in Sensu Style, Mandibuzz, and Toucannon. Electric, Rock, and Ice coverage is valuable against the Flying-heavy team. Rock attacks are especially useful when you need one move that threatens several of her Pokémon, while Electric attacks are dependable against Skarmory and Crobat.
Skarmory can create trouble if it sets entry hazards, so avoid unnecessary switching once it is active. Use a strong Electric, Fire, or special attack to remove it rather than allowing it to accumulate defensive advantages. Crobat is fast; paralysis, a naturally faster Pokémon, or a reliable priority move can prevent it from forcing several damaging turns.
Moon’s Oricorio is Sensu Style, giving it Ghost/Flying typing rather than the Fire/Flying typing associated with Sun’s version. Dark, Electric, Ice, Rock, Ghost, and other appropriate super-effective attacks can remove it. Mandibuzz is bulky, so use strong Electric, Ice, Rock, or Fairy coverage instead of expecting weak neutral attacks to finish it quickly.
Toucannon is Kahili’s Level 55 final Pokémon and holds Flyinium Z. Keep your best answer healthy for Supersonic Skystrike, and do not spend your last Revive on a Pokémon that cannot help against Kukui. After Kahili falls, return to the central chamber, heal with your remaining items, and prepare for the immediate Champion’s chamber sequence.
- Use Electric, Rock, or Ice coverage throughout the battle.
- Remember that Moon’s Oricorio is Sensu Style.
- Defeat Skarmory before making unnecessary switches.
- Keep a healthy counter for Toucannon’s Flying-type Z-Move.
- Reserve enough recovery items for Professor Kukui.
Before you move on
- Hala, Olivia, Acerola, and Kahili have all been defeated, and each chamber has sent light toward the central platform.
- The central platform has activated after all four victories and moved the player to the Champion’s chamber.
- The player has enough healthy Pokémon and remaining items to begin Professor Kukui’s battle without relying on a free Pokémon Center recovery.
- The game has transitioned from the Elite Four sequence to the immediate Kukui challenge.
Final Challenge: Professor Kukui — The Champion Battle
After defeating all four Elite Four members in the original Nintendo 3DS release of Pokémon Moon, return to the central League room and use the middle platform to reach the Champion’s throne. Professor Kukui appears when you approach the throne and challenges you to the final story battle. Defeat his six Pokémon, complete the ending sequence, and continue through the Tapu Koko event until the game reaches the “The End” screen and saves the completed story state.
Finish the Elite Four and make a recovery save
The Alola Pokémon League’s four members are Hala, Olivia, Acerola, and Kahili. You can challenge them in any order. Before entering the League, heal at the Mount Lanakila Pokémon Center, stock Revives, Max Potions or Full Restores, status-healing items, and PP-restoring items, then save from the X menu. Pokémon Moon uses one active save file rather than separate in-game save slots, so this is your main fallback if the complete League run fails.
After defeating the fourth Elite Four member, step onto the colorful platform behind that trainer to return to the central League room. You are not automatically healed, and there is no Pokémon Center between the fourth Elite Four battle and Kukui. However, you can still open the X menu, use items, rearrange your party, and save manually in the League area. Restore HP and PP now, then save before using the central platform.
When your team is ready, step onto the central platform. In the next room, walk up the stairs and approach the Champion’s throne. Examining or approaching the throne starts the final battle sequence, so do not trigger it until your team, items, and held items are ready.
- Defeat Hala, Olivia, Acerola, and Kahili.
- Use healing and PP items after the fourth Elite Four battle.
- Save in the League area before activating the central platform or examining the throne.
- Remember that Pokémon Moon has one active save file, not multiple manual save slots.
Prepare for Kukui’s original story team
The battle order is Lycanroc at Level 57, Alolan Ninetales, Braviary, Magnezone, and Snorlax at Level 56, followed by the fully evolved starter that has a type advantage over the starter you chose. If you began with Rowlet, Kukui finishes with Incineroar at Level 58 and holds Firium Z. If you began with Litten, he finishes with Primarina at Level 58 and holds Waterium Z. If you began with Popplio, he finishes with Decidueye at Level 58 and holds Grassium Z.
Kukui’s first story team is not the same as his later title-defense team. The repeat League challenge raises his Pokémon to Level 65, so do not prepare for the first completion using those rematch levels. The original battle begins with Lycanroc, followed by Alolan Ninetales, Braviary, Magnezone, Snorlax, and the starter evolution listed above.
The commonly documented movesets give Lycanroc Stone Edge, Accelerock, Crunch, and Stealth Rock; Alolan Ninetales Dazzling Gleam, Blizzard, Ice Shard, and Safeguard; Braviary Crush Claw, Brave Bird, Whirlwind, and Tailwind; Magnezone Thunderbolt, Flash Cannon, Thunder Wave, and Mirror Coat; and Snorlax Body Slam, Crunch, Heavy Slam, and High Horsepower. The final starter’s moves differ by species, so preserve a reliable counter rather than relying on one general-purpose attacker.
- Expect six Pokémon, with the first five at Levels 57 or 56 and the final starter at Level 58.
- If you chose Rowlet, prepare for Incineroar and its Firium Z.
- If you chose Litten, prepare for Primarina and its Waterium Z.
- If you chose Popplio, prepare for Decidueye and its Grassium Z.
- Do not confuse this first battle with the Level 65 title-defense version.
Defeat Lycanroc, Alolan Ninetales, and Braviary
Lead with a Pokémon that can deliver strong Water-, Grass-, Ground-, or Fighting-type damage to Lycanroc. Do not leave a weakened fast Pokémon in front of it merely because that Pokémon normally moves first: Accelerock has priority and can finish a damaged target. If Lycanroc sets Stealth Rock, avoid unnecessary switching, especially with Flying-types or Pokémon already near half health.
Alolan Ninetales is vulnerable to Steel- and Poison-type attacks. Its Ice- and Fairy-type moves are dangerous to Dragon-, Flying-, Fighting-, and some Grass-type Pokémon, while Ice Shard can finish a weakened target. Safeguard prevents new status conditions, so a status plan becomes less useful after Safeguard is active. If you lack Steel or Poison coverage, use a strong neutral physical attack from a Pokémon that can withstand its next hit.
Braviary is weak to Electric-, Ice-, and Rock-type attacks. Brave Bird can deal heavy damage, Whirlwind can remove a Pokémon after setup, and Tailwind can make the following turns more dangerous. Avoid spending several turns boosting unless Braviary cannot immediately disrupt you, and try to defeat it before Tailwind gives the remaining team a speed advantage.
- Account for Lycanroc’s priority Accelerock.
- Use Steel or Poison coverage against Alolan Ninetales when available.
- Avoid a prolonged setup plan against Braviary because of Whirlwind and Tailwind.
- Limit switching if Lycanroc has placed Stealth Rock.
Handle Magnezone and Snorlax while preserving your final counter
Magnezone is weak to Ground, Fighting, and Fire attacks. Ground coverage is especially useful, but switch into Magnezone with a Pokémon that can survive Thunderbolt or Flash Cannon. Thunder Wave can remove your speed advantage, and Mirror Coat punishes careless special attacks. If your main attacker becomes paralyzed, use a status-healing item or switch when the matchup allows it.
Snorlax is durable and may survive an ordinary super-effective hit. Use your strongest Fighting-type move, or spend your Z-Move if removing Snorlax quickly prevents several turns of damage and recovery. Body Slam can cause paralysis, while High Horsepower threatens Electric-, Poison-, Rock-, and Steel-type Pokémon.
Do not spend every recovery item or sacrifice your only dependable answer to the final starter during the middle of the battle. A controlled switch followed by a healing item is safer than leaving an important counter in against a poor matchup. Revive a fainted Pokémon when it has a useful matchup or a move that can immediately affect one of the remaining opponents.
- Use Ground, Fighting, or Fire coverage on Magnezone.
- Use powerful Fighting damage against Snorlax when possible.
- Watch for Thunder Wave, Mirror Coat, and Body Slam paralysis.
- Keep a healthy counter available for Kukui’s Level 58 final starter.
Survive the final starter and its Z-Move
Kukui’s final Pokémon holds a type-specific Z-Crystal and can use its Z-Move during the battle. Do not leave a weakened Pokémon in simply because it has a theoretical type advantage. Switch to a Pokémon that can survive the strongest likely attack, or use your own Z-Move to secure the knockout if the final starter is already damaged.
Against Incineroar, use Water-, Ground-, or Rock-type attacks. Flare Blitz, Darkest Lariat, Outrage, and Cross Chop give it broad coverage, so one resistance is not automatically safe. Against Primarina, use Electric- or Poison-type attacks. Moonblast, Sparkling Aria, Aqua Jet, and Hyper Voice let Primarina threaten both slow Pokémon and weakened targets.
Against Decidueye, Fire-, Ice-, Flying-, Ghost-, and Dark-type attacks are useful. Leaf Blade, Spirit Shackle, Brave Bird, and Sucker Punch give it strong physical coverage and priority. If the final Pokémon is already in knockout range, priority damage can finish it before another attack. Protect can help scout or absorb one turn, but it should support a real counter rather than replace one.
- Expect Kukui to use a Z-Move with his final Pokémon.
- Against Rowlet’s opposing starter, prepare for Incineroar.
- Against Litten’s opposing starter, prepare for Primarina.
- Against Popplio’s opposing starter, prepare for Decidueye.
- Do not spend your final healthy counter before the sixth Pokémon appears.
Complete the ending and recover after defeat
When Kukui’s final Pokémon faints, the game declares you Alola’s first Champion. The Champion throne and celebration scenes follow. Continue through the ending sequence rather than resetting or powering off. The first completion then leads into the Tapu Koko event at the Ruins of Conflict. Tapu Koko is separate from the Kukui victory itself, so the immediate objective is to continue the scripted ending until the game finishes recording the League completion.
Proceed through the remaining ending scenes until the “The End” screen appears. Press a button there so the game can complete its final save. When you load that save afterward, control resumes in the postgame. The Route 2 motel Looker episode becomes available after the required opening postgame events; it is a later postgame objective, not part of Kukui’s battle.
If Kukui defeats you, the story is not damaged. Reload the save made before the League run, heal and restock, then revise your lead, move coverage, held items, or party members. Because the four Elite Four members can be challenged in any order, you can also change their order to preserve key counters and healing resources. There is no healing stop between the fourth Elite Four victory and Kukui, so a loss after starting the final sequence normally requires repeating the League from your pre-League save.
- Kukui’s Level 58 final starter faints.
- The Champion throne and celebration scenes occur.
- The Tapu Koko ending event begins and the remaining ending scenes are completed.
- The “The End” screen appears and the game saves.
- Loading the completed save returns you to the postgame.
Before you move on
- Hala, Olivia, Acerola, and Kahili are defeated during the League challenge.
- The party is healed and the game is manually saved after the fourth Elite Four victory if necessary.
- Professor Kukui is defeated with his original story team.
- The corrected starter mapping is reflected in the battle: Incineroar for a Rowlet player, Primarina for a Litten player, and Decidueye for a Popplio player.
- The Champion throne and celebration scenes occur.
- The Tapu Koko ending event is reached and the remaining ending sequence is completed.
- The “The End” screen appears and the game saves.
- Reloading the save resumes the postgame, where the opening events lead toward the Route 2 motel Looker episode.
References for this chapter
Post-Credits: Looker Episode and UB Task Force (Postgame Start)
After becoming Champion in the original Nintendo 3DS Pokémon Moon, begin the International Police investigation through the Enigmatic Card, meet Looker and Anabel at the Route 8 Roadside Motel, and collect Beast Balls from Wicke. Moon’s task force sequence requires one Nihilego, four Pheromosa, two Xurkitree, two Celesteela, and one Guzzlord. The missions use several temporary motel bases and finish with a report to Wicke at Aether Paradise.
1. Start the investigation at the Route 8 motel
After defeating the Elite Four and Professor Kukui, finish the Champion celebration and regain control at home on Melemele Island. Leave the house. A mysterious man outside gives you the Enigmatic Card. Open the Key Items pocket and read it: it directs you to the guest room at the motel on Route 8, on Akala Island. This is the required trigger for the Looker episode; the first meeting is not at the Route 2 motel.
Fly to Route 8 and enter the Roadside Motel. Go to the guest room on the west side and speak with Looker and Anabel. They ask you to help contain Ultra Beasts that entered Alola. Anabel then battles you as a test. Her team is level 61 and includes Alakazam, Mismagius, Weavile, Salamence, and Snorlax, so heal first and bring answers to Psychic, Dark, Dragon, and Normal threats. After winning, speak with them again to receive the order to visit Aether Paradise.
- The Champion sequence and credits are complete.
- The Enigmatic Card is in the Key Items pocket.
- Anabel’s level 61 test battle is won.
- Looker and Anabel have directed you to Aether Paradise.
2. Collect the Beast Balls from Wicke
Fly to Aether Paradise and use the elevator in the entrance area to reach the lab area on B2F. Follow the corridor to Secret Lab B and speak with Wicke. She gives you 10 Beast Balls. These have a strong capture advantage against Ultra Beasts but perform very poorly against ordinary Pokémon, so reserve them for this investigation.
Return to the Route 8 motel and enter the guest room again. Looker announces the first assignment, UB-01 Symbiont, which is Nihilego. The target can appear in either Wela Volcano Park or Diglett’s Tunnel. Before leaving, heal your party, carry extra ordinary healing items, and place a Pokémon with a controlled-damage or status move in the lead.
- Wicke has supplied 10 Beast Balls.
- You have returned to the Route 8 guest room after visiting Aether Paradise.
- Your party is healed before beginning the Nihilego search.
3. Capture UB-01 Nihilego
Travel to Wela Volcano Park or Diglett’s Tunnel. Search the wild encounter areas until the area music changes to the Ultra Beast music. The encounter is random, so continue moving through the grass or cave rather than looking for a visible overworld model. Nihilego is level 55 and Rock/Poison-type. Its aura raises its Special Defense, so avoid relying on special attacks if you need to weaken it. Ground-type attacks are especially dangerous because they can knock it out; use restrained damage, status, or a move that leaves it safely weakened.
When Nihilego’s HP is low, throw a Beast Ball. If you accidentally defeat it or run out of the first supply, leave and re-enter the area or report back to Looker as appropriate; the mission remains active until the required Ultra Beast is captured. After catching Nihilego, return to the Route 8 motel and report to Looker and Anabel. The next briefing sends the team to Melemele Island.
- The Ultra Beast music has appeared in Wela Volcano Park or Diglett’s Tunnel.
- Level 55 Nihilego has been caught.
- Nihilego is recorded in the Pokédex.
- The capture has been reported at the Route 8 motel.
4. Complete Moon’s UB-02 Beauty mission
Travel to the motel on Route 2 and enter the guest room. Anabel remains there while Looker gathers information. Nanu arrives and identifies the next target as UB-02 Beauty. In Pokémon Moon, the target is Pheromosa, and four specimens must be captured in Verdant Cavern. The Sun version instead uses two Buzzwole in Melemele Meadow. Looker provides another 10 Beast Balls before you leave.
Enter Verdant Cavern and search its wild encounter areas. Pheromosa is level 60 and Bug/Fighting-type. Its speed and offensive power make it dangerous, so use a sturdy Pokémon, apply sleep or paralysis if available, and avoid attacks that could produce an accidental critical knockout. Capture all four Pheromosa, then return to the Route 2 motel and report the completed mission. The task force then relocates to Route 8.
- Nanu has identified UB-02 Beauty.
- You have captured four level 60 Pheromosa in Verdant Cavern.
- You have reported the completed UB-02 mission at the Route 2 motel.
5. Capture UB-03 Lightning and UB-04 Blaster
Return to the Route 8 motel. Mina is now present and challenges you to a battle before revealing the next target. Heal before entering the guest room. After the scene, receive another Beast Ball supply and search Memorial Hill or Lush Jungle for two level 65 Xurkitree. Xurkitree is Electric-type and its aura raises its Special Attack, so Ground-type attacks and Pokémon immune or resistant to Electric moves are useful. Capture both targets, then return to the Route 8 motel.
The next briefing sends you to the motel on Route 13. Nanu identifies UB-04 Blaster. In Moon, capture two level 65 Celesteela in Haina Desert or Malie Garden. Celesteela is Steel/Flying-type. Bring Fire- or Electric-type damage, but weaken it carefully and use Beast Balls rather than risking a knockout. Report the completed Celesteela mission in the Route 13 guest room. Moon does not use the four Kartana objective from Pokémon Sun.
- Mina’s battle at the Route 8 motel is complete.
- Two Xurkitree have been captured in Memorial Hill or Lush Jungle.
- Two Celesteela have been captured in Haina Desert or Malie Garden.
- Both missions have been reported at their assigned motel.
6. Finish UB-05 Glutton and close the task force episode
After the Celesteela report, travel to the floating restaurant in Seafolk Village. Nanu battles you again before giving the final assignment. Heal and restock before proceeding. The target is Guzzlord in Resolution Cave on Poni Island. Follow the route into Resolution Cave and descend to the basement. Guzzlord is level 70 and Dark/Dragon-type, with an aura that raises its Attack. Use Fairy-, Ice-, Fighting-, or Bug-type attacks for effective damage, but avoid an uncontrolled knockout. Capture it with a Beast Ball and return to the restaurant to report.
The investigators then send you to Aether Paradise. Use the elevator to reach B2F and enter Secret Lab B. Speak with Wicke to finish the investigation. The closing sequence pays 1,000,000 Poké Dollars and reveals that the mysterious black creature seen over Alola is Necrozma. This is the end of the original Sun and Moon Ultra Beast task force episode; it is not the Rainbow Rocket or Ultra Warp Ride storyline from Ultra Sun and Ultra Moon.
- Nanu’s final battle at Seafolk Village is complete.
- Level 70 Guzzlord has been captured in Resolution Cave’s basement.
- The Guzzlord capture has been reported at the floating restaurant.
- Wicke has acknowledged the completed investigation and paid 1,000,000 Poké Dollars.
- The closing Necrozma scene has occurred.
Before you move on
- The Enigmatic Card was received after the Champion sequence.
- Looker and Anabel were met at the Route 8 motel and Anabel’s test battle was won.
- Wicke supplied Beast Balls in Secret Lab B.
- Nihilego, four Pheromosa, two Xurkitree, two Celesteela, and Guzzlord are present in the Pokédex as captured Pokémon.
- The final report was made to Wicke in Secret Lab B at Aether Paradise.
- The 1,000,000 Poké Dollar reward and closing Necrozma scene were received.
Optional: Postgame Catching and Pokédex Completion Tips
After becoming Champion in the original Nintendo 3DS Pokémon Moon, finish the International Police Ultra Beast investigation, catch the four island guardians, and organize the remaining Alolan Pokédex work. The Moon-specific assignments are Pheromosa and Celesteela rather than Sun’s Buzzwole and Kartana. Save before every fixed encounter, keep Lunala recorded in the Pokédex, and separate ordinary in-game captures from event-distributed Pokémon.
Begin the Ultra Beast investigation
After the credits and the opening postgame scene, leave your house on Melemele Island. A stranger outside gives you the Enigmatic Card. Open the Key Items pocket and read it, then travel to the motel on Route 8 of Akala Island. Enter the western guest room to meet Anabel and Looker. Anabel challenges you to a battle before the investigation can begin, so heal your party before entering the room.
After defeating Anabel, travel to Aether Paradise and use the lift to reach the lower laboratory area. Speak with Wicke in the laboratory sequence, collect the story gifts there, and receive the Beast Balls intended for Ultra Beast captures. Return to the Route 8 motel and speak with Looker and Anabel again to receive the first assignment. This Aether Paradise and motel sequence belongs to the original Sun and Moon games; it is not the Ultra Warp Ride system from Ultra Sun and Ultra Moon.
- Become Champion by defeating the Elite Four and Professor Kukui.
- Collect and read the Enigmatic Card outside your house.
- Defeat Anabel at the Route 8 motel.
- Visit Aether Paradise and collect the Beast Balls.
- Return to Looker before beginning the first hunt.
Complete the Moon Ultra Beast assignments in order
The first assignment is Nihilego, also called UB-01. Search the grass in Wela Volcano Park or the cave grass in Diglett’s Tunnel on Akala Island. The changed area music indicates that the assignment is active. Nihilego appears at level 55. Weaken it carefully, apply sleep or paralysis if available, and use a Beast Ball. If you accidentally knock it out, continue searching the same active area; the assignment is not permanently lost. Return to Looker at the Route 8 motel after the capture.
The second assignment is Pheromosa, Moon’s version-exclusive UB-02. Travel to Verdant Cavern on Melemele Island and capture four Pheromosa. They appear at level 60. Do not return after catching only one: Looker’s assignment requires all four. Report back at the motel indicated by the investigation, then collect the next instructions and Beast Balls.
For UB-03, defeat Mina when she challenges you at the Route 8 motel area. Search Memorial Hill and Lush Jungle for two level 65 Xurkitree. After both are captured, report back as instructed. For UB-04, meet the investigators at the Route 13 motel and search Haina Desert and Malie Garden for two level 65 Celesteela. Moon receives Celesteela; Kartana is the corresponding Sun-exclusive Pokémon.
The final assignment is level 70 Guzzlord in the basement of Resolution Cave on Poni Island. Speak with the investigators at Seafolk Village and defeat Nanu when the story requires it. Then travel through Poni Plains and Poni Meadow to reach Resolution Cave. Capture Guzzlord and report back to the restaurant in Seafolk Village, then follow the directions to Aether Paradise and the final investigation scenes. Beast Balls can be replenished through the investigation contacts, so return to Looker rather than abandoning the assignment if your supply is low.
- Capture one Nihilego at Wela Volcano Park or Diglett’s Tunnel.
- Capture four Pheromosa in Verdant Cavern.
- Capture two Xurkitree in Memorial Hill or Lush Jungle.
- Capture two Celesteela in Haina Desert or Malie Garden.
- Capture Guzzlord in Resolution Cave.
- Report every completed assignment before searching for the next target.
Catch the four island guardians
Tapu Koko is tied to the post-Champion celebration at the Ruins of Conflict. Follow the story invitation to the ruins and interact with the statue when the scene allows the battle to begin. If you do not catch Tapu Koko during that encounter, it can be challenged again after you defend your Champion title by defeating the Elite Four and the Champion challenge.
Tapu Lele is at the Ruins of Life on Akala Island, Tapu Bulu is at the Ruins of Abundance on Ula’ula Island, and Tapu Fini is at the Ruins of Hope on Poni Island. Travel to each ruin, reach the rear altar, and interact with the statue or pedestal to start the fixed encounter. Tapu Bulu requires crossing Haina Desert from the Route 13 side; use the desert’s landmarks and route signs to reach the northern exit into the ruins rather than treating the desert as a normal straight path.
Save directly before touching each statue. The guardians are single fixed encounters, so do not accept a knockout if you want to secure that individual. If one is defeated or fled from, defeat the Elite Four and Champion challenge again before checking its altar. A status move such as Thunder Wave or Spore, a controlled False Swipe attack, and a supply of Ultra Balls make the fights safer. Avoid recoil, poison, confusion, or damaging weather that could finish a weakened guardian between turns.
- Save before activating each guardian encounter.
- Catch Tapu Koko at the Ruins of Conflict event or after a later title defense.
- Catch Tapu Lele at the Ruins of Life.
- Reach the Ruins of Abundance through Haina Desert and catch Tapu Bulu.
- Catch Tapu Fini at the Ruins of Hope.
- Defeat the League again if a guardian must be restored after being defeated or fled from.
Organize the remaining Pokédex work
Use the Pokédex to separate entries into four practical groups: Pokémon still available in Moon, Pokémon that require evolution, Pokémon that require trading or breeding, and event or distribution Pokémon. Revisit trial sites, caves, fishing areas, and routes after completing the story. Check each Pokémon’s Summary screen for friendship, held-item, time-of-day, or special-location evolution requirements before assuming an entry is unavailable.
Moon cannot provide every ordinary Alolan species by itself. Sun-exclusive species, including Buzzwole, Kartana, Solgaleo, and other version-specific lines, require trading from Pokémon Sun or another compatible source. Keep useful breeding parents and version exclusives until the Pokédex check is complete. Do not confuse the ordinary Alolan Pokédex with the National Pokédex or with the expanded content of Ultra Sun and Ultra Moon.
Magearna is obtained through the QR Scanner and the deliveryman in Hau’oli City’s shopping district after the main story, but it is a separate special distribution-style entry rather than a normal wild encounter. Marshadow and Zeraora should likewise be treated as event-related goals when applicable. The original Moon does not contain Ultra Warp Ride legendary hunting, so wormhole guides written for Ultra Moon should not be used for this chapter.
- Mark every missing entry as wild, evolved, traded, bred, or event-related.
- Retain breeding parents and version exclusives until the record is verified.
- Use a compatible trade source for Sun-only species.
- Do not count Ultra Warp Ride encounters as original Moon content.
- Check the Pokédex after each major capture or evolution session.
Use a repeatable capture setup
Before a Tapu or Ultra Beast encounter, heal at a Pokémon Center, save, and place a status user and a controlled-damage Pokémon in the party. Carry healing items, PP restoration, and more balls than the encounter should require. Beast Balls are the intended choice for Ultra Beasts; use Ultra Balls or another suitable ball for the Tapu guardians. Repeat Balls become useful once the species is already registered, but they do not replace the need for a safe first attempt.
Lower the target into the red zone without using recoil or uncontrolled damage. Apply sleep or paralysis, then throw balls while monitoring your Pokémon’s health and the target’s remaining moves. If the battle goes wrong, reload the save instead of allowing a fixed encounter to end in an unwanted knockout. After a successful capture, check the Pokédex and the party or PC before leaving the area.
- Save before every fixed legendary or guardian encounter.
- Bring a status user and a low-damage attacker.
- Use Beast Balls for assigned Ultra Beasts.
- Use Ultra Balls or controlled alternatives for Tapu guardians.
- Confirm the entry in the Pokédex and the captured Pokémon in the party or PC.
Optional post-investigation encounters
After Guzzlord and the final Ultra Beast reports, follow the investigators’ remaining directions. The closing scenes lead to a separate investigation involving a mysterious black Pokémon. This is Necrozma, not another Ultra Beast assignment. It can be encountered at Ten Carat Hill after the relevant Looker dialogue, so prepare a fresh save and a capture plan before entering the area. Do not use the Ultra Moon wormhole instructions for this encounter.
Other useful postgame goals include receiving Type: Null from Gladion at Aether Paradise, exploring the Battle Tree, and collecting missed Z-Crystals or evolution items. These are optional and do not replace the Tapu or Ultra Beast checks for this chapter.
- Finish the Guzzlord report before pursuing the final investigation scenes.
- Treat Necrozma as a separate legendary encounter, not as a required Beast Ball target.
- Save before searching Ten Carat Hill.
- Keep optional Battle Tree and item objectives separate from Pokédex completion.
Before you move on
- Tapu Koko, Tapu Lele, Tapu Bulu, and Tapu Fini are recorded as caught in the Pokédex.
- Nihilego, four Pheromosa, two Xurkitree, two Celesteela, and Guzzlord have been caught and reported to the Ultra Beast investigators.
- The final Looker and Anabel investigation scenes have been completed, or the remaining optional Necrozma investigation has been deliberately left for later.
- Lunala remains recorded in the Pokédex and is available in the party or PC.
- Every remaining Alolan Pokédex entry has been classified as caught, evolved, traded, bred, or event-related.
- No Ultra Warp Ride-only directions or Ultra Sun and Ultra Moon version-exclusive mechanics were used to verify the original Moon save.
Common Failure Modes and How to Recover
A failed Totem, Kahuna, Elite Four, or Professor Kukui battle usually points to one specific problem: a bad lead, an exploitable type weakness, insufficient speed or durability, depleted healing items, missing move coverage, or poor handling of a summoned ally. Recover methodically instead of rebuilding the entire team. Pokémon Moon has one normal in-game save file, so use deliberate manual saves before difficult encounters and keep the clean checkpoint until the battle and its immediate story sequence are safely finished.
1. Identify why the battle was lost
Before changing the whole party, identify the first point at which the plan failed. If an opponent defeated a Pokémon in one hit, compare levels, defensive typing, and the move used. If your attacks barely damaged the target, look for a type resistance or an attacking move that uses the wrong stat. If a Totem Pokémon called an ally, decide whether the ally or the Totem was the immediate danger; leaving two opponents active can make a manageable battle collapse quickly.
Speed is another common cause. A Pokémon that survives one hit but always moves second may need a faster replacement, a priority move, paralysis support, or a safer switch. Status conditions and stat drops can also decide a battle even when levels are adequate. Change one or two clearly identified weaknesses first, then retry so you know whether the adjustment worked.
- Review the move that caused the first knockout.
- Check whether your lead can deal useful damage on turn one.
- Decide whether speed, status, type resistance, or a summoned ally caused the collapse.
2. Heal at a Pokémon Center and reorganize through the PC
Return to the nearest Pokémon Center before preparing another attempt. The nurse restores the party, including Pokémon that fainted, and the PC lets you organize the active party and storage Boxes. If a key Pokémon fainted, deposit it and withdraw a healthy replacement or use a Revive after healing the rest of the party. In Pokémon Sun and Moon, depositing and withdrawing a Pokémon through the PC can restore a fainted Pokémon, but ordinary Potions and status-healing items do not revive one.
Do not keep a badly matched attacker in the party merely because it has the highest level. Replace it temporarily with a Pokémon that resists the opponent’s main attacks, has a super-effective move, can inflict a useful status condition, or can provide a safe switch. Before a major battle, check every active Pokémon’s HP, status, held item, and move PP rather than relying only on the party’s level.
- Use a Pokémon Center before rebuilding the party.
- Use a Revive or the PC to restore a fainted Pokémon.
- Withdraw a counter that can survive the opponent’s opening turns.
- Confirm HP, PP, status, and held items before leaving.
3. Add a targeted counter from an accessible area
If the current party lacks an answer, capture a temporary counter in the nearest accessible grass, cave, or water area. Prioritize a type advantage, a resistance to the opponent’s strongest move, or a support option such as paralysis, sleep, screens, healing, or accuracy reduction. The replacement does not need to remain on the final team; it only needs to solve the specific encounter.
After catching it, heal it and raise it near the rest of the active party. Check its Summary screen to confirm its ability, nature if relevant, and usable moves. Teach a TM only when it directly repairs the matchup. A reliable coverage move is usually more valuable than a third or fourth attack with the same type. Do not spend a rare TM or consumable battle item until you know what problem it addresses.
- Capture a Pokémon with a useful advantage, resistance, or support move.
- Raise the replacement close to the level of the Pokémon it will replace.
- Teach only a confirmed useful TM or move.
4. Repair the moveset before grinding heavily
Inspect the Summary screen of every Pokémon that failed to contribute. Four attacks that overlap heavily can leave a team unable to damage a resistant Totem or Kahuna Pokémon. Keep at least one dependable damaging move, then add coverage, priority, recovery, or status support when the Pokémon can use those options effectively.
Before the Alola League, the Move Reminder in the Mount Lanakila Pokémon Center can restore eligible forgotten level-up or Egg Moves for one Heart Scale per move. Speak to the woman inside the Center. This is useful when a Pokémon has replaced an important coverage, priority, or support move. Rebuilding the moveset may solve the problem without several levels of grinding.
- Remove redundant attacks when a better coverage or support move is available.
- Use the Mount Lanakila Move Reminder for eligible forgotten moves.
- Carry enough Heart Scales before making several move changes.
5. Gain focused experience without assuming trainer rematches
If the team is only slightly underlevelled, defeat unbattled trainers near the current objective and battle wild Pokémon in accessible areas. Pokémon Moon does not make every ordinary trainer a repeatable experience source, so do not plan around rematching trainers unless a particular trainer or battle facility is known to support it. Concentrate experience on the Pokémon that will actually enter the next attempt.
Switch a weaker Pokémon into a safe matchup when practical, then finish the battle with a stronger partner. Stop grinding when the Pokémon can survive the relevant attacks and deal reliable damage. Totem fights in particular punish a team that succeeds against ordinary wild Pokémon but cannot manage an ally, status effect, or aura-enhanced opponent.
- Use nearby unbattled trainers and wild encounters for normal story training.
- Focus experience on the intended battle party.
- Stop once the matchup problem is solved rather than chasing unnecessary levels.
6. Save correctly and decide when to reload
Pokémon Moon supports one normal in-game save file, not multiple save slots. To save, press X while your character is free, select Save, and confirm. Make a manual save before a Totem battle, Kahuna battle, one-time story Legendary encounter, the Elite Four, and the final Professor Kukui battle. Save again between Elite Four members when you have finished healing and reorganizing.
For the League, prepare and save before entering the first Elite Four room. After each victory, heal and save before entering the next room if the game permits menu access. After the fourth Elite Four victory, save at the Pokémon League before activating the portal and beginning Kukui’s battle. There is no reason to expect an automatic save between the Elite Four and Kukui, so this manual checkpoint is the important recovery point. If Kukui defeats you, reload that saved position rather than relying on an unverified checkpoint.
If you lose a normal battle without reloading, you black out, return to the last Pokémon Center, and lose some money. That is usually harmless; heal, restock, and rebuild normally. Reload instead when you have just spent scarce items, changed a valuable moveset incorrectly, or want to preserve a pre-battle position. Never power off while the save operation is in progress.
- Keep one clean save before the next major encounter.
- Save at the League before starting the Elite Four and again before Kukui.
- Reload only from a checkpoint you deliberately created.
- Never interrupt the 3DS while the game is saving.
7. Retry with a concrete battle plan
On the next attempt, lead with the Pokémon that has the safest immediate matchup, not necessarily the strongest overall attacker. Use a status move only when it has a realistic chance to land and will change the battle. Against a Totem encounter, remove a dangerous summoned ally when it is threatening a sweep; otherwise focus the Totem if the ally is weak and harmless. Use your Z-Move to remove the most dangerous target or secure a knockout that prevents another ally call, rather than spending it automatically on the first turn.
For an Elite Four or Kukui attempt, assign each Pokémon a job before entering: lead, physical or special attacker, defensive pivot, status support, and emergency cleaner. Keep enough healing items to recover between battles and preserve at least one strong answer for Kukui. If the retry still fails, return to the diagnosis step and change the specific cause instead of adding levels blindly.
- Choose the lead for matchup safety.
- Reserve the Z-Move for the encounter’s most dangerous target.
- Plan switches and recovery before the battle begins.
- Change the diagnosed weakness if the second attempt also fails.
Before you move on
- The active party includes a reliable answer to the next opponent’s main type or battle mechanic.
- Every intended battler is healed, has usable PP, and carries a moveset suited to the encounter.
- A replacement counter has been captured or withdrawn when the original party lacks a safe matchup.
- Healing, status, and revival items are stocked for the next major battle.
- A clean manual save exists before the retry, with only one in-game save file being relied upon.
- After victory, the trial completion, Grand Trial reward, next story marker, or League progression event triggers normally.
References for this chapter
- How to Save Your Game: Pokémon Sun, Moon, Ultra Sun, and Ultra Moon — Nintendo Support
- Pokémon Moon — Official 3DS Instruction Manual
- Pokémon Sun and Moon — Move Tutors
- Move Reminder — Bulbapedia
- Pokémon Storage System — Bulbapedia
- Mount Lanakila — Pokémon Sun and Moon Walkthrough
- Pokémon Battle — Bulbapedia
Version-Specific Differences to Watch For (Moon vs Sun)
Pokémon Moon and Pokémon Sun share the same main island challenge, but the first Totem, time cycle, story Legendary, several wild Pokémon, some post-trial battles, and the Ultra Beast assignments differ. These instructions apply to the original 2016 Nintendo 3DS releases Pokémon Moon and Pokémon Sun, not Ultra Moon or Ultra Sun.
1. Prepare for Moon’s Verdant Cavern trial
Travel through Route 2 to Verdant Cavern and speak with Ilima at the trial entrance. Inside the cavern, investigate the dens in the order the trial directs you. The trial Pokémon are Alolan Rattata in Pokémon Moon rather than Yungoos in Pokémon Sun. These trial encounters are fixed battles and cannot be captured. Team Skull interrupts partway through the investigation, after which you continue to the final den.
The Moon version’s Totem is Alolan Raticate. It is level 12, begins with a Defense boost, and can call an Alolan Rattata ally at level 11. The ally can use Quick Attack and Hyper Fang, so remove it promptly if the extra damage is putting your team at risk. Fighting-type attacks are the most direct answer. Bug- and Fairy-type attacks are also useful because Alolan Raticate is Normal/Dark-type. Avoid relying only on weak physical moves while its Defense is boosted; use a strong super-effective attack, a reliable status move, or your Z-Move if the Totem is about to survive and call another ally.
Defeat the Totem and take the Normalium Z to complete the trial. The Totem difference is the only first-trial battle difference between the two original versions: Sun has Gumshoos, while Moon has Alolan Raticate.
- Save before entering the Totem’s den. Pokémon Moon has one save file, not multiple independent save slots.
- Bring healing items and several Poké Balls for ordinary wild encounters around the trial area.
- Keep at least one Pokémon with a strong damaging move rather than depending entirely on status effects.
- After victory, confirm that the Normalium Z has been added to your Key Items or Z-Crystal inventory.
2. Use Moon’s reversed time cycle
Pokémon Moon runs twelve hours opposite the Nintendo 3DS system clock. The game treats 6:00 a.m. through 6:00 p.m. on the system as its night period, and 6:00 p.m. through 6:00 a.m. as its day period. The visual transition begins around 5:00, but use the game’s displayed lighting and encounter behavior as your practical guide.
This affects time-based wild encounters, some gifts and daily events, and evolutions that require day or night. Rockruff is the most important version-specific example during a normal playthrough: in original Pokémon Moon, evolve it during Moon’s in-game night to obtain Midnight Form Lycanroc. Because Moon’s in-game night occurs during the 3DS daytime, do not follow a Sun guide that says to evolve Rockruff during the system’s daytime.
The island challenge order does not change with the clock. If a time-dependent Pokémon is absent, first check whether you are searching during the correct Moon period before changing routes or assuming the encounter is unavailable.
- Remember that a 3DS daytime usually corresponds to nighttime in Pokémon Moon.
- Use Moon’s in-game time, not a Sun guide’s real-clock wording, for Rockruff and other time-based evolutions.
- Do not change the 3DS clock casually; time changes can temporarily affect some time-based features.
3. Follow the Moon Legendary sequence
After the Poni Island events, travel through Vast Poni Canyon to the Altar of the Moone. Hapu and Lillie meet you at the canyon exit, and Lillie heals the party before the ceremony. Climb the large staircase and take your position opposite Lillie. The Sun Flute and Moon Flute activate the altar, and Nebby evolves from Cosmoem into Lunala in Pokémon Moon. Pokémon Sun uses the Altar of the Sunne and produces Solgaleo instead.
Lunala’s appearance is scripted. You do not choose the Legendary, use an evolutionary item, or meet a manual level requirement. After the Ultra Space and Lusamine sequence, return to the altar and battle Lunala. It is level 55. The Master Ball is the simplest capture method, but ordinary Poké Balls also work. If you defeat Lunala or run from the battle, the encounter returns, so the story cannot be permanently blocked by an accidental failure.
A full party does not prevent the capture. If all six party positions are occupied, the captured Lunala is sent to a PC Box. Keep Poké Balls available and save before the encounter if you want a recovery point, but do not assume an empty party slot is required.
- Confirm the location is the Altar of the Moone, not the Altar of the Sunne.
- Capture Lunala after the Ultra Space sequence and check its entry in the Pokédex.
- Do not expect Lunala to be obtainable earlier as a normal wild encounter.
- Remember that Lunala is Psychic/Ghost-type and has Shadow Shield in the original game.
4. Plan around Moon-exclusive Pokémon
The principal wild or obtainable Moon exclusives are Alolan Sandshrew and Alolan Sandslash, Petilil and Lilligant, Vullaby and Mandibuzz, Oranguru, and Drampa. Alolan Sandshrew can be found in Tapu Village and on Mount Lanakila once those areas are available. Vullaby is found on Route 3. Petilil can be found in several meadow and garden areas, including Melemele Meadow, Malie Garden, Ula’ula Meadow, Poni Meadow, and Poni Plains. Drampa is associated with Mount Lanakila. These Pokémon are optional; none is required to clear the island trials or the Pokémon League.
Moon also provides the Moon-side fossils: Shieldon evolves into Bastiodon, and Archen evolves into Archeops. The corresponding fossils are version-specific, while a fossil or restored Pokémon can be traded from the other version. If you want one for your team, obtain the fossil through the available fossil opportunity, then use the Fossil Restoration Center on Route 8. Otherwise, treat these as Pokédex or collection targets.
Do not rebuild a functioning story team simply because a Sun walkthrough lists Vulpix, Cranidos, Tirtouga, Cottonee, Rufflet, Passimian, or Turtonator. Those are Sun-side targets and require trading in Pokémon Moon. Version exclusives can be exchanged through local or online trading features, but trading is not required for the main story.
- Moon-native Alolan Sandshrew is optional and becomes available late enough that it is not an early-trial requirement.
- Mark Sun exclusives for trading instead of searching Moon’s routes indefinitely.
- Restore Moon fossils at the Route 8 Fossil Restoration Center if you intend to use them.
- Remember that Lunala is a story-exclusive Moon Legendary, not a trade requirement.
5. Track Moon-specific postgame Ultra Beasts
After becoming Champion and beginning the Looker episode, Pokémon Moon receives the Moon-side Ultra Beast assignments. Pheromosa, code name UB-02 Beauty, is found in Verdant Cavern during the relevant postgame mission. Celesteela, code name UB-04 Blaster, is found in the Ula’ula locations specified by Looker, including the Route 17 and Haina Desert area. Pokémon Sun receives Buzzwole and Kartana instead.
These original Pokémon Moon encounters are part of the postgame Looker investigation. Do not follow Ultra Moon instructions involving Ultra Warp Ride, white wormholes, Ultra Crater, Ultra Desert, or Necrozma fusion. Those mechanics belong to the later Ultra games. In original Moon, the Ultra Beast task force directs you to normal Alola locations and supplies the capture equipment needed for the assigned mission.
- Use the Looker mission dialogue to identify the next Ultra Beast and its area.
- Expect Pheromosa and Celesteela in Moon, not Buzzwole and Kartana.
- Ignore Ultra Warp Ride and Necrozma-fusion instructions when playing the original 2016 release.
6. Recognize other Sun/Moon differences
The original games also differ in some optional battles and cosmetic content. After completing certain trials, Moon allows a later battle with Mallow where Sun has the corresponding Kiawe battle. Festival Plaza shops, clothing colors, and some Battle Tree scouting options also vary. These features do not alter the required route through the island challenge.
When checking any external guide, confirm that it names Pokémon Sun and Pokémon Moon rather than Ultra Sun and Ultra Moon. The original campaign uses the seven-trial structure, the Altar of the Moone, Lunala, and the original Looker Ultra Beast missions. Ultra guides may direct you to changed trial sites, expanded Poni content, or Necrozma events that do not exist in this edition.
- Verify the guide’s title before following route or boss instructions.
- Separate optional Festival Plaza, clothing, and Battle Tree differences from required story progress.
- Use Moon-specific names: Alolan Raticate, Altar of the Moone, Lunala, Pheromosa, and Celesteela.
Before you move on
- Verdant Cavern ended with Totem Alolan Raticate, and the Normalium Z was received.
- Moon’s in-game time is being used for night encounters and time-based evolutions.
- The Altar sequence produced Lunala, and Lunala is registered in the Pokédex or stored in a PC Box.
- Any desired Moon-native Pokémon, such as Alolan Sandshrew, Petilil, Vullaby, Oranguru, or Drampa, has been obtained from its Moon location or marked as an optional target.
- Sun-exclusive Pokémon are marked for trading rather than treated as required story objectives.
- The postgame notes identify Pheromosa and Celesteela as Moon’s Ultra Beasts and do not require Ultra Warp Ride or Necrozma fusion.
- The guide being followed refers to Pokémon Moon and Pokémon Sun, not Ultra Moon or Ultra Sun.
References for this chapter
- Pokémon Sun & Moon – Version Exclusives – Pokémon
- Pokémon Sun & Moon – Version Exclusives – Miscellaneous
- Pokémon Sun & Moon – Island Trials
- Pokémon Moon — Official 3DS Instruction Manual
- Walkthrough: Pokémon Sun and Moon – Original Games
- Pokémon Sun and Moon Walkthrough, Part 24: Altar of the Moone and Ultra Space
- Mount Lanakila – Pokémon Sun and Moon location data
- Pheromosa and Celesteela – Pokémon Sun and Moon Ultra Beast data
Tactics and Move Recommendations (Mid/Late Game)
Build a reliable story team around strong same-type attacks, practical coverage, one defensive switch-in, and a planned Z-Move user. Pokémon Moon does not require competitive breeding, exact IVs, or optimized EV spreads to finish the island challenge and Alola League. Consistent moves, sensible switching, status control, and regular healing matter more than perfect statistics.
1. Give each Pokémon a useful battle job
Before the later Akala trials, open each party member’s Summary screen and decide what that Pokémon does well. A practical story party should include dependable damage, at least one Pokémon that can safely switch into common attacks, and answers to opponents that are faster, physically strong, specially strong, or resistant to your main attacking type. One Pokémon can fill several jobs; do not force six separate roles if your available team does not support them.
Keep at least one reliable same-type attacking move on each active Pokémon. Add coverage only when it solves a real problem. Ground or Fighting moves are useful against many Rock, Steel, and Electric targets. Ice or Fairy attacks help against Dragon Pokémon. Dark or Ghost attacks are valuable against Psychic and Ghost opponents. Water, Fire, and Electric coverage can remove common resistances and troublesome wild or trial Pokémon.
Do not keep several weak moves of the same type merely because they have different names. Replace low-power attacks when stronger options become available, but retain a status move, setup move, recovery move, or priority attack if it repeatedly creates safe turns.
- Keep one dependable same-type attack on every active Pokémon.
- Avoid four moves that perform the same offensive job.
- Check accuracy before making a move your only answer to a Totem or Elite Four threat.
- Review the Summary screen before each major trial and before entering Mount Lanakila.
2. Assign and spend the Z-Move deliberately
In the original Sun and Moon battle system, a standard Z-Move requires a compatible Z-Crystal held by the Pokémon and a move whose type matches that crystal. Your team can use only one Z-Move during a battle. Equip the crystal before entering the trial or major battle, and confirm that the intended Pokémon still knows the matching move.
Do not spend the Z-Move automatically against the first opponent. Use it when removing one Pokémon prevents the battle from becoming harder: for example, when a Totem ally can heal, spread paralysis, change the weather, or deal enough damage to force repeated switches. Against an Elite Four member or Kukui, a strong super-effective Z-Move is often best used on a dangerous lead or on a target that would survive an ordinary attack and retaliate.
A Totem battle does not always have the same priority order. If the ally is providing disruptive support, remove it first. If the Totem itself can knock out your lead or boost its own damage, strike the Totem immediately. Inspect the field after each turn instead of following a fixed rule.
Status or supportive Z-Moves can be useful when their additional effect directly changes the matchup, but they are less reliable as an emergency button than a strong damaging Z-Move. If the intended user is badly weakened or cannot survive the next attack, switch to a safer Pokémon before attempting the Z-Move.
- Give the intended user the matching Z-Crystal before the battle.
- Confirm the Pokémon knows a move of the crystal’s type.
- Use the Z-Move against a threat that can otherwise force a losing sequence.
- Decide whether the Totem or its summoned ally is the immediate danger.
3. Prepare a late-game cleaner
A cleaner enters after the opposing team has been weakened and finishes targets with fast, consistent attacks. Give it one strong same-type move, one or two useful coverage attacks, and a final slot for priority, recovery, setup, or utility. Priority is helpful when the cleaner cannot naturally outspeed the opponent or when a weakened enemy could otherwise knock it out first.
Do not fill every slot with similar attacks. A fast Water Pokémon, for example, benefits more from one strong Water move, an attack for resistant targets, an Ice or other relevant coverage move, and priority or setup than from several weaker Water moves. If the Pokémon has a move that raises Attack, Special Attack, or Speed, use it only after checking that the opposing Pokémon cannot immediately overwhelm it.
Bring the cleaner in after a safe knockout, a resisted attack, paralysis, sleep, or a defensive pivot. Avoid switching it directly into an unknown attack merely because it has a favorable type matchup.
- Remove faster threats before relying on the cleaner.
- Keep at least one move for targets that resist its main attack.
- Use priority to secure knockouts rather than replacing all other coverage with it.
- Do not set up in front of a foe that can immediately use a super-effective move.
4. Use a bulky pivot to stabilize trials and the League
A bulky pivot enters a resisted or low-damage matchup, absorbs a hit, and creates a safer next turn. Its useful moves may include a reliable attack, recovery, screens, paralysis, a damage-lowering move, or another effect that lets a teammate enter safely. This role is particularly useful in Totem battles because a summoned ally can turn a favorable one-on-one matchup into a two-on-one fight.
Switch according to the attack you expect, not just the opponent’s type. A physically bulky Pokémon may still be a poor answer to a strong special attack, even if it resists the attacker’s typing. After the switch, heal, inflict status, defeat the ally, or bring in a better attacker. If the pivot cannot threaten the opponent, preserve health, or create a safe switch, do not leave it on the field without a purpose.
Intimidate, paralysis, screens, and recovery are especially useful when the opponent’s damage is becoming difficult to manage. They are not substitutes for damage, however. Once the pivot has created the opening, move to the Pokémon that can finish the matchup.
- Switch into predicted resisted attacks rather than relying only on type labels.
- Keep recovery or another way to preserve health when possible.
- Use the pivot to bring fragile attackers onto the field safely.
- Leave the field if the pivot has no useful action remaining.
5. Add status support without losing momentum
Paralysis can reduce an opponent’s speed and occasionally prevent its attack. Sleep can create a valuable turn for healing, switching, or attacking. Burn is useful against most physical attackers because it reduces their physical damage. Poison can wear down bulky targets, but it is less attractive when a Totem ally is attacking at the same time and the battle must end quickly.
Use status when your Pokémon can survive the attempt and when the condition creates a clear follow-up. Paralyze a faster threat, then switch to your cleaner. Burn a physical attacker, then use the reduced damage to heal or defeat its ally. Sleep can provide the turn needed to restore a damaged teammate or use a decisive attack.
Status does not replace type coverage. Some opponents can remove, ignore, or work around a condition, and a Totem Pokémon with a strong super-effective move may defeat the status user before the plan succeeds. Keep a direct attack available so the support Pokémon remains useful after the first status attempt.
- Carry an answer to fast and physically dangerous opponents.
- Pair status with a switch, recovery action, or immediate knockout attempt.
- Do not spend several turns inflicting status while an ally remains free to attack.
- Keep a damaging move on the support Pokémon whenever practical.
6. Train practically and refine moves before Mount Lanakila
For the story, keep the party reasonably close in level and train weaker members in nearby grass or against available trainers. Do not depend on one overleveled Pokémon to cover every weakness. A balanced party gives you more answers when a Totem aura, critical hit, status condition, or summoned ally disrupts your first plan.
Technical Machines in Pokémon Sun and Moon are reusable, so a move can be tested on one team member and later taught to another compatible Pokémon. Replace redundant attacks before important battles, but retain a move if it provides a distinct role such as recovery, priority, status, setup, or coverage. Avoid copying move recommendations from Ultra Sun and Ultra Moon without checking that the move or tutor exists in the original Moon release.
The Move Reminder is available at the Pokémon Center on Mount Lanakila and can restore eligible level-up or otherwise available moves in exchange for Heart Scales. This is useful immediately before the Pokémon League if a team member lost an important move earlier. It does not make every TM-only move available, so check the Pokémon’s actual learnset before planning around it.
Before entering the League, inspect every moveset, item, and held Z-Crystal. Make sure the party has reliable damage against the Elite Four’s different types, at least one answer to fast opponents, and a way to reduce or recover from incoming damage. Heal fully, restore PP, and keep enough healing items for a failed attempt. There is no need for exact IVs, breeding chains, or a competitive EV spread to complete the campaign.
- Train weaker party members rather than maximizing only one Pokémon.
- Confirm that every recommended TM or tutor move belongs to original Sun and Moon.
- Use the Mount Lanakila Move Reminder if a key eligible move was forgotten.
- Before the League, check coverage, priority, status, recovery, held items, and Z-Crystal assignment.
- Keep a separate save before beginning the League challenge.
Before you move on
- Each active party member has a clear practical role and at least one reliable same-type attack.
- The team can answer fast opponents, physical attackers, bulky targets, and common type resistances.
- A matching Z-Crystal is assigned to a Pokémon that knows a compatible move and can use it safely.
- The party includes at least one useful defensive switch, status option, priority move, or recovery plan.
- Before Mount Lanakila, every moveset has been checked for redundant attacks and missing coverage.
- The player has confirmed that final move recommendations apply to the original Nintendo 3DS Pokémon Moon release rather than Ultra Sun or Ultra Moon.
Final Checklist and Verification Before Declaring Completion
Use this checklist to confirm that the original Nintendo 3DS release of Pokémon Moon has reached the end of its main story and the immediate Looker postgame episode. The required Poni sequence includes Hapu’s Grand Trial, the Moon Flute journey to Exeggutor Island, and the Captainless Trial in Vast Poni Canyon. After that, verify the Altar of the Moone ceremony, Nebby’s evolution into Lunala, the Ultra Space and Lusamine events, Lunala’s capture, the Alola Pokémon League, Professor Kukui, the Champion ceremony, the credits, and the first Looker and Anabel investigation.
1. Confirm the completed island challenge and the correct Poni requirements
Check the Trainer Passport and your key items before attempting to declare the story complete. The Melemele, Akala, and Ula’ula Grand Trials should be complete, and you should have received the major island Z-Crystals from those challenges. These rewards and the cleared story gates are more reliable historical checks than Rotom Pokédex map markers, which primarily identify current objectives.
Poni has two distinct required challenges in original Pokémon Moon. First, Hapu must be recognized as Poni’s kahuna at the Ruins of Hope, after which you complete Hapu’s Grand Trial and receive the Groundium Z. Next, travel through Vast Poni Canyon. Mina appears there, but she is a captain without a trial in this original release. The required trial in the canyon is the Captainless Trial, a natural trial with no captain present.
Do not substitute Mina’s later trial from Ultra Sun or Ultra Moon. In Pokémon Moon, the Captainless Trial ends with Totem Kommo-o and awards the Dragonium Z. When this trial is complete, the path to the Altar of the Moone is open.
- The Melemele, Akala, and Ula’ula Grand Trial progression is complete.
- The relevant island Z-Crystals have been received.
- Hapu’s Grand Trial on Poni has been completed and the Groundium Z was awarded.
- The Captainless Trial in Vast Poni Canyon has been completed and the Dragonium Z was awarded.
- The route toward the Altar of the Moone is open.
2. Verify the Moon Flute, Altar of the Moone, and Ultra Space sequence
After Hapu’s Grand Trial, follow the story to Exeggutor Island with Lillie. Climb to the island’s highest point and take the Moon Flute from the pedestal. Lillie already has the Sun Flute that she received during the Aether Paradise sequence, so both flutes are available only after this Poni progression is complete.
Return to Poni and continue through Vast Poni Canyon. Clear the Captainless Trial, then follow Lillie and Hapu to the Altar of the Moone. During the ceremony, the two flutes are played and Nebby evolves from Cosmoem into Lunala. This is the original Pokémon Moon sequence; it does not include the Necrozma-centered finale added in Ultra Moon.
Continue into Ultra Space and complete the required events involving Guzma and Lusamine. You must finish the forced Lusamine confrontation before the story returns you to Alola and permits the legendary encounter. If the game has not returned you to the altar area, the Ultra Space sequence is not finished.
- The Moon Flute was obtained on Exeggutor Island.
- The Altar of the Moone ceremony has played.
- Nebby evolved from Cosmoem into Lunala.
- The required Ultra Space scenes and Lusamine battle are complete.
- The game returned to Alola and resumed the story toward the Pokémon League.
3. Capture Lunala and confirm the Pokédex record
After the Ultra Space events, continue the altar sequence until Lunala becomes the story encounter. In Pokémon Moon, this Lunala is level 55. Save before interacting with it if you want a recovery point, and carry enough Poké Balls for a deliberate capture attempt. Lillie can provide Poké Balls if you have none, but bringing your own supply avoids relying on that assistance.
Capture Lunala rather than treating the evolution cutscene as completion. Check the Pokémon menu afterward and confirm that Lunala is in the active party or in a PC box. Then open the Pokédex and verify that Lunala is marked as caught, not merely seen. If the encounter goes wrong, reload the save made before starting the battle and try again.
Once Lunala is recorded as caught, continue through the following dialogue and travel toward Mount Lanakila. This is the required story Legendary for Moon; do not use Solgaleo or Ultra Moon’s Necrozma-related checks for this file.
- Lunala is present in the party or a PC box.
- Lunala’s Pokédex entry is registered as caught.
- The file is not relying only on Nebby’s evolution cutscene as evidence.
- The route toward Mount Lanakila is available.
4. Reach and prepare for the Pokémon League
Travel to Mount Lanakila and enter the Pokémon League after the Lunala sequence. Heal at the Pokémon Center, review the moves and held items of your active team, and stock Revives, Max Potions or Full Restores, and status-healing items. Save before beginning the League challenge.
The League is a continuous gauntlet. You can use items and change your team between battles, but there is no ordinary route break that lets you freely return to a Pokémon Center after each member. Keep enough PP for your strongest attacks and reserve recovery items for the most damaging late battles.
Use concrete progression evidence rather than Rotom’s current destination marker. The completed Poni Grand Trial, the Captainless Trial reward, the Moon Flute sequence, the cleared Altar and Ultra Space events, Lunala’s capture, and access to Mount Lanakila together establish that the final story gates have been cleared.
- Mount Lanakila and the Pokémon League can be reached.
- The party is healed and equipped for a continuous battle sequence.
- A clean save exists before entering the League.
- The team has adequate healing items, PP, and type coverage.
5. Defeat the Elite Four and Professor Kukui
Defeat all four Elite Four members: Hala, Olivia, Acerola, and Kahili. Every member must be beaten before the final battle, although the game allows the available Elite Four rooms to be challenged in its selectable order. Heal with items after each fight and avoid spending all of your strongest moves before the final opponent.
After the fourth Elite Four victory, Professor Kukui challenges you. In the original Pokémon Moon story, Kukui is the final League battle before the Champion declaration. Defeat him to become Alola’s first Champion. Reaching Kukui proves that the four Elite Four victories were recorded, but the story is not finished until Kukui and the subsequent ceremony are complete.
If you lose to Kukui, reload the pre-League save and change the team order, held items, moves, or healing plan. A defeat does not invalidate the file, but you must clear the full League sequence again from the last intact save.
- Hala has been defeated.
- Olivia has been defeated.
- Acerola has been defeated.
- Kahili has been defeated.
- Professor Kukui has been defeated.
- The Champion declaration and ceremony begin.
6. Complete the Champion ceremony, Tapu Koko event, and credits
Continue through the Champion ceremony instead of stopping after Kukui’s defeat. The story takes you to the festival in Iki Town and then to the Ruins of Conflict with Lillie. At the shrine, Tapu Koko challenges you to a battle.
The Tapu Koko battle is part of the ending sequence, but catching Tapu Koko is optional for this completion goal. You may catch it, defeat it, or run from it; the story continues regardless. The battle itself is the important event check, and the game awards the Tapunium Z after the encounter if you do not already have it.
Continue through the remaining festival and farewell scenes and allow the credits to finish. When control returns after the ending, save the file. This post-credits save is a stronger confirmation than a single Champion cutscene because it shows that the game has advanced into its recorded postgame state.
- The Champion ceremony has played.
- The Tapu Koko event at the Ruins of Conflict has occurred.
- The credits have finished.
- Control has returned after the credits.
- The post-credits file has been saved.
7. Start the Looker Episode at the correct location
After the ending, leave the player’s house on the following morning. The postgame scene introduces a mysterious old man outside, who gives you the Enigmatic Card. Read the card and follow its instruction to the roadside motel on Route 8 of Akala Island.
Enter the motel’s indicated guest room to meet Looker and Anabel. Complete Anabel’s introductory battle. Afterward, travel to Aether Paradise and speak with Wicke in the laboratory area when the story directs you there. Wicke explains the Ultra Beast investigation and provides Beast Balls for the task force.
Return to the Route 8 motel when instructed. The first Looker Episode assignment is considered started once the Enigmatic Card event, the Route 8 meeting, Anabel’s battle, Wicke’s briefing, and the first Ultra Beast assignment have occurred. The Melemele Route 2 motel is not the initial trigger in original Pokémon Moon; it is used later in the investigation.
- The Enigmatic Card was received outside the house.
- Looker and Anabel were met at the Route 8 motel.
- Anabel’s introductory battle was completed.
- Wicke provided the Ultra Beast briefing and Beast Balls.
- The first Ultra Beast mission is available.
8. Recover from a missing completion check
If Lunala seems to be missing, check the active party and every PC box before assuming the capture failed. If Lunala is absent or the Pokédex marks it only as seen, reload the save from before the altar encounter and capture it again. If the League remains unavailable, verify Hapu’s Grand Trial, the Captainless Trial, the Moon Flute and Altar events, the Ultra Space and Lusamine sequence, and Lunala’s capture.
If the credits have not appeared, confirm that Hala, Olivia, Acerola, Kahili, and Professor Kukui were all defeated. The Tapu Koko event follows the Champion declaration and occurs before the ending scenes, but Tapu Koko’s capture is not required. If Looker is absent, leave the house after the completed ending, receive the Enigmatic Card, and visit the Route 8 motel before checking the later Route 2 location.
Do not use Ultra Moon’s completion checks. Original Pokémon Moon uses the Captainless Trial in Vast Poni Canyon, Hapu’s Grand Trial before it, the Moon Flute and Altar of the Moone sequence, Lunala, the original Ultra Space story, Lusamine, the Alola League, Kukui, Tapu Koko, and the credits.
- Lunala is caught rather than merely seen.
- Hapu’s Grand Trial and the Captainless Trial are both complete.
- All four Elite Four victories are recorded by reaching Kukui.
- Kukui, the Champion ceremony, Tapu Koko event, and credits have occurred.
- The post-credits save exists.
- The Looker Episode began at the Route 8 motel.
Before you move on
- The island Z-Crystals and Grand Trial progression are complete.
- Hapu’s Grand Trial on Poni is complete.
- The Captainless Trial in Vast Poni Canyon is complete and the Dragonium Z was received.
- The Moon Flute was obtained on Exeggutor Island.
- Nebby evolved into Lunala at the Altar of the Moone.
- The Ultra Space and Lusamine sequence was completed.
- Lunala was captured and is marked as caught in the Pokédex.
- Mount Lanakila’s Pokémon League was reached.
- Hala, Olivia, Acerola, and Kahili were defeated.
- Professor Kukui was defeated and the Champion ceremony played.
- The Tapu Koko event at the Ruins of Conflict occurred.
- The credits finished, control returned, and the post-credits file was saved.
- The Enigmatic Card was received.
- Looker and Anabel were met at the Route 8 motel.
- Anabel was battled, Wicke provided the Ultra Beast briefing and Beast Balls, and the first Ultra Beast mission became available.
References for this chapter
- Pokémon Moon — Official Nintendo 3DS Manual
- Pokémon Sun and Moon Walkthrough, Part 22: Ruins of Hope, Exeggutor Island, Poni Grand Trial
- Pokémon Sun and Moon Walkthrough, Part 23: The Captainless Trial
- Pokémon Sun and Moon Walkthrough, Part 24: Altar of the Moone and Ultra Space
- Looker Episode — Bulbapedia
- Island challenge — Bulbapedia
- Ruins of Conflict — Bulbapedia
- Pokémon Sun and Moon — Bulbapedia
Finishing up
You have defeated Hala, Olivia, Acerola and Kahili in the Alola Elite Four and then defeated Professor Kukui in the direct story battle; the Champion ceremony and credits have played.
Nebby evolved into Lunala during the Altar of the Moone and Lunala is recorded as caught in the party, PC or Pokédex.
The required Melemele, Akala, Ula’ula and Poni island-challenge gates are complete, evidenced by their rewards, stamps and the unlocked route to Mount Lanakila. Do not rely on Rotom Pokédex markers as a complete historical checklist.
The Aether Foundation and Ultra Space sequence, including the Lusamine confrontation and Nebby’s evolution into Cosmoem and then Lunala, is complete.
After the credits, the Enigmatic Card has been received, Looker and Anabel have been met at the Route 8 motel on Akala Island, Anabel’s introductory battle has been completed and Wicke’s Beast Ball briefing has begun the Looker episode. The Route 2 motel is a later investigation checkpoint, not the initial trigger.
Choose your next gameScreenshots & video
Game imagery for reference. Follow the written chapters above for the route and strategies.
Sources & references
Our original guide draws on the references below. Check the edition at the top of this page before following controls or unlock requirements.
- Pokémon Moon — Official 3DS Instruction Manual
- How to Save Your Game: Pokémon Sun, Moon, Ultra Sun, and Ultra Moon — Nintendo Support
- Nintendo 3DS Family Manuals | Nintendo Support
- Rotom Pokédex — Bulbapedia
- Menu — Bulbapedia
- Verdant Cavern — Bulbapedia
- Pokémon Sun & Moon – Island Trials
- Pokémon Sun and Moon Controls — StrategyWiki
- Pokémon Sun & Moon — Island Trials
- Pokémon Sun & Moon — Grand Trials
- Pokémon Sun and Moon walkthrough — Verdant Cavern and Route 3
- Walkthrough: Pokémon Sun and Moon – Original Games
- Pokémon Sun and Moon walkthrough — Part 6, Iki Town and Hala’s Grand Trial
- Bulbapedia — Version-exclusive Pokémon
- Serebii — Grubbin Pokédex Locations
- Bulbapedia — SOS Battle mechanics
- Walkthrough: Pokémon Sun and Moon/Part 8
- Walkthrough: Pokémon Sun and Moon/Part 10
- Walkthrough: Pokémon Sun and Moon/Part 12
- Brooklet Hill
- Walkthrough: Pokémon Sun and Moon, Section 15
- Bulbapedia — Pokémon Sun and Moon Walkthrough, Part 17: Abandoned Megamart
- Bulbapedia — Pokémon Sun and Moon Walkthrough, Part 19: Po Town and Shady House
- Bulbapedia — Shady House
- Samurai Gamers — Ula’ula Island Walkthrough 2: Pokémon Sun and Moon
- Walkthrough: Pokémon Sun and Moon/Part 13
- Pokémon Sun & Moon - Aether Foundation
- Aether Paradise Walkthrough [Pokemon Sun and Moon]
- Pokémon Sun and Moon Walkthrough, Part 22: Ruins of Hope, Exeggutor Island, Poni Grand Trial
- Pokémon Sun and Moon Walkthrough, Part 23: The Captainless Trial
- Pokémon Sun and Moon Walkthrough, Part 24: Altar of the Moone and Ultra Space
- Thonky, Ruins of Hope and Exeggutor Island Walkthrough
- GameFAQs, Pokémon Moon Guide and Walkthrough for Nintendo 3DS
- Mount Lanakila — Pokémon Sun and Moon Walkthrough
- Serebii — Pokémon Sun & Moon Elite Four and Professor Kukui
- Bulbapedia — Alola Pokémon League
- Pokémon Champion
- Acerola’s Elite Four battle information
- Pokémon Sun & Moon Elite Four walkthrough
- Pokémon Moon — Official Nintendo 3DS Manual
- Pheromosa and Celesteela – Pokémon Sun and Moon Ultra Beast data
- Looker Episode — Bulbapedia
- Bulbapedia — Alola Route 8 and Roadside Motel
- UB Task Force - Part 1 - Postgame Walkthrough
- Poké Ball Insider — Ultra Beast Missions
- Pokémon Moon: Ultra Beast Missions
- Pokémon Sun & Moon - The Legendary Pokémon
- Ruins of Abundance
- Haina Desert - Pokémon Sun and Moon Walkthrough
- Pokémon Sun and Moon — Move Tutors
- Move Reminder — Bulbapedia
- Pokémon Storage System — Bulbapedia
- Pokémon Battle — Bulbapedia
- Pokémon Sun & Moon – Version Exclusives – Pokémon
- Pokémon Sun & Moon – Version Exclusives – Miscellaneous
- Mount Lanakila – Pokémon Sun and Moon location data
- Pokémon Sun and Moon — Z-Moves
- Pokémon Sun and Moon — Technical Machines
- Z-Moves in Pokémon Sun and Moon
- Island challenge — Bulbapedia
- Ruins of Conflict — Bulbapedia
- Pokémon Sun and Moon — Bulbapedia
About the game & collecting notes
- Platform
- Nintendo 3DS
A start-to-finish walkthrough for Pokémon Moon (original Nintendo 3DS release). This guide walks you through every required island trial and grand trial, key story beats (Nebby/Lunala, Aether Foundation, Ultra Space), the Alola League run on Mount Lanakila and the Champion challenge. Practical tactics, recovery steps, and clear completion checks to finish the main campaign and access postgame content.
Darryl Polo
Darryl Polo loves tinkering with emulation and revisiting retro games. He enjoys exploring how old favorites play on different setups and sharing what he learns along the way. At Joking Joystick, he writes about the games, hardware, and small discoveries that keep the hobby fun.
Our editorial standardsFound a step that needs another look? Help us improve this guide.