
Pokémon Blue Version (Game Boy, USA/Europe) — Complete Campaign Walkthrough
Step-by-step original Nintendo Game Boy Pokémon Blue Version walkthrough covering the complete required route from Pallet Town through all eight Gyms, Team Rocket's required story events, Victory Road, the Elite Four, and the Champion. Optional sections cover Mewtwo and the distinction between the 150-species diploma, version-exclusive trading, trade evolutions, and the separate event-only Mew.

Find a copy
Pokémon Blue Version Game Boy
We may earn a commission if you buy through these links, at no extra cost to you. As an Amazon Associate I earn from qualifying purchases.
Opens retailer search results. Check the model, edition, seller, availability and current price before buying.
Before you begin
This walkthrough is written for the original Pokémon Blue Version cartridge played on the Nintendo Game Boy (the original DMG hardware or compatible re-releases of the same edition).
Follow the route order, gym strategies, and item locations here to finish the main story: travel from Pallet Town through Kanto, defeat each Gym, clear the silph company and Rocket bases, and beat the Elite Four and Champion.
Optional endgame and Pokédex guidance are included after you finish the main campaign.
Everything in this guide refers specifically to the original Red/Blue-era mechanics: Wild encounter pools, type effectiveness as implemented in Generation I, and trading/link requirements for version-exclusives.
Do not apply remake or later-generation mechanics (stat formula changes, move tutoring, new HM behavior) to this walkthrough; chapter instructions assume the original Game Boy game's rules and item availability.
Set yourself up for the run
Use the original Game Boy controls: Control Pad to move, A to confirm or interact, B to cancel, Start for the menu, and Select only where the game uses it contextually.
Use Pokémon Centers to restore HP and PP for free. Buy Poké Balls, Potions, and status cures as needed rather than spending all early money on healing items.
Choose a starter with the early Gym matchups in mind. Bulbasaur and Squirtle simplify Brock; Charmander requires an early supporting Pokémon such as Butterfree.
Plan HM assignments carefully because original Pokémon Blue has no normal move-deleter service. Use utility Pokémon for Cut, Flash, and Strength when practical; Surf is usually worth keeping on a main Water-type.
Save before major battles, one-time legendary encounters, fossils, and trades. The original cartridge provides one save file, not multiple in-game save slots.
For a complete collection, arrange compatible Generation I trades for version exclusives, missing starter families, fossils, and trade evolutions. Treat Mew separately from the 150-species diploma.
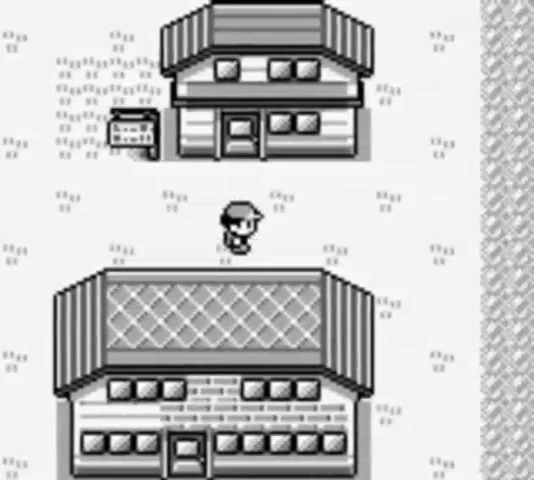
Start and Controls — Pallet Town, Professor Oak, and Picking a Starter
Begin Pokémon Blue in Pallet Town, choose your starter with the first two Gyms in mind, win the unavoidable opening rival battle, deliver Oak’s Parcel, receive the Pokédex, and learn the basic routines for saving, checking Pokémon information, healing, and catching Pokémon.
Start the game and learn the controls
Choose New Game from the title screen, then name your character and your rival. In the original Game Boy edition, use the Control Pad to move and move the cursor in menus. Press A to talk to people, inspect objects, and confirm selections. Press B to cancel a selection or close a menu. Press Start to open the main menu. Select has limited context-sensitive uses, but you do not need it for the opening sequence.
The main menu includes Pokémon, Item, Trainer, Save, and Option. Open Option if you want to change the text speed or battle style. To inspect a party member, choose Pokémon, select the Pokémon, and choose Stats. This screen shows its level, current HP, status condition, moves, and remaining PP. PP is consumed whenever that move is used in battle. The original game does not use the later Summary menu terminology.
- Name yourself and your rival.
- Confirm that Start opens the main menu.
- Use the Pokémon menu and Stats command to inspect your starter.
- Set text speed to a comfortable setting before continuing.
Leave home and trigger Professor Oak’s event
You begin upstairs in your house. Walk downstairs and speak with your mother if you want the opening advice. Leave through the mat along the bottom wall. Professor Oak is not waiting inside his laboratory yet, so walk north toward the tall grass at the edge of Pallet Town.
Before you can enter the grass, Oak appears and stops you. Follow him back to the large building in the south part of town: Professor Oak’s Laboratory. Your rival is already inside. This laboratory is the required location for starting the main quest and selecting your first Pokémon.
- Leave the house through the south exit.
- Walk toward the northern tall grass until Oak appears.
- Follow Oak into his laboratory.
Choose your starter and prepare for the first rival battle
Three Poké Balls are on the table in Oak’s Laboratory. Approach the one you want and press A to choose Bulbasaur, Charmander, or Squirtle. Each starter is received at level 5. The choice is permanent for this save unless you use trading or another external method later.
Bulbasaur is the most forgiving choice for the early campaign. Its Grass typing gives it a strong matchup against Brock’s Rock-type Geodude and Onix, and it is also useful against Misty’s Water Pokémon. Squirtle is another reliable choice because Water Gun is effective against Brock and Squirtle remains useful against Rock- and Ground-type opponents. Charmander makes the opening more demanding because Brock resists its early Fire attacks. If you choose Charmander, plan to catch a partner soon rather than trying to defeat Brock with Charmander alone. A Caterpie from Viridian Forest can evolve into Butterfree, whose Confusion is a practical early answer to Brock’s Pokémon.
The rival immediately takes the starter with a type advantage over yours and challenges you before you can leave the laboratory. His Pokémon is level 5. You cannot catch or train another Pokémon before this battle, so make your starter choice carefully. Select Fight and use your damaging move. If your HP becomes dangerously low, use the Potion stored in your bedroom’s PC by choosing Item during battle. Winning gives experience and leaves your starter ready for the trip to Viridian City.
- Choose Bulbasaur for the easiest early Gym matchups.
- Choose Squirtle for a sturdy early-game option.
- If choosing Charmander, plan to use an early partner such as Butterfree against Brock.
- Defeat the level 5 rival Pokémon before leaving the laboratory.
Reach Viridian City and collect Oak’s Parcel
After the battle, leave the laboratory and walk north onto Route 1. Wild Pokémon appear in the grass, but you do not have Poké Balls yet, so do not spend time trying to capture them. Continue north to Viridian City. If your starter has taken damage, enter the Pokémon Center and speak with the nurse. Healing restores the party’s HP and PP for free.
In Viridian City, enter the Poké Mart. The clerk gives you Oak’s Parcel, which is a required story item and is not purchased. Return south along Route 1 to Pallet Town and enter Oak’s Laboratory. Speak with Professor Oak and deliver the Parcel. Oak then gives you the Pokédex. Your rival’s sister, Daisy, can give you the Town Map in the house beside your rival’s home after the Pokédex event, so visit her if you want an in-game map for planning routes.
- Reach Viridian City by following Route 1 north.
- Heal at the Pokémon Center if necessary.
- Receive Oak’s Parcel from the Viridian City Poké Mart clerk.
- Return the Parcel to Professor Oak in Pallet Town.
- Receive the Pokédex and optionally collect the Town Map from Daisy.
Save, buy Poké Balls, and begin building your party
Save after receiving the Pokédex. Open the main menu with Start, select Save, choose Yes, and wait for the menu to close before turning off the Game Boy. The cartridge uses battery-backed save memory, so saving at major progression points is important.
Return to the Viridian City Poké Mart and buy Poké Balls. You can now catch wild Pokémon by selecting a target, lowering its HP without knocking it out, and choosing a Poké Ball from Item during battle. Early useful additions include Pidgey for a dependable Normal- and Flying-type attacker, Nidoran for future Poison- and Ground-type options, and Caterpie or Weedle if you want a fast-evolving Bug-type partner. Caterpie is especially useful for a Charmander player who wants Butterfree’s early Confusion.
Do not spend all of your starting money on Potions. Pokémon Centers restore HP and PP for free, so prioritize a modest supply of Poké Balls and carry only enough healing items to avoid abandoning a route. Heal before entering Route 2 or Viridian Forest, then continue north toward the next part of the journey.
- Save after receiving the Pokédex.
- Buy Poké Balls in Viridian City.
- Catch at least one partner before entering Viridian Forest.
- Use a Pokémon Center to restore HP and PP before continuing north.
Before you move on
- Your chosen Bulbasaur, Charmander, or Squirtle has defeated the opening rival’s level 5 Pokémon.
- Oak’s Parcel has been delivered at Professor Oak’s Laboratory.
- The Pokédex is present in your Key Items.
- You have collected the Town Map from Daisy if desired.
- You have saved successfully after the Pokédex event.
- You know how to heal at a Pokémon Center, inspect moves and PP through Stats, and use purchased Poké Balls to catch wild Pokémon.
- You have at least one usable partner or are prepared to catch one on Route 1, Route 2, or in Viridian Forest before challenging Brock.
Route 1–2 to Viridian City and Viridian Forest
Travel from Pallet Town to Viridian City, deliver Oak’s Parcel, return for the Pokédex and Poké Balls, then cross the western section of Route 2 and Viridian Forest to reach Pewter City. Use the early routes to build a small team and reach the low teens without excessive grinding. In Pokémon Blue, Caterpie is available on Route 2 and Viridian Forest, while Weedle is found in Viridian Forest rather than on the western section of Route 2.
Cross Route 1 and reach Viridian City
Leave Pallet Town through the northern exit and follow Route 1. In the original Game Boy version, Route 1 contains Pidgey and Rattata in the tall grass, usually at low levels. Before receiving Poké Balls, you cannot capture these Pokémon, so use the grass only for safe experience if your starter needs another level or two. You can run from encounters when your HP or move PP is getting low.
Take the Potion lying on the route by speaking with the person near the path, then continue north to Viridian City. Heal at the Pokémon Center if necessary and enter the Poké Mart. The clerk gives you Oak’s Parcel. Return south through Route 1 to Pallet Town and deliver it to Professor Oak in his laboratory. Oak gives you the Pokédex and five Poké Balls. Visit the house beside your own and speak with your rival’s sister to receive the Town Map before leaving again.
- Reach Viridian City through Route 1.
- Collect Oak’s Parcel from the Viridian Poké Mart.
- Return the Parcel to Professor Oak.
- Receive the Pokédex and five Poké Balls.
- Collect the Town Map from your rival’s sister if desired.
Restock in Viridian City and prepare to catch Pokémon
Return to Viridian City after speaking with Oak. Heal at the Pokémon Center, then buy additional Poké Balls from the Poké Mart. Carrying a few Potions is useful, but keep some money available for later Poké Balls and status cures. The Pokémon Center is free, so use it instead of spending money on unnecessary healing.
The old man near the northern part of Viridian City can demonstrate how to catch a Pokémon. The demonstration is optional and does not consume your Poké Balls. Viridian’s Gym is still closed, so the correct objective is to leave by the northern exit and continue toward Route 2.
- Heal after returning from Pallet Town.
- Buy extra Poké Balls.
- Buy a small number of Potions or an Antidote if you can afford them.
- Ignore the closed Viridian Gym for now.
Use Route 2 for optional captures and early experience
Take the northern exit from Viridian City onto the western section of Route 2. In Pokémon Blue, the grass here contains Pidgey, Rattata, and Caterpie. Pidgey is the most generally useful early addition because it remains effective against many ordinary Trainers and provides a Flying-type option later. Rattata is strong enough for the opening routes but is usually more valuable as an early temporary battler than as a permanent team member.
Caterpie is the version-specific early Bug choice on Route 2. Catching one is worthwhile if you want Butterfree, especially when using Charmander. Caterpie evolves into Metapod at level 7 and Butterfree at level 10. Butterfree gains Confusion upon evolving, giving it useful early special coverage and a way to handle some Poison-type opponents. Confusion is not super effective against Brock’s Rock/Ground Pokémon, so do not treat Butterfree as a direct replacement for Bulbasaur or Squirtle in the Pewter Gym.
The western path is the only practical section of Route 2 at this point. The eastern section is blocked by trees until you can use Cut, and the southern connection through Diglett’s Cave is a later route option. Continue north through the gatehouse into Viridian Forest.
- Remember that Pidgey and Rattata are available on Route 2 in Blue.
- Catch Caterpie if you want an early Butterfree.
- Do not expect Route 2 to provide a wild Water- or Grass-type answer to Brock.
- Enter the Viridian Forest gatehouse from the southern side.
Heal before entering Viridian Forest
Viridian Forest contains Trainer battles that cannot be avoided simply by walking around every opponent. If your starter is badly injured or has very little PP, return to Viridian City before entering. Otherwise, use the forest as your main source of early experience and save your money for supplies needed after Pewter City.
Bring an Antidote if possible. Weedle and other Bug Pokémon can inflict poison, and poison continues to damage a Pokémon while you walk in Generation I. The forest contains Antidotes, but carrying one prevents a poisoned team member from forcing an immediate retreat.
- Enter with your main battler healthy.
- Carry at least one Antidote if affordable.
- Keep enough Poké Balls for optional forest captures.
- Avoid beginning the forest with nearly empty attacking-move PP.
Cross Viridian Forest and collect useful items
Viridian Forest connects Route 2’s southern and northern gatehouses. Its Generation I Blue encounters are Caterpie, Metapod, Weedle, Kakuna, and the uncommon Pikachu. Pikachu is an optional capture rather than a requirement for the story. It can provide an Electric-type option later, but its low encounter rate and early level make it reasonable to skip if you do not want to spend time searching.
Follow the main paths north while taking side branches for items and Trainer battles. In the original game, the forest contains Poké Balls, Potions, and Antidotes. Pick up the visible items when they are close to your route, especially the Antidote and Potion, but do not repeatedly cross the grass solely to collect every encounter.
There are three Generation I Bug Catchers in the forest. Their teams include Weedle and Caterpie around level 6, Weedle and Kakuna around level 7, and a level 9 Weedle. Use the starter or another Pokémon with reliable damaging moves. Metapod and Kakuna commonly use Harden, so they are safe targets for a weaker team member when you need to distribute experience. If you intend to raise Butterfree or Beedrill, catching the attacking first-stage Pokémon is preferable to relying on a wild Metapod or Kakuna that has limited battle moves.
- Defeat the three original Red and Blue Bug Catchers if your team needs experience.
- Pick up nearby Poké Balls, Potions, and Antidotes.
- Catch Pikachu only if you want the optional Electric-type addition.
- Use weaker party members against safe Harden users when practical.
- Leave through the northern gatehouse.
Reach Pewter City without overgrinding
After leaving the forest, continue north through the Route 2 gatehouse and follow the short path into Pewter City. Battle the remaining route Trainers if you need experience or money, but avoid grinding far beyond the low teens. A starter around level 10 to 13, supported by one or two additional Pokémon, is a reasonable position for the next chapter.
Charmander users should not rely on Charmander alone against Brock. Raise Caterpie to Butterfree if you want an additional battler, and consider keeping Pidgey or another team member available so a critical hit or missed attack does not end the attempt. Bulbasaur and Squirtle already have a more direct matchup advantage, though they should still be healthy and have enough PP.
Enter Pewter City, heal at the Pokémon Center, visit the Poké Mart for any missing Poké Balls or Antidotes, and save before starting the Gym section. The forest crossing is complete once you are inside Pewter City; Brock’s strategy belongs to the following chapter.
- Pass through the northern Route 2 gatehouse.
- Reach Pewter City.
- Heal at the Pewter Pokémon Center.
- Restock basic supplies if needed.
- Save before challenging the Pewter Gym.
Before you move on
- Oak has received the Parcel, and you have the Pokédex and five Poké Balls.
- You have crossed the western section of Route 2 and entered Viridian Forest.
- You have passed through Viridian Forest and reached Pewter City.
- Your party is healed and contains your starter plus any optional support Pokémon you chose.
- Your supplies include enough Poké Balls for future captures and at least one status cure if possible.
- Your main battler is roughly in the low teens and ready for the Pewter Gym chapter.
References for this chapter
Pewter City and Brock — Rock-type Gym Strategy
Reach Pewter City through Viridian Forest, heal and resupply, then defeat Brock’s level 12 Geodude and level 14 Onix to earn the Boulder Badge and TM34, Bide. Bulbasaur and Squirtle have a clear type advantage. Charmander requires more preparation, with Butterfree’s Confusion or a trained neutral attacker providing the most practical support in the original Pokémon Blue.
Enter Pewter City and prepare
Leave Viridian Forest through its northern exit and continue along Route 2 until you enter Pewter City. Go to the Pokémon Center before visiting the Gym, especially if your team has taken damage or accumulated poison from the forest’s wild Pokémon and Bug Catchers. Restore the party, then save so a failed attempt does not force you to repeat your preparation.
Visit the Pewter City Poké Mart after healing. Buy Poké Balls if you still have space in your party and purchase a manageable supply of Potions. Avoid spending all your money immediately; Route 3 begins after the Gym and contains several trainers whose prize money can help fund later purchases. You can return to the Pokémon Center at any time before the Gym battle.
- Heal at the Pewter City Pokémon Center.
- Save after healing and before entering the Gym.
- Carry enough Potions for emergencies without spending all available money.
Set a realistic level target
Brock’s team in the original Pokémon Blue is Geodude at level 12 followed by Onix at level 14. A principal battler around level 13 or 14 is a practical target, although a lower-level Pokémon with a strong type advantage can still win. If your party is mostly around levels 9 or 10, complete more battles in Viridian Forest and Route 2 before challenging the Gym.
Do not grind every Pokémon equally. Choose one reliable answer to Brock and train a second Pokémon enough to switch in safely if the first is weakened. Wild encounters in the grass on Route 2 and inside Viridian Forest are close to Pewter City, making them the most convenient places to recover from a failed attempt. Return to the Pokémon Center when the PP of your main attacking move is running low.
- Train at least one dependable battler to approximately level 13–14.
- Keep the move you intend to use against Brock supplied with PP.
- Raise a backup Pokémon rather than relying on a single badly matched starter.
Select the best counter
Squirtle has the simplest matchup. Use Bubble against both of Brock’s Pokémon; their Water weakness makes it much more effective than ordinary physical attacks. Bulbasaur is also well suited once it knows Vine Whip. If Vine Whip is not yet available, gain a little more experience before entering rather than relying on Tackle or a weak neutral move.
Charmander faces the most difficult opening matchup because Fire attacks are resisted by Brock’s Rock/Ground Pokémon. The most useful early support is Butterfree from a Caterpie found in Viridian Forest. Butterfree’s Confusion is a Psychic-type special attack and is effective against Geodude and Onix. Beedrill can contribute with ordinary attacks, but it does not provide Butterfree’s Confusion strategy, so do not treat the two evolutions as interchangeable counters.
A Nidoran can help as a neutral or Fighting-capable option only if it has the appropriate move available in your version and at its current level. Do not assume an early Nidoran will already know Double Kick in Pokémon Blue; its original Generation I learnset does not make that a dependable early-Brock plan. Pidgey, Rattata, Pikachu, and unevolved Bug Pokémon are better used for supporting experience or finishing weakened targets than as the main answer.
- Use Bubble with Squirtle or Vine Whip with Bulbasaur when available.
- Use Butterfree’s Confusion as the clearest early support for Charmander.
- Do not use Electric attacks against Geodude or Onix; their Ground typing makes those attacks ineffective.
- Check the actual moves of any Nidoran before relying on it.
Navigate the Gym and defeat Brock
Enter Pewter Gym from the city. The Gym contains one regular Trainer before Brock. Battle that Trainer if you need experience or money, but heal afterward if the fight reduced your HP or PP. You can walk around the Trainer and challenge Brock directly if your team is already prepared.
Brock sends out Geodude first and Onix second. Open with your Water- or Grass-type attacker and use the corresponding super-effective move. If Brock’s Pokémon use Screech, remember that it lowers the target’s Defense; switching can remove the Defense reduction, but unnecessary switches also give the opponent more chances to act. Onix may also use Bind, which can restrict your actions for several turns.
Watch for Bide. When Brock’s Pokémon begin storing damage with Bide, avoid blindly continuing a weak attack if your active Pokémon might be knocked out by the stored damage. You can use a non-damaging move, switch when safe, or finish the Pokémon only when your battler can withstand the release. In most straightforward Water- or Grass-type victories, continuing with the super-effective attack is faster, but keep enough HP for the possible retaliation.
- Defeat Geodude before Onix.
- Use Water- or Grass-type attacks instead of Electric attacks.
- Respond carefully to Bide and avoid allowing a weakened Pokémon to absorb its release.
- Confirm that Brock awards the Boulder Badge and TM34, Bide.
Understand what the Boulder Badge unlocks
After the victory, the Boulder Badge raises the Attack stat of your Pokémon and permits the field use of HM05, Flash, once you obtain that HM later in the game. It does not grant the obedience threshold associated with the Cascade Badge. The badge also removes the story block at the eastern Pewter City exit, allowing you to proceed onto Route 3.
Before leaving, restore your party at the Pokémon Center. You may also return to the Poké Mart for additional Potions or Poké Balls, but do not need to buy a large stock yet. The immediate required route is Route 3, leading toward Mt. Moon.
- Verify that the Boulder Badge is recorded on your Trainer Card.
- Confirm that TM34, Bide, is in your inventory.
- Heal before starting Route 3.
- Use the eastern Pewter exit to confirm that Route 3 is now open.
Recover efficiently after a failed battle
If Brock defeats you, return to the Pewter City Pokémon Center and identify the specific problem before grinding. If your counter was knocked out quickly, raise its level or train a backup. If the battle was close but you ran out of PP, restore at the Center and reattempt without unnecessary wild encounters. If your attacks were ineffective, change the lead Pokémon rather than simply raising the same poorly matched attacker.
For a Charmander team, continue training in Viridian Forest and prioritize evolving Caterpie into Butterfree if you have one. Once Butterfree knows Confusion, it can provide a much better matchup than Charmander’s early Fire attacks. Bulbasaur and Squirtle teams generally need less preparation, but they still benefit from entering with full HP and enough PP.
When your main counter is around level 13–14, has its effective move available, and can survive at least one ordinary hit from Brock’s lead, return to Pewter City, heal, save, and challenge again. Brock uses the same two Pokémon on every attempt, so the previous battle gives you reliable information about how much additional training or healing you need.
- Diagnose the failed matchup before grinding.
- Train in Route 2 or Viridian Forest, close to Pewter’s Pokémon Center.
- Use Butterfree rather than Beedrill for the Confusion-based strategy.
- Heal and save immediately before the rematch.
Before you move on
- Brock’s level 12 Geodude and level 14 Onix are defeated.
- The Boulder Badge is visible on the Trainer Card.
- TM34, Bide, has been awarded.
- The Boulder Badge’s Attack increase and Flash field-use permission are available.
- The eastern exit from Pewter City to Route 3 is no longer blocked.
Mt. Moon and Route 3 — Key Items and Mt. Moon’s Trainers
Travel east from Pewter City across Route 3, then cross Mt. Moon in the original Nintendo Game Boy version. Collect the useful items, defeat the Team Rocket members and the Super Nerd guarding the fossils, choose either the Dome Fossil or Helix Fossil, and exit onto Route 4 toward Cerulean City.
1. Cross Route 3 and prepare at the cave entrance
Leave Pewter City through the eastern gate to enter Route 3. The route contains eight trainers: Lasses, Bug Catchers, Youngsters, and a Hiker. Their Pokémon range from about level 9 to level 14, making Route 3 a good place to bring a newly caught teammate closer to the rest of the party. The route includes Pidgey, Spearow, Jigglypuff, Rattata, and Nidoran-family encounters in the grass, so catch a Pokémon here if you still need Flying- or Normal-type coverage.
Battle as many trainers as you want for money and experience, but heal before entering Mt. Moon. There is no Pokémon Center inside the cave. You can return to Pewter City, or cross the cave and use the Pokémon Center near the Route 4 entrance after exiting. Buy enough Poké Balls and a few Potions or Antidotes before starting. An Escape Rope is useful if you need to leave early, but do not use it until after collecting the fossil if that is your immediate objective.
- Cross Route 3 and defeat the trainers needed for experience or money.
- Heal in Pewter City before entering Mt. Moon if the party is damaged.
- Carry Poké Balls, basic healing items, and an Escape Rope if available.
2. Collect the western and southern items on the first floor
Enter Mt. Moon from Route 3. On the first floor, take the western branch first to collect TM12, Water Gun, and the Potion in the chamber west of the entrance. Return to the main passage and continue east, then work through the southern passages. A second Potion is on the opposite side of the wall from the entrance, followed by a Rare Candy in the southeast area and an Escape Rope farther east.
The first floor also contains a Moon Stone in the northwest corner. Save it if you are not yet certain which Pokémon you want to evolve. Moon Stones are limited resources in the original game, and the item is more valuable when used deliberately for Pokémon such as Nidorino, Nidorina, Clefairy, or Jigglypuff.
Wild encounters in Mt. Moon include Zubat, Geodude, Paras, and Clefairy. The encounter pools vary by floor. Geodude can help against Normal- and Flying-type opponents, while Paras offers Grass-type attacks and status options later. Clefairy is uncommon, so only spend time searching for one if you want it for your team or Pokédex.
- Take TM12 and the Potion west of the entrance.
- Collect the second Potion, Rare Candy, and Escape Rope in the southern and southeastern passages.
- Pick up the visible Moon Stone in the northwest corner if you want the extra evolution resource.
3. Use the ladder branches to collect the lower-floor items
From the first floor, use the ladders in sequence rather than wandering randomly. The first ladder leads to a southern lower section containing a Team Rocket Grunt and an HP Up on a raised platform. Defeat the Grunt, collect the HP Up, and return to the first floor by the ladder.
Continue along the first-floor passage to the next ladder. This branch leads to another Team Rocket Grunt and a raised platform holding TM01, Mega Punch. Inspect the large rock in this area to find a hidden Ether, then return to the first floor. The Ether restores PP to one move, so it is especially useful if a key attack is running low before the fossil battle.
The lower sections contain Hikers, Lasses, Youngsters, Team Rocket Grunts, and the Super Nerd near the fossils. Hikers use Geodude and Onix, so Water- and Grass-type attacks are effective. Team Rocket commonly uses Rattata, Zubat, Sandshrew, and Ekans. Poison can accumulate during the cave, so cure it before walking long distances or entering another trainer battle. Wild encounters provide useful experience, but do not spend excessive time grinding if the party is already handling Route 3 trainers comfortably.
- Defeat the Rocket Grunt guarding the HP Up and collect the item.
- Collect TM01, Mega Punch, from the second lower branch.
- Inspect the nearby rock for the hidden Ether.
- Cure Poison before continuing if necessary.
4. Reach the fossil chamber and defeat the Super Nerd
After returning from the second item branch, continue west along the first-floor passage. Collect the Moon Stone in the northwest portion, then take the final ladder toward the fossil area. The required route winds through the lower section; follow the passages in a generally clockwise direction until you reach the northwest fossil chamber.
A Super Nerd stands on the platform in front of the fossils. In Red and Blue, his party consists of Grimer, Voltorb, and Koffing, all around level 12. Use reliable neutral attacks, or Ground- and Psychic-type moves if you have them. Avoid sending a weakened Pokémon into the fight: Voltorb is fast, and Koffing and Grimer can inflict or exploit Poison-related problems.
After winning, choose one fossil. The Dome Fossil becomes Kabuto, while the Helix Fossil becomes Omanyte when revived later at the Pokémon Lab on Cinnabar Island. The fossil is not immediately usable, so choose according to your collection plans rather than current battle strength. Only one fossil can be taken in this save without trading or using another game.
Before climbing toward the exit, inspect the white wall tile southeast of the fossil platform to find the hidden Moon Stone. This is an original Red and Blue hidden item location and should not be confused with the altered item placements in FireRed and LeafGreen.
- Reach the fossil chamber through the final lower-floor route.
- Defeat the Super Nerd’s Grimer, Voltorb, and Koffing.
- Take either the Dome Fossil or the Helix Fossil.
- Search the white wall tile southeast of the fossil platform for the hidden Moon Stone.
5. Exit onto Route 4 and recover
After taking the fossil, continue through the remaining passage and climb the final ladder to leave Mt. Moon. You will emerge on the western side of Route 4. The Pokémon Center is close to the cave entrance, so heal immediately before exploring the route or continuing toward Cerulean City.
Inside or near the Pokémon Center, a salesman offers a level 5 Magikarp for 500 Poké Dollars. This purchase is optional. You can obtain a Magikarp later with a fishing rod, so do not buy it if your money is needed for Poké Balls, Potions, or other campaign supplies.
Route 4 is effectively a one-way descent toward Cerulean City because the ledges prevent you from returning to Mt. Moon from the eastern side. Collect its items and wild Pokémon if desired, then continue to Cerulean. If you left the fossil chamber without choosing, you can return through Mt. Moon and complete the Super Nerd event later; the fossil does not need to be taken immediately, but it must be selected during that encounter to continue with one.
- Exit Mt. Moon onto Route 4.
- Heal at the Pokémon Center near the cave entrance.
- Confirm that the chosen fossil is in the Bag before moving on.
- Continue east toward Cerulean City when ready.
Before you move on
- Route 3 has been crossed and Mt. Moon has been entered from Pewter City.
- TM12, the desired optional items, and the fossil-area rewards have been collected according to the player’s priorities.
- The Super Nerd has been defeated and either the Dome Fossil or Helix Fossil is in the Bag.
- Mt. Moon has been exited onto Route 4 and the party has been healed at the nearby Pokémon Center.
- The player is ready to continue east toward Cerulean City.
Cerulean City, Nugget Bridge, and Misty — Water-type Gym
Heal and resupply in Cerulean City, defeat the rival, cross Nugget Bridge, help Bill on Route 25, collect useful nearby items, and defeat Misty for the Cascade Badge. This chapter follows the original Nintendo Game Boy Pokémon Blue Version battle data, not FireRed or LeafGreen.
Heal and prepare in Cerulean City
Enter Cerulean City from Route 4 and heal at the Pokémon Center. Save before heading north. Buy Potions, Antidotes, and Poké Balls if your supplies are low. The Cerulean Poké Mart does not sell a special item required for this section, so spend carefully and keep enough money for recovery items.
You can challenge the Cerulean Gym immediately, but the northern route is the better order for most teams. The rival battle, five Nugget Bridge battles, the Rocket battle, and the Route 25 trainers provide useful experience before Misty. Your practical target is a team with several Pokémon around the high teens rather than one severely overleveled Pokémon.
- Heal at the Cerulean Pokémon Center.
- Restock Potions, Antidotes, and Poké Balls as needed.
- Save before approaching the northern exit.
Defeat the rival before Nugget Bridge
Walk north from Cerulean City. The rival stands at the entrance to Route 24 and battles you when you approach. His team depends on your chosen starter, but the battle includes Pidgeotto, Abra, Rattata, and his starter Pokémon. Pidgeotto is normally the most dangerous opening opponent because it is fast and can inflict significant damage with Flying attacks.
Lead with your healthiest Pokémon and switch when the matchup is poor. Abra is fragile and normally uses Teleport, so defeat it quickly rather than allowing it to consume turns. If the rival defeats you, heal and try again with your strongest Pokémon in front; the rival battle must be cleared before you can continue across the bridge.
- Defeat the rival at the foot of Route 24.
- Keep at least one healthy Pokémon in reserve for Pidgeotto and the rival’s starter.
- Heal before beginning the bridge battles if the rival left your party weakened.
Cross Nugget Bridge and defeat the Rocket Grunt
Nugget Bridge contains five mandatory trainers in a fixed northward sequence. The first Bug Catcher uses Caterpie and Weedle at level 14. The second trainer, a Lass, uses Pidgey and Nidoran female at level 14. The third, a Youngster, uses Rattata, Ekans, and Zubat at level 14. The fourth Lass uses Pidgey and Nidoran female at level 16. The final trainer, a Junior Trainer male, uses Mankey at level 18.
Use the bridge to rotate weaker team members into safe experience, but do not let a damaged Pokémon remain in front just to gain experience. After all five trainers are defeated, the man at the north end gives you a Nugget, reveals himself as a Team Rocket Grunt, and battles you. In Pokémon Blue he uses Ekans and Zubat, both at level 15. Defeat him, then continue north into the grassy part of Route 24.
- Defeat all five Nugget Bridge trainers.
- Collect the Nugget from the Rocket Grunt.
- Defeat the Rocket Grunt after refusing his invitation.
- Heal if your main attackers are below safe fighting condition.
Use Routes 24 and 25 for counters and items
The grass north of the bridge contains useful early options. In Pokémon Blue, Bellsprout appears on Routes 24 and 25 and can provide Grass-type attacks for Misty. Abra also appears, but it commonly uses Teleport immediately, so throw a Poké Ball as soon as you encounter one if you want to catch it. Pikachu from Viridian Forest remains a strong Electric counter if you already trained one. Bulbasaur or Ivysaur is also an excellent answer if you selected it as your starter.
Continue east through Route 25. Its trainers include Hikers using Machop, Geodude, and Onix; Youngsters using Rattata, Spearow, or Slowpoke; a Lass using Nidoran; and other early-game trainers. Battle them individually and return to Cerulean City if your team needs healing. TM45 Thunder Wave is on the northwest hill in the grassy area of Route 24. It is optional, but paralysis can help slow fast opponents such as Misty’s Starmie.
At the far eastern end of Route 25, enter the Sea Cottage and speak to the Pokémon inside. Use the PC when Bill asks for help, then speak to him again after the procedure to receive the S.S. Ticket. The ticket is required for the later S.S. Anne sequence in Vermilion City, but Bill does not need to be helped before you earn the Cascade Badge.
- Catch or train Bellsprout, Pikachu, Bulbasaur, or another Pokémon with Electric or Grass attacks if needed.
- Collect TM45 Thunder Wave if you want the optional utility move.
- Help Bill and receive the S.S. Ticket.
- Return to Cerulean City and heal before entering the Gym.
Clear Cerulean Gym and defeat Misty
Enter the Cerulean Gym in the southwest part of town. The pool blocks the direct path, so walk around it and fight the Gym trainers before reaching Misty. The first trainer is a Swimmer with Horsea and Shellder at level 16. The second is a Junior Trainer female with Goldeen at level 19.
Misty uses Staryu at level 18 followed by Starmie at level 21. Starmie is the main threat because it is fast and has high Special in the original Generation I mechanics. Lead with Pikachu, Bellsprout, Ivysaur, or another Pokémon with a reliable Electric or Grass attack. If you use Pikachu, keep it healthy for Starmie rather than spending all of its HP on Staryu. Bellsprout can use Grass attacks, but avoid relying on it if it is far below Starmie’s level or has poor current HP.
A Water-type such as Squirtle or Wartortle can win through durable neutral attacks, but it should be well healed and close to the rest of your party’s level. Fire- and Ground-type attacks are poor choices here because Misty’s Pokémon resist or exploit those matchups. Do not waste turns on ineffective moves when a super-effective attack is available.
After the victory, Misty awards the Cascade Badge and TM11, BubbleBeam. The badge allows traded Pokémon up to level 30 to obey you and permits Cut to be used outside battle after you obtain HM01. BubbleBeam is a one-use TM, so teach it only to a Water Pokémon you intend to keep.
- Defeat the level 18 Staryu and level 21 Starmie.
- Receive the Cascade Badge.
- Receive TM11, BubbleBeam.
- Save after the Gym victory.
Before you move on
- The Cascade Badge appears on your Trainer Card.
- TM11, BubbleBeam, is in your Bag or has been taught to a chosen Water Pokémon.
- Bill has returned to human form and given you the S.S. Ticket.
- The rival, all five Nugget Bridge trainers, and the Rocket Grunt have been defeated.
- TM45 Thunder Wave has been collected if you chose to take the optional nearby item.
Route 5–6, Vermilion City and the S.S. Anne — Cut and the First Major Boat Event
Travel south from Cerulean City through Route 5, the Underground Path, and Route 6 to Vermilion City. Use the S.S. Ticket obtained from Bill to board the S.S. Anne, defeat the rival, explore the ship for its one-time battles and items, and receive HM01 Cut from the Captain. After Cut is obtained, the ship departs the next time you leave, so complete the ship’s optional content before collecting the HM or before disembarking afterward.
1. Confirm Bill’s ticket and prepare in Cerulean City
Before leaving Cerulean City, make sure you completed Bill’s event at the Sea Cottage on Route 25 and received the S.S. Ticket. The ticket is the required item for boarding the ship at Vermilion Harbor. If you have not completed Bill’s event, travel north from Cerulean across Nugget Bridge and Route 24, then east along Route 25 to the cottage. Help Bill return to normal and speak with him afterward to receive the ticket.
Heal at the Cerulean Pokémon Center and restock before starting the trip south. The S.S. Anne contains many trainer battles but no Pokémon Center, so bring a reasonably healthy party and enough Potions or status cures for several consecutive fights. You do not need Surf for this chapter. HM03 Surf comes later from the Safari Zone in Fuchsia City.
- Have the S.S. Ticket from Bill.
- Heal in Cerulean City.
- Carry enough Potions and status cures for the ship’s trainer sequence.
2. Travel through Route 5, the Underground Path, and Route 6
Leave Cerulean City through the southern gatehouse to enter Route 5. Continue south until you reach the Underground Path entrance. Enter the tunnel and walk through it to emerge on Route 6, then continue south toward Vermilion City.
Route 5 and Route 6 contain trainers and wild Pokémon that can provide useful experience before the S.S. Anne and Lt. Surge. Battle trainers if a team member needs to catch up, but avoid excessive grinding. Keep your main party close in level and save your supplies for the ship and the next Gym.
- Enter Route 5 through Cerulean’s south exit.
- Use the Underground Path to reach Route 6.
- Follow Route 6 south into Vermilion City.
3. Make optional Vermilion preparations
Heal at Vermilion’s Pokémon Center as soon as you arrive. Before boarding, you may visit the Pokémon Fan Club and speak with its chairman to receive the Bike Voucher. The voucher can later be exchanged for a Bicycle in Cerulean City, but it is not required for the S.S. Anne or the main campaign.
You can also receive the Old Rod from the Fishing Guru in the house near the Pokémon Center. In the original Red and Blue, the Old Rod produces Magikarp, making it useful mainly for an early Water-type project or Pokédex progress. These rewards are optional; the important destination is the harbor at the southeastern side of Vermilion City.
- Heal at the Pokémon Center.
- Collect the Bike Voucher if desired.
- Collect the Old Rod if desired.
- Keep space in your inventory for ship items.
4. Board the S.S. Anne and explore before taking Cut
Go to the Vermilion harbor and show the S.S. Ticket to the sailor. Once aboard, explore the ship’s corridors, cabins, stairways, and lower deck. You can battle Sailors, Fishermen, Gentlemen, Lasses, and other passenger trainers for money and experience. Use weaker Pokémon through safe switching if you want to raise them, but do not leave damaged Pokémon exposed to repeated attacks.
Important items aboard include TM08 Body Slam, TM44 Rest, healing items, Ether, Max Ether, and other supplies. The exact room order is not important: search each accessible cabin and corridor as you move toward the rival. Because there is no Pokémon Center on the ship, you may leave to heal in Vermilion and reboard while the Captain is still waiting for help. This option ends after you receive HM01 Cut.
- Battle useful ship trainers.
- Search cabins and corridors for one-time items.
- Return to Vermilion’s Pokémon Center if necessary before the Captain event.
5. Defeat the rival and speak with the Captain
Continue through the ship until you meet your rival. In the original Pokémon Blue, he leads with Pidgeotto and also uses Raticate, Kadabra, and the evolved form of the starter that has the type advantage over your choice. Pidgeotto can be handled with Electric- or Rock-type attacks when available. Kadabra has low physical Defense despite its Psychic typing, so strong physical attacks are useful. Use a type advantage against his starter rather than allowing a weakened Pokémon to remain in battle.
After winning, continue to the Captain’s quarters. Speak with the seasick Captain and choose to help him; the game depicts this as giving him a backrub. Once he feels better, he gives you HM01 Cut. Cut teaches a compatible Pokémon the Cut move and allows small trees to be removed outside battle after you have the Cascade Badge from Misty.
- Defeat the rival before entering the Captain’s quarters.
- Help the seasick Captain.
- Receive HM01 Cut.
6. Finish the ship before disembarking
Do not leave the ship immediately after receiving HM01. Before disembarking, revisit every accessible area for missed items and trainer battles. In the original Pokémon Blue, the S.S. Anne sails away after you leave once the Captain has given you Cut, and the ship does not return during normal play. This makes the ship’s remaining items and uncompleted battles permanently missable.
After checking the ship, teach Cut to a compatible Pokémon. Choose a Pokémon you can spare for utility because Generation I has no ordinary move-deletion service for removing HM moves. A temporary or less central team member is usually safer than placing Cut on a Pokémon whose four battle moves you expect to preserve.
- Collect desired items before leaving.
- Complete any ship trainer battles you still want to fight.
- Teach Cut to a practical utility Pokémon.
- Disembark only after you are finished with the ship.
7. Open Vermilion’s next routes
Back in Vermilion City, use Cut on the small tree blocking the entrance to the Vermilion Gym. Cut can be selected from the Pokémon menu when a compatible Pokémon knows it, but its field use requires the Cascade Badge, which you should already have from Misty.
You can also leave Vermilion through the eastern exit to Route 11. Diglett’s Cave is located near the western end of Route 11 and connects to Route 2. Entering the cave is optional, but Diglett and Dugtrio are valuable Ground-type choices for the upcoming Vermilion Gym because Ground-type Pokémon are immune to Electric attacks. After exploring, return to Vermilion, heal, and prepare for Lt. Surge. Do not attempt the longer Fuchsia route yet; later badges, HMs, and story events are needed to open that progression.
- Use Cut to open the Vermilion Gym entrance.
- Visit Route 11 and Diglett’s Cave if you want a Ground-type Pokémon.
- Return to Vermilion and heal before challenging Lt. Surge.
Before you move on
- You possess HM01 Cut from the S.S. Anne’s Captain.
- The rival battle aboard the ship is complete.
- You have searched the ship for any desired items and completed any desired trainer battles.
- The Captain event is finished and the S.S. Anne has departed after you disembarked.
- A compatible Pokémon knows Cut.
- You can access the Vermilion Gym entrance and Route 11, including Diglett’s Cave.
- Your party is healed and ready for the Vermilion Gym or Diglett’s Cave training.
Route 9–10, Rock Tunnel, Lavender Town, and Diglett’s Cave
After defeating Lt. Surge, travel through Route 11 and Diglett’s Cave if you want an optional Ground-type or a shortcut to Route 2. The required story route to Lavender Town begins in Cerulean City: use Cut to enter Route 9, cross Route 10, pass through Rock Tunnel, and continue south into Lavender Town. From there, leave west through Route 8 and use the Underground Path to reach Route 7 and Celadon City. Flash makes Rock Tunnel much easier, but the original Game Boy version does not require it for passage.
Use Route 11 and Diglett’s Cave as an optional detour
Heal in Vermilion City, then leave through the eastern exit to enter Route 11. The route contains several trainers and grass encounters, making it a useful place to earn money and bring weaker party members closer to the rest of the team. The eastern end is blocked by the Snorlax on Route 12, so Route 11 does not provide an open path to Lavender Town at this stage.
The southern entrance to Diglett’s Cave is on Route 11. The tunnel connects Route 11 with the eastern side of Route 2 and contains Diglett and the rarer Dugtrio in the original Pokémon Blue. Catch one if you want Ground-type coverage, particularly for Lt. Surge’s Electric Pokémon, or simply cross the cave to reach the western Kanto connection.
Diglett and Dugtrio are fast but fragile. Keep them away from Water-, Grass-, and Ice-type attacks, and do not rely on them as your only answer to the areas ahead. Diglett’s Cave is optional; the required route toward Lavender Town begins from Cerulean City, not from the cave.
- Heal and resupply in Vermilion City before entering Route 11.
- Use Diglett’s Cave for an optional Ground-type, training, or travel shortcut.
- Do not expect Route 11 to lead to Lavender Town or Fuchsia City before the Poké Flute event.
Reach Route 2 and collect Flash if you qualify
The northern exit of Diglett’s Cave places you on the eastern side of Route 2. A Cut tree blocks the direct route toward the gatehouse and Pewter City. You need HM01 Cut from the S.S. Anne and the Cascade Badge before Cut can be used outside battle.
Cut the tree and enter the nearby Route 2 gatehouse. Professor Oak’s aide gives you HM05 Flash after you have caught at least 10 different Pokémon species and registered them as caught in the Pokédex. Seeing species is not enough. If you are short of the requirement, catch common Pokémon on Routes 1 and 2 or in Viridian Forest, then return to the aide.
Teach Flash to a Pokémon that can spare a move slot. It is strongly recommended for Rock Tunnel because it illuminates the room and makes ladders, walls, trainers, and item balls visible. Flash is not needed in Diglett’s Cave, and it is not an overworld requirement for entering Rock Tunnel.
- Have the Cascade Badge before attempting to use Cut on the Route 2 tree.
- Register at least 10 species as caught before speaking to Oak’s aide.
- Teach Flash to an expendable utility Pokémon if possible.
Travel from Cerulean City through Route 9 and Route 10
Return to Cerulean City and leave through the eastern exit. Route 9 begins after the short approach east of town. Use Cut on the tree blocking the entrance, then follow the route east and southeast through its ledges and trainer sections. Route 9 contains many trainers, including Hikers, Bug Catchers, and Junior Trainers, so restore HP and PP before entering if your party is already worn down.
Several trainers can be avoided by moving around their sight lines, but battling them provides useful experience before Rock Tunnel. Grass encounters on this route can also help fill the Pokédex requirement if you still need Flash. Route 9 contains a visible TM30 Teleport and a hidden Ether; both are optional and should not distract you from reaching the eastern exit.
Continue into the northern section of Route 10. Heal at the Pokémon Center beside the Rock Tunnel entrance before entering the cave. There is also a hidden Super Potion near the upper section of this route. The Power Plant is visible from Route 10, but it is an optional later detour that requires Surf and is not part of this chapter’s required route.
- Leave Cerulean City through the eastern exit after using Cut.
- Heal at the Route 10 Pokémon Center before entering Rock Tunnel.
- Treat TM30, the hidden Ether, and the hidden Super Potion as optional pickups.
Cross Rock Tunnel and reach Lavender Town
Enter Rock Tunnel from the north side of Route 10. The original Game Boy dungeon is dark, and Flash is the safest way to make the ladders and walls easy to identify. If you do not have Flash, the tunnel is still passable by following a map and checking the position of every ladder carefully; it is not an absolute progression requirement.
Rock Tunnel has two floors connected by ladders. Follow the corridors from the entrance to the first ladder, use the lower level to reach the next ladder connections, and continue until the final southern exit. When a route appears to end, look for a ladder rather than assuming you have reached a dead end. The tunnel contains Hikers, PokéManiacs, and Junior Trainers, with Rock-, Ground-, Fighting-, and other mixed-type Pokémon. Carry Antidotes and healing items because wild encounters and trainer battles can drain the party before the exit.
If you are low on supplies, use an Escape Rope or return to the Route 10 Pokémon Center before committing to another attempt. After leaving through the southern end, follow Route 10 south. The remaining stretch is short and leads directly into Lavender Town.
- Use Flash or keep a reliable Rock Tunnel map available.
- Track every ladder and conserve PP for the trainers inside.
- Exit from the southern side of the tunnel and continue south into Lavender Town.
Leave Lavender Town through Route 8 and the Underground Path
Heal at Lavender Town’s Pokémon Center after arriving. Pokémon Tower is available in town, but the story cannot be completed there yet because the unidentified ghost blocks the upper floors until you obtain the Silph Scope later. You may inspect the tower now, but do not treat it as cleared during this chapter.
For the next required route, leave Lavender Town through the western exit onto Route 8. Battle or avoid the trainers while moving west toward the gatehouse. Saffron City lies directly ahead, but its gates are closed until you provide the guards with a drink from the Celadon Department Store.
Instead, enter the Underground Path in the building on Route 8. Walk through the passage and exit on Route 7, west of Saffron City. Follow Route 7 west to reach Celadon City, where the next major objectives include the Department Store, the Rocket Hideout, and Erika’s Gym. This route avoids the Saffron gate and does not require Surf or Fly.
- Heal in Lavender Town after exiting Rock Tunnel.
- Inspect Pokémon Tower only if desired; return after obtaining the Silph Scope.
- Use Route 8, the Routes 7–8 Underground Path, and Route 7 to reach Celadon City.
Before you move on
- You have crossed Diglett’s Cave or deliberately skipped it after confirming your team does not need the shortcut or Ground-type option.
- You have used Cut to enter Route 9 from Cerulean City.
- You have reached the Route 10 Pokémon Center and entered Rock Tunnel.
- You have exited Rock Tunnel from the southern side and arrived in Lavender Town.
- You have obtained HM05 Flash if you registered at least 10 caught species, or confirmed that you can navigate Rock Tunnel without it.
- You have left Lavender Town through Route 8, crossed the Underground Path, reached Route 7, and arrived at Celadon City.
- You have not incorrectly treated Pokémon Tower, the Power Plant, Fuchsia City, or Saffron City as completed parts of this chapter.
Fuchsia City, Safari Zone, and Koga’s Gym
Defer this chapter until after the Lavender Town Pokémon Tower sequence. You must have defeated the Marowak ghost, rescued Mr. Fuji, and received the Poké Flute. Use the flute to clear either the Snorlax blocking Route 12 south of Lavender Town or the Snorlax blocking Route 16 west of Celadon City. Then reach Fuchsia City, collect HM03 Surf and the Gold Teeth in the Safari Zone, return the teeth to the Warden for HM04 Strength, and defeat Koga for the Soul Badge and TM06 Toxic.
1. Complete the prerequisite and clear a Snorlax roadblock
Do not begin this chapter immediately after crossing Rock Tunnel. First finish the Pokémon Tower events described in the Lavender Town chapter. Obtain the Silph Scope in Celadon City’s Rocket Hideout, return to Pokémon Tower, defeat the ghost that blocks the upper floors, rescue Mr. Fuji, and accept the Poké Flute from him.
There are two valid routes into Fuchsia City. For the eastern route, travel from Lavender Town to Route 12 and use the Poké Flute on the sleeping Snorlax south of the town. You may catch it or defeat it; either result removes the roadblock. Continue south through Routes 12, 13, 14, and 15, then enter Fuchsia City from the east.
For the western route, travel to Route 16 on the west side of Celadon City, use the Poké Flute on the Snorlax blocking the road, and continue through Route 17, Cycling Road, and Route 18. This route requires the Bicycle. The Cycling Road route is optional because Routes 12–15 provide a complete walking route from Lavender Town.
- Poké Flute received from Mr. Fuji.
- At least one Snorlax roadblock cleared.
- Fuchsia City reached through Routes 12–15 or Routes 16–18.
- Party healed before entering the Safari Zone or Gym.
2. Prepare in Fuchsia City
Heal at the Pokémon Center and visit the southeastern-most house if you want the Good Rod. The Fishing Guru’s brother gives it to you. This rod is optional for the main campaign, and it is not needed to obtain Surf, Strength, or the Soul Badge. If you already have the Super Rod from Route 12, you can skip this visit.
Visit the Safari Zone Warden in the southeastern house near the Pokémon Center. His speech is difficult to understand because he has lost his Gold Teeth. This conversation is not required to enter the Safari Zone, but it identifies the item you must recover there. Returning the teeth later gives you HM04 Strength.
Buy Antidotes or Full Heals before challenging Koga. Poison is common among both Gym trainers and the Leader’s Pokémon. Save before a Safari visit if you plan to hunt a rare Pokémon, because Safari encounters can flee and the area has a limited number of steps and Safari Balls.
- Good Rod collected only if desired.
- Warden visited and Gold Teeth objective understood.
- Antidotes or Full Heals available.
- Save made before a capture-focused Safari attempt.
3. Enter the original Game Boy Safari Zone
Pay 500 Pokédollars at the Safari Zone entrance. The game gives you 30 Safari Balls and permits 500 steps. The Safari Game ends when you use all 30 Safari Balls or walk the full step allowance.
You cannot send out your own Pokémon to weaken wild encounters. During an encounter, you may throw a Safari Ball, bait, or a rock. Bait makes a Pokémon less likely to flee but harder to catch; a rock makes it easier to catch but more likely to flee. Neither option guarantees capture, so do not spend the entire visit trying to force one rare encounter while neglecting the required items.
Treat HM03 Surf and the Gold Teeth as the priorities for the first successful visit. Safari captures are optional for campaign completion. If you encounter something you need, throw Safari Balls immediately rather than wasting many steps trying to create an ideal capture state.
- 500 Pokédollars paid.
- 30 Safari Balls received.
- 500-step limit understood.
- No plan to weaken wild Pokémon with party attacks.
- Surf and Gold Teeth prioritized over optional captures.
4. Reach Area 3 and collect the required items
From the entrance, travel northeast into Area 1. Continue through the Safari Zone using the marked exits rather than circling through every patch of grass. From Area 1, take the northwest exit into Area 2. In Area 2, move through the northern portion and take the southwest exit into Area 3.
In Area 3, head south to find the Gold Teeth on the ground near the rocky ridge. Pick them up immediately. Then move west toward the Secret House. The Gold Teeth and HM03 Surf are in the same general end-of-zone section, so collecting them before exploring optional side paths reduces the chance of running out of steps.
Enter the Secret House and speak with the person inside to receive HM03 Surf. You do not need to use Surf inside the Safari Zone to obtain the HM. If your remaining steps permit it, you can collect the nearby optional items afterward, but leave as soon as the required objectives are secure.
- Area 3 reached.
- Gold Teeth picked up.
- Secret House entered.
- HM03 Surf received.
- Optional items collected only after the two required objectives are complete.
5. Separate required progress from optional Safari captures
The Safari Zone contains several useful or rare Pokémon, but none is needed to defeat Koga or finish the main campaign. In the international original Pokémon Blue release, Pinsir is the notable Blue-exclusive Safari encounter. Scyther is associated with Red and must be traded into Blue. Rhyhorn can provide Ground-type coverage, while Exeggcute can eventually provide Psychic and Grass options, but both require additional training.
Chansey, Kangaskhan, Tauros, and Pinsir are valuable Pokédex targets, yet their low encounter or capture reliability can consume many Safari visits. Dratini and Dragonair are fishing encounters that require the Super Rod; they are not ordinary grass encounters. If you are building a practical story team, use the Safari Zone for a Pokémon you intend to train rather than delaying progression for a rare capture.
The Safari Zone also contains fixed items such as Carbos, TM37 Egg Bomb, TM40 Skull Bash, TM32 Double Team, a Full Restore, and restorative items. These are optional. Do not let them distract you from the Gold Teeth and Secret House.
- Pinsir identified as the Blue-exclusive Safari target.
- Scyther reserved for a trade from Red or another compatible source.
- Dratini and Dragonair treated as Super Rod encounters.
- All Safari captures and fixed items recognized as optional.
6. Return the Gold Teeth for Strength
Leave the Safari Zone and return to the Warden’s house in Fuchsia City. Speak with him while the Gold Teeth are in your bag. He gives you HM04 Strength and can now speak normally.
Strength is not needed to enter Koga’s Gym, but it is required for later boulder puzzles, especially in Victory Road. Teach it to a compatible Pokémon only if that Pokémon can carry the field move without weakening your main battle plan. You can postpone teaching it until a later route requires it.
HM03 Surf can be received before the Gym battle, but the Soul Badge is required before Surf can be used outside battle. You may teach Surf immediately to a compatible Water-type, but overworld water traversal will remain unavailable until Koga is defeated.
- Gold Teeth returned to the Warden.
- HM04 Strength received.
- HM03 Surf is in the bag.
- A compatible Pokémon is available for Surf.
7. Navigate the invisible-wall Gym
Fuchsia Gym is built around invisible barriers. The visible floor space is divided by glass-like walls that are difficult to see. Move through the openings between the barriers and work toward the center of the Gym. If you reach a dead end, backtrack to the last opening rather than walking repeatedly into the same wall.
Gym trainers use Poison-focused teams, but several also carry Psychic- or Ground-type Pokémon. Bring more than one reliable attacker. Ground- and Psychic-type moves are the strongest general answers to Koga’s pure Poison team. Grass and Bug attacks are poor primary choices because Poison Pokémon resist them in the original type chart.
Heal before speaking to Koga. Use Antidotes or Full Heals if a trainer poisons the party, and restore move PP at the Pokémon Center if repeated trainer battles have exhausted your main attacking moves.
- Invisible-wall openings located.
- Ground- or Psychic-type attacks available.
- Second attacker prepared in case the lead is poisoned or weakened.
- Party healed before the Leader battle.
8. Defeat Koga
In Pokémon Blue, Koga uses Koffing at level 37, Muk at level 39, a second Koffing at level 37, and Weezing at level 43. Open with a Ground- or Psychic-type attacker that can defeat Koffing efficiently, but keep a second Pokémon ready in case poison, Disable, Minimize, or reduced accuracy interferes with the plan.
Muk may use Minimize, so rely on your most accurate damaging move and avoid wasting turns on unnecessary setup. Weezing knows Selfdestruct, so do not leave a badly weakened Pokémon in front of it. If Weezing uses Selfdestruct, the move can knock out both Pokémon; plan your final switch and remaining party members accordingly.
After the battle, Koga awards the Soul Badge and TM06 Toxic. The badge enables the use of Surf outside battle. Surf is required for the later route to Cinnabar Island and is also one of the most dependable Water-type attacks in the original game.
- Koffing, Muk, Koffing, and Weezing defeated.
- Soul Badge received.
- TM06 Toxic received.
- Surf can now be used outside battle.
- At least one healthy Pokémon remains available for future Surf travel.
9. Recover if Koga defeats the party
If you lose, return to the last Pokémon Center rather than trying to re-enter with poisoned or low-PP Pokémon. Cure the party, restock Antidotes or Full Heals, and restore the attacks you use against Poison types.
For quick retraining, battle the remaining trainers on Routes 13, 14, and 15, or use available wild encounters in the surrounding routes. Focus on the specific problem: if damage is sufficient but poison causes losses, carry more cures; if Muk or Weezing survives too long, add a Ground- or Psychic-type attacker or improve that Pokémon’s level and move selection.
After the rematch, confirm that Surf, Strength, the Soul Badge, and TM06 Toxic are all recorded before leaving Fuchsia. The next campaign route can then use Surf and Strength without requiring another visit to the Safari Zone.
- Party fully healed after a defeat.
- Poison cures and healing items restocked.
- Failed matchup addressed with levels, moves, or a better counter.
- Surf, Strength, Soul Badge, and TM06 Toxic confirmed before departure.
Before you move on
- Poké Flute was received from Mr. Fuji after the Pokémon Tower rescue.
- At least one Snorlax roadblock was cleared.
- Fuchsia City was reached through Routes 12–15 or Routes 16–18.
- HM03 Surf is in the bag.
- Gold Teeth were returned to the Safari Zone Warden.
- HM04 Strength was received.
- Koga was defeated in Fuchsia Gym.
- The Soul Badge is recorded.
- TM06 Toxic is in the bag.
- A compatible Pokémon can learn Surf and another compatible Pokémon can carry Strength when needed.
- The party is healed and poison has been cured before continuing.
References for this chapter
- Bulbapedia — Pokémon Red and Blue Walkthrough, Section 11
- Bulbapedia — Walkthrough: Pokémon Red and Blue
- StrategyWiki — Pokémon Red and Blue: Fuchsia City
- StrategyWiki — Pokémon Red and Blue: Safari Zone
- Smogon — Generation I TM and HM Location Guide
- Game Boy Instruction Manual — Pokémon Red Version
Saffron City, Silph Co., and Sabrina — Final Rocket and Psychic Gym Sequence
Defer this chapter until after the consolidated Pokémon Tower and Celadon City chapters. You must have rescued Mr. Fuji, obtained the Silph Scope and Poké Flute, cleared the Celadon Rocket Hideout, and completed the required Celadon objectives. Bring a Fresh Water, Soda Pop, or Lemonade from the Celadon Department Store to open Saffron City. Then recover the Card Key in Silph Co., defeat the rival and Giovanni, receive the Master Ball, and defeat Sabrina for the Marsh Badge. The Poké Doll and Copycat’s Mimic reward are optional.
Enter Saffron City after the Tower and Celadon objectives
Do not begin this chapter immediately after reaching Lavender Town. First complete the Pokémon Tower sequence: obtain the Silph Scope in the Celadon Rocket Hideout, return to the Tower, defeat the ghost Marowak, rescue Mr. Fuji, and receive the Poké Flute. The Celadon chapter should also be complete, including Erika’s Gym if you are following the planned order.
Buy one drink from a vending machine on the roof of the Celadon Department Store. Fresh Water, Soda Pop, and Lemonade all work. Carry the drink to any guarded Saffron entrance and speak with the guard. Give him the drink when prompted. After one guard accepts it, the city’s gates are open for passage.
Heal at the Saffron Pokémon Center and stock healing items before entering Silph Co. The mandatory rival and Giovanni battles use Pokémon in the high 30s, so a balanced party around the mid-to-high 30s is a practical target. Exact levels matter less than having reliable answers to Flying, Water, Psychic, Fire, and Ground opponents.
- Have the Silph Scope and Poké Flute before entering Saffron.
- Complete the Celadon Rocket Hideout and the required Celadon objectives.
- Carry a Fresh Water, Soda Pop, or Lemonade.
- Heal and resupply in Saffron.
Reach the Card Key on 5F
Enter Silph Co. and take the elevator to 5F. You do not need to defeat every Rocket Grunt or Scientist, but optional battles provide useful experience and money. The required goal is the Card Key.
On 5F, move through the corridor toward the lower portion of the floor and use the warp panel beside the Rocket Grunt. The paired warp places you in the nearby isolated section; follow that section to the Card Key item and pick it up. Confirm that the Card Key is listed in the Key Items pocket before leaving the floor.
The Card Key is reusable. Face a locked electronic door and press A to open it. It gives access to the rival on 7F and the boardroom route on 11F. Optional rewards include TM26 Earthquake on 10F, but do not detour for it if your team is already weakened.
- Reach Silph Co. 5F by elevator.
- Use the warp-panel route beside the Rocket Grunt.
- Pick up and verify the Card Key.
- Use the Card Key on electronic doors rather than searching for a one-use key.
Reach 7F and defeat the rival
Return to 3F and use the Card Key on the locked door near the central warp area. Enter the room and step onto the warp panel. This takes you to the northwest section of 7F, where the rival is waiting. Heal before speaking to him; this battle is part of the route to the Silph Co. boardroom.
The rival uses Pidgeot at level 37, Alakazam at level 35, and the final evolution of his starter at level 40. The other two Pokémon depend on your starter. After Bulbasaur, his team is Pidgeot, Exeggcute level 38, Gyarados level 35, Alakazam, and Charizard. After Charmander, his team is Pidgeot, Growlithe level 38, Exeggcute level 35, Alakazam, and Blastoise. After Squirtle, his team is Pidgeot, Gyarados level 38, Growlithe level 35, Alakazam, and Venusaur.
Use Electric attacks against Pidgeot and Gyarados when appropriate. Water or Ground attacks handle Growlithe. Fire or Flying attacks are useful against Exeggcute, while a strong physical attacker is generally more dependable against Alakazam than a slow special exchange. Keep a suitable answer for the rival’s final starter evolution. Be ready for status moves and Alakazam’s Recover.
After winning, speak with the nearby Silph employee to receive a level 15 Lapras. Lapras is optional for completing the campaign. If your party is full, make room in the party or use the PC and speak with the employee again so you can accept the gift.
- Use the Card Key on 3F and take the warp to 7F.
- Defeat the five-Pokémon rival battle.
- Receive Lapras if desired.
- Heal before continuing toward Giovanni.
Defeat Giovanni on 11F and receive the Master Ball
Take the elevator to 11F. Use the Card Key to open the western locked door, defeat the final Rocket Grunt in the approach, and enter the boardroom. Giovanni’s original Red and Blue team is Nidorino level 37, Kangaskhan level 35, Rhyhorn level 37, and Nidoqueen level 41.
Ground attacks are effective against Nidorino, Rhyhorn, and Nidoqueen. Rhyhorn and Nidoqueen are also vulnerable to Water and Grass attacks. Kangaskhan is weak to Fighting attacks, though a strong neutral physical move works if necessary. Do not use Electric attacks against Rhyhorn or Nidoqueen; both are Ground-type and immune to them in Generation I.
After defeating Giovanni, speak with the Silph president in the boardroom. He gives you the Master Ball. Normally save it for Mewtwo, although choosing another legendary is valid if that is your planned capture strategy. Team Rocket leaves Silph Co. after this battle, so you can return for optional items without the earlier Rocket obstruction.
- Reach the western boardroom on 11F.
- Defeat Nidorino, Kangaskhan, Rhyhorn, and Nidoqueen.
- Speak with the president and receive the Master Ball.
- Confirm that Team Rocket has left Silph Co.
Navigate the Saffron Gym
Leave Silph Co. and enter the Saffron Gym in the northeast part of the city. The shortest route uses the entrance panel, then the northwest panel in the next room, followed by the southwest panel and another southwest panel. This sequence takes you to the central room where Sabrina is waiting.
Gym trainers use Psychic-focused teams including Slowpoke, Slowbro, Mr. Mime, Kadabra, Gastly, and Haunter. They are optional if you only want Sabrina, but battling them gives useful experience. Heal first if Silph Co. left your party damaged.
In original Generation I, Bug is the listed super-effective type against Psychic, but the available Bug attacks are generally weak. Psychic Pokémon have comparatively low Defense, so strong physical Normal, Flying, and Rock attacks are practical choices. Fearow, Dodrio, Tauros, Snorlax, Persian, and similarly strong attackers can perform well. Do not make a Poison Pokémon your only answer, since Psychic attacks are super effective against Poison. Ghost attacks are not a dependable counter in the original games because of the Generation I Ghost-versus-Psychic type-effectiveness error.
- Enter the Gym after the Silph Co. battle if following the required chapter order.
- Use the entrance, northwest, southwest, southwest warp sequence.
- Bring a strong physical attacker.
- Avoid relying only on Poison or Ghost attacks.
Defeat Sabrina and continue toward Fuchsia
Sabrina uses Kadabra level 38, Mr. Mime level 37, Venomoth level 38, and Alakazam level 43. Alakazam is the main threat because of its Speed, high Special, Psybeam, and Recover. Use your strongest reliable physical attack, or inflict sleep or paralysis before attacking. Avoid spending several turns on setup while Alakazam is healthy and attacking.
Winning gives you the Marsh Badge and TM46, Psywave. The Marsh Badge raises the obedience limit for traded Pokémon to level 70. It does not grant the ability to use Surf outside battle. Surf comes from HM03 in the Safari Zone, while Koga’s Soul Badge grants its field use.
The Poké Doll is optional. Give it to Copycat in Saffron to receive TM31, Mimic, but it is not needed to enter Saffron, clear Silph Co., obtain the Master Ball, or open the Gym. After Sabrina, heal and continue toward Fuchsia City either south from Lavender Town through Routes 12–15 or west from Celadon City through Cycling Road and Routes 16–18. The next chapter covers Fuchsia and the Safari Zone.
- Defeat Kadabra, Mr. Mime, Venomoth, and Alakazam.
- Receive the Marsh Badge and TM46, Psywave.
- Do not treat the Poké Doll as a required Saffron item.
- Choose the Lavender coastal route or Cycling Road route toward Fuchsia.
Before you move on
- A Saffron guard has accepted a Fresh Water, Soda Pop, or Lemonade.
- The Card Key is in the Key Items pocket.
- The rival has been defeated in Silph Co. 7F.
- Lapras has been received or intentionally left for later.
- Giovanni has been defeated in the 11F boardroom.
- The Silph president has given you the Master Ball.
- Team Rocket has left Silph Co.
- Sabrina has been defeated and has awarded the Marsh Badge and TM46, Psywave.
Lavender Town, Pokémon Tower, Celadon Rocket Hideout, and the Poké Flute
In the original Nintendo Game Boy edition of Pokémon Blue, this sequence begins after Rock Tunnel and Route 10 bring you to Lavender Town. Investigate Pokémon Tower until the unidentified ghost stops progress, then travel west through Route 8 and the Underground Path to Route 7 and Celadon City. The secret Team Rocket base beneath the Game Corner contains the Silph Scope. Return to Pokémon Tower, defeat the level 30 Marowak ghost, drive Team Rocket from the seventh floor, rescue Mr. Fuji, and collect the Poké Flute. The flute later opens both Snorlax roadblocks on Routes 12 and 16. This is the standard story route; an original Generation I Poké Doll exploit can bypass part of it, but it is optional and should not be required for a normal campaign.
Reach Lavender Town and make the first Pokémon Tower visit
After leaving Rock Tunnel, continue south on Route 10 to reach Lavender Town. Heal at the Pokémon Center, cure any lingering poison or sleep, and buy a few Super Potions, Antidotes, Awakenings, and Poké Balls before entering Pokémon Tower. The tower is the large building on the east side of town.
Take the staircase to the second floor. Your rival is waiting in the northwest portion of the floor, so heal before walking up to him. His party changes according to the starter you selected, but the battle always includes Pidgeotto and Kadabra. The other members are drawn from the appropriate starter-evolution and version-dependent team: a Charmander player faces Growlithe, Exeggcute, and Wartortle; a Squirtle player faces Gyarados, Growlithe, and Ivysaur; a Bulbasaur player faces Gyarados, Exeggcute, and Charmeleon. The listed Pokémon are around levels 20 to 25, with the rival’s evolved starter at level 25.
Use a reliable answer to Kadabra rather than allowing it repeated turns to use Confusion. Electric or Grass attacks work well against Gyarados, while Water, Ground, or strong neutral attacks handle Growlithe. After winning, continue up the tower’s staircases and fight the Channelers. On the first visit, the wild apparitions are unidentified and cannot be fought or caught properly. When the ghost blocks the southern staircase on the sixth floor, leave the tower. You must obtain the Silph Scope before continuing.
Do not spend Poké Balls on the unidentified ghosts. They cannot be captured while they appear as generic ghosts, and thrown Balls are wasted. The first visit is complete when the sixth-floor ghost prevents access to the upper staircase.
- Heal and resupply in Lavender Town.
- Defeat the rival on Pokémon Tower 2F.
- Continue until the unidentified ghost blocks the sixth-floor staircase.
- Leave without wasting Poké Balls on unidentified ghosts.
Travel from Lavender Town to Celadon City
Exit Lavender Town to the west and cross Route 8. The Saffron City gate guards still block direct passage, so enter the Underground Path connecting Route 8 and Route 7. Walk west across Route 7 to reach Celadon City.
Heal at the Celadon Pokémon Center before entering the Game Corner. The hideout is beneath the Game Corner, and the city gives you access to shops and the Department Store if you need more healing items, status cures, or Poké Balls. The normal story route does not require clearing Celadon Gym first, although defeating Erika before or after the hideout is a separate progression choice.
- Leave Lavender Town through Route 8.
- Use the Underground Path instead of trying to pass through Saffron City’s guarded gate.
- Follow Route 7 west to Celadon City.
- Heal before entering the Game Corner.
Clear Team Rocket’s Celadon Hideout and obtain the Silph Scope
Enter the Celadon Game Corner and battle the Rocket Grunt standing near the poster at the back of the room. After defeating him, inspect the poster to reveal the staircase into the Rocket Hideout.
Work through the basement floors and use the spinning floor panels to reach the stairs and item rooms. On B4F, take the western route first. Defeat the Rocket Grunt near the northwest room and speak to him after the battle; he drops the Lift Key. Without this key, the elevator cannot be used.
Return through the spinner-panel rooms to reach the elevator. Take it to B4F, then travel west from the elevator and defeat the two Rocket Grunts guarding the electronic door. Enter the room beyond them to face Giovanni.
In the original Red and Blue releases, Giovanni uses Onix at level 25, Rhyhorn at level 24, and Kangaskhan at level 29. Water and Grass attacks are effective against Onix and Rhyhorn. Fighting attacks are especially useful against Kangaskhan, while Rage can become stronger if you repeatedly damage the Pokémon after it uses the move. Defeat Giovanni, then pick up the Silph Scope that he leaves behind. It is a Key Item and must be in your bag when you return to Pokémon Tower.
Ride the elevator back toward the entrance and defeat the remaining Rocket Grunt on the way out if you want to clear the route fully. The Rocket Hideout is now complete, and its Silph Scope reward is the required story item for the normal Pokémon Tower route.
- Inspect the Game Corner poster after defeating the Rocket Grunt.
- Obtain the Lift Key on B4F.
- Use the elevator to reach the southeast B4F section.
- Defeat Giovanni’s Onix, Rhyhorn, and Kangaskhan.
- Pick up the Silph Scope before leaving.
Return to Pokémon Tower with the Silph Scope
Retrace Route 7, the Underground Path, and Route 8 to Lavender Town. If you have already obtained Fly, you may use it for the return trip, but Fly is not required. Enter Pokémon Tower with the Silph Scope in your bag.
The item reveals the tower’s wild Pokémon as Gastly, Haunter, and Cubone. Gastly and Haunter are Ghost/Poison Pokémon. Normal- and Fighting-type attacks do not damage them in Generation I, while Psychic attacks are especially effective because of their Poison typing. Ground attacks are also useful, and ordinary Water, Grass, or Electric attacks can serve as neutral damage if necessary.
Use the healing area on the fifth floor. The marked central area fully restores your party and is safe from wild encounters. Heal there before climbing to the sixth floor, and return to it if your party is weakened. Channelers and wild Ghost Pokémon can cause confusion or sleep, so carry Awakenings and avoid allowing one damaged Pokémon to handle every encounter.
- Confirm the Silph Scope is in the bag.
- Use Psychic or Ground attacks when available.
- Use the fifth-floor healing area before the upper floors.
- Carry status recovery items for sleep and confusion.
Defeat Marowak and rescue Mr. Fuji
From the fifth floor, take the eastern staircase to 6F. Move north past the Channelers, collect the nearby items if desired, and approach the southern staircase. The Silph Scope identifies the blocking apparition as a level 30 Ground-type Marowak.
This Marowak is a mandatory story battle and cannot be captured. Poké Balls always fail, even if its HP is low. Use Water or Grass attacks for super-effective damage, and avoid relying on Electric attacks because Marowak is Ground type. If you run away, the ghost returns immediately and continues blocking the staircase.
After Marowak is defeated, climb to 7F. Defeat all three Rocket Grunts gathered around Mr. Fuji. Once they are gone, speak to Mr. Fuji at the top of the tower. He will accompany you back to his home, the Volunteer Pokémon House at the foot of the tower. Speaking to him there is required to receive the reward.
A Poké Doll can trigger an original Generation I oversight that treats the Marowak encounter as cleared without a normal battle. This is an optional exploit, not the standard route, and using it may leave the Silph Scope unnecessary for progression. For a regular completion, defeat Marowak with the Silph Scope active.
- Approach the sixth-floor ghost with the Silph Scope in the bag.
- Defeat the level 30 Ground-type Marowak.
- Do not waste Poké Balls on the story encounter.
- Defeat all three Rocket Grunts on 7F.
- Speak to Mr. Fuji after clearing the floor.
Receive the Poké Flute and open the Snorlax routes
After Mr. Fuji returns home, visit the Volunteer Pokémon House near the Pokémon Center in Lavender Town and speak with him again. He gives you the Poké Flute, a Key Item that wakes sleeping Pokémon during battle.
Two Snorlax block important roads: one is on Route 12 south of Lavender Town, and the other is on Route 16 west of Celadon City. Stand beside either Snorlax and use the Poké Flute from the Key Items pocket. The battle begins immediately, so save beforehand if you want to capture it. Each Snorlax is a one-time encounter; capturing at least one is optional, but both are useful Pokédex opportunities.
Route 12 continues south through Routes 13, 14, and 15 toward Fuchsia City. Route 16 leads west from Celadon City to Cycling Road, then through Routes 17 and 18 to Fuchsia City. Only one road needs to be opened for campaign progress, but clearing both Snorlax roadblocks gives access to additional trainers, items, and encounters.
The Mt. Moon fossils are unrelated to this sequence. Keep either fossil safely stored until you reach the Pokémon Lab on Cinnabar Island, where it can be revived later.
- Speak with Mr. Fuji at his house after the rescue.
- Receive the Poké Flute.
- Save before waking a Snorlax if you intend to capture it.
- Use Route 12 or Route 16 to continue toward Fuchsia City.
- Keep Mt. Moon fossils for revival at the Cinnabar Pokémon Lab.
Before you move on
- The Silph Scope is in the Key Items pocket after Giovanni is defeated.
- The level 30 Marowak ghost has been defeated or the optional Poké Doll bypass has been deliberately used.
- The three Rocket Grunts on Pokémon Tower 7F have been defeated.
- Mr. Fuji has been rescued and spoken to at his house.
- The Poké Flute is in the Key Items pocket.
- At least one Snorlax roadblock can now be awakened.
- The chapter’s required progression is complete before the later Fuchsia and Saffron chapters.
Celadon City — Department Store, Underground, and Erika Gym (Grass-type)
Use Celadon City to restock, collect optional rewards, and defeat Erika for the Rainbow Badge. This chapter covers the original Pokémon Blue Version for Nintendo Game Boy. The Celadon Rocket Hideout, Lift Key, Giovanni battle, and Silph Scope acquisition were completed in chapter 10 and are not repeated here. After Erika, proceed to the already-unlocked Saffron City sequence in chapter 9.
1. Set your objectives in Celadon City
Enter Celadon City from Route 7 on the east side or Route 16 on the west side and heal at the Pokémon Center. Save before shopping and again before challenging Erika. The Department Store is in the northwest, the Game Corner is near the center, and the Celadon Gym is in the southwest behind a Cut tree.
Chapter 10 has already handled the Celadon Rocket Hideout. Giovanni was defeated there and the Silph Scope was obtained. Do not search this chapter for another Lift Key, another Giovanni battle, or a second Silph Scope. The Silph Scope remains in the regular item inventory in the original Generation I games, which do not use the later separate Key Items pocket.
Bring a Pokémon that knows HM01 Cut. You need Cut to open the entrance to Erika’s Gym, and you may also want an empty party slot if you intend to collect the optional Eevee from the Celadon Mansion.
- Heal and save in Celadon City.
- Confirm that chapter 10 awarded the Silph Scope.
- Bring a Pokémon that knows Cut.
- Leave a party slot open if you want the optional Eevee.
2. Restock at the Celadon Department Store
Visit the second-floor Trainer’s Market before entering the Gym. The left cashier sells Great Balls, Super Potions, Revives, Antidotes, Burn Heals, Ice Heals, Awakenings, Parlyz Heals, and Super Repels. Prioritize Super Potions, Great Balls, and status cures that match the condition problems you have been encountering. Buy Revives only after covering your basic healing needs.
The right cashier sells the original Red and Blue shop TMs: TM32 Double Team, TM33 Reflect, TM02 Razor Wind, TM07 Horn Drill, TM37 Egg Bomb, TM01 Mega Punch, TM05 Mega Kick, TM09 Take Down, and TM17 Submission. These purchases are optional. Because Generation I TMs are generally single-use, do not teach one until you have selected a long-term user.
On the third floor, speak with the clerk behind the counter to receive TM18 Counter. The fourth floor sells the Fire Stone, Thunder Stone, Water Stone, Leaf Stone, and Poké Doll. Buy an evolution stone only after deciding which final evolution you want; the Poké Doll is optional and can help with escaping from wild battles.
Go to the rooftop vending machines and purchase Fresh Water, Soda Pop, and Lemonade. Give one of each to the nearby girl to receive TM13 Ice Beam, TM48 Rock Slide, and TM49 Tri Attack. These rewards are optional, although Ice Beam can be useful on a compatible Water-type. Buy at least one additional drink and keep it in your inventory for the Saffron City gate guards. In original Pokémon Blue, any of the three drinks works; the Tea key item belongs to FireRed and LeafGreen, not this release.
- Buy healing items and Great Balls before optional TMs.
- Collect TM18 Counter only if you have a planned user.
- Exchange the three rooftop drinks for their optional TMs if desired.
- Keep an extra Fresh Water, Soda Pop, or Lemonade for Saffron City.
3. Handle optional Celadon rewards
The Game Corner and Prize Corner are optional. If you have not already collected the Coin Case, speak with the man inside the restaurant on the south side of Celadon City. You can then play for coins and exchange them for prizes, but no Game Corner prize is required to earn the Rainbow Badge or finish the main campaign.
The Celadon Mansion contains the gift Eevee. To receive it, leave an empty party slot, walk behind the Pokémon Center to the opening in the trees, enter the mansion through the rear entrance, and climb to the top floor. Eevee is optional for story completion but useful for team building or Pokédex progress.
There is also a hidden PP Up on the east side of town, northeast of the small tree. This is optional and should not delay the Gym. Do not confuse optional Celadon exploration with the completed Rocket Hideout objective.
- Treat the Coin Case, Game Corner prizes, Eevee, and hidden PP Up as optional.
- Do not repeat the Rocket Hideout or Giovanni battle.
- Keep the party slot open before entering the mansion if you want Eevee.
4. Reach Erika’s room
Celadon Gym is in the southwest part of the city. Use Cut on the tree blocking the entrance, then follow the paths through the flower beds. You do not need to defeat every Gym Trainer to reach Erika, but battling several of them provides useful experience. The trainers use Grass Pokémon around the low-to-mid twenties and can inflict sleep, poison, paralysis, or trapping effects.
Fire-, Flying-, Ice-, Bug-, Poison-, and Psychic-type attacks are effective against the Grass Pokémon found here. Most of Erika’s team is also Poison-type, making Psychic attacks especially useful. Keep Water-, Rock-, and Ground-type attackers out of the lead position because Grass attacks are favorable against them.
Carry Antidotes, Awakenings, and Parlyz Heals. In Generation I, a trapping move such as Bind or Wrap can prevent the active Pokémon from moving while the effect continues, so keep a healthy backup Pokémon available rather than relying on one counter. Heal at the Pokémon Center and save before speaking to Erika.
- Bring a Fire, Flying, Ice, Bug, Poison, or Psychic attacker if available.
- Carry cures for sleep, poison, and paralysis.
- Keep a healthy backup Pokémon ready.
- Heal and save before the Leader battle.
5. Defeat Erika and claim the Rainbow Badge
Erika’s original Red and Blue team consists of Victreebel at level 29, Tangela at level 24, and Vileplume at level 29. Lead with your most dependable Fire-, Flying-, or Psychic-based attacker. Victreebel may use Wrap, PoisonPowder, Sleep Powder, or Razor Leaf. Tangela can use Bind, and Vileplume can use PoisonPowder, Mega Drain, Sleep Powder, and Petal Dance.
Use reliable super-effective attacks rather than spending several turns on a weak setup. If a status move disables your lead, switch to the backup instead of allowing the trapped or sleeping Pokémon to absorb unnecessary damage. If you chose Charmander, its Fire attacks are particularly useful here; other starters should rely on a trained counter, a traded Pokémon, or strong neutral damage if no better option is available.
After all three Pokémon are defeated, Erika awards the Rainbow Badge and TM21 Mega Drain. The badge raises the obedience limit to level 50 and allows HM04 Strength to be used outside battle. TM21 is optional; save it for a Grass-type you expect to keep for the rest of the campaign.
The chapter is complete when Erika has been defeated, the Rainbow Badge and TM21 have been received, and chapter 10’s Silph Scope remains confirmed. The Pokémon Tower sequence is already finished, including the Marowak battle, Mr. Fuji’s rescue, and the Poké Flute. Your next required objective is chapter 9: use a Department Store drink at any Saffron City gate, enter Saffron, and continue through Silph Co. and Sabrina’s Gym.
- Victreebel, Tangela, and Vileplume are defeated.
- The Rainbow Badge has been awarded.
- TM21 Mega Drain has been received.
- The Silph Scope, obtained in chapter 10, is still in the inventory.
- The Poké Flute sequence from chapter 10 is already complete.
- A drink is ready for the Saffron City gate.
- The next required objective is the Saffron City and Silph Co. sequence in chapter 9.
Before you move on
- The player has healed and saved in Celadon City.
- Required healing supplies and capture items have been purchased.
- Optional Department Store TMs and rooftop rewards have been collected only if wanted.
- The Celadon Rocket Hideout was completed in chapter 10, with Giovanni defeated and the Silph Scope obtained.
- Pokémon Tower, the Marowak battle, Mr. Fuji’s rescue, and the Poké Flute reward were completed in chapter 10.
- Erika has been defeated in Celadon Gym.
- The Rainbow Badge and TM21 Mega Drain have been received.
- An extra Department Store drink is available for the Saffron City gate.
- The player is ready to enter Saffron City and begin the Silph Co. and Sabrina sequence in chapter 9.
Vermilion City — Fishing and Lt. Surge
This chapter begins after the S.S. Anne sequence has already been completed in Chapter 6. HM01 Cut is therefore available, the ship has departed, and the remaining Vermilion objectives are collecting the optional Old Rod, opening Vermilion Gym, solving its switch puzzle, defeating Lt. Surge, and continuing toward Route 11 or Diglett’s Cave.
Confirm the Chapter 6 prerequisites
Before starting this chapter, Chapter 6 should have covered the trip from Cerulean City through Routes 5 and 6, the Underground Path, the S.S. Anne, the rival battle, the Captain event, and the award of HM01 Cut. Do not attempt to repeat those events here. The S.S. Anne leaves after the normal Cut sequence and cannot ordinarily be revisited in the original Game Boy release.
Make sure HM01 is in the TM/HM pocket and that a compatible Pokémon knows Cut. The Cascade Badge from Misty is required to use Cut outside battle. If you have not yet completed the S.S. Anne sequence, return to the earlier chapter rather than treating this chapter as a second route through the ship.
Heal at the Vermilion Pokémon Center and stock a few Potions, Super Potions, and Parlyz Heals if needed. Vermilion Gym trainers and Lt. Surge use Electric-type Pokémon, and paralysis can slow or disable a useful counter.
- Chapter 6 has already awarded HM01 Cut.
- A compatible Pokémon knows Cut.
- The Cascade Badge is recorded on the Trainer Card.
- The party is healed before entering the Gym.
Get the Old Rod
The Fishing Guru is in the house west of the Pokémon Center. Speak with him and answer that you like fishing to receive the Old Rod. This is optional for the Gym and the main campaign, but it is the earliest fishing rod available in this route sequence.
Use the Old Rod while standing beside a water tile. Open the menu, select the Old Rod, and face the water when casting. In original Pokémon Blue, the Old Rod’s practical encounter is Magikarp. It is weak when caught, but it evolves into Gyarados at level 20 if you raise it through switch-training or use it against suitable low-risk opponents.
Do not confuse the Old Rod with the later Good Rod and Super Rod. Those rods are obtained elsewhere and use different encounter tables. The Old Rod is useful mainly if you want an early Magikarp or are working toward Pokédex completion; it is not required to reach Lt. Surge.
- Visit the Fishing Guru’s house.
- Receive the Old Rod.
- Treat Magikarp as an optional capture rather than a required team member.
Open Vermilion Gym and solve the switch puzzle
The Vermilion Gym entrance is blocked by a small tree. Stand beside the tree, select a Pokémon that knows Cut, and use the field move. Enter the Gym after healing and restoring the PP of your intended Ground attacks.
The Gym contains Electric-type trainers. Ground Pokémon are the most dependable choice because Electric attacks do not affect them in the original battle system, and Ground attacks deal super-effective damage. Diglett or Dugtrio from Diglett’s Cave is especially convenient. Nidorino, Nidorina, a Pokémon taught Dig, or another Pokémon with a reliable Ground move can also work. Keep a second attacker available in case the first is weakened or paralyzed.
The Gym’s lock uses two hidden switches beneath trash cans. The first switch is randomly placed among the cans. After finding it, the second switch is in one of the cans directly adjacent to the first. If the second selection is wrong, both switches reset. Search the cans systematically, then inspect only the neighboring cans after locating the first switch.
- Cut the tree outside Vermilion Gym.
- Bring a healthy Ground-type or reliable Ground attack.
- Find the first hidden switch.
- Check adjacent cans for the second switch.
Defeat Lt. Surge
In Pokémon Blue, Lt. Surge uses Voltorb at level 21, Pikachu at level 18, and Raichu at level 24. A team in the low-to-mid 20s is generally appropriate, but matchup matters more than exact levels. Lead with a healthy Ground-type whenever possible.
Voltorb knows SonicBoom, which inflicts fixed damage, while Pikachu can use Thunder Wave and Raichu carries Thunderbolt. Avoid entering the Raichu battle with your only Ground counter already weakened. If paralysis occurs, use a Parlyz Heal when necessary or switch to a backup attacker rather than allowing the battle to be decided by repeated full-paralysis turns.
If you lack a Ground Pokémon, use strong neutral attacks or a Pokémon with Dig, but do not rely on Water-, Flying-, or Electric-types as your only plan. These options do not receive the same protection and offensive advantage as a Ground counter.
After the victory, Lt. Surge awards the Thunder Badge and TM24 Thunderbolt. The badge allows Fly to be used outside battle once HM02 is obtained later; it does not grant access to Surf.
- Defeat Voltorb, Pikachu, and Raichu.
- Keep a backup attacker available for Raichu.
- Receive the Thunder Badge.
- Receive TM24 Thunderbolt.
Continue from Vermilion
After defeating Lt. Surge, leave the Gym and choose your next route based on your current objectives. Route 11 leads east from Vermilion and contains additional one-time trainers and wild Pokémon. Diglett’s Cave is near the eastern side of the city and connects Vermilion with Route 2, making it useful for reaching earlier areas and for catching or training Diglett.
The Route 2 connection also lets you visit Professor Oak’s aide if you meet the caught-Pokémon requirement for HM05 Flash. Flash is helpful for Rock Tunnel but is not required if you can navigate the cave without it. You can also use Cut to reach the Pewter Museum’s back entrance and obtain the Old Amber, an optional item for later revival on Cinnabar Island.
Do not look for Surf in Vermilion. HM03 Surf comes later from the Safari Zone, and the Soul Badge from Koga is needed to use Surf outside battle. HM02 Fly is also obtained later near Celadon City, not from Lt. Surge.
Original Pokémon Blue has no VS Seeker and ordinary route trainers do not provide standard repeatable rematches. For recovery training, use wild encounters and any unbeaten trainers you intentionally left behind.
- Choose Route 11 or Diglett’s Cave as the next destination.
- Use Diglett’s Cave for Ground-type training or the Route 2 connection if useful.
- Remember that Surf and Fly are later rewards.
- Do not plan around repeatable route-trainer battles.
Before you move on
- Chapter 6 has already completed the S.S. Anne sequence and awarded HM01 Cut.
- HM01 Cut is in the TM/HM pocket and is taught to a compatible Pokémon.
- The tree blocking Vermilion Gym has been removed.
- The two hidden Gym switches have been solved.
- Lt. Surge has been defeated.
- The Thunder Badge appears on the Trainer Card.
- TM24 Thunderbolt is in the inventory.
- A healthy Ground-type or reliable Ground attack is available for future Electric-type encounters.
- The player understands that Surf and Fly are obtained later and that the S.S. Anne is not part of this chapter.
Seafoam Islands and Cinnabar Island — Ice and Fire Zones, Blaine Gym
Travel from Fuchsia City across Routes 19 and 20, solve the original Game Boy Seafoam Islands current puzzle with Strength, and reach Cinnabar Island. Revive fossils, obtain the Secret Key from Pokémon Mansion, defeat Blaine for the Volcano Badge, and then return north through Route 21 and Pallet Town to Viridian City. Seafoam Islands are the normal western approach from Fuchsia, but Cinnabar can also be reached from Pallet Town by surfing south on Route 21.
Prepare in Fuchsia City
Heal at the Fuchsia City Pokémon Center before leaving. You need a Pokémon that knows Surf and a party member that knows Strength. Surf comes from the Safari Zone’s hidden house, while Strength comes from returning the Safari Zone Warden’s Gold Teeth. By this point, the Soul Badge allows Surf outside battle and the Rainbow Badge allows Strength outside battle.
Bring healing items, a few status cures, and Repels if you want to reduce encounters. The swimmers on Routes 19 and 20 use Water-type Pokémon, so Electric- or Psychic-type attacks are useful when you choose to battle instead of avoiding them. Leave Fuchsia through the southern gate and Surf south on Route 19.
- A party member can use Surf outside battle.
- A party member can use Strength outside battle.
- The party is healed and has enough recovery items.
Cross Route 19 and solve the first Seafoam current puzzle
Continue south through Route 19 until you reach the eastern Seafoam Islands entrance. Inside, head northeast and use Strength to push the first boulder into the nearby hole. Follow it down. On B1F, push the same boulder through the next hole and follow it again. Repeat this on B2F so the boulder reaches the lower level and blocks the first current.
Do not try to ride the currents before dropping the boulder through this sequence. The current will carry you away from the route you need. If a boulder is pushed into an unusable position, leave that floor by a ladder and return; the floor’s boulders reset, while boulders already dropped to lower floors remain in place.
Continue through the ladders and lower passages until you reach the second group of boulders on B3F. Push the left-side boulder into the western hole. Position the other boulder so it can be pushed into the eastern hole. Once both are in the water, the lower current is blocked and the route to the eastern exit becomes available.
- The first boulder has been dropped through the upper holes.
- The second boulder pair is in the two lower holes.
- Use a ladder to reset a floor if a boulder becomes stuck.
Optional Articuno and the eastern exit
After the second current is blocked, use the lower-floor ladders to reach the Articuno area. Articuno is level 50 and appears only once in the save file. Save immediately before interacting with it. Weaken it carefully, then use Sleep if available; Paralysis is also helpful. Avoid poison or burn if you want to keep its HP stable while making repeated capture attempts.
Articuno is optional and is not required for Cinnabar Island, Blaine, or the main campaign. If you skip it, continue through the ladder route until you return to 1F. Take the southeast exit to the western half of Route 20, then Surf west across the route to Cinnabar Island.
- Save before attempting Articuno.
- Bring enough Poké Balls and a status move if you intend to capture it.
- Reach the western Route 20 exit before surfing to Cinnabar.
Visit the Pokémon Lab
Heal at the Cinnabar Island Pokémon Center, then visit the Pokémon Lab in the southwest part of town. In the experimental room, give the scientist one fossil. The Helix Fossil becomes Omanyte, the Dome Fossil becomes Kabuto, and the Old Amber becomes Aerodactyl. Each revived fossil Pokémon is level 30.
After handing over a fossil, leave the Lab and return to collect the revived Pokémon. Only one of the Helix Fossil or Dome Fossil can normally be selected at Mt. Moon, while the Old Amber is obtained separately in the Pewter Museum. Fossil revival is optional for story progress.
The Lab also contains TM35 Metronome and several optional trades. In international Red and Blue, these include Raichu for Electrode, Venonat for Tangela, and Ponyta for Seel. Use them only if they support your team or Pokédex plan.
- Hand over the desired fossil.
- Leave and re-enter the Lab to receive the revived Pokémon.
- Collect TM35 or complete optional trades only if wanted.
Get the Secret Key in Pokémon Mansion
Enter Pokémon Mansion, the burned building northwest of the Pokémon Center. The Cinnabar Gym is locked until you obtain the Secret Key from the basement. Inspect the statues to operate their switches; each switch changes which doors and passages are open.
Work through the upper floors, activating statues and using the opened routes to reach the basement. On B1F, search the central-west section for the Secret Key. The Mansion also contains optional items, including TM14 Blizzard and TM22 SolarBeam, but do not let item collection delay the key.
Use an Escape Rope or walk back to the entrance after collecting it. Return to the Pokémon Center, restore PP, and prepare a strong Water-, Ground-, or Rock-type attacker for Blaine.
- Activate the mansion statue switches.
- Collect the Secret Key on B1F.
- Heal before entering Cinnabar Gym.
Defeat Blaine and receive the Volcano Badge
Use the Secret Key to open Cinnabar Gym. The quiz machines ask six yes-or-no questions. The correct answers are Yes, No, No, No, Yes, and No. A wrong answer begins a trainer battle, while a correct answer opens the next door. Fighting the Gym Trainers is optional but provides useful experience.
Blaine’s original Red and Blue team is Growlithe level 42, Ponyta level 40, Rapidash level 42, and Arcanine level 47. Water, Ground, and Rock attacks are the practical counters. Keep your best counter healthy for Arcanine, which is Blaine’s strongest Pokémon and knows Fire Blast, Take Down, Roar, and Ember. Fire attacks can burn, so carry Burn Heals or another way to cure the condition.
After the battle, Blaine awards the Volcano Badge and TM38 Fire Blast. You now have seven badges. The badge also completes the required badge set for using the later League gates once Viridian Gym is cleared.
- Use Water, Ground, or Rock attacks against Blaine.
- Save healing items for Arcanine if necessary.
- Receive the Volcano Badge and TM38 Fire Blast.
Return to Viridian City for the final Gym
From Cinnabar Island, Surf north from the pier onto Route 21. Route 21 runs north to Pallet Town; it is not south of Cinnabar. You can battle the fishermen, swimmers, and other trainers along the route or avoid them if your team needs to conserve PP.
In Pallet Town, heal at home or continue north and then east through Viridian City. Enter the previously closed Viridian Gym. This is the required handoff to the next chapter: you should now have seven badges, access to Surf and Strength, the Secret Key completed, and a route back to Viridian City for Giovanni and the Earth Badge.
- Travel north from Cinnabar on Route 21.
- Pass through Pallet Town and reach Viridian City.
- Prepare for Viridian Gym and the eighth badge.
Before you move on
- The party reached Cinnabar Island through Seafoam Islands and Route 20, or used Route 21 from Pallet Town as an alternate approach.
- The Seafoam boulder puzzle was completed if the eastern entrance route was used.
- Articuno was captured or intentionally skipped.
- Any desired fossil was handed to the Cinnabar Lab scientist, followed by leaving and returning to collect the revived level 30 Pokémon.
- The Secret Key was collected from Pokémon Mansion B1F.
- Blaine was defeated and the Volcano Badge and TM38 Fire Blast were received.
- The party returned north on Route 21 through Pallet Town and reached Viridian City with seven badges, Surf access, and Strength access, ready for Viridian Gym.
References for this chapter
Viridian Gym, Victory Road, Elite Four Preparation, and Final Team Planning
After earning the Volcano Badge on Cinnabar Island, return to Viridian City for the eighth Gym battle. Defeat Giovanni, receive the Earth Badge, pass the eight Badge checks on Route 23, clear Victory Road, and reach Indigo Plateau ready for the uninterrupted Elite Four and Champion battles. The early Route 22 rival battle is optional, but the late Route 22 battle after all eight Badges is mandatory in normal original Pokémon Blue progression. Moltres is optional and is not needed to reach the Pokémon League.
Return to Viridian City and defeat Giovanni
From Cinnabar Island, use Surf east across Route 21 until you reach Pallet Town. Continue north through Route 1 to Viridian City. If you already have Fly available, flying to Viridian City is also safe, but Route 21 is the direct ground-and-water route from Cinnabar.
The Viridian Gym is open once the other seven Gym Leaders have been defeated. Heal at the Pokémon Center before entering, then enter the Gym and work through the arrow-panel maze. Go north past the first three Gym Trainers to reach the Revive. Continue through the next Trainers. If one Trainer blocks the route, battle him so that he moves away from the north wall. Return toward the entrance, follow the spinner tiles along the eastern side, then use the northern and western panels to reach Giovanni.
In Pokémon Blue, Giovanni’s team is Rhyhorn at level 45, Dugtrio at level 42, Nidoqueen at level 44, Nidoking at level 45, and Rhydon at level 50. Water and Grass attacks are the strongest general answers. Rhyhorn and Rhydon are both four times weak to Water and Grass because they are Ground and Rock types. Ice attacks are also effective against the Ground Pokémon, while Psychic attacks are useful against the Poison and Ground Nidoqueen and Nidoking.
Dugtrio is much faster than the rest of Giovanni’s team and can use Dig, Sand-Attack, and Slash, so do not assume a slow Water Pokémon will move first. Rhydon is the most dangerous target because it knows Fissure and Horn Drill. These one-hit knockout moves are inaccurate, but they can end the battle immediately if they connect. Use a reliable super-effective attack rather than giving Rhydon extra turns.
After winning, Giovanni awards the Earth Badge and TM27, Fissure. The Earth Badge is the required eighth Badge and is also needed for the last Route 23 checkpoint. Heal at the Viridian Pokémon Center and save before continuing west.
- The Viridian Gym is open.
- Giovanni is defeated.
- The Earth Badge has been received.
- TM27 Fissure has been received if wanted.
- The party is healed and the game is saved.
Handle Route 22 and enter Route 23
Route 22 contains two separate rival events in the original Red and Blue games. The early battle, available after delivering Oak’s Parcel and before earning the Boulder Badge, is optional and may already be unavailable. It has no bearing on the late-game route. Do not confuse that early encounter with the final Route 22 battle.
After earning all eight Badges, leave Viridian City through its western exit and travel through Route 22. As you move west toward the Pokémon League Reception Gate, the rival appears near the grass and challenges you. This late battle is mandatory in normal original progression. Heal in Viridian City first if Giovanni’s battle left your team weakened.
The rival’s strongest Pokémon is level 53, and his team depends on your starter. Every version of the battle includes Pidgeot at level 47, Rhyhorn at level 45, Exeggcute at level 45 or 47, Gyarados or Growlithe, Alakazam at level 50, and the fully evolved starter at level 53. Use Electric attacks against Gyarados, Water or Ground attacks against Growlithe, strong Psychic or Flying attacks against Fighting-capable targets elsewhere in the battle, and a sturdy answer to Alakazam. Rhyhorn is vulnerable to Water and Grass attacks. Save high-accuracy attacks for Alakazam and the final starter rather than relying on low-accuracy moves.
After the battle, continue west into the Pokémon League Reception Gate. Route 23 begins beyond the gate. Guards inspect your Badges at successive checkpoints, starting with the Boulder Badge and ending with the Earth Badge. You cannot pass the final checkpoint until Giovanni has been defeated and the Earth Badge has been awarded.
Route 23 leads north through grass and water sections. Surf is needed for some movement through the route, so keep a Pokémon that knows Surf in the active party. At the northern end, enter Victory Road. Strength is required inside the cave, so bring a Pokémon that knows HM04 Strength before crossing the final checkpoint.
- The early optional Route 22 battle has been distinguished from the late battle.
- The post-Badges Route 22 rival battle is complete.
- All eight Badges have been checked by the Route 23 guards.
- Surf and Strength are available in the active party.
- Victory Road has been entered.
Clear the first floors of Victory Road
Near the Victory Road entrance, find the first boulder west of the pressure switch. Use Strength to push it east, around the passage, and onto the switch. This removes the barrier on the rocky ridge. In the northeast area, another boulder blocks one of two items. You can take either the Rare Candy or TM43 Sky Attack, then leave and re-enter Victory Road to reset the boulder and collect the other item. These rewards are optional.
Go west past the two Cooltrainers and climb the northwest ladder. On the next floor, push the southern boulder southwest onto its pressure switch. Follow the opened ridge and take the first stairway down. TM05 Mega Kick is west of the stairs. Continue northeast to find a Full Heal and TM17 Submission, then climb the ladder in the northeast corner.
Victory Road trainers include Cooltrainers, Black Belts, Jugglers, Tamers, and PokéManiacs. Their Pokémon are generally in the high 30s to mid-40s. Fight enough Trainers to maintain useful experience and money, but avoid unnecessary wild battles if they are draining the PP of attacks needed for the League. Use an Escape Rope only if you intend to return to the Pokémon Center; the cave exit is not far once the final switches are solved.
- The first boulder is on its switch.
- Rare Candy or TM43 Sky Attack has been collected if desired.
- The second boulder is on its switch.
- TM05, Full Heal, and TM17 have been collected if desired.
- The party still has adequate PP for mandatory battles.
Finish Victory Road and decide whether to catch Moltres
On the third floor, travel northeast, defeat the Cooltrainer, and collect the Max Revive if desired. Continue toward the northwest section to find TM47 Explosion and another switch. Activate the switch, then take the ladder down to a separate section of the second floor.
Battle the PokéManiac and collect the Guard Spec. nearby. Moltres is beside this area at level 50. The encounter is optional. It does not block the exit, and skipping it does not prevent access to the Elite Four or Hall of Fame.
If you want Moltres, save before interacting with it. Reduce its HP carefully and use Sleep or Paralysis if available. Keep enough Poké Balls and status resources for the attempt, and avoid using an attack that might knock it out. If Moltres is defeated or escapes and you saved beforehand, reset and try again. Do not spend the healing and revival supplies needed for the League unless you have already decided that the capture is worth the cost.
Return to the third floor and push the northeastern boulder west until the next switch is activated. Follow the opened southern route, push the next boulder down the hole, and jump after it. On the lower section, push that boulder onto the final switch. Climb through the opened passage and take the ladders toward the eastern exit. Before leaving, inspect the rock near the final ladder to collect the hidden Full Restore if desired.
Exit Victory Road into the northern part of Route 23. Follow the tiled path through the Pokémon statues and enter Indigo Plateau.
- The third-floor switch is activated.
- Moltres is captured or deliberately skipped.
- The final boulder has been moved through the hole and onto its switch.
- The hidden Full Restore has been collected if desired.
- Victory Road has been cleared.
- The Indigo Plateau Pokémon Center has been reached.
Prepare for the Elite Four
Use the Indigo Plateau Pokémon Center before approaching the League rooms. Restore all HP and PP, cure every status condition, and arrange your party so the intended lead Pokémon is easy to select. Save at the Pokémon Center before entering Lorelei’s room.
The Indigo Plateau Poké Mart is the final shop before the League battles. Buy a practical supply of Full Restores, Revives, and Max Potions or Hyper Potions. Include status cures if your team lacks reliable ways to remove sleep, paralysis, poison, or burn. Ethers and Elixirs are limited, so reserve them for attacks that are essential to several battles rather than spending them on incidental Victory Road encounters.
Build coverage for the full sequence rather than preparing for only one Elite Four member. A strong Water attacker helps against Bruno’s Onix and several of Lance’s Pokémon. Electric attacks are valuable against Lorelei’s Water Pokémon and Lance’s Gyarados. Psychic attacks are effective against Bruno’s Fighting Pokémon and many of Agatha’s Poison Pokémon. Ice attacks are especially useful against Lance’s Dragonite. These roles may be spread across several Pokémon; one Pokémon does not need to cover every weakness.
An average party around levels 48 to 52 can complete the League with good type coverage and item use, while the main attackers are safer in the low-to-mid 50s. Do not waste all PP on wild Pokémon before the entrance. The Elite Four and Champion battles occur consecutively, and the game does not return you to the Pokémon Center between victories. Use healing items inside the run and save the most valuable recovery items for the final battles.
- The party is fully healed and status-free.
- Important moves have restored PP.
- Water coverage is available.
- Electric coverage is available if possible.
- Psychic or another dependable answer to Bruno and Agatha is available.
- Ice coverage or another strong answer to Lance’s Dragonite is available.
- Healing, revival, and status-curing items are stocked.
- The game is saved immediately before Lorelei.
Before you move on
- Giovanni has been defeated in Viridian Gym.
- The Earth Badge and TM27 Fissure have been received.
- The late Route 22 rival battle has been completed.
- All eight Route 23 Badge checks have been passed.
- Victory Road has been cleared and the Indigo Plateau Pokémon Center has been reached.
- The party has dependable answers for Lorelei, Bruno, Agatha, Lance, and the Champion.
- Healing supplies and important PP-restoring items are prepared.
- The game is saved before entering the Elite Four.
- The main campaign is complete only after all five League battles are won and the Hall of Fame registration occurs.
Elite Four — Individual Member Strategies and the Champion Battle
The Pokémon League in the original Nintendo Game Boy Pokémon Blue Version is a continuous five-battle sequence: Lorelei, Bruno, Agatha, Lance, and then your rival Blue as Champion. There is no Pokémon Center or shop between these battles, but you can use healing, status-curing, revival, and PP-restoring items from the Bag after each victory. Prepare at the Indigo Plateau Pokémon Center, save before entering the first battle, and bring a balanced party with dependable Water, Electric, Ice, Psychic, Fire, Grass, or Ground coverage. The opposing teams range from level 53 to level 65. A balanced party in the high 40s can succeed with favorable matchups and item use, while levels around the low 50s or higher make the attempt more forgiving.
Prepare at the Indigo Plateau
Heal your party at the Pokémon Center inside Indigo Plateau, restore the PP of the moves you intend to use, and save before walking into the first League room. The Poké Mart sells Full Restores, Max Potions, Full Heals, Revives, and other supplies. Buy enough recovery items for five consecutive battles rather than assuming your party will clear the League without healing.
A practical team should have a strong Water move for Bruno’s Onix and Blue’s Rhydon, Electric coverage for Lorelei’s Water Pokémon and Lance’s Gyarados, and Ice coverage for Lance’s Dragonair and Dragonite. Psychic coverage is useful against Bruno’s Fighting Pokémon and Agatha’s Poison-heavy party. Fire, Ice, Bug, or Flying coverage helps against Blue’s Exeggutor or Venusaur.
Use Full Restores when a Pokémon has both substantial damage and a major status condition. Use ordinary healing items when only HP is missing, and conserve Revives for important attackers or irreplaceable coverage Pokémon. After each victory, you can walk to the next room and use items, but you cannot return to the Pokémon Center without ending the attempt.
- Save at the Indigo Plateau Pokémon Center.
- Heal every party member and restore important move PP.
- Buy Full Restores, Max Potions, Full Heals, and Revives.
- Confirm that your team has answers to Water, Fighting, Poison, Dragon, Flying, Ground, and Rock targets.
Defeat Lorelei’s Water and Ice team
Lorelei sends Dewgong at level 54, Cloyster at level 53, Slowbro at level 54, Jynx at level 56, and Lapras at level 56. Electric attacks are effective against Dewgong, Cloyster, Slowbro, and Lapras. Grass attacks are also effective against those four Water Pokémon, although Jynx is Ice and Psychic rather than Water type and needs a separate answer.
Deal with Slowbro before it uses Amnesia repeatedly. In Generation I, Amnesia sharply raises Special, allowing Slowbro to withstand special attacks and return stronger damage. Cloyster has very high Defense, so special Electric or Grass attacks are preferable to ordinary physical attacks. Lapras can survive a hit and may use Confuse Ray or Blizzard, so switch out a confused or badly weakened Pokémon when necessary.
Jynx is best handled with Fire, Rock, Bug, or strong neutral physical damage. Do not rely on Ghost attacks as a Jynx solution because Generation I has faulty Ghost-versus-Psychic type interactions. After the battle, heal confusion, freezing, paralysis, sleep, or heavy damage before entering Bruno’s room.
- Use Electric or Grass attacks on Lorelei’s Water Pokémon.
- Use Fire, Rock, Bug, or strong neutral damage against Jynx.
- Cure status conditions before Bruno.
- Restore the PP of your main Electric, Grass, or Fire answers if necessary.
Exploit Bruno’s Rock and Fighting weaknesses
Bruno’s team is Onix at level 53, Hitmonchan at level 55, Hitmonlee at level 55, Onix at level 56, and Machamp at level 58. Both Onix are Rock and Ground, so Water, Grass, and Ice attacks are effective. Hitmonchan, Hitmonlee, and Machamp are Fighting types and are weak to Psychic and Flying attacks.
Use a Water or Grass attacker against each Onix. Switch to a Psychic attacker for the Fighting Pokémon if it can withstand their physical moves. Hitmonchan knows Counter, so avoid using a weak physical attack against it when a special or status option is available. Hitmonlee has powerful Jump Kick and Hi Jump Kick attacks, while Machamp is the most dangerous member because it carries Fissure and Submission.
Bruno is often the easiest League battle, making him a good place to conserve Full Restores. Do not leave the room with a key attacker asleep, confused, paralyzed, or at critical HP, because Agatha’s status moves can turn a small disadvantage into a failed attempt.
- Use Water, Grass, or Ice attacks on both Onix.
- Use Psychic or Flying attacks on the Fighting Pokémon.
- Watch for Counter from Hitmonchan.
- Heal important attackers before Agatha.
Handle Agatha’s Ghost and Poison Pokémon
Agatha uses Gengar at level 56, Golbat at level 56, Haunter at level 55, Arbok at level 58, and Gengar at level 60. Her Ghost Pokémon are also Poison type, making Psychic attacks a dependable general answer. A fast Psychic attacker can defeat several of them before Confuse Ray, Hypnosis, or Dream Eater becomes a problem.
Generation I’s type interactions matter here. Normal and Fighting attacks do not affect Agatha’s Gengar or Haunter, but Ground attacks can hit them in this original release because the Gastly line does not have the later Levitate ability. Ground attacks are also effective against Arbok, which is pure Poison. Golbat can be handled with Psychic, Electric, Ice, or Rock attacks.
If a lead Pokémon is asleep or confused, switch to a healthy party member rather than repeatedly losing turns. Use a Full Restore when status prevents your main attacker from functioning. Before Lance, make sure the Pokémon carrying your strongest Electric and Ice moves are alive, healthy, and stocked with PP.
- Prefer Psychic attacks against Agatha’s Ghost and Poison Pokémon.
- Normal and Fighting attacks fail against Gengar and Haunter.
- Ground attacks can damage Gengar and Haunter in Generation I and are effective against Arbok.
- Cure sleep, confusion, and poison before Lance.
- Keep your strongest Electric and Ice users available.
Stop Lance with Electric and Ice coverage
Lance uses Gyarados at level 58, Dragonair at level 56, a second Dragonair at level 56, Aerodactyl at level 60, and Dragonite at level 62. Open with an Electric attack against Gyarados if your Electric Pokémon can survive a possible Hydro Pump or Hyper Beam. Gyarados is Water and Flying, giving it a double weakness to Electric attacks.
Use Ice attacks against both Dragonair and Dragonite. Dragonite is Dragon and Flying in this game, so Ice attacks are especially effective. Water, Electric, or Ice attacks can damage Aerodactyl, but keep a durable Pokémon ready because it is fast and carries Hyper Beam.
Lance’s Dragonair use Dragon Rage, which inflicts fixed damage, and his Dragonite can use Barrier before attacking with Hyper Beam. Defeat them promptly rather than allowing repeated Agility or Barrier turns. After Lance falls, heal immediately and restore the PP of your best answers before challenging Blue. Revive only Pokémon you expect to use; do not spend the last of your recovery items on a party member with no useful matchup for the final battle.
- Use Electric attacks against Gyarados.
- Use Ice attacks against both Dragonair and Dragonite.
- Use Water, Electric, or Ice coverage against Aerodactyl.
- Restore HP, status, and important PP before facing Blue.
Defeat Blue as Champion
Blue always opens with Pidgeot at level 61, followed by Alakazam at level 59 and Rhydon at level 61. Rhydon is Ground and Rock, so Electric attacks do nothing; use Surf or another Water move, or a strong Grass move. Alakazam is fast, has high Special, and knows Recover. Attack it promptly with strong physical damage or an effective Bug attack rather than allowing it to restore its HP repeatedly.
The final three Pokémon depend on your starter choice. If you chose Bulbasaur, Blue’s remaining order is Exeggutor at level 61, Gyarados at level 63, and Charizard at level 65. If you chose Charmander, the remaining order is Gyarados at level 63, Exeggutor at level 61, and Blastoise at level 65. If you chose Squirtle, the remaining order is Exeggutor at level 61, Arcanine at level 63, and Venusaur at level 65.
Use Electric attacks against Pidgeot and any Gyarados. Use Water or Grass attacks against Rhydon. Use Fire, Ice, Bug, or Flying attacks against Exeggutor. Water is not a reliable Exeggutor counter. Arcanine is vulnerable to Water, Ground, and Rock attacks. Blastoise is vulnerable to Electric and Grass attacks. Venusaur is vulnerable to Fire, Ice, Bug, and Flying attacks. Charizard is vulnerable to Water, Electric, and Rock attacks; do not use Ground attacks against it because its Flying typing makes Ground moves ineffective.
Blue can use a Full Restore when one of his Pokémon is near defeat, so continue attacking until the target is actually knocked out. Once Blue is defeated, Professor Oak leads you to the Hall of Fame. The game records your party there and begins the ending sequence. That Hall of Fame registration is the completion point for the main campaign.
- Use Electric coverage for Pidgeot and Gyarados.
- Use Water or Grass attacks against Rhydon.
- Have a direct answer ready for Alakazam.
- Check the final three Pokémon against your chosen starter.
- Do not use Ground attacks against Charizard.
- Confirm that the Hall of Fame has registered the winning party.
Before you move on
- Lorelei, Bruno, Agatha, and Lance have been defeated in that order.
- Blue has been defeated in the Champion’s room.
- Professor Oak has led the player into the Hall of Fame.
- The Hall of Fame sequence has registered and displayed the winning party.
- The main campaign is complete once Hall of Fame registration and the ending sequence begin.
Post-Game — Mewtwo, Cerulean Cave, and Pokédex Completion Tips
After entering the Hall of Fame, the guard leaves Cerulean Cave. In the original international Pokémon Blue for Nintendo Game Boy, the cave contains one level 70 Mewtwo. Surf is the only field move required to reach the encounter. Save immediately before battling, then capture Mewtwo with the Master Ball or a supply of Ultra Balls. Completing the 150-species Pokédex also requires trades for Red-exclusive Pokémon, the two starter families not chosen, and the four trade evolutions. Mew is not required for the Generation I diploma.
1. Unlock Cerulean Cave and reach its entrance
Defeat the Elite Four and Champion, then let the Hall of Fame registration and ending sequence finish. Continue from the saved game afterward. The guard at the cave entrance on the northwest edge of Cerulean City will now allow entry. This is the original Red and Blue requirement; the expanded Pokédex condition from FireRed and LeafGreen does not apply here.
From Cerulean City, leave through the north exit onto Route 24. Cross Nugget Bridge, then move toward the water on the eastern side of the route. Use Surf and travel south along the water. Continue until you reach the cave entrance near the northern edge of Cerulean City. Enter after confirming that the guard is gone.
Heal at the Cerulean City Pokémon Center before entering. Cerulean Cave has no healing station, and its wild Pokémon are far stronger than those on the surrounding routes. Bring Surf on a Pokémon that can use it outside battle. Rock Smash, Dive, and Flash are not required in the original Game Boy cave.
- Elite Four and Champion defeated
- Hall of Fame sequence completed
- Cerulean Cave guard allows entry
- Surf available and usable
- Party healed before entering
2. Prepare for the cave and Mewtwo
Bring a high-level party, healing items, and as many Ultra Balls as you can afford. If the Master Ball is still available, it guarantees the capture and is the simplest option. You may also save before the encounter and attempt an Ultra Ball capture if you want to preserve the Master Ball for another purpose.
The wild Mewtwo is level 70. Its encounter moves are Barrier, Psychic, Swift, and Recover in the original Red and Blue battle data. Barrier raises its Defense, Psychic is its most dangerous attacking move, Swift cannot miss under Generation I rules, and Recover restores its HP. Mist is not part of this encounter; Mewtwo learns Mist later at level 75 if trained after capture.
Use a sleep, freeze, or paralysis move if your team has one. Sleep and freeze are especially useful for improving capture attempts, while paralysis is still helpful. Avoid poison or burn if possible because ongoing damage can knock Mewtwo out between turns. Lower its HP carefully, preferably into the red, and switch to a durable Pokémon if Psychic threatens your active battler.
Save immediately before interacting with Mewtwo. The encounter is one-time only. If Mewtwo is defeated or the battle ends without a capture, reset the Game Boy and reload the save rather than leaving the cave.
- Master Ball or a large supply of Ultra Balls
- Healing items stocked
- Sleep, freeze, or paralysis available if possible
- Save made immediately before the encounter
3. Follow the original Red and Blue cave route
Cerulean Cave in the original international Red and Blue release has three accessible sections: 1F, 2F, and B1F. The following route avoids remake directions and uses the numbered ladders as landmarks.
On 1F, follow the initial path upward onto the plateau north of the entrance and take the ladder there to 2F. On 2F, go south, west at the first major intersection, south at the second, and east at the third to reach the PP Up if you want it. Return to the earlier intersection and take the western route instead. Follow the winding passage until you find the next ladder down to 1F.
Back on 1F, descend from the plateau and Surf west a short distance. You can collect the Max Elixir, then disembark and move toward the northwest area for the Nugget. Take the nearby ladder back to 2F. On 2F, follow the narrow passage to the Full Restore, then return to the ladder and descend to 1F again.
On 1F, Surf southwest to the second Full Restore, then move to the eastern plateau. Examine the isolated rock there for the hidden Rare Candy. Descend toward the southeast and ignore the ladder on the northeast side. Continue to the next plateau and take its ladder to 2F.
On this second 2F visit, go east at the first intersection, south at the second, west at the third, and north at the fourth to reach an Ultra Ball. Return to the previous intersection, go west, then north at the next intersection. Follow this route to the final ladder down to 1F. On 1F, follow the short path to the ladder leading to B1F.
On B1F, head northeast from the ladder and take the Max Revive if desired. Turn around, follow the passage southwest, then climb onto the central ridge and collect the Ultra Ball. Surf along the water to the northeast, cut across the rocky ridge, and Surf southward through the water. The route ends at Mewtwo’s isolated platform.
- Entered 2F from the northern 1F ladder
- Used the 2F maze to reach the second 1F section
- Reached the eastern 1F plateau and hidden Rare Candy
- Used the final 2F ladder to reach B1F
- Surf route to Mewtwo’s platform completed
4. Capture Mewtwo and leave safely
Save again if necessary before speaking to Mewtwo, then interact with it from the front of the platform. With the Master Ball, select it at once for an immediate capture. With Ultra Balls, reduce Mewtwo’s HP carefully, apply a status condition when possible, and throw Balls while keeping your active Pokémon healthy.
Do not rely on a single physical attacker. Barrier makes physical damage less effective, while Psychic can quickly defeat fragile Pokémon. A strong Ice-type or Electric-type attack can help with damage, but the capture attempt should prioritize control over speed. If Mewtwo uses Recover repeatedly, continue applying status and throw Balls once its HP is low.
After the capture, save the game. If you defeat Mewtwo instead, reset to the pre-battle save. The objective is to have Mewtwo captured and stored safely in the party or a selected PC box, not merely defeated.
To leave, Surf away from the platform and follow the B1F water back to dry land. Continue through the winding paths to the northern portion of the floor and take the ladder back to 1F. On 1F, follow the route to the next ladder, then use the 2F passage to reach the ladder returning to 1F. Follow the southern path and Surf east through the final water section to reach the cave exit.
- Mewtwo captured rather than defeated
- Mewtwo’s moves checked after capture
- Game saved after capture
- Cave exited or Mewtwo safely deposited in a PC box
5. Trade for species unavailable in international Blue
International Pokémon Blue cannot record all 150 standard species without trades. The Red-exclusive families are Ekans and Arbok; Oddish, Gloom, and Vileplume; Mankey and Primeape; Growlithe and Arcanine; Scyther; and Electabuzz.
Blue-exclusive families are Sandshrew and Sandslash; Vulpix and Ninetales; Meowth and Persian; Bellsprout, Weepinbell, and Victreebel; Magmar; and Pinsir. These normally appear in Blue and do not need to be imported from Red.
The starter families are mutually exclusive by normal play. Trade for the two families not selected at the beginning: Bulbasaur and its evolutions, Charmander and its evolutions, or Squirtle and its evolutions. Generation I has no breeding, so obtaining all three families requires another cartridge or repeated arranged trades.
Kadabra, Machoke, Graveler, and Haunter evolve through trading into Alakazam, Machamp, Golem, and Gengar. Trade each Pokémon to a compatible Generation I game, allow the evolution to occur, and trade it back if you want to keep the evolved Pokémon in Blue.
- All Red-exclusive families obtained
- Both missing starter families obtained
- Alakazam registered
- Machamp registered
- Golem registered
- Gengar registered
- Pokédex entries checked after each trade
6. Arrange compatible trades and verify the diploma
For the simplest completion plan, use another Western Pokémon Red, Blue, or Yellow cartridge and a Game Boy Link Cable. Save both games before trading. In each game, enter a Pokémon Center and speak with the Cable Club receptionist. Enter the trade room, select the Pokémon to exchange, confirm both sides, and save when the game requests it.
Gold, Silver, and Crystal can connect to Western Red, Blue, and Yellow through the Time Capsule, but the Generation II party must obey its restrictions. Do not send Generation II Pokémon, Eggs, held Mail, or Pokémon using moves introduced in Generation II. A second Generation I cartridge avoids these restrictions.
Original Red, Blue, and Yellow do not trade directly with FireRed, LeafGreen, or later Pokémon games. Plan trades around compatible Generation I cartridges, or use a valid Generation II Time Capsule connection when every restriction is satisfied.
Visit the Game Freak development room in the Celadon Condominiums after the Pokédex records ownership of 150 species. The staff member awards the Generation I diploma for those 150 owned species. Mew is not required for the diploma. In the ordinary Western release, Mew was distributed through special events rather than normal wild encounters, so track it separately as an optional event or special-method goal.
- Compatible cartridge and Link Cable arranged
- Both games saved before trading
- Red-exclusive species obtained
- Missing starter families obtained
- Four trade evolutions completed
- Pokédex records 150 owned species
- Celadon Game Freak diploma checked
- Mew tracked separately as optional
Before you move on
- The Hall of Fame sequence has been completed and the Cerulean Cave guard permits entry.
- Surf is available and the original Red and Blue cave route has been followed without remake mechanics.
- Mewtwo has been captured at level 70 and the game has been saved afterward.
- The Red-exclusive families and both missing starter families have been obtained through compatible trades.
- Alakazam, Machamp, Golem, and Gengar have been registered through external trade evolutions.
- The Pokédex records ownership of 150 species and the Celadon Game Freak diploma has been checked.
- Mew is tracked separately as an optional event or special-method species.
References for this chapter
- Walkthrough: Pokémon Red and Blue/Part 17 — Bulbapedia
- GameFAQs — Pokémon Blue Version: Cerulean Cave Walkthrough
- Bulbapedia — Cerulean Cave
- Pokémon Database — Mewtwo Generation I Learnset
- Pokémon Database — Version-Exclusive Pokémon in Red and Blue
- Bulbapedia — Pokémon Red and Blue Versions
- Bulbapedia — Trade Evolution
- Bulbapedia — Time Capsule
- Bulbapedia — Diploma
- Game Boy Instruction Manual — Pokémon Red Version
Trading, Link Cable Use, and Version-Exclusive Checklist
Trading is required in the original international Pokémon Blue to obtain Red-exclusive species, evolve Kadabra, Machoke, Graveler, and Haunter, and collect Pokémon limited by one-time choices such as the starter families and Mt. Moon fossils. Use two compatible Generation I cartridges, save before every exchange, and arrange return trades before sending away Pokémon needed for your Pokédex.
Prepare the cartridges, systems, and cable
Use two Game Boy systems, two compatible original Generation I cartridges, and a Game Link Cable. For an English-language Pokémon Blue campaign, the safest partners are the Western versions of Pokémon Red, Blue, or Yellow. The Cable Club is the original Game Boy method for exchanging Pokémon; it is not a direct connection to Pokémon Gold, Silver, Crystal, or any later-generation cartridge.
Heal both teams at a Pokémon Center, place the Pokémon you intend to trade in each party, and save both games immediately before connecting. Only Pokémon currently in the party can be selected in the Cable Club. Keep a written list of the requested exchange so you do not accidentally choose a similarly named species or a Pokémon carrying a move you wanted to keep.
- Two compatible Game Boy systems
- A working Game Link Cable
- Compatible Western Generation I cartridges
- Both games saved before the session
- The intended Pokémon placed in each party
Enter the Cable Club and confirm the exchange
On both games, enter any Pokémon Center and speak to the Cable Club receptionist on the second floor. Choose the Trade Center option rather than the Colosseum. Follow the prompts until both players reach the trade room, then select a Pokémon from your party.
Before confirming, compare the species, nickname, level, and trainer information shown on both screens. Confirm only when both sides display the intended Pokémon. The trade animation completes the transfer, and a traded Pokémon evolves immediately if it meets a Generation I trade-evolution condition. Do not switch off either system while the game is saving or transferring data.
- Both players choose Trade Center
- The correct Pokémon is visible on both screens
- Both players confirm the intended exchange
- Neither system is switched off during the transfer
Recover from a connection failure
If the games fail to connect, cancel or leave the Cable Club on both systems and try again from the Pokémon Center. Check that the cable plugs are fully inserted, the cartridges are seated correctly, and both systems are operating normally. If the connection continues to fail, switch both systems off, reconnect the cable, and reload the saves made before the trade attempt.
Do not mix Japanese and non-Japanese Generation I cartridges. Their character encodings are incompatible and can cause connection or data problems. For an original USA or European Blue cartridge, use a partner cartridge from the same Western language family. If an unexpected interruption occurs, reload the pre-trade save on both games before attempting another exchange.
- Retry from the Cable Club rather than forcing a stalled connection
- Check both cable ports and cartridge seating
- Use compatible cartridges from the same Western language family
- Reload the pre-trade saves after an interrupted session
Evolve the four trade-dependent species
Trade Kadabra to evolve it into Alakazam, Machoke into Machamp, Graveler into Golem, and Haunter into Gengar. These four evolutions require trading in the international Red and Blue releases and do not require a held item. The evolution occurs during the receiving side of the exchange.
If the Pokémon belongs to you, arrange a second trade immediately after the evolution so it returns to your Blue cartridge. Moves already known by the Pokémon are retained through the trade and evolution. Confirm the species before each exchange, because cancelling the process is not a recovery method and a mistaken trade can leave the Pokémon on the other cartridge.
- Kadabra becomes Alakazam
- Machoke becomes Machamp
- Graveler becomes Golem
- Haunter becomes Gengar
- Each evolved Pokémon is returned if it was sent out temporarily
Trade for Blue’s missing version groups
The international Blue version contains Sandshrew, Sandslash, Vulpix, Ninetales, Bellsprout, Weepinbell, Victreebel, Meowth, Persian, Magmar, and Pinsir as its version-exclusive species. These are not all available as normal wild encounters in Red, so a Blue player should preserve specimens for trading rather than assuming a Red partner can replace them.
To complete Blue’s Pokédex, obtain Red-exclusive Ekans and Arbok; Oddish, Gloom, and Vileplume; Mankey and Primeape; Growlithe and Arcanine; Scyther; and Electabuzz. The evolved forms must be obtained separately if you are pursuing all 151 species. Capture the species on the partner cartridge, evolve it there when necessary, and trade each specimen to Blue.
- Ekans and Arbok
- Oddish, Gloom, and Vileplume
- Mankey and Primeape
- Growlithe and Arcanine
- Scyther
- Electabuzz
Handle one-time choices and Eevee carefully
A single Blue save normally provides only one starter choice, so the two unchosen starter families must come from trades. The same principle applies to the Mt. Moon fossil choice: revive either Omanyte or Kabuto, then trade for the other fossil family if you want both lines. The Celadon City gift provides one Eevee. To obtain Vaporeon, Jolteon, and Flareon on the same Pokédex project, trade for additional Eevee specimens or use additional compatible saves; one Eevee cannot produce all three evolutions.
Do not trade away a unique starter, fossil result, or Eevee until you have arranged a replacement or confirmed that the partner will return it. Keep the original and evolved forms when possible, because owning only a final evolution does not give you every earlier species for a complete collection.
- All three starter families obtained across compatible saves
- Omanyte and Kabuto families represented
- Additional Eevee specimens obtained for the desired Eeveelutions
- Rare one-per-save Pokémon retained or scheduled for return trades
Before you move on
- Blue contains Alakazam, Machamp, Golem, and Gengar, with each trade evolution completed successfully.
- Blue has obtained the Red-exclusive species groups: Ekans and Arbok; Oddish, Gloom, and Vileplume; Mankey and Primeape; Growlithe and Arcanine; Scyther; and Electabuzz.
- The unchosen starter families and the fossil family not selected at Mt. Moon have been obtained through compatible trades.
- The desired Eeveelutions have been produced using enough Eevee specimens.
- All borrowed Pokémon have been returned to their owners, and both cartridges were saved after the final confirmed trade.
Items, TMs, and Key NPCs — Where to Find Useful Moves and Healing
Pokémon Blue’s most useful campaign resources are the Gym Leader TMs, fixed field rewards, Celadon’s purchasable TMs, the five HMs, and several one-time NPC services. Collect them in route order, reserve important attacks for Pokémon that will remain in your party, and use Pokémon Centers to restore both HP and PP before every major objective.
Use free healing before spending items
Every Pokémon Center restores the entire party’s HP, status, and PP at no cost. Heal before entering a Gym, cave, Team Rocket building, or long route, then use the PC to reorganize the party and deposit temporary Pokémon. Saving after a major reward or before a difficult area prevents an avoidable loss from forcing a long repeat section.
The S.S. Anne has a cabin attendant who heals the party when spoken to. Use her service after battling several sailors and before the rival encounter near the captain’s quarters. The ship leaves permanently once its story event is completed, so collect the visible items, search the cabins, receive HM01 Cut from the captain, and use the healing service before triggering the final departure.
Indigo Plateau is the last Pokémon Center before the Elite Four. Buy the healing items you need, restore every move’s PP, arrange your battle party, and save before entering the challenge area. There is no ordinary mid-run Pokémon Center between Elite Four battles, so PP and item planning matter more than carrying a large number of low-value items.
- Heal and save before every Gym, cave, and major story building.
- Use the S.S. Anne healer before completing the ship event.
- Prepare and save at the Indigo Plateau Pokémon Center.
Collect fixed Gym and field TMs
Gym Leader rewards are fixed resources in the original Game Boy release. Brock gives TM34 Bide, Misty gives TM11 BubbleBeam, Lt. Surge gives TM24 Thunderbolt, Erika gives TM21 Mega Drain, Koga gives TM06 Toxic, Blaine gives TM38 Fire Blast, and Giovanni gives TM27 Fissure. Check compatibility and your long-term team plan before teaching any of these moves.
Several valuable field rewards are also worth collecting. TM08 Body Slam is on the S.S. Anne, TM19 Seismic Toss is on Route 25, TM16 Pay Day is on Route 12, TM14 Blizzard and TM22 SolarBeam are in the Pokémon Mansion, TM26 Earthquake is inside Silph Co., and TM29 Psychic comes from the man in the southwestern house of Saffron City. These fixed rewards normally cannot be replaced on the same cartridge, so do not teach them casually to a temporary capture.
TM38 Fire Blast, TM14 Blizzard, and TM22 SolarBeam are especially useful late in the campaign, but their accuracy and PP should be considered before replacing a reliable move. Earthquake is usually strongest on a Pokémon with good Attack, while Psychic, Thunderbolt, Ice Beam, and Surf benefit from the Generation I Special stat.
- Take each Gym reward but delay teaching it until the recipient is decided.
- Collect TM26 Earthquake in Silph Co. and TM29 Psychic in Saffron City.
- Do not spend a fixed reward on a Pokémon you plan to trade away.
Shop intelligently in Celadon City
The Celadon Department Store’s TM counter sells repeatable copies of several TMs, including TM01 Mega Punch, TM02 Razor Wind, TM05 Mega Kick, TM07 Horn Drill, TM09 Take Down, TM17 Submission, and TM18 Counter. Unlike fixed Gym and field rewards, these shop TMs can be purchased again while you have enough money, so they do not need to be treated as irreplaceable in the same way.
The Department Store rooftop vending machines provide three important gift TMs. Give the girl a Fresh Water for TM13 Ice Beam, a Soda Pop for TM48 Rock Slide, and a Lemonade for TM49 Tri Attack. These are the original Red and Blue rewards; do not substitute the arrangements from FireRed or LeafGreen.
The Rocket Game Corner offers TM15 Hyper Beam, TM23 Dragon Rage, and TM50 Substitute among its prizes. Obtain the Coin Case from the man in the Celadon restaurant before trying to use the prize counter. Hyper Beam can be powerful on a physically strong late-game Pokémon, but in Generation I the user does not recharge after knocking out an opponent, making it more attractive as a finishing move than as a routine attack.
- Buy repeatable Department Store TMs only after checking your available money.
- Visit the rooftop with all three drinks if you want Ice Beam, Rock Slide, and Tri Attack.
- Get the Coin Case before spending time at the Game Corner.
Acquire HMs and track badge permissions
The S.S. Anne captain gives HM01 Cut after you find him in his quarters and speak to him while he is seasick. Cut can be used outside battle after earning the Cascade Badge. HM02 Fly is in the house on Route 16, reached through the path west of Celadon City; the Thunder Badge permits its field use.
HM03 Surf is in the Safari Zone’s Secret House in Area 3. It becomes usable outside battle after the Soul Badge. HM04 Strength comes from the Safari Zone Warden after you return his Gold Teeth, which are found in Area 3; the Rainbow Badge permits Strength outside battle. HM05 Flash is given by Professor Oak’s aide in the Route 2 gatehouse after you have registered enough Pokémon, and the Boulder Badge permits its use in the field.
HMs cannot normally be deleted in original Pokémon Blue. Put Cut, Flash, and Strength on a spare compatible Pokémon when possible. Surf is different because it is both a required field move and one of the best Water attacks in the game, so keeping it on your primary Water-type is usually worthwhile.
- Remember the badge requirements for all five HMs.
- Return the Gold Teeth before expecting the Warden to give Strength.
- Use a spare Pokémon for low-value HMs when your team’s move slots are tight.
Use the Lab, NPC gifts, and limited-use moves correctly
The Pokémon Lab on Cinnabar Island can revive the Helix Fossil, Dome Fossil, or Old Amber. Give the fossil to the researcher, leave the building, and return later to receive the restored Pokémon. Your fossil choice is permanent on that cartridge, so use a trade if you want the other fossil species.
Original Pokémon Blue has no modern move deleter, move relearner, or reusable TM inventory. A TM disappears when taught, while HMs remain attached to the Pokémon until a later-generation service removes them. The game does contain one-time move-gift NPCs and TM rewards, but these are not modern move tutors. Plan four-move sets before teaching an HM or a rare offensive TM.
Generation I calculates damage by type category rather than by each individual move. Normal, Fighting, Ground, Rock, and similar types use Attack; Water, Electric, Grass, Ice, Fire, and Psychic use Special. This is why Body Slam and Earthquake favor strong physical attackers, while Surf, Ice Beam, Thunderbolt, and Psychic are best on Pokémon with strong Special or useful type compatibility.
- Revive your chosen fossil if desired before final team planning.
- Confirm the recipient’s moves and long-term role before teaching a rare TM.
- Keep the final team free of unnecessary HMs whenever possible.
Before you move on
- You have collected the Gym TMs you intend to use, including the correct Blaine reward, TM38 Fire Blast.
- You have obtained TM26 Earthquake in Silph Co. and TM29 Psychic in Saffron City if they fit your team.
- You have checked the Celadon Department Store rooftop rewards and purchased only the repeatable TMs you actually need.
- You know that Cut, Fly, Surf, Strength, and Flash require the Cascade, Thunder, Soul, Rainbow, and Boulder Badges respectively.
- Your HM assignments leave your main battlers with usable battle moves, and your fossil has been revived if desired.
- You have healed and saved at Indigo Plateau before beginning the Elite Four.
Recovery and Failure Handling — Rematch Planning and Efficient Retrains
Pokémon Blue on the original Nintendo Game Boy has no VS Seeker and no ordinary route-trainer rematch system. After a defeat, heal at the last Pokémon Center, identify the exact matchup that failed, and train only the Pokémon or moves needed to solve it. Use nearby wild encounters, any unbeaten trainers, Victory Road, and later repeat Elite Four runs as your reliable experience sources.
Recover from a defeat and identify the problem
When all of your Pokémon faint, Pokémon Blue returns you to the last Pokémon Center you used, restores the party, and removes half of the money you are carrying. Heal again if necessary, restock Potions or status cures, and review the battle before beginning another training session. Identify the opposing Pokémon that caused the loss and decide whether the real problem was a type disadvantage, low Speed, a status condition, depleted PP, or a level gap.
Do not automatically raise all six Pokémon. If one opposing Pokémon defeated the team, improve the member that can answer it. For example, a Ground-type answer is more useful against Lt. Surge than several additional levels on an Electric-type that cannot damage his team effectively. Save after healing and before the rematch so a failed attempt does not erase your preparation.
- Heal and restock at a Pokémon Center.
- Identify the opposing Pokémon or move that caused the loss.
- Save before the next Gym, rival, or Elite Four attempt.
Train near the location of an early or mid-game loss
For a failed Brock battle, use Route 3 and the accessible sections of Mt. Moon for wild experience. If you have not defeated the trainers on Route 24 or Route 25, those battles are useful before trying Misty again. Route 5 and Route 6 provide additional safe training once Cerulean City is connected to Vermilion City. Near Vermilion City, Diglett’s Cave is especially useful because its Ground-type encounters can both provide experience and prepare a team member for Lt. Surge.
Choose encounters that your trainee can defeat consistently. If the trainee cannot win alone, lead with a stronger Pokémon, switch to the trainee after the opposing Pokémon appears, and then switch back to finish the battle. This switch-training method gives the weaker Pokémon experience without repeatedly risking a knockout. Return to a Pokémon Center before the trainee runs out of HP or the main battler runs low on PP.
Unbeaten route trainers are valuable because they give more experience and money than ordinary wild encounters, but they are a limited resource. In the original Red and Blue release, defeated route trainers do not reset for ordinary rematches, and there is no VS Seeker. Do not plan a training routine around repeatedly fighting the same Youngster, Hiker, or Cooltrainer.
- Use the closest route with encounters your trainee can defeat reliably.
- Switch-train weak Pokémon instead of sacrificing them to wild battles.
- Fight unbeaten trainers for one-time experience and money when the route is safe.
Retrain before the final Gyms and Victory Road
Before Koga or Sabrina, the routes around Fuchsia and Saffron can provide additional wild experience, while any remaining trainers on Routes 12 through 15 can be cleared for one-time rewards. Before Blaine, use the late-game routes and Seafoam Islands if your team can defeat the encounters without frequent knockouts. Keep the training focused: add a Ground or Psychic move for Poison opponents, Water or Ground coverage for Fire opponents, and a strong physical attacker or useful Bug move when preparing for Sabrina.
After earning all eight Badges, Victory Road is the practical pre-League training area. Its wild Pokémon and remaining trainers provide the strongest normal experience available before entering Indigo Plateau. Carry Escape Ropes if you want to leave quickly, then heal and resupply at the Pokémon Center inside the Indigo Plateau entrance hall.
A useful recovery target is to raise the Pokémon that failed by several levels and test the battle again. If the same opponent still defeats it, change the matchup or move set instead of continuing to grind indefinitely. The Elite Four’s original teams reach the mid-50s and, in the final battles, level 60, so a team in the upper 40s to low 50s may need careful type use and healing rather than assuming levels alone will be enough.
- Use remaining route trainers before relying only on wild encounters.
- Train in Victory Road before the first League challenge.
- Improve the matchup or move coverage when extra levels stop solving the problem.
Replace a bad matchup instead of forcing it
Repeated failure usually indicates a coverage gap. Against Rock- and Ground-type opponents, use Water or Grass attacks. Against Electric opponents, a Ground-type Pokémon is immune to Electric attacks in Generation I. Against Poison opponents, Ground and Psychic attacks are strong options. Against Fire opponents, Water and Ground attacks are dependable. Against Sabrina, do not treat Ghost attacks as an automatic answer: Generation I’s Ghost interactions contain type-chart oddities, so a strong physical attacker or a properly trained Pokémon with a useful Bug move is safer.
Catch a replacement in an area that is already available rather than spending hours forcing an unsuitable team member to win. Diglett’s Cave can supply a Ground option, fishing can add Water coverage, and earlier routes remain open for filling a missing type. A traded Pokémon may help, but obedience restrictions apply to Pokémon whose original Trainer ID differs from yours. Earn the relevant Badges before relying on a traded Pokémon above your current obedience limit.
- Check the attack’s type and power, not only the Pokémon’s displayed type.
- Add or train a counter before committing to more grinding.
- Check the obedience risk before using a high-level traded Pokémon.
Recover after an Elite Four failure
The Elite Four and Champion must be defeated in one continuous sequence with no Pokémon Center stop between battles. Before entering, heal at the Indigo Plateau Pokémon Center, buy the healing items you can afford, restore important move PP, and save. If you lose, reload that save when possible. Otherwise, the game returns you to the last Pokémon Center, and you must rebuild the attempt from outside the League.
For the first successful run, return to Victory Road and train the Pokémon that failed against a particular member. Lorelei rewards reliable Electric or Grass coverage against her Water-heavy team; Bruno is vulnerable to strong Psychic attacks, although his Onix should be handled with Water or Grass moves; Agatha is best approached with strong Psychic or Ground coverage rather than depending on flawed Ghost interactions; and Lance requires Ice or Electric coverage for his Dragon- and Flying-type Pokémon. Keep PP restoration and healing items for the later battles instead of spending them on Victory Road encounters.
After entering the Hall of Fame, the Pokémon League can be challenged again. These repeat runs are the strongest repeatable trainer experience in the original campaign, but they still require the complete sequence. There is no intermediate Pokémon Center between Lorelei, Bruno, Agatha, Lance, and the Champion, so only start a repeat run when the whole party has usable PP and enough healing supplies.
- Save at the Indigo Plateau Pokémon Center before entering.
- Use Victory Road for training before the first Hall of Fame entry.
- Use repeat Elite Four runs for later experience, not ordinary route-trainer rematches.
- Confirm that every intended battler has usable PP before beginning.
Before you move on
- The Pokémon that previously caused the loss can survive the key opposing attack or has been replaced by a reliable counter.
- Your main party has suitable coverage for the next Gym, rival battle, or Elite Four member.
- You have healed, restocked, and saved before the rematch.
- For the League, every intended battler has usable PP and the team can continue through all four Elite Four members and the Champion without visiting a Pokémon Center.
- You are no longer relying on defeated route trainers to provide repeatable experience.
References for this chapter
- Bulbapedia — Pokémon Red and Blue Versions
- Bulbapedia — Walkthrough: Pokémon Red and Blue
- Bulbapedia — Pokémon Red and Blue Walkthrough, Part 15: Route 22, Route 23, Victory Road
- Bulbapedia — Pokémon Red and Blue Walkthrough, Part 16: Indigo Plateau and the Elite Four
- Bulbapedia — Black out
- Bulbapedia — Rematch
- Pokémon Database — Gym Leaders and Elite Four in Pokémon Red and Blue
Practical Tips, Common Pitfalls, and Final Checklist
Use this final checklist only after the campaign’s deferred objectives have been completed in the correct order. In the original Nintendo Game Boy Pokémon Blue Version, finish the Lavender and Celadon sequence in ch10, complete Celadon preparation and Erika in ch11, clear Saffron and Silph Co. in ch09, and then complete Fuchsia, the Safari Zone, and Koga in ch08. After those steps, travel to Cinnabar Island for Blaine, return through Route 21 and Pallet Town to defeat Giovanni in Viridian Gym, and then begin the League approach. Hall of Fame registration completes the main campaign; Cerulean Cave and Mewtwo are optional post-game objectives.
1. Confirm the corrected campaign order before the final gyms
Before preparing for Victory Road, verify that the deferred chapters have been completed in this order: ch10, Lavender Town and Pokémon Tower through the Celadon Rocket Hideout; ch11, Celadon City and Erika; ch09, Saffron City, Silph Co., and Sabrina; and ch08, Fuchsia City, the Safari Zone, and Koga. This order ensures that the Silph Scope, Poké Flute, Saffron access, Safari Zone progress, Surf, Strength, and Soul Badge requirements are already available.
Chapter 06 is the sole chapter for the S.S. Anne event and HM01 Cut. Do not search for a second HM01 reward or repeat the ship sequence here. Chapter 10 is the sole chapter that explains the Rocket Hideout and awards the Silph Scope, then returns to Pokémon Tower to rescue Mr. Fuji and receive the Poké Flute. No later chapter should send you back to repeat those events.
After ch08, travel to Cinnabar Island, explore the Pokémon Mansion, obtain the Secret Key, and defeat Blaine for the Volcano Badge. Then return east across Route 21, pass through Pallet Town, and enter Viridian Gym. Defeat Giovanni there for the Earth Badge. Only after all eight badges are recorded should you begin the final route.
Check the Trainer Card before leaving Viridian City. The badges should be Boulder, Cascade, Thunder, Rainbow, Soul, Marsh, Volcano, and Earth. The Earth Badge confirms that Giovanni has been defeated in Viridian Gym.
- ch10 is complete and the Silph Scope and Poké Flute have been obtained.
- ch11 is complete and Erika has been defeated.
- ch09 is complete and Sabrina has been defeated.
- ch08 is complete and Koga has been defeated; Surf and Strength are available.
- Blaine has been defeated and the Volcano Badge is recorded.
- Giovanni has been defeated in Viridian Gym and the Earth Badge is recorded.
- Chapter 06 supplied HM01 Cut; no duplicate HM01 objective remains.
2. Prepare Surf, Strength, and the League party
Leave Viridian City through the west exit and follow Route 22 to Route 23. The badge gates on Route 23 check your badges in order. Surf is needed for the water section on the League approach, while Strength is required for the boulder puzzles in Victory Road. Flash is not required for Victory Road if you can navigate the cave without it.
Use six trained Pokémon rather than adding a freshly caught replacement at the last minute. A practical party should include a reliable Water attack, Electric or Grass coverage for Lorelei’s Water Pokémon, Ice coverage for Lance’s Dragon and Flying Pokémon, and Ground, Psychic, Fighting, or strong neutral attacks for the other specialists and the Champion.
Aim for a party mostly in the low-to-mid 50s for a comfortable attempt. The Champion’s strongest Pokémon can reach level 65 in the original Blue battle, so a single underleveled Pokémon should not be expected to carry the entire challenge. If one matchup repeatedly causes a loss, correct the type or move-coverage problem instead of only adding levels.
Because Generation I has no ordinary HM deletion service, teach Surf and Strength to Pokémon whose long-term movesets can spare them. Before Victory Road, confirm that neither your only Surf user nor your only Strength user is being traded, boxed, or removed from the active party.
- Six intended League members are selected and fully healed.
- The party has answers to Water, Ice, Fighting, Rock, Ghost, Poison, Dragon, and mixed threats.
- A party Pokémon knows Surf and can use it outside battle.
- A party Pokémon knows Strength and can use it outside battle.
- The only useful HM users are not being traded or permanently boxed.
3. Organize the PC and stock Indigo Plateau
Use the Pokémon Center PC before entering Victory Road and again at Indigo Plateau. Deposit low-level captures, unnecessary HM users, and Pokémon that are not part of the League plan. Leave enough party or box capacity for later captures if you intend to continue directly to Cerulean Cave after the Hall of Fame.
Heal at the Indigo Plateau Pokémon Center before entering the League building. The attached Poké Mart sells Ultra Balls, Great Balls, Full Restores, Max Potions, Full Heals, Revives, and Max Repels. Buy enough healing to support five consecutive battles, but remember that the shop does not sell Ethers or Elixirs.
Full Restores heal all HP and remove status conditions. Max Potions restore HP but do not cure poison, paralysis, sleep, burn, or freeze. Full Heals are useful when a Pokémon needs status removal but does not need its entire HP restored. Revives are valuable after an unexpected knockout, but use a normal healing item first when the Pokémon is still conscious and safe to recover.
Reserve Ethers and Elixirs collected during the adventure for moves that are nearly empty and remain essential to the plan. Do not spend them merely because a move has lost a few uses if another dependable attack can handle the next battle. If you plan to capture Mewtwo later, buy Ultra Balls before leaving the Plateau or at another shop that sells them.
- The final party is healed and has full PP.
- Full Restores, Max Potions, Full Heals, and Revives are stocked.
- Ethers and Elixirs are reserved for essential moves.
- Poké Balls are available for optional legendary captures.
- The party and PC have room for later captures.
4. Save before the Elite Four and manage the continuous challenge
Save at the Indigo Plateau Pokémon Center after healing and purchasing supplies. The Elite Four and Champion must be fought in sequence without returning to a Pokémon Center between opponents. You may use items during the challenge, but there is no normal Center break between Lorelei, Bruno, Agatha, Lance, and the Champion.
Begin with reliable attacks and conserve low-PP moves for the matchups where they matter most. Electric attacks help against Lorelei’s Water Pokémon, although her Jynx requires a different answer. Psychic or Flying attacks are useful against Bruno’s Fighting Pokémon, while Ground attacks handle his Rock Pokémon. Agatha’s Ghost and Poison Pokémon can be pressured with Psychic or Ground attacks; do not substitute later-generation assumptions for the original Generation I type interactions. Ice attacks are valuable against Lance’s Dragon and Flying Pokémon.
After every victory, inspect HP, PP, status conditions, and the remaining usable Pokémon. Heal before the next room when necessary, but avoid spending every Full Restore early. Keep recovery available for Lance and the Champion, where critical hits, paralysis, sleep, confusion, and the Champion’s stronger Pokémon can quickly reverse a favorable battle.
If you lose, the saved game returns you to the preparation point. Restore PP, rebuild the party, replace the failed matchup, and train the problem Pokémon before trying again. More levels will not solve a team that has no dependable answer to a major type or status threat.
- The game is saved before entering the first Elite Four room.
- The five battles are planned as one uninterrupted challenge.
- Recovery items are rationed for Lance and the Champion.
- Important attacks have enough PP for the remaining opponents.
- A defeat will be followed by targeted preparation rather than an unchanged retry.
5. Avoid original Generation I preparation mistakes
Pokémon Blue uses the original Generation I rules. Do not plan around remake mechanics, abilities, held items, modern type interactions, or a move-removal service. HM moves cannot normally be deleted, so consider the final role of a Pokémon before teaching Surf or Strength.
Do not add a low-level capture to the League party simply because it provides the correct type. Train the replacement on available routes or in Victory Road before relying on it. A Pokémon that knows the right move but cannot survive a normal attack will consume healing items without fixing the matchup.
Do not assume route Trainers can be fought again through a VS Seeker; that device is not part of original Pokémon Blue. Use unbeaten Trainers, wild encounters, Victory Road, and later League clears as experience sources instead.
Save before link-cable trades and verify both offered Pokémon before confirming. Trading is useful for version exclusives and trade evolutions, but it must not leave the active party without a required field move or a dependable battle role.
- The final plan uses original Red and Blue mechanics.
- No required HM is stranded on a traded or boxed Pokémon.
- Any new team member has been trained before the League attempt.
- No VS Seeker or ordinary route-Trainer rematch plan is being used.
- Trades are saved and checked before confirmation.
6. Verify Hall of Fame completion, then handle Mewtwo separately
The main campaign is complete after defeating Lorelei, Bruno, Agatha, Lance, and the Champion, then completing the Hall of Fame registration. Professor Oak records the victorious party after the Champion battle, and the game saves as the Hall of Fame sequence begins.
Generation I does not automatically heal the party when it enters the Hall of Fame. When the game resumes, lost HP and PP, status conditions, and fainted Pokémon remain unchanged. Heal at a Pokémon Center before beginning any optional activity or attempting another major battle.
After Hall of Fame registration, Cerulean Cave is accessible in Pokémon Blue. Return to Cerulean City, go north through Route 24, and Surf southward to the cave entrance. Mewtwo is a one-time encounter, so save before approaching it. Bring a large supply of suitable Poké Balls and a Pokémon that can inflict a useful status condition without knocking Mewtwo out.
Before entering the cave, organize the party and PC. Make sure there is room for the capture, and deposit unnecessary HM users or weak Pokémon. After catching Mewtwo, save again and sort the PC before continuing with trading or Pokédex work.
- All eight Gym Badges are obtained: Boulder, Cascade, Thunder, Rainbow, Soul, Marsh, Volcano, and Earth.
- The corrected prerequisite order is complete: ch10, ch11, ch09, and ch08, followed by Cinnabar and Viridian Gym.
- Chapter 06 supplied HM01 Cut, and Chapter 10 supplied the Silph Scope and Poké Flute.
- Giovanni has been defeated in Viridian Gym.
- The Elite Four and Champion are defeated in one continuous challenge.
- The Hall of Fame sequence has been completed and records the victorious party.
- The party has been healed after Hall of Fame registration.
- For the optional Mewtwo goal, Cerulean Cave is accessible, the game is saved, and party or PC space is available.
Before you move on
- All eight Gym Badges are obtained, including the Earth Badge.
- The corrected deferred sequence is complete: ch10, ch11, ch09, and ch08.
- Cinnabar Island and Blaine are complete before the final Viridian Gym visit.
- Giovanni has been defeated in Viridian Gym.
- HM01 Cut was obtained during the one-time ch06 S.S. Anne sequence.
- The Silph Scope and Poké Flute were both obtained during ch10.
- Surf and Strength are available for the final route and Victory Road puzzles.
- The Elite Four and Champion are defeated in one continuous challenge.
- The Hall of Fame sequence has been completed and records the victorious party.
- The party has been healed after Hall of Fame registration.
- For the optional Mewtwo goal, Cerulean Cave is accessible, the game is saved, and party or PC space is available.
Finishing up
Required completion: defeat Brock, Misty, Lt. Surge, Erika, Koga, Sabrina, Blaine, and Giovanni; clear the required Team Rocket story events and Silph Co.; complete Victory Road; defeat Lorelei, Bruno, Agatha, Lance, and the rival Champion; and finish the Hall of Fame registration.
Optional post-game completion: capture the level 70 Mewtwo in Cerulean Cave after the Hall of Fame sequence. A defeat does not count as capturing it.
Collection completion: obtain all 150 species required for the original Red and Blue diploma through catches, gifts, evolutions, and compatible trades. Mew is a separate event-only species in the normal Western release and is not required for the diploma.
Choose your next gameScreenshots & video
Game imagery for reference. Follow the written chapters above for the route and strategies.
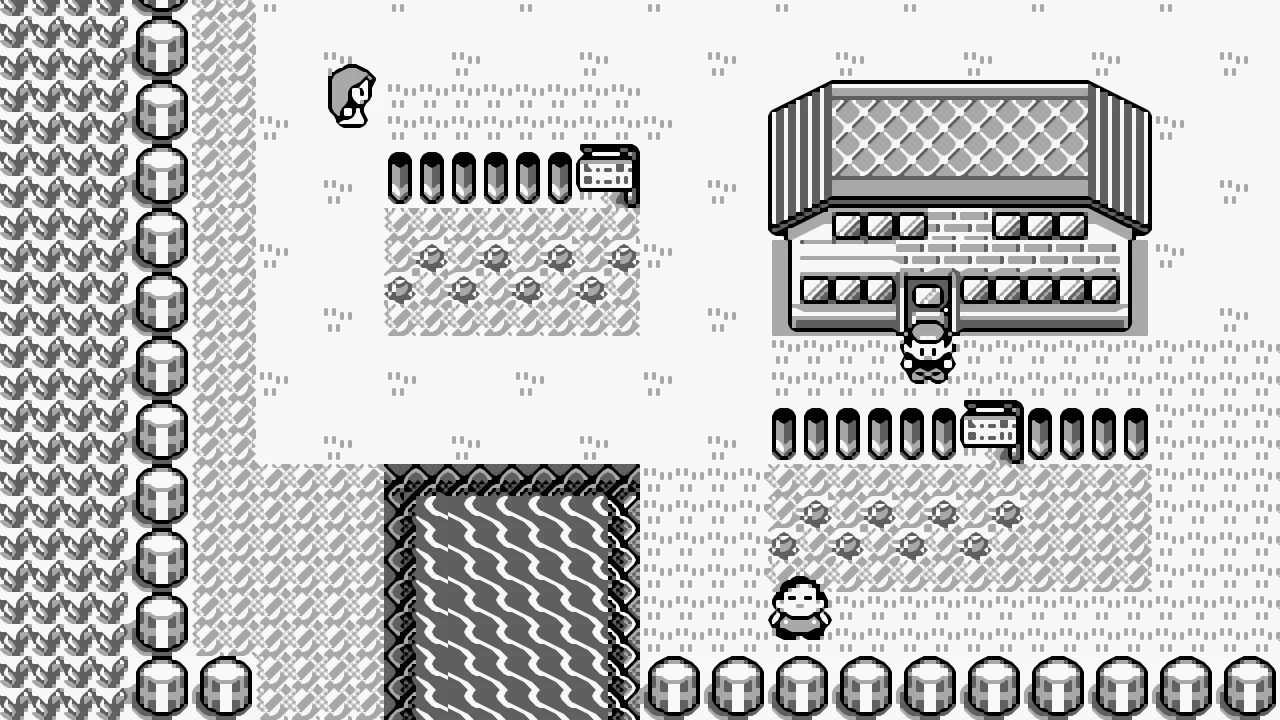
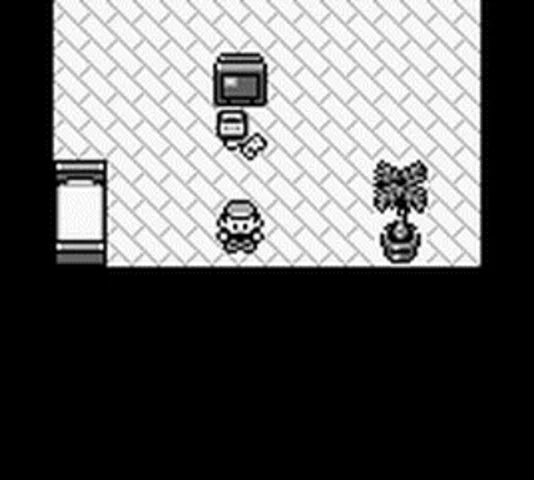
Sources & references
Our original guide draws on the references below. Check the edition at the top of this page before following controls or unlock requirements.
- Pokémon Blue Version — Nintendo UK
- Game Boy Instruction Manual — Pokémon Red Version
- StrategyWiki — Pokémon Red and Blue: Pallet Town
- Bulbapedia — Walkthrough: Pokémon Red and Blue
- Bulbapedia — Kanto Route 1
- Bulbapedia — Kanto Route 2
- Bulbapedia — Viridian Forest
- GameFAQs — Pokémon Blue Version Walkthrough: Route 1
- GameFAQs — Pokémon Blue Version Walkthrough: Route 2
- GameFAQs — Pokémon Blue Version Walkthrough: Viridian Forest
- Bulbapedia — Walkthrough: Pokémon Red and Blue, Part 3
- Bulbapedia — Pewter Gym
- Bulbapedia — Brock
- Bulbapedia — Nidoran♂ Generation I learnset
- Pokémon Red and Blue English instruction manual
- Walkthrough: Pokémon Red and Blue/Part 4 — Bulbapedia
- Mt. Moon — Bulbapedia
- Red/Blue Items List — Serebii.net
- Pokémon Red and Blue/Mt. Moon — StrategyWiki
- Pokémon Red and Blue/Walkthrough — StrategyWiki
- Walkthrough: Pokémon Red and Blue — Part 5
- Cerulean Gym — Bulbapedia
- Pokémon Red and Blue/Walkthrough summary — StrategyWiki
- Pokémon Blue Version — Guide and Walkthrough — GameFAQs
- Bulbapedia — Walkthrough: Pokémon Red and Blue, Part 6
- Bulbapedia — S.S. Anne
- GameFAQs — Pokémon Red Version Walkthrough: S.S. Anne
- Bulbapedia — Vermilion City
- StrategyWiki — Pokémon Red and Blue: S.S. Anne
- StrategyWiki — Pokémon Red and Blue: Routes 9 and 10
- StrategyWiki — Pokémon Red and Blue: Rock Tunnel
- Psypokes — Pokémon Red and Blue Walkthrough
- Bulbapedia — Pokémon Red and Blue Walkthrough, Section 11
- StrategyWiki — Pokémon Red and Blue: Fuchsia City
- StrategyWiki — Pokémon Red and Blue: Safari Zone
- Smogon — Generation I TM and HM Location Guide
- Bulbapedia — Walkthrough: Pokémon Red and Blue/Part 10
- Bulbapedia — Appendix: Red and Blue walkthrough/Section 10
- StrategyWiki — Pokémon Red and Blue/Silph Company
- Bulbapedia — Blue in Red, Green, and Blue: Rival Teams
- Bulbapedia — Saffron Gym
- Walkthrough: Pokémon Red and Blue — Bulbapedia
- Walkthrough: Pokémon Red and Blue/Part 9 — Bulbapedia
- Bulbapedia — Pokémon Tower
- Bulbapedia — Silph Scope
- StrategyWiki — Pokémon Red and Blue Rocket Hideout
- Bulbapedia — Walkthrough: Pokémon Red and Blue, Section 9
- Bulbapedia — Celadon Department Store
- Serebii — Pokémon Red & Blue Gyms
- StrategyWiki — Pokémon Red and Blue: Celadon City
- Bulbapedia — Lt. Surge
- S.S. Anne — Bulbapedia
- Bulbapedia — HM01
- Bulbapedia — Pokémon Red and Blue Versions
- StrategyWiki — Pokémon Red and Blue: Vermilion City
- Walkthrough: Pokémon Red and Blue/Part 12 — Bulbapedia
- Walkthrough: Pokémon Red and Blue/Part 13 — Bulbapedia
- Seafoam Islands — Pokémon Blue Version Walkthrough and Guide
- Cinnabar Lab — Bulbapedia
- Bulbapedia — Walkthrough: Pokémon Red and Blue, Part 14
- Bulbapedia — Pokémon Red and Blue Walkthrough, Part 15: Route 22, Route 23, Victory Road
- Bulbapedia — Kanto Route 22
- GameFAQs — Pokémon Blue Version Walkthrough: Viridian Gym and Route 22
- Indigo Plateau/Generation I — Red and Blue Elite Four and Champion data
- Pokémon Red & Blue — Elite Four
- Bulbapedia — Pokémon Red and Blue Walkthrough, Part 16: Indigo Plateau and the Elite Four
- Walkthrough: Pokémon Red and Blue/Part 17 — Bulbapedia
- GameFAQs — Pokémon Blue Version: Cerulean Cave Walkthrough
- Bulbapedia — Cerulean Cave
- Pokémon Database — Mewtwo Generation I Learnset
- Pokémon Database — Version-Exclusive Pokémon in Red and Blue
- Bulbapedia — Pokémon Red and Blue Versions
- Bulbapedia — Trade Evolution
- Bulbapedia — Time Capsule
- Bulbapedia — Diploma
- Pokémon Red and Blue Versions — Bulbapedia
- Trade Evolution — Bulbapedia
- List of mutually exclusive Pokémon — Bulbapedia
- Pokémon availability — Bulbapedia
- List of TM and HM locations in Generation I — Bulbapedia
- Pokémon Red/Blue — TMs & HMs — Serebii
- Pokémon Red & Blue — Game Corner — Serebii
- Bulbapedia — Black out
- Bulbapedia — Rematch
- Pokémon Database — Gym Leaders and Elite Four in Pokémon Red and Blue
- Indigo Plateau — Bulbapedia
- Hall of Fame — Bulbapedia
- Pokémon Red and Blue instruction manual
About the game & collecting notes
- Platform
- Game Boy
Step-by-step original Nintendo Game Boy Pokémon Blue Version walkthrough covering the complete required route from Pallet Town through all eight Gyms, Team Rocket's required story events, Victory Road, the Elite Four, and the Champion. Optional sections cover Mewtwo and the distinction between the 150-species diploma, version-exclusive trading, trade evolutions, and the separate event-only Mew.
Darryl Polo
Darryl Polo loves tinkering with emulation and revisiting retro games. He enjoys exploring how old favorites play on different setups and sharing what he learns along the way. At Joking Joystick, he writes about the games, hardware, and small discoveries that keep the hobby fun.
Our editorial standardsFound a step that needs another look? Help us improve this guide.