
Pokémon Alpha Sapphire — Complete Campaign Walkthrough (Nintendo 3DS, USA Rev 2)
Step-by-step walkthrough for Pokémon Alpha Sapphire (3DS, USA Rev 2). Covers the entire Hoenn main story from Littleroot to the Elite Four and Champion, the post-game Delta Episode with its legendary encounters, gym and boss strategies, team recommendations, and clear completion checks so you can finish the original campaign and its postgame content reliably.

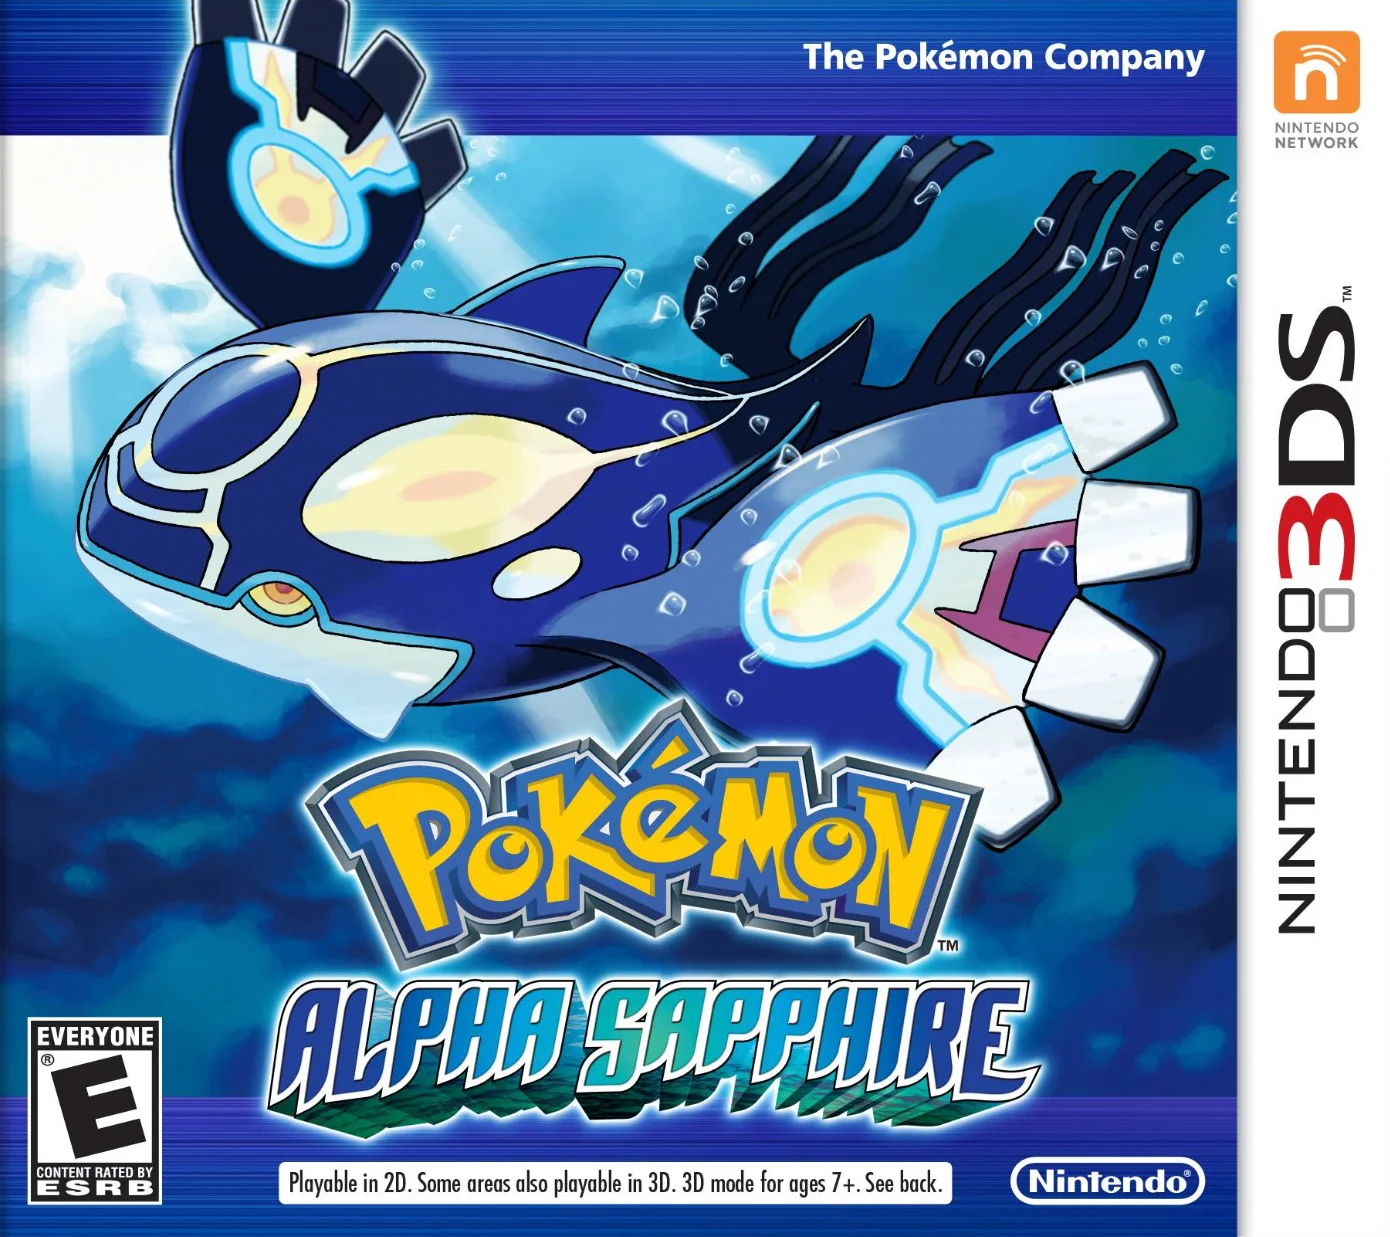
Find a copy
Pokemon Alpha Sapphire Nintendo 3DS
We may earn a commission if you buy through these links, at no extra cost to you. As an Amazon Associate I earn from qualifying purchases.
Opens retailer search results. Check the model, edition, seller, availability and current price before buying.
Before you begin
You are starting Pokémon Alpha Sapphire on Nintendo 3DS (USA Rev 2).
This guide covers one complete run through the eight-Gym Hoenn story, the first Elite Four and Champion victory, and the Delta Episode post-game story.
Follow the chapters in order. Chapters 1–12 cover the main campaign; chapters 13–15 cover the Delta Episode; chapters 16–18 cover optional postgame content.
The main story ends when you defeat Champion Steven Stone and enter the Hall of Fame. The Delta Episode is separate post-game story content that begins after the first Hall of Fame registration and a subsequent load of the completed save.
Use each chapter’s completion check before moving forward. Optional legendary hunts, Battle Resort activities and Pokédex work are clearly separated from required progression.
Set yourself up for the run
Make a manual save before every major story beat (before each Gym battle, before the Elite Four, and before any scripted legendary encounter).
The game permits only one main save file. Use the field-menu Save command to create restore points; you cannot maintain multiple independent in-game save slots. Keep important encounter saves until the relevant battle and story sequence are secure.
Pick your starter with the campaign in mind: Treecko (fast Special Attack), Torchic (becomes powerful Fire/Fighting on evolution), or Mudkip (solid Water/Ground coverage).
Each starter changes early-route matchups; choose the one whose typing you prefer for early Gyms.
Build a core team of three reliable members by midgame: one physical attacker, one special attacker or bulky Water (or starter), and one utility/support type that can cover common Hoenn threats (Electric, Ground, or Fighting coverage depending on your starter).
Expect Exp. Share and key progression items to be available during the early route sequence; keep a balanced party rather than over-leveling a single Pokémon unless you want to speedrun.
Learn the eight Gym specialties (Rock, Fighting, Electric, Fire, Normal, Flying, Psychic, Water) and plan at least one Pokémon with a super-effective moveset for each.
Prioritize catching or training a counter before each Gym.
Have a set of healing items and status cures; stock up on Full Restores and Revives before the Pokémon League run.
Save money during the story by selling surplus items and using the Poké Marts along the route.
Leave room in your team for a Mega Evolution-capable Pokémon by the late midgame if you plan to use Mega Evolution during the Elite Four or Delta Episode fights.
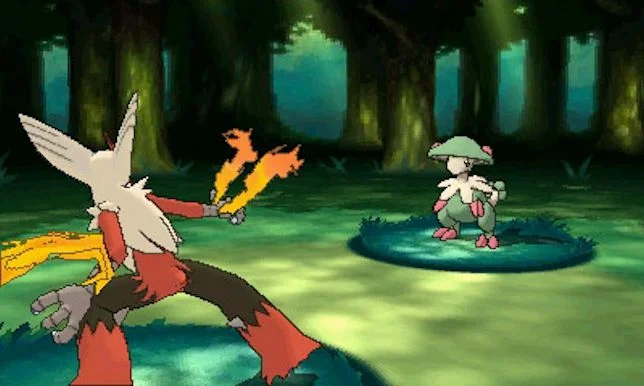
Littleroot and Petalburg — First Steps and the Starter Choice
Begin in Littleroot Town, choose a starter, defeat the first rival battle, assemble a small team on Routes 101–104, complete Wally’s catching lesson in Petalburg, and cross Petalburg Woods into Rustboro. The chapter ends with your party prepared for Roxanne and the Devon Parts events that follow the first Gym battle.
Start in Littleroot and choose your starter
After the opening scenes, go upstairs in your new house and set the clock. Speak with your mother, then visit Professor Birch’s house next door and talk to May or Brendan. Go north onto Route 101, where Birch is being chased by a wild Pokémon. Open his bag and choose Treecko, Torchic, or Mudkip.
Treecko gives the easiest immediate matchup against Roxanne’s Rock-type Pokémon because Grass attacks are super effective. Mudkip is also a strong all-purpose choice: Water attacks help against Roxanne, and its later Ground typing is especially valuable against Wattson’s Electric Gym. Torchic is less comfortable against Roxanne before evolving, but becomes much more effective after evolving into Combusken and gaining Fighting-type coverage. All three starters can complete the story, so choose based on the rest of your intended team rather than treating one choice as mandatory.
- Choose one of the three starter Pokémon from Birch’s bag.
- Set the clock before leaving the house.
- Save from the field menu after receiving the starter if you want a clean early backup.
Use Route 101, Oldale Town, and Route 103 to build your first team
Battle a few wild Pokémon on Route 101 before entering Oldale Town. Zigzagoon, Poochyena, and Wurmple are available immediately. Zigzagoon is a convenient utility Pokémon for the early game and may find items through Pickup; Poochyena provides early Dark-type damage and can have Intimidate; Wurmple evolves quickly and gives you an additional trained party member.
Heal at Oldale Town’s Pokémon Center, buy Poké Balls and a few Potions, then travel north onto Route 103. Catch at least one backup Pokémon before speaking to May or Brendan. After you win, return to Birch’s laboratory in Littleroot. Birch gives you the Pokédex, and your rival gives you ten Poké Balls. When you leave town again, your rival upgrades the PokéNav Plus with the DexNav. Use it as a local reference for species you have seen or caught; completing every area is optional and is not required for story progress.
A special hidden Poochyena encounter appears when the DexNav is introduced on Route 101. Its move depends on your starter: Thunder Fang follows Treecko, Ice Fang follows Torchic, and Fire Fang follows Mudkip. Catch it if you want an unusually useful early partner, but do not delay the story if it does not appear immediately.
- Catch at least one non-starter Pokémon before the Route 103 rival battle.
- Defeat May or Brendan on Route 103.
- Receive the Pokédex and ten Poké Balls in Birch’s laboratory.
- Receive the DexNav upgrade when leaving Littleroot again.
Complete Petalburg’s required Norman and Wally sequence
Travel west from Oldale along Route 102. This route offers additional early choices, including Lotad in Alpha Sapphire, Ralts, Poochyena, Zigzagoon, and Wurmple. Lotad is a practical catch if you chose Torchic or want a Water/Grass line for the early and midgame. Ralts is uncommon and begins fragile, so do not spend excessive time searching for it when another Pokémon can fill the immediate role.
Enter Petalburg City and visit the Gym. Norman will not accept your challenge yet. He introduces you to Wally, who takes you outside the city for a catching demonstration. Follow Wally to Route 102, watch him catch a Ralts, and return to the Gym. Norman then tells you to earn four Badges before challenging him. This conversation is required; simply walking into Petalburg and leaving will not advance the intended story sequence.
Heal at the Pokémon Center before continuing. Your mother in Littleroot can also restore your party whenever you return home, but the Center is the more convenient checkpoint once you begin moving west.
- Catch or train a second Pokémon on Route 102.
- Complete Wally’s catching lesson with Norman.
- Speak with Norman again after returning to the Petalburg Gym.
- Heal before leaving Petalburg through the western exit.
Cross Route 104 and clear the first Petalburg Woods event
Leave Petalburg through the west side of Route 104. Battle the trainers and collect visible items as you proceed. The Pretty Petal Flower Shop north of the woods can teach you how to grow Berries, and the shop provides a Wailmer Pail. Berry growing is optional, but planting Oran, Cheri, or Pecha Berries gives you inexpensive recovery and status protection during the early routes.
Enter Petalburg Woods and follow the open path north. Shroomish and Slakoth are the most notable local catches, while Wurmple and other Bug Pokémon are also available. Shroomish is a particularly useful option if your starter does not provide Grass coverage.
Near the northern route, an Aqua Grunt attacks a Devon Corporation employee. Defeat the Grunt, then speak to the employee. In Alpha Sapphire he gives you the Exp. Share. You do not need Cut to use the main northbound passage through the woods. Cut is only needed for the blocked eastern branches and their optional items, so leave those areas for later.
- Defeat the Team Aqua Grunt in Petalburg Woods.
- Receive the Exp. Share from the Devon employee.
- Catch Shroomish or another backup Pokémon if your current party lacks a safe switch.
- Leave through the northern exit toward Rustboro.
Reach Rustboro and prepare for the first Gym
Continue north across the upper part of Route 104 and enter Rustboro City. Heal before exploring. The house beside the Pokémon Center contains the Cutter, who gives you HM01 Cut. In the Poké Mart, speak with the businessman to receive TM54 False Swipe. False Swipe is optional for the story but is useful later when weakening Pokémon for capture.
Rustboro also contains the Pokémon Trainers’ School, Devon Corporation headquarters, and the Rustboro Gym. Visit the School if you want the Quick Claw from the teacher, then prepare for Roxanne. Treecko, Mudkip, Lotad, Shroomish, and Fighting-type attacks are useful against her Rock team. Torchic should rely on neutral damage, training, and a backup Pokémon rather than expecting its early Fire attacks to win quickly.
Save before entering the Gym. Roxanne’s Stone Badge raises the obedience limit to level 20, permits Cut in the field, and comes with TM39 Rock Tomb. After the battle, the story continues immediately: an Aqua Grunt flees from the Devon Corporation, the Devon employee follows, and the chase leads east through Route 116 toward Rusturf Tunnel. Recover the Devon Parts there and return to Devon Corporation when directed. Mr. Stone then gives you the next delivery assignments, including the letter for Steven and the Devon Parts-related progression toward Dewford.
- Reach Rustboro with at least two usable Pokémon and healing items.
- Collect HM01 Cut if you want access to optional blocked areas after earning the Stone Badge.
- Save before challenging Roxanne.
- Defeat Roxanne and receive the Stone Badge and TM39 Rock Tomb.
- Follow the Aqua Grunt east to Route 116 after the Gym battle and continue the Devon Parts objective.
Before you move on
- The starter has been selected and the Route 103 rival has been defeated.
- Birch has given you the Pokédex, your rival has given you ten Poké Balls, and the DexNav has been installed.
- Wally’s catching lesson in Petalburg has been completed and Norman has told you to earn four Badges.
- The Team Aqua Grunt in Petalburg Woods has been defeated and the Exp. Share has been received.
- You have reached Rustboro, defeated Roxanne, earned the Stone Badge, and received TM39 Rock Tomb.
- The Aqua Grunt has fled east from Rustboro and you are ready to pursue the Devon Parts through Route 116 and Rusturf Tunnel.
Rustboro and Roxanne — First Gym Strategy
Reach Rustboro through Petalburg Woods, prepare a Water-, Grass-, or Fighting-type answer to Roxanne, earn the Stone Badge, then recover the Devon Parts and Peeko from Rusturf Tunnel. Finish by returning to Devon Corporation, receiving the Letter for Steven, and sailing to Dewford Town.
Enter Rustboro and make a preparation stop
From the north exit of Petalburg Woods, continue along Route 104 until you reach Rustboro City. Heal at the Pokémon Center before challenging the Gym or starting the Devon Corporation sequence. Save manually after healing so you have a clean recovery point before the next group of battles and story events.
Roxanne’s team is level 12 Geodude followed by level 14 Nosepass. A practical preparation point is to have your main battler around level 13 or 14, with at least one backup Pokémon able to fight. You do not need to equalize every team member, but entering with only one usable attacker makes Rock Tomb’s Speed reduction and repeated damage much more dangerous.
Restock Potions if your supply is low. Early wild battles and Route 116 trainers can consume enough HP and PP that arriving at Rusturf Tunnel immediately after the Gym becomes inconvenient. Manual saving is especially useful before entering the Gym and again before the Team Aqua battle in Rusturf Tunnel.
- Heal at the Rustboro Pokémon Center.
- Bring at least two battle-ready Pokémon.
- Carry several Potions and save before the Gym challenge.
Collect useful Rustboro items before or after the Gym
Rustboro has several optional but practical gifts. The Cutter’s house, next to the Pokémon Center, provides HM01 Cut. You cannot use Cut outside battle until you have the Stone Badge, so you may collect the HM now and return to cut trees after defeating Roxanne.
Inside the Poké Mart, speak with the businessman to receive TM54 False Swipe. This move is not needed for Roxanne, but it is useful later when weakening Pokémon for capture. The Trainer’s School also has a teacher who gives you a Quick Claw, an optional held item that can occasionally let a slower Pokémon move first.
For a direct Fighting-type answer, visit the house beside the Gym and examine the in-game trade. The boy offers a level 9 Makuhita holding an X Attack in exchange for a Slakoth. Slakoth can be found in Petalburg Woods, so this is a viable Alpha Sapphire option if you want Arm Thrust against Rock Pokémon. The trade is optional; a Water- or Grass-type from your own party is usually simpler.
- Obtain HM01 Cut if you want early access to cut-tree items.
- Consider collecting TM54 False Swipe and the Quick Claw.
- Use the optional Makuhita trade if you have a Slakoth and want Fighting coverage.
Build a counter from nearby routes
Water- and Grass-type attacks are the most reliable answers to Roxanne. Mudkip can use Water Gun, Treecko can use Absorb, and Lotad found on Route 102 in Alpha Sapphire can supply Water- and Grass-type coverage. Marill on Route 104 is another useful Water-type option. Shroomish in Petalburg Woods is a strong early Grass-type choice and can handle both of Roxanne’s Pokémon with Grass attacks.
Torchic is not helpless, but its early Fire attacks are a poor matchup against Rock-types. If Torchic is your starter, add Lotad, Marill, Shroomish, or the traded Makuhita before challenging Roxanne. Fighting damage is also super effective against Rock, making Makuhita particularly useful if you do not want to train a Water- or Grass-type.
Route 116 contains Whismur, Nincada, Taillow, Zigzagoon, and Skitty. Whismur and Nincada are not direct Rock counters, but Route 116 is a safe place to gain experience before the Gym or to add a backup member. Do not mistake general team variety for a specific counter: Flying-, Bug-, and Fire-type attacks are poor choices for this battle.
- Have a Pokémon with a usable Water-, Grass-, or Fighting-type attack.
- If you chose Torchic, add a better matchup before entering the Gym.
- Train a backup instead of relying solely on your starter.
Navigate the Rustboro Gym
The Gym is on Rustboro’s northeast side. Enter and follow the walkways through the rock and fossil exhibits. This Gym has no complicated switch puzzle: the paths let you fight the Gym Trainers for experience or move around them to reach Roxanne more quickly.
Battling some or all of the Gym Trainers is helpful if your party is below the recommended level. The trainers use Rock-type Pokémon, so this is a convenient place to test your counter before the Leader. If your lead Pokémon takes substantial damage, leave the Gym, heal, and return. The layout does not reset a required puzzle when you exit.
- Follow the museum walkways toward the back of the Gym.
- Battle trainers for safe experience if needed.
- Heal before speaking to Roxanne.
Defeat Roxanne
Lead with your Water-, Grass-, or Fighting-type attacker. Geodude is level 12 and has Sturdy, so a full-health super-effective hit may leave it with 1 HP instead of knocking it out. Be ready to use the same attack again rather than assuming the first hit will finish it.
Nosepass is level 14 and also has Sturdy. It can use Rock Tomb, which deals damage and lowers Speed. Continue attacking while you have the type advantage. Do not switch automatically after a Speed drop: switching gives Nosepass another turn to attack and may remove the advantage you already have. Switch only if the current Pokémon is nearly fainted, has no effective move, or is facing a serious matchup problem.
After the victory, Roxanne gives you the Stone Badge and TM39 Rock Tomb. The badge allows Cut to be used outside battle. Rock Tomb is a useful Rock-type move, but TM use is permanent in this generation, so teach it only to a Pokémon that benefits from the coverage and accuracy.
- Defeat level 12 Geodude and level 14 Nosepass.
- Use repeated super-effective attacks to overcome Sturdy.
- Receive the Stone Badge and TM39 Rock Tomb.
Recover the Devon Parts and rescue Peeko
After leaving the Gym, speak with the Devon Researcher outside Devon Corporation. He explains that a Team Aqua Grunt has stolen the Devon Parts. This is separate from the earlier Petalburg Woods confrontation and is the required reason to travel east from Rustboro.
Leave Rustboro through its east exit onto Route 116. Follow the route east through the tall grass and past the Tunnelers’ Rest House. The entrance to Rusturf Tunnel is farther east. Mr. Briney is waiting outside and explains that the same grunt has also taken his Wingull, Peeko.
Enter Rusturf Tunnel. Go up the nearby staircase, then turn right and continue through the narrow passage toward the eastern side of the tunnel. The Team Aqua Grunt has a level 13 Poochyena. Defeat it with your strongest reliable attack. After the battle, the Grunt returns the Devon Parts and leaves, while Mr. Briney takes Peeko back.
Whismur is the only regular wild encounter in Rusturf Tunnel. You may catch one or collect the visible Poké Ball, but neither is required for story progress.
- Speak with the Devon Researcher after beating Roxanne.
- Travel east through Route 116 to Rusturf Tunnel.
- Defeat the level 13 Team Aqua Poochyena.
- Recover the Devon Parts and rescue Peeko.
Return to Devon Corporation and sail to Dewford
Return west through Route 116 to Rustboro City. Deliver the recovered Devon Parts to the Devon Researcher outside the Devon Corporation building. He gives you a Great Ball and escorts you inside to meet Mr. Stone, the company president.
Mr. Stone upgrades the PokéNav Plus with the BuzzNav and asks you to deliver a Letter to Steven in Dewford Town. The Letter, not the Devon Parts, is the next delivery objective. Before leaving, heal at the Pokémon Center and restock from the newly expanded Poké Mart inventory if necessary.
Travel south through Rustboro’s Route 104 exit, cross Petalburg Woods, and continue to the southern part of Route 104. Enter Mr. Briney’s cottage near the coast and speak with him. Choose Dewford Town as your destination to begin the next chapter.
- Return the Devon Parts to the Devon Researcher.
- Receive the Great Ball and Letter for Steven from Mr. Stone.
- Reach Mr. Briney’s cottage on southern Route 104.
- Sail to Dewford Town.
Before you move on
- Roxanne’s level 12 Geodude and level 14 Nosepass have been defeated.
- The Stone Badge and TM39 Rock Tomb are in the inventory or key-item records.
- The Team Aqua Grunt was defeated in Rusturf Tunnel.
- The Devon Parts were returned to the Devon Researcher.
- Peeko was rescued and Mr. Briney has recovered it.
- Mr. Stone gave the player the Letter for Steven.
- The player has sailed from Mr. Briney’s cottage to Dewford Town.
References for this chapter
Dewford, Brawly and the Devon Parts Delivery
Complete Dewford’s required sequence in this order: defeat Brawly for the Knuckle Badge, deliver Mr. Stone’s Letter to Steven in Granite Cave, then return to Mr. Briney and sail to Route 109. From there, walk north to Slateport City and finish the Devon Parts delivery through Stern’s Shipyard and the Oceanic Museum. Fishing, the Old Rod, and deeper Granite Cave exploration are optional.
Finish the Rustboro preparations and sail to Dewford
Before leaving Rustboro, make sure the Team Aqua Grunt in Rusturf Tunnel has been defeated and the stolen Devon Parts have been recovered. Return the parts to the Devon employee near the north side of Rustboro City. He will bring you to Devon Corporation, where Mr. Stone gives you a Letter for Steven and asks you to continue the Devon Parts delivery in Slateport City.
Travel south from Rustboro through Route 104 and Petalburg Woods to Mr. Briney’s cottage. Speak with him and choose Dewford Town. Once you arrive, heal at the Pokémon Center and save before training or entering the Gym. Brawly must be defeated before you can reach Steven’s room in Granite Cave, so do not spend time trying to force your way through the blocked entrance.
- The Letter is in the Key Items pocket.
- The Devon Parts were recovered from the Team Aqua Grunt.
- The party is healed in Dewford Town.
- A manual save has been made before the Gym challenge.
Build a reliable answer to Brawly
Brawly uses Fighting-type Pokémon, so Flying-, Psychic-, and Fairy-type moves are the most effective choices. Early Pokémon that can help include Taillow from Route 104, Wingull from the coastal routes, Beautifly if you raised Wurmple, and Ralts from Route 102. Wingull and Taillow are particularly convenient because their Flying attacks exploit Brawly’s weakness while their Flying typing reduces damage from Fighting moves.
Zubat from Granite Cave can also become useful once it has a reliable Flying attack, while Abra offers Psychic coverage if you can train it safely. These catches are optional; you can win with your starter and other team members if you have suitable coverage. Aim for a party around the mid-teens and keep at least one backup Pokémon healthy in case Brawly’s Makuhita survives your first attack.
Avoid relying on a Normal-, Rock-, Steel-, Ice-, or Dark-type Pokémon as your only answer. Fighting moves are super effective against those types. Carry Potions or other healing items, and consider giving key Pokémon held berries if you have them. A second attacker is more valuable than trying to win with one fragile sweeper.
- Bring a usable Flying, Psychic, or Fairy attack.
- Keep a second Pokémon ready for Makuhita.
- Heal before entering the Gym Leader’s room.
- Carry enough recovery items for the Gym Trainers and Brawly.
Navigate the redesigned Dewford Gym
Enter the Gym beside the Pokémon Center and follow the lit central passage. The side corridors are dark until you step on floor switches. Each switch briefly reveals nearby routes, so pause when the lights come on and identify the passage that continues toward the next section.
Defeat the Gym Trainers as you advance. After the first trainer, activate the nearby switch and follow the revealed corridor. Continue through the trainer areas and use each successive switch to expose the next route. Near the last section, choose the illuminated path that reaches the large switch in front of Brawly’s room. The conveyor belts in the central hallway limit your movement but also guide you toward the correct sections.
A vending machine near the entrance sells Fresh Water. It is useful for inexpensive emergency healing, but return to the Pokémon Center before challenging Brawly so the entire party begins at full health.
- Defeat the Gym Trainers while moving through the corridors.
- Activate each floor switch and study the revealed paths.
- Reach the large switch outside Brawly’s room.
- Heal fully before starting the Leader battle.
Defeat Brawly and claim the Knuckle Badge
Brawly’s Alpha Sapphire team consists of a Level 14 Machop and a Level 16 Makuhita. Both Pokémon have Guts, which increases their Attack when they suffer a major status condition, and both can use Bulk Up to raise their Attack and Defense. For that reason, direct super-effective attacks are generally safer than trying to win through poison, paralysis, burn, or sleep.
Use your strongest reliable Flying-, Psychic-, or Fairy-type move immediately. Machop knows Seismic Toss, which inflicts damage based on its level, so it can deal dependable damage even against a physically bulky target. Makuhita has more staying power and can use Knock Off to remove a held item temporarily. If either Pokémon uses Bulk Up, prioritize damaging it before it gains several boosts.
Brawly may use a Super Potion, so do not assume that reducing one of his Pokémon to low health guarantees a knockout on the next turn. If accuracy is lowered by Sand Attack, switch to a fresh attacker or use a dependable move rather than repeatedly risking misses. Winning awards the Knuckle Badge and TM08 Bulk Up. The badge also makes traded Pokémon up to Level 30 obey you.
- Machop and Makuhita have been defeated.
- The Knuckle Badge is recorded on the Trainer Card.
- TM08 Bulk Up has been received.
- The party is healed before entering Granite Cave.
Deliver Mr. Stone’s Letter in Granite Cave
Leave Dewford Town by the northern exit and follow Route 106 west to Granite Cave. After the Knuckle Badge is obtained, the group of Ruin Maniacs no longer blocks the entrance to Steven’s room. Enter the cave and follow the lit ground-floor passage toward the northwest, then continue down the sloping path into the rear chamber.
A Hiker near the entrance gives you TM70 Flash. Flash is a TM in Alpha Sapphire, not HM05, and it is optional for this short story visit because Steven’s room is accessible from the ground floor. You may accept the TM without teaching it immediately.
In the rear chamber, speak with Steven while he examines the ancient mural. The Alpha Sapphire mural depicts Primal Kyogre. When the conversation prompts you, give Steven Mr. Stone’s Letter. Steven leaves after the exchange and gives you TM51 Steel Wing. The lower cave floors require the Mach Bike and contain optional items and encounters; they are not needed for this delivery.
- Steven’s room is accessible after earning the Knuckle Badge.
- TM70 Flash has been collected if desired.
- The Letter has been handed to Steven.
- TM51 Steel Wing has been received.
Return to Mr. Briney and complete the Devon Parts delivery
Leave Granite Cave and return to Dewford Town. Go back to Mr. Briney’s cottage on Route 104 and speak with him. Once the Letter has been delivered, he will take you to Route 109. His boat does not place you directly in Slateport City, so walk north across Route 109’s beach and continue through the entrance to Slateport.
In Slateport, go to Stern’s Shipyard in the southeast portion of the city. Speak with Dock inside. He explains that Captain Stern is at the Oceanic Museum, so leave the Shipyard and enter the museum north of it. Pay the entry fee, go upstairs, and speak with Captain Stern in the southeast area.
When you attempt to hand Stern the Devon Parts, Team Aqua Grunts interrupt. Defeat the first Grunt, then the second Grunt, and watch the scene with Archie. After the confrontation, the Devon Parts delivery is complete and the story opens the next route north toward Route 110. This museum sequence is required; merely reaching Slateport or visiting the Shipyard does not finish the objective.
- Mr. Briney has taken you to Route 109.
- Route 109 has been crossed to reach Slateport City.
- Dock at Stern’s Shipyard has directed you to the Oceanic Museum.
- Captain Stern has received the Devon Parts after the Team Aqua battles.
- The Team Aqua museum sequence has ended and the northern Slateport exit is available.
Before you move on
- Brawly has been defeated and the Knuckle Badge is recorded on the Trainer Card.
- TM08 Bulk Up has been received.
- Steven’s room in Granite Cave is no longer blocked.
- Mr. Stone’s Letter has been delivered to Steven.
- TM51 Steel Wing has been received.
- Mr. Briney has taken the player to Route 109.
- The player has crossed Route 109 and reached Slateport City.
- The Devon Parts have been delivered to Captain Stern in the Oceanic Museum.
- The Team Aqua museum interruption has been resolved and the route toward Route 110 is open.
References for this chapter
- Dewford Gym — Bulbapedia
- Dewford Gym and Brawly — Pokémon Omega Ruby and Alpha Sapphire Walkthrough
- Granite Cave — Bulbapedia
- Walkthrough: Pokémon Omega Ruby and Alpha Sapphire/Part 3 — Bulbapedia
- Slateport City — Pokémon Omega Ruby and Alpha Sapphire Walkthrough
- Rusturf Tunnel — Pokémon Omega Ruby and Alpha Sapphire Walkthrough
Mauville City — Wattson’s Electric Gym and Local Facilities
Reach Mauville through Route 110, defeat Wally outside the Gym, obtain HM06 Rock Smash, prepare a Ground-based answer to Wattson’s Electric team, and win the Dynamo Badge. Mauville also offers Bulldoze, a Bicycle, the Battle Institute, healing and shopping before the journey toward Route 111, Route 112 and Mt. Chimney.
Enter Mauville and recover your party
Enter Mauville City from Route 110 and go to the Pokémon Center before exploring. The route includes several trainers and a rival battle, so restore HP and PP, remove status conditions, and check that your intended Gym team has usable moves. Save manually after healing if you want a clean retry point before the required Wally battle and Gym challenge.
Mauville is much larger than the earlier Hoenn towns, but the essential facilities are close to the central plaza. The Pokémon Center handles recovery, the Poké Mart supplies healing items and Poké Balls, and Rydel’s Cycles is near the eastern side of the city. If you have not yet received a Bicycle, speak with Rydel and choose either the Mach Bike or Acro Bike. The Mach Bike is better for fast straight travel, while the Acro Bike is useful for ramps and tricks. You can exchange it for the other model later, so this choice is not permanent.
- Heal at the Mauville Pokémon Center.
- Restore the party’s PP and remove paralysis or other status conditions.
- Buy Potions or Super Potions, Paralyze Heals and Poké Balls if supplies are low.
- Save before approaching the Gym entrance.
Battle Wally outside the Gym
Walk to the Mauville Gym entrance. Wally is outside with his father and uncle, and he asks for a battle to prove that he is ready to continue his journey. Accept the battle. Wally uses one level 17 Ralts with Confusion, Growl, Double Team and Teleport.
Use a dependable physical attack if possible. Ralts is not difficult at this point, but Confusion can hurt a Pokémon with poor Special Defense, and Double Team can make repeated attacks miss. A strong neutral physical move is more reliable than depending on a move with low accuracy.
After Wally loses, speak with his uncle. You receive HM06 Rock Smash. The move is needed for field obstacles after earning the Dynamo Badge, but it is not required to solve Wattson’s Gym puzzle. Teach it to a utility Pokémon when possible rather than replacing an important battle move on your main attacker.
- Defeat Wally’s level 17 Ralts.
- Receive HM06 Rock Smash from Wally’s uncle.
- Heal again before entering the Gym if Wally caused damage or used up PP.
Prepare a Ground-type answer
Wattson uses Magnemite at level 19, Voltorb at level 19 and Magneton at level 21. Ground-type attacks are the most direct counter because Electric-type attacks do not affect a Ground-type Pokémon. Marshtomp is particularly effective if Mudkip was your starter. Geodude from Granite Cave is another useful option, and Numel from Route 112 becomes available after leaving Mauville to the north. A Pokémon that merely knows a Ground-type move can also help even if it is not Ground type.
The two Steel-type Pokémon, Magnemite and Magneton, are also weak to Fire- and Fighting-type attacks. These are useful backup options if your Ground Pokémon is underleveled or gets paralyzed. Do not rely on Water- or Flying-type Pokémon as your primary answer: Electric moves are super effective against Flying types, and Water types provide no special protection in this battle.
Route 110 offers Electrike and Gulpin, but neither is a direct weakness-based answer to Wattson. Electrike can still contribute with neutral damage or utility, while Gulpin is mainly useful for general team balance. If you need a Ground attack immediately, buy TM78 Bulldoze at the Mauville Poké Mart for $10,000 and check that one of your compatible Pokémon can learn it. Bulldoze has reliable accuracy, damages the target and lowers its Speed.
- Bring at least one Pokémon with a reliable Ground-type attack.
- Keep a Fire- or Fighting-type move available as backup for Magnemite and Magneton.
- Aim for a team around the high teens or low twenties rather than relying on one heavily weakened Pokémon.
- Carry several Paralyze Heals.
Navigate the Mauville Gym puzzle
Enter the Mauville Gym and move through the rooms by stepping on the floor switches. The switches change the positions of the electric barriers, opening and closing routes through the Gym. Gym trainers stand along several of the paths, so defeat them while moving toward the switches instead of reaching Wattson with a damaged party.
If a switch sends you away from the route you need, walk back and activate the relevant switch again. The puzzle can be corrected by retracing your steps; you do not permanently lock yourself out of the Gym’s path. If your party becomes weak, leave through the entrance, heal at the Pokémon Center and return. Your approach is reset, but the Gym remains available and can be solved again without penalty.
Before speaking to Wattson, use the Gym trainers for experience if your party is below the leader’s levels. Do not spend every healing item inside the Gym if you still need to handle the leader battle. A Ground attacker should be kept healthy for the full fight.
- Use the switches to open the route through the electrical barriers.
- Defeat Gym trainers that stand in your way or provide useful experience.
- Leave and heal if your Ground attacker has been weakened or paralyzed.
- Save before starting Wattson’s battle.
Defeat Wattson for the Dynamo Badge
Lead with your Ground Pokémon against Magnemite. A Ground attack is super effective and prevents Electric attacks from dealing damage. Magnemite knows Thunder Wave, Tackle and Volt Switch, so it may attempt to paralyze your lead or switch out after attacking.
Voltorb is level 19 and uses Rollout, Charge and Volt Switch. Rollout can become more dangerous if it continues hitting, so defeat Voltorb promptly rather than allowing several turns to pass. Magneton is level 21 and knows Supersonic, Magnet Bomb and Volt Switch. Magnet Bomb is a Steel-type attack and can damage a Ground Pokémon normally, while Supersonic may cause confusion. If your Ground attacker is confused or weakened, switch to a healthy Pokémon with Fire-, Fighting- or strong neutral physical attacks.
Use a Paralyze Heal during the battle if paralysis prevents your Ground attacker from acting consistently. Save your strongest healing item for Magneton if necessary, but do not waste turns healing a Pokémon that can no longer survive the next attack. If the Ground attacker faints, avoid sending out a Water- or Flying-type unless you have no safer option. A healthy Fire- or Fighting-type is preferable against the two Steel Pokémon.
Wattson awards the Dynamo Badge after defeat and gives you TM72 Volt Switch. The badge permits the use of Rock Smash outside battle and raises the obedience limit for traded Pokémon. Volt Switch damages the target and then switches the user out, making it useful on a fast Electric Pokémon that wants to preserve momentum.
- Defeat Magnemite, Voltorb and Magneton.
- Receive the Dynamo Badge.
- Receive TM72 Volt Switch.
- Confirm that Rock Smash can now be used outside battle.
Use Mauville’s facilities before leaving
Return to the Pokémon Center after the Gym battle, then visit the Poké Mart to replace healing items, Paralyze Heals and Poké Balls. TM78 Bulldoze is sold here for $10,000 and is worth considering if your team lacks a Ground move. Do not spend all your money on it if doing so leaves you unable to carry basic recovery items.
Visit Rydel’s Cycles near the eastern exit if you still need a Bicycle. The Mach Bike is convenient for ordinary travel and later straight-line speed sections, while the Acro Bike is useful for ramps and bike tricks. You can return to Rydel to exchange bikes later.
The Battle Institute is an optional facility where you can test a team in a structured battle. It is not needed for story progression. Mauville also contains optional shops, food-court battles and move-related services, but none are required before continuing the main route.
Do not start looking for the current New Mauville quest yet. In Alpha Sapphire, Wattson’s New Mauville request becomes available later, after the Primal Kyogre storyline has been resolved. It is an optional post-story-of-Mauville task and is not required to earn the Dynamo Badge or proceed toward Mt. Chimney.
- Heal after the Wattson battle.
- Restock healing items, Paralyze Heals and Poké Balls.
- Buy TM78 Bulldoze if a compatible team member needs a Ground attack and you can afford it.
- Choose or confirm your Bicycle.
- Save after receiving the badge and before leaving Mauville.
Continue toward the next story objective
From Mauville, the northern exit leads toward Route 111 and Route 112. Route 112 contains Numel, which can provide a Ground-type option if you still need one, and the route leads toward the volcanic area and Mt. Chimney. The western exit leads to Route 117 and Verdanturf Town, which is optional for the immediate main-story route.
Use Rock Smash on cracked rocks only after earning the Dynamo Badge. Breaking rocks can open paths and may provide items or wild encounters, but do not let optional detours consume your healing supplies before the volcanic section. The next major story objective is to proceed through Route 111 and Route 112 toward Mt. Chimney and then Lavaridge Town.
- The northern route toward Route 111 is open.
- At least one party member can use Rock Smash outside battle.
- The party is healed and stocked before leaving Mauville.
- The Dynamo Badge and TM72 are recorded in the Bag or Trainer Card.
Before you move on
- Wally’s level 17 Ralts has been defeated outside the Mauville Gym.
- HM06 Rock Smash has been received from Wally’s uncle.
- Wattson’s Magnemite, Voltorb and Magneton have been defeated.
- The Dynamo Badge is displayed on the Trainer Card.
- TM72 Volt Switch has been received.
- The party has been healed and the bag contains enough recovery items for the next routes.
- The northern exit toward Route 111 and Route 112 is available.
- TM78 Bulldoze has been purchased only if it fits the team and the player can afford it.
- The Bicycle has been obtained from Rydel’s Cycles if desired.
References for this chapter
Mt. Chimney and Lavaridge — Fire-types and Hot Hazards
After defeating Wattson in Mauville, begin the next required story section by traveling north through Route 111 and Route 112, crossing Fiery Path, continuing through Route 113 to Fallarbor Town, and then taking Route 114 to Meteor Falls. Team Aqua has abducted Professor Cozmo and taken his Meteorite. Rescue him by joining your rival in the required double battle against Aqua Admin Shelly and an accompanying Team Aqua Grunt. After the scene in Meteor Falls, return to Route 112, enter the now-accessible Cable Car station, and ride to Mt. Chimney. Defeat the Team Aqua forces at the summit, including Shelly and Archie, recover the Meteorite, descend Jagged Pass, and defeat Flannery in Lavaridge Gym for the Heat Badge.
Leave Mauville and follow the required route to Fallarbor
After clearing Mauville Gym and defeating Wattson, leave Mauville through the northern exit onto Route 111. Continue north through the route until the path turns west toward Route 112. The desert section of Route 111 is not yet required because the sandstorm prevents normal exploration, so stay on the main path and continue west.
Cross Route 112 and enter Fiery Path. The cave is a straightforward passage at this stage. Follow the accessible path through the tunnel and emerge on the northern side onto Route 112 again. Continue north and then east through the route connection toward Route 113. Route 113’s ash-covered grass and volcanic debris do not change the objective: keep moving east until you reach Fallarbor Town.
Heal at Fallarbor’s Pokémon Center and restock before continuing. A Water-, Ground-, Fighting-, or Electric-type attacker is useful for the Team Aqua battles ahead, but do not build your entire plan around one Pokémon. Team Aqua uses a mixture of Dark, Poison, and Water types, and confusion, stat reduction, and Rough Skin can make a single sweeper unreliable.
From Fallarbor, leave through the southeastern exit and follow Route 114 south. Continue past the houses and trainers until you reach the entrance to Meteor Falls. Save before entering the cave if you want a recovery point before the required story battle.
- Leave Mauville through Route 111’s northern exit.
- Cross Route 112 and Fiery Path.
- Travel east through Route 113 to Fallarbor Town.
- Heal in Fallarbor and take Route 114 south to Meteor Falls.
- Save before beginning the Meteor Falls rescue sequence.
Rescue Professor Cozmo in Meteor Falls
Enter Meteor Falls from Route 114 and follow the available path into the cave. Your rival appears during the approach and explains that Professor Cozmo has been taken by Team Aqua. Continue toward the Team Aqua group rather than attempting to explore the deeper Waterfall sections of Meteor Falls; those later areas are not part of this story objective.
At the confrontation, you battle alongside your rival in a required double battle against Aqua Admin Shelly and an accompanying Team Aqua Grunt. In Alpha Sapphire, Shelly’s team for this encounter includes Mightyena and Carvanha at level 23. Mightyena can use Dark-type attacks and disruptive moves such as Swagger, while Carvanha can use Aqua Jet, Assurance, Screech, and Swagger. Use Fighting attacks against Mightyena when possible, and use Electric or Grass attacks against Carvanha. Avoid unnecessary contact attacks against Carvanha because Rough Skin damages Pokémon that make contact.
The accompanying Grunt is part of the mandatory rescue battle, so do not leave after defeating only one opponent. Your rival remains on the field and helps draw attacks, but still protect your active Pokémon from confusion and lowered Defense. If a Pokémon becomes confused or is badly damaged, switch it out rather than spending several turns attacking through a disadvantageous status condition.
After the double battle, the story scene resolves Team Aqua’s immediate operation and Professor Cozmo is freed. The opposing villainous team appears in the aftermath, and the Meteorite becomes the focus of the next stage of the plot. Return with the story characters to Fallarbor Town if prompted, then make your way back through Route 114, Route 113, Fiery Path and Route 112. The Cable Car station on Route 112 is now accessible because Team Aqua has moved its operation to Mt. Chimney.
- Reach the Team Aqua group inside Meteor Falls.
- Complete the double battle with your rival against Shelly and the accompanying Team Aqua Grunt.
- Confirm that Professor Cozmo has been rescued.
- Return to Route 112 after the Meteor Falls scene.
- Verify that the Cable Car station is no longer blocked.
Prepare and ride the Cable Car to Mt. Chimney
Before entering the Cable Car station, heal and buy several Potions or Super Potions. Antidotes are useful for Poison attacks from Grimer and other Team Aqua Pokémon, while Burn Heals can help against Fire attacks and wild encounters around the volcano. A reliable Water- or Electric-type is especially valuable, but bring a second dependable attacker so the summit sequence does not depend on one Pokémon.
Enter the Cable Car station on Route 112 and ride to the summit of Mt. Chimney. The guards who previously prevented access have moved after the Meteor Falls incident. An optional hidden item can be found near the Cable Car building with the Dowsing Machine, but it is not needed for progression.
At the summit, Team Aqua and the opposing team are engaged in a confrontation. You do not have to defeat every visible grunt in the area. Follow the route toward the crater and battle the Team Aqua Grunt blocking the approach. In Alpha Sapphire, this Grunt uses Poochyena and Grimer at level 22. Fighting attacks help against Poochyena, while Ground or Psychic attacks are useful against Grimer, though a strong neutral attack is sufficient if your team lacks those types.
You can take the optional path beneath the glass bridge to collect TM59 Incinerate, then return to the main route. A hidden Protein is also available near the eastern side of the crater. Neither item is required. Save before approaching the next named Team Aqua battles.
- Heal and restock before using the Cable Car.
- Ride from Route 112 to Mt. Chimney.
- Defeat the Team Aqua Grunt using Poochyena and Grimer.
- Collect TM59 Incinerate or the hidden Protein only if desired.
- Save before Shelly and Archie.
Defeat Shelly and Archie at the summit
Aqua Admin Shelly is fought before Archie. In Alpha Sapphire, Shelly uses Grimer and Carvanha, both at level 24. Grimer can use Disable, Sludge, Mud Bomb, and Minimize. Defeat it promptly or use a Pokémon that can tolerate Poison damage. Carvanha uses Aqua Jet, Assurance, Screech, and Swagger and has Rough Skin, so prefer special attacks or non-contact moves when possible.
After Shelly, continue across the bridge toward Aqua Leader Archie. Archie uses Mightyena at level 25, Golbat at level 25, and Sharpedo at level 27. Fighting attacks are effective against Mightyena. Electric or Rock attacks are useful against Golbat, while Electric or Grass attacks can handle Sharpedo. Sharpedo can use Ice Fang, so do not rely on a fragile Grass-type unless it can survive the attack and finish the battle quickly.
Archie’s Mightyena has Quick Feet in this battle rather than Intimidate. Golbat has Inner Focus, and Sharpedo has Rough Skin. Golbat’s Confuse Ray can waste turns, while Sharpedo may combine Screech, Swagger, and Ice Fang to create a dangerous finish. Heal or switch when confusion, lowered defenses, or low HP makes continuing unsafe.
After Archie is defeated, the story scene takes place around the Meteorite. Archie leaves after the confrontation, and you receive Professor Cozmo’s Meteorite as the immediate story reward. The remaining dialogue establishes that Team Aqua’s plan is moving toward the legendary events covered in later chapters. Pick up the Meteorite before leaving the summit.
- Defeat Shelly’s level 24 Grimer and Carvanha.
- Defeat Archie’s level 25 Mightyena, level 25 Golbat and level 27 Sharpedo.
- Recover Professor Cozmo’s Meteorite.
- Leave the crater only after the story scene and item handoff are complete.
Descend Jagged Pass and reach Lavaridge Town
From Mt. Chimney, take the southern exit into Jagged Pass. The required route is a descent toward Route 112 and Lavaridge Town. Follow the trail, slopes, ledges and bicycle terrain while battling or avoiding trainers. Wild Pokémon and trainers can inflict damage through Fighting, Rock, Psychic, Poison and Grass attacks, so check your party before the final descent.
The Acro Bike makes it easier to explore Jagged Pass’s optional side paths. The Mach Bike can complete the main descent, but some terrain is effectively one-way when approached with that bike. If you want to collect optional items or inspect the side paths, exchange for the Acro Bike at Rydel’s Cycles in Mauville before committing to the descent. Do not jump down optional ledges if you intend to return to an upper section immediately.
At the bottom of Jagged Pass, continue into Lavaridge Town. Use the Pokémon Center as your normal healing point before the Gym. The town’s hot springs are an optional feature, not a replacement for restoring the party at the Pokémon Center. Optional town rewards include an Ice Heal in the hot-spring building, a Wynaut Egg from the nearby old woman if you have an open party slot, and Charcoal from the Herb Shop. These rewards are not required for the story.
- Descend Jagged Pass to Route 112.
- Reach Lavaridge Town.
- Heal at the Pokémon Center.
- Use the Acro Bike only if you want to explore optional Jagged Pass terrain.
- Make sure your party has a healthy Water, Ground or Rock attacker.
Solve Lavaridge Gym and defeat Flannery
Lavaridge Gym uses wooden floor panels as trapdoors and geysers as lifts. Step on the correct upper-floor panels to drop into the basement, then step on the correct basement panels to ride geysers back upward. Trainers can be battled for experience or avoided where possible.
From the entrance, step on the wooden panel directly ahead, then use the panel on the right on the lower floor. Continue north and use the next trapdoor. In the lower area, the leftmost panel is the route upward; Ninja Boy Hiromichi can be encountered near the panels. Continue through the upper section, use the left-side route near the next trapdoor, and proceed north past Kindler Axle and Battle Girl Sadie. The next route drops you back down so you can use the panels on the right near Ninja Boy Shoji. From there, take the rightmost panel to reach the area near Ace Trainer Zane, then use the panel south of him. Defeat or pass Kindler Andy and use the panel on the left to reach Flannery.
Flannery uses Slugma at level 26, Numel at level 26, and Torkoal at level 28. Water and Ground attacks are effective against all three. Rock attacks are also effective against Slugma and Torkoal, while Numel is especially vulnerable to Water because of its Fire/Ground typing. Flannery’s team can use Sunny Day, which reduces Water damage while it lasts, so preserve your strongest Water or Ground attacker for Torkoal. Torkoal can use Overheat, Body Slam and Curse; watch for paralysis and increased Defense from Curse.
After winning, receive the Heat Badge and TM50 Overheat. The Heat Badge allows traded Pokémon up to level 50 to obey you and allows Strength to be used outside battle. Leave the Gym by jumping down the ledges. Outside, your rival gives you the Go-Goggles, which open the sandstorm area of Route 111. The desert and fossil activities are optional for now. The next required story destination is Petalburg City and Norman’s Gym.
- Navigate the trapdoors and geysers to Flannery.
- Defeat Slugma, Numel and Torkoal.
- Receive the Heat Badge and TM50 Overheat.
- Confirm that Strength can now be used outside battle.
- Receive the Go-Goggles from your rival.
- Set Petalburg City and Norman’s Gym as the next required objective.
Before you move on
- You traveled from Mauville through Route 111, Route 112, Fiery Path, Route 113, Fallarbor and Route 114 to Meteor Falls.
- Professor Cozmo was rescued through the required double battle against Shelly and the accompanying Team Aqua Grunt.
- You returned to Route 112 and used the newly accessible Cable Car.
- The Mt. Chimney Team Aqua sequence is complete.
- Shelly and Archie were defeated in Alpha Sapphire.
- You received Professor Cozmo’s Meteorite.
- You descended Jagged Pass and reached Lavaridge Town.
- Flannery was defeated and you received the Heat Badge and TM50 Overheat.
- Strength is usable outside battle and you received the Go-Goggles.
- Petalburg City and Norman’s Gym are now the next required story objective.
References for this chapter
Petalburg City and Norman’s Gym — Family Matters and Midgame Power
After earning the Heat Badge from Flannery, return to Petalburg City and challenge Norman, the fifth Gym Leader and the player’s father. His Normal-type team is built around powerful attacks, disruptive moves, and the alternating turns of Truant on two Slaking. Fighting-type attacks are the clearest offensive answer, but a second damage dealer and a plan for Yawn, Encore, Swagger, and Feint Attack are important. After the battle, receive the Balance Badge, TM67 Retaliate, and HM03 Surf from Wally’s uncle before continuing east from Mauville toward Route 118.
Leave Lavaridge and return to Petalburg City
After defeating Flannery and receiving the Heat Badge, leave the Lavaridge Gym and speak with May or Brendan outside. Your rival offers to accompany you back to Petalburg City. Accept this option for the quickest return. If you choose not to travel with your rival, return by land through the routes you have already opened, such as Mt. Chimney and Jagged Pass, or through Mauville, Verdanturf, Rusturf Tunnel, and Rustboro.
Heal at the Pokémon Center before entering Petalburg Gym. Restore move PP, remove lingering status conditions, and carry enough Potions or Super Potions to recover between Gym Trainer battles. Norman’s team is around the high twenties, so bring a party that is reasonably close to those levels rather than relying on one under-leveled attacker. Save manually before entering the Gym so you can retry the leader battle without repeating unnecessary travel.
- Have the Heat Badge and four total Gym Badges.
- Heal the party and restore PP before entering Petalburg Gym.
- Save before beginning the Gym Trainer route.
Navigate Petalburg Gym’s themed rooms
Petalburg Gym has several rooms marked by battle themes: Speed, Accuracy, Zero Reduction, Defense, Recovery, Strength, and One-Hit KO. Each room contains one Gym Trainer whose team or battle approach reflects the sign. The signs do not create a special battle rule; they are warnings about the opponent’s emphasis or the items that opponent may use.
You need to defeat at least three Gym Trainers to reach Norman, although you can battle more of them for experience and money. The opening rooms include Ace Trainers using Delcatty, while later rooms feature Linoone or Zangoose. X items and moves such as Sing can make these battles more troublesome than their levels suggest. If several Pokémon are weakened, leave the Gym, heal, and return; the defeated Gym Trainers remain defeated.
A Fighting-type move is useful against the Normal-type Gym Trainers and Norman himself. Makuhita or Hariyama trained earlier, Breloom if you raised Shroomish, or another Pokémon with a reliable Fighting attack can fill this role. Do not enter with only one counter, because critical hits, confusion, sleep, or an unlucky sequence of hits can remove your main answer before Norman’s battle begins.
- Defeat at least three Gym Trainers to open the path to Norman.
- Use the room signs to choose opponents your party handles comfortably.
- Heal outside if your Fighting-type attacker or backup Pokémon is weakened.
Prepare for Norman’s Normal-type strategy
Norman uses Slaking at level 28, Vigoroth at level 28, and a second Slaking at level 30. Fighting-type attacks deal super-effective damage to all three. Strong, accurate attacks are preferable to a slow setup plan because Norman’s Pokémon can punish hesitation with Retaliate, Feint Attack, and other coverage.
A Steel-type can resist ordinary Normal attacks, but it does not block every threat in the battle. Feint Attack is a Dark-type move and can damage Ghost Pokémon, so do not treat a Ghost as a complete answer simply because Norman specializes in Normal types. Ghost Pokémon can still be useful if they withstand Feint Attack and have a way to deal damage, but they should not be your only plan.
Status moves can help, but use them selectively. Vigoroth has Vital Spirit and cannot be put to sleep. Yawn is present on the first Slaking, while Encore can lock a Pokémon into a poor move. Keep a second Pokémon ready to switch in if your lead is put to sleep, Encored, confused by Swagger, or reduced to a dangerous amount of health.
- Bring a reliable Fighting-type attack.
- Keep a second source of damage available.
- Do not rely on sleep against Vigoroth or on Ghost immunity alone.
Defeat the first Slaking
Norman leads with Slaking at level 28. Its Truant ability makes it alternate between acting and loafing around. Slaking can use Encore, Retaliate, Yawn, and Feint Attack, so its active turns are dangerous even though it does not attack on every turn.
Use the loafing turns to attack, heal, or reposition. If you expect Slaking to act, do not leave a fragile Pokémon in merely because the next turn may be inactive. A strong Fighting-type attack can remove much of its health quickly. If Yawn is used, switch before your active Pokémon falls asleep unless you are certain you can finish Slaking immediately.
Be careful with Encore. If a move is Encored and no longer advances the battle, switch rather than spending several turns repeating it. Norman may also use a Hyper Potion, so keep attacking decisively instead of assuming that one moderate hit will finish the fight.
- Exploit Slaking’s Truant loafing turns.
- Switch or heal when Yawn threatens to disable your main attacker.
- Avoid being trapped by an unhelpful Encore lock.
Handle Vigoroth’s constant pressure
Vigoroth is level 28 and has Vital Spirit, so sleep-based tactics do not work. Unlike Slaking, it does not lose turns to Truant, making it the most consistently active member of Norman’s team. Use your Fighting-type attacker if it remains healthy, or switch to a durable Pokémon with strong neutral damage.
Vigoroth’s verified moves are Fury Swipes, Feint Attack, Retaliate, and Encore. Fury Swipes can strike multiple times, while Encore can force an unfavorable move. Avoid leaving a fragile Pokémon in only to set up a boost. If Vigoroth locks you into a move that is no longer useful, switch to break the pattern and preserve your team’s health.
If your Fighting-type attacker is weakened after the first Slaking, use healing items or bring in your backup before Vigoroth can wear down the rest of the party. The goal is to reach the final Slaking with at least one strong attacker and one emergency switch still available.
- Do not attempt to put Vigoroth to sleep.
- Watch for multi-hit Fury Swipes and Encore.
- Preserve a reliable attacker for the final Slaking.
Finish the final Slaking and collect the Balance Badge
Norman’s final Pokémon is a level 30 Slaking with Truant. Its moves are Retaliate, Feint Attack, Swagger, and Chip Away. Swagger raises the target’s Attack but causes confusion, so an attack boost is not automatically beneficial. If your active Pokémon becomes confused, switching is usually safer than risking self-damage while Slaking remains healthy.
Chip Away is more effective against targets that have raised their defenses, so avoid unnecessary defensive setup. Continue using strong Fighting-type damage during Slaking’s inactive turns, and heal or switch when its next active turn could knock out your Pokémon. After Norman’s defeat, he gives you the Balance Badge and TM67, Retaliate. The Balance Badge allows Surf to be used outside battle and raises the obedience limit for traded Pokémon to level 60.
Norman then leads you outside the Gym, where you meet Wally and Wally’s uncle. Wally’s uncle gives you HM03, Surf, as thanks for helping Wally earlier in the story. Wally then takes you toward Mauville City, placing you near the next eastward section of the adventure.
- Defeat Slaking, Vigoroth, and the final Slaking.
- Receive the Balance Badge and TM67, Retaliate.
- Speak with Wally and his uncle outside the Gym.
- Receive HM03, Surf.
Use Surf and make optional preparations before Route 118
Teaching Surf immediately is optional, but you need a Pokémon that can use it to cross water and continue exploring Hoenn’s newly accessible routes. From Mauville City, head east to Route 118 when you are ready. The route connects Mauville with Route 119 and contains the next major story transition.
Route 117 is an optional training and team-building stop. In Alpha Sapphire, its wild encounters include Roselia, Marill, Oddish, Volbeat, Surskit, and other Pokémon, while its Day Care can be used for leveling or breeding. These are optional additions, not required catches. A Roselia can provide Grass- and Poison-type coverage, while Marill can supply Water- and Fairy-type utility if your team lacks those roles.
Route 118 is a more direct place to add midgame coverage after obtaining Surf. Its available encounters include Electrike, Wingull, Linoone, and Kecleon on land, with Water-type encounters available while Surfing. Electrike is particularly useful if your party lacks an Electric-type answer for later Flying- and Water-type opponents. Do not replace established team members solely because a new encounter is available; add a catch when it fills a specific weakness in your current lineup.
Before leaving Petalburg or Mauville, heal, restock basic recovery items, and save after receiving Surf. Continue east from Mauville to Route 118, where the next story events and the route toward Fortree will begin.
- Teach Surf to a suitable party member if needed.
- Consider optional Roselia, Marill, or Electrike coverage only if your team lacks those roles.
- Heal and save after receiving Surf.
- Travel east from Mauville to Route 118.
Before you move on
- The Balance Badge is displayed among the Gym Badges.
- TM67, Retaliate, has been received from Norman.
- Wally’s uncle has given the player HM03, Surf.
- The party is healed and prepared to leave Mauville City through Route 118.
- The next objective is to travel east from Mauville toward Route 118 and Route 119.
References for this chapter
- Walkthrough: Pokémon Omega Ruby and Alpha Sapphire/Part 10 — Bulbapedia
- Petalburg Gym — Bulbapedia
- Pokémon Omega Ruby & Alpha Sapphire — Gym Leaders
- Pokémon Omega Ruby & Alpha Sapphire - Pokémon Trainer Wally
- Pokéarth — Hoenn Route 117 — Serebii.net
- Hoenn Route 118 — Bulbapedia
- Petalburg City (2nd Visit): Pokémon ORAS Walkthrough — ORAS Wiki
Fortree and Winona — Aerial Challenges
Travel north from Route 118 through Route 119, clear the Team Aqua takeover at the Weather Institute, defeat your rival on the upper bridge, and receive HM02 Fly. Continue to Fortree City, then use Route 120 to meet Steven and obtain the Devon Scope. Reveal and clear both invisible Kecleon blocking the Route 120 path and Fortree Gym entrance. Solve the Fortree Gym’s rotating-door puzzle and defeat Winona for the Feather Badge. Alpha Sapphire’s Winona battle is a single battle against Flying-based Pokémon with Water, Steel, and Ground coverage, so prepare Electric, Rock, Ice, or strong special attacks rather than relying on one Electric Pokémon.
Cross Route 119 and clear the Weather Institute
From Route 118, use Surf to cross the water and enter Route 119. Follow the route north through the tall grass, bridges, and trainer battles. The route is long, so heal at the rest area inside the Weather Institute if your team has taken heavy damage before dealing with Team Aqua.
Team Aqua has taken over the Weather Institute and blocks the route beyond the building. Enter the institute, defeat the Grunts on the lower floor, then take the stairs and continue through the upper rooms. In Alpha Sapphire, defeat Aqua Admin Shelly at the end of the sequence. After the battle, speak with the institute staff to complete the event and receive Castform as a reward if you have room in your party; otherwise, arrange your party so the gift can be collected later.
- Enter Route 119 from Route 118.
- Reach the Weather Institute and defeat the required Team Aqua members.
- Defeat Aqua Admin Shelly.
- Complete the institute event and collect or arrange to collect Castform.
- Exit through the north side of the Weather Institute.
Battle your rival and receive HM02 Fly
After leaving the Weather Institute, continue north along Route 119. Cross the upper bridge near the end of the route. Brendan or May will stop you before the path to Fortree and challenge you to a mandatory single battle. Heal before crossing the bridge if your team is worn down; there is no optional detour that bypasses this fight.
In Alpha Sapphire, the rival uses a team based on your starter. The lineup includes a level 31 Wailmer and a level 31 Pokémon chosen to cover the remaining starter type, followed by a level 33 evolved starter. The exact third Pokémon depends on your starter choice. Use Electric or Grass attacks against Wailmer, and bring coverage for the rival’s Fire-, Grass-, or Water-type partner. After winning, your rival gives you HM02 Fly.
Teach Fly to a compatible Pokémon if you want to use it in battle or prepare for later travel. Fly cannot be used outside battle yet; the Feather Badge from Winona is required before the field function becomes available. Continue east from Route 119 to reach Fortree City.
- Cross the upper bridge after leaving the Weather Institute.
- Defeat Brendan or May in the mandatory Route 119 rival battle.
- Receive HM02 Fly after the victory.
- Remember that Fly’s field use is locked until Winona awards the Feather Badge.
- Enter Fortree City and heal at the Pokémon Center.
Prepare in Fortree and follow Route 120 to Steven
Use Fortree’s Pokémon Center to heal and restore move PP. If your party lacks Electric coverage, Electrike from Route 118 is a convenient option to train for Pelipper and several of Winona’s other Pokémon. Rock attacks are also useful, while an Ice move is especially valuable for Altaria. Do not build the entire plan around Ground attacks: every Pokémon in Winona’s team has a Flying type and is immune to Ground moves.
The Fortree Gym cannot be entered yet because an invisible Pokémon blocks the entrance. Leave Fortree through its east exit and enter Route 120. Follow the route across the bridges until you find Steven Stone. Speak with Steven to receive the Devon Scope. In Alpha Sapphire, he also provides the Mega Stone associated with your chosen Hoenn starter if you have not already obtained it through the relevant story event.
After Steven demonstrates the Devon Scope, use it on the invisible Kecleon blocking the Route 120 path. Battle the Kecleon or catch it; either outcome clears the obstruction. Return west to Fortree City and approach the invisible Kecleon in front of the Gym. Use the Devon Scope again, then battle or catch this second Kecleon so the Gym entrance opens.
- Heal and restock in Fortree City.
- Leave through Fortree’s east exit to Route 120.
- Find Steven and receive the Devon Scope.
- Clear the invisible Kecleon on Route 120.
- Return to Fortree and clear the invisible Kecleon blocking the Gym.
- Keep Electric, Rock, Ice, or strong special attacks available.
Solve the Fortree Gym rotating-door puzzle
Enter the Gym after clearing the Kecleon. The puzzle uses rotating doors that move according to the direction from which you push them. From the entrance, move east through the first rotating door, climb the stairs, and continue north. Use the open side of the next door to reach the trainer area, or circle around it if you want to avoid a trainer.
Move west and south around the next section, then push the rotating door to the right. Walk around the room and use the opening created by that movement. Continue west, climb the stairs, and push the next door upward. Follow the path toward Camper Terrell, then proceed northeast through the trainer section.
At the later group of doors, use the lower passage to reposition yourself beside the eastern door. Push the door from the side that turns it toward the required passage, then travel back through the upper opening. Continue along the upper path and climb the final stairs to Winona. If a door does not move in the direction you need, do not keep pressing against the same side; circle around the room and approach it from another direction.
- Pass the first rotating doors from the east side.
- Push the middle door to the right after circling around it.
- Push the upper door upward to reach the next trainer section.
- Use the lower passage to reposition the later eastern door.
- Climb the final stairs and save or heal before speaking to Winona.
Defeat Winona’s single-battle team
Winona’s Alpha Sapphire team is Swellow at level 33, Pelipper at level 33, Skarmory at level 33, and Altaria at level 35. This is a standard single battle, not a double battle. Lead with a Pokémon that can pressure Swellow immediately, but avoid sacrificing a weakened Pokémon to Endeavor if Swellow has already reduced its HP or is targeting a low-health member.
Electric attacks are effective against Swellow and Pelipper. Pelipper can use Water Pulse, Protect, and Roost, so do not waste turns attacking into Protect. Grass attacks also work against Pelipper, provided the user can withstand its Water-type attacks. Skarmory is Steel/Flying and is immune to Ground and Poison attacks; special Fire or Electric attacks are safer choices than relying on a slow physical attacker.
Altaria is Winona’s final Pokémon and knows Earthquake, Dragon Breath, Cotton Guard, and Roost. Ice attacks are the most direct answer. Strong special attacks also avoid the worst effect of Cotton Guard, which raises Altaria’s Defense. Electric Pokémon must be protected from Earthquake unless they have a secondary Flying typing or another way to survive it. Dragon Breath can cause paralysis, so carry status recovery or switch out a paralyzed attacker if it is essential to the rest of the battle.
If Altaria uses Roost, continue applying reliable damage rather than allowing repeated recovery turns. If Cotton Guard makes physical attacks ineffective, switch to a special attacker or use Ice damage. Heal before the final exchange if paralysis, Earthquake, or repeated Roost has left your main counter in danger.
- Use Rock, Electric, or Ice damage against Swellow.
- Use Electric or Grass attacks against Pelipper and play around Protect.
- Use special Fire or Electric attacks against Skarmory; Ground attacks fail.
- Use Ice or strong special damage against Altaria.
- Avoid leaving a vulnerable Electric Pokémon in against Altaria’s Earthquake.
- Use healing items or status recovery when paralysis or repeated Roost threatens the battle.
Claim the Feather Badge and continue to Route 121
After defeating Winona, receive the Feather Badge and TM19, Roost. The Feather Badge allows Fly to be used outside battle, so HM02 can now transport you to previously visited towns, cities, and routes when taught to a compatible Pokémon. Fly is convenient but not required for the immediate route onward.
Leave the Gym and exit Fortree to the east. Continue through Route 120 toward Route 121. The cleared Weather Institute, defeated rival, HM02 Fly, Devon Scope, cleared Kecleon encounters, Feather Badge, and TM19 are the required outcomes of this chapter. Fortree’s Secret Base Guild, local gifts, optional trainers, and extra wild encounters are not required for story progression.
- Defeat Winona’s level 33 Swellow, Pelipper, and Skarmory.
- Defeat Winona’s level 35 Altaria.
- Receive the Feather Badge.
- Receive TM19, Roost.
- Confirm that Fly is now usable outside battle if taught to a compatible Pokémon.
- Leave Fortree through the east exit and continue toward Route 121.
Before you move on
- The Weather Institute was cleared and Aqua Admin Shelly was defeated.
- The upper bridge on Route 119 was crossed after the Weather Institute.
- Brendan or May was defeated in the mandatory Route 119 rival battle.
- HM02 Fly was received.
- The Devon Scope was obtained from Steven on Route 120.
- The invisible Kecleon on Route 120 was cleared.
- The invisible Kecleon blocking the Fortree Gym was cleared.
- Winona’s level 33 Swellow, Pelipper, and Skarmory were defeated.
- Winona’s level 35 Altaria was defeated.
- The Feather Badge and TM19, Roost, were received.
- Fly is usable outside battle after being taught to a compatible Pokémon.
- The east route from Fortree toward Route 120 and Route 121 is open.
References for this chapter
- Walkthrough: Pokémon Omega Ruby and Alpha Sapphire/Part 11 — Bulbapedia
- Pokémon Omega Ruby & Alpha Sapphire — Pokémon Trainer Brendan & May
- Pokémon Omega Ruby & Alpha Sapphire — Team Aqua & Team Magma — Serebii
- Hoenn Route 119 — Pokémon Omega Ruby and Alpha Sapphire Walkthrough
- Fortree Gym and Winona — Pokémon Omega Ruby and Alpha Sapphire Walkthrough
- Fortree City — Pokémon Omega Ruby and Alpha Sapphire Walkthrough
- Hoenn Route 120 South — Pokémon Omega Ruby and Alpha Sapphire Walkthrough
Mossdeep City — Tate & Liza and the Oceanic Plot
From Route 121, follow Team Aqua through Lilycove City, Mt. Pyre, Slateport Harbor and the Team Aqua Hideout. Recover the Blue Orb sequence, defeat Aqua Admin Matt and open the sea route to Mossdeep. After defeating Tate and Liza in the Mossdeep Gym, obtain Dive from Steven and pursue Team Aqua into the Seafloor Cavern, where Archie awakens Kyogre.
Follow Team Aqua from Route 121 to Mt. Pyre
At the Route 121 endpoint from the previous chapter, continue east into Lilycove City only long enough to identify the next objective. Team Aqua Grunts mention that they are heading to Mt. Pyre. Return west along Route 121, go south to the pier and Surf across Route 122 to Mt. Pyre.
Enter Mt. Pyre and climb through the memorial interior. The upper floors contain optional items, including Shadow Ball and Medichamite, but neither is required for story progress. Exit to the exterior and climb the mountain path to the summit. Bring a healthy team because several Team Aqua Grunts stand between the entrance and the summit battle.
At the summit, Team Aqua has taken the Blue Orb from its altar. Archie leaves for Slateport City to seize Captain Stern’s submarine, while Aqua Admin Matt stays behind to battle you. Matt uses a level 38 Sharpedo. Electric-, Grass-, Fighting- and Fairy-type attacks can help, but remember that Sharpedo is a Water/Dark type and has Rough Skin, so avoid unnecessary contact attacks from a weakened Pokémon.
- Reach Mt. Pyre by going south from Route 121 through Route 122.
- Climb to the Mt. Pyre summit.
- Defeat Aqua Admin Matt and his level 38 Sharpedo.
- Watch Archie take the Blue Orb and leave for Slateport City.
Receive the Blue Orb and pursue the submarine to Slateport
After Matt is defeated, the elders at the summit give you the Blue Orb. This is a story item in Alpha Sapphire and confirms that the active villainous team is Team Aqua; do not follow Omega Ruby directions involving Team Magma, Maxie, Groudon or the Red Orb.
Use Fly to return to Slateport City if it is available. From the Pokémon Center, travel northeast to Slateport Harbor and enter the dock area. Captain Stern is present, and a cutscene shows Archie and Team Aqua stealing the submarine. You cannot stop the theft. After the scene, battle the two Team Aqua Grunts at the harbor.
When both Grunts are defeated, speak with Captain Stern. Agree to pursue Team Aqua to Lilycove City. If you decline temporarily, return to the harbor and speak with Stern again when ready. The hideout will not become the next required destination until the harbor sequence has been completed.
- Confirm that you received the Blue Orb at Mt. Pyre.
- Return to Slateport Harbor.
- Watch the submarine theft scene.
- Defeat both Team Aqua Grunts at the harbor.
- Speak with Captain Stern and continue to Lilycove City.
Raid the Team Aqua Hideout in Lilycove
Return to Lilycove City and go to the cave-like Team Aqua Hideout northeast of the beach. The Wailmer blockade that previously prevented access to the eastern sea remains until the hideout sequence is finished. Heal at the Pokémon Center and carry enough recovery items for several battles.
On 1F, go north through the entrance and use the warp panels to reach the northwest section. The first warp room contains an optional Nugget. Continue through the next warp area, defeat the two Grunts in the northwest room, and use the beds in the southwest room if you need to restore your party. Pick up the Full Restore there before taking the stairs to B1F.
On B1F, follow the corridors and warp panels past the vending machine and the meteorite laboratory. The northeast warp from the laboratory reaches a library containing an optional Max Elixir. The northwest route leads toward Shelly’s room. Continue through the Aqua Suit laboratory and the warp rooms toward the submarine dock. The base contains several optional items, including TM97 Dark Pulse and a Master Ball in Archie’s room. Take the Master Ball before finishing the hideout if you want it; it is not required for story progress and is easy to overlook.
In the submarine room, defeat the Grunt near the entrance, then clear the five-Grunt horde battle. Heal before advancing if necessary. Pick up the Max Revive in the southeast corner, then go north to confront Aqua Admin Matt.
- Enter the Team Aqua Hideout northeast of Lilycove Beach.
- Use the warp panels to reach B1F and the submarine room.
- Rest in the hideout beds if your party needs healing.
- Collect the optional Master Ball before completing the hideout if desired.
- Defeat the Grunts and the five-Grunt horde battle.
- Reach Matt at the submarine dock.
Defeat Matt and open the eastern ocean
Matt uses a level 39 Sharpedo. Use a reliable Electric-, Grass-, Fighting- or Fairy-type attack, while remembering that Sharpedo’s Dark typing makes Psychic attacks ineffective. Avoid relying on weak contact moves because Rough Skin damages attackers that make contact.
After the battle, Archie escapes in the modified submarine. The chase cannot continue from inside the hideout because you do not yet have Dive. Return through the nearby warp panels to the hideout entrance. Once outside, the Team Aqua Grunt and the Wailmer blockade on Lilycove Beach are gone.
Surf east from Lilycove into Route 124. Route 124 is primarily a connector at this point. Follow the water route east to Mossdeep City. You may battle the Swimmers or detour for optional treasure, but the deep underwater items can wait until you have Dive.
- Defeat Aqua Admin Matt’s level 39 Sharpedo.
- Leave the Team Aqua Hideout through the warp route.
- Confirm that the Wailmer blockade has disappeared.
- Surf east through Route 124 to Mossdeep City.
Reach Mossdeep City and prepare for the Gym
Heal at the Mossdeep Pokémon Center and prepare the first two Pokémon in your party for a Double Battle. Tate and Liza fight together, so two dependable attackers are more useful than one strong Pokémon paired with a passive team member. A party in the mid-40s is appropriate for this section.
Dark-, Ghost- and Bug-type moves are super effective against the Gym’s Psychic Pokémon. Water attacks are also valuable because both of the leaders’ Pokémon are Rock/Psychic types. Dark-type Pokémon avoid Psychic damage, but they still need protection from Rock Slide and other coverage. Avoid exposing Fighting- or Poison-type Pokémon to Psychic attacks unless the matchup is controlled.
Before entering the Gym, restock healing items and status cures. Mossdeep also has optional facilities: a Fisherman near the Gym gives the Super Rod, and the Mossdeep Space Center contains an optional Sun Stone. Neither is required before the Gym.
- Heal in Mossdeep City.
- Place two dependable Pokémon in the first two party slots.
- Bring Dark, Ghost, Bug or Water attacks.
- Restock healing items before entering the Gym.
Navigate the redesigned Mossdeep Gym
Omega Ruby and Alpha Sapphire use floating platforms connected by energy trails. Each platform has a floating stone that changes the active routes. From the entrance, take the energy trail to the yellow southwest platform and defeat Psychic Preston. Activate that platform’s stone, then follow the south trail back toward the entrance.
Take the northern trail again, this time reaching the orange southeast platform and Psychic Joshua. Activate the stone there and use the eastern trail to reach the green northeast platform and Psychic Fritz. Activate the stone on that platform. You may take the northwest route for the optional battle against Hex Maniac Kindra, or continue west toward the gray northwest platform and Hex Maniac Patricia.
Activate the stone on Patricia’s platform, then return to the entrance. You may detour to battle Psychic Virgil, but it is optional. From the entrance, take the northern trail to the leaders’ platform. Heal and save before stepping into the final battle.
- Use the platform stones to change the energy-trail routes.
- Defeat the Gym Trainers on the required path.
- Return to the entrance after activating the northwest platform.
- Heal and save before challenging Tate and Liza.
Defeat Tate and Liza’s Double Battle
Tate and Liza use level 45 Lunatone and level 45 Solrock. Both are Rock/Psychic types with Levitate, so Ground-type attacks do not work. Lunatone can use Light Screen, Psychic, Hypnosis and Calm Mind. Solrock can use Sunny Day, Rock Slide, Psychic and Solar Beam.
Target one Pokémon at a time unless you have a reliable spread-move knockout plan. Lunatone is often the safer first target because Hypnosis and Calm Mind can disrupt the battle. Solrock may deserve priority if Rock Slide threatens both active Pokémon or if Sunny Day would make Solar Beam immediately available. The correct choice depends on your party, but splitting weak damage between both opponents gives them more chances to use setup or status moves.
Surf can hit both opposing Pokémon and is particularly effective here, but check whether your chosen spread move also damages your partner. Protect can deny one attack while the other Pokémon attacks, and Fake Out can remove one opponent’s first action when available.
After winning, receive the Mind Badge and TM04 Calm Mind. The badge allows traded Pokémon up to level 80 to obey and enables the use of Dive outside battle.
- Do not use Ground attacks against Lunatone or Solrock.
- Watch for Hypnosis, Light Screen, Sunny Day, Calm Mind and Rock Slide.
- Focus attacks until one opponent faints.
- Collect the Mind Badge and TM04 Calm Mind.
Receive Dive and enter the Seafloor Cavern
Leave the Gym to trigger the earthquake and the column of energy rising from the sea. Go to Steven’s house in the northwest corner of Mossdeep City and speak with him. Steven explains that Team Aqua has breached the Seafloor Cavern and gives you HM07 Dive and the Devon Scuba Gear.
Teach Dive to a suitable Water-type if necessary. From Mossdeep, Surf south through Route 127 and continue toward Route 128. On Route 128, look for the dark patch of deep water that marks a Dive location. Dive there and follow the underwater passage until you see the Seafloor Cavern entrance, then surface.
Do not use the separate underwater route around Route 126 yet; that route leads toward Sootopolis. The story entrance to the Seafloor Cavern is the underwater entrance on Route 128. Bring a Pokémon that knows Strength, because the cavern’s boulder puzzles require it. Restock healing items before diving.
- Leave Mossdeep Gym and finish the earthquake scene.
- Speak with Steven at his Mossdeep house.
- Receive HM07 Dive and the Devon Scuba Gear.
- Carry Dive and Strength users.
- Dive at the Seafloor Cavern entrance on Route 128.
Clear the Seafloor Cavern
Inside the cavern, follow the rooms toward the deepest chamber and use Strength to move the boulders. Walk around each puzzle room before pushing anything so that you can identify the intended destination. Push boulders only when they open a staircase, corridor or required route.
Team Aqua Grunts use Water-, Dark-, Poison- and Flying-type Pokémon. Electric- and Grass-type attacks handle Water Pokémon such as Carvanha and Sharpedo. Ground attacks help against Poison Pokémon, while Fighting- or Fairy-type attacks are useful against Dark types. Do not rely exclusively on Psychic attacks because Dark-type Pokémon are immune to them. Ice- or Rock-type coverage can help against Crobat.
Heal before entering the deepest room and save before approaching Archie. The final battle is required, and the sequence proceeds only after the confrontation is resolved.
- Use Strength to clear the boulder puzzles.
- Keep Electric or Grass coverage ready for Water-types.
- Prepare answers to Dark, Poison and Flying Pokémon.
- Heal and save before approaching Archie.
Defeat Archie and hand off to Sootopolis
In Alpha Sapphire, Archie uses level 41 Mightyena, level 41 Muk, level 41 Crobat and level 43 Sharpedo. His Sharpedo Mega Evolves during the battle. Use Fighting- or Fairy-type attacks against Mightyena, Ground-type attacks against Muk when safe, and Electric-, Ice- or Rock-type coverage against Crobat and Sharpedo. Watch Sharpedo’s Rough Skin when using contact moves.
After you win, Archie still awakens Kyogre with the Blue Orb. The weather changes and the story points toward Sootopolis City. Leave the Seafloor Cavern and travel west through Route 127, then use Route 126 to circle the crater. Dive at the deep-water opening around the crater, move underwater until you reach the city’s entrance and surface inside Sootopolis.
Follow the people gathered outside the Cave of Origin and speak with the required characters. Archie gives you the Aqua Suit for the next sequence. The Cave of Origin, Primal Kyogre encounter and Sootopolis Gym belong to the next chapter, so stop after reaching Sootopolis and receiving the suit.
- Defeat Archie and his Mega Sharpedo.
- Watch the Kyogre awakening sequence.
- Reach Sootopolis through Route 126.
- Speak with the characters outside the Cave of Origin.
- Receive the Aqua Suit from Archie.
Before you move on
- The Blue Orb sequence at Mt. Pyre is complete.
- The Slateport Harbor submarine theft scene has played and both Harbor Grunts are defeated.
- The Team Aqua Hideout has been cleared and Matt’s level 39 Sharpedo has been defeated.
- The Wailmer blockade outside Lilycove has disappeared.
- The Mind Badge and TM04 Calm Mind are in your possession.
- You have received HM07 Dive and the Devon Scuba Gear from Steven.
- You have reached the Seafloor Cavern through Route 128.
- Archie has been defeated and Kyogre has been awakened.
- You have reached Sootopolis City and received the Aqua Suit outside the Cave of Origin.
References for this chapter
- Walkthrough: Pokémon Omega Ruby and Alpha Sapphire — Bulbapedia
- Walkthrough: Pokémon Omega Ruby and Alpha Sapphire/Part 12 — Bulbapedia
- Walkthrough: Pokémon Omega Ruby and Alpha Sapphire/Part 14 — Bulbapedia
- Pokémon Omega Ruby & Alpha Sapphire — Team Aqua & Team Magma — Serebii
- Team Aqua Hideout — Pokémon Omega Ruby and Alpha Sapphire Walkthrough — Thonky
- Mt. Pyre & Lilycove City: Pokémon ORAS Walkthrough
Sootopolis, Primal Kyogre and Wallace — The Final Badge
After Team Aqua awakens Kyogre in the Seafloor Cavern, travel through Route 126 to Sootopolis City and resolve the crisis in the Cave of Origin. Alpha Sapphire features a level 45 Primal Kyogre encounter. Catching it is recommended, but defeating it still lets the main story continue; fleeing or losing the battle does not. Once the crisis is resolved, challenge Wallace in the Sootopolis Gym. His level 44–46 Water-type team requires both Grass coverage and a separate answer to Whiscash. Defeat him to receive the Rain Badge and HM05 Waterfall, then use Waterfall on Route 128 to reach Ever Grande City and Victory Road.
Enter Sootopolis from Route 126
Begin this chapter after completing the Seafloor Cavern and watching Archie awaken Kyogre. From Route 126, travel to the southern side of the crater surrounding Sootopolis. Use Dive at the dark-water diving spot, then enter the underwater cave entrance near the central section of the crater. Use Dive again inside that entrance to surface in Sootopolis City.
The city remains under severe rain when you arrive, and the Gym and much of the city are unavailable. Heal at the Pokémon Center before continuing. If you intend to catch Kyogre, stock up on Ultra Balls or other reliable Poké Balls, healing items, and a status move. Bring a Pokémon that can reduce Kyogre’s HP safely, but avoid relying on a strong Grass or Electric attack that might cause an accidental knockout.
- The Seafloor Cavern and Archie encounter are complete.
- You have entered Sootopolis by diving from Route 126.
- Your party is healed and your capture supplies are ready.
Meet Steven and Wallace at the Cave of Origin
Go to the northwest side of Sootopolis City. Steven Stone and Wallace are waiting near the Cave of Origin. Approach them to start the required story scene. In Alpha Sapphire, Team Aqua’s use of the Blue Orb has awakened Kyogre and caused the severe rain across Hoenn.
During the scene, you receive the Aqua Suit. The Cave of Origin cannot be bypassed for normal story progress, and the Gym is not the next objective. Follow the dialogue, then enter the cave through the northern entrance.
- You have triggered the scene with Steven and Wallace.
- You received the Aqua Suit.
- The Cave of Origin entrance is open.
Descend the Cave of Origin
Inside the cave, move north through the first hallway and take the staircase at its far end. On the next floor, turn left and follow the path upward, then continue along the hallway and turn right. Travel east to the next staircase.
On the following floor, use the nearby stairs to reach the lower-right section, then go west and descend again. Continue north on the next floor until you find the staircase in the upper-left part of the passage. Follow the route south, turn left near the lower-right corner, and take the final staircase down.
At the deepest cave floor, approach the center to trigger the next scene. Kyogre transports you safely to the encounter area while you are wearing the Aqua Suit. After the cutscene ends, you can move before interacting with Kyogre. Heal if necessary, arrange your lead Pokémon, and save manually immediately before approaching it.
- You reached the deepest floor of the Cave of Origin.
- The Aqua Suit transport scene has finished.
- A manual save exists before the Kyogre encounter.
Battle and capture Primal Kyogre
Interact with Kyogre to begin the Alpha Sapphire version-exclusive encounter. Kyogre undergoes Primal Reversion and appears as Primal Kyogre at level 45 with the Primordial Sea ability. Its moves are Body Slam, Aqua Ring, Ice Beam, and Origin Pulse.
Lower its HP carefully. False Swipe is useful if available, and sleep or paralysis improves the odds of capture. Avoid using a Grass or Electric move at full power unless you are certain Kyogre can survive it. Its Origin Pulse and Ice Beam can quickly overwhelm an unprepared team, so switch rather than leaving a weakened Pokémon in place.
If you catch Kyogre, the story continues normally. If you accidentally defeat it, the story also continues, but Kyogre can be encountered again after you enter the Hall of Fame. If you flee from the encounter during the story or lose the battle, the story does not advance; return to the encounter and resolve it. Do not treat fleeing as a completed outcome.
After the encounter is resolved, the severe weather ends. Continue through the following scenes until the characters leave and the Sootopolis Gym becomes available.
- Primal Kyogre has been captured or defeated.
- You did not leave the battle by fleeing or losing if you want to continue immediately.
- The weather crisis has ended and the Gym is accessible.
Solve the Sootopolis Gym ice puzzle
Enter the Sootopolis Gym after the Cave of Origin sequence. The puzzle uses cracked ice tiles. Step on each tile in an area once to create a route to the stairs. Stepping on a tile a second time breaks it and drops you to a lower floor where Gym Trainers are waiting.
The first ice section begins north of the entrance. Plan a complete route before committing to the tiles: move across the available tiles without stepping on any tile twice, then reach the stairs that appear when the section has been cleared. The next section uses a larger arrangement with central platforms. Keep access to the northern stairs and the central platforms until you have covered the remaining tiles.
Falling is recoverable rather than a permanent failure. Battle the Trainers on the lower floor or move past them, then use the stairs to return to the puzzle area. Previously completed sections can be crossed again, while an unsolved section resets. Once you reach Wallace’s room, heal before starting the Leader battle.
- You reached Wallace’s room.
- You understand that a second step breaks a tile and drops you below.
- Your party is healed before the Leader battle.
Defeat Wallace’s Water-type team
Wallace uses Luvdisc at level 44, Whiscash at level 44, Sealeo at level 44, Seaking at level 44, and Milotic at level 46. Grass attacks are super effective against all five Pokémon. Electric attacks work against Luvdisc, Sealeo, Seaking, and Milotic, but Whiscash is Water/Ground and immune to Electric attacks.
Whiscash knows Mud Sport, Waterfall, Zen Headbutt, and Earthquake. Use a Grass attacker against it, and do not waste Electric attacks while it is active. Sealeo carries Encore, Body Slam, Aurora Beam, and Waterfall, so a Grass Pokémon should be ready to take an Ice-type Aurora Beam. Seaking can use Aqua Ring, Rain Dance, Waterfall, and Horn Drill. Keep your active Pokémon above Seaking’s level when possible, because a Pokémon higher than the user’s level is safe from Horn Drill.
Milotic is Wallace’s final Pokémon and knows Hydro Pump, Disarming Voice, Recover, and Ice Beam. Apply strong, reliable damage instead of allowing it repeated turns to use Recover. A Grass attacker is effective but must respect Ice Beam. If your team lacks a safe Grass option, combine Electric pressure against Milotic with healing and a second attacker that can finish the battle. A party around level 45 or higher is a practical target for this fight, though type coverage and healing can compensate for some level differences.
- You have a Grass attack or another reliable answer to Whiscash.
- You will not use Electric attacks against Whiscash.
- You have a plan for Milotic’s Recover and Ice Beam.
- Your main battlers are approximately level 45 or higher when possible.
Claim the Rain Badge and HM05 Waterfall
After defeating Wallace, he awards the Rain Badge and HM05 Waterfall. The Rain Badge allows Waterfall to be used outside battle. This is HM05 in Pokémon Alpha Sapphire; HM07 is Dive, which was obtained earlier during the Mossdeep progression.
Teach Waterfall to a compatible Pokémon if necessary, but check its current moves before replacing an important attack. Heal at the Pokémon Center and restock Full Heals, Revives, and other recovery items before leaving Sootopolis.
From Sootopolis, return to the ocean routes and travel east through Route 128. Use Waterfall at the large waterfall leading to Ever Grande City. Enter the Pokémon League area and proceed into Victory Road. You do not need to complete Victory Road in this chapter, but the route is now open and the next main-story objective is preparation for the Elite Four.
- Wallace has been defeated.
- The Rain Badge is in your Badge Case.
- HM05 Waterfall is in your Bag.
- Waterfall works outside battle.
- You can reach Ever Grande City and enter Victory Road.
Before you move on
- Route 126 was used to enter Sootopolis City by Dive.
- Steven and Wallace’s Cave of Origin scene was completed.
- The Aqua Suit sequence and Cave of Origin descent were completed.
- Primal Kyogre was captured or defeated, with the encounter resolved rather than fled.
- Wallace was defeated in the Sootopolis Gym.
- The Rain Badge is in your possession.
- HM05 Waterfall is in your Bag.
- You can use Waterfall outside battle.
- Ever Grande City and Victory Road are accessible.
References for this chapter
- Pokémon Omega Ruby & Alpha Sapphire — Gym Leaders
- Pokémon Omega Ruby & Alpha Sapphire — Team Aqua & Team Magma
- Cave of Origin: Pokémon ORAS Walkthrough, Part 18
- Sootopolis Gym and Wallace — Pokémon Omega Ruby and Alpha Sapphire Walkthrough
- List of in-game event Pokémon in Pokémon Omega Ruby and Alpha Sapphire — Bulbapedia
After Wallace — Waterfall Handoff to the Pokémon League
This chapter confirms the final Alpha Sapphire story handoff before Pokémon League preparation. Team Aqua and Kyogre are the version-specific elements. Chapter 8 covers the Seafloor Cavern, while chapter 9 covers Sootopolis City, the Cave of Origin, Primal Kyogre, Wallace and the Waterfall reward. Continue only after the Kyogre sequence and Wallace’s Gym battle are complete.
Confirm the Alpha Sapphire sequence
Pokémon Alpha Sapphire uses Team Aqua and Kyogre for its main villain and legendary storyline. The underwater approach and Team Aqua operation in the Seafloor Cavern belong to chapter 8. Do not repeat those route or cavern instructions here.
Chapter 9 handles the Sootopolis portion that follows: the Cave of Origin crisis, the Primal Kyogre encounter, Wallace’s Sootopolis Gym battle and the HM reward that opens the route to the Pokémon League. Alpha Sapphire does not use the Omega Ruby Team Magma and Groudon sequence, and this pre-League crisis does not require the Emerald-style Rayquaza resolution.
Keep the two HMs separate. HM07 Dive is used before the crisis to travel underwater and reach the Seafloor Cavern. HM05 Waterfall is obtained afterward from Wallace, once the Rain Badge has been awarded. Waterfall is the move needed for the final climb toward Ever Grande City.
- The game is following the Alpha Sapphire Team Aqua and Kyogre storyline.
- The Seafloor Cavern operation from chapter 8 is complete.
- The Sootopolis and Cave of Origin sequence from chapter 9 is complete.
- HM07 Dive is understood as the earlier underwater-travel HM.
- HM05 Waterfall has not been treated as an item obtained before Wallace’s Gym battle.
Resolve Kyogre before treating the sequence as complete
The Primal Kyogre encounter must be resolved before the immediate story can continue into the final Gym progression. Capture Kyogre or defeat it in the encounter. Reaching the bottom of the Cave of Origin, triggering the battle, or seeing the crisis end is not by itself enough if the battle was fled or lost.
If you flee from Kyogre or lose the battle, the current sequence remains incomplete. You cannot use that unresolved encounter as permission to proceed directly to Wallace, claim Waterfall or move on to the Pokémon League route. Return to the encounter and complete it before checking the handoff requirements.
If Kyogre was defeated or the encounter was fled, the Pokémon can reappear in the Cave of Origin after you later enter the Hall of Fame. That later restoration provides another opportunity to capture it. It does not retroactively make the earlier unresolved sequence complete, and it does not mean Wallace or HM05 Waterfall becomes available immediately after fleeing or losing.
After Kyogre has been captured or defeated, finish the remaining Sootopolis story events covered in chapter 9. Wallace must then be defeated in the Sootopolis Gym. The required result is both a resolved Kyogre encounter and a completed final Gym battle.
- Primal Kyogre has been captured or defeated.
- The Kyogre battle was not merely fled or lost.
- The Cave of Origin sequence is complete.
- Wallace’s Gym battle has been completed.
- Any later Hall of Fame respawn is understood as recovery for a new capture attempt, not as immediate story completion.
Leave Sootopolis and reach the Pokémon League route
After defeating Wallace, confirm that the Rain Badge is registered as your eighth Hoenn Gym Badge. Wallace also gives you HM05 Waterfall at this point. Both the badge and the HM are required for the handoff; neither replaces the other.
Leave Sootopolis City and return to Route 128. Follow the water route toward the large waterfall leading to Ever Grande City. Use HM05 Waterfall to climb it once the Rain Badge permits its use outside battle. This is the final route-opening action covered by this chapter.
At Ever Grande City, use the Pokémon Center before entering Victory Road. This chapter does not repeat Victory Road’s internal path, trainer battles, item locations or Pokémon League strategy. Stop after confirming that the Victory Road entrance is available, then continue to chapter 11 for team preparation, supplies, level balance and the League approach.
There is no additional Team Aqua objective, Cave of Origin visit or legendary battle required between Wallace’s victory and the Route 128 waterfall handoff. The next required progression is Victory Road followed by the Pokémon League.
- Wallace has been defeated.
- The Rain Badge is registered as the eighth badge.
- HM05 Waterfall has been received from Wallace.
- Route 128 is accessible from Sootopolis.
- The Route 128 waterfall can be climbed.
- Ever Grande City has been reached.
- Victory Road is accessible.
- Chapter 11 is the next required chapter.
Before you move on
- The Team Aqua operation in the Seafloor Cavern has been completed.
- The Cave of Origin crisis has been completed.
- Primal Kyogre has been captured or defeated.
- Wallace has been defeated in Sootopolis Gym.
- The Rain Badge is registered as the eighth Gym Badge.
- HM05 Waterfall has been received from Wallace.
- The player can return to Route 128 and climb the waterfall.
- Ever Grande City is accessible.
- Victory Road is accessible.
- The player is ready to continue to chapter 11, Pokémon League preparation.
Preparing for Victory Road and the Pokémon League
After earning all eight Hoenn Badges, prepare a complete party, clear Victory Road and defeat Wally before entering the Pokémon League. Alpha Sapphire’s first League run ends with Champion Steven Stone, whose strongest Pokémon is a level 59 Mega Metagross. Bring broad type coverage, balanced levels, full PP and enough recovery items for the entire Elite Four sequence.
Reach Ever Grande City and check your field moves
Use Waterfall on Route 128 to climb to Ever Grande City, then heal at the Pokémon Center before entering Victory Road. The cave entrance is in Ever Grande City. The required field moves for the main route through Victory Road are Surf, Strength and Rock Smash. Flash is optional and makes the lower cave sections easier to navigate. Waterfall is also optional inside Victory Road after you have climbed the waterfall on Route 128; it reaches an elevated side area containing optional items, including TM81 X-Scissor.
Keep the Pokémon carrying these moves in your party until Victory Road is cleared. If one of those Pokémon is weak, place it in a support role and use the other party slots for your strongest battlers. Do not remove Surf, Strength or Rock Smash before finishing the cave. Save at the Ever Grande City Pokémon Center so a failed attempt at the cave or Wally can be retried without repeating the entire ocean approach.
- Earn all eight Hoenn Badges.
- Use Waterfall on Route 128 to reach Ever Grande City.
- Confirm access to Surf, Strength and Rock Smash.
- Teach or use Flash only if the darker cave sections are difficult to navigate.
- Heal and save at the Ever Grande City Pokémon Center.
Build a six-Pokémon party with League coverage
Bring six Pokémon that can contribute in battle instead of one overleveled sweeper and several passengers. A practical preparation target is a party in the low-to-mid 50s, with weaker members brought close to the rest before the League. The Elite Four begin at level 50 and rise to level 55, while Steven’s first team ranges from level 57 to level 59. A party with several Pokémon still in the 40s is much less reliable than a balanced team in the 50s.
Prepare both physical and special damage. Include a dependable answer to Water Pokémon, such as Electric or Grass attacks; Fighting, Fairy or Bug coverage for Sidney’s Dark Pokémon; Dark or Ghost attacks for Phoebe; Fighting, Rock, Steel or Fire options for Glacia’s Ice Pokémon; and Ice or Fairy attacks for Drake’s Dragons. Steven’s Steel- and Rock-heavy team also rewards Fire, Ground, Fighting, Water, Dark and Ghost coverage.
A Water-type with Ice or Fairy coverage, an Electric- or Grass-capable attacker, a Fighting- or Fairy-capable attacker and a reliable Ground or Fire option provide useful overlapping answers. These roles may be distributed among several Pokémon or combined in versatile movesets. Retain required field moves until Victory Road is finished, then replace weak utility attacks afterward if a team member needs stronger battle coverage.
- Bring six usable Pokémon if possible.
- Keep party levels reasonably close together.
- Carry both physical and special attacks.
- Prepare answers for Dark, Ghost, Ice, Dragon, Water, Steel and Rock targets.
- Retain Surf, Strength and Rock Smash until Victory Road is cleared.
Clear Victory Road and collect useful supplies
From the Victory Road entrance, Surf north into the cave. On the first interior section, use Strength to move the boulder into the hole and open the route forward. Follow the bridges and stairs, taking side paths for items when the party is healthy. In the basement, use Strength and Rock Smash to open the boulder routes. Check where a pushed boulder will land before committing to a move so you do not block your own route.
Victory Road provides useful experience through wild encounters and trainer battles. In Alpha Sapphire, wild encounters include Pokémon such as Golbat, Hariyama, Lairon, Loudred, Medicham and Sableye. Allow encounters if weaker party members need training; use Repels when the party is prepared and you only want to reach the exit. The optional side paths contain items and technical machines, but they are not required to reach the League.
TM29 Psychic is available through an optional basement route that uses Surf. TM81 X-Scissor is reached through an optional elevated section. Healing items, PP-related items and other pickups are worth collecting if your party needs them, but do not exhaust your resources exploring side paths immediately before Wally. Return to the Pokémon Center if several key Pokémon are injured or low on PP.
Wally challenges you near the end of Victory Road. His Alpha Sapphire team is Altaria level 46, Delcatty level 46, Roselia level 46, Magneton level 46 and Gallade level 48. Gallade Mega Evolves during the battle. Its Psychic- and Fighting-type attacks can punish a weakened physical attacker, and Swords Dance can sharply increase its Attack. A strong Fairy, Flying or Ghost attack is useful against Mega Gallade. Heal before approaching Wally and place a Pokémon that can answer Gallade safely in the lead position. If you lose, restore the save made before entering the cave, or heal and retrain before trying again.
- Use Strength and Rock Smash to open the required routes.
- Train weaker members while crossing the cave.
- Treat TM29, TM81 and other side-route items as optional.
- Heal before approaching Wally.
- Prepare a Fairy, Flying or Ghost answer to Mega Gallade.
Use the Pokémon League lobby for final supplies
After leaving Victory Road, enter the Pokémon League building and use the Pokémon Center on the left side of the lobby. The Poké Mart is on the right. Buy Hyper Potions or stronger HP recovery for routine healing, Full Restores for combined HP and status recovery, Full Heals for cheaper status removal, and Revives for emergencies. Buy according to your available funds rather than relying on an exact item count; the important point is to have enough recovery for five consecutive major battles.
Full Restores are particularly useful because they restore HP and remove ordinary status conditions. Keep a reserve for Drake and Steven instead of spending all premium items against Sidney. Ethers and Elixirs can restore PP between battles if you obtained them earlier, but they are limited resources, so prioritize the moves that answer the Champion’s team and Drake’s Dragons.
Once the Elite Four sequence begins, you cannot leave to use the outside Pokémon Center without restarting the challenge. You can use items and change Pokémon between battles from the party and Bag menus. Arrange the Bag so healing items, Revives and status cures are easy to find. Save in the lobby after shopping and after completing the final party check.
- Heal in the League lobby Pokémon Center.
- Buy Hyper Potions or stronger HP recovery.
- Buy Full Restores and Full Heals.
- Buy Revives for emergencies.
- Restore PP with existing Ethers or Elixirs when appropriate.
- Save after shopping and before entering the central League doors.
Set final moves, held items and the League order
Mega Evolution is optional, but a prepared Mega Pokémon can simplify a difficult matchup. Give the Mega Stone to the Pokémon you intend to use and confirm that its moveset still provides useful coverage. Do not remove your only answer to a League opponent just to make room for a Mega setup. Held items that boost damage, improve survivability or restore HP can help, but correct moves, full PP and a healthy party matter more than any single item.
The first opponent is Sidney, whose Dark team is vulnerable to Fighting, Fairy and Bug attacks. Phoebe follows with Ghost Pokémon; use Dark or Ghost attacks while watching for status effects and disruptive moves. Glacia uses Ice Pokémon, so Fighting, Rock, Steel and Fire attacks are useful. Her Water/Ice Pokémon can also be handled with Electric or Grass coverage. Drake is the fourth member and uses Altaria, two Flygon, Kingdra and Salamence, with levels from 53 to 55. Ice and Fairy attacks are particularly valuable. Kingdra is Water/Dragon, so it is weak to Fairy and Dragon attacks, but not to Ice attacks. Use strong Fairy or Dragon damage, or a reliable neutral attacker, if your Ice move is ineffective.
Alpha Sapphire’s first-run Champion is Steven Stone. His team is Skarmory level 57, Claydol level 57, Aggron level 57, Cradily level 57, Armaldo level 57 and Mega Metagross level 59. Skarmory is vulnerable to Electric and Fire attacks. Claydol can be pressured by Water, Grass, Ice, Bug, Ghost or Dark attacks, although its Levitate ability prevents Ground attacks from working. Aggron is especially vulnerable to Fighting and Ground attacks. Cradily can be targeted with Ice, Bug, Fighting or Steel attacks, while Armaldo is vulnerable to Water, Rock and Steel. Save a strong Ground, Fire, Fighting, Dark or Ghost option for Mega Metagross, and use special attacks against physically defensive targets when possible.
Steven can use Full Restores, so lowering a Pokémon into the red does not guarantee a knockout. If a battle goes badly, use the lobby save and adjust your lead, held items or move order before entering again. Your preparation is complete when all six party slots contain battle-ready Pokémon, the party is healed, important moves have full PP, recovery items are stocked and a manual save exists in the League lobby. Speak to the guards only after this check; they verify your eight Badges and begin the Elite Four sequence.
- Choose a lead that can handle Sidney or gain momentum safely.
- Keep Ice or Fairy coverage available for Drake.
- Remember that Kingdra is weak to Fairy and Dragon, but not Ice.
- Reserve Ground, Fire or Fighting attacks for Steven’s Steel Pokémon.
- Check Mega Stones, held items, HP, status and move PP.
- Save in the Pokémon League lobby before entering the gauntlet.
Before you move on
- All eight Hoenn Badges are obtained.
- A six-Pokémon party is healed and broadly in the low-to-mid 50s or stronger.
- The party has both physical and special damage.
- The party has practical coverage for Dark, Ghost, Ice, Dragon, Water, Steel and Rock opponents.
- Surf, Strength and Rock Smash remain available until Victory Road is complete.
- Wally has been defeated and the party is healed afterward.
- The bag contains strong HP recovery, status cures and Revives, with PP recovery available if owned.
- Mega Evolution and held items have been checked without sacrificing necessary type coverage.
- A manual save exists in the Pokémon League lobby before entering the Elite Four.
The Elite Four and Champion — Beating the Main Campaign
After earning all eight Hoenn Badges, enter the Pokémon League at Ever Grande City and prepare for five consecutive battles: Sidney, Phoebe, Glacia, Drake, and Champion Steven. You can use items and change your active Pokémon between battles, but you cannot return to the Pokémon Center until the challenge is over. The first League run uses opponents from levels 50 to 59, with Steven’s Mega Metagross as the final threat. Defeating Steven registers your party in the Hall of Fame and completes the standard campaign. The Delta Episode begins afterward as separate post-game content.
1. Prepare in the Pokémon League lobby
Travel through Victory Road to Ever Grande City and enter the Pokémon League building. The lobby contains a Pokémon Center, PC, and Poké Mart. Heal your entire party, restore the PP of important attacks, and organize your team before speaking to the two Ace Trainers guarding the central doors.
The attendants check that you possess all eight Hoenn Badges. Once you pass through the doors, you must defeat the four Elite Four members and Steven in sequence. You cannot walk back to the lobby between battles, so bring enough supplies for the entire run.
Buy Full Restores for combined healing and status recovery, plus additional Potions or Hyper Potions if you want to conserve Full Restores. Carry Revives for emergencies and Full Heals if you prefer to reserve Full Restores for low-health situations. Restore PP on your most reliable Fighting, Bug, Fairy, Fire, Electric, Ice, Ground, Dark, Ghost, and Water attacks as appropriate for your party.
Aim for a team generally around levels 50 to 55, with at least one Pokémon capable of surviving Steven’s level 59 Mega Metagross. A balanced party is safer than a single sweeper because Intimidate, confusion, screens, status conditions, and secondary typings can interrupt an otherwise favorable matchup. If you use Mega Evolution, choose the Mega Stone before entering. Mega Evolution is available once per battle, so the same Pokémon can Mega Evolve again in each separate League battle.
- Heal and restore PP in the League lobby.
- Buy Full Restores, Revives, and status-healing items.
- Keep physical and special damage available if possible.
- Save before entering the League chambers.
- Make sure your team can answer Mega Metagross.
2. Defeat Sidney with Fighting, Bug, or Fairy attacks
Sidney is the first Elite Four member and specializes in Dark types. His first team is Mightyena at level 50, Shiftry at level 50, Cacturne at level 50, Sharpedo at level 50, and Absol at level 52. Fighting, Bug, and Fairy attacks are effective across the team, but account for each Pokémon’s secondary typing before choosing your attacker.
Mightyena leads with Intimidate, lowering the Attack of the Pokémon that enters against it. A special attacker ignores that reduction, while a physical attacker can switch out if the penalty makes the matchup poor. Mightyena may use Swagger and Sucker Punch, so avoid giving it unnecessary turns. If confusion becomes a problem, use a Full Heal or Full Restore rather than repeatedly risking self-inflicted damage.
Shiftry and Cacturne are Grass/Dark types and are especially vulnerable to Bug attacks. Fire, Flying, Ice, Fighting, and Fairy attacks are also useful. Shiftry carries Extrasensory, so do not assume a Fighting-type Pokémon is completely safe just because the type matchup is favorable. Cacturne can use Leech Seed and Spiky Shield; attack with a strong move instead of allowing it to recover or punish contact.
Sharpedo is fast and hits hard but has poor defenses. Defeat it quickly, while remembering that Aqua Jet can finish a weakened Pokémon. Absol has high Attack and can use strong Dark and Psychic-type coverage. Keep a healthy Fighting or Fairy attacker available for it rather than sending in a damaged Pokémon simply to preserve items.
Sidney is a good battle in which to avoid unnecessary healing. After winning, use the next chamber’s pause to heal with items and restore PP before proceeding. Do not expect to return to the Pokémon Center.
- Use Fighting, Bug, or Fairy coverage.
- Expect Intimidate from Mightyena.
- Do not leave a vulnerable Fighting type against Shiftry’s Extrasensory.
- Defeat Sharpedo before its Speed and Aqua Jet create a problem.
- Keep a healthy answer for Absol.
3. Handle Phoebe’s five-Pokémon Ghost team
Phoebe’s first League roster contains five Pokémon: Dusclops at level 51, Banette at level 51, Sableye at level 51, a second Banette at level 51, and Dusknoir at level 53. This is a five-Pokémon battle, not a six-Pokémon roster. Dark and Ghost attacks are useful against the Ghost Pokémon, while Fairy attacks are especially valuable against Sableye because Alpha Sapphire uses the Generation VI type chart.
Dusclops and Dusknoir are bulky and can disrupt the battle with moves such as Confuse Ray, Curse, Future Sight, and elemental punches. Use strong, accurate Dark or Ghost attacks rather than weak repeated hits. Pressure can reduce the PP of moves used against Phoebe’s defensive Pokémon, so avoid wasting limited attacks on resisted or low-damage moves.
Banette can use Shadow Ball, Will-O-Wisp, Spite, or Toxic depending on the individual Pokémon. A burn weakens physical attackers, so switch to a special attacker or cure the condition if the affected Pokémon is central to your plan. Do not switch repeatedly without a reason, because Phoebe’s status moves can wear down the entire party.
Sableye is Ghost/Dark. Normal and Fighting attacks do not affect it, and Dark, Ghost, Bug, and Poison attacks are not super effective. Fairy attacks are its clear type-based weakness in this edition. If you lack Fairy coverage, use strong neutral damage and avoid spending turns on ineffective Normal or Fighting moves.
Save a dependable Dark, Ghost, or Fairy attacker for Dusknoir, Phoebe’s final Pokémon. If your primary attacker is confused, burned, or low on health, heal before Dusknoir appears rather than attempting to finish the battle with a compromised Pokémon.
- Expect five Pokémon: Dusclops, Banette, Sableye, Banette, and Dusknoir.
- Use Dark, Ghost, or Fairy attacks where appropriate.
- Use Fairy attacks against Sableye if available.
- Do not rely on Normal or Fighting attacks against Ghost Pokémon.
- Preserve a strong attacker for Dusknoir.
4. Beat Glacia with Fire, Fighting, Rock, and Electric coverage
Glacia is the third Elite Four member. Her first team is Glalie at level 52, Froslass at level 52, a second Glalie at level 52, a second Froslass at level 52, and Walrein at level 54. The two Glalie are pure Ice types, Froslass is Ice/Ghost, and Walrein is Water/Ice. This roster is different from the original Ruby and Sapphire teams, so do not prepare for two Sealeo.
Fire, Fighting, and Rock attacks are strong against Glalie. Froslass is also vulnerable to Fire, Rock, Ghost, Dark, and Steel attacks, but its Ghost typing means Fighting and Normal attacks do not work. It can use Blizzard, Confuse Ray, Hail, or Ominous Wind, so remove it quickly with an accurate super-effective attack.
Walrein is Water/Ice. Electric and Grass attacks are useful, although Grass attackers must respect Ice-type moves. Fighting and Rock attacks can also hurt Walrein, but do not send a Fire-type into it without checking whether the Pokémon can survive Surf. Walrein has considerable bulk and may use Blizzard, Body Slam, or Sheer Cold, so avoid trying to win through weak neutral damage.
Hail can increase the pressure from Blizzard and chip Pokémon that lack weather protection. Use strong attacks instead of attempting a long stall. If a Pokémon becomes confused or paralyzed, use a healing item rather than allowing the condition to disrupt several turns.
After defeating Glacia, heal immediately and restore PP before Drake. In particular, preserve Ice, Fairy, and Dragon-counter moves for Drake’s final three Pokémon.
- Prepare for Glalie, Froslass, Glalie, Froslass, and Walrein.
- Use Fire, Fighting, or Rock attacks against Glalie.
- Remember that Fighting attacks fail against Froslass.
- Use Electric or Grass attacks against Walrein when safe.
- Heal and restore PP before Drake.
5. Defeat Drake with Ice and Fairy control
Drake is the fourth Elite Four member. His first team is Altaria at level 53, Flygon at level 53, Kingdra at level 53, a second Flygon at level 53, and Salamence at level 55. Ice attacks are excellent against Altaria, both Flygon, and Salamence. Fairy and Dragon attacks are also useful, especially when Ice coverage is unavailable.
Altaria can use Cotton Guard to sharply raise its Defense. A special Ice, Fairy, or Dragon attack avoids making the battle harder after Cotton Guard. Flygon is Ground/Dragon and is especially vulnerable to Ice. Keep your Ice attacker healthy and avoid spending all of its PP on earlier targets.
Kingdra is Water/Dragon. Ordinary Ice attacks are only normally effective against it, not super effective, so use a strong Fairy or Dragon attack or powerful neutral damage. Freeze-Dry is an exception because it is super effective against Water types. Kingdra may use Surf, Ice Beam, Dragon Pulse, and Yawn, so remove it quickly if you lack a safe switch.
Salamence has Intimidate and strong mixed coverage. Special attacks avoid the Attack reduction, while Ice and Fairy attacks exploit its weaknesses. Do not sacrifice your only Ice or Fairy user before Salamence appears. If Salamence survives one hit, heal or switch only if the replacement can withstand its next attack; unnecessary switching can allow it to gain momentum.
- Preserve an Ice attacker for Altaria, both Flygon, and Salamence.
- Use special attacks against Altaria after Cotton Guard.
- Do not treat Kingdra as weak to ordinary Ice attacks.
- Use Fairy or Dragon damage against Kingdra when available.
- Keep a healthy answer for Salamence.
6. Defeat Champion Steven and complete the standard campaign
Steven’s first-challenge team is Skarmory, Claydol, Aggron, Cradily, Armaldo, and Metagross. The first five are level 57, and Metagross is level 59. Steven’s team combines Steel, Flying, Ground, Psychic, Rock, Grass, and Bug typings, so plan to switch between several attackers rather than attempting one universal sweep.
Skarmory has very high Defense and can use Toxic, Spikes, Aerial Ace, and Steel Wing. Use a strong special Fire or Electric attack when possible. Claydol can set Reflect and Light Screen and has Levitate, so Ground attacks do not affect it. Hit Claydol decisively before both screens remain active for too many turns, using Water, Dark, Ghost, Ice, Grass, or another suitable attack according to your team.
Aggron is Steel/Rock and is highly vulnerable to Fighting and Ground attacks. It can use Stone Edge, Earthquake, Iron Tail, and Dragon Claw, so do not leave a frail counter in front of it after the first attack. Cradily is Rock/Grass and may use Giga Drain, Ancient Power, Sludge Bomb, or Confuse Ray. Bug, Fighting, Ice, Steel, and strong neutral attacks are useful, but avoid allowing Cradily to recover repeatedly.
Armaldo is Rock/Bug and uses moves such as X-Scissor, Rock Blast, Metal Claw, and Crush Claw. Water, Rock, Steel, and other strong coverage attacks can handle it. Watch your remaining HP because Rock Blast can strike multiple times.
Steven’s final Pokémon is level 59 Metagross, which Mega Evolves into Mega Metagross. It has high offensive and defensive stats, Tough Claws, and attacks including Bullet Punch, Zen Headbutt, Meteor Mash, and Giga Impact. Keep your strongest Fire, Ground, Ghost, or Dark attack available and send in a healthy Pokémon. Mega Evolution is particularly useful here if it secures a knockout or lets your counter survive. Intimidate can reduce the impact of its physical attacks, but do not depend on that alone.
After Steven is defeated, your party is registered in the Hall of Fame and the ending and credits play. This completes the standard main campaign. The Delta Episode is separate post-game content and becomes available after the first League victory; it is not required to register the Hall of Fame party.
- Use separate answers for Skarmory, Claydol, Aggron, Cradily, and Armaldo.
- Do not use Ground attacks against Claydol while Levitate is active.
- Use Fighting or Ground coverage against Aggron.
- Use special Fire or Electric damage against Skarmory when possible.
- Keep a healthy Fire, Ground, Ghost, or Dark answer for Mega Metagross.
- Confirm that your party is recorded in the Hall of Fame.
Before you move on
- Sidney is defeated first.
- Phoebe is defeated second with her five-Pokémon roster cleared.
- Glacia and Drake are defeated in order.
- Champion Steven is defeated, including his level 59 Mega Metagross.
- The party is registered in the Hall of Fame.
- The standard ending and credits have played.
- The save can be reloaded afterward to begin the Delta Episode.
Delta Episode — How and When the Post-Game Starts
The Delta Episode begins after your first Pokémon League victory has been registered in the Hall of Fame. When you next open the completed save, an automatic prologue plays at the Mossdeep Space Center. Control then returns to your bedroom in Littleroot Town, where the required story route begins. In Alpha Sapphire, the sequence runs through Petalburg City, Rustboro City, Granite Cave, Mossdeep City, Meteor Falls, Devon Corporation, the Mossdeep Space Center, the Team Aqua Hideout, Sootopolis City, and Route 131. Defeating Wallace at Route 131 opens Sky Pillar. This chapter ends there; ch14 covers the Sky Pillar climb, Rayquaza, and the final Zinnia battle, while ch15 covers Deoxys and the closing scenes.
1. Register your first Hall of Fame victory and reload the save
Defeat the Elite Four and Champion Steven Stone for the first time. The Delta Episode becomes available only after that first League victory has been recorded in the Hall of Fame.
Allow the ending sequence to finish, then open the completed save again. The next load begins with an automatic Delta Episode prologue at the Mossdeep Space Center. You do not need to locate an activation NPC, obtain a key item, or complete an optional side quest.
After the prologue, the game places you in your bedroom in Littleroot Town. Go downstairs and speak with Norman to receive the Pair of Tickets for the Mossdeep Star Show. Leave the house to meet Zinnia, then enter your rival’s house next door to learn that Zinnia has stolen the rival’s Key Stone and gone toward Petalburg City.
- All eight Gym Badges are recorded.
- The Elite Four and Steven Stone have been defeated for the first time.
- The first Hall of Fame registration has completed.
- The ending sequence has finished and the completed save has been loaded again.
- The automatic Mossdeep Space Center prologue has played.
- The Pair of Tickets and stolen-Key-Stone scenes in Littleroot are complete.
2. Help Wally in Petalburg City
Travel to Petalburg City and enter Wally’s house beside the Gym. In Alpha Sapphire, Team Aqua Admin Matt is confronting Wally over his Key Stone.
Battle and defeat Matt. This fight is mandatory; leaving Petalburg without completing it will not advance the Delta Episode. After the battle, the conversation confirms that Wally’s Key Stone is gone.
Steven then contacts you through the PokéNav and directs you to the Devon Corporation in Rustboro City. Follow that instruction rather than searching for Zinnia elsewhere.
- Matt has been defeated in Wally’s house.
- The conversation about Wally’s missing Key Stone has finished.
- Steven has directed you to Devon Corporation in Rustboro City.
3. Get the Meteorite Shard from Granite Cave
Go to the Devon Corporation in Rustboro City and speak with Steven at the entrance. Mr. Stone explains that Devon needs a Meteorite Shard from Granite Cave for its response to the approaching meteoroid.
Travel to Granite Cave near Dewford Town. You can Fly there if the location is available. Enter the cave and return to the mural chamber where Steven appeared during the main story.
Zinnia is waiting in the mural chamber and challenges you to a required battle. Defeat her, then take the Meteorite Shard she leaves behind. Steven contacts you afterward and sends you to the Mossdeep Space Center.
- The Devon Corporation briefing is complete.
- Zinnia has been defeated in Granite Cave’s mural chamber.
- The Meteorite Shard has been obtained.
- Steven has directed you to Mossdeep City.
4. Visit the Mossdeep Space Center and Meteor Falls
Enter the Mossdeep Space Center in northeast Mossdeep City. Speak with the attendant on the first floor to gain access to the upper floor, then deliver the Meteorite Shard to Professor Cozmo during the story scene.
Cozmo’s team determines that another meteorite fragment is needed from Meteor Falls. Leave Mossdeep and travel to Meteor Falls with a Pokémon that knows Waterfall. The upper section cannot be reached without it.
Inside Meteor Falls, use Surf to reach the waterfall, climb it, and continue through the upper cave until you reach the Draconid story scene with Steven and Zinnia. Complete the conversation, then leave the cave and return to Rustboro City.
- Professor Cozmo has received the first Meteorite Shard.
- A Pokémon that knows Waterfall is available.
- The upper Meteor Falls story scene has been completed.
- The next destination is Rustboro City.
5. Stop the Devon Corporation attack and defend the Space Center
Return to the Devon Corporation after the Meteor Falls scene. Team Aqua attacks a Devon researcher outside the building. Defeat the required consecutive Aqua Grunt battles; there is no healing break between them, so restore your party before approaching the building.
The researcher directs you back to the Mossdeep Space Center. Return there and proceed toward the upper floor. Team Aqua members force a Horde Battle on the way, followed by a required Double Battle against Matt and an Aqua Grunt with Steven as your partner.
Complete both Space Center battles. The story then sends you to the Team Aqua Hideout in Lilycove City.
- The required Devon Corporation Aqua battles are complete.
- The Space Center Horde Battle is complete.
- The Double Battle against Matt and an Aqua Grunt is complete.
- The next destination is the Team Aqua Hideout.
6. Clear the Team Aqua Hideout and collect Sharpedonite
Go to the Team Aqua Hideout on the northeast side of Lilycove City’s beach. Enter the hideout and use its warp panels to reach Archie’s office area. The objective is to reach the leader’s room, not to collect every optional item in the hideout.
Zinnia confronts Archie and Shelly, takes Archie’s Key Stone, and leaves. Afterward, Archie gives you Sharpedonite. This is the correct Alpha Sapphire reward; Cameruptite is the corresponding Omega Ruby reward and does not belong in this version’s sequence.
Steven then contacts you and asks you to return to the Mossdeep Space Center. Speak with him there to learn that Wallace, a Lorekeeper, can open the sealed entrance to Sky Pillar. Your next destination is Sootopolis City.
- The Team Aqua Hideout leader-room scene is complete.
- Zinnia has taken Archie’s Key Stone.
- Sharpedonite has been received.
- Steven has directed you to Sootopolis City and Wallace.
7. Defeat Wallace on Route 131 and unlock Sky Pillar
Travel to Sootopolis City and speak with Wallace outside the Cave of Origin. He explains that he can open the ancient seal protecting Sky Pillar and asks you to meet him on Route 131.
Leave Sootopolis and Surf east through the ocean routes to Route 131. Follow the route to the island containing the Sky Pillar entrance. Wallace will already have removed the seal, but he requires a battle before allowing you to enter.
Defeat Wallace on Route 131. This battle is the final required milestone in this chapter. Once you win, the entrance to Sky Pillar is available. Heal your party and prepare before proceeding, because the next section begins the Rayquaza sequence.
- Wallace has been contacted outside the Cave of Origin.
- Route 131 has been reached.
- Wallace has been defeated on the Sky Pillar island.
- The Sky Pillar entrance is open.
- The party is healed before continuing.
8. Handoff to the remaining Delta Episode chapters
Do not mark the Delta Episode complete merely because Sky Pillar is open. The unlocked entrance is the endpoint of this trigger-and-route chapter.
Continue with ch14 for the detailed Mach Bike navigation inside Sky Pillar, the Rayquaza encounter, and the final Zinnia battle. That chapter handles the actions required before the story can move to the meteoroid’s final stage.
Continue with ch15 for the Deoxys encounter, the closing scenes, and the recovery rules for a failed Deoxys attempt. The Delta Episode is complete only after those later scenes have finished.
- Sky Pillar is unlocked.
- The player has handed off to ch14 for the tower sequence.
- The Delta Episode has not been incorrectly marked complete before Deoxys and the closing scenes.
Before you move on
- The first Hall of Fame registration has been recorded after defeating Steven Stone.
- Reloading the completed save triggered the automatic Mossdeep Space Center prologue.
- The Littleroot Pair of Tickets and stolen-Key-Stone scenes are complete.
- Matt has been defeated in Wally’s house in Petalburg City.
- The Meteorite Shard has been recovered from Granite Cave.
- The Meteor Falls Draconid scene is complete.
- The Devon Corporation battles and Mossdeep Space Center battles are complete.
- The Team Aqua Hideout sequence has awarded Sharpedonite.
- Wallace has been defeated on Route 131.
- The Sky Pillar entrance is open.
- The Delta Episode is not yet complete until the ch14 and ch15 objectives have also been finished.
Sky Pillar and the Mega Rayquaza Sequence
Sky Pillar is the climax of the Delta Episode in Pokémon Alpha Sapphire. After completing the required Mossdeep and Sootopolis events, obtain Wallace's permission to enter the tower on Route 131, climb to the Dragonhark altar with the Mach Bike, capture the required Level 70 Rayquaza, and defeat Zinnia. Rayquaza's Dragon Ascent move allows it to Mega Evolve without holding a conventional Mega Stone, and the resulting spaceflight leads directly to the Deoxys encounter.
1. Complete the Delta Episode events that open Sky Pillar
After defeating the Pokémon League Champion, continue the Delta Episode until the story sends you to Mossdeep City and the Space Center events are complete. Follow the dialogue involving Steven, the Space Center, and Zinnia rather than trying to reach Sky Pillar early. The tower is not available for this story sequence immediately after the League.
When the story directs you to Sootopolis City, go to the Cave of Origin and speak with Wallace near the entrance. Wallace explains the history of Sky Pillar and the Draconids, then tells you to meet him on Route 131. Fly to a nearby Hoenn location and travel to Route 131, or use the ocean routes if Sky Pillar has not yet been registered as a Fly destination.
On Route 131, surf north through the route and use the narrow northern passage to reach the island containing Sky Pillar. Wallace is waiting at the entrance. Heal your party and restore important move PP before speaking to him, because he battles you before allowing entry. Grass- and Electric-type attacks are useful against his Water-focused team, but keep a response ready for coverage such as Ice- and Ground-type moves.
- Finish the required Mossdeep City and Space Center scenes.
- Speak with Wallace at the Cave of Origin in Sootopolis City.
- Travel to the northern part of Route 131 and defeat Wallace at the Sky Pillar entrance.
2. Save and prepare for the tower
Make a manual save before entering the upper portion of Sky Pillar. The summit contains several conversations and cutscenes leading into the Rayquaza encounter, so saving beforehand gives you a reliable retry point if your capture attempt fails or you want to change your lead Pokémon.
Bring a Pokémon that can inflict sleep or paralysis and, if available, a Pokémon with False Swipe. False Swipe cannot reduce Rayquaza below 1 HP, which makes it safer to weaken the legendary without accidentally defeating it. Status is not mandatory, but it improves capture odds and reduces the number of turns Rayquaza can attack.
Carry plenty of Poké Balls. Ultra Balls are a dependable general choice, while Timer Balls become more useful after the battle has lasted many turns. A Quick Ball can also be tried immediately, but do not rely on it. Bring healing items and consider PP recovery for the Pokémon using False Swipe or status moves.
Rayquaza appears at Level 70. Use a durable Pokémon or one that resists its attacks, and avoid sending out a fragile Pokémon simply because it knows a super-effective move. If your party has six Pokémon, the game will require you to choose one to send to the PC after Rayquaza is captured.
- Save before beginning the summit sequence.
- Bring status support and False Swipe if available.
- Stock high-quality Poké Balls and healing items.
- Leave space in the party or be prepared to send one Pokémon to the PC.
3. Climb Sky Pillar with the Mach Bike
Sky Pillar's upper floors contain cracked floor panels. Use the Mach Bike to cross them; the tower's route is designed around the bike's high-speed movement. If you entered without it, return to Mauville City and speak with Rydel at Rydel's Cycles to obtain or switch to the Mach Bike before continuing.
Ride quickly across each cracked section. The panels break when crossed, so falling is part of the tower's navigation rather than a sign that the story is blocked. When a fall sends you to a lower floor, use the ladders and openings to work upward again. Repels are optional but helpful if you want to conserve time and healing resources while looking for the correct route.
Follow Zinnia's dialogue and movement through the tower. The murals and conversations explain Rayquaza's role in Hoenn's history, but the story advances by reaching the summit rather than by examining every optional item. Continue upward until you reach the Dragonhark altar. Once the summit scenes begin, allow the dialogue and cutscenes to finish instead of attempting to leave midway.
- Use the Mach Bike for the cracked floors.
- Use ladders and openings to recover if you fall.
- Follow Zinnia to the Dragonhark altar and complete the summit scenes.
4. Capture the required Level 70 Rayquaza
At the altar, Zinnia attempts to summon and Mega Evolve Rayquaza. Her Key Stone does not provide enough energy, but the Meteorite in your possession reacts. Rayquaza consumes the Meteorite, gains the power it needs, and challenges you. This is the required Rayquaza encounter for the Delta Episode.
Capture Rayquaza rather than defeating it. The story cannot continue until the capture succeeds. Start with a status move if possible, then lower its HP carefully with False Swipe or weak neutral attacks. If Rayquaza is already at low HP, avoid using a super-effective attack that could cause a critical hit or an unexpected knockout.
After the capture, Rayquaza is added to your party if there is room. With a full party, select a Pokémon to send to the PC. Zinnia then teaches Rayquaza Dragon Ascent and immediately challenges you to a battle. Dragon Ascent is the key to Rayquaza's Mega Evolution: unlike ordinary Mega Evolution, Mega Rayquaza does not require a held Mega Stone, but it must know Dragon Ascent.
If Rayquaza is knocked out or you run out of suitable Poké Balls, reload the save made before the summit sequence. Restock or change your lead Pokémon before trying again. Keep that backup until Rayquaza has been captured and the following story battle is complete.
- Capture Rayquaza at Level 70.
- Confirm that Rayquaza is in your party or has been assigned to the PC.
- Allow Zinnia to teach Rayquaza Dragon Ascent.
- Do not overwrite the pre-summit save until the sequence is secure.
5. Defeat Zinnia and begin the spaceflight sequence
Zinnia's team is Dragon-focused and includes Mega Salamence. Fairy-, Ice-, Rock-, and Dragon-type attacks can help, but choose attacks and switches carefully because her Pokémon also carry broad coverage. Keep a healthy answer to Mega Salamence rather than relying on a weakened Pokémon that survived the Rayquaza capture.
After Zinnia is defeated, the story equips you with the appropriate Magma Suit or Aqua Suit and sends you into space while riding Mega Rayquaza. This is a cinematic sequence, not a normal explorable route. Rayquaza uses Dragon Ascent to destroy the incoming meteoroid.
When the meteorite breaks apart, the remaining object produces the Deoxys encounter. The following chapter covers that battle. Do not leave the game assuming the Delta Episode is complete after the Rayquaza capture; the Zinnia battle and spaceflight must also finish for the story to advance.
- Defeat Zinnia after Rayquaza learns Dragon Ascent.
- Allow the spaceflight and meteorite destruction sequence to finish.
- Confirm that the Delta Episode has advanced to the Deoxys encounter.
Before you move on
- Wallace has been defeated at the Sky Pillar entrance on Route 131.
- The Mach Bike has been used to reach the Sky Pillar summit.
- Level 70 Rayquaza has been captured and placed in the party or PC.
- Rayquaza knows Dragon Ascent and Zinnia has been defeated.
- The spaceflight sequence has finished and the story has advanced to the Deoxys encounter.
Final Delta Episode Beats and the Deoxys Encounter
After capturing Rayquaza and defeating Zinnia at the top of Sky Pillar, Alpha Sapphire sends you into the automatic spaceflight sequence. Mega Rayquaza destroys the Grand Meteor Delta, but a black triangular remnant remains and releases a level 80 Deoxys. The Deoxys battle is the final encounter of the Delta Episode. Capturing Deoxys is optional for completing the story: defeating or fleeing from it still allows the closing scenes to play, but a missed capture must be restored later by clearing the Pokémon League again and returning to the Dragonhark Altar atop Sky Pillar.
Prepare before the Rayquaza sequence
Before speaking to Zinnia at the Dragonhark Altar, heal your party, restore move PP and purchase enough Poké Balls for a legendary encounter. Put a Pokémon with False Swipe in the party if you have one, along with a reliable sleep or paralysis move. Sleep generally gives the strongest capture aid, while paralysis is useful if you need a status condition that will remain active for the rest of the attempt. Avoid poison and burn when trying to catch Deoxys because residual damage can knock it out before a ball succeeds.
Save before starting the final Sky Pillar sequence. The encounter order is fixed: you battle Zinnia, Rayquaza appears, you must catch Rayquaza, Zinnia teaches it Dragon Ascent, and then you battle Zinnia again. After that battle, you automatically put on the Aqua Suit and ride Mega Rayquaza into space. There is no player-controlled space route and no normal Pokémon Center visit between the Rayquaza capture and the Deoxys battle, so prepare beforehand.
- Heal the entire party before speaking to Zinnia.
- Restore PP and carry Ultra Balls, Timer Balls or another suitable high-quality ball.
- Bring False Swipe and a sleep or paralysis move if available.
- Save before beginning the Rayquaza sequence.
- Catch Rayquaza when it appears; defeating or fleeing from Rayquaza does not advance this sequence.
Complete the automatic spaceflight
After you defeat Zinnia, the game uses the Rayquaza that you just caught for the spaceflight scene. Rayquaza Mega Evolves and carries you toward the Grand Meteor Delta. You do not steer Rayquaza or perform separate flight controls during this section. Watch the sequence until Rayquaza destroys the meteoroid.
A black triangular object remains in the debris. It opens and releases Deoxys, which immediately starts the next battle. Because Rayquaza begins the encounter already Mega Evolved, you cannot Mega Evolve another Pokémon during the Deoxys battle. This restriction is part of the special encounter setup, not a sign that your Mega Bracelet or Mega Stone is malfunctioning.
- Confirm that Rayquaza was caught before the spaceflight begins.
- Let the cutscene carry you through the meteor destruction.
- Remember that the Deoxys battle follows immediately after the black triangle opens.
- Do not plan on using a second Mega Evolution during this encounter.
Battle Deoxys at level 80
The Deoxys encounter is level 80 and has the Pressure ability. Its moves are Cosmic Power, Recover, Psycho Boost and Hyper Beam. Cosmic Power raises its defensive stats, Recover restores health, Psycho Boost is a powerful Psychic-type attack, and Hyper Beam is a strong Normal-type attack that requires a recharge turn afterward. Pressure causes moves used against Deoxys to consume additional PP, so avoid unnecessary setup turns and keep an emergency plan ready if the battle becomes long.
Begin by applying sleep or paralysis if your support Pokémon can do so safely. A Dark-type Pokémon is immune to Psycho Boost, but Hyper Beam still damages it and Deoxys remains dangerous because of its level and move coverage. Keep a second durable Pokémon available in case your first status user or False Swipe user is defeated. If Deoxys uses Recover, lower its HP again carefully rather than repeatedly attacking with a strong move.
- Expect Deoxys to be level 80.
- Account for Cosmic Power and Recover when estimating its remaining HP.
- Watch for the heavy damage from Psycho Boost and Hyper Beam.
- Monitor PP because Deoxys has Pressure.
- Keep a backup Pokémon ready for status support or capture attempts.
Lower Deoxys and attempt the capture
Use False Swipe to bring Deoxys down to 1 HP without knocking it out. If you do not have False Swipe, use a weak or resisted attack and check the HP after every hit. Stop attacking as soon as Deoxys is safely in the red. Do not continue using powerful attacks merely because Recover restored some of its health; a critical hit can end the encounter.
Throw Ultra Balls during the early turns and use Timer Balls if the battle has continued for many turns. A Master Ball succeeds immediately if you prefer to guarantee the capture. Keep sleep or paralysis active while throwing balls, heal or switch when your active Pokémon is in danger, and avoid spending turns on elaborate stat boosts. The optional capture objective is complete once the game confirms that Deoxys was caught and it is placed in your party or storage.
- Use sleep or paralysis rather than poison or burn.
- Reduce Deoxys to 1 HP with False Swipe when possible.
- Use Ultra Balls early and Timer Balls during a prolonged battle.
- Use a Master Ball if you want to eliminate capture risk.
- Check the party or storage after a successful capture.
Understand the story result if Deoxys is missed
The Delta Episode does not require Deoxys to be caught. After the Deoxys battle ends, whether you capture it, defeat it or flee, the game returns you to the top of Sky Pillar. Aster delivers Zinnia’s farewell letter, and the remaining closing scenes show the meteor crisis resolved. Once those scenes finish, the Delta Episode story is complete.
If Deoxys was defeated or fled, do not expect it to reappear at the Dragonhark Altar immediately. The missed capture remains an optional unfinished objective. To restore the encounter, complete the Pokémon League again by defeating the Elite Four and Champion, then return to the summit of Sky Pillar. The Dragonhark Altar will provide the level 80 Deoxys encounter again. Heal, restock capture supplies and save before starting that replacement battle.
- If Deoxys was defeated or fled, treat the story as complete but the capture objective as incomplete.
- Clear the Elite Four and Champion again to restore the encounter.
- Return to the Dragonhark Altar atop Sky Pillar.
- Save and prepare before interacting with the restored Deoxys encounter.
- Register Deoxys as caught only after a later successful capture.
Verify completion separately
Use two separate completion checks. Delta Episode story completion requires that Rayquaza was caught, the automatic spaceflight occurred, the Deoxys battle was completed, and the closing Sky Pillar scenes played. Deoxys capture is an additional optional objective. If you caught Deoxys during the spaceflight sequence, both checks are complete. If you defeated or fled from Deoxys, the story check is complete after the closing scenes, but the capture check remains open until you repeat the Pokémon League and catch Deoxys at the Dragonhark Altar.
- Story: Rayquaza was caught.
- Story: Mega Rayquaza destroyed the Grand Meteor Delta.
- Story: The Deoxys battle ended and the closing scenes played.
- Capture: Deoxys is registered as caught in the Pokédex or present in party or storage.
- If capture failed, use the later Hall of Fame restoration procedure.
Before you move on
- Story completion: Rayquaza was caught during the Sky Pillar sequence.
- Story completion: the automatic Mega Rayquaza spaceflight occurred and the Grand Meteor Delta was destroyed.
- Story completion: the Deoxys battle was completed, whether by capture, defeat or flight.
- Story completion: the closing Sky Pillar scenes, including Aster’s delivery and Zinnia’s farewell, have finished.
- Optional capture completion: Deoxys is registered as caught in the Pokédex or is present in the party or storage.
- If Deoxys was defeated or fled, the story check can pass immediately after the closing scenes, but the optional capture check remains incomplete until the later Hall of Fame restoration encounter is caught.
References for this chapter
- Pokémon Omega Ruby & Alpha Sapphire — Delta Episode
- Pokémon Omega Ruby & Alpha Sapphire — Legendary Pokémon
- Walkthrough: Pokémon Omega Ruby and Alpha Sapphire — Part 23
- Delta Episode
- Sky Pillar
- Deoxys - Serebii Pokédex
- List of in-game event Pokémon in Pokémon Omega Ruby and Alpha Sapphire — Bulbapedia
Post-Delta Postgame — Optional Legendary Encounters and Battle Resort
After the Delta Episode’s closing scenes, Pokémon Alpha Sapphire opens the Battle Resort and several optional legendary encounters. None of these activities is required for the eight Badges, the Pokémon League victory, or completion of the Delta Episode. Alpha Sapphire provides Latios during the normal story, while the Eon Ticket unlocks the optional Latias encounter on Southern Island. Treat each stationary legendary battle as optional, save before starting it, and distinguish ordinary Alpha Sapphire encounters from targets requiring an event item, trading, an opposite-version Pokémon, or conditional Mirage Spot requirements.
Reach the Battle Resort and collect Cameruptite
After the Delta Episode has ended, return to Littleroot Town and speak with Norman. He gives you the S.S. Ticket. Take the ticket to the harbor in Slateport City or Lilycove City, board the S.S. Tidal, and choose the Battle Resort destination.
On your first arrival, follow the opening scenes involving Wally and the opposing villain team. In Alpha Sapphire, Maxie, Tabitha, and Courtney of Team Magma appear. Speak with Maxie after the scene to receive Cameruptite, the Mega Stone for Camerupt. Sharpedonite is not the Alpha Sapphire Battle Resort reward: Sharpedonite belongs to Omega Ruby’s corresponding Battle Resort sequence, while Alpha Sapphire receives Cameruptite. Alpha Sapphire’s earlier Team Aqua Hideout sequence during the Delta Episode also has its own Sharpedonite reward, so keep those two rewards separate.
The Battle Resort contains the Battle Maison, Move Tutors, a second Pokémon Day Care, a Pokémon Center, the IV judge, and other optional activities. It is not the Battle Frontier from Pokémon Emerald. Battle Maison victories provide Battle Points for optional purchases and do not advance the story.
- Finish the Delta Episode and its closing scenes.
- Speak with Norman in Littleroot Town.
- Obtain the S.S. Ticket.
- Board the S.S. Tidal in Slateport City or Lilycove City.
- Receive Cameruptite from Team Magma at the Alpha Sapphire Battle Resort.
- Treat Battle Maison streaks and resort facilities as optional.
Use the Eon Ticket to obtain optional Latias
Latios is Alpha Sapphire’s regular story Eon Pokémon. During the normal story, after the Route 118 events, Steven takes you to Southern Island. After the Team Aqua encounter there, Latios joins your party at level 30. You do not need the Eon Ticket for this event. This is a required story event, not an event-only postgame encounter.
The Eon Ticket unlocks the other Eon Pokémon: Latias. The ticket was distributed through events and StreetPass sharing, so check the Key Items pocket before planning this objective. If the ticket is absent, Latias is not guaranteed local Alpha Sapphire content and must be obtained through trading or another compatible transfer route.
When the Eon Ticket is available and its postgame access conditions have been met, speak with Norman in the Petalburg City Gym. Follow his instructions to return to Southern Island. Go through the forest to the shrine, save before interacting with it, and battle Latias. Weaken it carefully, use status effects when possible, and bring suitable Poké Balls. After the battle, collect the Soul Dew left on the island.
The Eon Flute enables Soaring but does not replace the Eon Ticket requirement for this Southern Island encounter. Record Latios as the regular Alpha Sapphire story Pokémon and Latias as the ticket-dependent Pokémon.
- Confirm that Latios was obtained during the regular Alpha Sapphire story or otherwise recorded as the version’s local Eon Pokémon.
- Check for the Eon Ticket before attempting Latias.
- Speak with Norman in the Petalburg City Gym if the ticket is present and activated.
- Save before interacting with the Southern Island shrine.
- Record Latias as event- or StreetPass-dependent unless the ticket is available.
Complete the Sea Mauville and Scorched Slab encounters
After the Primal Kyogre sequence has been resolved, travel to Sea Mauville and search its underwater basement for the Scanner. Take the Scanner to Captain Stern in Slateport City. In Alpha Sapphire, he exchanges it for the Tidal Bell.
Return to Sea Mauville and take the Tidal Bell to the underwater basement. The bell causes a portal to appear. Save before entering it, then battle Lugia. Weaken Lugia without knocking it out, apply a useful status condition if available, and use reliable Poké Balls. Lugia is a local optional Alpha Sapphire encounter and does not require the Eon Ticket.
Heatran is another local optional encounter. Visit Scorched Slab after the Primal Kyogre progression. Flannery appears near the entrance, and the portal at the deepest point of the cave leads to Heatran. Heal before using the portal and save immediately beforehand. Lugia and Heatran are separate from the Delta Episode and may be postponed until after the Battle Resort becomes available.
- Find the Scanner in Sea Mauville’s underwater basement.
- Exchange the Scanner with Captain Stern in Slateport City.
- Use the Tidal Bell to open Lugia’s portal in Sea Mauville.
- Visit Scorched Slab after the Primal Kyogre progression.
- Save before battling Lugia and Heatran.
Open the Regi ruins and prepare Regigigas
The Regi quest begins in the Sealed Chamber. You need Relicanth and Wailord, along with the field moves required to reach and open the chamber. Reach the underwater chamber through Route 134, read the Braille inscription, use Dig at the indicated wall, then arrange Relicanth at the front of the party and Wailord at the back before reading the next inscription. The event opens the three Regi ruins.
Regirock is in the Desert Ruins on Route 111, Regice is in Island Cave on Route 105, and Registeel is in the Ancient Tomb on Route 120. Catch all three before attempting Regigigas.
For Regigigas, place Regirock, Regice, and Registeel in the party. Regice must have a nickname, which can be added by the Name Rater in Slateport City, and it must hold a qualifying cold item such as Never-Melt Ice, Casteliacone, Icy Rock, Icicle Plate, or Snowball. The Primal Kyogre progression must be complete. If all three Regis were caught consecutively, the game may require a day to pass; if the encounter does not trigger, wait until the next daytime period.
Return to Island Cave on Route 105 during the day and enter the back room. Move to the center to begin the Regigigas encounter. Save before starting the battle. If Regigigas is defeated or the capture fails without a usable pre-battle save, it reappears after a later Hall of Fame registration.
- Activate the Sealed Chamber correctly.
- Catch Regirock, Regice, and Registeel.
- Give Regice a nickname at the Name Rater in Slateport City.
- Give Regice a qualifying cold held item.
- Keep all three Regis in the party.
- Complete the Primal Kyogre progression.
- If the Regis were caught consecutively, wait until the next day if necessary.
- Enter Island Cave during daytime and save before Regigigas.
Use Soaring to find conditional Mirage Spot legends
Use the Eon Flute to Soar around Hoenn and look for Mirage Spot markers. Some locations appear under daily conditions, while others require specific Pokémon in the party. These encounters are optional, and several require trading or an opposite-version Pokémon.
In Alpha Sapphire, Thundurus appears in a Storm Cloud above Fortree City when Castform is in the party. Landorus requires both Tornadus and Thundurus, so an ordinary Alpha Sapphire file needs a traded or transferred Tornadus. Zekrom appears at the Fabled Cave when a level 100 Pokémon is in the party. Dialga appears in the dimensional rift south of Dewford Town after Uxie, Mesprit, and Azelf are all in the party. Kyurem requires both Reshiram and Zekrom, so Alpha Sapphire normally needs a traded or transferred Reshiram.
The Nameless Cavern appears northeast of Sootopolis City when three party Pokémon have maximum Friendship and offers Uxie, Mesprit, or Azelf according to the time condition. The Pathless Plain appears south of Route 131 when three party Pokémon have maximum EVs and offers Cobalion, Terrakion, or Virizion according to the day. The Trackless Forest appears east of Petalburg Woods when Lugia or Ho-Oh is in the party; Lugia is the locally obtainable Alpha Sapphire option. Cresselia is associated with the randomly appearing Crescent Isle Mirage Spot rather than a fixed ordinary route.
Save before entering every portal. If a battle goes badly, reload the pre-battle save rather than saving after the encounter has been lost. Some failed Mirage Spot encounters can also be restored by completing the Pokémon League again, but a pre-battle save is the safest recovery method.
- Carry Castform when searching for Thundurus.
- Use a level 100 Pokémon for Zekrom’s Fabled Cave.
- Bring Uxie, Mesprit, and Azelf for Dialga.
- Use three Pokémon with maximum Friendship for the Nameless Cavern.
- Use three Pokémon with maximum EVs for the Pathless Plain.
- Bring Lugia or Ho-Oh for the Trackless Forest.
- Trade or transfer Tornadus when Landorus is desired.
- Trade or transfer Reshiram when Kyurem is desired.
- Treat Cresselia as a conditional Mirage Spot encounter.
Pursue optional Battle Maison and resort challenges
The Battle Maison is near the upper part of the Battle Resort. It offers Single, Double, Triple, Rotation, and Multi Battle formats and awards Battle Points. Story teams can enter, but long streaks normally require speed control, defensive planning, reliable damage, and broad coverage.
After reaching a 50-win streak in a Super Battle format and defeating the relevant Battle Chatelaine, Wally becomes available for an optional rematch in the Battle Maison. His team includes a Mega-evolving Gallade in the stronger rematch. Winning this battle does not affect the Delta Episode, legendary availability, or access to the Battle Resort.
Other optional activities include the second Day Care, the IV judge, Move Tutors, resort NPC events, and the Battle Maison reward shop. Complete these only if they match your goals; they are not part of the required Alpha Sapphire story.
- Enter the Battle Maison and choose a format.
- Earn Battle Points for optional items and Move Tutors.
- Reach the required Super Battle milestone if Wally’s stronger rematch is desired.
- Visit the Day Care, IV judge, and other resort NPCs as optional objectives.
Recover from failed captures and verify optional completion
Save manually before touching every legendary portal, shrine, or dimensional ring. If a legendary is defeated or the party is wiped, reload the pre-battle save whenever possible. Regigigas specifically returns after a later Hall of Fame registration if the encounter is lost without a usable save.
The required story completion is separate from this chapter. You do not need Latios, Latias, Heatran, the Regi trio, Regigigas, Mirage Spot legends, Battle Maison streaks, Contests, Secret Bases, or Pokédex completion to finish Alpha Sapphire’s main campaign and Delta Episode. Latios is part of the regular story progression, but catching or recording the optional ticket-exclusive Latias is not required.
For an optional postgame finish, record which encounters are available on the current file, arrange trades for opposite-version prerequisites, check whether an event-dependent item is actually present, and maintain a separate save before every capture attempt.
- Keep a pre-battle save for every stationary legendary.
- Reload after a failed capture whenever possible.
- Distinguish local encounters from event-dependent and trade-dependent targets.
- Confirm that the Delta Episode is complete before measuring optional postgame progress.
- Record Cameruptite as the Alpha Sapphire Battle Resort reward.
- Record Latios as the regular Alpha Sapphire story Eon Pokémon.
- Attempt Latias only if the save has the Eon Ticket or obtain it through a compatible trade or transfer.
- Distinguish Lugia and Heatran as local optional Alpha Sapphire encounters.
- Include the possible next-day wait in the Regigigas checklist.
Before you move on
- The Delta Episode’s final story sequence has ended.
- The Battle Resort has been reached with the S.S. Ticket if optional resort content is desired.
- Cameruptite has been collected from Team Magma at the Alpha Sapphire Battle Resort.
- Latios has been identified as the regular Alpha Sapphire story Eon Pokémon.
- Latias has been attempted only if the save has the Eon Ticket or obtained through a compatible trade or transfer.
- Lugia and Heatran have been distinguished as local optional Alpha Sapphire encounters.
- Thundurus, Zekrom, the Lake Guardians, the Swords of Justice, the Regi trio, Regigigas, and Cresselia have been listed with their appropriate conditions.
- Regigigas has been attempted only with Regirock, Regice, and Registeel in the party; nicknamed Regice holding a qualifying cold item; completed Primal Kyogre progression; and daytime conditions.
- If the three Regis were caught consecutively, the possible next-day wait has been observed.
- Trade-dependent and event-dependent targets have not been mislabeled as guaranteed Alpha Sapphire content.
- Battle Maison streaks, Wally’s rematch, resort facilities, Contests, Secret Bases, and Pokédex completion remain clearly optional.
References for this chapter
- Pokémon Omega Ruby & Alpha Sapphire — Legendary Pokémon
- Pokémon Omega Ruby & Alpha Sapphire — Team Aqua & Team Magma
- Walkthrough: Pokémon Omega Ruby and Alpha Sapphire/Eon Ticket
- Walkthrough: Pokémon Omega Ruby and Alpha Sapphire/Part 19
- Mirage Spots
- Walkthrough: Pokémon Omega Ruby and Alpha Sapphire/Soaring Legendaries
- Battle Maison
- Pokéarth — Hoenn — Southern Island
Team Optimization — Mega Evolution, Movesets and Held Items
Build your Alpha Sapphire party around dependable type coverage, accurate moves, useful held items and one clear transformation plan. Mega Evolution is optional, while Primal Kyogre and Mega Rayquaza follow different rules that matter during the League and Delta Episode. This chapter applies to the original 2014 Pokémon Alpha Sapphire release for Nintendo 3DS, including the North American release.
Choose a Mega Evolution plan before the League
Mega Evolution requires the appropriate Mega Stone on the Pokémon and access to the Key Stone and Mega Bracelet. During a battle, choose Mega Evolution from the battle menu before selecting the move. Only one of your Pokémon can Mega Evolve during a battle, so decide which member provides the most useful answer to the opposing team rather than treating Mega Evolution as an automatic first turn.
Good story-run options include Mega Swampert for a sturdy Water/Ground attacker, Mega Manectric for speed and Electric damage, Mega Gardevoir for powerful special attacks, Mega Salamence for late-game physical pressure, Mega Metagross for a durable mixed-threat attacker, and Mega Sceptile for speed and Grass/Dragon coverage. These are recommendations, not requirements. A team that uses no Mega can still complete the Pokémon League and Delta Episode if its moves and matchups are sound.
Keep the Pokémon useful before transformation. A Mega Stone occupies the held-item slot, and the Pokémon cannot also use Leftovers, a Choice item or a Berry while carrying it. Build the party so it remains functional when another member has the better matchup or when a special battle prevents your preferred Mega from doing the work.
- Give the intended Pokémon its species-specific Mega Stone before the battle.
- Confirm that the team still has a plan if you do not Mega Evolve.
- Use only one planned Mega Evolution during an ordinary battle.
Build a six-member coverage core
For the Elite Four, Champion and Delta Episode, carry both physical and special damage. Include at least one fast attacker, one Pokémon that can switch into strong attacks, and one flexible member with recovery, status or support utility. The roles can overlap; you do not need six narrowly specialized Pokémon.
Keep reliable answers to Water, Dragon, Flying, Steel and Psychic targets. Electric or Grass attacks are useful against Water Pokémon. Ice Beam or another Ice move helps against Dragon and Flying Pokémon. Ground and Fighting attacks cover many Steel and Dark targets, while Dark, Ghost or Bug attacks help against Psychic Pokémon. A neutral damaging move on each main attacker prevents one bad matchup from stopping your progress.
Do not make every team member a physical attacker or every member dependent on setup. A balanced party is more reliable in a long League run because it lets you switch rather than repeatedly heal a single sweeper.
- Carry at least one physical attacker and one special attacker.
- Include a fast Pokémon or a dependable speed-control option.
- Give every team member at least one accurate damaging move.
- Keep a second answer to Water types if you plan to rely heavily on Kyogre.
Favor reliable moves over maximum displayed power
Replace weak early-game attacks before entering the League. A Water-type attacker can use Surf as dependable general damage, with a stronger single-target Water move only if its accuracy and PP fit the plan. Thunderbolt is a practical Electric option. Giga Drain supplies Grass damage while restoring health when available. Earthquake, Ice Beam, Flamethrower, Psychic or Psyshock are useful coverage choices when the Pokémon's attacking stats and movepool support them.
A practical four-move set often contains a reliable same-type attack, one or two coverage moves, and either recovery, setup or utility. Protect can scout an opponent's move and provide an extra turn of Leftovers recovery, but it should not replace all offensive coverage. Avoid building around inaccurate moves unless the Pokémon or battle conditions make their accuracy dependable.
Check whether a move is physical or special before teaching it. A high-power attack is not automatically useful if it uses the wrong attacking stat or leaves the Pokémon unable to damage common targets.
- Review each moveset before Victory Road.
- Check accuracy, PP and the move's physical or special category.
- Keep rare TMs for Pokémon that will remain in the party.
Assign held items to clear jobs
Leftovers fits a bulky Pokémon that expects to stay in battle, especially one using Protect or recovery. Sitrus Berry gives an immediate emergency heal and is simple to use in a story run. Lum Berry prevents one burn, paralysis, sleep or poison and is useful for a setup attempt or a capture-support Pokémon. Black Sludge heals Poison types but damages other species, so do not distribute it casually.
Choice Band, Choice Specs and Choice Scarf raise damage or Speed but lock the holder into its first selected move. They work best on Pokémon with a safe attack to repeat and are inconvenient on a Pokémon that must switch moves constantly. Focus Sash can save a frail Pokémon from one full-health hit, but entry damage and lingering effects can break it before the decisive attack.
A Mega Stone, Blue Orb or Red Orb occupies the held-item slot. Remove other items from that Pokémon before a major battle and do not expect a transformation item to provide passive healing or Choice-item benefits at the same time.
- Match the item to the Pokémon's role.
- Remove Choice items when frequent move changes are necessary.
- Carry ordinary healing items even when the party has recovery moves.
Plan around Primal Kyogre
Alpha Sapphire's version mascot is Kyogre. When Kyogre holds the Blue Orb, it automatically undergoes Primal Reversion as it enters battle. Primal Kyogre gains the Primordial Sea ability and becomes a powerful special attacker with exceptional Water pressure. The Blue Orb occupies its held-item slot, so it cannot also hold Leftovers, a Choice item or a Berry.
Use a reliable Water attack, then add coverage for Pokémon that resist Water. Ice Beam is practical against Dragon and Flying targets. An Electric move can pressure opposing Water Pokémon; Thunder becomes more reliable during rain, but accuracy still matters when rain is absent. Keep a Grass- or Electric-capable teammate so Kyogre is not forced into every matchup and so the party has an answer to opposing Water Pokémon.
Primal Reversion is not selected through the normal Mega Evolution command. In Alpha Sapphire it is triggered by the held Blue Orb when Kyogre enters battle. Primal Reversion can coexist with a Mega Evolution in the same battle system, although your ordinary Mega Evolution limit still applies.
- Give Kyogre the Blue Orb before sending it into battle.
- Use Kyogre as a special attacker rather than assuming every Water move benefits equally from its stats.
- Keep a separate Grass or Electric answer for opposing Water teams.
Prepare for Rayquaza and Deoxys
Save before beginning the Sky Pillar encounter sequence and bring several strong Poké Balls, a bulky Pokémon and a status move. Sleep or paralysis improves capture odds. Avoid poison and burn on a target you intend to catch because residual damage can knock it out while you are throwing balls. False Swipe is useful if available, but do not rely on it if the user cannot survive the target's attacks.
During the Delta Episode, Rayquaza must be caught before the story can continue. It appears at Level 70. After the capture, Rayquaza joins the party and Zinnia teaches it Dragon Ascent, replacing Fly. Rayquaza does not need a Mega Stone to Mega Evolve; knowing Dragon Ascent is the requirement. Do not waste time looking for a Rayquazite.
After Rayquaza learns Dragon Ascent, the story sends you into space to destroy the meteoroid. Rayquaza Mega Evolves for that sequence, and the subsequent Deoxys battle starts with your Rayquaza already Mega Evolved. Deoxys is Level 80, so you cannot Mega Evolve another Pokémon during that battle. If Deoxys is knocked out or you flee, it can return after you complete the Hall of Fame again; this is the recovery route, not a reason to overwrite a useful pre-encounter save.
If you want Deoxys, save before starting the final sequence, carry status support and use a safe capture plan. If you only want to finish the Delta Episode, defeating or fleeing from Deoxys still allows the ending scenes to proceed, but capturing it during the encounter avoids the need for a later Hall of Fame reset.
- Save before the Rayquaza sequence and again before any available final encounter setup.
- Bring status support, False Swipe if available and a large supply of suitable Poké Balls.
- Remember that Rayquaza must be caught and taught Dragon Ascent for the story to continue.
- Do not use a Mega Stone on Rayquaza; Dragon Ascent enables its Mega Evolution.
- If Deoxys is lost, complete the Hall of Fame again before checking Sky Pillar for its return.
Before you move on
- The League-ready party has both physical and special damage, a fast attacker and dependable answers to Water, Dragon, Steel and Psychic targets.
- One Pokémon has a deliberate Mega Evolution plan, but the party remains capable of winning without using Mega Evolution.
- Kyogre holds the Blue Orb when Primal Reversion is desired, and at least one teammate covers opposing Water Pokémon.
- Before the Delta Episode legendary sequence, the save is secure, capture supplies are stocked, status support is available and the party has a recovery plan.
- Rayquaza has been caught, Dragon Ascent has been taught, the meteoroid sequence has been completed and the Deoxys encounter has been captured or resolved.
References for this chapter
- Pokémon Omega Ruby and Pokémon Alpha Sapphire — Official Pokémon Website
- Pokémon Omega Ruby & Alpha Sapphire — Mega Evolutions
- Pokémon Omega Ruby & Alpha Sapphire — Primal Pokémon
- Pokémon Omega Ruby & Alpha Sapphire — Delta Episode
- Pokémon Omega Ruby & Alpha Sapphire — Legendary Pokémon
- Delta Episode
- List of in-game event Pokémon in Pokémon Omega Ruby and Alpha Sapphire — Bulbapedia
- Rayquaza — Bulbapedia
Optional Completion Goals — Pokédex, Postgame Areas and Final Checklist
Once the Delta Episode’s closing scenes have played, Pokémon Alpha Sapphire’s required story is complete. The remaining activities are optional: expand the Pokédex, pursue Mirage Spot encounters, visit the Battle Resort, challenge the Battle Maison, breed stronger teams, and set goals for another playthrough. Use the checklist below to separate mandatory progression from collection and challenge content.
Confirm the required Alpha Sapphire ending
For the main completion target, confirm that you have earned all eight Hoenn Gym Badges, defeated the Elite Four and Champion, entered the Hall of Fame, and completed the Delta Episode through its closing scenes. Alpha Sapphire’s story legendary is Kyogre, encountered in the Cave of Origin after the Seafloor Cavern events. During that battle, Kyogre undergoes Primal Reversion. The later Delta Episode sequence leads to Rayquaza and then to Deoxys.
Rayquaza is required for Delta Episode progression. Deoxys is the final battle in the episode, but catching it is not required for the story to end. The Delta Episode is complete when the Deoxys battle has ended by capture, defeat, or flight and the concluding scenes have played. Treat Deoxys capture as an additional collection goal, not as the only valid completion result.
After the ending, make a fresh manual save. If you want to capture Kyogre, Rayquaza, or Deoxys, keep a separate save before the relevant encounter whenever possible. Do not reset the completed file merely to pursue optional legendary captures, Pokédex entries, or Battle Maison streaks.
- All eight Hoenn Gym Badges obtained.
- Elite Four and Champion defeated.
- Hall of Fame entered.
- Delta Episode completed through its closing scenes.
- Kyogre’s main-story encounter completed.
- Rayquaza handled during the Delta Episode.
- Deoxys battle completed; capture is optional.
Obtain and use the National Pokédex
After completing the Primal Kyogre story, visit Professor Birch in Littleroot Town. He can give you the National Pokédex, which expands your tracking beyond the Hoenn entries and allows additional non-Hoenn Pokémon to appear through DexNav special-search encounters. This is post-story progression and is not required to reach the Hall of Fame or complete the Delta Episode.
Work through the Pokédex in stages. First register species already encountered during the adventure. Then target missing evolutions, fishing entries, fossils, gifts, and DexNav encounters. Alpha Sapphire cannot provide every species by itself, so version exclusives, trade evolutions, event distributions, and Pokémon originating in other games may require outside assistance. Keep those entries on a separate list so trade-dependent collection work is not mistaken for unfinished story progress.
The Shiny Charm is an optional reward connected to completing the National Pokédex requirements. It is not a normal story reward and is not needed for the Delta Episode. If you are pursuing a formal full-Pokédex goal, distinguish ordinary obtainable species from event-dependent Mythical Pokémon and species requiring another version.
- Visit Professor Birch after the Primal Kyogre story.
- Obtain the National Pokédex.
- Review missing Hoenn entries before targeting National Pokédex species.
- Record trade-exclusive, version-exclusive, event-dependent, and evolution-dependent entries separately.
- Pursue the Shiny Charm only if full Pokédex completion is one of your goals.
Use Soaring and investigate Mirage Spots
Use the Eon Flute to Soar around Hoenn and inspect available Mirage Spots. Ordinary Mirage Spots rotate, while legendary locations use separate requirements. Depending on the location, access can depend on Pokémon levels, party members, happiness, EV training, the in-game time, or a weekday. If a location is absent or a portal cannot be entered, check its requirement before assuming that the story has been missed.
The Nameless Cavern near Sootopolis, for example, uses a party requirement involving highly happy Pokémon and changes its lake-trio encounter according to the in-game time. Other legendary locations require specific Pokémon in the party, while some encounters depend on a rotating or calendar-based appearance. Use a current encounter reference when planning a particular legendary rather than searching randomly.
For an optional stationary encounter, bring a Pokémon with a dependable status move and a False Swipe user if available. Carry healing items and enough Poké Balls, then save before entering the portal or interacting with the encounter point. If the battle goes badly, reload the pre-battle save. If you fail to create a save first, do not assume that every encounter can be immediately restored; check that species’ reset condition.
- Use the Eon Flute to inspect Mirage Spots.
- Check party, level, happiness, EV, time, and weekday requirements before searching.
- Carry a status user, False Swipe user, healing items, and suitable Poké Balls.
- Save before each optional legendary encounter.
Enter the Battle Resort and Battle Maison
After the Delta Episode is complete, Norman gives you the S.S. Ticket in Littleroot Town. Use it at the harbor in Slateport City or Lilycove City and select the Battle Resort. On the first visit to Alpha Sapphire’s Battle Resort, Maxie gives you Cameruptite. Sharpedonite is the corresponding first-visit reward in Omega Ruby, not Alpha Sapphire.
Enter the Battle Maison on the northern side of the island and speak with the attendant to select a supported format: Single, Double, Triple, Rotation, or Multi Battle. These are optional challenges that award Battle Points for items and training supplies.
A normal course ends with the Battle Chatelaine on the twentieth battle. Winning that course unlocks the corresponding Super course. A Super course requires 49 consecutive wins before the Chatelaine battle on win 50. These streaks are challenge objectives, not story requirements.
Build for the selected format rather than entering with an unplanned adventure party. The Maison uses level-50 battle conditions, does not award experience or EVs, and does not allow ordinary Bag use during a challenge. Prioritize accurate attacks, speed control, defensive answers, and a clear plan for handling critical hits, setup moves, and status effects.
- Complete the Delta Episode before traveling to the Battle Resort.
- Board the S.S. Tidal from Slateport or Lilycove.
- Collect Cameruptite from Maxie on the first Alpha Sapphire visit.
- Enter the Battle Maison and select a format.
- Treat Battle Points and Chatelaine victories as optional goals.
Breed and train a postgame team
The Battle Resort contains a Pokémon Day Care and a route that is convenient for hatching Eggs. Leave compatible Pokémon with the attendant, collect Eggs outside, and use the island’s open path to hatch them. The Day Care near Mauville remains available as another option, so choose the location that fits your travel plans.
For ordinary postgame play, prioritize a useful Nature, compatible Ability, dependable moves, and a role that fills a weakness in your party. For Battle Maison attempts, plan more carefully around held items, speed, accuracy, defensive synergy, and the format’s team-size restrictions. A Maison team should be designed separately from the story party if you do not want to rebuild the Pokémon that completed the campaign.
Breeding, EV preparation, move tutoring, and competitive optimization are optional. They become worthwhile after you select a specific goal, such as a Super course, a themed team, a local link battle, or a long-term competitive build.
- Choose a team role before breeding a replacement Pokémon.
- Check Nature, Ability, moves, and held-item plans before investing resources.
- Use the Battle Resort Day Care and route for convenient breeding work.
- Prepare a separate Maison team if you want to preserve the story party.
Choose further optional projects
After the required checklist is complete, choose one or two optional projects instead of treating every feature as mandatory. Possible goals include a living Pokédex, all locally obtainable Mega Stones, Contest Spectacular ranks, Secret Base development, Mirage Spot encounters, a complete regional collection, or a long Battle Maison streak.
Legendary collection is also optional. Alpha Sapphire’s local postgame encounters can be supplemented by trade-dependent, event-dependent, or opposite-version Pokémon, so mark each target according to how it can actually be obtained. Do not describe every legendary associated with the ORAS games as guaranteed content in one Alpha Sapphire save.
A second playthrough can use a different starter, a themed party, or a self-imposed restriction. Decide beforehand whether you will transfer Eggs and items or keep the run self-contained. Keep the completed save intact if possible; finishing the credits and Delta Episode does not require resetting the cartridge or starting over.
- Choose a specific optional goal rather than attempting every system at once.
- Keep the completed save before beginning another file.
- Separate local, trade-dependent, event-dependent, and opposite-version targets.
- Return to the required-story checklist whenever optional objectives become confusing.
Before you move on
- Required story: all eight Gym Badges obtained.
- Required story: Elite Four and Champion defeated and the Hall of Fame entered.
- Required story: Delta Episode completed through its concluding scenes after the Deoxys battle.
- Alpha Sapphire legendary check: Kyogre’s main-story encounter completed; Rayquaza handled during the Delta Episode; Deoxys battle completed, with capture optional.
- Optional Pokédex check: National Pokédex obtained from Professor Birch after the Primal Kyogre story, with missing entries and trade requirements recorded.
- Optional postgame check: Battle Resort visited and Cameruptite collected from Maxie.
- Optional challenge check: Battle Maison format selected, with normal and Super streak goals tracked separately.
- Optional project check: breeding, Mirage Spot, Contest, Secret Base, collection, or competitive-training objectives written down separately from mandatory story goals.
References for this chapter
- Delta Episode
- Walkthrough: Pokémon Omega Ruby and Alpha Sapphire — Part 23
- Pokémon Omega Ruby & Alpha Sapphire — DexNav and National Pokédex
- Pokémon Omega Ruby & Alpha Sapphire — Legendary Pokémon
- Pokémon Omega Ruby & Alpha Sapphire — Soaring in the Sky
- Battle Resort
- Battle Maison
- Battle Maison Guide — Pokémon ORAS Wiki
- Cameruptite — Pokémon ORAS Wiki
- Regigigas
Finishing up
You have defeated all eight Hoenn Gym Leaders and earned their badges.
You have beaten the Elite Four and Champion Steven Stone and entered the Hall of Fame.
You have completed the Delta Episode through its closing scenes. Rayquaza must be captured for the episode to advance; the Deoxys battle may end by capture, defeat, or flight, with Deoxys capture remaining optional for story completion.
You have separately recorded any optional legendary, Battle Resort, Mirage Spot, Pokédex or Battle Maison goals you intend to pursue.
Choose your next gameScreenshots & video
Game imagery for reference. Follow the written chapters above for the route and strategies.
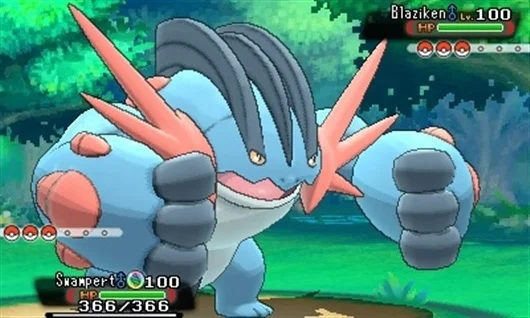
Sources & references
Our original guide draws on the references below. Check the edition at the top of this page before following controls or unlock requirements.
- Walkthrough: Pokémon Omega Ruby and Alpha Sapphire — Part 1
- Walkthrough: Pokémon Omega Ruby and Alpha Sapphire/Part 2 — Bulbapedia
- Petalburg Woods
- Rusturf Tunnel
- Pokémon Omega Ruby Instruction Manual, Nintendo 3DS
- Pokémon Omega Ruby & Alpha Sapphire — Gym Leaders
- Leader Roxanne — Pokémon Omega Ruby & Alpha Sapphire, Serebii
- Rustboro City: Pokémon ORAS Walkthrough (Part 3) — Pokémon ORAS Wiki
- Pokémon Omega Ruby & Alpha Sapphire — TMs & HMs
- Dewford Gym — Bulbapedia
- Dewford Gym and Brawly — Pokémon Omega Ruby and Alpha Sapphire Walkthrough
- Granite Cave — Bulbapedia
- Walkthrough: Pokémon Omega Ruby and Alpha Sapphire/Part 3 — Bulbapedia
- Slateport City — Pokémon Omega Ruby and Alpha Sapphire Walkthrough
- Rusturf Tunnel — Pokémon Omega Ruby and Alpha Sapphire Walkthrough
- Pokémon Omega Ruby & Alpha Sapphire - Pokémon Trainer Wally
- Walkthrough: Pokémon Omega Ruby and Alpha Sapphire — Part 5
- Mauville City — Bulbapedia
- New Mauville — Bulbapedia
- Rydel’s Cycles — Bulbapedia
- Walkthrough: Pokémon Omega Ruby and Alpha Sapphire, Section 9 — Bulbapedia
- Pokémon Omega Ruby & Alpha Sapphire — Team Aqua & Team Magma
- Lavaridge Gym and Flannery — Pokémon Omega Ruby and Alpha Sapphire Walkthrough — Thonky
- Mt. Chimney — Pokémon Omega Ruby and Alpha Sapphire Walkthrough — Thonky
- Walkthrough: Pokémon Omega Ruby and Alpha Sapphire/Part 10 — Bulbapedia
- Petalburg Gym — Bulbapedia
- Pokéarth — Hoenn Route 117 — Serebii.net
- Hoenn Route 118 — Bulbapedia
- Petalburg City (2nd Visit): Pokémon ORAS Walkthrough — ORAS Wiki
- Walkthrough: Pokémon Omega Ruby and Alpha Sapphire/Part 11 — Bulbapedia
- Pokémon Omega Ruby & Alpha Sapphire — Pokémon Trainer Brendan & May
- Pokémon Omega Ruby & Alpha Sapphire — Team Aqua & Team Magma — Serebii
- Hoenn Route 119 — Pokémon Omega Ruby and Alpha Sapphire Walkthrough
- Fortree Gym and Winona — Pokémon Omega Ruby and Alpha Sapphire Walkthrough
- Fortree City — Pokémon Omega Ruby and Alpha Sapphire Walkthrough
- Hoenn Route 120 South — Pokémon Omega Ruby and Alpha Sapphire Walkthrough
- Walkthrough: Pokémon Omega Ruby and Alpha Sapphire — Bulbapedia
- Walkthrough: Pokémon Omega Ruby and Alpha Sapphire/Part 12 — Bulbapedia
- Walkthrough: Pokémon Omega Ruby and Alpha Sapphire/Part 14 — Bulbapedia
- Team Aqua Hideout — Pokémon Omega Ruby and Alpha Sapphire Walkthrough — Thonky
- Mt. Pyre & Lilycove City: Pokémon ORAS Walkthrough
- Cave of Origin: Pokémon ORAS Walkthrough, Part 18
- Sootopolis Gym and Wallace — Pokémon Omega Ruby and Alpha Sapphire Walkthrough
- List of in-game event Pokémon in Pokémon Omega Ruby and Alpha Sapphire — Bulbapedia
- Sootopolis City: Pokémon ORAS Walkthrough (Part 19)
- Cave of Origin — Bulbapedia
- HM05 Waterfall — Pokémon ORAS Wiki
- Victory Road (Hoenn)
- Steven Stone
- The Elite Four & Champion — Pokémon ORAS Wiki
- ORAS Quick and Dirty Path Guide
- Pokémon Omega Ruby & Alpha Sapphire — Elite Four
- Walkthrough: Pokémon Omega Ruby and Alpha Sapphire, Part 22
- Pokémon Omega Ruby & Alpha Sapphire — Delta Episode
- Delta Episode 1st Phase: Pokémon ORAS Walkthrough (Part 23)
- The Delta Episode - Pokémon Omega Ruby and Alpha Sapphire Walkthrough
- Walkthrough: Pokémon Omega Ruby and Alpha Sapphire — Part 23
- Pokémon Omega Ruby & Alpha Sapphire — Legendary Pokémon
- Pokémon Omega Ruby and Alpha Sapphire Walkthrough - Sky Pillar
- Delta Episode
- Sky Pillar
- Deoxys - Serebii Pokédex
- Walkthrough: Pokémon Omega Ruby and Alpha Sapphire/Eon Ticket
- Walkthrough: Pokémon Omega Ruby and Alpha Sapphire/Part 19
- Mirage Spots
- Walkthrough: Pokémon Omega Ruby and Alpha Sapphire/Soaring Legendaries
- Battle Maison
- Pokéarth — Hoenn — Southern Island
- Pokémon Omega Ruby and Pokémon Alpha Sapphire — Official Pokémon Website
- Pokémon Omega Ruby & Alpha Sapphire — Mega Evolutions
- Pokémon Omega Ruby & Alpha Sapphire — Primal Pokémon
- Rayquaza — Bulbapedia
- Pokémon Omega Ruby & Alpha Sapphire — DexNav and National Pokédex
- Pokémon Omega Ruby & Alpha Sapphire — Soaring in the Sky
- Battle Resort
- Battle Maison Guide — Pokémon ORAS Wiki
- Cameruptite — Pokémon ORAS Wiki
- Regigigas
About the game & collecting notes
- Platform
- Nintendo 3DS
Step-by-step walkthrough for Pokémon Alpha Sapphire (3DS, USA Rev 2). Covers the entire Hoenn main story from Littleroot to the Elite Four and Champion, the post-game Delta Episode with its legendary encounters, gym and boss strategies, team recommendations, and clear completion checks so you can finish the original campaign and its postgame content reliably.
Darryl Polo
Darryl Polo loves tinkering with emulation and revisiting retro games. He enjoys exploring how old favorites play on different setups and sharing what he learns along the way. At Joking Joystick, he writes about the games, hardware, and small discoveries that keep the hobby fun.
Our editorial standardsFound a step that needs another look? Help us improve this guide.