
Phantasy Star IV: The End of the Millennium — Sega Genesis (North America) Complete Campaign Walkthrough
This guide covers party composition, essential techniques and macros, every required dungeon and boss through the Profound Darkness ending, plus optional side content and concrete completion checks so you can finish the game without missing story-critical events.


Find a copy
Phantasy Star IV: The End of the Millennium Sega Genesis / Mega Drive
We may earn a commission if you buy through these links, at no extra cost to you. As an Amazon Associate I earn from qualifying purchases.
Opens retailer search results. Check the model, edition, seller, availability and current price before buying.
Before you begin
You are about to play the original North American Genesis release of Phantasy Star IV: The End of the Millennium. The North American cartridge was released in February 1995; December 1993 refers to the Japanese release.
The main campaign route runs through the Motavia opening, Zio and Nurvus, Zelan and Kuran, the Dezolis and Air Castle sequence, Soldier's Temple, Rykros, Elsydeon, The Edge and the Profound Darkness ending.
Use the campaign chapters in route order: ch01, ch02, ch03, ch04, ch09, ch08, ch10, ch11, ch12 and ch13. Use ch05, ch06, ch07, ch14, ch15 and ch16 as reference chapters when their subjects become relevant; they are not additional sequential story stages.
Required progression is separated from optional content such as Plate System, Hunter's Guild jobs, Vahal Fort and Anger Tower.
Alys is a mandatory opening party member who later dies in a scripted event. Seth is a temporary companion for the Island Cave section. The final optional fifth member is chosen at the Nurvus Spaceport from Hahn, Gryz, Demi, Raja or Kyra.
Set yourself up for the run
Confirm you are playing the original North American Genesis cartridge build or an accurate ROM/virtual re-release; the guide's route and item names match that localization.
Refer to the official instruction manual for basic controls and item names if needed.
Learn the battle menu and macro system early: set up repeating macros for healing (party-wide and single-target), defensive buffs (Barrier/Nawat) and single-target damage moves so you can speed through random encounters without losing resources.
Practice using Trimate/Star Mist-type items and the macro UI in a safe town to avoid mistakes in dungeons.
Prioritize levels and tools for the party core: Chaz (frontline), Rika (support/techs), Rune (true magic/tech support), and Wren (physical damage and ranged attacks).
Recruit other specialists when their recruitment events become available rather than delaying main progression to grind for optional min-maxing.
Stock up on essential consumables before long dungeons: Star-Dews/Trimates (major healing items), EclpsTorch or other light/area items, and reviving items.
Buy or craft (if applicable in your version) weapons and armor upgrades whenever new equipment appears in town shops.
Save often and keep multiple save files at key points (before major story battles, before entering new dungeons, and before major event triggers).
The game includes some scripted party changes — a backup save avoids having to replay long stretches if you want to attempt an alternate party composition.
Familiarize yourself with boss immunities that commonly recur in Phantasy Star IV (Dark Force fights and Profound Darkness multi-form battles).
Keep a list of elemental weaknesses and make sure at least one party member can exploit Energy/Light weaknesses or apply necessary status counters.
Plan a consistent running tally for optional collectibles and side dungeons you want to do during your first playthrough.
The guide distinguishes required story progress (must do) from optional exploration (do if you want expanded equipment or characters).
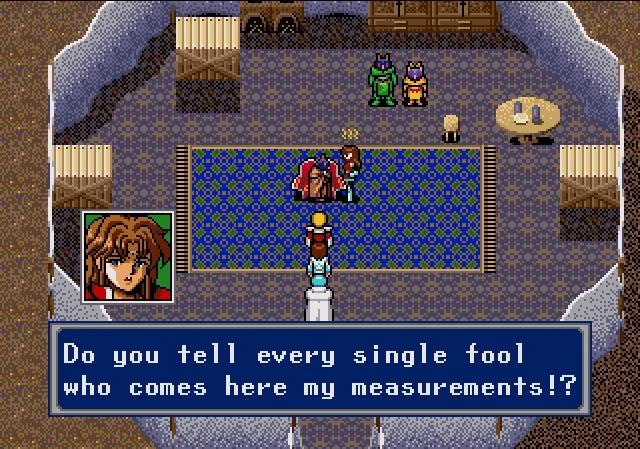
Quick-start: Controls, Menus and the Macro System
Learn the original North American Sega Genesis controls, understand the Camp and System menus, configure practical macros, and prepare for the opening Piata route without repeating the story events covered in the next chapter. This chapter ends before the first academy investigation begins.
Set the Genesis controls and menu options
On the field, press A to open the Camp Menu. This is where you manage Items, Techniques, Skills, Equipment, character State, marching Order, party Talk, and Macros. Press A or C to confirm a selection, and press B to cancel or return to the previous menu. Button C examines the space in front of the lead character and is used to open containers, interact with doors, and advance or initiate dialogue when facing someone.
Press Start while you are outside combat, a labyrinth, and dialogue to open the System Menu. The original Genesis release provides Save, Message speed, Battle speed, and Button configuration. Message speed ranges from 1, fastest, to 5, slowest. Battle speed uses the same range. Save data is written to one of three cartridge save spaces, and saving over a space erases its previous contents.
Choose a readable message speed and a slower battle speed while learning the game. You can increase battle speed later without affecting progression. Use Button configuration if the default A, B, and C layout is uncomfortable, but remember that the functions described in this guide refer to the default arrangement.
- Confirm that A opens the Camp Menu outside dialogue and combat.
- Confirm that Start opens the System Menu when saving is allowed.
- Set message and battle speeds before beginning the first route.
- Identify all three save spaces before creating your first permanent file.
Read the battle menu correctly
A normal character battle begins with Command, Macro, and Run. Command opens the individual character’s available actions: Attack, Technique, Skill when that character has one, Item, and Defend. Attack uses the currently equipped weapon. Technique consumes TP and then presents the applicable target selection. Item uses the shared inventory and asks for a target when the item requires one. Defend is a self-only action that reduces incoming damage for that character during the round.
Macro selects a previously recorded command sequence. Run attempts to escape, but it can fail; when it fails, the party is exposed to an enemy attack. Do not treat Run as a dependable answer to a boss or a dangerous scripted encounter. Boss battles generally cannot be escaped from, so use a manual recovery plan instead of wasting turns on repeated escape attempts.
The marching Order affects both movement and combat. The lead character is the usual focus of enemy attacks, so place a sturdier member in front when your current party permits it. Recheck Order after a scripted party change, because the active roster and preferred front character can change during the story.
- Use Command when you need to select a specific healing target.
- Use Macro for routine encounters only after confirming that every named character is currently active.
- Treat Run as an escape attempt, not a guaranteed retreat.
- Keep a durable character in the lead position when practical.
Record and edit battle macros
Open the Camp Menu with A, choose Macro, and select one of the eight slots labeled A through H. Macro A is already assigned at the beginning of the game and is an all-Attack pattern. Leave it available for ordinary battles until you have a reason to replace it.
To create a macro, select an unused slot and confirm it. Choose a character, then select that character’s action as you would through Command in battle. Continue until the desired party members have commands, then confirm the completed sequence. The macro stores the selected characters and actions in order; it does not automatically adapt when characters join, leave, become incapacitated, or run out of TP.
To erase a macro, select the occupied slot and confirm the deletion prompt. Keep one slot for ordinary attacks and reserve another for a defensive or healing pattern. A simple early defensive macro can assign Defend to the current party, but a manual Command is usually better when only one character needs treatment.
Macros are not simultaneous turns. Characters act according to the battle system, and enemies may act between party commands. A macro can also cause a slower character to commit to an action earlier than their normal turn would occur, so use manual commands for unfamiliar bosses and any battle where precise healing matters.
- Keep Macro A as an all-Attack option.
- Create a second slot for Defend or another pattern using only the current party.
- Confirm the character list whenever a story scene changes the roster.
- Use manual Command when target choice or TP conservation matters.
Prepare early healing without using later abilities
The opening game does not provide a party-wide healing technique. Early recovery comes from Monomates and the single-target Res technique. Chaz has Res from the beginning, so do not assume that healing must wait for the first additional recruit. Res restores HP to one active humanoid character and requires TP. Use it for substantial damage, but preserve enough TP to handle the next fight before you reach an inn.
Monomates are the dependable backup. Use them when damage is light, when the healer is the injured target, or when spending TP would leave the party unable to respond to another encounter. The item target is selected manually, so check the recipient before confirming the command.
Do not build the opening setup around Nawat or Barrier. Nawat is learned much later by Hahn, and Barrier is a later skill used by android characters such as Wren and Demi. They are useful examples for later macro design, not abilities available during the Piata preparation phase. When those abilities eventually become available, record separate support macros so a healing or defensive action can be chosen deliberately rather than replacing the standard attack macro.
- Use Chaz’s Res for single-target recovery when TP allows.
- Carry Monomates as the immediate fallback.
- Do not expect a party-wide heal in the opening route.
- Do not record Nawat or Barrier until the appropriate characters and abilities are actually available.
- Avoid spending all healing TP before entering the next story dungeon.
Shop and save preparation in Piata
Once free movement in Piata is available, visit the Tool Store and buy Monomates before beginning the opening dungeon sequence. The exact number depends on how many random battles you fight and whether you return to town, so prioritize a useful reserve rather than a fixed quantity. Keep enough Meseta for the upcoming party and story requirements instead of spending all available money on minor equipment upgrades.
Use the inn before beginning the opening route if anyone has lost significant HP or TP. Check the Camp Menu afterward: confirm current HP and TP, inspect each character’s equipment, verify the marching Order, and confirm that Macro A still names the active party correctly.
Save in Piata before entering the first story dungeon. This is the important pre-boss recovery point for the next chapter. Do not overwrite it immediately after entering the dungeon. Keep a second save in another space for the clean progression file, and retain an older town save whenever possible.
- Buy Monomates from the Piata Tool Store.
- Keep sufficient Meseta for the next story-triggered party requirement.
- Rest at the inn before starting the dungeon route if needed.
- Check equipment, Order, HP, TP, Items, and Macros after resting.
- Create a Piata save before entering the opening dungeon.
Use a three-slot recovery plan
Use the three cartridge save spaces for different purposes. Slot 1 should be the current progression file that you update after safe story milestones. Slot 2 should be the latest pre-dungeon or pre-boss file, such as the Piata preparation save. Slot 3 should be an older checkpoint that you keep before a major conversation, recruitment, departure, or forced battle.
Scripted party changes can invalidate a macro, change the best marching Order, alter which character should receive equipment, and remove access to a technique during a battle sequence. After any story scene that changes the roster, open the Camp Menu as soon as control returns. Check the active characters, equipment, HP, TP, Items, Order, and every macro slot that might name a departing member.
If a battle goes badly, reload the pre-dungeon save rather than repeatedly attempting the same fight with depleted resources. The goal of this chapter is to reach the next chapter’s opening route with supplies and recovery points intact, not to complete any academy event ahead of schedule.
- Slot 1: current clean progression.
- Slot 2: Piata pre-dungeon or pre-boss recovery save.
- Slot 3: older checkpoint retained before a major story transition.
- Rebuild or edit macros after every scripted roster change.
- Reload the earliest safe save when resources are depleted instead of overwriting all backups.
Before you move on
- You can open the Camp Menu with A and the System Menu with Start.
- You can identify Command, Macro, and Run in battle.
- Macro A remains available for routine attacks.
- A second macro slot is reserved for a current-party defensive or healing pattern.
- You understand that Chaz has Res at the beginning of the game and that Monomates are the early backup.
- You have bought Monomates in Piata and retained enough Meseta for the upcoming story route.
- You have checked equipment, marching Order, HP, TP, Items, and active macros.
- You created a Piata save before entering the first story dungeon.
- You have separate current-progress and recovery files, with an older checkpoint preserved in the third slot.
- The chapter ends with the party prepared to begin the opening route, without completing any academy story event covered in the next chapter.
Opening Acts: Chaz, the First Village and the First Boss
The game begins with Chaz and Alys traveling from Aiedo to the Motavia Academy in Piata. Reunite with Alys, accept the academy’s basement job, recruit Hahn, collect the basement supplies, defeat Igglanova, and return to the principal. The resulting Birth Valley objective sends the party north toward Mile. This route applies to the original North American Sega Genesis release.
1. Arrive at Piata and find Alys
The opening scene begins in Aiedo, but control starts after Chaz and Alys have already accepted the job that brings them to Piata. At the Motavia Academy, Chaz is separated from Alys. Walk left through the opening area and speak with her. Alys rejoins immediately and becomes the party’s strongest fighter for this section because she starts at a much higher level than Chaz.
Talk to academy residents if you want the background information, but their conversations are not required to unlock the basement. Before proceeding, make a save at the academy if your version provides a save point or available save slot. Keep this as your recovery point in case you want to retry the basement without repeating the opening scenes.
- Find Alys in the academy.
- Confirm that Alys has rejoined the party.
- Save before beginning the basement mission if possible.
2. Accept the principal’s basement commission
Go to the upper floor of the academy and enter the principal’s office at the rear of the floor. Speak with the principal. He claims that monsters have infested the basement and asks the Hunters to remove them. Alys accepts the job, although she is suspicious of the academy’s explanation.
Return downstairs. The basement route is not available until this conversation has taken place. Use the doorway behind the statue on the ground floor, then go toward the basement stairs. Hahn, an academy assistant investigating the disappearance of Professor Holt, is waiting nearby. Speak with him and accept his request to accompany the party. Alys charges him 100 Mesetas, and Hahn joins the active party.
Hahn is fragile at this point, so do not treat him as a front-line fighter. His techniques are more valuable than his physical damage, and he should be ready to heal or use Wat during the boss fight.
- Speak with the principal on the upper floor.
- Use the ground-floor doorway behind the statue.
- Recruit Hahn before entering the basement.
- Confirm that the party contains Chaz, Alys, and Hahn.
3. Prepare without overspending
Piata’s Tool Store sells Monomates. Buy a small supply if your starting money allows, but do not spend all of your Mesetas on consumables. The basement contains a Monomate, 100 Mesetas, and an Antidote, so the opening dungeon supplies part of what you need.
There is no requirement to buy Piata armor before this fight. Save enough money for the weapon upgrades in Mile after the boss. Rest at Piata’s inn before entering if the party has lost HP or TP during any incidental battles.
Open the battle macro menu and record a simple attack pattern for ordinary encounters, such as Alys attacking, Chaz attacking, and Hahn attacking. For Igglanova, use the macro only as a starting point: the boss’s reinforcements require manual target changes. If Chaz has Earth available, it can be attempted against the first summoned enemy, but do not depend on it succeeding.
- Carry several Monomates rather than emptying your wallet.
- Leave money available for Steel Sword and Slasher purchases in Mile.
- Set a basic attack macro before entering.
- Rest at the Piata inn if necessary.
4. Clear the Piata Academy Basement
Enter through the basement stairs where Hahn joined. From the entrance, go down until the passage turns left. Follow the left-hand route and enter the first side room to collect the Monomate. Return to the corridor, continue left, then go south into the next side room for the 100 Mesetas.
Return to the upper passage and follow it toward the stairs leading down. On the next level, move through the passage and enter the room containing the Antidote. After collecting it, return to the corridor and continue left to the stairs at the far end.
The final stairway leads to the room filled with glass capsules. Heal before approaching the upper part of the room. Walk upward toward the creature to trigger the Igglanova encounter. The regular enemies are Xanafalgues and Zoran Bults. A short amount of fighting is enough; Alys’s starting strength makes extensive grinding unnecessary.
- Collect the Monomate.
- Collect the 100 Mesetas.
- Collect the Antidote.
- Heal before approaching the capsules.
- Approach the creature in the capsule room.
5. Defeat Igglanova
Igglanova has 300 HP and repeatedly creates Xanafalgues. In the opening round, use Alys’s Vortex on Igglanova, have Chaz attack, and have Hahn use Wat on Igglanova if he has enough TP. If Hahn or Chaz needs immediate recovery, replace his action with healing rather than allowing a character to fall.
The Xanafalgues are the immediate danger. When they appear, have Chaz attack one of them instead of continuing to strike Igglanova. Alys can continue using Vortex on the boss unless the party needs her physical attack or the reinforcements are overwhelming the group. Once the active Xanafalgues are removed, return Chaz to attacking Igglanova.
A practical macro for the fight is Alys: Vortex, Chaz: Fight, Hahn: Wat. Do not leave it running without watching the battle, because a new Xanafalgue changes the correct target and Hahn may need to heal. Igglanova is not a long battle if the reinforcements are controlled. After the victory, inspect the post-battle dialogue and leave the basement.
- Use Vortex against Igglanova.
- Use Wat with Hahn when healing is unnecessary.
- Target Xanafalgues with Chaz when they appear.
- Manually correct the macro if a party member needs healing.
- Leave the capsule room after the victory.
6. Return to the principal and trigger the next objective
Retrace the basement route and return to the principal’s office. This conversation is mandatory. The principal explains that Professor Holt investigated Birth Valley, that the academy received monster-breeding capsules, and that the research team disappeared. Zio then warns the group not to enter Birth Valley and threatens anyone who investigates.
After Zio’s warning, Hahn insists on going to Birth Valley to search for Professor Holt. Alys agrees to continue the job for 300 Mesetas. Do not leave Piata immediately after defeating Igglanova; the principal’s second conversation is the progression flag that establishes the next destination.
Once the scene ends, rest at the inn and save again. This is the clean progression point for the route toward Mile, Zema, and Birth Valley.
- Return to the principal after defeating Igglanova.
- Watch the complete Birth Valley and Zio scene.
- Confirm that Hahn remains with the party.
- Confirm that Alys accepts the 300-Meseta continuation of the job.
- Rest and save before leaving Piata.
7. Travel north to Mile and upgrade the party
Leave Piata and travel across Motavia toward Mile. The walkthrough route describes Mile as north of Piata; follow the overworld path and continue north until you reach the village. Do not head toward the distant castle or attempt to cross the quicksand as part of this objective.
Mile is the first important equipment stop. Buy a Steel Sword for Chaz and two Slashers for Alys. Equip the Steel Sword to Chaz and the Slashers to Alys. Give Chaz’s old Hunting Knives to Hahn if you want to improve Hahn’s physical damage, then sell genuinely obsolete spare equipment if you need additional Mesetas.
Rest in Mile before leaving. The village’s residents provide setting information, but there is no separate required conversation in Mile that replaces the principal’s post-Igglanova scene. Your next critical destination is the route toward Zema and Birth Valley, which is covered in the following chapter.
- Reach Mile by traveling north from Piata.
- Buy and equip Chaz’s Steel Sword.
- Buy and equip two Slashers for Alys.
- Optionally pass Chaz’s old Hunting Knives to Hahn.
- Rest at Mile’s inn before continuing.
Before you move on
- Alys has rejoined Chaz at the Motavia Academy.
- Hahn has joined for 100 Mesetas before the basement entrance.
- The party has collected the basement Monomate, 100 Mesetas, and Antidote, if desired.
- Igglanova has been defeated in the capsule room.
- The principal has explained Professor Holt, Birth Valley, and Zio’s warning after the battle.
- Hahn remains in the party and Alys has accepted the 300-Meseta Birth Valley job.
- The party has reached Mile, equipped Chaz with a Steel Sword, and upgraded Alys with two Slashers.
References for this chapter
Expanding the Team: Rika, Wren, Rune and Early Recruits
These recruits arrive through fixed story events rather than optional town conversations. The correct sequence is Hahn during the Piata academy events, Rune at Molcum, Gryz in Tonoe after Rune leaves, Rika in the Bio-Plant after the Alshline rescue, and Wren much later on Zelan. Keep separate saves before the Tonoe warehouse, the Bio-Plant return, and the Zelan recruitment scene because each section changes the active party or unlocks the next major route.
1. Complete Piata and reach Zema
Finish the academy events in Piata, including the basement sequence and the Igglanova battle. Hahn joins as part of this story section; there is no separate recruitment choice. Return to the principal after the battle so the route advances, then leave Piata and travel north and east to Zema.
In Zema, the residents have been turned to stone. Search the town and speak with the surviving children in the house basement. This establishes the Birth Valley investigation. Enter Birth Valley and follow its route until the party finds Professor Holt in stone form. Take the Carbon Suit from the second level if you find it and give it to Hahn; it is a useful early defensive upgrade, but the critical objective is reaching the professor and learning about Alshline.
- Complete the Piata academy basement and defeat Igglanova.
- Return to the principal before leaving Piata.
- Speak with the survivors in Zema and enter Birth Valley.
- Find Professor Holt and receive the objective involving Alshline.
2. Find Rune in Molcum
Leave Zema and travel south to Molcum. The village has been burned, but a man standing in white remains there. Speak with him to trigger the scene identifying him as Rune. He explains that Zio caused the destruction and points the party toward Tonoe, where Alshline can be obtained. Rune joins automatically during this conversation.
Rune is a high-level temporary spellcaster rather than an early permanent recruit. Put him near the front only if you want his physical defenses to absorb some attacks; in most battles, preserve his TP for group damage and use combination techniques when several enemies appear. Do not spend heavily on a complete replacement set of gear for Rune because he leaves in Tonoe. Save before leaving Molcum so you can retry the next route without repeating the recruitment scene.
- Travel from Zema to Molcum.
- Speak to the white-clothed man and let the Rune scene finish.
- Save after Rune joins and before entering the cave north of Krup.
3. Cross Valley Maze and reach Tonoe
From Molcum, go east to Krup, then travel north to the cave blocked by a boulder. Rune uses Flaeli to clear the passage. Continue through Valley Maze; it is short, and a dead end means you should backtrack and take the other branch that continues upward. The exit leads directly to Tonoe.
Tonoe's shops are located in the eastern stalls rather than prominent standalone buildings. Rest at the inn, then check the weapon and armor stalls before entering the next story area. Titanium equipment is the important early upgrade: prioritize current armor for Chaz, Alys, and Hahn, then replace their weakest weapons if your Meseta allows. Do not sell unique utility items merely to complete every upgrade, and do not remove Rune's equipment until the story confirms that he has left.
- Use Flaeli at the blocked cave north of Krup.
- Follow the upward route through Valley Maze and enter Tonoe.
- Rest and inspect the eastern stalls before entering the warehouse route.
- Save before speaking to Grandfather Dorin.
4. Let Rune leave and recruit Gryz
In Tonoe, speak with Grandfather Dorin in the central-right tent. The resulting scenes open the underground warehouse route and change the party: Rune leaves, and Gryz joins. This is a scripted transition, not an optional recruitment. Gryz is a physical attacker suited to the front of the formation, so equip him with the strongest available weapon and armor that fit him after the scene.
Enter the basement or warehouse below Tonoe and retrieve the Alshline. Explore for chests before leaving, but do not confuse optional treasure with the required objective: the Alshline is the item needed to restore the petrified people in Zema. Save after obtaining it. If you leave Tonoe without Gryz active, return to Grandfather Dorin and confirm that the warehouse sequence has completed before backtracking.
- Speak with Grandfather Dorin.
- Confirm that Rune has left and Gryz has joined.
- Retrieve Alshline from the Tonoe underground area.
- Save before returning to Zema.
5. Return to Zema and recruit Rika in the Bio-Plant
Return to Zema and use Alshline on the petrified people. This restores the route to the Bio-Plant and leads to the Igglanova fight. Defeat Igglanova, then enter the Bio-Plant through the newly available route. The Bio-Plant is the original North American in-game name; some modern references describe it as a biosystems laboratory.
Work through the facility and follow the story to Professor Holt, Rika, and Seed. Rika does not join at the first Birth Valley visit and cannot be recruited by searching Zema or Molcum for an optional conversation. She joins after the Bio-Plant scenes and Seed's shutdown sequence. Rika starts at a very low level but gains experience quickly. Equip her with the best usable claw and armor you own, then fight nearby enemies until she is no longer dramatically behind the rest of the active party. She becomes a permanent member and supplies fast physical attacks plus valuable healing and support techniques.
- Use Alshline in Zema.
- Defeat Igglanova and enter the Bio-Plant.
- Reach Professor Holt, Rika, and Seed.
- Allow the Bio-Plant scenes to finish and confirm that Rika has joined.
- Equip Rika and bring her up to the party's general level through nearby battles.
6. Follow the route to the later Rune return
After Rika joins, the next required destination is Zio's Fort. Because the quicksand blocks the direct southern approach from Mile, travel north and west through Wreckage and then use the mountain Passageway north of Aiedo. This chapter's recruitment sequence does not end with Rika: Alys and Hahn remain with the party through the first Zio confrontation, while Gryz continues as the temporary Motavian recruit.
After the Zio and Nurvus events, the party eventually climbs Ladea Tower. Rune returns during that later tower sequence, not during the initial Bio-Plant or Tonoe route. Treat this as a second Rune recruitment event: he is unavailable between Tonoe and Ladea Tower, so do not plan an early permanent party around him. Before the tower, save in town, rest, and update equipment for the characters who are actually active.
- Leave the Bio-Plant with Rika active.
- Use Wreckage and the Passageway north of Aiedo to reach Zio's Fort.
- Do not expect Rune to remain after Tonoe.
- Save before the later Ladea Tower climb and confirm Rune's return there.
7. Reach Zelan and recruit Wren
Wren joins much later than Rika. Complete the Zio and Nurvus arc, allow the story scenes involving Alys to occur, and continue until Gryz and Demi leave after the second Zio sequence. Then go to the spaceport and select Zelan as the destination. Wren is found inside the satellite after the party follows the facility route and reaches the tall silver-clothed android. Speaking with him triggers the joining scene.
On Zelan, collect the equipment caches before speaking with Wren when practical. The facility contains a Plasma Sword for Chaz, a Plasma Claw for Rika, a Plasma Field, a Pulse Laser, and the Canceller. Equip the Plasma Sword and Plasma Claw immediately; the Pulse Laser gives Wren an area-attack option, while the Canceller is required for the route ahead. Wren joins at approximately level 20 and has high HP and defense, so place him at the front of the formation and give him the strongest available weapon and armor. At this point the stable core is Wren, Chaz, Rika, and Rune. Save after Wren joins before leaving Zelan for Kuran.
- Complete the second Zio and Nurvus sequence.
- Travel from the spaceport to Zelan after the scripted party departures.
- Reach the tall silver-clothed android and speak with him.
- Collect the Plasma equipment and Canceller where available.
- Equip Wren and save before continuing toward Kuran.
Before you move on
- Hahn joined during the Piata academy sequence and the party completed the Igglanova event there.
- Rune joined at Molcum, helped open the passage north of Krup, and later left in Tonoe when Gryz joined.
- Alshline was recovered from the Tonoe underground area and used in Zema.
- Rika joined after the Bio-Plant and Seed scenes, with a current claw and armor equipped.
- The party completed the required Zio and Nurvus progression, and Rune returned during the later Ladea Tower route.
- Wren joined on Zelan, the Plasma equipment and Canceller were collected where available, and a save exists before the Kuran sequence.
- The active party is equipped for the next dungeon rather than relying on the default gear of a newly recruited character.
Act I Bosses and the Zio Arc
Clear Zio’s Fort, survive the scripted first confrontation with Zio, obtain the Psycho-Wand through the Land Rover, Monsen, Termi and Ladea Tower sequence, then return to Nurvus for the real Zio battle. The Plate System near Monsen is an optional detour: it can be shut down for its equipment, Demi’s Phononmezer skill and the end of Monsen’s earthquakes, but it is not required to reach Termi, Ladea Tower, Nurvus or Zio. Alys and Hahn leave after the first Zio sequence, while Gryz and Demi leave after Nurvus is shut down.
Prepare in Aiedo and reach Zio’s Fort
After completing the Wreckage area east of Aiedo, leave town by the northern route and follow the passage north of Aiedo. Continue east and then south to reach Zio’s Fort. Kadary is a useful recovery point once this route is open, so heal and save there before entering the fort. Carry several Dimates and at least one revival item if available. Equip current weapons and armor, but retain enough Meseta for later consumables and the equipment sold in Termi.
The first visit to Zio’s Fort is required even though the barrier leading to Nurvus cannot yet be opened. Follow the stairways through the accessible rooms and reach Juza on the upper route. The fort has branching stairs, drop holes and dead-end rooms, but no permanent puzzle lock. If a route ends at a chest or drop, return to the previous junction and take the other stairs.
- The Wreckage sequence is complete.
- The party is healed and saved before entering Zio’s Fort.
- Dimates and a revival option are available.
- Current equipment has been checked.
Defeat Juza and release Demi
Juza blocks the route to the prisoner on the upper level. Use Chaz’s Crosscut or another dependable attack, Gryz’s physical attack, Alys’s Vortex or physical attack, Rika’s Double Slash when she is not healing, and Hahn’s Wat or healing technique. Juza’s Force Flash can damage the whole party, so do not allow the group’s HP to remain critically low. Use a Dimate immediately when necessary instead of allowing a healer to fall while conserving supplies.
After Juza is defeated, the route to the upper section opens. Continue to the chained android and approach her. The game identifies her as Demi, and Alys frees her. Demi then uses Medical Power to restore the party, so there is no need to spend recovery items immediately after the Juza battle. Before triggering the following scenes, remove equipment from Alys and Hahn if you want to preserve those items for later use; both characters leave during the next story sequence.
- Juza has been defeated.
- The upper route has opened.
- Demi has been released.
- Alys and Hahn’s equipment has been checked before the story scenes.
Survive the scripted first Zio battle
After freeing Demi, move toward the upper central area. Zio appears and the first battle begins automatically. This encounter is scripted rather than a normal victory condition. Zio’s Magic Barrier reduces ordinary attacks to negligible damage, and the sequence proceeds to the story event regardless of your commands.
Do not spend rare healing or revival items trying to overcome the barrier. Defend, attack or use ordinary actions until Zio summons Nightmare and uses Black Wave. Alys intercepts the attack aimed at Chaz, and the party retreats. The game then takes the group to Krup. Alys’s injury cannot be prevented by winning the battle or choosing different commands.
Allow the Krup scenes to finish. Hahn remains with Alys while the others begin seeking a way to reach Rune and obtain the means to break Zio’s barrier. Alys and Hahn are no longer available for the Land Rover, Monsen, Termi, Ladea Tower and Nurvus portions of this chapter.
- The first Zio battle ended through the Black Wave event.
- The party reached Krup.
- Alys and Hahn left the active party.
- Rare recovery items were not wasted on the scripted battle.
Obtain the Land Rover and reach Monsen
From Krup, follow Demi’s instructions to the Vehicle Control Plant south of town. Enter the facility, obtain the Control Key and receive the Land Rover. The vehicle is required to cross the quicksand that blocks the overland route; do not attempt to cross that area on foot.
Use the Land Rover to travel east across the quicksand and then northeast toward Monsen. Enter Monsen, rest and save if needed, and speak with the townspeople. The eastern-side conversation explains the earthquake problem and points to the Plate System, but the dungeon itself is optional. Monsen has an inn and tool services, but it does not provide a full weapon and armor shop, so plan major purchases in Termi.
- The Control Key has been obtained.
- The Land Rover is available on the world map.
- The quicksand crossing has been completed.
- Monsen has been visited and the party has been recovered.
Optional detour: shut down the Plate System
If you want the optional rewards, leave Monsen with the Land Rover and circle around the small mountain range north of town to reach the Plate System. The dungeon is not a required gate. You may skip it and travel directly from Monsen to Termi, then continue to Ladea Tower without losing access to Nurvus or Zio.
Inside the Plate System, search the branches for its optional equipment and recovery items. The dungeon contains useful upgrades for the current party, including Demi-related equipment and the Phononmezer parts that add the Phononmezer skill to Demi. The Repair Kit is also valuable because it can restore Demi after she is reduced to zero HP in battle. Take the items if you want the stronger optional preparation, but none of them is needed to obtain the Psycho-Wand.
To complete the detour, follow the internal routes to the control panel and operate it with Demi. This shuts down the system and ends Monsen’s earthquakes. There is no required boss fight at the panel. Return to Monsen to rest and save, then use the Land Rover to travel east across the quicksand and south to Termi. If you skip the dungeon, simply leave Monsen and follow the same Land Rover route to Termi.
- Optional: the Plate System entrance was reached.
- Optional: the control panel was operated by Demi.
- Optional: the equipment and recovery items were collected.
- Whether skipped or cleared, the party is ready to travel from Monsen to Termi.
Reach Termi and climb Ladea Tower
At Termi, heal and save before entering the tower. Buy Dimates and replace outdated armor or weapons where the shop offers meaningful upgrades. Ladea Tower is southwest of Termi. Enter it and work upward through its branching stairs, teleporter panels and one-way drops. If a route ends, return to the last junction rather than searching for a hidden story switch. Take accessible side rooms for useful equipment and recovery items, but do not spend all of your TP before the upper floors.
Rune rejoins the party during the tower sequence. He supplies strong offensive techniques, while Rika remains the most dependable source of party healing. After Rune joins, keep Chaz on physical attacks or Crosscut, use Rika’s healing when necessary, and reserve Rune’s TP for dangerous encounters and the tower guardian. Hahn is no longer present and cannot perform the healing role here.
At the top, fight Gy-Laguiah. Use Rune’s strongest dependable offensive technique, keep Rika focused on recovery when HP falls sharply, and have Chaz attack physically. Gryz can attack or use a Dimate when immediate item healing is preferable. After the victory, collect the Psycho-Wand from the tower’s treasure area. Do not sell or discard it; it is required for both the barrier outside Nurvus and Zio’s battle barrier.
- Termi has been reached and used for recovery.
- Rune has rejoined the party.
- Gy-Laguiah has been defeated.
- The Psycho-Wand is in the inventory.
Break the barrier and enter Nurvus
Return to Zio’s Fort with the Psycho-Wand. Examine the yellow barrier near the entrance. Rune uses the wand to break the seal; merely equipping it is not enough, and it is not used through the ordinary battle-item command for this exterior barrier.
Follow the newly accessible stairs into Nurvus. Search branches for useful chests, then return to the main route and continue through the facility. Nurvus contains mechanical enemies, corridors and elevators. Use Demi’s Barrier against dangerous physical attacks, but reserve enough healing and offensive TP for the final approach.
Before walking along the final corridor toward Nurvus’s central computer, create a separate save if possible. This gives you a recovery point before the real Zio battle and the permanent story changes that follow. Heal fully and confirm that Rika and Demi still have enough healing capability, with Dimates and revival items available as backup.
- The exterior barrier was broken by examining it with the Psycho-Wand available.
- Nurvus has been entered.
- The party is healed before the central computer route.
- A separate pre-Zio save exists.
Break Zio’s Magic Barrier and win the real battle
Zio appears when the party approaches the central computer. He begins with Magic Barrier. Use the Psycho-Wand through the battle item command; do not equip it as a weapon and do not select it as a normal attack. Once the wand removes the barrier, Zio can take normal damage.
A practical opening arrangement is Chaz using Crosscut, Rika using Deban or another useful support action, Demi using Barrier, Gryz attacking or using War Cry, and Rune using a strong single-target technique. If the macro system makes the item command reliable for your setup, the character assigned to use the Psycho-Wand should select Use Item and then Psycho-Wand on the opening turn. After the barrier is removed, stop spending turns on the wand.
Keep Rika ready for Gires or another available healing technique whenever the party’s HP drops sharply. Chaz should continue Crosscut while TP lasts, then switch to physical attacks or GiThu. Rune should maintain dependable single-target damage. Gryz can attack after his support action or use Dimates for immediate recovery. Demi can maintain Barrier, use Phononmezer or another available attack and provide emergency item healing.
Zio’s real battle is won by removing the barrier first and then maintaining a stable healing rotation. Do not allow both Rika and Demi to become incapacitated. If one falls, revive with Demi’s Medical Power when possible; use a Moon Dew or equivalent revival item if the battle becomes unstable. If the opening turns collapse your healing structure, reload the pre-Zio save instead of exhausting rare recovery items in a losing attempt.
- The Psycho-Wand was used through the battle item command.
- Zio’s Magic Barrier has been removed.
- At least one reliable healer remains active.
- Zio has been defeated and the Nurvus resolution scene begins.
Complete the Nurvus scenes and record the permanent changes
After Zio falls, Demi connects herself to Nurvus and shuts down the system. Allow the complete story sequence to play out. Gryz and Demi leave the active party after the Nurvus resolution: Gryz returns to Tonoe, while Demi remains connected to the system. Alys and Hahn departed earlier in Krup, leaving Chaz, Rika and Rune for the immediate Spaceport and Zelan sequence.
Do not reload the pre-Zio save expecting to preserve Alys, Hahn, Gryz or Demi in the continuing party. These departures are scripted in the original North American Genesis release. Keep the pre-Nurvus save for replaying the battle with a different strategy or equipment setup, then create a new save after the scenes finish.
The Zio arc is complete when control returns after the shutdown, the party can leave for the Spaceport and the game has established that Nurvus has been disabled. The next objective is the Spaceport, followed by the trip to Zelan and Wren’s recruitment.
- Zio has been defeated in Nurvus.
- Demi’s shutdown sequence has completed.
- Gryz and Demi have left after the Nurvus resolution.
- The active party is ready to proceed to the Spaceport and Zelan.
- A new post-Nurvus save has been created.
Before you move on
- Juza has been defeated in Zio’s Fort.
- The scripted first Zio battle has ended with Alys taking the Black Wave.
- The Control Key and Land Rover have been obtained.
- Monsen has been visited.
- The Plate System has either been cleared or deliberately skipped; its completion is not required.
- Termi has been reached and used as the recovery point before Ladea Tower.
- Rune has rejoined the party.
- Gy-Laguiah has been defeated and the Psycho-Wand has been collected.
- The exterior barrier at Zio’s Fort has been broken.
- Zio has been defeated in Nurvus by using the Psycho-Wand as a battle item.
- The Nurvus shutdown scenes have completed, with Gryz and Demi leaving the active party.
- The party is ready to enter the Spaceport and begin the Zelan sequence.
References for this chapter
- Phantasy Star IV — Walkthrough by Voltron, GameFAQs
- Phantasy Star IV — Guide and Walkthrough by Sir_Pobalot, GameFAQs
- Phantasy Star IV Guide and Walkthrough by KRaffa
- Monsen and the Plate System — Phantasy Star IV: The End of the Millennium
- Ladea Tower and the Psycho Wand — Phantasy Star IV: The End of the Millennium
- Phantasy Star IV Instruction Manual, Sega Genesis Mini archive
Late Game: Kuran, Dezolis, Garuberk Tower and the Air Castle
After Nurvus is shut down, Demi remains behind and Gryz returns to Motavia, leaving Chaz, Rika and Rune to travel to Zelan. Recruit Wren, obtain the Canceller, defeat the Chaos Sorcerer during the Kuran trip, recover the Landale through Ryuon and Tyler, and defeat the Kuran Dark Force manifestation. Wren then supplies the Ice Digger, opening the blocked areas of Dezolis. The Climate Control Center, its D-Elm-Lars encounter and Mysterious Valley are optional detours for equipment and exploration; skipping them does not block Meese, Kyra, Esper Mansion, Gumbious Temple, the Air Castle, Lashiec, Garuberk Tower, Rykros or the ending. The required route continues through Meese, Kyra’s rescue, Esper Mansion, the theft of the Eclipse Torch, the three-Xe-A-Thoul Air Castle encounter, Lashiec, Garuberk Tower and the bishop beneath the ruined Gumbious Temple. The chapter ends at the handoff to Soldier’s Temple.
Leave Nurvus, travel to Zelan and recruit Wren
Begin after Demi has connected herself to Nurvus and shut down its systems. Demi remains at the facility, while Gryz leaves to look after his sister. The active party for this section is Chaz, Rika and Rune. Heal at the Nurvus spaceport before using the shuttle, then select Zelan.
Search Zelan before speaking with Wren. The satellite contains several useful pieces of equipment, including the Canceller. Take the Canceller before leaving; it is needed to make Kuran accessible through the travel system. Continue to the upper section and speak with Wren. He explains that Kuran has taken control of Zelan and joins the party.
Equip Wren immediately with his available android weapon and armor. Wren is restored by Repair-Kits rather than ordinary healing techniques, so keep those items available for the upcoming mechanical areas. Save before selecting Kuran.
- Nurvus has been shut down.
- Demi remains at Nurvus and Gryz has departed.
- The Canceller is in the inventory.
- Wren has joined and has usable equipment.
Defeat the Chaos Sorcerer and survive the Dezolis crash
Select Kuran from the shuttle controls. During the trip, investigate the engine-room disturbance and fight the Chaos Sorcerer. Use Chaz and Wren for dependable physical damage, while Rune provides efficient offensive techniques or emergency support. Do not spend every recovery item during this battle; the party is not yet at Kuran.
The battle cannot prevent the shuttle from crashing. After the fight, the damaged craft lands on Dezolis. Speak with the people at the crash site and follow Raja’s directions. Raja joins the party during this sequence. Recover at the available facility and save before beginning the route to the Landale.
- The Chaos Sorcerer has been defeated.
- The shuttle has crash-landed on Dezolis.
- Raja has joined the party.
- A recovery save has been made before the Landale search.
Recover the Landale through Ryuon and Tyler
Travel to Ryuon and speak with Gyuna in the bar. Her information points the party toward Tyler. Continue to Tyler and inspect Tyler’s grave. The grave opens the concealed passage leading to the Landale.
Follow the passage to the ship and allow Wren to examine it. The nearby Tyler spaceport becomes usable after the recovery event. Heal at the spaceport and save. The Landale is now the normal transport for reaching Kuran and the other available destinations.
Do not treat the original crash site as the permanent travel hub. The Tyler spaceport is the important recovery point for the next stage, and Kuran is now reachable from the restored flight route.
- Gyuna has been questioned in Ryuon.
- Tyler’s grave has opened the hidden passage.
- Wren has examined and recovered the Landale.
- The Tyler spaceport is active.
Clear Kuran and obtain the Ice Digger
Fly from Tyler to Kuran. Explore the satellite and collect the useful equipment and recovery items, including the Hyper Jammer, Repair-Kits, Zirconium equipment and Napalm Shot. Keep Repair-Kits for Wren, especially if he is taking damage from the satellite enemies.
Follow the elevators and central corridors toward the control area. Before approaching the final computer room, heal the party and save if possible. The story triggers when the party examines the control system and the Kuran Dark Force manifestation appears.
Open with defensive support such as Wren’s Barrier, then keep Rika and Raja ready for recovery. Chaz, Rune and Wren should maintain steady damage without exhausting every expensive technique immediately. After the manifestation is defeated, Wren repairs Kuran. The following adjustment sequence returns the party to Zelan, after which Wren provides the Ice Digger.
Heal and save once the Ice Digger is available. It can bore through the ice barriers on Dezolis and is required to reach the next part of the main route.
- Kuran has been reached through the restored Landale route.
- The Kuran Dark Force manifestation has been defeated.
- Wren has repaired the Kuran systems and completed the Zelan adjustment.
- The Ice Digger is available.
Optional Dezolis detours after obtaining the Ice Digger
The Ice Digger opens several destinations, but not all of them are required. The Climate Control Center is optional. If you enter it, explore the facility, collect its equipment and defeat D-Elm-Lars at the end. The encounter is an optional boss and its rewards are useful, but the center does not control access to Meese or any later story event.
To continue the main campaign without this detour, use the Ice Digger to cross the ice barriers and travel through the Dezolis route toward Reshel and Meese. You may return for the Climate Control Center later while it remains available; skipping it does not prevent Kyra’s rescue, Esper Mansion, Gumbious Temple, Air Castle, Lashiec, Garuberk Tower, Rykros or the ending.
Mysterious Valley is another optional area. If you visit it, follow the path to the Musk Cats and obtain the Silver Tusk for Rika. This is an equipment and exploration reward, not a story prerequisite. Rest and save in Zosa or another available town before continuing southeast through Reshel toward Meese.
- The Ice Digger has been obtained.
- The Climate Control Center has been treated as optional.
- D-Elm-Lars has been fought only if the optional center was cleared.
- Mysterious Valley and the Silver Tusk have been treated as optional.
- The party has reached Reshel or continued onward to Meese.
Reach Meese, rescue Kyra and visit Esper Mansion
Enter Meese and speak with the residents and clinic staff. The illness affecting the town leads to Raja becoming ill and leaving the active party. This departure is scripted and cannot be prevented through party selection or earlier optional exploration.
The residents explain that Kyra went alone into the carnivorous forest. Travel to the forest northeast of Meese. The Carnivorous Trees regenerate during this first visit, so do not try to clear the area as a normal dungeon. Push forward until Kyra is reached, then use the escape command and return to Meese.
Kyra joins after the return sequence. She directs the party toward Esper Mansion, where the Espers may know how to deal with the forest. Travel to Esper Mansion and proceed to its inner area. The guards’ refusal is resolved through Rune’s identity. Complete the Lutz and Telepathy Ball scene to learn that the Eclipse Torch is needed to destroy the Carnivorous Trees.
- Raja has become ill and left the party.
- Kyra has been reached in the forest.
- The first forest visit has been escaped rather than treated as a winnable clearing operation.
- Kyra has joined.
- The Esper Mansion inner-sanctum scene has been completed.
Trigger the Eclipse Torch theft at Gumbious Temple
Restock and heal in Jut before visiting Gumbious Temple. Replace outdated weapons and armor if the town’s shops offer meaningful upgrades. Weapon Plant can be visited as an optional equipment and experience detour, but it is not needed for this chapter’s required route.
Inside Gumbious Temple, speak with the priest guarding the Eclipse Torch. He refuses to lend it. The three Xe-A-Thouls then appear, steal the torch and reveal that they are connected with the Air Castle. This event is the required trigger for the next dungeon.
Return to the spaceport after the theft. Heal, save and carry a large supply of restorative items before selecting Air Castle. Vahal Fort is also optional and does not replace the Air Castle route.
- Jut has been used for healing and restocking.
- Weapon Plant has been kept optional.
- The priest has refused to lend the Eclipse Torch.
- The three Xe-A-Thouls have stolen the torch and revealed the Air Castle route.
Clear Air Castle and defeat the three Xe-A-Thouls
Select Air Castle from the spaceport after the Gumbious Temple theft. Explore the upper sections and collect safe-to-reach recovery items and equipment. Preserve enough resources for the required boss encounter at the end of the upper route.
The three Xe-A-Thouls fight together in one required encounter. They are not three separate boss battles. Their group attacks can damage the entire party, so begin with defensive support such as Barrier and other available protective techniques. Concentrate attacks on one witch until it falls, then finish the remaining two.
Keep Rika ready to heal, use Rune and Kyra for efficient offensive techniques, and let Chaz and Wren provide dependable damage. Once all three Xe-A-Thouls are defeated, the invisible barrier blocking the basement is removed.
- Air Castle has been entered from the spaceport.
- The upper route has been cleared to the Xe-A-Thouls.
- All three Xe-A-Thouls have been defeated together in one encounter.
- The basement barrier has been removed.
Return to Air Castle and defeat Lashiec
Leave Air Castle after the Xe-A-Thoul battle. Return to the spaceport, heal, restock and save, then fly back to Air Castle. The second visit is required because the basement route is now open.
Follow the newly accessible route through the basement and approach Lashiec. Do not mark the Eclipse Torch as recovered before the battle. Lashiec is guarding it, and Rika takes it during the collapse sequence after his defeat.
Begin the battle with Barrier and other useful defensive support. Use Rika primarily for healing when the party is under pressure, while Chaz, Rune, Kyra and Wren maintain damage. If Lashiec uses Reinforce, refresh your own support and use the Psycho Wand if available to counter the increase. Use Star-Dews or other full-party recovery items before multiple characters are incapacitated.
Defeating Lashiec causes Air Castle to collapse. The party escapes with the Eclipse Torch. The upper Air Castle encounter against the three Xe-A-Thouls and the later basement battle against Lashiec are both required.
- The party has returned to the spaceport after defeating the Xe-A-Thouls.
- The Air Castle basement is accessible.
- Lashiec has been defeated.
- Rika has recovered the Eclipse Torch during the escape.
- The party has returned safely to Dezolis.
Destroy the Carnivorous Trees, clear Garuberk Tower and speak with the bishop
Return to the forest northeast of Meese with the Eclipse Torch. The party uses it to destroy the Carnivorous Trees, opening the route to Garuberk Tower. Heal and save in Meese before entering the tower.
Work through Garuberk Tower’s branching passages, switches and eye mechanisms. Search side rooms for useful recovery supplies and equipment, including the Pow Shield, Moon Slasher, Star-Dews and an Escapipe. Keep at least one escape option and enough healing for the final approach.
Before the Garuberk Tower Dark Force manifestation, restore the party and arrange defensive support. Rika should remain ready to heal, while Chaz, Rune and Kyra provide sustained damage. Wren can alternate between Barrier, attacks and emergency item use. After Dark Force is defeated, the tower’s story sequence causes Kyra to leave and Gumbious Temple to be destroyed.
Return to the ruins of Gumbious Temple and enter the opening beneath them. Speak with the Dezolisian bishop. This conversation completes the required Dezolis handoff and points the party toward Motavia and Soldier’s Temple. Soldier’s Temple, Seth and the Aero-Prism belong to the next chapter and should not be presented as available earlier.
- The Eclipse Torch has destroyed the Carnivorous Trees.
- Garuberk Tower has been entered and cleared.
- The Garuberk Tower Dark Force manifestation has been defeated.
- Kyra’s scripted departure has occurred.
- Gumbious Temple has been destroyed.
- The bishop beneath the ruins has been spoken to.
- The party is ready to begin the Soldier’s Temple route in the next chapter.
Before you move on
- Demi and Gryz have left after the Nurvus shutdown.
- Wren was recruited on Zelan and the Canceller was obtained.
- The Chaos Sorcerer was defeated and the party survived the Dezolis crash.
- The Landale was recovered through Ryuon and Tyler.
- Kuran was reached and its Dark Force manifestation was defeated.
- Wren provided the Ice Digger.
- The party skipped or optionally completed the Climate Control Center without treating it as a story requirement.
- The party reached Meese, Raja became ill and left, and Kyra was rescued from the Carnivorous Trees.
- The Esper Mansion inner-sanctum scene was completed.
- The Eclipse Torch was stolen at Gumbious Temple.
- The three Xe-A-Thouls were defeated together in one Air Castle encounter.
- The party returned to Air Castle, entered the basement and defeated Lashiec.
- Rika recovered the Eclipse Torch during the Air Castle escape.
- The Eclipse Torch was used to destroy the Carnivorous Trees.
- Garuberk Tower and its Dark Force manifestation were cleared.
- Kyra’s departure and Gumbious Temple’s destruction occurred.
- The Dezolisian bishop beneath the ruined temple was spoken to. The chapter now hands off to Soldier’s Temple; Soldier’s Temple and the Aero-Prism belong to the next chapter.
References for this chapter
- Phantasy Star IV Instruction Manual, Sega Genesis Mini archive
- Phantasy Star IV — Guide and Walkthrough by Sir_Pobalot, GameFAQs
- Phantasy Star IV – Guide and Walkthrough by TheStarbird
- Phantasy Star IV — Walkthrough by Voltron, GameFAQs
- Phantasy Star IV - Guide and Walkthrough - Genesis - By Marak - GameFAQs
- Phantasy Star IV Walkthrough Part II
- Phantasy Star IV — Guide and Walkthrough by Goldenguy, GameFAQs
- Meese and the Esper Mansion
Optional Vahal Fort, then Required Soldier's Temple
Begin this chapter only after completing the required Dezolis and Air Castle sequence. The Air Castle, the single three-Xe-A-Thoul encounter, Lashiec, Garuberk Tower, its Dark Force manifestation, the destruction of Gumbious Temple and the surviving bishop's conversation must all be complete. Demi then provides the Hydrofoil on Motavia. Silver Soldier and Vahal Fort are optional, but the job must be accepted after the Hydrofoil becomes available. If you want its equipment and normal Guild payment, finish it before obtaining Elsydeon. Soldier's Temple is required: Seth joins at the island, the Aero-Prism is recovered, Seth becomes the third Dark Force manifestation, and defeating it makes the Rykros route available.
Complete the required prerequisite sequence
Do not start this chapter immediately after obtaining the Ice Digger. First finish the required late-game route: enter the Air Castle, defeat the three Xe-A-Thouls in their single group encounter, return to the Air Castle basement and defeat Lashiec, recover the Eclipse Torch, destroy the Carnivorous Trees, clear Garuberk Tower and defeat its Dark Force manifestation, then return to the ruined Gumbious Temple and speak with the bishop.
After the bishop conversation, return to the Motavia spaceport. Demi provides the Hydrofoil, which is needed for the Soldier's Temple approach and for several late Hunter's Guild jobs. Restock, heal and make a recovery save before accepting optional work. Make another save before entering Soldier's Temple, because the Aero-Prism event leads directly to a boss fight.
The Silver Soldier job is optional for the main campaign. If you want Vahal Fort's equipment, Positron Bolt and Guild payment, accept the job after the Hydrofoil becomes available and complete the mission before obtaining Elsydeon. Skipping it does not block Soldier's Temple, Rykros or the ending.
- The Air Castle and Lashiec sequence is complete.
- Garuberk Tower and its Dark Force are complete.
- The Gumbious Temple destruction and bishop conversation have occurred.
- Demi has provided the Hydrofoil.
- A recovery save exists before the optional and required routes diverge.
Accept Silver Soldier and investigate Zema
Travel to the Aiedo Hunter's Guild after receiving the Hydrofoil and accept the Silver Soldier job. It is the optional mission that sends the party to investigate the machine trouble near Zema. Accepting the job is required before Vahal Fort's investigation can proceed normally.
Go to Zema and follow the investigation scene. Speak with the old man involved in the report and complete the local conversation that directs the party toward the source of the machine activity. If hostile machines attack when entering the town, defeat them before continuing the investigation.
Save before leaving Zema. The correct destination is not reached by boarding the Hydrofoil near Nalya. From Zema, take the overland route northeast, cross the Zema bridge and continue east and northeast across the land beyond the top of the bridge. Vahal Fort is reached on foot at the far end of this route.
- Silver Soldier has been accepted at the Aiedo Hunter's Guild.
- The Zema investigation has been triggered.
- The old man's conversation has been completed.
- The overland route northeast from Zema is available.
- A recovery save exists before entering Vahal Fort.
Reach Vahal Fort overland
Leave Zema and follow the road toward the northeast. Cross the Zema bridge, then continue beyond the bridge instead of returning to the Hydrofoil route. Vahal Fort stands far to the east of the bridge area. No separate voyage from Nalya is needed for this approach.
Enter the fort only after the Silver Soldier investigation is active. The dungeon contains mechanical enemies and several valuable Wren upgrades. Explore the side rooms as you advance instead of rushing directly to the central computer, because the mission's main objective and its best equipment are in different parts of the fort.
The important rewards include the Repair Kit, Photon Eraser, Laco Gear, Laco Armor and Positron Bolt. Equip Wren with the Photon Eraser and the Laco armor pieces when appropriate. Keep the Repair Kit and Photon Eraser rather than selling them. Positron Bolt becomes one of Wren's most useful attacks against groups of mechanical enemies and remains valuable after this optional mission.
- The party reached Vahal Fort overland from Zema.
- Repair Kit was collected.
- Photon Eraser was collected.
- Laco Gear was collected and equipped on Wren if appropriate.
- Laco Armor was collected and equipped on Wren if appropriate.
- Positron Bolt was obtained.
Find Daughter and defeat the Dominators
Work through the fort's elevators, corridors and conveyor sections, checking side rooms for the listed equipment. When a conveyor or elevator route appears to dead-end, search the adjacent rooms for the next control or connecting passage rather than leaving the fort; the route eventually leads to the main computer core.
At the core, interact with the computer named Daughter. The conversation reveals that the malfunctioning artificial intelligence is directing the hostile machines. Daughter's defenses are three Dominators fought together in one encounter.
Use group-targeting attacks and lightning-oriented options against the machines. Wren's Positron Bolt is a strong choice once obtained, while Rune can use a practical group Technique and Chaz can use his best reliable Skill. Keep Rika ready to heal rather than committing every character to offense. If damage accumulates, stabilize the party before resuming attacks.
After the Dominators are defeated, the shutdown scene occurs and Wren deals with Daughter. Leave Vahal Fort and return to Zema as directed by the mission. Speak with the old man again, then return to the Aiedo Hunter's Guild to close Silver Soldier and collect the 80,000-Meseta payment. Save after the report.
- Daughter's computer core was reached.
- All three Dominators were defeated.
- The shutdown scene played.
- The Zema report was completed.
- The Aiedo Hunter's Guild payment was collected.
- The desired Vahal Fort equipment was secured before obtaining Elsydeon.
Prepare at Krup and reach the Soldier's Temple island
For the required route, go to Krup, rest at the inn and save. Board the Hydrofoil and travel east across the lake to the island containing Soldier's Temple. Disembark at the foot of the hill and approach the entrance area.
An archaeologist named Seth approaches the party. Allow him to join. Seth is temporary and will not be present in the upcoming Dark Force battle, but his Skills are useful against ordinary enemies in the Island Cave. Use his Skills when practical to conserve the permanent party's MP.
Enter the Island Cave with an Escapipe available. The cave contains recovery items including an Escapipe, Sol-Dew, Trimate, Moon-Dew and Star-Dew. Collect what your inventory can hold, especially the Escapipe and Trimate, and avoid unnecessary MP expenditure before reaching the top.
- The Hydrofoil has been received.
- The party has rested and saved at Krup.
- The Hydrofoil reached the Soldier's Temple island.
- Seth joined the party.
- An Escapipe is available.
Cross the Island Cave and prepare for the boss
Follow the cave upward through its branching passages. Take the side paths that lead to the recovery chests, then return to the main route and continue toward the higher levels. Seth's comments indicate progress as the party climbs. The cave is confusing but short enough that careful exploration is preferable to using MP-heavy attacks against every ordinary encounter.
Collect the Escapipe, Trimate and Dew items when possible. At the upper section, continue through the route leading to the northern exit and the cliff-top area outside Soldier's Temple. Use the Escapipe only if you need to retreat; otherwise keep it for emergency recovery.
At the cliff top, heal Chaz, Rika, Wren and Rune completely. Seth does not need to be prepared for the boss because the story removes him during the transformation scene. Save before entering Soldier's Temple, and consider removing or rearranging Seth's equipment if you want to preserve useful gear for the permanent party.
- The upper cave exit was reached.
- The useful recovery items were collected if inventory space allowed.
- Chaz, Rika, Wren and Rune are fully healed.
- A save exists at the cliff top before entering Soldier's Temple.
Recover the Aero-Prism
Enter Soldier's Temple from the cliff top. The temple is a short dungeon. Follow the passage around the central pit, descend into the recessed area and open the chest containing the Aero-Prism. After the scene, leave through the entrance; there is no alternate temple objective required here.
Outside, the Aero-Prism emits light. Chaz raises it, a beam points into the sky and Wren calculates its direction toward Rykros. The scene then affects Seth, who reveals himself as the third Dark Force manifestation. Seth leaves the active party, leaving Chaz, Rika, Wren and Rune for the battle.
Because the battle follows immediately after the exterior scene, the cliff-top healing and save are the correct preparation point. Make sure Rika and Wren have enough MP for repeated recovery and support actions, and make sure Wren has his best available weapon.
- The Aero-Prism was collected.
- The beam scene played.
- Seth transformed and left the party.
- Chaz, Rika, Wren and Rune are the active battle party.
Defeat the third Dark Force manifestation
The third Dark Force manifestation uses heavy physical attacks and the dangerous Corrosion attack, which damages the party. Begin with defensive support rather than spending every expensive attack immediately. Wren can use Barrier when physical damage is severe, then attack with Positron Bolt or his strongest available option. Chaz should use a dependable high-damage Skill, Rune should use a strong practical offensive Technique, and Rika should prioritize healing.
When Corrosion damages the group, restore HP promptly. Do not allow both Rika and Wren to fall if it can be avoided: Rika is the primary healer, while Wren provides defensive support and strong mechanical-targeting damage. If one of them is incapacitated, revive that character before returning to a long offensive sequence unless the boss is clearly near defeat.
Use Sol-Dew, Moon-Dew or Star-Dew when recovery is necessary to prevent a collapse. If the party loses, reload the cliff-top save, confirm Wren's equipment and begin again with more conservative healing. Defeating this manifestation is required for the Rykros route.
- Barrier or equivalent defensive support was used when needed.
- Corrosion damage was answered with healing.
- A fallen healer or support character was revived promptly when possible.
- The third Dark Force manifestation was defeated.
- The post-battle scene played.
Return to Motavia and activate Rykros
After the battle, return through the Island Cave. Use the Escapipe if available, or retrace the route to the entrance, then leave the island and return to the Motavia spaceport. Heal before departure.
At the spaceport navigation controls, Rykros becomes selectable because Wren recorded the Aero-Prism's direction. Select Rykros; the Landale follows the beam and reaches the Silence Temple.
Vahal Fort is not required for this unlock. However, if Silver Soldier was wanted, its normal deadline was before obtaining Elsydeon. Do not postpone the job until after the Elsydeon sequence or assume that visiting Rykros will restore its availability.
The next required route begins on Rykros with Le Roof's instructions, followed by the Strength Tower and Courage Tower objectives.
- The Island Cave was cleared or exited with an Escapipe.
- The party returned to the Motavia spaceport.
- The party was healed before departure.
- Rykros became selectable at the navigation screen.
- The Rykros route was activated.
Before you move on
- The Air Castle and Lashiec sequence is complete.
- Garuberk Tower and its Dark Force are complete.
- The Gumbious Temple disaster and bishop conversation have occurred.
- The Hydrofoil was received from Demi.
- If taking the optional route, Silver Soldier was accepted after obtaining the Hydrofoil.
- If completing the optional route, Vahal Fort was reached overland from Zema, Daughter was shut down, the Zema report was made and the Aiedo Guild payment was collected before obtaining Elsydeon.
- The desired Vahal Fort equipment and Positron Bolt were obtained if wanted.
- The party rested and saved at Krup.
- Seth joined at the Soldier's Temple island.
- The Aero-Prism was collected from Soldier's Temple.
- The third Dark Force manifestation was defeated by Chaz, Rika, Wren and Rune.
- Rykros is selectable at the Motavia spaceport navigation screen.
References for this chapter
- Vahal Fort: The Silver Soldier Side Quest
- Phantasy Star IV Hunter's Guild Missions
- Phantasy Star IV — Guide and Walkthrough by Sir_Pobalot, GameFAQs
- Phantasy Star IV walkthrough, RPGClassics
- Phantasy Star IV — Walkthrough by Voltron, GameFAQs
- Phantasy Star IV Instruction Manual, Sega Genesis Mini archive
Pre-Final Dungeons: Teleports, Optional Chambers and Boss Prep
After obtaining the Aero-Prism and defeating the third Dark Force in Soldier’s Temple, travel to Rykros and enter Silence Temple. Speak with Le Roof first, then clear the required Strength and Courage Towers in either order. Their guardians award the five Rings of the Stars needed for the final route. Return to Silence Temple and speak with Le Roof in the central room to receive the Genesis of Algo explanation. Afterward, obtain Elsydeon through Esper Mansion and Sacred Sword Cave. Anger Tower is optional: it provides Guard Mail, a Sol-Dew and Megid, but it is not required to unlock the final dungeon or reach the ending.
Arrive at Rykros, meet Le Roof and search Silence Temple
Use the Aero-Prism route to reach Rykros. The party lands at Silence Temple, where the central room contains the Regen Platform and the first Le Roof story event. Walk into the central room and speak with Le Roof. Le Roof identifies the party as potential Protectors and orders them to meet the guardians of Strength Tower and Courage Tower. Both towers must be cleared, but the game allows either one to be completed first.
After the conversation, search the surrounding temple corridors before leaving. The chests contain a Guardshild, Guardsword, Telepipe and Trimate. Equip the Guardsword to Chaz. The Regen Platform restores the party, so use it before starting either tower. Rykros has no shop or inn, making the supplies purchased before landing important.
Strength Tower is northwest of Silence Temple among the red rocks. Courage Tower is southeast: travel east until the wall, go south, then move slightly east to the large purple rock with the entrance. Strength Tower is the safer first choice because its guardian is generally less punishing and its rings help prepare the party for Sa-Lews. Save outside whichever tower you enter and keep another save before each guardian.
- Speak with Le Roof in Silence Temple before entering either tower.
- Collect the Guardshild, Guardsword, Telepipe and Trimate.
- Equip the Guardsword to Chaz.
- Heal on the Regen Platform and save outside the chosen tower.
- Carry Trimates, Star-Dews, Sol-Dews and revival items.
Clear Strength Tower and defeat De-Vars
Enter Strength Tower from the red-rock group northwest of Silence Temple. On the first floor, go straight upward and stop before the staircase. Take the small passage to the left to collect the first Moon-Dew, then return and climb the stairs. On the next level, go left, take the staircase, descend the corridor and use the staircase on the right. Follow the corridor to the Guard Rod, then backtrack left and down. Pass the staircase, follow the upper-left route and continue through the thin upper passage to reach the first Guard Claw.
Return down the route and use the next staircase to reach the lower floor. Follow the passage between the stairs, turn right, then go up and left through the narrow opening for the second Guard Claw. Return right, go up through the gap in the wall and climb the stairs. On the following floor, take the upper-left alcove for the second Moon-Dew. Backtrack to the lower route, take the left staircase and follow the final path to the summit.
At the top, two attacking creatures are destroyed during the guardian scene. Heal before speaking to De-Vars. His most dangerous attack is Disrupt Arm, which damages the whole party physically. Have Rika cast Deban early, then keep her available for Gires or Gisar. Chaz can use Rayblade or Nathu, Rune can use Legeon or Nawat, and Wren should attack with his strongest single-target weapon. If Wren is hurt, use Recover rather than sacrificing a healing turn from Rika. Revive fallen characters promptly with Sol-Dew, the fast-slow revival method or a Repair Kit for Wren.
After De-Vars is defeated, three reward chests appear below him. Take the Palma Ring, Mota Ring and Dezo Ring. Equip them to Wren, Rika and Rune respectively. Leave with Hinas, Escapipe or the dungeon exit, then return to Silence Temple and use the Regen Platform before Courage Tower.
- Collect both Moon-Dews, the Guard Rod and both Guard Claws if desired.
- Defeat De-Vars with Deban available or active.
- Collect the Palma Ring, Mota Ring and Dezo Ring.
- Restore the party at Silence Temple before continuing.
Clear Courage Tower and defeat Sa-Lews
From Silence Temple, travel east to the wall, go south and move slightly east to the purple-rock entrance. Save outside. On the first floor, go up and left to the alcove containing a Star-Dew. Return to the center, continue upward to the top wall, then go right and down to the staircase.
On the next floor, go up, left and down while ignoring the upper-left branch. Continue down to the small passage on the right and collect the second Star-Dew. Return left, down and left, then go up to the junction. Ignore the left staircase for now. Instead, go up, right and down into the small room and take its stairs.
Continue up and left, then climb the next stairs. Go right and down to collect Guard Mail and Guard Armor. Equip Guard Mail to Rika and Guard Armor to Wren. Return to the upper-left stairs, then take the route right and down to the next staircase. Backtrack to the earlier junction and now take the left route. Climb to the next level, go right, down, right and up for Guard Robe, then equip it to Rune. Follow the upper route to the final staircase and climb to Sa-Lews.
Sa-Lews relies heavily on magic, including Legeon and Hewn. Have Wren cast Barrier at the start. Rika should prioritize healing and can use Deban if the party needs additional protection. Chaz can use Rayblade or Crosscut, Rune can use Legeon or Nawat, and Wren should attack after Barrier is established. Use Star-Dews or Sol-Dews instead of allowing several members to remain near defeat. If Wren falls, revive him with a Repair Kit; use Sol-Dew or the fastest available revival method for other characters.
After the battle, open the two chests below Sa-Lews. Collect the Algo Ring and Rykr-Ring, also rendered as Rykros Ring in some references. Equip the Algo Ring to Chaz. Keep the Rykr-Ring in the inventory; it is used for the later final-party protection sequence and should not be sold or discarded. Return to Silence Temple and proceed to the central room.
- Collect both Star-Dews.
- Collect and equip Guard Mail, Guard Armor and Guard Robe.
- Defeat Sa-Lews with Barrier available.
- Collect the Algo Ring and Rykr-Ring.
- Return to Silence Temple after the battle.
Explicitly trigger Le Roof’s Genesis of Algo explanation
After both De-Vars and Sa-Lews are defeated, enter the central room of Silence Temple and speak with Le Roof. Do not assume that merely stepping onto the Regen Platform completes this story requirement. The platform restores the party, but the Genesis of Algo scene is triggered by returning to the central room and proceeding through Le Roof’s conversation.
Let the entire explanation play. Le Roof describes the Great Light, the Profound Darkness, the seal formed by the Algo system and the role of the Protectors. The five rings are the proof that the party has completed the two guardian tests and can withstand the approach to the Darkness. When the conversation ends, the route to Elsydeon becomes available through Esper Mansion.
Use the platform after the conversation if needed, then leave Rykros. Make a recovery save before traveling to Dezolis and entering Esper Mansion.
- Both tower guardians are defeated.
- All five rings are in the inventory.
- You entered Silence Temple’s central room and spoke with Le Roof.
- The complete Genesis of Algo scene has played.
- A recovery save exists before Esper Mansion.
Travel through Esper Mansion and obtain Elsydeon
Return to Dezolis and enter Esper Mansion. Speak with the guards as necessary, then make your way through the mansion to Lutz’s room. In the lower area, Rune opens the secret door behind the Telepathy Ball and the story temporarily removes Rika, Rune and Wren from the active party. You control Chaz alone and cannot save or leave during this short sequence, so heal Chaz by speaking with Rune before entering the cave.
Go through the secret door into Sacred Sword Cave. Follow the passage upward, turn right, descend the steps and stay near the left wall as you move down. At the bottom, move slightly right and take the staircase. Continue up the passage and stairs to the statue on the raised platform. Examine the statue to begin the Elsydeon scene.
Chaz receives Elsydeon after the vision and dialogue. The party then reunites automatically. Elsydeon is required to enter Anger Tower, but Anger Tower itself remains optional. Elsydeon is also the essential weapon for the later final route, so equip it to Chaz and save after leaving the cave.
- Reach Lutz’s room in Esper Mansion.
- Enter Sacred Sword Cave through the secret door.
- Examine the statue at the end of the cave.
- Obtain Elsydeon and reunite with the party.
- Save after returning from the cave.
Optional Anger Tower and Megid
Only enter Anger Tower if you want its optional rewards. The tower is on Rykros west of the Courage Tower area, and its entrance becomes available after Chaz has obtained Elsydeon. It is not required for the Genesis of Algo scene, the final dungeon or the ending.
Inside Anger Tower, use the right-side route first to collect Guard Mail, then return and take the left-side route for the Sol-Dew. Continue upward through the short tower. At the top, Chaz is separated from the party and must fight the Alys illusion alone. Use Chaz’s strongest reliable attack and heal with items if necessary.
After the illusion, Re-Faze asks whether Chaz wants to turn his anger into power. Choose No. Choosing Yes begins a solo battle against Re-Faze that cannot be won normally and leads to defeat. Choosing No grants Chaz Megid without the unwinnable battle. Megid costs 30 TP and attacks all enemies, making it useful later, but its optional status should be clear.
Save after leaving Anger Tower if you take the rewards. If you skip it, proceed directly to the preparation point for the next chapter.
- Obtain Elsydeon before attempting Anger Tower.
- Collect Guard Mail and Sol-Dew if entering.
- Defeat the Alys illusion.
- Choose No when Re-Faze offers the anger power.
- Learn Megid only if the optional tower is completed.
Tune macros, equipment and supplies before the final approach
Keep the five rings assigned correctly: Palma Ring on Wren, Mota Ring on Rika, Dezo Ring on Rune and Algo Ring on Chaz. Carry the Rykr-Ring for the later fifth-member sequence. Equip Elsydeon to Chaz and place the strongest available defensive armor on the characters most exposed to physical attacks.
Prepare separate macros for normal healing and emergency recovery rather than forcing every turn through an expensive automatic sequence. A practical defensive setup uses Deban against physical pressure and Barrier against heavy magic. Keep Rika’s strongest healing available manually, keep Rune’s high-cost techniques for dangerous encounters and do not spend Megid casually if you learned it.
Restock Trimates, Star-Dews, Sol-Dews and other revival supplies before leaving the current hub. The exact level needed varies with equipment and battle choices, but the party should not enter the final approach with an underleveled fifth member. Save with the party healed, equipped and stocked. This completes the Rykros and pre-final preparation covered here; the next chapter begins with the final approach route.
- All five rings are retained and assigned appropriately.
- Elsydeon is equipped to Chaz.
- Deban, Barrier, healing and revival options are ready.
- The optional fifth member is not severely underleveled.
- A final pre-descent save exists.
Before you move on
- Le Roof’s initial Silence Temple conversation has played.
- De-Vars and Sa-Lews are defeated.
- Palma Ring, Mota Ring, Dezo Ring, Algo Ring and Rykr-Ring are collected.
- You explicitly spoke with Le Roof in Silence Temple’s central room after clearing both towers.
- The Genesis of Algo explanation has played.
- Elsydeon has been obtained through Esper Mansion and Sacred Sword Cave.
- Anger Tower is either completed for its optional rewards or deliberately skipped.
- The party is healed, equipped, stocked and saved before the final approach.
References for this chapter
Final Approach: Entering the Profound Darkness Lair
After obtaining Elsydeon, return to Motavia through the Tyler Spaceport sequence. The party then reaches Nurvus Spaceport, where the final optional companion is selected from Hahn, Gryz, Demi, Raja, and Kyra. Prepare the party before traveling to Mile and entering the eight-section dungeon known as The Edge. The Edge has no treasure or recovery facilities, so the last healing and supply check must be completed before entry.
1. Obtain Elsydeon and return to Motavia
Complete Sacred Sword Cave beneath Esper Mansion and take Elsydeon from the statue. Chaz enters the cave alone, but Rika, Rune, and Wren are restored to the party when he emerges. Leave Lutz's room and return to the Tyler Spaceport, either by teleporting or by traveling back through Dezolis.
At the Tyler Spaceport, use the navigation screen and return to Motavia. Raja and Kyra rejoin during the departure sequence. When the Landale reaches Motavia, the party arrives at Nurvus Spaceport, where Hahn, Gryz, and Demi are waiting. The group learns that a large hole has appeared north of Piata and that the surrounding life is dying. This is the story trigger for the final approach. The mandatory core party is Chaz, Rika, Rune, and Wren.
- Chaz has obtained Elsydeon.
- Rika, Rune, and Wren have rejoined.
- The Motavia disaster conversation has played at Nurvus Spaceport.
2. Decide whether to clear Anger Tower
Anger Tower on Rykros is optional. It is not needed to unlock The Edge, the final party choice, or the Profound Darkness battle. If you want Chaz's optional Megid Technique and the additional endgame equipment found through the tower, complete it before making the final party selection.
At the tower's upper section, defeat the Alys illusion. When Re-Faze offers to teach the technique through a direct fight, answer no. Refusing the battle grants Chaz Megid; accepting begins a solo fight that is not a practical route for a normal completion. Afterward, use Hinas or an Escapipe to return to the Silence Temple, board the Landale, and travel back to Motavia.
- Anger Tower was either deliberately skipped or completed.
- If Anger Tower was completed, Re-Faze was answered with no.
- The party has returned to Motavia before final party selection.
3. Choose the fifth member at Nurvus Spaceport
At Nurvus Spaceport, speak to the gathered characters and select one companion. Hahn and Gryz are on the left side of the Spaceport. Demi, Raja, and Kyra are on the right. Speak to the person you want and accept the offer to join. The five valid choices are Hahn, Gryz, Demi, Raja, and Kyra.
Raja is the most forgiving choice for a first completion because he supplies additional healing and revival support. Hahn adds offensive Techniques, Gryz supplies physical damage, Demi offers useful defensive Skills and immunity to status effects, and Kyra provides a mixed offensive and curative role. The selected character rejoins with strong late-game equipment, so the choice is not a requirement to have kept that character active earlier.
Set the marching order after choosing. A practical arrangement places Wren first, followed by Chaz and Rika, with Rune and the selected companion behind them. Adjust this if your chosen member has a specific battle role, but do not leave the Spaceport without confirming that the intended fifth member is active.
- The selection is being made at Nurvus Spaceport.
- One of Hahn, Gryz, Demi, Raja, or Kyra has joined.
- The chosen character is in the active five-member party.
- The marching order has been checked.
4. Restore equipment, levels, and supplies
Use the Regen Platforms at Nurvus Spaceport to restore the party. A useful preparation target is at least level 45 for every active character, with Chaz near level 49, Rika near level 52, Rune near level 45, and Wren near level 46. These are practical targets rather than hard entry requirements. If the chosen companion is below that range, gain experience before entering The Edge instead of relying on repeated revives.
Equip Chaz with Elsydeon. Rika should use the Silver Tusk and her strongest defensive equipment. Wren should be given PLSMLAUNCH or PHOTNERASR if available. The selected fifth member normally rejoins with high-level equipment, but inspect every slot before leaving. If Raja is selected, prioritize defensive equipment and healing capacity rather than physical attack.
Buy or retain Trimates, Star-Dews, and Sol-Dews. Keep Repair Kits if Wren or Demi is in the active party. An Escapipe is useful if you decide to leave before the final commitment. Save in a separate slot after healing and equipment checks.
- Every active character is at a practical endgame level.
- Chaz has Elsydeon equipped.
- Wren has PLSMLAUNCH, PHOTNERASR, or the best available weapon.
- Healing, revival, and repair supplies are stocked.
- A separate pre-final save exists.
5. Reach the hole south of Mile
Travel to Mile by teleport, vehicle, or foot. Mile is dead at this stage, so do not enter expecting an inn, shop, or other useful service. From Mile, travel south to the large gray area. The huge hole in the center is the entrance to The Edge.
Before stepping into the hole, restore the party again at Nurvus Spaceport if necessary. There is no shop, save point, Regen Platform, or treasure route inside The Edge. Save immediately before entering. The final dungeon contains random encounters through most of its route, so conserve expensive Techniques against ordinary enemies and use Elsydeon, Silver Tusk, and efficient group attacks where appropriate.
- The party has reached Mile.
- The hole south of Mile has been located.
- The party is fully restored and the game has been saved before entry.
6. Cross the first four sections of The Edge
The Edge uses lighted paths and patterned transport tiles. Follow the illuminated walkway; the patterned tiles carry the party to the next section. In section one, go up, right, up, left, up, right, and up, then enter the transport tile.
In section two, go right to the split. Take the upper path, turn right at the top, and continue right to the next transport tile. In section three, walk south, following the path whenever it turns. Ignore the short western branch, which is a dead end, and use the transport tile at the bottom.
In section four, walk west to the split. Ignore the short northern dead end and continue west to the next transport tile. These four sections have no services or useful treasure, so do not spend resources exploring apparent branches.
- The first transport tile was reached through the north/east route.
- The upper branch was used in section two.
- The western dead end in section three was ignored.
- The northern dead end in section four was ignored.
7. Cross the final four sections
In section five, walk north a short distance and take the western branch. At the next split, take west again rather than north. Follow the path as it turns north and enter the transport tile.
In section six, walk west, then south, then west again, and finally north to the transport tile. Section seven is nearly straight: walk north to the next tile. Section eight is also linear; walk north to the final transport tile. The eighth section has no random encounters, which signals that the final tile leads directly to the lair.
Do not use the final tile immediately. Stop before it and perform the last recovery check. If the party is not ready, return with an Escapipe before committing to the final battle route.
- The western branches were chosen in section five.
- Sections six, seven, and eight were crossed in order.
- The final transport tile is visible.
- No party member is relying on an emergency revive or depleted TP reserve.
8. Complete the final approach
Before stepping onto the final tile, heal every character and confirm that Chaz has Elsydeon. Equip Wren with PLSMLAUNCH or PHOTNERASR if available. Confirm that Rika and either the selected fifth member or another party member can provide the healing and revival actions you intend to use.
Step onto the final transport tile. The party appears before the black mass representing the Profound Darkness. The scripted conversation involves Chaz, Rika, Rune, Wren, and the chosen fifth member. The Profound Darkness battle begins immediately afterward, with no shop, rest scene, or further party-selection opportunity inside The Edge.
- All five active characters are fully healed.
- Chaz has Elsydeon equipped.
- Wren has a suitable final weapon.
- The intended fifth member is present.
- The final pre-battle save is complete.
- The Profound Darkness dialogue begins after the final tile is entered.
Before you move on
- Elsydeon has been obtained and Chaz, Rika, Rune, and Wren are together.
- The final companion was selected at Nurvus Spaceport from Hahn, Gryz, Demi, Raja, or Kyra.
- The party traveled from Mile to the hole south of Mile.
- All eight sections of The Edge were crossed in the verified transport order.
- The final transport tile was entered after the last healing and equipment check.
- The party appears before the black mass and the scripted build-up dialogue plays.
- The Profound Darkness battle begins, confirming that the final approach and party selection were accepted.
Final Boss Breakdown — Multi-form Combat and Counters
The Profound Darkness is fought in one uninterrupted battle against three successive incarnations. There is no camp or equipment screen between forms, and the battle continues immediately when one incarnation changes into the next. The first form uses single-target attacks, the second adds dangerous party-wide attacks, and the final form combines heavy physical damage, sleep effects, Canceling and Megid. The safest plan is to establish Barrier and Saner at the start, conserve party-wide healing through the first two forms, and spend the remaining offensive and recovery resources during the final form.
Prepare before entering the Dark Portal
Save before stepping onto the final transport tile and again before beginning the final descent if your route provides a separate save opportunity. Heal the entire party and equip current endgame gear. Chaz should use Elsydeon if it is available, and Wren should carry Positron Bolt or Photon Eraser for the final battle. Rika should have enough TP for repeated healing, while Rune needs sufficient TP for NaWat and Legeon or Efess. Your fifth member should be treated as a role specialist rather than as a replacement for Rika or Wren.
Carry a substantial supply of Star Dews, Sol Dews, Moon Dews and other strong recovery items. Do not assume that a normal dungeon recovery point exists between forms. A Star Dew is most valuable after a party-wide attack, while a revival item is preferable when a fallen character must return with enough HP to survive the next enemy action.
- Save before the final battle sequence.
- Heal the party and verify current equipment.
- Equip Chaz with Elsydeon when available.
- Give Wren Positron Bolt or Photon Eraser when available.
- Reserve strong recovery items for the final form.
Start the first incarnation with the essential buffs
The first incarnation uses Ray-Breath, Firebreath and Shadowbreath. These are single-target attacks, so this stage is controlled with ordinary attacks, Rayblade, NaWat and single-target healing rather than constant party-wide recovery. In the opening round, have Wren use Barrier and Rika use Saner. Rune can use NaWat, while Chaz uses Rayblade or another dependable attack. The fifth member should use a defensive skill, attack, or heal according to that character’s role.
If one character is injured, Rika should use Gires, NaRes or the equivalent efficient single-target cure. Do not spend a Star Dew for damage to only one party member. Deban can be added if the party is taking heavy damage, but it is not necessary to rebuild every possible buff before attacking. The first incarnation is the resource-saving phase: defeat it with normal attacks and moderate techniques while keeping everyone alive.
- Barrier is active before the first serious damage cycle.
- Saner is active if Rika can spare the opening turn.
- Use single-target healing for isolated damage.
- Use Rayblade and NaWat as dependable damage options.
- Avoid spending multiple Star Dews in this phase.
Handle the second incarnation’s party-wide attacks
The second incarnation introduces LightShowr, Distortion and AnothrGate in addition to its normal attack. These attacks can damage several or all party members, so switch from isolated healing to GiSar, Sar or a Star Dew whenever the whole party is badly hurt. Wren can use Recover when his own HP is low; the Guardian Rod is also useful if it is in your inventory and a character can use it safely.
Continue using Rayblade or Crosscut with Chaz, NaWat with Rune, and the fifth member’s most reliable damage or support option. Rika should heal whenever a group attack has reduced multiple characters below safe HP. If everyone is healthy, she can attack with Dblslash or use another efficient offensive action. Do not waste turns reapplying Barrier or Saner merely because the boss has transformed: buffs remain active across the change of form. Recast them only if their effects have actually been removed or expired.
- Watch for LightShowr, Distortion and AnothrGate.
- Use group healing after party-wide damage.
- Keep Rika’s turn available for emergency recovery.
- Do not automatically recast buffs after the transformation.
- Preserve at least one strong party-wide recovery item for the final form.
Enter the final incarnation with a functioning party
The final incarnation has the longest endurance of the three and should be treated as the real resource test. Its normal attack is dangerous, Possession can put a character to sleep, Canceling removes assistance effects such as Barrier, Deban and Saner, and Megid can heavily damage the entire party. Because the battle does not pause between forms, the action that defeats the second incarnation may be followed immediately by another character’s queued action or by the new form’s attack. Do not assume the transformation gives you a free healing round.
At the start of the final phase, continue attacking with Chaz’s strongest available option. Use Megid or Crosscut if appropriate, then rely on Rayblade or physical attacks when those resources are depleted. Rune should use Legeon, then Efess or another dependable technique when TP becomes limited. Wren should use Positron Bolt, then Photon Eraser or normal attacks, using Recover whenever necessary. If the fifth member is Raja, keep him on healing or support; if the member is Demi, Phonon or Medic Power can provide useful support; damage-oriented members should attack unless an emergency item is required.
- Treat Megid as a full-party recovery check.
- Use Legeon before moving Rune to lower-cost attacks.
- Use Wren’s strongest available weapon skill before normal attacks.
- Use support-oriented fifth members for healing when Rika is overwhelmed.
- Do not expect a free turn during transformation.
Respond immediately to Canceling, Possession and deaths
After Canceling, restore Barrier as soon as practical with Wren or Demi. If the party is stable, restore Saner next; if the party is taking critical damage, healing has priority. Do not spend several consecutive turns rebuilding every buff while the boss is still attacking. Possession or sleep can remove a key character from the rotation, so cure it when that character is required for healing, Barrier or a major damage action.
If Wren falls, use a Repair Kit if one of the surviving members can do so safely. For other fallen characters, a Sol Dew is generally preferable to a low-HP revival when the next boss action could kill the revived member again. Revive Rika or Wren before restoring a minor injury to an active attacker because losing both healing and Barrier makes recovery much harder. If two or more members fall and the remaining party cannot survive another attack, reload the pre-battle save rather than wasting the rest of the inventory on a failing attempt.
- Recast Barrier after Canceling.
- Cure sleep when it removes a healer or support character.
- Revive Rika or Wren before less essential attackers.
- Use strong revival items when a weak revival would cause another death.
- Reload if the final phase begins with no realistic recovery route.
Finish the battle and verify completion
Continue the final-form damage cycle until the third incarnation is defeated. There is no need to retreat between forms, and the battle is not complete when the first or second manifestation disappears. Once the final blow lands, do not reset, reload or interrupt the sequence. Allow the dialogue and ending scenes to run until the credits appear.
The campaign completion check is concrete: all three incarnations must fall in the same uninterrupted encounter, the post-battle scenes must play, and the credits must become visible. Preserve the save made before the final battle until this has been confirmed.
- The first incarnation was defeated.
- The second incarnation was defeated.
- The final incarnation was defeated.
- The post-battle dialogue and ending scenes played.
- The credits appeared before the final save was overwritten.
Before you move on
- All three Profound Darkness incarnations were defeated in one continuous battle.
- The party survived the transition into the final form or recovered from any deaths during it.
- The ending dialogue and post-battle scenes played without a reset.
- The credits became visible.
- The pre-battle save was preserved until the ending was confirmed.
References for this chapter
- Phantasy Star IV - Guide and Walkthrough - Genesis - By Marak - GameFAQs
- Phantasy Star IV — Guide and Walkthrough by Sir_Pobalot, GameFAQs
- Phantasy Star IV — Boss Guide by SSGokuEX, GameFAQs
- The Profound Darkness — Pixel Guides
- Phantasy Star IV — Profound Darkness enemy reference
- Phantasy Star IV Instruction Manual, Sega Genesis Mini archive
Recovery and Post-Boss Events: Epilogue Triggers and Scene Checks
In the original North American Sega Genesis release, defeating all three forms of the Profound Darkness automatically begins the escape and ending sequence. There is no required post-boss town visit, NPC conversation, or free-roaming post-game state. The fifth-member selection changes the final battle party, but it does not unlock a separate recruit-specific ending. Preserve a save outside Nurvus Spaceport, or immediately before entering it, if you want to test different final-party choices.
1. Make the final recovery save at Nurvus Spaceport
After obtaining Elsydeon through the Esper Mansion and Sacred Sword Cave sequence, the story returns the party to Motavia and directs you toward the final confrontation. Before entering the final area, complete all shopping, healing, equipment changes, and optional preparation you intend to use. Then travel to Nurvus Spaceport and save outside the entrance, or save immediately before entering it if you are using a convenient nearby save point.
Nurvus Spaceport is the final-party staging area. The core group remains Chaz, Rika, Rune, and Wren, while the fifth position can be filled by one of the previously recruited companions. The choice is not permanently locked when first made: before confronting the Profound Darkness, return to Nurvus Spaceport and speak with another available companion to replace the current fifth member. Keep the Nurvus-area save separate from your ordinary campaign file so optional content and alternate final battles remain recoverable.
- Save outside or immediately before entering Nurvus Spaceport.
- Finish purchases and equipment changes before entering The Edge.
- Equip Chaz, Rika, Rune, and Wren for the final dungeon.
- Carry suitable healing and revival items for the chosen fifth member.
- Keep a separate save if you want to compare final-party choices.
2. Choose the fifth companion inside Nurvus Spaceport
Enter Nurvus Spaceport and speak with the companion you want to take into the final battle. The valid choices are Hahn, Gryz, Demi, Raja, and Kyra. Alys and Seth are not available choices. The selected character joins the active party, while the other eligible companions remain available at the spaceport if you return before entering the final confrontation.
The selection changes your combat options rather than the story outcome. Raja adds dependable healing and defensive support. Demi contributes mechanical abilities and can support recovery, especially if you have maintained her equipment and supplies. Kyra and Hahn provide additional Technique options, while Gryz is a straightforward physical attacker who can also use items when another character needs emergency healing. Use the character whose level, equipment, and available abilities are strongest in your file rather than selecting someone who has remained underdeveloped.
If you change your mind, leave Nurvus Spaceport, restore your preparation, and return before entering The Edge. Speak to the replacement companion there. Make the final choice only after confirming that the active party has the equipment and item stock needed for the Profound Darkness battle.
- Choose one of Hahn, Gryz, Demi, Raja, or Kyra.
- Do not search for Alys or Seth as final-party options.
- Confirm that the selected character has usable equipment.
- Return to Nurvus Spaceport if you want to change the choice before the final battle.
- Do not overwrite the recovery save until the ending has been viewed.
3. Enter The Edge and follow the final route
Once the party is prepared, leave Nurvus Spaceport and enter the large hole south of Mile. This leads to The Edge, the dimension containing the Profound Darkness. The final area does not provide a normal town, shop, or required story conversation, so do not enter it expecting to activate another recruitment flag or ending condition.
Follow the dungeon route through its fixed teleport paths. Use recovery items carefully during the approach and heal completely before the final teleport. The last approach leads to the chamber where the party automatically gathers for the pre-battle dialogue. Control is temporarily restricted while the scene plays; allow it to finish rather than resetting because the game has not frozen or missed a required command.
The final confrontation begins after the scripted buildup. There is no additional NPC conversation to trigger once the party has entered The Edge, and there is no need to return to Nurvus Spaceport after the battle begins.
- Enter The Edge only after final preparation is complete.
- Follow the fixed teleport route instead of searching for a town or post-game area.
- Heal the party before the final teleport.
- Wait through the automatic pre-battle dialogue.
- Do not reset when control is temporarily removed.
4. Defeat all three Profound Darkness forms
The final encounter consists of three successive Profound Darkness forms. Treat the battle as one continuous victory condition: defeating the first or second form does not complete the game, and the ending does not begin until the third form has also been defeated.
Preserve enough healing and revival resources for the last form instead of spending every powerful item at the beginning. If the chosen fifth member falls, revive that character when the party is stable enough to do so; do not abandon the fight merely because one optional member is incapacitated. The four core characters remain central to the battle plan, and the fifth member is not required to unlock a different ending route.
After the final form is defeated, the game automatically begins the dimensional escape. Elsydeon protects the party as The Edge collapses. This is a scripted transition, not a return to normal exploration. Do not load a save state, turn off the console, or interrupt the game during the escape.
- Defeat the first Profound Darkness form.
- Defeat the second Profound Darkness form.
- Defeat the third Profound Darkness form.
- Wait for the automatic Elsydeon escape sequence.
- Do not interrupt the transition after the final victory.
5. Let the ending and credits finish
After the escape, the game automatically returns the party to Motavia and presents the closing farewell scenes. The sequence includes the party's separation, the characters' future activities, and the epilogue presentation. The fifth-member choice affects who fights beside the core group, but it does not create a separate ending branch tied to that recruit or require an earlier optional recruitment event.
No post-boss town visit, NPC conversation, or free-roaming post-game state is required in the original North American Genesis release. Once the final battle is won, simply allow the scenes to advance normally. Do not leave the ending sequence, reset the game, or reload before the credits if you are verifying completion.
The concrete completion check is the full automatic chain: the escape from The Edge, the return to Motavia, the farewell scenes, the epilogue presentation, and the staff credits. Preserve the Nurvus Spaceport recovery save afterward if you want to repeat the final battle with another fifth member or return to optional content.
- The automatic escape from The Edge completes.
- The party returns to Motavia.
- The scripted farewell scenes appear.
- The epilogue presentation appears.
- The staff credits roll to completion.
- The Nurvus Spaceport recovery save remains available for another final-party choice.
Before you move on
- All three Profound Darkness forms are defeated.
- Elsydeon protects the party during the automatic escape from The Edge.
- The party returns to Motavia without requiring player interaction.
- The farewell scenes play in their scripted sequence.
- The epilogue presentation appears.
- The staff credits roll to completion.
- A separate save remains outside or immediately before Nurvus Spaceport.
References for this chapter
- Phantasy Star IV - Guide and Walkthrough - Genesis - By Marak - GameFAQs
- Phantasy Star IV — Walkthrough by Voltron, GameFAQs
- Phantasy Star IV – Phantasy Star Series Ending FAQ – Genesis – By FZoli
- Phantasy Star IV – Game Script – Genesis – By SineNomine
- Phantasy Star IV Instruction Manual, Sega Genesis Mini archive
Optional World-Map Services and Side Content
Use this chapter as a side-content and recovery reference rather than as a second version of the main story route. Chapter 04 handles the required Monsen, Ladea Tower, Nurvus and Zio sequence. Chapter 09 handles the post-Nurvus route through Zelan, Kuran, the Dezolis crash, Landale recovery and the continuation into the late game. Return here when you want optional equipment, Hunter's Guild rewards, town services or safe recovery points. The Plate System, Hunter's Guild jobs and Vahal Fort are optional and can all be skipped without preventing the final confrontation or ending.
1. Keep the required route in its assigned chapters
Do not use this chapter to reproduce the main campaign path. If you have reached Monsen and need the story triggers, Ladea Tower directions, Nurvus route or Zio battle, follow chapter 04. That chapter covers the required sequence and should remain your progression reference.
After Nurvus, use chapter 09 for Zelan, Wren's recruitment, the Canceller, Kuran, the Dezolis crash, Raja, Landale recovery and the next required destinations. The services and side quests in this chapter are inserted around the main route; they do not replace it or create an alternate way through the story.
- Chapter 04 is being used for the required Monsen-to-Zio route.
- Chapter 09 is being used for the required post-Nurvus and Dezolis route.
- No optional quest or facility is being treated as a prerequisite for the ending.
2. Decide whether to clear the optional Plate System
The Plate System is the optional facility north of Monsen. The earthquake events around Monsen belong to the main story context, but entering the Plate System and shutting it down is not required to continue through Termi, Ladea Tower, Nurvus or the later campaign. If you skipped the facility while following chapter 04, persistent earthquake-related dialogue does not by itself indicate that the story is blocked.
If you choose to clear it, make a recovery save before entering and bring enough healing items for a dungeon run. The facility contains useful equipment, including Ceramic Armor, Titanium Gear, the Phonomezer, a Laser Axe and a Stun Shot. The objective is the control panel at the end of the facility; completing that interaction stops the earthquakes. Search the side routes before leaving so you do not have to make a second trip for the equipment.
After shutting down the system, return to a healing point before continuing the main route. If the Plate System has already been completed, do not revisit it expecting a new story flag. If you bypassed it, record that choice in your save notes so you do not mistake the optional omission for a progression error.
- The Plate System is recorded as completed or intentionally skipped.
- Optional equipment has been assigned to the characters who can use it before anything is sold.
- A save exists outside the facility or at a reliable nearby recovery point.
3. Use towns as service hubs
Aiedo is the main early optional-content hub. Alys's house provides free recovery while it remains available, and the town has weapon, armor and tool shops. The Hunter's Guild is in the northern part of town. The Naura cake shop is reached through the outer-wall route near the Guild and sells Shortcake, which is needed for the Tinkerbell's Dog job. The Guild building also contains hidden chests with a Trimate and Meseta; collect them once rather than repeatedly searching the building.
Piata is useful for ordinary shopping, healing and returning to the academy area during early Guild jobs. Krup is a convenient Motavia travel point during the middle game. Monsen has an inn and tool-shop access and is a practical place to restock before optional Motavia travel. Termi has an inn and armor shopping, including the Bayamare Gift Store, but it should not be treated as a complete tool-restock stop.
Buy Dimates, Antidotes, Cure-Parals, Telepipes and Escapipes before leaving a town with a full tool selection. After Landale is restored, Tyler becomes an important Dezolis service hub with an inn and shops. Use the nearby spaceport's regeneration facility when it is available, especially before a long story dungeon.
The Hunter's Guild is a job counter, not a healing facility. After accepting or completing a job, return to a house, inn, regeneration platform or magic circle before entering a side dungeon.
- Recovery items were purchased before leaving a town with a tool store.
- Termi was not mistaken for a full tool-restock location.
- Tyler and its spaceport facilities are used for recovery after Landale access is available.
4. Complete Hunter's Guild jobs when their rewards justify the detours
The Hunter's Guild has eight optional missions. Ranch Owner is available when the Guild first becomes accessible in Aiedo. Tinkerbell's Dog becomes available after obtaining the Land Rover. Missing Student and Fissure of Fear become available after Zio is defeated. Stain in Life, Dying Boy, Man With a Twist and Silver Soldier become available after obtaining the Hydrofoil. These jobs provide money, experience and special rewards, but none is required for the Profound Darkness route.
For Ranch Owner, accept the request in Aiedo, travel to Mile, defeat the troublesome sandworm and return to the Guild to collect the reward. For Tinkerbell's Dog, buy a Shortcake from the Naura shop, follow the job's town sequence to Rocky, complete the required conversation and return to the Guild for payment. Use Ryuka or a Telepipe where possible to avoid unnecessary crossings.
After Zio, accept Missing Student and Fissure of Fear if their rewards are wanted. After obtaining the Hydrofoil, revisit the Guild for the four late jobs. The Silver Soldier job is the one that opens Vahal Fort, but the fort remains optional and must not be confused with the required Soldier's Temple route.
For Silver Soldier, first confirm that the Hydrofoil has been obtained, then accept the job from the Hunter's Guild receptionist. Travel to Zema and enter the old man's house in the northeastern part of town. Speak to him and follow the local clues. When the job directs you toward the machines, do not board the Hydrofoil near Nalya and do not search for an isolated Motavia-side island. Vahal Fort is reached overland from the Zema area: cross the Zema bridge and travel northeast on foot until you reach the fort.
Inside Vahal Fort, reach the computer core and shut down Daughter. Search the fort's side rooms and collect the Laco Gear and Laco Armor before leaving. These are optional rewards, but they are the principal reason to clear the dungeon. After Daughter is shut down, return to Aiedo and report to the Hunter's Guild to receive the Silver Soldier payout. Vahal Fort can be skipped entirely without blocking Soldier's Temple, Rykros or the ending.
- The Guild receptionist has been revisited after completing a job so the reward is collected.
- The Land Rover is obtained before expecting Tinkerbell's Dog to appear.
- Zio has been defeated before expecting Missing Student or Fissure of Fear.
- The Hydrofoil is obtained before looking for the four late Hunter's Guild jobs.
- Silver Soldier is accepted before entering Vahal Fort.
- Vahal Fort is reached by crossing the Zema bridge and traveling northeast overland.
- Daughter is shut down, Laco Gear and Laco Armor are collected, and the completed job is reported at the Guild.
5. Make recovery saves before side-content transitions
Use separate saves before accepting a Hunter's Guild mission, entering an optional dungeon and beginning a major vehicle or planet transition. Keep one clean campaign save that is not overwritten by side-content progress. This is especially useful before accepting Silver Soldier, entering Vahal Fort and leaving a service hub for the next required dungeon.
If an optional dungeon becomes too dangerous, leave with Hinas, an Escapipe or the available exit route, then recover at a town or regeneration platform. Do not spend rare recovery items trying to finish a side area after the party is already losing members to ordinary encounters. Optional rewards are useful, but they are never worth damaging the only save that preserves the main route.
When returning to the story, verify the next assigned chapter rather than following an old side-quest note. After Zio, continue with chapter 09's post-Nurvus directions. After the late Dezolis and Air Castle events, use chapter 08 for the required Soldier's Temple route, keeping Vahal Fort separate.
- A clean main-route save is preserved.
- A separate save exists before optional dungeons and major vehicle transitions.
- The party has recovered before returning to the assigned story chapter.
- Vahal Fort has not been mistaken for the required Soldier's Temple route.
Before you move on
- The required Monsen, Ladea Tower, Nurvus and Zio route has been left to chapter 04.
- The required Zelan, Kuran, Dezolis, Landale and continuation route has been left to chapter 09.
- The Plate System is clearly recorded as completed or skipped.
- Desired Hunter's Guild jobs have been accepted, completed and paid out, or deliberately ignored.
- If Silver Soldier was chosen, the Hydrofoil was obtained first, the job was accepted at the Guild, Vahal Fort was reached from Zema overland across the Zema bridge, Daughter was shut down, the Laco equipment was collected and the Guild report was completed.
- The party has a clean campaign save and has recovered at a town, home, spaceport or magic circle before resuming the main route.
References for this chapter
Recruitment Arcs: Raja, Gryz, Kyra and Alys
Alys is part of the opening party and cannot be recruited again after her permanent story departure. Gryz joins in Tonoe when Grandfather Dorin sends the group to recover the Alshline. Raja first joins on Dezolis after the Landale crashes at his temple, then leaves during the Meese illness scene. Kyra joins only after the scripted Carnivorous Trees encounter northeast of Meese. Both Raja and Kyra later become available again for the final fifth-member choice at Nurvus Spaceport. These departures are mandatory story events, not missed recruitment flags.
1. Keep Alys through the opening Motavia chapters
The game begins in Piata, inside the Motavia Academy, with Chaz and Alys already together. Follow the principal's instructions, enter the Academy basement after Hahn joins, and complete the opening investigation. Alys is therefore a starting party member, not an optional recruit in Aiedo or another town.
Continue through Zema, Birth Valley, Molcum and Tonoe with Alys in the party. She is a strong early area attacker because slashers can strike groups of enemies. Keep her weapons and armor current while she remains available, but do not spend resources planning to restore her later.
Alys's departure is triggered by the mandatory Zio arc. After the relevant story confrontation, she leaves permanently. No dialogue response, chest, side quest or later town visit can prevent this in the original North American Genesis campaign. Kyra later fills a similar ranged-area role, but she is recruited much later on Dezolis and is not an alternate way to keep Alys.
- Begin in Piata's Motavia Academy.
- Keep Alys equipped through the early Motavia route.
- Treat her departure during the Zio sequence as permanent and required.
- Save before major bosses if you want a recovery point for equipment or dialogue management.
2. Recruit Gryz in Tonoe after the Grandfather Dorin scene
After the Birth Valley and Molcum events, follow the route into Tonoe. Rest and reorganize your equipment before speaking to Grandfather Dorin in the hut on the east side of the village. The story conversation is the recruitment trigger: Rune leaves, and Gryz joins the party at approximately level 6.
After Gryz joins, leave Dorin's hut and go to the separate warehouse building behind and west of the hut. Examine the trapdoor. Gryz opens it, allowing the party to descend into the warehouse basement. If the trapdoor does not open, return to Dorin and make sure the full conversation has played out; entering the warehouse before this event is not possible.
Clear the basement and obtain the Alshline. Return to Zema and use it to advance the restoration sequence. Gryz remains with the group through the following Bio-Plant and Zio progression, but he later leaves during the mandatory transition after Zio when he returns to Tonoe to look after his sister.
Gryz is a straightforward physical attacker with high early HP. Place him toward the front of the formation and keep Hahn or another support character available for healing. Before the warehouse, buy the best affordable titanium equipment from Tonoe's weapon and armor stalls; it is more important to upgrade Gryz's weapon and armor than to purchase every minor tool immediately.
- Enter Tonoe and speak with Grandfather Dorin.
- Allow Rune to leave and Gryz to join.
- Use Gryz to open the warehouse trapdoor.
- Collect the Alshline from the basement.
- Return to Zema and continue the story.
- Accept Gryz's later departure after the Zio sequence as mandatory.
3. Recruit Raja after the Landale crashes on Dezolis
Raja is first recruited during the early Dezolis route, not at the eventual final-party gathering. After Wren joins and the party travels through Kuran, the Landale is sabotaged and crashes on Dezolis. The party wakes at Raja's temple. Speak with Raja and accept his offer to accompany the group.
Raja joins at roughly level 25 and is primarily a healer and recovery specialist. Keep him toward the back of the formation. His curative Techniques and Skills make him especially useful for the long Dezolis sequence, so conserve his TP where possible and use ordinary healing items when a small amount of recovery is enough.
After joining, follow Raja's information toward Ryuon and Tyler. The party eventually obtains access to the Landale and continues the Dezolis investigation. Do not confuse this initial temple recruitment with the later return to Nurvus Spaceport; those are separate story events.
Raja's first departure occurs in Meese. Enter the clinic after completing the Climate Control Center portion of the route and allow the illness scene to play. Raja collapses because of the Black Energy Wave and leaves the active party. This departure is the trigger for the rescue mission involving Kyra. Reload only if you want to recover an earlier save, not because you believe the recruitment failed.
- Reach Dezolis after the Landale crash.
- Speak with Raja at his temple and accept his offer.
- Use him as the principal healer during the early Dezolis route.
- Visit the Meese clinic and complete the illness scene.
- Continue after Raja leaves instead of searching for another recruitment flag.
4. Recruit Kyra at the Carnivorous Trees northeast of Meese
After Raja leaves in Meese, an Esper explains that Kyra has gone toward the Garuberk Tower. Leave Meese and use the Ice Digger. Travel east from town, then follow the narrow passage through the mountain range toward the wooded area northeast of Meese. Drive into the cluster of Carnivorous Trees to trigger the rescue scene.
The battle against the Carnivorous Trees is not a normal victory condition. Defeated trees regenerate, so do not waste TP or consumables trying to clear the encounter. Choose the escape command. The game allows the party to retreat, and the following scene completes the rescue.
After escaping, Kyra Tierney joins the party. She explains that the Esper Mansion's leader, Lutz, may know how to defeat the trees. Take Kyra to Esper Mansion after recruitment. The guards at the entrance recognize her and allow the group to pass, so attempting to enter before this event will not advance the route.
Kyra is a ranged fighter and support-oriented Esper. Her slashers provide group damage, while her Techniques and Medice skill let her supplement Rika's recovery. Place her behind the sturdier physical attackers and equip current slasher and defensive gear. Kyra later leaves during the Garuberk Tower and Gumbious Temple sequence, then becomes available again for the final optional party position.
- Trigger Raja's departure at the Meese clinic.
- Use the Ice Digger to travel east and then northeast through the mountain pass.
- Enter the Carnivorous Trees area.
- Escape instead of attempting to defeat the regenerating trees.
- Confirm that Kyra joins after the rescue scene.
- Take Kyra to Esper Mansion to continue the story.
5. Choose the returning fifth member at Nurvus Spaceport
The core late-game party is Chaz, Rika, Rune and Wren. Earlier companions who leave during the story are not automatically active again, but the game later makes several of them available for the final approach. After the required late-game sequence returns the party to Motavia and the final route is open, go to Nurvus Spaceport.
Save before entering or before speaking to the character you want. The five valid choices are Hahn, Gryz, Demi, Raja and Kyra. Speak with one of them and accept the offer of help. The selected character joins as the fifth member, and the others remain available at the spaceport.
The choice is not permanently fixed. Return to Nurvus Spaceport before the final confrontation if you want to replace the fifth member. This makes a save outside the spaceport useful for comparing party compositions without replaying the preceding story.
Raja is the safest choice for sustained healing, revival and recovery. Kyra gives a balance of area damage and support. Gryz supplies physical damage but little healing. Hahn contributes offensive and support Techniques, while Demi offers android utility and Medical Power but requires Repair-Kits for her own recovery. These are strategic recommendations rather than story requirements; any of the five can be used to complete the campaign if properly equipped.
Equip the selected member before leaving Nurvus Spaceport. If choosing Demi, carry several Repair-Kits because ordinary revival items do not restore her in the same way as organic characters. If choosing Raja, prioritize defensive equipment and preserve his TP for healing and recovery. Once the fifth member is ready, proceed to the final-approach chapters.
- Complete the required late-game route that returns the party to Motavia.
- Go to Nurvus Spaceport, not Motavia Spaceport, for the final selection.
- Save before choosing the fifth member.
- Choose among Hahn, Gryz, Demi, Raja and Kyra.
- Equip the selected character before entering the final approach.
- Return to Nurvus Spaceport if you want to change the choice before the final confrontation.
Before you move on
- Alys was present through the opening Motavia route and her mandatory departure was accepted.
- Gryz joined after the Grandfather Dorin conversation in Tonoe and opened the warehouse trapdoor.
- The party obtained the Alshline and returned to Zema to advance the story.
- Raja joined at his temple after the Landale crash on Dezolis.
- Raja left after the Meese clinic illness scene.
- The party escaped the Carnivorous Trees northeast of Meese and Kyra joined afterward.
- Kyra was taken to Esper Mansion to continue the Lutz route.
- The late-game returning characters were found at Nurvus Spaceport.
- A save exists before the fifth-member selection.
- The selected fifth member is equipped and ready before the final approach.
References for this chapter
- Phantasy Star IV Instruction Manual, Sega Genesis Mini archive
- Phantasy Star IV — Guide and Walkthrough by Sir_Pobalot, GameFAQs
- Phantasy Star IV - Guide and Walkthrough - Genesis - By Marak - GameFAQs
- Phantasy Star IV — Guide and Walkthrough by saint35, GameFAQs
- Phantasy Star IV — Walkthrough by Voltron, GameFAQs
- Phantasy Star IV walkthrough, RPGClassics
Techniques, MP Management and Equipment Upgrades
Build the party around Rune’s offensive techniques, Rika’s support and recovery techniques, and physical equipment for Chaz, Gryz, and Wren. Spend TP where it removes danger, use items for routine recovery when appropriate, and buy upgrades in campaign order instead of outfitting every temporary character.
Assign the casters their proper jobs
Rune is the party’s main offensive technique user. He begins with Foi, Wat, and Gra, later adds stronger elemental and gravity techniques, and eventually gains Nawat, Nagra, Tandle, Efess, and Legeon. Use his area techniques when several enemies are present, but change elements when an enemy resists the current technique. Do not treat Rune as the party’s primary healer: his useful emergency options are limited compared with Rika’s recovery list.
Rika is the central support character. She learns Saner at level 8, Gires at 13, Deban at 14, Shift at 19, Sar at 20, Gisar at 28, Nares at 33, and Nasar at 40. Saner raises the party’s agility, Deban raises party defense, and Shift strengthens one ally’s attack. Sar, Gisar, Nares, and Nasar provide progressively stronger recovery, with the latter techniques healing all living organic allies when their descriptions specify a group target.
Wren cannot use ordinary techniques, but his built-in skills and android equipment make him valuable. Demi likewise relies on android skills such as Barrier and Medical Power rather than the organic recovery techniques. Chaz can heal with Res, Gires, and later Nares, while Raja eventually becomes another powerful healer if he is in the active party.
- Use Rune for elemental and area damage.
- Use Rika for Saner, Deban, Shift, and organic-party healing.
- Keep Chaz or Raja available as a backup healer when the story permits.
- Remember that androids require repair items or android-specific recovery rather than organic healing techniques.
Choose techniques by encounter type
Against ordinary groups, begin with Rune’s area techniques when they can defeat or seriously weaken several enemies at once. Gra, Gigra, Nagra, and other all-enemy techniques are useful when their damage type is effective, but the game still spends TP if a technique is resisted or fails. If Rune’s current element performs poorly, switch to physical attacks, another element, or a cheaper technique instead of repeating an inefficient cast.
For dangerous physical enemies and bosses, Rika’s Deban is usually a better opening action than immediately attacking. Saner is valuable when acting before the enemy will determine whether the party can heal in time. Use Shift on a strong physical attacker when the battle is expected to last several rounds. Against a boss with a protective stat increase or barrier, the Psycho-Wand can later be used as an item to cancel enemy stat bonuses and magic barriers; do not spend Rune’s TP trying to solve a problem the item handles directly.
Use single-target recovery when only one character is in danger. Use Sar, Gisar, or Nasar when several organic characters need healing or when a major attack has left the party in immediate danger. Rika’s offensive skill Double Slash can be preferable to spending TP when no healing or support action is needed.
- Use area techniques for groups and single-target damage for bosses.
- Open difficult physical fights with Deban when Rika knows it.
- Use Saner when turn order is important.
- Use group healing only when multiple living organic allies need it.
- Reserve the Psycho-Wand’s Canceling effect for enemy buffs and barriers.
Manage TP and recovery items together
Do not measure readiness by HP alone. A party with full HP but depleted TP may be unable to use Deban, Saner, Gisar, or emergency healing during the next boss attempt. Rest at an inn after a long dungeon, after returning from a major story area, and whenever Rune or Rika has spent enough TP that the next boss would force heavy item use.
Use Monomates, Dimates, and Trimates for ordinary recovery when the party is safe or when only one character is injured. A Trimate restores a large amount of HP to one living organic character; it does not revive a defeated ally. Moon Dew revives one defeated organic character with partial HP, while Sol Dew fully revives one defeated organic character. Star Dew heals all living organic characters for a fixed amount but does not revive the defeated.
Carry status cures that match the next dungeon. Antidotes handle poison, and Cure-Paral handles paralysis. Bring a Telepipe for returning to town and an Escapipe for leaving a dungeon. The Termi preparation guidance specifically calls for a few Dimates, a couple of Antidotes and Cure-Parals, and escape or return items as needed. For later boss runs, carry several Trimates and preserve revival items for battles where retreating would be costly.
- Restore TP at an inn before a major boss.
- Use Dimates and Trimates before spending expensive recovery TP when only one character is hurt.
- Do not confuse Star Dew with a revival item.
- Keep Moon Dew and Sol Dew for genuine defeats.
- Carry status cures and at least one practical escape method before a long dungeon.
Use equipment with useful item effects
Some equipment is valuable because of what it does when selected from the battle item menu, not only because of its attack or defense rating. The Wooden Cane provides a weak Res-like heal to one character. The Guard Rod provides a Sar-like heal to the whole party and can conserve Rika’s TP during long dungeon stretches. The Power Shield provides a Shift-like attack increase to one character. The Swift Helm provides a Saner-like effect to its user. Keep these items available even if a newer piece has a better displayed defense value, provided the active party can use the effect safely.
Ladea Tower is especially important because the Psycho-Wand is obtained there. Its item effect cancels enemy stat increases and magic barriers. Treat this as a tactical tool rather than automatically equipping it for every fight. If a boss has not raised defenses or created a barrier, Rune can continue using his normal weapon or technique plan.
- Keep Guard Rod available for TP-free group recovery.
- Use Power Shield when a physical attacker needs a temporary attack increase.
- Use Swift Helm when its self-targeted agility effect is useful.
- Do not sell unusual equipment before checking its battle-item effect.
- Obtain and preserve the Psycho-Wand after the Ladea Tower sequence.
Upgrade equipment in campaign order
When new shops open, prioritize weapons for characters who attack physically every round. Chaz, Gryz, and Wren gain immediate value from stronger weapons. For Rune and Rika, compare armor, headgear, shields, and mental-stat bonuses rather than buying every weapon tier. The equipment screen shows the resulting statistics before purchase, so use that comparison to avoid paying for an upgrade that does not improve the intended character.
At Termi, the armor shop sells Psy-Crown, Psy-Circlet, Psy-Mail, and Psy-Shield. The most important purchase is normally Psy-Crown for Rika because her mental statistic affects the power of her support and recovery techniques. Psy-Mail is a major defensive purchase for eligible active organic characters; the established walkthrough route prioritizes it for Chaz, Rika, and Gryz before entering Ladea Tower. Termi has no normal tool shop, so stock Dimates, status cures, Telepipes, and Escapipes before arriving or teleport back to a town that sells them.
Do not fully equip characters who are about to leave or who are only temporarily available. Buy for the active party first, then replace the weakest armor or weapon. Keep rare equipment with unusual effects until you are certain it has no later use.
- Upgrade physical weapons for Chaz, Gryz, and Wren first.
- Prioritize Rika’s Psy-Crown at Termi.
- Buy Psy-Mail for the active eligible characters before Ladea Tower.
- Stock tools before relying on Termi as a base.
- Compare projected statistics and preserve equipment with special item effects.
Before you move on
- Rune has an effective area technique and at least one reliable single-target or alternate-element option for the next dungeon.
- Rika knows the support and recovery techniques available at her current level and has enough TP for the next boss attempt.
- The inventory contains Dimates or Trimates for routine recovery, revival items for defeats, status cures for the next dungeon, and a Telepipe or Escapipe.
- Chaz, Gryz, and Wren have their current practical weapon tier, while Rika has the best affordable headgear and armor available.
- Special-effect equipment has been preserved rather than sold blindly.
- The party has rested and a separate save exists before the next major dungeon or story boss.
References for this chapter
Optional Completion: Silver Soldier, Equipment and Final Party Variations
The Silver Soldier assignment and Vahal Fort are optional content in the original North American Sega Genesis release. They provide some of Wren’s best equipment, his Positron Bolt skill, and an 80,000-Meseta Hunter’s Guild payment, but they are not required to reach the Profound Darkness or view the ending. Accept the assignment before entering Vahal Fort, clear the fort through the Daughter shutdown event, complete both reports, and collect the Guild payment. Elsydeon comes later from Esper Mansion and Sacred Sword Cave, never from Vahal Fort. Near the end of the campaign, preserve a save before the Nurvus Spaceport selection so you can test the five valid fifth-party choices: Hahn, Gryz, Demi, Raja or Kyra.
Separate optional goals from fixed story events
Alys’s death is a fixed event in the original Genesis campaign. There is no normal conversation, Hunter’s Guild job or rescue condition that changes this outcome. Do not spend time searching for an Alys-survival route.
Seth is also temporary. He accompanies the party during the approach to Soldier’s Temple, but his identity as the third Dark Force manifestation is then revealed. Seth is not one of the final-party choices.
The late-game party has four fixed members: Chaz, Rika, Rune and Wren. One additional character is selected from Hahn, Gryz, Demi, Raja or Kyra. The fifth-member choice affects the final battle party, available abilities and some surrounding character presence, but it does not create a separate recruit-locked campaign ending.
For an optional-completion file, finish Silver Soldier, collect its Wren rewards, obtain Elsydeon through its proper story route, and preserve a separate save before choosing the fifth member. Vahal Fort is not required for the main ending.
- Treat Alys’s death as unavoidable in the North American original.
- Do not search for an Alys-rescue trigger.
- Expect Chaz, Rika, Rune and Wren to form the fixed final-party core.
- Keep a separate save before the final fifth-member selection.
Accept Silver Soldier before entering Vahal Fort
Obtain the Hydrofoil first. Once the late Hunter’s Guild jobs become available, return to the Hunter’s Guild in Aiedo and speak with the receptionist to accept Silver Soldier. Accept the job before entering Vahal Fort. If the assignment has not been taken, the fort’s access is blocked.
Do not postpone the assignment until after the Elsydeon sequence. The job can become unavailable if delayed too far into the late game, and missing its timing can prevent the normal dungeon rewards. If Silver Soldier is already unavailable, reload a save from before the missed Guild visit whenever possible.
After accepting the job, warp to Zema. Three Servants attack when you enter town. Defeat them, then go to the old man’s house in the northeastern part of Zema and speak with him. This conversation establishes the machine trouble and directs the party toward the fort.
The corrected route begins from Zema. Leave town and travel overland northeast, crossing the Zema bridge and following the land route beyond it until you reach Vahal Fort. Do not warp to Nalya and board the Hydrofoil to reach the fort; that is not the correct approach for this assignment after the Zema scenes.
Save before entering Vahal Fort. This preserves the accepted job and gives you a recovery point if you need to restock, revisit a branch or reload after a difficult encounter.
- Obtain the Hydrofoil.
- Accept Silver Soldier at the Aiedo Hunter’s Guild.
- Accept the job before entering Vahal Fort and before the late Elsydeon sequence.
- Defeat the three Servants when entering Zema.
- Speak with the old man in northeastern Zema.
- Travel overland northeast from Zema across the Zema bridge.
- Save before entering Vahal Fort.
Clear Vahal Fort and collect its actual rewards
Vahal Fort is an optional mechanical dungeon. Its relevant rewards are the Repair-Kit, Photon Eraser, Laco-Gear, Laco-Armor and Positron Bolt. Laco-Gear and Laco-Armor are Wren equipment, Photon Eraser is a powerful Wren weapon, and Positron Bolt is his strongest skill from this side quest. Elsydeon is not in Vahal Fort.
Work through the fort’s machine corridors, elevators, switches and connecting routes. Search branches before taking an elevator or committing to the next section so you do not pass a chest. Collect the Repair-Kit, Photon Eraser, Laco-Gear and Laco-Armor, then equip the Wren upgrades when practical.
Continue through the fort until you reach the computer core known as Daughter. The core sequence leads to the Dominator encounter. Defeat all three Dominators in the single required battle, then allow the scene in which Wren shuts down Daughter to finish before moving away or leaving the fort. Positron Bolt is obtained as part of the completed Vahal Fort objective; confirm that it is available to Wren before treating the job as finished.
The fort’s enemies are mechanical, making lightning-oriented attacks useful. Rune’s Tandle is especially effective, although conserve enough technique points for healing and the Dominator battle. Strong physical attacks also work. Keep Rika and Wren alive when possible, use Trimates or Star Dews when ordinary healing is insufficient, and revive fallen characters promptly rather than allowing damage to accumulate across the encounter.
After Daughter has been shut down, return to Zema and report to the old man. Then return to Aiedo and speak with the Hunter’s Guild receptionist to receive the 80,000-Meseta payment. The side quest is not fully closed out until the Zema report and Guild payment have both been completed.
- Collect the Repair-Kit.
- Collect the Photon Eraser.
- Collect and equip Laco-Gear on Wren.
- Collect and equip Laco-Armor on Wren.
- Reach Daughter’s computer core.
- Defeat all three Dominators.
- Confirm that Positron Bolt is available to Wren.
- Allow the Daughter shutdown scene to finish.
- Report to the old man in Zema.
- Return to Aiedo and collect the 80,000-Meseta payment.
Obtain Elsydeon through Esper Mansion and Sacred Sword Cave
Elsydeon belongs to a separate late-game story sequence. It is not a Vahal Fort reward, and the Laco equipment, Photon Eraser and Positron Bolt should not be treated as substitutes for the sword.
After the required Dezolis and Air Castle progression, follow the story until Rune directs the party back to Esper Mansion. Enter the mansion and go to Lutz’s room. Use the hidden passage behind the Telepathy Ball to enter Sacred Sword Cave.
The cave sequence temporarily separates Chaz from the rest of the party. Follow the passage through the cave, descend the staircase and continue to the raised platform. Examine the statue holding the sword to trigger the vision and receive Elsydeon. When the scene ends, confirm that Chaz has received the weapon and equip it if necessary.
If Elsydeon is missing, verify the sequence rather than returning to Vahal Fort: complete the required late-game story, enter Esper Mansion, visit Lutz’s room, use the hidden passage behind the Telepathy Ball, reach the statue in Sacred Sword Cave and examine it. Vahal Fort cannot provide the sword.
- Complete the required Dezolis and Air Castle progression.
- Return to Esper Mansion when directed by the story.
- Enter Lutz’s room.
- Use the hidden passage behind the Telepathy Ball.
- Reach the statue in Sacred Sword Cave.
- Examine the statue and receive Elsydeon.
- Confirm that Elsydeon came from Sacred Sword Cave, not Vahal Fort.
Protect equipment during scripted party changes
Before a character leaves the active party, inspect that character’s equipment and remove rare or unusual gear you want to preserve. Store unique equipment instead of selling it merely because its owner is temporarily absent. This is useful when preparing several final-party variations.
Hahn is a technique-focused option with offensive and support magic. Gryz is primarily a physical attacker. Demi contributes android skills and utility. Raja is the strongest dedicated healing option. Kyra combines healing, offensive techniques and utility. These differences affect the final battle’s difficulty, but none changes the ending route.
If you choose a less supportive fifth member, carry extra Trimates, Star Dews and Moon Dews. Rika remains important for party recovery, while Raja or Kyra can add another source of support when selected. Recheck weapons, armor and item stock after every scripted party change.
- Save before major scripted party departures.
- Remove rare equipment before a temporary departure when practical.
- Store unique gear instead of selling it.
- Carry extra recovery items if choosing a less supportive fifth member.
- Review equipment again before the final descent.
Save outside Nurvus Spaceport before choosing the fifth member
After the Elsydeon sequence and the return to Motavia, the candidates for the final party gather at Nurvus Spaceport. The five valid choices are Hahn, Gryz, Demi, Raja and Kyra. Chaz, Rika, Rune and Wren remain the fixed core.
Save outside Nurvus Spaceport, or at the last safe save point before entering the selection area. This is the reusable checkpoint for comparing final lineups. Enter the spaceport, speak with the character you want and accept that character’s offer of help.
Reload the outside save if you want to test another choice. Do not rely on a save made only after selecting the fifth member, because that preserves the selection you are trying to compare. Before leaving for the final approach, confirm the marching order, equipment, healing items and technique reserves for the chosen group.
- Reach Nurvus Spaceport after the Elsydeon sequence and return to Motavia.
- Save outside Nurvus Spaceport or before entering the selection area.
- Choose Hahn, Gryz, Demi, Raja or Kyra.
- Reload the outside save to test alternate final parties.
- Recheck equipment, marching order and recovery items after each selection.
View the ending and replay final-party variations
After choosing the fifth member, continue through the final approach and defeat the Profound Darkness. Defeating all three forms automatically begins the escape and ending sequence. Allow the escape, Motavia return, farewell scenes, epilogue presentation and staff credits to play without resetting or interrupting the game.
The selected fifth member changes the final battle party and associated character presence, but the North American Genesis release does not provide a separate recruit-locked ending for each choice. There is no required post-boss town visit, NPC conversation or free-roaming post-game state. The complete credits sequence is the practical completion point.
If Silver Soldier was missed, use an earlier save from before the assignment became unavailable. The Nurvus Spaceport checkpoint cannot restore a missed Guild assignment or recover Vahal Fort treasure. If the assignment was accepted but the fort was not completed, return to Vahal Fort before the late-game cutoff, reach Daughter, defeat the Dominators and complete both reports.
- Complete the final battle at least once.
- Allow the automatic escape sequence to begin.
- Watch the Motavia return, farewell scenes, epilogue and staff credits.
- Keep the save made outside Nurvus Spaceport.
- Reload that save to test another fifth member.
- Use an earlier save if Silver Soldier was missed.
- Do not search for a separate recruit-specific ending or required post-credits visit.
Before you move on
- Silver Soldier was accepted after obtaining the Hydrofoil and before entering Vahal Fort.
- The party defeated the three Servants in Zema and spoke with the old man.
- Vahal Fort was reached by traveling overland northeast from Zema across the Zema bridge.
- Vahal Fort was cleared by reaching Daughter, defeating all three Dominators and completing the shutdown scene.
- Laco-Gear, Laco-Armor, Photon Eraser and Positron Bolt were collected if the optional equipment objective was pursued.
- The party returned to Zema and reported to the old man.
- The Hunter’s Guild payment of 80,000 Meseta was collected in Aiedo.
- Elsydeon was obtained later through Esper Mansion and Sacred Sword Cave, not Vahal Fort.
- The five final candidates gathered at Nurvus Spaceport after the Elsydeon sequence and return to Motavia.
- A save exists outside Nurvus Spaceport or before entering the final selection area.
- That checkpoint can select Hahn, Gryz, Demi, Raja or Kyra.
- At least one final battle was completed and the automatic escape, ending scenes and credits were viewed.
- No Alys-rescue route, post-game exploration mode or recruit-locked ending was required.
References for this chapter
- Phantasy Star IV - Guide and Walkthrough - Genesis - By Marak - GameFAQs
- Phantasy Star IV — Guide and Walkthrough by Sir_Pobalot, GameFAQs
- Phantasy Star IV - Hunter's Guild FAQ - Genesis - By Lutz
- Phantasy Star IV - Sidequest FAQ - Genesis - By Fox_Fire
- Phantasy Star IV — Walkthrough by Voltron, GameFAQs
- Vahal Fort: The Silver Soldier Side Quest
- Phantasy Star IV Instruction Manual, Sega Genesis Mini archive
Troubleshooting: Common Failure Points and Save Recovery
Phantasy Star IV on the original North American Sega Genesis release rarely creates an unrecoverable story block. Most apparent dead ends come from missing a conversation, leaving a dungeon before taking its required item, confusing the earlier Nurvus facility with the late-game Nurvus Spaceport, or traveling to the wrong destination after a scripted scene. The Genesis version has three save files. Saving is allowed in towns and on the field outside dungeons, but not inside dungeons, so protect each major transition with a separate checkpoint.
1. Establish the last confirmed story event
Start with the most recent event you can verify rather than the destination you expected to reach. Check the current party, inventory, available vehicles, map access, and the last boss or scripted battle that definitely ended. The main route begins in Aiedo and Piata, then passes through Zema, Birth Valley, Tonoe, the Bio-Plant, Zio’s Fort, Nurvus, Zelan, Kuran, Dezolis, Rykros, and the Profound Darkness route.
A missing character is useful evidence. Rune, Rika, Demi, Kyra, Wren, and the other recruits enter or leave during fixed scenes. If one is absent, replay the preceding objective before assuming that the character is permanently unavailable. Also separate the two locations named Nurvus: the earlier Nurvus facility is part of the Zio and Demi progression, while Nurvus Spaceport is the late-game Motavia gathering and replay point after Elsydeon.
- Write down the last boss or scripted battle that definitely ended.
- Check the newest vehicle, access ability, and key item in the inventory.
- Compare the current party roster with the expected story point.
- Save on the field or in a town before testing another route.
2. Recheck the relevant town and every likely story NPC
Return to the last settlement or base named by the party’s dialogue. Speak to NPCs in homes, shops, academies, temples, command rooms, and unusual buildings. Important flags are not always attached to the most prominent NPC, and a new conversation may appear only after returning from a dungeon or watching a follow-up scene.
For the early route, confirm the Academy assignment in Piata and Hahn’s involvement before entering the basement. After Birth Valley and the stone-statue events, return to Zema and confirm the town sequence. In Tonoe, Grandfather Dorin is essential: speaking with him triggers Rune’s departure and Gryz’s joining. Gryz then opens the basement entrance in the tent behind Dorin’s location.
After obtaining Alshline, return to Zema. The item alone is not the full objective; the restoration scene and the following Igglanova encounter must occur before the route continues. Later checks should be tied to the current objective, including Zio’s Fort, the Vehicle Control Plant, Monsen, Ladea Tower, Nurvus, Zelan, Kuran, Esper Mansion, Gumbious Temple, and the late-game spaceports.
- Piata: confirm the Academy assignment and Hahn’s joining scene.
- Zema: confirm the villagers and Professor Holt are restored after Alshline is returned.
- Tonoe: confirm Dorin’s conversation, Rune’s departure, Gryz’s joining, and the opened warehouse basement.
- After a major boss: revisit the named town, facility, or base before using a vehicle or teleport.
3. Confirm that the dungeon objective was completed
Entering a dungeon or winning a battle does not always complete its progression flag. The required action may instead be examining an object, opening a particular chest, taking a key item, using a terminal, or allowing a scripted conversation to finish. If you escaped immediately after a battle, reload the save from before the event and inspect the area again.
The Tonoe warehouse is a common early example. After Dorin’s conversation and Gryz’s recruitment, enter the basement through the tent behind Dorin. Descend to the bottom level and open the required chest containing Alshline. The separate Escapipe chest is useful for leaving, but it does not replace taking Alshline. Return to Zema and let the complete cure sequence play out.
The Vehicle Control Plant has a similar requirement. The Control Key must be obtained and used at the appropriate terminal before the Land Rover route becomes available. If the quicksand crossing still cannot be made, verify the key in the inventory and replay the terminal interaction rather than searching for an alternate vehicle route.
At the end of the campaign, reaching Rykros is only the beginning of its required test. After meeting Le Roof, both the Strength Tower and Courage Tower objectives must be completed. If the story does not advance, return to Silence Temple and confirm that both guardians and their follow-up scenes were completed. Do not substitute optional Anger Tower content for either required tower.
- Confirm that the required boss or scripted encounter ended normally.
- Confirm that the required chest, object, statue, or terminal was examined.
- Verify key items such as Alshline or the Control Key in the inventory.
- Check whether the expected door, vehicle route, NPC state, or map access changed.
4. Use the three Genesis save files deliberately
The original Genesis release provides three save files. Use one for ordinary progress, one for the last safe town or field position before a dungeon, boss, vehicle change, or permanent party event, and one temporary file for testing a suspected story transition. Because dungeons do not permit saving, leave the area and make the backup as soon as the next safe position becomes available.
If a block appears after a recent town visit, first try the current save by revisiting the relevant NPC or dungeon. Many events remain available after leaving. If the flag still does not trigger, reload the backup from before the last major transition and replay only the connected conversations and dungeon objective. Do not overwrite all three files while testing an uncertain route.
For the late-game party choice, preserve a save at Nurvus Spaceport after the party has returned to Motavia and the reunion scene has occurred, but before choosing the fifth member. This is the correct replay checkpoint for trying Hahn, Gryz, Demi, Raja, or Kyra. The choice is made by speaking to the desired character at Nurvus Spaceport; it is not a separate ending route and does not require a new recruitment arc.
- Slot 1: normal progression save in a town or safe field position.
- Slot 2: backup before a major dungeon, boss, vehicle transition, or party change.
- Slot 3: temporary save after a confirmed story transition.
- Late-game party experiments: keep the pre-choice save at Nurvus Spaceport.
- After recovery: create a new backup before overwriting the older event save.
5. Test for an edition or port mismatch
If the controls, menu labels, dialogue, item names, opening presentation, or save behavior differ substantially, stop using a Genesis-original route until the release is identified. Compare the copy with the official Sega Genesis manual, especially the field menu, battle commands, equipment handling, techniques, vehicles, and saving procedure.
The North American box and marketing title use Phantasy Star IV: The End of the Millennium, while the title screen uses Phantasy Star: The End of the Millennium. That title-screen wording is useful, but it is not enough by itself because compilations and later releases may combine or alter the displayed title. Check several details together: the three-file save structure, Genesis-style field menu, the opening Aiedo and Piata sequence, and the North American names Alys, Chaz, Hahn, Zema, Tonoe, and Alshline.
A Japanese release, European release, compilation, Genesis Mini version, or another port may preserve the broad story while changing terminology or presentation. Minor abbreviations do not prove a different build. If several independent details disagree, keep those saves separate and consult a walkthrough specifically identified for the release in hand.
- Check the title-screen wording against the original Genesis presentation.
- Confirm the Genesis field menu and three save files.
- Compare the opening route through Aiedo, Piata, Zema, and Tonoe.
- Compare character and item names, including Chaz, Alys, Hahn, Gryz, and Alshline.
- Do not mix saves from a port, compilation, or different regional release with an original-cartridge troubleshooting plan.
Before you move on
- The next required town, dungeon, vehicle route, or world area is available without unexplained backtracking.
- The inventory contains the key item associated with the latest progression event, such as Alshline or the Control Key when applicable.
- The party roster matches the expected story point, including scripted departures and recruitments.
- A fresh backup exists in a town or safe field position before the next major dungeon, boss, vehicle transition, or party change.
- For final-party testing, a backup exists at Nurvus Spaceport before speaking to the chosen fifth member.
- The title screen, Genesis field menu, three-save-file structure, opening route, and North American terminology agree with the original target edition.
- For endgame troubleshooting, the party has met Le Roof and completed both the Strength Tower and Courage Tower guardian objectives before attempting the final approach.
- If the problem occurs after Elsydeon, confirm the reunion at Nurvus Spaceport and the fifth-member choice before traveling to Mile and The Edge.
References for this chapter
Appendices: Boss Tables, Technique Lists and Equipment Index
This appendix applies to the original North American Sega Genesis localization of Phantasy Star IV: The End of the Millennium. The required campaign route does not include the Climate Control Center or D-Elm-Lars. After Kuran Dark Force is defeated and the Ice Digger becomes available, the Climate Control Center may be explored for equipment and its optional D-Elm-Lars encounter, but the main story can continue without entering it. The required late-game route proceeds through Meese, the Esper Mansion, the Air Castle, Lashiec, Gumbious Temple, Garuberk Tower, Soldier's Temple, Rykros, Elsydeon and The Edge.
Required boss progression
The required opening battles are the Igglanova in the Piata Academy basement and the second Igglanova encountered at Birth Valley. These are separate fights. After the Birth Valley and Bio-Plant events, continue through Tonoe and the route toward Zio's Fort. Juza is a required boss before the final Zio sequence. If the first encounter with Zio ends through a forced story retreat, that is normal; the battle is not yet meant to be completed.
Travel to Ladea Tower after the Monsen and Plate System events. Gy-Laguiah guards the Psycho-Wand at the top of the tower, so defeat Gy-Laguiah, take the Psycho-Wand, and return to Zio's Fort. Use the Psycho-Wand to break the barrier, complete the required Zio battle and finish the Nurvus sequence. Keep the Psycho-Wand until these events are complete; it is a story-critical item rather than ordinary equipment.
After Nurvus is shut down, follow the Zelan route and recruit Wren. Continue to Kuran and defeat the Kuran Dark Force manifestation. Heal at the dungeon recovery point before the final approach, keep revival items available and avoid spending all party-healing supplies on ordinary encounters. Once Kuran is restored, the story provides access to the Ice Digger and opens the required Dezolis route.
From the Ice Digger sequence, continue toward Meese. The Climate Control Center is not part of the required boss tally. You may go there for its equipment and optional boss, but you may also bypass it and continue through the Dezolis story toward Meese, the illness investigation, the Carnivorous Trees events, Kyra's recruitment and the Esper Mansion. The optional dungeon is covered separately below.
Complete the Esper Mansion events and follow the Eclipse Torch and Air Castle route. The Air Castle contains one required encounter against three Xe-A-Thouls fighting together. It is one group battle, not three separate boss fights. Concentrate attacks on one Xe-A-Thoul to reduce the combined attack pressure, then finish the remaining enemies. Afterward, continue through the castle basement and fight Lashiec as a separate required boss. Use the Psycho-Wand when Lashiec applies Reinforce, keep defensive support active and preserve a dependable source of group healing.
After Lashiec is defeated, the party escapes with the Eclipse Torch. Return to Gumbious Temple, receive permission to use it, and take it to the Carnivorous Trees blocking Garuberk Tower. Clear the trees, save before entering the tower and defeat the Garuberk Tower Dark Force manifestation. This is distinct from Kuran Dark Force and from the Dark Force battle in Soldier's Temple.
Complete the post-Garuberk Tower Gumbious Temple sequence and speak with the bishop. Return to the appropriate spaceport route, obtain the Hydrofoil and complete the Seth and Island Cave events. Enter Soldier's Temple, obtain the Aero-Prism and complete the Seth-related Dark Force battle. Do not attempt this route before the Air Castle, Lashiec, Gumbious Temple and Garuberk Tower events are finished.
Use the Aero-Prism to reach Rykros. At Silence Temple, follow Le Roof's directions to Strength Tower and Courage Tower. Defeat De-Vars in Strength Tower and Sa-Lews in Courage Tower. Both guardians are required, although the towers can be completed in either order. Return to Silence Temple after both victories and complete Le Roof's explanation. Continue through Esper Mansion and Sacred Sword Cave to obtain Elsydeon and equip it to Chaz before the final descent.
- Defeat both Igglanova encounters.
- Defeat Juza.
- Defeat Gy-Laguiah in Ladea Tower and obtain the Psycho-Wand.
- Complete the required Zio and Nurvus sequence.
- Defeat Kuran Dark Force and obtain the Ice Digger.
- Complete Meese, the Carnivorous Trees events and Kyra's required story sequence.
- Defeat the single group of three Xe-A-Thouls in the Air Castle.
- Defeat Lashiec in the Air Castle basement.
- Use the Eclipse Torch to clear the Carnivorous Trees.
- Defeat Garuberk Tower Dark Force.
- Complete the Gumbious Temple bishop sequence.
- Obtain the Hydrofoil and complete the Seth and Island Cave route.
- Obtain the Aero-Prism and defeat Soldier's Temple Dark Force.
- Defeat De-Vars and Sa-Lews on Rykros.
- Obtain Elsydeon through Esper Mansion and Sacred Sword Cave.
Optional Climate Control Center and D-Elm-Lars
After Kuran Dark Force is defeated and the Ice Digger is available, the Climate Control Center can be reached on Dezolis. It is optional. The dungeon contains useful equipment, including the Pulse Vulcan, Compound Gear, Compound Armor and Repair Kits, but neither entering the facility nor defeating its boss is required to reach Meese, the Air Castle, Garuberk Tower, Rykros or the ending.
If you enter, explore the facility, use its recovery point before the final area and defeat D-Elm-Lars at the back of the center. D-Elm-Lars is the optional boss associated with this dungeon. The encounter occurs after Kuran Dark Force and the Ice Digger sequence, not before them. Reliable physical attacks and repeatable damage techniques are safer choices than planning around a specific elemental weakness. Leave with a Telepipe or other escape option when the exploration is complete, then resume the required route through Meese.
Do not include D-Elm-Lars in the required boss count or completion checklist. The Climate Control Center is also separate from Garuberk Tower. Visiting the center does not replace the required Eclipse Torch, Carnivorous Trees and Garuberk Tower sequence.
- Reach this area only after Kuran Dark Force and the Ice Digger sequence.
- Treat the Climate Control Center as optional exploration.
- Defeat D-Elm-Lars only if you want the optional battle and equipment.
- Return to the required Meese route afterward.
- Do not count D-Elm-Lars toward campaign completion.
Final party and Profound Darkness reference
At Nurvus Spaceport, make a recovery save before the final party selection. The fixed core for the final confrontation is Chaz, Rika, Rune and Wren. The fifth position can be filled by one previously recruited character: Hahn, Gryz, Demi, Raja or Kyra. This selection changes the final battle party and available skills, but it does not create a separate character-specific ending route.
Before entering The Edge, equip Elsydeon to Chaz, review armor and accessories, restore HP and TP, and carry a strong reserve of Trimates, Star Dews, Moon Dews, Sol Dews, revival items and TP-restoration supplies. Save again before the final descent. The Profound Darkness forms are fought consecutively, with no town visit or normal restock opportunity between them.
The final required boss sequence is Profound Darkness Form 1, Form 2 and Form 3. Use defensive support and efficient damage during the early forms instead of exhausting every full-party recovery item. When a key character falls, revive the healer or principal support character first, then stabilize the rest of the party. If the first forms consume nearly all high-value recovery supplies, reload the pre-descent save rather than entering the final form without a realistic recovery reserve.
Defeating all three forms automatically starts the escape and ending sequence. Do not reset, reload or attempt to leave before the automatic escape, return to Motavia, farewell scenes, epilogue presentation and staff credits have finished.
- Save before the final fifth-member selection.
- Choose Hahn, Gryz, Demi, Raja or Kyra.
- Enter The Edge with Chaz, Rika, Rune, Wren and the selected fifth member.
- Defeat Profound Darkness Form 1.
- Defeat Profound Darkness Form 2.
- Defeat Profound Darkness Form 3.
- Allow the escape, Motavia return, farewell scenes, epilogue and credits to finish.
Technique and skill quick sheet
Rika is the primary support specialist. Saner improves party speed, Deban reduces physical damage, Shift strengthens physical attackers and Barrier helps against technique or energy damage. Apply the buff that matches the enemy's main threat rather than spending several turns establishing every enhancement. Keep Rika able to heal whenever a boss can damage the entire party.
Rune provides broad offensive technique coverage. Giwat, Gifoi, GiZan, Hewn, Nawat and Legeon are useful for different enemy groups and resistances. Use lower-cost techniques against ordinary enemies when practical, then reserve stronger attacks for required bosses. Megid belongs to optional Anger Tower content and is not needed for the Rykros route or the ending.
Chaz's Rayblade and Crosscut are dependable attacks before Elsydeon. Equip Elsydeon before entering The Edge. Wren's mechanical attacks and Barrier remain useful in late-game battles. Raja is the most direct healing-focused fifth-member choice, while Hahn, Gryz, Demi and Kyra change the balance of physical damage, technique support and recovery. Rebuild macros after the fifth member is selected.
Use macros for repeatable opening patterns, but switch to manual commands for emergency revival, immediate group healing, reapplying support after a transformation or responding to a changed attack pattern. Do not spend the entire stock of Star Dews, Moon Dews, Sol Dews or TP-restoration items in optional areas.
- Use Saner when speed and turn order matter.
- Use Deban against physical-heavy enemies.
- Use Barrier against technique-heavy enemies.
- Keep Rika or Raja available for emergency healing when possible.
- Reserve high-cost techniques and recovery items for required bosses.
- Rebuild macros after selecting the final fifth member.
Equipment priorities and optional content
Upgrade the active party before buying complete equipment sets for reserve characters. Keep the Psycho-Wand until the Zio barrier and Nurvus events are complete. Check character restrictions before purchasing weapons, armor and accessories; a higher displayed value is not useful if the intended character cannot equip the item.
Before the Ice Digger route, restock in the newly available Dezolis towns and replace the weakest equipment on the characters expected to enter the required late-game areas. If you complete the optional Climate Control Center, its equipment can improve the active party, but none of those rewards is required for the main route.
Search Strength Tower and Courage Tower thoroughly for their rings and useful equipment. Equip the rewards according to character restrictions before entering The Edge. Keep one save before the final-party choice and another before the final descent so a failed Profound Darkness attempt does not require replaying the late campaign.
Vahal Fort is optional Silver Soldier content. The job must be accepted before entering if wanted. Its objectives are to reach Daughter, shut down the computer core, collect Laco Gear and Laco Armor, and report back to the Hunter's Guild. Vahal Fort does not contain Elsydeon. Anger Tower is also optional, as are the Alys illusion, Re-Faze, Megid and Prophallis. None is required for the Rykros route or the main ending.
- Keep the Psycho-Wand until the Zio and Nurvus events are complete.
- Upgrade active characters before reserve characters.
- Restock before the Air Castle and Garuberk Tower routes.
- Search both Rykros guardian towers.
- Equip suitable late-game rewards before The Edge.
- Save before the final-party selection and final descent.
- Treat the Climate Control Center, D-Elm-Lars, Vahal Fort and Anger Tower as optional.
Before you move on
- Both Igglanova encounters are defeated.
- Juza, Gy-Laguiah and the required Zio sequence are complete.
- Kuran Dark Force is defeated before the Ice Digger is obtained.
- The required Meese, Carnivorous Trees, Kyra and Esper Mansion events are complete.
- The single Air Castle Xe-A-Thoul group encounter and Lashiec are defeated.
- Garuberk Tower Dark Force and Soldier's Temple Dark Force are defeated.
- De-Vars and Sa-Lews are defeated on Rykros.
- Elsydeon is obtained through Esper Mansion and Sacred Sword Cave.
- A fifth member is selected at Nurvus Spaceport from Hahn, Gryz, Demi, Raja or Kyra.
- All three Profound Darkness forms are defeated.
- The automatic escape, Motavia return, farewell scenes, epilogue presentation and staff credits have played.
- The optional Climate Control Center and D-Elm-Lars encounter were not mistaken for required progression.
- A separate save remains before the final descent.
References for this chapter
- Phantasy Star IV Instruction Manual, Sega Genesis Mini archive
- Phantasy Star IV — Complete walkthrough, Pixel Guides
- Phantasy Star IV — Guide and Walkthrough by Sir_Pobalot, GameFAQs
- Phantasy Star IV — Guide and Walkthrough by Goldenguy, GameFAQs
- Phantasy Star IV — Guide and Walkthrough by saint35, GameFAQs
- Phantasy Star IV — Walkthrough by Voltron, GameFAQs
- Phantasy Star IV — Boss Guide by SSGokuEX, GameFAQs
Finishing up
You have defeated all three Profound Darkness forms, watched the automatic escape, epilogue scenes and staff credits, and confirmed the ending sequence has completed.
The required campaign route is complete: Zio and Nurvus, Zelan and Kuran, the Dezolis and Air Castle sequence, Soldier's Temple, Rykros's Strength and Courage Towers, Elsydeon and The Edge.
Optional areas such as Plate System, Vahal Fort and Anger Tower are complete only if you deliberately chose to pursue them; they are not required for the main ending.
The final party consists of Chaz, Rika, Rune, Wren and one selected fifth member from Hahn, Gryz, Demi, Raja or Kyra. Alys and Seth are not final-party choices.
A pre-final save remains available if you want to replay the ending with a different fifth member or complete optional content.
Choose your next gameScreenshots & video
Game imagery for reference. Follow the written chapters above for the route and strategies.
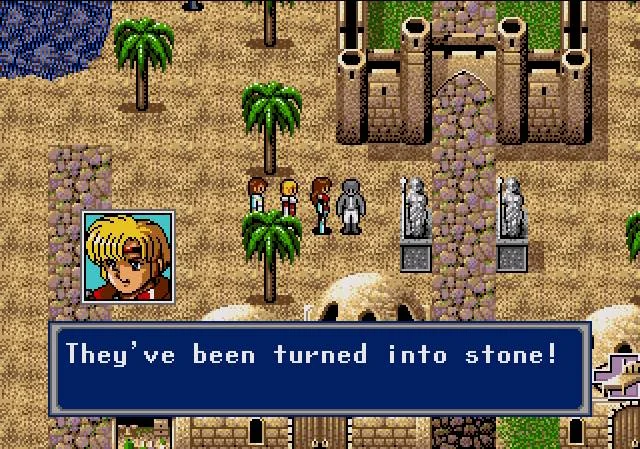
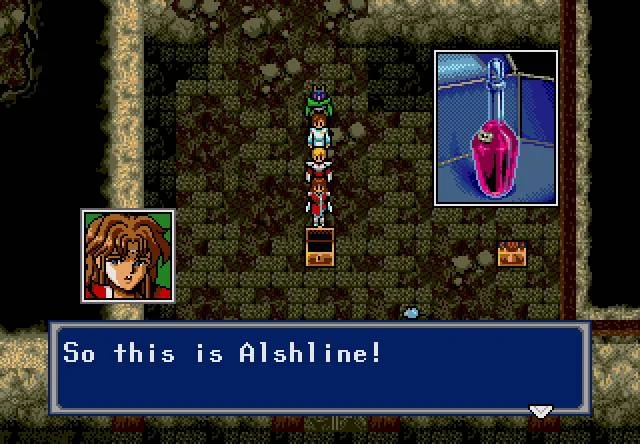
Sources & references
Our original guide draws on the references below. Check the edition at the top of this page before following controls or unlock requirements.
- Phantasy Star IV Instruction Manual, Sega Genesis Mini archive
- Phantasy Star IV Guide and Walkthrough by KRaffa
- Phantasy Star IV — Guide and Walkthrough by Sir_Pobalot, GameFAQs
- Phantasy Star IV – Guide and Walkthrough by TheStarbird
- Phantasy Star IV — Walkthrough by Voltron, GameFAQs
- Phantasy Star IV - Guide and Walkthrough - Genesis - By DarkNu
- Phantasy Star IV — Complete walkthrough, Pixel Guides
- Phantasy Star IV Walkthrough — RPGClassics, Part 2: Mile to Tonoe
- Zema, Birth Valley, and the Road to Tonoe — Pixel Guides
- Monsen and the Plate System — Phantasy Star IV: The End of the Millennium
- Ladea Tower and the Psycho Wand — Phantasy Star IV: The End of the Millennium
- Phantasy Star IV - Guide and Walkthrough - Genesis - By Marak - GameFAQs
- Phantasy Star IV Walkthrough Part II
- Phantasy Star IV — Guide and Walkthrough by Goldenguy, GameFAQs
- Meese and the Esper Mansion
- Vahal Fort: The Silver Soldier Side Quest
- Phantasy Star IV Hunter's Guild Missions
- Phantasy Star IV walkthrough, RPGClassics
- Rykros: Strength and Courage Towers — Phantasy Star IV
- Phantasy Star IV — Boss Guide by SSGokuEX, GameFAQs
- The Profound Darkness — Pixel Guides
- Phantasy Star IV — Profound Darkness enemy reference
- Phantasy Star IV – Phantasy Star Series Ending FAQ – Genesis – By FZoli
- Phantasy Star IV – Game Script – Genesis – By SineNomine
- Phantasy Star IV - Hunter's Guild FAQ - Genesis - By Lutz
- Phantasy Star IV — Guide and Walkthrough by saint35, GameFAQs
- Phantasy Star IV Skill and Technique Chronology
- Phantasy Star IV Technical Guide
- Phantasy Star IV Item Reference
- Phantasy Star IV - Sidequest FAQ - Genesis - By Fox_Fire
- The Tonoe Warehouse — grabbing the Alshline — Phantasy Star
- Phantasy Star IV
About the game & collecting notes
- Platform
- Sega Genesis / Mega Drive
This guide covers party composition, essential techniques and macros, every required dungeon and boss through the Profound Darkness ending, plus optional side content and concrete completion checks so you can finish the game without missing story-critical events.
Darryl Polo
Darryl Polo loves tinkering with emulation and revisiting retro games. He enjoys exploring how old favorites play on different setups and sharing what he learns along the way. At Joking Joystick, he writes about the games, hardware, and small discoveries that keep the hobby fun.
Our editorial standardsFound a step that needs another look? Help us improve this guide.