
Persona 3 Reload (PS5) — Complete Campaign Walkthrough
Practical, step-by-step walkthrough to complete Persona 3 Reload’s main campaign on PlayStation 5. Covers setup, daily scheduling, Tartarus progression, Social Link prioritization, Persona fusion and combat tactics, mid- and late‑game dungeons, and reaching the game’s canonical ending (Reload’s main story ending).


Find a copy
Persona 3 Reload Sony PlayStation 5
We may earn a commission if you buy through these links, at no extra cost to you. As an Amazon Associate I earn from qualifying purchases.
Opens retailer search results. Check the model, edition, seller, availability and current price before buying.
Before you begin
This guide is written for the PlayStation 5 edition of Persona 3 Reload and walks you through the entire main campaign from prologue to the game’s ending.
You will find concrete daily-routine priorities, Tartarus route planning, Social Link targets, Persona/fusion strategy, preparation for major encounters, and final-battle preparation tailored to Reload’s systems (direct party control, new Tartarus features, and quality‑of‑life changes).
Play at your chosen difficulty, but read the early chapters first to learn Reload’s changes versus older Persona 3 releases — some familiar content from Persona 3 FES or Portable (the FES epilogue 'The Answer' and the female protagonist campaign) are not included in Reload.
Use the preparation checklist before starting and follow chapter-by-chapter objectives to avoid missing required progression events.
Set yourself up for the run
Confirm the installed game is Persona 3 Reload for PS5 and install any available game updates through the PS5 system.
Confirm subtitle, voice-language, accessibility, vibration, adaptive-trigger, and volume settings in the game’s Config menu.
Select difficulty deliberately. Peaceful or Easy suits a story-first run, Normal is a balanced first-playthrough choice, and Hard or Merciless require stricter combat and resource management.
Learn that direct party control is available in Reload and practice issuing commands, changing Personas, using items, and guarding during the opening Tartarus visits.
Familiarize yourself with Reload systems such as Linked Episodes, Monad Doors, Tarot rewards, Shift, and Persona fusion before committing to a completion-focused calendar.
Use a weekly planning template: check Social Links and story events first, complete urgent Requests or Missing Persons objectives, then schedule Tartarus or fusion work when no higher-priority time-limited event is available.
Keep multiple in-game manual saves, especially before calendar decisions, major Tartarus operations, expensive fusion sessions, and the final January 31 expedition.
If PlayStation Plus cloud storage is available, use it as a secondary backup and compare local and cloud timestamps before uploading, downloading, or overwriting data.
Stock healing, revival, status-recovery, and SP-restoration items as the campaign advances. Reassess supplies before each new Tartarus block and major boss operation.
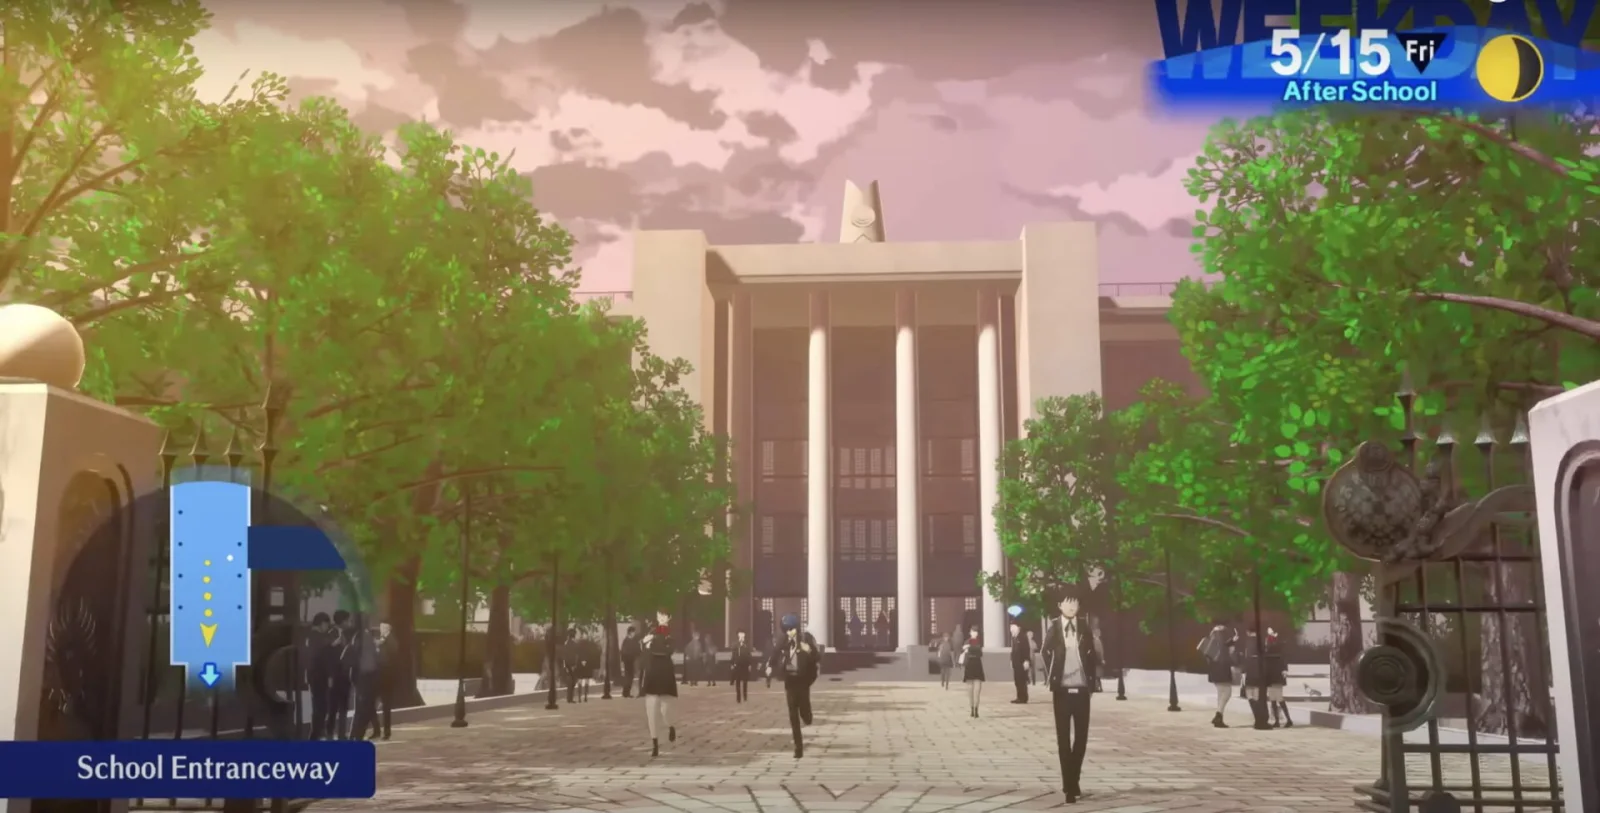
Setup and First Decisions (PS5) — difficulty, saves, and UI
Before committing to Persona 3 Reload’s calendar, confirm that you launched the PS5 version of the base game, choose a difficulty, configure voice and accessibility settings, and establish a manual-save routine. On PS5, open the field menu with Triangle, then use Config for difficulty and voice options. The US PlayStation listing supports English and Japanese voices and lists English plus several other screen languages; the available interface text depends on the regional edition and console setup. Keep separate saves before major events, Tartarus operations, and expensive fusion decisions. This chapter covers Reload’s core male-protagonist campaign only. Persona 3 FES’s epilogue, Persona 3 Portable’s female-protagonist route, and Episode Aigis are separate content.
1. Confirm the PS5 version and the correct campaign
From the PS5 home screen, launch Persona 3 Reload rather than the separate demo, another Persona 3 release, or Episode Aigis. The US PlayStation Store listing identifies the product as Persona 3 Reload for PS4 and PS5, published by SEGA of America, with the PS5 version included in the listing. If you own several Persona 3 products, check the title shown on the home screen before selecting New Game.
The main campaign in this guide is Reload’s original story route with the male protagonist. It is not Persona 3 FES’s additional epilogue, The Answer, and it does not contain Persona 3 Portable’s female-protagonist campaign. Episode Aigis is a separate expansion campaign. Do not expect any of those routes to appear as choices during a normal New Game of the base story.
- The title screen identifies Persona 3 Reload.
- You launched the PS5 version rather than the demo or Episode Aigis.
- You selected New Game for the core campaign.
- You have not overwritten a previous save that you still need.
2. Select the starting difficulty, then know where to change it
Choose the opening difficulty according to how you want to spend your time. Peaceful or Easy is appropriate if the story and calendar planning matter more than demanding battles. Normal is a sensible first-playthrough choice if you want to learn weakness exploitation, Persona fusion, equipment upgrades, and SP management without turning every mistake into a major setback. Hard and Merciless are better reserved for players who already understand Persona combat and are comfortable preparing around enemy damage and resource pressure.
After the opening sequence, press Triangle to open the field menu. Select Config, then locate Change Difficulty. The setting can be adjusted during the campaign, but do not treat that as a substitute for preparation. If you choose Merciless, verify the consequences before changing away from it; specialist walkthrough references consistently warn that leaving Merciless prevents returning to it in that run. Heartless is associated with Episode Aigis, not the main story covered here.
- Story-first run: choose Peaceful or Easy.
- Standard first run: choose Normal.
- Challenge run: choose Hard or Merciless only if you accept stricter resource and battle demands.
- You can reach Config and Change Difficulty from the field menu.
3. Configure voices, sound, subtitles, and controller comfort
When you are outside combat, a cinematic, and active dialogue choices, press Triangle and open Config. For spoken language, enter the game-system settings and use Change Voice Language. The US PS5 listing identifies English and Japanese as the available voice options. Choose one before beginning a long story session, although you can return to this menu later.
Do not confuse voice language with interface or screen language. The US PlayStation listing separately identifies screen languages, including English, French, German, Italian, Polish, Brazilian Portuguese, Russian, Spanish, and Turkish. If the menus or subtitles are not in the language you expect, check the regional edition you installed and the PS5 system-language configuration. A physical or imported copy may not provide the same text-language options as the US digital listing.
Review the volume sliders, subtitle display, vibration, adaptive-trigger effect, stick inversion, control reminders, and tutorial reminders. Keep control and tutorial reminders enabled until the opening combat and Tartarus systems are familiar. Lower vibration or adaptive-trigger intensity if repeated combat inputs become uncomfortable; these settings do not affect calendar progression or battle calculations.
- Voice language is set to English or Japanese as intended.
- Subtitles are enabled if you want dialogue text displayed.
- The interface language matches the installed regional edition and PS5 configuration.
- Vibration, adaptive triggers, stick settings, and volume levels are comfortable.
- Tutorial and control reminders remain available while you learn the systems.
4. Create a protected manual-save routine
As soon as the game allows manual saving, open the menu and choose Save. Create an opening slot that you will not overwrite during ordinary play. The PlayStation product listing confirms manual saving, which lets you return to the exact position recorded in that slot. Use this as the foundation of the campaign’s recovery plan rather than assuming that a later automatic recovery point will preserve every calendar decision.
Keep at least three working slots when possible. Use one for Current progress, one for Before Tartarus, and one for Before Event or Before Boss. Save after ordinary days, before entering a major Tartarus operation, before committing to an important story night, and before expensive fusion or equipment purchases. Rotate the working slots instead of overwriting the same file every time.
Also preserve an earlier calendar position when you reach a major month or story transition. A bad Social Link schedule, missed request, poor fusion result, or underprepared boss is much easier to correct from a separate date-specific save than from a single end-of-day file.
- One opening save is protected from routine overwrites.
- You have separate Current, Before Tartarus, and Before Event slots.
- You save before major story beats, dungeon operations, and expensive decisions.
- Each save is checked for the correct in-game date before confirmation.
5. Use PS5 cloud storage only as a second layer
If you have PlayStation Plus, use PS5 saved-data synchronization or manually upload an important save through the console’s saved-data settings. Before downloading or synchronizing, compare timestamps so that an older cloud copy does not replace newer local progress. Cloud storage is useful for hardware failure or accidental deletion, but it cannot replace deliberate in-game slot rotation.
For the most important points, keep both a local manual save before the event and another after the event succeeds. This is especially useful before long Tartarus pushes, major fusion sessions, and the final month. If you are unsure which copy is newest, stop and verify the date and timestamp before selecting overwrite, upload, or download.
- PlayStation Plus cloud storage is enabled if available.
- You have checked local and cloud timestamps before synchronizing.
- Important pre-event saves exist in separate in-game slots.
- You keep a successful post-event save as well as the pre-event backup.
Before you move on
- You can press Triangle outside combat and reach Config.
- You can find Change Difficulty and Change Voice Language in the relevant Config settings.
- Your voice, subtitle, screen-language, volume, vibration, and adaptive-trigger choices are correct.
- You have one protected opening save and multiple rotating manual slots.
- You understand that the completion target is Reload’s core main-story ending, not The Answer, the female-protagonist route, or Episode Aigis.
- If cloud storage is enabled, you know which local and cloud copy has the newer timestamp.
Prologue: Arrival, Dorm Move-In, and First Social Encounters
Follow the opening calendar in order rather than trying to reach Tartarus immediately. After arriving in Iwatodai, complete the dorm introduction, attend the April 7 school scenes at Gekkoukan High, and return to the Student Dormitory. April 8 introduces Social Stats, the Velvet Room, Igor, Elizabeth, and the Velvet Key. April 9 contains the first story battle during the Dark Hour, but it is not yet the normal Tartarus exploration tutorial. The first guided Tartarus visit comes on April 20. During free time, check the Town Map and phone notifications before choosing an activity. Story-linked conversations and the Fool Social Link are automatic, while later optional Social Links depend on meeting characters on their available days.
1. Finish the arrival sequence and enter the Student Dormitory
The opening begins on April 6 with the protagonist arriving in Iwatodai. Follow the route from Iwatodai Station through the barrier gap and into Iwatodai Strip Mall. Continue east through the mall until you reach the Student Dormitory. These opening conversations establish the setting and introduce the mysterious boy, later identified as Pharos.
Inside the dormitory, follow the direction to the entrance area and interact with Pharos when the game indicates that someone is there. Sign the contract, then go upstairs to the protagonist’s room and go to sleep. This is a mandatory story sequence; there is no useful free-time activity to pursue before it is complete.
- Travel from Iwatodai Station to Iwatodai Strip Mall.
- Enter the Student Dormitory.
- Speak with Pharos and sign the contract.
- Go to the protagonist’s room and sleep.
2. Complete the April 7 school introduction
On April 7, Yukari takes you to Gekkoukan High School. After the introductory scenes, use the school lobby and its bulletin boards to confirm your class assignment. You are placed in Class 2-F, with Ms. Toriumi as your homeroom and composition teacher.
From the entranceway, follow the hallway toward the Faculty Office. Speak with Ms. Toriumi, then attend the welcoming ceremony in the auditorium. The dialogue choices during these scenes do not alter the main route, so choose naturally and continue until Junpei Iori introduces himself after the ceremony.
When control returns after school, you may speak with nearby students, but this exploration is optional. Leave through the school entrance, return to Iwatodai Station, and follow the route through the Strip Mall to the dormitory. The Town Map and fast-travel functions are introduced during this return trip. Select Student Dormitory when the destination becomes available, go upstairs, and sleep.
- Confirm Class 2-F and Ms. Toriumi.
- Visit the Faculty Office.
- Attend the welcoming ceremony.
- Complete Junpei’s introduction.
- Return to the dormitory and sleep.
3. Answer the first classroom question on April 8
The April 8 lecture introduces the three Social Stats: Academics, Charm, and Courage. These stats are raised through school, town, and dorm activities and later affect available interactions and dialogue options.
When the teacher asks which phrase symbolizes summer, select “Vivid carp streamers.” This grants a Charm increase. The answer is not required for story progression, but it is the best result for that question and gives you a useful early stat boost. If you miss it, the campaign can still continue normally.
- Learn how Social Stats work.
- Answer “Vivid carp streamers.”
- Confirm the Charm increase after class.
4. Complete the April 8 dorm and Velvet Room scenes
Return to the Student Dormitory after the April 8 school sequence. Continue through the required conversation with Shuji Ikutsuki, Mitsuru, and Yukari. The game then moves into the Dark Hour and introduces the dorm’s connection to the supernatural events surrounding the protagonist.
During the same sequence, you are taken to the Velvet Room and meet Igor and Elizabeth. Complete the contract scene and receive the Velvet Key. This unlocks the Velvet Room as the location for Persona-related services and Elizabeth’s requests later in the campaign. You are not expected to fuse Personas or manage requests during this first introduction; simply finish the scene and advance the calendar.
- Complete Ikutsuki’s introduction.
- Enter the Velvet Room.
- Meet Igor and Elizabeth.
- Receive the Velvet Key.
5. Follow the April 9 story battle instead of searching for Tartarus
On April 9, the school and evening events remain mostly directed. If the classroom asks whether you should close your eyes for a few minutes, staying awake raises Academics, while closing your eyes improves your condition. Staying awake is the stronger long-term choice when you are healthy, but either option allows the story to continue.
That night, the Dark Hour produces the first mandatory story battle. Follow Yukari when she tells you to leave the dorm and continue through the scripted encounter. This is not the regular Tartarus route. Do not treat the early evening as an opportunity to grind, shop, or search for a dungeon entrance; the game is still unlocking its main systems.
- Complete the April 9 school scenes.
- Choose whether to stay awake or improve condition.
- Follow Yukari during the Dark Hour.
- Finish the mandatory battle and story sequence.
6. Use early free time correctly
Once the calendar begins showing selectable periods, distinguish between daytime or after-school actions and evening actions. The period is displayed on the calendar and activity prompts, and selecting an activity normally consumes that period. The Town Map shows destinations and available characters, while phone messages and map icons identify invitations or newly available scenes.
When a character invitation is marked as available, accept it if you want to advance that relationship. Do not assume every invitation can be repeated later: some activities are tied to a particular day, weekday pattern, story trigger, or availability window. If no important character is available, studying or another Social Stat activity is a safe use of the evening. Tartarus is a later evening option once the game explicitly unlocks it; do not abandon a required story scene to look for it earlier.
- Check the calendar period before selecting an activity.
- Review the Town Map and phone notifications.
- Accept time-sensitive invitations when they appear.
- Use studying or another stat activity when no priority scene is available.
7. Let the Fool Social Link unlock through the SEES story
The Fool Social Link is automatic, but its timing is later than the first dorm introduction. Continue the required school and dorm scenes until April 18, when the SEES-related story advances the link to Rank 1. The story then advances it again during the first guided Tartarus sequence on April 20.
The April 20 visit is the proper Tartarus tutorial. Follow the instructions for combat, exploration, and Shuffle Time, then use the available teleporter when the story tells you to regroup. The early objective is to complete the tutorial and return safely, not to clear every possible floor or exhaust your resources.
For optional Social Links introduced afterward, speak with characters when their icons appear on the map and keep any requested meeting in mind as a calendar opportunity. Matching Arcana Personas and optimized dialogue answers become useful later, but no special answer is needed to establish the automatic Fool link.
- Advance the calendar to the April 18 SEES event.
- Confirm the Fool Social Link reaches Rank 1.
- Complete the April 20 Tartarus tutorial.
- Return through the teleporter when instructed.
- Confirm the Fool Social Link advances again after the tutorial.
Before you move on
- The protagonist has entered the Student Dormitory, signed Pharos’s contract, and slept in the assigned room.
- Class 2-F and Ms. Toriumi have been confirmed, and the April 7 welcoming ceremony and Junpei introduction are complete.
- The April 8 classroom question was answered with “Vivid carp streamers,” or the player has accepted the missed Charm increase.
- The Velvet Room introduction with Igor and Elizabeth is complete, and the Velvet Key has been received.
- The April 9 mandatory Dark Hour battle has been completed.
- The Fool Social Link has advanced through the automatic April 18 and April 20 story events.
- The first guided Tartarus visit on April 20 has been completed and the party has returned safely.
References for this chapter
- Persona 3 Reload Official Website
- Persona 3 Reload PS4 & PS5 — PlayStation Store
- Walkthrough (Prologue) — Persona 3 Reload Walkthrough & Guide
- Walkthrough (April) - Persona 3 Reload Walkthrough & Guide
- April Walkthrough — Persona 3 Reload
- Persona 3 Reload: Episode Aigis — April Walkthrough and Guide
First Night and Tartarus Basics: Awakening and the First Dungeon
The first Dark Hour introduces Tartarus and the combat loop used for the rest of Persona 3 Reload. Enter from the dormitory when Mitsuru permits exploration, follow the guided opening visit, and use it to learn ambushes, Persona changes, treasure, healing, and teleporters. On the next full visit, climb Thebel from Floor 1 toward the first border at Floor 22. Activate the two-way teleporter on Floor 5, defeat the two Ruthless Ice Ravens with Fire attacks, learn Shift on the following floor, and continue through the available block. Preserve SP by using normal attacks against safe targets, reserve elemental skills for weaknesses or dangerous enemies, and retreat through a teleporter when the party can no longer fight safely.
Enter Tartarus during the first Dark Hour
After the story establishes the Dark Hour and the team returns to Iwatodai Dormitory, speak with Mitsuru in the first-floor lobby when she announces that Tartarus is available. Choose to enter, then use the lobby stairs to begin the initial visit. The opening combat group consists of the protagonist, Yukari, and Junpei; Mitsuru provides support rather than joining the frontline, and Akihiko is not yet available as a combat party member.
This first excursion is a guided tutorial rather than a complete Thebel run. Follow the corridor, approach the Shadows, open the available chests, and use the prompts to learn basic attacks, Persona skills, ambushes, and exploration. When the game directs you to the teleporter, use it to return to the entrance and finish the visit. Do not spend every recovery item trying to push beyond the tutorial’s intended stopping point.
- Speak with Mitsuru in the dormitory lobby when Tartarus opens.
- Complete the guided lessons on movement, combat, treasure, and returning through the teleporter.
- Leave the tutorial visit without treating it as the first full Thebel climb.
Ambush Shadows before they detect you
Approach a Shadow from behind and strike it before its detection indicator catches you. A successful ambush gives your party the initiative and can let you test weaknesses before the enemy acts. Contact from the front can instead give the Shadow the advantage, so circle around enemies or wait for an opening rather than forcing a bad approach.
Reload adds a more responsive exploration flow than the older releases, including dashing and quicker follow-up movement after an engagement. Use the dash to close distance for a back strike, but do not dash blindly into a Shadow. After combat begins, test the enemy with the protagonist’s available Persona skills or a teammate’s element. A weakness causes a knockdown and can grant One More. If the whole group is down, use an All-Out Attack when offered.
- Strike Shadows from behind whenever possible.
- Use weakness icons and battle results to record which elements work.
- Use All-Out Attacks after knocking down the entire enemy group.
Change the protagonist’s Persona correctly
The protagonist can carry multiple Personas and change the active Persona during battle. Select the Persona command, choose the Persona with the needed skill or resistance, and then choose the action to perform. The change itself uses the protagonist’s turn, so select the correct Persona before committing to the attack. Persona skills are not separately equipped from the menu; the currently equipped Persona determines which skills are available.
Outside battle, review the protagonist’s stock from the main menu and maintain broad early coverage when possible. Keep access to useful Fire, Ice, Electric, and Wind attacks as the stock expands, but do not keep a Persona solely because it has a strong spell. A Persona that can safely expose a common Shadow weakness is often more useful than one with slightly better damage. Once the Velvet Room’s registration function is available, register useful Personas before fusing them away so they can be recreated later.
- Choose the Persona before selecting the action for that turn.
- Maintain elemental coverage instead of carrying only damage-focused Personas.
- Register useful Personas before using them in fusion.
Begin the full Thebel climb
On the next available Tartarus night when Mitsuru permits a proper expedition, enter Thebel and climb from Floor 1. Floor layouts, treasure placement, and breakable objects can change when you revisit Tartarus on another night, so use the minimap and visible landmarks instead of memorizing one route. Prioritize the stairs, nearby treasure, and any special floor marker. Dead ends are worth checking when they are close because they commonly contain chests or breakable objects.
HP can be restored with healing skills and items, but SP is harder to replace early. Use normal attacks against Shadows whose weaknesses are already known and reserve elemental skills for knockdowns, dangerous enemies, or gatekeeper encounters. If the party is losing too much HP or SP to routine fights, stop exploring and return to the entrance rather than consuming your entire inventory for low-value experience.
- Climb Thebel toward Floor 22, the first border floor.
- Use the minimap to find stairs and check convenient dead ends for treasure.
- Preserve SP by using normal attacks against manageable enemies.
Activate the Floor 5 teleporter and defeat the first gatekeeper
On Floor 5, Mitsuru introduces a two-way teleporter. Activate it before challenging the powerful Shadow ahead. The device lets you return to the entrance, save, heal, adjust equipment, and later travel back to the connected Tartarus floor instead of repeating the entire climb.
The gatekeeper is a pair of Ruthless Ice Ravens. Both are weak to Fire. Use Agi from Junpei or from a protagonist Persona that knows Fire, then use the knockdown opportunity to perform All-Out Attacks. Their Ice attacks can exploit Junpei’s weakness, so monitor his HP and heal him before he is left vulnerable to a second attack. If the fight becomes unsafe, retreat through the teleporter, recover, and return; the encounter does not need to be attempted with depleted resources.
- Activate the two-way teleporter on Floor 5.
- Save and restore resources before starting the encounter.
- Use Fire against both Ruthless Ice Ravens and protect Junpei from Ice damage.
Learn Shift and continue toward the border
After the Floor 5 encounter, continue upward. The game introduces Shift while you advance through the next section, allowing a character who earns One More to pass the opportunity to a selected teammate. Use the tutorial prompt to perform the handoff. For example, the protagonist can knock down a Shadow, then Shift to Junpei or Yukari if that teammate has the next useful element or can finish the group with an All-Out Attack.
Continue climbing through Thebel, using activated teleporters and saving at the entrance when necessary. Defeat required gatekeepers rather than trying to clear every Shadow on every floor. The first available block ends at Floor 22, the current border floor. Once you reach it and receive the story restriction preventing further ascent, leave Tartarus safely through a teleporter or the entrance. The purpose of this early expedition is to establish a repeatable combat and resource routine, not to exhaust every floor in one attempt.
- Perform Shift after earning One More when the tutorial presents it.
- Reach the Floor 22 border or the highest floor currently permitted by the story.
- Return to the dormitory with enough HP, SP, and recovery items to continue the calendar.
Before you move on
- The opening Tartarus tutorial is complete, and the party has returned to the dormitory without a game over.
- The protagonist has changed Personas during combat and has successfully used at least one Persona skill.
- A Shadow has been ambushed, at least one weakness has been exploited, and an All-Out Attack has been performed.
- The Floor 5 two-way teleporter has been activated.
- The two Ruthless Ice Ravens on Floor 5 have been defeated with Fire-based attacks and follow-up All-Out Attacks.
- The Shift tutorial has been completed after the Floor 5 encounter.
- The party has advanced to the currently available Thebel border, normally Floor 22, and has returned safely to the entrance or dormitory.
References for this chapter
- Persona 3 Reload Official Website
- Persona 3 Reload - PS5 and PS4 Games | PlayStation
- Thebel Walkthrough - Persona 3 Reload
- Thebel - Persona 3 Reload Walkthrough & Guide
- Walkthrough (April) - Persona 3 Reload Walkthrough & Guide
- Tartarus Exploration Guide and Tips | Persona 3 Reload
- How to Baton Pass & Shift in Persona 3 Reload
Daily Life Rhythm and Social Link Priority (Month-by-Month Template)
Persona 3 Reload is won on the calendar as much as in Tartarus. Use after-school slots for Social Links with narrow schedules, raise Academics, Charm, and Courage before their thresholds are needed, and reserve planned Tartarus visits for story blocks, missing-person rescues, requests, treasure, and controlled leveling. Carry a Persona matching the Social Link’s Arcana whenever possible. Ordinary Social Links mainly improve fusion through Arcana Burst and unlock an Arcana’s Ultimate Persona at Rank 10; they do not provide a Persona 5-style direct combat-skill tree. Party-focused benefits come from dorm hangouts, teammate Persona development, Theurgy-related upgrades, and the six Reload Linked Episode sequences for Junpei, Akihiko, Koromaru, Ken, Shinjiro, and Ryoji. Ryoji’s main-campaign episodes culminate in the December 31 Music Box reward, which unlocks Saturnus fusion.
Check the calendar before committing the day
At the start of each week, inspect the calendar and the location icons for available Social Links, Linked Episodes, dorm activities, and major events. After school, normally choose a Social Link that is available on few days or will soon be blocked by exams, holidays, or a school break. School-based Links are especially vulnerable to calendar interruptions, while several town Links remain available when school is closed.
Keep a Persona of the matching Arcana in your stock before meeting a Social Link. It does not need to be equipped in battle. The matching Arcana improves relationship-point gains from conversations, reducing the number of non-ranking visits needed before the next rank. If the game says the relationship will not deepen yet, do not spend that slot automatically; use it only when the character’s availability is limited or when you need to repair the schedule.
- Review the day’s available activities before leaving the dorm.
- Carry the matching Arcana Persona for a planned Social Link.
- Protect school Links before repeatable town activities.
Give each part of the day a job
Use daytime and after-school slots primarily for Social Links, Linked Episodes, and scheduled events. Use evening slots to raise Academics, Charm, or Courage until a required threshold is reached. Books, the arcade, studying, and other evening options can be efficient, but stop repeating an activity once it no longer opens a useful interaction.
When no limited-time Link or teammate event is available, choose between social-stat progress, requests, equipment preparation, and Tartarus. Do not study by default every night. A stat point can be valuable before a gate, but a marked teammate event or Linked Episode may disappear later and therefore deserves priority.
- After school: choose the narrowest useful opportunity.
- Evening: raise the stat needed for the next known gate.
- Replace redundant stat activities with preparation or teammate content.
Run Tartarus in planned sessions
Enter Tartarus soon after a new story section opens, then combine several objectives in the same expedition. Push through the available required floors, rescue missing people before their deadlines, complete feasible Elizabeth requests, collect treasure, and gather Personas for fusion. If the party’s HP, SP, or restorative items become unreliable, return to the entrance and bank the progress rather than risking a game over.
A second visit is useful when you need to finish a deadline, collect a missing-person reward, complete a request, or gain levels before a major operation. Avoid making short, unplanned visits on every free evening. Several partial trips can consume calendar slots that would otherwise advance Links, raise a needed stat, or complete a limited teammate sequence.
- Clear the required Tartarus section early in its available window.
- Combine rescues, requests, treasure, and leveling whenever practical.
- Retreat before depleted resources turn a routine run into a failure.
Prioritize Social Links for availability, not imaginary combat skills
Ordinary Social Links in Reload do not provide a direct combat-passive tree. Their major mechanical benefits are Arcana Burst, which improves fusion experience for that Arcana, and the Ultimate Persona unlocked when the Link reaches Rank 10. Every Link is therefore useful for fusion, but scheduling priority should usually go to the character with the fewest available days or the most restrictive prerequisite.
Raise social stats before their associated Links open. Pay particular attention to Bebe, Tanaka, Mutatsu, Nozomi, Mamoru, Akinari, and other Links whose access depends on specific progress, locations, or stat thresholds. Do not spend several consecutive free days on a frequently available character while a school Link has only one usable day that week.
- Use limited availability as the primary ranking rule.
- Raise social stats before the relevant Link becomes available.
- Treat Rank 10 fusion access as the long-term reward for every Social Link.
Complete all six Linked Episode sequences when they appear
Linked Episodes are separate from ordinary Social Links. The complete relevant Reload roster is Junpei, Akihiko, Koromaru, Ken, Shinjiro, and Ryoji. Their scenes are connected to story progress and have finite availability windows, so accept them promptly unless a mandatory event occupies the same slot. Check the calendar, phone notifications, and nearby locations after major story beats and during school breaks.
Junpei, Akihiko, Koromaru, Ken, and Shinjiro each have a final reward that unlocks a special Persona for fusion: Surt, Horus, Byakko, Michael, and Hell Biker respectively. Ryoji’s sequence is part of the main campaign’s late-year schedule rather than a conventional Social Link. His events begin automatically on November 9, continue through late November and December, and culminate in an automatic December 31 event. Completing Ryoji’s sequence awards the Music Box, which unlocks Saturnus fusion. Earlier Ryoji scenes also strengthen the equipped Persona’s stats, so do not treat them as disposable filler.
Shinjiro’s daytime events are concentrated before October 2, with his final dorm event available in October. Ken’s sequence is spread across September, November, December, and January, ending with the Silver Key reward in late January. The exact day slots matter; use a calendar schedule if you want every reward. Missing an episode can lock out the character’s final Persona item even though the main campaign remains completable.
- Track Junpei, Akihiko, Koromaru, Ken, Shinjiro, and Ryoji separately from ordinary Social Links.
- Complete Ryoji’s November and December scenes, including the automatic December 31 event.
- Keep the special reward items for Surt, Horus, Byakko, Michael, Hell Biker, and Saturnus fusion.
Use dorm activities for direct party development
Marked evening activities with party members are distinct from both Social Links and Linked Episodes. Cooking, studying, gardening, walking Koromaru, and other dorm events can provide items, raise a social stat, improve a teammate’s Persona, advance Theurgy-related development, or grant another party benefit. Choose a marked teammate event when it is available and no more urgent Link or Linked Episode conflicts with it.
These events are easy to overlook because they are not always displayed in the same way as ordinary Social Links. Track which activities each teammate has completed, especially before a difficult Tartarus operation. The practical combat rewards come from teammate development, dorm events, Linked Episodes, and Persona preparation—not from simply ranking a civilian Social Link.
- Check the dorm for marked teammate activities each evening.
- Track completed events and remaining invitations.
- Use teammate activities to improve party readiness before difficult operations.
Adjust priorities across the year
April through June should focus on opening Links, raising social stats, and advancing school Links before vacations and exam periods remove their normal meeting days. During summer, use school-free daytime slots for town Links while preserving limited evenings for Linked Episodes and teammate events. In autumn, finish Links with narrow schedules before concentrating on characters who are available more often.
January is highly compressed. Reserve it for late-opening or unfinished Links, Aigis’s Aeon Link after it becomes available, final Linked Episodes such as Ken’s, and required story preparation. Do not assume a missed fall opportunity can be repaired during the final month; January has limited free time and mandatory story events.
- Spring: unlock Links and build the three social stats.
- Summer and autumn: protect limited schedules and Linked Episodes.
- January: finish late content instead of assuming the backlog can wait.
Separate an ending run from a completion run
The canonical main-story ending does not require every Social Link, every dorm event, or every Linked Episode. You can finish the campaign while leaving optional rewards behind. For a completion-focused run, follow a date-by-date schedule, use matching Arcana Personas, select favorable dialogue choices, and save before tightly scheduled events.
For the strongest completion check, verify both ordinary and Reload-specific content separately: Social Link Rank 10 rewards, dorm development, the five special Persona items from Junpei, Akihiko, Koromaru, Ken, and Shinjiro, and Ryoji’s Music Box for Saturnus. These goals improve fusion and party development, but they are not prerequisites for viewing the main campaign’s canonical ending.
- Decide whether the run targets only the ending or broader completion.
- Use manual saves before narrow Linked Episode windows.
- Verify Ryoji’s Music Box separately from the ending choice and final dungeon preparation.
Before you move on
- Your weekly routine gives narrow-availability Social Links priority over repeatable activities.
- Academics, Charm, and Courage are being raised before the stat-gated Links that require them become available.
- You carry matching Arcana Personas for planned Social Link meetings and use a calendar-based schedule when attempting a maxed run.
- You check the calendar, phone notifications, and dorm after major story milestones for Linked Episodes and teammate events.
- You have tracked the complete Linked Episode roster: Junpei, Akihiko, Koromaru, Ken, Shinjiro, and Ryoji.
- You have completed or deliberately declined the teammate content you wanted instead of allowing Tartarus visits to consume every free evening.
- You understand that ordinary Social Links grant Arcana Burst and Rank 10 Persona access rather than a direct combat-skill tree.
- You have completed Ryoji’s main-campaign Linked Episodes, including the automatic December 31 event, and received the Music Box if Saturnus fusion is part of your goals.
- Before the final month, you have not allowed Tartarus visits to consume every free evening, and you have completed or deliberately declined the teammate content you wanted.
- You understand which rewards come from Social Link Rank 10, which come from Linked Episodes, and which come from dorm-based party development.
Early Tartarus Blocks: Route Planning and Safe Grinding
Treat every Tartarus visit as a limited expedition with one main objective. In Thebel and early Arqa, reach the highest accessible border floor, defeat the gatekeepers that block further progress, collect nearby valuable chests, and retreat before depleted HP, SP, or supplies turn the climb into a gamble. Thebel covers Floors 2–22, while the first Arqa section covers Floors 23–43. Ordinary layouts change between visits, so use the map, stairs, access points, and teleporter locations instead of memorizing corridors. Monad content is not an opening Thebel or Arqa requirement: fixed Monad Passages become available later, beginning July 18, and random Monad Doors are associated with later Tartarus blocks. Enter them only when the party is prepared and the reward justifies the risk.
1. Enter Tartarus with one clear objective
Before entering Tartarus, check the party’s HP and SP, equipment, healing items, revival items, and current Persona roster. Decide whether the visit is for reaching a new border floor, defeating a gatekeeper, collecting a request item, completing a fixed story objective, or gaining experience for a planned fusion. Do not assume that every visit should accomplish all of these tasks. A short trip that reaches an access point and returns safely is more useful than a full night spent exhausting the party.
Thebel is the first block and covers Floors 2–22. Its early gatekeepers are on Floors 5, 11, and 17. The first Arqa section follows on Floors 23–43, with gatekeeper encounters on Floors 28, 35, 36, and 42. The ordinary floors between those checkpoints are randomized, but the important boss and border-floor locations are fixed. Use the floor numbers as your route plan and the changing layouts only as the immediate navigation problem.
- Choose the highest reachable border or gatekeeper floor as the main target.
- Restock healing and revival items before a serious climb.
- Keep the protagonist’s Persona roster broad enough to cover missing elements and emergency healing.
2. Build compact route loops on each floor
When a floor loads, open the map and identify the stairs, access point, visible chests, and unexplored branches. Follow the shortest unexplored route toward the next staircase. If a chest is close to that route, collect it before leaving. If a chest lies at the end of a long branch and the party is already losing resources, mark it mentally and return on a later visit instead of crossing the entire floor for a minor reward.
A reliable loop is to explore one side of the floor, clear nearby Shadows, collect accessible treasure, and return toward the stairs before crossing into another large branch. Use ambushes whenever the approach is safe. Dashing makes movement faster but can make Shadows notice the party sooner, so slow down near dangerous enemies or narrow corridors. Do not fight every Shadow merely because it is visible; prioritize encounters that provide useful experience, money, Shuffle Time cards, or a safe opportunity to test a new Persona.
- Check the map after each major branch rather than circling the same rooms.
- Collect nearby chests before taking the next staircase.
- Skip distant low-value detours when HP, SP, or healing items are becoming limited.
3. Use Direct Commands and conserve SP
Set party members to Direct Commands when you need precise control over weaknesses, healing, guarding, and Persona changes. Test an enemy’s affinity with a low-cost skill when necessary, then use the least expensive effective attack that can knock it down. Once a weakness is known, avoid repeatedly testing other elements. Multi-target skills become more efficient against groups, but they are wasteful against one weak enemy that can be handled with a basic attack or single-target spell.
Physical skills spend HP rather than SP and are useful for conserving magic during ordinary encounters. Use them selectively, especially when the target resists the relevant physical damage type or when the party’s HP is already low. Keep at least one protagonist Persona with a useful elemental option that the active party lacks, and replace underleveled Personas through fusion instead of carrying a large collection that no longer survives current fights. Register useful Personas before fusing them so they can be recreated later if needed.
Heal before entering a gatekeeper room. Do not wait until the first turn of the boss fight to repair damage, because early gatekeepers can exploit a weakness or concentrate attacks on an already injured member.
- Exploit discovered weaknesses before spending high-cost skills.
- Switch Personas when the current one is weak to the enemy’s main attack type.
- Use healing before a gatekeeper rather than relying on post-battle recovery.
4. Treat gatekeeper floors as checkpoints
Gatekeeper floors are compact combat checkpoints rather than normal exploration floors. Save before a major Tartarus push, then use access points and the teleporter system to return to the relevant floor on another night. On the approach, heal the party, inspect equipment, and confirm that the protagonist has more than one damage option. Bring recovery items for an unlucky critical hit, status ailment, or failed weakness test.
At the beginning of each gatekeeper fight, test weaknesses and observe resistances before committing to expensive skills. If the enemy has a weakness, knock it down and use an All-Out Attack whenever the party can do so safely. If no weakness is available, use available buffs, debuffs, critical-focused physical attacks, and guarding. Do not assume an early gatekeeper is harmless simply because it appears near the start of the game; entering after a long depleted climb can make a manageable fight dangerous.
After winning, open the reward chest, activate any available access point, and confirm that the next floor section is reachable. If the game gives you a teleporter immediately after the battle, use it to return and save instead of continuing automatically with a depleted party.
- Heal and adjust equipment before the boss room.
- Record resistances and dangerous attacks during the first turns.
- Use the new access point or teleporter after victory whenever possible.
5. Retreat before the run becomes unsafe
Return to the entrance when several party members are low on HP, the protagonist’s SP is nearly exhausted, healing items are running short, or the next objective is a known gatekeeper and you no longer have enough margin for a failed attempt. Reaching a new access point, border floor, or story objective is a successful stopping point. Experience, items, and completed progression are more valuable than one additional room.
After retreating, restock, fuse replacements, adjust inherited skills, and review the next gatekeeper’s likely damage types. Tartarus progression is designed to be spread across multiple visits. If a boss defeats the party, reload the pre-entry or pre-boss save, change the protagonist’s Persona, replace a vulnerable party member, and return with a specific countermeasure rather than repeating the same depleted attempt.
- Leave before the protagonist becomes the only healthy party member.
- Bank progress after reaching a new access point or border floor.
- Restock and fuse before returning to a failed gatekeeper.
6. Handle chests and Monad content at the correct time
Open regular chests that are close to your route. Locked or special chests can require Twilight Fragments, so do not spend fragments automatically if the reward is not useful for the current team. Prioritize equipment, healing supplies, or skill cards that solve an immediate weakness. If a locked chest is expensive and its reward is not needed, leave it for a later visit when your fragment supply is healthier.
Monad content is not part of the opening Thebel or early Arqa routine. The fixed Monad Passage request becomes available on July 18 or later, and random Monad Doors are associated with later Tartarus progression beginning in Yabbashah. A fixed Monad Passage is tied to the larger Tartarus progression and can be attempted later once its requirements are met. A random Monad Door is an optional challenge that can appear during exploration; if you leave the floor, that door can seal for the current visit. When one appears, enter only if the party is healed, the protagonist has suitable Personas, and the rewards justify spending the remaining resources.
Do not interrupt a required route just to chase a random Monad Door. If the team is already low on SP or recovery items, finish the story-required climb or retreat and try again on another night. Monad rewards are useful, but they are optional for clearing the early blocks and should not replace preparation for the next gatekeeper.
- Spend Twilight Fragments on chests whose rewards help the current build.
- Do not search Thebel or early Arqa for Monad Doors that have not unlocked yet.
- Enter a random Monad Door immediately if you choose to attempt it, because leaving its floor can seal it for that visit.
- Treat fixed Monad Passages as optional challenges with progression requirements, not as ordinary treasure rooms.
Before you move on
- Thebel progression has reached the highest currently accessible border floor, and the gatekeepers on Floors 5, 11, and 17 have been defeated when those floors are available.
- Early Arqa progression has reached its current border, and the gatekeepers on Floors 28, 35, 36, and 42 have been defeated when those floors are available.
- The party has a reliable healing option, several elemental attacks, revival items, and enough reserve SP to attempt the next story-required Tartarus encounter.
- Nearby useful chests have been opened or intentionally left for later, and the next Tartarus visit has one clear floor, request, or boss objective.
- Monad content has not been treated as mandatory early progression. If the calendar has reached July 18 or later and a fixed Monad Passage is available, it can be attempted separately with a prepared party.
References for this chapter
Exams, School Events and Time Management (Mid-Game)
Persona 3 Reload’s calendar becomes crowded once school Social Links, social-stat gates, exams, party activities and story scenes compete for the same time slots. Raise Academics, Charm and Courage steadily instead of trying to repair a missing requirement immediately before an event. Protect school Social Links because exams, holidays and summer break remove their normal meeting days. Use correct classroom answers to raise Charm, study regularly for Academics, and speak with Mitsuru after exam results are posted to claim any available reward. Fuuka, Yukari and Mitsuru each have a different maximum social-stat requirement, but reaching the required rank does not bypass their separate story and availability conditions. Treat exam periods, full-moon operations, the July summer trip, August summer school and the summer festival as fixed calendar blocks. Save before an exam period or unusual event if you want a safe recovery point.
Check the calendar before spending each free slot
At the beginning of each week, inspect the calendar, the map icons and your Social Link notifications. School links generally have fewer usable days than links in town because weekends, holidays, exam periods and school breaks remove their normal meeting opportunities. If a school link is available and the next meeting can advance its rank, use the after-school slot for it rather than spending that slot on a repeatable stat activity.
Keep a Persona matching the Arcana of the Social Link before you meet the character. The matching Arcana improves the relationship-point return from favorable conversations, reducing the number of separate non-ranking visits you may need. If nobody is ready to rank up, choose a targeted social-stat activity, a limited invitation or a required request instead of committing time without a purpose.
- Check school and town availability before leaving the dorm.
- Carry a Persona matching the Arcana of the link you plan to visit.
- Note the date and time slot of every accepted invitation.
Raise Academics before exams instead of cramming at the last minute
Academics is built through studying and knowledge-focused activities. Study in the library after school when school is open, study in your room at night when no higher-value event is available, answer classroom questions correctly when possible, and use dorm study sessions when they appear before exams. Academics-focused food, arcade games and other activities can fill evening gaps, but do not sacrifice a rare Social Link day merely to gain a small stat increase.
Exam periods remove normal free-time choices for several consecutive school days. For example, the July exams occupy July 14 through July 18 in the standard Reload calendar, so school Social Links cannot be scheduled during that block. Plan Academics before the first exam day, not after the period has already begun. Correct exam answers matter, but your final result also depends on your Academics level.
- Study consistently during ordinary weeks.
- Use pre-exam group study when your Academics needs improvement.
- Make a manual save before the exam period if you want a recovery point.
Answer classroom and exam questions correctly
A correct ordinary classroom answer raises Charm. This is separate from the Academics gained by studying, so answering every question correctly does not replace a study plan. Exam answers also contribute to your result, and exam results provide a larger Charm increase based on the grade received.
Exam results are posted on a later school day rather than immediately after the final question. When the results are available, speak with Mitsuru at school to receive the reward associated with your performance. The highest result gives the best reward. This is a useful reason to protect a pre-exam save, but do not describe exam success as a universal requirement for every later Social Link. Mitsuru’s own link has a separate Academics gate.
- Answer every classroom question correctly when possible.
- Review the correct answers before an exam if you are using an external reference.
- Visit Mitsuru after results are posted to collect the available reward.
Target the three maximum social-stat gates
Fuuka’s Priestess Social Link requires maximum Courage, shown as Badass, once her story availability has been reached. Yukari’s Lovers Social Link requires maximum Charm, shown as Charismatic, and becomes available later in the summer schedule. Mitsuru’s Empress Social Link requires maximum Academics, shown as Genius, and is a late-year opportunity. Reaching a stat rank alone does not start any of these links; the relevant story event, date and location must also be active.
A practical order is to raise Courage early enough for Fuuka, then keep Charm moving toward Yukari while continuing Academics for exams and Mitsuru. Do not stop raising one stat permanently after its first gate is met. Charm remains useful for classroom answers and exam results, while Academics remains important for later activities and Mitsuru’s requirement. If a character is not present at the expected location, recheck the calendar rather than assuming the stat requirement was missed.
- Reach Courage rank 6 before Fuuka’s opportunity is available.
- Reach Charm rank 6 before Yukari’s opportunity is available.
- Reach Academics rank 6 before Mitsuru’s late-year opportunity.
Handle fixed school and summer events as calendar blocks
Some events consume time automatically and cannot be treated as ordinary invitations. The July 20–22 summer trip is a story block. Summer school runs automatically from August 10 through August 15 and provides a substantial Academics boost. The summer festival on August 16 is a limited event that also provides relationship value. Summer film-festival dates are also fixed activities, with separate schedules for the different social stats.
Before a fixed event, finish urgent requests, complete a Tartarus visit if your party needs experience or supplies, and check which Social Links will disappear during the upcoming break. During summer vacation, school links are unavailable in their normal school locations, so use the period for town-based links, party activities, stat events and Persona preparation. When school resumes, immediately return to school links because later exams and holidays will narrow their remaining schedule.
- Treat the July summer trip as unavailable free time.
- Do not schedule ordinary activities during automatic summer school.
- Use the summer festival and film-festival dates before choosing a repeatable night activity.
Recover your routine after story operations and exams
Full-moon operations and other story sequences can move the calendar forward, restrict party access or change which characters are available. After the story resumes, inspect the map again instead of following the previous week’s plan. Check new requests, Social Link locations, invitations and the next Tartarus opening before selecting an activity.
If you fall behind in a stat, use the most efficient available activity for the needed attribute and avoid spending several consecutive days on low-value options. If a school Social Link is close to ranking up, prioritize it on the next school day and use evenings for the stat catch-up. A missed limited event cannot generally be recreated on demand, so maintain a manual save before exam periods, festivals and unusual story scenes.
- Recheck the map after every major story sequence.
- Use evenings for stat recovery when a daytime Social Link is available.
- Keep a separate save before exams, summer events and other calendar-changing scenes.
Before you move on
- You answer classroom and exam questions correctly whenever possible and speak with Mitsuru after exam results are posted.
- Academics, Charm and Courage are being raised deliberately, with Courage prepared for Fuuka, Charm prepared for Yukari and Academics prepared for Mitsuru.
- School Social Links receive priority on available school days, while exams, holidays and summer break are used for town links, party activities, stats or preparation.
- You recognize fixed calendar blocks such as the July 20–22 summer trip, August 10–15 summer school and the August 16 summer festival.
- You maintain a manual save before exam periods, major school events and story sequences that alter the calendar.
Summer: Linked Episodes, Party Hangouts and Skill Gains
Persona 3 Reload separates Linked Episodes from ordinary Arcana Social Links. These scenes do not use a matching Arcana Persona or a normal rank screen, and their availability is controlled by story progress, location, and calendar windows. The six campaign-relevant chains are Junpei, Akihiko, Koromaru, Ken, Shinjiro, and Ryoji. Summer priorities are Junpei’s second episode, Akihiko’s second episode, and Koromaru’s first episode. Ken and Shinjiro begin in September. Ryoji’s sequence is tied to fixed story dates, including a November 18 invitation followed by the actual Kyoto event on November 19. Completing the chains grants stat bonuses, protagonist HP or SP increases, or special fusion key items. Junpei’s optional White Flower event can affect the Chidori-related outcome but is not required for the canonical ending. Night dorm hangouts are separate: three uses of one activity unlock a teammate’s first Combat Characteristic, and three uses of the other activity unlock its upgraded version.
1. Check the map and messages before spending a free period
Read phone messages and inspect the town map before choosing Tartarus, a Social Link, a social-stat activity, or a dorm event. Linked Episodes are marked as special character events and do not behave like normal Arcana meetings. They do not require a matching Persona, and they do not advance through the usual Social Link rank interface.
Treat each displayed episode as deadline-sensitive. The listed availability range is not always a promise that the character will appear every day in that range. Some events require an earlier episode or a separate story conversation first. Keep a manual save before a crowded week if you are balancing an episode against a Tartarus run, a limited Sunday activity, or an event with a prerequisite choice.
- Read messages before selecting the day’s activity.
- Inspect the town map for special event markers.
- Save before a week containing a limited episode or prerequisite conversation.
2. Complete the summer episodes while their windows are open
Junpei’s Linked Episode 2 is available during the daytime from August 9 through August 28 at the Iwatodai Strip Mall. It raises Charm by 2. It follows Junpei’s first episode, which is available earlier in the year, so complete that first scene when it appears rather than waiting for the August window.
Akihiko’s Linked Episode 2 is an evening event at Iwatodai Station, available from July 24 through August 31. It raises Charm by 2 and awards Luxe Tropical Fruit, Imperial Sweets Set, and Fresh Juice. Koromaru’s Linked Episode 1 begins on August 22 and is a daytime event in front of Iwatodai Dorm. It raises Charm by 2.
These are the main summer targets. Ken’s first episode begins on September 8, while Shinjiro’s chain begins on September 4 and requires speaking with Mitsuru before finding Shinjiro. If neither character is available, use the time for a Social Link, an urgent social-stat threshold, or a dorm activity instead of searching for an event that has not unlocked.
- Complete Junpei’s second episode between August 9 and August 28.
- Complete Akihiko’s second episode between July 24 and August 31.
- Complete Koromaru’s first episode from August 22 onward.
- Record Ken and Shinjiro as September priorities.
3. Track all six character chains and their fusion rewards
Junpei, Akihiko, Koromaru, Ken, and Shinjiro each have five main Linked Episodes. Their final scenes provide the key items needed to fuse Surt, Horus, Byakko, Michael, and Hell Biker, respectively. Earlier scenes provide protagonist stat increases, HP or SP increases, or bonuses to a Persona’s attributes. These are not ordinary Social Link rank rewards, and the male party members and Koromaru do not use normal Arcana Social Links in Reload.
Shinjiro’s chain has an additional no-time prerequisite scene. During the September 4 through October 2 window, speak with Mitsuru in the Faculty Office Hallway before going to Shinjiro at Port Island Station Outskirts. Before his fourth episode, speak with Mitsuru again and choose the response that tells her to wait; this opens the required follow-up. His final reward comes from checking the desk drawer in his room on October 5, not from a conventional daytime meeting.
Ryoji’s sequence is preset and story-linked. The first event occurs automatically on November 9. The second can occur during the school-trip window from November 12 through November 16. On November 18, agree to spend time with him; that invitation leads to the actual Kyoto Linked Episode on November 19. The next event is on December 1 in the school music room. On December 31, the final event occurs automatically at the dorm and awards the Music Box, which enables Saturnus fusion.
On December 31, choose to spare Ryoji and insist on continuing if you want the canonical campaign route. The Ryoji sequence and Music Box are not required to reach the ending, but the decision to spare him is required to continue into January rather than triggering the alternate early conclusion.
- Complete the five main chains for Junpei, Akihiko, Koromaru, Ken, and Shinjiro if you want their special fusion unlocks.
- Use the Mitsuru prerequisite for Shinjiro’s first and fourth episodes.
- Watch Ryoji’s November 9, November 12–16, November 18 invitation, November 19 Kyoto, and December 1 events.
- On December 31, spare Ryoji to continue into January.
- Confirm that the Music Box is in the inventory before attempting to fuse Saturnus.
4. Complete Junpei’s optional late-game flower event carefully
Junpei’s November Link 3 is available from November 7 through November 11 and raises Academics by 2. During that same window, Link 3.5 is an optional no-time event. After viewing the relevant Junpei scene, buy a White Flower from Rafflesia at Port Island Station for 250 yen, then return to Iwatodai Dorm and speak with Junpei.
This flower sequence is connected to the optional Chidori-related outcome. It is not a prerequisite for the canonical ending, and missing it does not stop the main campaign. It does affect later optional material, so complete it if you want the additional outcome rather than treating it as part of the mandatory route.
Junpei’s ordinary chain continues with Link 4 from December 19 through December 26 and Link 5 from January 15 through January 29. Link 5 unlocks Surt. Record the flower event separately from the normal chain so you do not mistake an optional branch for a required ending trigger.
- View Junpei’s November Linked Episode during its availability window.
- Buy the White Flower at Rafflesia for 250 yen.
- Return to the dorm and speak with Junpei without spending another normal time slot.
- Do not restart the campaign solely because the flower event was missed.
5. Use evening dorm activities to unlock Combat Characteristics
Dorm hangouts are separate from Linked Episodes and Social Links. When a teammate is available at Iwatodai Dorm during the evening, choose one of that character’s activities. The activity may also provide a social-stat increase, food, gardening materials, coffee, or another item, but the lasting combat reward is the teammate’s Combat Characteristic.
Complete the same activity three times to unlock the teammate’s first Characteristic. Complete the character’s other activity three times to unlock the upgraded version. Each party member has two tracked activities, so six total hangouts with that character are needed for both stages. Three random visits are not enough unless they are all the same activity for the first stage, followed by three of the other activity for the upgrade.
The effects are character-specific. For example, Yukari’s activities improve healing efficiency, Junpei’s improve critical performance, Akihiko’s strengthen buff-related effects, Fuuka’s improve weakness support, Koromaru’s improve automatic debuffs, Ken’s improve SP recovery, and Shinjiro’s improve automatic offensive effects. Prioritize the teammates you will use in the next Tartarus block or full-moon operation.
- Repeat one activity type three times to unlock the first Characteristic.
- Repeat the second activity type three times to unlock the upgrade.
- Prioritize active combat members before spending evenings on minor item rewards.
6. Do not mistake dorm rewards for Social Link rank-ups
Most dorm hangouts do not advance an Arcana Social Link. Some activities with Yukari, Mitsuru, Fuuka, or Aigis can provide Social Link points when the relevant Social Link and conditions are active. Read the displayed activity description and reward preview before committing the evening.
If you urgently need Courage, Charm, or Academics for a daytime prerequisite, use a stat activity when the threshold matters more than a passive combat upgrade. If a teammate is close to the third use of an activity, the permanent Characteristic may be the better choice. Use the dorm as a flexible evening tool rather than assuming every visit advances a relationship.
- Read the displayed reward before choosing a hangout.
- Use a Social Link-supporting activity only when its conditions are active.
- Protect urgent social-stat thresholds.
7. Rebuild the protagonist’s Personas before the next Tartarus push
After the summer episodes, visit the Velvet Room and replace obsolete early Personas. Maintain several damage types, at least one dependable healing or support option, and resistances that cover weaknesses common in the next Tartarus block. Register useful Personas before fusing them away so the Compendium can recreate them.
When passing skills through fusion, favor healing, multi-target elemental attacks, buffs, debuffs, accuracy support, and resistance skills. Do not discard a low-level Persona merely because its level is outdated if it carries an unusual resistance or a skill that is difficult to reproduce. The special fusion Personas unlocked by Linked Episodes are valuable endgame options, but they do not replace a diversified working roster.
- Register useful Personas before fusion.
- Keep multiple elements plus healing or support coverage.
- Preserve rare resistances and difficult-to-replace inherited skills.
8. Finish summer with a deadline and readiness check
Before September begins, confirm that Junpei’s August episode, Akihiko’s July–August episode, and Koromaru’s August 22 episode are complete if their windows have opened. Check the map and messages for any next episode that has become available rather than assuming the chain has ended. Record September priorities for Ken, Shinjiro, and the later Koromaru episodes.
Review each active teammate’s dorm progress and make a manual save before the next major story sequence. You do not need every Linked Episode or special Persona to clear the campaign, but completed chains provide useful fusion unlocks and permanent stat or combat benefits. Enter the next Tartarus operation with registered Personas, healing supplies, revival items, SP recovery, and more than one viable combat role.
- No currently available summer Linked Episode remains unfinished.
- Ken and Shinjiro are recorded for their September windows.
- Ryoji’s November 18 invitation and November 19 Kyoto event are recorded separately.
- At least one regular teammate has a newly unlocked or improved Combat Characteristic.
- The protagonist’s Personas are registered and cover multiple combat roles.
- A manual save exists before the next story deadline.
Before you move on
- Junpei’s second episode is complete if its August 9–28 window has opened.
- Akihiko’s second episode is complete if its July 24–August 31 window has opened.
- Koromaru’s first episode is complete from August 22 onward.
- Ken and Shinjiro are recorded for their September windows.
- Junpei’s November flower event is completed only if the optional Chidori-related outcome is desired.
- Ryoji’s November 9, November 12–16, November 19, and December 1 events are complete, with the November 18 invitation accepted.
- On December 31, Ryoji is spared so the campaign continues into January.
- The Music Box is in the inventory and Saturnus is available for fusion.
- Selected party members have reached or are progressing toward their first or second Combat Characteristics.
- The protagonist’s Personas are registered, diversified, and ready for the next Tartarus operation.
- A manual save is stored before the next major story deadline.
References for this chapter
- Persona 3 Reload — Official Website: Velvet Room
- Persona 3 Reload Walkthrough and Guide — Linked Episodes
- Persona 3 Reload Walkthrough and Guide — Hangouts
- November Walkthrough and Activities Guide — Persona 3 Reload
- November Walkthrough — Persona 3 Reload
- All Linked Episode Dates and Rewards in Persona 3 Reload
- Persona 3 Reload: All key dates
Midgame Tartarus: Mini-bosses, Monad Doors and Tactical Options
Midgame Tartarus covers the later Arqa floors and the Yabbashah block, where gatekeepers become more specialized and optional Monad content introduces stronger encounters. Advance to each border floor, return to the entrance when HP, SP, or recovery items become unsafe, and update the protagonist’s Persona roster before the next guardian. Use Analyze when available, test unknown affinities carefully, and stop attacking with any damage type that is resisted, nullified, repelled, or drained. Random Monad Doors are optional encounters that can appear during exploration; fixed Monad Passages occupy specific floors and provide more structured challenges and rewards. Enter either only when the party can survive another difficult battle. Manual control, guarding, debuffs, healing, and Persona switching matter more than simply bringing every element.
1. Identify the current Tartarus block and the next required checkpoint
Use the Tartarus teleporter to confirm your current block and the highest unlocked floor. In midgame, Arqa continues through Floor 69, while Yabbashah covers Floors 70 through 118. The required route is always the next accessible guardian or border floor; optional rooms, rare Shadows, treasure chests, Monad Doors, and Monad Passages can wait if the party is not ready.
Do not treat every guardian floor as one uninterrupted climb. Before leaving the entrance, check equipment, replenish healing items, register Personas in the Compendium, and save. If you reach a teleporter shortly before a guardian, use it as your recovery point. This gives you a safe return route if the boss or an optional encounter defeats the party.
- Confirm the highest unlocked floor at the Tartarus entrance.
- Save before beginning the climb toward a guardian.
- Use teleporters and escape routes instead of forcing a depleted run.
2. Rebuild the party and Persona roster before exploring
Visit the Velvet Room before a serious Tartarus push. Register Personas you may want to recreate, then fuse replacements that are close to the protagonist’s current level. Keep a healing option, a physical-damage option, and several elemental attacks available. A roster containing only one physical attacker or one favored element becomes unreliable when a Shadow resists that approach.
Build the active party around the threats in the current block. Yukari supplies healing and Wind damage, Junpei supplies physical and Fire options, Akihiko covers physical and Electric damage, and Mitsuru covers Ice damage. These roles are not mandatory, but removing all healing or all physical coverage to stack attackers makes long guardian fights less stable. Equip armor and weapons from the most recent shops or Tartarus rewards before attempting a checkpoint battle.
- Register useful Personas before fusion.
- Maintain healing, physical, Fire, Ice, Electric, and Wind coverage where possible.
- Upgrade equipment before a guardian attempt.
3. Use ordinary floors to test whether the run is sustainable
Treat the first floors of each visit as a resource check. Strike Shadows from behind when practical, then use known weaknesses to reduce the number of turns spent in combat. Use Assist or the party’s established commands for enemies whose affinities are already known, but do not spend expensive skills simply to finish fights that can be handled safely with normal attacks.
Return to the entrance when several characters are badly injured, the protagonist has run out of useful Persona skills, or you are consuming recovery items after nearly every battle. Tartarus progress is retained through the teleporter system, so a second visit is safer than gambling the entire climb on one final fight. If the party becomes fatigued or the next guardian is still several checkpoints away, bank the progress and resume later.
- Use regular battles to measure damage and SP efficiency.
- Leave before emergency items become the only source of recovery.
- Resume from a teleporter rather than repeating cleared floors unnecessarily.
4. Test affinities and control guardian battles manually
Use Analyze when the navigator has recorded the target’s information. If an affinity remains unknown, test one appropriate attack rather than repeatedly cycling through the same damage type. Once a weakness is confirmed, exploit it to create knockdowns and Shift opportunities. If an attack is resisted, nullified, repelled, or drained, stop using that type against the target.
Set difficult battles to direct control instead of relying on broad automatic tactics. Use the protagonist’s turn to switch to the Persona that can exploit the target without exposing an avoidable weakness. Keep a healing action available when an enemy can score a critical hit or exploit a party weakness. If the boss has a charged, announced, or clearly telegraphed heavy attack, Guard with vulnerable characters rather than trying to finish a damage sequence at any cost.
For guardians without a usable weakness, lower the enemy’s attack or defense and improve the party’s survivability. Tarunda, Rakunda, Sukunda, and equivalent buffs are valuable because they reduce the number of turns in which a bad hit can end the fight. Do not assume every ailment will work on a guardian; use status skills only when the target’s resistance is known or when the attempt is low-risk.
- Use Analyze when available and test unknown affinities carefully.
- Switch Personas when the current one exposes a weakness.
- Guard through telegraphed heavy attacks.
- Use buffs and debuffs when weakness exploitation is unavailable.
5. Prioritize the required gatekeepers over optional fights
The midgame route contains multiple guardian checkpoints rather than one boss at the end of a huge uninterrupted block. Arqa’s later guardian floors include 47, 54, and 60, while Yabbashah’s progression includes 77, 82, 90, 99, 105, and 112. The exact enemy lineup and affinities differ by floor, so inspect each encounter instead of carrying one fixed strategy through the entire block.
If the party reaches a guardian with low SP or missing recovery items, return to the entrance and prepare again. On the next attempt, change the specific weakness coverage, equipment, or defensive Persona that caused the failure. If a guardian is accompanied by additional Shadows, identify whether one can heal, buff, or create immediate pressure; remove that threat first only when doing so does not leave a more dangerous target unchecked.
- Treat each guardian floor as a separate preparation point.
- Record which attack types the guardian resists or nullifies.
- Change the failed setup before attempting the same fight again.
6. Decide between random Monad Doors and fixed Monad Passages
Random Monad Doors can appear while exploring Tartarus and lead to stronger-than-normal encounters with valuable rewards. They are optional. Enter one only when the party is healthy, the protagonist has multiple usable Personas, and enough SP and revival capacity remain for the next required floor. Skip the door if the group has just completed a long climb, if the reward does not solve a current equipment or build need, or if entering would leave you unable to reach the next teleporter.
Fixed Monad Passages are different: they occur on designated floors and present more structured challenges. The first Monad content becomes available after the July Full Moon operation, with later passages appearing at set locations as Tartarus opens. Clear a fixed passage when its reward and Major Arcana benefit support the current run, but do not confuse it with required progression. A passage can be postponed until the party has better Personas and equipment.
Save before entering a high-risk optional encounter whenever possible. If a Monad battle goes badly, reload, alter the active party and Persona resistances, or leave it for a later visit. Do not spend the entire month repeatedly retrying an optional fight while required Tartarus progress remains unfinished.
- Distinguish random Monad Doors from fixed Monad Passages.
- Enter only with enough resources for the optional fight and the next checkpoint.
- Treat Monad content as optional unless a separate completion goal requires it.
- Reload and change the setup after a failed attempt.
7. Update the roster after every block or major guardian
After clearing a major guardian or opening the next Tartarus block, return to the Velvet Room and review the Compendium. Replace Personas whose skills or defenses are now behind the area’s enemy levels. Inherit complementary skills rather than creating several Personas with identical damage types. Preserve at least one dependable healer, one physical option, and elemental coverage for the current party’s gaps.
Make a manual save after a successful required checkpoint and another before the next optional Monad challenge. If the protagonist is repeatedly hit by a predictable element, fuse or summon a Persona that resists or nullifies it. If the party lacks damage against a no-weakness guardian, prioritize stronger physical skills, debuffs, Theurgy preparation, and survivability instead of grinding every optional floor.
- Register and review Personas after each major checkpoint.
- Maintain distinct healing, physical, elemental, and defensive roles.
- Save after required progress and before optional high-risk battles.
- Fuse around current needs instead of preserving obsolete Personas indefinitely.
Before you move on
- The current Tartarus block is open through its latest required guardian or border floor.
- The party has returned safely to a teleporter, the Tartarus entrance, or the dormitory after required progress.
- The protagonist’s registered roster includes current-level Personas covering healing, physical damage, and several elements.
- A manual save exists before the next major guardian or optional Monad encounter.
- Any skipped Monad Door or Passage was deliberately postponed because of resources, preparation, or priority rather than being mistaken for required progression.
References for this chapter
- Persona 3 Reload Official Website
- Tartarus Guardians: List of All Mini-Bosses | Persona 3 Reload
- Persona 3 Reload: How many floors is Tartarus? How big is each block?
- Persona 3 Reload – Floors 70 to 118 Tartarus Yabbashah Guide
- Persona 3 Reload Monad Doors and Passages: Locations and Rewards
- Clairvoyant Relic Guide - Persona 3 Reload
Social Link Midgame Push — Target Ranks and Rewards
Use the middle months to build a practical Social Link rotation rather than trying to advance every character at once. School-based links have limited availability during exams, holidays, and school breaks, so they usually deserve priority over links that can be visited at night or on Sundays. Carrying a Persona of the same Arcana increases the points gained from a meeting, while favorable dialogue choices reduce the number of visits needed before the next rank. Emperor must be started before Justice can be developed, and Hierophant must reach the required point before Temperance becomes available. Ordinary Social Links mainly improve Arcana fusion experience and unlock a powerful Persona at the highest rank; direct party combat improvements come from separate Linked Episodes and dorm activities. Use evenings for scarce links, affinity support, Social Stats, and time-limited Linked Episodes.
Set weekly priorities before spending your first free afternoon
At the start of each week, inspect the town map, calendar, and network indicators to see which Social Links are available. Make school-based links your first priority whenever they are close to ranking up. They lose access during exam periods, school holidays, and parts of the winter schedule, while some non-school links remain available on Sundays, public holidays, or at night. Do not spend a limited school day on a link that is unavailable or clearly not ready to advance.
A practical rotation uses two or three main daytime targets instead of scattering visits across every character. Choose one restricted school link, one link with a prerequisite or limited schedule, and one flexible backup. If a character is not available, immediately use the slot for the next target rather than walking back and forth to check the same location. This approach matters even on a normal campaign because Social Link time is finite; completing every link in one playthrough requires a planned calendar, while a streamlined run should focus on the characters you value most.
- Check the map and calendar before leaving school or the dorm.
- Prioritize school links before long breaks and examination periods.
- Keep one backup activity ready for days when your preferred character is unavailable.
Open the prerequisite chains early
Advance the Hierophant Social Link with Bunkichi and Mitsuko at the Iwatodai Strip Mall bookstore. Progressing this link introduces the requirement that leads to Bebe's Temperance Social Link. When Bebe becomes available, begin him promptly instead of assuming he can be started at any time; his schedule is narrower than many daytime links.
Start Hidetoshi's Emperor Social Link through the Student Council as soon as the school story makes the council available. The Emperor link is the prerequisite for Chihiro's Justice Social Link. Chihiro requires more than simply visiting her location: speak with her on the required occasions and choose the option that begins spending time together. If you wait until late in the year to start Emperor, Justice will also be delayed, costing several school-day opportunities.
These links are valuable because they unlock additional Social Links, not because their individual ranks provide a separate combat skill tree. Treat the prerequisite as a scheduling gate. If you have not opened Emperor or advanced Hierophant far enough for Temperance, those chains should take priority over a lower-pressure link.
- Advance Hierophant far enough to introduce Bebe before trying to rank Temperance.
- Join the Student Council and begin Emperor as soon as it opens.
- Complete Chihiro's required introductory conversations after Emperor is available.
Carry a matching Arcana Persona for every planned meeting
Before meeting a Social Link, open the Persona menu and confirm that a Persona of the same Arcana is in your stock. The Persona does not need to be equipped in battle and does not need to be high level. Its presence improves the affinity gained during the meeting, making it easier to reach the next rank without spending an extra afternoon on a non-ranking hangout.
If the matching Persona is missing, use the Compendium to summon an inexpensive example or fuse one before the meeting. Keep several low-cost Personas for commonly used Arcanas rather than repeatedly dismissing and recreating them. Check the Persona's Arcana in the status display; relying on the character's name or your memory can lead to carrying the wrong card.
During each conversation, choose responses that support the character's immediate concern. Reload adds more voiced and expanded scenes, but voice acting does not change the basic planning rule: favorable answers give more points, while neutral answers may leave the link short of its next rank. If you are not following a full answer guide, avoid mocking, dismissive, or contradictory choices unless the scene clearly signals that the character wants a challenge.
- Carry the correct Arcana Persona before accepting the meeting.
- Use a cheap matching Persona when optimizing time; level is not the important factor.
- Favor supportive answers when you want the next rank as soon as possible.
Handle a meeting that will not rank up without wasting the calendar
When the game says your relationship will not deepen yet, the Social Link has not reached the hidden point total required for its next rank. The message does not mean that the link is permanently blocked. You can spend time with the character to gain more points, but that consumes the time slot, so first look for a more efficient support option.
The Naganaki Shrine fortune-teller can provide a friendship or affinity reading for an available Social Link when that service is unlocked. Dating Site Notes purchased from the Club Escapade computer vendor can also provide evening affinity support for selected characters after the relevant computer content becomes available. These methods are useful when a daytime link is one meeting short of ranking and you need to avoid an additional unproductive visit.
Gifts can help some Social Links, but they are not a universal replacement for a normal meeting. Give only an item accepted by the specific character and only when the game presents the gift option. Do not spend rare quest items, unique rewards, or expensive presents merely to force progress. The matching Persona remains useful for ordinary meetings; affinity support raises points but does not itself advance the rank until you meet the character again.
- Treat a non-ranking message as a point shortage, not a permanent lock.
- Use Shrine readings or Dating Site Notes when available and appropriate.
- Do not assume every gift works for every Social Link.
Use evenings for scarce links and Reload-specific character events
Check the evening map before automatically studying, working, or entering Tartarus. Mutatsu's Tower Social Link is an important evening opportunity, and President Tanaka's Devil Social Link also uses the evening schedule. These links are less likely to compete with school links, so they can be developed after daytime targets are handled. Maya's Hermit link is advanced through the online game from the protagonist's room when it is available; use it on its designated day rather than treating every Sunday as interchangeable.
Linked Episodes are not ordinary Social Links and do not use the normal Arcana-rank structure. They are time-limited character events that appear through prompts and map icons. Complete them when they appear, especially for male SEES members, because later episodes can depend on completing earlier ones. Their rewards include character-focused scenes, items, stat or party benefits in some events, and unique Personas for fusion after the relevant sequence is completed.
Nighttime dorm activities and teammate hangouts are also separate from ordinary Social Links. They can improve a party member's personal development or unlock useful passive improvements, but they should not be described as Social Link ranks. If no priority evening event is available, raise the Social Stat needed for an upcoming link, use an affinity-support activity, earn money, or study.
- Check for Tower, Devil, online-game, Linked Episode, and dorm prompts before choosing a generic activity.
- Complete Linked Episodes in order because later events can be time-limited.
- Keep ordinary Social Link planning separate from party hangouts and Linked Episodes.
Use Social Link rewards correctly when planning fusion
Ordinary Social Link ranks improve the Arcana's fusion experience bonus and eventually unlock that Arcana's highest-level Persona. They do not provide a direct combat skill at every rank in the manner of Persona 5 Confidant abilities. Prioritize a link because it is restricted, unlocks another link, fits your preferred fusion plan, or leads to a Persona you want—not because every rank is expected to give a party skill.
When a link reaches a high rank, check the Velvet Room's fusion options and register useful Personas before fusing them away. A higher Arcana rank can make future fusion levels easier to reach, but it does not remove the need to maintain elemental coverage, healing, buffs, and resistances in your active stock. Linked Episodes and dorm events are the more relevant sources for several Reload-specific party improvements.
By the late middle game, aim to have your restricted or prerequisite links around Rank 7–9 when their schedules permit. This is a planning target, not a mandatory story requirement. If you are not attempting an all-links run, finish the links that matter to your preferred characters and Persona roster rather than sacrificing every other activity to chase a perfect calendar.
- Use Social Links for Arcana fusion bonuses and final Persona unlocks.
- Check the Velvet Room after major rank increases and register valuable Personas.
- Do not confuse ordinary Social Link rewards with Linked Episode party benefits.
Before you move on
- Your restricted school links are being visited before long breaks, exams, and winter availability limits.
- Hierophant has been advanced far enough to open Temperance, and Emperor has been started before attempting to develop Justice.
- You carry a matching Arcana Persona for each planned Social Link meeting.
- You have checked evening prompts for Tower, Devil, online-game progress, Linked Episodes, and dorm hangouts.
- You understand that ordinary Social Links support fusion and unlock top-rank Personas, while direct party improvements mainly come from separate Reload activities.
- Your priority links are generally around Rank 7–9 by the late middle game, or you have a calendar-based plan for completing them later.
Late-Game Tartarus Strategy and Resource Conservation
Late-game Tartarus should be handled as a sequence of story-gated climbs rather than one attempt to clear every optional encounter. On each available visit, start from the highest useful teleporter, advance to the current border or gatekeeper floor, and retreat when the party’s SP, HP, or item supply makes the next fight unsafe. After January 1, the upper route opens through floor 256, but this is not the tower’s final destination. On January 31, the remaining floors become available and the ascent continues through floors 264, including the final gatekeeper encounters. Monad challenges, Reaper hunting, rare Shadow farming, treasure collection, and missing-person rescues can improve a party but are not required for the main campaign. Use the time before the final expedition to register Personas, replace dangerous weaknesses, update equipment, and stock healing and revival supplies.
1. Use the current border floor as the main objective
Tartarus is divided into story-gated sections. When a new section opens, enter from the highest teleporter you have already activated and climb until you reach the next border, blocked route, or gatekeeper encounter. You do not need to remap or sweep every lower floor after the path has been cleared. The practical goal is to secure the highest available progression point while preserving enough resources to leave safely.
The late-game unlock after January 1 allows progress through floor 256, with important fights listed on floors 230, 236, 241, 246, 247, 253, 254, and 255. Reaching floor 256 completes that currently available section, but it does not finish Tartarus permanently. Treat the border as a staging point: save outside, fuse, restore, and use later visits for optional rewards or preparation rather than repeatedly fighting through every earlier floor.
- Start from the highest activated teleporter that saves time.
- Advance to the current border or gatekeeper floor.
- Save after returning to the entrance instead of relying on one dungeon run.
2. Plan one strong push instead of many inefficient visits
Before entering, visit the Velvet Room, register Personas you may fuse away, check equipment, and replenish ordinary healing and revival items. Use the Tartarus map and Fuuka’s navigation information to locate stairs, teleporters, treasure, rare Shadows, and special objectives. Activate a teleporter whenever you find one; it is more valuable than clearing another ordinary encounter because it shortens every later visit.
Fight enemies that can be ambushed and defeated without excessive SP expenditure. Use normal attacks when they are sufficient, then reserve elemental skills, healing, and Theurgy for enemies that resist physical damage or threaten to drain the party’s resources. If several characters are low on SP, a healer is repeatedly spending items after normal battles, or the next gatekeeper is close, return to the entrance. Losing a run to a preventable wipe costs more than leaving a few chests or ordinary Shadows behind.
- Restore HP and SP before a gatekeeper floor.
- Keep revival items available for the active party.
- Use the teleport network instead of repeating cleared lower floors.
3. Build for elemental coverage and safe substitutions
Late-game preparation should use a flexible party rather than one permanent lineup. Keep a dependable healer or support role, at least one strong damage option, and additional members who cover different elements or provide buffs, debuffs, status recovery, or emergency utility. Check the current block’s enemy affinities and change the lineup when a character’s weakness is being targeted repeatedly.
The protagonist should carry several Personas with different attack types and defensive profiles. Maintain access to fire, ice, electric, wind, light, dark, and physical answers when possible, but do not sacrifice survivability merely to collect every element. A Persona with a useful resistance, Null, Drain, or Repel effect can be more valuable than a slightly stronger attacker that exposes the protagonist to an enemy weakness. Register useful Personas before fusion so they can be restored if the next block demands a different defensive setup.
- Keep reliable healing available even if the usual healer is removed from the party.
- Carry more than one damage type for enemy weakness testing.
- Replace a Persona whose weakness is being exploited by repeated late-game attacks.
4. Treat Monad content as optional preparation
Monad Doors and Monad Passages offer dangerous battles and valuable rewards, but they are not required to unlock the main Tartarus route. Attempt them when the party has strong HP and SP reserves, current equipment, several usable Personas, and enough items to recover from an unlucky critical hit or status effect. If the displayed enemies are clearly above the party’s safe fighting range, leave the challenge for a later visit.
Prioritize the mandatory stairs and border floors before entering a Monad area. A Monad reward is worthwhile when it supplies a weapon, armor piece, skill card, money, experience, or fusion material that immediately improves the next required fight. It is not worthwhile if clearing it consumes the recovery items or Theurgy needed for a gatekeeper. The Reaper and rare Shadow hunts are also optional and should not delay the campaign ascent.
- Check party HP, SP, Theurgy, and items before opening a Monad challenge.
- Leave optional Monad content when it threatens the mandatory climb.
- Do not farm the Reaper as part of the normal campaign route.
5. Complete the January 1 upper climb without confusing it with the finale
After January 1, push through the newly available section toward floor 256. The listed major encounters on floors 230, 236, 241, 246, 247, 253, 254, and 255 are the fights to respect during this climb. Use a save outside Tartarus before beginning, activate every useful teleporter, and return after a major gatekeeper if your party needs fusion or recovery work.
Do not describe floor 256 as the final floor of the game. It is the top of the section available before the final day. Once this route is complete, spend the remaining time on Social Links, equipment, requests, fusion, and supplies rather than repeatedly climbing the same floors unless you need a specific reward.
- Reach floor 256 before the final day if your preparation requires it.
- Keep a separate save before the upper-section push.
- Use the remaining calendar time to improve the party instead of farming blindly.
6. Prepare for the January 31 final expedition
On January 31, the final Tartarus stretch opens beyond the earlier January limit. The complete tower contains 264 floors, and the last expedition includes major encounters on floors 259, 263, and 264. Enter with current weapons and armor, a balanced Persona stock, reliable healing, revival items, status recovery, and enough money to resummon a registered Persona if a fusion plan fails.
Save before entering this final stretch. Use teleporter points as soon as they become available and check the party after each major battle. If a boss or gatekeeper exposes a weakness in your lineup, adjust the protagonist’s Persona, party composition, buffs, debuffs, or guard timing before continuing. Do not spend every powerful consumable on an optional fight immediately before the final encounters.
- Stock healing, revival, and status-recovery items before January 31.
- Register the Personas you intend to fuse away.
- Reach and clear the final Tartarus route through floor 264 when pursuing the campaign ending.
Before you move on
- The highest story-unlocked border floor has been reached for each available Tartarus section.
- The January 1 section has been advanced through floor 256, with its mandatory gatekeeper progression completed.
- A separate save exists before the January 31 Tartarus expedition.
- The protagonist’s Compendium contains registered Personas providing healing, multiple attack types, and useful late-game resistances.
- The final Tartarus expedition has been completed through floor 264, including the required late-floor encounters.
Final Month: Story Beats, Cutscenes and Mandatory Progression
January is Persona 3 Reload’s final preparation month. The December 31 decision determines whether the main campaign continues toward the promised confrontation: reject the option that causes the team to abandon its memories. Adamah’s lower section, Floors 227–256, becomes available on January 1. Clear this section before January 31 so your party is ready and the final route is unlocked. The upper section, Floors 257–264, does not open until January 31, so the summit cannot be completed earlier. Aigis’s Aeon Social Link begins at school on January 8 and is optional for the ending. Use the rest of the month for Social Links, Linked Episodes, requests, missing-person rescues, fusion and equipment upgrades. On January 31, finish daytime preparations, make a separate manual save, then speak with Mitsuru in the dorm to enter Tartarus. Complete the upper Adamah route, defeat the Strega encounters and defeat Nyx Avatar to reach the canonical ending.
1. Confirm the December 31 route
January follows the late-December decision concerning Ryoji. To continue toward the canonical main-story ending, choose the response that refuses to accept the peaceful alternative that would make SEES forget the truth. The decision to fight remains in effect through January and leads to the January 31 operation.
If you are still able to save before the decision, keep a separate manual save. This is the meaningful route choice for the main campaign. Completing Social Links, raising Aigis’s Aeon Social Link or finishing Elizabeth’s optional requests does not replace this requirement.
- Confirm that the December 31 decision continues the fight against Nyx.
- Keep a separate save before the decision if you want access to the alternate outcome later.
2. Open Adamah and clear the lower section
On January 1, the lower portion of Adamah becomes available, covering Floors 227 through 256. Enter Tartarus during an early January evening and progress through this section rather than leaving the entire climb for the final day. Use the Tartarus clock and access points to return near your highest reached floor after recovering at the entrance.
Your target before January 31 is Floor 256, not the summit. The final floors are deliberately locked until January 31, so reaching Floor 256 is the correct preparation milestone. Defeat the gatekeepers blocking your route, register useful Personas before fusing them away, and retreat when your healing or SP reserves are becoming unsafe.
- Enter Adamah during January and begin the climb through Floors 227–256.
- Reach Floor 256 before January 31 if possible.
- Register useful late-game Personas before using them as fusion ingredients.
- Do not expect the final roof route to open before January 31.
3. Plan January’s limited daytime opportunities
School resumes on January 8. Aigis’s Aeon Social Link can begin after school when you speak with her at Gekkoukan High School. The link is optional for completing the main story, but January is its only available month, so start it promptly if you want its ranks and fusion benefits.
Use daytime slots for Social Links you still intend to advance. Keep a Persona of the matching Arcana in your stock before each meeting, and check the calendar for each character’s available days. Linked Episodes, party hangouts and unfinished Social Links are valuable but are not prerequisites for entering the final operation.
- Speak with Aigis at school on or after January 8 if you want to begin Aeon.
- Carry matching Arcana Personas for planned Social Link meetings.
- Prioritize time-limited links before ordinary stat-raising activities.
4. Review requests and missing-person deadlines
Check Elizabeth’s request list regularly during January. Missing-person rescues and other requests can provide equipment, consumables, materials and combat rewards, but they are optional for the canonical ending. If a request requires Tartarus, combine it with your Adamah climb rather than making a separate trip solely for that objective.
Complete any remaining missing-person rescues before their listed deadlines. Review the Bulletin Board and Elizabeth’s requests whenever you return to the dorm or Paulownia Mall. Do not let optional challenges consume the final preparation window if Floor 256 is not yet secured.
- Review Elizabeth’s requests before each Tartarus visit.
- Rescue missing persons before their individual deadlines.
- Combine request objectives with the Adamah climb when practical.
- Treat superbosses and high-risk Monad content as optional.
5. Build the final party and Persona roster
Before January 31, use the Velvet Room to replace Personas that have fallen behind in level or skill coverage. Keep several damage types available, including physical options and multiple elements, because late-game Shadows and gatekeepers do not all share the same weaknesses. At least one usable Persona should provide dependable healing or support, and the protagonist should have emergency answers for fights where the active party’s normal damage is resisted.
Prepare the party around survivability rather than a single damage gimmick. Bring a reliable healer, support or debuff access, physical damage and enough elemental coverage to test unfamiliar enemies. Review each member’s weapon and armor, and keep revival items, group healing and SP recovery available. Exact level and build requirements vary with difficulty, but the final route is substantially safer when the party is not dependent on one character remaining active.
- Reach Floor 256 before final-day preparation.
- Keep Personas with physical, elemental, healing and support options.
- Register important Personas before fusion.
- Upgrade practical weapons and armor where your resources allow.
- Carry revival, group-healing and SP-recovery items.
6. Use January 31 daytime for locked preparation
January 31 is the final preparation day. Make a manual save during the daytime and keep it separate from your ordinary rotating saves. Shop for medicines, revival items and SP recovery, visit the Velvet Room, register your final Personas and inspect every active party member’s equipment.
You can still make limited preparations on January 31 before entering Tartarus, so do not treat the previous evening as your only chance to buy supplies. However, the final day is not the time to begin an unfinished Adamah climb from a low floor. If you have not reached Floor 256, use the daytime to correct your roster and then enter with a clear plan for the remaining route.
- Create a separate January 31 manual save.
- Restore party HP and SP before entering Tartarus.
- Buy or confirm access to healing, revival and SP-recovery items.
- Register final Personas and verify their resistances and skill coverage.
- Inspect every active party member’s weapon and armor.
7. Enter the upper Adamah section
On the evening of January 31, speak with Mitsuru in the dorm when you are ready to leave. Tartarus’s upper Adamah section, Floors 257–264, becomes accessible only on this date. Use your established route to reach Floor 256, then proceed through the newly opened floors toward the top.
The final route contains required encounters before Nyx Avatar, including the remaining Strega battles. Do not assume that reaching the first upper-floor landing completes the operation. Conserve SP where possible, use access points when offered and spend recovery items when they prevent a likely defeat. The route is now mandatory, unlike optional Monad Doors or request areas.
- Enter Tartarus only after making the January 31 save.
- Proceed from Floor 256 into the newly opened upper Adamah floors.
- Defeat the required Strega encounters.
- Reach the roof and begin the Nyx operation.
8. Complete the operation and verify the ending
After clearing the upper route, continue through the required story encounters and fight Nyx Avatar. Keep healing and revival available throughout the battle, and do not spend every strong recovery item during an earlier Strega encounter. Use Persona changes to answer elemental or status threats, and maintain a defensive plan if the active attacker is disabled.
Defeating Nyx Avatar completes the main campaign route. Allow the following scenes to play rather than quitting immediately after the battle. The canonical ending sequence is the campaign completion check; Episode Aigis, the FES epilogue, is separate additional content and is not required for this chapter’s goal.
- Defeat the required Strega encounters before the final battle.
- Defeat Nyx Avatar on January 31.
- Allow the post-battle story scenes and ending sequence to play.
- Confirm that the main campaign has reached its ending rather than stopping at a Tartarus checkpoint.
Before you move on
- The December 31 decision continued the route toward fighting Nyx.
- Adamah Floors 227–256 were reached before January 31, with Floor 256 available as the starting point for the final route.
- A separate January 31 manual save exists before entering Tartarus.
- The inventory and Persona stock include healing, revival, SP recovery, support and multiple damage options.
- The upper Adamah floors were cleared on January 31.
- The Strega encounters and Nyx Avatar were defeated.
- The post-battle scenes advance to Persona 3 Reload’s canonical main-story ending.
References for this chapter
- January Walkthrough and Activities Guide | Persona 3 Reload
- January Walkthrough — Persona 3 Reload — Neoseeker
- Persona 3 Reload: All key dates
- Persona 3 Reload: How many floors is Tartarus? How big is each block?
- Adamah Walkthrough - Persona 3 Reload - Neoseeker
- Persona 3 Reload - Nyx Avatar Boss Guide — Samurai Gamers
The Final Dungeon and Climactic Encounters
Adamah is the final Tartarus block in Persona 3 Reload. The lower section begins at Floor 227 and ends at Floor 256, with required gatekeepers on Floors 230, 236, 241, 246, 247, 253, 254 and 255. The upper section, Adamah II, opens later and contains the required Jin encounter on Floor 259, Takaya on Floor 263, and the final story battle on Floor 264. Floors 253–255 form a consecutive gatekeeper sequence, so prepare the party and save before starting it. Monad Doors, Monad Passages and the Reaper are optional and are not needed for the canonical ending.
Prepare before entering Adamah
Make a manual save before beginning the Adamah expedition. Restore HP and SP, register valuable Personas, review equipment, and use the Velvet Room to cover missing damage types or support skills. Adamah contains enemies with varied affinities, so do not build the protagonist around one element alone. Keep access to physical damage, several magical elements, healing, buffs, debuffs and at least one reliable neutral or Almighty attack.
Carry revival items, party-wide HP recovery, SP recovery and ailment cures. Fear recovery is particularly important for the Floor 254 Hedonistic Sinners, while Confusion recovery is important for Genocidal Mercenary on Floor 255. A party should include dependable healing and support without forcing the protagonist to spend every turn restoring the group. Equip or prepare Personas that do not expose an easily exploited weakness, especially before the Jin and Takaya encounters.
Adamah begins at Floor 227. You do not need to clear every Monad Door, Formidable Shadow, rare chest or optional passage to advance the main campaign. Secure the required route first, then return for optional rewards only if the calendar and resources allow it.
- Create a manual save before the expedition.
- Restore HP and SP and register useful Personas.
- Carry revival, healing, SP and ailment-recovery items.
- Prepare multiple damage types and a Persona with safe defensive affinities.
Climb the lower Adamah section
Start from the highest available Tartarus access point and advance through the maps, checking each floor for the route forward, teleporters and treasure. Strike Shadows before they reach you, use Analysis to test unfamiliar enemies, and avoid repeatedly attacking an affinity that resists, nullifies, repels or absorbs the damage. Return to a teleporter or the entrance when the healer is low on SP or several characters are approaching critical HP.
The required lower-section gatekeepers are on Floors 230, 236, 241, 246, 247, 253, 254 and 255. At Floor 236, defeat the supporting Foot Soldiers and Mage Soldiers while monitoring the main enemy’s reinforcement behavior. At Floor 246, remove the Invasive Serpents before concentrating on Appropriating Noble; Strike is useful against the serpents when their current battle information confirms it, while Ice is effective against Appropriating Noble. At Floor 247, High Judge of Hell can pressure the party with heavy physical attacks, so heal before anyone becomes vulnerable to a knockout and use defensive support rather than waiting for a character to fall.
After every gatekeeper, use the next teleport point as a possible stopping place. The objective is to reach the upper sequence with a functioning healer, revival items and several usable Personas, not to spend every consumable clearing optional content. Monad Doors and rare rewards can be attempted later if they do not compromise the required route.
- Defeat the gatekeepers on Floors 230, 236, 241, 246 and 247.
- Remove supporting enemies when the encounter gives them a combat role.
- Use teleporters to preserve progress and retreat before resources become critical.
- Skip optional Monad fights when they would weaken the main route.
Prepare for the consecutive Floors 253–255 sequence
Before entering Floor 253, settle the party and save if a separate save is available. The gatekeepers on Floors 253, 254 and 255 are a consecutive sequence, so do not assume you will receive a normal chance to reorganize between battles. Give the healer enough SP for all three encounters, bring Fear and Confusion recovery, and keep emergency revival items accessible.
Cultist of Death on Floor 253 is weak to Wind. It can use heavy Almighty and instant-death pressure, so exploit Wind while keeping the party healed and protecting characters who lack Light or Darkness resistance. Do not spend every Theurgy gauge during the opening turns if the party can win through Wind attacks and normal damage.
The two Hedonistic Sinners on Floor 254 have no weakness. They are immune to Slash, Pierce, Fire, Electric, Light and Darkness, so do not search for a conventional weakness and do not use Strike as a default recommendation. Their dangerous pattern uses Stagnant Air, Evil Smile and Ghastly Wail: Stagnant Air increases the chance of ailments, Evil Smile attempts to inflict Fear, and Ghastly Wail can punish a feared character. Prevent Fear with suitable equipment or resistance when possible; otherwise cure it immediately and focus both attackers on one Hedonistic Sinner at a time. Use available damage that is not blocked by the current battle information, including suitable neutral, Almighty or charged options.
If an encounter ends with the party damaged, use recovery items before continuing. Spending an SP or healing item here is preferable to reaching Floor 255 without enough resources to heal, revive or remove an ailment.
- Choose the party before entering Floor 253.
- Use Wind against Cultist of Death.
- Treat Hedonistic Sinner as having no weakness and do not use Strike as the standard solution.
- Prevent or immediately cure Fear before Ghastly Wail can punish the party.
- Keep healing, revival and SP recovery available for all three fights.
Defeat Genocidal Mercenary on Floor 255
Genocidal Mercenary has no weakness. It resists Slash and Electric and is immune to Strike, Ice and Darkness. Do not use Strike, Ice or Darkness as routine attacks, and do not describe its defenses as a repel or drain effect. Favor available nonblocked options such as Fire, Wind, Light or Almighty, checking the battle information before committing to a skill. Charged or Concentrated attacks and Theurgy are useful because the fight cannot be solved through a weakness knockdown.
Genocidal Mercenary uses Tentarafoo to inflict Confusion and can follow with powerful physical or Almighty attacks, including Akasha Arts. Cure Confusion immediately. An afflicted attacker may waste turns, damage allies or create an opening for critical hits. If the enemy raises its statistics with Heat Riser, remove the boost with Dekaja or apply a comparable debuff plan. Keep the protagonist on a Persona with safe affinities and switch immediately if the current Persona exposes a weakness the enemy can exploit.
Guard when the enemy has prepared a heavy attack or when a damaged character cannot safely survive another hit. Heal the whole party before anyone reaches critical HP. Use Theurgy when it prevents a likely knockout or ends a dangerous phase instead of holding every gauge for a perfect setup. Defeating Genocidal Mercenary completes the lower Adamah gatekeeper sequence, but it does not begin the final battle.
- Remember that Genocidal Mercenary has no weakness.
- Avoid Slash, Electric, Strike, Ice and Darkness according to its verified defenses.
- Favor available Fire, Wind, Light or Almighty damage after checking the battle display.
- Cure Confusion immediately.
- Counter Heat Riser with Dekaja or an equivalent debuff plan.
Continue through Adamah II and defeat Jin
After Floor 255, continue through Adamah II rather than treating the lower block as the end of the route. Regular enemies in the upper section use different affinities, including Grand Magus and Wicked Turret, so reassess weaknesses instead of repeating the same Persona or attack pattern on every floor. Use teleporters to preserve access points and return for healing when the party’s SP is falling.
The required Jin encounter is on Floor 259. Jin has no weakness and the fight contains scripted damage pauses that cannot simply be bypassed by overwhelming the opening turns. Focus damage on Jin, maintain healing and remove harmful status effects. At approximately 50 percent HP, Jin begins using Flash Grenade EX, which can cause Confusion. At approximately 25 percent, Stimulating Injection restores his HP and grants powerful offensive effects while inflicting ongoing self-damage; heal before this threshold, then guard or use defensive actions while the effect is active. Keep the party alive through the scripted sequence rather than spending every high-cost attack immediately.
After Jin falls, reorganize before continuing. Keep at least one strong Theurgy gauge, revival options and sufficient healing for Takaya. Create a separate manual save before proceeding toward Floor 263 if the game provides a convenient access point.
- Continue beyond Floor 255 into Adamah II.
- Recheck affinities against upper-section enemies.
- Focus Jin and prepare for his scripted pauses at roughly 50 percent and 25 percent HP.
- Cure Confusion caused by Flash Grenade EX.
- Heal and guard through Stimulating Injection rather than assuming the fight ends immediately.
Defeat Takaya on Floor 263 and prepare for Floor 264
Takaya is the required encounter on Floor 263. He has no weakness and is immune to Light and Darkness, so use available physical, elemental or Almighty damage that the battle display confirms is not blocked. Keep the protagonist on a Persona with safe defenses and bring protection against Light and Darkness instant-death skills when available. Assign one character to maintain recovery while the others apply steady damage and buffs or debuffs.
Takaya changes the fight at scripted health thresholds. Around 75 percent HP, he can drain SP from the protagonist. Around 50 percent, he uses Megidolaon, so top off HP before reaching that point and be ready with group healing or Guard. Near 10 percent, Paradise of Quietus inflicts Fear, deals heavy damage and leaves the party with very little SP. Save a recovery plan and at least one useful Theurgy for this closing section; do not spend every resource before Takaya reaches his final threshold.
After Takaya is defeated, make a final manual save before Floor 264, restore the party and review the protagonist’s Persona stock. Floor 264 begins the final story battle sequence. Monad Passages, the Reaper and other special fights are not required for the campaign ending, so do not risk the final preparation by pursuing them immediately before the story finale.
- Defeat Takaya on Floor 263.
- Use safe damage because Takaya has no weakness and blocks Light and Darkness.
- Prepare for the scripted Megidolaon and Paradise of Quietus thresholds.
- Save recovery items, SP restoration and Theurgy for the closing turns.
- Create a separate pre-final-battle save before entering Floor 264.
Recover after a failed Adamah attempt
If a gatekeeper defeats the party, reload the most recent pre-battle or dorm save instead of restarting the campaign. Identify the cause: an exposed weakness, an untreated ailment, depleted healer SP, blocked damage, or poor timing around a scripted phase. Replace the vulnerable Persona, alter the party if the sequence permits, and retrieve the specific recovery items that were missing.
If the defeat occurs during Floors 253–255, rebuild the party before Floor 253 and conserve resources during Cultist of Death. Against Hedonistic Sinner, correct the Fear plan rather than trying to force Strike damage. Against Genocidal Mercenary, remove blocked Slash, Electric, Strike, Ice and Darkness options from the main attack plan and use nonblocked damage or Theurgy. If Jin or Takaya defeats you, keep the Adamah route save and change Persona resistances, healing assignments, defensive timing and Theurgy use before retrying.
- Reload a pre-battle or dorm save after defeat.
- Correct the specific resistance, ailment or resource problem.
- Rebuild the party before the consecutive Floor 253–255 fights.
- Do not restart the campaign because of one failed attempt.
Before you move on
- The required gatekeepers on Floors 230, 236, 241, 246, 247, 253, 254 and 255 have been defeated.
- Cultist of Death was handled with Wind rather than relying on blocked damage, Hedonistic Sinner was fought as a no-weakness immune encounter, and Genocidal Mercenary was fought without its blocked Slash, Electric, Strike, Ice or Darkness options.
- Jin on Floor 259 and Takaya on Floor 263 have been defeated, including their scripted health-threshold phases.
- A separate manual save exists before entering Floor 264 and the final story battle.
- The party is healed, recovery supplies are available, and the protagonist has multiple usable Personas with broad coverage.
- Optional Monad content and the Reaper remain separate from the required route.
References for this chapter
- Adamah I - Persona 3 Reload Walkthrough & Guide
- Adamah II - Persona 3 Reload Walkthrough & Guide
- Adamah Walkthrough - Persona 3 Reload - Neoseeker
- Jin Shirato (2nd Encounter) Boss Guide: Weakness and Resistances
- Takaya Sakaki (2nd Encounter) Boss Guide: Weakness and Resistances
- Persona 3 Reload: How many floors is Tartarus? How big is each block?
Final Boss — Practical Checklist and Fight Flow
On January 31, SEES reaches the top of Tartarus and fights Nyx Avatar in a long battle divided into 14 Arcana phases. Each phase changes Nyx’s attacks and defensive affinities, so do not assume one element or physical type will remain effective. Use Analysis after each Arcana Shift, stop attacking with any damage type that is resisted, nullified, reflected, or absorbed, and keep a healer ready throughout the operation. The Justice, Hanged Man, and Death phases deserve special preparation: Justice can use instant-death Light attacks, Hanged Man can combine extra actions with Concentrate and Megidolaon, and Death begins with Apocalypse before using Night Queen and attacks from earlier phases. Enter with full HP and SP, revival items, status recovery, several Persona options, and at least one dependable source of Almighty damage if available. The fight is complete when Nyx Avatar is defeated and the January 31 story sequence continues into Persona 3 Reload’s main-story ending. Reload does not continue into Persona 3 FES’s The Answer or the Portable female-protagonist route.
1. Save separately and prepare the party before the January 31 operation
Before beginning the final Tartarus operation, create a manual save in a separate slot. Register the protagonist’s current Personas in the Compendium, then visit the Velvet Room if you need to replace a narrow build or restore a Persona you may want later. This is not a secret-boss fight, but the protagonist should have several damage types available, at least one strong defensive Persona, and reliable healing or support options. A Persona that exposes the protagonist to a weakness can give Nyx an extra action, so switch away from a dangerous affinity instead of stubbornly keeping one Persona equipped.
Restore the party to full HP and SP before the final ascent. Stock revival items, party-wide healing, status recovery, and SP recovery items. Bring Homunculi or another protection against instant-death effects if you have them, because the Justice phase can use Light-based death attacks and the protagonist’s defeat ends the attempt. Favor a stable team containing a healer or strong recovery option, a support character who can buff or debuff, and damage dealers who can use more than one attack type. The battle has many phases, so survival and flexibility matter more than a single spectacular build.
- Create a separate manual save before starting the operation.
- Register Personas in the Compendium before entering the final sequence.
- Restore party HP and SP to full.
- Carry revival, healing, status-recovery, and SP-restoring items.
- Equip or carry protection against instant-death effects when available.
2. Start the fight by checking every Arcana Shift
Nyx Avatar’s fight contains 14 phases, each with its own health bar, attack pattern, and defensive profile. The opening Fool phase has no special weakness to exploit. When Nyx uses Arcana Shift, treat the new phase as a new encounter: check the current information with Analysis, note the active Arcana, and test your planned damage type before committing to repeated attacks. If an attack is resisted, nullified, reflected, or absorbed, stop using it and switch to another Persona, character, or damage category.
The early phases echo the Full Moon Shadows. Magician emphasizes Fire, Priestess emphasizes Ice, Empress uses strong magical defenses and Wind-oriented attacks, Emperor resists physical damage, Hierophant and Lovers introduce mental-status danger, and Chariot blocks physical damage. Justice blocks magic and can use Light instant-death attacks. Hermit emphasizes Electric attacks, Fortune uses severe high-level elemental skills, Strength resists Slash and Pierce while repelling Strike, and Hanged Man is especially dangerous because of its extra-action and concentrated attack pattern. These are not opportunities to force weaknesses; Nyx does not present a normal weakness during this sequence.
- Use Analysis after each Arcana Shift.
- Do not repeat an attack type that the current phase resists, nullifies, reflects, or absorbs.
- Switch the protagonist’s Persona when its weakness is unsafe.
- Treat Justice, Hanged Man, and Death as priority danger phases.
3. Spend healing, buffs, debuffs, and Theurgy during the whole marathon
Do not try to finish the first eleven phases while refusing to use resources. Nyx has separate health bars for the phases, so the encounter is an endurance fight. Heal when the party is in danger, revive characters before continuing to attack, and use status recovery immediately when Charm, Freeze, Shock, or another disabling effect prevents a character from acting. Guard when a character is already badly hurt or when Nyx has prepared a powerful attack; surviving the turn is usually better than dealing one more uncertain hit.
Use party buffs and Nyx debuffs whenever you have a safe opening, then refresh them after an Arcana Shift if the effect has disappeared. Prefer buffs that benefit only SEES rather than effects that also improve Nyx. Use Theurgy during the middle phases when it can shorten a dangerous phase, restore the party, or provide a decisive support effect. There is no requirement to save every Theurgy gauge or consumable for Death; arriving at the final phase with an exhausted party is more dangerous than spending a strong move earlier.
- Heal before a character reaches immediate knockout range.
- Revive fallen allies instead of attempting to finish with a reduced party.
- Cure disabling status effects promptly.
- Refresh useful buffs and debuffs after phase changes.
- Spend Theurgy and consumables when they prevent a collapse.
4. Handle Justice and Hanged Man deliberately
During Justice, protect the protagonist from instant-death Light skills. A Homunculus can save the targeted character, but it is still safer to keep the party healthy and avoid leaving the protagonist without protection. Use your strongest damage that is not blocked by the active phase and do not gamble on reflected or nullified attacks merely to preserve SP.
Hanged Man is one of the most dangerous non-Death phases. Nyx can gain extra actions through Grim Transcendence and can use Concentrate before Megidolaon or combine a charged physical attack with a strong area attack. When you see a setup that indicates a major incoming hit, prioritize Rakukaja, Tarunda, Debilitate, healing, or Guard over low-damage offense. If a charged attack is about to land and the party is already damaged, guard with vulnerable members and be ready to heal immediately afterward.
- Protect the protagonist against Justice’s instant-death attacks.
- Use defensive buffs or debuffs before Hanged Man’s concentrated attack sequence.
- Guard when a powerful attack is imminent and the party cannot safely absorb it.
- Keep revival items available instead of spending the last one on optional damage.
5. Treat Death as a separate final encounter
When Death begins, heal the party as soon as the battle allows and reapply your main buffs and debuffs. Death has no normal weakness, and its phase is not solved by repeatedly casting one element. Almighty attacks are useful because they avoid the elemental and physical affinity problems seen earlier, but they are not the only valid option: use your strongest damage that is not blocked, reflected, or absorbed. If you have a high-damage Theurgy or Armageddon available, this is an appropriate point to use it, but do not depend on having a specific ultimate Persona or skill.
Death begins with Apocalypse, which forcibly reduces the party to only a small amount of HP. Expect Night Queen immediately afterward and prepare to heal or guard rather than assuming the party can continue attacking. Death can then reuse dangerous attacks associated with earlier phases, including powerful elemental, physical, status, and Almighty moves. Keep the protagonist on a Persona with safe resistances, maintain a backup Persona for emergency switching, and preserve at least one full-party heal and revival option for the closing turns.
- Heal or guard after Apocalypse instead of spending the next turn on weak offense.
- Prepare for Night Queen immediately after Apocalypse.
- Use Almighty damage when available, but do not treat it as the only legal solution.
- Keep at least one emergency heal and revival option for the end of Death.
6. Finish without gambling on a one-character strategy
Continue alternating safe damage, recovery, buffs, and debuffs until Death’s health bar is empty. If Nyx removes a buff, a character is Charmed, or an ally falls, stabilize the party before attacking again. Do not leave a fallen healer or support character down while attempting a final burst. The final phase can still produce sudden damage, status problems, or additional actions, so a one-character strategy is unnecessarily fragile unless you have deliberately built for survival.
When Nyx is nearly defeated, use the safest effective attack already confirmed to work. Do not experiment with a new element or physical skill that might be reflected or absorbed. After the final health bar is depleted, the game proceeds through the concluding January 31 story scenes and then the main Persona 3 Reload ending. If the game offers a clear-data or completed-save prompt after the ending, create that save so you can preserve the completed campaign for optional cleanup or New Game Plus.
- Death’s final health bar is completely depleted.
- The protagonist survives the encounter and the story continues instead of showing a Game Over.
- The post-battle story scenes play through to the main ending.
- Create clear data or a completed save if the game presents that option.
Before you move on
- Nyx Avatar’s Death phase health bar is fully depleted.
- The battle transitions into the January 31 concluding story scenes.
- Persona 3 Reload reaches its canonical main-story ending.
- The game does not proceed into Persona 3 FES’s The Answer or the Portable female-protagonist route.
- Clear data or a completed save is created if prompted after the ending.
References for this chapter
- Nyx Avatar Boss Guide: Weakness and Resistances — Persona 3 Reload — Game8
- Nyx Avatar Boss Guide — Persona 3 Reload — Neoseeker
- Persona 3 Reload - Nyx Avatar Boss Guide — Samurai Gamers
- How to Beat Nyx in Persona 3 Reload — Siliconera
- Persona 3 Reload: Episode Aigis — The Answer Walkthrough and Guide — GameFAQs
Persona Fusion, Compendium and Endgame Builds
Persona 3 Reload on PS5 makes fusion inheritance much more controllable than the original Persona 3, but strong builds still require planning. Register improved Personas before fusing them, decide the target role before choosing ingredients, and inspect the inheritance list rather than assuming every parent skill will transfer. Normal fusion still follows compatibility rules, and Persona-exclusive skills cannot normally be passed down. Skill Cards are the exception: they can teach compatible or incompatible skills directly to a Persona. Use the Compendium to recover registered Personas, but remember that a registered entry is only a record; you must pay to summon that Persona before using it in another fusion. A campaign-clearing roster does not require a perfect Compendium. Maintain several practical Personas covering elemental attacks, physical damage, healing, support and defensive resistances, then register the finished builds before the final dungeon and final boss.
1. Register improved Personas before changing your stock
Enter the Velvet Room at the base of Tartarus or through the blue door in Paulownia Mall. Open the Compendium registration option whenever a Persona has learned a valuable skill, received a useful Skill Card, or gained a substantially better build. If the game asks whether to update the existing entry, compare the current Persona with the stored version and overwrite it when the current version is better.
Registration preserves the version you had at that moment. If you later summon the Persona, the Compendium returns that registered level, skills and other recorded improvements, not an unregistered version you used afterward. Register again before fusing, selling or replacing a carefully built Persona. This is especially important for Personas carrying a rare Skill Card or an unusual inherited combination.
- Register after valuable level-up skills, Skill Cards and major build changes.
- Overwrite an older Compendium entry when the current version is stronger or more useful.
- Leave an open stock slot before summoning a registered Persona.
2. Choose the target Persona and its job before fusing
Use the Fusion menu to select the Persona you want to create, then inspect its level, statistics, resistances, natural skills and expected inherited skills. Decide whether the result is an attacker, support Persona, healer, defensive switch-in or elemental specialist before selecting the ingredients.
A Persona with stronger Magic is normally a better home for elemental, Almighty or magic-support skills, while a Persona with stronger Strength is better suited to physical attacks and physical passives. The exact best choice depends on the Persona's growth and available skills, so use the preview rather than relying only on its Arcana or appearance.
Do not force one Persona to cover every role. The protagonist can carry multiple Personas and switch during combat. A practical endgame stock includes several elemental answers, one physical option, a healing or support option, and defensive Personas that resist or nullify attacks common in the current Tartarus block or boss encounter.
- Inspect the target's stats and affinities before selecting ingredients.
- Match physical skills to Strength-focused Personas and magic skills to Magic-focused Personas when possible.
- Keep several roles across the protagonist's stock instead of overloading one Persona.
3. Select ordinary inherited skills manually, but respect restrictions
Reload lets you choose from the compatible inherited skills shown during fusion instead of leaving the entire selection to the older random inheritance system. Review the list carefully before confirming. Prioritize a role-defining attack, passive, resistance, buff, debuff or healing skill over duplicate low-level abilities that the target already learns naturally.
Normal fusion does not allow every parent skill to transfer. Incompatible skill types are excluded from the inheritance list, and Persona-exclusive skills cannot normally be passed to another Persona. If the skill does not appear in the selection screen, cancel or change the ingredients; repeatedly confirming the same fusion will not force an unavailable skill onto the result.
Leave some space for the target's own level-up skills unless you have checked its complete natural skill list. Replacing all inherited skills immediately can cause you to lose a useful early skill before the Persona learns its stronger abilities.
- Read the complete inheritance list before confirming fusion.
- Do not assume a parent skill is transferable merely because the parent possesses it.
- Reserve room for useful skills the target learns naturally.
4. Use intermediate Personas for deliberate inheritance chains
For a desired endgame skill, first create a legal carrier Persona that can inherit it. Register the carrier, then summon it again later if you fused it away and need it as an ingredient. Use that carrier in the next fusion and check whether the skill appears for the new target. Repeat this process through as many intermediate steps as necessary.
The Compendium entry is not itself a fusion ingredient. It stores a Persona for later recovery, but you must select Summon and pay the displayed price to bring that Persona into your current stock. Plan for the cost, especially when rebuilding high-level carriers or ingredients for Special Fusions.
If the desired skill disappears at any stage, stop and change the intermediate Persona or the other fusion ingredient. Do not sacrifice an expensive carrier on the assumption that the skill will become available in the next result.
- Register each successful carrier before continuing the chain.
- Summon registered carriers before using them as fusion ingredients.
- Verify the desired skill is present at every fusion stage.
5. Reserve Skill Cards for final or unusually restricted builds
Skill Cards teach an ability directly to a Persona and bypass the normal compatibility restrictions that affect ordinary fusion inheritance. This allows a Persona to learn a skill it could not inherit through fusion, including an element that does not match its normal inheritance profile.
Use a Skill Card from the Persona's skill menu and confirm which existing skill will be replaced. The card is best spent on a Persona you expect to keep for a substantial part of the game, a build that cannot receive the skill through fusion, or a defensive option needed for a difficult encounter. Check the Persona's natural skills first so you do not spend a rare card on an ability it will learn soon by leveling.
After applying the card and making any further changes, register the Persona again. If you fuse it without updating the Compendium, summoning it later may restore the older version without the card.
- Confirm the target does not already learn the skill naturally.
- Use Skill Cards for restricted coverage, valuable passives or finalized builds.
- Register the Persona again after applying the card.
6. Prepare specialized endgame Personas instead of one universal build
Before the final dungeon, create a small rotation with distinct jobs. Keep an offensive Persona built around the protagonist's strongest damage stat, a support or defensive Persona with healing, buffs or debuffs, and additional Personas covering elements and physical damage. Include at least one emergency switch-in with useful resistance to attacks expected from the current boss.
Resistance is often more valuable than adding one more attack. A Persona that resists, nullifies, drains or repels a frequently used attack can prevent damage and preserve healing resources. Keep a recovery option available even if it deals less damage than the main attacker. During battle, inspect enemy affinities and switch Personas when the active one is exposed to a dangerous attack type.
Do not spend the entire budget on one high-level summon. Keep enough money to replace a lost ingredient, resummon a support Persona or rebuild a Special Fusion after testing a new setup.
- Cover multiple elements and physical damage across the stock.
- Maintain a support or recovery Persona and at least one defensive switch-in.
- Register every finalized endgame Persona before entering the final dungeon.
7. Recover Personas and preserve Special Fusion ingredients
If you fused away or sold a Persona, open the Compendium in the Velvet Room, locate the registered entry by list or Arcana, and summon it for the displayed fee. This restores the registered version only. If the Persona had gained later skills or stat improvements that were never registered, those changes must be recreated.
Special Fusions and Elizabeth requests may require particular Personas or specific skills. Keep likely ingredients registered before using them elsewhere, and check the request or fusion result before spending them. Some high-level Personas and Theurgy-related combinations are optional for completing the main campaign, so do not delay the story solely to complete the Compendium unless you are pursuing optional rewards or a completion goal.
If a fusion produces an unwanted result, reload the save made before the fusion session when necessary. Otherwise, register the useful result, resummon missing ingredients, and revise the chain rather than restarting the campaign.
- Search the Compendium before rebuilding a discarded Persona from scratch.
- Register ingredients for known Special Fusions and Elizabeth requests.
- Keep a pre-fusion save when testing an expensive or complicated inheritance chain.
Before you move on
- The Compendium has current entries for the Personas intended for the final dungeon and final boss.
- The protagonist's stock covers several elements, physical damage, recovery or support, and useful defensive resistances.
- The principal endgame Persona has been registered after its final skill selections and any Skill Card use.
- Required Special Fusion ingredients and important Elizabeth-request Personas are registered or otherwise available for resummoning.
- You can explain each Persona's role and know which one to switch to when an enemy resists the active damage type.
- A pre-fusion or pre-final-dungeon save exists so an expensive build can be corrected without restarting the campaign.
Optional Content, Side Quests and Completionist Targets
Persona 3 Reload’s optional content is not required to reach the canonical ending, but it supplies equipment, skill cards, materials, Persona unlocks, character scenes and useful combat improvements. Review Elizabeth’s Requests before each Tartarus visit, rescue Missing Persons before their deadlines, and attend Linked Episodes as soon as they appear. For a streamlined campaign, complete practical Requests, use Monad Doors and Passages only when the party can clear them safely, and keep mandatory Full Moon and Tartarus progress ahead of optional objectives. For a comprehensive Reload checklist, separately track all Requests, Missing Persons, Linked Episodes, dorm activities, Monad content, optional bosses, equipment, Persona registrations and late-game character scenes. The checklist must include Ryoji’s main-campaign episodes and Saturnus, Junpei’s January episode, and the optional Chidori-related outcome. Episode Aigis is a separate epilogue and is not part of this campaign.
Review Elizabeth’s Requests before and after Tartarus visits
Visit the Velvet Room and check Elizabeth’s Requests whenever a new Tartarus block, shop feature or story milestone becomes available. Requests cover material collection, Shadow defeats, Missing Persons, Persona registration, fusion tasks, special items and Monad challenges. Accept the Requests that fit your next trip, then return to Elizabeth and turn them in manually after completing their conditions.
Prioritize Requests that can be completed during mandatory Tartarus progress. Old Documents, Shadow-hunting milestones, treasure milestones and specified chest items are efficient to combine with a normal expedition. Fusion Requests are best handled after registering the required Persona and confirming that the requested skill is present. Do not sell rare materials before checking the active list, and read every deadline because some Requests are missable.
There are 101 Elizabeth Requests in Reload, but completing every Request is not necessary for the ending. At least 82 Requests are needed for the Distinguished Visitor trophy, while the remaining Requests mainly support equipment, consumables, fusion rewards, materials, optional superbosses and completionist goals. Treat the trophy threshold and a true all-Requests run as separate targets.
- Review Requests before entering Tartarus.
- Check deadlines, required locations and Persona skills.
- Keep unusual materials until active Requests are checked.
- Return to the Velvet Room and claim completed rewards.
Rescue Missing Persons and preserve deadline rewards
Check the police station and Elizabeth’s Request list for Missing Person reports. When a report is active, note the person’s Tartarus floor and deadline, then rescue them before continuing with optional exploration. Search the indicated floor during a planned Tartarus visit rather than making a separate trip whenever possible.
Missing Persons are optional for reaching the canonical ending, but several provide useful items or unlock Request-related rewards. Missing one does not normally invalidate the main campaign, but it can remove a reward or prevent a completionist checklist from being finished in the current calendar. Mark each report as rescued, expired or intentionally skipped.
- Record each Missing Person’s floor and deadline.
- Rescue them during a planned Tartarus run.
- Turn in the result and collect the reward.
- Keep expired or skipped reports on the completionist list.
Complete Linked Episodes, including Ryoji and Junpei’s late events
Linked Episodes are separate from Social Links and focus on Junpei, Akihiko, Koromaru, Ken, Shinjiro and Ryoji. They use limited calendar windows and often unlock the next event only after the previous one is completed. Attend the first available event for each character and record the next location rather than assuming the invitation will remain available indefinitely.
For Ryoji, complete the base-campaign sequence when the events appear in November and December. His episodes include the automatic November 9 introduction, later daytime events, the November 19 Kyoto event and the December 1 school event. The December 31 story event concludes his sequence and grants the ability to fuse Saturnus. These events and Saturnus are optional for reaching the canonical ending, but both are required for a complete Reload Linked Episode and Persona-unlock checklist.
Junpei has an additional late sequence. After completing his earlier episodes, watch for the November 7 event and continue the related November events. To pursue the optional Chidori-related outcome, buy the White Flower from Rafflesia after the relevant Junpei event and give it to Junpei at night when the game makes that opportunity available. This outcome does not determine whether the canonical ending can be reached, but it must be recorded separately from Junpei’s ordinary Linked Episode rewards.
Junpei’s final January event is also separate from the Chidori outcome. It becomes available in January and can lead to the Surt fusion unlock when the full chain is completed. For a comprehensive checklist, record Junpei’s summer events, the November Chidori-related sequence, the January event, and the Persona unlocks separately.
- Track all six Linked Episode characters.
- Complete Ryoji’s November and December events.
- Confirm Saturnus becomes available for fusion.
- Complete Junpei’s November sequence before attempting the Chidori outcome.
- Buy the White Flower from Rafflesia when required.
- Record Junpei’s January event and Surt unlock.
- Do not count Linked Episodes as Social Links.
Use shops, Mayoido Antiques and Tarot rewards for targeted upgrades
Check the Police Station, Aohige Pharmacy and Mayoido Antiques as the campaign advances. Buy healing and status-recovery items before optional challenges, replace outdated armor before a difficult Tartarus block, and use accessories to address a relevant weakness or status ailment. Mayoido Antiques exchanges gems and Tartarus materials for equipment and other rewards, including items made from Nihil materials.
Do not spend every gem or rare material immediately. Compare an exchange with the equipment already used by the active party, and keep enough yen for healing, Compendium summons and emergency purchases. Optional costumes and duplicate weapons can wait when a combat upgrade or revival stock is more valuable.
Tarot rewards and Major Arcana effects from Tartarus exploration are useful for improving a later run, but they are not required for story progression. Use them when you are already entering Tartarus for mandatory progress or when the party has enough resources to exploit the benefit. Do not extend a dungeon visit solely to claim a minor reward if the party is low on SP.
- Upgrade current equipment before chasing luxury items.
- Reserve yen for healing and Persona summons.
- Use Mayoido materials for immediate combat needs.
- Spend Tarot benefits on a planned Tartarus expedition.
Attempt Monad Doors and Passages only when prepared
Monad content is optional high-difficulty Tartarus content. Ordinary Monad Doors are associated with the floor and visit where they appear, so treat them as temporary opportunities and do not assume the same encounter will remain after leaving or retreating. Save before beginning the attempt, then check HP, SP, Theurgy gauges, revival items, status recovery and elemental coverage.
Monad Passages are fixed challenges located on designated floors. They can contain strong Shadows, Major Arcana effects, Twilight Fragments, rare materials and Request rewards. Return later if the party is underleveled or if clearing the Passage would consume the resources needed for mandatory progression.
Use Shift to transfer the turn after discovering a weakness, and use Theurgy when the encounter’s resistances make ordinary attacks inefficient. Guard through dangerous attacks, maintain group healing and retreat if revival supplies or SP are becoming scarce. Optional Monad rewards are valuable, but no single Door or Passage justifies a game over or a missed deadline.
- Save before an optional Monad attempt.
- Bring healing, revival and status recovery items.
- Check weaknesses before spending high-cost skills.
- Use Shift and Theurgy deliberately.
- Retreat and return later when resources are insufficient.
Separate a streamlined ending run from a complete Reload checklist
For a streamlined route to the canonical ending, keep mandatory Full Moon operations, required Tartarus progression and final-story dates ahead of optional content. Complete Requests that match your current trip, rescue Missing Persons before their deadlines, attend available Linked Episodes and clear only Monad challenges that do not endanger the calendar. You do not need every Request, Persona, optional boss, Social Link, Linked Episode or Tartarus reward to finish the campaign.
For a comprehensive checklist, maintain separate sections for Elizabeth’s Requests, Missing Persons, Linked Episodes, Ryoji’s Saturnus unlock, Junpei’s January event, Junpei’s Chidori-related outcome, dorm activities, computer software, shop and antique exchanges, Monad Doors, Monad Passages, optional bosses, equipment and Persona Compendium registrations. Mark every item as required, time-limited or freely postponable.
Before the final month, create a manual save and review the list. If an optional objective no longer fits the calendar, leave the main campaign intact and plan it for New Game Plus. Episode Aigis is a separate post-campaign scenario based on the FES epilogue. It is not required for Reload’s base-campaign ending and must not be substituted for Ryoji’s November-December episodes.
- Keep mandatory story progress separate from optional content.
- Track Ryoji’s episodes and Saturnus explicitly.
- Track Junpei’s January event separately from the Chidori outcome.
- Mark missed deadlines instead of assuming they can be recovered.
- Create a late-game manual save before optional superboss attempts.
- Use New Game Plus for goals that no longer fit the first calendar.
- Treat Episode Aigis as separate from the base campaign.
Before you move on
- All high-value Elizabeth Requests are completed or deliberately marked for later.
- Missing Persons with active deadlines are rescued or consciously abandoned.
- Every available Linked Episode is complete, or its next event and deadline are recorded.
- Ryoji’s base-campaign episodes are complete and Saturnus is available for fusion.
- Junpei’s January event is complete if pursuing the full Linked Episode checklist.
- Junpei’s White Flower and Chidori-related optional outcome are recorded separately from ordinary Linked Episode completion.
- Monad challenges appropriate to the party’s level are cleared without delaying mandatory story events.
- The optional checklist identifies unfinished Requests, Personas, equipment, bosses, Missing Persons, Social Links, dorm activities and Linked Episodes.
- Episode Aigis is excluded from the base-campaign completion requirement.
- The main campaign has been completed and its canonical ending viewed without requiring any optional objective.
Final Checklist and Recovery from Failure
Persona 3 Reload’s canonical main-story route depends on sparing Ryoji on December 31. January then provides the final preparation period before the January 31 Tartarus operation. Protect a manual save on January 31, resupply, update equipment, register useful Personas, and make sure your party can survive the Adamah climb and the Nyx Avatar battle at Tartarus’s summit. Maxing every Social Link, clearing Monad Passages, completing Elizabeth’s requests, and finishing all Linked Episodes are optional for the standard ending. If the final operation goes badly, reload the protected save and correct the specific weakness instead of restarting the campaign. Completion is confirmed by finishing the final battle, viewing the March 5 conclusion and credits, then preserving the resulting data separately from any earlier preparation save.
1. Protect the correct final preparation save
On January 31, create a manual save in a separate slot before beginning the final Tartarus operation. Keep this file untouched. It is the main recovery point if your party lacks damage, healing, revival items, defensive coverage, or sufficient levels. Use a second slot for any save made after you begin the operation so the protected file remains available.
January 31 is the last major preparation day. During the daytime, finish any remaining shopping, fusion, registration, or limited cleanup that you still want to do. In the evening, visit the places you need before speaking with Mitsuru and choosing to go to Tartarus. Once you commit to the operation, do not rely on the calendar for another normal preparation window.
If possible, keep an additional late-January save. The January 31 file is appropriate for changing equipment, buying supplies, and refilling your Persona roster. An earlier save is better if you need several Tartarus trips, additional leveling, a Social Link visit, or a larger fusion plan.
- A separate manual save dated January 31 exists.
- The protected file has not been overwritten after entering Tartarus.
- A second late-January save is available if you may need more extensive preparation.
2. Confirm the route that leads to the main ending
On December 31, choose the option that spares Ryoji. This keeps the group’s memories and opens January’s final month. Choosing to kill him produces the alternate ending route and does not lead to the Nyx Avatar operation described in this chapter. If the wrong choice was made, load a save from before the December 31 decision; it cannot be repaired later from the January calendar.
The standard ending does not require every Social Link to reach Rank 10. The Judgement Social Link advances as part of the main story, while other Social Links, Linked Episodes, dorm activities, Elizabeth’s requests, Monad challenges, and optional superboss content are additional goals. Do not delay the final operation because one optional link or request remains unfinished.
The required progression is straightforward: spare Ryoji, complete January’s story events, enter Tartarus on January 31, climb the final Adamah block, and reach the summit for the Nyx Avatar encounter.
- Ryoji was spared on December 31.
- January is available and the story has progressed normally.
- The Adamah block is accessible for the January 31 operation.
- You are not treating optional Social Links or requests as ending requirements.
3. Finish the equipment, inventory, and Persona check
Before leaving for the final operation, buy or redeem current weapons and armor for the party you expect to use. Refill dependable HP recovery, party healing, revival, and status-recovery items. Carry SP recovery where available, but do not assume you can replace unlimited SP during the climb. Spend your best supplies on gatekeepers and the final encounter rather than routine Shadows.
Open the Velvet Room before departure and register Personas you may want to restore. Build a flexible protagonist stock instead of keeping only one high-damage Persona. Maintain access to several elements, physical damage, healing or support skills, and useful resistances. A defensive backup Persona can rescue a failed attempt when the boss’s damage pattern or status effects invalidate a narrow offensive build.
Use the party members whose levels, equipment, Theurgy readiness, and skill coverage are strongest. There is no requirement to bring every teammate. If one member has repeatedly been knocked out during testing, replace that member for the final climb or adjust their equipment and role.
- Weapons and armor are current for the selected party.
- Healing, revival, status recovery, and SP supplies are stocked.
- Useful Personas have been registered before final fusion changes.
- The protagonist has elemental, physical, healing, and defensive options available.
4. Treat the January 31 Tartarus visit as a long operation
Speak with Mitsuru when you are ready to leave for Tartarus. The final route takes you through Adamah toward the summit, with required encounters before Nyx Avatar. Move methodically and use any available safe recovery or return facilities. Do not spend high-cost skills on every ordinary Shadow when weaknesses, physical attacks, normal attacks, Theurgy, or efficient Shift chains can finish the fight more cheaply.
Reload’s Shift system lets a character pass the turn advantage to another suitable party member after exploiting an opening. Use it to continue weakness pressure or move the turn to a healer or support character; do not describe it as Baton Pass, which belongs to other Persona combat systems. Save Theurgy and your strongest skills for gatekeepers and the final battle unless a difficult encounter requires them earlier.
Optional Monad doors, Monad Passages, requests, and Elizabeth’s challenge are not needed to complete the main route. Attempt them only if the party has surplus resources and you deliberately want their rewards. If an optional fight leaves the party depleted, retreat or reload rather than sacrificing the supplies needed for Adamah and Nyx.
- The party reaches the upper Adamah floors with core supplies intact.
- Shift is used to extend advantageous turns after weakness hits.
- Optional combat has not consumed resources needed for the required route.
- A retreat or reload plan exists if SP or healing becomes dangerously low.
5. Recover after a game over or failed final attempt
A game over does not require a new campaign. Reload the protected January 31 save, then identify the actual cause of failure. If damage was too low, fuse stronger Personas or improve equipment. If the party was repeatedly knocked out, change the active lineup or add resistance and defensive skills. If SP ran out, reduce expensive casts against ordinary enemies and reserve recovery items for the required encounters.
Use the Velvet Room to replace a Persona that lacks the resistance or skill coverage the failed attempt exposed. Register the improved roster before entering again. Refill revival and group-healing items, then choose a party with complementary roles: one reliable damage source, one dependable healer or support option, and enough elemental coverage to handle uncertain resistances.
If the defeat occurred after a long climb, the January 31 save still allows you to rebuild and repeat the operation. If that is not enough, load the earlier late-January save and spend additional time leveling, fusing, shopping, or completing a final Tartarus preparation visit. Do not restart from the beginning unless all protected late-game saves were lost.
- The retry begins from a protected manual save.
- At least one concrete failure point has been corrected.
- The active party and Persona roster now cover the failed encounter’s problem.
- Emergency healing and revival resources are reserved for the final stretch.
6. Confirm the ending and separate cleanup goals
The main campaign is complete after defeating Nyx Avatar and viewing the concluding story sequence through the March 5 graduation events and credits. Preserve the resulting save data separately if the game offers a save prompt, but do not assume it returns you to a normal free-roaming January schedule. Keep the January 31 preparation file as the reliable point for replaying the final operation or checking missed optional content.
For cleanup, record unfinished Social Links, Linked Episodes, Elizabeth requests, optional Tartarus rewards, Monad challenges, trophies, and superboss goals. Depending on the goal, use an earlier save or begin another playthrough rather than expecting the completed story to reopen ordinary calendar activities. A separate run can focus on Social Link completion, higher social stats, fusion collection, or optional combat.
If you want to view the alternate December outcome, use the protected save from before the Ryoji decision. Do not sacrifice the canonical-route January 31 file merely to test the other ending.
- Nyx Avatar has been defeated.
- The March 5 conclusion and credits have been viewed.
- The final data and January 31 preparation save are preserved separately.
- Unfinished optional goals are listed for an earlier save or another playthrough.
- Any alternate-ending attempt uses a save from before the December 31 decision.
Before you move on
- Ryoji was spared on December 31 and January became available.
- A protected January 31 save exists, with an earlier late-January save if possible.
- The Adamah climb and Nyx Avatar encounter are complete.
- The March 5 conclusion and credits have played.
- Optional unfinished goals are separated into an earlier-save or future-playthrough checklist.
References for this chapter
- Persona 3 Reload — PlayStation Store product page
- Persona 3 Reload — PS5 and PS4 Games | PlayStation
- Persona 3 Reload 100% Walkthrough — PowerPyx
- January Walkthrough — Persona 3 Reload — Neoseeker
- Persona 3 Reload - January Walkthrough and Guide — Samurai Gamers
- Persona 3 Reload - All Endings Guide — Samurai Gamers
- Persona 3 Reload - Nyx Avatar Boss Guide — Samurai Gamers
- Persona 3 Reload Official Website
Finishing up
You have watched the final main-campaign cutscene and the end-credit sequence for Persona 3 Reload’s canonical story ending.
All main Tartarus segments and their mandatory boss encounters in the main campaign have been cleared and the required late-game story events have been triggered.
You have at least one endgame Persona or a fusion plan prepared to face the final boss, with useful resistances, healing, damage coverage, and emergency recovery options.
The December 31 decision has been resolved in favor of sparing Ryoji, and the automatic story progression has advanced into the Judgement Arcana and January finale.
Optional: you have completed any Social Links, Linked Episodes, Requests, Missing Persons, Monad challenges, and other Reload-specific content you wanted. Episode Aigis, Persona 3 FES’s The Answer, and the Portable female-protagonist campaign are separate content.
Choose your next gameScreenshots & video
Game imagery for reference. Follow the written chapters above for the route and strategies.
Sources & references
Our original guide draws on the references below. Check the edition at the top of this page before following controls or unlock requirements.
- Persona 3 Reload PS4 & PS5 — PlayStation Store US
- Persona 3 Reload Official Website
- Persona 3 Reload: Expansion Pass — Official Website
- Persona 3 Reload Walkthrough & Guide — GameFAQs
- Persona 3 Reload Official Website
- Persona 3 Reload PS4 & PS5 — PlayStation Store
- Walkthrough (Prologue) — Persona 3 Reload Walkthrough & Guide
- Walkthrough (April) - Persona 3 Reload Walkthrough & Guide
- April Walkthrough — Persona 3 Reload
- Persona 3 Reload: Episode Aigis — April Walkthrough and Guide
- Persona 3 Reload - PS5 and PS4 Games | PlayStation
- Thebel Walkthrough - Persona 3 Reload
- Thebel - Persona 3 Reload Walkthrough & Guide
- Tartarus Exploration Guide and Tips | Persona 3 Reload
- How to Baton Pass & Shift in Persona 3 Reload
- Persona 3 Reload Walkthrough and Guide — Linked Episodes
- Link Episodes Guide | Persona 3 Reload
- Persona 3 Reload 100% Walkthrough — PowerPyx
- Persona 3 Reload: All key dates
- All Linked Episode Dates and Rewards in Persona 3 Reload
- Persona 3 Reload: How many floors is Tartarus? How big is each block?
- Arqa Walkthrough - Persona 3 Reload
- Requests Guide - Persona 3 Reload
- Persona 3 Reload Trophy Guide & Roadmap
- Persona 3 Reload Monad Doors and Passages: Locations and Rewards
- Persona 3 Reload: Exam Answers - All School and Test Questions Answered
- Persona 3 Reload - 100% Max Social Link Guide
- Social Stats Guide: Everything You Need To Know - Persona 3 Reload
- Persona 3 Reload — Official Website: Velvet Room
- Persona 3 Reload Walkthrough and Guide — Hangouts
- November Walkthrough and Activities Guide — Persona 3 Reload
- November Walkthrough — Persona 3 Reload
- Tartarus Guardians: List of All Mini-Bosses | Persona 3 Reload
- Persona 3 Reload – Floors 70 to 118 Tartarus Yabbashah Guide
- Clairvoyant Relic Guide - Persona 3 Reload
- Persona 3 Reload: All Social Links and How to Unlock Them
- Social Link Guide - All Social Links and How to Unlock
- Social Links - Persona 3 Reload Walkthrough & Guide (PS5)
- Max Social Links Guide - Persona 3 Reload
- How Many Floors Are in Tartarus in Persona 3 Reload?
- How Many Floors Are in Persona 3 Reload? All Blocks Listed
- Yabbashah Walkthrough - Persona 3 Reload
- January Walkthrough and Activities Guide | Persona 3 Reload
- January Walkthrough — Persona 3 Reload — Neoseeker
- Persona 3 Reload: How many floors is Tartarus? How big is each block?
- Adamah Walkthrough - Persona 3 Reload - Neoseeker
- Persona 3 Reload - Nyx Avatar Boss Guide — Samurai Gamers
- Adamah I - Persona 3 Reload Walkthrough & Guide
- Adamah II - Persona 3 Reload Walkthrough & Guide
- Jin Shirato (2nd Encounter) Boss Guide: Weakness and Resistances
- Takaya Sakaki (2nd Encounter) Boss Guide: Weakness and Resistances
- Nyx Avatar Boss Guide: Weakness and Resistances — Persona 3 Reload — Game8
- Nyx Avatar Boss Guide — Persona 3 Reload — Neoseeker
- How to Beat Nyx in Persona 3 Reload — Siliconera
- Persona 3 Reload: Episode Aigis — The Answer Walkthrough and Guide — GameFAQs
- Can You Inherit Skills? — Persona 3 Reload, Game8
- Persona 3 Reload — Full Persona Compendium Guide, PowerPyx
- Persona 3 Reload Elizabeth Request Guide, PowerPyx
- Persona 3 Reload Linked Episodes
- Persona 3 Reload: All New Linked Episode Dates
- Junpei Iori | Megami Tensei Wiki
- Persona 3 Reload 100% Guide
- Persona 3 Reload — PlayStation Store product page
- Persona 3 Reload — PS5 and PS4 Games | PlayStation
- Persona 3 Reload - January Walkthrough and Guide — Samurai Gamers
- Persona 3 Reload - All Endings Guide — Samurai Gamers
About the game & collecting notes
- Platform
- Sony PlayStation 5
Practical, step-by-step walkthrough to complete Persona 3 Reload’s main campaign on PlayStation 5. Covers setup, daily scheduling, Tartarus progression, Social Link prioritization, Persona fusion and combat tactics, mid- and late‑game dungeons, and reaching the game’s canonical ending (Reload’s main story ending).
Darryl Polo
Darryl Polo loves tinkering with emulation and revisiting retro games. He enjoys exploring how old favorites play on different setups and sharing what he learns along the way. At Joking Joystick, he writes about the games, hardware, and small discoveries that keep the hobby fun.
Our editorial standardsFound a step that needs another look? Help us improve this guide.