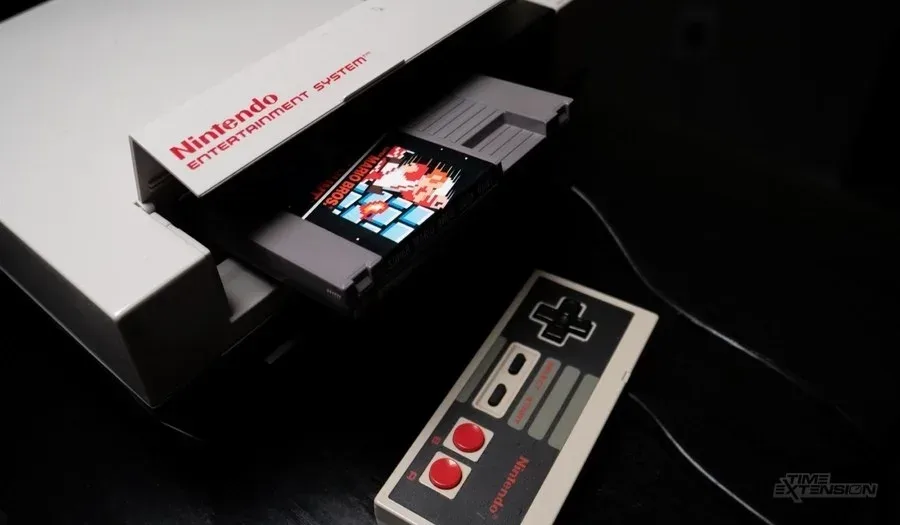
Ninja Gaiden (NES, USA) — Complete Campaign Walkthrough
A complete, play-by-play plan to finish Tecmo’s original Ninja Gaiden for the North American Nintendo Entertainment System. The guide covers the NES campaign from the opening Cinema Display through all required stages, the Act 5 Bloody Malth battle, the Act 6 final-boss sequence and the ending, with practical movement, resource, stage and boss instructions.

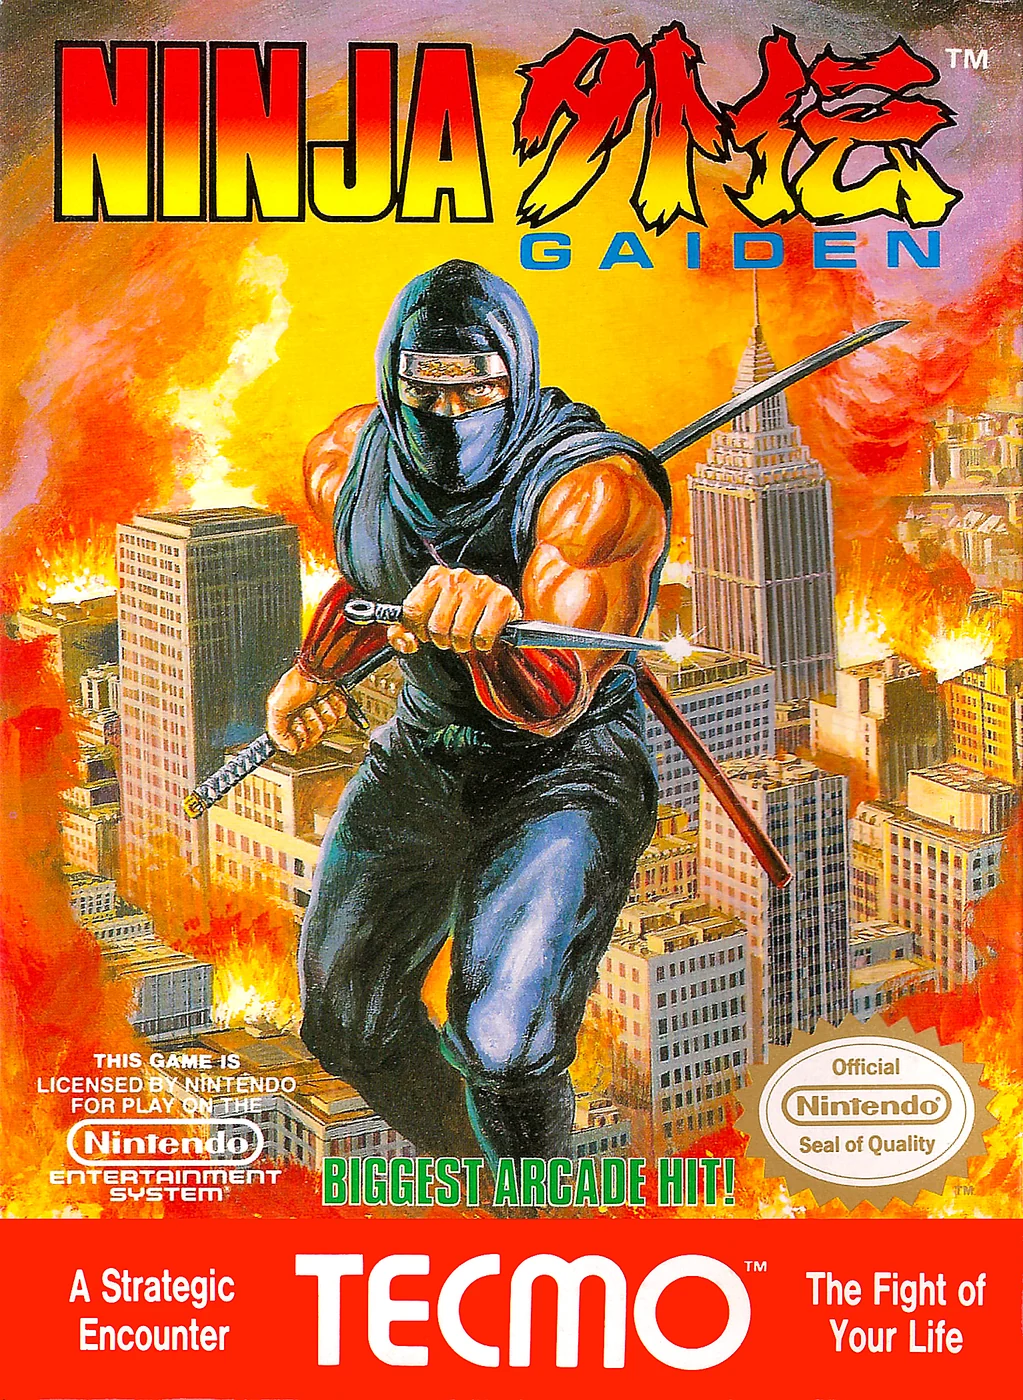
Find a copy
Ninja Gaiden Nintendo Entertainment System
We may earn a commission if you buy through these links, at no extra cost to you. As an Amazon Associate I earn from qualifying purchases.
Opens retailer search results. Check the model, edition, seller, availability and current price before buying.
Before you begin
You are Ryu Hayabusa: a single-player, precision platform-action run through six Acts that must be cleared in order.
Ninja Gaiden for the NES mixes fast platforming, wall techniques and boss fights; success depends on mastering jump timing, wall cling and wall-jump maneuvers, efficient use of Ninja Arts and Spiritual Strength, and learning recovery patterns for each boss.
Follow the chapter order to learn movement fundamentals, tackle each Act with staged objectives and boss counters, and finish with the final Act’s boss fight and ending.
Where failure is likely, the guide gives concrete recovery actions and what to avoid so you can make steady progress toward the ending.
Set yourself up for the run
Familiarize yourself with the controls from the official manual: D-pad for movement, A to jump, B to attack, Start to pause or skip Cinema Display scenes, and Select unused.
Learn ladder interactions by using the D-pad to climb and pressing the opposite direction plus A to jump away from a ladder.
Practice wall techniques before tackling long vertical areas: wall cling, wall-spring between two walls, and the one-wall wall-hop used to gain height in narrow shafts.
Mastering these prevents many deaths in later Acts.
Conserve and use Ninja Arts deliberately.
Throwing Stars, Windmill Throwing Stars, Fire Wheel, Jump and Slash and related techniques all draw from the game’s single Spiritual Strength gauge. Prioritize them for bosses, projectiles and heavy enemy clusters.
Do not treat Ninja Arts as a separate reserve called Ninpo. Check the Spiritual Strength total and the currently equipped technique before spending it.
Accept the NES continue behavior: after Game Over, Continue resumes from the beginning of the most recent stage. A death during the final-boss sequence instead returns Ryu to Stage 6-1, while already defeated final bosses remain defeated.
Do not rely on unlimited retries to replace learning a pattern; use each continue to practice a named stage section or boss response.
Set up play sessions to reduce fatigue.
The later Acts are punishing and require concentration. Take short breaks during long practice sessions.
If using an emulator for practice, keep save states strictly as practice aids, then play authentic runs without them for the real challenge.
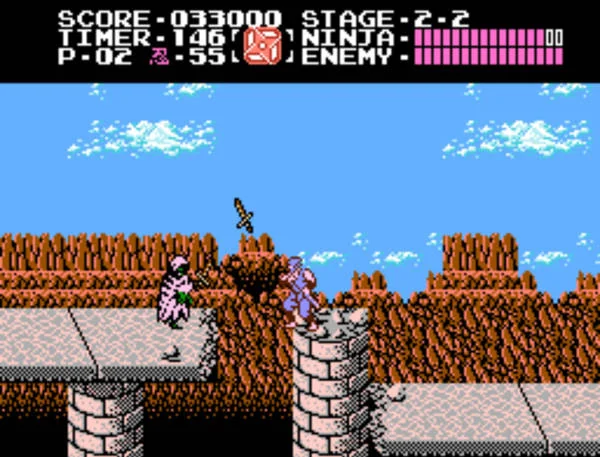
Core Controls and Movement Techniques
Learn the North American NES version’s controller behavior and movement techniques before beginning a full campaign. Ryu’s ordinary jump has a fixed height, while wall cling, wall-spring and wall-hop movement let him reach surfaces and platforms that a normal jump cannot. Ladders provide another route through vertical sections, but Ryu cannot attack while using them. Most Ninja Arts use Up plus B. Jump and Slash is different: while it is equipped, press B during a jump to perform the spinning attack if at least five Spiritual Strength remains. Press Down plus B during a jump to use the ordinary aerial sword attack instead. Start pauses active play and skips Cinema Display scenes; Select is unused.
Learn the controller layout
Use Left and Right on the Control Cross to run Ryu across solid ground. Press Down while he is standing on ordinary ground to crouch. Press Up or Down when Ryu is aligned with a ladder to climb or descend. The A button makes Ryu jump. The B button performs Ryu’s sword thrust. Start begins the game, pauses active gameplay and skips Cinema Display scenes. Select has no function in this NES edition.
Ryu’s normal jump reaches a fixed height. Tapping or holding A does not make an ordinary ground jump higher. Use Left or Right during the jump to guide Ryu toward a platform, enemy or wall. Holding A becomes important for wall-spring and wall-hop movement, but it does not alter the height of a normal ground jump.
On the ground, press B to attack with the Dragon Sword. Press Down and B together to perform the low crouching sword attack. During a jump, press Down plus B for the ordinary aerial sword slash. This input is especially important after collecting Jump and Slash, because it lets you attack normally in midair instead of activating the equipped Ninja Art.
- Left and Right make Ryu run.
- Down on ordinary ground makes Ryu crouch.
- A makes Ryu jump.
- B performs the ground sword thrust.
- Down plus B performs the low sword attack and the ordinary aerial sword attack.
- Up and Down control ladders when Ryu is aligned with one.
- Start pauses gameplay and skips Cinema Display scenes.
- Select is unused.
Understand Ninja Arts and Jump and Slash
Most Ninja Arts are activated by holding Up and pressing B. They consume Spiritual Strength, shown in the status display, so they will not deploy if Ryu does not have enough of the resource. Red Spiritual Strength items add 10 points and blue items add 5 points. Treat Spiritual Strength as a limited supply during each stage rather than firing secondary weapons whenever a minor enemy appears.
Jump and Slash uses a different input. After collecting and equipping it, press B during a jump to perform the spinning Jump and Slash, provided that at least five Spiritual Strength remains. The move is useful for striking enemies while crossing narrow ledges or approaching airborne targets, but each successful activation uses five Spiritual Strength. Do not spend the technique casually when you are preparing for a boss or a dangerous platforming section.
Jump and Slash does not remove the ordinary aerial sword attack. During a jump, press Down plus B to perform the normal midair slash rather than Jump and Slash. Use this deliberately when you want to conserve Spiritual Strength or when a regular sword strike is safer than the spinning technique. Most other Ninja Arts continue to use Up plus B.
- Most Ninja Arts use Up plus B.
- Press B during a jump to activate equipped Jump and Slash.
- Jump and Slash requires at least five Spiritual Strength.
- Each Jump and Slash activation costs five Spiritual Strength.
- Use Down plus B during a jump for the ordinary aerial sword attack while Jump and Slash is equipped.
- Do not assume every secondary weapon uses the same input.
Use Start during play and Cinema Display scenes
Press Start during a stage to pause the action. Pause on safe ground whenever possible, not while Ryu is standing at the edge of a pit, beside a moving hazard or in the middle of an enemy attack. Pausing gives you time to inspect the next visible section, but it does not repair damage or move Ryu to safety.
The game presents its story through Cinema Display scenes between playable sections. Leave the scene running if you want to watch the story and camera sequences. Press Start to skip the Cinema Display and proceed to the next gameplay section. Skipping a scene does not skip a stage, remove a boss or change the required order of the campaign.
- Pause from safe ground when possible.
- Press Start during a Cinema Display to skip it.
- Remember that skipping a Cinema Display only bypasses the story presentation.
Grab and hold a wall
Jump toward the side of a wall, column or other suitable vertical surface. When Ryu reaches the surface during the jump, he catches it and clings to it instead of immediately falling. The cling can be used to wait out a passing enemy, avoid a ground-level attack or set up the next jump. Watch Ryu’s position rather than relying only on the background art, because some surfaces have narrow contact areas.
Ryu cannot use his ordinary sword attack while clinging to a wall. Treat the cling as a movement and positioning state. If an enemy approaches, stay attached until the threat passes when the surface is safe, or launch away and attack during the jump. Do not waste Spiritual Strength trying to solve a basic wall section with a Ninja Art.
To leave a wall, hold A and press the horizontal direction away from the surface. If Ryu is clinging to the left wall, hold A and press Right. If he is clinging to the right wall, hold A and press Left. Begin practice with a wall beside a safe platform: jump into the wall without pressing B, confirm the cling, wait briefly, then launch away.
- Jump toward a wall or column.
- Confirm that Ryu catches and holds the surface.
- Remember that Ryu cannot use the ordinary sword attack while clinging.
- Hold A and press away from the wall to launch away.
- Use the cling to avoid threats or prepare the next jump.
Perform a wall-spring between two walls
In a narrow shaft with two reachable walls, hold A while alternating Left and Right on the Control Cross. From one wall, press the direction away from that wall to leap across the shaft. As Ryu reaches the opposite wall, reverse the direction so he catches it, then repeat. You do not need to release A between leaps.
For example, while Ryu is attached to the left wall, keep A held and press Right to launch toward the right wall. As he reaches the right wall, press Left to catch it. Continue alternating directions as he reaches each side. Do not mash both directions at once. Watch Ryu’s movement and change direction after he leaves the current wall, then reverse again as he reaches the opposite surface.
Practice in a shaft where a missed catch lands on a platform rather than dropping directly into a pit. Once the rhythm is reliable, use the same technique in timed vertical sections and while enemies enter from above or below.
- Find two walls close enough for Ryu to reach both.
- Hold A throughout the climb.
- Press away from the wall Ryu currently holds.
- Reverse direction as he reaches the opposite wall.
- Repeat until Ryu reaches the upper ledge.
Perform a one-wall wall-hop
The wall-hop uses one wall instead of two. Jump toward the wall and wait for Ryu to cling to it. Keep A held, press away from the wall to launch, then immediately press back toward the same wall while Ryu is still airborne. If the timing is correct, he catches the same wall higher than the previous contact point.
If the wall is on Ryu’s left, press Right to launch away and then press Left to return. If the wall is on his right, press Left to launch away and then press Right to return. Keep A held through the sequence. The return direction must be entered soon after Ryu leaves the wall; waiting too long lets him fall below the contact point.
Repeat the same rhythm from each renewed cling. If Ryu misses, stop changing directions randomly. Look for a lower ledge, another wall or a safe landing area, then reset the attempt. The wall-hop is a sequence of cling, launch, reverse and re-catch, not an automatic climb produced by holding one direction.
- Cling to the wall first.
- Hold A and press away from the surface.
- Reverse direction quickly while Ryu is still in the jump.
- Catch the same wall at a higher position.
- Repeat from the new contact point.
Climb, descend and leave ladders
Move Ryu horizontally until he is aligned with a ladder, then press Up to climb or Down to descend. If the ladder input does nothing, adjust Ryu’s position instead of repeatedly pressing the button. Ryu can also grab a ladder during a jump, which is useful when a ladder begins above a gap or near the edge of a platform.
Ryu cannot attack while on a ladder. Before committing to a climb, inspect the destination for enemies, projectiles and limited landing space. If an enemy is waiting at the top, approach the ladder with a plan for immediately jumping away or attacking after reaching solid ground.
To jump down or away from a ladder, press the horizontal direction opposite the ladder together with A. If the ladder is on Ryu’s right, press Left plus A. If it is on his left, press Right plus A. Choose the destination before leaving. A missed departure may be recoverable if a lower platform or wall is available, but repeatedly pressing directions without watching the screen can turn a recoverable fall into a pitfall.
- Align Ryu with the ladder.
- Press Up to climb.
- Press Down to descend.
- Remember that Ryu can grab a ladder during a jump.
- Do not expect to attack while on the ladder.
- Press opposite direction plus A to jump away or down from it.
- Check the landing area before leaving.
Complete a movement and resource drill
Use a safe early section to rehearse the complete sequence with the Dragon Sword equipped. First, jump into a wall and hold the cling without attacking. Next, use a two-wall shaft to alternate between surfaces while holding A. Then practice the one-wall wall-hop by launching away, reversing direction and catching the same wall. Finish by climbing and descending a ladder, then leaving it with opposite direction plus A.
Do not spend Ninja Arts during this drill. Most Arts consume Spiritual Strength, and Jump and Slash requires you to press B during a jump while it is equipped and sufficiently powered. If Jump and Slash is active, use Down plus B for a normal aerial sword attack when you want to conserve the resource. Avoid pressing B during every jump if you need the technique for a later encounter.
Once the inputs are reliable, add pressure one element at a time. Pause to inspect a platform, cling to avoid a ground enemy, launch away and use the appropriate aerial attack only when needed. The objective is not speed; it is identifying whether the next obstacle requires a ladder, a two-wall wall-spring or a one-wall wall-hop.
- You can cling to a wall without attempting to attack from it.
- You can alternate between two walls while holding A.
- You can climb using one wall by reversing direction in midair.
- You can climb and descend ladders.
- You can jump away from a ladder with opposite direction plus A.
- You can press B during a jump to use equipped Jump and Slash when at least five Spiritual Strength remains.
- You can use Down plus B for a normal aerial slash while Jump and Slash is equipped.
- You can pause or skip a Cinema Display scene with Start.
- You can complete the drill without wasting Spiritual Strength.
Before you move on
- You can perform a wall cling, a two-wall wall-spring and a one-wall wall-hop without confusing their inputs.
- You know that wall contact is for positioning and movement and does not permit ordinary sword attacks.
- You can climb and descend ladders, grab a ladder during a jump and leave it with opposite horizontal direction plus A.
- You know that A is jump, B is the Dragon Sword attack, Start pauses or skips Cinema Display scenes and Select is unused.
- You know that most Ninja Arts use Up plus B.
- You know that Jump and Slash is activated by pressing B during a jump while it is equipped and at least five Spiritual Strength remains.
- You know that Jump and Slash costs five Spiritual Strength when activated and that Down plus B performs the normal aerial sword attack while it is equipped.
- You can reach elevated platforms using the required movement technique without wasting Spiritual Strength or weapon charges.
- You can identify whether an upcoming section requires a ladder, a two-wall wall-spring or a one-wall wall-hop.
Survival Rules, Items and Resource Management
Ninja Gaiden’s secondary weapons all draw from one Spiritual Strength meter. The active Power Item determines which Ninja Art is available, while the Dragon Sword remains usable at all times. Collect Spirit tiles and recovery items when the route is safe, spend Ninja Arts for specific hazards or dependable boss openings, and use unlimited continues to practice the current stage instead of restarting the campaign from Act 1.
Read the status display before entering danger
The status display shows the score, current Act and stage, timer, remaining lives, Physical Strength, Spiritual Strength, and the currently equipped Ninja Art. The enemy strength meter is also displayed during boss encounters. Check these values before committing to a difficult jump, crowded platform, or long enemy formation.
Physical damage and instant-death hazards must be handled differently. Enemy attacks and projectiles reduce Physical Strength. Falling into a pit costs a life immediately, regardless of remaining health. If the timer reaches zero, Ryu also loses a life. Keep moving while waiting for an enemy pattern or lining up a pickup; do not pause in a dangerous area until the timer becomes the problem.
Energy Potions restore six units of Physical Strength. They cannot restore a life, undo a fall, or reverse a time-out. A 1 Up increases the remaining-life count by one. Take these items whenever the landing and escape route are reliable, but do not turn a recoverable health situation into an instant-death fall by forcing an uncertain jump.
- Check the timer before studying an enemy formation.
- Treat pits and bottomless gaps as immediate life-loss hazards.
- Use an Energy Potion before a dangerous section when reaching it is safe.
- Take a 1 Up only when Ryu can land and retreat safely.
Break item holders and identify the pickup
Items are hidden inside breakable holders placed throughout the stages. Depending on the area, a holder may be a candle, lamp, flame, insect, bird, or another moving object. Strike the holder with the Dragon Sword or an equipped Ninja Art, then move into the released item. Pickups are not collected from a distance, and some fall away or disappear if Ryu does not reach them promptly.
Blue Spiritual Strength tiles add five points and red tiles add ten. Spiritual Strength is the single resource used by Ninja Arts. Collect Spirit tiles whenever the route is safe, even when the next enemy can be defeated with the Dragon Sword. A well-stocked meter gives Ryu options against projectile formations, enemies guarding jumps, and boss openings.
Energy Potions restore six units of Physical Strength. 1 Ups add one life. Blue Bonus items award 500 points and red Bonus items award 1,000; neither restores health, lives, or Spiritual Strength. Time Freeze items are hourglasses. Collecting one temporarily freezes enemies and projectiles, letting Ryu cross or reposition while the danger is suspended. A frozen enemy can still be dangerous through contact, so use the opening to move through the area rather than standing against it.
- Break holders from stable ground whenever possible.
- Collect blue and red Spirit tiles before they fall away.
- Do not confuse Bonus items with Spirit tiles or Energy Potions.
- Use Time Freeze to cross a hazard or reset Ryu’s position.
- Leave a pickup behind only when collecting it creates a greater danger.
Know the cost and input for each Ninja Art
The Throwing Star costs three Spiritual Strength. Press Up and B to send it straight ahead. Use it to remove a projectile threat, strike an enemy outside Dragon Sword range, or interrupt a narrow-platform encounter when three points are enough.
The Windmill Throwing Star costs five Spiritual Strength. Press Up and B to send it forward. It passes through enemies and returns toward Ryu like a boomerang. The returning star can hit enemies behind him, but it can also occupy the space needed for a retreat. Watch its return path before jumping backward.
The Art of the Fire Wheel costs five Spiritual Strength. Press Up and B to launch three flames that travel upward at different angles. It is useful against enemies above Ryu, airborne threats, and boss openings where multiple flames can connect. Do not spend it merely to defeat an enemy that can be bypassed or attacked safely with the sword.
Jump and Slash costs five Spiritual Strength and is performed by pressing A to jump, then B while Ryu is airborne. The ordinary jump itself does not spend Spiritual Strength. This distinction matters: you can cross a gap or reach a platform without consuming the technique, provided you do not press B during the jump. When Jump and Slash is equipped, press Down and B during the jump to perform the regular aerial sword attack instead of the spinning Jump and Slash technique.
The Invincible Fire-Wheel activates as soon as it is collected and does not consume Spiritual Strength. A flame circles Ryu and destroys enemies or projectiles that touch it for a limited period. It replaces the Ninja Art currently held. When the effect ends, the previous Ninja Art is not restored, so do not collect it casually when a Windmill Throwing Star, Art of the Fire Wheel, or Jump and Slash is being saved for the next difficult section.
- Use Throwing Stars when three points are enough.
- Use Up and B for Throwing Star, Windmill Throwing Star, and Art of the Fire Wheel.
- Use A followed by B during a jump to activate Jump and Slash.
- Remember that an ordinary jump does not spend Spiritual Strength.
- Use Down and B during a jump for the regular aerial sword attack while Jump and Slash is equipped.
- Reserve five-point techniques for a real hazard or dependable boss opening.
- Check the active Power Item before collecting another weapon or Invincible Fire-Wheel.
Spend Spiritual Strength for a specific purpose
Use the Dragon Sword against ordinary enemies whenever the approach is safe. Spend Spiritual Strength when a Ninja Art prevents a forced collision, clears a dangerous projectile, removes an enemy guarding a jump, or creates a reliable boss opening. Do not throw a weapon into empty space simply because the meter is full.
A new Power Item changes the active Ninja Art immediately. Check the Power Item symbol and Spiritual Strength total after every pickup. A powerful technique with no points behind it cannot help until the meter is replenished, while a three-point Throwing Star may be more useful than a five-point technique if several hazards remain before the next safe refill.
Before entering a boss area, decide whether the current Ninja Art is worth preserving. Jump and Slash can be effective against enemies and bosses, but it only activates when the airborne B input is made. Use ordinary jumps freely when positioning, then use Down and B for routine aerial sword attacks if you want to preserve five Spiritual Strength points. This avoids the earlier misconception that every jump automatically consumes the technique.
If the meter is empty, return to sword attacks unless a confirmed Spirit pickup is directly ahead. Do not rely on an assumed future refill. If you replace a useful Ninja Art, the previous weapon is lost, so examine each holder and consider the next major encounter before taking a new Power Item.
- Spend Spiritual Strength to solve a specific problem, not to accelerate every encounter.
- Recheck the active Power Item after every weapon pickup.
- Do not rely on an unconfirmed future Spirit tile.
- Keep a Dragon Sword plan for the section after the meter is empty.
- Use Down and B for ordinary aerial sword attacks while saving Jump and Slash.
- Do not press B during a routine jump when the Jump and Slash technique is being preserved.
Use deaths and continues as practice tools
A normal life loss is not the same as a Game Over. When Ryu still has lives remaining, continue the current stage and use the next attempt to repeat the section with the enemy positions, item holders, and safe landings already learned. Treat each life as a chance to isolate one failure: a projectile trigger, a forced landing, a missed wall transfer, or an unnecessary weapon expenditure.
When all lives are lost through damage, a pit, or the timer, the Game Over screen appears. Press Start to continue from the beginning of the most recent stage. This does not send Ryu back to Act 1, and the North American NES edition provides an unlimited number of continues. Use the restart to rebuild the weapon and Spiritual Strength supply from the stage opening, then change one specific tactic instead of repeating the same failed response.
For example, if a projectile killed Ryu while approaching a ladder, slow down and remove the attacker before making the climb. If a boss attempt ended with an empty meter, preserve Spirit tiles and stop spending the equipped Ninja Art on minor enemies. If a jump was missed, approach it with the same setup but delay the jump or use the ladder and wall route more deliberately. A continue is most useful when the next attempt has a clear adjustment.
The final sequence has a special recovery rule. Losing a life to a final boss in Stage 6-4 or Stage 6-5 sends Ryu back to the start of Act 6 at Stage 6-1. Previously defeated final bosses remain defeated, but the approach must be replayed. Preserve health, lives, and a useful Ninja Art before entering the final doorway whenever possible.
The USA NES edition has no standard password or ordinary stage-select system. Continues are the intended recovery method. If several attempts fail for the same reason, stop spending lives without a plan: identify the exact screen or input that caused the failure, practice that response during the next run, and preserve resources for the section that follows.
- Use remaining lives to repeat the current stage and study one failure at a time.
- After Game Over, press Start to resume from the beginning of the most recent stage.
- Remember that continues are unlimited in this NES edition.
- After a final-boss death, prepare to replay Act 6 from Stage 6-1.
- Change one specific tactic between continue attempts.
- Do not expect a password or stage-select screen in the USA NES version.
Before you move on
- You can identify the timer, lives, Physical Strength, Spiritual Strength, and active Ninja Art before entering danger.
- You can distinguish Throwing Star, Windmill Throwing Star, Art of the Fire Wheel, Jump and Slash, Invincible Fire-Wheel, Energy Potion, Spirit, Bonus, Time Freeze, and 1 Up items.
- You know that Throwing Star costs three Spiritual Strength and the other three standard Ninja Arts cost five.
- You know that Jump and Slash requires a jump followed by B while airborne.
- You know that an ordinary jump does not consume Spiritual Strength when Jump and Slash is equipped.
- You know that Down and B during a jump performs the regular sword attack instead of Jump and Slash.
- You know that Up and B activates the standard projectile and flame Ninja Arts.
- You understand that Invincible Fire-Wheel replaces the held Ninja Art after it is collected.
- You can choose when to spend Spiritual Strength and when to rely on the Dragon Sword.
- You know that Game Over followed by Start resumes from the beginning of the most recent stage.
- You know that a final-sequence death returns Ryu to Stage 6-1.
- You understand that campaign completion ultimately requires defeating the final boss and viewing the ending screens.
Act 1 — Opening: Forest, Bridge and Barbarian
Act 1 contains two required stages. Stage 1-1 carries Ryu through the opening streets and ends at the entrance to Jay’s Bar. Stage 1-2 is the Barbarian battle. Follow the upper ledges and signs carefully, collect Spiritual Strength and a useful Ninja Art, and save that resource for the boss instead of spending it on ordinary enemies. Act 1 offers several weapon pickups and Spiritual Strength restores, but no confirmed health-restoring item is required on the documented route, so protect your health through movement and positioning.
1. Clear the opening street and handle the first rear attack
Move right through the first street enemies, using short sword attacks from the ground. Strike the first two lanterns as you pass to collect Spiritual Strength, the resource used by Ninja Arts. Take the pickups when the area is clear; do not stop directly beside an active enemy just to collect them.
After the next enemy enters from the right, a dog runs in from behind. Turn around as soon as you see it and slash, or jump straight over it and attack while descending. Do not keep moving forward and allow the dog to collide with Ryu from behind. A knife-throwing enemy appears farther ahead. Defeat him quickly before he fills the approach with knives, then continue toward the raised step.
- Collect the first two Spiritual Strength pickups when the immediate area is safe.
- Turn around as soon as the first rear dog approaches.
- Defeat the knife thrower before climbing onto the next ledge.
2. Use the step and sign to reach the first weapon
A dog attacks from the top of the step. A standing slash from below is unreliable, so jump onto the small platform and use a jumping slash. From there, jump toward the sign on the left and let Ryu cling to it. Hold A while pressing away from the sign, then quickly press back toward it to perform the wall hop. The direction change needs to be immediate; waiting too long causes Ryu to lose height and fall back into the enemy area.
The upper platform contains enemies and an item holder with the Throwing Star. Defeat or bypass the enemies one at a time, then take the Throwing Star if you want a projectile for the boss. Picking up another Ninja Art replaces the currently equipped one, so do not collect a weapon automatically if you are preserving a preferred technique. Drop back down through the same area and strike the lower item holder for another Spiritual Strength pickup before dealing with the knife thrower.
- Use a jumping slash against the dog on the step.
- Practice the sign wall hop before attempting the higher platform.
- Remember that a new weapon replaces the current Ninja Art.
3. Cross the middle street without losing control of the screen
Use the sign and wall to return to the higher street. Defeat the boxer on the upper route and collect the nearby Spiritual Strength pickups. Drop to the lower level for the red Spiritual Strength pickup, then move right beneath the row of signs. A biker occupies this stretch, and another dog can attack from behind near the signs. Turn around and kill the dog before it reaches Ryu; continuing right can leave you caught between the dog and the biker.
The building light contains another Spiritual Strength pickup. Defeat the biker on the upper plateau, then climb the wall at the right side. A dog can approach near the upper ledge, so pause on the wall or sign until its movement is clear. Jump onto the sign and then onto the ledge where the biker stood. Check the landing before committing, because enemies can return if enough time has passed.
- Collect the red Spiritual Strength pickup below the boxer section.
- Watch for the rear dog beneath the signs.
- Check the upper ledge before landing in case the biker has returned.
4. Choose a boss-useful Ninja Art and finish Stage 1-1
The item holders on the upper ledge provide the Art of the Fire Wheel and the Jump and Slash Technique. The Fire Wheel is a useful general-purpose choice for this Act because its rising fireballs can damage enemies without requiring Ryu to stand directly beside them. Jump and Slash is also highly effective against Barbarian, but it requires closer positioning and deliberate jumping. Take only the weapon you want to keep, because collecting the other replaces it.
Use the sign to climb back to the street. Defeat the boxers on the small step, collect the nearby Spiritual Strength, and continue through the structure. The high item holder contains Time Freeze, which is optional. Do not take a risky route for it when the goal is simply to reach the boss.
On the descent, strike the upper item holder to obtain the Windmill Throwing Star. This is useful if you have not already chosen a Ninja Art, but it replaces your current weapon if you have one. Continue right, defeat the biker near the incline, and crouch to slash the knife thrower before he throws. Kill the next biker, then turn around for the dog approaching from behind. Finish the boxer group and enter the building to load Stage 1-2.
Act 1 supplies Spiritual Strength and several weapon choices, but the documented street route does not establish a required health-restoring pickup. If your health is low, do not search the lanterns expecting a potion. Slow down, avoid unnecessary contact and enter Jay’s Bar with as much health and Spiritual Strength as possible.
- Choose either Fire Wheel or Jump and Slash according to your preferred boss method.
- Treat Time Freeze as optional.
- Check whether the Windmill Throwing Star would replace a weapon you want to keep.
- Enter the building after clearing the final enemy group.
5. Control Barbarian’s spacing in Jay’s Bar
Barbarian approaches from the right, stops periodically and swings his large weapon repeatedly before resuming his advance. The instruction manual describes the weapon as a huge axe, while the in-game animation resembles a broad blade. Do not stand directly in front of him while waiting for the attack. Stay just outside his reach, move in for sword strikes during his recovery or approach, and retreat before the next swing reaches Ryu.
His swings are high enough that Ryu can crouch beneath them. Use this when Barbarian has closed the distance and jumping would risk contact. Crouch under the attack, then stand and slash as soon as the swing has passed. Keep Barbarian near the middle of the room. If he pushes Ryu toward a wall, jump onto the wall and cling to it. When Barbarian walks underneath or close to the wall, spring over him to reverse positions and regain room.
- Watch Barbarian’s advance and wait for the repeated swing sequence to finish.
- Use crouching to pass beneath high swings when jumping is unsafe.
- Cross over him with a wall cling and wall hop before Ryu is trapped in a corner.
6. Defeat Barbarian and confirm the Act transition
Use an approach, strike and retreat rhythm. Move toward Barbarian, land sword hits while remaining outside the active part of his weapon swing, then create distance before the next attack. Do not attack continuously from point-blank range. The fight is predictable once you watch his movement, and the main danger is losing the space needed to retreat.
Use a Throwing Star or Windmill Throwing Star while Barbarian is crossing open ground if enough Spiritual Strength remains. The Art of the Fire Wheel is also useful when he is positioned so the rising fireballs can pass through him. Jump and Slash is especially powerful if you preserved it from Stage 1-1; jump through Barbarian with the technique rather than wasting it against minor enemies immediately before the boss.
If you reach the fight with low health, prioritize crouching, wall-crossing and survival over an extra sword hit. Should you lose the battle, use the retry to practice maintaining room behind Ryu instead of changing the plan every attempt. When Barbarian is defeated, the post-battle Cinema Display begins. Allow the scene to play through so the Act transition is clear. The game then advances to Act 2; there is no alternate Act 1 route or stage skip in the original North American NES campaign.
- Use Barbarian’s recovery and approach windows for sword attacks.
- Keep enough room behind Ryu to retreat or jump over him.
- Spend a Ninja Art only during a real opening or to prevent a likely hit.
- Confirm victory when Barbarian disappears and the post-battle Cinema Display starts.
Before you move on
- Stage 1-1 is complete when Ryu enters the building at the end of the street and Stage 1-2, Jay’s Bar, loads.
- Stage 1-2 is complete when Barbarian is defeated and the post-battle Cinema Display begins.
- Act 1 is complete when the story scene finishes and the game advances into Act 2.
- The original NES campaign requires the stages to be cleared in order; there is no Act 1 stage select or alternate route.
Act 2 — Urban Streets and Bomberhead
Act 2 contains three stages: Outpost, Death Valley and Amura’s Altar. The first two stages use bottomless gaps, ladders, narrow columns, projectile enemies and attackers that enter from behind. Move deliberately around every landing, use ladders to control the route, and protect a useful Ninja Art for dangerous ledges or the Bomberhead fight. Stage 2-3 is the boss hall, where Bomberhead advances slowly and attacks with a long spinning sickle and chain. In the original NES version, crouching beside him can avoid the swing and create a quick sword opening. Hit-and-retreat movement and wall-jump escapes remain reliable alternatives when the timing or spacing is unfavorable.
Stage 2-1: Outpost — cross the opening girders
Run right across the first group of girders, jumping from beam to beam and attacking only after Ryu has landed securely. A knife thrower occupies an upper girder while a dog approaches from the left on the lower route. Remove the knife thrower if the landing is safe, then defeat or jump over the dog before committing to the next gap. Lamps along this opening route provide Spirit Points, followed by a Throwing Star. Collect them when doing so does not leave Ryu standing at the edge of a pit.
A boxer appears near the end of the first girder section. Crouch and slash when he comes within range instead of trying to trade blows while moving across a narrow beam. Near the end of the section, another dog leaps down from the right. Clear the immediate threats before attempting the route to the upper platform and ladder.
Jump back to the left to reach the platform above the floor, then jump right again to reach the ladder. The gaps in this stage are instant-death hazards, so do not use a blind forward jump after an enemy hit. If Ryu is knocked backward, hold toward the nearest solid surface and wait for a stable recovery rather than attacking during the fall.
- Land on each girder before attacking.
- Watch for dogs entering from the side opposite Ryu’s movement.
- Use crouching slashes against the boxer when he approaches on a narrow beam.
- Treat every floor gap as an instant-death hazard.
- Reach the ladder by using the alternating left-right platform route.
Stage 2-1: Outpost — climb and preserve a useful weapon
After climbing the ladder, continue through the upper section and watch the platforms before each jump. A lamp provides Jump and Slash. This is a strong technique to carry toward Bomberhead because the jumping strike can damage him while Ryu passes over or near his body. Use it against enemies on the next platforms if necessary, but do not replace it casually with another pickup.
A later lamp may change the current technique to Throwing Stars. Do not collect it automatically if you still want Jump and Slash for the boss. Check the landing position first, because a weapon pickup is not worth falling into a gap or being struck while standing at the edge.
The short section above the ladder requires controlled horizontal jumps. From the ladder, jump left to the lower floor, then jump right over the ladder and move left again to the higher platform. Return right to reach the next ladder. These jumps are the intended route upward; do not attempt to climb straight through the open space.
- Take Jump and Slash if you want the simplest boss option.
- Do not replace it unless you deliberately prefer another weapon.
- Use late, controlled jumps when reaching ladders.
- Follow the alternating left-right route in the upper section.
Stage 2-1: Outpost — clear the final leftward section
The final section begins on the right side after the ladder. Run left, expecting a dog to drop from the right as you approach the first enemy. Stop on solid ground long enough to clear both threats, then jump to the high girder and defeat the enemies there.
Prepare for the descent to another girder over a floor gap. An enemy patrols the lower girder, and a dog can enter from the left. Do not attack while Ryu is still falling. Land, face the immediate enemy and clear the landing zone before continuing left.
If a hit knocks Ryu backward, hold toward the girder and prioritize recovery over another attack. Reach the left exit to finish Stage 2-1. The exit route is mandatory; there is no stage select or alternate route that bypasses this level.
- Begin the final section by moving left, but expect an enemy and dog from behind.
- Land on the lower girder before attacking.
- Keep Ryu away from the edge while clearing the patrol enemy.
- Reach the left exit to complete Stage 2-1.
Stage 2-2: Death Valley — columns, ladders and machine-gun fire
Run left and jump onto the first column. A dagger-throwing enemy guards the upper route. Stand near the left side of the column and slash when the enemy is within range, or use a carried secondary weapon if the position is unsafe. Once the thrower is gone, turn around because a commando can rush in from the right.
The next ledge contains a machine gunner. Wait for the burst to finish, then jump up and attack. Another commando may enter from the right while you are dealing with the gunner, and an enemy can arrive from behind after Ryu drops to the lower area. Keep Ryu near the center of each column so there is room to react in either direction.
Collect the red Spirit Points tile only when Ryu is positioned beneath it and can land safely afterward. Take the downward ladder to continue. Do not drop through an unconfirmed opening; the lower route is reached through the ladder, not by guessing at a fall.
- Defeat the dagger thrower before crossing the column.
- Wait out the machine-gunner’s burst before attacking.
- Check both sides for commandos after every landing.
- Use the downward ladder instead of dropping blindly.
- Keep space behind Ryu when projectiles are active.
Stage 2-2: Death Valley — use the middle-route weapons carefully
After climbing down, run right, drop to the lower route and continue left as the screen scrolls. A bat crosses the route. Jump onto the column and then toward the left side, where an insect contains a health-restoring potion. Take it only if the landing is secure.
The following insect contains Fire Wheel. Fire Wheel can reduce pressure during the gap sequence by clearing enemies approaching from the front or above. After collecting it, continue left without pausing on narrow ledges. Do not spend Spiritual Strength on every minor enemy; preserve enough for a dangerous approach or the boss if the current weapon is useful.
Collect Spirit Points from insects only when the pickup will not interrupt a jump. Continue to the ladder at the end of the section and climb rather than attempting to cross an unscouted lower gap.
- Take the health-restoring potion when the landing is safe.
- Use Fire Wheel to reduce pressure during the gap sequence.
- Avoid wasting Spiritual Strength on enemies that can be bypassed.
- Keep moving left toward the ladder.
Stage 2-2: Death Valley — reach the exit with the preferred weapon
The final section begins on the far right. Jump from the ladder to the wall on the right, then jump back over the ladder and continue through the route. A bat attacks during this movement, followed by a drop to a lower column. Land before attempting to slash.
After defeating the first enemy, turn around for the commando that appears behind Ryu. Continue left and remove the dagger thrower quickly if the screen gives you room. An insect beyond this area can provide Jump and Slash. Take it if you do not already have it and want that weapon for Bomberhead.
The first insect on the lower ledge releases red Spirit Points. The next contains Flame. Flame can help against ledge enemies, but Jump and Slash is usually the more direct choice for the upcoming boss. Three ordinary enemies guard the exit. Land fully before attacking them, because a hit during descent can knock Ryu backward into the gap.
- Use the wall route to leave the starting ladder area.
- Expect commandos from behind throughout the section.
- Prefer Jump and Slash over Flame if preparing for Bomberhead.
- Clear the three enemies from solid ground before entering the exit.
Stage 2-3: Amura’s Altar — defeat Bomberhead
Stage 2-3 is the boss hall, so there is no ordinary stage route to clear first. Bomberhead begins advancing as Ryu enters. His sickle and chain have long reach and spin through the space in front of him, while his slow movement gives Ryu time to choose a response.
The original NES version allows a useful close-range answer: when Bomberhead begins his swing, crouch beside him rather than standing upright in front of the weapon. If Ryu is positioned correctly, the sickle passes over him, creating a fast opening for one or more sword strikes. This is a timing-based counter, not a reason to remain beside him indefinitely. Crouch only when the swing is beginning and immediately prepare to move after the slash.
If the crouch timing is uncertain, use the safer hit-and-retreat pattern. Start near the middle of the room, let Bomberhead approach, slash during his advance, then back away before the chain reaches Ryu. Do not repeatedly trade standing sword swings at point-blank range. Jump and Slash is especially effective because Ryu can leap over Bomberhead and attack during the pass. Keep enough room to land behind him rather than jumping into the wall.
When Bomberhead reaches a corner, climb the wall and jump over him to reverse the positions. If the wall escape is mistimed, stop attacking and regain floor space first. A projectile Ninja Art can damage him during a clear approach, but spend Spiritual Strength only when Ryu has room to recover and the attack will not leave him helpless.
Repeat the crouch-and-slash, hit-and-retreat or wall-jump pattern until Bomberhead’s life meter is empty. The post-boss Cinema Display begins afterward, and the game advances to Act 3.
- Keep Bomberhead away from the corner whenever possible.
- Use crouching beside him to avoid the sickle swing and create a quick sword opening.
- Do not remain crouched after the attack; reset your spacing immediately.
- Use hit-and-retreat when the crouch timing or position is poor.
- Use Jump and Slash during a controlled pass if you carried it.
- Climb and jump over Bomberhead if he corners Ryu.
- Spend Spiritual Strength only during a clear, recoverable opening.
- Confirm that Bomberhead’s life meter is empty and the Cinema Display begins.
Before you move on
- Stage 2-1, Outpost, has been cleared through its left-side exit.
- Stage 2-2, Death Valley, has been cleared through the final enemy group and exit.
- Stage 2-3, Amura’s Altar, has been entered and Bomberhead’s life meter has been depleted.
- The post-boss Cinema Display begins, confirming that Act 2 is complete and Act 3 is available.
References for this chapter
Act 3 — Martial Arts Strongholds and Basaquer
Act 3, titled The Chase, contains Stage 3-1, Stage 3-2 and Stage 3-3. The first stage crosses wilderness docks and narrow platforms, while Stage 3-2 adds bazooka soldiers, eagles, football players, ladders and pits. Stage 3-3 is the Basaquer fight in Yomi’s Cave. The act rewards controlled movement rather than speed: turn around for pursuing cheetahs, let eagles pass overhead before attacking, bait bazooka shots before dropping, and preserve a useful secondary weapon and Spiritual Strength for the boss. Stage 3-2 also contains an optional Jump and Slash pickup, so do not treat that technique as unavailable during Act 3.
1. Start Stage 3-1 by controlling enemies from both directions
Move right through the opening sword fighters, but do not run so far that the next enemy reaches Ryu during the recovery from a slash. When the fourth sword fighter appears, a cheetah attacks from behind. Turn immediately and defeat the cheetah before continuing. If it follows Ryu into the next section, it can combine with the forward enemies and force a collision near the water.
At the first water crossing, an eagle approaches from above and then reverses direction. Let it pass over Ryu, turn around, crouch and slash as it comes back. This is safer than repeatedly jumping after it. Continue to the dock section with short jumps, aiming for the middle of each dock rather than its edge. The item over the second dock is a Time Freeze. Use it to cross the next sequence promptly if the landing is secure. A Throwing Star appears over a later dock, and another item above the dock provides a red Spiritual Strength bonus.
- Turn around and defeat the first pursuing cheetah.
- Let the first eagle pass overhead before turning to attack.
- Land near the centers of the docks instead of their edges.
- Take the Time Freeze only when doing so will not compromise the next jump.
2. Cross the lower route and finish Stage 3-1
After dropping from the docks, expect another cheetah to follow from behind. Cross to solid ground, turn and defeat it before dealing with the next forward enemies. Elevated ghouls and sword fighters can be ignored when the lower route is open; staying underneath them reduces the chance of being struck while jumping between narrow platforms. An item near the elevated ghoul contains the Art of the Fire Wheel, but reaching it is optional and should not take priority over a safe route.
Farther on, a commando and an eagle attack from behind. Defeat the commando if it is in immediate range, then use a short vertical jump to avoid the eagle and turn into a crouching slash. Climb the dock and clear the sword fighters only when they block the route. On the small docks near the end, do not stop to fight unnecessarily. If an eagle flies over Ryu, let it pass, then turn and attack. A blue Spiritual Strength bonus is available before the transition to Stage 3-2. A health-restoring item also appears along this section; collect either resource only when Ryu is standing safely and the next landing is controlled.
- Use the lower path beneath elevated enemies when it is available.
- Handle the commando before allowing the pursuing eagle to reach Ryu.
- Do not chase optional items across a dangerous dock or gap.
- Confirm the next platform before collecting the late blue Spiritual Strength bonus or health item.
3. Open Stage 3-2 by removing the bazooka soldiers quickly
At the start of Stage 3-2, jump up and defeat the first sword fighter, then remove the second sword fighter. Continue upward and attack the first bazooka soldier before he can establish a repeated firing rhythm. Defeat the second bazooka soldier and collect the blue Spiritual Strength bonus above him if the platform is clear. The safest approach is to keep moving vertically and attack before giving either soldier time to fire repeatedly.
Drop to the next platform and move to the extreme right edge without falling. Turn left and crouch. An eagle should pass over Ryu and reverse direction; slash it when it returns. Then jump upward to the sword fighter’s platform and continue across the next platforms. A bird carries a Windmill Throwing Star. It is a useful weapon for the upcoming ranged enemies, but do not jump for it if doing so places Ryu over an active projectile or at the edge of a pit.
- Kill the opening bazooka soldiers before lingering on their platforms.
- Stop at the right edge before turning for the eagle.
- Collect the Windmill Throwing Star only when the landing is controlled.
- Keep enough Spiritual Strength for the optional technique or the boss approach.
4. Cross the ghoul, pit and football-player sections
After collecting the Windmill Throwing Star, defeat or bypass the ghoul according to your position. If the ghoul is above Ryu, throw the star or wait for its projectile to pass before jumping into range. Climb the wall and cross the pit without chasing sword fighters on the opposite side; they can be ignored when Ryu lands safely. During the descent that follows, an eagle attacks. Slash it normally, then prepare for football players approaching from behind. Keep moving and defeat them before they can push Ryu toward the edge.
At the lower section, collect the blue Spiritual Strength bonus if the landing is clear, then climb the ladder and defeat the sword fighter at the top. A bazooka soldier is positioned across from Ryu. A Throwing Star is helpful because it allows an attack without standing directly in front of the weapon. The red Spiritual Strength bonus above the soldier is optional. Secure the platform first, then take it only if the soldier is no longer controlling the landing area.
- Use a projectile or wait for a ghoul’s shot before attacking from below.
- Ignore sword fighters across the pit when they do not block progress.
- Defeat football players before they can force Ryu toward a drop.
- Do not collect a bonus while a bazooka shot controls the landing zone.
5. Use bait-and-drop timing against the final bazooka sequence
At the next bazooka positions, stand at the edge and wait for the lower soldier to fire once. After the shot passes, drop and attack immediately rather than waiting in the soldier’s firing line. When Ryu returns to the upper platform, turn for the eagle that follows. Repeat the same method for the next lower bazooka soldier: bait a shot, descend during the opening, defeat the soldier and return only after the route is clear.
When the route drops into the pit, turn and crouch-slash the incoming eagle. Wait for the bazooka shot before jumping back up to attack. A bird above this section contains another Windmill Throwing Star. Continue to the next plateau, turn around when the cheetah approaches, and wait for the sword fighter to move away before dropping. An eagle attacks during the descent. Land ready to slash, defeat or pass the remaining sword fighter, and enter the opening at the right to finish Stage 3-2.
Stage 3-2 also contains an optional Jump and Slash pickup. Collect it if you want a stronger aerial attack for the remaining campaign, but do not take a dangerous detour merely to obtain it. If you already have a weapon you intend to preserve, compare the pickup with your current resource plan before striking the item.
- Bait one bazooka shot before every dangerous descent.
- Turn immediately for the eagle after returning to an upper platform.
- Wait for the sword fighter to move before making the final drop.
- Treat Jump and Slash as optional rather than required for Stage 3-3.
- Do not replace a useful weapon without a deliberate resource plan.
6. Enter Stage 3-3 and establish the correct Basaquer position
Stage 3-3 is the Basaquer boss encounter in Yomi’s Cave; there is no ordinary platforming section before the fight. Enter with as much health and Spiritual Strength as possible. The sword is sufficient, while the Windmill Throwing Star, Art of the Fire Wheel and optional Jump and Slash can create safer openings if Ryu still carries them.
Basaquer jumps repeatedly from one side of the room to the other. His body damages Ryu when he lands directly on him, but his normal jump path does not strike a stationary Ryu in the center. Begin near the middle and watch which direction he takes. Turn toward the side where he will land and slash as he reaches the floor. Do not chase him through the air or stand directly under his landing point.
The boss may release three round projectiles as he re-enters the air. These are the main threat while Ryu is moving between landing points. Keep the center available so that Ryu can respond without being trapped against a wall.
- Enter the boss room with enough health to survive one mistake.
- Remain near the center until Basaquer’s landing direction is clear.
- Attack during the landing opening instead of pursuing him in the air.
- Avoid being directly beneath his landing point.
7. Defeat Basaquer by controlling the projectile pattern
When Basaquer releases the three-projectile formation, crouch and slash to destroy the lower and middle projectiles. The highest projectile normally passes above Ryu. If only the middle projectile is destroyed, use the opening to move through rather than trying to eliminate every projectile. Do not jump blindly into the formation; the upper projectile can still catch Ryu during an unnecessary jump.
After clearing the pattern, return toward the center and prepare for Basaquer’s next landing. The sword gives a reliable method: follow his movement, turn toward the landing side and slash as he touches down, then immediately reset your spacing. If Ryu gets ahead of the pattern, stop in the middle, wait for the projectile sequence to resolve, and resume the landing attack rather than rushing into the corner.
The Art of the Fire Wheel can damage Basaquer during an aerial opening, but it consumes Spiritual Strength. Use it only when the attack will produce clear damage or protect Ryu from a difficult approach. The Windmill Throwing Star extends Ryu’s reach and can help clear the projectile formation, but conserve enough Spiritual Strength and health to finish the fight if the weapon supply runs out. Jump and Slash is also a valid optional tool if collected in Stage 3-2; use it deliberately because repeated aerial attacks spend Spiritual Strength quickly.
If Basaquer lands close to Ryu, retreat only far enough to avoid contact, then turn back toward him. Do not remain at the wall unless necessary, because reduced space makes the next jump harder to read. Repeat the cycle of central spacing, projectile clearing and landing attacks until Basaquer is defeated. The boss fight ends immediately, followed by the Act 3 Cinema Display and the transition toward Act 4.
- Destroy the lower and middle projectiles with crouching sword swings.
- Let the highest projectile pass overhead instead of jumping into the formation.
- Use Art of the Fire Wheel, Windmill Throwing Star or Jump and Slash for clear openings, not continuously.
- Return to central spacing after every projectile pattern.
- If the weapon supply runs out, continue with the sword and landing attacks.
Before you move on
- Stage 3-1 is cleared and the game transitions to Stage 3-2.
- Stage 3-2 is cleared after the final cheetah, sword fighter and eagle sequence.
- Basaquer is defeated in Stage 3-3 after the projectile-and-landing pattern is completed.
- The Act 3 Cinema Display plays after the boss encounter.
- The game advances to Act 4, confirming that all three Act 3 stages were completed in order.
Act 4 — Beasts, Vertical Gauntlets and Kelbeross
Act 4, titled A Trap, contains four stages in the North American NES edition: 4-1 South American Amazon, 4-2 Bazlisk Mine Field, 4-3 Temple of Darkness, and 4-4 Space of Kelbeross. The first three stages are platforming routes filled with pits, bats, eagles, ninjas, projectile enemies, ladders, and wall-jump sections. Stage 4-4 is the Kelbeross battle. Clear the stages in order, defeat the real Kelbeross, and watch the following Cinema Display to confirm that Act 4 has ended and Act 5 has begun.
1. Clear Stage 4-1: South American Amazon
Run right and jump the opening gap. Land near the first gunner and slash him before he has time to fire. Continue across the next platforms, dealing with the jaguar and eagle without stopping in an exposed position. Keep moving forward so enemies do not repeatedly respawn behind Ryu.
Defeat the dagger thrower on the raised platform. The route then divides. The upper route is the safer mandatory path and provides a Jump and Slash technique. The lower route is optional and contains a Windmill Throwing Star and an extra life, but it leads through swamp platforms and narrow landings. Take it only if your health is strong and you are comfortable correcting Ryu in midair.
If you choose the lower route, descend carefully and wait for the soldier below to finish firing before dropping to his level. Attack him, then cross the swamp platforms without lingering at their edges. Collect the extra life only when you can immediately retreat to solid ground. The pickup is not required to finish the stage.
After the bat and bazooka soldier, either jump over the soldier or use the Windmill Throwing Star if you already collected it. The spider above contains the Fire Wheel technique. Picking it up replaces the Ninja Art currently held, so do not take it automatically if Jump and Slash or Windmill Throwing Star is more useful to you.
Drop to the small lower ledge and begin the vertical section. Use repeated wall-spring jumps between the wall and platforms; do not attempt to climb the shaft with ordinary jumps alone. Continue right, reach the ladder, and climb while watching for the bat and eagle. Remain on the ladder until the eagle has passed, then dismount onto the branch or platform.
At the final enemy group, handle the sword fighter, eagle, and upper gunner one at a time. When cats approach from both directions, jump straight up as they cross or defeat one and jump over the other. Run right to exit the jungle and complete Stage 4-1.
- Cross the opening gap and defeat or bypass the first gunner without being trapped at the edge.
- Choose the lower Windmill Throwing Star and extra-life route only if the swamp landings are safe.
- Treat Fire Wheel as optional because collecting it replaces the current Ninja Art.
- Use wall-spring jumps in the lower vertical section.
- Wait for the eagle to pass before leaving the ladder.
2. Cross Stage 4-2: Bazlisk Mine Field
Move right from the entrance and deal with the armored sword enemy near the first mine cart. A green ninja drops from above and moves unpredictably around the area. Strike it after it lands, use Jump and Slash if available, or keep moving while avoiding its approach. Hit the lamps above the tracks for items when doing so does not expose Ryu to a bat or cart.
Use the mine carts as moving platforms, but do not jump blindly across the gaps. Let a bat approach, then clear it or wait for it to pass before making the next jump. Watch the upper tracks for knife throwers and the lower route for additional green ninjas. If enemies begin gathering behind Ryu, advance to the next broad platform rather than turning around in a cramped space.
Before the bridge section, collect the Hourglass when the approach is clear. It freezes enemies and projectiles briefly, giving Ryu time to cross the bridge. Use the opening to advance decisively; stopping in the center allows eagles and ninjas to surround you.
At the far side of the bridge, drop down and strike the lamp on the left for the health-restoring item. Take the recovery before attempting the remaining jumps. The nearby Jump and Slash, Windmill Throwing Star, and extra-life pickups are optional. Pursue them only after the immediate enemies are under control and you have a safe landing route.
Finish by moving right, crossing the remaining gap, and climbing the final ladder. Do not spend all of your Spiritual Strength on the bridge enemies. A reserve is more valuable if you carry a useful Ninja Art into the Kelbeross fight.
- Use carts as platforms while checking for bats before each jump.
- Collect the Hourglass before the bridge when it can be reached safely.
- Cross the bridge while clearing only the threats directly in Ryu’s path.
- Take the health restoration after dropping from the bridge.
- Treat the extra weapons and extra life near the exit as optional.
3. Scale Stage 4-3: Temple of Darkness
Jump the opening gap and climb the ladder on the left. Cross the column, defeat the martial-arts enemies, and begin the first wall-jump section. A knife thrower waits near the upper platforms; attack during the ascent or use the opposite wall to approach him. The nearby Fire Wheel is optional.
Continue right past the club thrower. The lower lamp contains a Windmill Throwing Star, but reaching it exposes Ryu to a ground enemy, so collect it only if you can land safely. Climb the ladder on the right and make the long jump over the column to the broken column ahead.
Defeat or bypass the gunner before he fires. On the ground, whirlwind-kick enemies leap toward Ryu. Let them complete their approach before slashing, rather than walking into their airborne hitbox. Continue to the narrow shaft between the wall and pillar.
Use repeated wall-spring jumps to climb the shaft. At the top, a fireball-spitting statue controls the approach. Pause below its firing line, wait for a safe interval, and climb through rather than rushing into the projectile. A health-restoring item is in the nearby candle; secure it before crossing the exposed upper platforms.
Move quickly across the upper platforms so the next gunner does not get repeated shots. Deal with the final statue, defeat the axe thrower by the ladder, and climb to the last section. The high Windmill Throwing Star is optional and should not be worth a risky fall. Continue right through the last whirlwind-kick enemies and enter the doors to reach Stage 4-4.
- Use wall-spring jumps in both narrow vertical sections.
- Wait for fire-statue projectiles before climbing into the upper platforms.
- Take the health restoration before the exposed jumps whenever possible.
- Defeat or bypass the axe thrower before climbing the final ladder.
- Enter the doors at the far right to reach the boss stage.
4. Defeat Kelbeross in Stage 4-4: Space of Kelbeross
The fight begins with two dog-like demons perched on pedestals. The real Kelbeross is the creature that starts above the left pedestal, directly above Ryu. The creature on the right is a decoy. Damage to the decoy does not complete the fight, so identify the left-starting target immediately and keep tracking it as both demons move.
Stay near a pedestal rather than standing in the open center for the entire fight. The pedestals give Ryu a reference point and a short retreat route, but they are not completely safe: a demon can jump into that space. When the real Kelbeross approaches, step out and slash, then retreat before the other demon blocks the route.
The demons hop around the room and spit slow-moving projectiles that travel above the floor. Grounded movement is usually safer than jumping into the projectiles. Slash at a projectile if it reaches Ryu’s height, or move beneath it when there is enough room. Avoid chasing the real Kelbeross across the room, because the decoy can land on Ryu or cut off the retreat.
Windmill Throwing Star is useful for attacking from range and clearing airborne projectiles. Fire Wheel is also effective if you carried it from an earlier stage. Both are optional. If Spiritual Strength is low, conserve it and use deliberate sword attacks. If you use a Ninja Art, spend it while the real Kelbeross is exposed and keep enough room to retreat after the attack.
The decoy can be damaged or even destroyed, but the battle ends only when the left-starting real Kelbeross is defeated. After the boss dies, let the Cinema Display play. Jaquio’s scene and Ryu’s fall into the dungeon confirm the Act 4 transition into Act 5.
- Identify the real Kelbeross as the creature beginning above the left pedestal, directly above Ryu.
- Track that target throughout the fight instead of relying on damage to the decoy.
- Use a pedestal as a spacing reference, but retreat when either demon enters the area.
- Stay grounded when possible against the high-moving projectiles.
- Use Windmill Throwing Star or Fire Wheel only during a reliable opening.
- Defeat the real Kelbeross and watch the Cinema Display leading into Act 5.
Before you move on
- Stage 4-1 is complete when Ryu exits the South American Amazon after the final jungle enemy group.
- Stage 4-2 is complete when Ryu climbs the final ladder and leaves the mine-field route.
- Stage 4-3 is complete when Ryu enters the doors at the end of the Temple of Darkness section.
- Stage 4-4 is complete only when the real Kelbeross, which began above the left pedestal directly above Ryu, is defeated.
- The Act transition is confirmed when the Cinema Display shows Jaquio’s aftermath and Ryu’s fall into the dungeon before Act 5 begins.
Mid-campaign: Act 5 — Long Sequences and Stage Traps
Act 5 contains Stages 5-1 through 5-4: the Prison of the Dead, the Cliff, the East Tower Outer Wall and the Place of Red Execution. The safest approach is controlled forward movement. Enemy groups often reappear when you retreat, while eagles, flying ninjas, football players and projectiles can knock Ryu from narrow platforms. Preserve a useful Ninja Art, avoid replacing it with an unwanted pickup, and try to reach Stage 5-4 with at least 5 Spiritual Strength if you are carrying Jump and Slash. Bloody Malth restores Ryu’s health when the battle begins, but a death during the fight sends the next life back to the lower part of Stage 5-3.
1. Clear Stage 5-1 without giving enemies extra chances
After the opening fall, move right. Defeat the first bat before jumping the pit, then handle the two mummy swordsmen. A bat approaches from behind; avoid it while dealing with the tribal knife thrower. The upper candle in the nearby group contains a Throwing Star. Take it only if you want that weapon, because collecting a different Ninja Art replaces the one currently equipped.
Jump to the upper platform and strike the candle for the blue bonus. An evil ninja drops into the route; slash it on the way down or let it pass overhead. On the lower path, collect the red bonus if the landing is safe and kill the short cripple with a normal standing slash. Continue to the Windmill Throwing Star candle, but do not strike it if you are deliberately preserving another weapon.
Wait for the mummy swordsman to turn before jumping to his platform. After defeating him, another mummy and an eagle appear. Let the eagle fly over Ryu, crouch while it passes, then turn and slash when it returns. Continue across the platforms and slash immediately before landing where an evil ninja drops from above.
When the monster throws its returning blade, use the pillar as a temporary shield and jump to the main route after the blade passes. Do not retreat repeatedly, because earlier enemies can reappear. Continue through the mummy, bat and eagle sequence, using crouching sword strikes when an eagle returns. At the lower route, ignore enemies above and behind you when possible, climb the wall, defeat the mummy and bat, jump over the monster below, and enter the door on the right.
- Move right after the opening fall.
- Do not replace a preferred Ninja Art merely to collect a nearby candle.
- Use the pillar to manage the returning blade.
- Crouch while an eagle passes overhead, then slash it on its return.
- Climb the final wall and enter the right-side door.
2. Climb Stage 5-2’s cliff route
At the beginning, run left and wait for the first mummy swordsman to pass underneath Ryu. Drop down and defeat both mummies, then cling to the structure and climb upward. Defeat the next mummy and collect the nearby bonus only if you can land safely. Jump to the next platform, defeat the mummy, then drop down and kill the cripple. The Jump and Slash candle here is optional; it is valuable for Bloody Malth, but do not take it if doing so would cost a weapon you already intend to keep.
Climb the ladder and jump to the next platform. When the eagle approaches, jump over it and turn around after landing so you can slash it on its return. Two evil ninjas attack on the following platforms. Keep moving toward the next safe landing instead of backing into the previous spawn point. On the lower path, handle the next ninja and eagle in the same way. The Throwing Star candle can be ignored if you already have Windmill Throwing Star or Fire Wheel.
After the next ladder, defeat or bypass the kick fighters and approach the paired serpent turrets. Wait for the lower turrets to fire, then jump up and slash them while moving back from the second shot. Let the upper turrets fire before crossing their level. Continue to the upper path, then drop to the lower route and slash the bat during the descent; missing it can cause a collision or a fall.
At the final climb, let the eagle pass and attack it on the return. Approach the axe thrower after he moves away from the edge. Use the adjacent wall to reach his platform, jump across and slash him, then return for the Restore Health pickup only if the landing is secure. Drop and cling beneath the parallel structure, wall-jump to the inner ledge, collect the bonus, kill the bat and climb to the exit.
- Treat Jump and Slash in the early section as optional but valuable.
- Wait for serpent-turret shots before crossing.
- Slash the bat during the dangerous descent.
- Use the wall beside the axe thrower to control the climb.
- Take Restore Health only when the landing is safe.
3. Cross Stage 5-3’s outer wall
Climb the ladder on the right and jump to the upper platform. Defeat the boxer, drop down and kill the next boxer, knife thrower and biker. Climb the wall before the ladder to reach the candle containing the Art of the Fire Wheel if you need it. Then return to the route and climb the ladder.
The flying-ninja section is a forward-movement challenge. Slash when a flying ninja enters range, avoid its stars where possible and keep advancing. Do not stop to clear every enemy or candle. Moving backward can cause flying ninjas to return, increasing the number of projectiles near the next landing. At the mace thrower, wait until he moves toward the back of his platform, then jump over and attack him before climbing the ladder.
Drop to the lower level and defeat the sword fighter. A Throwing Star candle can be used against the commando, but leave it alone if it would replace Windmill Throwing Star, Fire Wheel or Jump and Slash. Cross the gaps carefully, watching for the bat and the charging animal. Near the ladder, an eagle attacks from the side while a football player approaches from above; jump over the eagle, turn and slash it on the return, then climb.
The next section pairs football players with bazooka soldiers. Move forward quickly, jump beneath the football player and land near the bazooka soldier so you can slash him before he fires. Football players can return, so do not linger trying to remove them permanently. Repeat the same approach at the next platform, then jump over the bat and land at the edge of the lower platform to attack the commando.
On the final lower route, let the eagle fly over and slash it as it returns. Defeat or bypass the cripple and avoid the tribal knife thrower if the passage is crowded. When the monster attacks from behind near the ladder, climb quickly. At the top, defeat or bypass the mummy swordsmen, climb the next ladder and run right to the door for Stage 5-4.
- Keep moving through the flying-ninja platforms.
- Do not retreat unless necessary.
- Attack bazooka soldiers immediately after landing.
- Treat football players as hazards to bypass rather than enemies to farm.
- Climb quickly when the monster appears behind Ryu.
- Reach the upper-right door.
4. Defeat Bloody Malth in Stage 5-4
Stage 5-4 is the Place of Red Execution. When the Bloody Malth battle begins, Ryu’s health meter is restored. Damage taken during Stage 5-3 does not carry into the boss fight, although preserving health still matters because a death before the arena costs a life.
Malth moves back and forth and releases a fast lightning orb that tracks Ryu. He turns to face Ryu, so jumping behind him is not a guaranteed escape. The orb is difficult to avoid from the floor. The small pillar on the right gives one of the few reliable evasive options: climb onto it, then leap toward Malth while he is gathering the orb so Ryu passes above the projectile. This requires practice and should be treated as an alternative rather than the only plan.
If Jump and Slash is equipped, retain at least 5 Spiritual Strength. To activate it, press A to jump and then press B while Ryu is airborne. Jump and Slash is not triggered by jumping alone. The technique can defeat Bloody Malth in one successful attack, making it the preferred prepared solution. Do not press B during unnecessary jumps through Stage 5-3, because each activation consumes 5 Spiritual Strength.
When you want a regular aerial sword attack instead, press Down and B during the jump. This produces the ordinary aerial slash and avoids activating Jump and Slash. Use that input while crossing Stage 5-3 if you are trying to preserve the technique for Malth. If Jump and Slash is unavailable, Windmill Throwing Star, Fire Wheel or a direct Dragon Sword attack can still win the fight. Use Ninja Arts only when the attack will connect; otherwise close in and slash aggressively during the full-health opening.
If Malth defeats Ryu while lives remain, the next life begins at the lower part of Stage 5-3. Re-climb the stage, recover the route to the boss door and repeat the fight with the same resource plan. If all lives are lost, select Continue. The continuation returns Ryu to the beginning of the reached stage rather than placing him inside the boss arena. After defeating Malth, allow the Cinema Display to play; Act 6 begins afterward.
- The Stage 5-4 encounter restores Ryu’s health.
- Preserve Jump and Slash and at least 5 Spiritual Strength if possible.
- Press A to jump, then B while airborne to activate Jump and Slash.
- Do not claim that jumping alone activates the technique.
- Use Down plus B during a jump for the ordinary aerial slash.
- Use the right-side pillar only as a practiced evasive option.
- After a death, expect to replay the lower part of Stage 5-3.
- Watch the post-boss Cinema Display and confirm that Act 6 begins.
Before you move on
- Stages 5-1, 5-2 and 5-3 have been cleared in order.
- The Stage 5-3 upper route has been completed and the Stage 5-4 boss door reached.
- Bloody Malth has been defeated.
- If Jump and Slash was used, A was pressed to jump and B was pressed while airborne, with at least 5 Spiritual Strength available.
- If Spiritual Strength was conserved, Down plus B produced the normal aerial sword slash instead of Jump and Slash.
- The post-boss Cinema Display has played.
- Act 6 has begun after the Bloody Malth sequence.
- If a life was lost during the boss fight, the lower Stage 5-3 route was replayed successfully.
- If Game Over occurred, Continue returned Ryu to the beginning of the reached stage rather than directly to the boss arena.
Act 6 — Final Approach and the Three-Part Final Battle
Act 6 is the final campaign sequence in the North American NES edition of Ninja Gaiden. After defeating Bloody Malth at the end of Act 5, begin Stage 6-1 by moving left from the boss area. Stage 6-2 reverses direction and sends Ryu right through the green-tower section. Stage 6-3 continues right through the orange-temple route, then climbs through the recovery-item and final ladder section. The final doorway leads to the Masked Devil and Jaquio in Stage 6-4, followed by the Demon Sculpture in Stage 6-5. If Ryu loses a life to one of these final bosses, Act 6 restarts at Stage 6-1, but final bosses already defeated remain defeated. The campaign is complete only after the Demon Sculpture is destroyed and the ending Cinema Display and concluding story presentation have played.
1. Clear Stage 6-1 by moving left from Bloody Malth’s area
When Act 6 begins, move left from the area where Bloody Malth was defeated. The opening section places a machine-gunner ahead and a bat behind Ryu. Keep moving left after dealing with the immediate threat so the bat does not trap you against the gunner. Do not reverse direction repeatedly; the safest route is to clear the blocker, pass the bat or let it fall behind, and continue toward the first platform.
Approach the first ledge carefully. Hunchbacks and additional ranged enemies occupy the route, while an eagle can enter from the side or from above. Let the eagle commit to its flight, then jump and press B to slash it. Deal with the hunchback only when Ryu has enough room to land safely. If an upper enemy is firing downward, avoid jumping directly beneath it; wait for the projectile to pass before committing to the next platform.
Continue through the bridge and platform sequence. Whirlwind kickers leap from the platforms, and dragon or serpent cannons fire across the gaps. Let a kicker complete its jump before crossing. Against a cannon, watch one firing lane at a time: wait for the shot, advance during the opening, and stop before the next cannon fires. On the section containing several cannons, use the walls to climb or wall-spring over the danger rather than trying to run through every shot at ground level.
The later route combines hunchbacks, eagles and whirlwind kickers. Clear only the enemy that blocks the next landing and keep advancing. A late candle contains the Jump and Slash Technique. Collect it if you want a powerful close-range option for the remaining Act 6 encounters. When Jump and Slash is equipped, jump and press B to perform it. To conserve Spiritual Strength, hold Down while jumping and press B for the ordinary aerial sword slash instead. Do not confuse this with Up plus B, which activates the currently equipped ordinary Ninja Art.
At the end of the route, enter the door to Stage 6-2. Do not retreat to repeatedly reactivate candles or enemies. The priority is to reach the next stage with health, a usable secondary weapon and enough Spiritual Strength for a deliberate attack later in Act 6.
- Move left at the start of Stage 6-1.
- Pass the opening machine-gunner and rear bat without excessive backtracking.
- Handle the hunchbacks, eagles and upper ranged enemies from stable platforms.
- Cross the whirlwind kickers and dragon or serpent cannons one firing lane at a time.
- Collect the late Jump and Slash pickup if it supports your planned boss strategy.
- Use a jump plus B for Jump and Slash.
- Use Down while jumping plus B for the ordinary aerial slash.
- Enter the Stage 6-2 door without returning into cleared enemy triggers.
2. Clear Stage 6-2 by moving right through the green towers
Stage 6-2 begins by moving right. Clear the opening enemies without stopping in the first exposed lane, then approach the pair of green towers. The towers form the main vertical route. Use wall cling and wall-spring movement to climb instead of attempting to fight every enemy from the floor. If Ryu is knocked onto a tower wall, hold A and alternate directions to climb between the surfaces rather than jumping blindly into the gap.
The green-tower section includes elevated throwers, knife throwers and dogs. Eliminate the enemy that controls the next landing, then move on. A thrower is easiest to attack after its projectile has passed or while it is recovering. If a dog approaches from below, climb or jump over it rather than allowing it to pin Ryu against the tower. A weapon candle on the route may provide the Windmill Throwing Star; collect it only if you intentionally want to replace the current weapon.
Continue right across the upper platforms and ladders. Flying ninjas, bats and eagles appear around small landing areas. Stand on a stable platform before attacking a flying ninja, and jump and press B when it enters sword range. If several flying ninjas overlap, Jump and Slash can clear the crossing, but it consumes Spiritual Strength. For a normal aerial attack, hold Down while jumping and press B. Avoid pressing Up plus B unless you deliberately want to spend Spiritual Strength on the equipped ordinary Ninja Art.
The middle and later portions mix lower platforms, ranged enemies and narrow transfers. Clear the enemy directly blocking the next jump, then continue right instead of repeatedly retreating into respawning enemies. When an eagle approaches over a short platform, allow it to pass or jump and slash on its return only when there is enough room to land. At a ladder, climb from a secure position and do not attack while on the ladder; jump off by pressing the direction opposite the ladder together with A when the route requires it.
Finish the final tower and ladder sequence, then enter Stage 6-3. Preserve whichever weapon you can carry reliably. A stronger weapon is not useful if collecting it forces Ryu into a dangerous landing or leaves too little Spiritual Strength for the final stage.
- Move right at the beginning of Stage 6-2.
- Use the green towers as the intended vertical route.
- Handle throwers, knife throwers and dogs from controlled landings.
- Take the Windmill Throwing Star only when replacing the current weapon is intentional.
- Use a jump plus B for Jump and Slash.
- Use Down while jumping plus B for the ordinary aerial slash.
- Advance after clearing each blocker instead of farming respawning enemies.
- Reach Stage 6-3 with useful health and a deliberate weapon choice.
3. Cross Stage 6-3 and secure the recovery items
Stage 6-3 continues right through the orange-temple route. Clear the opening bat and whirlwind kicker, then break the nearby candle for Spiritual Strength if the approach is safe. Use the large green pillar and adjacent structures as climbing points. Wall-spring between the surfaces and ledges instead of remaining on the floor beneath the upper enemies.
At the green pillar section, collect the Art of Fire Wheel if you want a ranged attack for the upper enemies. The route also offers Jump and Slash later in the stage. Every new Ninja Art replaces the one currently equipped, so do not strike a candle automatically. Decide whether you want Fire Wheel for a ranged boss attack or Jump and Slash for direct movement through enemy clusters before taking the next weapon.
Continue right beneath the upper structure and deal with the axe thrower only when it controls your landing. Bats, dragon or serpent cannons, hunchbacks, eagles and mummy swordsmen occupy the platforms and ladders that follow. Attack while jumping when an enemy is on the next platform, but avoid landing beside a hunchback. In the lower ranged-enemy section, cross promptly after the projectile pattern opens; fighting in the center gives enemies time to attack from both sides.
In the later column route, climb to the higher position and strike the candle containing the health-restoration pickup. Collect it before continuing if Ryu has lost health. After dropping to the main route, keep moving right beneath the upper platform. Several hunchbacks descend from above. Pass beneath them, then turn back only long enough to strike the candle containing the Hourglass.
Use the Hourglass before the final wall-jump and ladder sequence. It freezes active enemies and projectiles for a short period and prevents new enemies from appearing during its effect. While the screen is controlled, wall-spring between the wall and the small ledges, then complete the ladder route. If the Hourglass is missed, slow down and clear only the enemy blocking the next jump; do not trigger multiple hunchbacks and cannons at once.
The final candles offer replacement Ninja Arts and weapons. Choose the item that best supports the remaining bosses. Jump and Slash requires a jump followed by B. For a regular aerial sword slash that conserves Spiritual Strength, hold Down while jumping and press B. Use Up plus B only when intentionally activating the equipped ordinary Ninja Art. Enter the final doorway after checking your weapon, health and Spiritual Strength.
- Move right through the orange-temple opening.
- Use the green pillar, broken columns and ladders for the vertical route.
- Cross the lower ranged-enemy area quickly after the projectile pattern opens.
- Collect the health-restoration pickup in the later column section when needed.
- Collect and use the Hourglass before the final wall-jump and ladder route.
- Treat every new weapon pickup as a replacement for the current weapon.
- Reach the final doorway with a deliberate weapon and useful Spiritual Strength.
4. Defeat the Masked Devil and Jaquio in Stage 6-4
The Masked Devil is the first final encounter. The central orb is the required target; attacking the advancing body does not finish the fight. The orb’s fireballs circle the room at changing heights while the Masked Devil walks across the floor. Use the walls and central platforms to change sides, then jump over the boss during a projectile gap and press B to strike the orb.
Do not rush directly into the orb while its fireballs are active. Lure the Masked Devil toward one side, wait for the fireball pattern to open, then climb or cling to the wall and jump over the body. A normal aerial slash is performed by holding Down while jumping and pressing B. If you have Jump and Slash equipped, a jump plus B gives the stronger technique, but spending Spiritual Strength is worthwhile only when the attack will safely connect.
Alternate sides rather than allowing the boss to push Ryu against a wall. If a fireball closes the side you planned to use, remain on the floor and let it pass instead of forcing the jump. Continue striking the orb until it is destroyed. The Masked Devil himself is not the finishing target.
Jaquio follows in the same final sequence. He glides across the upper part of the room and fires tracking fireballs as he crosses. Run on the floor to make the projectiles travel away from Ryu, then climb a wall when Jaquio is moving toward that side and the fireballs have cleared. Jump out and press B as he passes. Return to the floor immediately after the attack and prepare for the next projectile pattern.
If Jaquio’s fireballs restrict one side, switch to the opposite wall rather than standing on a small half-pillar. The floor provides more space for dodging. Fire Wheel is useful if enough Spiritual Strength remains, while Jump and Slash can produce a decisive jump plus B attack. If Ryu dies to either final boss, the game returns him to Stage 6-1. A final boss already defeated remains defeated, so a successful Masked Devil fight does not need to be repeated on the next attempt.
- Attack the Masked Devil’s central orb, not the advancing body.
- Use wall movement to change sides and jump over the boss during projectile gaps.
- Use jump plus B for Jump and Slash when equipped.
- Use Down while jumping plus B for the ordinary aerial slash.
- Manage Jaquio from the floor and walls rather than remaining on the half-pillars.
- Strike Jaquio as he crosses toward Ryu, then return to the floor.
- After a death, replay Act 6 from Stage 6-1; defeated final bosses remain defeated.
5. Defeat the Demon Sculpture and confirm completion
Stage 6-5 contains the Demon Sculpture, the final boss. It releases red projectiles while its separate body sections become vulnerable in sequence. Do not try to destroy every projectile. Keep moving through the safe spaces, attack during a clear opening and retreat before the next volley reaches Ryu.
First destroy the head with jumping sword attacks. Move into position beneath the head, jump and press B, then withdraw as the next projectile pattern begins. Jump and Slash is also performed with a jump followed by B when equipped. If you need to conserve Spiritual Strength, hold Down while jumping and press B for the ordinary aerial slash.
After the head is removed, attack the tail with crouching sword strikes when it enters range. Rise or reposition when the red projectiles approach instead of remaining crouched through the entire pattern. The tail can be damaged repeatedly from the ground, but patience is safer than trying to continue attacking while a projectile is closing in.
Once the head and tail are gone, the central heart becomes the finishing target. Use jumping sword strikes during the openings between projectile volleys. A jump plus B is appropriate if Jump and Slash is equipped and enough Spiritual Strength remains. Otherwise, use Down while jumping plus B for the ordinary aerial slash. Strike, retreat and repeat until the heart is destroyed.
A death in Stage 6-5 returns Ryu to Stage 6-1, while the Masked Devil and Jaquio remain defeated if they were already cleared. The Act 6 route must therefore be replayed, but previously defeated final encounters are not reset. Recollect useful weapons and resources on the way back, then use the Stage 6-3 health-restoration pickup and Hourglass deliberately before attempting the remaining boss.
When the Demon Sculpture is destroyed, allow the ending Cinema Display, story conclusion and credits to play. Reaching the final doorway or defeating only the Masked Devil and Jaquio does not complete the NES campaign. Completion is confirmed only after the final boss has fallen and the ending presentation has finished.
- Avoid the Demon Sculpture’s projectiles instead of trying to destroy every one.
- Destroy the head with jumping sword attacks.
- Destroy the tail with crouching sword strikes during safe openings.
- Finish by attacking the central heart after the head and tail are gone.
- Use jump plus B for Jump and Slash when equipped.
- Use Down while jumping plus B for the ordinary aerial slash.
- After a death, replay Act 6 from Stage 6-1 while relying on defeated-boss persistence.
- Let the ending Cinema Display and concluding presentation play through.
Before you move on
- Stage 6-1 has been cleared by moving left from Bloody Malth’s area.
- The opening machine-gunner and rear bat have been passed without excessive backtracking.
- The ledge hunchbacks, eagles and upper ranged enemies have been cleared.
- The whirlwind kickers and dragon or serpent cannon platforms have been crossed safely.
- The late Jump and Slash pickup has been collected or deliberately bypassed.
- Stage 6-2 has been cleared by moving right through the green towers and later platform sections.
- Throwers, dogs, bats, eagles and flying ninjas have been handled from stable landings.
- Stage 6-3 has been cleared by moving right through the orange-temple route.
- The lower ranged-enemy and broken-column sections have been crossed without repeated enemy reactivation.
- The Stage 6-3 health-restoration pickup has been collected when needed.
- The Hourglass has been collected and used before the final wall-jump and ladder sequence.
- The final doorway has been reached with a deliberate weapon choice and useful Spiritual Strength.
- The Masked Devil’s central orb has been destroyed.
- Jaquio has been defeated.
- The Demon Sculpture’s head has been destroyed.
- The Demon Sculpture’s tail has been destroyed.
- The Demon Sculpture’s central heart has been destroyed.
- The North American NES ending Cinema Display, concluding story presentation and credits have played through.
Boss Pattern Mastery — Practical Counters and Recovery
The original North American NES campaign presents five Act bosses in order: Barbarian, Bomberhead, Basaquer, Kelbeross and Bloody Malth. Act 6 then follows with the Masked Devil, Jaquio and the Demon Sculpture. These encounters are easier when treated as repeatable positioning exercises rather than damage races. Identify the target, wait for its approach or recovery, attack only from a prepared position, and keep a route to open ground. Spiritual Strength and secondary weapons can shorten difficult fights, but sword timing, crouching, wall movement and deliberate spacing remain the foundation. The procedures below are for the original NES release, not later remakes or ports.
1. Barbarian — control the distance and keep the arena centered
Barbarian advances toward Ryu and attacks at close range with his large weapon. Stand just outside the weapon’s reach, step in for a sword thrust when he approaches or finishes an attack, then retreat before remaining beside him becomes dangerous. Do not stand next to him and trade repeated hits. The dependable rhythm is approach, strike once or twice, retreat and repeat.
If Barbarian pushes Ryu against a wall, stop attacking and use the wall to escape. Cling to the wall, climb high enough to clear his body and jump over him only after checking the landing side. The wall jump is primarily an escape tool. Once Ryu is back near the center, resume the approach-and-retreat pattern instead of chasing Barbarian into a corner.
- Stay just outside the weapon’s range.
- Strike as Barbarian approaches or finishes an attack.
- Retreat instead of trading repeated close-range hits.
- Use a wall jump to escape a corner.
- Keep the fight near the center of the arena.
2. Bomberhead — use the crouch counter before resorting to a wall crossing
Bomberhead resembles Barbarian in that he advances slowly, stops to attack and can be punished while approaching. The important NES-specific differences are that Bomberhead advances farther between attacks and his spinning sickle-and-chain reaches farther than Barbarian’s weapon. Ryu must therefore attack sooner and leave less room for Bomberhead to close the distance.
The primary counter is to crouch beside Bomberhead as the sickle swings, then slash quickly while remaining low. Ryu’s crouched position can pass beneath the weapon’s sweep even when the blade appears to clip through the top of his sprite. Do not stay beside Bomberhead after the slash. Immediately retreat far enough to avoid contact and prevent him from pushing Ryu toward a wall. This is a close-range timing counter, not an invitation to mash the sword while standing in front of the chain.
A useful sequence is to let Bomberhead walk toward Ryu, duck beside him as the weapon begins its swing, press B for a fast crouching strike, then move away. Repeat the sequence rather than waiting for a long opening. The Jump and Slash Technique is also effective if you retained it, but the crouch-and-slash method gives you a dependable sword-only answer and teaches the distinction between Bomberhead’s range and Barbarian’s simpler attack.
If Bomberhead has already driven Ryu into a wall, use the wall as a recovery route. Climb high enough to clear his tall body, check the opposite landing area and jump over him only when the landing side is safe. This wall crossing is the fallback for a bad position, not the primary replacement for crouching beside him. After crossing, restore space and return to the crouch, strike and retreat rhythm. If the opposite side is blocked, stay on the wall until the sickle passes instead of forcing a jump into the weapon.
- Expect Bomberhead to advance farther than Barbarian.
- Treat the sickle-and-chain as a longer danger zone.
- Crouch beside him as the weapon swings.
- Slash quickly from the crouched position.
- Retreat immediately so contact does not push Ryu into a wall.
- Use Jump and Slash if you have safely retained it.
- Use wall climbing and a wall crossing only after Ryu is cornered.
- Check the landing area before jumping over him.
3. Basaquer — attack the landing and clear the projectile spread
Basaquer jumps from one side of the room to the other. His airborne movement is not the safest time to chase him. Watch where he will land and meet him with the sword as he descends. When he releases his projectile spread after re-entering the air, treat the projectiles as the immediate threat instead of pursuing him across the room.
The sword can destroy projectiles that enter Ryu’s lane. When the spread blocks the floor route, prioritize the middle and lower shots; opening that space lets Ryu move beneath the remaining upper shot. The Windmill Throwing Star can clear projectiles from farther away if you have retained it. The Art of the Fire Wheel can damage Basaquer when its path intersects him, but do not spend Spiritual Strength merely because he is visible. If the spread is unsafe, clear the shots and wait for the next landing.
- Watch Basaquer’s landing point instead of chasing him airborne.
- Strike as he descends into sword range.
- Clear projectiles that block the movement route.
- Use the Windmill Throwing Star for projectile control when available.
- Wait through an unsafe spread instead of forcing a hit.
4. Kelbeross — identify the real target and use the pillars
The battle begins with two Kelbeross creatures. Only one can be damaged normally. The real target is the creature that starts on the left; track its longer jumps after the pair begins moving rather than assuming the two creatures remain in their original positions. The other creature can still obstruct movement and cause damage, so avoid standing where either one can land directly on Ryu.
The pillar areas provide useful positioning references. Stay near one pillar without jumping unnecessarily, wait for the real Kelbeross to come within sword range, slash and return to a safer position. The creatures spit projectiles while bouncing. Destroy or avoid anything entering Ryu’s route before committing to another attack. The Windmill Throwing Star can simplify the encounter if you have enough Spiritual Strength, but target identification comes first.
- The left-starting Kelbeross is the real target.
- Track its longer jumps after the fight begins.
- Do not waste attacks on the false creature.
- Use the pillars as positioning references.
- Clear incoming projectiles before attacking again.
- Do not jump unnecessarily when the ground route is safe.
5. Bloody Malth — preserve the approach and answer the lightning attack
Bloody Malth is the Act 5 boss in Stage 5-4. The fight restores Ryu’s health when the boss encounter begins, so use Stage 5-3 to preserve Spiritual Strength, retain a suitable secondary weapon and avoid unnecessary damage that could cost lives before reaching the arena.
Malth moves back and forth and raises his hand before releasing a fast lightning orb that tracks Ryu. Ordinary ground movement is unreliable against this attack. Keep the small column on the right available as a reference point. When Malth begins gathering the lightning, jump from the column toward him, passing high enough that the orb travels beneath Ryu. Land with room to retreat, then repeat the setup instead of remaining beside Malth after a slash.
A direct damage race is possible because the battle begins with full health, but it is less reliable if Ryu has no weapon support or is unfamiliar with the lightning timing. The Windmill Throwing Star is useful if safely retained, and the Art of the Fire Wheel can provide additional damage when its path is reliable. Spend Spiritual Strength deliberately and do not replace a useful weapon immediately before the boss unless the replacement clearly improves the fight.
If Malth defeats Ryu, the next life does not restart at the boss. It begins at the bottom of Stage 5-3, requiring the climb back to Stage 5-4. Treat the first attempt as pattern practice, then use the restored-health rematch to apply the column-and-jump response.
- Use Stage 5-3 to preserve Spiritual Strength and retain a useful weapon.
- Remember that Stage 5-4 restores Ryu’s health when the boss battle begins.
- Watch for Malth’s raised hand and lightning charge.
- Use the right-hand column and a high jump to avoid the tracking orb.
- Keep open space after each attack.
- If defeated, prepare to climb again from the bottom of Stage 5-3.
- Do not assume a death returns Ryu directly to the boss.
6. Act 6 — separate the Masked Devil, Jaquio and Demon Sculpture
The Masked Devil is not the damage target. Attack the central orb that produces the surrounding fireballs. Use the platforms and walls to move around the Masked Devil instead of trying to strike through his raised swords. Lure him toward one side, cross over him when the route is clear and return to the orb from a safer angle. Repeat the wall-to-wall movement and attack the orb during a clear opening.
Jaquio floats across the upper part of the room and launches fireballs that track Ryu’s position. Stay on the floor while the fireballs follow, allowing them to move away from the useful attack lane. Once the projectiles have cleared the room, climb or jump to reach Jaquio during a safe pass, strike him and return to the floor. Do not remain on a half-platform long enough for the fireballs to reverse and continue tracking Ryu. If one side becomes unsafe, change sides instead of repeating the same jump.
The Demon Sculpture remains stationary and has three relevant areas: the head, the tail and the heart. Fireballs emerge from the sculpture and scatter through the room at varying intervals and directions. Each can be destroyed with the sword, but the safest response is usually to watch the projectile path and move away before committing to another strike.
The head and tail are the two outer targets. Either one may be destroyed first; the game does not require a head-then-tail order. The heart cannot be damaged reliably until both the head and tail have been removed, so eliminate both outer targets before focusing on the center. A straightforward training sequence is head first, then tail, because jumping attacks make the head easy to recognize and crouching sword strikes make the tail easier to handle. This is a recommendation, not a mandatory order.
To attack the head, jump and slash as Ryu passes its height, then use the landing to retreat from incoming fireballs. To attack the tail, stay low and slash when the tail is within reach, breaking off when a projectile enters the route. If the tail is removed first, use the same caution while dealing with the head. Once both outer targets are gone, move in on the exposed heart and strike repeatedly during clear openings. Continue watching the fireball stream; the final phase still punishes attacks made without an escape route.
- Attack the Masked Devil’s central orb, not the Masked Devil himself.
- Use walls and platforms to lure the Masked Devil away from the orb.
- Let Jaquio’s tracking fireballs clear before climbing to attack.
- Return to the floor after a Jaquio strike.
- Destroy both the Demon Sculpture’s head and tail before relying on heart damage.
- Either outer target may be handled first.
- Use head first, then tail as a simple recommended sequence.
- Attack the heart after both outer targets are gone.
- Treat scattered fireballs as the immediate hazard.
7. Universal recovery checklist
After Ryu is hit, stop attacking until you know whether he is standing, falling or clinging to a wall. Do not press jump automatically during knockback. First identify a safe floor, wall or platform. If projectiles are still active, allow the current pattern to pass before choosing a Ninja Art or attempting another attack.
Against Barbarian, Bomberhead and Bloody Malth, create distance and restore the fight to the center or an open side of the arena. Against Bomberhead specifically, return to crouching only after there is enough room to avoid being pushed into a wall. Against Basaquer, wait for the next landing instead of chasing him. Against Kelbeross, locate the left-starting target again before spending attacks. During Act 6, confirm the current target before using Spiritual Strength. Survival takes priority over damage when Ryu is near a wall edge or pit.
- Identify Ryu’s movement state after taking damage.
- Create room before attacking again.
- Use wall cling only when it leads to a safe landing.
- Pause until active projectiles clear.
- Reidentify the correct target before spending Spiritual Strength.
- Resume the established pattern instead of improvising while cornered.
8. Practice drills — turn recognition into automatic responses
Run each Act boss in two phases. First, survive several complete behavior cycles while attacking only when necessary to avoid being trapped. Second, repeat the same cycles while adding one deliberate attack at the established opening. Barbarian should become an approach, strike and retreat drill. Bomberhead should become a crouch-beside-him, slash-quickly and retreat drill, with wall crossing practiced separately as the cornered recovery. Bloody Malth uses the same close-range discipline but requires the lightning response. Basaquer should become landing recognition plus projectile clearing. Kelbeross should become target identification followed by a controlled slash and retreat.
Practice the Act 6 encounters separately. For the Masked Devil, rehearse reaching the central orb, crossing over the approaching body and returning to the opposite platform. For Jaquio, rehearse staying low until the tracking fireballs clear, making one safe climb, delivering one slash and returning to the floor. For the Demon Sculpture, rehearse removing both outer targets before attacking the heart. Head first and tail second is a useful training sequence, but reverse the order in practice as well so the requirement is understood correctly and the fight remains manageable if one target presents a safer opening.
A useful standard is three clean survival cycles followed by a controlled victory. If panic movement causes a mistake, return to the survival phase and repeat the escape route. Add heavier Ninja Art use only after the sword-and-positioning version is reliable. This provides a fallback plan for attempts that reach a boss with low Spiritual Strength or without the preferred secondary weapon.
- Survive the behavior before optimizing damage.
- Practice the escape route as deliberately as the attack.
- Use crouch-and-retreat against Bomberhead before practicing wall recovery.
- Repeat one response until it becomes automatic.
- Train the three Act 6 encounters separately.
- Practice removing both Demon Sculpture outer targets before attacking the heart.
- Use three survival cycles plus a victory as a practical drill target.
- Add faster strategies only after the basic response is reliable.
Before you move on
- You can state the boss order: Barbarian, Bomberhead, Basaquer, Kelbeross, Bloody Malth, Masked Devil, Jaquio and Demon Sculpture.
- You can explain how Bomberhead differs from Barbarian in reach and advance distance.
- You can crouch beside Bomberhead, land a quick sword strike and retreat without being pushed into a corner.
- You can use wall climbing to recover when Bomberhead has already cornered Ryu.
- You can survive several behavior cycles against each encounter without panic movement.
- You can recognize Basaquer’s landing opening and clear the projectile spread.
- You can identify the left-starting Kelbeross as the real target during live play.
- You can explain that the Masked Devil’s central orb must be destroyed instead of attacking the father.
- You can evade Jaquio’s tracking fireballs, land a safe strike and return to the floor.
- You can explain that the Demon Sculpture’s head and tail may be destroyed in either order.
- You can remove both outer targets before relying on damage to the heart.
- You can recover from a hit by creating space, identifying Ryu’s position and waiting for a reliable opening.
- You know that defeating Bloody Malth requires returning through Stage 5-3 if Ryu loses the boss fight.
- You have defeated the Demon Sculpture and viewed the authentic NES ending sequence.
References for this chapter
- NINJA GAIDEN — North American NES Instruction Manual, Tecmo/Nintendo
- Ninja Gaiden — Boss Guide — NES — By Emptyeye
- Ninja Gaiden (NES)/Act 2 — StrategyWiki
- Ninja Gaiden (NES)/Act 4 — StrategyWiki
- Ninja Gaiden (NES)/Act 6 — StrategyWiki
- Ninja Gaiden — Guide and Walkthrough — NES — By Dead_Hero
- Ninja Gaiden (NES) Walkthrough — RetroMaggedon Gaming
- Bomberhead | Ninja Gaiden Wiki
Troubleshooting: Common Failure Modes and How to Recover
Ninja Gaiden becomes easier to manage when every death produces one specific correction. Treat a failed attempt as practice for a screen, a wall-jump sequence, an enemy approach, a resource route, or a boss pattern. The North American NES manual lets you continue after Game Over by pressing Start, returning you to the beginning of the area where Ryu was defeated. The final-boss sequence has a special penalty: a death during Stage 6-4 or 6-5 sends Ryu back to Stage 6-1, but final opponents already defeated remain defeated when you return to the sequence.
1. Stabilize Ryu immediately after taking damage
When Ryu is hit, do not instantly attack the enemy that caused the damage. First identify the surface where knockback will end. Hold toward a safe platform or wall, and use a wall cling if one is available. Delay the next jump until the landing area and nearby enemies are visible. Many deaths come from pressing forward blindly after the first hit and turning one mistake into two.
If enemies are arriving from both sides, stop advancing until the nearest threat is handled. Moving too far backward can reactivate enemies that were already cleared, while moving forward can trigger another formation before Ryu has room to fight. Hold a favorable position, defeat the closest attacker, wait for the next approach, and advance only when the route is open.
- After a hit, locate the landing surface before pressing A.
- Do not retreat through several previously cleared screens unless the route is genuinely safer.
- When a screen becomes crowded, stop scrolling and remove threats one at a time.
2. Correct missed platforms and vertical-shaft deaths
If a vertical section keeps killing you, stop trying to climb it at full speed. Enter the shaft with the sword ready, clear the enemy nearest the next wall, then make a short wall-spring rather than a long blind leap. The reliable sequence is wall contact, a controlled jump toward the opposite wall, then another wall contact. Hold A while alternating directions for the wall-spring described in the manual; do not assume the game will automatically carry Ryu upward.
When Ryu misses a platform, do not mash A during the fall. Look for a lower ledge or a wall that can be reached with a deliberate directional input. If no surface is available, accept the death and use the next life to begin from the preceding platform with a corrected jump arc. Start from a consistent position and repeat the same jump until the landing is reliable.
If a ladder is involved, clear enemies before changing levels. Ryu cannot attack while hanging on a ladder, and jumping off requires pressing the direction opposite the ladder together with A. Use that escape only when the landing platform is visible; jumping blindly from a ladder often creates a second fall.
- Practice one wall contact at a time instead of rushing the entire shaft.
- Clear the enemy that guards the next wall or ledge before committing to the jump.
- Use a lower ledge as a recovery point when one is clearly reachable.
- On ladders, confirm the landing area before pressing the opposite direction and A.
3. Slow down against surprise projectiles and airborne enemies
If a projectile hits Ryu before you can react, stop at the previous safe position on the next attempt and watch one complete approach. Then choose one response: let it pass, jump over it, crouch beneath it when the stage allows, or destroy it with the Dragon Sword. Advancing while the projectile is already entering the screen usually removes the space needed to react.
For eagles, bats, and other airborne attackers, do not jump as soon as they appear. A premature jump can place Ryu directly in the enemy’s path or leave him unable to reach the next platform. Hold position until the attacker commits, then jump or slash. When a new enemy appears after the screen scrolls, pause briefly before stepping toward the next gap or platform.
Against enemy formations that fire from ledges, approach from below only after watching the firing rhythm. If a safe Ninja Art is available, use it to cross a section that repeatedly causes damage, but do not spend Spiritual Strength merely because an enemy is visible. The goal is to remove the hazard that causes deaths, not to use every charge on the screen.
- Watch one projectile cycle before changing position.
- Do not jump automatically when an airborne enemy appears.
- Use the sword when a jump would create a dangerous landing.
- Spend Spiritual Strength only when it solves a repeatable hazard.
4. Recover when Spiritual Strength or a secondary weapon is lost
If Spiritual Strength is depleted before a boss, do not restart automatically. Check the remaining route for a safe Spiritual Strength pickup, then preserve any new resource for the boss room or the most dangerous approach. Spiritual Strength is the shared resource used by Ninja Arts; it is not a separate reserve for each weapon.
If Ryu is carrying an unwanted secondary weapon, avoid collecting replacement icons automatically. Striking an item container can change the currently held Ninja Art, so approach a replacement only when it improves the next section. When low on throwing stars or another limited-use option, return to sword attacks against stationary enemies and save the remaining charges for an enemy that blocks safe movement or for a boss opening.
The Jump and Slash technique requires pressing B during a jump while that technique is equipped. Do not describe it as activating from jumping alone. Down plus B produces the normal downward aerial slash behavior, so use the correct input for the attack you intend to perform.
If a desired pickup was missed, continue far enough to see whether the route provides another safe replacement. If none appears, practice the boss without the item instead of repeatedly sacrificing lives to recover it. A clean sword-only attempt often teaches more than a desperate run that spends the last charge before the boss door.
- Treat Spiritual Strength as one shared resource for all Ninja Arts.
- Do not replace a useful weapon without considering the next hazard.
- Use the sword on ordinary enemies when secondary-weapon charges are low.
- Press B during a jump for Jump and Slash when that technique is equipped.
- Practice the boss without the missing item before abandoning the stage.
5. Apply a concrete correction by Act
Acts 1 and 2: If basic enemies are draining health, stop jumping into groups. Strike from the edge of sword range, then make only a short retreat so enemies behind Ryu do not reactivate. In Act 2, preserve a jump-clear space behind Ryu when fighting Bomberhead. If the boss pushes you toward a wall or hazard, stop attacking long enough to create room, then re-enter with a jump or a carefully timed sword strike.
Acts 3 and 4: If aerial enemies or wall sections cause repeated deaths, separate movement practice from combat practice. On one life, focus on reaching each wall or ledge safely. On the next, add the sword attacks. If Basaquer or Kelbeross closes the distance, use vertical space to reset your position, but do not cling to a wall when the landing area is occupied.
Act 5: Treat an unfamiliar trap as a timing problem. On the next life, stop before the trigger point and observe which enemy or hazard appears first. Mark the safe pause, the required jump, or the direction of the escape. Against Bloody Malth, if Spiritual Strength is low, use the attempt to learn his approach and attack timing rather than spending the last resource on minor enemies before the arena.
Act 6: Relearn the route using the correct entrances. Stage 6-1 begins by moving left from the area where Bloody Malth was defeated. The late Jump and Slash pickup is on this leftward route before the Stage 6-2 transition. Stage 6-2 begins by moving right through the green towers and continues through the tower, flying-ninja, and cannon hazards. Stage 6-3 is the orange-themed route and also proceeds right; it contains the late health-restoration pickup and Hourglass before the final wall-jump and ladder section.
If the final-battle sequence defeats you, rebuild the route from Stage 6-1 with a deliberate plan. A death to the Masked Devil, Jaquio, or the Demon returns Ryu to Stage 6-1 rather than leaving him at the final doorway. Once you reach the boss sequence again, opponents already defeated remain cleared, so concentrate on the surviving opponent instead of assuming the entire sequence must be repeated.
- Acts 1–2: control enemy spacing and preserve a retreat route.
- Acts 3–4: practice wall movement separately from enemy attacks.
- Act 5: observe each unfamiliar trap before committing to it.
- Act 6-1: move left from Bloody Malth’s area.
- Act 6-2: move right through the green-tower route.
- Act 6-3: move right through the orange-themed route.
- After a final-boss death, replay from Stage 6-1 and use the persistent boss defeats to shorten the next attempt.
6. Use Continue as a structured practice tool
When Game Over appears, press Start to continue from the beginning of the area where Ryu was defeated. Do not think of this as a password or stage-select system. It is a restart point for the most recently failed area, and it gives you a practical way to isolate difficult segments without replaying the entire campaign.
Use the first life to reach the failure point without changing your normal route. Use the next life to change one input or one pause. If the correction works, repeat it until the movement is consistent. If it fails, change only that same decision again. This prevents a practice session from becoming a collection of unrelated guesses.
Quit and return fresh when fatigue is causing repeated unplanned deaths, when you are pressing A before seeing the landing surface, or when you are losing lives before reaching the section you intended to practice. Continue immediately when the failure is specific and measurable. Several focused attempts are useful; several angry attempts through the whole stage are usually not.
For Stage 6-4 and 6-5, remember the special restart rule. A final-boss death sends Ryu back to Stage 6-1 even if extra lives remain. The return trip is still useful: collect dependable resources, avoid unnecessary risks, and use the next boss-room attempt knowing which final opponents have already been defeated.
- Continue when you can name the area, input, or pattern being practiced.
- Change one action at a time so the result is measurable.
- Stop for a break when fatigue causes repeated unplanned deaths.
- Treat the Act 6 return as a planned replay, not proof that all boss progress was lost.
Before you move on
- You can name the exact cause of each recent death and apply one repeatable correction on the next attempt.
- You can clear a troublesome vertical section by identifying its wall contacts, enemy pauses, and safe recovery ledges.
- You can reach difficult bosses with a deliberate Spiritual Strength and secondary-weapon plan.
- You know that Ninja Arts consume the shared Spiritual Strength resource.
- You know that Jump and Slash requires B during a jump while equipped, while Down plus B performs the normal downward aerial slash.
- After Game Over, you press Start to resume from the beginning of the area where Ryu was defeated.
- You can correctly orient the final approach: left from Bloody Malth’s area in Stage 6-1, right through the green towers in Stage 6-2, and right through the orange-themed route in Stage 6-3.
- After a Stage 6-4 or 6-5 death, you can replay from Stage 6-1 and confirm that final opponents already defeated remain cleared when you return to the boss sequence.
Optional Completion Goals and Skill Challenges
These are self-imposed challenges for the North American NES edition of Ninja Gaiden. None is required to reach the ending. First complete the campaign normally, then add one restriction at a time: boss clears without Ninja Arts, stage-by-stage no-continue practice, no-damage encounters and repeatable speed goals. Ninja Arts consume Spiritual Strength. Ordinary Ninja Arts are activated with Up plus B. Jump and Slash is a separate equipped technique that uses Jump plus B when it has enough Spiritual Strength, while Down plus B during a jump performs a normal aerial sword slash instead.
1. Complete one unrestricted campaign first
Before attempting a restricted run, complete the six-Act campaign normally. Play every required stage in order, defeat the Act bosses and final sequence, and watch the ending. This establishes the route and shows which screens actually cause repeated deaths.
Keep a short training record during the clear. Write down the Act and stage, then identify the specific mistake: a missed wall transfer, an enemy appearing from behind, a projectile near a pit, a poor ladder descent, a lost secondary weapon or a boss attack that pushed Ryu into a corner. Do not label an entire Act as the problem when one platform, enemy formation or boss response is responsible. A specific problem can be repeated and corrected.
- Finish one unrestricted campaign.
- Record at least three repeatable death locations.
- Separate stage mistakes from boss mistakes.
- Confirm that the ending sequence is viewed after the final victory.
2. Train bosses without Ninja Arts
The first restriction should be a no-Ninja-Art boss drill. Keep the Dragon Sword as your only attack and defeat the selected boss through movement, jumps and ordinary sword strikes. For ordinary Ninja Arts, do not press Up plus B. That input activates the selected throwing star, Windmill Throwing Star or Art of the Fire Wheel when enough Spiritual Strength is available.
Handle Jump and Slash separately. When the technique is equipped and sufficiently powered, use Jump plus B to perform it. A jump alone is not the activation rule. If you need an ordinary aerial sword attack while Jump and Slash is equipped, hold Down while pressing B during the jump. For a strict no-Ninja-Art drill, avoid collecting Jump and Slash before the fight whenever the route allows, because carrying it creates an additional input and resource-management concern.
Use two versions of the drill. In the relaxed version, forbid Ninja Arts only inside the boss room while allowing them during the approach. In the strict version, forbid them throughout the entire stage. Practice one boss at a time. Identify one safe sword strike, retreat to a stable position and repeat rather than chasing every opening. The goal is a reliable response when a normal campaign leaves Ryu with little or no Spiritual Strength.
- Defeat each selected boss without activating a Ninja Art.
- Do not press Up plus B with an ordinary Ninja Art equipped.
- Do not use Jump plus B when Jump and Slash is equipped during a strict drill.
- Use Down plus B during a jump for a normal aerial sword slash when appropriate.
- Decide before starting whether the restriction applies only to the boss or to the whole stage.
- Use grounded sword attacks and controlled retreats instead of chasing damage.
- Practice the final sequence as a separate late-game target.
3. Use a three-session training ladder
For a difficult boss, divide practice into three sessions. In session one, observe the attack cycle without forcing damage. Learn where the boss moves, which attacks require a jump or retreat and where Ryu can stand without being cornered. If the attempt ends quickly, record the event that caused it and repeat that response rather than changing the entire plan.
In session two, add controlled damage. Aim for one safe sword strike, then reset your position. If the chosen rule forbids Ninja Arts, do not press Up plus B with an ordinary Ninja Art equipped. If Jump and Slash is equipped, do not press Jump plus B during the restriction. When an ordinary aerial sword attack is needed, use Down plus B during the jump. Return to the single-hit plan if adding a second attack causes damage.
In session three, combine the movement and attack responses into a complete clear under the chosen rule. Three clean clears are a better milestone than one lucky victory. If the boss remains inconsistent, repeat the ladder on another session instead of escalating immediately to a full no-continue campaign.
- Session one: identify attacks and safe positions.
- Session two: practice one controlled sword punish and reset.
- Do not use Up plus B with an ordinary Ninja Art during the drill.
- Do not use Jump plus B if Jump and Slash is equipped during the restriction.
- Use Down plus B for an ordinary aerial sword attack when appropriate.
- Session three: complete the fight under the selected restriction.
- Repeat the ladder if the result depends on luck.
4. Build a no-continue campaign in stages
Do not begin with a full no-continue attempt unless each Act is already familiar. First clear Act 1 without selecting Continue after Game Over. Repeat the same target for Acts 2, 3, 4, 5 and 6. This does not change the game's rules; it creates a manageable practice ladder for a personal challenge.
Once each Act is consistent by itself, connect the runs. Attempt Acts 1 and 2 in one session, then Acts 1 through 3, and continue extending the chain until you can reach Act 6 without continuing. Preserve lives by choosing reliable movement over unnecessary attacks, particularly on screens where an enemy can knock Ryu into a pit.
For the full challenge, begin at the opening stage and end after the ending sequence. If Game Over appears and Continue is selected, the ordinary campaign can proceed, but that no-continue attempt is over. Restart the challenge later rather than counting the continued run as successful.
- Clear each Act individually without continuing.
- Link Acts 1 and 2, then Acts 1 through 3, before attempting the full campaign.
- Restart the challenge after selecting Continue.
- Finish the complete run with every required stage played in order.
5. Add a resource-control rule
After the no-continue route is stable, add a resource restriction. Choose the rule before starting. A moderate version allows Ninja Arts only in boss rooms. A stricter version allows them only during Act 6. An extreme version forbids Ninja Arts for the entire campaign. These are personal rules; none is required for the ending.
Do not restart automatically when a stage leaves Ryu with no Spiritual Strength. Continue the attempt and use the situation as training for the no-Ninja-Art boss drill. When the selected rule permits emergency use, spend Spiritual Strength only to escape a dangerous formation, clear a projectile-heavy section or create a reliable boss opening. Record each activation afterward so you can distinguish a necessary use from a convenient one.
Track Jump and Slash separately from ordinary Ninja Arts. Ordinary Ninja Arts use Up plus B. When Jump and Slash is equipped, Jump plus B performs the technique if sufficient Spiritual Strength is available. During a strict restriction, avoid the pickup when possible or use Down plus B for a normal aerial sword slash instead of Jump plus B.
- Choose the Ninja-Art rule before the run.
- Record every Ninja Art activation and the Spiritual Strength spent.
- Distinguish ordinary Up plus B activation from Jump plus B for Jump and Slash.
- Avoid the Jump and Slash pickup during a strict drill when the route permits.
- Use Down plus B for an ordinary aerial sword attack when Jump and Slash is equipped.
- Review the run afterward instead of changing the rule after a mistake.
6. Attempt no-damage boss clears
Treat no-damage victories as individual boss goals, not as an immediate full-campaign requirement. Define damage before starting: if Ryu loses any health, the attempt does not count, even if the boss is defeated. Begin with a boss whose attack pattern you already understand, then move to a more difficult encounter.
Decide where Ryu begins, which direction he faces, when he jumps and where he retreats after each attack. Favor one reliable sword hit over a fast exchange. If the arena becomes crowded or a projectile threatens to trap Ryu, survival takes priority over damage. Restart the individual practice attempt after a hit, but do not abandon the whole campaign unless the selected challenge is explicitly a full no-damage run.
Three clean victories on separate attempts are a useful milestone. Continue until the result is repeatable rather than an isolated successful dodge.
- Select one boss at a time.
- Define exactly what counts as taking damage.
- Plan a retreat position before attacking.
- Earn three clean victories before moving to a harder target.
7. Set speed goals only after the route is safe
Speed practice should follow survival practice. Time one stage or one Act from a consistent starting point to a consistent endpoint, such as the transition to the next stage. The game does not need to recognize the attempt; use the same external timer method each time and record deaths separately from elapsed time.
First establish a safe route with no deaths. Then remove one pause, detour or unnecessary enemy exchange at a time. Do not create a speed route by skipping required stages or relying on an unverified shortcut. Keep two routes available: a safety route for full campaign attempts and a faster route for personal time trials.
A faster result that repeatedly loses lives is not yet an improvement for campaign reliability. Compare attempts using both time and deaths. When a faster section becomes consistent, incorporate it into the safe route and begin working on the next segment.
- Use a consistent start and finish point.
- Record time and deaths for every attempt.
- Establish a death-free route before optimizing it.
- Change one movement or detour at a time.
- Do not skip required stages or count an unverified shortcut as valid progression.
Before you move on
- A normal campaign is complete when every required numbered stage in Acts 1 through 6 has been played in order, the required final sequence has been defeated and the ending sequence has been viewed.
- A no-continue campaign is complete when the entire run is cleared without selecting Continue after Game Over.
- A no-Ninja-Art campaign is complete only when the chosen restriction is followed from the opening stage through the final sequence. For ordinary Ninja Arts, avoid Up plus B. If Jump and Slash is equipped, also avoid Jump plus B during the restricted run; use Down plus B for an ordinary aerial sword slash when needed.
- A boss challenge is complete when the selected boss or final sequence is defeated under the stated rule. Keep a personal record because this is a self-set goal.
- A no-damage target is complete when the selected encounter is cleared without Ryu losing health, according to the rule defined before the attempt.
- A speed target is complete when the same stage or Act time can be reproduced across multiple attempts without skipping required progression or depending on an unverified shortcut.
References for this chapter
Final Run Checklist and Post-completion Steps
Complete the North American NES campaign by clearing Acts I through VI in order, then defeat the Masked Devil, Jaquio and the Demon Sculpture. Act VI begins by moving left from Bloody Malth’s area in Stage 6-1, continues right through the green towers in Stage 6-2, and proceeds right through the orange-temple route in Stage 6-3. After entering the final doorway, all three final encounters must be cleared and the complete ending presentation must be allowed to finish.
Confirm the required campaign route
Start a normal game at Act I and clear Acts I, II, III, IV, V and VI in order. The NES campaign does not require a speed target, collectible total, no-continue run or particular Ninja Art. The required objective is ordinary stage progression followed by the complete final sequence.
Act VI contains Stages 6-1, 6-2 and 6-3 before the final doorway. Stage 6-4 contains the Masked Devil and Jaquio, while Stage 6-5 contains the Demon Sculpture. Reaching the doorway is not enough: all three encounters must be defeated before the ending can begin.
- Begin at Act I.
- Clear every Act in order.
- Complete Stages 6-1, 6-2 and 6-3.
- Defeat the Masked Devil.
- Defeat Jaquio.
- Defeat the Demon Sculpture.
- Watch the complete ending presentation.
Prepare movement, controls and resources
Before attempting a full run, rehearse short and long jumps, crouching sword attacks, ladder movement, wall clinging and wall-spring timing. Act VI combines narrow platforms, respawning enemies, projectiles and pits, so passing an enemy without stopping is often safer than fighting in an exposed position.
A jumps, B attacks with the Dragon Sword, Start pauses or resumes play and can skip cutscenes, and Select is not used for gameplay. Use the Control Pad for movement, crouching and ladders. To jump down from a ladder, press the opposite direction together with A. Ryu clings to a wall when he jumps into it; while clinging, press the opposite direction and A to spring away. In a vertical shaft, hold A and alternate directions as Ryu contacts the walls.
Most Ninja Arts use Up plus B and consume Spiritual Strength. Jump and Slash is activated by pressing B while jumping when the technique is equipped and enough Spiritual Strength remains. While Jump and Slash is equipped, press Down plus B during a jump to perform the regular aerial slash instead. Preserve a useful weapon and Spiritual Strength for the final doorway, but do not take a dangerous detour for an optional pickup.
- Practice wall-spring movement.
- Practice ladder climbing and ladder drops.
- Remember that most Ninja Arts use Up plus B.
- Use jump plus B for Jump and Slash when it is equipped.
- Use Down plus B during a jump for a normal aerial slash when conserving Spiritual Strength.
- Protect lives rather than taking unsafe detours.
Clear Stage 6-1 by moving left from Bloody Malth’s area
After the Bloody Malth battle and story sequence, Stage 6-1 begins in the same general area. Move left immediately. The opening machine gunner is followed by a bat from behind, but continuing left helps you outrun it. Keep advancing instead of repeatedly reversing direction, because returning across the same screen can reactivate enemies.
Approach the first platform carefully. A hunchback and gunner occupy the route while an eagle approaches from the right. Move decisively toward the hunchback so the eagle is pushed off-screen, then cross the platform without lingering. Continue through the whirlwind kicker and dragon-cannon section by waiting for firing lanes to clear before crossing.
The next platform contains several dragon cannons and an eagle. Avoid standing at the edge while a cannon is firing, and remove the eagle before it can knock Ryu into a gap. Near the end of the stage, a candle contains Jump and Slash. Collect it only if the landing is safe, then use jump plus B to cut through the final hunchbacks, eagles and whirlwind kickers. The late route also contains Spiritual Strength pickups; take them when doing so does not expose Ryu to a hit.
When the exit door appears, go directly through it. Do not move right at the start of this stage and do not search here for the Stage 6-3 recovery sequence.
- Move left immediately from Bloody Malth’s area.
- Outrun or defeat the rear bat without unnecessary retreating.
- Cross the hunchback, gunner and eagle section decisively.
- Wait out dragon-cannon shots before crossing.
- Collect the late Jump and Slash weapon when safe.
- Reach Stage 6-2 with as much health and Spiritual Strength as possible.
Clear Stage 6-2 by moving right through the green towers
Stage 6-2 begins by moving right. Defeat the opening ground enemies, then approach the green-tower section without rushing into the dog and club-tosser overlap. Use the towers as stopping points: clear the nearest enemy, wall-spring between the columns, and climb rather than fighting several enemies at the edge of a platform.
From the taller tower, strike the high candle while dropping if the landing is secure. The Windmill Throwing Star is useful against enemies that are dangerous to approach, but do not replace a weapon you intend to carry into the final approach unless the change is deliberate. Continue right through the ladder and platform sections, clearing each platform before crossing the next gap.
The flying-ninja area is the main hazard. Keep moving across the larger platforms instead of repeatedly backing up, because retreating can cause enemies to return. Strike a flying ninja when it enters sword range, then jump onward before its projectiles and the next enemy overlap. If you have Jump and Slash, use jump plus B against a dense wave only when the Spiritual Strength cost is justified.
Further sections combine bats, eagles, machine gunners, serpent turrets, axe throwers and hunchbacks. Wait for turret shots before crossing, and avoid fighting at the extreme edge of a platform where knockback can send Ryu into a pit. The objective is the Stage 6-3 transition, not a complete sweep of every candle.
- Move right at the start of Stage 6-2.
- Use the green towers and walls to control vertical movement.
- Keep advancing through the flying-ninja section.
- Cross turret lanes after their shots pass.
- Avoid edge fights near bottomless pits.
- Preserve health and Spiritual Strength for Stage 6-3.
Clear Stage 6-3 through the orange-temple route
Stage 6-3 begins by moving right through the orange-temple route. Handle the opening bat and whirlwind kicker, then use the green columns and raised blocks as controlled landing points. Do not jump toward an enemy until you know where Ryu will land.
Continue right through columns, ladders, bats, axe throwers, cannons and platform enemies. Strike candles only when the landing is secure. A candle in this stage provides Restore Strength, allowing you to recover health before the final approach. Later, collect the Hourglass, also called Time Freeze, when the route is safe. It freezes enemies and projectiles temporarily, giving you a safer opportunity to cross the next enemy-heavy section.
After the Hourglass section, use the walls and projecting ledges to complete the final wall-jump and ladder climb. Avoid stopping to fight every hunchback or turret. The goal is to reach the final doorway with enough health to survive mistakes and a Ninja Art that can reliably create boss openings.
The recovery items belong to Stage 6-3. Do not place them in Stage 6-1, and do not spend all Spiritual Strength before the final doorway merely to clear ordinary enemies.
- Move right through the orange-temple opening.
- Use columns, blocks and ladders to control vertical movement.
- Collect Restore Strength when the landing is safe.
- Collect Hourglass and use the frozen interval to cross danger.
- Complete the final wall-jump and ladder section.
- Enter the final doorway prepared for the boss sequence.
Defeat the Masked Devil and Jaquio
The Masked Devil is protected by a central orb surrounded by rotating fireballs. Use the walls to gain height and jump across the room, striking the orb during an opening. Jump and Slash can deal heavy damage if it is equipped and Spiritual Strength remains. If conserving the resource, use Down plus B during a jump for the regular aerial slash. Avoid jumping directly into the rotating fireballs or the boss’s body.
Jaquio moves across the upper part of the room and fires projectiles toward Ryu. Stay near the floor while the projectiles pass, then move to a wall when Jaquio approaches. Climb only when he is safely away, jump out to attack as he crosses, and return to the floor before the next projectile pattern. Do not remain on a half-height pillar long enough for projectiles to turn back into the room.
A death to a final boss sends Ryu back to the start of Act VI at Stage 6-1 rather than directly to the boss doorway. Previously defeated final bosses remain defeated, so an attempt that has cleared the Masked Devil does not require fighting him again after returning through Act VI. Recollect useful weapons only when the route is safe.
- Strike the Masked Devil’s central orb.
- Avoid direct contact with the Masked Devil.
- Use wall attacks and grounded movement against Jaquio.
- Clear Jaquio’s projectiles before climbing to attack.
- If defeated, replay Act VI from Stage 6-1.
- Confirm that completed final bosses remain cleared.
Defeat the Demon Sculpture
The Demon Sculpture remains in the final room and sends fireballs across the arena. Maintain enough room to retreat, destroy or avoid projectiles with the sword, and attack only during a clear opening. Do not rush forward simply because the boss has stopped moving.
The Demon has three vulnerable targets: the head, the tail and the heart. Destroy the head and tail in either order. Use jumping sword attacks against the head and crouching attacks against the tail whenever their positions are safe. Jump and Slash is useful for rapid damage if Spiritual Strength remains, but conserve enough room and health to avoid the next projectile pattern.
The heart becomes the effective final target after both the head and tail have been destroyed. Approach it during a clear fireball window and continue striking until the health meter is empty. Watch the detached head after it falls, because it remains a hazard rather than disappearing harmlessly.
If Ryu dies, return to Stage 6-1 and repeat the Act VI route. The Masked Devil and Jaquio remain defeated if they were already cleared. Once the Demon’s health meter is depleted, allow the victory sequence to proceed.
- Destroy the head or tail during a safe opening.
- Destroy the remaining outer target.
- Attack the heart after both outer targets are gone.
- Avoid the detached head and remaining fireballs.
- Deplete the Demon’s health meter.
- Allow the ending scenes to begin.
Verify the authentic ending
The campaign is complete when Acts I through VI have been cleared, the Masked Devil, Jaquio and Demon Sculpture have been defeated, and the complete North American NES ending presentation has played. Let the post-battle Cinema Display, epilogue and concluding scenes finish before resetting or powering off the system.
A no-continue clear, no-damage boss fight, speed target or specific Ninja Art is not required. The concrete confirmation is the completed final battle followed by the full ending presentation.
- Acts I through VI were cleared in order.
- Stage 6-1 was completed through its leftward route.
- Stage 6-2 was completed through its rightward green-tower route.
- Stage 6-3 was completed through its rightward orange-temple route.
- The Masked Devil was defeated.
- Jaquio was defeated.
- The Demon’s head and tail were destroyed.
- The Demon’s heart was destroyed after both outer targets.
- The Demon’s health meter was depleted.
- The Cinema Display and epilogue finished.
Set optional goals after completion
For a no-continue challenge, first clear one Act at a time. Then link Acts I and II, Acts III and IV, and Acts V and VI before attempting a full campaign run. This builds consistency without requiring every practice session to reach the final doorway.
For boss mastery, defeat each selected boss consistently with the sword before reducing reliance on Ninja Arts. For Act VI, practice the leftward Stage 6-1 route, the rightward Stage 6-2 tower and flying-ninja route, and the rightward Stage 6-3 recovery route as separate drills.
For the Demon Sculpture, practice the head phase, the tail phase and the exposed-heart phase separately. Then practice both valid orders for destroying the head and tail before attempting a complete no-damage fight. These are self-set challenges, not in-game requirements.
- Clear one Act without continuing.
- Defeat a boss without using a Ninja Art.
- Attempt a no-damage boss clear.
- Practice the Stage 6-1 leftward route.
- Practice the Stage 6-2 rightward tower route.
- Practice the Stage 6-3 rightward recovery route.
- Practice both Demon outer-target orders.
- Keep optional goals separate from required completion.
Before you move on
- Acts I through VI were cleared in order.
- Stage 6-1 was completed by moving left from Bloody Malth’s area.
- Stage 6-2 was completed by moving right through the green towers.
- Stage 6-3 was completed by moving right through the orange-temple route.
- The final wall-jump and ladder approach was completed.
- The Masked Devil was defeated.
- Jaquio was defeated.
- The Demon’s head and tail were both destroyed, in either order.
- The Demon’s heart was destroyed only after both outer targets were removed.
- The Demon’s health meter was depleted.
- The post-battle Cinema Display appeared.
- The epilogue and concluding presentation finished before the game was reset or exited.
Finishing up
You have defeated the final Act 6 sequence: the Masked Devil, Jaquio and the Demon/Demon Sculpture.
You have completed every required stage in Acts 1–6 in order and watched the complete North American NES ending presentation.
You can consistently perform the core movement techniques used by the campaign: wall cling, wall-spring jump, ladder movement and controlled ladder departures.
You can reach the Act 5 boss Bloody Malth and the Act 6 final-boss sequence with a workable recovery strategy for each encounter.
Choose your next gameScreenshots & video
Game imagery for reference. Follow the written chapters above for the route and strategies.
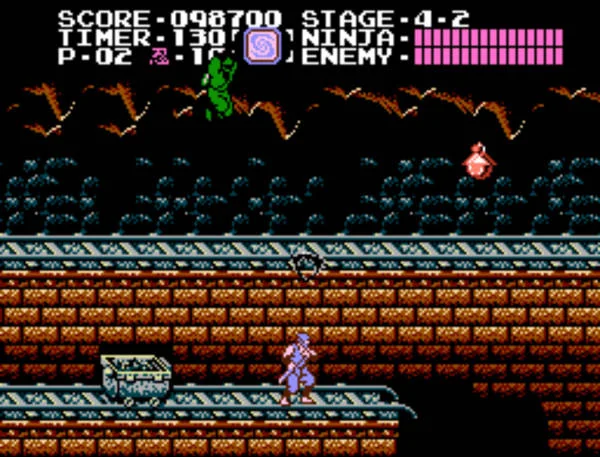
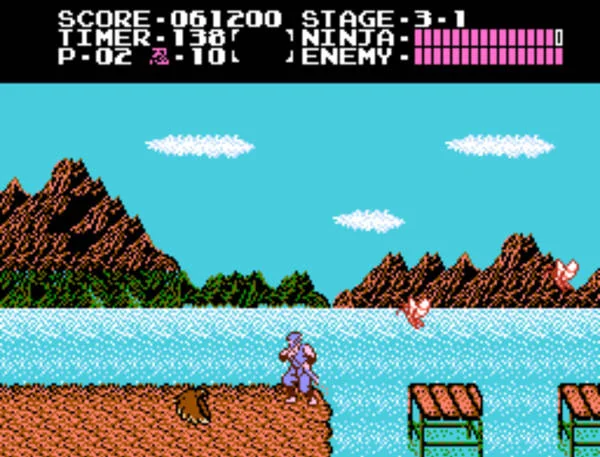
Sources & references
Our original guide draws on the references below. Check the edition at the top of this page before following controls or unlock requirements.
- NINJA GAIDEN — North American NES Instruction Manual, Tecmo/Nintendo
- Ninja Gaiden (NES)/Gameplay — StrategyWiki
- Ninja Gaiden (NES)/Walkthrough — StrategyWiki
- Ninja Gaiden (NES)/Items — StrategyWiki
- Ninja Gaiden — Guide and Walkthrough — NES — By Dead_Hero
- NINJA GAIDEN — Official Nintendo NES Manual
- Ninja Gaiden (NES)/Act 1 — StrategyWiki
- Ninja Gaiden — Boss Guide — NES — By Emptyeye
- Ninja Gaiden (NES)/Act 2 — StrategyWiki
- Ninja Gaiden — Guide and Walkthrough by BoringPolitico, GameFAQs
- Ninja Gaiden (NES)/Act 3 — StrategyWiki
- Ninja Gaiden (NES)/Act 4 — StrategyWiki
- Ninja Gaiden (NES) Walkthrough — RetroMaggedon Gaming
- Ninja Gaiden USA Instruction Manual scan
- Ninja Gaiden (NES)/Act 5 — StrategyWiki
- NES Instruction Manuals: Ninja Gaiden
- Ninja Gaiden (NES)/Act 6 — StrategyWiki
- Bomberhead | Ninja Gaiden Wiki
- Ninja Gaiden (NES)/Act 1 — StrategyWiki
- Ninja Gaiden — Labeled Maps — Nintendo NES
About the game & collecting notes
- Platform
- Nintendo Entertainment System
A complete, play-by-play plan to finish Tecmo’s original Ninja Gaiden for the North American Nintendo Entertainment System. The guide covers the NES campaign from the opening Cinema Display through all required stages, the Act 5 Bloody Malth battle, the Act 6 final-boss sequence and the ending, with practical movement, resource, stage and boss instructions.
Darryl Polo
Darryl Polo loves tinkering with emulation and revisiting retro games. He enjoys exploring how old favorites play on different setups and sharing what he learns along the way. At Joking Joystick, he writes about the games, hardware, and small discoveries that keep the hobby fun.
Our editorial standardsFound a step that needs another look? Help us improve this guide.