
Metaphor: ReFantazio — PS5 Complete Campaign Walkthrough
Step-by-step campaign walkthrough for the PlayStation 5 edition of Metaphor: ReFantazio. Covers main-story route from prologue to the Tyrant's Star finale, essential boss strategies, key deadlines and missables, recommended archetype builds and synthesis/equipment guidance, plus New Game+ and optional completion targets.


Find a copy
Metaphor: ReFantazio Sony PlayStation 5
We may earn a commission if you buy through these links, at no extra cost to you. As an Amazon Associate I earn from qualifying purchases.
Opens retailer search results. Check the model, edition, seller, availability and current price before buying.
Before you begin
This walkthrough is written for players using the PlayStation 5 edition of Metaphor: ReFantazio who want a practical, route-focused plan to finish the main campaign and unlock the true ending.
Follow the chapter order and checklist: it guides you through required story beats, the important deadline windows, and the boss encounters you cannot bypass.
You'll find concise routing for each dungeon and boss, recommended party roles and archetypes for PS5 controller layouts, and behaviour to avoid that leads to bad endings.
Treat the preparation checklist as mandatory before pushing into each major story act — it will save time and prevent missable choices from costing you a full replay.
Set yourself up for the run
Install the latest PS5 updates. If you used the PS5 Prologue Demo, keep its save data available so the PS5 full game can offer the compatible carryover prompt; PS4 and PS5 demo saves are not cross-compatible.
Use at least three manual-save slots: a normal progress file, a recent backup and a protected rollback file before major choices, dungeons and boss battles.
Save before major deadlines, ending-critical conversations, optional trophy routes and the final departure to Tyrant's Star.
Learn Archetypes, skill inheritance, Press Turn management and Synthesis early. Synthesis is a cooperative combat-skill system, not ordinary equipment crafting.
Prioritize role coverage: dependable healing, physical damage, elemental or magical coverage, defensive support and status recovery.
Use the map, journal and calendar to track Main Operation deadlines, Follower requirements, optional quests and missable events.
For the first ending route, save before the Ancient Eldan Sanctum choice, the Skybound Avatar Louis conversation and More's final escape conversation.
If pursuing trophies or 100% completion, preserve separate saves for the unweakened Destroyer Charadrius route, Clear Data and the New Game+ Redscale Apocalypse Dragon.
Prologue and PS5 Setup — Saves, Controls and Demo Transfer
Prepare the PS5 edition before committing to the campaign. If you played the Prologue Demo, use the PS5 demo save with the PS5 full game and accept the automatic carryover prompt at startup. PS4 and PS5 demo saves are not cross-compatible, so a PS4 demo save cannot be continued directly in the PS5 full game. Create several manual saves immediately, keep a separate rollback slot, and verify that manual saving and reloading work. Before advancing, adjust subtitles, camera effects, audio and controller options to your needs. Use the opening battles as a gradual control test: confirm Wield Arms, Guard, Use Skill, Use Item, Yield Turn and Synthesis when each command becomes available. There is no standard Image command in the battle menu; do not treat its absence as a missing unlock.
1. Confirm that you are using the compatible PS5 edition
For a direct Prologue Demo transfer, use the PS5 version of the demo with the PS5 version of the full game. SEGA states that demo save data can continue into the full release, but also states that PS4 and PS5 demo saves are not cross-compatible. Therefore, a PS4 demo save cannot be continued directly in the PS5 full game.
If your existing save was created in the PS5 Prologue Demo, keep that save data on the console while you install or launch the PS5 full game. You do not need to replay the demo merely because the full game is a separate application. If your only save is from the PS4 demo, choose between replaying the opening in the PS5 demo or starting a new PS5 campaign; do not expect the PS4 file to appear as a usable PS5 continuation.
- The demo save was created in the PS5 version.
- The full game being launched is the PS5 version.
- A PS4 demo save is not being treated as compatible with the PS5 full game.
2. Accept the automatic demo-save carryover prompt
Launch the PS5 full game and watch the startup messages before selecting a new campaign. SEGA describes an auto-detect feature that presents the option to carry over available Prologue Demo save data when the main game starts. Accept that option if you want to continue the demo file.
After accepting the transfer, confirm that the resulting continuation reflects your demo progress, such as the protagonist information and the most recent story position shown by the game. If no carryover option appears, quit without replacing the demo data. Check that the PS5 demo save still exists in the console's saved-data storage, then relaunch the full game. A PS4 demo file will not be fixed by repeating this process because the platform versions are incompatible.
Do not begin a replacement New Game until you have decided whether the detected file is the one you want. If the transfer prompt does not appear for a compatible PS5 demo save, preserve the original demo data and use the game's support channel rather than overwriting it during troubleshooting.
- The startup carryover prompt was accepted for the intended PS5 demo save.
- The continuation file shows recognizable demo progress.
- The original demo data remains available until the transfer is confirmed.
3. Create a manual-save rotation before progressing
Once the transferred continuation or a new PS5 campaign is loaded, make a manual save in a fresh slot. Maintain at least three slots: a normal progress file, a recent backup and a reserve file for major story decisions or dungeon entrances. Rotate the normal and backup files instead of overwriting your only save.
Use the reserve slot before a major dungeon, before prominent dialogue decisions and after completing an important objective. The game supports manual saving, but auto-save should be treated as a secondary recovery tool rather than your only rollback method. A manual save is especially valuable when you want to test a battle setup, revisit a decision or recover from entering a dungeon with poor equipment.
Test the rotation immediately. Save to the backup slot, return to the title screen, reload that file and verify that the location and progress are correct. Then create the reserve file. This confirms that you can identify your files before the campaign begins presenting consequential choices.
- At least three manual-save slots are available.
- One slot is reserved for rollback before decisions and major battles.
- A saved file was reloaded successfully from the title screen.
4. Configure subtitles, camera effects and accessibility options
Open the options menu before moving deeply into the opening sequence. Keep subtitles enabled so voiced and unvoiced story instructions remain readable. Adjust text speed to a pace that lets you read tutorials and battle explanations without skipping them.
If camera movement or screen effects cause discomfort, use the game's visual-comfort options to reduce camera movement and effects during gameplay. The PlayStation accessibility listing also confirms options for volume control, stick sensitivity, stick inversion, vibration, adaptive-trigger effects, button holds, rapid presses and simultaneous presses. Enable only the alternatives you need, but check them before a battle rather than discovering a changed input during a tutorial.
Set stick sensitivity and inversion according to your normal PS5 layout. Vibration and adaptive triggers can be disabled if they are distracting. Keep tutorial reminders enabled during the opening hours so you can review command explanations instead of relying on memory.
- Subtitles and captions are readable.
- Camera movement and effects are comfortable.
- Stick, vibration, adaptive-trigger and button-input options have been tested.
- Tutorial reminders remain available if you want them during the opening section.
5. Learn the field and dungeon controls without relying on memory
Use the on-screen legend as the final authority if you remap controls. The commonly documented default PlayStation layout assigns X to interact, R2 to dash, R1 to the map, L2 to FaeSight, Circle to blade-ride or dodge depending on context, and Square to attack in dungeon exploration. Context changes the available action, so do not assume that one button always performs the same task.
Before entering the first serious dungeon, test ordinary interaction with X, open the map with R1, activate FaeSight with L2 and use the field movement controls in a safe area. In a dungeon, approach a weak enemy and use the displayed attack command to stun or engage it. This gives you a low-risk check of movement, camera control and real-time enemy engagement.
- Field interaction works with the displayed confirm button.
- The map and FaeSight commands can be opened without confusion.
- Dungeon attack and dodge inputs are understood before a difficult encounter.
6. Verify battle commands as they become available
Use the early tutorial battles to identify the command wheel rather than trying to force every action into the first fight. The documented PlayStation battle shortcuts include Square for Wield Arms, Circle for Guard, Triangle for Use Skill, X for Use Synthesis, R1 for Yield Turn, L2 for Analyze and the Menu button for Use Item. Contextual availability depends on story progress, party composition and whether the relevant system has been introduced.
In an available battle, choose Guard once and confirm that the character raises defenses. Use Wield Arms or Use Skill on a legal target, then check the displayed cost before confirming. When Use Item is available, open the item command and cancel once if you only want to inspect it. When Yield Turn is available, pass the action and confirm that the turn indicator changes as shown. Test Synthesis only after the game has introduced a valid synthesis combination.
Metaphor: ReFantazio does not have a standard battle command named Image. Do not wait for an Image command or mark the setup incomplete because it is absent. If a guide or interface uses image-related wording for a tutorial illustration or another system, follow the exact label shown in your game instead of substituting it for a battle command.
- Guard completes without accidentally selecting another command.
- Wield Arms and Use Skill show their target and cost before confirmation.
- Use Item, Yield Turn, Analyze and Use Synthesis are checked when the game makes them available.
- No unavailable Image command is being treated as a required unlock.
7. Save the completed setup file
After the opening tutorial has introduced the commands you intend to use, finish the encounter normally and create another manual save in a separate slot. Keep the transfer-confirmed file or new-campaign starting file intact until you are certain the setup save is the one you want to continue.
Your setup is complete when the correct PS5 campaign loads, the manual-save rotation works, the accessibility settings are comfortable and the battle legend no longer causes hesitation. From this point forward, make a reserve save before major dungeons and consequential dialogue. Auto-save can help after ordinary movement or battles, but it should not replace those deliberate saves.
- The intended PS5 campaign loads correctly.
- The setup save is stored separately from the initial transfer or starting file.
- The next progression point can be resumed without relying on auto-save alone.
Before you move on
- The PS5 full game has loaded the intended PS5 demo continuation, or a clearly identified new PS5 campaign if no compatible demo save is being used.
- The player has at least three manual saves, including a separate rollback slot.
- The manual-save rotation has been tested by saving, returning to the title screen and reloading.
- Subtitles, camera effects, audio, stick and controller accessibility settings have been checked.
- Field controls for interaction, map access, FaeSight and dungeon engagement are familiar.
- A tutorial battle has confirmed Guard, Wield Arms and Use Skill, with Use Item, Yield Turn, Analyze and Synthesis checked as those commands become available.
- The setup save reloads correctly and no nonexistent Image command is being treated as a required feature.
Early Route (First Weeks): Recruit, First Camp and Party Basics
The opening route runs through the Northern Border Fort, the Nord Mines, Grand Trad and the Regalith Grand Cathedral. Strohl is the first permanent combat ally, Grius is temporary, and Hulkenberg becomes permanent during the 6/11 Cathedral sequence. Clear Nord Mines before planning Grand Trad free time: follow the tunnel objective through Dig Sites 1, 2 and 3, use the Magla Hollow in Dig Site 3 to save and recover, defeat Homo Fulquilo, then cross the collapsing Miners’ Bridge. In Grand Trad, study Archetypes, inherit healing or elemental skills, buy recovery supplies and complete useful early requests. Pagan’s Dilemma and Help the Hushed Honeybee are inexpensive; A Bullish Embargo requires Wisdom Rank 2 and Belega Corridor is optional. Prepare physical damage, healing and Ice coverage before the Cathedral, and keep a separate manual save before every major dungeon.
1. Finish the Northern Border Fort and enter Nord Mines
Follow the opening story through the Northern Border Fort. The protagonist awakens the Seeker Archetype, Strohl awakens as a Warrior, and Grius joins the group for the early operation. After the fort sequence, the story moves to the Nord Forest Trail and then the Northern Entrance of Nord Mines. The active objective is Get through the tunnel.
Grius is a temporary story companion. Use him during the mine sequence, but do not spend scarce MAG, rare equipment or long-term planning resources on him. Strohl is the first permanent combat ally and should remain your dependable physical attacker while the protagonist handles healing, elemental coverage or flexible support.
At the Northern Entrance, speak to the Young Peddler if you need to sell Exchange materials or purchase supplies, then enter the tunnel. The mine route is story-required; it is not a side dungeon that can be skipped before Grand Trad.
- Awaken Seeker.
- Awaken Strohl’s Warrior Archetype.
- Treat Grius as a temporary ally.
- Confirm the objective reads Get through the tunnel.
- Enter Nord Mines from the Northern Entrance.
2. Cross Dig Site #1 and defeat Captain Klinger
In Dig Site #1, move past the State Army Swords and follow the mine passage east. Their levels are low enough that you can often defeat them in real-time combat, but switch to turn-based combat when an ambush would leave the party exposed. A collapsed miner triggers a short story sequence; after it ends, continue past the remaining soldiers toward the marked destination.
Heal before approaching the destination marker. The required encounter is Captain Klinger with two Mage Soldiers. Klinger is weak to Light and uses Fire attacks, while the Mage Soldiers are neutral. Keep the protagonist in the back row when targeted, use Dei when necessary, and have Strohl apply Warrior damage with Diagonal Slash. The fight awards Captain’s Uniform, which should be equipped where its defense is useful.
After the battle, continue through the story sequence rather than returning to Grand Trad. The mine objective remains active and the next route section opens after the encounter.
- Follow the collapsed miner story event.
- Heal before the marked encounter.
- Defeat Captain Klinger and two Mage Soldiers.
- Equip or reserve Captain’s Uniform.
- Continue toward Dig Site #2.
3. Use Dig Site #2 to prepare Ice coverage
Dig Site #2 introduces Gelatinos and Serpetias. Gelatinos are weak to Fire, Ice and Electric, while Serpetias are weak to Ice. Avoid using Fire or Wind against Serpetias. If the protagonist or Grius has not learned Blizz, buy Ice Chunks from the Young Peddler and use them against the reptiles.
Search the side passages only when your resources allow. A chest in this section contains a Magla Pill, and another contains Iron Gauntlets for Strohl. The practical route is to clear the central enemies, pass through the narrow passages, take the northern chest if desired, then use the middle passage to reach Dig Site #3.
Before leaving this section, make sure the protagonist can use Mage or that another active character can provide Blizz. Strohl can temporarily study Mage later if you need a second Ice user. Do not overspend MAG simply to create a perfect setup; Ice coverage and a functioning healer matter more than maximizing every early Archetype rank.
- Keep Blizz or Ice Chunks available for Serpetias.
- Use Fire, Ice or Electric against Gelatinos.
- Collect Iron Gauntlets if you want the early defense upgrade.
- Reach the middle passage leading to Dig Site #3.
- Retain healing and MP supplies for the deeper mine route.
4. Reach the first recovery and save point in Dig Site #3
Dig Site #3 contains Nocrosses, Sandworm Valmo and stronger mine encounters. Avoid Sandworm Valmo until the party is healthy and has Ice attacks. If you choose to fight it, a safe setup is the protagonist as Warrior in the front row with Strohl and Grius as Mages in the back row, repeatedly using Blizz after stunning or engaging the worm from a safe distance.
Continue through the passages toward the northern part of Dig Site #3. The landmark you need is a door emitting unusual black smoke, which leads to a Magla Hollow. This is the first important recovery and save point for the mine route. Save there, visit Akademia if you need to study or change Archetypes, and use the location as your rollback point before the next boss.
A useful preparation is to let Strohl study Mage and learn Blizz, then restore MP by defeating weak enemies with the Mage Archetype if necessary. The goal is not to clear every optional enemy or collect every material. The goal is to reach the Magla Hollow with enough MP and healing for Homo Fulquilo.
- Locate the Magla Hollow in Dig Site #3.
- Save before continuing.
- Use Akademia to study Mage or Warrior as needed.
- Prepare at least one, preferably two, Ice users.
- Avoid fighting Sandworm Valmo while depleted.
5. Defeat Homo Fulquilo and cross the Miners’ Bridge
From the Magla Hollow, proceed east toward the black-smoke door. Heal completely before entering. Homo Fulquilo is weak to Pierce and Ice, resists Wind and Light, and blocks Hex. A simple early setup is Mage on the protagonist and other available party members, with the party in the back row and Blizz as the main attack. If your team lacks enough Ice skills, use Ice Chunks rather than exhausting the protagonist’s MP before the battle.
After Homo Fulquilo falls, the story continues through the Crystal Cavern. The optional Fire Dragon Mauna is in this area; it is weak to Ice and Frostbite and repels Fire. It is not required to complete Nord Mines, so skip it if your resources are low. If you defeat it, search its nest for Dragon’s Indignation and other rewards before continuing.
Follow the objective to the Miners’ Bridge. When the bridge begins to collapse, move quickly around the crates using the left stick and cross before the route closes. The bridge sequence completes Nord Mines and leads the story toward Grand Trad. Make a new manual save after the transition if the game permits it.
- Heal and save before Homo Fulquilo.
- Use Ice and Pierce; avoid relying on Wind, Light or Hex.
- Defeat Homo Fulquilo.
- Treat Fire Dragon Mauna as optional.
- Cross the collapsing Miners’ Bridge and confirm Nord Mines is cleared.
6. Reach Grand Trad and establish the first permanent team
After the Nord Mines sequence, continue through the story into Grand Trad, the royal funeral and the early Necromancer Takedown period. The protagonist remains the flexible slot. Strohl should normally stay on Warrior for physical damage, while the protagonist can switch between Seeker, Mage and Healer according to the area.
During the 6/11 Regalith Grand Cathedral story sequence, the party confronts the undead Grius. Hulkenberg then becomes a permanent party member and is available for the following preparation period. Her Knight Archetype provides durability and Pierce damage. Keep her as Knight for a straightforward front-line role, or study Healer on her if the protagonist is covering another function.
Visit Akademia whenever available. Study the Archetypes that fill the party’s current gaps instead of keeping every character in the role they first awakened with. Before entering the Cathedral, aim for physical damage, a reliable healing source and elemental weakness coverage.
- Reach Grand Trad after completing Nord Mines.
- Complete the undead Grius story sequence.
- Confirm Hulkenberg is permanently available.
- Keep Strohl prepared for physical damage.
- Use the protagonist as the flexible Mage, Healer or Seeker slot.
7. Complete useful Grand Trad requests and prepare the Cathedral
Accept Pagan’s Dilemma from the Mustari man in Sunshade Row. Buy Breath of Fresh Air at St. Fermis Church on Sunlumeo Street for 500 Reeves and return it to receive a Rusted Accessory and Tolerance progress. Accept Help the Hushed Honeybee from the Young Nidia man on Sunlumeo Street, then help Fabienne at the Hushed Honeybee Inn. The request rewards Magla Pills, Wisdom progress and Reeves.
A Bullish Embargo is optional. It requires Wisdom Rank 2 before Brigitta will properly offer it. When accepted, travel to Belega Corridor and complete the request if the displayed main-story deadline and your supplies allow it. The reward advances Brigitta’s bond and unlocks the Merchant Archetype, but it is not required to clear the Cathedral.
Synthesis is a skill-combination system, not normal weapon crafting. Study Archetypes and inherit skills that solve immediate problems. Mage supplies elemental coverage, Healer supplies recovery, Knight provides durability and Pierce, and Synthesis skills such as Jumping Thrust or Gablizz are useful only when their Archetype requirements are affordable. Buy healing, status recovery and MP-restoring supplies before spending Reeves on optional equipment.
- Complete Pagan’s Dilemma if desired.
- Complete Help the Hushed Honeybee if desired.
- Reach Wisdom Rank 2 before A Bullish Embargo.
- Use Synthesis for skill combinations rather than weapon recipes.
- Upgrade core weapons and armor before cosmetic purchases.
- Create a manual save immediately before the Cathedral dungeon.
Before you move on
- Nord Mines is cleared: Captain Klinger and Homo Fulquilo are defeated, the Crystal Cavern sequence is complete, the Miners’ Bridge has been crossed and the story has moved on to Grand Trad.
- The protagonist can change Archetypes, Strohl is prepared for physical damage and Hulkenberg is permanently available.
- At least two active characters can contribute healing, Ice, Pierce or another useful support function through studied or inherited skills.
- Pagan’s Dilemma and Help the Hushed Honeybee are completed, or deliberately deferred while their journal availability remains safe.
- Wisdom Rank 2 is available before attempting A Bullish Embargo.
- Core weapons and armor are upgraded, recovery supplies are stocked and a manual save exists before the Regalith Grand Cathedral dungeon.
References for this chapter
First Dungeon — Layout, Key Puzzles and Boss Approach
The Regalith Grand Cathedral is the first major story dungeon. Rescue the hostages to obtain the Chamber Side Room Key and unlock Catherina’s Brawler Archetype, defeat the Louisian Mage Captain, lower the giant statue with the Sanctified Amulet, and destroy the crystal blocking the lift. After the Whiteclads and Zorba sequences, leave the cathedral and defeat Homo Avades outside. Use Magla Hollows for HP and MP recovery and Plateau Mirages for saves and Akademeia access. Strike breaks Homo Avades’s Shell, Fire damages its Hands, and physical attacks are best against the exposed heart. Remove Assailants or Guard when they appear, then repeat the shell-to-heart cycle until the Human falls.
1. Enter the cathedral and establish the first recovery points
Enter the Regalith Grand Cathedral through the Catacombs entrance. Gallica gives you Ariadne’s Thread, which lets you retreat from the dungeon if you need to leave. Speak with More if you need to change Archetypes before going deeper.
Follow the objective toward the Prayer Chamber. A Magla Hollow is nearby; use it to restore HP and MP when necessary. Plateau Mirages are separate landmarks used for saving and Akademeia access, so do not mistake one for a recovery point.
Keep a Healer or another reliable Light-user available. Hama is useful against the cathedral’s undead enemies. Ambush ordinary enemies when practical, but do not spend all of your MP clearing every fight; the dungeon contains several mandatory battles later.
- Use the first Magla Hollow in the Prayer Chamber.
- Keep a Healer or emergency recovery item available.
- Activate Plateau Mirages when you pass them.
- Retain Ariadne’s Thread if you may retreat.
2. Rescue the hostages and unlock the Brawler route
From the Prayer Chamber, head toward the hostage area on the upper floor. The door is locked, so return to the first floor and enter the guard’s room on the western side. Search the southwest portion of that room to obtain the Chamber Side Room Key.
Return upstairs and use the key on the hostage door. The rescue advances A Friend in Need, introduces Catherina, unlocks the Brawler Archetype, and establishes her Follower Bond. Activate the nearby Plateau Mirage and save after the scene.
Leave the hostage area and take the western stairs down to B1F. Follow the connected lower route toward the Altar Chamber, using boxes, ladders, and ledges whenever the normal corridor appears blocked.
- Obtain the Chamber Side Room Key.
- Release the hostages.
- Unlock Catherina’s Brawler Archetype and Follower Bond.
- Save at the Plateau Mirage after the rescue.
- Descend to B1F through the western route.
3. Cross the Altar Chamber and defeat the Louisian Mage Captain
Continue through the Altar Chamber, climbing boxes and using the floor transitions to reach the upper route. Activate the Plateau Mirage before the mandatory fight. A Healer and Brawler are useful here, while a Seeker or Knight can provide additional skill coverage.
The Louisian Mage Captain is weak to Pierce. The accompanying skeletal enemies are vulnerable to Strike and Light, with Cursewight Magileto requiring more attention than the lesser Captain Malmorta enemies. Use Hama, Strike skills, or synthesis attacks to remove the undead efficiently.
If your MP is low, do not automatically spend every resource on the minions. Prioritize the Mage Captain, keep the party healed, and finish the remaining undead with the cheapest effective attacks. After the battle, collect the Glow Igniter and use the Magla Hollow beyond the encounter before entering the Reception Chamber.
- Save before the Louisian Mage Captain.
- Use Pierce on the Mage Captain.
- Use Light or Strike on the skeletal enemies.
- Collect the Glow Igniter.
- Recover at the Magla Hollow afterward.
4. Lower the statue and remove the lift barrier
Enter the Reception Chamber from the Altar Chamber and descend toward the first floor. Bring a Seeker or inherit Cyc from one before committing to this section. Lifewrought Gargoz are weak to Wind and are unaffected by Slash and Pierce; Strike can hurt them, but Cyc is the efficient answer.
At the blocked lift, take the southeast route, climb the ladder, and work around the connected walkways. Move between the first and second floors until you reach the large statue with extended arms. At its base, inspect the altar and place the Sanctified Amulet. The statue lowers and becomes the bridge to the western side.
Continue down to B1F and use the Magla Hollow. The black-smoke route leads to the Spekto group guarding the crystal that supports the lift barrier. Spekto repel common physical attacks and are weak to Light, so use Hama or another Light skill rather than Slash or Pierce. Defeat them, destroy the crystal, and return to the lift.
Save at the Plateau Mirage before the Whiteclads encounter. Take the lift, defeat the Whiteclads, and save again when control returns. The Louisian Mage Captain is vulnerable to Pierce, while the Sword Captains are vulnerable to Ice.
- Bring Wind for Lifewrought Gargoz.
- Place the Sanctified Amulet at the statue altar.
- Rest at the B1F Magla Hollow.
- Use Light against Spekto.
- Defeat the Whiteclads and save afterward.
5. Reach Zorba through the Royal Portrait Hall
After the lift, enter the Royal Portrait Hall and follow the southern route toward the round-table scene. Continue west through the doors, climb the stairs, and follow the story sequence involving Zorba. After the scene, proceed north through the hall and toward the Royal Sceptre Chamber.
Optional human enemies can be avoided if your HP, MP, or healing supplies are low. Louisian Mage Soldiers are weak to Pierce, Louisian Spear Soldiers are weak to Fire, and Homo Fulquilo enemies can usually be bypassed without affecting progression.
Use the second-floor Magla Hollow before the final approach. Continue through the Royal Sceptre Chamber and out to the Heavenly Staircase. The Plateau Mirage beside the black-smoke door is your last preparation point inside the cathedral. Save there, restore your party, and review Archetypes before entering Zorba’s area.
- Follow the Royal Portrait Hall route after the round-table scene.
- Avoid optional enemies when resources are low.
- Use the second-floor Magla Hollow.
- Save at the Plateau Mirage beside the Heavenly Staircase.
- Prepare Light, physical, and healing options.
6. Defeat Zorba and control the Corpsethralls
Zorba has no dependable standard elemental weakness. Use physical attacks, Light damage, or defensive and offensive synthesis skills rather than repeatedly testing Fire, Ice, Lightning, or Wind. Keep a Healer in the party and give another character an emergency healing option if possible.
Zorba summons Corpsethralls and can strengthen them or inflict paralysis. Corpsethralls are vulnerable to Light and Strike. Remove them promptly, especially when more than one is present, because their additional actions and buffs can overwhelm the party while Zorba remains active.
Use spare turn icons for physical damage or a defense-lowering synthesis attack on Zorba. Heal before a character reaches critical health, and Guard when a character is vulnerable to a heavy attack or status setup. Once Zorba falls, the story advances to the next sequence and the cathedral interior is no longer freely explorable.
- Bring a Healer and emergency recovery option.
- Keep Hama or another Light attack available.
- Use Light or Strike on Corpsethralls.
- Do not waste turns testing resisted elements on Zorba.
- Save when control returns after the story sequence.
7. Leave the cathedral and defeat Homo Avades
After the Zorba sequence, control returns in the Prayer Chamber. The interior route is closed, so do not try to retrace the earlier dungeon path. Use the Plateau Mirage to the north to save, then leave the cathedral and go outside. The outdoor objective triggers the mandatory Homo Avades battle.
Homo Avades consists of a Shell covering its body, two Hands, and a heart that becomes targetable when the Shell is broken. The Shell is weak to Strike and resists elemental attacks. Use Brawler skills such as Perfect Punch or another reliable Strike attack on the Shell. The Hands are weak to Fire; destroy them when they begin restoring the Shell or when their attacks are putting the party at risk.
When the Shell breaks, the heart is exposed and takes strong physical damage. Attack it immediately while it is down. After the heart recovers, Assailants emerge inside the Shell. They have no notable resistance and will attack the party; Guard if you cannot defeat them safely, or eliminate them before their attack resolves. The Shell is then restored.
The Right Hand and Left Hand can restore the Shell. Destroying both reduces the later reconstruction pressure, while keeping both alive allows the two-hit Swiping Arc attack. With one Hand alive, Swiping Arc is reduced; with both Hands destroyed, that attack misses. Later in the fight Gallica can distract the Assailants, weakening them. Use that opening to break the Shell again, expose the heart, and finish Homo Avades. The boss awards Avades’s Eggshell and advances the story to the next day.
- Save at the Plateau Mirage before leaving the cathedral.
- Use Strike against the Shell.
- Use Fire against the Right and Left Hands.
- Attack the heart only after the Shell breaks.
- Guard or defeat Assailants when they appear.
- Use Gallica’s distraction when offered.
- Collect Avades’s Eggshell after victory.
Before you move on
- The hostages have been released using the Chamber Side Room Key.
- Catherina’s Brawler Archetype and Follower Bond have been unlocked.
- The Louisian Mage Captain has been defeated and the Glow Igniter obtained.
- The Sanctified Amulet has been placed at the giant statue’s altar.
- The Spekto group has been defeated and the lift barrier removed.
- The Whiteclads have been defeated after using the lift.
- The party has reached the Plateau Mirage beside the Heavenly Staircase and saved.
- Zorba has been defeated and the post-battle story sequence has advanced.
- The party has left the cathedral and triggered the outdoor Homo Avades battle.
- Homo Avades’s Shell has been broken, its exposed heart defeated, and Avades’s Eggshell obtained.
- The story has advanced to the following day after Homo Avades’s defeat.
References for this chapter
- Regalith Grand Cathedral Walkthrough - Metaphor: ReFantazio - Neoseeker
- Metaphor: ReFantazio Guide/Walkthrough v0.75 - Neoseeker Walkthroughs
- Grand Cathedral - Metaphor: ReFantazio Walkthrough & Guide - GameFAQs
- How to Beat Homo Avades & Weakness in Metaphor: ReFantazio
- Metaphor: ReFantazio – Regalith Grand Cathedral Area Guide
Town Routines: Bonds, Shops, Synthesis and Side Content
Use each free-time block deliberately: advance a ready Follower Bond, raise the Royal Virtue blocking a future rank, complete a deadline-based Request, or improve supplies. Follower ranks unlock Bond abilities, Archetype lineages, inheritance slots and study-cost reductions. Unlike Persona-style systems, ordinary conversation choices do not determine whether a bond advances; they mainly change the amount of MAG earned afterward. Prioritize healing, revival, status recovery, current weapons and armor, then reserve MAG and money for the next story area. Remember that Synthesis is a cooperative battle skill system, not an item-crafting facility. Use the Gauntlet Runner kitchen for food, and arrange compatible Archetypes when you want to use Synthesis attacks or support skills.
1. Review the calendar, map and journal before spending free time
At the beginning of each free-time block, check the map and journal. A Follower icon indicates that an event is available or that the character is present, while Requests list their destination, objective and any visible deadline. Read the requirement text instead of assuming that every event can be started immediately: later Bond ranks can require Courage, Wisdom, Tolerance, Eloquence or Imagination, and some Followers are gated by story progress or a prerequisite Request.
Handle a Request first when it has a stated deadline, unlocks a Follower, opens an Archetype lineage or provides a reward needed for the next dungeon. If no urgent Request is active, a ready Follower event is usually the strongest use of the time block because each rank gives a concrete gameplay benefit. If the next Follower event is blocked, use the block to raise the listed Royal Virtue rather than repeatedly visiting the same NPC.
Keep a manual save before accepting a Request that sends you to a new destination or begins a multi-step chain. Not every Request expires, so do not treat all errands as emergencies; use the journal’s deadline information and the campaign calendar to distinguish time-sensitive work from ordinary cleanup.
- Open the journal and map before selecting an activity.
- Check each blocked Follower for its exact Royal Virtue or story requirement.
- Prioritize Requests with deadlines or permanent unlocks.
- Keep a manual save before beginning an unfamiliar Request chain.
2. Advance Follower Bonds for specific gameplay rewards
Follower Bonds are a progression system, not optional flavor. Forming and ranking a Bond can unlock an Archetype lineage, improve skill inheritance, reduce the MAG cost of studying that lineage, reveal future Bond rewards or provide a passive benefit outside combat. The Follower menu and More’s Ability Forecast help you see what a Bond will provide before committing your next free-time block.
Maria is an excellent early priority. Her Bond unlocks the Healer lineage, and later ranks provide Healer-related progression, experience benefits and kitchen improvements. Maria’s rank 4 rewards include Purpose, which increases battle experience, and Speed Cooking, which allows cooking in the Gauntlet Runner without consuming the normal time block. Her later ranks continue to improve the value of cooking and Healer progression.
Brigitta is another important early target. Her Bond begins after completing A Bullish Embargo in Grand Trad, which requires Wisdom rank 2 and becomes available from June 12 onward. Her Bond opens the Merchant lineage and provides shop and money-related benefits. Do not ignore the prerequisite virtue simply because Brigitta’s icon is visible; raise Wisdom, complete the Request and then return to her to activate the Bond.
Party members also unlock their own Archetype lineages through their Bonds. When a new lineage becomes available, go to Akademia and study the relevant Archetype for the characters who need it. Unlocking a lineage does not automatically equip every tier on every party member, and studying costs MAG.
- Use the Follower menu to inspect available rewards and requirements.
- Prioritize Maria if the party lacks reliable healing or you want early kitchen benefits.
- Raise Wisdom to 2 before attempting Brigitta’s A Bullish Embargo.
- Study newly unlocked Archetypes at Akademia for the characters who will use them.
- Reserve MAG for role coverage before buying experimental Archetypes.
3. Treat dialogue choices as MAG optimization, not bond survival
During a Follower event, any completed event that meets its prerequisites advances the Bond rank. There is no ordinary hidden affinity meter that makes the next rank fail because of a poor response. Dialogue choices can change the MAG reward, so choose the response that produces the larger MAG result when you know it, but do not reload a normal conversation merely to prevent the Bond from breaking or reversing.
There is also no general-purpose gift routine that works like Persona’s gift system. Do not buy presents expecting them to accelerate every Bond. Some Followers have specific drawings, quest items or story objects connected to their events, but those are individual requirements and should be handled when the journal or event directs you to them. Currency is better spent on equipment, medicine, ingredients and Archetype studies than on hypothetical gifts.
A Bond may be unavailable even when the character is present because the next event is restricted by a Royal Virtue, a date, a story flag or a requirement elsewhere in the chain. Record the displayed requirement, then use the next free-time block efficiently. You can return after raising the virtue or completing the prerequisite.
- Do not reload ordinary Bond dialogue solely to protect progression.
- Use known favorable answers when you want extra MAG.
- Do not spend money on generic gifts as a Bond strategy.
- Follow special Bond items or drawings only when that Follower’s event requires them.
- Write down blocked virtue or story requirements before leaving an NPC.
4. Spend money on survival supplies before luxury equipment
When arriving in a new town, inspect the weapon, armor, item and ingredient vendors before buying accessories. Upgrade the active party first, but do not drain the treasury on a complete set for every reserve character. The next story destination may have stronger equipment, and a stock of medicine is more useful than a small attack increase when a dungeon contains several fights before its recovery point.
Keep healing medicine, revival items and status cures available before a major dungeon. Shop inventories vary by location, and new medicine or equipment becomes available as the campaign reaches new towns. Buy enough to recover from a bad encounter without relying on a single healer, but avoid hoarding every low-value item if the party already has reliable healing skills.
Rare materials, ingredients and unidentified equipment should not be sold automatically. Ingredients feed the kitchen’s recipes, while unidentified equipment may become more valuable after appraisal or purification. If money is tight, sell ordinary excess gear only after comparing it with current equipment and checking whether it has a useful effect or resistance.
- Buy medicine, revival supplies and status cures before vanity accessories.
- Upgrade active characters before reserve characters.
- Compare new gear with current resistances and effects, not only attack or defense.
- Keep rare ingredients and unidentified equipment until their use is clear.
- Leave enough money for the next town’s shops and required Archetype studies.
5. Use the Gauntlet Runner kitchen and plan Synthesis separately
Cooking is the Runner’s main preparation activity for food items. After selecting a destination and beginning the voyage, visit the kitchen between the pantry and lounge to prepare available recipes. Food can restore HP or MP, cure conditions, provide resistances or grant other useful effects. Save ingredients for recipes that solve the next dungeon’s problem instead of selling every gathering item immediately.
Maria’s rank 4 Speed Cooking is a major routine improvement because it lets you cook without spending the normal time block. Until then, cook when the benefit justifies the time, especially for MP recovery or a resistance that answers a known boss mechanic. Do not describe this as item synthesis: the game’s Synthesis system refers to cooperative combat skills.
Before entering a dungeon, inspect the Synthesis tab for the Archetypes currently equipped. Synthesis skills require compatible Archetype lineages in the active party, and some require two or three party members. They can consume multiple turn icons and MP, so arrange the party around the skills you intend to use rather than assuming every powerful attack is available. A practical early setup is a Healer or Mage lineage alongside the lineage that supplies the desired attack or defensive Synthesis. Use More’s Archetype information to identify the prerequisite lineages and level requirements.
- Cook MP recovery, healing, ailment-curing or resistance food before difficult dungeons.
- Save rare ingredients for recipes with a clear combat purpose.
- Treat Synthesis as cooperative combat skills, not item crafting.
- Check required lineages, MP costs and turn-icon costs before building around a Synthesis skill.
- Keep a normal healing plan in case a Synthesis skill is unavailable or too expensive.
6. Complete Requests in deadline and unlock order
Accept Requests as soon as they appear, then sort them by deadline, unlock value and travel route. A Request that opens a Follower or Archetype lineage is more important than one that only awards ordinary currency. A Request that shares a destination with the next story dungeon can often be completed during the same visit, reducing wasted travel and calendar time.
Some Requests cannot be completed immediately because their enemy, ingredient or destination is introduced later. Leave those in the journal and revisit them after the relevant story event rather than repeatedly checking the giver. When a Request awards access to a Bond or facility, return to the NPC named in the objective and speak to them again if the reward does not activate automatically.
Before advancing a major story deadline, check that no urgent Request is waiting in the current town, that all practical shopping is complete and that the next blocked Bonds have their required Royal Virtues underway. You do not need to finish every optional activity before every deadline, but you should avoid leaving a time-sensitive unlock unresolved when the journal explicitly warns about its window.
- Sort Requests by deadline, permanent unlock value and travel efficiency.
- Keep later-completable Requests in the journal instead of abandoning them.
- Confirm the objective is marked complete after delivery or a boss victory.
- Speak to the relevant NPC again when a Request unlocks a Bond or facility.
- Before a major deadline, finish urgent errands and stock the next dungeon’s supplies.
Before you move on
- The party has a dependable Healer option available through studied Archetypes, plus at least one elemental, physical and support or debuff option.
- Maria’s Bond has been started when available, and Brigitta’s A Bullish Embargo prerequisite is understood or completed once Wisdom rank 2 is reached.
- The Follower menu has been checked for blocked events, with Royal Virtue and story requirements recorded.
- The active party has current weapons and armor, and the inventory contains healing, revival and status-recovery supplies.
- The kitchen has been used to prepare useful food, especially MP recovery, healing, ailment removal or resistance effects before major dungeons.
- The Synthesis tab has been checked for the current party, and at least one practical Synthesis option is available or its prerequisite lineage is being developed.
- Urgent Requests have been accepted or completed before the next relevant deadline.
- MAG, currency, ingredients and rare materials remain available for the next town, Archetype studies and dungeon preparation.
References for this chapter
- Follower Bonds - Metaphor: ReFantazio Walkthrough & Guide
- Archetypes - Metaphor: ReFantazio Walkthrough & Guide
- Metaphor: ReFantazio: All Followers, Abilities, and How to Increase Bonds
- How to Cook all Recipes in Metaphor: ReFantazio
- Metaphor ReFantazio complete Synthesis skills guide
- Metaphor ReFantazio Trophy Guide & Roadmap
Combat Deep Dive — Archetype Builds and Team Roles
Build the active party around jobs that cover damage, healing, protection, and support instead of locking every character into one damage type. Use Archetype inheritance to carry essential healing, elemental, passive, or utility skills onto a different lineage, but remember that Synthesis skills, Royal Archetype skills, and other restricted skills cannot simply be inherited. Manage Press Turn icons by exploiting weaknesses, passing half-turns, guarding before dangerous attacks, and changing formation rows when appropriate. Synthesis is a planned burst: check its participating Archetypes, turn-icon cost, MP or HP cost, and possible item requirement before committing. There is no separate combat category called Image skills in the PS5 release; use Archetype skills, inherited skills, and Synthesis instead. Keep Patra or a suitable status remedy available on more than one possible user so one disabled character cannot collapse the entire recovery plan.
1. Assign jobs before choosing favorite Archetypes
Start by deciding what the party must accomplish in the next dungeon. A dependable group needs a damage dealer, a source of healing, a way to protect or reinforce the party, and at least one character who can apply useful debuffs or cover an alternate damage type. The protagonist is the easiest flexible slot because his Archetype can be changed to answer a dungeon weakness without rebuilding the rest of the team.
A practical midgame arrangement is Strohl on a Warrior-line physical setup, Hulkenberg on Knight-line protection or Magic Knight utility, the protagonist on Mage, Wizard, Seeker, or Healer depending on the target, and Heismay on Thief, Gunner, or Faker when speed and support matter. This is a template, not a mandatory party. Faker is a general Archetype unlocked through its follower progression, so it is not exclusive to Heismay. If the boss resists slash, move the attacker to Pierce, Strike, or an effective elemental option rather than repeatedly using the same resisted attack.
- Keep at least one dependable healing skill available in every major battle.
- Prepare at least two damage categories before entering a boss dungeon.
- Use the protagonist as the flexible slot when the next enemy’s weakness is uncertain.
- Do not confuse a recommended role with a mandatory character assignment.
2. Use inheritance to preserve useful skills
At the Akademia, study an Archetype far enough to unlock the skill you want, then pay MAG to make that skill available for inheritance. Inherited skills let a new Archetype retain an important function from an earlier one, such as elemental coverage, healing, a passive, or a support effect. For example, a Knight can inherit healing, a physical attacker can carry an elemental attack for resistant targets, and a Mage can take a defensive or utility skill when the dungeon makes pure damage inefficient.
Inheritance is limited by available slots and by the skills that the game permits to be transferred. Synthesis skills and Royal Archetype skills are not normal inheritance options, and Masked Dancer mask skills have their own restrictions. Follower progression increases the number of inheritance slots for the relevant lineage, so do not spend MAG as though every character immediately has a full set of slots. When a new boss reveals an unexpected weakness, reserve enough MAG to purchase the answer instead of spending all of it on minor upgrades.
- Review each Archetype’s unlocked skills before changing jobs.
- Reserve one inherited slot for dungeon-specific coverage.
- Advance follower lineages that increase inheritance capacity.
- Remember that Synthesis and restricted Royal skills cannot be treated like ordinary inherited skills.
3. Protect the Press Turn economy
A normal action consumes one Press Turn icon. Hitting a weakness or scoring a critical hit can preserve a half-used icon, while a miss or an attack that is blocked, repelled, or drained can waste the turn badly. When the current character has no safe follow-up, use Pass to move the remaining half-turn rather than forcing a low-accuracy attack. A passed half-turn is valuable because it allows the next character to exploit a weakness, heal, or set up support without sacrificing the party’s whole sequence.
Guard is the correct response when an enemy is charging, has raised its attack power, is preparing a known area attack, or is about to enter a dangerous phase. Guard reduces incoming damage and protects against weakness exploitation, although it does not make the character impossible to hit. Use Fast combat to weaken or stun ordinary enemies in the field, then enter Squad combat when you need commands, weakness checks, row changes, items, or Synthesis.
- Test a weakness before spending an expensive skill when the target’s resistances are unknown.
- Pass a half-turn instead of gambling on a low-accuracy follow-up.
- Guard before a telegraphed heavy attack or phase transition.
- Do not spend every available icon on damage when the party needs a heal or status cure.
4. Use formation rows as part of the build
Characters in the front row deal normal physical damage and expose themselves to more danger. Moving a character to the back row reduces the damage of physical attacks they deal, but also reduces the physical damage they receive; magic damage is not reduced by row placement. Keep a Knight or other durable protector in front when the party is relying on physical attacks, and move a fragile caster or support character back when the enemy’s physical pressure is high.
Rows can be changed during a character’s turn without consuming an additional turn icon. This makes row changes useful after a boss shifts from a physical phase to a magic phase, or when a physical attacker must stop attacking and survive until the next weakness window. Do not leave the entire party in the back row merely because it feels safer: that can unnecessarily weaken the physical damage needed to end the fight.
- Use the front row for committed physical attackers and durable defenders.
- Move fragile support characters back when physical damage is the main threat.
- Recheck row placement after a boss changes attack pattern.
- Remember that row placement does not reduce incoming magic damage.
5. Treat Synthesis as a planned burst
Synthesis skills require specific Archetypes to be present among the participating characters. They commonly use more than one Press Turn icon, and their resource costs vary: a skill may consume MP, HP, an item, or a combination shown in its battle description. Confirm the displayed requirements before selecting it. A Synthesis attack that hits a weakness can preserve more of the turn sequence, but a miss can cause a severe Press Turn loss, so do not use an inaccurate burst against an untested resistance.
Set up the burst first when possible. Apply a debuff, raise the attacker’s output, or expose the target to the needed damage type, then use Synthesis while the party still has a recovery action available. Do not spend the entire party’s MP and icons at the opening of a long boss fight unless the damage will prevent the enemy’s next dangerous action. Keep a healer, item user, or defensive action available after the burst.
- Confirm the required Archetypes are currently active in the party.
- Check the exact turn-icon and resource cost before confirming.
- Avoid Synthesis attacks against unknown Repel, Drain, or high-evasion targets.
- Keep one recovery action available after the burst.
6. Pair physical damage with protection and debuffs
Strohl’s Warrior line is a straightforward physical-damage foundation, but it performs better when another character improves the attack conditions. Knight-line Archetypes can protect allies or draw pressure, while Commander-line skills can improve the party’s offensive or defensive situation. A Faker-line user can reduce an enemy’s attack, defense, or accuracy when the battle lasts long enough for those debuffs to matter. The specific user is flexible; choose the character who can act early and still preserve the party’s damage coverage.
A safe boss opening is to identify the weakness, apply a debuff or useful buff when the enemy is not about to attack, then commit to physical damage or Synthesis during the next safe sequence. If the boss resists the current physical type, change the attacking Archetype or inherit a different damage type. Do not keep a favorite build unchanged simply because its normal damage is high.
- Apply a debuff before a long physical burst when the boss is not acting immediately.
- Use Knight protection when one party member is taking repeated hits.
- Change damage type rather than repeatedly attacking into resistance.
- Keep a second attacker capable of exploiting a different weakness.
7. Carry reliable answers to status ailments
Healer-line Patra is a dependable single-target answer to status ailments, so keep it on a character who is unlikely to be disabled alongside the rest of the party. For emergencies, buy the remedy that matches the next dungeon’s threats instead of carrying only general healing. In the English PS5 localization, examples include Robust Remedy for Poison, Sulphurous Salt for Daze, Purified Teacake for Hex, Notebook of Remembrance for Forget, and Thrilling Tintinnabulator for Sleep. Check the item description in your inventory because broader remedies and later items can cover multiple conditions.
Forget prevents Archetype skills, Sleep prevents actions and makes physical hits critical, and Daze greatly harms accuracy, so continuing an attack rotation while affected is usually worse than spending the next action on recovery. If the healer is disabled, use the backup remedy carrier, Guard with the affected character when recovery is not immediately possible, and protect the character who still has Patra. Reapply buffs and debuffs only after the party is stable.
- Keep Patra or an equivalent status cure on a backup character.
- Stock the specific remedy associated with the next dungeon’s status threats.
- Carry Robust Remedy, Sulphurous Salt, Purified Teacake, Notebook of Remembrance, or Thrilling Tintinnabulator when their matching ailments are expected.
- Do not allow the only healer and the only status-cure carrier to share the same vulnerability.
Before you move on
- Every active party member has a defined role and a current Archetype that supports it.
- At least one character can heal, another can provide a useful buff or debuff, and the group covers more than one damage type.
- You know the next boss’s likely weakness, dangerous status effects, and safest opening before entering.
- You can use Pass and Guard deliberately instead of spending every Press Turn icon on attacks.
- You can identify the exact Synthesis participants and displayed resource cost before committing.
- Your inventory contains ordinary healing, revival options, and remedies for the next dungeon’s expected ailments.
- You can finish a normal battle without using Synthesis every turn and still retain resources for the next encounter.
References for this chapter
- Combat Mechanics Guide - Metaphor: ReFantazio Walkthrough & Guide
- Archetypes - Metaphor: ReFantazio Walkthrough & Guide
- Metaphor: ReFantazio Beginner Tips: Calendar, Archetypes and Combat Basics
- Metaphor: ReFantazio Best Builds: Archetypes, Stats, Skills and Parties
- Metaphor: ReFantazio - Status Ailments List and Guide
- Metaphor: ReFantazio Best Stats and Archetype Builds
- Metaphor: ReFantazio - All Advanced Archetypes And How To Unlock Them
Key Mid-Story Dungeons — Route, Secrets and Mid-Bosses
The reliable midgame order is Greatworm Homo Butera and the timed Giant Sandworm’s Belly, the Giant Sandworm’s Nest and Heismay, optional Man-Eater’s Grotto, Kriegante Castle, then the Charadrius after reaching Port Brilehaven. The opening worm sequence is not one ordinary dungeon: the mandatory Greatworm fight occurs first, the Belly has escape timers and damaging sludge, and the Nest is the later Heismay investigation. Man-Eater’s Grotto is an optional bounty dungeon with two Alpha Rockworm Valmos. Kriegante Castle uses stealth, lifts, and shortcut doors before Homo Jaluzo. The Charadrius is a chain of three-turn boss encounters separated by safe rooms and a choice between Port and Starboard corridors. Save before each boss, activate every recovery point, and do not spend the final deadline day on optional content unless the main route is already secure.
1. Complete the Greatworm and Giant Sandworm’s Belly sequence
Before entering the Nest, the party is forced into the mandatory Greatworm Homo Butera encounter. The worm is weak to Ice and uses Sandstorm, which can reduce accuracy and evasion. Keep the party in the back row while using Blizz or Ice-based items, and use a cleansing skill or item if Sandstorm causes repeated misses. This battle does not provide a normal reward, so do not spend rare consumables trying to achieve a perfect result.
The party is then swallowed and enters the Giant Sandworm’s Belly. In the Foregut, destroy the fleshy lumps marked by the objective to open the valves. After the first lump opens the route, the escape timer begins. The timer pauses while the map or menus are open, so check the map whenever the route becomes unclear. The damaging sludge slows movement and drains HP; use the dodge-roll button repeatedly while crossing it, and heal before continuing rather than waiting until the party is near defeat.
Take the western route for the Balm of Life chest if it is convenient, then return to the main path and destroy the northern fleshy lump to reach the Hindgut. In the Hindgut, the four-way split is deceptive: the middle routes rejoin, the far-east route contains optional pickups, and the left route leads toward the optional Homo Fios encounter. Proceed to Parasitic Valmo if the timer is low. Parasitic Valmo is weak to Electric and can summon Vampiric Gelatinos and drain MP, so use Electric attacks quickly and avoid exhausting your casters on the preceding enemies.
After escaping, the story advances to the Giant Sandworm’s Nest. The Belly and the Nest are separate areas with separate objectives; do not assume that defeating Parasitic Valmo has completed Heismay’s section.
- Defeat Greatworm Homo Butera before entering the Belly.
- Destroy the Belly’s fleshy lumps and escape before the timer expires.
- Defeat Parasitic Valmo, then restock before entering the Giant Sandworm’s Nest.
2. Navigate the Giant Sandworm’s Nest and recruit Heismay
At the Nest entrance, speak with Serpenta the Peddler and replenish Medicine or other basic supplies. Follow the Burrow route southeast, then northeast, collecting nearby pickups without detouring into every dead end. The Nest is much shorter and less hazardous than the Belly. A Sandflash is active, however, so weakness hits do not produce the usual extra half-turn advantage; plan fights around reliable damage instead of expecting a chain of bonus turns.
Near the lower section, the first Heismay battle begins. He creates copies, and the real Heismay is identified by his shadow. Attack the real target rather than wasting turns on false copies. When the encounter ends, continue to Heismay’s Hideout and examine the hut to trigger the second battle. Heismay uses the same clone trick and adds Sand Throw, which lowers accuracy and evasion, along with dark-element attacks.
Ice attacks and dependable healing make this sequence straightforward. If Sand Throw causes a character to miss repeatedly, use Dekunda or an accuracy-restoring item instead of repeatedly attacking with low-hit-rate physical skills. Heal before entering the hideout because the story battles occur close together. The Nest’s completion leads into the Martira investigation; Heismay becomes a proper party member after the later story progression, and his Thief Archetype is then available.
- Use Heismay’s shadow to identify the real target in both clone encounters.
- Keep Ice damage and healing available for the Nest fights.
- Continue through the post-battle story until Heismay formally joins; do not treat the first Nest victory as the end of his recruitment.
3. Clear Man-Eater’s Grotto as an optional Martira bounty
Man-Eater’s Grotto opens through the Alpha Rockworm Valmo bounty accepted in Martira. It is optional for the main story but worthwhile before Kriegante Castle if you want experience, equipment, and the bounty reward. Buy or equip protection against Paralysis and bring Ice damage. The two Alpha Rockworm Valmos resist Slash, Pierce, and Strike while being weak to Ice; they can also use Sandstorm, Fire Breath, Paralysis Fang, and Strong Acid.
Follow the cave route through its ledges and chambers until the northwestern boss door. Check the side rooms for the relic and chests, then activate the wall switch after the boss route to open the shortcut back toward the entrance. This switch is the dungeon’s important shortcut trigger; missing it forces an unnecessary retreat through the cleared cave.
The two worms must be defeated in the same turn. Reduce both to low HP, then use Ice attacks or an Ice synthesis skill to finish them together. If one survives, it can summon another Alpha Rockworm with full health. Bring a Mage or inherit Blizz onto multiple party members, and keep a healer who is not dependent on the same MP pool as every Ice attacker. Turn in the bounty after returning to Martira. The Grotto is optional and does not replace Kriegante Castle, which remains the required Martira dungeon.
- Accept the Alpha Rockworm Valmo bounty before travelling to the Grotto.
- Equip or carry a solution for Paralysis and prepare several Ice users.
- Defeat both worms in the same turn and activate the return shortcut.
4. Use Kriegante Castle’s patrol routes and shortcuts before Homo Jaluzo
Kriegante Castle is the required Martira story dungeon. Follow the lower route until the game introduces the large Homo Casco patrol enemy. You can fight it, but avoiding it is safer: move behind pillars, boxes, and tunnel walls, and cross open sections only after the patrol turns away. If detected, retreat around a corner and break line of sight before trying again. The patrol has multiple actions per round and is a poor target for an unprepared party.
Continue through the Old Reservoir and adjacent rooms, collecting keys and activating every lift or door switch as soon as you reach it. These switches create return routes and prevent a full walk through the lower rooms. In the reservoir section, take the side route to the chest containing the Amnesty Talisman if your party can safely make the detour. It is an optional equipment reward, not a progression key. Use the cat-shaped teleport or Magla Hollow recovery point when available before entering the upper castle route.
The final boss is Homo Jaluzo. Its main body has no simple elemental weakness, so use buffs, debuffs, and reliable damage rather than building the whole party around one element. The eyes are separate targets and should be destroyed when they are creating accuracy or damage problems. Jaluzo can inflict Daze with Stare, use area damage, and recover through its support mechanics; characters affected by Daze should Guard, pass, or use an item instead of gambling a valuable attack. When the boss begins powering up, heal and defend rather than spending every turn on low-probability damage. Defeat the eyes when necessary, then focus the body during a safe opening.
- Pass the Homo Casco patrol using cover and line-of-sight breaks.
- Activate lifts, switches, and shortcut doors before climbing toward the upper rooms.
- Reach a recovery point and save before Homo Jaluzo.
- Carry healing, Daze recovery, and at least one reliable source of buffs or debuffs.
5. Infiltrate the Charadrius in the correct objective order
After reaching Port Brilehaven, gather the available town information and purchase the Charadrius intel before beginning the infiltration. Enter through the Crew Quarters and follow the objective route to Sergeant Xanth. Charadrius boss encounters impose a three-turn limit, so prepare a damage plan before opening the fight. Burn, Poison, Merchant’s Gold Attack, and strong weakness-targeting skills are useful ways to end Xanth quickly; do not spend turns on slow setup that cannot pay off within the limit.
After Xanth, take the Sergeant’s Magla Key and continue through the Level 1 Passage. Enter the Soldier’s Lounge beside the party members even if you do not need to heal: it registers a quick-travel and recovery point. At the intersection, choose the Port Corridor or Starboard Corridor. Port leads to Master Sergeant Glechom, while Starboard leads to Maintenance Chief Ceiba. The chosen route is sufficient for story progression, but the other corridor can be revisited through the passage if you want its items, encounter, and key reward.
Each corridor has a stealth section. Descend the ladder, use boxes and corners as cover, and knock out guards only when they are facing away. Climb the connected ladders rather than trying to force the patrol line from the floor. In Port, Hulkenberg helps distract guards; in Starboard, Heismay assists. After the stealth section, use the corridor’s boss approach and defeat Glechom or Ceiba within three turns. Glechom pressures the party with physical attacks and Daze, while Ceiba emphasizes barriers and defensive effects; status-inflicting skills are less useful than fast, accurate damage when the timer is active.
Return through the ship’s safe route and continue toward the Front Deck. The final encounter is Guard Chief Salva and Helmsman Cabio, also subject to the three-turn rule. Enter with MP-restoring items, a dependable healer, and at least one high-damage option that does not depend on a rare weakness appearing. If a status effect such as Burn or Poison lands reliably, use it early; otherwise attack with the strongest accurate skills and pass unused half-turns rather than wasting them on low-hit-rate actions.
- Save before Sergeant Xanth and preserve a separate manual save.
- Register the Level 1 Passage Soldier’s Lounge before choosing a corridor.
- Choose either Port or Starboard for the required route; revisit the other only after the main route is secure.
- Defeat Xanth, Glechom or Ceiba, and Salva with Cabio within their three-turn limits.
- Confirm the Charadrius operation is complete before leaving the ship.
Before you move on
- Greatworm Homo Butera and Parasitic Valmo are defeated, and the Giant Sandworm’s Belly escape sequence is complete.
- Heismay’s Nest sequence is complete and Heismay has joined the party with the Thief Archetype available.
- The Alpha Rockworm Valmo bounty is either completed and turned in or deliberately recorded for later cleanup.
- Kriegante Castle is cleared, Homo Jaluzo is defeated, and Martira’s main objective is complete.
- Port Brilehaven is available, the Charadrius operation is completed, and the party has defeated the final Salva and Cabio encounter.
- A manual save exists after each major dungeon and before any optional return to the other Charadrius corridor.
References for this chapter
- Metaphor: ReFantazio — Guide and Walkthrough (PS5): Giant Sandworm’s Nest and Belly
- Journey to the Giant Sandworm’s Nest — Step-by-step
- Man-Eater’s Grotto Walkthrough — Martira
- Man-Eater’s Grotto Walkthrough
- Kriegante Castle Walkthrough — Metaphor: ReFantazio
- Metaphor ReFantazio Walkthrough Part 2: Martira & Kriegante Castle
- Charadrius Dungeon Guide — Metaphor: ReFantazio
- Operation: Infiltrate the Charadrius — Step-by-step
- Metaphor ReFantazio 100% Walkthrough
Deadlines, Missables and Branching Choices — Avoiding Bad Endings
Metaphor: ReFantazio's calendar makes main-story deadlines mandatory. Failing to complete a major Operation before its deadline causes a game-over situation, although the game may offer a rewind to an earlier point; optional Requests generally expire without ending the campaign. The true ending requires avoiding three late-story bad-ending branches: denial-focused answers in the Ancient Eldan Sanctum on September 24, agreeing with Louis at the end of the Skybound Avatar sequence, and accepting More's escape offer immediately before the final Tyrant's Star battle. The final Louis question about whether you want to stop him or become king does not decide the ending. Use separate manual saves before each branch, keep an older campaign file untouched, and treat October 26's Tyrant's Star selection as the final point of no return for normal town activities.
1. Check every main Operation before spending the day
Open the pause menu and review the calendar, active main Operation and its displayed deadline before choosing a free-time activity. A main Operation must be completed by its deadline. Starting it is not enough if the objective remains unfinished when the deadline passes. If you fail a major deadline, the game enters a game-over sequence and may offer a rewind to an earlier date; do not treat that recovery as a replacement for your own saves.
Optional Requests use the same calendar but have different consequences. An expired Request normally costs you its reward or completion opportunity rather than ending the campaign. Before committing to a full dungeon run, inspect the quest list for Requests close to expiration. Complete the main dungeon first when its deadline is approaching, then use remaining days for bonds, Royal Virtues, shopping or optional Requests.
- Review the current date and main Operation at the beginning of each free day.
- Complete every main Operation before its displayed deadline.
- Check the Request list before beginning a long dungeon or multi-day trip.
- If a deadline is missed, use the offered rewind only as emergency recovery and then make a new manual save.
2. Maintain dated manual saves on PS5
Use the pause-menu manual save command to create several independent files. Keep one general campaign file, one older safety file from before the current deadline window, and one branch file for the next major story scene. The PS5 release supports manual saves that return you to the exact point where they were created, so use that system deliberately rather than relying only on autosaves.
Name the slots mentally by date and location: examples include September 24, Ancient Eldan Sanctum; Skybound Avatar, Louis scene; and October 26, Akademia. Save before entering the relevant room or initiating the marked interaction, not after the first dialogue choice. Keep the older file untouched until the correct story branch has progressed beyond its ending check.
- Keep at least one untouched file from before the current late-game branch.
- Create a separate save before each ending-critical conversation.
- Do not overwrite the branch file immediately after making a choice.
- Use autosaves for ordinary battle recovery, not as your only protection against a narrative branch.
3. Survive the September 24 Ancient Eldan Sanctum scene
The first bad ending occurs during the story sequence in the Ancient Eldan Sanctum on September 24, when the party investigates the Prince's condition. After reaching the marked central area and progressing through the cutscenes, a mysterious voice asks questions about what has happened and what the protagonist should accept. These are the first choices that can end the campaign early.
Choose the responses that acknowledge the truth and continue the journey. Avoid denial-focused or fatalistic answers that claim the effort was meaningless, that everything is over, or that the situation should be abandoned. The scene may present several connected prompts rather than one simple yes-or-no question, so keep selecting the forward-moving interpretation. If the story abruptly ends after the scene, reload the September 24 save and repeat it with the affirmative, truth-accepting responses.
- Save before beginning the Ancient Eldan Sanctum story sequence.
- When questioned about the Prince and the journey, reject denial and fatalism.
- Continue until the story sends the party onward instead of returning to the title screen.
- Keep the September 24 save until the next major branch is safely cleared.
4. Reject Louis's false fairness at the Skybound Avatar
The second bad ending occurs late in the Skybound Avatar sequence, after the confrontation with Louis. The operation begins on September 26 and can remain the active endgame objective until the final deadline period. After the battle and subsequent conversations, Louis argues that his brutal plan is a form of fairness and asks the protagonist to side with him.
To continue toward the true ending, reject the argument rather than agreeing that Louis is right. The safe meaning is that his proposed fairness is false or unacceptable. The dangerous response is the one equivalent to telling Louis that he is absolutely right or accepting his plan. That choice leads to the Fantasy Is Ruined bad ending. Save before the Louis conversation, because the scene follows combat and several cutscenes and the safest rollback point is before the interaction begins.
- Save before the post-battle Louis conversation in the Skybound Avatar.
- Reject Louis's claimed solution and false version of fairness.
- Do not select the response equivalent to You are absolutely right.
- Confirm that the campaign continues into the final preparation period.
5. Reject More's escape before the final battle
The third bad ending appears on October 26 in the final sequence, before the actual Tyrant's Star battle. After the preceding endgame events, More presents an apparent escape to a modern world. This is not a harmless optional scene. Accepting the escape ends the story in the Fantasy Is Only Fiction bad ending instead of sending the party into the final confrontation.
Choose the response that rejects the escape and returns to the real objective: saving your companions and confronting Louis. The exact wording can vary by language setting, so use the meaning of the response rather than searching for one exact English sentence. Make the save before beginning this Akademia sequence. If the game transitions to the modern-world ending, reload that file rather than assuming the later Louis dialogue can repair the branch.
- Save before the Akademia sequence immediately before the final confrontation.
- Reject More's offer to leave the world.
- Choose the response that returns to the party and the real mission.
- Continue until the Tyrant's Star final battle begins.
6. Do not confuse the final Louis question with an ending branch
During the final Tyrant's Star sequence, Louis asks whether the protagonist wants to stop him or become king. Either answer allows the story to continue and does not create the same immediate bad-ending result as the three earlier branches. For a straightforward role-playing response, choose the option stating that you want to stop Louis, but do not treat the alternative as the critical true-ending requirement.
The ending-critical decision has already occurred in the earlier More sequence. This distinction matters because reloading after the final Louis question will not help if the escape branch was accepted before the battle. Preserve the Akademia save until the final battle and its opening cutscenes have been reached successfully.
- Do not restart solely because of the stop-Louis or become-king question.
- Verify that More's escape was rejected before entering Tyrant's Star combat.
- Keep the pre-Akademia save until the true ending route is confirmed.
7. Verify the point of no return before selecting Tyrant's Star
On October 26, review the active main Operation, calendar and quest list before selecting Tyrant's Star from the world map. Confirm that the required late-game mission is active and that no main-story objective is overdue. The game does not provide a reliable menu flag saying that every optional scene is complete, so use the visible quest list, map markers and your own checklist rather than searching for a hidden confirmation.
Selecting Tyrant's Star is the practical point of no return for normal town-and-calendar activities. Finish any remaining Requests, follower scenes, shopping, equipment preparation and desired Royal Virtue actions first. Once the final sequence starts, follow the story through the More choice, final dungeon and Louis battle without overwriting the branch save. After the true ending and credits, preserve the completion file if you intend to begin New Game Plus.
- The active main Operation is current and no main deadline has been missed.
- Desired Requests, follower scenes and purchases are complete before October 26's final departure.
- A manual save exists immediately before selecting Tyrant's Star.
- All three bad-ending branches have been avoided.
- The true ending route reaches the Tyrant's Star battle rather than an early ending screen.
Before you move on
- The September 24 Ancient Eldan Sanctum sequence was completed with truth-accepting, forward-moving responses.
- The Skybound Avatar Louis scene was completed without agreeing that his false-fairness plan was right.
- More's escape offer before the final battle was rejected.
- The final Louis question was treated as non-critical to the ending route.
- Selecting Tyrant's Star led into the final sequence and battle rather than an early bad-ending result.
- At least one dated manual save from before the final branch remains available until the ending and credits are complete.
References for this chapter
- Metaphor: ReFantazio - PS5 and PS4 Games - PlayStation
- Metaphor: ReFantazio — Louis Guide and Answers — Dot Esports
- Ancient Eldan Sanctum Walkthrough - Finale - Gamer Guides
- Metaphor: ReFantazio Walkthrough: Month-by-Month Route, Missables and Endings — SlashKeys
- Walkthrough Part 6 — Royal Academy Ruins and Ancient Eldan Sanctum — The Escapist
- Operation: Skybound Avatar Conquest - Metaphor: ReFantazio Walkthrough & Guide
Major Boss Patterns — Common Opens, Phase Transitions and Recovery
Metaphor: ReFantazio bosses are primarily Press Turn and preparation tests. Read the enemy’s displayed action, identify whether the threat is physical, elemental, Almighty, status-based or forced-KO, then spend your next action on the correct answer instead of attacking automatically. Weakness hits preserve turn icons, but evasion and nullification cost extra icons, while Drain and Repel can end the round immediately. Use Pass to move an action to the character with the right damage type, Guard through known lethal attacks, and keep healing or cleansing available before the enemy acts. Rows matter for physical attacks but not magic. Many late bosses remove buffs, change resistances, summon targets or gain additional turn icons at thresholds. Destroyer Charadrius illustrates the full pattern: remove its masks, break the puppet created by New Dawn’s Sacrifice, reassess after the transition, and switch out the tribe named by A Tribe Condemned before the instant KO resolves. After a defeat, change the defense or turn-economy problem that caused it instead of grinding blindly.
Read Press Turn results before committing to a full rotation
At the start of each round, check your action order and the enemy’s visible turn icons. A weakness hit normally consumes half an icon, allowing another action from the same character or a later party member. A miss or an attack stopped by Null costs two icons. Drain or Repel can consume all remaining icons, so do not test an uncertain element with an expensive Synthesis skill when a safer option is available.
Use Analyze when it provides information, then confirm uncertain resistances with a low-cost attack or an inherited skill. Once a weakness is known, Pass from a character without a productive action to the ally who can exploit it. This is safer than spending a full icon on neutral damage, especially against bosses that gain extra turns through Soul Cry or Soul Scream.
- Check the current resistance table before using a limited Synthesis skill.
- Treat weakness hits as turn-economy tools, not merely damage increases.
- Avoid untested attacks when the boss has multiple icons remaining.
- Use Pass to move an unproductive action to the correct attacker.
Use Guard and rows to answer physical threats
Guard greatly reduces incoming damage and prevents the guarded character’s weakness from being exploited, but it does not make the character invulnerable and does not guarantee an evasion. Use it when a boss has announced or visibly prepared a heavy strike, when a character is already weakened, or when the incoming damage type is unclear and survival matters more than one ordinary attack.
Formation rows are relevant to physical attacks: the back row deals less physical damage and receives less physical damage, while magic damage is unaffected by row position. Keep fragile physical attackers in the back row while they recover or use support skills. Move a physical attacker forward before a high-value strike, then return them to safety if the next enemy action is expected to be physical. Row changes can be made during a character’s turn without spending an additional Press Turn icon.
- Guard the character targeted by a known heavy single-target attack.
- Keep vulnerable physical characters in the back row during defensive turns.
- Move physical attackers forward only when the damage gain justifies the risk.
- Do not treat Guard as protection from all status effects or forced-KO mechanics.
Respond to charged attacks, area damage and status pressure
A charged stance, an announced attack name, a visible power-up or a sudden resistance change is a warning to stop using low-value attacks. Heal the threatened character, apply a defensive buff, Guard, or use an evasion or resistance setup that directly answers the attack. Against a known full-party attack, preserving the party through Guard is often better than adding one neutral hit that does not change the boss’s turn count.
Keep ailment cures and revival items on active characters before entering a boss arena. Anxiety is especially important in the final sequence because Destroyer Charadrius repeatedly increases its chance to inflict it and can exploit afflicted characters. Cure it promptly unless the affected character can safely be replaced or the boss is about to enter a decisive damage window. Do not assume that reviving after every forced KO is the intended answer; several late attacks are designed to be handled before they resolve.
- Identify whether the next threat is single-target, party-wide, elemental, physical, Almighty or ailment-based.
- Heal before the boss’s turn rather than after a predictable lethal attack.
- Carry cures for Anxiety and other commonly inflicted ailments.
- Keep revival items accessible for mistakes and unavoidable follow-up damage.
Manage Destroyer Charadrius’s mask phase and puppet mechanic
Destroyer Charadrius begins with the Masks of Mirth, Ire and Joy protecting the main body. They are separate targets with different damage preferences: Joy is more vulnerable to physical attacks, Ire is more vulnerable to magic, and Mirth reduces both physical and magical damage more strongly than the other two. Plan mixed coverage instead of repeating one damage type across the entire party. Almighty attacks are also reduced by the masks, so they are not a universal shortcut for this phase.
When New Dawn’s Sacrifice creates a puppet in one mask, attack the mask holding the puppet. Breaking it interrupts the powerful follow-up. The masks continue acting after the puppet is destroyed, so do not stop healing simply because the immediate attack was canceled. Remove the masks methodically, recheck buffs and debuffs after each major action, and keep enough MP for the form that follows. Destroying a mask also removes some of the boss’s associated attacks and reduces its turn pressure.
- Assign physical damage to Mask of Joy and magical damage to Mask of Ire.
- Use debuffs or high-value Almighty and critical options carefully against Mask of Mirth.
- Break the puppet-holding mask before the sacrifice follow-up resolves.
- Do not spend all MP before the mask phase is complete.
Treat phase transitions as checkpoints, not invitations to overextend
When a boss is near a scripted threshold, stop and restore HP, refresh only the buffs that matter, and move characters into useful rows. Many encounters remove your buffs, alter affinities, summon additional targets or change their attack list after the transition. Entering that phase with a weakened healer or an empty damage dealer can turn a winning fight into an attrition loss.
After the masks fall, Destroyer Charadrius enters its second form with no ordinary elemental weakness. Its behavior becomes more aggressive, it can use physical and area elemental attacks, and it may remove your debuffs or apply its own. If you did not destroy the optional crystals in Tyrant’s Star, the fight is substantially harder because the boss retains more health, more turn pressure and additional moves. This is a preparation check, not a reason to repeat the same opening rotation. Reapply debuffs only when their cost is justified, and use Dekaja or equivalent tools when the boss raises its own attack, defense or accuracy.
- Top off HP before the boss crosses a known threshold.
- Recheck resistances and available enemy skills after every form change.
- Reserve MP for the second form and its forced-KO sequence.
- Destroy Tyrant’s Star crystals when you want the less demanding final-boss version.
Answer A Tribe Condemned and late-phase turn escalation
In the second form, Destroyer Charadrius can use A Tribe Condemned. The boss names a tribe, and the corresponding active party member is instantly killed on the following turn. Switch that character out before the attack resolves when the party-management tools available in your run allow it. If switching is impossible or the character is already down, keep a revival ready and continue the fight without wasting the entire round trying to prevent an effect that has already been queued. The protagonist is treated differently by this attack, but do not rely on leaving every other character exposed.
Near the end of the fight, the boss can gain additional turn icons through Soul Cry or Soul Scream. This is where defensive turn denial, evasion, resistance accessories, and efficient burst damage matter most. Heismay’s evasion-focused options, Hulkenberg’s defensive or repel-based tools, Prince damage, and Junah’s party charge support are examples of useful roles, not mandatory party requirements. Choose the tools your save has actually unlocked and build around the boss’s attack types rather than copying a single lineup.
- Watch the dialogue and action text for the named tribe.
- Switch the threatened character out before the next enemy turn when possible.
- Keep a revival plan for the character affected by the forced KO.
- Save burst damage and turn-denial tools for the boss’s extra-icon phase.
Recover from defeat with a targeted retry plan
Immediately before retrying, write down the attack that caused the failure, the turn on which it occurred, and whether it was physical, elemental, Almighty, ailment-based, resisted, reflected or forced-KO. Then change the relevant answer: replace a weakness, move the target to the back row, equip ailment protection, add Guard coverage, bring Dekaja or cleansing, prepare a puppet-breaking attack, or assign a character who can switch or revive efficiently.
Make a manual save before the boss approach and keep a second save before late-game sequences. Restock at the last safe point, heal reserve characters, equip current weapons and armor, and verify inherited skills before entering. If the party survives but runs out of MP, improve turn efficiency first: exploit weaknesses, Pass unused actions, avoid repeatedly refreshing buffs that are immediately removed, and reserve Synthesis for a weakness, major buff or phase-ending burst. Lowering the difficulty is also a legitimate recovery option because the game supports adjustable difficulty; it is preferable to abandoning a correct strategy because the current resource margin is too narrow.
- Manual save immediately before the boss approach.
- Current equipment and resistance accessories equipped.
- Active and reserve characters healed and assigned useful Archetypes.
- Revives, full-heal items, ailment cures and MP recovery available.
- A specific response prepared for the attack that caused the previous defeat.
Before you move on
- You can identify the next threat as physical, elemental, Almighty, status-based or forced-KO before ending the round.
- You understand that weakness hits preserve Press Turn value, misses and Null cost extra icons, and Drain or Repel can consume the remaining actions.
- You can use Guard and rows correctly without assuming either makes a character invulnerable.
- You can handle Destroyer Charadrius’s three masks, puppet interruption, form transition and A Tribe Condemned sequence.
- Every retry begins with a saved party, current equipment, mixed damage coverage, recovery items and a specific response to the previous wipe.
- You defeat major encounters by adjusting preparation and turn economy rather than relying on unexplained level grinding.
References for this chapter
- Combat Mechanics Guide - Metaphor: ReFantazio Walkthrough & Guide
- Metaphor: ReFantazio Walkthrough & Guide — Finale Guide
- Destroyer Charadrius Boss Guide - Metaphor: ReFantazio
- Destroyer Charadrius Boss Guide - Finale - Walkthrough | Metaphor: ReFantazio
- Some notes for preparing for the full-power final boss - Metaphor: ReFantazio
- Metaphor: ReFantazio - PS5 and PS4 Games - PlayStation
Late Game Acts — Forcing Openings and Pre-Final Setup
Complete the mandatory late-game route through Virga Island Dragon Temple, Montario Opera House, Royal Academy Ruins, Ancient Eldan Sanctum and the Skybound Avatar. Sogne the Icebound is part of the required route. Save before the Prince-related Sanctum dialogue and choose the answers that preserve the Prince’s will. On September 26, begin Skybound Avatar Conquest, clear Royal Garden, solve Palace Corridor and defeat Leogrophon. Afterward, destroy the King’s Servant, revisit the opened Palace Corridor for optional rewards, then return to Royal Passage. Enter Banquet Hall only after healing, destroy all five Trance Crystals within five minutes, defeat Gupdetron and use the Royal Passage Magla Hollow before Melancholia Zorba. Reject Louis’s false-fairness proposal. October Dragon Trials, Elegy of the Soul and other late requests are optional for reaching Tyrant’s Star. Use October 21–25 for preparation and create a dedicated save before selecting Tyrant’s Star on October 26.
1. Finish the mandatory route before Skybound Avatar
Complete Virga Island Dragon Temple, Montario Opera House and Royal Academy Ruins in the active story order. Sogne the Icebound is part of the required progression after the Opera House and Royal Academy Ruins; do not classify this encounter with the optional October Dragon Trials. After Sogne, continue to Ancient Eldan Sanctum.
Create a manual save before examining the Prince’s body and beginning the Mysterious Voice sequence. Do not choose the pessimistic responses that deny the journey or treat the Prince’s life as meaningless. The early negative answers can place the game on the bad-ending route, so keep this save separate from your normal rotating saves.
Choose the responses that affirm the Prince’s will, continue through the Sanctum scenes and complete the required Homo Gorleo encounter. The Prince Archetype becomes available during this sequence. Recover before beginning Skybound Avatar Conquest; carrying critical injuries or depleted MP into the operation makes the opening section needlessly difficult.
- Complete Virga Island Dragon Temple.
- Clear Montario Opera House and Royal Academy Ruins.
- Defeat Sogne the Icebound.
- Save before examining the Prince’s body.
- Reject the pessimistic Sanctum responses.
- Unlock the Prince Archetype and begin Skybound Avatar Conquest.
2. Clear Royal Garden before Palace Corridor
Enter Skybound Avatar Conquest through Front Parlour and follow the route to Royal Garden. Use the Magla Hollow before committing to the two garden halves. The real targets are the two Voidblack Homo Orelon enemies hidden among the repeating Human encounters. Electric damage and debuffs are useful against them; heal between the two fights rather than allowing attrition to carry into the central encounter.
Explore the western half first or second. Stay low around the patrols, move through the hedge and mud routes, then use the stairs and northern approach to reach the western true Human. On the eastern half, take the lower route around the rubble, pass through the small gate, follow the northern stone path and use the crawl-through opening to reach the eastern true Human. Defeat both real bodies before returning to the central junction.
After both Voidblack Homo Orelon enemies are defeated, return to the center and prepare for Grotesque Chimenzahn. Use Ice and Wind damage. The boss can heal itself at the start of the fight and uses Breath of Battle, so spend the opening turn on buffs, debuffs or defensive preparation if your damage cannot overcome the heal. Avoid relying on Fire or Electric attacks. After victory, return through the Front Parlour route and use the Royal Passage recovery point before Palace Corridor.
- Use the Royal Garden Magla Hollow.
- Defeat the western Voidblack Homo Orelon.
- Defeat the eastern Voidblack Homo Orelon.
- Use Ice and Wind against Grotesque Chimenzahn.
- Heal before entering Palace Corridor.
3. Navigate Palace Corridor by stable landmarks
From the Palace Corridor entrance, go west to the Heavenly Water dead end. Return from that dead end and take the northern path to trigger the short Eupha scene. Continue through the hallway to the eastern door at its end. This door loops the party across to the opposite door; it is a navigation landmark, not the final progression door.
Return to the top hallway and collect Ariadne’s Thread and the Magla Candelabra if desired. Enter the adjacent north-south hallway. On its eastern side, use the second door, not the first. This is the unpaired progress door that transfers the party to the western side. Any door with a directly opposite partner is a loop: if you return to a familiar hallway, backtrack to the last named junction and use the specified unpaired door instead of repeating the loop.
After the transfer, collect Lovers White Mask if desired. Travel north, then west, then south to reach Topaz. Return north and take the southern of the two doors on that side. Continue north for Hero’s Jewelled Root, then travel south across the bridge and collect the Magla Candelabra.
Continue south past Moldilich and Ziocropos. Take the side path to the room containing the Trance Crystal and chest. Defeat the Bloodcoin Imitec guarding the chest to obtain Snowfield Mace. Return to the previous hallway, go all the way south to the end door and enter the next hallway. Collect Graced Water, take the next door, collect Superior Tainted Blade and continue north past Ziocropos.
The northern dead end contains Pristine Looking Glass if you want it. Return to the Plateau Mirage save point after collecting it. Save before entering the nearby doors to Leogrophon. If you choose a wrong door and loop back, reload the last save rather than retracing the entire maze.
- Reach the Heavenly Water dead end.
- Trigger the short Eupha scene on the northern path.
- Use the second eastern door in the north-south hallway.
- Collect Lovers White Mask, then travel north, west and south for Topaz.
- Use the southern door after returning north.
- Cross the Chimera bridge and collect the Magla Candelabra.
- Defeat Bloodcoin Imitec for Snowfield Mace.
- Reach Plateau Mirage and save before Leogrophon.
4. Defeat Leogrophon and reopen Palace Corridor
Put the active party in the back row before entering the boss room. Leogrophon becomes more dangerous when a character remains in the front row and can gain extra actions through Soul Scream. Use Pierce coverage from Gunner, Sniper, Dragoon or another Archetype with dependable Pierce attacks. Avoid Wind attacks and keep healing available for its physical and elemental damage.
Leogrophon can use Deadeye Stance before its strongest attack. Remove the resulting attack penalty with Dekunda or another appropriate debuff cure when possible. Keep the party in the back row throughout the fight instead of moving one attacker forward for a small damage increase.
If the party loses, reload the nearby Plateau Mirage save. Change row placement and replace weak damage options before attempting the corridor again; there is no reason to retrace the maze. After Leogrophon falls, destroy the King’s Servant. The spell blocking the Palace Corridor doors is removed.
Return to the main Palace Corridor hallway and explore the newly accessible sections if you want the rewards. The northeast, central, southwest and northwest areas contain optional treasures and equipment. Collect what you need, then return to the staircase and go back to Royal Passage. The Plateau Mirage save point is not a substitute for the Royal Passage recovery point.
- Place the active party in the back row.
- Use Pierce damage.
- Avoid Wind attacks.
- Remove the Deadeye Stance attack penalty when possible.
- Reload Plateau Mirage after a failed attempt.
- Destroy the King’s Servant.
- Collect optional Palace Corridor rewards.
- Return to Royal Passage.
5. Complete Banquet Hall and defeat Gupdetron
Enter Banquet Hall only after healing and arranging a fast crystal-breaking party. The room imposes a five-minute objective timer that continues during battles. There are five Trance Crystals: one on the center floor, two in the lower side rooms and two on the upper level. Pierce and Light damage are useful for clearing the crystals and their guards.
Destroy the center-floor crystal first. Then enter both lower side rooms and destroy one crystal in each. Use the stairs on both sides to reach the upper level and destroy the remaining two crystals. The order of the two lower rooms and the two upper rooms is interchangeable, but all five must be destroyed before the timer expires.
Ignore treasure and optional loot until the crystal objective is complete. If a skeleton blocks a crystal, defeat it quickly and continue. Once all five crystals are destroyed, use the unlocked doors to reach Gupdetron.
Gupdetron is vulnerable to Pierce and Ice and absorbs Fire. When it uses Charge, Guard with characters likely to be hit by Slam Shatter or apply defensive support before the attack lands. If Gupdetron defeats the party, reload the last Royal Passage or nearby save, skip optional loot and preserve Pierce, Ice and healing resources for the retry.
- Heal before entering Banquet Hall.
- Destroy the center-floor crystal.
- Destroy both lower side-room crystals.
- Destroy both upper-level crystals.
- Complete the objective within five minutes.
- Ignore loot until all five crystals are destroyed.
- Use Pierce or Ice against Gupdetron.
- Guard or defend after Charge.
6. Use the final recovery point before Melancholia Zorba
After Gupdetron falls, the party returns to the main hallway and the remaining obstruction is removed. Take the newly opened stairs and collect the optional Hero’s Leaf of Light on the western side if desired. Continue east until you reach the Royal Passage Magla Hollow.
Save and restore the party at the Magla Hollow. Reassign Archetypes, replace high-cost ordinary-fight skills if necessary and confirm that you have reliable healing, status recovery and damage that remains effective against Zorba. The corridor after this point is linear, so the Magla Hollow is the correct place to prepare.
Continue east through the final corridor and enter the room that triggers the Melancholia Zorba sequence. If MP is low after Gupdetron, return to the Royal Passage Magla Hollow before entering the boss room. Do not confuse this local recovery point with later Neuras recovery services in Tyrant’s Star; if you leave the area for broader recovery, do so before committing to the next boss sequence.
- Return to the main hallway after Gupdetron.
- Collect Hero’s Leaf of Light if desired.
- Use the Royal Passage Magla Hollow.
- Save and change Archetypes before Zorba.
- Enter the final corridor only after restoring MP.
7. Defeat Melancholia Zorba and reject Louis’s offer
Melancholia Zorba alternates between offensive and defensive behavior. Offensive Form uses physical, Lightning, Dark and Almighty attacks and can inflict Anxiety or Rage. Cure those ailments promptly, especially when they leave a character exposed to amplified follow-up damage.
During Defensive Form, stop wasting turns on attacks that the current form resists or repels. Use Almighty damage if available, heal, pass turns or remove the boss’s advantages until its effective damage window returns. Keep defensive buffs and debuff removal ready rather than spending all MP on one opening.
If Zorba defeats the party, reload the Royal Passage Magla Hollow save. Add status recovery, a dependable healer and at least one damage option that is not invalidated by the defensive form. After the boss dies, continue through the story scenes to the Louis conversation.
Choose the responses equivalent to “I don’t seek to destroy” and “That’s false fairness.” Agreeing with Louis’s proposal leads to a bad ending. Once the correct responses are accepted, confirm that Save the Country is active before spending the remaining calendar days.
- Cure Anxiety and Rage quickly.
- Do not attack into Zorba’s defensive resistances or repels.
- Use Almighty damage, healing, passing or defensive support during the resistant phase.
- Reload the Royal Passage save after failure.
- Reject Louis’s offer.
- Choose the response equivalent to “That’s false fairness.”
- Confirm Save the Country is active.
8. Prepare for the October 26 Tyrant’s Star departure
Mt. Vulkano, Manor of the Ascendant, Disgraced Ruins, the October Dragon Trials and Elegy of the Soul are optional for reaching Tyrant’s Star. Complete them only if you want their rewards, experience or challenge encounters. Do not let optional content consume the resources or preparation time needed for the final operation.
Use October 21–25 for requests, Follower events, Royal Virtues, synthesis, equipment upgrades, cooking and shopping. Stock full-party healing, revives, status cures and MP recovery. Make sure the final party has dependable Pierce or physical damage, Almighty damage or another answer to resistant enemies, defensive support and debuff removal. There is no universal consumable count or Archetype-energy threshold that guarantees success, so prioritize flexibility and recovery capacity over a fixed checklist number.
Create a dedicated manual save before October 26 and keep another save for optional cleanup or alternate-ending experiments. Selecting Tyrant’s Star ends normal town access. When More presents the surrender-related choice, reject surrender with the response equivalent to “I don’t want to give up.” This preserves the main route into the final sequence.
- Keep optional Dragon Trials and Elegy of the Soul separate from mandatory progress.
- Finish desired town activities by October 25.
- Restock healing, revival, status and MP items.
- Confirm the final party has Pierce or physical damage, Almighty damage, healing and debuff removal.
- Create a dedicated pre-Tyrant’s Star save.
- Select Tyrant’s Star on October 26 only after preparation.
- Reject More’s surrender response.
Before you move on
- Virga Island Dragon Temple, Montario Opera House, Royal Academy Ruins and Ancient Eldan Sanctum are complete.
- Sogne the Icebound was defeated on the mandatory route.
- The Prince Archetype was unlocked without triggering the Sanctum bad ending.
- Both Royal Garden true Human encounters were defeated.
- Grotesque Chimenzahn was defeated.
- The Palace Corridor route reached Plateau Mirage.
- Leogrophon was defeated from the nearby save point.
- The King’s Servant was destroyed.
- Optional Palace Corridor rewards were collected or intentionally skipped.
- The party returned to Royal Passage.
- All five Banquet Hall Trance Crystals were destroyed within five minutes.
- Gupdetron was defeated.
- The Hero’s Leaf of Light was collected if desired.
- The Royal Passage Magla Hollow was used before Melancholia Zorba.
- Melancholia Zorba was defeated.
- The Louis conversation rejected the false-fairness proposal.
- Save the Country became active.
- A dedicated manual save exists before October 26 Tyrant’s Star departure.
- More’s surrender response was rejected.
References for this chapter
- Skybound Avatar Walkthrough
- Skybound Avatar Conquest Walkthrough
- Skybound Avatar Palace Corridor Walkthrough
- Metaphor: ReFantazio Walkthrough & Guide — Finale Guide
- Prepare for the Final Battle: Guide - Metaphor: ReFantazio Walkthrough & Guide - GameFAQs
- Metaphor: ReFantazio — Louis Guide and Answers — Dot Esports
Tyrant's Star Dungeon — Full Route, Rooms and Puzzle Solutions
Tyrant's Star is entered on October 26 after the October 25 preparation window. Selecting it from the Gauntlet Runner is the final point of no return for normal travel, but Neuras remains at the entrance. He can fully restore HP and MP and sells useful supplies, including MP recovery items. The dungeon has two areas: Melancholia Threshold and Melancholia Depths. Each area has three optional Diabolus guardian branches. Defeating those six guardians destroys their linked crystals, grants powerful Archetype weapons and weakens the final boss. The dungeon also contains a seventh Melancholia Crystal, so the six guardian branches are not the complete crystal count. Leave every Melancholia Crystal intact for the Star Shatterer route. The main route continues northeast through the Threshold, then through the Depths toward the northern checkpoint and the locked final sequence.
1. Save and prepare on October 26
Before selecting Tyrant's Star from the Gauntlet Runner, make a manual save in a dedicated slot. October 26 is the final playable day for normal preparation. Complete any remaining town activities, follower events, shopping, cooking and optional quests before departing. On the night of October 25, completed Followers can provide their lineage-specific bonding items, so collect those rewards before starting the final operation if you want them for the finale.
Stock healing items, revivals, ailment cures and MP recovery. Equip a dependable healer or healing skill, and prepare answers for Anxiety, Dark, Light and Almighty damage. Once Tyrant's Star is selected, normal travel to towns is no longer available. You can still return to the entrance and speak with Neuras beside the Gauntlet Runner. His rest service fully restores HP and MP, and his shop supplies final-dungeon necessities, including Magla Potions. Use this service instead of consuming your entire MP stock on ordinary enemies.
Make another manual save after arriving at Tyrant's Star. If you want Star Shatterer, keep a separate untouched-crystal save and do not destroy any Melancholia Crystal. If you want the easier weakened-boss route, defeat the six optional Diabolus guardians. Their branches are optional for story completion, but their victories destroy associated crystals, provide strong Archetype weapons and reduce the final boss's strength.
- Manual save before selecting Tyrant's Star.
- Manual save after arriving at the entrance.
- Healing, revival, ailment-curing and MP-recovery supplies stocked.
- A reliable healing plan and an Anxiety counter prepared.
- Separate untouched-crystal save created for the Star Shatterer route.
2. Clear Melancholia Threshold and its three guardian branches
From Neuras, enter Melancholia Threshold and follow the main route toward the northeast exit. The area contains three moving-platform branches: one to the northwest, one to the north and one to the southeast. These platforms lead to optional Melancholia Crystals and Diabolus guardians. If you are completing the weakened-boss route, clear the three branches before taking the northeast route onward. If you are preserving the full-strength route, do not activate or destroy any Melancholia Crystal and proceed without fighting the guardians.
The northwest branch leads to Diabolus Gorleo. The boss itself has no ordinary weakness, but its wings are weak to Wind. Prioritize the wings when they are present, then maintain pressure on the main body. Gorleo regenerates its parts more quickly than in the earlier encounter, so avoid wasting turns on a long setup rotation. Defeat it, collect the reward at the crystal site and return to the main platform route.
The northern branch leads to Diabolus Avades. Its arms are weak to Fire, while the shell is weak to Smash. Break the arms to reduce its pressure, then use Smash attacks against the shell to expose the vulnerable interior. Do not rely on elemental attacks against the shell unless your analysis confirms the result; Smash is the dependable route described for this rematch.
The southeast branch leads to Diabolus Butera. It is weak to Ice and uses accuracy-reducing effects. Remove the debuff when it causes repeated misses or makes the fight unstable, then continue using Ice attacks. After completing the chosen branches, return to the central path and take the northeast stone to Melancholia Depths. Use Neuras before leaving the Threshold if your MP is below a comfortable reserve.
- Northwest platform: Diabolus Gorleo; use Wind against its wings.
- Northern platform: Diabolus Avades; use Fire on the arms and Smash on the shell.
- Southeast platform: Diabolus Butera; use Ice and clear accuracy penalties when needed.
- Collect each guardian's reward before leaving its branch.
- Take the northeast route to Melancholia Depths.
- Leave all Melancholia Crystals intact for Star Shatterer.
3. Navigate Melancholia Depths and decide on the remaining guardian branches
Melancholia Depths contains the second group of three optional guardian branches. Continue through the central route, checking the southwest, northwest and southeast areas. The southwest branch leads to Diabolus Jaluzo, the northwest branch leads to Diabolus Sabara and the southeast branch leads to Diabolus Margo. Return to Neuras between branches when necessary; the entrance restoration is more efficient than entering a guardian fight with depleted MP.
Diabolus Jaluzo has no weakness on its main body. Both eyes are weak to Pierce and resist Slash and Strike. The eyes also have different elemental immunities, so use Pierce or Almighty damage rather than cycling elements blindly. Destroying the eyes reduces the boss's offensive options, but they can regenerate, so keep enough damage available to finish the main body after the eyes return.
Diabolus Sabara's tentacles and other parts are weak to Electric. Focus Electric attacks on the exposed parts and destroy the tentacles early. Once the tentacles are removed, Sabara's ability to attack accurately and consistently is reduced. The earlier draft's claim that only the body is Lightning-weak and that the legs should be handled separately is not reliable for this rematch, so use the in-game analysis screen to confirm each exposed part before committing to a turn.
Diabolus Margo changes its affinity during the fight. Watch the color of its aura after Reversal Prayer and use the opposite element. Royal Masked Dancer skills that create a weakness are a safer alternative when you do not want to interpret the aura every turn. Margo may remove buffs and debuffs, so use short buff windows and do not spend several turns building a rotation that can be erased immediately.
The Depths also contains Trance Crystals for optional experience and Archetype experience. Some crystal encounters can produce high-level Homo Tenta variants. Their physical and elemental reflection behavior has been described inconsistently by different guides, so inspect the enemy analysis and avoid attacking with a damage type that is reflected. Almighty is not automatically safe against every rare variant.
- Southwest branch: Diabolus Jaluzo; use Pierce on the eyes.
- Northwest branch: Diabolus Sabara; use Electric against its exposed parts and tentacles.
- Southeast branch: Diabolus Margo; use the element opposite its active aura or create a weakness.
- Inspect rare Homo Tenta variants before attacking.
- Use Neuras before the final northern approach if MP is low.
- Remember that six guardian branches are not the entire seven-crystal count.
4. Reach the northern checkpoint and confirm the chosen route
After clearing the optional branches you want, return to the central route and continue north through Melancholia Depths. Follow the available platforms and passages toward the northern end of the area. The final checkpoint is positioned before the locked story section. Activate it and make a fresh manual save without overwriting the pre-dungeon or untouched-crystal saves.
The checkpoint is not a replacement for Neuras. If you need complete HP and MP restoration, walk back to the entrance, rest with Neuras and return through the cleared route. Use the checkpoint for retry protection, not as evidence that the party has been fully restored. The guardian branches do not need to be repeated during the same visit after they have been cleared.
Before continuing, verify which ending of the dungeon route you intend to use. For the weakened final boss, all six optional Diabolus guardians should be defeated and their associated crystals destroyed. For Star Shatterer, every Melancholia Crystal must remain intact, including any crystal that is not attached to one of the six Diabolus branches. Do not assume that leaving the six guardian fights alone is sufficient if you have already destroyed another crystal elsewhere in the dungeon.
Use the remaining route to restock your final equipment and inherited skills. A physical damage option, an Almighty option, party buffs, debuffs for the early part of the Louis fight and protection against Anxiety are useful preparations. Do not enter the locked sequence with depleted MP simply because the northern checkpoint has been activated.
- Northern checkpoint activated.
- Fresh manual save created before leaving the Depths.
- Neuras used for full restoration if necessary.
- Six guardian victories confirmed for the weakened route, or every Melancholia Crystal preserved for Star Shatterer.
- Final equipment, Archetypes, inherited skills and consumables checked.
5. Leave Tyrant's Star and enter the final story sequence
Continue beyond the northern checkpoint to begin the linear finale. There are no additional optional dungeon branches after this transition. Scenes involving Louis lead into the final battle chain, followed by a later preparation opportunity before the last encounter. Keep the northern save available until the entire ending route is secure.
The final narrative scenes contain bad-ending choices. Earlier in the finale, responses that accept the premature conclusion, such as agreeing that the story ends there or refusing to continue learning the truth, stop the game early. At the later Louis and More sequence, agreeing with More's conclusion also produces a bad ending. For the true-ending route, choose the responses that reject the premature ending and continue the confrontation. The exact dialogue belongs in the final-battle chapter, but the safe practice here is to save before leaving the checkpoint and never overwrite that save until the ending has been confirmed.
A successful Tyrant's Star route is confirmed when the game advances from Melancholia Depths into the Louis sequence and then continues into the final battle chain instead of ending at a bad-ending prompt. If a subsequent battle fails, reload the northern checkpoint or the earlier Neuras preparation save. Do not spend every high-grade recovery item attempting repeated fights without restoring MP and reviewing the party setup.
- Northern checkpoint save remains available.
- Linear Louis scenes begin after leaving Melancholia Depths.
- No premature-ending dialogue response has been selected.
- The game advances into the final battle chain.
- The untouched-crystal save remains preserved if pursuing Star Shatterer.
Before you move on
- Tyrant's Star was entered on October 26 after all desired October 25 preparation was completed.
- Neuras has been used for full HP and MP recovery, and final supplies have been purchased.
- The selected crystal route is complete: six optional Diabolus guardians defeated for the weakened final boss, or every Melancholia Crystal left intact for Star Shatterer.
- The northern checkpoint in Melancholia Depths has been activated and preserved in a separate save.
- The party has left Melancholia Depths and entered the Louis story sequence leading to the final battle chain.
References for this chapter
- Metaphor: ReFantazio Walkthrough & Guide — Finale Guide
- Prepare for the Final Battle: Guide - Metaphor: ReFantazio Walkthrough & Guide - GameFAQs
- Tyrant’s Star Walkthrough — Metaphor: ReFantazio — Neoseeker
- Metaphor ReFantazio 100% Walkthrough
- Operation: Final Dungeon - Metaphor: ReFantazio Walkthrough & Guide
Final Boss Walkthrough — Phases, Counters and the True Ending
The Tyrant’s Star finale is a sequence of Archdemon Louis Charadrius, a solo battle against More, and Destroyer Charadrius. Before the final confrontation, defeat the optional crystal guardians if you want the standard-strength version of Destroyer Charadrius; leaving the crystals intact produces a much stronger fight with more turn icons and additional attacks. Make a manual save before the final Akademia conversation and reject the offered escape. During the boss sequence, destroy the three masks, eliminate any puppet created by New Dawn’s Sacrifice, cure Anxiety, and keep recovery available for the second phase. Destroyer Charadrius has no ordinary weakness, so use your strongest reliable physical, magical, Almighty, buffing, debuffing, and healing tools rather than building the entire plan around one element.
1. Finish preparation before the irreversible finale sequence
At the Tyrant’s Star entrance, speak with Neuras to rest and use the available shop before continuing. This is the safest place to restore resources while exploring the final dungeon. If you have not already done so, clear the optional Diabolus crystal guardians. These encounters are not required to reach the ending, but destroying their associated crystals weakens the later Destroyer Charadrius battle. Leaving the crystals intact is primarily a challenge route and is associated with the Star Shatterer trophy condition.
Create a manual save before beginning the final sequence. Keep a second save if you want to preserve the dungeon for optional boss cleanup. Set up at least one dependable high-rank healer, one source of revival, and more than one way to remove ailments. The final battles can remove buffs and debuffs, so do not make the party dependent on a single setup turn. Give your strongest characters Archetypes with dependable damage rather than forcing a particular elemental weakness that the bosses do not possess.
A Royal Archetype is useful but not mandatory. Prince, Royal Berserker, Royal Warrior, Royal Thief, Royal Dancer, and other mastered endgame Archetypes can all contribute, provided the party still covers healing, revival, status recovery, and sustained damage. If you have unlocked King’s Sovereignty, equip it before Destroyer Charadrius; its Anxiety protection is especially valuable in the mask phase.
- Rest and restock at the Tyrant’s Star entrance before the final approach.
- Defeat the optional crystal guardians if you want the weakened final boss.
- Save before the final story sequence and keep a separate rollback save.
- Bring healing, revival, ailment recovery, and more than one reliable damage option.
2. Defeat Archdemon Louis Charadrius, then oppose More
The first major fight is Archdemon Louis Charadrius. He has no ordinary weakness. Use buffs and debuffs early, but expect Dekaja and Dekunda later, so refresh them only when they produce immediate value. Physical damage from strong late-game Warrior or Berserker variants is effective, while a high-rank magical attacker gives you a second damage route. Keep the party healthy because Louis’s later attacks are more aggressive and can land critical hits.
Louis can raise his power and prepare major attacks. When he begins a visible charge or protection sequence, use a strong attack rather than spending the entire round on low-impact setup. Do not empty your inventory of recovery items here; this is followed by more story and combat before the ending is secured. After Louis is defeated, the game moves to a solo battle against More. This is not a normal party fight: the protagonist faces More alone.
During the More encounter, use the protagonist’s strongest reliable attacks and heal whenever necessary. The fight is mainly a story gate, but losing here can force you to repeat the preceding sequence. Afterward, when the game presents the choice concerning More’s position, choose the response that opposes him rather than siding with or accepting his proposal. The story then returns to the final confrontation.
- Treat Archdemon Louis as a no-weakness boss.
- Use buffs and debuffs, but do not rely on them surviving every round.
- Keep enough healing and revival for the battles that follow.
- Oppose More when the post-Louis choice appears.
3. Destroy the three masks in the first Destroyer Charadrius phase
Destroyer Charadrius begins with three separate masks: Mask of Mirth, Mask of Ire, and Mask of Joy. All three must be destroyed before the second phase begins. The masks do not offer a normal elemental weakness, but they favor different damage types. Mask of Ire takes reduced damage from physical attacks, so use magical damage against it. Mask of Joy takes reduced damage from magical attacks, so use physical damage against it. Mask of Mirth is less specialized and takes reduced damage from both major damage categories.
The boss can inflict Anxiety early and repeatedly. Cure it immediately on a healer, primary attacker, or any character whose loss would break the turn cycle. King’s Sovereignty prevents Anxiety for the party if available. Otherwise, carry remedies and use a status-recovery skill rather than allowing a key character to lose actions. Keep HP high because critical damage, missed attacks, and weakness interactions can make Anxiety more likely or turn a single bad round into a wipe.
Watch for New Dawn’s Sacrifice. Louis places a Magla puppet in one mask’s mouth. Destroy that puppet before the next enemy sequence. If it is consumed, the effect depends on the mask: Joy produces a powerful magical attack, Ire produces a powerful physical attack, and Mirth generally heals or strengthens the masks while weakening your party. The puppet is the immediate target even if one of the masks is close to defeat.
Terror Overflowing can precede Great Reset, a severe Almighty attack that may inflict Anxiety. When the boss has charged power, stop spending the whole round on damage. Heal, guard, or use the remaining actions to destroy a puppet and prepare for the incoming attack. Once the third mask falls, use the transition to restore HP and remove dangerous ailments before the body phase begins.
- Destroy Mask of Mirth, Mask of Ire, and Mask of Joy.
- Use magic on Ire and physical attacks on Joy when practical.
- Destroy every Magla puppet created by New Dawn’s Sacrifice.
- Cure Anxiety and recover before the second phase starts.
4. Survive the final Destroyer Charadrius body phase
The second phase is a single-target battle against Destroyer Charadrius. It has no normal weakness or resistance that requires a specific attack type, so use your best dependable damage. Almighty attacks are valid, and strong physical or magical skills work as well. Louis frequently uses Dekaja and Dekunda in this phase; apply buffs and debuffs only when they will matter immediately or force him to spend a turn removing them.
High Pressure reduces the number of Turn Icons available on your following turn. After High Pressure, avoid spending the reduced turn on a risky setup unless the party is already safe. Pass toward the character who can heal or finish the boss, and use Guard when a character has no productive action. The boss also uses powerful Fire, Ice, Electric, Wind, Light, and Dark attacks, so finish each round with the party healthy rather than assuming elemental coverage will prevent damage.
At a scripted point, Louis names one of the tribes. A Tribe Condemned then targets that tribe and will KO the corresponding party member on the following enemy turn. This effect cannot be prevented by ordinary resistance. Be ready to revive the victim after the attack, and do not allow the targeted character to be your only healer or damage source. The protagonist is not the normal target of this tribe-specific KO, so keep the protagonist capable of stabilizing the party.
If you left the Tyrant’s Star crystals intact, this phase is substantially harder. Destroyer Charadrius gains more Turn Icons and can use additional attacks associated with the crystal guardians. For the standard completion route, clearing the guardians before the final approach is strongly recommended. If attempting the full-power version, prioritize survival, use every efficient recovery option, and do not waste turns maintaining buffs that are immediately erased.
- Use your best reliable damage; do not search for an ordinary weakness.
- Recover immediately after High Pressure reduces your next turn.
- Prepare to revive the character targeted by A Tribe Condemned.
- Treat the no-crystal route as a challenge fight with a much larger turn burden.
5. Reject the Akademia escape and confirm the true ending
The decisive final ending choice occurs before the Destroyer Charadrius battle, during the final Akademia sequence after the revelations about the world. More presents an escape from the current reality. Reject that escape and choose to remain committed to saving Euchronia. Accepting the offered escape produces the bad ending and prevents the final boss sequence from proceeding normally.
This is the last choice for which the manual save is essential. If you select the wrong response, reload the save made before the Akademia conversation rather than relying on an autosave. The correct route then returns you to the final battle preparation and continues through Destroyer Charadrius.
After Destroyer Charadrius is defeated, allow the ending scenes and credits to play. The post-battle sequence does not contain another comparable true-ending decision. When the game becomes available again after the ending, create a clear-game save if prompted or offered. That file is the appropriate starting point for New Game Plus and preserves the completed campaign state.
- Before Destroyer Charadrius, reject More’s offered escape in Akademia.
- Reload the pre-Akademia save if the bad ending occurs.
- Defeat Destroyer Charadrius after making the correct choice.
- Watch the ending and credits, then create a clear-game save.
Before you move on
- Archdemon Louis Charadrius is defeated.
- The solo More battle is completed and the route continues.
- Mask of Mirth, Mask of Ire, and Mask of Joy are destroyed.
- Destroyer Charadrius is defeated in its final body phase.
- The Akademia escape is rejected before the final boss.
- The normal ending scenes and credits play, followed by creation of a clear-game save.
References for this chapter
- Metaphor: ReFantazio Walkthrough & Guide — Finale Guide
- Destroyer Charadrius Boss Guide - Finale - Walkthrough | Metaphor: ReFantazio
- Metaphor: ReFantazio Endings Guide – How To Avoid All Bad Endings
- Metaphor: ReFantazio Walkthrough: Month-by-Month Route, Missables and Endings — SlashKeys
- Metaphor ReFantazio Trophy Guide & Roadmap
Post-Credits, New Game+ and Superboss Route
After completing the ending, create Clear Data and keep a separate manual save from before the final sequence. Loading Clear Data starts New Game+, where money, MAG, Royal Virtues, ordinary inventory, equipment, unused Gold Beetles, Memorandum progress and Archetype development carry over. Character levels, Follower ranks, Follower abilities, story progress, key items, currently unlocked Archetypes and temporary stat increases from runner activities reset. Archetype rank progress, mastered skills and related bonuses are retained, but you must unlock each Archetype again before using it. New Game+ adds Regicide and the Redscale Apocalypse Dragon, accessed through the Book of Apocalypse in Akademia. Start NG+ on Easy, Normal, Hard or Regicide; Storyteller disables this superboss for that run. Prepare near the end of the second playthrough, make a separate save before examining the book, and defeat the dragon to unlock Closing the Book.
1. Finish the first run and preserve both save types
Complete the final story battle and continue through the ending sequence until the game offers to create Clear Data. Save that file in a clearly marked slot. Clear Data is the file used to begin New Game+; an ordinary save made before the final battle does not substitute for it.
Keep a second manual save from before the final sequence. This rollback file is useful if you want to revisit the final battle, check late-game rewards, inspect optional content or preserve access to the ending route without replaying the entire campaign. Do not overwrite it with the Clear Data file.
- Confirm that the completed file is identified as Clear Data.
- Keep one untouched pre-final save and one completed Clear Data save.
- Do not delete the first-run file until the ending and trophy checks are complete.
2. Start New Game+ from Clear Data
Return to the title screen and load the Clear Data file when you are ready to begin the second playthrough. The game creates a fresh campaign while transferring the eligible long-term progress from the completed run.
New Game+ is not a post-game free-roam state. Story scenes, dungeons, calendar progression, party recruitment and required objectives must be completed again. Use the carried-over equipment, money and MAG to reduce routine preparation, but expect the campaign systems to unlock again as the story advances.
- Load Clear Data rather than the pre-final manual save.
- Confirm that the new campaign begins from the opening story sequence.
- Keep the pre-final save separate in case you still need first-run cleanup.
3. Understand what carries over and what resets
Money, MAG, Royal Virtues, ordinary items, equipment, unused Gold Beetles, Memorandum progress and scanned-enemy progress carry over. Follower Bond items obtained from maximum ranks also remain available. This lets you begin the second run with stronger gear, a larger item stock and far fewer Royal Virtue obligations.
Archetype development is partially retained. Archetype rank progress, mastered skills, purchased skill access and mastered-Archetype stat bonuses remain associated with the relevant Archetype. However, the Archetype itself must be unlocked again through the required story event or Follower rank. Until that happens, you cannot equip it or inherit its saved skills.
Character levels, Follower ranks, Follower abilities, story-linked Archetype access, quest progress and key story items reset. Temporary stat increases obtained from bathing, washing clothes or cleaning on the Gauntlet Runner also reset, so do not treat those bonuses as permanent NG+ carryover.
- Use carried-over money and equipment instead of farming early-game upgrades.
- Rebuild Follower ranks before planning a final Royal Archetype party.
- Reapply temporary runner and bathing stat bonuses during the second run if needed.
4. Select an eligible difficulty
New Game+ adds Regicide, the hardest difficulty, but it also allows Easy, Normal and Hard. Choose the difficulty with the Redscale Apocalypse Dragon in mind: the superboss is unavailable if the New Game+ run is started on Storyteller.
Normal or Hard is the practical choice for most trophy-focused runs. Regicide lowers combat rewards and makes ordinary encounters more punishing, so use it only if you specifically want the additional challenge. The superboss does not require Regicide.
- Choose Easy, Normal, Hard or Regicide when creating NG+.
- Do not start the superboss-focused run on Storyteller.
- Use Normal or Hard if your priority is efficient completion rather than maximum difficulty.
5. Rebuild only the systems needed for the final attempt
Advance the required story until Followers, party members and late-game Archetypes become available again. Prioritize the Followers whose ranks unlock the Archetypes and inherited skills used by your planned superboss team. Because Archetype ranks and purchased skills are retained, the second unlock is much faster than raising every Archetype from the beginning.
Keep carried-over endgame equipment, healing items and battle items rather than selling them for early upgrades. During the second campaign, save rare materials and cooking resources for powerful consumables, especially Sublime Spoonfuls and MP recovery items. These are optional rather than mandatory, but they can give you extra turns and make the fight considerably safer.
- Reunlock the Archetypes required by your intended party.
- Retain strong equipment and high-grade consumables.
- Build a reserve of extra-turn and MP-recovery resources before the final attempt.
6. Reach Akademia and access the Redscale Apocalypse Dragon
The Redscale Apocalypse Dragon is available only in New Game+. Once you gain access to Akademia during the second playthrough, inspect the red Book of Apocalypse that has been moved from its pedestal in More's room. Examining the book starts the superboss battle; there is no separate quest chain that must be completed first.
The book can be reached much earlier than the fight is practical. Make a manual save before examining it, then leave the battle setup until your party has the necessary Archetypes, equipment and consumables. A level around 70 or higher is a reliable preparation target for the regular strategy, but it is not a fixed entry requirement and specialized extra-turn strategies can win at lower levels.
- Reach Akademia in the New Game+ campaign.
- Locate the red Book of Apocalypse near More.
- Save before interacting with the book.
- Do not attempt the fight merely because the book is available.
7. Prepare the team and survive the opening turns
Use a damage core supported by healing, buffs, debuffs and emergency recovery. A common setup uses the protagonist as Prince, Strohl as Royal Warrior, Hulkenberg as Royal Knight and Eupha as Royal Summoner, but other Royal Archetype combinations can work. Equip the strongest available weapons and armor, then add inherited skills that improve damage, accuracy, healing, MP management or defense.
Do not equip effects that repel or drain attacks unless your strategy specifically accounts for them. The Redscale Apocalypse Dragon can punish reflected or absorbed attacks with a devastating response. Open by reducing the dragon's defenses and increasing your party's damage, while keeping recovery available. If the boss is about to receive a turn and the party has only one Press Turn icon remaining, a Sublime Spoonful can provide extra actions and may prevent the fight from reaching a dangerous enemy phase.
If an attempt fails, reload the pre-battle save. Change Archetypes, inherited skills, equipment or consumable stock before grinding levels blindly. The fight rewards accurate attacks and disciplined turn management more than simply adding a few character levels.
- Aim for approximately level 70 or higher for the standard approach.
- Bring healing, revives, MP recovery and status-recovery options.
- Keep a separate save immediately before the book interaction.
- Reserve extra-turn items for the point where the boss would otherwise act.
8. Confirm the trophy and preserve the completed NG+ file
Defeat the Redscale Apocalypse Dragon to unlock the PlayStation trophy Closing the Book. Confirm the trophy notification or check the PS5 trophy list before deleting any saves. The trophy description identifies the target as the redscale dragon from the Book of Apocalypse.
A complete chapter finish requires a loadable Clear Data file, a functioning New Game+ campaign, the Redscale Apocalypse Dragon defeated on an eligible difficulty and the original pre-final save preserved. Keep the NG+ file afterward if you still need Bond scenes, Royal Virtues, missed quests or other cleanup.
- Clear Data loads successfully.
- The Book of Apocalypse has been examined in Akademia.
- The Redscale Apocalypse Dragon is defeated on Easy, Normal, Hard or Regicide.
- Closing the Book is registered on the PS5 trophy list.
- The first-run pre-final save remains intact.
Before you move on
- A Clear Data file from the completed first playthrough is present and loadable.
- New Game+ shows transferred money, MAG, Royal Virtues, inventory, equipment and Archetype development.
- The required Archetypes and Followers have been reopened for the second-run party.
- The Book of Apocalypse is accessible in Akademia.
- The Redscale Apocalypse Dragon has been defeated on an eligible New Game+ difficulty.
- The PS5 trophy Closing the Book is unlocked.
- A separate pre-final first-playthrough save remains available.
References for this chapter
Optional Quests, Missable Scenes and How to Clean Them Up
Metaphor: ReFantazio allows most optional content to be completed in one playthrough, but calendar windows, candidate debates, one-time collectibles and certain NPC events require planning. The main Operations display deadlines and must be completed before they expire. Sogne the Icebound is not optional: after Drakodios is recovered, the September 12 Royal Academy Ruins sequence leads directly to this mandatory story boss. By contrast, Elegy of the Soul in the October Dragon Temple is optional Dragon Trial content and belongs in the late cleanup period, not the required September route. Protect several manual saves, accept requests as soon as they appear, complete Follower-opening quests, obtain The Magical Future in Port Brilehaven, track candidate debates and record Gold Beetles. New Game Plus is useful for the Redscale Dragon and general cleanup, but it does not restore missed calendar events or preserve unfinished Follower ranks.
1. Separate mandatory story progression from optional cleanup
Use the deadline shown in each Main Operation as the controlling date. Complete deadline dungeons early enough to leave time for turn-ins, Follower events, shopping and newly unlocked requests. A quest that remains accepted is not necessarily complete; return to the designated NPC and confirm the reward or completion state before moving the story forward.
The September 12 Royal Academy Ruins sequence is mandatory. After recovering Drakodios, travel to the Royal Academy Ruins when the story directs you there and defeat Sogne the Icebound. Do not label Sogne as an optional dragon, side boss or cleanup encounter. This fight is part of the required route and occurs before the later October endgame preparation period.
The optional October dragon content is separate. The Dragon Temple encounter against Elegy of the Soul is part of the Trial of the Dragon: Essence of Power content. It is optional for reaching the ending and should be scheduled during the late October free-time window after the mandatory story operations that open the final stretch. Treating Elegy of the Soul as optional does not make the September Sogne fight optional; they are different encounters in different story periods.
- Accept every visible request and bounty when entering a newly unlocked area.
- Record the displayed deadline in the quest menu.
- Complete Main Operations before their deadlines and turn in their associated quests.
- Defeat Sogne the Icebound during the September 12 Royal Academy Ruins story sequence.
- Reserve Elegy of the Soul for optional October Dragon Trial cleanup.
2. Protect Follower access and schedule Rank events
When a character becomes a Follower, check the next available Rank requirement immediately. Some bonds require a Royal Virtue threshold, a personal opening quest, a story trigger or a particular travel schedule. Raise the required Virtue during spare daytime or Gauntlet Runner periods, then use the next available Follower event instead of repeatedly visiting a character whose Rank is blocked.
Follower events do not use Persona-style matching-Archetype affinity rules. You do not need to equip a matching Archetype, and ordinary dialogue choices do not normally prevent a Rank increase when the event is available. The practical risks are failing to open the bond, overlooking its prerequisite or spending too many free periods on low-priority activities. Maxing all 14 Followers is possible in one run, but it requires deliberate calendar use.
Catherina and the other Followers should be checked whenever Gallica's consultation feature identifies a request or available ally. Consultation helps locate activity, but it does not replace checking the quest list, map and current Virtue requirements. Complete personal opening quests promptly, especially when the quest itself has a visible deadline or disappears after a story-area transition.
- Complete every quest that opens a new Follower as soon as it appears.
- Record each bond's next Virtue, quest or story requirement.
- Use available Follower events before ordinary sightseeing and nonessential shopping.
- Keep a separate note for Followers that are temporarily unavailable.
- Do not rely on New Game Plus to preserve unfinished bond ranks.
3. Obtain The Magical Future before leaving Port Brilehaven
During the Port Brilehaven story period, visit Angler's Inn Square during the daytime when the weather permits. From July 23 onward, speak with Julian at the fountain in the southwest portion of the square. Continue the conversation and answer the literacy prompt so that he gives you The Magical Future. The first response is not the important requirement; reaching the later literacy exchange is what matters.
Read the book from the Gauntlet Runner bookshelf during travel time. Julian leaves after the Brilehaven story section, so returning to the city later will not reliably restore this opportunity. The book is associated with the Bookworm trophy, and merely receiving it is not enough: finish reading it along with the other available books.
Make a manual save before leaving Brilehaven if Bookworm is a goal. If Julian is absent, reload the earliest save from before the relevant Brilehaven transition rather than assuming the NPC will return during a later free period.
- Visit Julian at the Angler's Inn Square fountain during the Brilehaven window.
- Confirm that The Magical Future appears on the Gauntlet Runner bookshelf.
- Finish reading the book.
- Keep a pre-departure save until Bookworm is confirmed.
4. Complete candidate debates before their story windows close
Candidate debates occur at the podium in the active story area and count toward the Debate Me trophy. The commonly tracked dates are July 9 with Roger, July 12 with Lina, July 16 with Loveless, July 23 with Jin, July 24 with Glodell, July 26 with Rudolf, July 27 with Milo and September 13 with Julian. Visit the appropriate podium on each date, select the response that wins the debate and verify that the event has completed before using the remainder of the day.
A candidate may no longer be available after that part of the campaign ends. If you are following a day-by-day route, check the podium at the listed date; if a debate was missed, inspect the podium on later available days before assuming the trophy is lost, because some guides report limited rescheduling behavior. Make a manual save before a debate if you want a reliable rollback point.
Debates are optional for ordinary story completion, but they are not cosmetic if you are pursuing Debate Me or a complete missables checklist. Do not spend the relevant time slot elsewhere until you have checked the podium.
- Track all eight candidate debates in a separate calendar checklist.
- Check the correct podium before using that day's free activity.
- Save before a debate if you want to reverse a wrong response.
- Confirm the debate event registered before leaving the area.
- Do not assume a departed candidate will return later.
5. Sweep towns, one-time areas and Gold Beetles
When a new town or story region opens, inspect its streets, taverns, inns, shops, Recruitment Center, informants, podium and named NPCs before advancing the main objective. Prioritize conversations that create a quest, provide a unique book, unlock a Follower or offer a one-day Virtue activity. Record unusual NPC locations because some scenes disappear after the next story transition.
Gold Beetles require their own checklist. The All That Glitters trophy requires trading 46 Gold Beetles, while the game contains enough Beetles to allow some misses. Several are associated with locations that later become inaccessible, so record both collected and traded totals. Visit the Gold Beetle collector in Port Brilehaven when available and do not confuse the number collected with the number traded.
For broader completion, track one-time dungeon pickups and story-area collectibles separately from trophy progress. A player who only needs the trophy can recover from a small number of misses; a player targeting a complete collectible record should follow a location checklist from the beginning.
- Inspect every town facility and named NPC when each region first opens.
- Track Gold Beetles by location and maintain a traded total.
- Visit the Brilehaven Gold Beetle collector before late-game cleanup.
- Treat one-time dungeons and story zones as immediate checklist priorities.
- Do not mistake 46 traded Beetles for a requirement to collect every Beetle.
6. Create protected saves before the final act
Before beginning the final chain of story operations, create a dedicated manual save and do not overwrite it. Keep a second save from the latest town arrival and a third for ordinary progress. Autosaves can recover a recent battle or scene, but they are not a dependable record of a missed date or vanished NPC.
From the protected save, inspect the quest menu and confirm that every intended request has been turned in. Check that each Follower is Rank 8, available, or blocked by a requirement you have written down. Confirm that The Magical Future was read, the candidate debates were completed and one-time Gold Beetles or story-area pickups on your checklist are finished.
Also confirm the mandatory route separately from optional October cleanup. Sogne the Icebound must already be defeated as part of the September 12 Royal Academy Ruins sequence. Elegy of the Soul is not a required replacement for Sogne and is not evidence that the September story route is complete; it is an optional Dragon Temple Trial encounter that can be handled during October preparation.
- Keep one untouched save before the final-act transition.
- Keep one save from the latest town arrival and one current-progress save.
- Verify completed quest turn-ins, not only accepted quests.
- Confirm Sogne is defeated on the September story route.
- Track Elegy of the Soul separately as optional Dragon Trial content.
- Verify books, debates, Followers, Gold Beetles and one-time areas independently.
7. Decide what can wait for New Game Plus
A normal ending does not require every request, debate, book or optional Dragon Trial. For a safe first run, prioritize Main Operations, Follower-opening quests, visible deadline requests, The Magical Future, the candidate debates and one-time story-area collectibles. Ordinary equipment rewards, spare materials and nonexclusive money rewards can be postponed when the quest remains available and its deadline is recorded.
The October Dragon Temple fight against Elegy of the Soul is optional. It is a late Dragon Trial encounter and can be skipped if the goal is only to finish the main story and reach the true ending. Complete it during October if you want its reward, related request completion or a broader endgame checklist. Do not move it into the September mandatory route or treat it as the story boss following Drakodios.
New Game Plus is primarily useful for the Redscale Dragon and deliberate second-run cleanup. It is not a dependable substitute for missed debates, The Magical Future or unfinished Follower ranks, because calendar progress and Follower Bond progress must be rebuilt. Preserve the first-run save before starting the second campaign.
- Story completion: defeat Sogne during the September 12 Royal Academy Ruins sequence and finish every Main Operation before its deadline.
- Optional Dragon cleanup: defeat Elegy of the Soul in the October Dragon Temple only if pursuing its Trial of the Dragon content.
- Quest completion: finish and turn in the intended Main Quests, Side Quests, bounties and special trials.
- Follower completion: reach Rank 8 with all 14 Followers in the same run.
- Trophy cleanup: read all books, complete the candidate debates and trade at least 46 Gold Beetles.
- New Game Plus: preserve the first-run save and use NG+ for the Redscale Dragon or deliberate second-run cleanup.
Before you move on
- The September 12 Royal Academy Ruins sequence was completed and Sogne the Icebound was defeated after Drakodios was recovered.
- The main story was completed without allowing a Main Operation deadline to expire.
- The quest menu and personal checklist confirm that intended Main Quests, Side Quests, bounties and special trials were completed and turned in.
- All 14 Followers reached Rank 8, or a protected save exists before the unresolved bond's final availability window.
- The Magical Future was obtained from Julian in Port Brilehaven and fully read from the Gauntlet Runner bookshelf.
- All eight candidate debates were completed: July 9, July 12, July 16, July 23, July 24, July 26, July 27 and September 13.
- At least 46 Gold Beetles were traded for All That Glitters; a full collectible checklist is complete if broader 100 percent cleanup is intended.
- Elegy of the Soul was either defeated as optional October Dragon Temple Trial content or deliberately skipped with no confusion about mandatory story progress.
- A protected manual save exists before the final-act transition, in addition to a current progress save.
- If New Game Plus is planned, the first-run save is preserved because Follower ranks and missed calendar events are not repaired automatically.
References for this chapter
- Obtain Drakodios Walkthrough - Metaphor: ReFantazio - Neoseeker
- Metaphor: ReFantazio Walkthrough: Month-by-Month Route, Missables and Endings — SlashKeys
- Walkthrough Part 6 — Royal Academy Ruins and Ancient Eldan Sanctum — The Escapist
- Bookworm Trophy/Achievement Guide - Gamer Guides
- Metaphor ReFantazio Trophy Guide & Roadmap
- Metaphor ReFantazio - All Gold Beetle Locations - PowerPyx
- All Missables in Metaphor: ReFantazio - Gamer Guides
- Metaphor: ReFantazio - All Requests and How to Complete Them - Push Square
Equipment and Synthesis — Best Value Upgrades and Farming Tips
Use equipment as a progression tool, not a reason to empty every shop. Replace outdated weapons first on the characters and Archetypes you will use in the next dungeon, then protect your reeve for recovery items, ingredients, accessories and purification. Appraise damaged or unidentified gear before selling it, and only purify equipment marked as eligible after Wisdom Rank 2 unlocks the service at St. Fermis Church in Grand Trad. Blessed Water is especially important early because purification consumes it and some early Mimics do not remain available forever. For income, use normal dungeon clears, Merchant abilities, bounties and carefully chosen farming loops; distinguish reeve farming from Debt Collection, which produces MAG and costs MP. Prepare boss consumables before luxury purchases, and preserve strong equipment, items, money, MAG and Archetype progress if you intend to enter New Game+.
1. Replace equipment according to the next dungeon and current Archetype
When you reach a new town, inspect the weapon and armor shops, but do not replace every item automatically. Start with the active damage dealers and the protagonist, then cover the party members who will be available for the next story dungeon. A meaningful increase in weapon attack is usually more noticeable than a small defensive upgrade, while armor becomes a priority when it provides a large defense improvement or protects against a danger you expect to face.
Check the Archetype restriction before buying. Weapons are not universally usable across every role, so a strong-looking blade, staff or spear may be unusable after a character changes Archetype. Keep at least one practical weapon for a flexible character who changes roles frequently, especially the protagonist. Compare the shop item with dungeon rewards, appraised equipment and purified equipment before spending reeve; ordinary shop stock is not always the best long-term purchase.
Do not treat every accessory as a stat upgrade. A resistance or status-protection accessory can be more valuable than a few points of defense during a boss fight. Make the equipment decision from the encounter ahead: damage for routine exploration, resistance for a known boss mechanic, and synthesis support when a particular combination skill is central to the plan.
- Upgrade the weapons of the party members you will actively use next.
- Check weapon and armor Archetype restrictions before buying.
- Compare shop gear with dungeon, appraised and purified alternatives.
- Favor resistance or status protection when a boss threatens a specific ailment.
2. Appraise damaged equipment before selling it
Damaged, rusted or otherwise unidentified weapons and armor can be taken to the appropriate weapon or armor shop for appraisal. The appraisal reveals the equipment's actual identity and effects; therefore, do not sell an unidentified item merely because its displayed name looks weak. Some results are ordinary, while others can become useful class-specific upgrades. The PS5 equipment guide lists multiple possible results for several unidentified items, so an appraisal is not a guarantee of a rare reward.
Use a simple inventory rule: keep unidentified gear until you have enough reeve to appraise it, then compare the revealed item with the equipment currently assigned to each relevant Archetype. Sell duplicate low-value results after checking them. If your inventory is full during a dungeon, discard only equipment you have already identified as disposable; preserve unknown gear until you can make an informed decision.
Do not build a farming plan around repeatedly reloading for a desired appraisal result unless you deliberately want to manipulate the game's auto-save behavior. Appraisal outcomes can vary, and a normal campaign should treat a favorable result as a bonus rather than a required step.
- Appraise unknown gear at weapon or armor shops.
- Compare the revealed result against the relevant Archetype's current equipment.
- Sell duplicates only after their identity and value are known.
- Do not promise yourself a specific appraisal result without verified manipulation steps.
3. Unlock purification, then spend water only on gear worth keeping
Equipment marked as eligible for purification can be improved at St. Fermis Church in Grand Trad. The service becomes available after Wisdom reaches Rank 2. Purification requires the appropriate water item and reeve; early equipment generally uses Blessed Water, while later equipment can require Graced Water or Heavenly Water. The game can show the resulting equipment before you commit, so compare the future stats or effect with your current gear first.
Blessed Water deserves special care. Dungeon chests and material discoveries are important sources, and the PS5 guide notes that Mimics can also provide water through stealing. Overworld Mimics can be stolen from and escaped, but Mimics disguised as treasure chests should not be treated as the same repeatable source. Some early overworld Mimics do not respawn after leaving their dungeon, so spending Blessed Water on a weapon you will replace immediately can leave you short later.
A good purification target is a weapon, armor piece or accessory that you expect to use through several story sections, particularly one with a useful elemental, enemy-type or defensive effect. Do not purify every eligible item as soon as you see the option. Keep a reserve for stronger later discoveries and check the required water tier before committing.
- Raise Wisdom to Rank 2 before planning around purification.
- Use St. Fermis Church in Grand Trad for the service.
- Check the projected purified result before paying.
- Preserve Blessed Water for durable or strategically important equipment.
- Do not assume every Mimic can be farmed indefinitely.
4. Buy boss consumables before luxury equipment
Before a major deadline or boss, reserve reeve for revival items, strong healing, status cures and MP recovery. These supplies can correct a bad turn or recover from a failed phase transition; a minor weapon upgrade usually cannot. Carry the cure for the next boss's known ailment when one is available, then add general-purpose remedies for emergencies.
Cooking expands the value of ingredients beyond simple healing. MP-restoring food, full-party recovery, status cures and defensive food can solve problems that equipment cannot. Sublime Spoonful is a late-game priority because it adds turn icons when used in battle, making it valuable for major encounters and New Game+ preparation. It is not a routine-dungeon consumable. The recipe requires a Lord of the Lake, Queen's Honey Jar and Gauntlet Shrooms, so avoid converting these ingredients into low-impact food if you are saving for difficult fights.
Synthesis accessories should match the fight. Utilitarian's Manual reduces the turn-icon cost of synthesis skills and is suited to a character who repeatedly initiates high-value combinations. Overlord's Sash sharply increases both the power and MP cost of MP-consuming synthesis skills, so it is a specialist damage option rather than a universal recommendation. Do not equip it without a plan for restoring MP or ending the fight quickly.
- Carry revives and strong healing before a boss dungeon.
- Bring cures for the next boss's likely status effects.
- Reserve Sublime Spoonful for major battles or superboss preparation.
- Use Utilitarian's Manual for repeated synthesis and Overlord's Sash only with MP support.
5. Farm reeve, MAG and materials as separate activities
For ordinary reeve, use the Merchant Archetype while clearing enemies in areas where you can defeat targets quickly and safely. The Merchant's money-oriented abilities can make overworld and dungeon clears more profitable, but do not spend reeve on attacks without checking the skill description. Bounties are another reliable source of cash, and Catherina's Bond Rank 3 ability improves bounty rewards, making it valuable before completing many hunts.
MAG farming is a different loop. Merchant's Debt Collection steals MAG and consumes MP; it is not a reeve-generating skill. At higher Merchant progression, it becomes useful in endgame farming, but you need an MP recovery plan. The final dungeon and late-game areas can support efficient MAG farming, while ordinary players should first clear profitable bounties and collect dungeon rewards instead of grinding for hours.
For a repeatable material route, enter with open inventory space, collect visible material points, defeat profitable enemies, inspect chests, and return to a safe room or exit point. Appraise unknown gear before selling it. Keep rare synthesis materials, purification water, unique accessories, ingredients for high-value recipes and Archetype experience items. Sell ordinary junk and duplicate equipment only after confirming that it has no purification or recipe use.
- Use Merchant abilities for reeve only when the skill's cost is understood.
- Treat Debt Collection as MAG farming and plan around its MP cost.
- Complete bounties after improving Catherina's reward ability when practical.
- Collect material points and inspect chests during normal dungeon clears.
- Keep rare materials, water, unique accessories and high-value ingredients.
6. Prepare an endgame reserve and preserve New Game+ value
Before the final dungeon, sell appraised junk, empty unnecessary inventory space and verify that every active character has a usable weapon, armor set and accessory. Keep a dedicated reserve of revives, strong healing, status cures, MP recovery and any synthesis ingredients required for your boss plan. Do not spend the reserve on marginal shop upgrades or cosmetic purchases.
If you intend to start New Game+, preserving strong equipment and consumables is worthwhile. Verified carryover includes money, MAG, items, equipment, Kingly Virtues and Archetype progress, while character levels, Follower ranks, Follower abilities and story key items do not carry over. Archetypes must still be unlocked again through their story or bond requirements even though Archetype ranks and related progress are retained.
Make a final inventory pass rather than selling everything for a small cash increase. Keep purified weapons, strong accessories, spare recovery items, masks and vessels, rare ingredients and materials that support late-game cooking or synthesis. The objective is not to own every item; it is to enter the final sequence with a complete battle loadout and leave yourself useful resources for the next run.
- Sell only appraised junk and confirmed duplicates before the final dungeon.
- Reserve reeve for recovery, purification and boss-specific equipment.
- Keep enough ingredients for high-value MP recovery and turn-economy food.
- Preserve strong equipment, items, money, MAG and Archetype progress for New Game+.
Before you move on
- Wisdom is at Rank 2 or higher and you know where St. Fermis Church is in Grand Trad.
- Every active party member has a current weapon, armor set and role-appropriate accessory.
- All unidentified equipment has been appraised or deliberately retained for later appraisal.
- Rare purification water, synthesis materials, unique accessories and high-value ingredients have not been sold blindly.
- Your inventory contains revives, strong healing, status cures and MP recovery for the next major boss.
- Your intended synthesis setup has the required Archetypes, inherited skills and supporting accessory.
- You have separated ordinary reeve farming from MAG farming and understand the MP cost of Debt Collection.
- A final inventory review preserves useful equipment and consumables for the final dungeon and possible New Game+.
References for this chapter
- Metaphor: ReFantazio Walkthrough & Guide — Appraisal Guide
- Metaphor: ReFantazio Walkthrough & Guide — Purification Guide
- Metaphor: ReFantazio Walkthrough & Guide — Finale Guide
- Metaphor: ReFantazio Walkthrough & Guide — Recipes and Food Ingredients
- Metaphor ReFantazio Trophy Guide & Roadmap
- Metaphor: ReFantazio — How to Purify Equipment
- Overlord's Sash — Metaphor: ReFantazio Database
- Metaphor: ReFantazio How To Farm Money Guide
Boss Strategy Compendium — Mandatory Story Bosses, Optional Trials and the Final Route
This PlayStation 5 original-release reference covers the principal mandatory story bosses in campaign order, then separates optional October Dragon Trials and Elegy of the Soul from required progression. Use Analysis before committing to expensive attacks, maintain a healer or reliable recovery plan, and treat body parts, defensive states, healing scripts, evasion, and target priority as seriously as elemental weaknesses. Homo Avades requires a Shell, Assailant, Hands, and exposed-heart sequence. Sogne the Icebound is a mandatory story boss after the Montario Opera House and Royal Academy Ruins sequence, and Fire is the key weakness to exploit. In Tyrant’s Star, Neuras restores HP and MP at the Gauntlet Runner. The six optional crystal guardians weaken the final Louis encounter; leaving them intact creates the harder Star Shatterer route. Save before the major ending choices, including the Ancient Eldan Sanctum, Skybound Avatar, and final Tyrant’s Star dialogue.
1. Universal preparation and recovery routine
Create a manual save before each major boss room and a separate save before the final Tyrant’s Star sequence. Inspect every active character’s Archetype, inherited skills, weapon, accessory, row, and status resistance. A dependable formation contains one healer or support role, one durable front-line role, one physical or Almighty damage source, and one character carrying the encounter’s relevant element or counter.
Use Analysis or a low-cost attack before spending a high-value Synthesis skill. Weaknesses and critical hits create extra Press Turns, while resisted or ineffective attacks waste the turn economy. If the boss resists your main damage type, pass, Guard, heal, apply a buff, or change Archetypes instead of repeating the same attack.
Move vulnerable characters to the back row when the boss uses strong physical attacks or announces a charged strike. Guard through a clearly telegraphed heavy attack when healing is already under control. Cure Daze, Anxiety, Forget, and other action-blocking ailments before a planned burst. After a failed attempt, determine whether the cause was an affinity mistake, missed body-part objective, poor row placement, inadequate healing, or depleted MP before grinding.
- Create a manual save before the encounter.
- Carry full-party healing, revival items, and relevant status cures.
- Keep physical or Almighty damage available for resistant targets.
- Use Guard and row changes against charged or area attacks.
2. Early mandatory encounters: Homo Gorleo, Captain Klinger, Homo Fulquilo and Undead Grius
Homo Gorleo begins with a scripted tutorial phase in which normal attacks and early Fire damage are poor answers. When the battle advances, target its wings and legs with Wind. Once the body parts are removed, attack the healing apples when they become the active objective, then finish the main body. Do not spend limited recovery items trying to force the scripted opening to end faster.
Captain Klinger is accompanied by soldiers. Remove the Mage Soldier first because its magic creates the greatest immediate pressure. Use Analysis to confirm the soldier line’s current affinities, then finish the remaining soldiers before concentrating on Klinger. Preserve rare consumables; this encounter is primarily a target-priority lesson.
Homo Fulquilo is weak to Ice and resists Wind. Keep a Mage or another character with Ice access in the party, and use Blizz or an Ice item to create extra turns. When Fulquilo charges a row attack, move threatened characters to the opposite row if possible. Its Fire attacks punish a front-row formation, so leave casters in the back row and expose physical attackers only when the damage gain is worthwhile.
Undead Grius is a short story encounter rather than a resource-heavy boss. Use Light when available, but do not spend rare Light items if the fight is already under control. Keep the party healed because the encounter occurs during the early sequence, when a single knockout can consume a disproportionate amount of the available recovery stock.
- Use Wind on Homo Gorleo’s wings and legs after the scripted opening.
- Defeat Captain Klinger’s Mage Soldier before focusing the captain.
- Use Ice against Homo Fulquilo and avoid Wind.
- Use Light against Undead Grius when convenient.
3. Regalith Grand Cathedral: Zorba and Homo Avades
Zorba has no ordinary elemental weakness that should define the encounter. Favor dependable physical or Light damage, healing, and defensive buffs. When Zorba enters a defensive state, stop forcing attacks into it. Use those turns to heal, adjust rows, apply a buff, or prepare the next burst. The goal is controlled Press Turn spending rather than repeatedly testing resisted magic.
Homo Avades is the mandatory boss outside the Regalith Grand Cathedral. Begin by attacking the Shell. The Shell is weak to Strike, so use Brawler skills such as Perfect Punch when available. When the Shell breaks, Homo Avades falls and exposes its heart. Attack the heart with your strongest reliable physical or Pierce damage during the opening rather than spreading damage across inactive targets.
After the heart phase, Assailants can appear inside the empty Shell. Guard if the party is not healthy enough to defeat them immediately, and move fragile characters to the back row. Once the attackers finish their action or are defeated, the Shell is reconstructed. When the Hands become targetable, destroy the Right Hand first and then the Left Hand. The Hands restore the Shell; leaving them alive also allows Swiping Arc to strike the entire party with greater force. The Shell is weak to Strike, the Hands are weak to Fire, and the heart is vulnerable to Pierce.
Repeat the sequence until both Hands are removed and the Shell is broken again. When the heart is exposed, concentrate all available damage on it. If resources are low, ignore nonessential area attacks, heal between openings, and use the active objective to determine whether the Shell, a Hand, an Assailant, or the heart is the correct target.
- Use physical or Light damage against Zorba.
- Do not attack Zorba’s defensive state automatically.
- Break Homo Avades’s Shell with Strike.
- Destroy the Right Hand, then the Left Hand, when they begin restoring the Shell.
- Use Fire on the Hands and Pierce on the exposed heart.
4. Martira sequence: Gideaux, Greatworm Homo Butera, Heismay and Homo Jaluzo
Monk Captain Gideaux and Greatworm Homo Butera are mandatory encounters in the Martira progression. Handle them through target confirmation and role coverage rather than a fixed universal build. Use Analysis on the first turn, remove any support target before the main damage race, and reserve enough MP for the following story battle. If no useful fixed weakness is available for your current Archetypes, physical damage, buffs, healing, and row control are safer than repeatedly guessing.
The Heismay confrontation is partly a story encounter. Follow the objective presented by the battle and avoid spending endgame consumables. If the available party is restricted, prioritize survival and the required target over a fast clear. The fight should not determine the final-dungeon inventory.
Homo Jaluzo has no simple elemental weakness. Its eyes are separate targets and are weak to Pierce, so bring Gunner, Merchant, a Pierce inheritance, or a Pierce item. Remove the eyes whenever they are targetable, then return to the body. Jaluzo can inflict Daze, reduce party Defense, and gain additional turns with Soul Scream. Cure Daze before attempting a decisive burst, or Guard with the affected character if the ailment item would be better saved.
Joanna can heal Homo Jaluzo with Mother’s Love when the fight reaches its healing script. Keep the party healthy before that threshold and do not assume the first damage burst ends the battle. If the eyes return, repeat the Pierce priority rather than attacking the body blindly.
- Use Analysis on Gideaux and Greatworm Homo Butera before committing resources.
- Treat Heismay as a controlled story encounter, not an endgame resource sink.
- Use Pierce against Homo Jaluzo’s eyes.
- Cure or work around Daze before a decisive turn.
- Expect Mother’s Love and keep the party healthy before the healing threshold.
5. Kriegante and Charadrius-related mandatory encounters
Sergeant Xanth, Maintenance Chief Ceiba, Master Sergeant Glechom, and the Helmsman Cabio and Grand Chief Salva encounter are mandatory campaign fights. These battles test party control more than one universal elemental weakness. Use Analysis on each new target, defeat the most dangerous support or commander first, and avoid spending all MP on broad attacks if another mandatory battle follows immediately.
When several enemies are present, use a durable front-row character to absorb pressure while casters and healers remain behind them. Remove enemy buffs with Dekaja when the opponent’s damage or defense rises sharply. If an enemy raises evasion, use reliable physical skills only when accuracy is under control, lower its evasion if possible, or Guard and spend the turn on recovery rather than feeding it missed attacks.
Glodell is vulnerable to Light in the late-story references. Bring Light damage or Light items and focus him before secondary enemies whenever the encounter allows it. Keep a healer ready because surrounding enemies can leave the party damaged before the next sequence.
- Analyze Xanth, Ceiba, Glechom, Cabio, and Salva before spending rare skills.
- Remove dangerous support enemies before broad damage.
- Use Dekaja against major enemy buffs.
- Use Light against Glodell when available.
- Restock before the late-story boss sequence.
6. Virga Island and Dragon Temple mandatory bosses
Sea Horror Homo Sabara is a body-part encounter. Follow the active target objective and remove the part creating the greatest offensive pressure before committing to a damage burst. Keep a reserve of MP for the main body and place fragile casters in the back row. If the battle becomes a recovery contest, stop using expensive area skills against inactive parts.
Treebeast Alento is another mandatory Virga-region encounter. Use Analysis at the beginning and bring both physical and elemental options because its useful affinity can determine the fight’s length. When a target changes state or gains a defensive effect, stop repeating the previous attack pattern and spend the turn on healing, buff removal, or a safer damage type.
Homo Margo and Malvirta Drako Eht are the mandatory Dragon Temple confrontation. Homo Margo is weak to Wind, so bring Seeker-line Wind skills or an inherited equivalent. Focus Homo Margo when that weakness is available, but do not assume Malvirta Drako Eht shares it. Use Analysis on the dragon and keep a healer ready for its area pressure.
Sogne the Icebound is not part of the optional Dragon Trials. It is a mandatory story boss encountered after the Montario Opera House and Royal Academy Ruins sequence. Bring Fire skills or Fire items and keep the party ready for Ice pressure and Anxiety. Do not skip this encounter when checking required campaign progress.
- Handle Homo Sabara through its current body-part objective.
- Use Wind against Homo Margo when it is targetable.
- Analyze Malvirta Drako Eht separately rather than assuming a shared weakness.
- Keep Treebeast Alento’s battle controlled with row changes and recovery.
- Classify Sogne the Icebound as a mandatory post-Opera House story boss.
7. Sogne the Icebound: mandatory post-Opera House and Royal Academy Ruins boss
After the Montario Opera House sequence, the route leads through the Royal Academy Ruins area and into the mandatory confrontation with Sogne the Icebound. This encounter belongs in the main campaign checklist. It is not an optional Dragon Trial and should not be postponed as side content.
Sogne is weak to Fire. Bring a Mage, Wizard, Masked Dancer, Fire inheritance, or Fire items so the party can exploit the weakness consistently. A Masked Dancer can also create Fire weakness through the appropriate dance setup, but a direct Fire skill is sufficient for normal progression. Use the extra Press Turns to heal, remove Anxiety, refresh buffs, or continue Fire attacks rather than wasting turns on resisted damage.
Sogne’s Ice attacks and Anxiety pressure can interrupt the party’s turn plan. Carry Anxiety cures and keep the healer able to act. If the party is struggling to exploit Fire, move the affected character to the back row, use Guard during a dangerous telegraph, and spend items to maintain the weakness exploit. Rebuild the party around Fire access before attempting a long grind.
- Reach Sogne through the post-Opera House and Royal Academy Ruins story route.
- Use Fire to exploit Sogne’s weakness.
- Carry Anxiety cures and protect the healer from losing actions.
- Record Sogne as mandatory campaign progress, not optional Dragon Trial content.
8. Late-story Louis route and ending safeguards
Louis Guiabern and the late Skybound Avatar sequence are mandatory progression. Use a balanced team rather than a fixed four-element lineup. Analyze each new enemy, remove the most dangerous active target, and maintain defensive buffs when multiple enemies or a high-damage commander are present. Do not assume a weakness from an earlier Louis encounter carries into the next form.
Create rollback saves before the Ancient Eldan Sanctum choice sequence, the Skybound Avatar conversation with Louis, and the final Tyrant’s Star conversation. Avoid the Ancient Eldan Sanctum answers that produce the early bad-ending sequence. At the Skybound Avatar, do not affirm Louis’s claim with the response that triggers the bad ending. At Tyrant’s Star, reject the offer to accept his cause; choose the response equivalent to refusing to give up.
Before the final operation, replenish revival items, full-party healing, status cures, and elemental items. Once Tyrant’s Star is selected on October 26, normal calendar activities are no longer available, so complete desired shopping, equipment changes, and saves first.
- Save before the Ancient Eldan Sanctum decision sequence.
- Reject the bad-ending response at the Skybound Avatar.
- Save before the final Tyrant’s Star dialogue.
- Reject Louis’s offer to join his cause.
- Enter Tyrant’s Star with restored MP and endgame consumables.
9. Optional content: October Dragon Trials and Elegy of the Soul
The October Dragon Trials and Elegy of the Soul are optional challenge content and must remain separate from the mandatory campaign route. They are not substitutes for Sogne the Icebound, the Royal Academy Ruins story boss. Attempt them when the calendar allows and when the party can preserve enough resources for the next deadline.
If an optional trial consumes the inventory needed for a mandatory dungeon or story boss, leave it for a later preparation window. Use Analysis, elemental items, and defensive Archetype changes rather than forcing a single build through every trial. Record these encounters separately in a completion checklist so an unfinished optional challenge is not mistaken for a missing story objective.
- Keep October Dragon Trials separate from main-story bosses.
- Keep Elegy of the Soul separate from required campaign progress.
- Do not classify Sogne as optional because of the Dragon Trial content.
10. Optional Tyrant’s Star crystal guardians
The six Diabolus guardians in Tyrant’s Star are optional rematches based on earlier Human encounters. They are not required to reach the ending, but defeating them destroys their associated crystals and weakens the final Louis encounter. Create a separate save before the first guardian so the normal completion route and the Star Shatterer challenge route remain available.
Use Analysis for each guardian rather than importing every weakness from the original encounter. Diabolus Butera is weak to Ice and can use Sandstorm, which lowers Hit and Evasion; remove the effect with Dekunda or an appropriate cleansing item. Diabolus Avades repeats the Shell, Hands, and core structure: Strike the Shell, Fire the Hands when active, then Pierce the exposed heart. Treat the remaining guardians as mechanics rematches and respond to their current body parts, buffs, and status attacks.
Neuras can restore HP and MP at the Gauntlet Runner during the Tyrant’s Star operation. Return for recovery whenever MP, revival stock, or status cures are low. The northern save point is useful for rollback, but it is not a substitute for the Runner’s full recovery service. If pursuing Star Shatterer, preserve the save made before destroying any crystals and leave the crystal guardians intact.
- Keep a separate save before the first crystal guardian.
- Use Ice and Dekunda against Diabolus Butera.
- Use Strike on Diabolus Avades’s Shell, Fire on its Hands, and Pierce on its heart.
- Use Neuras for HP and MP recovery.
- Leave all six guardians undefeated for the Star Shatterer route.
11. Archdemon Louis Charadrius
Archdemon Louis has no ordinary elemental weakness that should define the fight. Use physical or Almighty damage, selective debuffs, defensive buffs, and dependable healing. Do not build the entire plan around permanent debuffs because Louis can remove them. Refresh only the effects that matter, then spend the remaining Press Turns on your strongest reliable attacks.
Destroying the six Tyrant’s Star crystals reduces the pressure of the final operation and makes the normal route safer. If the crystals remain intact, expect the harder Star Shatterer version and a more punishing action economy. In either route, heal before Louis’s large attacks and Guard when the battle clearly telegraphs a dangerous turn.
The decisive ending safeguard is the correct dialogue route before and during the final sequence, not a new choice after defeating Destroyer Charadrius. If the party has already entered a bad-ending branch, reload the appropriate earlier manual save rather than assuming a later battle victory will restore the true route.
- Use physical or Almighty damage against Archdemon Louis.
- Refresh debuffs selectively because Louis can remove them.
- Destroy the crystals for the safer ordinary route.
- Keep the pre-final dialogue saves for rollback.
- Do not rely on a post-battle choice to repair a bad-ending branch.
12. Destroyer Charadrius and low-resource fallback
Destroyer Charadrius begins with the Joy, Mirth, and Ire masks protecting the main body. The masks are separate targets and do not have one universal elemental weakness. Use dependable physical or Almighty damage, Human-effective options, or a weakness-creation ability such as a Masked Dancer dance. Maintain healing because the boss can use area attacks, self-buffs, Dekaja, Dekunda, and Anxiety pressure.
When New Dawn’s Sacrifice places a puppet in a mask’s mouth, immediately attack that mask. The puppet’s mask is the priority target because failing to remove it allows the dangerous follow-up to resolve. Destroy the masks one at a time, but preserve enough MP for the next phase. Each removed mask reduces the boss’s available actions and removes part of its moveset.
After the masks are gone, prepare for the final form with full-party healing, refreshed buffs, and the strongest saved Synthesis or Royal Archetype attacks. If damage is too low, replace one Archetype, improve a weapon, use inherited skills that cover a weakness, or lower the difficulty. If MP is the problem, use lower-cost skills, physical attacks, elemental items, and Neuras’s recovery service before retrying. If one attack is repeatedly killing the party, change rows, add resistance, Guard through the telegraph, or use defensive Synthesis instead of adding another attacker.
The fight is complete when the final Destroyer Charadrius form is defeated and the ending sequence begins. The earlier dialogue choices must already have been handled correctly for the true-ending route.
- Treat Joy, Mirth, and Ire as separate mask targets.
- Attack the mask holding the New Dawn’s Sacrifice puppet.
- Keep Anxiety cures and full-party healing ready.
- Save high-value Synthesis skills for the final form when possible.
- Use equipment, Archetype changes, recovery services, or difficulty changes before blind grinding.
Before you move on
- The principal mandatory story encounters from Homo Gorleo through the late Louis route are defeated, including Homo Avades at the Regalith Grand Cathedral.
- Sogne the Icebound is defeated after the Montario Opera House and Royal Academy Ruins sequence and is counted as mandatory campaign progress.
- Sogne was handled with Fire access and was not filed under optional Dragon Trials or Elegy of the Soul.
- The Ancient Eldan Sanctum, Skybound Avatar, and final Tyrant’s Star dialogue choices avoided their bad-ending responses.
- The six Tyrant’s Star crystal guardians were either defeated for the weakened final route or intentionally left intact for Star Shatterer.
- Archdemon Louis Charadrius and Destroyer Charadrius are defeated.
- The ending scenes and credits play without an unresolved final-battle objective.
- The pre-final dialogue saves remain available for rollback or for attempting the alternate crystal-guardian route.
References for this chapter
- Walkthrough Part 6 — Royal Academy Ruins and Ancient Eldan Sanctum — The Escapist
- Tyrant’s Star Walkthrough — Metaphor: ReFantazio — Neoseeker
- Trophy/Achievement Guide - Metaphor: ReFantazio - Neoseeker
- Metaphor: ReFantazio Walkthrough: Month-by-Month Route, Missables and Endings — SlashKeys
- Metaphor: ReFantazio — Louis Guide and Answers — Dot Esports
- Boss Guide — Metaphor: ReFantazio — NTGame
Trophies, 100% Checklist and Endgame Cleanup
The PS5 version has 44 trophies, including the Platinum. Most story trophies unlock automatically, but ten trophies are commonly missable: Closing the Book, Star Shatterer, Archetype Hero, Summon Mask Time, Hearts as One, King of Cuisine, Help Anyone in Need, Debate Me, Chef in Training and Bookworm. The first playthrough can earn every trophy except Closing the Book, which requires the New Game+ Redscale Apocalypse Dragon. Star Shatterer requires a separate October 26 save and an unweakened Destroyer Charadrius fight. Complete all quests, exchange 46 Gold Beetles, cook all 21 recipes, create every required vessel and mask, read all seven books, and preserve separate clear-data saves before beginning New Game+.
1. Separate automatic trophies from the missable checklist
Metaphor: ReFantazio has 44 offline PS5 trophies: one Platinum, three Gold, eight Silver and 32 Bronze. The dungeon and ending trophies are story-related. They include completion of the Nord Mines, Regalith Grand Cathedral, Kriegante Castle, Charadrius, Dragon Temple, Montario Opera House and Skybound Avatar, followed by Coronation of the King when the main story is completed. The trophy list and roadmap identify ten commonly missable trophies, while the remaining story trophies and routine combat milestones can normally be earned during progression.
Protect the ten missable trophies from the beginning. Hearts as One requires every Follower to reach maximum rank. Archetype Hero requires the protagonist to master every unlocked Archetype, so maxing Followers alone is not enough; continue raising each Archetype to level 20. Debate Me requires winning against every listed election candidate on the scheduled podium days. Bookworm requires reading all seven Gauntlet Runner books, including the missable book obtained by speaking with Julian at Angler’s Inn Square during the Port Brilehaven window. After receiving it, use the Gauntlet Runner bookshelf to read the book over its required sessions.
King of Cuisine requires cooking all 21 recipes. Chef in Training requires cooking with Fabienne after Maria’s Follower rank is maxed, and this interaction cannot be completed during October. Summon Mask Time requires creating every summoning vessel and mask, not merely collecting materials. Help Anyone in Need requires completing every main and side quest. Keep calendar saves before major deadlines because these activities cannot all be recovered after their windows close.
- Max all 14 Followers before the final story sequence.
- Raise every protagonist Archetype to level 20 after unlocking the full set.
- Win all eight candidate debates on their scheduled dates.
- During the Port Brilehaven window, speak with Julian at Angler’s Inn Square to obtain the missable book; later read it from the Gauntlet Runner bookshelf.
- Finish all seven books, all 21 recipes, and every required vessel and mask.
- Complete every main and side quest for Help Anyone in Need.
2. Finish first-run cleanup before the final October sequence
Use the journal and in-game records as your working checklist. Do not assume an activity is complete because its related Follower or dungeon is finished. Check every Follower rank, the recipe list, the book list, the mask and vessel records, and the quest list. For Bookworm, confirm that you spoke with Julian in Angler’s Inn Square, obtained The Future of Magic, and spent the necessary Gauntlet Runner travel sessions reading it from the bookshelf. Books require multiple reading sessions while the Runner is traveling, so obtaining the book alone does not complete the trophy.
For Gold Beetles, collecting 46 and exchanging them with the Elderly Entomophile at Arenafront Wharf in Port Brilehaven is sufficient for All That Glitters. There are more than 46 available, so some misses are allowed. Collecting beetles alone is not enough: speak with the merchant and make the exchanges. Untraded Gold Beetles carry into New Game+, allowing remaining exchanges to be completed there if necessary.
Complete the four preceding Trial of the Dragon quests and the final Dragon Temple trial if they remain unfinished. These are quests and count toward the complete quest requirement. The verified quest list contains 76 main and side quests, including the Dragon trials and the Coliseum quest. Keep at least one save before the final act and another before the October 26 dungeon so a missed activity can be repaired without restarting the entire campaign.
- Confirm the quest list contains no unfinished main or side request.
- Exchange at least 46 Gold Beetles at Port Brilehaven.
- Check that every recipe has been cooked, not merely unlocked.
- Speak with Julian during the Port Brilehaven window, obtain the book, and read it from the Gauntlet Runner bookshelf.
- Create every available vessel and mask, and verify the corresponding trophy if possible.
- Preserve a pre-final-act save in a separate manual slot.
3. Secure Star Shatterer with a dedicated October 26 save
Star Shatterer is tied to the alternate, fully powered final boss: Destroyer Charadrius. On October 26, make a manual save before entering the late-game dungeon. Inside that dungeon, do not use the elevators or routes that lead to its sub-bosses. Do not defeat any of those sub-bosses. Defeating even one weakens the final boss and locks out the qualifying version of the encounter for that run.
Proceed directly through the dungeon to the final boss and defeat Destroyer Charadrius in its unweakened form. Prepare for a substantially harder fight than the weakened route: use reliable defense and healing, maintain debuffs such as Debilitate when available, and use defensive or offensive support such as Marakukaja and Heat Riser when your party can access them. The trophy unlocks for defeating the true-power version, not for a generic post-battle dialogue response.
After Star Shatterer unlocks, keep the backup save. If you want the powerful weapons from the sub-bosses, reload the pre-dungeon save, defeat the sub-bosses, and then complete the weakened final-boss route. This order protects the trophy while still allowing the optional rewards.
- Save before entering the October 26 dungeon.
- Avoid every elevator or route leading to a dungeon sub-boss.
- Defeat Destroyer Charadrius without weakening it first.
- Wait for the Star Shatterer notification before overwriting the backup save.
- Reload afterward if you want the sub-boss weapons and weakened final-boss route.
4. Start New Game+ without losing the clear file
After the ending and credits, save the clear data in a new slot. Keep the original completed file untouched. From the title screen, load the clear data to begin New Game+. The game resets the calendar and story progress, so do not treat New Game+ as a post-game free-roam state. Use the carryover screen to confirm what is being transferred before accepting the new run.
Choose Easy, Normal, Hard or another valid difficulty for the New Game+ run. Do not select Storyteller at any point during this playthrough. Closing the Book requires defeating the Redscale Apocalypse Dragon, and selecting Storyteller disables access to that superboss until another playthrough. Storyteller is safe for the first run if desired, but not for the run intended to earn Closing the Book.
You may use New Game+ to finish missed cumulative objectives such as recipes, masks, vessels, Archetypes or Gold Beetle exchanges. If the first-run trophy checklist is already complete, prioritize money, MAG, experience, equipment, cooking materials and the strongest inherited skills. Rebuild the Archetype access you need rather than assuming every Follower-dependent Archetype is immediately available.
- Save clear data in a new slot after the credits.
- Keep the original first-run clear file separate.
- Select Easy or higher for the superboss playthrough.
- Never select Storyteller during that New Game+ run.
- Check the carryover screen before confirming the new campaign.
5. Open the Book of Apocalypse and defeat the Redscale Apocalypse Dragon
In New Game+, use Akademia to access the Book of Apocalypse. The Redscale Apocalypse Dragon is the New Game+ superboss required for Closing the Book. Save before entering the encounter and arrive with a complete healing stock, MP recovery, revives and the strongest equipment available from your current run.
Sublime Spoonful items are particularly useful because they can create additional turn opportunities, so gather the necessary cooking materials during the run instead of spending every rare item in ordinary battles. Re-maxing Followers is also useful when it unlocks Archetypes or inherited skills needed for your preferred superboss setup. If the first attempt fails, reload the dedicated save and change the opening rotation, resistances, support skills or resource plan rather than grinding without identifying the cause. The Redscale Dragon guide specifically recommends preparing Sublime Spoonful items and avoiding Storyteller difficulty for the qualifying New Game+ run.
Defeat the dragon and wait for the Closing the Book trophy notification. Do not delete the New Game+ save immediately afterward. Keep a pre-fight save and a post-fight save so the completed Platinum state remains recoverable.
- Use the Book of Apocalypse in Akademia to start the encounter.
- Confirm the New Game+ difficulty is not Storyteller.
- Carry Sublime Spoonful items and a full recovery stock.
- Save before the superboss fight.
- Verify Closing the Book unlocks after the dragon is defeated.
6. Verify the Platinum and preserve the finished campaign
Use the PS5 trophy list as the final authority. The game menus can confirm Follower ranks, quest records, recipes, books, masks, vessels and Gold Beetle exchanges, but they do not replace the platform trophy list as a complete percentage tracker. Confirm that all 44 trophies are unlocked and that The Traveller Platinum has appeared.
Maintain three useful manual saves: the first-run clear file, the New Game+ file immediately before the Redscale Apocalypse Dragon, and the New Game+ file after defeating it. This preserves a rollback point for alternate boss routes, missed scenes, difficulty challenges or future experimentation without risking the verified completion state.
If a trophy is missing, identify it by name in the PS5 list and consult the corresponding in-game record before starting another playthrough. A missing Star Shatterer requires the October 26 unweakened-boss route; a missing Closing the Book requires a valid New Game+ difficulty and the Redscale Apocalypse Dragon; a missing Help Anyone in Need requires locating the unfinished main or side quest rather than stopping at an approximate quest count. A missing Bookworm requires checking both halves of its requirement: Julian’s time-limited book pickup in Angler’s Inn Square and all required reading sessions at the Gauntlet Runner bookshelf.
- PS5 shows 44/44 trophies and The Traveller Platinum.
- Closing the Book is unlocked after the Redscale Apocalypse Dragon.
- Star Shatterer is unlocked from the unweakened Destroyer Charadrius route.
- The quest list, Follower ranks, books, recipes, masks, vessels and Gold Beetle exchanges are checked.
- The first-run clear save and post-superboss New Game+ save remain in separate slots.
Before you move on
- The PS5 trophy list shows The Traveller Platinum and all 43 other Metaphor: ReFantazio trophies.
- Destroyer Charadrius was defeated without first defeating the October 26 dungeon sub-bosses.
- The Redscale Apocalypse Dragon was defeated from Akademia’s Book of Apocalypse during a valid New Game+ run.
- Every main and side quest is complete, all 14 Followers are maxed, and all protagonist Archetypes reached level 20.
- All 21 recipes were cooked, all seven books were read from the Gauntlet Runner bookshelf, all vessels and masks were created, and at least 46 Gold Beetles were exchanged.
- The first-run clear save, pre-superboss New Game+ save and post-superboss save are preserved separately.
Finishing up
You have completed the final story boss encounter at the Tyrant's Star and proceeded through the final choice sequences to the true ending and credits.
All mandatory story objectives and required dungeon clears are finished, including the required Nord Mines, Regalith Grand Cathedral, Kriegante Castle, Charadrius, Dragon Temple, Montario Opera House and Skybound Avatar operations.
You avoided the three early or late bad-ending branches, or used protected saves to reload before an incorrect choice.
New Game+, Star Shatterer and the Redscale Apocalypse Dragon are optional trophy and completion goals, not requirements for ordinary true-ending campaign completion.
Choose your next gameScreenshots & video
Game imagery for reference. Follow the written chapters above for the route and strategies.
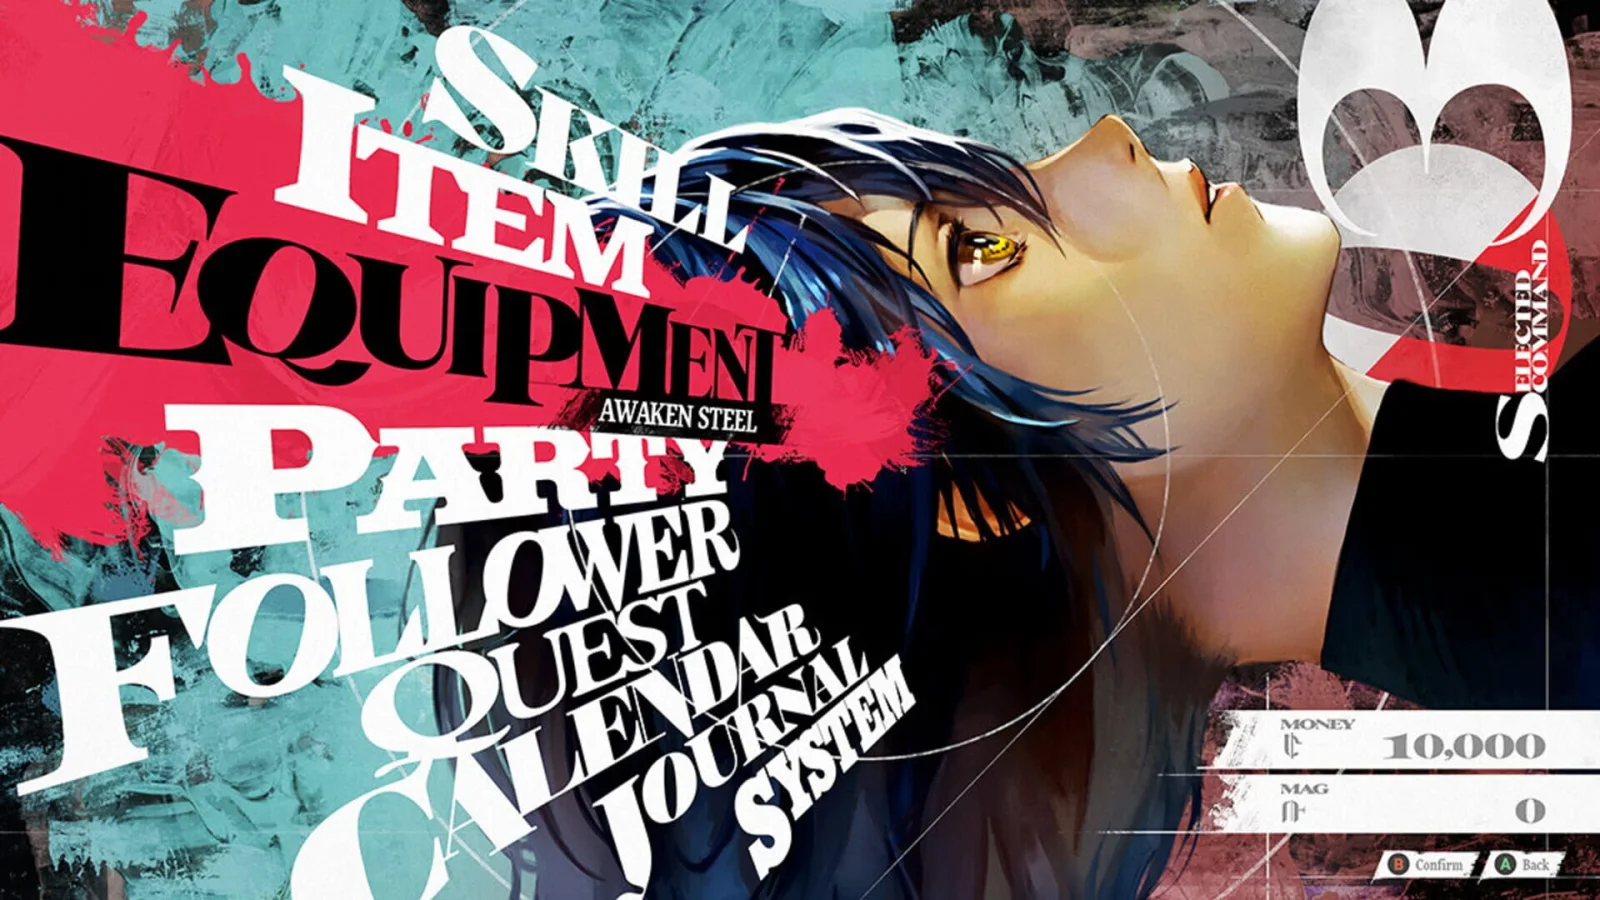
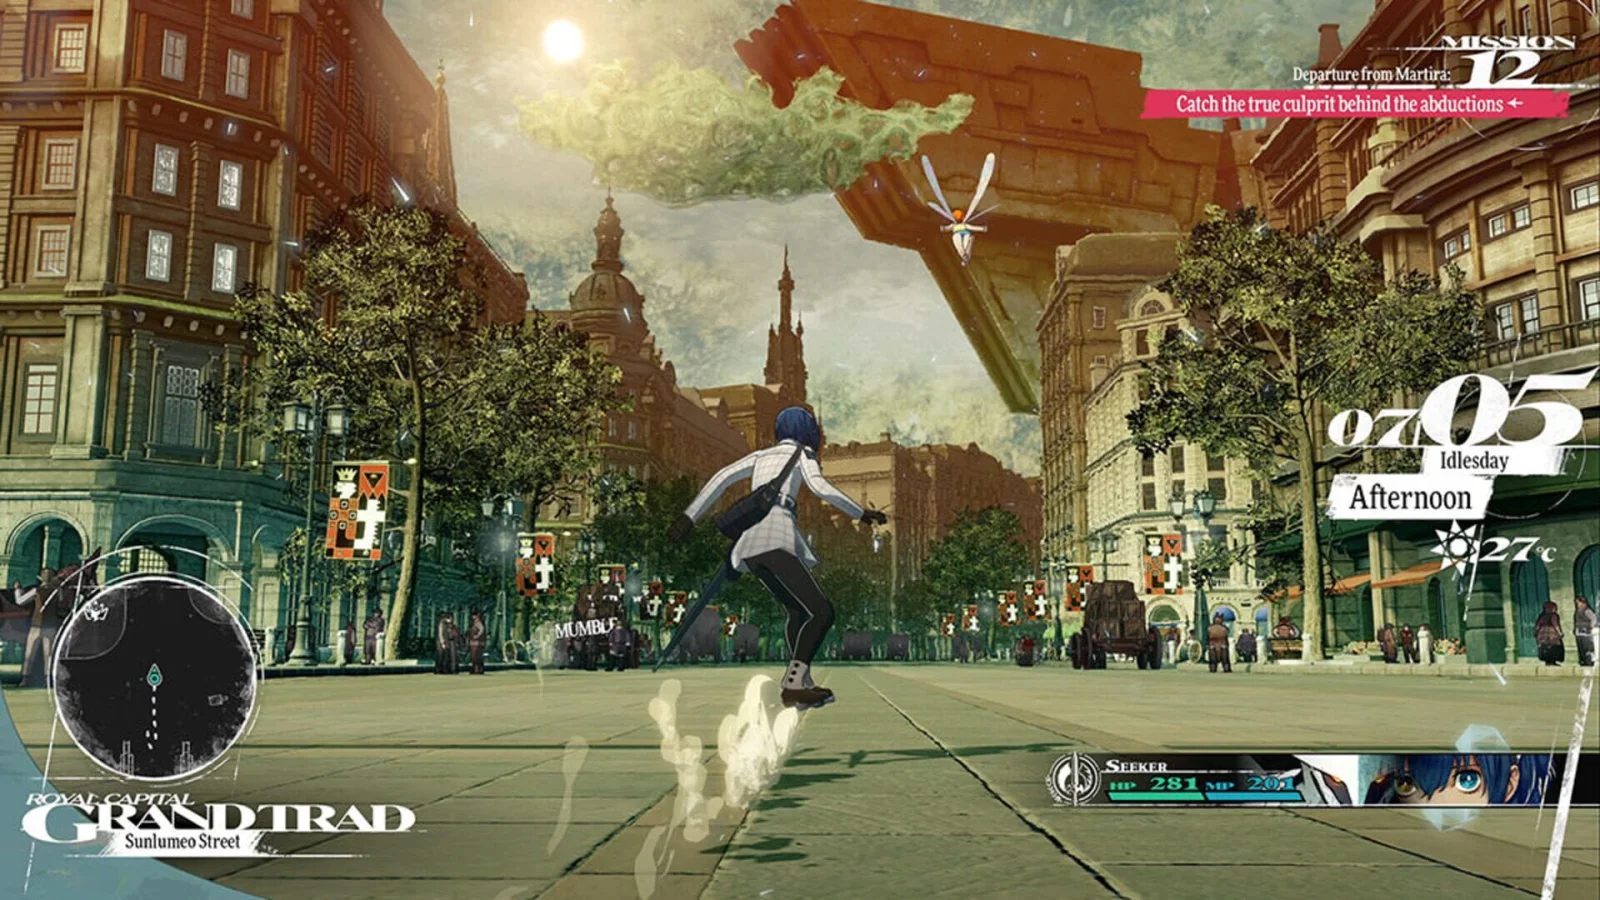
Sources & references
Our original guide draws on the references below. Check the edition at the top of this page before following controls or unlock requirements.
- Metaphor: ReFantazio - FAQ — SEGA Support
- Metaphor: ReFantazio - PS5 and PS4 Games - PlayStation
- Metaphor ReFantazio Complete Controls for PC and Controller — Prima Games
- Combat Mechanics Guide - Metaphor: ReFantazio Walkthrough & Guide
- Northern Border Fort and Nord Mines - Step-by-step - Metaphor: ReFantazio Walkthrough & Guide
- Metaphor ReFantazio 100% Walkthrough
- Metaphor ReFantazio All Quests Guide
- Metaphor: ReFantazio Walkthrough: Month-by-Month Route, Missables and Endings — SlashKeys
- Metaphor ReFantazio - 100% Walkthrough
- Regalith Grand Cathedral Walkthrough - Metaphor: ReFantazio - Neoseeker
- Metaphor: ReFantazio Guide/Walkthrough v0.75 - Neoseeker Walkthroughs
- Grand Cathedral - Metaphor: ReFantazio Walkthrough & Guide - GameFAQs
- How to Beat Homo Avades & Weakness in Metaphor: ReFantazio
- Metaphor: ReFantazio – Regalith Grand Cathedral Area Guide
- Follower Bonds - Metaphor: ReFantazio Walkthrough & Guide
- Archetypes - Metaphor: ReFantazio Walkthrough & Guide
- Metaphor: ReFantazio: All Followers, Abilities, and How to Increase Bonds
- How to Cook all Recipes in Metaphor: ReFantazio
- Metaphor ReFantazio complete Synthesis skills guide
- Metaphor ReFantazio Trophy Guide & Roadmap
- Metaphor: ReFantazio Beginner Tips: Calendar, Archetypes and Combat Basics
- Metaphor: ReFantazio Best Builds: Archetypes, Stats, Skills and Parties
- Metaphor: ReFantazio - Status Ailments List and Guide
- Metaphor: ReFantazio Best Stats and Archetype Builds
- Metaphor: ReFantazio - All Advanced Archetypes And How To Unlock Them
- Metaphor: ReFantazio — Guide and Walkthrough (PS5): Giant Sandworm’s Nest and Belly
- Journey to the Giant Sandworm’s Nest — Step-by-step
- Man-Eater’s Grotto Walkthrough — Martira
- Man-Eater’s Grotto Walkthrough
- Kriegante Castle Walkthrough — Metaphor: ReFantazio
- Metaphor ReFantazio Walkthrough Part 2: Martira & Kriegante Castle
- Charadrius Dungeon Guide — Metaphor: ReFantazio
- Operation: Infiltrate the Charadrius — Step-by-step
- Metaphor: ReFantazio — Louis Guide and Answers — Dot Esports
- Ancient Eldan Sanctum Walkthrough - Finale - Gamer Guides
- Walkthrough Part 6 — Royal Academy Ruins and Ancient Eldan Sanctum — The Escapist
- Operation: Skybound Avatar Conquest - Metaphor: ReFantazio Walkthrough & Guide
- Metaphor: ReFantazio Walkthrough & Guide — Finale Guide
- Destroyer Charadrius Boss Guide - Metaphor: ReFantazio
- Destroyer Charadrius Boss Guide - Finale - Walkthrough | Metaphor: ReFantazio
- Some notes for preparing for the full-power final boss - Metaphor: ReFantazio
- Skybound Avatar Walkthrough
- Skybound Avatar Conquest Walkthrough
- Skybound Avatar Palace Corridor Walkthrough
- Prepare for the Final Battle: Guide - Metaphor: ReFantazio Walkthrough & Guide - GameFAQs
- Tyrant’s Star Walkthrough — Metaphor: ReFantazio — Neoseeker
- Operation: Final Dungeon - Metaphor: ReFantazio Walkthrough & Guide
- Metaphor: ReFantazio Endings Guide – How To Avoid All Bad Endings
- Metaphor: ReFantazio New Game+: How to Start and What Carries Over in New Game+
- Metaphor: ReFantazio - What carries over to New Game Plus?
- Metaphor ReFantazio Redscale Dragon Superboss Guide
- Closing the Book Trophy in Metaphor: ReFantazio
- ATLUS's Latest Title Metaphor: ReFantazio Releasing Today!
- Obtain Drakodios Walkthrough - Metaphor: ReFantazio - Neoseeker
- Bookworm Trophy/Achievement Guide - Gamer Guides
- Metaphor ReFantazio - All Gold Beetle Locations - PowerPyx
- All Missables in Metaphor: ReFantazio - Gamer Guides
- Metaphor: ReFantazio - All Requests and How to Complete Them - Push Square
- Metaphor: ReFantazio Walkthrough & Guide — Appraisal Guide
- Metaphor: ReFantazio Walkthrough & Guide — Purification Guide
- Metaphor: ReFantazio Walkthrough & Guide — Recipes and Food Ingredients
- Metaphor: ReFantazio — How to Purify Equipment
- Overlord's Sash — Metaphor: ReFantazio Database
- Metaphor: ReFantazio How To Farm Money Guide
- Trophy/Achievement Guide - Metaphor: ReFantazio - Neoseeker
- Boss Guide — Metaphor: ReFantazio — NTGame
About the game & collecting notes
- Platform
- Sony PlayStation 5
Step-by-step campaign walkthrough for the PlayStation 5 edition of Metaphor: ReFantazio. Covers main-story route from prologue to the Tyrant's Star finale, essential boss strategies, key deadlines and missables, recommended archetype builds and synthesis/equipment guidance, plus New Game+ and optional completion targets.
Darryl Polo
Darryl Polo writes about emulation and retro games. What changes when an old favorite moves to another setup? That question connects his interest in tinkering with the games that made the hardware worth keeping.
Our editorial standardsFound a step that needs another look? Help us improve this guide.