
Mass Effect — Legendary Edition (PS5) — Complete Campaign Walkthrough
A start-to-finish campaign walkthrough for Mass Effect — Legendary Edition on PlayStation 5. Covers character creation, every major mission in Mass Effect 1–3, import continuity, Mass Effect 2 Suicide Mission success, Mass Effect 3 war-preparation and the trilogy ending. Includes PS5-specific setup, DLC coverage and a final completion checklist.


Find a copy
Mass Effect — Legendary Edition Sony PlayStation 5
We may earn a commission if you buy through these links, at no extra cost to you. As an Amazon Associate I earn from qualifying purchases.
Opens retailer search results. Check the model, edition, seller, availability and current price before buying.
Before you begin
This guide takes you through the entire single-player campaign of Mass Effect — Legendary Edition on PlayStation 5.
Legendary Edition is a remaster of the original Mass Effect trilogy (a PS4 build with targeted PS5 enhancements and forward compatibility); it bundles the three main games and most single-player DLC.
Follow the chapter sequence to manage choices that carry between games, avoid missed content, and reach the trilogy ending with desired companions and outcomes.
Play on PS5 via backward compatibility to use the console’s performance options: choose Favor Quality for higher resolution or Favor Framerate for smoother FPS.
This walkthrough explains the key decisions, mission order and preparation steps you must take in each game to preserve your narrative import and finish the campaign cleanly.
Use the preparation checklist before you start and the completion checklist at the end to confirm a finished run.
Set yourself up for the run
Install and update Legendary Edition on PS5; confirm the game is updated to the latest patch before you begin.
Decide whether you will import a save between games.
If you plan a single continuous trilogy run, finish Mass Effect 1 with the exact choices you want carried forward (companion survival, Council/Alliance outcomes).
Set your preferred control and difficulty in the options menu.
On PS5, pick Favor Quality or Favor Framerate in Performance/Graphics settings to match your preference; enable aim-assist & subtitles as needed.
Familiarize yourself with the unified character creator in Legendary Edition.
Create a Shepard appearance and class that you’ll keep across the trilogy (you can pick Femshep preset if desired and available).
Back up your saves in the PS5 cloud or external storage if you have PlayStation Plus (or local backup) before importing across games; keep at least one manual save from near each game’s ending.
Plan how you want to roleplay: Paragon/Renegade tendencies change some dialogue options and critical moments.
Note major decision points (Wrex, Ashley/Kaidan, the Council, the Collector Base choices, ME3 ending choices) and what outcome you want carried forward.
Enable HUD and accessibility settings you need early.
Legendary Edition includes quality-of-life fixes compared to the original releases—use them to reduce risk of missed objectives.
If you want the fullest DLC experience, confirm DLC packs are listed in the game’s Included Content section (Leviathan, Omega, Citadel, From Ashes, etc.).

PS5 Setup, Performance Modes and Save Management
Mass Effect: Legendary Edition on PS5 is the PS4 release played through backward compatibility, with targeted PS5 enhancements rather than a separate native PS5 edition. Install the complete game and its updates before beginning a trilogy run. The collection includes the three single-player campaigns and more than 40 DLC items, but Mass Effect 1’s Pinnacle Station is not included. On PS5, Favor Quality and Favor Framerate both target up to 60 frames per second; Quality prioritizes a higher-resolution presentation, while Framerate uses a lower resolution target. Configure subtitles, HUD, aiming and difficulty before Eden Prime, then keep separate manual saves at major decisions and game finales. Back up completed PS4-format saves through PlayStation Plus cloud storage or a FAT or exFAT USB drive, and verify each backup rather than relying on autosaves.
Install and verify the PS5-compatible edition
Install Mass Effect: Legendary Edition from your PlayStation Store library or from the physical disc. The PlayStation listing identifies the product as a PS4 game that is playable on PS5. Do not search for a separate native PS5 download; launch the installed Legendary Edition application from the PS5 home screen after the installation and update process has finished.
For a digital copy, open the game library and confirm that the application has completed downloading. For a disc copy, leave the disc inserted until the installation and any update downloads are complete. You can check general progress from the PS5 Downloads or Uploads area. Do not begin a long campaign while the console is still copying game data or installing an update, because the launcher or individual campaign content may not yet be fully available.
The collection uses one launcher for Mass Effect, Mass Effect 2 and Mass Effect 3. Open the launcher and confirm that all three games are selectable before creating Shepard. If one game is unavailable, wait for installation to finish and check the PS5 storage screen for incomplete or paused content instead of assuming the license is defective.
- The installed title is Mass Effect: Legendary Edition, listed as the PS4 product playable on PS5.
- The PS5 Downloads or Uploads queue is empty for the game.
- Mass Effect, Mass Effect 2 and Mass Effect 3 are all selectable from the collection launcher.
Confirm included DLC and understand the one major omission
Legendary Edition includes the single-player base content for all three games and more than 40 DLC items, including story expansions, promotional weapons, armor and equipment packs. These contents are bundled with the collection rather than being separate PS5 purchases. Start each campaign from the collection launcher and inspect its available extras, mission prompts or downloadable-content listings after the game has finished installing.
Mass Effect 1’s Pinnacle Station is not included in Legendary Edition. It is an optional combat and challenge expansion, not a required story mission, so its absence does not indicate that your installation is incomplete. Bring Down the Sky is included, as are the major Mass Effect 2 and Mass Effect 3 single-player expansions listed for the collection.
Do not use the presence or absence of a separate PlayStation Store DLC download as your only test. The reliable check is whether the relevant story content appears in its game after installation. If a known included expansion does not appear, close the game, confirm the application is updated, restart the PS5, and check the game’s installed-content information from the PS5 storage menu.
- All three campaigns open from the launcher.
- Included story expansions and bonus content are accessible from their respective games.
- You understand that Pinnacle Station is omitted and is not required for trilogy completion.
Select the appropriate graphics mode
Open the collection’s graphics or performance setting before beginning Mass Effect 1. Favor Quality prioritizes the higher visual-fidelity and resolution target. Favor Framerate uses a lower resolution target while prioritizing the smoother performance presentation. On PS5, both modes are documented around a target of up to 60 frames per second; do not select Favor Framerate expecting the 120-frame-per-second option available to Xbox Series X in its comparable mode.
Favor Quality is the sensible starting point if you use a 4K display and prefer sharper environments, character models and interface elements. Favor Framerate is worth testing if you prefer its lower-resolution presentation or find its image treatment more comfortable during camera movement and combat. The mode can be changed later, and it does not alter campaign progress, difficulty, imports or story outcomes.
Test the chosen mode in the opening area before settling into the campaign. Compare camera movement, text clarity and aiming comfort rather than assuming that the mode name alone determines which option will feel best on your display.
- A graphics mode is selected before the first major mission.
- You understand that PS5 modes differ primarily in resolution and visual presentation, with both targeting up to 60 frames per second.
- The selected mode is comfortable for reading dialogue and aiming.
Set difficulty, subtitles and gameplay preferences
Choose your starting difficulty before Eden Prime. Normal is a practical first-trilogy setting for a player learning the remastered Mass Effect 1 combat systems. Higher difficulties demand more deliberate use of cover, squad powers, equipment and power cooldowns. If you later change difficulty, do it between missions rather than for the first time during a major encounter so the change does not distract from learning the fight.
Open Settings and configure subtitles, display size, HUD visibility, controller vibration, camera sensitivity and aim-assist options to your preference. Keep the HUD enabled at first so you can read objectives, squad status, power cooldowns and combat feedback. Turn on subtitles if you want dialogue and radio transmissions to remain readable in noisy environments or during action scenes.
Test the controller in the opening section. Adjust camera sensitivity if turning feels sluggish or uncontrolled, and change vibration only if it interferes with aiming or comfort. These settings can be revisited between missions and do not affect trilogy import data.
- Difficulty is appropriate for the whole planned playthrough.
- Subtitles and display settings are readable from your normal seating position.
- HUD, camera sensitivity, vibration and aim assistance have been tested before Eden Prime.
Create milestone saves and back them up correctly
Use manual saves throughout each campaign. Keep a separate save before major irreversible decisions and avoid overwriting the only file that contains your current canonical run. For trilogy continuity, create a clearly identifiable manual save before each game’s finale and another after the completed-campaign save becomes available. At minimum, preserve a completed Mass Effect 1 save before starting Mass Effect 2 and a completed Mass Effect 2 save before starting Mass Effect 3.
Legendary Edition is a PS4-format game on PS5, so its individual saves are managed under Settings, Saved Data and Game or App Settings, Saved Data (PS4). PlayStation Plus users can upload PS4 saves to cloud storage. Unlike PS5-save synchronization, a PS4 save stored in the cloud must be manually downloaded to PS5 console storage before the game can use it. After uploading, verify the file in the cloud-management screen rather than assuming that closing the game completed the upload.
You can also copy PS4 game saves to a compatible FAT or exFAT USB drive. The relevant path is Settings, Saved Data and Game or App Settings, Saved Data (PS4), Upload or Delete from Console Storage, then Copy to USB Drive. To restore a save, use Saved Data (PS4), Copy or Delete from USB Drive, choose the game and copy the selected file to console storage.
After finishing Mass Effect 1 or Mass Effect 2, open Load Game and confirm that the completed manual save is visible. Then upload or copy it and leave the local file untouched until the next game confirms the import. A full PS5 system backup is an additional safeguard, but it is not a substitute for maintaining distinct in-game milestone saves.
- A manual save exists before each game’s final sequence.
- A completed Mass Effect 1 save has been confirmed in Load Game and backed up before Mass Effect 2 begins.
- A completed Mass Effect 2 save has been confirmed in Load Game and backed up before Mass Effect 3 begins.
- Cloud or USB copies have been verified and can be downloaded or copied back to console storage.
Before you move on
- Mass Effect: Legendary Edition launches from the PS5 home screen as the PS4 product playable on PS5.
- Mass Effect, Mass Effect 2 and Mass Effect 3 are available in the collection launcher.
- The selected graphics mode has been tested, with the PS5 resolution and frame-rate trade-off understood.
- Subtitles, HUD, difficulty, camera and aiming preferences are configured before Eden Prime.
- Included single-player DLC is accessible, and the Pinnacle Station omission is understood.
- A save routine is ready with separate pre-finale and completed-campaign manual saves.
- The completed Mass Effect 1 and Mass Effect 2 saves will be verified in Load Game and backed up through PS Plus cloud storage or a FAT or exFAT USB drive before importing them into the next game.
References for this chapter
- Mass Effect Legendary Edition — PlayStation Store listing
- Mass Effect Legendary Edition – PlayStation
- Mass Effect Legendary Edition official product page — Electronic Arts
- Mass Effect Legendary Edition Official Remastered Comparison Trailer – PlayStation
- How to Manage PS5 Console Storage Space
- PlayStation support: Transfer data from a PS4 console or PS5 console to your PS5 console
- PlayStation Plus cloud storage – PlayStation Support
- Mass Effect Legendary Edition PS5, Xbox Series X, and PC Performance Details Revealed – Game Informer
Mass Effect 1 — Character Creator, Class and First Steps
Create Shepard with the trilogy in mind, complete the Normandy and Eden Prime prologue, then thoroughly explore the first Citadel visit before departing for the main planetary missions. Legendary Edition provides a shared character-creation system for the trilogy, while Mass Effect 1 retains its six distinct classes. The opening establishes Shepard’s reputation, squad roster and several import flags, but the major companion-survival decision does not occur until Virmire. Save before Eden Prime, after the mission, and before leaving the Citadel so you can revisit early choices without rebuilding the entire opening.
Create Shepard and choose a class for the full trilogy
At the new-game screen, choose Shepard’s name, voice presentation, appearance, personal history and psychological profile. Legendary Edition uses a unified character-creation system across the trilogy, and an imported Shepard can retain the intended appearance as the campaign moves into Mass Effect 2 and Mass Effect 3. The background choices are primarily role-playing decisions, though they can open specific dialogue and assignment variations later. Choose the history and profile that match the Shepard you want to carry through the trilogy rather than treating them as mandatory build choices.
Choose one of Mass Effect 1’s six classes: Soldier, Adept, Engineer, Vanguard, Infiltrator or Sentinel. Soldier is the most direct first-playthrough choice because it emphasizes firearms, health and durability. Adept focuses on biotic control, Engineer on technology powers, Vanguard on close-range combat and biotics, Infiltrator on firearms and technology, and Sentinel on a combination of tech and biotic utility. Each class has different talent access and weapon emphasis, so decide whether Shepard will personally handle most firefights or rely more heavily on squad powers.
You can change difficulty later through the Options menu, so select a setting you can sustain rather than restarting over an uncomfortable opening. Enable subtitles if you want dialogue and codex entries consistently visible, and make a manual save after character creation if you may later test another class, background or appearance.
- Finalize Shepard’s name, appearance, background and class.
- Choose a manageable difficulty and configure subtitles or other accessibility settings.
- Create a manual baseline save if you want an untouched starting point for alternate playthroughs.
Complete the Normandy introduction before Eden Prime
The opening Normandy section introduces Captain Anderson, Spectre Nihlus and the Eden Prime assignment. Speak with the available characters when prompted, especially Anderson and Kaidan, then follow the objective to report for deployment. This section is brief; do not expect the full Normandy hub or the complete crew-conversation system to be available yet.
Use the early dialogue to establish the tone of your Shepard. Paragon and Renegade responses begin building reputation, but the opening choices do not lock you into one alignment. If you are planning a consistent trilogy persona, choose responses that fit that plan while remembering that later reputation comes from many conversations, assignments and mission decisions.
Before deploying, open the squad or equipment interface and familiarize yourself with weapon selection, armor, talents and squad commands. Mass Effect 1’s combat can be paused so you can issue powers and target priorities. Make a manual save before launching Eden Prime; this is the first useful recovery point if you want to replay the mission while keeping the same Shepard.
- Speak with the available Normandy characters before deployment.
- Review Shepard’s equipment and talent interface before the first combat mission.
- Make a manual save immediately before starting Eden Prime.
Advance through Eden Prime and recover the beacon
On Eden Prime, follow the objective marker toward the dig site and use the opening encounters to practice movement, cover and squad positioning. Move between cover points instead of crossing exposed ground while Geth units are active. Pause the action when necessary to direct Kaidan’s powers or focus fire on dangerous targets such as elevated enemies or units protected by distance.
Search the route for containers, medical stations and equipment, but do not assume every item is automatically scaled to Shepard’s current level. Inspect new weapons, armor and upgrades in the equipment menu and compare their statistics before equipping them. Spend talent points when they become available, concentrating first on Shepard’s primary class abilities rather than scattering points across unrelated trees.
Continue through the dig site and the colony area, investigating the attack and following the objective markers. Ashley Williams is encountered during this mission and joins the Normandy after the Eden Prime operation. Kaidan and Ashley are both available as early squadmates; Eden Prime does not present the later choice between them. That irreversible survivor decision belongs to the Virmire mission much later in the campaign.
At the Prothean beacon, clear the surrounding enemies before interacting with it. The beacon sequence triggers the major story cutscene and ends the mission after the return scenes. Once Eden Prime is complete, the Normandy travels to the Citadel.
- Use cover and squad powers rather than advancing through open fire.
- Inspect new equipment manually instead of assuming drops are level-scaled.
- Complete the beacon sequence and confirm that Ashley has joined the Normandy.
- Remember that the Ashley-versus-Kaidan survivor decision happens at Virmire, not Eden Prime.
Use the Normandy return to prepare for the Citadel
After the Eden Prime debrief, walk through the Normandy before using the galaxy map. Speak with the available crew, including Kaidan, Ashley, Captain Anderson, Doctor Chakwas and Joker when their conversations are available. Some dialogue provides background or codex information, while repeated conversations with squadmates help open their later personal and relationship content.
Open the talent screens and spend every available point. For Shepard, improve the class tree that supports your chosen role, then add weapon training, defensive abilities or useful powers as appropriate. Upgrade Kaidan and Ashley as well, prioritizing their strongest powers and survivability. Equipment is not automatically optimized after every mission, so check armor, weapons and upgrades manually.
When you are ready, use the galaxy map to travel to the Citadel. Make a manual save after the Eden Prime debrief and before entering the station. This gives you a clean point from which to repeat the first Citadel investigation without replaying the prologue.
- Talk to newly available Normandy crew members before departing.
- Spend Shepard’s and the squad’s available talent points.
- Review weapons, armor and upgrades manually.
- Create a manual save before beginning the Citadel investigation.
Explore the first Citadel visit before advancing the hearing
When the Normandy docks, explore the Presidium and Wards instead of immediately following the main objective to Citadel Tower. Speak with Ambassador Donnel Udina and Captain Anderson as the mission directs, but use the available areas to find assignments, codex entries and optional conversations before completing the investigation.
In or near Citadel Tower, speak with Chorban to begin Scan the Keepers. If the Keeper assignment has already been introduced through the related conversation with Jahleed, continue it through the journal and scan Keepers whenever you pass them. You do not need to interrupt the main investigation to search every location immediately, but starting the assignment early prevents it from being forgotten.
Explore the Wards and C-Sec areas around the markets, elevator routes and offices. Depending on which characters you approach, you can begin optional assignments such as Reporter’s Request, The Fan, The Consort, Rita’s Sister, The Signal Tracking and the Jahleed-Chorban investigation. These are not all required to leave the Citadel, but they provide experience, reputation opportunities and later references. Check the journal after each conversation because some assignments begin through terminals or follow-up dialogue rather than a conventional quest marker.
Do not treat optional assignment completion as a prerequisite for Expose Saren. The required route is to follow the investigation, locate the leads involving Garrus and Wrex, confront Fist, and recover the evidence that allows Tali to testify. Optional Citadel content can be completed before or around that route, but it is safest to finish any early assignment you specifically want before departing for the first planetary mission.
- Explore both the Presidium and Wards before leaving the station.
- Start Scan the Keepers and continue scanning them as you travel.
- Check the journal after conversations for new optional assignments.
- Make a note of optional assignments you intend to complete before departing.
Recruit Garrus, Wrex and Tali through Expose Saren
Advance Expose Saren by following the leads in the Citadel investigation. One branch takes Shepard toward Garrus at the Med Clinic, while another leads to Wrex and the operation against Fist at Chora’s Den. Complete the required firefights and speak with the characters after each objective so their recruitment scenes trigger properly.
Garrus becomes available after the Med Clinic confrontation. Wrex can be recruited through the investigation involving Fist and Chora’s Den. Bring whichever squad combination suits your class, but remember that both characters can be recruited before you leave the Citadel. Garrus provides firearm and tech support, while Wrex is a durable close-range biotic fighter.
After Fist is dealt with, follow the objective involving the quarian witness. Protect Tali during the encounter and escort her to the diplomatic area so she can deliver the evidence against Saren. Tali then joins the Normandy. This completes the essential opening recruitment sequence and gives Shepard a full group of early squadmates, even though Liara remains unavailable until her later recruitment mission.
Return to the Normandy after the Council hearing and speak with Garrus, Wrex, Tali, Kaidan and Ashley. Their early conversations can reveal personal assignments and establish future dialogue. Choose the Paragon or Renegade responses you want to carry forward, but keep a separate manual save before departing in case you later want to revisit the opening investigation or complete additional Citadel assignments.
- Recruit Garrus through the Med Clinic lead.
- Recruit Wrex during the investigation involving Fist and Chora’s Den.
- Recover Tali’s evidence and escort her safely to the diplomatic area.
- Speak with the recruited squadmates aboard the Normandy.
- Create a final first-Citadel manual save before selecting the next planetary destination.
Before you move on
- Shepard has a finalized appearance, background and class, with a manual baseline save.
- Eden Prime is complete, the Prothean beacon sequence has played, and Ashley has joined the Normandy.
- The post-Eden Prime Normandy conversations have been reviewed and available talent points have been spent.
- The first Citadel visit has advanced through Expose Saren.
- Garrus, Wrex and Tali have been recruited and are available aboard the Normandy.
- Scan the Keepers and any other desired early Citadel assignments have been started or completed.
- A manual save exists after the Citadel recruitment sequence and before choosing the first major planetary destination.
References for this chapter
- Mass Effect Legendary Edition: A detailed look at visual enhancements to the celebrated trilogy – PlayStation.Blog
- Mass Effect Legendary Edition: Rebalancing, tuning, & mechanical improvements – PlayStation.Blog
- Mass Effect instruction manual – Character Creation and Classes
- Guide for Mass Effect Legendary Edition – Mass Effect 1 – TrueAchievements
- The Citadel: Expose Saren – Mass Effect 1 Walkthrough
- Citadel Exploration – Mass Effect 1 Legendary Edition
- Citadel: Meet the Council – Mass Effect 1 Legendary Edition
Mass Effect 1 — Exploration, Assignments and Planet Missions
After the Citadel opening, Shepard can investigate Therum, Feros and Noveria in any order, and Virmire becomes available after any two of those three worlds are complete. A reliable completion route is Therum, Feros, Noveria, then Virmire. This recruits Liara early, leaves time to build Paragon or Renegade points, and lets you finish the optional content that is easiest to miss. Complete X57: Bring Down the Sky and all desired Citadel assignments before finishing the fourth main world. Completing all four triggers the Citadel lockdown; after escaping, some galaxy assignments remain possible, but Citadel errands do not. Treat the later trip to Ilos as the true endgame point of no return. Virmire contains several import-relevant decisions: Wrex may live or die, Captain Kirrahe can survive, and exactly one of Ashley Williams or Kaidan Alenko is permanently lost.
1. Finish Citadel work and establish your cleanup plan
After the Citadel story opens and the Normandy is available, inspect the Assignments journal after every major mission. Speak with squadmates and crew members on the Normandy, revisit the Citadel when an assignment names a specific NPC or district, and check the galaxy map for newly revealed systems. This is the safest period for Citadel errands, companion assignments and missions that require shops, terminals or conversations in the wards and Presidium.
You do not need every assignment to finish Mass Effect 1, but optional missions provide experience, credits, equipment and import flags. If a decision matters to your planned trilogy continuity, make a manual save before starting it and another after resolving it. Give priority to Wrex’s family armor assignment, Garrus’s investigation, Tali’s evidence-related assignment and any faction, colony or rachni decisions you want represented in later games.
Do not finish the fourth main world until you have completed the Citadel content you care about. Once all four main worlds are complete, the game begins the Citadel lockdown sequence. You will not have normal access to unfinished Citadel assignments afterward.
- Review Assignments after every main mission and Normandy conversation cycle.
- Complete desired Citadel errands before finishing the fourth main world.
- Create a manual save before major import-relevant decisions.
2. Complete Therum, Feros and Noveria before Virmire
The three initial investigation worlds are flexible. For a straightforward first campaign, complete Therum first, then Feros, then Noveria. Therum recruits Liara T’Soni early, giving you the complete core squad for later conversations and combat. Virmire unlocks after any two of these three worlds, but postponing it until all three are complete gives you more time to finish assignments and avoids entering the late-game transition prematurely.
On Therum, follow the mining route through the outdoor Mako sections and the underground ruins. Geth forces mix ranged fire, shields and heavier units, so use cover, squad powers and focused fire instead of driving or shooting in the open whenever the terrain allows. Continue through the excavation area until you reach Liara, then speak with her on the Normandy to unlock her further dialogue and personal context.
On Feros, speak with the colonists and inspect available terminals before pushing into the next combat area. Several optional objectives depend on what you learn and which colonists remain alive. Protect the colony’s interests while investigating the Thorian, and use crowd-control powers in the narrow interior spaces rather than allowing enemies to surround Shepard.
On Noveria, investigate Port Hanshan before forcing access to restricted areas. Talk to workers, inspect offices and follow the available access or evidence leads. Noveria alternates between conversation checks, exploration and combat, so keep a balanced squad and save before major confrontations.
- Recruit Liara before making later main-story decisions if you want her available for them.
- Inspect terminals, offices and conversation options before advancing key objectives.
- Update weapons, armor and squad powers after each main world.
3. Complete X57: Bring Down the Sky and desired galaxy assignments
After obtaining the Normandy, X57: Bring Down the Sky can be accessed from the galaxy map as an included Legendary Edition assignment. Complete it before beginning the Ilos endgame sequence. For a clean campaign plan, finish it before Virmire so the late-game transition cannot interrupt your DLC schedule.
Use the galaxy map and journal to identify newly available UNC and faction assignments. Complete companion missions and any colony, smuggling, distress or investigation assignments whose outcomes you want to carry into the trilogy. Return to the Normandy after each major mission and exhaust new squadmate conversations; some assignments appear only after a story or dialogue trigger.
You may leave some galaxy assignments until after the Citadel lockdown, but this is not true for Citadel errands. After escaping the lockdown, prioritize only the remaining galaxy content you still want, then make your pre-Ilos save. Do not assume that the game will preserve a convenient free-roam state after entering the final sequence.
- Complete X57: Bring Down the Sky before traveling to Ilos.
- Resolve desired companion and faction assignments before the late-game transition.
- Finish all Citadel-dependent errands before completing the fourth main world.
4. Prepare equipment and squad tactics for Virmire
Make a manual save before landing on Virmire. Equip Shepard and both selected squadmates with current armor, weapons and upgrades. Bring a team that can handle shields, armor and organic targets through a mixture of weapon damage, tech powers, biotics and defensive abilities. The exact best squad depends on Shepard’s class, but avoid taking two under-equipped characters simply because they fit the story.
Use cover during the beach approach, base assault and laboratory sections. Geth snipers, rocket units and heavily protected enemies should be targeted first when they can punish movement or expose the squad. Pause to issue focus-fire commands, keep squadmates behind cover and use powers to disable enemies before crossing open ground. Legendary Edition improves the feel and presentation of ME1’s combat, but outdated equipment and uncontrolled squad movement can still cause avoidable deaths.
Unequip valuable weapons, armor and upgrades from Ashley or Kaidan if you do not want those items lost with the character who dies later in the mission. Save again before the decisive conversations.
- Create a manual save immediately before Virmire.
- Confirm Shepard and squad equipment is current.
- Use cover, focus fire and powers against snipers, rockets and heavily protected enemies.
5. Resolve the Virmire decisions deliberately
Before the laboratory assault, Wrex confronts Shepard over the genophage cure. Completing Wrex’s family armor assignment and building sufficient Charm or Intimidate options gives you reliable ways to resolve the confrontation without killing him. If Shepard cannot calm him, Ashley can shoot Wrex. Wrex’s survival substantially changes later trilogy content, so preserve a pre-confrontation save if this outcome matters to your import.
During the assault, one of Ashley or Kaidan is assigned to support Captain Kirrahe’s unit while the other remains with Shepard. This assignment does not by itself determine which human companion survives. Later, Shepard must choose whether to go to the bomb site or the AA tower during the extraction crisis. The squadmate at the location Shepard abandons dies, permanently removing that character from the current game and future imports.
To improve Kirrahe’s chance of survival, assist his unit during the base approach rather than ignoring the available sabotage and diversion objectives. His survival can affect later events even though it is separate from the Ashley-or-Kaidan choice. After Virmire, talk to the Normandy crew and record Wrex’s outcome, Kirrahe’s outcome and the chosen human survivor in your trilogy notes.
- Resolve Wrex’s confrontation using your intended outcome.
- Choose deliberately between the bomb site and AA tower.
- Record Ashley or Kaidan, Wrex and Kirrahe before continuing.
6. Handle the lockdown, finish galaxy cleanup and stop before Ilos
After Therum, Feros, Noveria and Virmire are complete, access to the galaxy map triggers the Citadel lockdown sequence. Follow the objective through the Citadel and escape with the Normandy. From this point, unfinished Citadel errands are no longer available, so they must have been completed earlier.
Once the Normandy is free again, inspect the galaxy map and journal. Any remaining galaxy assignments that are still available can be completed now. This is also the last practical opportunity to improve equipment, talk through remaining Normandy conversations and create a separate pre-endgame save. Do not describe this period as unrestricted free roam: the Citadel is closed to ordinary cleanup, and the campaign is now moving directly toward its conclusion.
When you are ready, travel to Ilos. Entering the Ilos sequence starts the final run through the Conduit and the assault on the Citadel. You cannot return to the galaxy map, shop, explore the Normandy or complete ordinary assignments after that point. Keep the pre-Ilos save separate from your final completed save so it can support an import retry or missed-content cleanup.
- Escape the Citadel lockdown and verify that desired galaxy assignments remain available.
- Create a manual save after cleanup and immediately before traveling to Ilos.
- Do not select Ilos until all desired ME1 content is complete.
Before you move on
- Therum, Feros, Noveria and Virmire are complete, with Liara recruited and your intended Virmire survivor recorded.
- Wrex’s outcome and Captain Kirrahe’s outcome are documented for the trilogy import.
- X57: Bring Down the Sky and all desired Citadel assignments are complete before the fourth main world triggers the lockdown.
- Any remaining desired galaxy assignments are complete after lockdown and before traveling to Ilos.
- Manual saves exist before Virmire, after the Virmire sequence, after Citadel lockdown cleanup and immediately before Ilos.
- Shepard and the active squad have current weapons, armor and powers, and the pre-Ilos save is preserved separately from the eventual completed-game save.
Mass Effect 1 — Ilos and the Final Sequence; Preparing ME2 Import
Ilos is Mass Effect 1’s final point of no return. Before entering the Refuge system, finish the assignments, companion conversations, romance scenes, and Bring Down the Sky content you want in this career. After the Normandy lockdown, some assignments remain available, but anything requiring a Citadel visit is no longer practical, so complete that cleanup before Ilos. The endgame runs continuously through Ilos, the Conduit, the Citadel approach, and the final Saren battle. Keep a manual save before traveling to Ilos, then let the ending and credits finish so the game creates a completed career for Mass Effect 2. Record the Virmire survivor, Wrex, the Rachni queen, Council outcome, Anderson or Udina choice, romance, and major morality decisions. Legendary Edition on PS5 includes Bring Down the Sky but not Pinnacle Station.
1. Complete final cleanup before traveling to Ilos
Return to the Normandy and review the Journal, squad conversations, and galaxy map before committing to the ending. Complete the assignments and companion scenes you want for this Shepard, including Bring Down the Sky if you are using the included ME1 story DLC. Finish any romance scene you intend to carry forward before selecting Ilos, because the remaining endgame path does not provide normal access to the ship and galaxy map for cleanup.
The final main-planet sequence places the Normandy under Citadel lockdown before Ilos. You can still perform some non-Citadel activities during that interval, but assignments that require returning to the Citadel may no longer be completable. Treat Ilos as the hard point of no return: once you confirm the trip from the Pangaea Expanse’s Refuge system, you are committed to the ending.
Create a manual save aboard the Normandy before opening the Galaxy Map. Keep this file in a separate slot and identify it as the pre-Ilos save. It is the reliable recovery point if you want to change a final decision, replay the ending, or discover that you forgot an assignment. Do not overwrite it with a later combat save.
- Desired assignments and companion conversations are complete.
- Bring Down the Sky is complete if you want its story and choices in this career.
- Any planned romance scene has been completed.
- A protected manual save exists before traveling to Ilos.
2. Land on Ilos and disable the security system
Travel to the Pangaea Expanse, enter the Refuge system, and land on Ilos. Follow the objective through the opening Prothean ruins. The first section is fought on foot around plazas, ramps, and enclosed approaches, so move from cover to cover and let the squad catch up before crossing open ground.
At the opening defenses, use the Mako to clear or bypass the first group, then dismount and push through the ruins toward the elevator and Security Station. Geth Armatures are the most dangerous targets in this section. If the Armature Control terminal is available to your squad, it can disable the defenses; otherwise, fight from cover and use the Mako whenever the route allows it.
Reach the Security Room and activate the Security Panel. This advances the objective and opens the route toward the Archives. Ride the elevator back toward the landing area, return to the Mako, and drive to the barrier near the Archives. Exit at the barrier and use the elevator to reach Vigil’s chamber. Search nearby equipment before moving on, since Ilos is a continuous endgame mission rather than a hub you can revisit.
- The Ilos security lockdown has been disabled.
- The Security Panel has been activated.
- The Mako has reached the Archives barrier.
- Shepard has spoken with Vigil.
3. Listen to Vigil, then take the Mako through the trench
After the Vigil conversation, take the elevator back to the area where the Mako is parked. Board the vehicle before descending into the aqueduct route. The Mako is required for the Conduit transition; continuing on foot will not complete this section.
Drive through the trench toward the Conduit. You can destroy Geth Rocket Troopers and a Geth Colossus with the Mako cannon, but fighting every enemy is unnecessary. Keep the vehicle moving, use the jump or boost controls to avoid heavy projectiles, and stay aligned with the route instead of stopping in awkward corners.
At the final plaza, a cutscene begins a strict countdown of about 40 seconds. Drive directly toward the glowing Conduit beam and use the ramp. Ignore the Colossi, Armatures, and infantry unless an obstacle physically prevents forward movement. Trading fire in the plaza is the most common cause of failure. If the timer expires or the Mako is destroyed, reload the most recent autosave; if that position is poor, reload the protected pre-Ilos save and repeat the run without stopping.
- The Mako reaches Vigil’s chamber and returns to the trench route.
- The Conduit countdown begins.
- The Mako enters the Conduit before the timer expires.
- Shepard arrives at the Citadel Presidium.
4. Fight through the Citadel and reach the Council Chambers
After the Conduit transition, continue through the Citadel approach toward the Council Chambers. This is a forward combat sequence with Geth reinforcements and limited opportunities to recover. Keep the squad close, use side cover, and clear enemies before advancing through the next doorway or open platform.
Prioritize dangerous ranged units and enemies that can stagger or disable Shepard. Powers that reduce enemy accuracy, remove defenses, or interrupt attacks are more valuable here than rushing into the center of a room. If the squad is overwhelmed, retreat to the previous cover position and let cooldowns recover instead of pushing through crossfire.
Use the elevators and marked route toward the tower. Make a combat save when the game permits one before committing to the final confrontation, but retain the original pre-Ilos save separately. This combat save is only for convenience; it is not the completed career that Mass Effect 2 imports.
- The Citadel approach is complete.
- The squad has reached the Council Chambers route.
- A separate combat recovery save exists if the game allows it.
5. Defeat Saren in both stages
The first Saren confrontation takes place in the Council Chambers. Saren moves around the arena, uses ranged attacks, and is supported by Geth forces. Fight from the side cover and keep moving when he launches rockets or closes distance. Eliminate reinforcements when they threaten to surround the squad, then concentrate fire on Saren during his exposed moments.
Dialogue choices during the first confrontation can affect the encounter, including options that weaken Saren before the fight. If you prefer to fight normally, use disabling powers and maintain distance. Do not stand in the open center of the chamber while waiting for squad abilities to recharge.
The second confrontation begins after the ending scenes reveal Saren’s transformed form. Circle the arena using the perimeter cover, avoid standing directly in front of him, and attack after his movement or ranged barrage ends. Disable him whenever possible, revive fallen squadmates before attempting a risky push, and keep moving rather than exchanging fire in one position. When the transformed Saren is defeated, the final decision and epilogue scenes begin.
- The first Saren encounter is complete.
- The transformed Saren has been defeated.
- The final Council and human leadership scenes begin.
6. Record the decisions needed for trilogy continuity
Record which Virmire survivor remains alive: Ashley Williams or Kaidan Alenko. The other character is permanently lost in that playthrough, and the survivor can reappear in later games. Also record whether Wrex survived, what happened to the Rachni queen, and whether the Council was saved or sacrificed during the final battle.
During the final scenes, record whether Anderson or Udina becomes humanity’s representative on the Council. Note Shepard’s major Paragon or Renegade direction, completed romance, and any major faction or companion outcomes you deliberately want to preserve. Mass Effect 2 imports many decisions, but the game’s import summary will not display every minor assignment result, so written notes are safer than relying on memory.
If you want a different Virmire, Council, or leadership outcome, reload the protected pre-Ilos save and replay the endgame. Make a separate completed career for the alternate version. Never overwrite the preferred pre-Ilos file while experimenting.
- The Virmire survivor is documented.
- Wrex and the Rachni queen outcomes are documented.
- The Council outcome is documented.
- The Anderson or Udina decision is documented.
- Romance and major morality choices are documented.
7. Finish the credits and preserve the ME2 import career
Allow the final scenes and credits to finish. Mass Effect 1 does not become a normal post-game free-roam campaign afterward. Loading or resuming the finished game commonly returns you to an endgame state or the last pre-ending position rather than reopening the galaxy for new assignments. If you still need side content, use the pre-Ilos save and complete it there before replaying the ending.
After the credits, open Mass Effect 2 Legendary Edition and choose New Game, followed by Import ME1 Character. Select the completed Mass Effect 1 career created by finishing the ending and credits. A normal manual save from before Ilos is not enough by itself, and reaching Saren without completing the credits does not create the career entry the importer expects.
Keep the pre-Ilos manual save and the completed career available as separate records. If the career does not appear in Mass Effect 2, return to Mass Effect 1, load the pre-Ilos save, complete Ilos and the final Citadel sequence again, and let the credits finish before checking the import menu. On PS5, this is the forward-compatible PlayStation 4 release of Legendary Edition, so do not expect a separate native PS5 save format or a post-game free-roam state.
- The final scenes and credits have finished.
- Mass Effect 2 detects a completed ME1 career in Import ME1 Character.
- The protected pre-Ilos save remains separate.
- The imported Shepard and intended continuity decisions are selected.
Before you move on
- Ilos security has been disabled and Vigil’s chamber has been completed.
- The Mako has reached the Conduit before the countdown expired.
- The Citadel approach and both Saren encounters are complete.
- The ending scenes and credits have been viewed.
- A completed ME1 career appears under Mass Effect 2’s Import ME1 Character option.
- Separate records exist for the pre-Ilos save and the completed career.
- The Virmire survivor, Wrex, Rachni queen, Council, Anderson or Udina, romance, and major morality outcomes are documented.
References for this chapter
- Race Against Time: Escape the Citadel — Mass Effect 1 Legendary Edition Walkthrough
- Race Against Time: Ilos — Mass Effect 1 Legendary Edition Walkthrough
- Race Against Time: Final Battle — Mass Effect 1 Legendary Edition Walkthrough
- Ilos: The Conduit and Trench Run — Mass Effect 1 Legendary Edition Walkthrough
- Ilos — Mass Effect Guide and Walkthrough
- Mass Effect Save Import Guide: Legendary Edition, Genesis, and Old PC Saves
- Mass Effect Legendary Edition — Official EA Product Information
- Electronic Arts Announces Mass Effect Legendary Edition with PS5 Forward Compatibility
- BioWare Explains Pinnacle Station DLC Exclusion From Mass Effect Legendary Edition
Importing to Mass Effect 2 — Continuity, Choices and Early Checklist
Start Mass Effect 2 from the Legendary Edition collection, choose New Game and Import ME1 Character, then select the completed Mass Effect 1 career you intend to continue. Review the displayed import information before creating Shepard in Mass Effect 2. If no usable Mass Effect 1 career appears, use the included Mass Effect: Genesis interactive comic to establish a limited set of major earlier decisions; it cannot reproduce every assignment, relationship detail or minor plot flag from a played campaign. After the import is accepted, complete the Lazarus reconstruction, the Cerberus briefing, the opening Normandy sequence and Freedom’s Progress. Once the Normandy SR-2 and galaxy map are available, inspect the ship, speak with the crew, check messages and terminals, and review newly available recruitment and DLC destinations. Keep separate manual saves for the imported career, the recovered Normandy and the completion of Freedom’s Progress.
1. Finish Mass Effect 1 and preserve the correct career
Complete Mass Effect 1 through its final mission and ending scenes before attempting the handoff. Make a manual save after the conclusion rather than relying only on an autosave. Keep that save in a separate slot from routine mission saves and note the Shepard name, class, appearance, background and major decisions associated with it.
On PS5, launch Mass Effect 2 from the Mass Effect Legendary Edition collection. The trilogy uses separate career saves for each game; finishing Mass Effect 1 does not automatically create a playable Mass Effect 2 career. If several Mass Effect 1 careers are listed, identify the intended one by comparing the displayed Shepard information before selecting it.
- Mass Effect 1 ending completed
- Manual post-ending save created
- Correct Shepard career identified
2. Select the Mass Effect 1 import path
At the Mass Effect 2 title screen, choose New Game, then choose Import ME1 Character. Select the completed Mass Effect 1 career you want to carry forward. Do not choose an ordinary new Mass Effect 2 character if preserving the played campaign is your objective.
The import carries Shepard’s identity and a substantial set of Mass Effect 1 story variables into Mass Effect 2. These variables can affect returning characters, Citadel conditions, conversations, assignments, romance references and later plot context. The handoff is not a complete recording of every line Shepard spoke or every optional activity completed, so expect continuity in important outcomes rather than a visible replay of the entire previous game.
- New Game selected
- Import ME1 Character selected
- Intended completed career selected
3. Review the imported career information before confirming
Mass Effect 2 displays important information associated with the selected Mass Effect 1 career during the import setup. Read the available pages instead of accepting the first selection automatically. Compare the displayed results with your notes, especially the Virmire survivor, Wrex’s fate, the Council outcome, the human councilor, the rachni decision, major Feros results and Shepard’s romance history where shown.
If the displayed information is wrong, cancel the setup before creating the Mass Effect 2 character. Return to Mass Effect 1, load the appropriate completed career, and make sure you are selecting the post-ending save rather than an earlier file. Once the new Mass Effect 2 campaign has been created, switching to a different Mass Effect 1 career requires restarting the Mass Effect 2 setup.
- Virmire survivor matches the intended outcome
- Wrex and Council outcomes are correct
- Shepard’s identity and romance history are acceptable
4. Use Genesis only when you are not importing a completed career
If no suitable Mass Effect 1 career is available, start a new Mass Effect 2 character and use the included Mass Effect: Genesis sequence when the game offers it during the opening setup. Genesis lets you establish a limited group of major Mass Effect 1 decisions, including several choices involving Wrex, the Council, the Virmire survivor, the rachni and Shepard’s principal romance.
Genesis is a fallback, not an equivalent replacement for a completed import. It does not recreate every side assignment, minor conversation, relationship detail, recruitment history or other plot flag that a played Mass Effect 1 career may contain. Record the choices you make in Genesis so the later Mass Effect 2 import into Mass Effect 3 has a clear continuity record.
If an imported career is selected, any Genesis presentation should be treated as a recap of the imported decisions, not as permission to overwrite them. If the game begins with the wrong continuity, stop and restart the setup rather than continuing for several hours and hoping later dialogue will repair the mismatch.
- Genesis used only without a suitable Mass Effect 1 career
- Major Genesis decisions recorded
- Imported careers are not overwritten by recap choices
5. Complete the Lazarus opening and Cerberus briefing
After confirming the career, play through the Lazarus Research Station sequence. Follow the objective markers, learn the cover and squad-command controls, collect the available equipment and move through the station until Shepard reaches the reconstruction and briefing scenes. This section is linear; there is no need to search for the galaxy map or optional Normandy activities yet.
Continue through the meeting with the Illusive Man and the early Cerberus briefing. The opening establishes Shepard’s new operational situation and leads into the replacement Normandy. Keep a manual save after the prologue if you want a clean point for changing difficulty, appearance or import choices without replaying the entire beginning.
- Lazarus Research Station completed
- Shepard’s reconstruction completed
- Illusive Man briefing completed
6. Recover the Normandy SR-2 and finish Freedom’s Progress
Once the Normandy SR-2 becomes available, walk through the ship and speak with the crew before using the galaxy map. Examine the ship’s terminals and messages, check the available equipment and learn where the mission computer and squad-management functions are located. The Normandy is now the central hub for recruitment briefings, crew conversations, assignments and later DLC prompts.
Follow the first major investigation to Freedom’s Progress. Use cover, pause to issue squad powers when necessary and search each area for objective markers before advancing. Complete the mission, resolve its concluding conversation and return to the Normandy. Afterward, speak with the available crew again and check the galaxy map for the dossiers and destinations now provided by the Illusive Man.
- Normandy SR-2 recovered
- Freedom’s Progress completed
- First recruitment destinations visible
7. Begin recruitment without skipping shipboard checks
Start the recruitment phase by reviewing the dossiers and destinations available from the galaxy map. There is no single mandatory order for the early recruitment missions, but newly revealed dossiers should not be ignored. Recruiting squadmates expands combat options and creates access to later conversations and loyalty missions.
After every mission, return to the Normandy and speak with crew members who have new dialogue. Check the galaxy map, private terminal and ship messages again. Some opportunities are communicated through conversation or a message rather than appearing as a large story prompt, so these short checks prevent you from overlooking newly available content.
- Recruitment dossiers reviewed
- Normandy crew conversations checked
- Galaxy map revisited after the opening missions
8. Confirm the included Mass Effect 2 content and create continuity saves
Legendary Edition includes Mass Effect 2’s major single-player DLC and additional equipment content. Confirm that the relevant content is present by checking the Normandy’s messages, terminals, conversations and galaxy-map destinations after the opening unlocks. Zaeed’s and Kasumi’s content is accessed through their in-game recruitment opportunities, while Firewalker, Overlord, Lair of the Shadow Broker and Arrival become available through their own later triggers. Do not expect every DLC mission to appear during the first minutes of the campaign.
Create a manual save after the Normandy is recovered and another after Freedom’s Progress. Keep the original Mass Effect 1 completion save untouched. These saves give you a stable restart point if the wrong career, Genesis path, Shepard appearance or opening setup was selected.
- DLC-related messages and destinations checked
- Post-Normandy manual save created
- Freedom’s Progress completion save created
Before you move on
- Mass Effect 2 was started through New Game and Import ME1 Character, or Genesis choices were deliberately established because no suitable Mass Effect 1 career was available.
- The import information matches the intended major outcomes, especially the Virmire survivor, Wrex, the Council and Shepard’s identity.
- The Lazarus opening, Cerberus briefing, Normandy SR-2 recovery and Freedom’s Progress are complete.
- The first recruitment dossiers and destinations have been reviewed.
- Normandy conversations, messages, terminals and galaxy-map destinations have been checked for early assignments and DLC triggers.
- Manual saves exist for the imported career, the recovered Normandy and the completed Freedom’s Progress mission.
Mass Effect 2 — Rebuilding Shepard and Recruiting the Team
Finish Lazarus Station and Freedom’s Progress, then use the Normandy SR-2 as the center of the campaign. The early recruitment phase has a clear story gate: recruit Mordin Solus, Garrus Vakarian, Jack, and Grunt to trigger Horizon. Their missions may be completed in different orders, and the included Kasumi and Zaeed missions can be done before or between those dossiers. Tali, Thane, and Samara become available later and should not be treated as early recruits. Return to the Normandy after every operation, speak with the crew, inspect the private terminal, and use the research computer once Mordin opens the laboratory. Spend early minerals and credits on meaningful upgrades, adjust squad powers for shields, armor, and barriers, and save before each major recruitment mission and before Horizon.
1. Complete the prologue and take command of the Normandy SR-2
Play through Lazarus Research Station, recover Shepard’s equipment, and complete the escape sequence. Continue through the Illusive Man’s briefing and Freedom’s Progress. These missions establish the core ME2 combat loop: use solid cover, switch weapons when an enemy’s defensive layer changes, and issue squad power commands instead of allowing both companions to fire independently without direction.
After the opening briefing, Shepard receives the rebuilt Normandy SR-2. Walk through the ship before selecting another operation. Speak with Miranda and Jacob, visit Joker and EDI on the flight deck, inspect the private terminal, and locate the galaxy map and research facilities. The Normandy is not merely a travel screen: crew conversations, messages, research projects, and later loyalty opportunities are routed through it.
- Lazarus Research Station completed.
- Freedom’s Progress completed.
- Normandy SR-2 available.
- Galaxy map, private terminal, armory, and research areas located.
2. Use the Normandy as the campaign hub
The galaxy map is in the Combat Information Center on Deck 2. It displays available destinations and mission leads, while the private terminal carries messages and some new assignments. After each mission, return to the ship and check both before departing again. Speak to squadmates when conversation prompts become available; some dialogue advances personal arcs, reveals upgrades, or changes after recruitment missions.
Use the armory to select Shepard’s weapons and heavy weapon, and use the squad-selection screen before each landing to review available powers. The research computer is available in the armory and, after the laboratory is opened, in the laboratory as well. Planet scanning supplies the minerals required for many projects, but do not spend every resource immediately on minor purchases.
- Galaxy map reviewed after each operation.
- Private terminal checked for new messages.
- Crew conversations completed when available.
- Research computer and armory inspected.
3. Recruit Mordin Solus on Omega
Travel to Omega and accept Dossier: The Professor from Aria’s area. Follow the route through the plague-stricken districts, fighting mercenaries and vorcha while staying behind cover. Reach Mordin’s clinic and complete the recruitment sequence. Mordin then joins the Normandy as both a squadmate and the ship’s medical and scientific specialist.
After returning to the Normandy, speak with Mordin and visit the Tech Lab. His arrival opens the laboratory’s research functions. Research projects require a discovered project and the appropriate minerals, so scan planets when you have funds and fuel available. Begin with upgrades that support Shepard’s class and the weapons or powers you use most often; later chapters will cover the Normandy’s critical ship upgrades separately.
- Mordin recruited.
- Tech Lab available.
- Mordin’s conversations checked.
- At least one useful research project started if resources allow.
4. Recruit the other three squadmates required before Horizon
The initial story recruitment group consists of Garrus Vakarian, Jack, and Grunt in addition to Mordin. Complete Dossier: Archangel on Omega to recruit Garrus. Complete Dossier: The Convict at the Purgatory prison ship to recruit Jack. Complete Dossier: The Warlord on Korlus to recruit Grunt. These three missions can be completed in different orders; there is no requirement to follow one universal sequence.
The important progression rule is that Horizon becomes available after Mordin, Garrus, Jack, and Grunt have all been recruited. Do not promise yourself that every squadmate can be recruited before Horizon. Tali, Thane, and Samara become available in the later recruitment phase, after this story checkpoint. Once the fourth required recruit is aboard, return to the Normandy, finish any immediate conversations and research, and prepare for Horizon rather than trying to clear the entire eventual roster first.
- Garrus recruited.
- Jack recruited.
- Grunt recruited.
- Mordin, Garrus, Jack, and Grunt are all aboard before Horizon.
5. Add the included DLC companions when convenient
Kasumi Goto is recruited at the Citadel through the Stolen Memory content. Speak with her at her designated location to begin her recruitment and DLC mission chain; she does not follow the same dossier-mission format as Garrus, Jack, or Grunt. Zaeed Massani is recruited on Omega through The Price of Revenge content after the early Normandy sequence. Both companions are included in Legendary Edition and can be added before Horizon if you want their equipment, dialogue, and loyalty missions available earlier.
These missions are optional for triggering Horizon. If you recruit Kasumi or Zaeed, return to the Normandy afterward, speak with them, and check their available upgrades or loyalty content. They are useful additions, but their presence does not remove the requirement to recruit Mordin, Garrus, Jack, and Grunt for the early story gate.
- Kasumi recruitment checked if using the included DLC.
- Zaeed recruitment checked if using the included DLC.
- Optional DLC recruitment is not confused with the four-recruit Horizon requirement.
6. Match squad powers to enemy defenses
ME2 enemies commonly use shields, armor, or biotic barriers before their health can be damaged normally. Shields are generally best handled with powers and ammunition designed to disrupt technology, such as Overload or disruptor ammunition. Armor responds well to fire, warp, or armor-piercing options. Biotic barriers are vulnerable to suitable biotic and damage powers, with Warp being a reliable specialist tool when available. Check the defense bar rather than repeatedly using the same power against every target.
Bring complementary squadmates and focus fire on one protected enemy at a time. Keep Shepard behind solid cover, place companions on separate firing angles when the terrain permits, and move if enemies begin flanking. On higher difficulties, do not assume squadmates will automatically choose the correct counter. Pause the action, select the relevant power, and remove the defense layer before attempting crowd control or direct health damage.
- Landing party covers multiple defense types.
- Weapons and powers assigned before deployment.
- Squadmates positioned so one enemy cannot suppress the entire team.
- Manual save made before difficult recruitment missions.
7. Research upgrades and manage early resources
Collect credits and minerals from missions, containers, purchases, and planetary scanning. Research projects improve Shepard, squadmates, weapons, ammunition, and eventually the Normandy. Squadmate conversations can reveal personal upgrade projects, so revisit the crew instead of relying only on the projects visible immediately after a mission.
Prioritize upgrades that improve your main weapon, class powers, survivability, or the squad powers you use repeatedly. Visit merchants on Omega and the Citadel when available, but retain enough credits for high-value equipment and enough minerals for research. The Normandy’s hull, armor, and weapon upgrades matter for the later Collector Base operation; during this opening chapter, concentrate on establishing a functional personal and squad loadout rather than purchasing every minor item.
- Research computer checked after recruitment missions.
- Minerals retained for useful projects.
- Shepard’s preferred weapons and powers tested.
- Credits not exhausted on low-impact purchases.
8. Finish the opening recruitment phase and prepare for Horizon
After all four required recruits are aboard, return to the Normandy and check the galaxy map, private terminal, research computer, and crew dialogue one more time. Make a manual save before accepting or entering Horizon. If you have not recruited Kasumi or Zaeed, you may still do so before advancing, but they are optional and do not replace the required four.
You are ready to continue when the prologue and Freedom’s Progress are complete, Mordin, Garrus, Jack, and Grunt have joined the crew, the research laboratory is functioning, and Shepard has a tested loadout with at least a few relevant upgrades. Horizon is the next major story checkpoint; later recruitment missions and broader loyalty planning belong to the following chapter.
- Four required early recruits aboard.
- Optional Kasumi and Zaeed content considered.
- Normandy dialogue, messages, and research reviewed.
- Manual save created before Horizon.
Before you move on
- Lazarus Research Station and Freedom’s Progress are complete.
- Shepard commands the Normandy SR-2.
- Mordin Solus, Garrus Vakarian, Jack, and Grunt have been recruited.
- The research laboratory is available and at least the basic research flow has been tested.
- Kasumi and Zaeed recruitment opportunities have been considered without confusing them with the Horizon requirement.
- The galaxy map, private terminal, crew dialogue, armory, and research computer have been reviewed.
- A manual save exists immediately before Horizon.
References for this chapter
- Mass Effect 2 official manual — research computer, squad selection, Normandy facilities, and resource use
- Mass Effect 2 Guide — Normandy SR-2 and early recruitment missions
- Mass Effect 2 Squad Members Guide
- Mass Effect Legendary Edition mission order guide
- Mass Effect Legendary Edition — PlayStation Store listing
Mass Effect 2 — Loyalty Missions and Normandy Upgrades
Prepare for the Suicide Mission by completing squad loyalty missions, resolving the Jack–Miranda and Tali–Legion confrontations, buying Heavy Ship Armor, Multicore Shielding and the Thanix Cannon, and arranging the final specialist roles. Loyalty is necessary but not sufficient: the game also checks ship upgrades, specialist identity, fireteam leadership, the crew escort and the defensive strength of squadmates left behind. Complete almost everything before Reaper IFF. The safest sequence is to finish all loyalty missions except Legion’s, install all three critical ship upgrades, complete Reaper IFF, wake Legion, complete A House Divided, and immediately begin the rescue after the Normandy crew is abducted.
1. Recruit the squad and complete loyalty missions before Reaper IFF
After recruiting each squadmate, return to the Normandy and speak with them whenever new dialogue becomes available. Their personal request eventually unlocks a loyalty mission. Complete that mission successfully, then check the squad screen to confirm the loyalty status changed. A loyal squadmate is more reliable in every Suicide Mission role and contributes more strongly to the final defensive calculation.
For a full-survival attempt, complete the loyalty missions for Jacob, Miranda, Garrus, Mordin, Jack, Grunt, Tali, Samara or Morinth, Thane, Zaeed and Kasumi. Legion is the exception to the pre-Reaper IFF rule because he is obtained during Reaper IFF. Do not start Reaper IFF until every other available loyalty mission, desired side mission and desired DLC mission is complete.
- All recruited squadmates except Legion have completed their loyalty missions.
- The squad screen shows the intended squadmates as loyal.
- Kasumi and Zaeed are included in the Legendary Edition roster if you recruited them.
2. Resolve the two loyalty conflicts without leaving anyone disloyal
Some loyalty missions trigger an argument when you return to the Normandy. The two important confrontations are Jack versus Miranda and Tali versus Legion. If you have enough Paragon or Renegade reputation, use the special reputation response to reconcile both sides. This preserves both loyalty flags.
Make a manual save before completing each loyalty mission that can trigger one of these arguments. If the reputation response is unavailable, you must support one character, causing the other to lose loyalty. Continue talking to the affected squadmate later; a further reputation check may restore the lost loyalty, but do not assume it will be available.
- Jack and Miranda are both loyal, or you have a save before their argument.
- Tali and Legion are both loyal, or you have a save before their argument.
- The squad screen confirms the final loyalty state before Reaper IFF.
3. Install all three survival-critical Normandy upgrades
Use the Research Project terminal in Mordin’s laboratory. The three upgrades required for the safest approach to the Collector Base are Heavy Ship Armor, Multicore Shielding and the Thanix Cannon. Each project must first be unlocked through the relevant squadmate conversation, and then purchased with minerals at the research terminal. Merely unlocking the project does not install it.
Jacob provides the Heavy Ship Armor project. Tali provides the Multicore Shielding project. Garrus provides the Thanix Cannon project. When all three are installed, the Normandy’s approach to the Collector Base does not kill a squadmate. Without them, the game can remove squadmates during the relay approach or the Collector Base assault.
Heavy Ship Armor protects Jack during the approach. Multicore Shielding protects the squad during the drive-core overload. The Thanix Cannon prevents the loss associated with the opening attack on the Collector Base. Mine planets and scan systems until you have the required resources, then verify that each project is listed as completed rather than merely available.
- Heavy Ship Armor is completed.
- Multicore Shielding is completed.
- Thanix Cannon is completed.
- The research terminal shows all three upgrades as installed before Reaper IFF.
4. Use the safe Reaper IFF sequence
Treat Reaper IFF as the endgame trigger. Before launching it, finish every loyalty mission except Legion’s, install all three ship upgrades, complete the side content you want, and make a manual save. After completing Reaper IFF, return Legion to the Normandy and speak with him until he offers A House Divided.
Complete Legion’s loyalty mission immediately. Do not use the galaxy map for unrelated missions first. After the next galaxy-map transition, the Collector attack on the Normandy occurs and the surviving crew is abducted. Launch the Omega-4 Relay rescue operation immediately after the abduction. This sequence gives you Legion’s loyalty flag while preserving the Normandy crew.
If you delay after the abduction, the non-combat crew is killed progressively. Waiting one to three missions costs members of the crew such as Kelly, Gabby, Ken and Gardner; waiting four or more leaves only Doctor Chakwas alive. Even with an immediate response, select a loyal squadmate to escort the rescued crew. Without an escort, the crew can die during the escape.
- All non-Legion loyalty missions are complete before Reaper IFF.
- All three Normandy upgrades are installed before Reaper IFF.
- Legion’s loyalty mission is the only planned operation after Reaper IFF.
- The Omega-4 Relay is entered immediately after the crew abduction.
5. Assign the correct specialists and fireteam leaders
For the ventilation shafts, choose a loyal Tali, Legion or Kasumi. These are the legal tech specialists. The first fireteam leader must be a loyal Garrus, Miranda or Jacob. Choosing an otherwise capable character, or choosing a disloyal specialist or leader, causes a scripted failure.
For the seeker-swarm passage, choose a loyal Jack, Samara or Morinth. Miranda is not a valid biotic specialist for this assignment, even though she can volunteer. The second fireteam leader must again be a loyal Garrus, Miranda or Jacob.
When the rescued Normandy crew is found, send a loyal squadmate back with them. Mordin is a practical choice because his Hold the Line value is low, so removing him from the final defensive group improves the average strength left behind. Any loyal squadmate can perform the escort, but do not leave the crew without one.
- Vent specialist: loyal Tali, Legion or Kasumi.
- First fireteam leader: loyal Garrus, Miranda or Jacob.
- Biotic specialist: loyal Jack, Samara or Morinth.
- Second fireteam leader: loyal Garrus, Miranda or Jacob.
- Crew escort: a loyal squadmate, preferably Mordin.
6. Protect the final defensive line
After the specialist sections, the game calculates the average defensive strength of squadmates left behind while Shepard proceeds. Loyal Garrus, Grunt and Zaeed are the strongest defenders. For a straightforward full-survival setup, leave those three among the defenders, keep the weaker defenders out of unnecessary specialist assignments, and take two loyal squadmates into the final confrontation.
Do not take all three of Garrus, Grunt and Zaeed into Shepard’s final squad unless you have calculated that the remaining defenders still average at least 2.0. Disloyalty lowers a squadmate’s defensive value, so loyalty missions matter even for characters you never plan to use directly.
A safe example is to use loyal Tali for the vents, loyal Garrus as both fireteam leader, loyal Samara for the barrier, loyal Mordin as escort, and leave loyal Garrus, Grunt and Zaeed available for the defensive line whenever the other assignments permit it. Do not copy this example if one of those characters is dead or disloyal; use the valid-role rules and maintain a strong group behind Shepard.
- At least two strong loyal defenders remain for the final Hold the Line section.
- You have not used every high-value defender in Shepard’s final squad.
- No squadmate assigned to a specialist role is disloyal.
- The expected defensive average is at least 2.0 for a no-casualty attempt.
7. Create a pre-relay recovery save
Before entering the Omega-4 Relay, create a named manual save in a separate slot. Confirm the roster, loyalty flags, ship upgrades and planned roles. This save is the correct recovery point if a specialist dies, the Normandy crew is lost or the final defensive line fails.
If a squadmate dies, reload this pre-relay save and inspect the relevant condition. Ship-approach deaths indicate a missing Normandy upgrade. Vent or barrier deaths indicate an invalid or disloyal specialist or fireteam leader. A death during the final hold indicates that too much defensive strength was taken into earlier sections or that one or more defenders were disloyal.
- A named manual save exists immediately before entering the Omega-4 Relay.
- Every intended survivor is alive and loyal.
- Heavy Ship Armor, Multicore Shielding and Thanix Cannon are installed.
- You can name the legal tech specialist, biotic specialist and both fireteam leaders before starting.
Before you move on
- Every squadmate intended to survive is alive and loyal, including the results of both Normandy arguments.
- Heavy Ship Armor, Multicore Shielding and Thanix Cannon are visibly completed at the research terminal.
- All non-Legion loyalty missions are complete before Reaper IFF, and Legion’s loyalty mission is completed immediately afterward.
- A loyal tech specialist, biotic specialist and valid fireteam leader are available for every required assignment.
- The Normandy crew is rescued immediately after abduction with a loyal escort selected.
- A named manual save exists immediately before entering the Omega-4 Relay.
- The remaining defenders are strong enough to meet the Hold the Line average for the intended no-casualty result.
Mass Effect 2 — Side Ops, DLC and Timing to Avoid Missed Content
Use the open middle of Mass Effect 2 to finish recruitment, loyalty missions, assignments, upgrades and the included DLC you want to carry into the finale. The Collector Ship mission arrives automatically after enough progress following Horizon, but it is not the final point of no return. Acquire Reaper IFF is the important boundary: complete nearly everything first, then finish Legion’s loyalty mission if needed and enter the Omega-4 Relay promptly after the Normandy crew is abducted. Delaying the rescue costs crew lives, although most optional missions remain available afterward. Play Arrival after the Suicide Mission as the narrative handoff to Mass Effect 3. Lair of the Shadow Broker, Overlord, Kasumi’s Stolen Memory, Zaeed’s The Price of Revenge, Firewalker and Normandy Crash Site can be completed before the IFF or used as post-finale cleanup, depending on your preferred story order.
1. Check the Normandy and Journal after every operation
After each recruitment mission, loyalty mission or assignment, return to the Normandy and speak with available squadmates. Check Kelly Chambers, the crew decks, private terminal and incoming messages before opening the galaxy map again. New conversations often provide the next loyalty mission or reveal a newly available destination. The Journal distinguishes major missions from assignments, so use it to track whether a character’s loyalty objective is actually complete rather than assuming that recruiting the squadmate was enough.
Use the Normandy’s research terminal whenever new projects appear. Squad upgrades, weapon improvements and ship systems are purchased with resources gathered from planet scanning, assignments and mission rewards. This chapter’s safe pacing is to alternate a character mission with a short assignment, hub visit or resource-gathering stop, then return to the ship for conversations and upgrades.
- Speak with squadmates and ship contacts after major missions.
- Review the Journal, galaxy map and private terminal before choosing the next operation.
- Confirm loyalty missions are marked complete and research any available upgrades.
2. Use the post-Horizon period for recruitment and early DLC
After Horizon, recruit the remaining available squadmates before spending too much time on minor assignments. The Collector Ship mission is triggered automatically after sufficient progress following Horizon; established mission-order guides commonly describe this as five completed missions. It is a mandatory story interruption, not the same point of no return as Acquire Reaper IFF. Complete the Collector Ship mission when it appears, then use the following loyalty-mission period to finish personal objectives and prepare the Normandy.
Kasumi’s Stolen Memory is available early through Kasumi on the Citadel, and Zaeed’s The Price of Revenge becomes available after recruiting Zaeed on Omega. Both are included in Legendary Edition. Their missions can be completed during the normal recruitment and loyalty phase, but Zaeed’s loyalty outcome may require a Paragon or Renegade dialogue check depending on your choice at the end. Do not leave these missions merely because they are DLC; they are full squad-related operations and can affect your available loyal roster.
- Recruit the available squadmates before treating side assignments as the main focus.
- Complete the Collector Ship mission when it becomes mandatory.
- Fit Kasumi’s and Zaeed’s missions into the recruitment or loyalty phase if you want their loyalty secured early.
3. Place Overlord, Shadow Broker and the smaller DLC deliberately
Project Overlord works well after Shepard has several squadmates, upgraded weapons and enough combat abilities to handle its mixed encounters. Lair of the Shadow Broker can be started through Liara on Illium after the relevant conversation becomes available. Completing it before the finale provides useful rewards and upgrades for the remainder of Mass Effect 2; saving it for after the Suicide Mission gives it a stronger epilogue function and does not prevent completion.
Firewalker content and Normandy Crash Site are optional assignments rather than prerequisites for the Collector Base. Complete them during a resource or assignment break if you want the included content finished before importing into Mass Effect 3. These missions do not need to be forced into the narrow post-IFF period. Make a manual save before any DLC operation that contains a major personal choice, especially if you want to preserve alternate outcomes for later imports.
- Complete Overlord before Acquire Reaper IFF if you want all major side content cleared first.
- Choose whether Lair of the Shadow Broker belongs in the midgame or as a post-Suicide Mission epilogue.
- Finish Firewalker and Normandy Crash Site during the open middle of the game if they are part of your completion plan.
4. Finish loyalty missions and resolve squad disputes before the IFF
Before selecting Acquire Reaper IFF, finish the loyalty missions for every squadmate you intend to use or protect in the Suicide Mission. This includes the personal missions for Jacob, Miranda, Garrus, Mordin, Grunt, Jack, Thane, Samara, Tali, Kasumi and Zaeed when those characters are present. Loyalty is not the only survival factor, but an unloyal squadmate is at significant risk during the finale and can create additional problems during role assignments.
Resolve Jack and Miranda’s argument, and Tali and Legion’s argument if both confrontations have occurred. Use the available Paragon or Renegade interruption when possible to preserve both loyalties. If you have not yet completed Tali’s loyalty mission, the game allows a special post-IFF route in which Legion can accompany her, but this uses the limited pre-abduction window. For a safer completion route, do Tali’s mission before Acquire Reaper IFF and reserve Legion’s mission for immediately afterward.
- All recruited squadmates have completed loyalty missions, unless you deliberately accept the risk.
- Resolve Jack and Miranda without sacrificing either loyalty.
- Resolve Tali and Legion without sacrificing either loyalty when the confrontation occurs.
- Create a manual save on the Normandy immediately before Acquire Reaper IFF.
5. Treat Acquire Reaper IFF as the crew-rescue boundary
Acquire Reaper IFF is selected deliberately from the galaxy map after the Collector Ship sequence. Once the mission is complete, the Normandy enters a short installation phase. The next use of the galaxy map advances the story toward the crew abduction, so do not begin this operation while several loyalty missions, DLC missions or assignments remain unfinished.
If Legion’s loyalty mission is still available, activate Legion after the IFF mission and obtain A House Divided. Complete that mission as the planned exception, then proceed to the Omega-4 Relay as soon as the abduction occurs. If Tali’s loyalty mission was deliberately saved for Legion’s unique dialogue, it can occupy this window instead, but using this route leaves less flexibility. Do not spend the period after the abduction on Overlord, Shadow Broker, N7 assignments, planet scanning, shopping trips or unrelated loyalty missions. The longer you wait before entering the relay, the more Normandy crew members can die.
The key distinction is that most side content is not erased forever by the IFF. The penalty is the rescue timer, not a universal mission lockout. However, if preserving the entire abducted crew matters, finish all other desired content before the IFF and launch the final rescue promptly.
- Complete desired recruitment, loyalty, DLC and assignment content before Acquire Reaper IFF.
- After the IFF, complete only the specific loyalty mission you intentionally saved.
- After the abduction, enter the Omega-4 Relay immediately if you want the full crew rescued.
6. Save around the finale, then use the postgame for Arrival and cleanup
Keep separate manual saves before Acquire Reaper IFF, after the Normandy crew is abducted, before entering the Omega-4 Relay and after the Suicide Mission. These files let you retry the final mission, test different role assignments and preserve a pre-IFF state for unfinished DLC. Do not overwrite the pre-IFF save when experimenting with the finale.
After completing the Suicide Mission, load the completed-game save if you still want to play Lair of the Shadow Broker or Overlord. Then play Arrival as the final Mass Effect 2 story operation. Arrival serves as the narrative bridge into Mass Effect 3, so completing it after the Suicide Mission produces the cleanest transition. After Arrival, create a final named ME2 save and use that file for the ME3 import. If a squadmate died, that character’s remaining loyalty content may no longer be available; this is another reason to preserve the pre-IFF and pre-Relay saves.
- Separate manual saves exist before the IFF, before the Omega-4 Relay and after the Suicide Mission.
- The Normandy crew-rescue result matches your intended import continuity.
- Lair of the Shadow Broker and Overlord are complete if they are part of your chosen plan.
- Arrival is complete before importing the finished Mass Effect 2 save into Mass Effect 3.
- The final ME2 save is preserved separately from experimental ending saves.
Before you move on
- All intended squadmates are recruited and their loyalty missions are complete, or the chosen exceptions are documented.
- The Collector Ship mission is complete and Acquire Reaper IFF has not been started until the desired side content is finished.
- Normandy ship upgrades and squad upgrades have been purchased where resources allow.
- The Normandy crew is rescued by entering the Omega-4 Relay promptly after the abduction.
- The Suicide Mission result and surviving squad list are recorded in a separate manual save.
- Chosen Mass Effect 2 DLC is complete, and Arrival is finished last before the ME3 import.
- A final ME2 save remains available without overwriting the pre-IFF and pre-Relay backups.
References for this chapter
- Mass Effect 2 Mission Order: optimal DLC, dossier, loyalty quest sequence
- Mass Effect Mission Order — Story DLC Timing for Legendary Edition
- Mass Effect Legendary Edition Guide: Suicide Mission Mass Effect 2
- Mass Effect Legendary Edition mission order guide
- Mass Effect Legendary Edition — Official Reveal Trailer
Mass Effect 2 — Assigning Roles and the Suicide Mission Walkthrough
The Suicide Mission is determined by preparation, loyalty, ship upgrades, role assignments and timing. Before entering the Omega-4 Relay, finish the loyalty missions you want to use, resolve the Jack–Miranda and Tali–Legion disputes so the affected characters remain loyal, install the Heavy Ship Armor, Multicore Shielding and Thanix Cannon, and create a manual save. After the Normandy crew is abducted, go directly through the Omega-4 Relay; completing another mission or assignment can cost crew members. During the assault, use only loyal approved specialists and leaders: Tali, Legion or Kasumi for the vents; Garrus, Miranda or Jacob for fireteam leadership; and Jack, Samara or Morinth for the biotic barrier. Send a loyal low defensive-strength squadmate as the crew escort, then leave durable loyal fighters behind for the hold-the-line defense while taking weaker defenders into the final team. Keep a pre-relay save and a save before each major assignment so a death can be corrected without replaying the campaign.
1. Complete the preparation checklist before entering the Omega-4 Relay
Make a manual save on the Normandy before selecting the Omega-4 Relay. For a no-loss run, complete every squadmate loyalty mission you intend to use and settle the Jack–Miranda and Tali–Legion confrontations without allowing either side to become disloyal. If you lack sufficient Paragon or Renegade points to resolve a confrontation peacefully, keep a save before the conversation so you can revisit the outcome later.
Install the three Normandy upgrades that are checked during the approach to the Collector Base: Heavy Ship Armor from Jacob, Multicore Shielding from Tali, and the Thanix Cannon from Garrus. These upgrades prevent the scripted ship-approach casualties. They are separate from ordinary weapon, armor and research improvements.
Do not treat the Omega-4 Relay as an ordinary mission. If the Normandy crew has not yet been abducted, finish the loyalty missions, research and optional content you want first. Once the abduction occurs after the Reaper IFF sequence, launch the Suicide Mission immediately. Do not complete Legion’s loyalty mission, a DLC mission or any other assignment after the abduction if you want the entire captured crew rescued.
- The intended squadmates are loyal.
- The Jack–Miranda and Tali–Legion disputes are resolved without losing loyalty.
- Heavy Ship Armor, Multicore Shielding and the Thanix Cannon are installed.
- A manual save exists before entering the Omega-4 Relay.
- If the Normandy crew has been abducted, no further mission is started before the rescue attempt.
2. Survive the Normandy approach and reach the Collector Base
After entering the relay, the Normandy is attacked by Collector defenses. The ship upgrades determine the scripted casualty checks during this approach. With Heavy Ship Armor, Multicore Shielding and the Thanix Cannon installed, no squadmate is lost in this section. If an upgrade is missing, reload the pre-relay save if preserving the whole squad is your goal.
Once Shepard lands on the Collector Base, choose two squadmates for the opening combat. This selection does not decide the later specialist assignments, so use companions whose powers suit your Shepard build and the enemies in front of you. Advance through the wreckage, use cover against Collector fire, destroy the defensive positions and follow the objective route to the first assignment.
Create a new manual save when the game allows it before selecting the first specialist and fireteam leader. This gives you a convenient recovery point if a role is rejected or a squadmate dies in a later cutscene.
- The Normandy reaches the Collector Base without a ship-approach casualty.
- The opening combat squad is not confused with the specialist assignments.
- A save exists before the first role-selection sequence.
3. Select the vent specialist and first fireteam leader
For the first specialist assignment, select a loyal Tali, Legion or Kasumi to enter the ventilation system. These are the approved tech specialists in Legendary Edition. Select a second loyal squadmate as the diversion fireteam leader: Garrus, Miranda or Jacob. Loyalty and the correct role both matter; a strong combat build cannot substitute for an unapproved specialist or leader.
Choose two squadmates for Shepard’s combat team and advance through the Collector base. In the vent route, move between the marked access points, activate the controls and keep the specialist’s progress moving while you fight Collectors and Harbinger-controlled enemies. When the route reaches the final door, the tech specialist must complete the override.
If you selected an unapproved specialist, an unapproved leader or a disloyal character, a squadmate can die in the resulting scene. Reload the save from before the assignment and use one of the approved loyal choices rather than continuing with the failed result.
- Tali, Legion or Kasumi is the vent specialist.
- Garrus, Miranda or Jacob is the first fireteam leader.
- Both assigned characters are loyal.
- The specialist completes the vent override and the team proceeds.
4. Rescue the Normandy crew and cross the seeker-swarm route
After the infiltration section, Shepard reaches the abducted Normandy crew. Choose a loyal squadmate to escort the survivors back to the ship. Any loyal squadmate can complete the escort safely. For the strongest hold-the-line arrangement, Mordin, Tali, Kasumi or Jack is a practical escort because these characters contribute less defensive strength when left behind than Garrus, Grunt or Zaeed. The escort choice cannot repair a delayed rescue: if you complete missions after the abduction, some or all of the captured crew may already be dead before this decision appears.
The next section requires a loyal biotic specialist to maintain a barrier through the seeker-swarm area. Use Jack, Samara or Morinth. Choose a loyal second fireteam leader from Garrus, Miranda or Jacob. Keep Shepard and the selected squadmates inside the moving barrier; do not leave the protected route to chase enemies outside it. Follow the objective path, activate the controls and let the biotic specialist carry the group through each swarm-covered area.
When the barrier section ends, choose loyal squadmates for the next combat group. Loyalty does not make every possible assignment safe: the game checks whether the named role was filled by an approved character.
- A loyal squadmate escorts the rescued Normandy crew.
- Jack, Samara or Morinth is the biotic specialist.
- Garrus, Miranda or Jacob is the second fireteam leader.
- The rescued crew reaches the Normandy.
- No disloyal squadmate is assigned to a scripted role.
5. Build the hold-the-line defense and choose the final team
After the barrier sequence, Shepard fights through the base toward the Human-Reaper. Choose two loyal squadmates for Shepard’s final combat team. There is no special class requirement for this selection, so choose companions whose powers cover the defenses and enemy protections you expect to face. Armor-stripping, barrier-damaging and shield-damaging abilities are useful, but loyalty and the composition of the remaining defensive group are more important for survival.
The squadmates left behind hold the line. Their survival is based on the defensive strength of that group, so leave durable loyal fighters such as Garrus, Grunt and Zaeed behind whenever possible. Take lower-strength defenders such as Mordin, Tali, Kasumi or Jack with Shepard, or use one of them as the crew escort. This arrangement is safer than taking the strongest defenders into the final fight and leaving the weakest group to defend the base.
If every squadmate is loyal, the ship upgrades are installed and the specialist assignments were correct, this arrangement supports a no-loss outcome. If a squadmate is disloyal, role mistakes have occurred or the defensive group is too weak, a death can occur during the hold-the-line sequence even if the final combat team wins its encounters.
- Only loyal squadmates are used in the final combat team and defensive group.
- Durable loyal defenders remain behind for hold-the-line.
- Lower defensive-strength squadmates are used as the escort or final combat companions when practical.
- The hold-the-line section ends without a squadmate casualty.
6. Defeat the Human-Reaper and preserve a recovery save
During the final battle, use cover whenever the Human-Reaper exposes itself and target its vulnerable areas while clearing Collector enemies that threaten Shepard’s position. Avoid standing in the open during its attacks, and use squad powers to remove barriers, armor or shields from supporting enemies before they surround you. After the battle, choose whether to destroy or preserve the Collector Base according to the continuity you want to carry into Mass Effect 3.
Complete the escape sequence and verify that Shepard survives. A dead Shepard produces a failed campaign state rather than a normal import. When the ending sequence is complete, create a separate manual save recording the survivor list and the Collector Base decision. Keep the pre-relay save as well; it is the most useful file for trying a different role assignment or a different final decision.
If a squadmate dies, reload the most recent save before the relevant specialist assignment if the death resulted from a role choice. If the death occurs during the Normandy approach, reload the pre-relay save and install the missing ship upgrade. If the death occurs during hold-the-line, revise who is escorted, who joins Shepard and who remains behind. Do not depend on an autosave made after the death, because it may preserve the failed outcome.
- The Human-Reaper is defeated.
- Shepard survives the escape.
- The intended Collector Base decision is recorded.
- The final squad survivor list is recorded in a separate manual save.
- A post-Suicide Mission save is retained for Mass Effect 3 import.
Before you move on
- A pre-relay manual save exists with the intended loyalty missions completed and all three required Normandy upgrades installed.
- The Normandy crew is rescued without losses.
- The vent specialist, both fireteam leaders and the biotic specialist are loyal approved choices.
- Every desired squadmate survives the Collector Base assault.
- Shepard survives, the intended Collector Base decision is documented and a separate post-Suicide Mission save is ready for Mass Effect 3 import.
References for this chapter
- Suicide Mission — Mass Effect Wiki
- Collector Abduction — Point of No Return — Mass Effect 2 Legendary Edition Walkthrough
- Suicide Mission — Collector Base: Infiltration — Gamer Guides
- Choosing a Biotic Specialist and Diversion Squad Leader — Gamer Guides
- Mass Effect Legendary Edition official product page — Electronic Arts
- Mass Effect Legendary Edition — PlayStation Blog gameplay improvements
- Mass Effect Legendary Edition launch and PS5 forward compatibility — Electronic Arts
Post-Suicide Mission — Consequences, Saves and Prepping for ME3
After the Suicide Mission, let Mass Effect 2 return you to the Normandy, confirm that Shepard survived, record the squad and major story outcomes, and preserve separate manual saves. You can continue playing the completed career and finish remaining assignments or included DLC before importing into Mass Effect 3. For a clean trilogy handoff, complete the content you want, play Arrival last among your Mass Effect 2 missions, then create a final import save. In Mass Effect 3, use New Game and Import ME2 Character, select the correct completed career, and keep the original Mass Effect 2 saves until the opening continuity checks are complete.
1. Finish the Suicide Mission and confirm that Shepard survived
Allow the entire Suicide Mission conclusion to play until Mass Effect 2 returns control to the Normandy or presents the option to continue the career. Do not treat the last combat checkpoint as your completed save. The post-mission Normandy state is the useful handoff point for later play and importing.
Make a new manual save in a separate slot as soon as you regain normal control. Label the slot in your own notes as Immediate Post-Suicide Mission. Keep the earlier pre-relay save untouched; it is the recovery point for changing squad assignments, loyalty status, ship upgrades, or final-mission choices.
Check Shepard’s status before doing anything else. A career in which Shepard dies during the Suicide Mission is not a viable completed Shepard career for the normal Mass Effect 3 import. If Shepard survived, the career can be continued and later imported. The survival of individual squadmates is a separate result and must also be recorded.
- The Suicide Mission conclusion has finished.
- Shepard is alive and the career can continue from the Normandy.
- A new manual save exists after the mission.
- The pre-Omega 4 Relay save remains available.
2. Record squad survival and the decisions you intend to carry forward
Open the squad and crew areas of the Normandy and compare the surviving roster with your pre-mission notes. Record every recruited squadmate as alive or dead. Do not assume that a character’s absence from one immediate scene proves that character died; use the mission outcome and the later Normandy roster rather than a single cinematic.
Write down the major results of the finale: which squadmates survived, the fate of the Collector Base, the outcome of Shepard’s final exchange with the Illusive Man, and the romance or relationship state you want to preserve. Also note unresolved loyalty disputes and any major decisions from companion missions that matter to your planned Mass Effect 3 continuity.
Loyalty and survival are related but not identical. A loyal squadmate can still be placed in an unsuitable Suicide Mission role, while an unloyal character may survive depending on the complete endgame state. Your record is a reference for checking that you selected the intended career; it is not a substitute for keeping the actual save.
- Every recruited squadmate has an alive or dead status in your notes.
- The Collector Base decision is recorded.
- The final Illusive Man decision is recorded.
- Romance and important loyalty outcomes are recorded.
3. Continue Mass Effect 2 and finish the postgame content you want
After a successful Suicide Mission, choose to continue the career rather than starting a new game. Mass Effect 2 returns you to the Normandy, where you can use the galaxy map, speak with surviving squadmates, review the Journal, and complete remaining assignments or included story DLC. This is the correct place to clean up content that you deliberately left until after the finale.
For a story-focused trilogy run, complete Lair of the Shadow Broker and any other remaining Mass Effect 2 content you want before the final import save. Arrival is best saved for last among the Mass Effect 2 missions because it functions as the bridge into Mass Effect 3. The game permits other timing, but playing Arrival after the Suicide Mission avoids placing its transition material before the Collector Base finale.
Review the Journal and galaxy map, then walk through the Normandy and speak with available companions. Finish the missions you want represented in your canonical career. Do not assume that every earlier opportunity can be restored after the fact: a failed prerequisite, a missed recruitment opportunity, or a decision already resolved in an earlier mission may not be recoverable from the postgame save.
- You selected Continue after the Suicide Mission if you wanted more Mass Effect 2 content.
- The Journal and galaxy map have been reviewed.
- Remaining assignments and DLC you want in the trilogy record are complete.
- Arrival is complete if you are using it as the final Mass Effect 2 story mission.
4. Create distinct completion and import saves
Keep at least three distinct manual saves. The first is the Immediate Post-Suicide Mission save made before postgame cleanup. The second is a Postgame Complete save made after finishing the assignments and DLC you want to carry forward. The third can be a Final ME2 Import save made after your last conversations and final review.
Use different save slots rather than overwriting the first file. The immediate save lets you return to the completed Suicide Mission state, while the postgame save preserves the version with Arrival or other optional content finished. Keep both until Mass Effect 3 has successfully created the intended career.
Back up the Mass Effect 2 saves using the PS5 save-data options if you have PlayStation Plus cloud storage available. Synchronize only after confirming that the correct local saves exist. The backup does not replace manual save separation: a cloud copy of one overwritten file cannot restore the earlier version unless that earlier version was separately preserved.
- An immediate post-Suicide Mission save exists.
- A postgame-complete save exists.
- A separate final import save exists.
- The intended save data has been backed up before starting Mass Effect 3.
5. Import the completed career into Mass Effect 3
Start Mass Effect 3 from the Legendary Edition menu and choose New Game, then Import ME2 Character. Select the completed Mass Effect 2 career corresponding to your final import save. If several Shepards appear, compare the displayed identity details and save timing with your notes before confirming. Do not select the first similarly named career automatically.
The import preserves Shepard’s level and the decisions that affect Mass Effect 3’s story. It creates a new Mass Effect 3 career; it does not convert or erase the Mass Effect 2 save. Keep Mass Effect 2 available until the new career has started and you have checked the major continuity results.
Use the opening Mass Effect 3 scenes and early conversations as a partial check. Look for expected references to Shepard’s history, major relationships, the Collector Base decision, and surviving characters when those subjects become relevant. Not every Mass Effect 2 choice is mentioned immediately, and some surviving characters return later, so the absence of one early reference is not by itself proof of an import failure.
If the wrong Shepard or an earlier save was selected, stop before investing time in the new campaign. Return to the Mass Effect 3 main menu, select the intended career, and begin again. If the intended career is missing, return to Mass Effect 2, load the final manual save, save again in a clearly separate slot, and check the import list once more.
- Mass Effect 3 was started through New Game and Import ME2 Character.
- The selected career matches the intended Shepard and final save.
- The imported Shepard has the expected identity and level.
- Early relevant dialogue agrees with the recorded major outcomes.
- The original Mass Effect 2 saves remain intact.
Before you move on
- Shepard survived the Suicide Mission.
- A manual save exists immediately after the Suicide Mission.
- The squad survival roster, Collector Base decision, romance state, and major loyalty outcomes are recorded.
- All desired postgame assignments and included DLC are complete.
- Arrival is complete if it is being used as the final Mass Effect 2 mission.
- A separate final Mass Effect 2 import save and backup exist.
- Mass Effect 3’s Import ME2 Character screen shows the intended career.
- The opening Mass Effect 3 sequence confirms several major outcomes without requiring every flag to appear immediately.
References for this chapter
Mass Effect 3 — Opening, Galaxy at War and War-Readiness Fundamentals
Mass Effect 3 opens with Earth, Mars and the first Citadel visit. These missions establish the Normandy’s War Room, galaxy map and War Assets system. Imported ME1 and ME2 decisions can add or remove squadmates, survivors, allies and military support. In Legendary Edition, multiplayer and Galactic Readiness are absent, so the War Terminal uses the campaign’s Total Military Strength rather than a multiplayer-adjusted Effective Military Strength score. Build that total through Priority missions, side missions, imported outcomes, planet scanning and DLC. Advance the story deliberately: several assignments expire after later Priority missions, especially Grissom Academy, Citadel requests and Tuchanka: Bomb. Check the Journal after every operation, complete urgent missions before their stated cutoff, and keep manual saves before major Priority missions.
1. Complete Prologue: Earth and begin the Normandy campaign
The opening sequence is linear. Follow Anderson through the evacuation route, stay in cover during the Husks’ approach, and use the available heavy weapon against the larger armored threats rather than wasting ammunition on basic enemies. Move through the evacuation area, assist the survivors you encounter, and continue toward the shuttle objective until Shepard reaches the Normandy.
After the escape, speak with the available crew and Admiral Hackett when the game directs you to do so. Earth has no optional exploration phase, so leave once the required conversations and launch sequence are complete. Create a manual save before selecting Priority: Mars if you want a clean opening checkpoint.
- Complete Prologue: Earth.
- Board the Normandy SR-2 and finish the required launch conversations.
- Create a manual save before Priority: Mars.
2. Finish Priority: Mars and unlock the strategic campaign systems
Launch Priority: Mars from the galaxy map. Follow the route through the Mars Archives and research facility, checking accessible side rooms for ammunition, upgrades and equipment before entering major combat arenas. Cerberus units use cover and defensive formations. Guardians can protect themselves with a forward shield, so attack from an angle or use powers that bypass or disrupt their defensive position instead of repeatedly firing into the shield.
Continue through the facility until Shepard recovers the Crucible research and reaches the extraction sequence. The mission ends with the Normandy’s next phase of the campaign unlocked. Afterward, review the Journal, visit the War Room on the Normandy and inspect the War Terminal before committing to the next Priority mission. The game’s imported decisions may already have affected available personnel and asset entries.
- Complete Priority: Mars.
- Review the Journal for newly added missions.
- Visit the War Room and inspect the War Terminal.
- Make a manual save before Priority: The Citadel I.
3. Complete Priority: The Citadel I and search the station carefully
Priority: The Citadel I follows Priority: Mars. Attend the Council meeting, then explore the locations currently open to Shepard, including the docking area, hospital and embassies. Speak with the representatives and civilians who offer requests, and check the Spectre office and requisitions terminal. Several early assignments begin through conversations or by examining objects in these areas rather than through a prominent mission marker.
Return to the Citadel after later missions because additional areas, contacts and requests become available as the campaign advances. Imported outcomes can change which characters appear, whether former squadmates survive and which support missions Shepard can receive. Do not assume that every conversation is cosmetic: some requests later become War Assets, intelligence or faction support.
- Complete Priority: The Citadel I.
- Speak with the Council and available diplomatic contacts.
- Check the hospital, embassies, Spectre office and requisitions terminal.
- Record new Citadel assignments in the Journal before leaving.
4. Use the Legendary Edition War Terminal correctly
War Assets are military forces, specialists, fleets, resources and political support committed to the Reaper war. They come from the trilogy import, Priority missions, side missions, companion outcomes, faction negotiations, scanning and downloadable story content. Inspect the War Terminal in the Normandy’s War Room to see the categories and the campaign’s Total Military Strength.
Legendary Edition does not include Mass Effect 3 multiplayer or the old Galaxy at War readiness system. There is no multiplayer percentage to raise and no separate in-game Effective Military Strength figure that you must calculate. Older guides that tell you to multiply assets by 50 percent or increase readiness through multiplayer describe the original release, not the PS5 Legendary Edition campaign. The practical goal is to complete substantial available content and preserve favorable imported outcomes, not to chase an obsolete readiness percentage.
- Inspect the War Terminal after major missions.
- Use Total Military Strength as the relevant campaign figure.
- Ignore original-release multiplayer readiness instructions.
- Continue collecting assets through missions, imports, scanning and DLC.
5. Follow the early Priority order without rushing past optional content
After Priority: The Citadel I, Priority: Palaven becomes the next major story operation. Complete it to secure the turian leadership effort and, if he survived Mass Effect 2, reunite with Garrus. Priority: Eden Prime is also available as the From Ashes DLC mission. Complete it before leaving it for the late game if you want Javik available for more of the campaign; he cannot be selected as a squadmate until after Priority: Palaven.
Priority: Sur’Kesh becomes available after Priority: Palaven. Complete it to advance the krogan, salarian and turian negotiations, then inspect the Journal before starting the next major mission. The early campaign’s useful rhythm is: complete the current Priority mission, return to the Citadel, speak with crew and faction contacts, scan safe nearby systems, complete newly unlocked side missions, and only then launch the next Priority mission.
Omega is not an opening mission. After Palaven, Citadel: Aria T’Loak introduces the Omega DLC, but it is generally more coherent to postpone the full Omega operation until after the Citadel political crisis. Leviathan begins through Citadel: Dr. Bryson after it becomes available; it can be played in the middle portion of the campaign, with its placement chosen around the time-sensitive missions listed in the Journal.
- Complete Priority: Palaven when it becomes available.
- Complete Priority: Eden Prime early if you want Javik for most of the campaign.
- Complete Priority: Sur’Kesh after Palaven.
- Treat Omega and Leviathan as later content rather than opening missions.
- Check the Journal after each Priority operation.
6. Protect time-sensitive missions before advancing the main plot
Some side missions expire or change if you complete later Priority missions. After Priority: Palaven, watch for Grissom Academy: Emergency Evacuation and complete it before Priority: The Citadel II. Several Citadel requests and collection missions available around the Palaven and Sur’Kesh portions should be finished before Priority: Tuchanka. Once Tuchanka: Bomb becomes available after the relevant Tuchanka events, complete it within the mission window described by the Journal rather than postponing it behind several unrelated operations.
The Journal is the authority for missions currently available in your save. Before launching a major Priority mission, read every new entry, finish assignments marked as urgent or tied to an active crisis, and make a manual save. The same rule applies before beginning Omega or a major Leviathan segment: first check whether a time-sensitive assignment is waiting, because downloadable missions can still count as campaign operations for expiration purposes.
- Read every new Journal entry before the next Priority mission.
- Complete Grissom Academy before Priority: The Citadel II.
- Complete urgent Citadel requests before Priority: Tuchanka when their entries warn of a cutoff.
- Complete Tuchanka: Bomb within its stated mission window.
- Keep a manual save before Palaven, Sur’Kesh and each later point where several missions unlock.
7. Scan systems safely and verify the opening chapter is complete
Planet scanning can reveal War Assets, artifacts, fuel, credits and other resources. Enter a system, use the scan pulse when necessary, and leave once the Reaper alert becomes dangerous. Reaper pursuit is a risk-management mechanic, not a reason to sweep every planet immediately. If the Reapers enter the system, depart through the relay and return later when the route is safer.
This chapter is complete when Earth, Mars and Priority: The Citadel I are finished; the Normandy War Room and galaxy map are available; Palaven and Sur’Kesh have been completed when their prerequisites are reached; Priority: Eden Prime has been handled if desired; and no urgent early assignment has been ignored. Keep the post-Sur’Kesh save as the checkpoint for the next chapter’s Tuchanka and alliance planning.
- Scan available systems without remaining after Reaper pursuit becomes dangerous.
- Confirm that War Assets and Total Military Strength have been updated.
- Confirm that Priority: Palaven and Priority: Sur’Kesh are complete.
- Maintain a manual save after the opening alliance missions.
- Proceed to the next chapter with urgent early assignments resolved.
Before you move on
- Prologue: Earth, Priority: Mars and Priority: The Citadel I are complete.
- The Normandy War Room, galaxy map and War Terminal are accessible.
- Priority: Palaven and Priority: Sur’Kesh are complete, with Garrus available if he survived ME2.
- Priority: Eden Prime has been completed early if Javik is part of the intended campaign plan.
- Grissom Academy and other early progress-sensitive missions have been completed before their cutoffs.
- The player understands that Legendary Edition uses Total Military Strength rather than a multiplayer readiness percentage.
- The War Terminal has been checked after major operations and the player has begun collecting assets through missions, imports, scanning and DLC.
- A manual save exists before the early Priority sequence and after Sur’Kesh, providing a stable checkpoint before the next alliance arc.
References for this chapter
- Mass Effect Legendary Edition official product page — Electronic Arts
- Mass Effect: Legendary Edition — Rebalancing, tuning, & mechanical improvements — PlayStation.Blog
- Mass Effect 3 Guide — Mass Effect Wiki
- Mass Effect 3 Mission Order: best sequence for all priority, DLC and side quests
- Mass Effect 3 Mission Order Guide
- How Mass Effect: Legendary Edition Changes Galactic Readiness System — GameSpot
- Nightsolo’s Mass Effect 3 Legendary Edition Walkthrough
Mass Effect 3 — Key Priority Missions and Strategic Choices
Use the early and middle acts of Mass Effect 3 to secure time-sensitive missions, settle the genophage crisis, and prepare the strongest possible geth-quarian outcome. After Priority: Sur’Kesh, Priority: Tuchanka becomes available after either Attican Traverse: Krogan Team or Tuchanka: Turian Platoon. Tuchanka: Bomb is different: it is unlocked specifically by completing Tuchanka: Turian Platoon. If that mission appears, complete the bomb operation before completing three other missions. Finish Grissom Academy before Priority: The Citadel II, complete both Rannoch support missions before Priority: Rannoch, and make manual saves before the Tuchanka and Rannoch decisions. Imported ME2 results, loyalty outcomes, reputation, and mission choices determine whether the krogan cure can be preserved and whether the geth and quarians can share the war effort.
1. Complete the early missions and protect Grissom Academy
After Priority: Palaven, return to the Normandy and speak with Specialist Traynor and the crew. Visit the Citadel, turn in assignments, check the Spectre terminal, and review new emails before launching another Priority mission. This is also a good time to recruit Javik through the From the Ashes content if it is installed, because he can provide unique dialogue in later missions.
Complete Grissom Academy: Emergency Evacuation before Priority: The Citadel II. The mission becomes available after Priority: Palaven when Traynor contacts Shepard. Do not leave it for late cleanup: once the Cerberus coup mission begins, the academy mission is no longer available in its intended form, and the associated students, Jack outcome, dialogue, and war-asset results are lost without an earlier save. The safest approach is to complete Grissom Academy as one of your first operations after Palaven rather than counting on a later opening.
When Priority: Sur’Kesh is available, complete it to begin the krogan cure storyline. After Sur’Kesh, the game can unlock Priority: Tuchanka after either Attican Traverse: Krogan Team, also identified as Attican Traverse: The Rachni, or Tuchanka: Turian Platoon. These missions are alternative progression routes for unlocking the Priority mission; you do not need both simply to make Priority: Tuchanka appear. However, they are separate missions with separate rewards and character consequences, so completing both is worthwhile when your schedule allows. Grunt and the rachni outcome affect the later Tuchanka sequence if they are alive in the imported continuity.
- Complete Priority: Palaven and Priority: Sur’Kesh.
- Complete Grissom Academy before Priority: The Citadel II.
- Check the Citadel, Normandy conversations, emails, and Spectre terminal after major missions.
- Complete Attican Traverse: Krogan Team and Tuchanka: Turian Platoon if you want both sets of rewards and story outcomes.
2. Understand the exact Tuchanka mission order
The Tuchanka order matters. Completing Attican Traverse: Krogan Team can advance the cure storyline and unlock Priority: Tuchanka, but it does not itself create Tuchanka: Bomb. Tuchanka: Bomb is specifically unlocked by completing Tuchanka: Turian Platoon. If you want the bomb operation and its associated effect on the krogan outcome, you must complete Tuchanka: Turian Platoon and then check your journal for Tuchanka: Bomb.
If Tuchanka: Turian Platoon is completed and Tuchanka: Bomb appears, treat the bomb mission as urgent. Complete it before completing three other missions. In practical terms, launch Tuchanka: Bomb immediately after returning to the Normandy from Turian Platoon. Do not use the intervening mission slots on N7 operations, DLC, Citadel assignments, scanning missions that initiate an operation, or unrelated Priority missions. The game counts completed missions, not merely time spent exploring the Normandy.
Priority: Tuchanka can therefore be approached in either of two useful ways. You can complete Turian Platoon, immediately defuse the bomb, and then launch Priority: Tuchanka. Alternatively, you can use Attican Traverse: Krogan Team to unlock Priority: Tuchanka first, complete the Priority mission, and later complete Turian Platoon and its newly unlocked bomb mission before Priority: Thessia. The second route gives you more scheduling flexibility, but it does not bypass the bomb timer once Turian Platoon has been completed.
Before Priority: Tuchanka, finish the Citadel assignments you want to keep, including requests from the embassies, hospital, C-Sec, and the Spectre terminal. Priority: Tuchanka leads directly into Priority: The Citadel II, which closes or changes access to several earlier assignments. Create a manual save on the Normandy before selecting the Shroud Facility.
- Remember that Attican Traverse: Krogan Team does not create Tuchanka: Bomb.
- Complete Tuchanka: Turian Platoon if you want the bomb mission.
- Once Tuchanka: Bomb appears, complete it before completing three other missions.
- Finish desired pre-coup Citadel assignments.
- Create a manual save before Priority: Tuchanka.
3. Complete Priority: Tuchanka and record the genophage result
Launch Priority: Tuchanka after the urgent operations are complete. The mission takes Shepard to the Shroud, where the krogan cure becomes the central political decision. Bring Garrus, Wrex, Mordin, or other story-relevant squadmates when available if you want additional dialogue, but no particular class is required. For combat, use cover against the Reaper ground units and keep a squadmate with reliable crowd-control or armor damage if your build lacks those tools.
The available outcome depends on the imported save and your actions. Wrex or Wreav may lead Clan Urdnot; Mordin or Padok Wiks may be present; and Eve’s survival depends on earlier ME2 outcomes and whether Tuchanka: Bomb was successfully completed. If you intend to cure the genophage, continue the cure operation and do not deliberately follow the sabotage route. If you intend to accept the salarian dalatrass’s offer, make the sabotage choice knowingly: it changes the war assets and later scenes, and the deception can be exposed depending on Wrex, Eve, and other continuity flags.
Create a separate manual save shortly before the final Shroud decision. After choosing, finish the mission and return to the Normandy. Speak with the crew, inspect the war room, and record whether the cure was completed, sabotaged, or later exposed. Note who survived and which krogan, turian, and salarian assets are listed. These results influence later alliance strength and cannot be freely rewritten after the campaign advances. Priority: The Citadel II follows the Tuchanka sequence, so complete any remaining pre-coup tasks before beginning it.
- Complete Tuchanka: Bomb first if you chose the Turian Platoon route.
- Create a save before the final Shroud decision.
- Record the cure, sabotage, or exposure result.
- Record Wrex or Wreav, Mordin or Padok, Eve, and the resulting war assets.
- Complete desired pre-coup assignments before Priority: The Citadel II.
4. Prepare the Rannoch decision
After the Citadel coup, complete Priority: Perseus Veil and then Priority: Geth Dreadnought. Tali is a mandatory squadmate for the dreadnought mission if she survived Mass Effect 2. Legion or the Geth VI appears according to the imported continuity. After the mission, speak with the relevant characters aboard the Normandy before selecting either Rannoch support operation.
Complete both Rannoch: Admiral Koris and Rannoch: Geth Fighter Squadrons before Priority: Rannoch. Their order is flexible. During Admiral Koris, rescue Admiral Koris rather than accepting his sacrifice if the dialogue option is available; this provides an additional benefit for the later reconciliation calculation. Geth Fighter Squadrons sends Shepard into the geth consensus and is a required condition for the peace option.
A peaceful outcome requires more than completing the two support missions. Tali and Legion must both be present, which generally requires that both survived ME2 and that the save was imported. Geth Fighter Squadrons must be completed, and Shepard must have at least four reputation bars. The game also checks a set of earlier trust factors. The commonly documented point values are two points for destroying the heretics during Legion’s loyalty mission, two points for preventing Tali’s exile without presenting evidence of her father’s actions, one point for resolving the Tali-Legion argument while preserving both loyalties, one point for completing Admiral Koris, and another point for saving Koris. At least five qualifying points are needed. If a condition is missing, the ceasefire option may not appear in that save.
Create a manual save before Priority: Rannoch. During the final fleet confrontation, use the available persuasion or reputation option to order the quarian fleet to stand down if the game presents it. If the option is unavailable, load the pre-mission save only if you intend to revisit earlier continuity; no later Rannoch side mission will repair a missing historical requirement. Otherwise, choose which faction survives and record the result for your final war-asset planning.
- Complete Priority: Geth Dreadnought.
- Complete Rannoch: Admiral Koris and save Koris if possible.
- Complete Rannoch: Geth Fighter Squadrons.
- Confirm that Tali and Legion are present and review their ME2 loyalty history.
- Create a manual save before Priority: Rannoch.
- Record whether the geth, quarians, or both factions survive.
5. Use the post-Rannoch window for alliance work
After Priority: Rannoch, return to the Normandy and inspect the journal and war room. New Citadel assignments, crew conversations, and faction-related opportunities can appear. Speak with squadmates after every major mission, because companion dialogue and personal closure are easy to miss if you move directly from one Priority mission to the next.
Complete Omega and Leviathan before the final campaign push if they are part of your planned playthrough. Omega is a substantial operation that can be placed before or after Rannoch, while Leviathan can be started during the middle act and finished before the endgame. Both are included single-player DLC in Legendary Edition. Their placement is flexible, but completing them before Thessia or soon afterward makes their story context and war-asset results easier to track.
Finish faction missions connected to the krogan, turians, quarians, geth, salarians, and surviving squadmates before advancing to Thessia. Check the war room after each arc and make a manual save after Rannoch. Also create another save immediately before Priority: Thessia. Do not treat Thessia as a routine mission after which all earlier content remains safe; it is the major late-campaign turning point and several earlier operations have narrow availability windows.
- Inspect the journal and war room after Priority: Rannoch.
- Complete desired faction and companion assignments.
- Complete Omega and Leviathan before the final campaign push if included in your plan.
- Speak with the Normandy crew after major missions.
- Create saves after Rannoch and before Thessia.
6. Finish the chapter at Priority: Thessia
Before launching Priority: Thessia, verify that the genophage result and Rannoch result match your intended trilogy continuity. Check the war room for krogan, salarian, turian, geth, and quarian assets. Confirm that Grissom Academy, Tuchanka: Bomb, Admiral Koris, and Geth Fighter Squadrons are resolved as intended. If you have not yet completed Tuchanka: Turian Platoon, do so before Thessia; if its bomb mission appears, complete the bomb operation before the three-mission limit.
Priority: Thessia is a mandatory story mission and begins the final phase of the campaign. Choose squadmates whose powers complement Shepard’s build and whose dialogue you want to hear. Javik and Liara provide especially relevant context if available, but any competent squad can complete the mission with upgraded weapons, suitable armor penetration, and disciplined use of cover.
After Thessia, create a manual save and inspect the journal before continuing to the late-game chapters. Some assignments remain available, but this is the point where the recommended strategic cleanup should already be finished. This chapter is complete when Priority: Palaven, Priority: Sur’Kesh, Priority: Tuchanka, and Priority: Thessia are complete; Grissom Academy is resolved before the Cerberus coup; Tuchanka: Bomb is completed within its mission window when unlocked; both Rannoch support missions are complete before Priority: Rannoch; and the genophage and geth-quarian outcomes are recorded.
- Complete Priority: Palaven, Sur’Kesh, Tuchanka, and Thessia.
- Complete Grissom Academy before Priority: The Citadel II.
- Complete Tuchanka: Turian Platoon before Thessia if you want its mission chain.
- Complete Tuchanka: Bomb before completing three missions after it appears.
- Complete both Rannoch support missions before Priority: Rannoch.
- Create and preserve the post-Thessia manual save.
Before you move on
- Priority: Palaven, Priority: Sur’Kesh, Priority: Tuchanka, and Priority: Thessia are complete.
- Grissom Academy was completed before Priority: The Citadel II.
- If Tuchanka: Turian Platoon was completed, Tuchanka: Bomb was completed before three other missions followed it.
- The genophage result is recorded and matches the intended krogan, salarian, and turian continuity.
- Priority: Geth Dreadnought, Rannoch: Admiral Koris, and Rannoch: Geth Fighter Squadrons are complete before Priority: Rannoch.
- The geth-quarian result is recorded; both factions survive only if the reconciliation option was available and selected.
- Desired companion, Citadel, Omega, and Leviathan content is complete before the final-act push.
- Manual saves exist before Tuchanka, before Rannoch, after Rannoch, and before Thessia.
References for this chapter
- Mass Effect Legendary Edition — PlayStation Store listing
- Nightsolo’s Mass Effect 3 Legendary Edition Walkthrough
- Mass Effect 3 Guide — Mass Effect Wiki
- Priority: Rannoch — Mass Effect Wiki
- Priority: Cerberus Headquarters Guide
- Tuchanka: Bomb — Mass Effect 3 Guide, Prima Games
- Act 2: Priority: The Citadel — Mass Effect 3 Guide, Prima Games
- Mass Effect 3 Checklist — Nightsolo
Mass Effect 3 — Side Missions, DLC (Leviathan, Omega, Citadel) and Companion Endings
Complete time-sensitive companion and faction missions before their associated Priority missions, then finish Omega, Leviathan and Citadel before Priority: Cerberus Headquarters. Grissom Academy must be completed before Priority: Citadel II. On Rannoch, finish Admiral Koris and Geth Fighter Squadrons before Priority: Rannoch if you want the strongest chance of resolving the quarian-geth conflict peacefully. Omega becomes available after the Citadel coup and Aria’s three recruitment assignments. Leviathan can be played in stages, but finish its investigation before the final push. Save Citadel shore leave, its character scenes and the apartment party for late in the campaign, after the major surviving cast has returned and before Priority: Cerberus Headquarters. That mission is the final lockout for unfinished side content.
Clear urgent companion and faction missions before their lockout missions
After every Priority mission, return to the Normandy, speak with the crew, visit the Citadel and check the Journal for newly unlocked assignments. Do not advance only by following Priority markers. Several missions expire when a later Priority mission is completed, and the game may not give a second warning.
Complete Grissom Academy: Emergency Evacuation before Priority: Citadel II. Leaving it until after that Priority mission causes the academy’s students to be lost and removes the best available outcome for Jack and the students. If the mission is already in your Journal, treat it as urgent rather than optional cleanup.
Before Priority: Tuchanka, resolve available krogan and turian assignments, including the bomb-related mission if it has appeared. Before Priority: Rannoch, complete Rannoch: Admiral Koris and Rannoch: Geth Fighter Squadrons. These missions are not interchangeable with the finale: they establish important conditions for the later quarian-geth decision.
Continue companion conversations after each major mission. Check the Normandy’s regular crew areas, the Citadel’s hospital and embassies, and any active apartment or personal-meeting locations. A companion who has boarded the Normandy is not necessarily finished; new conversations and assignments can appear after another Priority mission.
- Complete Grissom Academy before Priority: Citadel II.
- Complete the available Tuchanka bomb assignment before advancing too far after its related mission appears.
- Complete Admiral Koris and Geth Fighter Squadrons before Priority: Rannoch.
- Speak with companions after each major Priority mission.
Complete Omega after the Citadel coup and Aria’s recruitment assignments
After the Cerberus attack on the Citadel, meet Aria in the nightclub area and complete the assignments to recruit the Blood Pack, Blue Suns and Eclipse. Once those preparations are finished, return to Aria and accept the Omega operation. The exact assignment names and map presentation can vary slightly by journal state, but the operation is started through Aria on the Citadel rather than from an ordinary Normandy mission marker.
Omega is a committed multi-mission sequence. Once Shepard begins the assault, the game does not allow a return to the Normandy until the operation is complete. Make a manual save before accepting it, and do not start it immediately before a real-world interruption if you want to avoid losing progress.
Follow Aria’s marked objectives through the station, search side rooms before passing one-way objective doors, and adjust squad powers for the protection type of the current enemies. Area control is useful against clustered enemies, while armor-piercing damage and incendiary effects help against heavily armored targets. Equipment and upgrades can be found away from the direct route, so do not sprint through every corridor.
After the final confrontation, return to the Normandy and inspect the War Room and Journal. Omega supplies narrative context and a military-support reward, but it does not replace the ordinary Citadel assignments or the companion missions that become available elsewhere.
- Complete Aria’s three recruitment assignments before starting Omega.
- Create a manual save before entering the Omega assault.
- Search side rooms before crossing objective doors.
- Confirm the operation is complete in the Journal and check the War Room afterward.
Work through Leviathan’s investigation before the endgame
Begin Leviathan through Dr. Bryson’s investigation on the Citadel when the assignment becomes available. The DLC is not one uninterrupted mission: it consists of an investigation stage followed by several destination missions. Return to the Normandy between stages, examine the next lead and launch each newly identified location from the galaxy map.
At each destination, follow the investigation objective until the game changes the objective to extraction or survival. Expect a substantial combat section at the end of several stages. Bring a squad that can handle the defenses used by the current enemy group, and carry weapons or powers that cover shields, barriers and armor instead of specializing in only one damage type.
You may interleave Leviathan with ordinary campaign missions, but complete the entire investigation before Priority: Cerberus Headquarters. For a late-campaign narrative flow, a practical placement is after the Rannoch arc and before the final Cerberus missions. This avoids placing its major revelations too early while still leaving time to complete every stage.
When the final Leviathan mission ends, return to the Normandy and check the War Room. The DLC contributes story information and military support, but the guide should not assume a single universal final asset total because imported choices and other completed content affect the overall calculation.
- Start Leviathan through Dr. Bryson’s Citadel investigation.
- Follow every new lead from the galaxy map until the investigation is complete.
- Finish all Leviathan stages before Priority: Cerberus Headquarters.
- Check the Journal and War Room after the final Leviathan mission.
Resolve the Rannoch arc before leaving the quarian-geth conflict
Before Priority: Rannoch, complete Rannoch: Admiral Koris and Rannoch: Geth Fighter Squadrons. Make a manual save before launching the Priority mission because the final conversation and its consequences depend on imported decisions, surviving characters, earlier loyalty outcomes, reputation and the preparation missions you completed.
During Priority: Rannoch, follow the objectives through the geth base and do not treat the final confrontation as a simple faction-selection prompt. The possibility of preserving both sides requires several prerequisites, including the survival and loyalty state of key characters, completion of the Rannoch preparation missions and sufficient reputation for the required dialogue checks.
If the game offers a choice involving Tali, Legion, the quarians or the geth, pause before confirming it if you are following a planned trilogy outcome. A failed prerequisite can force a death or faction loss even when the final dialogue choice appears correct.
After the arc, return to the Normandy and inspect the War Room. Record who survived, which faction or factions joined the war effort and whether any companion relationship changed. If the result is not what you intended, reload the save made before Priority: Rannoch rather than relying on an autosave created after the decision.
- Complete both Rannoch preparation missions before Priority: Rannoch.
- Create a manual save immediately before the Rannoch finale.
- Use the final conversation only after checking reputation and imported prerequisites.
- Record the resulting companion and war-support outcome.
Begin Citadel shore leave after the major surviving cast has returned
Save Citadel for the late campaign, after the major faction arcs and before Priority: Cerberus Headquarters. Tali must be available if she survived Mass Effect 2, and the Virmire survivor must have rejoined the Normandy after the Citadel storyline. Other guests depend on survival, imported choices and whether their Mass Effect 3 missions were completed.
Start the DLC from the Citadel invitation and complete the opening investigation. Create a manual save before entering this sequence because it is a committed opening mission. Bring the squadmates whose dialogue you want during the operation, then return to the Citadel after the opening story section ends.
The opening mission and the later shore-leave activities are separate stages. Once free movement is available, visit character markers on the Citadel and Normandy, check apartment messages and speak with guests more than once when the game presents new dialogue. Some invitations appear only after another conversation or short activity is completed.
Citadel is optional for the main ending, but it provides the most extensive character closure in Mass Effect 3. Romance status, survival results, loyalty outcomes and earlier decisions alter the available scenes, so do not assume that every playthrough produces the same guest list.
- Create a save before starting the Citadel opening mission.
- Start Citadel only after desired late-game squadmates have returned.
- Complete the opening investigation before arranging shore-leave activities.
- Check the Citadel, Normandy and apartment markers for additional scenes.
Hold the Citadel party and finish the DLC before the final lockout
After completing the Citadel opening arc and the available shore-leave scenes, use the apartment terminal to organize the party. Obtain the available party supplies, send invitations and speak with guests before starting the event. The party can be delayed within the DLC, which lets you finish more character conversations first.
Run the party only after the desired surviving companions and former crew members are available. The game determines attendance from survival, imported outcomes and completed Mass Effect 3 story arcs. If a character is missing, check their personal mission or conversation requirements before proceeding rather than assuming the party is bugged.
After the party, revisit the apartment and speak with guests again. Additional interactions become available during and after the gathering. When the character scenes you want are complete, create a separate post-party save.
Do not accept Priority: Cerberus Headquarters until Citadel is finished. Launching that mission begins the final chain and prevents access to unfinished Citadel activities, Leviathan stages, Omega and most ordinary side missions. The point-of-no-return check occurs before the mission launches, so use that conversation to cancel and return to your checklist if anything remains.
- Complete desired Citadel invitations and shore-leave scenes.
- Hold the apartment party before Priority: Cerberus Headquarters.
- Revisit the apartment after the party for additional interactions.
- Keep separate saves before Citadel, after the party and immediately before the final lockout.
Perform the final companion and war-support audit
Before launching Priority: Cerberus Headquarters, review the Journal for every desired companion, faction and DLC mission. Confirm that Omega, every Leviathan stage and the Citadel party are complete. Also turn in completed Citadel assignments and check for unresolved companion conversations or romance decisions.
Pay special attention to characters whose outcomes depend on earlier loyalty or faction choices. Citadel completion does not automatically repair a failed ME2 loyalty result, a dead imported companion, an unresolved dispute or a missed Priority prerequisite. The best available ending for an individual character is the combined result of imported flags, mission order and current dialogue choices.
Check the War Room after all desired content is finished. Do not chase a single universal numerical target in this chapter: military strength varies according to imported survival states, faction outcomes, DLC rewards and side missions. The practical requirement is to complete the available high-value arcs and preserve a pre-final save.
Make two final manual saves in separate slots. Keep one before Priority: Cerberus Headquarters and one after the Citadel party or final side-content audit. The earlier save is the recovery point for missing missions; the later save preserves your chosen cast and DLC state for the final chapter.
- The Journal shows Omega, Leviathan and Citadel complete.
- All desired companion and faction missions are resolved.
- The War Room has been checked after the final optional content.
- Separate pre-final and post-party saves are preserved.
Before you move on
- Grissom Academy was completed before Priority: Citadel II, and all desired time-sensitive companion or faction missions were finished before their related Priority missions.
- Omega was completed after Aria’s recruitment assignments, and the operation is marked complete in the Journal.
- Every Leviathan investigation stage was completed and the resulting support was checked in the War Room.
- Admiral Koris and Geth Fighter Squadrons were completed before Priority: Rannoch, and the Rannoch outcome was recorded.
- The Citadel opening, shore-leave scenes and apartment party were completed with the surviving imported cast before Priority: Cerberus Headquarters.
- A separate save exists before the final lockout, with the Journal, War Room and desired companion outcomes checked.
References for this chapter
- Mass Effect Mission Order — Story DLC Timing for Legendary Edition
- Mass Effect 3 Mission Order: best sequence for all priority, DLC and side quests
- Priority: Cerberus Headquarters — Mass Effect 3 Legendary Edition Walkthrough
- Mass Effect Legendary Edition — Included single-player DLC
- Mass Effect 3 Mission Order Guide
Mass Effect 3 — Final Preparations: Inventory, Mods and Final Saves
Treat Priority: Cerberus Headquarters as the final commitment point for Mass Effect 3. Before launching it, complete the remaining missions and DLC you want, resolve companion conversations, buy or collect equipment, configure Shepard’s weapons and armor, review the War Assets screen, and create several manual saves. Some assignments close earlier, so inspect the Journal after every major Priority mission rather than assuming they remain available. Priority: Earth gives you two final squad and equipment selections: one at the start of the mission and another at the Forward Operating Base. The second selection is the last opportunity to change squadmates, weapons, and weapon mods before the final advance.
1. Clear content that can disappear before the endgame
Before starting Priority: Cerberus Headquarters, open the Journal and finish every optional mission and companion objective that you still want in this playthrough. This is the Mass Effect 3 point of no return: once the mission begins, side missions, DLC missions, and normal Citadel access are closed until the campaign is finished. Admiral Hackett provides a warning when you approach the mission, so cancel the launch if anything remains unfinished.
Complete the Citadel: Shore Leave operation and the Citadel party if you want the full companion farewell sequence. Also finish Leviathan and Omega, any remaining N7 operations, Aria’s support missions, Priority: Eden Prime if you want Javik and its associated assets, and Citadel assignments that you have accepted. Visit the Normandy and Citadel to speak with living squadmates, resolve romance conversations, and collect any purchases or rewards before committing.
Do not rely only on the Priority list. Several assignments close earlier: the Rannoch support missions must be completed before Priority: Rannoch; Grissom Academy must be handled before Priority: The Citadel II; Tuchanka: Bomb has a limited window after it appears; and several Citadel assignments disappear after Priority: Tuchanka. Review the Journal after each major Priority mission and complete newly issued assignments before advancing.
- Citadel: Shore Leave and the party completed if desired.
- Leviathan and Omega completed if desired.
- Remaining N7, Aria, Citadel, companion, and war-asset missions reviewed.
- Rannoch support missions completed before Priority: Rannoch.
- Grissom Academy and Tuchanka: Bomb completed before their lockout points.
2. Finish shopping, research, and companion setup before Priority: Cerberus Headquarters
Use the Normandy’s stores and terminals before beginning the Cerberus Headquarters mission. Purchase weapons, weapon modifications, armor pieces, and any consumable or mission-related items you want. The endgame sequence does not provide normal access to the Normandy for additional shopping, and guide documentation identifies weapon, weapon-modification, and bonus-power changes as unavailable after the point of no return.
Visit the Normandy’s weapon bench to compare weapons and install mods. Each Mass Effect 3 weapon has two modification slots, and the best choice depends on the weapon’s purpose. Accuracy and damage are useful for general firearms; magazine or rate-of-fire improvements help weapons that must sustain pressure; armor-piercing options are valuable against Brutes, Ravagers, Harvesters, and other armored enemies. Do not choose a mod merely because it has the highest purchase price.
Use the weapon locker in the Normandy’s cargo area or Shepard’s cabin to configure armor. Combine armor pieces to support your class: power-focused bonuses help Adepts, Sentinels, and other ability-heavy builds, while weapon damage, shields, health, or survivability bonuses may suit combat-focused characters. Check your total weapon weight as well; carrying too much slows power cooldowns, which can be more damaging than a modest weapon-stat improvement.
Speak with every living squadmate you want to include in the ending and record who is available. Starting Priority: Cerberus Headquarters also locks the romance state and triggers the final romance-related scenes. If a companion died in Mass Effect 2 or earlier in Mass Effect 3, that person cannot be selected later, so record the surviving roster before beginning the final chain.
- Desired weapons, armor, mods, and bonus powers acquired.
- Shepard’s weapon weight is compatible with the intended power cooldown.
- Armor bonuses match the chosen class and combat style.
- All desired romance and companion conversations completed.
- Surviving squadmate roster recorded.
3. Audit War Assets and record the campaign state
Open the War Assets screen from the War Terminal and review the coalition you have assembled. Record the displayed total and the status of major groups such as the Alliance, Council species, krogan, quarians, geth, salarians, asari, and other allied forces. There is no single preparation number that guarantees the same result for every imported campaign: the total is affected by earlier decisions, failed or completed missions, DLC, and which companions and factions survived.
Pay particular attention to the genophage and Rannoch outcomes. The Tuchanka arc can change krogan and salarian support, while the Rannoch arc can affect both quarian and geth assets. If one of these arcs is unresolved, do not start Cerberus Headquarters. Check the Journal for missed prerequisites or uncompleted support missions instead.
Some small asset sources come from Citadel purchases, scans, assignments, and conversations rather than obvious combat missions. Resolve the content that matters to your intended ending before treating the recorded total as final. Save a screenshot or write the total and major faction outcomes in your notes so you can compare alternate ending attempts without replaying the trilogy.
- War Assets total recorded.
- Major faction outcomes recorded.
- Genophage and Rannoch resolutions verified.
- Journal checked for remaining asset-producing missions.
- Desired ending plan written down before the final chain begins.
4. Create a reliable set of pre-final saves
Make a manual save before selecting Priority: Cerberus Headquarters. Keep this as the canonical pre-final save and do not overwrite it. Make a second manual save after completing your last shopping, conversation, and equipment review. If your platform storage permits it, copy the save to a separate backup location using your normal PS5 save-backup method.
Create another manual save immediately before traveling to Sol after finishing Priority: Cerberus Headquarters. This save is useful for replaying the Earth sequence, but it does not replace the earlier pre-Cerberus save because the campaign has already crossed the point of no return. Keep both files under distinct names or in clearly separate save slots.
After the ending, Legendary Edition can return you to a state before the final commitment so you can continue missed content, but do not depend on that behavior as your only recovery method. A manual pre-Cerberus save is the dependable way to preserve the completed campaign state, repeat the ending, or test different final choices without rebuilding your last several hours.
- Canonical save made before Priority: Cerberus Headquarters.
- Separate save made after final equipment and conversation checks.
- Backup copy created using the available PS5 save method.
- Pre-Earth or final-chain save retained separately.
- No canonical save overwritten during experimentation.
5. Choose the first final-mission squad and loadout
When Priority: Earth begins, select two squadmates for the London landing and the first combat stages. Choose characters whose powers cover your class’s weaknesses. Overload or Energy Drain helps remove shields, while Warp, Reave, Incinerate, and armor-piercing effects help against armor and barriers. Singularity, Pull, Stasis, grenades, and other control abilities are useful when Cannibals, husks, or other numerous enemies press your position.
Your first squad choice covers the opening Earth combat, including the advance through the landing area and the fight involving the anti-aircraft weapon. Bring a reliable weapon for the range you expect and keep a heavy weapon available for a major target or dense defensive position. Take cover immediately after landing, eliminate enemies controlling the approach, and do not sprint into the next area while Brutes or flankers still have clear lines of fire.
This first selection is not your only final choice. The Forward Operating Base later provides access to surviving squadmates and a second selection screen. You can leave story-favorite characters out of the opening squad and still speak with living companions at the base.
- Two opening squadmates selected for complementary powers.
- Weapon and armor loadout checked before landing.
- Heavy weapon reserved for a high-value target or dense enemy group.
- Opening squad choice recorded if you plan to compare ending variations.
6. Use the Forward Operating Base as the last equipment checkpoint
After the Earth landing sequence, reach the Forward Operating Base and finish the available conversations before continuing. Speak with the living squadmates present if you want their final dialogue. When you tell Anderson you are ready and complete the speech sequence, the game gives you the final squad and loadout selection.
Treat this second screen as the definitive final setup. Select the two squadmates who best cover the remaining combat encounters or who provide the narrative farewell you want. Recheck Shepard’s weapons, armor, weapon mods, and heavy weapon. The Forward Operating Base selection is the last opportunity to change squadmates, weapons, and weapon modifications before the push to the Conduit.
Once you leave the base, advance from cover to cover and preserve ammunition for the fortified positions and heavy enemies ahead. Downed squadmates in ordinary combat can be revived, but the beam approach has story consequences affected by your overall military strength and final squad choice. Keep your pre-final saves if you want to test a different pair or ending decision instead of relying on an autosave.
- All desired farewell conversations completed at the Forward Operating Base.
- Final two squadmates selected.
- Final weapons, armor, mods, and heavy weapon checked.
- Pre-final save retained before continuing toward the Conduit.
- Ending choice plan confirmed.
Before you move on
- Every desired ME3 mission and included single-player DLC arc is complete before Priority: Cerberus Headquarters.
- Earlier lockout missions, including Rannoch support missions, Grissom Academy, and Tuchanka: Bomb, were handled before their respective deadlines.
- Shepard has a deliberate weapon, armor, power, and mod setup.
- The War Assets screen, major faction outcomes, and surviving squadmate roster are recorded.
- At least one canonical manual save exists before Priority: Cerberus Headquarters, with a separate backup copy.
- A second save exists for replaying the final chain or Earth sequence.
- At the start of Priority: Earth, the opening squad and loadout are ready.
- At the Forward Operating Base, final conversations, squad selection, weapons, armor, and mods are checked before proceeding.
- The desired ending choice is planned before beginning the final advance.
Mass Effect 3 — The Final Run: Priority: Earth and the Ending Sequence
Priority: Earth is Mass Effect 3’s final operation. Before launching it, finish the missions, DLC and conversations you want, check your War Assets, and create a named manual save. The assault has two combat stages: the initial London landing and the later missile-truck defense before the beam. Your earlier choices determine which surviving characters and faction forces appear, while War Assets determine the available ending options and the severity of the aftermath. In Legendary Edition, ending availability is based on the War Asset total read before Priority: Cerberus Headquarters: Synthesis requires 6200, while the Destroy ending’s Shepard-survival scene requires 7400 or more. At the Catalyst, choose Destroy, Control, Synthesis or Refuse according to the outcome you want. Legendary Edition includes Extended Cut, so allow the epilogue scenes to finish before loading your pre-finale save for another ending.
1. Finish preparations and preserve the correct replay save
Return to the Normandy and create a named manual save before selecting Priority: Earth. This is the practical replay point for the finale. Once the mission begins, you cannot return to the galaxy map until the ending is complete. Keep a second copy if you want to preserve both your completed campaign state and a clean alternate-ending starting point.
Before launching, complete any remaining missions, DLC, romance conversations or crew conversations you want to experience. Priority: Cerberus Headquarters is the earlier point at which the remaining galaxy-map content is closed, so this chapter assumes that mission is already complete. Read the War Terminal before committing to the final assault. In Legendary Edition, the relevant War Asset total is set before Priority: Cerberus Headquarters; assets obtained during that mission, including the Collector Base remains, do not unlock additional endings afterward.
For reference, 5200 or more War Assets removes the major low-strength damage bracket, 6200 or more unlocks Synthesis, and 7400 or more before Priority: Cerberus Headquarters enables the high-strength Destroy epilogue in which Shepard may be shown alive. These thresholds describe ending presentation, not a universal best outcome. Also review Shepard’s weapons, armor, powers and squad equipment. The final combat includes shields, armor, barriers, Husks, Marauders, Brutes and Banshees, so use a loadout that can handle more than one defense type.
- Priority: Cerberus Headquarters is complete.
- Desired Citadel, Leviathan, Omega and companion content is complete.
- A named manual save exists before Priority: Earth.
- The War Asset total has been checked before the Cerberus Headquarters lock-in.
- Shepard’s equipment and intended final squad are ready.
2. Land in London and destroy the anti-aircraft gun
After the Normandy deploys the assault force, clear the landing area and advance through the ruined streets. Use cover while moving between buildings, but relocate when Brutes or concentrated fire make your position unsafe. Prioritize enemies that can stagger or surround Shepard, then weaken armored targets from range. Do not waste time chasing enemies away from the route.
When the objective leads to the ruined building, move to the upper section and prepare for a defense sequence. An M-920 Cain heavy weapon is available in the area. Use one Cain shot against the anti-aircraft gun; the gun is destroyed by the heavy weapon rather than by a separate control-panel interaction. A second Cain is available, and it is useful against the Banshee and other enemies that appear during the defense.
After the gun is destroyed, survive until the shuttle arrives. When the extraction prompt appears, run to the shuttle instead of trying to eliminate every remaining enemy. The game then moves Shepard to the Forward Operating Base.
- The anti-aircraft gun has been destroyed with the M-920 Cain.
- You have reached the shuttle when extraction begins.
- You have arrived at the Forward Operating Base.
3. Use the Forward Operating Base before the final point of no return
At the Forward Operating Base, speak with the surviving squadmates and faction representatives you want to hear. Depending on your imported choices and ME3 decisions, different characters can appear, including James, Ashley or Kaidan, Garrus, Liara, Javik, Wrex or Wreav, EDI, Tali or a Geth representative. These conversations are optional for mission completion but provide the final character reactions to the assault.
Read the nearby communications terminal and talk to the available officers. When you are ready, proceed through the rubble ramp and the next doorway. The route becomes one-way, so treat the decision to continue as the last chance to finish these base conversations.
Before the final combat stage, the game lets you choose Shepard’s two squadmates and adjust the loadout again. Pick companions whose powers cover your build’s weaknesses, or take characters whose final dialogue you want to see. Squad choice changes combat support and scenes, but it does not create a separate ending branch; the ending is controlled by prior decisions, War Assets and the Catalyst choice.
- The desired Forward Operating Base conversations are complete.
- You have passed the one-way point only after finishing preparation.
- The final squad and loadout have been selected.
4. Advance to the missile-truck defense
Follow the assault route through the ruined street, parking garage, apartment and storefront. Use med-kits and ammunition as needed; this section is a forward push, not an exploration area that must be fully searched. When Brutes break through the wall in the alley, keep distance and use powers or heavy weapons to prevent them from reaching Shepard.
The route ends at two missile trucks facing a Ground Reaper. Clear the enemies already in the area, then activate the rear truck’s controls. Reaper forces continue arriving while it calibrates, so fight from cover and move into a shop when the Ground Reaper’s beam sweeps across the street. Banshees are the most urgent close-range threat. A nearby M-560 Hydra heavy weapon can help during the later wave; use it when the Banshees and other heavy enemies appear.
When the rear truck finishes, activate the forward truck. The objective is to survive until the missile system is ready, not to kill every enemy. As soon as the game confirms that the truck is operational, run to the marked activation point. The missiles destroy the Ground Reaper and trigger the transition to the beam assault.
- Both missile trucks have been activated.
- You have taken cover from the Ground Reaper’s beam.
- You ran to the objective after the missiles became ready.
5. Reach the beam and handle the Citadel confrontation
After the missile strike, follow the route toward the beam. Shepard becomes separated and reaches the Conduit with limited combat capability. The brief approach contains slow-moving enemies and is followed by a non-combat Citadel corridor. Continue forward using the objective marker; there is no remaining open area to explore.
The corridor leads to Anderson and the Illusive Man. The Illusive Man’s first shot is unavoidable, but the second shot can be prevented through the appropriate reputation dialogue. The final Paragon or Renegade persuasion option depends on having used the corresponding opportunities during the earlier encounters, including the Mars, Thessia and Cerberus Headquarters confrontations. If the option appears, select it to resolve the scene through dialogue rather than allowing the default outcome.
Continue to the Catalyst. Ask the available questions if you want the full explanation of the Crucible and the choices. Make a manual save here only if the game permits you to create one without replacing your pre-Priority: Earth save. Do not rely on the final autosave: reloading the autosave immediately before the Catalyst choice can remove the Catalyst interaction and prevent the Refuse outcome.
- The beam has transported Shepard to the Citadel.
- The Illusive Man confrontation is complete.
- You have reached the Catalyst.
- Your pre-Priority: Earth save is still preserved.
6. Select the ending and let Extended Cut play
The Catalyst presents the available choices based on your War Assets and earlier decisions. Destroy eliminates the Reapers but also destroys EDI and the geth. Control sacrifices Shepard’s physical existence to command the Reapers. Synthesis merges organic and synthetic life and requires at least 6200 War Assets in Legendary Edition. Refuse rejects the Catalyst’s proposed solutions and allows the cycle to continue. At very low War Asset totals, the available choices and the condition of Earth can be restricted; do not assume every option will appear.
For Destroy, follow the red route and shoot the power conduit. For Control, follow the blue route and interact with the control mechanism. For Synthesis, follow the central route and enter the Crucible beam. Refuse is selected through the rejection dialogue or by attempting to shoot the Catalyst. Choose according to the narrative result you want rather than treating one option as universally correct.
The game then shows the immediate consequences, the Normandy’s fate and the surviving crew. Legendary Edition includes the Extended Cut material, which adds dialogue, transition scenes and epilogue narration. Allow the ending and credits sequence to continue instead of closing the application after the first Crucible scene. The final scenes vary with your War Assets, imported choices, surviving characters, romance state and selected ending.
To replay the finale, return to the manual save before Priority: Earth. If you want to change only the final ending, replay the mission and preserve a save near the Catalyst when possible. Do not overwrite the original pre-finale save with an alternate result.
- The intended Crucible choice or Refuse outcome has been selected.
- The ending scenes, credits and Extended Cut epilogue have played.
- A final save or backup records the intended outcome.
- The pre-Priority: Earth save remains available for another ending.
Before you move on
- Priority: Earth is marked complete and the intended Crucible choice or Refuse outcome has been made.
- The Extended Cut epilogue scenes and narration have played.
- A final save or backup records the intended ending and surviving major characters.
- A separate pre-Priority: Earth save remains available for alternate endings.
- If a specific ending presentation was desired, the relevant War Asset total was reached before Priority: Cerberus Headquarters: 6200 for Synthesis or 7400 for the high-strength Destroy breathing scene.
References for this chapter
- Mass Effect 3 Legendary Edition: Priority: Earth Walkthrough
- Nightsolo’s Mass Effect 3 Legendary Edition Walkthrough
- Mass Effect 3: Priority Earth — Mass Effect Wiki
- Mass Effect 3 Endings — Mass Effect Wiki
- Mass Effect 3: Extended Cut — BioWare Blog
- Mass Effect Legendary Edition — PlayStation Store listing
Post-Ending — Epilogues, New Game+ and Optional Cleanup
Mass Effect 3 does not turn into a permanent free-roam game after the ending. Once the credits and Extended Cut scenes finish, Legendary Edition returns you to a save positioned before Priority: Cerberus Headquarters, allowing you to complete available content and replay the final sequence. It does not restore missions that were already locked by earlier story decisions. Treat the pre-Cerberus Headquarters file as your main cleanup point, and keep it separate from your completed-ending and alternate-ending saves. New Game Plus is handled within each individual trilogy entry rather than through one campaign-wide mode. Preserve the completed ME1, ME2 and ME3 files, then begin a separate replay using the appropriate character import or New Game Plus option. Appearance codes can reproduce Shepard’s look, but they do not reproduce story decisions; those still require the correct imported save or manual choices.
1. Preserve the completed trilogy and the pre-final ME3 save
After viewing the Mass Effect 3 ending and Extended Cut epilogue, keep your canonical files intact. The most useful ME3 file is the manual save made before starting Priority: Cerberus Headquarters. Keep another save before Priority: Earth if you created one, plus your final ME1 and ME2 import files. Do not rely on the post-credits state as your only record of the campaign.
Mass Effect 3 treats starting Priority: Cerberus Headquarters as the final lockout. After completing the ending, the game returns you to the earlier part of the campaign rather than creating an ordinary postgame world. This returned position is useful for cleanup and replay, but it does not mean that every mission remains available. Missions already failed or closed by earlier Priority missions stay closed.
Use separate save slots for canonical progress, cleanup, alternate endings and trophy attempts. On PS5, use the save-backup method available to your console and PlayStation account, such as cloud storage for an active subscription or a compatible USB backup procedure. The goal is to retain the original trilogy chain even if a later experiment produces an unwanted result.
- Keep the final ME1 save used for the ME2 import.
- Keep the post-Suicide Mission or completed-campaign ME2 save used for ME3.
- Keep an ME3 save before Priority: Cerberus Headquarters.
- Keep a separate save for the ending you regard as canonical.
- Back up important files before starting cleanup or a new campaign.
2. Clean up unfinished ME3 content from the returned save
If the credits have rolled and you still need to scan systems, finish companion missions, complete Leviathan, Omega or Citadel, or collect remaining war assets, load the save positioned before Priority: Cerberus Headquarters. If that file is unavailable, load the earliest manual save that predates the content you want to complete.
Finish the remaining Journal entries and Galaxy Map activities before launching Priority: Cerberus Headquarters again. Check the Journal after every major Priority mission because some side assignments have earlier failure conditions or become unavailable after story events. This is particularly important for missions involving the krogan, quarians, geth, Grissom Academy and other time-sensitive allies.
Citadel is not accessible after the ending as a new free-roam chapter. You can, however, load the returned pre-Cerberus Headquarters save and play it there. For the intended story presentation, complete the Citadel story, crew interactions and party before beginning the final assault. The DLC’s main mission and party are most useful when the relevant squadmates are alive and available, which is why Citadel belongs in the pre-final cleanup phase rather than after the credits as a permanent epilogue.
Once cleanup is complete, make a fresh manual save without deleting the earlier pre-lockout file. If you later replay the finale, you can return to this prepared state instead of repeating the entire campaign.
- Load a save before Priority: Cerberus Headquarters.
- Review the Journal for remaining side missions and DLC.
- Complete Citadel before the final assault when possible.
- Confirm desired war assets and companion outcomes before restarting the finale.
- Save the cleaned-up state in a separate slot.
3. Replay the ending without overwriting your original result
To try a different ME3 ending, load the save before Priority: Cerberus Headquarters, or the post-credits returned save if it contains the preparation state you want. Replay Priority: Cerberus Headquarters and Priority: Earth, then make a different choice during the final Catalyst sequence. Save the alternate result in a new slot.
Do not assume that changing only the final choice will alter earlier mission outcomes. The available ending results and surrounding epilogue details depend on decisions and war-asset preparation already established before the final lockout. If an outcome depends on an earlier companion, faction or mission decision, load a save from before that decision rather than replaying only the last scene.
After viewing the alternate ending, allow the credits and Extended Cut scenes to finish, then return to your named canonical save if you want to continue with the original version. Never use the same slot for both results.
- Load a save before the final lockout.
- Replay both final missions as required.
- Choose and save the alternate result in a new slot.
- Keep the canonical ending untouched.
- Return to the intended save before beginning other cleanup.
4. Start a separate New Game Plus or character replay
New Game Plus is not a single mode that restarts all three games with one shared inventory. Each title handles its own replay through its character-start, import or New Game Plus options. Begin the replay from the individual game you want to revisit, then select the completed character or import option offered by that title.
For a new trilogy run, begin in Mass Effect 1, create or select the Shepard you want, and finish that separate campaign before importing it into Mass Effect 2. Continue by importing the resulting ME2 character into Mass Effect 3. Story decisions do not automatically transfer merely because the same console account or appearance is being used.
Read each confirmation screen before accepting the new run. The games differ in what can be carried into a replay, including level, powers, equipment and other progression. Do not delete the completed character file while testing the mode. Create a distinct save group for the replay so the original import chain remains available.
- Open the specific trilogy entry you want to replay.
- Use that title’s New Game Plus or character-import option.
- Select the completed character intended for the replay.
- Create separate saves for the new run.
- Build a new ME1 endgame save before importing another trilogy.
5. Reuse Shepard’s appearance while creating alternate continuities
Legendary Edition’s unified character creator can display a creator code for Shepard’s appearance. Record the code or capture the appearance screen if you want to reproduce the same face in another run. This preserves the visual design only; it does not carry over romances, morality, squad survival, faction decisions or war assets.
For a continuity replay, choose the intended ME1 save when beginning ME2 and verify the selected career. At the next transition, import the intended ME2 save into ME3. If the wrong career appears, stop before committing to the new campaign and check the save slot rather than assuming the game will correct the choice later.
Keep canonical and experimental runs in separate save groups. This is especially important when testing different romances, Virmire outcomes, Suicide Mission results or ME3 endings, because a later import can otherwise make it difficult to identify which decisions belong to which Shepard.
- Record Shepard’s appearance code or settings.
- Verify the selected ME1 career before starting ME2.
- Verify the selected ME2 career before starting ME3.
- Keep alternate continuity saves separate from the canonical chain.
6. Finish trophies and optional challenges methodically
Use a decision-point save for trophies involving romances, faction outcomes, companion survival or mission-specific results. Save before the conversation or mission that controls the result, complete the sequence, and confirm the trophy notification before removing the test file. If the result depends on an earlier trilogy decision, use the appropriate imported campaign rather than trying to force it from an unrelated Shepard.
For difficulty trophies, check the PS5 trophy description and confirm the difficulty before beginning the relevant campaign or mission. Keep a dedicated difficulty-run save group. Do not lower the setting during a run unless the trophy’s requirements explicitly allow it.
For a no-loss Suicide Mission challenge, begin from a separate ME2 preparation file and verify loyalty missions, Normandy upgrades and final role assignments before entering the Collector Base. Do not risk your canonical trilogy file. Legendary Edition’s campaign completion and trophy goals are self-contained; the original Mass Effect 3 multiplayer readiness system is not required for this collection.
- Read the exact PS5 trophy requirement.
- Save before the decisive conversation or mission.
- Use separate files for alternate outcomes and difficulty runs.
- Confirm the trophy notification before deleting a test save.
- Keep the canonical trilogy chain backed up.
Before you move on
- Separate ME1, ME2 and ME3 saves representing the intended canon are preserved.
- An ME3 save before Priority: Cerberus Headquarters is available for cleanup and ending replays.
- All desired DLC, companion missions, war-asset activities and trophy objectives are complete on the appropriate pre-ending save.
- Any alternate ending or trophy experiment is stored in a separate save slot.
- The correct Shepard, appearance, difficulty and import chain have been verified before starting a replay or New Game Plus run.
References for this chapter
- Mass Effect Legendary Edition official product page — Electronic Arts
- Mass Effect 3: Citadel — FAQ — BioWare Blog
- Mass Effect 3 Extended Cut — BioWare Blog
- Mass Effect 3: Where the Point of No Return Is
- Priority: Cerberus Headquarters — Mass Effect 3 Legendary Edition Walkthrough
- Mass Effect 3 Point of No Return: The Beginning of the End
- Mass Effect Legendary Edition Trophy Guide and Road Map
Troubleshooting Common Issues on PS5 and Legendary Edition Specific Fixes
Mass Effect Legendary Edition is the PS4 version playable on PS5, so troubleshoot it as PS4 software running through PS5 compatibility. Start with updates, storage, account licenses and installation status before using Safe Mode. The collection includes the trilogy’s single-player campaign content and over 40 DLC items, but story expansions usually appear inside the relevant game rather than as separate launcher tiles. Import failures are separate from installation failures: a completed career must be saved under the same PlayStation user, while Genesis can recreate selected major choices only. Protect completed careers before experimenting, and use official PlayStation or EA support instead of unsupported save editing.
1. Confirm the exact installation and update state
On the PS5 home screen, highlight Mass Effect: Legendary Edition, press the Options button and select Check for Update. Then open Settings, System, System Software, and System Software Update and Settings. Install available updates and restart the console before testing the game again. The PlayStation Store identifies Legendary Edition as a PS4 title playable on PS5, so do not look for a separate native PS5 game entry or assume that a PS5-only troubleshooting procedure applies.
Check Settings, Storage and confirm that the console has enough free space for patches, installation files and saved data. If a download is paused or stuck, open Downloads/Uploads, pause it, resume it, and test the connection through Settings, Network, Connection Status, and Test Internet Connection. Record any error code rather than repeatedly deleting files without knowing whether the problem is the network, account licensing or the installation.
- Legendary Edition is installed under the intended PlayStation account
- The game and PS5 system software are updated
- Adequate console storage is available
- Any download error code has been recorded
2. Restore licenses and verify the owned edition
If the collection shows a padlock, fails to launch, or behaves as though content is unowned, sign in to the account that purchased or redeemed it. Go to Settings, Users and Accounts, Other, and Restore Licenses. You can also highlight the game from the home screen or Game Library, press Options and use the Restore License command when it is available. This does not delete local save data.
For a disc copy, confirm that the disc region is compatible with the PlayStation account region. Region mismatches can prevent store-linked add-on content from appearing correctly. For a digital copy, open Game Library, Your Collection, select Legendary Edition and inspect the game’s Add-Ons area. The collection’s major story content is bundled with the edition, so a missing DLC mission is not necessarily a missing standalone tile. Launch the appropriate trilogy game and check its normal Normandy, galaxy-map or story access point after confirming the installation.
- The purchasing or redeeming account is signed in
- Licenses have been restored
- Disc and account regions are compatible when using physical media
- The owned edition and installed content have been checked
3. Reinstall only the damaged game data or download
If the game itself is corrupted or repeatedly crashes during loading, first close it completely and restart the PS5. If the problem continues, open Game Library, Your Collection, highlight Legendary Edition, press Options and choose Delete. This removes the game installation, not the saved-data category, provided you do not separately select saved data for deletion. Reinstall from the same account or insert the compatible disc again, then apply the latest update before opening a career.
For missing or failed downloadable content associated with the edition, use Game Library, Your Collection, select the game and scroll to Add-Ons. Download listed content that is owned but not installed. If the download fails, cancel the failed item from Downloads/Uploads, restart the console and begin it again. Do not buy a second copy of a DLC item merely because the store displays a price until you have checked the edition description, transaction history and account licenses.
- Completed careers are visible before any deletion
- Only the game installation or failed download is removed
- The collection is reinstalled from the correct account
- The game is tested after updates finish
4. Use Safe Mode carefully
Turn the PS5 off completely. Press and hold the power button until the second beep, connect the controller with a USB cable, and enter Safe Mode. Select Clear Cache and Rebuild Database, then choose Clear System Software Cache when the problem concerns system features or a general performance drop. Clearing the system software cache is not a method for repairing an incorrect Mass Effect import and should not be expected to alter a career.
If deleted game icons remain or the library database appears wrong, return to Safe Mode and select Rebuild Database. PlayStation describes this as scanning the drive and creating a new content database. Do not choose Reset PS5 or Reset PS5 (Reinstall System Software) for an ordinary Legendary Edition fault. Those options erase user data and are only appropriate for broader console failures after you have made the necessary backups.
- The console was fully shut down before Safe Mode
- Clear System Software Cache was tried before destructive reset options
- Rebuild Database was used only for database or icon problems
- Reset PS5 was not used as a routine game fix
5. Preserve and repair ME1-to-ME2 import continuity
Because Legendary Edition is PS4 software on PS5, its saves are handled as PS4 saved data. Use PlayStation Plus cloud storage or copy PS4 saved data to a FAT or exFAT USB drive; a USB drive formatted as PS5 extended storage is for game installation and is not the same thing as a save backup. On PS5, use Settings, Saved Data and Game/App Settings, Saved Data (PS4), then Upload or Delete from Console Storage. Upload the latest manual saves before troubleshooting an import.
In Mass Effect 2, choose New Game and Import ME1 Character. The completed Mass Effect 1 career must be under the same PS5 user profile and must have been saved normally. If it is absent, return to Mass Effect 1, load the completed career or a save made after the finale, create a fresh manual save, close the game normally and check the import list again. If no completed career exists, the Genesis comic can establish selected major decisions before Mass Effect 2. It does not recreate every assignment, conversation, romance, squad state or DLC flag, so it is a fallback rather than a full save replacement.
- A completed ME1 career is backed up locally or in cloud storage
- The same PlayStation user profile is active in both games
- Import ME1 Character is selected before starting ME2
- Genesis is used only when limited decision recreation is acceptable
6. Preserve and repair ME2-to-ME3 import continuity
Before starting Mass Effect 3, back up the completed Mass Effect 2 career, preferably including a post-Suicide Mission manual save and a separate pre-final save. In Mass Effect 3, choose New Game and Import ME2 Character, then select the completed career rather than an earlier mission save. If it does not appear, launch Mass Effect 2, load the post-finale career, create a new manual save and return to the collection launcher before checking again.
If no usable ME2 career exists, the Genesis comic can recreate selected headline decisions, but it cannot reproduce the full loyalty-mission record, individual survivor states, romance history or every side-quest result. If the import screen shows the wrong Shepard or career, cancel before creating the new ME3 save. Never overwrite the known-good ME2 career while testing an alternate import.
- The completed ME2 career is backed up
- The post-Suicide Mission state is preserved
- The intended Shepard profile is selected on the import screen
- The original ME2 career remains available for another attempt
7. Escalate with evidence through official support
Before contacting support, write down the exact error message, whether the copy is disc or digital, the affected game in the collection, the account region, the point at which the failure occurs and whether a separate manual save works. This distinguishes an installation or license problem from one damaged career. Do not upload or modify console saves with PC editors, unofficial transfer tools or file-editing methods.
Check PlayStation’s current pages for PS5 downloads, add-ons, licenses, storage and Safe Mode. Check Electronic Arts’ Mass Effect Legendary Edition news and update page for official patch notes or developer notices. If every game or application crashes, stop treating the issue as specific to Legendary Edition and use PlayStation Repairs or console support. Keep the original installation and saves intact until support has advised the next step.
- The failure is reproducible and documented
- A separate manual save has been tested
- PlayStation support guidance has been checked
- EA Legendary Edition update notes have been checked
- No unsupported save-editing workaround was used
Before you move on
- Legendary Edition launches from the intended PS5 account as PS4 software playable on PS5.
- The owned edition, update state, licenses and bundled content have been verified.
- A completed ME1 career appears in Mass Effect 2’s Import ME1 Character list, or the limited Genesis fallback was deliberately selected.
- A completed ME2 career appears in Mass Effect 3’s Import ME2 Character list, with the original career preserved separately.
- PS4 saved data has been backed up through PlayStation Plus cloud storage or a compatible USB-drive method.
- Any remaining fault has been documented and escalated through PlayStation or EA support rather than unsupported console file editing.
References for this chapter
- Mass Effect Legendary Edition — PlayStation Store listing
- Mass Effect Legendary Edition official product page — Electronic Arts
- How to Troubleshoot Game Downloads from PlayStation Store
- How to Restore Licenses on PlayStation Consoles
- How to Download Your Games and Add-Ons from PlayStation Store
- How to Troubleshoot Add-On Issues
- How to Use Safe Mode on PS5 Consoles and PS4 Consoles
- How to Manage PS5 Console Storage Space
- PlayStation Plus Cloud Storage for PS5 Consoles
- How to Back Up and Restore PS5 Console Data
- PlayStation support: Transfer data from a PS4 console or PS5 console to your PS5 console
- Mass Effect Legendary Edition News, Updates and Patch Notes
Final Completion Checklist and Optional Challenges
Use this chapter to verify that your Mass Effect: Legendary Edition trilogy run is complete, backed up, and ready to replay. Protect the end-of-game handoff save from each title, especially the Mass Effect 3 save before Priority: Earth. Record your major choices, surviving companions, romance, DLC progress, faction outcomes, and ending choice outside the game. Legendary Edition is a self-contained single-player collection; its campaign ending does not depend on multiplayer readiness. On PS5, the collection is the PS4 version played through backward compatibility, so use PS4 saved-data backup methods when protecting your Shepard career.
1. Confirm the three campaign milestones
For Mass Effect 1, keep a manual save after completing the final sequence and another immediately before beginning the endgame if you have one. Record the Virmire survivors, Council result, rachni queen decision, major romance, and any other choice you want to reproduce in Mass Effect 2. The finished save is your import source; the pre-endgame save is your recovery copy.
For Mass Effect 2, retain a save after the Suicide Mission has concluded and verify the surviving squadmates, Normandy crew outcome, Collector Base decision, and Shepard’s survival. Also protect a save from before launching the final mission. That earlier file is the practical recovery point if a role assignment produces an unwanted death. If you want the cleanest continuity, finish recruitment, loyalty missions, ship upgrades, and chosen DLC before starting the Reaper IFF and final sequence.
For Mass Effect 3, the critical save is the one immediately before Priority: Earth. Do not overwrite it after entering the final act. Use it to replay the final battle and test alternate ending choices. Record the completed ending separately with a written note or screenshot because the pre-final save, rather than a post-ending continuation, is the reliable replay point. Priority: Earth is the final campaign sequence, and beginning the preceding endgame operation removes normal galaxy exploration and unfinished side-mission access.
- Mass Effect 1 endgame and completed-campaign saves are retained.
- Mass Effect 2 post-Suicide Mission and pre-final saves are retained.
- Mass Effect 3 pre-Priority: Earth save is protected.
- The ending choice and final narrative result are recorded outside the save system.
2. Back up and label your canonical saves
Use recognizable descriptions in your own notes, such as ME1 final Paragon, ME2 loyal survivors, ME3 pre-Earth, and ME3 Destroy attempt. The game’s save interface may not provide enough room to document every decision, so pair each file with a written record containing Shepard’s name, class, romance, major choices, and surviving companions.
On PS5, Legendary Edition is listed as a PS4 title that is playable on PS5. With PlayStation Plus, PS4 saved data can be uploaded to cloud storage; PS4 game saves can also be copied to USB-supported storage and transferred through PlayStation’s supported procedures. Cloud saves for PS4 games may require manually downloading the selected file back to console storage. Keep the canonical local save separate from experimental runs, and never rely on Resume or an autosave as the only copy.
- Every handoff save has a recognizable label or matching written description.
- A second supported backup exists for the important saves.
- The ME3 pre-Priority: Earth file is not overwritten by an alternate ending attempt.
- Backups use the same PlayStation account and supported PS4 saved-data methods.
3. Confirm the included single-player content
Review each game’s journal, completed-mission notes, and your external checklist rather than assuming that every historical add-on must appear. The collection includes the single-player base games and more than 40 DLC items, including story expansions, weapons, armor, and promotional packs. For Mass Effect 1, confirm that Bring Down the Sky was completed if it is part of your target. Pinnacle Station is not included in Legendary Edition, so its absence is not an installation failure.
For Mass Effect 2, check the recruitment and loyalty missions for Zaeed and Kasumi, then verify the story DLC you intended to play, including Overlord, Lair of the Shadow Broker, and Arrival. For Mass Effect 3, check From Ashes, Leviathan, Omega, and Citadel, plus the companion and faction missions that support your chosen continuity. Extended Cut ending material is included in Legendary Edition, so viewing the post-choice epilogue completes the ending presentation even though you should preserve the pre-final save for replay.
- Bring Down the Sky is complete if included in your target.
- Chosen Mass Effect 2 recruitment, loyalty, and story DLC missions are complete.
- Chosen Mass Effect 3 DLC and companion missions are complete.
- Pinnacle Station is excluded from the Legendary Edition checklist.
4. Verify companions, factions, and romance
Compare the finished trilogy with the decision record you made during play. Confirm that the Mass Effect 2 squadmates you wanted alive survived the Suicide Mission, that the Normandy crew outcome matches your plan, and that the Collector Base choice is recorded. A completed campaign is not automatically a no-death campaign; companion survival depends on preparation, loyalty, ship upgrades, and correct Suicide Mission assignments.
In Mass Effect 3, verify the outcomes of the genophage storyline and the geth-quarian conflict, then confirm that the resulting allies and squadmate appearances match your intended continuity. Check that your romance reached its intended conclusion and was not displaced by a later relationship. Companion personal missions and time-sensitive faction tasks should be completed before their relevant points of no return; if one is missing, return to the protected earlier save rather than trying to repair the completed final act.
- Planned Mass Effect 2 survivors match the written record.
- The Normandy crew and Collector Base outcomes are recorded.
- The genophage and geth-quarian outcomes match the intended continuity.
- The planned romance and companion conclusions are present.
5. Optional challenge routes
For a no-companion-loss Suicide Mission, use a pre-final Mass Effect 2 save, complete the loyalty missions for the squadmates you plan to use, install the important Normandy upgrades, and assign every specialist role deliberately. If a squadmate dies, reload the protected save and correct the preparation or assignment rather than accepting the result as part of the canonical run.
For the trilogy Insanity challenge, complete all three games without changing difficulty. Legendary Edition tracks cumulative Insanity objectives for one, two, and all three games, so lowering the setting during any title breaks the relevant uninterrupted run. The challenge is separate from the individual game completion trophies and should be planned as its own career.
For romance completion, use separate careers or protected branch saves. Several relationships require different choices, identities, or timing, and forcing multiple incompatible romances into one continuity can invalidate the result. Use the written decision log to track which relationship belongs to each Shepard.
- A no-companion-loss Suicide Mission is complete, if desired.
- The Insanity setting remained unchanged for each selected game.
- Romance attempts use separate protected careers or branch saves.
- Alternate endings are replayed from the protected ME3 pre-final save.
6. Create the permanent completion record
Write one final record containing Shepard’s name, class, origin, morality direction, romance, Mass Effect 1 decisions, Mass Effect 2 survivors, Collector Base result, Mass Effect 3 faction outcomes, completed DLC, final war-assets status as shown in your game, and ending choice. Add the save names or timestamps for the Mass Effect 1 handoff, Mass Effect 2 post-Suicide Mission state, and Mass Effect 3 pre-Priority: Earth state.
Treat cross-platform and cross-account save sharing as unsupported unless the platform explicitly provides a compatible transfer path. PlayStation documents PS4 saved-data transfer to PS5, but that does not establish compatibility with another platform, account, edition, or altered save file. Sharing screenshots, a written decision log, and trophy progress is safer than depending on unofficial file conversion.
The trilogy run is complete when the three campaign handoffs are protected, the desired single-player content is finished, the intended companions and faction outcomes are recorded, and the Mass Effect 3 final sequence has been completed with its epilogue viewed. Optional trophies, alternate endings, and challenge careers can then be pursued without risking the canonical save.
- A complete decision record exists outside the game.
- Canonical saves are separated from alternate experiments.
- The desired DLC and companion content is marked complete.
- The Mass Effect 3 ending and epilogue have been viewed.
- The original Shepard career remains recoverable from protected saves.
Before you move on
- Protected Mass Effect 1, Mass Effect 2, and Mass Effect 3 milestone saves exist.
- The Mass Effect 3 pre-Priority: Earth save is preserved for ending retries.
- Desired single-player DLC, companion arcs, faction outcomes, romance, survivors, and ending choice are recorded.
- The Mass Effect 3 final sequence and Extended Cut epilogue have been viewed.
- Any no-death, Insanity, romance, trophy, or alternate-ending goal has its own protected save or documented replay point.
- The canonical trilogy career can be restored without depending on an autosave or unsupported file transfer.
References for this chapter
- Mass Effect Legendary Edition official product page — Electronic Arts
- Mass Effect Legendary Edition — PlayStation Store listing
- PlayStation support: Transfer data from a PS4 console or PS5 console to your PS5 console
- PlayStation support: PlayStation Plus cloud storage for PS5 consoles
- Mass Effect Legendary Edition trophy list — PlayStationTrophies.org
- Mass Effect 3: Priority Earth — Mass Effect Wiki
- Mass Effect Legendary Edition EA forum clarification on Pinnacle Station
Finishing up
You reach and complete the Mass Effect 1 ending, then import or recreate its major decisions in Mass Effect 2 and verify the intended continuity.
You complete Mass Effect 2’s recruitment, loyalty, Normandy-upgrade and Suicide Mission preparations, finish the Suicide Mission with the intended survivors, and preserve the completed career for Mass Effect 3.
In Mass Effect 3, you complete the main Priority missions, desired side operations and included single-player DLC, then finish Priority: Earth and view the ending and Extended Cut epilogue.
You verify that the ending, companion outcomes, romance and faction results match your intended narrative.
You use the chapter checklists to confirm campaign completion, DLC progress, save backups and optional challenge goals.
Choose your next gameScreenshots & video
Game imagery for reference. Follow the written chapters above for the route and strategies.
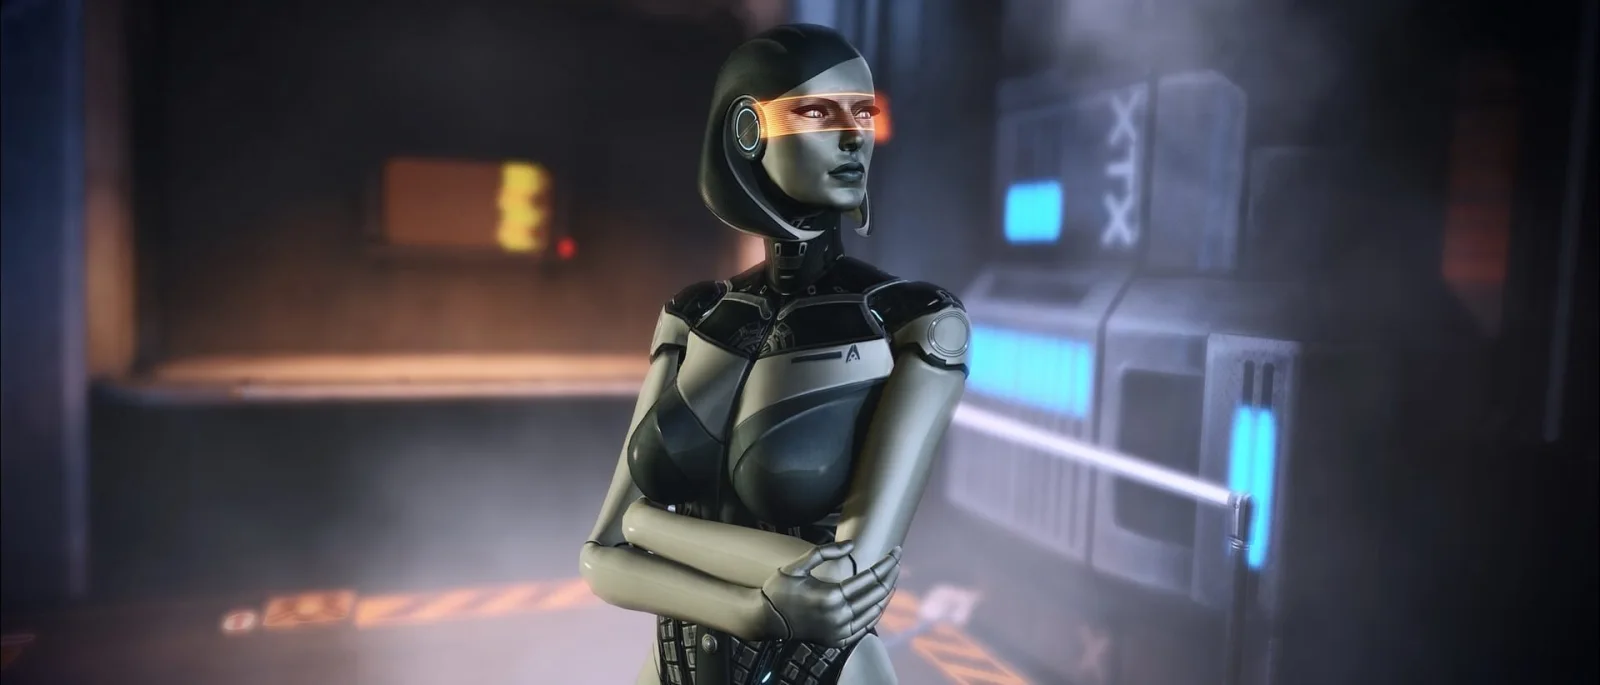
Sources & references
Our original guide draws on the references below. Check the edition at the top of this page before following controls or unlock requirements.
- Mass Effect Legendary Edition — PlayStation Store listing
- Mass Effect Legendary Edition – PlayStation
- Mass Effect Legendary Edition official product page — Electronic Arts
- Mass Effect Legendary Edition Official Remastered Comparison Trailer – PlayStation
- How to Manage PS5 Console Storage Space
- PlayStation support: Transfer data from a PS4 console or PS5 console to your PS5 console
- PlayStation Plus cloud storage – PlayStation Support
- Mass Effect Legendary Edition PS5, Xbox Series X, and PC Performance Details Revealed – Game Informer
- Mass Effect Legendary Edition: A detailed look at visual enhancements to the celebrated trilogy – PlayStation.Blog
- Mass Effect Legendary Edition: Rebalancing, tuning, & mechanical improvements – PlayStation.Blog
- Mass Effect instruction manual – Character Creation and Classes
- Guide for Mass Effect Legendary Edition – Mass Effect 1 – TrueAchievements
- The Citadel: Expose Saren – Mass Effect 1 Walkthrough
- Citadel Exploration – Mass Effect 1 Legendary Edition
- Citadel: Meet the Council – Mass Effect 1 Legendary Edition
- Mass Effect Legendary Edition
- Mass Effect Legendary Edition mission order guide
- Virmire: Landing Zone and mission walkthrough
- The Citadel: Lockdown walkthrough
- X57: Bring Down the Sky assignment reference
- Race Against Time: Escape the Citadel — Mass Effect 1 Legendary Edition Walkthrough
- Race Against Time: Ilos — Mass Effect 1 Legendary Edition Walkthrough
- Race Against Time: Final Battle — Mass Effect 1 Legendary Edition Walkthrough
- Ilos: The Conduit and Trench Run — Mass Effect 1 Legendary Edition Walkthrough
- Ilos — Mass Effect Guide and Walkthrough
- Mass Effect Save Import Guide: Legendary Edition, Genesis, and Old PC Saves
- Mass Effect Legendary Edition — Official EA Product Information
- Electronic Arts Announces Mass Effect Legendary Edition with PS5 Forward Compatibility
- BioWare Explains Pinnacle Station DLC Exclusion From Mass Effect Legendary Edition
- Mass Effect 2 Guide
- Mass Effect 2 Official Instruction Manual
- Mass Effect 2 Guide — Normandy SR-2 and early recruitment missions
- Mass Effect Legendary Edition — Included Content
- Mass Effect 2 official manual — research computer, squad selection, Normandy facilities, and resource use
- Mass Effect 2 Squad Members Guide
- Mass Effect Legendary Edition mission order guide
- Suicide Mission — Mass Effect Wiki
- Mass Effect Legendary Edition Guide: Suicide Mission Mass Effect 2
- Normandy Upgrades — Suicide Mission — Mass Effect 2 Legendary Edition
- Mass Effect 2 Mission Order: optimal DLC, dossier, loyalty quest sequence
- Mass Effect Mission Order — Story DLC Timing for Legendary Edition
- Mass Effect Legendary Edition mission order guide
- Mass Effect Legendary Edition — Official Reveal Trailer
- Collector Abduction — Point of No Return — Mass Effect 2 Legendary Edition Walkthrough
- Suicide Mission — Collector Base: Infiltration — Gamer Guides
- Choosing a Biotic Specialist and Diversion Squad Leader — Gamer Guides
- Mass Effect Legendary Edition — PlayStation Blog gameplay improvements
- Mass Effect Legendary Edition launch and PS5 forward compatibility — Electronic Arts
- Mass Effect 3 PlayStation Manual — Character Creation and Importing an ME2 Character
- Mass Effect: Legendary Edition — Rebalancing, tuning, & mechanical improvements — PlayStation.Blog
- Mass Effect 3 Guide — Mass Effect Wiki
- Mass Effect 3 Mission Order: best sequence for all priority, DLC and side quests
- Mass Effect 3 Mission Order Guide
- How Mass Effect: Legendary Edition Changes Galactic Readiness System — GameSpot
- Nightsolo’s Mass Effect 3 Legendary Edition Walkthrough
- Priority: Rannoch — Mass Effect Wiki
- Priority: Cerberus Headquarters Guide
- Tuchanka: Bomb — Mass Effect 3 Guide, Prima Games
- Act 2: Priority: The Citadel — Mass Effect 3 Guide, Prima Games
- Mass Effect 3 Checklist — Nightsolo
- Priority: Cerberus Headquarters — Mass Effect 3 Legendary Edition Walkthrough
- Mass Effect Legendary Edition — Included single-player DLC
- Mass Effect 3: Where the Point of No Return Is
- Mass Effect 3: Who to Take on the Final Mission
- Mass Effect 3 Guide — Priority: Earth
- Mass Effect 3 Legendary Edition: Priority: Earth Walkthrough
- Mass Effect 3: Priority Earth — Mass Effect Wiki
- Mass Effect 3 Endings — Mass Effect Wiki
- Mass Effect 3: Extended Cut — BioWare Blog
- Mass Effect 3: Citadel — FAQ — BioWare Blog
- Mass Effect 3 Extended Cut — BioWare Blog
- Mass Effect 3 Point of No Return: The Beginning of the End
- Mass Effect Legendary Edition Trophy Guide and Road Map
- How to Troubleshoot Game Downloads from PlayStation Store
- How to Restore Licenses on PlayStation Consoles
- How to Download Your Games and Add-Ons from PlayStation Store
- How to Troubleshoot Add-On Issues
- How to Use Safe Mode on PS5 Consoles and PS4 Consoles
- PlayStation Plus Cloud Storage for PS5 Consoles
- How to Back Up and Restore PS5 Console Data
- Mass Effect Legendary Edition News, Updates and Patch Notes
- PlayStation support: PlayStation Plus cloud storage for PS5 consoles
- Mass Effect Legendary Edition trophy list — PlayStationTrophies.org
- Mass Effect Legendary Edition EA forum clarification on Pinnacle Station
About the game & collecting notes
- Platform
- Sony PlayStation 5
A start-to-finish campaign walkthrough for Mass Effect — Legendary Edition on PlayStation 5. Covers character creation, every major mission in Mass Effect 1–3, import continuity, Mass Effect 2 Suicide Mission success, Mass Effect 3 war-preparation and the trilogy ending. Includes PS5-specific setup, DLC coverage and a final completion checklist.
Darryl Polo
Darryl Polo writes about emulation and retro games. What changes when an old favorite moves to another setup? That question connects his interest in tinkering with the games that made the hardware worth keeping.
Our editorial standardsFound a step that needs another look? Help us improve this guide.