
Marvel's Spider-Man 2 (PS5) — Complete Campaign Walkthrough
A practical, start-to-finish campaign guide for the PS5 original of Marvel's Spider-Man 2. Follow step-by-step mission routing, boss strategies, essential skill/suit tech priorities, character-specific tactics for Peter and Miles, and a concrete completion checklist that ends at the game's canonical epilogue.


Find a copy
Marvel's Spider-Man 2 Sony PlayStation 5
We may earn a commission if you buy through these links, at no extra cost to you. As an Amazon Associate I earn from qualifying purchases.
Opens retailer search results. Check the model, edition, seller, availability and current price before buying.
Before you begin
This walkthrough is written for the PS5 original edition of Marvel's Spider-Man 2 and focuses solely on the main campaign from the opening sequence through the game's final cutscenes and epilogue.
It assumes you will play on the console edition released by Insomniac Games and covers switching between Peter Parker and Miles Morales, core combat and traversal tactics, mission routing to reduce backtracking, and the exact checks you need to finish the canonical ending.
Expect roughly a 20–30 hour campaign if you mainly follow the story and do some side content; plan longer if you aim for 100% completion.
This guide highlights the story beats that must be completed for progression, the unavoidable boss encounters, and the gear/skill priorities that make the later acts manageable.
For accessibility, difficulty and save options consult Insomniac's official support page before starting.
Set yourself up for the run
Set difficulty and accessibility before you begin: the PS5 edition supports adjustable difficulty, puzzle and QTE assistance, chase assistance, manual saving and other accessibility options—enable the options that match how you want to experience the story.
Familiarize yourself with switching characters (Peter/Miles) and their separate skill trees—plan to spend early skill points on traversal and a small set of core combat abilities for each.
Prioritize earning and holding Tech Parts, Rare Tech Parts, City Tokens and Hero Tokens; Suit Tech and other upgrades use different material types.
Keep an eye on the resources you accrue during early side activities.
Enable HUD/aim assists only if you need them for platforming or quick-time sequences; they can be toggled later if you prefer a less assisted run.
Confirm manual save availability so you can create a safe restore point before major fights.
If you plan to chase trophies or 100% district completion, track the in-game district counters and activity categories district-by-district. The original PS5 release has 160 tracked collectible and activity locations across 14 districts, not 160 identical collectible pickups.

Prepare: Controls, Accessibility, Difficulty and Early Loadout
Set up the PS5 version before committing to the opening missions. Choose a suitable challenge level, review accessibility assists, learn the combat indicators, and create a manual save once the pause menu permits it. Peter Parker and Miles Morales each have a personal skill tree, while the Shared tree benefits both characters. Suit Tech is shared between them and improves Health, Damage, Focus, or Traversal, so early resources are best spent on practical upgrades rather than appearance options. Follow the primary mission until the game has introduced the relevant menus, then use the map and mission tracker to understand where story objectives and optional activities are displayed.
Configure difficulty and accessibility before or during the opening missions
From the title screen, open Settings and review Difficulty and Accessibility before starting a new campaign. The game supports adjustable challenge settings and individual modifiers, so you can change enemy health, enemy damage, stealth awareness, game speed, chase assistance, and dodge or parry timing without abandoning the campaign.
If you need them, enable Simplify Puzzles, QTE Autocomplete, Enhanced Auto-Aim, or Auto Heal. Puzzle skips are also available from the pause menu when an eligible puzzle is active. Review subtitles, speaker labels, visual contrast, controller reminders, haptic feedback, adaptive triggers, and control remapping at the same time. These options can be changed later, so select a comfortable baseline rather than choosing a high difficulty simply to prove that you can maintain it.
- Choose a challenge level that suits your preferred combat pace.
- Review puzzle, QTE, chase, dodge/parry, subtitle, and controller options.
- Confirm that the control layout and visibility settings are comfortable before continuing.
Use the opening tutorial to learn movement and combat responses
The opening missions introduce jumping, web-swinging, web-zipping, wall movement, attacks, web-shooters, and contextual interactions. Follow each prompt once instead of skipping through it. Test the difference between a regular swing, a web zip, and a landing or perch interaction so that you can recognize the correct response when a chase combines them.
In combat, practice normal attacks followed by an aerial attack or launch, then stop attacking and watch the Spider-Sense indicator around an incoming enemy. A blue warning indicates that you should dodge. A yellow warning that turns red identifies an attack suited to a timed parry with L1; some especially dangerous attacks are designed around parrying rather than a normal dodge. If your timing is inconsistent, increase Dodge/Parry Timing in Accessibility instead of wasting healing items while learning.
Both Spider-Men use the same basic button layout, although their abilities and available skill trees differ. When the campaign changes characters, take a moment to test the new ability prompts rather than assuming every power has the same effect.
- You can swing, zip, land, and wall-move without stopping to search the controls.
- You can distinguish a blue dodge warning from a yellow-to-red parry warning.
- You know where the health, Focus, ability, gadget, and objective indicators appear.
Create a manual save and understand backup recovery
Once you have control of the character and the pause menu shows the save options, press Options and select Manual Save. Choose a slot that you can identify later and confirm that the save completes. Manual saving lets you create a deliberate return point, but it may not reproduce every instant of a mid-mission sequence, so use it before beginning a difficult mission, a long setpiece, or a risky change to your upgrade plan.
The game also creates automatic backup saves at key points. These are separate from your normal manual save. If a current slot becomes stuck or unusable, return to the title screen, select the save slot, choose Load Game, and look for entries marked Backup. Do not overwrite a potentially useful recovery file while trying to troubleshoot a problem. A manual save is a convenience and fallback; it does not replace the game’s ordinary autosaves or backup entries.
- A manual save is visible in the save list after you create it.
- You know which file is your active campaign slot.
- You know that backup saves are loaded from the title screen through Load Game.
Identify the map, mission tracker, and HUD before leaving the primary route
Open the map and Missions tabs when the story makes them available. Select the current main mission so the objective marker and directional guidance point toward the required destination. The map also displays optional activities, district information, and fast-travel information as those systems unlock.
During the opening stretch, follow the primary mission marker instead of attempting to clear every icon immediately. Several systems are introduced gradually, and early detours can send you toward activities before you have the resources or character abilities that make them efficient. If the route becomes unclear, reopen Missions and reselect the active story objective rather than traveling toward the nearest unrelated icon.
The HUD provides the information needed for ordinary play: current health, Focus, abilities, gadgets, and the objective. Learn to glance at these elements during combat and traversal instead of pausing after every encounter.
- The active story mission is selected in the Missions tab.
- You can distinguish a main-story marker from an optional activity.
- You know where to check district progress and current objective text.
Plan early skill points across Peter, Miles, and Shared
The Skills menu contains separate personal trees for Peter and Miles and a Shared tree that grants abilities to both. Skill Points are earned through progression, so inspect the connected upgrades before spending. For the first ten to fifteen points you receive, use a balanced plan: choose one or two useful Shared movement or combat skills, then purchase at least one practical combat improvement in each personal tree as those characters become available.
Favor abilities that improve aerial control, crowd management, Focus generation, or reliable damage. The exact best purchase depends on whether you prefer dodging, parrying, gadgets, or direct attacks, and bonus skill points from preorder or Digital Deluxe content can change the order. Do not spend points solely to reach a cosmetic goal. You will earn enough points over the campaign to unlock the full skill selection, so an early purchase should improve the next several encounters rather than permanently lock you out of another branch.
Keep both personal trees reasonably developed because the story assigns missions to a specific Spider-Man. A Miles-only build does not help during a Peter section, and the reverse is also true.
- You have inspected Peter’s, Miles’s, and the Shared skill trees.
- Both characters have a useful combat or ability upgrade when their trees are available.
- Your first points support movement, crowd control, Focus, or dependable damage rather than cosmetics alone.
Inspect Suit Tech, gadgets, and suits before spending materials
Open the Suit Tech, Gadgets, and Suits menus after the story unlocks them. Suit Tech is separate from costume appearance, so changing a suit does not remove the practical upgrades you have bought. Suit Tech improvements apply to both Peter and Miles and are organized around Health, Damage, Focus, and Traversal.
Check the material requirements for the first available upgrades before spending Tech Parts, Rare Tech Parts, or Tokens. Focus upgrades are useful if you frequently heal or activate abilities; Health and Damage are straightforward choices while you are still learning enemy patterns; Traversal is valuable if you want faster movement between objectives. Buy the first practical upgrade you can support without exhausting materials needed for the next connected purchase.
Gadgets and abilities are equipped separately from costumes. Keep at least one crowd-control option available once the game provides one, but do not assume that every gadget must be upgraded immediately. Cosmetic suit styles can wait until your core Health, Damage, Focus, or Traversal plan is established.
- You can locate Suit Tech separately from Suits and Gadgets.
- You understand that Suit Tech purchases benefit both Spider-Men.
- You have reserved enough materials for a practical upgrade instead of spending everything on appearance options.
Before you move on
- Difficulty and accessibility settings match your intended playstyle, and you know where to change them.
- A manual save exists after the save option becomes available, and you know how to create another one.
- You know how to load a backup save from the title screen if the active slot becomes unusable.
- The map, Missions, HUD, Skills, Suit Tech, Gadgets, and Suits menus have been opened or identified as soon as the story makes them available.
- Your early skill-point plan includes Peter, Miles, and Shared abilities, while your first materials are reserved for practical Suit Tech rather than cosmetic spending.
References for this chapter
- Marvel’s Spider-Man 2 arrives only on PS5 October 20, Collector’s & Digital Deluxe Editions detailed – PlayStation Blog
- What Accessibility options does Marvel's Spider-Man 2 feature?
- I am stuck or can't progress the game. – Insomniac
- Marvel's Spider-Man 2 – PlayStation Store
- Marvel’s Spider-Man 2: hands-on report – PlayStation.Blog
- Marvel's Spider-Man 2: Best Skills to Unlock First – Push Square
- Marvel's Spider-Man 2: Best Suit Tech Upgrades – Push Square
- Marvel’s Spider-Man 2 Tips: 7 Things I Wish I Knew Before Playing – Push Square
Prologue and the First Act: Opening Missions and Story Beats
Follow the main-story markers from Surface Tension through Good Men without stopping to clear the open world. The opening missions teach Sandman combat, Web Wings, gadgets, stealth, environmental puzzles, Miles’s Venom abilities, Peter’s Web Lines, and MJ’s stun gun. Suit Is Sandy is a short interlude that unlocks the Suits tab; Spider-Spy? similarly unlocks Spider-Bots and is completed by investigating a nearby signal. Several missions briefly wait for a phone call or story trigger after the preceding objective, so swing around the marked area rather than assuming the campaign is stalled. Prowler Stashes, FNSM App Requests, Hunter activities, EMF Experiments, The Flame, crimes, Photo Ops, and other collectibles are optional and can be completed later.
1. Complete Surface Tension, One Thing at a Time, and Show Me New York
Begin Surface Tension at Brooklyn Visions and follow the marked route toward the Financial District. Use the guided traversal prompts to gain height, redirect swings, and maintain momentum. When Sandman appears, dodge his debris, throw highlighted objects back at him, and perform the prompted Web Strikes whenever the mission exposes an opening. In the damaged building, rescue the civilian and clear each Sand Minion group rather than running past ranged attackers. Peter’s section introduces Spider Barrage.
Control then switches to Miles. Perform the prompted Web Strike, use Venom Punch against the Sand Minions, react to ranged attacks when Spider-Sense warns you, and use Zip to Point on the marked rubble. After the roof opens, follow Sandman to the water tank. When Web Wings become available, stay on the guided route through the debris and finish the encounter with the prompted Web Strike. The Kraven introduction and the completed mission entry in the Missions tab confirm Surface Tension is finished.
One Thing at a Time starts in the Financial District. Aid the marked civilians, clear the obstruction, and complete the rooftop drone flight through its rings. Spend the first skill point on the option presented by the tutorial, Spider Whiplash, then answer the nearby Break In marker. Craft Upshot when instructed and use it during the follow-up wave. As Miles, clear the sand mound with the water pipe, complete the second drone flight, and finish the Armoured Truck crime. Restore the sprinklers in the high-rise, investigate the crystal, defeat the Sand Minions, and break the crystal to obtain the Marko’s Memory. Finish by freeing the limo and escorting J. Jonah Jameson to the hospital.
Show Me New York is played as Peter. Follow the marker to Little Odessa, equip the camera with the Touch Pad, and photograph the shield-shaped frisbee activity when it is in focus. Once Robbie accepts the picture, the mission completes. Continue swinging until Peter comments about changing his suit; this makes Suit Is Sandy the next objective. If a fight or tutorial fails, use the checkpoint reload and repeat the marked encounter rather than leaving the mission area.
- Surface Tension is marked complete after the final Sandman Web Strike and Kraven scene.
- One Thing at a Time includes the rooftop tutorials, Break In, Upshot, Armoured Truck, high-rise crystal, Marko’s Memory, limo rescue, and hospital scene.
- Show Me New York is complete after the focused Little Odessa photograph.
- Suit Is Sandy appears as the next story objective.
2. Retrieve the spare suit in Suit Is Sandy, then tidy the Astoria house in Roll Like We Used To
Suit Is Sandy is a short Peter interlude after Show Me New York. Travel north across the river to Downtown Queens and land on the marked office building. Interact with the rucksack to retrieve the spare suit. The Suits tab opens, allowing you to spend City Tokens on Advanced Suit 2.0 styles. Exiting the suit screen completes the interlude and leads to Roll Like We Used To.
Roll Like We Used To begins when Peter receives MJ’s call and travels to the southeastern part of Astoria. After the cutscene, inspect the papers in front of the calendar and the boxes on the nearby table. Put the rotten fruit from the fruit bowl into the bin by the back door, then put the takeaway box from the kitchen table into the same bin. Speak with MJ in the back room and examine the photo albums.
The photograph sends Peter upstairs. In the bedroom at the end of the hallway, interact with the pinboard beside the computer desk to reveal the face-shaped hole shown in the picture. After the flashback, return downstairs and follow Harry during the bicycle ride to Midtown High School. The mission then shifts to a younger Peter. Push the cleaning cart toward the American-football-player standee, follow Harry, and evade the security guard by refilling Web-Shooters and moving through the ceiling and wall vents. Use the whiteboards for cover, wait for the guard to move away, then reach the partly open door and crawl through the next vent.
A failed stealth section returns you to the current indoor checkpoint. Recheck the guard’s patrol direction and use the ceiling or vent route instead of crossing the hallway in view. After the Midtown flashback and the return to the present, the next main marker is Not On My Watch.
- Retrieve the spare suit from the Downtown Queens rucksack.
- Confirm that the Suits tab opens and Suit Is Sandy completes.
- Inspect the Astoria house items, find the face-shaped hole upstairs, and finish the flashback.
- Reach Midtown High School and complete the young Peter stealth route.
- Not On My Watch becomes the next main-story marker.
3. Reach the Raft and survive the prison transfer in Not On My Watch
Not On My Watch is primarily Miles’s mission and begins after Peter and Harry’s school sequence. Travel to the Raft in Astoria using Web Wings and updrafts. The transfer involves Scorpion and Martin Li, but Kraven’s forces attack before the handoff is complete. The mission changes to Peter during the opening battle; defeat the enemies on the boat until the game switches back to Miles.
As Miles, follow the survivor marker through the damaged Raft. Interact with the locked cell door, then backtrack to open the electrical access hatch. Scan with R3 to reveal the fuse box and reach it through the maintenance route. Use Venom Punch as instructed, then swim away from the electrified section. Return to the cell by Zip to Pointing across safe objects protruding from the water.
After Scorpion is released, follow the hallucination route with Zip to Perch. When Martin Li is taken away, use Chain Lightning against the enemies blocking the pursuit. Return to the surface, clear the attackers, and follow the prompts to rescue civilians on the smaller ship. Web the propeller when instructed, then use Chain Lightning on it to finish the escape sequence.
If you fail during the water, hallucination, civilian-rescue, or propeller sections, restart from the current checkpoint and follow the objective marker rather than swimming into unexplored electrified areas. The closing cutscene explains ability swapping in the Skills menu. Amends becomes available after the Raft sequence.
- Reach the Raft as Miles and complete the opening Web Wings route.
- Protect the boat during the Kraven attack as Peter.
- Rescue survivors, open the locked cell route, and use Venom Punch through the fuse-box objective.
- Survive the hallucination section, defeat the escape enemies, rescue civilians, and web the propeller.
- Amends is the next mission.
4. Complete Amends and unlock Suit Tech through the Prowler Stash
Amends is played as Miles. After the Raft aftermath, travel to the northwest corner of Harlem for Uncle Aaron’s meeting. Follow the new marker to Upper West Side. Scan the marked area for Prowler Code, align the L2 and R2 controls as prompted, and pull the gate into position. Repeat the scan and gate-pull process from the higher position to open the next section.
Enter the room and collect the Prowler Stash. The reward grants Rare Tech Parts and unlocks the Suit Tech tab. The tutorial directs you to upgrade Health; after that, Damage, Focus, and Traversal upgrades become available. Exit the pause menu to complete Amends. The Prowler Stash also becomes an available optional activity type on the map.
The puzzle is forgiving, but if a pull fails, rescan the area and reposition until both trigger indicators align. A checkpoint reload restores the current Prowler Code objective. Healing the World becomes available after the mission, although its phone call may not arrive immediately.
- Meet Uncle Aaron in Harlem.
- Scan for Prowler Code in Upper West Side and pull both gates into place.
- Collect the Prowler Stash.
- Open Suit Tech and complete the tutorial upgrade.
- Healing the World becomes the next story objective after its call triggers.
5. Visit Harry’s lab in Healing the World, then track the Hunters in Bad Guys On the Block
Healing the World is played as Peter and begins when Harry calls. Travel to the Emily-May Foundation in Greenwich and enter through the marked route. Follow Harry’s guided tour. When Dr. Young gives Peter the controller, destroy the red-marked Beewolves; keep moving around the area and shoot all 20 targets shown by the objective. Continue through the laboratory and interact with the blue-and-white information stations if the tour directs you to them. Harry’s yellow marker upstairs ends the tour and completes the mission.
The game may leave a short open-world interval between Amends and Healing the World. This is not a progression error. You may wait for Harry’s call by swinging around the city, but optional Brooklyn Visions, The Flame, crimes, and collectibles are not required.
Bad Guys On the Block begins as Peter after Miles reports a trail to the Williamsburg Bridge. Investigate the hidden area beneath the bridge, defeat the enemies, and inspect the computer at the back. Chase the activated drone, survive the next encounter, and examine the Talon Drone. When it carries Peter upward and is destroyed, deploy Web Wings to glide back toward the location data in Chinatown.
At the Chinatown base, use R3 to scan enemy states. Perch Takedowns and Web Strike Takedowns are safe only when the game identifies the target as Safe; create distractions or remove dangerous enemies before striking. Inspect the security terminal, enter through the vent, and use the new Web Lines to cross gaps and set up takedowns. In the research lab, examine the evidence and inspect the chest armor to reveal the hidden passage. Clear the large room, prioritize the Talon Drone, and use the central terminal. Robotic dogs then attack from below; defeat them and the incoming waves to trigger the closing cutscene.
If stealth breaks, do not restart automatically. Move to high ground, use Web Lines and gadgets, and clear the alerted enemies. A failed encounter reloads at the latest combat or stealth checkpoint. Make Your Own Choices follows the story trigger.
- Reach the Emily-May Foundation and destroy the required Beewolves.
- Finish Harry’s lab tour and the mission cutscene.
- Investigate the Williamsburg Bridge hideout and chase the drone.
- Glide to Chinatown, complete the stealth and Web Line sections, inspect the lab, and defeat the robotic dogs.
- Make Your Own Choices becomes available.
6. Follow Miles’s investigation in Make Your Own Choices, then clear Mysterio’s attraction in Master Illusionist
Make Your Own Choices is exclusive to Miles and begins after a short delay or MJ’s call. Travel to the Midtown rooftop marker and scan the sunbed’s scratch marks. Complete the corrupted-atom puzzle by destroying purple atoms while preserving green ones. In the first displayed puzzle, destroy the central purple atom on the left and the bottom-middle purple atom on the right. When neutral atoms appear, destroy neutral atoms attached to red atoms; in the final puzzle, destroy the red atoms.
Scan the blue floor blips to locate the stash box, then scan the arrows and recreate the scene digitally. After the explosion, travel to the next rooftop and scan the four electrical volts and the roof cable. Create a Web Line from the generator to the stash box, routing the current through the highlighted electrical points. Open the box, then pursue the Hunter gunship toward Felicia’s suspected location. Clear the surrounding Hunters either through Camouflage and distractions or direct combat. The portal sequence and Felicia’s departure complete the mission.
Master Illusionist immediately sends Miles to Coney Island in southeastern Downtown Brooklyn after Ganke reports Mysterio’s attraction. Enter through the roof and follow the corridor to the terminal. In the music simulation, match the displayed beat prompts with the face buttons and thumbsticks. When Martin Li appears, use the newly introduced Thunder Burst and defeat the enemy waves.
When the objective changes to escape, return to the DJ mixer and complete the song sequence. The resulting exit lets Miles swing out of the simulation. If the rhythm sequence or Hunter fight fails, the checkpoint returns you to the current puzzle, combat wave, or gunship approach. A Second Chance begins as soon as Peter takes over at Coney Island, without a normal return to free roam.
- Scan the rooftop evidence and complete all three atom puzzles.
- Open the powered stash box and follow the Hunter gunship.
- Clear the enemies around Felicia’s location and finish the portal scene.
- At Coney Island, reach Mysterio’s terminal, complete the rhythm sequence, use Thunder Burst, and escape through the mixer exit.
- A Second Chance begins with Peter at Coney Island.
7. Finish the Coney Island setpiece, research Harry’s suit, and unlock Spider-Bots
A Second Chance is played as Peter. At Coney Island, play the Hydro Bench minigame by keeping the water stream on the target until it is completed. Ride the Speed Demon roller coaster when the main marker directs you there. Play Muscle Up, then ride the Big Wheel with MJ. The blue-and-white attractions are optional; they are not required for campaign progression.
Hunters attack during the Big Wheel sequence. Defeat the attackers, move toward the racetrack, and clear the additional groups arriving by truck. When the coaster begins to collapse, follow the on-screen prompts and complete the quick-time actions to save the riders. The mission ends after the rescue cutscene. If a prompt is missed, use the checkpoint and wait for each input rather than pressing through the sequence early.
Science Buddy follows at the Emily-May Foundation in east Greenwich. Control returns to Peter. Enter from the roof, interact with the objective, and complete the overnight tests on Harry’s suit. This mission has no extended combat section; follow the lab prompts until the next-morning scene with Norman Osborn.
Spider-Spy? begins after Peter leaves the foundation. Follow the nearby signal southeast from the starting position and land on the marked building. Interact with the Spider-Bot to unlock Spider-Bots as an open-world collectible category. The interaction itself completes the mission. If the signal seems absent, use R3 to reveal the nearby objective and follow the short-distance marker rather than searching across the city. Hunt to Live, Live to Hunt follows after the story call.
- Complete Hydro Bench, Speed Demon, Muscle Up, and Big Wheel objectives.
- Defeat the Hunters and rescue the riders during the collapsing coaster sequence.
- Enter the Emily-May Foundation as Peter and finish the suit experiments.
- Locate and interact with the nearby Spider-Bot.
- Hunt to Live, Live to Hunt becomes the next main-story mission.
8. Rescue Tombstone, complete Funky, and finish Good Men
Hunt to Live, Live to Hunt is played as Peter and begins at the Steele Foundry in eastern Williamsburg after Black Cat’s call. Clear the rooftop Hunters using stealth or direct combat, then enter through the hatch at the top. Descend the shaft, clear the interior group, and join Harry when he appears. During the flamethrower-truck fight, stay to the arena sides, defeat the Hunters first, then reach the balcony behind the truck and pull the lava vat onto it.
Fight through the foundry, escape the conveyor belt, and clear the next wave before reaching the steel door. Defeat the guards around Tombstone, activate the cooling valve, and survive the interruption. When directed to free Tombstone, pull down the cage’s support structures. Ranged Hunters can interrupt the pulls, so move between cover and eliminate them before returning to the supports. Follow Tombstone during the collapsing-building escape, obeying the sprint, swing, and quick-time prompts. A failed escape or support section reloads at the latest checkpoint.
Funky switches to Miles after the foundry. Visit Rio’s office in east Harlem, then go to the museum in Harlem. Scan the exterior wiring and locate the control panel. Follow the orange wiring, deploy a Spider-Bot through the opening, and repair the first relay with Web. Use Jump Jets to reach the open vent and repair the next relay. For the stealth section, scan for distraction objects: use the drums, flush a toilet in the bathroom, then reach the relay behind the music-hall sign. In the final room, use the guitars, drum sets, and grand piano to separate guards before repairing the last relay.
Return to direct combat and defeat the gang. When the truck escapes, use Mega Venom Blast as instructed, pursue a truck through the streets, dodge incoming bullets, and launch into it to defeat the occupants. If you miss the truck entry, continue the chase until the objective resets or reload the checkpoint. Good Men begins automatically with Peter afterward.
For Good Men, travel to the Emily-May Foundation in Greenwich and enter through the roof. The mission shifts to MJ at the abandoned zoo. Leave the truck, complete the stun-gun tutorial, enter through the open window on the left, perform the first stealth takedown, and examine the computer and notes. Squeeze through the next gap, distract the guard with a rock, climb to the roof, and takedown the guard after the floor breaks.
In the elephant-statue room, separate the two guards with a distraction and take them down one at a time. Examine Vulture’s wings on the table and answer the ringing phone. Dr. Connors is then found caged outside. MJ must obtain the cage code and the key for his shackles. Follow the two R3-marked objectives: one is near the building with the lion statue, and the other is in a nearby house.
For the code route, squeeze through the metal fence, enter the camp, and inspect the note by the computer. After the ambush, examine the second note for radio call signs, the whiteboard for the correct call sign, and the book beside the radio. Answer the radio when the evidence identifies the proper response. For the other objective, follow the marker to the house and inspect the required evidence to locate the key. If guards detect MJ, use the stun gun, reposition behind cover, and resume stealth from the checkpoint rather than trying to cross the camp in the open.
Return to the cage with both requirements and free Connors. The mission then shifts back to Peter for the Hunter confrontation. Use the prompted combat actions and clear the attackers until the story cutscene grants Peter the symbiote suit. Good Men is complete when the cutscene ends and The Flames Have Been Lit appears as the next main-story marker.
- In Hunt to Live, Live to Hunt, clear Steele Foundry, disable the flamethrower truck, free Tombstone, pull the cage supports, and escape.
- In Funky, repair every museum relay, clear the gang, learn Mega Venom Blast, and stop a fleeing truck.
- In Good Men, complete MJ’s zoo stealth route, investigate Vulture’s wings, obtain the cage code and shackles key, and rescue Connors.
- Peter’s concluding Hunter sequence and the symbiote-suit cutscene have played.
- The Flames Have Been Lit is visible as the next main-story objective.
Before you move on
- Surface Tension, One Thing at a Time, and Show Me New York are marked complete.
- Suit Is Sandy has unlocked the Suits tab and Roll Like We Used To has completed its Astoria and Midtown High School sequences.
- Not On My Watch has completed the Raft transfer, survivor rescue, hallucination section, civilian rescue, and propeller escape.
- Amends has unlocked Suit Tech through the Prowler Stash.
- Healing the World has completed Harry’s lab tour and the Beewolf exercise.
- Bad Guys On the Block, Make Your Own Choices, Master Illusionist, A Second Chance, Science Buddy, and Spider-Spy? are marked complete.
- Hunt to Live, Live to Hunt has rescued Tombstone from Steele Foundry.
- Funky has completed the museum relay repairs, Mega Venom Blast tutorial, and fleeing-truck chase.
- Good Men has rescued Dr. Connors, completed the final Peter combat sequence, and played the symbiote-suit cutscene.
- The main-story marker for The Flames Have Been Lit is visible, confirming the chapter’s assigned endpoint.
City Navigation and Side Activity Routing
Use the map to keep story travel efficient while building district progress at a controlled pace. Fast travel is earned separately in each district: raise that district’s progress to Level 2, then place the map cursor in the unlocked area and hold Triangle. For optional 100% completion, work district by district through the counters shown on the map. During the campaign, stop for nearby activities only when their displayed rewards support an upgrade or when the activity is directly on your route. Many activities become available through story progress, so a locked category is a reason to continue the campaign, not to search the district indefinitely.
Track the main mission before leaving your current location
Open the Map from the pause menu and select the active main mission. Check both the mission marker and the district name before you start moving. This gives you a fixed destination and prevents a nearby side-activity marker from becoming your accidental route.
If the objective is in another district, travel directly to it unless a nearby activity supplies a resource you immediately need. Spider-Man 2 is designed around rapid movement through the city, so a long chain of unrelated stops can take more time than the upgrade is worth. Keep the main mission selected while traveling and return to that marker after any optional activity.
- The current main mission is tracked.
- The destination district is identified.
- Optional stops are limited to the route or a clear upgrade need.
Choose a short activity loop near the story route
Inspect the map around the main mission marker and choose no more than two or three nearby activities. Useful options can include Prowler Stashes, Photo Ops, FNSM Requests, and other activities listed in the district panel. Select each icon or activity entry and read the displayed reward before committing; activity names alone do not tell you whether the reward is Tech Parts, Rare Tech Parts, City Tokens, or Hero Tokens.
Complete the closest suitable activity first, then choose the next one that keeps you near the story destination. After the short loop, return to the main marker. If the available rewards do not help your next upgrade, skip the detour and continue the campaign. This is especially useful during linked story missions, when wandering far from the objective can interrupt your pacing.
- The reward preview was checked.
- The selected activities are close to the story route.
- The loop ends near the active main mission.
Unlock fast travel independently in each district
Open a district’s progress panel on the Map and watch its progress meter. The district’s Level 2 marker is the relevant fast-travel threshold. Raise the meter by completing the activities and collectibles that count toward that district’s progress; you do not need to finish every category before fast travel becomes available.
When the district reaches Level 2, the game reveals the remaining map area there and enables fast travel for that district. This unlock is local to the district, so progressing one area does not automatically unlock fast travel everywhere else. Repeat the process only in districts you expect to revisit often during the campaign or cleanup.
To use it, place the map cursor inside an unlocked district and hold Triangle when the fast-travel prompt appears. The cursor may shift slightly to a usable street position. That is normal; the destination remains within the selected area. Use fast travel for long crossings, but keep normal swinging and Web Wings travel for nearby activities so you can collect items and respond to Crimes along the way.
- The district progress meter has reached Level 2.
- The district map has been revealed.
- The hold-Triangle fast-travel prompt appears in that district.
Use the district panel for systematic completion
For optional 100% completion, select one district and use its Map progress panel as your checklist. Marvel’s Spider-Man 2 has 14 districts and 160 tracked collectible or activity locations in the original PS5 release. That total is divided among categories such as Marko’s Memories, Photo Ops, FNSM Requests, Prowler Stashes, Hunter activities, EMF Experiments, Mysteriums, Cultural Museum missions, Unidentified Targets, Symbiote Nests, Brooklyn Visions missions, and Spider-Bots.
Do not interpret the total as 160 identical objects placed on the map. Some entries are missions or combat activities, and some become available only after story progress. Complete the categories currently shown, then recheck the panel before leaving. A category that is locked should be deferred until the story or a prerequisite activity makes it available.
Spider-Bots require special handling: they count toward district completion, but they are the collectible type not marked with normal locations on the main map. If the district panel is incomplete after every visible activity is finished, consult a Spider-Bot-specific checklist rather than repeatedly searching icons that cannot display their positions.
- One district is selected as the current completion target.
- The map panel is checked after each activity.
- Locked categories are deferred.
- Spider-Bots are tracked separately when the district total remains incomplete.
Route activities around the material you actually need
Before farming optional content, open the Suit Tech, Gadget, and suit menus and identify the next useful upgrade. Then choose nearby map activities whose reward previews provide the required materials. Tech Parts and Rare Tech Parts support equipment upgrades, while City Tokens and Hero Tokens are tied to different upgrade and unlock categories. Selecting activities by reward prevents a long trip for a resource that does not advance your current purchase.
Crimes and nearby open-world activities can be worthwhile when they are already on your route, but do not abandon a distant story marker just to chase a low-value reward. Rare Tech Parts and named tokens are best collected when their associated activity is available and conveniently placed. If an activity requires later story progress, continue the campaign and return after it appears rather than repeatedly checking an empty section of the map.
- The next upgrade and required resources are known.
- The chosen activities display matching rewards.
- Story progress is not being delayed for an unnecessary detour.
Finish the campaign route first, then clean up districts
The most reliable campaign route is story-first with selective nearby activities. New activity types and mission chains unlock as the story advances, so attempting to finish every district immediately can create repeated trips. Continue the main missions when the map offers no nearby reward worth taking, and return to earlier districts when new categories become available.
After the story opens the remaining activities, use fast travel to create a cleanup route. Select one district, complete every available category shown in its progress panel, and verify that the counter changes before moving on. If a district is short of completion, check for a locked story-dependent category or an unmarked Spider-Bot before assuming that a visible activity failed to register.
For the final cleanup, compare both the district counters and the overall completion display. A district is not complete merely because its visible icons are gone; the panel must show all categories finished. This method minimizes backtracking and gives you a clear recovery path whenever a collectible or activity is not yet available.
- The story has unlocked the activities needed for the intended cleanup.
- Districts are being cleared one at a time.
- The district and category counters update before departure.
- Unmarked Spider-Bots and locked categories have been checked if progress is incomplete.
Before you move on
- The active story mission remains tracked after every optional stop.
- Every district intended for rapid travel has reached Level 2 and shows the hold-Triangle fast-travel prompt.
- For optional 100% completion, all 14 district panels show their categories complete.
- The overall tracker confirms the 160 tracked collectible or activity locations are complete.
- If a district remains incomplete, locked story categories and unmarked Spider-Bots have been checked before revisiting ordinary map icons.
References for this chapter
Core Combat and Stealth Tactics
Marvel’s Spider-Man 2 expects you to alternate between parries, dodges, movement, gadgets and character abilities rather than repeat one attack string. Watch the Spider-Sense warning: ordinary attacks can be avoided with Circle, while red warnings identify attacks that must be parried with L1. Use Web Zip and vertical movement to leave the center of a crowded fight, reach ranged enemies or create a safer angle. In stealth sections, begin from above, use Web Lines where the environment permits them, and remove isolated targets before dropping into open combat. Purchase and test a crowd-control gadget such as Web Grabber when it becomes available and affordable; it groups enemies so you can follow with an area ability, environmental attack or finisher. Peter and Miles have individual skill trees as well as a shared tree, and their abilities differ, so practice with each hero during ordinary crimes before relying on them in story encounters. Heavy enemies are safest when their support is removed first. If stealth breaks, escape upward, control the pursuing group and resume the fight from the edge of the arena instead of standing in the middle.
1. Read the Spider-Sense before committing to an attack
At the start of every encounter, watch the warning around Spider-Man before holding Square for a long melee string. For an attack that can be avoided normally, press Circle to dodge, jump away or use Web Zip to leave the danger area. When the warning turns red, treat the strike as a parry check and tap L1 as the blow is about to connect. A successful parry interrupts the attacker and leaves it vulnerable, giving you time to counter or change targets.
Practice this timing against ordinary melee enemies before attempting it against elites or bosses. Do not repeatedly press L1 in the hope of catching the timing; a premature parry can fail and leave you exposed. Against several enemies, parry the nearest red-indicator attack, then immediately move away from the group rather than remaining in the center.
- Use Circle for attacks that can be dodged.
- Use L1 for red-indicator attacks that require a parry.
- After a successful parry, counter briefly or reposition before the next enemy attacks.
2. Use Web Zip and aerial movement to control distance
Web Zip is a positioning tool as much as an attack starter. Use the traversal input to zip toward a nearby enemy, wall or point in the environment, then begin a short melee or aerial sequence. If a ranged enemy is firing from a ledge, reach that enemy first or break line of sight behind a structure. This prevents gunfire from interrupting every ground attack.
When several melee enemies surround you, launch or lift one target, continue the attack in the air, and return to the ground only after checking the arena. If the group closes in, Web Zip toward the perimeter, circle the fight and choose an isolated target. This is safer than forcing a full combo while multiple enemies are within striking range.
- Use Web Zip to reach ranged attackers or escape a surrounded position.
- Prefer aerial attacks when several melee enemies are grouped below.
- Break line of sight before healing or preparing another gadget.
3. Add crowd control before difficult story arenas
Open the Gadgets menu whenever a new gadget or upgrade becomes available. Web Grabber is a useful general-purpose crowd-control option, but it is not automatically available from the opening moments of every save: buy it when the game permits the purchase and you have the required resources, unless an applicable preorder bonus has unlocked it early. Test it in a street crime or another low-risk encounter before taking it into a major story fight.
Use the gadget to gather enemies into one location, then follow with an area ability, an environmental object, a web attack or a finisher. The purpose is to create a controlled opening, not merely to deal a small amount of damage. Keep one crowd-control option available for reinforcements instead of spending every gadget charge during the first wave.
- Confirm the gadget is actually unlocked before planning around it.
- Group enemies before using a powerful area ability.
- Reserve one control option for a later wave or a heavy enemy.
4. Isolate heavy enemies before fighting them directly
Do not attack a heavy enemy in the middle of an untouched group. First remove or disable ranged attackers, aerial units and nearby ordinary enemies. Web Zip, aerial attacks and quick gadgets let you reach support targets without walking through the heavy enemy’s attack range.
When the heavy enemy displays a red warning, parry if the attack is within reach. For other attacks, dodge or move away rather than assuming every strike should be parried. Use nearby environmental objects when the arena makes them available, and use crowd control to interrupt pursuit or create a stagger. Spend a finisher or character ability after the heavy is isolated or briefly disabled, not while several enemies can interrupt you.
- Clear ranged and support enemies first.
- Parry red-indicator attacks and dodge other dangerous swings.
- Use environmental objects, gadgets or abilities to create a safe opening.
5. Start stealth encounters from a high position
When stealth is allowed, climb to a roof, ceiling, wall or other elevated perch and survey the entire encounter. Identify guards who cover the central route, enemies near alarms or surveillance equipment, and isolated targets that can be removed without alerting others. Use the game’s safety indication before committing to a takedown; if the target is being watched, wait or change position.
Create a Web Line where the environment provides suitable anchor points. Use it to move across the arena and approach enemies from an unexpected angle. A Web Line can also support a dual takedown when two targets are positioned appropriately, but do not force this option if the line exposes you to another guard. After each takedown, relocate and reassess instead of repeating the same attack from the same perch.
- Survey enemy positions before dropping into the arena.
- Use high perches and Web Lines to separate targets.
- Confirm that a takedown is safe before committing.
6. Recover when stealth fails
If an enemy discovers you and the alert spreads, stop trying to force stealth through an active firefight. Jump upward, Web Zip to a wall or roof edge, and create distance. From that safer position, use a gadget or ability to group, disable or stagger pursuers, then deal with the nearest immediate threat. Spider-Man’s vertical mobility is most useful when you use it to reset the angle of the fight.
If the mission later returns to stealth, wait until the search state has settled before moving toward the objective. If combat remains mandatory, fight from the arena’s edge and keep moving. Use a finisher for health when necessary, but do not spend every gadget at once; reserve at least one option for reinforcements or a heavy enemy.
- Leave the center when stealth breaks.
- Use height and Web Zip to separate pursuers.
- Resume stealth only after the search state has ended.
7. Manage Focus, abilities and the three skill trees
Treat Focus as a resource for solving the encounter. Use a finisher to remove a dangerous enemy or recover health when needed, and spend character abilities when a group is clustered or an enemy is staggered. Do not spend every ability during the opening wave if the mission is likely to introduce reinforcements.
Peter and Miles have separate individual skill trees, and the game also provides a shared skill tree. Their combat options are not identical: Peter’s later powers emphasize Spider-Arms and Symbiote abilities, while Miles uses bioelectric abilities and invisibility-related tools. Practice both characters in ordinary encounters, and follow any story prompt that temporarily restricts the available loadout. When a character-specific mission begins, rely on that hero’s current abilities rather than assuming the other Spider-Man’s tools are available.
- Keep one gadget or ability for a later wave.
- Use finishers for survival or dangerous targets, not only routine damage.
- Spend skill points across the individual and shared trees according to the abilities you actually use.
Before you move on
- You can distinguish an ordinary dodge warning from a red parry warning without stopping movement.
- You have unlocked and successfully used a crowd-control gadget in a live encounter, or confirmed which story or resource requirement is blocking it.
- You can reach a ranged enemy, escape a surrounded position and re-enter combat using Web Zip or vertical movement.
- You can complete a safe stealth takedown from a perch or Web Line and relocate before attacking again.
- You can isolate a heavy enemy by removing support targets and using parries, gadgets or environmental objects to create openings.
- When stealth fails, you can escape upward, control the group and finish the encounter without remaining trapped in the center.
References for this chapter
Traversal: Advanced Web-Swinging and Parkour
Build reliable speed by combining a dive, swing, Swing Jump, Web Zip, Point Launch, and Web Wings instead of holding one movement input across the whole city. Practice in an open area before a timed mission, then use rooftops, walls, poles, wind tunnels, and visible skyline features as recovery points. Web Wings are most useful across parks, water, rail yards, and low-rise districts; return to swinging when taller buildings provide attachment points again. During chases, safe continuous movement is more valuable than air tricks. If you miss a line, recover onto a wall or roof rather than continuing at street level. Accessibility options such as Steering Assistance, Camera Follow, and Chase Assist can make practice and timed pursuits more forgiving without changing the underlying traversal sequence.
Set up a safe practice route and confirm the traversal inputs
Choose an open section of Manhattan, Brooklyn, or Queens with several medium-height buildings, a clear street, and at least one rooftop or wall that you can use as a recovery point. A quiet area outside an active mission is preferable because you can repeat the same route without enemy pressure or an objective timer. In the Accessibility menu, adjust Steering Assistance under Swing Assists if the character resists your steering too much or if you want more help maintaining a swing line. Camera Follow and Swing Camera Motion can also reduce the amount of manual camera correction needed during fast movement.
On the default PS5 layout, hold R2 in the air to swing and press Cross while swinging for a Swing Jump. Press Cross while airborne to perform a Web Zip toward the direction you are facing or an available point. Hold L2 and R2 to aim and Zip to Point; press Cross just before reaching the point to perform a Point Launch. Press Triangle while airborne to deploy Web Wings. Press L3 to dive when airborne or to perch and dive near a suitable ledge. These moves are separate: Web Zip is a quick airborne correction, while Point Launch is the acceleration move that follows a Zip to Point.
- Perform one swing, one Swing Jump, one airborne Web Zip, and one Point Launch.
- Check Swing/Parkour Mode, Air Trick Mode, and Web Wings Mode in Accessibility if you prefer toggles instead of holding buttons.
- Keep the camera aimed toward the next roof, wall, pole, or open landing area before starting each transition.
Use the dive, swing, and launch cycle to cross several blocks
Begin from a high rooftop and press L3 to dive. As you descend, hold R2 and attach a swing line before reaching street level. The purpose of the dive is to trade height for forward speed and create a long, low arc; do not wait until Spider-Man is almost at the road before trying to swing. Aim through the gap between buildings rather than directly at the building supporting the web line.
As the swing moves forward, press Cross for a Swing Jump. If the next building is too far away or your line is drifting sideways, use an airborne Web Zip to correct the route. If a roof edge, pole, or other valid point is directly ahead, hold L2 and R2, then press Cross near the end of the zip to Point Launch. Repeat the sequence across several blocks. The goal is not to perform every move on every swing; it is to recognize which move solves the current problem. Swing for sustained movement, Web Zip for correction, and Point Launch when a valid target can convert the approach into a burst of forward speed.
- Dive from height and attach the swing before losing all usable altitude.
- Use Web Zip to fix position instead of forcing a badly angled swing.
- Use Point Launch only after Zip to Point and only when the target is close enough for the launch prompt.
Cross open terrain with Web Wings and wind tunnels
Web Wings are most useful where buildings are too low or too far apart for comfortable swinging. After a jump, Swing Jump, or Point Launch, press Triangle while airborne to deploy them. Aim across parks, water, rail yards, and suburban blocks toward a visible elevated destination. Keep the destination in view rather than gliding toward the ground; Web Wings cover distance efficiently, but they do not remove the need to plan the next attachment point.
When you see a wind tunnel, enter it with enough height and a shallow approach. The tunnel provides a major boost of speed and height, making it valuable for long crossings. PlayStation describes these tunnels as traversal routes that boost both height and speed. As you approach taller buildings, leave Web Wings early enough to swing, Web Zip, or wall-run. A dependable long-distance pattern is Point Launch, Web Wings across the open gap, dive near the far side, then swing between the next buildings.
- Use Web Wings over low-rise or open terrain instead of repeated low swings.
- Enter wind tunnels with a visible route through them and enough altitude to reach the opening.
- Return to swinging before the destination if you need height for the following objective.
Handle corners, chase targets, and failed movement safely
Timed chases reward uninterrupted forward progress more than elaborate air tricks. Keep the target and the next major turn visible, and choose a roof, wall, or skyline feature before the current swing ends. Use Web Zip for sideways correction, Point Launch for acceleration from a reachable point, and Web Wings when the route crosses an open area. If the target turns around a building, gain height rather than trying to cut the corner at street level. A wall-run, Web Zip, or Web Wings transition is safer than colliding with traffic or a low obstacle.
If you want assistance during a chase, enable Chase Assist in the Gameplay accessibility options. It lowers the target’s top speed, automatically attaches to the target when within range, and allows R3 to turn the camera toward that target. Without Chase Assist, R3 remains the normal Show Objective or Scan Environment input, so do not rely on it as a universal target-camera command. If you miss a turn, aim for the nearest wall or roof, use a wall-run or Web Zip to regain height, and continue from there. Landing in the street is not automatically a failure, but it usually costs more time than recovering vertically.
- Stay above traffic and obstacles whenever the route allows.
- Use one correction at a time: Web Zip for position, Point Launch for acceleration, and Web Wings for open gaps.
- Enable Chase Assist before a difficult chase if target speed or camera tracking is causing repeated failures.
Create a landmark plan before a difficult mission
Do not try to memorize the entire city. Before a timed traversal section, identify one high landmark near the starting point, one landmark beside the destination, and one open roof or wall that can save a failed swing. Useful references include distinctive towers, bridges, water towers, large signs, wind turbines, and the edges of parks or waterways. These are navigation aids chosen by you, not mandatory story waypoints.
Make one short loop around the mission area before activating the objective if the game leaves you free to move. Check whether the area has enough building height for swinging and locate at least one Web Wings route across low-rise terrain. During a combat transition, jump away from the crowd, Zip to a visible point, wall-run upward, and deploy Web Wings only after clearing immediate hazards. Avoid blind dives when a timer starts; losing height without a visible recovery point can leave you with no clean swing line.
- Choose one starting landmark, one destination landmark, and one recovery roof or wall.
- Practice the nearby route before starting a chase when the mission permits free movement.
- Use vertical escape routes during battlefield transitions instead of remaining at street level.
Before you move on
- You can cross several city blocks using a dive, swing, Swing Jump, Web Zip, and Point Launch without landing in the street.
- You can launch from a high rooftop, deploy Web Wings across an open gap, pass through a wind tunnel, and reconnect to swinging near the destination.
- You can recover from a missed swing by reaching a wall, roof, or Zip to Point target instead of restarting the route.
- You know the difference between Web Zip, Zip to Point, and Point Launch and can select the appropriate move under pressure.
- You have selected repeatable skyline landmarks and at least one vertical recovery route near the next major story mission area.
References for this chapter
- What Accessibility options does Marvel's Spider-Man 2 feature?
- Controls & moves list - Marvel's Spider-Man 2 – Shacknews
- Marvel's Spider-Man 2 PS5 Official Game Page
- Marvel’s Spider-Man 2: hands-on report – PlayStation.Blog
- Marvel's Spider-Man 2 Launches Worldwide Only on PlayStation 5 – Sony Interactive Entertainment
Suit Tech and Skill Trees: What to Buy First
Marvel’s Spider-Man 2 has three Skill trees and four shared Suit Tech categories. After One Thing at a Time, you can review and spend Skill Points in the Peter, Miles, and Shared trees. Suit Tech is not available at that point: it unlocks during Amends after Miles completes the first Prowler Stash. From then on, Health, Damage, Focus, and Traversal upgrades apply to both Spider-Men. For a first campaign, establish reliable survival and Focus generation before chasing maximum damage or cosmetic suit styles. Give Peter and Miles useful individual abilities as well, because mandatory character switches become easier when neither character is underdeveloped. Confidence Boost and Rejuvenating Parry are alternative Health-path recovery options, not simultaneous early upgrades.
Review Skills after One Thing at a Time
After completing One Thing at a Time, open the pause menu and review the Skills tab. You can inspect the Peter, Miles, and Shared trees at this stage, even though Suit Tech is still locked. Skill Points come from leveling and are spent separately from the materials used for Suit Tech.
Use this early menu access to learn which abilities are available, what each prerequisite requires, and which button combination activates the move. You do not need to save every point for a late-game ability. A practical early plan is to buy one Shared movement or combat skill, then give Peter and Miles one usable character-specific ability each as their trees open.
- Open the Skills tab after One Thing at a Time.
- Review all three trees: Peter, Miles, and Shared.
- Read the prerequisite and input before purchasing an ability.
- Do not spend Skill Points on a move you do not understand or expect to use.
Wait until Amends to open Suit Tech
Suit Tech becomes available during Amends, not immediately after One Thing at a Time. Follow Amends with Miles until the mission directs you to Aaron Davis’s old Prowler equipment. Complete the first Prowler Stash by following the environmental prompts and opening the hidden storage area.
The Rare Tech Parts found there trigger the Suit Tech tutorial. After the tutorial appears, open the new Suit Tech tab and complete the required introductory upgrade. Finishing this sequence also makes Prowler Stashes available as a map activity. This is the correct point to begin planning Health, Damage, Focus, and Traversal purchases.
- Reach Amends in the main story.
- Complete the first Prowler Stash for Aaron.
- Collect the Rare Tech Parts inside the stash.
- Confirm that Suit Tech is now visible in the pause menu.
Treat Suit Tech as a shared investment
Suit Tech upgrades affect both Peter Parker and Miles Morales. The four categories are Health, Damage, Focus, and Traversal, and the active upgrade applies regardless of which Spider-Man you control. This makes an early shared upgrade valuable during missions that switch characters without warning.
Suit Tech purchases use the materials shown on each node, including Tech Parts, Rare Tech Parts, Hero Tokens, or City Tokens. These materials are not interchangeable. Check the complete cost before confirming a purchase, and retain enough rare materials for the next useful node rather than spending them immediately on suit styles.
For a first campaign, begin with Health or Focus if combat mistakes are costing you attempts. Choose Damage when regular encounters are lasting too long, and choose Traversal when movement sections or chases are the problem. There is no requirement to buy the categories in a fixed order.
- Remember that Suit Tech applies to both characters.
- Check each node’s specific material cost.
- Prioritize a category that addresses your current weakness.
- Delay appearance-only suit styles when combat upgrades are affordable.
Build around Focus and dependable recovery
Focus is useful for both Finishers and healing, so a Focus upgrade can improve offense and recovery at the same time. In combat, avoid spending every available Focus bar on Finishers if the next enemy wave is likely to damage you. Preserve enough Focus to heal when your health becomes dangerous.
The Health path also contains alternative action-based recovery choices. Confidence Boost provides a slight heal after a Perfect Dodge, while Rejuvenating Parry provides a slight heal after a successful Parry. They are alternative choices in the Health branch, so select the one that matches your reliable defense rather than treating them as a combined loadout.
Neither option should be described as an automatic low-health trigger. If you need dependable emergency recovery early, use Focus healing and improve your defensive timing. Accessibility settings can also be adjusted if the standard dodge or parry window is too demanding.
- Buy an early Health or Focus node when its cost is manageable.
- Use Focus healing when survival is more important than an immediate Finisher.
- Choose Confidence Boost if Perfect Dodges are your strongest defense.
- Choose Rejuvenating Parry if you consistently parry attacks.
- Do not expect either upgrade to heal automatically at low health.
Develop Peter and Miles together
Spend Skill Points in both individual trees instead of putting every point into one character. Peter’s tree supports his Spider-Arms and later Symbiote abilities, while Miles’s tree strengthens his Venom powers. A character-specific ability that gives crowd control, enemy separation, mobility, or a reliable stun is generally more useful early than a narrow bonus for a move you rarely activate.
Examples such as Peter’s Symbiote Strike or Symbiote Yank and Miles’s Venom Punch: Concentrated Force or Venom Dash: Double Dash become relevant when their prerequisites are available. They are recommendations rather than mandatory purchases. Read each node’s description and select the ability whose range, target type, and input fit your playstyle.
The goal is not to make both trees identical. The goal is to ensure that each Spider-Man has at least one combat tool you can activate without checking the menu during a mandatory story section.
- Buy at least one practical Peter ability.
- Buy at least one practical Miles ability.
- Prefer crowd control, separation, stun, or mobility.
- Test each new ability in a regular encounter before a major mission.
Add Damage and Traversal according to need
Damage Suit Tech is useful once your survival tools are established or when enemies are consistently surviving several full attacks. It shortens encounters, but it does not replace the correct response to shields, armor, or other enemy defenses. Continue using the required parry, gadget, or ability instead of relying only on higher damage.
Traversal upgrades improve movement and later Web Wings or swing performance. Buy them when you repeatedly lose speed in chases, fail to maintain altitude, or spend too long crossing the city. If movement sections are already comfortable, Health, Focus, or Damage will usually provide more immediate campaign value.
After every major story ability unlock, revisit both the Skills and Suit Tech tabs. Confirm which abilities are equipped, check the next upgrade costs, and keep enough materials for a node that solves a real combat or traversal problem.
- Add Damage after establishing a survival foundation or when fights drag on.
- Buy Traversal when it addresses repeated movement failures.
- Recheck both characters after major story unlocks.
- Keep a reserve of rare materials for a useful upgrade.
Before you move on
- The Skills menu has been reviewed after One Thing at a Time.
- Suit Tech has been unlocked by completing the first Prowler Stash during Amends.
- The Shared tree contains at least one movement or combat skill that you actively use.
- Peter and Miles each have at least one practical character-specific combat ability.
- The shared Suit Tech loadout includes an early Health or Focus improvement.
- You have selected either Confidence Boost or Rejuvenating Parry only after considering which defense you perform reliably.
- You can build Focus in a normal encounter and make a deliberate choice between healing and a Finisher.
- You have checked the next upgrade costs and retained useful materials instead of spending everything on cosmetics.
References for this chapter
Midgame: Kraven, Symbiote Pressure and Major Fight Patterns
Good Men is already complete when this chapter begins. Follow The Flames Have Been Lit, Stay Positive, Wings of My Own, New Threads, It Chose You, Wake Up, I’m the Hero Here, No Escape, Anything Can Be Broken, and Don’t Be Scared in that order. Optional Hunter, EMF, FNSM, Prowler, Unidentified Target, and The Flame activities can be postponed. Blue attack warnings are dodged. Yellow warnings turn red at the parry cue; press L1 when the warning reaches red. This stretch covers Peter’s Black Suit fights, Miles’s Mister Negative encounter, the Lizard pursuit, Kraven’s arena battle, the Peter-versus-Miles confrontation, Venom’s Oscorp escape, the Times Square Hunter battle, and Venom’s two-phase fight with Kraven. Finish Don’t Be Scared to unlock Trouble with Harry.
1. Start at The Flames Have Been Lit
Arrive here with Good Men complete; do not replay it. As Peter, investigate the two black-smoke bonfires in Little Odessa. Defeat the Hunters at each site and inspect the evidence. At the second bonfire, use the computer, then go north to the docks.
Clear the dock enemies and destroy the arriving truck with the turret. Pick up the injured civilian and carry him to the hospital in west Little Odessa. Place him on the stretcher, then travel to 718 Kent. Peter’s Black Suit changes into the formal disguise automatically.
Carry the dish through the kitchen and corridor, then approach the elevator. Follow the objective through the party and serve the dish to the Hunter identified as Kraven’s shield bearer. When the investigation points to Kraven’s lounge, create a Web Line above the raw meat, distract the nearby guard, and take the meat. Return to the tranquilized Hunter, use a Perch Takedown, and collect the sleeping dart.
Use the meat and dart to incapacitate the tiger, then inspect the incense, potions, desk, and book in Kraven’s lounge. After the Hunters attack, clear the room and proceed to the Williamsburg graveyard. In the Shield Bearer fight, remember that its ground slam temporarily disables webs and gadgets. Blue warnings are dodged; yellow warnings turn red before a parry. Defeat the Shield Bearers and reinforcements, including the truck wave, then enter the church.
- Begin with Good Men already marked complete.
- Investigate both bonfires, the docks, the hospital, and 718 Kent.
- Retrieve the meat and sleeping dart, search Kraven’s lounge, and defeat the Shield Bearers.
- Confirm Stay Positive is the next main-story mission.
2. Stabilize the foundation in Stay Positive
Return to the Emily-May Foundation as Peter. Complete the corrupted-atom experiment, crawl through the particle accelerator, realign the tunnel, and stabilize the particle beam twice. Keep the yellow circular indicators inside the grey areas together; make small trigger adjustments rather than holding both triggers at maximum.
Escape the accelerator and extinguish every fire in the foundation. Check the upper floor as well as the ground level. When the Hunters invade, defeat the first groups and use Symbiote Blast when the game introduces it.
Fight the Hunter Brute while watching its axe sequence. Yellow warnings turn red before attacks that can be parried, while blue warnings still require dodges. After the helicopter crashes through the building, clear the surviving Hunters, rescue Harry, and let the ending scene play.
- Stabilize the beam twice and escape the accelerator.
- Extinguish fires on both floors.
- Use Symbiote Blast, defeat the Hunter Brute, clear the remaining Hunters, and rescue Harry.
- Confirm Wings of My Own is available.
3. Chase the Talon Drone in Wings of My Own
As Miles, travel to the marked Harlem building and examine the transmitter behind the force field. After Kraven’s message plays, chase the Talon Drone. Stay in its slipstream until the download reaches 100 percent and avoid the bombs it drops.
When the download completes, use the prompted interaction to end the chase. After the call with Harry, travel northwest to Miles’s father’s grave and interact there. The mission ends at the grave. The Talon Drones and Unidentified Targets that become available around this point are optional.
- Examine the Harlem transmitter.
- Remain in the Talon Drone’s slipstream until the download reaches 100 percent.
- Visit Miles’s father’s grave and confirm New Threads is next.
4. Search Connors’s home in New Threads
As Peter, enter Dr. Connors’s house in Astoria through the open bedroom window and turn off the alarm. Search the bedroom, then go downstairs and inspect the papers on the filing cabinet, the test tubes near the sink, and the photograph beside the refrigerator.
Use the photograph’s clue in the living room. Find the child’s piano, press the house-shaped key, and enter the screen sequence purple, purple, purple, green. Follow the revealed passage into the lab, watch the CCTV recording, open the door shown in it, and inspect the hole in the wall to obtain the blood vial.
Defeat the Hunters outside the house, including the reinforcements arriving by truck. The perspective then switches to Miles at the Harlem fish market. Enter from the roof and clear the Hunters. When Ganke’s Talon Drone is involved, pull the crank and use Scan to identify the correct shutters. Chase the Lizard through the market, then destroy the three jet skis and the boat during the water pursuit. Assist with the gunship sequence until the mission ends.
- Inspect Connors’s house clues and solve the piano password.
- Find the blood vial and defeat the Hunter reinforcements.
- Complete Miles’s fish-market, Talon Drone, water, and gunship sections.
- Confirm It Chose You is next.
5. Pursue the Lizard in It Chose You
As Peter, enter the Upper West Side sewer marker. Pull the water pipe to extinguish the fire, crawl through the opening, and zip to the wall on the right when the abandoned subway line explodes. Follow the route to the Oscorp lab.
Scan the required specimen, sample, whiteboards, research papers, and rear workstation. When the Lizard attacks, dodge blue crush warnings and parry when its attack warning turns red. During the wall phase, web the Lizard and press Triangle when close. Pull the floor vents when it stands over them to create stun openings.
After the first arena sequence, pursue the Lizard through the museum and streets. Follow the traversal prompts and use the Triangle prompts when you close the distance. After Kraven intervenes, continue into the final underground fight and repeat the parry, dodge, web, and vent tactics. The mission ends after the Lizard is defeated.
- Scan all required objects in the Oscorp lab.
- Dodge blue crush attacks and parry yellow-to-red attacks.
- Web the wall-climbing Lizard and pull the floor vents for stun opportunities.
- Complete the chase and final fight; confirm Wake Up is next.
6. Escape the Hunters in Wake Up
Peter returns home in Astoria, but control soon switches to MJ. Take down the upstairs Hunter, then quickly eliminate the Hunter near the dining table and the one entering through the kitchen before they alert others. Enter the basement through the door under the stairs and use Peter’s workbench to modify MJ’s stun gun so it can fire Web-Shooters.
Leave through the basement vent. Web the two Hunters beside the foliage so they cannot raise an alarm. Behind the nearby house, throw a rock to separate the next pair, take them down, and continue through the garage. In the construction site, push the marked scaffolding over the enemies. At the next house, distract the Hunters with a rock, enter through the upper window, and clear the interior.
Control changes to Miles in Downtown Queens. Join Peter against the Hunters, then follow the tunnel route. Outside, defeat the next group and rescue the civilian on the crane when prompted. The apparent rescue is an ambush. Control returns to MJ; run through the tunnel and complete the prompted actions to finish the mission.
- Modify MJ’s stun gun and escape the house through the basement vent.
- Use foliage, rocks, webbing, and scaffolding to cross the Hunter positions.
- Complete Miles’s Downtown Queens combat and crane sequence.
- Finish MJ’s tunnel escape and confirm I’m the Hero Here is next.
7. Visit Harry in I’m the Hero Here, then begin No Escape
As Peter, travel to Harry’s house in the Upper East Side. I’m the Hero Here is a short story transition: interact at the marked location and allow the entire conversation scene to finish. When control returns, No Escape becomes available.
Start No Escape by visiting Rio at her office in Harlem. The perspective changes to Miles inside Kraven’s prison. Follow the movement prompts to escape the cage, then pull both wall-mounted cogs to remove the laser grid. Defeat the first Hunters and open the next door with Venom Punch.
Cross the laser traps with timed jumps. In the gas-filled room, power the three generators: one immediately to the left, one behind the rubbish on the right, and one on the ceiling. Defeat the following Hunters, zip upstairs, enter through one of the openings beside the blast door, and clear the next rooms. In the armor-display room, smash the glass above the lion-marked door.
- Complete the Harry visit without leaving the marked area.
- Pull both prison cogs and cross the laser traps.
- Power all three generators and exit the gas room.
- Break through the lion-marked exit and continue to Mister Negative.
8. Defeat Mister Negative and obtain Reverse Flux
Mister Negative’s encounter has three phases. In the opening phase, use normal combat fundamentals: dodge blue warnings and parry when the warning turns red. In the shield phases, avoid his attacks while charging an Evolved Venom ability. Use the charged ability against the shield, then attack while he is exposed. Repeat this process during the final stand.
After the boss fight, chase the demon through the distorted city and use the Triangle prompt when you get close. Continue through the demon encounters as the perspective and scene change. Follow Miles’s father’s ghost when it appears, then defeat the enemies in the next arena.
Reverse Flux is awarded during the final combat sequence. Use it against the clustered enemies to finish the encounter. The following cutscene completes No Escape and opens Anything Can Be Broken.
- Break Mister Negative’s shield with an Evolved Venom ability.
- Complete the demon chase and inner-dimension combat.
- Follow the ghostly figure and obtain Reverse Flux.
- Confirm Anything Can Be Broken is next.
9. Defeat Kraven and stop Peter in Anything Can Be Broken
As Peter, go to the F.E.A.S.T. Shelter marker in Chinatown and meet Martin Li. Follow the new marker to Kraven’s lair in Astoria. Defeat the opening Hunters, then break out of Kraven’s cage to begin the boss fight.
Kraven’s battle has three phases. Watch for fists, the axe, mines, and arena-control effects. Parry attacks whose warning turns red and dodge blue warnings. In the bell phase, web the ringing bell with R1 as soon as control returns so it stops stunning Peter. When Kraven becomes invisible or obscures your vision, watch the arena and react to the next attack rather than striking blindly. Robotic dogs appear at health thresholds; destroy them before returning focus to Kraven.
After Kraven falls, control switches to Miles for a three-phase fight against symbiote-controlled Peter. Ring the bell when available, parry Peter’s attacks, and use Miles’s electric abilities after Peter’s attack strings. In the final phase, use the bell again to create openings. The perspective briefly returns to Peter for the prompted symbiote-removal actions.
- Meet Martin Li at the F.E.A.S.T. Shelter and reach Kraven’s lair.
- Web the bell during Kraven’s fight and defeat the robotic dogs when they appear.
- Defeat Kraven as Peter and complete all three Peter-versus-Miles phases.
- Finish the symbiote-removal prompts and confirm Don’t Be Scared is next.
10. Escape Oscorp and defeat Kraven in Don’t Be Scared
As Peter, travel to Oscorp in Midtown. After Harry becomes Venom, control switches to Venom. Defeat the guards, charge through the blocked door when prompted, and follow the linear interior route. Clear each enemy group while advancing toward the security room.
In the large open room, move upward through the guards and reach the security room. Clear it, then charge down the corridor toward the gunship while avoiding its fire. The crash sends Venom to Times Square.
Defeat every Hunter group in Times Square, starting at ground level and continuing onto the higher platforms. Kraven then appears for a two-phase boss fight. Use Venom’s heavy attacks during recovery windows, but defend between openings. Blue warnings are dodged; yellow warnings turn red before a parry. When Kraven climbs to a higher platform and prepares a ranged attack, wait for the red counter prompt and use it. The second phase follows the same general pattern, so continue reacting to the warnings instead of spending every ability at once.
The cutscene after Kraven’s defeat completes Don’t Be Scared. Trouble with Harry is the next main-story mission. Optional activities remain available and are not required to reach that marker.
- Escape Oscorp as Venom and reach the security room.
- Survive the gunship sequence and clear every Hunter group in Times Square.
- Defeat Kraven across both phases as Venom.
- Confirm Trouble with Harry is the next main-story mission.
Before you move on
- Good Men is marked complete before this chapter begins.
- The Flames Have Been Lit, Stay Positive, Wings of My Own, New Threads, and It Chose You are marked complete.
- Wake Up and I’m the Hero Here are complete, with No Escape cleared afterward.
- Mister Negative is defeated and Reverse Flux has been awarded.
- Anything Can Be Broken is complete after Kraven’s defeat, the Peter-versus-Miles fight, and the symbiote-removal sequence.
- Don’t Be Scared is complete after Venom escapes Oscorp, the Times Square Hunters are defeated, and Venom defeats Kraven.
- Trouble with Harry is visible as the next main-story objective.
References for this chapter
- Marvel's Spider-Man 2: All Missions
- Marvel's Spider-Man 2: Good Men
- Marvel's Spider-Man 2: The Flames Have Been Lit
- Marvel's Spider-Man 2: Stay Positive
- Marvel's Spider-Man 2: Wings of My Own
- Marvel's Spider-Man 2: New Threads
- Marvel's Spider-Man 2: It Chose You — Push Square
- Marvel's Spider-Man 2: Wake Up
- Marvel's Spider-Man 2: I'm the Hero Here
- Marvel's Spider-Man 2: No Escape
- Marvel's Spider-Man 2: Anything Can Be Broken
- Marvel's Spider-Man 2: Don't Be Scared
The Connors/Lizard Arc: It Chose You Combat Reference
Follow Chapter 7 for the chronological campaign route and begin this focused reference when It Chose You is active. This Peter-only mission sends you through the sewer and abandoned subway route to Connors’s Oscorp laboratory, then into a multi-stage Lizard encounter. The key rules are simple: dodge blue Crush warnings, parry attacks when Lizard’s head flashes red, use the yellow floor vents during the first arena, web Lizard from the walls when the prompt allows it, and activate wall doors during the later underground fight. The museum-and-street pursuit is a traversal sequence rather than a normal combat arena. Do not treat the mission as complete after the first boss phase or the chase; wait for the final underground encounter and aftermath, then confirm that It Chose You is complete and Wake Up is available.
Follow Chapter 7 for the route and enter as Peter
Use Chapter 7 for the campaign order from New Threads into It Chose You. Do not replay that chronological route here. When the mission marker is active, Peter is the required character, and the objective leads to the sewer entrance in the Upper West Side area. Remain on the marked story objective until the Lizard sequence has fully ended.
Before starting, equip the healing and combat abilities you normally use with Peter. No special build is required, but defensive resources are valuable because the mission contains several combat phases and a long pursuit before the final encounter. If you fail, the checkpoint normally lets you retry the immediate sequence; adjust the attack or traversal section that caused the failure instead of abandoning the mission route.
- New Threads is complete.
- It Chose You is active in the main-story mission list.
- Peter is the active character.
- The sewer objective is selected.
- Healing and preferred abilities are equipped.
Finish the required laboratory investigation
The laboratory investigation is a progression gate, not optional exploration. Follow the sewer and abandoned-subway path from the active objective until Peter reaches Connors’s hidden Oscorp laboratory. When the search objective appears, use Scan to highlight the interactive evidence.
Inspect the specimen, sample, both whiteboards, and the research papers. The exact order is not the important part; the objective must advance after all required clues have been examined. If the mission does not continue, scan the room again and look for an unexamined highlighted object rather than leaving the laboratory.
Once the evidence objective is complete, interact with the workstation at the back of the laboratory. The facility powers down and Lizard attacks. Treat this workstation interaction as the boss-sequence trigger. Do not assume the fight is available while investigation markers are still active.
- The specimen has been inspected.
- The sample has been inspected.
- Both whiteboards have been examined.
- The research papers have been examined.
- The search objective has advanced.
- The rear workstation has been used.
Use the correct Lizard defensive rules
Lizard’s blue warning around the head signals a Crush attack. Dodge this attack; do not attempt to parry it. When Lizard’s head flashes red during a parryable strike, press L1 at the correct moment. A successful parry interrupts the attack and creates a short opening for melee attacks or abilities.
Keep moving around the arena and avoid lingering directly in front of Lizard or behind its tail. The tail has wide reach, so retreat after a short attack string instead of committing to a long combo while Lizard is recovering. Use abilities and Symbiote Surge during a clear opening, but keep enough healing and combat resources for the later underground encounter.
- Blue Crush warnings are dodged.
- Red parry signals are answered with L1.
- The tail’s reach is respected.
- Attacks are limited to short openings after a dodge or parry.
- Resources are not exhausted before the later encounter.
Use the floor vents and wall-web opening
During the first arena phase, lure Lizard over one of the yellow floor vents or doors. When the boss is positioned above the opening, use the prompted L1 and R1 pull interaction to trigger the environmental stun. This is a safer damage opportunity than trying to attack through an active tail sequence. Use a focused melee string, a finisher when available, or an ability during the stun, then disengage before Lizard resumes attacking.
When Lizard climbs onto the arena walls, do not chase it with uncontrolled movement. Aim R1 webbing at the exposed boss. When the web connects and the Triangle prompt appears, perform the web strike to reach Lizard and create the next attack window. If the prompt is unavailable, keep moving and wait for another exposed wall position. The wall-web sequence is the intended way to bring the boss down reliably.
- Lizard is positioned over a yellow floor vent or door.
- The L1 and R1 pull interaction is completed when prompted.
- Damage is delivered during the resulting stun.
- Wall-mounted Lizard is webbed with R1.
- The Triangle web-strike prompt is completed when it appears.
Treat the chase as traversal, then use wall doors underground
After the arena phases, follow the marked pursuit through the museum and streets. Web-swing and web-zip along the route, complete the displayed Triangle prompts, and prioritize avoiding debris, vehicles, and Hunter fire. This section is not a conventional boss arena; maintaining the route and responding to prompts matters more than dealing damage freely. If Peter is knocked away, regain altitude and follow the objective marker instead of cutting across unrelated streets.
The pursuit eventually returns to an underground confrontation. Apply the same core rules: dodge blue Crush warnings, parry attacks signaled by a red flash, and avoid standing in front of the tail for extended periods. Lizard again uses wall movement, but this phase also provides usable doors or panels on the wall. When Lizard is positioned near one, activate the prompted wall interaction to knock the boss down and create a vulnerable opening. Do not wait for the first arena’s floor-vent prompt; the later encounter uses the wall-mounted environmental opportunity.
If the chase fails, stay higher and follow the displayed route more closely. If the underground fight fails, stop attacking through tail swings, reserve abilities for knockdown windows, and dodge the roar or other clearly signaled attacks rather than trying to absorb them.
- The museum and street pursuit is completed.
- Displayed traversal prompts are completed.
- Debris, vehicles, and Hunter fire are avoided.
- The later underground Lizard encounter is reached.
- Wall doors or panels are activated when the prompt is available.
- The final underground encounter is defeated.
Confirm the mission completion state
Do not leave after the first arena or after the initial pursuit. It Chose You is complete only after the later underground encounter, the serum-related aftermath, and the resulting story transition have finished. Wait until control returns or the next mission transition is established.
Open the Missions tab or story log and verify that It Chose You is marked complete. Wake Up is the next main-story mission and serves as the practical progression check. If Wake Up is not visible immediately, finish any active cutscene or transition first, then confirm the mission status before reloading the latest checkpoint or save. Optional activities can remain untouched while you continue the campaign.
- The final underground Lizard encounter is complete.
- The aftermath sequence has finished.
- It Chose You is marked complete.
- Wake Up is available as the next main-story mission.
- The campaign can continue without replaying It Chose You.
Before you move on
- It Chose You is marked complete in the Missions tab or story log.
- The Connors laboratory evidence objective has been completed.
- The first Lizard arena and wall-web sequence are complete.
- The museum and street pursuit has been completed.
- The later underground Lizard encounter and aftermath have finished.
- Wake Up appears as the next main-story mission.
- The player can resume the campaign route in Chapter 7 without replaying this mission.
Oscorp, Harry and Mid-to-Late Story Progression
This chapter begins after Don't Be Scared, which was completed in chapter 07. Follow Trouble with Harry from Peter's Oscorp-network search through the shipyard sound collection and the underground Sonic Burst defense. The mission alternates between Peter and Miles and cannot be completed by leaving its active objectives for unrelated activities. After the rescue cutscene, start This Isn't You by investigating Harry's house, then travel to MJ's home and defeat Scream through four combat phases. Optional side activities, including The Flame, EMF Experiments, Hunter content, Prowler Stashes, FNSM requests and Symbiote Nests, are not required for this story route and can be postponed.
1. Start the chapter after Don't Be Scared
Don't Be Scared is not repeated here. That mission was completed in chapter 07 and ends after the Oscorp escape, the Times Square Hunter encounters and the two-phase Kraven fight. When this chapter begins, the next required main-story mission is Trouble with Harry. Select it in the Missions tab if its objective marker is not already visible.
Trouble with Harry alternates between Peter and Miles. Once the mission has started, remain inside its active route until each objective advances. The game temporarily directs you through the city, the shipyard and the subway nest, so use the mission marker rather than fast-traveling to unrelated activities. If a failure occurs, restart from the checkpoint and repeat the current objective; the earlier completed sections do not need to be replayed from the beginning.
- Don't Be Scared is already marked complete.
- Trouble with Harry is selected as the next main-story mission.
- No optional activity is being treated as a prerequisite.
2. Track Harry's signal as Peter
Begin Trouble with Harry as Peter. At the marked location, connect to the Oscorp Network using the prompted interaction. A moving signal appears ahead. Deploy the Web Wings and follow the orange signal bursts across the city. The map objective marker provides the route; if the signal seems to disappear, use the scan input to pinpoint the next location.
At the overpass, locate Harry's work badge and investigate the passage beyond it. The target is a group of Symbiotes rather than Harry. Defeat the entire group before attempting to continue. They are tougher than ordinary enemies, so avoid standing in the middle of the pack. Keep moving around the space, interrupt clustered enemies with available abilities and use ranged attacks when several Symbiotes converge.
After the encounter, the mission automatically changes to Miles. This character switch is part of the required sequence and is not a free-roam character-selection prompt.
- Connect to the Oscorp Network.
- Follow the moving signal with the Web Wings.
- Locate Harry's work badge at the overpass.
- Defeat the Symbiotes blocking the route.
- Continue until control changes to Miles.
3. Reconstruct the Sonic Burst at the shipyard
As Miles, follow the mission marker to the shipyard. Scan the bell on the boat and the roof of the hangar to identify the available sound sources. The bell alone is not strong enough, so board the boat and charge its generator when prompted. Symbiotes attack during this section; defeat them before returning to the sound objective.
For the next sound, scan the container suspended from the crane. Move to a higher position and use the Pull interaction on the crane magnet to drop the container. The recording cannot be completed until the container has been lowered, so do not search the ground for a different interaction if the objective appears stalled.
For the final sound, pursue the marked helicopter. Record the rotor when the prompt appears, then climb onto the helicopter and reach the indicated recording position. Symbiotes attack again after the recording. Survive the fight until Peter arrives. Miles transfers the completed sound combination, and Peter receives the Sonic Burst ability.
Use Sonic Burst to stun Symbiotes and create safe openings. It is especially useful when several enemies are grouped together or when a stronger enemy is about to pressure you. Do not spend every available ability during the first shipyard encounter if you need emergency crowd control during the later defense.
- Scan the boat bell and hangar roof.
- Charge the boat generator.
- Defeat the first shipyard Symbiote group.
- Drop the suspended container by pulling the crane magnet.
- Record the helicopter rotor.
- Survive the second shipyard battle.
- Receive and test the Sonic Burst.
4. Reach the subway nest and defend the emitters
After the shipyard fight, follow the waypoint to Frederick Douglass Circle. Defeat the Symbiotes around the train, then enter the tunnel when the route opens. Continue toward Ganke and Rio rather than leaving the underground area for side content.
Inside the nest, hold the scan input to reveal the orange circular growths hanging from the ceiling. Destroy each required growth with Sonic Burst. A larger central growth lies farther inside and requires multiple Sonic Bursts, so avoid wasting the ability immediately before reaching it. If the objective does not advance, scan again and check the ceiling and nearby walls for the remaining orange target.
Peter then places Sonic Bursts that must synchronize. Defend them while Symbiotes attack for the timed defense sequence. Watch Sonic Burst Integrity; if it reaches zero, the objective fails. Stay near the emitters and intercept enemies that approach them instead of chasing distant targets into side tunnels. Your own Sonic Burst remains available during this section and is valuable for stunning groups when enemy numbers increase. Prioritize enemies attacking the devices, then return to the center of the defense area.
The mission completes during the rescue sequence after the emitter defense. Wait for the cutscene to finish before attempting to open the map or start another activity.
- Reach Frederick Douglass Circle.
- Defeat the Symbiotes around the train.
- Enter the tunnel and find Ganke and Rio.
- Scan for and destroy the orange nest growths.
- Use multiple Sonic Bursts on the large central growth.
- Protect the Sonic Bursts until synchronization finishes.
- Allow the rescue cutscene to complete.
5. Complete This Isn't You and confirm the next marker
After Trouble with Harry, start This Isn't You as Peter. Travel to Harry's house in the Upper East Side and investigate the rooftop. Harry is not there; listen to Norman Osborn's recording at the marked location. The story then directs Peter toward MJ's home in Astoria. Follow the yellow marker rather than searching other houses or attempting to begin an optional mission.
At MJ's home, the story reveals that Harry has transformed her into Scream. This Isn't You is a four-phase Scream boss encounter. The boss's basic attacks repeat across the phases, so learn the timing of the red attacks and parry when the warning reaches its parry state. Use Sonic Burst to create temporary stun windows, then spend combat abilities while Scream is staggered.
During the arena phases, use the marked environmental objects when available. Pull the cars to trigger their alarms in the earlier area. In the construction-site phase, pull the pipe stacks along the sides of the arena and use the blue truck when the prompt allows it. These environmental stuns reduce pressure and provide openings without requiring all of Peter's abilities to be ready.
Checkpoints separate the boss phases. If you are defeated, repeat the current phase instead of changing equipment or leaving the mission. After the fourth phase, the symbiote separates from MJ and the rescue cutscene plays. The mission then ends with Miles requesting help at City Hall, and Set Things Right becomes the next main-story mission.
- Investigate Harry's house as Peter.
- Listen to Norman's recording.
- Reach MJ's home in Astoria.
- Complete all four Scream phases.
- Use Sonic Burst and environmental stun opportunities.
- Watch the rescue cutscene.
- Confirm Set Things Right is the next main-story mission.
Before you move on
- Don't Be Scared is already marked complete from chapter 07.
- Trouble with Harry is complete after the Oscorp-network search, Symbiote fights, shipyard sound collection, helicopter recording, nest destruction and Sonic Burst defense.
- The rescue cutscene has finished and the game presents This Isn't You as the active or available main-story mission.
- This Isn't You is complete after all four Scream phases and the MJ rescue cutscene.
- Set Things Right appears as the next main-story mission or its yellow objective marker becomes active.
- The game no longer shows an active Oscorp, shipyard, subway-nest or Scream objective.
Miles-Focused Missions: Abilities, Stealth and Support Play
Use this chapter as a compact reference for character assignments and mechanics that matter during forced perspective changes. It does not replace the chronological walkthroughs. For Make Your Own Choices, use chapter 2; for Wings of My Own, Wake Up, and No Escape, use chapter 7. Make Your Own Choices and Wings of My Own are Miles-exclusive. Make Your Own Choices includes corrupted-atom puzzles where useful green atoms should be preserved and a Web Line interaction that must pass through highlighted electrical points. Wings of My Own requires Miles to remain in a Talon Drone’s slipstream until the download reaches 100 percent while avoiding bombs. Wake Up is a Peter-assigned mission but includes mandatory MJ and Miles sections; MJ’s portion uses foliage, rocks, scaffolding, and a workbench. No Escape is Peter-assigned but contains a mandatory Miles prison section, generator activation, and a Mister Negative encounter where Evolved Venom is best reserved for shield phases. Optional crimes, FNSM App Requests, Hunter activities, Unidentified Targets, collectibles, and other open-world content can wait until free roam returns.
Use the correct mission handoffs
Use chapter 2 for the complete chronological route through Make Your Own Choices. This chapter only confirms its character assignment and the mechanics to remember while playing it.
Use chapter 7 for the complete routes through Wings of My Own, Wake Up, and No Escape. Follow the active objective whenever the game changes perspective. A mission’s campaign assignment does not mean that every section uses the same character.
Make Your Own Choices and Wings of My Own are Miles-exclusive missions. Wake Up and No Escape are assigned to Peter at the campaign level, but each contains mandatory sections controlled by another character. Do not expect free-roam character switching to override those scripted changes.
- Use chapter 2 for Make Your Own Choices.
- Use chapter 7 for Wings of My Own, Wake Up, and No Escape.
- Identify Make Your Own Choices and Wings of My Own as Miles-exclusive.
- Expect forced perspective changes in Wake Up and No Escape.
Make Your Own Choices: Miles-exclusive mechanics
Make Your Own Choices is a Miles-exclusive mission. During its corrupted-atom puzzles, preserve useful green atoms instead of treating every atom as disposable. The green atoms are part of the intended puzzle interaction, so avoid unnecessary destruction while following the active on-screen objective.
The mission also uses a Web Line interaction with highlighted electrical points. Route the Web Line through the points identified by the game rather than attempting an arbitrary direct connection. If the interaction does not advance, rescan the area for a missed highlighted point and follow the displayed prompt.
These are mechanics reminders, not a replacement walkthrough. Return to chapter 2 for the mission’s chronological objective order, investigation, traversal, combat, and completion route.
- Confirm Miles is the playable character.
- Preserve useful green atoms during corrupted-atom puzzles.
- Route the Web Line through highlighted electrical points.
- Return to chapter 2 for the full mission route.
Wings of My Own: maintain the Talon Drone pursuit
Wings of My Own is exclusive to Miles. Its central pursuit requires staying in the Talon Drone’s slipstream until the download reaches 100 percent. Maintain the chase position instead of leaving the active pursuit for optional map activities.
The drone deploys bombs during the sequence. Avoid the hazards while keeping the download active; drifting too far from the slipstream can interrupt progress. Use the current objective and on-screen prompts to continue after the download completes.
Use chapter 7 for the complete chronological route, including the mission’s opening investigation and its ending objective.
- Confirm Wings of My Own is a Miles-exclusive mission.
- Remain in the Talon Drone’s slipstream.
- Keep the download progressing to 100 percent.
- Avoid bombs without abandoning the pursuit.
- Return to chapter 7 for the full route.
Wake Up: Peter-assigned mission with MJ and Miles sections
Wake Up is assigned to Peter, but it contains mandatory MJ and Miles sections. When the perspective changes, use only the tools and abilities shown for the active character rather than assuming Peter’s combat loadout remains available.
MJ’s section uses foliage for web interactions, rocks for distractions, scaffolding for an environmental interaction, and a workbench. These are required character-specific mechanics, so follow the objective prompts instead of trying to approach the sequence as a normal Spider-Man combat encounter.
When control passes to Miles, continue with the active Miles objective until the game returns control or advances the story. Use chapter 7 for the complete route and mission-ending sequence.
- Recognize Wake Up as Peter-assigned.
- Expect mandatory MJ gameplay.
- Use foliage, rocks, scaffolding, and the workbench during MJ’s section.
- Complete the forced Miles section.
- Return to chapter 7 for the full route.
No Escape: Peter assignment with a Miles prison section
No Escape is assigned to Peter, but its central prison sequence is a mandatory Miles section. Follow the Miles-specific objective and HUD rather than expecting uninterrupted Peter gameplay.
The prison sequence includes required generator activation. Complete the generator objective shown by the mission before attempting to proceed. The mission also includes a Mister Negative encounter with shield phases; reserve Evolved Venom for the moments when the shield is active and the fight indicates that the ability can affect it.
After the forced sequence, use chapter 7 for the remaining encounter order, post-fight events, and mission completion route. This chapter intentionally does not reproduce those details.
- Recognize No Escape as Peter-assigned.
- Complete the mandatory Miles prison section.
- Activate the required generators.
- Reserve Evolved Venom for Mister Negative’s shield phases.
- Return to chapter 7 for the full route.
General support and optional-content guidance
Forced character changes can temporarily limit equipment, abilities, or traversal options. When control changes, read the current HUD and objective before acting. Adapt to the character actually selected by the mission instead of planning around Peter’s or Miles’s normal free-roam loadout.
Miles’s Camouflage and Venom abilities are useful support tools when they are available, but this chapter does not require a particular skill purchase. The listed missions can be completed by following their objective prompts and using the abilities supplied for the current section.
Crimes, FNSM App Requests, Hunter activities, Unidentified Targets, collectibles, and other open-world tasks are optional for this campaign stretch. Defer them until the active mission ends and free roam returns, or complete them later during post-story cleanup.
- Read the current HUD after every forced character change.
- Use the abilities available to the active character.
- Do not assume Peter’s equipment carries into MJ or Miles sections.
- Defer optional activities until free roam returns.
Before you move on
- The player knows to use chapter 2 for Make Your Own Choices.
- The player knows to use chapter 7 for Wings of My Own, Wake Up, and No Escape.
- The player identifies Make Your Own Choices and Wings of My Own as Miles-exclusive.
- The player preserves useful green atoms during Make Your Own Choices.
- The player routes the Web Line through highlighted electrical points.
- The player remains in the Talon Drone’s slipstream until the download reaches 100 percent while avoiding bombs.
- The player recognizes Wake Up as Peter-assigned and completes its MJ and Miles sections.
- The player uses foliage, rocks, scaffolding, and the workbench during Wake Up’s MJ section.
- The player recognizes No Escape as Peter-assigned and completes its Miles prison section.
- The player activates the required generators during No Escape.
- The player reserves Evolved Venom for Mister Negative’s shield phases.
- The player understands that optional activities can wait until free roam returns.
High-Stakes Setpieces and Puzzle Sequences
This chapter begins after This Isn’t You. Use Chapter 9 for the complete route through Harry’s house, Norman’s recording, MJ’s home, and all four Scream phases. When that mission ends, Set Things Right begins at City Hall in the southern Financial District. Follow Peter through the City Hall fight, the alternate dimension, the Raft, Aunt May’s house, F.E.A.S.T., the gymnasium purge, the Anti-Venom unlock, the Symbiote waves, and the Behemoth encounter. After the final cutscene, confirm that Set Things Right is complete and wait for It’s All Connected to become the next required mission. No Escape and Don’t Be Scared are earlier missions, while Together belongs in Chapter 12 and its final boss tactics belong in Chapter 13. The final EMF Experiment is optional and does not block the campaign.
1. Hand off from This Isn’t You
Complete the full This Isn’t You route in Chapter 9, including the approach to Harry’s house, the recording from Norman Osborn, the trip to MJ’s home, and all four Scream phases. This chapter does not repeat those objectives or provide a second route through that mission.
After the Scream encounter and MJ’s rescue, the game places the next main-story objective at City Hall. Wait for the Set Things Right marker to appear before leaving the area. Optional activities can be postponed; none are required to unlock the route described here.
- Finish This Isn’t You using Chapter 9.
- Confirm MJ has been rescued.
- Confirm Set Things Right is the active main-story marker.
- Travel to City Hall in the southern Financial District.
2. City Hall: clear the symbiote outbreak
Set Things Right is played as Peter. Reach City Hall and begin the fight against the Symbiotes covering the surrounding area. Stay mobile around the street and courtyard spaces rather than allowing the enemies to surround you. Use area attacks and environmental objects when groups cluster, then finish the remaining enemies before moving toward the building.
Once the exterior group is defeated, climb to the City Hall roof and clear the rooftop enemies. The objective changes after the roof is safe. Approach the blocked entrance and follow the on-screen interaction prompts to open the double doors. A second Symbiote group emerges inside, so be ready to fight immediately instead of assuming the door interaction ends the encounter.
The story then forces the transition into Peter’s mind. Mister Negative takes Miles into the alternate dimension, and Peter follows to find him. Follow the objective route rather than trying to return to the city; the mission is now a linear setpiece.
- Reach City Hall as Peter.
- Defeat the exterior Symbiotes.
- Clear the City Hall roof.
- Open the blocked entrance.
- Defeat the Symbiotes that emerge inside.
- Enter the alternate-dimension sequence.
3. Alternate dimension and Raft ambush
Inside the alternate dimension, follow Mister Negative across the floating structures. Swing between the available platforms and continue toward the marked vortex. When the route leads into the vortex, pass through it to reach the Raft.
Move through the Raft facility using the marked path. The mission soon triggers an ambush involving enemies associated with Peter’s earlier adventures. Enter the combat arena and defeat the attackers. The encounter advances after enough enemies have been defeated or the required combat sequence has run its course, so continue fighting until the objective changes rather than searching for a hidden exit.
When the arena clears, follow Mister Negative down the corridor and into the next open area. Keep following the waypoint; this section is a story transition rather than an open-world branch. The route eventually leads toward Aunt May’s house.
- Follow Mister Negative through the alternate dimension.
- Pass through the vortex to the Raft.
- Survive the Raft ambush.
- Continue through the corridor after the arena clears.
- Follow the route toward Aunt May’s house.
4. Aunt May’s house and the route to F.E.A.S.T.
Use the Web Wings when the objective sends you across the open area toward Aunt May’s house. Land at the marked location and enter the house. Go upstairs and continue into the back room. When the symbiote-covered obstruction appears, use the Pull interaction indicated on screen. This opens the portal leading to F.E.A.S.T.
Continue through the symbiote-covered passageways. The route uses walls and ceilings as traversal surfaces, so follow the highlighted path instead of dropping back to the floor whenever the game presents a crawlable surface. If the camera seems to lose the route, look for the next illuminated opening or objective marker before moving forward.
The passage ends at the gymnasium. Climb toward Mister Negative and prepare for another combat sequence. The mission remains linear, and there are no optional collectibles or side objectives required inside this section.
- Use Web Wings to reach Aunt May’s house.
- Enter the house and go upstairs.
- Pull the symbiote in the back room.
- Follow the portal to F.E.A.S.T.
- Traverse the symbiote-covered walls and ceilings.
- Reach the gymnasium.
5. Gymnasium purge and Galvanise
At the gymnasium, climb to Mister Negative’s position and begin the purge sequence. Symbiotes attack while he channels his power. Defeat the waves that enter the gymnasium, using crowd-control abilities when several enemies converge. Avoid standing directly in the center of the group; the surrounding floor gives you room to dodge and reposition.
Miles learns Galvanise during this section. Follow the ability tutorial when it appears and use the new power against the attacking Symbiotes. When the enemies are defeated, return to Mister Negative and interact with the purge sequence as directed. Do not leave the gymnasium looking for another objective; the next progression trigger is beside him.
The cutscene that follows returns Miles and Mister Negative to the real world and restores Peter. Peter receives the Anti-Venom suit and its associated abilities. This is the required ability progression for the remainder of the mission.
- Climb to Mister Negative in the gymnasium.
- Defeat the attacking Symbiote waves.
- Complete the Galvanise tutorial as Miles.
- Return to Mister Negative.
- Complete the purge interaction.
- Confirm Peter receives Anti-Venom abilities.
6. Anti-Venom combat and the Behemoth
After the cutscene, Peter is surrounded by Symbiotes. The game introduces Anti-Venom Bomb first; use it against the incoming waves and combine it with Peter’s other available abilities. Anti-Venom attacks are the intended tools for clearing this encounter, so do not rely only on ordinary melee strings when the new ability prompt is available.
Continue defeating the Symbiote waves until the next ability tutorial appears. Peter then learns Anti-Venom Tempest. Use the prompted ability to control the group and keep enough space to avoid being pinned by multiple enemies. If health drops, disengage briefly, heal with Focus if available, and resume from the edge of the arena.
The final combat section is a single-phase fight against the Symbiote Behemoth. Use Anti-Venom abilities when the creature is exposed, dodge its large attacks, and avoid remaining in front of it after an attack finishes. Clear nearby Symbiotes if they interfere with your attacks, then return focus to the Behemoth. The mission ends in the following cutscene rather than with another exploration objective.
- Use Anti-Venom Bomb against the Symbiote waves.
- Learn and use Anti-Venom Tempest.
- Defeat the remaining Symbiote groups.
- Dodge the Behemoth’s large attacks.
- Use Anti-Venom abilities during the Behemoth fight.
- Finish the Behemoth encounter and watch the next cutscene.
7. Confirm completion and continue to It’s All Connected
After the Behemoth fight, allow the following cutscene to finish. Check the mission log or objective display to confirm that Set Things Right is marked complete. Peter should retain Anti-Venom abilities after the mission, which confirms that the story progression has registered correctly.
The next required main-story mission is It’s All Connected. Follow its marker when it appears. If the marker does not appear immediately, remain in free roam and follow the game’s next story prompt rather than replaying Set Things Right. Optional crimes, FNSM Requests, Hunter activities, EMF Experiments, and The Flame content can be completed later and are not required to finish this chapter.
No Escape and Don’t Be Scared belong to earlier portions of the campaign. Together is reserved for Chapter 12, and the final EMF Experiment is optional post-story content. Do not treat either as a missing Set Things Right objective.
- Confirm Set Things Right is marked complete.
- Confirm Peter still has Anti-Venom abilities.
- Wait for It’s All Connected to become available.
- Continue with Chapter 12 for the remaining campaign route.
- Leave optional EMF content and other side activities for later if desired.
Before you move on
- This Isn’t You has already been completed through Chapter 9, including MJ’s rescue and all four Scream phases.
- Set Things Right begins at City Hall in the southern Financial District.
- The City Hall exterior, rooftop, and interior Symbiote encounters are complete.
- Peter has followed Mister Negative through the alternate dimension and Raft.
- Peter has reached Aunt May’s house, opened the F.E.A.S.T. route, and completed the wall-and-ceiling traversal section.
- The gymnasium Symbiote waves are defeated and the purge is complete.
- Peter has received Anti-Venom abilities.
- The Anti-Venom Symbiote waves and the Symbiote Behemoth are defeated.
- Set Things Right is marked complete after the following cutscene.
- It’s All Connected is the next required main-story mission.
- Continue to Chapter 12 for It’s All Connected, Finally Free, and Together; use Chapter 13 for final-boss strategy.
Assembling Allies and Final Zones
Begin this chapter only after Set Things Right is complete and Peter has received Anti-Venom powers. Wait in free roam for Dr. Connors's call, then follow the gold marker to his Midtown lab for It's All Connected. Complete the lab confrontation and symbiote takeover sequence, then play Finally Free: search for the meteorite as Peter, rescue civilians near the bus, switch to Miles to defend the Sonic Bursts and investigate the nest heart, then return to Peter for the bridge, subway, and meteorite objectives. After Finally Free registers as complete, use the free-roam window to improve skills, suit tech, gadgets, and supplies or finish optional activities. The Flame, FNSM Requests, EMF Experiments, Hunter content, crimes, collectibles, and other ally activities are not required for the campaign finale. Travel to May's House in Astoria only when ready. Approach the entrance until the Together point-of-no-return warning appears, then stop and continue with the dedicated finale chapter.
1. Wait for Dr. Connors's call and start It's All Connected
This chapter starts with Set Things Right already marked complete. Do not return to City Hall, repeat the F.E.A.S.T. sequence, or replay the Anti-Venom unlock. After control returns to free roam, remain available for Dr. Connors's call. When he reports trouble at the lab and the call is interrupted, open the map and follow the gold main-story marker to the laboratory in Midtown.
It's All Connected is played as Peter. Enter the marked lab area and follow the active objective into the sewer-lab section. The mission is a compact story sequence centered on Venom, Norman Osborn, and Dr. Connors, so stay with the marker rather than leaving to pursue open-world activities. Complete the confrontation, then continue through the scene showing the symbiote spreading through the city.
The mission is complete when Peter returns to ground level and the takeover sequence finishes. Confirm that It's All Connected has cleared from the main-story list and that Finally Free is the next gold objective. If the encounter fails, reload the latest checkpoint and resume the current lab section rather than abandoning the campaign route.
- Begin with Set Things Right already complete.
- Receive Dr. Connors's call in free roam.
- Reach the Midtown laboratory as Peter.
- Complete the lab confrontation and symbiote takeover sequence.
- Confirm that Finally Free is available next.
2. Search for the meteorite and rescue the civilians near the bus
Start Finally Free by following the gold marker to the opening search area as Peter. Defeat all Symbiotes at the site. The next objective does not advance until the immediate group is cleared, so finish the encounter before moving to the following waypoint.
Continue to the civilians trapped near the bus. Eliminate every Symbiote attacking them and remain in the area until the rescue objective updates. Once the civilians are safe, follow the next marker and answer Miles's call. The game then transfers control to Miles for the nest operation.
Use Peter's Anti-Venom abilities when enemies cluster around him, but avoid spending every available resource during the first encounters. Healing, crowd control, and a charged Surge are more valuable later in the subway section. If you are defeated, reload the current checkpoint; the mission is checkpointed by encounter rather than requiring the entire campaign to be replayed.
- Reach the first meteorite-search location as Peter.
- Clear the opening Symbiote encounter.
- Reach the bus and rescue the civilians by defeating their attackers.
- Follow the next marker after Miles calls.
- Confirm the switch to Miles.
3. Defend the Sonic Bursts and investigate the nest heart as Miles
As Miles, travel to the marked rooftop nest. Place the Sonic Bursts at the prompted locations, then defend them until the countdown finishes. Stay mobile around the equipment instead of standing in the center of the enemy group. Use Miles's venom abilities and available gadgets to interrupt groups that reach the devices, prioritizing enemies attacking the equipment over isolated targets.
When the defense objective ends, interact with the nest's heart. Miles is transported inside the structure. Follow the linear traversal route toward the bright center, using the marked surfaces and openings instead of searching for a side path. The heart sequence reveals Hailey's capture and gives Miles the information needed to locate the meteorite.
Allow the vision and return sequence to finish. After Miles reports the lead, control returns to Peter. If the Sonic Burst defense fails, reload the checkpoint and repeat that defense; the earlier Peter objectives do not need to be repeated from the beginning.
- Reach the rooftop nest as Miles.
- Place every prompted Sonic Burst.
- Defend the devices until the countdown completes.
- Enter the nest heart and reach the bright center.
- Finish the vision and return to Peter.
4. Follow the lead through the bridge and subway to complete Finally Free
As Peter, follow the new marker to the meteorite's location. Clear the Symbiotes on the bridge before approaching the subway entrance. The story briefly switches to Miles during the rescue involving Hailey, then returns to Peter underground; do not try to bypass this character transition.
Inside the subway, follow the linear route by wall-crawling and swinging through the accessible passages. When Peter reaches the open area and the lights go out, defeat the surrounding Symbiotes before attempting to continue. A charged Surge is useful here because it can control much of the wave while reducing the time spent exposed to attacks.
After the fight, use the opening that becomes available and continue through the tunnel toward the meteorite. Reach the objective and let the completion scene play. Finally Free is finished when the active mission clears and Together becomes the next main-story objective.
- Reach and clear the bridge as Peter.
- Enter the subway after the story transition.
- Defeat the underground Symbiote wave.
- Follow the opened tunnel to the meteorite.
- Confirm that Finally Free is complete and Together is available.
5. Use the preparation window and display the Together point-of-no-return warning
After Finally Free registers as complete, the game leaves you free to prepare before the finale. Spend available skill points, improve suit tech and gadgets, refill or upgrade anything useful for extended Symbiote fights, and make a manual save if you want a rollback point. This is also the correct time to complete optional activities that you do not want to postpone until after the story.
The Flame, including It Was Meant for Me, is optional for reaching Together. FNSM Requests, EMF Experiments, Hunter Blinds and Bases, crimes, collectibles, Prowler content, and other ally activities are likewise optional for the main campaign. None of them is required to make Together appear after Finally Free.
When ready, travel to May's House in Astoria and approach the entrance marked for the final mission. The game displays a point-of-no-return warning before the finale begins. You can stop at that warning and continue exploring. Do not accept the confirmation yet if you are following this chapter's endpoint; accepting it locks free roam until the connected final sequence is finished. Once the warning is visible, continue to the dedicated Together and final-boss chapter.
- Confirm Finally Free is marked complete.
- Spend desired skill points and upgrade suit tech or gadgets.
- Finish any optional activities you want before the finale.
- Reach May's House in Astoria.
- Display the Together point-of-no-return warning without accepting it.
Before you move on
- Set Things Right was already complete when this chapter began, with Peter's Anti-Venom powers available.
- It's All Connected is marked complete after the Midtown lab and symbiote takeover sequence.
- Finally Free is marked complete after the subway route and meteorite objective.
- Together appears as the next main-story mission at May's House in Astoria.
- The point-of-no-return warning is visible at May's House.
- The player has stopped before accepting the warning and is ready to continue with the dedicated finale chapter.
Final Boss Sequence: Strategy, Phases and Recovery
Once Together is active, the mission moves through MJ’s hive escape, Peter’s Venom battle, Miles’s airborne pursuit and a combined final phase. MJ uses the upgraded Sonic Shot to open routes and Sonic Barrels to defeat the Symbiote Behemoth. Peter must avoid wasting ordinary Web attacks because Venom is immune to them, use Anti-Venom abilities during shield phases and move to raised platforms when symbiote tendrils cover the floor. Miles counters the winged phase by dodging projectiles, pulling them when prompted and web-striking Venom during the resulting opening. The last phase combines these patterns with Sonic Barrels, airborne attacks and floor-wide tendrils. After the final health segment, continue through the chase and on-screen finishing prompts; the mission is not complete when the health bar first disappears.
MJ: retrieve the meteorite and escape the hive
Follow the marked route through the symbiote hive as Mary Jane. When a yellow, pulsing growth blocks a passage, aim the upgraded Sonic Shot at it and destroy it rather than searching for a lever or ordinary switch. Continue through the opened route until MJ drops into the lower lair.
Use the Sonic Barrel in the lair against the first large group of Symbiotes, then finish survivors with the upgraded stun gun. Keep moving between attacks and use cover when enemies pressure MJ at close range. At the meteorite, clear the immediate enemies, take the objective and retrace the route toward the exit.
The Symbiote Behemoth stops MJ near the ladder. Keep distance, circle rather than standing directly in front of it, and shoot it consistently. When it approaches a Sonic Barrel, use the barrel for a larger stagger and damage window, then resume ranged fire. Dodge its lunges and avoid taking two hits in quick succession. Once the Behemoth is defeated, climb out and continue until control changes to Peter.
- Destroy yellow pulsing growths with the upgraded Sonic Shot.
- Use the Sonic Barrel in the lair before clearing remaining Symbiotes.
- Take the meteorite before beginning the escape.
- Use Sonic Barrels and ranged fire against the Symbiote Behemoth.
- Continue until Peter’s Venom encounter begins.
Peter: opening Venom phase
Venom is immune to ordinary Web attacks, so do not spend time trying to restrain him with R1. Use melee strings, Anti-Venom abilities and the sound equipment positioned around the arena. When the nearby sound disruptor is accessible, activate or pull it to interrupt Venom and create a safe damage window.
Use the combat indicators consistently. Yellow warnings that turn red identify attacks that can be parried with L1 at the moment of impact. Blue warnings identify attacks that must be dodged; do not attempt to parry them. If Venom raises tendrils, sends a broad ground attack or begins covering the floor, stop attacking and move to a raised platform or another clear section of the arena.
Web-zip between platforms or toward safe tendril points when the floor becomes hazardous. Return to Venom only after the attack finishes or the sound equipment has interrupted him. This phase rewards short attacks followed by repositioning rather than standing in front of Venom and trading damage.
- Do not rely on ordinary Web attacks.
- Use the arena’s sound equipment to interrupt Venom.
- Parry yellow-to-red attacks with L1.
- Dodge blue-indicator attacks.
- Move to raised platforms when symbiote tendrils cover the floor.
Peter: break Venom’s white shield
The next Peter section adds Symbiote reinforcements and gives Venom a white shield bar. Venom is invulnerable while this shield objective is active. Use Anti-Venom abilities on Venom; three successful Anti-Venom skill hits are required before his normal health can be damaged again.
Do not spend every Anti-Venom charge on the smaller Symbiotes. Web the reinforcements or use ordinary crowd control to create room, then defeat enough of them to rebuild the abilities you need. When the required Anti-Venom hits have landed, attack Venom during the exposed window with melee strings, abilities and any safe environmental opportunity.
The shield mechanic returns later in the same phase. Repeat the process instead of attacking the shield with normal punches. Continue using the indicator rules: parry yellow attacks only when they turn red, and dodge blue attacks. The section ends through a scripted transition in which Venom overwhelms Peter and takes flight.
- Recognize the white bar as Venom’s shield objective.
- Land three Anti-Venom skill hits on Venom before normal damage.
- Use Web and crowd control on reinforcements without exhausting Anti-Venom charges.
- Repeat the shield-breaking cycle when the shield returns.
- Follow the transition to Miles’s airborne section.
Miles: fight winged Venom
Miles takes over while Venom is airborne. Keep moving laterally and avoid flying directly toward him. Dodge the projectiles and other attacks marked with blue indicators. When a projectile can be pulled, use L1 + R1 as prompted to send it back and damage or stagger Venom.
After a successful pull or another clear stagger, use Web Strike to close the distance and follow with melee attacks, Lightning and Venom abilities. Leave the airspace as soon as Venom recovers instead of remaining beneath him during a dive or grab attempt.
The sequence eventually returns to ground combat. Apply the same response rules as Peter: yellow-to-red attacks are parry opportunities, while blue attacks require a dodge. Keep at least one ability charge available for a confirmed opening or a dangerous transition rather than spending everything immediately.
- Move laterally during the airborne fight.
- Dodge blue projectiles and unblockable attacks.
- Use L1 + R1 to pull projectiles when the prompt appears.
- Web Strike only after Venom is staggered or exposed.
- Save an ability charge for a reliable opening.
Final combined phase: Sonic Barrels and floor attacks
The final phase combines the earlier patterns. Venom alternates between ground attacks, airborne projectile clusters and tendrils that spread across the floor. Leave the floor as soon as the tendrils appear, using raised platforms or web-zip points to keep clear. When Venom flies, continue moving instead of waiting beneath his path.
Sonic Barrels are available around the arena. Throw one at Venom with L1 + R1 when you have a clear line, then follow the sonic interruption with Anti-Venom abilities, Lightning, melee attacks or another high-damage option. Treat the barrel as an interruption tool and damage window, not as a reason to stand still near Venom.
If Symbiotes interfere, use Web, crowd-control abilities or environmental attacks to clear enough space to move. Do not focus on minions while Venom is already telegraphing a major attack. Use Focus for healing when necessary or during a confirmed opening, and avoid exhausting every resource at the beginning of the phase.
- Move to higher ground when tendrils cover the floor.
- Throw Sonic Barrels at Venom with L1 + R1.
- Use crowd control to prevent Symbiotes from surrounding you.
- Spend Focus on healing or confirmed damage windows.
- Continue through every phase transition instead of treating a depleted health segment as the end.
Finish the scripted ending and recover from failure
When the final Venom health segment is depleted, keep following the on-screen chase and finishing prompts. The combat encounter is not finished at the instant the health bar disappears. Complete each prompted input, allow the final exchange and cutscenes to play, and do not quit during the transition.
If MJ dies, use the hive’s Sonic Barrels earlier and keep the Behemoth at range. If Peter dies during the shield phase, control the smaller Symbiotes with Web and ordinary tools while preserving Anti-Venom abilities for Venom. If Miles dies, prioritize lateral movement and projectile pulls over immediate attacks. If the combined phase causes the failure, leave the floor sooner when tendrils appear and throw Sonic Barrels only when Venom is exposed.
The campaign objective is complete when the finishing sequence has played, Together is recorded as completed and control returns to post-story free roam. The optional activities that appear afterward are not required to defeat Venom or complete the main story.
- Continue after Venom’s health reaches zero.
- Complete every on-screen finishing prompt.
- Reload the latest checkpoint after a death and change the tactic that caused the failure.
- Wait for the ending scenes to finish.
- Confirm Together is complete and post-story free roam has returned.
Before you move on
- MJ has retrieved the meteorite and defeated the Symbiote Behemoth.
- Peter’s opening and shield phases are complete.
- Miles’s winged Venom sequence is complete.
- The combined final Venom phase has ended.
- All post-battle finishing prompts have been completed.
- Together is marked complete and the game returns to post-story free roam.
References for this chapter
Canonical Ending and Epilogue: How to Confirm You Finished the Campaign
Use this chapter only to verify that Marvel’s Spider-Man 2’s main campaign has fully registered as complete on the original PS5 edition. Together is the final main-story mission. Before accepting its point-of-no-return warning at Aunt May’s house in Astoria, finish any optional activities you want to complete first. After the final mission, allow the closing scenes and credits to proceed, then confirm that Together is marked complete and that post-story free roam has returned. That combination—not merely defeating the final boss—is the reliable campaign completion check. New Game Plus is a post-launch feature, not a guaranteed launch-build option, so look for the explicit mode on an updated PS5 installation only after the completed story state is present.
Confirm that you are at the finale checkpoint
If you have reached the main-story marker at Aunt May’s house in Astoria after Finally Free, the mission shown should be Together. Together is the 33rd and final main-story mission. This chapter does not provide another route through the finale; use it to verify the result after the mission is over.
Before interacting with the final mission marker, decide whether you want to complete optional content first. The game displays a warning that city exploration and unrelated activities will be unavailable during the remaining story sequence. Cancel the prompt if you still want to complete crimes, collectibles, side missions, upgrades, or other open-world objectives before the finale.
- The active final-story mission is Together.
- You are at Aunt May’s house in Astoria, after Finally Free.
- The point-of-no-return warning has been acknowledged before starting the mission.
- Any optional activities you wanted to complete before the finale are finished or deliberately postponed.
Do not treat the final boss victory as the completion check
The final boss sequence is covered in the preceding campaign chapters. For this chapter, the relevant test is what happens after the combat ends. Do not close the game immediately when the last health bar is depleted or when the final combat prompt has been completed. Continue through the immediate transition and let the concluding story scenes run.
You do not need to replay the meteorite retrieval, hive escape, Behemoth encounter, Peter’s sections, Miles’s aerial section, or the other final-battle stages merely to validate the ending. If those sections have already been completed and the game proceeds into its closing scenes, remain in the mission until the post-battle sequence has finished.
- The final combat sequence has ended.
- The game has advanced into the closing story presentation.
- You have not restarted Together or replayed an earlier boss phase solely to check completion.
Let the closing scenes and credits proceed
Allow the ending cutscenes to play without quitting during the transition from gameplay. Let the credits begin and, if you prefer the safest verification route, allow the credits sequence to finish before checking the save and mission menus. The credits are an end-state indicator, but they are not the only check required: the mission record and return to the city are stronger confirmation that the campaign state has been saved.
If the game offers a prompt or input during the ending presentation, follow the displayed instruction rather than repeatedly pressing unrelated buttons. Once the credits have played far enough for the game to continue, wait for the post-story state to load before closing the application.
- The final cutscenes have played through.
- The credits have begun or finished.
- The application was not closed during the immediate post-battle transition.
- The post-story state has had time to load.
Verify Together in the mission record
When control returns, open the Missions menu and select the Main Story list. Confirm that Together is shown as completed rather than active, paused, or replayable without a completed-story state. This is the direct mission-log check that the final required story mission has registered.
Mission Replay may appear on an updated installation after the campaign is complete. Do not confuse a replay option with an unfinished mission. The status you need is a completed Together entry in the main-story record, alongside the ability to continue in the ordinary post-story game state.
- Together is marked complete in the Main Story mission list.
- Together is not still shown as the active required mission.
- Any available replay entry is understood as optional and is not being mistaken for unfinished progression.
Confirm the return to post-story free roam
Move through the city after the ending has registered. Confirm that ordinary open-world control has returned and that you can access the map, travel through districts, start available optional activities, respond to crimes, and continue remaining collectible or side-mission objectives. You do not need to complete any of those activities for the canonical story ending; their availability confirms that the temporary finale lock has ended.
If the city has not returned or Together is not marked complete, do not begin a new save. Reload the latest completed story save or checkpoint, allow the closing scenes to finish again, and recheck the Main Story list after free roam loads. Avoid relying on a title-screen assumption that the finale saved correctly.
- Post-story free roam has returned.
- The map and ordinary city traversal are available.
- Optional activities can be resumed.
- Together remains marked complete after returning to the city.
Check New Game Plus only after the ending is registered
New Game Plus was added after launch through a PS5 update that also introduced Mission Replay and other post-launch features. Therefore, do not assume that an unupdated launch installation contains the mode. First verify Together and the post-story free-roam state; then confirm that the game is updated through the PS5 system software and game information screens.
After updating, return to the game’s relevant save or mode-selection interface and look for an explicit New Game Plus option. Start it only after the game displays the mode and explains its carryover rules. Do not infer that every suit, ability, upgrade, collectible, or other item transfers unless the on-screen New Game Plus description confirms it.
- Together is complete before New Game Plus is considered.
- The PS5 installation has the update that adds New Game Plus.
- An explicit New Game Plus option is visible.
- The displayed carryover information has been reviewed before starting a new run.
Before you move on
- Together is marked complete in the Main Story mission list.
- The final cutscenes have played and the credits have begun or finished.
- The game has returned to post-story free roam.
- The map, city traversal, and optional activities are available again.
- New Game Plus is considered only after the story completion state is present and the updated installation displays the mode explicitly.
Post-Game: New Game Plus, Suit Collections and Optional Endings
After finishing the campaign, keep the completed PS5 save available for free-roam cleanup before creating a New Game Plus file. New Game Plus requires the main story to be complete, starts the campaign again in a separate save and carries your major character progression, suits and upgrades into the replay. It adds Ultimate Levels, new styles for several of Peter’s symbiote suits, Golden Gadget styles and Suit Tech Fusion. Mission Replay is a separate feature for revisiting completed missions without restarting the campaign. Additional suits from updates or special editions are wardrobe content, not alternate story endings or mandatory post-game missions.
1. Preserve the completed campaign save
Finish the final story mission and allow the ending sequence to conclude. Return to the main menu and open the save-selection screen rather than immediately starting a new game. The completed file should be identified as a finished campaign save and should remain available for continued free-roam play.
Create or retain a separate save for this completed state. This gives you a permanent file for unfinished activities, district cleanup, suit purchases and trophy work. New Game Plus is designed to create a separate replay file, but you should still confirm the destination slot before accepting the prompt so that you do not overwrite the save you intended to keep.
- The main story is complete on the selected PS5 save.
- The ending sequence has finished before leaving the game.
- The completed free-roam save remains available in the save list.
2. Complete optional activities before beginning NG+
Load the completed file and use the map, Missions tab and Collections tab to identify anything you still want to finish. Clear remaining FNSM requests, Mysteriums, Hunter activities, Symbiote Nests, EMF Experiments, Prowler Stashes, Spider-Bots, Marko’s Memories, Cultural Museum missions and other optional activities in whatever order is convenient. These are not prerequisites for unlocking New Game Plus; they are cleanup goals for the original campaign file.
Spend remaining Tech Parts, City Tokens and other resources on the upgrades and suit styles you actually want. Check both Peter’s and Miles’s equipment screens because their suits, skills and equipment are tracked separately. If your objective is only to replay the story, stop once the completed save is safely preserved. If you want the broadest NG+ starting build, finish desired upgrades first, then make a fresh save before creating the replay.
- The map has been reviewed for unfinished optional activities.
- Desired suit, gadget and Suit Tech upgrades have been purchased.
- The original completed save is still separate from any cleanup or replay file.
3. Create New Game Plus from the completed save
From the save-selection screen, highlight the completed campaign save and use the on-screen New Game Plus prompt. Confirm that the game is creating a new NG+ save rather than loading the old file or starting a standard New Game. Select the destination slot carefully, especially if your save list is nearly full.
NG+ restarts the story from its opening missions. You must again complete story objectives, character switches and mission-specific encounters in their normal order. Carrying over a powerful build does not bypass story gates or unlock every mission immediately. Optional activity completion and campaign progress are treated as part of the new run, so use the original file whenever you want to continue the old post-game map.
- The completed save is the source selected for NG+.
- The new file is explicitly labeled or identified as New Game Plus.
- The original campaign file has not been overwritten.
4. Build around Ultimate Levels and Suit Tech Fusion
During NG+, continue earning experience after reaching the normal progression ceiling. These additional ranks are Ultimate Levels and provide the mode’s extended progression and associated rewards. Several of Peter’s symbiote suits receive additional styles through this progression, so check the Suits tab whenever a new Ultimate Level reward becomes available.
NG+ also introduces Golden Gadget styles and Suit Tech Fusion. Golden Gadget styles change the appearance of upgraded gadgets. Suit Tech Fusion is more significant during combat: it lets both perks in a shared Suit Tech category be active together instead of choosing between the two displayed perks. Review each category after unlocking Fusion and equip the combination that matches your playstyle; do not assume every cosmetic style changes gadget damage or utility.
- Ultimate Level progress is visible during the replay.
- Peter’s symbiote suit styles are checked as their requirements appear.
- Suit Tech Fusion has been reviewed before spending scarce resources on additional upgrades.
- Golden Gadget styles are distinguished from functional gadget upgrades.
5. Check suits and update content separately
Open Peter’s and Miles’s Suit menus after the game is updated. The post-launch PS5 content includes free suits such as the Hellfire Gala designs, while other wardrobe items can depend on an edition, promotion, paid pack or later game update. A suit appearing in the wardrobe is not evidence of a hidden post-game mission, and a locked style should be checked for its displayed requirement before searching the city.
The PlayStation 5 game has also received later updates that add further suit content. Treat those additions as optional wardrobe collection goals. They do not create another campaign ending, change the canonical conclusion or serve as requirements for New Game Plus. If a suit is unavailable, read the in-game label and verify whether it is an edition or separately provided item rather than assuming the story has a missing objective.
- The PS5 installation is fully updated before checking the wardrobe.
- Peter’s and Miles’s suit menus have both been reviewed.
- Locked outfits are checked against their displayed requirements or content source.
6. Use Mission Replay and post-game settings for targeted cleanup
Use Mission Replay when you want to revisit a completed story mission without starting another campaign. It is separate from New Game Plus: replay is for isolated missions and practice, while NG+ creates a new story run with carried-over progression. Choose replay for alternate difficulty attempts, missed mission challenges, combat practice or cinematic revisits.
After the story is complete, the updated game also provides additional presentation and accessibility options, including time-of-day selection and symbiote tendril-color customization. These options change how the replay looks or feels; they do not add an alternate ending. Complete the campaign again in NG+ only if you are pursuing its replay rewards or the NG+-specific completion trophy.
- Mission Replay is used for individual missions instead of restarting unnecessarily.
- Time-of-day and tendril-color options have been checked if desired.
- NG+ is reserved for a full replay and its associated progression rewards.
Before you move on
- The original PS5 campaign save remains available with the final story completed.
- A separate New Game Plus save has been created from that completed file.
- The replay has been checked for Ultimate Levels, symbiote suit styles, Golden Gadget styles and Suit Tech Fusion.
- Peter’s and Miles’s Suit menus have been reviewed for obtainable base-game and update content.
- Mission Replay and post-game presentation settings have been tested or deliberately left unused.
- Any remaining map activities, trophies and wardrobe goals have been checked from the original completed save and the relevant progression menus.
References for this chapter
100% Completion: Districts, Collectibles and Trophy Checklist
Finish the optional content after the story by working through the in-game district tracker one district at a time. The original PS5 release records 160 tracked locations and activities across 14 districts. Use the map panels to identify unfinished categories, then verify every activity through its completion notification or reward screen. The audit includes Marko’s Memories, Photo Ops, FNSM Requests, Prowler Stashes, The Flame missions, Brooklyn Visions, EMF Experiments, Hunter activities, Mysteriums, Cultural Museum missions, Unidentified Targets, Symbiote Nests, and Spider-Bots. Spider-Bots are introduced during Spider-Spy? and are handled differently from ordinary map icons, so confirm their progress through Collections, district panels, and a specialist location checklist rather than relying on a disputed numerical split. Complete the follow-up objectives The Message, Grand Finale, Target Identified, It Was Meant for Me, A Gift, and Hard Bop when they become available. District completion is separate from equipment trophies: purchase every Gadget and Suit Tech upgrade and acquire every required Suit before declaring the file complete. All of this remains available in post-story free roam.
1. Select a district and use its tracker
Open the world map and select a district that does not show 100 percent. Inspect the district panel before traveling. The panel identifies unfinished activity categories and gives you a practical route without requiring a citywide search. The 14 districts are Harlem, Upper East Side, Central Park, Upper West Side, Hell’s Kitchen, Midtown, Greenwich, Chinatown, Financial District, Downtown Brooklyn, Williamsburg, Little Odessa, Downtown Queens, and Astoria.
Clear one district at a time whenever practical. After completing an activity, remain in the area until its reward and completion notification appear. Reopen the map and confirm that the category counter or district percentage increased. If a category shows a lock icon, advance the story or complete the prerequisite activity instead of searching for a marker that has not unlocked. The district percentage covers tracked activities and collectibles, not every random street crime or resource crate.
- Choose a district with an unfinished category.
- Check the category counter before traveling.
- Wait for the reward or completion notification.
- Confirm that the counter or percentage increased.
2. Audit the 160 tracked locations and activities
Use the district tracker as the overall checklist. The verified total is 160 tracked locations and activities across 14 districts. The activity categories include Marko’s Memories, Photo Ops, FNSM Requests, Prowler Stashes, The Flame missions, Brooklyn Visions missions, EMF Experiments, Hunter Blinds, Hunter Bases, Mysteriums, Cultural Museum missions, Unidentified Targets, Symbiote Nests, and Spider-Bots. The category totals shown in some specialist lists include late follow-up objectives inside their parent categories, so do not add those follow-ups again as separate entries.
Spider-Bots are introduced during Spider-Spy? and are tracked differently from ordinary map activities. They may not appear as standard full-map icons. Verify remaining Spider-Bots through the in-game Collections count, the district completion panels, and a reliable specialist location checklist. This avoids depending on a disputed numerical split between the story-introduced bot and free-roam entries. Check every district panel individually: a completed category in one district does not prove that the other districts are finished.
- Use the district panels as the primary progress record.
- Confirm that the overall audit reaches 160 tracked locations and activities.
- Check Spider-Bot progress through Collections and district panels.
- Use a specialist checklist for Spider-Bot locations without requiring a disputed numerical total.
- Do not count follow-up missions twice.
3. Audit Spider-Bots and complete The Message
When searching for Spider-Bots, use the proximity cue and inspect building surfaces, elevated structures, walls, and other landmarks rather than sweeping only along the streets. Because Spider-Bots are not handled like ordinary map icons, compare each completed location with the Collections count and the appropriate district panel. A specialist location checklist is useful for identifying a missed bot, but the in-game counters are the final confirmation for your save.
After the required Spider-Bot progress is complete, check the FNSM App and the map for The Message. If it does not appear immediately, finish any active Spider-Bot interaction, wait for the completion notification, and reload the map or save before checking again. Travel to The Message marker and complete the follow-up sequence. Confirm that Funky Wireless Protocols has appeared before leaving this chain.
- Spider-Bot progress is complete in Collections or the relevant district panels.
- Remaining locations were checked against a specialist checklist.
- The Message is available in the FNSM App or on the map.
- The Message is finished and Funky Wireless Protocols has appeared.
4. Complete FNSM Requests and character-focused chains
Finish all six FNSM Requests, including Howard’s request. These missions unlock during campaign progress, so return to the FNSM App after advancing the story if a request is not yet available. Complete each request through its final objective and reward screen rather than stopping when the main conversation ends.
Complete all five Brooklyn Visions missions. The final activity is A Gift, so continue the chain when that marker appears. Complete both Cultural Museum missions, including Hard Bop, and all four The Flame missions, including It Was Meant for Me. These final chain missions can appear only after earlier entries in their category are finished, so a missing marker is not automatically a tracking error.
- All six FNSM Requests are complete.
- All five Brooklyn Visions missions, including A Gift, are complete.
- Both Cultural Museum missions, including Hard Bop, are complete.
- All four The Flame missions, including It Was Meant for Me, are complete.
5. Clear Hunters, Prowler Stashes, EMF and challenge activities
Complete all Prowler Stashes and verify the Prowler category counter afterward. Complete the Hunter Blinds before attempting the Hunter Bases; the Blinds provide the progression that opens the larger bases. Finish every EMF Experiment through its final result screen. These categories unlock gradually through story progress, so use the lock icon and mission progression as your guide when a marker is absent.
Complete the ordinary Mysteriums, then finish Grand Finale when it becomes available. Bronze performance is sufficient for completion, so higher medals are optional unless you want the challenge. Complete the ordinary Unidentified Targets, then finish Target Identified when it appears. Also clear every Symbiote Nest. Check the map after each chain because a final follow-up may not appear until the preceding entries are complete.
- All Prowler Stashes are complete.
- All Hunter Blinds and Hunter Bases are complete.
- All EMF Experiments are complete.
- The ordinary Mysteriums and Grand Finale are complete.
- The ordinary Unidentified Targets and Target Identified are complete.
- All Symbiote Nests are complete.
6. Finish equipment trophies after activity cleanup
District completion and equipment trophies use overlapping resources but are separate requirements. Spend the Tech Parts and Tokens earned during cleanup on every Suit Tech upgrade. If resources remain missing, complete available Crimes or other unfinished activities instead of leaving an upgrade tier incomplete. Fully Loaded requires every Suit Tech upgrade.
Open the Gadgets menu and purchase every Gadget upgrade for To the Max. In the Suits menu, acquire every required Suit for Kitted Out, including suits earned through story progress or side content and suits purchased with resources. Suit Styles are cosmetic variants and should not take priority while a required Suit, Gadget upgrade, or Suit Tech upgrade is still unavailable.
- Every Suit Tech upgrade is purchased.
- Every Gadget upgrade is purchased.
- Every required Suit is acquired.
- Fully Loaded, To the Max, and Kitted Out have appeared.
7. Perform the final completion audit
Return to the map and confirm that all 14 districts display 100 percent. Open the FNSM App and check for unfinished side missions. Compare the district panels with the 160-location audit, paying special attention to Spider-Bot progress, The Message, Grand Finale, Target Identified, It Was Meant for Me, A Gift, and Hard Bop. Verify Spider-Bots through Collections and district panels rather than requiring a particular story-versus-free-roam count.
For a complete cleanup file, confirm Superior along with Funky Wireless Protocols and the equipment trophies. If a counter fails to update, remain in the activity area until the completion screen finishes, then check the map again. Make a separate manual save before correcting a suspected tracking problem so you can recover if an activity fails to register.
- All 14 districts display 100 percent.
- The tracked activity audit reaches 160 of 160.
- Spider-Bot progress is complete in Collections and the district panels.
- The Message, Grand Finale, Target Identified, It Was Meant for Me, A Gift, and Hard Bop are complete.
- Every required Suit, Gadget upgrade, and Suit Tech upgrade is obtained.
- Superior, Funky Wireless Protocols, and the relevant equipment trophies have been awarded.
Before you move on
- All 14 districts display 100 percent on the in-game map.
- The district-tracker audit is complete at 160 of 160 tracked locations and activities.
- Spider-Bot progress is complete according to Collections, district completion panels, and a specialist location checklist; no disputed numerical category total is required.
- The Message, It Was Meant for Me, A Gift, Hard Bop, Grand Finale, and Target Identified are complete.
- Every required Suit, Gadget upgrade, and Suit Tech upgrade is obtained.
- Superior, Funky Wireless Protocols, and the relevant equipment trophies have been awarded.
References for this chapter
- Marvel's Spider-Man 2 Support
- Marvel's Spider-Man 2 - PS5 Exclusive
- Marvel's Spider-Man 2 Trophy Guide & Roadmap
- Spider-Man 2 Collectible Guide - 100% Completion
- Spider-Man 2 All Spider-Bot Locations
- Spider-Man 2 All Mysterium Locations
- Spider-Man 2 All FNSM Request Locations & Solutions
- Marvel's Spider-Man 2: All Spider-Bots Locations
Finishing up
You have reached the guide's completion goal when: 1) the final story mission and all required boss confrontations are completed and the game's epilogue/canonical ending plays to completion, 2) the end credits sequence begins and the final cutscene epilogue is visible, and 3) the in-game story log shows the last main mission as completed.
Optional completion targets (not required for the canonical ending): 100% district completion (collectibles finished per district), all suit tech upgrades purchased, all skill trees fully unlocked, and the main story completed on a higher difficulty for trophies.
If any required mission fails, reload the last manual or auto-save and follow the step-by-step boss strategy in the corresponding chapter rather than restarting the campaign.
The guide includes recovery steps for each major fight.
When you see the final epilogue scenes and the credits roll, stop and confirm the story log shows the last main mission as completed—this documentary check confirms you have reached the canonical ending.
Choose your next gameScreenshots & video
Game imagery for reference. Follow the written chapters above for the route and strategies.
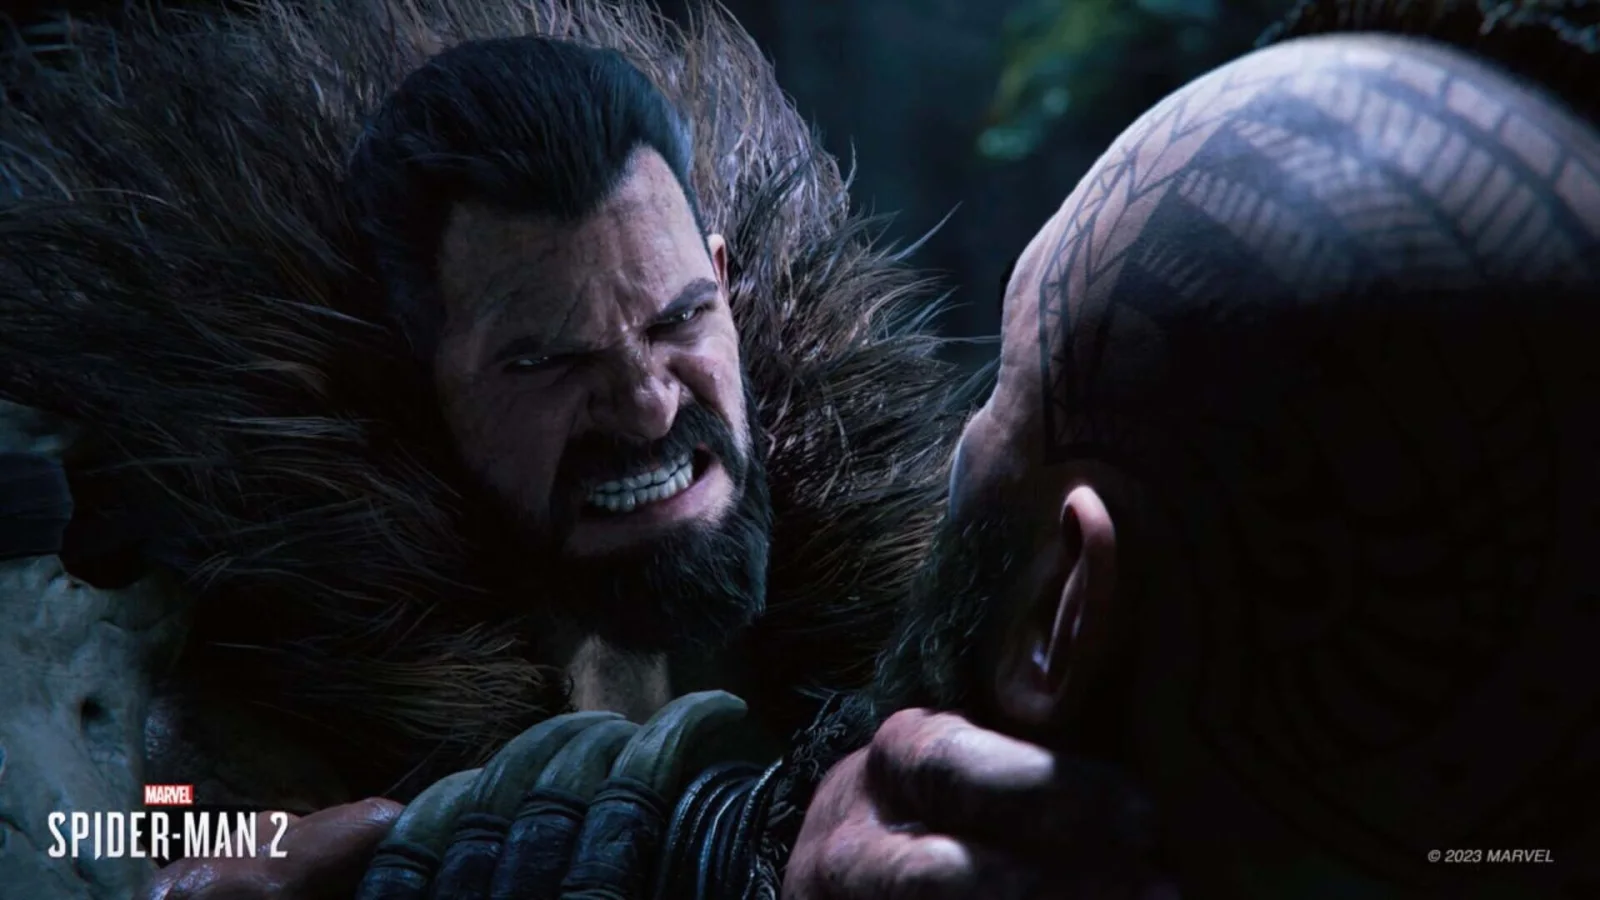
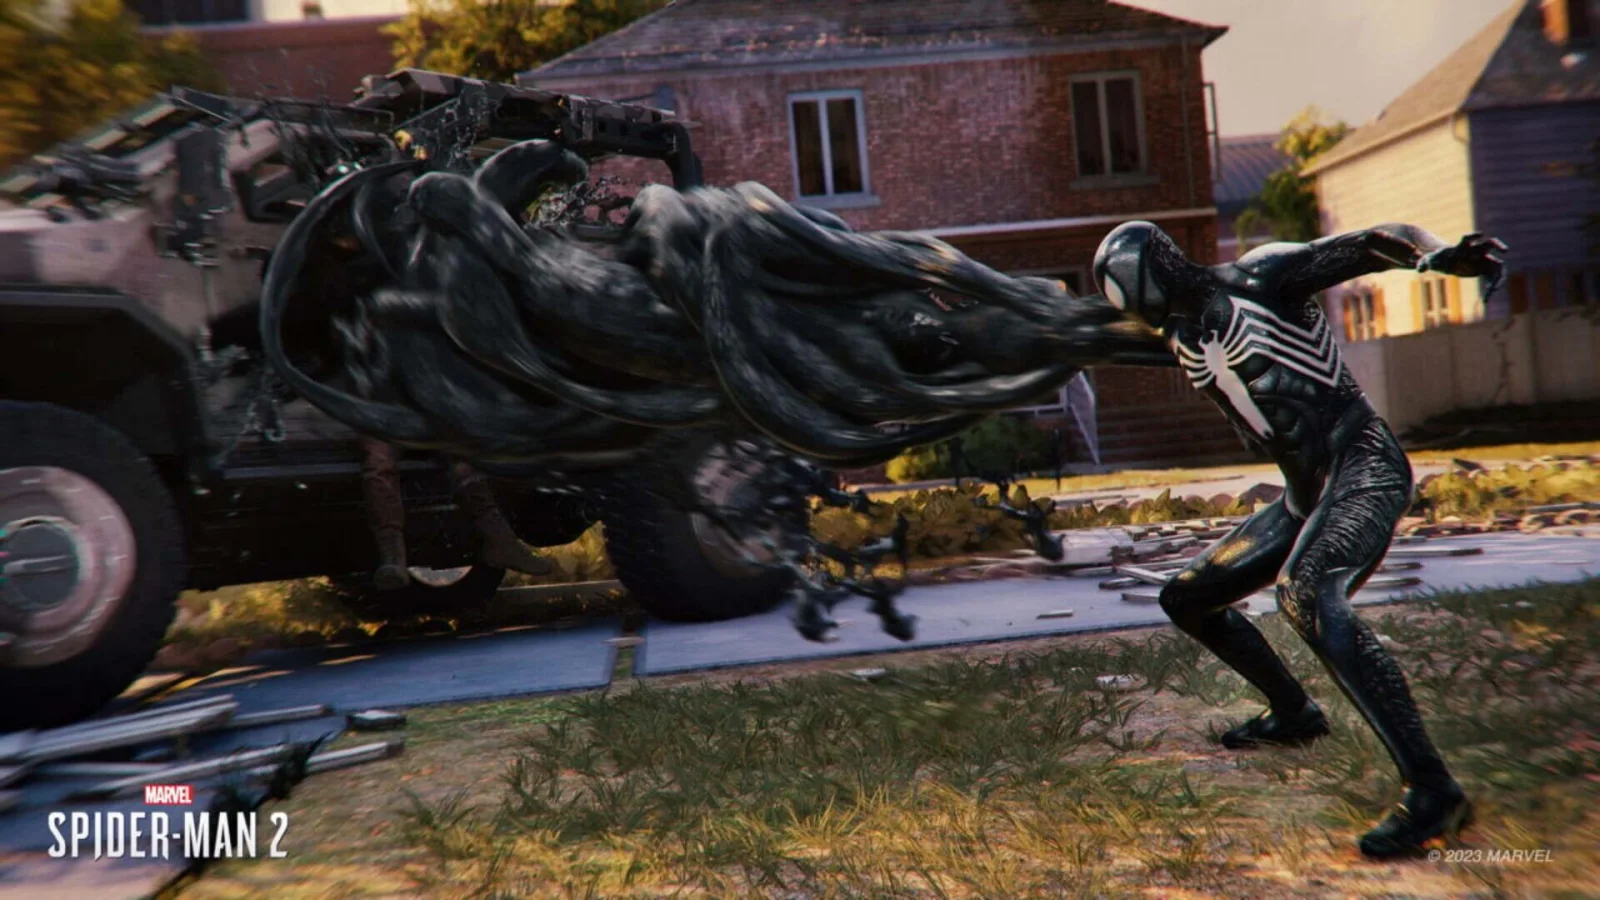
Sources & references
Our original guide draws on the references below. Check the edition at the top of this page before following controls or unlock requirements.
- Marvel’s Spider-Man 2 arrives only on PS5 October 20, Collector’s & Digital Deluxe Editions detailed – PlayStation Blog
- What Accessibility options does Marvel's Spider-Man 2 feature?
- I am stuck or can't progress the game. – Insomniac
- Marvel's Spider-Man 2 – PlayStation Store
- Marvel’s Spider-Man 2: hands-on report – PlayStation.Blog
- Marvel's Spider-Man 2: Best Skills to Unlock First – Push Square
- Marvel's Spider-Man 2: Best Suit Tech Upgrades – Push Square
- Marvel’s Spider-Man 2 Tips: 7 Things I Wish I Knew Before Playing – Push Square
- Marvel's Spider-Man 2: All Missions
- Marvel's Spider-Man 2: Surface Tension
- Marvel's Spider-Man 2: One Thing at a Time
- Marvel's Spider-Man 2: Show Me New York
- Marvel's Spider-Man 2: Roll Like We Used To
- Marvel's Spider-Man 2: Good Men
- Spider-Man 2 Collectible Guide - 100% Completion
- Spider-Man 2 How to Fast Travel
- Marvel's Spider-Man 2: How to Fast Travel
- Spider-Man 2 All Spider-Bot Locations
- Marvel’s Spider-Man 2 gameplay revealed – PlayStation.Blog
- Your guide to what’s new in Marvel’s Spider-Man 2 – PlayStation
- Controls & moves list - Marvel's Spider-Man 2 – Shacknews
- Marvel's Spider-Man 2 Trophy Guide & Roadmap
- Marvel's Spider-Man 2 PS5 Official Game Page
- Marvel's Spider-Man 2 Launches Worldwide Only on PlayStation 5 – Sony Interactive Entertainment
- Marvel's Spider-Man 2: Amends
- Marvel’s Spider-Man 2 Suit Tech Guide
- Marvel's Spider-Man 2: Suit Tech Upgrades List
- Marvel's Spider-Man 2: The Flames Have Been Lit
- Marvel's Spider-Man 2: Stay Positive
- Marvel's Spider-Man 2: Wings of My Own
- Marvel's Spider-Man 2: New Threads
- Marvel's Spider-Man 2: It Chose You — Push Square
- Marvel's Spider-Man 2: Wake Up
- Marvel's Spider-Man 2: I'm the Hero Here
- Marvel's Spider-Man 2: No Escape
- Marvel's Spider-Man 2: Anything Can Be Broken
- Marvel's Spider-Man 2: Don't Be Scared
- Spider-Man 2: How to defeat Lizard (It Chose You guide) — Destructoid
- It Chose You: Marvel's Spider-Man 2 Walkthrough — VGTimes
- Marvel's Spider-Man 2 Support
- Marvel's Spider-Man 2: Trouble with Harry
- Trouble With Harry: Marvel's Spider-Man 2 Walkthrough
- Marvel's Spider-Man 2: This Isn't You
- Marvel's Spider-Man 2 - Main Story Missions Walkthrough
- Marvel's Spider-Man 2: Make Your Own Choices
- Marvel's Spider-Man 2: Set Things Right – Push Square
- Marvel's Spider-Man 2: It's All Connected
- Marvel's Spider-Man 2: Finally Free
- Is there a point of no return in Marvel's Spider-Man 2?
- Marvel's Spider-Man 2 Guide: 100% Completion Walkthrough
- Marvel's Spider-Man 2 - PS5 Exclusive | PlayStation
- Marvel's Spider-Man 2: Together
- Marvel’s Spider-Man 2: How to Beat Venom in ‘Together’ Walkthrough
- Marvel’s Spider-Man 2 Boss Guide: Tips on defeating Venom
- Marvel’s Spider-Man 2 update adds New Game Plus and new suits today
- Spider-Man 2 missions list: All main chapters and how many to expect
- Marvel’s Spider-Man 2 update adds New Game Plus and new suits today – PlayStation Blog
- Marvel's Spider-Man 2 New Game Plus explained – GamesRadar+
- How to Start New Game Plus in Spider-Man 2 – Prima Games
- Release Notes v1.005.000 – Insomniac Games
- Marvel's Spider-Man 2 - PS5 Exclusive
- Spider-Man 2 All Mysterium Locations
- Spider-Man 2 All FNSM Request Locations & Solutions
- Marvel's Spider-Man 2: All Spider-Bots Locations
About the game & collecting notes
- Platform
- Sony PlayStation 5
A practical, start-to-finish campaign guide for the PS5 original of Marvel's Spider-Man 2. Follow step-by-step mission routing, boss strategies, essential skill/suit tech priorities, character-specific tactics for Peter and Miles, and a concrete completion checklist that ends at the game's canonical epilogue.
Darryl Polo
Darryl Polo writes about emulation and retro games. What changes when an old favorite moves to another setup? That question connects his interest in tinkering with the games that made the hardware worth keeping.
Our editorial standardsFound a step that needs another look? Help us improve this guide.