
Kingdom Come: Deliverance II — Complete PS5 Campaign Walkthrough
Step-by-step campaign coverage for the PS5 original release of Kingdom Come: Deliverance II. This guide prepares your console, prioritizes skills and perks, and walks the main campaign from opening sequence through the final ending, with chapters on combat, stealth, alchemy, major regions, endgame choices and Royal Edition DLC integration.


Find a copy
Kingdom Come: Deliverance II Sony PlayStation 5
We may earn a commission if you buy through these links, at no extra cost to you. As an Amazon Associate I earn from qualifying purchases.
Opens retailer search results. Check the model, edition, seller, availability and current price before buying.
Before you begin
This walkthrough is written specifically for the PlayStation 5 original release of Kingdom Come: Deliverance II (released February 4, 2025) and covers the main campaign from the opening tutorial through the game's final main-quest ending.
Follow the chapter order for a straightforward run; consult the chapters on optional content if you want a completionist route or plan to include Royal Edition DLC.
Play safely: use multiple manual save slots, check the settings chapter before you begin, and install all official updates from the PS5 store.
The guide focuses on practical, actionable objectives (what to do and the order to do it) plus recovery steps for stuck or failed quests; it does not attempt to summarise story beats beyond what you need to make progress.
Set yourself up for the run
Install all available PS5 patches and the latest platform update before starting; if using the Royal Edition or DLC, confirm the DLC is enabled in the PS5 store page for your account.
Create at least four manual save slots and use them routinely: one before major quest decisions, one before combat-heavy sections, one after finishing key questlines, and one 'clean' slot for experimentation.
Open Settings: set difficulty and accessibility options to your comfort level (combat difficulty, aim assist if available, subtitle size).
On PS5, choose a performance/quality profile only if you need more stable framerate — this affects precision in timed combat.
Configure the controller deadzones and sensitivity in the Input menu; enable button prompts for controller if you prefer the PS flyout prompts.
Make sure vibration and adaptive trigger settings suit long sessions.
Decide on a playstyle build early (Melee/Warrior, Stealth/Thief, Speech/Trader, or Mixed).
The game uses Stats → Skills → Perks; investing early in a few complementary skills speeds up access to key perks.
Familiarize yourself with the quick-save/auto-save cadence and inventory management: stash heavy loot in town chests, sell redundant items to reliable vendors, and keep enough coin for essential services (repairs, training, horses).
If you plan to use DLC content (Royal Edition), read the DLC/integration chapter first so you know recommended insertion points and avoid sequence conflicts with main-quest flags.

Settings, saves and PS5 performance checklist
Prepare the PS5 version before beginning a serious campaign. Install the current update, choose a graphics mode that suits your display, make subtitles and HUD elements readable, and test DualSense vibration and trigger effects. Select difficulty during new-game setup rather than assuming a PS5 system preset controls it. Kingdom Come: Deliverance II has quest autosaves, sleep saves, Saviour Schnapps saves, and a temporary Save and Exit file. Because Save and Exit is not a permanent named archive, maintain several deliberate recovery points and record their purpose outside the game. Finally, verify Royal Edition add-ons in PS5 Manage Game Content, compare them with the PlayStation Store entitlement list, and check the game's DLCs & Extras menu before committing to a long campaign.
Update the game and confirm the correct PS5 edition
On the PS5 home screen, highlight Kingdom Come: Deliverance II, press the Options button, and choose Check for Update. Install the available update before starting the campaign. For a disc copy, keep the disc inserted while checking downloadable content; for a digital copy, sign in with the PSN account that owns the game or the relevant add-on. The PlayStation Store identifies the title as a PS5 release and lists the Royal Edition separately from the standard edition.
Do not treat the edition name printed in a purchase history as proof that every add-on has finished downloading. After updating, highlight the game again, press Options, and open Manage Game Content. This is the first place to check whether separately installed DLC is actually present on the console.
- The game is updated before the first long session.
- The correct PSN account is signed in.
- A disc copy remains inserted when checking disc-owned add-ons.
- Manage Game Content is available for the installation.
Set graphics and display options without confusing PS5 and game settings
Open the game's Options menu from the title screen or pause menu and inspect the graphics or display settings. On a standard PS5, use Performance mode if smoother camera movement and combat response matter more to you, or Fidelity/Quality mode if you prefer the sharper visual presentation. The available labels and exact output can vary with the installed patch and display, so confirm the selected mode in the game's own menu rather than copying a PC setting.
Calibrate brightness and HDR while the television is in the picture mode you normally use for games. Check a dark interior and a bright outdoor scene before settling on the setting. If the HUD is cut off, first inspect the game's display or safe-area controls; then use PS5 Settings → Screen and Video if the whole console image is misaligned. The PS5 system's Game Presets can prefer Performance Mode or Resolution Mode for compatible games, but they do not choose Kingdom Come: Deliverance II's difficulty.
If you experience crashes or shutdowns, PLAION's PS5 support recommends trying Settings → Saved Data and Game/App Settings → Game Presets → Performance Mode as a console troubleshooting step. This is a stability measure, not a substitute for checking the game's own graphics mode.
- The selected game graphics mode matches your display preference.
- The HUD, map edges, and subtitle area are fully visible.
- Dark scenes remain readable without making outdoor scenes excessively bright.
- You know that PS5 Game Presets do not set campaign difficulty.
Configure subtitles, HUD readability, and DualSense comfort
From the title screen or pause menu, open Options and adjust the accessibility and HUD entries. Enable subtitles if you want spoken dialogue and quest instructions retained on screen. The official technical FAQ lists four subtitle sizes—small, classic, large, and extra-large—as well as speaker-name display, subtitle contrast, and crosshair visibility. Choose the smallest size you can read comfortably, then increase it if names or objective dialogue disappear into the background.
The PS5 version supports DualSense haptic feedback and adaptive triggers. Test both during ordinary movement and combat. Turn vibration or trigger effects down or off if resistance makes repeated attacks uncomfortable, causes hand fatigue, or makes it harder to notice the intended weapon response. Stick sensitivity and inversion can also be adjusted in the game's control settings. These choices do not alter quest requirements, so revisit them whenever camera control feels less readable than expected.
- Subtitles are enabled when needed.
- Subtitle size and contrast work from your normal seating distance.
- Speaker names are enabled if identifying quest participants is difficult.
- Stick sensitivity, inversion, vibration, and adaptive triggers are comfortable.
Choose difficulty at new-game setup
Begin a new game and read the difficulty choices before confirming the campaign. Use the standard setting for a first playthrough unless you specifically want Hardcore Mode's additional navigation and survival restrictions. Hardcore Mode is not simply a damage slider: reduced information and harsher travel or preparation requirements change how you read the world and plan journeys.
If you are unsure, begin on the normal setting and make a deliberate save after the opening sequence rather than restarting repeatedly to test options. Do not assume a PS5 Game Preset, Performance mode, or accessibility setting changes difficulty. If your installed version exposes a gameplay difficulty entry later, read the confirmation text and make a recovery save before changing it.
- The intended difficulty is confirmed before the campaign begins.
- Hardcore Mode is not enabled accidentally.
- Graphics and accessibility settings are not being mistaken for difficulty settings.
Build a reliable save routine and record checkpoint purposes
Kingdom Come: Deliverance II saves automatically around significant quest conversations and other major progression moments. Sleeping can also save, but only use a bed interaction that explicitly says Sleep and Save; a bed that merely offers Sleep should not be treated as a guaranteed manual checkpoint. For a durable manual save at your current location, use Saviour Schnapps through the save command or inventory. Reserve at least one bottle for an irreversible conversation, crime attempt, dangerous fight, or quest hand-in.
When ending a session, use the pause menu's Save and Exit to Menu command. This creates a temporary exit save so you can resume after quitting without spending Saviour Schnapps. It is not a permanent named archive: maintain separate Saviour Schnapps or Sleep and Save checkpoints for important decisions, and do not assume the exit file will preserve a whole history of previous sessions.
The game does not provide editable save-slot names. Use an external note, phone note, or paper list with labels such as PRE-DECISION, PRE-BATTLE, POST-QUEST, and EXPERIMENTAL, followed by the in-game location and approximate time. After creating a save, open Load Game and check its timestamp, location, and save type. Keep an older recovery point instead of overwriting every recent checkpoint.
- A Save and Exit file is created when you finish the first session.
- A durable manual save exists before a major decision or dangerous activity.
- The Load Game screen confirms the expected location and timestamp.
- Your checkpoint labels are recorded outside the save list.
- Autosaves are treated as backup rather than your only recovery method.
Verify Royal Edition DLC and optional account content
On the PS5 home screen, select the game, press Options, and choose Manage Game Content. Install every add-on you own. Then open the game's PlayStation Store page while signed into the purchasing account and compare the installed content with the current Royal Edition listing. The US PlayStation Store lists the Expansion Pass, Gallant Huntsman's Kit, The Lion's Crest, Brushes with Death, Legacy of the Forge, and Mysteria Ecclesiae with the Royal Edition; Shields of Seasons Passing is also listed as an included add-on on that page.
Launch the game and open the title-screen DLCs & Extras menu. Confirm that the expected additional-content entries are recognized. Installation does not necessarily begin a DLC quest immediately; story content can have its own start conditions. If an owned item is absent, close the game completely, recheck Manage Game Content, verify the account and region, and use PS5 Settings → Users and Accounts → Other → Restore Licenses before relaunching. Do not delete campaign saves while resolving an entitlement problem.
Deep Silver Account rewards are separate from the Royal Edition purchase. If you want them, use DLCs & Extras → Deep Silver Account and follow the QR-code or Visit URL process. The official instructions state that linked rewards become available in the shared stash after completing Laboratores, so their absence at the start of the game does not prove that paid DLC is missing.
- Every owned Royal Edition add-on shows as installed.
- The PlayStation Store page shows the expected edition and add-ons for your account.
- The DLCs & Extras menu recognizes the installed content.
- You understand that DLC installation and DLC quest availability are separate checks.
- Deep Silver Account rewards are not being confused with Royal Edition ownership.
Before you move on
- The intended difficulty is confirmed in the new-game setup.
- Subtitles, subtitle contrast, HUD visibility, camera controls, vibration, and adaptive triggers are readable and comfortable.
- The selected graphics mode displays the complete HUD and map without clipping.
- A temporary Save and Exit file and at least one durable recovery save have both been tested through the Load Game screen.
- Your external checkpoint log identifies a pre-decision or pre-battle save and a post-quest save.
- Manage Game Content and the DLCs & Extras menu recognize the Royal Edition or separately purchased add-ons you intend to use.
- Any optional Deep Silver Account rewards are understood to require account linking and Laboratores before appearing in the shared stash.
Opening sequence and tutorial completion
Kingdom Come: Deliverance II opens with the Suchdol siege, where you control Father Godwin before the story shifts to Henry and Hans Capon. The next three quests—Easy Riders, Fortuna and Laboratores—form a mostly linear prologue that teaches combat, stamina, stealth, horse travel, alchemy, dialogue checks and reputation consequences. Follow the marked objectives rather than exploring aggressively, because Henry is poorly equipped after the ambush. Use the practice duel with Hans to learn blocking, timed parries, stamina recovery and evasive movement. In Fortuna, complete Bozhena’s treatment and alchemy instructions before leaving. In Laboratores, finish the work at Troskowitz and accept the scripted consequences of the tavern dispute. The prologue is complete when the journal moves on to the wedding-invitation objective. Create a manual save before committing to the blacksmith Radovan or miller Kreyzl route if you want to compare the two openings.
1. Defend Suchdol and complete the Last Rites tutorial
Last Rites begins at Suchdol Castle with Father Godwin during the siege. Follow the objective marker to the front ramparts, use the crossbow as instructed and defend the position until the objective changes. You do not need to search the castle for loot or attempt to alter the battle’s outcome; this sequence is scripted and is designed to introduce movement, aiming and objective tracking.
When the game sends you back into the courtyard, help defend the gate, then follow Commander Dry Devil up through the castle. On the wall, deal with the attackers using the equipment and nearby soldiers available to you. The final task is to knock down the ladder against the outer wall. Completing that interaction triggers the cutscene that ends the siege tutorial and transitions the story to Henry and Hans travelling toward Trosky.
- Follow the marked objectives through Suchdol.
- Use the crossbow when the tutorial requires it.
- Return to the commander instead of wandering after the courtyard defense.
- Knock down the wall ladder to finish Last Rites.
2. Stay with Hans during Easy Riders and complete every tutorial prompt
Easy Riders begins with Henry travelling alongside Hans Capon and the escort. Stay with the group and complete the early dialogue and travel objectives in order. The quest introduces horse movement, conversations, a dice interaction and a short choice that nudges Henry toward a broad playstyle. Choose the option that best matches your intended approach, but do not treat it as a permanent class selection; your later actions and skill use matter far more.
The practice duel with Hans is not optional for progression. Equip the training equipment he requires, enter the practice area and defeat him with the training sword. Use the fight to learn the difference between holding a guard and responding to an attack with a timed parry. After a successful defense, answer with a controlled strike rather than repeatedly attacking until Henry’s stamina is empty. Allow stamina to recover between exchanges and use the duel to test evasive movement as well: step away or evade when an attack is poorly timed instead of absorbing every hit.
Winning the duel is also the safe way to secure the related combat achievement or trophy, but the trophy is optional for campaign completion. If you lose and want that reward, reload a save before the spar rather than assuming it can be recovered later in the same run.
- Complete the horse and dialogue instructions before leaving the escort.
- Equip the required practice gear.
- Defeat Hans in the training duel if you want the related trophy.
- Test guarding, timed parrying, stamina recovery and evasive movement.
3. Follow Hans through the ambush and the rock passage
After the camp sequence changes, remain behind Hans and copy his cautious movement through the woods. Use crouching and observation during the stealth section rather than sprinting ahead. The archers and the ambush are scripted events, so perfect stealth does not prevent the story from moving into its next phase.
When Hans stops near the rocks, speak with him and scout the passage he indicates. Follow the route that leads through the rock formation and reunite with him on the far side. If you become disoriented, return to the point where Hans was last waiting and check the alternate branch rather than circling indefinitely. The subsequent confrontation and fall cannot be avoided through superior combat or stealth. Once the scene ends, Henry is badly injured and the game begins Fortuna.
- Stay close to Hans during the stealth instruction.
- Use crouching and visual observation instead of rushing.
- Scout the rock passage and reunite with Hans.
- Do not waste supplies trying to prevent the scripted ambush.
4. Complete Fortuna at Bozhena’s cottage
Fortuna starts with Henry recovering at Bozhena’s cottage. Follow the immediate recovery instructions before travelling away from the hut. Treat bleeding, eat when instructed, wash if the objective calls for it and inspect the available equipment. The early game is not yet a good time to pick fights or roam far from the cottage because Henry has limited equipment and is still recovering from the ambush.
Bozhena then teaches the basic alchemy procedure needed to prepare medicine. Gather the requested herbs, place the required liquid and ingredients into the alchemy apparatus in the order shown by the recipe, complete the heating and grinding steps, and fill the phial. Recipes are not interchangeable, so read each instruction rather than copying the previous action. Keep requested herbs and quest items until the current objective is complete.
When armed men arrive at the cottage, use dialogue if you want to avoid an immediate fight, or prepare for the confrontation if your choices make hostilities unavoidable. Either way, follow the updated objective afterward and do not leave while the journal still requires you to resolve the cottage situation.
- Complete Henry’s recovery tasks before travelling.
- Follow Bozhena’s alchemy instructions in order.
- Keep requested ingredients until Fortuna is complete.
- Resolve the visitors’ confrontation and follow the updated journal objective.
5. Finish Laboratores and accept the scripted Troskowitz consequences
Laboratores brings Henry and Hans to Troskowitz, where they need money, lodging and a way to continue their mission. Speak with the relevant tavern characters, then accept the work objective. Carry the required flour sacks to the inn’s pantry or the destination shown by the objective marker. Do not abandon the task to chase unrelated activities while the journal still lists the sacks.
The tavern dispute involving Hans and Svatya can lead to a fistfight and arrest. Stay near allies, use short attacks, defend when stamina is low and avoid striking bystanders. If Henry and Hans are placed in the pillory, wait through the scripted punishment and continue after release. This is a consequence built into the prologue, not a campaign-ending failure. Do not reload solely because the pillory scene occurs.
After the final conversation, inspect the journal. Laboratores is the fourth main quest of the linear prologue. The next major objective concerns finding a way to attend the wedding and reach the people Henry and Hans need to contact.
- Carry the required sacks to the marked destination.
- Avoid creating additional crimes during the tavern dispute.
- Survive or accept the scripted brawl outcome.
- Continue after the pillory instead of treating it as a failed campaign.
6. Review early character choices without rushing perk decisions
During or immediately after the prologue, the game may notify you about available level, skill or perk choices. Open the character menus and read the available descriptions before confirming anything. Choose improvements that match the actions you are already using: combat for frequent fighting, stealth or thievery for covert play, speech for dialogue-focused play, or alchemy and survival for preparation-heavy play.
There is no single mandatory first perk for every build. If a choice is unclear, leave the point unspent until you understand the requirement and effect, provided the menu allows you to do so. Create a manual save before committing to an uncertain decision. This is safer than relying on autosaves, especially when several systems unlock close together.
- Read the full description of each available perk.
- Choose improvements that match your actual playstyle.
- Do not spend points merely to clear a notification.
- Keep a manual save before an uncertain choice.
7. Confirm the prologue completion and save before the wedding route
The opening tutorial is complete when Last Rites, Easy Riders, Fortuna and Laboratores are marked finished in the journal, Henry has recovered from the ambush, and the next major goal concerns obtaining an invitation to the wedding. At this point, the game opens into the Trosky region and gives you more freedom to train, repair equipment, earn money and pursue side activities.
The two principal wedding approaches begin through blacksmith Radovan at Tachov or miller Kreyzl at Lower Semine. These routes are mutually exclusive for the immediate progression sequence. Make a manual save before accepting one if you want to compare both paths or preserve the alternative for a later playthrough. You do not need to rush directly into the decision, but do not mistake optional exploration for unfinished tutorial objectives.
- The four prologue quests are complete in the journal.
- The next major objective is obtaining access to the wedding.
- You can guard, parry, recover stamina and evade without exhausting Henry.
- You have completed a basic alchemy sequence.
- A manual save exists before choosing Radovan or Kreyzl.
Before you move on
- Last Rites, Easy Riders, Fortuna and Laboratores are marked complete in the journal.
- Henry has reached the open Trosky section where the wedding invitation becomes the next major objective.
- The player has practised crossbow use, horse travel, guarding, timed parrying, stamina recovery, evasive movement, stealth and basic alchemy.
- The player understands that the ambush and pillory consequences are scripted rather than signs of a failed campaign.
- A manual save exists before committing to the Radovan or Kreyzl route.
References for this chapter
Early progression: stats, skills and perk priorities
Kingdom Come: Deliverance II has no fixed class system. Henry improves by using weapons, speaking, reading, sneaking, crafting, riding, and completing quests. Strength, Agility, Vitality, and Speech are the four main stats; Main Level is influenced by those stats and also receives quest experience. Individual skills and combat proficiencies level through their associated actions. Reaching even-numbered levels, beginning at level 6, grants a perk point for that category. These points are not a free universal pool: a point earned in Swords is used in the Swords category, while a point earned in Speech remains available for Speech perks. Build around two or three activities during the first 10–15 hours, leave room for higher-level options, and use the Player menu’s star and point indicators before buying anything. Mistakes can later be undone with Lethean Water, but that respec option requires progress into the Kuttenberg region or access to its recipe.
Open the Player menu and identify the categories that actually level
Open the Player menu and check the Main Level, Stats, Skills, and Combat sections. The four main stats are Strength, Agility, Vitality, and Speech. Main Level is not a separate class choice: it is influenced by the value of those four stats and also gains experience from quests. Raise Strength through melee activity, Agility through stealth, dodging, and suitable combat, Vitality through running, climbing, and surviving exertion, and Speech through conversations, successful dialogue checks, and reading.
Skills improve through the actions associated with them. Brewing raises Alchemy; reading and new Codex discoveries raise Scholarship; sneaking, pickpocketing, and lockpicking raise Stealth; stealing, pickpocketing, and lockpicking raise Thievery; riding raises Horsemanship; and general fighting raises Warfare. Weapon categories such as Swords, Heavy Weapons, Polearms, Unarmed, and Marksmanship improve when you use those weapons. Quests, books, and teachers can also contribute to selected skills.
- Check Main Level, Stats, Skills, and Combat separately rather than treating them as one progression bar.
- Confirm that your regular actions are raising the categories you intend to use.
Read the perk indicators before spending a point
Perk points become available as a category reaches even-numbered levels, beginning at level 6 and continuing at 8, 10, and later thresholds. The point belongs to the category that produced it. A Swords point cannot simply be transferred to Alchemy, and a Scholarship point cannot be used to buy a Strength perk. The Player menu displays the available point and the remaining perk capacity for each category; use those indicators instead of relying on a total shown elsewhere in the interface.
A perk may still be unavailable after the category has a point. Check its required level, prerequisites, and whether it conflicts with a perk already selected. Higher levels also allow more perks to be owned in that category. Because early choices can consume limited capacity, do not fill a tree with convenient but irrelevant perks before checking what becomes available at the next even level.
- Spend points only in the category where the game shows them as available.
- Inspect the requirement and any exclusive-perk warning before confirming a purchase.
- Leave capacity for a later perk if the next threshold is close.
Fighter route: choose one main weapon and its supporting stats
For a reliable early combat build, select one weapon family and use it often enough to build that category naturally. Strength is a practical partner for heavier melee equipment and physical combat. Agility is useful for mobile styles, dodging, lighter weapons, and characters who also want stealth or ranged options. Warfare rises from general combat and is a broad support category, but it does not replace the weapon skill for the weapon you actually carry.
A straightforward route is Strength, Warfare, and either Swords or Heavy Weapons. If you prefer mobility, bows, or lighter attacks, use Agility with Warfare and Swords or Marksmanship. These are priorities, not mandatory classes. Equipment requirements, weapon availability, and your comfort with the combat system matter more than forcing a theoretical optimum. Keep one backup weapon usable, but avoid dividing every early perk between several weapon trees.
- Choose a primary weapon family before buying several combat perks.
- Use the weapon often enough for its own category to level.
- Keep enough Strength or Agility for the equipment you intend to wear and carry.
Stealth and Thievery route: separate quiet movement from theft
A thief should focus on Stealth, Thievery, and Agility, but treat them as separate progress tracks. Stealth improves through sneaking near enemies, stealth takedowns, pickpocketing, and lockpicking. Thievery improves through lockpicking, pickpocketing, and stealing; more valuable stolen goods and harder locks provide better progress. Agility supports movement and gives you a fallback when a quiet attempt becomes a fight.
Practice on low-risk locks and isolated targets. Save before a serious theft, especially if the attempt takes place near a quest objective or valuable equipment. Do not spend every early point on combat simply because stealth can fail; instead, maintain a functional weapon skill and reserve the rest for the activities you perform most. A stealth perk helps only if your clothing, light level, noise, and route also support concealment.
- Raise Stealth through cautious movement and Thievery through actual theft-related actions.
- Keep a dependable escape or combat option for failed stealth attempts.
- Save before stealing from quest-related NPCs or entering restricted areas.
Social route: build Speech, Scholarship, and presentation together
For a dialogue-focused character, make Speech the center of the build and support it with Scholarship and suitable clothing. Speech improves through new dialogue and successful checks. Scholarship improves through reading books, winning Scholarship checks, and unlocking Codex entries. Read whenever it is safe and use ordinary dialogue instead of skipping every optional line; new dialogue is part of the intended progression for Speech.
Charisma, Persuasion, Impression, Coercion, Domination, Presence, and Intimidation are derived dialogue values rather than independent skill trees. Clothing and ornaments influence Charisma, while reputation and equipment can affect the displayed dialogue values. Before an important conversation, check the actual value shown for each response and change clothing when it improves the relevant check without damaging another requirement. Keep one practical combat category active even in a social build, because some quests still place Henry in danger.
- Raise Speech through new conversations and successful dialogue checks.
- Read books and unlock Codex entries to build Scholarship.
- Check clothing, reputation, and the displayed dialogue value before committing to a key response.
Use Lethean Water only when you are ready to rebuild
Lethean Water removes purchased perks and returns the points while leaving earned stat and skill levels intact. It is therefore a full perk reset, not a way to lower a skill or undo the experience gained from using it. Make a manual save before drinking it, then reopen the Player menu and confirm that the points and category limits are available for redistribution.
This option is not an opening-area convenience. You can buy the potion or its recipe from the apothecary in Kuttenberg after reaching that region. The alternative is The Thunderstone side quest in Grund: speak with the innkeeper to learn about Kona, complete the quest, and give the Thunderstone to Kona to receive the Lethean Water recipe. The verified recipe uses two Wormwood, one Belladonna, and one Henbane. Grind the Wormwood, add it to the cauldron, add Belladonna and brew for three turns, add Henbane, then distil. If you have not reached Kuttenberg, make careful choices and continue using your intended build rather than expecting an early respec.
- Save before drinking Lethean Water or replacing exclusive perks.
- Confirm that skill and stat levels remain unchanged after the reset.
- Obtain the potion or recipe in Kuttenberg, or earn the recipe from The Thunderstone in Grund.
- Use two Wormwood, one Belladonna, and one Henbane for the verified brew sequence.
Before you move on
- You can name your primary build route and the two or three categories you are actively improving.
- You have checked the Stats, Skills, and Combat sections and understand which category owns each available perk point.
- Your fighter build has one main weapon family, your thief build separates Stealth from Thievery, or your social build combines Speech with Scholarship and suitable presentation.
- You have left room for higher-level perks instead of filling every category with the first available option.
- You know that Lethean Water preserves earned levels while resetting purchased perks, and you know the Kuttenberg and The Thunderstone routes for obtaining it.
References for this chapter
- Kingdom Come: Deliverance II - PS5 Games | PlayStation
- Kingdom Come Deliverance 2 How to Level Up All Stats & Skills | PowerPyx
- Earning and Spending Perk Points - Gameplay - Getting Started | Kingdom Come: Deliverance II | Gamer Guides
- How leveling up & perk points work - Kingdom Come: Deliverance 2 | Shacknews
- Kingdom Come Deliverance 2 How to Reset Skills & Perks | PowerPyx
- How to Respec in Kingdom Come Deliverance II - Gameplay - Getting Started | Gamer Guides
Combat fundamentals: weapons, parry and stamina management
Kingdom Come: Deliverance II combat is built around distance, timing and stamina rather than constant attacking. Learn the default PS5 controls in the settings menu, practice basic attacks and defense with Tomcat, and complete Combat Training I and Combat Training II to unlock Master Strikes. A normal block protects Henry but consumes stamina; a Perfect Block is timed to the green shield window and is more efficient; a riposte follows with an attack; and a Master Strike is a learned sword counter performed from the opposite direction at the same timing. Use swords for flexible defense and Master Strikes, blunt weapons against heavily armored targets, and long weapons only where there is space to control distance. Against groups, keep enemies in front of Henry, retreat before stamina is exhausted, and heal only after creating room.
1. Prepare Henry and verify the PS5 combat controls
Before a serious fight, repair your equipped weapon and armor at an appropriate service point or with the relevant repair equipment. Weapon condition matters, and a broken sword is lost rather than simply becoming a weaker version of itself. Check the weapon’s Strength or Agility requirements and equip something Henry can use effectively instead of carrying a superior item that is currently beyond his capability.
Open the in-game controls menu before practicing. On the default PlayStation layout, the primary attack is assigned to R2 and block to L2, but the game permits control changes, so use the labels shown by your own configuration rather than memorizing a guide’s button sequence. Confirm the inputs for attack, block, dodge, lock-on and combat free look. Create a manual save before a difficult camp, duel or quest battle.
- Repair the weapon and armor you plan to use.
- Check requirements, condition and current equipment.
- Verify attack, block, dodge and targeting controls in the in-game menu.
- Save before a risky encounter.
2. Select a weapon according to range and protection
Swords are the most flexible choice while learning the combat system. They support directional attacks, sword combinations and the Master Strike once that technique has been learned. A one-handed sword with a shield gives a cautious fighter a dependable defensive setup, while a longer sword provides more reach but needs room for its attacks. Do not assume the longest weapon is best in every location: cramped rooms, narrow passages and cluttered courtyards make distance difficult to maintain.
Maces and other blunt weapons are useful against heavily armored opponents because blunt damage is better suited to protected targets than repeatedly relying on cutting attacks. Axes offer a different balance of damage and technique. Polearms and halberds can control open-ground spacing and threaten mounted targets, but they are awkward in confined interiors and are not a replacement for a sidearm. Change equipment only after creating distance or reaching a safe pause; attempting to switch while an opponent is already in striking range can leave Henry exposed.
- Use a sword while learning directional defense and Master Strikes.
- Consider blunt weapons against heavily armored enemies.
- Reserve long weapons for open areas where retreat is possible.
- Create space before changing equipment.
3. Practice the four defensive responses
A normal block is the safe response when you have recognized an attack but are too early or too uncertain to attempt a tighter timing. It protects Henry, but it consumes stamina. Holding block continuously is therefore a poor long-term plan: it can drain the resource needed to absorb the next hit and to attack afterward.
A Perfect Block is performed during the brief green-shield timing window shown in the normal combat interface. It is more efficient than an ordinary block and briefly disrupts the attacker. A riposte is the attack that follows a successful defensive exchange; use it when Henry has enough stamina and the enemy is isolated. A dodge avoids the attack line instead of absorbing it, but only use it when the landing space is clear. Dodging into another enemy, a wall or an obstacle can be worse than taking a controlled block.
Practice against one opponent and watch the attack animation as well as the indicator. Do not stare only at the reticle during a group fight. Once you can recognize the timing, repeat the exercise while keeping the camera positioned so a second attacker remains visible.
- Use ordinary blocks when the timing is uncertain.
- Press block during the green-shield window for a Perfect Block.
- Riposte only when stamina and positioning allow it.
- Dodge toward clear space, not toward another enemy or an obstacle.
4. Unlock and learn Master Strikes at the Nomads’ Camp
After the early Trosky progression points Henry toward the Nomads’ Camp, speak with Tomcat and begin Combat Training I. This lesson provides controlled practice with sword attacks, combinations and defensive timing. Complete the exercises before relying on the technique in live fights; the training arena lets you separate timing errors from problems caused by armor, terrain or multiple opponents.
Combat Training II follows with a duel against Tomcat. Save immediately before starting it. Protect yourself from the opening attack, keep enough stamina for defense, and use ordinary blocks, Perfect Blocks and retreats rather than trying to force a Master Strike before it is available. If you lose, return after improving Henry’s equipment or combat skills; the quest does not require you to win by exhausting every supply in one attempt.
After the duel, Tomcat demonstrates the Master Strike and has Henry perform the technique during the follow-up practice. A Master Strike is not the same as a Perfect Block followed by a separate riposte. Use a sword, place the attack on the side opposite the enemy’s incoming direction, and attack at the green-shield timing. If the enemy attacks from high, answer low; if the attack comes from one side, answer from the opposite side. Complete the practice requirements, then repeat the lesson until the timing is reliable.
- Complete Combat Training I with Tomcat.
- Save before the Combat Training II duel.
- Defeat Tomcat, then finish the Master Strike practice.
- Remember that Master Strikes require a sword.
5. Manage stamina as defense, damage protection and attack budget
Stamina supports more than attacking. Ordinary blocks and attacks consume it, while a depleted bar leaves Henry much less able to withstand a continuing exchange. Treat the bar as a reserve for defense rather than spending it on a long sequence whenever an opening appears.
Use a simple combat rhythm: defend, make one useful attack or short combination, then reset your distance. After a Perfect Block, do not automatically riposte if stamina is low. Let the efficient defense buy time for recovery. If Henry is fighting one opponent and the enemy has clearly finished an attack, use a short counter or learned combination. If several opponents are active, prioritize keeping them in one forward arc over completing a combo.
Back away before the stamina bar is empty. Doors, fences, slopes and narrow approaches can prevent enemies from surrounding Henry. Use combat free look or release and re-establish the target when another attacker moves outside the camera. The safest group fight is usually the one in which Henry controls the approach rather than the one in which he stands in the middle and trades blows.
- Keep stamina available for the next defense.
- Stop attacking when an opening closes.
- Use terrain to prevent enemies from surrounding Henry.
- Reposition the camera when a second threat leaves view.
6. Use armor, food and potions without trapping yourself
Armor provides protection but does not remove the need for stamina management. A heavily protected setup can tolerate more mistakes, while a lighter setup rewards movement and cleaner dodges; either way, do not remain in a fight after the stamina reserve has collapsed. Keep weapons and armor maintained before entering a camp or quest battle.
Eat outside combat when Henry is hungry and use food for routine recovery and hunger management. Healing and combat-support potions are safer during a pause than during an active exchange. Create distance, move behind cover or isolate an opponent before drinking. If Henry is bleeding or badly injured and there is no safe opening, retreat rather than attempting to heal in front of a weapon.
If a fight turns against you, disengage, heal when safe, repair equipment and return with a new plan. For a failed training duel, reload the pre-duel save or leave the camp and improve Henry before trying again. If Combat Training II appears unable to continue, update the PS5 installation before repeating the quest; later official patches addressed a progression issue involving that training sequence.
- Match armor choices to movement and stamina habits.
- Use food for hunger and routine recovery.
- Drink potions only after creating a safe opening.
- Reload, retreat or update the game if Combat Training II fails to advance.
Before you move on
- You can identify the difference between an ordinary block, a Perfect Block, a riposte, a dodge and a Master Strike.
- You have completed Combat Training I and Combat Training II with Tomcat at the Nomads’ Camp.
- You can perform a sword Master Strike by answering the enemy’s attack from the opposite direction during the green-shield timing window.
- You can finish a normal duel without emptying stamina through constant blocking and attacking.
- Before a major encounter, your weapon and armor are maintained, your supplies are ready and a retry save exists.
- You can survive a group fight by keeping opponents in front of Henry, retreating before stamina is exhausted and healing only after creating distance.
Stealth, thievery and non-lethal play
Stealth in Kingdom Come: Deliverance II is built around visibility, noise, clothing, lighting, line of sight and local suspicion. Crouch before entering private areas, wear quiet clothing, use darkness and solid cover, and watch the stealth feedback as you move. The safest way to learn the system is through the optional thievery lessons in Materia Prima at Lower Semine Mill after starting Wedding Crashers. Hired Hand Hensel teaches pickpocketing and takedowns, while the miller’s training introduces lockpicking. Start with low-risk targets and easy locks, save before important attempts, and leave when detection rises. Theft can cause fines, arrest, bounties, reputation loss or quest complications, and a crime may still be attributed to Henry after the immediate incident. Stealth is an approach, not a guarantee: scripted scenes, witnesses, patrols and quest requirements can still force confrontation.
Prepare Henry and save before entering a restricted area
Open the equipment screen and build a quiet outfit before entering private homes, guarded compounds or quest locations. Dark, soft clothing with low noise is preferable to heavy armour, but do not judge the outfit by colour alone. Noise comes from equipped gear, while visibility and conspicuousness are also affected by what Henry is wearing and how he is seen. Remove unnecessary armour and noisy pieces when the situation allows, and repair clothing if its condition has become a problem.
Make a manual save before a serious theft, takedown or lockpick attempt. Use separate saves for a normal campaign position and a crime attempt so a failed experiment does not overwrite useful progress. Carry a dagger only when a lethal stealth kill is actually appropriate; a dagger is required for the stealth-kill prompt, while a takedown is the non-lethal option. A knockout is still risky because the unconscious person can be discovered and the target may recover.
- Crouch before crossing into a restricted or private area.
- Wear quiet clothing and avoid unnecessary heavy armour.
- Create a manual save before targeting an important NPC, chest or quest location.
Use darkness, cover and the target’s patrol pattern
Approach at night or in poorly lit spaces, then combine darkness with physical cover. Walls, fences, buildings, vegetation, furniture and corners are useful because they break the observer’s line of sight. Crouching reduces your profile, but it does not make Henry invisible. Do not cross an open yard simply because the stealth indicator looks favourable; wait until a guard turns away, then move between cover points.
Move slowly near guards and sleeping targets. A person turning toward a doorway, changing direction or beginning to investigate is a warning to stop. If the stealth feedback worsens, freeze behind cover, back away or leave the property. Avoid memorising a fixed detection radius: clothing, noise, lighting, angle, visibility and the observer’s awareness all affect the outcome. The game’s visual feedback and nearby reactions are more reliable than a universal distance rule.
- Use darkness and solid cover together rather than relying on crouching alone.
- Study patrol routes before crossing an exposed area.
- Retreat when awareness rises instead of sprinting through the last open space.
Learn the systems through Materia Prima
After starting Wedding Crashers, visit Miller Kreyzl at Lower Semine Mill and begin the side quest Materia Prima. After helping with the mill work, exhaust the dialogue options about thievery. The miller can open optional objectives for practising lockpicking and for learning takedowns and pickpocketing. These lessons are the safest introduction to the systems and also provide Stealth and Thievery experience.
For the takedown and pickpocket lesson, find Hired Hand Hensel. His location changes with the time of day, so check around the mill area and nearby Troskowitz if he is not immediately present. Choose the dialogue to practise pickpocketing, follow him, and complete the exercise before attempting valuable targets. The lesson also demonstrates the counter required when Hensel resists a takedown. For lockpicking, use the practice opportunity from the same quest and begin with very easy locks.
- Start Materia Prima after Wedding Crashers is available.
- Ask Miller Kreyzl about learning thievery.
- Complete Hensel’s pickpocketing and takedown practice before robbing quest characters.
Pickpocket by banking preparation time, then taking one safe item
Begin pickpocketing only when the target is isolated, asleep or distracted, and make sure nearby witnesses cannot see Henry. The first phase is preparation: hold the interaction and build the available time without allowing the detection state to become dangerous. A fuller preparation gives more time for the item-selection phase, but greed is counterproductive. Stop before the meter or visual warning reaches the danger point.
During the second phase, select one useful, low-risk item and withdraw before the timer expires. A key or small purse is a better first target than emptying every pouch. The back pouch is generally easier to access; the front pouch is more demanding and is the situation addressed by the Inconspicuous Thievery perk. Nimble Fingers improves the opening pickpocket phase, while Rapid Flight provides additional forgiveness after a failed attempt. These perks are useful choices, not universal requirements.
Sleeping targets are good practice, but they are not consequence-free. A witness can still discover Henry, and the owner or guards may later connect him with the crime. Close the interaction and leave rather than beginning another attempt immediately.
- Save before trying to pickpocket an important NPC.
- Build preparation time without reaching the detection warning.
- Take one useful item and withdraw safely instead of emptying the pouch.
Use takedowns only after checking witnesses and escape routes
Circle behind an unaware person while crouched until the takedown prompt appears. Before committing, check for another guard, an open doorway, a nearby civilian, a patrol route and a place where the body could be discovered. A successful takedown removes an immediate obstacle, but it does not erase the crime. If someone finds the unconscious person, the area can become suspicious and the target can recover.
Move or hide a body only when the quest and surroundings clearly permit it. Do not knock out an NPC whose presence is required for a scripted conversation, timed objective or later quest stage. If Henry carries a dagger and the prompt offers a stealth kill, remember that the lethal choice can create a much greater reputation and quest consequence than a knockout. Use lethal stealth only when the objective or situation justifies it.
- Check patrols and witnesses before starting a takedown.
- Keep a clear retreat route.
- Prefer a knockout when the quest does not require killing and the body can be secured.
Use thieves’ clothing and criminal perks carefully
Materia Prima can lead to an optional thieves’ clothing objective involving Bathhouse owner Dorothy at Zhelejov Wagoners’ Inn. She can sell or otherwise provide access to Kreyzl’s stored clothing, and the outfit is useful for stealth because it is designed for quiet movement. If you obtain it by theft, do not immediately wear it in front of Dorothy; she can recognise the clothing and report the theft. Leave the area, change elsewhere and keep a normal outfit available for public conversations.
The Thievery tree contains tools for different criminal styles. Nimble Fingers helps pickpocket preparation, Inconspicuous helps with more difficult pouch access, and Rapid Flight is useful when a pickpocket attempt goes wrong. Choose based on whether you are practising theft, relying on front-pouch targets or accepting occasional failed attempts. These perks improve the system but do not override witnesses, patrols or quest scripting.
- Treat the thieves’ clothing as an optional reward, not a requirement for campaign progress.
- Change clothing away from the person who owns or recognises stolen garments.
- Choose Thievery perks according to your preferred method rather than taking every criminal perk automatically.
Recover when a theft is discovered
If a guard or resident notices Henry, stop stealing and create distance without drawing a weapon unless attacked. Depending on the crime and circumstances, the game may offer dialogue, a fine, arrest, punishment, a bounty or a chance to flee. Use a speech option or pay the fine when preserving local reputation and quest access matters more than the money. Fighting guards over a minor theft usually turns a recoverable mistake into a much larger crime.
Check the Player Card’s Reputation tab and the journal after a serious incident. Crime affects local reactions, and repeated offences can make an area more vigilant. Even if nobody saw the theft directly, witnesses may later infer Henry’s involvement from his presence near the scene or from missing property. If an essential NPC becomes hostile, a quest objective disappears or a key item is lost, reload the pre-attempt save rather than continuing for several hours.
If you choose to flee, leave the settlement and avoid returning while Henry remains wanted. Once the immediate danger has passed, resolve the problem through an available fine, dialogue option or other in-game punishment. Do not carry stolen goods openly through the same settlement immediately after the theft; the item’s stolen status and suspicious behaviour can create a second confrontation.
- Leave the crime scene before more guards arrive.
- Check local reputation and the journal after the incident.
- Reload the pre-attempt save if an important quest flag or NPC has been damaged.
Before you move on
- Materia Prima is active or completed, and you have used its optional training to practise at least one lockpick, pickpocket attempt and takedown.
- You can enter a private area using quiet clothing, darkness and cover, recognise rising detection and retreat before a full search begins.
- You can identify when a dagger is needed for a lethal stealth kill and when a non-lethal takedown is the safer option.
- You have successfully completed a low-risk theft without losing a quest item or provoking a major reputation problem.
- After a mistake, you can check the journal and local reputation, then recover through dialogue, payment, flight or a pre-attempt manual save.
References for this chapter
- Kingdom Come: Deliverance II - PS5 Games | PlayStation
- Kingdom Come Deliverance 2 Materia Prima Walkthrough
- Kingdom Come: Deliverance 2 – How To Sneak And Steal From People
- KCD2 Stealth, Lockpicking and Pickpocketing Guide
- Crime, reputation and punishment | Kingdom Come 2 | INARA
- Kingdom Come Deliverance 2: Materia Prima (Thieves' Clothing & Documents Location)
Alchemy, crafting and managing your economy
Alchemy gives Henry dependable healing, manual-save supplies, skill experience and a useful source of early income. Once the prologue releases you into Troskowitz, use the accessible shed beside the apothecary as your regular early-game bench. Learn recipes through the in-game recipe book, vendors, quests and books, then follow the displayed liquid, ingredient, grinding, boiling and distillation instructions instead of relying on memory. Keep common ingredients for practice, store rare materials and quest items, and sell surplus potions or unwanted equipment through the appropriate specialist. Pair every town visit with repairs, storage and a manual save so Henry is ready for the next dangerous quest without carrying an overloaded inventory.
Use the Troskowitz alchemy shed as your first reliable workshop
After the prologue, when Henry is free to move around Troskowitz, go to the apothecary’s area and look for the small shed containing an alchemy bench. This is a practical early station because it is close to an apothecary, herb sources and town services. Other benches appear in settlements and specialist locations later, but you do not need to search for a distant laboratory before beginning the system.
Interact with the bench and open the recipe book before selecting ingredients. Each entry shows the base liquid, ingredient quantities, whether an ingredient must be ground, the required boiling stages and whether the result is poured or distilled. The bench’s displayed instructions take priority over any external recipe list. If an entry is unavailable, learn it from a purchased recipe, quest reward, readable book or another confirmed source before spending valuable components.
- Reach Troskowitz after the prologue.
- Locate the usable alchemy shed near the apothecary.
- Read the complete recipe entry before beginning a brew.
- Keep a manual save before testing an expensive or unfamiliar formula.
Begin with Marigold Decoction and Saviour Schnapps
Marigold Decoction is a practical first healing brew. Its basic recipe uses water, one nettle and two marigolds. Put the water and nettle into the cauldron, boil the nettle for the displayed number of turns, prepare the marigolds in the mortar as directed, add them at the indicated stage, and pour the finished mixture into a phial. The exact quality depends on Henry’s Alchemy skill, ingredient condition, perk choices and how accurately the process is followed.
Saviour Schnapps is the campaign’s manual-saving consumable. Its basic recipe uses wine, one nettle and two belladonna. Boil the nettle first, grind the belladonna, add it when the recipe indicates, boil the required additional stage and pour the result. Higher-quality Schnapps can also restore health and temporarily improve physical attributes, but do not waste the potion merely to obtain a small combat benefit when you need it for saving.
Treat these recipes as examples of the process, not as the only useful options. Aqua Vitalis, Buck’s Blood, Nighthawk and other utility or combat-support brews may suit a particular quest or build. No single potion is required for a normal campaign completion.
- Keep a working supply of Marigold Decoction.
- Carry several Saviour Schnapps before entering a long quest or making a major decision.
- Follow the recipe’s displayed turns and distillation instructions.
- Use the recipe book rather than relying on memory when repeating a brew.
Raise Alchemy with inexpensive successful brews
Alchemy experience is earned by brewing at an alchemy bench, with better execution and higher-quality results improving the return. Gather common herbs during ordinary travel around roads, settlements, gardens and fields, then brew when returning to town. Marigold Decoction is particularly convenient because its ingredients are common and the finished product remains useful even when you are training the skill.
Do not begin by spending rare ingredients on complicated recipes. Use a cheap, familiar formula until you understand how the cauldron, mortar, bellows, hourglass and phial stages work. If a batch fails, stop and reread the recipe rather than immediately repeating it with another set of scarce materials. A failed attempt can consume ingredients, especially after they have been added, ground or boiled.
A Fox Potion can provide a substantial experience bonus when available, making it useful before a planned skill-training session. It is an efficiency option, not a campaign requirement. Drink it only when you expect to perform enough skill actions to justify using the potion.
- Practise with common ingredients.
- Confirm the next action before lifting the cauldron or adding a prepared ingredient.
- Use Fox Potion only for a deliberate training session.
- Stop and diagnose a failed batch instead of repeatedly wasting rare materials.
Choose Alchemy perks according to your production style
As Alchemy rises, read each perk description before spending the point. Secret of Matter increases the number of potions produced by a successful brew, while Secret of Equilibrium improves tolerance for small preparation errors. These are competing choices rather than a path you can freely combine: decide whether you value larger batches or more forgiving preparation.
Later Alchemy perks improve quality, healing results, distillation or specialised production. A player who brews frequently for income will usually gain more from output or quality improvements than from a narrowly focused poison or gunpowder option. A player who makes occasional emergency supplies may prefer tolerance or convenience. Do not treat any perk as mandatory, and check whether a respec consumable or method is available before committing to a change.
- Read the full perk description in the Alchemy skill screen.
- Choose between extra production and mistake tolerance deliberately.
- Reserve points for the recipes and playstyle you actually use.
- Do not assume a high-end quality perk is needed for ordinary healing or saving potions.
Gather, preserve and store ingredients before they become a burden
Pick herbs while travelling, but sort them when Henry returns to town. Keep the materials for recipes you already use, rare components, and anything connected to an active quest. Drying racks can preserve herbs and other suitable materials, which is useful when you have more fresh ingredients than you can immediately brew. Do not empty every herb into a merchant’s inventory just because it has a low sale value; check the recipe book first.
Alchemy benches do not automatically replace ingredients that are sitting in Henry’s personal chest. Move the required materials into Henry’s inventory before starting a brew. Afterward, return surplus herbs and crafting components to a safe personal storage chest. Storage is preferable to carrying every ingredient because weapons, armour and quest loot can quickly push Henry into an encumbered state.
When uncertain whether an item is needed, store it rather than selling it. This costs nothing and preserves the option to use it later. Sell only confirmed surplus after checking active quest objectives and known recipes.
- Keep recipe ingredients in personal storage until needed.
- Use drying racks when preserving suitable herbs is more valuable than immediate sale.
- Move ingredients into Henry’s inventory before opening the bench.
- Store uncertain quest or crafting materials instead of selling them.
Run a specialist vendor loop after every profitable expedition
Separate loot into equipment to wear, quest or crafting materials, items worth storing and goods for sale before opening a merchant screen. Take herbs, ingredients, recipes and finished potions to an apothecary or herbalist when possible. Use a blacksmith, weaponsmith or armourer for appropriate weapon and armour sales and repairs; a general merchant is a fallback when a specialist is unavailable.
Do not assume one trader has enough groschen to buy an entire battle haul. If the merchant cannot afford the full load, sell the most valuable unwanted items first, store the rest and return after the trader’s funds recover. Keep money available for repairs, training, recipe purchases, food and emergency supplies before buying low-priority equipment.
Repair weapons and armour that Henry will actually use before a dangerous quest. Repairing a worthless item solely to sell it is only sensible when the expected increase is greater than the repair cost. For low-value damaged gear, selling or abandoning it is usually better than carrying it across the region.
- Sort loot before visiting a trader.
- Use apothecaries for alchemical goods and suitable smiths for equipment.
- Keep enough groschen for repairs, training and supplies.
- Store valuable unsold goods instead of accepting a poor rushed sale.
Complete a preparation cycle before major quests
Before starting a difficult main quest, return to town and perform the same short routine: repair the equipment you plan to use, brew or buy the consumables you genuinely rely on, move surplus goods into storage, sell selected loot, and make a manual save. Carry healing supplies, a sensible number of Saviour Schnapps and only the ingredients needed for the next planned session.
If Henry becomes overburdened, do not continue into a combat objective hoping the problem will solve itself. Return to storage or a merchant, remove spare weapons and armour, and keep only equipment and supplies that serve the next objective. If a brew fails, reread the recipe and practise with a cheaper formula before attempting it again.
This routine also protects against poor economic decisions. Keep a reserve of groschen after every sale, and do not spend the entire balance on recipes, repairs or upgrades immediately before a quest that may require travel or emergency purchases.
- Repair active equipment.
- Restock healing and saving consumables.
- Clear unnecessary weight before departure.
- Save after preparation and before beginning the quest.
Before you move on
- Henry can successfully brew Marigold Decoction from the in-game recipe book.
- Henry has a practical reserve of Saviour Schnapps before long quests or major decisions.
- Alchemy has been raised through inexpensive successful brews rather than unnecessary rare-material experimentation.
- The inventory contains only useful active equipment and mission supplies, with surplus ingredients and loot stored safely.
- Apothecary, general merchant and smith services have been used according to their useful trade categories.
- Before the next major quest, equipment is repaired, potions are stocked, enough groschen remains for emergencies, and a manual save exists.
References for this chapter
- Kingdom Come: Deliverance II - PS5 Games | PlayStation
- Alchemy Leveling & Perks Guide — Kingdom Come: Deliverance II
- Alchemy Bench — Kingdom Come: Deliverance II Database
- KCD2 Alchemy: Every Potion Recipe and How to Brew
- Kingdom Come Deliverance 2 All Potions Alchemy Recipes
- How to get Saviour Schnapps in Kingdom Come: Deliverance 2
- Kingdom Come: Deliverance II perks
Mounted travel, horsemanship and open-world navigation
Kingdom Come: Deliverance II gives Henry a horse early, but Pebbles and the horse provided during Back in the Saddle are obtained through different routes. Once you have a dependable mount, use its inventory to carry heavy loot, equip tack to improve its statistics, and ride manually when you want to build Horsemanship or discover roadside content. Fast travel is best for returning to known settlements and quest hubs, but it advances time and can interrupt the journey with encounters. A horse improves mobility rather than making Henry invulnerable: avoid cramped fights, dismount before enemies surround you, and keep a manual save before risky travel. The completion check is simple: you can call and mount an owned horse, transfer equipment, fast-travel to a discovered destination, and complete a manual journey without losing the active quest objective.
1. Reach the first open-world section and secure a usable horse
Continue the opening quests until Henry reaches the Trosky region and begins working toward the wedding in Semine. You can travel on foot at first, but a horse makes carrying equipment and crossing the region much easier. The earliest safe approach is to obtain an owned mount through the available stable or story routes instead of stealing one in a populated area.
If you want Pebbles specifically, visit the Semine stables once you can reach them during the early Semine objectives. Speak with Groom Ballatay and inspect the inexpensive grey horse. This is Henry’s old horse, and the game provides a dialogue or payment route for reclaiming her. Recovering Pebbles is optional for campaign completion, but it also satisfies the An Old Friend trophy objective. Do not confuse this with Back in the Saddle: that later main quest deals with recovering equipment and arranging a horse for the escort to Nebakov, and its stable sequence can provide Herring or allow you to keep an existing horse.
- Henry has reached the Trosky open world and can travel between settlements.
- An owned horse is available through the stable or current quest route.
- If pursuing Pebbles, Groom Ballatay has been contacted at the Semine stables.
- A manual save exists before spending money or making a stable choice.
2. Equip tack and use the horse inventory correctly
After mounting an owned horse, open the inventory and switch to the horse section. The horse has separate storage, so move heavy weapons, armour and valuable loot there instead of leaving Henry overburdened. On PS5, the inventory prompt can be used to move an item to the horse; the verified Back in the Saddle walkthrough identifies Square for that transfer on the PlayStation control layout.
Horse equipment occupies its own slots. Saddles and related tack can improve carrying capacity or other horse statistics, so compare the displayed values before replacing an item. Inspect a horse with the inventory prompt identified as Triangle in the PS5 walkthrough, then choose equipment that matches your use: more capacity for looting, better speed for long travel, or stronger overall statistics for mounted activity.
Do not fill the horse with damaged junk simply because space is available. Keep quest items, repair supplies and useful combat equipment accessible, and sell or dismantle low-value gear when you next reach a suitable trader or crafting station.
- The horse inventory is visible in the Inventory menu.
- Heavy loot has been transferred before a long journey.
- Saddle and tack bonuses have been checked rather than assumed.
- Henry still carries his normal combat set and essential consumables.
3. Build Horsemanship through manual riding and sensible equipment choices
Horsemanship is improved by riding and mounted activity. Use manual travel between nearby objectives when you want to practise, learn the roads or raise the skill naturally. Fast travel is convenient but should not replace all ordinary riding if your goal is to develop Horsemanship.
Open the Player and Skills menus before spending Horsemanship perk points. The tree includes options supporting different approaches, including reduced stamina use, faster movement, horse morale and mounted attacks. Read the complete description and choose according to your playstyle; none of the early Horsemanship perks is required to finish the main campaign.
Horse statistics matter differently. Speed shortens manual journeys, stamina affects sustained movement, carrying capacity determines how much equipment the horse can hold, and courage influences how confidently it behaves around danger. A faster horse is not automatically the best choice if you frequently loot camps or transport crafting materials.
- Horsemanship has increased after ordinary riding or mounted activity.
- Perk descriptions have been read before selection.
- Horse speed, stamina, courage and capacity have been compared when changing mounts.
- The horse is not being forced into a long sprint immediately before a dangerous encounter.
4. Decide when to ride manually and when to fast-travel
Use fast travel for destinations Henry has already discovered, especially when returning to Troskowitz, Semine, a known inn or a familiar quest hub. It saves real-world time, but it is still a journey through the game world: in-game time passes and encounters may interrupt the route. Leave enough time for the destination’s NPC schedules, quest deadlines and shop hours.
Ride manually when the destination is new, when the quest points to a road or wilderness landmark, or when you want to stop for herbs, hunting, a roadside encounter or a newly revealed activity. Manual riding also lets you approach a camp in daylight, change equipment before entering danger, or stop short of a town and walk in if you are carrying suspicious goods.
Fast travel is unavailable while Henry is too heavily overburdened. Transfer excess equipment to the horse first, then check that Henry can move normally before opening the map. If the route is important or a quest has a narrow objective, create a manual save before travelling.
- Fast travel is being used mainly for known locations and routine backtracking.
- New objectives and wilderness markers are approached manually at least once.
- Henry is not overburdened before selecting fast travel.
- A pre-route save exists before a long or quest-critical journey.
5. Survive encounters and use mounted combat without relying on it
Fast-travel encounters can involve travellers, conversations, challenges or hostile groups. When one appears, decide whether Henry is equipped and rested before accepting a fight. If the opponents are numerous or heavily armoured, avoiding the encounter or retreating is usually safer than forcing mounted combat with weak equipment.
A horse gives Henry room to escape, but it does not make him immune to attacks or bad positioning. Ride past an ambush to create distance, then dismount behind a wall, wagon, slope or other obstruction. Fight on foot when the terrain is narrow, wooded or crowded, because enemies can surround a mounted character and remove the space that makes the horse useful.
Mounted attacks are best treated as a specialised option for a prepared build. They can disrupt exposed enemies or let Henry disengage quickly, but they are less reliable in dense camps and against groups. If the horse becomes frightened, Henry is thrown, or the fight moves into cramped ground, withdraw and continue on foot rather than repeating the same attack.
- The group size and terrain are assessed before accepting a mounted fight.
- Henry dismounts before entering cramped camps, alleys, dense woods or steep confined ground.
- A failed encounter can be recovered through retreat, healing, repair and reloading the pre-route save.
6. Use travel planning to protect campaign progress
Before leaving a town, repair the equipment you expect to use, sell unnecessary loot, rest if Henry is exhausted, and check the active quest objective. Group nearby errands in the same region before travelling to another map area. This reduces wasted journeys and creates opportunities to meet vendors, trainers and side-quest characters without abandoning the current objective.
Do not automatically skip every open-road event. Many are optional, but some introduce characters, clues, rewards or follow-up tasks. When a main quest explicitly tells Henry to follow a person, escort someone or inspect a route, travel manually until the objective updates. This prevents a fast-travel interruption from leaving you uncertain about where the next trigger occurred.
When a journey finishes, confirm that the quest marker or journal objective changed before immediately leaving again. Make a post-arrival save after a successful escort, conversation or location trigger. If the objective does not update, reload the pre-route save and repeat the final approach on foot or by horse.
- Repairs, selling, rest and equipment checks are complete before departure.
- Nearby required NPCs and quest markers have been reviewed.
- The active quest objective updates after arrival.
- A post-arrival save confirms the stable quest state.
Before you move on
- An owned horse can be called, mounted and used as a separate inventory.
- Pebbles has been recovered at Semine if that optional objective is desired, or another dependable owned horse is available.
- Horse equipment has been inspected and at least one useful tack upgrade or deliberate no-change decision has been made.
- Horsemanship has increased through manual riding or mounted activity, and perk choices have been reviewed.
- A discovered destination has been reached through fast travel while managing the resulting time and encounter risk.
- A new or quest-critical destination has been reached manually, the journal has updated, and a post-arrival save has been created.
References for this chapter
- Kingdom Come: Deliverance II PS5 product page
- Kingdom Come: Deliverance II launch announcement — PLAION Press Server
- Kingdom Come Deliverance 2 How to Get Horse
- Kingdom Come Deliverance 2 Back in the Saddle Walkthrough
- Where to find Pebbles the horse — PlayStationTrophies.org
- Horsemanship Leveling & Perks Guide — Gamer Guides
- Kingdom Come Deliverance 2 Horses: Pebbles, Best Horse, Buying and Racing
Major regions and town-by-town tactics
Kingdom Come: Deliverance II has two connected regions: Trosky, the opening area, and Kuttenberg, which opens after the main quest Storm. Treat each map as a changing network of settlements rather than a checklist that can be completed once. At every new town, identify a bed, storage, repairer, healer and food source, then check the journal, noticeboards and innkeepers for new leads. Speak to named quest givers directly because some tasks are not marked until you start the conversation. Make a manual save before regional main-quest operations. In Trosky, complete Demons of Trosky before Necessary Evil advances. In Kuttenberg, finish time-sensitive and missable side content before accepting the final commitment during Oratores. After Kuttenberg opens, red caravan markers provide paid travel between regions, but they do not undo quests already failed or locked.
1. Establish a working route through Trosky
Once the opening story gives you room to explore, use Troskowitz and the surrounding roads as your first supply loop. Find a usable bed and storage chest, then identify where you can repair equipment, buy food, obtain healing items and sell ordinary loot. Do not sell objects whose descriptions identify them as quest items, and avoid stripping your inventory of useful repair or crafting materials merely because they have a low resale value.
At each settlement, speak with the innkeeper if one is present and inspect the noticeboard. These are lead sources, not complete quest catalogues. A task can require a direct conversation with a named resident before it appears in the journal or on the map. After a major main-quest step, repeat the visit: NPC schedules, quest states and available tasks can change.
- Locate a bed and storage chest in or near your current settlement.
- Repair weapons, armor and clothing before a long journey.
- Check noticeboards and ask available innkeepers about local news.
- Sell ordinary excess loot while retaining quest items, food and healing supplies.
2. Visit the important Trosky contacts before the first regional cutoff
Use the roads between Troskowitz, Tachov, Semine, the nearby mills, the Nomad Camp, local inns and Trosky Castle to uncover the region’s practical quest chains. Speak with blacksmiths and millers when their markers or dialogue become available, and return to the Nomad Camp for training and new conversations rather than treating it as a one-time stop. You do not need to clear every map icon, but you should investigate named characters whose dialogue offers a new journal entry.
At Trosky Castle, speak with Chamberlain Ulrich after the required early main-story progress. His task Demons of Trosky is the critical exception to the general advice that much Trosky content can be completed later. Finish its objectives before proceeding through Necessary Evil. Once the next main quest begins and the castle state changes, the task can no longer be completed, even though the game’s broader point-of-no-return message may suggest that some activities remain available.
Before starting a major operation involving von Bergow, Hans Capon or the castle, make a manual save in a separate slot. Keep it until you have confirmed that the side quests and tasks you wanted are complete. This is especially useful if you are pursuing alternate outcomes involving Semine, Nebakov or faction reputation.
- Speak with Chamberlain Ulrich and complete Demons of Trosky before Necessary Evil advances.
- Visit blacksmiths, millers, trainers, innkeepers and other named quest givers during free-roam periods.
- Keep a manual save before major castle or faction operations.
- Review the journal for active, timed or recently failed objectives before continuing the main story.
3. Prepare for Kuttenberg instead of rushing through Storm
Storm moves the campaign into the Kuttenberg region. After the story establishes you there, pause before following every urgent marker. Find a bed and storage chest, repair your equipment, replenish healing and food, and identify the city’s main vendors, bathhouse and training contacts. Kuttenberg is denser and more faction-driven than Trosky, so leaving a quest active while you travel can be more dangerous than in the countryside.
Start with Kuttenberg city and then explore Suchdol, nearby inns, villages and the western roads as the journal directs. Read city and settlement noticeboards and question innkeepers, but do not assume an empty board means the region has no new content. Some activities unlock after a main quest, a conversation, a delay or a return visit. Recheck important locations after completing a major operation.
- Establish a bed and storage location in Kuttenberg.
- Repair equipment and restock food, bandages and healing potions.
- Locate the city’s principal merchants, bathhouse and training contacts.
- Recheck noticeboards and innkeepers after major story changes.
4. Protect named Kuttenberg quest chains
Speak with named contacts in Kuttenberg city even when they are not part of the active main objective. The city’s commercial, criminal and political quests overlap, and some tasks begin through tavern workers, bathhouse staff, guild contacts or people encountered during another quest. Rosa’s Book is particularly important if you want its reward and related content: it is tied to Taking French Leave, so follow its objectives when it appears rather than postponing it indefinitely.
As the story opens more of the region, check Suchdol, Bylany, Miskowitz, the Sigismund camp, Devil’s Den and the roads around them. Examples of content that can depend on timing or earlier choices include Bellatores, The White Roebuck, Seeking Justice, Spoils of War, The Stalker and several Kuttenberg city tasks. This is not a requirement to complete every task for the main campaign; it is a warning that delaying or advancing the story can remove options.
After Kuttenberg is available, travel between the regions through the red caravan markers shown on the map. The trip costs money and is separate from ordinary local fast travel. Use the caravan to finish eligible Trosky activities, but do not rely on it to restore a quest that has already failed or passed its lockout condition.
- Complete Rosa’s Book when it becomes available during Taking French Leave.
- Check Suchdol, Bylany, Miskowitz, Devil’s Den and Sigismund’s camp for named contacts and active tasks.
- Review the journal after each major Kuttenberg main quest.
- Use the red caravan markers for inter-region travel once the route is unlocked.
5. Make the Oratores save before committing to the final Kuttenberg sequence
Oratores contains the Kuttenberg point of no return. Progress through the quest until the cardinal sequence is complete and Zizka gives the explicit warning. At that moment, choose the dialogue option that lets you postpone joining the final operation if you still have side quests or tasks to finish. Create a separate manual save before confirming the commitment.
Before accepting the final advance, review the journal for every active named-character quest, especially content linked to Ruthard Palace, Suchdol, the city, Miskowitz, the Sigismund camp and nearby settlements. Finish any side quest whose objective mentions a meeting, escort, rescue, investigation or return after several days. If a quest has already failed, reload the pre-decision save rather than assuming the regional caravan or post-story free roam will restore it.
Routine maintenance should remain simple: repair damaged gear, sell heavy ordinary loot, restock healing and food, and use a bathhouse when cleanliness or appearance affects your plan. An escort is only useful when a specific quest offers one; it is not a universal preparation requirement. Keep your own horse, weapons and recovery items ready for travel and combat.
- Make a separate save after the Oratores warning appears and before joining the final operation.
- Finish active timed, faction-linked and named-character quests before committing.
- Check the journal rather than relying only on map markers.
- Keep the save until the campaign ending is complete and all desired regional content is confirmed.
Before you move on
- You have a usable bed and storage chest in both regions and can identify repair, healing, food and selling options near your current route.
- Demons of Trosky is completed before Necessary Evil advances, or you have retained a pre-quest save if you are still preparing.
- You have visited the principal Trosky settlements and the main Kuttenberg city and rural contacts relevant to your active journal entries.
- You have checked noticeboards and innkeepers after major story changes rather than only once at the start of each region.
- You have a separate save from before the final Oratores commitment and have reviewed every active timed or named-character quest.
- You can use the red caravan markers to travel between Trosky and Kuttenberg when the story permits, while understanding that locked or failed quests remain unavailable.
References for this chapter
- Kingdom Come Deliverance 2 Full Walkthrough – All Main Quests
- Kingdom Come Deliverance 2 Necessary Evil Walkthrough
- Kingdom Come Deliverance 2 Demons of Trosky Walkthrough
- Kingdom Come Deliverance 2 Oratores Walkthrough
- Kingdom Come Deliverance 2 All Side Quests & Tasks Guide
- Quests (Kingdom Come: Deliverance II)
- Kingdom Come Deliverance 2 Speak of the Devil Walkthrough
Act structure: progressing the main campaign (early to mid-game)
Kingdom Come: Deliverance II uses two large regions and a 32-quest base-game main story. Trosky is the starting region; Kuttenberg opens after Storm. The campaign permits multiple approaches inside many quests, but two progression thresholds require deliberate preparation. Before committing to Necessary Evil, finish the Trosky side content you want, including Demons of Trosky and any accepted timed tasks. Before committing to Oratores, complete the Kuttenberg content you want to preserve, because the story then moves into a largely linear endgame and several characters, locations and quests may no longer be available. Between these thresholds, follow the journal, use the map to identify newly available activities, save before major decisions and complete accepted side quests promptly. After Storm, the red carriage fast-travel point lets you move between Trosky and Kuttenberg, but travel access does not restore quests already closed by earlier story states.
1. Use the opening Trosky quests to establish your route
The campaign begins with Last Rites, Easy Riders, Fortuna, Laboratores and Wedding Crashers. These quests introduce the principal mechanics and gradually open Trosky rather than presenting the entire region at once. Follow the current main objective until the journal releases you to pursue other activities, then inspect nearby settlements and the map before advancing again.
At each new stage, speak with available quest-givers and inn-based tipsters, check vendors, repair equipment and train the skills that match your build. The main story can be completed through different dialogue, stealth, social or combat approaches, so a route that differs from a published walkthrough is not automatically wrong. Preserve a save before a high-consequence conversation instead of trying to force a single universal order.
- Create a manual save after each new main-quest arc opens.
- Check nearby settlements for new side quests and tasks after Laboratores and Wedding Crashers.
- Complete accepted side content promptly when the journal or an NPC suggests urgency.
2. Treat Wedding Crashers and Back in the Saddle as side-content windows
Wedding Crashers is the first major Trosky opportunity to pause the main story and work through local questlines. Blacksmith, miller, brawler, shepherd, hunting, training and settlement activities can provide equipment, money, skill experience and useful relationships. Complete the activities you want before following the next urgent main objective, but do not assume every quest is available immediately; some side content unlocks only after additional story progress or another questline.
After For Whom the Bells Tolls, the story reaches Back in the Saddle. This is a particularly important checkpoint for Trosky Castle content. Demons of Trosky is highly missable and should be completed before advancing through the regional cutoff. If you have accepted a side quest, avoid letting several in-game days pass without checking its objectives, because some tasks can fail or change state.
- Keep separate saves for before and after a major Wedding Crashers decision.
- Complete Demons of Trosky before moving into the Necessary Evil transition.
- Do not kill non-hostile quest-givers or villagers while clearing optional content.
3. Clear the Trosky backlog before Necessary Evil
Necessary Evil is the Trosky point of no return for side content. Before starting it, finish the Trosky quests and tasks you care about, especially any questlines involving local blacksmiths, millers, fighters, shepherds, hunters, the Nomad camp and castle contacts. The game may display a warning later in the quest, but waiting for that warning can already be too late for some objectives, including Demons of Trosky.
Make a manual save named Trosky Before Necessary Evil. Repair your main weapons and armor, sell excess loot, carry suitable healing supplies and keep enough money for repairs. The game maintains a permanent save at the beginning of each main quest, which is useful for recovering from a failed objective, but it is not a substitute for a pre-cutoff save because it may be too late to preserve an optional quest or preferred decision.
- Finish desired Trosky side quests before accepting the decisive Necessary Evil progression.
- Keep the pre-Necessary Evil save untouched until the regional arc is complete.
- Use the completed-quest journal to confirm that important optional lines actually ended successfully.
4. Finish Trosky through Storm and prepare for the second region
After Necessary Evil, the remaining Trosky main quests are For Victory!, Divine Messenger, The Finger of God and Storm. These missions increasingly emphasize preparation and sustained combat. Use available downtime to improve one primary combat style, restore equipment condition, restock food and healing items and reduce inventory weight. You do not need to finish every Trosky activity for the main story to continue, but postponing all optional content until after the regional transition is risky.
Storm opens Kuttenberg. This changes the campaign’s scale and introduces a new backlog rather than immediately closing Trosky. Before committing deeply to the new story, establish a routine in Kuttenberg: inspect the journal, visit vendors and trainers, identify new quest-givers and note which Trosky tasks still have deadlines. Travel between the two regions remains possible through the red carriage map location.
- Create a final Trosky save before Storm if you want a clean regional backup.
- Do not treat the opening of Kuttenberg as permission to ignore timed Trosky quests.
- Use the red carriage location when a pre-existing Trosky quest requires a return trip.
5. Follow the full Kuttenberg main-quest sequence while clearing new content
Kuttenberg begins with The Sword and the Quill, Speak of the Devil and The Devil’s Pack. The campaign then proceeds through Into the Underworld, Via Argentum, Taking French Leave, The King’s Gambit, The Feast, Exodus, The Lion’s Den and Dancing with the Devil. These quests may present different objectives, evidence checks, social approaches or infiltration routes, but the broad sequence is shared. Follow the active journal objective and save before negotiations, arrests, faction choices and fortress operations.
Side quests and tasks continue to unlock throughout this section. Do not wait until the whole map is covered before checking the journal: some side content is tied to a specific main-quest state, while other activities can become unavailable after later operations. When a quest is accepted, finish it promptly where practical. Keep a pre-decision save and a post-quest save so a failed branch does not erase several hours of progress.
- After Speak of the Devil, inspect both Kuttenberg City and the surrounding settlements for new activities.
- Before Taking French Leave, preserve a save in case you need to replay an infiltration or mutually exclusive objective.
- Check the journal after The King’s Gambit, The Feast and The Lion’s Den for newly unlocked or endangered quests.
6. Clear Kuttenberg before Oratores
Oratores is the second major point of no return. Before beginning its decisive operation, complete the Kuttenberg side quests and tasks you want to keep, including activities tied to Suchdol, Sigismund’s Camp, Kuttenberg City and other named settlements. Pay particular attention to quests that depend on characters remaining at camp or on an earlier political situation. After this threshold, the game locks Henry into the ending sequence for a substantial stretch, and the camp and several characters may no longer be available afterward.
Name the safety save Kuttenberg Before Oratores. Repair gear, replenish healing and combat supplies, carry equipment suited to prolonged missions and finish any accepted task whose journal text suggests a deadline. If you are undecided about a side quest, preserve the save first; you can advance the story, then reload and complete the optional content without sacrificing the campaign route.
- Complete desired Kuttenberg side content before committing to Oratores.
- Preserve a manual save outside the Oratores commitment point.
- Verify that mutually exclusive quests and faction objectives have been resolved before continuing.
7. Continue the endgame with operation-by-operation saves
After Oratores, the main sequence is The Italian Job, Civitas Pragensis, So it begins…, Besieged, Hunger and Despair, Reckoning, Last Rites and Judgement Day. This is the final run of the base-game campaign. Side content left unfinished may no longer be recoverable, so focus on the current main objective and do not overwrite your last pre-Oratores save until you are satisfied with the result.
Before each major battle, infiltration, political meeting or irreversible conversation, create a new manual save. If an objective fails, reload the save made immediately before that operation and change your preparation, dialogue approach or route. At the end, allow the concluding scenes and credits to play, then check the journal and preserve the post-campaign save before experimenting with remaining free-roam content or installed DLC.
- Keep the pre-Oratores save until the campaign and ending have been viewed.
- Confirm each final main quest is marked completed before moving on.
- After the credits, inspect the journal rather than assuming every missed side quest has reopened.
Before you move on
- The journal shows the Trosky arc completed through Storm and the Kuttenberg arc completed through Judgement Day.
- The final main-quest scenes have finished and the credits have appeared.
- A post-campaign save exists separately from the pre-Necessary Evil and pre-Oratores backups.
- After returning to play, check the journal and map for remaining content instead of assuming the post-campaign state restores every missed quest.
- If Royal Edition or DLC content is installed, verify its quest markers separately. DLC availability confirms installation, not restoration of base-game quests closed by Necessary Evil or Oratores.
Factions, reputation and political objectives
Kingdom Come: Deliverance II does not use one universal reputation score. Open Player and select Reputation to inspect standing by settlement and by local social groups, such as civilians, nobility, men-at-arms, shepherds, fishermen or hermits. Crime, failed or dishonest dialogue, and hostile quest decisions can reduce standing; completed tasks, successful conversations, helpful encounters, merchant tips, indulgences and penitential pilgrimages can restore it. Reputation affects greetings, prices, cooperation and access to some conversations, but it is not a requirement to keep every group pleased. Political quests often force trade-offs, so preserve a manual save before accusations, alliances and disclosures, then keep it until the follow-up objective has completed.
1. Inspect the correct reputation entry before a political objective
Open the Player menu and choose Reputation before entering a settlement where you need to negotiate, question an official or complete a crime-sensitive objective. Read the individual entries rather than treating the page as one global score. In larger settlements, the game can distinguish groups such as civilians, nobility and men-at-arms; in the countryside it can show groups such as shepherds, fishermen and hermits. A good result with one group does not guarantee that another group will react the same way.
Use a manual save before any conversation that can accuse someone, reveal information, support a side or determine who receives help. Name the slot for both the place and the decision, for example Political Choice - Trosky or Reputation Before Alliance - Kuttenberg. Keep that slot until the quest has advanced beyond the immediate decision and any follow-up conversation has occurred.
- Open Player, then Reputation, before a high-stakes local interaction.
- Read the settlement and group entries relevant to the people you need.
- Save before accusations, alliances, threats and irreversible disclosures.
2. Prevent reputation loss during ordinary town activity
Treat trespassing, theft, lockpicking, pickpocketing, assault and killing innocents as reputation risks even when no guard is standing beside you. A witness may report Henry immediately, while people can also discover the crime later and connect it to him. Keep stolen items separate from ordinary equipment, do not enter private areas without permission, and avoid drawing weapons in a populated settlement unless the quest specifically calls for it.
Current patched versions make an important distinction: killing or looting bandits is no longer listed as a crime, following the official Patch 1.4 changes. That exception does not make civilian theft, trespassing or violence safe. If a guard or victim confronts Henry, consider the available fine, persuasion and punishment options before escalating into a public fight. Fleeing or fighting may get you out of the immediate scene, but it postpones the problem and can leave Henry wanted when he returns.
- Avoid civilian crimes and restricted areas when reputation matters.
- Remember that an unseen crime can still be discovered later.
- Do not treat fleeing as a clean reset; return only after the consequence is manageable.
- Use the bandit-crime exception only on a properly patched game.
3. Build standing through quests, conversations and fair transactions
The most dependable way to improve a settlement's standing is to complete tasks for people connected to that settlement or group. Resolve local disputes, help quest participants survive, and select outcomes that support the people whose cooperation you need. Main and side quests can change how residents treat Henry, but a quest success does not mean every local group will approve of the same decision.
Dialogue also matters. Passing an appropriate Persuasion, Impression or Presence check can improve reputation, while failing can lower it. Check Henry's condition, clothing and relevant skills before choosing a difficult social approach; do not assume that the highest-looking number is always the best option. When dealing with merchants, a normal sale contributes to the relationship, and the haggle interface allows Henry to offer a small tip by accepting a slightly worse price. Use this when you want to improve a merchant relationship without committing to a risky quest choice.
Helpful random encounters during fast travel can also raise reputation. If Henry rescues civilians from attackers and the survivors remain alive, speak to them afterward instead of immediately riding away. These gains are local and should be verified in the same Reputation page after the encounter or quest.
- Prioritize completed local quests over repeated risky conversations.
- Choose dialogue checks Henry is equipped to pass.
- Use a modest merchant tip when improving a vendor relationship is worthwhile.
- Talk to surviving civilians after successful rescue encounters.
4. Repair serious damage with lawful actions or religious absolution
If a settlement becomes hostile, stop committing further crimes there. Leave the area, store or sell questionable goods somewhere safe, repair and clean Henry's equipment if you need better social checks, and return only when you have a lawful objective. Clean clothing and good equipment can support dialogue approaches, but they are not a substitute for repairing the reputation loss itself.
Complete legitimate tasks for the affected community and use respectful dialogue when opportunities appear. If normal quest progress is not enough, speak with a priest. The game provides two verified forms of religious repair: paying an indulgence through an indulgence box, or undertaking a penitential pilgrimage when a priest imposes one. Save before spending money or accepting the pilgrimage so you can confirm the result and avoid wasting resources during a separate urgent quest.
A fine resolves the active legal confrontation, but it should not be treated as a universal reputation reset. Check the Reputation page after paying, completing the punishment or finishing the religious remedy. If the relevant entry remains poor, continue with lawful local tasks rather than provoking another guard encounter.
- Stop offending in the damaged settlement.
- Use local quests and helpful conversations to rebuild trust.
- Use an indulgence or priest-imposed penitential pilgrimage when appropriate.
- Recheck the same Reputation entry after the remedy.
5. Manage faction and political trade-offs with durable saves
Political objectives often improve one relationship while damaging another. Do not attempt to keep every faction or social group equally pleased in a single campaign; the game is designed around conflicting interests and consequences. Before the decisive dialogue, create a pre-choice save. After the scene, make a second save only once the journal updates or the next objective visibly begins. Keep the first slot until the entire choice-heavy quest chain has reached a safe checkpoint.
Read each dialogue option carefully. A threat, lie or boast can alter standing even if Henry still completes the stated objective. If the quest offers several routes, choose the one that matches the ally, merchant access or local authority you expect to need later. Reload when a result blocks the required objective, removes an essential route or produces a consequence you did not intend—not merely because one group dislikes a morally difficult choice.
- Keep separate pre-choice and post-resolution saves.
- Wait for the next objective or journal update before overwriting the backup.
- Accept that rival groups may require different playthrough outcomes.
- Reload only for a blocked route or unintended consequence, not every reputation change.
6. Recover from arrest, failed checks or a public fight
When confronted by guards, compare the likely cost of paying the fine, attempting persuasion, accepting punishment or escaping. A controlled fine or punishment is usually safer than turning one accusation into an extended fight through town. If Henry runs, leave the area rather than committing additional crimes while trying to escape, and keep the pre-incident save if the resulting wanted status threatens a required quest.
After a failed social check, do not repeatedly force the same conversation. Record the failed route, improve Henry's relevant skill or presentation through normal play, and look for another quest objective or dialogue approach. A failed check is not automatically a campaign failure, but it can become serious if the conversation was the only route to an objective. Confirm the journal has advanced before deleting the earlier save.
- Prefer a manageable legal consequence over escalating violence.
- Leave and regroup if guards become hostile.
- Use another lawful route after a failed check when one is available.
- Keep the earlier save until the quest confirms progress.
Before you move on
- The relevant settlement and social-group entries are visible in Player, Reputation, and the people needed for the next objective are willing to speak, trade or cooperate.
- Any active crime has been resolved through payment, persuasion, accepted punishment or a deliberate reload, rather than merely postponed by fleeing.
- A damaged relationship has improved through a completed local task, a successful interaction, an indulgence or a penitential pilgrimage.
- The political quest has advanced to its next journal objective after the chosen decision.
- Both the pre-decision save and the post-resolution save remain available until the full choice-heavy quest chain is complete.
- You have recorded which faction or local-group outcome you selected instead of assuming all rival groups can remain equally favorable.
References for this chapter
- Crime, reputation and punishment | Kingdom Come 2 | INARA
- How to increase reputation in Kingdom Come: Deliverance 2
- 8 Kingdom Come: Deliverance 2 tips that will help you become Bohemia's next top knight
- How Crime and Punishment Work in Kingdom Come: Deliverance 2
- KCD2 Crime and Reputation: Fines, Punishment and Branding
Large battles, group tactics and siege sequences
Kingdom Come: Deliverance II’s major battles are required story sequences with changing objectives rather than free-form army commands. The safest approach is to stay near allied soldiers, fight at the edge of a melee, protect your stamina, and complete the marked objective instead of chasing enemies across the battlefield. Before each operation, repair equipment, carry healing supplies, and save before the triggering conversation or march. Suchdol’s defenses reward a halberd because ladder interactions require a polearm, while Besieged gives you a choice of bow or crossbow for wall support. In The Finger of God, optional tasks around Nebakov let you recruit or prepare allies before the fortress defense. In the later Hunger and Despair defense, enemies can overwhelm you if you interact with ladders while exposed, so clear nearby attackers first and use the tower interior as a recovery point. These battles are not completed by defeating every hostile: follow the current objective, return to the marked commander, and wait through the required cutscenes or rest transitions.
Prepare before entering a campaign battle
Make a manual save before speaking to the NPC who starts the operation, beginning a march, or going to bed when the quest warns that events will continue. Repair your main weapon and armor, remove excess loot, and place a healing consumable in an easy-to-reach slot. Carry food and stamina-supporting items, but do not depend on eating while surrounded; withdraw behind a wall, doorway, or stairwell before healing or managing inventory.
Bring a dependable melee weapon suited to your build and take a shield if you normally use one. Polearms are especially valuable in the Suchdol siege defenses because the ladder objectives require a halberd-type weapon. The fort supplies halberds from weapons racks in the relevant sections, so lacking one before the quest does not permanently block progress. Still, saving before the battle lets you repair, change equipment, or retry the approach without losing the preceding quest.
- Repair weapons and armor before the operation.
- Carry and quickslot a healing item.
- Save before the battle-triggering conversation or rest.
- Keep space for temporary weapons from fortress racks.
For Victory!: follow the advance and survive the ambush
When For Victory! begins, speak with Hans in the evening and complete the required preparations for the operation, including obtaining his equipment when the objective requests it. Optional feast activities can provide experience or rewards, but they are not required for the battle. Once the group moves out, stay with Hans and the soldiers instead of sprinting toward distant enemies. Let allied fighters draw attention, then attack opponents who are already engaged or exposed.
At the ambush and subsequent fighting, avoid chasing fleeing enemies or separating from Hans. Use short attacks, block when several opponents face you, and retreat toward allied soldiers if your stamina falls. The battle is an objective sequence, not a requirement to clear every hostile in the area. Follow the marked route and protect the immediate group until the bandit leader is reached. Defeat that leader to trigger the concluding scenes; the next main quest is Divine Messenger, where control changes to Godwin.
- Stay with Hans and the advancing group.
- Attack enemies occupied by allies.
- Retreat before stamina is exhausted.
- Defeat the bandit leader and wait for the transition to Divine Messenger.
The Finger of God: prepare Nebakov before the fortress defense
The Finger of God starts with Godwin-related objectives and a hand-cannon tutorial before the fortress defense. Complete the required burial and shooting tasks, then use the optional Try to get new allies objective if you want the defense to be easier. Speak with the marked people around Nebakov and complete the available assistance tasks; these can let you recruit or assign additional defenders for the upcoming battle. Helping Klara is also tied to a later benefit, but it is not necessary to invent a fixed placement plan or to guarantee that every ally survives.
When the defense starts, fight from the edge of the allied line. Use walls, stairs, doorways, and corners to reduce the number of enemies who can attack at once. If you have a ranged weapon, use it against exposed targets while allies hold the position, then switch to melee when enemies reach you. The battlements eventually fall as part of the quest and cannot be permanently preserved. When the objective changes to helping Godwin in the courtyard, leave the wall and follow the marked route; the concluding cutscene completes the quest and leads into Storm.
- Complete the required hand-cannon tutorial.
- Use optional Nebakov tasks to recruit or prepare allies.
- Fight beside allied soldiers rather than in the center of the crowd.
- Leave the battlements when the objective changes to the courtyard.
So it begins…: hold the palisade and control the gate
Go to the palisade when ordered and take a halberd from the weapons rack near the stairs. When attackers reach the gate, use the stones through the opening above it. When the ladder objective appears, begin at the far-right ladder and work across the wall, but do not interact while enemies are striking your back. Defeat or stagger the attackers immediately around you first, then push down the next ladder. Allied soldiers remove some ladders themselves, so survival and objective progress matter more than performing every interaction personally.
After the first assault, use the rest period and optional preparation time. You can speak with Janosh, help Frenzl sharpen two swords, and visit Musa and Katherine before returning to the walls. When Zizka orders you to recruit men, speak with the marked groups, including Sam and Kubyenka, Mikesh and Kozliek, and the old friends at the indicated gathering place. After sleeping, inspect the marked night guards; the eastern-palisade guard is the disguised enemy. The impostor attacks immediately. During the night assault, retrieve a halberd if necessary, stop the ladders, prevent the gate from being taken, then report to Zizka in the outer courtyard.
- Take a halberd before the ladder objective.
- Use stones against attackers at the gate.
- Complete optional preparation before sleeping if desired.
- Recruit the marked men before the night defense.
- Find the disguised enemy and report to Zizka afterward.
Besieged: support the raid from the south wall
Besieged begins with Zizka’s briefing and the prisoner interrogation. Select men for the raid by speaking with the marked groups in the courtyard or at the gate; the available choices affect who takes part, so make a pre-quest save if you want to test the outcome. Interrogate the prisoner with Dry Devil in the underground torture chamber, reached through the north side of the inner courtyard. Ask about the camp’s weaknesses; that information is required to advance, while the other questions and the choice to allow or avoid torture are optional approaches.
After the interrogation, go to Hans on the south wall. Ask for a bow or crossbow if you need one, then fire at the enemies below. Prioritize the enemy shooters on the right, wait while the raid group burns the structures, and then shoot the pavisiers arriving from the left. Use the parapet for cover and do not climb down merely to increase your kill count. When the retreat cutscene occurs, speak with Dry Devil, report to Zizka in the castle dining hall, and sleep in your upstairs bed. Resting triggers the transition to Hunger and Despair; stopping after the shooting is not enough to finish Besieged.
- Choose the raid party before starting the operation.
- Obtain the prisoner’s camp-weakness information.
- Use Hans’s south-wall position for ranged support.
- Shoot enemy shooters before the pavisiers.
- Report to Zizka and sleep to complete Besieged.
Hunger and Despair: defend the north wall and the tower
The opening request to find food for Hans is optional. If you do not want to pursue it, speak with Hans and decline after checking with Janosh. Avoid the shoe-soup solution if you are pursuing the Lent trophy, because giving Hans the leather-based food counts as eating meat. The battle begins after the associated cutscenes. Go to the north wall and push down the four ladders. Take a halberd from the north-wall weapons rack if needed, but clear enemies beside each ladder before using the interaction. Advancing while surrounded is the fastest way to lose stamina and take attacks from behind.
After the crossbowmen breach the tower, enter and defeat the attackers. Opening the tower entrance for your allies is optional but useful because additional friendly soldiers can then enter and help with the remaining wall defense. Use the tower’s stairs and doorways to break contact before healing. Once the marked combat objectives are complete, finish any optional conversation or romance content you want, then go to the ramparts and use the wait prompt at the marked location. The quest completes after the required transition and leads to Reckoning.
- Treat the food request as optional.
- Do not use shoe soup if pursuing Lent.
- Clear attackers around each ladder before interacting.
- Defeat the tower breach and open the entrance for allies if desired.
- Wait at the marked rampart location to finish the quest.
Before you move on
- For Victory! is complete when the bandit-leader fight and its following scenes finish and Divine Messenger begins with Godwin.
- The Finger of God is complete when the courtyard defense concludes in its final cutscene and the journal advances to Storm.
- So it begins… is complete after the night assault, the gate and ladder objectives, the assembly, and the report to Zizka; Besieged then begins.
- Besieged is complete only after the raid’s ranged objectives, the report to Zizka, and the required sleep transition to Hunger and Despair.
- Hunger and Despair is complete after the north-wall ladder defense, the tower sequence, the remaining marked objectives, and the wait prompt on the ramparts; the journal then advances to Reckoning.
References for this chapter
- Kingdom Come Deliverance 2 For Victory! Walkthrough
- Kingdom Come Deliverance 2 The Finger of God Walkthrough
- Kingdom Come Deliverance 2 So it begins… Walkthrough
- Kingdom Come Deliverance 2 Besieged Walkthrough
- Kingdom Come Deliverance 2 Hunger and Despair Walkthrough
- Besieged Walkthrough - Kingdom Come: Deliverance II - Neoseeker
- Hunger and Despair Walkthrough - Kingdom Come: Deliverance II - Neoseeker
Late-game: decisive missions and final act preparation
Use the warning inside Oratores as the real final preparation break for the main campaign. Finish any side quest you still care about before choosing to continue with Zizka after the cardinal sequence, then repair Henry’s equipment, replenish healing supplies, check his horse, and create several separate manual saves. The remaining main quests form a mostly linear chain through the assault on Suchdol, with limited opportunities to shop or return to ordinary activities. You do not need a universal list of recruited companions, but earlier choices can alter scenes, objectives, and available support. After Judgement Day, the ending scenes and credits play, and the game allows free roam from the resulting campaign state. Preserve that save before starting DLC, cleanup, or alternate choices.
1. Reach the Oratores warning before making final preparations
Do not treat the opening of Oratores as an immediate point of no return. Complete the quest’s initial objectives, including the work involving Ruthard Palace, the underground passage, Vavak’s key, and the pursuit of the cardinal. After the cardinal sequence, return to Zizka and read the warning carefully. This is the point at which the game asks whether you are ready to continue into the concluding chain. If you still have side content to do, choose the option that postpones joining Zizka rather than the option that commits Henry to the operation.
The Kuttenberg regional cutoff is inside Oratores, not simply the moment the quest appears in the journal. Walkthrough references consistently identify this warning as the last reliable opportunity to complete remaining Kuttenberg activities. Side quests accepted earlier can also have their own deadlines, so finishing a quest before the warning is safer than merely leaving it active. The earlier Trosky cutoff has already passed by this stage, meaning content lost at that earlier regional transition cannot be restored from the current save.
- Read the in-game point-of-no-return warning after the cardinal sequence.
- Finish any timed, character-linked, faction, romance, or reward-bearing side quests you still want.
- Create a manual save named FINAL PREP before choosing to continue with Zizka.
2. Resolve the journal without inventing a mandatory ally list
Review active, failed, and completed journal entries for unresolved requests from major characters. Prioritize objectives that mention securing cooperation, delivering evidence, rescuing someone, settling a dispute, or returning to a named NPC. These outcomes can change later dialogue and some objectives, but there is no universal companion-recruitment checklist that every playthrough must satisfy. The campaign can reach its ending through different earlier choices, so preserve your own preferred outcomes rather than trying to force a single “correct” faction state.
If a quest offers a consequential choice, save before the conversation and keep both the decision save and the resulting completion save. Do not assume that a high reputation in Kuttenberg repairs a separate bounty or hostility elsewhere. Clear fines, avoid unnecessary new crimes, and make sure that NPCs needed for your preferred side content are not left in an immediately hostile or inaccessible state.
- Important character and faction quests are completed or intentionally abandoned.
- No wanted status or active bounty interferes with a location you still need to visit.
- Separate saves preserve major late-game decisions and preferred quest outcomes.
3. Repair Henry and prepare equipment for the concluding chain
Visit the appropriate craftsmen and repair the weapons, armor, clothing, and footwear you actually intend to use. Carry one dependable melee weapon, a backup weapon for a different range or damage profile, and a shield if your build uses one. Keep a torch and lockpicks available when normally useful, but avoid filling Henry’s inventory with equipment you will not use. Store spare gear rather than entering the final chain overloaded.
Check your horse before committing. The late-game sequence includes mounted travel and a pursuit during Oratores, so use a horse with adequate speed and stamina and carry the equipment you need without overloading Henry. A faster horse is helpful, but the chase advances through a scripted sequence once you remain close enough; it is not necessary to treat one named horse as mandatory. Later fortified fights also reward having a loaded crossbow or pistol if you use one, while a melee-only build should enter with repaired weapons and full stamina.
- Primary and backup weapons are repaired.
- Armor and clothing are repaired and suited to your intended speech, stealth, or combat approach.
- Horse condition, speed, stamina, and carrying capacity are adequate for the cardinal pursuit.
- Henry is not overburdened before leaving for the final chain.
4. Stock recovery items and protect your save rotation
Carry healing and combat-support supplies before continuing. Marigold decoctions are particularly useful for recovering health during the remaining battles, and should be placed where you can reach them quickly. Bring nourishment that is fresh enough to help rather than causing a condition problem, plus any antidote or status remedy you normally rely on. You do not need to buy every potion in the game; keep a practical reserve and leave room for quest equipment and loot.
Use at least three separate manual-save positions: FINAL PREP before the warning, LATE CHAIN after the concluding sequence has begun, and POST ENDING after the credits. Keep the first slot untouched while experimenting. The game also creates main-quest autosaves, including at the start of main quests, but those are recovery aids rather than a replacement for a deliberately named save before a major decision.
- Healing items are carried and quick-access placement is tested.
- Food and status remedies are usable and not spoiled or unnecessary inventory clutter.
- FINAL PREP remains untouched while newer saves are used for attempts and experiments.
5. Continue through the final main-quest chain methodically
After accepting the continuation prompt, follow the main objectives instead of detouring for ordinary town errands. The remaining main quests are The Italian Job, Civitas Pragensis, So it begins…, Besieged, Hunger and Despair, Reckoning, Last Rites, and Judgement Day. The route includes infiltration, dialogue, large group fights, fortified positions, and the final assault on Suchdol, so conserve healing supplies and let allied forces absorb pressure whenever the objective allows it.
During the final assault, avoid taking unnecessary damage before the more isolated encounters. Use cover, elevation, doorways, and allied fighters to prevent multiple enemies from surrounding Henry. If you carry a crossbow or pistol, load it before entering an encounter where a ranged opening shot is practical; otherwise keep your melee weapon ready rather than spending too long changing equipment under pressure. If a fight goes badly, reload LATE CHAIN or the relevant quest autosave instead of consuming all supplies and continuing with damaged equipment.
- The continuation warning was accepted from a preserved preparation save.
- A newer save exists after the ending chain becomes active, when the game permits saving.
- You retain enough healing and combat supplies for the assault on Suchdol.
6. Confirm completion, then preserve the ending state for DLC and cleanup
Judgement Day is the 32nd and final main quest. Finish its objectives and continue through the concluding scenes instead of quitting after the last battlefield encounter. The campaign completion check is the final main quest marked complete in the journal, followed by the ending cutscenes and credits. A further post-credit scene can play after the credits, so allow the sequence to finish before deciding that the story has ended.
After the ending sequence, create or preserve a new manual save before starting cleanup or downloadable content. The game permits free roam after the story, including travel back to Trosky, but this does not restore side content already lost at the Trosky or Kuttenberg points of no return. Use the post-ending save for available cleanup and DLC. The PS5 Royal Edition lists the base game separately from its included Expansion Pass, The Lion’s Crest, Brushes with Death, Legacy of the Forge, Mysteria Ecclesiae, and additional item packs; these are separate content lines, not prerequisites for the base-game ending.
If you want to explore an alternate late-game outcome, reload FINAL PREP or a later decision save. Do not overwrite the only completed-campaign save while testing DLC start points, post-game activities, or alternate choices.
- Judgement Day is marked completed in the journal.
- All final cutscenes and credits have played, including the post-credit scene if presented.
- A POST ENDING save is preserved in a separate slot.
- DLC and post-game cleanup begin from the completed-campaign save, not the only pre-final backup.
Before you move on
- The Oratores continuation warning was accepted only after desired side content and preparation were complete.
- The main-quest journal marks Judgement Day, quest 32, as completed.
- The final ending cutscenes, credits, and post-credit material have played.
- A separate POST ENDING save is available for free roam, remaining content, DLC, or alternate late-game decisions.
Endings, epilogues and post-credit content
Kingdom Come: Deliverance II’s base campaign ends with Judgement Day, the 32nd main quest. Earlier quest outcomes, relationships, and choices can affect dialogue and ending details, but there is no normal ending-selection screen that lets you choose every possible variation at the finale. Preserve a manual save before the late-game commitment, complete Judgement Day, allow the ending scenes and credits to run, then verify the quest journal and trophy status. After the credits, the game provides a post-story free-roam state covering both Trosky and Kuttenberg. This lets you continue many remaining activities, but it cannot restore quests, NPC states, timed events, or choices that were already lost. Royal Edition DLC is separate from the base-game ending. Preserve the completed campaign save, confirm each expansion’s availability in the PS5 DLC menu or journal, and then begin DLC from the post-story file unless its own quest instructions recommend an earlier point.
1. Make separate saves before the final sequence
Before beginning the final chain, create a manual save with a clear name such as FINAL PREP or BEFORE JUDGEMENT DAY. Keep at least one additional late-game save from before the major siege and endgame decisions if you still have side content to finish. A final save protects the completed campaign; an earlier save preserves access to quests and conversations that can disappear as the story advances.
Repair the weapons and armor you expect to use, empty unnecessary inventory from Henry’s equipment, and carry healing and stamina-supporting supplies. Judgement Day contains a sequence of linked objectives and battles rather than a normal open-world errand. Once it is underway, follow the active objective and read the journal whenever a cutscene changes the task. Do not overwrite your only pre-finale slot with experimental dialogue choices.
- Create a manual save named FINAL PREP or BEFORE JUDGEMENT DAY.
- Keep an earlier late-game save if unfinished side content matters.
- Repair equipment and prepare healing supplies before committing.
2. Complete Judgement Day, the 32nd and final main quest
Judgement Day is the final main quest. Its opening objectives take place during the assault on Suchdol. Follow the army’s current objective, help clear the assigned combat area, and stay alert for new instructions after the battlefield changes. The route includes combat, movement through the fortress, and further objectives after the first engagement, so do not assume the quest is complete when the initial enemies are defeated.
Use the objective marker and the current journal entry rather than trying to leave the operation to pursue unrelated work. If Henry takes heavy damage, retreat behind allied positions when the objective allows it, recover, and re-enter from a safer angle. When the quest moves from combat into dialogue or scripted scenes, make your choices deliberately: some closing dialogue reflects the state created by earlier decisions, but the game does not provide a final menu containing every alternate ending.
- Finish every Judgement Day objective shown in the journal.
- Do not stop after the first battle at Suchdol.
- Read the updated objective after each major scene.
3. Watch the complete ending sequence and post-credit scene
After the final objectives, remain in the game through the closing scenes. The conclusion is not confirmed merely by winning the last battle. The ending includes outcome-focused dialogue and cinematic scenes, followed by the main credit roll. A further scene is shown after the credits, so allow the complete sequence to finish before treating the campaign as concluded.
The practical completion test is threefold: Judgement Day is marked completed in the journal, the ending scenes and credits have appeared, and the post-credit transition leads back to the game’s world or continuation state. The hidden PlayStation trophy The End is tied to completing Judgement Day and is useful confirmation, but trophy pop-ups can be delayed by account, notification, or synchronization issues. Use the quest journal and visible credits as the primary checks.
- Judgement Day is marked complete.
- The ending scenes and credit roll have played.
- The additional post-credit scene has finished.
- The End trophy appears if trophy services are functioning normally.
4. Create a post-credit save and continue carefully
When control returns, create a new manual save named POST CREDITS. The game supports free roam after the story, and both Trosky and Kuttenberg remain available. The red carriage map icon can be used to travel between the two regions when the game has returned control to the post-story state.
Post-credit free roam is not a universal rewind. It allows you to continue many remaining side quests, exploration activities, and open-world tasks, but it cannot restore a quest that already failed or expired, an NPC state that changed, or a one-time decision that was made earlier. If a particular side quest or relationship outcome matters, load the earlier save and complete it before the relevant story cutoff instead of relying on the post-credit file.
- Create a separate POST CREDITS save after control returns.
- Confirm both regions are available before beginning extended free roam.
- Use an earlier save for missed or failed time-sensitive content.
5. Integrate Royal Edition DLC without risking the campaign archive
The PS5 Royal Edition includes the base game, the Expansion Pass, Gallant Huntsman’s Kit, Shields of Seasons Passing, The Lion’s Crest, Brushes with Death, Legacy of the Forge, and Mysteria Ecclesiae. These are additional content packages, not requirements for triggering the base-game ending. Confirm ownership and installation from the PlayStation Store’s game add-ons area and from the game’s own DLC or extras menu if an expansion is not appearing.
For a clean completion archive, keep the POST CREDITS save untouched before beginning an expansion. Then inspect the relevant DLC quest entry and follow its stated start conditions. Starting story DLC after the base campaign is a practical, low-risk order because it preserves the completed main-story file, but an individual expansion may be designed to fit better before the finale. If its journal instructions identify a recommended story position, follow that instruction and use a separate working save.
- Verify the Royal Edition add-ons are installed on PS5.
- Preserve the completed POST CREDITS file before starting DLC.
- Follow each expansion’s journal instructions for its intended start point.
Before you move on
- The journal marks Judgement Day, the 32nd main quest, as completed.
- The ending scenes, main credit roll, and additional post-credit scene have played.
- A separate POST CREDITS save loads into continued free-roam play.
- Trosky and Kuttenberg are available in the post-story state, with the red carriage usable for regional travel.
- The End trophy unlocks when PlayStation trophy notifications and synchronization are operating normally.
- Royal Edition DLC appears as owned and installed before expansion quests are started.
Optional completion: side quests, achievement/trophy route and 100% considerations
Handle side content region by region instead of saving it for the finale. Trosky has its main cleanup checkpoint around Necessary Evil, while the Kuttenberg region reaches its major lockout during Oratores. Use the game’s warning screens as the final confirmation, but make a manual save before each point and finish desired side quests, tasks and companion follow-ups beforehand. Some quests are time-sensitive after acceptance, and some encounters depend on speaking with a particular NPC or visiting a location before the story advances. For trophies, prioritize unique quests and their required outcomes; repeatable activities do not replace missing quest entries. The PS5 trophy list confirms unlocked awards, while the Journal is the practical record of active, completed and failed content. Royal Edition DLC is optional for the base-game campaign, so begin each expansion from a separate save and follow its own journal objectives.
1. Clear Trosky locally before committing to Necessary Evil
After Main Quest 4: Laboratores opens broader exploration, use Trosky as a local backlog rather than racing through the next main objectives. Check Troskowitz, Semine, Tachov, the Nomad’s Camp, Trosky Castle and nearby roads. Speak with innkeepers, millers, blacksmiths, hunters, shepherds, bailiffs and other named residents. Several tasks begin through conversation, overheard information or a location visit instead of appearing immediately as a large map marker.
Before beginning the operation in Main Quest 8: Necessary Evil, finish the Trosky side content you care about and make a permanent manual save. Treat this as the safest regional cutoff even though the game’s explicit warning and individual quest failures can occur at different points. Demons of Trosky deserves special attention: complete it before the relevant story transition if you want its full objectives and rewards. Also resolve the Frogs, Mice and Battle of the Frogs and Mice chain if you want its associated outcome and trophy opportunity.
- Review both Side Quests and Tasks in the Journal.
- Visit local settlements and camps instead of relying only on map icons.
- Create a manual save before starting Necessary Evil.
- Finish Demons of Trosky before advancing beyond its available objectives.
2. Treat accepted quests as potentially urgent, but verify the Journal
Do not assume every quest has a strict countdown, but do assume that some quests and encounters can fail when you spend too long on unrelated activities or advance the main story. When a new quest gives a direct objective, a meeting time, a warning about urgency or an NPC who follows a daily schedule, complete that objective promptly. Avoid accepting several distant tasks and then sleeping or fast-travelling for many in-game days before returning.
If an objective disappears, a named NPC becomes unavailable or the Journal marks a quest failed, reload the latest save from before the failure whenever completion matters to you. Keep a separate experimental save before entering unfamiliar camps, starting faction disputes or killing enemies near a settlement. Do not kill uniquely named non-hostile residents, quest givers or faction members merely to simplify exploration; their survival can control later dialogue and follow-up tasks.
- Read new Journal objectives instead of postponing them automatically.
- Keep a pre-quest save before faction disputes and unusual encounters.
- Check for failed quests after a major main-quest transition.
- Reload rather than accepting a failed unique quest when trophy progress matters.
3. Finish Kuttenberg content before Oratores locks the story route
After Kuttenberg becomes available, clear its content by neighborhood and faction. Start in the settlement you are currently visiting, then work through nearby tavern, bathhouse, guild, religious, criminal and companion contacts. Repair equipment, sell surplus loot and ask local NPCs for work before leaving town. This reduces backtracking and helps reveal tasks that do not appear until you speak to the correct person.
Use the beginning of Oratores as the final preparation point. Before entering the warned story sequence or proceeding through the palace-related commitment, finish the Kuttenberg, Suchdol and camp content you want, including companion and romance follow-ups. Guides consistently identify activities such as Hush, My Darling…, Lost Honour, Ransom, Spoils of War, The Thunderstone, Absolver, Primum Nil Nocere, The Peasants’ Revolt and The White Roebuck as content that can be lost or failed around this late lockout. Because individual availability can depend on earlier choices, use the Journal and the quest’s current objectives rather than assuming every listed quest is active in every playthrough.
- Make a Kuttenberg cleanup save before Oratores.
- Review Side Quests, Tasks and companion entries separately.
- Resolve desired Suchdol, camp and romance follow-ups.
- Do not enter the final palace commitment while unique side content remains active.
4. Route trophies through unique quests and protected choice saves
For the broad quest-completion trophy, prioritize unique Main Quests, Side Quests and Tasks. Pilgrimages, training, gambling and other repeatable activities may provide money or skill practice, but they do not replace a missed unique quest. Check the PS5 trophy list after a known objective and use the Journal to identify failed or missing entries. The console trophy screen is the authority for your account’s unlock status; online lists are route aids, not proof that your save is complete.
Protect outcome-specific trophies with separate saves. During the Frogs and Mice chain, preserve a save before the resolution so you can pursue the required Truce outcome without sacrificing your normal route. For A Knight’s Word, pay Bozhena as required before Hans gives Henry the money during Main Quest 7; do not treat it as a generic Wedding Crashers reward. For other trophies tied to stealth, competitions, dialogue or unusual quest conditions, save before the decisive objective and reload only if the required condition is missed.
- Use the Journal for quest status and the PS5 interface for trophy status.
- Keep a normal campaign save and separate trophy-experiment saves.
- Protect the Frogs and Mice resolution before committing to a faction outcome.
- Make the required Bozhena payment for A Knight’s Word before Hans provides the money.
5. Use a practical backlog order and separate DLC saves
When several activities are available, clear the current settlement first, then nearby wilderness objectives, then cross-region faction or companion chains. Complete blacksmith, miller, hunter, shepherd and inn-related chains soon after they appear, because later dialogue or story changes can remove a starting NPC or alter the available route. Before a wedding, political operation or military mission, resolve local errands involving its participants if you want their rewards or trophy conditions.
Royal Edition expansions are optional additions rather than requirements for completing the base-game campaign. When a DLC quest appears, read its journal entry for the actual start condition and make a dedicated save before accepting it. Complete related objectives together, preserve a save before the DLC’s final quest and do not assume that finishing the base-game story will restore any DLC quest that has already failed. This is particularly useful for replaying alternate DLC outcomes without disturbing the main campaign save.
- Clear local tasks before starting a long cross-region objective.
- Create a save immediately before each DLC chain.
- Keep a pre-final-DLC save for alternate outcomes.
- Do not use DLC completion as a substitute for unfinished base-game side content.
6. Verify a clean completion without inventing a required total
After the main story, free-roam access allows additional exploration and cleanup, but it does not restore quests that were failed or permanently closed at Necessary Evil, Oratores or another quest-specific cutoff. Use the post-story period for non-timed activities, equipment improvement, training and trophy cleanup. If a trophy is missing, inspect its PS5 description, review failed Journal entries and reload a preserved pre-lockout save when necessary.
A strong completion check is: desired Trosky content finished before Necessary Evil; desired Kuttenberg and late-region content finished before Oratores; no avoidable failed unique quests; required choice trophies visible in the PS5 interface; and a separate post-story save preserved. Do not claim a universal quest or collectible total. The game’s Journal, trophy screen and the requirements of the individual objective are more reliable than an assumed online count.
- Confirm intended trophies in the PS5 trophy interface.
- Review the Journal for failed unique quests.
- Keep a post-story save separate from replay saves.
- Use earlier permanent saves for content lost at a lockout instead of expecting post-game free roam to restore it.
Before you move on
- Desired Trosky side quests and tasks are complete before the Necessary Evil commitment, including Demons of Trosky and the Frogs/Mice chain if those outcomes are wanted.
- Desired Kuttenberg, Suchdol, camp, companion and romance content is complete before the Oratores warning and palace commitment.
- A Knight’s Word and other outcome-specific trophies were handled from protected pre-decision saves.
- The PS5 trophy interface shows the intended quest and choice trophies unlocked.
- The Journal contains no avoidable failed unique quests, and separate pre-lockout and post-story saves are preserved.
References for this chapter
Troubleshooting, bug recovery and save-repair tactics
On PS5, handle a blocked quest as a controlled save-recovery process. Preserve the affected save, check for the newest game and system updates, restart the application completely, and test the newest safe save before moving backward through pre-objective and pre-decision saves. Current updates have fixed missing interactors, inactive objectives, stuck NPCs, crashes, long save loads, black screens and specific quest failures, including a Patch 1.5.6 fix involving So it begins… after Mysteria Ecclesiae progression. There is no supported console command for manually resetting an individual quest, so recovery depends on valid saves, normal in-game transitions and official patches. Back up saved data before using PS5 Safe Mode, and contact PLAION support if the issue survives an updated installation and earlier saves.
1. Preserve the affected quest state before testing fixes
Do not overwrite your only recent save when an objective, NPC or interaction stops responding. If the game still allows saving, create a manual save immediately and leave it untouched. If saving is unavailable, keep the newest autosave and avoid advancing unrelated quests until you have tested recovery options.
Use a rotating naming scheme in your own notes: pre-decision, pre-objective, pre-battle, post-quest and test. Make a pre-decision save before an important conversation, a pre-objective save before entering a quest location, and a post-quest save only after the completion message, reward or next journal entry is visible. Keep at least one older save from before the affected quest or trigger.
- Keep the newest autosave and at least one earlier manual save.
- Write down the exact quest name and journal objective.
- Do not delete a save until the repaired state has survived a reload.
2. Update the game and identify whether a known fix applies
From the PS5 home screen, highlight Kingdom Come: Deliverance II, press Options, and choose Check for Update. Install the available game update, check for PS5 system software updates, then close and relaunch the game instead of continuing from a suspended Rest Mode session. Record the installed game version if you may need support.
The official update history confirms that quest failures have been addressed across multiple versions. Hotfix 1.1.2 fixed missing interactors and several crashes. Hotfix 1.3.2 addressed a long save-loading problem and several quest conditions. Patch 1.5 fixed older-save progression problems in quests including A Sinful Soul and corrected many stuck or permanently active objectives. Hotfix 1.5.2 fixed issues involving Damsel in Distress, Materia Prima, So it begins…, The Devil’s Pack and DLC activities. Patch 1.5.6 also fixed a So it begins… state where Mikesh or Kozliek could incorrectly remain required after the player had visited the Mysteria Ecclesiae monastery after killing them.
An update may repair the underlying quest logic immediately, but it may still require you to load an earlier save or revisit the affected area. Test the updated save first; do not assume either automatic repair or automatic failure.
- Install the latest available game update before repeating the trigger.
- Restart the game after updating.
- Compare the problem with the official patch notes before using a community workaround.
3. Reload from the newest valid point, then move backward methodically
Load the newest autosave or manual save connected to the objective. If the same NPC, marker or interaction is still missing, return to the main menu and close the application completely from the PS5 home screen. Relaunch the game and load the same save again so you are not repeatedly testing one suspended or unstable session.
If the problem remains, move backward one save at a time: first the pre-objective save, then the pre-decision save, then an older save from before entering the location. Replay the conversation or approach through a normal route. Allow dialogue, cutscenes and loading transitions to finish. Where the quest permits waiting or sleeping, use an ordinary in-game transition before returning; do not force progress by repeatedly reloading the exact same broken state.
This is a recovery attempt, not a guaranteed reset. The supported PS5 materials provide no command for resetting an individual quest, so do not search for PC console commands, save editors or modification tools.
- Test the newest updated save before discarding it.
- Close and relaunch the application when the state repeats.
- Confirm that the journal objective changes before continuing.
4. Recover from a failed conversation or timed decision
For an unwanted dialogue result or failed approach, load the manual save made immediately before the decision. Replay the conversation and complete the objective again rather than relying on an autosave created after the consequence. If the quest begins a timed sequence, keep a second save before entering the location so you can retry the route as well as the dialogue choice.
After the alternate attempt, verify the journal, the relevant NPC and the next objective before overwriting older files. A completed conversation may need its full cutscene or loading transition before the new state appears. Save to a separate test slot, reload that slot, and confirm the same objective remains advanced.
- Use the pre-decision save, not merely a post-dialogue autosave.
- Let the full dialogue and cutscene finish.
- Check the journal and NPC state after a save-and-reload test.
5. Handle crashes, shutdowns and repeated black screens safely
If the game crashes or the PS5 shuts down, back up saved data to PlayStation Plus cloud storage or a USB drive before using Safe Mode options. PLAION’s PS5 procedure says to shut the console down completely, hold the power button until the second beep, connect the DualSense by USB, choose Clear Cache and Rebuild Database, and then select Clear System Software Cache and Rebuild Database. Do not choose a factory-reset option unless official support directs you and your data is backed up.
Afterward, verify that the PS5 system software is current, improve ventilation, clear dust from the vents and, if applicable, confirm that an added SSD has a heatsink. PLAION also lists Performance Mode under Settings → Saved Data and Game/App Settings → Game Presets, and suggests checking display options such as VRR and 120Hz Output. If crashes continue, reinstall the game only after confirming that saved data is safe.
- Back up saves before entering Safe Mode.
- Use Clear System Software Cache and Rebuild Database, not a factory reset.
- Reinstall only after confirming the saves remain available.
6. Report an unresolved blocker with reproducible evidence
If the newest update, a clean relaunch and earlier saves do not solve the issue, use the official PLAION Helpcenter’s Report a Bug or Contact Support process. Include the PS5 model, disc or digital edition, installed game version, quest name, exact journal objective, location, steps that reproduce the problem, whether it happens every time or only occasionally, and every troubleshooting step already attempted.
Attach a screenshot or short video when it shows the missing interaction, incorrect marker, crash or black screen. Community discussions can identify temporary workarounds, but treat them as leads. Prefer advice that matches the same PS5 edition and patch, is reversible, and does not alter the console or save files. Never install PC mods, use console commands, edit saves or follow instructions that modify PSN data.
- Describe how to reproduce the failure, not only that the quest is broken.
- State the platform and patch version in the report.
- Attach visual evidence when it demonstrates the fault.
- Follow official support over an older community workaround.
Before you move on
- The repaired quest displays its next journal objective after loading the recovered save.
- The relevant NPC, location or interaction responds normally after a complete application restart.
- A completion notification, reward or quest-state change is present, and the next objective can be selected without the blocker returning.
- The recovered state has been copied to a separate manual save slot.
- If the issue persists, an official PLAION report includes the platform, game version, quest name, objective text, reproduction steps, troubleshooting history and visual evidence where useful.
DLC and Royal Edition: integration, recommended order and must-play expansions
The PS5 Royal Edition contains the base game, Expansion Pass, Gallant Huntsman’s Kit, Shields of Seasons Passing, The Lion’s Crest, Brushes with Death, Legacy of the Forge, and Mysteria Ecclesiae. The three major story expansions are separate side-story chains and do not replace or restart the main campaign. Brushes with Death begins after Main Quest 6 and eventually requires access to Kuttenberg. Mysteria Ecclesiae opens on the second day of The Sword and the Quill, while Legacy of the Forge begins after Speak of the Devil. For a smooth campaign, use manual saves before each DLC, finish urgent timed quests before entering Sedletz Monastery, and keep separate completion saves for the main story and each expansion. The journal and DLC & Extras menu are more reliable than assuming every marker appears immediately.
Verify the PS5 edition, ownership, and installation
On the PS5 home screen, highlight Kingdom Come: Deliverance II, press Options, and choose Manage Game Content. Check that the three story expansions and any bonus packs included with your purchase are installed. If you own the Royal Edition or Expansion Pass but an add-on is not installed, open its PlayStation Store entry with the purchasing account and download or claim it there.
Launch the game and open the title-screen DLC & Extras menu. Confirm that Brushes with Death, Legacy of the Forge, and Mysteria Ecclesiae are identified as owned or available. The Royal Edition contents are the base game, Expansion Pass, Gallant Huntsman’s Kit, Shields of Seasons Passing, The Lion’s Crest, and the three story expansions. Restart the game after installing an add-on and check the menu again.
Before beginning Mysteria Ecclesiae or troubleshooting a missing quest giver, update the game to the current PS5 version. Official updates have corrected cases involving Peter of Pisek, the Hole in the Wall interactor, dialogue loops, crashes, and Legacy of the Forge item persistence.
- DLC & Extras recognizes all owned story expansions.
- Manage Game Content shows the purchased add-ons as installed.
- The game has been updated before starting a newly installed expansion.
Use a campaign order that avoids unnecessary backtracking
A practical order is Brushes with Death first, once Trosky Castle is available; Mysteria Ecclesiae during the Kuttenberg portion after its start condition appears; and Legacy of the Forge after Speak of the Devil. This places each expansion near the region and story period where its opening is introduced, but none of these chains is required to finish the base-game campaign.
For the safest completion run, you can postpone every expansion until after the main story. The DLC chains remain playable from a completed campaign save, and postponing them gives Henry more developed combat, Speech, Scholarship, Alchemy, Stealth, and Thievery skills for demanding checks. The exception is practical rather than absolute: if you want the stories to feel integrated into the campaign, start them when their journal markers first appear and keep a separate manual save beforehand.
- Use saves named DLC-Before-Brushes, DLC-Before-Mysteria, and DLC-Before-Forge.
- Read the journal prerequisite for a missing marker before assuming installation failed.
- Keep a post-completion save for the main campaign and another for each completed expansion.
Start and complete Brushes with Death
After completing Main Quest 6, For Whom the Bells Tolls, travel to the Trosky region and look for the purple DLC marker southeast of Trosky Castle. Approach the painter Master Voyta, who is tied to a tree at the forest edge, and begin the opening conversation. The resulting quests appear in the journal as side quests.
The first portion takes place around Trosky. Later objectives move into Kuttenberg, so the opening marker does not mean the entire expansion is available in the first region. Continue the chain when the journal sends you onward rather than searching for every later objective immediately. The expansion also adds shield painting and horse-riding and horse-archery activities at the Nomad Camp. These activities and the equipment rewards are optional unless you are pursuing complete DLC or trophy progress.
Make a manual save before conversations containing skill checks. If a desired dialogue outcome fails, reload that save rather than continuing and assuming the result can be repaired later. The expansion is complete only when its final quest, Unveiling, is recorded as completed in the journal.
- Master Voyta’s opening quest is active.
- The Kuttenberg portion has been completed, not just the Trosky opening.
- The final Brushes with Death quest is marked complete.
Start and complete Legacy of the Forge
Finish Main Quest 14, Speak of the Devil, in Kuttenberg. Then follow the purple anvil marker near the Hole in the Wall Tavern. At the closed-up building, use the interaction prompt to begin Adept.
The opening work restores the forge and establishes Henry’s home and personal smithy. Continue the main Forge chain through Magdalena’s Axe, The Master’s Game, Klaus’ Introduction, Martin’s Dream, Old Plans, and The Last Step. Guild investigations and blacksmith activities appear alongside this chain. They provide extra work, rewards, and Forge prestige, but they are separate from the required story route.
Keep the guild activities in a separate journal checklist if you want full DLC completion. Do not treat every guild task as a prerequisite for The Last Step. The expansion is finished when The Last Step is completed and the journal records the Forge story as concluded.
- Adept has started at the Kuttenberg anvil marker.
- Henry’s forge and home are available.
- The main chain ends with The Last Step.
- Optional guild activities have been tracked separately.
Prepare carefully before entering Mysteria Ecclesiae
Advance Main Quest 13, The Sword and the Quill, to its second day after Kuttenberg and Suchdol are available. A purple DLC marker then appears at Suchdol Castle. Speak with Peter of Pisek in the banquet hall to begin The Royal Physician. If the base-game story is already complete, Peter’s location may shift to Kuttenberg instead, so check the map and journal rather than returning repeatedly to the banquet hall.
Accept the request to escort Albich of Uniczow toward Sedletz Monastery. Before committing to the monastery sequence, repair weapons and armor, carry food and healing supplies, and make a manual save. Complete any timed main-game or side-quest objectives that you care about first. Once the committed monastery portion begins, you cannot freely return to the wider map until the DLC sequence is finished.
Mysteria Ecclesiae emphasizes investigation, conversation, stealth, and resource management. Bring suitable clothing and prepare for skill checks, but do not assume one build is mandatory. Follow the journal objectives through the monastery and complete the final quest, The Time Has Come. Henry then returns to the open world, and Sedletz Monastery remains accessible after the expansion.
- The Sword and the Quill is on its second day or later.
- The Royal Physician has started from Peter of Pisek.
- Timed quests are resolved before entering the monastery.
- The Time Has Come is complete and free-roam control has returned.
- Sedletz Monastery can be revisited after completion.
Use the bonus packs correctly
Gallant Huntsman’s Kit provides hunting-themed equipment. Shields of Seasons Passing provides shield designs. The Lion’s Crest is optional side content connected to the Brunswick equipment rewards. These are not substitutes for Brushes with Death, Legacy of the Forge, or Mysteria Ecclesiae, and owning a bonus pack does not make a missing story marker appear.
If a bonus item is absent, check the PS5 add-on list, the correct purchasing account, and the in-game stash or journal location associated with that item. Do not delay the main campaign while searching for a bonus object that has not been claimed or installed.
- The three story expansions are distinguished from the equipment and bonus content.
- Bonus items are claimed separately from starting the major DLC quest chains.
Before you move on
- DLC & Extras recognizes Brushes with Death, Legacy of the Forge, and Mysteria Ecclesiae as owned or installed.
- The journal records the final quest of each intended story expansion as complete.
- Brushes with Death includes its later Kuttenberg objectives, not only the Trosky opening.
- Legacy of the Forge is complete through The Last Step.
- Mysteria Ecclesiae is complete through The Time Has Come, Henry has returned to free roam, and Sedletz Monastery remains accessible.
- The Lion’s Crest, Gallant Huntsman’s Kit, and Shields of Seasons Passing have been checked separately if Royal Edition content is part of the completion target.
- Separate manual saves exist before each DLC and after the completed main campaign and expansions.
References for this chapter
- Kingdom Come: Deliverance II Official Website — Royal Edition contents
- Mysteria Ecclesiae — Deep Silver official DLC page
- Hotfix 1.5.1 — Deep Silver
- Kingdom Come Deliverance 2 How to Start Brushes with Death DLC — PowerPyx
- Kingdom Come Deliverance 2 How to Start Legacy of the Forge DLC — PowerPyx
- Kingdom Come Deliverance 2 How to Start Mysteria Ecclesiae DLC — PowerPyx
Finishing up
Judgement Day, the final main quest, is marked complete in the journal, and the final battlefield objectives have been finished.
All ending cutscenes, the main credit roll, and the post-credit scene have been watched, with a separate save created after control returns.
All critical decision junctions that lock or alter quest outcomes were reached with documented pre-decision saves available for replay.
If the goal includes Royal Edition content, the intended Royal Edition expansion quests are marked finished in the journal and their rewards have been obtained.
The completed-campaign save loads into post-story free roam, with Trosky and Kuttenberg available for remaining compatible activities. Do not claim or imply that the game provides New Game+.
Choose your next gameScreenshots & video
Game imagery for reference. Follow the written chapters above for the route and strategies.
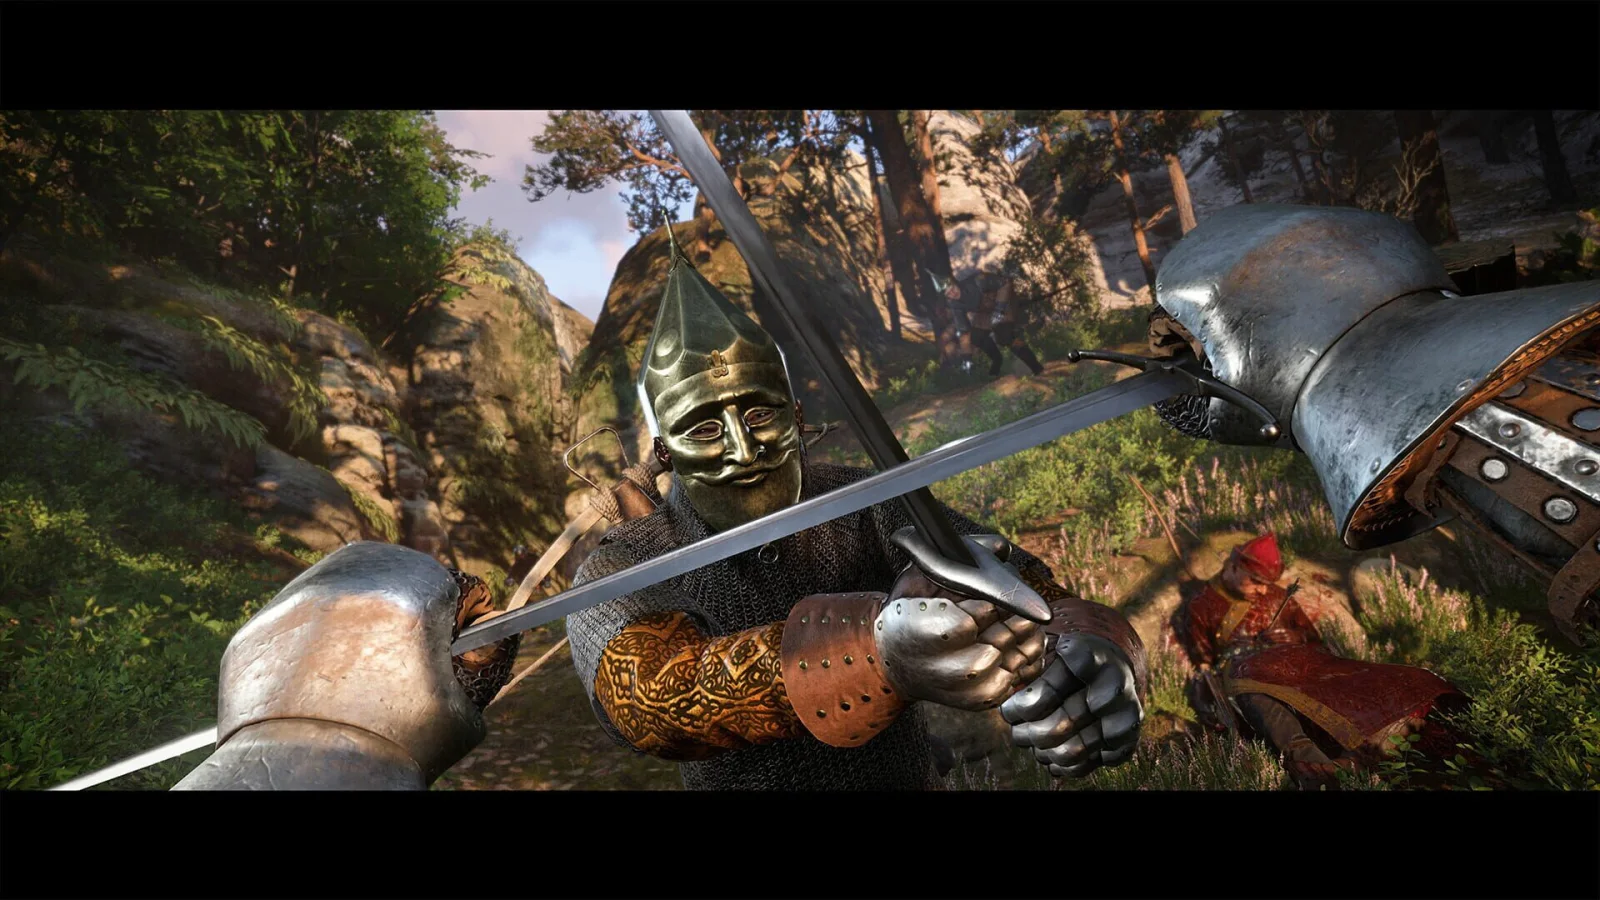
Sources & references
Our original guide draws on the references below. Check the edition at the top of this page before following controls or unlock requirements.
- Kingdom Come: Deliverance II Technical FAQ — Deep Silver
- How to Save — Kingdom Come: Deliverance II — Shacknews
- Kingdom Come Deliverance 2 Tips & Tricks — PowerPyx
- Deep Silver Account Quest Rewards — Deep Silver
- PS5: Crash and Shutdown — PLAION Support
- Kingdom Come Deliverance 2 Last Rites (Prologue) Walkthrough
- Kingdom Come Deliverance 2 Easy Riders Walkthrough
- KCD2 Prologue Walkthrough: Last Rites to Laboratores
- Laboratores Walkthrough - Kingdom Come: Deliverance II
- Kingdom Come: Deliverance II - PS5 Games | PlayStation
- Kingdom Come Deliverance 2 How to Level Up All Stats & Skills | PowerPyx
- Earning and Spending Perk Points - Gameplay - Getting Started | Kingdom Come: Deliverance II | Gamer Guides
- How leveling up & perk points work - Kingdom Come: Deliverance 2 | Shacknews
- Kingdom Come Deliverance 2 How to Reset Skills & Perks | PowerPyx
- How to Respec in Kingdom Come Deliverance II - Gameplay - Getting Started | Gamer Guides
- Kingdom Come: Deliverance II | Official Website
- Weapons and combat mechanics in Kingdom Come: Deliverance 2
- Patch 1.2
- KCD2 Combat Guide: Stamina, Counters, Group Fights
- KCD2 Master Strike and Combat Guide
- Kingdom Come Deliverance 2 Materia Prima Walkthrough
- Kingdom Come: Deliverance 2 – How To Sneak And Steal From People
- KCD2 Stealth, Lockpicking and Pickpocketing Guide
- Crime, reputation and punishment | Kingdom Come 2 | INARA
- Kingdom Come Deliverance 2: Materia Prima (Thieves' Clothing & Documents Location)
- Alchemy Leveling & Perks Guide — Kingdom Come: Deliverance II
- Alchemy Bench — Kingdom Come: Deliverance II Database
- KCD2 Alchemy: Every Potion Recipe and How to Brew
- Kingdom Come Deliverance 2 All Potions Alchemy Recipes
- How to get Saviour Schnapps in Kingdom Come: Deliverance 2
- Kingdom Come: Deliverance II perks
- Kingdom Come: Deliverance II PS5 product page
- Kingdom Come: Deliverance II launch announcement — PLAION Press Server
- Kingdom Come Deliverance 2 How to Get Horse
- Kingdom Come Deliverance 2 Back in the Saddle Walkthrough
- Where to find Pebbles the horse — PlayStationTrophies.org
- Horsemanship Leveling & Perks Guide — Gamer Guides
- Kingdom Come Deliverance 2 Horses: Pebbles, Best Horse, Buying and Racing
- Kingdom Come Deliverance 2 Full Walkthrough – All Main Quests
- Kingdom Come Deliverance 2 Necessary Evil Walkthrough
- Kingdom Come Deliverance 2 Demons of Trosky Walkthrough
- Kingdom Come Deliverance 2 Oratores Walkthrough
- Kingdom Come Deliverance 2 All Side Quests & Tasks Guide
- Quests (Kingdom Come: Deliverance II)
- Kingdom Come Deliverance 2 Speak of the Devil Walkthrough
- Kingdom Come Deliverance 2 Trophy Guide & Roadmap
- Quests (Kingdom Come: Deliverance II)
- How to increase reputation in Kingdom Come: Deliverance 2
- 8 Kingdom Come: Deliverance 2 tips that will help you become Bohemia's next top knight
- How Crime and Punishment Work in Kingdom Come: Deliverance 2
- KCD2 Crime and Reputation: Fines, Punishment and Branding
- Kingdom Come Deliverance 2 For Victory! Walkthrough
- Kingdom Come Deliverance 2 The Finger of God Walkthrough
- Kingdom Come Deliverance 2 So it begins… Walkthrough
- Kingdom Come Deliverance 2 Besieged Walkthrough
- Kingdom Come Deliverance 2 Hunger and Despair Walkthrough
- Besieged Walkthrough - Kingdom Come: Deliverance II - Neoseeker
- Hunger and Despair Walkthrough - Kingdom Come: Deliverance II - Neoseeker
- Kingdom Come Deliverance 2 Judgement Day Walkthrough
- Kingdom Come: Deliverance II Royal Edition
- Kingdom Come: Deliverance 2: Judgement Day
- Kingdom Come: Deliverance II Royal Edition
- PLAION Support: Kingdom Come: Deliverance II Helpcenter
- Deep Silver: Hotfix 1.1.2 – Stability & Quest Fixes
- Deep Silver: Hotfix 1.3.2
- Deep Silver: Patch 1.5
- Deep Silver: Hotfix 1.5.2
- Kingdom Come: Deliverance II Official Website — Royal Edition contents
- Mysteria Ecclesiae — Deep Silver official DLC page
- Hotfix 1.5.1 — Deep Silver
- Kingdom Come Deliverance 2 How to Start Brushes with Death DLC — PowerPyx
- Kingdom Come Deliverance 2 How to Start Legacy of the Forge DLC — PowerPyx
- Kingdom Come Deliverance 2 How to Start Mysteria Ecclesiae DLC — PowerPyx
About the game & collecting notes
- Platform
- Sony PlayStation 5
Step-by-step campaign coverage for the PS5 original release of Kingdom Come: Deliverance II. This guide prepares your console, prioritizes skills and perks, and walks the main campaign from opening sequence through the final ending, with chapters on combat, stealth, alchemy, major regions, endgame choices and Royal Edition DLC integration.
Darryl Polo
Darryl Polo writes about emulation and retro games. What changes when an old favorite moves to another setup? That question connects his interest in tinkering with the games that made the hardware worth keeping.
Our editorial standardsFound a step that needs another look? Help us improve this guide.