
Indiana Jones and the Great Circle — Xbox Series X Campaign Walkthrough
Complete, platform-specific campaign guide for the Xbox Series X edition of Indiana Jones and the Great Circle. Covers the full main story from Marshall College through the final Great Circle site, core combat and puzzle tactics, platform performance notes, optional side content, and how to access the post-launch story expansion.


Find a copy
Indiana Jones and the Great Circle Xbox Series X|S
We may earn a commission if you buy through these links, at no extra cost to you. As an Amazon Associate I earn from qualifying purchases.
Opens retailer search results. Check the model, edition, seller, availability and current price before buying.
Before you begin
This guide is written specifically for the Xbox Series X edition of Indiana Jones and the Great Circle.
It assumes you are playing the single-player, first-person campaign and covers the verified main-story route, practical puzzle and combat guidance, optional exploration, post-game cleanup, and access to The Order of Giants.
The main campaign ends after the Atonements finale and regular credits. The expansion is separate and can be started during the campaign once its Vatican story requirement is met, or from a completed save after returning to Vatican City.
Use the Journal, Travels and Fieldwork entries to keep the active objective aligned with the route described in each chapter.
Set yourself up for the run
Install the latest Xbox Series X update before starting.
Check for updates through My games & apps.
Do not assume that Xbox Series X provides separate Performance and Quality graphics presets; use the video, brightness, HDR and accessibility options actually exposed by the installed build.
Confirm control mappings, camera sensitivity, aim assistance and subtitle or font settings before beginning.
Familiarize yourself with the whip, sidearm, melee interactions and environmental tools.
Practice basic whip traversal, stealth takedowns and improvised-weapon combat during the opening sections.
Rely on autosaves, checkpoints and Save Rollback where available; create manual saves only if the current build exposes that option.
Choose difficulty according to whether you want more forgiving combat or less guided exploration and puzzles.
If using Game Pass or an eligible edition, verify that The Order of Giants is owned and installed before looking for its Fieldwork entry.
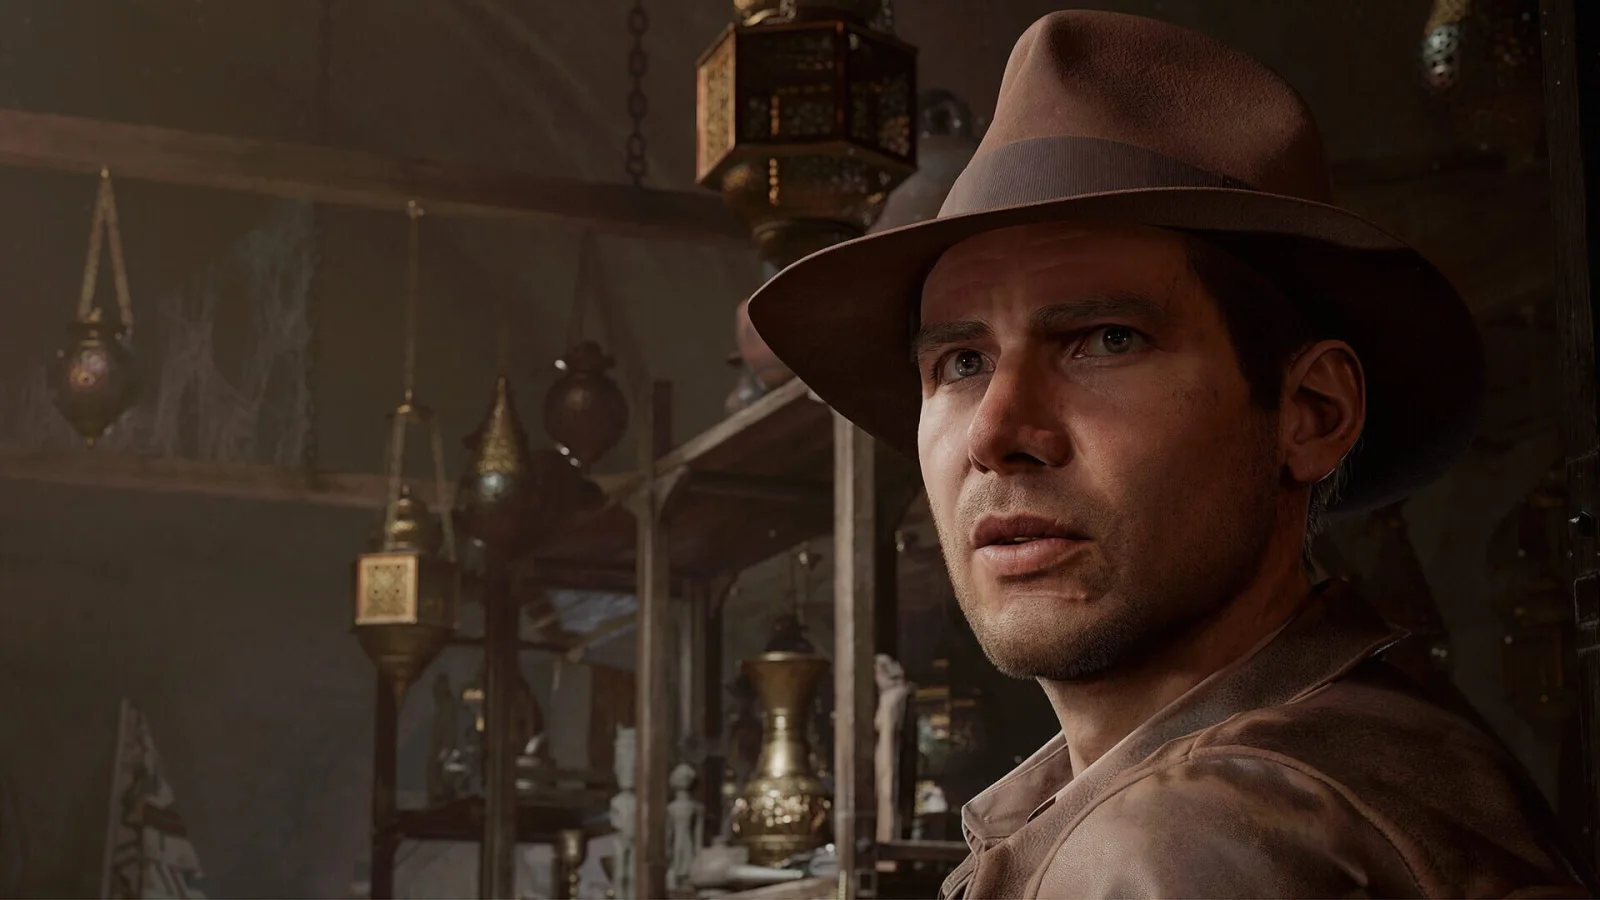
Prologue — Marshall College: theft, tutorial and core mechanics
The opening chapter begins in Peru, where a linear temple sequence teaches movement, crouching, trap awareness, whip traversal and object exchanges. The Peru section cannot be revisited after you leave, but optional finds there are not required for the campaign. At Marshall College, Indy investigates a break-in, loses the forced intruder fight, reconstructs a damaged museum exhibit and discovers that the Cat Mummy was stolen. The final objective is to return to the office, collect the required travel items and close the suitcase. The chapter is complete when the departure sequence begins for Vatican City. The game relies on autosaves and checkpoint rollback rather than a conventional manual-save system, so allow the save indicator to appear before quitting.
1. Follow the guides into the Peruvian temple
Stay with the two guides as they lead Indy through the jungle and across the stream. The route is linear; inspect nearby objects only if you want optional discoveries. Any optional Peru finds must be collected before leaving this opening area because the prologue is not available for normal backtracking later, but none is needed to finish the story.
Continue uphill to the temple entrance and follow the prompts at each obstruction. When the game highlights an object or surface, use the displayed context action instead of trying to jump or force your way through it. This establishes the interaction style used throughout the campaign: look for a clear visual target, center it, and wait for the prompt.
- Follow both guides from the jungle to the temple.
- Collect optional Peru discoveries only if desired; they are not required for story progress.
- Do not leave the area while intending to return for missed prologue finds.
2. Learn crouching, trap reading and the whip
Inside the temple, clear the web obstruction and proceed through the passage. When light-triggered spike traps appear, crouch and move through the safe route instead of sprinting. The danger is telegraphed by the environment, so stop and observe whenever the floor, lighting or camera framing changes.
Use the bullwhip at the first highlighted anchor. Aim at the marked point, wait for the context prompt, then complete the swing across the gap. The whip is introduced as both a traversal tool and a context-sensitive interaction; later prompts use the same targeting behavior for swings, pulls and distractions.
- Crouch through the light-triggered trap section.
- Use the prompted whip anchor to cross the chasm.
- Wait for the interaction prompt before committing to a traversal move.
3. Take the Golden Idol and escape
In the idol chamber, examine the floor before walking toward the pedestal. The safe pressure plates are marked with circular symbols. Step only on those marked plates to reach the pedestal, then follow the prompt to exchange the Golden Idol with the nearby Sandbag.
The trap activates after the exchange, so immediately run back along the route. Follow the escape prompts, throw the idol to the guide when requested, and use the prompted traversal action to cross the final gap. If you are hit or fall, use the checkpoint restart rather than searching for a new route; repeat the marked-plate path and leave the chamber as soon as the idol is secured.
This sequence teaches a recurring rule: a puzzle solution may trigger the hazard rather than end it. Once the objective is complete, prioritize the escape route over exploration.
- Use only the circularly marked pressure plates.
- Swap the Golden Idol with the Sandbag.
- Throw the idol to the guide and complete the chasm crossing.
- Reach the cutscene that ends the Peru section.
4. Investigate the break-in at Marshall College
After the Peru sequence, Indy wakes in his office at Marshall College. Follow the immediate objective toward the museum and take the Local Map from the brochure stand if it is available. The map is useful for orienting yourself, but it is not required to advance.
The first intruder encounter is a forced tutorial fight. Learn the punch, guard and movement prompts, but do not treat it as a fight you must win: the story proceeds when Indy is defeated. In the narrow rooms, use walls, furniture and doorways to avoid being surrounded. If an enemy detects you during the investigation, retreat around a doorway, break line of sight and let the alert settle. A quick melee strike can create space when an enemy reaches you, but you do not need to clear the college.
- Follow the footprints and break-in objective to the museum.
- Take the Local Map if you want easier navigation.
- Complete the forced intruder encounter; victory is not required.
- Use cover and doorways if the investigation becomes an alert encounter.
5. Solve The Exhibit puzzle
In the museum, inspect the damaged display and read the labels before moving the loose artifacts. The relevant pieces are the Bastet Statue, Terracotta Relief and Funerary Mask. Starting from the left side of the display arrangement, place the Bastet Statue first, the Terracotta Relief in the next position, and the Funerary Mask in the third position. Leave the empty position empty and keep the Ivory Case in its indicated display.
If the puzzle does not complete, pick up each loose artifact and examine its associated label or flag. The clues identify the objects by region and subject; the solution is based on matching those clues to the display positions, not on repeatedly trying random placements. When the arrangement is accepted, Indy identifies the missing Cat Mummy and the investigation advances.
- Inspect the display labels and loose artifacts.
- Place Bastet Statue, Terracotta Relief and Funerary Mask in the verified order.
- Leave the empty position empty and keep the Ivory Case with its display.
- Confirm that the stolen item is identified as the Cat Mummy.
6. Follow the evidence to the broken window
Continue through Marshall College using the new investigation objective. Examine highlighted documents, marks, photographs and damaged areas, and check the journal whenever a new note or objective is added. The route leads upward toward the broken window and the next story scene.
Use the whip whenever a traversal prompt appears. In hostile sections, crouch behind furniture or display cases and move only after patrols pass. If you are discovered, retreat to the previous room and allow the search to end rather than pursuing enemies through the building. If a mistake causes a death or leaves the scene in an awkward state, reload the latest checkpoint or use the save-slot rollback option instead of restarting the entire game.
- Inspect the newly highlighted evidence and journal entries.
- Reach the upper route and complete the broken-window scene.
- Receive the Giant’s Pendant before returning to the office.
7. Pack the case and leave for Vatican City
Return to Indy’s office when prompted and interact with the suitcase. Collect and place the four required travel items: the bullwhip, the vinyl record, the Giant’s Pendant and the Cat Mummy Photograph. The photograph is obtained during the Marshall College investigation, while the pendant is found after the broken-window sequence. Continue checking the nearby office surfaces if an item is not immediately highlighted.
After all required items are placed, close the suitcase and let the departure cutscene play. Do not quit merely because the suitcase interface closes; wait until the transition toward Vatican City and the next story objective begins. Before stopping, wait for the autosave indicator or otherwise confirm that the new progress has been recorded.
- Bullwhip packed.
- Vinyl record packed.
- Giant’s Pendant packed.
- Cat Mummy Photograph packed.
- Suitcase closed and departure sequence started.
- Autosave completed before quitting.
Before you move on
- The Peru temple sequence has ended and Indy is back at Marshall College.
- The forced intruder encounter has occurred.
- The Exhibit puzzle has identified the stolen Cat Mummy.
- The broken-window scene has awarded the Giant’s Pendant.
- The bullwhip, vinyl record, Giant’s Pendant and Cat Mummy Photograph are in the suitcase.
- The suitcase is closed and the story has begun its transition to Vatican City.
- A new autosave has been registered before leaving the game.
References for this chapter
- Indiana Jones and the Great Circle: Prologue and Marshall College
- Indiana Jones Great Circle: The Exhibit at the Marshall College Puzzle
- Guide for Indiana Jones and the Great Circle - Marshall College
- Indiana Jones and the Great Circle Walkthrough: Chapter Route, Missables and Order of Giants
- Indiana Jones and the Great Circle Starting Tips and Tricks - Xbox Wire
Vatican City — infiltration, clues and meeting Gina
The Vatican chapter begins at Castel Sant’Angelo and proceeds through the Church of the Condemned, Bastione San Giovanni, the Apostolic Library, the Post Office and the Tower of Nicholas V. Follow the marked route, use cover instead of prolonged firefights, and collect the Captain’s Key before crossing into the city. Father Antonio provides the wine needed for the Sacred Wounds investigation. Ernesto gives Indy a camera, which is required to photograph four inscriptions and advance the main quest. At the Tower of Nicholas V, open the underground route, inspect five frescoes, record their Roman numerals and set the central mural to II, II, III, III and IV. Then search the Warrior Giant’s Tomb before meeting Gina and surviving the escape sequence. Optional disguises, fieldwork and mysteries can be handled later and are not required for this main-story route.
Escape Castel Sant’Angelo and reach the Church of the Condemned
Follow the objective through Castel Sant’Angelo, using the obvious ladders, ledges and whip anchors as the tutorial introduces them. When the path appears to stop, look above doors, balconies and broken masonry for the next climbable route. In guarded rooms, crouch behind cover and wait for patrols to turn away. Bottles, shovels and other nearby objects can provide a quiet takedown or a quick melee weapon if a guard catches you.
After reaching the exterior, continue toward the Church of the Condemned. If the alert meter begins filling, retreat through a doorway, stairwell or courtyard corner and break the guards’ line of sight. Once the search ends, resume the objective rather than fighting the entire group. The transition into the church establishes the next checkpoint and moves the main quest forward.
- Reach the Church of the Condemned.
- Use cover to break line of sight when detected.
- Allow the church transition checkpoint to register.
Climb Bastione San Giovanni and obtain the Captain’s Key
Follow the route from the church to Bastione San Giovanni. This section is mainly vertical traversal, so search for ladders, narrow ledges and whip points instead of looking for a standard ground-level entrance. Keep the camera angled upward whenever the objective route seems to end; the next handhold is often above the current platform.
When the objective sends you to the guarded position, enter the captain’s quarters and take the Captain’s Key from the indicated location. A stealth takedown is safest, but a short melee encounter is recoverable if you move behind walls or crates immediately afterward. Use the key on the locked access point and continue to the zipline. The Captain’s Key is required for this route; the Blackshirt disguise found elsewhere in the Vatican is optional.
- Reach the upper Bastione San Giovanni route.
- Collect the Captain’s Key.
- Use the zipline toward Bastione San Marco.
Meet Father Antonio and open the Apostolic Library passage
After the zipline, find Father Antonio and complete his conversation. He gives Indy the wine required later in the Tower of Nicholas V investigation. Follow the objective into the Vatican and continue to the Apostolic Library rather than detouring into optional courtyards.
In the library, proceed to the underground section and investigate the marked symbol. When the game prompts you to use the Giant’s Pendant, hold it to the matching symbol to open the hidden passage. Follow the route through the concealed area and return to the main objective afterward. Camera focus, interaction prompts and Indy’s comments identify the objects that matter; do not assume every readable document is mandatory, but inspect highlighted clues before leaving.
- Speak with Father Antonio.
- Receive the wine.
- Use the Giant’s Pendant to open the Apostolic Library’s hidden passage.
- Complete the underground library objective.
Get Ernesto’s camera and photograph the four required inscriptions
Travel to the Post Office and speak with Ernesto. Take the camera when prompted. It becomes a permanent investigation tool for this chapter and records photographs in Indy’s journal. Follow the main objective to the four inscription locations. At each site, center the camera on the marked text or symbol until the recognition prompt and shutter confirmation appear.
The four photographs are located around the Vatican’s accessible streets, courtyards and elevated walkways. If a guard blocks the direct route, wait behind cover, use a side entrance or approach from a balcony. A Blackshirt disguise can make restricted areas easier to cross, but enemy captains can see through disguises, so do not walk directly past them. After the fourth successful photograph, return to Antonio and inspect the images as directed. The quest should update before you proceed to the Tower of Nicholas V.
- Take Ernesto’s camera.
- Photograph all four required inscriptions.
- Confirm the journal objective updates.
- Return to Antonio and review the photographs.
Enter the underground chamber beneath the Tower of Nicholas V
Track the updated objective to the Tower of Nicholas V. Inside, pour wine into the basin in front of the altar, then interact with the central bas-relief and rotate it to the left. The correct position reveals a concealed stairway. Descend into the underground chamber and locate the central mural surrounded by five related frescoes.
Before changing the central mural, inspect the side frescoes and their bowls. You may examine them in any order. The first fresco on the left is blocked by a stone bust; pick up the bust and move it aside. Another left-side room closes its gate after entry, but its only passage leads onward. In the central area, find a two-handed melee weapon and use it to break through the weakened wall to reach the remaining murals. Pull the chains beside the gates so you can return to the central chamber instead of becoming trapped on one side.
- Pour wine into the Tower of Nicholas V basin.
- Rotate the bas-relief left and descend the revealed stairs.
- Reach all five side frescoes.
- Use the weakened-wall route and reopen the gates with the chains.
Read the five Roman numerals and solve Sacred Wounds
Pour wine into each side fresco’s bowl and record the Roman numeral that appears. The Holy Chalice fresco shows II. The Body of Christ fresco also shows II. The next left-side fresco shows III. After breaking through the weakened wall, the right-side fresco shows III, while the final right-side fresco shows IV. These numbers are the puzzle clues; the murals and the central wall also provide camera opportunities, but photographs are optional for story progression.
Return to the central mural and pour wine into its bowl. Five switches appear at Christ’s hands, torso and feet. Set them according to their physical positions: upper-left hand II, upper-right hand II, middle spear wound III, lower-left foot III and lower-right foot IV. When the values are correct, the mural rotates and exposes the passage to the Warrior Giant’s Tomb.
- Record the five clues: II, II, III, III and IV.
- Set the central mural to II, II, III, III and IV from upper-left to lower-right.
- Confirm that the mural rotates and opens the passage.
Search the Warrior Giant’s Tomb, meet Gina and escape
Follow the opened passage into the Warrior Giant’s Tomb and continue through the marked route. Search the chamber as directed and interact with the required mechanisms near the tomb. This section is mandatory between the Sacred Wounds puzzle and the next major encounter; do not turn back after the mural opens.
After the tomb sequence, follow the objective to the meeting with Ginetta “Gina” Lombardi. The story then sends you through an escape route with two enemy encounters. Use corners, pillars and doorways to split the guards’ sight lines. Throw a bottle or other object to draw one guard away, then use a quick melee takedown before dealing with the second. If an alarm starts, retreat instead of pursuing enemies into a larger patrol group. Once Gina’s escape sequence is complete, the journal should move on to the Vatican’s next main objectives, including the Fountain of Confession.
- Complete the Warrior Giant’s Tomb objective.
- Meet Gina Lombardi.
- Survive both escape encounters.
- Confirm that the next objective is no longer tied to the inscriptions or Sacred Wounds.
Before you move on
- The Captain’s Key has been collected and the route into the Vatican has advanced.
- The Giant’s Pendant has opened the hidden Apostolic Library passage.
- The journal confirms all four required inscription photographs and Antonio’s image analysis.
- The Tower of Nicholas V bas-relief has opened the underground route.
- The Sacred Wounds mural is set to II, II, III, III and IV, and the Warrior Giant’s Tomb sequence is complete.
- Gina Lombardi has been introduced and the two enemy escape encounters are finished.
- The next main objective points toward the Fountain of Confession or the continuing Vatican investigation.
References for this chapter
- Indiana Jones and the Great Circle Walkthrough: Chapter Route, Missables and Order of Giants
- Indiana Jones Great Circle: Jesus puzzle
- Indiana Jones and the Great Circle – Five Sacred Wounds Puzzle Guide
- Indiana Jones and the Great Circle The Stolen Cat Mummy Walkthrough
- Indiana Jones and the Great Circle – Vatican City Walkthrough
Gizeh — dig site, pyramid ascent and the Idol of Ra
The Idol of Ra takes Indy beneath Khafre’s Pyramid after the Dream Stele investigation. Photograph the required symbols, enter through the concealed breakable wall, solve the Chamber of Resonance with six Adamic tablet photographs, and use mirrors to open the Three-Eyed Gate. Beyond it, reopen the ceiling portals and defeat the blindfolded guardian by combining silence, movement and heavy metal rods. Place the Guardian Pendant in the statue, enter the newly opened chamber and take the Idol of Ra. The following collapse, rising-sand escape and scorpion sequence belong to c04 and are not covered here.
1. Complete the Dream Stele investigation and reach the pyramid entrance
Follow the active Gizeh objective through the Sphinx area until you reach the Dream Stele. Photograph the four highlighted symbols shown on the stone: the Queen’s Pyramid, the Sphinx, the guardian symbol and the Great Pyramid. Use the camera’s zoom if a symbol is not immediately registered. Examining the stele without taking the required photographs does not advance the objective.
After the investigation updates, travel to the marked area near Khafre’s Pyramid. The Nazi excavation zone does not need to be completely cleared. Move around the outside of the camp, using tents, excavation equipment, walls and raised platforms to break line of sight. If soldiers become alerted, retreat into cover and wait for the search to pass rather than spending ammunition on every enemy.
Near the large tree in the objective area, locate the low crawlspace leading toward the pyramid. A cracked wall blocks the entrance. Go to the nearby work area and take a large two-handed weapon, such as the available sledgehammer, then return to the wall and smash it open. Ordinary punches and the whip will not open this entrance.
- Photograph all four required Dream Stele symbols.
- Reach the marked pyramid search area.
- Take a two-handed weapon from the nearby work area.
- Break through the cracked wall and enter the tunnels.
2. Photograph and translate the six Adamic tablets
Continue through the tunnel until you reach the Chamber of Resonance. Photograph the three visible tablets in the main room. When the objective requires more evidence, crawl through the low side opening and follow the curved passage. Light the braziers with the lighter so the additional inscriptions become visible for the camera.
One tablet is incomplete. Find the loose tablet piece in the side route, then return to the central room. Use the available metal rod to break through the cracked obstruction if necessary, take the piece and fit it into the damaged tablet. Photograph the repaired tablet after assembling it. The game must register six tablet photographs before the central statue can be used.
Place the photographs on the flat surface of the central statue. Select the translated words in this order: Heed, The Lord’s, Oath, Protect, The Secret, Of the Name. If Indy says the sentence does not make sense, review the tablet photographs and select them again rather than guessing at a different phrase. A correct solution triggers the collapse into the cave system; that fall is scripted progress, not a failed attempt.
- Photograph the three tablets in the central chamber.
- Light the side-route braziers and photograph the hidden tablets.
- Repair and photograph the incomplete tablet.
- Use the phrase Heed / The Lord’s / Oath / Protect / The Secret / Of the Name.
- Continue after the scripted collapse.
3. Navigate the Ancient Caves and open the Three-Eyed Gate
Use the lighter and nearby braziers to maintain visibility while moving through the caves. At the broken bridge, take the lower route to the whip point, swing across, climb to the next ledge and use the following whip point to continue. Let Indy settle on a stable surface before starting the next swing; missed jumps are the main danger in this section.
When you reach the Light Chamber, photograph the Three-Eyed Gate so it is recorded in the Journal. Begin with the central mirror and aim its beam at the matching symbol dish that opens the first side passage. Follow that passage to the next mirror. Position this mirror so its light passes through the opening in the damaged section and reaches a reflector in the main chamber.
Return to the gate room and use the available mirror beams to reproduce the symbol for the second side passage. The gate’s dishes can be combined, so do not look only for one dish that exactly matches the displayed shape. Once the second passage opens, follow it to the loose brass mirror or reflector, collect it and carry it back to the open chamber. Install it at the indicated position to create the third beam.
With all three beam paths available, adjust the mirrors to match each of the Three-Eyed Gate’s locks. Work on one lock at a time and wait for its mechanism to respond before changing the mirrors. If a beam appears correct but the lock does not move, check that the light is striking the intended dish and not the nearby reflector.
- Use the whip points to cross the broken bridge route.
- Open the first side passage with the central mirror.
- Use the second mirror to bounce light through the damaged section.
- Retrieve and install the loose brass mirror.
- Align the available beams with all three gate locks.
4. Cross the temple route and activate the ceiling portals
After the Three-Eyed Gate opens, follow the cave route around the collapse. Crouch along the chasm edge, descend to the lower path and continue through the tunnel. The whip points provide the intended crossing route; if Indy falls, reload the checkpoint rather than attempting to climb an unstable ledge from below.
You may encounter an Ancient Relic and a relic-slot puzzle in the surrounding caves. These are optional and do not block The Idol of Ra. For a direct campaign route, keep the main objective active and continue toward the temple chamber instead of searching every side alcove.
In the temple room, locate the three pressure plates and step on each one. Each plate opens a corresponding ceiling portal. After all three are active, light reaches the statue and reveals the next objective. Interact with the illuminated statue and continue when the story sequence moves the mission into the guardian encounter.
- Follow the main route around the cave-in.
- Cross the chasm using the whip points.
- Leave the optional relic puzzle for later if you are prioritizing campaign progress.
- Activate all three pressure plates.
- Interact with the illuminated statue.
5. Defeat the blindfolded guardian
The blindfolded guardian tracks Indy primarily through sound. Crouch whenever possible, avoid loose debris and do not sprint across noisy ground unless you are escaping an attack. The lighter helps you identify the floor and nearby routes, but the guardian can still hear movement while you are using it.
The ceiling portals close during the encounter. Return to the pressure plates and reactivate them one at a time. The guardian may hear a plate being triggered and rush toward that position, so leave immediately after activating a plate. Break line of sight behind terrain, crouch and wait until the guardian stops searching before moving to the next plate.
When all three portals are open again, search the illuminated arena for metal rods. Pick one up, charge a heavy strike and hit the guardian when you have a clear approach. Do not remain in front of it for a second attack. After each successful blow, retreat, crouch and relocate until the guardian loses your position. Replace the rod when it breaks and repeat the same hit-and-reposition pattern.
If you are discovered before reaching a rod, prioritize escape over attacking. The arena’s darkness and cover are more useful than trying to trade blows. Once the guardian is defeated, collect the Guardian Pendant from its body.
- Stay crouched and minimize noise.
- Reactivate all three ceiling portals while avoiding the guardian’s search path.
- Use metal rods for charged heavy attacks.
- Relocate after every hit and replace broken rods.
- Collect the Guardian Pendant.
6. Place the Guardian Pendant and take the Idol of Ra
Return to the central statue and place the Guardian Pendant in the matching slot in its chest. The statue opens the route to the inner chamber. If the entrance does not respond, confirm that the pendant was taken from the guardian and inserted into the correct matching recess rather than merely examined.
Enter the newly opened chamber and take the Idol of Ra. The following cinematic breaks the idol and gives Indy the Great Circle piece. This pickup is the completion point for c03.
Stop the chapter here. The rising-sand escape, collapse route, scorpion encounter, Gina and Nawal’s rescue, and the transition toward the Himalayas are covered separately in c04.
- Place the Guardian Pendant in the statue.
- Enter the opened inner chamber.
- Take the Idol of Ra.
- Confirm that the cinematic awards the Great Circle piece.
- Hand the following escape sequence to c04.
Before you move on
- The four Dream Stele symbols were photographed.
- The six Adamic tablet photographs were registered and the Chamber of Resonance phrase was solved.
- The Three-Eyed Gate was opened and the three ceiling portals were activated.
- The blindfolded guardian was defeated and the Guardian Pendant was recovered.
- The pendant was placed in the statue.
- Indy entered the inner chamber, took the Idol of Ra and received the Great Circle piece.
- The chapter is ready to hand off to c04 for the separate escape sequence.
References for this chapter
- Indiana Jones and the Great Circle The Idol of Ra Walkthrough
- Indiana Jones Great Circle: The Resonance Chamber and Adamic Tablets puzzle
- Indiana Jones Great Circle: The Cave of Darkness puzzle and the confrontation with the Giant
- How to solve the Resonance Chamber puzzle in Indiana Jones
- Indiana Jones and the Great Circle - Gizeh Walkthrough
Gizeh escape — rising sand, scorpions and transition to the Himalayas
This chapter begins immediately after Indy takes the Idol of Ra in the Gizeh temple. The chamber fills with sand, and you must use repeated jumps to stay on the surface while moving toward the high passage marked by daylight. Continue through the linear escape corridor and use the marked whip traversal point. A second sand surge then buries Indy outside while Voss escapes with the Great Circle stone. The following scorpion sequence is a survival prompt rather than a normal combat encounter: wait for a scorpion to raise its tail, then use the displayed blow input to drive it back. After the sequence advances, Gina and Nawal arrive in a truck and dig Indy out. The chapter ends with the conversation about Voss’s Himalayan destination and the departure aboard Nawal’s yacht. A Harsh Climb is the next main quest. There is no playable desert vehicle chase in this section.
Begin the escape immediately after taking the Idol of Ra
The escape starts as soon as Indy takes the Idol of Ra from the inner chamber. Any optional exploration you want to complete around the temple should be finished before interacting with the idol. Once it is taken, the story enters a linear emergency sequence and the earlier puzzle route is no longer the objective.
When the chamber begins filling with sand, look toward the upper passage where daylight is visible. That opening is the required destination. Do not search for a lower doorway or attempt to return through the rooms used to reach the idol. The game will carry you through the next story transition after you reach the exit route.
- Complete nearby optional exploration before taking the idol.
- Look for the high, daylight-lit passage.
- Move toward the upper passage rather than searching below the chamber.
- Expect the story to become linear after the pickup.
Use the rising sand to reach the upper passage
Move toward the daylight while repeatedly pressing A to jump. Indy must keep popping back onto the surface as the sand rises. If you stop jumping or allow him to sink too far, the sand buries him and the sequence must be restarted from the most recent checkpoint.
Keep the camera aimed toward the opening as you advance. The sand is functioning as the moving platform for this escape, so the correct route is not a conventional climb across separate ledges. Continue forward and jump regularly until the passage is low enough to enter.
If you fail, reload the available checkpoint rather than trying to recover from a fully buried position. The checkpoint system handles the major story transitions, so a restart should return you to the current escape section rather than requiring the entire Gizeh mission again.
- Face the daylight-lit opening.
- Move forward while pressing A regularly.
- Do not turn back toward the idol chamber.
- Reload the latest checkpoint if Indy is buried.
Run through the corridor and use the whip point
As soon as Indy reaches the upper passage, sprint through the corridor. This section is intentionally direct. Follow the visible route and do not stop to search for optional rooms or supplies; the collapsing temple is not opening a second exploration path here.
A marked whip traversal interaction appears along the escape route. Aim at the highlighted anchor and use the on-screen whip prompt. After the traversal, continue through the passage until the sequence reaches the exterior. The next sand collapse and Voss encounter are story events, not a branch that can be changed by taking a different route.
- Sprint once the passage is reachable.
- Use the marked whip traversal interaction.
- Stay on the main corridor.
- Continue until the exterior sequence begins.
Treat Voss’s escape as a scripted story beat
After Indy appears to escape the temple, another surge of sand buries him outside. Voss and his soldiers take the Great Circle stone and leave. Indy cannot chase them, recover the stone or start a normal boss fight here, so do not waste time looking for a weapon, vehicle control or alternate pursuit route.
The game then places Indy in a fixed survival situation while scorpions approach. The objective changes from movement to repelling the attackers. Keep the nearest scorpion in view and wait for its attack animation. The useful cue is the raised tail immediately before it strikes.
- Accept the second burial as scripted progression.
- Do not pursue Voss.
- Do not look for desert vehicle controls.
- Watch the scorpion’s raised-tail attack cue.
Repel the scorpions until Gina and Nawal arrive
When a scorpion raises its tail, use the blow input shown on screen. On the standard Xbox layout, the blow is assigned to a trigger input; use the displayed prompt if your controls have been customized. The timing matters more than aiming at a specific body part. Blow too early and the scorpion may not be in its attack window.
Handle the threats one at a time, keeping the nearest attacker centered. This is not a melee fight and ordinary punches or weapons are not the intended solution. Continue responding whenever another scorpion prepares to strike. The encounter advances after enough successful repels.
Gina and Nawal eventually arrive in a truck and dig Indy out. The truck is part of the rescue cutscene; there is no driving segment. If the rescue does not begin after the scorpion sequence has clearly progressed, reload the latest checkpoint and repeat the prompts rather than wandering around the buried area.
- Wait for each scorpion to raise its tail.
- Use the displayed blow input during the attack window.
- Repeat until the truck arrives.
- Watch Gina and Nawal’s rescue cutscene.
- Reload the checkpoint only if the rescue trigger fails to advance.
Finish the yacht transition into A Harsh Climb
After Indy is rescued, Gina explains that Voss is heading toward a location in the Himalayas associated with a transmission. The conversation establishes the next destination and closes the Gizeh story route.
Allow the post-rescue dialogue and departure to finish. Indy, Gina and Nawal leave aboard Nawal’s yacht, and the game transitions to the Himalayan chapter. This is a narrative travel scene, not a playable boat or desert vehicle section. There are no steering, fuel, pursuit or convoy objectives to complete.
The Idol of Ra ends when the yacht departure is complete. Confirm that A Harsh Climb is now the active next main quest before leaving the sequence. Optional Gizeh mysteries, relics and fieldwork can be handled separately and are not required for this chapter’s story completion.
- Complete the post-rescue conversation.
- Confirm that Voss’s Himalayan destination is established.
- Let Nawal’s yacht departure finish.
- Confirm that A Harsh Climb is the next main quest.
Before you move on
- The Idol of Ra has been taken and the pyramid escape has begun.
- Indy reaches the high passage through the rising sand and completes the whip traversal route.
- The second sand surge buries Indy while Voss escapes with the Great Circle stone.
- The scorpion sequence advances through the blow prompts.
- Gina and Nawal arrive in a truck and dig Indy out.
- The post-rescue conversation identifies Voss’s Himalayan destination.
- Nawal’s yacht departure completes the Gizeh transition.
- A Harsh Climb appears as the next main quest.
Himalayas — the battleship, freezing hazards and capture by Gantz
A Harsh Climb is the linear Himalayas main quest that follows the Gizeh events. Follow Gina through deep snow and a collapsing mountain route, reach the stranded Nazi battleship KMS Kummetz, search its frozen interior, and recover the Machu Picchu Stone from the Conning Tower. The ship contains several fights, stealth opportunities, narrow exterior ledges and the mandatory Kummetz Cipher. The cold weather limits visibility and makes exposed traversal dangerous, but the chapter does not use a separately documented cold-status meter; survival depends on following the marked route, avoiding falls and moving between stable surfaces. After Gantz takes control of the situation, prioritize the escape path over combat. The chapter ends when the Kummetz sequence concludes and the story proceeds to Shanghai.
1. Follow Gina through the mountain route
Stay behind Gina through the deep snow and continue along the marked mountain path. At the crumbling suspended bridge, cross toward the broken section and use the whip on the reachable anchor to swing across. Climb the rock face on the far side and follow the route into the cave. The cave is a short sheltered passage, so use it to orient yourself before continuing rather than searching the surrounding cliffs for another route.
When you emerge, the KMS Kummetz is visible high on the mountain. Take the photograph if you want the associated journal entry, then continue toward the ship. At the ice crossing, use the whip to pull the debris away, shimmy across the exposed surface and climb up. Follow Gina to the hanging lifeboat, attach the whip to its propeller shaft and climb. Use the whip again to help Gina up; the floor then gives way and drops both characters inside the battleship.
- Cross the broken bridge with the whip.
- Enter the cave and continue to the battleship overlook.
- Use the lifeboat propeller shaft to board the KMS Kummetz.
2. Find the handwheel and open the first airtight hatch
Inside the ship, follow the corridor until you reach the hatch with its handwheel missing. Pick up the pipe near the door and carry it to the ice-covered passage. Break through the ice, enter the adjoining room and take the handwheel. The Kummetz Map is also in this room, just inside the doorway, so collect it before returning to the hatch.
Install the handwheel and open the door. Search the first frozen crew compartment for supplies and the nearby Survivor’s Account if you are collecting notes. Then climb to the upper level, take the second pipe if it is available, and break through the next ice-covered doorway. Crawl through the duct, drop onto the catwalk and help Gina clear the broken pipe. A story scene follows, after which Nazi soldiers begin forcing their way into the ship.
- Use the pipe to break the first ice blockage.
- Recover and install the handwheel.
- Collect the Kummetz Map before leaving the handwheel room.
3. Reach the anchor room while conserving resources
After the story scene, defeat the soldiers who reach you, then climb the ladder and follow the ship’s corridors. The radio room is a useful landmark and contains supplies; from there, the route becomes a long interior search area with armed Nazis. Crouch when possible, use corners and doorways as cover, and hide or avoid bodies if you are using stealth. Enemy firearms make standing in open corridors dangerous, so use close melee only when an enemy is isolated or already within reach.
Continue through the hospital and mess areas until the waypoint leads to the Anchor Room. Gina climbs toward the upper level, but the anchor chain blocks the route. Before descending, you may photograph the chain for the related journal entry. Follow the visible platform route down, then break the ice-covered doorway at the lower level with the butt of the revolver or another weapon that the game allows for the interaction. Search the room if desired, then return to the Anchor Room.
- Use cover against armed patrols.
- Follow the route through the radio, hospital and mess areas.
- Reach the Anchor Room and descend to the lower level.
4. Release the anchor chain and cross the exterior deck
From the Anchor Room, look up at the chain and use the whip on the reachable release points. One attachment can be reached from the lowest level; the second requires climbing back up one level. Complete both whip interactions so the chain moves out of Gina’s route. Return to the upper level and climb to where Gina is waiting.
Step through the broken railing and walk across the exposed pipes to the exterior hatch. The snowy deck has narrow walkways and open drops, so walk rather than making unnecessary jumps. Move toward the bow, climb onto the suspended lifeboat and use it to reach the next opening in the hull. Re-enter the ship, continue east through the pipes and catwalks, and approach the upper ladder. Nazi soldiers patrol the deck above. You can quietly remove them one at a time, but if you are discovered, retreat behind the ship’s structures and advance after the immediate firing lane is clear.
- Use both whip points to release the anchor chain.
- Cross the pipes and suspended lifeboat to regain the interior.
- Reach the upper deck without falling from the exterior walkways.
5. Solve the Kummetz Cipher and open the Officer Lounge exit
Climb into the Officer Lounge and inspect the Captain’s Code, the two code-table sheets, the four loose cipher wheels and the machine. The Captain’s Code is JÖGM. Place the wheel containing J in the first slot, the wheel containing Ö in the second, the wheel containing G in the third and the wheel containing M in the fourth. The umlaut matters: use the wheel with Ö rather than substituting an ordinary O.
Close the machine and rotate the wheels until JÖGM appears across the top row with the white markers aligned. The lower row then displays BLUT. Find BLUT on the nearby code table; its corresponding number is 3666. Enter 3666 at the locked exit door. Once it opens, go through and check the floor immediately ahead for the Machu Picchu Sketch if you want the final note in this section. Then climb the ladder, open the hatch and enter the bridge area.
- Load the wheels in J-Ö-G-M order.
- Align JÖGM on the machine’s top row to reveal BLUT.
- Enter 3666 at the exit door.
6. Take the Machu Picchu Stone and survive the Gantz sequence
Continue to the Conning Tower and approach the frozen captain. The Machu Picchu Stone is revealed during the ensuing story sequence, alongside the information about Laura Lombardi. Colonel Viktor Gantz then takes control of the confrontation. This is not a normal boss encounter: do not spend ammunition attempting to defeat Gantz through ordinary combat. Watch the scene and wait until the game returns control.
When Gina creates an opening with a grenade, follow the objective toward the rear of the ship. The Kummetz begins sliding and breaking apart, turning the route into a traversal escape. The hazards are unstable footing, narrow platforms, moving wreckage and long drops. The game signals the intended path with climbable surfaces, whip anchors and Gina’s position. Keep moving between those points instead of lingering in exposed snow or stopping to clear every enemy.
- Reach the Conning Tower.
- Collect the Machu Picchu Stone through the story sequence.
- Follow the escape objective after Gina’s grenade creates an opening.
7. Escape across the collapsing ship and finish A Harsh Climb
After regaining control, take Gina’s hand when prompted to climb back onto the deck. Move aft along the catwalk and use the whip to swing to the remaining deck section beside the ship. Climb to the higher level, turn back toward the next crane and attach the whip. Climb while hanging from the crane, then use the next whip point to reach Gina’s platform after she deals with the nearby Nazi.
Continue aft and use the zipline to reach the deck. The ship then pitches onto its side, leaving Indy hanging from the mast while Gina remains attached to him. Follow the on-screen prompts and do not attempt to explore the collapsing wreckage. If you miss a grab or fall, reload the latest checkpoint and repeat the visible crane-to-platform route; the failure recovery is faster than replaying the ship interior.
The chapter ends after the final escape sequence and the story transition into Shanghai. Confirm that control or the location indicator has changed before quitting, because reaching the Shanghai transition is the practical completion check for A Harsh Climb.
- Use the cranes and whip anchors to reach Gina’s platform.
- Take the zipline to the deck and survive the ship’s roll.
- Confirm the transition to Shanghai.
Before you move on
- The KMS Kummetz has been boarded and the missing handwheel has opened the ship’s first airtight hatch.
- The anchor chain has been released and Indy has crossed the exterior deck into the Officer Lounge route.
- The Kummetz Cipher has been solved with JÖGM, BLUT and door code 3666.
- The Machu Picchu Stone has been revealed in the Conning Tower sequence.
- The crane, whip and zipline escape is complete, the collapsing ship sequence has ended and the story has transitioned to Shanghai.
References for this chapter
- Indiana Jones and the Great Circle A Harsh Climb Walkthrough
- How to complete the Indiana Jones cipher machine code puzzle
- Indiana Jones and the Great Circle — A Harsh Climb Walkthrough
- Guide for Indiana Jones and the Great Circle — The Himalayas and Shanghai
- Indiana Jones and the Great Circle Walkthrough: Chapter Route, Missables and Order of Giants
Shanghai — wartime urban setpiece, chases and aerial escape
Shanghai’s Into the Fire chapter is a mostly linear escape through a city under Japanese attack. Follow Gina across the wreckage of the Kummetz, descend through the ruined streets, detour through a streetcar, climb across buses and broken buildings, then use the whip on a green sign to create the route to the grounded aircraft. The main required ground fight is a close-range encounter with a Japanese fighter pilot armed with a wakizashi. At the plane, straighten the aircraft with the whip, climb aboard before the collision sequence, defend it with the rear gun, and leave the turret when the game displays the transition prompt. Indy then crosses to an enemy fighter, defeats its gunner, deals with the pilot and helps Gina aboard. The chapter ends when the story establishes Sukhothai as the next destination.
1. Escape the burning building with Gina
At the start of Into the Fire, follow Gina through the wreckage around the Kummetz. Climb the collapsed floor, move around the ship’s debris and continue along the remaining second-floor boards until the collapsed third floor forms a ramp upward. Stay on this elevated route rather than searching the lower rooms; the intended path leads directly toward Gina’s jump to the broken rooftops.
When Gina tells you to jump, drop onto the ruined roofs and rubble below. Keep moving with her through the burning structure. Fire and broken flooring are the main hazards here, so do not linger on damaged surfaces or attempt to return through rooms that have already collapsed. If you miss a jump or become trapped behind debris, reload the latest checkpoint rather than trying to force a climb from the wrong side.
- Climb around the Kummetz wreckage.
- Use the collapsed third floor as the upward ramp.
- Jump down only when Gina directs you.
2. Get off the streets
Run toward the objective marker through the street. A fiery crater blocks the direct road, so enter the streetcar and use it as the detour around the crater. Continue forward after leaving the streetcar, then climb onto the top of the bus. From the bus, jump into the next building.
The interior floor gives way and drops Indy to the first floor. This fall is part of the route, not a failed jump. After landing, move to the exit and look left when the next objective appears. The route remains linear, but the correct direction is easy to miss if you focus only on the waypoint and ignore the open porch outside.
- Take the streetcar route around the crater.
- Climb the bus and enter the next building.
- Treat the interior collapse as scripted progression.
3. Cross the canal and handle the fighter pilot
Open the door, then look left toward the porch outside. Continue down toward the canal and cross the broken bridge. In the alley beyond, a Japanese fighter pilot approaches with a wakizashi. Fight him at close range with melee attacks, using the surrounding space to avoid being pinned against the wall. This is a short encounter; do not spend explosives or scarce ammunition on it.
After the pilot is defeated, move toward the crashed aircraft to advance the objective. Face the wreck and use the rubble ramp on the right to reach the bus and balcony above. From the balcony, look back toward the canal before dropping down. Climb the cart into the building opposite, then continue upward to the third floor and rejoin Gina.
- Cross the broken bridge.
- Defeat the single wakizashi-wielding pilot.
- Use the rubble ramp, bus and cart to regain the upper route.
4. Reach the grounded aircraft
When Gina points toward an intact aircraft in the distance, continue toward it through the upper floors. In the next room, follow the route after the floor collapses: jump the gap, go around the corner and use the whip to grab the distant ledge. Climb up, follow Gina and ascend the rubble pile to the floor above.
At the green sign across the street, use the whip to pull it down. The sign becomes a bridge. Cross through the neighboring building, then head toward the street and jump onto the roof. Follow the connected rooftop route, cross to the bridge roof and continue to the eastern gap. Jump across, turn around and drop to the lower platform visible below the edge. From there, jump to the next building, climb back up and continue through the ruined structure until the floor drops you lower again. Cross the gap, use the whip on the ledge and follow the path back to Gina. The final rubble climb and jump across the street place you beside the aircraft.
- Pull down the green sign with the whip.
- Use the bridge roof and lower platform to continue east.
- Climb back to Gina and reach the aircraft.
5. Straighten the plane and climb aboard
Once Gina reaches the aircraft, interact with the tail when the objective changes to pulling it up. Use the whip to yank the tail straight so Gina can start the engine. The game then changes immediately into a timed traversal sequence.
When the aircraft begins moving, follow the on-screen movement prompts and climb the whip line to reach the plane. Do not search for a second route or wait on the ground; the sequence is designed around getting onto the aircraft before it strikes the surrounding wreckage. If the climb fails, reload the checkpoint and repeat the whip climb as soon as the prompt appears.
- Pull the aircraft’s tail straight with the whip.
- Climb the whip line when the aircraft starts moving.
- Reload the checkpoint if the climb sequence fails.
6. Defend the aircraft and transfer to the fighter
Indy takes the rear gun while Gina pilots. Shoot the pursuing fighter planes as they enter range, using controlled aim and prioritizing aircraft that approach directly behind you. The sequence is scripted, so there is no alternate flight path to discover. Continue defending the plane until the dialogue reaches the Lao Che exchange and Indy says he will get a new plane.
At that point, stop treating the scene as a normal dogfight. The game displays an interaction prompt to leave the turret. Activate it promptly. Continuing to fire instead of taking the prompt causes the aircraft to be destroyed and sends you back to the checkpoint.
After leaving the turret, run along the upper wing, jump to the enemy fighter and land on its wing before it pulls away. Knock the enemy gunner off the wing, reach the cockpit and interact with it to deal with the pilot. Gina then jumps toward Indy’s aircraft. Use the displayed prompt to grab her hand and pull her aboard.
- Shoot the pursuing aircraft from the rear gun.
- Leave the turret when the scripted prompt appears.
- Cross to the enemy fighter, defeat the gunner and deal with the pilot.
- Pull Gina aboard when she reaches the wing.
Before you move on
- The Into the Fire objectives in Shanghai are complete.
- Indy has taken control of the enemy fighter and pulled Gina aboard.
- The closing conversation identifies Sukhothai as the next destination.
- The game transitions into the next main-story sequence, Trouble in Paradise, with Shanghai no longer active as the current objective.
Sukhothai, Siam — The Blessed Pearl, Locus and Wat Mahathat
The required Sukhothai route is The Blessed Pearl. After meeting Uncle Sunan, join Gina, speak with Tongdang and purchase the breathing device before entering the underwater passage to the hidden pyramid. Repair the two gear trains, cross the pyramid, defeat the snake with thrown spears, and solve the Nephilim game board. Locus then confronts Indy, leading to a close-range fight and the snake’s scripted intervention. Return to Sunan, travel by boat to Wat Mahathat, and wait for Gina to uncover the Nephilim symbol beneath the stones. In the Hidden Temple, direct the villagers and Indy onto the correct pressure plates to win the Great Game. Follow the revealed route through collapsing, flooded ruins to the Inner Sanctuary and collect the Blessed Pearl. The following escape begins immediately and leads into the next story sequence.
1. Meet Sunan, Gina and Tongdang before entering the ruins
When the Sukhothai story resumes, speak with Uncle Sunan in the village, then follow the active objective to Gina and board the boat. After the conversation about the temple search, take the boat upriver to Tongdang’s store. Speak with Tongdang about the breathing device; the story requires you to buy it before the underwater route can be completed.
The device costs 798฿. If you do not have enough money, complete Voss’s Gold Stash or search the nearby ruins and camps for valuables before returning to Tongdang. After buying it, equip it through the prompted inventory interaction whenever the game calls for underwater travel. The rebreather is not automatic and its air supply is limited, so surface at visible openings when the route permits.
- Speak with Uncle Sunan.
- Meet Gina and board the boat.
- Buy the breathing device from Tongdang for 798฿.
2. Enter the hidden pyramid and repair both gear trains
Take the boat toward the Yeak statue in the northwestern search area. Gina identifies the statue as the landmark for the underwater entrance. Dive beside it, equip the breathing device when prompted, and descend through the submerged opening. Move the beam blocking the passage, surface at the shaft of light to replenish air, then continue into the chamber containing two gear mechanisms and two levers.
Inspect both gear trains before placing anything. Pulling a lever briefly shows which parts already transfer motion. Search the chamber for loose cogwheels, including the upper platforms and side passages, and place the missing wheels so each train forms an unbroken connection from its water wheel to its mechanism. Stop the mechanism before rearranging wheels, then pull the lever after the teeth connect. Take the small cogwheels back into your inventory after solving the room; they are reusable for later Sukhothai puzzles.
Once both trains work, use the opened route and follow the tunnels toward the hidden pyramid. The correct path uses crawl spaces, climbable ledges and whip anchors rather than a conventional doorway.
- Reach the Yeak statue and dive into the submerged entrance.
- Repair the left and right gear trains.
- Retrieve loose small cogwheels before leaving the mechanism room.
- Enter the hidden pyramid.
3. Cross the pyramid and defeat the snake
Inside the pyramid, examine each chamber before jumping. Use white-painted surfaces, roots and whip points as traversal indicators. When a gap is too wide for a normal jump, look for a spear and a giant mushroom: throw the spear into the mushroom, then use the embedded spear as a whip anchor. Some routes require a short swim, so move quickly between dry platforms and climb out immediately when you reach a ledge.
At the Lost Archive section, collect a spear before approaching the water. The snake circles below the surface and announces its attack with splashes. Track the wake, listen for the creature to go quiet, and turn toward the side where it resurfaces. Throw the spear only when the snake opens its mouth; hits against its body do not count. Continue until the required number of successful mouth strikes forces it through the wall.
Follow the newly opened route, reunite with Gina and operate the two handles together. This opens the inner chamber and leads to the first Nephilim game board.
- Use spears and giant mushrooms to cross the pyramid’s gaps.
- Strike the snake in its open mouth when it resurfaces.
- Reach Gina and open the inner chamber.
4. Solve the first Nephilim game board and fight Locus
In the first game room, inspect the board and the wall alcove before moving pieces. The pieces rotate adjacent towers; diagonal contact does not count. Place the first peg in the center space. Place the next peg to the right of the top-right piece that has not turned toward the exit. This opens the side panel and provides three more pegs. Place the third peg in column four, row four, then the fourth in column two, row two. Use the final peg beside the only remaining piece that is not facing the exit. If the panel closes before you collect the additional pegs, restart from the latest checkpoint rather than trying to force the board.
The solved board reveals a map. Photograph it when prompted, then continue through the opened door. Locus appears and the floor drops both of you into the Stone Library. During the fight, block his attacks and counterpunch after his combinations. When he drops to one knee, use the finishing prompt, but expect the scripted interruption: Locus catches Indy and the snake returns. Follow the spear prompt and strike the snake when the game gives you the opening. The encounter ends through a story scene rather than a conventional knockout.
- Solve the first Nephilim game board.
- Photograph the revealed map.
- Block and counterpunch Locus.
- Complete the scripted snake intervention.
5. Return to Sunan and reveal the Wat Mahathat entrance
After the confrontation, the game automatically returns Indy to the boat. Follow the objective back to Khaimuk Saksit Village and speak with Sunan. His conversation identifies Wat Mahathat as the next destination. Board the boat and travel to the central temple area.
At Wat Mahathat, remain in the eastern part of the marked search zone. Do not waste time searching the western Nazi compound. Look for a group of stones covering a Nephilim symbol on the ground. The stones initially cannot be moved by Indy. Wait for Gina to reach the location; she examines the symbol and moves the stones. A cutscene then shows Indy and Gina opening the large stone slab. After it ends, jump into the exposed hole to enter the Hidden Temple.
- Speak with Sunan after the Locus sequence.
- Travel by boat to Wat Mahathat.
- Find the stones covering the Nephilim symbol.
- Wait for Gina to uncover the entrance.
- Enter the Hidden Temple.
6. Win the Great Game with the villagers
Proceed through the Hidden Temple until Gina gives you the torch and the story brings the villagers into the game chamber. The Great Game uses people as living pieces. The board has five required pressure plates: four are for the villagers and one is for Indy.
Place three villagers on the three marked plates on the left side of the room. Send the fourth villager to one of the two plates in the upper-right area, following the white-centered markers rather than the larger black game pieces. Then move Indy to the last unoccupied white-centered plate in the upper-right section. The game accepts the solution when all five plates are occupied correctly. If a villager walks to the wrong marker, reposition that person before moving Indy; the exit remains locked until the full arrangement is correct.
When the board opens the route, continue through the newly revealed chamber. The objective is now the Blessed Pearl, not a separate Temple stone. Follow the traversal prompts through the roots, ledges and platforms until you reach the Inner Sanctuary.
- Bring the villagers into the game chamber.
- Place three villagers on the left-side plates.
- Place the fourth villager on the upper-right plate.
- Stand Indy on the remaining correct plate.
- Enter the route opened by the Great Game.
7. Collect the Blessed Pearl and survive the collapse
In the Inner Sanctuary, use the central platforms and whip anchors to descend. The route includes deep drops, narrow ledges and rooms filled with water. When you reach the central platform, interact with the Blessed Pearl and allow the translation and story animation to finish. This is the required Sukhothai relic for The Blessed Pearl; it is not called the Temple stone in the game’s progression.
The ruins begin collapsing as water rises. Follow the white-painted climbing surfaces around the outside of the chamber. Whip-climb the marked wall, shimmy along the ledge, and use fallen beams as temporary bridges. In the leech-filled rooms, do not linger in the water. If you fall, swim directly to the nearest dry platform and continue toward the next white-painted route.
When the flooding fills the game room, equip the breathing device and swim away from the blocked entrance. The escape route is through the upper tunnel above the original doorway, then toward the ladder on the left. After the exterior cutscene, run for the exit and defend the boat with its mounted machine guns. Aim at fuel barrels when enemies cluster nearby. During the final waterfall transition, respond immediately to the branch interaction prompt. The following shore sequence and rescue objective confirm that The Blessed Pearl section has advanced.
- Reach the Inner Sanctuary.
- Collect the Blessed Pearl.
- Escape the collapsing and flooded temple.
- Complete the boat defense and waterfall transition.
- Confirm that the next rescue objective appears.
Before you move on
- The Blessed Pearl has been collected in the Inner Sanctuary.
- The collapsing-temple escape has been completed and the flooded game room has been exited through the upper tunnel.
- The boat-defense and waterfall sequence has finished.
- After the next cutscene, the active objective changes to the following rescue sequence, confirming that The Blessed Pearl route is complete.
References for this chapter
- Indiana Jones and the Great Circle The Blessed Pearl Walkthrough
- Indiana Jones Great Circle: Finding the entrance to Wat Mahathat puzzle
- Indiana Jones Great Circle: The Game Room and the Great Game puzzle in Sukhothai
- How to solve and win the Blessed Pearl game in Indiana Jones and The Great Circle
- Indiana Jones and the Great Circle - Wat Mahathat Walkthrough
- Guide for Indiana Jones and the Great Circle - Sukhothai
Midgame pivot — tracking Voss, rescue attempts and narrative choices
Begin after The Blessed Pearl, the Sukhothai boat defense and the waterfall escape have concluded. Use any remaining Sukhothai access for optional Fieldwork, Mysteries, photographs, Adventure Books, currency and equipment preparation, but do not repeat the main route. In Iraq, use the distraction at the Nazi excavation camp to enter without forcing a full battle. Locate the excavation office and the wooden holding building, collect the Storage Room Key, clear the immediate guards and unlock Gina’s room. After the rescue conversation, the Journal changes to the next objective involving the Ziggurat. Stop there: this chapter does not cover the later scaffolding, lift, generator, underground route or Ziggurat approach. Dialogue responses in this section do not create a separate main-campaign branch.
1. Use the Sukhothai preparation window
Start this chapter only after the Sukhothai main sequence has advanced beyond The Blessed Pearl, including the boat defense and waterfall escape. You do not need to replay any temple, river or Pearl objective. If you still have optional Sukhothai work available, decide whether to complete it before committing to the Iraq route.
Open the Journal and review the active Adventures, Mysteries, Fieldwork and Discoveries. Optional activities can provide Adventure Points, currency, books, photographs and clues, but they are not prerequisites for rescuing Gina or advancing the main campaign. Spend currency or Adventure Points if you have useful upgrades available, and restock medicine or other supplies when a vendor is accessible. A sturdy melee weapon and at least one throwable are practical choices for the camp, although the rescue can be completed without clearing every enemy.
Select the current main adventure before leaving Sukhothai. Treat dialogue choices as role-playing or information choices rather than branch selectors: the main route continues through the active objective and does not split into separate campaign endings here. Allow the game to record its transition into Iraq before making a long optional detour.
- Confirm that The Blessed Pearl and the Sukhothai escape are complete.
- Review unfinished optional Sukhothai activities in the Journal.
- Spend available currency or Adventure Points if desired.
- Carry medicine and a serviceable melee weapon.
- Set the current Iraq main adventure as the active objective.
2. Enter the Nazi excavation camp
When the Iraq sequence begins, move toward the Nazi excavation camp and use the attack on the camp as cover for your entry. Take a photograph of the camp entrance if you want the associated Adventure Note, then approach the gate rather than wandering away from the objective.
The safer route uses the large tank near the gate. Jump over the wall, move around the tank and open the hatch on its far side to reach the camp interior. The alternative is the wooden-platform route to the left of the entrance. Those platforms collapse as you cross them, so use that path only if you are comfortable committing to a one-way entry. Both routes place you near guards; avoid a prolonged firefight and use cover, distractions or isolated takedowns instead.
Once inside, move between tents, vehicles, walls and excavation equipment. The Excavation Camp Map is in a small building near the approach. Pick it up if you want the area recorded in the Journal or need help orienting yourself, but do not mistake it for a required key. If guards become suspicious, retreat behind solid cover and break their line of sight. The objective is to reach Gina, not to defeat every soldier in the camp.
- Use the camp assault as cover for your approach.
- Enter through the tank hatch or the collapsing wooden platforms.
- Avoid committing to a full camp-wide firefight.
- Collect the Excavation Camp Map if desired.
- Use cover to recover if the camp becomes alerted.
3. Reach Gina’s holding room
From the camp interior, work toward the excavation office and the wooden barracks or storage building where Gina is being held. Approach the building from the side that gives you the best view of the nearby guards. Windows and gaps around the structure let you observe patrols before entering, so wait for a guard to move away instead of opening the door into an active confrontation.
Clear or bypass the guards around the entrance and inside the first rooms. If you choose combat, keep it close and controlled: use a nearby melee weapon, pull enemies away from the doorway and avoid allowing an alarm to spread to the entire camp. If you choose stealth, use distractions and hide unconscious bodies where they will not be discovered immediately.
Gina is in the final room of the building. The Storage Room Key is in the adjoining room on a table after the Nazi officer and nearby guards have been dealt with or avoided. Pick up the key, then return to Gina’s locked room. The Excavation Camp Map and the Storage Room Key serve different purposes: the map is optional documentation, while the key is the required item for opening Gina’s door.
- Reach the excavation office and adjoining holding building.
- Observe the guards before entering.
- Clear or bypass the guards around Gina’s room.
- Find the adjoining room with the Nazi officer and table.
- Pick up the Storage Room Key.
- Return to Gina’s locked room.
4. Free Gina and stop at the new Journal objective
Do not attempt the rescue while Indy is still in active combat. If the camp is alerted, move away from the building, break line of sight and wait until the immediate search ends. Once the area is sufficiently quiet, use the Storage Room Key on Gina’s door and interact with Gina to untie her.
A conversation follows the rescue and changes the purpose of the mission. The task is no longer simply to extract Gina; the Journal advances toward the Ziggurat objective. Let the conversation and objective update finish before leaving the area. If the objective does not update, make sure you completed the interaction at Gina’s restraints rather than merely opening the door.
This is the endpoint for this chapter. Do not continue into the later Ziggurat scaffolding, lifts, generator route, underground traversal or stone-door sequence here. Those actions belong to the next chapter. Create or retain the post-rescue checkpoint before starting that continuation, especially if you want to preserve a clean save immediately after the required rescue.
- Make sure nearby enemies are no longer actively engaging Indy.
- Use the Storage Room Key on Gina’s door.
- Interact with Gina and complete the rescue.
- Wait for the rescue conversation to finish.
- Confirm that the Journal now points toward the Ziggurat.
- Stop before beginning the Ziggurat approach.
Before you move on
- The Blessed Pearl and the Sukhothai escape are already complete.
- Indy has entered the Iraq excavation camp.
- The Excavation Camp Map has been collected if desired, or the camp has been navigated without it.
- The Storage Room Key has been taken from the adjoining room.
- Gina’s locked room has been opened.
- Gina has been untied and rescued.
- The rescue conversation has completed.
- The Journal now points toward the Ziggurat objective.
- The chapter ends before the Ziggurat scaffolding and lift sequence begins.
References for this chapter
Ziggurat of Ur — siege, large-scale setpieces and the Nephilim reveal
Begin this chapter after Gina has been rescued from the excavation office in Iraq. The Nazi camp is no longer distracted by the rescue operation, so approach the Ziggurat from the western side and avoid unnecessary fights. Use the scaffolding route with Gina, cross by crane and whip, then descend through the lift shaft. The second lift is unpowered: pass through the narrow gap, crouch across the fallen ladder, ride the zipline, pull a wooden structure into a bridge, and reach the generator. After the lift stops during its next descent, leave it with the whip, cross to the side ledge, and remove the beam blocking its path. At the bottom, collect the optional Ziggurat Guide if desired, ignore the non-required Secret Vault branch, and continue north with Gina. The chapter ends when you help Gina open the massive stone doors and the Nephilim revelation cinematic plays.
Leave the rescued area and approach the Ziggurat
Start this chapter only after Gina is free and the objective has changed from the rescue to reaching the Ziggurat. Do not return to the excavation office or repeat the route used to obtain the Storage Room Key. The earlier giant-created distraction has ended, so the camp is more dangerous than it was during the rescue.
Move toward the Ziggurat along the western side of the camp. Stay behind tents, walls, earthworks, and armored vehicles, and wait for patrols to turn away before crossing exposed ground. Lone guards can be silently removed if they block the route, but clearing the entire camp is unnecessary. If the alert rises, retreat behind solid cover and break line of sight instead of allowing several patrols to converge.
Go around the armored vehicles and climb the dark staircase near the Ziggurat. Jump across to the scaffolding. Gina will boost you up to the next level, then move the crane into position. Use the available whip point to swing across and continue toward the lift. Guards near the upper ledge can be avoided; only engage them if they prevent safe passage.
- Begin with Gina already rescued.
- Use the western camp route and armored vehicles for cover.
- Climb the staircase and reach the scaffolding.
- Let Gina move the crane, then cross with the whip.
- Avoid spending ammunition on patrols that can be bypassed.
Take the first lift and reach the unpowered second lift
Board the first lift with Gina and ride it down. When it stops, leave the platform and follow the route toward the second lift. A Nineveh Document can be found near the area between the lifts; it is an optional Adventure Note and is not required to continue.
The second lift has no power. Go around its side and pass through the narrow gap beside the shaft. On the far side, crouch-walk across the fallen ladder. Keep the movement controlled: standing or moving too quickly can send Indy off the narrow surface. If you fall and the companion sequence does not recover, reload the latest checkpoint or use the rollback option from the Xbox game-slot menu rather than trying to force the route from an unintended position.
At the end of the ladder, use the zipline to reach the lower platforms. Drop down carefully and look across the gap for the whip ring attached to the large wooden structure. Pull the structure toward Indy to create a rough bridge. It has large openings, so cross slowly, use the edge-hanging prompt when needed, and drop to the lower boards rather than attempting unsafe jumps.
- Ride the first lift down with Gina.
- Take the Nineveh Document only if desired.
- Squeeze around the unpowered second lift.
- Crouch across the fallen ladder.
- Use the zipline and pull the wooden structure into a bridge.
Cross the shaft and activate the generator
After crossing the wooden bridge, continue over the remaining platforms until you reach the elevator shaft. Jump across to the opposite side, then climb the ladder. Follow the platform to the generator and activate the nearby switch. This is the required action that restores power to the second lift; there is no need to search the lower platforms for another generator.
Return to the shaft and wait for the lift to arrive. Board it with Gina and begin the next descent. The lift stopping partway down is scripted, not a failed attempt. Do not jump blindly into the shaft or abandon the lift before checking for the overhead whip point.
- Reach the opposite side of the elevator shaft.
- Climb to the generator.
- Activate the switch to restore power.
- Return to the lift and ride down with Gina.
- Treat the mid-shaft stop as part of the intended progression.
Remove the obstruction and complete the descent
When the lift stops, look above it for the beam that can be reached with the whip. Use the whip to pull yourself up, climb onto the beam, and swing across to the platform on the rock wall. From there, look over the edge and drop carefully onto the narrow ledge below.
Follow the ledge and wooden beams toward the lift. A wooden beam is lodged in the lift’s path. Position yourself close enough for the whip interaction, then yank the obstruction free. The lift can now descend again. Climb back into the lift with Gina and continue to the bottom chamber.
If you miss the ledge or fall into an awkward position, reload the latest checkpoint rather than attempting a long improvised climb. Companion and lift triggers are tied to the intended route, so reaching the bottom out of sequence can leave Gina unable to perform the next interaction.
- Use the overhead beam to leave the stalled lift.
- Swing to the rock-wall platform.
- Drop to the lower ledge and follow the beams.
- Pull the wooden obstruction out with the whip.
- Re-enter the lift and reach the bottom chamber.
Collect the Ziggurat Guide and open the stone doors
At the bottom, move into the chamber containing the Nephilim remains. Near the center, look for crates with the Ziggurat Guide Adventure Book on top. The book is optional, but it helps track remaining collectibles in the area and can be collected without diverting from the main route.
A side passage leads toward the Secret Vault and its relic-related content. That branch is optional and is not needed to trigger the campaign’s next story beat. Do not spend time trying to complete the relic puzzle here; the final Ancient Relic is obtained after the main story, and the Secret Vault is separate from required progression.
Return to the main chamber and continue north with Gina. Approach the massive stone doors and wait for the contextual interaction to appear. Interact with the doors, then assist Gina when prompted. The doors open together and a cinematic reveals the Nephilim remains, changing the objective and advancing the story.
The chapter ends as soon as that cinematic has played and control or the next objective returns. Do not continue into the Ark excavation, attempt to reach Voss’s tent, collect the sledgehammer, or begin the final confrontation; those actions belong to the next chapter.
- Reach the bottom chamber with Gina.
- Collect the Ziggurat Guide if desired.
- Leave the Secret Vault and relic puzzle as optional content.
- Continue north to the massive stone doors.
- Help Gina open the doors.
- Wait for the Nephilim revelation cinematic to finish.
Before you move on
- Gina is rescued before this chapter begins.
- Indy and Gina have reached the Ziggurat through the western camp approach.
- The scaffolding, crane, and first-lift sequence is complete.
- The fallen ladder, zipline, and whip-created bridge have been crossed.
- The generator has restored power to the second lift.
- The lift obstruction has been removed and the bottom chamber reached.
- The optional Ziggurat Guide has been collected or deliberately skipped.
- The massive stone doors have opened with Gina.
- The Nephilim revelation cinematic has played and the next story objective is active.
References for this chapter
- Indiana Jones and the Great Circle Atonements Walkthrough — PowerPyx
- Indiana Jones and the Great Circle: Atonements Walkthrough & Secrets
- Indiana Jones and the Great Circle — Atonements Walkthrough — Neoseeker
- Indiana Jones and the Great Circle Walkthrough: Chapter Route, Missables and Order of Giants
Noah’s Ark chamber — final excavation and point of no return
After the Nephilim revelation in c09, follow the final excavation approach toward Voss’s tent. This section is a stealth crossing, not another combat-clear objective: use the sledgehammer to remove or bypass the first heavyweight, wait out the central patrol, climb the raised ledge with the whip, drop only when the patrol turns away, and use the trucks as cover for the last approach. Entering Voss’s tent begins the final confrontation and removes the last convenient preparation window. This chapter stops at that transition; the Voss fight, ending scenes and credits belong to c11 and c12.
1. Begin at the final excavation approach
Start this chapter immediately after the Nephilim revelation and the transition into the Ark excavation. The preceding chapter should already have covered the return to the Ziggurat, the descent and the opening of the buried stone doors, so do not retrace those objectives here. Follow the active objective toward Voss’s tent and treat the excavation as a guarded approach rather than an area that must be cleared.
Crouch as soon as the route opens and study the guard positions before crossing the road. The first useful weapon is a sledgehammer near the starting side of the approach. Pick it up before moving into the open. It gives you a quiet option against the nearby heavyweight, but you do not need to defeat every soldier in the excavation to advance.
- Begin after the Nephilim revelation and final-excavation transition.
- Do not repeat the Ziggurat descent or buried-door sequence.
- Crouch and observe the patrols before crossing the road.
- Pick up the nearby sledgehammer before advancing.
2. Bypass the first heavyweight and wait at the central stone
Cross toward the first heavyweight and use the sledgehammer for a quiet takedown if he blocks your route. Then continue east while remaining crouched. A second heavyweight patrols around the large stone in the middle of the excavation. Do not follow him immediately. Let him walk past, trail him around the stone, and then stay concealed behind the stonework while he reverses direction.
Your goal is to reach the shadowed route beyond the central area, not to start a prolonged fight. If a guard becomes suspicious, backtrack behind the central stone or nearby cover and wait for the search to settle. Moving deeper while several enemies are actively searching usually exposes you in the next open section. A failed attempt should return you to a nearby checkpoint, allowing you to repeat this patrol timing without replaying the earlier story sequence.
- Use the sledgehammer only if the first heavyweight blocks the route.
- Wait for the central heavyweight to pass before following his patrol line.
- Hide behind the central stone when he turns back.
- Reset behind cover if an alert begins instead of running into the next area.
3. Climb the raised ledge and cross above the patrol
Continue through the shadows until you reach the wall beyond the central stone. Look upward for the contextual whip point and use the whip to climb onto the raised ledge. Move across the platform while watching the heavyweight below. The ledge provides the safest way around the guarded ground, but it does not make the route completely safe: the patrol can still see you if you drop at the wrong moment.
When you reach the point above the lower path, drop once onto the intermediate level and pause. Wait until the heavyweight below has turned away from your intended direction. Then drop to the lower ground, cross the road and continue toward the gate and the trucks. If the guard is still facing the drop point, remain on the ledge rather than forcing the descent. The route depends on the patrol’s position, not on defeating him.
- Find the whip point above the shadowed wall.
- Use the raised ledge to bypass the exposed ground.
- Drop to the intermediate level and pause.
- Descend fully only after the heavyweight turns away.
4. Use the trucks for the final approach
After crossing the road, stay low and follow the outer edge of the excavation toward the gate. The trucks provide the final cover route. Watch the guard inspecting or patrolling around them, and move only when he is walking away from Voss’s tent. Keep the vehicles between Indy and the guard as you circle around them; do not cut across the open approach while he is looking toward you.
A document near the gate may be collected if you are pursuing optional notes, but it is not required for the campaign route. If detection starts, retreat to the trucks or the nearby structures and wait for the alert to diminish. Fighting one guard may be recoverable, but a full camp alarm removes the advantages of this route and can force unnecessary damage before the finale.
- Stay on the outer edge after crossing the road.
- Use the trucks as cover from the final patrol.
- Move toward the tent only while the guard is walking away.
- Treat nearby documents and collectibles as optional.
5. Prepare, then enter Voss’s tent
Before entering the tent, take the last normal preparation opportunity. Restore health and stamina, replenish what you can, and make sure any preferred upgrades or equipment choices are already set. Once you cross into Voss’s tent, the game begins the final sequence and does not provide another convenient free-roaming window before the confrontation.
When the entry prompt or objective allows you to go inside, enter the tent to hand off directly to c11. Do not search for a separate player-controlled stone-assembly puzzle in this chapter, and do not remain outside expecting another required objective. The story transition inside the tent is the intended endpoint of this approach.
- Restore health and stamina before entering.
- Confirm preferred upgrades and equipment before committing.
- Do not expect another preparation period after entry.
- Enter Voss’s tent to begin c11.
Before you move on
- The chapter is complete when Indy has crossed the excavation, reached Voss’s tent and entered it.
- The active story transition into the final confrontation should begin after entering the tent.
- Do not count the Voss fight, ending scenes or credits as part of this chapter’s completion requirement.
Final confrontation with Emmerich Voss — boss tactics and recovery
This chapter begins after Indy enters Emmerich Voss’s tent at the end of the Iraq sequence. The fight is a scripted two-phase encounter rather than a conventional boss with a clearly displayed health bar. In the first phase, keep Voss in front of you, block his ordinary punches and chopping attacks, dodge his committed forward kick, and use short counterattacks before returning to defense. When Voss appears to collapse, approach only as prompted; the apparent opening leads to a sucker punch and a cutscene that changes the encounter. The second phase leaves Indy and Voss hanging from Indy’s whip above the Ark. Indy can block with LB, punch with LT, and kick with RT to create distance. Survive the exchange until Gina reaches the plank above you, then look up and press X when the hand prompt appears. The chapter ends as Gina pulls Indy up and the concluding cinematic begins.
Resume control inside Voss’s tent
This chapter starts after you enter Voss’s tent and the opening cinematic finishes. The tent entrance is the boundary from the preceding chapter: do not leave the fight to search the Iraq camp, solve another puzzle, or revisit the rescue route. Indy cannot use his normal pistol, explosives, or environmental weapons as part of this confrontation, so treat the encounter as a close-range scripted fight.
There is no conventional preparation phase once the fight has begun. The useful preparation is having already restored health and stamina before entering the tent. After control returns, keep Voss in view and allow him to approach. The arena gives you room to circle, but its edges can leave Indy vulnerable if Voss pins him there. Stay near open ground and use the perimeter only to reposition, not as a source of cover or a separate objective.
- Confirm that the tent cinematic has ended and control has returned.
- Keep Voss centered in view before exchanging attacks.
- Do not search for weapons, explosives, or another puzzle.
- Avoid allowing Voss to force Indy against the arena edge.
Block Voss’s ordinary strikes and counter briefly
Voss’s ordinary punches and chopping attacks can be blocked. On the default Xbox Series X layout, hold LB as the strike arrives. After a successful block, answer with one or a short pair of punches using LT or RT, then immediately return to LB. Timed blocks and counters are safer than trying to win through long attack strings. The exact number of successful counters is not the objective; the sequence advances after you survive and deal enough effective damage for the scripted transition.
Keep your attacks short because Voss recovers quickly. If the camera drifts during an exchange, stop attacking, turn until Voss is directly ahead, and resume blocking. You do not need to chase him around the arena. A stable rhythm of block, brief counter, regain spacing, and block again prevents most avoidable damage. If you have enabled an alternate control layout, follow the binding shown in your control settings rather than assuming the default buttons.
- Hold LB against ordinary punches and chops.
- Counter with LT or RT only after the attack is stopped.
- Use short combinations rather than extended attack strings.
- Re-center Voss before resuming the exchange.
- Keep enough open space to move sideways.
Dodge the committed forward kick
Voss’s forward kick is the main exception to the normal block-and-counter rhythm. When he pulls back and commits to the kick, dodge sideways with A while directing the left stick left or right. Do not stand in the kick’s line holding LB. The dodge is most dependable when you move across his approach rather than retreating straight backward.
After the kick misses, Voss is briefly exposed. Use a small counterattack, then return to defense. Do not remain beside him trying to extend the opening; the safest response is to take the opportunity and reset. If you are already near the arena boundary, prioritize reaching open ground before attempting the counter. This prevents a successful dodge from leaving Indy trapped against the tent wall or edge.
- Watch for Voss to pull back before the kick.
- Dodge sideways with A and the left stick.
- Do not try to block the committed kick.
- Counter briefly after he misses.
- Move back toward open ground before the next exchange.
Escape the grab and trigger the scripted transition
Voss can raise his hands and rush for a grab. Treat the raised-hands animation as a warning to move away or prepare to use the displayed escape input if the grab connects. Do not remain stationary waiting for him to finish the animation. If Indy is caught, follow the on-screen prompt promptly, then re-center the camera and return to blocking.
Continue the defensive cycle until Voss takes enough punishment to stagger or drop to his knees. This apparent defeat is not the end of the fight. Approach only when the game presents the opening, because Voss answers with a sucker punch instead of allowing a normal finishing attack. The sucker punch triggers the next cutscene and binds Indy’s hands with the whip. Do not waste time looking for a way to prevent this transition; it is required story progression.
- Move when Voss raises both hands for a grab.
- Use the displayed escape input if Indy is caught.
- Continue until Voss drops or staggers as part of the scripted sequence.
- Expect the apparent finishing opening to become a sucker punch.
- Wait for the cutscene that changes the fight.
Survive while hanging from the whip
After the cutscene, Indy and Voss hang from Indy’s whip above the Ark. This is a restricted combat phase. Indy can punch with LT because one hand holds the whip. On the default Xbox layout, RT becomes a kick that pushes Voss away and creates space, while LB remains the block button. Use LB when Voss attacks, then kick with RT when he closes in. If the kick sends him away, do not assume the phase is finished; Voss can use the distance to return with another kick.
The hanging exchange is not completed by reducing Voss through an ordinary boss health bar. The required action is to survive until Gina reaches the plank above Indy. Blocking is safer than repeatedly attacking. If you lose sight of Voss, adjust the camera enough to read his next attack, but do not turn so far that Gina’s position leaves the screen. When Gina calls out, stop concentrating on damage and look upward toward the plank.
- Use LB to block incoming attacks while hanging.
- Use LT for the available punch.
- Use RT to kick Voss away when he closes in.
- Expect Voss to attack again after being pushed back.
- Wait for Gina’s callout and arrival on the plank.
Take Gina’s hand and end the boss sequence
When Gina reaches the plank and calls to Indy, look directly upward toward her hand. The required interaction prompt is easy to miss if the camera remains aimed at Voss or at the Ark below. Center the view on Gina, wait for the prompt, and press X on the default Xbox Series X controls. Do not continue attacking once the prompt is visible.
Indy does not need to knock Voss out, perform another counter, or complete a final puzzle. Pressing the hand interaction is the completion action for this chapter. Gina pulls Indy onto the plank, the boss gameplay ends, and the concluding cinematic begins immediately. Leave the game running through that transition if you want to confirm that the final sequence has started.
- Wait until Gina is on the plank and calls to Indy.
- Look up at her hand rather than at Voss.
- Press X when the interaction prompt appears.
- Confirm that Gina pulls Indy up.
- Confirm that the concluding cinematic begins.
Recover after a failed attempt or missing prompt
If Indy is defeated during the first phase, reload the latest checkpoint and repeat the tent encounter. The reliable recovery method is not to replay the Iraq rescue or the Ziggurat approach: the fight itself is the relevant checkpointed sequence. Use the same pattern of blocking ordinary strikes, dodging the forward kick, escaping the grab, and countering briefly.
If the hanging phase seems to continue indefinitely, stop attacking for a moment and keep Gina’s position in view. The scene advances after the required survival exchange, not after a normal damage total that you can monitor. When Gina calls, aim precisely at her hand. A visible grab prompt should appear; press X immediately. If no prompt appears after correcting the camera, reload the latest checkpoint and repeat the sequence. Do not continue attacking after Gina presents the interaction.
- Reload the latest checkpoint after defeat.
- Repeat the defensive first-phase rhythm instead of forcing damage.
- In the hanging phase, prioritize blocking and camera control.
- Aim directly at Gina’s hand when she calls.
- Reload and retry if the interaction prompt still does not appear.
Before you move on
- The tent cinematic ends and control returns for the unarmed Voss encounter.
- Indy survives the first phase by blocking ordinary strikes, dodging the forward kick, and escaping the grab.
- Voss’s scripted stagger leads to the sucker punch and whip-binding cutscene.
- Indy and Voss are hanging from the whip above the Ark.
- Gina reaches the plank and calls to Indy.
- The hand interaction prompt appears and Indy presses X.
- Gina pulls Indy up and the concluding cinematic begins.
References for this chapter
- Indiana Jones and the Great Circle Atonements Walkthrough — PowerPyx
- Indiana Jones and the Great Circle — Atonements Walkthrough — Neoseeker
- Guide for Indiana Jones and the Great Circle — Iraq and the Final Puzzle
- Xbox Controls for Indiana Jones and the Great Circle — Magic Game World
- Indiana Jones and the Great Circle Update 4 Patch Notes
Escape, epilogue and credits — final sequences and post-game checks
After the final hanging sequence, take Gina’s hand when the interaction prompt appears. That action ends the playable portion of the Atonements campaign; the remaining cinematic, epilogue and ordinary credits complete the required first-playthrough ending. Do not expect another Voss combat phase after the hand interaction. Once the credits finish and control returns, keep the completed save and use Journal → Travels to revisit regions. Optional post-game cleanup includes returning to Voss’s tent in Iraq for the final Ancient Relic and Stone Research note, then solving the Secret Vault and viewing the Great Circle Mural material. These activities, all Fieldwork, New Game+ and The Order of Giants are separate from the required campaign ending. The Order of Giants requires ownership and installation of the DLC. It can be started from a completed campaign save or from an unfinished save that has begun Bring the Parchment to Antonio in The Stolen Cat Mummy. In either case, return to Vatican City, begin A Mystery Begins by speaking with Father Ricci, and follow the new Fieldwork.
1. Finish the final hanging sequence
This chapter begins during the last playable sequence after the confrontation with Emmerich Voss. When Gina reaches Indy, look toward her and use the on-screen interaction prompt to take her hand. Complete that interaction rather than trying to move away, attack Voss again or search for another route.
The hand interaction is the final required gameplay action in the original campaign. Once it succeeds, the game transitions into the conclusion. If you leave the game during the transition and the scene does not continue correctly, reload the latest available checkpoint and repeat the interaction with Gina. Do not reload an earlier campaign save unless the checkpoint itself fails to restore the sequence.
- Complete the prompt to take Gina’s hand.
- Do not look for another Voss combat phase afterward.
- Reload the latest checkpoint if the transition is interrupted.
2. Watch the epilogue and ordinary credits
After Gina pulls Indy to safety, the remaining Atonements scenes play as cinematics. Continue through the concluding story material and let the ordinary campaign credits roll. Reaching the end of these regular credits is the required completion point for a normal first playthrough.
The base-game ending is separate from the additional ending associated with New Game+. New Game+ becomes available from the main menu after a completed story save has been created. It carries selected progression items into a new playthrough and adds a different ending sequence after the New Game+ credits. You do not need to start New Game+ to complete Atonements or to finish the canonical first-playthrough campaign.
Avoid quitting during the final interaction, the concluding cinematic or the ordinary credits if you want the game to finish its normal end-of-story transition cleanly. If you have already reached the credits and the game has returned to the post-game state, the campaign objective is complete even if optional investigations remain.
- Let the Atonements conclusion play.
- Remain in the game through the ordinary campaign credits.
- Do not confuse the optional New Game+ ending with the required first-playthrough ending.
3. Confirm the post-game exploration state
After the ending sequence, allow the game to restore control on the completed campaign save. Open the Journal and check the Travels tab. The practical confirmation of post-game access is that completed regions can be revisited from this save, allowing you to return to Iraq, Vatican City, Gizeh, Sukhothai and the other previously visited locations.
Keep this completed save available before beginning New Game+ or loading an older checkpoint. The regular ending does not require every Fieldwork activity, every Ancient Relic, the Secret Vault, the Great Circle Mural or any DLC. Those objectives are optional follow-up content and can be pursued without replaying the Voss confrontation.
If the game offers multiple save slots or rollback points, select the one that contains the finished story when you want to continue cleanup. Do not use a pre-finale slot as your only remaining save if you want immediate post-game access.
- Regain control after the credits.
- Open Journal → Travels and verify that regional revisits are available.
- Preserve the completed story save before starting another mode or campaign.
4. Return to Voss’s tent for optional cleanup
To pursue the final Ancient Relic, use post-game travel to return to the Iraq excavation and make your way back to Voss’s tent. The tent is accessible for post-game exploration, and the final Ancient Relic becomes available there after the campaign is complete. A Stone Research note can also be collected inside the tent.
These items are not prerequisites for the Atonements ending. They matter only if you are completing the Ancient Relic collection, pursuing the Secret Vault investigation or filling out the Iraq notes in the Journal. If your goal is only the main story, stop after confirming the completed save and regional travel access.
- Return to Iraq after the credits.
- Re-enter Voss’s tent during post-game exploration.
- Collect the final Ancient Relic if pursuing the complete collection.
- Pick up the Stone Research note if completing optional Iraq discoveries.
5. Complete the Secret Vault and Great Circle Mural investigation
The Secret Vault is optional post-game content connected to the Ancient Relic collection. Return to its location in Iraq after gathering the relics you intend to use, then place the relics into the four puzzle sections and complete the matching arrangements. If you are missing a relic, leave the vault and use the Journal’s collection tracking to identify the outstanding region before returning.
For the cleanest completion route, collect the post-game relic from Voss’s tent before solving the vault. That gives you the complete Ancient Relic collection and avoids confusing the optional vault puzzle with the required campaign ending. The vault can be treated as a separate investigation rather than a prerequisite for the credits.
When all four vault sections are solved, the game adds the Great Circle Mural material and plays its associated additional story content. This is optional and does not replace the ordinary Atonements ending. Do not restart the campaign or replay Voss simply because the mural has not yet been unlocked.
- Gather the remaining Ancient Relics you want before solving the vault.
- Return to the Secret Vault in Iraq.
- Complete all four relic puzzle sections.
- Confirm that the Great Circle Mural material has been added to the Journal.
6. Access The Order of Giants from either save state
The Order of Giants requires the DLC to be owned and installed. It is included with eligible Premium, Premium Upgrade, Collector’s Edition and Collector’s Bundle purchases, or it can be purchased separately for the base game. The expansion does not launch automatically when the ordinary credits end.
From a completed campaign save, use Journal → Travels to return to Vatican City. Find Father Ricci outside the west side of Belvedere Courtyard, south of the Blackshirt barracks, near the Fountain of Confession area. Speak with him and begin the Fieldwork objective A Mystery Begins. Follow that Fieldwork to enter the expansion’s opening sequence.
You can also begin the DLC before finishing the base campaign. On an unfinished save, first reach the objective Bring the Parchment to Antonio in The Stolen Cat Mummy. Once that objective has been started, return to Vatican City through the Travels tab, locate Father Ricci and begin A Mystery Begins. A completed campaign is therefore a valid access route, not a mandatory prerequisite.
If A Mystery Begins is not visible, confirm that the DLC is installed, verify that the save has reached the required Vatican progression point, and check the Journal rather than starting a new campaign. The expansion is separate from the main ending and can be started from either an eligible mid-campaign save or a completed campaign save.
- Own and install The Order of Giants.
- For a completed save, travel back to Vatican City through Journal → Travels.
- For an unfinished save, start Bring the Parchment to Antonio in The Stolen Cat Mummy first.
- Find Father Ricci outside the west side of Belvedere Courtyard, south of the Blackshirt barracks.
- Begin A Mystery Begins and follow its objectives into the DLC.
Before you move on
- Gina’s hand interaction has succeeded at the end of the hanging sequence.
- The Atonements concluding cinematic and epilogue have played.
- The ordinary campaign credits have finished.
- Control has returned on the completed campaign save.
- Journal → Travels permits regional revisits.
- The final Ancient Relic is available in Voss’s tent if optional collection is being pursued.
- The Secret Vault has been solved and the Great Circle Mural material has appeared if optional completion is being pursued.
- Father Ricci has started A Mystery Begins if The Order of Giants access is being pursued.
References for this chapter
- Indiana Jones and the Great Circle Atonements Walkthrough — PowerPyx
- Indiana Jones and the Great Circle — Atonements Walkthrough — Neoseeker
- How do I access the Indiana Jones and the Great Circle: The Order of Giants DLC? — Bethesda Support
- How does New Game+ work in Indiana Jones and the Great Circle? — Bethesda Support
- Indiana Jones and the Great Circle: The Order of Giants DLC Available Now — Bethesda.net
- Indiana Jones and the Great Circle: The Order of Giants DLC — First Hands-on — Xbox Wire
Optional exploration — relics, side puzzles and optional rewards
Optional content is tracked through Fieldwork, Mysteries, Discoveries, Journal notes, Ancient Relics, Adventure Books, photographs and regional collectibles. None is required to reach the main campaign ending, but Fieldwork and Adventure Books can provide useful abilities, Adventure Points and access to additional activities. Explore each hub when the story opens it, then return after gaining required tools such as the camera, disguises or the rebreather. Use the Journal and Travels tab to track unfinished work instead of searching without a plan. Most completion-related content can be recovered after the story, although some linear interiors and temporary photo opportunities need extra care before leaving. Regional map books reveal categories of collectibles, but they cost local currency, so collect money from pouches, locked boxes, footlockers and drawers while exploring.
1. Complete Fieldwork before sweeping a region for small collectibles
When you arrive in a new hub, open the Journal and speak with named allies, merchants and residents who offer conversations or activity prompts. Fieldwork is the most substantial optional content: these quests usually involve several objectives, restricted areas, puzzle rooms and story scenes. They also tend to provide more Adventure Points, books, clues or useful access than isolated pickups.
Track the Fieldwork entry directly from the Journal. Follow its current objective and read every newly added note or photograph before moving on, because the next step may be elsewhere in the same region. If the route leads through a guard post, sealed door, high ledge or flooded passage that you cannot yet use, do not spend resources trying to force it. Advance the main Adventure until the required disguise, key item, camera clue or traversal tool becomes available, then return through Travels.
- Open the Journal after entering each major region.
- Speak with available named NPCs before leaving the hub.
- Finish nearby Fieldwork before collecting every minor note or relic.
- Treat a blocked route as a progression gate unless the Journal provides another way through.
2. Buy regional map books only after securing enough local currency
Merchants sell regional books that reveal categories of optional locations on the map. These books are convenience tools, not requirements for the ending. Each region uses its own currency, so money collected in one location cannot be assumed to pay for books in another. Search money pouches, locked boxes, footlockers and desk drawers during normal exploration, then return to the appropriate merchant when you can afford the book you need.
Prioritize the book that marks the category you are currently cleaning up. Use map filters so relics, notes and photographs do not hide Fieldwork or Mystery objectives. If the map shows a marker inside an underground or inset area, switch between the local map and the wider level map; the game supports cycling between these map views, and the smaller view can make the correct entrance easier to identify.
- Use the currency belonging to the current region.
- Buy a collectible-marking book only when its cost will not prevent useful purchases.
- Filter the map by activity type.
- Check both local and wider map views for underground routes.
3. Start Mysteries from their initiating clue and keep the Journal current
Mysteries are shorter optional investigations discovered through exploration. Begin one by examining the initiating document, object, photograph or unusual scene rather than walking directly to an unexplained marker. After each clue, reopen the Mystery entry and follow its updated objective; the Journal is more reliable than guessing from the general map.
Mysteries may award Adventure Points, money, notes, collectibles or access to a small hidden location. They are worthwhile when they overlap your current route, but they do not block the main campaign. If a Mystery sends you into an enemy-held building or a locked section, complete the nearby story objective first and return with the appropriate access. Do not assume that every visible locked door is part of the Mystery’s immediate solution.
- Inspect the object or document that begins the Mystery.
- Read the updated Journal entry after each clue.
- Return later if a disguise, key, camera interaction or traversal tool is missing.
- Use the Mystery as a route guide, not as a reason to search the entire region blindly.
4. Revisit optional puzzle rooms after gaining new equipment
Optional puzzles reuse the main game’s visual language. Look for inscriptions, unusual mechanisms, movable pieces, light sources, weight interactions and camera prompts. Photograph important inscriptions or murals before rearranging objects so the clue remains available in the Journal. Test one interaction at a time and confirm what changed before moving to the next mechanism.
A visible entrance does not mean the puzzle is currently solvable. Crawlspaces, submerged passages, high ledges and weak barriers may require later equipment or a story state. The rebreather is particularly important for water routes, while disguises can change access through guarded areas. When you return, check the Journal first, then inspect the entrance again for a newly available interaction rather than assuming the original route is still correct.
- Photograph puzzle inscriptions and unusual mechanisms.
- Move one object at a time and observe the result.
- Record the landmark for any room blocked by missing equipment.
- Return after acquiring the rebreather, a useful disguise or a newly available traversal interaction.
5. Use Travels for cleanup, but check linear areas before departing
After the story opens regional travel, use the Travels tab in the Journal to return to previous hubs. This lets you clean up unfinished Fieldwork, Mysteries and collectibles without replaying the campaign. Fast travel from a regional signpost is preferable to crossing the whole map on foot, especially when a guidebook has revealed many markers.
Most completion-related content remains recoverable after the story, and missed items from some locked story locations are relocated into the associated regional hub. However, do not treat every temporary scene as automatically safe to ignore. The opening sequence and certain linear interiors cannot be freely revisited, and some photographs can depend on the current story state. Before leaving a one-time area, check the Journal category, inspect nearby interactable objects and allow the save to finish. If a collectible or photograph clearly registered incorrectly, reload a recent save or use Save Rollback as a recovery measure rather than as your normal cleanup method.
- Open Travels after completing a major region.
- Check the Journal before leaving a linear mission area.
- Wait for the autosave indicator to finish after important pickups.
- Use rollback only when a clearly obtained item failed to register.
6. Spend the useful rewards and defer archival cleanup when necessary
Adventure Books are not automatically active when collected. Open the Books menu, select the acquired book and spend the required Adventure Points to activate its ability. Read and activate the books that match your playstyle before difficult story sections; combat or exploration abilities can provide a practical benefit. Medicine-related regional activities and other Fieldwork rewards can also improve survivability, so prioritize them over purely archival pickups when resources are limited.
Ancient Relics, photographs, notes and many Discoveries are mainly completion, Journal and story-context objectives rather than mandatory progression. For a focused campaign, complete nearby Fieldwork, buy useful books when affordable and collect optional items that sit along the route. For a full cleanup, work region by region: Fieldwork first, Mysteries second, then guidebook-marked relics, Adventure Books, notes, photographs and remaining Discoveries. Let the save complete after each group so the regional totals have time to update.
- Open and activate collected Adventure Books.
- Spend Adventure Points before difficult combat if a useful ability is available.
- Prioritize Fieldwork rewards over archival collectibles during a story-focused run.
- Clean each region systematically instead of alternating between several incomplete maps.
Before you move on
- The Journal contains no Fieldwork or Mystery entries that you still intend to complete.
- Each region’s Travels summary has been checked for remaining Discoveries, notes, photographs, Ancient Relics and Adventure Books.
- Collected Adventure Books have been opened and the desired abilities have been activated with Adventure Points.
- Any blocked marker has been identified as either a missing-equipment gate, a story-state gate or a route requiring a local map view.
- After the final cleanup visit to a region, the save has completed and its Journal or Travels totals have updated.
- Any one-time area was checked before departure, or a recent save was preserved in case a temporary photo or note failed to register.
References for this chapter
- Indiana Jones and the Great Circle 100% Walkthrough - All Collectibles - PowerPyx
- Indiana Jones and the Great Circle Trophy Guide & Roadmap - PowerPyx
- Indiana Jones and the Great Circle Update 4 - Bethesda.net
- Guide for Indiana Jones and the Great Circle - General gameplay and tips - TrueAchievements
- Guide for Indiana Jones and the Great Circle - Walkthrough overview - TrueAchievements
Combat tactics, loadouts and gadget use on Xbox Series X
Indiana Jones and the Great Circle rewards controlled, improvised fighting rather than standing in the open and exchanging gunfire. Before entering an enemy area, identify hard cover, a retreat route, loose objects, narrow doorways and any hazards that can divide the group. Begin with stealth or a distraction when the layout allows it, then use the whip to disarm, interrupt or pull suitable enemies into close combat. Once fighting starts, block ordinary strikes, parry attacks when the timing is clear, and dodge grabs or heavy overhand blows. Improvise with nearby weapons instead of spending ammunition on every patrol. The revolver is an emergency tool: pressing X while it is drawn uses the grip for a pistol-whip, but repeated use damages the weapon and eventually requires a Repair Kit. Skill Books and Adventure Books support different approaches, so improve the techniques you actually use. On Xbox Series X, adjust sensitivity and accessibility settings in a safe area, then rely on checkpoints and change your opening tactic after a failed attempt.
1. Read the arena before you commit to combat
Before crossing into an enemy-held space, look for hard cover, doorways, corners, climbable routes, loose objects and hazards. Choose a position that prevents enemies from attacking from several directions at once. A doorway or narrow passage is valuable because it lets you deal with opponents one at a time instead of being surrounded.
If the patrol pattern permits it, wait for a guard to separate from the group. Use a bottle or another loose object to draw attention away from the route you need. When a stealth takedown prompt appears, use it; otherwise, do not force an unverified silent attack and risk starting an alarm. If enemies discover you, break their line of sight and retreat toward the choke point you identified rather than running farther into an unknown area.
- Identify a retreat route before making the first attack.
- Check for throwable objects and improvised weapons near the approach.
- Prefer a doorway, corner or other position that limits the number of attackers who can reach you.
2. Use the whip according to the target and the distance
The whip is a control tool as much as a weapon. A crack can interrupt or stagger an enemy, while targeting a weapon hand can disarm a foe. Holding the whip action can pull a suitable enemy toward Indy and create a close-range clinch or grab opportunity. Aim deliberately: the result depends on where the whip connects, and different enemy types react differently to a pull.
Use the whip first on a dangerous ordinary soldier, especially one carrying a firearm or a weapon that would make a brawl unsafe. Against a light enemy, pulling them toward a doorway or hazard can isolate the fight. Do not repeatedly attempt to drag a large or resistant opponent. If the pull fails, move behind cover, target the legs or weapon when the opportunity is clear, or switch to an improvised weapon and normal hand-to-hand combat.
- Use a whip crack to interrupt, and target the weapon hand when disarming is the priority.
- Pull ordinary enemies toward a controlled position rather than into the middle of a group.
- Stop repeating whip pulls against resistant enemies and change tactics.
3. Control close combat with blocks, parries and dodges
When stealth breaks down, keep the nearest enemy between Indy and the rest of the group. Hold the block against a normal incoming strike, and tap the block at the correct moment to parry when the attack is easy to read. A successful parry creates a short opening for a punch, push or follow-up whip action. Do not remain locked onto one target after a hit; look around immediately for a second attacker.
Not every attack should be parried. Use a dodge for grabs and heavy overhand attacks, as recommended by the game’s combat guidance. Move backward or sideways rather than charging forward into a cluster. If an opponent is staggered or exposed, grab, push or finish them with a nearby environmental opportunity when the prompt appears. The aim is to shorten the encounter while preserving space, not to perform a long uninterrupted combo.
- Block ordinary strikes and use timed parries when the attack is readable.
- Dodge grabs and heavy overhand attacks instead of trying to block everything.
- After a successful hit, reposition before another enemy reaches you.
4. Treat patrols, firearm users and heavy enemies as separate problems
For a small patrol, distract or isolate the rear guard, then work through the group one enemy at a time. If the alarm is already active, back through a doorway and make the enemies approach in a line. Use the whip to remove a weapon from the first dangerous target, then pick up the dropped weapon or use a nearby improvised object if it is safe to do so.
Against firearm users, prioritize the shooter when you can reach them without crossing open ground. Otherwise, stay behind solid cover and advance only during a pause in their attack. Thin scenery should not be treated as dependable protection. Heavy enemies resist some control actions and should not be fought by standing directly in front of them. Circle around cover, punish the recovery after a swing, and use hazards or available weapons instead of repeatedly trying to pull them.
- Separate patrols before starting a full melee.
- Remove or disarm the most dangerous ranged enemy when possible.
- Use cover and delayed counters against heavy opponents.
5. Preserve the revolver and manage improvised weapons
Use the revolver when a fast interruption or a dangerous target makes gunfire worthwhile, not as the default answer to every guard. Shots are loud and can draw nearby enemies. If the handgun is drawn, pressing X uses the grip for a pistol-whip instead of firing. This is useful when an enemy is already close, but repeated pistol-whips damage the revolver and can leave it unusable until repaired.
Repair Kits are the recovery item for damaged weapons. If the revolver has been battered, repair it before entering a story encounter where a ranged emergency may be necessary. Until then, use the whip, fists and objects such as bottles, shovels, brooms or other available weapons. Keep at least one distraction or useful object available before beginning an objective that may trigger a larger fight. Do not assume every area supplies the same tools.
- Reserve ammunition for urgent targets and scripted pressure points.
- Use X with the drawn revolver for a pistol-whip only when close combat makes it worthwhile.
- Repair a damaged revolver with a Repair Kit before a major encounter.
6. Shape skills and Xbox settings around your actual failures
Skill Books and Adventure Books let you strengthen different parts of Indy’s toolkit. If you are regularly detected, favor abilities that improve stealth, whip control or silent approaches. If you are losing close fights, choose upgrades that improve hand-to-hand survivability or follow-up attacks. If you are spending ammunition to escape every encounter, improve the techniques that help you disarm, stagger or control enemies instead of building around constant shooting.
On Xbox Series X, adjust look sensitivity, aim sensitivity and accessibility options in a low-risk area rather than changing several settings immediately before a boss or story wave. Use the default control prompts as the authority for the current installation, especially after changing the layout. When an attempt fails, reload the checkpoint and alter one variable: enter from another side, remove the ranged enemy first, save the Repair Kit, or use the choke point earlier. Repeating the same opening usually wastes resources without solving the positioning problem.
- Choose skills that address the combat problem you encounter most often.
- Test sensitivity or accessibility changes before a major encounter.
- After failure, change one approach variable and use the checkpoint to retry.
Before you move on
- You can approach an ordinary patrol, identify a retreat route and use a distraction or choke point before the alarm spreads.
- You can use the whip to crack, disarm or pull a suitable normal enemy, then follow with a grab, punch, improvised weapon or environmental finish.
- You can distinguish attacks that are appropriate for blocking or parrying from grabs and heavy overhand attacks that should be dodged.
- You can prioritize a ranged enemy, fight heavy opponents without repeatedly exposing yourself, and preserve ammunition for urgent situations.
- Your revolver is repaired before a major story encounter, and you know where to find or how to use a Repair Kit when it is damaged.
- Your Xbox Series X sensitivity and accessibility settings are comfortable, and you change your approach after a failed checkpoint rather than repeating the same opening.
References for this chapter
- Indiana Jones and the Great Circle: Breaking Down Brand New Gameplay
- Diving Deeper Into Indiana Jones and The Great Circle - Official Xbox Podcast
- Indiana Jones and the Great Circle Starting Tips and Tricks - Xbox Wire
- Indiana Jones and the Great Circle Tips & Tricks - Bethesda.net
- Guide for Indiana Jones and the Great Circle - Marshall College
Puzzle-solving patterns — reading clues, environmental logic and repeatable techniques
Treat each puzzle as a small investigation. First identify the room’s central mechanism, then inspect nearby notes, inscriptions, movable objects, ledges and unusual architecture. The game commonly places its solution information in the environment and records discovered clues in Indy’s journal. Recurring solution patterns include redirecting light, matching symbols, manipulating weights or switches, using line of sight, arranging mechanical parts and timing movement around traps. Test one change at a time so you know what caused a door, beam, platform or lock to react. Indy’s camera is also an optional hint system: find the nearby point of interest, photograph it, and review his comment. If the first hint is not enough, later photographs can provide more direction and eventually a fuller solution. When a puzzle seems stuck, check the journal, search above and below the main mechanism, and look for a side route or required tool rather than repeating random interactions.
1. Establish the puzzle’s boundaries before touching anything
When the camera settles on a suspicious mechanism, pause and survey the entire room. Look for carved symbols, tracks in the floor, sockets, chains, mirrors, pressure surfaces, loose containers, breakable obstructions and doors that appear designed to open. The intended puzzle space is usually compact, but its important components may be spread across the floor, walls, upper ledges or a short side passage.
Read every nearby note, inscription and journal entry before experimenting. Notes can provide an order, translation, diagram or limitation that makes the mechanism understandable. If the game presents a camera opportunity, photograph the clue and keep the resulting journal entry available. This is especially useful when several symbols resemble one another or when a written clue must be compared with markings elsewhere in the room.
- Search the floor, walls and upper ledges, not just the central device.
- Read nearby notes and inscriptions before changing the puzzle state.
- Identify which doors, platforms, beams or lights visibly belong to the same mechanism.
- Check whether an apparently blocked route can be opened with the whip, lighter or another acquired tool.
2. Confirm progress through visible and journal feedback
A successful action should produce a recognizable change in the puzzle state: a symbol may illuminate, a beam may reach a receiver, a lock may retract, machinery may move, or a new route may become available. Indy may also comment on an important discovery, and the journal can record the clue or objective. Use these responses to confirm that an action mattered instead of assuming that every movable object belongs in the final position.
If an object moves but no connected element reacts, treat that as information rather than failure. Restore the previous arrangement if practical and test one different component. Do not move every object at once. Recording the starting positions with a short note or screenshot makes it easier to identify the action that opened, redirected or disabled the mechanism.
- Look for a connected environmental response after each major placement.
- Check the journal after discovering a clue or completing a puzzle stage.
- Change one component at a time so the cause of each response is clear.
- If a mechanism resets, rebuild from the fixed clue or anchor point rather than guessing.
3. Solve weight, pressure and switch mechanisms by isolating states
For pressure surfaces and weighted switches, first determine whether the effect must remain active or only needs to be triggered once. Stand on the surface yourself and watch what changes. If a door, bridge or mechanism operates only while Indy remains there, search for a movable object that can hold the position while you move away. Place it carefully and confirm that the destination remains active before crossing the room.
Do not assume that every pressure device serves the same purpose. One may open a door, another may redirect machinery, and another may be one part of a sequence. Identify each device by its location or symbol, then test them individually. If two switches must remain active, secure the first before moving to the second. Some puzzles combine a weight with a timed route, so observe the complete sequence before committing to the crossing.
- Test a pressure surface with Indy before searching for a permanent weight.
- Watch the destination that changes when the switch is activated.
- Secure the first switch before leaving it to operate another.
- If the mechanism resets, return to the last stable checkpoint and repeat the sequence with fewer unnecessary movements.
4. Treat light, mirrors and traps as line-of-sight problems
When a puzzle uses light, begin at the source and trace the possible route to the receiver or symbol. Identify every mirror, reflector or movable part between them, then adjust one component at a time. A correct alignment should create a visible beam segment or activate the intended target. If the beam disappears, check whether the reflector is misaligned, the source is inactive or another object is blocking the route.
Use the room’s geometry instead of aiming only at the final target. Search side chambers, upper ledges and areas behind breakable walls for additional reflectors or controls. Some light puzzles ask you to reproduce a symbol from several illuminated pieces rather than simply light one target. For traps and moving machinery, watch a full cycle first and identify the safe standing position before crossing.
- Trace the light from source to receiver in order.
- Move one reflector at a time and confirm each new beam segment.
- Search elevated platforms and side chambers for overlooked controls.
- Observe a complete trap or machinery cycle before attempting the route.
5. Decode symbols and mechanical arrangements from relationships
Symbol locks and arrangement puzzles often combine a written clue with a rule about order, orientation or fixed pieces. Copy the sequence into a simple note using positions such as top-left, center and lower-right. Then compare the mechanism with the clue again before committing to the final arrangement. If one symbol or component cannot be moved, use it as the anchor and solve around it.
Mechanical puzzles can require a correct sequence rather than merely placing every visible part. Watch which sections engage when a piece is inserted or rotated, and stop if the response shows that the sequence has changed. A successful arrangement normally produces a clear opening, movement or new objective. If the lock resets, retain the clue and reconstruct the pattern from the fixed element instead of cycling pieces at random.
- Record symbol positions and order before rotating or replacing anything.
- Identify fixed symbols, sockets or anchor pieces first.
- Confirm which item is selected before placing it.
- Use the mechanism’s movement and sound as confirmation, not as a substitute for the written clue.
6. Use Indy’s tools and camera without wasting attempts
The whip is more than a combat weapon. Depending on the location, it can grab environmental objects, smash obstructions, provide a climbing or swinging route, or help Indy reach a mechanism from another angle. If a puzzle includes a suspicious hook, cracked obstruction or hanging route, test whether the whip is the intended tool before searching for a conventional switch.
When you need help, look for the puzzle’s nearby camera point of interest and photograph it. Indy will provide an observation or hint, and additional photographs after progress can reveal more detailed guidance. Change zoom and slowly scan the room if the hint prompt is difficult to locate. The camera is optional, so you can inspect and solve the puzzle yourself first. Some of the hardest optional puzzles are designed without the normal hint assistance.
- Test the whip on marked hooks, environmental objects and breakable obstructions.
- Use the camera only when you want a hint or need to document a clue.
- Try different zoom levels and scan the surrounding area for the hint point.
- Remember that camera hints may not be available for every optional puzzle.
7. Recover methodically when a puzzle seems stuck
First review the journal for an unread clue or newly recorded observation. Then inspect the highest, lowest and least obvious parts of the room. A required interaction may be behind a breakable obstruction, across a short whip swing, in a side chamber or beyond a switch you activated earlier. If the puzzle state appears inconsistent, reload the latest checkpoint or use the available save-rollback option rather than repeatedly forcing an interaction that no longer produces feedback.
Adventure difficulty can be changed independently from action difficulty. A lighter Adventure setting provides more guided exploration and easier puzzles, while Moderate provides less guidance and more demanding puzzle steps. Changing the setting is a valid recovery option if you are blocked; the objective is to complete the adventure, not to preserve a particular difficulty setting.
- Review the journal before abandoning the puzzle.
- Search above, below, behind and beyond the main mechanism.
- Use a camera hint if the puzzle supports one.
- Reload a stable checkpoint or use save rollback if object states or feedback appear abnormal.
- Adjust Adventure difficulty if you need clearer guidance.
Before you move on
- The mechanism produces a definite success response such as an opening door, activated receiver, moved platform, completed symbol arrangement or cleared route.
- Indy comments on the result, the journal updates, a new objective appears or a checkpoint is reached.
- The newly opened path leads to the next traversal section, story beat, room or objective rather than ending at an unchanged dead end.
- If the puzzle was optional, its reward or completed activity is recorded before you leave the area.
- If the puzzle was required, the main objective advances and the game provides a route onward without requiring the original arrangement to be solved again.
References for this chapter
- Mechanisms Become Mechanics: Inventing Puzzles for Indiana Jones and the Great Circle
- Unraveling Indiana Jones and the Great Circle’s Puzzles
- Indiana Jones and the Great Circle Accessibility Guide
- Indiana Jones and the Great Circle Tips & Tricks
- Indiana Jones and the Great Circle: Breaking Down Brand New Gameplay
- What are the different difficulty settings available in Indiana Jones and the Great Circle?
Post-game and The Order of Giants expansion — access and integration
The Order of Giants is a story expansion integrated into Indiana Jones and the Great Circle rather than a post-game-only campaign. On Xbox Series X, it becomes available during an unfinished campaign after The Stolen Cat Mummy reaches the objective Bring the Parchment to Antonio. At that point, A Mystery Begins appears in the Journal. Track it, return to Vatican City, and meet Father Ricci near the Fountain of Confession. The marked encounter is outside the west side of Belvedere Courtyard, south of the Blackshirt barracks. A completed campaign save is also a valid access route: use the Journal’s Travels tab to return to Vatican City, then locate the same Fieldwork marker. The expansion follows Indy’s investigation into the Nephilim Order and adds new Rome locations, puzzles, investigation objectives and Cult of Mithras encounters. You do not need to replay the main story or start a separate New Game campaign.
1. Confirm that The Order of Giants is installed on Xbox Series X
The base game is required, and The Order of Giants must be owned through an eligible edition, upgrade or separate purchase. If the DLC was purchased separately, or included with your edition but not yet downloaded, open the Xbox dashboard, highlight Indiana Jones and the Great Circle, open Manage game and add-ons, and check the Add-ons list.
The expansion should appear as installed before you load the campaign save. Ownership by itself is not enough if the add-on has not finished downloading. If it is listed as owned but not installed, select it and complete the installation. Then fully quit the game from the Xbox dashboard and relaunch it before troubleshooting the Journal. Do not begin a new campaign just because the Fieldwork is absent from an already eligible save.
- The base game is installed on the Xbox Series X.
- The Order of Giants is owned through an eligible entitlement.
- The DLC is shown as installed under the game’s Xbox add-ons.
2. Reach the Vatican story state that unlocks the expansion
For an unfinished campaign, continue The Stolen Cat Mummy until the objective Bring the Parchment to Antonio has started. This is the required story-state check. You do not have to complete the Vatican chapter, finish the global campaign or watch the ending credits first.
Once that objective is active, open the Journal and check the Fieldwork section. A Mystery Begins should become available. Track it before moving through the Vatican so the game supplies the correct marker. If it is not present, verify that the parchment objective has actually begun rather than merely completing an earlier part of The Stolen Cat Mummy.
- The Stolen Cat Mummy is active or has reached its later Vatican objectives.
- Bring the Parchment to Antonio has started.
- A Mystery Begins appears under Fieldwork.
3. Travel to the Father Ricci marker
Track A Mystery Begins and follow its marker toward the Fountain of Confession. Father Ricci’s encounter is positioned outside the west side of Belvedere Courtyard, south of the Blackshirt barracks. Use the objective marker rather than searching every Vatican courtyard, because the nearby fountain and courtyard landmarks can look similar when approached from different routes.
Speak with Father Ricci and complete the conversation. This begins the DLC investigation and adds its next objective to the Journal. The opening leads into a Rome mystery tied to the Nephilim Order, with new underground areas, puzzle sequences and hostile Cult of Mithras encounters.
- The A Mystery Begins marker leads you back to the Vatican.
- Father Ricci is found by the marked Belvedere Courtyard area near the Fountain of Confession.
- The full conversation is completed and a new DLC objective is added.
4. Start The Order of Giants from a completed campaign save
If the main campaign is already complete, do not restart it and do not look for a separate post-game story slot. Load the completed save, open the Journal and use the Travels tab to select Vatican City. After arriving, check the Fieldwork section for A Mystery Begins and follow its marker to Father Ricci.
The expansion is set during the events of the main adventure, but a completed save can still access it through the existing world and travel system. Main-campaign completion is therefore one valid route, not a requirement. The same Father Ricci conversation starts the DLC whether the save is mid-campaign or already marked complete.
- A completed campaign save is loaded.
- Vatican City is available through Journal → Travels.
- A Mystery Begins can be tracked after returning to the Vatican.
5. Prepare before entering the DLC investigation
Make a manual save before speaking with Father Ricci if the game offers a free save slot. Refill healing items and carry a dependable melee weapon. Keep some ammunition and throwables available for marked combat sections instead of spending everything on ordinary Vatican patrols.
You do not need a special late-game outfit, a completed collection or every main-story Fieldwork mission to enter The Order of Giants. Familiarity with the camera, Journal clues, stealth, environmental interaction and recurring puzzle logic is useful, but the expansion is designed to use the game’s established systems. Completing the base campaign is recommended for broader story context, not for unlocking the DLC.
- A recent save exists before the Father Ricci conversation.
- Healing supplies and basic combat resources are available.
- The Journal, camera and stealth systems are accessible on the current save.
6. Confirm the DLC has started and recover from a missing marker
The access process is complete when A Mystery Begins is recorded in the Journal and Father Ricci’s conversation adds the next expansion objective. At that point, continue following the Fieldwork marker; returning to ordinary Vatican errands is no longer necessary unless you want to resupply or explore.
If the Fieldwork does not appear, check the requirements in order: confirm that the Xbox add-on is installed, confirm that The Stolen Cat Mummy has reached Bring the Parchment to Antonio on an unfinished save, or confirm that a completed save has returned to Vatican City through Travels. Fully quit and relaunch the game after installation, then reload an earlier save if the mission state still has not refreshed. Keep the original save rather than deleting it while troubleshooting.
- The Xbox Series X recognizes the installed DLC.
- A Mystery Begins appears after the required Vatican story state or completed-save return.
- Father Ricci’s conversation starts the expansion and creates its next objective.
Before you move on
- The Order of Giants is installed and recognized on Xbox Series X.
- On an unfinished campaign, The Stolen Cat Mummy has reached Bring the Parchment to Antonio.
- A Mystery Begins appears in the Journal’s Fieldwork section.
- Father Ricci is located near the Fountain of Confession, outside the west side of Belvedere Courtyard and south of the Blackshirt barracks.
- Speaking with Father Ricci adds the next DLC objective.
- On a completed campaign save, Vatican City can be revisited through Journal → Travels without restarting the main story.
References for this chapter
- Indiana Jones and the Great Circle: The Order of Giants DLC Available Now — Bethesda.net
- Indiana Jones and the Great Circle: The Order of Giants DLC Official Reveal — Bethesda.net
- Indiana Jones and the Great Circle: The Order of Giants DLC — Xbox Store
- How to start the Indiana Jones DLC Order of Giants — GamesRadar+
- Indiana Jones and the Great Circle — How to Start The Order of Giants DLC — MP1st
Finishing up
Main campaign complete: every required story mission has been finished, the Atonements confrontation is resolved, the epilogue has played and the regular credits have begun or finished.
The campaign completion check does not require all Ancient Relics, the Secret Vault, the Great Circle Mural, New Game+ or optional Fieldwork.
The Order of Giants is separately accessible when owned and installed. Start A Mystery Begins by meeting Father Ricci near the Vatican Fountain of Confession after the required Vatican story state, or use a completed save and return through Journal → Travels.
Optional regional cleanup, the Secret Vault, the final relic, the Great Circle Mural and New Game+ can be completed afterward.
Choose your next gameScreenshots & video
Game imagery for reference. Follow the written chapters above for the route and strategies.
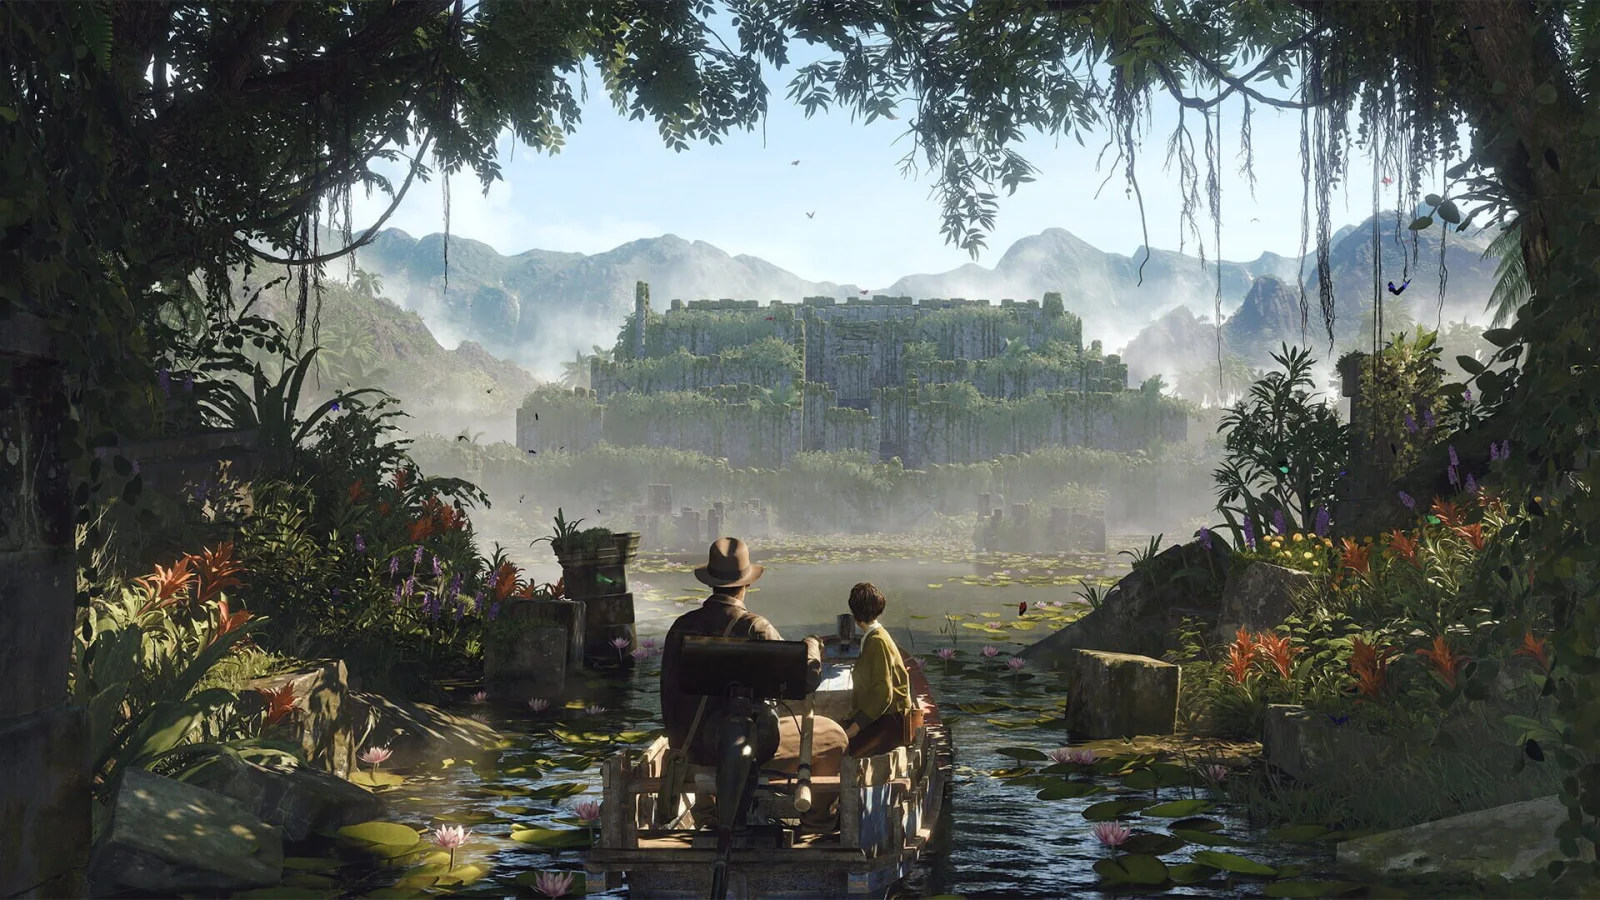
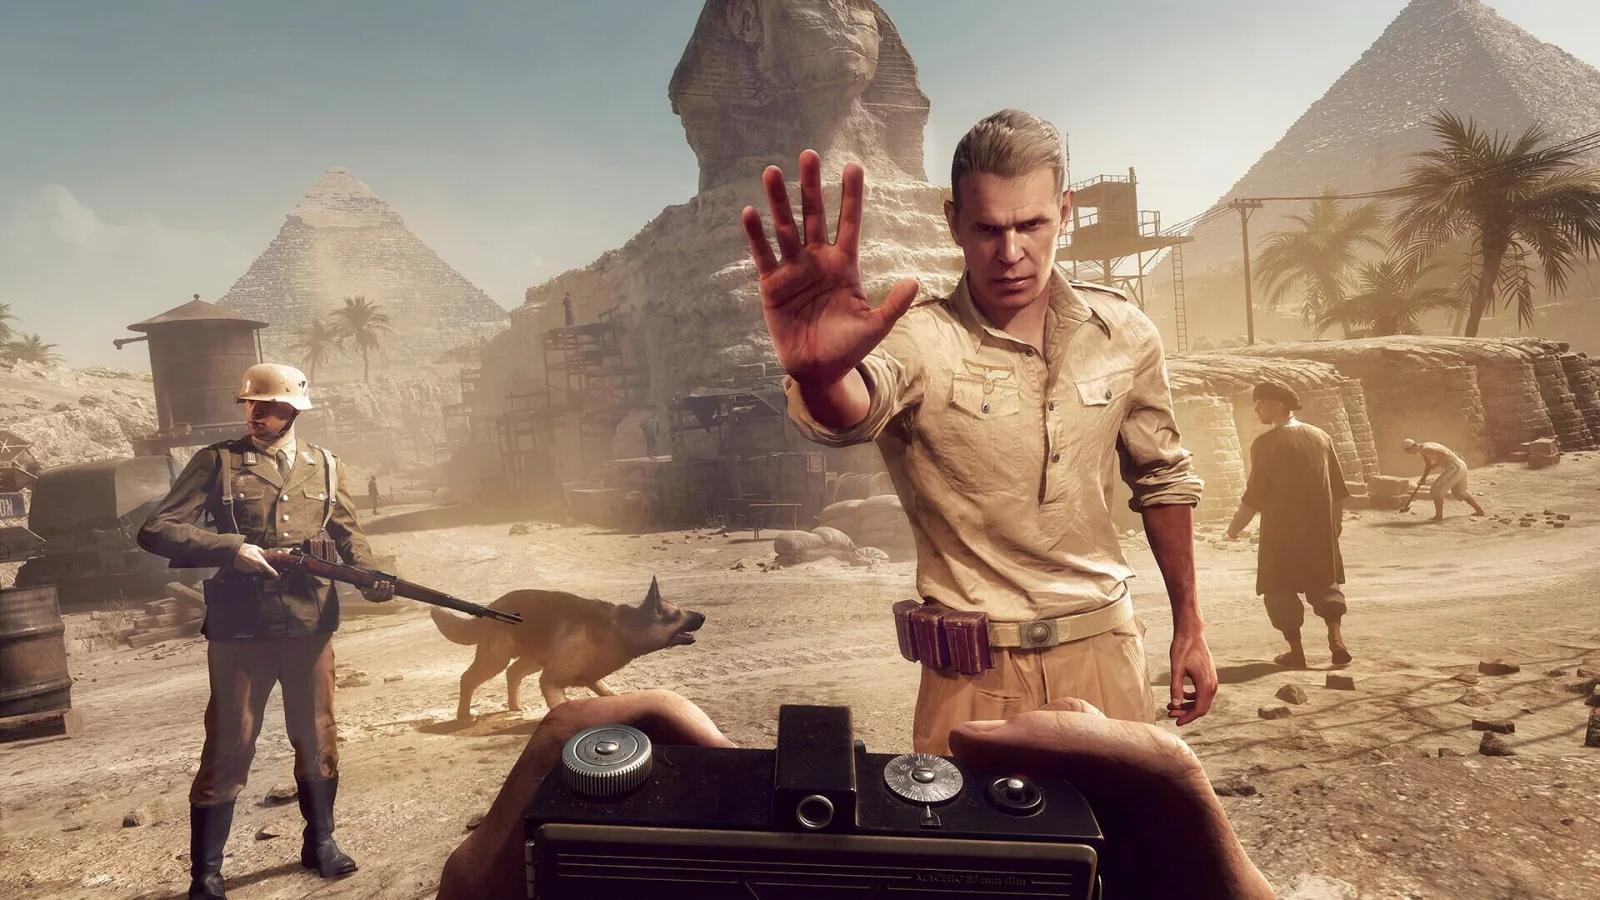
Sources & references
Our original guide draws on the references below. Check the edition at the top of this page before following controls or unlock requirements.
- Indiana Jones and the Great Circle: Prologue and Marshall College
- Indiana Jones Great Circle: The Exhibit at the Marshall College Puzzle
- Guide for Indiana Jones and the Great Circle - Marshall College
- Indiana Jones and the Great Circle Walkthrough: Chapter Route, Missables and Order of Giants
- Indiana Jones and the Great Circle Starting Tips and Tricks - Xbox Wire
- Indiana Jones Great Circle: Jesus puzzle
- Indiana Jones and the Great Circle – Five Sacred Wounds Puzzle Guide
- Indiana Jones and the Great Circle The Stolen Cat Mummy Walkthrough
- Indiana Jones and the Great Circle – Vatican City Walkthrough
- Indiana Jones and the Great Circle The Idol of Ra Walkthrough
- Indiana Jones Great Circle: The Resonance Chamber and Adamic Tablets puzzle
- Indiana Jones Great Circle: The Cave of Darkness puzzle and the confrontation with the Giant
- How to solve the Resonance Chamber puzzle in Indiana Jones
- Indiana Jones and the Great Circle - Gizeh Walkthrough
- Indiana Jones Great Circle: How to avoid the sand trap inside the Gizeh pyramid
- A Harsh Climb: Indiana Jones And The Great Circle Quest Walkthrough
- Indiana Jones and the Great Circle A Harsh Climb Walkthrough
- How to complete the Indiana Jones cipher machine code puzzle
- Indiana Jones and the Great Circle — A Harsh Climb Walkthrough
- Guide for Indiana Jones and the Great Circle — The Himalayas and Shanghai
- Indiana Jones and the Great Circle Into the Fire Walkthrough
- Into the Fire: Indiana Jones And The Great Circle Quest Walkthrough
- Indiana Jones and The Great Circle — Into the Fire Walkthrough
- Indiana Jones and the Great Circle The Blessed Pearl Walkthrough
- Indiana Jones Great Circle: Finding the entrance to Wat Mahathat puzzle
- Indiana Jones Great Circle: The Game Room and the Great Game puzzle in Sukhothai
- How to solve and win the Blessed Pearl game in Indiana Jones and The Great Circle
- Indiana Jones and the Great Circle - Wat Mahathat Walkthrough
- Guide for Indiana Jones and the Great Circle - Sukhothai
- Indiana Jones and the Great Circle Atonements Walkthrough — PowerPyx
- Indiana Jones and the Great Circle: Atonements Walkthrough & Secrets
- Indiana Jones and the Great Circle — Atonements Walkthrough — Neoseeker
- Guide for Indiana Jones and the Great Circle — Iraq and the Final Puzzle
- Get to the Tent | Atonements Walkthrough Gameplay
- Xbox Controls for Indiana Jones and the Great Circle — Magic Game World
- Indiana Jones and the Great Circle Update 4 Patch Notes
- How do I access the Indiana Jones and the Great Circle: The Order of Giants DLC? — Bethesda Support
- How does New Game+ work in Indiana Jones and the Great Circle? — Bethesda Support
- Indiana Jones and the Great Circle: The Order of Giants DLC Available Now — Bethesda.net
- Indiana Jones and the Great Circle: The Order of Giants DLC — First Hands-on — Xbox Wire
- Indiana Jones and the Great Circle 100% Walkthrough - All Collectibles - PowerPyx
- Indiana Jones and the Great Circle Trophy Guide & Roadmap - PowerPyx
- Indiana Jones and the Great Circle Update 4 - Bethesda.net
- Guide for Indiana Jones and the Great Circle - General gameplay and tips - TrueAchievements
- Guide for Indiana Jones and the Great Circle - Walkthrough overview - TrueAchievements
- Indiana Jones and the Great Circle: Breaking Down Brand New Gameplay
- Diving Deeper Into Indiana Jones and The Great Circle - Official Xbox Podcast
- Indiana Jones and the Great Circle Tips & Tricks - Bethesda.net
- Mechanisms Become Mechanics: Inventing Puzzles for Indiana Jones and the Great Circle
- Unraveling Indiana Jones and the Great Circle’s Puzzles
- Indiana Jones and the Great Circle Accessibility Guide
- Indiana Jones and the Great Circle Tips & Tricks
- What are the different difficulty settings available in Indiana Jones and the Great Circle?
- Indiana Jones and the Great Circle: The Order of Giants DLC Official Reveal — Bethesda.net
- Indiana Jones and the Great Circle: The Order of Giants DLC — Xbox Store
- How to start the Indiana Jones DLC Order of Giants — GamesRadar+
- Indiana Jones and the Great Circle — How to Start The Order of Giants DLC — MP1st
About the game & collecting notes
- Platform
- Xbox Series X|S
Complete, platform-specific campaign guide for the Xbox Series X edition of Indiana Jones and the Great Circle. Covers the full main story from Marshall College through the final Great Circle site, core combat and puzzle tactics, platform performance notes, optional side content, and how to access the post-launch story expansion.
Darryl Polo
Darryl Polo writes about emulation and retro games. What changes when an old favorite moves to another setup? That question connects his interest in tinkering with the games that made the hardware worth keeping.
Our editorial standardsFound a step that needs another look? Help us improve this guide.