
Horizon Zero Dawn Remastered (PS5) — Complete Campaign Walkthrough
A full, campaign-focused walkthrough for Horizon Zero Dawn Remastered on PlayStation 5. This guide covers the entire main story from A Gift from the Past through the canonical ending (Face of Extinction), optional Frozen Wilds expansion content, PS5 settings and performance modes, combat and build guidance, cauldrons and machine tactics, and a post-game completion checklist.


Find a copy
Horizon Zero Dawn Remastered Sony PlayStation 5
We may earn a commission if you buy through these links, at no extra cost to you. As an Amazon Associate I earn from qualifying purchases.
Opens retailer search results. Check the model, edition, seller, availability and current price before buying.
Before you begin
This walkthrough is written for the PS5 Remastered edition of Horizon Zero Dawn.
It walks you through the full main campaign from Aloy’s earliest quests through the game’s ending (Face of Extinction).
Where useful, the guide explains PS5-specific options (performance/quality modes, DualSense considerations), the included Frozen Wilds expansion, and how to import/upgrade existing copies.
If you want to focus strictly on beating the story, follow the main-chapter steps in order.
If you prefer to level up, collect side content, or prepare for tougher encounters, use the Preparation and Cauldrons & Machine Hunting chapters before attempting late-game missions.
The guide assumes you have the Remastered edition on PS5 (released Oct 31, 2024) and notes where edition-specific features or PS5 settings change gameplay experience.
Set yourself up for the run
Choose a PS5 graphics mode: Performance for responsiveness, Quality for visual fidelity, or Balanced when the display supports its requirements.
Test aiming, camera sensitivity, weapon switching, dodge movement and Focus access before leaving the opening area.
Enable subtitles and adjust HUD, accessibility and haptic options to suit your needs.
Choose a general approach such as stealth, precision ranged combat, traps, elemental control or a hybrid loadout.
Early priorities include a Hunter Bow, then a Sling and Tripcaster or another control weapon as they become available.
Keep medicine, Ridge-Wood, Wire, Blaze, Chillwater and Metal Shards available for routine crafting.
Use Focus scans to identify machine weaknesses, detachable weapons, elemental canisters and patrol routes.
If upgrading from PS4, verify the qualifying upgrade route, imported save and separate Remastered trophy list before deleting older data.
Plan optional quests, Cauldrons, Tallnecks and Frozen Wilds content around the main-story chapters, but do not treat them as required for reaching Face of Extinction.
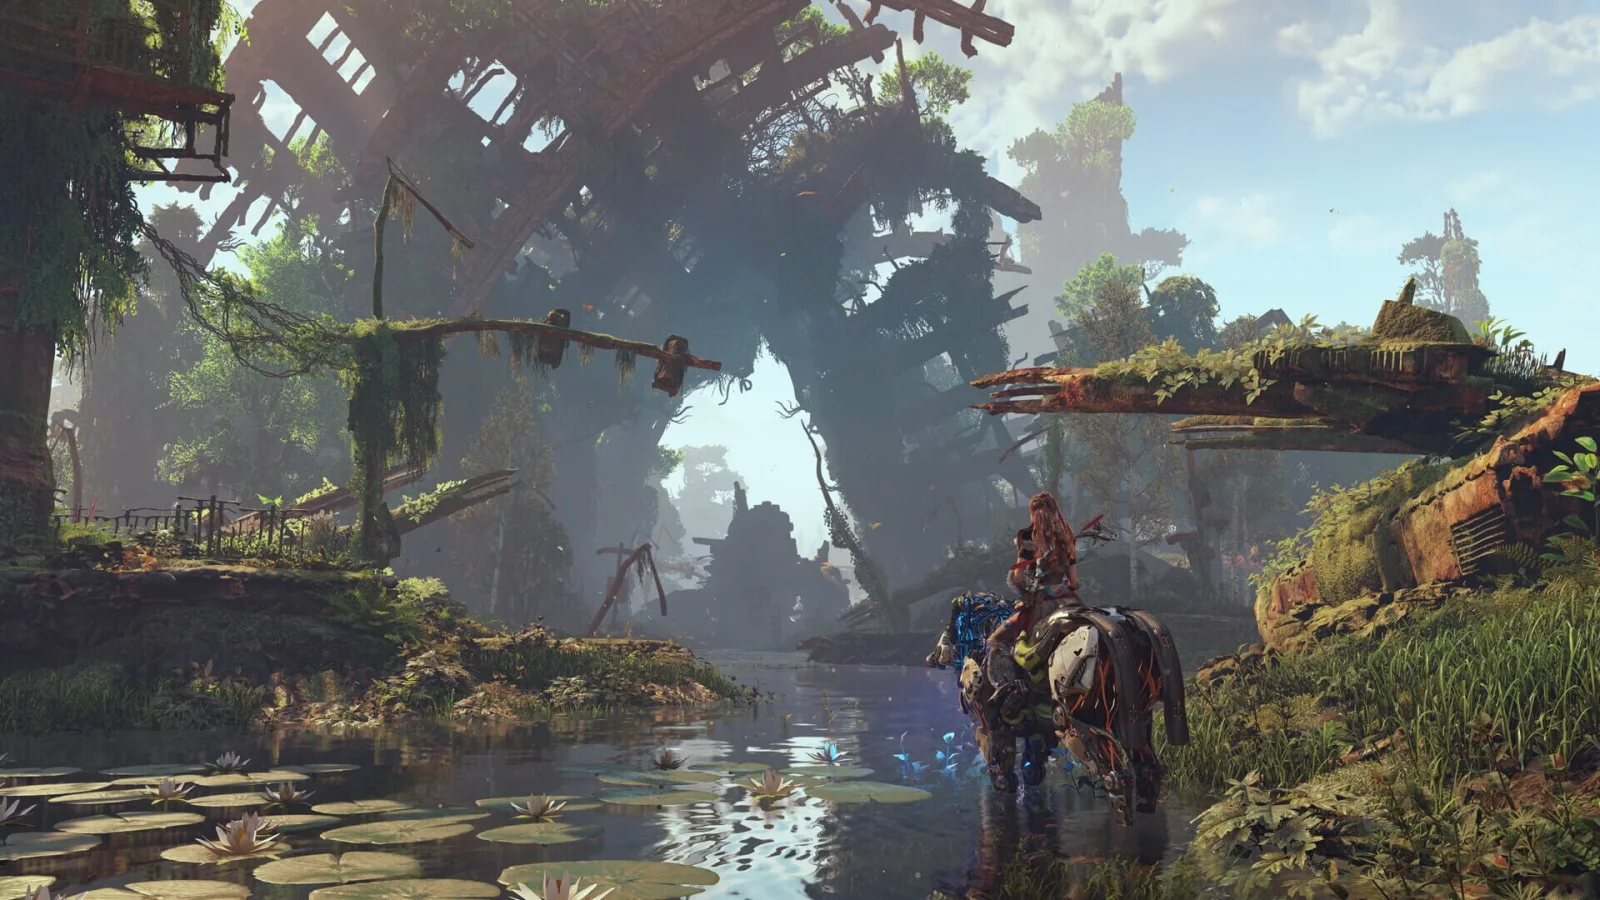
Preparation & PS5 Settings
Set up Horizon Zero Dawn Remastered before starting so aiming, stealth and exploration feel comfortable from the opening tutorial. Select a graphics mode based on your display and priorities, configure controls and accessibility options, and verify any existing save before creating a new campaign. The Remastered edition includes The Frozen Wilds, but that region is designed for later progression and should not be treated as an opening area. For early gameplay, build around the Hunter Bow, then add the Sling and Tripcaster as they become available. Spend initial skill points on flexible survival tools such as Silent Strike, Concentration, Critical Hit, trap improvements and Override abilities rather than planning around mechanics from Horizon Forbidden West.
Select the PS5 graphics mode
From the main menu or pause menu, open Settings and locate the display or graphics options. The Remastered PS5 version provides Quality, Performance and Balanced modes. Quality targets 4K resolution at 30 frames per second and favors the sharpest image and most cinematic presentation. Performance targets 4K at 60 frames per second and gives the most responsive camera movement, bow aiming and dodge timing. Balanced targets 4K at 40 frames per second and sits between the two. PlayStation identifies these as targets, so actual output can depend on the display and game conditions.
Choose Performance if you value fast aiming, concentration shots and evasive movement, particularly when several machines are attacking together. Choose Quality if distant scenery, environmental detail and visual fidelity matter more than input response. Balanced is a reasonable compromise on a display that supports 120Hz output; on a standard 60Hz television, Performance or Quality is usually the more practical choice. You can change the mode later, so test bow aiming and camera movement in the opening area rather than treating the first choice as permanent.
- Use Performance for the most responsive aiming and movement.
- Use Quality for maximum visual clarity and a 30fps cinematic presentation.
- Use Balanced when your display supports the required 120Hz output and you want a middle ground.
Configure controls and accessibility before beginning
Open the controller and accessibility menus before selecting New Game. Keep the default control layout for the tutorial unless a button position causes discomfort; the opening quests teach sprinting, crouching, jumping, aiming, weapon selection and Focus use through those prompts. If you remap controls, test the new arrangement before leaving the Nora settlement so weapon switching and the Focus remain easy to reach.
Adjust camera sensitivity in a safe area rather than during a difficult fight. A higher sensitivity can help when a machine circles Aloy, while a lower setting may make weak-point shots steadier. Enable subtitles if you want full dialogue and datapoint text, and adjust subtitle size or HUD settings for readability. Adaptive triggers and haptic feedback are supported by the PS5 version, but reducing their strength is sensible if repeated bow shots or trigger resistance become tiring.
- Confirm the Focus button, weapon wheel and dodge action are comfortable.
- Test camera sensitivity before the first major machine encounter.
- Set subtitles, HUD and haptic options before starting the campaign.
Check upgrade eligibility and existing saves
Horizon Zero Dawn Remastered released for PS5 on October 31, 2024. Owners of Horizon Zero Dawn or Horizon Zero Dawn Complete Edition may be eligible to upgrade to the digital Remastered version through the PlayStation Store. If you own the PS4 disc, insert it into the PS5 to access the offer and keep it inserted whenever you play. A PS5 Digital Edition without a disc drive cannot use that disc-based upgrade route. PlayStation Plus redemptions are not eligible for the upgrade offer.
Before starting a new file, make sure the PS5 has access to the save you intend to use. PlayStation confirms that existing Horizon Zero Dawn save games work with Remastered. Transfer the save through the method appropriate to your setup, such as PS4-to-PS5 data transfer or supported cloud or USB storage, then launch Remastered and check Load Game. Do not delete the original installation or old save until the imported file appears and opens correctly. If you want a completely fresh playthrough, verify the old file first and then select New Game.
- Confirm the Store lists the Remastered upgrade or full product for your account.
- Keep a qualifying PS4 disc inserted when using the disc upgrade.
- Check Load Game before creating a new campaign or deleting older files.
Prepare the first weapons and supplies
Use the Hunter Bow as the default early weapon. It is economical for ordinary machines and human enemies and teaches the weak-point aiming that remains important throughout the campaign. Add the Sling when it becomes available for area damage and elemental effects, then obtain the Tripcaster when merchants and story progress make it available. The Tripcaster is particularly useful when you have time to prepare a fight before a machine reaches you.
Spend early shards carefully. Carrying-capacity upgrades, ammunition pouches and medicine capacity generally provide more value than buying every weapon or outfit immediately. Keep wood, metal shards, wire, blaze and chillwater because they support common arrows, traps, bombs and elemental ammunition. Before selling machine components, check merchant trade screens so you do not discard an item needed for a weapon, outfit or capacity upgrade.
- Keep the Hunter Bow as the dependable general-purpose weapon.
- Add the Sling and Tripcaster before buying specialized late-game tools.
- Prioritize capacity upgrades and maintain medicine and ammunition supplies.
Spend initial skill points on flexible tools
For a general campaign, begin with skills that improve reliable stealth and damage. Silent Strike helps remove isolated Watchers and human guards quietly. Concentration and related aiming skills make it easier to place arrows on components while time is slowed. Critical Hit is useful after a machine is knocked down, stunned or otherwise opened to a close-range follow-up.
If you prefer preparation, take trap-related skills and use the Tripcaster to shape the approach to an encounter. If you want machine control, work toward Override improvements in the Forager tree, but do not delay basic survival tools so much that every fight consumes excessive resources. Pullcaster abilities are not part of Horizon Zero Dawn’s skill system and should not be included in an early build plan; they belong to later Horizon gameplay and are not an unlock in this Remastered edition.
- Take at least one Silent Strike or other stealth improvement.
- Add Concentration or Critical Hit for direct combat reliability.
- Choose trap or Override improvements after covering basic survival needs.
Before you move on
- The game is running in the selected Quality, Performance or Balanced mode and bow aiming feels comfortable.
- The control layout, camera sensitivity, subtitles and accessibility options have been tested.
- An existing save appears under Load Game, or a new campaign has been deliberately selected after checking for older saves.
- The Hunter Bow is ready, capacity upgrades are planned, and the first skills support stealth, Concentration, Critical Hit, traps or Override.
- The player understands that The Frozen Wilds is included but should be approached later rather than treated as opening content.
References for this chapter
Proving and the Opening Act (A Gift from the Past → The Proving)
Follow the opening main-quest chain in order: A Gift from the Past, Lessons of the Wild, The Point of the Spear, Mother's Heart and The Proving. The early sections teach Focus scanning, patrol tracking, stealth, silent strikes, bow aiming, component targeting, crafting and machine looting. Do not expect the Tripcaster or Fire Arrows during the first hunting lesson; both become available in The Point of the Spear. Before starting The Proving, refill Hunter Arrows, craft Fire Arrows and Shock Wires, equip the Tripcaster, spend your first skill points and gather medicinal plants. The Proving combines climbing, a Grazer trophy hunt, a timed route and a scripted assault by Eclipse attackers. Use cover and traps rather than trying to win the final battle in the open.
1. Search the ruins and recover the Focus
After Aloy falls into the ruins, follow the only practical route through the rooms. Crouch through the low opening, climb the metal stairs and continue past the blocked doorway until you reach the old-world corpse holding the Focus. After the scene, activate Focus mode with R3 and scan the nearby objects as the tutorial requests.
Use the Focus to inspect the Holo Lock, then rotate its interface until the door opens. Continue through the ruin, scanning audio devices and datapoints if you want the introductory lore. The blocked side room is not required for progression. Follow the escape route until Rost finds Aloy and the quest ends.
- Obtain the Focus.
- Open the Holo Lock.
- Leave the ruins with Rost.
2. Complete Lessons of the Wild and learn the basic hunt
Stay behind Rost during Lessons of the Wild and enter the tall grass when he signals. Scan a Watcher with the Focus, tag it and highlight its path. Crouch while moving through grass. When Rost demonstrates distractions, equip a rock and throw it away from your intended route to pull the Watcher aside. A silent strike from cover is safer than beginning with arrows.
When Rost gives Aloy the bow, gather Ridge-Wood and the nearby metal scraps, then open the weapon wheel with L1 to craft Hunter Arrows. Follow Rost to the Strider herd and scan a Strider. Its eye and Blaze Canister are highlighted as vulnerable components. Shoot the Blaze Canister or the eye with Hunter Arrows, then continue firing until the machine falls. If it charges, roll clear with Circle rather than standing in front of it.
Loot the Strider and follow Rost to the next scene. Do not try to clear every Watcher or Strider in the area. The lesson is complete once you have used the Focus, crafted arrows, killed and looted the Strider, and continued after Rost.
- Scan a Watcher and follow its patrol path.
- Use tall grass and a rock distraction.
- Craft Hunter Arrows.
- Scan and kill the Strider.
- Loot the carcass.
3. Prepare for The Point of the Spear
After the time skip, follow the objective to Rost and begin The Point of the Spear. You can gather nearby plants, Ridge-Wood and machine parts while travelling, but avoid wasting resources on fights that are not required. If you have a skill point, Silent Strike is a strong first purchase for stealth players; Concentration is a good alternative if you prefer bow combat. Critical Hit is also useful after you regularly knock machines or humans down.
When the quest sends you into the Embrace to gather materials, collect the required Blaze and Ridge-Wood for Fire Arrows. Then locate Karst, the merchant marked on the map, and trade the required Scrapper Lens for the Tripcaster. Craft Fire Arrows from the weapon wheel and make Shock Wires for the Tripcaster. This is the first point in the chapter where elemental ammunition and tripwires are available.
- Spend at least one skill point.
- Gather Blaze and Ridge-Wood.
- Trade with Karst for the Tripcaster.
- Craft Fire Arrows and Shock Wires.
4. Defeat the Sawtooth with traps and fire
Travel toward Rost at the northern gate and activate the nearby campfire. Before approaching the Sawtooth, scan it with the Focus and highlight its patrol route. Stay in tall grass and place Shock Wires across the route at ground level, using rocks or other nearby anchor points. Do not place the wires so high that the machine can pass underneath them.
When the Sawtooth reaches a wire, fire Fire Arrows at the Blaze Canister on its underside. If the canister is difficult to hit, keep using fire arrows to build the burning status, then retreat into cover while it staggers. Let the machine cross another wire before taking a new shot. If it reaches you, sprint around cover and reset the engagement instead of trying to trade spear blows.
Loot the Sawtooth after it falls and return to Rost. The quest ends after the following scene. This encounter is the practical introduction to combining Focus information, a machine route, traps and elemental damage.
- Scan and tag the Sawtooth.
- Place Shock Wires along its route.
- Use Fire Arrows against its Blaze Canister or to ignite it.
- Loot the defeated Sawtooth.
- Return to Rost.
5. Enter Mother's Heart and prepare for the Proving
After The Point of the Spear, meet Rost at the northern entrance and enter Mother's Heart. Follow the marked route through the settlement. Speak with Teb to receive the Nora Brave outfit, then visit Karst again if you want to inspect his stock. Continue to the Matriarchs' lodge and speak with the required characters, including Olin, until the quest advances.
The Proving begins after the farewell and preparation scenes. Before starting it, heal fully, craft a reserve of Hunter Arrows and Fire Arrows, make Shock Wires and ensure the Tripcaster is equipped in a weapon slot. Gather medicinal plants along the route if convenient. You cannot freely return to normal exploration during the event, so prepare before speaking to Rost at the final starting point.
- Enter Mother's Heart.
- Collect the free Nora Brave outfit from Teb.
- Complete the required conversations.
- Restock arrows, wires and medicine before starting The Proving.
6. Win the Grazer trophy and follow the climbing route
During the first Proving objective, move with the other aspirants and watch the Grazer herd. The easiest opening is to wait until a Grazer is distracted by the other contestants, then attack from the side or rear. Use a charged Hunter Arrow on the Blaze Canister or eye, or use a heavy spear attack when it is close. Loot the machine for the Proving Trophy.
Bast interferes with Aloy's first trophy, so continue along the marked route and locate another Grazer. Do not stop to fight every machine. After obtaining the replacement trophy, follow the handholds, ropes and ledges toward the next section. Keep moving through the climbing route; the event is designed around reaching the next objective rather than clearing the entire mountain.
- Kill a Grazer.
- Loot a Proving Trophy.
- Obtain the replacement trophy after Bast's interference.
- Continue through the marked climbing route.
7. Survive the Eclipse assault and complete The Proving
When the attackers appear, use the boulder and nearby terrain as cover. Begin with isolated targets and use headshots or silent strikes when an enemy is separated. After the first group, archers and melee reinforcements arrive. Stay near cover, heal before your health becomes critical and reposition whenever several enemies begin firing from different angles.
Two Cultist Leaders eventually enter the fight, supported by archers. Keep the large boulder between Aloy and the enemies, place Shock Wires along approaches if you have room, and use Fire Arrows to ignite a leader or force a stagger. Eliminate the leader who is easiest to expose, then deal with the second. One leader carries a heavy weapon; if you knock it loose, pick it up and use it briefly against the remaining attackers, but do not leave cover merely to obtain it.
When the combat objective ends, follow the final scripted actions and scenes. The Proving is complete after the attack and the resulting story sequence. The next main quest is The Womb of the Mountain.
- Use terrain instead of fighting in the open.
- Defeat the initial attackers and reinforcements.
- Survive the two Cultist Leaders and their archers.
- Complete the final scripted sequence.
- Confirm that The Womb of the Mountain is available next.
Before you move on
- A Gift from the Past is complete and Aloy has obtained the Focus.
- Lessons of the Wild is complete, including Watcher scanning, stealth movement, Hunter Arrow crafting, the Strider kill and machine looting.
- The Point of the Spear is complete, including the Karst trade, Tripcaster acquisition, Fire Arrow crafting and Sawtooth defeat.
- Mother's Heart is complete and Aloy has entered the Proving sequence.
- The Proving Trophy and its replacement objective are complete.
- The Eclipse attackers and both Cultist Leaders have been defeated.
- The post-Proving story scenes have played and The Womb of the Mountain appears as the next main quest.
References for this chapter
- Horizon Zero Dawn Remastered official game page
- Lessons of the Wild - Horizon: Zero Dawn Walkthrough
- The Point of the Spear - Horizon Zero Dawn Remastered Walkthrough & Guide
- The Point of the Spear - Horizon Zero Dawn
- Mother's Heart - Horizon: Zero Dawn Walkthrough
- Complete The Proving in Horizon Zero Dawn
Into the Wider World (The Womb of the Mountain → A Seeker at the Gates)
After The Womb of the Mountain, complete A Seeker at the Gates in two stages. First, override a Strider, ride through the Main Embrace Gate, and reach Mother’s Crown. Speak with Marea to open the route toward Daytower, then clear the two marked Corrupted Zones and defeat the machines attacking the border fort. Cauldron SIGMA is optional but valuable: it grants a skill point and unlocks several early machine overrides. Use Mother’s Crown and Daytower as resupply points, scan every unfamiliar machine, and spend only enough on equipment to support fire, tear, and basic impact damage before continuing toward Meridian.
Begin A Seeker at the Gates and leave the Embrace
When The Womb of the Mountain ends, select A Seeker at the Gates from the quest log and travel to the Strider site in the center of the Embrace. Crouch in the tall grass and use Lure Call if the herd is too far away or a Strider is surrounded. When one approaches, stay behind it and hold the Override command until the process completes. Mount the overridden Strider and ride to the Main Embrace Gate.
Pass through the gate for the story scene, then speak with Varl. This completes the first stage of A Seeker at the Gates and starts The War Chief’s Trail. The War Chief’s Trail is another main quest, but it does not need to be completed before you visit Mother’s Crown or Cauldron SIGMA. Before traveling north, activate campfires, gather medicinal plants, and loot machines for Metal Shards, Ridge-Wood, Wire, and Blaze.
- Override one Strider and mount it.
- Ride through the Main Embrace Gate.
- Speak with Varl after the gate scene.
- Stock basic Hunter Arrows, Fire Arrows, medicine, and traps.
Reach Mother’s Crown and open the next objective
Follow the road north to Mother’s Crown. Activate the settlement campfire and any campfires along the approach so you have safe fast-travel points. Speak with Marea near the settlement’s main buildings to continue A Seeker at the Gates. She explains that Daytower is closed because of corrupted machines and marks the required Corrupted Zones on the map.
Mother’s Crown is also a useful preparation hub. Speak with Dral near the wounded Braves to unlock Cauldron SIGMA. Den and Taim offer nearby errands, and Lut can direct you toward Valleymeet Hunting Grounds. These activities are optional, but nearby errands and Hunting Ground trials provide experience, resources, and skill points without forcing a long journey into stronger regions.
At the merchant, do not sell every machine part for immediate Shards. Keep common crafting materials and parts needed for ammunition or capacity upgrades. Sell duplicate weapons and outfits only after checking whether they contain useful coils or resistances. Keep the Hunter Bow for routine combat, and add a Tripcaster, Sling, or Sharpshot Bow if your current merchant offers one that fits your resources.
- Speak with Marea at Mother’s Crown.
- Speak with Dral to reveal Cauldron SIGMA.
- Activate Mother’s Crown and nearby campfires.
- Take nearby optional errands only if you need experience or supplies.
Clear the two Corrupted Zones
After speaking with Marea, follow the two red Corrupted Zone markers in the Sacred Lands. The game requires two zones for the quest. If you cleared one before receiving this objective, the counter may already show one of two completed, leaving only one new zone to finish.
The zone nearest Mother’s Crown contains Corrupted Grazers. Use Fire Arrows on the Blaze canisters on their backs, then move away before the explosion. In the other marked zone, corrupted Watchers and Scrappers patrol an abandoned settlement. Begin from tall grass or elevated ground, scan each machine, and remove Watcher eyes or Scrapper components before committing to close combat. Fire damage is useful against corrupted machines, but do not stand in the red corruption pools or allow several machines to surround you.
If an encounter becomes chaotic, retreat beyond the zone boundary, heal while moving, and return after the machines separate. The objective advances only after every corrupted machine in the zone is defeated, so check the Focus scan and quest marker before leaving.
- Complete two Corrupted Zones in Nora territory.
- Use Fire Arrows against vulnerable canisters when practical.
- Loot the cleared zones for Blaze, Wire, Shards, and machine parts.
- Confirm the quest objective changes to travel to Daytower.
Optional preparation at Cauldron SIGMA
Cauldron SIGMA is north of Mother’s Crown at the base of the mountains. Enter after filling the medicine pouch and crafting Hunter Arrows, Fire Arrows, Tripcaster wires, and any available Shock ammunition. The facility is a traversal dungeon: follow the marked route, climb yellow handholds, use suspended machinery to cross gaps, and look for override interfaces when the path stops. Do not treat every locked door as a combat obstacle; the intended route usually continues through a climbable wall, platform, vent, or terminal.
The first serious machine encounter includes a Shell-Walker and Watchers. Scan the Shell-Walker before attacking. Its shield protects much of its body, so use openings when it fires or target exposed mechanisms with tear-focused attacks if available. Eliminate Watchers first when they are isolated, because their ranged attacks can interrupt your shots in the narrow corridors. Loot supply crates and machine carcasses before moving deeper.
At the core chamber, Watchers and a Fire Bellowback are separated by a barrier. Climb to the elevated discharge pylon and override its node to lower the barrier. The Bellowback is then released and additional Watchers join the fight. Keep moving around the outer edge of the arena, destroy or tear away armor covering the Blaze canisters, and use Fire Arrows on exposed canisters for a large explosion. Stay outside the blast radius and avoid fighting directly beneath the machine. If the Bellowback closes distance, sprint to the opposite side rather than relying on repeated dodge-rolls.
After defeating the machines, approach the exposed central core and hold the Override command. SIGMA awards experience and a skill point and unlocks overrides for Scrapper, Sawtooth, Grazer, and Lancehorn. The core platform provides the route back to the entrance. Cauldron SIGMA is optional for story progression, but its rewards make later exploration safer.
- Reach Cauldron SIGMA north of Mother’s Crown.
- Survive the Shell-Walker and Watcher encounter.
- Lower the core barrier from the discharge pylon.
- Defeat the Fire Bellowback and remaining Watchers.
- Override the core and verify the new machine overrides.
Enter Daytower and finish A Seeker at the Gates
After the two Corrupted Zones are complete, follow the western route toward Daytower. Save at the nearest campfire and restock before approaching the gate. A Corrupter, a Scrapper, and a Watcher are attacking the fort. Use the rocks and fort structures as cover from the Corrupter’s ranged fire and jump-stomp. Scan it first, then target exposed components and weapon parts rather than firing repeatedly into armored areas. Fire-based attacks are effective against the corrupted machines, while distance prevents the Corrupter’s melee attacks from trapping you.
Kill the Watcher early if it is exposing your position, then remove the Scrapper or any weapon component that threatens your cover. If the Corrupter advances, move along the perimeter and use the available elevation instead of standing in the gate approach. Heal behind cover and loot only after the area is safe. Once all attackers are defeated, approach the gate commander to enter Daytower and complete A Seeker at the Gates.
Daytower opens the route into the Carja Sundom and toward Meridian. Before starting The City of the Sun, you may use the new region for side quests, hunting grounds, Tallnecks, bandit camps, or additional Cauldrons. These are optional; choose activities near campfires and merchants if you need levels, coils, medicine, or ammunition.
- Reach Daytower after clearing the required Corrupted Zones.
- Defeat the Corrupter, Scrapper, and Watcher at the gate.
- Enter Daytower and complete A Seeker at the Gates.
- Save inside or near Daytower before continuing toward Meridian.
Before you move on
- A Seeker at the Gates is complete and Aloy has entered Daytower.
- Two required Corrupted Zones have been cleared, unless one was already completed before the quest objective appeared.
- Cauldron SIGMA is complete if the optional preparation goal was chosen.
- SIGMA overrides for Scrapper, Sawtooth, Grazer, and Lancehorn are visible in the override menu if SIGMA was cleared.
- Mother’s Crown and Daytower campfires are activated for travel and resupply.
- The inventory contains medicine, Hunter and Fire Arrows, basic traps, and enough crafting materials to begin the Meridian-bound story missions.
- The next required main quest is available after Daytower, while optional Sacred Lands and Carja activities remain open.
References for this chapter
- Horizon Zero Dawn Remastered official game page
- Horizon Zero Dawn Remastered — Guide and Walkthrough — PlayStation 5 — GameFAQs
- A Seeker at the Gates - Horizon Zero Dawn walkthrough
- A Seeker at the Gates – Part 02 - Horizon: Zero Dawn Walkthrough
- Cauldron SIGMA - Horizon: Zero Dawn Walkthrough
- Cauldron Sigma - Horizon Zero Dawn walkthrough
Finding Allies and Tribe Politics: The War-Chief’s Trail → Revenge of the Nora
This chapter covers the Nora revenge arc from the Main Embrace Gate to the massacre site, Devil’s Thirst, Red Echoes and the Ring of Metal. Investigate the massacre, follow Sona’s trail, survive the first cultist encounter, then begin Revenge of the Nora at Red Echoes. Clear the three cultist camps in Devil’s Grief, regroup with Sona and Varl, ignite the Blaze stockpile and defeat the remaining Eclipse forces. Optional activities at Mother’s Rise and the Nora Hunting Grounds can provide experience and practice, but they are not required. The same quest objectives and progression apply in Horizon Zero Dawn Remastered on PS5.
1. Prepare at the Main Embrace Gate and travel to the massacre site
After speaking with Varl at the Main Embrace Gate, select The War-Chief’s Trail as the active quest. Restock medicinal berries, Ridge-Wood, Wire and Blaze before leaving. Carry a Hunter Bow and Tripcaster if available. Fire Arrows help against machines with Blaze canisters, while tripwires are useful for stopping a charging machine or creating space during a retreat.
Leave the gate and follow the marked route north toward the massacre site. You can detour to Mother’s Rise to activate its campfire, which provides a useful fast-travel point. At the fork near the river, Cren can introduce the Nora Hunting Grounds. The Hunting Grounds are optional; postpone them if your ammunition or healing pouch is limited. Continue toward the massacre site rather than following optional markers.
- Select The War-Chief’s Trail before leaving the gate.
- Carry healing items, Fire Arrows and basic trap materials.
- Activate the Mother’s Rise campfire if you pass nearby.
2. Examine the massacre and follow the trail into Devil’s Thirst
At the massacre site, activate the Focus and scan the destroyed machines. Examine the Corruptor wreckage and the required Watcher remains, then speak with Dran when he arrives. The quest does not advance from scanning alone; interact with the highlighted evidence and complete the conversation.
Follow the updated objective toward Devil’s Thirst. Approach the ruins from the edge instead of crossing the machine site directly. Scan Watchers, Grazers, Scrappers and any larger machine before committing to combat. Use tall grass, rock formations and ruined walls to separate targets. Silent Strike isolated Watchers, but retreat if several machines become alerted rather than spending all your medicine in an open fight.
At the abandoned campsite in Devil’s Thirst, use the Focus to inspect the highlighted bow, campfire, bandage and arrowheads. Examine each clue until Aloy identifies the tracks. Follow the trail to locate Sona and the Nora survivors.
- Scan and examine the required evidence at the massacre site.
- Inspect every highlighted object at the abandoned campsite.
- Follow the tracks until the objective changes to the cultist encampment.
3. Clear Sona’s first encampment and complete The War-Chief’s Trail
When Sona leads you toward the cultist encampment, use the upper ground and nearby tall grass to mark cultists and corrupted machines with the Focus. Begin with isolated human enemies if you can do so safely. A silent approach reduces incoming damage, but the encounter can become an open battle once the Nora fighters join, so do not spend every trap trying to remain undetected.
If combat starts, target corrupted machines before they corner you. Fire Arrows can trigger Blaze canisters and create an opening, while tear attacks can remove dangerous components. Keep a retreat path toward the perimeter instead of fighting in the middle of the camp. Use rocks and elevation to break line of sight, heal, then re-enter from a different angle.
After the encampment is secure, speak with Sona and follow the next Focus investigation. Examine the tracks and datapoint that reveal the killers’ base and the Blaze stockpile. The quest then points you toward Red Echoes and Revenge of the Nora. Do not expect the Ring of Metal assault during this first quest; it occurs after the three-camp operation in the following mission.
- Scan the encampment before attacking.
- Use cover and retreat routes during the mixed machine-and-cultist fight.
- Inspect the post-battle evidence and confirm Revenge of the Nora is available.
4. Handle optional Nora activities before starting Revenge of the Nora
Before travelling to Red Echoes, you may complete Insult to Injury and A Daughter’s Vengeance if their markers are available around Mother’s Rise. These activities are optional and do not change the main quest outcome, but they provide experience, combat practice and additional Nora context. Complete them now if you want to improve Aloy’s level before the next multi-stage fight; otherwise, leave the markers active and return later.
The Nora Hunting Grounds are also optional. Their trials can consume arrows, traps and healing items, so they are better postponed if you are still using basic weapons or have not expanded your carrying capacity. There is no need to clear every nearby activity before Revenge of the Nora. Prioritize a stocked medicine pouch, Fire Arrows, Tripcaster ammunition and enough Ridge-Wood for repeated crafting.
- Complete the Mother’s Rise errands only if you want the extra experience and story context.
- Postpone the Hunting Grounds if resources are low.
- Restock before travelling to Red Echoes.
5. Reach Red Echoes and clear the three cultist camps
Select Revenge of the Nora and travel north to the Red Echoes campfire. Rest at the campfire to trigger the mission scene. Afterward, three cultist camps appear as objectives across the ruins of Devil’s Grief. They can be cleared in any order, so choose the camp whose approach is easiest for your current position.
At each camp, approach from the outside and use the Focus to mark cultists, corrupted machines and the alarm. Quietly eliminate or bypass the guard closest to the alarm, then disable the alarm before starting a prolonged fight. If stealth breaks, the Nora war party can assist once the battle is underway. Use tall grass to isolate human enemies and place tripwires on routes used by corrupted machines.
Do not chase enemies into an unscouted section of the ruins. If a machine group presses you, retreat beyond the camp perimeter, heal and let the Nora fighters draw attention before returning. Loot between camps, but keep machine parts and Wire for ammunition crafting. Confirm each camp’s objective is complete before travelling to the next one.
- Rest at the Red Echoes campfire before beginning the operation.
- Disable each camp’s alarm as early as practical.
- Clear all three Devil’s Grief camps before visiting Sona at the tower.
6. Regroup with Sona, enter the Ring of Metal and ignite the Blaze
After the three camps are cleared, travel to the marked tower and speak with Sona and Varl. Follow Varl toward the Ring of Metal. Move carefully through the ruins because corrupted machines can patrol the approach. Use the Focus to identify a safe route, then follow Varl over the wall and into the compound.
The first Ring of Metal section is a controlled infiltration. Stay on the elevated route when possible and eliminate guards when the path is clear. After reaching the required overlook, move through the marked route toward the Blaze stockpile. Equip Fire Arrows before taking the shot. The objective advances when the marked Blaze containers are ignited; do not waste time trying to destroy every enemy before triggering the assault.
The explosion opens the Nora attack and starts the final battle. Keep moving around cover and avoid standing in the center of the compound. Prioritize the corrupted Bellowback because its size, area attacks and durability make it the greatest immediate threat. Use Tripcaster wires to restrict its approach, target exposed components and take advantage of openings after its attacks. Remove corrupted Watchers next, then finish the remaining cultists. If overwhelmed, retreat toward the perimeter, heal behind cover and rejoin the Nora fighters rather than attempting a prolonged melee exchange.
- Speak with Sona and Varl after the three camps are cleared.
- Equip Fire Arrows before approaching the Blaze stockpile.
- Defeat the corrupted Bellowback, corrupted Watchers and remaining cultists.
- Wait for the completion objective and quest update before leaving the Ring of Metal.
Before you move on
- The War-Chief’s Trail is complete after the Devil’s Thirst investigation, Sona’s encampment battle and the evidence investigation.
- Revenge of the Nora has begun at Red Echoes and all three Devil’s Grief cultist camps are cleared.
- Aloy has met Sona and Varl at the tower, entered the Ring of Metal and ignited the Blaze stockpile.
- The final Ring of Metal battle is complete, including the corrupted Bellowback, corrupted Watchers and remaining cultists.
- Optional Mother’s Rise errands and the Nora Hunting Grounds are either complete or left as active activities for a later return.
- Healing items and ammunition have been replenished before continuing to the next available main-story mission.
References for this chapter
- Horizon Zero Dawn Remastered launches tomorrow: Nixxes details the collaboration — PlayStation.Blog
- The War-Chief’s Trail - Horizon: Zero Dawn Walkthrough - Neoseeker
- The War-Chief's Trail - Seeking Mothers Crown - Walkthrough | Horizon Zero Dawn | Gamer Guides
- Revenge of the Nora - Horizon: Zero Dawn Guide/Walkthrough
- Revenge of the Nora - Horizon: Zero Dawn Walkthrough - Neoseeker
Meridian, The City of the Sun and Main Story Beats
Reach Meridian, investigate Olin’s apartment and workshop, then fight through the excavation site where he is being held by the Eclipse. Afterward, complete The Field of the Fallen at Red Ridge Pass before meeting Erend and Marad at Pitchcliff for Into the Borderlands. These quests alternate investigation, machine combat, human ambushes, and a fortified Oseram camp. Use Meridian and Pitchcliff as resupply points, rely on Focus tagging and terrain rather than frontal assaults, and reserve fire, tear, and precision ammunition for the two Corruptors, Ravagers, and Dervahl’s Champion. Into the Borderlands ends only after the sonic device is disabled, Ersa’s area is investigated, the recording and journal are examined, and Aloy speaks with Erend.
1. Enter Meridian and prepare before the investigation
Follow the main quest marker across the bridge into Meridian and speak with the Checkpoint Commander. Erend arrives and leads Aloy through the city to Olin’s apartment. Follow him instead of leaving the route; the city walk ends at the apartment and begins The City of the Sun’s investigation sequence.
Before pursuing the excavation, use Meridian’s merchants and crafting bench. Restock medicine, ridge-wood, wire, and blaze, then prepare a Hunter Bow for ordinary enemies and exposed components, a Sharpshot Bow for distant cultists and precision shots, and either a Tripcaster or Ropecaster for controlling a dangerous machine. If you have elemental ammunition, carry fire for Corruptors and corrupted machines, plus tear ammunition for removing armor or weapons. Make a manual save at a Meridian campfire.
- Reach Olin’s apartment with Erend.
- Restock healing items and ammunition in Meridian.
- Carry Hunter Bow, Sharpshot Bow, and one machine-control option.
2. Search Olin’s apartment and workshop
Inside the apartment, activate the Focus and scan the carpet on the lower floor to reveal the hidden hatch. Go upstairs, climb the ladder, and push the stack of ingots over the weak floor section. Return downstairs and enter the opened passage.
In Olin’s workshop, scan the wall map, the journal on the table, and the hologram datapoint. The map identifies the excavation site, while the other evidence explains Olin’s connection to the Eclipse. Examine all three items before speaking with Erend. This conversation completes the investigation portion and makes The Field of the Fallen available.
- Scan the carpet and open the hidden hatch.
- Push the ingots down from the loft.
- Examine the map, journal, and hologram datapoint.
- Speak with Erend after investigating the workshop.
3. Assault the excavation site
Travel to the excavation site shown on Olin’s map. Approach from the upper ledges instead of dropping immediately into the pit. Use the Focus to tag both Corruptors, cultists, snipers, and nearby explosive objects. The ledges and rock formations provide cover from missiles while allowing you to attack exposed enemies from above.
Remove isolated cultists and elevated archers first when possible. Use silent strikes from tall grass or precision headshots, then concentrate fire on the Corruptors. Fire ammunition is useful against them; once a Corruptor is burning, continue moving rather than standing still to maintain the effect. Target exposed components with precision or tear ammunition and use rocks, ledges, and the excavation walls to block missile attacks. There are two Corruptors, so do not commit to the center of the pit until you have a retreat route.
After all enemies are defeated, go to Olin and speak with him. The following conversation determines whether Aloy spares or kills him, but either choice advances the campaign and completes The City of the Sun.
- Tag both Corruptors before beginning the fight.
- Clear elevated cultists and archers before crossing into the pit.
- Use fire, cover, and precision attacks against the Corruptors.
- Speak with Olin after the excavation is secure.
4. Complete The Field of the Fallen before Pitchcliff
Activate The Field of the Fallen and travel to Red Ridge Pass. Erend is fighting machines when Aloy arrives; help him defeat the attackers, including the Ravagers, before speaking with him. Keep to the surrounding rocks and use Focus tagging to avoid being caught between machine attacks and Erend’s position. Freeze ammunition is useful if available, but it is not required; tear or precision shots can remove dangerous components and weapons.
Follow Erend to the nearby massacre site and use the Focus to examine the evidence around the bodies, bloodstains, weapons, and tracks. Continue following the trail to Dimmed Bones. When the Oseram ambush begins, fight from the ruins and place Tripcaster wires or other traps at the approaches before the Ravagers arrive. Deal with human attackers from cover, then use fire, freeze, or tear ammunition against the Ravagers while circling the stone structures.
After the machines and ambushers are defeated, scan the remaining evidence in the ruins and speak with Erend. The resulting conversation reveals that Ersa may have survived long enough to be taken away and leads directly to Into the Borderlands.
- Meet Erend at Red Ridge Pass.
- Defeat the machines attacking him.
- Investigate the massacre evidence and follow the tracks to Dimmed Bones.
- Survive the Oseram ambush and two-Ravager encounter.
- Speak with Erend to unlock Into the Borderlands.
5. Meet Marad at the Palace and travel to Pitchcliff
When Into the Borderlands is active, return to Meridian and enter the Palace of the Sun. Speak with Marad at the entrance, follow him through the palace, and complete the audience with Sun-King Avad. After the conversation, speak with Erend to receive the Pitchcliff operation.
Restock before leaving. The route is long and includes machine patrols, so use campfires along the road as recovery and fast-travel points. You do not need to fight every patrol. Tag machines with the Focus, pass through tall grass, and avoid combat when the road is clear. At Pitchcliff, visit the merchant and campfire before searching for Marad’s operative. From the marketplace, follow the objective trail and Focus tracks north and west behind the buildings to find the operative near a well. Examine the body to reveal the route to Dervahl’s camp.
- Complete the Palace of the Sun audience.
- Speak with Erend after meeting Avad.
- Use the Pitchcliff merchant and campfire before continuing.
- Examine Marad’s operative and follow the discovered trail.
6. Infiltrate Dervahl’s camp and exploit the chained machines
Approach Dervahl’s camp from the campfire southeast of the objective and scan the entire area before attacking. The camp contains Oseram enemies and chained machines, including a Ravager and Longlegs. From tall grass, shoot the chains holding the outside machines to release them. Let them attack the camp while Aloy remains hidden, then clean up survivors from the perimeter. This is optional, but it can remove several enemies before the main fight.
If the machines do not clear the camp, continue from cover with a Sharpshot Bow. Prioritize archers and heavy human weapons, then target machine components. Do not rush into the central buildings while multiple enemies have line of sight. Use Tripcaster wires at doorways or narrow approaches, and reposition to the outer rocks whenever the camp becomes crowded. A captured Ravager cannon can also be useful if you safely detach it and have room to fire.
- Scan enemies, machines, and escape routes before attacking.
- Optionally free the chained Ravager and Longlegs from concealment.
- Prioritize human ranged threats and dangerous machine weapons.
- Keep a retreat path open toward the outer rocks.
7. Defeat Dervahl’s Champion and finish the workshop objectives
After the camp defenders and machines are defeated, enter the northern building marked by the objective. The Champion uses a Firespitter, so do not fight him in a narrow doorway. Back away into a wider area, keep moving around cover, and use the Sharpshot Bow for headshots or precision shots while Erend distracts him. If you have a Ravager cannon or traps ready, use them before spending rare ammunition.
Loot Dervahl’s Champion after the fight. The body contains earplugs that protect Aloy from the sonic device. Enter the building, move downstairs, and interact with the control beside the stairwell to disable the sonic barrier. Continue into the workshop and find Ersa. After the scene, investigate the marked workshop evidence: scan and examine the Recording Device, then scan and examine Dervahl’s Journal. Loot the large supply crate if you need modifications or materials.
Speak with Erend after the evidence is examined. This conversation completes Into the Borderlands and starts The Sun Shall Fall. The next objective sends Aloy back into the Meridian storyline, so resupply there before beginning the next mission rather than treating the camp as the chapter’s final preparation point.
- Defeat Dervahl’s Champion without remaining in the Firespitter’s line of fire.
- Loot the Champion and obtain the earplugs.
- Disable the sonic device at the stairwell control.
- Find Ersa and complete the workshop scene.
- Examine the Recording Device and Dervahl’s Journal.
- Speak with Erend to complete Into the Borderlands.
Before you move on
- The City of the Sun is complete after the excavation site is cleared and Aloy speaks with Olin.
- The Field of the Fallen is complete after Red Ridge Pass, the massacre investigation, the Dimmed Bones ambush, the Ravager fight, and the final conversation with Erend.
- Into the Borderlands is complete after the Palace audience, Pitchcliff investigation, Dervahl’s camp, Dervahl’s Champion, the sonic device, the workshop evidence, and the final conversation with Erend.
- The Sun Shall Fall is available in the quest journal, and Aloy can return to Meridian to restock before continuing.
The Sun Shall Fall → Maker’s End
Both The Sun Shall Fall and Maker’s End are available during this portion of the campaign. Maker’s End is the earlier quest in the overall main-story sequence, but completing The Sun Shall Fall first is a practical route: it resolves Dervahl’s plot, gives you a controlled Glinthawk encounter and lets you restock before the Maker’s End excavation. In Maker’s End, scout the Eclipse positions, isolate the corrupted machines, defeat the stationary Deathbringer by using cover and attacking exposed components, then climb Faro Automated Solutions to Ted Faro’s office. Watch the three required holographic datapoints in sequence. Before taking the elevator, climb above the office for the optional Ancient Armory Power Cell. Finish the Sylens conversation, save outside the ruin and prepare for The Grave-Hoard.
1. Prepare in Meridian and choose the route
Make a manual save at a Meridian campfire. Restock medicine, ridge-wood, metal shards, blaze and wire, then craft ordinary arrows, fire arrows, precision or hardpoint ammunition and any control ammunition you regularly use. A Hunter Bow covers ordinary targets and fire arrows; a Sharpshot Bow is useful for components and distant human enemies; a Tripcaster or Ropecaster gives you a way to control a dangerous machine. A Blast Sling is helpful against clustered Eclipse soldiers, but do not consume every blaze canister before Maker’s End.
At this point in the campaign, both The Sun Shall Fall and Maker’s End are available. Maker’s End is earlier in the overall main-story sequence, but this chapter deliberately completes The Sun Shall Fall first. That order is convenient rather than mandatory: it resolves Dervahl’s immediate threat and gives you a natural opportunity to return to Meridian, save and replenish supplies before entering the excavation at Maker’s End.
If you are short on resources, clear a nearby bandit camp, machine site or optional quest before starting. You do not need to clear every side activity, but entering these missions with a full medicine pouch and several ammunition types is more valuable than carrying a large collection of low-quality loot.
- Manual save made in Meridian
- Medicine and ammunition replenished
- Hunter Bow and Sharpshot Bow available
- Tripcaster, Ropecaster or another control option available
- The Sun Shall Fall selected as the chosen first mission
2. Investigate Dervahl’s bomb in Meridian
Travel to the Palace of the Sun and speak with Avad and Erend to begin The Sun Shall Fall. Follow the objective to the warehouse near the Hunter’s Lodge. Examine the bomb materials on the lower floor, then climb upstairs and inspect the larger Blaze barrels.
Use the Focus to identify the wall bracket beside the barrels. Interact with it to push the Blaze outside through the opening. Move away from the blast area and wait for the scene to finish. Activate the Focus afterward and tag the tracks leading away from the warehouse.
Follow the trail through Meridian. Enter the indicated building, descend into the basement and continue through the damaged section. Keep following the objective rather than searching every room; the route eventually leads toward the palace and Dervahl’s position.
- Palace of the Sun visited
- Warehouse bomb examined
- Blaze barrels pushed outside
- Tracks scanned
- Trail followed through the basement route
3. Reach the Solarium and destroy the sonic device
Continue along the marked route toward the palace. When the path reaches the cliffside approach, use the visible handholds and wooden beams to descend and cross toward the palace walkway. The route includes a zipline that places Aloy near Dervahl’s guards. Use tall grass, rocks and the Focus to mark enemies before moving forward.
Enter the Solarium and interact with the sonic device as soon as the objective allows it. Destroying the device is the required priority; do not chase Dervahl before disabling it. Once the device is gone, use cover around the palace structure to separate Dervahl’s men. Mark ranged attackers first, fire from cover and relocate after each shot so the group cannot surround Aloy.
A Blast Sling can damage several human enemies at once, but ordinary arrows and silent strikes conserve resources when a guard is isolated. If the fight becomes crowded, retreat along the route you entered, heal behind solid cover and re-engage after the enemies spread out.
- Cliffside approach completed
- Solarium entered
- Sonic device destroyed
- Dervahl’s guards defeated
- Dervahl confronted
4. Defeat the Glinthawks and complete The Sun Shall Fall
After Dervahl’s confrontation, Glinthawks arrive in waves. Equip fire arrows and keep moving around the palace grounds. A burning Glinthawk can be forced down, giving you time to follow with ordinary arrows, a spear attack or a critical strike when the machine is vulnerable.
Aim for the chest canister when it is clearly exposed, or target the wings and beak to reduce its ability to attack. Do not stand beneath a hovering Glinthawk while it is preparing an ice attack. Sprint sideways or move behind palace structures when it begins a dive or launches ice.
When all required Glinthawks are defeated, speak with Dervahl, then complete the conversations with Erend and Avad that the objectives request. The quest does not finish merely because Dervahl and the machines are defeated; wait for the final dialogue objectives to register. Loot the machine remains before leaving if you need chillwater, metal shards or other components.
- All required Glinthawks defeated
- Dervahl spoken to
- Erend and Avad spoken to
- The Sun Shall Fall marked complete
- Meridian campfire save created afterward
5. Travel to Maker’s End and clear the excavation sites
Select Maker’s End and travel northeast to the marked excavation. Before entering, use the Focus to tag Eclipse soldiers, corrupted Watchers and nearby machine routes. Tall grass and rocks let you remove isolated cultists with silent strikes, but avoid crossing the open excavation merely to reach a distant enemy.
Advance from one excavation position to the next. When a Corruptor appears, prioritize survival over fast damage: stay near cover, keep its movement in view and use fire damage when you have a safe shot. Precision or tear attacks can remove vulnerable components, while hardpoint or other impact ammunition is better once an exposed weak point is available.
If several enemies become alerted together, retreat to the previous piece of cover. Let the group separate, then remove cultists or ranged attackers before returning to the machine. Follow the quest marker after the Corruptor and the required Eclipse forces are defeated; it leads to the damaged Deathbringer encounter.
- First excavation cleared
- Eclipse soldiers dealt with
- Corrupted Watchers defeated or bypassed
- Corruptor defeated
- Deathbringer arena reached
6. Defeat the stationary Deathbringer
Scan the Deathbringer before firing. This Maker’s End Deathbringer is damaged and cannot walk, but its turret and weapons still rotate and can cover much of the arena. Remove nearby cultists and corrupted Watchers first when possible. Use the excavation walls, concrete structures and other solid cover rather than relying on a single rock or low obstruction.
The machine’s weapons and body components are vulnerable at different moments. Use fire arrows when you have a safe opportunity to build heat, then switch to impact-focused ammunition when highlighted cooling rods, vents or the core are exposed. Do not continue spending fire ammunition after the machine is already overheated; the exposed components are the better targets during that opening.
Watch the turret and firing direction. If repeated shots begin landing near your cover, relocate to another solid structure before returning fire. Shock can help create a temporary opening if you have suitable ammunition, but the reliable method is to survive the firing cycle, expose the machine’s vulnerable parts and attack those parts instead of wasting arrows on intact armor.
After the Deathbringer falls, loot the marked Eclipse Officer. Take the officer’s Focus and wait for the required story sequence. The Focus is what opens the next investigation route into Faro Automated Solutions.
- Nearby human and machine enemies cleared
- Deathbringer scanned
- Solid cover used throughout the fight
- Exposed Deathbringer components destroyed
- Eclipse Officer looted
- Focus-triggered story sequence completed
7. Enter Faro Automated Solutions and climb through the ruin
Investigate the rubble revealed by the quest and enter the ruin. Inside, look for yellow handholds, ladders, broken floors and ledges. The intended route often continues above Aloy’s current position, so when a corridor seems to end, check overhead platforms and the opposite side of the room before backtracking.
Use the Focus on terminals, holograms and datapoints when the objective calls for an investigation. Optional datapoints provide additional history but are not all required for quest completion. Do not spend medicine or ammunition unnecessarily here: after the Deathbringer, this portion is primarily traversal and investigation.
If you fall, look for the nearest yellow handhold or lower platform rather than trying to jump directly to the upper route. Follow the objective marker through the tower until Aloy reaches the upper office area associated with Ted Faro.
- Rubble investigated
- Faro Automated Solutions entered
- Yellow handholds followed
- Required investigation points examined
- Ted Faro’s office area reached
8. Watch the three holograms and collect the optional Power Cell
At the office, interact with the marked mainframe or data storage rack. A holographic datapoint appears nearby. Scan and watch it; after it finishes, a second holographic datapoint appears in the same general area. Scan and watch that one as well, then repeat for the third. The three holograms must be viewed in sequence for the elevator objective to advance.
Before using the elevator, take the optional climbing route above Faro’s office. Follow the handholds upward to the tower’s top ledge and collect the Power Cell for the Ancient Armory side quest. This Power Cell is optional for Maker’s End and is not required to unlock the next main quest. If you choose to collect it, use the rappel point to return safely to the office level.
Return to the office and use the personal elevator once it becomes available. Complete the conversation with Sylens. Dialogue responses do not change the required route; continue speaking with him until the scene ends and the quest completion reward registers.
- First required holographic datapoint watched
- Second required holographic datapoint watched
- Third required holographic datapoint watched
- Optional Power Cell collected if desired
- Personal elevator used
- Sylens conversation completed
- Maker’s End reward and completion registered
9. Save outside Maker’s End and prepare for The Grave-Hoard
After leaving the ruin, make a new campfire save and replenish medicine and ammunition. The open world remains available, so you can complete side quests, visit a Cauldron or upgrade equipment before starting The Grave-Hoard.
If you fail during the Deathbringer fight, reload the excavation checkpoint or your most recent manual save. You do not need to repeat The Sun Shall Fall unless you deliberately load a much older save. For the next mission, keep a Sharpshot Bow and at least one control option equipped; the campaign continues to use high-threat machines and mixed enemy encounters.
- Maker’s End exited
- New campfire save created
- Medicine pouch replenished
- Ordinary and precision ammunition crafted
- The Grave-Hoard available as the next main-story destination
Before you move on
- The Sun Shall Fall is marked complete after the Dervahl, Glinthawk and final palace conversation objectives.
- Maker’s End excavation objectives are complete, including the required Eclipse forces, Corruptor and stationary Deathbringer.
- The marked Eclipse Officer has been looted and the Focus-triggered sequence has played.
- All three required holographic datapoints in Faro’s office have been watched in sequence.
- The optional Power Cell above Faro’s office has been collected if desired.
- The personal elevator has been used and the Sylens conversation has finished.
- Maker’s End completion reward has registered.
- A new save exists outside the ruin and The Grave-Hoard is available.
References for this chapter
- Horizon Zero Dawn Remastered official game page
- The Sun Shall Fall - Horizon Zero Dawn Walkthrough - Neoseeker
- Horizon: Zero Dawn FAQ/Walkthrough - Tallneck locations and progression
- Maker’s End - Horizon Zero Dawn Walkthrough - Neoseeker
- The Sun Shall Fall - Horizon Zero Dawn Walkthrough - SuperCheats
- Maker’s End - Horizon Zero Dawn Walkthrough - SuperCheats
The Grave-Hoard and Eclipse (The Grave-Hoard → To Curse the Darkness)
Complete The Grave-Hoard by restoring power to the ancient door, collecting the nearby Power Cell, defeating the Deathbringer and examining the War Room evidence about Project: Zero Dawn. Then begin To Curse the Darkness, infiltrate the Eclipse base, reach the derelict Tallneck, disrupt the Eclipse Focus network and escape by rappelling from the bridge. Stealth is useful in both missions, but neither requires clearing every optional enemy or collecting every datapoint. Use the Focus to identify routes and weak points, keep solid cover between Aloy and heavy weapons, and preserve medicine and ammunition for the Deathbringer and the scripted escape.
Prepare for The Grave-Hoard
Activate The Grave-Hoard before entering the ruins. Refill Aloy’s medicine pouch and craft Hunter, Sharpshot and Tear ammunition. Equip a weapon that can remove components at range, along with a Tripcaster, Blast Sling or another control weapon for confined encounters. The Deathbringer is much easier after its mounted weapons are removed, so do not enter with only a basic close-range option.
Scan Eclipse soldiers and corrupted machines with the Focus as you advance. Use doorways, pillars and raised platforms to break line of sight. Silently remove isolated cultists when convenient, but do not spend supplies clearing every room if the objective marker already points deeper into the bunker. If several enemies detect Aloy, retreat through the route you used and let the alert settle instead of fighting in an exposed corridor.
- The Grave-Hoard is the active main quest.
- Medicine and important ammunition are replenished.
- A Tear-capable weapon and a reliable damage weapon are equipped.
Restore power to the ancient door
Drop into the Grave-Hoard and follow the corridors until the ancient door blocks the route. Search the adjacent rooms for supplies, then locate the three breaker panels. Each panel has four rotating rings. The safest way to confirm a solution is to scan the nearby Code Nexus with the Focus; it displays the intended direction for each ring.
Use these location-based solutions rather than relying on the order in which you find the panels. The upper-floor panel is Up, Down, Left, Right. The lower-floor panel beside the broken-directions clue and nearby audio log is Up, Right, Left, Down. The other lower-floor panel is Up, Up, Down, Down. Turn each ring until its indicator matches the displayed direction. If your physical approach makes the panels appear reversed or the visual layout is unclear, rescan the Code Nexus before making another attempt. After all three are aligned, return to the ancient door and pass through it.
- The upper-floor panel is set to Up, Down, Left, Right.
- The lower-floor panel beside the broken-directions clue is set to Up, Right, Left, Down.
- The other lower-floor panel is set to Up, Up, Down, Down.
- The ancient door opens.
Collect the Power Cell and clear the armory room
After passing through the powered door, check the left side of the next area for the Power Cell. Pick it up before continuing. This is an optional Ancient Armory objective rather than a requirement for finishing The Grave-Hoard, but collecting it now avoids a return trip through the bunker. If you miss it, the ruins remain accessible for later collection.
Continue into the next room, where Eclipse cultists and a corrupted Scrapper may be present. Use the doorway and raised platforms as cover. If enemies are grouped near a Blaze canister, ignite it from concealment when safe. Otherwise, remove isolated soldiers quietly and use Tear ammunition to strip the Scrapper’s dangerous components before finishing it. Loot the room after the encounter, but do not delay the main route for optional datapoints unless you want the additional lore.
- The Grave-Hoard Power Cell is in Aloy’s inventory.
- The cultist and corrupted-machine encounter is complete.
- The route deeper into the bunker is open.
Reach the Deathbringer arena
Follow the objective markers through the bunker and interact with the required consoles. When the path appears to end, scan with the Focus to reveal climbable handholds and route details. Optional datapoints can be collected during this section, but they are not required for quest progression.
Before entering the arena, prepare a Tear-capable weapon, fire ammunition and a reliable hardpoint or other damage weapon. Tag the Eclipse troops and identify their positions. If the layout allows it, silently remove archers and exposed cultists before fully engaging the Deathbringer. Do not chase fleeing soldiers into the machine’s firing lanes; keep the human enemies separated from the machine by using walls, pillars and the arena’s different levels.
- The required console has been used.
- Aloy has reached the Deathbringer arena.
- The machine’s weapons and nearby human enemies are tagged.
Defeat the Deathbringer
Start by removing the Deathbringer’s mounted weapons with Tear ammunition or other component-removal attacks. Do not treat hardpoint ammunition as a Tear substitute: hardpoint arrows are for reliable damage after parts are exposed. Detaching the machine’s guns reduces incoming pressure and creates safer movement windows. Keep changing cover positions because its attacks can destroy or bypass shelter.
Use fire ammunition to build heat. When the machine overheats, its heat vents and cooling rods become exposed. Target those highlighted components with hardpoint or other high-damage ammunition. When its stabilizers or legs can be targeted, damage them to create a stagger, then use the opening to hit exposed weak points. Repeat the cycle of removing weapons, building heat, attacking exposed cooling components and repositioning behind solid cover.
If cultists remain active, prioritize archers because they can punish Aloy while she is lining up component shots. Heal behind cover and move whenever the machine destroys the current shelter. The fight becomes substantially safer once the offensive weapons are gone, so avoid focusing only on body damage at the start.
- The Deathbringer is destroyed.
- The arena no longer contains enemies blocking progression.
- The route to the War Room is open.
Examine the War Room and leave the bunker
After the Deathbringer is defeated, loot the machine and nearby supply containers. Follow the objective through the door and hallway to the War Room. Interact with the central holographic console to view the Project: Zero Dawn evidence required by the quest. Nearby terminals and datapoints provide optional story context; missing them does not prevent completion.
When the objective changes, follow the marked exit route. Continue through the hallway, use the ladder and marked handholds, and complete the escape sequence. The quest ends after Aloy leaves the bunker and awards experience and a skill point. If the Power Cell was missed, the Grave-Hoard remains available for later exploration and the Ancient Armory objective can still be pursued.
- The War Room holographic console has been examined.
- The marked exit route and climb are complete.
- The Grave-Hoard is marked complete and To Curse the Darkness is available.
Infiltrate the Eclipse base
Travel to Sylens’s marked location and speak with him to begin To Curse the Darkness. Use the nearby campfire and surrounding vegetation as a preparation point. Tag Eclipse patrols and corrupted machines with the Focus before entering the base. You can clear enemies quietly, but a full base clear is unnecessary and consumes resources that are more useful during the escape.
Cross the bridge and inspect the nearby hut if you want its optional datapoints. At the cliff edge, push the fallen tree when prompted to create the crossing. Follow the narrow path toward the derelict Tallneck, using tall grass and the perimeter route to bypass patrols. If detected, break line of sight behind vegetation or terrain and continue once the alert weakens.
- The conversation with Sylens is complete.
- The Eclipse base has been infiltrated.
- The fallen-tree crossing has been created and passed.
Reach the Tallneck and escape
Follow the scaffolding, ramps and ladders to the top of the derelict Tallneck. Reaching its head triggers the story sequence and advances the mission automatically. After control returns to Aloy, do not stop to loot or fight the pursuing force. Run along the cliff route, follow the objective markers and use the visible handholds to cross gaps.
The first escape section includes exposed traversal while Eclipse forces and heavy weapons fire from behind, so heal while moving and use cover whenever the route provides it. In the later jungle section, most cultists can be bypassed. Keep moving rather than attempting a full clear. The path eventually returns to the earlier bridge area. Run to the center of the bridge and activate the rappel point. The scripted sequence completes the mission and awards the Crashed the Eclipse Network trophy, experience and a skill point.
- The derelict Tallneck has been reached and overridden.
- Aloy has returned to the bridge during the escape.
- The rappel sequence, trophy notification and quest completion have appeared.
Before you move on
- The Grave-Hoard is complete, the War Room evidence has been examined and the Grave-Hoard Power Cell is secured if pursuing Ancient Armory.
- To Curse the Darkness is complete after Aloy reaches the bridge rappel point and the scripted escape finishes, with the Eclipse-network trophy and quest rewards recorded.
- The next main-story quest is available, and Aloy has restored medicine and ammunition before continuing.
References for this chapter
- Horizon Zero Dawn Remastered launches tomorrow: Nixxes details the collaboration that upgraded Aloy’s first adventure
- Horizon Zero Dawn – How to Solve Grave-Hoard Puzzle
- The Grave-Hoard - Horizon: Zero Dawn Walkthrough
- To Curse the Darkness - Horizon: Zero Dawn Walkthrough
- To Curse the Darkness - Horizon Zero Dawn
- Horizon Zero Dawn Power Cell location guide
Deep Secrets of the Earth → The Terror of the Sun
Travel to Sunfall, pass through the Citadel, and enter the hidden Project: Zero Dawn facility. This chapter is largely a linear exploration mission with several Eclipse firefights, two Code Nexus sequences, and numerous datapoints that explain Zero Dawn, GAIA, HADES, and the Cradle facilities. The first Code Nexus opens the route to the missing Emitter; installing that Emitter reveals the second combination, which restores power to the sealed door. Search the upper facility before using Elisabet Sobeck’s terminal, because several story datapoints and supply containers are located there. The following quest, The Terror of the Sun, begins immediately and takes place in the Sun Ring. Aloy temporarily loses her equipment, then must lure a corrupted Behemoth into destroying two support pillars so her weapons fall into the arena. Defeat the Behemoth, survive the Corruptors’ arrival, and follow the escape sequence with Sylens. Horizon Zero Dawn Remastered on PS5 contains the same campaign progression and The Frozen Wilds expansion as the Remastered edition documented by PlayStation.
1. Prepare at Sunfall and enter the Citadel
Travel to Sunfall in the western desert and activate the campfire beside the ramp leading into the settlement. Restock healing items, ridge-wood, metal shards, and ammunition before continuing. Hunter Arrows are sufficient for ordinary Eclipse soldiers, while Tearblast or other tear ammunition is useful for removing heavy weapons. Fire ammunition is more important for the corrupted Behemoth in the next quest than for the facility itself.
Speak with any optional NPCs or complete nearby errands before proceeding if you want them available. When you are ready, enter Sunfall and follow the objective through the Citadel. Continue through the courtyard and throne-room sequence until the objective directs you to leave by the route beside the railing. Drop across the stone pillars, then use the handholds and ledges to descend toward the concealed entrance.
Inspect the wooden doorway at the bottom to begin the facility section. Treat this entrance as a practical stopping point: finish optional Sunfall activities first, then make a controlled save at the nearby campfire. The mission is linear after entry, but dying or reloading is less inconvenient when your supplies and save position are current.
- Activate the Sunfall campfire.
- Restock healing items and ammunition.
- Finish optional Sunfall activities you do not want to postpone.
- Make a controlled save before inspecting the concealed entrance.
2. Explore the opening rooms and listen to The Bad News
Inside the Project: Zero Dawn facility, move through the first rooms and scan the available text and audio datapoints with the Focus. Continue through the waiting area and the next door. A holographic recording titled The Bad News appears during the facility’s opening sequence. Let it play if you want the central explanation of the Faro Plague and the reason Zero Dawn was created.
When Eclipse soldiers appear, use door frames, pillars, and room corners as cover. Tag the group with the Focus before shooting. Eliminate exposed ranged attackers first, then move between cover rather than standing in the central floor. Human enemies do not require elemental buildup; ordinary arrows, precision shots, stealth attacks, and tear ammunition for their heavy weapons are the efficient choices.
Follow the objective toward the next locked section. Scan the nearby datapoints and holographic projectors, but do not assume every recording is required for mission progression. The story-critical material is concentrated in the holograms and Elisabet’s terminal; the surrounding text and audio records provide additional context about the people and departments involved in Project: Zero Dawn.
- Scan the opening datapoints.
- Listen to The Bad News hologram.
- Use cover against Eclipse soldiers.
- Remove heavy weapons when possible.
3. Solve both Code Nexus sequences and restore power
At the locked route, go down the stairs to the Code Nexus area. The first sequence is the functioning set of hololocks. Scan the Code Nexus and enter the directions Left, Up, Left, Down, Right. This opens the side door leading to the storage route. Go through it, climb the ladder, cross the upper passage, and take the Emitter from the desk. Loot the supply crate across the rope bridge if you need materials.
Return to the Code Nexus room and install the Emitter in the missing socket. Scan the nearby audio or text datapoint explaining that the H-emitter node was installed backward. The second sequence must therefore be entered using the inverted orientation: Down, Left, Up, Right, Down. Entering that combination restores power to the sealed door in the previous area.
Go back to the powered door and open it. Prepare for several waves of Eclipse troops, including enemies carrying heavy weapons. Stay near the entrance or retreat into the preceding corridor if the room becomes crowded. Let enemies approach through the doorway, use Concentration for exposed heads or weapon carriers, and pick up a dropped heavy weapon only after the immediate pressure is reduced. This encounter is the facility’s main sustained combat section; there is no corrupted Behemoth here.
- Enter Left, Up, Left, Down, Right in the first Code Nexus.
- Collect and install the Emitter.
- Enter Down, Left, Up, Right, Down in the repaired sequence.
- Restore power and clear the Eclipse waves.
4. Cross Central Projects and search Elisabet Sobeck’s office
After the Eclipse fight, follow the route through Central Projects. Scan the holographic displays and nearby datapoints as you pass. The Good News hologram appears after the Code Nexus section and continues the explanation of Zero Dawn. Additional displays discuss HEPHAESTUS, APOLLO, HADES, and ELEUTHIA; these recordings are useful for story context, but only the objective-marked route is required to finish the mission.
Continue through the upper walkways and descend the marked stairs. A later room contains more Eclipse soldiers. Tag them before entering, use the doorway as a choke point, and avoid crossing the open area while heavy gunners have line of sight. Once the route is clear, proceed toward the cradle-related displays and the elevator shaft. Climb the ladder and handholds rather than searching for an alternate exit if you fall; the game returns you to a recent checkpoint after a fatal mistake.
At the top, inspect the side passage and scan the GAIA hologram recordings before opening the way to Elisabet Sobeck’s office. In the office, loot the supply container and scan the nearby text datapoints, including the records concerning Odyssey and the cradle project. Then interact with the terminal marked by the red beam to complete Deep Secrets of the Earth. The mission awards experience and a skill point, and The Terror of the Sun follows immediately.
- Listen to The Good News hologram.
- Use the upper routes and marked ladder through Central Projects.
- Scan the GAIA recordings.
- Search Elisabet’s office before using the terminal.
- Interact with the terminal to finish Deep Secrets of the Earth.
5. Complete The Terror of the Sun in the Sun Ring
The next quest begins with Aloy imprisoned above the Sun Ring and without her normal equipment. After the scene, she is dropped into the arena against a corrupted Behemoth. You cannot meaningfully fight it until the weapons platform falls, so concentrate on positioning rather than attacking.
Run far enough away to make the Behemoth attempt a charge. Stand directly in front of one of the support pillars, then dodge aside at the last moment so the charging machine smashes the pillar. Repeat this with a second pillar. When the platform collapses, retrieve Aloy’s equipment immediately and create distance before attacking.
Scan the Behemoth to identify its components. Tear ammunition can remove useful parts, while fire ammunition builds the corrupted machine’s elemental state and deals damage over time. Blast Wires or other traps can punish its approach, but keep moving because the arena gives the Behemoth room to charge. Target exposed components when the machine is recovering from a missed attack, and heal before your medicine pouch is empty.
After the Behemoth falls, Corruptors enter the sequence. Do not treat this as a normal open-world battle that must be won alone. The scene progresses into Sylens’s intervention, with overridden machines assisting Aloy’s escape. Follow the marked route and complete the final scripted sequence. A death during the arena reloads the latest quest checkpoint; if you fail, repeat the pillar maneuver rather than trying to attack the Behemoth weaponless.
- Lure the Behemoth into destroying two support pillars.
- Recover Aloy’s equipment from the fallen platform.
- Use tear and fire ammunition against the Behemoth.
- Survive the Corruptor sequence and follow the escape objective.
- Confirm that The Terror of the Sun is marked complete.
Before you move on
- Deep Secrets of the Earth is marked complete.
- The Bad News and The Good News appear in the Datapoints menu.
- The Code Nexus door has been opened using the Emitter and corrected sequence.
- Elisabet Sobeck’s terminal sequence has played.
- The Terror of the Sun is marked complete.
- Aloy’s normal equipment is restored and The Heart of the Nora is available as the next main quest.
- The Sunfall campfire and nearby fast-travel network remain available for returning to optional exploration.
References for this chapter
- Horizon Zero Dawn Remastered launches on PS5 & PC October 31, 2024 — PlayStation.Blog
- Horizon Zero Dawn Remastered launches tomorrow: Nixxes details the collaboration — PlayStation.Blog
- Deep Secrets of the Earth — Horizon: Zero Dawn Walkthrough — Neoseeker
- The Terror of the Sun — Horizon: Zero Dawn Walkthrough — Neoseeker
- Deep Secrets of the Earth — Horizon Zero Dawn Walkthrough — SuperCheats
- The Terror of the Sun — Horizon Zero Dawn Walkthrough & Guide — GameFAQs
- Horizon Zero Dawn Remastered — Guide and Walkthrough — PlayStation 5 — GameFAQs
The Heart of the Nora & The Mountain That Fell
The Heart of the Nora returns Aloy to the Nora Sacred Land during an Eclipse assault. Travel from a nearby campfire to Mother’s Watch, fight through Eclipse troops and corrupted machines, defeat the Corrupted Thunderjaw outside All-Mother, then speak with Varl and Teersa before exploring the ELEUTHIA-9 facility. If you missed the Ancient Armory Power Cell during The Womb of the Mountain, this mission provides another legitimate opportunity to collect it. The Mountain That Fell sends Aloy to Bitter Climb and the GAIA Prime ruins. Save at the campfire before climbing, use wreckage as cover against the Stormbird, retrieve the Master Override, and attach it to Sylens’s Lance. Side quests, Cauldrons, Tallnecks and most collectibles are optional and do not gate either mission, but restocking medicine and ammunition before each major encounter makes the late-game transition safer.
1. Prepare for the return to the Nora homeland
Select The Heart of the Nora and travel to a nearby campfire outside the Embrace. During this mission, direct fast travel into the Nora homeland is unavailable, so the Nora Hunting Grounds is a practical arrival point. Make a manual save before beginning the approach, refill the medicine pouch, and craft Hunter Arrows, Hardpoint or Precision Arrows, and any available Tearblast ammunition. Carry a Tripcaster, Blast Sling or Ropecaster if those tools are part of your loadout.
The route and fights do not require every side quest, Tallneck, Cauldron or collectible. For an easier run, however, finish nearby errands, upgrade your medicine pouch, and make sure you have at least one ranged weapon for component removal and one weapon for traps, elemental buildup or immobilization. The objective is not level-gated, so do not delay the campaign solely to reach a specific level.
- A manual save exists before the approach to Mother’s Watch
- Medicine and ordinary ammunition are replenished
- A tear-focused weapon and an area-control weapon are equipped
- The Heart of the Nora is the active main quest
2. Clear the Eclipse assault and defeat the Corrupted Thunderjaw
Follow the quest marker toward Mother’s Watch and use the Focus before entering each hostile area. Tag Eclipse soldiers, corrupted machines, explosive objects and heavy weapons. The first groups can be reduced from cover with headshots, silent strikes or ranged attacks. If you are detected, retreat toward vegetation, rocks or the ruined walls rather than standing in the open and trading shots with several enemies.
Continue uphill toward All-Mother. More Eclipse troops and corrupted machines appear before the main arena. Let the Nora defenders draw attention while you attack from the side. Place traps at the approach to the fight, but leave enough room to circle the machine without triggering your own devices.
The Corrupted Thunderjaw is the main threat. Use the surrounding buildings, walls and raised ground to break its line of sight. Tear off its Disc Launcher and other detachable weapons when you have a safe angle; the removed Disc Launcher can then be used against the machine if you can reach it safely. Strip armor from the chest to expose the heart, and target the heart for high damage once it is visible. Keep moving when the Thunderjaw charges, and leave the arena briefly to heal or reset the engagement if both the machine and Eclipse soldiers focus Aloy.
After the Thunderjaw falls, eliminate any remaining hostiles around the entrance. Then speak with Varl. Enter the mountain and speak with Teersa in the main chamber to trigger access to the facility.
- The Eclipse and corrupted-machine groups on the approach are defeated or no longer blocking the route
- The Corrupted Thunderjaw is defeated
- Varl has been spoken to
- Teersa has opened the next story sequence
3. Collect the optional Power Cell and search All-Mother
Before following the main marker deeper into the bunker, collect the Ancient Armory Power Cell if you missed it during The Womb of the Mountain. From the entrance area, take the side route toward the locked door and use the accessible vent to bypass it. Continue through the tunnel and take the Power Cell. This is optional for the campaign but important for the Ancient Armory side quest.
Follow the marker through the facility. There are no ordinary hostile encounters inside, so use the Focus to scan datapoints and examine the rooms at your own pace. Descend from the entrance, pass through the identiscan door, and enter the former learning area. Continue through the facility until the route reaches the control room.
In the control room, scan the terminal or console in the center to trigger GAIA’s recorded message. When the scene ends, leave through the rear door and climb the pipes and elevator-shaft route to the upper passage. Follow the corridor back to the entrance and interact with the exit door. Aloy’s return to the Nora completes the mission. Optional conversations with Teersa and other Nora characters become available after the facility sequence; they are not required for progression.
- The optional Power Cell has been collected if Ancient Armory is being pursued
- The identiscan door and learning-area route have been completed
- The central control-room console has been scanned
- Aloy has exited the facility and The Heart of the Nora is marked complete
4. Reach Bitter Climb and survive the GAIA Prime approach
Start The Mountain That Fell and travel north to Bitter Climb. Make a manual save at the campfire at the base before beginning the ascent. Follow the visible handholds, beams and broken structures up the cliff. If the route seems to stop, use the Focus to highlight climbable yellow handholds and check the adjacent wreckage rather than jumping into the open.
A Stalker patrols near the upper approach. Scan it first to reveal its mines and position. You can bypass it through vegetation and along the edge of the ruins, or tear away its stealth generator and weapons before finishing the fight. Higher on the climb, a Stormbird arrives near the GAIA Prime approach. Use the broken structures and wreckage as cover from its dive and ranged attacks.
Shock ammunition can create an opening for a critical strike, while Tearblast or other tear ammunition can remove detachable weapons. Do not remain directly underneath the Stormbird. Move after each attack, heal behind wreckage, and shoot when it lands or finishes a dive. Once the approach is clear, enter the GAIA Prime ruins and continue to the interior objective.
- A manual save exists at the Bitter Climb campfire
- The climb to the GAIA Prime entrance is complete
- The Stalker has been bypassed or defeated
- The Stormbird encounter is complete
5. Search GAIA Prime and install the Master Override
Inside GAIA Prime, follow the climbing route through the broken facility. Use rappel points, handholds and the marked paths to move between exterior platforms and interior rooms. Sylens’s holographic sequence and nearby datapoints explain the purpose of the ruins, but optional scans are not required to advance.
Near the later control-room route, do not take the first zipline automatically if you want the Ancient Armory Power Cell. Before committing to that descent, inspect the side path and follow it to the hidden room containing the cell. If you are not pursuing Ancient Armory, take the main route and continue through the facility.
Reach the control-room area, scan the required console and complete the hologram sequence. The Master Override is obtained from the objective area after the sequence. Pick it up, then retrace the route and return to Sylens’s workshop. Speak with Sylens and interact with the Lance on the workbench to attach the Master Override. This completes The Mountain That Fell; no boss fight is required after the installation.
- The GAIA Prime control-room sequence has played
- The Master Override is in Aloy’s inventory
- The optional GAIA Prime Power Cell has been collected if required for Ancient Armory
- The Master Override has been attached to the Lance and the quest is complete
Before you move on
- The Heart of the Nora is marked complete in the quest log.
- Aloy has exited the All-Mother facility and the Nora return scene has played.
- The Mountain That Fell is marked complete.
- The Master Override has been attached to Sylens’s Lance at the workshop.
- The Ancient Armory Power Cells in All-Mother and GAIA Prime have been collected if that optional equipment quest is being completed.
- A post-mission manual save is available at a campfire or through the Load Game menu before starting the next final-act quest.
References for this chapter
- Horizon Zero Dawn Remastered official game page
- The Heart of the Nora - Horizon Zero Dawn walkthrough
- The Mountain That Fell - Horizon Zero Dawn walkthrough
- The Heart of the Nora - Horizon Zero Dawn walkthrough
- The Mountain That Fell - Horizon Zero Dawn walkthrough
- The Heart of the Nora - Main Quest Walkthrough
Final Push and Ending (The Looming Shadow → The Face of Extinction)
The final act begins with The Looming Shadow in Meridian and leads into The Face of Extinction after Aloy rests at Olin’s apartment. Finish optional quests, upgrade equipment, refill medicine, and prepare the Ridge and Spire defenses before using the bed. The finale covers Helis’s arena fight, the Ridge defense against Eclipse machines using an Oseram Cannon, a Corrupted Stormbird assault that may require normal weapons, and the final Deathbringer at the Spire. After destroying the Deathbringer, reach HADES and complete the Master Override prompt. The ending and Sylens post-credit scene follow. The game then restores Aloy to the pre-finale world state, leaving The Frozen Wilds, exploration, collectibles, side quests, and trophy cleanup available.
Prepare Meridian before resting at Olin’s apartment
Fast-travel to Meridian and enter the Palace of the Sun. Speak with Sun-King Avad, then find Blameless Marad and speak with him to advance The Looming Shadow. The quest adds optional objectives to review the Ridge and Spire defenses and a main objective to rest before the final battle.
Do not use the bed in Olin’s apartment until you are ready to begin the finale. Refill the medicine pouch, craft healing items, and stock the ammunition for your Hunter Bow, Sharpshot Bow, Sling, Ropecaster, or other preferred weapons. Carry reliable fire, shock, tear, and direct-damage options. A strong outfit with useful resistances is preferable to several weak alternatives.
For the All Allies Joined trophy, complete the required side quests and errands before resting. The required chain includes Traitor’s Bounty and Queen’s Gambit; Hunting for the Lodge, Hunter’s Blind, Deadliest Game, and Redmaw; plus A Daughter’s Vengeance, A Moment’s Peace, Honor the Fallen, Sun and Shadow, and Sunstone Rock. Dialogue choices do not determine this trophy. Visit both defense sites afterward and speak with the available allies.
- Refill medicine and craft healing items.
- Complete the required ally quests if pursuing All Allies Joined.
- Create a manual save before using Olin’s bed.
- Review both defense sites before starting the finale.
Review the Ridge and Spire preparations
Travel to the Ridge and speak with the named defenders gathered around the fortifications. The available group depends on the ally content you completed. Exhaust the conversations connected to the preparation objective rather than leaving after speaking to only one character.
Travel to the Spire and speak with the allies gathered along the approach and near the defensive position. Varl, Erend, and Talanah are present for the final Spire battle, while other optional allies appear according to the quests you completed. Check the full marked area if an ally is not immediately beside the objective marker.
Return to Meridian, enter Olin’s apartment, and interact with the bed only after all preparation is complete. This begins The Face of Extinction and temporarily removes ordinary exploration until the finale has concluded.
- Complete the Ridge preparation objective.
- Complete the Spire preparation objective.
- Confirm the ally quest requirements before resting.
- Keep a separate save before the bed interaction.
Defeat Helis in Meridian’s upper arena
The Face of Extinction begins with Meridian under attack and moves into the Helis encounter. Stay mobile around the arena and use its cover instead of trading repeated melee blows. Helis closes distance quickly, while Deathbringer fire gradually makes the arena less safe.
Use the Blaze canisters placed around the arena when Helis passes near them. Shoot a canister with a fire arrow to create a major damage opening, then retreat before he closes the distance. Defeat nearby Eclipse soldiers when practical and pick up a dropped heavy weapon if you can do so safely.
When Helis crosses open ground, use focused ranged attacks or the heavy weapon rather than pursuing him. Heal before the arena becomes cramped. After Helis falls, follow the objective through the damaged doorway, loot only if safe, and take the zipline down toward the Ridge.
- Use Blaze canisters when Helis is nearby.
- Keep moving between cover and firing lanes.
- Use dropped heavy weapons when safe.
- Take the zipline to the Ridge after the Helis sequence.
Defend the Ridge with the Oseram Cannon
At the Ridge, move to the lower defensive position and pick up the Oseram Cannon. Its projectiles travel in an arc, so aim above distant targets and adjust after watching the first shot land. Use the cannon primarily against the advancing ground waves.
Deathbringers are the highest-priority ground targets because their weapons and area attacks can damage the defenses quickly. Fire on them first, then remove Corrupted machines and lesser attackers approaching the gate. Turn the cannon as the assault changes direction rather than remaining fixed on one lane.
Move to the rear platforms or nearby cover when an area attack targets your position. Heal, then return to the cannon when the attack passes. The cannon is the most efficient tool for the ground assault, but surviving is more important than holding it continuously.
- Aim above distant targets to compensate for projectile drop.
- Destroy Deathbringers before lesser ground machines.
- Turn the cannon when the attack shifts sides.
- Use rear platforms or cover during area attacks.
Fight the Corrupted Stormbird and reach the Spire
Near the end of the Ridge defense, the aerial encounter includes Glinthawks and then a Corrupted Stormbird. This is not a cannon-only phase. Leave the Oseram Cannon when the Stormbird’s attacks make the cannon position unsafe and fight with your normal weapons.
Use tear ammunition to remove armor and components, then target exposed weak points. Shock ammunition can create an opening when the Stormbird flies low or lands, while the Ropecaster can help restrain it long enough to land accurate shots. Use the Ridge structures as cover and fire during the recovery after its dives or electrical attacks.
Once the Corrupted Stormbird and remaining attackers are defeated, follow the marked route through the damaged settlement toward the Spire. Loot supply crates along the route if you need ammunition or medicine, but do not spend time clearing every stray machine. At the Spire, resupply before climbing to the final arena.
- Treat the aerial enemy as a Corrupted Stormbird.
- Leave the cannon when normal weapons are safer or more effective.
- Use tear and shock effects to create openings.
- Loot supplies on the route to the Spire.
Destroy the final Deathbringer and use the Master Override
At the Spire, use walls and structures to break the final Deathbringer’s line of fire, remembering that cover can be destroyed. Remove its mounted weapons first, especially weapons that force you out of cover. Tear ammunition helps strip components; pick up a detached weapon if the position is safe and use it against the machine.
The Deathbringer exposes vulnerable areas as it overheats and deploys its systems. Concentrate damage on exposed components rather than armored sections. Corrupted machines enter the arena during the fight. Control or eliminate them when they threaten to surround you, then return to the Deathbringer before the mission timer becomes dangerous. Varl, Erend, and Talanah help draw attention but cannot replace Aloy’s damage output.
After the Deathbringer is destroyed, do not stop at the kill. Follow the objective marker to HADES and complete the prompted Master Override interaction. The interaction triggers the shutdown sequence, the final story scenes, and the campaign-completion reward.
- Destroy the Deathbringer’s heavy weapons first.
- Use the Spire structures as temporary cover.
- Control corrupted reinforcements when they close in.
- Reach HADES and complete the Master Override prompt.
Watch the ending and resume the world
Allow the final scenes and credits to play for the complete ending. The post-credit scene involving Sylens provides additional story context after HADES is defeated.
After the credits, the game restores Aloy to a pre-finale world state rather than leaving Meridian permanently changed by the battle. This is expected behavior, not a failed save. Experience and completed quest progress remain, while The Frozen Wilds, side quests, Cauldrons, Tallnecks, hunting grounds, collectibles, equipment upgrades, and unfinished trophies remain available.
To replay the finale, continue from the restored state, return to Olin’s apartment, and rest again. If All Allies Joined did not unlock, complete any missed required ally content, return to the defense sites if needed, and replay the final preparation and battle sequence.
- The Face of Extinction is marked complete.
- The ending and Sylens post-credit scene have played.
- Aloy returns to the pre-finale world state.
- Optional activities and The Frozen Wilds remain accessible.
- Check campaign trophies and All Allies Joined.
- Create a final manual save after returning to the world.
Before you move on
- Complete The Looming Shadow by reaching the preparation stage and resting at Olin’s apartment.
- Complete The Face of Extinction by defeating Helis, defending the Ridge, defeating the Corrupted Stormbird, defeating the final Deathbringer, and using the Master Override on HADES.
- Watch the final scenes and post-credit sequence.
- Confirm that Aloy returns to the pre-finale world state with optional activities available.
- Verify All Allies Joined if that trophy is being pursued.
- Create a final manual save and review the trophy list.
- Complete remaining Frozen Wilds, Cauldrons, Tallnecks, collectibles, side quests, and errands as desired.
References for this chapter
- Horizon Zero Dawn Remastered official game page
- The Looming Shadow - Horizon Zero Dawn Walkthrough - Neoseeker
- The Face of Extinction - Horizon Zero Dawn Remastered Walkthrough & Guide - GameFAQs
- The Face of Extinction - Horizon Zero Dawn - GameA
- Horizon Zero Dawn How to Get All Optional Allies
- The Face of Extinction - Rise of the Machines Walkthrough
- The Face of Extinction - Horizon Zero Dawn Walkthrough - Neoseeker
Frozen Wilds Expansion — Entry and Main Objectives
The Frozen Wilds adds The Cut, a snowy region north of the Grave-Hoard, where Aloy investigates Daemonic machines, Banuk conflicts, and the AI CYAN. The expansion becomes accessible after completing A Seeker at the Gates. The opening quest is Into the Frozen Wilds, and level 30 is the practical minimum suggested by the quest design; stronger equipment and a full medicine pouch matter more than the exact level. The required story route is Into the Frozen Wilds, The Shaman’s Path, For the Werak, Firebreak, and The Forge of Winter. The Hunters Three is an optional side quest that becomes available after The Shaman’s Path and provides additional Banuk story and rewards. There is no separate cold meter to monitor. Instead, The Cut tests you with Daemonic machines, Control Towers, confined terrain, Scorchers, Frostclaws, and Fireclaws. Bluegleam merchants and expansion errands provide stronger Banuk weapons, outfits, and upgrades. Complete The Forge of Winter to finish the expansion’s central story, then return to Song’s Edge or another settlement to clear optional quests and spend remaining Bluegleam.
1. Unlock the route and prepare before entering The Cut
Complete the main quest A Seeker at the Gates. Once it is finished, you can begin Into the Frozen Wilds by speaking with Yariki at the camp north of the Grave-Hoard, Rhavid southeast of Meridian, or Ohtur inside Daytower. You only need one of these characters. Yariki is the most convenient choice because her location is closest to the passage into The Cut.
Treat level 30 as a practical starting point rather than a guarantee of safety. The expansion’s later encounters are much more demanding than ordinary early-game fights. Upgrade your weapon wheel before entering: carry a Hunter Bow for precision and elemental arrows, a Sharpshot Bow for component removal, a Ropecaster for emergency restraint, and a Tripcaster or Blast Sling for traps and area damage. Fill the medicine pouch, craft several ammunition types, and keep spare machine parts for resupply.
The expansion does not add a temperature gauge or a cold meter. You do not need to maintain a special warmth resource. The danger comes from powerful machines, narrow arenas, steep terrain, Control Towers, and longer combat sequences.
- A Seeker at the Gates is complete.
- Into the Frozen Wilds is available from one of the three quest givers.
- Aloy has upgraded weapons, medicine, and several ammunition types.
2. Enter The Cut and establish Song’s Edge as your base
Follow the quest marker north of the Grave-Hoard to the Banuk-marked passage. Speak with the Banuk at the entrance and continue along the climbing route until Aloy reaches The Cut. Use the Focus on every unfamiliar machine before attacking. Daemonic machines are more aggressive and more durable than their ordinary counterparts, so identify their removable components, elemental canisters, and weapons before choosing a target.
When you reach Song’s Edge, activate the settlement’s campfire and use it as your main resupply point. Speak with the local characters to reveal errands and side quests, but do not feel obliged to clear the whole region immediately. Save at campfires before crossing valleys or approaching marked machine sites. If a fight becomes crowded, retreat behind rock or terrain, heal, and re-enter from a better angle instead of spending all ammunition in an open field.
Control Towers are important hazards in The Cut. Their influence can empower nearby machines and make an already difficult encounter worse. When the objective or terrain permits, destroy or override the tower first. If you cannot reach it safely, lure machines away from its area of influence and fight from cover.
- Song’s Edge is unlocked.
- The Cut is visible on the map and can be revisited.
- You know how to identify Control Towers and nearby Daemonic machines.
3. Complete The Shaman’s Path, then decide whether to pursue The Hunters Three
Follow Into the Frozen Wilds into The Shaman’s Path. This quest introduces Ourea, the Banuk spiritual conflict, and the route toward the expansion’s deeper objectives. Follow the climbing markers carefully and scan machines before beginning each encounter. The terrain often gives you ledges, tall grass, and rock formations that allow you to divide enemies rather than fight a whole group at once.
After The Shaman’s Path, Burgrend in Song’s Edge can offer The Hunters Three. This is optional, not a prerequisite for the required story chain, but it is worth completing if you want additional Banuk characterization, machine-hunting practice, and expansion rewards. The quest sends Aloy into the wilderness after a hunting group, so restock before leaving Song’s Edge and use the Focus to locate the hunters and nearby threats.
Bluegleam is the special currency of The Cut. Gather it from deposits and expansion activities, then spend it with Banuk merchants on stronger weapons and outfits. Do not spend every piece immediately if you are saving for a particular weapon. Preserve at least one loadout slot for tear or elemental coverage instead of equipping only direct-damage weapons.
- The Shaman’s Path is complete.
- The Hunters Three has been accepted or deliberately left as optional content.
- Bluegleam is being reserved for useful Banuk equipment.
4. Complete For the Werak and learn the Scorcher matchup
The required story continues with For the Werak. This quest includes a hunting challenge and combat against some of The Cut’s most dangerous machines. Follow the objective markers, but loot supply crates and gather medicinal plants before starting each major encounter. If the quest presents several possible side activities, complete the required number shown by the objective rather than assuming every activity is mandatory.
Scorchers close distance rapidly and combine leaps, charges, fire attacks, and mine-launching attacks. Scan the machine first, then use the Sharpshot Bow or tear ammunition to remove dangerous components. A Ropecaster can create a short opening, but do not attempt a restraint while another machine has a clear attack path. Use rocks and elevation to break the Scorcher’s charge line, and move laterally when it begins a ranged attack rather than retreating in a straight line.
Against groups of Daemonic machines, isolate the fastest attacker first. Freeze a vulnerable target when possible, tear weapons from larger machines, and use overridden machines only after the immediate area is controlled. If you are overwhelmed, disengage uphill or behind solid cover, heal, and wait for awareness to fall before restarting the fight.
- For the Werak is complete.
- You can remove or disable Scorcher components before committing to close combat.
- You have a recovery route using terrain and cover.
5. Enter Firebreak and reach Cauldron EPSILON
After For the Werak, continue to Firebreak. Speak with Ourea near Longnotch and follow the route to Thunder’s Drum. The mission begins in a Battery Facility and then leads toward the Cauldron door. Search for supply crates before entering the deeper sections because the mission contains several consecutive combat and traversal segments.
Inside the facility, follow the marked climbing and bridge routes. Override the appropriate panels to create crossings for Aloy and her allies, then continue through the production and recycling areas. Expect Daemonic machines and at least one Frostclaw encounter before reaching the deeper Cauldron section. Use elemental effects and component targeting instead of trying to burn through the machine’s full health bar.
In the Cauldron, follow the objective prompts to reach CYAN’s chamber. Collect supplies and datapoints if desired, then complete the source-node puzzle by aligning the node connections as indicated by the Focus interaction. After restoring CYAN’s control, move toward the Cauldron core, deal with the Control Tower, and complete the final combat sequence. Do not enter this section with an empty medicine pouch or only one ammunition type.
- Firebreak is complete.
- The Battery Facility and Cauldron traversal objectives are finished.
- CYAN’s source-node sequence and the Cauldron-core encounter are complete.
6. Finish The Forge of Winter and verify expansion completion
The Forge of Winter follows Firebreak and is the final required expansion mission. Follow the route into the facility and complete its traversal and override objectives. The mission ends with a Fireclaw encounter, so equip high-impact ammunition, tear options, and an outfit or resistance setup suited to fire attacks. Use the arena’s cover to interrupt charges and prevent the machine from keeping you in a close-range attack loop.
Prioritize detachable weapons and exposed components when a safe shot is available. Use freeze to create damage windows, then switch to impact or precision attacks. Do not spend all heavy ammunition before the final arena. If the fight fails, reload the mission checkpoint, restock from nearby crates when possible, and change your opening position rather than repeating the same open-ground approach.
After the final encounter, complete the dialogue with Ourea and CYAN and follow the final objective involving Aratak. When the closing scenes finish, Aloy returns to the open world. The Cut remains available, so you can complete The Hunters Three, Banuk errands, hunting activities, weapon-upgrade quests, collectibles, and Bluegleam purchases afterward. Make a manual save at Song’s Edge or another settlement once the expansion is marked complete.
- The Forge of Winter is complete.
- The final Fireclaw encounter and CYAN conclusion have been resolved.
- Aloy has returned to the open world with The Cut still accessible.
- A final save exists after the expansion story.
Before you move on
- A Seeker at the Gates was completed before entering The Cut.
- Into the Frozen Wilds, The Shaman’s Path, For the Werak, Firebreak, and The Forge of Winter are complete.
- The Hunters Three is complete if pursuing the optional Banuk hunting storyline.
- The final Fireclaw encounter and CYAN’s conclusion have been completed.
- Song’s Edge and The Cut remain accessible after the story.
- Desired Bluegleam weapons, outfits, and expansion upgrades have been purchased.
- A final post-expansion save confirms that Aloy has returned to the open world.
References for this chapter
- Horizon Zero Dawn Remastered official game page
- Starting the DLC — Horizon: Zero Dawn: The Frozen Wilds Walkthrough
- The Hunters Three — Horizon: Zero Dawn: The Frozen Wilds Walkthrough
- Firebreak — Horizon: Zero Dawn: The Frozen Wilds Walkthrough
- Firebreak — The Frozen Wilds Walkthrough
- The Forge of Winter — Horizon Zero Dawn: The Frozen Wilds
- Horizon Zero Dawn: The Frozen Wilds FAQ: Trophies, quests and the new machines
Cauldrons, Overrides and Machine Hunting
Cauldrons are optional for the main campaign, but they unlock valuable machine overrides and count toward important completion goals. After The Womb of the Mountain, PSI provides early overrides for machines such as Watchers, Striders, Chargers and Broadheads. Tallnecks are different: Aloy must climb each one and use the separate override interaction at its head. The four base-game Cauldrons unlock SIGMA, RHO, XI and ZETA permissions. Complete them in a practical progression as your weapons improve. Each facility combines traversal, machine encounters and a core defense. Scan enemies before choosing ammunition, detach components when farming resources, and use overridden machines to split enemy groups rather than replacing combat planning. The Frozen Wilds adds EPSILON through The Forge of Winter, unlocking Fireclaw, Frostclaw and Scorcher overrides.
Unlock PSI and prepare for the first Cauldron
During The Womb of the Mountain, after the story sequence involving the Corruptor, Aloy gains the PSI Override. This permits ordinary overrides for early machine types such as Watchers, Redeye Watchers, Striders, Chargers and Broadheads. Approach an eligible machine from concealment and hold the override prompt when it is unaware. Corrupted and Daemonic machines cannot be overridden. A hostile machine that is actively attacking will not normally accept the interaction, so break line of sight or restrain it before trying again.
Tallnecks are not ordinary PSI overrides. To override one, climb its body, reach the platform near its head and use the separate override interaction there. Completing a Tallneck reveals map information; it does not function as a normal combat override and should not be counted as one of the machine classes unlocked by a Cauldron.
Before entering a Cauldron, use a nearby campfire or merchant, refill the medicine pouch, craft the ammunition you actually use and carry Ridge-Wood for arrows. Check the Machine Catalogue before farming a material. Its entries identify components, elemental weaknesses, detachable weapons and the Cauldron permission required for that machine.
- Complete The Womb of the Mountain and confirm PSI Overrides are available.
- Use Tallneck climbing and its head interaction separately from ordinary PSI overrides.
- Scan unfamiliar machines before selecting ammunition.
- Carry healing items, Ridge-Wood, traps and enough ammunition for a core defense.
Complete SIGMA first
Travel to the SIGMA marker and hold the interaction prompt at the entrance. Inside, follow glowing conduits and look for yellow climbing surfaces, overhead routes and override interfaces when the direct path ends. If progress stops, scan the room instead of searching only at ground level; Cauldrons frequently place the next route above, behind or around the machinery.
At the core, activate the override and prepare for a machine defense. Use pillars and raised platforms to break line of sight, and place Tripcaster wires across likely approaches if the room gives you time. Do not remain beside the core while fighting. SIGMA unlocks overrides for Grazers, Lancehorns, Scrappers and Sawtooths. Test one new permission outside the facility so you know the unlock is recorded.
- Reach and override the SIGMA core.
- Confirm the SIGMA permissions in the Machine Catalogue.
- Use a newly unlocked SIGMA override on a live, non-corrupted machine.
Use RHO for the next group of overrides
RHO is entered by rappelling down at its marked entrance. The facility emphasizes vertical traversal, rotating machinery and suspended platforms. Follow the visible route, use yellow handholds and scan before dropping into a lower chamber. When a moving platform appears to stop short, wait for it to align rather than jumping early; several routes loop around the machinery before returning to a higher ledge.
Prepare traps before the core defense, then draw machines away from the central interface. RHO unlocks Longlegs, Ravagers, Shell-Walkers, Snapmaws and Tramplers. Against a group, override one machine from grass or behind cover, immediately move away from its route and let it attract attention. Use the distraction to tear weapons or elemental components from the remaining enemies. Ordinary combat overrides are temporary unless extended by skills, while mountable machines are mainly useful for travel.
- Enter RHO through the rappel point shown on the map.
- Use cover and vertical terrain during the core defense.
- Verify that Longleg, Ravager, Shell-Walker, Snapmaw and Trampler permissions are unlocked.
Clear XI and ZETA for heavy-machine access
XI is reached through an Eclipse-controlled approach. At the entrance, deal with or bypass the guards and obtain the Excavation Key from one of them before opening the facility. Inside, use stealth where possible so you do not spend healing and ammunition before the core fight. Follow conduits, climb marked surfaces and activate exposed devices in sequence. XI unlocks Glinthawks, Stalkers, Fire Bellowbacks, Freeze Bellowbacks and Behemoths.
ZETA is a later base-game Cauldron. At the large entrance structure, climb the rock pillar and enter through the opening above the main door. Its route is shorter than RHO’s, but the final Thunderjaw fight is more demanding. Before activating the core, prepare Tear ammunition and an elemental option. Strip the Thunderjaw’s Disc Launchers and other dangerous weapons first; if a weapon drops, pick it up and use it against the machine when safe. ZETA unlocks Rockbreakers, Stormbirds and Thunderjaws.
- Obtain the Excavation Key before attempting to open XI.
- Do not start ZETA without a plan for removing Thunderjaw weapons.
- Complete SIGMA, RHO, XI and ZETA if pursuing All Cores Overridden.
Farm parts by targeting machine components
For common crafting supplies, revisit marked machine sites instead of wandering randomly. Grazer and Broadhead herds in the Sacred Lands are dependable early sources of Blaze, Wire and ordinary machine parts. Scrapper sites are useful for Wire, Sparker and medium-machine components. Bellowback sites are preferable when you need canisters, lenses or specialized elemental materials. Hunting Grounds also provide repeatable machine groups and usually have nearby merchants or campfires for restocking.
Scan before attacking and mark the component you need. If you want Blaze or another canister resource intact, use Tear or Harvest ammunition to detach the container rather than detonating it. If you want a clean kill, exploit the listed elemental weakness first, then remove valuable parts before looting. Coils come from machine loot and containers rather than one guaranteed species, so hunt machines appropriate to your current area and inspect every carcass and chest.
- Use the Catalogue’s component list to choose a farming target.
- Detach canisters before destroying them when you need their contents.
- Loot machines and nearby containers for coils instead of relying on one species.
Use overrides to split fights, not replace combat planning
Crouch in grass or use terrain to approach an unaware machine. After the override completes, move away from its route so it can engage nearby hostiles without immediately drawing you into the same attack. Mountable machines provide travel; combat machines are temporary allies unless skills extend their duration. If the target becomes alert, break line of sight and wait for it to settle, or restrain it before trying again.
An override is most valuable when it changes the encounter’s shape. Use a large machine to occupy a group while you remove weapons, attack exposed components or retreat to a better position. Do not override a machine beside another patrol if you have no escape route. Save at a nearby campfire before a difficult override or resource run so a failed attempt does not cost a long journey.
- Override from concealment or after restraining the target.
- Move away immediately after a successful override.
- Use the ally to create an opening, then reposition instead of standing in the middle of the fight.
Finish EPSILON during The Forge of Winter
Cauldron EPSILON is part of The Frozen Wilds quest The Forge of Winter and is designed for the expansion’s higher-level combat. The route uses the same core ideas as the base-game facilities: climb yellow surfaces, operate consoles, ride moving structures and follow the path opened for Aloy’s companions. Scan side rooms and collect any datapoints you want while progressing through the facility. Some records were affected by post-release fixes, and missed EPSILON datapoints may be recoverable after the quest, but collecting them during the route is the safest approach.
At the core, deal with the Control Towers as they appear, then fight the Daemonic Fireclaw. Freeze damage is effective against its body, while the Control Towers must be destroyed or overridden before they restore too much health. Keep moving around the arena, avoid standing beneath close-range attacks and use cover while a tower is exposed. After the Fireclaw is defeated, override the core and complete the escape and the following conversations with CYAN and Aratak. The quest awards EPSILON permissions for Fireclaws, Frostclaws and Scorchers. EPSILON is optional for the base-game campaign but required for full Frozen Wilds Cauldron and override completion.
- Complete Firebreak before expecting The Forge of Winter to begin.
- Scan and collect desired EPSILON datapoints during the facility route.
- Finish The Forge of Winter and confirm Fireclaw, Frostclaw and Scorcher overrides are available.
Before you move on
- PSI Overrides are available from The Womb of the Mountain for ordinary early machines such as Watchers, Striders, Chargers and Broadheads.
- Tallnecks have been handled through their separate climb-and-override interactions and are not being counted as ordinary PSI combat overrides.
- The cores of SIGMA, RHO, XI and ZETA have been overridden and their permissions appear in the Machine Catalogue.
- Aloy has used overrides on at least seven different eligible machine types if pursuing the 7 Types of Machine Overridden trophy.
- The resource routine is repeatable: scan the machine, identify the component, match ammunition to the weakness, then harvest, override or disengage according to the goal.
- For Frozen Wilds completion, The Forge of Winter is finished and EPSILON permissions for Fireclaw, Frostclaw and Scorcher are unlocked.
Weapons, Mods and Builds for PS5
Build Aloy around combat roles instead of forcing one weapon to handle every encounter. Keep a Hunter Bow for fast, economical attacks; use a Sharpshot Bow for precision shots, tear work and long-range openings; then reserve the other slots for control, elemental effects or explosives. Weapon coils improve statistics and effects that the weapon’s ammunition already supports, so a coil cannot give a bow an entirely new ammunition type. On PS5, Performance targets 4K at 60 frames per second, Balanced targets 4K at 40, and Quality targets 4K at 30. Performance is generally the easiest mode for aiming and evasive combat, while Quality favors visual detail; Balanced is a middle option for compatible displays. Change equipment before a mission or hunting trip so the loadout matches the machines you expect to face.
1. Establish a flexible four-slot loadout
Use a Hunter Bow as your everyday weapon. Its quick draw and low-cost Hunter Arrows make it suitable for Watchers, Striders, Chargers and exposed components on larger machines. Upgrade to a Carja or Shadow Hunter Bow when merchants offer one, but keep the earlier bow in storage rather than selling it until you know which ammunition and coil combination you prefer.
Purchase a Sharpshot Bow for deliberate precision work. Its Precision Arrows are slower to use but hit harder, while Tearblast Arrows are useful for stripping armor and detachable weapons. Use it from stealth, from high ground or after restraining a machine. Do not rely on it at close range when a Hunter Bow or control weapon can create a safer opening.
Use the Tripcaster when you can predict an enemy route, defend a narrow approach or prepare an ambush. Use the Ropecaster when a large or airborne machine must be held in place immediately. Put a War Bow in the loadout when you need elemental arrows for shock or freeze buildup. Choose a Sling or Blast Sling when you need elemental bombs, explosive area damage or a way to attack through armor without lining up a single weak point.
- Hunter Bow for routine combat and fast component shots
- Sharpshot Bow for precision, tear and long-range attacks
- Tripcaster or Ropecaster for battlefield control
- War Bow, Sling or Blast Sling for elemental or explosive support
2. Match coils to the ammunition you actually use
A weapon coil improves the weapon’s existing statistics or ammunition effects; it does not create a new damage type. Check the ammunition listed on the weapon before installing a coil. A Fire coil is useful on a Hunter Bow that has Fire Arrows, but it cannot make a Sharpshot Bow fire elemental arrows if that weapon does not support them.
For a Hunter Bow, choose damage when you use it to finish ordinary targets, tear when you mainly remove components, and handling when faster draw and recovery are more valuable than maximum damage. For a Sharpshot Bow, damage and tear are the most direct choices. Handling is worthwhile if the bow’s slower draw causes missed shots or leaves you exposed during follow-ups.
A Tripcaster should be modified for the wires you place most often. Damage helps explosive or blast wires, while an appropriate elemental bonus helps wires that apply a supported status. A Ropecaster benefits strongly from handling because faster shots make it easier to tie down a machine before it reaches you. Blast Sling coils should support damage or the elemental ammunition you regularly use. Keep useful spare coils because a better weapon can change the best arrangement.
- Confirm that the weapon supports the effect before installing a coil
- Use damage for direct-kill weapons
- Use tear for component removal and part harvesting
- Use handling when draw, reload or firing speed causes problems
3. Build for stealth and prepared traps
For a stealth-trap setup, combine a Hunter Bow, Tripcaster and Blast Sling, then use the fourth slot for a Sharpshot Bow or War Bow. Enter tall grass or reach high ground, activate the Focus and mark the largest threat, nearby watchers and likely approach paths. Place wires across routes the machines must cross rather than directly beneath a target that is standing still.
Open with a silent Hunter Bow shot against a watcher, a human guard or a removable component. If a machine triggers a wire, use the stagger or elemental opening to reposition. Follow with a Blast Sling bomb when the target is trapped, shocked or funneled into a narrow space. Against groups, avoid spending every wire at the first machine; leave a second line between yourself and the remaining enemies so you retain an escape route.
This setup is strongest before combat begins. If the machines scatter, stop trying to rebuild the whole trap line while under pressure. Move to new cover, use the Hunter Bow to create distance, or switch to the Ropecaster if a large machine is closing rapidly.
- Scan patrol routes before placing traps
- Place wires across approaches and choke points
- Use control effects to create safe explosive openings
- Keep an escape route instead of trapping yourself in one position
4. Build for precision and machine-part damage
Use the Hunter Bow for quick component shots and the Sharpshot Bow for high-value targets. Scan every unfamiliar machine and tag power cells, elemental canisters, weapons, sensors and detachable armor. Remove the part that changes the encounter most: a Ravager cannon, Thunderjaw disc launcher, elemental canister or ranged weapon is usually more important than immediately reducing body health.
Use tear-focused coils on the weapon that performs your component-removal work. After a component is exposed or removed, switch to damage-focused ammunition and aim at the resulting weak point. If the machine is vulnerable to freeze, apply that status with a War Bow or Sling before committing Precision Arrows. Do not repeatedly fire at heavy armor when a detachable component can be removed first.
Keep a fast Hunter Bow available even in a precision build. Sharpshot attacks are valuable when there is distance and time, but a close machine or an alerted human group can punish slow weapon handling.
- Scan and tag components before committing ammunition
- Remove weapons or elemental canisters that alter the fight
- Use tear for parts and damage for exposed weak points
- Carry a fast weapon for close-range emergencies
5. Use a heavy-control setup for difficult encounters
For large machines, flying machines or crowded arenas, equip a Ropecaster, a War Bow or elemental Sling, and a Blast Sling or Tripcaster. Restrain the most dangerous target first, then apply the element that gives you the best opening. Once the machine is vulnerable, switch to damage or tear ammunition and attack exposed components rather than wasting shots on intact plating.
Against flying machines, the Ropecaster can give you time to bring them down or target their weapons. Against charging machines, use terrain, tripwires and ropes together so you are not relying on repeated dodge-rolls. In a mixed group, control the machine that interrupts your attacks or forces you out of cover; do not automatically spread status effects across every target.
Handling coils are particularly useful on a Ropecaster because a missed or delayed shot can leave you exposed. Keep medicine and crafting materials ready before entering an arena, since control ammunition is most effective when you can maintain the setup through several phases.
- Control the machine that poses the immediate threat
- Apply an element before spending expensive damage ammunition
- Attack while the target is restrained or staggered
- Recover behind terrain if the group breaks your setup
6. Adapt equipment for The Frozen Wilds
The Frozen Wilds introduces tougher machines and expansion weapons, so carry both precision and control options. A dependable Hunter Bow, a tear or precision weapon, and either a Ropecaster or elemental weapon provide a stable foundation. Try Banuk weapons when their merchants become available, but replace existing equipment only when the ammunition and handling fit your preferred approach.
Scan Scorchers, Frostclaws, Fireclaws and other expansion machines before selecting ammunition. Target the components that enable their special attacks, then use freeze, fire, shock, tear or restraint according to the machine’s weakness and the current terrain. Do not spend all rare resources on body damage while a dangerous weapon or elemental canister remains attached.
Restock medicine, blaze, chillwater, wire and metal shards before entering remote snowy areas. If a fight fails, return to the nearest campfire or settlement, craft the ammunition you actually need and change the loadout before trying again.
- Carry both precision and control weapons
- Scan new machines before choosing an elemental approach
- Target special-attack components first
- Restock before entering remote expansion areas
7. Choose the PS5 graphics mode for your playstyle
The Remastered edition lists three PS5 graphics targets: Quality at 4K and 30 frames per second, Performance at 4K and 60, and Balanced at 4K and 40. Performance is the most practical starting point for bow aiming, rapid weapon-wheel changes, trap placement and evasive movement. It is especially helpful for precision and heavy-control builds where a missed shot can collapse the setup.
Quality is appropriate when visual detail matters more than responsiveness, particularly during exploration or slower ranged engagements. Balanced sits between the two and can be a good compromise on a display that supports the required refresh mode. Test the same machine hunt in two modes instead of choosing by reputation alone, then keep the mode that makes weak-point tracking and movement most reliable.
The Remastered edition’s visual upgrades, DualSense support and accessibility options do not change the underlying weapon roles or coil rules. Build around the original game’s ammunition system, then use the PS5 mode as a comfort and aiming preference.
- Test Performance during a machine fight
- Use Balanced when its display requirements are available and the middle ground feels better
- Use Quality when image detail is your priority
- Select the mode that produces the most reliable aiming and movement for you
Before you move on
- You have a fast general-purpose bow, a precision or tear weapon, and at least one control or elemental option equipped.
- Each installed coil supports the ammunition and combat role of its weapon.
- You can explain how your current setup handles a small machine group, a large machine and a mixed encounter.
- You have tested at least two PS5 graphics modes and selected the one that gives you the most reliable aiming and movement.
- You have a separate Frozen Wilds plan that includes precision, control, status effects and enough healing supplies.
Stealth, Traps and Combat Tactics
Horizon Zero Dawn Remastered is easiest to control when Aloy decides how the fight will happen before releasing the first arrow. Scan machines with the Focus, identify weapons, detachable components, armor gaps, canisters, patrol routes, and elemental weaknesses, then choose an ambush, a trap line, a restraint, or a stealth takedown. Tripcaster wires control movement, Tear and Tearblast ammunition expose important parts, elemental ammunition creates specific status effects or canister explosions, and blast ammunition punishes enemies that cannot spread out. Against large machines, remove their most dangerous weapons before chasing damage. Use rocks, ruins, elevation, tall grass, and broken sight lines to separate groups. If the engagement becomes chaotic, sprint to cover, heal, craft, and return from a new angle instead of relying on repeated dodge-rolls.
Scan the area and define the opening
Crouch in tall grass, behind a rock, or on elevated terrain before entering a machine site. Use the Focus on every visible machine rather than scanning only the largest target. Check its patrol route, detachable weapons, armor plates, elemental canisters, and highlighted weak points. Tag the most dangerous enemy and note a route to cover before attacking.
A stealth opening should remove an isolated small machine or create a positional advantage without alerting the whole group. A silent strike is appropriate when the target is separated and the approach is safe. If the herd is tightly packed, wait for a patrol to move, override a machine when the area allows it, or reposition until you can begin with a controlled shot. Avoid firing immediately just because a target is visible; the first alarm often determines whether the encounter stays manageable.
- Scan all nearby machines and mark the highest-threat target.
- Identify at least one escape route before beginning the ambush.
- Start from grass, cover, or elevation whenever the area permits.
Lay tripwire traps across a forced route
Use the Tripcaster where the machine is likely to travel: between rocks, across a narrow approach, beside a ruin, at the foot of a slope, or along the route back to your cover. The wire must be anchored to valid surfaces, but the important tactical point is the route it controls. Open ground with several directions of approach is a poor place for a trap because the machine can simply go around it.
Use shock wires when you want a machine disabled long enough to aim at a component, perform a critical strike, or create space. Use blast wires when interruption and damage are more important. Leave room between wires so one trigger does not consume the entire trap line at once. Do not stand directly beside an armed wire, and keep a second retreat path in case the machine circles around the first line.
After placing the wires, make a controlled shot or allow a patrol to notice Aloy, then retreat through the prepared route. Turn only after the machine is committed to the approach. The stagger or explosion is your opportunity to remove a weapon, apply an elemental effect, or land precise shots; it is not a reason to remain in the open after the trap has fired.
- Place wires across a route the machine is likely to use.
- Select shock for control and blast for interruption and damage.
- Keep an alternate retreat path and avoid standing beside your own traps.
Use Tear, Tearblast, and damage ammunition in sequence
Use ordinary Tear ammunition or Tearblast Arrows when the Focus shows a valuable weapon, armor plate, or component that can be removed. Tear ammunition is not a replacement for damage ammunition. Removing a Thunderjaw disc launcher, Ravager cannon, or another dangerous weapon can be more valuable than immediately reducing health, because the dropped weapon may eliminate one of the machine’s strongest attacks.
Once armor is removed or a weak point is exposed, change to Hardpoint, Hunter, or Sharpshot ammunition according to range and target size. Concentration and a stable position make component shots easier, but do not hold the aim so long that another machine reaches Aloy. If a heavy weapon falls, collect it only after checking nearby threats; crossing an active battlefield to pick it up can undo the advantage created by the disarm.
For elemental canisters, use the matching elemental ammunition on the canister itself when you have a clear shot. A successful hit can cause the canister’s elemental explosion and affect nearby machines. This is different from building a machine-wide fire, freeze, or shock state, so follow the Focus information for the target and do not spend ammunition blindly on a resistant component.
- Use Tear or Tearblast to expose or remove a high-value component.
- Switch to damage ammunition after the target’s protection is removed.
- Shoot elemental canisters with their matching element when a safe shot is available.
Restrain large machines before committing to a punish
Against a Thunderjaw, Behemoth, Ravager, Stormbird, or another high-threat machine, begin by removing the weapon or component that most threatens your position. The Focus view tells you what can be detached; do not assume that every leg or armor section is removable. Some leg shots can stagger or disrupt a machine, but they are situational and should not replace targeting a clearly marked weapon or weak point.
The Ropecaster creates a deliberate control window when enough ropes are attached to tie a machine down. Use that window to tear off a weapon, shoot a canister, place a trap, or perform a critical strike if Aloy can reach the machine safely. Ropes are temporary control, not a permanent stun, so prepare the follow-up before firing the final rope.
If several machines are present, keep the largest target between Aloy and the others only when the terrain makes that safe. Otherwise, retreat and separate the group. Fighting a large machine while another enemy attacks from outside the camera view is usually a positioning problem, not a damage problem.
- Target marked weapons and components before general body shots.
- Use the Ropecaster to create a specific follow-up opportunity.
- Separate multiple large machines rather than fighting them in a cluster.
Exploit elemental states and grouped targets
Use the Focus to check the machine’s elemental vulnerability before selecting ammunition. Fire can create a burning state, freeze can increase the damage a machine takes while frozen, and shock can incapacitate a machine when its buildup is completed. The useful follow-up depends on the state: use a burning target’s damage-over-time window to reposition, use a frozen target for concentrated physical damage, and use a shocked target for component shots or a controlled critical opportunity.
Blast Bombs and other explosive ammunition are most useful when an enemy is restrained, staggered, trapped in a narrow area, or grouped with nearby targets. Do not spend explosive ammunition on a fast machine that is still moving freely unless the shot also prevents an imminent attack. Against human groups, use cover and line-of-sight breaks first; explosives are a supplement to positioning, not a substitute for it.
- Confirm the target’s elemental vulnerability before spending elemental ammunition.
- Prepare a damage or component follow-up for each elemental state.
- Use blast ammunition when enemies are grouped, trapped, or unable to evade.
Use verticality and cover without becoming trapped
High ground improves sightlines and can delay a charge, but it is not automatically safe. Machines can circle, attack ledges, or force Aloy off a narrow position. Prefer rocks, ruins, trees, and broken terrain that provide both cover and a second route out. Fire from one side, then relocate after a major attack or after the machine loses track of Aloy; repeated shots from the same exposed position invite a direct counterattack.
Against low-profile or burrowing machines, move the engagement toward solid terrain and avoid a flat open area where attacks can emerge without warning. Against flying machines, use overhangs and ruins to block dives, then shoot during a clear pass. Keep the Focus ready to reacquire a target after it moves behind terrain, but do not remain stationary while scanning if another enemy is closing.
- Choose cover that blocks attacks and has a way out.
- Use elevation for sightlines, not as a promise of complete safety.
- Relocate after major attacks or whenever the machine loses track of Aloy.
Disengage, heal, and reset a failing encounter
When several machines attack at once, stop trading hits. Sprint toward cover, break direct sight lines with rocks, ruins, ridges, or vegetation, and create distance before healing or crafting. Use the medicine pouch when safe, and gather medicinal plants during the retreat only when the immediate area is clear. Standing still in the middle of the encounter to loot or harvest invites another charge.
Once the enemies separate, use the Focus again, replace missing wires, and decide whether the fight is still worth continuing. Recover a dropped heavy weapon only after checking the route and nearby machines. For optional encounters, retreat to a campfire or fast-travel point, restock ammunition and healing supplies, then return from a better angle. For a required quest fight, use the same reset principle: move to a safe edge of the arena rather than repeatedly re-entering the center while depleted.
- Break line of sight before healing, crafting, or harvesting.
- Separate the group before re-engaging.
- Restock and retry optional encounters instead of forcing a depleted fight.
Before you move on
- You can scan an unfamiliar machine, identify its dangerous weapon or elemental component, and choose an opening before attacking.
- You can place a tripwire across a forced route, trigger it safely, and follow the stagger with a component or damage shot.
- You can use Tear or Tearblast ammunition to remove a weapon, then switch to suitable damage ammunition.
- You can restrain a large machine with the Ropecaster and use the control window for a planned follow-up.
- You can disengage from a mixed-machine fight, heal behind cover, reset enemy separation, and return without exhausting your supplies.
- You have defeated at least one large machine by removing or exploiting a component rather than relying on repeated melee attacks.
References for this chapter
Collectibles, Tallnecks, Power Cells and Optional Rewards
Tallnecks reveal regional map information and award experience and a skill point, while collectibles provide optional lore, completion progress, and trophy progress. The five base-game Power Cells unlock the Shield-Weaver outfit through the Ancient Armory side quest. Collect the cells as story locations become available, especially the one inside All-Mother during The Womb of the Mountain, then return to the bunker east of Mother’s Rise. None of these activities is required to reach Face of Extinction. If you are underlevelled or short on supplies, prioritize the Power Cells and useful travel routes, then clean up other collectibles after the campaign.
Use the base-game Tallnecks to reveal the map
Horizon Zero Dawn’s base game has five Tallnecks: Devil’s Thirst in the Nora region, Copper Deeps near the central lake, Sun-Steps in the Carja Sundom, Rustwash in the western desert, and Spearshafts in the southeast of the Carja territory. The Frozen Wilds expansion adds a separate Tallneck at Frostfigures, so do not count that activity as one of the five base-game machines.
Each Tallneck reveals map information for its surrounding region after you climb to its head and override it. The revealed area includes points of interest such as settlements, campfires, machine sites, Cauldrons, Hunting Grounds, Bandit Camps, and other activities. Each completed Tallneck also grants experience and a skill point. Tallnecks are therefore useful navigation targets, but none is required for the main story.
Approach each activity by scanning the Tallneck’s patrol route and nearby machines with the Focus. Look for the intended jump-off point: a ruined building at Devil’s Thirst, elevated terrain or structures at Copper Deeps, an occupied compound at Sun-Steps, debris and raised rock at Rustwash, and a rocky butte at Spearshafts. You do not have to kill every machine in the area. Clear only enemies that can interrupt the climb, or use stealth and wait for the Tallneck to pass the safest ledge. Once Aloy reaches the head, use the Override command, then rappel or climb down carefully.
- Override Devil’s Thirst early if you want the eastern Nora map revealed.
- Treat Sun-Steps as a combat-heavy Tallneck site because Eclipse forces control the area.
- Leave Rustwash and Spearshafts until you can handle their surrounding machine groups or safely bypass them.
- Count Frostfigures separately when checking Frozen Wilds completion.
Start Ancient Armory and collect the first Power Cell
The Ancient Armory side quest begins when you find a Power Cell or investigate the bunker east of Mother’s Rise. The first cell is in the Old World ruin where Aloy fell as a child during A Gift from the Past. You can return there later, so missing it during the opening sequence does not permanently block the armor.
Travel to the ruin and retrace the underground route. Force open the damaged door, continue through the corridors, and break through the rock obstruction near the rear of the facility. The Power Cell is in the room beyond the obstruction. Pick it up before leaving, then check the quest log to confirm that Ancient Armory has been added or updated.
The Ancient Armory itself is in a separate bunker east of Mother’s Rise. You can place cells there as you find them, but the Shield-Weaver outfit cannot be claimed until all five required cells are installed.
- Confirm the Power Cell appears in the inventory before leaving the childhood ruin.
- Activate Ancient Armory in the quest log so the game tracks the objective.
- Do not search merchants for this item; Power Cells are fixed quest collectibles.
Take the All-Mother Power Cell during The Womb of the Mountain
During The Womb of the Mountain, search All-Mother Mountain before following the final exit route. After the Proving sequence, move through the temple interior until the main path leads toward the exit. Locate the locked side room and look for the ventilation opening beside it. Crawl through the duct rather than trying to open the main door. The Power Cell is inside the room beyond the passage.
This is the most important early pickup to make during its original story window. If you leave without it, All-Mother becomes inaccessible for part of the campaign, and you must wait until The Heart of the Nora allows you to return. The cell is not permanently missable, but recovering it later requires additional story progress and backtracking.
- Search the side room before exiting All-Mother.
- Use the ventilation duct beside the locked door.
- If the cell is missing later, advance the story until The Heart of the Nora opens the area again.
Collect the three story-location cells in order
During Maker’s End, climb to the top of the FAS building and complete the main office sequence. Before descending from the highest area, continue upward along the exterior climb route above Ted Faro’s office. The Power Cell is at the top of the tower, above the room used for the story holograms. Search the upper structure before using the descent route.
During The Grave-Hoard, progress through the ruin and solve the rotating hololock door required by the main path. After the door opens, search the room or nearby corridor beyond it for the Power Cell before moving on. It is close to the required route and should be collected before leaving the facility.
During The Mountain That Fell, enter GAIA Prime and follow the mission until Aloy reaches the exterior section after the story scene. When the objective marker points toward the main route and a zipline, pause and inspect the side path leading down toward a cave. Follow the purple-lit passage to its end and take the Power Cell from the shelf, then return to the objective path. This is the final required cell.
- Search above Ted Faro’s office before descending from Maker’s End.
- Inspect the area beyond the Grave-Hoard hololock before continuing.
- At GAIA Prime, take the side path and search the cave before using the intended route onward.
Open the Ancient Armory and claim Shield-Weaver
Return to the bunker east of Mother’s Rise after collecting all five Power Cells. Insert the cells into the power interfaces, then solve the first rotating lock. Read the nearby display as clock positions and set the five symbols from left to right to up, right, down, left, up. This corresponds to twelve o’clock, three o’clock, six o’clock, nine o’clock, and twelve o’clock.
After the first door opens, install the remaining cells and solve the second lock from left to right with right, left, up, right, left. When the clamps release, open the reward container and take the Shield-Weaver Outfit Box. The outfit is not necessarily added as a normal armor item until you open the box from the inventory’s treasure or reward-box section.
Shield-Weaver provides a rechargeable energy shield that absorbs incoming damage while active. The shield temporarily fails after taking enough damage and recharges when Aloy avoids further hits. The outfit has no modification slots, so compare it with a heavily modified alternative before every major encounter. It is especially valuable for long fights, but it does not eliminate the need for healing, cover, elemental attacks, or evasive movement.
- Install all five Power Cells before attempting the final armory lock.
- Use the sequences up, right, down, left, up and right, left, up, right, left.
- Open the Shield-Weaver Outfit Box after claiming it from the armory.
- Equip the completed outfit from the inventory before testing its shield.
Route optional collectibles around existing travel
Vantages, Metal Flowers, ancient vessels, Banuk figures, and world datapoints are optional. They contribute lore, collectible completion, and trophy progress, but they do not unlock Face of Extinction. Collect them when they are close to a current quest, settlement, Tallneck, campfire, or Cauldron instead of crossing the map for one isolated item.
A practical route is to complete Devil’s Thirst while working through the early Nora region, then gather nearby items before leaving for Meridian. Add Copper Deeps and Spearshafts during Carja travel, and collect Sun-Steps and Rustwash when the relevant desert routes are already open. Leave remote items near high-level machines for post-story cleanup. Use campfires and settlements as route anchors, restock before detours, and fast-travel away if a collectible route turns into an unnecessary large-machine fight.
For Frozen Wilds cleanup, treat the Frostfigures Tallneck and Banuk-related collectibles as expansion objectives rather than base-game requirements. The expansion’s collectibles and activities can be completed after the main campaign, so there is no need to delay the final story missions merely to finish every marker.
- Group collectibles by nearby fast-travel points and story destinations.
- Prioritize Power Cells and equipment rewards when resources or levels are limited.
- Use Tallneck map reveals to plan several nearby pickups in one trip.
- Leave dangerous or remote collectibles for post-campaign cleanup if necessary.
Before you move on
- All five base-game Tallnecks show as overridden: Devil’s Thirst, Copper Deeps, Sun-Steps, Rustwash, and Spearshafts.
- If completing The Frozen Wilds, Frostfigures also shows as overridden.
- Ancient Armory is complete and the Shield-Weaver Outfit Box has been opened and equipped or stored in the inventory.
- The five required Power Cells are recorded from the childhood ruin, All-Mother, Maker’s End, The Grave-Hoard, and GAIA Prime.
- Chosen Vantages, Metal Flowers, ancient vessels, Banuk figures, and datapoints are marked complete according to the player’s intended completion target.
- Face of Extinction remains available regardless of whether optional Tallnecks and collectibles are finished.
References for this chapter
- Tallnecks - Horizon: Zero Dawn Walkthrough
- Horizon: Zero Dawn FAQ/Walkthrough - Tallneck locations and progression
- Ancient Armory - Horizon Zero Dawn Walkthrough
- Horizon Zero Dawn Power Cell Locations: All 5 Cells
- Horizon Zero Dawn Ancient Armory Puzzle Codes and Power Cell Locations
- All Horizon Zero Dawn power cells: Ancient Armory guide
Post-Game, Completion Checklist and Trophies
Finish The Face of Extinction and allow the ending sequence to complete. Horizon Zero Dawn then returns you to a pre-final-assault exploration state, which is the intended cleanup state rather than a missing ending. From there, finish selected Cauldrons, Tallnecks, Hunting Grounds, quests, collectibles and The Frozen Wilds. Remastered uses a separate PS5 trophy list with the same general structure as the original, but imported PS4 progress does not automatically unlock the corresponding PS5 trophies. Preserve both a pre-finale save and a current cleanup save when possible, synchronize trophies separately, and back up the Remastered save through PlayStation Plus cloud storage or a full PS5 USB backup.
1. Finish The Face of Extinction and confirm the campaign ending
The base-game campaign is complete when you finish The Face of Extinction and view the ending sequence. Follow the final assault objectives in order, complete the required combat and interaction prompts, and let the closing scenes and credits proceed. Check the Remastered trophy list afterward to confirm that the final story trophy has registered.
The game does not leave the world in a permanently altered post-finale state. After the ending, continuing the game places Aloy in a world state from before the final assault. This is the intended post-game setup: the ending has counted, but the open world remains available for unfinished quests, errands, Cauldrons, Tallnecks, Hunting Grounds, collectibles and The Frozen Wilds.
Use the returned exploration state for cleanup. If you want to replay the final assault, keep a manual save from before starting The Looming Shadow or from another point before the final sequence. Do not overwrite that file with your general exploration save until you are certain you will not need to replay the finale.
- The Face of Extinction is complete.
- The ending sequence and credits have been viewed.
- The Remastered final-story trophy is visible in the PS5 trophy list.
- The returned exploration state is available.
- A pre-finale manual save remains available if replaying the ending matters.
2. Complete The Frozen Wilds main story
The Frozen Wilds is included with Horizon Zero Dawn Remastered, but completing The Face of Extinction does not complete the expansion. Travel to the Cut and begin Into the Frozen Wilds. Follow the expansion story through The Shaman’s Path, For the Werak, Firebreak and The Forge of Winter. These are the essential story missions for the expansion route.
The Hunters Three is optional side content, not a replacement for any of those main story missions. Complete it if you want the associated quest and trophy progress. The Cut also contains additional errands, side quests, machine hunts, weapon upgrades, Bluegleam rewards and collectibles; track these separately from the expansion’s story conclusion.
You may complete The Frozen Wilds before the base-game finale or after it. If you have already finished The Face of Extinction, use the returned open-world state to travel north and start or resume the expansion. For a broad completion target, finish the expansion story first, then review the Cut’s remaining quest markers and trophy requirements.
- Into the Frozen Wilds is complete.
- The Shaman’s Path is complete.
- For the Werak is complete.
- Firebreak is complete.
- The Forge of Winter is complete.
- The Hunters Three and other chosen Cut side activities are complete.
3. Clean up base-game activities and collectibles
Use the map and notebook to define what “complete” means for your run. For a broad gameplay clear, finish every Cauldron and Tallneck, complete the Hunting Grounds trials you intend to record, and review all remaining Side and Errand quests. Tallnecks reveal map information; Cauldrons expand override access; Hunting Grounds provide trial and trophy progress. None is required after the story ending unless it is part of your personal completion goal or trophy plan.
For collectible cleanup, review the map categories for Vantage points, Banuk figures, Ancient Vessels and Metal Flowers. These remain available after the finale. When working toward the Ancient Armory objective, gather the required Power Cells, complete the associated objective and claim the Shield-Weaver outfit. Reaching the bunker without completing the objective and taking the reward is not enough for a completion check.
Before leaving an activity, confirm that its quest reward, trial result, override, Cauldron completion or collectible pickup has registered. A remaining map icon can indicate an available activity rather than an unfinished one, so use the notebook and objective completion state as the final confirmation.
- Chosen or all Cauldrons are complete.
- Chosen or all Tallnecks are overridden.
- Chosen Hunting Grounds trials are recorded as complete.
- Remaining Side and Errand quests have been reviewed.
- Chosen collectible categories are complete.
- The Ancient Armory objective and Shield-Weaver reward are complete if required.
4. Verify the Remastered trophy list
Horizon Zero Dawn Remastered has a separate PS5 trophy list with the same general trophy structure as the original release. Imported PS4 progress does not automatically unlock the corresponding Remastered trophies. Treat an imported save as a way to continue with equipment and world progress, not as proof that the PS5 trophy list is complete.
If you are pursuing the Remastered Platinum, open the Remastered list from the PS5 Control Centre or game hub and review each missing requirement. Story trophies, level trophies, combat actions, Cauldrons, Hunting Grounds, overrides and collectibles should be checked against what you actually performed in the Remastered version. Imported progress may leave some requirements already satisfied in the save, but do not assume that merely loading the save will award every matching trophy.
After the final trophy session, synchronize trophies while signed into the intended PlayStation Network account. Trophy progress is separate from saved-game backup, so a backed-up save cannot restore trophies that have not been synchronized.
- The PS5 Remastered trophy list is selected.
- The original PS4 trophy list is not being used as the completion record.
- Missing Remastered trophies have been reviewed individually.
- Trophies have been synchronized after the final session.
5. Preserve the final save and optional New Game Plus setup
For PlayStation Plus cloud storage, create the manual save you want to preserve, then open Settings → Saved Data and Game/App Settings. Select Saved Data (PS5), then use the upload or synchronization controls for Horizon Zero Dawn Remastered. You can also manage cloud uploads and downloads from the PS5 saved-data menus. Verify the cloud status or upload date before deleting or replacing local saves.
For a local recovery copy, connect a FAT32- or exFAT-formatted USB drive and select Settings → System → System Software → Back Up and Restore → Back Up Your PS5. This creates a full PS5 console backup rather than a simple individual save export. PlayStation notes that trophies are not included in this backup, so synchronize them separately first.
Keep two useful manual saves when possible: one before the final assault and one from your latest cleanup session. Retain a completed-story save if you plan to use the New Game Plus loadout option. Before starting a new run, confirm that the intended save is protected in local storage and, if applicable, in PlayStation Plus cloud storage.
- The latest cleanup save exists locally.
- The save is uploaded to PlayStation Plus cloud storage or included in a completed PS5 USB backup.
- Trophies are synchronized to the correct account.
- A pre-finale save is retained.
- A completed-story save is retained if New Game Plus is planned.
Before you move on
- The Face of Extinction is complete and the ending sequence has been viewed.
- The intended post-finale exploration state is accessible.
- The Frozen Wilds missions Into the Frozen Wilds, The Shaman’s Path, For the Werak, Firebreak and The Forge of Winter are complete if expansion completion is required.
- Chosen Cauldrons, Tallnecks, Hunting Grounds, quests and collectibles are confirmed in the notebook or map.
- The Ancient Armory and Shield-Weaver reward are complete if included in the target.
- The Remastered trophy list has been reviewed and synchronized.
- The final save has been uploaded or included in a completed local PS5 backup.
References for this chapter
- Horizon Zero Dawn Remastered support and release information
- Horizon Zero Dawn Remastered official game page
- Horizon Zero Dawn Remastered trophies are the same as original version, and there’s no auto-pop
- Horizon Zero Dawn Trophy Guide and Roadmap
- Horizon Zero Dawn Remastered's PS5 platinum gets weird with PS4 data
- How to back up and restore PS5 console data
- PlayStation Plus cloud storage for PS5 consoles
- Horizon Zero Dawn quests
- Horizon Zero Dawn: The Frozen Wilds FAQ: Trophies, quests and the new machines
Finishing up
You have viewed the final cutscene and completed The Face of Extinction, including the Master Override interaction on HADES. The game returns Aloy to its intended pre-finale exploration state after the ending sequence.
Optional: You completed The Frozen Wilds storyline and verified its final quest in the Quest Log.
You have saved or backed up the desired final save and synchronized trophy progress.
The Remastered PS5 trophy list is separate from the original PS4 list; imported PS4 trophies do not automatically unlock the corresponding Remastered trophies.
You can return to Meridian and access remaining Cauldrons, Tallnecks, Hunting Grounds, side quests, Frozen Wilds activities and collectible cleanup after the finale.
Choose your next gameScreenshots & video
Game imagery for reference. Follow the written chapters above for the route and strategies.


Sources & references
Our original guide draws on the references below. Check the edition at the top of this page before following controls or unlock requirements.
- Horizon Zero Dawn Remastered official game page
- Horizon Zero Dawn Remastered support and release information
- Horizon Zero Dawn Remastered launches on PS5 & PC October 31, 2024 — PlayStation.Blog
- Horizon Zero Dawn Remastered: A deep dive into its enhancements - PlayStation.Blog
- Lessons of the Wild - Horizon: Zero Dawn Walkthrough
- The Point of the Spear - Horizon Zero Dawn Remastered Walkthrough & Guide
- The Point of the Spear - Horizon Zero Dawn
- Mother's Heart - Horizon: Zero Dawn Walkthrough
- Complete The Proving in Horizon Zero Dawn
- Horizon Zero Dawn Remastered — Guide and Walkthrough — PlayStation 5 — GameFAQs
- A Seeker at the Gates - Horizon Zero Dawn walkthrough
- A Seeker at the Gates – Part 02 - Horizon: Zero Dawn Walkthrough
- Cauldron SIGMA - Horizon: Zero Dawn Walkthrough
- Cauldron Sigma - Horizon Zero Dawn walkthrough
- Horizon Zero Dawn Remastered launches tomorrow: Nixxes details the collaboration — PlayStation.Blog
- The War-Chief’s Trail - Horizon: Zero Dawn Walkthrough - Neoseeker
- The War-Chief's Trail - Seeking Mothers Crown - Walkthrough | Horizon Zero Dawn | Gamer Guides
- Revenge of the Nora - Horizon: Zero Dawn Guide/Walkthrough
- Revenge of the Nora - Horizon: Zero Dawn Walkthrough - Neoseeker
- Into the Borderlands - Horizon Zero Dawn - GameA
- Into the Borderlands - Dervahl's Conspiracy Walkthrough - Gamer Guides
- The Sun Shall Fall - Horizon Zero Dawn Walkthrough - Neoseeker
- Horizon: Zero Dawn FAQ/Walkthrough - Tallneck locations and progression
- Maker’s End - Horizon Zero Dawn Walkthrough - Neoseeker
- The Sun Shall Fall - Horizon Zero Dawn Walkthrough - SuperCheats
- Maker’s End - Horizon Zero Dawn Walkthrough - SuperCheats
- Horizon Zero Dawn Remastered launches tomorrow: Nixxes details the collaboration that upgraded Aloy’s first adventure
- Horizon Zero Dawn – How to Solve Grave-Hoard Puzzle
- The Grave-Hoard - Horizon: Zero Dawn Walkthrough
- To Curse the Darkness - Horizon: Zero Dawn Walkthrough
- To Curse the Darkness - Horizon Zero Dawn
- Horizon Zero Dawn Power Cell location guide
- Deep Secrets of the Earth — Horizon: Zero Dawn Walkthrough — Neoseeker
- The Terror of the Sun — Horizon: Zero Dawn Walkthrough — Neoseeker
- Deep Secrets of the Earth — Horizon Zero Dawn Walkthrough — SuperCheats
- The Terror of the Sun — Horizon Zero Dawn Walkthrough & Guide — GameFAQs
- The Heart of the Nora - Horizon Zero Dawn walkthrough
- The Mountain That Fell - Horizon Zero Dawn walkthrough
- The Heart of the Nora - Horizon Zero Dawn walkthrough
- The Mountain That Fell - Horizon Zero Dawn walkthrough
- The Heart of the Nora - Main Quest Walkthrough
- The Looming Shadow - Horizon Zero Dawn Walkthrough - Neoseeker
- The Face of Extinction - Horizon Zero Dawn Remastered Walkthrough & Guide - GameFAQs
- The Face of Extinction - Horizon Zero Dawn - GameA
- Horizon Zero Dawn How to Get All Optional Allies
- The Face of Extinction - Rise of the Machines Walkthrough
- The Face of Extinction - Horizon Zero Dawn Walkthrough - Neoseeker
- Starting the DLC — Horizon: Zero Dawn: The Frozen Wilds Walkthrough
- The Hunters Three — Horizon: Zero Dawn: The Frozen Wilds Walkthrough
- Firebreak — Horizon: Zero Dawn: The Frozen Wilds Walkthrough
- Firebreak — The Frozen Wilds Walkthrough
- The Forge of Winter — Horizon Zero Dawn: The Frozen Wilds
- Horizon Zero Dawn: The Frozen Wilds FAQ: Trophies, quests and the new machines
- Horizon Zero Dawn Cauldron Locations & Override Unlocks
- Override
- 7 types of machine overridden Trophy in Horizon Zero Dawn
- The Forge of Winter - Horizon: Zero Dawn - The Frozen Wilds Walkthrough
- Machine Catalogue - Horizon Zero Dawn: The Frozen Wilds Walkthrough & Guide
- Weapons - Horizon Zero Dawn Remastered Walkthrough & Guide - GameFAQs
- Horizon Zero Dawn Guide: Weapons Guide
- Modification - Horizon Wiki
- Master Combat: Horizon Zero Dawn Remastered Battle Guide
- Weapons - Gameplay - The Basics | Horizon Zero Dawn | Gamer Guides
- Horizon Zero Dawn - Guide and Walkthrough - GameFAQs
- Tallnecks - Horizon: Zero Dawn Walkthrough
- Ancient Armory - Horizon Zero Dawn Walkthrough
- Horizon Zero Dawn Power Cell Locations: All 5 Cells
- Horizon Zero Dawn Ancient Armory Puzzle Codes and Power Cell Locations
- All Horizon Zero Dawn power cells: Ancient Armory guide
- Horizon Zero Dawn Remastered trophies are the same as original version, and there’s no auto-pop
- Horizon Zero Dawn Trophy Guide and Roadmap
- Horizon Zero Dawn Remastered's PS5 platinum gets weird with PS4 data
- How to back up and restore PS5 console data
- PlayStation Plus cloud storage for PS5 consoles
- Horizon Zero Dawn quests
About the game & collecting notes
- Platform
- Sony PlayStation 5
A full, campaign-focused walkthrough for Horizon Zero Dawn Remastered on PlayStation 5. This guide covers the entire main story from A Gift from the Past through the canonical ending (Face of Extinction), optional Frozen Wilds expansion content, PS5 settings and performance modes, combat and build guidance, cauldrons and machine tactics, and a post-game completion checklist.
Darryl Polo
Darryl Polo writes about emulation and retro games. What changes when an old favorite moves to another setup? That question connects his interest in tinkering with the games that made the hardware worth keeping.
Our editorial standardsFound a step that needs another look? Help us improve this guide.