
Hogwarts Legacy (PS5) — Complete Campaign Walkthrough
A PS5-focused campaign walkthrough to finish Hogwarts Legacy’s full single-player main-quest sequence on the PlayStation 5 edition. It covers prologue setup, core mechanics, classes and Assignments, Keeper Trials, the route through Wand Mastery and The Final Repository, the Ranrok battle, the post-story quests Weasley’s Watchful Eye and The House Cup, and a concrete post-credits save and completion checklist. Optional chapters cover companion stories, PS5 settings and cleanup without confusing them with required campaign progression.


Find a copy
Hogwarts Legacy Sony PlayStation 5
We may earn a commission if you buy through these links, at no extra cost to you. As an Amazon Associate I earn from qualifying purchases.
Opens retailer search results. Check the model, edition, seller, availability and current price before buying.
Before you begin
You are the new fifth-year at Hogwarts with a secret tied to Ancient Magic.
This guide is written for the PS5 edition and includes practical notes for DualSense, graphics modes, accessibility and supported PlayStation conveniences.
Follow the chapter order through the four Keeper Trials, Wand Mastery, The Final Repository and the Ranrok confrontation.
The central conflict ends in The Final Repository, but the full main-quest sequence continues with Weasley’s Watchful Eye, then requires you to reach Level 34 before The House Cup becomes available.
Optional chapters explain companion quests, exploration and post-campaign cleanup without presenting them as prerequisites for the campaign ending.
Your final completion check is the House Cup ceremony, followed by the credits, return to free exploration and a protected post-ending manual save.
Set yourself up for the run
Update PS5 system software and install the latest Hogwarts Legacy PS5 patches before starting; the PS5 edition supports DualSense, Activity Cards and PS5-specific fixes.
(Check developer/WB support for patches.)
Decide your PlayStation preference: Performance (60 fps target) or Fidelity (30 fps raytracing target) in Settings — pick what you prefer before deep progression and keep a note of it.
The game allows graphics mode changes on PS5 via the in‑game graphics options and PS5 Game Presets can conflict with those settings.
Set DualSense preferences: enable haptic feedback and adaptive triggers if you want immersion; confirm controller mappings in Accessibility → Input if you need custom layouts or single‑stick camera options.
Plan save discipline: Hogwarts Legacy on consoles supports autosaves and manual saves — use multiple manual save slots before key fights or story choices to preserve options and reduce restart time.
Decide an early talent/role focus (spell damage/offense, defense/support, or utility/exploration).
This will shape which classrooms, quests and side activities you prioritise for specific perks and gear upgrades.
Enable any accessibility options you need (text size, haptics, aim assist and controller remapping) early.
The PS5 edition exposes several accessibility settings that can reduce frustration during the campaign.
Familiarise yourself with the Tool Wheel, Field Guide and Map menus.
Unlocking Floo Flames (fast travel nodes) and the broom early reduces wasted traversal time during the campaign.
Prepare basic consumables: learn potion and crafting basics early so you have Wiggenweld and stamina potions before longer fights or the final Repository run.

Prologue — Character Creation, Difficulty and First Save
Create your student, choose and record a difficulty, complete The Path to Hogwarts, select a house during the Sorting Ceremony, and establish reliable manual saves as soon as saving becomes available. The prologue is a guided route through the opening ruins, Gringotts Vault 12, the ancient-magic chambers, and the first Guardian fights. It teaches Basic Cast, Revelio, Lumos, Protego, and Stupefy. The Field Guide is not fully introduced during the opening escape; it becomes part of normal play during the first Hogwarts quests. Manual saving is unavailable during the earliest tutorial, so use the opening autosaves until the Sorting Ceremony is complete.
1. Create your student and record the starting difficulty
From the title screen, choose New Game and complete the character creator. Set the face, hair, complexion, accessories, voice, voice pitch, and first and last names. These choices are primarily cosmetic. There is no dormitory selection in the character creator, and your Hogwarts house is chosen later during the Sorting Ceremony.
Select Story, Easy, Normal, or Hard before confirming the character. Write down the selected setting if you want a record of the campaign baseline. Difficulty affects combat and puzzle pressure. Story difficulty makes spell-learning minigames that require precise movement unable to fail and removes time-sensitive puzzle pressure. You can change difficulty during normal play, so choose the setting that fits your preferred balance rather than treating it as a permanent commitment.
- Character appearance, name, voice, and voice pitch confirmed.
- Starting difficulty recorded.
- No house or dormitory choice expected during character creation.
2. Follow Professor Fig through the opening ruins
After the opening scenes, control begins during the journey with Professor Fig. Drink the Wiggenweld Potion when prompted, then follow Fig along the marked route. Stay near him rather than attempting to leave the guided area; the opening is designed to teach movement, camera control, interaction prompts, and the objective trail.
When the first barrier blocks the route, use Basic Cast with R2 as instructed. Continue across the ruins, examine the marked ancient structures, and interact with the highlighted magical point when the objective changes. A chest or side path may be available in the ruins, but it is optional and does not affect completion of The Path to Hogwarts.
- Wiggenweld instruction completed.
- First barrier cleared with Basic Cast.
- Ruins exploration objective advanced.
3. Reach Gringotts and learn Revelio
Follow the route to the magical object that transports you to Gringotts. Approach the banker and wake him when prompted, then remain with the escort during the ride to Vault 12. You may inspect the nearby chest before entering the vault, but do not leave the marked area while the quest objective is active.
Inside Vault 12, complete the spell-learning sequence for Revelio. On PS5, Revelio is assigned to the left direction on the D-pad after it is learned. Cast it at the sealed wall to reveal the door symbol, then interact with the revealed entrance. In the dark passage beyond, stay close to Professor Fig and follow the visible route until you reach the next glowing magical point.
- Gringotts transition completed.
- Revelio learned and cast on the hidden door.
- Vault 12 passage entered.
4. Learn Lumos and solve the first statue encounter
Interact with the glowing point in the dark chamber, then cast Revelio to reveal the statue. Complete the spell-learning sequence for Lumos. On PS5, hold R2 and press Triangle to cast or extinguish Lumos. Keep Lumos active while following the statue’s reflected light and move until the statue lines up correctly with its reflection.
The Guardian statues then attack. Wait for the incoming-attack prompt and press Triangle to use Protego. Complete the tutorial requirement, then defeat the Guardians with Basic Cast using R2. Keep moving around the arena and do not worry about conserving resources; the prologue is teaching timing, not testing your final build.
- Lumos learned and activated.
- Statue reflection aligned.
- Guardian tutorial completed with Protego and Basic Cast.
5. Follow the wisps and solve the three-statue puzzle
After the first Guardian fight, cast Lumos and follow the magical wisps through the chamber until you find the next glowing point. Interact with it, then use Revelio to reveal the statues needed for the second puzzle. Cast Lumos and position yourself so the three statues align with their reflections at the same time. The statues follow your position, so adjust your location rather than trying to move each one independently.
Once the puzzle activates, defeat the next Guardian group with Basic Cast and Protego. During this encounter, hold Triangle while Protego is active to perform the Stupefy counterattack when the tutorial permits it. Stupefy stuns the target and creates a safer opening for Basic Cast.
- Second magical pool reached.
- All three statue reflections aligned.
- Stupefy counterattack performed.
- Second Guardian group defeated.
6. Finish The Path to Hogwarts and complete sorting
Continue using Lumos to follow the wisps until you find the next interaction point. Enter the opened passage and approach the central Pensieve or memory sequence. The remaining scenes include the encounter with Ranrok and the escape from the vault area. Follow the objective markers; no optional exploration is required to complete the quest.
The prologue ends when you arrive at Hogwarts and complete the Sorting Ceremony. Answer the Sorting Hat prompts, then choose the house you want when the game gives you the final selection. Your house changes the common room, certain dialogue, and one early house-specific quest route, but every house can complete the same main campaign. The house cannot be changed later on that character.
- The Path to Hogwarts completed.
- Sorting Ceremony completed.
- House selected and common-room arrival reached.
7. Create the first reliable manual saves
Do not expect to make a manual save immediately after starting New Game. During the prologue, rely on the game’s autosaves. Once sorting is complete and you have normal control in Hogwarts, open the Field Guide or pause menu and locate the Save option. Create a manual save in a clearly identifiable slot, such as Post-Sorting, and record the slot and timestamp.
The Field Guide is introduced as part of the first Hogwarts orientation quests rather than being a complete prologue tutorial. Continue into those opening quests until the game gives you normal access to the Field Guide’s quest and map functions, then create a second manual save in a different slot. This gives you one house-and-arrival baseline and one save after the opening Hogwarts flow.
- First manual save created after the Sorting Ceremony.
- Second manual save created after normal Hogwarts quest access is established.
- Save slots and timestamps recorded.
Before you move on
- A student has been created and the selected difficulty has been recorded.
- The Path to Hogwarts is complete and the Sorting Ceremony has assigned a house.
- Basic Cast, Revelio, Lumos, Protego, and Stupefy have all been learned or demonstrated during the opening route.
- The character has reached Hogwarts with normal menu access.
- At least two separate manual saves exist: one after sorting and one after the first Hogwarts orientation flow, with their slots and timestamps noted.
Tutorial Quests — Learning Core Spells and the Field Guide
After the Sorting Ceremony, complete Welcome to Hogwarts, attend both early classes, and meet Professor Weasley to begin Weasley After Class. The opening lessons teach the Wizard’s Field Guide, Revelio, map navigation, Floo Flame travel, spell-learning, shield colors, Protego, dodge timing, and the basic combat loop. Charms Class awards Accio. Defence Against the Dark Arts Class awards Levioso and uses a supervised duel with Sebastian Sallow to teach shield breaking and Protego counters. After both classes, Weasley directs you to Professor Ronen’s Assignment. Collect the two marked flying Field Guide Pages with Accio, return to Ronen, and learn Reparo. Complete this sequence before treating the game as a free-exploration adventure. Set up your first four-spell loadout, inspect the Tool Wheel for consumables, and create a manual save after the assignment so the tutorial state is easy to recover.
Accept the Wizard’s Field Guide during Welcome to Hogwarts
After the Sorting Ceremony, follow the objective to meet Professor Weasley outside your common room. Stay with her through the castle tour until she gives you the Wizard’s Field Guide. This is the main menu for quests, maps, gear, collections, challenges, and later spell management, so use the Field Guide whenever the game pauses for an instructional prompt.
Cast Revelio when Weasley asks. With the default PS5 controls, Revelio is D-pad Left; if you changed the control scheme, follow the on-screen prompt instead. Move toward the revealed floating Field Guide Page and use the displayed collect input. This page completes the tutorial objective. You do not need to begin searching Hogwarts for every page yet.
- Receive the Wizard’s Field Guide from Professor Weasley.
- Cast Revelio.
- Collect the tutorial Field Guide Page.
- Open the Field Guide and confirm that the Map and Quests sections are available.
Complete the map and Floo Flame lesson
Continue following Weasley until she explains the castle map and Floo Flames. Open the map from the Field Guide and select the Hogwarts map layer when the tutorial directs you there. The map separates Hogwarts, Hogsmeade, and the wider Highlands, so check the active layer before selecting a destination.
When Weasley asks you to travel, select the indicated discovered Floo Flame and confirm using the prompt shown on screen. The game handles the confirmation through the displayed button; do not rely on a presumed hold input. Later, any Floo Flame you discover can be used for fast travel from the appropriate map layer. If a flame is not yet discovered, travel to the area normally and activate it when its interaction prompt appears.
- Open the Field Guide map.
- Select the correct Hogwarts map layer.
- Complete the prompted Floo Flame travel lesson.
- Return to the active quest marker after the demonstration.
Attend Charms Class and learn Accio
Track Charms Class and follow the quest marker to Professor Ronen’s classroom in the Astronomy Wing. Enter the classroom and begin the lesson. Spell-learning uses a short tracing exercise: guide the wand icon along the path, avoid the red obstacles, and press the indicated button when the moving icon reaches a marked point. If you miss an input, continue or repeat the exercise as directed by the game.
After learning Accio, use it during the classroom exercise, including the Summoner’s Court demonstration. On the default PS5 layout, hold R2 and press the face button assigned to Accio. When the lesson ends, open the spell-management screen and verify that Accio occupies one of the four slots in your initial active spell set. Accio is a yellow Control spell and will be useful for breaking matching enemy shields later.
- Attend Charms Class.
- Complete the Accio spell-learning exercise.
- Use Accio in the classroom activity.
- Confirm Accio is assigned to an active spell slot.
Attend Defence Against the Dark Arts Class and learn Levioso
Track Defence Against the Dark Arts Class to the classroom in the Defence Against the Dark Arts Tower. Complete the spell-learning exercise to obtain Levioso, then follow the lesson to the duelling platform. The duel with Sebastian Sallow is the first practical combat tutorial involving enemy shields and incoming attacks.
Sebastian begins with a yellow shield during the intended tutorial sequence. Cast Levioso to break that shield, then use Basic Cast attacks while he is exposed. When the warning indicator appears above your character, press Triangle to cast Protego. Hold the Protego input when the game presents the counter opportunity to perform Stupefy. If an attack is not safe to block, use the dodge input shown on screen and reposition rather than standing in the impact area.
- Attend Defence Against the Dark Arts Class.
- Learn Levioso.
- Break Sebastian’s yellow shield with Levioso.
- Use Protego during the duel.
- Hold the Protego input when prompted to perform Stupefy.
Set up the first spell loadout and practice combat
After the classes, open the spell-management screen and inspect the active spell set. The initial set provides four spell slots. Place Accio and Levioso where their positions are easy to recognize, and keep Basic Cast available. Additional spell sets are unlocked later through Core talents, so do not expect to manage several sets during this first lesson.
Use the next required combat encounter to practice the basic loop: identify a shield color, cast a spell from the matching category, follow with Basic Cast attacks, and react to warning indicators with Protego or dodge. Accio and Levioso are both Control spells, while red Damage spells and purple Force spells are learned later. Do not repeatedly use Basic Cast against an active shield and expect it to break; use the matching spell category or the specific counter the encounter provides.
- Confirm Accio and Levioso are assigned.
- Keep Basic Cast available.
- Break at least one shield with the matching spell category.
- Use both Protego and dodge during live combat.
Begin Weasley After Class and complete Professor Ronen’s Assignment
After both classes are complete, meet Professor Weasley in the Transfiguration Classroom to start Weasley After Class. She explains the plan for replacing your lost supplies and asks you to complete Professor Ronen’s Assignment before the Hogsmeade visit. The companion choice for the later Hogsmeade trip is not a permanent campaign branch, so choose either available option according to preference.
Track Professor Ronen’s Assignment and speak with Ronen in the Transfiguration Courtyard. He asks for two flying Field Guide Pages. The first is near the broken statue close to Ronen’s position. The second is inside the Defence Against the Dark Arts Tower, flying above the stairs. Aim at each page, hold R2, and press the face button assigned to Accio to pull it to you. Return to Ronen after collecting both pages, complete the spell-learning exercise, and learn Reparo. Cast Reparo on the marked damaged object when instructed.
- Meet Professor Weasley in the Transfiguration Classroom.
- Start Weasley After Class.
- Speak with Professor Ronen in the Transfiguration Courtyard.
- Collect both marked flying Field Guide Pages with Accio.
- Return to Ronen and learn Reparo.
- Repair the marked object with Reparo.
Inspect the Tool Wheel and create a recovery save
After the Ronen assignment, open the Tool Wheel using the displayed PS5 prompt and inspect its available slots. The Tool Wheel is used for consumables and other tools once you acquire them; it is not the mount system, and you do not need a broom or mount during this chapter. Equip consumables only when you have them, and follow the on-screen prompt rather than assuming a fixed button if the controls have been remapped.
Finish the current Weasley After Class objectives and verify that the next main quest points you toward the Hogsmeade visit. Before leaving the tutorial sequence, make a manual save in a clearly identifiable slot. This save should preserve the state after the early classes, Reparo, and the assignment, giving you a reliable recovery point if you later want to revisit the opening without relying only on autosave.
- Open and inspect the Tool Wheel.
- Confirm that Accio, Levioso, and Reparo appear in the spell inventory.
- Complete the current Weasley After Class objectives.
- Verify that the next main quest leads toward Hogsmeade.
- Create a manual save after the tutorial assignment.
Before you move on
- Welcome to Hogwarts is complete and the Wizard’s Field Guide is available.
- The Map and Quests sections can be opened from the Field Guide.
- Accio, Levioso, and Reparo appear in the spell inventory.
- The player has broken an enemy shield with the appropriate spell category.
- The player has used Protego and performed or attempted the prompted Stupefy counter.
- Weasley After Class has progressed through Professor Ronen’s Assignment.
- The next main quest points toward the Hogsmeade visit.
- A manual save exists after the early class and Reparo sequence.
Hogwarts Hub — Map, Classes, and Early Sidequests
Use Hogwarts and Hogsmeade as the first campaign hubs, but follow the main quest markers instead of trying to clear every castle activity. Complete the opening classes, Weasley After Class, Professor Ronen’s Assignment, and Welcome to Hogsmeade. Continue through the intervening early story quests until Trials of Merlin unlocks your house-specific route to Richard Jackdaw. Gryffindor players complete The Hunt for the Missing Pages; Ravenclaw players complete Ollivander’s Heirloom; Hufflepuff players complete Prisoner of Love; and Slytherin players complete Scrope’s Last Hope. These four routes converge before Jackdaw’s Rest. Complete Professor Hecat’s second Assignment when it becomes available, then finish Jackdaw’s Rest. Classes and Assignments primarily unlock spells, experience, and story access; they do not directly provide talent points. Activate useful Floo Flames, keep gear current, and leave optional castle puzzles and sidequests for convenient returns.
Finish the opening class route and Professor Ronen’s Assignment
After the opening tutorial, keep the current main quest active and complete Defence Against the Dark Arts Class, Charms Class, and Weasley After Class. These quests introduce the castle’s main wings and establish Professor Weasley’s early instructions. Some doors, puzzles, and rooms remain unavailable because they require later spells or story milestones, so do not treat every visible marker as an immediate objective.
When Weasley After Class is complete, select Professor Ronen’s Assignment from the Assignments section if it is not already active. Travel to the Transfiguration Courtyard, speak with Ronen, and collect the two flying Field Guide pages: one is near the damaged statue in the courtyard area and the other is in the Defence Against the Dark Arts Tower. Use Revelio if the pages are difficult to see, track them in the air, and cast Accio when they pass within range. Return to Ronen, learn Reparo, and repair the nearby statue.
Completing Ronen’s Assignment unlocks Welcome to Hogsmeade. It is an immediate spell-training requirement, not an optional activity, while unrelated classroom collectibles remain optional.
- Complete Defence Against the Dark Arts Class, Charms Class, and Weasley After Class.
- Collect both flying Field Guide pages for Professor Ronen.
- Learn Reparo and repair the damaged statue.
- Confirm Welcome to Hogsmeade is available.
Use Floo Flames and the correct Hogwarts map layer
Walk close to any unlit Floo Flame encountered on the required route. Prioritize the nodes near the Defence Against the Dark Arts Classroom, Transfiguration Classroom, Central Hall, Transfiguration Courtyard, and other locations you are revisiting for assignments. You do not need to activate every Floo Flame in Hogwarts during this chapter.
For castle travel, open the map and select the Hogwarts map layer rather than Hogsmeade or the Highlands. Zoom into the appropriate wing before selecting a green Floo Flame. A classroom may appear absent when the map is showing the wrong region or wing, even though the node has already been activated.
Use fast travel to return to professors and quest areas, but do not abandon a tracked objective merely because a nearby optional activity appears. The active quest marker remains the reliable route.
- Activate useful Floo Flames encountered on the required path.
- Use the Hogwarts map layer for castle travel.
- Check the correct Hogwarts wing if a destination seems missing.
Complete Welcome to Hogsmeade and gather the required supplies
Track Welcome to Hogsmeade and meet either Natty Onai or Sebastian Sallow at the designated Hogwarts exit. The choice changes the companion accompanying you but does not change the required campaign route. Follow the path to Hogsmeade and activate the Hogsmeade Floo Flame when you reach the village.
In Hogsmeade, visit the marked shops and purchase the required quest items: a wand from Ollivanders, spellcraft or recipe supplies from Tomes and Scrolls, and combat supplies from J. Pippin’s Potions and the Magic Neep as directed by the objective markers. The exact shopping order is not important; the quest updates as each required shop visit is completed.
After the supply visits, investigate the troll attack, defeat the Armored Troll, and repair the damaged area with Reparo. The fight is a good place to practice Protego, dodge red-warning attacks, and use Ancient Magic when the prompt becomes available. Speak with the shopkeeper afterward and return to Hogwarts when the quest directs you.
- Travel to Hogsmeade with Natty or Sebastian.
- Activate the Hogsmeade Floo Flame.
- Visit every shop required by the active objective.
- Defeat the Armored Troll and complete the repair objective.
- Finish Welcome to Hogsmeade.
Follow the intervening early story until the house quest appears
After Welcome to Hogsmeade, continue the main quest markers rather than going directly to Jackdaw. The game first routes you through early Hogwarts and companion story beats, including The Locket’s Secret, Professor Hecat’s Assignment 1, Secrets of the Restricted Section, Tomes and Tribulations, Herbology Class, Potions Class, The Girl from Uagadou, and Trials of Merlin. The precise order in which some available quests are completed can vary slightly, so use the active main quest and prerequisite markers.
Complete Professor Hecat’s first Assignment when it is required or conveniently available to learn Incendio. The Assignment provides spell progression and combat practice, not a talent point. Professor assignments should be treated as spell gates when the campaign requires their rewards; ordinary classes and optional student activities can wait.
Trials of Merlin introduces the open-world puzzle system and leads into the stage where the house-specific Richard Jackdaw quest becomes available. Merlin Trials beyond the introductory objective are optional and are not required for Jackdaw’s Rest or the later campaign.
- Complete the early main quests required after Welcome to Hogsmeade.
- Learn Incendio from Professor Hecat’s first Assignment when required.
- Complete the introductory Trials of Merlin objective.
- Watch for the house-specific Jackdaw quest in the main quest log.
Complete the house-specific Jackdaw lead-in
The quest name depends on your selected house. Gryffindor players complete The Hunt for the Missing Pages. Ravenclaw players complete Ollivander’s Heirloom. Hufflepuff players complete Prisoner of Love. Slytherin players complete Scrope’s Last Hope. These are alternative versions of the same campaign stage, not four quests that one character must complete.
Follow the quest marker and its Charmed Compass or objective path. Each route provides access to Richard Jackdaw’s story through different house-specific scenes and locations. Hufflepuff’s Prisoner of Love includes a distinctive Azkaban visit, while the other houses remain on their respective routes; none of the variations changes the final requirement to complete Jackdaw’s Rest.
For the Gryffindor route, follow Nearly Headless Nick, obtain the rotten roast beef from the Hogwarts kitchens, meet the Headless Hunt in the Hogsmeade cemetery, destroy the quivering pumpkins until Jackdaw is found, and speak with Richard Jackdaw. Do not describe these Gryffindor objectives as universal instructions for the other houses.
- Identify the house-specific quest in the main quest log.
- Complete the version assigned to your house.
- Meet Richard Jackdaw or complete the final house-route objective that leads to him.
- Do not attempt to complete the other houses’ versions on this character.
Learn the required spell and finish Jackdaw’s Rest
Before Jackdaw’s Rest, complete Professor Hecat’s second Assignment when it appears and learn Expelliarmus. The quest may not advance to Jackdaw’s Rest until this spell requirement is satisfied. Return to Hecat after completing her listed combat objectives and finish the spell-learning sequence.
Track Jackdaw’s Rest and meet Richard Jackdaw near the Forbidden Forest. Follow him to the cave entrance and interact with the birdbath to provide the password. Enter the cave, defeat Ranrok’s Loyalists, and proceed into the ruins where Jackdaw died.
Inside the ruins, activate the three circular seals at the locked gate with Basic Cast to form the bridge. Continue through the dungeon, handling enemy groups and following the objective marker. When you reach Jackdaw’s remains, collect the missing pages and survive the resulting attack. Continue through the remaining ruin route, activate the Map Chamber, and speak with the portraits as directed.
Jackdaw’s Rest is the completion point required before the next chapter’s broom and wider progression route. It also unlocks the Talents interface, so this is the first point at which talent points become an active build-planning concern.
- Complete Professor Hecat’s second Assignment and learn Expelliarmus.
- Meet Richard Jackdaw at the Forbidden Forest.
- Give the password at the birdbath and enter the cave.
- Defeat the Loyalists and activate the three circular seals.
- Collect the missing pages from Jackdaw’s remains.
- Complete Jackdaw’s Rest and activate the Map Chamber.
Keep optional activities separate from campaign progress
Crossed Wands, Summoner’s Court, The Daedalian Keys, castle puzzles, additional Merlin Trials, student relationship quests, and ordinary sidequests are optional during this chapter. Complete them when they are nearby or when you want practice, experience, gear, or cosmetic rewards, but do not postpone the required route to clear every marker.
If a door or chest is locked, leave it for a later return instead of repeatedly testing it. Alohomora progression, later spells, and story milestones open areas that are intentionally inaccessible during this stage. Gear management is useful, but do not keep weak equipment solely for its appearance; use Change Appearance to preserve a preferred look while equipping stronger gear.
Classes and Assignments provide spells, experience, and access to story content. They do not directly award early talent points. Talent points become relevant after Jackdaw’s Rest unlocks the Talents system and the character begins earning them through leveling.
- Do optional activities only when they fit the current route.
- Leave spell-gated rooms and locked rewards for later.
- Equip stronger gear and sell or dismantle unwanted low-level equipment when appropriate.
- Confirm optional content is not blocking the main quest.
Before you move on
- Weasley After Class and Professor Ronen’s Assignment are complete.
- Reparo has been learned and the damaged statue has been repaired.
- Welcome to Hogsmeade is complete, including the required Hogsmeade supply visits and Armored Troll encounter.
- The early main quests leading to the introductory Trials of Merlin objective are complete.
- The correct house-specific Jackdaw quest has been completed.
- Professor Hecat’s second Assignment is complete and Expelliarmus has been learned.
- Jackdaw’s Rest is marked complete.
- The Map Chamber has been activated and the Talents interface is available.
- Useful Hogwarts and Hogsmeade Floo Flames are active, gear is equipped, and optional activities are not blocking the next main quest.
- The next chapter can begin with Jackdaw’s Rest complete and the campaign ready to move into broom and wider exploration progression.
References for this chapter
- Hogwarts Legacy Walkthrough: Main Quest Order and Missables
- Hogwarts Legacy: Professor Ronen’s Assignment Walkthrough
- Professor Ronen’s Assignment — Hogwarts Legacy Quest
- Weasley After Class — Hogwarts Legacy Walkthrough
- Hogwarts Legacy: How to Fast Travel Using Floo Flames
- The Hunt for the Missing Pages: Gryffindor Quest Walkthrough
- Jackdaw’s Rest — Hogwarts Legacy Walkthrough
- Hogwarts Legacy: Jackdaw’s Rest Walkthrough
- Hogwarts Legacy main quests: All main missions in order
Exploration Basics — Floo Flames, Broom and Mount Unlocks
After completing Jackdaw’s Rest, attend Madam Kogawa’s Flying Class at Hogwarts. The lesson teaches the basic flight course and unlocks broom purchases at Spintwitches Sporting Needs in Hogsmeade; you still need to buy and equip a broom before you can fly freely. On PS5, hold L1 and press Circle to summon the broom in an allowed outdoor area. Use the broom to connect distant objectives, but rely on Floo Flames whenever you are inside Hogwarts, in Hogsmeade, in a dungeon or in another restricted zone. A flying mount becomes available later through The High Keep, which unlocks Highwing and uses the same mount wheel with Triangle instead of Circle.
1. Complete Jackdaw’s Rest and start Flying Class
Continue the main story through your house-specific Jackdaw investigation and then complete Jackdaw’s Rest. Flying Class becomes available after that quest, with a recommended level of 6. If the quest marker does not appear immediately, open the quest log and select Flying Class from the main-quest list rather than searching the castle manually.
Travel to the Flying Class Lawn and speak with Madam Kogawa. The lesson is a short tutorial and does not require special gear or consumables. Follow the objective markers to mount the practice broom, then fly through the first set of elevated rings. Keep the next ring centered in your view before turning; abrupt camera corrections are more likely to make you miss a ring than a slow approach.
- Jackdaw’s Rest is complete.
- Flying Class is listed as an available main quest.
- You have reached Madam Kogawa at the Flying Class Lawn.
2. Finish the lesson and unlock broom purchases
Complete the second ring course around the Hogwarts grounds, then follow Everett Clopton when he leads you on the unauthorized flight route. This is part of the Flying Class quest and is required to finish the lesson. Land when the objective directs you back to the courtyard, dismount and speak with Madam Kogawa to complete the quest.
Flying Class unlocks the ability to buy a personal broom; it does not place a permanent broom in your inventory. After the quest ends, travel to Hogsmeade and visit Spintwitches Sporting Needs. Speak with Albie Weekes if the shop or purchase prompt is not active. The shop is near the South Hogsmeade Floo Flame.
- The ring courses and Everett’s flight are complete.
- Flying Class is marked complete in the quest log.
- Spintwitches Sporting Needs is open and Albie Weekes can be spoken to.
3. Buy, equip and test a broom
Purchase one broom from Spintwitches Sporting Needs. The available broom designs are appearance options rather than different early handling classes, so select the design you prefer and keep enough Galleons for other useful purchases. Broom performance improvements come later through Albie Weekes and the Flight Test side quests; those upgrades are optional for the main campaign.
Open the Gear menu and verify that the broom is equipped in the broom slot. Leave Hogsmeade before testing it, because the town is a no-fly area. Walk or use the Hogsmeade Floo network to reach an open field outside the restricted boundary.
- A broom has been purchased.
- The broom is equipped in the Gear menu.
- You are outside Hogsmeade in an open area where flight is permitted.
4. Use the PS5 broom controls
Hold L1 to open the Tool Wheel, then press Circle to summon and mount the equipped broom. The combination may register before the wheel fully appears, so press Circle while continuing to hold L1. If nothing happens, check that you are outdoors, not in combat, and not inside a marked restricted area.
Use the Left Stick for horizontal movement and the Right Stick to control the broom’s vertical movement and camera direction as shown by the in-game control display. R2 provides forward flight or the faster flight setting, while L2 activates the speed boost. Circle dismounts. Press Right on the D-pad to display the current flying controls if you need to check the layout during practice.
Begin with short flights between visible landmarks. Practice rising over a low obstacle, reducing speed before a turn, and landing in a clear patch of ground. The broom is most useful for crossing the Highlands, but it is not a substitute for fast travel when the destination is inside a building or restricted quest area.
- L1 plus Circle summons the broom in a permitted area.
- You can use the Left Stick and Right Stick without losing control of altitude.
- You can use R2, L2 and Circle for movement, boost and dismount.
5. Establish a useful Floo Flame network
Floo Flames activate when you approach their green markers in the world. Use Revelio and the World Map to find them while moving between objectives. Prioritize flames at Hogwarts exits, Hogsmeade, hamlets, major dungeon entrances and locations connected to active main or companion quests.
Do not spend time trying to activate every flame as soon as it appears. Instead, activate the flames that lie along your current route and at the nearest settlement before continuing. Once a flame is active, open the World Map, select its icon and fast-travel there when you are not in combat or another state that blocks travel. A route-based network prevents backtracking without turning early exploration into a map-clearing task.
- The Hogwarts and Hogsmeade flames on your current route are active.
- You have activated at least one Highlands flame near an early objective or settlement.
- You have tested fast travel from the World Map.
6. Unlock and use a later flying mount
A flying mount is not available immediately after Flying Class. Continue the main story until The High Keep, the quest in which you help Natty and rescue Highwing. Completing The High Keep unlocks Highwing as a flying mount; additional mount availability depends on the edition or content you own and on later story progression.
In a permitted outdoor area, hold L1 and press Triangle to summon the selected flying mount. Circle dismounts after the mount is on the ground. Flying mounts use the same general flight space as the broom, but the on-screen control prompt is the final authority if your layout has been remapped. Keep the broom available because it remains a practical option even after Highwing is unlocked.
Neither broom nor flying mount can be summoned in many Hogwarts interiors, inside Hogsmeade, in dungeons or in other marked no-fly areas. An unavailable mount icon means the location is restricted, not that the mount is missing. Leave through the normal exit, use a nearby Floo Flame or continue on foot.
- The High Keep is complete if you want the first flying mount.
- Highwing appears in the mount selection wheel.
- L1 plus Triangle summons Highwing in an allowed outdoor area.
- You can identify a no-fly restriction and switch to foot travel or Floo travel.
Before you move on
- Flying Class is complete after the ring courses, Everett’s flight and the return to Madam Kogawa.
- A broom has been bought from Spintwitches Sporting Needs and appears in the Gear menu.
- L1 plus Circle summons the broom in an allowed outdoor area, and Circle dismounts it.
- R2, L2, the Left Stick and the Right Stick produce the expected broom movement shown by the control display.
- Useful Floo Flames are active around Hogwarts, Hogsmeade and the Highlands locations currently used for quests.
- The High Keep has been completed if the chapter goal includes a flying mount, and Highwing can be summoned with L1 plus Triangle.
- You know that no-fly zones require foot travel or Floo travel rather than repeated mount attempts.
Combat Fundamentals — Build Your Loadout and Talent Path
After completing Jackdaw’s Rest and entering the Map Chamber, the Talents menu becomes available. Character level 5 is the first level that grants a talent point, with additional points awarded as you gain levels. For a dependable campaign setup, improve the Core and Spells branches first, then add defensive, Dark Arts, or Room of Requirement talents according to the way you fight. Keep spell colors covered, react correctly to yellow and red attack indicators, and use Protego, Stupefy, dodges, and Basic Casts rather than relying on one damage spell. Accio into Incendio is effective against suitable unshielded targets, while Levioso, Accio, or another spell should be selected according to the enemy shield color. Carry Wiggenweld Potions before difficult quests and reserve Maxima, Edurus, and Focus Potions for encounters where their specific benefits matter.
Unlock the Talents menu and establish your first priorities
Continue the main story through Jackdaw’s Rest. After the quest sequence leads you into the Map Chamber, the Talents menu opens in the Field Guide. Do not spend time looking for talents earlier than this point: reaching level 5 awards the first available point, but the menu remains locked until the required story progression is complete. If you are already above level 5 when the menu opens, the points earned from those levels are available to spend.
For a broadly useful first build, begin in Core or Spells. Spell Knowledge adds another spell set, which is valuable because it lets you prepare different combinations without constantly replacing spells during a fight. Basic Cast Mastery, Protego-related improvements, Wiggenweld Potency, and other Core options are useful for general survival. Spells talents are stronger when you already know which spells you actually use. Room of Requirement talents become more valuable once potion and plant production are part of your regular routine, while Stealth and Dark Arts can wait unless you are deliberately building around them.
A focused opening does not lock you into one permanent role. Treat the first several points as a way to make normal encounters more consistent, then adjust later if your preferred spells or difficulty change.
- Complete Jackdaw’s Rest and enter the Map Chamber.
- Open Field Guide, then Talents, and check the points available.
- Spend early points mainly in Core or Spells unless you have a specific Dark Arts, Stealth, or Room of Requirement plan.
- Choose improvements that support spells you already know and use.
Arrange spell sets around shield colors and range
Enemy shields display a color that indicates the spell category required to remove them. Yellow shields require control spells such as Levioso. Violet shields require force spells such as Accio. Red shields require damage spells such as Incendio, Confringo, or Expelliarmus when those spells are available. The shield must normally be removed before ordinary spell damage can affect the target, so identify the color above the enemy before starting a combo.
A practical early set can include Accio, Incendio, Levioso, and a fourth spell chosen for the quest area. Accio pulls an appropriate target toward you and is useful for bringing an unshielded enemy into Incendio range. Levioso gives you control over suitable targets and creates time for Basic Casts. Incendio is strongest at close range, so do not waste its cooldown against a distant enemy when Confringo or another ranged option is available.
When you have more than one spell set, keep one set for close-range control and damage, another for ranged attacks or utility, and another for spells needed by the current quest. On PS5, use the on-screen spell-set prompt rather than pausing to guess which set is active. Keep the placement of frequently used spells consistent so that switching sets does not interrupt your reaction to a shield.
- Keep a yellow, violet, and red option available across your active spell sets when possible.
- Remember that Accio is violet, Levioso is yellow, and Incendio is red.
- Use a ranged spell against distant enemies instead of forcing Incendio into an ineffective position.
- Give each spell set a clear purpose.
Practice Protego, Stupefy, dodge, and Basic Casts
During combat, watch the warning indicator around your character. A yellow warning indicates an attack that Protego can block. On the default PS5 controls, press the displayed Protego input at the correct moment; holding the defense after a successful block allows the counterattack, Stupefy, to target the enemy you are facing. Stupefy creates a valuable opening and can help remove pressure from a group.
A red warning indicates an unblockable attack. Do not attempt to Protego it. Dodge away or through the attack, then turn the camera back toward the enemy before resuming your combo. Dodging is also a safe answer when several enemies attack together or when you cannot identify the source of an incoming strike.
Between spell cooldowns, use Basic Casts instead of standing idle. Continue moving while casting, especially against ranged enemies. If melee enemies surround you, dodge toward open ground before selecting another target. Fighting with your back to a wall makes the warning indicators harder to interpret and reduces the space available for recovery.
- Block a yellow-indicator attack and follow it with Stupefy.
- Dodge a red-indicator attack instead of trying to block it.
- Use Basic Casts during spell cooldowns.
- Move into open space before continuing a fight against several enemies.
Use simple rotations without ignoring the battlefield
Against a suitable unshielded target, Accio followed by Incendio is a straightforward close-range sequence. Pull the enemy in, cast Incendio while it is within effective range, then use Basic Casts or dodge away rather than remaining in the middle of the group. If the target has a yellow shield, use Levioso first; if it has a violet shield, use Accio or another force spell; if it has a red shield, use a damage spell. Do not cast the preferred combo until the shield requirement has been handled.
For a safer ranged approach, use a control or damage spell from distance, then reposition while waiting for cooldowns. Expelliarmus is useful against suitable armed or wand-using enemies, but it remains a red damage-category spell and should not be described as a universal answer to every shield. Protego into Stupefy and Ancient Magic are additional tools when a normal shield-color rotation is inconvenient or several enemies are attacking at once.
If a spell is on cooldown, switch targets, use Basic Casts, Protego, dodge, or throw an environmental object when the prompt appears. A good rotation is one that preserves space and reaction time, not merely one that produces the largest single burst.
- Check the enemy shield color before committing to a combo.
- Use Accio-to-Incendio only when the target can be pulled and is close enough for the fire spell.
- Use Levioso for suitable yellow shields and a force spell for suitable violet shields.
- Reposition instead of finishing a low-health target while another enemy is attacking.
Prepare Wiggenweld and combat potions before major fights
Check your Wiggenweld Potion supply before leaving for a combat-heavy quest. Keep the healing potion assigned to the Tool Wheel and use it before your health becomes critical. Brewing and purchasing options become more useful as potion recipes, ingredients, vendors, and Room of Requirement facilities become available. You do not need a full collection of recipes to survive the campaign, but entering a difficult quest with no healing reserve creates unnecessary reloads.
Maxima Potion increases spell damage for its duration, Edurus Potion improves defensive security, and Focus Potion reduces spell cooldown pressure. Use each for a clear purpose: Maxima for a damage window, Edurus when several attacks are difficult to avoid, and Focus when repeated spell casts are central to your plan. Do not consume every potion during the first ordinary enemy group if the quest is likely to contain an elite encounter or arena later.
If you are struggling, lower the difficulty temporarily or improve your gear before spending all your rare consumables. Difficulty can be changed during normal play, and doing so is preferable to repeatedly entering the same encounter without changing the underlying problem.
- Place Wiggenweld Potion on the Tool Wheel.
- Check healing and combat-potion quantities before a difficult quest.
- Reserve stronger potions for elite enemies, arenas, or a boss phase.
- Change difficulty or improve gear if the encounter remains unsafe after practice.
Review gear, talents, and create a recovery save
Before starting a major quest, equip the strongest current gear you have collected, then use the appearance option if you want to preserve a preferred cosmetic look. Early in the campaign, replacing outdated gear is usually more important than chasing a perfect trait combination. Later upgrades and traits can support a more specialized build, but they are not required for the basic combat routine in this chapter.
Create a manual save from the pause menu after confirming your talent purchases, spell sets, gear, and potion supply. Keep the save separate from your normal rolling manual save if you are testing a new build. If a fight goes badly, reload this prepared state, change one factor at a time, and try again. For example, replace one spell to cover the missing shield color, move a close-range spell to a more accessible set, or reserve a potion for the later wave instead of changing everything at once.
After a successful difficult encounter, make another manual save when the game allows it. This preserves the progress made with the new loadout and prevents an accidental reload from undoing the improvement.
- Equip current gear before entering the quest.
- Confirm every active spell set has a purpose and includes needed shield colors.
- Create a manual save after preparing the loadout.
- Create a second save after completing a difficult encounter if you want a stable recovery point.
Before you move on
- Jackdaw’s Rest is complete, the Map Chamber has been reached, and the Talents menu is available.
- You have spent early talent points on a defined Core, Spells, defensive, or other focused plan.
- Your active spell sets cover yellow, violet, and red shield requirements when the necessary spells have been learned.
- You can recognize a yellow warning as blockable and a red warning as unblockable.
- You can perform a safe control-to-damage sequence such as Levioso into Basic Casts or Accio into close-range Incendio when the target and shield color permit it.
- Wiggenweld Potion is assigned to the Tool Wheel and you have checked your supply before a major quest.
- A manual save preserves the prepared gear, talent, spell-set, and potion configuration.
References for this chapter
- Talents: Core — Hogwarts Legacy Database
- Jackdaw’s Rest — Hogwarts Legacy Walkthrough
- Combat Tips & Basics — EIP Gaming
- How to Unlock Talents in Hogwarts Legacy — Prima Games
- Adjusting Performance or Fidelity Mode On PlayStation 5 — Portkey Games Support
- Hogwarts Legacy Accessibility Features (A11Y)
Inventory & Upgrades — Gear, Recipes and Banked Resources
Gear in Hogwarts Legacy is a regularly replaced resource, not a permanent collection. Equip the best current Offence or Defence values, sell or destroy obsolete clothing before your gear slots fill, and use Merlin Trial challenge rewards to expand capacity. Hogsmeade’s shops cover clothing, potion supplies, seeds, Conjuration recipes and beast materials. Later, the Room of Requirement and Deek’s beast-care quest unlock the Enchanted Loom, which upgrades suitable gear and applies Traits using collected materials. Clothing appearance is separate from its statistics, so you can keep a preferred look without sacrificing stronger equipment.
1. Check and clear gear after every major reward
Open the Gear menu whenever a quest, chest or enemy drops clothing. Compare the item’s current Offence or Defence value with the equipped piece, then check its rarity, available Trait slot and upgrade potential once the Loom is unlocked. During the early and middle game, equipment is replaced frequently, so prioritize current statistics over building a permanent set.
Your gear inventory has limited capacity. Before entering a long dungeon, bandit camp or story mission, visit a merchant and sell clothing that is weaker than your equipped item and has no appearance you still need. If you cannot reach a shop, destroying unwanted gear is preferable to losing a better quest or chest reward because the inventory is full. Keep several open slots before starting exploration, since many rewards are clothing items.
- Equip the strongest practical item in every filled gear slot.
- Sell or destroy obsolete clothing before a major quest.
- Keep free slots available for dungeon and chest rewards.
- Do not treat ordinary clothing as irreplaceable quest equipment.
2. Expand gear capacity through Merlin Trial milestones
After the main quest Trials of Merlin introduces the activity, carry Mallowsweet Leaves so you can activate discovered Trial sites. Completing a Trial contributes to the Exploration challenge, but solving the puzzle does not automatically apply every capacity increase. Open the Field Guide, select Challenges, enter Exploration, choose Complete Merlin Trials and claim each completed milestone reward. The claimed reward increases the number of gear slots available.
You do not need to complete every Merlin Trial before continuing the campaign. Solve Trials near routes you already travel, claim the available Exploration rewards, then return to a merchant when your capacity begins filling again. The activity is an optional exploration system whose storage benefit becomes more valuable as quests begin awarding more gear.
- Carry Mallowsweet Leaves for discovered Trial platforms.
- Complete nearby Merlin Trials after the activity is unlocked.
- Claim completed rewards under Challenges → Exploration.
- Confirm that the gear-capacity total changed after claiming a milestone.
3. Use the correct Hogsmeade vendor for each resource
Gladrags Wizardwear sells wearable gear and is a convenient place to replace an underpowered item or sell surplus clothing. J. Pippin’s Potions sells potion recipes and potion ingredients. The Magic Neep supplies seeds and plant-related ingredients, while Dogweed and Deathcap focuses on combat-plant seeds and related supplies. Tomes and Scrolls sells Conjuration recipes for the Room of Requirement, including useful potting and utility stations.
Brood and Peck is the specialist shop for beast-related materials. It becomes relevant after the beast-care progression has begun, so it is not a substitute for the early-game vendors. You can buy materials there when a Loom upgrade is blocked by one missing component, but raising beasts in the Vivariums is the more sustainable way to build supplies. Check vendors after meaningful story progression, but do not spend all your Galleons on minor gear upgrades when a recipe, station or potion ingredient would help your build more.
- Use Gladrags for wearable gear and clothing sales.
- Use J. Pippin’s Potions for potion recipes and ingredients.
- Use the Magic Neep and Dogweed and Deathcap for plant supplies.
- Check Tomes and Scrolls for Room of Requirement Conjurations.
- Use Brood and Peck for beast products after beast care is available.
4. Unlock the Room of Requirement and the Enchanted Loom
Continue the main story until the Room of Requirement becomes available. Then complete Deek’s quest The Elf, the Nab-Sack, and the Loom. This quest teaches beast rescue and care and unlocks the Enchanted Loom as a Room of Requirement Conjuration recipe. The Loom is the required station for gear upgrades and Trait application; Hogsmeade clothing shops cannot perform these functions.
Enter the Room of Requirement through the Hogwarts map’s Secret Rooms section. Use the Conjuring spell to place the Enchanted Loom in an available location, then interact with it and select a suitable clothing item. Depending on the item and your materials, the Loom can raise its statistics or apply a Trait. Upgrade gear you expect to keep for more than a short time, because materials are limited while you are establishing your Vivarium supply.
- Unlock the Room of Requirement through story progression.
- Complete The Elf, the Nab-Sack, and the Loom.
- Conjure and place the Enchanted Loom.
- Use the Loom to upgrade only gear worth retaining.
5. Produce and spend beast materials carefully
During Deek’s beast-care quests, use the Nab-Sack to rescue beasts and place them in an unlocked Vivarium. Feed and brush them, then collect the materials they produce. These materials are used by the Enchanted Loom for upgrades and Traits. If you need one missing product immediately, Brood and Peck can cover the gap, but buying every material is expensive and is not necessary for normal campaign progression.
Trait recipes are collected separately from the gear itself. When a recipe is available, select the Loom’s Trait option on an item with an open Trait slot and choose a compatible unlocked Trait. Higher-quality equipment can provide more useful Trait options, but avoid spending rare materials on an item whose level or statistics you are about to replace.
- Rescue and care for beasts in each available Vivarium.
- Collect their produced materials before leaving the Room of Requirement.
- Use Brood and Peck for urgent shortages rather than routine supply.
- Apply Traits to equipment that fits your chosen spell or combat style.
6. Separate cosmetic appearance from functional gear
After equipping the item with the best statistics, use Change Appearance from that gear slot to select an appearance you have collected. This changes the visible clothing without replacing the equipped item’s Offence, Defence, upgrades or Traits. The feature is available on the PS5 Gear screen once the introductory sequence has provided access to gear management.
Do not keep weak equipment merely because you like its look. Record or retain the appearance through the Gear menu, then sell or destroy the inferior item if it no longer has functional value. Before selling, verify that you are selecting the unwanted item rather than the currently equipped piece.
- Choose functional gear by statistics and Trait potential first.
- Use Change Appearance to preserve a preferred outfit.
- Verify the selected item before selling or destroying it.
- Reserve upgrade materials for gear you expect to use.
Before you move on
- Your equipped slots contain current-level gear and you have cleared enough capacity for the next story mission.
- You have claimed every currently available Merlin Trial capacity milestone in Challenges → Exploration.
- The Room of Requirement is unlocked and The Elf, the Nab-Sack, and the Loom is complete.
- The Enchanted Loom is placed and you know how to upgrade gear and apply Traits.
- You have access to a repeatable supply of beast materials, potion ingredients and combat plants.
- You can change a gear slot’s appearance without replacing its functional equipment.
Companions and Key NPCs — Using Allies and Relationship Quests
Hogwarts Legacy has three major relationship questlines: Sebastian Sallow, Natsai “Natty” Onai and Poppy Sweeting. They are optional to the main campaign, but they contain substantial story scenes, combat encounters, exploration objectives, spells and unique rewards. Their quests appear gradually as you advance the main story and complete earlier relationship quests. Check the Quest menu after major main missions, class assignments and owl messages rather than assuming a missing marker is a bug. You can complete Natty’s and Poppy’s full lines before the ending, but Sebastian’s final quest, In the Shadow of Friendship, becomes available after the main confrontation. Companion quests let these students accompany you during particular missions, but they do not create a permanent party system or provide a required ally for The Final Repository.
Meet the three relationship characters and check the correct quest category
Sebastian Sallow is introduced during the early Hogwarts story and becomes associated with the Slytherin Undercroft, Defence Against the Dark Arts and Feldcroft. Natsai “Natty” Onai is introduced through Charms Class and later investigates Harlow and his criminal network. Poppy Sweeting is introduced through Beasts Class and becomes involved in quests concerning dragons, poachers and centaurs.
Relationship quests appear as separate entries in the Quest menu. After completing a main quest, class assignment or currently available relationship quest, open the menu and inspect the Hogwarts and World Map tabs. Some objectives begin in Hogsmeade, Feldcroft, the Forbidden Forest or the Highlands rather than at Hogwarts. If no continuation is visible, advance the main story and finish any earlier quest in that character’s chain before searching the map.
- Meet Sebastian during the early Hogwarts story.
- Meet Natty through Charms Class.
- Meet Poppy through Beasts Class and the related early Beasts progression.
- Check the Quest menu and both map views after major story milestones.
Complete the relationship lines in parallel instead of waiting for one character
The three lines can be completed in the same PS5 campaign and do not require a particular Hogwarts house. A useful routine is to complete one available relationship quest before beginning several more main quests, then check the Quest menu again. This keeps the chains moving without requiring a separate dedicated playthrough.
Quest availability is controlled by story progress, previous relationship quests and occasional delays before the next objective appears. A companion may have no new marker immediately after a mission. In that situation, complete the next available main quest, wait for the next owl or quest release, and revisit the relevant location. The relationship lines are not required to unlock The Final Repository and are not permanently missable during an ordinary campaign.
- Finish available relationship quests before pushing far ahead in the main story when convenient.
- Use the recommended level shown in the Quest menu before entering a difficult camp, cave or ruin.
- If a quest appears absent, check Hogwarts, Hogsmeade and the World Map rather than only the current location.
Follow Sebastian’s line carefully if you want the Unforgivable Curses
Sebastian’s relationship chain runs through In the Shadow of the Bloodline, In the Shadow of the Study, In the Shadow of Discovery, In the Shadow of Time, In the Shadow of Distance, In the Shadow of Hope, In the Shadow of the Relic, In the Shadow of Fate and In the Shadow of Friendship. The sequence includes opportunities to learn Crucio, Imperio and Avada Kedavra. These spells are optional and are not required for the main campaign or the Ranrok fight.
When a quest offers to teach an Unforgivable Curse, select the learning option if you want that spell on the current character. Declining can remove the immediate opportunity, although later dialogue may provide another chance for some spells. Make a manual save before the relevant conversation if you want to preserve a choice. In the Shadow of Fate also contains the decision about whether to turn Sebastian in. Turning him in prevents the remaining Sebastian relationship content from proceeding, so create a separate save first if you want to see both outcomes.
- Complete Sebastian’s available quests in the listed progression.
- Save before curse-training conversations if you want to preserve alternate choices.
- Save before the decision in In the Shadow of Fate.
- Remember that In the Shadow of Friendship is a post-ending relationship quest.
Advance Natty’s investigation against Harlow
Natty’s relationship sequence is The Lost Child, Mum’s the Word, A Basis for Blackmail, Grief and Vengeance, Finding Focus, Harlow’s Last Stand and Acting on Instinct. Follow the active objective because the line moves between Lower Hogsfield, Hogsmeade, Hogwarts and the southern Highlands. Several stages involve stealth, enemy encounters or travel away from the castle, so equip a combat-ready spell set and carry healing potions.
Harlow’s Last Stand is not the end of the line by itself. After progressing the required objectives, Acting on Instinct becomes available and sends you back to Natty at Hogwarts. Complete that quest and allow its closing conversation to finish before treating Natty’s relationship line as complete. Natty’s storyline is optional and does not determine who appears during The Final Repository.
- Complete The Lost Child through Harlow’s Last Stand in order.
- Return to Hogwarts when Acting on Instinct becomes available.
- Finish Acting on Instinct and confirm no further Natty relationship quest remains.
Complete Poppy’s dragon, poacher and centaur storyline
Poppy’s relationship sequence is A Dragon Debrief, Poached Egg, The Poachers’ House Call, Surprise Meeting, The Centaur and the Stone, It’s in the Stars, A Bird in the Hand and Poppy Blooms. The objectives travel through Hogsmeade, the Forbidden Forest and the Highlands. Activate nearby Floo Flames when you reach new regions, replace weak gear before long expeditions and keep spells suitable for both human enemies and creatures.
A Bird in the Hand contains a door puzzle at the quest location. At the marked ruins, inspect the moonstone door and the illuminated symbols around it. Move the nearby pillars or objects so their shadows align with the required symbols, then enter the ruins and continue through the combat encounters. Finish Poppy Blooms afterward in the Great Hall; it is the closing quest of her relationship line.
- Complete A Dragon Debrief through A Bird in the Hand in order.
- Inspect the environment at the moonstone-door puzzle instead of treating it as a combat gate.
- Finish Poppy Blooms in the Great Hall.
- Confirm that Poppy has no remaining relationship quest in the Quest menu.
Prepare for the main ending without expecting a companion party system
Sebastian, Natty and Poppy can accompany you during particular relationship missions, but they are not permanent party members and none is required for The Final Repository. Their questlines provide optional story content, rewards, combat practice and, in Sebastian’s case, possible access to the Unforgivable Curses. Do not delay the main campaign because you are waiting for a companion-support prompt in the final mission.
Before starting the late Keeper sequence, make a manual save and review the Quest menu. Complete Natty’s and Poppy’s final relationship quests if you want their stories resolved before the ending. Sebastian’s full line cannot be checked off at that point because In the Shadow of Friendship is unlocked after the main confrontation. After completing the campaign and reaching the post-ending free-roam state, return to the Undercroft and complete that final Sebastian quest if it is available.
- Do not treat relationship quests as prerequisites for The Final Repository.
- Complete Natty’s Acting on Instinct if you want her full storyline before the ending.
- Complete Poppy Blooms if you want Poppy’s full storyline before the ending.
- After the main campaign, complete In the Shadow of Friendship to finish Sebastian’s full relationship line.
- Keep a post-ending manual save before continuing optional cleanup.
Before you move on
- The Quest menu shows no unfinished Natty relationship quest, including Acting on Instinct.
- The Quest menu shows no unfinished Poppy relationship quest, including Poppy Blooms.
- Sebastian’s full line is complete through In the Shadow of Friendship after the main campaign.
- Any Unforgivable Curses you wanted have been learned, or you have retained a save before the relevant dialogue choice.
- A manual save exists both before the late main-campaign sequence and after the post-ending cleanup.
- The main campaign is verified separately by completing The Final Repository and its ending sequence.
References for this chapter
The Keepers, Trials and Ancient Magic — Mid-Campaign Objectives
Advance through the four Keeper Trials in order: Percival Rackham’s Trial, Charles Rookwood’s Trial, Niamh Fitzgerald’s Trial and San Bakar’s Trial. Between the second and third trials, complete the required story bridge through Fire and Vice, Professor Weasley’s Assignment, In the Shadow of the Mine, It’s All Gobbledegook, The Headmistress Speaks and The Polyjuice Plot. After Niamh’s Trial, complete In the Shadow of the Mountain and Lodgok’s Loyalty before starting San Bakar’s Trial. Merlin Trials, broom upgrades, extra mounts and most exploration rewards are optional conveniences, not requirements for The Final Repository. Save before each trial, keep gear space available, and maintain spell sets that cover shield colors, control, damage and Ancient Magic.
1. Treat the Map Chamber and quest log as your progression checkpoints
When a Keeper quest sends you back to the Map Chamber, complete every conversation marked by the active objective before leaving. The four trials are not unlocked by completing a certain number of Merlin Trials or by collecting exploration rewards. The active main-quest marker, the Map Chamber conversations and the named quest requirements determine the route.
Create a manual save before entering each trial and another after its Pensieve memory. Use separate slots rather than overwriting the same file. Clear unwanted gear before entering a trial so chests and quest rewards are not lost to a full inventory. Equip at least one spell from each shield color, one control spell, one or more damage spells and a dependable defensive option. Refill Wiggenweld Potions before difficult combat, but do not spend them unnecessarily in ordinary encounters.
- Check the active Keeper-related quest before travelling.
- Create a separate manual save before every trial.
- Leave enough gear capacity for dungeon and quest rewards.
2. Complete Percival Rackham’s Trial
Travel to the marked tower in the northern region and meet Professor Fig. Deal with the enemies around the ruins, enter the tower and locate Percival Rackham’s portrait. Follow the ancient-magic trail downstairs and interact with the pool to open the trial entrance.
Inside the trial, use the ancient-magic portals to change which version of a room you can interact with. A platform, hook point or movable object may be usable only from one side of the portal. If a route appears blocked, cross the portal and inspect the room again before attempting another jump. Pull platforms into position, change sides when necessary and use the available interaction points to continue.
The combat sections contain Pensieve Protectors, Sentinels and Sentries, followed by a Pensieve Guardian. Break ordinary enemy shields with a spell of the matching color and remove smaller enemies when they create crossfire. When the Guardian charges a colored orb, strike the orb with the matching spell color. Block attacks that display the normal block indicator, dodge red-warning attacks and spend Ancient Magic during safe damage windows. After the fight, witness Percival’s Pensieve memory, return through the crystallized passage and speak with the required Keepers in the Map Chamber.
- Inspect both sides of every portal before abandoning a puzzle route.
- Use matching spell colors against enemy shields and Guardian orbs.
- View the memory and complete the required Map Chamber conversations.
3. Complete Charles Rookwood’s Trial
Follow the main quest to Rookwood Castle and meet Professor Fig. Fight through the Loyalists, enter the castle and locate Charles Rookwood’s portrait. Interact with the ancient-magic pool to begin the second trial.
This trial adds rune switches that rotate or reposition portals and platforms. Activate a switch with Basic Cast, then inspect the room from the newly available side. Move objects only after confirming which portal state makes them solid or reachable. Wingardium Leviosa is useful for positioning movable objects, while Accio or Depulso may be required when the room places an object in a corresponding spell position. If a chest, bridge or platform appears out of reach, change the portal orientation rather than repeating the same jump.
The final combat sequence again leads to a Pensieve Guardian. Keep moving, avoid being pinned near the arena edge and defeat surrounding enemies when they create crossfire. Use matching colors on charged Guardian orbs, Protego against blockable attacks and dodge red-warning attacks. Witness Charles’s memory, leave through the magical passage and return to the Map Chamber. Complete the required conversations so the next story markers appear.
- Activate rune switches before moving portal-room objects.
- Keep matching shield colors available in the spell sets.
- Return to the Map Chamber after Charles’s memory.
4. Complete the required bridge before Niamh Fitzgerald’s Trial
After Charles Rookwood’s Trial, do not jump directly to Niamh Fitzgerald’s Trial unless the game has already cleared the intervening objectives. Follow the active markers through Fire and Vice, then complete Professor Weasley’s Assignment. Continue through In the Shadow of the Mine and It’s All Gobbledegook. These quests may appear as separate markers or become available at slightly different times, but complete them before attempting to start the Niamh sequence.
Next complete The Headmistress Speaks. This directs you toward Niamh Fitzgerald and establishes the objective involving the Headmaster’s Office. The Polyjuice Plot follows: obtain and use the Polyjuice Potion, impersonate Headmaster Black and gain access to the office. The password and office access are part of this progression, so do not treat the office as an ordinary exploration destination.
When The Polyjuice Plot is complete, Niamh Fitzgerald’s Trial becomes the next Keeper objective. Make a manual save before entering the office and another before beginning the trial itself. This bridge is the key transition checkpoint between the second and third Keeper memories.
- Complete Fire and Vice.
- Complete Professor Weasley’s Assignment.
- Complete In the Shadow of the Mine.
- Complete It’s All Gobbledegook.
- Complete The Headmistress Speaks.
- Complete The Polyjuice Plot before starting Niamh Fitzgerald’s Trial.
5. Treat Merlin Trials as optional preparation
Merlin Trials are not required to unlock the Keeper memories. After the introductory Merlin activity, completed trials contribute to Exploration Challenge rewards that increase gear capacity, but the rewards must be claimed from the Field Guide’s Challenges menu. A completed trial icon alone does not automatically apply every available capacity reward.
Complete nearby Merlin Trials if your gear slots fill frequently, but do not search the entire Highlands before continuing the main story. Selling unwanted equipment, claiming completed Challenge rewards and keeping open slots before a trial provide the immediate benefit needed for this chapter. Broom upgrades, additional mounts and broader exploration rewards are also optional conveniences and are not prerequisites for The Final Repository.
- Complete the introductory Merlin activity before expecting normal Merlin rewards.
- Claim finished Merlin Trial rewards in the Challenges menu.
- Do not delay a Keeper quest to clear every Merlin icon.
6. Complete Niamh Fitzgerald’s Trial
After The Polyjuice Plot, enter the Headmaster’s Office through the marked route and interact with the objective that begins Niamh Fitzgerald’s Trial. The opening section is a stealth sequence through a hostile area. Combat spells are unavailable, so use cover, concealment points and the Cloak of Invisibility when the trial provides it. Watch patrols and wait for a safe opening rather than crossing open ground immediately after an enemy turns away.
The trial then moves through the three Deathly Hallows sections. Follow the linear route and use the Hallow supplied by the trial to pass each obstacle. The available tools change during the sequence, so do not assume your normal spell loadout is available. Progress only after the current barrier or enemy group has been cleared.
At the end, interact with the Pensieve and witness Niamh’s memory. Return through the crystallized passage to the Map Chamber and speak with the newly arrived Keeper and the required story characters. Niamh’s Trial is complete only after the memory and the return conversation have registered.
- Start Niamh’s Trial after The Polyjuice Plot.
- Use stealth and concealment during the first section.
- Complete the Deathly Hallows sequence and view Niamh’s memory.
- Return to the Map Chamber and speak with the required Keeper.
7. Complete the post-Niamh objectives before San Bakar’s Trial
After Niamh Fitzgerald’s Trial, follow the next story markers through In the Shadow of the Mountain. This quest takes you into the Coastal Mine and advances the Ranrok and Lodgok plot. Clear the mine route, solve its environmental obstacles and complete the marked objective rather than leaving after the first combat section.
Then complete Lodgok’s Loyalty. Follow Lodgok’s objective into the mine, work through the goblin defenses and finish the quest’s final story sequence. These quests form the required practical bridge between Niamh’s Trial and San Bakar’s Trial. If San Bakar’s marker is not visible, check the quest log for an unfinished objective in either of these missions before searching the map for the trial location.
When Lodgok’s Loyalty is complete, create a manual save, refill healing supplies and travel to San Bakar’s marked Pensieve chamber with Professor Fig. Use the required fire spell at the chamber to reveal the clue, then follow the marker to the Graphorn den.
- Complete In the Shadow of the Mountain.
- Complete Lodgok’s Loyalty.
- Confirm San Bakar’s Trial is active before travelling to its chamber.
- Save and restock before the Graphorn encounter.
8. Defeat the Graphorn and finish San Bakar’s Trial
The Lord of the Shore is the major combat gate in San Bakar’s Trial. Keep moving sideways or around the arena, dodge its charges and avoid standing directly in front of it for extended periods. Damage spells, Ancient Magic and Ancient Magic Throws are effective tools; control spells and curses are not the reliable answer for this creature. Use red damage spells when available, preserve healing for mistakes and spend Ancient Magic when the Graphorn is exposed.
After the Graphorn is subdued, follow the prompted interaction to tame it and unlock the Graphorn mount. Ride it back to San Bakar’s Pensieve chamber. The Graphorn must be present at the chamber entrance for the route to open, so do not approach the entrance on foot after dismounting elsewhere. If you fast-travel, summon the Graphorn again from the mount or Nab-Sack controls before returning to the marked passage.
Enter the chamber, view San Bakar’s Pensieve memory and return to the Map Chamber through the magical passage. Speak with the Keepers after the memory. The four Keeper Trials are now complete, and the main quest should advance toward Wand Mastery and the Repository-related endgame objectives.
- Defeat the Lord of the Shore using movement, damage spells and Ancient Magic.
- Unlock the Graphorn mount and bring the Graphorn to the Pensieve chamber.
- View San Bakar’s memory.
- Return to the Map Chamber and speak with the Keepers.
Before you move on
- Percival Rackham’s Trial is marked complete.
- Charles Rookwood’s Trial is marked complete.
- Fire and Vice is complete.
- Professor Weasley’s Assignment is complete.
- In the Shadow of the Mine is complete.
- It’s All Gobbledegook is complete.
- The Headmistress Speaks is complete.
- The Polyjuice Plot is complete.
- Niamh Fitzgerald’s Trial is marked complete.
- In the Shadow of the Mountain is complete.
- Lodgok’s Loyalty is complete.
- San Bakar’s Trial is marked complete.
- All four Keeper Pensieve memories have been viewed.
- The Graphorn mount has been unlocked.
- The player has returned to the Map Chamber after San Bakar’s memory and spoken with the Keepers.
- Wand Mastery or the next Repository-related main quest is now available.
- A separate post-trial manual save exists with open gear space, replenished healing supplies and a combat-ready spell loadout.
References for this chapter
- Hogwarts Legacy main quests: All main missions in order
- Hogwarts Legacy Walkthrough: Main Quest Order and Missables
- Hogwarts Legacy: Percival Rackham’s Trial Walkthrough
- Hogwarts Legacy Charles Rookwood’s Trial Walkthrough
- Hogwarts Legacy Niamh Fitzgerald’s Trial Walkthrough
- Hogwarts Legacy The Polyjuice Plot Walkthrough
- Hogwarts Legacy The Headmistress Speaks Walkthrough
- Hogwarts Legacy San Bakar’s Trial Walkthrough
- Hogwarts Legacy: How to Increase Inventory Size
- Hogwarts Legacy: San Bakar’s Trial Guide
Preparing For Act III — Inventory, Allies and Save Checkpoints
Before accepting The Final Repository, verify the complete late-story sequence: In the Shadow of the Mountain, Lodgok’s Loyalty, San Bakar’s Trial, Wand Mastery, and then The Final Repository. In the Shadow of the Mountain is a required main-story progression quest that leads into Lodgok’s Loyalty; it is not optional Sebastian relationship content. If Lodgok’s next quest does not appear after completing the required stage, check Owl Post for his letter. Optional Natty, Poppy and Sebastian relationship quests, Merlin Trials, Field Guide pages, Hogwarts Secrets, treasure vaults, broom upgrades and most exploration rewards can wait. Refill Wiggenweld Potions, equip familiar gear and spell sets, review talents, and create two manual saves in separate slots before entering the finale. Preserve the earlier backup because the Repository choice changes the immediate closing scenes, although either choice still allows the later post-campaign quests. Create another save after normal saving becomes available following the finale.
1. Confirm the required late-story quest chain
Open the quest log and verify the late main-story sequence in this order: In the Shadow of the Mountain, Lodgok’s Loyalty, San Bakar’s Trial, Wand Mastery, and The Final Repository. These quests are part of the campaign route into the finale. In the Shadow of the Mountain is not optional Sebastian relationship content; it is a required main quest in the late Prepare for Your O.W.L.s section and supplies the progression needed for Lodgok’s Loyalty.
Complete In the Shadow of the Mountain at the southern coast, following the objective marker to Sebastian and through the mine sequence. When that quest ends, wait for Lodgok’s next objective to appear. If Lodgok’s Loyalty is not immediately visible, open Owl Post and read Lodgok’s letter, then check the main quest tab again. The quest takes you to the Coastal Mine in the Marunweem Lake region, where you must enter the mine, search for Lodgok, defeat the Loyalists and destroy the drill before escaping.
After Lodgok’s Loyalty, return to the Map Chamber when instructed and begin San Bakar’s Trial. Complete the Graphorn section and the Keeper memory. Then follow the objective into Wand Mastery. Travel to Ollivanders in Hogsmeade, gather the required wand materials, craft the Keepers’ wand and survive the Victor Rookwood encounter. The Final Repository becomes available after Wand Mastery; its starting point is the Map Chamber.
- In the Shadow of the Mountain is complete as a main-story quest.
- Lodgok’s Loyalty is complete, including the Coastal Mine and drill sequence.
- San Bakar’s Trial is complete, including the Graphorn section and Keeper memory.
- Wand Mastery is complete and the Keepers’ wand has been crafted.
- The Final Repository is available in the main quest log.
2. Keep optional companion content separate
Natty’s, Poppy’s and Sebastian’s broader relationship quests are optional storylines. They can provide additional scenes, rewards and late relationship conclusions, but they do not create a selectable party system for The Final Repository. The finale does not require you to choose a companion, assemble a party or unlock a companion support slot.
Do not confuse Sebastian’s optional relationship chain with In the Shadow of the Mountain. In the Shadow of the Mountain is a required late main-story quest even though Sebastian appears during it. Its completion is the prerequisite that leads into Lodgok’s Loyalty. Other Sebastian quests, including Dark Arts-related progression, are separate from the minimum route to the campaign ending.
Merlin Trials, Hogwarts Secrets, Field Guide pages, treasure vaults, broom upgrades, unfinished relationship quests and most exploration rewards can be postponed. Complete them before the finale only if you want their rewards or want to reduce the optional content remaining afterward. If a named quest is still missing, use the main quest log and Owl Post rather than assuming a collectible or companion task is blocking the story.
- In the Shadow of the Mountain is treated as required campaign progression.
- No optional companion quest is being used as a substitute for a missing main quest.
- No final-mission party selection or companion support unlock is expected.
- Optional relationship and exploration content is either complete or deliberately postponed.
3. Prepare a familiar combat loadout
Open the Talents menu and spend available points on abilities that strengthen the spells and tools you already use. Avoid changing your entire build immediately before the finale unless you can still identify every spell quickly. Fill all four spell sets with combinations you recognize without hesitation.
A practical setup includes a control spell such as Accio or Depulso, spells that break the shield colors you commonly encounter, a dependable damage spell and an area-control or crowd-damage option. Keep Protego, dodge, Ancient Magic and healing inputs familiar. Test switching spell sets and using the Tool Wheel in an ordinary encounter before accepting The Final Repository.
Equip your strongest current gear and useful traits for your preferred damage type or combat style. Gear does not require a repair step, so replace weak items from the Gear menu instead of searching for a durability vendor. If you use the Room of Requirement, collect completed potions and plants, manage your inventory and finish any brewing cycle that is worth taking with you. These are conveniences, not requirements for unlocking the quest.
- All four spell sets contain usable, familiar spells.
- Talents support the spells and combat tools you actually use.
- Your strongest current gear and useful traits are equipped.
- Protego, dodge, Ancient Magic, healing and consumable controls are familiar.
- Inventory space is available for useful gear picked up during the finale.
4. Refill healing and combat resources
Check your Wiggenweld Potion count before leaving for the Map Chamber. Brew additional healing potions, collect completed brews in the Room of Requirement or purchase them from a Hogsmeade vendor. The carrying limit is 25 Wiggenweld Potions, so use the inventory count as the check rather than trying to exceed the capacity.
Refill other potions and combat plants if they are part of your build. Focus, Maxima and Edurus Potions support different approaches, while Mandrakes, Venomous Tentacula and Chinese Chomping Cabbages can help against groups. None is mandatory for starting The Final Repository, so take familiar tools rather than experimenting with an untested crafting plan.
The mission contains several Loyalist encounters before Ranrok. Conserve healing and high-impact tools during the first groups when possible. If you fail later and reload the quest checkpoint, you may not regain resources spent earlier in the mission. If a first attempt leaves too few potions for the boss, deliberately restart from the pre-finale save rather than continuing with an exhausted inventory.
- Wiggenweld Potions are refilled as far as the 25-item capacity allows.
- Useful potions and plants are available and assigned to known controls.
- Consumable inputs have been tested outside the final quest.
- Strong combat tools have not been spent needlessly before entering the finale.
5. Create two independent pre-finale saves
Finish the optional activities you intend to do before the finale, travel to a safe location and use the pause menu’s Save/Load function to create a manual save. Wait for the save to complete, then create a second manual save in a different slot. Keep one slot as the primary backup and do not overwrite either pre-finale slot with later progress.
The Final Repository contains a conversation about what should happen to the Repository before the Ranrok battle. The responses concern keeping the power contained or opening it. This changes the immediate ending scenes and dialogue, but it does not prevent the later post-campaign quests. A pre-finale save lets you experience the other choice, but loading it requires replaying the encounters between the save and the decision.
Identify the slots by their timestamps and keep both untouched. One slot protects the prepared state before accepting the quest. The second protects against accidentally overwriting the first while traveling, changing equipment or beginning the mission. Manual saves are preferable to relying only on autosaves because the game supports player-created save files in addition to automatic checkpoints.
- Two different manual save slots contain the prepared character.
- One slot is reserved as an untouched pre-finale backup.
- The saves were made after your final optional-activity and inventory decisions.
- You know which slot to load if you want to replay the Repository choice.
- Neither backup has been overwritten by a later quest checkpoint.
6. Begin The Final Repository only after every check passes
Track The Final Repository and fast-travel to the Map Chamber. Speak with Professor Fig and accept the quest only after confirming the quest chain, saves, gear, spells, talents and resources. Follow Fig through the Keeper caverns and Loyalist encounters. Use crowd control and shield-breaking spells deliberately, and avoid spending every healing item before the later stages.
When the Repository dialogue appears, choose the response that matches the outcome you want for this run. If you plan to view both immediate variants, do not overwrite either pre-finale slot. The combat and story sequence must be replayed from the backup, but the choice does not block Weasley’s Watchful Eye, The House Cup or continued exploration.
After the ending scenes finish and normal saving becomes available, create a new manual save in a separate slot. Use that file for the post-finale quests and free exploration. Preserve at least one pre-finale save until you are certain that you no longer want to replay the Repository decision.
- The Final Repository is actively tracked before departure.
- Both prepared manual saves remain preserved.
- The Repository choice is made deliberately.
- A separate post-finale save is created when normal saving becomes available.
- The pre-finale backup remains untouched for an alternate replay.
Before you move on
- In the Shadow of the Mountain, Lodgok’s Loyalty, San Bakar’s Trial and Wand Mastery are complete in the required continuity order.
- The Final Repository is available in the main quest log.
- Two separate manual saves preserve the prepared state before accepting the finale.
- Wiggenweld Potions, gear, talents, spell sets and consumables have been checked.
- Optional companion quests have been completed by choice or deliberately postponed, with no assumption that they provide final-mission support.
- After the finale, a separate post-finale save is created for Weasley’s Watchful Eye, The House Cup and continued exploration.
The Final Repository — Entry, Early Encounters and Resource Management
Before starting The Final Repository at the Map Chamber, equip your strongest functional gear, refill Wiggenweld Potions, arrange spell sets with red, yellow and purple options, and create a dedicated manual save. Follow Professor Fig through the Keepers’ Caverns, defeat the required Loyalist groups and Trolls, and conserve healing during the approach. The Repository response changes the surrounding Fig scenes but does not remove the Ranrok fight or provide a separate route through the campaign. After Ranrok is defeated, allow the automatic In the Shadow of Revelation transition to finish before continuing to Weasley’s Watchful Eye. The House Cup still requires Level 34 and remains the final main-story check for a complete campaign ending.
1. Prepare at the Map Chamber before starting
Travel to the Map Chamber and speak with Professor Fig only when you are ready to begin The Final Repository. This starts the final quest route through the Keepers’ Caverns, so complete any optional preparation you want before talking to him. You can still return to optional content after the story, but a preparation pass is easier while vendors, gear and the wider map are immediately available.
Create a manual save in a dedicated slot before speaking with Fig. Keep a second manual save available if possible, especially if you want to preserve the Repository conversation and replay its alternate presentation later. Do not rely only on an autosave for a choice you may want to revisit.
Equip your strongest current functional gear and apply cosmetic appearances separately if you want to keep a preferred look. Refill Wiggenweld Potions and arrange spell sets so you can access red, yellow and purple spells. Include a dependable control spell such as Accio or Depulso, a reliable damage spell, Protego and a dodge-ready loadout. Combat plants, Ancient Magic and offensive potions can help, but they are optional rather than required.
- Optional preparation completed or deliberately postponed
- Strongest practical gear equipped
- Wiggenweld Potions replenished
- Red, yellow and purple spell options available
- Manual save created before speaking with Professor Fig
2. Follow Fig through the opening Loyalist encounter
After the opening scenes, follow Professor Fig along the marked route. The professors join the battle outside, but you do not need to stop and clear every enemy in that opening movement. Continue with Fig until the route places you in the required Loyalist fight blocking further progress.
The encounter includes Loyalist Warriors and Rangers, with additional Loyalist Assassins and Sentinels appearing as the fight develops. Break shields with spells of the matching color, then use control effects or basic attacks to finish exposed targets. Use Protego against blockable attacks and follow it with Stupefy when appropriate. A red warning indicates an unblockable attack, so dodge instead of trying to absorb it.
Prioritize enemies that can interrupt you or attack from outside your view. Rangers and Sentinels should not be ignored while you focus on a nearby Warrior. If an Assassin disappears, stop committing to a long animation and reposition until you can see its approach. Avoid spending several Wiggenweld Potions or your strongest offensive resources here; more combat occurs before the repository and Ranrok.
- Followed Fig through the opening professor-led battle
- Defeated the required Loyalist force
- Matched shield-breaking spells to enemy colors
- Watched for Rangers, Sentinels and Assassins
- Kept healing and high-value resources in reserve
3. Continue through the drill route and Armored Troll fight
After the first Loyalists are defeated, Fig moves the drill blocking the route. Continue through the opened passage and follow the objective marker. The next major combat area contains two Armored Trolls with Loyalist reinforcements.
Keep both Trolls in view and avoid standing between them. Circle the arena so their large swings and charges are easier to read, and avoid allowing the goblins to pin you against an edge. Rangers and Sentinels are especially dangerous when they attack while your attention is on a Troll, so remove or interrupt them whenever the opening is safe.
Use Protego only against a clearly blockable strike. Dodge red-warning attacks and the impact areas of large Troll attacks. A control spell can create room when goblins close in, while Ancient Magic is best reserved for a dangerous target or a moment when several enemies are grouped. Defeat the Loyalist reinforcements and both Armored Trolls without exhausting your entire potion supply.
- Passed through the drill opening
- Defeated the Loyalist reinforcements
- Defeated both Armored Trolls
- Maintained space for dodging
- Preserved resources for the final approach and boss
4. Clear the final Loyalist force and Fighter Troll
Continue along the marked route after the Armored Troll encounter. You reach another large combat area where Loyalists arrive in waves. Warriors and Rangers make up much of the group, while Assassins and Sentinels can create pressure from less predictable angles.
Stay mobile without chasing one target so far that you lose awareness of the arena. Break shields promptly, interrupt dangerous enemies when possible, and use a control spell if several enemies converge. Avoid fighting with your back against a wall, because the arena becomes much harder to read when dodge space is limited.
A Fighter Troll enters with additional goblins after enough of the Loyalist force has been defeated. Do not focus exclusively on the Troll while ranged and stealth enemies remain active. Weaken or remove the supporting Loyalists when safe, then circle the Fighter Troll and respond to its telegraphed attacks with appropriate Protego or dodges. Defeating the required force triggers the next sequence with Professor Fig.
- Final Loyalist waves defeated
- Ranged and stealth threats handled without losing arena awareness
- Fighter Troll defeated
- Open space preserved for dodging
- Approach completed without wasting the remaining potion supply
5. Make the Repository response and prepare for Ranrok
During the conversation with Professor Fig, choose either response concerning the Repository. The response changes the surrounding cutscene and Fig’s fate sequence, but both choices continue into the same Ranrok confrontation. It is not a branching route that allows you to skip the final battle or select a separate campaign ending.
If you want to preserve both presentations, use the manual save made before this conversation. If manual saving is available immediately before confirming the response, make another save there as well. Do not overwrite the earlier pre-quest slot until you are certain you no longer need it.
Before the Ranrok transition, confirm that your spell sets contain red, yellow and purple options. Ranrok’s colored orbs must be destroyed with matching spell colors before he becomes vulnerable. Keep at least one dependable damage spell, Protego, a control option and a dodge-capable set accessible. The orb phases and the final boss pattern are covered in the next chapter, but the loadout decision belongs here.
- Preferred Repository response selected
- Pre-choice save retained if alternate scenes are wanted
- Red, yellow and purple spells ready
- Healing supply checked before the boss transition
- Quest continued beyond the conversation
6. Continue through the post-battle transition
After defeating Ranrok, do not treat the end of the boss fight as the complete campaign ending. The game automatically starts and resolves In the Shadow of Revelation through its post-battle dialogue and cutscene sequence. Depending on earlier Sebastian-related choices, the conversation involves Sebastian Sallow or Ominis Gaunt. This transition can occur without a prominent separate quest-start notification, so allow the full sequence to finish and check the completed quest log afterward.
The next required main-story quest is Weasley’s Watchful Eye. Complete it, then reach Level 34 to unlock The House Cup. The House Cup is the final required main-story quest for the full campaign conclusion and occurs after the Ranrok sequence, rather than immediately after the Repository response.
If you fail during the approach, reload the latest useful save, adjust spell placement or gear, refill potions and retry. If Ranrok defeats you, use the retry or reload option and preserve healing for later phases. A completed approach is not the campaign completion check; verify The Final Repository, In the Shadow of Revelation, Weasley’s Watchful Eye and The House Cup separately.
- Ranrok defeated
- In the Shadow of Revelation completed automatically after the finale
- Weasley’s Watchful Eye completed
- Level 34 reached
- The House Cup completed for full main-campaign verification
Before you move on
- The first Loyalist group has been defeated and Fig has moved the drill.
- Both Armored Trolls and their Loyalist reinforcements are defeated.
- The final Loyalist assault and Fighter Troll are defeated.
- The Repository response has been selected.
- The mission has transitioned into the Ranrok confrontation.
- Ranrok is defeated and the post-battle scenes play.
- In the Shadow of Revelation has completed after The Final Repository.
- Weasley’s Watchful Eye is completed.
- Level 34 has been reached and The House Cup is completed.
- A pre-choice manual save remains available if the alternate Repository presentation is desired.
References for this chapter
- The Final Repository - Hogwarts Legacy Quest
- Hogwarts Legacy: The Final Repository Walkthrough | Push Square
- The Final Repository - Hogwarts Legacy Walkthrough - Neoseeker
- Hogwarts Legacy The Final Repository Walkthrough
- Hogwarts Legacy Walkthrough - All Quests - PowerPyx
- In the Shadow of Revelation — Hogwarts Legacy Wiki
- Hogwarts Legacy main quests: All main missions in order
Ranrok: Final Confrontation — Four Orb Phases, Patterns and Recovery
Ranrok’s dragon form cannot be damaged while its shield is active. Break each colored orb with a spell from the matching category: yellow requires Control, purple requires Force and red requires Damage. The battle has four main phases. The first requires one orb, the second two, the third three and the fourth four moving orbs. After each shield breaks, use the short vulnerability window for Ancient Magic and your strongest attacks. Ranrok’s fireballs can be blocked, but breath attacks, charges, shockwaves and large explosions require dodging. The fourth phase is the most dangerous because Ranrok fights from the ground while the orbs appear and disappear quickly. After the health bar reaches zero, destroy a separate sequence of three rapidly appearing colored orbs. The encounter is complete only when those final orbs are gone and the closing cutscene begins.
1. Prepare spell sets and resources before the transformation
Before the Ranrok battle begins, pause after the transformation and arrange your spell sets so you can quickly reach all three spell categories. Keep at least one yellow Control spell, one purple Force spell and one red Damage spell available. Levioso, Glacius and Arresto Momentum are Control spells; Accio, Depulso, Descendo and Flipendo are Force spells; Confringo, Diffindo, Bombarda, Incendio and Expelliarmus are Damage spells. The exact spell choice is flexible, but ranged spells are safer because the orbs may appear around the arena or away from Ranrok.
Fill your Wiggenweld supply before starting The Final Repository if you still have access to preparation facilities. Maxima, Edurus and Focus Potions are useful but not mandatory. A manual save before the repository conversation is also the safest way to preserve the Repository choice and avoid repeating the lengthy goblin and troll encounters if you want another attempt.
- A yellow Control spell is assigned.
- A purple Force spell is assigned.
- A red Damage spell is assigned.
- Wiggenweld Potions are stocked.
- A manual save exists before the repository choice.
2. Phase One — Break one orb, then punish Ranrok
When Ranrok first becomes a dragon, do not waste time attacking his protected body. Wait for the first colored orb to appear, identify its color and cast a spell from the corresponding category. Yellow requires Control, purple requires Force and red requires Damage. A spell with the wrong category will not remove the shield, even if its animation looks similar to the orb.
The first main phase requires one orb before Ranrok becomes vulnerable. Keep moving laterally while you search for it, then target the orb directly if Ranrok’s body or the camera makes aiming difficult. Once the shield drops, use Ancient Magic, high-damage spells, Basic Cast attacks and any offensive potion you intend to spend. The vulnerability period is limited, so attack immediately rather than chasing Ranrok across unsafe ground. When the shield returns, stop attacking his protected form and prepare for the next orb.
- Destroy the single required orb.
- Match the spell category to the orb color.
- Use Ancient Magic during the vulnerability window.
- Resume movement when Ranrok’s shield returns.
3. Phase Two — Handle two orbs and the charged blast
After the first health segment is removed, Ranrok relocates and repeats the shield pattern with two colored orbs. Destroy both before trying to damage him. They can be different colors, so check each target separately and switch spell sets rather than repeatedly casting the spell that worked on the first orb.
This section introduces a large charged blast that covers much of the arena. When Ranrok begins charging it, stop attacking and create distance. The blast cannot be safely treated as a normal Protego exchange; move away and dodge as it lands. Fireballs are the attacks most suited to Protego, while breath attacks, charges and major area attacks should be avoided with movement. After the blast ends, locate both orbs, break them, and spend your strongest damage tools only when Ranrok is exposed.
- Destroy both orbs in the second phase.
- Move away from the large charged blast.
- Use Protego mainly for attacks that can actually be blocked.
- Do not spend healing just to remain inside an active area attack.
4. Phase Three — Break three orbs while preserving healing
The third main phase requires three colored orbs. Ranrok continues using ranged fire, breath attacks and charges, so keep him in view while circling through the arena. Break the first orb as soon as it is safely targetable, then immediately search for the second and third. The orbs do not need to be destroyed with identical spell categories; match each individual orb’s color.
Use the red warning indicator as a signal to dodge rather than cast Protego. Move away from the line of a breath attack, roll through or away from a charge when space allows, and leave any marked ground hazard before it activates. Save at least some Wiggenweld Potions for the next phase. If you are low on health, heal during a movement sequence or after an attack finishes rather than waiting until the next hit would defeat you.
- Destroy all three orbs in the third phase.
- Dodge red-warning and area attacks.
- Keep a reserve of Wiggenweld Potions for Phase Four.
- Use Ancient Magic only when the shield is down.
5. Phase Four — Defeat the grounded form and four moving orbs
The fourth main phase begins in the final arena. Ranrok lands and uses more direct ground attacks, including charges, swipes, fire attacks and a large charged explosion. Stay mobile and avoid backing into the arena edge. If he curls up or gathers energy for a wide attack, move away early; these attacks are not reliable Protego opportunities. Fireballs can still be blocked, but dodging is the safer default when the warning is unclear.
Four colored orbs must be destroyed in this phase. They spread around the arena and can disappear or reappear quickly, so do not commit to a long attack animation while an orb is active. Circle around the arena, switch to the spell category required by the current orb and fire as soon as the target is available. If an orb vanishes, do not waste a potion or Ancient Magic trying to force damage through the shield; wait for its next appearance and keep moving.
This is the best point to use Edurus if you have it and are struggling to survive incoming hits. Save Wiggenweld for genuine damage recovery, and use Maxima or Ancient Magic after the four-orb requirement has been completed. During the charged explosion, retreat and dodge late enough to avoid the blast, or use Ancient Magic during the charge if you need to interrupt the attack and have a charge available.
- Destroy all four moving orbs.
- Continue moving while waiting for an orb to reappear.
- Dodge grounded charges, swipes and the charged explosion.
- Use Edurus for difficult survival sections if available.
- Spend major damage resources only after the shield is removed.
6. Final sequence — Destroy three rapid colored orbs after the health bar
When Ranrok’s health bar reaches zero, the encounter is not finished. Ranrok moves to the center and three colored orbs appear above him one after another. Destroy each orb with the matching spell category before it disappears. This is a separate closing sequence, not a continuation of the three-orb main phase, and the battle does not conclude when the health bar first empties.
If you are defeated, use the game’s restart or continue option and note where it places you. A reload may return you to an encounter checkpoint or an earlier part of the quest, so do not assume that every failed attempt resumes at the same orb phase. If the available restart point is inconvenient, load the manual save made before The Final Repository, restock your potions and recheck every spell set before entering the caverns again. Keep the post-fight save once the story has advanced.
- Ranrok’s health bar reaches zero.
- The separate sequence of three final colored orbs appears.
- All three final orbs are destroyed.
- The closing battle cutscene begins.
- The story advances beyond the active Ranrok objective.
- A post-fight save is retained.
Before you move on
- The one-orb first phase is complete.
- The two-orb second phase is complete.
- The three-orb third phase is complete.
- The four-moving-orb fourth phase is complete.
- Ranrok’s health bar has been emptied.
- The separate final sequence of three colored orbs has been completed.
- The closing battle cutscene has started.
- The quest has advanced beyond the active Ranrok objective.
- A save made after the battle is available.
References for this chapter
Ending Choice — Contain or Open the Repository and Aftermath
Finish The Final Repository, preserve a manual save before the Repository decision, defeat Ranrok, and allow the automatic In the Shadow of Revelation sequence to resolve. Then complete Weasley’s Watchful Eye, reach Level 34, and finish The House Cup in the Great Hall. The Repository choice changes the immediate ending scenes, including Professor Fig’s final moments, but it does not create a separate post-game route. The campaign ending is verified when the House Cup ceremony and closing scenes have played, the credits have appeared, and control returns to normal free exploration. Keep the pre-Repository save if you want to replay the alternate choice.
1. Create two manual saves before The Final Repository
Before selecting The Final Repository in the Main Quests tab, make a manual save in a new slot. Create a second manual save in another slot if possible, and record which slots contain these backups. Do not rely on the autosave alone, because later autosaves can overwrite the useful pre-choice position.
The Repository decision occurs during the final mission, in the conversation with Professor Fig shortly before the Ranrok encounter. A save made before starting The Final Repository lets you replay the entire finale and view the alternate ending scene without replaying the earlier Keeper sequence. Keep both backup slots untouched until you are finished comparing the outcomes.
- Create a manual save before starting The Final Repository.
- Use a second slot for an additional backup if available.
- Record the save slots and do not overwrite them during the finale.
2. Reach the Repository and choose what to do with its power
Track The Final Repository from the Main Quests tab and travel to the Map Chamber. Follow the quest marker into the Keepers’ Caverns, then advance through the underground route with Professor Fig. Fight the Loyalists and trolls blocking the route, and continue toward the Repository rather than detouring into optional exploration.
Near the Repository, Professor Fig asks what you intend to do with the Ancient Magic. Choose “I intend to keep it contained here” for the restrained outcome, or choose “I intend to open it” for the alternate outcome. This decision changes the immediate finale scenes. Both choices continue into the same Ranrok battle and the same post-story quest route.
Professor Fig’s ultimate fate is not avoided by choosing either response. The contained choice gives him a later scene in which he helps with the Repository before dying from his injuries. The open choice changes that sequence and removes that particular farewell scene, but it does not create a different post-game campaign.
- Reach the Repository conversation with Professor Fig.
- Choose either “I intend to keep it contained here” or “I intend to open it.”
- Keep the pre-quest backups if you want to replay the alternate scene.
3. Defeat Ranrok and complete The Final Repository
Continue into the Ranrok battle and stay mobile around the arena. During each vulnerability window, colored Ancient Magic orbs appear around Ranrok. Cast a spell matching an orb’s color to destroy it; the orb must be removed before Ranrok can be damaged normally. Change spell sets if necessary so that the required colors are available without wasting time cycling through unrelated abilities.
Use Protego only against attacks that can be blocked. Red warning indicators identify attacks that require a dodge instead. Keep moving after each dodge because Ranrok’s attacks can cover large areas, and use Wiggenweld Potions before your health becomes critically low. Save Ancient Magic and high-damage spells for vulnerability windows rather than repeatedly attacking the dragon while an orb remains active.
The fight continues through multiple orb phases and a final closing sequence after Ranrok’s health appears to be depleted. Let the battle-ending cutscenes and quest transition play completely. Do not quit immediately when the health bar reaches zero, because the game still has to resolve the conclusion of The Final Repository.
- Destroy every required colored orb with a matching spell color.
- Complete all Ranrok phases and the closing sequence.
- Allow the post-battle scenes and quest transition to finish.
- Confirm The Final Repository is marked complete in the Main Quests tab.
4. Allow In the Shadow of Revelation to resolve
After Ranrok is defeated, the game automatically resolves the main-quest stage In the Shadow of Revelation during the closing post-battle sequence. This is not a separate combat mission that you need to locate on the map. Remain in the finale and allow the conversations and cinematic scenes to finish.
The exact participants in this closing sequence can reflect earlier relationship-quest decisions, but the stage is part of the main campaign’s post-Ranrok resolution. Wait until control returns and the game advances to the next available player-facing main quest. Do not treat the end of the Ranrok health bar as the complete campaign check.
- Let the automatic In the Shadow of Revelation sequence play to completion.
- Wait for the next player-facing main quest to appear.
- Do not leave the game before the post-battle transition finishes.
5. Complete Weasley’s Watchful Eye
Open the Main Quests tab after In the Shadow of Revelation has resolved and track Weasley’s Watchful Eye. Follow the marker to Professor Weasley’s classroom and speak with her about your Field Guide progress. This is a short conversation quest rather than another dungeon or boss mission.
You do not need to complete every Field Guide page, Merlin Trial, collection, or side quest for this step. Professor Weasley’s dialogue can acknowledge your progress, but the campaign route continues even if optional activities remain unfinished. Confirm that Weasley’s Watchful Eye is marked complete before trying to begin The House Cup.
- Track Weasley’s Watchful Eye after the post-Ranrok sequence.
- Speak with Professor Weasley at the marked classroom location.
- Confirm the quest is complete.
6. Reach Level 34 and complete The House Cup
The House Cup requires the character to be at least Level 34. If the quest is unavailable after Weasley’s Watchful Eye, check your level in the character interface and earn experience through available side quests, relationship quests, Challenges, combat encounters, Field Guide activities, or other optional exploration. Full Field Guide completion is not required.
When you reach Level 34, open the Main Quests tab and track The House Cup. Travel to the Great Hall using its Floo Flame or the quest marker, then enter the objective area. The quest is primarily a concluding ceremony and cinematic sequence, not another combat mission.
Allow the House Cup presentation and closing scenes to play without skipping out of the area. The Repository decision has already produced its ending variation; The House Cup does not create a new branch based on that choice. Your selected Hogwarts house receives the ceremony’s outcome.
- Reach Level 34 or higher.
- Confirm Weasley’s Watchful Eye is complete.
- Track The House Cup from the Main Quests tab.
- Enter the marked Great Hall objective area.
- Watch the House Cup ceremony and closing scenes.
7. Verify the ending and preserve the finished save
After The House Cup ceremony, allow the credits and the return to normal play to finish. When control returns, confirm that the map opens, Floo Flames are available, and optional exploration or side quests can be resumed. This confirms that the game has returned to its normal post-campaign state.
Create a new manual save after the ceremony and credits in a separate slot from the pre-Repository backups. Check the Main Quests tab and confirm that The Final Repository, Weasley’s Watchful Eye, and The House Cup are completed. If you want to view the alternate Repository outcome, load the pre-Repository save, select the other response, replay the Ranrok finale, allow In the Shadow of Revelation to resolve, and repeat Weasley’s Watchful Eye and The House Cup as required.
- The Final Repository is complete.
- In the Shadow of Revelation has resolved after the Ranrok battle.
- Weasley’s Watchful Eye is complete.
- The character is Level 34 or higher.
- The House Cup is complete.
- The Great Hall ceremony and closing scenes have played.
- The credits have appeared and free exploration is available again.
- A post-ceremony manual save exists.
- The pre-Repository backup remains available if an alternate replay is wanted.
Before you move on
- The Final Repository is marked completed in the Main Quests tab.
- The automatic In the Shadow of Revelation stage has resolved after the Ranrok battle.
- Weasley’s Watchful Eye has been completed with Professor Weasley.
- The character is Level 34 or higher.
- The House Cup has been completed in the Great Hall.
- The House Cup ceremony and closing scenes have played.
- The credits have appeared and the game has returned to normal post-campaign exploration.
- A manual save exists after the ceremony.
- The pre-Repository manual backup is preserved if alternate-ending replay is desired.
References for this chapter
- Hogwarts Legacy The Final Repository Walkthrough
- Hogwarts Legacy: Weasley’s Watchful Eye Walkthrough
- The House Cup - Hogwarts Legacy Walkthrough
- In the Shadow of Revelation — Hogwarts Legacy Wiki
- The Final Repository - Hogwarts Legacy Quest
- Should you open the repository in Hogwarts Legacy?
- The House Cup - Hogwarts Legacy Walkthrough - Neoseeker
Post-Campaign Checks — Confirming Completion and Collecting Rewards
Defeating Ranrok completes The Final Repository, but it is not the end of the full single-player main-quest sequence. The Final Repository normally transitions directly into In the Shadow of Revelation, a short automatic post-battle conversation and cutscene that resolves without a separate player-directed route. After that sequence, complete Weasley’s Watchful Eye, reach Level 34 if necessary, and finish The House Cup in the Great Hall. Allow the ceremony and closing transition to finish, then create a protected manual save. Verify the completed quest state, return to ordinary free exploration and, on PS5, the Seeker of Knowledge trophy. Remaining companion quests, Field Guide challenges, Merlin Trials, collections and other side content are optional.
1. Let The Final Repository transition through In the Shadow of Revelation
After defeating Ranrok, remain in the final mission and allow the closing dialogue and cinematic sequence to play. The game normally moves directly from The Final Repository into In the Shadow of Revelation. This intermediate quest is a short story transition, not a dungeon or combat mission, and it does not require you to select a new destination or follow a separate route.
The conversation depends on your earlier Sebastian storyline choices. You may speak with Sebastian or Ominis, but the game handles the transition during the post-battle sequence. If the quest log does not display a prominent completion banner, that is not by itself a failure; this transition can begin and resolve without the normal pause between quests. Wait until control and ordinary menu access return before checking your progress.
Afterward, open the Quests menu. Weasley’s Watchful Eye should be available as the next post-story quest, or the game may already have advanced to it if the transition completed quickly. This confirms that the Ranrok mission and its automatic aftermath have resolved.
- Ranrok has been defeated.
- The Final Repository’s closing sequence has finished.
- In the Shadow of Revelation has resolved through its automatic dialogue or cutscene.
- Weasley’s Watchful Eye is available, or the game has advanced beyond the transition.
- You can move normally and open the pause menu outside the final encounter.
2. Preserve a post-Repository manual save
Once free exploration or the next post-story quest is available, open the pause menu and create a manual save in a separate slot. Record the slot and displayed date and time. This save preserves the completed Ranrok sequence and the resolved In the Shadow of Revelation transition before you continue toward the House Cup.
Keep this file separate from routine rotating saves. It is useful if you want to review the Repository dialogue choice, inspect the post-battle state or continue optional companion content from a clean post-finale point. A timestamp alone does not prove that the campaign is complete, so treat this file as a backup rather than the final verification.
- A manual save exists after The Final Repository and its automatic transition.
- The slot and timestamp are recorded.
- Loading the save places you in ordinary exploration or the post-story quest state, not the final arena.
3. Complete Weasley’s Watchful Eye
Track Weasley’s Watchful Eye from the Main Quests list and follow its marker to Professor Weasley at Hogwarts. Speak with her and complete every objective shown by the tracker. The quest reviews your progress with the Wizard’s Field Guide, but it does not require every Field Guide page, Collection entry, Challenge tier or exploration activity.
Professor Weasley’s comments can vary according to your optional progress. Do not interpret a less enthusiastic assessment as a failed requirement. The required action is to follow the quest marker, finish the conversation and confirm that Weasley’s Watchful Eye is no longer active in the Main Quests section.
- Weasley’s Watchful Eye has started.
- The meeting with Professor Weasley and every displayed objective are complete.
- The quest is no longer active among Main Quests.
4. Reach Level 34 and unlock The House Cup
The House Cup is gated by character level. If it does not appear after Weasley’s Watchful Eye, check your character screen and continue optional activities until you reach Level 34. You do not need to replay The Final Repository or complete every Field Guide category.
Side quests, relationship quests, unfinished Challenge objectives, exploration activities and combat can all provide additional experience. Choose whichever unfinished content is convenient; no companion storyline is required to unlock the House Cup. When the quest becomes available, create another manual save if you want to preserve a pre-ceremony state.
- Your character is Level 34 or higher.
- Weasley’s Watchful Eye is complete.
- The House Cup appears in the Main Quests list.
- A pre-ceremony manual save exists if you want a separate backup.
5. Attend The House Cup ceremony in the Great Hall
Track The House Cup and follow its objective to the Great Hall at Hogwarts. Use the Great Hall Floo Flame if it is unlocked, then follow the quest marker to the required objective. This is a ceremony and end-of-year sequence rather than another combat mission.
Allow the ceremony, closing scenes and credits transition to finish. The House Cup is the final post-story main quest and supplies the campaign’s epilogue. When the sequence ends, the game returns you to the playable world so you can continue side quests, relationship quests, challenges and collections.
- The House Cup directs you to the Great Hall.
- The ceremony has played in full.
- The closing transition and credits sequence have finished.
- Control returns to ordinary free exploration.
6. Create the completed-campaign save and verify the ending
After control returns, create a fresh manual save in a different slot from the post-Repository and pre-ceremony backups. Record its timestamp and confirm that loading it places you in normal post-campaign exploration. Protect this file before beginning a new character or replacing it with routine saves.
Open the Quests menu and check that The Final Repository, In the Shadow of Revelation, Weasley’s Watchful Eye and The House Cup are complete or absent from active Main Quests. The strongest completion check is not a timestamp or location by itself: combine the completed Ranrok encounter, the automatic In the Shadow of Revelation transition, Weasley’s Watchful Eye, the Level 34 House Cup quest, the Great Hall ceremony and the return to free exploration.
On PS5, The Seeker of Knowledge trophy should register for winning the House Cup. If the notification is delayed, check the console trophy list after saving. Remaining companion quests, relationship quests, Merlin Trials, Field Guide pages, Collections entries, Challenges and the PlayStation-exclusive Minding Your Own Business quest are optional and do not mean the core single-player campaign is unfinished.
- A fresh manual save exists after The House Cup epilogue.
- The save loads into normal post-campaign exploration.
- The Final Repository is complete or absent from active Main Quests.
- In the Shadow of Revelation has resolved.
- Weasley’s Watchful Eye is complete.
- The House Cup is complete.
- The House Cup ceremony has played.
- The Seeker of Knowledge trophy has registered, where trophy tracking is enabled.
- Any remaining objectives are optional side, relationship, challenge, collection or exploration content.
Before you move on
- The Final Repository has been completed and Ranrok has been defeated.
- In the Shadow of Revelation has automatically resolved during the post-battle closing sequence.
- Weasley’s Watchful Eye has been completed.
- The character has reached Level 34 or higher and unlocked The House Cup.
- The House Cup ceremony has played in the Great Hall.
- The closing transition and credits sequence have finished.
- The game has returned the character to ordinary free exploration.
- A manual save made after the epilogue loads into the post-campaign world.
- The Seeker of Knowledge trophy or achievement has registered, where applicable.
- No required main quest remains active; remaining content is optional.
References for this chapter
- Hogwarts Legacy: All Main Quests, Side Quests, Assignments & Relationship Quests
- Hogwarts Legacy main quests: All main missions in order
- Hogwarts Legacy The Final Repository Walkthrough
- Hogwarts Legacy Trophy Guide & Roadmap
- In the Shadow of Revelation — Hogwarts Legacy Wiki
- Hogwarts Legacy Accessibility Features (A11Y)
Optional Content — Trials, Hogwarts Secrets and Companion Epilogues
After The Final Repository, Hogwarts Legacy remains open for optional quests, companion relationship conclusions, Merlin Trials, Hogwarts Secrets, regional Challenges and Collections cleanup. These activities are not required to defeat Ranrok or complete The House Cup. First finish Weasley’s Watchful Eye, reach level 34 and complete The House Cup, then preserve a protected manual save before starting optional cleanup. Use the Quests menu for quest progress, Challenges for milestone-based activities and Collections for broader inventory completion. Do not treat map icons, completed Challenge tiers or discovered chests as proof that every optional category is finished.
1. Confirm the campaign epilogue before beginning optional cleanup
Load the save created after The Final Repository and open the Quests menu. If Weasley’s Watchful Eye is available, complete it first. This post-story quest reviews your Field Guide progress, but it does not require every optional activity or every Collection entry.
Reach level 34, then travel to the Great Hall and begin The House Cup. If you are below level 34, gain experience through available Side Quests, Relationship Quests, Assignments, combat encounters, Merlin Trials or other world activities before returning to the quest marker. The House Cup is the final main-story quest and its ceremony follows the level requirement.
Allow the House Cup sequence and credits to finish. When control returns to free exploration, create a manual save in a dedicated slot. Make a second manual save if you want an untouched copy of the completed campaign before beginning a long cleanup session.
- The Final Repository is complete.
- Weasley’s Watchful Eye is complete.
- The House Cup is complete at level 34 or higher.
- The game has returned to post-epilogue free exploration.
- A protected post-epilogue manual save exists.
2. Finish companion Relationship Quests and preserve permanent choices
Open the Quest Log and complete available Relationship Quests for Sebastian Sallow, Natsai Onai and Poppy Sweeting. These storylines are optional and are not required for The House Cup, but they provide separate conclusions, rewards and character scenes.
If one of these quests is absent, read the prerequisite shown in the Quest Log and continue the associated main-story or relationship progression. Check the log again after completing a stage; companion missions unlock progressively rather than appearing all at once.
Treat decisions involving Sebastian’s Unforgivable Curses as permanent for the current save. If you want to preserve alternate dialogue or spell-learning outcomes, create a manual save before the decision. Do not rely on the post-epilogue state to provide a replay option.
- Sebastian’s intended Relationship Quest outcome is complete.
- Natsai’s Relationship Quests are complete if desired.
- Poppy’s Relationship Quests are complete if desired.
- Any desired pre-choice backup saves are preserved.
3. Use Merlin Trials for gear-capacity milestones, not story progression
Merlin Trials are optional open-world puzzles introduced by the Trials of Merlin quest. Activate a trial by interacting with its marker and supplying Mallowsweet Leaves. Grow or purchase Mallowsweet before planning a large regional route so you do not reach several markers without enough activation items.
Do not force every visible trial immediately. Different puzzles can require Incendio, Confringo, Lumos, Flipendo, Accio, Depulso, Wingardium Leviosa or later traversal access. If a puzzle cannot be completed with your current spellbook, mark the location and return after the relevant spell or ability is available.
Merlin Trials advance the Exploration Challenge. Gear-capacity increases come from reaching the applicable Merlin Trial Challenge milestones and then claiming those rewards in the Challenges menu; an individual completed trial does not directly grant a separate gear-slot increase. Check the Exploration section after each batch of trials and claim any available milestone rewards.
For efficient cleanup, work one region at a time. Activate nearby Floo Flames, solve the trials whose mechanics are currently available and leave blocked locations for a later spell-and-traversal pass.
- Mallowsweet Leaves are available before activating trials.
- Completed Merlin Trial milestones have been claimed in Challenges.
- Blocked trials have been marked for a later pass.
- Gear-capacity progress has been checked separately from the number of visible trial markers.
4. Complete the three tracked Hogwarts Secrets
The Hogwarts Secrets Challenge tracks three specific castle puzzles. Ordinary hidden chests, locked rooms and Field Guide Pages do not count as additional Hogwarts Secrets. After solving each puzzle, check the Exploration Challenges menu and claim any available reward.
For the Viaduct Bridge secret, travel to the bridge near the Viaduct Courtyard. Inspect the symbols and numbered plates beneath the four braziers. Rotate each brazier to the number associated with its symbol, then light all four braziers. The bridge mechanism opens a hatch; enter the passage and collect its rewards.
For the Clock Tower secret, go to the Clock Tower Courtyard and reach the pendulum area. The pendulum passes four symbols. Use Arresto Momentum when the pendulum aligns with a symbol to open the matching gate, then enter the room behind it. Repeat the process for all four symbol positions and inspect each unlocked area.
For the final secret, use the available Headmaster’s Office route after the relevant story access is unlocked. Reach the upper area, obtain Alohomora III and collect the Key of Admittance. Return to the locked door below the Headmaster’s Study and use the key to enter the hidden room. This completes the third tracked secret; it is not the same as finding every locked chest in the castle.
- The Viaduct Bridge secret is complete.
- The four Clock Tower secret areas have been opened.
- The Headmaster’s Office route, Alohomora III and Key of Admittance secret are complete.
- The Hogwarts Secrets Challenge entry and rewards have been checked.
5. Clean up Side Quests, Assignments and the PS5-supported shop quest
Use the Quest Log’s available and completed sections to track Side Quests, Assignments and Relationship Quests. Most optional content remains available after The House Cup, so you can complete it from the post-epilogue free-roam state without restarting the campaign.
On the PS5 edition, check Hogsmeade for Minding Your Own Business, a PS5-supported side quest. It becomes available after completing Fire and Vice and requires 1,500 Galleons to purchase the shop from Cassandra Mason. Speak with Penny near the vacant shop, meet Cassandra, pay for the property and follow the quest through the shop repairs, haunted interior, Fastidio encounters and the confrontation with Cassandra.
Sell unwanted gear or other nonessential items if you need the 1,500 Galleons. Save after the quest is complete. Do not confuse Minding Your Own Business or any other Side Quest with the required main-campaign ending; optional quest completion is tracked separately from The House Cup.
- Desired Side Quests and Assignments are complete.
- The three companion Relationship Questlines are complete if desired.
- Minding Your Own Business is complete on PS5 if pursuing the available side-quest content.
- Quest completion has been checked independently from Collections.
6. Verify broader completion with Challenges and Collections
Open Challenges and review Exploration, Combat, Quests and Field Guide Pages category by category. Astronomy Tables, Landing Platforms, balloon sets, Ancient Magic hotspots, enemy defeats and duelling feats use separate progress records and may require different routes across Hogwarts and the Highlands.
Then open Collections and identify missing entries. A completed Field Guide Page, finished Exploration tier or solved Hogwarts Secret does not prove that every Collection entry has been obtained. Continue with regional maps, Revelio searches, locked areas, vendor visits and late-spell routes only if those broader goals matter to you.
Finish the cleanup session with another manual save. Keep this file separate from the protected post-epilogue campaign save. This preserves a clear proof of the completed ending and prevents a long optional-content session from overwriting the file you may want for alternate character choices or replay planning.
- Challenges have been reviewed by category.
- Collections has been reviewed separately.
- Desired companion, Side Quest, Merlin Trial and Hogwarts Secret goals are complete.
- A final optional-content cleanup save exists.
- The protected post-epilogue save remains available.
Before you move on
- The post-House Cup save loads into free exploration after the campaign epilogue.
- The Final Repository, Weasley’s Watchful Eye and The House Cup are complete in the main-quest record.
- The desired Sebastian, Natsai and Poppy Relationship Quests are complete.
- The Challenges menu confirms the targeted Merlin Trial milestones and all three Hogwarts Secrets.
- Minding Your Own Business is complete if the PS5 optional-content goal includes that quest.
- Challenges and Collections have both been reviewed if pursuing broader completion.
- A separate manual save preserves the completed campaign before optional cleanup.
References for this chapter
- Hogwarts Legacy All Side Quests Guide
- Hogwarts Legacy Minding Your Own Business Walkthrough
- The House Cup - Hogwarts Legacy Walkthrough
- Hogwarts Legacy All Hogwarts Secrets Locations & Solutions
- Hogwarts Legacy Challenges Guide - All Challenges
- Hogwarts Legacy All Merlin Trials Locations & Solutions
- Hogwarts Legacy - PS4 & PS5 Games
PS5-Specific Tuning — Performance, Accessibility and DualSense Tips
Configure Hogwarts Legacy on PS5 before a long campaign session, then keep the setup stable during combat and flight. Fidelity favors resolution and visual quality and targets 30 frames per second, while Performance favors a higher frame rate and targets 60 frames per second. Depending on the connected display, additional options such as Balanced or HFR Performance may be available; Fidelity with ray tracing requires a restart. If the console’s Game Presets override the in-game choice, set the PS5 preset to Game Default and select the mode inside Hogwarts Legacy. Accessibility options cover text, subtitles, color, camera effects, audio, aiming, sensitivity, flight inversion, and difficulty. DualSense haptics and adaptive triggers provide supplementary spell, potion, and flight feedback, but visual and audio cues remain sufficient if those effects are reduced. Activity Cards and Game Help can assist with supported objectives, while the in-game quest log and map remain the primary campaign reference.
Choose a graphics mode before a major story session
From the Hogwarts Legacy title screen, open Settings and enter Display Options. Fidelity is the high-fidelity mode that favors resolution and graphical quality and commonly targets 30 frames per second. Performance is the high-frame-rate mode that favors responsiveness and commonly targets 60 frames per second. Choose Performance if camera movement and combat input feel more important than maximum image quality; choose Fidelity if you prefer a sharper, more cinematic presentation.
The PS5 version can also show Fidelity with ray tracing, Balanced, or HFR Performance. Fidelity with ray tracing requires a reboot before the change applies. Balanced and HFR Performance are only available with supported output devices, so their absence is not a campaign or installation problem. If an option is unavailable, check the television or monitor’s capabilities instead of changing unrelated gameplay settings. After selecting a mode, move the camera in a quiet area and cast several basic spells so you know how the image and input response feel before entering a difficult quest.
- Display Options shows the mode you intend to use.
- You understand that Performance and Fidelity are targets rather than guarantees of a perfectly fixed frame rate.
- You restart the game when selecting Fidelity with ray tracing.
- You test the selected presentation before a major combat encounter.
Fix a Game Presets conflict when the choice keeps reverting
If Hogwarts Legacy displays a message that Performance Mode has been set to default, or if the game repeatedly changes your selected mode, close the game and open the PS5 Settings menu. Select Save Data and Game/App Settings, then Game Presets. Under Performance or Resolution Mode, choose Game Default rather than forcing Performance Mode or Resolution Mode at the console level.
Launch Hogwarts Legacy again. From the title screen, open Settings with the Triangle button, enter Display Options, and choose the preferred in-game mode. Confirm the selection after loading your save. This procedure addresses a conflict between the console preset and the game’s own setting; it is not necessary to change the preset when the in-game option is already saving normally.
- PS5 Game Presets is set to Game Default if an override occurred.
- The preferred mode is selected from Hogwarts Legacy’s title-screen settings.
- The selection remains after launching the save again.
- You do not mistake an unavailable display-dependent mode for a progression issue.
Set accessibility options for reading, camera comfort, and control
Open Settings and review Accessibility before beginning the campaign or whenever a setting becomes uncomfortable. The game provides text scaling, high-contrast text, colorblind presets, subtitles, separate music, effects, and dialogue volume controls, text-to-speech, an audio visualizer, and adjustments for camera shake, motion blur, chromatic aberration, depth of field, and film grain. High Contrast Gameplay can emphasize important elements in the environment if ordinary visibility is difficult.
For control comfort, test Aim Mode, camera and aiming sensitivity, camera acceleration, camera deadzone, follow-camera speed, stick swapping, and independent camera or broom-flight inversion. The PS5 version also supports a motion-sensor option for flight when using a compatible controller configuration. Change one group of settings at a time, then test movement, aiming, combat, and broom travel separately. Story difficulty is available for players who need reduced combat or puzzle pressure: spell-learning minigames cannot fail from imprecise movement at that difficulty, puzzles are not time-sensitive, and difficulty can be changed during normal gameplay.
- Text, subtitles, and menu narration are readable or audible from your normal position.
- Camera shake and other visual effects are reduced if they cause fatigue or discomfort.
- Aiming and flight inversion have been tested in actual gameplay.
- Your selected difficulty matches the amount of combat and puzzle pressure you want.
Configure DualSense feedback without depending on it
Hogwarts Legacy uses DualSense haptics and adaptive triggers for wand actions, spell impacts, Protego interactions, potion work, and broom or mount flight. Keep these effects enabled if tactile feedback helps you distinguish actions, but treat them as supplementary information. Incoming attacks, Protego timing, and spell effects must remain readable through the screen and audio because vibration is not a reliable substitute for visual warnings.
If trigger resistance or vibration causes hand fatigue, press the PS button, open the Control Center, select Accessories, and adjust the connected DualSense controller’s vibration and trigger-effect intensity. Reduce only the uncomfortable feature when possible instead of disabling every effect. If another controller is connected later, check its setting separately; the adjustment applies to the controller being configured.
- Haptic and trigger strength are comfortable for extended play.
- You can recognize combat prompts and incoming attacks without relying on vibration.
- Any second controller has been checked separately if it will be used.
Use PS5 conveniences while keeping the in-game log authoritative
Press the PS button during play to open the Control Center and inspect Hogwarts Legacy Activity Cards when they are available. Supported cards can show progress or provide jump points for certain activities, and Game Help may offer assistance for supported objectives. These features vary by activity and should be treated as convenience tools, not as a replacement for the in-game quest menu, map, tracked objective, or objective markers.
Once the graphics, accessibility, and controller settings feel right, avoid changing the core display mode during a boss attempt unless comfort or visibility requires it. If you do make a change, apply it between encounters, return to gameplay, confirm that the quest objective is still tracked, and create a manual save. This leaves a stable checkpoint for the next campaign session.
- The intended quest is still tracked in the in-game menu and map.
- Activity Cards are used only when they provide a supported shortcut or progress view.
- A manual save exists after finalizing the settings.
- You know how to restore the preferred in-game graphics mode if the console preset overrides it.
Before you move on
- Display Options shows the intended graphics mode and it remains selected after a restart or relaunch.
- Any Game Presets conflict has been corrected by selecting Game Default on the PS5.
- Accessibility settings have been tested during movement, combat, menu navigation, and flight.
- DualSense feedback is comfortable, deliberately reduced, or disabled through the controller settings.
- A manual save has been created after tuning, providing a stable starting point for the next campaign session.
References for this chapter
- Adjusting Performance or Fidelity Mode On PlayStation 5 — Portkey Games Support
- Hogwarts Legacy Graphics Modes for PlayStation 5 and Xbox Series X|S — Portkey Games Support
- Hogwarts Legacy Accessibility Features — WB Games Support
- How Hogwarts Legacy Taps PS5 Features to Make Gameplay Feel Magical — PlayStation.Blog
Completion Roadmap — Replay, Alternate Ending, and Backups
Complete The Final Repository and defeat Ranrok, then allow the automatic In the Shadow of Revelation transition to finish. This short cinematic main-quest sequence occurs immediately after the finale and should be counted before Weasley’s Watchful Eye. Complete Weasley’s Watchful Eye, reach level 34, and finish The House Cup in the Great Hall. The House Cup ceremony and its ending scenes are the final playable main-story milestone; afterward, the character returns to free exploration. Keep a manual save before the Repository decision if you want to view the alternate response, and make a separate post-House-Cup save for optional cleanup. Protect the finished PS5 character with verified PlayStation Plus cloud storage or a full PS5 USB backup. Track relationship quests, Challenges, Collections and map activities separately from the campaign-ending checklist.
1. Finish the permanent campaign route
Complete The Final Repository and defeat Ranrok. Do not stop your completion check immediately after the boss battle. The game transitions directly into In the Shadow of Revelation, a short automatic main-quest sequence made up of cinematic scenes and dialogue. Depending on earlier Sebastian-related decisions, the scene involves Sebastian or Ominis. There is no conventional dungeon route or combat objective to complete during this transition; allow the scenes to finish and verify that the quest is recorded in the completed-quest history.
After In the Shadow of Revelation ends, check the main quest list for Weasley’s Watchful Eye. Complete that quest from its marker. If it does not appear immediately, finish the automatic post-finale scenes, regain control of your character, and check the quest log again rather than assuming The Final Repository was the complete campaign ending.
The House Cup is gated behind level 34. If the quest is unavailable, gain experience through remaining side quests, relationship quests, Challenges, Field Guide activities, combat encounters and exploration objectives. These activities are only needed to reach the level requirement or for optional completion; Merlin Trials, Collection Chests and full map clearing are not required simply to unlock the final ceremony.
Once you are level 34 and Weasley’s Watchful Eye is complete, travel to Hogwarts Castle and follow the quest marker to the Great Hall. Start and finish The House Cup ceremony. Let the closing scenes and credits play until control returns to the character in ordinary free exploration.
- The Final Repository is complete and Ranrok is defeated.
- In the Shadow of Revelation has automatically played and is recorded as complete.
- Weasley’s Watchful Eye is complete.
- The House Cup has been completed at level 34 or higher.
- The credits have played and the character has returned to free exploration.
2. Create the permanent post-ending save
After the credits return you to normal exploration, make a manual save in a fresh slot. Record the slot’s date and purpose if you use several characters or multiple campaign backups. Load this file once to verify it is a post-ending save: it should place you in ordinary exploration with no active Ranrok battle, Repository traversal or unresolved House Cup ceremony.
Create a second post-ending manual save in another slot if space allows. Use one as the main optional-content file and leave the other untouched as a recovery copy. The House Cup confirms the main campaign’s school-year epilogue, but it does not complete every Field Guide category, Collection, Challenge, side quest or relationship storyline.
Do not overwrite the post-ending file when beginning optional cleanup. If you later create a new student for another house or trophy, use separate save slots and preserve the completed character first. A second PS5 user profile is not itself a backup of the original save; it is only a separate account or save environment.
- A fresh manual save exists after The House Cup and credits.
- Loading the file returns to free exploration.
- A second post-ending recovery save is preserved when possible.
- The finished character is separated from any new-house or trophy character.
3. Preserve the alternate Repository response
Before entering the final Repository sequence, create a manual save in a separate slot. The useful replay point is before the conversation with Professor Fig about what to do with the Repository. A save earlier in The Final Repository also works, but it requires repeating the remaining traversal and combat before reaching the decision.
Load the pre-choice save and select the other Repository response. The choice changes the final presentation and dialogue, but it does not create a permanently separate campaign route. You still need to complete the remaining Ranrok fight, allow In the Shadow of Revelation to finish, complete Weasley’s Watchful Eye, reach level 34 and complete The House Cup if you want a second fully verified ending run.
Keep the pre-choice file intact after viewing the alternate response. Do not depend on an autosave to preserve the decision, because later autosaves may place you inside the final battle or after the choice. Keep the preferred post-House-Cup save in a different slot so alternate-ending experiments cannot replace your main continuation file.
- A manual save remains before the Repository decision.
- The alternate response has been viewed if desired.
- The pre-choice replay file and post-House-Cup continuation file are separate.
4. Back up the completed PS5 save
With PlayStation Plus, use PS5 saved-data management to upload the desired completed file. From Settings, open Saved Data and Game/App Settings, choose Saved Data (PS5), then choose Upload or Delete from Console Storage and the Upload to Cloud Storage tab. You can also highlight Hogwarts Legacy on the Games home screen, press the Options button and choose Upload/Download Saved Data. Confirm that the cloud copy reflects the post-ending manual save rather than a later replay attempt.
PS5 cloud synchronization follows the most recent data, so verify the local save state before uploading or downloading. For alternate endings, keep the pre-choice manual save locally and upload the completed continuation only after confirming which file should be protected. Cloud storage is useful for save recovery, but it is not a substitute for maintaining separate in-game manual slots.
A USB backup is a full PS5 console backup, not a simple Hogwarts Legacy slot export. Connect a compatible FAT32- or exFAT-formatted USB drive, then open Settings, System, System Software, Back Up and Restore, and Back Up Your PS5. Select the desired data and wait for the console to confirm completion. Restoring the backup can erase current console data, so use this method as a protection measure. Trophies are not included in the PS5 backup; synchronize them separately before backing up.
- The preferred completed save exists on console storage.
- The correct save has been uploaded to PlayStation Plus cloud storage, if available.
- A verified USB console backup exists if an offline copy is needed.
- The backup date is later than the final manual save.
- Trophies have been synchronized separately from the USB backup.
5. Track optional completion separately
Use the post-ending character to review the quest log, map, Field Guide, Challenges and Collections. Make separate lists for unfinished side quests, Assignments, Sebastian Sallow’s, Poppy Sweeting’s and Natsai Onai’s relationship quests, Hogwarts Secrets, Revelio Pages, Collection Chests, gear appearances, broom-upgrade races and regional activities.
Work region by region and use Floo Flames to reduce backtracking. Check regional map counters and Field Guide categories independently; completing The House Cup does not mean every counter is complete. Merlin Trials, treasure vaults, bandit camps, Field Guide pages and Collection Chests are optional after the campaign ending.
For trophy hunting, review the trophy requirements independently of the Field Guide. House-specific trophies require separate characters, so preserve the completed campaign character before starting another house. There is no New Game Plus transfer that carries this student into a fresh campaign.
- Every unfinished side and relationship quest is listed.
- Regional map counters and Field Guide categories have been reviewed separately.
- Optional cleanup is being performed on the backed-up completed character.
- Additional house or trophy characters use separate saves.
Before you move on
- Ranrok is defeated and The Final Repository is complete.
- In the Shadow of Revelation has played automatically and is recorded in the completed-quest history.
- Weasley’s Watchful Eye is complete.
- The House Cup has been completed after reaching level 34.
- The ceremony and credits have played.
- A post-ending manual save loads into normal free exploration.
- A separate pre-choice save remains available for replaying the alternate Repository response.
- The completed save is uploaded to cloud storage or included in a verified USB backup.
- Optional quests, relationship stories, Challenges, Collections and map activities are tracked separately.
- Any additional house or trophy characters use separate saves and do not replace the completed campaign character.
References for this chapter
Finishing up
You have completed The Final Repository and defeated Ranrok.
The post-battle closing sequence has completed, including the automatically resolved In the Shadow of Revelation stage where applicable.
You have completed Weasley’s Watchful Eye, reached Level 34 or higher and completed The House Cup in the Great Hall.
The House Cup ceremony and closing sequence have played, followed by the credits.
After the credits, the game has returned you to normal free exploration and you have created at least one manual save dated after the ceremony.
Choose your next gameScreenshots & video
Game imagery for reference. Follow the written chapters above for the route and strategies.
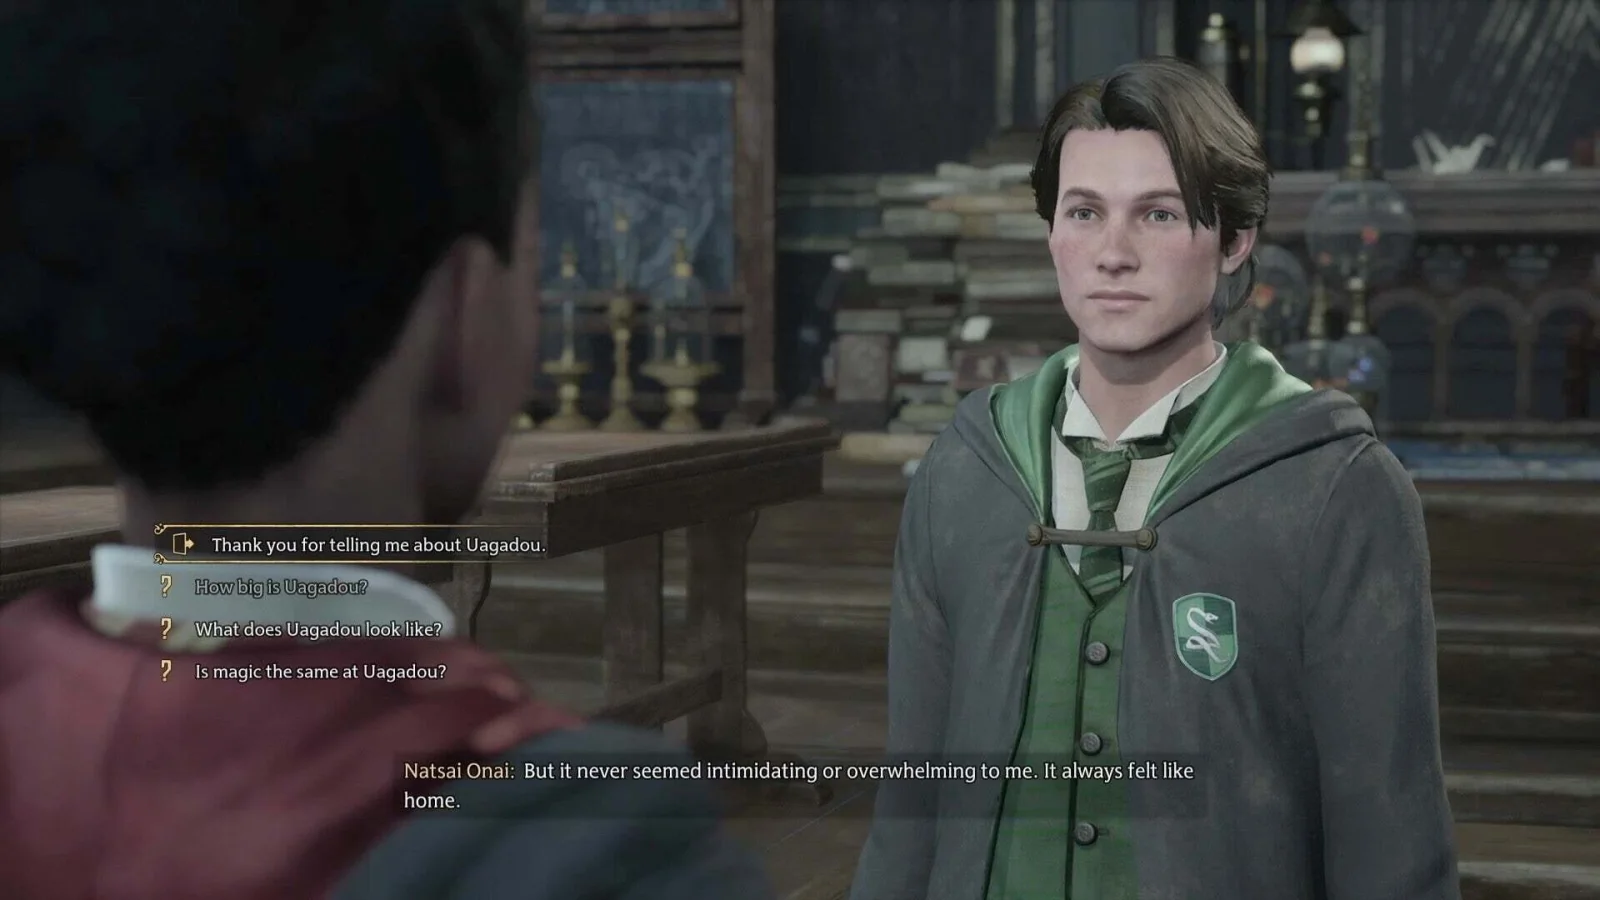
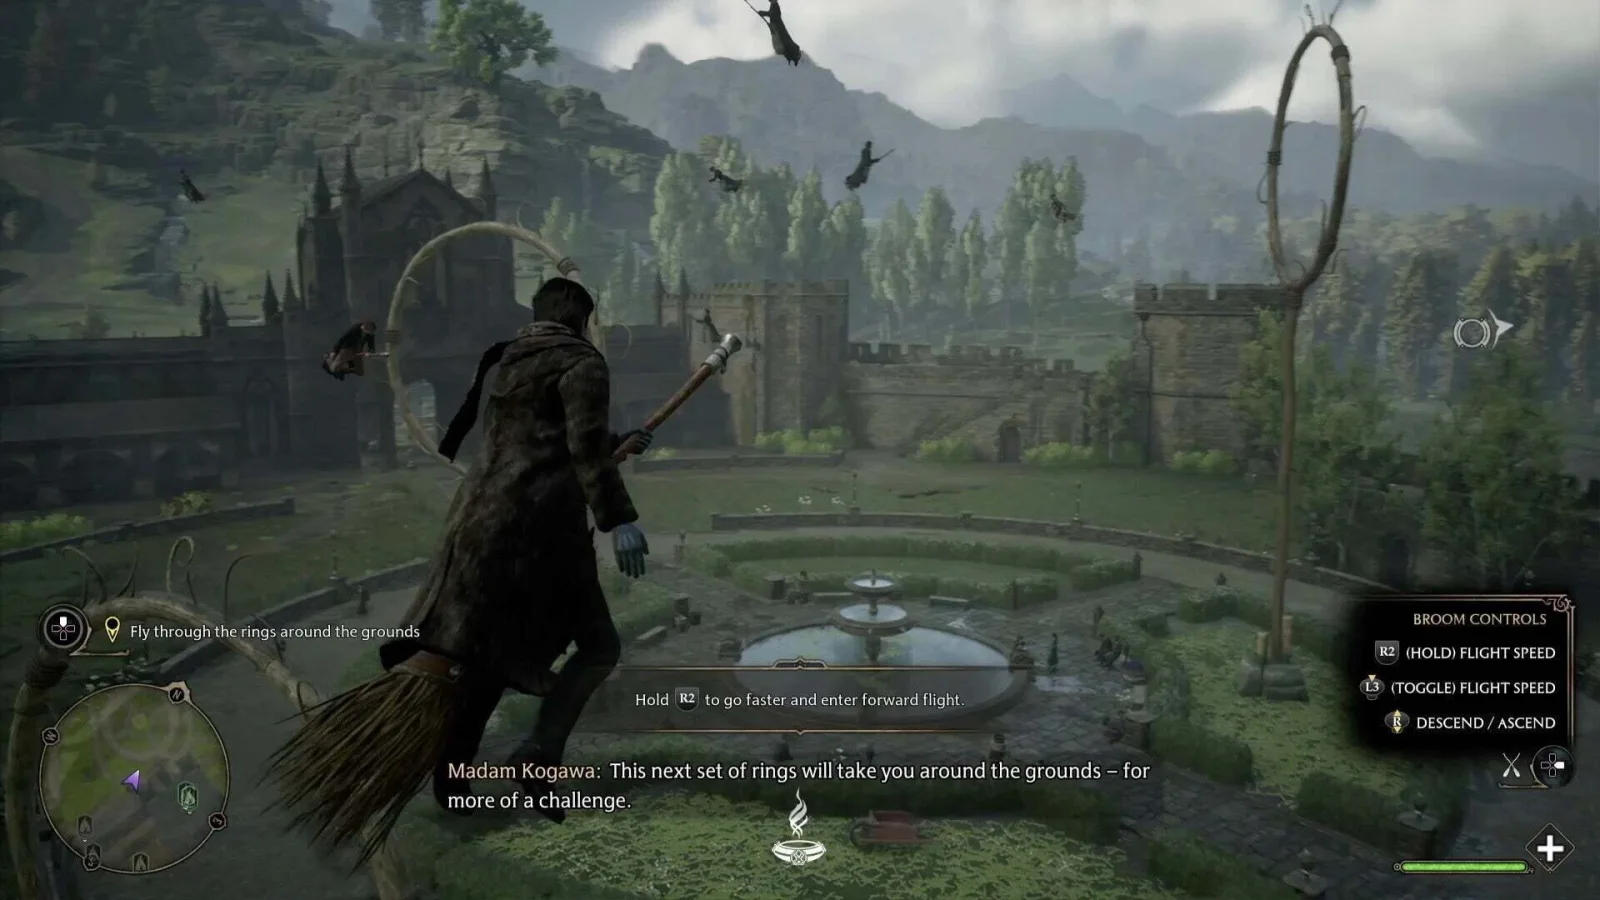
Sources & references
Our original guide draws on the references below. Check the edition at the top of this page before following controls or unlock requirements.
- Hogwarts Legacy Accessibility Features (A11Y)
- Hogwarts Legacy: The Path to Hogwarts Walkthrough – Push Square
- Hogwarts Legacy The Path to Hogwarts Walkthrough – PowerPyx
- Hogwarts Legacy Trophy Guide & Roadmap
- The Path to Hogwarts – Hogwarts Legacy Walkthrough – Neoseeker
- Welcome to Hogwarts Walkthrough
- Defence Against the Dark Arts Class Walkthrough
- Charms Class – Hogwarts Legacy Quest
- Professor Ronen’s Assignment Walkthrough
- Weasley After Class Walkthrough
- Basic Controls – Hogwarts Legacy
- Hogwarts Legacy Walkthrough: Main Quest Order and Missables
- Hogwarts Legacy: Professor Ronen’s Assignment Walkthrough
- Professor Ronen’s Assignment — Hogwarts Legacy Quest
- Weasley After Class — Hogwarts Legacy Walkthrough
- Hogwarts Legacy: How to Fast Travel Using Floo Flames
- The Hunt for the Missing Pages: Gryffindor Quest Walkthrough
- Jackdaw’s Rest — Hogwarts Legacy Walkthrough
- Hogwarts Legacy: Jackdaw’s Rest Walkthrough
- Hogwarts Legacy main quests: All main missions in order
- Hogwarts Legacy Flying Class Walkthrough
- Hogwarts Legacy: Flying Class Walkthrough
- How to use a broom in Hogwarts Legacy
- Hogwarts Legacy mounts: When and how to unlock them
- Talents: Core — Hogwarts Legacy Database
- Combat Tips & Basics — EIP Gaming
- How to Unlock Talents in Hogwarts Legacy — Prima Games
- Adjusting Performance or Fidelity Mode On PlayStation 5 — Portkey Games Support
- Hogwarts Legacy PS5 Version — PlayStation Store
- Hogwarts Legacy Challenges Guide - All Challenges
- The Elf The Nab-Sack and the Loom — Hogwarts Legacy Walkthrough
- How to upgrade gear in Hogwarts Legacy - Enchanted Loom Guide
- Shops and Vendors — Hogwarts Legacy
- Hogwarts Legacy PS5 Version — PlayStation Store
- Hogwarts Legacy Frequently Asked Questions — Official Site
- Hogwarts Legacy: All Main Quests, Side Quests, Assignments & Relationship Quests
- Relationship Quests (Companions) — Hogwarts Legacy
- Hogwarts Legacy: Percival Rackham’s Trial Walkthrough
- Hogwarts Legacy Charles Rookwood’s Trial Walkthrough
- Hogwarts Legacy Niamh Fitzgerald’s Trial Walkthrough
- Hogwarts Legacy The Polyjuice Plot Walkthrough
- Hogwarts Legacy The Headmistress Speaks Walkthrough
- Hogwarts Legacy San Bakar’s Trial Walkthrough
- Hogwarts Legacy: How to Increase Inventory Size
- Hogwarts Legacy: San Bakar’s Trial Guide
- Lodgok’s Loyalty - Hogwarts Legacy Quest - EIP Gaming
- The Final Repository - Hogwarts Legacy Quest
- Hogwarts Legacy Main Quests Story Walkthrough Guide - GameWith
- Hogwarts Legacy Walkthrough - All Quests - PowerPyx
- Hogwarts Legacy: The Final Repository Walkthrough | Push Square
- The Final Repository - Hogwarts Legacy Walkthrough - Neoseeker
- Hogwarts Legacy The Final Repository Walkthrough
- In the Shadow of Revelation — Hogwarts Legacy Wiki
- How to Defeat Ranrok: Hogwarts Legacy Final Boss Guide
- The Final Repository Ending Choices in Hogwarts Legacy | Gamer Guides
- Hogwarts Legacy: Weasley’s Watchful Eye Walkthrough
- The House Cup - Hogwarts Legacy Walkthrough
- Should you open the repository in Hogwarts Legacy?
- The House Cup - Hogwarts Legacy Walkthrough - Neoseeker
- Hogwarts Legacy All Side Quests Guide
- Hogwarts Legacy Minding Your Own Business Walkthrough
- Hogwarts Legacy All Hogwarts Secrets Locations & Solutions
- Hogwarts Legacy All Merlin Trials Locations & Solutions
- Hogwarts Legacy - PS4 & PS5 Games
- Hogwarts Legacy Graphics Modes for PlayStation 5 and Xbox Series X|S — Portkey Games Support
- Hogwarts Legacy Accessibility Features — WB Games Support
- How Hogwarts Legacy Taps PS5 Features to Make Gameplay Feel Magical — PlayStation.Blog
- In the Shadow of Revelation - Hogwarts Legacy Speedrunning Wiki
- PlayStation Plus cloud storage for PS5 consoles
- How to back up and restore PS5 console data
About the game & collecting notes
- Platform
- Sony PlayStation 5
A PS5-focused campaign walkthrough to finish Hogwarts Legacy’s full single-player main-quest sequence on the PlayStation 5 edition. It covers prologue setup, core mechanics, classes and Assignments, Keeper Trials, the route through Wand Mastery and The Final Repository, the Ranrok battle, the post-story quests Weasley’s Watchful Eye and The House Cup, and a concrete post-credits save and completion checklist. Optional chapters cover companion stories, PS5 settings and cleanup without confusing them with required campaign progression.
Darryl Polo
Darryl Polo writes about emulation and retro games. What changes when an old favorite moves to another setup? That question connects his interest in tinkering with the games that made the hardware worth keeping.
Our editorial standardsFound a step that needs another look? Help us improve this guide.