
Halo: Combat Evolved — Xbox (Original 2001) Full Campaign Walkthrough
Step-by-step directions for completing all ten missions in the original 2001 Xbox release of Halo: Combat Evolved. The guide covers combat, weapons, vehicles, checkpoints, local two-player campaign co-op, difficulty advice, recovery from failed encounters, and edition-specific completion checks. It does not include Terminals or Skulls because those collectibles are absent from the original Xbox release.


Find a copy
Halo: Combat Evolved Xbox
We may earn a commission if you buy through these links, at no extra cost to you. As an Amazon Associate I earn from qualifying purchases.
Opens retailer search results. Check the model, edition, seller, availability and current price before buying.
Before you begin
This guide is for the original 2001 Xbox release of Halo: Combat Evolved.
Follow the ten campaign missions in the order presented on the original Xbox release.
Each mission gives practical route directions, landmarks, combat priorities, recovery advice, and a concrete completion trigger.
The guide distinguishes required progression from optional weapons, vehicles, difficulty challenges, and co-op tactics.
Do not apply Anniversary, Master Chief Collection, or other rerelease Terminal and Skull instructions to the original Xbox campaign.
Set yourself up for the run
Use the original Xbox manual or its verified scan to confirm the default controller layout and local split-screen co-op setup.
Use a valid Xbox storage device for campaign save data and confirm the correct player profile before starting.
Set the controller layout and aim sensitivity before beginning the campaign.
Practice strafing, melee attacks, grenade selection, weapon switching, and shield recovery during The Pillar of Autumn.
Choose a difficulty before starting; Heroic and Legendary require more conservative ammunition, cover, and vehicle use.
If playing local co-op, decide who will drive, who will use mounted weapons, and who will carry limited heavy ammunition.
Regroup after major fights and objective triggers so both co-op players are ready before entering the next encounter.
Treat in-level co-op checkpoints as temporary failure-recovery points rather than a dependable mid-mission resume system.
Use accurate weapons in open areas and close-range weapons in interiors and Flood sections.
Do not prepare a Terminal or Skull checklist; those collectibles are not present in the original 2001 Xbox release.
Controls, HUD and Save/Co-op Basics (original Xbox)
Set up the original 2001 Xbox release before beginning the campaign. The default control diagram is on the back page of the Xbox manual: the left stick moves, the right stick aims, the right trigger fires, the left trigger throws a grenade, B melees, A jumps, X reloads or performs an action, and Y changes weapons. Press the left stick to crouch, the right stick to zoom with compatible weapons, Black to change grenade type, and White to toggle the flashlight. The HUD separates rechargeable shields from permanent health: shields recover after you stop taking damage, while damaged health requires a health power-up. In single-player, reach a favorable checkpoint and use Save and Quit when you want to commit that latest checkpoint for later loading. During active split-screen co-op, checkpoints govern death recovery, but unfinished missions should not be treated as dependable mid-mission resume saves after quitting. Complete the mission before ending a co-op session whenever possible.
Confirm the original Xbox controller layout
Use the control diagram on the back page of the original Halo: Combat Evolved Xbox manual, or open Settings from the main menu and check the selected controller configuration. This chapter applies to the original 2001 Xbox release. Anniversary, Master Chief Collection, and PC versions may show different prompts or offer additional layouts, so do not substitute their button labels without checking the active configuration.
With the default Xbox layout, use the left thumbstick to move and the right thumbstick to turn and aim. Press the right trigger to fire the equipped weapon. Press the left trigger to throw the currently selected grenade. Press A to jump, B to perform a melee attack, X to reload or activate a nearby action, and Y to switch weapons. Press the left thumbstick to crouch and the right thumbstick to activate scope zoom when the weapon supports it. Press Black to switch between fragmentation and plasma grenades, and White to toggle the MJOLNIR flashlight. Start pauses the game; Back returns from the current menu or screen.
- Test firing, reloading, weapon switching, melee, jumping, crouching, and grenade selection before leaving the opening ship areas.
- Test the pistol’s scope with the right thumbstick rather than assuming every weapon can zoom.
- If the controls differ, check Settings and the selected layout before changing your tactics.
Read shields, health, ammunition, and the motion tracker
The HUD separates health and shields. The health indicator uses the gauge beside the cross symbol; its color shows your condition, with red indicating poor health, yellow indicating an intermediate state, and blue indicating strong health. Health does not regenerate on its own. When your health is reduced, find a health power-up rather than waiting behind cover for the bar to refill.
The shield indicator is beside the shield symbol. It drains when you take damage and recharges automatically after you stop taking damage. If the shield reaches a critical level, its bar changes to red until it recovers. When the shield is gone, further damage reduces health, so retreat behind cover as soon as the shield fails instead of continuing to trade shots.
The weapon display shows the equipped weapon, ammunition, and grenade supply. Ballistic weapons show ammunition counts; Covenant charge weapons show remaining charge as a percentage. The motion tracker displays nearby characters and vehicles that are moving relative to you. Motionless enemies and visually stealthed units may not appear, so check corners and listen for movement rather than trusting the tracker alone. The flashlight indicator appears when White activates the flashlight and shows how much charge remains. Use it only when necessary in dark areas.
- When the shield breaks, leave the line of fire instead of continuing to trade shots.
- Do not wait for damaged health to regenerate; search for a health power-up when the health indicator is reduced.
- Check ammunition, grenade supply, and flashlight charge before crossing an exposed or dark area.
Fight from cover and manage weapon pairs
Use doorframes, crates, rocks, corners, and vehicle hulls to limit the directions from which enemies can hit you. Fire a controlled burst, retreat behind cover, and allow the shield to recharge before re-engaging. In open terrain, move between solid cover points rather than stopping in the center of several enemy firing lanes. If you must reload or change weapons after taking shield damage, do it behind cover.
Carry weapons with different ranges or functions. The M6D pistol is accurate at distance and can finish exposed targets with precise shots. The MA5B assault rifle is better for sustained close- and medium-range fire, especially against groups. Covenant plasma weapons are useful against energy shields but overheat and use charge instead of conventional ammunition. Keep a close-range option for enemies that reach a doorway or corridor. Replace empty weapons with compatible weapons from fallen enemies instead of spending every round on a weak target.
- Keep one weapon for the current engagement distance and another for the next likely encounter.
- After losing the shield, retreat before reloading or swapping weapons.
- Use Covenant weapons when their shield-damage or ammunition properties suit the encounter.
Use melee without exposing yourself
Press B when within striking distance to attack with the held weapon. Melee is an efficient way to finish isolated Grunts, exposed Jackals, damaged Elites, and Flood forms at close range. It conserves ammunition, but it is not a substitute for positioning. Approach from cover, wait until the target is committed to an attack, strike, and move away immediately. A missed swing can leave you exposed to several enemies.
Against an Elite, weaken or remove the energy shield before attempting a melee finish unless you have a safe flank. Do not chase a retreating enemy into crossfire, and avoid swinging beside explosive objects or a friendly player. On Heroic or Legendary difficulty, one failed close-range attack can cost more health than the ammunition it saves.
- Use melee on isolated or weakened targets rather than charging a group.
- After a hit, reposition or follow with a controlled burst instead of swinging repeatedly in open combat.
- Do not melee toward explosives, ledges, or a second enemy outside your view.
Choose and throw grenades deliberately
Press the left trigger to throw the selected grenade. Press Black to change grenade type. Fragmentation grenades bounce, roll, ricochet, or can be thrown over obstacles, making them useful for flushing enemies from cover, closing a doorway, or damaging a group around a corner. Plasma grenades stick to suitable living targets and can force a dangerous Elite to flee, but they require more careful aim and can detonate close to you if thrown against a nearby surface.
Before throwing, identify the bounce path, blast area, allied positions, and your retreat route. A grenade in a narrow doorway can interrupt a rush, while a throw into a crowded room can create space for a weapon swap or escape. Do not throw blindly through a doorway occupied by a co-op partner or Marine. Against Flood, save explosives for groups of combat or carrier forms; an isolated infection form is usually not worth spending a grenade on.
- Use fragmentation grenades to reach enemies behind cover or hold a chokepoint.
- Use plasma grenades on priority targets when there is enough space to avoid the blast.
- Leave yourself an escape route before throwing into a confined room.
Commit a single-player checkpoint correctly
During single-player campaign play, Halo automatically creates progress at internal auto-save points. Those points are used when you die and the game reloads the most recent checkpoint. They are also the position you should commit before stopping. When you reach a favorable checkpoint, pause the game and choose Save and Quit, then return through Campaign using the same player profile. This gives you a dependable way to resume from the latest committed single-player checkpoint rather than relying on an arbitrary position in the level.
The Xbox manual explains that campaign progress is associated with the selected profile. From the Campaign menu, select that profile and choose the last level played or another completed level, then select the difficulty. If campaign data is stored or transferred through an Xbox Memory Unit, the manual warns that loading returns to the start of the level being played rather than preserving an arbitrary mid-level position. Keep the correct profile selected and use Save and Quit after a checkpoint when you want to protect your solo progress.
Do not confuse death recovery with a permanent resume save. A checkpoint can be useful immediately after failure, but single-player progress should be committed with Save and Quit before powering down or leaving the game.
- Reach a checkpoint before leaving a difficult encounter or stopping a solo session.
- Use Save and Quit after the checkpoint you want to resume later.
- Reload with the same campaign profile and verify that the expected level or resume point is available.
Start and manage original Xbox split-screen co-op
The original Xbox manual starts co-op from Multiplayer, then Cooperative Play. Each player presses Start or A to join, each player selects a custom player profile, the players choose the campaign difficulty, and Start or A begins the session. The mode supports two players on one Xbox for the complete single-player campaign.
During an active mission, players should stay close enough to share cover, weapons, and information without standing on top of each other. If one player dies, the surviving player may continue while the game handles the dead player’s respawn when the current encounter and checkpoint conditions allow it. Both players do not need to remain alive for every checkpoint. If both players die, the latest active checkpoint reloads and the encounter must be attempted again.
Treat co-op checkpoints as temporary in-session recovery points, not as dependable mid-mission resume saves after quitting. Original Xbox co-op does not provide the same reliable Save and Quit workflow as single-player. If the session is ended before the mission is completed, plan to restart that mission rather than assuming the last co-op checkpoint will be available later. For reliable campaign progress, finish the current mission and confirm that the campaign has advanced before powering down.
- Start co-op through Multiplayer, Cooperative Play, two player profiles, and the chosen difficulty.
- Assign weapon roles before opening a major fight, especially when rockets, sniper ammunition, or shotguns are limited.
- After one player dies, regroup when that player returns instead of splitting into separate fights.
- If both players die, use the reloaded checkpoint to repeat the encounter with a safer plan.
- Finish the mission before ending the co-op session whenever possible.
Before you move on
- The default actions work: right trigger fires, left trigger throws a grenade, B melees, A jumps, X reloads or performs an action, Y switches weapons, Black changes grenade type, and White toggles the flashlight.
- You can distinguish rechargeable shield loss from health loss and know that damaged health requires a health power-up.
- You can locate the original control diagram on the back page of the Xbox manual and recognize that alternate editions may use different prompts.
- You can reach a single-player checkpoint, use Save and Quit, and reload the campaign with the correct profile.
- You understand that active co-op checkpoints control death recovery but are not dependable mid-mission resume saves after quitting.
- In split-screen, one player can continue after the other dies, both players can recover from a shared checkpoint after a total-party death, and you can plan to complete the mission before ending the session.
References for this chapter
The Pillar of Autumn — Shipboard Combat and First Objectives
The first mission has two objectives: find Captain Keyes on the bridge, then escape the Pillar of Autumn. On Easy, Normal and Heroic, the opening cryo-bay sequence teaches movement, looking and shields; Legendary skips those tests and begins with the systems active. Follow the technician through the damaged ship, using pipes, half-closed doors and blue navigation arrows as landmarks. After the bridge cutscene, Keyes gives you an empty pistol. Continue through the cafeteria and adjoining combat areas to obtain the MA5B assault rifle, then fight through the Covenant-held lower decks. Use doorways, benches, pillars and tunnels as cover, let shields recharge, and retreat when an Elite closes in. Collect the optional overshields and health packs when convenient. The route eventually reaches the lifeboat section and a Maintenance-marked passage. Clear the final Covenant groups, enter the lifeboat and allow the ending cutscene to play.
1. Complete the opening cryo-bay tutorial
After the introductory cutscene, the technicians release the Master Chief from the cryo-tube. On Easy, Normal or Heroic, follow the technician through the basic movement and looking checks, then stand in the marked area while the armor’s energy shields are activated. The tutorial may also ask you to confirm your preferred look direction. These tests are not a separate objective, so complete them and continue when Captain Keyes calls for you at the bridge.
On Legendary, the opening tutorial checks are skipped. You begin with health, shields and the motion tracker active, so follow the technician’s route immediately. The original Xbox mission is otherwise the same campaign level, but Legendary places tougher pressure on every corridor fight.
- Exit the cryo-tube.
- Complete the shield and look tests on Easy, Normal or Heroic.
- Follow the technician toward the bridge.
2. Follow the damaged route to Captain Keyes
Stay behind the technician until an explosion kills him and blocks the doorway ahead. Turn around, jump over the large pipes and pass through the next door. Continue along the damaged corridor, then crouch under the partially closed boarding door. Use the small side door when the main passage is blocked.
The next rooms contain Marines fighting Covenant troops. Do not sprint through the firefights. Move from doorway to doorway and let the Marines reveal the enemy positions. If an Elite appears in a dark room, remain behind cover while the nearby Marines draw its attention, then fire when the Elite exposes itself. Follow the blue navigation arrows and the Marine-led route rather than searching the damaged side areas.
After passing through the Marine combat rooms, take the hallway route toward the bridge. The bridge is a large control room; cross it to reach Captain Keyes and trigger the cutscene. This completes the first objective, Find Captain Keyes on the Bridge.
- Jump over the pipes after the first explosion.
- Crouch under the jammed boarding door.
- Follow the blue navigation arrows to the bridge.
- Cross the bridge to Captain Keyes.
3. Take the empty pistol and begin the escape route
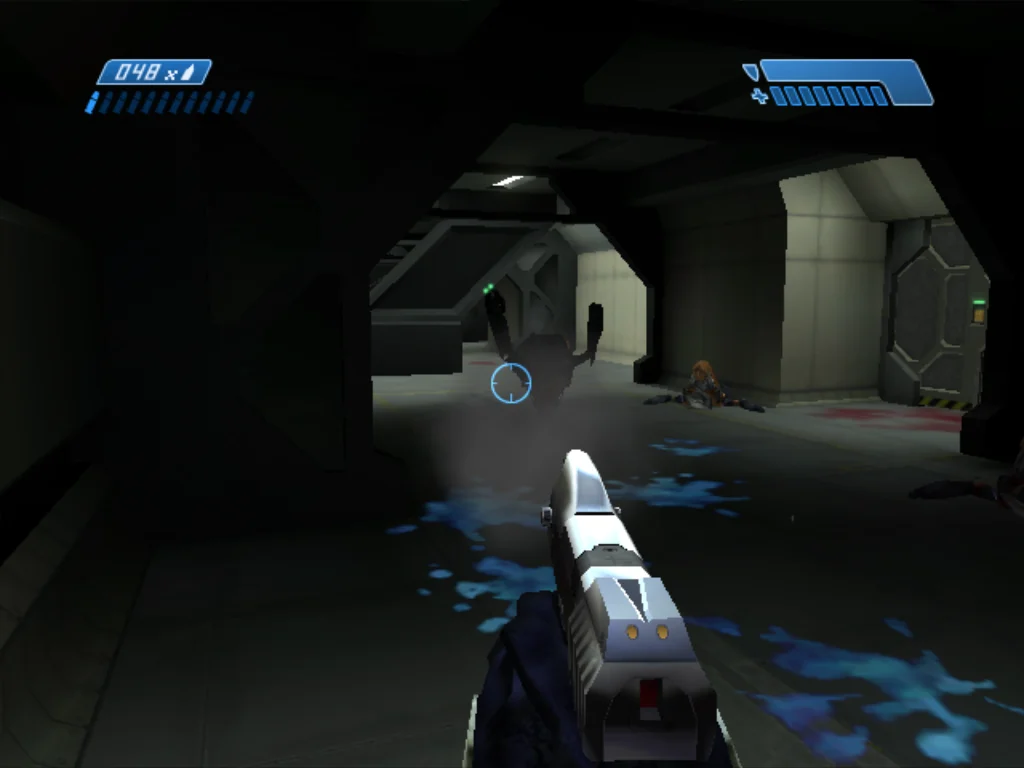
When the bridge scene ends, return toward the entrance of the bridge room and take the route indicated by the objective marker. Captain Keyes gives the Chief a pistol, but it is empty at first. Continue forward to find ammunition before relying on it. Use the pistol’s accuracy for exposed Grunts and distant targets, but avoid standing in the middle of the corridor while aiming.
A few Grunts are ahead. Use the doorway and nearby walls as cover, fire controlled shots and allow your shields to recover whenever the shield display drops. The HUD separates the rechargeable shield from health: once the shield is gone, incoming damage reduces health, which can only be restored with a health pack. Do not spend health simply to finish an enemy that can be engaged safely from behind cover.
- Receive the pistol after leaving the bridge.
- Collect pistol ammunition before depending on it.
- Break line of sight whenever the shield is depleted.
4. Pick up the MA5B and clear the cafeteria
Proceed through the next doorway and the game equips you with the MA5B assault rifle. This is the mission’s main general-purpose weapon. Use short bursts at medium range and switch back to the pistol when a Grunt is exposed at a distance. Covenant and Marines exchange fire in the next area, so use the cafeteria benches as cover while targeting the Elite and then the Grunts around it.
Leave the cafeteria through the indicated route. In the following room, several Grunts and an Elite occupy the way forward. Deal with the Grunts first if they are exposed, then pressure the Elite from the edge of the room. A Grunt can be positioned behind the large central object, so check around it before advancing. If the Elite retreats, do not chase blindly into the next hallway; reload, check your shields and approach the corner ready to fall back.
- Acquire the MA5B assault rifle.
- Use cafeteria benches as cover.
- Check behind the large central object before advancing.
- Let shields recharge before the next room.
5. Survive the first major Covenant reinforcement wave
Continue through the hallway until you reach Marines near another opening. A nearby explosion triggers a heavy Covenant push, beginning with Grunts and followed by Elites. Hold the side of the room or the previous doorway instead of moving into the center. Elites are dangerous because their energy shields absorb damage and they can force you out of cover; shoot from range, retreat around corners and resume only after the shield display has recovered.
After the wave is under control, enter the small tunnel from which the Covenant emerged. An overshield is available there. It is optional, but it is useful for the later lower-deck encounters. Take it if your current shields are damaged or if you are playing on a higher difficulty. Continue through the dark passage and use the Marine position behind you as a fallback point if the next room becomes crowded.
- Hold a doorway during the reinforcement wave.
- Prioritize exposed Grunts without rushing past the Elite.
- Collect the optional overshield in the Covenant tunnel.
- Retreat to the previous Marine position if necessary.
6. Push through the burning corridors and stairwell
Advance through the next combat areas carefully. Covenant troops can occupy both the direct route and a side passage, so peek from cover before crossing. Health packs appear on the walls or floor along this stretch; use one only after your health is damaged, and remember that an overshield does not replace missing health.
You will reach a dark, damaged section with flames and a low opening. Crouch beneath it, then clear the Covenant using the nearby obstacles as cover. Continue until you find stairs where Marines are firing upward. Shoot from below before climbing, especially against the Elites above. Once the upper level is safe, move with the Marine group and continue through the remaining Covenant positions. If the MA5B runs low, take a plasma weapon from a fallen Covenant soldier rather than charging forward with an empty rifle.
- Crouch beneath the low opening in the damaged section.
- Use the stairs as a firing position before climbing.
- Take health packs when health, rather than shields, is missing.
- Replace an empty rifle with a fallen Covenant weapon if needed.
7. Follow the lifeboat route and finish the mission
After the stairwell fights, continue through the corridors until you enter an area containing lifeboats. Eliminate the nearby Grunts, then follow the navigation point into the smaller passage. Turn on the flashlight if the route becomes difficult to see. When Cortana indicates that you are too close to the outer route, turn back and take the indicated side passage instead of continuing straight.
The route eventually leads to a broken door. Strike it with a melee attack to open it, then proceed into the next combat section. Use the doorway as a choke point: fire into the room, retreat when grenades or Elite fire make the entrance unsafe, and repeat until the immediate Covenant force is gone. Continue through the hallway and the Maintenance-marked tunnel. Clear the final groups, including the Elite near the end of the route, then enter the lifeboat on the right. The mission completes through the escape cutscene; there is no boss fight and no requirement to eliminate every Covenant soldier left behind.
- Reach the lifeboat area.
- Use the navigation point and flashlight to identify the final route.
- Open the broken door with a melee attack.
- Follow the Maintenance-marked passage.
- Enter the lifeboat and watch the completion cutscene.
Before you move on
- The objective to find Captain Keyes has been completed at the bridge.
- The MA5B has been acquired and the lower ship route has been cleared.
- The final Covenant groups near the Maintenance-marked passage have been defeated or bypassed safely.
- The Chief has entered the lifeboat and the escape cutscene has played.
- The next campaign mission, Halo, is available in the original Xbox campaign progression.
References for this chapter
Halo — Ring-Surface Recon, Warthog Operations and Long-Range Combat
After the Pillar of Autumn crashes, leave the lifeboat and cross the chasm to the first Marine position. Defeat the Covenant assault while keeping enough Marines from the required group alive for Echo 419 to evacuate them. When the evacuation triggers, take the delivered Warthog into the chasm, clear the Forerunner chamber, and activate the light bridge. Return outside and follow the HUD markers to each remaining Marine group. At every rescue position, the group must retain enough survivors for Echo 419’s evacuation trigger; if the group is wiped out or the Pelican does not arrive, reload the latest checkpoint and repeat the defense. Use the Warthog across open ground, but dismount in narrow structures. The original 2001 Xbox release has no Terminals or campaign Skulls. The mission ends after the final required group is secured, Echo 419 arrives, and you board the Pelican.
1. Leave the lifeboat and reach the first Marine position
Collect the ammunition and grenades around the lifeboat, then leave the crash area. A Covenant Spirit drops troops nearby, but you do not need to stand and clear every enemy before advancing. Cross the bridge over the chasm and continue up the slope on the far side. The bridge is the intended route out of the starting area; lingering beside the lifeboat only exposes you to more Covenant fire.
Follow the path around the rocks until you reach a circular rock formation. Clear the Grunts and Elite inside it, then continue across the open ground and around the bend to find Marines, including Sergeant Johnson, fighting Covenant. Use the rocks as cover and let the Marines draw attention while you attack from changing angles. The pistol is effective against exposed heads at distance; use the assault rifle when several enemies close together.
- Leave the lifeboat with ammunition and grenades.
- Cross the chasm bridge and reach the rock formation.
- Join Sergeant Johnson and the first Marine group.
2. Defend the first Marine group until Echo 419 evacuates it
This is a required defense encounter. Covenant reinforcements arrive in several drops around the facility, and the next group appears after the current attackers have been dealt with. Your objective is not merely to kill the Covenant: enough Marines from this required group must remain alive until Echo 419’s evacuation event triggers. The game does not require you to preserve every Marine, but a wiped-out group cannot satisfy the rescue condition.
Fight from cover near the facility and rocks instead of chasing enemies into the open. Eliminate exposed Grunts first, then strip Elite shields with sustained fire before finishing with a pistol shot, melee attack, or grenade. Attack Jackals from an angle that exposes their unshielded side. If a reinforcement group lands behind or beside the facility, rotate around the rocks and keep checking the Marines rather than holding only the original firing position.
Keep the surviving Marines away from unnecessary crossfire. Do not drive or run ahead while the defense is still active, because leaving the area can allow Covenant attackers to reach the group while you are out of position. When enough Marines remain and the Covenant waves are cleared, Echo 419 announces the evacuation, collects the survivors, and delivers a Warthog. If the group is wiped out, or if the evacuation call does not occur after the area is clear, reload the latest checkpoint and repeat the defense. Do not continue assuming the mission will repair the failed trigger.
- Defeat the Covenant reinforcement waves.
- Keep enough Marines from the required group alive for Echo 419’s evacuation.
- Reload the latest checkpoint if the group is wiped out or the evacuation does not trigger.
- Take the Warthog after Echo 419 completes the evacuation.
3. Drive into the chasm tunnel and clear the large chamber
Leave the evacuated Marine position in the Warthog and follow the broad route toward the deep chasm. Drive down the ramp into the tunnel. The vehicle can cross the initial passage, but avoid stopping in the center of the large chamber while enemies are active. Use the Warthog to reposition, then dismount if it is taking sustained fire or if you need a clear angle on enemies above you.
The chamber contains Covenant infantry, including Grunts, Jackals, and an Elite. Clear the lower floor first, using the Warthog as mobile cover without relying on it as your only protection. Search for ammunition and grenades before moving on. The route forward is a raised passage on one side of the chamber, not another vehicle road.
The upper passage contains additional Elites. Fight from the ramp entrance and retreat down the slope if your shields are depleted. Plasma grenades are useful against Elites, but throw from cover so a missed stick does not force you into close quarters. At the end of the upper passage, use the computer control for the light bridge. There is no Terminal or collectible objective here in the original Xbox release.
- Drive through the chasm tunnel.
- Clear the large Forerunner chamber.
- Defeat the Elites in the raised side passage.
- Reach the light-bridge control.
4. Activate the light bridge and return to the surface
Activate the computer control to extend the light bridge. If the bridge has not appeared, return to the upper passage and check the control panel rather than searching the lower chamber for another route.
Go back down to the Warthog and drive across the newly extended bridge. Follow the tunnel through the Forerunner structure until you emerge outdoors. Avoid forcing the Warthog through side passages; the intended route returns you to open ground.
In co-op, regroup at the vehicle before entering the next open area. A checkpoint is a temporary recovery point, not a dependable permanent co-op resume save after quitting. If you are ending a solo session, use the original Xbox Save and Quit option after reaching a useful checkpoint.
- Activate the light-bridge control.
- Return to the Warthog.
- Cross the bridge and reach daylight again.
5. Locate and secure every remaining Marine group
Once outside, use the directional objective marker on the HUD to locate the next Marine group. Drive across the stream and open terrain rather than wandering into unrelated valleys. The mission is not asking you to clear every Covenant patrol on the island; concentrate on the marked survivors and preserve the Warthog for movement between positions.
At each marked Marine area, stop outside the densest enemy fire and let the gunner work while you circle for better angles. Dismount when the vehicle is boxed in by rocks or structures. Use the assault rifle against groups and the pistol against exposed Elite heads. If a Sniper Rifle is available beside a later lifeboat, take it for long sightlines while retaining a close-range weapon for enemies that reach the Marines.
The survival requirement applies to every required rescue group: enough Marines must remain alive until Echo 419’s evacuation trigger occurs. Do not treat a group as secured merely because its attackers are dead. Wait for the Pelican to arrive and complete the evacuation. If the group is wiped out, or if the evacuation does not trigger after the local Covenant are defeated, reload the latest checkpoint and repeat that defense. After each successful evacuation, follow the next HUD marker. If the Warthog is destroyed, continue on foot, but search bodies and nearby supplies before moving on.
- Follow the HUD marker to each required Marine group.
- Defeat the Covenant without allowing the required group to be wiped out.
- Wait for Echo 419’s evacuation trigger at every position.
- Reload the latest checkpoint and repeat the defense if evacuation fails.
- Proceed only after the group has been evacuated.
6. Secure the final group and board the Pelican
At the final Marine position, eliminate the Covenant around the survivors while staying close enough to protect them. Enough Marines from this final required group must survive for Echo 419’s Pelican evacuation event to trigger. Do not leave immediately after the last enemy falls; remain in the area and watch for the radio call and landing sequence.
If the final group is wiped out, or the Pelican does not arrive after the area is clear, reload the latest checkpoint and repeat the encounter. Once the Pelican arrives, move close to it and use the action button to board when the prompt appears.
The mission is complete when boarding begins and the game transitions to the cutscene and then the next campaign mission, Truth and Reconciliation. The original Xbox campaign has no Terminals, collectible Skulls, or related checklist for this mission.
- Keep enough Marines from the final group alive.
- Wait for Echo 419’s Pelican evacuation.
- Reload the latest checkpoint if the group is wiped out or evacuation fails.
- Board the Pelican.
- Confirm the transition to Truth and Reconciliation.
Before you move on
- The light bridge has been activated and crossed on the return route.
- Every HUD-marked Marine group has been defended successfully.
- Enough Marines from each required group survived for Echo 419 to trigger evacuation.
- The Pelican arrived at the final position and the final group was evacuated.
- Boarding the final Pelican triggered the cutscene and advanced the campaign to Truth and Reconciliation.
- No Terminals or Skulls remain to be collected in the original 2001 Xbox release.
The Truth and Reconciliation — Boarding a Covenant Cruiser
The Truth and Reconciliation starts with a nighttime assault across Installation 04 and ends with Captain Keyes rescued from a Covenant cruiser. Use the Sniper Rifle to remove Shade gunners, Elites and distant Jackals before advancing with the Marines. At the gravity lift, survive the Covenant reinforcement waves and kill the two Hunters before boarding. Inside the ship, the route is controlled by unlocked doors, consoles and Marine movements rather than a free-form map. Clear the hangar and shuttle-bay areas patiently, preserve accurate weapons for Gold and invisible Elites, and use corridors as retreat points. After opening the holding cells, keep Captain Keyes alive while retracing the route to the shuttle bay. Activate the final console there to launch the escape craft and finish the mission.
1. Start the night assault and use the high ground
After the opening cutscene, move uphill toward the Covenant position while staying near the rock wall. The original Xbox mission gives you an Assault Rifle and a Sniper Rifle at the start. Use the Sniper Rifle from the elevated ground before the Covenant fully reacts. Its night-vision scope makes the distant targets easier to identify in the dark.
Shoot the Grunts operating the two Shade stationary guns first. Then concentrate on exposed Elites and Jackals around the valley. Let the Marines draw attention while you fire from cover; if your shield drops, back behind the ridge and wait for it to recharge. Do not rush down into the valley simply because the first gunner is dead. Several enemies remain on the slopes and can attack from different elevations.
- Keep both starting weapons until the outdoor fight is nearly complete.
- Destroy Shade gunners before engaging the larger groups.
- Use the ridge and rocks to recover your energy shield.
2. Advance through the canyon with Marine support
Follow the canyon path as the Marine groups move up. When the route bends and Cortana calls attention to the left path, stop and scan the upper ledges with the Sniper Rifle. Remove Shade gunners and distant Elites before crossing the exposed cliff edge. Stay close to the solid wall and avoid unnecessary jumps near drops; falling from the narrow ledges can kill you even when no enemy is shooting.
When another Marine group advances through the center, move along the side route and eliminate the Covenant position ahead. A Shade on the path can be used after its Grunt operator is killed. The turret is useful for suppressing the valley and incoming reinforcements, but dismount before moving into a narrow passage. Continue through the canyon, using the rifle on distant gunners and the Assault Rifle or a recovered plasma weapon when enemies close in.
A checkpoint occurs during the uphill advance before the final approach to the gravity lift. Once it occurs, prepare for the largest outdoor fight rather than treating the area as cleared. Refill ammunition from fallen Covenant and pick up grenades or a plasma weapon if available.
- Clear elevated gunners before crossing narrow paths.
- Stay with the Marines instead of sprinting far ahead.
- Use the outdoor checkpoint as the recovery point for failed attempts.
3. Defend the gravity lift and defeat the Hunters
The large purple beam ahead is the gravity lift. Do not step into it immediately. Covenant forces arrive in several groups from the lift area, including Grunts, Jackals and Elites. Move to the nearby Shade that you cleared and turn it toward the beam. Fire from the turret while using the surrounding rocks and terrain to limit incoming fire. If the Shade is destroyed or you are forced out, fight from the left-side rocks and return to cover between attacks.
After the regular waves, two Hunters arrive. Keep the Shade between you and their fuel-rod fire whenever possible. Aim at the exposed orange back of a Hunter when it turns or when the Marines distract it. Focus on one Hunter first, then rotate the turret toward the second. On lower difficulties, a pistol or other accurate weapon can also exploit the exposed back, but the Shade is the safest original-release option when it remains available.
Wait until both Hunters are dead and the next Marine group has arrived. Restock from the area, replace an empty weapon with a plasma pistol or plasma rifle if one is available, and keep grenades. The Sniper Rifle is valuable outdoors but less practical inside the cruiser, so do not rely on it as your only close-range weapon. Enter the gravity lift only after the platform is secure.
- Survive the regular Covenant waves before the Hunters appear.
- Use the Shade to absorb pressure and damage the Hunters.
- Change to a close-range or plasma weapon before boarding.
4. Survive the cruiser entry ambush
The lift deposits you in a large entry chamber containing crates and inactive Wraiths. The room appears empty, but the doors soon open and Covenant troops attack. Stay near the center or use the crates as cover so you can respond to enemies entering from different doors. The first dangerous attacker is an invisible Elite carrying an energy sword. Keep backing away from it, fire continuously, and use a grenade if it closes the distance; a sword strike can kill you immediately on higher difficulties.
After the invisible Elite falls, mixed groups of Elites, Jackals and Grunts continue entering. Help the Marines instead of chasing enemies through every doorway. Listen for grenade warnings and move away from live explosives. When the room settles, follow the surviving Marines through the open route. The first apparent dead end is intentional: return to the entry area and use one of the other opened doors, which leads into the interior route.
- Kill or drive back the first invisible sword Elite immediately.
- Use crates and doorways to avoid being surrounded.
- Do not mistake the initial locked route for a mission failure.
5. Clear the interior route and shuttle bay
Follow the open corridors until you reach a large room viewed from an upper walkway. Clear the enemies on the walkway first, then shoot the Grunts, Jackals and Elites below from the doorway or railing. Cross only after the upper firing positions are quiet. Continue down to the lower level, collect the available health and ammunition, and activate the holographic console that opens the route for the Marines.
The next major battle begins when you enter a large Covenant room through a blue door. Before stepping fully inside, throw a plasma or fragmentation grenade toward the first group, then retreat into the corridor if the room becomes crowded. Covenant troops attack from the floor and from elevated ledges. Fight in short advances: shoot, fall back to recharge your shield, then re-enter. Marine reinforcements can reduce the pressure, but do not stand in the open waiting for them.
Two Hunters appear after the room has been sufficiently cleared. Use the doorway and side corridors to create space, then shoot their exposed backs when they turn. Continue through the corridors to the shuttle bay. Activate the console on the upper walkway to bring in Marine reinforcements, then use the newly opened route around the bay. Check the side branch for health, ammunition and grenades before entering the next large combat room.
- Clear upper walkways before dropping to lower floors.
- Use the corridor outside the large battle as a shield-recovery point.
- Defeat the second Hunter pair before leaving the area.
6. Reach the holding cells and rescue Captain Keyes
Proceed through the open doors toward the command and detention sections. At the room containing sleeping Grunts and sword-wielding Elites, melee the Grunts only if the route remains safe. As soon as the sword Elites advance, retreat through the doorway and fight them from a longer distance. A plasma grenade can damage or kill one, but back away immediately after throwing it so the blast does not catch you.
Continue to the holding-cell area. Clear the Covenant around the cells, including the invisible Elites, before activating the holographic console. Use the console to open the cells and trigger the rescue sequence. Search the opened cells for available health and grenades before leaving, but do not wander into red or locked doors that do not contribute to the route.
- Keep distance from sword-wielding Elites in the control-room approach.
- Clear the cell area before activating the console.
- Open the holding cells and confirm the rescue sequence has played.
7. Protect Keyes during the escape
Once control returns after the rescue, two invisible sword Elites attack from the nearby doorway. Kill them before moving away from the cell block. Captain Keyes must survive the escape, so stay ahead of him without abandoning him in a room full of enemies. If he begins moving into danger, eliminate the immediate threats before continuing rather than sprinting far ahead.
Retrace the route toward the shuttle bay. At the control-room area, the expected evacuation craft is no longer available, so follow the route back to the shuttle-bay console. Covenant forces occupy parts of the return path; use grenades at doorways, retreat around corners to recharge, and prioritize enemies close to Keyes. Do not stop at the detention cells after the rescue: the mission is not complete until the extraction sequence begins.
At the shuttle bay, clear the enemies blocking the console and activate it. The resulting escape sequence completes The Truth and Reconciliation and advances the campaign to The Silent Cartographer. If Keyes dies before the launch, reload the last checkpoint and repeat the return trip more cautiously.
- Kill the post-rescue invisible Elites before moving out.
- Keep Captain Keyes alive on the return route.
- Activate the shuttle-bay console and wait for the escape sequence.
Before you move on
- Captain Keyes has been released from the holding cells.
- The player and Keyes have returned to the shuttle-bay area.
- The shuttle-bay holographic console has been activated.
- The escape sequence plays and the campaign advances to The Silent Cartographer.
References for this chapter
The Silent Cartographer — Beach Infiltration and Map Room
The Silent Cartographer is the fourth campaign mission in the original 2001 Xbox release. Clear the landing beach, take the Warthog around the island, and reach the Forerunner structure where the Cartographer entrance locks. Leave that area, follow the inland path through Covenant defenses and two Hunter encounters, then enter the security substation and activate its holo-panel. This opens the original entrance and releases a sword-wielding Zealot. Return to the first structure, descend through the main shaft, activate the Silent Cartographer, and fight back to the surface exit. Echo 419 then retrieves the Chief and descends into an underground tunnel, completing the mission. The original Xbox edition has no Terminals, Skulls, achievements, or Anniversary collectible checklist.
1. Clear the landing beach and prepare your weapons
When the Pelicans land, stay near the Marines and use the beach crates, rocks, and raised sand as cover. The pistol is the best opening weapon because its scope lets you remove Grunts and damage Elite shields accurately across the beach. Use the assault rifle when enemies close the distance or when pistol ammunition becomes scarce.
Advance only after the first Covenant group is under control. Jackals can hold the approach with their shields while Grunts fire from behind them, so move to an angle that exposes their unshielded side or feet. Do not rush past the beach defenders: additional Covenant appear farther along the landing area, and the Warthog is not delivered until the area is secure.
When the radio call confirms the beach is clear, Echo 419 drops a Warthog. Before driving away, collect pistol ammunition, plasma weapons, and grenades from the fallen Covenant. Keep at least one accurate weapon for Hunters and distant Elites later in the mission.
- Landing beach cleared.
- Warthog delivered by Echo 419.
- Pistol or another accurate weapon retained.
- Grenades and spare ammunition collected where practical.
2. Drive around the island and locate the locked entrance
Board the Warthog as driver and place Marines in the passenger and gunner positions if they are available. Follow the island route with the water generally on your right. Keep moving through open ground, but slow down before dense Covenant groups so the gunner can fire while you choose a safe approach. Running over isolated Grunts is useful; charging directly into an Elite formation can strand or destroy the vehicle.
At the first major Forerunner structure, park the Warthog at the front opening rather than attempting to drive inside. Let the gunner cover the entrance while you dismount and clear the Elites in the short hallway. Continue down the ramps until you reach the lower doorway and nearby Covenant defenders.
The doorway locks after the local enemies are defeated. This is the first major progression trigger. Cortana reports that the security system has blocked the route, and the next objective changes to finding the main-facility security override. Do not keep attacking this door or search the same interior for another switch; the override is elsewhere on the island.
- Warthog reached the first major structure.
- Vehicle parked outside the structure.
- Locked Cartographer entrance triggered.
- Objective changed to finding the security override.
3. Follow the inland route to the security substation
Exit the first structure and return to the Warthog. Drive around the island through the arch-shaped opening and past the crashed Warthog and fallen Marines. Stop near the logs and clear the Covenant group beyond them before continuing. This area contains Grunts, Jackals, and Elites, so use the vehicle gunner to suppress them while you fight from cover.
Proceed through the opening in the rocks and follow the rising path toward the circular area with a central Forerunner structure. Two Hunters guard this section. Use the surrounding rocks and the Warthog to avoid their assault-cannon fire, then circle behind each Hunter when it turns toward a Marine or commits to an attack. Fire at the exposed orange back rather than trading shots against its shield. A pistol shot to the exposed back is especially effective, but any accurate weapon can finish the job.
Collect health and ammunition near the fallen Marines if needed. Overshields are available around the central structure and provide useful protection for the next building assault. The central structure itself is not the route forward. Look around the outside of the area for the rocky opening that leads onward, then follow the right-hand wall toward the security substation.
- Covenant near the crashed Warthog defeated.
- Two Hunters at the central island area defeated.
- Health and ammunition recovered where needed.
- Inland path and security substation reached.
4. Clear the security substation and activate the override
Before entering the security substation, use an Overshield if you have one available. Several Covenant occupy the approach, and the substation contains another pair of Hunters. Fight from behind the crates and walls, bait their assault-cannon shots into cover, and move around them only when their backs are exposed. Avoid standing in the center of the room where both Hunters can fire at once.
After the Hunters are defeated, enter the adjoining corridors and follow them to the holo-panel. The panel is the required security override. Activate it to shut down the main facility security system. A cutscene shows the previously locked entrance opening and a gold-armored Elite with an energy sword emerging from it.
Leave the panel room carefully. Invisible Elites attack in the surrounding area after the override sequence. Watch for shimmering movement, listen for footsteps, and sweep the room with the assault rifle or another rapid-fire weapon before moving toward the exit. If your shields are low, retreat through the doorway and make the enemies approach through the choke point.
- Security substation entered.
- Second pair of Hunters defeated.
- Holo-panel activated.
- Invisible Elite ambush survived.
- Main Cartographer entrance unlocked.
5. Return to the first structure and descend through the main shaft
After leaving the substation, move down toward the beach and the crashed Pelican. The crash site contains useful ammunition, health, and heavy weapons. Collect the rocket launcher if you can carry it without giving up a more useful close-range weapon; it is valuable against the Hunters that now guard the original structure.
Return to the Warthog if it remains usable and drive back to the first Forerunner structure. Expect another pair of Hunters near the entrance. Dismount before fighting them, use the vehicle and nearby cover to break their line of fire, and attack their exposed backs. Do not drive the Warthog into the interior. The entrance ramps and corridors are designed for infantry movement, and the vehicle can become stuck or be destroyed before it provides any further benefit.
Enter through the unlocked route and follow the ramps downward. The facility has multiple levels, so use the broad ramps, doorways, and Forerunner platforms as landmarks. Clear Covenant from each landing before dropping to the next level. On Heroic or Legendary, avoid sprinting down a ramp into an unseen room; stop at the edge, let enemies reveal themselves, and retreat upward if shields collapse.
- Crashed Pelican supplies searched.
- Warthog left outside the structure.
- Second entrance Hunter pair defeated.
- Unlocked main shaft entered.
- Interior descent underway.
6. Activate the Silent Cartographer
Continue down through the Forerunner facility, clearing Covenant from each room and landing. Keep a close-range weapon for Grunts and Elites in narrow corridors, but preserve pistol, needler, or plasma-pistol ammunition for shielded Elites. Fragmentation grenades are effective against groups gathering around a doorway; throw from cover and wait for the blast before crossing.
As you approach the lower map chamber, Covenant resistance becomes heavier. Use the room entrances as choke points instead of stepping into the center immediately. Hunters may appear in the approach, and the chamber itself contains multiple Elites. Break their sightlines with pillars and walls, then attack one target at a time. If you carry an Overshield, save it for this descent or the final chamber rather than spending it on isolated Grunts.
The Silent Cartographer is the large holo-panel in the lower chamber. Clear the nearby Covenant first, then approach the panel and activate it. The map display reveals the location of Halo's Control Room and changes the mission objective to returning to the surface for extraction. This activation is the required objective; there is no Terminal or Skull to collect on the original Xbox release.
- Lower Cartographer chamber reached.
- Nearby Covenant cleared.
- Silent Cartographer holo-panel activated.
- Objective changed to returning to the surface.
7. Fight back to the surface and complete extraction
Retrace the route upward through the facility. The upper levels are no longer safe: Covenant reinforcements, including stealth Elites, occupy the return path. Move from doorway to doorway and check corners before crossing ramps. If an invisible Elite is nearby, its shimmer and weapon fire reveal its position; back into a wider room rather than allowing it to attack from behind.
When you reach the surface exit, do not wait for the Marines or assume the Warthog will provide the final defense. The stealth-Elite ambush normally kills Marines left near the vehicle, so treat the exit as a solo combat sequence. Use the pistol for distant Jackals and the assault rifle for cloaked Elites at close range. If your health is low, search the nearby crash-site supplies before pushing through the last enemies, provided the area is clear enough to do so safely.
Once the exit area is secured, Echo 419 arrives for pickup. The Pelican lifts off, circles the island, and descends into the underground shaft revealed beneath the Forerunner structure. The screen then fades and the game advances to Assault on the Control Room. That Pelican sequence, rather than reaching a generic beach marker, is the concrete completion trigger for this mission.
- Upper facility route cleared on the way out.
- Stealth-Elite ambush survived.
- Echo 419 arrives and boards the Chief.
- Pelican descends into the underground shaft.
- Assault on the Control Room loads next.
Before you move on
- The beach has been cleared and the Warthog section has begun.
- The first Cartographer entrance locked, the security substation was reached, and its holo-panel was activated.
- The unlocked entrance was revisited and the Silent Cartographer was activated in the lower facility.
- The Chief fought back to the surface and Echo 419 arrived for extraction.
- The Pelican descended into the underground shaft and the game loaded Assault on the Control Room.
Assault on the Control Room — Snowfield Tactics and Suspension Bridges
Assault on the Control Room is a long Covenant assault through Forerunner interiors, snowy valleys, vehicle battlefields, underground chambers and elevated bridges. In the original 2001 Xbox release, this mission contains no Scarab encounter and no Flood combat. Keep a precision weapon for Grunt and Elite finishing shots, carry a plasma weapon when possible, use cover around the opening bridge, and take the Scorpion when you reach Fireteam Zulu. Use the tank through the open snowfields and canyons, but leave it outside the narrow interior passages. Later sections add Wraiths, Ghosts, Banshees, Hunters and cloaked Elites. At the Control Room, activate the entrance, handle the Covenant response that follows, enter through the opened doorway, and open the remaining interior doors. The mission is complete when the Cortana cutscene plays and the campaign advances to 343 Guilty Spark.
1. Survive the insertion platform and first Forerunner rooms
After Echo 419 drops you at the underground platform, move toward the pressure door and use the Shade turret or grenades against the Covenant inside. The turret clears Grunts quickly, but leave it if a Major Elite closes in or grenades begin landing around your position. Once the entrance is clear, collect plasma grenades and a plasma weapon if one is available.
Continue through the short passage and the first circular room. Use the pistol for Grunt headshots and exposed Jackals. Against Elites, remove the shield with a charged plasma-pistol shot, then finish with a pistol headshot, assault-rifle burst or melee attack. Fight from doorways and corners rather than standing in the center of a room.
Follow the glowing floor arrows through the Forerunner rooms. Clear each room before passing through its next door, and search fallen enemies for grenades and ammunition. On Heroic or Legendary, retreat behind the previous doorway after throwing a grenade so the Covenant cannot surround you.
- Keep a precision weapon if possible.
- Carry a plasma weapon for Elite shields.
- Use doorways and corners as cover.
- Follow the floor arrows through the circular rooms.
2. Cross the opening bridge and descend to the snowfield
The route opens onto a long Forerunner bridge. Several Grunts may be asleep, so melee them when practical. If the group wakes, fall back toward the previous doorway and clear the bridge in sections. Do not remain exposed in the middle while Jackals fire from the far side or a Banshee passes overhead.
At the far end, prepare for an Elite Zealot carrying an energy sword. Keep backing away while firing and use a plasma grenade, fragmentation grenade or charged plasma-pistol shot to create an opening. Do not allow the Zealot to reach melee range. Enter the next structure and deal with the Stealth Elites and Grunts inside.
Take the elevator down and check the lower rooms carefully. Sleeping Grunts can be removed with melee attacks to conserve ammunition, but an alerted room must be cleared before you search for the exit. Continue through the basement route and emerge into the first snowfield.
- Use bridge structures to break enemy sight lines.
- Watch for the energy-sword Zealot near the far end.
- Check both sides after the elevator reaches the bottom.
- Do not leave Covenant behind before entering the snowfield.
3. Reach Fireteam Zulu and take the Scorpion
In the first open snowfield, Fireteam Zulu is fighting Covenant near Ghosts, Shade turrets and a Wraith. Approach from cover and identify the Wraith before driving into the open. If you use the Warthog, keep it moving and approach the Marines from an angle that reduces the Wraith’s firing lane. Do not stop directly in front of the tank.
A Rocket Launcher and Sniper Rifle are available around the crashed Pelican area. Use rockets on the Wraith if you have them, or let the Warthog gunner and Marines draw attention while you circle to a safer angle. After the immediate vehicle group is under control, board the Scorpion parked with the Marines.
Take Marines with you when possible. A sniper Marine is useful against distant infantry, while other passengers suppress Covenant around the tank. Use the Scorpion cannon against Ghosts, Wraiths, Shade turrets and groups of infantry. Use the machine gun for isolated Grunts and targets close to friendly troops. Avoid firing the cannon beside Marines because the blast can kill them.
- Approach Fireteam Zulu without driving into the Wraith’s firing lane.
- Collect heavy weapons near the crashed Pelican if needed.
- Board the Scorpion after securing the battlefield.
- Preserve useful Marine passengers when possible.
4. Drive through the open canyon and leave the tank at the narrow passage
Take the Scorpion through the next canyon and vehicle fields. Expect Ghosts, Wraiths, Shade turrets, Covenant infantry and Banshee attacks. Use the cannon’s range to destroy vehicles before they reach you, and use rocks to break line of sight from Wraith mortar fire. If a control panel opens a gate, leave the Scorpion only long enough to activate it, then return to the tank.
The route eventually reaches a narrow tunnel or interior passage that the Scorpion cannot safely traverse. Stop outside and continue on foot. Do not wedge the tank into the entrance or abandon it in the middle of an active firefight. Collect nearby ammunition, health or useful equipment before entering, but do not spend time trying to force the vehicle through.
Inside, move carefully around corners. Cloaked Elites and sword-wielding Elites can attack at close range, so keep the shotgun if you have it, or carry an assault rifle with a plasma weapon. Use the motion tracker, listen for movement and avoid rushing into the next room.
- Use the Scorpion against Wraiths, Ghosts and Shade turrets.
- Return to the tank after opening route gates.
- Leave the Scorpion outside the narrow interior passage.
- Expect cloaked or sword-wielding Elites on foot.
5. Clear the later canyon, Hunters and elevated bridge defenses
After the tunnel, the path opens into another vehicle battlefield. Clear nearby Ghosts and Shade turrets before advancing toward the canyon. Banshees may attack during the vehicle sections; use rock cover or the Scorpion cannon when they make a predictable pass. Drive far enough to keep the Marines moving, but do not outrun them so completely that Covenant vehicles surround them behind you.
Hunters appear near the bridge and lower canyon areas. If you still have the Scorpion, a cannon shell is the safest solution. On foot, circle to the Hunter’s side or rear, wait for the orange exposed back, fire, and retreat before its melee attack. Never remain directly in front of the fuel-rod cannon. Use rockets for Hunters or dangerous vehicle groups rather than ordinary Grunts.
Eventually the route reaches another point where the Scorpion must be left behind. Before entering the final interior sequence, collect heavy weapons, ammunition and health supplies near the fallen Marines if they are available. The following rooms contain circular platforms, bridges, Jackals, Needler Elites, Hunters, Zealots and Stealth Elites. Use bridge edges and central structures as cover, clear one group at a time, and check the motion tracker for enemies appearing behind you.
- Divide vehicle groups with terrain and retreat routes.
- Attack Hunters from the rear or use tank shells.
- Collect heavy weapons before the final interior sequence.
- Watch the motion tracker for Covenant spawning behind you.
6. Reach the Control Room and complete the mission
Continue through the remaining Forerunner rooms until you return to ground level near the Control Room structure. Use available vehicles or cover to reduce the defenders around the pyramid approach. The original Xbox mission has no Scarab fight and no Flood combat; the vehicle battles and Covenant infantry defenses are the intended encounters for this level.
Before the final entrance, restock from nearby weapons and ammunition if needed. Clear the Hunters, Elites, Jackals and Grunts around the approach, then move to the Control Room entrance and activate its control. Opening the entrance releases a large Covenant response, including Grunts and a sword-wielding Elite.
Back away into the previous area after activating the entrance. Use grenades to soften the wave, then prioritize the sword-wielding Elite. A turret or Ghost can help against Grunts, but abandon the position if grenades land nearby. You do not have to perform a separate final mechanism, and you do not need to kill every defender before advancing. Once the group is manageable, enter through the opened doorway.
Deal with any remaining Covenant around the corner, then open the last interior doors leading into the Control Room. The mission-ending cutscene plays as Cortana interfaces with the Control Room. Allow the complete scene to finish; the campaign then advances to 343 Guilty Spark. If you die before reaching the doorway, reload the latest checkpoint and repeat the entrance sequence.
- Reach and activate the Control Room entrance.
- Handle or bypass the Covenant response that follows.
- Enter through the opened doorway.
- Open the remaining interior doors into the Control Room.
- Watch the complete Cortana cutscene and confirm that 343 Guilty Spark follows.
Before you move on
- The Control Room entrance has been activated and opened.
- The Covenant response after opening it has been handled or bypassed sufficiently to advance.
- The player has entered through the opened doorway and opened the remaining interior doors.
- The Cortana Control Room cutscene has played completely.
- 343 Guilty Spark becomes the next campaign mission or loads after the transition.
343 Guilty Spark — Forerunner Walkways and Companion Mechanics
Search the swamp for Captain Keyes, enter the Forerunner containment facility, survive the Flood outbreak, and escape to the surface. Use the crashed Pelican, the Brilliant Gift wreck, the fallen tree-root bridge, the frightened Marine, the damaged walkways, and the facility elevators as route landmarks. After the first Flood encounter, the original elevator fails and forces you through an alternate route containing the shotgun and Overshield. Fight upward through the damaged structure, using doorways, ramps, ledges, grenades, and the shotgun to control close-range Flood attacks. At the top, regroup with the surviving Marines and follow Echo 419’s direction toward the blinking tower. Reach the tower and remain nearby while the Sentinels arrive and attack the Flood. The gameplay section ends when the screen fades to white. The Marines provide useful fire support but are not an escort requirement, and no Terminal, Skull, achievement, or Marine-survival objective exists in the original Xbox release.
1. Leave the Pelican and cross the swamp
Begin beside the crashed Pelican. Collect nearby ammunition, then move through the swamp toward the crashed Covenant dropship known as the Brilliant Gift. The opening area is primarily a landmark exercise: keep the Pelican behind you, use the wreck as your next reference point, and do not wander into the fog looking for a different path.
Clear the Covenant around the Brilliant Gift before crossing the large fallen tree root. Use the M6D magnum for accurate Grunt headshots and the MA5B assault rifle when several enemies close together. A charged plasma-pistol shot can remove a Jackal’s shield before you finish it with the magnum or rifle. On higher difficulties, avoid standing in the open around the wreck; fire from behind the dropship, rocks, or tree cover.
Cross the root carefully. If you fall, return to the swamp side and use the root again rather than trying to jump across the gap. On the far side, help the Marines near the Forerunner structure if they are still fighting, then enter the facility elevator. The elevator is the required route forward.
- Leave the crashed Pelican.
- Reach and clear the Brilliant Gift wreck.
- Cross the fallen tree-root bridge.
- Enter the Forerunner facility elevator.
2. Follow the damaged facility route
Inside the facility, move from doorway to doorway and clear each room before entering its center. The early opposition is Covenant, so the magnum is efficient against exposed Grunts while the assault rifle handles enemies that push into close range. If a route seems to end, check the upper walkway or ramp; several rooms are split across multiple levels.
Continue through the damaged rooms marked by blood, scorch marks, dead Covenant, broken structures, and green-lit entrances. You eventually reach a frightened Marine crouched against a wall with a magnum. Treat him as a landmark rather than an escort. He does not need to follow you, and waiting for him can make the route less clear.
Move beyond the Marine, climb to the upper level, and cross the damaged walkway. Follow the ramps toward the room containing the light-bridge controls. Activate the bridge and cross to the far side. Keep your weapon ready at the next doorway because the Flood reveal follows this section. Do not spend every grenade during the Covenant fights; the first Flood rooms reward having explosives available.
- Use doorways and corners for cover.
- Pass the frightened Marine.
- Cross the damaged upper walkway.
- Activate the light bridge and continue toward the Flood section.
3. Survive the first Flood outbreak
The first wave consists of Pod Infectors. Hold near a doorway, ramp, or upper-level edge so the swarm approaches through a manageable opening. Sweep the assault rifle across groups, then melee isolated Infection Forms when they are close and your shields are stable. Do not stick a plasma grenade to an Infection Form; it can carry the grenade back into you before it detonates.
Combat Forms follow the Infection Forms. Armed Combat Forms are the priority because their firearms can drain your shields while you are dealing with the swarm. Use the magnum or assault rifle on their bodies and destroy Infection Forms gathering around corpses before they can reanimate fallen forms. Use fragmentation grenades against clusters entering through a doorway, not against lone targets.
Let surviving Covenant and Flood fight when the level gives you that opportunity. Hold back, listen for the fight to thin, then finish the survivors from cover. Avoid dropping to a lower floor until the immediate wave is under control. Upper ledges, ramps, and railings give you more time to react and make it easier to retreat when the Flood rushes.
- Fight from a doorway, ramp, or elevated edge.
- Use the assault rifle against Infection Form groups.
- Prioritize armed Combat Forms.
- Prevent corpses from being reanimated when possible.
- Keep at least one grenade for a later choke point.
4. Use the alternate route after the elevator fails
Continue through the facility until you reach the bridge controls and the route back toward the first elevator. Activate the bridge and return toward the elevator shaft. When you activate the elevator and it fails, this is a scripted event. Do not waste time trying to repair it or return to the swamp.
Take the nearby alternate door and follow the route to the resupply room. Collect the M90 shotgun, health, ammunition, and grenades. This is the reliable shotgun pickup for the mission, not an optional weapon that depends on a random drop. Keep the assault rifle as your second weapon for Infection Forms and Flood at medium range.
Continue to the next elevator and ride it down. At the bottom, look for the crates blocking an opening. Climb over the crates and collect the Overshield when the surrounding enemies are under control. The Overshield is optional, but it is valuable on Heroic and Legendary because the next route contains several close-range attacks. Do not cross an exposed room while surrounded merely to reach it; clear the immediate area first.
- Return to the failed elevator route.
- Take the alternate door.
- Collect the shotgun and resupply.
- Ride the second elevator downward.
- Climb over the crates and take the Overshield when safe.
5. Fight upward through the damaged complex
From the lower section, follow the ramps, broken floors, and upper ledges back toward the surface. Use the shotgun on Combat Forms that reach your platform and the assault rifle on Infection Forms or distant targets. When Flood gather below an opening, throw a fragmentation grenade from above, then wait for the blast and rifle survivors before dropping down.
Check adjoining doors and lower platforms before advancing. The level uses split-level rooms and broken walkways to let Flood attack from more than one direction. If your shields fall, retreat to the previous doorway and allow them to recharge instead of trying to win a close-range fight in the middle of a room.
Surviving Marines appear during the climb and can draw fire. They are useful support, but their survival is not required. Do not abandon a safe route to protect them, and do not wait for them to form an escort. Continue through the damaged corridors, collect health and ammunition from supply areas, and use any Active Camouflage you encounter only if it helps you reposition or bypass a dangerous group. It is optional and should not lead you away from the main path.
- Use elevated firing positions where available.
- Keep the shotgun for close Combat Forms.
- Check split-level rooms before dropping down.
- Treat Marines as optional support.
- Continue upward through the damaged complex.
6. Exit the facility and find the tower
Near the end of the interior route, activate the final energy bridge and cross toward the upper elevator. Flood gather around the far doorway, so use a grenade to break up the group and finish the survivors with the shotgun. You do not need to clear every enemy on the lower floor before moving through the exit route.
Ride the elevator to the upper facility exit. Restock on ammunition and health near the surviving Marines before leaving. Their presence makes the next section easier, but the game does not require all of them to survive. If they are overwhelmed, move on rather than turning the area into an unnecessary rescue objective.
Exit into the swamp and follow the Marines’ general direction. Echo 419 reports a large tower above the fog and foliage. Look for the structure with prominent blinking lights. This tower is the final landmark for the mission. You are not looking for another facility entrance, a panel, or an extraction vehicle.
- Activate the final bridge.
- Reach the upper elevator.
- Restock near the surviving Marines.
- Exit the facility.
- Locate the blinking tower above the swamp.
7. Trigger the Sentinels and complete the mission
Move toward the blinking tower and remain in its vicinity. Flood approach from the surrounding swamp, so use the tower, nearby trees, and terrain as cover instead of chasing enemies into the fog. Keep the shotgun ready for anything that reaches you and use the assault rifle against targets at medium range.
The Marines can help hold the area, but they are not an escort condition. You can complete the objective even if some or all of them are killed. Your task is to stay near the tower long enough for the scripted event to begin. If the Flood surround you, retreat around the tower rather than running far away from the objective area.
When the Sentinels descend, let them engage the Flood and avoid shooting them. Continue surviving near the tower until the gameplay screen fades to white. You do not need to activate a separate control panel, board a vehicle, or protect every Marine. If you die before the fade, reload the latest checkpoint, return to the tower, and repeat the holdout. Completion is confirmed when the fade occurs and the game advances into the next campaign mission, The Library.
- Reach the blinking tower.
- Hold the area while the Flood attack.
- Allow the Sentinels to arrive.
- Do not attack the Sentinels.
- Remain near the tower until the screen fades to white.
- Confirm that the campaign advances to The Library.
Before you move on
- The Chief has escaped the Forerunner containment facility.
- The surviving Marine group and the blinking tower have been reached.
- The Sentinels have arrived and begun attacking the Flood.
- The gameplay has faded to white.
- The campaign has advanced to The Library.
- No Terminal, Skull, achievement, or Marine-survival requirement remains for the original Xbox mission.
The Library — Flood Emergency, Slow Methodical Progress
The Library is the seventh mission in the original 2001 Xbox campaign. Follow 343 Guilty Spark through the Library, recover the Index, and trigger the Control Room cutscene. The level is entirely focused on Flood combat, with Sentinels appearing in several later sections. You begin with the M6D Magnum and MA5B Assault Rifle, then acquire an M90 Shotgun early in the route. Use the Magnum to destroy Carrier Forms at range, the Assault Rifle to clear Infection Forms, and the Shotgun to stop Combat Forms when they reach a doorway. The safest rhythm is to move forward only far enough to trigger a wave, retreat behind a sloped wall, doorway, or tunnel entrance, and let the Flood approach in a manageable line. Checkpoint areas, health kits, overshields, rocket-launcher Flood and the final Index-room battle require special attention.
1. Start with the Magnum and Assault Rifle, then secure the Shotgun
The mission starts with the M6D Magnum and MA5B Assault Rifle. Follow 343 Guilty Spark into the first large chamber, but do not stay directly beside him. The first Infection Forms can be melee-killed or allowed to break against your shield while it recharges. When you reach the area with the blue-lit structures and vents, turn and watch for Carrier Forms. Shoot the swollen Carrier Forms with the Magnum before they reach you, then use melee or the Assault Rifle on the Infection Forms released by their explosions.
As you advance, Flood begin emerging from vents and surrounding the blue-lit structures. Back away from each trigger point instead of pushing into the next room. When the first Combat Forms appear, keep the Assault Rifle trained on their bodies while retreating toward the previous safe space. Search the fallen Flood after each wave. An M90 Shotgun becomes available during this early sequence; take it immediately when you find one, replacing the weapon you use least. Keep the Magnum for distant Carrier Forms and the Shotgun for close-range Combat Forms.
- Begin with the M6D Magnum and MA5B Assault Rifle.
- Acquire the M90 Shotgun during the opening Flood encounters.
- Destroy Carrier Forms before they reach your position.
- Reload and collect ammunition before triggering the next wave.
2. Clear the first chambers from doorways and sloped walls
After acquiring the Shotgun, use the entrances between chambers as choke points. Move into a room only until Flood begin appearing, then retreat to the doorway or behind a sloped wall. Let Combat Forms round the cover one at a time. A close Shotgun blast is the fastest way to stop them, but do not fire repeatedly into Infection Forms; use the Assault Rifle or melee for those smaller targets.
Several early rooms have vents, floor openings, and raised outcroppings that hide Flood above or below your first line of sight. When a room appears quiet, check the nearby ledges and floor slots before following the Monitor. If you see Carrier Forms standing at a distance, use the Magnum rather than rushing them with the Shotgun. If Combat Forms close the gap, switch to the Shotgun and keep moving backward so a melee attack cannot pin you against a wall.
When you reach the tunnel section, expect a Combat Form to leap down from above. Retreat all the way to the wider entrance if necessary. Clear the tunnel, replenish ammunition, and then enter the next room only far enough to activate its wave. Repeat the same retreat-and-clear pattern until the Flood stop spawning, then follow the Monitor through the open door.
- Use sloped walls, doorways, and tunnel mouths as cover.
- Check vents, ledges, and floor openings for surviving Flood.
- Use the Magnum on distant Carriers and the Shotgun on close Combat Forms.
- Do not advance while a triggered wave is still entering the room.
3. Cross the first elevator section and use the overshield carefully
Continue through the rooms marked by blue-lit pillars and repeated floor pits. When Flood attack from both sides, immediately retreat across the pit to the previous sloped wall. Clear Combat Forms as they approach, then step out only long enough to shoot the Carrier Forms at range. This section rewards patience: the available cover is more valuable than the small amount of ground you gain by rushing.
An overshield is available in a lower floor opening during this part of the route. Do not spend it casually while Infection Forms are nearby. Before collecting it, clear the surrounding Combat Forms and Carriers, then wait for your normal shield to recharge if possible. Once you have the overshield, use the Assault Rifle to remove Infection Forms quickly so they do not repeatedly collide with it. Keep the Shotgun for Combat Forms and retain the Magnum for Carriers.
The route eventually reaches Sentinels fighting the Flood. Help them from a safe distance, but do not depend on them to survive or follow you through every elevator. When the immediate area is clear, board the large elevator platform and ride it upward. After dismounting, follow the Monitor past the large screen displays and use nearby alcoves as fallback positions whenever vents begin releasing another wave.
- Clear both sides of ambushes before crossing the next opening.
- Collect the overshield only after securing the surrounding area.
- Protect the overshield from Infection Forms with quick Assault Rifle fire.
- Treat Sentinels as temporary support, not a required escort.
4. Survive the middle floors and the Monitor waiting objectives
The upper sections repeat the same pattern but add more vents, longer halls, and occasional rocket-launcher Combat Forms. When you see a rocket carrier, do not stand in the open and trade shots. Use a corner to expose yourself briefly, fire the Magnum, and retreat as soon as the Flood aims. If the rocket carrier advances with other Combat Forms, destroy nearby Carriers first so their explosions may remove the group, then finish the survivor with the Shotgun or Magnum.
At several large doors, the objective changes to holding your position until 343 Guilty Spark returns. You do not have to remain beside the door. Move back to a sloped wall or the previous tunnel entrance, where Flood can approach from fewer directions. Keep moving while using the Shotgun, and use the health kits placed in these rooms when your health is low after shield loss. When the Monitor opens the door, advance through it and collect ammunition before activating the next group.
Some encounters can be bypassed partially by running toward the next elevator once the route opens, but do not sprint blindly through an active wave. If the path is blocked, turn around and use the last doorway as a firing position. Controlled retreat is safer than attempting to clear a broad chamber from its center.
- Watch for Combat Forms carrying rocket launchers.
- Use corners to peek at rocket carriers and retreat from incoming fire.
- Fall back during Monitor waiting objectives instead of defending the doorway in the open.
- Use health kits before a new checkpoint battle when practical.
5. Reach the Index room and recover the objective
After another elevator and Sentinel-supported fight, follow the Monitor through the upper corridors. Continue using the established trigger-and-retreat rhythm. When Flood appear from vents near pits or blue-lit pillars, back up to the nearest sloped wall and clear the wave before turning toward the next door. Keep at least one close-range weapon, preferably the Shotgun, and collect grenades from fallen Flood whenever the route allows.
The final approach leads into the Index complex. At the last major door, Combat Forms initially pass through a partial opening. Use the Shotgun to stop them as they enter, but watch behind you for a Carrier Form emerging from a nearby vent. When the door opens fully, retreat toward the nearby health kit and rocket launcher. If you take the rocket launcher, fire into groups rather than isolated targets, then switch back to the Shotgun or Magnum when the rockets are gone.
When the final wave ends, move through the room and continue until the objective changes to Recover the Index. Follow the large blue beam toward the central elevator. The elevator descends through the energy beam to the Index platform. Approach the Index to trigger the cutscene; you do not need to eliminate every remaining Infection Form in the chamber.
- Clear the final doorway while watching both forward and rear approaches.
- Use rockets on clustered Combat Forms, not single targets.
- Reach the central elevator beneath the blue beam.
- Trigger the Recover the Index objective and approach the Index.
6. Confirm mission completion
The Library does not end with an evacuation run through the facility. Once you approach the Index, the cutscene shows the Master Chief recovering it and the story transferring to the Control Room. The following gameplay belongs to Two Betrayals, not The Library. Allow the cutscene to finish and verify that the next mission begins in the campaign flow.
If you die before reaching the Index, resume from the latest checkpoint and rebuild your weapon pair before pushing forward. If you lose the Shotgun, search nearby Combat Forms for another one rather than trying to complete the whole mission with only the Assault Rifle. If a rocket-launcher Flood kills you repeatedly, trigger the group from farther away, use cover to bait the rocket carrier into exposing itself, and retreat after every shot.
For co-op, keep both players near the same fallback doorway before activating a wave. A player who runs far ahead can trigger Flood behind the other player and make the checkpoint restart more dangerous.
- Recover the Index at the end of the Library.
- Let the Control Room cutscene play completely.
- Confirm that Two Betrayals becomes the next campaign mission.
- Do not treat the later Control Room combat as part of The Library.
Before you move on
- The objective changes to Recover the Index.
- The Master Chief reaches the central blue beam and the Index cutscene begins.
- The cutscene transfers the story to the Control Room.
- Two Betrayals becomes the next mission in the original Xbox campaign flow.
References for this chapter
Two Betrayals — Flood Pressure and Survival Aftermath
Two Betrayals returns you to the Control Room route from Assault on the Control Room. The mission objective is to destroy three Phase Pulse Generators, with each generator reached through a mixture of Covenant, Flood and Sentinel battles. The original Xbox route is built around Banshee flights, narrow Forerunner corridors, two bridge crossings and a final vehicle fight near Canyon A. Use the plasma pistol against Sentinels and Elite shields, keep the shotgun for Flood Combat Forms, and preserve rockets for the Wraiths and dangerous Flood carrying heavy weapons. After each of the first two generators, leave immediately because the generator room fills with enemies while your shields are depleted. The third generator is different: entering it ends the mission at once and begins the transition to Keyes.
1. Defeat the opening Sentinels and reach the first Banshees
Two Betrayals begins near the Control Room with four hostile Sentinels. Move behind the transparent energy shielding for cover and use charged plasma-pistol shots against them. A fully charged hit is especially effective here. After the opening group is gone, activate the switch on the right to open the door and cross into the next area.
A Covenant group and more Sentinels will fight in the following room. Let them weaken one another before committing to the fight. Stay near the entrance and avoid drawing Sentinel fire unnecessarily. When the battle settles, use the plasma pistol to strip Elite shields, then finish Elites with the shotgun. Grunts and Jackals can be handled from cover or finished with melee attacks when they are isolated.
Continue through the marked doors and out into the exterior area. Follow the ramp and clear the Covenant around the lower path. A Wraith becomes active farther along the route. Move toward the dead Flood and collect the Rocket Launcher and rockets there, then fire from cover until the Wraith is destroyed. Two to four direct rockets may be needed depending on difficulty and accuracy.
After the Wraith is gone, clear only enough Covenant to reach the two Banshees. The original Xbox version does not have a vehicle-hijacking mechanic, so do not try to board an occupied Banshee. Use an unoccupied vehicle after the nearby defenders are dead or have moved away. Fly to the navigation marker on the elevated platform and use the Banshee’s missiles against the Grunts and Elites emerging from the doorway before landing.
- Destroy the four opening Sentinels.
- Survive the Covenant-Sentinel battle and clear the route to the exterior.
- Collect the Rocket Launcher and destroy the Wraith.
- Reach the elevated platform using an unoccupied Banshee.
2. Destroy Pulse Generator 1 and retreat immediately
Enter the platform door, follow the hallway and open the next door into the generator chamber. Move through the opening toward the blue energy beam in the center. This beam is the first Phase Pulse Generator. Walking into it destroys the generator, but the interaction drains your shields completely.
Before activating it, make sure the route back to the hallway is clear and that the shotgun has ammunition. Once the generator is destroyed, Sentinels enter the room. Do not stay to fight them. Turn around at once, run back through the entrance hallway and continue outside. The objective changes to reaching Canyon B.
The first generator room is not a room you need to clear. If Sentinels block the exit, use the shotgun only to open a path, then keep moving. Once outside, take the fresh Banshee positioned to the right and follow the navigation marker toward the bridge. This replacement vehicle is useful because the first Banshee may be damaged during the opening flight.
- Walk into the first blue energy beam.
- Leave the generator chamber without trying to clear every Sentinel.
- Take the replacement Banshee outside.
- Follow the navigation marker toward Canyon B.
3. Cross Canyon B and destroy Pulse Generator 2
At the bridge, Covenant troops emerge from both ends, including Grunts carrying Fuel Rod Guns. Use the Banshee’s missiles while hovering outside their effective range, then land only after the bridge is safe enough to cross. Enter the marked door and continue through the interior.
The next rooms contain Grunts, Elites and Jackals. Use the previous hallway as a shield-recovery position. Plasma weapons are useful against Elites, while the shotgun handles enemies that close the distance. Jackals can be finished with melee attacks when they are separated from supporting fire. Continue left from the entry room, descend the ramp and clear the alcove where more Covenant emerge.
Flood and Covenant meet in the next large chamber. Let the two groups fight whenever possible, then eliminate the survivors. Continue through the rooms until Combat Forms begin breaking through. Draw them toward the preceding hallway and use the shotgun from the doorway. Grenades are best reserved for groups, especially when Carrier Forms are present.
Cross the second bridge cautiously. A Banshee patrols the area, and several Combat Forms can carry Rocket Launchers. Remove those weapon carriers first with the pistol, grenades or careful shotgun attacks. At the far end, clear the Infection Forms and follow the corridor to the lift. Activate the lift, ignore harmless Infection Forms during the descent, then continue through the lower doors to the exterior.
Outside, Covenant control the area around the second generator. A Banshee, Ghost, stationary guns and a Wraith can all threaten you. Find the lower pit and collect the Rocket Launcher, rockets and health packs. Destroy the Wraith from a protected angle before advancing. Use a Ghost to move through the tunnel if one is available, then follow the route past the pillars and the overturned Warthog toward the next Banshee platform.
Take one of the Banshees and fly to the next navigation marker. Suppress the platform defenders with missiles, enter the structure and follow the hallway to the second generator chamber. Flood and Sentinels are already fighting inside, and some Combat Forms may carry rockets. Use the entrance as cover, collect a Rocket Launcher if one is available, and destroy the generator by walking into the beam.
The second generator triggers a much heavier Flood attack while your shields are depleted. Run directly for the entrance. Fire one or two rockets into the densest group if Combat Forms block the doorway, then retreat down the hallway until your shields recover. Leave the structure and take the Banshee outside for the tunnel route.
- Use the Banshee to clear the bridge defenders.
- Cross both bridges while watching for rocket-carrying Combat Forms.
- Use the lower pit for health and rockets.
- Destroy the Wraith before taking the tunnel toward the second Banshee platform.
- Destroy Pulse Generator 2 and escape through the entrance hallway.
4. Fly through the tunnels and reach Canyon A
Follow the navigation marker to the tunnel near the Wraith. Enter in the Banshee and stay high in the passage rather than hovering over the Covenant-Flood battle below. Combat Forms may carry rockets, so keep moving and avoid unnecessary exchanges.
The tunnel ends at a partially opening door. Land, leave the Banshee and activate the panel beside the door. The opening is wide enough for you but not for the Banshee, so continue on foot. Cross the interior bridge using the side barriers as cover. Clear Infection Forms quickly, then watch for Combat Forms at the far end.
Proceed through the doors and corridors until the route opens into the large exterior battlefield known as Canyon A. Do not rush into the center. Use rocks and elevation to observe the Covenant and Flood fighting ahead. A Ghost is available on this route; use it to move quickly toward the next tunnel and the final vehicle battle.
- Enter the tunnel near the Wraith in the Banshee.
- Open the partially blocked door and continue on foot.
- Cross the interior bridge without exposing yourself to rocket carriers.
- Reach the Canyon A battlefield.
5. Reach and destroy Pulse Generator 3
In Canyon A, head right first and deal with the nearby Combat Forms. Throw a grenade into a group, then use the shotgun on survivors. Allow the Covenant and Flood forces farther ahead to fight before approaching. A Banshee attacks once you are exposed; destroy it or use rocks to break its line of fire. Eliminate any Grunts still operating stationary guns.
Find the Ghost and follow the direction it faces into the passage. At the supply area, collect shotgun ammunition, a Rocket Launcher and a health pack if needed. Continue through the passage and use the Ghost to reach the upper section. The final Covenant-Flood battle is ahead, with a Wraith blocking the route to the Banshees. Fire rockets into the Wraith from cover before trying to cross.
Once the Wraith is destroyed or sufficiently distracted, move around the less crowded side of the battlefield and take an unoccupied Banshee. Fly along the marked route to the final platform. Sentinels emerge from the doorway as you approach, so use the Banshee’s guns and missiles before landing.
Enter the platform door and follow the hallway to the final generator room. Sentinels surround the generator, but they do not need to be defeated. Run directly into the blue energy beam in the center. Destroying Pulse Generator 3 removes the remaining objective and ends the mission immediately.
- Use cover and grenades in the first Canyon A Flood encounter.
- Collect the Rocket Launcher and destroy the Wraith blocking the Banshees.
- Reach the final platform in an unoccupied Banshee.
- Run into Pulse Generator 3 to complete the mission.
Before you move on
- Pulse Generator 1 has been destroyed and the route to Canyon B opens.
- Pulse Generator 2 has been destroyed and the tunnel route toward Canyon A opens.
- Pulse Generator 3 has been destroyed.
- The game begins the ending cutscene for Two Betrayals and transitions to Keyes.
Keyes — Shipboard Rescue and Banshee Escape
Keyes begins after the Chief is transported back aboard the Truth and Reconciliation. The opening route is locked toward the control room, so follow the alternate corridor, take the definite Shotgun pickup after the first Combat Forms, and drop through the damaged shuttle-bay floor into the coolant section. Let Covenant and Flood forces weaken each other when possible, use the Shotgun for close-range Combat Forms, and use the Pistol or Sniper Rifle against Hunters and distant targets. After crossing the lower cruiser, return through the shuttle-bay levels and reach the control room. Captain Keyes has already been assimilated into the Flood; approaching the Proto-Gravemind triggers the neural-implant recovery cutscene rather than a rescue escort. Return to the shuttle bay, descend to the lower floor when the Covenant dropship delivers Banshees, board one, and fly out. The mission is complete when the transition to The Maw begins.
1. Follow the alternate opening route and take the Shotgun
After the opening transition, you begin inside the Truth and Reconciliation with the MA5B Assault Rifle and Plasma Pistol. Move down the corridor while Captain Keyes radios in. The door toward the control-room route is locked, so do not waste time searching the starting area for a switch. Continue through the available door instead.
A Grunt is being chased by an unarmed Flood Combat Form. Kill both, then continue to the dead end. The Active Camouflage is in the side area where the Grunt and Combat Form came from; it is useful but optional. From the dead end, turn right and take the opening on the left to reach a room with four Grunts. Use a Fragmentation Grenade or controlled fire, then move through the area and turn left.
Two Combat Forms are in the next section. After this first Combat Form encounter, the Shotgun is a definite route pickup. Swap the Plasma Pistol for the Shotgun and continue straight to the dead end, then turn right. Kill the Carrier Form and its Infection Forms before going through the door. From this point onward, Shotgun ammunition and grenades are the most valuable resources in the cruiser.
- Ignore the locked control-room route at the start.
- Treat Active Camouflage as optional.
- After the first two Combat Forms, replace the Plasma Pistol with the Shotgun.
- Destroy the Carrier Form before moving through the door.
2. Drop through the damaged shuttle-bay floor
Continue until the floor gives way over the damaged shuttle-bay section. The opening is the intended route. Do not try to jump across the gap or remain above it trying to clear every Covenant unit. Drop through the hole and follow the transition into the coolant area below.
The coolant section contains a large Covenant-and-Flood battle. Throw a grenade toward clustered Elites if you have a safe angle, then use the Shotgun when Flood emerge from the coolant. Keep walls, machinery, and doorways between you and the next wave so you can retreat without being surrounded.
Turn on the flashlight in the darker passages and follow the route from the area where the Covenant were positioned. When you reach another battlefield, pause and let the Covenant and Flood damage each other. Once the fight thins out, move across the area and enter the next passage rather than chasing enemies into open ground.
- Drop through the shuttle-bay floor; this is mandatory progress.
- Use the Shotgun against Flood that emerge from the coolant.
- Let mixed enemy groups weaken each other before advancing.
3. Cross the lower cruiser and deal with the Hunters
The next passage contains repeated Combat Form attacks and Carrier Forms dropping into the route. Hold near corners and doorways, fire the Shotgun at close targets, and destroy Carriers before their Infection Forms spread. Do not panic if Flood remain behind you; keep a retreat path open and advance once the immediate area is clear.
A Health Pack and Sniper Rifle are available before the Hunter encounter. Keep the Shotgun and take the Sniper Rifle in place of your other weapon if you can do so safely. From the ledge, watch the Hunters fighting Flood and Covenant below. Their exposed orange back is the vulnerable target. Take deliberate shots rather than dropping immediately into the fight.
After the Hunters are down, use the Sniper Rifle or Pistol against remaining Covenant at range. If the opposing groups are still fighting, you can wait and let them reduce one another. When you descend, clear Carriers and Infection Forms first, then move through the passage toward the next battlefield.
- Keep the Shotgun for close-range Flood.
- Use the Sniper Rifle on the Hunters’ exposed backs.
- Do not drop into the Hunter area until you have a retreat route.
- Destroy Carrier Forms before cleaning up Infection Forms.
4. Pass the Shade and lower-pit battles
You will reach an area with an Elite on a Shade and nearby Grunts. You can attack with grenades from cover, or let the Flood engage them before finishing the survivors. Avoid standing in the open between both factions. Use the Shotgun only when an enemy closes the distance, and use the Pistol for exposed targets farther away.
Continue through the next Flood-filled passage and drop down the cliff edge when the route ends. A Covenant-and-Flood fight follows. Throw a grenade into the cluster if you have one, then use the Pistol against enemies on the higher ledges. Move toward the route the Combat Forms used and turn left.
An Overshield is available on the higher ledge during the following Covenant-and-Flood encounter. Take it after clearing the nearby Combat Forms and Carriers. A Combat Form in this section can provide another Shotgun, so replenish your ammunition when safe. Defeat the remaining Covenant on the ledge; the next transition occurs after this area is secured.
- Use cover around the Shade and let the Flood help when practical.
- Use the Pistol for distant targets instead of wasting Shotgun shells.
- Collect the Overshield when the surrounding enemies are under control.
- Replenish Shotgun ammunition from Combat Form drops when available.
5. Re-enter the cruiser and return toward the shuttle bay
After the transition, you are back inside the cruiser. Turn around and follow the open route. Kill the Carrier Form ahead, then enter the larger room where more Flood are moving through the area. Combat Forms carrying Shotgun ammunition can be found below; collect ammunition before dropping into the lower pit if the route is clear.
Follow the open passage through the lower section. Several Carrier Forms and mixed Covenant groups occupy the route. Use the Shotgun at corners, throw grenades into clusters, and back away from Combat Forms rather than fighting several at once in a narrow room. The route eventually returns to the shuttle-bay levels.
When you reach the shuttle bay, note the Health Pack near the door you used to enter. Do not spend time clearing every enemy on the platform. Move along your current level, take the open route at the far end, and continue through the halls toward the third level. Locked doors are normal here; use the open passage after each fight.
- Collect Shotgun ammunition before the lower drop if safe.
- Use corners to separate Combat Forms from Covenant groups.
- Remember the Health Pack near the shuttle-bay entrance.
- Follow open doors rather than searching locked rooms.
6. Push through the upper halls and reach the command center
Continue through the upper cruiser passages while Covenant and Flood groups fight around you. If Grunts are fleeing from Flood, eliminate the immediate threat but do not linger in the middle of the corridor. Use grenades to break up groups, then finish close survivors with the Shotgun.
When you reach the third level of the shuttle bay, take the open route on the right. Flood will emerge from the next door and additional enemies may be fighting nearby. Draw the Flood toward a doorway, throw a grenade, and retreat far enough to avoid being surrounded. Continue through the route once the immediate wave is gone.
Proceed through the next hallway and deal with the Covenant near the command-center approach. The Flood continue to emerge until you enter the command center, so do not attempt to farm every spawn in the surrounding corridors. Clear a path, enter the command center, and climb toward the large Flood mass to trigger the cutscene.
- Use doorways as choke points in the upper halls.
- Do not remain in the third-floor shuttle-bay approach fighting endless reinforcements.
- Enter the command center to advance the objective.
- Approach the Proto-Gravemind to trigger the cutscene.
7. Recover the neural implants and survive the return fight
The large Flood mass is the Proto-Gravemind containing Captain Keyes. Keyes is not a living escort character in this mission. Approaching the mass triggers the cutscene in which the Chief recovers the Captain’s neural implants. There is no rescue sequence requiring Keyes to follow you or survive.
After the cutscene, leave the platform and wait briefly for the next Flood movement. Move toward the door you used to enter, but use the doorway as cover rather than rushing through. The door opens onto a large Special Operations Covenant group, and a major Covenant-versus-Flood fight begins.
Stay behind a pillar or other solid cover while the two sides engage. Throw a grenade only when it will not trap you in the blast, and let the battle reduce the enemy count. When the fighting subsides, finish dangerous survivors with the Pistol at range or Shotgun at close distance. The goal is to reopen the route to the shuttle bay, not to chase every Flood Form into side passages.
- Treat the Proto-Gravemind cutscene as the Keyes objective completion.
- Do not look for a living Captain Keyes escort.
- Use cover while Special Operations Covenant and Flood fight.
- Advance only after the doorway route is safe enough to cross.
8. Reach the lower shuttle bay and escape in a Banshee
From the control-room area, follow the route back toward the shuttle bay. Fuel Rod Gun Grunts and silver-armored Elites appear during the return, so stay behind columns, walls, and stationary shields. Use the Pistol to weaken distant Grunts and grenades or close Shotgun fire for Elites. You do not need to clear every enemy in the hangar.
When you return to the third level of the shuttle bay, move toward the far-right side of the room. The Covenant dropship delivers Banshees to the lower floor. If the bay is crowded, wait behind cover until the aircraft arrive rather than standing exposed on the central platform.
Drop from the third level to the projecting second-level platform, crouching on landing to reduce fall damage, then descend to the lower floor. Move to the Banshees, board one, and fly out through the shuttle-bay opening. Do not stop to farm ammunition or clear the entire hangar. If you die before boarding, repeat the descent from the latest checkpoint and prioritize the vehicle over enemy elimination.
- Use cover against Fuel Rod Gun Grunts and silver Elites.
- Wait for the Covenant dropship to deliver the Banshees.
- Descend from the third level through the second-level platform.
- Board a Banshee on the lower floor and fly out.
Before you move on
- The Proto-Gravemind cutscene has played and the Captain’s neural implants have been recovered.
- The return route has brought you back to the shuttle bay.
- A Covenant dropship has delivered Banshees to the lower level.
- You have boarded a Banshee and flown out through the shuttle-bay opening.
- The mission transition begins and the campaign advances to The Maw.
The Maw — Final Ship Sabotage, Reactor Escape and Campaign Finale
The Maw is the tenth and final mission in the original 2001 Xbox campaign. Reach the bridge, follow the damaged Pillar of Autumn to Engineering, retract all four exhaust couplings from the Level 3 control panels, and destroy each exposed fusion core with a rocket or grenade. The armory supplies a shotgun, rocket launcher and grenades, making it the key preparation point before the reactor fight. After the fourth core is destroyed, reach the elevator and clear the Covenant waiting inside. The timed escape then begins. Take the first Warthog on the right, keep moving through the collapsing ship, use side routes around unstable obstacles, and stay straight through the two final jumps. Debris eventually blocks the vehicle. Leave it, run along the outside edge of the final combat area, reach the Longsword area and allow the ending cutscene to start automatically. The original Xbox release has no Terminals or Skulls.
1. Reach the bridge and prepare at the armory
After the opening cinematic, follow the objective through the damaged ship toward the bridge. The opening route contains Flood, Sentinels and Covenant fighting in overlapping areas. Use doorways, supports and wreckage as cover, and let hostile groups weaken one another before committing to a room. Keep the shotgun for Flood at close range and retain an accurate weapon for Sentinels and distant Covenant.
After the bridge sequence, follow the red arrows painted on the floor toward the armory. This detour is important preparation rather than an optional collection stop. Refill the shotgun, take the rocket launcher and collect fragmentation and plasma grenades. Active Camouflage Flood attack near the rear of the armory. On higher difficulties, grab the supplies and retreat instead of trying to defeat every invisible enemy. If the reactor fight consumes your ammunition, the armory remains available for restocking.
- Complete the bridge objective.
- Follow the red floor arrows to the armory.
- Leave with a shotgun, rocket launcher and grenades.
2. Enter Engineering and reach Level 3
From the armory, continue to Engineering. When the route gives you a right-or-left choice, take the right side into the Engine Room. Climb the ramp, continue through the upper route and follow the interior path until you reach Level 3. Flood and Sentinels fight throughout the room, so use machinery and upper walkways as cover instead of standing in the open lower floor.
Health packs are positioned around the computer banks on the first floor. Remember their locations because you may need to return for recovery. The four control panels on Level 3 can be used in any order. Before activating a panel, reload your explosive weapon and make sure you have a retreat path. The panel begins the reactor procedure but does not destroy a core by itself.
- Enter the Engine Room through the right-hand route.
- Reach the Level 3 control walkways.
- Locate all four control panels and preserve explosive ammunition.
3. Retract and destroy all four fusion cores
Activate one Level 3 control panel. The corresponding exhaust coupling retracts and exposes a bright opening into the fusion reactor. Move onto the retracting pipe or another safe firing position, then fire a rocket into the exposed opening. A fragmentation grenade can also destroy the core if thrown accurately. Confirm the explosion before leaving; activating the panel alone does not count as sabotage.
Return to Level 3 and repeat the procedure at the next panel. The reactor room becomes more dangerous as additional Flood and Sentinels enter from different levels. Fire from behind machinery, retreat when shields drop and use the lower health packs when necessary. For one return route, jump from the blue barrel to the yellow barrel and then onto the large exhaust coupling to reach the upper platform. Use the normal ramps if that jump is unreliable.
Continue until all four couplings have been retracted and all four exposed cores have visibly exploded. The panels may be completed in any order. After the fourth core is destroyed, wait for Cortana's new objective and follow the route toward the elevator. Do not remain in the reactor room searching for another activation step.
- Activate a Level 3 control panel.
- Destroy the exposed core with a rocket or grenade.
- Repeat the process until all four cores have exploded.
- Follow the new objective after the fourth core.
4. Clear the elevator and begin the escape
After the fourth core, follow the objective through the damaged corridors toward the elevator. Move quickly past fire and wreckage, but do not stop inside burning areas. The elevator brings Covenant reinforcements, including Grunts with fuel-rod weapons and Elites. Attack them before boarding. A rocket fired as the elevator descends can remove several enemies, while the shotgun and grenades finish survivors.
The countdown has not begun during the reactor work or while you are clearing the elevator. Use this opportunity to reload, recover from a nearby health pack and collect any remaining grenades. Once the elevator is clear, board it and continue to the vehicle bay. Take the first Warthog on the right. If that vehicle is unavailable, use another accessible Warthog rather than delaying for a perfect setup.
- Reach the elevator after destroying the four cores.
- Defeat the Covenant riding down with it.
- Reload before entering the vehicle bay.
- Take the first Warthog on the right.
5. Drive through the collapsing Pillar of Autumn
Once the escape timer begins, keep the Warthog moving. Shoot only enemies directly blocking the route. In the first large room, stay near the middle, drive under the floor and steer slightly to one side while climbing back up to avoid the obstruction at the exit. In the next large room, use a side tunnel if the central passage repeatedly flips the vehicle. Return toward the middle after clearing the obstacle.
In the following hallway, pass to the left of the first column, then to the right of the second, and turn into the shortcut. In the next large room, approach the wall at an angle and use a side catwalk or the lower off-center route. The later pillar room requires a simple slalom: go left of the first pillar, right of the next, then left again until clear.
Continue through the hallway toward Foehammer without stopping. In the next winding corridor, use the shortcut after the second column when it is clear. When Cortana warns about the large jump, align the Warthog straight and maintain speed. Two jumps follow in succession. Avoid sharp steering while airborne and correct only after landing.
- Keep driving once the countdown begins.
- Use side tunnels and catwalks when the central route is unstable.
- Slalom through the pillar room.
- Stay straight through both final jumps.
6. Leave the Warthog and reach the Longsword area
After the final jumps, the hangar opens ahead, but wreckage blocks the Warthog before the actual evacuation point. Leave the vehicle and run the remaining distance. Stay along the outside edge of the route rather than crossing the central combat area; many enemies will fail to notice you there. Do not waste the remaining countdown trying to defeat every Flood, Sentinel or Covenant unit.
If the Warthog becomes stuck earlier, abandon it and continue on foot rather than repeatedly attempting to free it. The vehicle is not the completion condition. Follow the route through the final hangar and continue toward the Longsword area. You do not need to board the Longsword or find an interaction prompt. Reaching the end of the escape route triggers the ending sequence automatically.
If the escape fails, restart from the available escape checkpoint and prioritize a clean line through the rooms. If the reactor objective does not update, return to Engineering and verify that every coupling was retracted and every exposed core was hit afterward. Once the Longsword-area ending begins, allow the cutscene to play through. That automatic ending sequence confirms completion of The Maw and the original Xbox campaign.
- Reach the hangar after the two final jumps.
- Leave the Warthog when debris blocks the route.
- Run to the Longsword area without searching for an interaction prompt.
- Allow the ending cutscene to trigger and play through.
Before you move on
- All four exhaust couplings have been retracted from the Level 3 control panels.
- All four exposed fusion cores have been destroyed with rockets or grenades.
- The player reaches the vehicle bay, takes a Warthog and completes the collapsing-ship escape route.
- The player abandons the Warthog at the final debris blockage and reaches the Longsword area on foot.
- The ending cutscene triggers automatically and plays through, confirming completion of The Maw and the original Xbox campaign.
Weapons, Vehicles and Resource Management (throughout campaign)
Halo: Combat Evolved on the original Xbox limits you to two carried weapons, so change your loadout whenever the terrain or enemy mix changes. Use the pistol for accurate fire at range, the shotgun and assault rifle in close or medium engagements, plasma weapons against shields, and the sniper rifle or rocket launcher for high-value targets. Preserve rockets for vehicles, Hunters, dense Flood groups, and emergencies. The Warthog is a fast transport and infantry-support vehicle, the Scorpion controls open battlefields, the Ghost excels at strafing and hit-and-run attacks, and the Banshee provides aerial access and attack runs. The original Xbox campaign does not give the player a usable Energy Sword or Fuel Rod Gun, and it does not contain the later rocket Warthog variant.
1. Choose the weapon pair before entering the next area
You can carry only two weapons, so treat every weapon pickup as a decision about the next encounter. Keep the M6D pistol when the route has open sightlines, distant Grunts, Jackals, or shielded Elites. Its precision and zoom make it useful at ranges where the MA5B assault rifle becomes inaccurate. Follow a shield-breaking shot or burst with accurate pistol fire, then take cover while an Elite’s shield recharges.
Pair the pistol with the MA5B when you expect mixed infantry at medium range, or with the shotgun when the next section contains corridors, rooms, or Flood Combat Forms. The assault rifle is useful for suppressing groups and finishing unshielded targets, but do not hold the trigger continuously at long range. The shotgun is powerful only when you can close the distance safely; replace it with a pistol, sniper rifle, or rocket launcher before crossing a large outdoor area.
Before moving through a doorway, elevator, or mission transition, look at the weapons on the ground and nearby bodies. Pick up ammunition only after the current fight is safe, and do not carry two weapons that serve the same short-range role unless the next section clearly demands it.
- Carry the pistol for open ground and precision shots.
- Use the assault rifle for medium-range suppression rather than distant precision fire.
- Take the shotgun into tight interiors and Flood-heavy routes.
- Swap weapons before the environment changes instead of waiting until ammunition is exhausted.
2. Use Covenant weapons for specific targets
The plasma pistol is most valuable against Elite energy shields. Charge a shot, release it at the Elite, and immediately switch to the pistol, assault rifle, melee attack, or another finishing weapon while the shield is down. In the original Xbox release, the charged plasma-pistol shot is not a vehicle-disabling EMP. Do not build a vehicle strategy around that later-series behavior; use rockets, vehicle weapons, the Scorpion, or a captured enemy vehicle instead.
The plasma rifle performs well at short and medium range against unshielded infantry and can keep pressure on enemies while they retreat. Fire in controlled bursts so it does not overheat at the moment you need it. Plasma weapons use battery energy rather than conventional ammunition, and the original Xbox campaign does not provide a normal way to recharge them. Replace a nearly depleted weapon with another dropped weapon before a major encounter.
The Needler is effective when its projectiles can track exposed infantry, but it is not a substitute for the pistol against distant precision targets or for the shotgun against enemies already inside your defensive space. Covenant weapons are situational tools: keep one when its next use is obvious, but return to a human weapon when range, accuracy, or ammunition reliability matters more.
- Use a charged plasma-pistol shot to remove an Elite’s shield, then finish the target quickly.
- Do not expect the original Xbox plasma pistol to disable vehicles.
- Watch battery and heat limits on Covenant weapons.
- Use the Needler against suitable infantry groups, not every enemy type.
3. Preserve sniper and rocket ammunition
Use the sniper rifle on distant Elites, enemy gunners, Hunters exposed at range, and other high-value targets that are difficult to approach safely. Fire from cover and relocate if enemies begin advancing toward your position. Do not spend sniper rounds on isolated Grunts unless they are operating a dangerous weapon or blocking the only safe route.
The rocket launcher is your most dependable portable answer to Wraiths, clustered enemies, Hunters, and emergency crowd control. Fire from a clear angle because the explosion can kill you, Marines, or co-op partners. Keep away from walls, rails, and narrow doorframes when possible; a rocket fired from too close can turn a successful hit into a checkpoint reload.
Rockets are limited, so use ordinary weapons and grenades against routine infantry. Before a known vehicle fight, collect available rocket ammunition and check whether a Scorpion, Warthog gun, or other heavy weapon can do the job instead. If you reach a Wraith encounter without rockets, use terrain and vehicle access rather than wasting time trying to duel it with a pistol in the open.
- Spend sniper ammunition on high-value distant targets.
- Reserve rockets for vehicles, Hunters, dense Flood groups, and emergencies.
- Check the blast area before firing.
- Collect nearby ammunition after combat, but do not abandon cover for a single round.
4. Drive the Warthog as a mobile support platform
The Warthog is strongest on open sections of Halo, The Silent Cartographer, and other outdoor routes. As driver, use ridges, turns, and terrain to avoid sustained fire. Do not drive directly into a fortified position if you can approach from an angle, suppress the defenders, and withdraw along the same route. The rear M41 LAAG is effective against infantry and exposed Covenant gunners, but the gunner is vulnerable, so keep the vehicle moving rather than parking beneath a Shade or in front of a Wraith.
With Marines or a co-op partner aboard, assign roles before the fight. The driver should concentrate on positioning, the gunner should suppress infantry and anti-vehicle troops, and passengers should dismount before narrow entrances or defended structures. Once the route becomes an interior corridor, leave the Warthog outside and clear on foot. A vehicle wedged against a doorway is not useful cover and can block your retreat.
If the Warthog flips or becomes trapped, get out and continue on foot. Repeatedly trying to recover it exposes the entire group and can turn a safe checkpoint into a difficult restart. Treat the vehicle as transport and fire support, not as armor that can absorb every attack.
- Use the Warthog to cross open ground and reposition quickly.
- Keep the LAAG gunner moving while the driver avoids direct approaches.
- Dismount before narrow entrances and indoor areas.
- Abandon an overturned or trapped Warthog when recovery is unsafe.
5. Keep the Scorpion at the front of open battles
The Scorpion is the best tool for controlling large outdoor encounters. Use its main cannon against Wraiths, Banshees, other vehicles, Hunters, and groups of infantry. Use the coaxial machine gun against ordinary infantry while the cannon reloads. Keep the hull moving or angled toward incoming fire, and check the sides because enemies can approach from areas where the cannon cannot easily respond.
Marines riding on the tank add useful fire from the track pods, but they do not replace your responsibility to check flanks or identify anti-vehicle threats. Clear dangerous infantry before driving past them, especially when they carry rockets or can attack from elevated ground.
Do not force the Scorpion through every doorway or narrow bridge. Its size and turning limits can make a confined route more dangerous than continuing on foot. When leaving the tank, park it where it can still provide cover or fire support and away from explosive hazards. If it is damaged, trapped, or separated from the route, switch to a pistol, rifle, shotgun, or rocket launcher instead of waiting for it to become unusable during the next engagement.
- Use the cannon for vehicles and heavy targets.
- Use the machine gun for ordinary infantry between cannon shots.
- Watch for anti-vehicle troops on elevated or side positions.
- Leave the tank when the route becomes cramped or the vehicle is no longer an advantage.
6. Use Ghosts and Banshees for movement and attack passes
The Ghost is a one-person Covenant vehicle built for speed, strafing, and hit-and-run attacks. Keep moving laterally while firing its plasma cannons, circle exposed infantry positions, and avoid stopping in front of rockets or concentrated fire. Its driver has little protection, so use the Ghost to cross exposed ground or harass a position rather than to sit still in a prolonged firefight.
The Banshee is useful when the mission provides it for crossing gaps, reaching elevated routes, or attacking ground forces from above. Make short attack passes with its plasma cannons, use its fuel-rod weapon against groups when the shot is safe, then climb or turn away from return fire. Do not hover directly over a fortified position while infantry or heavy weapons can target you. If the Banshee is damaged or the route requires an interior fight, land or dismount and continue on foot when possible.
The original Xbox campaign does not include the later rocket Warthog variant, and the player cannot normally pick up and use the Energy Sword or the campaign Fuel Rod Gun. The Energy Sword and fuel-rod weapons may appear in enemy hands or as vehicle equipment, but they are not part of the normal two-weapon player loadout for this edition.
- Use Ghosts for rapid movement, strafing, and hit-and-run attacks.
- Make Banshee attack passes instead of hovering over enemy fire.
- Use heavy vehicle weapons against appropriate targets, not isolated infantry.
- Do not search the original Xbox campaign for later player weapons or vehicle variants.
Before you move on
- You change weapons when moving between open terrain, tight interiors, Flood areas, and vehicle engagements.
- You can explain when to use the pistol, assault rifle, shotgun, plasma pistol, plasma rifle, Needler, sniper rifle, and rocket launcher.
- You preserve rockets for vehicles, Hunters, dense Flood groups, and emergencies instead of routine infantry.
- You use Warthog roles correctly: driver for positioning, gunner for suppression, and passengers for dismounting before chokepoints.
- You use the Scorpion’s cannon for heavy targets and its machine gun for ordinary infantry while checking the tank’s flanks.
- You use Ghosts for mobility and strafing and Banshees for controlled aerial attack passes.
- You recognize the original Xbox edition’s weapon limits and do not rely on Energy Sword, campaign Fuel Rod Gun, Battle Rifle, or rocket Warthog mechanics.
- Before The Maw’s final escape, you can collect nearby ammunition, preserve a heavy weapon for dangerous groups, and switch to a dependable infantry weapon when the vehicle section ends.
References for this chapter
- Halo: Combat Evolved Xbox Manual — Halopedia
- Halo: Combat Evolved Manual — Halopedia
- Halo: Combat Evolved — Halopedia
- Halo: Combat Evolved Vehicles — StrategyWiki
- Halo: Combat Evolved — Microsoft Xbox Manual
- Halo: Combat Evolved Xbox Guides and FAQs — GameFAQs
- Energy Sword — Halopedia
- M808B Scorpion Gameplay — Halopedia
Co-op, Checkpoints, Skulls and Terminals on the Original Xbox
Halo: Combat Evolved on the original 2001 Xbox supports two-player local split-screen campaign co-op through Multiplayer → Cooperative Play. The campaign uses shared checkpoints while the session is active: if one player dies, the survivor can often continue until the dead player respawns, while both players dying reloads the latest checkpoint. However, do not treat co-op checkpoints as a mid-mission save system. Finish the current level before quitting, because the original co-op mode is not designed to resume from an in-level checkpoint later. The original Xbox release also contains no Terminals and no collectible Skulls. Those features belong to later editions such as Halo: Combat Evolved Anniversary and later collections. Optional original-edition goals are therefore difficulty or co-op challenges, not collectible checklists.
1. Start local campaign co-op from the correct menu
Connect two controllers to the original Xbox and reach the main menu. Select Multiplayer, then choose Cooperative Play. This is separate from the regular Campaign entry used for solo play. Each player joins by pressing START or A, selects a custom player profile, and then the session leader chooses the campaign difficulty before starting.
The original Xbox manual describes Cooperative Play as a two-player mode for completing the entire single-player campaign together on one console. Do not use setup instructions for Halo: Combat Evolved Anniversary, Halo: The Master Chief Collection, or modern Halo releases: those versions may add online options, different menus, achievements, or different progression behavior.
The player selecting the co-op session chooses the mission and difficulty. Before beginning, agree whether you are playing a complete campaign run or replaying a particular unlocked mission. Both players should remain at the console through the opening gameplay section so you can confirm that split-screen is active and both characters can move.
- Use Multiplayer, then Cooperative Play.
- Connect and join both controllers before the mission begins.
- Choose the difficulty and mission before starting.
- Confirm that both players are visible in split-screen gameplay.
2. Treat checkpoints as temporary shared recovery points
During an active co-op mission, the game uses checkpoints to manage deaths and failed encounters. If one player dies while the other remains alive, the survivor can sometimes continue the fight until the fallen player respawns. If both players die, the game returns the pair to the latest checkpoint and the encounter must be attempted again.
The practical rule is to regroup after every major firefight, vehicle section, or objective trigger. Do not push into a new arena while your partner is dead, because the surviving player may be forced to fight alone and can create a worse recovery position. If a respawn does not happen immediately, leave the immediate combat area or finish the current threat rather than repeatedly charging into danger.
Checkpoints are not a substitute for a co-op save file. They help only while the current session is running. The original Xbox manual's automatic-save instructions describe the campaign save system, but co-op guidance for this release indicates that players cannot save and later resume from the middle of a co-op level. Plan to finish the current mission before powering down.
- Regroup after clearing each substantial encounter.
- Wait for a dead partner to return before triggering the next major fight.
- If both players die, rebuild the approach from the reloaded checkpoint.
- Do not quit halfway through a co-op mission expecting to resume at its last checkpoint.
3. Use separate positions and complementary weapon roles
Two players should not stand in the same doorway or occupy the same cover position. Stagger your angles so one player can retreat without blocking the other, and call out grenades before throwing them. In larger outdoor spaces, use different rocks, trees, vehicles, or structures to create crossfire against Covenant groups.
Assign temporary roles rather than permanent classes. One player can draw attention from an Elite or operate a vehicle while the other uses the pistol, sniper rifle, rocket launcher, or plasma weapon to exploit the opening. When fighting Flood, keep enough distance to avoid chain reactions from Carrier Forms and avoid allowing both players to be surrounded in the same corridor.
Share ammunition deliberately. If one player carries the rocket launcher or sniper rifle, the other should retain a dependable close- or medium-range weapon. Before boarding a Warthog, decide who drives and who uses the mounted gun. The driver should prioritize a route that does not wedge the vehicle against scenery; the gunner should suppress infantry and remove threats that can disable the vehicle.
- Keep the players on different firing angles.
- Call out fragmentation and plasma grenades.
- Avoid giving both heavy weapons to one player.
- Choose the Warthog driver and gunner before boarding.
4. Recover safely after a death or checkpoint reload
If one player dies repeatedly, stop advancing and make the next checkpoint the immediate objective. Clear the room or outdoor pocket, wait for the respawn, and then move together. Do not sprint through an uncleared enemy group to rescue a fallen partner; a second death usually returns both players to the last checkpoint.
After a reload, check the surroundings before repeating the encounter. Fallen weapons, vehicles, and enemy positions may no longer be arranged exactly as before. Re-arm from nearby bodies or weapon locations, use doorways and pillars as fallback cover, and let shields recharge before exposing yourself again.
On Heroic or Legendary, divide the enemy's attention instead of trading damage in the open. One player should retreat when shields fail while the other keeps enemies occupied. Against shielded Elites, combine plasma damage with a precise human weapon or melee attack rather than wasting all ammunition into the shield at once.
- Re-arm after a checkpoint reload.
- Use separate fallback positions.
- Let shields recharge before re-engaging.
- Never attempt a reckless rescue through an uncleared group.
5. Do not search the original Xbox missions for Terminals
The original 2001 Xbox release has no Terminals. There is no Terminal interaction, Terminal checklist, Terminal achievement, or hidden narrative console that must be activated for campaign completion. Later versions introduced Terminal content while retaining the same broad mission names, which is why an Anniversary guide can appear to describe the same level while sending you to objects absent from the original maps.
This applies to every mission, including The Silent Cartographer, 343 Guilty Spark, Two Betrayals, and The Maw. If a later guide instructs you to search a wall, control room, bridge, or side passage for a Terminal, ignore that step when playing the original Xbox disc. Follow the mission objective, navigation arrows, allies, and scripted story events instead.
- Do not count Terminals for the original Xbox release.
- Ignore Anniversary and Master Chief Collection Terminal locations.
- Use mission objectives and story completion to track progress.
6. Do not search the original Xbox missions for collectible Skulls
The original Xbox version also has no collectible Skulls that modify campaign rules. It has no Skull pickup locations, Skull activation menu, Skull effects, or per-mission Skull count. Those systems belong to later Halo releases, including Halo: Combat Evolved Anniversary and later collections.
For an optional challenge on the original Xbox, substitute a difficulty goal or a complete co-op run. You can play all ten campaign missions on Heroic or Legendary, complete the game without changing difficulty, or finish each mission without abandoning the current session. If you later play Anniversary or another rerelease, begin a separate collectible checklist using a guide written for that edition's maps and mechanics.
- Ignore Skull locations and effects on the original Xbox.
- Choose Heroic or Legendary as the optional challenge target.
- Keep later-edition collectible progress separate from the original campaign.
7. Confirm completion at the end of The Maw
The original campaign contains ten missions and ends with The Maw. In co-op, complete the final mission's objectives, survive the reactor and escape sequences, and remain in the session through the ending cutscene. Do not quit as soon as the last objective appears; allow the final escape sequence and ending presentation to finish.
For a reliable completion record, note the selected difficulty and whether the run was solo or local co-op. If you stop during an earlier co-op mission, plan to replay that mission from its beginning rather than assuming the last mid-level checkpoint was saved for later. The original Xbox campaign does not require any Terminal or Skull confirmation.
After the finale, return to the menu only after the ending sequence has completed. For future play, use the campaign's available completed-level selection rather than looking for a saved co-op checkpoint inside The Maw.
- The Maw reaches its final escape sequence and ending presentation.
- All ten original campaign missions are complete on the chosen difficulty.
- Both players remain present until the finale has finished.
- No Terminal or Skull checklist is outstanding for this edition.
- Any future co-op session is planned around complete mission runs, not mid-level saves.
Before you move on
- Two players successfully start Cooperative Play from the original Xbox Multiplayer menu.
- The co-op run reaches The Maw and completes its escape and ending sequence.
- The ten-mission original campaign is completed on the selected difficulty.
- Players understand that active checkpoints aid recovery but do not provide a dependable mid-mission co-op resume.
- No Terminal, Skull, or later-edition collectible requirement remains for the original Xbox release.
Finishing up
The campaign is complete when The Maw's final escape finishes and the ending sequence plays.
The required missions are The Pillar of Autumn, Halo, The Truth and Reconciliation, The Silent Cartographer, Assault on the Control Room, 343 Guilty Spark, The Library, Two Betrayals, Keyes, and The Maw.
Optional goals include completing the campaign on Heroic or Legendary and completing it in local two-player split-screen co-op.
For co-op, finish the current mission before ending the session because an active checkpoint is not a dependable later resume point.
No Terminal, Skull, achievement, or later-edition collectible confirmation is required for the original Xbox release.
Choose your next gameScreenshots & video
Game imagery for reference. Follow the written chapters above for the route and strategies.
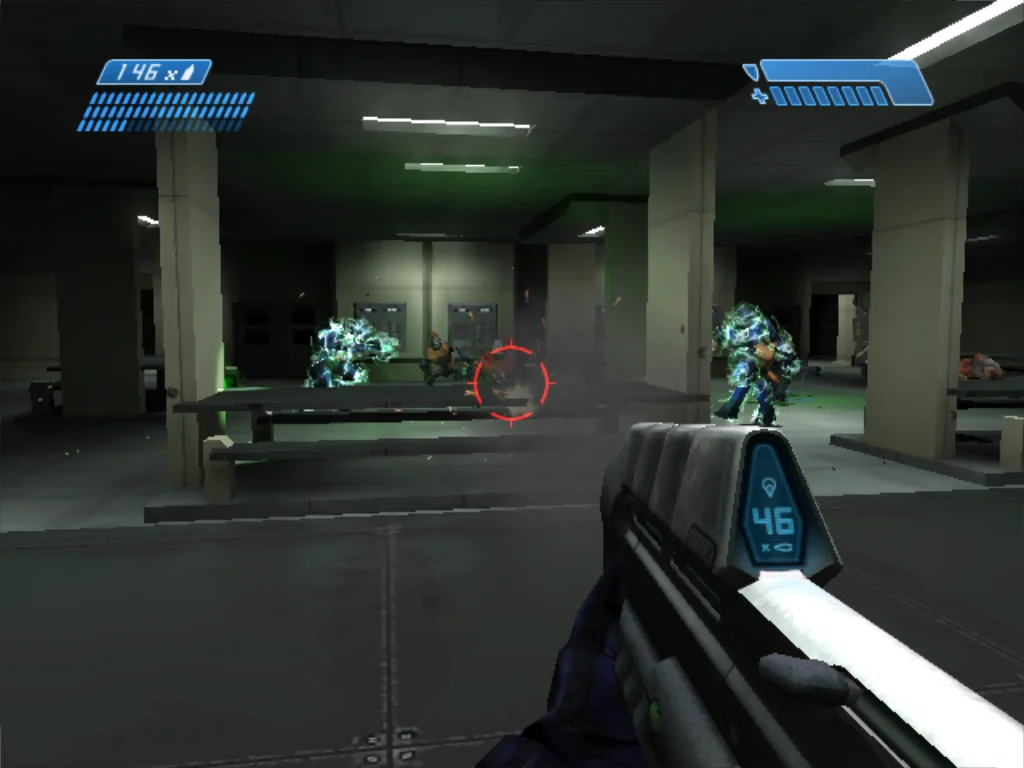
Sources & references
Our original guide draws on the references below. Check the edition at the top of this page before following controls or unlock requirements.
- Halo: Combat Evolved Xbox Manual
- Microsoft HALO-COMBAT EVOLVED Manual — ManualsLib
- Halo: Combat Evolved — Guide and Walkthrough, Xbox — GameFAQs
- Saving on multiplayer — Microsoft public Xbox Halo discussion archive
- How do you save in Co-Op mode? — Halo: Combat Evolved Q&A for Xbox
- Halo: Combat Evolved — The Pillar of Autumn walkthrough, Halopedia
- Halo: Combat Evolved — Guide and Walkthrough, Xbox — GameFAQs
- Halo: Combat Evolved — Guide and Walkthrough — Xbox — GameFAQs
- Halo: Combat Evolved — The Pillar of Autumn, StrategyWiki
- Halo — Walkthrough — Halopedia
- Halo: Combat Evolved Xbox Manual — Halopedia
- Halo: Combat Evolved — Microsoft Xbox Manual
- The Truth and Reconciliation - Walkthrough - Halo: Combat Evolved - Halopedia
- Halo Walkthrough - GameSpot
- Halo: Combat Evolved/The Truth and Reconciliation — StrategyWiki
- The Silent Cartographer — Halopedia
- Halo: Combat Evolved/The Silent Cartographer — StrategyWiki
- Assault on the Control Room - Walkthrough, Halopedia
- Halo: Combat Evolved/Assault on the Control Room, StrategyWiki
- Halo: Combat Evolved - Legendary Difficulty Walkthrough - Bungie.org PDF
- 343 Guilty Spark — Halo: Combat Evolved — Halopedia
- Halo: Combat Evolved — Spoiler-Free Walkthrough — GameFAQs
- The Library - Walkthrough - Halo: Combat Evolved - Halopedia
- Halo: Combat Evolved - Guide and Walkthrough - Xbox - By Thuyker - GameFAQs
- Halo: Combat Evolved - Guide and Walkthrough - Xbox - By Dark_Vortex - GameFAQs
- Two Betrayals - Walkthrough - Halo: Combat Evolved - Halopedia
- Two Betrayals - Campaign level - Halo: Combat Evolved - Halopedia
- Keyes — Walkthrough — Halo: Combat Evolved — Halopedia
- Keyes — Walkthrough — Halo: Combat Evolved — Halopedia, archived level walkthrough
- Legendary Walkthrough — Keyes — Halo.Bungie.Org
- The Maw - Walkthrough - Halo: Combat Evolved - Halopedia
- Halo: Combat Evolved/The Maw — StrategyWiki
- Halo: Combat Evolved Manual — Halopedia
- Halo: Combat Evolved — Halopedia
- Halo: Combat Evolved Vehicles — StrategyWiki
- Halo: Combat Evolved Xbox Guides and FAQs — GameFAQs
- Energy Sword — Halopedia
- M808B Scorpion Gameplay — Halopedia
- Microsoft Halo: Combat Evolved Manuals listing
- The Maw — Halopedia
About the game & collecting notes
- Platform
- Xbox
Step-by-step directions for completing all ten missions in the original 2001 Xbox release of Halo: Combat Evolved. The guide covers combat, weapons, vehicles, checkpoints, local two-player campaign co-op, difficulty advice, recovery from failed encounters, and edition-specific completion checks. It does not include Terminals or Skulls because those collectibles are absent from the original Xbox release.
Darryl Polo
Darryl Polo loves tinkering with emulation and revisiting retro games. He enjoys exploring how old favorites play on different setups and sharing what he learns along the way. At Joking Joystick, he writes about the games, hardware, and small discoveries that keep the hobby fun.
Our editorial standardsFound a step that needs another look? Help us improve this guide.