
Half-Life 2 — Xbox (Original 2005) Complete Campaign Walkthrough
Step-by-step campaign walkthrough for the original 2005 Xbox release of Half‑Life 2. This guide covers every required chapter from the opening train ride through the Citadel finale, practical tactics for combat and physics puzzles on the original Xbox hardware, save/save-slot advice, recovery from common failures, and a completion checklist for the true game ending.

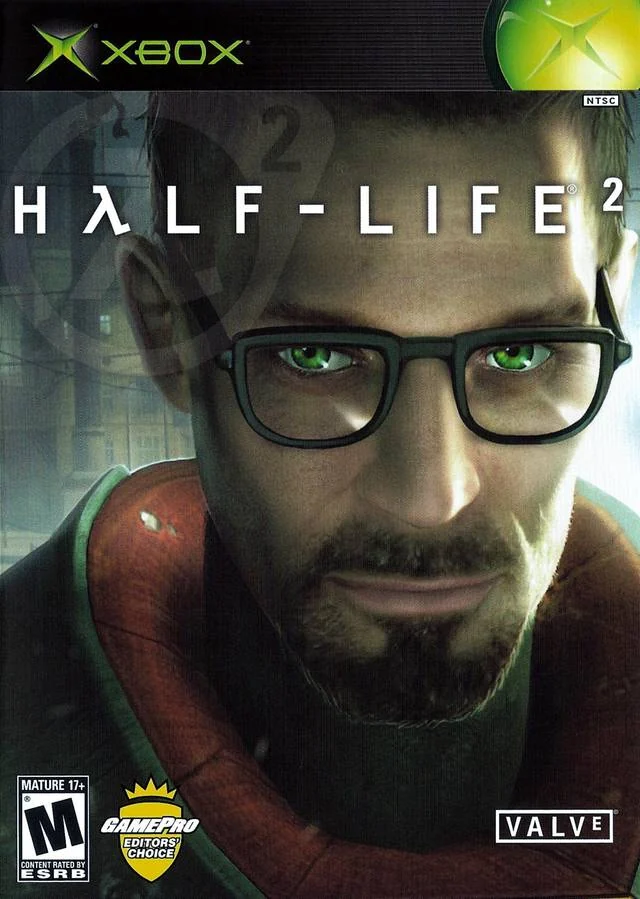
Find a copy
Half-Life 2 Xbox
We may earn a commission if you buy through these links, at no extra cost to you. As an Amazon Associate I earn from qualifying purchases.
Opens retailer search results. Check the model, edition, seller, availability and current price before buying.
Before you begin
You are preparing to play Half‑Life 2 on the original Xbox disc released in November 2005.
This walkthrough directs you through each required chapter, gives concrete movement and combat priorities for console controls, explains how to use the Gravity Gun and vehicles effectively, and tells you when to save so you don’t lose progress.
Follow the chapter objectives in order; skip or optional content will be marked.
Because this is the original Xbox edition, expect lower texture detail and occasional framerate drops compared with PC/2007 console builds.
The walkthrough notes Xbox-specific behavior where it affects routing or saves and gives concrete recovery steps if you become trapped or cause a scripted event to fail.
Read the Preparation section before you start playing.
Set yourself up for the run
Controller layout: open Options → Controls and confirm or modify the button layout to your preference.
The standard original Xbox layout uses the D-pad for weapon-category selection, X for temporary sprint, Y for action, A for jump, B for reload, the left trigger for secondary attack, and the right trigger for firing or throwing grenades.
If you prefer a different mapping, change it before the first combat encounter and follow the labels shown in your own control settings.
Use the pause menu’s Save option when manual saving is available, especially after major fights, vehicle sections, or difficult physics puzzles.
Keep separate saves at useful chapter transitions when possible so a failed vehicle run or puzzle does not require replaying an entire section.
Audio and display: set TV mode and brightness in Options if needed.
If movement or aiming feels sluggish, adjust sensitivity in small increments until the controls are comfortable.
Conserve ammunition early, especially for the SMG and Shotgun.
The Gravity Gun is the game’s most important tool. Practice pulling and launching crates, barrels, saw blades, and other movable objects.
Use cover and environmental hazards instead of standing in the open during Combine fights.
The airboat occupies a long section of the campaign. Practice throttle, steering, braking, and low-speed turning before attempting difficult jumps.
Save before long vehicle runs and after reaching major resistance stations when the game allows it.
Expect more loading transitions on the original Xbox release than on PC versions.
If a door, lift, or other scripted trigger fails to activate, reload a save made before the relevant encounter and replay the approach without bypassing the intended route.
Headcrabs, fast zombies, poison headcrabs, grenade throwers, and mounted weapons deserve priority because they can disrupt otherwise safe positions.
Optional caches and side routes are not required for campaign completion unless a chapter explicitly identifies them as part of the main route.
Keep a chapter-start or transition save if you intend to replay individual sections.
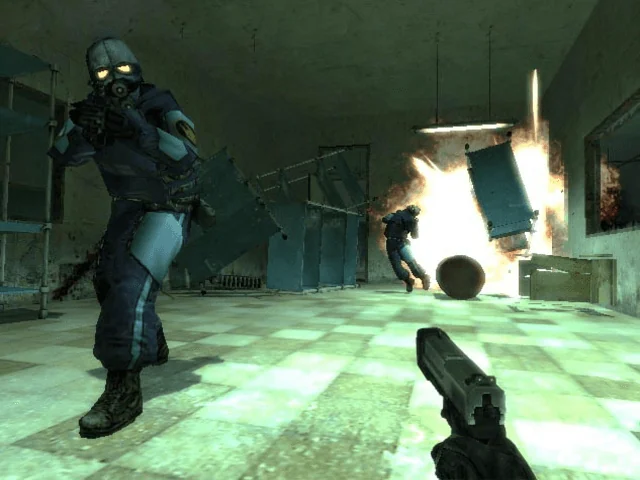
Point Insertion — Train Arrival and City 17 Escape
Point Insertion is an unarmed escape through City 17. Leave the train, follow the passenger route through the station, enter the interrogation room and meet Barney Calhoun, then escape through the storage area by stacking boxes beneath a window. From the station plaza, avoid the Combine roadblock by using the alley and green dumpster to reach the next street. Enter the apartment building, follow the Resistance escape route upward during the Civil Protection raid, cross the rooftops, and reach Alyx Vance. This chapter ends when Alyx rescues Gordon and leads him toward Dr. Kleiner’s laboratory. The crowbar and 9mm pistol are not obtained here: the crowbar appears in A Red Letter Day after the lab teleport sequence, while the pistol is acquired at the beginning of Route Kanal.
Leave the train and pass through the station
Wait for the train to stop, then step onto the platform and follow the passengers through the turnstile into the station. Civil Protection officers control the crowd and direct everyone along a fenced route, so stay with the marked passenger flow instead of searching the platform for alternate exits.
Continue past the announcements, scanner and citizens until an officer directs Gordon into a side room. This opening contains no combat objective and no weapon pickup. You can examine loose objects, but do not expect the crowbar or pistol during Point Insertion.
- Leave the train after it stops.
- Follow the passengers through the turnstile.
- Stay on the fenced route directed by Civil Protection.
- Do not search for weapons in the station.
Meet Barney and escape through the storage area
Enter the interrogation room when the officer orders you inside. The door closes as part of the scripted sequence. Wait for the disguised officer to reveal himself as Barney Calhoun and allow his conversation with Dr. Kleiner to finish. When Civil Protection begins trying to enter, use the exit Barney opens rather than looking for another way out.
Follow the short service route into the storage area. Climb the ladder, pick up a movable box and place it beneath the open window. Jump onto the box and climb through the window into the adjoining area. If the jump does not connect, reposition the box directly below the window and try again; there is no crowbar or firearm to collect here.
- Allow Barney’s conversation with Dr. Kleiner to finish.
- Use the side exit Barney opens.
- Place a box below the open window.
- Climb through the window into the service area.
Cross the cafeteria and reach the plaza
Continue through the service area and follow the route toward the cafeteria. A Civil Protection officer may order Gordon to dispose of a can. Either place it in the nearby receptacle or leave the interaction behind once the route opens; this optional choice does not affect campaign completion.
Proceed through the cafeteria and use the double doors leading outside. The plaza contains several visible buildings, but the usable route is along the street rather than through those façades. Move toward the roadblock and look for the partially blocked alley nearby.
- Continue through the storage and cafeteria areas.
- Complete or pass the can interaction.
- Exit through the double doors into the plaza.
- Head toward the roadblock and nearby blocked alley.
Bypass the plaza roadblock
Do not try to run directly through the Combine blockade. Turn into the nearby alley and use the green dumpster to reach the fire escape. Climb up, move across the elevated route and jump from the top of the fire escape over the fence. The landing returns Gordon to a street beside the playground.
If the jump fails, move to the highest stable part of the fire escape before jumping. This section is still unarmed, so the safest response to Civil Protection is to keep moving, use walls and corners as cover, and follow the open route rather than trying to fight.
- Enter the alley beside the roadblock.
- Use the green dumpster to reach the fire escape.
- Climb to the top and jump over the fence.
- Reach the street near the playground.
Enter the apartment building and follow the escape route
On the street beyond the fence, look for the lit doorway leading into an apartment building. Enter and climb the stairs. A group of Civil Protection officers will be breaking into an apartment farther along the upper hall. Wait for them to enter, then move down the corridor and take the opposite staircase. At the top, a Resistance member calls Gordon into the next area.
The apartment raid now becomes an escape sequence. Follow the open doors, staircases and damaged floors upward. Civil Protection officers may strike or fire from behind, but Point Insertion does not require clearing the building. Keep moving toward the next occupied room and use doorways, walls and furniture to reduce exposure.
- Enter through the lit apartment doorway.
- Climb the staircases after the officers enter the apartment.
- Follow the Resistance member’s call at the upper landing.
- Move upward instead of stopping to defeat every officer.
Cross the rooftops and reach Alyx
Continue taking the available stairs until the route opens onto the rooftops. Jump to the nearest roof, then use the planks and narrow ledges to work around the building toward the open window. Line up each jump carefully and avoid sprinting across narrow edges; a fall can cost health or return you to the last checkpoint.
Combine officers fire during this escape. Use chimneys, parapets and rooftop structures as cover, but prioritize reaching the next roof and the open window. Enter the building through that window and descend the stairs. Gordon is cornered at the bottom, triggering Alyx Vance’s arrival.
- Take the stair route to the rooftops.
- Jump to the nearest roof.
- Use the planks and ledges to reach the open window.
- Enter the building and descend toward the scripted confrontation.
Allow the Alyx rescue and save the transition
Alyx defeats the immediate threat and leads Gordon away from the station district. Stay with her and follow the route she opens. There is no weapon fight or additional Point Insertion objective after the rescue. When the game transitions into A Red Letter Day and Gordon reaches the laboratory sequence, the chapter has ended.
For a persistent Xbox save, press Start to open the pause menu, select Save Game, then choose New Saved Game or overwrite an existing slot. Save after A Red Letter Day has begun rather than trying to save the unarmed station section. The crowbar is obtained later in A Red Letter Day after the teleport accident, and the first 9mm pistol is obtained at the beginning of Route Kanal, so neither belongs in this chapter’s completion requirements.
- Let Alyx complete the rescue sequence.
- Follow Alyx toward Dr. Kleiner’s laboratory.
- Confirm that A Red Letter Day has begun.
- Press Start, choose Save Game and confirm the save slot.
Before you move on
- Gordon has left the train and passed through the City 17 station.
- Barney Calhoun has revealed himself and opened the service-area escape route.
- The cafeteria and plaza have been crossed using the alley and green dumpster bypass.
- Gordon has escaped through the apartment building and crossed the rooftops.
- Alyx Vance has rescued Gordon and begun leading him toward Dr. Kleiner’s laboratory.
- The game has transitioned into A Red Letter Day.
- A persistent save has been created through Start, then Save Game, after that transition.
- No crowbar or 9mm pistol was required or obtained during Point Insertion.
A Red Letter Day — Kleiner’s Lab and the Trainyard Escape
A Red Letter Day begins in Dr. Kleiner’s hidden laboratory, immediately after Alyx brings Gordon there at the end of Point Insertion. Follow the laboratory dialogue, restore the HEV suit, participate in the teleport experiment, and leave through the rear route after Gordon’s teleport fails. Barney supplies the crowbar outside the lab. Use it to clear the boarded passage back to the trainyard, then cross the yard through the boxcars while avoiding Combine fire and an incoming train. The chapter ends when the route opens into Route Kanal. There is no pistol or Gravity Gun to collect here; the pistol appears at the beginning of Route Kanal, and the Gravity Gun is obtained later at Black Mesa East.
Begin in Kleiner’s laboratory
This chapter does not begin with another street patrol. You start inside Dr. Isaac Kleiner’s laboratory, where Alyx has brought Gordon after the escape from the apartment buildings in Point Insertion. Stay in the lab and allow the conversation with Kleiner, Alyx, and Barney to progress. Walk with the characters when they move between the office, equipment area, and teleport chamber; the next interaction becomes available only after the preceding dialogue and animation have finished.
There is no need to search for a pistol, shotgun, or Gravity Gun at this stage. Gordon’s useful equipment is restored during the laboratory sequence, but the Gravity Gun is not awarded here. The first firearm is found in Route Kanal after this chapter, so do not treat the absence of a weapon as a missing pickup.
- Remain inside the laboratory until Kleiner and Barney finish the required dialogue.
- Do not search the City 17 streets for a pistol or Gravity Gun.
- Follow Alyx and Kleiner when they move toward the teleport equipment.
Restore the HEV suit
When the laboratory sequence reaches the suit equipment, Gordon receives the restored HEV suit functions. Use the orange suit charger before leaving if it is available and needs to be used. Hold the action button while facing the charger until the suit reading increases. On the original Xbox control layout, the Y button is the action button, Start pauses the game, X activates the temporary sprint function, A jumps, B reloads, and the triggers perform weapon actions when a weapon is available.
This is a good point to create a manual save. Press Start, select the save option, and use a separate slot if you want to preserve a retry point before the teleport sequence. Saving here is optional for progression, but it avoids repeating the laboratory dialogue if the trainyard escape goes badly.
- Use the orange HEV suit charger before the teleport demonstration if it is available.
- Confirm that the suit indicator has charged before moving on.
- Create a manual save from the pause menu if you want a laboratory retry point.
Complete the teleport demonstration
Follow the instructions around Kleiner’s teleport apparatus. Interact with the controls when the scene directs you to do so; the sequence includes operating the equipment and connecting the required cable. Alyx’s teleport succeeds and sends her to Black Mesa East, but Gordon’s attempt fails. The failed teleport is the required story event that moves the chapter into its escape section.
The small experimental teleporter near the laboratory equipment can be disturbed with movable objects. This is an optional physics interaction and is not needed to complete the chapter. Ignore it if your goal is simply to reach Route Kanal. Do not mistake this small device for the main teleport sequence: breaking or leaving it alone does not change the required route.
- Operate the teleport equipment only when the laboratory scene directs you to do so.
- Allow Alyx’s teleport to finish before moving toward the exit.
- Treat the small teleporter experiment as optional.
Reach Barney and collect the crowbar
After Gordon’s teleport fails, you appear outside the laboratory building. Follow the visible path around the structure rather than trying to return through the teleport room. Move toward the rear stairs and continue through the narrow exterior route. Barney is positioned near the back route and gives Gordon the crowbar. Pick it up before attempting to leave the area.
The crowbar is the only required weapon pickup in this chapter. It breaks wooden obstructions and can be used against isolated close-range enemies, but it is safer to retreat if several Combine are firing from above. If you need to fight, use cover and move between doorways, walls, and the boxcars rather than standing in the open yard.
- Leave the laboratory through the exterior route after the failed teleport.
- Follow the path to the rear stairs.
- Collect the crowbar from Barney before entering the trainyard.
Clear the boarded passage into the trainyard
Use the crowbar on the boarded or obstructed doorway near the rear route. This opens the way down into the trainyard area connected to the opening chapter. Once inside, Combine troops fire from elevated positions. Do not remain in the exposed approach; move directly toward the nearby boxcar filled with breakable debris and use it as cover.
The first boxcar provides a protected route through the initial firing line. Break or move through the loose junk as needed, then continue out the opposite side. The objective is not to clear every Combine soldier in the yard. Survive the crossing and keep moving toward the second boxcar and the fence beyond it.
- Use the crowbar to clear the boarded passage.
- Enter the first boxcar when Combine fire reaches the yard.
- Move through the boxcar instead of trading shots in the open.
Cross the tracks and climb over the fence
Exit the first boxcar and watch the active railway. A train passes through the yard, so stay clear of the tracks until it has gone by. Do not rush across immediately after leaving the boxcar; wait for the train to pass and then move toward the second boxcar, which has a ladder inside or beside it.
Use the ladder to reach the top of the second boxcar and jump over the fence. If the jump does not connect, reposition on the roof rather than repeatedly jumping from ground level. Continue through the opening on the far side and use the crowbar on the remaining boarded obstruction blocking the exit route.
Health and suit supplies are optional if encountered, but the main priority is the exit. The Combine presence here is brief, and the chapter is designed around movement through cover rather than a full combat arena.
- Wait for the train to clear the tracks.
- Reach the second boxcar and use its ladder.
- Climb over the fence and clear the final boarded obstruction.
Confirm the transition into Route Kanal
Continue beyond the trainyard exit until the game loads Route Kanal. The chapter is complete when the loading transition into Route Kanal begins. At that point, the laboratory sequence, failed teleport, crowbar pickup, and trainyard escape are finished.
After Route Kanal begins, use the medical station near the opening area if needed and prepare for the first sustained combat section. The 9mm pistol is obtained in Route Kanal, not in A Red Letter Day. Save again from the pause menu after the transition if you want a clean starting point for the canal chapter.
- Reach the loading transition into Route Kanal.
- Verify that the crowbar is in Gordon’s inventory before continuing.
- Do not expect the pistol until the opening section of Route Kanal.
- Create a new save after the chapter transition if desired.
Before you move on
- The laboratory dialogue with Kleiner, Alyx, and Barney has finished.
- Gordon has restored HEV suit functions and completed the main teleport demonstration.
- Alyx has teleported away and Gordon’s teleport attempt has failed.
- Gordon has reached the rear stairs and collected the crowbar from Barney.
- The boarded passage into the trainyard has been cleared.
- Gordon has crossed through the boxcars, avoided the train, climbed over the fence, and passed the final obstruction.
- The Route Kanal loading transition begins, confirming completion of A Red Letter Day.
Route Kanal — Canals, First Boat Operation
Starting outside Kleiner’s lab, follow the canal escape route through City 17’s underground rail yards and flooded service tunnels. Obtain the pistol, submachine gun and grenades; survive Combine checkpoints, the turret emplacement, barnacle passages, manhack ambushes and the two water puzzles. The first puzzle uses nine cinderblocks to balance a seesaw. The second requires turning a valve, raising submerged debris and using it as stepping stones. Avoid radioactive waste and the electrified boxcar, then reach the refugee outpost and take the airboat. Drive through the radioactive channel to the lowered gate, leave the boat, turn the crank and pass through to begin Water Hazard.
1. Get the pistol and leave the opening canal station
At the beginning of Route Kanal, use the nearby medical station if you need health. Move toward the civilians being attacked by Combine officers. Use the crowbar on the officers at close range, then pick up a dropped pistol. Keep using the crowbar when an enemy is isolated so you preserve pistol ammunition.
When a train approaches on the low tracks, use the stairs to get onto the train and climb down the ladder on the opposite side. Enter the roofless house near the tracks and clear the path through it. Shoot the flammable barrels blocking the next doorway, then use the bent mesh fence as a step to regain the raised walkway. Check the low vent for supplies before dropping back to the tracks.
Continue across the upper walkway and around the barrier. Combine troops attack from above, including one who throws burning barrels. Stay behind solid cover and use the walkway to bypass the forcefield. When you reach the canal drop, wait for the incoming train to pass through the area before dealing with survivors. Jump into the canal, climb onto the red boxcar and speak with the refugees. Their route leads you onward after a suit recharge.
- Pistol obtained from a defeated Combine officer.
- Train and upper walkway used to bypass the early barriers.
- Red boxcar and refugee checkpoint reached.
2. Cross the first canal and take the emplacement
Break through the wooden debris beyond the boxcar and watch for barnacles hanging from the ceiling. Shoot them from a safe distance or move underneath their tongues only when the path is clear. At the first major turn, Combine fire from elevated ground. Drop into the red-lit drain, climb the ladder and attack from the higher position.
After clearing the officers, use the mounted machine gun emplacement to sweep the remaining Combine. A flammable barrel sits on a wooden ledge; shoot it to destroy the obstruction that restores the lower route. Leave the emplacement when the mobile missile battery begins firing from the highway above. Follow the dirty tunnel and keep moving through the barnacle sections.
When the tunnel opens into a deep-water passage, dive whenever burning barrels are thrown into the water. Surface for air as needed, then continue toward the next outdoor canal. Use red barrels against clustered Combine, but fire only after moving away from the blast. Under the bridge, eliminate the two officers attempting to flank you, then climb the dirt pile and crouch through the narrow opening beside the barrels.
- The mounted machine gun has been used or bypassed after clearing its position.
- The mobile missile battery is avoided by entering the tunnel.
- The deep-water canal and bridge section are passed.
3. Solve the cinderblock seesaw puzzle
In the next deep canal, stay underwater while burning barrels roll into the water. Surface on the floating debris, climb the ladder over the metal partition and clear the Combine on the wooden walkways. Shoot the large stack of red barrels when enemies gather near the bridge, then pass through the bent-open sewer grate.
The next room contains a crude seesaw leading to a higher ledge. The required counterweight is made from the cinderblocks scattered around the room. Move all nine cinderblocks onto the far end of the seesaw. Once that end is weighted down, the near end rises high enough for you to jump across to the upper ledge. If a block falls into an awkward position, push it back onto the seesaw rather than trying to jump around the puzzle.
Beyond the ledge, move through the sewer complex. Combine carrying submachine guns rappel into the area; defeat them and take an MP7 from a fallen soldier. A nearby vent contains grenades, but a zombie torso can appear there, so clear it before collecting the supplies. Prepare the MP7 for close fights and keep the pistol available for manhacks.
- All nine cinderblocks have been placed on the seesaw’s far side.
- The upper ledge beyond the seesaw has been reached.
- The MP7 and available grenades have been collected.
4. Pass the filter machinery and manhack tunnel
At the large spinning water-filter machinery, do not try to pass through the rotating blades. Look underwater for the passage around the obstruction. Swim through, surface for air, and enter the long room with the steaming pipe. Defeat the four Combine, then walk along the pipe while timing your movement around the steam bursts.
Break the wooden debris at the far end and collect the nearby health supplies. Use the dark opening near the drop-down point to return to the water on the opposite side of the filter. When burning crates are thrown downhill, dive to avoid their explosions. Follow the parallel covered corridor and enter the supply room and vent beyond it.
The vent drops you into a room full of manhacks. Destroy them before climbing the ladder. Follow the PVC pipes to the walkway and drop to the lowest solid platform. A crank valve raises the water level in this room and the previous one. Return to the ladder, drop through the opening and swim through the newly accessible passage into the closed side of the valve area.
Use the crowbar on the submerged floor to free the debris. The floating pieces become stepping stones across the gap. Continue into the mostly dry creekbed, climb over the fence and use debris to keep out of the muck. Take the inner low route toward the exit rather than wandering into the side caches.
- The spinning filter has been bypassed underwater.
- The steam-pipe room and manhack tunnel are cleared.
- The crank valve has raised the water level.
- Floating debris has been used to cross the valve area.
5. Cross the radioactive section and reach the airboat
The suit’s Geiger counter begins clicking near the yellow radioactive waste. Do not step into the waste unless there is no alternative. Stay on dry ground, pipes and floating debris while following the creek. A refugee outpost provides health and supplies; use it before continuing.
Head through the outpost route and prepare for headcrab missiles. Shoot the launched shells or the headcrabs as they emerge. Zombies appear in this section; aim for the headcrab controlling each body so you do not have to fight the detached headcrab afterward. Continue past the electrified boxcar without touching the live water or the charged structure.
Clear the final Combine and headcrab encounters until you reach the airboat dock. Board the airboat and use the quiet water near the dock to practice steering. The boat has no weapon in this first section, so use it mainly for movement and avoid striking walls at high speed.
- Radioactive waste has been crossed without relying on the hazardous water.
- The refugee outpost has been reached.
- The electrified boxcar and final headcrab encounters are passed.
- The airboat has been boarded.
6. Open the gate and begin Water Hazard
Drive the airboat forward through the radioactive channel toward the lowered gray gate. Keep the boat aligned with the channel and slow down near walls or obstacles. When you reach the gate, disembark at the walkable landing and find the small crank valve nearby.
Turn the valve to raise the gate, then return to the airboat and drive through the opening. A loading transition or the Water Hazard chapter title confirms that Route Kanal is complete. If you make a manual save, save after the transition so the file begins in the next chapter rather than before the gate.
- The lowered gate has been reached by airboat.
- The nearby crank valve has been turned.
- The airboat has passed through the raised gate.
- Water Hazard has begun.
Before you move on
- The pistol, MP7 and grenades available in Route Kanal have been obtained or intentionally bypassed.
- The turret emplacement, cinderblock seesaw, water-valve area and manhack tunnel have been passed.
- The radioactive section, refugee outpost and electrified boxcar are behind you.
- The airboat has reached the lowered gray gate.
- The crank valve has opened the gate and the game has transitioned to Water Hazard.
Water Hazard — Airboat and Longer Vehicle Run
Drive the airboat through the canal network, using ramps, narrow waterways, supply stations, and on-foot gate controls to keep advancing. The opening section is an evasion run because the airboat has no weapon. After the first barrel ramp, stop at required Station 13, clear its garage and factory defenders, and operate the crane-and-red-barrel mechanism to open the river gates. Continue to Station 16, then reach the refugee camp, where a Vortigaunt installs the mounted airboat gun. Use it to survive the later Hunter-Chopper encounters, destroy the chopper in the final arena, open Station 18’s gate, and launch through the exit into Black Mesa East. Lambda-marked caches and the hidden Vortigaunt cave are optional.
1. Learn the airboat and clear the first ramp
At the start of Water Hazard, enter the airboat at the resistance dock and practice steering in the open water before committing to the canal. On the original Xbox, the airboat uses the movement controls for acceleration, reverse, and turning; it does not strafe. Make short steering corrections near walls, supports, and debris. Light crates can be broken, but solid scenery damages the boat if struck at speed, so slow down before corners rather than correcting after a collision.
Follow the waterway to the first resistance supply area, recognizable by its red structure and lambda marking. Dock if you need the supplies, then continue downstream until a refugee drops supplies from a bridge and the canal ends at a broken ramp. Leave the boat and find the blue flotation barrels. Put the loose barrels beneath the ramp cage with the barrel already in place. Once the cage rises, return to the airboat, line up with the ramp, and jump the gap. Save before the jump if you have a convenient manual-save slot.
- Enter and retain the airboat.
- Reach the broken ramp after the bridge supply drop.
- Place the loose barrels beneath the ramp cage and jump across.
2. Pass the unarmed canal section
After the ramp, Combine troops appear along the canal. The airboat has no mounted weapon yet, so do not stop in exposed water to fight. Accelerate past the troops or run them over when the channel is clear. If the hull catches on debris, reverse while turning away from the obstruction, then accelerate once the boat is free.
You will pass missile batteries, bridges, and defensive positions. Use bends, concrete structures, and bridge supports to break enemy fire. When the Hunter-Chopper first begins harassing you, keep moving and make broad turns. Its dropped mines are more dangerous than its gunfire in many sections; steer around mine patterns instead of making abrupt corrections that throw the boat into the bank.
Continue until the route reaches a second ramp and a large concrete barricade. Use the narrow wall-side ramp or sandbar to bypass the obstruction rather than trying to drive directly through the flames. The canal beyond this section leads toward Station 13.
- Keep moving while the airboat is unarmed.
- Use cover and bends to evade missile batteries and the Hunter-Chopper.
- Use the wall-side ramp to pass the burning barricade.
- Reach the dock at Station 13.
3. Clear Station 13 and open the river gates
Dock at Station 13 and leave the airboat. The required station route includes a garage, an outdoor section, and a smaller factory area. Enter the garage first and clear the defenders inside before moving farther into the compound. Search the rooms for useful ammunition and health, but do not treat the station as an optional supply stop: the gate mechanism here is required for the route to Station 16.
Advance from the garage through the outside area toward the factory. Expect defenders in the open yard and a Combine soldier using a mounted position in the factory section. Use the garage and building corners as cover, then cross only after the immediate threats are dealt with. Grenades are useful against enemies behind cover, while the shotgun is safer for close targets inside the buildings.
Find the crane mechanism near the river-gate controls. Beneath it are red explosive barrels. Trigger the mechanism so the crane swings the heavy piece into the red barrels. The resulting blast clears the obstruction and opens the river gates. Confirm that the water route is open before leaving the factory.
Return through the outdoor section and garage to the dock. Recheck the area for ammunition if needed, board the airboat, and drive through the newly opened gates. The next canal stretch is primarily about evasion and leads toward Station 16.
- Enter and clear Station 13’s garage.
- Clear the outdoor yard and factory defenders.
- Operate the crane-and-red-barrel mechanism to open the river gates.
- Return to the airboat and pass through the opened gates.
4. Open Station 16 and continue toward the refugee camp
After Station 13, stay in the airboat and drive beneath bridges while avoiding Combine fire. Missile batteries and troops can be bypassed; do not stop in the open unless the route itself requires you to disembark. Continue until the boat reaches Station 16 and the waterway ends at the station entrance.
Leave the airboat and enter Station 16 through the locked door near the water. Break the lock with the crowbar, collect the supplies inside, and defeat the Combine who enter. Move through the freight yard and boxcars toward the guarded tower. Use the boxcars and buildings as temporary cover because the Hunter-Chopper can still expose you while you cross the yard.
Reach the tower controls, clear the guards, and activate the switch that opens the next gate. Return to the airboat and follow the new canal. Use a manual save before the yard assault or after the gate opens if you want to avoid repeating the on-foot portion.
- Reach Station 16 after passing Station 13.
- Enter through the locked station door and clear the interior.
- Activate the tower gate switch.
- Return to the airboat and use the opened route.
5. Solve the Station 17 route and obtain the mounted gun
Continue through the canal, lining the boat up before entering narrow pipe sections. At branches marked by the route’s ramps and barriers, follow the path toward Station 17. Avoid radioactive water and do not take a jump unless the boat is centered with enough forward speed to land on the intended channel.
At Station 17, use the station controls to lower the cargo lift and clear the boat’s route. Continue until you reach the weight-operated ramp. Follow the side passage and find the washing machine. Move it onto the lift so its weight holds the mechanism down, then return to the airboat and pass through the opened route.
The refugee camp is the major progression point of this section. After the conversation, a Vortigaunt installs the mounted machine gun on the airboat. Test the weapon before leaving and save afterward if possible. The gun is required for the later Hunter-Chopper fights.
- Follow the route toward Station 17.
- Use the cargo lift and washing machine to open the next boat passage.
- Reach the refugee camp.
- Receive the mounted airboat gun.
6. Fight through the final canal and destroy the Hunter-Chopper
Leave the refugee camp with the mounted gun ready. The Hunter-Chopper attacks again. Keep the airboat moving while firing, using wide curves instead of repeated sharp turns. Sustained fire drives it away from the first encounter; continue along the canal rather than stopping to search for another objective.
Pass the missile batteries and the Combine-filled tunnel. An optional side route contains additional enemies and supplies, but the required route continues around the fire barrier and through the section with missile batteries. Afterward, reach the red boxcar and shoot the red barrels inside it. This opens the structure so the airboat can enter the drain-pipe route.
The pipe leads to the final open Hunter-Chopper arena. Avoid floating explosive barrels while positioning the boat, then fire whenever the chopper crosses your view. It drops mines as the fight continues, so keep circling and steer away from mine clusters. Do not stop beside explosive barrels. Destroying the Hunter-Chopper is required before the next gate sequence can begin.
- Use the mounted gun during the later Hunter-Chopper encounter.
- Open the red-boxcar route with the explosive barrels.
- Reach the final open arena.
- Destroy the Hunter-Chopper.
7. Open Station 18 and launch into Black Mesa East
After the Hunter-Chopper is destroyed, use the movable gate near the battle area to enter the next bay. A pipe through radioactive water leads to an optional hidden Vortigaunt and supplies. Skip it if you are low on health or want to maintain the direct route. The required path uses the sunken dock as a ramp toward Station 18.
Enter Station 18, collect the available supplies, and follow the outer walkway to the gate lever. Activate the lever to open the gate back in the Hunter-Chopper arena. Return to the airboat and line up with the nearby ramp. Accelerate through the opened gate and keep the boat centered during the launch; avoid turning while airborne.
The loading transition after the landing marks the end of Water Hazard and begins Black Mesa East. If the boat is destroyed or a jump is missed, reload the latest useful save before that vehicle section. If no manual save is available, use the most recent checkpoint rather than attempting to continue on foot through a boat-only route.
- Reach Station 18 after destroying the Hunter-Chopper.
- Activate Station 18’s outer gate lever.
- Return to the airboat and pass through the reopened gate.
- Reach the loading transition into Black Mesa East.
Before you move on
- Station 13 has been entered and its crane-and-red-barrel mechanism has opened the river gates.
- Station 16 has been entered, its tower switch has been activated, and the airboat has continued through the opened route.
- The refugee camp has installed the mounted airboat gun.
- The final Hunter-Chopper has been destroyed after the drain-pipe route.
- Station 18 has been reached and its outer gate lever has been activated.
- The airboat has launched through the reopened gate and a loading transition has begun into Black Mesa East.
- A save made after the transition places Gordon beyond the Water Hazard route rather than back at the early canal sections.
Black Mesa East — Meeting Eli and Receiving the Gravity Gun
Leave the airboat at the Black Mesa East facility, enter through the rear airlock, and follow Judith Mossman, Eli Vance, and Alyx through the laboratory. Alyx then takes Gordon to the scrapyard and gives him the Zero Point Energy Field Manipulator, commonly called the Gravity Gun. Complete her object-handling lesson and Dog’s required fetch exercise. When Combine scanners appear, follow Alyx back inside, then use the Gravity Gun to clear the escape route after Dog opens the garage. Move the metal locker, break the padlock on the ladder, climb out, and continue through the tunnel into We Don’t Go to Ravenholm. The chapter has no conventional combat objective or boss.
1. Dock at the Black Mesa East facility
Continue through Water Hazard until the airboat reaches the Resistance facility marked with a lambda symbol. Leave the airboat at the dock. If the dock is slightly too high, use the boat as a step to reach the walkway rather than searching for another landing point.
Walk around the outside of the power-station structure toward the rear entrance. The route is not through the front machinery area. Enter the short airlock passage and wait for the facility’s security identification sequence to finish. The interior door opens automatically after the scripted identification, so do not try to force a side entrance or jump around the airlock.
This opening section is non-combat. Check your health and suit status if needed, but save ammunition and remain on the marked interior route. The next objective is to meet the Black Mesa East scientists, not to search the facility for a weapon or key.
- Leave the airboat at the lambda-marked facility.
- Walk around to the rear entrance.
- Pass through the airlock after the security identification finishes.
2. Follow Mossman, Eli, and Alyx through the laboratory
Judith Mossman meets Gordon near the entrance and leads him farther into Black Mesa East. Follow her to the elevator and ride it down to the lower laboratory. Remain near Mossman and Eli Vance while they talk; the level advances through their conversation and nearby scripted movements rather than through a switch or inventory item.
Walk with the group through the laboratory. Displays and equipment provide optional environmental information, but examining them is not required. If the group appears to stop, move closer to Eli or Mossman and wait for the current conversation to end. Do not leave through an unmarked side room expecting to find the Gravity Gun there; Alyx has to escort Gordon to the scrapyard before the weapon is awarded.
When Alyx arrives and asks Gordon to follow her, leave the laboratory with her. Stay behind Alyx as she leads the way outside. The route to the scrapyard is linear, and the game does not require a combat clear before the equipment demonstration begins.
- Ride the elevator to the lower lab.
- Stay with Mossman and Eli until the laboratory sequence advances.
- Follow Alyx outside to the scrapyard.
3. Accept the Gravity Gun and learn its two functions
Alyx stops beside the Zero Point Energy Field Manipulator in the scrapyard. Wait through her explanation, then take the weapon when she offers it. The Gravity Gun is added to Gordon’s weapon selection and is the central tool for the remainder of this chapter and the next one.
The weapon has two basic uses. Its pulling function attracts suitable loose objects toward Gordon, while its pushing function repels objects or launches them forward. Use it on the nearby crates, barrels, and other loose debris when Alyx demonstrates. The Xbox walkthrough identifies the left trigger as the attraction control and the right trigger as the launching control under the standard layout; if the controls have been customized, use the configuration shown in the game’s control settings.
Do not expect every object to move. Fixed machinery, heavy structural pieces, and objects attached to the environment may resist the weapon. Aim at movable crates and barrels for the tutorial. The Gravity Gun is not ammunition-based, so practice does not consume a resource.
- Receive the Zero Point Energy Field Manipulator from Alyx.
- Pull a loose object toward Gordon.
- Launch or push a movable object across the scrapyard.
4. Clear the scrapyard obstacle and meet Dog
Alyx directs Gordon to move objects near the blocked route. Use the Gravity Gun’s pulling function to bring crates and barrels into position, then arrange them so Gordon can climb over the obstruction and reach the higher part of the yard. Make small adjustments: pull an object close, reposition yourself, and push it only when it is lined up with the route.
If a crate slides away, pull it back rather than trying to jump around the exercise. The game expects the player to demonstrate both attraction and repulsion. Once the temporary platform or stack is usable, climb over it and continue toward Dog.
Dog then throws objects toward Gordon. Aim the reticle at each incoming crate and use the pulling function to catch it, or push it away if it reaches you at an awkward angle. Catching the required thrown crates advances the tutorial. Dog’s later play with the heavy ball is useful practice but is not a separate progression objective.
- Move the crates and barrels blocking the scrapyard route.
- Build and climb the temporary object platform.
- Catch the required objects Dog throws.
5. Finish the Dog sequence and prepare for the attack
After the required crate-catching exercise, Dog plays with his heavy ball. Use the Gravity Gun to pull the ball toward Gordon and launch it back toward Dog. This optional practice helps demonstrate how the weapon handles heavier objects and how launch angle affects distance. You may continue briefly, but the chapter advances only after the scripted training and dialogue have concluded.
Remain in the scrapyard until Alyx’s instructions and the Dog sequence are finished. Do not try to leave through an opening in the yard before the level signals the return route. When Combine scanners appear over the facility, Alyx leads Gordon back toward Black Mesa East. Follow her immediately.
This is a good point for a manual save on the original Xbox release. Save after obtaining the Gravity Gun and completing the training if you want to avoid repeating the laboratory conversations and scrapyard lesson after a failed escape attempt.
- Complete the required Dog training.
- Optionally play fetch with Dog’s ball.
- Wait for the scanners and follow Alyx back indoors.
- Create a manual save if desired.
6. Escape through Dog’s garage route
Follow Alyx through the interior corridors during the Combine attack. You are not required to defeat every attacker in the base. Stay with Alyx and Dog, move through the doors they use, and wait at pauses for the next scripted action. When a collapse separates Gordon from Alyx, continue with Dog on the isolated side of the facility.
Dog opens a garage door, revealing a route cluttered with debris. A metal locker blocks the way toward the ladder. Aim the Gravity Gun at the locker and use its pushing function to move it clear. The weapon can repel objects that it cannot pull, so do not assume that an object must be collectible before it can be displaced.
Proceed to the ladder area. The ladder hatch is secured by a padlock. Use the Gravity Gun to blast the padlock away, then climb the ladder. This is the correct escape action for the Xbox route; there is no separate key to find and no boss encounter to complete.
- Follow Alyx and Dog during the Combine attack.
- Let Dog open the garage route.
- Push the metal locker away from the passage.
- Break the ladder padlock with the Gravity Gun.
- Climb the ladder.
7. Enter We Don’t Go to Ravenholm
At the top of the ladder, follow the passage through the damaged structure and continue forward. The route leads from Black Mesa East into the tunnel toward Ravenholm. Keep the Gravity Gun selected or readily available because the next chapter relies heavily on movable objects, explosive containers, saw blades, and other environmental weapons.
There is no additional Black Mesa East objective after the ladder climb. You do not need to return to Eli’s laboratory, recover another device, or defeat the Combine force attacking the base. Continue through the passage until the loading transition or chapter title identifies We Don’t Go to Ravenholm.
If the scripted route appears stalled, reload the manual save made after the scrapyard training and replay the return sequence. Stay close to Alyx and Dog, allow the garage-opening scene to occur, then move the locker and break the padlock rather than attempting to bypass the debris.
- Follow the upper passage after climbing the ladder.
- Reach the tunnel leading away from Black Mesa East.
- Confirm the loading transition into We Don’t Go to Ravenholm.
Before you move on
- The Gravity Gun is available in Gordon’s weapon selection and can pull and launch loose objects.
- Alyx’s scrapyard instruction sequence and the required Dog crate exercise are complete.
- The Combine scanner attack has begun and Gordon has been separated from Alyx on the escape route.
- Dog has opened the garage, the metal locker has been moved, and the ladder padlock has been destroyed.
- Gordon has climbed the ladder and reached the loading transition or chapter title for We Don’t Go to Ravenholm.
We Don’t Go to Ravenholm — Traps, Zombies, and the Shotgun
Ravenholm is a mostly one-way escape through a ruined town filled with zombies, headcrabs, physics traps, and narrow routes. The Gravity Gun is your main weapon: saw blades, explosive barrels, air canisters, and other objects can kill without consuming ammunition. Follow Father Grigori’s marked route, disable the flame and electrical traps, use the suspended cars to cross the street, and climb through the rooftops until he gives you a shotgun. Grigori then leads you through the cemetery to a mine entrance. Cross the mine tunnels and reach the coastal Resistance outpost, where the waiting buggy begins Highway 17.
Enter Ravenholm and use the first physics weapons
After Dog escorts Gordon through the tunnel from Black Mesa East, climb into Ravenholm and follow the first streets and buildings. The route is largely linear, but several entrances are blocked by boards, furniture, or other movable objects. Use the Gravity Gun to push obstructions aside, then enter the next building rather than searching for an alternate street route.
Use the Gravity Gun as your primary weapon. Saw blades are especially effective against ordinary zombies and can often be recovered and reused. Aim through the torso so the blade also destroys the headcrab riding a corpse; striking only the legs can leave the headcrab alive. Air canisters and explosive barrels are useful against groups, but create distance before igniting or throwing them. Keep a pistol or SMG ready for a headcrab that reaches you at close range.
- Enter Ravenholm with the Gravity Gun available.
- Use saw blades and other objects before spending ammunition.
- Keep clear of explosive barrels when setting them off.
Reach Father Grigori and disable the first traps
Continue toward the burning section where Father Grigori first appears. The fire-lit route identifies the correct direction. In the building near the burning zombies, turn the red valves on the propane tanks to shut off the flames blocking the passage. Search the upper rooms for the switch that disables the electrical hazard around the fence, then return to the cleared route.
Do not assume that a burning zombie is harmless. It can still damage Gordon at close range, so let the fire finish the kill or push the enemy back with the Gravity Gun. Father Grigori’s traps are safer when you activate them from a distance. Use spinning blades, fire, and explosions to thin groups instead of standing in the middle of the courtyard.
- Turn off the propane-fed flames.
- Disable the electrical fence from the upper section.
- Follow the cleared route to Grigori instead of forcing a side path.
Use the car traps and cross the connected buildings
After the fence section, move across the planks and into the next building. A lower room contains several headcrabs and a zombie; use the Gravity Gun on nearby air canisters or another heavy object before dropping into the room. Outside, Father Grigori’s suspended-car traps provide the intended route. Pull the winch lever to drop the second car, then jump onto it before it rises and use it to reach the next planks and platform.
Continue along the elevated path above the street. Explosive barrels below can clear groups, but shoot them from a protected position. Collect nearby health, armor, and ammunition if you can do so without leaving the route. When the path leads into the larger building, climb the stairs and keep moving upward. The side rooms are optional; the stairwell and upper rooftops are the required route.
- Use the second suspended car to cross the gap.
- Clear explosive barrels from cover.
- Climb the main building rather than wandering through side rooms.
Take the shotgun and survive the rooftop attacks
At the top of the building, Father Grigori gives Gordon a shotgun. Pick it up and reload before leaving the roof. Fast zombies then attack from the surrounding rooftops and drainpipes. Let Grigori handle enemies in his immediate area while you watch the pipes and the roof access points. Fire when a fast zombie reaches the top instead of wasting shells on enemies still climbing.
Jump from the rooftop to the water reservoir and then to the adjacent roof when the route opens. On the next roof, fast zombies climb from the drainpipes. Listen for their movement and watch the pipe that shakes as an enemy climbs. The shotgun is the safest answer at close range, but a saw blade or another heavy object remains useful when several enemies bunch together.
- Collect and reload Father Grigori’s shotgun.
- Watch the drainpipes during the rooftop ambush.
- Use the reservoir and adjacent roof as the intended route forward.
Cross the upper town and reach the cemetery
Follow the rooftops, ladders, crates, and narrow walkways through the upper part of Ravenholm. In the alley section, climb the stacked crates to reach the small roof, jump across to the ladder, and continue along the elevated walkways. If a route appears to stop, look for the next ladder, roof edge, or movable platform rather than jumping into the street.
The following buildings contain more ordinary zombies, fast zombies, and poison headcrabs. Kill poison headcrabs immediately because they can reduce Gordon’s health sharply even when the host zombie is not close. Use the shotgun for sudden fast attacks and the Gravity Gun for saw blades and barrels. Continue upward and across the factory rooftops until you reach Grigori’s position and the cart mechanism.
- Use crates and ladders to stay above the streets.
- Prioritize poison headcrabs.
- Reach the factory roof where Grigori prepares the cart.
Follow Grigori through the cemetery
When the cart arrives, cross to Father Grigori’s side and follow him toward the cemetery. Grigori is effectively a powerful escort during this section, but he does not remove the need to move carefully. Stay near him, use gravestones and walls as cover, and help eliminate zombies that approach from the sides or behind.
Do not stop to clear every enemy or search every grave. The objective is to follow Grigori across the cemetery and toward the mine access. When he reaches the mine-side route and opens the way, continue behind him rather than returning to the earlier rooftops. Save at a safe opportunity before entering the mine section if you want a short recovery point.
- Cross the cemetery with Grigori.
- Use the gravestones for cover.
- Continue to the mine entrance when Grigori moves onward.
Descend through the mines and reach the coastal outpost
At the mine chasm, follow the descent route across the wooden beams and platforms. If an explosive barrel is positioned above the lower area, use it from a safe distance to thin the headcrabs below. Move carefully across the beams, then drop into the lower chamber when the route is clear. The tunnels contain narrow ledges, dark corners, and fast enemies, so keep the shotgun ready while checking above and below before crossing.
When you reach the gated mining passage, climb back onto the nearby wooden supports and use the upper shoring to get around the obstruction. Continue through the mine tunnels, using lamps, tracks, platforms, and ladders as route markers. Some falls lead into safe water, but do not jump into an unlit shaft unless the landing is clearly visible. After the final passages, emerge at the coastal Resistance outpost and approach the waiting buggy.
Entering the buggy or triggering the next loading transition starts Highway 17 and confirms that Ravenholm is complete. If a door, ladder, or escort trigger genuinely fails to respond, reload the latest manual or checkpoint save and repeat the nearby action without bypassing the intended route. Do not treat ordinary loading pauses on the original Xbox as proof that the chapter has frozen.
- Cross the mine chasm and bypass the gate using the upper supports.
- Reach the coastal Resistance outpost.
- Confirm Highway 17 begins after reaching the buggy.
Before you move on
- Father Grigori has given Gordon the shotgun on the rooftop.
- Gordon has crossed the upper town and followed Grigori through the cemetery.
- The mine descent and tunnel route have been completed.
- Gordon has emerged at the coastal Resistance outpost.
- The buggy is reached and the game transitions into Highway 17.
References for this chapter
- Half-Life 2 — Guide and Walkthrough — Xbox — Shotgunnova
- Half-Life 2 Walkthrough — GameSpot
- Half-Life 2 Gravity Gun Challenge Guide — Xbox — GameFAQs
- Half-Life 2 Walkthrough for Chapter 6 — Ravenholm: The Church and the Cemetery — Altered Gamer
- Half-Life 2 Official eGuide — Chapter 12: Follow Freeman!
Highway 17 — Coastal Driving, Snipers and Boats
Highway 17 is the buggy chapter between Ravenholm and Sandtraps. Recover the overturned buggy, follow the coast through Combine positions, help the resistance at the first refugee base, and use the supplied RPG to destroy a gunship. Continue through the crane yard and Northern Petrol area, remove the buggy’s sticky mines, collect the crossbow, and disable the force fields blocking the bridge. The last gunship appears after the bridge controls are shut down. Return to the buggy, cross the railway while avoiding the oncoming train, and enter the tunnel that loads Sandtraps. The lighthouse and its major dropship assault are not part of Highway 17; they occur in the next chapter.
1. Recover the buggy and reach the coastal road
Highway 17 opens with the buggy overturned near a failed crane operation. Exit the vehicle and use the Gravity Gun to push it upright. Antlions will attack while you work, so keep moving in broad circles and use the nearby mounted defenses and terrain to avoid being surrounded. Once the buggy is upright, enter it and drive down toward the beach.
At the beach, turn right and follow the slightly paved route climbing toward the pier. It is easy to mistake the sand and rocks for the intended path, but the darker, firmer track leads uphill. At the top, use the buggy’s turbo to clear the jump. A small guard station sits beyond the gap and contains useful supplies. This is a sensible place for an Xbox manual save before continuing.
- The buggy is upright and drivable.
- The beach path and uphill route have been found.
- The first jump has been cleared and the guard station reached.
2. Cross the tunnel and reach the first resistance base
Drive through the tunnel and continue along the coast. Antlions remain a threat outside the influence of the thumpers, so keep the buggy moving and use its mounted weapon when enemies gather around the road. When you reach a thumper, use the protected area around it to dismount and search nearby buildings for supplies.
The second substantial building has Combine troops inside and around it. Clear them from cover, then use the mounted binoculars if you want to identify the resistance activity farther along the coast. Continue until you reach the refugee base and meet Colonel Cubbage in the main building. The resistance will provide an RPG and ammunition because a gunship is about to attack. Make a manual save before taking the launcher if possible.
- The first thumper area has been passed.
- The coastal building with Combine troops has been cleared.
- Colonel Cubbage has been reached and the RPG has been obtained.
3. Destroy the first gunship and leave through the gate
Stay near solid cover during the gunship fight. Fire an RPG, then keep the aiming reticle on the gunship so the rocket can be guided toward it. If the gunship is firing at your position, wait behind cover until it shifts attention to a resistance fighter before stepping out to launch the next rocket. Friendly resistance members and the medic can provide replacement ammunition and health during the battle.
Do not fire rockets at ordinary soldiers or attempt to destroy the gunship with the buggy’s weapon. Keep guiding each rocket until it hits or is shot down. After enough direct hits, the gunship crashes and the route gate opens. Search the base for supplies, save again, then drive through the opened roadway.
- The first gunship has been destroyed.
- The gate beyond the refugee base is open.
- The RPG and other essential weapons have been replenished.
4. Use the crane to move the buggy and reach Northern Petrol
Follow the road down to the beach beneath the aqueduct. You will reach a freight area with a crane, an overturned truck and a raised bridge to the pier. Clear the Combine near the shack and crane, then activate the thumper in the area so antlions do not keep interrupting the vehicle puzzle.
Enter the crane control tower. Move the magnet over the buggy, pick it up and carry it toward the pier. Once the buggy is positioned, use the crane magnet to knock down the raised bridge. Cross to the far side and enter the Northern Petrol building. Clear or bypass the guards, find the switch in the warehouse’s far room and raise the exit door. Drive the buggy through the large opening to return to the roadway.
- The thumper at the freight area is active.
- The crane has moved the buggy to the pier.
- The bridge has been knocked down and Northern Petrol has been exited.
5. Destroy the second gunship and clear the mine road
After the aqueduct jump, a second gunship attacks. The buggy cannot damage it, so leave the vehicle at the roadblock and use the RPG from behind wrecked cars, concrete or other solid cover. Rocket ammunition is available near the semi-truck and in a white van. Fire only when the gunship is moving across your view, then guide the rocket while retreating behind cover.
Once the gunship crashes, use the Gravity Gun to move the wrecked cars blocking the road. Drive through the tunnel and watch for sticky mines that attach to the buggy. If one begins disrupting your steering, stop in a safe place, exit, pull it off with the Gravity Gun and throw it into the water. Continue through the Combine ambush and destroy the barrels around the truck blocking the route.
- The second gunship has been destroyed.
- The roadblock and truck have been cleared.
- Sticky mines have been removed from the buggy before the next combat area.
6. Take the crossbow and disable the bridge force fields
At the next roadblock, do not simply drive forward. A force field blocks the road, and the nearby settlement must be cleared first. Climb the hill beside the wrecked semi and collect the crossbow and its ammunition. Use the elevated position to eliminate exposed Combine troops, then enter the buildings and finish the remaining defenders.
The force field is powered by an armored riot vehicle. Move the vehicle with the Gravity Gun, or pull the supports from behind its rear wheels so it rolls away and disconnects the field. Continue to the next settlement beneath the bridge. Clear the Combine there, then locate the side path below the cliff and enter the bridge supports on foot. The buggy must remain behind while you cross the bridge structure.
Move along the broken rafters and ladders, checking corners for headcrabs and Combine troops. At the far side, fight upward through the rooms. Use the Gravity Gun to unplug the first force-field connection, then operate the control panel to disable the remaining bridge fields. Create an Xbox manual save before activating the panel if you have not saved recently; disabling the fields triggers the final gunship.
- The crossbow has been collected.
- The first road force field has been disconnected.
- The bridge controls have been reached and the force fields are ready to be disabled.
7. Defeat the final gunship and reach Sandtraps
After the bridge force fields shut down, a gunship enters the area. Return through the bridge rafters to the nearby rocket-ammunition cache. Use the small lookout room beside the cache as cover: fire from the doorway or window, guide the rocket toward the gunship, then retreat while it returns fire. Refill from the cache and repeat until the gunship is destroyed.
Return across the bridge structure and head back toward the settlement where the buggy is parked. Combine troops and antlions will be fighting there, so do not stop to clear every enemy. Reach the buggy and drive onto the railway route. An oncoming train blocks the first passage; reverse or move aside and wait until it has passed, then continue through the tunnel beyond the tracks.
The next loading transition or chapter title is Sandtraps. Stop there if you want a clean chapter-completion save. The lighthouse defense, four dropship waves and the gunship fought from the lighthouse belong to Sandtraps, not Highway 17.
- The final bridge gunship has been destroyed.
- The buggy has been recovered after the bridge fight.
- The train has passed and the tunnel into Sandtraps has loaded.
Before you move on
- Highway 17 is complete when the game loads Sandtraps after the railway and tunnel sequence.
- The buggy has been recovered, the first refugee-base gunship and second road gunship have been destroyed, and the bridge force fields have been disabled.
- The final bridge gunship has been destroyed and the train crossing has been passed.
- A manual save exists after the bridge gunship or immediately after Sandtraps loads, providing a practical restart point for the next chapter.
Sandtraps — Coastal Assaults and Dropship Pressure
Sandtraps begins after the Highway 17 tunnel and ends when Gordon enters Nova Prospekt. Drive through the zombie-filled tunnel and coastal checkpoints, open the battery-powered gate, then defend Lighthouse Point against four dropship deployments and a gunship. After the buggy is left behind, cross the antlion beaches, activate the disabled thumper, defeat or outlast the first Antlion Guard, and receive Bug Bait from the Vortigaunt. Use the pheropods to direct antlions through the Combine beach defenses, climb into Nova Prospekt’s exterior yard, destroy the two gunships there, and shut off the flames with the nearby valves. On the original Xbox, manual saves are useful before Lighthouse Point, after the gunship, before the exterior prison assault, and in the flooded approach, because the game supports manual saves as well as checkpoint and level saves.
1. Drive through the tunnel and coastal checkpoints
Begin in the tunnel after Highway 17. Use the buggy’s mounted weapon against zombies and headcrabs, and use the Gravity Gun or the buggy’s boost to clear vehicle wrecks and debris. A small supply room is accessible from an opening above the tunnel route; collect its health and shotgun ammunition if needed, then continue through the blocked sections until you emerge outside.
Follow the road through the coastal houses. The first occupied house has Combine patrols and a locked front entrance; approach from the rear if you want its supplies. Continue to the next lookout and the windmill area, clearing soldiers from cover before searching the buildings. At the battery-operated gate, enter the nearby building and collect the two loose batteries: one is on a bedframe and another is outside near an overturned bathtub. A third battery is already installed in the gate mechanism. Insert the two loose batteries, then return to the buggy and drive through the opened gate.
- Buggy cleared through the tunnel debris.
- Two loose batteries collected and installed at the gate.
- Coastal patrols defeated before advancing.
2. Reach Lighthouse Point and prepare for the defense
Continue until the road reaches the refugee camp beside Lighthouse Point. Park the buggy in the garage when directed. Collect health, suit power, ammunition and grenades from the camp before triggering the assault. Find the rocket launcher and its ammunition near the lighthouse’s upper levels. The rocket launcher is for gunships; do not spend its rockets on ordinary Combine soldiers.
Make a manual save before beginning the defense if the Xbox pause menu permits saving at your current position. Keep the lighthouse, garage and camp buildings between you and incoming fire. The camp contains useful cover and ammunition, so do not remain in the exposed center after the first dropship arrives.
- Buggy parked at Lighthouse Point.
- Rocket launcher and rocket ammunition located.
- Manual save made before the defense.
3. Survive the four dropship deployments
The Combine attack arrives in four stages, with soldiers landing at different parts of the position: the road behind the garage, the camp entrance, the opposite end of the camp, and the lighthouse. Move toward the landing area only after the soldiers have disembarked, then retreat behind the nearest building or wall. Use the SMG, shotgun and grenades against troops that enter the camp, and search bodies for ammunition only when the immediate area is clear.
The dropships themselves are not the target of this section. Concentrate on the soldiers they deploy. A mounted gun can help from a protected position, but abandon it if troops flank you or explosives make the position unsafe. After the fourth group is defeated, do not leave the area expecting the chapter to advance immediately; the gunship arrives next.
- Four landing areas cleared.
- Rocket ammunition preserved for gunship encounters.
- Camp buildings and walls used as cover.
4. Destroy the Lighthouse Point gunship
Climb the lighthouse and use the rocket launcher against the gunship. Fire with a clear view, then guide each rocket around the gunship’s defensive flares so the decoy is not hit instead. After launching, retreat behind the lighthouse structure or use the stairs as cover while the gunship fires back. Repeat the launch, guidance and retreat cycle until it crashes.
The lighthouse has a rocket-ammunition supply, so resupply between attacks rather than wasting rockets on soldiers. Once the gunship is destroyed, wait for the Resistance member to lead you to the concealed route beneath the lighthouse. Follow the narrow cliffside path through the tunnel. Save again after reaching the far side; a fall from the exposed path can force a lengthy replay on Xbox.
- Lighthouse gunship destroyed.
- Concealed route beneath the lighthouse opened.
- Manual save made after reaching the antlion territory.
5. Cross the first beach and activate the thumper
A Resistance survivor warns you that movement on the sand summons antlions. Cross the first beach using rocks, wreckage, boards and other solid surfaces. The Gravity Gun can pull loose debris into temporary stepping stones. At the broken windmill structure, use the beams and nearby objects to reach the higher ledge; shifting the large box or balancing debris can help you climb.
Continue toward the red-roofed shack connected to the inactive thumper. Follow the electrical cable to the shack and activate the machine. The thumper’s vibrations repel antlions, allowing you to cross the nearby sand safely. If you touch the sand and antlions appear, reach solid ground or the thumper’s protected area, then deal with the pursuers before continuing. After the thumper is active, jump into the next enclosed sandy area rather than spending time building another path.
- First beach crossed using solid surfaces where practical.
- Red-roofed shack reached.
- Nearby thumper activated.
6. Survive the first Antlion Guard encounter and collect Bug Bait
Dropping into the next sandy enclosure triggers the first Antlion Guard, also called a Myrmidon in some Xbox guide terminology. A Resistance fighter operates a turret nearby. Use the large central rock as cover and keep it between you and the Guard while the turret fires. Shotgun blasts, the pulse rifle and explosive barrels can help, but the required objective is to survive the encounter and let the Guard be defeated; do not expose yourself to its charge attacks merely to deal the final blow.
After the Guard falls, the Vortigaunt extracts a pheropod from the corpse and gives it to Gordon as Bug Bait. Follow the Vortigaunt through the short underground route. Throwing Bug Bait directs antlions toward a location or enemy, while squeezing it recalls nearby antlions. The game replenishes your antlion followers as they are lost, so use them to draw fire rather than spending ammunition on every Combine soldier.
- Antlion Guard encounter completed.
- Bug Bait collected from the Vortigaunt.
- Bug Bait command and recall functions demonstrated.
7. Lead the antlions through the coastal defenses
Use Bug Bait to send antlions toward Combine pillboxes, bunkers and mounted guns. Thumpers interfere with the antlions, so climb to each thumper’s control panel and deactivate it before trying to move your followers through that section. Start with the first bunker, then advance to the bunker protected by a thumper. The third bunker cannot be entered directly from the front; use the antlions as a distraction, keep behind beach debris, and circle around to its rear entrance.
Continue through the tunnel and the remaining checkpoints. At the final hill, move quickly toward the mounted gun before the Combine position becomes fully active, then use the gun or your own weapons from cover. Follow the wooden path to the fire-lit zombie cave. Kill the zombies and headcrabs, break the small supports beneath the ladder, and climb toward the cliff ledges. Use Bug Bait against the Combine on the walkways, then reach the sewer drain at the top. The drain leads to the flooded exterior approach to Nova Prospekt.
- Thumpers disabled before sending antlions onward.
- Rear entrance to the third bunker used.
- Sewer drain reached above the coastal cliffs.
8. Clear Nova Prospekt’s exterior and enter the prison
Save in the flooded approach if possible. Climb out into the prison exterior and use Bug Bait to attack the soldiers in the guard towers. Move from one tower’s cover to the next rather than crossing the open yard. Antlions can keep the defenders occupied while you use the crossbow, SMG or pulse rifle against exposed gunners. Clear the tower positions before pushing toward the rear of the yard.
A gunship appears during this advance, and a second gunship joins the fight near the rear rocket cache. Keep moving between solid cover and prioritize the gunships whenever they are in view. The rocket cache near the back of the yard supplies the ammunition needed for the encounter. Destroy explosive barrels near your firing position so gunship fire cannot detonate them beside you. Use Bug Bait to send antlions away from your position when they obstruct movement, then guide rockets around the gunships’ flares.
After both gunships are destroyed, locate the damaged concrete section where flames block the route. Use the valves on the pipes to shut off the fuel and extinguish the fire. Proceed through the opened passage and enter the prison interior. The loading transition into Nova Prospekt confirms that Sandtraps is complete.
- Exterior guard towers cleared.
- Both Nova Prospekt gunships destroyed.
- Flames shut off with the pipe valves.
- Nova Prospekt interior entered.
Before you move on
- The Lighthouse Point defense is complete, the first gunship is destroyed, and Gordon has followed the concealed route beneath the lighthouse.
- The first Antlion Guard encounter is complete, Gordon has received Bug Bait, and the Vortigaunt’s route into the coastal defenses is open.
- The thumpers blocking the antlion advance have been disabled, the sewer drain above Nova Prospekt has been reached, and the exterior guard towers have been cleared.
- Both gunships in the Nova Prospekt exterior have been destroyed, the flames have been shut off with the valves, and Gordon has crossed into the Nova Prospekt interior chapter.
Nova Prospekt — Infiltration and Prison Assault
Enter Nova Prospekt after the Sandtraps assault and work through its abandoned cellblocks, officer stations, flooded sewer, shower room, laundry and kitchen. The Gravity Gun is the key tool for toppling automatic turrets, moving barriers and clearing hazards. Antlions help in several outdoor and later prison fights, but they do not remain with Gordon throughout the facility. The large myrmidonts can be avoided rather than defeated. Follow the connected maintenance routes, use the guard stations for health and suit refills, and operate the switches that open the later cellblocks. The chapter ends in a trash compactor: after clearing the zombie beneath the stairs, enter the machine, stack debris to reach the bright alcove and jump through the hole. Alyx and the train-platform reunion occur in Entanglement, not Nova Prospekt.
Enter the prison and disable the first turret
From the end of Sandtraps, follow the outer route into the breached Nova Prospekt grounds. Move through the damaged opening and enter the facility. The first cellblock appears empty, so go downstairs. In the lower cells, find the lit cell with a hole in its wall. Enter the short passage, kill the headcrab inside and emerge in the officer station.
A stationary automatic turret is firing at the antlions outside the bars. Approach it with the Gravity Gun and knock it onto its side. Normal gunfire is not the reliable solution for these turrets; a thrown object, grenade or SMG alternate-fire grenade can also topple one when the Gravity Gun cannot reach. Once it is down, climb the nearby stairs and slip over the bent section of mesh fencing.
- Enter Nova Prospekt through the damaged exterior opening.
- Use the lower cell's wall hole to reach the officer station.
- Topple the first automatic turret before moving on.
Use the refill station and cross the sewer
The next officer station contains health and suit refills. Use them before continuing, then check the monitors if you want to identify the turret positions ahead. Climb the next stairs and topple the two turrets facing down toward the route. Do not try to run past them while they are upright.
Enter the half-flooded sewer area. Follow the passage around the water and leave through the opening at the far side. Headcrabs appear near the damaged floor, so keep a close-range weapon ready. In the following three-tiered hall, use the middle level to reach the larger chamber, then climb the stairs and disable the two turrets overlooking the room. Their doorway leads into the abandoned shower area.
- Restore health and suit power at the officer station.
- Disable the two turrets above the sewer route.
- Use the middle level of the three-tiered hall to reach the shower area.
Bypass the first myrmidont and open the turret route
Drop into the shower room and move to the opposite side, where barrels block a hole in the wall. Clear the room beyond and locate the white double doors blocked by benches and debris. A large myrmidont is loose in this section. You do not need to fight it: use the available opening and continue toward the corridor where the antlions return.
Two more automatic turrets cover the corridor near Combine soldiers. Use the pillars as cover and topple the turrets with the Gravity Gun. A third turret is visible behind a railing; leave it temporarily and take the perpendicular passage instead. Fight through the manhacks and Combine soldiers, then pull the plug that deactivates their energy barrier. Operate the red switch to open the stairwell.
Clear the upper room and find the control that unlocks the gate near the turret you skipped. Return to that turret and topple it with a grenade or the Gravity Gun. Continue until two more turrets cover the next hallway.
- Do not waste ammunition fighting the first interior myrmidont.
- Deactivate the Combine barrier by pulling its plug.
- Use the red switch and upper control to open the route around the skipped turret.
Stop the fan and clear the next cellblock
The next hallway has a loose gate leading to a vent, which is the safer route around the turret fire. A large fan blocks the passage. Use the Gravity Gun to place an object in the fan's path and stop it, then enter the vent. Clear the Combine soldiers beyond, unplug the next barrier and topple the turrets so the antlions can move into the area.
Follow the long staircase into the next cellblock. Stay behind the bullet-resistant glass while the antlions attack soldiers and trigger the laser mine traps. At the stair access, use nearby barrels against the paired turrets rather than exposing yourself. Fight across the middle tier, then reach the top tier and take the back passage to the active control station. Operate the gate controls, but be ready for Combine reinforcements when the station opens the route.
- Stop the fan with a movable object before entering the vent.
- Use the glass and antlions as protection in the next cellblock.
- Reach the upper control station and open the gate.
Cross the laundry and kitchen sections
Proceed through the opened corridor and pass the antlion escape hole. Two more turrets cover the route ahead; use the side hallway to avoid their strongest firing angle, then topple them when you have a safe approach. Enter the laundry area and let the antlions occupy the Combine while you attack from behind cover. Search the room for supplies before climbing the stairs.
The following hall leads toward the kitchen. This is a tighter fight, with several turrets, Combine soldiers and a section that can catch fire. Use grenades, explosive objects or RPG ammunition if available, and do not stand beside flammable objects while fighting. The narrow stairway beyond the kitchen contains another turret and soldiers. Clear it from the doorway, then continue to the small station overlooking the former cafeteria.
- Use the side hallway to reduce exposure to the laundry-route turrets.
- Search the laundry for ammunition and recovery items.
- Clear the kitchen and narrow stairway before entering the cafeteria station.
Escape the trash compactor and end Nova Prospekt
From the station, drop through the window into the cafeteria area. Another large myrmidont appears below, but it can again be bypassed. Move toward the exit near the door blocked by laundry carts and debris. Supply crates mark the correct route. Continue through the doorway and kill the zombie beneath the stairs.
Make a manual save before entering the trash compactor if you want to avoid repeating the preceding fights. Enter the machine and move forward until the compactor closes around you. When the walls begin crushing the available space, use the loose junk to build a ramp or stack. Climb onto the debris and jump into the brightly lit alcove before the compactor reaches you. Continue through the hole in that alcove.
The hole completes Nova Prospekt and transitions into Entanglement. Alyx appears near the train tracks during the next chapter, so do not treat the lack of a platform reunion here as a missed objective.
- Bypass the second myrmidont and reach the debris-blocked exit.
- Kill the zombie beneath the stairs before entering the compactor.
- Stack debris to reach the bright alcove and jump through the hole.
- Confirm that the game transitions to Entanglement.
Before you move on
- The first cellblock turret, sewer-route turrets and later corridor turrets have been toppled or bypassed.
- The Combine barriers and cellblock gate controls have been operated, allowing passage through the laundry and kitchen sections.
- The zombie beneath the final stairs has been defeated and the trash-compactor sequence has begun.
- Gordon has stacked debris to reach the bright alcove and has jumped through the hole.
- The game loads or transitions into Entanglement; Alyx is encountered there rather than on the Nova Prospekt platform.
Entanglement — Breakout and Escape
Reunite with Alyx in Nova Prospekt, fight through the prison’s control rooms and service passages, and reach Eli Vance and Judith Mossman at the Combine teleporter. Entanglement is an on-foot escape chapter with three sentry-turret defenses: a two-turret control-room hold, a three-turret cellblock assault, and the final teleporter-room defense. Stay close to Alyx when she is operating prison equipment, use the gravity gun to disable turrets and manipulate the environment, and save before the cellblock and teleporter battles. After the teleporter activates, Gordon arrives at Kleiner’s laboratory, leaves with Dog, and drops through the shaft into Anticitizen One.
1. Rejoin Alyx and reach the upper prison
At the start of Entanglement, break the nearby supply crate and move through the opening toward the train tracks. Drop into the lower passage and follow it until Alyx appears. She runs ahead and unlocks the way to an elevator, so wait for her rather than searching the surrounding dead ends.
Ride the elevator upward and clear the Combine soldiers on the upper level. When Alyx stops at the force field, follow her into the adjoining office or control room. Use the office walls and doorway for cover while dealing with the soldiers, then help remove the force field’s power connection. A grenade thrown into the small room beyond the field can knock the electrical plug loose when the gravity gun cannot reach it.
Continue through the cramped passage. Deal with the stationary turret around the corner and the additional Combine resistance near the headcrab-filled rooms. Follow the route toward the first control room, where Alyx will rejoin you after the immediate fighting.
- Meet Alyx beside the train tracks.
- Ride the elevator and clear the upper level.
- Disable the force field and reach the first control room.
2. Survive the first turret defense
Clear the Combine inside the first control room, then use the two friendly sentry turrets as temporary defenses. Place them on opposite sides of the room or on the raised ledges so they cover the approaches without standing directly in the center of the doorway. Keep your own weapon ready for soldiers who attack from an angle or rush a turret.
The Combine will target the turrets, so watch for one being knocked over. Restore it with the normal Xbox action control when the immediate pressure eases, then return to cover. Do not pursue soldiers down every corridor; the objective is to hold the room until Alyx reaches the control position and opens the next route.
Use the health station before leaving if necessary. Alyx opens the blocked door leading down. Save after this defense, because the next route includes an electrified service area followed by a longer prison assault.
- Position both friendly turrets where they cover separate approaches.
- Keep fallen turrets upright when safe.
- Wait for Alyx to unlock the exit before advancing.
3. Cross the service passages and electrified sewer
Follow the opened route through the old station area. When the obvious door does not open, look behind the paired cabinets for the vent. Crawl through it, kill or bypass the headcrabs, and emerge in the room beyond. Alyx opens the next door toward the generator area.
Use the available grenade supply against the Combine and turrets in the narrow hallway. After the force field is removed, take out the turret around the corner and the two turrets farther along the passage. Continue to the generator room and use the stairs and opened gate to reach the service route.
The next obstacle is an electrified sewer. Do not step into the water. From the stair area, climb onto the pipe and reach the balcony with the floating barrels and loose debris. Push crates, boxes, and other solid objects into the water to make a bridge across the gap. Save before crossing, because falling into the electrical water costs health and can leave you exposed to the nearby headcrabs and zombies.
After crossing, fight through the zombie-filled rooms. A health station is located near an electrified fence. Take the stairs upward, collect supplies, and enter the cellblock door that leads to the next turret defense.
- Use the vent when the station door is unavailable.
- Cross the electrified sewer on floating debris, not through the water.
- Reach the three-turret cellblock.
4. Win the three-turret cellblock defense
Before dropping into the cellblock, clear enemies from the upper level and save. Enter the lower area and locate the three automated turrets in the small room between the walkways. Set them around the central intersection so they can cover the front approach and side routes. Avoid placing all three directly in a doorway where shotgun troops can knock them down immediately.
Use nearby crates, barrels, and tables to obstruct less important entrances, but leave yourself a route to reach the turrets. Fight from behind the sentries and focus on soldiers who get close or throw grenades. If a turret falls, put it upright again as soon as the wave gives you room. This defense ends only after the Combine assault is defeated and Alyx returns.
When the area is secure, use the health and suit stations near the turret room or in the next section. Follow Alyx down the stairs and through the double doors. Clear the large Combine group, then continue to the security station where Alyx locates Mossman.
- Save before entering the cellblock.
- Cover the central intersection with all three turrets.
- Restore turrets and survive until Alyx returns.
5. Reach the teleporter chamber
Follow Alyx through the remaining prison corridors after the cellblock fight. The route includes another large firefight and a security station. Stay near Alyx while she contacts Mossman; moving into unexplored side rooms can leave you fighting without the intended support or make you miss the route she opens.
When you reach the teleporter chamber, walk past the available turrets and use the health and suit chargers. Collect ammunition from the immediate area and make a manual save before the final defense. Mossman’s betrayal and the teleporter reset are scripted events, so wait for the conversation and Alyx’s actions to finish before trying to activate anything.
Alyx eventually unlocks the three turrets. Do not enter the teleporter until she says the reset is complete.
- Stay with Alyx through the Mossman sequence.
- Use the chargers in the teleporter room.
- Save before the final turret defense.
6. Defend the teleporter and escape
Place the three turrets so they cover the three active approaches. One can stand on the glass section facing the opening beyond the glass doors. Place another near the right side of the teleporter, between the console and stairs, facing the force-field approach. Put the third beside the teleporter behind the rail, aimed toward the remaining entrance. Keep the glass-floor turret under observation because it is the most exposed.
Use the AR2, SMG, shotgun, and grenades to eliminate soldiers who get past the sentries. Prioritize enemies rushing a turret, then restore any fallen turret when the immediate wave weakens. Do not chase soldiers into the adjoining corridors; the goal is to protect Alyx and hold the chamber while the teleporter descends and resets.
The room may become briefly quiet before the sequence is complete. Continue defending until Alyx announces that the teleporter is ready. Then enter it with her immediately. If Alyx stands in the way or the sequence does not advance after the defense is clearly over, reload the save made before the holdout and repeat the setup without moving the turrets into the characters’ path.
- Cover all three teleporter-room approaches.
- Protect the exposed glass-floor turret.
- Enter the teleporter only after Alyx gives the signal.
7. Confirm the chapter transition
Allow the complete teleportation scene to play. Gordon and Alyx arrive at Dr. Kleiner’s laboratory after the delayed teleport, and the laboratory conversation explains what happened to Nova Prospekt. Do not quit during this sequence.
Alyx remains with Kleiner while Gordon leaves with Dog. Follow Dog into the main hallway. Use the supply area if needed, then go to the newly opened elevator shaft and drop down it. The shaft is the intended end of Entanglement and loads Anticitizen One.
Make a new manual save after Anticitizen One loads if you want a clean starting point for the uprising chapter. Entanglement is complete when Gordon has arrived at Kleiner’s lab, departed with Dog, and entered the shaft.
- Let the teleporter arrival scene finish.
- Leave the laboratory with Dog.
- Drop through the shaft and load Anticitizen One.
Before you move on
- Alyx has been reunited with Gordon at the train-track entrance and the force field has been disabled.
- The first two-turret control-room defense and the three-turret cellblock defense have been completed.
- Eli and Mossman have been reached at the Combine teleporter.
- The final teleporter defense has ended, Alyx has announced that the teleporter is ready, and Gordon has entered with her.
- Gordon has arrived at Dr. Kleiner’s laboratory, left with Dog, and dropped through the shaft into Anticitizen One.
Anticitizen One — City 17 Uprising and Momentum
Anticitizen One begins outside Dr. Kleiner’s lab after the teleportation delay has turned City 17 into an active war zone. Follow Dog into the streets, gather a Resistance squad, and lead it through the hopper field, the barricade, the Combine base, and the car-park assault. When the squad reaches a toxic flooded passage, use the wrecked vehicles and pipes as stepping stones; the route then continues through ruined apartments and a besieged Rebel position. Reunite with Alyx, survive the generator-plaza defense, and use the Gravity Gun to destroy the exposed generator core. Alyx is separated from Gordon afterward. Continue alone through the sewer, then fight through the factory’s catwalks and Combine defenses. The chapter is complete only after the factory exit triggers the loading transition into Follow Freeman!.
1. Follow Dog and assemble the first Resistance squad
Leave Kleiner’s lab and follow Dog into the damaged street. Do not try to fight ahead of him; he destroys the initial obstacles and clears the immediate Combine presence. When Dog pulls away a large metal barrier, go through the opening and turn into the dark alley. Jump the bent fence, enter the damaged apartment, and crawl under the low obstruction to reach the outside area where a Resistance fighter is battling scanners.
Continue toward the street where several Rebels are pulling down a large Combine screen. These fighters join Gordon. Follow the on-screen squad-command instruction by ordering the Rebels to a nearby position and then recalling them. This triggers the next Combine attack and opens the metal door near the statue. Use the Resistance fighters as support, then save if you want a recovery point before the minefield.
- Follow Dog through the first barrier instead of searching for a side route.
- Reach the Rebels near the large Combine screen.
- Complete the squad-command prompt and pass through the opened door.
2. Cross the hopper field and reach the barricade approach
A Rebel warns you about hopper mines. Pull the metal covering away from the floor opening and use the Gravity Gun to lift the red-glowing hoppers from the ground. Releasing them after they are lifted deactivates them; do not shoot them into the air while your squad is nearby. Drop into the lower area and neutralize the remaining hoppers before leading the group through the office and alley.
On the street, avoid wasting ammunition on the distant Strider. Shoot Combine soldiers in the lookout positions and watch for hoppers dropped by scanners. Continue through the side alley, remove the mines near the truck, and enter the connected yards. Combine fire comes from windows and from the ground. Disable the hopper near the explosive barrel before shooting the barrel, then clear the red office and collect supplies.
Leave through the adjacent door and follow the Rebels to the forward camp. If you have lost squad members, additional fighters can join here. Enter the basement route beneath the camp, clear the Combine in the offices, and use the hole in the floor to reach the street behind the main barricade.
- Deactivate the hopper mines with the Gravity Gun.
- Ignore the Strider unless it directly blocks the route.
- Reach the street behind the Combine barricade.
3. Flank and breach the Combine barricade
Do not attack the barricade from the open street. Its defenders can continue reinforcing the front. Instead, use the blue car and the damaged storefront to cross into the building opposite the barricade. Move upstairs, clear the Combine and hopper near the entrance, and continue to the guarded room. Take the supplies, drop to the lower level, and exit into the street behind the barricade.
Eliminate the soldiers on the barricade, then use the control near the health station to open the way forward. Heal and collect ammunition before entering the Combine base. The interior is a close-range fight through connected office levels. Stay in front of the squad, check side rooms as you advance, and use the Shotgun against soldiers who appear at short distance.
At the basement, three turrets guard a hole leading onward. Deal with the hidden turret around the corner first, then knock over the two visible turrets with a grenade or the Gravity Gun. Drop through the opening and continue to the loading transition into the car-park section.
- Use the building flank rather than crossing the barricade’s front.
- Open the barricade from behind.
- Disable all three turrets before dropping into the lower passage.
4. Survive the car park, destroy the obstruction, and cross the toxic tunnel
The car-park passage fills with manhacks. Keep moving toward the fuel tanker and use the Gravity Gun to throw manhacks into walls. Go around the tanker through the opening at the right, shoot the lock from the gate, and continue down the next corridor. More manhacks enter through the windows, so avoid stopping in the middle of the passage.
At the far end, Combine soldiers and mounted gunners cover the route. Use the explosive barrel near the right gunner, then approach the left gunner from behind the blue car. Once the position is clear, reach the Rebels preparing charges at the collapsed section. Take the mounted gun and hold the approach while they work. Leave through the opening when they signal that the route is ready.
Your squad cannot follow through the radioactive water. Step across the wrecked cars, spools, and other debris without falling into the liquid. Zombies emerge from the water, so use the Shotgun or pistol to expose them before they reach your stepping stones. At the far side, climb onto the white car, use the fallen pipe to reach the vent, and follow the vent back to the parallel corridor. Open the door to reunite with the surviving Rebels.
- Keep advancing through the manhack tunnel.
- Defend the charge-setting Rebels until the opening is made.
- Cross the radioactive water using the vehicles and debris.
5. Fight through the ruined apartments and reunite with Alyx
After the toxic passage, stay near the entrance when the incoming headcrab missile strikes; move away from the impact point and let the attack finish. Follow the covered sidewalk into the apartment route, then descend through the hole with the supplies. Fight through the alley and connected buildings, checking upper floors and stairwells rather than attempting to force locked doors.
Use the upper route to cross the broken skybridge and enter the next apartment. Eliminate Combine above the alley before your squad advances into the hoppers below. In the burning building, climb to the upper floor, collect health and ammunition, and lower the bridge. Clear the rooftop defenders first so the Rebels can cross safely. On the far side, use the floor opening and proceed downward through the headcrab and zombie rooms.
When you reach the apartment section with turrets, knock them over with grenades or the Gravity Gun. After the turrets are disabled, Alyx breaks through the door. Follow her through the control area and eliminate the remaining Combine. She explains that the generator outside must be disabled and opens the route to the plaza.
- Move away from the headcrab missile impact.
- Clear rooftop enemies before sending the squad across the bridge.
- Disable the turrets and trigger Alyx’s arrival.
6. Defend the generator plaza and destroy the core
Clear the small station beside the generator, then enter the plaza. Gather the nearby supplies and reposition the hopper mines around the two enemy approaches if you want extra defenses. The useful cover is the wall near the fountain and Alyx’s control position; the large gate behind the fountain is not the main attack route.
Hold the plaza while Alyx works on the generator. Combine troops advance from the blocked streets, so use the wall as cover and switch between the AR2, Magnum, Crossbow, and Shotgun according to range. Return to Alyx’s position for the health and suit chargers when necessary, but do not abandon the plaza before the generator sequence advances.
Alyx announces the generator’s stages as its outer protection, inner protection, and core are exposed. When she tells you the core is ready, use the Gravity Gun to strike the exposed energy ball. The gate opens after the generator is destroyed. Move through it promptly with Alyx, then follow her to the ravine. She climbs onto the roof and tells Gordon to continue alone. Drop into the ravine and enter the sewer opening.
- Hold the generator plaza until Alyx exposes the core.
- Use the Gravity Gun on the exposed energy ball.
- Pass through the opened gate and enter the sewer after Alyx separates from Gordon.
7. Cross the sewer and clear the factory
Inside the sewer, descend the damaged stairway and deal with the two Combine soldiers. Enter the small side room beside the locked double doors and use the Gravity Gun through the window to pull away the bar. In the canal beyond, let Combine and zombies damage each other before finishing the survivors. Watch for poison headcrabs and barnacles, and use the visible ladder and pipe routes rather than dropping into hazardous areas.
After the loading transition, push open the gate, remove the locking bar, and use the barrels beneath the platform to make a ramp to the pipes. Follow the vent into the next room, destroy the manhacks, and collect the health and suit supplies. Descend through the broken stairwells while the Combine fight the zombies below.
The double doors at the bottom are barred from the other side. Enter the supply room, kill the headcrab, and use the Gravity Gun through the window to remove the bar. Continue along the alley, allow the zombies and Combine to weaken each other, then climb the ladder behind the post and enter the factory through the pipe gap.
Cross the factory catwalk to the office and pull the switch. Use the office as cover while the moving platform comes into position. Ride it upward, taking care around the soldiers on the platform and the Combine Elites near the water tower. Continue along the upper pipes and catwalks, using the ladder as cover against the Elites. Pull up the final hoppers, drop through the open door, and continue until the loading screen for Follow Freeman! appears.
- Use the Gravity Gun to open the sewer and double doors.
- Reach the factory through the pipe gap.
- Survive the upper catwalks and trigger the Follow Freeman! loading transition.
Before you move on
- Gordon has formed a Resistance squad after following Dog from Kleiner’s lab.
- The Combine barricade and interior base are breached, and the car-park obstruction is destroyed.
- Gordon has crossed the radioactive tunnel and fought through the ruined apartments.
- Alyx has helped Gordon reach the generator plaza, the exposed generator core has been destroyed with the Gravity Gun, and Alyx has separated at the ravine.
- Gordon has cleared the sewer and factory sections.
- The game loads Follow Freeman!, confirming that Anticitizen One is complete.
References for this chapter
Follow Freeman! — Capitol Assault and Strider Push
Follow Freeman! begins with Gordon joining the City 17 uprising and rescuing Barney from a sniper blockade. Use the ruined-building route and the infinite grenade supply to silence the sniper windows, then follow Barney toward the Capitol. Cross the suppression-device street by moving between the first shelter, central bunker, and second shelter. Release the captive refugees, remove the forcefield cable with the Gravity Gun, and enter the Overwatch Nexus. Inside, disable the three generator cores, first clearing bunker turrets and freeing the prisoners. The third generator is behind a lethal laser-trap room with a fixed machinery-and-pipe route. After the suppression device shuts down, climb to the roof, defeat the Gunship with guided RPG rockets, activate the skybridge, and descend into the Capitol grounds. Survive the Strider battles by using the central bunker, underground car park, ruined structures, and supplied rocket crates as successive cover. The chapter ends after the last Striders are destroyed and Dog lifts the obstruction that reveals the route into Our Benefactors.
1. Rescue Barney from the sniper blockade
Move with the refugees through the ruined streets and buildings. When the group reports that Barney is pinned down, use doorways, rubble, and vehicles as cover. Continue toward the damaged building and take the route through its lower area. Expect quick zombies before reaching the blue-lit stairwell that leads to the roof.
On the rooftop, use the grenade supply beside Barney’s position. The sniper soldiers are concealed in windows and are not practical targets for ordinary gunfire; throw grenades through the openings while remaining behind cover. Eliminate every sniper that is still firing before trying to move Barney forward. Clear any quick zombies in the stairwell with the shotgun or another close-range weapon.
Return to Barney after the windows are quiet. Follow him down through the junk pile to street level. He uses his Civil Protection card to open the gate. This is a good place for a manual save because the next route crosses an exposed street and several scripted fights.
- The rooftop sniper windows are silent.
- Barney is following Gordon.
- Barney has opened the Civil Protection gate.
- A manual save is available after the gate opens.
2. Cross the suppression-device street and enter the Capitol
Follow Barney through the adjacent building and courtyard. Poisonous headcrabs, Combine soldiers, red barrels, and a turret occupy the route, so clear the immediate threats before climbing through the building. Reach the upper floor, look toward the Capitol, and then descend by the indicated stair route. Watch for hoppers and floor turrets rather than trying to force a shortcut.
The suppression device fires a white energy beam across the street. Sprint from cover to the blue container or boxcar, then continue along the fence toward the first small suppression shelter. Enter the shelter and eliminate the Combine inside. Leave through its side exit and move across the Capitol grounds using the central bunker whenever the beam or enemy fire makes the crossing unsafe.
Continue to the second suppression shelter. Break the ordinary padlock to release the captive refugees inside; they can assist during the nearby fight. Clear the Combine around the Capitol entrance. The suppression device does not cover the entrance closely, so use the doorway and nearby structures as cover. At the forcefield, use the Gravity Gun to pull the power cable out of its socket. The barrier drops, opening the Capitol. Save inside before entering the Nexus security areas.
- The first suppression shelter has been reached.
- The central bunker has been used as cover during the crossing.
- The captives in the second shelter have been released.
- The forcefield cable has been pulled from its socket.
- Gordon is inside the Capitol.
3. Clear the Nexus security and destroy the first two generators
In the lower Capitol wing, use the open double doors. The first bunker turret rises when its laser alarm is triggered. Stay out of its firing direction and throw a grenade into its exposed opening, or move around it if the route permits. In the large foyer, keep to the route left of the staircase. Disable the next turret and move quickly past another turret position before it can lock onto you.
Upstairs, free the Resistance prisoners from their barrier cage before dealing with the defenses around the first generator. Destroy the two bunker turrets outside the generator room, then use the Gravity Gun to pull the glowing energy core out of its containment field and destroy it. The generator is disabled only when its core is removed and broken; there is no separate conventional switch to activate.
From the first generator, follow the connected hall and short outdoor walkway into the other wing. The approach to the second generator triggers an ambush that can seal the room around Gordon. Use the doorway, furniture, and nearby explosives as cover while Combine soldiers attack through the openings. Clear the ambush, deal with the hallway turret, and destroy the second generator’s energy core. Save before returning to the main stair route for the final generator.
- The first generator core is destroyed.
- The Resistance prisoners have been released.
- The second-generator ambush has been survived.
- The second generator core is destroyed.
- A manual save is available before the laser-trap route.
4. Cross the laser traps and destroy the final generator
Reach the remaining generator from the main staircase, on the side opposite the second generator. The laser-trap room is fatal if a beam is touched. Step onto the first machine to bypass the opening grid. Use the small platform to jump over the group of four beams, then jump onto the circular machine section to pass the next grid.
Crouch under the following beam. Duck beneath the gray pipe, climb onto the pipe, and vault over the bookcase. Once across, disable the trap controls so Barney and the other Resistance members can rejoin you. Do not try to lead them through the active beams.
Enter the final generator room and remove the third energy core with the Gravity Gun. When all three generators are destroyed, Barney announces that the suppression device is down. Return to the lobby and fight through the Combine reinforcements. Use the doorway marked by the green EXIT sign to reach the roof-access stairway. Restock health, suit power, ammunition, and rockets before climbing. Three additional refugees join this part of the assault.
- The laser room has been crossed without touching a beam.
- The laser system has been disabled for the Resistance group.
- The third generator core is destroyed.
- Barney confirms that the suppression device is down.
- The roof-access stairs are open.
5. Defeat the rooftop Gunship and activate the skybridge
Continue up to the rooftops and clear the Combine soldiers and fixed turret from behind solid cover. A Gunship arrives after the rooftop fighting begins. Take rockets from the supplied crate and fire from behind containers, machinery, or other hard cover. Keep the reticle on each rocket so it curves into the Gunship; after firing, return to cover while the Gunship circles and strafes.
The crate provides enough rockets for the encounter, so do not risk exposed crossings to collect ammunition during the attack. If the Gunship moves behind a building, wait for it to return rather than chasing it. Continue guiding rockets until the destruction sequence occurs, then refill health and suit power.
A dropship sequence opens the gate near the dispensers. Clear the Combine on the far side, move through the gate, and climb to the skybridge controls. Activate the bridge so the Resistance can cross. Continue into the damaged, burning stairway in the adjoining structure and descend toward the street. This transition leads into the Strider section; it does not end Follow Freeman!.
- The rooftop Gunship has been destroyed.
- The rooftop Combine and turret are cleared.
- The gate near the health and suit dispensers is open.
- The skybridge has been activated.
- The damaged stairway to the street is accessible.
6. Survive the Capitol-ground Striders and follow Dog
After descending from the building, reach the central bunker as quickly as possible. From Gordon’s starting side, move through the fiery trench and the tunnel with medical supplies; the slope at the far end leads into the bunker. Heal, save, and collect rockets. Resistance fighters help attack the Striders, but use the bunker and surrounding structures to avoid cannon fire.
Move from the bunker toward the first suppression shelter and collect rockets from the crate beneath the colonnade. Destroy the nearby Striders one at a time, firing from cover and guiding every RPG to its target. When the immediate grounds are clear, return toward the original approach. The entrance is closed, but a nearby barrier is now inactive. Find the stairs into the underground car park.
Fight through the car park while staying below the Strider’s line of fire. Searchers can reveal your position, so destroy them when they block the route. Ascend through the damaged levels and use the fallen girder and exposed framework to reach the upper section. The stairwell contains another rocket supply. Use it to destroy the Strider outside, then drop through the indicated opening and regroup with the refugees and medic.
Clear the two Combine waves in the fiery mini-car park. Use the debris and pavement opening to reach the next street, then enter the roofless building foundation. The structure provides the necessary cover while the Striders attack. After the building opens a route upward, use its health and suit dispensers, collect the nearby rockets, and destroy the patrolling Strider. A second Strider arrives after the surrounding Combine are defeated; remain under cover and destroy it as well.
When both rooftop Striders are down, cross the rusty girders near the rocket supply and drop onto the dumpster below. Clear the remaining street enemies. Dog appears, walks to the obstruction, and lifts it to reveal a hole. Drop through the opening and allow the loading transition to complete. The next chapter, Our Benefactors, confirms that Follow Freeman! is finished.
- The Capitol-ground Striders near the first bunker are destroyed.
- The underground car park route is complete.
- The first upper-route Strider is destroyed.
- The final two Striders at the ruined building are destroyed.
- Dog has lifted the street obstruction.
- Our Benefactors loads after Gordon drops through the revealed hole.
Before you move on
- Barney has been rescued and has opened the Civil Protection gate.
- The suppression-device crossing and Capitol forcefield are complete.
- All three Overwatch Nexus generator cores are destroyed.
- The rooftop Gunship is destroyed.
- The skybridge is activated and the damaged stairway is open.
- The Capitol-ground Striders and final rooftop Striders are defeated.
- Dog opens the obstruction and Our Benefactors loads.
- Follow Freeman! has ended without entering the Citadel reactor or reaching Dr. Breen.
Our Benefactors & Dark Energy — Final Confrontation and Ending
Our Benefactors carries Gordon through the Citadel’s final interior ascent. Cross the rock ledges, choose the far transport-pod line, survive the confiscation field with the overcharged Gravity Gun, remove energy orbs from force-field generators, defeat the Strider with the Citadel’s own energy orbs, and board the next pod. Dark Energy begins after that ride. Let the opening confrontation play until Mossman frees Gordon, Eli, and Alyx, then follow Alyx through the Citadel and recover the Gravity Gun before entering the dark-fusion reactor shaft. Climb the moving platforms, recharge when possible, and reach the top before Breen escapes. When the portal is exposed, immediately fire energy orbs into its core. The rotating shield sections must be shattered with additional orbs while gunships attack. Destroy the complete shield assembly before the timer expires, then let the reactor detonate and allow the ending and credits to finish. These are separate chapters in the original 2005 Xbox campaign, even though this guide section covers them together.
Enter the Citadel and take the safe transport pod
When Follow Freeman! ends, continue through the Citadel’s exposed lower structure. Follow the rock ledges downward, cross the sloped section, and use the moving platform to reach the Citadel entrance. The route is narrow and surrounded by deep drops, so make each jump from the intended ledge rather than trying to cross the central gaps. Once inside, follow the machinery-lined passage until you reach the chamber where the transport pods run on two parallel lines.
The nearer line carries pods into the matter-disintegration beam. Do not use it. Move around to the far side of the chamber and wait for a pod from the second line to open toward you. Use the pod and remain inside for the automated ride. The journey passes through the Citadel and ends at the confiscation field; leaving early is not necessary and can kill Gordon.
- Cross the exterior rock route and enter the Citadel.
- Reach the chamber with two transport-pod lines.
- Use a pod from the far line, not the line leading into the disintegration beam.
- Remain inside until the ride ends at the confiscation field.
Escape the confiscation field with the overcharged Gravity Gun
The confiscation field removes Gordon’s conventional weapons and ammunition. It does not remove the Gravity Gun; instead, the weapon becomes overcharged. Use it to pull Combine soldiers toward Gordon or blast them away at close range. Large consoles, empty transport pods, and other heavy metal objects can be held in front of you as cover while crossing exposed industrial areas.
Follow the open route through the Citadel. When a force field blocks a passage, locate the nearby energy-orb generator and pull its orb free with the Gravity Gun. Removing the orb drops the force field. Recharge health and suit power at the available stations before the elevator defense and before the Strider hall. Do not wait for the normal weapons to return during this chapter; the overcharged Gravity Gun is the intended weapon.
- Use the overcharged Gravity Gun against Combine soldiers.
- Carry a large metal object as cover when crossing exposed areas.
- Pull energy orbs from generators to remove force fields.
- Recharge before the elevator defense and the Strider encounter.
Defend the elevator and destroy the Strider
At the circular elevator room, press the control to call the lift. Combine soldiers, manhacks, and scanners attack while it arrives. Use a broad console or another large object as a shield, and keep enemies from surrounding the elevator platform. When the lift arrives, step onto it and continue fighting as it rises. The elevator pauses at intermediate levels until the attacking troops are defeated.
After the lift section, follow the passage to the long hall containing the Strider. Use the rows of transport pods, metal supports, and nearby structural cover to avoid its cannon. Clear the Combine soldiers that can flank you, then pull the red-orange energy orbs from the conduits beside the hall and fire them into the Strider. Aim for its body or legs and keep moving between cover. The Strider is the objective; ordinary debris is not a substitute for the conduit orbs.
After the Strider falls, continue through the opening beyond it. Remove the energy orbs from the next generator to lower the force field, then drop down and recharge. Enter the next transport pod. This ride carries Gordon upward and ends Our Benefactors when the loading transition into Dark Energy appears.
- Survive the elevator defense.
- Use conduit energy orbs to destroy the Strider.
- Remove the next generator’s orbs and recharge afterward.
- Board the second transport pod and confirm the transition to Dark Energy.
Let Mossman free the prisoners and recover the Gravity Gun
Dark Energy opens with Gordon held in Breen’s office alongside Eli and Alyx. Do not try to interrupt the confrontation. Wait through the dialogue until Mossman turns against Breen and releases the prisoners. Follow Alyx through the opened route and use the directed elevator when she moves ahead.
Breen takes the overcharged Gravity Gun during the escape. Do not expect to retain its one-hit-kill power through the rest of the chapter. Continue through the Citadel with Alyx, fight the Combine with the weapons and equipment provided by the sequence, and retrieve the normal Gravity Gun when the route supplies it. Use the health and suit stations before entering the reactor shaft. Stay on the platforms and near railings; falling into the shaft is fatal.
- Allow the office confrontation and Mossman’s release sequence to finish.
- Follow Alyx through the opened route.
- Do not rely on retaining the overcharged Gravity Gun.
- Recover the normal Gravity Gun before the reactor climb.
- Recharge before entering the reactor shaft.
Climb the dark-fusion reactor shaft
Follow Alyx to the reactor shaft and descend onto the first moving platform. Ride the platforms around the shaft, stepping onto each stable ledge when it reaches your level. Combine soldiers occupy several landings, so eliminate them before making the next jump. Keep Gordon near the center of each platform and avoid jumping toward the open shaft.
Continue upward through the successive platforms and short walkways. Use the normal Gravity Gun to move obstructing objects and to handle the energy orbs encountered along the route. A health and suit station is available during the ascent; use it before the final moving platform if you need recovery. At the top, move onto the final reactor platform and approach the exposed portal area. The finale starts as Breen continues toward the portal, so do not pause to explore once the platform opens.
- Ride the moving platforms around the reactor shaft.
- Defeat Combine soldiers on each landing before advancing.
- Stay away from the open central drop.
- Use the available health and suit station before the final ascent.
- Reach the top reactor platform before Breen escapes.
Destroy the portal machinery before the timer expires
As soon as the shield drops and the portal is visible between the reactor rings, pull an energy orb from one of the nearby streams and fire it into the portal’s core. Start immediately; the sequence is timed, and the gunships will attack while you work. After the first successful hit, rotating metal shield sections extend around the reactor.
Use more energy orbs to break the shield sections. The pieces shatter when struck. Continue pulling fresh orbs and firing at every visible section rather than waiting for the gunships to become a separate objective. If the shield rotates and blocks the center, shoot the exposed section or fire through the opening as it passes. Move along the platform and use the reactor structure or nearby cover to reduce incoming fire, but prioritize destroying the machinery.
The finale ends when the complete rotating shield assembly has been broken and the portal machinery fails. You do not need to destroy the gunships manually. If the timer expires, reload the most recent save and begin the orb attack sooner, firing continuously instead of trying to line up a perfect shot.
- Fire the first energy orb immediately after the portal is exposed.
- Shatter every rotating shield section with additional orbs.
- Ignore the gunships unless they prevent movement or targeting.
- Finish the shield assembly before the timed sequence fails.
- Confirm that the reactor and portal machinery collapse.
Watch the ending and finish the campaign
After the reactor is destroyed, stop attempting to navigate the platform and allow the scripted ending to play. The game takes control for the closing sequence, including the final intervention and transition to the credits. Do not reset the console, quit to the dashboard, or reload during this sequence if you want to see the complete ending presentation.
Let the credits run to completion. The original Xbox Half-Life 2 campaign is finished when the reactor destruction has occurred, the closing sequence has played, and the credits have ended. Episode One, Episode Two, and the Xbox 360 Orange Box edition are separate releases and are not required for this goal. Keep an earlier manual save if you want a practical replay point, preferably one made before the final reactor-platform sequence.
- The reactor and portal machinery have been destroyed.
- The closing scripted sequence has played.
- The credits have finished.
- The original Xbox Half-Life 2 campaign is complete.
- No Episode or Orange Box content is required.
Before you move on
- Our Benefactors has been completed and the second transport pod has carried Gordon into Dark Energy.
- The Strider has been destroyed with Citadel energy orbs.
- The normal Gravity Gun has been recovered before the final reactor climb.
- The upper reactor platform has been reached.
- The portal has been struck with an energy orb and every rotating shield section has been destroyed.
- The reactor and portal machinery have collapsed.
- The closing cinematic has played and the credits have finished.
- The original Xbox Half-Life 2 campaign is complete; Episode One, Episode Two, and Orange Box content are not required.
References for this chapter
- Half-Life 2 — Our Benefactors — StrategyWiki
- Half-Life 2 — Dark Energy — StrategyWiki
- Half-Life 2 Walkthrough — Chapter 12: Our Benefactors — Reaching the Elevator
- Half-Life 2 Walkthrough — GameSpot
- Half-Life 2 — Guide and Walkthrough — Xbox — Shotgunnova
- How do I get past the ending teleportation bit? — Half-Life 2 Q&A for Xbox
Finishing up
You have completed every main chapter included on the original Xbox release through and including Dark Energy and have watched the ending sequence and credits.
You resolved the required campaign objectives, including reaching Black Mesa East and acquiring the Gravity Gun, escaping Ravenholm, completing the Nova Prospekt and Entanglement sequence, disabling the suppression device, surviving the Citadel ascent, and defeating Breen’s portal.
You retained a useful in-campaign save if you want to replay the final sections or revisit earlier chapter saves.
You reached the ending on the original 2005 Xbox release. Episode One, Episode Two, Orange Box content, and optional collectibles are outside this completion goal.
Choose your next gameScreenshots & video
Game imagery for reference. Follow the written chapters above for the route and strategies.
Sources & references
Our original guide draws on the references below. Check the edition at the top of this page before following controls or unlock requirements.
- Half-Life 2 — Guide and Walkthrough — Xbox — Shotgunnova
- Half-Life 2/Point Insertion — StrategyWiki
- Half-Life 2 Xbox Manual
- Half-Life 2/Controls — StrategyWiki
- Half-Life 2 Walkthrough — GameSpot
- Half-Life 2 — A Red Letter Day Strategy Guide
- Half-Life 2 Official eGuide — Chapter 12: Follow Freeman!
- Half-Life 2 Xbox Strategy Guide Archive
- Half-Life 2 — Route Kanal — StrategyWiki
- Chapter 3: Route Kanal — Prima Official eGuide
- Half-Life 2 — Valve Developer Community
- Half-Life 2/Water Hazard — StrategyWiki
- Chapter 7 | Highway 17 — Prima Official eGuide
- Half-Life 2/Black Mesa East — StrategyWiki
- Half-Life 2 Gravity Gun Challenge Guide — Xbox — GameFAQs
- Half-Life 2 Walkthrough for Chapter 6 — Ravenholm: The Church and the Cemetery — Altered Gamer
- Half-Life 2 — Chapter 7: Highway 17 — StrategyWiki
- Half-Life 2 Xbox Review – GameSpot
- Half-Life 2/Sandtraps – StrategyWiki
- Half-Life 2/Nova Prospekt - StrategyWiki
- Part 22: Nova Prospekt - Half-Life 2 | Ludo
- Half-Life 2 - Full Game Walkthrough | Original Xbox via Xemu
- Half-Life 2/Entanglement — StrategyWiki
- The Fight to the Nova Prospekt Teleporter — Half-Life 2 Walkthrough
- Half-Life 2 Walkthrough — Anticitizen One: A Bittersweet Reunion at the Rebel Base — Altered Gamer
- Half-Life 2 Walkthrough — Anticitizen One: The Sewers and the Factory — Altered Gamer
- Half-Life 2 — Anticitizen One — StrategyWiki
- Half-Life 2 — Follow Freeman! — StrategyWiki
- Half-Life 2 — Our Benefactors — StrategyWiki
- Half-Life 2 — Dark Energy — StrategyWiki
- Half-Life 2 Walkthrough — Chapter 12: Our Benefactors — Reaching the Elevator
- How do I get past the ending teleportation bit? — Half-Life 2 Q&A for Xbox
About the game & collecting notes
- Platform
- Xbox
Step-by-step campaign walkthrough for the original 2005 Xbox release of Half‑Life 2. This guide covers every required chapter from the opening train ride through the Citadel finale, practical tactics for combat and physics puzzles on the original Xbox hardware, save/save-slot advice, recovery from common failures, and a completion checklist for the true game ending.
Darryl Polo
Darryl Polo loves tinkering with emulation and revisiting retro games. He enjoys exploring how old favorites play on different setups and sharing what he learns along the way. At Joking Joystick, he writes about the games, hardware, and small discoveries that keep the hobby fun.
Our editorial standardsFound a step that needs another look? Help us improve this guide.