
Hades (Nintendo Switch) — Complete Campaign Walkthrough
Step-by-step campaign walkthrough for Hades on Nintendo Switch: prepare the House, improve the Mirror and weapons, clear Tartarus, Asphodel, Elysium and the Temple of Styx, defeat Hades, complete ten successful escapes to trigger Persephone's return and the credits, then complete the separate Queen's Plan and Family Reunion objectives for the narrative epilogue.

Find a copy
Hades Nintendo Switch
We may earn a commission if you buy through these links, at no extra cost to you. As an Amazon Associate I earn from qualifying purchases.
Opens retailer search results. Check the model, edition, seller, availability and current price before buying.
Before you begin
This guide is written for players using the Nintendo Switch edition of Hades.
It concentrates on concrete, repeatable advice: how to set up the Switch controls, prepare the House between runs, choose weapons and Boons, route each region (Tartarus, Asphodel, Elysium, Temple of Styx), and handle every boss encounter so you can escape and advance the story.
Hades is designed around repeated runs.
Expect to make many attempts while gradually unlocking permanent upgrades (Mirror of Night talents, weapon Aspects, House upgrades, keepsakes and Companions).
The walkthrough organizes what to do before a run, what to aim for during each region, how to handle the bosses, and what triggers the true ending and epilogue.
Set yourself up for the run
Switch setup: use a controller you find comfortable, such as a Joy-Con pair or Pro Controller.
Open Options and confirm the displayed button mapping before your first run.
If you prefer a different layout, keep Attack and Dash on buttons that are comfortable to use together.
Save and cross-save: the Switch version supports cross-saves with the Steam and Epic Games Store PC/Mac versions when you own both copies and configure the feature.
If you plan to move progress between PC and Switch, confirm the cross-save setup in the game menu before relying on it.
Beginner loadout: equip a forgiving Keepsake and use a weapon or Aspect whose attack rhythm you can learn safely.
Use the Mirror of Night’s early defensive talents first if survival is your priority.
Spend early Darkness on practical survivability or consistent-damage upgrades.
Save Gemstones for functional House Contractor work orders, and learn the common sources of Darkness, Gemstones, Keys, Nectar, Ambrosia and Titan Blood.
Play several no-Heat runs to learn weapon rhythm, enemy tells and how Boons modify your core actions.
Use the House Contractor for functional progression such as Fated List access, Fountains and regional Keepsake changes before prioritizing cosmetics.
Track character affinities: Nectar and Ambrosia advance relationships, favors and optional Companion progress.
When a Daedalus Hammer appears, read every offered upgrade and take one only if it strengthens the current weapon, Aspect or primary damage action.
Practice unfamiliar Hammer changes in ordinary chambers or low-pressure runs before adding Heat.
On runs that reach Temple of Styx, preserve enough health and Obols for a final upgrade, recovery purchase or the Hades encounter.
If a run becomes clearly underpowered, continue only through safe rewards or allow the attempt to end; do not use Give Up expecting to preserve resources gathered during that run.
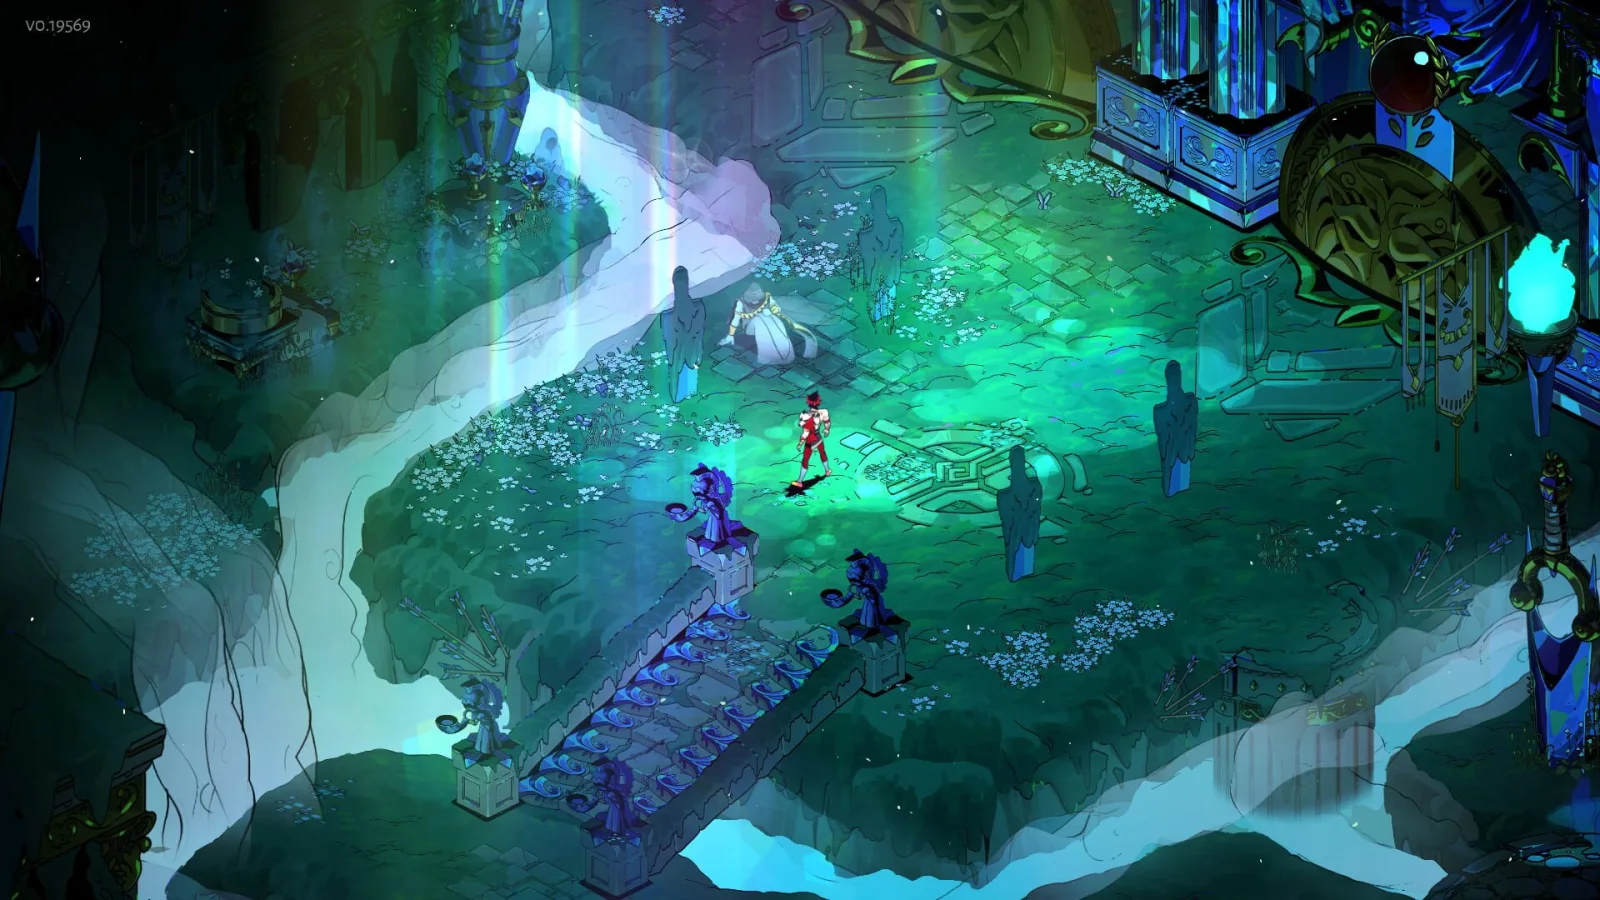
Switch Setup, Controls and First Runs
Set up Hades on Nintendo Switch before trying to optimize escape attempts. Confirm the displayed bindings instead of copying a layout from another platform, test your preferred controller, and use the Cross-Saves menu only if you own a matching PC copy. Your first two attempts are practice runs with no Pact of Punishment modifiers. Learn movement, Attack, Special, Cast, Dash timing, chamber rewards, and the basic Tartarus combat rhythm. A failed attempt still advances permanent progression through resources such as Darkness, Keys, and other items you successfully collect, while temporary Boons and run-specific upgrades are lost.
1. Confirm the Switch edition and test your controller
This chapter applies to Hades on Nintendo Switch, the original v1.0 release rather than Hades II or the later iOS version. The Switch edition launched alongside the completed version of the game on September 17, 2020. It supports handheld play, tabletop play, Joy-Con controllers, and compatible larger controllers such as the Nintendo Switch Pro Controller.
From the House of Hades or during a run, pause the game and open Options, then inspect the Controls section. Read the action labels shown for Attack, Special, Cast, Dash, Call, Interact, and Confirm. Do not rely on a PC, PlayStation, or Xbox guide for the button positions. Hades allows its gameplay bindings to be changed, and the labels visible on your Switch are the authority for your current setup.
Before leaving the House, move around the available safe area and test each combat action. Confirm that the controller registers movement, Attack, Special, Cast, and Dash without delayed inputs. A Pro Controller is optional, but its larger grips may be more comfortable during repeated runs. Handheld and single Joy-Con play are also viable if the layout feels manageable.
- Confirm that your controller responds before entering an escape attempt.
- Read the displayed binding for Dash instead of assuming it matches another platform.
- Test Attack, Special, Cast, Dash, and Interact once before entering Tartarus.
2. Place Attack and Dash where they can be used together
Attack and Dash are the most important early inputs. Attack should be reachable repeatedly without forcing your thumb into an awkward position, while Dash must be available quickly enough to escape an incoming strike. Many players prefer moving Dash to a shoulder button, but this is a comfort choice rather than a required setup. Use any arrangement that lets you keep moving while attacking and evading.
If you use a single Joy-Con, enter the first safe room and test the complete layout before committing to the attempt. If a button feels difficult to reach, pause and remap it immediately. Change one or two actions at a time so you can tell whether the new arrangement is helping. Keep Special, Cast, and Interact distinct enough that you will not confuse them during a crowded fight.
Practice pressing Dash while moving, then immediately press Attack. This creates the basic dash-strike rhythm used throughout the game. Dash is an evasive movement tool, not permanent immunity, so avoid spending it blindly into groups of enemies.
- Move and Dash without releasing the direction you are holding.
- Use Attack immediately after a Dash.
- Reach Special and Cast without confusing them with Dash or Interact.
3. Set up cross-save only if you own a supported PC copy
Cross-save is optional. It is useful only when you own Hades on Nintendo Switch and on Steam or the Epic Games Store for PC or Mac. From the Switch title screen, select Cross-Saves and follow the displayed account-linking instructions. The feature transfers supported save progress between the Switch version and those PC versions; it is not a universal transfer system for every console edition.
If you already intend to move between Switch and PC, link the accounts before spending substantial time on the save slot you plan to use. Keep the Switch connected to a stable internet connection, ensure the computer platform's cloud-save feature is enabled, and wait for synchronization to finish before closing the game. If you own only the Switch version, skip this menu. Local Switch progress does not require an account link.
When a synchronization conflict appears, read the progress information carefully and choose the save with the progress you intend to keep. Do not start a new slot casually if you are trying to transfer an existing campaign.
- Open Cross-Saves from the Switch title screen if you need the feature.
- Own separate copies on Switch and a supported PC storefront.
- Allow synchronization to finish before quitting or switching devices.
4. Start the first attempt without Pact modifiers
Leave the Pact of Punishment disabled during these introductory attempts. In a normal save, the Pact becomes available after you defeat Hades and successfully complete an escape. Until that point, there is no reason to plan around Heat. Begin an ordinary escape attempt from the House and enter Tartarus.
In each chamber, identify the enemies and hazards before committing to damage. Move around the room rather than standing still and trading hits. Use Dash to leave the path of an attack or to reposition, then resume attacking after the enemy finishes its animation. When the chamber is clear, collect the displayed reward and read what it affects before choosing. Pay attention to whether a reward is a Boon, a weapon upgrade, a resource, healing, or another temporary run benefit.
Do not judge the attempt only by whether you escape. The first objective is to learn how rooms close, how enemies telegraph attacks, and how reward doors shape a run. If Zagreus is defeated, permanent resources already collected during the attempt remain available for House progression, while temporary Boons and other run-specific effects do not carry into the next attempt.
- Begin with no Pact or Heat modifiers.
- Clear at least one chamber while moving instead of stationary damage trading.
- Read each reward description before selecting it.
5. Use the first two attempts as focused drills
On the first attempt, concentrate on the basic inputs. Use Attack, Special, Cast, and Dash in actual combat so their range, recovery, and timing become familiar. Watch enemy animations and Dash away before an attack reaches you. Do not repeatedly Dash into enemies simply because the movement feels fast; use the move to cross danger, create space, or approach from a safer angle.
On the second attempt, add combat rhythm. Open from a safe position, use Special or Cast when it fits the weapon and enemy group, and attack during recovery windows instead of chasing every target. If a room contains traps, keep the hazard behind or beside you whenever possible so it cannot cut off your retreat. Spend the attempt noticing which mistakes cost health and which attacks can be avoided by moving earlier.
After each attempt, return to the House and make one deliberate adjustment. Change one control if necessary, remember one enemy tell, or choose a different reward approach. Do not activate Heat merely because the Pact appears after a future victory. Learn the unmodified combat flow first, then add difficulty when you can consistently reach later regions.
- Complete two full attempts, ending when Zagreus escapes or is defeated.
- Use every core combat input during those attempts.
- After each attempt, identify one specific mistake and change one habit or setting.
- Enter Tartarus, clear a chamber, select a reward, and use Dash to avoid an incoming attack.
Before you move on
- The displayed controls let you move, Attack, Special, Cast, and Dash without hesitation.
- You have completed two full no-Heat escape attempts and can identify what caused each defeat or where each run ended.
- You know how to reach Cross-Saves from the Switch title screen and have either linked a supported PC copy or deliberately left the feature unused.
- You can enter Tartarus, clear a chamber, choose a reward, and use Dash to avoid an incoming attack instead of relying on stationary damage trading.
- You understand that Pact of Punishment is a later system unlocked after the first successful defeat of Hades.
House of Hades: Resources, Mirror of Night and Contractors
The House of Hades is where each escape attempt becomes permanent progress. Darkness improves Zagreus through the Mirror of Night, Chthonic Keys unlock weapons and additional Mirror talent rows, Gemstones pay for Contractor work orders, and Nectar begins relationships that provide Keepsakes. Ambrosia is rarer and is mainly reserved for later relationship milestones and Companion upgrades. Spend resources according to your next gameplay goal: survival and reliable damage first, functional House renovations second, and cosmetics or Broker trades only after they do not delay an important unlock.
Return to the House and separate permanent resources from run resources
After Zagreus dies or completes an escape attempt, walk through the House before beginning another run. The House displays and menus let you track Darkness, Chthonic Keys, Gemstones, Nectar, Ambrosia, Diamonds and Titan Blood. These currencies remain in your save file between attempts.
Do not confuse these resources with Charon’s Obols. Obols are temporary currency for the current escape attempt and disappear when the run ends. Spend them at shops or Wells before the attempt finishes. The permanent resources should instead be assigned to a long-term target such as a Mirror talent, weapon unlock, Contractor order or relationship milestone.
Darkness is most commonly earned from chambers and can also come from special encounters, prophecies, Broker trades and other unlocked systems. Gemstones and Chthonic Keys usually appear as chamber rewards. Nectar is found through selected chamber rewards, special encounters, prophecies and trades. Diamonds, Ambrosia and Titan Blood are chiefly tied to boss bounties, prophecies, special rewards and the Wretched Broker, so do not expect them to accumulate like ordinary chamber currency.
- Spend temporary Obols before the escape attempt ends.
- Check the Mirror, Contractor and Broker after returning to the House.
- Keep permanent resources assigned to a specific next unlock.
Spend Darkness at the Mirror of Night
The Mirror of Night is in Zagreus’s bedroom. Interact with it to spend Darkness on permanent talent ranks that apply to future escape attempts. For a newcomer, prioritize upgrades that make every run more forgiving: additional Death Defiance uses, greater maximum health, improved damage consistency or other broadly useful bonuses are generally more valuable than a talent designed around a narrow build.
The Mirror is not one fixed linear tree. Chthonic Keys unlock additional sections, and many rows contain two alternative talents. Once both choices are available, compare their descriptions and activate the one that matches your current weapon and habits. The two choices in a row do not stack with each other. You can change the active alternative while using the Mirror.
After the relevant Mirror progression and dialogue are available, you can also refund spent Darkness at the Mirror for a Chthonic Key. This returns the Darkness from purchased ranks and lets you rebuild, but the reset cost is separate from the Darkness returned. Use this when your preferred playstyle changes rather than repeatedly buying specialized ranks without a plan.
Do not delay every useful talent while saving for an expensive purchase. A practical approach is to buy affordable survival or damage ranks after most runs, then save only when a clearly valuable weapon unlock, Mirror section or Contractor order is close.
- Unlock and improve broadly useful survival talents first.
- Compare both choices in each available Mirror row.
- Use a Mirror reset when your active talent choices no longer suit your main weapon.
Use Chthonic Keys to open weapons and Mirror sections
Chthonic Keys are primarily chamber rewards during early progression. Spend them in the courtyard to unlock additional Infernal Arms and in the Mirror interface to open more talent rows. New weapons are not merely collection items: each gives you another way to solve difficult regions and can make a later escape easier by matching a boon or Hammer upgrade you already understand.
During the early game, unlock the next weapon or Mirror section that is available and relevant to your play. There is no need to keep a large stockpile once a useful option is ready. After the core weapons and Mirror rows are open, surplus Keys can support Broker trades or certain later systems. The Contractor’s Fated Keys work order can also give additional value to future Key chamber rewards by converting them into a reroll resource, but it should be treated as a later functional improvement rather than an early requirement.
- Unlock additional Infernal Arms as they become affordable.
- Open Mirror rows that contain useful talents.
- Consider later Key-enhancing Contractor work orders after core unlocks are covered.
Buy functional House Contractor work orders before decorative projects
The House Contractor is in the House of Hades. Gemstones pay for many work orders, while Diamonds and other rare resources are required for more advanced projects. Read each description before buying it because the Contractor offers both cosmetic renovations and changes that affect future escape attempts.
Useful functional projects include region Fountain Chambers, which can provide healing opportunities during later runs, the Fated List of Minor Prophecies, which creates long-term objectives and rewards, and other renovations that add or improve run systems. The available list expands as the story and Contractor progress, so do not assume every important order is available immediately.
The Keepsakes Collection, Regional work order is especially useful once you regularly want to change your plan between regions. It adds a Keepsake case in the transition area after a region boss. Without that work order, equip one Keepsake before the run and keep it for the attempt. With it, you can replace the current Keepsake between regions, but once a Keepsake has been removed it cannot be equipped again during that same run. The case also locks after you close it, so choose the replacement carefully.
Buy a Fountain or other run-affecting order before a purely visual renovation when you are still struggling to escape. Cosmetic purchases are safe to delay because they do not improve Zagreus’s combat performance.
- Inspect the Contractor after major story conversations.
- Prioritize Fountains, the Fated List and other run-affecting projects.
- Buy the regional Keepsake work order when swapping Keepsakes between biomes fits your strategy.
- Remember that a removed Keepsake cannot be re-equipped during that run.
Give Nectar deliberately and reserve Ambrosia for confirmed progress
Nectar is used on characters in the House and Underworld to begin or advance affinity. The first gift to many characters unlocks that character’s Keepsake, so after giving Nectar, check the Keepsake display in the House and equip the new item before a later escape if its effect suits your goal. You do not need to give every available Nectar immediately; prioritize characters whose Keepsakes or conversations help your current plan.
Ambrosia is rarer and should not be spent simply because it is available. After several Nectar gifts, a character may present a locked heart that requires a character-specific favor or other story condition. Once that condition is complete, Ambrosia can advance the relationship. Ambrosia is also used to upgrade unlocked Companions. Check the character’s heart display or Companion description before spending it so that the gift produces the progress you want.
Relationship progress may require several House returns and conversations. If a character has no new dialogue, continue making escape attempts and speak with them again after future runs. Keep enough Nectar and Ambrosia for relationships or Companion upgrades that you have deliberately chosen rather than trading them away casually.
- Use early Nectar to unlock useful Keepsakes.
- Check a character’s locked heart and favor before giving Ambrosia.
- Reserve Ambrosia for confirmed relationship or Companion progress.
Check the Wretched Broker only after protecting your next upgrade
The Wretched Broker is in the House lounge and offers rotating resource exchanges. Before accepting a trade, identify the next Mirror rank, Contractor order, Keepsake-related purchase or relationship milestone you are saving for. A trade that converts Gemstones or Keys may be useful after your early unlocks, but it can delay a more important functional purchase if made too soon.
Use the Broker to convert surplus resources once your immediate priorities are secured. Broker offers change, so inspect the available trades after returning from an attempt. Do not assume that a rare-looking exchange is automatically good: compare the cost against the resource’s other uses, especially for Nectar, Ambrosia, Diamonds and Titan Blood.
- Plan your next permanent purchase before visiting the Broker.
- Protect rare resources needed for known favors or upgrades.
- Use surplus Keys and Gemstones for trades after core progression is covered.
Before you move on
- You can locate the Mirror of Night, House Contractor and Wretched Broker without entering an escape attempt.
- You have spent Darkness on practical Mirror talents and understand that each two-choice row allows only one active alternative at a time.
- You have used Chthonic Keys to unlock a useful weapon or Mirror section instead of hoarding them without a target.
- You have purchased at least one functional Contractor work order before prioritizing optional decoration.
- You understand that Keepsake changes between regions require the regional Keepsake work order and that a removed Keepsake cannot return during the same run.
- You have given Nectar to at least one useful character and are reserving Ambrosia for a confirmed relationship or Companion upgrade.
Weapons, Aspects and the Daedalus Hammer
Hades has six Infernal Arms, each with four total Aspects: Zagreus, two visible alternatives and one hidden form. Stygius is available immediately; the other weapons require Chthonic Keys, with Malphon and Exagryph gated behind earlier weapon unlocks. The Aspect panel does not appear simply because all six weapons are purchased: collect at least one Titan Blood and complete the relevant House progression or conversation, then revisit the Arsenal. Titan Blood permanently unlocks and upgrades Aspects. Hidden Aspects require additional story, dialogue and weapon-investment conditions, beginning with Guan Yu for Varatha. During an escape attempt, Daedalus Hammers provide temporary weapon changes. Select upgrades that reinforce the action your weapon, Aspect and Boons already use, and test altered timing before the next boss.
1. Unlock the six Infernal Arms
The Arsenal is in the House of Hades courtyard, beside the exit used to begin an escape attempt. Stygius, the Stygian Blade, is available from the start. The other weapons use Chthonic Keys: Coronacht, the Heart-Seeking Bow, costs 1; Aegis, the Shield of Chaos, costs 3; Varatha, the Eternal Spear, costs 4; Malphon, the Twin Fists, costs 8 after the first four additional weapons have been unlocked; and Exagryph, the Adamant Rail, costs 8 after all five other weapons are available.
Coronacht, Aegis and Varatha can be purchased in any order. Buy whichever of these three fits your next practice goal when you have enough Keys. After the first four non-Stygius weapons are available, Malphon becomes purchasable. After all five non-Stygius weapons are available, Exagryph becomes purchasable. The game does not require you to follow the order listed above for the first three purchases.
Test every weapon in a low-pressure escape rather than judging it from the courtyard alone. Stygius uses close-range Attacks and an area Special. Varatha has long-reaching thrusts, a charged spin and a thrown-and-recalled Special. Aegis can block while Bull Rush is charging and throws its shield as a bouncing Special. Coronacht rewards charged shots and has a spread Special. Malphon relies on rapid close-range Attacks and movement. Exagryph uses ammunition that must be reloaded after its magazine is spent. These are starting patterns only; Hammers, Boons and Aspects can change the best use of any weapon.
- Unlock Stygius, Coronacht, Aegis, Varatha, Malphon and Exagryph.
- Remember that Coronacht, Aegis and Varatha are not locked to a fixed purchase order.
- Practice Attack, Special, Dash-Strike and Cast interactions with each weapon before committing to a difficult escape attempt.
2. Open the Aspect panel after the required House progression
The Aspect panel is not guaranteed to appear immediately after the sixth Infernal Arm is purchased. First unlock all six weapons, collect at least one Titan Blood, and complete the relevant House progression or conversation that introduces weapon customization. Then return to the House on a later visit and check the Arsenal again. If the panel is still absent, speak with the available House characters and inspect the Arsenal after the next return; the trigger is tied to House progression rather than to the weapon purchases alone.
Aspects are permanent configurations for a weapon. Each Infernal Arm has four total Aspects: the default Aspect of Zagreus, two visible alternate Aspects and one hidden Aspect. Titan Blood is used to reveal or purchase available forms and to upgrade their ranks. The upgrades remain available on future escape attempts, unlike Daedalus Hammer effects.
The Aspect of Zagreus is a valid starting choice and is not automatically inferior. Alternate Aspects change a specific weapon property, such as Attack speed, Special behavior, Cast handling, ammunition, charge behavior or another core function. Read the exact description in the Arsenal before spending Blood, because an Aspect may improve one action while changing its timing or removing a familiar option.
Spend early Titan Blood on a weapon you are willing to use repeatedly. A practical first investment is one whose basic moves already feel reliable, followed by an Aspect that strengthens the action you can land consistently. Take the weapon into a low-Heat run after each major change. Confirm its range, recovery time and defensive limitations before adding Pact modifiers.
- Unlock all six Infernal Arms.
- Collect at least one Titan Blood.
- Complete the relevant House progression or conversation, then revisit the Arsenal on a later House visit.
- Distinguish permanent Aspect upgrades from temporary Hammer upgrades.
- Spend Titan Blood on a weapon and playstyle you can use consistently.
3. Begin hidden-Aspect progression in the correct order
Hidden Aspects are not available merely because all six weapons and the regular Aspect panel are unlocked. The first hidden form is the Aspect of Guan Yu for Varatha. Before its waking phrase can be learned, unlock the Fated List of Minor Prophecies through the House Contractor, reach the final boss at least once, and unlock five non-Zagreus Aspects across the Infernal Arms. Reaching the final boss is sufficient for this condition; victory is not required.
After those requirements are met, continue checking for conversations with Achilles in the House. When Achilles provides the waking phrase, go to the courtyard, select Varatha and interact with the hidden Aspect slot. The phrase reveals Guan Yu. Revealing it and purchasing it are separate steps: Titan Blood is still required before Guan Yu can be equipped in an escape attempt.
Guan Yu must be revealed before the remaining hidden Aspects can be pursued. The other five use character-specific dialogue and additional conditions involving characters such as Nyx, Artemis, Chaos, Zeus and Asterius. Some require Titan Blood invested in the relevant weapon, and some require a conversation while that weapon is equipped. The game may distribute these conversations over several House visits, so continue speaking with the relevant characters after returning from runs.
Do not spend Titan Blood on every available Aspect solely to force hidden-Aspect progress if you are still struggling to escape. Hidden Aspects are optional for the campaign. Reveal them when you want their altered movesets, then purchase and test one at a time in ordinary runs.
- Purchase the Fated List of Minor Prophecies.
- Reach the final boss at least once.
- Unlock five non-Zagreus Aspects using Titan Blood.
- Learn Achilles’ waking phrase and reveal Guan Yu for Varatha.
- Treat revealing a hidden Aspect and purchasing it with Titan Blood as separate steps.
- Complete the character-specific conversations required for later hidden Aspects.
4. Build each escape attempt around one primary action
Before filling every Boon slot, decide which action will carry the run. Malphon may reward repeated Attack hits, Coronacht can center on charged shots, Aegis can emphasize Bull Rush or its bouncing Special, Varatha can focus on thrusts, spin or the thrown Special, and Exagryph can focus on sustained fire, reload timing or its explosive Special. Stygius may be built around close-range Attack, Special or Dash-Strike. Reassess after every Hammer because the weapon’s strongest action can change.
Match percentage-based damage effects to slower, stronger actions when possible, and use repeated-hit effects on fast Attacks when they can apply reliably. Do not place every strong Boon on Attack automatically. If a Hammer improves Special or Dash-Strike, that action may become the real damage source. Use defensive, control or mobility Boons to cover the weapon’s weakness rather than splitting damage across actions you rarely use.
Keep Cast and Dash-Strike in the plan. Bloodstones can lodge in enemies and later be recovered, while some Aspects and Hammers change how Cast or Dash-Strike behaves. After changing weapons or Aspects, deliberately test these actions in the next ordinary chamber instead of relying on timing learned from another weapon.
- Choose a primary damage action before committing to a full Boon plan.
- Use secondary slots for defense, control, mobility or a complementary damage source.
- Recheck Cast and Dash-Strike after changing an Aspect or Hammer.
5. Select the first Daedalus Hammer
Daedalus Hammers are temporary upgrades that apply only to the current escape attempt. They can alter damage, Attack speed, range, charge behavior, ammunition, Special behavior or defensive properties. A Hammer does not carry back to the House after death or after a successful escape.
When a Hammer chamber appears, read every offered description before choosing. Favor an upgrade that strengthens the action supported by your Aspect and Boons, removes a weakness that is costing health, or creates a pattern you already understand. A Bow Hammer that improves charged shots, a Shield Hammer that reinforces Bull Rush, or a Rail Hammer that improves ammunition can be valuable when the rest of the build points in the same direction.
Do not choose solely by the largest displayed damage increase. Some Hammers replace an Attack, remove knockback, alter charge timing, change magazine behavior or add a drawback. If none is ideal, choose the least disruptive compatible option. Use the next ordinary chamber to test its timing and range before the next boss.
- Read all available Hammer descriptions.
- Prefer compatibility with the current Aspect and primary damage action.
- Test the altered attack pattern before the next boss encounter.
- Remember that Hammer choices disappear when the escape attempt ends.
6. Use the second Hammer and Styx Anvil cautiously
A normal escape attempt can provide two Daedalus Hammer upgrades. The second should reinforce the first upgrade or cover a weakness that remains dangerous. If the first Hammer transformed the Attack, check whether the second option still works with that replacement. Two individually strong upgrades can be poor together if they compete for the same action or introduce conflicting timing.
Hammer offers depend on the current weapon, Aspect and upgrades already selected. Some options exclude one another, and some are unavailable to particular Aspects. Choose from the upgrades actually shown in the current run instead of planning around one that may not appear.
The Temple of Styx can contain an Anvil of Fates in a Charon shop. Buying it exchanges existing Hammer upgrades for replacement choices. It can provide a third Hammer effect, but the replacement choices are random and may remove the upgrade carrying the build. Treat the Anvil as a risk decision: use it only when you can afford the Gold, the current combination is actively failing, and you are prepared for the replacement to be worse before the fight with Hades.
- Make sure the second Hammer works with the first and with the chosen Aspect.
- Do not expect a particular Hammer combination every run.
- Use the Anvil of Fates only when the possible replacement is worth losing an existing upgrade.
- Test the final weapon pattern before entering the last boss sequence.
Before you move on
- All six Infernal Arms are unlocked and usable at the Arsenal.
- At least one Titan Blood has been collected, the relevant House progression has occurred and the Aspect panel is available on a later House visit.
- You can describe the main action and drawback of the weapon and Aspect you plan to use.
- You know that each weapon has four total Aspects and that hidden Aspects require separate progression conditions.
- You have completed a low-pressure run in which you tested at least one Daedalus Hammer before a later region.
- Your selected Hammer and Boons reinforce the same primary damage action instead of splitting investment across moves you rarely use.
Boons, Olympians and Duo Boons
Boons shape every escape attempt. Build around the weapon action you use most, then add effects that cover its weaknesses: control for crowded rooms, defense for dangerous approaches, mobility for repositioning, or a Cast that lets you damage enemies from safety. Attack, Special, Cast, Dash, and Call each have one core boon slot. Hermes and Chaos provide separate support effects, and other passive boons can stack alongside the core slots. Duo Boons combine two Olympians’ powers, but they only become eligible after you obtain qualifying boons from both gods. Use the Codex Index to check requirements, then keep taking sensible upgrades instead of sacrificing a winning run for a rare combination.
1. Identify the weapon action that should carry the run
At the first Olympian reward, look at the weapon and Aspect you selected before choosing a boon. Fast weapons such as the Twin Fists often make repeated Attack or Special hits, while the Bow can center on charged Attacks, repeated Specials, or a Cast-focused setup. The Shield, Spear, and Stygian Blade can support several different plans, so choose the action you can use safely and consistently rather than selecting only by rarity.
A boon with Strike in its name modifies Attack. Flourish modifies Special, Shot modifies Cast, Dash modifies Dash, and Aid modifies Call. Choose one main damage action first. A Common boon on the action you use constantly is usually more useful than a Rare or Epic boon attached to an attack you seldom press. Read the complete effect, including any status condition or range limitation, before accepting it.
- Choose a primary damage action based on the weapon’s actual attack rhythm.
- Compare the boon’s effect with the Daedalus Hammer upgrades already taken.
- Do not choose rarity alone when the boon changes an action you rarely use.
2. Treat the five core actions as separate boon slots
Attack, Special, Cast, Dash, and Call each have one core boon slot. A second Olympian boon for the same slot normally replaces the existing boon rather than adding a second independent effect. The selection screen identifies when a replacement will occur, so check the comparison before confirming it. This matters when a new boon has higher rarity but a worse effect for your weapon’s current plan.
Not every boon uses one of those five slots. Hermes provides speed and ability-enhancing effects that can coexist with many ordinary Attack, Special, Cast, or Dash boons, while Chaos boons are temporary trade-off effects and do not occupy a core action slot. Other passive boons can also work alongside the core slots. Use these additions to repair a weakness instead of assuming that every new boon replaces something you already have.
- Keep track of which god currently occupies each core slot.
- Read the replacement warning before exchanging an existing boon.
- Use Hermes and Chaos as support, not as substitutes for a reliable damage plan.
3. Complete the basic build before pursuing advanced effects
After securing a main damage boon, add an answer for the problems that damage alone does not solve. A Dash boon can improve repositioning or punish enemies while you evade. Athena can make dangerous approaches safer, while Zeus, Dionysus, or other gods can add repeated damage that continues while you move. A Cast may group enemies, apply a status, create an area of danger, or provide ranged damage when closing distance is unsafe.
Calls charge through the God Gauge as you deal or take damage. Use a Call when its effect matches the fight: a defensive or invulnerable Call can protect you during a boss pattern, while a damage Call can create a strong opening against an armored target. Do not spend every resource chasing a particular Call if your build still lacks dependable damage or survival tools.
- Secure one reliable damage source before collecting niche effects.
- Add control, defense, mobility, or ranged pressure to cover the weapon’s weakness.
- Judge a Call by how safely and often its effect can be used.
4. Unlock and use the Codex Index for Duo requirements
The House Contractor’s Codex Index work order adds the detailed Olympian boon lists to the Codex. Purchase it when it becomes available, then open an Olympian’s boon list and inspect the Duo entries. The list shows which qualifying boons are needed from each partner god. Without this information, it is easy to take a boon from the correct god but use the wrong slot or effect and remain ineligible.
A Duo requires qualifying prerequisites from both gods. Having seen both gods during a run is not enough, and simply owning any boon from each god may not satisfy the specific requirement. Merciful End, for example, needs an eligible Ares Attack or Special boon and an eligible Athena Attack or Special boon. Heart Rend needs an eligible Aphrodite boon and an eligible Artemis Attack, Special, or Cast boon. Check the Codex entry for the exact choices instead of relying on the gods’ names alone.
- Purchase Codex Index from the House Contractor when available.
- Check both sides of the target Duo’s prerequisite list.
- Confirm that the boons occupy the required actions or use the required effects.
5. Make a Duo eligible, then improve the odds without abandoning the run
Once both prerequisite groups are satisfied, the Duo enters the pool of possible advanced boon offers. It is not guaranteed to appear at the next chamber. Continue taking boon rooms from either partner god when practical, and use an Olympian Keepsake in a later region if you need help finding one of them. Keepsakes improve access to a god’s offerings, but they do not guarantee the Duo itself.
The Mirror of Night talent Gods’ Legacy raises the chance of Legendary and Duo Boons when they are eligible. It does not bypass missing prerequisites or force a specific result. Duo Boons have a fixed rarity and cannot be upgraded with Poms of Power, so compare the Duo’s effect with the needs of the current run. A Duo that does not improve your main attack may be less valuable than a defensive boon or a strong upgrade for an action you use constantly.
- Use a god Keepsake when a required partner is not appearing.
- Buy Gods’ Legacy if advanced boon hunting is a recurring goal.
- Treat chance increases as assistance, not a guarantee.
6. Stop gambling once the build can clear rooms and bosses
Test the finished build immediately. Apply the intended status effect, use the weapon action receiving the strongest bonus, and Dash away before enemies can trade damage with you. If the Hammer changed the Attack, Special, or Cast, practice the modified timing in ordinary chambers before committing to an aggressive boss strategy.
If the desired Duo does not appear, keep the run alive. Use shops, healing, defensive boons, or safe chamber rewards to preserve your escape attempt. Against bosses, save a fully charged Call for a clear damage or survival window unless the Call charges unusually quickly. A functional build with ordinary boons is a successful result; the Duo is an optional improvement, not a reason to throw away an otherwise strong attempt.
- Verify that the primary boon improves the action you actually use.
- Use movement and Dash timing to create safe damage windows.
- If the Duo fails to appear, finish the run and try again with the same prerequisites or a new target.
Before you move on
- The run has one clear primary damage action and at least one effect for defense, control, mobility, or safe ranged pressure.
- You can identify the current Attack, Special, Cast, Dash, and Call boons and know which replacements would remove them.
- Codex Index is purchased and the target Duo’s requirements have been checked in the Codex.
- For a Duo attempt, qualifying prerequisites from both partner gods are active.
- The run is still combat-effective even if the target Duo never appears.
Mirror of Night and Keepsakes: Permanent Power and Run Tools
The Mirror of Night supplies permanent upgrades between escape attempts, while Keepsakes shape the build of an individual run. Spend early Darkness on reliable survival and damage, then compare the alternate talent on each Mirror row instead of assuming the default choice is always best. Give Nectar to several characters to build a useful Keepsake collection, and choose one in the Courtyard before leaving the House. Later, purchase the Keepsakes Collection, Regional work order from the House Contractor if you want to change equipment between Underworld regions. A Keepsake swap is permanent for that escape, so decide what the next region requires before removing the current item.
Open the Mirror and establish a survival baseline
The Mirror of Night is in Zagreus’s bedchamber. Interact with it after returning to the House and spend Darkness on upgrades that improve every future escape attempt. For a new player, Death Defiance, Thick Skin, and Greater Reflex are dependable starting priorities. Death Defiance gives Zagreus a recovery when his health reaches zero, Thick Skin raises his starting health, and Greater Reflex improves his dash capacity. These upgrades do not require a particular weapon or Boon plan, so they remain useful while you are still learning enemy patterns and boss arenas.
The Mirror is divided into upgrade rows, and several rows eventually offer an alternate talent. At first, some sections must be unlocked with Chthonic Keys. After collecting 300 Darkness and having the required conversation with Nyx, the alternate versions become available. They are purchased separately from the default versions, and only one side of each row can be active at a time. Stand at the Mirror and select the side you want before beginning the next attempt; changing sides is not a permanent save-file commitment.
- Spend early Darkness on Death Defiance, Thick Skin, Greater Reflex, or another upgrade that solves a current survival problem.
- Use Chthonic Keys to open additional Mirror sections when the next useful talent is locked.
- After alternate talents appear, compare both sides of each row instead of automatically using the first option.
Match Mirror choices to your weapon and habits
There is no single required Mirror arrangement for completing the campaign. Choose talents according to how your current weapon deals damage and how you usually lose health. A close-range weapon benefits from reliable movement, extra health, and damage bonuses that reward attacking from advantageous positions. A ranged or cast-centered build may prefer talents that improve Cast ammunition, Boon quality, or reroll options once those parts of the Mirror are available.
If a talent stops fitting your approach, do not continue investing in it merely because it was your first purchase. After enough early progress and conversations with Nyx, the Mirror can be reset for one Chthonic Key, returning the Darkness spent on its active upgrades. Use a reset when it will fund a meaningful change, such as moving from a straightforward defensive setup to a cast-focused or reroll-focused plan. You can also switch between already purchased alternatives directly at the Mirror without treating the change as permanent.
- Choose talents that support the attacks and movement you actually use.
- Use the alternate side of a row when it solves a more immediate problem than the default side.
- Reset the Mirror only when the refunded Darkness will produce a clear improvement.
Give Nectar and unlock useful Keepsakes
Give Nectar to eligible characters in the House and during escape attempts. The first gift to most characters grants that character’s Keepsake. Once obtained, Keepsakes can be selected from the display case in the Courtyard. Early in the campaign, give your first Nectar gifts to several characters rather than putting every gift into one relationship. A small collection gives you more ways to respond to a weak opening, an unfamiliar region, or a weapon that needs a particular kind of support.
Choose the Keepsake after selecting your weapon and before entering the first chamber. Cerberus’s Old Spiked Collar is a simple health option while learning, and a god-associated Keepsake can steer the opening Boon offering toward that god. Use the effect that addresses the run’s immediate problem: extra health if ordinary rooms are wearing you down, a defensive effect if you are taking avoidable hits, or a god Keepsake when a specific attack, Special, Cast, Dash, or Call Boon is central to the build. Keepsakes gain experience from encounters cleared while equipped, reaching stronger ranks over time, but a useful effect for the current attempt matters more than leveling an item as quickly as possible.
- Give early Nectar to multiple characters so you have more than one practical Keepsake.
- Equip the selected Keepsake from the Courtyard display case before leaving the House.
- Use a god Keepsake to influence the opening Boon or a defensive Keepsake to cover a known weakness.
Plan Keepsake use around the current objective
A god-associated Keepsake is most valuable at the start of a run, when you are trying to establish a particular attack or Special effect. Once that opening Boon has appeared, the Keepsake has done its main job; later, a different effect may be more useful if you have unlocked regional swapping. An economy Keepsake, such as one that improves your starting Obols, is worthwhile when you expect to reach shops and can survive the chambers leading to them. It is not a replacement for Mirror upgrades or a defensive choice when you are consistently dying before the first boss.
Do not select a Keepsake only because it has a higher rank. Rank improves the item’s effect, but it does not change the fact that the item must suit the run. If low health is preventing progress, use a health or defensive Keepsake for several attempts and concentrate on reaching the next region safely. Once the route is stable, change to a god or resource Keepsake when you have a specific build or shopping goal.
- Use god Keepsakes to shape the beginning of a build, not to force an entire run to follow a perfect plan.
- Use resource Keepsakes only when the route and your current health make the resource accessible.
- Replace a high-ranked but unsuitable Keepsake when another effect directly fixes the problem stopping progress.
Unlock and use regional Keepsake changes
Normally, once Zagreus leaves the House, the equipped Keepsake cannot be changed during that escape. The House Contractor eventually offers the Keepsakes Collection, Regional work order for 10 Gemstones. Buy this work order when you can afford it and want to manage different phases of a run. It adds a Keepsake display at the transition between Underworld regions, letting you change equipment after completing a region and before entering the next one.
A common plan is to begin with a god Keepsake to establish the build, then switch to a defensive Keepsake before a difficult later region. You can also change to a resource-focused item when the remaining route contains a useful shop. The swap is one-way for that escape: after removing a Keepsake, you cannot equip that removed item again during the same attempt. When using a regional case, make the decision before confirming the change. Closing the case locks it until the next eligible post-boss room, so do not open it merely to inspect the collection if you still need to decide.
- Purchase Keepsakes Collection, Regional from the House Contractor for 10 Gemstones before planning region-by-region swaps.
- Change Keepsakes at the regional display only after deciding what the next region demands.
- Remember that a removed Keepsake cannot return during the same escape.
- Do not close the case until the intended replacement is equipped.
Before you move on
- The Mirror has several purchased talents that address your main survival or damage problems.
- You have unlocked and tested at least one alternate Mirror talent rather than using only the initial side of every row.
- You can explain why your current Keepsake suits the weapon, Boon plan, region, or recovery goal for the next escape.
- You have given Nectar to several characters and can equip their Keepsakes from the Courtyard display case.
- If you intend to swap between regions, the House Contractor has completed Keepsakes Collection, Regional and you understand the one-way nature of each swap.
Tartarus: Chamber Choices, Priority Loot and Megaera (Furies)
Tartarus is the first region on every standard escape attempt. Read each exit symbol before choosing a chamber, build one reliable source of damage, and value survival upgrades over small permanent-resource rewards when learning. Optional skull-marked encounters are tougher than ordinary rooms and should be taken only when the current build can handle them. Sisyphus offers a safe special encounter when he appears, while shops and Wells of Charon can repair a weak run before the boss. The region ends with one of the Fury sisters. Megaera is the initial boss, while Alecto and Tisiphone become possible after further progression. Defeat the Fury, collect the resulting boss bounty, and use the opened stairway to continue to Asphodel.
1. Read the door symbols and establish a focused build
At the start of each chamber, look at the symbols above the available exits before committing to a route. A god symbol offers a Boon and is usually the best early reward because it establishes the run’s main attack, Special, Cast, Dash, or Call effect. Match the Boon to the weapon’s strongest action instead of automatically placing every upgrade on Attack. A weapon with a fast, repeated attack can make good use of an Attack Boon, while a weapon with a powerful ranged or area Special may benefit more from improving that slot.
If no useful god Boon is available, choose a Centaur Heart when your maximum health is low, a Pom of Power when an important Boon already supports the build, or Darkness and Chthonic Keys for permanent progression. A Daedalus Hammer is especially valuable when its modification improves the weapon’s central attack pattern. Do not select a Hammer blindly in a difficult run: read what it changes and favor an upgrade that makes your primary source of damage safer, faster, or easier to use.
- Inspect every exit symbol before choosing a chamber.
- Choose one main damage source and build around it.
- Take a Daedalus Hammer when its weapon modification clearly helps the current plan.
2. Treat skull-marked rooms as deliberate risks
A skull symbol marks a tougher encounter, including Tartarus mini-boss rooms. These rooms can provide attractive rewards, but the increased pressure is not automatically worthwhile. Take one when Zagreus has dependable damage, enough health to survive mistakes, and a movement option that lets him escape crowded situations. If the run is already fragile, choose a normal chamber with a useful Boon, Heart, Pom, or shop instead.
Tartarus can offer Darkness, Gemstones, Keys, Obols, and combat upgrades. Darkness and Gemstones help with House progression, while Keys support weapon and Mirror unlocks, but immediate survival should come first. Reaching the Fury with a sound build is generally more valuable than collecting a small resource reward and losing most of your health in the process.
- Use skull-marked rooms only when the current build can absorb their extra pressure.
- Prefer combat power or survivability over a small resource payout when learning.
- Do not spend most of your health for a minor permanent-resource reward.
3. Control the room against traps, armor, and mini-bosses
Tartarus introduces floor traps, explosive objects, armored enemies, and stronger individual threats. Keep an escape lane open before starting an attack sequence. Circle around the room instead of standing between several enemies, and use Dash to cross an active danger zone rather than spending it only to approach a target. Armored enemies are harder to interrupt, so avoid trading hits with them when they begin a committed attack.
Only one Tartarus mini-boss normally appears in a run. Possible encounters include the Bloodless, Wretched Sneak, and Doomstone, and each demands a different priority. Against the Bloodless, avoid letting armored enemies surround you. Against Wretched Sneak, keep moving and do not chase it through traps. Against Doomstone, watch the arena threats and clear lesser enemies when they block your route. Collect the chamber reward only after all enemies have been defeated.
- Keep a route around the room clear before attacking.
- Dash through danger instead of repeatedly trading damage.
- Clear threats that block movement before pursuing a weaker enemy.
4. Use Sisyphus, Chaos, shops, and Wells according to your condition
Sisyphus is an optional, non-combat encounter that may appear in Tartarus. When he appears, choose the reward that best repairs the current run: Obols for a planned purchase, Darkness for permanent progression, or health when survival is the immediate problem. Because this room is safe, it is especially useful when the run is underpowered or damaged.
A Chaos Gate can offer a strong long-term benefit, but entering it imposes a temporary drawback. Avoid taking that risk when Zagreus is already near defeat or when the drawback directly harms the build’s main source of damage. At a Shop, prioritize a useful Boon, Centaur Heart, or other direct improvement. A Well of Charon can provide recovery or temporary effects; use it before the boss when the purchase addresses a clear weakness rather than spending Obols on a minor convenience.
- Take Sisyphus’s reward based on the run’s immediate need.
- Enter Chaos only when the temporary drawback is survivable.
- Spend Obols on damage, health, or recovery before less important purchases.
5. Prepare at the final chamber
The last Tartarus combat chamber is the Fury encounter. Before entering, finish any safe pickups, use a nearby Shop or Well if it offers a meaningful improvement, and make sure the current Boons match the weapon’s intended attack pattern. There is no ordinary combat route back once the boss chamber begins, so do not leave an obvious purchase or recovery option unused.
Megaera is the first Fury most players face. After additional progression, Alecto or Tisiphone can appear instead. The exact Fury is selected for the run, and defeating any of the three completes Tartarus. Their fights share the same basic rule—avoid the active attack, then punish recovery—but their arena pressure and signature mechanics differ.
- Use an available Shop or Well when it supplies a clear improvement.
- Enter with enough health to survive a mistake.
- Prepare for the specific Fury rather than assuming every boss fight follows Megaera’s pattern.
6. Defeat Megaera through movement and recovery windows
Megaera attacks with whip strikes, forward lunges, wide-area attacks, and projectile patterns. Watch her animation and do not remain directly in front of her while the whip is active. Dash through or away from the strike, then attack after the animation finishes. Her lunge and longer attack sequences create brief recovery windows; use those moments for your strongest Attack, Special, Cast, or Call instead of forcing damage during the active hitbox.
When summoned enemies appear, remove the threats that restrict movement or fire from a distance. Keep circling around the arena and use the pillars in Megaera’s chamber to break line of sight when they help against projectiles. Do not stand beside an active trap or allow summoned enemies to pin Zagreus against a wall. If a crowd-control effect is available, use it to create room or delay support enemies before returning to Megaera.
At health thresholds, Megaera pauses and changes the pressure in the room. Treat these transitions as opportunities to reposition and collect safe Cast ammunition if it is available. Avoid spending a limited Call simply because the boss has paused; wait until her next vulnerable window is clear. Short attack bursts followed by a Dash are safer than standing in front of her and trying to win through trades.
- Dash through or away from whip attacks, then punish the recovery.
- Remove summoned enemies that restrict movement or create ranged pressure.
- Use the arena pillars to help manage projectiles when necessary.
- Avoid fighting beside traps or getting cornered during a summon.
7. Adapt to Alecto or Tisiphone
Alecto builds Rage during the encounter. When her Rage is high, prioritize survival and clean dodges over trying to trade damage. Her pressure can cover large areas, so keep moving and use burst damage during the moments when she finishes an attack or becomes vulnerable. Do not chase her through an active hazard simply to maintain contact.
Tisiphone progressively restricts the usable space in her arena. Begin the fight with deliberate positioning and avoid wasting room through careless movement. As the arena becomes smaller, stay close enough to respond to her attacks but do not stand directly in the path of a lunge. Use efficient attack bursts and preserve your Dash for escaping the next pattern.
For all three Furies, the reliable sequence is the same: identify the incoming attack, move through or away from it, clear support threats when they obstruct the arena, and attack during recovery. If you lose a Death Defiance, slow down rather than attempting to recover the lost health through reckless aggression.
- Watch Alecto’s Rage and prioritize dodging when it is high.
- Preserve maneuvering space during Tisiphone’s shrinking-arena fight.
- After any Fury falls, collect the boss reward and use the opened stairway to continue to Asphodel.
Before you move on
- The Tartarus Fury is defeated.
- The boss reward is collected: normally Titan Blood for the first qualifying victory or the applicable Heat bounty, with Darkness awarded when no Titan Blood bounty is available.
- The exit stairway opens after the boss chamber.
- Zagreus enters Asphodel, confirming that Tartarus is complete for the current escape attempt.
References for this chapter
Asphodel: Lava, Platforms and the Lernaean Bone Hydra
Asphodel is the second region of a standard escape attempt. Its chambers place combat on separated solid islands surrounded by lava, with narrow approaches, ranged pressure and enemies that can push Zagreus toward the edge. Move deliberately, preserve open ground for retreat and use Dash to cross gaps or escape attacks only when the landing area is safe. At the end of the region, the Lernaean Bone Hydra blocks the passage to Elysium. Damage the main head until it becomes invulnerable at roughly two-thirds health, then defeat the three summoned support heads. Repeat the process at roughly one-third health, when six support heads appear. The main head cannot be damaged again until every support head in that phase is defeated. Use the arena’s central pillars to block some projectiles, prioritize heads that restrict movement, and return to the main target only after checking that the arena is under control. Defeating the Hydra opens the route to Elysium and awards the appropriate region bounty for the weapon and Heat level involved.
Enter Asphodel with a movement-focused plan
After defeating the Tartarus boss, inspect the condition of your build before choosing the next chamber. Ranged Attacks, Casts, Specials, lingering effects and wide-area Calls are convenient in Asphodel because they let Zagreus deal damage without remaining beside lava. Close-range weapons are fully viable, but attack in short bursts and Dash back toward solid ground before enemies can surround you.
Asphodel does not require you to jump across a platforming course. Instead, its combat rooms use separated pieces of solid floor, narrow passages and lava boundaries that punish careless positioning. Before attacking, identify the widest safe area and the route leading back to it. Keep that route open whenever possible.
- Identify solid ground before beginning a long attack sequence.
- Keep the widest part of the room available as a retreat area.
- Use Dash to evade or cross a gap only when the destination is clear.
Clear rooms without surrendering control of the floor
Asphodel chambers can combine Bloodless enemies with ranged attackers, flame-producing foes and enemies that pressure Zagreus near the edge. Remove threats that restrict movement first. A distant attacker or an enemy capable of knocking you backward can be more dangerous than a nearby target with low health. Attack while moving through the open part of the room, then return to a safe position instead of chasing enemies onto a narrow ledge.
When a chamber contains separate islands, cross only after checking where enemies are positioned. Do not chain Dashes without confirming that the final landing point is safe. If you are forced toward lava, stop attacking and regain solid ground first. The damage from a single mistake can be followed by additional hits if Zagreus lands beside another enemy.
Collect the reward only after the room is clear. This prevents an enemy hit from interrupting your movement while you are focused on selecting a Boon, Pom or resource.
- Defeat ranged and movement-disrupting enemies before low-risk melee targets.
- Use short movement loops instead of fighting with your back to lava.
- Do not chase weakened enemies onto an isolated piece of floor.
Prepare at the final shop or healing opportunity
Treat the last Asphodel chambers as preparation for the Lernaean Bone Hydra. If health is low, choose a healing opportunity or a safer reward rather than taking an unnecessary high-risk encounter for a minor improvement. If a shop appears, spend Obols on a useful Boon, Pom, healing item or other upgrade that strengthens the build you already have.
A dependable build is more valuable than a perfect combination. Add a defensive or mobility effect if your primary damage source is already strong. A Cast that can be placed on a head while Zagreus retreats, an area Special or a Call that damages several targets can be particularly useful during the support-head phases, but no single Boon is required.
- Enter the boss room with enough health to survive at least one mistake.
- Have at least one reliable way to damage targets at more than one distance if possible.
- Spend useful Obols before entering the boss chamber.
Damage the main Hydra head from open ground
The Hydra arena is a solid island surrounded by lava, with central pillars that can block some incoming projectiles. At the start, move onto open ground and observe the main head’s attack rhythm. Keep a path around the arena clear so you can circle away from lunges, slams, volleys and other attacks associated with the current head variant.
Use short damage windows. When the head finishes a committed attack, apply your strongest safe damage, then move before the next pattern begins. Melee weapons should strike from the side and disengage quickly. Ranged weapons can maintain pressure while circling. If the Hydra begins an attack that covers your position, prioritize reaching safe ground over landing one additional hit.
Do not stand directly against the arena edge. The lava removes your recovery space, and a knockback or poorly timed Dash can cause repeated damage. The central pillars are useful for breaking projectile lines, but do not let them trap you between the main head and a support head.
- Keep a retreat route open around the arena.
- Attack after the Hydra finishes an animation rather than during its wind-up.
- Use central pillars as temporary projectile cover, not as a permanent hiding place.
Clear the first support-head phase
At approximately two-thirds of its health, the main head becomes invulnerable and summons three support heads. Stop spending attacks on the protected main head and locate every summoned head. The support heads have different attack patterns, so identify which ones are firing projectiles, creating area pressure, summoning additional enemies or threatening your available floor.
Prioritize the head that most restricts movement or places danger on your safest ground. Then damage the remaining heads while continuing to watch the main head and the lava boundary. Area damage, a persistent Cast, a wide Special or a strong Call can weaken multiple heads, but do not stand still to complete a combo if another head is preparing an attack.
The main head becomes vulnerable only after all support heads in the phase are defeated. Once the final head disappears, reposition before returning to the center target. This brief reset prevents you from beginning the next damage cycle beside a hazard.
- Three support heads are present in the first transition.
- Prioritize support heads that deny safe movement or generate the most pressure.
- Confirm that every support head is defeated before attacking the main head again.
Clear the second support-head phase
At approximately one-third of its health, the Hydra repeats the transition and summons six support heads. The larger group makes positioning more important than immediate damage. Move around the arena’s solid ground, use the pillars when they block projectiles and eliminate heads in an order that preserves room to maneuver.
Do not tunnel vision on a nearly defeated support head if another head is covering the only safe route. Apply broad damage when several heads are grouped, then finish them individually while avoiding lava and incoming attacks. If a support head creates an enemy or projectile that can be removed quickly, deal with that threat before returning to a distant target.
After all six support heads are defeated, the main head becomes vulnerable again. Recover your position, use your strongest safe burst during its next recovery window and repeat the basic attack-and-retreat rhythm until the boss falls.
- Six support heads are present in the second transition.
- Keep the arena’s safest route open while reducing the group.
- Do not return to the main head until the entire support group is gone.
Finish the Hydra and take the route to Elysium
During the final vulnerable section, continue circling on solid ground and wait for the main head to finish its committed attacks. A full Call or other limited burst is safest during a clear recovery window, when Zagreus can remain in range without stepping into lava. If health is low, shorten each attack sequence and prioritize survival over maximum damage.
When the Lernaean Bone Hydra is defeated, collect the victory reward and use the exit that opens beyond the arena. The chapter is complete when the next region, Elysium, loads. The Hydra’s region bounty is tracked by weapon and affected by the run’s reward conditions, so a first clear with one weapon does not remove the corresponding bounty progress for other weapons.
- The main Hydra head and all summoned support heads are defeated.
- The exit beyond the boss arena has opened.
- Elysium loads after taking the exit.
- The appropriate Hydra bounty is awarded when the run meets its weapon and Heat conditions.
Before you move on
- The Lernaean Bone Hydra has been defeated at the end of Asphodel.
- The first invulnerability phase was ended by defeating three support heads.
- The second invulnerability phase was ended by defeating six support heads.
- The passage to Elysium has been taken and the next region has loaded.
- If applicable, the Hydra bounty for the current weapon and Heat level has been granted.
Elysium: High Pressure Enemies and Theseus & Asterius
Elysium is the third region of an escape attempt, reached after the Lernaean Bone Hydra. Its armoured enemies resist interruption and include shield users, ranged attackers, chariots and Exalted souls that can rearm after their weapons are destroyed. Use cover, keep open space around Zagreus and prioritize the enemy that is limiting your movement. Optional encounters include Asterius alone, the Dire Soul Catcher and Patroclus. The region ends in the Heroes’ Arena, where Theseus and Asterius fight together. In a standard run, separate them with the arena pillars, usually defeat Asterius first, then survive Theseus’s Olympian aid attack before finishing him. The following Stairway chamber leads to the Temple of Styx and contains recovery and preparation facilities rather than another combat encounter.
Enter Elysium with a reliable way to damage armour
After defeating the Bone Hydra and taking the stairway, begin choosing Elysium rewards with your current build in mind. Elysium’s armoured enemies do not flinch from ordinary hits in the same way as unarmoured enemies, so a weak Attack or Special can leave you committed while the enemy continues its own attack. Your main damage option can be an Attack, Special, Cast, Dash effect or Hammer upgrade, but it should be capable of finishing armoured targets without requiring you to stand in danger for too long.
If your health or Death Defiances are low, take a Centaur Heart, healing room or shop over an elite reward unless the elite chamber supplies something your build urgently needs. A Hammer is especially valuable when it changes your weapon’s damage pattern or improves the move you are already using most often. Do not choose a Hammer solely because it is available; reject upgrades that undermine your current plan or force an unfamiliar rhythm in a run that is already unstable.
- Confirm that one attack option can reliably break through armoured enemies.
- Prefer healing, a Centaur Heart or a shop when the run is damaged.
- Take a Hammer when it improves the weapon action carrying your build.
Control Exalted enemies and Elysium hazards
Exalted enemies leave behind a disarmed soul when their weapon is destroyed. That soul can move toward a dropped weapon and rearm, so watch it after the body falls. Finish the soul when it is safe, or fight in a position that keeps the weapon away from it. A Greatshield should be attacked from behind or during the recovery after its movement. Longspears and Strongbows are easier to manage from behind pillars or room edges, where their attacks cannot cross the whole room unobstructed.
Soul Catchers fill space with butterfly projectiles; destroy or avoid the projectiles rather than allowing them to surround you. Nemean Chariots punish direct approaches, while Flame Wheels should be destroyed or avoided before they reach Zagreus. Voidstones can shield nearby enemies, making them worthwhile targets when the protection prevents you from making progress. Keep moving around the room’s outside edge, but do not back yourself into a corner where multiple ranged attacks overlap.
- Stop Exalted souls from reaching their weapons when possible.
- Use pillars and room edges against Strongbows and Longspears.
- Clear projectiles and movement hazards before committing to a long attack string.
Choose optional encounters according to the run’s condition
Elite chambers are marked by a skull beneath the reward symbol. Elysium can offer a solo Asterius encounter or a Dire Soul Catcher encounter, but the available mini-boss route is not guaranteed and the two mini-boss types do not normally appear together in the same attempt. Enter one when your health, damage and Death Defiance supply can withstand a difficult room; the reward is not worth sacrificing the run if ordinary combat is already unstable.
The solo Asterius fight is useful practice for the final arena. If you defeat him there, he starts the later Theseus-and-Asterius fight with reduced health during that escape attempt. This makes the optional fight attractive when your build is strong enough, but it is not required to reach the boss. If Patroclus appears, enter his non-combat room and select the temporary benefit that addresses the run’s biggest weakness. A defensive recovery option is generally more valuable than extra damage when you have already lost Death Defiances.
- Treat skull-marked chambers as optional risk, not required progress.
- Use solo Asterius as practice and a way to reduce his later health.
- Visit Patroclus when available and choose the temporary aid that stabilizes the run.
Prepare in the rooms before the Heroes’ Arena
The final ordinary Elysium route leads to the Heroes’ Arena. The exact chamber sequence can vary, but the room immediately before a region boss is a non-combat preparation room: it is normally Charon’s Shop or a free room. Use it to recover, buy a missing improvement or spend Obols that will not help you after the transition. Enter the boss only after checking that your main damage source is active and that you have a plan for avoiding both melee and ranged pressure.
The boss arena contains pillars that are useful for breaking Theseus’s line of sight. Keep enough open floor for repeated Dashes, and avoid beginning between the two champions. Move toward an outer section so Asterius approaches from one direction while Theseus remains across the arena. This reduces the chance that a charge, spear throw and axe attack arrive at the same time.
- Use the final shop or free room to recover and spend useful resources.
- Begin at the arena’s outside rather than between the champions.
- Keep pillars nearby but preserve enough open floor for escape routes.
Defeat Asterius while monitoring Theseus
In the standard fight, focus Asterius first in most builds. His axe swings, leaps and Bull Rush force you to move, while Theseus pressures you from range. Let Asterius approach, then attack after a committed axe sequence, leap or charge. During Bull Rush, lead him toward a pillar and Dash away before contact; the pillar can interrupt the rush and create a recovery window. Do not remain in front of him to finish a long combo if Theseus is lining up a spear throw.
Keep Theseus on the opposite side of the arena while you fight Asterius. Listen for the spear throw and use a sideways Dash or a pillar to avoid it. Theseus’s shield blocks attacks from the front, so do not waste a close-range sequence against the shield. Use a Cast, Special or other effect that can reach Asterius without forcing Zagreus to stand between both bosses.
At half health, Asterius briefly becomes invulnerable and adds more dangerous axe patterns that create damaging waves. Stop attacking during the transition, create space and wait for the attack to finish before resuming. If you defeated him in the optional solo chamber, his starting health in this arena is lower, but his attack patterns remain the same.
- Keep Asterius as the usual primary target.
- Use pillars or sideways Dashes to answer Theseus’s spear throw.
- Stop attacking during Asterius’s health transition and avoid his expanding axe waves.
Finish Theseus after surviving his Olympian aid
When Asterius falls, Theseus is easier to isolate, but continue attacking only during clear openings. Circle behind him after his spear actions or strike while he is recovering. If he raises his shield, move rather than repeatedly attacking from the front. Short attack strings are safer than standing still to complete a long combo.
After Theseus reaches the later phase, he calls on an Olympian god for aid. The specific area attack varies, so stop prioritizing damage when the call begins. Watch the arena markers and move out of affected zones while retaining enough Dashes to respond to a spear attack. Resume attacking after the divine hazard passes or when Theseus is committed to a recovery animation. A strong Call or burst attack is safest during one of these openings, not during the phase transition itself.
The chariot is not part of the ordinary Switch campaign encounter. It appears when the Pact of Punishment’s Extreme Measures changes the fight, so do not use the normal pillar-and-spacing plan without accounting for that altered boss version.
- Attack Theseus from behind or after a committed spear action.
- Treat the Olympian aid as a survival phase before a damage phase.
- If Extreme Measures is active, expect a modified encounter rather than the standard arena fight.
Collect the reward and use the Stairway chamber
When both champions are defeated, collect the chamber reward before leaving. On a first successful bounty for the weapon, this reward is normally Ambrosia; later clears can award Darkness unless a Pact bounty is available. The result depends on the run’s bounty state, so do not assume every clear pays the same resource.
The exit leads to the Stairway chamber between Elysium and the Temple of Styx. This chamber is a fixed preparation area with a Fountain, a Well of Charon, a Pool of Purging and a Keepsake Cabinet. Use the Fountain and Well if they help the current attempt, purge an unwanted Boon only when the trade improves the build, and swap your Keepsake if a different one better suits Styx. Then take the exit to begin the fourth region.
- Defeat both champions and collect the boss reward.
- Use the Stairway’s Fountain, Well, Pool and Keepsake Cabinet as appropriate.
- Take the next exit only after preparing for the Temple of Styx.
Before you move on
- All combat rooms on the chosen Elysium route are cleared or deliberately bypassed.
- Theseus and Asterius are both defeated in the Heroes’ Arena.
- The boss reward is collected.
- The Stairway chamber opens after the arena.
- Any useful Fountain, Well of Charon, Pool of Purging or Keepsake Cabinet option in the Stairway has been considered before entering the Temple of Styx.
Temple of Styx: Branches, Fetid Sack and the Path to Hades
The Temple of Styx is the final regular region before the surface route and the Hades fight. Its central hub has Cerberus at the exit, Charon’s shop, and five Satyr Tunnel entrances. Enter the tunnels one at a time and clear their compact rooms until one branch ends in the Storage Room. That room contains the Fetid Sack, commonly called the Satyr Sack, along with the branch reward and a powerful Healing Fountain. The Storage Room cannot be the first tunnel you enter, so at least two branches are required. Styx’s main danger is poison: Mandragora Curing Pools remove the poison debuff, while the Storage Room fountain restores health. After collecting the sack, return to the hub, make any final purchase, and give it to Cerberus. He leaves the exit, the unused wings close, and the route to the surface opens.
Prepare at the Temple hub
Zagreus enters the Temple of Styx in a central hub. Cerberus blocks the exit, Charon’s shop is nearby, and five doors lead into the Satyr Tunnels. Before choosing a door, check your current health, Death Defiance charges, Obols, and the Boons carrying most of your damage. Styx rooms are short, but their confined layouts can remove health quickly if you are caught by poison or overlapping attacks.
Spend Obols only when the purchase has a clear purpose. A major upgrade to your main attack, Special, Cast, or Call is worthwhile, as is a Centaur Heart or a defensive effect when your health is low. Keep some Obols available because Charon’s shop remains usable after you find the Fetid Sack. Do not enter an elite-marked tunnel merely because its reward looks attractive if your build is already fragile.
- Check health and Death Defiance charges.
- Buy only upgrades that improve damage or survival.
- Keep some Obols for a possible final purchase.
Enter a Satyr Tunnel and follow its branch
Choose one of the five tunnel entrances and clear the rooms in sequence. These branches contain several small combat chambers followed by a larger ending chamber or another special encounter. After each room, use the available door to continue forward; there is no need to search for a hidden alternate route. Door symbols show the reward type or increased danger associated with the branch, so use them to decide whether the next route is worth the health cost.
The first tunnel you enter cannot contain the Storage Room. Once its ending chamber is complete, return to the hub and choose another door. The Fetid Sack is assigned to a later branch, not to a particular visible door that can be identified in advance. Continue until the Storage Room appears. You do not need to clear every wing once the sack has been found.
- Clear the rooms in the selected branch.
- Remember that the first tunnel cannot contain the Storage Room.
- Return to the hub and reassess after each completed branch.
Remove Styx Poison immediately
Poison is the most dangerous recurring hazard in Styx. Satyr Cultists can inflict it with darts, and traps or enemy-created poison pools can also apply the debuff. Poison continues draining health while you fight, so stop pursuing enemies when the poison indicator appears and locate the Mandragora Curing Pool in the room. Interact with the pool to cleanse the debuff before resuming combat.
Do not confuse a Curing Pool with the Healing Fountain in the Storage Room. Curing Pools remove poison; they are not the branch’s major health refill. The Storage Room fountain is reserved for restoring health after you reach that chamber. If a curing pool is positioned near traps, approach it with a Dash and avoid crossing an active hazard just to finish a nearly defeated enemy.
When Satyrs attack from range, use pillars, walls, and the room perimeter to break their line of fire. Prioritize enemies that can poison you or force you to stand in a restricted area, then return to the remaining targets after the room is safer.
- Use a Mandragora Curing Pool as soon as poison is applied.
- Do not continue fighting while poisoned unless reaching the pool is temporarily unsafe.
- Use cover and movement to avoid Satyr darts and poison hazards.
Manage swarms, traps and elite branches
Styx’s small rooms often combine enemies with traps, beams, poison pools, or narrow passages. Keep moving rather than standing in the center of a room, and use attacks that can reach several targets when small enemies surround you. Casts, Calls, wide Specials, and lingering damage are especially useful for controlling groups without chasing one enemy into a hazard.
Some tunnel branches carry an elite marker and contain tougher encounters. Treat these as optional risk rather than mandatory progress. Enter one when its reward is valuable and your health, damage, and Death Defiance supply can support the fight. If a branch is costing too much health, finish the current room safely, return to the hub, and select a safer remaining tunnel. The objective is to locate the sack, not to complete all available encounters.
- Use area damage against groups and small enemies.
- Avoid standing beside traps or poison pools.
- Skip an elite branch when its risk exceeds the likely reward.
Recognize and clear the Storage Room
The Storage Room replaces the final large room of one tunnel branch. It is guaranteed to appear in one of the five wings, but never in the first wing you enter. When you reach it, clear the room and collect the displayed branch reward. The Fetid Sack is in this chamber alongside a Healing Fountain.
Collect the Fetid Sack before leaving. If you lost health during the preceding rooms, use the Storage Room fountain after the fight; it provides a larger recovery than ordinary run fountains. This fountain is the Temple’s major health recovery, so do not leave it unused when you need it. Once the sack is collected, the Temple’s required objective is complete, although you may still return through the tunnel and decide whether another branch reward is worth the danger.
- Confirm that the Storage Room contains the Fetid Sack.
- Collect the branch reward and the sack.
- Use the Storage Room Healing Fountain if needed.
Return to Cerberus and finish the Temple objective
Travel back through the completed tunnel to the central hub. Before speaking with Cerberus, check the remaining health and Obols and decide whether Charon has a worthwhile final purchase. Favor a substantial damage upgrade, a Centaur Heart, or a defensive option over a minor resource gain. You are not required to enter any remaining tunnel after finding the sack.
Approach Cerberus at the blocked exit and interact with him. Zagreus gives him the Fetid Sack, causing Cerberus to abandon his post. The exit opens toward the surface route, while the remaining unentered tunnel wings close. Any branch rewards left behind are optional and cannot be collected after Cerberus moves.
Walk through the opened exit to leave Styx. The next objective is the surface route and the fight with Hades, so use the final shop opportunity before handing over the sack rather than expecting another shop inside the exit passage.
- Return to the hub with the Fetid Sack.
- Make any final Charon purchase before giving it to Cerberus.
- Confirm that Cerberus leaves and the exit opens.
- Proceed through the exit toward the surface and Hades.
Before you move on
- The Storage Room has been found.
- The Fetid Sack, also commonly called the Satyr Sack, has been collected.
- The Storage Room Healing Fountain has been used if health recovery was needed.
- Cerberus has accepted the sack and left the exit.
- The remaining tunnel wings have closed or are no longer accessible.
- The route through the northern exit is open and Zagreus can proceed to the surface and the Hades encounter.
Final Boss: Hades — Patterns, Skulls and Phase Management
The standard, unmodified Hades encounter has two phases. The first uses spear thrusts and sweeps, a large spin, skull casts, temporary invisibility and summoned Underworld enemies. When the first health bar is depleted, Hades restores it and begins the second phase with a damaging wave. He then adds a three-hit spear sequence, green urns that create damaging stun zones when broken, and rotating laser attacks. Win by moving through committed attacks, clearing only the skulls or summons that threaten your route, and attacking during recovery animations. Pillars block the lasers. Extreme Measures 4 changes the encounter substantially by adding stronger attacks and a third phase, so do not apply the standard plan without adapting.
Enter with a build that can survive mistakes
Before leaving the Temple of Styx, check your health, remaining Death Defiances, Call charge and healing options. A dependable source of damage is more valuable than a build that requires a rare combination to function. Ranged attacks, persistent Cast damage and Specials that can be used while retreating are forgiving choices, but every weapon can defeat Hades if you control your attack windows.
Keep enough gold for a possible final shop purchase or healing opportunity before the boss. Do not spend every remaining resource trying to add a small amount of damage. Extra dashes, damage reduction, a defensive Dash Boon or a strong Companion can be more valuable than a minor offensive increase because the fight punishes one mistake at a time.
Choose a weapon-specific plan before entering. Close-range weapons should use short attack strings followed by a retreat. Ranged weapons can circle the arena while attacking. If you use the Shield, blocking can cover dangerous transitions, but do not let blocking replace learning when to reposition.
- Confirm your remaining Death Defiances and current health.
- Keep at least one reliable attack that can reach Hades without standing directly in front of him.
- Save some Call charge for a dangerous overlap or a safe late-phase burst.
Read the first-phase spear attacks
At the start, stay at mid-range and move in a broad loop around the arena. Hades can thrust forward, sweep with his spear and charge a wide spin attack. The spin is preceded by a visible area warning; leave its range before the attack completes. Dash through or past a committed attack rather than making a late dash away from its edge. This often places Zagreus behind Hades, where a short punishment window opens.
After a thrust or completed spin, attack briefly and disengage. With a melee weapon, use one controlled attack string or Special, then move away before the next animation begins. With a ranged weapon, continue circling and attack while he recovers. Do not remain in front of him trying to finish a combo once he begins another wind-up.
Hades can disappear temporarily and reappear elsewhere with another attack. Stop chasing him when he vanishes. Continue moving through open ground, watch for his return and wait for the reappearance attack to finish before committing. Keeping space near the center of the arena gives you more options when he returns at an awkward angle.
- Identify whether Hades is preparing a thrust, sweep or spin before attacking.
- Dash through a committed attack when possible instead of reacting at its outer edge.
- Stop attacking immediately when Hades begins a new wind-up.
Manage skull casts and Boiling Blood
Hades fires skull-shaped casts that track Zagreus. Being struck can apply Boiling Blood, increasing the damage Zagreus takes while the effect remains active. Treat the skull projectile as a separate threat rather than assuming your armor or health can absorb it. Keep moving laterally and use a dash to cross its path when the projectile is about to connect.
Some skulls remain in the arena after landing. They later create a damaging wave. You do not have to destroy every skull as soon as it appears, but remove one that blocks your escape route or is about to activate beside you. If several are present, clear the skull nearest your planned movement path first, then return to Hades during his recovery.
Use Cast, Special or area damage to clear skulls without standing still. If a wave is already expanding, move around its edge whenever possible. Do not dash blindly across overlapping hazards, because you may spend your only safe movement option just before Hades begins a spear attack.
- Watch for the Boiling Blood effect after being struck by a skull cast.
- Clear skulls that block your route or overlap with another attack.
- Preserve one dash for Hades after dealing with a skull wave.
Handle summoned enemies and the first phase transition
During the first phase, Hades can summon random Underworld enemies. Do not automatically chase a summon across the arena. Keep Hades and the additional enemy in view, then attack whichever threat is preventing safe movement. If the summon is distant and harmless, continue damaging Hades while staying ready for its projectile or reappearance. If it corners you or combines with a skull wave, eliminate it before resuming the boss rotation.
When Hades’s first health bar is depleted, he pauses as though defeated, then restores his health and begins the second phase. Do not spend a remaining Death Defiance or force an attack during this transition. Move away from him, reset your position and prepare for the damaging wave that opens the next phase.
- Remove a summoned enemy when it blocks movement or creates a dangerous overlap.
- Keep the arena’s center and at least one pillar accessible before the transition.
- Treat the restored health bar as a new phase, not as the end of the fight.
Survive the second-phase spear sequence and urns
The second phase adds a three-attack spear sequence: two sweeps followed by a faster spin. Wait for the entire sequence to finish before returning to melee range. If you attack after the first sweep, the remaining strikes can catch you during recovery. Ranged weapons should continue circling rather than standing still to maximize damage during this pattern.
Hades also summons green urns around the arena. When an urn is broken by an attack, it creates a damaging zone that can stun Zagreus. Avoid fighting beside an urn unless you have a clear reason to break it. If an urn blocks the route to a pillar or leaves no safe space, destroy it from a distance if possible, then move away from the resulting green zone before resuming the boss fight.
During the second phase, prioritize open movement space over immediate damage. If urns, skull waves and Hades’s spear attacks overlap, clear the route first. A few seconds without attacking is safer than losing a Death Defiance while trapped in several hazards.
- Wait for both sweeps and the follow-up spin before counterattacking.
- Do not break green urns casually near your intended escape route.
- Move away from the stun zone after breaking an urn.
Use pillars against the laser attack
Hades’s laser attack begins with a clear stationary wind-up. Move toward one of the large unbreakable pillars before the beams reach you and keep the pillar between Zagreus and Hades. The beams rotate and can continue damaging you for the duration of the attack, so do not leave cover merely because the first sweep has passed. Wait until the complete sequence ends.
In the standard fight, standing very close to Hades can avoid some laser coverage, but this is a less forgiving option because urns, skulls and his close-range attacks may overlap your position. Use the pillars while learning the fight. The safe space immediately around Hades is not a general solution for Extreme Measures 4, where the laser sequence gains additional pressure.
If Hades begins a laser attack while skulls or urn zones are active, do not cross a hazard simply to reach a preferred pillar. Choose the nearest available cover and preserve a dash for the final movement after the beams disappear.
- Position yourself within a short dash of a pillar before the beams begin.
- Remain behind cover for the full laser sequence.
- Do not use the standard close-range laser tactic unchanged with Extreme Measures 4 enabled.
Spend Calls and burst damage safely
Use a Call after Hades finishes a spin, the full spear sequence, a laser attack or a stationary summon. A Call that grants invulnerability or strong burst damage is especially useful when skulls, urn zones and Hades’s attacks overlap. Do not preserve a nearly full Call indefinitely; spending it to prevent a Death Defiance can be the correct decision.
Keep attacks short while Hades is active. Apply damage, dash through or away from the completed attack, then reset your position. When the arena is crowded, survival is worth more than a few additional hits. If a Companion has a limited use, save it for a stationary summon, a clear recovery window or the final portion of the second phase.
Continue this rhythm until the second health bar is fully depleted. The escape sequence follows the victory immediately, so do not stop moving during the final exchange. Confirm that the boss has actually fallen before relaxing, because a last skull wave or urn zone can still damage Zagreus before the combat room closes.
- Use burst damage after a completed attack or during a stationary summon.
- Spend defensive resources to prevent a death when several hazards overlap.
- Keep moving until the victory sequence has definitely begun.
Before you move on
- Hades’s second health bar is completely depleted and the victory sequence begins.
- The attempt continues beyond the boss arena to the surface, confirming that the encounter was cleared.
- For the next attempt, note whether you reached the second phase with Death Defiances, Call charge and a usable pillar route remaining. This identifies whether the next improvement should focus on safer Styx preparation or recognizing the boss’s attack windows.
Charon, Special Rooms, and Strategic Risk/Reward
Optional rooms can improve the current escape attempt or advance permanent relationships, but none is required for campaign progress. Use Charon’s ordinary shops to repair a weak build, preserve enough Obols for later healing or combat upgrades, and skip dangerous reward rooms when your health or damage is poor. The Obol sack that triggers Charon’s optional boss fight appears only after the first successful escape and is not found in boss-adjacent shops or the Styx Mega-Shop. Infernal Troves are timed reward chests whose value decays while their guardians remain alive. Infernal Gates are separate no-hit challenges unlocked through the House Contractor and Pact of Punishment. Sisyphus, Eurydice, and Patroclus advance relationship progress and provide temporary run benefits, but their rooms do not automatically award Ambrosia or Companions.
Read the door symbols and judge the route before entering
A Charon Shop is identified by its shop symbol and contains no combat encounter. Charon offers current-run purchases such as Boons, Centaur Hearts, Poms of Power, and healing. Inspect the available items before spending Obols. A Boon is most valuable when it fills an empty Attack, Special, Cast, Dash, or Call slot, or directly improves the weapon action carrying your build. A Centaur Heart is useful when additional maximum Life gives you room to survive a difficult boss. A Pom is strongest when it improves a central damage or defensive Boon rather than an effect you rarely use.
A skull under a chamber reward marks a more dangerous encounter, usually an Elite or miniboss room. The upgraded reward is optional. Compare it with the safer doors and consider your current Life, Death Defiance charges, defensive effects, damage output, and remaining recovery options. If the run is fragile, take a reliable reward instead of gambling the escape for a higher-rarity item.
- Check current Life and remaining Death Defiance charges before selecting a risky door.
- Compare the displayed reward with safer alternatives.
- Keep some Obols available for a later heal, Heart, or essential combat purchase.
Use ordinary Charon Shops to repair a weak build
Spend Obols to solve an immediate run problem. Buy healing when damage has accumulated and the next route contains a difficult encounter. Buy a Centaur Heart when extra maximum Life will protect the run through unavoidable chip damage. Buy a Pom when one of your main Boons already defines the build. Buy a Boon when a core combat slot is empty or when the offered effect fits your weapon’s attack rhythm and existing effects.
Do not spend every Obol on a minor upgrade simply because it is available. A later Charon Shop, Well of Charon, or Styx purchase may offer a stronger recovery option. Darkness, Keys, Gemstones, and Nectar are permanent resources, but they should usually be secondary to immediate survival during a promising escape attempt. All ordinary shop purchases affect only the current run and are lost when the attempt ends.
- Prioritize healing, a Heart, or a build-defining Boon over a small resource purchase.
- Leave enough Obols for a possible later shop or recovery item.
- Buy permanent-resource items only when the run is already stable.
Challenge Charon only after the fight becomes available
After Zagreus has completed one successful escape, a sack containing Obols can sometimes appear in a mid-region Charon Shop. Interacting with it starts an optional encounter and transports Zagreus to Charon’s arena in Erebus. The sack does not appear in every shop. It cannot appear in the Charon Shop immediately before a region boss or in the large shop area in the Temple of Styx. This encounter is never required for reaching the surface or completing the campaign.
Charon attacks with wide oar swings, projectiles, a floor wave, and a close-range shockwave that can punish an immediate return to melee range. Keep moving, use Dash to pass through dangerous attacks, and avoid trading blows directly in front of him. Pillars can block some incoming attacks, but do not remain trapped against them. Wait for a committed swing or projectile sequence to finish, land a short burst of damage, and disengage before the next pattern begins.
You do not need to defeat Charon completely. When his Life reaches approximately one-fifth of its starting amount, he ends the encounter and awards the Loyalty Card. The card reduces the prices of later Charon Shops and Wells of Charon for the remainder of that escape attempt. Leave the Obol sack alone when you are low on Life, have already spent important Death Defiance charges, or lack dependable damage. The discount is useful only if you can survive the detour and still have future purchases to make.
- Look for the Obol sack only in eligible mid-region Charon Shops after your first escape.
- Treat the sack as an optional boss fight, not as a normal purchase.
- Use Dash, pillars, and short damage windows instead of standing in front of Charon.
- Stop attacking when Charon withdraws at low health and collect the Loyalty Card.
Treat Infernal Troves as timed optional combat rooms
An Infernal Trove is a special chest that begins a timed combat challenge when opened. Enemies spawn around the chest, and the displayed reward loses value while the encounter continues. The timer stops when all guardians are defeated, allowing you to collect the remaining reward. Troves can offer current-run or permanent resources, and a Trove may also provide a small chance of bonus Nectar after its guardians are defeated.
Use area damage, crowd control, and a Call early if several enemies appear together. Open the chest when your room-clearing damage is strong enough to eliminate waves quickly. If you are already injured or your build depends on slow single-target attacks, skip the Trove and preserve health for the region boss. Enemies created by the Trove should not be treated as a normal source of Obol drops; the chest’s reward is the reason to accept the challenge.
- Open a Trove only when your build can clear groups quickly.
- Use room-clearing effects before enemies surround the chest.
- Collect the reward immediately after the guardians are defeated and reassess the next chamber.
Use Sisyphus, Eurydice, and Patroclus for separate relationship progress
Special NPC chambers are marked by an exclamation symbol. Sisyphus appears in Tartarus, Eurydice in Asphodel, and Patroclus in Elysium. Each room is safe to enter, provides a temporary benefit or resource interaction, and advances that character’s permanent relationship when you speak with them. Take the room when the route can spare the detour, especially when your combat build is already stable.
Their temporary room rewards and House relationship systems are separate. Giving Nectar to an eligible character can unlock a Keepsake and advance affinity. Further gifts, completed favors, and dialogue can unlock Companions or other relationship rewards. Entering one of these chambers does not automatically grant Ambrosia or a Companion. After returning to the House, speak with characters and check the Codex or Fated List when a relationship milestone appears.
Ambrosia is a permanent resource. Spend it only when the character’s next Ambrosia gift is available and you want to advance that character’s favor, affinity, or Companion path. Do not use Ambrosia merely because an NPC chamber appeared during a run.
- Enter Sisyphus, Eurydice, or Patroclus when the detour will not endanger the escape.
- Distinguish the room’s temporary reward from the character’s House-based affinity progression.
- Check for new dialogue, favors, and gift opportunities after returning to the House.
Enter Infernal Gates only when you can attempt a no-hit challenge
Infernal Gates are optional challenge entrances unlocked by purchasing the Gateways, Erebus renovation from the House Contractor and activating enough Heat through the Pact of Punishment. The entry thresholds are 5 Heat in Tartarus, 10 in Asphodel, and 15 in Elysium. They are not part of the required route to the next region.
Inside an Infernal Gate, defeat the encounter without taking damage to receive the enhanced version of the reward shown before entry. A successful clear can improve a Boon, Pom, Obol, or maximum-Life reward depending on the chamber. The challenge is not an ordinary timed Trove room, so prioritize safe positioning over reckless speed. If Zagreus is hit, the enhanced reward is forfeited and the room provides a Red Onion that restores one Life instead. The gate is therefore worthwhile only when you can protect the run while attempting the no-hit condition.
Skip the gate when you are near death, missing essential defensive tools, or carrying a build that cannot control the arena. After a failed or costly detour, choose reliable healing, shops, or safer chamber rewards until your Life and defenses are stable again.
- Confirm that the Gateways, Erebus renovation and the required regional Heat are active.
- Enter only when you can reasonably avoid all damage.
- Remember that taking a hit forfeits the enhanced reward rather than ending the entire escape.
- Treat the Infernal Gate as optional and return to safer rewards if the run becomes unstable.
Before you move on
- You can identify Charon Shops, skull-marked encounters, Infernal Troves, NPC chambers, and Infernal Gates from their chamber symbols.
- You have used an ordinary Charon Shop to make a deliberate current-run purchase while preserving resources for later recovery.
- You know that the Obol sack becomes available after the first successful escape and starts an optional Charon encounter.
- You understand that Charon withdraws at low health and awards a Loyalty Card that discounts later Shops and Wells during that escape attempt.
- You can distinguish a timed Infernal Trove from a no-hit Infernal Gate.
- You have entered an NPC chamber or completed a House gift step with the correct expectation that affinity, favors, Ambrosia, and Companions progress separately.
- You can finish a region with enough Life, Obols, and combat power to continue toward its boss without taking every optional reward.
Pact of Punishment (Heat): Choosing Modifiers and Managing Rewards
After your first successful escape, the Pact of Punishment appears in the courtyard of the House of Hades. It lets you add Conditions that raise Heat and make future escape attempts harder. Heat and bounty progress are tracked separately for the Stygian Blade, Heart-Seeking Bow, Shield of Chaos, Eternal Spear, Twin Fists and Adamant Rail. Each weapon has its own next bounty target. Use the Pact to earn repeatable Titan Blood, Diamonds, Ambrosia and later replacement Darkness, but remember that Heat is optional for the story. The safest progression is to meet the next displayed target with a manageable combination of Conditions, then increase the target one step at a time after a successful escape.
1. Open the Pact and identify the selected weapon’s target
After defeating Hades for the first time, return to the House and walk to the Pact of Punishment in the courtyard. The Pact is available for normal escape attempts and remains optional; it is not required for the credits, the true ending or the epilogue. Select the weapon you intend to carry before choosing Conditions.
The Pact screen shows the weapon’s current target Heat and the four boss reward panels. The target belongs only to that weapon. A clear with the Bow does not advance the Blade, Shield, Spear, Fists or Rail. Check the display before every run because switching weapons also switches to that weapon’s own bounty ladder.
On a normal save, the first Heat-based bounty tier begins at 1 Heat. Heat 0 rewards are tracked separately and cannot be claimed later by clearing at a higher Heat. If you have not yet completed the Heat 0 run for a weapon, finish that separate clear before treating the Heat ladder as your main resource route.
- Select the weapon you will actually use.
- Read that weapon’s displayed target Heat.
- Check which boss panels still show their rare bounty rewards.
- Remember that the Pact is optional for narrative progress.
2. Set only enough Heat for the next bounty tier
Each Condition contributes a stated amount of Heat. To claim the next bounty tier, set the Pact to at least the displayed target and defeat the final boss. Meeting the target exactly is normally safest. You may run above the target, but the game awards the lowest outstanding tier for that weapon rather than letting you skip ahead through every intervening bounty level.
For example, if the weapon’s next target is 2 Heat and you complete a 5-Heat escape, the run satisfies the outstanding 2-Heat tier. After the final boss is defeated, that weapon’s target advances to the next uncompleted tier. The additional Heat does not immediately grant every skipped tier.
The four normal bounty sources are fixed: the Furies award Titan Blood, the Lernaean Bone Hydra awards a Diamond, Theseus and Asterius award Ambrosia, and Hades awards Titan Blood. Once a weapon has claimed a boss bounty at a particular tier, repeating that tier does not produce another copy of the rare item. The run must reach the final boss for the weapon’s bounty ladder to advance.
- Set Heat to the displayed target or slightly above it.
- Do not assume a high-Heat clear skips all lower bounty tiers.
- Defeat Hades to advance the weapon’s target.
- Reopen the Pact afterward and verify the new target.
3. Start with predictable Conditions
Hard Labor increases damage dealt by all foes. It is easy to understand, but every mistake costs more health. Lasting Consequences reduces healing effectiveness and is best left for runs in which you already avoid most damage. Convenience Fee raises prices at shops and Wells of Charon, so it is less dangerous when your build does not depend on frequent purchases.
Jury Summons increases the number of foes in standard Encounters. It can be manageable with wide-area attacks, wall-bounce effects or a strong Call, but it becomes risky when combined with other Conditions that already make rooms crowded. Choose one familiar penalty first rather than stacking several unfamiliar effects.
There is no universally correct lowest-Heat combination. A ranged build may tolerate extra enemies but suffer badly from faster foes, while a close-range build may prefer slower enemies and normal damage. Read the Conditions as a package and choose penalties that interfere least with the weapon Aspect and Boons you plan to use.
- Begin with one familiar Condition.
- Avoid combining reduced healing with increased enemy damage until you clear reliably.
- Keep enough Obols for essential healing or a late shop purchase.
- Favor area damage when using Jury Summons.
4. Practice boss-changing Conditions separately
Extreme Measures changes bosses in order. Rank 1 modifies the Furies, rank 2 modifies the Bone Hydra, rank 3 modifies Theseus and Asterius, and rank 4 changes the Hades encounter. These are altered boss fights, not simple health increases. Practice each rank before relying on it for a new bounty target, especially Extreme Measures 4.
Heightened Security greatly increases damage from traps and environmental hazards. It is particularly dangerous in Asphodel, where lava can turn a positioning mistake into a lost Death Defiance. Forced Overtime makes enemies and bosses faster, reducing the time available to react to telegraphed attacks.
Middle Management changes selected miniboss Encounters, and Benefits Package gives some ordinary foes additional traits. Their effects can combine in ways that are difficult to predict on a first attempt. If an unfamiliar room combination defeats you, repeat the target with fewer overlapping Conditions instead of immediately adding more enemy damage.
- Treat each Extreme Measures rank as a separate practice goal.
- Avoid pairing Forced Overtime with a boss-changing Condition on your first attempt.
- Use Heightened Security only when you are comfortable avoiding traps and lava.
- Reduce overlapping Conditions after a failure caused by unfamiliar mechanics.
5. Build around the main penalty
Choose your Aspect, Keepsake and Mirror setup after reading the selected Conditions. Against increased enemy damage, favor safe range, damage reduction, deflection, crowd control or dependable mobility. Against additional enemies, use area attacks and effects that keep foes away from Zagreus. If healing is weakened, prioritize avoiding damage instead of trading health for faster kills.
Tight Deadline adds a timer to the escape attempt. Select a weapon and build that defeat ordinary rooms efficiently, but do not panic and take unnecessary risks. Spend less time on optional fights and shopping detours unless their reward directly supports the run. Learn the timer on a low target before combining it with other difficult Conditions.
Underworld Customs requires you to purge a Boon between regions. Before selecting it, identify which Boon can be sacrificed without breaking your attack, Special, Cast, Dash or defensive plan. Purging a central damage Boon can leave the run weaker than the Heat value suggests.
- Match the Aspect to the principal Condition.
- Maintain one reliable damage source and one emergency defensive tool.
- Do not select Tight Deadline without a fast, practiced room-clear plan.
- Do not select Underworld Customs until you know which Boon can be removed.
6. Use optional Heat milestones after bounty progress is stable
The normal bounty ladder reaches Heat 20 for each weapon. It is tracked independently for all six weapons, so a long-term resource plan can rotate through weapons instead of forcing one weapon to climb immediately. After the rare bounty at a tier has already been claimed, later clears at that same tier provide a lesser replacement reward rather than another Titan Blood, Diamond or Ambrosia.
The Pact also contains optional milestones. Defeating the final boss at 8, 16 and 32 Heat unlocks Skelly’s cosmetic statues for the House courtyard. These statues do not advance the story and are not required for the credits or epilogue. Infernal Gates also become available at specified Heat totals when their other requirements are met, making them challenge or resource options rather than campaign necessities.
For consistent progression, keep a record of each weapon’s next target and the Conditions that caused trouble. Raise one major difficulty element at a time. If you can clear a target repeatedly without depending on one lucky Boon combination, move that weapon to the next target. If not, lower the experimental Conditions while keeping the required Heat.
- Use the Pact screen to track each weapon separately.
- Treat Heat 8, 16 and 32 statue goals as optional.
- Raise one major difficulty element at a time.
- Do not risk narrative progress for a cosmetic milestone.
Before you move on
- The Pact screen displays the selected weapon’s next target Heat and remaining boss bounties.
- After a successful escape, the selected weapon’s eligible boss panels award their listed bounty resources.
- After defeating Hades, the selected weapon’s target advances to its next uncompleted tier.
- You can clear the current target without relying on a single unusually lucky Boon combination.
- For optional mastery, the relevant 8-, 16- or 32-Heat Skelly statue milestone is shown as completed in the Pact progression.
Companions, Hearts, Nectar and Ambrosia: Building Bonds and Story Progression
The epilogue has separate milestones. First, defeat Hades and successfully escape ten times. This brings Persephone back to the House and leads to the credits milestone, but it does not finish the complete narrative. Next, fulfill The Queen's Plan by forming qualifying bonds with any six of the nine Olympians and advancing the required favors and dialogue. Six Nectar gifts or six partially filled affinity bars are not enough. Continue speaking with Persephone, Hades, Zeus, Demeter and other characters whenever new dialogue appears. After The Queen's Plan, Family Reunion requires invitations to Zeus, Poseidon, Athena, Aphrodite, Ares, Artemis, Dionysus, Hermes and Demeter. Track missing Olympians with the Fated List and collect their normal Boon conversations during later escape attempts. Chaos is not one of the nine Family Reunion invitees. Chaos-related affinity, dialogue and any optional invitation are separate content and do not block the final gathering. Companions, romances and unrelated affinity goals are optional.
Reach the credits milestone before beginning the epilogue work
Defeat Hades and successfully escape ten times. Count only runs that reach the surface; failed attempts and runs abandoned with Give Up do not count as successful escapes. Continue returning to the House normally after each clear so the next story conversations can occur.
After the tenth successful escape, keep speaking with Persephone and Hades in the House. The credits milestone comes before the full epilogue. Persephone's return and the credits do not by themselves complete The Queen's Plan or Family Reunion.
After later runs, talk to anyone showing new dialogue instead of immediately beginning another escape. Zeus and Demeter are especially important to the family-related story, but dialogue can be delayed when several conversations are waiting. If a prophecy does not advance, complete another run, return normally and clear the available conversations.
- Record ten successful escapes to the surface.
- Confirm that Persephone has returned to the House and the credits milestone has occurred.
- Speak with Persephone, Hades and characters showing new dialogue after subsequent runs.
Give Nectar until the next heart locks
Give Nectar to the Olympians you intend to use for The Queen's Plan, then inspect each character's affinity row in the Codex. When the next heart displays a keyhole, stop giving that character more Nectar. The locked heart indicates that a favor, story event or other prerequisite must be completed first; additional gifts do not bypass it.
Develop more than six Olympian candidates when possible. God appearances are random, and an individual relationship may stall behind a delayed favor or conversation. Keeping several candidates in progress gives you alternatives if one bond cannot advance immediately.
The first Nectar gift to an Olympian normally awards that god's Keepsake. Use a Keepsake to improve the chance of encountering that god later when appropriate, but owning the Keepsake does not complete the bond and does not guarantee that every later Boon offer will contain the dialogue you need.
- Inspect the Codex affinity row after important gifts.
- Stop gifting when the next heart is locked.
- Keep several Olympian candidates progressing until six qualifying bonds are secure.
Resolve favors before spending Ambrosia
When a character's favor becomes available, complete its associated dialogue or House requirement. Then continue gifting when the game accepts the next gift. Ambrosia cannot replace the favor that opens a locked relationship, so do not spend it while the affinity row is still blocked.
The nine Olympians relevant to this story are Zeus, Poseidon, Athena, Aphrodite, Ares, Artemis, Dionysus, Hermes and Demeter. Their relationship thresholds and prerequisites are not identical. Most qualifying Olympians require progression through the locked-heart favor and the next accepted gift; Hermes has a different threshold, and Demeter's relationship is handled specially because her final heart is not required before the epilogue.
Demeter can still contribute to the six qualifying bonds through the progression available before the epilogue. You do not need to wait for a final Demeter heart that the game keeps unavailable until later. Companions are separate optional rewards: they can help in combat and support broader relationship completion, but they are not required for The Queen's Plan or the normal Family Reunion gathering.
- Complete a character's favor before expecting its remaining hearts to open.
- Spend Ambrosia only when the game accepts it for that relationship.
- Treat Companion acquisition, upgrades and romance routes as optional.
Fulfill The Queen's Plan with six qualifying Olympian bonds
The Queen's Plan requires qualifying bonds with any six of the nine Olympians. Six Nectar gifts are not sufficient, and six partially filled affinity bars do not satisfy the prophecy. Advance each selected character through the applicable favor, accepted gifts and required dialogue until the game recognizes the bond.
The commonly used qualifying thresholds are seven hearts for Zeus, Poseidon, Athena, Aphrodite, Ares, Artemis and Dionysus; eight hearts for Hermes; and six hearts for Demeter using her available pre-epilogue progression. The important practical rule is to follow the locked-heart state and the accepted gift prompt rather than spending resources blindly.
The prophecy also depends on story dialogue. Continue taking Boons from the gods and speaking with Persephone and Hades in the House. Make sure the relevant Zeus and Demeter conversations about Persephone and the family have occurred. If six bonds appear complete but The Queen's Plan remains unfinished, complete another escape, return normally and exhaust available conversations. Use the Fated List as your progress check.
- Confirm six qualifying bonds rather than six partial affinity bars.
- Complete the required favors and accepted Ambrosia gifts.
- Continue House conversations with Persephone, Hades, Zeus and Demeter.
- Check the Fated List if the prophecy does not advance.
Start Family Reunion and invite the nine Olympians
Family Reunion begins after The Queen's Plan has been fulfilled. The required invitation list is Zeus, Poseidon, Athena, Aphrodite, Ares, Artemis, Dionysus, Hermes and Demeter. Use the Fated List before each run to see which Olympians remain missing.
During later escape attempts, collect a missing god's Boon when that god appears as a normal chamber reward. The invitation conversation occurs through the appropriate Boon interaction. You do not need a completed bond with every invited god, so Olympians not used for The Queen's Plan can still be invited.
An Olympian Keepsake can usually help target a missing god by directing a later Boon opportunity toward that god. Hermes is the exception: his Keepsake does not summon him, so take Hermes's Boon whenever a chamber offers it.
Some Boon situations may not produce the invitation line, including certain Charon-shop purchases, Duo Boon offers or replacement conversations after refusing a god. When targeting a missing Olympian, prefer an ordinary chamber Boon reward. If the invitation does not appear, return to the House normally, check the Fated List and try again on a later run; another important conversation may have taken priority.
Chaos is not one of the nine Family Reunion invitees. Chaos-related affinity, dialogue and any separate Chaos invitation content are optional. They do not count toward the nine Olympian invitations and do not block the final House gathering. Do not delay Family Reunion while trying to complete Chaos content.
- Wait until Family Reunion is active before collecting invitations.
- Invite Zeus, Poseidon, Athena, Aphrodite, Ares, Artemis, Dionysus, Hermes and Demeter.
- Check the Fated List after each normal House return.
- Use ordinary chamber Boon rewards when targeting a missing Olympian.
- Treat Chaos-related dialogue and invitations as optional.
Return normally and trigger the final House gathering
After the ninth Olympian invitation registers, finish the run or allow Zagreus to fall and return to the House normally. Do not use Give Up to force an immediate return after an invitation conversation: Give Up restores the latest House save and can discard progress from the current attempt.
At the House, inspect the Fated List and speak with Persephone. The final gathering triggers after the required Olympian invitations have registered and the relevant House dialogue is available. If the gathering does not occur immediately, complete another run and clear any waiting Persephone or Hades dialogue.
The narrative epilogue is complete when The Queen's Plan has been fulfilled, Family Reunion records all nine Olympian invitations and the final House gathering has occurred. Chaos does not need to be completed for this check. Remaining Companions, romances, Mirror ranks, weapon Aspects, Heat bounties and unrelated character favors are optional.
- Confirm The Queen's Plan is fulfilled.
- Confirm the Fated List records all nine Olympian invitations.
- Return to the House normally rather than using Give Up.
- Speak with Persephone and verify that the final House gathering has occurred.
- Treat Chaos, Companions, romances, Heat and unrelated affinity goals as optional.
Before you move on
- Persephone has returned to the House after ten successful escapes and the credits milestone has occurred.
- The Queen's Plan is fulfilled with six qualifying Olympian bonds and the required story dialogue.
- Family Reunion is active only after The Queen's Plan is complete.
- The Fated List records invitations for Zeus, Poseidon, Athena, Aphrodite, Ares, Artemis, Dionysus, Hermes and Demeter.
- Chaos-related affinity, dialogue or invitation content has not been mistaken for a Family Reunion requirement.
- The invitation run was finished or ended normally rather than abandoned with Give Up.
- After all nine Olympian invitations register, the final Persephone and House gathering has occurred.
- Any unfinished Companion, romance, Heat, weapon or unrelated affinity objective is correctly treated as optional.
Permanent Unlocks, Weapon Mastery and Post-Credits Progression
Hades has three useful narrative checkpoints. Defeating Hades and reaching the surface ten times brings Persephone back to the House and leads to the credits. Continue speaking with Persephone, Hades and the Olympians afterward to fulfill The Queen’s Plan through six qualifying Olympian relationships and their associated dialogue. Family Reunion then requires invitations to all nine Olympians: Zeus, Poseidon, Athena, Aphrodite, Artemis, Ares, Dionysus, Hermes and Demeter. Track the remaining invitations through the Fated List and trigger the final House gathering through Persephone. Chaos is separate optional content. Chaos does not count as one of the nine Olympians, is not required for Family Reunion, and is not required to trigger or complete the final gathering. Weapon Aspects, Mirror completion, Heat bounties, Companions, maximum relationship ranks and unrelated prophecies are optional long-term goals.
Spend permanent resources before planning the next run
When Zagreus returns to the House, inspect the Mirror of Night before spending Darkness on decorative Contractor items. Mirror talents provide permanent run improvements, while Chthonic Keys unlock Infernal Arms and additional Mirror options. Prioritize upgrades that make your preferred weapon safer and more consistent, but do not treat one talent arrangement as mandatory; the best choices depend on your weapon, Aspect and comfort with combat.
Visit the weapon courtyard and inspect the six Infernal Arms. Unlocking every weapon is not required for the credits or epilogue, but each arm has its own moveset and Heat bounty track. Keep enough Keys for a planned weapon or Mirror unlock instead of automatically trading every spare Key at the Wretched Broker.
Review the Fated List of Minor Prophecies after major story events. It helps track permanent rewards and relationship objectives, but completing every prophecy is not required for the campaign ending. The narrative prophecies relevant to this chapter are The Queen’s Plan and Family Reunion.
- Check the Mirror after House returns.
- Unlock weapons or useful Mirror options before low-priority cosmetics.
- Use the Fated List to distinguish story objectives from optional prophecies.
Unlock and upgrade Aspects with Titan Blood
Titan Blood is spent at the weapon racks to reveal and upgrade Aspects. Select the weapon and Aspect before entering a run; its altered attack, Special, Cast or other mechanics apply only to that weapon. Start with one or two Aspects whose rhythm you understand instead of distributing Blood across every arm without a practice plan.
Each Infernal Arm has four Aspects. The Zagreus Aspect requires five Titan Blood to reach maximum rank, while the other Aspects require larger total investments. Fully upgrading all 24 Aspects requires 306 Titan Blood, making complete Aspect mastery a long-term project rather than a prerequisite for the credits or epilogue. A partially upgraded Aspect is still usable, and no specific Aspect is required for Family Reunion.
A hidden Aspect does not appear merely because you have accumulated Titan Blood. Hidden Aspects require the relevant weapon investment, story progression and awakening conversation. If one does not appear, continue speaking with the appropriate character and check that weapon’s requirements rather than spending Blood at random. Test a newly revealed moveset in the courtyard before combining it with unfamiliar Heat modifiers.
- Choose an Aspect at the weapon rack before each escape attempt.
- Spend Titan Blood on weapons you are prepared to practice.
- Treat all-Aspect completion as optional for the narrative route.
- Check a hidden Aspect’s awakening requirements before pursuing it.
Use Heat for optional weapon mastery, not story progression
After you can clear with a weapon, inspect the Pact of Punishment to see that arm’s next available bounty. Set only the Heat needed for the reward you intend to claim. The story does not require Heat, and you do not need to raise every weapon to the same level.
Use a familiar Aspect when testing a new Pact condition, or keep Heat low while learning a newly unlocked Aspect. This separates the difficulty of the weapon from the difficulty of the modifier and makes failed attempts easier to diagnose. Raise Heat gradually after you can complete the current setup reliably.
Titan Blood, Diamonds and Ambrosia from bounty progression are useful for long-term unlocks, but do not select an unfamiliar weapon solely for its reward if it repeatedly causes late-run failures. Track each arm’s next bounty independently in the Pact display.
- Check the Pact before selecting a weapon.
- Use low Heat for unfamiliar Aspects or modifiers.
- Raise Heat one manageable step at a time.
- Track bounty progress separately for each Infernal Arm.
Complete ten escapes and see the credits
The first narrative milestone is ten successful escapes. Defeat Hades and reach the surface ten times, using any weapon and any Heat level. The tenth successful escape brings Persephone back to the House and leads to the credits. Do not count an attempt that ends before reaching the surface, and do not treat the first escape as the end of the campaign.
After the credits, continue from the same save. Return to the House after runs and speak with Persephone and Hades whenever they have available dialogue. Continue taking Olympian encounters as well, because their conversations and relationship conditions are part of the next stage.
If a required character is absent or has no useful line, make another escape attempt and check the House again. Important story conversations are distributed over repeated visits rather than presented in one post-credits conversation.
- Reach the surface successfully ten times.
- See the credits after the tenth successful escape.
- Continue House conversations after the credits.
- Keep taking Olympian encounters while post-credits dialogue advances.
Fulfill The Queen’s Plan through six qualifying Olympian bonds
The Queen’s Plan is a separate post-credits objective. It requires qualifying bonds with six of the nine Olympians: Zeus, Poseidon, Athena, Aphrodite, Artemis, Ares, Dionysus, Hermes and Demeter. Six Nectar gifts alone are not enough. For each selected god, continue the relationship until the locked affinity requirement and associated story condition have been resolved, then keep meeting that god until the relevant dialogue has played.
Affinity requirements are not identical across the pantheon. Most gods require additional relationship progress after their condition is addressed, while Hermes and Demeter use different requirements. Use the heart display and the character’s dialogue as the authority for whether a bond is ready; do not assume that a single Ambrosia gift or a nearly full-looking bar has completed the requirement.
The plan also depends on House dialogue connected to Persephone, including conversations involving Zeus and Demeter. Keep speaking with Persephone, Hades and the gods after runs. If six relationships appear advanced but The Queen’s Plan does not complete, the missing piece is usually an unresolved relationship condition, a queued god conversation or a required Zeus, Demeter or House exchange. Continue meeting the relevant god rather than spending gifts blindly.
- Choose six of the nine Olympians to develop first.
- Resolve each selected god’s affinity, story condition and required dialogue.
- Continue Zeus, Demeter, Persephone and Hades conversations.
- Wait for The Queen’s Plan to register before pursuing Family Reunion.
Complete Family Reunion by registering all nine Olympian invitations
Once The Queen’s Plan is fulfilled, Family Reunion becomes the next narrative objective. It requires a registered invitation from every Olympian: Zeus, Poseidon, Athena, Aphrodite, Artemis, Ares, Dionysus, Hermes and Demeter. Chaos is not part of this list.
The invitations are delivered through eligible Olympian boon encounters during escape attempts. When the god appears as a normal chamber reward, take the boon and continue the conversation until the invitation is registered. The Fated List identifies which names remain. A god may fail to deliver the invitation if another important line has priority, so meet that god again on a later run.
For ordinary Olympian doors, equipping the missing god’s Keepsake can help bring that god into the run when its selection effect is available. Hermes is the exception: Lambent Plume does not force a Hermes appearance. Take Hermes’s available boon and dialogue whenever he appears. A boon bought from Charon, a Duo Boon selection or a replacement offer after refusing a god may not provide the required invitation conversation, so use a normal eligible encounter instead.
Check the Fated List between runs and work through the missing names one at a time. You do not need all nine gods in a single escape attempt. After the ninth Olympian invitation is registered, return to the House and follow the available Persephone and Hades dialogue.
- Confirm that Family Reunion is active.
- Register invitations from Zeus, Poseidon, Athena, Aphrodite, Artemis, Ares, Dionysus, Hermes and Demeter.
- Use the Fated List to identify missing Olympians.
- Use a missing god’s Keepsake when appropriate, but do not expect Lambent Plume to force Hermes.
- Do not count Chaos toward the nine required invitations.
Treat Chaos as optional separate content
Chaos has separate affinity, dialogue and invitation content, but Chaos is not one of the nine Olympians required by Family Reunion. A Chaos invitation does not replace any Olympian invitation and does not count toward the Fated List requirement for the final House gathering.
Do not delay Family Reunion while raising Chaos’s affinity or pursuing Chaos-related dialogue. If you enjoy completing optional relationship content, continue gifting Chaos and following the relevant House conversations after the main epilogue. Those activities are separate from the required Olympian invitation route.
If the Fated List still shows an unfinished Family Reunion objective, check the nine Olympian names rather than searching for a Chaos requirement. The final gathering is triggered by the required Olympian invitations and the associated House dialogue, not by Chaos.
- Treat Chaos affinity and invitation dialogue as optional.
- Do not count Chaos as an Olympian invitation.
- Do not delay the final gathering for Chaos content.
- Check the nine Olympian names when Family Reunion remains incomplete.
Trigger the final House gathering and verify completion
After the nine Olympian invitations are registered, finish the run or otherwise return to the House. Speak with Persephone and follow the available House dialogue. The final gathering scene is the epilogue closure; reaching the surface ten times and seeing the credits is not enough by itself.
If the gathering does not trigger, check Family Reunion for a missing Olympian. Then make another run, seek the missing god through an eligible encounter and return to the House. Also speak with Persephone, Hades and the relevant Olympians when they have dialogue, because a queued conversation can delay the scene.
Do not add Chaos to the completion requirements. Chaos is optional whether or not you have pursued that character’s affinity. The concrete completion check is the final House gathering and the fulfilled Family Reunion entry on the Fated List.
- All nine Olympian invitations are registered.
- Return to the House after the final required invitation.
- See the final gathering with Persephone and the reunited family.
- Confirm Family Reunion is fulfilled on the Fated List.
- Record Chaos as optional rather than required.
Use post-epilogue runs for focused completion goals
After the gathering, set one objective before each run. Good targets include claiming the next manageable Titan Blood bounty, learning a hidden Aspect, earning Ambrosia for a Companion, completing a Minor Prophecy or raising a weapon’s Heat. Separating goals prevents rare resources from being spent without a plan.
For weapon mastery, rotate through the Infernal Arms and claim each next bounty at a Heat level you can clear consistently. For relationship completion, gift Nectar or Ambrosia in the House, equip a useful Keepsake when appropriate and continue taking the character’s encounters. For Mirror completion, save Darkness for remaining talents and remember that alternate talent choices are separate options rather than simultaneous effects.
Contractor work orders, the Wretched Broker, Resource Director ranks, Companions, maximum Heat and optional Chaos content support long-term completion but are not required for the campaign epilogue. Spend practical resources first, then use surplus currency on cosmetics and collection goals.
- Set one concrete post-epilogue objective per run.
- Track Titan Blood, Aspects, Mirror talents, Companions and prophecies separately.
- Use manageable Heat for bounty farming.
- Treat Chaos affinity and invitation dialogue as optional.
- Spend surplus resources on optional collection goals.
Before you move on
- Ten successful escapes are complete and the credits have rolled.
- The Queen’s Plan has been fulfilled after six qualifying Olympian bonds and its associated dialogue conditions.
- Family Reunion is active and invitations from Zeus, Poseidon, Athena, Aphrodite, Artemis, Ares, Dionysus, Hermes and Demeter are registered.
- The final House gathering with Persephone and the reunited family has occurred.
- Family Reunion is marked fulfilled on the Fated List.
- Chaos affinity and invitation content are recorded as optional and are not used as a completion requirement.
- Remaining Aspects, Mirror talents, Companions, Heat bounties and unrelated prophecies are recorded as optional goals.
Mid-Run Troubleshooting, Recovery and Safe Play Patterns
A weak run is not automatically lost, but recovery requires changing priorities. Check health, Death Defiance charges, and whether your main attack or Special is functioning before choosing the next chamber. Favor healing, maximum health, defensive Boons, compatible damage upgrades, and shops over optional high-risk encounters when your margin is small. Use Dash to cross telegraphed attacks and reposition rather than repeatedly dashing without a plan. Against groups, remove enemies that create projectiles or arena hazards before ordinary melee targets. Save Calls and burst attacks for boss recovery windows or dangerous phases. Fated Authority can alter eligible chamber rewards, while Fated Persuasion changes choices inside Boon offers and Wells of Charon; neither guarantees a particular result. If you die, permanent resources collected during the run remain available in the House. If you select Give Up, the game abandons the attempt and returns you to the latest House save, so resources gathered during that attempt are not a safe reason to quit.
1. Diagnose the run before choosing the next door
After each chamber, check your current health, remaining Death Defiance charges, and the performance of your main damage source. If you are losing health quickly, stop selecting rooms solely for damage or rare rewards. Look for a Fountain Chamber, Charon’s Shop, a Centaur Heart, a defensive Boon, or another recovery option when one is available. Fountain Chambers must be unlocked through House Contractor renovations and do not appear automatically in every early run.
Match the next reward to the problem you are currently experiencing. If your Attack already deals good damage but enemies reach you, favor a Dash upgrade, defensive effect, crowd-control Special, Cast support, or maximum-health increase. If you survive comfortably but armored enemies take too long to defeat, choose a damage upgrade for the attack or Special you actually use most often. A small increase to an unrelated ability is usually less useful than improving the action carrying the run.
- Check health and Death Defiance before every door choice.
- Choose rewards that repair the current weakness instead of merely adding a small bonus.
- Do not treat a rare-looking or skull-marked reward as mandatory if reaching it may cost a Death Defiance.
2. Use recovery rooms and shops deliberately
A Fountain Chamber restores health after its encounter and is especially valuable before a regional boss. Take the recovery whenever the restored health materially improves your chance of surviving the next section. If a Fountain is not available, consider Charon’s Shop, a Centaur Heart, or a Well of Charon purchase that directly supports survival. Charon’s inventory varies, so do not assume every shop will contain healing. Compare the available Boon, Pom, Heart, and other offerings against your current health and build before spending.
Avoid Infernal Troves and other optional timed challenges when you are already struggling. Infernal Troves add a time-sensitive combat encounter, and the reward is not worth sacrificing a Death Defiance merely to gain a modest short-term benefit. Enter one when you have enough health, reliable area damage, and a clear reason to want its reward. The same principle applies to skull-marked encounters and optional miniboss rooms: increased rewards are useful only if you can survive the added pressure.
- Take a Fountain Chamber when its healing meaningfully improves your boss margin.
- At a shop, buy a recovery or maximum-health option first if one mistake could end the run.
- Keep enough Obols for a later shop when the next region or final approach may offer a more valuable purchase.
- Skip optional timed encounters when your health or damage is already failing.
3. Change your combat rhythm when health is low
Do not stand in front of an enemy simply because your weapon can reach it. Attack once or twice, Dash through or away from the incoming danger, then re-enter after the enemy finishes its attack. Against ranged enemies, move laterally around the room and use pillars, walls, and other obstacles to break projectile lines. If an enemy is armored or has a long recovery animation, use that recovery to apply your strongest damage instead of trading hits during its active attack.
Dash provides a brief invulnerable period, but repeated Dashes without a destination can leave Zagreus beside a hazard when the protection ends. Use Dash to cross a telegraphed attack, escape a damaging zone, pass behind an enemy, or reach a safer side of the room. When several enemies are active, prioritize the enemy creating unavoidable pressure, such as a projectile user, bomb carrier, shielded threat, or summoned hazard, before chasing a weaker melee target.
Against bosses, use Calls, powerful Specials, Cast ammunition, and other burst tools during clear recovery windows. Continue moving when a boss becomes protected or temporarily untargetable. Attacking into a shield or phase transition wastes time and can place Zagreus in danger without advancing the fight.
- Attack from the edge of your weapon’s range when possible.
- Use Dash to cross or escape a specific threat, not simply whenever it is available.
- Remove enemies that create projectiles or arena hazards before ordinary melee targets.
- Stop attacking during shields, invulnerability, and phase transitions.
4. Use Mirror rerolls to repair the plan
If the Mirror of Night has Fated Authority active, you can spend one of its dice to alter an eligible upcoming chamber reward before entering that chamber. Use it when the displayed reward does not support your build or when changing from one eligible reward pool to another would substantially improve the run. The result remains governed by the game’s reward rules: Fated Authority does not let you name a specific God, Boon, Hammer, Heart, or item, and it cannot freely alter shops, friendly NPC chambers, regional passages, or boss rooms.
Fated Persuasion is a separate Mirror talent. It rerolls the choices presented inside a Boon offer and can also reroll eligible choices in a Well of Charon. Use it when the current options fail to support your weapon or when a defensive or compatible choice is more important than a minor damage increase. It does not turn a Boon offer into any arbitrary reward type, and it does not guarantee a particular rarity or God.
Do not spend every reroll early while the run is still functioning. Save at least one charge for a later chamber where a defensive option, compatible Boon, or recovery purchase could prevent a collapse. If you have no rerolls, take the best available option and adjust your combat rather than forcing a narrow build.
- Use Fated Authority before entering the affected chamber.
- Use Fated Persuasion after a Boon or Well of Charon choices are displayed.
- Remember that rerolls alter eligible random choices; they do not guarantee a specific reward.
- Do not spend every die before reaching the dangerous part of the run.
5. Decide whether to finish or abandon the attempt
There is no mid-run retreat to the House that preserves your current Boons, health, Obols, or temporary purchases. If you die, the temporary build ends and you return to the House, but permanent resources collected during the attempt remain available for Mirror, Contractor, weapon, or relationship progression. This makes a failed escape useful even when the combat result is poor.
The Give Up option is different from dying. Selecting it abandons the attempt and returns you to the latest House save. Do not use Give Up merely to preserve Darkness, Gemstones, Keys, or Nectar collected during the current run; those resources are not safely banked by abandoning. If the run is still playable, continue and try to die naturally or complete the escape. If you are deliberately testing a weapon or learning a boss and no longer want to continue, Give Up is appropriate, but treat the attempt as discarded.
When a run is clearly failing, play conservatively for permanent resources only if you can collect them without taking reckless fights. Choose safe Darkness, Gemstone, Key, or Nectar rooms when they appear, and avoid optional minibosses or Infernal Troves that could end the attempt for a minor reward. A controlled death preserves what you gathered, advances some dialogue, and gives you a clear reason to improve the next build.
- Continue if your main Attack, Special, Cast, or Dash can still defeat ordinary enemies safely.
- On a failing run, prefer safe permanent-resource rooms when the route offers them.
- Do not select Give Up expecting to keep resources gathered since the run began.
- Use Give Up only when you intentionally want to discard the attempt and return to the House save.
- After death, spend the preserved resources and adjust the next weapon, Mirror setup, or Keepsake choice.
Before you move on
- You can identify whether the next priority is healing, defense, damage, or permanent resources before choosing a chamber.
- You can survive an underpowered room by attacking from safe angles, using Dash to cross telegraphed attacks, and disengaging instead of trading health.
- You know that Fountain Chambers, Shops, Hearts, and some Wells can support recovery, while optional timed challenges are discretionary.
- You understand that Infernal Troves and skull-marked encounters offer greater risk and reward rather than mandatory progress.
- You can distinguish Fated Authority’s chamber-reward rerolls from Fated Persuasion’s Boon and Well of Charon rerolls.
- You understand that dying ends the temporary build but preserves permanent resources already collected, while Give Up discards the current attempt and returns you to the House save.
Checklist to Reach the True Ending, Credits and Epilogue
Hades has two connected narrative milestones. First, defeat Hades and reach the surface ten times. The tenth successful escape brings Persephone back to the House and leads to the credits. The later epilogue begins with The Queen’s Plan, which requires the necessary House and Olympian dialogue plus qualifying bonds with six of the nine Olympians. Once that prophecy is fulfilled, Family Reunion asks you to invite Zeus, Poseidon, Athena, Aphrodite, Artemis, Ares, Dionysus, Hermes, and Demeter. Deliver those invitations through eligible Olympian Boon conversations, then return to the House and speak with Persephone to trigger the final gathering. Chaos is not one of the nine Family Reunion invitees. Chaos affinity, Nyx conversations, and a Chaos invitation are optional side content and cannot prevent Family Reunion from being completed. Heat, God Mode, weapon choice, Aspects, Mirror ranks, Companions, romances, and unrelated prophecies are not required for this campaign endpoint.
1. Complete ten successful escapes and watch the credits
A successful escape is a run in which Zagreus defeats Hades and reaches the surface. Count completed escapes, not attempts. Deaths, abandoned runs, and victories that occur before the Hades fight do not advance this story milestone. You may use any weapon, Aspect, Keepsake, Mirror setup, Heat level, or God Mode setting; choose the configuration that gives you the most reliable clears.
After each escape, return to the House and speak with Persephone whenever she has new dialogue. These conversations advance the return-home storyline. Continue defeating Hades until the tenth successful escape. Persephone then returns to the House and the credits begin. Allow the credits to play before moving on to the epilogue checklist.
- Record only runs that defeat Hades and reach the surface.
- Complete ten successful escapes.
- Allow the credits to play.
- Return to the House after the credits.
2. Advance the post-credits conversations
After the credits, speak with Persephone and Hades whenever they have new dialogue. The next story stage does not appear simply because the escape counter reached ten; it is advanced through additional House conversations and normal runs. Continue starting runs, whether they end in victory or death, and check the House after each return.
If a required conversation is not available, talk to the other House characters who have dialogue, begin another run, and return again. The game can place important lines behind the current conversation sequence, so the absence of a prophecy or exclamation mark does not mean the save is broken. Continue until Persephone introduces the plan and The Queen’s Plan appears on the Fated List of Minor Prophecies.
- Speak with Persephone after the credits.
- Speak with Hades and clear available House dialogue.
- Start additional runs to advance the post-credits sequence.
- Confirm that The Queen’s Plan appears on the Fated List.
3. Fulfill The Queen’s Plan through six qualifying Olympian bonds
The Queen’s Plan uses the nine Olympians who later receive invitations: Zeus, Poseidon, Athena, Aphrodite, Artemis, Ares, Dionysus, Hermes, and Demeter. You need qualifying bonds with six of them. Six Nectar gifts alone are not enough. Each selected god requires the relevant relationship progress, including the god’s favor or required dialogue and the subsequent bond condition shown by the heart track.
Choose six gods whose Boons you regularly encounter, then give Nectar whenever the gift option is available. Complete each selected god’s favor and keep taking that god’s Boons in later runs so its dialogue can advance. Hermes and Demeter have different relationship conditions from most of the other Olympians, so follow the heart track and the prophecy rather than assuming every god uses the same threshold.
Continue speaking with Persephone and Hades in the House. Zeus and Demeter also need their relevant Persephone-related conversations before the prophecy can finish. If six heart tracks appear complete but The Queen’s Plan remains unfinished, check for a locked heart, unfinished favor, or missing dialogue instead of spending Ambrosia randomly. The Fated List is the progress authority for this stage.
- Select six Olympians from the nine-god pool.
- Raise each selected god to a qualifying bond.
- Complete each selected god’s favor or locked-heart condition.
- Continue taking their Boons and exhausting their available dialogue.
- Complete the required House, Zeus, and Demeter-related conversations.
- Confirm that The Queen’s Plan is marked fulfilled.
4. Begin Family Reunion and invite the nine Olympians
After The Queen’s Plan is fulfilled, Persephone presents the next task and Family Reunion appears on the Fated List. Its required invitees are exactly Zeus, Poseidon, Athena, Aphrodite, Artemis, Ares, Dionysus, Hermes, and Demeter. No other character is part of this required nine-god invitation list.
An invitation is delivered through the appropriate Olympian conversation when you accept that god’s Boon as a chamber reward during a run. If one god is not appearing, equip that god’s Keepsake before starting a new escape; this can direct a future god encounter toward the chosen Olympian. Hermes is the exception to this planning method, so accept Hermes’s Boon whenever he appears normally.
Do not assume every way of obtaining a Boon delivers the invitation. A Boon bought from Charon, a Duo Boon offer, or a replacement Boon after refusing a god during a Trial of the Gods encounter may not trigger the required invitation conversation. If the prophecy does not update, check the missing name and take that god’s ordinary chamber-reward Boon in a later run.
- Confirm that Family Reunion is active.
- Invite Zeus, Poseidon, Athena, Aphrodite, Artemis, Ares, Dionysus, Hermes, and Demeter.
- Use eligible chamber-reward Boon conversations.
- Check the Fated List between runs.
- Verify that all nine Olympian entries are complete.
5. Treat Chaos as optional side content
Chaos is not one of the nine Olympians required by Family Reunion. A Chaos affinity track, conversations with Nyx about Chaos, and a Chaos invitation are separate optional content. They do not add a tenth required invitation, do not replace an Olympian invitation, and cannot block the final Family Reunion gathering.
You may pursue Chaos dialogue and affinity if you want the additional scenes, but do not delay the campaign finish while trying to make Chaos appear on the Fated List. The required checklist remains the six qualifying Olympian bonds for The Queen’s Plan, followed by the nine Olympian invitations for Family Reunion.
- Do not count Chaos as one of the nine Olympian invitees.
- Do not treat Chaos affinity as a prerequisite for Family Reunion.
- Pursue Chaos dialogue only as optional side content.
6. Trigger the final House gathering
After the ninth Olympian invitation is registered, finish the current run or otherwise return to the House. Check Family Reunion on the Fated List to confirm that Zeus, Poseidon, Athena, Aphrodite, Artemis, Ares, Dionysus, Hermes, and Demeter are all marked complete. The prophecy should then direct you to report to Persephone and Hades.
Speak with Persephone in the House. This triggers the final gathering scene with the House and Olympian story participants. If the scene does not occur immediately, start another run, return to the House, and speak with Persephone and Hades again. Also check the Fated List for an invitation that failed to register; a full-looking relationship display does not prove that the invitation conversation played.
- All nine Olympian invitations are complete.
- Family Reunion shows no missing Olympian entry.
- Return to the House after the final invitation.
- Speak with Persephone and Hades.
- Watch the final gathering scene.
- Confirm that Family Reunion is fulfilled.
7. Apply the complete campaign check
The first narrative milestone is complete when ten successful escapes have been recorded and the credits have played. The full campaign goal for this chapter is complete only when The Queen’s Plan has been fulfilled, Family Reunion has registered all nine Olympian invitations, and the final House gathering has occurred.
You do not need every weapon Aspect, Mirror talent, Keepsake rank, Companion, romance, Heat bounty, Chaos relationship, or unrelated prophecy. Those systems continue after the epilogue and are separate completion goals. If the final scene has played and Family Reunion is fulfilled, the requested campaign endpoint is complete even if substantial optional content remains.
- Ten successful escapes are complete.
- The credits have played.
- The Queen’s Plan is fulfilled.
- Family Reunion is active and then fulfilled.
- Zeus, Poseidon, Athena, Aphrodite, Artemis, Ares, Dionysus, Hermes, and Demeter are marked invited.
- The final House gathering scene has played.
- Chaos-related content may remain incomplete.
- Heat, Aspects, Mirror ranks, Keepsakes, Companions, and unrelated prophecies may remain incomplete.
Before you move on
- Ten successful escapes have been completed and the credits have played.
- The Queen’s Plan is fulfilled through six qualifying Olympian bonds and its required dialogue.
- Family Reunion is active.
- Zeus, Poseidon, Athena, Aphrodite, Artemis, Ares, Dionysus, Hermes, and Demeter are all marked invited.
- The final House gathering scene has played after returning to the House and speaking with Persephone.
- Family Reunion is marked fulfilled.
- Chaos is not required and may remain incomplete.
- Heat, weapon mastery, Mirror completion, Companions, romances, and unrelated prophecies may remain incomplete.
Finishing up
Defeat Hades and reach the surface ten times; count successful escapes, not attempts or deaths.
Allow the post-tenth-clear scenes and credits to play.
After the credits, advance the required House and Olympian dialogue until The Queen's Plan is fulfilled through six qualifying Olympian bonds and its associated story conditions.
Complete Family Reunion by registering invitations from all nine Olympians, then return to the House and trigger the final gathering with Persephone.
Verify both milestones in the game: the credits have played, and Family Reunion is marked fulfilled in the Fated List after the gathering scene.
Treat remaining weapon Aspects, Mirror talents, Companions, Keepsake ranks, Heat bounties and unrelated prophecies as optional post-epilogue content.
Choose your next gameScreenshots & video
Game imagery for reference. Follow the written chapters above for the route and strategies.
Sources & references
Our original guide draws on the references below. Check the edition at the top of this page before following controls or unlock requirements.
- Hades FAQ — Supergiant Games
- Hades FAQ - Supergiant Games Blog
- Hades: Now Out of Early Access!
- Hades: Coming to Nintendo Switch!
- Pact of Punishment - Hades Wiki
- Hades Wiki: Hades Combat
- Mirror, Keepsakes and Companions Reference: Hades systems - Game Design Lab
- Wretched Broker - Hades Wiki
- House of Hades | Hades Wiki
- Hades: Infernal Arms
- Hades weapon upgrades and how to get more Titan Blood
- Hades Trophy Guide & Roadmap
- Hades: Boons — Hades Wiki
- Hades: Duo Boon — Hades Wiki
- Hades: Mirror of Night - Hades Wiki
- Work Orders — Hades
- Boons and Gods Reference: Hades systems
- Hades for Nintendo Switch - Nintendo Official Site
- Keepsakes - Hades Wiki
- Tartarus — Hades Wiki
- Furies — Hades Wiki
- Chambers and Encounters — Hades Wiki
- Hades for Nintendo Switch - Nintendo Official Site
- Asphodel | Hades Wiki
- Lernaean Bone Hydra | Hades Wiki
- Enemies and Bosses Reference: Hades systems
- Elysium | Hades Wiki
- Theseus and Asterius | Hades Wiki
- Asterius/Combat | Hades Wiki
- Theseus | Hades Wiki
- Rooms, Rewards and Heat Reference: Hades systems
- Hades: Now Out of Early Access! — Supergiant Games
- Temple of Styx - Hades Wiki
- Temple of Styx | Hades Wiki
- Styx - Hades Walkthrough - Neoseeker
- Styx - Hades: Loot | Quest Compendium
- Hades Wiki: Hades Combat Details
- Hades Guides: Boss Patterns and Builds
- Hades: Charon - Hades Wiki
- Charon/Combat - Hades Wiki
- Infernal Trove - Hades Wiki
- Erebus Gate - Hades Wiki
- Guide for Hades - Underworld Reoccurring Things / First Run
- Charon - Hades Wiki
- Pact of Punishment · Hades Guide
- Epilogue Guide - Hades Wiki
- Fated List of Minor Prophecies - Hades Wiki
- Hades Trophy Guide - The Wayside
- Hades Trophy Guide & Road Map
- Persephone dialogue documentation - Hades-Dialogues
- Titan Blood - Hades Wiki
- Hades 1 Epilogue: True Ending Requirements
- Mirror of Night — Hades Wiki
- Saving your Progress — Hades Wiki
- Guide for Hades - One for the Ages
About the game & collecting notes
- Platform
- Nintendo Switch
Step-by-step campaign walkthrough for Hades on Nintendo Switch: prepare the House, improve the Mirror and weapons, clear Tartarus, Asphodel, Elysium and the Temple of Styx, defeat Hades, complete ten successful escapes to trigger Persephone's return and the credits, then complete the separate Queen's Plan and Family Reunion objectives for the narrative epilogue.
Darryl Polo
Darryl Polo writes about emulation and retro games. What changes when an old favorite moves to another setup? That question connects his interest in tinkering with the games that made the hardware worth keeping.
Our editorial standardsFound a step that needs another look? Help us improve this guide.