
Ghost of Tsushima: Director's Cut (PS5) — Complete Campaign Walkthrough
Step-by-step campaign walkthrough for Ghost of Tsushima: Director’s Cut on PlayStation 5, covering the three-act Jin’s Journey story, Iki Island expansion, combat preparation, boss approaches, progression checkpoints, and post-game completion checks. The guide covers the base campaign through The Tale of Lord Shimura, all 9 Iki Main Tales, all 7 Iki Side Tales, and both Iki Mythic Tales. Friend to All Raiders requires all 18 of those Iki Tales: 9 Main, 7 Side, and 2 Mythic. Treasures of the Past separately requires the same 2 Iki Mythic Tales. The six Unwritten Tales exist for Common Courtesy; after the relevant patch, only five are required for that trophy, and all Unwritten Tales remain outside this campaign-focused goal.


Find a copy
Ghost of Tsushima: Director's Cut Sony PlayStation 5
We may earn a commission if you buy through these links, at no extra cost to you. As an Amazon Associate I earn from qualifying purchases.
Opens retailer search results. Check the model, edition, seller, availability and current price before buying.
Before you begin
This guide takes you through Ghost of Tsushima: Director’s Cut on PS5, from the Komoda Beach prologue through all three Jin’s Journey acts and the Iki Island expansion.
Follow the ordered chapters for the base campaign, then use the Iki cleanup sections to verify all 9 Main Tales, all 7 Side Tales, and both Iki Mythic Tales. Friend to All Raiders requires all 18 of these Tales. Treasures of the Past is verified separately from the same two Mythic Tales. The six Unwritten Tales are separate Common Courtesy content; after the relevant patch, only five are required for that trophy.
The final choice changes the ending scenes and Ghost Armor dye, but either choice completes the campaign. Preserve a manual save before that choice if you want to view both outcomes without replaying the entire campaign.
PS5-specific features such as improved loading, haptic feedback, adaptive triggers, Japanese lip-sync, and enhanced display options are edition features; they do not change the route or prerequisites.
Set yourself up for the run
Install the Director’s Cut edition and confirm PS5 enhancements in the options menu (Performance vs Resolution mode; DualSense haptics/adaptive triggers).
If you have a PS4 save, transfer it using the in-game save transfer tools to continue on PS5.
If starting new, plan to reach Toyotama (Act 2) to unlock Iki Island content.
Reference: PlayStation Blog guidance on save transfer and Iki unlock.
Familiarize yourself with both samurai stances and Ghost tools early — they’re required at different story beats.
Allocate Technique Points to at least one stealth tool and one combat stance before mid-game.
Enable accessibility/combat assists if you want target lock-on or alternate control layouts added in Director’s Cut patches.
Decide whether you prefer a stealth-first Ghost approach or direct samurai duels; both are viable but certain tales and boss encounters favor one approach — carry appropriate gear (smoke bombs and kit for stealth; heal and posture mitigation for duels).
Use fast travel pillars as map unlocks become available; plan side activities to acquire specific armor or technique upgrades before high-difficulty main missions.
Back up saves if you intend to experiment with the two possible final choices; the story’s last missions include an irreversible choice that determines the ending scene you’ll view.
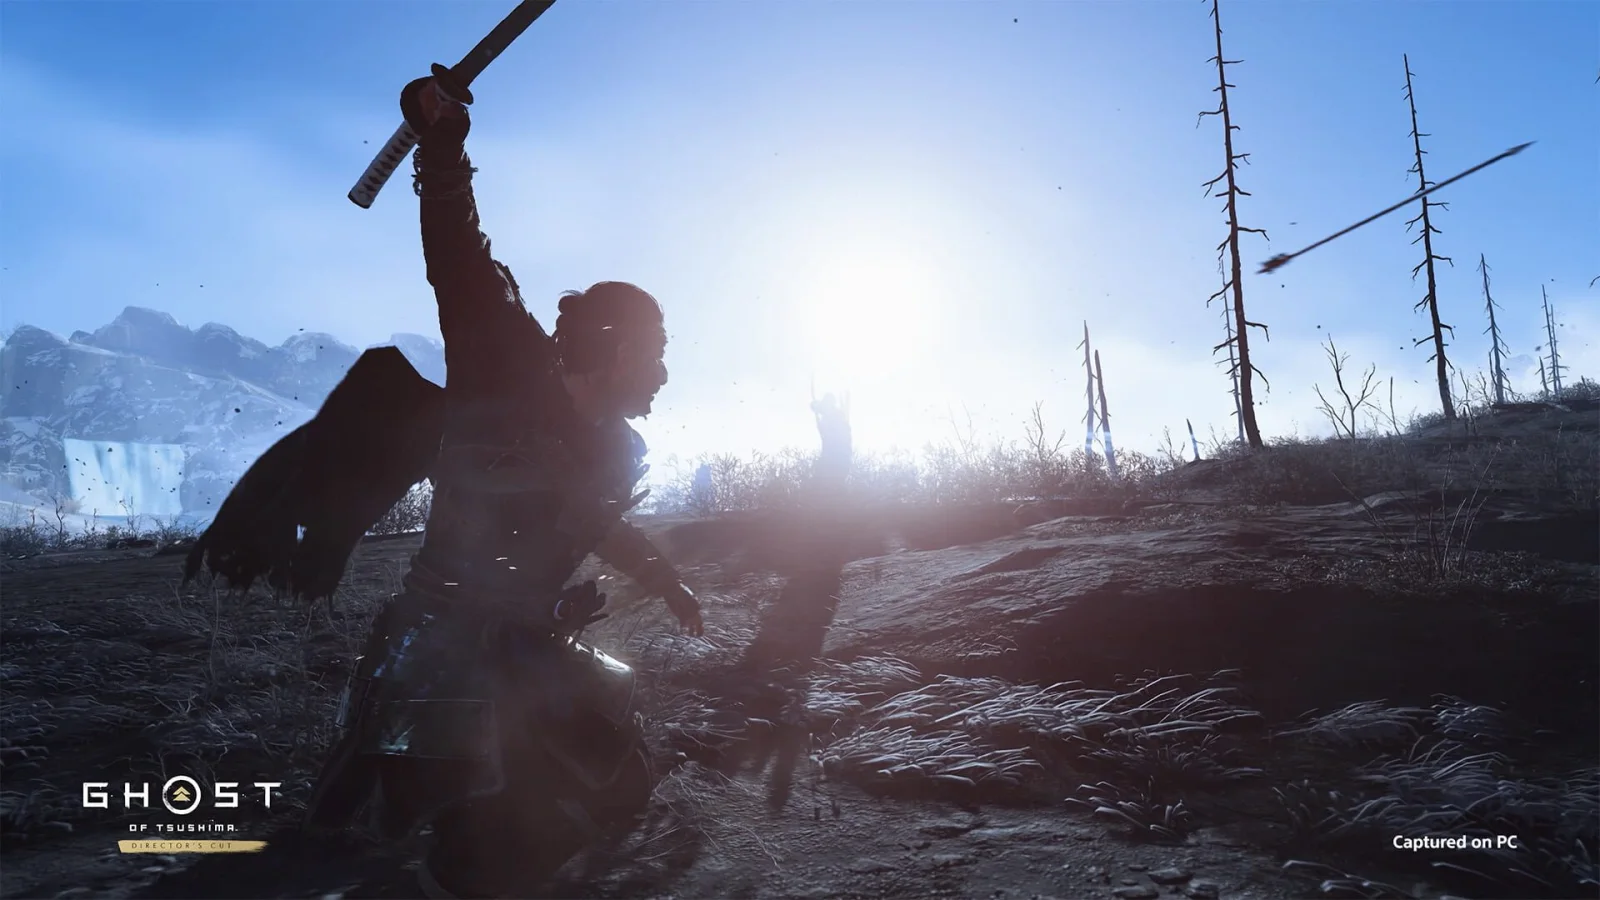
Prologue: Komoda Beach — Learn basic controls and survive the invasion
Ghost of Tsushima: Director’s Cut begins with Jin Sakai’s failed defense of Komoda Beach, his recovery in an occupied village, and his rescue by Yuna. The prologue teaches movement, blocking, quick and heavy attacks, guard breaking, healing, parrying, dodging, archery warnings, and Standoffs. It also introduces basic stealth movement through crouching, cover, rooftops, and tall grass, but it does not provide a normal assassination tutorial: when Yuna suggests sneaking past three Mongols, Jin instead challenges them openly. Smoke bombs, advanced stances, and most Ghost tools are unavailable. The section ends after the scripted defeat by Khotun Khan, the Sakai-family flashback, and the hiding sequence in pampas grass. Only then does free exploration begin, with the Izuhara map and early main Tales available.
1. Follow Lord Shimura through the Komoda Beach battle
Move forward with Lord Shimura and attack Mongols along the marked route. Use Square for quick attacks and keep Jin near the allied samurai. This opening battle is a scripted sequence, not an area that can be won or fully cleared. Continue advancing until the Mongol assault overwhelms the samurai and the story takes control.
Use L1 to block ordinary attacks when the game gives you room to practice. Do not search the beach for collectibles or attempt to change the outcome. Jin’s defeat and the following cutscene are required parts of the prologue.
- Stay with Lord Shimura.
- Practice quick attacks and blocking when safe.
- Continue until the scripted defeat and cutscene.
2. Leave the shelter and enter the occupied village
After Jin wakes in the rock shelter, examine the nearby points of interest as requested, then follow the path toward the overlook. When you reach the narrow gap, press R2 to squeeze through. Continue down toward the burning village and follow the trail without trying to fight the Mongols below.
At the house, investigate the indicated clues and inspect the container to recover Jin’s damaged armor. Leave through the prompted route to meet Yuna. When the armored Mongol enters, remain hidden and let the scene play out. Yuna kills the soldier and explains that she rescued Jin from the beach.
- Examine the shelter clues.
- Squeeze through the rock gap with R2.
- Inspect the container and recover Jin’s armor.
- Allow Yuna’s rescue scene to finish.
3. Learn basic stealth movement while following Yuna
Follow Yuna through the window and stay crouched whenever she crouches. When Mongols patrol nearby, use logs, buildings, walls, and other cover to break their line of sight. Move after the detection indicator clears and continue along Yuna’s route.
The prologue teaches stealth positioning rather than assassination. There is no required assassination prompt here. When Yuna later suggests sneaking around three Mongols, Jin refuses and initiates an open fight, so do not wait for a stealth-kill command that does not appear.
Crawl under the indicated structures, use the window and rooftop route, and climb when prompted. Supplies inside the buildings are optional. They provide early materials but are not needed to finish the prologue.
- Crouch when Yuna does.
- Hide behind cover until the detection indicator clears.
- Use windows, rooftops, and crawl spaces as directed.
- Do not expect an assassination tutorial in this chapter.
- Collect Supplies only if desired.
4. Recover the katana and complete Lord Shimura’s flashback
Continue through the occupied village and enter the final building with Yuna. Climb through the window and take Jin’s katana from the container at the far side of the room. This triggers a flashback to Jin training with Lord Shimura.
Complete the combat lessons in order. Square performs quick attacks, Triangle performs heavy attacks, and holding Triangle produces a thrust. Heavy attacks pressure an enemy’s guard and create an opening when the guard breaks. The tutorial then introduces blocking with L1, healing with Down on the directional pad when Resolve is available, parrying, and dodging.
Watch the attack indicators carefully. Ordinary attacks can be blocked or parried, while red-glint attacks require a dodge. Finish the final sparring exercise against Shimura to end the flashback.
- Take the katana from the container.
- Complete quick-attack and heavy-attack drills.
- Practice guard breaking, blocking, healing, parrying, and dodging.
- Win the final sparring exercise.
5. Defeat the first present-day enemies
When control returns to the present, a Mongol wielding a spear attacks Jin. At this stage, do not try to parry the spear thrust. Wait for the red attack cue, dodge with Circle, and counter with quick attacks after the spear user finishes the lunge. Create distance if the enemy shoves Jin, then re-enter after the attack ends.
Follow Yuna outside. She proposes sneaking past the next group, but Jin openly challenges the three Mongols. Defeat them using the targeting lesson and watch the surrounding enemies rather than attacking continuously in one direction.
Move to the burning building and defeat the two swordsmen threatening Kiheiji, who is holding his infant son. After the conversation, Yuna explains that her brother Taka was captured, while Jin needs her help rescuing Lord Shimura.
- Dodge the spear thrust instead of attempting to parry it.
- Defeat the three Mongols after leaving the building.
- Defeat the two swordsmen near Kiheiji.
- Finish the conversation about Taka and Lord Shimura.
6. Secure the stable and choose Jin’s horse
Continue toward the stable with Yuna. Defeat the Mongols along the route and clear the group near the horses, including the spear user. Yuna assists during these encounters, but Jin must defeat the remaining enemies before the horse-selection scene begins.
Choose one of the available horses and select its name. The choice is cosmetic for the story route, although the selected horse and name remain associated with this playthrough. Jin can call the horse later by pressing Left on the directional pad.
After the cutscene, mount up and ride with Yuna toward Castle Kaneda. No weapon, armor, stance, Ghost tool, or Technique Point investment is required before leaving the stable.
- Clear the Mongols near the stable.
- Choose a horse color.
- Choose the horse’s name.
- Ride toward Castle Kaneda with Yuna.
7. Assault the approach to Castle Kaneda
When the Standoff prompt appears, press Up on the directional pad to begin. Hold Triangle and release it when the opponent commits to the attack. Continue through the castle approach and defeat the remaining Mongols.
Use heavy attacks against shielded enemies to damage their guard. When archers call out, dodge immediately after the warning and close the distance if the route allows. Use L1 against ordinary strikes and heal with Down when Jin is injured and has enough Resolve.
At the bridge, take the second Standoff opportunity if it appears, then defeat the remaining enemies blocking the route. The fight contains several enemy types, so change targets rather than remaining fixed on one opponent while an archer or spear user is active.
- Complete the first Castle Kaneda Standoff.
- Break shield guards with heavy attacks.
- Dodge after hearing an archer’s warning.
- Complete the bridge encounter and defeat the enemies there.
8. Survive the scripted Khotun Khan encounter
After crossing the bridge, Jin confronts Khotun Khan while Lord Shimura is held captive. This is not a conventional boss fight and cannot be won. You may block, dodge, and attack during the encounter, but the story must end with Jin being defeated and thrown from the bridge.
Do not reload because the Khan overwhelms you. The defeat advances the prologue, so conserve no special resources and do not search for a hidden victory condition.
- Reach Khotun Khan at the bridge’s far side.
- Survive until the story takes control.
- Accept the scripted defeat and following cutscene.
9. Hide with Yuna and unlock free exploration
After the Khan sequence, follow the Sakai-family flashback and then follow the Guiding Wind when Jin returns to the present. Move through the grassland toward Yuna. When Mongol riders search the area, crouch in the pampas grass beside Yuna and remain hidden until the patrol passes.
After the final cutscene, the prologue is complete. Jin can call the selected horse with Left on the directional pad, and the Izuhara map becomes available. The map reveals prominent locations such as Golden Temple, Castle Kaneda, Komoda Town, Hiyoshi Springs, Komatsu Forge, and Azamo Bay. Early main Tales, including The Warrior’s Code and The Tale of Sensei Ishikawa, can now be selected.
Golden Temple is a practical first destination because it provides early services and a safe place to begin the open-world portion of Jin’s Journey. Travel there or begin another available Tale according to the route you want; no optional activity is required for this chapter.
- Follow the Guiding Wind after the Khan encounter.
- Hide in the pampas grass until the Mongol riders leave.
- Complete the final cutscene.
- Confirm that the horse can be summoned.
- Confirm that the Izuhara map and early main Tales are available.
Before you move on
- Jin has recovered his katana from the occupied village.
- The Lord Shimura flashback and final sparring exercise are complete.
- The spear-wielding Mongol, village attackers, and stable attackers have been defeated.
- Jin has selected a horse and ridden with Yuna toward Castle Kaneda.
- The Castle Kaneda Standoffs and bridge encounter are complete.
- The scripted Khotun Khan defeat has occurred.
- Jin has followed the Guiding Wind and hidden in the pampas grass with Yuna while the Mongol riders pass.
- The final cutscene has finished, the horse can be summoned, and the Izuhara map is open.
- The Warrior’s Code and The Tale of Sensei Ishikawa are available as early main Tales.
- No assassination, smoke bomb, advanced stance, Ghost tool, collectible, or Technique Point purchase is required to complete this chapter.
References for this chapter
- Ghost of Tsushima - PS4 and PS5 Games | PlayStation
- Ghost of Tsushima Director’s Cut arrives on PS5 and PS4 consoles on August 20 — PlayStation.Blog
- Ghost of Tsushima: Director’s Cut Walkthrough & Guide — Attacked
- Retrieving Your Sword — Prologue — Ghost of Tsushima: Director’s Cut Walkthrough
- Ghost of Tsushima — Main Story Prologue Walkthrough
Act 1 — Establishing the Resistance in Izuhara
Build Jin’s early resistance by completing the opening Jin’s Journey Tales, recruiting Sensei Ishikawa, Lady Masako, Ryuzo, Taka, and the people of Komatsu Forge, then assaulting Castle Kaneda. The game allows flexibility in the order of several ally Tales, but The Warrior’s Code starts the sequence, The Broken Blacksmith brings Jin to Taka, and The Iron Hook provides the grappling hook needed for the castle approach. Use Izuhara camps to practice stealth, standoffs, archery, stance changes, and posture damage. Observe Mongol leaders when safe, defeat them for additional stance progress, and upgrade the katana, armor, and a few practical techniques before beginning Shadow of the Samurai.
1. Finish The Warrior’s Code and establish your first route through Izuhara
After the prologue, travel with Yuna to Kechi Fishing Village and complete The Warrior’s Code. Follow the objectives through the occupied village, using tall grass and Focused Hearing to identify patrol routes before moving. The mission introduces assassination, hiding, and the consequences of being detected, so use it to learn how to break line of sight instead of treating every alert as an immediate open fight.
When the tale ends, use the newly revealed gold markers and Guiding Wind to locate the next Jin’s Journey objectives. The Golden Temple becomes an important early refuge with merchants, a trapper, a gift altar, and information about nearby activities. Visit it before committing to a long ride across Izuhara, but do not assume that every service or upgrade is immediately available without the required materials.
- Complete The Warrior’s Code at Kechi Fishing Village.
- Use Focused Hearing and tall grass during the stealth section.
- Visit the Golden Temple and check its merchants and gift altar.
2. Recruit Sensei Ishikawa and begin the ally quest lines
Start The Tale of Sensei Ishikawa at Hiyoshi Springs. Follow the innkeeper to Ishikawa’s dojo, investigate the area, and travel with the sensei to Fort Nakayama. The mission teaches tracking, archery, and ranged target selection. When entering a hostile area, use the bow on exposed archers or isolated targets, then move through cover rather than shooting from the same position repeatedly.
Continue Ishikawa’s next available Tales when convenient, but do not postpone the other recruitment missions indefinitely. The ally chains are not merely background material: they introduce recurring characters, provide rewards, and develop combat situations that prepare Jin for later acts. Their markers appear in the Journal and on the map as gold or character-related tale icons.
- Complete The Tale of Sensei Ishikawa.
- Begin the next available Ishikawa Tale if its marker is already visible.
- Use archery from cover and relocate after enemies become alerted.
3. Complete Lady Masako’s first Tale and manage investigations carefully
Take The Tale of Lady Masako after it becomes available near the Golden Temple region. Follow Masako to the Adachi estate and investigate the marked grounds thoroughly. Search highlighted locations, inspect evidence when prompted, and follow tracks or blood trails rather than leaving the search area early. The mission shifts from investigation into combat, so refill resolve and healing before beginning if you have recently fought through a camp.
Masako’s later Tales become available through normal story progress. You can complete them as they appear or return to them before leaving Izuhara; the game does not require every side Tale before the Act 1 finale. Completing the first Tale early is still useful because it establishes a major ally and familiarizes you with objective-based investigations followed by ambushes.
- Complete The Tale of Lady Masako.
- Inspect every marked investigation point before following the next clue.
- Continue Masako’s chain when later Tales appear, but do not confuse it with a mandatory immediate prerequisite for every main Tale.
4. Recruit Ryuzo and progress toward Taka
Complete Blood on the Grass and then The Tale of Ryuzo when those markers become available. Ryuzo’s missions involve following the Straw Hat ronin and fighting in spaces where enemies can surround Jin quickly. Keep moving toward open ground, use the correct stance against the most dangerous nearby enemy, and save at least some resolve for healing rather than spending it on every offensive option.
Advance to The Broken Blacksmith to help Yuna locate Taka in Azamo Bay. Follow the planned route through the occupied settlement instead of attacking every Mongol immediately. Stealth, rooftops, and cover let Jin reach the objective with fewer enemies alerted. After Taka is rescued, continue to Hammer and Forge at Komatsu Forge. This sequence establishes the forge as the resistance’s working base and leads directly to the equipment needed for the castle assault.
- Complete Blood on the Grass when it appears.
- Complete The Tale of Ryuzo.
- Complete The Broken Blacksmith and rescue Taka.
- Complete Hammer and Forge at Komatsu Forge.
5. Earn stance progress from Mongol leaders
Occupied Mongol territories display objectives when you approach them. When a camp offers leader observation, reach the leader without being detected and hold the prompted interaction while the leader practices. Observation grants stance progress; defeating the leader afterward grants additional progress. If sneaking to the leader would expose Jin to the entire camp, leave the objective for later or take the safer route and defeat the leader normally.
Stone Stance is suited to swordsmen. Water Stance is effective against shield users once unlocked, while later stances address spearmen and brutes. Stances are not purchased with Technique Points, so do not delay a stance by saving points in the Technique menu. Switch stances during a mixed fight and use heavy attacks to damage the posture bar of the enemy type that is currently pressuring you.
- Observe a Mongol leader whenever the camp provides a safe route.
- Defeat leaders to continue stance progression.
- Use Stone Stance against swordsmen and Water Stance against shield users after unlocking it.
6. Liberate a camp and spend early upgrades sensibly
Clear at least one nearby Mongol camp before the castle finale. Begin by scouting with Focused Hearing, assassinate isolated enemies, and remove archers if they have a clear view of the battlefield. If detected, stop trying to preserve stealth at all costs: move to open ground, keep enemies in front of Jin, and use heavy attacks, parries, and dodges to prevent a surrounding attack.
Spend early Legend-earned Technique Points on abilities that fit your playstyle. The Perfect Healing Parry and Deflect Arrows are practical defensive choices, while healing-oriented Evolving Tactics can help if you frequently lose fights. Ghost weapons are unlocked individually through the technique system; do not assume smoke bombs or every other tool is available at this stage. Kunai may be available before smoke bombs, while the grappling hook requires the later Iron Hook tale.
Upgrade the katana at a swordsmith whenever the material requirement is met, and improve armor when doing so does not prevent the weapon upgrade. Equip a useful charm rather than leaving a slot empty. A fully stocked healing supply, a katana upgrade, and one or two dependable techniques matter more than saving every resource for late-game purchases.
- Liberate at least one Mongol camp.
- Clear or avoid archers before they can fire into a crowded melee.
- Spend at least one Technique Point on a practical combat or survival ability.
- Upgrade the katana if the swordsmith has the required supplies.
- Equip a charm and refill healing items before the castle sequence.
7. Obtain the grappling hook and begin Shadow of the Samurai
Complete The Iron Hook after Hammer and Forge. Taka’s work gives Jin the grappling hook, which is required for the intended approach to Castle Kaneda and remains useful for later traversal. During the fort section, use the hook only on marked grapple points; it is not a general-purpose climbing tool and cannot attach to every wall or ledge.
When the main objective returns you to Komatsu Forge, talk to Yuna to start Shadow of the Samurai once you are ready. The opening Castle Kaneda infiltration requires stealth. Move through the courtyard using cover, rooftops, and isolated assassination opportunities. If an alarm is raised during this section, the mission can fail, so do not begin the assault with the expectation that you can simply fight through detection.
After the infiltration, the mission becomes a sequence of open fights and a duel. Keep healing supplies and resolve available, eliminate ranged threats when they threaten to interrupt attacks, and change stance according to the opponent. The end of Shadow of the Samurai closes Act 1 and opens the route into Toyotama.
- Complete The Iron Hook and obtain the grappling hook.
- Return to Komatsu Forge and start Shadow of the Samurai only after upgrading your preferred equipment.
- Remain undetected during the required opening infiltration.
- Finish Shadow of the Samurai to complete the Act 1 resistance push and open Act 2.
Before you move on
- The Warrior’s Code is complete and the Golden Temple is available as an early refuge.
- The Tale of Sensei Ishikawa, The Tale of Lady Masako, and The Tale of Ryuzo are complete or have been started from their available markers.
- The Broken Blacksmith and Hammer and Forge are complete, Taka is rescued, and Komatsu Forge is established.
- The Iron Hook is complete and Jin has obtained the grappling hook.
- At least one Mongol camp has been liberated, Jin has made progress toward additional stances, and a practical Technique Point ability is equipped.
- The katana has been upgraded if materials were available, healing supplies are replenished, and Shadow of the Samurai has been completed to finish Act 1 and unlock Toyotama.
References for this chapter
Izuhara: Exploration, upgrades, and building your kit
Once Izuhara is open and Jin has access to friendly settlements, spend time improving his basic equipment before rushing through every main Tale. Use a major survivor camp as an upgrade base, visit the vendors that are actually present, and prioritize the Sakai katana plus one combat armor set instead of spreading supplies across the entire wardrobe. Traveler’s Attire is useful while revealing the map, while Samurai Clan Armor or another combat-focused set is safer for direct fights. Hot Springs permanently increase health, Bamboo Strikes increase maximum Resolve, and foxes lead to Inari Shrines that unlock additional Minor Charm slots. Arrow Peak Shrine is an especially useful early target because it awards the Charm of Inari, which improves resource collection. Complete at least one character Tale and, if available, a Mythic Tale before pushing too far into Act 1. Ordinary Tales are optional for story completion, but character Tales expand ally quest lines and Mythic Tales provide major combat rewards. Exploration is never permanently missable, so move on when your weapons, armor, techniques, and supplies are ready.
1. Choose a reliable settlement and check the vendors
After a friendly settlement or survivor camp becomes available, walk through it before leaving. A swordsmith upgrades the Sakai katana and tanto, an armorer improves armor, a trapper expands ammunition capacity in exchange for predator hides, and a merchant sells dyes and utility items. Not every settlement has every vendor, so use the map and settlement layout to find the service you need rather than assuming all upgrades are available in one place.
Spend supplies on the katana whenever you can afford an upgrade. Sword improvements raise the damage of Jin’s ordinary attacks and sword techniques, making every later fight more forgiving. Upgrade one armor set for direct combat before investing heavily in alternate outfits. Keep linen, leather, iron, steel, bamboo, yew wood, wax wood, and predator hides for equipment that supports your current playstyle instead of buying cosmetic dyes while essential upgrades remain available.
- Find a settlement with the vendor you need.
- Prioritize the Sakai katana over cosmetic purchases.
- Keep one combat armor set current.
- Visit a trapper after collecting predator hides.
2. Use Traveler’s Attire while exploring
Equip Traveler’s Attire when riding between objectives. Its exploration bonuses help reveal more of the map and detect nearby points of interest. After purchasing the relevant exploration techniques, the Guiding Wind can be directed toward Hot Springs, Bamboo Strikes, Fox Dens, Shinto Shrines, and other activity types. Switch out of Traveler’s Attire before a planned fight if you need stronger defensive, melee, stealth, or archery bonuses.
When a Mongol camp or controlled settlement lies close to your route, clearing it is often worthwhile. Eliminate every enemy and complete any listed liberation objective, then inspect the map. Liberated locations provide safer travel and become useful fast-travel destinations. You do not need to clear every camp before continuing the story, but removing nearby camps cuts down on ambushes and makes return trips easier.
- Use Traveler’s Attire between fights.
- Spend exploration Technique Points only on activity types you intend to seek.
- Liberate convenient camps on your route.
- Fast-travel from cleared locations instead of repeatedly crossing the same roads.
3. Increase health, Resolve, and charm capacity
Enter Hot Springs whenever one is nearby and complete the reflection sequence. Each completed Hot Spring permanently increases Jin’s maximum health. Bamboo Strikes increase maximum Resolve when you complete their button sequence, giving you more healing and more access to Resolve-consuming abilities. These activities are optional for the story but are practical upgrades, especially before long assaults and duels.
Find Fox Dens and follow the fox to the hidden Inari Shrine. Honoring these shrines progresses the unlocks for additional Minor Charm slots. The fox path may leave the road or climb around a cliff, so follow it rather than searching for the shrine directly. If you want a resource-focused setup, travel to Arrow Peak Shrine in Izuhara, south of Kii’s Pond. Reach the mountaintop shrine by following the torii route and platforming path; honoring it awards the Charm of Inari, which increases the supplies, predator hides, bamboo, and yew wood collected from the environment.
Shinto Shrines provide Major Charms and wax wood for bow upgrades. Some Izuhara shrine routes can be completed early, while others require the grappling hook or another traversal ability. If a route ends at an unreachable gap, mark it and return after the required tool is unlocked rather than treating it as a missed objective.
- Complete nearby Hot Springs for permanent health increases.
- Complete Bamboo Strikes when you want more Resolve.
- Honor Fox Shrines to unlock additional Minor Charm slots.
- Visit Arrow Peak Shrine for the Charm of Inari.
- Return to blocked Shinto Shrine routes after gaining the required traversal tool.
4. Match armor and charms to the activity
Use Samurai Clan Armor or another melee-oriented set for open combat while you are still learning enemy groups. Its defensive benefits make missed parries and imperfect positioning less costly. Traveler’s Attire is better for travel and discovery. If you have obtained Ronin Attire, use it when stealth is more important; if you have completed The Legend of Tadayori, Tadayori’s Armor is the stronger choice for an archery-focused approach. You do not need to maintain every outfit at the same upgrade level.
Equip the Charm of Inari while gathering materials, then replace it with a defensive or combat Major Charm before a difficult mission. Minor Charms can improve damage, survivability, Resolve gain, healing, or utility. Build each armor set around a clear purpose instead of using the same charms everywhere. On PS5, the gameplay settings include armor loadouts; enabling that option allows charms and vanity choices to be remembered separately for different armor sets.
- Use a melee set for direct fights.
- Use Traveler’s Attire for travel and discovery.
- Use a stealth or archery set only when its bonuses support the mission.
- Equip the Charm of Inari during resource-gathering trips.
- Enable armor loadouts if you want separate charm configurations.
5. Complete a character Tale and consider a Mythic Tale
When Tales for Lady Masako, Sensei Ishikawa, Yuna, Kenji, or another recurring character appear, complete at least one before advancing deep into Act 1. These missions teach different encounter types, expand the ally network, and open later parts of their quest lines. Follow the objective marker, inspect highlighted evidence during investigations, and finish the marked search area before leaving. Some character Tales become available only after additional story progress, so an absent marker is not a sign that the quest has been lost.
If a Mythic Tale is available and you are comfortable with its travel and duel requirements, completing one is an excellent preparation step. Mythic Tales provide distinctive combat rewards such as armor, weapons, or special techniques. Do not assume every ordinary secondary Tale awards a new Ghost tool or technique; most instead provide a charm, supplies, ally progress, or another quest reward. New Ghost tools also arrive through campaign progression and Technique purchases, so spend Technique Points on tools you already use rather than waiting for every optional Tale to provide one.
- Complete at least one character Tale in Izuhara.
- Inspect all highlighted clues during investigation objectives.
- Complete a Mythic Tale when its combat reward fits your build.
- Do not confuse ordinary Tale rewards with Mythic Tale rewards.
6. Prepare before returning to the main story
Open the Techniques menu after raising Jin’s Legend and spend available Technique Points. Prioritize the stance that counters the enemy weapon type appearing most often, then purchase a defensive or evasion option you can perform reliably. Add Ghost Weapon upgrades when you regularly use kunai, smoke bombs, or another available tool. There is little benefit in leaving usable Technique Points unspent when a purchased ability can immediately improve an encounter.
Before a major assault, refill arrows and Ghost Weapons at a trapper or merchant, confirm that the katana and primary armor have affordable upgrades, and equip the correct stance and charms. Use a nearby Hot Spring or Bamboo Strike if you need more health or Resolve. Then fast-travel to the next main Tale. You can return to unfinished Izuhara exploration later; the region’s activities and side Tales are not permanently locked by continuing the story.
- Spend available Technique Points.
- Restock arrows and Ghost Weapons.
- Confirm the katana and primary armor are upgraded as far as practical.
- Equip charms and armor for the next encounter.
- Fast-travel to the next main Tale when ready.
Before you move on
- The Sakai katana has received at least one practical upgrade, and one armor set is prepared for direct combat.
- At least one Hot Spring and one Bamboo Strike have been completed.
- At least one Fox-led Inari Shrine has been honored and a Minor Charm slot has been unlocked or advanced.
- The Charm of Inari has been obtained from Arrow Peak Shrine, or the shrine has been marked for a later visit if the route is not yet convenient.
- At least one Izuhara character Tale is complete, with a Mythic Tale completed as an optional combat-preparation goal when available.
- Technique Points have been spent on useful stance, defense, evasion, or Ghost Weapon upgrades.
- Arrows and Ghost Weapons are stocked, the next main Tale is reachable by fast travel, and Jin is wearing an armor set suited to that mission.
Transition to Act 2 — Reaching Toyotama and required checkpoints
Act 2 begins after you complete Shadow of the Samurai, the final main Tale of Act 1. The next main Tale, A New Horizon, starts at Castle Kaneda and takes Jin with Lord Shimura through a hidden forest route into Toyotama. Completing A New Horizon establishes Toyotama as the second explorable region and unlocks its main, side, Mythic, and activity content. The Fate of Tsushima is not this transition; it is a later Act 2 mission tied to retaking Castle Shimura. If you are moving from PS4 to PS5, transfer the campaign save before continuing, then verify the Journal, equipment, techniques, and map progress in the PS5 Director’s Cut.
1. Complete Shadow of the Samurai at Castle Kaneda
Continue the Act 1 main Tales until Shadow of the Samurai becomes available. This is the required assault on Castle Kaneda to rescue Lord Shimura. Follow the objective markers through the castle approach, use the grappling hook where directed, and fight through the compound with your allies. The mission concludes with Jin and Shimura reunited, but the Khan has already moved against Castle Shimura in Toyotama.
The Act 2 transition occurs after Shadow of the Samurai, not after The Fate of Tsushima. The Fate of Tsushima is a later Act 2 Tale, so do not wait for or search for that mission before expecting Toyotama to open. After the final cutscene in Shadow of the Samurai, check the Journal for A New Horizon.
- Shadow of the Samurai is marked complete in the Journal.
- Lord Shimura has been rescued from Castle Kaneda.
- A New Horizon is available as the next main Tale.
2. Start A New Horizon at Castle Kaneda
Begin A New Horizon from the main Tale marker at Castle Kaneda. Speak with the required characters, then meet Lord Shimura near the castle stables when the objective directs you there. Mount your horse and follow Shimura out of the castle area. The destroyed bridge prevents a direct crossing, so stay with him as he leads Jin along an older forest route into Toyotama.
Do not leave the mission to explore during this opening ride if you want to keep the sequence moving. Follow the marked path through the forest, listen for the objective update, and dismount when the Mongol patrol appears. A mounted attack is unnecessary and makes the encounter harder to control. Use the bow against exposed archers if needed, then finish the remaining patrol members with sword attacks or Ghost tools.
- A New Horizon is active in the Journal.
- You have followed Lord Shimura through the forest route.
- The patrol encounter outside the forest is complete.
3. Clear the fort and light the Toyotama lighthouse
Continue following Lord Shimura toward the fort protecting the lighthouse. Before entering the main compound, scan the approach for archers and other ranged enemies. Remove exposed archers with arrows or close the distance under cover, then enter the fort and defeat the Mongols inside. If the group surrounds you, use a smoke bomb to create space for assassinations or reposition behind cover before resuming the sword fight.
After the fort is secured, follow the objective to the lighthouse and light it. This is the mission’s required regional landmark and confirms that Jin has established a foothold in Toyotama. Finish the remaining conversations and scenes instead of riding away immediately. The mission awards a Major Legend Increase and then releases you into Act 2 exploration.
- The fort in A New Horizon is cleared.
- The lighthouse has been lit.
- The mission’s final scenes have played and Jin is free to continue in Toyotama.
4. Confirm that Toyotama is fully available
When A New Horizon ends, open the map and verify that Toyotama is an active region rather than merely a visible area beyond the border. Its settlements, Tales, Mythic Tales, enemy territories, and exploration activities should now be available. The Journal should also show new Act 2 objectives, including the next main-story route toward the resistance effort and Castle Shimura.
Use the map to select a newly available Toyotama location or ride a short distance from the mission’s ending point. Fast travel may be unavailable during a brief story transition, but it should return once the mission sequence has fully ended. If a particular Tale does not appear, check its prerequisite in the Journal rather than assuming the region failed to unlock. Some Tales become available only after related characters or story missions are completed.
- Toyotama can be selected and explored on the map.
- A New Horizon is marked complete.
- New Act 2 Tales and regional objectives are visible in the Journal.
5. Spend resources before taking on the first Toyotama objectives
Before committing to the next large Act 2 mission, spend any available Technique Points on tools that match your combat habits. Stone Stance remains the appropriate stance for swordsmen, while Water, Wind, and Moon Stance become more useful when their matching enemy types appear. If your stance set is already adequate, a Ghost weapon, resolve, healing, or defensive upgrade can provide more immediate value than saving points indefinitely.
Check your armor, charms, arrows, and Ghost weapons at a settlement or merchant. Samurai Clan Armor is useful for direct fights, while a stealth-focused set helps when approaching camps through grass and cover. Upgrade the katana or tanto when you have sufficient supplies, but do not treat full Izuhara completion as a prerequisite for Act 2. The story can continue without every camp, shrine, or side Tale being finished.
- Your preferred armor and charms are equipped.
- At least one useful stance or Ghost technique is upgraded.
- Healing supplies and Ghost weapons are replenished before the next major encounter.
6. Transfer and verify a PS4 campaign save on PS5
If you began on PS4, sign in to the same PlayStation Network account on the PS5. You can transfer saved data through the console’s PS4-to-PS5 data-transfer process, PlayStation Plus cloud storage, or the Director’s Cut’s supported PS4 save-transfer process. Keep the original PS4 save until the PS5 version has loaded and been checked.
Launch Ghost of Tsushima Director’s Cut on PS5 and use the available PS4 save import or transfer option when presented. Select the Jin’s Journey campaign save, not a Legends-only save. After loading, open the Journal and confirm the expected Tale completion, then check the map region, armor, charms, Technique Points, and weapon upgrades. Only delete or overwrite the source save after the PS5 campaign state is correct.
- The PS5 Director’s Cut recognizes the intended PS4 campaign save.
- The Journal shows the expected Act 1 or Act 2 Tale completion.
- Your equipment, techniques, and map progress match the source campaign.
7. Decide when to begin Iki Island
After Toyotama is available and A New Horizon has been completed, look for the Iki Island Tale Journey into the Past. Its starting investigation is at Drowned Man’s Shore in Toyotama. If the Tale is not immediately visible in the Journal, travel to that area and inspect the nearby objective marker after confirming that A New Horizon is complete.
Starting Journey into the Past begins Iki Island’s introductory sequence. The game temporarily restricts normal travel back to Tsushima during part of that sequence, so finish any urgent shopping, weapon upgrades, or preparations first. You may begin Iki at this point, or postpone it and continue Act 2 until Jin has stronger equipment and more techniques. Do not mistake Iki’s availability for completion of the main campaign; it is an additional Director’s Cut story branch.
- Journey into the Past is available in Toyotama.
- You have prepared supplies before accepting the Iki departure sequence.
- You understand that starting Iki temporarily limits return travel to Tsushima.
Before you move on
- Shadow of the Samurai is complete.
- A New Horizon is complete and the Toyotama lighthouse has been lit.
- Toyotama is open for exploration and its regional Tale markers are visible.
- At least one stance, Ghost technique, or survival upgrade has been purchased for Act 2 encounters.
- A transferred PS4 save shows the expected Jin’s Journey progress on PS5.
- Journey into the Past is visible if you intend to begin the Iki Island expansion next.
References for this chapter
- Ghost of Tsushima DIRECTOR’S CUT — PlayStation Store
- Transfer data from a PS4 console or PS5 console to your PS5 console — PlayStation Support
- A New Horizon — Ghost of Tsushima Walkthrough
- A New Horizon — Ghost of Tsushima Walkthrough & Guide
- Ghost Of Tsushima: How To Unlock The Iki Island Expansion
- Ghost of Tsushima Journey Into the Past Walkthrough
- The Fate of Tsushima — Ghost of Tsushima Walkthrough
Act 2 — Retake Castle Shimura: mid-game tactics and stealth planning
Act 2’s castle campaign follows A Message in Fire, A Reckoning in Blood, and The Fate of Tsushima. A Message in Fire teaches you to fight alongside Lord Shimura and operate a hwacha. A Reckoning in Blood requires The Ghost of Yarikawa, A Message in Fire, and Ghosts From the Past; it is an infiltration followed by several Straw Hat and Mongol battles. The Fate of Tsushima is the major allied assault on Castle Shimura and ends when the bridge is destroyed. The castle infiltration itself begins in From the Darkness, the next tale. Complete useful companion Tales before The Fate of Tsushima if you want the strongest story order, but the mission does not permanently lock out unfinished side content.
1. Prepare before starting the castle sequence
After completing A New Horizon and reaching Toyotama, check the Journal for the next main Tales and visit an armorer, trapper, and merchant. Upgrade the Sakai Clan Armor if you intend to rely on Standoffs and direct combat. Samurai Clan Armor is a sound defensive alternative, while Ronin Attire remains useful for stealth approaches. Refill arrows, kunai, smoke bombs, and healing supplies before beginning any long mission.
A Reckoning in Blood becomes available after The Ghost of Yarikawa, A Message in Fire, and Ghosts From the Past are complete. The Ghost of Yarikawa is the correct tale name; do not wait for a separate mission called The Ghost of Yurikawa. Complete any companion Tales you want to experience before the castle assault, especially available stages for Masako, Ishikawa, Norio, and Yuna. These are recommended for story order and rewards, not mandatory prerequisites for every stage of the castle campaign.
- Complete The Ghost of Yarikawa, A Message in Fire, and Ghosts From the Past before attempting A Reckoning in Blood.
- Upgrade one combat armor set and keep a stealth set available.
- Refill arrows, Ghost Weapons, and healing supplies.
2. Complete A Message in Fire and control the Fort Mitodake approach
Start A Message in Fire at the marked location near Umugi Cove. Enter the cove by following the path marked with red flowers, then follow the guard to Lady Sanjo. Speak with Goro, walk with him to his home, take the map, and confront the ronin at the door. Travel to Lord Shimura’s old hunting camp, speak with him, and follow the mission route to Goro’s boat and then Fort Mitodake.
At the ambush, wait for Lord Shimura to engage before attacking the patrol. From the elevated position, use an assassination or bow shots to remove isolated enemies, then stay near Shimura during the fort assault. Archers and enemies using fire should be your first ranged targets. Water Stance is effective against shield users; Stone Stance is suited to swordsmen; Moon Stance helps against brutes. When the hwacha begins firing, watch the white impact markers on the ground and sprint or dodge clear of them rather than trying to fight inside the marked areas.
After reaching the hwacha, take control of it and defend Goro’s ship. Aim with the right stick and fire as soon as enemy ships enter a clear line. Destroy approaching ships quickly, then respond to shore attackers when the objective changes. When larger ships appear, keep firing until they are destroyed before returning attention to the next wave. The tale is complete after Goro escapes and the closing scene plays.
- Use the elevated ambush position before entering Fort Mitodake.
- Avoid the hwacha’s marked impact zones while advancing.
- Use the hwacha to defend Goro’s ship until the objective ends.
3. Infiltrate Fort Koyasan in A Reckoning in Blood
Travel to Lord Shimura’s war camp and speak with him, then find Yuna between the red banners and speak with her. Ride or fast-travel toward Fort Koyasan. At the survey point, inspect the fort until the scene advances. Enter through the front gate after the diversion has drawn away most of the garrison. Move low and use the buildings along the approach to get behind isolated guards. If stealth fails, retreat through the same buildings instead of fighting in the open gate area.
At the upper gate, clear the nearby guards and open the gate to trigger the cutscene. When Jin regains control, repeatedly tap the prompted button to break free, then open the chest beside the place where he was tied up to recover his equipment. Do not search the fort for weapons or supplies before opening this chest; the required gear is placed immediately beside the escape point.
The next battle is against Straw Hats. Use a Standoff if your armor and techniques support it, then rely on Stone Stance for their sword attacks. After the Straw Hats are defeated, move toward the keep to trigger the next scene. Follow Yuna back through the fort and prepare for a larger battle containing Straw Hats, Mongols, dogs, and brutes. Eliminate Straw Hats early, switch to Water Stance against shields, and use Moon Stance against brutes. Explosive barrels are useful when enemies cluster, but shoot them only from a position with a clear escape route. The tale ends after all enemies in the final battle are defeated; it does not contain a separate focused duel with Ryuzo.
- Recover Jin’s equipment from the chest beside the restraint area.
- Use Stone Stance against the Straw Hats.
- Clear the final mixed enemy battle with Yuna before leaving the fort.
4. Resupply before The Fate of Tsushima
The Fate of Tsushima requires A Reckoning in Blood. It is a long mission and does not permanently remove unfinished Tales, but starting it commits you to a lengthy sequence of battles and cutscenes. Before speaking with the samurai leader at Lord Shimura’s camp, finish the companion Tales you want in your preferred story order, upgrade your sword or armor if materials allow, and refill supplies.
When ready, speak with the samurai leader and available allies at the camp. Talk with Yuna, Norio, Kenji, Ishikawa, and Masako when their markers are present, then ride with Lord Oga to meet Lord Shimura at the watchtower. The Bamboo Strike near the tower is optional and is not required to start the assault. After the planning scene, follow the army toward Castle Shimura.
- Finish desired companion Tales before starting the long assault.
- Upgrade combat gear and refill consumables at camp.
- Speak with the marked allies before riding to the watchtower.
5. Survive the Castle Shimura assault
Stay with the allied force during the first battle and let the group draw enemy attention. Use your bow to remove archers from the ramparts, then target brutes before they reach the melee. If an ally falls, revive that ally before the recovery timer expires or the checkpoint will restart. Do not run ahead of the formation; the assault advances when the current area is secured.
After the ram breaks the gate, replenish arrows at the nearby caches and help clear the courtyard. Prioritize archers on the walls and upper balconies before committing to the central melee. Continue into the inner courtyard and support your allies from the edges of the fight. When the Mongols activate a hwacha, advance with Yuna toward its tower while using cover, bow shots, and Ghost Weapons. You do not need to defeat every enemy immediately if the objective is directing you toward the weapon.
Kill the defenders at the hwacha’s base, climb the tower, and take control of the weapon. Fire on the Mongol groups advancing through the gates, especially clusters near explosive barrels. Leave the hwacha when enemies close in and rejoin the ground fight. Continue moving with the allied force through the following courtyards until the retreat reaches the bridge.
At the bridge, watch for the explosive wagon sent through the gate. Aim at the wagon’s explosives, preferably with an explosive arrow if available, before it reaches the allied force. The resulting destruction ends the assault and blocks the direct route into the castle. The Fate of Tsushima then concludes with the dispute over how to proceed. This is the end of the allied assault, not the full retaking of the castle.
- Revive fallen allies before their timers expire.
- Clear rampart and balcony archers before pushing into courtyards.
- Take the hwacha and use it to support the advancing army.
- Destroy the explosive wagon at the bridge.
6. Confirm the correct Act 2 handoff and recover from failure
The Fate of Tsushima is complete when its bridge sequence and following cutscenes finish, and the Journal marks the tale complete. The next main tale is From the Darkness. That mission begins the stealth entry into Castle Shimura, so do not treat the end of The Fate of Tsushima as confirmation that the castle has already been retaken. Before starting From the Darkness, speak with allies, purchase upgrades, and prepare a stealth-oriented armor set if desired.
If you die during A Message in Fire, reload the checkpoint and remain near cover while approaching the hwacha. If A Reckoning in Blood goes badly, recover Jin’s gear first, then use the fort buildings as retreat routes and reserve smoke bombs for the final mixed battle. If an ally falls during The Fate of Tsushima, revive them immediately; if the checkpoint restarts, reduce ranged threats earlier and stay close to the allied formation. After the final cutscene, unfinished Toyotama Tales should remain available unless you have separately completed them.
- A Message in Fire, A Reckoning in Blood, and The Fate of Tsushima show as complete in the Journal.
- From the Darkness is available as the next main tale.
- The bridge destruction and its concluding cutscenes have played.
- Unfinished companion Tales remain listed if you postponed them.
Before you move on
- A Message in Fire is marked complete after Goro’s ship escapes the Fort Mitodake assault.
- A Reckoning in Blood is marked complete after Jin recovers his equipment and defeats the final mixed enemy force with Yuna.
- The Fate of Tsushima is marked complete after the Castle Shimura assault, explosive-wagon sequence, bridge destruction, and concluding cutscenes.
- From the Darkness appears as the next main tale, confirming that the campaign has advanced beyond the allied assault and into the castle-infiltration stage.
References for this chapter
Toyotama exploration & side Tales: gear, stances and builds
Toyotama is the best time to strengthen Jin before the final stretch of the campaign. Complete The Unbreakable Gosaku for a strong stagger-focused armor set, The Six Blades of Kojiro for Kensei Armor, and The Spirit of Yarikawa’s Vengeance for Dance of Wrath. Ghost Stance comes from the separate main story Tale The Ghost of Yarikawa, so do not confuse the two Yarikawa missions. Use different armor loadouts for exploration, stealth, duels, and group fights. Gosaku’s Armor is suited to breaking enemy guards, Kensei Armor supports Ghost-weapon builds, and Sakai Clan Armor is useful for direct sword combat and standoffs. Horse armor is not a Toyotama reward; the Director’s Cut horse-barding quest is on Iki Island.
1. Establish a Toyotama base and prepare your equipment
After reaching Toyotama through A New Horizon, visit a survivor camp, temple, or liberated settlement and check nearby merchants and trappers. Sell spare predator hides to the trapper for ammunition-capacity upgrades, then spend supplies on your katana, tanto, and one dependable combat armor set. Do not divide every material between all outfits at once. A well-upgraded set is more useful for the upcoming Tales than several weak sets.
Use Traveler’s Attire while traveling if you want help clearing fog and locating artifacts, but change before entering a camp or starting a duel. Equip combat armor for direct fights and assign charms to match the task. Prioritize stance upgrades that improve stagger damage, followed by reliable defensive or Ghost-tool techniques. Keep healing items stocked and preserve enough Resolve to heal during a difficult duel or activate a special combat technique.
- Upgrade one primary combat armor set before attempting the harder Toyotama Mythic Tales.
- Carry healing supplies and enough Resolve for emergency recovery.
- Keep Traveler’s Attire available for exploration, but do not rely on it as your default combat set.
2. Complete The Unbreakable Gosaku for armor suited to group fights
After A New Horizon, speak with the musician Yamato in or near Akashima Village and begin The Unbreakable Gosaku. The Tale marks six farmsteads across Tsushima. Liberate Aoi Village, Kuta Farmstead, Ohama Fishing Village, Yagata Farmstead, Iijima Farmstead, and Koshimizu Farmstead. Four are in Izuhara and two are in Toyotama, so this objective sends you back across the island rather than keeping you inside Toyotama.
At each farmstead, scout the Mongol position, rescue the captives, and eliminate the occupying force. The key is awarded when that farmstead’s rescue objective is finished; you do not need to search a separate reward chest for it. If a farmstead is already liberated when you start the Mythic Tale, check the location and continue with the remaining marked objectives. Fast travel between liberated settlements to reduce unnecessary riding.
Once all six keys are collected, track the Tale and travel to the hill south of Akashima Village. Defeat the Mongols around the entrance, use the keys on the locked gate, then follow the grappling-hook route up the hill. The path uses ledges, a log, and several grapple points. Open the chest at the summit to obtain Gosaku’s Armor and its matching headband.
Gosaku’s Armor increases health and improves stagger-focused combat. In a large fight, match the stance to the enemy in front of you, break one guard, finish that target, and then turn toward the next threat. Do not remain surrounded while repeatedly using attacks that are weak against the enemy’s defense.
- The Unbreakable Gosaku is complete in the Journal.
- The six farmstead keys were obtained from Aoi, Kuta, Ohama, Yagata, Iijima, and Koshimizu.
- Gosaku’s Armor is present in the Gear menu and available for upgrading.
3. Unlock Ghost Stance through The Ghost of Yarikawa
Ghost Stance is not awarded by The Spirit of Yarikawa’s Vengeance. It is unlocked during the main Act 2 Tale The Ghost of Yarikawa, after Jin helps defend Yarikawa and defeats General Temuge. Continue the main story through the Yarikawa sequence rather than searching the Mythic Tales list for this ability. The game adds Ghost Stance automatically during that story progression.
Before starting the Yarikawa assault, equip a combat set with strong health or defense benefits and carry healing supplies. During the siege, use rooftops and walls to separate enemies where possible, remove archers before committing to prolonged melee, and switch stances as enemy types change. After the General Temuge encounter, confirm that Ghost Stance is available from the combat controls before leaving the area.
Ghost Stance is charged by maintaining a clean run of kills without taking damage and by defeating leaders in the appropriate encounters. Save it for a dangerous group, a high-value target, or a moment when you need to break enemy morale. It is usually more valuable at the beginning of a crowded fight than against the final weakened enemy.
- The Ghost of Yarikawa is complete.
- Ghost Stance is visible and usable in combat.
- You have tested the meter and know how to activate the stance before entering the next major fight.
4. Complete The Spirit of Yarikawa’s Vengeance for Dance of Wrath
The Spirit of Yarikawa’s Vengeance is a separate Mythic Tale in Toyotama. Begin it by following the musician’s lead after the Tale becomes available, then investigate the reports of a spirit by following the marked clues and speaking with the relevant witnesses. The mission eventually leads to a duel. This Tale rewards the Dance of Wrath technique and the Omukade’s Revenge sword kit.
For the duel, use an armor set that improves health, defense, or Resolve rather than an exploration outfit. Watch for red unblockable attacks and avoid attacking immediately after every dodge; wait until the opponent’s recovery animation is clear. Dance of Wrath costs Resolve, so use it when several targets are exposed or when it will shorten a dangerous encounter. This Mythic Tale is optional for the main story but is a useful Act 2 combat upgrade.
- The Spirit of Yarikawa’s Vengeance is complete.
- Dance of Wrath is available in the Technique menu.
- You understand that this Tale provides Dance of Wrath, not Ghost Stance.
5. Add The Six Blades of Kojiro for dueling practice and Kensei Armor
Speak with Yamato in Umugi Cove to begin The Six Blades of Kojiro after the Tale becomes available. The objective is to locate and defeat five straw-hat ronin in separate duels. Their locations are marked as you progress, so travel to each marker and complete the duel before returning to Umugi Cove.
Duels remove most normal combat options, making armor and charm selection important. Use a set that improves health, defense, Resolve, or melee performance. Watch for blue and red attack indicators, parry normal attacks when the timing is reliable, and dodge red attacks instead of trying to block them. Do not spend all Resolve at the start; retain enough to heal after a mistake or to use a decisive technique.
After the five ronin are defeated, return to Umugi Cove and follow the new objective to Kojiro at Omi Monastery. Defeat Kojiro in the final duel to complete the Tale and receive Kensei Armor. Kensei Armor is especially useful for builds that rely on kunai and other Ghost weapons, while Gosaku’s Armor is generally the more straightforward choice for stagger-heavy group combat.
- The five straw-hat ronin have been defeated.
- The Six Blades of Kojiro is complete in the Journal.
- Kensei Armor is available in the Gear menu.
6. Use Toyotama activities to improve routes and maintain separate loadouts
Follow foxes from discovered fox dens to Inari Shrines. These shrines expand charm capacity and provide charm benefits as the chain progresses. Shinto Shrines provide major charms and require climbing, jumping, and grappling routes; complete them when you want a specific charm or an exploration break, but they are not all mandatory before Act 3.
Liberated Mongol territories provide supplies, ammunition materials, and combat practice. Scout from high ground, identify archers first, and use the stance that handles the largest immediate threat. Clearing every red marker is optional, so prioritize activities near fast-travel points or along the route to an active Tale.
Maintain several loadouts instead of changing individual items every time. Gosaku’s Armor is a strong choice for posture and group fights, Kensei Armor supports Ghost-weapon use, Ronin Attire favors stealth, and Sakai Clan Armor is useful for direct sword combat and standoffs. Dyeing changes appearance; armor upgrades and charm assignments change performance. Horse armor is not obtained through Toyotama exploration. In the Director’s Cut, the principal horse-barding quest is The Legacy of Kazumasa Sakai on Iki Island.
- A combat armor set has useful charms assigned.
- Nearby settlements and important Tale locations are unlocked for fast travel.
- You understand that horse armor belongs to Iki Island rather than Toyotama.
Before you move on
- The Unbreakable Gosaku is complete and Gosaku’s Armor is available.
- The Ghost of Yarikawa is complete and Ghost Stance is usable.
- The Spirit of Yarikawa’s Vengeance is complete if Dance of Wrath is desired before the final acts.
- The Six Blades of Kojiro is complete if Kensei Armor is desired.
- At least one upgraded combat loadout and one stealth or exploration loadout are assigned with suitable charms.
- Any remaining Toyotama armor, Mythic Tale, or technique objective is visible in the Journal before leaving the region.
References for this chapter
- Ghost of Tsushima Director's Cut - PS5 Disc Game
- Ghost of Tsushima Director’s Cut arrives on PS5 and PS4 consoles on August 20 — PlayStation.Blog
- The Unbreakable Gosaku - Ghost of Tsushima Walkthrough & Guide
- Ghost of Tsushima The Unbreakable Gosaku Walkthrough
- Ghost of Tsushima - How to Unlock Ghost Stance
- The Spirit of Yarikawa's Vengeance - Ghost of Tsushima Walkthrough & Guide
Iki Island — How to unlock and recommended preparations
In Ghost of Tsushima: Director’s Cut on PS5, Iki Island becomes available after Act 1 when Toyotama opens in Act 2. Start the expansion through Journey into the Past, which begins at Drowned Man’s Shore in southern Toyotama. Track the tale from the Journal or travel to that location if the entry is not immediately visible. The opening investigation introduces shamans and leads to a boat crossing. Once Jin sails to Iki, Tsushima travel is restricted for a substantial portion of the expansion, so finish urgent Tsushima objectives, improve your combat equipment, refill supplies, and make a pre-departure save first. Iki does not require a special anti-poison item. Its early difficulty is better handled by prioritizing shamans, switching stances against mixed weapon groups, using ranged or Ghost weapons to create space, and preserving healing and Resolve. You can begin Iki as soon as Act 2 unlocks, but completing several major Toyotama Tales first is the smoother route. For this guide’s completion goal, finish Iki’s main story as well as Jin’s three-act campaign and final credits.
1. Reach Act 2 and confirm the Iki unlock
Complete Act 1’s final main tale and enter Toyotama, the region opened at the beginning of Act 2. Iki Island is not available during the Izuhara portion of a standard new game. After the Act 2 transition, check the Journal for a new Tales of Iki entry.
If Tales of Iki is not displayed immediately, travel to Drowned Man’s Shore in southern Toyotama and look for the starting tale there. The expansion’s opening mission is Journey into the Past. On a PS4 save transferred to the PS5 Director’s Cut, the save must also have reached the Act 2/Toyotama point before the Iki content becomes available.
- Act 1’s final story transition is complete.
- Toyotama is accessible and Act 2 has begun.
- Tales of Iki or the Journey into the Past marker is visible.
2. Start Journey into the Past at Drowned Man’s Shore
Select Journey into the Past from Tales of Iki and follow the Guiding Wind to Drowned Man’s Shore. If the Journal marker is absent, travel there manually; the tale can be found at the settlement on that shore. Investigate the disturbance, examine the abandoned Mongol ship, and fight the Mongols who appear during the investigation.
The first encounter introduces shamans. They chant from the edge of the battlefield and strengthen nearby enemies, making the fight more aggressive and difficult. Kill the ordinary enemies only as necessary to create a route, then reach the shaman with a safe approach. After the fight, interrogate the surviving shaman and continue to the boat indicated by the tale.
- Journey into the Past is active.
- The Drowned Man’s Shore investigation is complete.
- The shaman encounter and interrogation are complete.
3. Finish Tsushima preparations before boarding
The game warns you that you will not be able to return to Tsushima for quite some time after sailing. Treat the boat departure as a temporary lockout. Before boarding, finish any nearby objective you urgently want to do, spend available upgrade materials, and create a manual save that can return you to the pre-Iki state.
Upgrade the Sakai Clan armor or another combat-focused set as far as your materials allow, and improve the Sakai sword if an upgrade is available. A stealth outfit can work, but the first Iki encounters contain mixed groups and benefit from reliable survivability. Carry a bow with ammunition, replenish Ghost weapons, and enter with full or nearly full healing and Resolve.
Do not waste time searching for a mandatory anti-poison charm or consumable. Poison arrows and other threats can be answered with cover, healing, distance, and target priority. Iki’s early encounters reward a broad combat kit more than one specific resistance item.
- A pre-departure manual save exists.
- Your sword and preferred combat armor are upgraded where practical.
- Healing, Resolve, arrows, and Ghost weapons are replenished.
4. Board the boat and survive the arrival sequence
After completing the shore investigation, speak with the boatman and choose to sail to Iki. The crossing is followed by a storm and a shipwreck sequence. Continue through the opening survival objectives rather than attempting to explore immediately; the island’s normal map access becomes available after the introductory route.
When the first Iki battles begin, use stealth to remove isolated enemies and avoid starting a large fight in the open if archers or shamans are positioned nearby. If you hear the distinctive shaman chant, locate that enemy and eliminate it before spending time on tougher front-line targets. A shaman’s support effect can make otherwise manageable enemies attack continuously.
Iki also uses mixed weapon groups and new variants such as spear brutes. Change stance according to the opponent instead of relying on one stance for every target. Use Wind Stance against spear users, Water Stance against shield users, Stone Stance against swordsmen, and Moon Stance against brutes. Ghost weapons, arrows, and smoke bombs are valid ways to interrupt a dangerous group or create a safe assassination opening.
- You have reached Iki through the boat sequence.
- You can identify shamans by their chanting and support effect.
- You are switching stances instead of attacking every enemy with the same option.
5. Plan around the Iki lockout
Do not board the boat assuming you can immediately fast-travel back to every Tsushima location. The opening Iki story keeps Jin away from Tsushima through several main expansion objectives. Because the exact point at which travel becomes available is tied to story progress, plan for a meaningful uninterrupted section of Iki rather than relying on a short introductory visit.
For the recommended first-playthrough order, reach Act 2, complete several major Toyotama Tales, recruit important allies, and improve Jin’s core techniques before beginning Journey into the Past. This provides more combat options without requiring the entire base campaign to be finished. Starting immediately at the beginning of Act 2 is still valid if you want Iki’s rewards early or prefer to follow the expansion as soon as it unlocks.
If you want to avoid any interruption to the main campaign, complete Jin’s Journey first and then begin Iki from the completed save. This is the safest order for the base-game story, but Iki’s rewards will arrive after the final Tsushima missions rather than helping during Act 3.
- You understand that boarding creates a substantial temporary travel restriction.
- Recommended route: several important Toyotama Tales, then Iki.
- Alternative route: finish the main campaign first, then complete Iki.
6. Confirm successful access and preserve completion progress
After the opening tale moves Jin through the shipwreck and initial escape route, Iki’s map and expansion objectives become available. Journey into the Past should be marked complete, or its immediate follow-up objective should be active, and the island should load normally after saving and reloading.
For the full Director’s Cut campaign objective, do not treat merely unlocking Iki as completion. Finish the Iki main story later and verify its story-related trophies, then return to Tsushima and complete the remaining Jin’s Journey acts through the final tale and credits. Keep the pre-Iki save until you are certain you want the chosen campaign order; it is useful if you decide the early expansion difficulty or temporary lockout is inconvenient.
- Iki’s map and active story objectives are visible.
- A save made after arrival on Iki loads correctly.
- The expansion’s main story is later completed separately from the three-act Tsushima campaign.
Before you move on
- Act 1 is complete and Toyotama is unlocked.
- Journey into the Past is available at Drowned Man’s Shore and has been started.
- Jin has sailed to Iki and the island’s map and story objectives are active.
- The pre-departure save remains available if you need to postpone the expansion.
- Iki’s main story is later marked complete, in addition to completing Act 3, the final main tale, the ending cinematic, and the credits.
References for this chapter
- Ghost of Tsushima - PS4 and PS5 Games | PlayStation
- Ghost of Tsushima: Journey into the dark secrets of Iki Island – PlayStation.Blog
- Ghost Of Tsushima: How To Unlock The Iki Island Expansion
- Ghost of Tsushima Journey Into the Past Walkthrough
- Ghost of Tsushima Director's Cut: Everything new on Iki Island
Iki Island — Main tale routing, key encounters and boss patterns
Complete Iki Island’s nine Main Tales in this order: Journey Into the Past, A Lost Friend, The Eagle’s Cry, A Raider’s Return, Jin From Yarikawa, The Lightning in the Storm, Massacre at Kidafure Village, The Blessing of Death, and Epilogue: Last Words. The opening route restricts travel, so follow the marked objectives until the game restores travel between Iki and Tsushima after Jin From Yarikawa. Shamans strengthen nearby enemies; eliminate them before prolonged fights, then remove archers and other ranged threats. The Eagle’s duel alternates between a shortsword and a spear: use Stone Stance against the shortsword and Wind Stance against the spear, parry blue-glint attacks when reliable, and dodge red-glint attacks, kunai, and spear slams. The hallucinations in The Blessing of Death are scripted, but Jin can still take damage. After defeating the Eagle, complete Epilogue: Last Words and bow to Tenzo. Friend to All Raiders requires all 18 Iki Tales: 9 Main Tales, 7 Side Tales, and 2 Mythic Tales. Treasures of the Past separately requires The Legend of Black Hand Riku and The Legacy of Kazumasa Sakai. Six Unwritten Tales exist for Common Courtesy, but only five are required after patch 2.10.
1. Start Journey Into the Past and reach Iki Island
Begin Journey Into the Past from its Tale marker in southern Toyotama after the Iki Island expansion becomes available in Act 2. Investigate the affected settlement and inspect the marked clues around the yurt and shrine. When Mongols appear, identify the shaman and defeat that enemy first whenever the approach is safe; shamans strengthen nearby fighters and can make the encounter much harder if left active.
After speaking with Yuna, use the boat behind the yurt to sail to Iki. Follow the marked route through the storm, wreck, and smuggling hideout. Clear the required enemies and remove the obstructing planks when prompted. Travel remains restricted during this introduction, so follow the Tale objectives instead of attempting to explore the island freely. The mission ends after Jin emerges on Iki and completes the landing sequence.
- Complete Journey Into the Past.
- Inspect the marked clues near the yurt and shrine.
- Defeat and interrogate the Mongol shaman.
- Sail to Iki with Yuna’s boatman.
- Finish the restricted landing sequence.
2. Recover Jin’s horse in A Lost Friend
Begin A Lost Friend after Journey Into the Past. Travel to the marked shoreline and examine the wrecked boat. Search the sand near the water for hoofprints, then follow the marked trail uphill. Stop at each clue area so the search objective advances before leaving the designated route.
The trail leads to Jin’s horse, surrounded by Mongols. Defeat the group, approach the horse, and use the horse charge when the prompt appears. Charge through the marked enemy groups, then rescue the captive survivor near the large tree. Speak with the survivor to finish the Tale and unlock The Eagle’s Cry.
- Inspect the wrecked boat.
- Follow the hoofprint trail.
- Defeat the Mongols around Jin’s horse.
- Use the horse charge through the marked groups.
- Rescue and speak with the survivor.
3. Escape Fort Sakai in The Eagle’s Cry
Travel to Fort Sakai and approach through the marked route. Clear the outer defenders by stealth, mounted attacks, or direct combat. Jin’s capture is scripted, so do not waste supplies trying to prevent it or search for missing equipment during the capture sequence.
After Yuna helps Jin escape, follow her to the equipment chest and recover the katana, bow, and Ghost tools. Help open the blocked gate, then follow the route toward the ravine. The dream sequence with Jin’s father is a linear passage; follow the marked path through the cliffs until it ends. Tenzo rescues Jin afterward. Speak with Tenzo to complete The Eagle’s Cry and unlock A Raider’s Return.
- Reach Fort Sakai.
- Allow the scripted capture to occur.
- Recover Jin’s equipment from the chest.
- Help Yuna open the gate.
- Complete the Kazumasa dream sequence.
- Speak with Tenzo.
4. Reach Fune’s Refuge in A Raider’s Return
Meet Tenzo at the abandoned village and follow him toward the raider camp. When Mongols attack, target the shaman first, then clear the remaining soldiers. Continue to the blocked cliff route. Grapple down the first obstruction, follow Tenzo around the cliff when the next route cannot be lowered, then grapple the final barricade and help open the camp gate.
The game warns that there is no immediate way back during this section. Continue through the camp introduction, enter the large building, and meet Fune. This conversation completes A Raider’s Return and unlocks Jin From Yarikawa. The Mythic Tale The Legend of Black Hand Riku becomes available from Fune’s Refuge after this progression; complete it separately when pursuing Treasures of the Past.
- Meet Tenzo.
- Defeat the roadside Mongols and their shaman.
- Use the grapple points along the cliff route.
- Open the final gate.
- Meet Fune inside the raider refuge.
- Note the new Mythic Tale at Fune’s Refuge.
5. Sink the warship in Jin From Yarikawa
Start Jin From Yarikawa through Tenzo. Follow the raiders to the coast and defeat the first Mongol group. Use rocks and hanging beams to approach the cannon crews while the raiders draw enemy attention. Clear the shore and cannon positions before boarding the warship.
On the ship, clear the deck and enter the inner rooms. Locate the black powder cache and ignite it when prompted to sink the vessel. After the Tale ends, fast travel between Iki and Tsushima becomes available. This is the point at which the initial island lockout ends, so return to Tsushima if you need supplies or want to pursue mainland content before continuing.
- Meet Tenzo at the raider camp.
- Follow the raiders to the shore.
- Defeat the Mongols blocking the warship.
- Approach and defeat the cannon crews.
- Board the warship.
- Find and ignite the black powder cache.
- Confirm that travel between Iki and Tsushima is available.
6. Retake Fort Sakai in The Lightning in the Storm
Speak with Fune to begin The Lightning in the Storm. Travel to Fort Sakai and free the prisoners outside the fort. Speak with the freed raiders, then enter the lower fort and release the prisoners there. Opening the cages provides additional raider support for the later stages, so do not rush directly toward the upper fort.
Clear the remaining Mongols and reach the upper fort gates. Defeat the defenders, then pursue Khunbish through the final gate and across the bridge. Continue through the building until the confrontation ends. Use stance changes against the different enemy types, search elevated positions for shamans, and remove archers before committing to a long melee exchange.
- Speak with Fune.
- Free the prisoners outside Fort Sakai.
- Release the prisoners in the lower fort.
- Use the added raider support.
- Clear the upper fort.
- Pursue and defeat Khunbish.
- Confirm The Lightning in the Storm is complete.
7. Win the Kidafure ambushes in Massacre at Kidafure Village
Speak with Fune to begin Massacre at Kidafure Village. Ride to the village and climb to the marked vantage point to survey the three ambush areas. When the battle begins, follow the fireworks markers between engagements. Use the pauses to heal, reload, and locate archers or shamans before advancing.
Shamans may stand away from the main formation or on elevated ground. Eliminate them first, then target archers and other ranged attackers. During the second ambush, explosive carts can disrupt groups when enemies gather nearby; trigger them only after checking that Jin and the raiders are clear of the blast. After all three ambushes, free the captive raiders, lead them back to the tower, and defeat the final Mongol group.
- Survey the three ambush locations.
- Follow each fireworks marker.
- Kill shamans before prolonged melee engagements.
- Remove archers and ranged attackers.
- Use explosive carts safely when useful.
- Free the captive raiders.
- Lead them to the tower.
- Finish the final battle.
8. Advance through Senjo Gorge in The Blessing of Death
Meet Tenzo and Fune, then ride to Tenzo’s scouts and investigate the reported Eagle sighting. The first Eagle encounter is an illusion. Defeat the ordinary Eagle Tribe soldiers and continue the objective instead of searching for a separate boss fight.
Ride with Tenzo to Senjo Gorge and preserve healing supplies and Resolve for the forced battles ahead. Advance through the gorge with the raiders, clearing each marked Mongol group before entering the next section. Use the raiders as distractions, but search behind or above the main formation for shamans. Rescue fallen allies only after nearby enemies are under control.
During the hallucinations, Jin can still be damaged. Treat blue-glint attacks as parry opportunities when your timing is reliable and red-glint attacks as attacks to dodge. The visions advance through scripted progression; you do not need to defeat the Eagle during each hallucination. Continue through the gorge until the real confrontation begins.
- Investigate the false Eagle sighting.
- Reach Senjo Gorge with healing and Resolve available.
- Clear each gorge battle.
- Prioritize shamans and ranged attackers.
- Defend Jin during each hallucination.
- Reach the real Eagle encounter.
9. Defeat the Eagle in the final duel
Before entering the arena, heal and equip a combat-focused armor set. The Eagle alternates between a shortsword and a spear. Use Stone Stance while she holds the shortsword and Wind Stance while she holds the spear. Change stances whenever her weapon changes.
The Eagle uses quick combinations, blue-glint attacks that can be parried, red-glint attacks that must be dodged, and thrown kunai. Her spear attacks can include large unblockable thrusts or overhead strikes; create distance with a dodge or roll rather than trying to block them. Use short attack strings after successful defenses instead of attacking continuously. Preserve enough Resolve for healing or a decisive special attack.
When the duel reaches its scripted hallucination sequence, continue defending against attacks, including thrown explosives when they appear. The sequence is not a separate objective requiring a special item. After the duel resumes, continue matching Stone and Wind Stances to the Eagle’s current weapon. Defeat her to complete The Blessing of Death and trigger the final Iki Tale.
- Use Stone Stance against the Eagle’s shortsword.
- Use Wind Stance against the Eagle’s spear.
- Parry blue-glint attacks when reliable.
- Dodge red-glint attacks, kunai, and spear strikes.
- Survive the scripted hallucination sequence.
- Defeat the Eagle.
10. Complete Epilogue: Last Words and verify all Iki Tale categories
After The Blessing of Death, travel to Fune’s Refuge and speak with Tenzo and Fune to begin Epilogue: Last Words. Let the conversation finish, then use Jin’s bow gesture when prompted to say farewell to Tenzo. This completes the Iki Main Tale route and unlocks the Out of the Past trophy.
Use the Journal to verify the nine Main Tales: Journey Into the Past, A Lost Friend, The Eagle’s Cry, A Raider’s Return, Jin From Yarikawa, The Lightning in the Storm, Massacre at Kidafure Village, The Blessing of Death, and Epilogue: Last Words.
Friend to All Raiders requires all 18 Iki Tales: all 9 Main Tales, all 7 Side Tales, and both Iki Mythic Tales. The Side Tales are A Helping Hand, Troubled Waters, Bloodletting, The Ghost of Iki Island, A Mother’s Law, The Impact of Loss, and Caretakers of the Eagle. The two Mythic Tales are The Legend of Black Hand Riku and The Legacy of Kazumasa Sakai. Verify Friend to All Raiders only after all 18 are complete.
Treasures of the Past is a separate trophy check for the same two Mythic Tales: The Legend of Black Hand Riku and The Legacy of Kazumasa Sakai. Six Unwritten Tales exist on Iki for Common Courtesy, but patch 2.10 removed the Legends-related tale from the trophy requirement, leaving five required. None of the Unwritten Tales count toward Friend to All Raiders.
- Speak with Tenzo and Fune after defeating the Eagle.
- Use Jin’s bow gesture to say farewell to Tenzo.
- Confirm Epilogue: Last Words is complete.
- Confirm the Out of the Past trophy or equivalent notification.
- Verify all 9 Iki Main Tales in the Journal.
- Complete all 7 Iki Side Tales.
- Complete The Legend of Black Hand Riku.
- Complete The Legacy of Kazumasa Sakai.
- Verify Friend to All Raiders after all 18 Iki Tales are complete.
- Verify Treasures of the Past after both Iki Mythic Tales are complete.
- Track the 6 Unwritten Tales separately; only 5 are required for Common Courtesy after patch 2.10.
Before you move on
- The Journal marks all 9 Iki Main Tales complete.
- The Eagle has been defeated in the Senjo Gorge duel.
- The hallucination and post-duel scenes have finished.
- Epilogue: Last Words is complete and Jin has said farewell to Tenzo.
- The Out of the Past trophy or equivalent completion notification has appeared.
- A Helping Hand, Troubled Waters, Bloodletting, The Ghost of Iki Island, A Mother’s Law, The Impact of Loss, and Caretakers of the Eagle are complete.
- The Legend of Black Hand Riku is complete.
- The Legacy of Kazumasa Sakai is complete.
- Friend to All Raiders is verified after all 18 Iki Tales are complete: 9 Main, 7 Side, and 2 Mythic.
- Treasures of the Past is verified after both Iki Mythic Tales are complete.
- Six Unwritten Tales are tracked separately for Common Courtesy, with only five required after patch 2.10.
- No Unwritten Tale is being substituted for a Main, Side, or Mythic Tale.
References for this chapter
- Ghost of Tsushima Director’s Cut arrives on PS5 and PS4 consoles on August 20 — PlayStation.Blog
- Ghost of Tsushima Walkthrough – All Tales
- Ghost of Tsushima Journey Into the Past Walkthrough
- Ghost of Tsushima The Eagle’s Cry Walkthrough
- Ghost of Tsushima A Raider’s Return Walkthrough
- Ghost of Tsushima Jin From Yarikawa Walkthrough
- Ghost of Tsushima The Lightning in the Storm Walkthrough
- Ghost of Tsushima Massacre at Kidafure Village Walkthrough
- Ghost of Tsushima The Blessing of Death Walkthrough
- Ghost of Tsushima Iki Island Epilogue: Last Words Walkthrough
- Ghost of Tsushima – Iki Island DLC Trophy Guide & Roadmap
- Ghost of Tsushima Iki Island All Unwritten Tales Locations
Iki Island — Required Tale cleanup, armor and long-term rewards
Use Fune’s Refuge as the cleanup base for Iki’s seven Side Tales and the two Mythic Tales. Friend to All Raiders requires all 18 Iki Tales: 9 Main Tales, 7 Side Tales, and 2 Mythic Tales. The two Mythic Tales are The Legend of Black Hand Riku and The Legacy of Kazumasa Sakai; completing them contributes to both Friend to All Raiders and Treasures of the Past. The six Unwritten Tales are separate content. After the relevant patch, only five Unwritten Tales are required for Common Courtesy, and none count toward Friend to All Raiders. A Mother’s Law requires all nine Iki Main Tales, ending with Epilogue: Last Words. A Helping Hand is an unmarked resource-delivery tale that must be completed through its final house visit.
1. Prepare at Fune’s Refuge
Progress through the Iki story until A Raider’s Return is complete and Fune’s Refuge is available as a fast-travel destination. The seven Side Tales and two Mythic Tales can be completed during the story, but post-story cleanup is usually clearer because A Mother’s Law is locked until all nine Iki Main Tales are finished, including Epilogue: Last Words.
Before beginning the cleanup route, refill healing items, Resolve, arrows, and Ghost weapons. Equip a practical combat armor set for camps and duels, and keep a ranged or stealth loadout available for encounters that benefit from archery or quiet infiltration. Spend materials on functional weapon, armor, bow, or charm upgrades before optional dyes and vanity purchases.
The seven required Side Tales are The Ghost of Iki Island, Caretakers of the Eagle, Troubled Waters, The Impact of Loss, Bloodletting, A Mother’s Law, and A Helping Hand. The two required Mythic Tales are The Legend of Black Hand Riku and The Legacy of Kazumasa Sakai. The nine Main Tales must also be complete for the full 18-Tale Friend to All Raiders check.
- A Raider’s Return is complete.
- Fune’s Refuge is available for fast travel.
- Healing items, Resolve, arrows, and Ghost weapons are replenished.
- A practical combat armor set is equipped.
- The Journal is being used to track Main, Side, and Mythic Tales separately.
2. Complete the five normally marked Side Tales
Complete The Ghost of Iki Island, Caretakers of the Eagle, Troubled Waters, The Impact of Loss, and Bloodletting through their final objectives and closing conversations. Do not leave after an intermediate fight or reward; wait for the final dialogue and completion notification, then confirm each entry in the Journal.
For The Ghost of Iki Island, follow the investigation involving the person claiming to be the Ghost, travel to the offering site, continue to the raider hideout, rescue the captive, defeat the required enemies, and finish the concluding conversation.
Caretakers of the Eagle begins at Cloud Forest Temple. Follow the infiltration objectives, rescue the captives, stop the executions, and remain in the temple area until the sequence and closing objectives are complete.
Troubled Waters begins the Sugi-related chain. Follow the shipwreck investigation and resolve the resulting battle. Bloodletting then takes you through the fishing-village defense: clear the attackers, free the captive, light the signal fires when instructed, and complete the required inspection and conversation with Sugi.
The Impact of Loss leads from Lake Nagata toward the Kidafure battle site. Investigate the evidence, defeat the attackers, and rescue a hostage. Only one hostage can be saved in that playthrough, but either rescue outcome completes the Side Tale. Confirm the Journal entry before leaving the area.
- The Ghost of Iki Island is complete.
- Caretakers of the Eagle is complete.
- Troubled Waters is complete.
- The Impact of Loss is complete.
- Bloodletting is complete.
3. Unlock and finish A Mother’s Law
A Mother’s Law becomes available only after all nine Iki Main Tales are complete, ending with Epilogue: Last Words. Return to Fune’s Refuge and enter Fune’s room. If no exterior quest marker appears, speak with Fune inside the room and allow the conversation to finish before searching for the next objective.
After speaking with Fune, socializing with the raiders is optional. Board Fune’s ship, wait through the travel objectives, and follow her crew to the Mongol ship. Defeat the ship’s defenders, release the prisoners, and listen to Fune’s conversation.
When the mutinous raiders turn against Fune, defeat them and remain through the final scene. Releasing the prisoners is not the completion condition by itself; wait for the tale-complete notification and confirm A Mother’s Law in the Journal.
A Mother’s Law is one of the seven Side Tales counted toward Friend to All Raiders. It is not an Unwritten Tale, and it does not replace either Mythic Tale. Its completion also helps ensure that your total includes all seven Side Tales rather than only the five that are normally marked.
- All nine Iki Main Tales are complete.
- Epilogue: Last Words is complete.
- A Mother’s Law was started inside Fune’s room.
- The prisoners were released.
- The mutinous raiders were defeated.
- A Mother’s Law is recorded as complete.
4. Finish A Helping Hand in order
A Helping Hand is unmarked on the map and does not initially behave like a normal Journal quest. Find the builder in the woods near Tatsu’s Ladder, or at the alternate wooded spawn near Weeping Mother’s Meadow. Look for the campfire and the column of smoke. Speak with him and provide 3 Yew Wood.
For the second meeting, search the field southeast of Zasho River or the area north of Kidafure Battleground. The builder requests 6 Predator Hides. If he is absent, leave the area, fast-travel elsewhere, or complete another activity before checking again; his location is not guaranteed to remain active while you are standing nearby.
For the third meeting, search the beach west of Yahata Lighthouse, including the shipwreck area around Zasho Bay. Provide 10 Iron. The builder then directs Jin to the completed house in a grassy clearing west of Fort Sakai, south of Sly Hunter’s Forest.
Visit the completed house and speak with the builder. This final visit is required; the tale does not finish immediately after the third resource handoff. The reward includes the Charm of Iron Grip, which prevents bow aim from shaking or forcing a shot during a held draw. A Helping Hand is the seventh Side Tale for Friend to All Raiders.
- 3 Yew Wood was delivered.
- 6 Predator Hides were delivered.
- 10 Iron was delivered.
- The completed house west of Fort Sakai was visited.
- The Charm of Iron Grip was received.
- A Helping Hand is recorded as complete.
5. Complete The Legend of Black Hand Riku
Start The Legend of Black Hand Riku by speaking with Kashira, the storyteller at Fune’s Refuge. This Mythic Tale becomes available after A Raider’s Return. Follow the objectives toward Mount Takenotsuji, locate Minato, rescue her, and rest at her campfire when prompted so the nighttime portion can begin.
Travel to the northeastern coast and follow the glowing water to the cave entrance. Inside the cave, use the provided fire arrows to light braziers and reveal the traversal route. The path is linear, but lighting the braziers makes the dark sections easier to read. Continue until Black Hand Riku challenges Jin to a duel.
During the duel, prioritize clean dodges and perfect parries instead of repeatedly holding block. Sarugami Armor disables ordinary parries while improving perfect-parry and perfect-dodge rewards, so do not equip it before the duel unless you are comfortable with that altered timing. After defeating Riku, escape the cave, then defeat Kashira and the raiders waiting outside.
The reward is Sarugami Armor. Its combat effects are mechanical rather than merely cosmetic: perfect parries produce stronger counterattacks and perfect dodges damage nearby enemies. This Mythic Tale counts toward Treasures of the Past and also counts as one of the two Mythic Tales required for Friend to All Raiders.
- The Legend of Black Hand Riku is complete.
- Minato was rescued.
- The cave traversal and brazier objectives are complete.
- Black Hand Riku was defeated.
- Kashira and the raiders were defeated.
- Sarugami Armor is available in the armor menu.
- The Mythic Tale is recorded as complete.
6. Complete The Legacy of Kazumasa Sakai
Begin The Legacy of Kazumasa Sakai by speaking with Jiro at the Sheltered Campsite. Follow the objective to the shipwrecks at Zasho Bay, infiltrate the camp, and listen to the rest of the story before entering the wreckage search area.
Search the wrecks for Kazumasa Sakai’s horse armor. Follow the traversal route across the ships, using ledges, ropes, and the grappling hook where marked. Time jumps around the waves and avoid falling into the water, which can force you to repeat parts of the traversal.
After recovering the armor, defeat the enemies that appear and speak with the survivors at the end of the sequence. Do not fast-travel immediately after taking the armor; the final survivor conversation is part of the completion sequence.
The reward is Sakai’s Horse Armor, which changes mounted-charge gameplay and is equipped separately from Jin’s armor. This is the second Iki Mythic Tale, so its completion contributes to Treasures of the Past and to the two-Mythic-Tale portion of Friend to All Raiders.
- The Legacy of Kazumasa Sakai was started at the Sheltered Campsite.
- The shipwreck traversal and armor recovery objectives are complete.
- The enemies after the recovery sequence were defeated.
- The final survivor conversation has ended.
- Sakai’s Horse Armor is available.
- The Mythic Tale is recorded as complete.
7. Verify all 18 Iki Tales and the two trophy checks
Open the Journal and verify the Iki Tale categories separately. Friend to All Raiders requires all 18 Iki Tales: 9 Main Tales, 7 Side Tales, and 2 Mythic Tales. The nine Main Tales are Journey Into the Past, A Lost Friend, The Eagle’s Cry, A Raider’s Return, Jin From Yarikawa, The Lightning in the Storm, Massacre at Kidafure Village, The Blessing of Death, and Epilogue: Last Words.
The seven Side Tales are The Ghost of Iki Island, Caretakers of the Eagle, Troubled Waters, The Impact of Loss, Bloodletting, A Mother’s Law, and A Helping Hand. The two Mythic Tales are The Legend of Black Hand Riku and The Legacy of Kazumasa Sakai. Do not stop after checking only the 16 Main and Side Tales; the two Mythic Tales are also part of Friend to All Raiders.
For Treasures of the Past, verify The Legend of Black Hand Riku and The Legacy of Kazumasa Sakai separately as the complete set of Iki Mythic Tales. These same two entries satisfy the Mythic Tale portion of Friend to All Raiders, so both trophy checks should be confirmed after the second Mythic Tale is complete.
Six Unwritten Tales exist on Iki, but they are separate from the 18 Tales used for Friend to All Raiders. After the relevant patch, Common Courtesy requires five Unwritten Tales rather than all six. Track Unwritten Tales separately and do not use them to replace a missing Main, Side, or Mythic Tale.
- All 9 Iki Main Tales are complete.
- All 7 Iki Side Tales are complete.
- Both Iki Mythic Tales are complete.
- Friend to All Raiders is confirmed after all 18 Iki Tales are complete.
- Treasures of the Past is confirmed after both Iki Mythic Tales are complete.
- The six existing Unwritten Tales are tracked separately from the 18 required Tales.
- Common Courtesy is treated as a separate patched five-tale requirement.
8. Clean up optional rewards afterward
Once the 18 required Iki Tales are complete, pursue remaining expansion activities according to your separate goals. Animal Sanctuaries, Archery Challenges, the Hidden Cove Tournament, Memories of Your Father, shrines, haiku, hot springs, bamboo strikes, records, banners, and Mongol territory liberation are not substitutes for the required Main, Side, or Mythic Tales.
Continue building Iki’s Legend if you want the Legacy Redeemer reward and its associated charm. Collect dyes, masks, banners, flowers, and other vanity items after securing the functional Tale rewards and Technique upgrades relevant to your build. Sarugami Armor and Sakai’s Horse Armor provide gameplay effects; cosmetic dyes and masks do not replace or advance the Tale requirements.
Make a manual save after the final required Tale and trophy confirmation. If the Journal appears complete but a trophy has not appeared, reload the save and revisit the relevant completion location, beginning with Fune’s Refuge for A Mother’s Law or the completed house for A Helping Hand. Then recheck all three Iki Tale categories rather than assuming the missing entry is an Unwritten Tale.
- All 18 required Iki Tales are complete.
- Friend to All Raiders is confirmed.
- Treasures of the Past is confirmed.
- Optional activities are tracked separately.
- Cosmetic rewards are not confused with mechanical rewards or Tale requirements.
- A manual save exists after cleanup.
Before you move on
- All 9 Iki Main Tales are complete, ending with Epilogue: Last Words.
- All 7 Iki Side Tales are complete: The Ghost of Iki Island, Caretakers of the Eagle, Troubled Waters, The Impact of Loss, Bloodletting, A Mother’s Law, and A Helping Hand.
- The Legend of Black Hand Riku is complete.
- The Legacy of Kazumasa Sakai is complete.
- Friend to All Raiders is confirmed after all 18 Iki Tales are complete: 9 Main, 7 Side, and 2 Mythic.
- Treasures of the Past is confirmed after both Iki Mythic Tales are complete.
- Sarugami Armor and Sakai’s Horse Armor are selectable.
- The six existing Unwritten Tales are tracked separately if pursuing Common Courtesy.
- Common Courtesy is checked against the patched five-tale requirement, not against Friend to All Raiders.
- Optional activities and Legacy Redeemer rewards are collected only if pursuing those separate objectives.
- A manual save exists after the final cleanup objective.
References for this chapter
- Ghost of Tsushima Walkthrough – All Tales
- Ghost of Tsushima – Iki Island DLC Trophy Guide & Roadmap
- Ghost of Tsushima A Mother’s Law Walkthrough
- Ghost of Tsushima The Legend of Black Hand Riku Walkthrough
- Ghost Of Tsushima Iki Island Hidden Sidequest Guide - A Helping Hand
- Ghost of Tsushima The Legacy of Kazumasa Sakai Walkthrough
- Friend to All Raiders Trophy
- Treasures of the Past Trophy
- Ghost of Tsushima Director's Cut - PS5 Disc Game
Act 2 Completion Handoff — From the Darkness to Honor and Ash
Verify that The Fate of Tsushima is complete, then follow Yuna into From the Darkness, the final main tale of Act 2. Infiltrate Castle Shimura without raising the alarm, survey the Mongol defenses, poison both marked containers, defeat Ryuzo, and finish the resulting story sequence to receive the Ghost Armor and Ghost Mask. From the Darkness is not an Act 3 mission. After it ends, Honor and Ash begins automatically, taking Jin through his escape from Castle Shimura and into Kamiagata. Complete the opening escape and reach Jin’s horse; the following cinematic confirms the Act 3: Kill the Khan transition. The story temporarily restricts travel to the earlier regions during this handoff, so finish any errands you specifically want to do beforehand. Optional character Tales, Mythic Tales, camps, shrines, and collectibles are not required for this transition.
1. Confirm the correct starting point
Open the Journal and check the Jin’s Journey section before leaving for the mission marker. The Fate of Tsushima must be marked complete. From the Darkness is the next main tale and is started by speaking with Yuna at her marker near Castle Shimura. Do not restart A Message in Fire, The Walls of Yarikawa, Ghosts from the Past, A Reckoning in Blood, or The Fate of Tsushima in this chapter; they are earlier prerequisites and are not part of this handoff.
This is the last opportunity before the story restriction to complete a specific side activity in Izuhara or Toyotama if you want it finished before Act 3. You do not need to clear every optional tale or activity. Before speaking with Yuna, equip the armor you prefer for stealth or duels, refill healing supplies and Ghost weapons, and make sure you have enough arrows for the opening infiltration. There is no character-level or gear-score requirement for this mission.
- The Fate of Tsushima is marked complete.
- From the Darkness is available from Yuna.
- Any optional activity you specifically want before the travel restriction is complete.
- Healing items, arrows, and Ghost weapons are replenished.
2. Reach the first keep without raising the alarm
Speak with Yuna, then follow the route along the outside of Castle Shimura. Use the grappling hook on the bridge support and transfer to the lower grapple point. Continue across the log, hook the stump below, climb onto the overhang, and follow the ledges around the cliff. Grapple across the gap and climb toward the keep. This approach avoids the main battle area and leads to a window into the first keep.
The mission requires stealth during this section. Enter the window only after using Focused Hearing to identify the guard inside. Wait for the nearby sentry to move away, assassinate the first guard, then eliminate the second guard in the adjoining room. Climb the ladder and kill the Mongol on the balcony before he can turn toward you. Two more guards are positioned above; wait until they separate, then take them out one at a time, including the archer.
If a guard begins moving toward your position, stop climbing and let the patrol pass rather than forcing an assassination. A detection failure can restart the infiltration checkpoint, so use grass, roof edges, and the keep’s walls to break sightlines. Do not begin open combat here; the mission’s stealth objective is active.
- Jin has entered the first keep.
- All first-keep guards and the exposed archer are eliminated silently.
- The alarm has not been raised.
3. Survey the defenses and cross the garden
After clearing the keep, climb to the northeast corner of the upper balcony and trigger the survey. Look across the castle defenses until all marked points have been examined. When the survey ends, jump to the lower roof and use the slackline to reach the archer tower. Assassinate the sentry there, cross the next slackline, and drop behind the small shed.
Use Focused Hearing before moving through the garden. Squeeze through the opening in the nearby barrier when the patrols are facing away. Stay in the tall grass and move toward the stone wall. Eliminate the shield Mongol when his route separates him from the other guards, then climb the hay bale to the circular tent roof.
Cross the slackline and plank to the next tent. Wait until the Mongol below is isolated, then perform the aerial assassination. If another patrol approaches, remain on the roof or use the tall grass rather than chasing it. A Wind Chime can draw a patrol behind cover if you have one equipped, but it is not required; patience and Focused Hearing are enough.
- The castle defenses have been surveyed.
- Jin has crossed into the garden without detection.
- The route to both poison containers is open.
4. Poison the containers and defeat Ryuzo
From the tent route, move behind the logs and low fence toward the first marked container. Two guards watch the area. Wait until their attention turns away, move behind the barrels, and interact with the first container. Immediately relocate behind the straw barrier and then the pile of wooden beams before approaching the second marker. Poison the second container only when its nearby guards are looking away.
Once both containers are poisoned, the following scene removes the need to remain undetected. Search the immediate area for supplies if necessary, then proceed to the marked structure and confront Ryuzo. This becomes a one-on-one duel. Stone Stance is the reliable default against his sword attacks. Block or parry ordinary strikes, dodge attacks marked with a red flash, and use a well-timed dodge or parry against attacks marked with a blue flash according to the attack’s direction and timing.
Do not spend all Resolve at the start of the duel. Heal when necessary and reserve Resolve for recovery or a strong ability during a safe opening. Ryuzo can close distance quickly, so avoid attacking repeatedly after a single successful counter. Finish the duel and continue through the cutscenes with Lord Shimura. Completing the tale awards the Ghost Armor and Ghost Mask; the armor is not obtained earlier in the mission.
- Both marked containers are poisoned.
- Ryuzo is defeated.
- The Ghost Armor and Ghost Mask have been awarded.
- From the Darkness is marked complete.
5. Complete the escape and confirm Act 3
After the From the Darkness cutscenes, Honor and Ash begins automatically. This is the start of Act 3, not a continuation of Act 2’s Castle Shimura assault. Speak with Kenji and use the window to leave the building. Follow the Guiding Wind along the rock wall, squeeze through the gap in the fence, and keep to the wall while the soldiers search.
Climb the stone wall, pass the well, go through the building’s window, and follow the objective to the next opening. When the search begins in earnest, move across the rooftops rather than dropping into the soldiers. Use the slacklines to reach the next roofs and then the stable. Climb down to the horse and complete the escape sequence. The story then carries Jin into Kamiagata and begins the next phase of the campaign.
The opening of Honor and Ash temporarily limits travel to earlier parts of Tsushima. This restriction is a story condition, not a failed fast-travel system. Continue through the opening objectives until Jin reaches the northern region and the story settles in Kamiagata. After broader travel is restored later, unfinished optional Tales from Izuhara and Toyotama can be completed. You do not need to return to those regions before beginning Honor and Ash.
- Honor and Ash has started automatically or appears as the active main tale.
- Jin has escaped Castle Shimura and reached his horse.
- The Act 3 transition cinematic has played.
- The Journal identifies Act 3: Kill the Khan.
- Kamiagata is the current story region.
Before you move on
- The Fate of Tsushima was already complete before starting this chapter.
- From the Darkness is complete without repeating earlier Act 2 prerequisite missions.
- The Ghost Armor and Ghost Mask are present in Jin’s equipment.
- Honor and Ash has begun after the From the Darkness conclusion.
- Jin has escaped Castle Shimura, reached his horse, and entered the Kamiagata story sequence.
- The Journal shows Act 3: Kill the Khan as the active campaign chapter.
References for this chapter
- Ghost of Tsushima Director’s Cut arrives on PS5 and PS4 consoles on August 20 — PlayStation.Blog
- Ghost of Tsushima From The Darkness Walkthrough
- Ghost of Tsushima Honor and Ash Walkthrough — PowerPyx
- From The Darkness - Ghost of Tsushima: Director’s Cut Walkthrough & Guide
- Honor And Ash - Ghost of Tsushima: Director’s Cut Walkthrough & Guide
Act 3 — Kamiagata: large-scale assaults and final campaign structure
Act 3 begins after Jin escapes Castle Shimura and reaches Kamiagata. Complete Honor and Ash to restore Jin’s equipment and establish Jogaku Temple as the northern base, then finish Wolves at the Gates to open the route through Fort Kaminodake. A Gathering Storm is a stealth reconnaissance mission at Port Izumi, followed by Heart of the Jito, in which Jin infiltrates Castle Shimura and leaves a letter for Lord Shimura. After those four Tales, prepare Jin and the allied group for Eternal Blue Sky at Jogaku Temple. This chapter ends with Eternal Blue Sky ready to start; the following chapter covers its Port Izumi assault, Khotun Khan encounters, completion, and the subsequent availability of The Tale of Lord Shimura.
1. Complete Honor and Ash and establish Jogaku Temple
Honor and Ash begins after From the Darkness. Escape Castle Shimura using the rooftops, hanging lines, broken buildings, and elevated routes, then reach the stables and ride north with Yuna. This opening section is primarily stealth and movement, so use Focused Hearing to track guards and avoid unnecessary fights. Jin’s equipment is restored during the tale.
At the ice fishing camp, survey the area, approach the prisoner enclosure, and free the prisoners after dealing with the guards. Return to Yuna near the rocks and review the attack plan. The required signal is the fireworks beside the tent. Ignite them when prompted, then regroup with Yuna and defeat the Mongol force that arrives.
After the battle, scout the grounds of Jogaku Temple. Locate the frozen waterfall near the bamboo, climb it with the grappling hook, and use the upper route to reach the temple entrance. Defeat the warlord and his guards, then free the hostages. Jogaku Temple becomes the main northern base and the starting point for the next Act 3 Tales.
- Jin’s equipment has been restored.
- The prisoners at the ice fishing camp are free.
- The signal fireworks have been ignited.
- The Jogaku Temple hostages are free.
- Jogaku Temple is available as a fast-travel location.
2. Retake Fort Kaminodake in Wolves at the Gates
Begin Wolves at the Gates by speaking with Yuna at Jogaku Temple. Travel to Takeshi’s camp in Sago Prefecture, speak with him, then meet him again at the cliff overlook. Continue to Fort Kaminodake and find the hunters at the lumber camp near the fort.
Use the collapsed structure and grappling points to climb to the hunters’ access route. Crouch beside them and survey the fort before attacking. Both stealth and open combat are valid. If you choose stealth, remove exposed archers and isolated guards first. In open combat, change stances as swordsmen, shield users, spearmen, and brutes enter the fight.
After clearing the first fort section, regroup with the hunters and wait for the Mongol patrol to arrive. Defeat the patrol, then advance with the hunters toward the Toyotama Gate. Investigate the fighting there and climb to the overlook to survey the keep from the balcony. Follow the grappling route across the cliffs, clear the next enemy group, reach your allies, and defeat the final wave. The mission ends after the fort is secured and the northern route is opened.
- Takeshi and his hunters have been reached.
- The first fort group and returning Mongol patrol are defeated.
- The keep has been surveyed from the overlook.
- The enemy groups near the Toyotama Gate are cleared.
- Wolves at the Gates is marked complete.
3. Scout Port Izumi in A Gathering Storm
Start A Gathering Storm by speaking with Yuna at Jogaku Temple. The mission moves Jin and Yuna to Port Izumi, where the immediate objective is to reach the lighthouse without raising the alarm. Follow the approach through the purple flowers, then bear right near the camp in front of the lighthouse.
Use the cliffside route and tall grass to avoid the guards. A slackline provides a higher path over part of the camp, and the enemies near the rear approach generally move away from the route. Assassinate only guards who block your progress, and wait for patrols to separate before crossing exposed ground.
Continue toward the back of the lighthouse rather than the front courtyard. Enter through the rear opening, investigate the objects on the ground floor, then climb to the roof. Survey the marked locations around Port Izumi from the top of the lighthouse. The tale ends after the reconnaissance is complete; it is not a full assault on the port.
- The lighthouse was approached without turning the mission into an open assault.
- The rear entrance was used to enter the lighthouse.
- The ground-floor investigation is complete.
- The marked Port Izumi locations were surveyed from the roof.
- A Gathering Storm is marked complete.
4. Infiltrate Castle Shimura in Heart of the Jito
After A Gathering Storm, speak with Yuna at Jogaku Temple to begin Heart of the Jito. Follow her to the stables, choose one of the available horses, and give it a name. The selection is cosmetic and does not change the mission’s objectives or the horse’s practical performance.
Travel to Castle Shimura and approach from the north, near the waterfalls. Cross the river and climb the rocks to reach the opening behind the castle walls. The infiltration does not permit you to clear the castle by force, so remain unseen and do not attack the guards.
Move through the gardens using pampas grass, haystacks, roofs, scaffolding, broken windows, and hanging lines. Use Focused Hearing to watch patrols and wait when guards block a narrow route. When the path requires a door, open it normally rather than breaking it with the katana. Follow Lord Shimura’s movement through the keep, using the cleared spaces behind him to reach the upper levels.
Continue to the marked room in Lord Shimura’s quarters and leave the letter at the objective marker. Allow the closing scene to finish. This completes Heart of the Jito and unlocks the preparation stage for Eternal Blue Sky.
- A new horse has been chosen and named.
- Castle Shimura was entered from the north.
- The castle infiltration was completed without attacking the guards.
- The letter was left in Lord Shimura’s quarters.
- Heart of the Jito is marked complete.
5. Prepare at Jogaku Temple for Eternal Blue Sky
After Heart of the Jito, return to Jogaku Temple and review the Journal. Eternal Blue Sky should be the next active main Tale. Do not begin the conversation with Yuna yet if you still need to make preparations, because the mission moves into an extended story sequence after you commit to it.
Restock arrows, healing items, and Ghost weapons at Jogaku Temple. Refill Resolve and health through a nearby hot spring or other available activity if needed. Equip the armor and charms you intend to use for large battles. A combat-focused set such as Samurai Clan Armor, Gosaku’s Armor, or Sakai Clan Armor is useful for the assault, while Ghost Armor is better suited to the stealth portions. No single armor set is required.
Spend any available Technique Points, upgrade the katana if you have the materials, and ensure that the stances and Ghost tools you rely on are unlocked. Carry enough supplies for repeated combat encounters rather than assuming you will have time to resupply after leaving Jogaku Temple.
Speak with the allied characters at their markers around the temple when the mission preparation sequence presents them: Norio, Sensei Ishikawa, Lady Masako, and Kenji. These conversations establish the group assembled for the attack. When the Journal shows Eternal Blue Sky as ready and Yuna remains at Jogaku Temple as its starting point, stop here. The Port Izumi assault, the Khan encounters, and the unlock of The Tale of Lord Shimura belong to the next chapter.
- Honor and Ash, Wolves at the Gates, A Gathering Storm, and Heart of the Jito are complete.
- Health, Resolve, arrows, healing items, and Ghost weapons are replenished.
- The preferred combat or stealth equipment is equipped.
- The available allies at Jogaku Temple have been spoken to during the preparation sequence.
- Eternal Blue Sky is available as the next active main Tale.
- Eternal Blue Sky has not been launched.
- The Tale of Lord Shimura is not yet available.
Before you move on
- Honor and Ash is marked complete in the Journal.
- Wolves at the Gates is marked complete and the route through Kamiagata is open.
- A Gathering Storm is marked complete after the Port Izumi survey.
- Heart of the Jito is marked complete after the letter is delivered.
- Jogaku Temple is available as the northern base.
- Eternal Blue Sky is visible and ready to start at Jogaku Temple.
- The final assault has not been launched in this chapter.
- The Tale of Lord Shimura is not yet available.
References for this chapter
- Ghost of Tsushima Director's Cut - PS5 Disc Game
- Ghost of Tsushima Director’s Cut arrives on PS5 and PS4 consoles on August 20 — PlayStation.Blog
- Ghost of Tsushima Honor and Ash Walkthrough — PowerPyx
- Ghost of Tsushima Wolves at the Gates Walkthrough — PowerPyx
- Ghost of Tsushima Heart of the Jito Walkthrough — PowerPyx
- Ghost of Tsushima: Director’s Cut Act 3 Walkthrough — GameFAQs
Final boss approaches: Khotun Khan and final duel mechanics
Eternal Blue Sky contains two separate Khotun Khan encounters. Jin first reaches the manor house and fights Khan in a short duel. Khan then blinds Jin and escapes toward his ship, creating a running battle through Port Izumi. The final confrontation takes place on the ship and combines Mongol retainers, archers, explosive hazards and Khan’s changing weapons. Use the frozen ravine to enter the port, preserve Ghost weapons for the ship, remove ranged attackers whenever they appear and use the stance that matches Khan’s current weapon. The mission becomes available after Heart of the Jito and ends when Khan is killed, the finishing prompt is completed and Jin follows Yuna back to Jogaku Temple.
Prepare before starting Eternal Blue Sky
Eternal Blue Sky begins at Jogaku Temple after you complete Heart of the Jito. Speak with Yuna to start the tale. Before committing to the mission, refill healing items, arrows and Ghost weapons at a nearby supply point. The mission provides some pickups later, but beginning with a full supply makes the ship battle more forgiving.
Equip an armor set that matches your approach. Ghost Armor is useful if you intend to rely on stealth, Ghost Stance and assassination chains. A defensive or melee-focused set is a safer general choice for the open fights. Make sure you have Wind Stance available for spear or glaive enemies and Water Stance available for shield users. Keep at least one Smoke Bomb, several kunai or sticky bombs, and enough Resolve for healing or a powerful technique.
- Complete Heart of the Jito first.
- Refill healing items, arrows and Ghost weapons.
- Have Wind Stance and Water Stance available.
- Reserve some Ghost weapons and Resolve for the ship battle.
Clear the opening assault at Port Izumi
After the opening scenes, take position in the fishing village and fight the Khan’s reinforcements with your allies. This opening battle is not the boss encounter, so do not spend every Ghost weapon immediately. Use the appropriate stance for the enemy in front of you, stay close enough to revive an ally if necessary, and use Ghost weapons when a group surrounds Jin.
After the first wave, follow the objective and your allies to the next section. Defeat the second group, then regroup with the allied forces before entering the port. Build Resolve where possible, but avoid unnecessary damage. You want healing and tools available when the mission separates Jin from the main group.
- Defeat both reinforcement groups.
- Revive allies when the prompt appears.
- Preserve some Resolve and Ghost weapons for later.
Infiltrate Port Izumi through the frozen ravine
When Yuna’s group attacks the main gate, do not try to force your way through the front entrance. Follow the objective toward the frozen ravine and stay near the cliff on the indicated route. Use pampas grass and other cover to avoid detection from the Mongols above.
At the end of the ravine, climb the ledges and remain concealed. From the upper position, deal with the nearby Mongols using assassinations, poison darts or arrows. Cross the wire to the next structure, then use the roof and lower cover to approach the watchtower. You can perform a chain assassination against clustered enemies if the opportunity is safe, but do not rush into the open area beneath the tower.
Climb the watchtower to locate Khan and trigger the next objective. From there, follow the marker toward the manor house. Use rooftops, grass and buildings to reduce the number of enemies before approaching the gate. If you are detected, fight from an open space rather than allowing archers to pin Jin against a wall.
- Use the frozen ravine instead of the main gate.
- Cross the rooftops and wires toward the watchtower.
- Reduce nearby enemies before approaching the manor house.
- Watch for archers while moving through the port.
Win the manor-house duel and survive the escape
At the manor-house gate, squeeze through to begin the first Khotun Khan duel. This is a short one-on-one fight, separate from the later ship battle. Khan uses a long spear or glaive with wide-reaching attacks. Keep a moderate distance, watch for unblockable red attacks and dodge rather than attempting to block them. Attack during his recovery, then disengage before he can complete a follow-up sweep.
Wind Stance is the appropriate stance for reducing the guard of a spear or glaive user. Heavy attacks and a safe Heavenly Strike can shorten the exchange if you have enough Resolve, but do not spend all of it if your health is low. When the scripted sequence occurs, Khan blinds Jin and escapes; this is not a failed fight and cannot be prevented.
Follow the objective downhill toward the ship. The route contains Mongols, but you do not need to defeat every enemy on the way. Run past groups when the path is clear, or eliminate only enemies that block the route or threaten to stagger Jin. Use Resolve to heal if necessary, because the ship battle begins immediately after the pursuit.
- Use Wind Stance against Khan’s spear or glaive.
- Dodge red attacks and punish recovery windows.
- Do not mistake Khan’s escape for a failed duel.
- Follow the marker toward the ship rather than clearing every enemy.
Control the opening ship phase
When Jin reaches the ship, Khan initially remains on the deck while tough Mongol retainers attack. Clear the nearby melee enemies enough to create room, but do not ignore Khan for so long that the fight becomes crowded. Move around the deck instead of standing between multiple enemies. Kunai, sticky bombs and black-powder bombs are effective for creating an opening against Khan or staggering retainers.
Ranged attackers become the main danger once the battle develops. Archers on the upper deck can interrupt Jin with normal, fire or poison arrows while he is fighting below. When they appear, stop attacking Khan and remove the archers with a bow, a Ghost weapon or an explosive barrel positioned near them. Shoot environmental explosives only after checking that Jin is outside the blast radius.
Khan can leave the deck or become mixed into the surrounding enemies as the battle progresses. Follow the active objective and keep the camera moving so you can see incoming arrows. If a Smoke Bomb is available, use it when several retainers surround Jin; assassinate nearby targets, then return to Khan after the immediate pressure is gone.
- Create space before committing to Khan.
- Prioritize upper-deck archers and other ranged enemies.
- Use explosives only when Jin is clear of the blast.
- Use Smoke Bombs to escape a crowded deck.
Adapt when Khan changes weapons
After Khan has been wounded during the ship battle, the encounter escalates with additional Mongols and ranged support. The fight continues through several reinforcement surges rather than ending after one health reduction. Keep moving, collect nearby supplies when safe and attack Khan during openings instead of chasing him through a crowd.
Khan eventually changes from his spear or glaive to a sword and shield. Switch to Water Stance for the shield phase. Water Stance heavy attacks are better suited to breaking a shield user’s guard. Continue to dodge unblockable attacks and avoid remaining directly in front of Khan after a short attack string, because retainers or archers can punish a stationary Jin.
Use Ghost Stance when it is available, especially after the deck becomes crowded. It can remove Khan or other dangerous enemies without requiring a normal guard break. Sticky bombs, kunai, explosive arrows and fire arrows are also valid tools in this fight. The objective is not to preserve an honorable-duel format; use the complete arsenal that the mission gives you.
- Switch to Water Stance when Khan uses a sword and shield.
- Clear archers before resuming prolonged attacks on Khan.
- Use Ghost Stance and explosives during reinforcement surges.
- Do not stand still after attacking.
Finish Khan and recover after failure
Continue alternating between clearing immediate threats and damaging Khan. When his health is depleted, the game displays a finishing prompt. Follow the prompt to skewer and kill him. The mission then transitions to the burning fleet and the return journey; follow Yuna on horseback back toward Jogaku Temple instead of searching the ship for additional objectives.
If Jin dies during the mission, use the latest checkpoint and adjust the phase that caused the failure. If the manor duel is the problem, fight from mid-range and wait for the end of Khan’s spear sequence before counterattacking. If the ship is the problem, stop attacking Khan whenever archers or fire arrows are active. Clear ranged enemies first, then use bombs or Ghost Stance to reduce the melee group.
Changing the difficulty is also a valid recovery option if the mission is blocking campaign progress. The story and trophy progression remain available after completing the tale. A successful run is not confirmed merely by depleting Khan’s health: perform the finishing prompt, let the post-battle scene play and complete the follow-Yuna objective.
- Perform the finishing prompt when it appears.
- Follow Yuna after the ship battle.
- Reload the latest checkpoint after a death.
- Clear ranged threats first on the next attempt.
- Confirm the tale completes after the return sequence.
Before you move on
- Heart of the Jito was completed before Eternal Blue Sky was started.
- The frozen-ravine infiltration, watchtower approach and manor-house duel are complete.
- Khan is defeated aboard the ship and the finishing prompt is performed.
- The post-battle cinematic plays and Eternal Blue Sky is marked complete in the Tales menu.
- Jin follows Yuna back toward Jogaku Temple, allowing the next main tale, The Tale of Lord Shimura, to begin.
References for this chapter
- Eternal Blue Sky - Ghost of Tsushima: Director's Cut Walkthrough & Guide
- Ghost of Tsushima Eternal Blue Sky Walkthrough
- Ghost of Tsushima - Eternal Blue Sky Walkthrough - SAMURAI GAMERS
- Eternal Blue Sky — Act 3 Walkthrough, Ghost of Tsushima: Director's Cut
- Ghost of Tsushima Director's Cut - PS5 Disc Game
The ending(s): choices, consequences and confirmed outcomes
Complete The Tale of Lord Shimura to finish Jin’s Journey. The finale begins at Omi Lake in Toyotama, where Jin meets Lord Shimura, rides with him, helps free a stuck wagon, follows him through the Sakai family cemetery, completes a final haiku, and enters the last duel beneath the red-leafed tree. Defeat Shimura, then choose whether to honor his request for a warrior’s death or spare him. Honoring him grants the Righteous Punishment Ghost Armor dye; sparing him grants Vow of Vengeance. The choice changes the final cinematic, post-game refuge, and some dialogue, but both choices complete the main campaign and unlock Mono No Aware. Create a separate save before beginning the tale if you want a dependable route to the other ending later. Reload that save for the alternate choice, or replay the campaign in New Game Plus. The two choices are alternatives, not separate completion requirements.
1. Prepare before starting The Tale of Lord Shimura
The Tale of Lord Shimura is the final tale in Jin’s Journey. Its starting point is at Omi Lake in Toyotama, at the old sparring circle near the Sakai family estate. The tale becomes available after Eternal Blue Sky. Starting it does not remove access to unfinished side Tales, activities, exploration, or Iki Island content after the credits, so you do not need to clear every optional objective beforehand.
If you want to see both endings, create a separate manual save before beginning the tale. Keep that save in a separate slot and do not overwrite it during the finale. This gives you a dependable pre-finale state from which to replay the mission and select the other choice. If you already have a valid save shortly before the final choice, preserve it rather than replacing it.
Refill healing supplies and resolve before traveling to the meeting point. Equip the armor and charms you use most confidently in sword duels. A health-, defense-, or resolve-focused setup is useful, but no particular armor, charm, Ghost tool, or Mythic Technique is required. The final battle is a one-on-one duel rather than a camp assault, so prioritize equipment that helps you survive and recognize attack timing.
- Create and preserve a separate manual save before beginning the tale.
- Refill healing supplies and resolve.
- Equip a dependable duel loadout.
- Keep the pre-finale save if you intend to view both choices.
2. Follow Shimura from Omi Lake to the Sakai cemetery
Travel to the objective at the old sparring circle beside Omi Lake and wait for Lord Shimura. When the mission prompts you to ride, mount your horse and stay with him. This section follows a scripted route, so remain close to Shimura instead of taking a detour.
At the docks, speak with the peasant and help push the wagon when it becomes stuck. After the wagon is free, mount again and continue following Shimura. This travel segment does not require a special stance or Ghost tool.
At the Sakai family cemetery, follow Shimura through the graves to the resting place of Jin’s father. A haiku sequence begins there. Complete the haiku to advance the mission. It is part of the finale’s route, not an additional campaign-completion requirement separate from The Tale of Lord Shimura.
After the cemetery scene and conversation, follow the objective toward the red-leafed tree. The final duel begins after the next sequence, so use the approach to confirm that your preferred armor and supplies are equipped.
- Meet Lord Shimura at Omi Lake in Toyotama.
- Push the wagon free when it becomes stuck.
- Follow Shimura through the Sakai family cemetery.
- Complete the final haiku.
- Approach the red-leafed tree to begin the duel.
3. Defeat Lord Shimura in the final duel
Lord Shimura is fought as a dedicated sword-duel opponent. Avoid attacking continuously. Watch his body and blade, wait for the attack to begin, and respond to the specific move. Ordinary sword attacks can be blocked or parried when your timing is reliable. Attacks marked by the red unblockable warning must be avoided with a sidestep or roll.
Shimura’s thrusts are useful opportunities to practice defensive timing. He commonly gives a brief cue before committing to a thrust, so wait for the lunge rather than striking as he moves backward. After a successful parry or dodge, use a short sword combo and return to defense. Do not continue attacking after the opening closes, because Shimura can punish extended strings.
Use resolve for healing when necessary instead of trying to end the duel quickly. Heavenly Strike and other unlocked techniques can shorten the fight, but they are optional. The duel can be completed with ordinary sword attacks, defensive timing, and controlled counterattacks.
If you are defeated, reload the duel checkpoint. On the next attempt, spend the opening exchanges identifying Shimura’s timing instead of forcing damage. Dodging is the safer response while you are learning the red attacks. Once you recognize the recovery after his longer sequences, punish only those clear openings and preserve enough resolve for emergency healing.
- Parry or block ordinary sword attacks when the timing is clear.
- Dodge red unblockable attacks.
- Use short counterattack strings.
- Keep resolve available for healing.
- Use the duel checkpoint to learn the pattern after a defeat.
4. Select the ending and understand the rewards
After defeating Shimura, Jin receives the finale’s irreversible choice for that playthrough. Choosing to honor Shimura grants him the warrior’s death he requests. This outcome awards the Righteous Punishment dye for the Ghost Armor, a predominantly white variation.
Choosing to spare Shimura means Jin refuses the requested execution and walks away. This outcome awards the Vow of Vengeance dye for the Ghost Armor, a predominantly red variation. The post-game refuge and some later dialogue differ according to the choice.
The two outcomes are not separate campaign-completion requirements. Both finish Jin’s Journey, both lead to post-game exploration after the credits, and the ending choice does not change the Mono No Aware trophy requirement. The principal differences are the final cinematic, refuge, dialogue, and Ghost Armor dye.
There is no normal undo command within the choice scene. If you want both outcomes, reload the separate pre-finale save and replay the required portion before selecting the other option. New Game Plus is the fallback if you no longer have an earlier save.
- Honor Shimura for Righteous Punishment.
- Spare Shimura for Vow of Vengeance.
- Remember that either choice completes Jin’s Journey.
- Do not overwrite your pre-finale save if you want the other ending.
5. Finish the tale and verify campaign completion
Allow the selected ending cinematic and credits to play. After the credits, control returns in a post-game refuge associated with your choice. Both endings restore free exploration and allow you to continue unfinished activities on Tsushima or Iki Island. Completing the finale does not erase completed Iki progress or make optional Tales inaccessible.
Check the Journal after control returns. The Tale of Lord Shimura should be marked complete in Jin’s Journey. The selected Righteous Punishment or Vow of Vengeance dye should be available for the Ghost Armor. The Mono No Aware trophy should unlock for completing the final tale; it is not dependent on killing or sparing Shimura.
If you want the alternate ending, reload the separate manual save made before the finale and repeat the mission through the final choice. If that save is unavailable, use New Game Plus to replay the campaign and choose the other outcome when you reach The Tale of Lord Shimura. Treat these as the dependable methods rather than relying on an inconsistent post-credits tale-abandon behavior.
- Watch the selected ending cinematic and credits.
- Confirm The Tale of Lord Shimura is complete in Jin’s Journey.
- Confirm Mono No Aware unlocked.
- Check Gear for the selected Ghost Armor dye.
- Reload a pre-finale save or use New Game Plus for the alternative ending.
Before you move on
- The Tale of Lord Shimura is marked complete in Jin’s Journey.
- The final ending cinematic and credits have played.
- Mono No Aware is unlocked on the PS5 trophy list.
- Jin has returned to the appropriate post-game refuge with free movement restored.
- The selected Righteous Punishment or Vow of Vengeance dye appears in Gear.
- A separate pre-finale save is preserved, or the alternative ending has been viewed in New Game Plus.
Post-game and New Game Plus: replays, builds and trophy guidance
After completing The Tale of Lord Shimura, keep a separate manual save for the finished campaign and any remaining Tsushima or Iki Island cleanup. New Game Plus starts after the opening invasion sequence and title-card transition rather than replaying the beach prologue. Techniques, equipment, charms, vanity items, and other earned character progression carry over, while story progress, liberated areas, fast-travel access, activities, Tales, and ordinary resources reset. New Game Plus adds Ghost Flowers, Baku the Voiceless, exclusive charms and cosmetics, higher upgrade levels, and two New Game Plus trophies. Use a pre-choice save for the quickest alternate-ending route; otherwise, replay the campaign route in New Game Plus to reach the final Tale. Legends remains a separate online mode and is not required for Jin’s Journey or New Game Plus completion.
Finish the original campaign and protect the completed save
Complete The Tale of Lord Shimura, view the selected ending cinematic, and allow the credits to finish. When control returns, create a separate manual save in a different slot. This is the dependable save for post-game exploration, unfinished Tales, equipment upgrades, and remaining Iki Island objectives. Starting New Game Plus creates a separate replay; it should not be treated as a replacement for this completed campaign state.
Use the Journal and Collections menus on the original save to identify unfinished companion Tales, Mythic Tales, Iki Island Tales, and other objectives relevant to your completion plan. Unfinished fox dens, hot springs, haiku, vanity items, and similar exploration activities are not automatically evidence that Jin’s Journey is incomplete. The main campaign ending and optional cleanup are separate goals.
If you want to see both endings, preserve a manual save from before the final choice in The Tale of Lord Shimura. Load that save to view the other outcome. Do not overwrite it after choosing. Without a pre-choice save, the reliable alternative is to replay the campaign route in New Game Plus and make the other choice during the second completion of the final Tale.
- The Tale of Lord Shimura is complete.
- The selected ending cinematic and credits have been viewed.
- A separate completed-campaign save exists.
- Unfinished Tsushima and Iki Island Tales have been identified.
- A pre-choice save is retained if both endings are desired.
Start New Game Plus from the completed campaign
Return to the title screen and select New Game Plus from the main menu. Choose the completed campaign save when prompted, then review the confirmation screen before accepting. The new mode creates a replay campaign and leaves the original save available for unfinished content.
New Game Plus skips the original beach prologue. It begins after Jin’s first confrontation with Khotun Khan, during the opening transition into the open world and title-card sequence. From that point, the campaign must be replayed. Equipment and techniques may be available immediately, but later regions, allies, activities, and story Tales remain tied to campaign progression.
There is no general menu that instantly opens every earlier main Tale. You cannot select The Fate of Tsushima, From the Darkness, Eternal Blue Sky, or The Tale of Lord Shimura from a universal replay list and complete them in isolation. Follow the campaign route and complete the required earlier objectives until the desired Tale becomes available. A pre-choice save is therefore much faster when the sole goal is an alternate ending.
- The intended completed save is selected.
- The original save remains separate and untouched.
- You understand that the beach prologue is skipped.
- You understand that story progression and later Tales reset.
- You know that late missions require replaying the campaign route.
Confirm what carries over and what resets
Your techniques, weapons, armor, charms, sword kits, bow equipment, masks, hats, dyes, and other earned vanity items carry into New Game Plus. Jin also receives the New Game Plus horse and its unique saddle. Existing character progression makes the opening missions easier, but it does not unlock later story locations ahead of schedule.
Story progress resets. Allies must be recruited again, regions reopen through the campaign, liberated locations return to their original state, and Tales must be completed again. Fast-travel access and activity completion are also reset for the new campaign. Previously collected exploration rewards may instead produce Ghost Flowers when their equivalent reward has already been obtained.
Do not plan around carrying over supplies or crafting stock. Ordinary resources such as supplies, upgrade materials, ammunition materials, and regular flowers are not dependable carry-over resources and should be spent or used before starting the new mode. Check the New Game Plus confirmation information and the inventory after the opening sequence rather than assuming that every item in the completed save transfers.
- Preferred armor, charms, weapons, and techniques are present.
- The New Game Plus horse and saddle are available.
- Story and regional progress are understood to be reset.
- Fast-travel and activity progress are not being treated as permanent.
- Supplies and crafting materials have been checked rather than assumed.
Prepare combat and stealth loadouts before major Tales
Use Armor Loadouts to keep at least one direct-combat setup and one stealth setup ready. A survivability or melee-focused armor set is useful when enemies surround Jin, while Ghost Armor or another stealth-oriented set helps thin a camp before open combat. Match charms to the purpose of each set instead of combining bonuses that support unrelated playstyles.
Retained techniques make stance changes, parries, dodges, ranged attacks, and Ghost tools available earlier than in a first playthrough. They do not eliminate the need to read enemy weapon types. Change stance when the group changes, remove archers and bomb throwers before committing to a prolonged melee, and preserve Resolve for healing or a controlled special attack.
Before a major Tale, confirm that healing, arrows, kunai, bombs, and other Ghost weapons are available. New Game Plus adds further upgrade levels for equipment, including additional weapon and armor progression and expanded ammunition capacity. Gather the required materials during the replay rather than expecting the original stockpile to remain.
- A combat loadout is assigned.
- A stealth loadout is assigned.
- The next Tale’s enemy mix is covered by the selected stances.
- Healing and Ghost tools have been checked.
- The available equipment upgrade levels are understood.
Find Baku and spend Ghost Flowers carefully
New Game Plus introduces Ghost Flowers as a replay currency. When a completed activity or Tale would otherwise award something already obtained, its New Game Plus reward can be converted into Ghost Flowers. Additional Ghost Flowers come from replayed activities and other New Game Plus objectives.
Follow the early New Game Plus route toward Baku the Voiceless near Lake Izuhara. Baku exchanges Ghost Flowers for New Game Plus-exclusive armor dyes, vanity items, and powerful charms. Read each charm’s description before buying or equipping it: some strengthen established builds, while others deliberately increase risk or difficulty.
The Grand Opening trophy requires only one purchase from Baku. It does not require clearing his entire inventory. Once you have enough Ghost Flowers, buy any available item and confirm that the trophy registers. Continue saving Flowers for functional charms or useful equipment if those are more important than cosmetic rewards.
- Baku the Voiceless has been reached in New Game Plus.
- Ghost Flowers have been earned.
- A Baku purchase has been made if Grand Opening is required.
- Functional charms have been considered before cosmetic purchases.
Replay the campaign for A Legend for All Time
The final choice in The Tale of Lord Shimura changes the ending cinematic and post-game presentation. Load a pre-choice save for the quickest alternate-ending viewing. If that save is unavailable, replay Jin’s Journey in New Game Plus, following the story route through the required Acts until The Tale of Lord Shimura is available again.
A Legend for All Time requires completing Jin’s Journey in New Game Plus. That means finishing the replayed main-story route, including the late campaign Tales and The Tale of Lord Shimura; it is not earned merely by starting New Game Plus, buying from Baku, or completing a selection of side activities.
Use the replay to recover missed main-story rewards and finish Tales that were skipped in the original run, but keep the original save for optional cleanup that is already available there. New Game Plus equipment reduces the need to rebuild Jin’s kit, yet it does not bypass campaign prerequisites or make isolated main-Tale selection available.
- The original completed save remains available.
- The alternate ending is viewed from a pre-choice save or reached again in New Game Plus.
- The campaign route is followed instead of relying on isolated Tale replay.
- A Legend for All Time is earned if New Game Plus completion is required.
- Base campaign, Iki Island, and New Game Plus objectives are tracked separately.
Keep Legends separate from single-player completion
Ghost of Tsushima: Legends is a separate online multiplayer mode with its own classes, gear, activities, and progression. Its objectives do not replace Jin’s Journey, Iki Island Tales, or New Game Plus progress. Track Legends trophies independently from the single-player campaign.
You can play Legends at any time, but postponing it until after the campaign keeps save management and completion tracking clear. Do not use Legends progress as evidence that the story route or New Game Plus campaign is complete. Campaign saves and online-mode progress serve different purposes.
- The completed single-player save is retained independently.
- Iki Island progress is checked in the campaign save.
- Legends trophies and progression are tracked separately.
- Legends has not been mistaken for New Game Plus completion.
Before you move on
- The original save still records The Tale of Lord Shimura as complete.
- The selected ending cinematic and credits have been viewed.
- New Game Plus has been started from the completed campaign save.
- Retained techniques, gear, charms, and vanity items have been confirmed.
- Baku the Voiceless has been found and a purchase has been made if Grand Opening is required.
- The desired alternate ending has been viewed or reserved through a pre-choice save or New Game Plus replay.
- A Legend for All Time has been earned if New Game Plus completion is required.
- Iki Island and Legends progress have not been confused with New Game Plus completion.
Optional: Ghost of Tsushima: Legends — What Complements the Campaign
Ghost of Tsushima: Legends is a separate online multiplayer mode included with Ghost of Tsushima: Director’s Cut. It does not continue Jin Sakai’s campaign and is not required for Acts 1–3, Iki Island, The Tale of Lord Shimura, either ending choice, or the campaign credits. Legends has four classes—Samurai, Hunter, Ronin, and Assassin—and separate Story, Survival, Raid, and Rivals activities. Its gear, Ki rating, techniques, and resources belong to the online mode rather than Jin’s single-player save. An internet connection is needed for Legends’ online features. PlayStation Plus is generally required for online multiplayer on PS5, subject to the platform’s current requirements. For a campaign-focused completion, finish Jin’s Journey and the Iki Island story before spending time in Legends. Starting Legends earlier is safe, but it should be tracked as a separate objective.
1. Enter Legends as a separate mode
Select Legends from the game’s title screen or main-menu mode selection. You can also access it through the game’s supported Legends entry points, but do not search for its missions on Jin’s campaign map. Legends is a cooperative online mode inspired by Japanese mythology, with its own characters, objectives, equipment, and progression instead of Jin Sakai’s personal story.
Choose one of four classes: Samurai, Hunter, Ronin, or Assassin. Samurai focuses on direct close combat, Hunter specializes in ranged attacks, Ronin supports the team and can restore fallen allies, and Assassin emphasizes stealth and burst damage. These classes do not replace Jin’s stances, armor, charms, or Ghost techniques in Jin’s Journey.
An internet connection is needed for Legends’ online features. For online multiplayer on PS5, PlayStation Plus is generally required under the platform’s current requirements, although account sharing and other platform conditions can affect how that requirement is met. Check the current PlayStation Store listing and PlayStation Plus support information if access is refused.
- Launch Legends through the mode selection or an available Legends entry point.
- Choose Samurai, Hunter, Ronin, or Assassin.
- Use an internet connection for online features.
- Check the current PlayStation Plus requirements before attempting online multiplayer.
2. Learn the four Legends activities
Story missions are two-player cooperative tales presented through Gyozen’s mythic narration. Use them to learn class abilities, revive timing, and basic team coordination. Higher difficulties add tougher encounters, bonus objectives, and stronger rewards, so begin at a comfortable difficulty rather than treating the hardest setting as an early requirement.
Survival missions support up to four players defending locations against enemy waves. Prioritize the active defense area, revive teammates when the battlefield is safe, and coordinate movement instead of scattering. Survival is useful for learning crowd control, but it does not advance any Jin’s Journey objective.
The Raid is a three-part, four-player adventure set in Iyo’s realm. It expects strong Legends gear, a coordinated group, and reliable communication. Leave it until you understand your class and have a developed online loadout. The Raid is not a story mission on Tsushima or Iki Island.
Rivals uses two teams of two. Defeat enemies to collect Magatama, spend it on effects that hinder the opposing team, and complete the Final Stand before the other team. Rivals is competitive online content and has no role in advancing Jin’s campaign.
- Use Story missions to learn the mode and your selected class.
- Treat Survival as four-player defense and crowd-control practice.
- Reserve the Raid for a coordinated four-player group with suitable gear.
- Remember that Rivals is competitive Legends content, not a campaign objective.
3. Keep Legends progression separate from Jin’s equipment
Legends missions award online gear and cosmetics, while Ki represents the power of your Legends equipment. Complete missions, equip stronger drops, and improve your Ki before attempting higher difficulties. The mode also uses Honor, Essence, and Blessing for online abilities, perks, challenges, and gear management. These systems do not upgrade Jin’s katana, armor, charms, or campaign techniques.
The two modes have limited cosmetic interaction. Some Legends cosmetics can be unlocked through requirements in Jin’s story or New Game Plus, but that does not merge the saves or allow campaign equipment to be used by a Legends class. Treat those rewards as cosmetic links between modes, not shared character progression.
- Raise Ki by equipping stronger Legends gear.
- Spend Honor, Essence, and Blessing only within Legends systems.
- Do not expect campaign charms, techniques, or resources to transfer into Legends.
- Treat story-linked Legends cosmetics as exceptions to otherwise separate progression.
4. Decide when to play it
For the shortest campaign route, finish Jin’s Journey, the Iki Island story scope required by your completion plan, The Tale of Lord Shimura, the selected ending cinematic, and the credits before spending time in Legends. This keeps the campaign Journal and completion checklist focused on the required single-player content.
Starting Legends earlier is safe. It does not block Act 1, Act 2, Act 3, Iki Island, the final story choice, or New Game Plus. Returning to Jin’s Journey does not erase campaign progress. Play Legends earlier only when you deliberately want cooperative combat practice or a break from the open-world route.
- For campaign-focused completion, postpone Legends until after the credits.
- If you play early, record unfinished campaign Tales before switching modes.
- Return through the campaign mode selection and confirm that Jin’s next main Tale is still available.
5. Separate online trophies from campaign completion
Legends has its own trophy content and online objectives. Those objectives are separate from the single-player campaign trophies and are not required to complete Jin’s Journey, Iki Island, The Tale of Lord Shimura, or the campaign-focused Director’s Cut checklist. A completed Legends Story mission, Survival match, Raid, or Rivals match cannot substitute for a campaign Tale or Iki story objective.
If you want every trophy associated with the installation, inspect the PS5 trophy groups and track Legends separately from the main story, Iki Island, and exploration trophies. Some online objectives may require matchmaking, arranged partners, or higher-difficulty activities. Do not treat those requirements as prerequisites for reaching Kill the Khan or viewing the campaign ending.
- Review campaign and Legends trophy sections separately.
- Use matchmaking or arranged partners for online objectives that require multiple players.
- Do not mark the campaign complete because a Legends activity has been finished.
Before you move on
- Jin’s Journey, Iki Island’s required story content, the final story cinematic, and the credits are complete independently of Legends.
- The campaign-focused completion goal remains valid even if no Legends activity has been played.
- If pursuing the broader trophy set, inspect the separate Legends trophy section and complete its requirements independently.
- Confirm that remaining online objectives are tracked as Legends goals rather than campaign Tales.
- Return to Jin’s Journey after online play and verify that the campaign save still shows the expected completed Acts and Iki Island progress.
100% and completionist checklist: reliable final steps
Complete Jin’s Journey through The Tale of Lord Shimura, allow the selected ending cinematic and credits to finish, and confirm Mono No Aware. On Iki Island, Friend to All Raiders requires all 18 Tales of Iki: 9 Main Tales, 7 Side Tales, and 2 Mythic Tales. The two Mythic Tales are The Legend of Black Hand Riku and The Legacy of Kazumasa Sakai; verify them separately as the requirement for Treasures of the Past as well. Use the Journal’s individual Tale entries and the trophy list instead of island completion percentage. Six Unwritten Tales exist on Iki, but after patch 2.10 only five are required for Common Courtesy. Memories of Your Father, exploration activities, Legends, and New Game Plus are separate objectives. Keep a manual save before the final Lord Shimura choice if you want to view both ending cinematics.
Finish Jin’s Journey from the Omi Lake marker
Open the Journal and confirm that Eternal Blue Sky is complete. The final main Tale, The Tale of Lord Shimura, becomes available after that mission. Travel to the gold Tale marker at the old sparring circle beside Omi Lake in Kubara Prefecture. Do not treat Eternal Blue Sky’s completion as the end of Jin’s Journey, and do not rely on starting this final Tale from Jogaku Temple.
At Omi Lake, follow the active objective to the dock and wait for Lord Shimura. Ride with him, dismount to help the farmer push the wagon, and continue to the cemetery. Follow Shimura to Jin’s father’s grave and complete the haiku sequence. The Tale then leads directly into the final duel beneath the red-leafed tree.
During the duel, observe Shimura’s sword animations instead of attacking continuously. Parry ordinary and blue attacks when the timing is safe, dodge red-glash attacks, and avoid striking into his follow-up swings. Stone Stance is a suitable default because Shimura uses a sword. Use Resolve for healing or a special technique only when it gives you a safe opening. After his health is depleted, make the irreversible choice and allow the ending cinematic and credits to play.
Either ending completes Jin’s Journey and awards Mono No Aware. When control returns after the credits, make a separate manual save. Keep this completed save distinct from any pre-choice save and from a later New Game Plus file.
- Acts 1, 2, and 3 are complete.
- Eternal Blue Sky is complete.
- The Tale of Lord Shimura is complete.
- The selected ending cinematic and credits have played.
- Mono No Aware is unlocked.
- A completed campaign save is preserved.
Audit all nine Iki Main Tales
Open Tales of Iki in the Journal and verify these nine Main Tales: Journey Into the Past; A Lost Friend; The Eagle’s Cry; A Raider’s Return; Jin From Yarikawa; The Lightning in the Storm; Massacre at Kidafure Village; The Blessing of Death; and Epilogue: Last Words.
The Main Tales normally appear in story order. If an entry is locked or missing, select it and follow the prerequisite shown by the Journal rather than using island completion percentage, enemy-camp liberation, or unexplored map icons as a substitute. Continue through the final farewell in Epilogue: Last Words until the Tale-complete notification appears.
Completing all nine Main Tales awards Out of the Past. These nine entries count toward Friend to All Raiders, but they are not the entire requirement; the seven Side Tales and two Mythic Tales must also be complete.
- Journey Into the Past is complete.
- A Lost Friend is complete.
- The Eagle’s Cry is complete.
- A Raider’s Return is complete.
- Jin From Yarikawa is complete.
- The Lightning in the Storm is complete.
- Massacre at Kidafure Village is complete.
- The Blessing of Death is complete.
- Epilogue: Last Words is complete.
- Out of the Past is unlocked.
Complete all seven Iki Side Tales
Verify these seven Side Tales in Tales of Iki: The Ghost of Iki Island, Caretakers of the Eagle, Troubled Waters, The Impact of Loss, Bloodletting, A Mother’s Law, and A Helping Hand. The first five generally appear through normal Tale markers or quest locations. A Mother’s Law and A Helping Hand are the two entries most likely to be missed because they do not behave like ordinary map-marked quests.
For A Mother’s Law, return to Fune’s Refuge after the Iki story has progressed through Epilogue: Last Words. Enter Fune’s room and begin the Tale. Follow the objective to Fune’s ship, board it after the scouting sequence, defeat the defenders, release the prisoners, and help Fune against the mutinous raiders. Remain in the mission until the completion notification appears.
A Helping Hand is initially unmarked. Find the peasant at his smoke-marked camp and deliver 3 Yew Wood. Find him again at the next construction location and deliver 6 Predator Hides, then locate him at the beach and deliver 10 Iron. If he is not present, leave the area, advance time through normal play, and return. After the third delivery, visit his house in the grassy clearing west of Fort Sakai and speak with him to finish the Tale.
These seven Side Tales are part of the 18-Tale Friend to All Raiders requirement. Do not replace them with Unwritten Tales or count the Mythic Tales twice.
- The Ghost of Iki Island is complete.
- Caretakers of the Eagle is complete.
- Troubled Waters is complete.
- The Impact of Loss is complete.
- Bloodletting is complete.
- A Mother’s Law is complete.
- A Helping Hand is complete.
- All 7 Side Tales are complete.
Complete both Iki Mythic Tales and verify Treasures of the Past
Complete The Legend of Black Hand Riku and The Legacy of Kazumasa Sakai. These are the only two Iki Mythic Tales. They count toward Friend to All Raiders and, separately, together satisfy Treasures of the Past.
Begin The Legend of Black Hand Riku at Fune’s Refuge after the required Iki story progress, then follow the Journal to Mount Takenotsuji. Rescue Minato and wait at the campfire until night. At the northeastern coast, enter the glowing water and follow the cave route. Light the path with flaming arrows and braziers, defeat Black Hand Riku in the duel, escape the cave, and finish the raider encounter outside. The Tale is not complete until the final notification appears. Its major reward is the Sarugami Armor.
Begin The Legacy of Kazumasa Sakai at the Sheltered Campsite near Zasho Bay. Equip something other than Sakai Clan Armor before speaking with the people there. Follow the shipwreck route through the search area, use the grapple points and fallen masts to reach the eastern wreck, collect the Sakai Horse Armor, defeat the Mongol waves, and speak with the survivors to finish the Tale.
If Treasures of the Past is missing, recheck both Mythic Tale entries specifically. If Friend to All Raiders is missing, also confirm that the nine Main Tales and seven Side Tales are complete; the two trophies should be audited independently even though the Mythic Tales overlap between their requirements.
- The Legend of Black Hand Riku is complete.
- The Legacy of Kazumasa Sakai is complete.
- Both Iki Mythic Tales are complete.
- Treasures of the Past is unlocked.
- The two Mythic Tales are counted toward the 18-Tale Friend to All Raiders audit.
Preserve the final-choice save and view the alternate ending if desired
Before selecting Jin’s response in The Tale of Lord Shimura, create a manual save and keep it separate from the completed campaign save. Finish one ending through the cinematic and credits, then reload the pre-choice save and select the other response.
The choices are alternative outcomes, not separate campaign-completion requirements. One ending is sufficient for Mono No Aware and the stated completion goal. The choice changes the final narrative scene and the Ghost Armor dye received afterward, but it does not change Iki Tale progress, Friend to All Raiders, or Treasures of the Past.
Do not assume a nearby checkpoint or a general mission-select menu will reliably reopen the final choice. If the pre-choice save has been overwritten, the dependable alternative is replaying the campaign, including through New Game Plus if available.
- A manual save exists before the final choice.
- At least one ending has played through the credits.
- The completed campaign save remains separate.
- The alternate ending is viewed from the pre-choice save or a full replay.
Perform the final 18-Tale and trophy audit
On the completed save, inspect Tales of Tsushima and confirm The Tale of Lord Shimura. Then inspect Tales of Iki and verify all 9 Main Tales, all 7 Side Tales, and both Mythic Tales. Friend to All Raiders requires all 18 Tales of Iki: 9 Main, 7 Side, and 2 Mythic. Do not stop after checking only the 16 written Main and Side Tales.
If Friend to All Raiders is missing, audit each category separately. Check A Helping Hand and A Mother’s Law first among the Side Tales because they are easy to overlook. Then verify The Legend of Black Hand Riku and The Legacy of Kazumasa Sakai as the two Mythic entries. If Out of the Past is missing, recheck the nine Main Tales and finish Epilogue: Last Words fully.
Treasures of the Past is a separate confirmation that both Iki Mythic Tales are complete. It does not replace the Main Tale or Side Tale checks for Friend to All Raiders.
Six Unwritten Tales exist on Iki Island. After patch 2.10, only five are required for Common Courtesy; the sixth, the Legends-related retelling for Uta, is no longer required for that trophy. Unwritten Tales are outside this campaign-focused goal. Memories of Your Father belongs to Elegy for Kazumasa, while exploration activities, Legends, and New Game Plus have separate rewards or trophies.
The final state is a completed Jin’s Journey save, Mono No Aware, Out of the Past, all 18 Iki Tales, Friend to All Raiders, both Iki Mythic Tales, Treasures of the Past, and a separate pre-choice save if both endings are wanted.
- Mono No Aware is unlocked.
- Out of the Past is unlocked.
- The Tale of Lord Shimura and one selected ending are complete.
- All 9 Iki Main Tales are complete.
- All 7 Iki Side Tales are complete.
- Both Iki Mythic Tales are complete.
- Friend to All Raiders is unlocked after all 18 Iki Tales are complete.
- Treasures of the Past is unlocked after both Mythic Tales are complete.
- Six Unwritten Tales are recognized, with only five required for Common Courtesy after patch 2.10.
- Memories of Your Father, exploration, Legends, and New Game Plus are classified separately.
- The final cinematic and credits have been viewed.
- The completed save is preserved.
Before you move on
- Tales of Tsushima shows Acts 1, 2, and 3 complete, including The Tale of Lord Shimura.
- Mono No Aware is unlocked and the final cinematic and credits have been viewed.
- The 9 Main Iki Tales are complete: Journey Into the Past, A Lost Friend, The Eagle’s Cry, A Raider’s Return, Jin From Yarikawa, The Lightning in the Storm, Massacre at Kidafure Village, The Blessing of Death, and Epilogue: Last Words.
- The 7 Side Tales of Iki are complete: The Ghost of Iki Island, Caretakers of the Eagle, Troubled Waters, The Impact of Loss, Bloodletting, A Mother’s Law, and A Helping Hand.
- The 2 Iki Mythic Tales are complete: The Legend of Black Hand Riku and The Legacy of Kazumasa Sakai.
- Friend to All Raiders is unlocked after all 18 Iki Tales are complete: 9 Main, 7 Side, and 2 Mythic.
- Treasures of the Past is unlocked after The Legend of Black Hand Riku and The Legacy of Kazumasa Sakai are complete.
- Out of the Past is unlocked after the Iki Main Tale sequence reaches its completed epilogue.
- Six Unwritten Tales are recognized, while only five are required for Common Courtesy after patch 2.10.
- Memories of Your Father, exploration, Legends, and New Game Plus are separately identified.
- A completed save is retained, with a separate pre-choice save if both endings are desired.
- No generic checkpoint replay is treated as a guaranteed substitute for an unfinished Tale or the final choice.
References for this chapter
- Ghost of Tsushima Walkthrough – All Tales
- Ghost of Tsushima – Iki Island DLC Trophy Guide & Roadmap
- Ghost of Tsushima Iki Island All Unwritten Tales Locations
- Ghost of Tsushima The Tale of Lord Shimura Walkthrough
- Ghost of Tsushima A Helping Hand Walkthrough
- Ghost of Tsushima The Legacy of Kazumasa Sakai Walkthrough
- Friend to All Raiders achievement guide
Finishing up
Complete The Tale of Lord Shimura, the final Jin’s Journey tale after Eternal Blue Sky, and watch the ending cinematic and credits.
Complete all 9 Iki Main Tales, all 7 Iki Side Tales, and both Iki Mythic Tales. Friend to All Raiders requires all 18 Iki Tales, while Treasures of the Past separately confirms completion of The Legend of Black Hand Riku and The Legacy of Kazumasa Sakai. The six Unwritten Tales belong to Common Courtesy and are outside this campaign-focused goal; only five are required for that trophy after the relevant patch.
Verify Mono No Aware for the base campaign, Out of the Past for the 9 Iki Main Tales, Friend to All Raiders for all 9 Main Tales, 7 Side Tales, and 2 Mythic Tales, and Treasures of the Past for the 2 Iki Mythic Tales.
Use a pre-choice manual save to view both endings, or use New Game Plus for a later alternate-ending run. Do not rely on a general campaign mission-replay menu.
Confirm the Journal records The Tale of Lord Shimura and all required Tales of Iki as complete; map completion, Legends, exploration trophies, Unwritten Tales, Memories of Your Father, and New Game Plus trophies are separate goals unless explicitly added to the completion scope.
Choose your next gameScreenshots & video
Game imagery for reference. Follow the written chapters above for the route and strategies.
Sources & references
Our original guide draws on the references below. Check the edition at the top of this page before following controls or unlock requirements.
- Ghost of Tsushima - PS4 and PS5 Games | PlayStation
- Ghost of Tsushima Director’s Cut arrives on PS5 and PS4 consoles on August 20 — PlayStation.Blog
- Ghost of Tsushima: Director’s Cut Walkthrough & Guide — Attacked
- Retrieving Your Sword — Prologue — Ghost of Tsushima: Director’s Cut Walkthrough
- Ghost of Tsushima — Main Story Prologue Walkthrough
- A beginner’s guide to Ghost of Tsushima
- Ghost Of Tsushima Act 1 Walkthrough (Spoiler-Free)
- Ghost of Tsushima Walkthrough – All Tales
- The Tale of Lady Masako - Ghost of Tsushima: Director's Cut Walkthrough & Guide
- The Tale of Sensei Ishikawa - Act 1 - Rescue Lord Shimura - Walkthrough
- Game Basics — Ghost of Tsushima: Director’s Cut Walkthrough & Guide
- Exploring Izuhara (3) — Act 1 — Rescue Lord Shimura
- Shinto Shrines — Izuhara Region
- Inari Shrines — Izuhara Region
- Ghost of Tsushima DIRECTOR’S CUT — PlayStation Store
- Transfer data from a PS4 console or PS5 console to your PS5 console — PlayStation Support
- A New Horizon — Ghost of Tsushima Walkthrough
- A New Horizon — Ghost of Tsushima Walkthrough & Guide
- Ghost Of Tsushima: How To Unlock The Iki Island Expansion
- Ghost of Tsushima Journey Into the Past Walkthrough
- The Fate of Tsushima — Ghost of Tsushima Walkthrough
- Ghost of Tsushima Director's Cut - PS5 Disc Game
- A Message in Fire Walkthrough
- A Reckoning in Blood Walkthrough
- Ghost of Tsushima Act 2 Walkthrough
- The Fate of Tsushima Walkthrough
- The Unbreakable Gosaku - Ghost of Tsushima Walkthrough & Guide
- Ghost of Tsushima The Unbreakable Gosaku Walkthrough
- Ghost of Tsushima - How to Unlock Ghost Stance
- The Spirit of Yarikawa's Vengeance - Ghost of Tsushima Walkthrough & Guide
- Ghost of Tsushima: Journey into the dark secrets of Iki Island – PlayStation.Blog
- Ghost of Tsushima Director's Cut: Everything new on Iki Island
- Ghost of Tsushima The Eagle’s Cry Walkthrough
- Ghost of Tsushima A Raider’s Return Walkthrough
- Ghost of Tsushima Jin From Yarikawa Walkthrough
- Ghost of Tsushima The Lightning in the Storm Walkthrough
- Ghost of Tsushima Massacre at Kidafure Village Walkthrough
- Ghost of Tsushima The Blessing of Death Walkthrough
- Ghost of Tsushima Iki Island Epilogue: Last Words Walkthrough
- Ghost of Tsushima – Iki Island DLC Trophy Guide & Roadmap
- Ghost of Tsushima Iki Island All Unwritten Tales Locations
- Ghost of Tsushima A Mother’s Law Walkthrough
- Ghost of Tsushima The Legend of Black Hand Riku Walkthrough
- Ghost Of Tsushima Iki Island Hidden Sidequest Guide - A Helping Hand
- Ghost of Tsushima The Legacy of Kazumasa Sakai Walkthrough
- Friend to All Raiders Trophy
- Treasures of the Past Trophy
- Ghost of Tsushima From The Darkness Walkthrough
- Ghost of Tsushima Honor and Ash Walkthrough — PowerPyx
- From The Darkness - Ghost of Tsushima: Director’s Cut Walkthrough & Guide
- Honor And Ash - Ghost of Tsushima: Director’s Cut Walkthrough & Guide
- Ghost of Tsushima Wolves at the Gates Walkthrough — PowerPyx
- Ghost of Tsushima Heart of the Jito Walkthrough — PowerPyx
- Ghost of Tsushima: Director’s Cut Act 3 Walkthrough — GameFAQs
- Eternal Blue Sky - Ghost of Tsushima: Director's Cut Walkthrough & Guide
- Ghost of Tsushima Eternal Blue Sky Walkthrough
- Ghost of Tsushima - Eternal Blue Sky Walkthrough - SAMURAI GAMERS
- Eternal Blue Sky — Act 3 Walkthrough, Ghost of Tsushima: Director's Cut
- Ghost of Tsushima - The Tale of Lord Shimura Walkthrough
- The Tale of Lord Shimura - Ghost of Tsushima Walkthrough & Guide
- Ghost of Tsushima The Tale of Lord Shimura Walkthrough
- Mono No Aware Trophy in Ghost of Tsushima
- Ghost of Tsushima - Ending Choice Guide
- Ghost of Tsushima: Legends and New Game+ out October 16
- Ghost of Tsushima: How to Start New Game + and What Carries Over
- Ghost of Tsushima: Director’s Cut Trophy Guide & Road Map
- A Legend for All Time Trophy in Ghost of Tsushima
- Ghost of Tsushima: Legends — Official PlayStation page
- Ghost of Tsushima: Legends — PlayStation Store listing
- Ghost of Tsushima: Legends gets standalone release, adds new Rivals mode — PlayStation.Blog
- PlayStation Plus support — Official PlayStation Support
- Ghost of Tsushima A Helping Hand Walkthrough
- Friend to All Raiders achievement guide
About the game & collecting notes
- Platform
- Sony PlayStation 5
Step-by-step campaign walkthrough for Ghost of Tsushima: Director’s Cut on PlayStation 5, covering the three-act Jin’s Journey story, Iki Island expansion, combat preparation, boss approaches, progression checkpoints, and post-game completion checks. The guide covers the base campaign through The Tale of Lord Shimura, all 9 Iki Main Tales, all 7 Iki Side Tales, and both Iki Mythic Tales. Friend to All Raiders requires all 18 of those Iki Tales: 9 Main, 7 Side, and 2 Mythic. Treasures of the Past separately requires the same 2 Iki Mythic Tales. The six Unwritten Tales exist for Common Courtesy; after the relevant patch, only five are required for that trophy, and all Unwritten Tales remain outside this campaign-focused goal.
Darryl Polo
Darryl Polo loves tinkering with emulation and revisiting retro games. He enjoys exploring how old favorites play on different setups and sharing what he learns along the way. At Joking Joystick, he writes about the games, hardware, and small discoveries that keep the hobby fun.
Our editorial standardsFound a step that needs another look? Help us improve this guide.