
Gears of War (Xbox 360, original retail release) — Complete Campaign Walkthrough
Step-by-step campaign walkthrough for the original 2006 Xbox 360 retail release of Gears of War. This guide covers every required mission through the game's retail ending (Acts 1–5 as shipped on Xbox 360), explains cover-and-fire tactics, boss methods, co-op recovery, and optional collectible guidance while excluding PC-exclusive chapters added after the retail release.

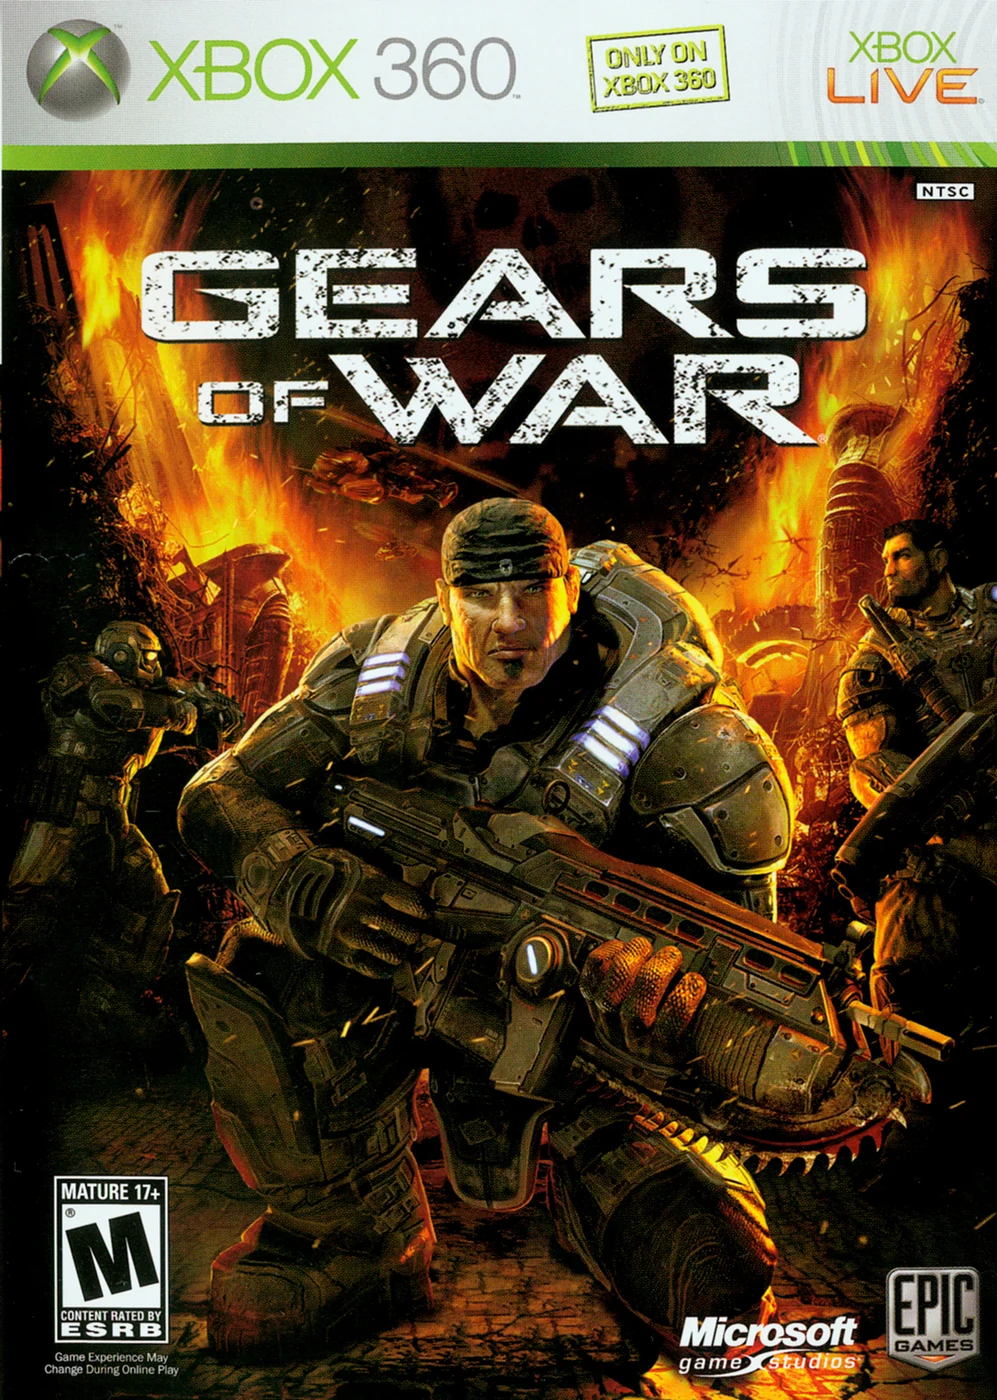
Find a copy
Gears of War Xbox 360
We may earn a commission if you buy through these links, at no extra cost to you. As an Amazon Associate I earn from qualifying purchases.
Opens retailer search results. Check the model, edition, seller, availability and current price before buying.
Before you begin
This walkthrough is specifically for the original Xbox 360 retail release of Gears of War (released November 7, 2006).
It follows the campaign structure and missions as shipped on that retail disc and does not add PC-exclusive chapters that were introduced in later ports and reissues.
Read the Preparation section before starting to avoid early mistakes.
You will be guided through the campaign act-by-act with clear objectives, tactics for surviving encounters, how to handle major set pieces and bosses, and what is optional versus required.
If you play co-op, many checkpoints and enemy behaviors change — there are dedicated notes on cooperative recovery and sharing cover roles.
Set yourself up for the run
Choose a difficulty; Normal is suitable for a first campaign, while Hardcore and Insane increase enemy damage, accuracy and encounter pressure.
Difficulty is selected for the campaign run and should be chosen with any intended difficulty achievement in mind.
Familiarize yourself with cover: press A to enter, move along and leave cover, and hold A while moving to Roadie Run.
Aim with the left trigger and fire with the right trigger on the default Xbox 360 layout.
Use B for melee; hold B with the Lancer equipped for the chainsaw attack.
Press X to interact, open or kick through objects, revive when prompted, and pick up or swap with a dropped weapon.
Use the D-pad to switch between carried weapons and grenade types.
Press the right bumper to reload; a second well-timed press performs an Active Reload.
Keep one reliable mid- or long-range weapon and one close-range weapon when the available pickups allow it.
Swap weapons at enemy drops according to the next encounter rather than carrying two weapons with the same role.
Carry grenades for groups, fortified positions and Emergence Holes; do not spend every grenade on isolated enemies.
Use checkpoints as tactical resets. If a section repeatedly fails, change the opening cover, target priority or weapon plan.
In co-op, assign complementary roles: one player handles close threats while the other suppresses distant enemies and watches alternate angles.
Clear the immediate firing lane before attempting a revive.
COG Tags and other collectibles are optional and can be collected through chapter replay.
Expect scripted waves, route choices and set-piece encounters; not every visible enemy must be chased after the objective is available.
Advance patiently between connected cover positions instead of sprinting across open ground.
Act 1 — Opening: 14 Years After E-Day, Trial By Fire, Fish in a Barrel
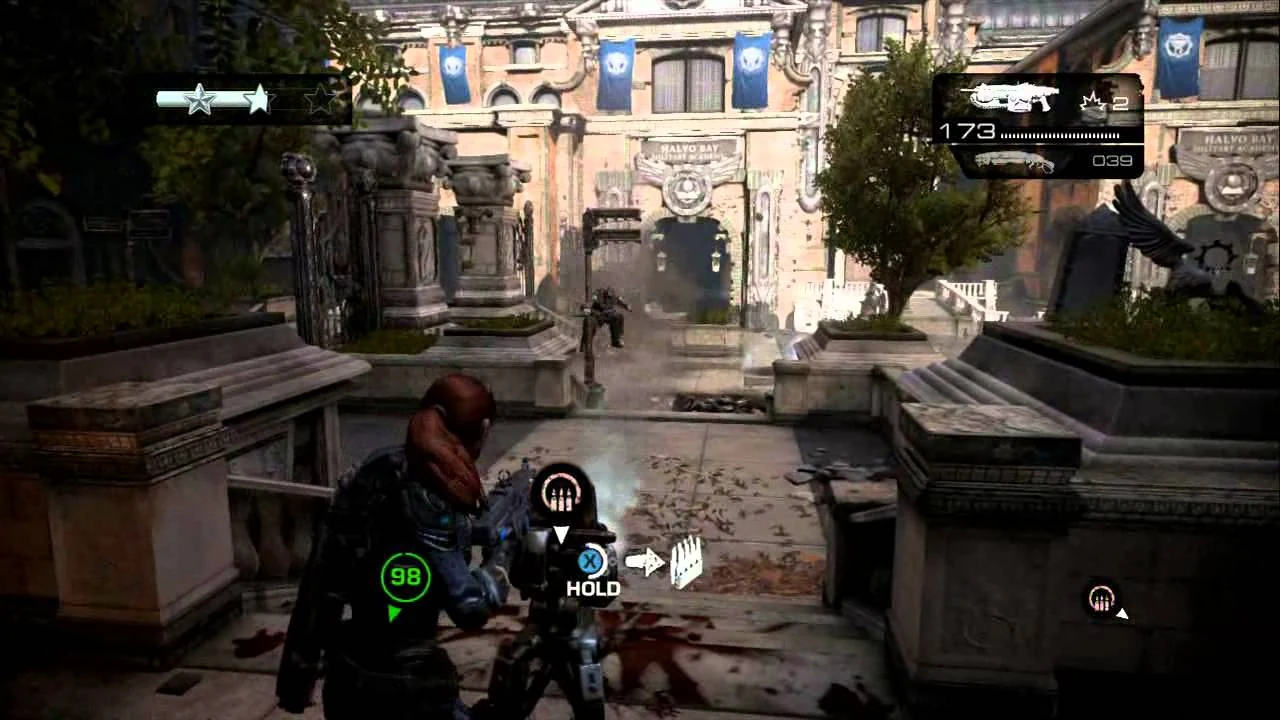
The first three chapters teach the original Xbox 360 campaign’s essential cover-combat route. In 14 Years After E-Day, follow Dom from the prison and choose Combat for the shorter direct route or Training for the tutorial route. The Training path uses a desk, two red breakers, a timed security door, grenades and several prison courtyard fights before the helicopter escape. Trial By Fire continues through Embry Square and a large courtyard where the correct left flank exposes the Locust position and an emergence hole must be sealed. After the bridge, clear two more emergence holes inside the building and descend to the fallen Alpha soldiers. Fish in a Barrel begins with a right-side flank around a white van to reach a Troika. Capture the weapon, use it against the following wave, then defend the circular statue area while four emergence holes appear. COG Tags are optional; the required endpoint is the transition to Fork in the Road.
1. Choose Combat or Training and leave the prison cell block
After the opening scene, follow Dom through the hall and choose Combat or Training. Combat takes the more direct route into the prison fight. Training leads through the guards’ quarters and demonstrates the basic controls before rejoining the same campaign path. Choose Training if you want the game to introduce cover and interaction prompts; neither choice changes the campaign order.
On the default Xbox 360 layout, press A near suitable cover to enter it, move along it, mantle over it or evade. Hold A while exposed to Roadie Run. Use the left trigger to aim and the right trigger to fire. Press B for melee, or hold B with the Lancer equipped to rev the chainsaw. Press X to interact with doors and switches or to pick up and swap dropped weapons. Use the D-pad to switch carried weapons. Press Y to inspect a point of interest or locate an objective such as an emergence hole.
- Meet Dom outside the cell area.
- Choose Combat or Training.
- Confirm the default cover and weapon controls before entering the prison fights.
2. Complete the prison route and reach the helicopter
On the Training route, follow Dom upstairs to the desk and press X to open the door. Step onto the outside platform and shoot both red circuit breakers. Press X at the next door, enter the cover room and practice moving between the stone barriers. Use A to enter cover and mantle when the path requires it.
Cross the short bridge, defeat the Locust on the opposite side and press X at the far security door. Roadie Run through before it closes. Continue downstairs and collect the grenades near the ammunition. From cover, shoot the Locust in the courtyard below, then follow Dom down and use the stone barriers when enemies break through the door.
Enter the broken doorway used by the Locust and clear the final prison courtyard. Check the side lanes and upper stairs before advancing because enemies can remain outside your forward firing angle. Once the area is secure, wait for the helicopter and the large creature to reach the far side, then Roadie Run to the helicopter. COG Tags in the prison are optional and do not affect the route.
- Open the training route with the desk and red breakers, if selected.
- Cross the timed security door and survive the prison courtyards.
- Reach the helicopter rendezvous.
3. Clear the opening Trial By Fire courtyards
After the cutscene, take cover behind the barrier in front of Marcus and eliminate the Locust descending the stairs. Enter the building, move right through it and step into the next courtyard. Use the first stone pillar as cover while firing across the courtyard. Follow the squad to the stairs, collect the nearby ammunition and continue to the next checkpoint.
In the following courtyard, follow the squad’s instruction to flank left. Stay along the left edge instead of trading fire from the initial approach. Continue until you are level with the Locust line, then fire into their exposed side and occupy the cover they were using. An emergence hole opens at the far corner. Throw a Frag Grenade into it when you have a clear angle; sealing it prevents additional Locust from joining the fight.
Collect ammunition near the hole and the large pillar, then follow the squad across the remaining courtyard. Use cover and controlled bursts rather than crossing the open center. When the squad reaches the bridge, press Y at the fallen soldiers if you want to inspect the point of interest, then enter the building after the door is opened.
- Defeat the first Trial By Fire reinforcement group.
- Use the left flank in the large courtyard.
- Seal the far-corner emergence hole and cross the bridge.
4. Seal both emergence holes inside the building
The building contains another Locust group. Stay behind the room’s cover and eliminate the first wave. When an emergence hole opens in the center, throw a Frag Grenade into it immediately if the throw is safe. Do not sprint into the opening while enemies still have a clear firing lane.
Move around the fallen stone structure to locate the second emergence hole. Seal it, then fall back behind the stone and kill the Locust that already emerged. If a grenade misses, remain in cover and clear the spawned enemies before attempting another throw. The fight is complete only after both holes have been dealt with and the remaining enemies are down.
Exit the building and descend the ramp toward the fallen Alpha soldiers. This descent completes Trial By Fire and triggers the transition into Fish in a Barrel. The COG Tag near the building exit is optional; collect it only after the immediate fight is safe.
- Defeat the first indoor wave.
- Seal the central emergence hole.
- Find and seal the second hole beyond the fallen stone structure.
- Descend to the fallen soldiers.
5. Flank the Troika and turn it on the advancing Locust
Fish in a Barrel begins beside an emergence hole and a white van. Move to the right and use the van as cover while following the side lane. Collect the nearby ammunition and continue around the lane until you have a flank on the Locust position. The Troika gunner is exposed from the side, so do not approach by crossing directly into the weapon’s fire.
Kill the gunner or force him off the Troika, then press X to use the mounted weapon. Turn it around toward the direction from which you came and fire on the Locust advancing through the street. After the wave is stopped, leave the Troika and follow Delta Squad to the next bottleneck.
At the bottleneck, use the stone pillar as cover and clear the nearby Locust. Move through the opening beyond the pillar and follow the road toward the circular statue area. The Lancer chainsaw is useful against an isolated standard enemy only when the firing lanes are safe; it is not a substitute for cover, and Trial By Fire does not require a chainsaw demonstration against Boomers or shock troopers.
- Reach the Troika by the right-side flank.
- Defeat the gunner and take the weapon with X.
- Use the Troika against the advancing wave.
- Reach the statue area.
6. Defend the statue circle and close four emergence holes
Before entering the circular statue cover, collect the available Frag Grenades and ammunition around the perimeter. The statue’s stone edge provides protection from several directions, so use it as the main firing position instead of standing in the open center.
The first emergence hole opens after you enter the area. Press Y to identify its location, move only far enough to obtain a safe throwing angle and throw a Frag Grenade into the hole. Return to cover and eliminate any Locust that emerged. Three more holes open around the statue area, bringing the total to four. Their order can vary, so react to the rumbling and Y marker rather than relying on a fixed sequence.
Two additional grenades are available near the dead soldier in the statue area. If a hole releases enemies before you can seal it, kill the closest attackers first, then close the opening when the lane is safe. Keep the statue between Marcus and distant fire whenever possible. Once all four holes have been sealed and the remaining Locust are defeated, follow Delta Squad out of the area and collect ammunition along the route.
- Collect grenades before entering the statue cover.
- Use Y to locate each emergence hole.
- Seal all four holes and defeat the remaining Locust.
- Leave with Delta Squad.
Before you move on
- Marcus has completed either the Combat or Training prison route and reached the helicopter.
- Trial By Fire is complete after the left-flank courtyard, the bridge, both indoor emergence holes and the descent to the fallen Alpha soldiers.
- Fish in a Barrel is complete after the Troika encounter and the statue-area defense with four emergence holes.
- The next chapter displayed by the campaign is Fork in the Road.
Act 1 — Fork in the Road to Hammer
Fork in the Road is a short route-choice chapter followed by two Troika defenses. Take the right branch for the safer direct route, eliminate the first gunner, use the opened door and interior cover to flank the second emplacement, then use that Troika against the reinforcements. Knock Knock moves outside around the House of Sovereigns. Find the COG Tag near the van if desired, clear the street and side rooms, defend the position after Carmine’s death, and regroup when Kim opens the next door. Hammer begins with an Alpha Team rescue and introduces Cole, Wretches and the Hammer of Dawn. Pick up the Hammer of Dawn, use it on both Seeders, cross the lowered bridge, clear the sanctuary and follow the squad to the next checkpoint. Fork in the Road has no required collectibles, and the COG Tags in these chapters are optional.
1. Take the right branch and clear the first Troika
Follow Delta Squad from Fish in a Barrel until the team divides at the fork. Choose the right-hand path. Advance through the corridor and up the dirt slope, but stop when the Troika comes into view. Stay behind the sandbags while the gunner is facing away or dealing with the squad. Throw a frag grenade beside the emplacement to force the gunner away, or use controlled rifle fire when the gunner is exposed.
Finish the nearby Locust before crossing the firing lane. Once the position is secure, move to the Troika and use it against the Locust emerging behind you. Do not leave the gun immediately; the gun emplacement is the safest way to clear this first reinforcement wave. When the area is quiet, use the button beside the door to open it and enter the next room.
- Choose the right-hand branch.
- Defeat the first Troika gunner from cover.
- Use the cleared Troika against the rear attack.
- Open the door beside the emplacement.
2. Flank the second Troika inside the building
After entering the room, take cover and let the squad catch up. A second Troika is positioned in the next area with Locust guarding it. Move along the right-hand side rather than crossing directly in front of the gun. Use the connecting rooms and doorways as cover, then continue toward the room ahead.
Break into the room containing the Troika’s supporting Locust. Eliminate the guards first, then kill the gunner. A grenade is useful if the gunner is protected by several enemies, but do not expose yourself to the weapon’s frontal fire just to throw it. Once the room is clear, leave the interior and return to the Troika.
- Keep to the right-side interior route.
- Kill the supporting Locust before taking the emplacement.
- Avoid crossing the Troika’s frontal firing lane.
3. Finish Fork in the Road with the second Troika
Mount the second Troika and aim toward the route you used to enter. Locust will advance from Emergence Holes and attempt to retake the position. Sweep the approaching group with the emplacement, then check for survivors hiding behind cover. Wait until the reinforcement wave is finished before leaving the gun.
A Drone breaks through the boarded door behind the emplacement after the defense. Kill it from a safer distance instead of standing directly in the doorway. Enter through the broken door and kick open the next door to trigger the Knock Knock transition. There are no COG Tags in Fork in the Road, so do not search this chapter for the fountain-area tag from the preceding chapter.
- Use the second Troika to stop the reinforcement wave.
- Defeat the Drone that breaks through the rear door.
- Exit through the broken doorway and complete the chapter transition.
4. Start Knock Knock and collect the optional COG Tag
Walk through the hallway while Kim communicates with command. After the door opens, move outside with Dom and stay along the left side. Continue toward the building and look beside the wall near the white van marked with the red Locust skull and COG symbol. The COG Tag is on the ground there. It is optional; if you are only completing the campaign, continue directly to the squad.
Locust fire begins as you approach the building. Use the available sandbags and vehicles as cover, then move from one protected position to the next. A Troika fires from one of the doorways, so do not cross the open street in front of it. Reach the side entrance and enter from the right rather than attacking the gunner head-on.
- Stay left after leaving the hallway.
- Take the optional COG Tag beside the marked van if wanted.
- Use the side entrance to avoid the Troika’s frontal fire.
5. Clear the building and hold the Troika
Fight through the side rooms slowly. Eliminate the nearest Drones first, then advance toward the Troika position. Keep a retreat route behind you in case grenades land near your cover. Once the gunner and nearby Locust are dead, regroup with the squad and remain at the Troika when the defense sequence begins.
After the cutscene involving Carmine, use the Troika to repel the Locust trying to retake the building. Aim down the approach you came from and sweep the attackers before they reach the sandbags. When Kim orders the squad forward, leave the gun and follow the marked route through the door on the right. Do not remain behind the emplacement after the squad has moved on.
- Clear the side rooms before advancing on the Troika.
- Hold the Troika during the post-cutscene attack.
- Follow Kim through the right-hand door when ordered.
6. Begin Hammer by rescuing Cole and preparing for Wretches
Hammer starts with Alpha Team calling for help. Move up the stairs and fire into the area where the Alpha soldier is under attack. Continue down the indicated stairs to assist him, then follow the scene introducing Augustus Cole. Collect ammunition and return to the squad before taking the left-hand stairs.
When Kim opens the next door, move right and pick up the Gnasher if you need a close-range weapon. Wretches attack from the doorway and ceiling, and additional Wretches can approach from behind. Hold near the corridor entrance, use the shotgun at close range, and turn around whenever the squad warns that the attack is coming from the rear. Do not push into the next room until the Wretch wave has ended.
- Assist the Alpha Team survivor.
- Meet Cole and resupply.
- Carry a close-range weapon for the Wretches.
- Check the ceiling and rear approach during the attack.
7. Take the Hammer of Dawn and destroy both Seeders
Before entering the next exterior area, pick up the Hammer of Dawn from the floor near the far wall. Carry it through the chapter. Proceed outside and aim the targeting beam at the Seeder visible across the courtyard. Keep the beam on the creature until the satellite strike destroys it, then eliminate any remaining Drones before crossing.
Cross the lowered bridge and enter the next area with the Hammer of Dawn still equipped or immediately available. A second Seeder must be destroyed in the following room. Use the weapon on it, then clear the Drones and Wretches around the balcony. If you lose track of the route, regroup with Kim at the marked doorway rather than wandering into side corridors.
- Pick up and retain the Hammer of Dawn.
- Destroy the first Seeder outside.
- Cross the lowered bridge.
- Destroy the second Seeder and clear the balcony.
8. Clear the sanctuary and complete Hammer
After the balcony fight, follow Kim through the opened route and down the stairs. Wretches attack again as you turn the corner, so keep the Gnasher or another close-range weapon ready. Continue into the sanctuary and clear the Drones in the room. Search the area for ammunition before following the squad upstairs.
When Kim opens the final route, move through the rooms and remain with Delta Squad. The chapter is complete after the sanctuary sequence and the following movement through the upper area, when the next Act 1 chapter, Wrath, loads. If a squadmate is down, remove enemies controlling the body before attempting a revive; the narrow rooms make rushed revives especially dangerous.
- Defeat the sanctuary attackers.
- Resupply before leaving the interior.
- Follow Delta Squad through the upper route.
- Confirm that Wrath loads.
Before you move on
- Fork in the Road is complete after the second Troika defense, the rear Drone is defeated and the next door loads Knock Knock.
- Knock Knock is complete after the exterior and interior resistance is cleared, the Carmine cutscene and counterattack occur, and Kim opens the route into Hammer.
- Hammer is complete after Cole is rescued, the Wretch attacks are cleared, both Seeders are destroyed with the Hammer of Dawn, the sanctuary is cleared and Wrath loads.
Act 1 — Wrath and China Shop (Act 1 finale)
Finish Wrath by defeating the third Seeder with the Hammer of Dawn, clearing the returning Locust force, taking the Troika, and defending the balcony against ground enemies and Nemacysts. China Shop is a controlled Berserker escape rather than a normal firefight. Collect the replacement Hammer of Dawn, lure the Berserker through three interior doors by making it charge and dodging aside, then draw it into the courtyard. Stun it against solid objects and fire the Hammer of Dawn twice to end Act 1. The three COG Tags in China Shop are optional and can be collected without changing the required route.
1. Defeat the third Seeder
At the start of Wrath, deal with the nearby Locust from cover, then move outside toward the large Seeder. The Seeder is the priority target because it produces airborne Nemacysts and keeps the surrounding area dangerous. Pick up or equip the Hammer of Dawn and aim at the Seeder until the targeting lock is established; hold the attack button through the brief activation delay and the orbital strike.
The Seeder requires two Hammer of Dawn strikes in the standard campaign. Stay near cover while the weapon charges, and let Delta Squad draw some of the ground fire. If the reticle cannot lock because the target is hidden, shift position only far enough to gain line of sight. Do not spend both shots on ordinary Drones unless one is preventing you from reaching a safe firing angle.
- The third Seeder is destroyed.
- The Hammer of Dawn has been used on the Seeder rather than wasted on routine enemies.
- You have moved back toward the building after the Seeder dies.
2. Clear the returning Locust force
When the squad returns toward the building, Locust enter the room and surrounding approaches. Use the doorway, sofas, and stone cover to fight from a protected angle. Eliminate the nearest Drones first, especially any enemy that can reach the squad's position or threaten a revive. After the immediate group is down, follow Delta Squad through the newly opened route.
The Hammer of Dawn is no longer needed for the required Wrath route once the Seeder is dead. You may exchange it for the automatic weapon or shotgun if that gives you a more useful close-quarters loadout. A separate Hammer of Dawn is available at the beginning of China Shop, so do not make the next chapter harder by assuming this weapon must be carried forward.
- The first Locust counterattack is cleared.
- Delta Squad has resumed its route through the building.
- Your replacement weapon is suitable for corridor fights.
3. Flank the first Troika and survive the Wretch push
Continue through the corridors until you reach the long hallway containing a Troika. Do not cross directly in front of the gun. Take the side passage that runs alongside the position, come around behind the gunner, and eliminate the operator. Once the weapon is safe, mount the Troika and use it to cut down the incoming Wretches.
Keep the firing lane focused on the ground and the hallway approaches. Delta Squad can help with enemies above, but dismount if a Wretch reaches the weapon or if grenades make the position unsafe. After the wave ends, leave through the hallway beside the Troika and continue through the interior rooms. Use the stairway and available cover to clear the small Locust groups rather than rushing into the next chamber.
- The first Troika operator is eliminated from the flank.
- The Wretch wave is defeated.
- You have left the Troika corridor and continued toward the balcony section.
4. Clear the final Wrath balcony
After passing through the interior rooms, follow the stairs toward the balcony and deal with the Troika operator overlooking the lower area. Once the position is captured, use the Troika to suppress the Locust below. There is another Troika on the balcony if you need a second firing angle or if playing co-op.
Nemacysts move through the air during this defense. Watch for them approaching the balcony and destroy them before they reach the squad; an airborne enemy that gets too close can knock you down or interrupt your firing position. Concentrate first on ground Locust that can climb or advance toward the balcony, then clean up enemies at longer range. Do not leave the balcony to chase targets below. The chapter advances after the area is cleared and the transition cutscene plays.
- The balcony Troika is under your control or its operator is dead.
- The ground Locust are eliminated.
- The approaching Nemacysts are destroyed.
- The Wrath ending cutscene begins.
5. Take the Hammer of Dawn in China Shop
After the cutscene, turn around and follow the hallway back toward the dead COG soldier and burning debris. The Hammer of Dawn is on the ground nearby. Pick it up before entering the Berserker route. The first China Shop COG Tag is in this opening hallway near the corpse; collect it only if you want the optional collectible.
Continue through the hallway and large room. The Berserker is immune to ordinary gunfire for this encounter, so do not try to win by trading shots. Walk when you are repositioning near it to reduce unnecessary noise, then use a short burst of gunfire or your exposed position to make it charge when you are ready to dodge.
- The China Shop Hammer of Dawn is in your inventory.
- The optional first COG Tag has been collected, if desired.
- You have reached the large room where the Berserker appears.
6. Make the Berserker break through three doors
When the Berserker charges, wait until it is about to reach you and press A to dodge sideways. Immediately run through the opening on the right and continue to the far end of the next room. Stand near the first smashable door, face the Berserker, and fire once or otherwise let it detect you. As it charges, move just outside its path so it hits the door instead of you.
Repeat this process through the next two rooms. Each time, position yourself close enough to the required door that the Berserker's charge will connect, then dodge at the last moment. If it misses, run to the opposite end of the room and draw it back; staying on one side can leave too little room to set up the next dodge. A second COG Tag is near one of the later interior doors, but it is not required.
- The first interior door has been smashed.
- The second interior door has been smashed.
- The third interior door has been smashed.
- You have avoided being pinned against a wall or furniture.
7. Destroy the Berserker in the courtyard
Once the final door breaks, enter the courtyard and keep moving until the Berserker follows you fully into the open. The Hammer of Dawn will not fire effectively until the target is under open sky. Use the stone rubble or another solid object as a stopping point: stand on the far side, let the Berserker charge, and dodge aside so it slams into the obstacle and becomes briefly stunned.
During that opening, aim the Hammer of Dawn at the Berserker and hold the attack button until the strike lands. It takes two strikes on the standard Xbox 360 campaign route. After the first hit, move away and repeat the lure-and-dodge maneuver against another solid object before firing again. A third COG Tag is in the courtyard near the route's left side; collect it before the final strike if wanted. When the Berserker dies, allow the cinematic to play.
- The Berserker is fully outside under open sky.
- The first Hammer of Dawn strike has landed.
- The second Hammer of Dawn strike kills the Berserker.
- The Act 1 ending cinematic plays and Act 2 becomes available.
Before you move on
- Wrath is complete when the third Seeder is destroyed, the returning Locust are cleared, the Troika and balcony enemies are defeated, and the transition cutscene begins.
- China Shop is complete when the Berserker has broken through the three interior doors, has been killed by two Hammer of Dawn strikes in the courtyard, and the Act 1 ending cinematic has played.
- From chapter select, verify that Act 2: Nightfall is available before quitting if you want an explicit progression check.
Act 2 — Nightfall: Tick Tick Boom, Grist, Outpost
This Xbox 360 retail chapter group begins with Tick Tick Boom, where Delta Squad splits around a ruined roadway and later reunites after fights involving Boomers, Drones, Wretches and Troikas. Grist continues through a factory approach and street battle, including a movable car that serves as portable cover before the squad reaches the Stranded settlement. Outpost is a brief transition: Marcus and Dom leave the settlement after speaking with Franklin and enter a building on the route to Chap's gas station. The spotlight, propane-lighting and Kryll mechanics begin in the next chapter, Lethal Dusk, not Outpost. Optional COG Tags are found in Tick Tick Boom and Grist; none are required for campaign progress.
1. Tick Tick Boom: take the route that matches your weapon needs
Move forward with Dom until Delta Squad reaches the route split. Both paths eventually reconnect, so choose based on the weapons and cover you want. The left path is the more dangerous option, but it lets you collect Rocket Launchers from enemies ahead. The right path sends you up a concrete slab and stairs, giving you elevation and a useful firing position over the left-side route. From there, provide cover fire against the two Boomers below rather than dropping into the open area immediately.
Keep solid cover between you and the Boomshot explosions. Boomshot rounds can catch the edge of a barrier, so avoid standing directly beside thin cover and move after firing. Use the Lancer for controlled shots against exposed Drones, and switch to the Gnasher if Wretches reach your position. Do not sprint past the first combat area: the squad must clear the enemies before the path through the next rooms becomes safe.
- Choose left for Rocket Launcher access or right for elevation and safer cover fire.
- Prioritize the two Boomers when they become visible.
- Avoid standing against the edge of cover where a Boomshot blast can reach you.
2. Tick Tick Boom: clear the reunited route and collect the optional tag
After the route split, continue through the rooms until the squad begins working back toward one another. In the larger area with a car, use the surrounding barriers while dealing with the attacking Drones. When Troikas become active near the building, remain in the alcoves and advance only after their firing angles are reduced. Wretches can enter during this fight, so check the approach to your position instead of aiming only toward the machine guns.
When Delta Squad has regrouped, move to the left of the machine gun and break through the indicated door. Follow the route until you reach the room with stairs in the middle. Go down the second staircase to the dead end, where a couch blocks the optional COG Tag. Destroy the couch with the Lancer's chainsaw or a melee attack, then pick up the tag. This is the only COG Tag assigned to Tick Tick Boom in the original Xbox 360 layout. After collecting it, continue through the exit and allow the Grist chapter to load.
- Use alcoves and hard cover during the Troika and Wretch encounter.
- In the room with two staircases, take the second staircase to the couch.
- Destroy the couch to collect the optional Tick Tick Boom COG Tag.
3. Grist: cross the factory and survive the Wretch attack
At the start of Grist, break through the door and immediately take cover. Clear the Locust around the building before moving down the side route. Enter the rear building and climb to the catwalk. When Wretches attack, keep your aim low and deal with the nearest climbers before continuing. After passing through the door, another group can approach from above and around the grate, so check the upper openings before leaving the room.
Return beneath the stairs and search beyond the rubble on the right side of the route. The first Grist COG Tag is there, under the walkway near the dead-end area. It is optional and can be collected before continuing toward the Corpser activity. Once the area is clear, proceed until a Troika begins firing from the street. Take cover behind the movable car and push it forward as a portable shield. Keep the car between you and the Troika while closing the distance, then eliminate the gunner and clear the remaining Drones and Wretches.
- Advance through the factory catwalk after stopping the Wretches.
- Search beneath the stairs, beyond the rubble, for the first Grist tag.
- Push the movable car forward to approach the Troika under cover.
4. Grist: reach the Stranded settlement without missing the second tag
After the movable-car fight, follow the winding streets while staying toward the left side. Clear enemies from cover before searching the next area. Continue straight until you reach the newspaper dispensers. The second Grist COG Tag is on the ground beside them, before you enter the Stranded settlement. Collect it before crossing into the settlement; entering the area can remove the opportunity until you restart the chapter.
Once the route is clear and the tag is secured, move to the gate on the right and enter the Stranded campsite. Walk left through the settlement to trigger the conversation and chapter transition. There is no boss encounter or timed defense in Grist. The main progression requirement is reaching the settlement after the street battle, not defeating every enemy in a distant side position.
- Stay left after the movable-car fight and locate the newspaper dispensers.
- Collect the second Grist tag before entering the Stranded settlement.
- Enter the settlement and walk left to trigger the next sequence.
5. Outpost: leave Franklin's settlement and start the gas-station route
Outpost is a short transition chapter, not the Kryll defense. After the conversation at Franklin's settlement, move down the street with Dom and turn left as the route opens. Franklin explains over the radio that the Junker is at Chap's gas station and that checkpoints along the way can provide ammunition. Keep moving forward with Dom; the chapter does not require you to defend the settlement or operate a spotlight.
At the end of the street, kick open the door on the left and run through the building. Follow the interior route until the game loads Lethal Dusk. The next chapter contains the nighttime transport, propane tanks, lights and Kryll hazards. If you are carrying a Longshot or Boomshot from the earlier chapters, keep it if you can, but do not delay the Outpost transition to search for additional weapons. Outpost has no COG Tags and no separate boss encounter.
- Leave Franklin's settlement with Dom after the radio conversation.
- Turn left down the street and use the door on the left at the end of the route.
- Run through the building until Lethal Dusk loads.
Before you move on
- Tick Tick Boom is complete when Delta Squad has regrouped after the Troika and Wretch encounters, passed through the building route and Grist loads.
- Grist is complete when the street fight and movable-car sequence are finished, the squad enters the Stranded settlement and the conversation with Franklin begins.
- Outpost is complete when Marcus and Dom leave the settlement, pass through the building at the end of the street and Lethal Dusk loads.
- For optional progress, the relevant collectible count for this chapter group is one COG Tag in Tick Tick Boom, two in Grist and zero in Outpost.
- The next chapter confirms that the route has advanced: Lethal Dusk begins the nighttime journey involving the transport, lights and Kryll.
Act 2 — Lethal Dusk to Last Stand (Act 2 finale)
Finish the final four chapters of Act 2: cross Kryll-infested streets in Lethal Dusk, use a burning car to reach the gas station in Dark Labyrinth, fuel the Junker and survive the Powder Keg attack, then drive through the Kryll swarm in Burnt Rubber. Last Stand ends Act 2 with a defense of the Stranded position. Close the Emergence Holes with grenades when possible, use the Troika from a protected position, and save a safe fallback route for the final Boomer group. The Xbox 360 campaign continues to Act 3, Belly of the Beast, after the Last Stand battle and following scene.
1. Build a safe light route in Lethal Dusk
After the chapter begins, move through the initial Locust positions toward the river. Take the Longshot if one is available and useful to you, but it is optional; the chapter can be completed with the standard weapons. At the river, board the hand-cranked transporter, stand by the crank, press X to latch onto it, then press A to start crossing. Stay behind the transporter's protection while Dom supports the crossing.
On the far side, do not enter the dark streets directly. The Kryll quickly kill Marcus outside the light, so advance from one illuminated area to the next. Enter the nearby building, eliminate the Locust and close the Emergence Hole with a grenade when you have a safe angle. Shoot the propane tanks placed along the route to create temporary pools of light. Near the first Troika, either snipe the gunner from cover or use the surrounding buildings and alleys to approach from the side. Crossing directly through the Troika's fire is unnecessary.
- Use the transporter by latching onto the crank and activating it.
- Treat every light source as part of a connected route.
- Carry at least one grenade for an Emergence Hole if possible.
2. Reach the spotlight and guide Dom across the street
Continue through the lit buildings and alleys, shooting propane tanks whenever the next safe patch is not illuminated. Keep to cover around the Troika positions and avoid standing in the open street while searching for the next light source. When an Emergence Hole opens, close it promptly or kill the Locust emerging from it before attempting to cross.
Enter the building with the spotlight and climb to its controls. Aim the beam at Dom while he crosses the street toward the opposite building. Keep the light on him until he reaches safety; moving the beam away too soon can leave him exposed to the Kryll. After the street lights are activated, leave the spotlight and follow Dom. Clear the Wretches at close range, then advance to the next checkpoint.
Another Emergence Hole appears near the route forward. Seal it with a grenade when practical, then locate the partly concealed propane tank that illuminates the next passage. Optional COG Tags can be collected during these searches, but none is required to finish the chapter.
- Keep the spotlight on Dom during his crossing.
- Clear Wretches before attempting to revive a downed squadmate.
- Do not spend every grenade before the later Emergence Holes.
3. Push the burning car through Dark Labyrinth
Dark Labyrinth begins inside a building. Fight through the Wretches room by room and exit only after the immediate area is clear. If a doorway or passage is blocked by furniture, destroy the obstruction with gunfire. When you reach the street, find the car with a propane tank in or around its rear section. Shoot the tank to ignite the vehicle.
The burning car provides the moving light needed to cross the Kryll-infested street. Push it forward along the road rather than running ahead into darkness. Stay close enough to its light and use the buildings for cover when Locust appear. If you stop to collect an optional item, make sure the car remains close enough to protect you; missing a collectible has no effect on progression. Continue behind the vehicle until you reach the gas station.
- Destroy the furniture blocking the interior route.
- Ignite the car before entering the dark street.
- Stay with the moving vehicle instead of outrunning its light.
4. Fuel the Junker and defend the gas station in Powder Keg
At the gas station, collect the ammunition and grenades inside the building before starting the objective. Go to the fuel pump, press X to hold the handle and tap A to operate it. Once fueling begins, expect an attack. Return to the gas-station building and use it as your defensive base rather than fighting in the open around the pump.
Locust attack from several directions, including Wretches, Grenadiers and a Boomer. Eliminate Grenadiers and the Boomer before ordinary Drones because their explosives can break the building's cover and force you into the street. Use the Longshot for distant headshots if you kept it, or use the Lancer and grenades from the doorways and windows. Do not chase survivors far from the building; the objective advances after the attacking group is defeated and the following scene begins.
- Collect supplies before operating the pump.
- Fall back into the station after fueling.
- Prioritize Grenadiers, Wretches near the entrances and the Boomer.
5. Escape through Burnt Rubber with the Junker
Burnt Rubber is a vehicle sequence. In single-player, switch between driving and the Junker's UV lamp with X. Drive while the route ahead is clear. When the Kryll swarm approaches, switch to the UV function and sweep the lamp across the swarm until it burns away, then return to driving. The two functions cannot be used effectively at the same time, so avoid remaining stopped while trying to illuminate every direction.
The swarm can approach from behind, particularly after the off-road section. If Kryll attach to or gather around the Junker, switch to the UV lamp, turn the beam around the vehicle and clear them before moving again. Follow the marked road and take the required detour when the main route is blocked. Once the path is safe, resume driving promptly; lingering in darkness makes the sequence more difficult.
- Use the UV lamp as soon as the Kryll warning begins.
- Check behind the Junker after the off-road detour.
- Return to driving as soon as the swarm has been cleared.
6. Defend the Stranded position in Last Stand
When the Junker reaches the Stranded position, move toward the wooden bridge and the nearby building. Collect the ammunition, then help repel the Locust around the boardwalk and defensive structures. Emergence Holes open during the fight. Throw a grenade into each hole when you have a clear throw; if a grenade is unavailable, shoot enemies as they emerge and use cover until the hole closes.
After the first groups are reduced, use the Troika to control the approaches, but do not remain mounted if enemies flank the position or explosives begin landing near you. Dismount and retreat behind solid cover, then return to the gun when the immediate angle is safe. Watch both sides of the defensive area and help the Stranded clear whichever flank is closest to the line. In co-op, one player can operate the Troika while the other watches the opposite side and handles revives only after the area around the downed player is clear.
- Close Emergence Holes with grenades whenever possible.
- Use the Troika from a position with a nearby retreat route.
- Watch both flanks instead of defending only the center.
7. Use the fuel-tank trap against the final Boomers
After the earlier waves, the ground opens and a large Emergence Hole produces a final group of Boomers. Keep solid cover between you and them. Nearby, a large tank rolls into position and begins leaking fuel. Look for the damaged panel or wall section beneath the tank; shooting it exposes propane tanks. Shoot one of those propane tanks from cover. The resulting fire causes the large tank to collapse into the Emergence Hole, destroying the Boomer group without requiring a prolonged open-ground fight.
If any enemies survive, stay behind cover and finish them with the Troika, Longshot or Lancer. Do not cross the arena simply to revive a squadmate while Boomers still have a clear firing lane. The chapter ends after the final enemies are defeated and the following scene plays. The campaign then advances to Act 3, Belly of the Beast, beginning with Downpour.
- Keep distance from the final Boomer group.
- Expose and shoot the propane tanks beneath the leaking tank.
- Wait for the post-battle scene before treating Act 2 as complete.
Before you move on
- The chapter sequence Lethal Dusk, Dark Labyrinth, Powder Keg, Burnt Rubber and Last Stand is complete in the Xbox 360 campaign.
- The Junker escape has ended and the Stranded defense has been won.
- The final Boomer group has been destroyed and the following scene has played.
- The campaign advances to Act 3: Belly of the Beast, with Downpour available as the next chapter.
References for this chapter
- Gears of War – Guide and Walkthrough – Xbox 360
- Gears of War Walkthrough – GameSpot
- A Gears of War Walkthrough for Act 2, Chapters 5, 6, 7 and 8 — Altered Gamer
- Gears of War Walkthrough Act 2 — Lethal Dusk — PortForward
- Gears of War Walkthrough Act 2 — Powder Keg — PortForward
- Last Stand — Gears of War Wiki
Act 3 — Belly of the Beast: Downpour, Evolution, Coalition Cargo
Act 3 moves through Locust industrial and mining facilities filled with Lambent Wretches, unstable flooring, narrow walkways and separated combat routes. Lambent Wretches explode when killed, so keep them at range and retreat after firing. In Downpour, locate the generator before returning to the elevator. In Evolution, use the alternate hallway, cross the rotting boards one section at a time and fall back whenever they begin to crack. In Coalition Cargo, collect supplies, operate the computer switch, survive the mine-cart ride and clear the parallel Boomer fights before continuing to Darkest Before Dawn. COG Tags are optional and can be skipped without affecting campaign progress.
Downpour: Clear the approach and restore elevator power
After the transmission, follow Dom along the path until the cutscene ends. Continue toward the industrial structures and engage the Lambent Wretches from a distance. Their deaths cause explosions, so use the Lancer while they are approaching and do not chainsaw or melee them. If one reaches your position, retreat immediately after killing it so the blast does not catch Marcus.
Go through the doorway onto the walkway and clear the Wretches that appear. Watch for the Crimson Omen on the right-hand wall. The optional COG Tag is behind the marked building: follow the narrow bridge to its far end, collect the tag, then return to the main route.
The elevator in the nearby building is inactive. Leave it and enter the building at the far end of the area. Press the green control inside to activate the generator. Return to the elevator, ride it upward and enter the factory through the open window. This begins Evolution.
- Keep the Lancer equipped for distant Lambent Wretches.
- Collect the optional COG Tag behind the Crimson Omen building if desired.
- Activate the green generator before returning to the elevator.
Evolution: Take the alternate route through the factory
After the transmission, turn right and follow the hall to the door at the end. That door is locked, so return to the previous room and use the other hallway. Continue through the working door, collect the ammunition if needed and kick in the door at the end of the adjoining corridor. In the next room, use the switch to unlock the way forward, then follow the Stranded survivor.
You will reach a room with rotting wooden flooring. The boards are unstable and can drop Marcus into a lower area filled with Lambent Wretches. Test each new section by stepping onto it and immediately stepping back. If you hear the wood crack or feel the controller rumble, retreat to the last stable section before trying another route. Do not sprint across the room.
The optional COG Tag is in the far-right corner of the wooden-floor area. Only take it after identifying a safe path. Once across, collect the ammunition, Frag Grenades and optional Gnasher. Continue through the rooms until you reach the mining area.
- Use the alternate hallway when the first door is locked.
- Cross the boards by testing each section and retreating from cracks.
- Keep Frag Grenades available for the later Boomer encounter.
Mining area: Control the Lambent Wretches before advancing
Move carefully through the mining area and watch for Wretches approaching from several directions. The Gnasher is effective at close range, but fire only when you have room to retreat from the explosion. If the Wretches begin surrounding you, fall back into the previous room and let them approach through the doorway rather than fighting in the center of the mine.
After the area is clear, take the opposite doorway and kill the lone Wretch in the hall. In the next room, turn the handwheel to open the door on its right. Collect the ammunition, then use the door on the left. A Longshot is down the stairs; take it if you do not already have a suitable long-range weapon.
Continue through the next door to reunite with the rest of Delta Squad. Use the handwheel beside the gate to raise it. More Lambent Wretches and Drones attack together. Kill approaching Wretches first, then use the Longshot to remove Drones from safer angles. Fall back through the gate if the Wretches reach your cover.
- Fight mining-area Wretches from the room entrance or a previous chamber.
- Take the Longshot if you lack a long-range weapon.
- Raise the gate with the handwheel beside it.
Jack’s door: Defeat the Grenadier and Boomer from cover
At the iron gate, the route continues through an elevator. Kick in the door to the right and take cover behind the barrier opposite the elevator while Jack works. A Grenadier and a Boomer approach when the elevator opens, so do not stand in the doorway or move forward to collect weapons during the attack.
If you have the Longshot, eliminate the Grenadier first with a headshot. Then concentrate fire on the Boomer while your squadmates engage it. Keep the barrier between Marcus and the Boomshot, and use accurate fire or Frag Grenades rather than exposing yourself in the open.
Once both enemies are down and Jack has opened the passage, go through the doorway. Do not stop for the dropped Boomshot if doing so leaves you exposed; Coalition Cargo provides ammunition and begins immediately beyond the passage.
- Reach cover before the elevator opens.
- Prioritize the Grenadier, then the Boomer.
- Proceed through Jack’s opened doorway after the area is clear.
Coalition Cargo: Operate the switch and survive the mine carts
Restock from the ammunition in the opening control room. Before touching the green switch beside the computer, take the doorway on the left and descend the stairs. Turn toward the stairs near the plant to find the optional COG Tag, then return to the control room.
Press the switch by the computer and go downstairs to the mine carts. Ignore the nearby Drones if the available cover protects you. During the ride, watch the ceiling for Lambent Wretches and shoot them before they fall close to the cart. Killing one too late can leave its exploding body on the track as the cart passes. Near the end of the route, shoot the Drone carrying a Boltok before the cart reaches him.
After leaving the cart, take the ammunition if necessary and continue through the door. Delta Squad is separated onto parallel paths. A Lambent Wretch drops from a vent near the switch door, so be ready before advancing. Clear the Wretches along the walkway, follow the pipeline and collect the Frag Grenades at the far end.
The checkpoint before this section makes a grenade attack safer if needed. When the Boomer reaches your side of the walkway, either stick a Frag Grenade to it and immediately roll away, or remain behind the metal railing and use the Longshot or thrown grenades. After defeating the Boomer on your route, help the squad eliminate the Boomer threats on the parallel paths. Continue through the passage once the enemies are cleared; the next chapter is Darkest Before Dawn.
- Collect COG Tag 21 before activating the computer switch.
- Press the switch before entering the mine carts.
- Shoot ceiling Wretches early during the ride.
- Use the metal railing or a quick grenade attack against the Boomer.
- Help clear the parallel Boomer routes before proceeding.
Before you move on
- Downpour is complete when the generator has powered the elevator and Marcus enters the factory through the open window.
- Evolution is complete when Marcus crosses the unstable flooring, survives the mining and gate encounters, and passes through Jack’s opened doorway.
- Coalition Cargo is complete when the mine-cart ride and the separated Boomer fights are cleared and the squad proceeds into Darkest Before Dawn.
Act 3 — Darkest Before Dawn, Angry Titan, Tip of the Iceberg
Finish Act 3 by navigating the underground passages, defeating the Corpser in Angry Titan, and clearing the pumping station in Tip of the Iceberg. Darkest Before Dawn combines Lambent Wretches, Drones, Grenadiers, a Boomer and several optional COG Tags. Angry Titan is a weak-point boss fight: expose the Corpser’s belly, shoot its mouth, then destroy the supports beneath the platform. Tip of the Iceberg introduces Theron Guards with Torque Bows and ends when the pumping-station area is secured and its elevator control is activated. The original Xbox 360 retail campaign continues into Act 4, Campus Grinder, after this sequence.
1. Choose the correct route through Darkest Before Dawn
Move forward from Coalition Cargo until the underground passage divides. The route marked by the bright red symbol contains optional COG Tags, while the route with barrels provides ammunition and may contain a Longshot. The path beneath the rock archway is the required way forward. Use the lit route and stay with Dom when the squad separates.
Continue through the passage until Lambent Wretches attack. Keep the Lancer or Gnasher ready, but do not chainsaw or melee these enemies: they explode when killed. Shoot them before they reach the squad, then back away from any Wretch that has already closed the distance. After the encounter, proceed until Marcus and Dom move ahead of Cole and Baird.
- Take the path beneath the rock archway to continue.
- Shoot Lambent Wretches before they reach the squad.
- Do not melee or chainsaw explosive Lambent Wretches.
- Collect optional tags or the Longshot only if you can do so safely.
2. Cross the waterfall route and clear the first ambushes
Follow the passage until Marcus drops through the water-filled route. At the bottom, take cover before advancing: Locust attack from ahead. Clear them from cover, then check the area around the stairs and the nearby building before moving onward. The building can provide ammunition, and the second optional COG Tag in this chapter is in the upper-left area near the stairs when you face them.
A sniper watches the route farther ahead. When the game highlights the nearby support, shoot the base of the column to bring the rocks down and remove the sniper without exposing yourself for a prolonged exchange. Continue through the passage, using cover whenever the path widens.
- Use cover immediately after the drop.
- Check near the stairs for the optional COG Tag.
- Shoot the highlighted support beneath the sniper’s position.
- Search the nearby building for ammunition before advancing.
3. Defeat the Boomer and survive the split passage
When a Boomer appears, use the nearby pillar as hard cover. Let it fire, remain behind the pillar while the Boomshot reloads, then lean out and attack. Keep the Lancer for controlled fire or use another accurate weapon if one is available. Lambent Wretches join this encounter, so deal with them before they reach your position and avoid standing beside Dom during their explosions.
After another unavoidable drop, move to the ammunition but use the wall in front of it as cover before collecting anything. Wretches attack from the passage and one may destroy the obstruction blocking the route. Once the area is clear, collect the ammunition and continue to the fork. Either side eventually reconnects, but the right-hand route is generally the safer choice because it gives you a higher approach during the crossing.
Clear Drones at range and watch for shotgun Grenadiers near the end of the route. Ceiling Wretches appear as the tunnel narrows, followed by another rushing Grenadier. Move from cover to cover until the Corpser becomes visible.
- Use the pillar to block the Boomer’s Boomshot fire.
- Clear Wretches before collecting the ammunition after the drop.
- Take the right-hand route at the fork when possible.
- Watch for ceiling Wretches and shotgun Grenadiers near the end.
4. Prepare for and defeat the Corpser in Angry Titan
Before entering the Corpser arena, turn toward the area near the lava and collect ammunition if needed. The third optional COG Tag from Darkest Before Dawn is on the outcropping near the Corpser approach. Enter the fractured platform only after reloading and choosing a weapon suitable for repeated close-range weak-point shots; the Lancer works reliably, while the Gnasher can deal heavy damage when used from a controlled angle.
Stay slightly to one side of the Corpser rather than directly in front of it. When it raises its armored limbs to attack, shoot the exposed belly. The creature then opens its mouth and recoils; immediately fire into the mouth. Do not wander too far around its flank, because the Corpser can use a damaging breath attack. Repeat the belly-then-mouth sequence until the creature is pushed onto the metal platform at the rear of the arena.
When the supports become the active target, shoot both metal restraints beneath the platform. Do this promptly rather than continuing to attack the armored body. The platform collapses and defeats the Corpser. Follow the route to the right afterward to rejoin Cole and Baird.
- Reload before entering the Corpser arena.
- Shoot the exposed belly, then the open mouth.
- Stay near the Corpser’s front-side angle without standing directly in front.
- Destroy both platform supports when they become vulnerable.
- Rejoin the squad after the collapse.
5. Take the Torque Bow and approach the pumping station
At the start of Tip of the Iceberg, follow the route taken by Cole and Baird around the Imulsion lake. When the path points you toward the Torque Bow, pick it up. Keep the Lancer as your second primary weapon if possible; the Torque Bow is useful against Theron Guards, while the Lancer handles ordinary Locust and provides dependable fire when an enemy closes in.
Continue toward the pumping station and use the outer cover instead of crossing the open approach in a straight line. Theron Guards use Torque Bows and can kill an exposed player quickly. Hold behind walls or barriers, charge an arrow only while protected, and release it at a visible enemy. If you miss or run out of Torque Bow ammunition, switch to the Lancer and advance between cover positions rather than remaining exposed.
- Pick up the highlighted Torque Bow.
- Keep the Lancer if a weapon slot allows it.
- Use the outside edge and cover to approach the station.
- Prioritize Theron Guards carrying Torque Bows.
6. Clear the pumping station and finish Act 3
When the fight begins around the pumping station, secure one ramp or approach lane first. Enemies may fire Torque Bow shots from above, so do not rush up the stairs while several Theron Guards still have clear lines of fire. Use cover at the bottom of the ramp, attack enemies as they expose themselves, and move upward only after the immediate firing positions are reduced.
Once you reach the upper area, continue clearing Theron Guards and remaining Locust around the station. Stay near cover and let Cole and Baird draw some attention, but do not rely on them to remove every enemy. Search for ammunition only after the active firing lanes are quiet. When the area is secure, follow the objective marker to the elevator control and activate the button.
The chapter is complete when the activation triggers the ending cutscene and the game transitions to Act 4, Campus Grinder. There is no second Core-area Boomer encounter at the end of Tip of the Iceberg; the mining-platform Boomers belong to Coalition Cargo earlier in Act 3.
- Secure a ramp before pushing up the pumping station.
- Use cover against Theron Guard Torque Bow fire.
- Clear the station before searching for supplies.
- Activate the elevator control after the area is secure.
- Confirm that Act 4, Campus Grinder, becomes available or starts.
Before you move on
- Darkest Before Dawn is complete when you survive the underground route, reach the Corpser approach and load into Angry Titan.
- Angry Titan is complete when the Corpser falls through the damaged platform and Marcus reaches the squad again.
- Tip of the Iceberg is complete when the pumping-station area is cleared and the elevator control is activated.
- Confirm the ending cutscene plays and the next available chapter is Act 4, Campus Grinder.
Act 4 — The Long Road Home: Campus Grinder, Bad to Worse, Hazing
Act 4 begins with a large courtyard battle, followed by a route choice and a Seeder encounter in Campus Grinder. Use solid cover, keep a Longshot or Torque Bow when possible, collect the Hammer of Dawn in the Wretch room, destroy the Seeder, turn the handwheel and shoot the propane tank beside the truck to open the gate. Bad to Worse starts with a Jack door-defense sequence, then sends you through a conservatory to another Berserker. Collect the Hammer of Dawn, bait the Berserker into destroying a roof support, and use the orbital beam before turning the water wheel. Hazing begins with a Troika and two Emergence Holes, then moves through rooftops, streets and an alley containing Theron Guards, Nemacyst, Drones and Boomers. COG Tags 25 and 26 are optional.
1. Clear the opening Campus Grinder courtyard
Go through the gates and take cover behind the stone blocks or another solid barrier. Fight from cover instead of crossing the courtyard immediately. Drones, Gnasher users and other Locust attack from several angles, and a sniper operates around the building near the COG statue. Eliminate exposed ranged enemies first, then work through the ground troops while moving between cover positions when grenades or sustained fire make your current position unsafe.
After the initial group is reduced, more Drones and Theron Guards enter near the far side of the area. Two Boomers also arrive. Keep the courtyard's barriers between you and their Boomshots, and use a Torque Bow, Longshot or controlled rifle fire rather than chasing them into the open. If you need Longshot ammunition, check the building associated with the sniper and the sandbag positions nearby before leaving the area.
- Use the courtyard's stone cover before engaging.
- Kill the sniper and Theron Guards when they expose themselves.
- Defeat the Boomers before advancing to the route choice.
2. Take the Campus Grinder route and destroy the Seeder
Campus Grinder presents a left/right choice after the first courtyard. Either route continues the campaign. The left route is a useful choice if you have or want a Longshot: follow Baird, reach the window overlooking the lower courtyard and shoot the Drones below while staying protected from Torque Bow fire. Cross only after the visible enemies are down.
Continue into the Wretch area and take the Hammer of Dawn from the room near the windows. Aim it through the opening at the Seeder outside and keep the beam on the target until it is destroyed. Before firing, shoot incoming Nemacyst so they do not interrupt you. Afterward, use the Longshot from cover against remaining Drones and Theron Guards, then turn the handwheel at the end of the walkway to open the gate for the rest of Delta Squad.
Move through the next street section using the pillars and hedges as cover. Deal with the Wretches at range or as they climb into reach. Enter the building across the street, turn left and go through to the opposite side. Shoot the propane tank beside the pickup truck in front of the gate. The explosion opens the way and completes Campus Grinder.
- Collect the Hammer of Dawn in the Wretch room.
- Destroy the Seeder before crossing the exposed area.
- Turn the handwheel and shoot the propane tank beside the truck.
3. Defend Jack in Bad to Worse
Follow the road from the chapter start until rubble blocks the way. For COG Tag 26, turn right at the rubble and search beside the wall near the scrap car. Return to the rubble and take the left path for the objective route. An ammo box is behind the sandbags near the approach to the locked doors.
Jack begins opening the doors while enemies attack from behind. Hold a position that lets you cover both the approach and Jack's location. Pick off Drones with a Longshot or rifle, then stop Wretches before they reach the defense line. An Emergence Hole opens across from the conservatory doors; close it with a frag grenade if available, then concentrate on the two Boomers. Keep hard cover between you and their shots rather than pursuing them.
Enter the conservatory after the area is clear. Follow the walkway and descend the stairs at the far end to collect the Hammer of Dawn. Continue through the door and take the left-hand route into the Berserker area.
- Collect COG Tag 26 only if pursuing optional collectibles.
- Protect Jack from the enemies behind the defense position.
- Close the Emergence Hole before dealing with the two Boomers.
4. Defeat the conservatory Berserker
The Berserker breaks through the wall as you move through the conservatory. It is blind, but it tracks sound and movement, so do not stand in its path. Lead it toward one of the roof-support pillars by positioning yourself beyond the pillar and firing to draw its charge. As it rushes, roll or move aside at the last moment. A successful impact removes support from the glass roof and gives the Hammer of Dawn a clear sky path; you do not need to destroy every pillar if the opening is sufficient.
After the Berserker finishes its charge, equip the Hammer of Dawn, target it and hold the beam on it. Keep moving if it begins another charge, then reacquire the target when the beam can reach it. Several beam applications may be needed. If a charge catches you, reload the checkpoint rather than trying to win from a poor position.
When the Berserker dies, go to the handwheel at the middle of the wall at the end of the conservatory. Turn it to activate the water and remove the flames blocking the exit. Leave through the opened route to begin Hazing.
- Bait the Berserker into a roof-support pillar.
- Use the Hammer of Dawn only after the roof is open.
- Turn the water wheel after the Berserker is dead.
5. Clear Hazing and trigger the chapter transition
Enter the area through the doorway left of the large statue. If the Hammer of Dawn is still online, use it on the Troika gunner or the densest enemy group. If it is offline, use the Longshot against the gunner and keep behind the sandbags or the Troika emplacement. An Emergence Hole opens in the distance, followed by another near the doorway behind you. Close each hole with a frag grenade when possible; otherwise keep the sandbags between you and the Wretches while shooting the Drones below.
Go through the opposite doorway after the first courtyard is clear. A Theron Elite occupies a rooftop and Nemacyst appear overhead, so look upward before moving through the open space. Fight the Drones from the building entrance or another protected angle, checking both sides because reinforcements drop in from different positions. An ammo box sits between the stone flower holders if you need to restock. A Boomer appears after the Drones are defeated; kill it from cover before proceeding.
Continue through the doorway by the dead Seeder and kick through the next door. A Theron Guard retreats into an alley, but the pursuit triggers additional Drones armed with Gnashers and another Boomer. Stay back from the shotgun carriers, use the stairs and walls as separation, and collect the grenades near the lower stairs if needed. After the alley is clear, follow the path through the gate and onward. The chapter ends at the checkpoint as the route advances to Close to Home.
- Destroy or bypass both Hazing Emergence Holes without losing the cover line.
- Check rooftops for the Theron Elite and Nemacyst.
- Defeat the final Boomer and follow the path until Close to Home loads.
Before you move on
- Campus Grinder is complete after the opening courtyard waves, the Seeder, the handwheel and the propane-truck gate trigger are finished and the next chapter begins.
- Bad to Worse is complete after Jack's doors are opened, the conservatory Berserker is destroyed with the Hammer of Dawn and the water wheel removes the fire barrier.
- Hazing is complete after the Troika courtyard, both Emergence Holes, rooftop and street enemies, the final Boomer and the following checkpoint are cleared.
- COG Tag 25 is in the opening Campus Grinder area near the second staircase and blocked doorway. COG Tag 26 is beside the wall near the scrap car after the rubble in Bad to Worse. Both are optional.
Act 4 — Close to Home, Imaginary Place, Entrenched
Cross the outskirts of the Fenix Estate, storm the mansion, locate the hidden laboratory, and escape to the APC. Close to Home is safer through the left cemetery route, where you can use the Mausoleum and nearby cover to approach the Troikas. Imaginary Place is an uphill assault followed by a house clear: seal Emergence Holes with Frag Grenades, clear the upper floor, open the basement gate, and descend to the wine cellar. The Berserker fight belongs to the preceding Bad to Worse chapter, so this chapter does not contain that encounter. Entrenched begins when Marcus reveals the hidden door behind the wine rack. Protect Jack, help Baird and Cole at the front of the house, open the rear route, defeat the two Boomers, and run to the APC when the 30-second timer appears. Optional COG Tag 27 is under the desk in the oval library.
1. Close to Home: choose the cemetery route
At the start of Close to Home, take cover and eliminate the Drones and Theron Guards around the estate approach. Keep the Torque Bow if one is available; a charged arrow is effective against Troikas and other exposed heavy targets. Do not remain upright in the open while Therons have a clear firing lane, because their Torque Bow shots can force you out of cover or down you before the ordinary Drones are cleared.
When the large garden gives you a route choice, take the left path through the cemetery rather than the right path along the water. The right route is overlooked by Troikas, while the cemetery route provides better cover and grenade resupply. Move from wall to wall and use the Mausoleum to break enemy sightlines before entering the next area.
- Left cemetery route selected.
- Theron Guards and Troika gunners prioritized.
- Grenades and dropped Torque Bow ammunition collected when safe.
2. Close to Home: neutralize the Troikas and reach the estate stairs
At the cemetery statue, check around the right side for a Torque Bow if you still need one. Use it to remove the first Troika gunner, then advance to the sandbags and attack the second Troika from an angle that limits return fire. Clear remaining Locust before crossing the broken bridge; Frag Grenades and ammunition are available near the far end.
Follow the opened gateway and continue toward the foot of the estate stairs. Do not rush uphill while Therons or a Boomer still control the elevated positions. Reload, collect useful drops, and approach the next cover section only after the immediate firing lanes are quiet.
- Both Troika positions cleared or rendered harmless.
- Broken-bridge supplies checked.
- Estate stairs reached with a reliable mid- or long-range weapon.
3. Imaginary Place: assault the Fenix Estate
Imaginary Place begins at the stairs leading up to the Fenix Estate. Advance up the left side and use the landings as cover. Theron Guards and a Grenadier occupy elevated positions, and a Boomer can approach during the climb. Use the Lancer from cover and the Torque Bow against the high-threat targets, then gather dropped ammunition before climbing to the courtyard doors.
Baird and Cole meet Marcus and Dom inside the estate entrance, but they draw some Locust away while Marcus and Dom clear the house. Cross the entrance room carefully and be ready for an Emergence Hole in the back-left area. Close it immediately with a Frag Grenade, then clear the upper floor. Grenadiers emerge near the fireplace, so avoid relying on destructible furniture as permanent cover.
- Elevated Therons and the Boomer eliminated before the final stair push.
- Entrance-room Emergence Hole sealed.
- Upper-floor Grenadiers cleared without depending on fragile furniture.
4. Imaginary Place: open the basement route and search the library
After the upper floor is clear, return downstairs and use the newly opened doorway to continue through the house. Seal the large Emergence Hole in the room at the end of the corridor, then use the Torque Bow or Lancer to finish surviving Locust. Follow the route to the gate leading toward the wine cellar and turn the wall wheel to open it.
The optional COG Tag is in the oval-shaped library on the first floor, beneath a desk. Destroy the desk with the chainsaw bayonet or melee attack to expose it. This tag is not required for campaign progress. Afterward, continue downstairs, clear the basement approach, and enter the wine cellar.
- Basement gate opened with the wall wheel.
- COG Tag 27 collected only if desired.
- Wine cellar reached with Frag Grenades or Torque Bow ammunition available.
5. Entrenched: reveal the laboratory and protect Jack
In the flooded end of the wine cellar, find the wine rack at the back with the wooden doorframe around it. Kick it open to reveal the concealed metal door, then activate Jack’s attempt to open it. Locust attack while Jack works, so take cover behind the nearby wall or pillars and face the central gate. Use Frag Grenades or Torque Bow shots to thin the first group, then watch for Grenadiers attempting to flank from the left.
Once Jack opens the door, enter the laboratory and allow the data download sequence to finish. Then immediately retrace the route toward the front of the house. Wretches and other Locust pressure the return path, so use the Lancer for close-range attackers and collect ammunition only when it does not delay the regrouping objective.
- Correct wine rack opened.
- Jack protected until the laboratory door opens.
- Laboratory data download completed.
- Return route to the main floor started without detouring.
6. Entrenched: defend the front, open the rear route, and reach the APC
At the front of the house, help Baird and Cole by clearing the Wretches, Grenadiers, Drones, Therons, and Boomers attacking the entrance. A Torque Bow arrow can remove clustered Locust, but keep Frag Grenades for enemies entering through the damaged front door. When the second wave attacks from the courtyard, use the front window and nearby cover to eliminate the Boomer before finishing ordinary Drones.
When Jack completes the download, go downstairs through the opened doorway on the right side of the staircase. Use the attic route to reach the hallway above the small courtyard. Seal the Emergence Hole in that courtyard with a Frag Grenade, then destroy the boards blocking the far door with the Lancer or by shooting the nearby propane tank. Return through the newly opened route and enter the backyard.
Two Boomers enter the far end of the backyard. Take cover along the center wall and use the Torque Bow to defeat them quickly. Only after both Boomers are down does the escape timer appear. When the 30-second timer starts, do not search for weapons, close the Emergence Hole, or clear enemies that are not blocking the route. Roadie Run directly across the yard to the APC. Reaching the vehicle triggers the Act 4 conclusion and the transition to Act 5.
- Front-of-house attack repelled.
- Rear courtyard Emergence Hole sealed and blocked door opened.
- Both backyard Boomers defeated.
- APC reached during the 30-second escape timer.
Before you move on
- Close to Home is complete when Marcus and Dom pass the estate approach and reach the Fenix Estate stairs and entrance.
- Imaginary Place is complete when the house is cleared, the basement route is opened, and Marcus reaches the wine cellar.
- Entrenched is complete when Jack’s data download finishes, the backyard route opens, and Marcus reaches the APC during the timed escape.
- The next chapter, Special Delivery, begins after the Act 4 transition.
Act 5 — Desperation: Special Delivery
On the original Xbox 360 retail release, Act 5 begins with Special Delivery after Entrenched. The campaign then continues directly to Train Wreck and Pale Horse. The five chapters inserted before Special Delivery in expanded PC-based versions—Impasse, Comedy of Errors, Window Shopping, Powers That Be, and Jurassic Proportions—are not part of this Xbox 360 route. Special Delivery is a train-yard fight followed by a short crossing to the opposite platform. Eliminate the elevated Snipers, use cover against the ground troops, close Emergence Holes with Frag Grenades when you have a safe throw, and deal with Wretches before they reach your position. Once the active waves are under control, sweep the parked train cars and cross to the opposite platform to trigger the cutscene that begins Train Wreck.
Start from the correct Xbox 360 Act 5 chapter
Load the campaign after completing Entrenched. On the original Xbox 360 retail release, the next chapter is Special Delivery, listed as Act 5-1. The remaining retail chapters are Train Wreck and Pale Horse. If a guide tells you to play Impasse, Comedy of Errors, Window Shopping, Powers That Be, or Jurassic Proportions before reaching the train yard, it is describing expanded PC-based content rather than the requested Xbox 360 campaign.
There is no missing console checkpoint to unlock for those chapters. Select Special Delivery from the campaign chapter list or continue the save normally from Entrenched. The correct opening location is the train-yard area, not a theater, retail district, or Brumak street sequence.
- The platform is the original Microsoft Xbox 360 retail release.
- Special Delivery is selected as Act 5-1.
- The five expanded chapters are excluded from the route.
Take the opening cover and remove the Snipers
Move forward only far enough to establish cover in the train yard. Snipers fire from elevated structures above and around the approach, so look upward before trying to cross open ground. Eliminate them first with a Longshot if one is available; otherwise use the Lancer or another accurate weapon while exposing as little of Marcus as possible.
Do not let the first ground-level Locust wave draw your attention away from the overhead firing positions. Sniper shots can down you while you are focused on Wretches or Drones. If a squadmate falls in the open, clear the elevated threat and the nearest attackers before attempting the revive. The safest position is a solid piece of cover with sightlines toward both the yard and the upper structures.
- The elevated Snipers are defeated or no longer firing into the yard.
- You are fighting from hard cover rather than standing in the central open area.
- A Longshot or accurate substitute is retained if available.
Control the Emergence Holes and Wretches
After the initial sniper pressure, Emergence Holes open during the scripted yard fight. Listen for the rumbling and watch the surrounding ground and structures for the opening animation. Wretches may rush from the first opening, so keep a close-range weapon ready and do not allow them to reach the side of your cover.
Throw a Frag Grenade into an active hole when the angle is safe. Sealing a hole reduces the pressure from that spawn point, but do not leave cover merely to force a grenade throw. If the throw is blocked, mistimed, or you have no grenade, stay behind cover and kill the Locust emerging from it. The chapter can be completed by surviving and clearing the waves; sealing every opening is helpful, not a separate completion requirement.
Additional openings and reinforcements appear around the yard, including threats toward the right side. Keep checking both flanks after dealing with the first wave. Use the Lancer for Drones at medium range and the Gnasher for Wretches or any Locust that pushes directly into your position.
- The first Emergence Hole has been sealed or its attackers have been defeated.
- Later holes and their Locust waves are being handled from cover.
- Wretches are stopped before they overrun the squad position.
- Frag Grenades are used only when a safe throw is available.
Clear the parked trains and side angles
When the active Emergence Hole pressure drops, do not immediately sprint for the far platform. Locust can fire from inside or beside the parked train cars, and the gaps between cars create concealed firing angles. Advance in short movements between cover points, checking windows, doors, and the spaces alongside the cars.
Hold the center only while it remains defensible. If enemies begin firing from several directions, fall back to the previous solid cover instead of trading damage in the open. Keep a mid-range weapon for Drones and retain the Gnasher for close threats. Pick up ammunition after the immediate area is quiet, but do not abandon a reliable weapon merely for a full magazine of a less useful type.
In co-op, one player can watch the current train-car angle while the other covers the yard and listens for another Emergence Hole. Revive only after the lane around the downed player is clear; the parked cars can hide an attacker during the revive animation.
- Locust firing from or beside the parked trains are defeated.
- The central yard and approach to the platform are no longer under sustained fire.
- You have enough ammunition for both medium-range and close-range engagements.
Cross to the opposite platform and end Special Delivery
After the yard is sufficiently clear, move in front of the parked train and follow the route toward the opposite train platform. The transition is triggered by reaching the platform area; you do not need to keep searching for a hidden enemy after the game has opened the route.
If the cutscene does not begin, turn back and check the train cars, nearby cover, and elevated positions for a surviving Drone, Wretch, or Sniper. Once the transition cutscene plays, Special Delivery is complete and the next retail chapter is Train Wreck. Do not reload Entrenched or search for the five expanded chapters unless you intentionally changed to a different edition.
- The parked-train route has been crossed after the yard fight.
- The opposite train platform has been reached.
- The transition cutscene plays.
- Train Wreck becomes the next chapter.
Recover after a failed attempt or wrong guide
If you die, repeat the fight in this order: establish cover, remove the elevated Snipers, stop the Wretches, control the Emergence Holes, then sweep the parked trains. The precise order of individual reinforcements can vary with difficulty and timing, so prioritize whichever enemy is currently threatening your cover rather than abandoning safety to follow a rigid sequence.
If an external walkthrough sends you to Impasse, Comedy of Errors, Window Shopping, Powers That Be, or Jurassic Proportions, return to the Xbox 360 chapter list and choose Special Delivery. Those directions do not indicate a damaged save on the original console release. In co-op, divide responsibility between the current hole or Wretch rush and the train-car firing lanes, but regroup before crossing the final open section.
- The retry plan begins with Snipers and cover.
- Emergence Holes are treated as hazards to seal or survive, not mandatory collectibles.
- The chapter ends at the platform transition, not after an additional arena clear.
Before you move on
- Special Delivery is confirmed as Act 5-1 after Entrenched on the original Xbox 360 route.
- The elevated Snipers have been defeated or neutralized.
- The scripted Emergence Hole waves and Wretches have been sealed, defeated, or safely survived.
- The parked train cars and approach route have been cleared enough to cross safely.
- The opposite train platform has been reached.
- The transition cutscene plays and Train Wreck is available next.
- No Impasse, Comedy of Errors, Window Shopping, Powers That Be, or Jurassic Proportions objective was required.
References for this chapter
Act 5 — Desperation: Train Wreck
Train Wreck begins immediately after Special Delivery and takes place entirely aboard the moving train. Advance toward the engine through Locust resistance, then use the train’s controls or the nearby fuel tank to remove the Berserker without trying to kill her with normal weapons. Afterward, fight through Drones, Theron Guards and Reavers, using the roof-mounted chain guns when they provide a safe firing angle. Lambent Wretches then attack through several passenger and service cars. Keep moving, activate the buttons that release the large cylinders, and use the short timed run to reach the next car before the rear section is disconnected. A COG Tag is available during the route but is optional. At the end, enter the ammunition car, replenish your Torque Bow, Longshot or Lancer and grenades, then open the forward doors to begin Pale Horse.
1. Board the train and advance toward the front
Train Wreck starts after the cutscene at the end of Special Delivery. Move forward through the train cars, using the side cover and interior walls whenever Locust appear. The first groups include Theron Guards and Drones. A Longshot is useful for removing enemies at distance, but do not expose yourself in the open simply to preserve a preferred weapon; the immediate objective is to reach the front section alive.
Advance one car at a time. Clear the enemies directly ahead, then check the opposite side of the train before crossing an opening. Reavers can fire from outside the moving train, so avoid standing in a doorway or exposed side lane longer than necessary. Before opening the next major door, collect nearby ammunition if it is on the safe route. The fuel tank farther ahead is important, so avoid detonating it during the ordinary Locust encounters.
- Move toward the engine through the connected train cars.
- Use cover against Theron Guards and Drones.
- Watch the outside edges for Reaver fire.
- Leave the large fuel tank intact until the Berserker sequence.
2. Remove the Berserker with the train’s rear section
When you reach the door control and activate it, a cutscene introduces the Berserker aboard the train. Do not attempt to defeat her through sustained gunfire. Move back toward the rear cars and use the green coupler release control when the game presents it as the objective. The control disconnects the cars behind the section you are standing on.
After activating the coupler, make enough noise to draw the Berserker toward you, then retreat toward the end of the car. Wait until she commits to a charge and roll sideways rather than backing straight into the gap. The Berserker should run onto the detached rear section, which then falls away from the train.
An alternative is to use a fragmentation grenade on the large fuel tank near the Berserker after positioning yourself safely. The explosion can detach the affected cars and remove her. This method is more hazardous if you stand too close or detonate the tank before the Berserker is in the correct area, so the coupler is the more controlled solution. Once she is gone, return to the open doorway and continue toward the engine.
- Activate the train door and trigger the Berserker event.
- Use the coupler release when it is available.
- Lure the Berserker onto the cars being detached.
- Roll away from her charge instead of trying to outrun it in a straight line.
- Use the fuel tank only as an alternative solution.
3. Fight through the Reaver cars and use the roof weapons
Beyond the Berserker encounter, enter the next cars and eliminate the Drones inside. Reavers attack from alongside the train, and their mounted guns can punish anyone who remains in the center of an exposed car. Keep moving between interior cover points and do not stop in the doorway while trying to trade shots with a Reaver.
When the route leads into the car with a ladder, climb to the roof. A chain gun is available there. Use it to damage or destroy the Reavers passing alongside the train, beginning with the one that has the clearest firing angle. If one Reaver is hidden on the opposite side, do not cross the roof in the open just to reach the other chain gun; use a Torque Bow, Longshot or controlled rifle fire when possible.
After the Reavers are dealt with, collect ammunition near the ladder and climb back down. Continue through the next small exterior section, where additional Locust may include a Theron Guard and a Drone with a Boltok. Clear them before entering the following car.
- Clear the Drones inside the first post-Berserker cars.
- Use cover against Reaver-mounted weapons.
- Climb to the roof and operate a chain gun when safe.
- Do not cross an exposed roof merely to reach the opposite weapon.
- Collect ammunition before descending.
4. Survive the Lambent Wretch sections
Lambent Wretches begin attacking as you move through the passenger and service cars. A Lancer is dependable for shooting them as they approach, while a Gnasher is effective when one drops directly in front of you. Keep a retreat lane open; a Wretch can close the distance quickly, and an explosion can damage you even after the creature is staggered.
At the car with the large cylinders, activate the button that releases them, then move to cover while they fall. Do not stand beside the release path. Once the cylinders have dropped, cross through the newly cleared route and continue to the next car. More Wretches may attack while you are waiting, so face the approach rather than watching the machinery.
Some Wretches drop from ceilings or enter from both ends of a car. Fight the first group from the doorway when possible, then turn around when squad callouts indicate another attack from behind. After the immediate wave is controlled, activate the next door or machinery button and continue. The intended rhythm is short defensive stops followed by forward movement, not a full retreat through every cleared car.
- Carry a close-range weapon if available.
- Shoot Wretches before they reach the squad.
- Stand clear while the large cylinders fall.
- Check both ends of passenger cars.
- Advance after each machinery sequence is complete.
5. Complete the timed crossing
After another Lambent Wretch encounter, activate the door control to start the timed escape. The game gives you a short countdown to reach a later car before the rear section is disconnected. Roadie run through the connected cars and roll around obstacles instead of stopping to defeat every Wretch.
Ignore enemies that are not directly blocking the route. The goal is to reach the car with the next control, not to secure a complete clear. If a Wretch follows, keep moving; stopping to fight in the narrow passage is more dangerous than creating distance. When you reach the control, activate it as required to open the way and continue forward.
A COG Tag can be collected during this broader train route by taking an optional doorway near the end of one of the cylinder sections. It is not required for progression. If you are attempting to collect it, secure the immediate area first and enter the side room only when the timed sequence is not active. Otherwise, remain on the main route and do not detour.
- Activate the timed door control.
- Run through the connected cars without stopping for optional enemies.
- Reach the next control before the rear cars detach.
- Use the optional side room only outside the timed escape.
- Continue forward after the cylinders clear the final obstruction.
6. Enter the ammunition car and prepare for Pale Horse
Continue through the final cars until you reach the empty ammunition car. This is the resupply point before the General RAAM encounter in Pale Horse. Search the car thoroughly before touching the forward doors. Refill the weapons you intend to use and collect grenades if available.
A strong preparation is a Torque Bow plus a Longshot for the next chapter. The Torque Bow or another explosive attack is used to strip RAAM’s Kryll shield, while the Longshot can exploit the opening. A Lancer is a practical backup if you do not want to carry the Longshot, but do not leave the ammunition car without a reliable weapon for repeated damage after the Kryll moves away.
When ready, open the forward doors. The loading transition or cutscene moves the campaign into Pale Horse. Train Wreck is complete when the ammunition-car sequence ends and Pale Horse begins; RAAM is not fought during this chapter.
- Reach the final ammunition car.
- Restock the Torque Bow, Longshot or Lancer and grenades.
- Choose a primary weapon for damaging RAAM after the Kryll disperses.
- Open the forward doors to begin Pale Horse.
- Do not treat the RAAM fight as part of Train Wreck.
Before you move on
- The Berserker has been removed by detaching the rear train cars or by the fuel-tank alternative.
- The Drones and Theron Guards after the Berserker have been cleared.
- The Reaver section has been passed using the roof-mounted chain gun or other safe ranged weapons.
- The Lambent Wretch and cylinder sections have been completed.
- The timed crossing has been survived and the rear train section has detached.
- The final ammunition car has been reached and searched.
- Opening the forward doors triggers the transition into Pale Horse.
Act 5 — Desperation: Pale Horse and the Retail Ending
Pale Horse begins after Train Wreck, in the final ammunition car before General RAAM. Use this resupply point to take the Torque Bow, Longshot ammunition and grenades, then arrange a dependable backup weapon before opening the doors. RAAM is protected by a Kryll swarm. Hit him with a Torque Bow or grenade to scatter the Kryll, then use the Longshot or Lancer while he is exposed. Keep moving between the illuminated portions of the train and retreat before RAAM reaches your cover. Repeat the explosive-and-precision cycle until he falls. The ending cinematic follows immediately and is the completion point for the original Xbox 360 retail campaign. Pale Horse is the final Xbox 360 chapter; the later PC version added five Act 5 chapters before Special Delivery, including Jurassic Proportions, but none is required here.
1. Prepare in the final ammunition car
Pale Horse starts immediately after the Train Wreck sequence. You are in the final ammunition car, so do not open the exit doors until your loadout is ready. Search the available weapon and ammunition pickups and take the Torque Bow. Its charged shot is the most reliable way to force the Kryll away from RAAM. Pick up Longshot ammunition if available and carry the Longshot if you are comfortable making deliberate headshots. Keep grenades as another way to break the Kryll swarm.
Use the remaining weapon slot for a dependable backup, usually the Lancer. It can damage RAAM during the brief periods when the Kryll are dispersed, although it requires more exposure than the Longshot. Reload both weapons and confirm that you have enough ammunition before activating the doors. This room is the intended preparation point for the boss encounter, and there is no reason to begin the fight while carrying an unsuitable weapon set.
- Take the Torque Bow before leaving the ammunition car.
- Collect Longshot ammunition and grenades.
- Carry a Lancer or another reliable backup weapon.
- Reload and arrange the loadout before opening the doors.
2. Enter the boss arena and identify the safe route
Open the doors to trigger the scene and begin the fight with General RAAM. He carries a Troika and is protected by Kryll, so do not challenge him in the open or stand still in front of his weapon. Move immediately to cover and note the illuminated portions of the train. The light is essential: Kryll can attack you in darkness, while staying in lit areas gives you a safer route when RAAM sends the swarm toward your position.
The arena is a long train section with cover at both ends. Treat the two ends as alternating fallback positions rather than committing to one barricade. Keep enough space between Marcus and RAAM to use the Torque Bow or throw a grenade, then prepare to retreat along the train when RAAM advances. Avoid crossing into darkness just to gain a slightly better angle. Surviving the approach is more important than taking an early shot.
- Take cover as soon as the encounter begins.
- Stay in illuminated sections whenever the Kryll are active.
- Identify the opposite lit fallback position before attacking.
- Do not remain at one barricade until RAAM reaches it.
3. Break the Kryll shield and deal precision damage
Wait for a clear shot and fire a charged Torque Bow bolt at RAAM. A successful explosive hit scatters the Kryll and creates the short damage window you need. A grenade can serve the same purpose, but throw it so the blast reaches RAAM rather than detonating harmlessly against nearby cover. Do not waste Longshot ammunition while the swarm is still covering him.
As soon as the Kryll pull away, switch to the Longshot and aim for RAAM’s head. Fire only during the opening, then return to cover instead of trying to force extra shots. Active Reload can improve damage, but it is not worth exposing yourself to RAAM’s Troika while waiting for a perfect reload. If the Longshot is empty or you miss, use the Lancer during the next exposed window rather than abandoning the basic pattern.
RAAM may begin moving toward your position while the Kryll are dispersed. If he closes the distance, stop shooting and retreat through the lit train sections to the opposite end. Create space first, then repeat the explosive attack and precision-fire sequence. The battle is won through several controlled openings, not by holding one position and firing continuously.
- Disperse the Kryll with a Torque Bow shot or grenade.
- Use the Longshot against RAAM’s head while he is exposed.
- Use the Lancer only during a Kryll-free damage window.
- Retreat when RAAM advances and reset the distance before attacking again.
4. Recover from a failed attack
If the Torque Bow shot misses, do not remain exposed trying to correct it. Move to the nearest illuminated cover and wait for a safe opportunity to fire again. If RAAM reaches your side of the train, roadie-run to the opposite lit section instead of attempting a close-range exchange. The Troika and Kryll make a stationary recovery attempt especially dangerous.
If you lose the Longshot, continue with the Torque Bow and Lancer. Grenades are valuable because each successful blast can create another opening, but do not throw them blindly while RAAM is behind cover. If you are downed in co-op, the surviving player should draw RAAM away and revive only after the immediate firing lane is safe. Both players should avoid standing together at the same barricade, since one advance can put the entire team in danger.
- Retreat after a missed explosive attack.
- Use the opposite illuminated section when RAAM closes in.
- Continue with Torque Bow, grenades and Lancer if the Longshot is depleted.
- In co-op, separate roles and revive only from a safe position.
5. Confirm the retail campaign ending
Repeat the cycle of explosive attack, Longshot or Lancer damage, and illuminated retreat until General RAAM is defeated. Once he falls, the game begins the final ending cinematic. Do not expect another playable boss encounter or a separate train chapter after this point. Allow the cinematic to play through; its start after RAAM’s defeat is the direct completion check for the campaign route.
For the original Xbox 360 retail release, the required Act 5 sequence is Special Delivery, Train Wreck and Pale Horse. The later PC version added Impasse, Comedy of Errors, Window Shopping, Powers That Be and Jurassic Proportions before the three Xbox 360 chapters. Those additions are not part of the original Xbox 360 campaign and are not needed to complete the retail ending.
- Defeat General RAAM.
- Let the final ending cinematic begin and play through.
- Confirm that Special Delivery, Train Wreck and Pale Horse were the completed Act 5 route.
- Do not seek Jurassic Proportions or the other later PC chapters on the original Xbox 360 release.
Before you move on
- General RAAM has been defeated.
- The final ending cinematic begins after the boss fight.
- The original Xbox 360 Act 5 route has concluded with Pale Horse.
- No PC-exclusive Act 5 chapter was required.
Boss and Heavy-Enemy Tactics: Berserkers, the Corpser and General RAAM
The original Xbox 360 retail campaign has three required Berserker encounters: China Shop in Act 1, Bad to Worse in Act 2, and Train Wreck in Act 5. Their charge attacks are the key to victory; ordinary gunfire is not a dependable solution. The Corpser appears as the boss of Angry Titan in Act 3. Provoke its attack, shoot its exposed belly, damage its lower face when it falls, and then destroy the chains supporting its platform. General RAAM is the final boss and is fought on the train during Pale Horse. Carry grenades, a Torque Bow and a Longshot if possible. Break up the Kryll around RAAM with explosive damage, fire precision shots during the opening, and relocate when he advances. Defeating RAAM immediately leads to the ending cinematic. Skorge and a playable Brumak-rider battle are not part of the original Xbox 360 retail campaign.
1. Prepare your weapons and use the relevant Xbox 360 controls
Before entering a known boss checkpoint, reload both weapons and inspect the nearby ammunition. Keep one accurate weapon, such as the Longshot, for deliberate damage and one weapon suited to close emergencies. Preserve grenades and Torque Bow ammunition whenever possible, especially from Act 3 onward. The final RAAM encounter is much easier if you arrive with explosives and a precision weapon rather than spending every special round on ordinary Locust.
With the default Xbox 360 control layout, A handles cover movement, evasion, mantling and Roadie Running. X interacts with doors, machinery and downed squadmates. B performs melee attacks and starts the Lancer chainsaw when the Lancer is equipped. RB reloads, and pressing it again at the correct moment performs an Active Reload. Against a charging Berserker, use a sideways evasion instead of trying to outrun it in a straight line. Keep a clear route behind you before provoking a charge.
- Reload before triggering a boss checkpoint.
- Preserve grenades, Torque Bow ammunition and Longshot ammunition when possible.
- Keep an escape route visible before opening fire.
2. Defeat the China Shop Berserker by opening the route
The Berserker in China Shop is defeated by using its charges to break through the required doors. Move far enough away that you can see the creature commit to an attack, then wait for it to charge. Evade sideways with A at the last moment and let the Berserker crash into the door or barrier blocking the route. Do not dodge backward into a wall, corner or furniture, because the creature can pin you or catch you during the recovery.
After the first barrier breaks, continue through the newly opened passage and repeat the process at the next required door. If the Berserker stops moving, briefly expose yourself or fire from a safe distance to draw its attention, then immediately return to a position with room to evade. Avoid trying to chainsaw or shotgun it while it is moving; the encounter is built around its environmental impacts, not a conventional health-bar exchange.
In co-op, one player can draw the Berserker toward the next door while the other watches the escape path. Do not attempt a revive while the creature is still lined up with the downed player. Clear the route first, then revive from cover.
- Maintain enough distance to see the full charge.
- Dodge sideways just before impact.
- Use the Berserker to break each required door or barrier.
- Do not pursue it into a corner.
3. Defeat the Bad to Worse Berserker with the Hammer of Dawn
The Berserker in Bad to Worse uses the same charge principle, but the finishing method is different. First eliminate nearby Locust so that they cannot interrupt your movement or force you into the Berserker’s path. Then lure the creature into the large pillars or supports in the arena. Evade at the last moment so the charge damages the structure rather than you.
Continue baiting charges until the roof or overhead obstruction is cleared and the arena is exposed to the sky. Only then switch to the Hammer of Dawn. Acquire the Berserker from a safe position and hold the beam on it until the encounter ends. If the Hammer is unavailable because the arena has not opened, keep working on the pillars rather than wasting ammunition with the Lancer or Gnasher.
If a charge goes wrong, do not run blindly through adjoining rooms. Re-establish distance, identify the next pillar or open lane, and make the creature attack again. The checkpoint is close, so restarting after a bad collision is usually safer than attempting a desperate recovery in a cramped corner.
- Clear nearby Locust before focusing on the Berserker.
- Bait charges into the arena’s pillars or supports.
- Expose the sky before using the Hammer of Dawn.
- Keep enough distance to evade each charge.
4. Defeat the Corpser in Angry Titan
Angry Titan contains the campaign’s single Corpser boss encounter. Stay at range and avoid standing directly in front of its legs. Provoke an attack, then watch for the Corpser to raise its defenses and expose its underside. Fire into the belly during that opening. A successful hit knocks it down or creates the next damage opportunity; do not waste time firing repeatedly at its armored legs.
When the Corpser falls, aim at the lower face area to inflict additional damage. After the damage phase, retreat and repeat the pattern: provoke an attack, shoot the exposed belly, damage the lower face when it is down, and move back before the creature can retaliate. Supporting Locust can create a crossfire, so remove enemies with a clear line to your position before beginning another cycle.
After enough successful cycles, the Corpser is pushed toward the unstable platform. At that point, stop treating the fight as a normal damage race. Shoot the chains holding the platform when they become exposed and continue damaging the required supports until the platform collapses. The encounter is complete only after the Corpser falls and the route opens for you to rejoin the squad.
- Provoke the Corpser’s attack.
- Shoot the exposed belly.
- Damage the lower face after it is knocked down.
- Destroy the platform’s supporting chains in the final phase.
5. Manage Boomers, Theron enemies and mounted defenses
Boomers and Grenadiers are priority targets whenever they control a revive route or a narrow defensive position. Peek from cover, attack during their recovery or reload, and change positions after an exchange. Do not chase a retreating heavy enemy into an unexplored spawn area. Grenade explosions can remove your cover, so eliminate the explosive threat before attempting a long flank or revive.
Theron Guards and Theron Sentinels are dangerous because their Torque Bows punish exposed movement. Break their sightline with cover, then attack from a side angle or while they are recovering from a shot. Troika guns and Seeders should be handled according to the immediate objective: clear infantry that can punish you while you focus on the emplacement, then use the Hammer of Dawn or another suitable weapon when the game provides it.
The original Xbox 360 retail campaign does not contain a Skorge boss fight or a playable Brumak-rider battle. A Brumak appears in the console story as a non-playable story element, while the PC version added five Act 5 chapters and a playable Brumak encounter. Do not reserve ammunition for those PC-only sections or treat their mechanics as required Xbox 360 progression.
- Eliminate explosive enemies before attempting a revive.
- Break Theron sightlines with cover.
- Clear infantry before concentrating on a mounted defense.
- Do not expect Skorge or a playable Brumak battle on the original Xbox 360 route.
6. Defeat the Train Wreck Berserker
The third and final Berserker appears during Train Wreck. Advance through the train cars until the creature attacks while Jack works on a door. Do not try to kill it with ordinary weapons. Lead it backward through the cars toward the car containing the green control panel and the detachable section of train.
Position yourself on the appropriate car and activate the green control when the Berserker is in the section that must be detached. Move to the edge with enough room to evade, wait for the charge, and dodge aside. The Berserker should continue past you and fall from the train when the car separates. If the timing is wrong, keep moving through the cars and set up another charge rather than cornering yourself.
Once the Berserker is gone, enter the newly opened route and continue through the train. This is the final Berserker encounter in the original retail campaign. The remainder of Train Wreck contains Locust, Theron Guards, Reavers and Wretches, so retain a Torque Bow or another effective weapon for the later cars instead of spending everything during the Berserker setup.
- Lure the Berserker back to the detachable train car.
- Activate the green control at the correct time.
- Dodge from the car edge instead of fighting at close range.
- Continue through the opened train route after the car separates.
7. Defeat General RAAM during Pale Horse
Pale Horse is the final chapter of the original Xbox 360 retail campaign, and General RAAM is fought on the train. Before opening the final door, collect the available grenades and ammunition. If the weapons are present, take the Longshot and Torque Bow and reload both. The useful damage cycle is explosive damage followed by precision fire: use a grenade, Torque Bow shot or comparable explosive impact to scatter the Kryll surrounding RAAM, then immediately fire Longshot shots or another accurate weapon while the swarm is away.
Use the train’s cover and keep moving between safe positions. RAAM carries a Troika and can punish a player who remains in one firing lane. When he advances, abandon the compromised cover rather than trying to finish one more shot. If the Kryll reforms, stop firing ordinary rounds and create another opening with an explosive attack. Active Reloads are valuable during the brief damage window, but survival and relocation take priority over perfect shot timing.
In co-op, separate the players so RAAM cannot pressure both from the same angle. One player can draw his approach while the other creates a Kryll-opening attack, but both players must be ready to move. Revive only after RAAM’s immediate firing lane or approach has been interrupted.
When RAAM is defeated, Pale Horse ends and the game proceeds directly to the ending cinematic. There is no further playable train sequence after the boss. Let the cinematic play to confirm completion of the retail campaign.
- Carry explosive damage into the final train encounter.
- Scatter the Kryll before using precision ammunition.
- Move when RAAM advances instead of holding unsafe cover.
- Treat RAAM’s defeat as the end of the playable campaign.
- Allow the ending cinematic to play immediately afterward.
Before you move on
- China Shop advances after the Berserker breaks through the required doors and the route opens.
- Bad to Worse advances after the Berserker is exposed to the Hammer of Dawn and destroyed.
- Angry Titan advances after the Corpser damage phases are completed and the supporting platform chains are destroyed.
- Train Wreck advances after the Berserker is removed by detaching the correct train car and the remaining train route is cleared.
- Pale Horse is complete when General RAAM is defeated on the train and the ending cinematic begins immediately afterward.
- The original Xbox 360 retail campaign does not require Skorge, the PC-only Act 5 chapters, or a playable Brumak encounter.
Survival, Cover Combat and Resource Management
The original Xbox 360 campaign is won by moving between cover positions, controlling enemy sightlines, and choosing targets before shooting. Use A to attach Marcus to cover, peek out with aimed fire when a kill matters, and blind-fire only to interrupt advances or discourage a flank. Keep a rifle for medium and long sightlines and a close-range weapon for corridors, corners, and enemies that reach your position. Grenades are most valuable against grouped Locust, fortified positions, and enemies blocking the route forward. Rotate cover when explosives, crossfire, or flankers make the current barrier unsafe. Melee and the Lancer chainsaw can conserve ammunition against isolated targets, but both leave Marcus exposed. After each encounter, reload, collect useful drops, and check the next room before crossing a likely trigger point.
1. Begin each encounter from a usable cover position
Move to solid cover before opening fire. On the original Xbox 360 control layout, press A to enter or leave cover, mantle low obstacles, and perform a Roadie Run when held with movement. From cover, look for the next connected barrier rather than treating the first wall, vehicle, pillar, or barricade as a permanent nest.
Before firing, identify the main lanes into the arena. Note where rifle Drones are positioned, whether a Grenadier or Boomer has a clear shot, and whether a side passage allows shotgun units to approach. The safest route is usually a chain of nearby cover points that lets you advance while keeping at least one escape direction available.
- Enter combat with solid cover between Marcus and the largest group of enemies.
- Identify a fallback barrier and at least one likely flank route before committing to a push.
2. Use suppression to create movement opportunities
Use the Lancer or another rifle to keep enemies behind cover while you or the squad changes position. Blind-fire by remaining in cover and firing without fully aiming. It is inaccurate, so use it to interrupt an advance, discourage a close approach, or make an enemy duck while you move—not as the main method for killing distant targets.
When an enemy rises from cover, briefly aim and fire controlled bursts, then duck back. Do not stay exposed for an entire magazine if several Locust can answer from different angles. If an enemy is distracted by Dom or another squadmate, use that opening to lean out from a different angle and finish the target before it resumes firing.
- Use blind fire for suppression and interruption rather than long-range damage.
- Expose yourself for accurate shots only when the enemy’s return fire is limited or interrupted.
3. Rotate cover when the position becomes compromised
Grenades, Boomshot blasts, crossfire, and repeated suppression indicate that the current barrier is no longer safe. Move laterally through connected cover instead of sprinting across the open center of an arena. Hold A to Roadie Run only when the destination is visible and provides real protection; do not run blindly toward the next doorway or weapon pickup.
If a grenade lands beside your cover, leave before reloading or finishing a kill. If enemies begin firing from a side entrance, shift your angle so that the new threat cannot attack your back. A short retreat to a stronger barrier is preferable to holding a position until explosives or flanking fire force you into the open.
- Keep a visible escape route beside or behind the current cover.
- Leave immediately when explosives, crossfire, or a new flank makes the barrier unreliable.
4. Keep one weapon for distance and one for close quarters
Maintain a practical two-weapon loadout whenever the available pickups allow it. The Lancer is a dependable general-purpose rifle, while the Hammerburst is useful for controlled shots at range. The Gnasher is valuable in corridors, around corners, and against enemies that rush your cover, but it is a poor sole weapon for a wide arena.
Press X to use objects and pick up weapons or ammunition when the prompt appears. Compare the terrain ahead with your remaining ammunition before replacing a weapon. A Boomshot, Longshot, or Torque Bow can be worth carrying into a heavy encounter, but do not discard your only close-range answer immediately before a cramped room or a rush sequence. Weapon placements are fixed within campaign encounters, so make the decision from the available pickup and the next battlefield rather than expecting a resupply later.
- Carry a rifle when the route includes open sightlines.
- Keep a shotgun or another reliable close-range option before entering tight interiors.
5. Reserve grenades for targets they can actually dislodge
Use fragmentation grenades against groups sharing cover, entrenched enemies blocking the route, or a dangerous weapon carrier protected by several Drones. Throw from cover whenever possible. The explosion can force enemies into the open, where rifle fire is safer and more accurate than trying to rush their position.
Do not spend a grenade on a lone weak Drone unless that enemy is about to flank or is preventing the squad from advancing. Keep an explosive available when the game has recently supplied one, because a later fortified position may be more difficult to clear without it. Avoid stepping into the open merely to place a grenade; survival and cover are more important than a perfect throw.
- Reserve at least one grenade for a group, fortified position, or dangerous flank.
- Throw from cover and exploit the enemies’ forced movement after detonation.
6. Treat melee and chainsaw attacks as controlled finishers
Press B for melee; hold B with the Lancer equipped to attempt a chainsaw attack. These attacks are effective against an isolated, weakened enemy, but they commit Marcus to close range. Check the surrounding firing lanes before starting an execution or chainsaw animation. A target that looks alone may still be covered by a Drone, Grenadier, or Boomer outside the camera’s immediate view.
Against Boomers, Theron Guards, and other heavy threats, keep your distance unless the enemy is already disabled and the area is secure. If a close-range attack fails to finish the target, break away with A, roll to new cover, and resume shooting instead of trading repeated melee attacks in the open.
- Confirm that nearby enemies cannot interrupt the attack before committing.
- Use melee to finish isolated targets, not as the primary answer to armored or crowded encounters.
7. Reload, resupply, and recover between combat phases
After a wave ends, reload every weapon and collect useful ammunition before crossing the next doorway or objective trigger. RB starts a reload. Pressing RB again at the correct point in the reload sequence performs an Active Reload; practice it from cover, but use a normal reload when enemies are actively pressuring your position and a mistimed attempt would leave you vulnerable.
Collect dropped weapons only after the immediate area is safe. Check whether the next section favors a rifle, shotgun, sniper weapon, explosive weapon, or another specialized pickup. If you are downed, crawl toward cover when possible and avoid remaining in the center of a firing lane. In co-op, the standing player should clear the nearest threat before reviving; attempting a revive under uninterrupted fire often downs both players.
If a section repeatedly defeats you, restart from the latest checkpoint with a changed opening position, target priority, or weapon choice. Do not repeat the same exposed push while expecting a different result.
- Reload and collect useful supplies before activating the next encounter.
- Attempt a revive only after the immediate firing lane is controlled.
- After failure, change the opening cover, priority target, or loadout plan.
Before you move on
- You can clear ordinary arenas by moving through connected cover instead of crossing open ground under sustained fire.
- You consistently identify and remove Boomers, Grenadiers, shotgun flankers, and other immediate threats before finishing weaker enemies.
- Before a major scripted wave, you have a loaded rifle, a suitable close-range weapon, and grenades when the encounter has supplied them.
- You can recover from a bad position by rotating to new cover, breaking line of sight, and resuming the fight from a safer angle.
- After each completed encounter, you reload, collect appropriate drops, and enter the next section with a deliberate weapon plan.
Optional Objectives: COG Tags, Collectibles and Completionist Notes
The original Xbox 360 retail release of Gears of War contains 30 COG Tags. They are optional and do not affect story progression, mission completion, or the retail ending. The later PC release and Ultimate Edition add three tags in additional Act 5 chapters, so a 33-tag checklist is incorrect for the 2006 Xbox 360 campaign. Crimson Omens usually mark a tag nearby, but the item may be around a corner, beneath cover, behind a destructible object, or on a nearby side route. Collect tags before leaving the current area, especially before the Berserker finale in China Shop and before locked train-car doors in Train Wreck. Tag progress is cumulative across campaign runs and difficulties. Missed tags can be recovered by replaying the relevant chapter; use the achievement totals of 10, 20, and 30 tags to confirm progress.
Use the correct Xbox 360 checklist
Use a 30-tag checklist for the original Microsoft Xbox 360 retail release. The retail distribution is 12 tags in Act 1, 6 in Act 2, 6 in Act 3, 3 in Act 4, and 3 in Act 5. The 33-tag count belongs to versions containing the additional Act 5 material and should not be used to judge an Xbox 360 disc run.
Search whenever you see a Crimson Omen, but treat it as a nearby clue rather than an exact item marker. Check dead ends, side rooms, corners behind cover, upper or lower ledges, memorial areas, and destructible furniture before following the next objective route. Collect a tag before triggering a chapter-ending cutscene or entering a one-way vehicle or train section.
Tags are optional. You can finish the campaign without any of them, and collecting them does not change the story or unlock a required route. Difficulty does not matter for tag progress, so cleanup can be done on a lower difficulty if desired.
- Use a 30-tag Xbox 360 list.
- Search around every Crimson Omen before advancing.
- Do not delay optional collection until after a one-way transition.
Act 1 — Ashes: tags 1 through 12
14 Years After E-Day contains tags 1, 2, and 3. At the opening choice of left or right route, continue to the end of the selected path and inspect the floor near the Crimson Omen. In the next large room, look behind the pillar beneath the catwalk near ammunition. After clearing that room and reaching the open area, climb the staircase on the immediate left and turn hard left for the third tag.
Trial by Fire contains tags 4 and 5. The first is in the early courtyard where the game draws attention to the Crimson Omen; search the grass between the stone blocks before climbing the stairs. After crossing the long bridge and entering the building, turn left before exiting the room to find tag 5.
Fish in a Barrel has tag 6 near the fountain. When you enter the fountain area, search straight ahead near the pole and ammunition. Knock Knock has tag 7: after the slow walking section and the exit to the street, follow the opened gap up the stairs toward the van.
Hammer contains tags 8 and 9. Follow the wretch tracks in the small corridor toward the boarded opening for tag 8. Later, in the room containing Rojas’s remains, descend the stairs and check the right-hand corner for tag 9.
China Shop contains tags 10, 11, and 12. Search the fire patch after Kim’s death, inspect the dark window area near the third breakable door while the Berserker sequence is underway, and, after reaching the exterior, turn hard left toward the stone planter and lamppost. Collect tag 12 before killing the Berserker or triggering the chapter-ending sequence.
- Act 1 total: 12 tags.
- Collect tag 12 before completing the China Shop Berserker encounter.
- Check the fountain, wretch-track corridor, and Rojas room carefully.
Act 2 — Nightfall: tags 13 through 18
Tag 13 is in Tick Tick Boom, but it can also be collected by loading the Grist chapter. In the room with two sets of staircases, take the second staircase down to the dead end and destroy the couch. The tag is beneath it. If starting from Grist, turn left, run down the stairs, hop over the ledge, and destroy the couch.
Grist contains tags 14 and 15. After the room where part of the catwalk breaks and the Wretches attack, go outside, clear the enemies, descend the staircase, and turn around toward the dead end. Tag 14 is under the walkway behind a rock. Later, after the street fight involving the pushable car and Troika, find tag 15 behind the newspaper-stand-like structures before entering the settlement. If you pass into the settlement, restart the chapter for another attempt.
Lethal Dusk contains tags 16 and 17. After the first checkpoint, search the shack beside the Emergence Hole and shoot the propane tank to expose tag 16. Later, after Dom activates the street lights, move the spotlight slightly above Dom’s starting position and check the corner near the destroyed car for tag 17.
Dark Labyrinth contains tag 18. After leaving the dark building and before reaching the gas station, look to the right beside the car with the explosive tank. The car does not need to be used to reach the tag.
- Act 2 total: 6 tags, bringing the campaign total to 18.
- Treat tag 13 as one tag, whether collected through Tick Tick Boom or Grist.
- Collect tag 15 before entering the settlement.
Act 3 — Belly of the Beast: tags 19 through 24
Downpour contains tag 19. After the long approach to the plant, identify the elevator building and the power-generator building. Go behind the elevator building and follow the wooden dock to its end.
Evolution contains tag 20. After entering the plant and meeting the stranded survivor, reach the room with the unstable wooden floorboards. Move carefully to the far-right corner and collect the tag. The collapsing floorboards can vary, so use safe surfaces and take the ladder if you fall.
Coalition Cargo contains tag 21. In the plant room with weapons, ammunition, two mine carts, and a computer terminal, take the side doorway and descend the stairs. At the bottom, look to the right behind the weeds before activating the computer switch.
Darkest Before Dawn contains tags 22 and 23. Follow the normal underground route and stay straight at the first split to find tag 22 near grenades and a Crimson Omen. After the water-ride section and the next fight, check to the right before the stairs leading to the hut for tag 23.
Tag 24 is shared by Darkest Before Dawn and Angry Titan as an alternate chapter-loading location, not two separate tags. From Darkest Before Dawn, after regrouping with Dom and passing the tunnel, enter the open area and hug the right wall. If loading Angry Titan directly, turn around at the start and follow the left ledge to the end. Either route counts for the same final Act 3 tag.
- Act 3 total: 6 tags, bringing the total to 24.
- Do not count tag 24 twice when using chapter select.
- Search the dock, wooden-floor room, plant ammunition room, and post-tunnel area.
Act 4 — The Long Road Home: tags 25 through 27
Campus Grinder contains tag 25. In the opening area, move forward through the two stairways toward the blocked door and check the ground after the second staircase.
Bad to Worse contains tag 26. Continue along the road until reaching the debris, then take the right side toward the wall and inspect around the car. This can be collected before or after the nearby fight, provided you do not leave the area.
Tag 27 is in the Phoenix mansion and can be collected from either Imaginary Place or Entrenched. In Imaginary Place, reach the library after clearing the mansion’s Emergence Holes. Destroy or inspect the desk and collect the tag beneath it. If loading Entrenched instead, follow the route into the mansion and use the corresponding library area to collect the same tag. These are alternate access points for one collectible, not separate tags.
Act 4 therefore has three tags total: Campus Grinder, Bad to Worse, and the single mansion tag associated with Imaginary Place or Entrenched.
- Act 4 total: 3 tags, bringing the total to 27.
- Do not count the mansion tag twice.
- Search the Campus Grinder opening, the Bad to Worse car area, and the mansion library.
Act 5 — Desperation: tags 28 through 30
The original Xbox 360 retail campaign places all three Act 5 tags in Train Wreck. Special Delivery contains no tag. The later chapters sometimes listed as Comedy of Errors, Window Shopping, Powers That Be, and Jurassic Proportions are not part of this retail route, so do not search for them on the Xbox 360 disc or use them to alter the 30-tag count.
After boarding the train and completing the Berserker sequence, go through the door Jack opens. Tag 28 is in the first train car you enter, on the left after the door opens. Continue through the cars and the exterior section. In the next passenger car, tag 29 is on the right before the exit. Do not leave the car without picking it up; the door locks behind you.
For tag 30, continue through the train until the section where the fuel tanks are jettisoned. Before entering the ammunition car, turn around and go back along the train to the final tag location. Once you enter the ammunition car, the route locks behind you and the chapter must be restarted if tag 30 was missed.
Pale Horse contains no additional COG Tag. After tag 30, continue through the final RAAM sequence normally; the collectible route is complete.
- Act 5 total: 3 tags, bringing the campaign total to 30.
- All three retail Act 5 tags are in Train Wreck.
- Collect tag 29 before leaving its passenger car and tag 30 before entering the ammunition car.
Recover a missed tag and verify progress
If a tag was missed, replay the chapter containing it rather than restarting the entire campaign. For locations before a locked door or irreversible encounter, reload an earlier checkpoint if it is convenient. Otherwise restart the chapter from its beginning and follow the route to the item.
Tag progress is cumulative across campaign runs and difficulty levels. In co-op, if neither player has a particular tag, either player can collect it and both profiles receive credit. If only one player is missing it, both players may see it but the player who still needs it must make the pickup. If both players already have it, it will not appear for either profile.
Use the Xbox 360 achievement progress as the final confirmation: Time to Remember corresponds to 10 tags, Honor-Bound to 20, and For the Fallen to all 30. The story campaign remains completable even if the collectible total is incomplete.
- Confirm the 10-, 20-, and 30-tag achievement thresholds as progress milestones.
- In co-op, verify which player still needs the tag before approaching it.
- Replay only the chapter containing the missed collectible.
Before you move on
- The original Xbox 360 retail checklist totals 30 tags: 12 in Act 1, 6 in Act 2, 6 in Act 3, 3 in Act 4, and 3 in Act 5.
- The For the Fallen achievement has unlocked, confirming all 30 COG Tags on the relevant Xbox profile.
- No additional tags are expected in the original retail chapters after Train Wreck tag 30.
- Campaign completion does not require any COG Tags, so missing collectibles do not prevent reaching the retail ending.
Co-op Campaign: Roles, Checkpoints and Recovery
The original Xbox 360 release supports two-player campaign co-op through Split Screen, System Link, and Xbox Live. The host plays Marcus Fenix and the joining player plays Dominic Santiago. Treat every fight as a coordinated advance: one player controls close threats and moves between cover while the other suppresses distant enemies, watches side angles, and protects the route to the next position. The campaign is checkpoint-based rather than a freely shared manual-save system. Partners can normally revive one another, but some campaign split sections disable revives; if a player dies there, the game restarts that player at the last checkpoint. The host retains the main session progress, while the joining player records unlocked chapters rather than individual checkpoints.
1. Start the correct co-op session
From the main menu, choose Campaign. Select Split Screen for two players on one Xbox 360, Host Co-op Game to create a System Link or Xbox Live session, or Join Co-op Game to enter another player’s session. The manual identifies the host as Marcus Fenix and the joining player as Dominic Santiago. For local play, sign in the second controller with the intended player profile before launching; if no second profile is available, create one or use the profile arrangement supported by the console.
For network play, decide which player owns the campaign session and should host. The host is the player whose campaign route and current checkpoint control the session. Do not assume that the joining player’s local checkpoint will be used when entering someone else’s game. Start from the host’s available chapter or current campaign position, then confirm both characters have loaded before moving into combat.
- Choose Campaign rather than Versus.
- Use Split Screen for local play, or Host Co-op Game and Join Co-op Game for network play.
- Confirm which profile is hosting and which profile is joining.
- Verify that Marcus and Dom are both present before advancing.
2. Assign complementary combat jobs
Use a staggered formation instead of standing shoulder-to-shoulder. The advancing player should carry a Gnasher or Lancer and handle enemies that reach the squad’s cover. The supporting player should favor a Lancer, Longshot, or another accurate weapon for Boomers, Grenadiers, Troikas, and enemies crossing distant lanes. Keep enough separation that one grenade or burst of fire cannot hit both players, but stay close enough for a safe revive or quick retreat.
Use a repeatable advance pattern. The support player suppresses the enemy position, the assault player moves to the next solid barrier, and both players relocate only after the new cover is secure. Call out pushes, weapon swaps, and retreats. If the player in front loses health or encounters a heavy enemy, fall back to the last shared barrier instead of forcing the other player to cross an exposed lane alone.
- One player handles close threats while the other covers distance and flanks.
- Keep separate but mutually visible cover positions.
- Announce movement before leaving cover.
- Preserve a retreat route behind every push.
3. Use split paths to create crossfire
Gears of War sometimes lets Marcus and Dom take different routes around an obstacle. These paths are meant to create alternate angles of fire, not to encourage an uncontrolled race. Before splitting, identify where each route reconnects and which player has the safer fallback position. The player with the protected angle should begin suppressing while the other attacks the exposed flank or clears the obstruction preventing progress.
Do not split farther than the encounter requires. A route is unsafe if a downed player cannot be reached without crossing active fire. When one side draws Boomers, grenades, or concentrated gunfire, retreat to the last shared cover and let the other player pull enemies into a crossfire. After the area is clear, regroup before collecting weapons or activating the next objective.
- Choose paths with visible cover and a reachable fallback.
- Use separate angles to support one another, not to clear both routes independently.
- Regroup before triggering the next encounter.
- Treat a forced split section as a special hazard because normal revives may be unavailable there.
4. Revive only after creating a safe pocket
In ordinary co-op combat, a downed player can normally be revived by the partner. The revive itself is not a substitute for clearing the area. First suppress or eliminate the nearest threat, check for grenades and explosive enemies, and watch the side entrances. Then approach using cover and revive only when the route can be protected. After the revive succeeds, move both players to a different barrier rather than remaining in the position where the down occurred.
The manual specifically warns that during campaign co-op split sections, neither Marcus nor Dom can be revived and each player must restart at the last checkpoint. If a partner goes down in one of these separated sequences, do not waste time attempting repeated rescues. Finish the section only if the game permits it; otherwise accept the checkpoint restart and use the next attempt to keep both players alive through the split.
- Suppress immediate threats before starting a revive.
- Check for grenades, Boomers, and side angles.
- Relocate after a successful revive.
- Do not expect a revive during a campaign split section where the game disables it.
5. Recover after a team wipe
If both players die, the team restarts from the latest checkpoint. Treat the restart as a tactical reset rather than repeating the same sprint. Identify whether the failure came from a Troika, a Boomer, grenade pressure, an uncovered flank, or advancing too far ahead of the partner. Change the firing angle, preserve a different weapon, or delay the push until the high-threat enemy is exposed.
At the restart, let the player with the better weapon for the encounter lead the first movement while the other maintains suppression. Do not chase a retreating enemy into the next spawn area. Clear the current cover line, reload, check both players’ positions, and advance together only after the first wave is under control.
- Identify the cause of the wipe before retrying.
- Change the failed angle or weapon plan.
- Keep one player covering while the other repositions.
- Do not activate the next combat area with the team separated.
6. Handle a disconnect or session exit
If either player quits or disconnects, the co-op session ends. Stop treating the current position as safely preserved. The host should return to the campaign menu or restart the appropriate host session from the latest available campaign point, then invite or reconnect the second player. The original manual states that the joining player saves unlocked chapters, not checkpoints, so a joiner should not expect every mid-chapter checkpoint to remain available as an independent save.
After reconnecting, confirm that both players are using the intended profiles and that the host has selected the correct chapter or campaign position. If the joining player’s menu now shows an unlocked chapter rather than the exact previous checkpoint, use that chapter for recovery. Avoid starting a new campaign accidentally when the goal is to resume the existing host route.
- Treat a quit or disconnect as the end of the current co-op session.
- Resume from the host’s available campaign point.
- Remember that the joining player saves unlocked chapters, not checkpoints.
- Confirm both profiles and characters before resuming.
7. Confirm completion for both players
Play through the final retail Xbox 360 campaign sequence and allow the ending scenes to finish before leaving. The host should verify the completed campaign or final chapter through the host profile’s campaign records. The joining player should verify that the relevant chapters have been unlocked or recorded on the joining profile; the manual does not promise identical checkpoint saves for both players.
If one player joined only partway through the campaign and lacks a desired chapter or completion record, replay the missing chapter with that profile signed in as the joining player. Keep the final session active until both players have checked their own progress. Reaching the last checkpoint is not by itself the completion check; both players should reach the retail ending sequence.
- The retail ending scenes play before the session is closed.
- The host profile records the completed campaign or final chapter.
- The joining profile has the expected unlocked chapters or campaign record.
- Replay missing chapters with the affected profile signed in.
Before you move on
- Both players have reached the retail campaign ending on the original Xbox 360 release.
- The host profile shows the expected completed campaign or final chapter progress.
- The joining profile has recorded the chapters it was meant to unlock during the run.
- Any missing chapter record is corrected by replaying that chapter with the affected profile signed in.
References for this chapter
Final Checks, Achievements and Next Steps After the Retail Ending
The original Xbox 360 retail campaign ends with Act 5 chapters Special Delivery, Train Wreck, and Pale Horse. The five chapters Impasse, Comedy of Errors, Window Shopping, Powers That Be, and Jurassic Proportions belong to later versions and are not missing from the 2006 console release. Finish Pale Horse by defeating General RAAM, then allow the ending sequence to play. Afterward, use Campaign and Load Last Chapter to verify that the completed route is recorded. Treat remaining achievements as separate goals: act and difficulty completions, COG Tags, campaign actions, co-op requirements, and multiplayer tasks. The RAAM achievement A Dish Best Served Cold specifically requires a Hardcore-difficulty victory, so an ordinary story completion does not unlock every campaign achievement.
1. Confirm the original Xbox 360 Act 5 route
The retail Xbox 360 route through Act 5 is Special Delivery, Train Wreck, and Pale Horse. Special Delivery is the train-yard operation, Train Wreck is the boarding and train advance, and Pale Horse is the final chapter containing the General RAAM encounter. Reaching these three chapters in that order confirms that you are following the original 2006 console campaign structure.
Do not search the disc for Impasse, Comedy of Errors, Window Shopping, Powers That Be, or Jurassic Proportions. Those five chapters were added to the later PC version and carried into subsequent expanded editions. They extend Act 5 with the playable Brumak route, but they are not required for Xbox 360 retail completion. The original console campaign can move directly from Entrenched into Special Delivery without indicating a missing chapter.
- Act 5 contains Special Delivery, Train Wreck, and Pale Horse.
- The five additional Act 5 chapters are absent by design.
- A playable Brumak sequence is not required on the original Xbox 360 disc.
2. Finish Pale Horse and defeat General RAAM
Pale Horse is the final playable chapter. Before entering the last fight, use the nearby supply area to check your weapons and ammunition. A Longshot is useful when RAAM's Kryll are displaced, while Torque Bow shots, grenades, or other explosive attacks can create those openings. Keep a reliable backup weapon rather than exhausting every powerful weapon on the preceding train encounters.
Stay in the illuminated portions of the train and use the available cover as RAAM advances. When the Kryll are covering him, use an explosive attack to scatter them, then fire at RAAM during the brief opening. When he closes the distance, cross to a safer cover position instead of holding a losing close-range angle. Repeat the explosive-and-precision cycle until he falls. If you are pursuing A Dish Best Served Cold, the killing blow must occur on Hardcore difficulty; defeating RAAM on Casual does not satisfy that achievement, while Insane is a higher difficulty and can also satisfy a Hardcore requirement in the normal achievement progression.
- Pale Horse has been entered.
- General RAAM has been defeated during the Pale Horse battle.
- Hardcore difficulty is being used if A Dish Best Served Cold is the goal.
- No further combat chapter follows the RAAM encounter on this edition.
3. Let the ending play and verify the saved route
After RAAM is defeated, allow the conclusion and credits sequence to run before returning to the main menu. There is no hidden Xbox 360 epilogue mission, extra train chapter, or post-campaign mansion segment that must be completed after the final battle.
To check the campaign record, enter Campaign, select the player or co-op setup being used, and choose Load Last Chapter. Completed chapters should be available through that menu. Pale Horse is the clearest final-route check, but also inspect earlier chapters if an act or difficulty achievement failed to unlock. If the result is not recorded, make sure the same Xbox profile and campaign storage device are active, then replay the affected chapter from its beginning and reach its completion checkpoint.
- The ending and credits have played normally.
- Pale Horse is available through the campaign chapter-loading option.
- The same Xbox profile and campaign save are being used.
- Any missing act entry has been replayed from the relevant chapter start.
4. Separate story completion from achievement cleanup
Completing the retail story does not unlock every achievement. The Xbox 360 achievement set includes achievements for completing individual acts on specified difficulties, completing the campaign on higher difficulties, collecting COG Tags, performing selected campaign actions, completing co-op chapters, and earning multiplayer results. Review the achievement list after the ending and sort unfinished items into those categories instead of treating every locked item as evidence that the story is incomplete.
For a difficulty achievement, use the difficulty named in its description and make sure the required act or full campaign is completed under that setting. Chapter selection is useful for revisiting a missed act section or campaign action, but it does not turn a collectible or multiplayer achievement into a story requirement. If you are playing co-op, keep the intended profile signed in and confirm that the player whose achievement is being pursued is present when the required chapter or act is completed.
- Difficulty achievements are matched to their stated difficulty.
- COG Tags and campaign actions are tracked separately.
- Co-op and multiplayer achievements are not being mistaken for campaign requirements.
- A Dish Best Served Cold is attempted on Hardcore if required.
5. Plan replays using the correct edition
Use the Xbox 360 chapter list when planning cleanup runs. Revisit chapters through Campaign and Load Last Chapter for missed COG Tags or campaign actions, rather than restarting the entire story unless a full-campaign difficulty achievement requires it. Keep the retail Act 5 order visible while consulting outside material: Special Delivery leads to Train Wreck, and Train Wreck leads to Pale Horse.
If a guide sends you to Impasse, Comedy of Errors, Window Shopping, Powers That Be, or Jurassic Proportions, it is describing the PC release, Ultimate Edition, or another later version. Do not use those chapters to judge the original disc's completion status. The Xbox 360 retail campaign is complete when Pale Horse is finished, General RAAM is defeated, the ending has played, and the final chapter is available in the campaign-loading menu. Remaining goals can then be handled as difficulty, collectible, objective, co-op, or multiplayer work.
- Special Delivery, Train Wreck, and Pale Horse are complete.
- General RAAM is defeated.
- The ending has played before leaving the campaign.
- Pale Horse is visible in the chapter-loading menu.
- Remaining achievements are categorized by type.
- No PC-only Brumak chapters are included in the Xbox 360 completion checklist.
Before you move on
- Complete Special Delivery, Train Wreck, and Pale Horse.
- Defeat General RAAM in Pale Horse.
- Allow the ending and credits sequence to play normally.
- Return to Campaign and use Load Last Chapter to verify the completed route.
- Check the signed-in profile's remaining achievements by category.
- If pursuing A Dish Best Served Cold, confirm that RAAM was defeated on Hardcore difficulty.
- Confirm that the final Xbox 360 checklist excludes the five later Brumak-route chapters.
Finishing up
You reach the original Xbox 360 retail campaign ending after completing Special Delivery, Train Wreck and Pale Horse, then defeating General RAAM during Pale Horse and allowing the ending cinematic to play.
The required retail Act 5 order is Special Delivery, Train Wreck, then Pale Horse. The PC-only chapters Impasse, Comedy of Errors, Window Shopping, Powers That Be and Jurassic Proportions are absent from the original Xbox 360 release.
After the ending cinematic, return to Campaign and verify that the final chapter is recorded or available through the chapter-loading option. Do not use the absence of PC-only chapters as evidence of a missing save.
Difficulty, collectible, objective and co-op achievements remain separate from basic campaign completion.
In co-op, have both profiles reach the Pale Horse ending sequence if both players need campaign completion credit.
Choose your next gameScreenshots & video
Game imagery for reference. Follow the written chapters above for the route and strategies.
Sources & references
Our original guide draws on the references below. Check the edition at the top of this page before following controls or unlock requirements.
- Gears of War – Guide and Walkthrough – Xbox 360
- Gears of War — Insane Mode Walkthrough — Xbox 360
- Gears of War — Walkthrough — Xbox 360
- Gears of War Xbox 360 Instruction Manual
- Gears of War FAQs, Walkthroughs, and Guides for Xbox 360
- Gears of War — Guide and Walkthrough, Xbox 360, chapter list and Act 5 route
- Gears of War Walkthrough — Xbox 360 — SuperCheats
- Gears of War Walkthrough — Act 1: Fork in the Road
- Gears of War: Wrath, China Shop — Gamepressure
- Gears of War Walkthrough – GameSpot
- Gears of War – COG Tag Locations FAQ – Xbox 360
- Gears of War – Guide and Walkthrough – Xbox 360
- Outpost — Gears of War Wiki
- Act 2: Nightfall — Gears of War Wiki
- A Gears of War Walkthrough for Act 2, Chapters 5, 6, 7 and 8 — Altered Gamer
- Gears of War Walkthrough Act 2 — Lethal Dusk — PortForward
- Gears of War Walkthrough Act 2 — Powder Keg — PortForward
- Last Stand — Gears of War Wiki
- Gears of War Guide — Act 3: Belly of the Beast
- Gears of War Xbox 360 Manual — Microsoft
- Gears of War Walkthrough Act 3 — Darkest Before Dawn
- Gears of War Xbox 360 Retail Manual
- Gears of War Guide — Act 4: The Long Road Home
- Act 4: The Long Road Home — Gears of War eGuide
- Gears of War Walkthrough Act 4 - Entrenched
- Gears of War - Insane Mode Walkthrough - Xbox 360 - GameFAQs
- Gears of War Walkthrough Act 5 — Special Delivery
- Special Delivery — Gears of War Wiki, chapter and edition breakdown
- FAQ/Walkthrough - Gears of War - Xbox 360
- Gears of War Walkthrough Act 5 - Train Wreck
- Train Wreck | Gears of War Wiki
- Gears of War/Act Five: Desperation - StrategyWiki
- Pale Horse | Gears of War Wiki
- Gears of War: Reloaded — Everything You Need to Know — Windows Central
- Gears of War Walkthrough – Xbox 360
- Gears of War Interview – VideoGamer
- Gears of War Xbox 360 Manual — Microsoft download
- Gears of War — Battle/Weapon Tactics FAQ — Xbox 360
- Gears of War Guide — Controls
- COG Tag Locations – Gears of War Wiki
- COG Tag Locations – Gears of War Wiki, Neoseeker mirror
- Buy Gears of War — Xbox Official Store
- How to replay the chapters? – Gears of War Xbox 360 Q&A
- A Dish Best Served Cold Achievement in Gears of War
- Gears of War Hands-On – New PC Content
About the game & collecting notes
- Platform
- Xbox 360
Step-by-step campaign walkthrough for the original 2006 Xbox 360 retail release of Gears of War. This guide covers every required mission through the game's retail ending (Acts 1–5 as shipped on Xbox 360), explains cover-and-fire tactics, boss methods, co-op recovery, and optional collectible guidance while excluding PC-exclusive chapters added after the retail release.
Darryl Polo
Darryl Polo loves tinkering with emulation and revisiting retro games. He enjoys exploring how old favorites play on different setups and sharing what he learns along the way. At Joking Joystick, he writes about the games, hardware, and small discoveries that keep the hobby fun.
Our editorial standardsFound a step that needs another look? Help us improve this guide.