
Gears of War 3 (Xbox 360, original retail release) — Campaign Walkthrough
Complete, play-ready plan for the original Xbox 360 retail campaign of Gears of War 3. This guide breaks the single-player campaign into 22 focused chapters (act-based groupings), lists precise objectives, key tactical tasks, common hazards and what to avoid, and links official/manual and authoritative walkthrough references to verify progression and chapter names.

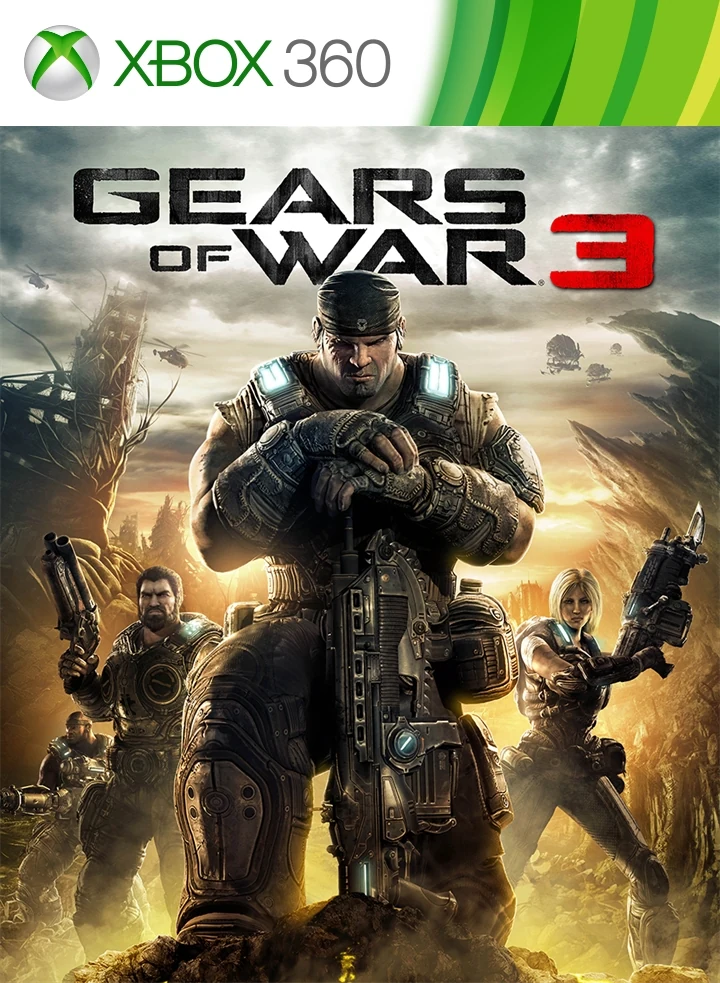
Find a copy
Gears of War 3 Xbox 360
We may earn a commission if you buy through these links, at no extra cost to you. As an Amazon Associate I earn from qualifying purchases.
Opens retailer search results. Check the model, edition, seller, availability and current price before buying.
Before you begin
You are about to run the original Xbox 360 single-player campaign of Gears of War 3.
This guide is organised into short, actionable chapters that match the game’s acts and mission beats: each chapter lists what you must accomplish, the tactical approach that works best (cover usage, weapon pairings, when to move), and the hazards that typically stop new players.
Difficulty and medal goals are optional extras you can attempt after you know the route.
The walkthrough chapters here focus on guaranteed story progression and safe strategies to reach each checkpoint.
If you intend to pursue Hardcore/Insane runs or Arcade medal completion, treat those as separate runs after you complete the campaign once.
Controls, HUD items, and weapon descriptions are verified by the official manual and community walkthroughs; consult the manual for button bindings if you changed the control scheme.
Set yourself up for the run
Confirm you have the original Xbox 360 retail edition and any early patches installed; this walkthrough targets the stock campaign as shipped on retail.
(Manual and official PDF reference included in sources.)
Choose your difficulty: Casual/Normal for story practice, Hardcore/Insane when you want a challenge.
Finish one normal playthrough before attempting medal-specific Arcade/Hardcore goals.
Familiarise yourself with three core weapons and their roles: Lancer (mid-range/sustained), Gnasher (close-quarters finishing), Boomshot or Mulcher (heavy / anti-group).
Keep a balance of ammo; conserve heavy explosives for vehicle or heavy-armor encounters.
Enable subtitles and check checkpoint autosave behaviour.
Campaign uses frequent checkpoints but some long sections (vehicle runs, stealth moments) save less frequently — note your last checkpoint before attempting risky maneuvers.
If you plan co-op, play with a stable partner and agree on roles (one player focused on cover suppression, one on flanking/gnasher shots).
For solo, use conservative cover tactics and bait enemies into chokepoints before exposing yourself.
Carry a throwable (frag or incendiary) for clustered enemies and always aim to control high ground or chokepoints.
If you want collectible completion later, slow down and search alcoves and side-rooms while still following the chapter objectives.
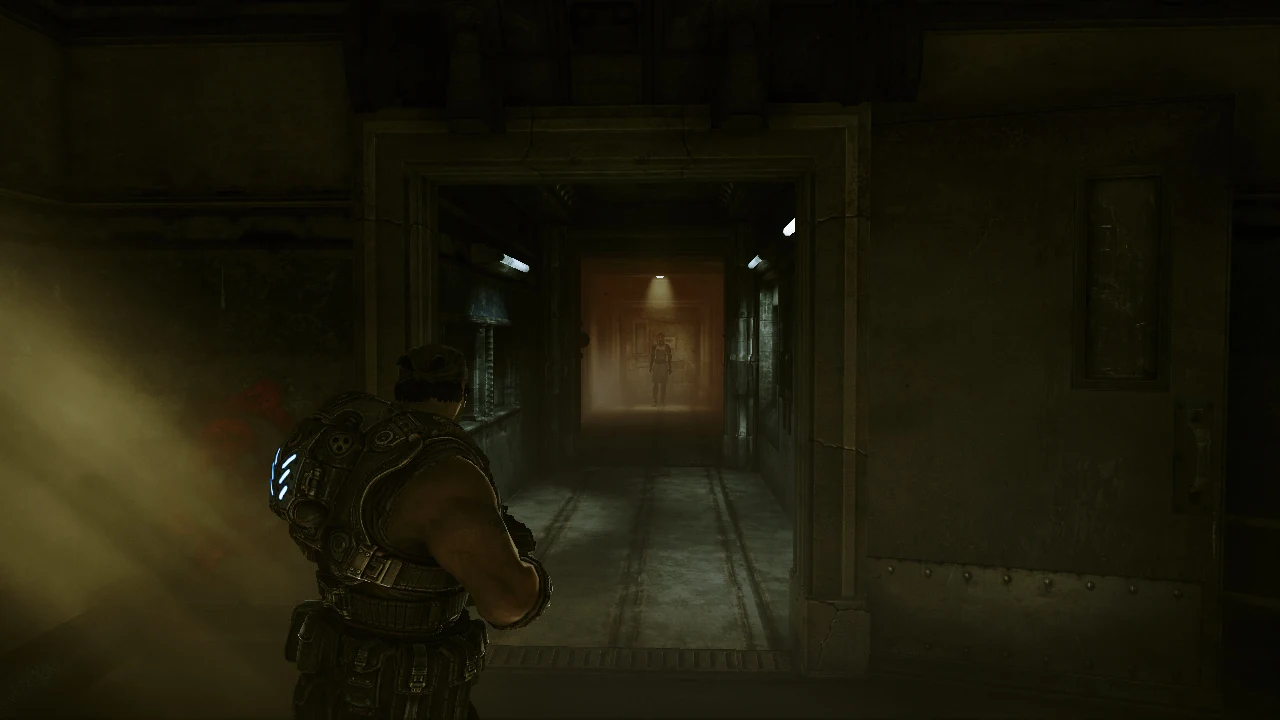
Prologue & Anchored — opening dream and CNV Sovereign defense
Complete Prologue: Troubled Past, then begin Act I aboard the CNV Sovereign. Find the first optional COG Tag immediately after gaining control of Marcus, complete the prison and Fenix Estate tutorial, assemble Delta Squad by finding Dom and Jace, meet Anya, and follow Prescott to the helipad. Repel the Lambent boarding attack, raise the deck lift, view Prescott’s message in CIC, defend the Raven’s Nest, cross to the captain’s quarters and complete the fire-extinguisher sequence. Optional shipboard collectibles are not required for story progress. Stop when Anchored ends; Act I, Chapter 2: Abandon Ship begins afterward.
1. Finish Prologue: Troubled Past
Follow Anya through the prison corridor after Jack releases Marcus. As soon as you gain control of Marcus, leave his cell and enter the room immediately to the right. Open the door and collect the optional COG Tag inside before continuing down the corridor toward Anya.
Proceed through the prison and into the Fenix Estate dream sequence. This opening section teaches the Xbox 360 controls: move between solid cover, aim from cover, blind-fire when necessary and use the Active Reload by pressing the reload button again when the marker reaches the highlighted zone. Follow the tutorial prompts and defend the stairs in the courtyard. Marcus is not in danger during this dream sequence, so use it to become comfortable with cover movement and weapon handling. The prologue ends through a scripted transition to the CNV Sovereign.
- Complete the Jacinto Prison tutorial.
- Optional: collect the COG Tag in the room immediately to the right of Marcus’s starting cell.
- Clear the Fenix Estate courtyard sequence.
- Watch the transition to the CNV Sovereign.
2. Find Dom, Jace and Anya aboard the CNV Sovereign
After Marcus wakes, leave his cabin and follow the corridor toward Dom’s cabin. The Twenty Dollar Bill is an optional collectible on the table in Marcus’s cabin. Across from Dom’s cabin, enter the infirmary and collect Dom’s Psych Report from the clipboard near the chair and sink if you want the shipboard collectibles.
Before taking Dom upstairs, enter Baird’s cabin on the left and collect the optional Requisition Form from the workbench. Continue upstairs to the recreation room on deck two. Jace is beside the Candy Striper vending machine; interact with the machine to complete the objective and bring him into the squad. Continue toward the captain’s quarters and speak with Anya. The nearby Thrash Ball machine is optional and does not affect progress.
- Find Dom.
- Optional: collect the Twenty Dollar Bill, Dom’s Psych Report and Requisition Form.
- Find Jace beside the Candy Striper vending machine.
- Meet Anya near the captain’s quarters.
3. Meet Prescott and secure the deck
Follow the objective route to the helipad. Before Prescott’s Raven lands, Polyps enter through the open doorway. Use the Lancer and shoot them before they reach the squad. They are dangerous mainly when several erupt close to the team, so do not allow them to surround you.
Collect ammunition from the armory on the right, then climb onto the deck. Move from one durable piece of cover to the next and prioritize Lambent Drudges when they appear. A Drudge releases a damaging Imulsion burst when killed, so avoid executing or destroying one beside Marcus or a teammate. Concrete barriers, metal-banded crates and large barrels provide better protection than wooden pallets and light crates, which can be destroyed.
Clear the deck around the helipad and control station. If a Drudge reaches close range, retreat around solid cover before finishing it. Keep the squad moving toward the lift-control area rather than remaining in the open center of the deck.
- Meet Prescott on the helipad.
- Repel the Polyp attack.
- Collect armory ammunition.
- Clear the Lambent attack on the deck.
- Defeat the Drudges without standing beside their death bursts.
4. Raise the deck lift and view Prescott’s message
Climb to the operator’s booth overlooking the helipad bay and pull the lever to raise the deck lift. After Prescott arrives and gives Marcus the data disc, another Lambent attack begins near the route toward CIC.
Take cover behind the barrels beyond the sandbags and clear the Drudge on the overhead walkway before dealing with the remaining Dark Drones. Keep moving between cover points if enemies begin closing from the sides. The optional COG Tag near CIC is on the broken overhead walkway: use the shipping-container area and the dead Gear above as landmarks, then shoot the tag so it falls to the deck before collecting it.
Continue up the stairs to the bridge and enter CIC. A Longshot and ammunition are available near the railing and along the walkway. Take the Longshot if you want precision fire; keeping the Lancer is also valid. Enter CIC and view Prescott’s message to advance the chapter.
- Raise the deck lift.
- Optional: shoot down and collect the COG Tag near the broken walkway.
- Reach CIC.
- View Prescott’s message.
5. Defend the Raven’s Nest
Return to the deck when the attack begins. On the right side, cut through the pallets and crates blocking the shed-like structure. Ammunition and Frag Grenades are inside. Use this elevated position to fire across the deck and reduce the first Lambent boarding group before moving on.
The Longshot is useful against distant targets, but reload from cover and change position if enemies approach your platform. After the first group is reduced, move along the walkway and use the Lancer against enemies below. Check both the helipad side and your rear before descending because additional Lambent can approach from either direction.
Prioritize Drudges and leave space around them when they die. If you are downed, let the squad draw enemy attention before attempting a revive, then return to solid cover rather than standing in the open. Finish the boarding waves and follow the objective toward the helicopter lift.
- Reach the Raven’s Nest position.
- Use the elevated structure to control the first boarding wave.
- Clear the remaining Lambent attackers.
- Advance when the helicopter lift is raised.
6. Reach the captain’s quarters and finish Anchored
Cross the helicopter pad diagonally toward the left after the nearby crewmember raises the lift. Take cover on the far side, use a Frag Grenade if the Drudge and Dark Drones cluster together, then collect nearby Lancer or Hammerburst ammunition. Descend the stairs on the right to the staterooms.
Pick up the fire extinguisher lying opposite the stairs. Hold the Fire Weapon control and sweep the spray across the flames. Extinguish the fire by the door and the second fire near the piano. Leave the third fire burning: it blocks the Drudge’s advance and is part of the safe route through this section.
Use the opening on the left to reach the armory and resupply. The Longshot can be replaced with the Gnasher if you want a close-range weapon for the hallway. Finish the Drudge while keeping enough distance to avoid its Imulsion burst, then continue down the hall to the captain’s quarters and eliminate the two Dark Drones with the Gnasher or another suitable weapon.
When the resulting scene completes, Anchored is finished. Do not treat the following shipboard escape as part of this chapter. Act I, Chapter 2: Abandon Ship begins next and contains the Leviathan, Engineering and Silverback sections.
- Cross to the captain’s-quarters side of the deck.
- Extinguish the fire by the door.
- Extinguish the fire near the piano.
- Leave the third fire burning to block the Drudge.
- Resupply at the armory.
- Defeat the hallway Drudge.
- Reach the captain’s quarters and eliminate the two Dark Drones.
- Confirm that Abandon Ship is the next chapter.
Before you move on
- Troubled Past is complete and the game has transitioned to the CNV Sovereign.
- The optional Prologue COG Tag has been collected from the room immediately to the right of Marcus’s starting cell, if collectibles are being tracked.
- Dom, Jace and Anya have been found.
- Prescott has arrived on the helipad and the first Lambent attack has been defeated.
- The deck lift has been raised and Prescott’s message has been viewed in CIC.
- The Raven’s Nest defense is complete.
- The fire by the door and the fire near the piano have been extinguished.
- The third fire remains burning, the hallway Drudge has been defeated and the two Dark Drones in the captain’s quarters are dead.
- The chapter transition identifies Act I, Chapter 2: Abandon Ship as the next chapter. The Leviathan, Engineering and Silverback sequence should not be counted toward Anchored completion.
Abandon Ship — shipboard combat and the Leviathan encounter
Help the Raven crews aboard the CNV Sovereign, raise the lifts, and fight through Lambent attacks to the burning upper deck. Restore the fire-control system by activating three irrigation valves, then follow the collapsing route into the maintenance area. Before entering a Silverback, collect the Silverback Manual from the storage bay. Use the Silverback to clear the obstruction and repel the Lambent Leviathan through three attack cycles by concentrating fire on its exposed eye. Clear Polyps and other Lambent between openings, then complete the scripted explosive attack that ends the chapter.
Reach the Raven area below deck
At the start of Abandon Ship, move through the CNV Sovereign toward the stranded Raven crews. Use the ship’s doors, machinery and passageways as cover while clearing Lambent Drones. Keep a rifle for enemies at medium range and use a close-range weapon when Polyps rush through the corridors.
Advance only after the current compartment is clear. Polyps can move around cover and detonate near the squad, so shoot them before they reach your position. Follow the objective route to the lift controls and raise the lift so the Raven can launch.
- Clear Polyps before they reach the squad.
- Use interior doorways as firing positions.
- Raise the first lift when the area is secure.
Clear the supply compartment and raise the second lift
Continue through the supply compartment and collect available ammunition before moving on. This is a useful resupply point before the larger fights ahead. Check the side of the room for the available sidearm and replace a weapon only if it improves your current loadout; the campaign does not require a particular weapon here.
Follow the objective toward the second Raven pad. Fight through the Lambent and reach the lift controls. When the Leviathan attacks and destroys the Raven, do not remain exposed on the pad. Use the nearby machinery and barriers as cover, eliminate the immediate attackers, and then activate the lift to reach the upper deck.
- Reload and collect ammunition before leaving the supply compartment.
- Reach and activate the second lift.
- Fall back from the open pad if Lambent surround the squad.
Cross the burning deck and activate three irrigation valves
The upper deck is on fire and the fire-control system is offline. Follow the objective markers across the deck and activate all three irrigation valves. Each valve requires an interaction followed by the displayed activation input, so clear the enemies around the control before starting it.
The deck is exposed and the Leviathan can disrupt the route. Move from one piece of cover to the next rather than crossing the full deck in the open. If Polyps approach while you are working at a valve, stop the interaction and destroy them first. Confirm that each valve has completed its activation before leaving it.
- Activate all three irrigation valves.
- Do not leave a valve until its activation is complete.
- Use cover near the deck machinery and avoid fire hazards.
Follow the collapse into Engineering
After the third valve, the Leviathan tears through the ship and forces the squad into the lower maintenance and Engineering route. Follow the newly opened path instead of trying to fight the tentacle or hold the previous deck position. Lambent Drones and Polyps attack through the wreckage, so clear the immediate path and keep moving when the objective advances.
When shipping containers or wreckage shift across the route, wait for the opening and sprint through it. Standing in front of moving debris can kill you even if the surrounding enemies are under control. Reach the maintenance bay and prepare for the Silverback section.
- Follow the route into Engineering after the Leviathan attack.
- Do not stand in front of moving containers.
- Clear Polyps before attempting a revive or narrow passage.
Collect the Silverback Manual and enter a mech
Enter the storage bay containing the two Silverbacks. Before taking a machine, turn left and collect the Silverback Manual from the crate or bench area beside the entrance. This is the chapter’s collectible and is easy to miss if you immediately approach the mechs.
Enter a Silverback after collecting the manual. Use its chain gun in controlled bursts so it does not overheat, and use its rockets when the Leviathan is exposed or when several Lambent are grouped together. The mech can also melee enemies that reach its feet, which is particularly useful against Polyps.
- Collect the Silverback Manual before entering the mech.
- Use the Silverback’s chain gun in bursts.
- Keep Polyps away from the mech with melee attacks or focused fire.
Drive through the obstruction and engage the Leviathan
Use the Silverback to open the blocked route and follow the deck toward the Leviathan. When the creature exposes its eye, concentrate the mech’s fire on that eye rather than wasting ammunition on random tentacles. Sustained fire during the opening makes the Leviathan recoil and withdraw.
After each successful eye attack, Lambent reinforcements appear. Clear Drones and Polyps while watching for the next eye opening. Do not let the smaller enemies accumulate around the Silverbacks, because they can interrupt your aim and damage the mech at close range. Repeat the eye attack until the Leviathan has been driven back three times.
- Use the Silverback to remove the obstruction.
- Target the exposed eye during each attack opening.
- Clear Lambent reinforcements between Leviathan openings.
- Complete three successful knockback cycles.
Complete the explosive finish and leave the chapter
Once the third Leviathan cycle is complete, stay with the squad and follow the objective for the explosive attack. The final destruction is scripted after the required knockbacks; there is no need to chase the creature or spend time firing at it after the objective changes.
Remain in the sequence until the explosion and transition cinematic finish. The chapter is complete when the next campaign section loads. If you are retrying after a death, use the checkpoint at the relevant valve, maintenance or Silverback section rather than replaying the entire chapter.
- The Leviathan has been driven back three times.
- The explosive attack has been triggered.
- The destruction sequence and transition cinematic have finished.
- The next campaign chapter has loaded.
Before you move on
- The squad has raised the required lifts and reached the upper deck.
- All three irrigation valves have been activated.
- The Silverback Manual has been collected if the optional collectible is desired.
- The squad has entered the maintenance bay and used the Silverbacks to fight the Leviathan.
- The Leviathan has been knocked back three times through focused eye attacks.
- The scripted explosives destroy the Leviathan and the following cinematic transitions into the next chapter.
Homecoming & Helping Hand — Hanover and Cole’s hometown beats
Act 1 Chapters 3 and 4 take Cole’s squad through Hanover in search of food and ammunition. Homecoming covers the ruined streets, the playground Stalks, the shopping-center approach, the grocery-store loader and the supply drop. Helping Hand continues through the warehouse district, where the squad aids Bernie’s Stranded camp, fights several Gunkers and Lambent Stalks, then follows the docks toward Cougars Stadium. The stadium defense and Silverback sequence are in the next chapter, MVP; this chapter ends when the team reaches the stadium entrance.
1. Search the Hanover streets
After the Raven lands near the docks, collect the nearby ammunition and follow the road past the seafood restaurant. Continue to the Stranded outpost and approach the gate. The survivor opens the way after the brief exchange, so advance instead of trying to search every building.
Use the low walls, vehicles and rubble as cover. Before crossing an exposed street, check windows, rooftops and side alleys for Lambent. A Hammerburst and Boltok are available near the early barricade if you need a rifle or sidearm, but your Lancer and Gnasher remain sufficient if ammunition is healthy.
- The Stranded gate is open.
- The squad has entered the Hanover streets beyond the first outpost.
2. Defeat the playground Stalks
At the park, take cover behind the low wall and playground equipment when the Lambent Stalk appears. Do not waste ammunition on the main body. Sweep your aim along the Stalk until the crosshair turns red, then destroy each visible Stalk Pod. The pods can grow on different sides, so circle around the park when the creature blocks your angle.
More Stalks, Drones, Dark Wretches and a mutating Drudge appear as you advance. Keep distance from Dark Wretches, watch for a Drudge mutation after its apparent death, and use grenades against groups gathered near a Stalk. The Cougars hat near the pickup is optional and has no effect on progression.
- The Stalk Pods in the playground area are destroyed.
- The Lambent waves near the park exit are cleared.
3. Reach the grocery store
Follow the road toward the shopping center and make Cole and Baird hold the razor wire apart when the prompt appears. In the parking lot, fight from the concrete barricades rather than crossing the open ground. Stalks release additional Lambent, so target their pods whenever they are exposed and use the nearby alley to flank or retrieve grenades.
Enter the grocery store and work along the aisles from the walls. Search the side rooms for ammunition, but do not push into the middle of a room without checking the next angle. Drudges can mutate, and a detached head can remain dangerous after the body is down.
- The razor-wire passage has been opened.
- The parking lot and grocery-store entrance are clear.
4. Operate the loader and retrieve the supplies
Fight through the store until you reach the boxed-in supply area. In the small room, chainsaw through the stacked boxes to reveal the switch that opens access to the loader. Enter the loader, move the overturned locker out of the way and use the machine to pick up the food supplies.
With the supplies loaded, drive the loader to the far-left exit and use it to force the bay doors open. The loader is required for the objective; shooting the locker or waiting for a squadmate will not advance the sequence.
- The switch has opened the loader area.
- The food supplies are loaded.
- The bay doors are forced open with the loader.
5. Deliver the supplies and clear the route
Outside, move toward the green smoke and establish cover before dropping off the supplies. Lambent attack during this objective, so keep the loader and your retreat path in view. Prioritize enemies closing from the sides, then use the loader to create a bridge of cars across the broken roadway.
Once the delivery is complete, return to the loader and push the obstructing car. Follow the newly opened route until the chapter transition begins. This completes Homecoming; the next chapter starts in the Hanover warehouse district.
- The landing zone is cleared and the supplies are delivered.
- The loader has pushed the car out of the route.
- Helping Hand has begun.
6. Aid the Stranded warehouse camp
At the start of Helping Hand, cross the sunken Imulsion-covered road carefully and climb out on the left. Collect the Longshot and nearby ammunition before taking cover near the van. Several Stalks and two Gunkers attack between the warehouses. Stay behind tall cover and keep away from the Gunkers: their Imulsion bombs are easier to evade when they must lob them in a high arc, while close-range attacks are much more dangerous.
Destroy Stalk Pods from a distance, then focus on the nearest Gunker before advancing around the building. Frag grenades and the Boomshot are effective against Gunkers, but do not move past the first building corner until the immediate heavy threat is down. Scavenge Hammerburst ammunition after the fight, since it is useful against the Drones and Drudges in this section.
- The first Gunker is defeated before advancing around the building.
- The warehouse approach is cleared.
- The Stranded gate opens after the attack.
7. Follow the camp leader to Cougars Stadium
Follow the Stranded camp leader through the warehouse and interior gates. At the ammunition cart, resupply and check the armory for Frag grenades and Hammerburst ammunition. A Boomshot can be found in a blue shipping container, and the Hanover Times-Tribune clipping nearby is optional.
After the gate opens, move along the docks toward the stadium. Use the raised platform near the water to fire on Stalk Pods, and keep enough distance from the next Gunker to dodge its Imulsion bombs. Use the Longshot or Boomshot for heavy targets, then advance through the warehouse and across the bridge. Stalks can appear behind you, so do not turn the final run into a prolonged search. Entering Cougars Stadium completes Helping Hand; the stadium celebration, Silverback, and later bridge defense are in subsequent chapters.
- The Stranded camp has been traversed and the ammunition cart reached.
- The dock and warehouse fights are cleared.
- The squad enters Cougars Stadium and Act 1, Chapter 5: MVP becomes available.
Before you move on
- Homecoming is complete after the grocery-store supplies are loaded, delivered at the green smoke and the loader pushes the obstructing car.
- Helping Hand is complete after the Stranded warehouse and dock fights are cleared and the squad enters Cougars Stadium.
- The chapter-select screen makes Act 1, Chapter 5: MVP available. Do not expect the Silverback or stadium defense to appear before this transition.
MVP & Hanging by a Thread — Act I Chapters 5–6
Finish MVP’s stadium and elevator set piece, then complete Hanging by a Thread on Centennial Bridge. The bridge chapter begins with a zip-line landing against Lambent, including a Gunker, and continues through the Stranded fortification, toll booths, Ticker assault, mortar position and Gas Barge attack. Use elevated cover, mounted weapons and shipping containers to control the bridge without outrunning the squad. The chapter ends after you seize the Ticker storage crate and drop it onto the Lambent Leviathan below, triggering the transition to Shipwreck.
1. Finish MVP before entering Hanging by a Thread
If you are still in MVP, clear the Lambent around the stadium and take the South Gate after the area is secure. Follow the route into the Thrashball set piece, then return toward the bomb shed and go up into the stands. The door behind the stands leads to the Stranded leader and the elevator sequence.
During the elevator ride, stay alert for Lambent on the floors ahead. Red fuel containers are useful targets when enemies cluster around them, but do not stand beside one when firing. The elevator sequence ends with the Gunker encounter and a cutscene. After the transition, the next chapter begins with the squad preparing to cross Centennial Bridge.
- Complete the Thrashball sequence.
- Reach the elevator through the stands.
- Survive the elevator sequence and wait for the transition to Hanging by a Thread.
2. Land on Centennial Bridge and defeat the Gunker
At the start of Hanging by a Thread, use the zip-line to descend toward the bridge. While sliding, fire at visible Lambent and red explosive objects when doing so does not compromise your landing. As soon as you touch down, move behind nearby cover rather than remaining in the landing area.
The first bridge fight includes a Gunker and other Lambent. Keep the Gunker at range and aim for its exposed glowing chest. Its projectile and close-range attacks are especially dangerous, so do not attempt a melee finisher. Use the car, barricades or nearby cover to break line of sight, then move only after its attack has passed. Once the landing zone is secure, follow the squad toward the Stranded fortification.
- Take cover immediately after the zip-line landing.
- Shoot the Gunker’s glowing chest from range.
- Clear the landing zone before advancing toward the fortification.
3. Break through the Stranded fort and toll booths
Approach the fortification from cover. Enemies occupy the walls and elevated positions, while a mounted turret covers the main approach. Remove the exposed defenders first, then deal with the turret from a protected angle or use a grenade if you have a safe throw. Watch for the OneShot user on the wall; do not cross the open roadway while that weapon is active.
Once the defense weakens, use the mounted turret as temporary suppression. In co-op, one player can operate the gun while the other watches the side approaches and eliminates enemies who reach the booth. In solo play, leave the turret before its ammunition is exhausted if enemies begin attacking from multiple directions. Advance through the opened toll area and use the shipping containers as hard cover. Do not sprint through the center of the bridge.
- Clear elevated defenders before pushing toward the turret.
- Treat the OneShot position as a priority threat.
- Use the mounted turret briefly, then continue from container cover.
4. Cross the bridge while managing the Tickers
Follow the route along the bridge and use the available ramps and walkways to stay behind cover. When the path drops toward the lower deck, expect Tickers and additional Locust resistance. Keep your weapon ready for close-range threats, but avoid shooting a Ticker beside yourself or a teammate. If a squad member is down, clear the immediate attackers before beginning the revive.
When the route returns toward the upper bridge, move between shipping containers rather than remaining in one position. Mortar fire begins in the next section, and staying still allows the blasts to remove your cover or trap you. Keep a retreat route open and advance after each bombardment. The objective is to reach the Locust mortar crew, not to eliminate every enemy from the first position.
- Use the lower-deck cover against the Tickers.
- Avoid detonating Tickers beside the squad.
- Move between containers as mortar fire changes the safe area.
5. Use the mortar against the Gas Barge
At the mortar position, eliminate the crew before taking control of the weapon. The Gas Barge appears over the bridge and attacks with rockets, so use the mortar to fire at it as soon as the objective becomes available. Aim high enough for the shell to reach the airborne target and adjust after each shot rather than wasting ammunition with repeated identical attempts.
While operating or approaching the mortar, keep an eye on the surrounding bridge. Locust and Lambent can continue attacking, and the barge’s rockets can destroy exposed cover. In co-op, one player should handle the mortar while the other protects the position. After the barge is destroyed, follow the route down to the lower bridge section and fight through the Lambent and Polyps blocking the return path.
- Kill the mortar crew before using the weapon.
- Destroy the Gas Barge with the bridge mortar.
- Clear the lower route after the barge sequence.
6. Seize the Ticker crate and finish the chapter
Continue through the final bridge defenses, using cover and any available heavy weapon to deal with the remaining turret and OneShot threats. Expect enemies to attack from more than one direction, so do not commit to a long open-road sprint. Push toward the marked Ticker storage area and clear the Locust guarding it.
When the area is secure, interact with the Ticker container and carry it to the indicated drop point. Nearby enemies may continue appearing, but the crate is the required objective. Follow the prompt to drop the Tickers onto the Lambent Leviathan beneath the bridge. A cinematic follows, and the chapter concludes after the Leviathan sequence transitions to Act II, Chapter 1, Shipwreck.
- Reach and secure the Ticker storage area.
- Carry the Ticker crate to the marked drop point.
- Drop the Tickers onto the Lambent Leviathan and wait for the Shipwreck transition.
Before you move on
- The Ticker container has been dropped onto the Lambent Leviathan.
- The ending cinematic for Hanging by a Thread has played.
- The campaign advances to Act II, Chapter 1, Shipwreck.
- Putting It Scientifically… may register after completing Act I, Chapter 6 on a qualifying campaign run.
References for this chapter
Shipwreck & House of Sand — coastal and Deadlands traversal
Act II begins after the CNV Sovereign wrecks in the Seran Deadlands. Shipwreck opens with Cole’s group recovering weapons while Wild Tickers try to consume equipment, then switches to Marcus’s squad for a Savage Locust assault. After taking a Siege Beast, use its fireballs to destroy enemy Siege Beasts and an initial Brumak. The squads then regroup with Anya and Jace for a beach defense against another Brumak. House of Sand follows the gas barges through a collapsed cave and the Deadlands, introduces a juvenile Savage Corpser, and leads through Savage Locust positions to a Siege Beast crew and artillery section. Complete both chapters to reach Act II, Chapter 3: Forced Entry; the later Trench Run has not started yet.
Recover weapons after the Sovereign wreck
At the beginning of Shipwreck, Cole’s group has been separated from most of its equipment. Move along the wreckage and pick up the weapons scattered through the opening area. Wild Tickers run toward guns and other items on the ground and consume them, so shoot the Tickers before they reach the better weapons. If one eats a weapon, killing it makes the item available again, but stopping them early is safer.
Take a Lancer or Hammerburst for the medium-range fights ahead, and collect grenades when you pass them. Advance through the wreckage once the immediate area is clear. The route is straightforward, but do not sprint past the opening enemy groups and leave threats behind the squad.
- Recover a primary weapon before the first major firefight.
- Kill Wild Tickers before they consume nearby weapons.
- Keep a rifle available for the open wreckage encounters.
Fight through the Savage Locust position
Control shifts to Marcus after the initial wreckage section. Savage Drones attack from the surrounding structures, while snipers and Savage Boomers armed with Digger Launchers threaten the longer sightlines. Remain behind solid cover and prioritize the Boomers when they expose themselves; Digger projectiles travel beneath or around ordinary cover before erupting near you.
Work uphill with the squad and check bridges, ledges, and side approaches before leaving each position. When the path reaches the Siege Beast, eliminate the crew guarding it rather than charging directly toward the machine. Once the area is secure, climb aboard and prepare for the artillery sequence.
- Prioritize Savage Boomers and distant snipers.
- Use solid cover against Digger Launcher attacks.
- Clear the Siege Beast crew before mounting the weapon.
Use the Siege Beast against the enemy machines
The captured Siege Beast functions as a catapult. Aim at the enemy Siege Beasts along the forward route and fire when the targeting reticle is over them; the shots land on the reticle, so there is no need to manually calculate an arc. Destroy both enemy Siege Beasts before dealing with the Brumak that enters the area.
Use the Siege Beast’s limited ammunition deliberately and focus on the large targets rather than minor Locust. The initial Brumak is vulnerable to the artillery fire, so hit it until the scripted advance can continue. Afterward, leave the Siege Beast and follow the squad downhill, collecting ammunition as the route opens.
- Destroy both enemy Siege Beasts.
- Use the Siege Beast to bring down the first Brumak.
- Collect ammunition while moving toward the beach.
Regroup at the beach and defeat the second Brumak
At the beach, Anya and Jace are fighting Locust. Clear the enemy force to trigger the next scene, then take cover around the ammunition and container positions for the defensive hold. Stay near cover with a clear view of the approaches and avoid chasing enemies into the open sand.
When the second Brumak arrives, target the rocket launcher mounted above its head first. Continue firing from cover and relocate whenever its attacks make your position unsafe. If you can circle around without exposing yourself, fire on the tanks on its back for additional damage, but steady potshots from cover are safer than attempting a close approach. The chapter ends after this Brumak is destroyed and the following story scene sends the team onward.
- Clear the Locust fighting Anya and Jace.
- Survive the beach defense.
- Destroy the Brumak and wait for the story transition.
Enter the collapsed cave in House of Sand
House of Sand begins near the wrecked gas-barge route. Gather the ammunition around the starting plateau before entering the cave. A tremor collapses the passage behind the squad, so once the cave gives way, continue forward instead of trying to return to the entrance. In the confined route, check each opening before crossing it and avoid firing explosives at close range beside teammates.
After leaving the cave, continue toward the area with the hanging cages and follow the visible gas-barge route. Pick up the Sawed-Off Shotgun near the red ammunition crate if you want a strong close-range option for the upcoming Corpser encounter, but retain a rifle for the later open-ground firefights.
- Collect ammunition before entering the cave.
- Move forward after the collapse blocks the return path.
- Carry both a mid-range weapon and a close-range option if possible.
Defeat the juvenile Savage Corpser
When the ground begins to rumble, keep moving and avoid the Savage Corpser’s dust trail as it burrows. Stay away from the walls so you cannot be cornered. Wait for it to surface, then fire at its head or through the exposed spaces between its armored legs. Headshots can make it rear up and expose more of its body.
Side-roll when it lunges, then back away while firing. Clear any ordinary Locust that threatens to flank you, but return your attention to the Corpser quickly. The Sawed-Off can deal heavy damage at close range, yet do not stand in front of its claws or attempt a melee attack unless the creature is clearly exposed and you have room to escape.
- Avoid the Corpser’s burrowing trail.
- Attack its head or exposed areas between the armored legs.
- Maintain an open route for side-rolling and retreat.
Clear the Savage camp and seize the Siege Beast
After the Corpser, descend toward the stone blocks and upper ledges. Savage Grenadiers and Savage Boomers occupy the high ground, and Digger attacks can reach you behind low cover. Use grenades to disrupt the ledge positions, then pick off exposed enemies with the Boltok or your assault rifle. Move up only after the immediate firing lane is under control.
Deal with the Grinder on the upper ledge and collect the Mulcher it drops. Before approaching the heavy wooden gate, gather Digger ammunition if you have room. A surprise wave of Savage Drones and Cleaver-wielding Savage Therons erupts behind the squad near the gate. Mount the Mulcher on the low cover and use it to cut down the rush before the enemies surround you.
- Remove the elevated Savage Boomers and Grenadiers.
- Collect the Mulcher from the Grinder’s position.
- Expect a rear ambush near the wooden gate.
Take out the Siege Beast crew and finish the chapter
Beyond the gate, a Siege Beast begins bombarding the route with fireballs. Roadie Run left and continue around to the right-hand flank until you reach cover. Do not make a direct uphill assault: Savage Boomers, Grenadiers, Tickers, and a Multi-Turret make the central approach dangerous. From cover, eliminate the turret operator and the nearby Locust, then work around the large tree and use the ladders to reach the unattended Siege Beast.
Mount the Siege Beast and fire on the advancing Locust, prioritizing Savage Boomers. It has limited shots, so aim carefully. After using the available fireballs, dismount and collect ammunition, grenades, and the Longshot from the ledge behind it. Push along the remaining path, using the Longshot or rifle for distant targets and grenades for enemies behind cover. Clear the final Locust group and enter the gated ammunition area. The next chapter is Forced Entry, confirming that Shipwreck and House of Sand are complete.
- Reach cover before dealing with the Siege Beast crew.
- Destroy the Multi-Turret and clear the crew around the ladders.
- Use the Siege Beast’s limited shots on the densest enemy groups.
- Enter the next chapter, Act II, Chapter 3: Forced Entry.
Before you move on
- Shipwreck is complete after the initial weapon-recovery section, Savage Locust assault, Siege Beast artillery sequence, beach defense, and destruction of the second Brumak.
- House of Sand is complete after the cave collapse, juvenile Savage Corpser fight, Savage Locust camp, wooden-gate ambush, Siege Beast crew assault, and final Siege Beast firing section.
- The definitive progression check is that the game loads Act II, Chapter 3: Forced Entry. The later Trench Run chapters begin only after this point.
Forced Entry & Trench Run — Locust stronghold and Corpser Mother
Act II, Chapters 3 and 4 take Delta through a Locust stronghold and the bunker system beneath it. Forced Entry has a stealth route through three alarm-horn areas; silently dealing with the guards opens a side gate containing the chapter’s COG Tag. If an alarm sounds, the chapter remains completable through the main gate, but the collectible route is lost for that attempt. Trench Run begins with a Gas Barge mortar bombardment, continues through elevated walkways and a Ticker assembly facility, and ends with a juvenile Corpser followed by the Corpser Mother. Keep rifles for exposed Corpser heads and eyes, reserve Boomshot or Frag Grenades for juvenile Corpsers, and leave the final arena immediately after the Mother’s fourth eye is destroyed.
1. Prepare for the stealth approach
At the opening of Forced Entry, eliminate the first Locust Grenadier near the horn when his patrol has moved away from it. Collect the Frag Grenades and ammunition behind the nearby crates, then take a Longshot or Hammerburst. A Longshot is useful for the wall guards, but the Hammerburst is safer for the final pair because they stand on opposite sides of the horn and can reach it quickly.
Move toward the first wall and kill both guards before either reaches the alarm horn. Continue to the next lookout and deal with the two Savage Drones near the second horn. Watch their patrols and shoot only when they are away from the horn. If the final pair are near the explosive fuel cells, shoot the cells when both are within the blast radius. Do not allow any of the three horns to sound if you want the side route and COG Tag.
- Kill the initial Grenadier away from the horn.
- Carry a Longshot, Hammerburst or another accurate rifle.
- Avoid sounding any of the three alarm horns.
- Restart from the checkpoint if you are attempting the stealth collectible and an alarm sounds.
2. Enter through the side gate and collect the COG Tag
After all watchmen are dealt with quietly, a gate on the right opens and Savage Therons attack. Stealth is no longer required once the guards are gone, so use the Mortar or normal cover-based fire to clear them. Enter through the side gate, raise the internal gate and move into the stronghold.
Locate the gated Wild Ticker storage area. The COG Tag is inside a basket on the ground in the center of that area. Pick it up before continuing. If an alarm sounded, the side gate remains locked and the COG Tag cannot be reached during that attempt; use the main route and return through chapter select later if needed.
- Use the right-side gate only after the guards are eliminated without an alarm.
- Search the Wild Ticker cages and baskets for the COG Tag.
- Treat the collectible as optional; it is not required to finish the chapter.
3. Secure the stronghold and open the trench gate
Whether you used the side or main entrance, take cover before dealing with the stronghold’s central Multi-Turret. From the upper walkway, throw a Frag Grenade onto the turret platform or at the fuel cells beneath it. The resulting explosion removes the turret threat and prevents enemies from using it against the squad.
Clear the Savage Grenadiers and Therons around the walkways, then find the lever that raises the next gate. If enemies are firing from above, shoot the concrete barrier protecting them to expose the lever, then shoot the lever itself. Fall back after opening the gate rather than standing in the doorway. Gather Frag Grenades and ammunition before entering the trench system.
- Destroy the central Multi-Turret before crossing the open area.
- Use the upper walkway and explosive fuel cells to create a safer firing line.
- Shoot the lever after exposing it through the concrete barrier.
- Collect ammunition before entering Trench Run.
4. Cross the mortar trench and take the Locust Hammer
When Trench Run begins, the Gas Barge starts bombarding the trench. Sprint to the first bunker straight ahead and move deep inside it; standing near the opening can still expose you to the next salvo. Wait until the explosions stop, then run to the second bunker, followed by the third and fourth. On higher difficulties, do not skip bunkers because the mortar timing is tighter.
After the final bunker, exit through its back side and turn right. Look behind the crate with the large pickaxe on top to find the Locust Hammer collectible. Pick it up before continuing across the elevated walkways. This item is optional and does not affect progression.
- Move only after each mortar salvo ends.
- Stand deep inside each bunker, away from the entrance.
- Search behind the pickaxe-marked crate after the final bunker.
- Do not rely on skipping bunkers on Hardcore or Insane.
5. Fight across the walkways and use the Ticker facility
On the elevated walkway, take the Frag Grenades on the right and deal with the nearest Locust before advancing. Flank left around the square walkway to create crossfire, while watching for Tickers approaching along the floor. Melee a Ticker to knock it away or upside-down before it detonates. Raise the gate at the far side to enter the next interior room.
Inside the Ticker facility, stay on the higher right-hand walkway. Shoot the suspended Ticker cages as they pass above enemy groups so the Tickers fall onto the Locust below. Prioritize Grenadiers throwing Incendiary Grenades and Savage Drones near the bins. Do not advance beneath a busy overhead track; shoot several cages first, then cross while the path is clear. At the next ramp, shoot more cages over the Savage Therons and provide covering fire until the squad reaches the lower path.
Before climbing the ladders, collect the available assault-rifle ammunition, Frag Grenades and power-weapon ammunition. A Boomshot is important for the upcoming Corpser Mother encounter, so retain it if one is available.
- Use the Ticker cages as area damage against clustered Locust.
- Stay high while clearing the first assembly-room wave.
- Remove Grenadiers before they fill the walkway with fire.
- Clear overhead tracks before moving underneath them.
- Gather rifle ammunition, grenades and heavy ammunition before the Corpser encounters.
6. Defeat the juvenile Corpser
Beyond the Ticker facility, a juvenile Corpser attacks. Its legs are armored, so do not waste ammunition on them while it is low to the ground. Wait for it to rise or rear up, then fire at its exposed head with a Hammerburst, Lancer or Gnasher. Side-roll away from its forward leg jabs and keep enough room behind you to retreat.
A Digger Launcher or Frag Grenade can force the juvenile Corpser to rise, but preserve heavy ammunition when possible because the next arena is more demanding. After it falls, clear the Savage Grenadiers and Savage Butcher that appear, then reload and collect the weapons and grenades near the ladders before moving into the egg chamber.
- Target the juvenile Corpser’s head, not its armored legs.
- Roll away from forward leg strikes.
- Clear the following Savage enemies before climbing onward.
- Reload and collect heavy ammunition before entering the egg chamber.
7. Defeat the Corpser Mother and escape
When the Corpser eggs begin hatching, move across the cavern toward the Boomshot. Use your assault rifle for the hatchlings; they are much less dangerous than the larger Corpsers, and explosive ammunition is better saved for them. Keep moving around the arena so the hatchlings do not surround you.
The Corpser Mother has four exposed eyes. Stand back from her leg jabs and shoot the same eye until it ruptures. After each eye is destroyed, she goes into a rampage and summons juvenile Corpsers. Switch to the Boomshot or Frag Grenades for those larger enemies, then return to rifle fire against the Mother once the immediate threat is down. Continue this pattern for the remaining eyes. When the third eye is destroyed, expect a larger juvenile-Corpser wave; use any remaining heavy ammunition and let squadmates draw their attention while you fire from an angle.
After the fourth eye ruptures, the Mother becomes uncontrollable and tears through the cavern. Stop attacking and sprint to the far-side gate. Only player-controlled characters need to reach the exit, but a total squad wipe ends the attempt. Continue running until the escape transition and the pursuit of the Gas Barge begin.
- Use assault-rifle fire on hatchlings.
- Shoot one eye repeatedly until it ruptures.
- Use Boomshot or Frag Grenades on summoned juvenile Corpsers.
- After the fourth eye is destroyed, run immediately to the far gate.
- Wait for the transition to Chapter 5, Hijack.
Before you move on
- Forced Entry is complete after the stronghold is secured, the lever opens the trench gate and the squad enters the bunker system.
- The optional Forced Entry COG Tag is recorded only if the guards were handled without any alarm horn sounding and the basket in the Wild Ticker area was searched.
- The optional Trench Run Locust Hammer is behind the crate with the large pickaxe after the final bunker.
- Trench Run is complete when the Corpser Mother’s fourth eye is destroyed, the player-controlled character reaches the far gate and the escape transition begins.
- The next available campaign chapter is Act II, Chapter 5, Hijack.
References for this chapter
- Gears of War 3 Xbox 360 Manual
- Chapter 3: Forced Entry — Gears of War 3 eGuide
- Chapter 4: Trench Run — Gears of War 3 eGuide
- Gears of War 3 — Guide and Walkthrough, Xbox 360 — ExtremePhobia
- 2-03 Forced Entry — Gears of War 3 Guide and Walkthrough
- 2-04 Trench Run — Gears of War 3 Guide and Walkthrough
Hijack, Airborne & Touchdown — Anvegad plains and mid-air sequences
Act II Chapters 5–7 form a linear sequence: fight across the ramparts, board a Locust gas barge in Hijack, rescue Dizzy during Airborne, then defend the captured barge in Touchdown. Use cover whenever Shriekers, Torque Bow-carrying Theron Guards, Reavers, or enemy barges have a clear firing lane. The chapter collectibles are the Queen’s Symbol in Hijack, followed by the Manifest and a COG Tag in Airborne. Touchdown is not a conventional boss fight: destroy the attacking barges, then survive Queen Myrrah’s scripted assault from the rear of the barge until the crash and Act III transition.
1. Clear the ramparts and enter the tower
Begin on the ramparts with Delta Squad. Shoot down the Shriekers before crossing exposed sections; their approach fire and death explosions make it dangerous to rush past them. Once they are gone, eliminate the ground Locust from behind the wall sections and crenellations, advancing only when the current firing lane is under control.
After passing through the raised gate, turn right toward the small tower. Circle to its front, kick in the door, and collect ammunition before leaving. The Queen’s Symbol is inside the tower near the entrance. This is the only collectible in Hijack. Keep a mid-range rifle, and retain a Torque Bow or another accurate weapon if one is available for the next Theron encounter.
- Destroy the Shriekers before crossing exposed ramparts.
- Search the tower for the Queen’s Symbol and ammunition.
- Prioritize accurate weapons for Torque Bow-carrying Theron Guards.
2. Survive the dock approach
Continue toward the next gate and open it to trigger the barge sequence. Follow the route to the lift and ride it to the dock platform. The gas barge makes strafing passes while Theron Guards rappel down in groups, so use the lift structure and central cover to break line of sight from the barge.
Keep moving around the platform instead of standing in its center. When Therons land, eliminate the Torque Bow users first; a direct hit can down you immediately, especially on higher difficulties. Use the barge’s approach as a timing cue: reposition while it is making a pass, then focus on the enemies it drops. After the final group leaves the barge, clear the remaining crew to trigger the hijacking scene.
- Use the lift and central cover to block strafing fire.
- Kill Torque Bow users before ordinary Drones.
- Clear the final docked crew and wait for the hijacking cutscene.
3. Board the gas barge
When the barge has docked and the last Therons are defeated, cross onto it and clear the remaining Locust. Keep your aim trained on deck openings and elevated sections as you advance; the barge’s structure can hide enemies at different heights.
The chapter ends after the crew is cleared and the hijacking cutscene begins. Before the transition, replace a depleted weapon with a dropped Locust weapon or collect nearby ammunition if needed. Airborne starts immediately afterward with Delta aboard the captured barge.
- Board only after the barge has fully docked.
- Clear the deck and remaining crew.
- Confirm the hijacking cutscene before quitting or restarting.
4. Defend Dizzy’s ammunition outpost
At the beginning of Airborne, use the barge’s right-side turret to destroy the hostile barges attacking the ammunition outpost. Aim at the exposed ammunition crates or explosive cargo inside each barge rather than firing into empty hull sections.
After landing, move right to flank the Therons attacking Dizzy. Use cars, walls, and other solid cover to avoid Torque Bow fire, and eliminate the elevated guards as soon as they expose themselves. A Reaver then arrives on a nearby building. Use the available One-Shot, Torque Bows, or concentrated rifle fire against it; the One-Shot can destroy a Reaver efficiently. Clear the remaining ground enemies before leaving the area.
- Destroy attacking barges by hitting their exposed ammunition cargo.
- Reach Dizzy through cover and eliminate the Theron Guards.
- Use the One-Shot or Torque Bows against the Reaver.
5. Search Anvil’s Creek and return to the barge
After Dizzy is safe, collect the ammunition and weapons supplied around the outpost. A One-Shot and Boomshots can be useful for the Reaver encounters, but the chapter does not require a Hammer of Dawn. Keep a rifle for the regular Locust and save explosive ammunition for heavy targets.
Follow the route toward the barge and clear the next Locust attack before exploring. In Anvil’s Creek, locate the burning wrecked truck on the left side of the route; the Manifest is beside it. Then return toward the road and use the stairs beside the yellow container. Follow the upper path to the damaged building or shed and enter it to collect the COG Tag. These items are optional, so if survival is the priority, collect them after the immediate enemy wave is under control.
- Collect useful Lancer ammunition, Boomshots, or the One-Shot.
- Find the Manifest beside the wrecked truck in Anvil’s Creek.
- Use the stairs by the yellow container to reach the building containing the COG Tag.
6. Defend the barge during Touchdown
Touchdown takes place aboard the captured barge. Use the front-mounted turrets to shoot down the attacking gas barges and Reavers while they approach. Keep firing at visible targets, but do not leave the defensive positions to chase enemies across the deck unless the game forces you to move.
After the barge assault, Queen Myrrah appears and the encounter becomes scripted. Move to the rear portion of the barge, use its cover, and stay out of the illuminated areas. You do not need to defeat Myrrah or prevent the barge from crashing. Concentrate on surviving until the scene advances; exposure in the light is the main danger during this phase.
The crash is unavoidable. Remain in the sequence through the rescue and post-crash cinematics. Act II is complete when the game transitions to Act III, Chapter 1: Unbreakable, or makes that chapter available in the campaign progression.
- Use the front turrets to destroy the incoming barges and Reavers.
- During Myrrah’s appearance, stay in rear cover and out of the light.
- Survive the scripted crash and confirm the transition to Unbreakable.
Before you move on
- The Hijack cutscene has played after the docked barge crew is defeated.
- Dizzy has been rescued and the Airborne outpost encounter is complete.
- The Manifest beside the wrecked truck and the COG Tag in the upper damaged building have been collected if optional items are being tracked.
- The attacking barges and Reavers in Touchdown have been handled with the barge turrets.
- Queen Myrrah’s scripted assault, the crash, and the post-crash cinematics have finished, with Act III Chapter 1: Unbreakable available or begun.
Unbreakable & Rescue — Anvil Gate siege and evacuation
Act III begins with Unbreakable, a defensive siege at Anvil Gate. Gather ammunition and heavy weapons, hold the front gate until the Siege Beast forces a retreat, then defend the second gate against Bloodmounts, Maulers and Grinders. If the Locust break through, fall back to the inner courtyard, stop the Boomers from opening the garage and shoot the Last Resort fuel tank when Bernie gives the signal. Rescue follows immediately. Choose between covering the rescue from the walls or riding out in the truck. Both routes reunite outside the fort, where Lambent Stalks release Dark Drones and Drudges before a Lambent Berserker appears. Evade its charges and reach the fort while Baird’s repaired Hammer of Dawn completes the scripted attack. The next chapter is Breakneck Run.
1. Act III, Chapter 1: prepare Anvil Gate
At the beginning of Unbreakable, do not rush straight to the front gate. Use the preparation period to collect ammunition and inspect the available weapons. The right-hand route through the living quarters leads toward the upper interior path; the lower route provides access to Frag Grenades, a Boomshot and a OneShot. Carry a Lancer or another reliable rifle for the large number of Grenadiers, and preserve the Boomshot and OneShot for the heavier waves.
Optional collectibles are available during this preparation period, including the Anvil Gate Plaque, Watercolor Painting and Sam’s Father’s Medals. They are not required for campaign progression. Once supplied, move to the front gate and take cover behind the fort’s vertical supports or another solid barrier.
- Collect ammunition before starting the siege.
- Keep a rifle for sustained fire and save heavy weapons for priority targets.
- Treat the Unbreakable collectibles as optional.
2. Defend the front gate until the Siege Beast arrives
Use the mounted guns or nearby cover to thin the Savage Grenadiers. Listen for grappling hooks and eliminate any Grenadiers climbing onto the fort before they reach the platform. When Reavers arrive, use the OneShot after they land or become easy targets, and stay behind tall cover while lining up shots. Switch back to the Lancer for ordinary Grenadiers, then use the OneShot against Grinders when they enter the firing lanes.
The front gate is not a permanent hold. The Siege Beast eventually destroys it and forces the squad to withdraw. Do not waste time trying to destroy the Siege Beast. As the gate falls, retreat around the fort’s right-hand side when facing the invasion and collect the Frag Grenades, Boomshot and OneShot along the way.
- Stop grappling Grenadiers before they reach the upper platforms.
- Use the OneShot on Reavers and Grinders when possible.
- Retreat when the Siege Beast breaches the front gate.
3. Defend the second gate
At the second gate, choose the lower route toward the Boomshot and OneShot unless a human co-op partner is deliberately operating the upper Vulcan route. Use the lower catwalk as your main firing position and deal with the initial Drones, Bloodmounts and Beast Riders before the Maulers and Grinders arrive.
Explosive cars in the courtyard can be detonated when Bloodmounts or clustered enemies pass nearby. When Maulers approach, do not fire Boomshot rounds into their shields. Use rifle fire to slow them, then throw Frags or shoot the suspended propane-tank pallet after the Maulers have moved beneath or beyond it so the blast reaches their exposed sides. Keep the OneShot for Maulers and Grinders if you have ammunition.
The second gate can be successfully held by clearing the attacking heavy waves. If the Locust breach it, do not treat the failure as a restart condition. Follow the squad toward the inner courtyard and continue the fallback objective.
- Use the lower catwalk and nearby heavy weapons in solo play.
- Detonate explosive cars against clustered Bloodmounts or Drones.
- Attack Maulers from angles that avoid their shields.
- Fall back if the second gate is breached.
4. Defend the inner courtyard and trigger Last Resort
Take a Troika position or use balcony cover overlooking the inner courtyard. The first attackers include grappling Savage Grenadiers and Maulers. Clear the climbers quickly, but save Boomshot ammunition and explosive vehicles for the Boomer wave. Once the Boomers appear, prioritize them over ordinary Drones because they can reach and destroy the garage door.
Remain mobile when Boomers fire. Their Boomshots can down you through splash damage, especially while you are using a mounted gun. Fire from the balcony or tall cover, retreat when they turn toward you, and use Frags, the Boomshot and the Lancer to finish the wave. Keep the garage approach clear and prevent the Boomers from slipping through.
If the final defense is overwhelmed, Bernie initiates the Last Resort plan. Wait for her signal and watch for the large reserve fuel tank to be pushed into the courtyard. When the objective changes to shooting it, target the tank and destroy it. The explosion collapses the defense and ends the Unbreakable siege.
- Protect the garage entrance from the Boomer wave.
- Avoid staying on a Troika while Boomshots are landing nearby.
- Shoot the Last Resort fuel tank only after Bernie gives the signal.
- Wait for the transition into Rescue.
5. Act III, Chapter 2: choose the Rescue route
Rescue begins after the Anvil Gate siege. The game offers two approaches: provide covering fire from the fort walls or ride out in the truck to reach Sam and Anya. The routes are different combat scenarios but lead to the same campaign progression. In solo play, the wall route generally offers safer distance and access to a OneShot, while the truck route puts you directly into the crash-site firefight.
If you choose the wall route, use the Lancer against the Grenadiers while the truck advances, then take the OneShot when the ground fight begins. If you choose the truck route, fire at visible Grenadiers during the ride without exhausting your ammunition. After the Digger hits the vehicle, move to the brick wall, take cover and clear the Grenadiers and Boomers before following Sam and Anya.
- Choose either covering fire or the truck rescue.
- Wall players should use the OneShot against distant heavy targets.
- Truck players should use the brick wall after the crash.
6. Protect the return to Anvil Gate
As Sam and Anya move back toward the fort, Lambent Stalks appear and spawn Dark Drones and Drudges. Destroy exposed Stalk Pods when they are safe targets, then eliminate the spawned enemies blocking the next movement route. The wall team must turn toward new Lambent enemies on the fort and continue supporting the ground team as the battle shifts along the wall.
Collect Lancer ammunition during lulls, but do not cross open ground merely to reach supplies. Stay near cover and keep an escape lane behind you. Drudges and Dark Drones can attack from different elevations, so remove the enemies threatening your route before advancing toward the fort.
- Destroy exposed Stalk Pods when practical.
- Prioritize Dark Drones and Drudges that block movement.
- Keep the route behind you open for retreat and revival.
7. Evade the Lambent Berserker and enter the fort
The final Stalk releases a Lambent Berserker. This is not a conventional gunfight. Do not spend rifle, OneShot or Boomshot ammunition trying to kill it outside the fort. When it charges, roll away from the attack and keep moving through open ground. Avoid corners, walls, vehicles and narrow dead ends where a charge can trap you.
Baird repairs the Hammer of Dawn during the pursuit. Follow the objective toward the fort entrance when the firing sequence begins. The targeting system fires multiple strikes, and the early impacts are unreliable. Sprint past the Berserker, keep close to the fort wall on the right as you round the corner and enter through the marked opening. The final strike destroys the Berserker and the remaining enemies outside.
After entering Anvil Gate, follow Sam and Anya through the safe area. Suppress nearby enemies before reviving a downed ally, then allow the story scene and checkpoint transition to finish. The next chapter is Act III, Chapter 3: Breakneck Run.
- Evade every Berserker charge instead of trying to damage it.
- Run for the fort when Baird announces the Hammer sequence.
- Use the fort wall and marked entrance to avoid the strikes.
- Wait for the post-rescue scene and Breakneck Run transition.
Before you move on
- Unbreakable has been completed through the front-gate defense, second-gate defense, inner-courtyard defense and Last Resort fuel-tank detonation.
- The campaign has entered Act III, Chapter 2: Rescue.
- Sam and Anya have been reached and protected during their return to Anvil Gate.
- The Lambent Stalk encounters have been cleared sufficiently for the Berserker pursuit to begin.
- The Lambent Berserker has been destroyed by the Hammer of Dawn sequence rather than a normal weapon attack.
- Sam, Anya and the squad have entered the fort and the post-rescue story scene has played.
- The next available campaign chapter or checkpoint is Act III, Chapter 3: Breakneck Run.
References for this chapter
Breakneck Run & Ghost Town — Mercy and Imulsion facility incursions
Act III, Chapters 3 and 4 take Delta to Mercy to secure fuel for the submarine. Breakneck Run is a moving convoy defense: use the Vulcan to stop grounded Reavers, cut three Imulsion pipelines, protect the trucks from roadblocks and survive the Corpser hatchling stretch. The larger Corpsers are scripted obstacles, not boss fights. Ghost Town changes to an on-foot investigation of abandoned Mercy. Disarm the motion-activated bombs, follow the route through the buildings and sewers, then survive the Lambent Human attacks in the pit and courtyard. A Scorcher, grenades and the mounted Vulcan make the final defenses safer, but ranged cover and constant attention to both flanks matter more than chasing enemies.
1. Escort the fuel trucks toward Mercy
Breakneck Run begins with Marcus and Anya mounted in a truck carrying a Vulcan. The weapon does not use a normal finite ammunition reserve during this sequence, but Anya’s feed can pause. Press Reload periodically to prompt her to continue supplying ammunition, then keep the gun trained ahead of the convoy.
Reavers attack from the air and can land directly in the road. Destroy airborne Reavers when possible, but immediately prioritize any Reaver that lands in the truck’s path. The convoy crashes if it reaches a grounded Reaver. Shooting the Beast Rider earns extra damage or score but does not destroy the Reaver itself, so keep firing at the vehicle.
- Prompt Anya to resume the Vulcan feed when it pauses.
- Destroy Reavers that land in front of the truck.
- Prioritize the vehicle rather than only its rider.
2. Cut through the three Imulsion pipelines
The convoy leaves the road and enters the Imulsion fields, where three pipelines block the route. Aim at the sections leaking Imulsion vapor and keep firing until a truck-sized opening is cut through each pipe. All three must be opened before the convoy reaches them; colliding with an intact pipe ends the sequence.
Keep the Vulcan firing in short bursts between targets. This reduces the delay caused by its wind-up when the next pipeline appears. The other truck provides support, but your gun must do most of the damage, so reacquire each pipe quickly after the convoy passes through the previous opening.
- Open all three pipelines before the trucks reach them.
- Aim at the visibly leaking sections.
- Use short bursts so the Vulcan is ready for the next obstacle.
3. Protect the convoy from Corpser hatchlings
Baby Corpsers cover the road and some leap onto the front of the truck. Fire at hatchlings directly ahead so the vehicle can run over weakened targets, then immediately shoot any creature gripping the truck. Keep the Vulcan moving across the front of the vehicle instead of holding it on one distant target.
The Corpser Mother appears as a scripted obstruction and cannot be killed. You may shoot her eyes for optional score, but doing so does not advance the chapter. A later armored Corpser also cannot be defeated by gunfire; continue clearing hatchlings and let the driver shake it free. Do not treat either large Corpser as a conventional boss.
- Shoot hatchlings on the road and on the truck.
- Do not waste time trying to kill the Corpser Mother.
- Continue firing until the convoy clears the encounter.
4. Break through Concord Air Base defenses
At Concord Air Base, Locust roadblocks contain fuel cells, Troikas and infantry. Destroy the explosive fuel cells and mounted guns as soon as they become targets. Start by sweeping the left side, then shift toward the right as the convoy reaches the runway. The left Troika is especially dangerous and should be destroyed quickly.
The trucks eventually become stuck in sand. Clear the enemies on the ground, then turn toward the rocks on the left and eliminate the Reavers and other shooters there before sweeping across to the right. In solo play, concentrate on the left ridge while the squad handles much of the opposite side. A final wave rises from beneath the sand; keep firing while Jace backs the truck free.
- Destroy the left Troika as soon as it is exposed.
- Clear the left ridge before distant targets.
- Keep firing during the sand-stall recovery.
5. Escape the final roadblock and enter Mercy
Once the trucks regain the road, destroy the final fuel cells on the left, then quickly pan to the right and remove the closest threats. The Brumak beyond the last roadblock is part of the scripted escape and does not need to be killed. Jace and the other driver use the ramps beside it, carrying the convoy into Mercy.
Wait for the transition into Ghost Town before moving on. The next chapter abandons the truck-mounted Vulcan and returns to normal on-foot weapon and ammunition management.
- Clear both sides of the last roadblock.
- Do not spend time trying to destroy the Brumak.
- Confirm that the Mercy transition has finished.
6. Investigate Mercy and disarm the bombs
Ghost Town starts with Delta exploring the abandoned settlement. Follow the main route until the first motion-activated bomb appears on the pipeline. Approach it and use the interaction prompt to disarm it; do not sprint through the warning area or fire carelessly near the charge. More bombs appear farther along the same route, and each must be disarmed to continue.
After the bomb sequence, enter the buildings and collect ammunition before taking the sewer route. A frightened man explains that a fever emptied Mercy, then the path continues through the town. Before leaving the building area, check the room behind the deli counter for supplies and take the available route into the sewers.
- Disarm every pipeline bomb encountered.
- Collect ammunition before entering the sewers.
- Follow the survivor’s route rather than searching for an alternate exit.
7. Fight through the sewers and hold the pit
The sewer section reveals what happened to Mercy’s residents and introduces the Lambent Humans. Their movements are erratic, and close-range deaths can create dangerous explosive or burning effects. Keep a gap between yourself and the nearest target, fire from cover with the Lancer or another ranged weapon, and relocate when an enemy begins closing the distance.
Continue forward until the squad reaches a pit. Hold the available cover while Lambent attack, then watch the wooden barricade on the left when the next group breaks through. Clear that opening before turning the valve. After the valve opens the way forward, collect grenades if needed and climb the ladders to the upper route.
- Maintain distance from Lambent Humans.
- Watch the left barricade during the pit defense.
- Turn the valve after the immediate attackers are under control.
8. Defend the courtyard and trigger the chapter ending
In the upper courtyard, take the mounted Vulcan. The Lambent attack in concentrated groups from the left and right, so rotate the weapon according to squad callouts instead of watching only one entrance. Stay behind cover when not firing because Lambent can cross open ground quickly. When the Vulcan is spent, switch to the Scorcher or Lancer ammunition rather than abandoning the defensive position.
After the courtyard defense ends, collect nearby ammunition and climb the ladder that becomes available. At the top, follow the corridor to the left, then descend the steps toward the plaza. The chapter is complete when the final plaza story scene triggers and the game transitions to Act III, Chapter 5, Brothers to the End.
- Use the Vulcan against both courtyard attack directions.
- Switch to the Scorcher or Lancer when the mounted weapon is depleted.
- Reach the plaza and allow the closing scene to play.
Before you move on
- Breakneck Run is complete when the convoy survives the final Concord Air Base defenses, escapes the Brumak and reaches Mercy.
- Ghost Town is complete when the Lambent courtyard defense ends, the upper route is reached and the final plaza story scene plays.
- The next available campaign chapter is Act III, Chapter 5, Brothers to the End.
Brothers to the End & Ashes to Ashes — Mercy, Char, and Griffin Tower
Finish Act III, Chapter 5, Brothers to the End, by crossing Mercy, activating the fuel pump behind the church, clearing the Former attack, taking the underground air-raid shelter route, and defending Dizzy and Jace from Locust and Lambent forces. The chapter ends during Dom’s sacrifice sequence. Act IV, Chapter 1, Ashes to Ashes, begins in Char. Follow the Ash Man through the ruined streets, survive traps, Polyps, turret fire, and a Lambent Stalk encounter, then enter Griffin Tower. Restore power, activate the elevator, survive the Former ambush, and follow the route to Griffin’s office. Avoiding every ash body is optional but can open the bonus armory and support the Respect the Dead achievement.
1. Reach the church and activate Mercy’s fuel pump
After the opening cutscene, collect the ammunition near the starting area and move through Mercy toward the church. Formers attack from the streets and from a boarded structure, so fight from the edges of the road instead of standing in the center. A Retro Lancer is useful for close-range bayonet charges, while the Lancer is safer if you prefer to keep distance.
At the church, the front entrance is blocked. Follow the squad around to the rear entrance and continue toward the cemetery. Dom stops at the Flores family grave before the objective becomes available. Activate the fuel pump beside the cemetery, then immediately prepare for the Former assault that comes from the church and surrounding approaches.
- Collect ammunition before leaving the starting area.
- Reach the rear of the church rather than forcing the barricaded front door.
- Activate the pump near the cemetery after the graveyard scene.
2. Clear the church and enter the air-raid shelter
When the Formers attack, use the low wall and crumbling gravestones as cover. Frag Grenades placed near the church steps and in the central yard can thin the first rush, but leave yourself room to retreat. Watch the roof and side angles because additional Formers can approach from above or around the monuments.
After the attack, return to the church and cut through the wooden boards on the left with a Lancer chainsaw. Follow the underground path. The elevator route is to the right after dropping into the cavern; before taking it, climb back toward the left-hand dead end and inspect the sign on the wall if you want the optional Air Raid Shelter Sign collectible.
- Use cover at the church perimeter.
- Check the left-hand dead end for the Air Raid Shelter Sign.
- Take the elevator only after entering the underground shelter route.
3. Defend the platform after the elevator ride
The elevator brings you to an elevated position overlooking the gas station, where Dizzy and Jace are under attack. Take cover behind the sandbags and engage the Locust moving out of the cave. Prioritize Savage Boomers because their Boomshots can destroy your position or down squad members quickly, especially on higher difficulties.
Some Locust eventually use grappling hooks to reach your platform. Keep a Gnasher or another close-range weapon ready for climbers, but do not abandon the main firing lane. After the Locust pressure begins, Formers attack from behind and Lambent Stalks appear, dropping Lambent units into the battle. Turn toward each Stalk when it becomes exposed and destroy it or its deployed threats while maintaining cover.
The encounter is complete when the scripted waves have been defeated. There is no separate boss fight in this chapter; the following story sequence carries the squad out of Mercy and completes Brothers to the End.
- Kill Savage Boomers before ordinary Drones.
- Watch the platform’s rear edge for grapplers and Formers.
- Destroy exposed Stalks or the Lambent units they deploy.
- Remain in cover until the final scripted wave ends.
4. Follow the Ash Man through Char
Ashes to Ashes begins after the Act IV transition. Follow the Ash Man through the ruined streets instead of searching for alternate routes. The opening is mostly scripted movement, but Char contains traps and falling debris. When gunfire starts, take cover and wait for the threat to stop. Step back when the squad warns about falling objects, and do not run ahead while the Ash Man is triggering hazards.
Polyps emerge from containers and holes along the route. Shoot them before they reach the squad, then continue through the indicated doors. When you hear the baby crying, approach slowly; a falling cart and additional Polyps can interrupt the path. Keep a rifle for street-distance targets and a shotgun for anything that reaches the barricades.
- Stay behind the Ash Man and the squad.
- Wait for falling debris and carts to settle.
- Destroy Polyps before they close the distance.
- Do not disturb ash bodies if pursuing Respect the Dead.
5. Survive the Char street and tower-approach fights
When Stranded defenders open fire from a building, do not shoot back immediately. Take cover and wait for the encounter to change. A Lambent Stalk appears in the area with supporting Lambent enemies; target the Stalk when possible, then clear the remaining Drudges and Wretches. Keep to the more enclosed side of the street so enemies cannot surround you from the open rubble.
Continue toward the second Griffin tower. Expect another attack involving Lambent enemies and flanking threats from behind. Fall back toward the previous cover if necessary, eliminate the Stalk, and then advance only after the side routes are clear. Climb into the building through the large entrance once the area is secure.
- Wait out the initial turret fire from cover.
- Prioritize the Lambent Stalk when it appears.
- Use the enclosed side of the street to limit flanks.
- Clear the tower approach before climbing into the building.
6. Restore power and reach Griffin
Inside the tower, collect ammunition before proceeding. Follow the room’s perimeter: the generator route is along the right side, while a side door on the left can provide a heavy weapon such as a Mulcher. Activate the generator, then use the nearby switch to call the elevator.
The elevator area triggers another Former attack. After clearing the first Former near the elevator, turn back toward the room because additional Formers can emerge from vents. Hold the doorway or a nearby piece of cover until the ambush ends. Continue through the blue door and follow the Ash Man to Griffin’s office.
If you avoided touching or shooting the ash bodies throughout Char, check the barred room on the right before meeting Griffin. Its opening and bonus weapon supplies are optional. Speak with Griffin, then leave through the indicated route; this completes Ashes to Ashes and unlocks Crater.
- Activate the generator before using the elevator switch.
- Expect Formers from both the elevator area and vents.
- Check the optional barred armory only if the ash-body condition was met.
- Meet Griffin and exit the tower to finish the chapter.
Before you move on
- Brothers to the End is complete when the shelter-platform defense ends and Dom’s sacrifice sequence begins.
- Ashes to Ashes is complete after you restore power, survive the elevator ambush, meet Griffin, and leave the tower.
- Crater should become available in the campaign chapter-selection menu.
- If pursuing the optional Respect the Dead reward, verify that you avoided disturbing the ash bodies and check the barred armory before leaving Griffin Tower.
- The Air Raid Shelter Sign should be recorded in the collectible tracker if you inspected the sign in the left-hand underground passage.
References for this chapter
- Chapter 5: Brothers to the End — Prima Games eGuide
- Brothers to the End — Gears of War Wiki
- Gears of War 3 - Guide and Walkthrough — Xbox 360, redapocalypse04
- Gears of War 3 — Guide and Walkthrough, Xbox 360 — ExtremePhobia
- Gears of War 3 eGuide — Act 4 collectibles, Prima Games
- Gears of War 3 Manual — Microsoft PDF
Crater, Hang ’em High & Batten Down the Hatches — Endeavour shipyard and ship sequences
Act 4, Chapters 2–4 take Marcus’s squad from the Hammer-struck crater in Char to Griffin’s refinery, then back across the city to rescue Dizzy and finally into the abandoned shipyard. In Crater, follow the crater edge, pass through the subway, destroy Lambent Stalk Pods, restore the refinery’s power, defeat the Formers in the lobby, and ride the counterweight lift while fighting a Gunker. Hang ’em High is a cable-car operation: start the car, cut its safety cable from inside the refinery, survive the Former swarm, then endure the Palace attack during the return trip before fighting to Griffin’s office and Dizzy. Batten Down the Hatches begins at the shipyard. Use the rail car as moving cover, clear Palace Guards and Boomers, pass through Hangar 1, defeat two Serapedes while dealing with Longshot Drones, and enter Hangar 2 to find the submarine. The chapter ends there; submarine preparation and launch belong to Act 4, Chapter 5: Bon Voyage.
1. Cross the crater and collect the Journal
At the start of Crater, leave Griffin’s tower and descend the steps. Before following the main route, kick open the standing wooden door on the right to collect the Journal. Return outside and follow the crater edge to the right. Move cautiously through the ruins because Polyps can emerge from pipes, abandoned vehicles, and machinery. Shoot them at close, controlled range rather than spending power-weapon ammunition on them.
Continue toward the subway entrance. When Dark Wretches and the first Lambent Stalks appear, stay behind the broken walls and keep your distance. Destroy Stalk Pods as soon as they become exposed, because they continue producing Lambent pressure. Use the higher ground first, then retreat toward the entrance if the fight begins to surround the squad.
- Leave Griffin’s tower and follow the crater edge.
- Collect the Journal from the small wooden-door building on the right.
- Destroy Stalk Pods before clearing the remaining Lambent.
2. Clear the subway and reach the refinery
The subway entrance is a multi-level fight. Eliminate Polyps around the stairs before committing to the lower level. Enter the subway car and take the Mulcher if it is available. Carry it back toward the wall on the right, mount it, and use it against Stalk Pods and the Lambent spawning above and below the entrance. Do not chase enemies into the lower area while the pods remain active; preserve a retreat route through the subway car.
When the horde has thinned, gather ammunition from the subway and bookstore areas, then proceed through the collapsing passage into the old subway. Advance slowly with an assault rifle and shoot Polyps before they close in. At the refinery entrance, another Stalk appears. Fall back into the tunnel if needed, destroy its pods from cover, then climb the stairs into the refinery.
- Use the subway car and Mulcher to control the multi-level Stalk fight.
- Search the subway and bookstore for ammunition before leaving.
- Defeat the refinery-entrance Stalk and enter the building.
3. Restore power and ride the refinery lift
Inside the refinery lobby, collect ammunition and grenades behind the front desk. Find the maintenance closet marked by the Danger Keep Out door and pull the generator lever. This powers the elevators. A Mulcher is available in the closet to the left of the entrance; take it if you want sustained fire for the next hold.
Press an elevator call button and remain near the center of the lobby. Formers emerge from the elevators, vents, and eventually the doors beside the front desk. Keep moving between the central cover points and avoid being trapped against an elevator. After the wave ends, take the alternate route upstairs. If needed, collect the Boltok near the left stairway, then step onto the large wooden lift and push the car off its platform to act as the counterweight.
A Gunker drops through the ceiling during the ascent. Keep to its right side and circle around it while firing at its exposed body. Do not stand directly in front of its striking arm. Reaching the upper refinery area completes Crater.
- Pull the generator lever in the maintenance closet.
- Survive the Former waves in the lobby.
- Push the car from the lift and defeat the Gunker during the ascent.
4. Start the cable car and disable its safety release
At the beginning of Hang ’em High, cross the refinery roof to the cable car. Collect the nearby ammunition and Incendiary Grenades, then board the car and pull the starter cord. The engine works, but the safety release still holds it in place.
Leave the car and follow the roof perimeter clockwise. Pass the barbed wire and prepare for a large Former attack. Use the Gnasher, Incendiary Grenades, or a Retro Lancer bayonet charge to control the close-range rush. Before entering the refinery interior, circle to the far barricade and collect the Fuel Order beside the dead Griffin employee if you want the chapter collectible.
Enter the refinery and move through the serpentine path while watching beneath the partially raised doors. Stay on the right when the route divides. Continue to the safety cable, pick up the Lancer beside it, and use the chainsaw to cut the cable. Take the Mulcher afterward, because it is useful for the return route.
- Start the cable car with the starter cord.
- Survive the Former attack on the roof.
- Cut the safety release with the Lancer chainsaw.
5. Return across the cable car and rescue Dizzy
The return path loops back toward the cable car but is filled with Formers. Use the Mulcher in short bursts, setting it against cover when possible. Continue upstairs, return to the roof, and board the cable car. During the crossing, Palace forces and Gas Barges attack. The Barges cannot be destroyed, so stay in cover and conserve ammunition while removing only the most dangerous visible Palace Guards.
The cable car docks below Griffin’s office. Fight through the halls with a Gnasher for nearby Palace Guards and take a Torque Bow from the fallen enemies when possible. Use it for instant kills against Guards while keeping an assault rifle or Retro Lancer for Shriekers. Advance through the stairways and interior corridors, using the flaming crates and hallway corners as cover.
On the upper approach, clear the Shriekers before exposing yourself to the Palace Guards around Griffin’s office. From the hallway, shoot the final Guards protecting Griffin and Dizzy, then approach them to trigger the rescue and chapter transition. The Old Magazine collectible is under the right-hand couch in Griffin’s office when facing the desk.
- Use the Mulcher to survive the return route.
- Endure the Gas Barge attack without trying to destroy the Barges.
- Fight to Griffin’s office and rescue Dizzy.
6. Search the shipyard and find the submarine
Batten Down the Hatches opens with Shriekers attacking at the shipyard. Take cover and shoot them with an assault rifle. A Gas Barge then deploys Palace Guards and a Boomer while one Guard uses the turret in the security hut. Stay behind cover until the Barge leaves, then eliminate the turret operator with a Torque Bow, rifle fire, or a grenade.
Pull the lever for Rail Car C and move behind the car. Marcus advances with it, giving you moving cover and a chance to shoot the Boomer and Palace Guards from the side. Cross the yard, deal with the next Shriekers and Boomer, and use the upper walkway angles to clear the Guards around Hangar 1. Enter Hangar 1 and follow the web-covered catwalk to the opposite exit.
Outside, collect ammunition before crossing the wooden gangway into the container yard near Hangar 2. A Palace Guard releases a Serapede. Keep moving around cover and shoot the glowing vulnerable end of its tail, not its armored head. A Boomshot or other heavy weapon can rupture several segments at once. After the first Serapede falls, another appears with three Longshot-equipped Drones. Kill the snipers from cover first, then defeat the second Serapede by targeting its tail.
When the yard is clear, collect the available ammunition and Retro Lancer if useful. For the Clipping collectible, face the back of the shipyard near Hangar 2 and search behind the blue COG-marked container on the right. Enter the doors on the left side of the hangar to find the submarine. Do not continue looking for a repair or refueling objective in this chapter; the next chapter, Bon Voyage, handles the submarine sequence.
- Use Rail Car C as moving cover against the first shipyard group.
- Destroy both Serapedes by targeting their glowing tail segments.
- Kill the Longshot Drones before finishing the second Serapede.
- Enter Hangar 2 and locate the submarine.
Before you move on
- Crater is complete after the squad reaches the upper refinery area following the Gunker lift encounter.
- Hang ’em High is complete after the squad fights through Griffin’s office area and rescues Dizzy and Griffin.
- Batten Down the Hatches is complete when the squad enters the second submarine hangar and finds the submarine.
- The next campaign entry should be Act 4, Chapter 5: Bon Voyage. Submarine refueling, preparation, and launch objectives belong to that chapter, not Batten Down the Hatches.
Bon Voyage & Watery Grave — submarine and Maelstrom approach
Act IV, Chapters 5 and 6 begin with the shipyard submarine split path. In Bon Voyage, complete both the maintenance-bay rotor route and the dockyard fuel route; the order does not matter, but neither objective can be skipped. Use cover and the route-specific weapons, then escort the submarine through the hangar and defeat the Armored Kantus and Serapedes before turning the valve to flood the dock. Watery Grave is an on-rails submarine weapon-pod chapter. Follow the blue sonar indicators against the early sea creatures, shoot the Leviathan in the face or mouth when it exposes those targets, clear the minefields, and prioritize torpedoes before the seafloor turrets. Break through the large door, destroy the final defenses, and wait for the transition into Azura.
1. Complete both Bon Voyage recovery routes
After Dizzy inspects the submarine, choose either Find the Rotor or Find Fuel for the Submarine. This is a temporary split path, not a permanent choice: both routes must be completed before the submarine can leave. The rotor route leads to the maintenance bay; the fuel route leads to the dockyard. Resupply at the weapon racks and ammunition points before each route, and keep at least one accurate rifle or explosive weapon available for elite enemies.
Do not treat the first recovered part as the end of the chapter. After returning one item to the submarine, enter the remaining route and recover the second item. The chapter advances only after both parts have been delivered.
- Choose either recovery route first.
- Resupply before entering each route.
- Recover both the rotor and the fuel.
2. Recover the rotor through the maintenance bay
The rotor route begins with Wretches in a cramped storage room, followed by more Wretches and Tickers as the exit opens. Backpedal toward open space and use melee strikes to create room rather than allowing the creatures to surround you. Outside, use the pipe stacks and columns as cover while dealing with Palace Guards and Grenadiers.
At the tracks, destroy the two Troikas by pushing the unstable artillery-shell carts into the structures beside them. The carts can be detonated by enemy fire while you are pushing them, so move from cover, push quickly, and retreat. After using the lift, eliminate the Kantus on the raised structure before it revives or strengthens other Locust. Then deal with the Boomer, Grinder, Palace Guards, and Shriekers before entering the maintenance bay.
Inside the bay, kill the upper-level Kantus first, then clear the Mauler and Palace Guards. Board the loader, pick up the rotor, and drive onto the loader-shaped floor panel to open the route back toward the submarine. When the next area fills with Locust, park the loader behind cover and fight on foot. Save explosive ammunition for the Reaver, then use the loader on the next pressure panel to open the submarine bay.
- Use the pipe stacks against the first Palace Guard wave.
- Push the artillery-shell carts into the Troika positions.
- Kill the maintenance-bay Kantus before handling the Mauler.
- Use the loader on both floor panels.
3. Recover the fuel in the dockyard
From the submarine bay, equip a Longshot and an assault rifle if available. In the hangar, take cover immediately and eliminate the elevated Kantus before working through the Troikas and Palace Guards. Once the hangar is clear, move through the decommissioned ship area and continue to the dockyard.
Use the Silverback storage bay on the right when you reach the dockyard. Pull the lever, enter the Silverback, and use its guns against Palace Guards and nearby Bloodmounts. Switch to the rocket mode when you have distance, and lead moving targets because the rockets travel slowly. Prioritize Bloodmounts, turret crews, and Torque Bow users before pushing toward the cargo ship.
Use the Rail C control lever to move the brow into position, then board the cargo ship with the Silverback. Clear the deck and the crane-control area. Take the Hammer of Dawn and activate the crane to place the fuel on the conveyor. During the counterattack, use the Mortar from cover to hit the Locust near the tracks and the Gas Barge. Then use the Hammer of Dawn on Reavers and clustered Bloodmounts. Finish survivors with the nearby Troika before returning to the submarine.
- Kill the dockyard Kantus early.
- Use the Silverback against Bloodmounts and turret crews.
- Move the brow with the Rail C control.
- Use the Mortar for the first counterattack and the Hammer of Dawn for heavy reinforcements.
4. Escort the submarine and flood the dock
Follow the submarine through the hangar as each gate opens. Clear every section before advancing. The first areas contain Palace Guards, Boomers, Shriekers, and other Locust. In the final hangar section, take a OneShot or use the Vulcan position if available, and preserve Boomshot, Torque Bow, and grenade ammunition for the Armored Kantus encounter.
At the water dock, an Armored Kantus becomes the immediate priority. Ordinary bullets are ineffective against its armor, so use Boomshots, Torque Bows, Frag Grenades, or flame-based attacks to stagger it. When it opens its mouth and screams, switch to rifle or Gorgon fire and shoot into the mouth. Repeat this explosive-stagger and mouth-shot method for later Armored Kantus waves. Keep the Serapedes for last when possible; avoid damaging them while the Kantus and Palace Guards are still active. After the final wave is defeated, enter the control shed and turn the valve control wheel to flood the dock.
- Clear all three hangar defense sections.
- Save explosives for Armored Kantus enemies.
- Shoot an Armored Kantus in the mouth after staggering it.
- Defeat the Serapedes and turn the flooding valve.
5. Operate the weapon pod in Watery Grave
Watery Grave places you in a submarine weapon pod for the entire chapter. When the pod powers up, destroy the obstruction ahead. The blue flashes on the HUD are sonar indicators; turn toward them to locate incoming threats instead of relying only on what is visible in the dark water.
The early Lambent sea creatures attack the front of the submarine and can repeatedly damage it if ignored. Fire at them as they approach, using the sonar direction to find attacks from outside your immediate view. When the Leviathan appears, target its face. After the submarine enters the arches and the creature exposes its mouth, keep firing into the mouth whenever it is visible.
- Destroy the opening obstruction.
- Use blue sonar indicators to locate attackers.
- Stop the early sea creatures before they repeatedly strike the hull.
- Shoot the Leviathan’s face or mouth when exposed.
6. Clear the minefields, Maelstrom, and defenses
When Dizzy steers into the minefield, stop focusing on the Leviathan and clear mines in the submarine’s path. Chained mines are easier to identify by tracing the chain to the explosive rather than searching randomly. After the Leviathan grabs the submarine, shoot its mouth again until it releases the vessel and the chase ends.
The Maelstrom then sweeps the submarine through another minefield. Keep the weapon pod aimed mostly forward and destroy mines before they collide with the hull. Once the submarine exits the current, seafloor turrets launch torpedoes. Destroy torpedoes first, then shoot the turret that fired them. Lead moving torpedoes by firing ahead of their path, especially when they cross from the right.
Break open the large door when it blocks the route. Inside the facility approach, continue watching forward for torpedoes and destroy the remaining defensive turrets. Do not stop after the first turret group; the chapter ends only after the final torpedoes and turrets are destroyed and the submarine reaches the Azura transition.
- Clear the first minefield before it reaches the submarine.
- Shoot the Leviathan’s mouth when it pulls the submarine backward.
- Destroy Maelstrom mines while being swept through the current.
- Prioritize torpedoes over their launch turrets.
- Break the large door and destroy the final defenses.
Before you move on
- Bon Voyage is complete only after both the rotor and fuel have been recovered, the submarine has been escorted through the hangar, the Armored Kantus and Serapede waves have been defeated, and the valve has flooded the dock.
- Watery Grave is complete after the Leviathan sequence, both minefield sections, the Maelstrom, the large door, and the final torpedoes and turrets have been cleared.
- Wait for the transition into the next Azura chapter before quitting or reloading; the fourth act is not finished when the Leviathan first disappears.
Home Away From Home & Blackout — Azura arrival and island infiltration
Act V begins at Azura’s dock and train station. Clear the Palace Guards, destroy the train Troika through its fuel tanks, and release the first Silverback. Keep that vehicle functional through the beach and cave routes, using it to break the required barriers and reach the train station. Operate the track switch, then move the Silverback off the rails before the incoming train reaches the platform. Finish the station defense with the vehicle still available before entering Blackout. In Blackout, obtain the separate second Silverback beside the freight elevator, survive the storage-level attack, and use the numbered halls to reach the Maelstrom Facility. Restore the lights if desired, then activate all three generator controls. When that fails to stop the facility, shut down five coolant valves across the three levels. The fifth valve starts a timed escape; follow the exit route immediately and continue into Shattered Paradise.
Home Away From Home: Clear the dock and train station
After the submarine sequence, climb the dock steps and use the walls, crates, and railings as cover. Palace Guards patrol the first area, so let them move into clear firing lanes before advancing. Continue toward the station platform, clearing defenders along the approach. When the train enters, do not expose yourself to the Troika longer than necessary. Shoot the red fuel tanks beside the mounted weapon. The resulting explosion destroys the Troika and helps clear the train’s defenders.
Before leaving the outdoor platform area, check the far end of the platform for the optional pamphlet collectible. Once the station is secure, follow the opened route until Adam directs the squad to locate a Silverback.
- Clear the dock patrol and station approach.
- Destroy the train Troika by shooting its nearby fuel tanks.
- Check the far end of the outdoor platform for the optional pamphlet.
Release and preserve the first Silverback
At the Silverback bay, use the release switch and enter the vehicle. Drive through the grassy tunnel and destroy the Reaver ahead before continuing toward the beach. Keep the Silverback functional: its weapons are needed for the upcoming barriers, and leaving it behind in the tunnel prevents access to the optional Assault Plans collectible and makes the later route harder.
On the beach, use either the higher or lower path while watching for mortar fire and Locust emerging from trenches. Destroy the next Reaver and move into the cave route when the bombardment makes the open beach unsafe. In the caves, stay near the left side when possible. Use the Silverback to break the barred gate and collect the Assault Plans if desired, then remount and continue. When the first obstruction blocks the direct route, follow the cave passage until the Boomers open the usable gate. Eliminate them and drive through.
- Release and enter the first Silverback.
- Keep it functional through the beach and cave sections.
- Use it to break the cave barrier and collect the optional Assault Plans if desired.
- Drive through the gate opened after the Boomer encounter.
Bring the Silverback into the train-station fight
The opened gate leads to the train tracks. Clear enemies near the switch, then use the lever to open the track gates. Keep the Silverback with you as you move along the rails toward the next station. Palace Guards attack from across the tracks and upper positions; use the vehicle’s cannon and rockets from cover rather than stopping in the center of the route.
An incoming train approaches from the opposite direction. Move the Silverback up the stairs and onto the platform before the train reaches the tracks. The vehicle must be first up the stairs if you want to retain it after the transition. Once it is clear of the rails, regroup and use it against the Palace Guards and Boomers defending the station. Finish the station battle and enter the lift or follow the resulting transition into Blackout.
- Operate the track switch and open the gates.
- Keep the first Silverback with the squad along the tracks.
- Move the Silverback off the rails and onto the platform before the train arrives.
- Complete the station defense with the Silverback still available.
Blackout: Obtain the second Silverback
Blackout begins at the Maelstrom Facility. Move toward the freight elevator, then look beside it for the control that releases the second Silverback from its bay. Activate the control, enter the vehicle, and take it onto the elevator. This is a separate vehicle from the Silverback used in Home Away From Home.
The elevator stops at a storage level where Wretches, Scorchers, and other Locust attack through the numbered corridors. Use the Silverback’s cannon and rockets to control the open center, but keep rotating your aim because enemies can enter from multiple directions. Clear enough space to move through the halls rather than remaining stationary while enemies surround the vehicle.
- Find the Silverback bay beside the freight elevator.
- Release and enter the second Silverback before using the elevator.
- Survive the storage-level ambush.
Use the numbered halls and reach the generator room
Continue through the numbered storage corridors. Hall 3 leads toward the lighting control; activate it if you want a clearer view of the route, although restoring the lights is not required for story progress. A gated storage room with a red door can be reached using the Silverback. Break the door with the vehicle and collect the optional item inside if you are hunting collectibles.
Return to the main route through the halls, then follow the ladders and upper passage toward the exterior section. When the level requires the squad to continue on foot, leave the second Silverback and advance through the outdoor defenses. Expect Reavers, Locust, a sniper, Shriekers, and an Armored Kantus. Use cover and available grenades before taking the lift toward the Maelstrom generator area.
- Clear the numbered storage halls.
- Restore the lights optionally.
- Use the Silverback to reach the optional red-door room if collecting items.
- Leave the second Silverback when the route becomes an infantry section.
- Reach the Maelstrom generator room.
Activate three generator controls
After the facility interior combat and cutscene, enter the generator room. Three controls must be activated. The first is on the generator directly ahead. The second is on the next generator farther into the room. The final control is on the left side of the last generator. Clear nearby Scorchers, Wretches, and other Locust before interacting if they are pressing your position.
After all three controls are activated, the facility remains operational and the objective changes to shutting down the coolant supply. Reload, collect nearby ammunition, and prepare for enemies entering from the surrounding rooms before beginning the valve route.
- Activate the first generator control.
- Activate the second generator control.
- Activate the third generator control.
- Prepare for the coolant-valve objective.
Shut down five coolant valves
The five valves are spread across three levels of the central cooling chamber. Begin with the valve on the current level, located on the central circular structure. Continue around the same level to the next valve. A Grinder enters near this section, so use the surrounding cover and a heavy weapon if one is available.
Proceed down the stairs for the next valve. Armored Locust defend the lower levels, and additional enemies fill the surrounding rooms as you interact with the controls. Continue downward to the final two valves on the lowest level. Palace Guards and Armored Kantus can fire from the chamber perimeter, so do not remain exposed after pulling a valve. You do not need to eliminate every enemy before moving to the next objective.
- Shut down the first two valves on the upper level.
- Descend and shut down the third valve.
- Reach the lowest level and shut down the final two valves.
- Use cover and heavy weapons against the Grinder and Armored Kantus threats.
Escape the collapsing facility
The fifth coolant valve triggers the facility failure and starts a timed escape. Immediately follow the marked route back through the facility. Do not stop to clear every remaining enemy or return for optional items. Sprint past the final resistance when necessary, keep moving through the exit path, and reach the extraction point before the timer expires. The chapter is complete when the escape sequence ends and the game transitions to Shattered Paradise.
- Pull the fifth coolant valve.
- Follow the exit route without backtracking.
- Reach the extraction point before the timer expires.
- Confirm that Shattered Paradise is available next.
Before you move on
- Home Away From Home is complete after the first Silverback reaches the train-station platform, is moved off the tracks before the incoming train, and the station defense is cleared.
- Blackout is complete after obtaining the second Silverback, surviving the storage-level route, activating three generator controls, shutting down five coolant valves, and reaching the extraction point during the timed escape.
- Shattered Paradise becomes the next available chapter or begins immediately after the Blackout transition.
- Optional checks include the pamphlet on the outdoor station platform, the Assault Plans behind the Silverback-breached cave gate, and the optional item in the red-door room reached through the storage route.
References for this chapter
- Chapter 1: Home Away From Home — Gears of War 3 Guide, Prima Games
- Chapter 2: Blackout — Gears of War 3 eGuide, Prima Games
- 5-01 - Home Away from Home - Gears of War 3 Guide and Walkthrough, SuperCheats
- 5-02 - Blackout - Gears of War 3 Guide and Walkthrough, SuperCheats
- Gears of War 3 - Guide and Walkthrough — Xbox 360, ExtremePhobia
- Gears of War 3 - Guide and Walkthrough — Xbox 360, redapocalypse04
- Gears of War 3 BradyGames E-Guide
Shattered Paradise & Threshold — siege weapons and tower approach
Act V, Chapter 3: Shattered Paradise begins with KR-06 supporting Delta’s approach to the Azura resort. Fight to the first Catapult, use it to destroy the three gas barges, then enter the hotel and collect the optional Money Stack. Reach the second Catapult and destroy the dam, which removes the other siege weapons and opens the route through the angel-statue room and atrium. The optional Diary and COG Tag are along this route. Clear the final defenders, destroy the last gas barge with the final Catapult, push the Catapult into the ocean and escape the Lambent Stalks into the building. Act V, Chapter 4: Threshold continues immediately inside the hotel. Call the first elevator, collect the optional Memorial Announcement, call the second elevator from the upper floor to collect the Announcement, then enter the courtyard. Survive Palace Guards, Bloodmounts, Armored Kantus and mortar fire while advancing to the tower entrance. When Jack begins cutting open the palace door, defend him from Lambent Stalks, Drudges, Dark Drones and a Gunker. The next chapter is Ascension.
1. Follow KR-06 to the first siege weapon
After the opening scene, follow the cliffside route toward the resort while KR-06 provides air support. Move from cover to cover and allow the helicopter to draw enemy attention before crossing exposed ground. Clear the Wretches and Palace Guards before advancing; a Grinder and Butcher appear farther along the approach, so keep the Grinder at rifle range and stop the Butcher before it reaches the squad.
When the route opens near the first siege weapon, eliminate the guards around it before climbing aboard. Keeping the approach clear prevents the Catapult position from becoming a crossfire while you handle the gas barges.
- Reach the first Catapult or Siegebeast position.
- Clear the Palace Guards, Grinder and Butcher before using the weapon.
2. Destroy the three gas barges
Use the first Catapult to destroy all three gas barges over the water. Track each target carefully and lead the shot when a barge is moving across your view. The barges are the required targets; do not leave the weapon until all three have been destroyed.
Exit the Catapult after the objective updates, then use nearby cover to finish any surviving ground troops. Enter the resort through the opened route once the area is safe.
- All three gas barges are destroyed.
- The resort entrance is open and the remaining ground enemies are under control.
3. Search the hotel and reach the second Catapult
Inside the hotel, follow the corridor until the route is about to turn right. Check the left side near the obstructed doorway and suitcases. A loose floor panel has an interaction prompt; open it to collect the optional Money Stack.
Continue through the hotel using walls, doorways and furniture as cover. Clear each Palace Guard group before moving into the next room. Once outside again, fight around the courtyard to reach the second Catapult. Do not rush across the open area while enemies remain on the flanks.
- Optional: collect the Money Stack from the loose floor panel.
- Reach the second Catapult after clearing the courtyard.
4. Destroy the dam and search the angel-statue room
Enter the second Catapult and aim at the dam ahead. Fire until the dam collapses. This destroys the other two Catapults and opens the route to the final siege position.
Leave the weapon and enter the next building. In the room with the large white angel statue, check the small table between the couches to the statue’s left, behind the ammunition box, for the optional Diary. Continue through the building after collecting it.
- The dam has collapsed.
- Optional: collect the Diary beside the white angel statue.
- The route beyond the building is open.
5. Clear the atrium and reach the final siege position
Move into the atrium and use the raised central walkway or nearby solid cover to control the defenders. Palace Guards and heavier Locust attack from several directions, so keep the squad together and avoid crossing the open center without suppression.
After the first group is defeated, check the right-hand branch of the raised walkway near the COG symbol. The optional COG Tag is on the floor beside a body near the column. Collect it before continuing if desired. Then push down the main route toward the final Catapult. Armored Kantus protect the position; attack them when their mouths open, or use explosives and Torque Bow ammunition when available.
- Optional: collect the COG Tag near the COG symbol and body.
- Defeat the Armored Kantus and the remaining defenders.
- Reach the final Catapult.
6. Destroy the final gas barge and escape the Stalks
A gas barge provides fire during the final siege fight. Use the final Catapult to destroy it when the objective becomes available, then clear the surviving Palace Guards, Armored Kantus and other defenders around the position.
When the area is secure, interact with the Catapult and push it into the ocean. Lambent Stalks appear in the water immediately afterward. Do not stop for a normal arena fight. Follow the escape route into the building or elevator area and keep moving until the chapter transition begins.
- The final gas barge is destroyed.
- The final Catapult has been pushed into the ocean.
- Delta reaches the building and Threshold begins.
7. Enter the hotel and collect the Threshold announcement
At the start of Threshold, cross the quiet hotel lobby and call the first elevator. Ride it to the upper floor, then follow the hall toward its far end. Inspect the marble bust on the pedestal to collect the optional Memorial Announcement.
Return to the elevator area and call the second elevator from the upper floor. The other car opens; enter it and take the Announcement poster from the back wall. Leave through either set of doors toward the fountains. Both routes converge, but both expose you to the courtyard mortar, so use the interior stairs and roofed cover before committing to the crossing.
- Optional: collect the Memorial Announcement beside the marble bust.
- Optional: call the second elevator and collect the Announcement poster.
- Reach the fountain courtyard.
8. Cross the courtyard and defend Jack
Palace Guards and Bloodmounts attack as you leave the hotel. Hold near the high interior stairs under cover while the first wave approaches. Use explosives or a Torque Bow against Bloodmounts, then advance only after the immediate wave is defeated. Move when the mortar fires; the mortar shot is aimed at your current position and cannot correct after launch, so relocate as soon as you hear it fire.
Continue around the fountain toward the opposite stairs. Use recovered Torque Bow ammunition against the next Bloodmount and engage Armored Kantus from range. If explosives are unavailable, shoot an Armored Kantus while its mouth is open. Downing a Palace Guard without killing it can make the Kantus attempt a revival, exposing its mouth. Eliminate or bypass the mortar operator during a lull, then push to the tower entrance.
When Jack begins opening the palace door, two Lambent Stalks appear. One produces Drudges and Dark Drones; the other deploys a Gunker. Prioritize the Gunker because its projectile can force you out of cover. Use grenades and Torque Bow shots to weaken it, then reach the mortar position and fire at the Gunker. Use the remaining mortar ammunition against the Drudges and Stalk-supported enemies, staying behind cover when mutations or explosive attacks threaten the platform. Finish any survivors with the assault rifle or Torque Bow. The door opens after the defense, and the next chapter is Ascension.
- Survive the Palace Guard, Bloodmount and Armored Kantus courtyard assault.
- Avoid mortar impacts by changing position immediately after each shot.
- Defeat the Gunker and the other Lambent attackers while Jack opens the palace entrance.
- Trigger the transition to Act V, Chapter 5: Ascension.
Before you move on
- The first Catapult has destroyed all three gas barges.
- The hotel Money Stack has been collected if desired.
- The second Catapult has destroyed the dam.
- The Diary and atrium COG Tag have been collected if desired.
- The final gas barge has been destroyed and the final Catapult has been pushed into the ocean.
- Delta has escaped the Lambent Stalks and entered the building.
- Threshold’s Memorial Announcement and Announcement have been collected if desired.
- The courtyard mortar, Palace Guards, Bloodmounts and Armored Kantus have been overcome.
- Jack has finished opening the palace entrance after the Lambent defense.
- The chapter transition to Act V, Chapter 5: Ascension plays.
Ascension — Pinnacle Tower and Adam Fenix’s rescue
Ascension is Act V, Chapter 5 of the original Xbox 360 campaign. Enter Pinnacle Tower, defeat the Palace Guards, Bloodmounts, and Reaver in the atrium, then call the elevators and survive the Lambent assault until they arrive. Fight upward after the elevator transfer, avoid Queen Myrrah’s Tempest, and cut the three cables supporting the counterweight above it. Use the maintenance route to ambush the Locust, bypass the hallway turret, disable both security panels, and enter Adam Fenix’s laboratory. After the reunion scene, use the stationary turret to control the Lambent attack, destroy the Stalk’s pods, clear the remaining enemies, and call the elevator. Ascension ends when the lift departs; the final confrontation with Myrrah occurs in Reckoning, the following chapter.
1. Enter Pinnacle Tower and clear the atrium
Wait for Jack to open the sealed entrance, then move through the arches into Pinnacle Tower. Frag Grenades are behind the main reception counter. Take cover near the cloth-covered table and let the two Boomers descend before throwing grenades or firing. Palace Guards follow them; clear those on the lower level before advancing, while the squad can handle enemies on the upper walkway.
Move toward the stairs and collect the Boomshots. Stay behind cover on the upper route rather than pushing into the center. Bloodmounts and additional Palace Guards attack from the elevator side, so use the Boomshots at close-to-medium range and then collect the Torque Bow ammunition. When the remaining guards are nearly defeated, pick up the Mortar and use it from behind the central counter against the Reaver that breaks through the window. Fire from a moderate distance so the rounds do not strike the ceiling.
- Take Frag Grenades from behind the reception counter.
- Defeat the Boomers and Palace Guards before crossing the atrium.
- Save heavy firepower for the Bloodmounts and the Reaver.
2. Call the elevators and survive the Lambent hold
Cross toward the window where the Reaver appeared, but collect the ammunition on the right and the Frag Grenades on the left before pressing the elevator button. Plant grenades along the approach from the central counter if you have spare explosives, then activate the elevators.
Two Lambent Stalks rise through the atrium and release Drudges, Dark Drones, and Wretches. Use the surrounding cover and focus on the enemies that reach the central aisle. Shoot some Stalk Pods with the Lancer or Hammerburst to reduce pressure, but do not expose yourself trying to destroy every pod. The elevators eventually arrive if you simply survive. Collect nearby ammunition and board as soon as the doors open.
- Collect ammunition and grenades before activating the elevators.
- Survive the two-Stalk Lambent assault.
- Board the elevator promptly when it arrives.
3. Transfer between the damaged elevators
During the ascent, Palace Guards use grappling hooks to reach the elevator cars. Shoot the attackers or knock them away when they reach the roof. A Grinder attacks from outside the tower, but you can ignore it if the elevator sequence is becoming dangerous. Reavers eventually damage the cable and force the elevator to collide with the adjacent lift.
When Anya climbs onto the neighboring elevator, follow her across. You arrive above Cole and Baird, so take cover at the railing and clear the Palace Guards below. A Kantus and Tickers approach from the stairs; kill the Kantus quickly so it cannot keep summoning Tickers, then wait for the rest of the squad to regroup before continuing upward.
- Stop grappling enemies from boarding.
- Jump to the adjacent elevator after the cable failure.
- Kill the Kantus and Tickers before climbing higher.
4. Avoid the Tempest and cut the three cables
Advance through the circular balcony levels and use the stairs. Queen Myrrah arrives on the Tempest after the Palace Guard fight. The creature’s energy beam destroys exposed cover and can down you quickly, so move around the outer perimeter from one solid cover position to the next. Run during the gaps between beam attacks and climb as soon as the upper stairs are clear.
At the top, Baird identifies three cables holding a large counterweight above the atrium. A Lancer chainsaw cuts each cable quickly, although repeated melee attacks also work. Approach each cable from nearby cover, wait for the beam to finish, cut the cable, and retreat or crouch behind the next planter. Continue around the room until all three cables are severed. The counterweight falls onto the Tempest and opens the route forward.
- Move only between Tempest beam attacks.
- Use cover beside each cable before attempting the cut.
- Sever all three cables to drop the counterweight.
5. Take the maintenance route and ambush the Locust
Board the next elevator and follow the stop at the maintenance level. Cut through the breakable crates near the weapon racks for ammunition. A COG Tag is behind crates in the back-right corner near the Crimson Omen; it is optional. Frag Grenades are behind crates near the stairs.
Follow the dark maintenance passage and open the route into the Locust position. Throw grenades at the nearby Grinder, then use the fallen Mulcher or another heavy weapon against the Palace Guard and Mauler across the hall. The long corridor is covered by a turret. Do not attack it from the center if you can avoid it; use the smaller rooms along the sides to advance and gather grenades.
- Restock ammunition on the maintenance floor.
- Ambush the Grinder and Mauler position.
- Use the side rooms instead of walking directly into the turret’s firing lane.
6. Disable both security panels and enter Adam’s laboratory
The laser grid blocks the laboratory entrance. The corridor has guarded rooms on both sides, each containing a security panel. Clear the first room, activate its panel, return through the corridor, and repeat in the opposite room. Keep cover between pushes because Palace Guards and heavy weapons can make the hallway dangerous.
Once both panels are disabled, pass through the central entrance and let the rescue scene play. The Fenix Research document is on the table near the telescope after the scene; it is optional. Do not leave until the objective updates and the laboratory sequence has finished.
- Activate the security panel in the first side room.
- Activate the panel in the opposite room.
- Enter the laboratory and allow the Adam Fenix scene to complete.
7. Defend the laboratory and leave by elevator
After the reunion, Lambent break in through the damaged window. Mount the stationary turret in front of the study and use it to control the corridor. A Lambent Stalk appears; sweep the room until the turret sight identifies its pods, then destroy the pods on the left, right, and upper side. Keep firing on the released Lambent while the Stalk is vulnerable, but do not abandon the turret to chase enemies into side rooms.
When the Stalk and its remaining attackers are defeated, move down the corridor to the elevator and call it. Ascension is complete when the elevator departure triggers and the game advances to Act V, Chapter 6, Reckoning. If the elevator does not activate, search the laboratory corridor and window area for a surviving Lambent enemy.
- Use the stationary turret during the laboratory defense.
- Destroy the Lambent Stalk’s reachable pods and clear its attackers.
- Call the elevator and wait for the transition to Reckoning.
Before you move on
- The three cables have been cut and the counterweight has fallen onto the Tempest.
- Both security panels are disabled and the Adam Fenix laboratory scene has played.
- The final Lambent Stalk defense is complete and the elevator departs.
- The game advances to Act V, Chapter 6, Reckoning.
Reckoning — final battle at Pinnacle Tower
Act V, Chapter 6, Reckoning is the final chapter of the original Xbox 360 campaign. From the top of Pinnacle Tower, protect Adam Fenix while he activates the Imulsion Countermeasure Weapon. First clear the Locust and Lambent fighting around the rooftop, then survive Queen Myrrah’s assault aboard the Tempest. Damage the Tempest’s mouth with conventional weapons while it is airborne, use the Hammer of Dawn when Adam brings the weapon columns online, and remove Palace Guards or Shriekers that threaten your cover. During a later phase, the Tempest climbs onto the countermeasure weapon; shoot its exposed rear plates until it is forced away. Repeat the airborne and grounded phases until the Tempest is destroyed. The remaining confrontation with Myrrah and the campaign epilogue are handled by scripted cinematics, so allow the chapter to continue through the final scenes before quitting.
1. Secure the Pinnacle Tower rooftop
Exit the elevator and move into the rooftop battle area. The countermeasure weapon is the main landmark, with cover arranged around the central platform and outer ring. Drudges and Palace Guards are already fighting, so use cover and let the two groups weaken one another before exposing yourself.
Clear ranged threats first, especially Palace Guards carrying high-damage weapons. Use the Lancer or Hammerburst for controlled mid-range fire, then deal with Drudges that push toward your position. Do not chase enemies to the roof’s outer edge; staying close to the central cover keeps you near Adam and gives you safer routes when the Tempest arrives.
- Stay near the countermeasure weapon and solid rooftop cover.
- Remove ranged Palace Guards before cleaning up weaker Drudges.
2. Protect Adam during activation
After the opening fight, Adam enters the weapon and begins activating it. Additional Drudges and Palace Guards attack while the process continues. Hold the central rooftop rather than advancing toward enemy spawn points. Watch both sides of the platform, because enemies can approach while you are focused on the opposite edge.
Use grenades or close-range weapons only when a Palace Guard or Drudge reaches your cover. A King Raven arrives to provide support fire, but it does not replace your responsibility to stop enemies that reach the weapon. When the area is sufficiently clear, the scene transitions to Myrrah’s arrival.
- Defend the activation area instead of pursuing stragglers.
- Use the Raven’s support to stabilize the rooftop fight, not as a reason to abandon cover.
3. Damage the airborne Tempest
Myrrah attacks aboard the Tempest. Keep a solid piece of cover between Marcus and the creature whenever it lines up its fire breath. The attack can down you rapidly, so relocate before the beam reaches your position rather than trying to finish a magazine in the open.
When the Tempest exposes its head, concentrate conventional weapon fire on its mouth. The mouth is the reliable target during the airborne phase. After enough damage, the Tempest drops to the rooftop and Adam activates the Hammer of Dawn columns.
- Break line of sight before each fire-breath pass.
- Target the Tempest’s mouth while it is flying.
- Do not waste time firing at areas that are not exposed targets.
4. Use the Hammer of Dawn only while it is grounded
When the Tempest falls, move to one of the Hammer of Dawn weapons raised around the rooftop and pick it up. Aim the beam at the grounded Tempest and hold the firing sequence until the weapon discharges. Keep your position protected as much as possible; Shriekers and Palace Guards can appear during this opening and may force you away from the Hammer.
The Tempest eventually retreats and resumes its aerial attacks. Return to cover immediately, clear the most dangerous support enemies, and repeat the mouth-damage phase. Hammer fire is for the grounded Tempest; ordinary weapons are for bringing it down and for controlling the surrounding enemies.
- Pick up a Hammer of Dawn after the Tempest is grounded.
- Fire it at the Tempest during the grounded window.
- Return to cover as soon as the Tempest takes flight again.
5. Survive the tower-climb phase
After several attack cycles, the Tempest climbs onto the countermeasure weapon and tries to destroy it. Do not continue aiming at its mouth during this phase. Circle to a safe firing position and shoot the exposed plates on its back until it is knocked away from the machine.
Once the Tempest leaves the weapon, the earlier pattern resumes: use cover against the fire breath, shoot the mouth until it falls, then use another Hammer of Dawn discharge. Palace Guards and Shriekers are not optional distractions when they occupy your route to cover or the Hammer; eliminate them before they trap you in the open.
- Shoot the Tempest’s exposed rear plates when it climbs onto the weapon.
- Keep the central cover route open.
- Repeat the mouth and Hammer phases until the final cutscene begins.
6. Complete the final chapter and epilogue
When the Tempest is defeated, do not quit at the moment it collapses. The countermeasure activates and the chapter continues into the scripted confrontation with Myrrah. Marcus uses Dom’s knife during this cinematic sequence; there is no player-controlled knife attack or quick-finish input to perform.
Allow every ending scene to play. The campaign concludes with the countermeasure spreading across Sera and the surviving characters’ epilogue. Return to the campaign menu only after the cinematics have finished and the game has completed its chapter transition. Reckoning is the last campaign chapter, so there is no subsequent playable chapter to unlock.
- Confirm the Tempest is destroyed.
- Let the Myrrah scene and all ending cinematics finish.
- Return to the campaign menu only after the final transition.
Before you move on
- The opening Locust and Lambent rooftop battle is cleared and Adam activates the countermeasure weapon.
- The Tempest has been repeatedly grounded, struck with the Hammer of Dawn, and defeated, including its countermeasure-weapon attack phase.
- The scripted confrontation with Queen Myrrah plays after the Tempest battle.
- The countermeasure epilogue cinematics finish and the game returns to the campaign interface.
- Reckoning is confirmed as the final chapter of the original retail Xbox 360 campaign; no later playable campaign chapter is required.
Final Confrontation — Queen Myrrah and campaign closure
This section covers only the closing sequence after the Reckoning combat described in Chapter 16. Once the final Tempest phase is defeated and the countermeasure weapon is ready, stop treating the finale as another conventional boss fight. The remaining events are scripted: the Imulsion Countermeasure Weapon activates, Adam Fenix dies from the weapon’s effect, Queen Myrrah emerges from the Tempest wreckage, and Marcus kills her with Dom’s commando knife. Afterward, allow the full epilogue cinematics and credits transition to finish before leaving the chapter. The original Xbox 360 retail campaign is complete when the game returns to the campaign interface or otherwise records the final chapter as completed. After completion, inspect the campaign menu separately for installed additional content; RAAM’s Shadow is a separate Gears of War 3 campaign add-on, while Aftermath is associated with Gears of War: Judgment rather than being an automatic Gears 3 reward.
1. Finish the countermeasure sequence
The complete Tempest encounter, including the rooftop defense, airborne damage phases, Hammer of Dawn strikes, and the phase in which the Tempest attacks the countermeasure machine, is covered in Chapter 16. Do not restart that combat here unless you are replaying the chapter from an earlier checkpoint. This section begins once the final combat has ended and the game has moved into the countermeasure sequence.
When the Imulsion Countermeasure Weapon activates, remain in the chapter and let the scripted scene proceed. Adam Fenix is affected by the weapon because of his earlier exposure to Imulsion while testing the device. Marcus speaks with Adam during the sequence, and Adam dies before the weapon’s effect finishes spreading. There is no additional combat objective or player-controlled defense task to complete during this aftermath.
- The final Tempest combat from Chapter 16 is complete.
- The countermeasure weapon activates.
- Adam Fenix’s death scene plays without interruption.
2. Allow the scripted Myrrah scene to finish
After Adam’s death, Queen Myrrah emerges from the Tempest wreckage. The game presents her confrontation with Marcus as a cinematic continuation of the finale, not as a new free-form boss encounter. Do not look for another weapon, Hammer of Dawn charge, attack prompt, or quick-time sequence. Marcus uses Dom’s commando knife in the scripted scene, killing Myrrah without requiring a player-controlled finishing input.
Once the scene begins, leave the controls alone unless the game displays an ordinary menu prompt. Avoid quitting, loading an earlier checkpoint, or disconnecting during this transition. The chapter still has to move from the Myrrah scene into the wider epilogue before the campaign has fully closed.
- Myrrah emerges from the destroyed Tempest.
- The scripted knife scene plays completely.
- No player-controlled quick-time or close-quarters prompt is expected.
3. Watch the epilogue and credits transition
After Myrrah is killed, allow the remaining cinematics to play. The countermeasure wave spreads across Sera and the story shows the consequences for the Locust, Lambent, and surviving COG forces. The final Azura scenes then bring Marcus and the surviving characters to the campaign’s emotional conclusion. These scenes are part of the ending requirement, so do not treat the destruction of the Tempest or Myrrah’s death as the exact point at which the campaign is safely finished.
Continue through the credits or the game’s post-ending transition until control returns to the campaign interface, chapter selection, or another clear completion screen. If the console is connected to Xbox Live, achievement synchronization may occur separately and can take additional time; the achievement notification is not the completion test by itself.
- The global epilogue cinematics play through.
- The credits or post-ending transition begins and finishes as directed by the game.
- The game returns to a campaign-related interface or records the chapter as complete.
4. Confirm campaign completion and separate DLC checks
Open the campaign menu after the ending transition and verify that Act V, Chapter 6, Reckoning is marked completed. If the game returns directly to chapter selection, confirm the final chapter no longer appears as unfinished. This is the practical completion check for the original retail campaign.
If you want to play additional story content, inspect the available campaign entries separately. RAAM’s Shadow is a distinct Gears of War 3 add-on and requires the relevant content entitlement. Aftermath is not an automatic post-campaign unlock in the original Gears of War 3 retail story; it is associated with Gears of War: Judgment. Do not delay campaign completion while looking for either item in the base-game ending.
- Reckoning is marked complete.
- The game has returned to the campaign interface or chapter selection.
- Any RAAM’s Shadow or other additional content is checked as separate installed or owned content.
- The original retail campaign is complete independently of DLC availability.
Before you move on
- The final Reckoning combat described in Chapter 16 has been completed.
- The Imulsion Countermeasure Weapon activates and Adam Fenix’s death scene finishes.
- Queen Myrrah emerges from the Tempest wreckage and the scripted knife scene completes.
- The full ending cinematics and credits or post-ending transition play through.
- The game returns to the campaign interface or chapter selection and Reckoning is recorded as completed.
- Any additional campaign entries are checked separately rather than treated as automatic rewards for finishing the original Xbox 360 retail campaign.
Aftermath & Optional Post-campaign items — checking unlocks and DLC status
The original Xbox 360 release of Gears of War 3 ends with Act 5, Chapter 6, Reckoning. Completing that chapter and watching the ending does not unlock a campaign called Aftermath. Aftermath belongs to Gears of War: Judgment, while Gears 3’s separate story expansion is RAAM’s Shadow. Treat both as separate content: RAAM’s Shadow requires its own purchase or Season Pass entitlement, and Aftermath requires Gears of War: Judgment content. After the ending, confirm that Reckoning has been completed, allow any achievement notification to register, and review Arcade, medal, collectible and co-op records separately. Use chapter replay for unfinished goals rather than assuming the final cinematic completes optional objectives.
1. Complete Reckoning before checking optional content
Finish Act 5, Chapter 6, Reckoning through the final confrontation and all ending cinematics. The campaign is not complete when the Queen is first weakened; continue through the scripted conclusion, including the final close-quarters action and the epilogue scenes.
After the cinematic sequence ends, wait until control returns to a menu or the game finishes saving the chapter result. Do not shut down the Xbox 360 during the transition. If an achievement notification appears, leave the game running long enough for it to register before starting another chapter.
- Act 5, Chapter 6, Reckoning has been played to its conclusion.
- The final confrontation and epilogue cinematics have finished.
- The game has returned to a menu or completed its save transition.
2. Confirm the final chapter and campaign records
Open Campaign and use Chapter Select to review Act 5. The retail campaign’s final entry is Reckoning; there is no additional Gears of War 3 story chapter after it. If Reckoning can be selected for replay and the ending achievement has appeared, the story route itself is complete.
Chapter Select is useful for checking which sections remain available for replay, but it does not replace the Xbox 360 achievement panel when you are checking a difficulty completion. The story achievement for the final chapter is “You’re Dead! Now Stay Dead!” and is awarded for story progression in Act 5, Chapter 6 in Standard or Arcade.
- Act 5 contains Reckoning as the final campaign chapter.
- The final-chapter achievement has appeared, if achievements are part of your goal.
- Any missing act or difficulty record has been identified before beginning a replay.
3. Check RAAM’s Shadow separately
RAAM’s Shadow is the relevant Gears of War 3 story add-on. It is not granted merely for finishing the retail campaign. If you own the add-on or a Season Pass entitlement, look for its campaign entry from the game’s downloadable-content or campaign selection areas and confirm that its chapters are available before launching it.
If it is absent, verify that the add-on was purchased for the same Xbox profile and that the content is installed on the console. Season Pass ownership is an entitlement, not a second copy of the campaign; avoid buying the same add-on again when the account already includes it. If you do not own the add-on, the correct completion state is simply that RAAM’s Shadow remains unavailable.
- RAAM’s Shadow is either installed and selectable or correctly identified as unowned.
- The add-on is associated with the Xbox profile used to play.
- You have not confused DLC ownership with main-campaign completion.
4. Do not search Gears 3 for Aftermath
Aftermath is not a post-campaign unlock in the original Gears of War 3 retail release. It is a separate campaign associated with Gears of War: Judgment, so it will not appear as a hidden Act 6 chapter or as a reward in Gears 3’s Campaign menu.
If you want to play Aftermath, use the appropriate Gears of War: Judgment installation and content entitlement. Keep it separate from the Gears 3 completion checklist; finishing Reckoning does not purchase, install or unlock Judgment content.
- No Aftermath entry is expected in Gears of War 3.
- Aftermath is treated as Gears of War: Judgment content.
- RAAM’s Shadow is treated as the Gears 3 story add-on.
5. Review Arcade, medals and replay goals
Open the Arcade or medal records and write down unfinished objectives separately from the story completion. A Standard campaign finish does not automatically complete Arcade score goals, multiplier requirements, medal tiers, collectible achievements or co-op achievements.
For each replay, choose one target before launching: a missing collectible, a difficulty completion, an Arcade medal, a score record or a co-op requirement. Use Chapter Select to return to the relevant act and chapter. If an achievement failed to appear, first verify its stated mode, difficulty and co-op conditions before replaying the entire campaign.
- Unfinished Arcade and medal objectives are recorded.
- Collectible and co-op goals are tracked separately from story completion.
- The next replay has a specific act, chapter and objective.
Before you move on
- Act 5, Chapter 6, Reckoning has been completed through the final confrontation and epilogue.
- The game has finished its save or menu transition after the ending.
- The “You’re Dead! Now Stay Dead!” story achievement appears if Xbox Live achievements are being tracked.
- RAAM’s Shadow is confirmed as installed and selectable, or identified as separately unowned.
- Aftermath is correctly excluded from the Gears 3 menu and identified as Gears of War: Judgment content.
- Remaining Arcade, medal, collectible, difficulty and co-op objectives are listed for targeted replays.
Optional: Arcade and Medal Farming
Arcade Campaign follows the ordinary story chapters while adding a shared score pool, a multiplier that rises with continued scoring, and medal tracking. The practical order is to learn a short repeatable chapter, reach and preserve the 10x multiplier, then separate score and placement runs from difficulty-completion runs. Act II, Chapter VII is a commonly used route for Force Multiplier practice because its encounters can be completed quickly once learned. Act II, Chapter II is also frequently used for score-focused attempts, but no single chapter is required. Check Stats & Awards after completed chapters: Force Multiplier requires max multiplier in 10, 30, 60 or 100 chapters; King of COG requires cumulative Arcade scores of 1,000,000, 2,000,000, 5,000,000 or 7,500,000; Number 1 requires the highest score in 20, 60, 120 or 240 Arcade chapters. Warmonger is separate and requires every Arcade chapter on the relevant difficulty.
1. Set up a repeatable Arcade practice run
Choose Arcade Campaign and select a chapter you already know from ordinary Campaign. Begin on Casual or Normal while learning the route. Arcade retains the story encounters but adds scoring, so dependable kills and safe movement matter more than forcing executions or rushing between arenas.
In co-op, decide who is pursuing the highest score before starting. Give one player responsibility for long-range targets and heavy weapons while the other handles close threats, revives and flankers. In split-screen, keep the second character in safe cover whenever that character is not actively contributing. An idle or repeatedly downed partner can damage the team’s multiplier and waste an otherwise good run.
- Arcade Campaign is selected.
- The chapter route and major encounters are familiar.
- Co-op players have assigned roles before the chapter begins.
2. Build and protect the 10x multiplier
The multiplier increases as the team continues earning points and falls when the scoring chain is interrupted. Incoming damage gradually drains it, while being downed causes a much larger loss; a player death resets the multiplier to 1x and resumes play from a checkpoint. Use cover, kill enemies in a steady rhythm and avoid crossing open ground merely to chase a low-value target.
Use a reliable mid-range weapon to keep scoring while enemies are distant. Bring out the Gnasher for forced close fights, and use explosives when they safely remove a heavy target or clustered enemies. Executions are useful only when the surrounding area is secure. A slower kill from cover is preferable to a risky melee attempt that causes a down.
- The multiplier reaches 10x during the run.
- The team avoids unnecessary damage and downs.
- The chapter is completed after reaching maximum multiplier.
3. Repeat Act II, Chapter VII for Force Multiplier
Act II, Chapter VII is a commonly recommended repeat chapter for Force Multiplier practice. Learn the order of its aerial targets and the safest turret positions, then reproduce the same route each attempt. Do not leave the chapter immediately after the meter reaches 10x: finish the chapter so the qualifying result can be recorded.
The Force Multiplier medal tracks maximum-multiplier chapter completions. Its progression is 10 chapters for Bronze, 30 for Silver, 60 for Gold and 100 for Onyx. The same chapter may be repeated, so a short, reliable route is more useful than changing chapters after every attempt. Confirm the counter in Stats & Awards after the results screen or after returning to the menu.
- Act II, Chapter VII can be completed without a multiplier break.
- The 10x state is maintained through the end of the chapter.
- Stats & Awards shows the expected Force Multiplier increase.
4. Separate score and placement runs
Use a different plan when pursuing King of COG or Number 1. Act II, Chapter II is often used for score attempts because its encounters provide a manageable route, but choose any chapter that you can finish consistently. Higher difficulty and permitted mutators can change the scoring potential, so use only settings that match the medal goal you are tracking.
For a Number 1 attempt, agree which player is competing for the highest total. The other player should provide safe support without taking avoidable scoring opportunities. Number 1 counts first-place Arcade chapter results, with thresholds of 20, 60, 120 and 240. King of COG counts cumulative Arcade points, with thresholds of 1,000,000, 2,000,000, 5,000,000 and 7,500,000. Check the recorded totals after completing the chapter rather than relying on memory.
- A scoring player is chosen before the run.
- The chapter is completed without sacrificing survival for a risky kill.
- Arcade totals and first-place results are checked after completion.
5. Work toward Warmonger separately
Warmonger is not a score medal. It requires completion of every Arcade chapter on a specified difficulty: Casual for Bronze, Normal for Silver, Hardcore for Gold and Insane for Onyx. If that is the target, use chapter select and track each completed chapter and difficulty. Do not assume an ordinary Campaign completion fills the Arcade requirement.
For difficult runs, prioritize survival and route consistency over multiplier perfection. A full Arcade run on Insane also satisfies the corresponding campaign-difficulty completion requirement according to the medal references, but it remains a separate objective from Force Multiplier and score farming.
- Every Arcade chapter is tracked for the selected difficulty.
- Campaign and Arcade completion are not being treated as interchangeable.
- Stats & Awards confirms Warmonger progress.
6. Review results and adjust one problem at a time
After each completed run, check Stats & Awards for Force Multiplier, Number 1, King of COG, Survivalist, Aficionado and Warmonger progress. Record the encounter where the multiplier dropped, the weapon or ammunition problem that caused it, and whether the issue was damage, a down or a death. Practice that section on its own before attempting another full chapter.
Keep the next attempt specific: reach 10x, finish without dying, beat a previous score, or complete one unplayed chapter. This prevents score farming, multiplier practice and difficulty completion from interfering with one another.
- The intended medal counter changes after a qualifying run.
- The next attempt has one clearly defined objective.
- Repeated failures lead to a route or loadout change rather than blind repetition.
Before you move on
- Stats & Awards records the intended Force Multiplier progress after completed chapters.
- The selected repeat chapter can be finished while maintaining 10x through the qualifying result.
- King of COG totals and Number 1 first-place results are visible after completed Arcade chapters.
- Warmonger progress is confirmed for the intended Arcade difficulty and all required chapters are tracked.
- Any co-op or split-screen partner remains alive and useful through the chapter’s major encounters.
Optional: Collectibles & COG Tag hunts — where to look
The original Xbox 360 campaign contains 42 standard collectibles and 15 COG Tags, for 57 optional campaign items. They do not alter the story route. Act I contains 14 standard collectibles and 5 COG Tags, including the Prologue tag; Acts II through V contain 6 and 3, 7 and 2, 6 and 2, and 9 and 3 respectively. Use chapter select to revisit missed items, preferably on Casual, and verify named entries in Stats & Awards → Collectibles. Search side rooms, route branches, service corridors, rooftops, spaces behind destructible cover and arenas before activating the next objective. The first COG Tag is in Prologue: Troubled Past. Anchored contains the Twenty Dollar Bill, Dom’s Psych Report, Requisition Form and one COG Tag. The Silverback Manual is not in Anchored; it is in Abandon Ship’s maintenance bay, on the table before taking the Silverback.
Start a controlled cleanup run
From the campaign menu, select the standard five-act campaign and load the chapter containing the missing item. Use Casual for a dedicated search unless you are combining the hunt with a difficulty, co-op or Arcade objective. Keep separate records for standard collectibles and COG Tags, noting the act, chapter, item name and whether the item is a document, journal entry, blueprint, manual or tag.
After every pickup, pause and check Stats & Awards → Collectibles for the named entry. A pickup disappearing from the floor is not by itself a reliable troubleshooting check. Chapter replay can recover missed items, and the Hoarder and Remember the Fallen requirements allow collection on any difficulty in Standard or Arcade.
- Select a standard campaign chapter, not RAAM’s Shadow.
- Use Casual when survival is not the priority.
- Track standard collectibles and COG Tags separately.
- Confirm each pickup in Stats & Awards → Collectibles.
Recover the Prologue tag before Anchored
Start Act I with Prologue: Troubled Past. As soon as you gain control of Marcus, leave the starting cell and turn immediately to the right. Kick open the adjacent cell door and collect the COG Tag from the floor before continuing along the tutorial route.
This is the first campaign COG Tag and is counted within Act I’s total of five tags. Do not list it as an Anchored item. When Anchored begins aboard the Sovereign, search that chapter separately rather than treating the Prologue and Anchored as one location.
- Prologue: Troubled Past — gain control of Marcus.
- Leave the starting cell and turn right.
- Kick open the adjacent cell door.
- Collect the tag before following the tutorial route.
- Count this tag within Act I’s five COG Tags.
Search Anchored’s four assigned items
In Act I, Chapter 1: Anchored, collect the Twenty Dollar Bill from the table beside Marcus’s bunk at the opening. After leaving the bunk area, enter Sickbay and take Dom’s Psych Report from the desk or table inside. Once Dom has been found, enter Baird’s room and collect the Requisition Form from the table near the bulletin board.
When the squad reaches the Sovereign’s deck, fight through the initial Lambent encounter and raise the lift. After the following battle, locate the container marked with the Gear symbol. Move behind it, look up toward the walkway and shoot the corpse holding the COG Tag so it falls within reach. These are Anchored’s three standard collectibles and one COG Tag.
Do not include the Silverback Manual in this chapter. The manual belongs to Act I, Chapter 2: Abandon Ship. During Abandon Ship, when the route reaches the maintenance bay before you take control of the Silverback, check the table on the left for the manual.
- Anchored — Twenty Dollar Bill beside Marcus’s bunk.
- Anchored — Dom’s Psych Report in Sickbay.
- Anchored — Requisition Form in Baird’s room.
- Anchored — shoot the corpse above the deck to drop the COG Tag.
- Abandon Ship — collect the Silverback Manual from the maintenance-bay table before taking the Silverback.
Sweep every area before advancing
At every chapter opening, turn around and inspect the starting room and nearby dead ends before following the squad. At a fork, search both branches before taking the route that advances the objective. Inspect desks, counters, offices, tables, bodies, containers, ammunition areas and spaces marked by a Crimson Omen or Gear symbol.
After a firefight, circle the complete arena before using a lift, opening a gate, entering a vehicle, activating a console or crossing a one-way threshold. Some areas become accessible only after combat. In hotel, resort and shipyard chapters, search service corridors, stairwells, maintenance rooms, rooftop walkways and upper balconies rather than checking only the main lobby or deck. On large shipyard maps, clear enemies first, then inspect the perimeter and maintenance structures before boarding the next vehicle or opening the mission gate.
- Turn around at every chapter opening.
- Search both branches at route splits.
- Check side rooms, rooftops, service corridors and maintenance areas.
- Sweep arenas before lifts, gates, vehicles, consoles or one-way doors.
Handle conditional and route-dependent items
Some COG Tags require an event to be completed before the collectible route opens. In Act II, Chapter 3: Forced Entry, eliminate all five guards without sounding the alarm. A side door then opens; follow the lower path beyond it to find the COG Tag near ammunition and Digger Launchers. If the alarm sounds, restart the chapter rather than assuming a later checkpoint will restore the route.
Other items depend on a route choice, a vehicle or a destructible object. Check both sides of optional paths before committing, use the Silverback where a barrier specifically requires it, and destroy marked crates or barricades when a Gear symbol suggests a hidden area. In co-op, one player can hold enemy attention or trigger a map event while the other checks an alcove, upper path or service room, but both players should confirm the pickup has registered before advancing.
- Complete stealth or alarm-sensitive prerequisites first.
- Restart Forced Entry if the alarm prevents the tag route from opening.
- Check route choices, vehicle-only barriers and destructible cover.
- Use a co-op partner to distract enemies or trigger events when helpful.
- Verify the collectible entry before leaving the chapter.
Audit all 57 campaign items
Use the act totals as the final audit: Act I has 14 standard collectibles and 5 COG Tags; Act II has 6 and 3; Act III has 7 and 2; Act IV has 6 and 2; and Act V has 9 and 3. The totals are 42 standard collectibles and 15 COG Tags. Because Prologue: Troubled Past is included within Act I, its tag must be included in Act I’s total rather than added as a separate sixth tag.
Hoarder requires all 42 standard campaign collectibles. Remember the Fallen requires all 15 campaign COG Tags. These are separate from story completion. After collecting the final item, allow the game to save, recheck the named entries in Stats & Awards → Collectibles, and then check the Xbox 360 achievement panel while signed in if you want the achievement notification to synchronize.
- Act I: 14 standard collectibles and 5 COG Tags, including Troubled Past.
- Act II: 6 standard collectibles and 3 COG Tags.
- Act III: 7 standard collectibles and 2 COG Tags.
- Act IV: 6 standard collectibles and 2 COG Tags.
- Act V: 9 standard collectibles and 3 COG Tags.
- Stats & Awards → Collectibles records all 42 standard items and 15 tags.
- Hoarder and Remember the Fallen register after saving and synchronization.
Before you move on
- Stats & Awards → Collectibles records all 42 standard campaign collectibles.
- Stats & Awards → Collectibles records all 15 COG Tags.
- Act totals match 14/6/7/6/9 standard collectibles and 5/3/2/2/3 COG Tags.
- Act I’s total includes COG Tag 1 from Prologue: Troubled Past.
- Anchored contains three standard documents and one COG Tag; Silverback Manual is recorded under Abandon Ship.
- Hoarder and Remember the Fallen register after the game saves and synchronizes.
- Previously collected entries remain recorded when their chapters are replayed.
Co-op-specific checks & splitscreen tips
Gears of War 3 supports two-player local split-screen on one Xbox 360 and up to four-player campaign co-op online. Before launching, connect both controllers, sign in the intended profiles and select Standard Campaign or Arcade deliberately. In Standard Campaign, each co-op player can choose an individual difficulty. Arcade is different: the host or session difficulty applies to the group, so do not use Arcade when you need separate player difficulty settings. Divide responsibilities instead of carrying identical weapons. One player should retain a heavy weapon or operate a mounted gun while another covers flanks, close-range breaches and revives. Move through exposed areas by leapfrogging from cover, communicate before triggering objectives and never attempt an immediate revive in an active grenade or sniper lane. In local split-screen, adjust brightness and controller schemes before the first chapter. The chapter is complete when both players can launch the intended campaign mode, reach a saved checkpoint, maintain complementary battlefield roles, recover safely from a downed teammate and clear difficult encounters without blind advances.
1. Start the correct campaign session
Connect the second Xbox 360 controller before entering the campaign lobby. From the main menu, choose Campaign and select Split Screen for two players on one console. For remote teammates, choose the co-op hosting or joining option and invite the intended players. The original Xbox 360 release supports two players locally and up to four players in campaign co-op online; four people cannot use one Xbox 360 screen through the normal split-screen option.
Sign in each player before launching if you want progress and achievements associated with the intended Xbox profiles. Confirm that the party is entering Campaign rather than Horde, Beast or Versus. Then select Standard Campaign or Arcade according to the goal of the run, and choose the required act, chapter or checkpoint.
- Two controllers are connected and assigned correctly.
- The session is Campaign, not Horde, Beast or Versus.
- The party has deliberately selected Standard Campaign or Arcade.
- The host has selected the intended act, chapter or checkpoint.
2. Set difficulty and readable split-screen options
Gears of War 3 has Casual, Normal, Hardcore and Insane difficulties. In Standard Campaign co-op, each player can select a difficulty independently, which is useful when one player is learning while another is attempting a harder completion. Confirm the setting for every profile before launching or resuming a chapter. Do not assume that the host's choice represents every player in Standard Campaign.
Arcade uses a different rule. It adds scoring and a shared team score system, and the host or session difficulty governs the co-op group rather than allowing each player to use a separate difficulty. If the purpose of the run is to combine, for example, one player's Insane setting with another player's Casual setting, use Standard Campaign, not Arcade.
Before starting a long chapter, open the available options and check each controller's scheme. The original Xbox 360 manual lists the basic movement, aiming, cover and command controls, while the game allows controller settings to be adjusted. In split-screen, raise brightness only as needed to distinguish cover, enemies and floor hazards. Keep ammunition, objective and downed-player indicators readable.
- Each player has confirmed an individual difficulty for Standard Campaign, if using that mode.
- The team understands that Arcade uses the host or session difficulty for everyone.
- Each controller responds with the intended scheme.
- Both screens show cover, enemies, ammunition and downed-player information clearly.
3. Divide weapons and battlefield duties
Use complementary loadouts. The heavy-weapon player should claim a Boomshot, One-Shot, Mulcher or another high-impact weapon when the encounter provides one, and should operate a mounted gun when it controls a useful lane. Do not carry a limited heavy weapon into a minor fight merely because it is available. The second player should retain a dependable mid-range rifle, such as a Lancer or Hammerburst, and a close-range weapon for enemies that breach the cover line.
Before moving, call two responsibilities: forward pressure and flank watch. The heavy-weapon player handles Boomers, armored targets and dense groups; the support player watches side doors, emergence holes and enemies attempting to rush the firing position. Swap roles when ammunition or terrain makes the original assignment impractical. If a set piece uses a two-person weapon or requires one player to feed ammunition while another fires, stay together and move in the same direction rather than separating.
- One player carries the strongest available anti-heavy weapon.
- At least one player retains reliable mid-range fire.
- Flank coverage is assigned before the advance.
- Players know who handles each side of a two-person weapon sequence.
4. Cross open areas by leapfrogging
Never have both players sprint across exposed ground at once. One player stays in cover and suppresses visible enemies while the other moves to the next solid position. Once the moving player reaches cover and calls the route clear, switch roles. This prevents a single grenade, sniper shot or heavy burst from disabling the entire team.
When the campaign presents two routes, split only after identifying the purpose of each path. Put the heavy weapon on the route with armored enemies or a mounted weapon, and send the rifle-equipped player to protect the side angle or rear. Regroup before opening a major door, activating an objective or entering a scripted defense unless the encounter clearly requires simultaneous positions. Spot dangerous enemies and call their location before either player leaves cover.
- One player provides suppression during every exposed crossing.
- The route is called before either player moves.
- The team regroups before major scripted holds.
5. Revive safely and recover from failure
When a teammate is downed, first suppress or eliminate the enemy controlling that position. A revive in front of a heavy unit, inside a grenade lane or beneath an active turret often creates a second casualty. The standing player should use cover, obstruction where available, planted grenades or focused fire to create a safe window, then revive from the protected side.
Local split-screen has an additional risk: if both players are lost, the game returns the team to the last checkpoint rather than allowing the failed push to continue. Treat a wipe as a tactical diagnosis. On the next attempt, change the firing position, delay the objective trigger, redistribute heavy weapons or hold one player farther back. Do not repeat the same sprint simply because the checkpoint reloads quickly.
- The immediate attacker is suppressed before a revive begins.
- The reviving player has cover and an escape route.
- A team wipe produces a changed plan on the next attempt.
6. Prepare for Hardcore, Insane and co-op goals
Practice communication on Casual or Normal before attempting Hardcore or Insane. Call sniper locations, Kantus or Theron support, heavy targets, flank routes and the moment an objective becomes active. If using Standard Campaign, the players may use different difficulties, but agree on the arrangement before starting and verify the settings after loading a checkpoint.
If using Arcade for a scoring run or an Arcade co-op achievement, set the host or session difficulty deliberately because that setting applies to the group. Do not expect a second player to retain an independent difficulty in Arcade. Decide who may spend each limited explosive weapon before the fight begins, and avoid giving both players only Gnashers unless the arena is entirely close quarters. That loadout leaves the team exposed to distant snipers, Therons, Kantus units and armored enemies.
Complete the required campaign chapters with the intended party arrangement, then verify the relevant achievement or campaign progress through the Xbox 360 guide after the final checkpoint has saved. For a difficulty-specific goal using unequal player settings, use Standard Campaign and confirm the intended profile's difficulty rather than relying on Arcade.
- The team can clear ordinary encounters without panic revives.
- Heavy-ammo ownership is agreed before major fights.
- At least one player retains a reliable long-range or mid-range weapon.
- The intended co-op party remains present for any full-campaign co-op requirement.
- The team has selected Standard Campaign for independent player difficulties or Arcade for a shared host/session difficulty.
Before you move on
- Both players can launch Campaign together, see the intended profiles and reach a saved checkpoint without controller or display problems.
- The team can identify whether the session is Standard Campaign or Arcade and apply the correct difficulty rule.
- In Standard Campaign, each player has confirmed the intended personal difficulty; in Arcade, the team has confirmed the host or session difficulty.
- The team can divide heavy weapons, suppression and flank coverage during a major encounter.
- A downed teammate is revived only after the firing lane is controlled, and a failed push leads to a deliberate tactical adjustment.
- The pair can clear several difficult checkpoints without relying on repeated blind rushes.
- If pursuing a co-op achievement, the intended party size and campaign mode have been maintained for the required chapters and the Xbox 360 achievement record has been checked after saving.
Wrap-up: campaign completion checklist and next goals
Finish the original Xbox 360 campaign by completing the final rooftop confrontation and allowing the ending cinematics and credits to play. Then verify the result through the campaign’s completed chapter or replay access and check the Xbox 360 achievement list separately. Do not treat downloadable content, collectibles, medals, co-op requirements or higher-difficulty achievements as part of the basic story-completion check. RAAM’s Shadow is a separate Gears of War 3 campaign add-on. Aftermath is associated with Gears of War: Judgment, not the original Gears of War 3 retail campaign. Once the base story is confirmed, choose one focused replay goal and practice its relevant chapters rather than immediately starting another unfocused full run.
1. Let the final sequence finish
After defeating Queen Myrrah in the final rooftop sequence, continue through every scripted transition until the epilogue cinematics and credits have played. Do not quit, shut down the console or load another chapter during the transition from the last gameplay section to the ending. The retail campaign’s completion point is the end of the base-game story and its closing cinematics, not the appearance of a downloadable episode.
If the achievement notification does not appear immediately, do not assume the campaign failed. An Xbox 360 console that is offline or temporarily unable to synchronize can delay the notification. Leave the save intact, reconnect later if possible, and check the profile separately.
- Queen Myrrah has been defeated.
- The epilogue cinematics have played.
- The credits or final completion transition has finished.
- The game has been allowed to save before quitting.
2. Verify the completed campaign through replay access
Return to the campaign menu and inspect the standard campaign’s act and chapter selection. The most reliable practical confirmation is that the final campaign material is available for replay under the completed difficulty or save profile. Menu wording can vary with the selected mode, save file and downloadable content, so do not require a specific universal banner labelled Campaign Completed.
If the final chapter is unavailable, first confirm that you finished the sequence on the same profile used to start the campaign and that the game reached its post-ending save point. Avoid deleting the local save while investigating; the Xbox 360 campaign progression is tied to the saved profile data.
- The final act or final chapter is available in standard campaign replay.
- The replay is associated with the correct player profile and difficulty.
- The completed save remains present on the console.
3. Check achievements as a separate record
Open the Xbox 360 achievement list and check the story achievement that applies to the difficulty and campaign mode you completed. The base game distinguishes completing all campaign acts on Casual or Normal, Hardcore and Insane. Collectibles, co-op completion, Arcade progress, medals and multiplayer objectives are separate achievements and should not be used as the sole test of whether the retail story ended successfully.
If you played Arcade instead of Standard Campaign, verify the achievement requirement before treating it as equivalent for a particular goal. The campaign achievement list identifies which objectives accept Standard, Arcade or both.
- The applicable campaign achievement has unlocked or is pending synchronization.
- Difficulty achievements are tracked separately from the basic ending.
- Collectibles, co-op and Arcade goals have not been confused with story completion.
4. Separate Gears 3 DLC from Aftermath
Check the downloadable-content entries from the main menu only after confirming the base campaign. RAAM’s Shadow is the story campaign add-on made for Gears of War 3; it requires the relevant installation or entitlement and is not automatically granted merely for finishing the retail story.
Do not look for Aftermath as a Gears of War 3 campaign episode. Aftermath is associated with Gears of War: Judgment and is separate from the original Gears of War 3 Xbox 360 campaign. If RAAM’s Shadow is missing, inspect the console’s installed game add-ons, storage and account entitlement rather than replaying the final act. A missing add-on is an installation or ownership issue, not evidence that the base campaign failed.
- RAAM’s Shadow has been checked as separate Gears 3 content.
- Aftermath has not been treated as a Gears 3 retail unlock.
- Installed add-ons and entitlement are checked before replaying the campaign.
5. Choose a focused replay objective
For a higher-difficulty run, list the chapters and checkpoints that caused the most deaths. Practice those encounters first, noting enemy entrances, safe cover, heavy-weapon locations and when the game changes objectives. On Hardcore or Insane, use conservative pushes and preserve explosive weapons for heavy enemies and defensive holds instead of spending them on the first group in an arena.
For collectibles, use chapter selection and maintain a written list of recovered items. Search side rooms, service corridors, balconies and areas behind destructible cover before advancing the next objective. Run exploration and high-difficulty survival separately when necessary so that searching does not compromise the combat attempt.
- One difficulty or collectible target is selected.
- Problem chapters are listed before starting the replay.
- Exploration runs are separated from survival-focused runs when useful.
6. Plan Arcade, medal and co-op goals
If the next goal is Arcade scoring or medals, replay individual chapters rather than repeating the entire campaign without a defined target. Select one priority such as maintaining the multiplier, avoiding deaths, improving kill efficiency or earning a specific medal. Record which encounters offer safe score-building opportunities and which should be handled cautiously.
For co-op, assign roles before loading the chapter. One player can carry long-range suppression or a heavy weapon while the other watches close approaches and flanks. In split-screen or online play, cover the reviver before attempting a revive and avoid having both players abandon the same defensive lane.
- A specific Arcade, medal or co-op objective is selected.
- The relevant chapter or checkpoint is identified.
- Roles and weapon responsibilities are agreed before the run.
7. Record the next goals
Write down the chapters that caused failures, the enemy types responsible and the tactics that solved each problem. Keep base-story completion, higher difficulty, collectibles, Arcade medals, co-op achievements and DLC campaigns as separate projects. A short checkpoint practice session is preferable to immediately replaying all five acts with the same unresolved weakness.
Choose no more than a few immediate goals, such as completing Hardcore, collecting the remaining campaign items or starting RAAM’s Shadow after verifying access. Review the record before the next full campaign so the replay has a concrete purpose.
- The difficult chapters and successful tactics are recorded.
- The next goals are limited to a manageable set.
- Base campaign, optional achievements and DLC are tracked separately.
Before you move on
- The final rooftop confrontation with Queen Myrrah is complete.
- The epilogue cinematics and credits have played before leaving the game.
- The final standard-campaign act or chapter is available for replay on the correct Xbox 360 profile.
- The applicable campaign achievement has unlocked or has been checked after synchronization.
- RAAM’s Shadow has been checked separately as Gears of War 3 downloadable campaign content.
- Aftermath has not been counted as part of the original Gears of War 3 retail campaign.
- Any replay goal is recorded as a separate difficulty, collectible, Arcade, medal, co-op or DLC objective.
References for this chapter
- Gears of War 3 — Official game page
- Gears of War 3 Manual — Microsoft PDF
- Gears of War 3: RAAM’s Shadow Game Add-on Coming December 13 — Xbox Wire
- Gears of War 3 Achievements — TrueAchievements
- Gears of War 3 — Guide and Walkthrough, Xbox 360 — GameFAQs
- Gears of War: Judgment Unleashed on Xbox 360 — Official Microsoft Blog
- Gears of War: Judgment World Premiere Broadcast announcement mentioning Aftermath — Xbox Wire
Finishing up
Finish Act V, Chapter 6, Reckoning, including the Tempest battle, the scripted Queen Myrrah confrontation, the ending cinematics and the post-ending save/menu transition.
Confirm completion through the final campaign chapter being available for replay and, if desired, the applicable Xbox 360 campaign achievement. Do not require a universal menu label reading Campaign: Completed.
Treat RAAM’s Shadow as separate Gears of War 3 downloadable campaign content that requires its own entitlement or installation.
Do not include Aftermath in the Gears of War 3 completion route; Aftermath belongs to Gears of War: Judgment.
Treat collectibles, Arcade medals, co-op achievements and higher-difficulty achievements as separate optional goals.
Choose your next gameScreenshots & video
Game imagery for reference. Follow the written chapters above for the route and strategies.
Sources & references
Our original guide draws on the references below. Check the edition at the top of this page before following controls or unlock requirements.
- Prologue: Troubled Past — Gears of War 3 Guide
- Chapter 1: Anchored — Gears of War 3 Guide
- Gears of War 3 — Guide and Walkthrough, Xbox 360 — GameFAQs
- Gears of War 3 Xbox 360 manual
- Gears of War 3 Xbox 360 Manual
- Chapter 2: Abandon Ship — Gears of War 3 eGuide
- 1-02 Abandon Ship — Gears of War 3 Guide and Walkthrough
- Gears of War 3 — Guide and Walkthrough, Xbox 360 — ExtremePhobia
- Abandon Ship — Gears of War Wiki
- Chapter 3: Homecoming — Gears of War 3 eGuide
- Chapter 4: Helping Hand — Gears of War 3 eGuide
- Gears of War 3 walkthrough — GameSpot
- Gears of War 3 - Guide and Walkthrough — Xbox 360, redapocalypse04
- Chapter 6: Hanging by a Thread — Gears of War 3 eGuide
- 1-06 — Hanging by a Thread, SuperCheats walkthrough
- Gears of War 3 Manual — Microsoft PDF
- Chapter 1: Shipwreck — Gears of War 3 Guide
- Chapter 2: House of Sand — Gears of War 3 eGuide
- Chapter 3: Forced Entry — Gears of War 3 eGuide
- Chapter 4: Trench Run — Gears of War 3 eGuide
- 2-03 Forced Entry — Gears of War 3 Guide and Walkthrough
- 2-04 Trench Run — Gears of War 3 Guide and Walkthrough
- Gears of War 3 — Xbox 360 Manual
- Gears of War 3 — Guide and Walkthrough, Xbox 360
- Gears of War 3 Collectable/Cog Tag Guide — Xbox 360
- 2-05 Hijack — Gears of War 3 Guide and Walkthrough
- The Ultimate Gears of War 3 Walkthrough — Act 2
- Gears of War 3 Walkthrough — GameSpot
- Chapter 1: Unbreakable — Gears of War 3 Guide
- Chapter 2: Rescue — Gears of War 3 eGuide
- 3-01 - Unbreakable — Gears of War 3 Guide and Walkthrough
- 3-02 - Rescue — Gears of War 3 Guide and Walkthrough
- Chapter 3: Breakneck Run — Gears of War 3 eGuide
- 3-04 - Ghost Town — Gears of War 3 Guide and Walkthrough
- Chapter 5: Brothers to the End — Prima Games eGuide
- Brothers to the End — Gears of War Wiki
- Gears of War 3 eGuide — Act 4 collectibles, Prima Games
- Chapter 2: Crater — Gears of War 3 eGuide
- Chapter 3: Hang ‘Em High — Gears of War 3 eGuide
- Chapter 4: Batten Down the Hatches — Gears of War 3 eGuide
- Chapter 5: Bon Voyage — Gears of War 3 eGuide
- Chapter 6: Watery Grave — Gears of War 3 eGuide
- 4-06 - Watery Grave - Gears of War 3 Guide and Walkthrough
- Bon Voyage | Gears of War Wiki
- Chapter 1: Home Away From Home — Gears of War 3 Guide, Prima Games
- Chapter 2: Blackout — Gears of War 3 eGuide, Prima Games
- 5-01 - Home Away from Home - Gears of War 3 Guide and Walkthrough, SuperCheats
- 5-02 - Blackout - Gears of War 3 Guide and Walkthrough, SuperCheats
- Gears of War 3 - Guide and Walkthrough — Xbox 360, ExtremePhobia
- Gears of War 3 BradyGames E-Guide
- Chapter 4: Threshold — Gears of War 3 Guide
- 5-03 - Shattered Paradise — Gears of War 3 Guide and Walkthrough
- Final Act Walkthrough for Gears of War 3
- Gears of War 3: Chapter 3 - Shattered Paradise
- Chapter 5: Ascension — Gears of War 3 eGuide, Prima Games
- Gears of War 3: Chapter 5 — Ascension, Gamepressure
- 5-05 — Ascension, Gears of War 3 Guide and Walkthrough, SuperCheats
- Reckoning — Gears of War Wiki
- 5-06 - Reckoning - Gears of War 3 Guide and Walkthrough
- Boss Battle — Gears of War 3 Guide
- Act 5 Chapter 6 — Gears of War 3 walkthrough
- Gears of War 3: RAAM’s Shadow Game Add-on Coming December 13 — Xbox Wire
- Gears of War: Judgment — Official Gears of War site
- Gears of War 3 Medals — Gears of War Wiki
- Campaign Modes & Difficulties — Gears of War 3 Guide
- Gears of War 3 Achievement Guide — GameFAQs
- Gears of War 3 Printable Achievement Guide and Road Map
- Gears of War 3 COG Tags and Campaign Collectibles Guide
- Hoarder Achievement in Gears of War 3
- Gears of War 3 Collectible Guide
- Gears of War 3 — Official game page
- Gears of War Support — Co-op difficulty and campaign settings
- Gears of War 3 Achievements — TrueAchievements
- Gears of War: Judgment Unleashed on Xbox 360 — Official Microsoft Blog
- Gears of War: Judgment World Premiere Broadcast announcement mentioning Aftermath — Xbox Wire
About the game & collecting notes
- Platform
- Xbox 360
Complete, play-ready plan for the original Xbox 360 retail campaign of Gears of War 3. This guide breaks the single-player campaign into 22 focused chapters (act-based groupings), lists precise objectives, key tactical tasks, common hazards and what to avoid, and links official/manual and authoritative walkthrough references to verify progression and chapter names.
Darryl Polo
Darryl Polo loves tinkering with emulation and revisiting retro games. He enjoys exploring how old favorites play on different setups and sharing what he learns along the way. At Joking Joystick, he writes about the games, hardware, and small discoveries that keep the hobby fun.
Our editorial standardsFound a step that needs another look? Help us improve this guide.