
Gears of War 2 (Xbox 360, original retail release) — Complete Campaign Walkthrough
Complete walkthrough for the original Xbox 360 retail campaign, covering all 29 required story chapters in verified Act 1 through Act 5 order. Because the fixed chapter roster contains 17 publication slots, some adjacent chapters are grouped in one entry, but every required chapter must have its own clearly labeled route, objective sequence and transition. Optional Road to Ruin DLC remains separate and is not required for the retail ending.


Find a copy
Gears of War 2 Xbox 360
We may earn a commission if you buy through these links, at no extra cost to you. As an Amazon Associate I earn from qualifying purchases.
Opens retailer search results. Check the model, edition, seller, availability and current price before buying.
Before you begin
This walkthrough covers the original Xbox 360 retail campaign of Gears of War 2.
Follow all 29 required story chapters in their verified Act 1 through Act 5 order. Some entries group adjacent chapters, but each chapter is labeled separately inside the relevant entry.
Each chapter provides the required route, objective order, major hazards, recovery advice and a concrete completion check.
Optional collectibles and Road to Ruin DLC are separated from required story progression.
The guide assumes the default Xbox 360 control layout unless the game’s Options menu has been changed.
Set yourself up for the run
Choose a difficulty appropriate to the run. Difficulty affects combat and achievement goals, but campaign completion does not unlock a separate New Game+ mode on the original Xbox 360 release.
Use chapter select or replay individual chapters for missed collectibles and higher-difficulty progress.
The retail campaign contains 41 collectibles tracked through the War Journal; collectibles are optional for reaching the ending.
If using co-op, confirm the host and joining player are using the same campaign progression point before starting.
Road to Ruin requires the applicable Dark Corners or All Fronts DLC and is launched separately from the Deleted Scene/DLC menu.
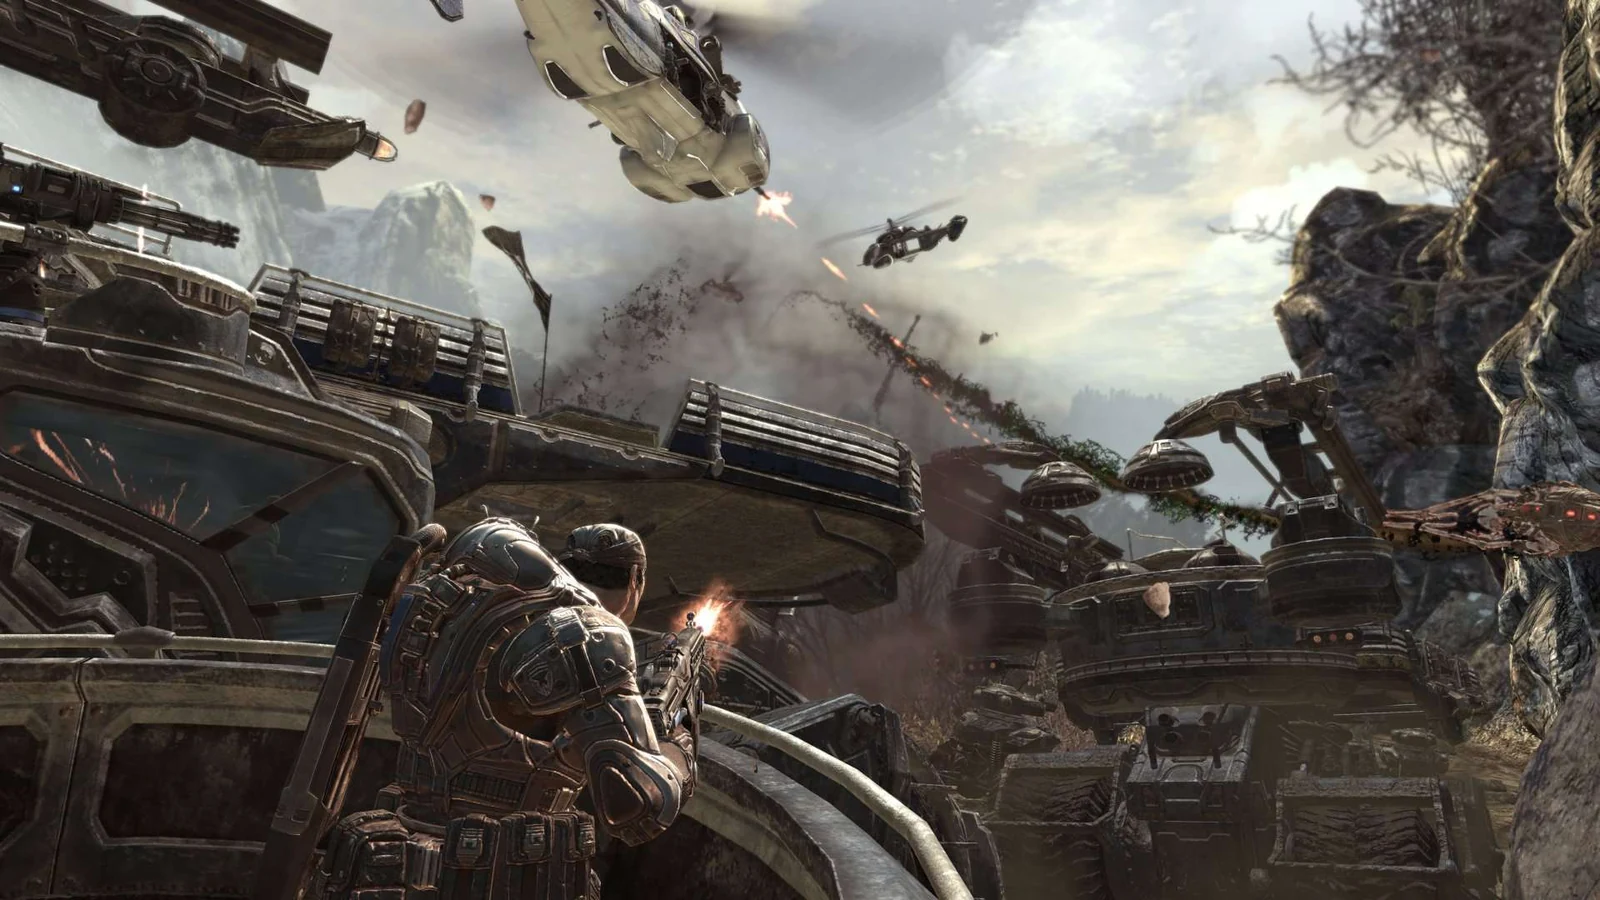
Act 1, Chapter 1: Welcome to Delta
Welcome to Delta is the optional training chapter at the beginning of Gears of War 2. Choose Train the Rookie to complete the tutorial, learn the Xbox 360 controls, and access both chapter collectibles. Follow the linear route through cover practice, bottle shooting, weapon switching, Active Reloads, grenades, revives, chainsaw use, and the ladder descent. The chapter contains a brief scripted Wretch sequence rather than a normal fight. After descending the ladder, turn right into the garage for the Ambulance Driver’s Log, then return to the route and follow the squad toward the hospital. Choosing Skip Training bypasses this chapter and starts Act 1, Chapter 2: Desperation. The hospital courtyard ambush, Tai’s arrival, and the Reaver encounter belong to Desperation and are not completion requirements here.
1. Select Train the Rookie
After the opening cinematic, the game asks whether Marcus should train Benjamin Carmine or proceed directly to the operation. Select Train the Rookie. This starts Act 1, Chapter 1: Welcome to Delta. Selecting Skip Training bypasses the entire chapter, including its tutorial sequence and collectibles, and begins Desperation instead.
Move forward with Dom and Carmine along the street. The route is linear, so stay with the squad and follow the objective prompts. The Xbox 360 controls used throughout this chapter are A for cover and movement actions, X for contextual actions, B for melee and Lancer chainsaw revving, LB for objectives and squad status, LT for aiming, RT for firing or throwing, and RB for reloading.
- Select Train the Rookie.
- Follow Dom and Carmine down the opening street.
- Use LB to review the objective if necessary.
2. Take cover and collect The Eagle Newspaper
Continue down the opening alley toward the fence where Jack is cutting an opening. Before moving through the fence, look on the ground near the boards and dumpster for The Eagle Newspaper. It is the first of the two collectibles in Welcome to Delta and is optional for campaign completion.
When prompted, press A near a wall or object to attach to cover. Practice blind fire from cover by firing without fully aiming, then use LT to aim normally. Continue following the prompts until the game directs you to the bottle exercise. The tutorial teaches weapon switching with the D-pad; shoot the marked bottles and wait for the next instruction.
- Collect The Eagle Newspaper if desired.
- Attach to cover with A.
- Practice blind fire and normal aiming.
- Switch weapons with the D-pad.
- Shoot the marked bottles.
3. Complete the Active Reload lesson
When the reload prompt appears, press RB to begin reloading. Press RB again when the moving indicator reaches the highlighted timing zone to perform an Active Reload. A successful timing improves the reload; pressing outside the correct zone can cause the weapon to jam temporarily. If that happens, let the reload finish before attempting another action.
After the bottle exercise, continue around the truck and dumpster. Follow the prompts rather than leaving the training route early. The chapter is built as a sequence of lessons, so advancing only after each instruction is completed prevents the next objective from failing to trigger.
- Begin reloading with RB.
- Complete the Active Reload timing prompt.
- If the weapon jams, wait for it to recover.
- Continue along the marked tutorial route.
4. Pass the Wretch and open the gate
Proceed around the obstruction until a Wretch appears ahead. This is a scripted tutorial obstacle, not a required combat encounter. Keep moving and use A to mantle over the blockade when prompted.
Continue to the closed gate and press X for the contextual action that opens it. Enter the basketball-court or car-park area and pick up the frag grenades indicated by the tutorial. Keep the grenades available for the next scripted objective rather than switching away immediately.
- Pass the scripted Wretch encounter.
- Mantle over the blockade with A.
- Open the gate with X.
- Pick up the frag grenades.
5. Throw the grenade and revive both squadmates
When the game directs you to attack the building, aim the frag grenade toward the indicated opening and press RT to throw it. The resulting scripted sequence leaves Benjamin Carmine and Dom downed. Approach each squadmate and press X when the revive prompt appears.
Revive both Carmine and Dom before advancing. If one is not immediately visible, use the objective markers and return to the downed soldier. There is no need to sprint ahead; the next route opens after the squad has regrouped.
- Throw the frag grenade into the instructed opening.
- Revive Benjamin Carmine.
- Revive Dom.
- Wait for the squad to regroup.
6. Chainsaw through the wooden obstruction and descend
Follow the squad through the parking-area route until wooden planks block the way. Equip the Lancer if necessary, face the obstruction, and hold B to rev the chainsaw through it. Once the path opens, collect nearby ammunition if your supply is low.
Continue to the ladder and press X to descend. Do not immediately take the first route you see after reaching the bottom if you want both collectibles. The Ambulance Driver’s Log is located through the right-hand detour.
- Equip the Lancer.
- Hold B to chainsaw through the wooden obstruction.
- Collect nearby ammunition if needed.
- Descend the ladder with X.
7. Collect the Ambulance Driver’s Log and finish the chapter
At the bottom of the ladder, turn right and enter the small garage or room at the end of the alley. Turn toward the desk and look on the floor nearby for the Ambulance Driver’s Log, the second and final collectible in this chapter. Collecting it is optional for story progress.
Leave the garage and return to the junction. Follow the remaining route toward the hospital, staying with the squad until the chapter transition occurs. Welcome to Delta ends before the hospital courtyard battle. The next chapter, Desperation, begins the hospital operation and contains the courtyard ambush and later Reaver encounter.
- Turn right after descending the ladder.
- Enter the small garage or room.
- Collect the Ambulance Driver’s Log near the desk.
- Return to the main route.
- Follow the squad into Act 1, Chapter 2: Desperation.
Before you move on
- Train the Rookie was selected.
- The cover, blind-fire, aiming, weapon-switching, bottle-shooting, and Active Reload lessons were completed.
- The grenade was thrown into the instructed opening.
- Benjamin Carmine and Dom were both revived.
- The wooden obstruction was chainsawed with the Lancer.
- The ladder was descended.
- The Ambulance Driver’s Log was collected if optional collectibles were being pursued.
- The squad was followed into Act 1, Chapter 2: Desperation. The hospital courtyard ambush is not required to complete Welcome to Delta.
Act 1, Chapter 2 — Desperation
After meeting Tai at Jacinto Medical Center, defend the hospital from the Locust attack and escape through the ruined streets. Use the courtyard fuel tanks for the opening ambush, then advance through the hospital while using pillars, desks, counters, and balcony railings as cover. The chapter includes the King Raven crash, a power-outage defense, and the final street fight outside the hospital. Five optional War Journal collectibles are available: Doctor’s Journal, Jacinto Medical Center File, COG Letterhead, COG Proclamation, and a COG Tag. Desperation is complete when the street advance ends and the game transitions to Act 1, Chapter 3: Rolling Thunder.
1. Reach the courtyard overlook
After the opening scene, leave through the hospital door marked by the green light. Follow Dom and Tai through the adjoining room and up the stairs. Continue through the upper doorway into the patient area, then enter the next room when the squad moves forward.
When Anya warns that the Locust are attacking, take cover at a window overlooking the courtyard. Wait until the patrol gathers around the fuel tanks in the center. Shoot the tanks to destroy or weaken the group, then finish survivors from the same protected position. Do not drop into the courtyard while enemies remain on the upper levels.
- Follow Tai and Dom up the hospital stairs.
- Reach a covered window overlooking the courtyard.
- Wait for the Locust patrol to gather near the fuel tanks.
- Destroy the tanks and eliminate the survivors.
2. Collect the Doctor’s Journal and clear the upper floor
After the courtyard ambush, follow the opened route along the upper hallway. Enter the open room on the left to find the Doctor’s Journal on the floor. This collectible is optional and can be skipped without affecting the campaign.
Return to the hallway and follow the balcony toward the next room. Locust attack from the balcony and from the floor below. Use the railing, pillars, and corners as cover, exposing yourself only long enough to fire. Continue through the doorway and clear the adjoining room from behind its furniture.
- Optional: collect the Doctor’s Journal in the open room off the upper hallway.
- Clear the balcony and enemies below it.
- Advance through the next room while staying near fixed cover.
3. Search the reception area and descend
In the next reception area, move the table aside and use it as cover while clearing the Locust. Once the room is safe, inspect the space between the two reception desks for the Jacinto Medical Center File. Pick it up before going downstairs; it is optional but easy to miss if you continue immediately.
Proceed through the open doorway and collect the grenades in the side area. Descend the stairs, clear the room at the bottom, and leave through the door on the right. Follow the squad’s route instead of trying to backtrack through the hospital.
- Optional: collect the Jacinto Medical Center File between the reception desks.
- Pick up the grenades near the next doorway.
- Clear the lower room.
- Leave through the right-hand door toward the courtyard.
4. Cross the courtyard and reach the cafeteria approach
Outside, help the COG soldiers clear the Locust in the courtyard. Move toward the stairs on the opposite side. A Reaver arrives during this sequence. You do not need to remain in the open and destroy it; use cover and reach the opposite stairs, then enter the doorway to continue.
Follow the hallway and turn left at the end. Clear the room on the left, then regroup with Dom and Tai. Take either connecting hallway toward the cafeteria. Before entering the main dining area, use the left route’s small office to find the COG Letterhead. It is outside the cafeteria in the left-side hallway.
- Assist the COG soldiers in the courtyard.
- Use cover when the Reaver arrives.
- Reach the opposite stairs and enter the hospital doorway.
- Optional: collect the COG Letterhead in the small office beside the cafeteria approach.
5. Survive the King Raven crash
In the cafeteria, take cover behind the end of a serving table and clear the Locust near the far side. Continue into the adjoining circular garden. A King Raven crashes through the structure, creating a new fight with enemies on the lower floor and upper walkway.
When control returns, move behind a sturdy pillar at either side of the room. Use it to protect yourself from fire on both elevations. Eliminate the enemies below first if they are pressing your position, then clear the upper walkway. Check the surrounding corners for ammunition and grenades before following the squad up the stairs and through the exit.
- Clear the cafeteria from serving-table cover.
- Reach the circular garden.
- Move behind fixed pillar cover after the crash.
- Defeat enemies on both levels.
- Resupply before following the squad onward.
6. Defend the hospital during the power outage
Continue into the next large room and pause on the upper balcony before descending. The COG Proclamation is on the floor at the right end of the balcony, near the railing and ammunition. Collect it before going downstairs if you want every item in the chapter.
Descend into the central area. When the power fails, Locust enter through the door on the left. Use the statue, desks, and nearby walls as cover. After that group is defeated, another group enters near the bottom of the opposite staircase. Clear both groups, then wait for Jack to open the main exit.
- Optional: collect the COG Proclamation from the upper hospital balcony.
- Defeat the first Locust group after the lights go out.
- Defeat the second group near the opposite stairs.
- Wait for Jack to open the exit door.
7. Escape through the street and begin Rolling Thunder
As soon as you leave the hospital, inspect the nearby pillar beside the exit for the COG Tag. It is the chapter’s fifth collectible. Collect it before moving to the sandbag line if you are completing the War Journal.
Use the sandbags to engage the Locust ahead. Descend the stairs only after the immediate firing lane is manageable, then clear the enemies at street level. When the gunship arrives, move across the street to the store marked with a white Buy, Sell, Trade sign. Enter through the window and use the store’s interior and windows as cover while firing into the next area.
Leave the store and follow the street to the end. Eliminate the enemies blocking the route, but do not pursue targets into side areas. After the advance and transition, the game moves to Act 1, Chapter 3: Rolling Thunder.
- Optional: collect the COG Tag on the pillar beside the hospital exit.
- Defend the sandbags.
- Descend and clear the lower street.
- Use the Buy, Sell, Trade store as cover.
- Reach the end of the street and trigger Rolling Thunder.
Before you move on
- Tai, Dom, and Marcus have escaped the hospital interior.
- The King Raven crash encounter is complete.
- The power-outage defense is complete and Jack has opened the main exit.
- The squad has reached the exterior sandbags and cleared the street route through the Buy, Sell, Trade store.
- The game transitions to Act 1, Chapter 3: Rolling Thunder, or Rolling Thunder appears as the next available chapter.
- Optional collectible check: all five Desperation items appear in the War Journal if they were recovered.
Act 1, Chapters 3–6 — Rolling Thunder, The Big Push, Roadblocks and Digging In
Continue Act 1 through four linked chapters. Defend and repair Betty in Rolling Thunder, protect the convoy during The Big Push, clear Landown in Roadblocks, and hold the Grindlift deployment zone in Digging In. Roadblocks offers two alternative routes—Rooftops or Hotel—and both end with a mortar attack on the Brumak threatening Betty. Its four collectibles are the Jacinto Sentinel Newspaper, Memorial Inscription, Landown Delivery Driver’s Note, and one COG Tag. Rolling Thunder has two collectibles; The Big Push and Digging In have none. After the deployment sequence finishes, Act 2, Chapter 1: Scattered becomes available.
Act 1, Chapter 3: Rolling Thunder — defend and repair Betty
At the start of Rolling Thunder, turn around on the derrick and inspect the notice on the wall beside the rear ladder. This is the optional Grindlift Spec Sheet. Return to the forward turret before the convoy reaches the active combat area.
Use the turret to intercept Nemacysts and incoming mortar fire. Lead moving targets instead of tracking directly behind them, and vent the turret before it overheats. Reavers soon join the attack. Turn the turret toward any Reaver threatening the derrick and keep firing until it withdraws or is destroyed. The Reaver is the priority over individual riders.
After Betty crashes, leave the turret and move to the repair area. The Ammo Requisition Form is beside the ammunition and grenades near the wreck. Take cover behind the fallen pillars while Dizzy works. Locust attack from the central platform, the ridge, and the right side of the area. Fire from cover and avoid crossing the open ground merely to close every Emergence Hole; grenade the holes only when you can do so without exposing yourself.
When Dizzy confirms that Betty is repaired, return to the derrick rather than chasing surviving enemies. Climb aboard and allow the transition to Act 1, Chapter 4: The Big Push.
- Collect the Grindlift Spec Sheet beside the rear ladder if desired.
- Use the turret against Nemacysts, mortar fire, and Reavers.
- Collect the Ammo Requisition Form near the repair supplies if desired.
- Defend Dizzy from the fallen-pillars cover.
- Board Betty after the repair call.
Act 1, Chapter 4: The Big Push — protect the convoy
Begin on the derrick turret and clear Locust emerging from the lava-field tunnels. A Brumak appears during the advance, but this first appearance is part of the convoy set piece. Concentrate on the active Locust threats rather than trying to force an early kill.
Ava’s hijacked rig is the next major danger. Fire at the exposed Locust on the rig and help the squad repel boarders. When grappling hooks appear on either side of the derrick, shoot the attackers or the hooks before they reach the deck. Check both sides of the vehicle because enemies can board from either direction.
When Ava reaches the narrow bridge, keep firing at the Locust around the rig. The driver’s cabin is protected until Dizzy rams the vehicle and exposes the operator. Continue shooting through the opening and eliminate the driver. Betty then crosses the bridge.
Several Brumaks and Corpsers appear during the remaining convoy push. Some are handled by the allied vehicles or by scripted events. At the final Brumak that blocks the convoy, use the derrick’s weapons and keep firing until it is destroyed. The chapter ends after the convoy clears the route and Roadblocks begins.
- Clear the opening Locust waves from the derrick.
- Repel boarders and destroy grappling hooks when possible.
- Support Dizzy’s attack on Ava’s rig and kill the exposed driver.
- Destroy the final Brumak blocking the convoy.
Act 1, Chapter 5: Roadblocks — clear Landown
Enter the first building and go upstairs. The Jacinto Sentinel Newspaper is on the floor near the ammunition and grenades. Collect it before returning downstairs. Continue through the building, then deal with the Tickers outside. Shoot them before they reach the squad, or knock one away and finish it while keeping distance from the explosion.
After the next Ticker attack, enter the small graveyard on the right side of the street. Inspect the large war memorial for the Memorial Inscription. Continue up the street under cover, watching for Nemacyst bombardment and Locust around the fuel station. When the Raven attacks the station’s Troika, use the distraction to clear the surrounding enemies.
Once the Imulsion station is secure, search the small room at the back of the cleared station. The Landown Delivery Driver’s Note is inside. Do not look for a Locust Calendar here; that is not the Roadblocks collectible at this location. After collecting the note, leave through the fence opening and follow Betty toward the tunnel.
Stay close to Betty’s headlights in the tunnel because Tickers can be difficult to see in the dark. At the wrecked-car blockage, take the small room beside the nearby stairs. The single COG Tag, COG Tag: Private Samuel Lee, is inside. Continue through the stairs and tunnel until a Reaver blocks the exit. Fight from behind the wrecked car and shoot it while it is recovering from a failed close attack. The gate opens after the Reaver is defeated.
The route now splits. Choose either Rooftops or Hotel; they are alternative paths, not consecutive sections. For Rooftops, turn left at the top of the stairs, climb to the roof, clear the Locust near the mortar, and use the mortar to break open the blocked building so the squad can advance. Follow Jack through the opened route, clear the next room, and take the mortar at the end.
For Hotel, clear the rooftop and upper rooms, then follow the squad through the hotel. Use the available mortar support to open the blocked passage and continue until you reach the mortar position. Whichever route you choose, take cover and repeatedly bombard the Brumak threatening Betty. Aim quickly, because the Brumak continues advancing while you reload and reposition. The chapter ends when it is destroyed and the transition to Digging In begins.
- Collect the Jacinto Sentinel Newspaper upstairs.
- Collect the Memorial Inscription at the war memorial.
- Collect the Landown Delivery Driver’s Note in the small room at the back of the cleared Imulsion station.
- Collect the single COG Tag in the tunnel room beside the stairs.
- Choose either Rooftops or Hotel.
- Use the mortar to destroy the Brumak threatening Betty.
Act 1, Chapter 6: Digging In — defend the Grindlift deployment
Digging In begins at the drilling zone. The Grindlifts cannot deploy until the assault is repelled, and this chapter contains no collectibles. Take the mortar if it is available and use it against the Emergence Hole and enemy mortar crews. Enemy mortars are an immediate threat to Betty and the squad, so eliminate their operators before spending time on distant infantry.
Grappler Drones join the assault. Move between the available cover positions and the front of Betty, collecting ammunition when your rifle reserves become low. When Boomers appear on the far side, prioritize them and remain behind cover while their Boomshots are in the air. Do not cross open ground for a dropped weapon while a Boomer has a clear shot.
The closing attack brings two Reavers into the deployment zone. Use remaining mortar ammunition if possible, leading the shots and firing from cover. If the mortar is unavailable, concentrate fire on the Reavers while avoiding their rockets and close-range attacks. After both Reavers are defeated, do not quit or reload an earlier checkpoint. Let the deployment sequence play through; its completion advances the campaign to Act 2, Chapter 1: Scattered.
- Defend the drilling zone while the Grindlifts are prepared.
- Destroy enemy mortar crews quickly.
- Survive the Grappler Drones and Boomers from cover.
- Defeat both final Reavers.
- Allow the deployment sequence to finish and confirm Scattered is next.
Before you move on
- Rolling Thunder ends after Betty is repaired and Delta boards the derrick.
- The Big Push ends after the convoy clears the final Brumak encounter.
- Roadblocks ends after the Brumak is destroyed from either the Rooftops or Hotel mortar position.
- If collecting items, the Roadblocks set is Jacinto Sentinel Newspaper, Memorial Inscription, Landown Delivery Driver’s Note, and one COG Tag.
- Digging In ends after the two final Reavers are defeated and the Grindlift deployment sequence begins.
- Act 2, Chapter 1: Scattered appears as the next available campaign chapter.
Act 2 — Denizens, Chapter 1: Scattered
The COG assault teams are scattered after entering the Hollow, leaving Marcus and Dom to locate Carmine. Choose any of the three opening routes; they converge at a vine barrier leading to Carmine’s position. After rescuing him from Drones, defend Jack while he repairs a Grindlift. Ride the machine through the newly opened tunnel, then help Omega Squad repel a staged Locust attack featuring Drones, Grenadiers, Tickers, and Boomers. Once the cavern is secure, follow the illuminated passage through a Wretch ambush and cut through the final vine barrier. Scattered contains no required collectibles and ends when the game transitions to Indigenous Creatures.
1. Leave the starting Grindlift and reach Carmine
When control returns, move away from the Grindlift with Dom. You have three valid routes: the path to the left, the path to the right, or the ladder behind the starting position. These paths loop around and converge, so none is a wrong choice. Continue forward when you see other Grindlifts landing or breaking through the cavern; Carmine’s radio call is the objective that keeps you moving.
At the converging route, find the vine-covered opening. Cut through it with the Lancer’s chainsaw bayonet or break it with melee attacks. Take cover behind the rocks in the next area and eliminate the Drones attacking Carmine. Approach Carmine after the immediate threat is gone. Pick up the nearby ammunition and Frag Grenades before beginning the next defense.
- Leave the starting Grindlift with Dom.
- Choose the left route, right route, or ladder.
- Cut or bash through the vines.
- Kill the Drones attacking Carmine and regroup with him.
2. Defend Jack while he repairs the Grindlift
Follow Carmine to the damaged Grindlift. Jack begins repairing it while two Emergence Holes open and Locust attack from the surrounding area. Take cover along the short wall, rocks, or nearby ridgeline where you can watch the approaches without exposing yourself in the open.
The first attackers include Drones and Grenadiers. Prioritize Grenadiers because their thrown grenades can flush you from cover. Use controlled rifle bursts and let the cover do most of the work. The Emergence Holes trigger the encounter, but they are difficult to target from the available positions and do not need to be closed to finish the objective; concentrate on the Locust instead.
After the initial wave, Tickers rush the position. Watch the ground near both sides of your cover. Shoot them before they reach you, or knock them away with melee and roll back if they get too close. Hold the area until Jack finishes the repair. When the Grindlift becomes usable, activate it at the control point on its side.
- Take cover before the repair defense begins.
- Kill Grenadiers before they force you out of position.
- Stop Tickers before they reach your cover.
- Wait for Jack to finish repairing the Grindlift and activate it.
3. Ride the Grindlift to Omega Squad
Follow the repaired Grindlift as it digs through the stone. Do not backtrack toward the starting cavern. The machine opens a route into a larger chamber where Omega Squad is engaged in a Locust attack.
Move toward the battle but establish a protected firing position before shooting. The upper ledge gives a useful view over the combat area and lets you support the COG soldiers without standing in the center of the cavern. If the ledge becomes unsafe, retreat behind its cover rather than advancing into the enemy formation.
- Activate the repaired Grindlift.
- Follow it through the tunnel it creates.
- Reach the Omega Squad battle area.
- Take a covered position before engaging.
4. Defeat the Locust attacking Omega Squad
The fight arrives in staggered waves. Begin with the Drones, then deal with the additional Drones and Grenadiers as they enter. Stay at range and avoid pushing toward the enemy’s side of the cavern; the waves are easier to manage when you keep the ledge, sandbags, or other barriers between you and the Locust.
Keep checking for Tickers approaching along the floor or around the sides of your cover. Use Frag Grenades against clustered enemies, but do not spend every grenade before the later waves arrive. Boomers appear near the end of the encounter. Focus fire on them from cover, duck behind solid protection when they fire their Boomshots, and collect the Boomshots afterward only if you want the optional heavy weapon.
The fight is complete when the Locust waves have been defeated. Move past the battle area and follow the route through the rock archway rather than searching for another objective in the cavern.
- Defeat the first Drone wave from cover.
- Watch both flanks for Tickers.
- Handle Grenadiers without abandoning safe cover.
- Defeat the Boomers and collect a Boomshot only if useful.
- Wait for the combat area to clear before moving on.
5. Cross the Wretch passage and finish Scattered
Enter the darkened passage beyond the Omega Squad battle. Jack’s spotlight and the glowing plants provide the main visual landmarks, so stay near the illuminated route instead of wandering into the darkness. Wretches attack at close range and can approach from the sides.
Use the Lancer or another firearm before they surround you. If a Wretch reaches melee range, the Gnasher or a quick melee strike can create space; retreat toward the light after the attack rather than chasing enemies into the unlit sections. Continue through the passage once the Wretches are defeated.
At the end of the route, find the final vine barrier and cut through it with the Lancer or bash it with melee attacks. A Lancer is available nearby if you need one. Crossing the barrier completes Scattered and triggers the transition to Act 2, Chapter 2: Indigenous Creatures.
- Follow Jack’s light or the glowing plants.
- Defeat the Wretches in the passage.
- Cut or bash through the final vine barrier.
- Confirm the transition to Indigenous Creatures.
Before you move on
- Carmine has been rescued after the opening Drone encounter.
- Jack has completed the Grindlift repair and you have activated the machine.
- You have followed the Grindlift through the dug tunnel and helped Omega Squad defeat the Locust attack, including the Boomers.
- You have crossed the dark Wretch passage and destroyed the final vine barrier.
- The game has advanced to Act 2, Chapter 2: Indigenous Creatures.
Act 2 — Indigenous Creatures
Act 2, Chapter 2 follows Delta through the Hollow while Rockworms provide moving cover. Shoot the glowing red fruit hanging from the cavern ceiling to lure each Rockworm into position, then stay behind its stone body while crossing exposed ground. Clear the Troika outpost, seal an Emergence Hole with a Frag Grenade, take the Longshot near the sniper bridge and use the Rockworm to cross safely. At the large outpost, defeat the Drones and Troikas, survive the Reaver, and collect the Kantus Scroll behind the turret positions. After the Boomers and Wretches emerge from the stone doorway, descend the ridge, attack the Locust Mortar team and Troika from behind, then use the captured Mortar or Troika to support Alpha Two below. Follow the squad down the tunnel to begin Disturbing Revelations. The Riftworm’s interior, digestive teeth and artery-cutting sequence are not part of this chapter.
1. Lure the first Rockworms and collect the Gear’s Journal
Move forward from the chapter start until a Rockworm crawls out of the cavern wall. Rockworms are not ordinary enemies and cannot be defeated with normal gunfire. Look up for the glowing red fruit hanging from the ceiling and shoot it down. The Rockworm will move toward the fruit, allowing you to follow behind its stone body. Keep away from its mouth and head, especially when it rears up; contact can down or kill you on higher difficulties.
Continue along the trail as it curves right. After the next Rockworm appears, look left for a secluded Grindlift behind a wall of vines. Cut through the vines with the Lancer’s chainsaw bayonet or regular melee attacks. Pick up the Gear’s Journal on the ground at the base of the Grindlift, then return to the main route. Shoot the next hanging fruit to move the Rockworm away from the blocked path and continue toward the fork.
- Shoot glowing fruit to move Rockworms.
- Do not attack the Rockworms with small arms.
- Collect the Gear’s Journal beside the secluded Grindlift behind the vines.
- Stay behind the Rockworm but clear of its mouth.
2. Take the Troika outpost
At the fork, the left route provides higher ground; the right route places a Rockworm closer to the Locust position. Either route reaches the same outpost. The left route is generally easier because it gives you elevation, while the Rockworm can still provide close cover after you advance.
Use the Rockworm or the ridge as cover while targeting the Troika nest and Drones. Throw a Frag Grenade behind the sandbags toward the Troika gunner, then pick off enemies who expose themselves. Once the gunner is distracted or eliminated, push into the outpost and clear the remaining Drones. Watch the ladders: reinforcements climb up behind the Troika position. Search the area for ammunition and Frag Grenades, then climb to the upper level after all Locust are down.
- Choose either branch at the fork.
- Prioritize the Troika gunner and the Drones.
- Watch for Locust climbing the ladders.
- Restock before moving through the upper tunnel.
3. Destroy the Tickers and close the Emergence Hole
As you climb toward the higher tunnel, Tickers rush in. Shoot them before they reach your cover or the squad. One Ticker detonates an obstruction and opens the route forward; destroy the remaining Tickers before entering the next chamber.
A Rockworm crosses the tunnel as an Emergence Hole opens farther ahead. Use the Rockworm or the loosened rock formation as cover while Drones and Grenadiers emerge. Throw a Frag Grenade directly into the Emergence Hole to seal it, then eliminate the remaining Locust. Do not advance until the immediate chamber is clear, since the next sniper position begins around the bend.
- Destroy the Tickers before they reach the squad.
- Use the Rockworm or rock formation as cover.
- Seal the Emergence Hole with a Frag Grenade.
- Clear the Drones and Grenadiers before continuing.
4. Take the Longshot and cross the Rockworm bridge
After the Emergence Hole, follow the path around the bend. A sniper fires from ahead, and additional snipers and a Troika cover the large outcropping beyond a narrow rock bridge. Pick up a Longshot near the Grindlift and use nearby cover to eliminate the visible snipers. Headshots conserve ammunition and remove most Drone-type enemies quickly.
Advance toward the bridge only after the closest sniper pressure is reduced. A Rockworm emerges along the route. Move behind it and use its body as mobile cover while crossing the narrow bridge. On the far side, shoot the visible Locust explosive on the opposing platform if you can see it; the blast can remove several defenders at once. Continue up the rock spiral. The branch at the base leads to the same upper outpost, so use whichever side gives you the better angle.
- Take the Longshot beside the Grindlift.
- Eliminate the bridge-area snipers and Troika from cover.
- Follow the Rockworm across the narrow bridge.
- Use the Locust explosive on the far platform when available.
5. Clear the upper outpost and collect the Kantus Scroll
At the top of the rock spiral, a Locust patrol is visible below. You may snipe the patrol from the overlook before entering the large outpost. The main platform contains Drones and two manned Troikas. Move from cover to cover, use Frag Grenades against the turret nests, and avoid crossing the open center while both guns are active.
When the platform is clear, a Reaver crashes into the area. Stay behind cover or use a Troika to bring it down, then keep your distance from the body as it explodes. After the Reaver is defeated, go to the rear of the platform behind the Troika positions and pick up the Kantus Scroll beside the ammunition box. This is the chapter’s second collectible.
Remain near cover while waiting for the next encounter. A pair of Boomers and a group of Wretches emerge through the stone doorway, followed by Tickers. If you are using a Troika, prioritize the Boomers, then leave the turret if Wretches reach your position. Their Boomshots provide a useful heavy-weapon option for the next section.
- Clear the Drones and both Troika positions.
- Defeat the Reaver from cover.
- Collect the Kantus Scroll at the rear of the platform.
- Handle Boomers first when the stone doorway opens.
- Leave the Troika if Wretches reach close range.
6. Support Alpha Two and finish the chapter
Go through the stone doorway and descend the winding ridge. Delta reaches Alpha Two, who are pinned down below. The Locust firing on them include a Troika and a Mortar operator positioned on the ridge. Approach from behind rather than exposing yourself to the field below. Eliminate the Troika gunner and the Mortar operator, then take the Mortar if you want a safer way to support the squad.
Use the Mortar or the nearby Troika to attack the Locust force below. Aim beyond the closest sandbags when necessary; the distant group is the required target. Keep firing until the enemy contingent is defeated and Alpha Two is safe. A cutscene and seismic disturbance reveal the route onward.
When control returns, follow your squad down the tunnel. The chapter ends as you move into the next story section, Act 2, Chapter 3: Disturbing Revelations. If you die during the support fight, reload the checkpoint, approach the ridge from behind again and remove the Mortar threat before trying to clear the lower field.
- Approach the Alpha Two fight from behind the ridge.
- Kill the Mortar operator and Troika gunner.
- Use the captured Mortar or Troika against the Locust below.
- Follow the squad into the next tunnel and chapter transition.
Before you move on
- The Gear’s Journal and Kantus Scroll have been collected if optional collectibles are being tracked.
- The Rockworm bridge and upper outpost encounters are complete.
- The Reaver, Boomers, Wretches and Tickers at the stone doorway have been defeated.
- The ridge Mortar operator and Troika have been eliminated.
- The Locust force below Alpha Two has been destroyed with the Mortar, Troika or regular weapons.
- The squad moves down the tunnel and Act 2, Chapter 3: Disturbing Revelations begins.
References for this chapter
Act 2 — Denizens, Chapters 3–6: Disturbing Revelations to Intestinal Fortitude
Continue Act 2 from the Locust stronghold approach through the sinking streets, prison rescue and Riftworm encounter. In Disturbing Revelations, use rock worms as moving cover, activate the fruit that advances Dom’s group and reunite with the squad inside the stronghold. In Sinking Feeling, clear Bloodmounts, Reavers and snipers, then reach the rooftop extraction point and survive the timed defense. Captivity moves through the prison pods and beast barges: board the first barge, operate its controls, transfer to the second and fight through the prison and ruined streets to the hotel roof. Intestinal Fortitude is the final chapter. Cross the digestive teeth, outrun the debris wall, open the sphincters, use the fallen vehicle as a bridge, cross the acid jets and pass the gas-filled intestines. Chainsaw the first heart’s two arteries, the second heart’s three arteries and the final heart’s four arteries. The last cut triggers the Riftworm’s death and the transition to Act 3, Chapter 1: Dirty Little Secret. Collectibles are optional throughout.
Disturbing Revelations — enter the Locust stronghold and reunite with Delta
Follow the squad down the ramp into the water and continue through the mushroom-filled passage. Climb the stairs cut into the rock to trigger the stronghold approach. Take cover at the top and eliminate the Kantus on the upper level first if you have the sniper rifle. Shoot the hanging fruit to summon a rock worm, then use the creature as moving cover while you thin the Locust on the lower ground. Do not remain exposed in the open; advance when the worm blocks the enemy’s fire.
When enough enemies are defeated, enter through the stronghold door. The optional collectible is on the right side of this room. Continue through the tunnel and climb the ladder. The chapter gives you a left or right route, but both routes reunite. On the left route, shoot the fruit from the windows in sequence so the rock worm can carry Dom’s group across the room. Clear the Wretches, pull the lever beside the exit and deal with the Troika before descending.
On the right route, collect nearby ammunition if needed, move through the Troika fire and use the rock worm as cover while Dom shoots the fruit. Detach from the worm near the interior entrance, clear the Troika room, pull the switch and climb the ladder. Kill the gunner at the top, descend to the platform and eliminate the remaining Locust. Once both groups are together, pass through the next door to finish Disturbing Revelations.
- Use the rock worm as moving cover during the stronghold approach.
- Enter the Locust stronghold after the first enemy group retreats.
- Activate the fruit sequence on either the left or right route.
- Pull the exit switch and reunite with Delta.
Sinking Feeling — cross the ruined streets and reach the extraction route
Move forward after the opening dialogue and continue toward the crashed helicopter. The first Bloodmount retreats, but another encounter begins among the burned-out cars. Keep distance from Bloodmounts and use cover while damaging both the rider and the mount; killing only one leaves the other active. Clear the accompanying Drones, then continue to the concrete roadblocks. A further Bloodmount and Drones appear, followed by a Reaver. Defeat the group before advancing.
At the large pit containing a burning car, take the right-hand street for ammunition and the Boltok if you need them, then return and use the left street. Stay behind cover and eliminate the two snipers on the ridge. Continue to the balcony overlooking the courtyard. When the wooden walkway descends and Drones attack, prioritize the Reaver when it arrives, then finish the ground forces. After part of the building collapses, descend the ramp, cross the damaged structure and turn right into the street. Enter the door on the left in front of the van.
The next room is an ambush. Get into cover immediately and hold against the enemies on the upper floor until assistance arrives. After the cutscene, inspect the body beside the wall near Dom for the optional collectible, then return to Dom. Follow the building around and pass through the gate into the graveyard. A Reaver attacks partway up the hill. Defeat it, then cross the bridge while quickly killing the Drones; delaying can allow Tickers to join the fight. Reaching the far side completes Sinking Feeling.
- Defeat both parts of each Bloodmount encounter.
- Clear the Reaver and sniper threats before pushing through the streets.
- Survive the upper-floor ambush and regroup with Dom.
- Cross the graveyard bridge after defeating the final attackers.
Captivity — board the beast barges and survive the rooftop extraction
Follow the large tunnel into the fog-covered room, take the left route and climb past the rows of blue prison containers. Continue uphill into the second pod area and investigate the pod containing the voice. After the scene, follow Delta down the ramp into the larger prison area. The optional collectible is on the right side. Move toward the beast barge and kill the Drones and Boomer that disembark before boarding.
Take cover immediately on the barge. A Grinder with a mounted Mulcher arrives near the front; eliminate him from cover, then ride the lift upward. Activate the switch on the pillar and climb either rear staircase. On the top deck, kill the two Grinders and the Reaver that arrives. Collect ammunition, go to the opposite end and pull the lever beside the Troika to start the barge. Mount the Troika while the barge moves and use it against incoming Reavers.
When the barge stops beside the second barge, clear its upper-deck Drones and board it. Go to the front, descend the stairs and activate the switch on the pillar. After the cutscene, fight from the lower deck until the wooden boarding platform drops. Clear the enemies on the platform, cross it and follow the route around to the ramp. Defeat the Drones and Grinder while descending.
At the bottom, ignore the upright wooden ramp. Turn left into the fog passage and defeat the Kantus, Drones and Tickers. In the ruined streets, use the damaged car and concrete barriers as cover. Clear the Kantus and Drones, kill the Reaver at the first intersection, then take the right path beneath the destroyed overpass. Pass the burning gas station and enter the large building. Circle around its right side, climb the rear stairs, vault the fallen concrete block and reach the center of the roof to trigger the checkpoint.
Carmine’s green smoke signals the extraction helicopter but also brings a large Locust assault. This is a survival objective, not a route-clear objective. Stay in cover, rotate only when necessary and preserve ammunition for enemies that approach the roof. Hold out until the countdown ends and the cutscene completes.
- Investigate the speaking prison pod.
- Board the first beast barge and activate its controls.
- Use the Troika during the barge ride against Reavers.
- Transfer to the second barge and fight through the prison and ruined streets.
- Reach the hotel roof and survive until the extraction countdown ends.
Intestinal Fortitude — cross the Riftworm and destroy its hearts
At the start, move forward and look left of the slanted steel support for the optional Car Gold Magazine. Regroup with Delta, descend through the water and approach the digestive teeth. For the first two teeth, wait until each tooth has struck and begins rising, then roadie-run across to the next safe space. For the long angled tooth, wait for it to rise, run across and veer right toward the safe ground. The following long row requires continuous roadie-running. Steer around the low broken walls without stopping, because stopping or getting caught can leave Marcus under the next impact.
The next tooth room alternates horizontal and vertical hazards. Move through the first opening, time the vertical teeth as they rise and exit through the final horizontal set. After the cutscene, kill the small parasites blocking the route. When the debris wall begins chasing Delta, run immediately and avoid the green villi on the floor and walls. Hug the left side after control returns if you want the optional COG Tag, then follow the path uphill to the sphincter and shoot the opening until it opens.
Pass through the sphincter, take the left route and chainsaw through the thin mucus membrane. Continue to the next sphincter and shoot it open. At the dead end, follow the car alarm, shoot the hanging vehicle and use it as a bridge. Ignore enemies that do not block the route, then chainsaw through the next membrane to escape the debris chase.
Take the left route into the acid section. Shoot the green tip of each acid nozzle to disable it temporarily, then cross the exposed pool before the spray resumes. When two nozzles cover the next pool, disable both quickly and roadie-run across. Repeat for the remaining nozzles, staying on solid ground whenever possible. Continue up the hill into the intestines. Poison gas fills this maze, so follow the brighter main route, avoid dark side paths and keep moving. Pass through the opening, turn left when possible, continue along the lit route and chainsaw through the membrane at the end. Cut through the next membrane beyond the following passage to reach the hearts.
At the first heart, cut its two attached arteries with the Lancer chainsaw. A passage opens after both cuts. Leave through it, climb the ramp and clear only parasites that block the route. Chainsaw through the next membrane to reach the second heart. Take the left side up the ramp and cut all three arteries. Continue through the opened path and chainsaw through the next membrane.
The final heart chamber has four arteries arranged as two on each side. Begin with the nearest artery, then move directly to the remaining targets. Blood rises after the first cut, and parasites can interrupt the chainsaw, so fire or shove them away only long enough to resume cutting. Do not search for supplies or attempt to clear every parasite. Severing all four arteries kills the Riftworm and completes the chapter.
- Cross the digestive teeth using timed runs and continuous roadie-running where required.
- Outrun the debris wall and use the fallen vehicle as a bridge.
- Disable acid nozzles by shooting their green tips.
- Follow the brighter route through the poison-gas intestines.
- Cut two arteries at the first heart, three at the second and four at the final heart.
- Allow the Riftworm death sequence to trigger.
Before you move on
- Disturbing Revelations has ended after Delta reunites inside the Locust stronghold.
- Sinking Feeling has ended after the ruined streets and rooftop extraction defense.
- Captivity has ended after the prison, beast-barge route and rooftop survival sequence.
- The digestive teeth, debris chase, acid section and poison-gas passage have been cleared.
- The first heart has been destroyed after two arteries were severed.
- The second heart has been destroyed after three arteries were severed.
- The final heart has been destroyed after four arteries were severed.
- The Riftworm death sequence has completed.
- The chapter select or campaign flow advances to Act 3, Gathering Storm, Chapter 1: Dirty Little Secret.
Act 3, Chapter 1 — Dirty Little Secret
Delta investigates an abandoned research facility after arriving in the Centaur. Enter through the side route, reach the sealed vault door and trigger the security system’s request for access codes. Follow Jack through the dark facility, take the optional Scorcher, restore power, then open the loading-bay route. Clear the Wretches, turn the large wheel to reopen the gate and meet Baird and Cole outside. Carry the heavy explosive back through the facility with Dom. While carrying it, movement is restricted and Marcus can use only his pistol, so stay beside Dom and keep advancing through the Wretch attacks. Plant the bomb at the sealed security door to finish the chapter and begin Origins. This original Xbox 360 chapter contains no collectibles.
Reach the abandoned facility and trigger the security lockdown
When control returns outside, move left around the facility. Follow the path toward the courtyard and climb the stairs to the entrance beneath the large structure. Kick in the double doors and enter the building.
Inside, take the hallway on the right and continue toward the large sealed vault door. The side rooms contain weapon options, including pistols and a shotgun. Take a pistol before approaching the vault because you will need one during the bomb-carrying section later. Walk to the end of the hall to trigger the scene in which the facility’s security system denies access and Delta decides to restore the power and force the door open.
- Circle left around the facility.
- Enter through the stairway and double doors.
- Follow the right-hand hall to the sealed vault door.
- Carry a pistol forward for the later escort section.
Follow Jack and restore the facility’s power
After the cutscene, you begin in a different room near the vault area. Follow Jack’s light through the dark corridor, passing through the rooms and the storage area. Continue along the only available route until Jack highlights a Scorcher on the floor. Pick it up if you want an effective weapon against the Wretches; another flamethrower and additional ammunition can be found in the loading-bay area later.
Continue past the Scorcher into the adjacent generator room. Use the power switch on the wall to reactivate the facility. Return to the storage room. The route you used earlier is now closed, so look for the green-lit control beside the opposite door and activate it to open the way into the loading bay.
- Follow Jack’s light through the dark rooms.
- Take the Scorcher if you want a strong close-range weapon.
- Activate the generator-room power switch.
- Use the green-lit control in the storage room.
Clear the loading bay and open the outside gate
The next room contains a large Wretch attack. Keep moving between cover positions and use the Scorcher at close range if you brought it. If the swarm reaches you, melee attacks can create space, but do not let several Wretches surround you. A catwalk above the loading-bay floor provides another Scorcher and a shotgun if you need replacement weapons or ammunition.
After the room is clear, locate the large wheel beside the garage-style door. Turn the wheel to open the gate back to the yard. The Wretches must be dealt with before you can safely operate it in single-player. Once the gate opens, go outside and approach the Centaur to trigger the next scene.
- Defeat the Wretches in the loading bay.
- Use the upper catwalk for extra weapons if needed.
- Turn the large wheel to open the gate.
- Approach the Centaur after the gate opens.
Carry the explosive back to the sealed door
Baird gives Delta the improvised explosive, and Marcus and Dom carry it together. The bomb limits movement and leaves Marcus with only his pistol, so do not wander away from Dom or attempt unnecessary detours. Move back into the loading bay, go straight ahead, then turn right and follow the raised lift and corridor toward the vault entrance.
Wretches attack repeatedly during the return trip. Fire your pistol at enemies approaching from the front and sides, and keep advancing rather than stopping in an open doorway. Stay aligned with Dom; moving too far ahead or behind can make the bomb awkward to control and may cause the pair to rotate in place. Use the corridor walls and doorways as protection whenever the Wretches give you a brief opening.
At the sealed security door, move into position with Dom. Marcus plants the explosive, and the resulting scene opens the route into the next chapter.
- Pick up the bomb with Dom.
- Use only the pistol while carrying it.
- Stay beside Dom and move steadily through the facility.
- Defeat or push past the Wretches without dropping the bomb.
- Plant the explosive at the sealed security door.
Before you move on
- The security system has denied access at the sealed vault door.
- Facility power has been restored and the loading-bay door has opened.
- The loading-bay Wretches are defeated and the outside gate has been opened with the wheel.
- Baird and Cole have supplied the explosive.
- Marcus and Dom have carried the bomb back to the sealed security door.
- The bomb has been planted and the cutscene has played.
- Act 3, Chapter 2: Origins is now active.
Act 3, Chapter 2: Origins
Origins takes Marcus and Dom through the New Hope Research Facility while Jack opens sealed doors and the squad navigates automated security defenses. The chapter is built around Wretch ambushes, sweeping gun turrets, flame turrets, and a short split-path section where one player either crosses as laser bait or operates the turret-control panels. Three collectibles are available: Interoffice Memo near the opening stairs, Memo in a cramped office after the first turret-controlled Wretch room, and New Hope Medical File in a small room beside the final turret controls. Use cover to approach each security system, deactivate defenses whenever the route allows, and move quickly through exposed corridors. The chapter is complete when you reach the central facility chamber and pull the lever after Jack cuts through the final fence.
1. Enter the facility and collect the Interoffice Memo
After the opening scene, go through the blasted door and climb the two flights of stairs. Before entering the larger room at the top, turn into the small office on the right. Pick up the Interoffice Memo beside the Boltok Pistol, then return to the main route.
Enter the adjoining room and wait through the security conversation. When Jack opens the next door, follow the corridor down the stairs. At the bottom, kick open the door on the right and use the switch around the corner to activate the automated turrets. Let them clear the Wretches in the adjacent room, then deactivate the system before leaving so the turret fire does not become a hazard on the return route.
- Enter the New Hope facility.
- Collect the Interoffice Memo near the top of the stairs.
- Use the first turret control to clear the Wretches.
- Deactivate the first turret system.
2. Cross the first security corridor and collect the Memo
Return to the hallway and kick open the door at the opposite end, entering the room where the Wretches were destroyed. Continue through to the next corridor. An active turret is positioned to the left; avoid its detection beam and enter the small room beside it to deactivate the turret. Grenades are available there if you need them.
Take the opposite corridor and enter the first open door on the right. Kick through the second door inside the office area to find the Memo on the floor near the blocked doorway. Pick it up, then return to the main hall. A Scorcher is available in the last door on the right before the next turret section.
- Deactivate the turret beside the first security corridor.
- Collect the Memo in the cramped office.
- Return to the main hall with the Scorcher or another suitable weapon.
3. Pass the flame turrets and reach the courtyard
Advance using wall cover until another turret activates down the hallway. The first room on the right is not the objective; enter the second room to reach the turret controls. Use them if needed, then clear the Wretches from the safer hallway rather than standing in the open.
The next room contains flame turrets embedded in the walls. Stay behind cover on the right and move between safe positions as the flames sweep across the passage. Use the deactivation controls if they are available before crossing. In the following corridor, kick open the door straight ahead and pass through the showers to reach another disarming switch. Use it to shut down the sweeping defenses, then enter the courtyard and eliminate the Wretches outside.
- Use cover near the second turret section.
- Cross the flame-turret room between firing sweeps.
- Use the shower-area switch to disable the corridor defenses.
- Clear the courtyard Wretches.
4. Cross the kitchen and collect the New Hope Medical File
Enter the building on the right side of the courtyard. Wretches will burst out as you approach. Inside the kitchen, use the lone cover object in the back-right area and clear the attackers. When the turret beams create an opening, cross to the far side and use the kitchen deactivation switch outside the room.
Continue through the twisting hallway until Baird reports worsening weather conditions. In the next room, two turrets cover a large partition. Move into the partition to trigger another Wretch wave, then search the small room beside the controls for the New Hope Medical File. It is on the floor next to a Scorcher. Collect it, use the nearby controls to disable the defenses, and continue through the doors where the Wretches entered.
- Clear the courtyard building and kitchen.
- Deactivate the kitchen turrets.
- Collect the New Hope Medical File beside the final turret controls.
- Turn off the defenses before leaving the room.
5. Reach the split-path security section
Move along the left side of the next room and pass behind the table to avoid the remaining turret beams. Descend the stairs and deal with the Wretches that emerge from the doorway below. You can eliminate the survivors or use a Roadie Run to reach the end of the corridor quickly.
Follow Jack through the fence he opens, then take the stairs on the left. The next area presents two linked roles. One route has you move between pillars as laser defenses are disabled; the other has you operate a sequence of turret-control panels while your partner crosses. In solo play, the AI handles the partner role. Follow the available prompts and keep moving when the active defenses change.
- Avoid the remaining turret beams after the kitchen.
- Clear or bypass the last Wretch group in the corridor.
- Reach the split-path security area.
- Complete the laser-bait or turret-control route.
6. Pull the final lever and finish Origins
After the split-path section, enter the next room and continue upstairs. Jack will cut through the final fence while dialogue plays. Wait until the interaction prompt appears at the central console, then pull the lever. A scene follows and the chapter ends.
If the lever prompt does not appear immediately, remain near the console until Jack finishes cutting through the fence and the objective updates. The transition to Rude Awakening confirms that Origins is complete.
- Reach the central facility chamber.
- Wait for Jack to finish opening the final fence.
- Pull the central console lever.
- Confirm the transition to Act 3, Chapter 3: Rude Awakening.
Before you move on
- The War Journal records three Origins collectibles if all were collected: Interoffice Memo, Memo, and New Hope Medical File.
- The final console lever has been pulled after Jack opens the fence.
- A cutscene plays and the game advances to Act 3, Chapter 3: Rude Awakening.
- If a collectible was missed, replay Act 3, Chapter 2 from chapter select and collect it before pulling the final lever.
Act 3 — Gathering Storm: Rude Awakening through Brackish Waters
Act 3, Chapters 3–6 carry Marcus and Dom out of the New Hope facility, across the razorhail-covered surface and into Mount Kadar. In Rude Awakening, destroy the escaped Sires, shut down the facility security system, escape through the storm and reach the Centaur. Ascension is a vehicle chapter: drive up Mount Kadar, cross the frozen lakes, destroy the Seeders and Reavers, break through the mountain entrance and defeat the three Brumaks. Displacement follows the stranded squad across ruined walkways and an underground lake while gunboats attack from the water. Brackish Waters is the Leviathan encounter. Its tentacles must be cut or tagged, its eye must be shot when it bites the boat, and grenades must be thrown into its throat after the interior polyps turn blue. Two collectibles are in Rude Awakening and one is in Displacement; Ascension and Brackish Waters have none.
1. Rude Awakening — escape the New Hope laboratories
At the bottom of the opening staircase, enter the laboratory and move left. A Sire breaks out of its stasis container. Use the Lancer chainsaw or another close-range finishing method when it is down; ordinary gunfire can leave a Sire able to rise again. Continue around the rear wall and handle the additional Sires that escape from their containers and nearby gates.
Advance slowly through the next laboratories. Several groups break free as you move between rooms, so keep a retreat route open instead of standing beside the containment pods. A Scorcher and ammunition are available near the back-left wall if you need a close-range weapon. At the final laboratory, wait for the immediate wave to thin, then interact with the gate. If another Sire reaches you while operating it, stop the interaction, back away, and resume once the room is under control.
- Defeat the Sires in the opening laboratories.
- Use a finishing attack so downed Sires do not recover.
- Open the gate at the far end of the final laboratory.
2. Rude Awakening — disable the facility and reach the trains
After Marcus and Dom pass through the blast shield, enter the security mainframe room and pull the lever at the end of the central aisle. Take the stairs and turn right. Locust break through the left wall, including Flame Grenadiers. If you use the security turrets, reach their controls in the small room at the back-right; otherwise, remain behind the overturned table and shoot the fuel tanks on Flame Grenadiers from a safe distance.
Use the first door on the left after the breach, not the corridor facing the turret. In the small room, activate the switch to retract the central turret and raise the opposite turret. Mantle through the window, take cover at the desk in the parallel hall and clear the Flame Grenadier and Drone. Continue through the grenade pickup area, then kick open the next doors and let the Locust enter the center of the room. The razorhail will eliminate them once the fight is positioned correctly.
Circle the room’s edge and leave the facility. For the first collectible, roadie-run through the razorhail into the small building on the right and collect the Doctor’s Journal. Return outside, enter the next building and board the train after killing the Locust inside. Pull the brake release to start moving. At the first stop, clear the E-Hole forces from the ramp and train car, then take a Longshot if one is available.
Use the wheels in the next structures to extend the shutter doors and create cover from the razorhail. Before boarding the second train, enter the building to the left of the previous structure and collect the Captivity Marks from the wall near the ammunition box. Board the train and survive the attacks from both sides. At the next stop, climb the rear ladder, follow the covered route and sprint between shelters toward the facility. Maulers use their shields against the storm, leaving them exposed; kill them before they reach close range. Finally, return to the Centaur and destroy the two Reavers that land while Baird repairs it.
- Pull the security-mainframe lever.
- Use or bypass the facility turrets.
- Collect the Doctor’s Journal if desired.
- Ride both trains and use the shutter wheels for shelter.
- Collect the Captivity Marks if desired.
- Defeat the Maulers and the two Reavers at the Centaur.
3. Ascension — drive the Centaur up Mount Kadar
Ascension is played from the Centaur. Aim the turret with the Right Stick, steer with the Left Stick and use the boost command only when the route is stable. The left route at the first fork is shorter: drive through the light sheet-metal barricades. The right route requires a ramp around a heavier obstruction. Both routes merge after the jumps. Destroy Boomers, Troikas, Reavers and ground Locust before they can surround the vehicle, and allow Baird’s repair sequences to restore the Centaur when the vehicle is damaged.
When Seeders begin striking the frozen lake, follow the open path that loops right and back toward the opposite bank. Do not boost on the ice; slow steering is safer. Destroy the Reavers when you reach solid ground, then cross the next lake by staying toward the far-right shore and curving left before the later breach. On land, follow either trail around the trees and destroy the Locust outpost and Reavers along the climb.
Two Seeders appear on a ridge above the route. Destroy them before continuing, then use the natural ramp where the bridge has collapsed. Eliminate the Reavers that descend near the crest and the one on the ridge beyond it. At the fortified entrance, destroy the nearby Reaver first, shell the defenses from range and concentrate on the vulnerable tower when Baird calls it out. The falling tower breaks the gate.
Drive through Mount Kadar until the Centaur drops into the dark cavern section. A Corpser opens the cave wall; follow the breach. After the vehicle stalls, survive the three Corpsers while Baird restores power. Once the turret is operational, fire at the Corpsers as they raise their legs. At the bottom, three Brumaks attack. Keep moving around the central column to avoid rockets and fire five shots into each Brumak to end the chapter.
- Choose and complete one route at the opening fork.
- Cross both frozen lakes without boosting recklessly.
- Destroy the Seeders and the fortified entrance tower.
- Survive the three Corpsers in the cavern.
- Defeat all three Brumaks.
4. Displacement — cross the ruins and destroy the gunboats
At the opening overlook, use the right-side parallel path to approach the first Theron. A spare Torque Bow is available there, and charged shots or splash damage can remove the Theron from cover. Continue through the ruins, clearing the ground Locust while avoiding unnecessary exposure to the gunboat patrolling the water.
Near the ruined staircases, defeat the Wretches and the Locust on the far side, including the Kantus and Flame Grenadier. Grenades and a Torque Bow are available on the central platform. The Stranded’s Journal collectible is at the top of the stairs in the middle of this area. When the first gunboat pulls alongside the shore, detonate the explosives on it, then cross over the wreckage.
A second gunboat docks ahead. Use the Longshot or Torque Bow near the foot of the steps to clear its passengers. Continue through the ruins and defeat the Bloodmount, Kantus and Drones, followed by the Grinder at the pier. Pick up the Mulcher before approaching the rowboat if you want to use it during the next sequence; the rowboat itself is unusable.
The pier is destroyed and the squad is carried across the underground lake. Shoot the crews of the pursuing gunboats and use the available mounted weapon when a boat moves ahead of you. When the raft reaches the Imulsion section, kill the Flame Boomer on the next gunboat and move onto that craft before the raft sinks. After the cutscene, repel attacks from the right and left, then destroy the Grinder-bearing boat. Use the bow Troika against the final craft before entering the tunnel.
- Defeat the opening Theron and ground Locust.
- Destroy the first gunboat with its onboard explosives.
- Optional: collect the Stranded’s Journal at the top of the central stairs.
- Reach the replacement gunboat before the raft sinks.
- Survive the final gunboat attacks and enter the tunnel.
5. Brackish Waters — defeat the Leviathan
Brackish Waters is the Leviathan fight. Take the Lancer from the center of the gunboat if you replaced it earlier. When a tentacle wraps around the boat, avoid its striking motion, then run to the tentacle and chainsaw it. A grenade tag can also remove it. Repeat this tentacle counter three times to advance the encounter.
When the Leviathan bites the front of the boat, shoot its eye until it withdraws. Collect the grenades at the bow if your supply is low. During the next bite, shoot the eye and sprint into the mouth before it closes. Inside, shoot the polyps as their tips turn blue. After three polyps are destroyed, throw a grenade into the exposed throat. Aim toward the center of the opening rather than the moving outer flesh.
Repeat the eye shot, mouth entry, three blue-tipped polyps and throat grenade sequence until the required throat attacks are completed. The Leviathan can still strike the boat with a tentacle between bites, so watch the deck and do not remain at the mouth after throwing the grenade. The chapter and Act 3 finish when the Leviathan is defeated.
- Destroy the tentacle three times.
- Shoot the Leviathan’s eye when it bites the boat.
- Enter its mouth after the eye is exposed.
- Destroy three blue-tipped polyps inside.
- Throw grenades into the throat for the final damage.
Before you move on
- Rude Awakening ends after the Centaur is repaired and both Reavers are defeated.
- Ascension ends after the three Brumaks are destroyed and the game transitions to Displacement.
- Displacement ends after the squad survives the underground-lake gunboats and enters the tunnel.
- Brackish Waters ends when the Leviathan is defeated after the throat-grenade sequence.
- The next campaign chapter is Act 4, Chapter 1: Priorities.
- Optional collectible progress for these chapters is two items in Rude Awakening, none in Ascension, one in Displacement and none in Brackish Waters.
Act 4 — Priorities
Priorities is Act 4, Chapter 1 of the original Xbox 360 campaign. After leaving the Lake Monster area, follow Dom through the Locust highway toward the dam. Ride the first elevator up, cross the ledge, and use the second elevator to enter the dam interior. Turn the wheel to lower the water, then stop the Drone Engineer before he can reopen the flood valve. Continue down to the cavern, defeat the Wretches and Mauler, and take the Mauler’s Boomshield for the bridge fight. Advance across the bridge, deal with the Troika, Drones, Sniper, and Theron Guard, then use the second active Locust terminal on the left before accessing the objective terminal. The chapter ends after the Maria search sequence and transition to Answers. The only collectible is the Locust Terminal.
1. Follow Dom to the dam
Leave the starting area and follow the marked path through the Locust highway. This opening stretch has no combat, so stay with Dom and continue toward the dam rather than trying to follow the marching Locust column. A cutscene shows a Brumak moving along the highway and reveals the human slave camp below.
Continue along the upper walkway until you reach the first elevator. Ride it upward, then follow the ledge around the dam structure. Use the second elevator to descend into the dam interior. There is no required weapon setup at this point, but keep a rifle and grenades available for the next room.
- Follow Dom through the Locust highway.
- Ride the first elevator up.
- Cross the ledge to the second elevator.
- Descend into the dam interior.
2. Drain the dam and stop the flood valve
The dam room is filled with fast-moving water that blocks the route. Go to the wheel at the side of the chamber and turn it until the water level drops enough for you to cross through the channels.
As soon as you begin crossing, Locust enter the room. A Drone Engineer runs toward the valve on the opposite side and attempts to restore the water flow. Make the Engineer your first target. If he reaches the valve, the room floods and you are forced to restart from the checkpoint. Use the channel walls as cover while firing, then eliminate the remaining Drone, Grenadier, and Sniper. Frag Grenades are useful for enemies grouped near the far side, but the main priority is stopping the Engineer quickly.
Once the room is clear, move through the exit and take the next elevator down.
- Turn the dam wheel to lower the water.
- Prioritize the Drone Engineer at the opposite valve.
- Use the water channels as cover.
- Clear the remaining Locust and take the lower elevator.
3. Defeat the Wretches and Mauler
At the bottom, collect the ammunition and pick up the Longshot near the lift if you want a precision weapon for the next encounter. Enter the cavern to trigger an attack by Wretches and a Mauler.
Shoot the Wretches before they reach you. They are the immediate close-range danger and can distract you while the Mauler advances. Keep Dom on the opposite side of the Mauler when possible so the Boomshield does not protect it from both directions. If the Mauler keeps its shield facing you, reposition instead of wasting rifle ammunition against the shield.
After the enemies are defeated, take the Mauler’s Boomshield. You can carry it into the bridge fight, plant it as portable cover, or leave it behind if you prefer a full two-weapon loadout. Pick up the nearby Frag Grenades before stepping onto the bridge.
- Collect the Longshot and nearby ammunition if needed.
- Kill the Wretches before they surround you.
- Flank the Mauler with Dom’s help.
- Take the Mauler’s Boomshield and nearby Frag Grenades.
4. Cross the bridge and clear the Locust position
Step onto the bridge to trigger the searchlight and the next Locust attack. The position contains a Troika, ground Drones, a Sniper, and a Theron Guard. Plant the Boomshield midway between available cover points if you carried it; this gives you protection while you fire or throw grenades. You can also advance slowly behind the raised shield, but do not expose your side to the Troika.
Deal with the ground Drones first if they are pushing forward, then eliminate the Troika and the Sniper. The Theron Guard is dangerous at medium range, especially if he has a Torque Bow, so keep cover between you and him while you close the distance. The searchlights can be destroyed, but they are not themselves a required objective.
When the bridge area is clear, search the far side for ammunition. A Torque Bow is available near the Locust terminals, and the terminal room contains the chapter’s only collectible.
- Trigger the bridge encounter.
- Use the Boomshield as planted cover or advance behind it.
- Prioritize ground Drones and exposed heavy threats.
- Collect ammunition and inspect the terminal area.
5. Collect the Locust Terminal and access the objective terminal
Face the Locust terminals on the left side of the cleared room. Do not immediately use the terminal marked as the current objective. Instead, activate the second illuminated terminal beside the wall. This records the Locust Terminal collectible in the War Journal.
After collecting it, use the primary terminal indicated by the objective. A cutscene follows concerning the search for Maria. This interaction completes Priorities; the later terminal patrol and the next combat sequence belong to Act 4, Chapter 2: Answers.
- Find the two active terminals on the left side.
- Use the second illuminated terminal beside the wall for the Locust Terminal collectible.
- Use the primary objective terminal afterward.
- Wait for the chapter transition to Answers.
Before you move on
- Marcus and Dom have reached the dam interior and lowered the water.
- The Drone Engineer and the remaining dam-room Locust are defeated.
- The Wretches and Mauler in the cavern are defeated.
- The bridge position is cleared of the Troika, Drones, Sniper, and Theron Guard.
- The Locust Terminal is recorded if the optional collectible was taken.
- The primary terminal has been accessed and the game advances to Act 4, Chapter 2: Answers.
Act 4, Chapter 2: Answers
Follow Dom through the Locust prison tunnel and inspect the terminals while searching for Maria. The early terminals are not all the story objective, and the Locust Prisoner’s Journal is in the alcove to the left of the second terminal, beside the large transport vehicle. Continue with Dom until you activate the terminal displaying the matching Locust symbol. That interaction starts four defense waves: the first Bloodmount and Wretches enter from the right, the second Bloodmount attack comes from the left, a Grinder group arrives from the right, and the final Theron-led group attacks from the left. Use the central cover, stop Wretches and Bloodmounts from reaching your position, and stay protected from Torque Bow fire. After the defense, wait for Jack’s search and the Dom-and-Maria cutscene. The next chapter is Act 4, Chapter 3: Hornets’ Nest.
1. Follow Dom through the prison tunnel
Move forward through the tunnel lined with Locust holding capsules and stay with Dom. The first terminal is part of the search, but activating it does not complete the chapter objective. After checking it, advance toward the next terminal and take cover when Dom does.
A Locust patrol moves through the passage near the second terminal. You can remain behind cover and let the patrol pass, or engage it if it blocks the route. Avoid pushing into the open while the patrol is present. If you fight, eliminate the nearby Locust from cover before continuing toward the terminal area.
- Follow Dom through the capsule-lined passage.
- Check the first terminal when Dom stops there.
- Use cover while the Locust patrol passes or while you clear it.
2. Recover the Locust Prisoner’s Journal
After the patrol has moved away or has been defeated, approach the second terminal. Before continuing along the main route, turn left and search beside the large transport vehicle, near the cavern wall and barricades. The Locust Prisoner’s Journal is on the ground in this alcove.
The journal is optional and does not affect story progression. Pick it up before moving onward, because the terminal sequence and the following defense can make backtracking inconvenient. After collecting it, return to Dom and continue through the passage.
- Reach the second terminal after the patrol clears the area.
- Turn left beside the large transport vehicle.
- Pick up the Locust Prisoner’s Journal before continuing.
3. Locate the story terminal
Continue following Dom and activate the additional terminals as the search proceeds. The first several machines do not all trigger the chapter’s combat sequence. Watch for the terminal that displays the matching Locust symbol found during the search; activating that machine advances the story.
Before interacting with the correct terminal, reload both weapons and collect nearby ammunition. The activation begins the defense sequence immediately. Start from the central cover position so you can see the right and left approaches without standing in the open.
- Continue past the earlier terminals with Dom.
- Identify the terminal with the matching Locust symbol.
- Reload and take central cover before activating it.
4. Stop the first Bloodmount wave from the right
The first attack enters from the right and includes a Bloodmount supported by Wretches. Turn toward that approach as soon as the defense begins. Keep hard cover between yourself and the Bloodmount while firing, and do not allow the Wretches to slip around your flank.
The Bloodmount is the immediate threat because it can cross the room quickly. Fire from cover, retreat around the central position if it closes the distance, and target the mount or rider consistently instead of splitting your attention between both. Remove Wretches that are about to reach you, then finish the Bloodmount before the next wave arrives.
- Watch the right approach when the defense starts.
- Stop Wretches from reaching your flank.
- Keep the first Bloodmount away from the central cover.
5. Defeat the second Bloodmount wave from the left
After the first group is defeated, the second Bloodmount attack comes from the left. Move only far enough to gain a clear firing angle and keep the central cover between you and the approaching enemies. This wave can reach the defense position quickly, especially if Wretches from the first attack are still alive.
Prioritize any Wretches that are about to force you out of cover, then concentrate fire on the Bloodmount and rider. If the mount reaches close range, retreat around cover rather than attempting to stand in the open. Once the second wave is down, reload and prepare for the Grinder group.
- Turn toward the left entrance after the first wave.
- Prevent leftover Wretches from surrounding you.
- Defeat the second Bloodmount before leaving the central cover.
6. Survive the Grinder group from the right
The third wave arrives from the right and includes a Grinder with supporting Drones. Keep solid cover between yourself and the Grinder’s Mulcher. The Grinder’s sustained fire can overwhelm an exposed position, so fire during short openings and return to cover before it can track you.
Prioritize the Grinder when it advances, but eliminate supporting Locust whenever they expose themselves safely. Grenades are useful if several enemies bunch up near the approach. If the Grinder drops the Mulcher, take it only if you can remain protected and still have room to change cover.
- Watch the right approach for the Grinder group.
- Use hard cover against the Mulcher.
- Do not expose yourself to chase distant Drones.
7. Defeat the final Theron-led wave from the left
The final defense group attacks from the left and includes Theron Guards with supporting Locust. Keep the left approach in view and prioritize Theron Guards because their Torque Bows can down you with a charged shot. Stay behind cover while a Theron is drawing the bow, then peek out after the shot has been released.
Remove Wretches if they reach the defense area, but do not abandon cover to chase ordinary Drones. Continue checking the left side for another Torque Bow charge. When the final enemies are defeated, remain in the area and allow Jack to complete the search. The following scene involving Dom and Maria ends the chapter and leads into Act 4, Chapter 3: Hornets’ Nest.
- Watch the left approach for Theron Guards.
- Stay behind cover during Torque Bow charges.
- Wait for Jack’s search and the ending cutscene.
Before you move on
- The Locust Prisoner’s Journal is recorded in the War Journal if you collected it.
- The first Bloodmount wave from the right is defeated.
- The second Bloodmount wave from the left is defeated.
- The Grinder group from the right is defeated.
- The final Theron-led group from the left is defeated.
- Jack completes the search for Maria’s capsule.
- The Dom-and-Maria cutscene begins.
- The chapter advances to Act 4, Chapter 3: Hornets’ Nest.
Act 4, Chapters 3–6 — Hornets’ Nest, No Turning Back, The Best-Laid Plans and Royal Inquisition
After Answers, Delta must complete Hornets’ Nest before reaching the gondolas in No Turning Back. Fight through the palace approach, activate the switches that raise cover, defend Jack while he calls for reinforcements, and survive the mortar and Reaver attacks. The chapter contains the Locust Jailer Document near the opening lower corridor and the easily missed Human Finger Necklace beyond a closing doorway after the Grinder fight. No Turning Back crosses the chasm by gondola and offers alternative routes through the palace defenses. The Best-Laid Plans circles the palace after its trapped entrance, uses a Locust lift, divides the squad and descends through the machinery. Royal Inquisition continues through the lower palace, moving platforms and the throne room. Defeat Skorge by surviving his attacks and winning three chainsaw duels, then cross the bridge to the Reaver pen. The route is complete when Act 5, Chapter 1: Escape loads.
Hornets’ Nest: Collect the Jailer Document and enter the palace approach
Hornets’ Nest begins immediately after the defense sequence in Answers. Restock from the nearby ammunition, then go down the staircase. At the bottom, turn right into the narrow lower corridor. The Locust Jailer Document is on the floor at the back, before the route continues to a door that Delta can break through.
After the cutscene, remain behind the railing and reduce the enemies in the courtyard from cover. A distant archer in the tower can harass the squad, so eliminate that enemy when possible. Move down the stairs to the wall beside the ammunition box, then advance along the wall while using the raised walkway and nearby structures as cover. Clear the courtyard and climb the tower stairs to activate the switch.
- Leave Answers through its transition into Hornets’ Nest.
- Collect the Locust Jailer Document if desired.
- Defeat the initial courtyard attackers and the distant archer.
- Reach the tower and activate its switch.
Hornets’ Nest: Raise the cover and clear the palace courtyard
The switch triggers another attack, including enemies carrying flamethrowers. Leave the switch room immediately and use the walkway on the left to watch the courtyard and stairwell. Do not remain beside the switch while the reinforcements arrive. Once the immediate attackers are down, return to the courtyard and follow the hallway behind the tower.
Use the low walls and ammunition stations as you advance. A mounted enemy appears in the next engagement, followed by more resistance near the building. Enter the building, go down the spiral staircase and exit on the opposite side. Take cover behind the barricade, then activate the switch to raise additional cover points. Enemies on the right-side ledge can lower or compromise the defenses, so deal with them before pushing forward.
- Survive the switch-room ambush.
- Clear the courtyard and walkway enemies.
- Defeat the mounted enemy near the low-wall section.
- Activate the barricade switch beyond the spiral staircase.
Hornets’ Nest: Survive the Reaver and Boomer engagements
A Reaver joins the fight outside. Retreat through the building doorway and fire from inside; the Reaver cannot follow through the narrow entrance, making this a safer position than fighting in the open. Return outside after it is destroyed and finish the remaining enemies.
As Delta approaches the large palace door, two Boomers appear. Keep cover between yourself and their explosive fire, then attack during the pauses between shots. Enter the palace once the approach is clear. Inside, collect grenades from the short hall on the right and use the room’s exit as a firing position. Clear the first group, move from trench to trench and climb the rear staircase.
- Defeat the Reaver from the building entrance or another protected position.
- Clear the remaining courtyard enemies.
- Defeat both Boomers near the palace door.
- Enter the palace and climb the rear staircase.
Hornets’ Nest: Find Jack’s transmission position and collect the Human Finger Necklace
At the top of the stairs, check the end room for ammunition and grenades, then return to the skipped doorway. Step into the next room only far enough to trigger the enemies, then retreat into the hall and fire from either side of the doorway. Boomers will advance through the encounter; keep the doorway between you and them whenever possible. Follow the walkway back outside after the room is secure.
Outside, activate the switch to raise cover and move up the stairs. After the initial enemies are defeated, Jack begins transmitting and another ambush starts. Use the nearby switch, then fight from the wall and cover ahead. Two Reavers arrive one after another. If the open courtyard is unsafe, retreat to the doorway and shoot them as they approach. A mortar enemy appears after a gate opens, so watch for the impact marker and move before the shell lands.
After the mortar carrier is defeated, activate the nearby switch to bring in the COG reinforcements. The following fight opens additional sections of the courtyard, with more mortar fire, Tickers and Boomers. Raise the available cover switches as you advance and use the left-side pillar or angled wall to stay outside the mortar’s most dangerous area. Once the last group is defeated, climb the rear stairs, collect ammunition and grenades, and open the doors to finish Hornets’ Nest.
The Human Finger Necklace is the chapter’s timed collectible. After the pair of Grinders emerges from the large doors, immediately Roadie Run past them toward the closing doorway. Turn right, go up the stairs and enter the small room before the second door shuts. The necklace is on the floor inside, near the Troika. If the door closes, reload the checkpoint and repeat the run rather than continuing without it.
- Clear the upper palace room and return outside.
- Defend Jack while he transmits.
- Defeat both Reavers and the mortar carrier.
- Survive the expanded courtyard fight with mortar fire, Tickers and Boomers.
- Collect the Human Finger Necklace by reaching the closing room quickly.
- Open the final doors and trigger the transition to No Turning Back.
No Turning Back: Defend the gondolas and reach the palace landing
No Turning Back begins only after Hornets’ Nest is complete. On the first gondola, stay behind the railing and shoot down the Reavers making attack runs. When the second gondola approaches with Locust aboard, eliminate its passengers before the platforms align. Cross to the second gondola as soon as the game allows it; the first gondola is not the route forward. Activate the control on the replacement gondola and use its cover while dealing with the next Reavers.
Disembark at the palace landing and climb the stairs. The Locust Calendar is on a glowing orange pedestal to the left shortly after the gondola section. Continue to the defense platform, pull the lever to raise the mechanical cover and clear the enemies ahead. A Troika covers the approach; attack the gunner from the side or use explosives while staying behind cover. Pull the lower lever after the platform is secure to open the alternative routes.
- Defeat the Reavers attacking the first gondola.
- Clear the Locust from the incoming gondola.
- Cross to the replacement gondola and activate its control.
- Collect the Locust Calendar if desired.
- Raise the palace defense cover and pull the lower lever.
No Turning Back: Complete one split route and cross the Lambent chamber
Choose either the Stairwell path or the Troika-lift path. The Stairwell route uses ground-level cover and switch points; advance carefully, clear the enemies below and activate the lift controls. The Troika-lift route places Delta on the mounted weapon while the squad operates the switches that lower the platform. The paths are alternatives and reunite later, so completing both is unnecessary.
After the reunion, extend the bridge and cross into the next section. Turn left at the far side and follow the corridor to the Locust Defensive Plans, located on the floor near ammunition. Raise the stairs with the wall lever, then descend. Two Grinders emerge from the large doors; fight from cover and avoid allowing both Mulchers to dominate the same angle. A Grenadier enters from a side door after the Grinders fall. Continue through that doorway and clear the Flame Grenadier, Drones and Kantus along the Lambent trail.
An elevator arrives in the cavern carrying a Kantus, Theron or Palace Guard enemies and Maulers. Use the nearby cover, prioritize the Kantus and ranged enemies, then separate the Maulers and attack when their shields are lowered. Board the elevator after the room is clear. The resulting cutscene begins The Best-Laid Plans.
- Complete either the Stairwell or Troika-lift route.
- Extend the bridge and collect the Locust Defensive Plans if desired.
- Defeat both Grinders and the following palace enemies.
- Clear the cavern elevator ambush.
- Board the elevator and trigger The Best-Laid Plans.
The Best-Laid Plans: Abandon the trapped entrance and circle the palace
After the lift stops, climb the stairs and approach the palace entrance. The gate closes and enemies appear in the upper windows while the mechanical cover rises and drops. Use the center switch if you need to restore the cover, but do not treat this courtyard as a required full clear. When the cover starts to drop or the entrance becomes unsafe, retreat down the stairs and follow the outside path around the palace.
Use the pop-up cover created by the glowing floor panels. Palace Guards, Tickers and a Bloodmount-riding Theron attack along the outer route. Prioritize the Bloodmount so it cannot rush the position, then clear the remaining enemies. Continue around the palace until a Locust lift arrives carrying a Kantus and another guard. Defeat them before boarding.
Do not step onto the lift immediately if you want the collectible. Continue around the palace’s outer edge beyond the lift and check the small alcove on the right for the Locust Invasion Map. Return to the lift and activate it to reach the lower palace route.
- Use the center switch if the entrance cover is retracted.
- Withdraw from the trapped gate and circle the palace.
- Defeat the Bloodmount, Theron, Tickers and Palace Guards.
- Defeat the lift defenders.
- Collect the Locust Invasion Map if desired.
- Ride the Locust lift.
The Best-Laid Plans: Complete the palace split and descend the machinery
At the lower level, activate the switch near the cells to divide the squad into an upper and lower route. The upper route gives Delta a higher firing position over the enemies below and is generally safer. The lower route places Delta closer to the Flame Grenadier, Mauler and later Bloodmount encounter, but it can provide access to useful heavy equipment. Complete the route assigned to you and activate the required switch so the squad reunites.
After regrouping, locate the two stairways. Before taking the long spiral staircase downward, climb the other staircase into the area where the Grinder fired. At the end of the corridor, the Trinity of Worms is marked on the floor near ammunition. Return to the main route and descend through the palace machinery.
Use the columns along the spiral staircase as cover against Palace Guards and Torque Bow users. Tickers appear during the descent; shoot them before they reach the squad or roll away when they begin their detonation. At the base, remain near the doorway while clearing the final room’s Kantus and Palace Guards. The cutscene after this room begins Royal Inquisition.
- Activate the split-route switch.
- Complete the upper or lower route and reunite with the squad.
- Collect the Trinity of Worms if desired.
- Descend the spiral staircase using the columns as cover.
- Defeat the final palace room and trigger Royal Inquisition.
Royal Inquisition: Clear the split hall and reach the lower palace
Collect ammunition and grenades at the chapter start. In the second room, turn left and inspect the base of the last column for the Locust Tablets. Pull the lever along the railing to open the Left Hall and Right Hall routes. Either side is sufficient; the routes are functionally equivalent and reunite later.
Advance from column to column and clear the first Mauler and Palace Guards. Tickers appear in the following area. Torque Bow users fire across the gaps, so wait for Dom and Baird to suppress their side or eliminate them before crossing exposed ledges. Clear the Palace Guards on your side, reunite with the squad and use the lift at the far end to descend.
- Collect the Locust Tablets if desired.
- Pull the hall lever and choose either route.
- Defeat the Maulers, Palace Guards and Tickers.
- Suppress or eliminate the Torque Bow users before crossing.
- Ride the central lift downward.
Royal Inquisition: Cross the moving platforms and enter the throne room
On the lower level, the floor separates across Imulsion gaps. Step onto the raised panels and use them as cover while Palace Guards attack from the opposite side. Clear each enemy group before advancing to the next division. Torque Bow fire is especially dangerous in the later section, so stay behind the left-side cover when possible and avoid crossing while a bolt is charging.
The floor eventually drops into a lower chamber and more Palace Guards enter. Use the central column and available ammunition while clearing the room. When the platform becomes trapped, find the wheel on the central column and turn it to raise the platform. The ammunition containers in the chamber can be used to replenish supplies while the enemies appear.
Once the platform reaches the upper level, follow the opened route through the tall doorway. Restock before entering the throne room, because the next objective is the Skorge encounter.
- Use the mechanized panels as cover over the Imulsion gaps.
- Clear each enemy group before advancing.
- Turn the central wheel to raise the fallen platform.
- Restock ammunition and enter the throne room.
Royal Inquisition: Defeat Skorge and reach the Reaver pen
Skorge’s battle is completed through three chainsaw duels rather than sustained gunfire. Win the opening duel, then move behind the arena’s cover while Skorge circles the edges. Avoid his Ink Grenades and leave the affected area immediately. Tickers emerge from the Imulsion pools, so destroy them before they force you out of cover.
Watch for falling debris and the telltale rubble that marks where ceiling material will land. When Skorge cuts down a pillar, move away from the collapse path and keep running until the falling structure has passed. Do not waste ammunition trying to damage him while he is moving around the arena; wait for him to return for the next chainsaw duel. After each duel, reactivate the center switch to raise the arena cover.
Repeat the survival pattern until all three chainsaw duels are won and Skorge retreats. Leave through the doorway to the right of the throne and reunite with Baird and Cole. Cross the bridge when it connects, then Roadie Run through the final passage to the Reaver pen. Reaching the pen triggers the transition to Act 5, Chapter 1: Escape.
- Win the opening chainsaw duel.
- Avoid Ink Grenades, Tickers, falling debris and collapsing pillars.
- Raise the arena cover after each duel.
- Win all three chainsaw duels and force Skorge to retreat.
- Reunite with Baird and Cole.
- Cross the bridge and reach the Reaver pen.
- Confirm that Act 5, Chapter 1: Escape loads.
Before you move on
- Hornets’ Nest is complete when the final mortar courtyard fight is cleared, the rear doors are opened and the cutscene transitions to No Turning Back.
- No Turning Back is complete when the cavern elevator is boarded and its cutscene begins The Best-Laid Plans.
- The Best-Laid Plans is complete when the final palace chamber is cleared and the cutscene begins Royal Inquisition.
- Royal Inquisition is complete when Skorge has been defeated through three chainsaw duels, Delta has reunited with Baird and Cole, crossed the connecting bridge and reached the Reaver pen.
- The next chapter loads as Act 5, Chapter 1: Escape. This transition confirms that the entire assigned Act 4 route is complete.
Act 5, Chapters 1–2: Escape and Desperate Stand
Escape is a vehicle-based chapter followed immediately by Desperate Stand at the Jacinto perimeter. During Escape, the Reaver follows a fixed route: strafe around incoming fire, use rockets on turrets and Brumaks, and use the machine gun against faster targets. The Hydra must be handled through its attack cues rather than by firing randomly at its armored body. Shoot its turret when it fires, its mouth when it lunges, sever the tentacle holding your Reaver, then land three rocket hits on its exposed face during the final charges. Escape has no collectibles. Desperate Stand begins on foot. Follow Hoffman through the perimeter, stop Locust from grappling onto the landing platforms, search for two optional collectibles, defend the communications array by killing six Reavers, and survive the final assault by using the available mortar against two Brumaks. Completing both chapters unlocks Free Parking.
Chapter 1: Escape — clear the Reaver flight
The Reaver is on a fixed route, so you cannot steer it through the level or alter its speed. Use the Left Thumbstick to strafe left and right around incoming fire. Rotate the Right Thumbstick to aim and switch between the forward rocket launcher and the rear machine gun; tapping X quickly reverses your view when a target moves behind you. Hold RB to cool the mounted weapon before it overheats.
When the formation levels out, destroy the rocket turret ahead. As the Reavers shift right, fire at the Brumak on the ledge before it can damage your mount. Continue through the tunnel and destroy the next rocket turret, then the following Brumak. A further turret and a Brumak near the dam appear before the landing area. Deal with the turrets promptly because their rockets can damage you while you are concentrating on larger targets.
After landing, help the stranded Gears by firing rockets into the Locust group. Prioritize Grinders and Boomers when they are exposed, then clear the supporting Drones. A Brumak breaks through the wall on the left; turn toward it immediately and use rockets until it is destroyed. There is no side route or collectible search in Escape, so stay focused on the active combat area.
- Strafe with the Left Thumbstick instead of trying to steer the Reaver along the route.
- Use rockets for rocket turrets and Brumaks; use the machine gun for targets crossing your view.
- Hold RB to cool the Reaver weapon when its heat rises.
- Destroy the Brumak that breaks through the wall on the left.
- Do not spend time searching for collectibles; Escape has none.
Chapter 1: Escape — survive the Hydra’s first pursuit
Skorge’s Hydra follows you through the tunnel. When its mounted turret becomes active, fire at the turret. When the Hydra opens its mouth and lunges at your Reaver, shoot into the exposed mouth. These attacks are the useful damage opportunities during this section.
The Hydra also launches rocket barrages. Swerve laterally with the Left Thumbstick rather than absorbing the explosions. Keep moving while the missiles approach, then reacquire the Hydra and resume fire. Survive the sequence until the Reavers reach the surface; this completes the first Hydra phase and leads into the pursuit through the open terrain.
- Fire at the Hydra’s mounted turret when it begins firing.
- Shoot into the mouth during the bite attempt.
- Strafe around the rocket barrages.
- Continue until the Reavers reach the surface.
Chapter 1: Escape — protect the formation and defeat the Hydra
On the surface, enemy Reavers pursue the formation. Sweep the machine gun across targets moving laterally and use rockets when a Reaver presents a clear frontal target. Prioritize enemies closest to your allied Reavers. If a rider is exposed, damaging the rider can reduce incoming fire, but destroy the Reaver if it remains a threat. Enemy rockets have a visible trail and limited tracking, so keep strafing when they launch.
Skorge’s Hydra eventually catches up and grabs your Reaver with a tentacle. Aim at the limb holding you, especially its tip, and keep firing until it is severed. Once released, the Hydra moves in front of you and charges with its face exposed. Fire one rocket directly into its face during the charge.
The Hydra circles back and repeats the pattern, adding rocket volleys between charges. Dodge the missiles, then wait for the next frontal attack and land another face shot. Three successful rocket hits during these final frontal charges defeat the Hydra. The chapter ends here; the game then transitions to Act 5, Chapter 2: Desperate Stand at the Jacinto perimeter.
- Protect the allied Reavers before chasing distant enemies.
- Sever the tentacle holding your Reaver.
- Land the first rocket hit on the Hydra’s exposed face.
- Avoid the intervening rocket volleys.
- Land two more face shots to defeat the Hydra.
- Wait for the transition to Desperate Stand.
Chapter 2: Desperate Stand — secure the outer perimeter
Desperate Stand begins on foot with Marcus, Dom, and Hoffman at the Jacinto perimeter. Take cover and help deal with the Reaver in front of you, but nearby Gears and emplacements can destroy it if you avoid exposing yourself. Follow Hoffman to the entrance and wait for him to open the route to the outer perimeter.
At the first landing platform, Locust climb up using grappling hooks. Shoot the hooks or the climbers before they reach the platform. Clear the attackers and the Reaver that joins the fight. When the KR-36 arrives, remain in cover while it clears the remaining hostiles. Follow the squad toward the next platform.
Before passing through the next doorway, search the middle of the balcony on the left for the first collectible, a COG Recon Report. This is optional and does not affect story progression. Continue to the next landing platform, clear the Drones and supporting Reaver, and follow the squad into the parking garage.
- Follow Hoffman through the perimeter entrance.
- Shoot Locust grappling hooks before the attackers reach the platform.
- Stay in cover while the KR-36 clears the remaining enemies.
- Collect the COG Recon Report from the left balcony if desired.
- Continue into the parking garage.
Chapter 2: Desperate Stand — clear the parking garage
In the parking garage, use the available cover and ammunition before engaging the street below. A Longshot, ammunition, Mulchers, and Frag Grenades are available in the recess on the left. Mount a Mulcher at the railing if you want sustained fire, then clear the Drones and other Locust in the street and opposite building.
A Boomer destroys part of the wall near the corner and additional Drones enter. Keep the railing or nearby barriers between you and the street while eliminating the new wave. Two Reavers arrive near the end of the engagement. Defeat or survive them until the Raven arrives to help finish the fight.
When the area is clear, a bridge extends across to the opposite parking structure. Cross it, follow the steps, and proceed toward the communications array. The chapter checkpoint and objective progression occur after this transition.
- Use the parking garage ammunition before crossing the bridge.
- Clear the street and opposite building from behind the railing.
- Prepare for the Boomer breach and additional Drones.
- Survive the two-Reaver attack.
- Cross the bridge to the communications array.
Chapter 2: Desperate Stand — defend the communications array
Follow the route and wait for Hoffman to unlock the doors leading to the communications array. Mount the chain gun and defend the array against six Reavers. Grounded Reavers are the safest targets, but fire at airborne Reavers when they swoop across your coverage area. Hold RB to cool the turret before it overheats.
The array must survive until six Reavers have been destroyed. If it is destroyed, the checkpoint lets you retry the defense. On higher difficulties, some Reavers may remain airborne instead of landing, making the section harder. Keep using the turret, prioritize grounded targets, and track the Reavers rather than firing continuously at empty air.
After the sixth Reaver is destroyed, move through the open door to the right of the array. The objective is complete only after the game allows this route forward; do not leave the defense area early.
- Use the communications-array chain gun.
- Destroy six Reavers before the array is destroyed.
- Cool the turret by holding RB.
- Retry from the checkpoint if the array is lost.
- Proceed through the open door after the sixth Reaver dies.
Chapter 2: Desperate Stand — collect the second item and defeat the Brumaks
After leaving the communications-array area, follow the walkway through the open gate. Before the final defense develops, go through the arched doorway at the far end and descend the steps on the left. The second collectible, a COG Tag, is at the end of the platform near the ammunition container. Collect it before the fight becomes crowded.
Return to the defense area and clear the Drones, Grinders, Boomers, and other Locust. A mortar is available near the monitors; pick it up and use it against the two Brumaks that enter during the climax. Wait until a Brumak is in a useful range, then launch mortar strikes while staying behind cover. The surrounding infantry can be handled with rifle fire or nearby emplacements.
Once both Brumaks and the remaining attackers are defeated, the chapter is complete. Free Parking becomes the next Act 5 chapter. The COG Recon Report and COG Tag are optional; missing either does not block campaign completion.
- Collect the COG Tag at the far balcony beside the ammunition container if desired.
- Clear the infantry waves before concentrating on the Brumaks.
- Use the mortar against both Brumaks from cover.
- Finish the defense and confirm Free Parking is available next.
Before you move on
- Escape is marked complete after the Hydra is defeated with its tentacle severed and three successful frontal face shots.
- The game has transitioned to Desperate Stand at the Jacinto perimeter.
- Escape records zero collectibles.
- Desperate Stand is complete after the communications array survives six Reaver kills and the final defense is won.
- Both Brumaks in the final Desperate Stand assault have been defeated.
- Free Parking is the next available Act 5 chapter.
- Optional completion: the COG Recon Report and COG Tag are recorded as collected.
Act 5, Chapters 3–4 — Free Parking and Tenuous Footing
Free Parking starts at the Archives and continues through the courtyard, gate, parking area, route split and Hammer of Dawn street fight. After turning the gate wheels, search around the wall to the right near the red car for the Jacinto Sentinel Newspaper. After the Reaver encounter, enter the destroyed building on the left to collect the COG Tag before continuing to the sinkhole. Tenuous Footing begins at the sinkhole. Use the crane platform to move Dom, cross the failed crane boom, repel Grappler attacks and survive the collapsing building. After the roof gives way, collect Stranded’s Journal if desired, then descend to the trapped Brumak and kill its pilot. Closure begins after the capture scene; it is a separate chapter and contains the campaign finale.
1. Clear the Archives courtyard in Free Parking
Free Parking begins outside the Archives building. A Longshot and ammunition are available behind the tall metal barricade on the right if you want to remove the balcony snipers safely. Take cover before firing, then clear the ground-level Drones and Grenadiers. Flame Boomers arrive from both sides of the building, so move behind the courtyard cover instead of remaining in the open.
Enter the Archives after the courtyard is secure. The interior routes reconnect, and the left route is the more direct option. Eliminate the Flame Grenadier and Grenadier inside, then use the corners and doorways to control the next group. A Kantus and Grinder enter through the opposite doors; defeat them before moving on. If you use the alternate route, treat the stair rail as poor cover because Grenadiers can pressure the stairs quickly.
- The Archives courtyard is clear.
- The balcony snipers, Flame Boomers and ground Locust are defeated.
- You have entered the Archives building.
2. Defeat the courtyard force and collect the Jacinto Sentinel Newspaper
Continue through the Archives to the rear courtyard. A Troika is positioned near the next fighting area. If you kept the Longshot, use it to eliminate the gunner; otherwise approach from cover and throw a grenade toward the emplacement. Clear the Kantus, Drones, Wretches and Mauler, then prepare for two Bloodmounts entering from the far doors.
After the courtyard is secure, go through the doors used by the Bloodmounts and turn both hand wheels with Dom. The gate rises into the parking area. Before advancing toward the street split, search around the wall to the right near the red car. The Jacinto Sentinel Newspaper is on the ground there, partly obscured by leaves. This is the first of the two Free Parking collectibles and is optional for campaign progress.
Move through the parking area and eliminate the Locust and Grinder. Keep ammunition from the courtyard weapons if possible, because the next section divides Marcus and Dom between two routes.
- The Troika, Mauler, Wretches and Bloodmounts are defeated.
- Both hand wheels have been turned and the gate is open.
- Optional: the Jacinto Sentinel Newspaper near the red car has been collected.
- The parking area is clear.
3. Complete the Free Parking split route
At the street, the game assigns Marcus and Dom to either the Garage or Streets route. On the Garage route, climb the stairs, kill the Drone and shoot the marked fuel tank from the window. Continue through the garage, defeat the Grenadiers and use the movable vehicle as extra cover if needed. Follow the route down until it reconnects with Dom.
On the Streets route, stay behind the cars and fire on the large fuel tanks beside the buildings. The first explosion clears the storefront and the dropped sign provides cover. Advance from car to car, then destroy the farther tank near the parking garage. A Reaver appears during this push, so retreat behind the available barriers instead of fighting in the middle of the street. Both routes reunite after the garage collapses.
Defeat the Grinder and remaining Drones, then pick up the Hammer of Dawn. It needs open sky and a brief charge before the orbital strike lands. Use it on the Reaver and the Mauler rather than trying to expose yourself with ordinary weapons. Continue toward the sinkhole after the street is clear.
- The Garage or Streets route is complete.
- The two routes have reunited.
- The Grinder and remaining street resistance are defeated.
- The Hammer of Dawn has been collected and used against the heavy threats.
4. Collect the Free Parking COG Tag and reach Tenuous Footing
After the Reaver encounter, continue along the street until you reach the destroyed building on the left. Enter the blown-open structure and search the accessible ruined section for the COG Tag on the floor. This is the second Free Parking collectible. Some reference lists or the War Journal associate this tag with Tenuous Footing because it lies close to the chapter boundary, but it is reached during this Free Parking route. Pick it up before proceeding if you are tracking all campaign collectibles.
Once the tag is secured, continue through the ruined route toward the Jacinto sinkhole. The sinkhole transition marks the beginning of Tenuous Footing. Do not expect Closure yet; the Brumak encounter and pilot kill are still ahead.
- Optional: the COG Tag in the destroyed building after the Reaver has been collected.
- The sinkhole has been reached.
- Tenuous Footing has begun.
5. Use the cranes and cross the exposed boom
At the sinkhole, take the Longshot and ammunition if available. Enter the crane on the right and move its suspended platform left and downward so Dom can board it. Carry the platform toward the nearby building and lower Dom onto the roof. Leave the crane and follow the ledge toward the second crane.
The second crane fails while Marcus is being moved. When the route opens, sprint across the exposed crane boom rather than waiting in the open. After reaching the opposite side, defeat the Grappler Drones, then handle the Mauler and elevated Reaver from cover. Avoid chasing enemies across exposed ledges; the safe route is defined by the cover positions and the next doorway.
- Dom has been moved to the opposite building.
- The failed crane boom has been crossed.
- The Grappler Drones, Mauler and elevated Reaver are defeated.
6. Survive the rooftops and collect Stranded’s Journal
Go down the ramp near the Reaver’s former position. Eliminate the Tickers and Flame Grenadier, then cross the ruined opening and makeshift bridge. More Tickers and Drones occupy the next roof, so clear them before advancing.
Grappler Drones attack in waves. Shoot the incoming hooks when possible and remain behind cover if a Grappler reaches the roof. A chainsaw is useful at close range, but do not leave cover simply to chase a missed hook. The route opens after the waves are repelled.
The rooftop collapses and Marcus drops into the building. Kill the Locust and Flame Boomer through the windows, then mantle through the opening. Search the back-right corner of this area for Stranded’s Journal. It is Tenuous Footing’s final collectible and is optional. Descend the staircase after collecting it or passing the location.
- The rooftop Tickers and Drones are defeated.
- The Grappler waves have been repelled.
- The building-collapse sequence has occurred.
- Optional: Stranded’s Journal has been collected.
7. Reach the trapped Brumak and end Tenuous Footing
Continue downward after the collapse. When the wall breaks on the right, use the ramp and eliminate the remaining hostiles. At the tower base, sever the cables and cross when the route becomes available. The next collapse is scripted, so prioritize reaching the far side instead of spending ammunition on distant enemies.
A Kantus and two Grapplers attack near the cliff. Stay clear of the unstable structure until the fight is finished. The landslide creates a ramp into the building, but standing in its path can kill Marcus. Enter only after the slide has passed, mantle over the wall supports and call the elevator.
The elevator carries Marcus toward the trapped Brumak. Use the cover positions and advance in short movements rather than attempting a long exposed sprint through its fire. Circle around to the pilot and kill him. The pilot’s death completes Tenuous Footing and triggers the capture scene. Closure begins afterward, with Marcus controlling the captured Brumak.
- The tower cables have been severed.
- The landslide and building-collapse sequence is complete.
- The elevator has reached the trapped Brumak.
- The Brumak pilot has been killed.
- The capture scene has played and Closure is available.
Before you move on
- Free Parking is complete when the street route has been cleared, the optional COG Tag has been passed or collected, and Marcus reaches the Jacinto sinkhole transition.
- Tenuous Footing is complete when Marcus kills the trapped Brumak’s pilot and the capture scene finishes.
- The next chapter should be Act 5, Chapter 5: Closure.
- For collectibles, verify the War Journal shows the Jacinto Sentinel Newspaper, the COG Tag and Stranded’s Journal. The COG Tag may be grouped under Tenuous Footing in some chapter displays despite its position on the Free Parking route.
- Collectibles are optional and do not affect the required campaign sequence. Closure remains necessary for the canonical ending.
References for this chapter
- Gears of War 2 — Guide and Walkthrough — Xbox 360 — GameFAQs
- Chapter 3: Free Parking — Gears of War 2 eGuide, Prima Games
- Gears of War 2 Walkthrough — GameSpot
- Act 5 Collectibles — Gears of War 2 Guide and Walkthrough
- Location of All the Collectibles in Gears of War 2
- Gears of War 2 Collectables Guide
- Gears of War 2: Tenuous Footing — Gamepressure
Act 5, Chapter 5: Closure
Closure begins with Marcus and Dom riding the Brumak captured during the preceding chapter. Use its chain guns and rockets to clear the cavern, break through Locust defenses, defeat the Corpser and destroy the Torture Barge. Continue to the large chamber and demolish all three support pillars so the Ravens can deliver the Lightmass Bomb. The Brumak then mutates into a Lambent Brumak after exposure to Imulsion and destroys the Raven carrying the bomb. Marcus, Dom and Baird escape aboard another Raven; keep the Hammer of Dawn trained on the Lambent Brumak until it is destroyed. The resulting explosion sinks Jacinto and floods the Hollow. Closure contains no collectibles.
1. Ride the captured Brumak through the cavern
Closure starts after the Brumak has been captured in the preceding sequence. The controls are simple: use the Brumak’s chain guns for ordinary Locust and its rockets for groups, heavy targets and structures. The chain guns overheat, so release fire or use the reload button to cool them before they lock up. Keep moving forward rather than stopping to clear every enemy in the cavern; the Brumak’s size and firepower are intended to carry you through the route.
Use rockets against clustered Drones, Boomers, Reavers and other large targets, then sweep survivors with the chain guns. Locust fire is most dangerous when several enemies are allowed to attack from different elevations, so destroy elevated emplacements and obvious heavy weapons before dealing with scattered Drones. If the screen becomes crowded, fire a rocket into the densest group and continue advancing once the route opens.
- Begin the chapter aboard the captured Brumak.
- Use chain guns for ordinary enemies.
- Use rockets against groups, Reavers and heavy targets.
- Cool the chain guns before they overheat.
2. Defeat the Corpser and destroy the Torture Barge
Continue through the cavern until the Corpser blocks the route. Move close enough to engage it and repeatedly use the Brumak’s melee attack. Keep attacking when the Corpser exposes itself; the encounter is designed around the Brumak overpowering it at close range rather than a conventional rifle fight. After it falls, resume the forward route and clear the Locust positions ahead with rockets and chain-gun fire.
At the cavern’s bend, a Torture Barge appears over the Imulsion pool. Aim the Brumak’s weapons at the barge and fire continuously, mixing rockets with chain-gun bursts until it is destroyed. If supporting enemies interfere with your aim, fire a rocket at them first, then return to the barge. Do not stop moving for long beneath the barge or in the open pool area; keep the Brumak advancing while maintaining fire.
After the barge is destroyed, break through the next gate and continue into the chamber containing the support pillars. The chapter’s progress is tied to destroying the barge and opening the route, not to eliminating every Locust in the area.
- Use the Brumak’s melee attack against the Corpser.
- Destroy the Torture Barge above the Imulsion pool.
- Break through the next gate.
- Continue to the pillar chamber.
3. Destroy all three support pillars
The next objective is to destroy three support pillars so the Ravens can enter the cavern. The first pillar is visible near the entrance to the chamber. Fire the chain guns and rockets into it until it collapses. Advance through the chamber and locate the second and third pillars; the third requires moving farther through the area rather than remaining at the entrance.
Use the bases of the pillars and nearby structures as partial protection while Reavers, Seeders and Nemacysts attack. The Brumak can absorb punishment, but avoiding unnecessary incoming fire makes the objective safer, especially on higher difficulties. Shoot Nemacysts when they obstruct your view or when their attacks are landing near the Brumak. Reavers and Seeders can be ignored briefly if they are not preventing you from lining up a pillar.
Check the chamber after each collapse and continue until all three pillars are down. Destroying only the first two does not trigger the next sequence. Once the third pillar is destroyed, the roof collapses and the Ravens arrive with the Lightmass Bomb.
- Destroy the first visible pillar.
- Move deeper into the chamber for the remaining pillars.
- Shoot Nemacysts when they block your aim or threaten the Brumak.
- Confirm that all three pillars have collapsed.
4. Survive the Lambent Brumak transformation
The Brumak becomes exposed to Imulsion after the pillars are destroyed. During the following scene, the creature mutates into a Lambent Brumak and destroys the Raven carrying the Lightmass Bomb. Marcus, Dom and Baird are moved into another Raven, which carries a Hammer of Dawn targeting system. This is the final boss sequence; the earlier Brumak weapons are no longer the objective.
When control returns, aim the Hammer of Dawn at the Lambent Brumak and keep the targeting beam on it. Maintain the lock as the Raven moves and the creature attacks. If the beam slips away, retarget the Brumak immediately rather than firing at surrounding enemies. The boss must be destroyed before the evacuation can proceed, so prioritize the target over any incidental threats in the cavern.
Continue holding the Hammer of Dawn on the Lambent Brumak through the attack sequence until the game triggers its destruction. The beam is the required method for finishing the encounter; ordinary weapons are not a substitute for the Hammer of Dawn in this finale.
- Wait for the Lambent Brumak transformation.
- Use the Hammer of Dawn from the Raven.
- Keep the targeting beam trained on the Lambent Brumak.
- Retarget immediately if the beam loses contact.
5. Confirm the campaign ending
After the Lambent Brumak is destroyed, the resulting explosion begins the evacuation from the cavern. Follow the automatic Raven sequence and allow the ending scenes to play. The explosion sinks Jacinto and floods the Hollow, completing the original Xbox 360 retail campaign’s canonical ending.
If you fail during the Brumak ride, restart from the latest checkpoint and resume clearing the route with rockets reserved for heavy enemies and structures. If you fail during the final Hammer of Dawn sequence, retarget the Lambent Brumak as soon as control returns and keep the beam active until the encounter ends.
Closure has no collectibles. Completion is registered when the Lambent Brumak is destroyed and the Jacinto-sinking ending sequence begins; allowing the closing cinematic and credits to finish provides the clearest confirmation that the final chapter is complete.
- Survive the Raven evacuation sequence.
- Watch the Jacinto-sinking ending.
- Allow the final cinematic and credits to play.
- Confirm that Closure is marked complete in the campaign or chapter selection menu.
Before you move on
- The captured Brumak has advanced through the cavern.
- The Corpser has been defeated.
- The Torture Barge has been destroyed.
- All three support pillars have collapsed and the Ravens have entered the cavern.
- The Lambent Brumak has been destroyed with the Hammer of Dawn.
- The Jacinto-sinking sequence begins and the game advances through the ending cinematic and credits.
- Optional completion: none required; Closure has no collectibles.
Epilogue — Campaign completion check
Act V, Chapter 5: Closure is the final required chapter of the original Xbox 360 campaign. Campaign completion is confirmed after the three cavern pillars are destroyed, the Lambent Brumak is eliminated with the Hammer of Dawn, and the Jacinto-sinking ending cinematic plays. The credits and post-credit Adam Fenix transmission are optional viewing. Closure has no collectible, and Road to Ruin is separate bonus content from the Dark Corners or All Fronts DLC rather than part of the retail campaign ending.
1. Finish the final objective in Closure
Continue Act V, Chapter 5: Closure until the three pillars in the cavern have been destroyed and the ceiling opens for the Ravens. This marks the transition into the final encounter. If the pillars are still standing, the campaign has not yet reached its ending sequence.
After the scripted transformation, control returns to Marcus in a Raven. Aim the Hammer of Dawn at the Lambent Brumak and keep the targeting beam on the creature. Continue the bombardment until the game triggers the explosion and Delta’s evacuation. There is no additional on-foot boss phase after this objective and no alternate weapon or route required to finish the campaign.
- Act V, Chapter 5: Closure is in progress.
- All three cavern pillars have been destroyed.
- The Lambent Brumak has been destroyed with the Hammer of Dawn.
- The evacuation sequence has begun.
2. Watch the required ending sequence
Allow the final cinematic to play after the Lambent Brumak detonates. Delta’s evacuation and the sinking of Jacinto are the canonical ending of the original Xbox 360 retail campaign. Once this cinematic has finished, there is no further playable story chapter or required combat encounter.
The credits may be watched, but they are not an additional gameplay objective. The post-credit Adam Fenix radio transmission is also optional viewing and is not needed to complete Closure or the main campaign.
- Delta’s evacuation has played.
- The Jacinto-sinking cinematic has played.
- No further required story objective is waiting in Closure.
3. Verify the campaign record
Return to the campaign menu after the ending and open the act or chapter selection screen for the save file used during the playthrough. Check Act V, Chapter 5: Closure and confirm that it is shown as completed for the difficulty played. If the menu returns to the campaign screen without displaying the result immediately, use the save file’s chapter-selection option rather than starting a new campaign.
A completed Closure entry is the practical record that the required story route has been finished. Collectibles from earlier chapters, higher-difficulty clears, and multiplayer or Horde-related goals are separate objectives. Closure itself contains no required collectible, so missing items elsewhere do not require replaying the finale for story completion.
- Closure is shown as completed in the campaign or chapter-selection record.
- The ending cinematic has already played on the current save.
- Any unfinished collectibles or difficulty goals are being handled separately.
4. Handle optional content separately
Road to Ruin is a bonus deleted single-player chapter included with the Dark Corners or All Fronts content. It is separate from Closure and is not required to reach or register the original retail campaign ending. If the DLC is installed, play it from its own chapter-selection entry after completing the main campaign or whenever you want to pursue its additional content.
Do not treat the presence or absence of Road to Ruin as evidence that the retail campaign is incomplete. The required campaign ends with Closure, the Lambent Brumak explosion, the evacuation, and the sinking of Jacinto.
- Road to Ruin is recognized as optional DLC content.
- The main campaign is complete independently of that chapter.
- No additional retail story chapter is required after Closure.
Before you move on
- Act V, Chapter 5: Closure is marked complete for the played difficulty.
- The three final cavern pillars were destroyed.
- The Lambent Brumak was destroyed with the Hammer of Dawn.
- Delta’s evacuation and the Jacinto-sinking ending cinematic played.
- Credits and post-credit material are optional.
- Road to Ruin is not required for campaign completion.
References for this chapter
- Chapter 5: Closure — Gears of War 2 Guide
- Gears of War 2 — Guide and Walkthrough — Xbox 360 — GameFAQs
- Gears of War 2 Walkthrough — GameSpot
- Gears of War 2 — Xbox 360 Campaign Progress Q&A
- Gears of War 2: All Fronts Collection — Xbox
- Gears of War: All Fronts Collection and Dark Corners Multiplayer Map Pack — XBOX Wire
Optional: Road to Ruin — Deleted Scene
Road to Ruin is an optional bonus chapter created for Gears of War 2 and released through the Dark Corners downloadable content. It is also included in the All Fronts Collection. The original 2008 Xbox 360 retail disc does not contain the playable chapter by itself. Launch it from the separate Deleted Scene menu after installing the applicable content; it is not inserted into the ordinary campaign chapter list or an existing campaign save. For story order, play it after Act 4, Chapter 2: Answers and before Act 4, Chapter 3: Hornets’ Nest, although this is only chronological context and does not replace either required chapter. At the beginning, choose Use Stealth or Go in Guns Blazing. The routes merge when Marcus and Dom reach Franklin. Stealth is forced to end there, so detection after Franklin does not invalidate the stealth achievement. Continue through the final combat sequence and destroy the Reaver to complete the deleted scene.
1. Install the content and launch Road to Ruin
Road to Ruin is not included on the original 2008 Xbox 360 retail disc. Install the Dark Corners downloadable content or the All Fronts Collection, which includes the deleted single-player chapter along with the downloadable multiplayer maps. Start Gears of War 2 and select Deleted Scene from the separate downloadable-content menu. Do not search for Road to Ruin among the ordinary campaign chapters, and do not expect it to appear inside a campaign save.
For the intended story position, play it after Act 4, Chapter 2: Answers and before Act 4, Chapter 3: Hornets’ Nest. This placement is chronological context only. Road to Ruin does not insert itself into the retail campaign, create a required transition checkpoint, or alter the canonical ending. Answers and Hornets’ Nest remain available as separate required chapters.
The deleted scene uses separate progress handling rather than the normal campaign chapter save flow. Arrange enough uninterrupted time to finish it. If you leave before completion, expect to restart the deleted scene rather than resume it through an ordinary campaign checkpoint.
- Confirm that Dark Corners or All Fronts Collection is installed.
- Launch Road to Ruin through Deleted Scene.
- Treat the chapter as optional and separate from the retail campaign.
- Plan to complete the deleted scene in one sitting.
2. Choose Stealth or Guns Blazing and open the first gatehouses
After the introductory scene, select Use Stealth or Go in Guns Blazing. Both routes lead to the same ending. Choose Stealth if you are attempting the stealth achievement; choose Guns Blazing if you want the direct combat route.
The stealth route disguises Marcus and Dom as Theron Guards. Locust cannot identify them visually at normal distance, but the disguise does not eliminate close-range scent detection. Stay behind Dom, use cover between patrols, and wait rather than crossing an exposed route while enemies are facing you. At the first gatehouse, climb the ladder and pull the lever. Dom handles the opposite lever in solo play. In cooperative play, both players must reach and activate the paired levers.
On the combat route, move from cover toward the torches and eliminate the Drones. Prioritize the Flame Grenadier before he closes the distance; shooting the fuel tank on his back can cause an explosion. Kill the Troika gunner, then defeat the Drones and Boomer coming from the far gatehouse. Do not stay exposed on the Troika platform while the Boomer is active. Pick up the Boomshot if you need explosive fire for the next area, then use the lever above the doorway to open the following gatehouse.
If the stealth route is detected, the chapter can still be completed, but the stealth achievement attempt is lost. Reload the latest available checkpoint if appropriate; otherwise restart the deleted scene when a clean attempt is important.
- Choose Use Stealth or Go in Guns Blazing.
- Open the first gatehouse with the paired levers.
- Combat route: defeat the Flame Grenadier, Troika gunner, Drones and Boomer.
- Stealth route: remain behind Dom and avoid close-range detection.
3. Cross the river and reach the final gatehouse
On the stealth route, use the turn wheel on the right to drop the suspended stone and draw the Locust away. Descend the steps while keeping to the side and let the Grinder pass. At the river, turn the second wheel to raise the bridge. Cross after the nearby patrol has moved, then enter the gatehouse and activate the paired levers.
Continue behind Dom and use the wheel near the ammunition box to drop the cement slab. The noise creates another opening. Stay behind cover, allow the Flame Grenadier and Butcher to move away, and follow the Butcher toward the last gatehouse without approaching too closely. Wait for a clear path before moving to the levers.
On the combat route, clear the river approach from cover. Defeat the Flamer and Drones, then deal with the Grinder. Use the wheel to raise the bridge. After crossing, eliminate the two Bloodmounts, the Grinder and the supporting Drones before advancing to the next gatehouse. A Longshot helps against distant targets, while the Mulcher near the river can provide sustained fire against the Bloodmounts and later reinforcements.
Stealth is required only until Franklin is reached. If a Locust detects you before that point, restart or reload for another achievement attempt. Do not treat the forced combat after Franklin as a stealth failure.
- Raise the river bridge with the turn wheel.
- Stealth route: use the stone and cement-slab distractions.
- Combat route: defeat the Grinder, two Bloodmounts and supporting Locust.
- Reach the final gatehouse without detection if pursuing the stealth achievement.
4. Bypass the Brumak and reach Franklin
The routes converge in the cavern beyond the final gatehouse. A Brumak blocks the bridge. The required path is underneath it: move to the back-right staircase, descend below the bridge and follow the lower passage to reach Franklin on the opposite side. Do not remain on the exposed bridge trying to force a fight with the Brumak.
The combat route contains a prison section before the Brumak. Let Jack open the way, use railings and doorways as cover, and clear the Grubs, Butchers, Wretches and guards as they enter. Once the Brumak appears, use the back-right stairs and continue through the lower route rather than attempting to destroy the Brumak from the bridge.
On the stealth route, preserve the disguise until Marcus and Dom reach Franklin. The scene then forces the group into combat. Once Franklin has joined the party, stop prioritizing stealth: subsequent detection and open fighting do not cancel the stealth achievement condition.
- Take the back-right stairs beneath the blocked bridge.
- Reach Franklin to merge the two routes.
- Remain undetected until Franklin if attempting the stealth achievement.
- Prepare for mandatory combat after the rescue.
5. Survive the final battle and destroy the Reaver
After Franklin joins the group, take the Mulcher near the doorway if you want sustained fire. Mount it behind the raised cover and suppress the Drones and Wretches attacking below the bridge. Check above the barricade as well as the lower walkway, because Wretches can approach from elevated positions.
When the first attack subsides, turn toward the left-side approach and defeat the Grubs and Butcher. Move through the door, climb the ladder and clear the Grubs entering across the highway. In the next room, pull the lever near the far end to lower the cover and open the route.
In the final chamber, resupply with available ammunition and grenades before lowering the next cover section. Approach the following lever to open the gate and trigger a large Locust attack. Hold central cover and prioritize the Flame Grenadier. A Kantus enters from the small left door with Tickers, followed by more Grubs and another Kantus from the right-side door.
After the first wave, the remaining gate opens and two Bloodmounts enter with additional Grubs. Raise the distant cover before the Bloodmounts overrun the position, then focus fire on the Bloodmounts and clear the remaining reinforcements. A Reaver lands after this wave. Destroy it from cover, then allow the ending scene to play. The deleted scene is complete when the final Reaver encounter has been defeated and its concluding scene has finished.
- Survive the combat beneath the bridge.
- Defeat the Flame Grenadier, Kantus, Tickers, Grubs and Bloodmounts.
- Raise the distant cover before the Bloodmount wave overwhelms the area.
- Destroy the final Reaver and watch the deleted-scene ending.
Before you move on
- Dark Corners or All Fronts Collection is installed and Road to Ruin was launched from Deleted Scene.
- At least one opening route was completed.
- Franklin was reached and the final Reaver was destroyed.
- The deleted-scene ending played to completion.
- For the stealth achievement attempt, no detection occurred before reaching Franklin.
- Answers and Hornets’ Nest remain available as separate campaign chapters.
- The main retail campaign remains completable without Road to Ruin.
References for this chapter
- Gears of War 2: Dark Corners Multiplayer Map Pack — Xbox
- Gears of War 2: All Fronts Collection — Xbox
- Gears of War 2 — Guide and Walkthrough — Xbox 360 — GameFAQs
- Road to Ruin Walkthrough — Stealth — Gears of War 2 Guide and Walkthrough
- Road to Ruin Walkthrough — Guns Blazing — Gears of War 2 Guide and Walkthrough
- Downloadable Content Guide: Gears of War 2 — Road to Ruin
Finishing up
The required campaign is complete after Act 5, Chapter 5: Closure finishes and the Jacinto-sinking ending sequence begins.
Use chapter selection or the campaign progress screen to confirm that Closure is marked complete.
The 41 collectibles and Road to Ruin DLC are optional and do not block the retail campaign ending.
Do not claim New Game+ as an unlock; replay chapters through chapter select for cleanup or higher-difficulty progress.
Choose your next gameScreenshots & video
Game imagery for reference. Follow the written chapters above for the route and strategies.
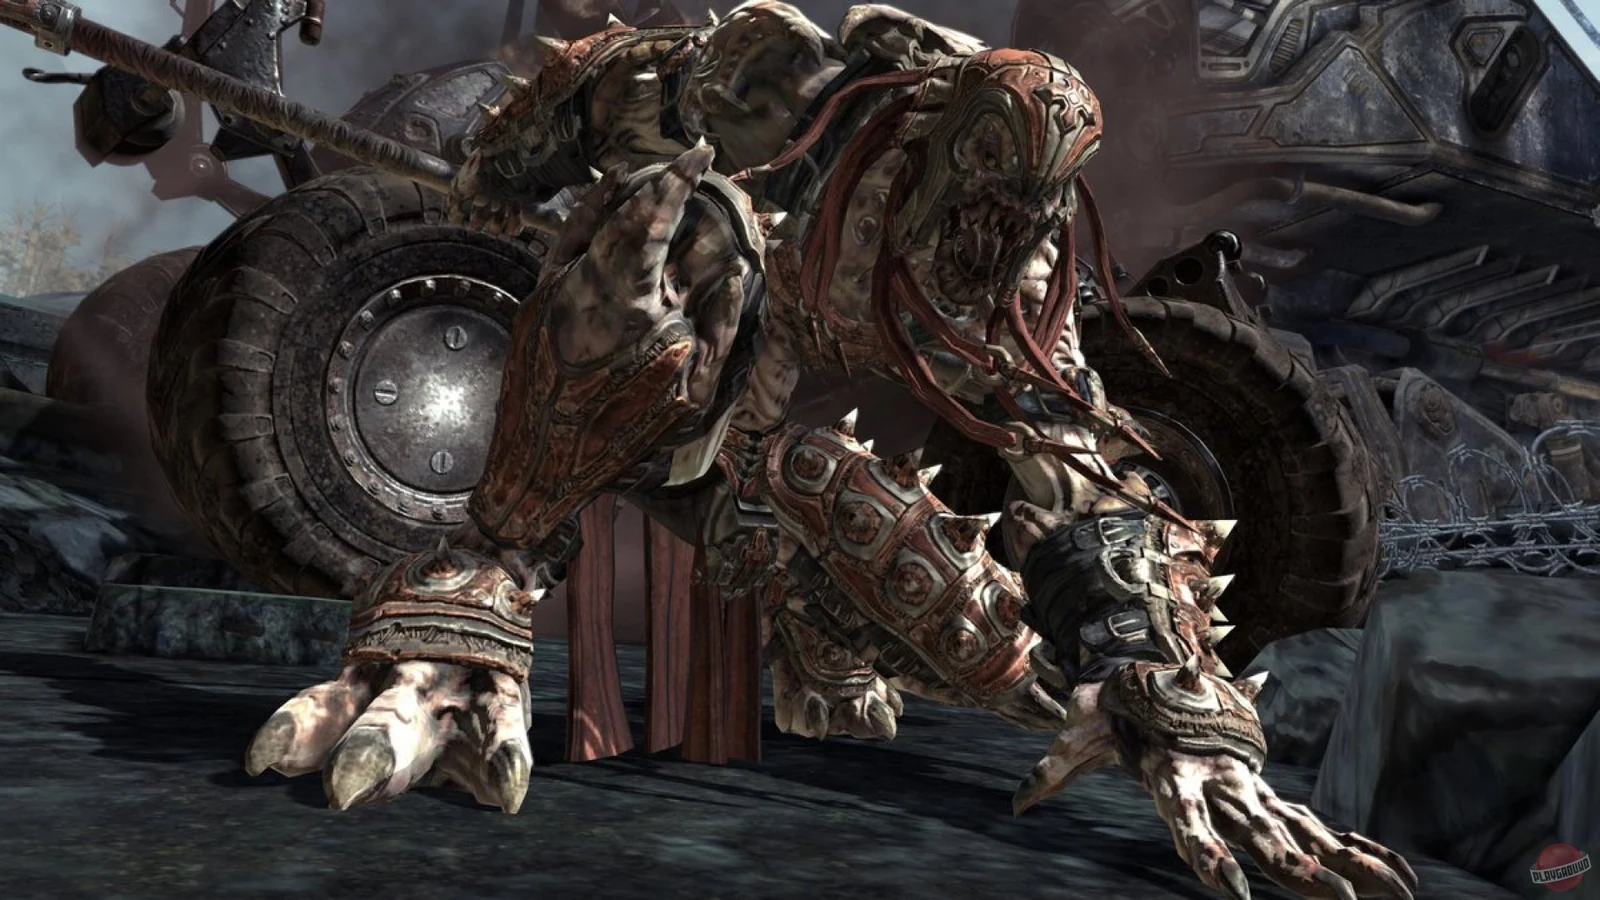
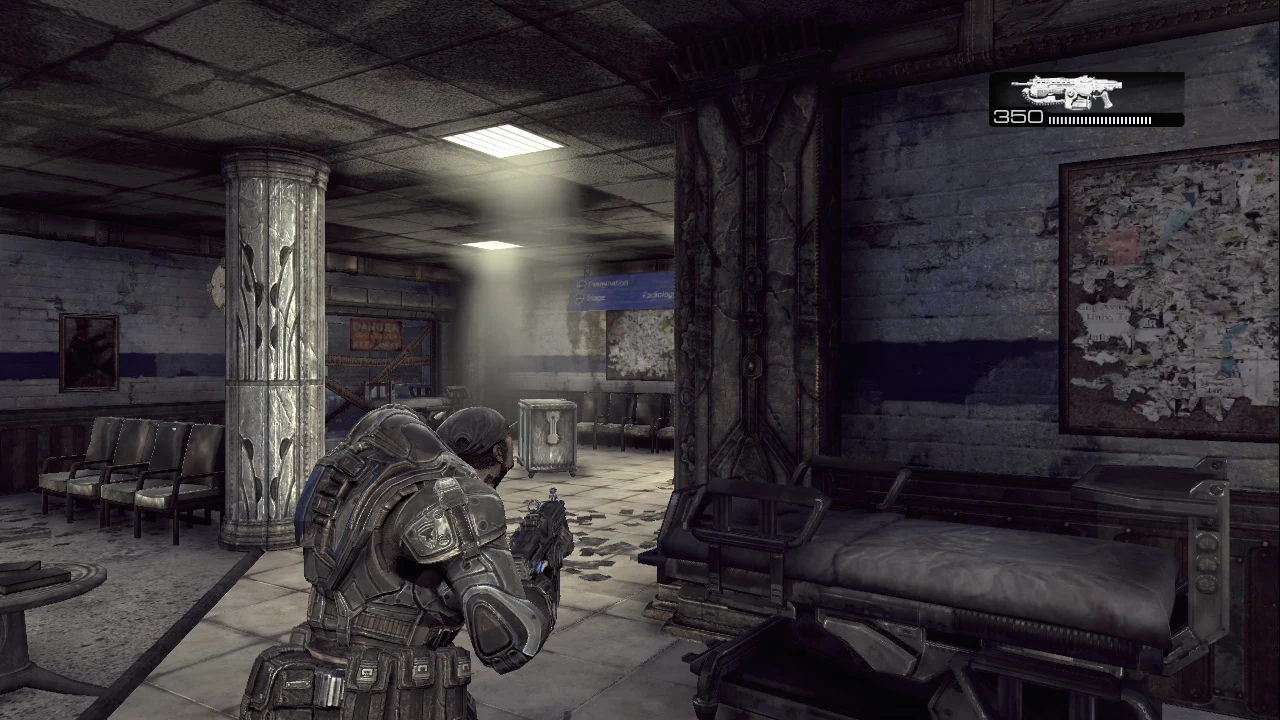
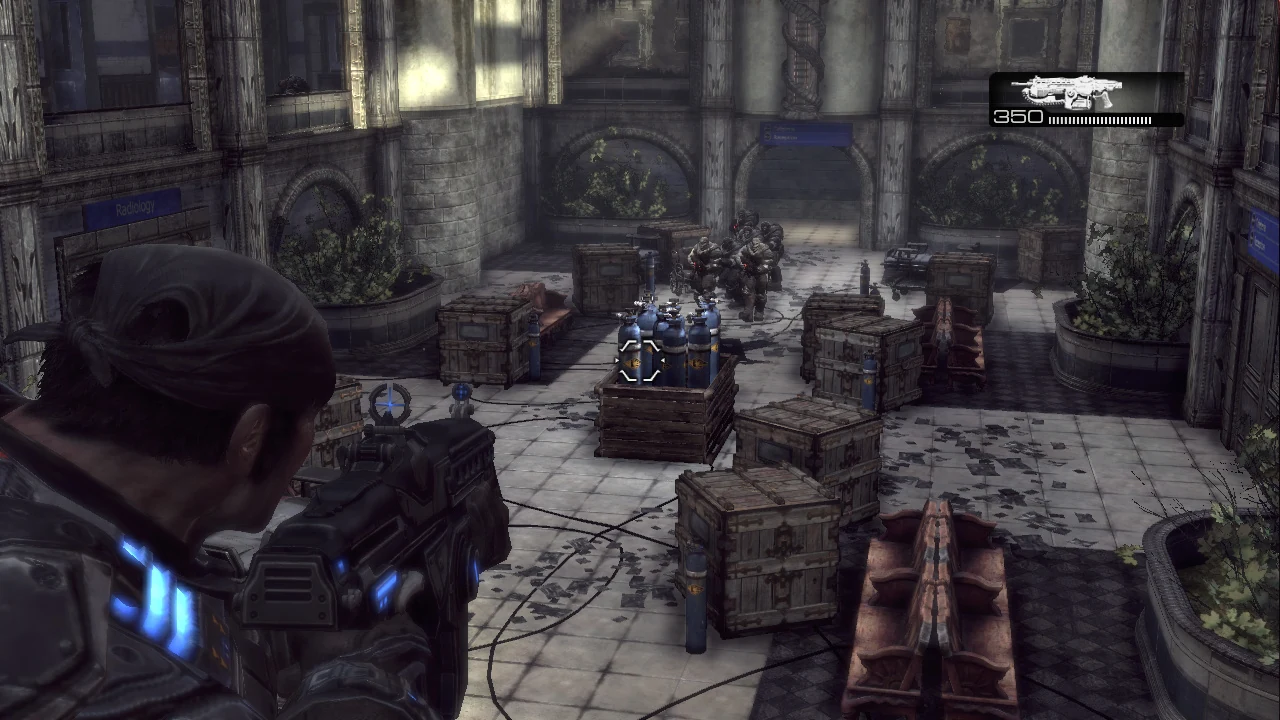
Sources & references
Our original guide draws on the references below. Check the edition at the top of this page before following controls or unlock requirements.
- Gears of War 2 Game Guide
- Gears of War 2 — Collectible Guide for Xbox 360, SuperSonic67, GameFAQs
- Gears of War 2 Guide and Walkthrough, Welcome to Delta, SuperCheats
- Gears of War 2 Walkthrough — GameSpot
- Chapter 1: Welcome to Delta, Gears of War 2 eGuide, Prima Games
- Desperation | Gears of War Wiki
- Collectibles | Gears of War Wiki
- Gears of War 2 - War Journal Guide - Xbox 360 - By ShadowDragon777
- Gears of War 2 — Microsoft Xbox 360 Manual
- Gears of War 2 — Guide and Walkthrough, Xbox 360, by TheGum
- Gears of War 2 — Guide and Walkthrough — Xbox 360 — GameFAQs
- Chapter 1: Scattered — Gears of War 2 eGuide, Prima Games
- Gears of War 2 - Guide and Walkthrough - Xbox 360 - By nofxgamer
- Scattered — Gears of War 2 Guide and Walkthrough, SuperCheats
- Chapter 2: Indigenous Creatures — Gears of War 2 Guide, Prima Games
- Indigenous Creatures — Gears of War 2 Guide and Walkthrough, SuperCheats
- Gears of War 2 — Guide and Walkthrough, Xbox 360, GameFAQs/GameSpot
- Gears of War 2 — Guide and Walkthrough — Xbox 360 — Chapter routes and progression
- Intestinal Fortitude — Gears of War 2 Guide and Walkthrough
- Gears of War 2 walkthrough — Act and chapter structure
- Gears of War 2 Guide and Walkthrough — GameFAQs, Xbox 360
- Chapter 1: Dirty Little Secret — Gears of War 2 Guide, Prima Games
- Act 3 Collectibles - Gears of War 2 Guide and Walkthrough
- Gears of War 2 Xbox 360 Manual
- Chapter 1: Priorities — Gears of War 2 Guide — Prima Games
- Gears of War 2: Answers
- Answers - Gears of War 2 Guide and Walkthrough
- Chapter 5: The Best-Laid Plans — Gears of War 2 Guide, Prima Games
- Royal Inquisition — Gears of War 2 Guide and Walkthrough, SuperCheats
- Escape — Gears of War 2 Guide and Walkthrough
- Desperate Stand — Gears of War 2 Guide and Walkthrough
- Chapter 3: Free Parking — Gears of War 2 eGuide, Prima Games
- Act 5 Collectibles — Gears of War 2 Guide and Walkthrough
- Location of All the Collectibles in Gears of War 2
- Gears of War 2 Collectables Guide
- Gears of War 2: Tenuous Footing — Gamepressure
- Chapter 5: Closure — Gears of War 2 Guide
- Closure — Gears of War 2 Guide and Walkthrough
- Closure - Gears of War 2 Walkthrough
- Gears of War 2 — Xbox 360 Campaign Progress Q&A
- Gears of War 2: All Fronts Collection — Xbox
- Gears of War: All Fronts Collection and Dark Corners Multiplayer Map Pack — XBOX Wire
- Gears of War 2: Dark Corners Multiplayer Map Pack — Xbox
- Gears of War 2: All Fronts Collection — Xbox
- Road to Ruin Walkthrough — Stealth — Gears of War 2 Guide and Walkthrough
- Road to Ruin Walkthrough — Guns Blazing — Gears of War 2 Guide and Walkthrough
- Downloadable Content Guide: Gears of War 2 — Road to Ruin
About the game & collecting notes
- Platform
- Xbox 360
Complete walkthrough for the original Xbox 360 retail campaign, covering all 29 required story chapters in verified Act 1 through Act 5 order. Because the fixed chapter roster contains 17 publication slots, some adjacent chapters are grouped in one entry, but every required chapter must have its own clearly labeled route, objective sequence and transition. Optional Road to Ruin DLC remains separate and is not required for the retail ending.
Darryl Polo
Darryl Polo loves tinkering with emulation and revisiting retro games. He enjoys exploring how old favorites play on different setups and sharing what he learns along the way. At Joking Joystick, he writes about the games, hardware, and small discoveries that keep the hobby fun.
Our editorial standardsFound a step that needs another look? Help us improve this guide.