
Fire Emblem: Three Houses (Switch) — Complete Campaign Walkthrough
A complete, route-by-route campaign walkthrough for Fire Emblem: Three Houses on Nintendo Switch. Covers Part 1 monastery life and time management, the Point of Divergence, each Part 2 route (Silver Snow / Church, Crimson Flower / Edelgard, Verdant Wind / Claude, Azure Moon / Dimitri), endgame preparation, and optional 100% completion tasks.


Find a copy
Fire Emblem: Three Houses Nintendo Switch
We may earn a commission if you buy through these links, at no extra cost to you. As an Amazon Associate I earn from qualifying purchases.
Opens retailer search results. Check the model, edition, seller, availability and current price before buying.
Before you begin
You are the professor at Garreg Mach Academy.
This guide walks you from the prologue through the monastery term, the Point of Divergence, and every Part 2 route’s conclusion.
Follow the daily/weekly rhythm, prioritize teaching and supports, and treat the five-year time skip as a waypoint—you will need to convert monastery prep into battlefield effectiveness in Part 2.
Choose your house deliberately: the house you teach in Part 1 determines the major Part 2 storyline you will follow.
This guide explains what to prioritize on free days, how to use certification exams and seminars, how to recruit and pair units, and how to prepare for the final battles on each route so you can reach that route’s true ending without guesswork.
Set yourself up for the run
Decide difficulty and save strategy.
Use multiple manual save slots and make a backup before major choices (house selection, Point of Divergence).
Understand the calendar: the monastery uses a monthly calendar with free days, lectures, and special events.
Plan training, seminary, and exploration to hit certification and support goals.
Pick a long-term class plan per key units.
Certification exams and Seminar participation shape class eligibility—set class goals early for your main damage dealers and healers.
Build target supports early for cross-house recruitment opportunities and long-term combat cohesion.
Use free time to pair-teach and to accept requests from students who want to join your class.
Manage Motivation and items.
Use rest/food/activities so key students aren’t locked out of training when you need them for Seminar or a Certification Exam.
Learn battalion and gambit basics.
Battalions affect combat stats and gambits provide situational advantages; equip them to units who will lead enemy engagements.
Install the Expansion Pass only if you plan to use DLC content; base-game progression and endings are reachable without DLC.
Keep a separate save if you want to experiment with DLC missions.
Prologue and Choosing a House
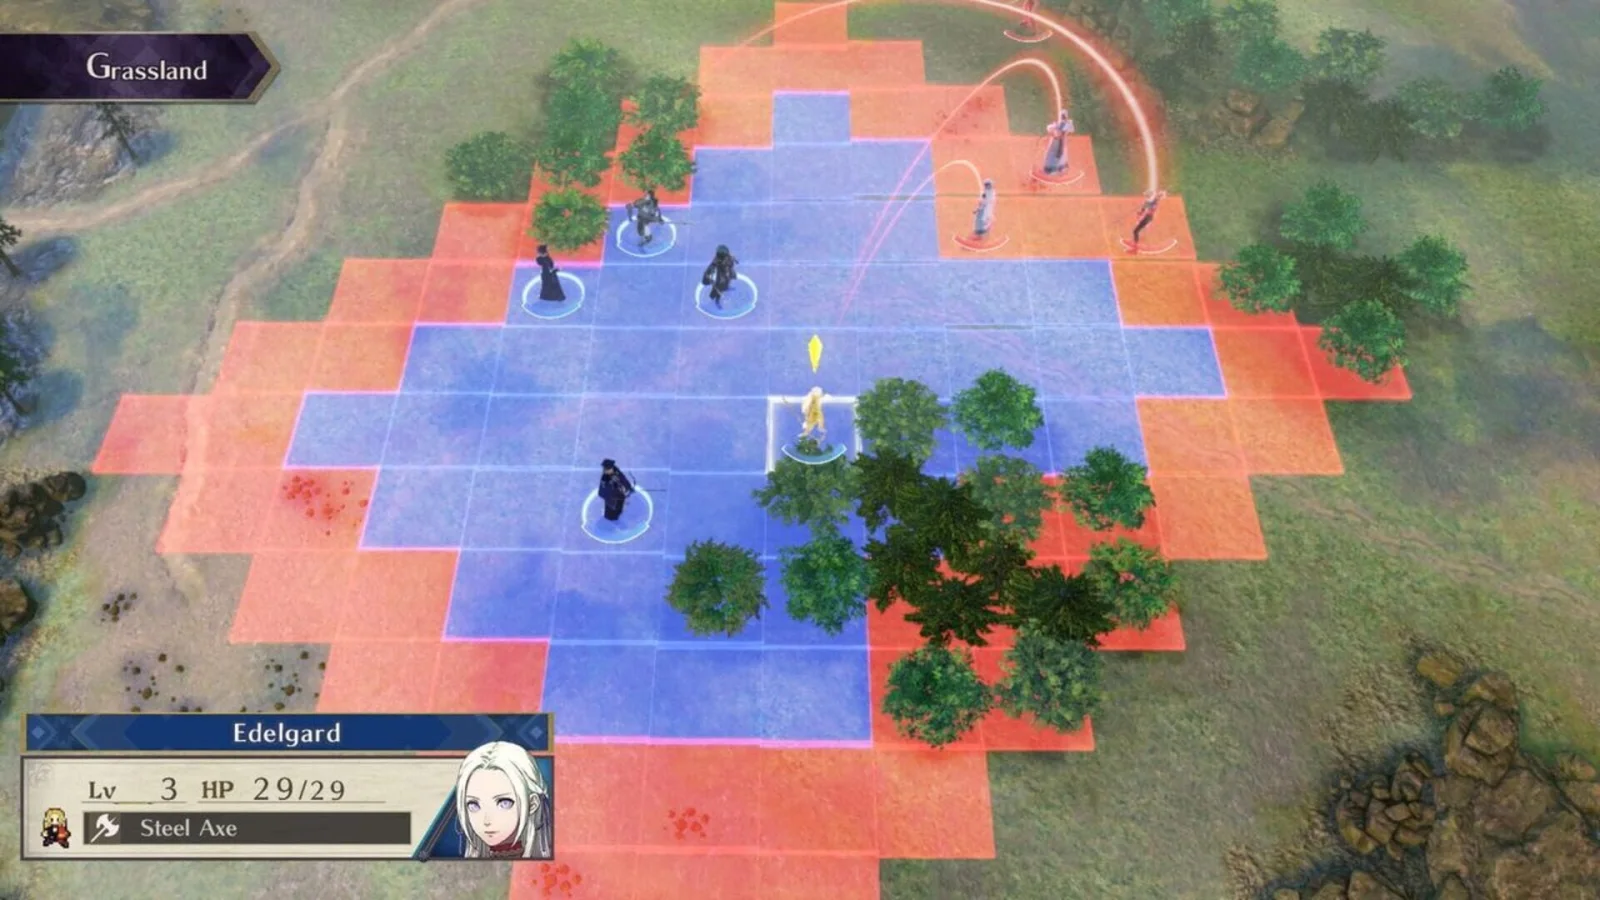
Complete An Inevitable Encounter by defeating Kostas, then follow the guided introduction to Garreg Mach Monastery. Before confirming a class, speak with Edelgard, Dimitri, and Claude and save in a separate slot. Blue Lions leads to Azure Moon, Golden Deer leads to Verdant Wind, and Black Eagles begins the campaign that later becomes either Silver Snow or Crimson Flower. The prologue is not a recruitment chapter: the three house leaders temporarily fight beside Byleth, and the actual house roster is assigned after the academy introduction. If you intend to pursue Crimson Flower, preserve another save before the Chapter 11 decision as well as the pre-house-choice save.
1. Start An Inevitable Encounter and keep Byleth with the allied leaders
The opening battle is the prologue, An Inevitable Encounter. The victory condition is to defeat Kostas. Byleth fights alongside Edelgard, Dimitri, and Claude, who are temporary allied participants for this opening scenario. Jeralt is also present in the scene and battle, but this is not the point where you recruit any of these characters into a permanent class roster.
Keep Byleth near the other three playable units while moving through the opening area. Check enemy attack ranges before ending each turn, especially if Byleth is exposed to more than one enemy. The prologue is short, so there is no benefit in taking reckless damage to secure every possible experience point. Let the allied leaders soften enemies when necessary, then use Byleth to finish safe targets.
- Confirm that the objective is to defeat Kostas.
- Keep Byleth close to Edelgard, Dimitri, and Claude.
- Use the battle forecast before attacking.
- Do not treat the opening battle as a recruitment opportunity.
2. Approach the enemy groups one at a time
An isolated Thief is near the starting area. Beyond it are three enemy groups: Kostas with two Ruffians near the upper part of the map, two Ruffians on the right, and three enemies on the left. Advancing into a group’s range can cause that group to move, so avoid entering several groups’ ranges at once unless Byleth and the allied leaders can safely absorb the response.
Clear the isolated enemy first, then move toward one side group while keeping the formation together. If Byleth is injured, have another allied unit weaken a target or draw its attack before Byleth counterattacks. You do not need to defeat every enemy to win, but reducing the accessible groups gives Byleth safer space and useful early experience.
- Trigger one enemy group at a time when possible.
- Use the allied leaders to soften dangerous enemies.
- Do not leave Byleth inside multiple enemy attack ranges without support.
- Remember that complete map clearance is optional once Kostas can be defeated safely.
3. Regroup before fighting Kostas
When you are ready, bring Byleth and at least one allied leader together before approaching Kostas. Deal with a nearby Ruffian first if it can attack Byleth alongside Kostas. Then use the battle forecast to choose the safest attack that defeats Kostas or leaves him ready for a guaranteed finishing blow.
Do not rely on Jeralt to complete the objective. The battle is won when Kostas is defeated by the player’s side, and the scenario ends immediately after the victory condition is satisfied. If Byleth is close to defeat, retreat toward the other units rather than forcing an unfavorable attack. Once the victory screen appears, proceed through the story scenes.
- Regroup before pulling Kostas’s group into combat.
- Prioritize Kostas after nearby threats are controlled.
- Verify that the victory screen appears.
- Continue the story after the prologue rather than searching for a house choice on the battle map.
4. Follow the guided arrival at Garreg Mach Monastery
After the prologue, follow the story through the bandit aftermath and the journey to Garreg Mach Monastery. The monastery becomes the main hub for the academy portion of the campaign, but not every facility or activity is available immediately. Follow the active objectives and required conversations until the game introduces the Officers Academy and its three houses.
The house decision occurs after the introductory scenes. It is a teaching assignment for Byleth and determines which students are automatically placed in your class. The prologue itself does not lock the choice.
- Reach Garreg Mach Monastery.
- Complete the required introductory conversations.
- Continue until the game explicitly asks you to choose a house.
- Do not assume the opening battle has already selected your route.
5. Speak with all three house leaders before confirming
Talk to Edelgard of the Black Eagles, Dimitri of the Blue Lions, and Claude of the Golden Deer. Review the students associated with each group before selecting. The Black Eagles represent the Adrestian Empire, the Blue Lions represent the Holy Kingdom of Faerghus, and the Golden Deer represent the Leicester Alliance.
Your choice determines the starting roster, the house-specific story perspective, and the main Part 2 campaign family. Choosing Blue Lions leads to Azure Moon. Choosing Golden Deer leads to Verdant Wind. Choosing Black Eagles begins the only house campaign with a later Part 2 split: Silver Snow if you remain opposed to Edelgard, or Crimson Flower if you satisfy the Edelgard conditions and side with her.
This is a permanent campaign decision for the current file. You can recruit students from other houses later when their requirements are met, but you cannot simply change the house you teach after confirming it.
- Speak with Edelgard, Dimitri, and Claude.
- Inspect the student rosters before deciding.
- Blue Lions leads to Azure Moon.
- Golden Deer leads to Verdant Wind.
- Black Eagles later branches into Silver Snow or Crimson Flower.
6. Create a pre-choice save and an active campaign save
Before confirming the house, open the save menu and create a manual save in a clearly labeled slot. This is the file to use if you want to revisit the house decision without replaying the prologue and opening conversations. Keep it separate from routine saves and do not overwrite it during later monastery exploration.
After confirming your house, create a second manual save in another slot. Use this as the active campaign file. If you choose Black Eagles, also create a further backup before speaking with Edelgard during Chapter 11 exploration. That later save is the practical route-split backup; it is separate from the save before the initial house choice.
- Save immediately before confirming the house.
- Save again after the house is confirmed.
- Keep the pre-choice file separate from the active campaign file.
- If choosing Black Eagles, preserve another save before the Chapter 11 route conversation.
7. Record the later Black Eagles conditions if you want Crimson Flower
The Black Eagles campaign defaults to Silver Snow unless the Crimson Flower conditions are met. Before Chapter 11 begins, raise Byleth’s support with Edelgard to C+. During Chapter 11 exploration, speak with Edelgard in the Entrance Hall and agree to accompany her to Enbarr. This conversation is a route requirement, not an optional flavor scene, and accepting it ends the remaining exploration opportunity for that period, so complete any essential tasks first.
After the Chapter 11 Holy Tomb battle, the game presents the decisive choice. Choose to protect Edelgard rather than follow the Church’s command to oppose her. Meeting only one of these requirements is insufficient: the required support, the Chapter 11 conversation and Enbarr trip, and the final decision all matter. If you miss the support deadline, do not accompany Edelgard, or choose against her at the decision, the Black Eagles file proceeds to Silver Snow.
The Chapter 11 save can preserve the two Black Eagles outcomes, but it cannot be converted into Azure Moon or Verdant Wind. Those routes require beginning the campaign with Blue Lions or Golden Deer.
- Reach Edelgard C+ before Chapter 11 begins.
- Speak with Edelgard during Chapter 11 exploration.
- Agree to accompany her to Enbarr.
- Before the Chapter 11 decision, make a backup save if desired.
- Choose to protect Edelgard for Crimson Flower.
- If any condition is missed, expect Silver Snow instead.
Before you move on
- The prologue is complete and Kostas has been defeated.
- Byleth has reached Garreg Mach Monastery and completed the guided introduction.
- You have spoken with Edelgard, Dimitri, and Claude before confirming a house.
- A manual save exists immediately before the house choice.
- A separate active campaign save exists after the house choice.
- Your route plan is recorded: Blue Lions for Azure Moon, Golden Deer for Verdant Wind, Black Eagles for Silver Snow by default, or Crimson Flower if all later Edelgard conditions are completed.
References for this chapter
- Fire Emblem: Three Houses for Nintendo Switch - Nintendo Official Site
- An Inevitable Encounter — Fire Emblem: Three Houses — Triangle Attack
- Multiple endings — Fire Emblem Wiki
- Chapter 11: Pegasus Moon — Fire Emblem: Three Houses Walkthrough & Guide
- List of chapters in Fire Emblem: Three Houses — Fire Emblem Wiki
Garreg Mach Monastery: Calendar, Free Days and Core Systems
Garreg Mach Monastery is the campaign hub between story battles. The calendar controls Monday instruction, free-day activities, deadlines, paralogues, tournaments, birthdays and the monthly mission. On a free day, choose Explore to improve motivation, Professor Level, supports and resources; Battle to gain experience, class mastery, gold, items or quest progress; Seminar to train a group in selected skills; or Rest to restore motivation and repair the Sword of the Creator while skipping the day. Check each month before acting, complete time-sensitive requests and paralogues first, and prepare weapons, healing items and battalions before the marked story mission. Use the monastery facilities deliberately instead of wandering without a goal.
Read the full calendar before choosing an activity
When a new month begins, open the calendar and inspect every marked date. Mondays normally lead into instruction for your house, while free days are usually Sundays, although story events and holidays can change the rhythm. The calendar identifies the main mission, paralogues, tournaments and other special events, so use it as your schedule rather than assuming every free day has the same value.
The main mission has a specific date shown on the calendar. You may have several free days before it, but the game advances automatically once you choose activities and pass through the intervening weeks. Check any paralogue deadline before spending a day on a routine auxiliary battle. If a paralogue is close to expiring, treat it as the priority because its rewards and story scenes are not interchangeable with ordinary battles.
- Inspect the complete month before selecting the first free-day activity.
- Record the main mission date and every paralogue deadline.
- Mark tournaments, birthdays and other events that matter to your active units.
- Leave enough time to prepare equipment before the main mission.
Use Explore to manage people, quests and resources
Choose Explore when you need to handle several kinds of preparation at once. You can move through Garreg Mach, talk to characters, accept requests, collect glowing items, give gifts, fish, garden, train Byleth with faculty, practice choir, share meals and use other activities as they unlock. Most of these actions spend Activity Points, so decide your priorities before beginning conversations or optional activities.
Start an Explore day by accepting every available request from the bulletin board or characters with request markers. Then complete nearby monastery objectives before spending the remaining Activity Points. Requests may ask you to speak with someone, collect an item, complete an activity or win a battle. Some unlock or improve facilities, while others grant experience, gold, weapons, battalions or useful materials; their exact rewards depend on the request.
Use the dining hall to share meals with compatible students. This improves their motivation for the next instruction session and can build supports between the participants. The greenhouse supplies planted materials after the harvest, and the fishing pond converts bait into fish while also contributing to Professor Level through successful fishing activity. These are efficient uses of an Explore day when you need resources without entering combat.
- Accept requests before leaving the area where they are posted.
- Use meals or gifts to raise motivation for students you plan to instruct.
- Plant in the greenhouse whenever a future harvest will help your current plan.
- Fish when you need Professor Level progress, fish for cooking or event-specific resources.
Visit the facilities according to your current goal
The marketplace is the practical preparation area. Check the Item Shop and Armory for vulneraries, healing supplies and replacement weapons, then use the battalion facilities and blacksmith services that have been unlocked. Repair important weapons before their durability becomes critical, and replenish battalion endurance before a major map. Do not spend all of your gold on optional weapons if several units still need basic equipment.
The training grounds provide weapon instruction and host tournaments after the relevant activity becomes available. Use them when Byleth or a student is close to an important weapon rank, or enter a tournament only with a unit whose weapon, durability and combat statistics make the attempt worthwhile. The chapel supports choir practice and Faith-related development. Choir practice also builds relationships between participants, so it can serve both a skill and support goal.
The dining hall is for shared meals and cooking, while the greenhouse and fishing pond provide renewable materials. Facilities become available through story progress and requests, so do not worry if an option is missing early in Part 1. Revisit the monastery after each major unlock and check which new service is now available.
- Shop and repair before a story battle, not after entering battle preparation.
- Train Byleth or a student at the training grounds when a certification requirement is close.
- Use choir practice for Faith progress or support building.
- Check the dining hall, greenhouse and fishing pond during planned Explore days.
Choose Battle for experience, mastery and quest progress
Select Battle when your roster needs combat development or when a request requires a field battle. The menu can contain auxiliary battles, paralogues and battles connected to monastery requests. Auxiliary maps are useful for experience, class mastery and practice with a developing formation; depending on the map, they can also provide gold, items or materials. Deploy weaker units alongside reliable leaders so the activity develops the roster rather than only your strongest four or five characters.
Use the calendar to identify battles with deadlines. A paralogue generally deserves priority over an ordinary auxiliary map because it can provide unique rewards, battalions, weapons or character scenes. Battle-related requests may also have specific objectives, so read the victory conditions and reward description before choosing a map.
Do not assume that Battle is always better than Explore. A unit with low motivation may gain little from another fight if the next Monday instruction is important. Likewise, a newly recruited character may need meals, gifts or support activities more than another level. Choose Battle when combat progress is the limiting factor, not simply because it is available.
- Use auxiliary battles to raise underleveled units and build class mastery.
- Complete expiring paralogues before routine auxiliary maps.
- Read battle objectives and reward information before deployment.
- Bring developing units when the map is safe enough to support them.
Use Seminars and Rest for specific recovery needs
Choose Seminar when several units need related skill experience and you do not need to spend the day exploring. The lecturer determines the skills trained, and participating units receive skill experience and motivation benefits. Select a seminar that matches your planned certifications rather than choosing one only because the instructor has a high personal level.
Choose Rest when skipping the day is worthwhile. Rest restores student motivation and, once available, repairs the Sword of the Creator. It does not provide the quests, supports, resources or combat experience gained from other activities, so use it when recovery is the immediate problem or when the next instruction session is more valuable than another activity.
Certification Exams are handled through the game's certification interface when the relevant menu is available, including during appropriate monastery or battle-preparation screens. Before attempting an exam, confirm the unit's level, required weapon or skill ranks and available seals. Do not treat a failed exam as free progress: prepare the unit first and keep enough seals and money for the class changes you actually intend to use.
- Use Seminar when multiple units share the same immediate skill target.
- Use Rest only when motivation or Sword of the Creator durability justifies losing the day.
- Check class requirements before buying seals or attempting Certification Exams.
- Keep enough money for repairs, weapons, battalions and planned certifications.
Prepare Monday instruction and the monthly mission
Motivation determines how much individual instruction a student can receive. Students with low motivation cannot use the full teaching opportunity, so raise motivation through meals, gifts and suitable Explore activities. A well-planned Explore day can produce more long-term skill progress than another low-level battle because it prepares several students for Monday instruction.
Before the marked mission date, open the roster and confirm each active unit's class, weapon durability, equipped battalion, battalion endurance, healing items and combat role. Review the map's recommended level and victory condition, then adjust deployment rather than taking the same team automatically. Keep a recent manual save before the mission if you want a safe retry point.
Complete important requests and attend worthwhile special events before advancing the calendar. Birthdays, tournaments and other highlighted events can provide support, items or training opportunities, but their value varies. Do not let a minor reward make you miss a paralogue deadline or the main mission. After finishing major preparation, save in a separate slot so a later mistake does not erase the month’s planning.
- Raise motivation for students who need Monday instruction.
- Confirm classes, weapons, healing, battalions and seals before the main mission.
- Prioritize expiring paralogues and mandatory events over routine activities.
- Keep a manual save before the story battle and before major decisions.
Before you move on
- You can read the calendar and identify the main mission date, paralogue deadlines and relevant special events.
- You know when to choose Explore, Battle, Seminar or Rest based on your current development need.
- You have accepted important monastery requests and know how to reach the marketplace, training grounds, chapel, dining hall, greenhouse and fishing pond.
- Your students have sufficient motivation for the next instruction session and clear class or skill targets.
- Before the monthly mission, your deployed roster has repaired weapons, usable battalions, healing items and a recent manual save.
References for this chapter
Teaching, Seminars and Certification Exams
Use weekly lessons to move each student toward a practical next class rather than training every skill evenly. Set two focused goals, then spend individual instruction on the exact rank blocking the next certification. Motivation determines how many instructions a student can receive, while Seminars train an automatically selected group in two related skills and restore 50 motivation to each attendee. Faculty Training is Byleth-only and becomes available after the Chapter 3 Learning from the Best quest. Certification Exams require the correct level tier and seal; the displayed pass chance must be at least 30%, and the seal is consumed whether the unit passes or fails. Passing unlocks the class but does not permanently force the unit to use it, so reclass deliberately after the exam.
Choose the next practical class before setting goals
At the beginning of the week, open the lesson plan and decide what each active unit should pursue next. Plan one class tier at a time: Beginner classes become available at Level 5, Intermediate classes at Level 10, Advanced classes at Level 20, and Master classes at Level 30. Each tier uses its corresponding seal.
Open the class list for the intended class and read every displayed requirement. Physical classes may require Sword, Lance, Axe, Bow, or Brawl. Mounted, armored, and flying classes also require Riding, Heavy Armor, or Flying. Magic classes commonly require Reason or Faith, and some advanced or master classes combine magic with a weapon or movement skill.
Do not plan only around a distant Master Class. Set goals for the next realistic certification, then revise them after the unit passes or changes direction. A student who reaches the weapon requirement but lacks Riding, Authority, Heavy Armor, or Flying may still be unable to use the intended role effectively.
- Choose a realistic next class tier for every active unit.
- Read the full requirement list for that specific class.
- Separate Byleth’s plan from the student lesson roster.
Set two focused weekly goals
Goals provide automatic skill experience during the week. Assign the two subjects that best advance the unit toward the next class. A physical attacker might study Axe and Authority; a cavalry candidate might study Lance and Riding; a mage might study Reason and Faith or replace one subject with Riding if the intended class needs it.
Change default goals when the class plan changes. Once a unit reaches the needed weapon rank, redirect that goal to Authority or a movement skill instead of continuing to overtrain the finished subject. Authority is especially useful because stronger battalions require higher Authority ranks even when Authority is not printed as the class’s main certification requirement.
Goals are background progress, not a substitute for targeted instruction. Check the class menu again after each certification and update both goals so the unit continues toward a useful follow-up class.
- Use no more than two focused goals per student.
- Redirect completed weapon training toward Authority or movement skills.
- Update goals after every certification or major class-plan change.
Restore motivation before the weekly lesson
Motivation controls how many individual instructions a student can receive. Motivation is tracked in 25-point segments, so a student at 100 can normally receive four instructions. A student at 25 can receive one. Raise motivation through exploration activities such as meals, gifts, lost-item returns, choir practice, and support-building interactions. Rest on a free day restores motivation but gives up that day’s exploration, battle, or Seminar.
Prioritize students who are close to a certification threshold or who fill an essential role such as healer, front-line defender, or primary damage dealer. A low-motivation student still advances through weekly goals, but contributes less to the targeted lesson.
During instruction, a Perfect result grants the option to Praise the student. The first Perfect instruction for that student in the session restores 25 motivation, allowing one additional instruction. Good and Great results still provide useful experience, while Bad results are inefficient and should not be the basis of a tight certification schedule.
- Raise motivation before the lesson when a student needs multiple instructions.
- Spend instruction opportunities on units near a useful threshold.
- Use Praise after the first Perfect result to gain the extra instruction.
Use individual instruction for exact skill bottlenecks
Select the student during the weekly lesson and choose the skill that is blocking the next certification. This is the best method when one character needs a particular Authority, Faith, Reason, Riding, Flying, Heavy Armor, weapon, or Brawl rank.
Favor strengths when you need quick progress, but do not ignore a required weakness if the class reward is important. Sustained instruction can develop a budding talent, and a weak skill may still be worthwhile when it opens a strong class or completes a role such as cavalry, wyvern rider, armored unit, or healer.
Instruction also supports the relationship between Byleth and the student. Use group tasks and combat deployment to supplement individual training, not to replace it when a single rank is urgently needed.
- Use individual instruction for one-unit bottlenecks.
- Train required weaknesses when the resulting class is worth the investment.
- Use group tasks to supplement, not replace, urgent instruction.
Choose Seminars when several units share a skill need
Seminars are free-day activities that train a group in two related skills. The game selects the attendees automatically according to their current goals and needs; the usual group contains three to six recruited characters. Review the displayed participant list and the two skills before confirming.
Every selected attendee receives the Seminar’s skill experience and 50 motivation. Byleth is included when another character is leading the Seminar, unless Byleth is the instructor. Seminars are therefore useful both for shared training and for restoring motivation across several students at once.
Use Seminars when multiple active units need the same subjects, such as Axe and Lance training for physical units or Reason and Faith for magic users. Do not spend the free day on an unsuitable Seminar when one key student needs a precise individual threshold or when the automatically selected group is already prepared.
- Check the automatically selected attendees before confirming.
- Verify that the Seminar’s two skills match several current goals.
- Use the 50-motivation benefit when multiple students need another lesson later.
Use Faculty Training and Group Tasks for separate objectives
Faculty Training is Byleth’s targeted skill-training activity. It becomes available after accepting and completing Learning from the Best during Chapter 3. Explore the monastery, take Manuela’s quest when it appears, and complete the requested training to unlock the option. Faculty Training consumes an Activity Point and lets Byleth choose a skill taught by the selected instructor.
The available skill categories depend on the instructor. Use Hanneman for Reason, Bow, or Riding; Manuela for Sword, Faith, or Flying; Seteth for Sword, Lance, Axe, Authority, or Flying; and other instructors for their listed specialties. Faculty Training is not student instruction, and ordinary student instruction cannot be used on Byleth.
Group Tasks assign two students to a shared weekly activity. The available task determines the skill category, such as Riding, Heavy Armor, or Flying, and the result can also provide rewards and support progress. Choose pairs whose class plans benefit from that category, but do not sacrifice an urgent certification threshold without a reason.
- Complete Learning from the Best in Chapter 3 to unlock Faculty Training.
- Use the instructor whose specialties match Byleth’s missing skill.
- Choose Group Tasks that benefit both participating students.
Take Certification Exams only when the attempt is worthwhile
From the calendar’s Certification option on an eligible free day, select the unit, class tier, and required seal. The game displays the unit’s current pass chance. A unit must meet the tier’s level requirement and possess the correct seal, and the displayed chance must be at least 30% to attempt the exam. Meeting the listed skill ranks generally produces a 100% chance, but the game permits some attempts while the unit is below the displayed recommendation.
The seal is consumed whether the unit passes or fails. Each unit can attempt only one certification exam per week, so do not spend a scarce seal on a low-chance attempt unless the class is urgently needed and the risk is acceptable. If the displayed chance is below 30%, continue training rather than searching for a way to force the exam.
Passing unlocks the class and may raise stats to the class’s minimum bases if the unit is below them. It does not reset the unit’s level. The unit is not required to remain in the newly certified class; after passing, choose the class deliberately from the reclass menu during battle preparation or at the start of a week.
- Confirm the unit’s level tier, class requirements, and seal.
- Do not attempt an exam below the displayed 30% minimum.
- Remember that one unit gets one exam attempt per week.
- Reclass separately after passing if the new class is immediately useful.
Match the activity to the current bottleneck
Use weekly instruction when one or more students need exact skill progress. Use a Seminar when several selected units share the same two-skill need. Use Faculty Training when Byleth needs a specific skill. Use a Group Task for a compatible pair and an appropriate movement or armor objective. Use Certification when a prepared unit can immediately benefit from the unlocked class.
Before choosing the free-day activity, review the next story battle, unit levels, skill ranks, available seals, motivation, battalions, and equipment. If a unit has a strong pass chance and the class will help in the next battle, certify before advancing the calendar. If the pass chance is poor and the class is not urgent, train instead.
Do not focus exclusively on weapon ranks. A unit that attacks well but cannot use the intended battalion or access the required mounted, armored, or flying path may be less useful than a slightly weaker unit with a complete role package.
- Choose the activity that addresses the most urgent requirement.
- Reserve seals for certifications with a practical payoff.
- Review classes, battalions, equipment, goals, and motivation before the next mandatory battle.
Before you move on
- Every active student has a practical next-class objective and matching weekly goals.
- Byleth has a separate skill plan and receives Faculty Training when a specific skill is lagging.
- Primary frontline units are progressing toward their weapon, Authority, armor, Riding, or Flying requirements.
- Primary magic users are progressing toward the Reason, Faith, weapon, or movement skills required by their intended classes.
- Seminars are chosen only after checking the automatically selected participants and the Seminar’s two skills.
- Certification Exams use the correct level tier and seal, with the displayed pass chance checked before the seal is spent.
- No unit is being asked to take more than one certification exam in the same week.
- After each successful exam, the unit’s class is deliberately selected rather than assumed to have changed automatically.
- Before the next major battle, review every active unit’s class, skill goals, battalion eligibility, motivation, and equipment.
References for this chapter
- Fire Emblem: Three Houses for Nintendo Switch — Nintendo Official Site
- Fire Emblem: Three Houses 101 - Nintendo
- Lesson - Fire Emblem Wiki
- Class change - Fire Emblem Wiki
- Faculty Training - Serenes Forest
- Instructing and Seminars: Skill growth outside battle - Fire Emblem: Three Houses Walkthrough
- Classes - Fire Emblem: Three Houses Walkthrough and Guide
Recruitment, Support Conversations and Party Composition
Recruitment is mainly a Part 1 task. Your chosen house joins automatically, while most students from the other two houses require Byleth to meet a displayed stat and weapon or skill requirement. Raising support with a student lowers that requirement, and a student at B support or higher may randomly offer to join during a free weekday. Use meals, gifts, lost items, choir practice, tea and safe linked attacks to build relationships. House leaders cannot be recruited, while Hubert and Dedue remain tied to their houses. Hilda has special rules: she can join the Blue Lions during Part 1 and can join the Church route during Chapter 12, but not Crimson Flower. Ashe and Lorenz have route-specific return events if they were recruited before the timeskip, later desert, and are defeated and persuaded in the correct Part 2 chapter. Faculty, Church characters, Jeritza, Anna and the Ashen Wolves use separate conditions. Keep a pre-timeskip save and verify the roster before the Part 1 war transition.
1. Choose priority recruits and check the displayed requirement
After selecting a house, identify the roles your starting roster lacks. Useful targets may include a second healer, bow user, mounted unit, flier, dedicated mage, durable frontline fighter or additional Gambit user. Recruitment is optional, and training too many units can spread experience, instruction and battalion resources too thinly.
Your house students join automatically. From Chapter 2 onward, speak to students from other houses during monastery exploration and choose the recruitment conversation. The game displays the current requirement, normally one Byleth stat and one weapon or skill rank. Treat that displayed requirement as authoritative for the current save, because support ranks can reduce it and some characters have special rules.
Ordinary student recruitment should be completed before the Part 1 war transition. Black Eagles players who intend to choose Crimson Flower should finish ordinary recruitment during Chapter 11 exploration. Other routes have limited exceptions after the timeskip, but waiting for them can cost instruction time, paralogues and useful support conversations.
- List two to five priority recruits and the roles they fill.
- Speak to each target during exploration and record the displayed requirement.
- Recruit ordinary cross-house students before the Part 1 war transition whenever possible.
2. Raise support to reduce requirements and improve combat teamwork
Support ranks with Byleth reduce the stat and skill thresholds shown for cross-house recruitment. Meals are efficient because they can raise support with two students at once, while liked gifts, returned Lost Items, choir practice and tea are useful for specific targets. Fighting near an ally also builds support, but never expose a weak unit merely to gain relationship points.
Check the Support menu after each exploration day. A support conversation may be available even when a character has not yet agreed to join, and viewing it can lower the recruitment requirement before the next free day. Some support ranks are restricted by the calendar or chapter, so do not assume every target can reach B support during Part 1.
A student at B support or higher may offer to join during a free weekday from Monday through Saturday. This is a low-chance event, not a guaranteed command, so maintain a backup plan using the displayed stat and skill requirements. Ferdinand and Caspar are special cases: their Byleth B supports normally cannot be reached during the standard Part 1 window, so meet their direct requirements instead of waiting for a support request.
Support also affects combat. Allies with support can contribute linked-attack bonuses when positioned near one another, improving offensive reliability and defensive interactions. Build these relationships through safe positioning, shared meals and gifts rather than reckless adjacency.
- Use meals and targeted gifts on priority recruits.
- View newly available support conversations promptly.
- Use direct requirements for Ferdinand and Caspar during a normal first playthrough.
- Build combat support through safe linked attacks and sensible positioning.
3. Use monastery activities and Mission Assistance correctly
During exploration, speak to recruitment targets before spending activity points. Return Lost Items, then use meals, gifts, choir practice or tea on the students closest to joining. Keep enough gold for weapon purchases, repairs, battalions and useful gifts instead of spending everything on low-priority items.
Complete monastery quests that unlock merchants, the Battalion Guild and additional supply options. These facilities do not directly recruit students, but they provide weapons, battalions, gifts and other resources that make recruitment and subsequent training easier. Gardening and fishing can supply materials without consuming every activity point.
If your professor level allows Mission Assistance, borrow one student from another house for the current month. That student can participate in battles and gain support points but does not receive experience. Mission Assistance is therefore a relationship-building tool, not a replacement for recruitment and not a method for leveling an unrecruited student. Auxiliary battles train your existing roster but do not automatically recruit anyone.
- Talk to targets before using exploration activities.
- Return Lost Items and buy useful gifts without exhausting funds.
- Use Mission Assistance when you need support points from a specific unrecruited student.
- Do not confuse quests, auxiliary battles or borrowed units with completed recruitment.
4. Separate house-locked and route-dependent students
Claude, Dimitri and Edelgard cannot be recruited outside their own houses. Hubert is exclusive to the Black Eagles, and Dedue is tied to the Blue Lions. Most other students from the two houses you did not choose can be recruited during Part 1 if their requirements are met.
Hilda is route-sensitive. She can be recruited during Part 1 by the Blue Lions. If you teach the Black Eagles and choose Silver Snow, she becomes recruitable during Chapter 12 after the Church route is established. She cannot be recruited on Crimson Flower. Do not spend time planning Hilda as a Crimson Flower recruit.
Ashe and Lorenz are not general Part 2 recruits. Ashe leaves after the timeskip on Silver Snow and Verdant Wind. If Ashe was recruited before the timeskip, he appears as an enemy in Chapter 15; defeat him, then select the in-game Persuade option. Lorenz leaves after the timeskip on Silver Snow and Azure Moon. If he was recruited before the timeskip, he appears as an enemy in Chapter 16; defeat him, then select Persuade. An unrecruited Ashe or Lorenz cannot be obtained through these return events.
- Do not attempt to recruit Claude, Dimitri, Edelgard, Hubert or Dedue outside their normal routes.
- Recruit Hilda during Part 1 for Blue Lions, or during Chapter 12 on Silver Snow.
- For Ashe, verify prior recruitment, the Silver Snow or Verdant Wind route, Chapter 15, defeat and Persuade.
- For Lorenz, verify prior recruitment, the Silver Snow or Azure Moon route, Chapter 16, defeat and Persuade.
- If the Persuade prompt does not appear, use Divine Pulse and confirm the character was recruited before the timeskip.
5. Handle faculty, Knights of Seiros and route characters separately
Faculty and Knights of Seiros generally use Byleth level or story conditions rather than the student stat-and-skill formula. Catherine becomes available from Chapter 4, Cyril from Chapter 5, Shamir from Chapter 6, Hanneman and Manuela from Chapter 8, and Alois during Chapter 11 when Byleth meets their level conditions. Catherine, Cyril and Shamir have special Silver Snow availability, with route-specific automatic recruitment conditions; check their prompts before the route split rather than assuming every Church character is universally available.
Flayn joins through the story during Part 1 but leaves if you choose Crimson Flower. Seteth joins automatically on the non-Crimson Flower routes during Chapter 12. Gilbert is associated with Azure Moon and joins automatically during Chapter 13 on that route. These characters should be included in your route plan before you finalize a permanent party.
Jeritza is a free update character, not an ordinary faculty recruit. On an updated game he joins automatically from Chapter 13 on Crimson Flower and is unavailable on the other routes. Do not reserve a normal recruitment activity or gift plan for him.
- Check faculty and knight recruitment prompts after the relevant chapter and level milestones.
- Confirm Church-character availability before choosing the Black Eagles route split.
- Include Gilbert only in an Azure Moon roster plan.
- Treat Jeritza as an automatic Crimson Flower character on an updated game.
6. Recruit Expansion Pass characters and preserve a flexible roster
With the Expansion Pass, progress through the Cindered Shadows side story to unlock the Ashen Wolves for the main campaign. After a character becomes available, visit Abyss during main-campaign exploration and speak to that character to recruit them. The Ashen Wolves do not use the ordinary student stat checks.
Anna is also Expansion Pass content and uses her own recruitment event rather than the standard student formula. Recruit DLC characters early enough to instruct them, certify classes, assign battalions and complete desired paralogues before the late Part 1 schedule becomes crowded.
Keep a reserve roster instead of forcing every recruit into one permanent class. Maintain at least two healing options, several ranged attackers, a frontline unit and a mobility option. When a recruit joins, inspect their class, weapon ranks, skills, battalion and inventory immediately. A late recruit may require tutoring, certification and equipment before being ready for a story battle.
- Complete the required Cindered Shadows progress for each desired Ashen Wolf.
- Visit Abyss during main-campaign exploration after the relevant unlock.
- Recruit Anna through her separate event if using the Expansion Pass.
- Review every recruit’s class, skills, battalion and inventory before deployment.
- Keep reserve units for unusual terrain, deployment limits and route-specific enemies.
Before you move on
- Every intended ordinary student is marked recruited before the Part 1 war transition, except for a clearly recorded route-specific return event.
- For Ashe, confirm prior Part 1 recruitment, Silver Snow or Verdant Wind, Chapter 15, defeat and the Persuade choice.
- For Lorenz, confirm prior Part 1 recruitment, Silver Snow or Azure Moon, Chapter 16, defeat and the Persuade choice.
- Hilda’s status is confirmed for the chosen route, including the Chapter 12 Silver Snow window if applicable.
- Byleth has viewed the support conversations needed for priority recruits, and remaining displayed requirements are recorded from the in-game recruitment menu.
- The roster contains a healer, ranged attacker, frontline unit, mobility option and at least one reserve unit.
- Faculty, Knights of Seiros, Seteth, Flayn, Gilbert, Jeritza and Cyril have been checked against the selected route and their separate availability rules.
- If using the Expansion Pass, the desired Ashen Wolves and Anna are recruited through their specific unlock and event conditions.
- A pre-timeskip save is preserved before the Part 1 route transition so missed recruitment, support and route-specific roster decisions can be revisited.
References for this chapter
- Nintendo Official Site: Fire Emblem: Three Houses for Nintendo Switch
- Recruitment - Fire Emblem: Three Houses | Serenes Forest
- Recruitment - Fire Emblem: Three Houses | Triangle Attack
- Ashe — Fire Emblem Wiki
- Lorenz - Fire Emblem Wiki
- Downloadable content in Fire Emblem: Three Houses - Fire Emblem Wiki
Tactical Combat Basics, Gambits and Classes
Fire Emblem: Three Houses does not use a universal sword-lance-axe weapon triangle. Weapon matchups instead depend on unit stats, combat arts, effective damage, class abilities and conditional Breaker skills. Battalions provide passive bonuses and limited-use Gambits, while Authority determines which formations a unit can equip. Offensive Gambits can control groups, prevent counterattacks and disable monster barriers, but their accuracy depends heavily on Charm and positioning. Build each unit around a clear job, then promote when a new class provides the movement, durability, weapon access or spell list that job requires. Stay in an earlier class for mastery only when the resulting ability is worth delaying the promotion.
1. Read the battle forecast before moving
At the beginning of every battle, inspect enemy ranges, weapons, skills, movement and effective-damage indicators. The red danger area shows where enemies can attack on their phase, while the combat forecast displays expected damage, hit rate, critical chance and follow-up attacks. Three Houses has no universal weapon triangle, so do not assume that a sword automatically has an advantage over an axe or that a lance automatically defeats a sword.
Check the combined enemy phase rather than testing one opponent at a time. A heavily armored unit may withstand ordinary physical attacks but fail against magic or armor-effective weapons. A fast sword user may avoid standard blows and still be vulnerable to bows, high-accuracy Gambits, monsters or enemies with reliable hit bonuses. Combat arts can change the result by adding might, range, accuracy or effectiveness, but they consume extra weapon durability and normally cannot produce follow-up attacks.
- Check enemy ranges before crossing into a new group.
- Inspect magic, bows, effective-damage skills and monster attacks.
- Confirm that the unit survives every likely attack during the enemy phase.
- Use Breaker skills as conditional matchup bonuses, not as a replacement for general positioning.
2. Assign battalions according to the unit’s job
Battalions grant passive bonuses such as physical attack, magic, hit, avoidance, protection, resistance and Charm. They also provide the Gambit shown on the battalion’s information screen. A unit must meet the battalion’s Authority requirement, and movement-type restrictions can limit the formations available to mounted, armored or flying classes. Flying units in particular have a smaller battalion selection, so check compatibility before changing a unit’s class.
Give an offensive battalion to a frontliner or attacker with enough Charm and Authority to land Gambits consistently. Area Gambits such as Blaze are valuable on units that can reach several enemies and then survive the retaliation. Stride belongs on a unit that can safely spend its action improving the army’s movement. Healing, protection and other support Gambits are useful on dedicated support units, but do not overload the entire party with passive formations and leave yourself without area control.
Battalion endurance falls when the host takes damage. As endurance drops, the battalion’s stat bonuses weaken; at zero, its bonuses disappear and its Gambit cannot be used. Replenish damaged formations at the Knights’ Guild before important missions. Battalions also gain their own experience and improve as they level, so assign valuable formations consistently rather than rotating them without a reason.
- Equip a battalion on each regular combat unit whenever the system is available.
- Match the Gambit’s range and effect to the unit’s battlefield position.
- Raise Authority on units intended to use stronger battalions.
- Repair endurance before major story battles.
3. Use Gambits to control enemies and break monster barriers
Gambits are limited-use actions tied to equipped battalions. Offensive Gambits ignore enemy counterattacks and cannot produce normal follow-up attacks. Most offensive Gambits inflict Rattled when they hit. Rattled reduces the enemy’s effectiveness, prevents movement for the next turn and prevents the affected unit from benefiting from battalions or using its own Gambit. Use it on an enemy you cannot defeat immediately, on a group blocking a narrow passage, or on a dangerous unit whose movement would otherwise collapse your formation.
Gambit accuracy is influenced by the user’s Charm compared with the target’s Charm. If the displayed hit rate is poor, improve it by using a unit with better Charm, a more accurate battalion, an Accuracy Ring or a linked Gambit Boost. A Gambit Boost occurs when nearby allies can also target the same enemy from their current positions. Support levels improve the boost, but a formal support rank is not required for the basic linked effect. Arrange the formation before selecting the Gambit rather than expecting distant allies to contribute.
Monsters have several barrier sections covering their body. An intact barrier substantially reduces incoming damage and can activate barrier-related abilities. A Gambit aimed at a barrier section can disable that section, and destroying one or more sections can make the monster Confused, preventing it from counterattacking during that turn. Use multiple Gambits or attacks against separate sections when you need a safe opening. Barrier breaking is not the same as effective damage: monster-effective weapons, combat arts and spells remain useful after the barrier is removed.
- Use Rattled to stop an enemy that cannot be safely defeated this turn.
- Aim Gambits at monster barrier sections when disabling the barrier is the priority.
- Create linked positions before using an uncertain Gambit.
- Save at least one reliable Gambit for a monster or enemy reinforcement wave.
4. Plan classes around a long-term role
Choose a target role before spending training time. A physical frontliner generally needs a dependable weapon, enough Authority for a useful battalion and a plan for defense, speed or mobility. A mage needs Reason or Faith ranks and a class that supports the intended spell list and magic power. Archers benefit from range and safe positioning. Mounted and flying units provide mobility but must account for terrain, bows and movement-type battalion restrictions.
Certification Exams are available at the class tiers’ level thresholds: Beginner classes from level 5, Intermediate from level 10, Advanced from level 20 and Master from level 30. Master certification also requires Professor Level C or higher. The relevant weapon, magic, movement or Authority rank determines the exam’s success chance. Meeting the requirement is not the same as guaranteeing a pass, so use the displayed percentage and avoid wasting a seal on a poor attempt unless the class is urgently needed.
Do not promote automatically the moment a higher-tier exam appears. An Intermediate class may provide a valuable mastery ability, such as an offensive or defensive stat boost, and each combat encounter, Gambit use or eligible magic action advances class mastery. However, mastery is optional. Promote when the added movement, durability, weapon access or spell access solves an immediate problem, even if that means leaving a useful ability unfinished. A unit can certify into a class and later return to another unlocked class.
- Set a target class and identify its required skill ranks.
- Check the exam percentage before spending a seal.
- Master an earlier class only when its ability supports the unit’s actual build.
- Promote before a story map if the new movement or durability is more valuable than delayed mastery.
5. Control formation, choke points and mobility
Advance in layers. Put durable units at the front edge of enemy range, keep healers one or two spaces behind them and position fragile attackers where they can strike without becoming the next target. Narrow bridges, doors, forests and other restricted approaches reduce the number of enemies that can reach you at once. If a group is too large to defeat, use a Gambit to Rattle its lead units, retreat behind the choke point and let the enemy approach in manageable waves.
Mounted units cross ground quickly but may lose access to rough terrain. Flying units ignore many terrain restrictions and are excellent for reaching switches, isolated objectives, archers and distant reinforcements. They are also exposed to bows and other anti-flying effects. Do not send a flyer beyond healing or support range merely because it can reach a target; check the return route and enemy ranges first.
Assign an adjutant during deployment when a unit needs a specialized support effect. Adjutants do not simply add ordinary Pair Up statistics and cannot act independently, but they can provide follow-up attacks, protect the host from enemy follow-ups or heal the host, depending on the adjutant’s class and support level. An adjutant also counts as a possible linked-attack or Gambit-Boost participant. Use an armored adjutant for a vulnerable frontliner, a healing-capable adjutant for a unit expected to take repeated damage and a combat-capable adjutant when the host can safely attack from that range.
- Create a front line before entering several enemy ranges.
- Use mounts and flyers to alter the map’s geometry, not to justify unsupported solo attacks.
- Keep fragile damage dealers within healing or retreat range.
- Choose adjutants for their actual follow-up, guard or healing effect.
Before you move on
- Every deployed core unit has a defined role, an appropriate class, a usable battalion and a clear next Authority, weapon or magic goal.
- Your formation includes at least one reliable healer, one unit with an area or control Gambit, one durable frontliner and one mobile unit able to reach distant objectives.
- Before each major battle, battalion endurance is restored, weapons are repaired, Gambit uses are reviewed and certification opportunities are checked.
- You can identify a safe response to armored enemies, flying enemies, enemy spellcasters and monsters with intact barriers.
- You understand whether each adjutant is providing follow-up, guard or healing support and have not mistaken it for an extra independent action.
- You can explain why each primary unit is positioned where it is and can retreat or reinforce the formation if the first enemy phase produces an unexpected result.
References for this chapter
- Fire Emblem: Three Houses for Nintendo Switch - Nintendo Official Site
- Battalions — Serenes Forest
- Gambits — Serenes Forest
- Linked Attacks & Gambit Boost — Serenes Forest
- Adjutants — Serenes Forest
- Class-Change — Serenes Forest
- Classes — Serenes Forest
- Gambit — Fire Emblem Wiki
- Battalion — Fire Emblem Wiki
- Barrier (mechanic) — Fire Emblem Wiki
- Status effects — Fire Emblem Wiki
Auxiliary Battles, Quests and Resource Farming
Use free days according to your immediate need. Explore when you need quests, motivation, recruitment attempts, gifts, gardening, fishing, or monastery items. Choose Battle when a recruit needs experience, a unit is approaching a certification requirement, or a paralogue or quest battle is nearing its deadline. Auxiliary battles become available from Chapter 2 onward. Their rewards and enemy levels vary by map and difficulty. Normal mode includes repeatable auxiliary options that do not consume Battle Points, while every auxiliary battle costs a Battle Point on Hard and Maddening. Prioritize expiring paralogues and required quest battles over routine farming, then keep enough gold for repairs, forging, battalions, and class seals.
1. Read the calendar and battle menu before committing the day
On each free day, inspect the calendar and then open the Battle menu before choosing an activity. The Battle option can contain the monthly mission, auxiliary battles, paralogues, quest battles, rare monster sightings, and DLC battles if that content is installed. The monthly mission advances the story; auxiliary battles are repeatable training fights; paralogues are character-linked side chapters; and quest battles are unlocked by accepting particular monastery requests.
Treat an expiration date shown on a paralogue or other limited battle as a real deadline. Clear that battle before spending the day on ordinary training. A routine auxiliary map can usually be selected later, but a time-limited paralogue may disappear when its listed window closes. If several side battles are available, compare their required characters, level, rewards, and expiration before selecting one.
Auxiliary battles become available from Chapter 2 onward. On Normal, the first two standard auxiliary choices do not consume Battle Points; higher-level auxiliary options and Rare Monster Sightings can cost a point. On Hard and Maddening, every auxiliary battle costs one Battle Point. Quest battles and DLC battles also consume a Battle Point when played.
- Open the Battle menu before choosing Explore or Battle.
- Clear a limited paralogue before a repeatable auxiliary map.
- Check the Battle Point cost, recommended level, rewards, and expiration shown on the battle screen.
2. Use auxiliary battles for targeted training
Choose an auxiliary battle when a recruit is far below the rest of the roster, when a unit needs weapon experience for a certification, or when you need additional gold and monastery materials. Put weaker units in the deployment roster, but protect them with a stable frontline. Let a trainee attack enemies they can survive against rather than sending them into an isolated group simply to gain experience.
Rotate one or two underlevelled characters at a time. Bringing every weak unit into the same battle can spread experience too thinly and leave the entire formation vulnerable. A durable unit can hold a passage while a trainee finishes weakened enemies, gains weapon experience, and works toward the next class requirement. Use healing and battalion support to keep the training formation from collapsing.
The reward and enemy arrangement depend on the selected battle, story progress, difficulty, and available map. Auxiliary victories can provide experience, gold, and monastery items such as produce or ore. Some maps include human enemies whose commanders drop bullion, while Rare Monster Sightings can provide different combat and material opportunities. Inspect the displayed reward information and enemy levels instead of assuming every auxiliary fight pays the same amount.
- Bring only the trainees needed for the current goal.
- Keep weaker units behind a protected frontline.
- Inspect the map’s reward preview before spending a Battle Point.
3. Prioritize paralogues and quest battles
Paralogues are optional character-linked battles with rewards that ordinary auxiliary maps do not normally provide. Depending on the paralogue, rewards can include battalions, equipment, ores, stat items, or other valuable resources. Read the deployment requirements and victory conditions carefully; some paralogues require particular recruited characters to be present or use them for a battle-specific condition.
If a paralogue is above your current level, improve equipment, battalion endurance, and unit positioning before attempting it. Do not assume that routine grinding is the best use of the next free day: a paralogue’s expiration is more important than a small level increase from an ordinary map. If necessary, use a lower-risk auxiliary battle first, then return to the paralogue while it is still available.
Accept monastery requests as soon as they appear. Many quests ask you to retrieve an item, speak with a character, use a facility, or complete a specified battle. After accepting a request, check the Battle menu for a quest-marked map if the objective requires combat. Read the victory conditions on the preparation screen and complete the requested objective rather than treating every quest battle as an ordinary defeat-all map. Quest rewards can include gold, Renown, gifts, ingredients, bait, seeds, or other items, and some quests unlock monastery facilities.
- Accept new requests during every important exploration session.
- Check whether a paralogue requires named characters or a particular route condition.
- Read the quest battle’s stated objective before deploying.
4. Use a deliberate exploration route through Garreg Mach
Start an exploration session by accepting every available request. Then visit the greenhouse to plant or harvest, collect visible items, and check the Marketplace for weapon purchases, repairs, forging, seals, and battalion supplies. The exact order can vary, but handling requests and resource facilities first prevents you from ending the session with an incomplete objective.
Move through the monastery and collect gifts, ingredients, lost items, and other visible pickups. After the Lost? Found! quest has been completed, lost items can be returned to their owners; correct returns raise the owner’s support with Byleth and can raise motivation if that character belongs to your class. Speak with students who have activity icons, especially characters you intend to recruit or support before the timeskip.
Use remaining activity points on the action that matches your plan. Meals can raise motivation and support among selected participants, choir practice supports Faith and relationships, faculty training improves Byleth’s skills, and gifts are efficient for building a specific support. Fishing and gardening provide useful resources but should not automatically replace recruitment conversations or quest completion. Once activity points are spent, continue walking through the monastery to return items and speak with characters; those conversations do not require another activity point.
- Accept requests before beginning other exploration actions.
- Harvest or plant in the greenhouse and collect visible items.
- Return lost items and speak with recruitment targets before ending Explore.
5. Match Battle, Explore, Seminar, and Certification to the immediate goal
Choose Battle for experience, weapon ranks, battalion experience, gold, or a time-sensitive combat objective. Choose Explore when motivation, recruitment, support ranks, gardening, fishing, gifts, or facility quests are more urgent. Choose Seminar when several students need the same skill areas and individual motivation is better saved for another week. Seminars train Byleth and eligible students whose study goals fit the seminar’s subjects, so check the participant list before confirming.
Use Certification Exams after checking the candidate’s required weapon or skill ranks and available seals. An auxiliary battle can supply experience and weapon skill, but it cannot substitute for the actual proficiency requirements shown on the certification screen. If a unit is one or two ranks short, Battle may be worthwhile; if the unit already qualifies, certification is usually a better use of the next opportunity than another routine map.
Before a major story battle, spend funds on essential weapon repairs, forging, battalion replenishment, and seals needed for planned promotions. Keep a reserve for stronger weapons and later repairs. Avoid converting the entire treasury into consumables early, especially when several recruits still need class changes or when forged weapons will solve more combat problems than extra healing items.
- Battle for levels and ranks; Explore for relationships and resources.
- Use Seminars when a group needs the same skill training.
- Check certification requirements before spending a Battle Point on training.
6. Stop farming when the roster is ready
Part 1 contains limited free days and important calendar events. Once the core roster can survive the next story battle, key students have enough motivation for upcoming instruction, and planned certifications are possible, return to the campaign schedule. Excessive auxiliary farming can leave recruitment attempts, support conversations, quests, or expiring paralogues unfinished before the story advances.
At the end of the month, verify that priority requests are complete, limited paralogues are cleared, weapons are repaired, battalions are replenished, and the next story map has the units and equipment it requires. Do not measure success by maximum level. A successful resource cycle leaves you with a stable active roster, usable equipment, adequate gold, and no important side battle accidentally ignored.
If a battle goes badly, retreat or reload according to your difficulty and mode rules, then change the deployment rather than repeatedly forcing the same formation. Replace an exposed trainee, assign a sturdier battalion, repair a damaged weapon, or spend the next free day on the specific skill or level that caused the failure.
- Complete priority quests and expiring paralogues.
- Repair weapons and replenish battalions before the next story mission.
- Stop routine farming once the roster meets its next level, skill, and equipment goals.
Before you move on
- Your active roster can handle the next story mission without relying on emergency grinding.
- All currently available priority quests and expiring paralogues are complete or deliberately skipped.
- Weapons are repaired, battalions are replenished, and enough gold remains for the next important purchases.
- You have used exploration to accept requests, gather resources, return useful items, and attempt recruitment conversations.
- You know whether the next free day is better spent on Battle, Explore, Seminar, or Certification based on a specific roster goal.
Midterm Events, Tournaments and Social Opportunities
Use each exploration day to clear expiring quests, handle scheduled events, and build the supports needed for recruitment before Part 1 ends. Regular tournaments are optional Activity Point activities: they use the listed weapon type, provide gold, and usually give a special reward the first time that tournament is cleared. They do not directly raise support ranks or decide who joins your class. The major missable social event is the Chapter 9 White Heron Cup. Choose a representative before the event deadline and prepare that unit to reach at least 13 Charm at the competition if you want the Dancer class. Birthdays, gifts, Lost Items, meals, choir practice, tea, and mission assistance are support tools. They matter because higher support lowers the Byleth skill and stat requirements for outside-student recruitment, but support does not bypass every route or availability restriction. Keep a recruitment list, reserve gifts for priority targets, complete important paralogues before their deadlines, and save before the monthly mission or any route-relevant decision.
1. Read the month before spending your first free day
At the beginning of every month, inspect the calendar for the story mission, quests, paralogues, tournaments, birthdays, fishing or dining events, and the White Heron Cup when it becomes available. Use the date information to identify deadlines rather than assuming that every activity remains available until the end of the month. A paralogue can have a shorter availability window than the main mission, and a fixed event can disappear when the calendar advances.
Separate mandatory progress from optional rewards. The monthly mission advances the story, but a tournament is normally optional and costs an Activity Point during Explore. If you need a recruit, a support conversation, or a paralogue reward more than extra gold, schedule those first. Make a manual save at the start of a month containing a major deadline or decision.
- Inspect all highlighted calendar dates.
- Mark expiring paralogues and quests before routine activities.
- Reserve a free day for any tournament or social event you deliberately want to complete.
- Save before a month with a major event or route-relevant decision.
2. Enter regular tournaments with the correct weapon and a reliable unit
Go to the Training Grounds during Explore and read the tournament rules before selecting a participant. The competition specifies the weapon type or other applicable restriction. Choose a unit who can use that weapon effectively and who has enough durability, accuracy, and survivability to finish several consecutive fights. Byleth cannot enter these tournaments, so select a student or another eligible roster member.
Each entry consumes one Activity Point. The participant fights through successive arena rounds and can receive limited healing between battles, but the unit does not gain ordinary battle experience or skill experience from the tournament. Winning supplies gold and, on a first clear of that tournament, a special reward such as a weapon or promotion item. Repair or replace the prescribed weapon before entering; do not treat tournament participation as a substitute for leveling a weak student.
If the tournament is attached to a quest, accept the quest first, enter the matching competition, and return to the quest giver afterward if a hand-in is required. If the reward is not important, skip the tournament when the same Activity Point is needed for a meal, choir practice, or a recruitment target.
- Confirm the tournament’s weapon restriction.
- Use an eligible unit with a durable, accurate weapon.
- Remember that each attempt costs an Activity Point.
- Use the limited tournament healing carefully.
- Collect the first-clear reward and turn in any associated quest.
3. Do not confuse tournaments with support or recruitment events
Regular arena tournaments are resource activities, not direct support events. Winning one does not itself raise a support rank or make an outside student join your class. The support opportunities that matter for recruitment come from activities such as meals, choir practice, gifts, Lost Items, tea, combat adjacency, healing, and mission assistance, along with available support conversations.
A tournament may still be worthwhile because its gold or first-clear reward pays for weapons, gifts, or a certification plan. It can also be a good use of an otherwise spare Activity Point. However, if an outside student is close to recruitment or a support conversation is available, prioritize the support action instead of entering a low-value competition.
- Do not count a tournament victory as recruitment progress.
- Compare the tournament reward with the value of a meal, gift, or choir session.
- Use tournaments for money and items, not normal experience.
4. Build recruitment support before the deadline
Recruitment becomes available while exploring from the early academy chapters onward. Speak to outside students and use the Recruit option to see whether Byleth meets their current expectations. Their requirements involve a Byleth stat and skill, and higher support with Byleth lowers those requirements. A B support with an outside student can also create a chance for that student to ask to join on a free weekday, but this is not a guaranteed immediate recruitment method.
Start with a written priority list instead of trying to raise everyone equally. Give preferred gifts, return Lost Items to their owners, invite priority targets to meals, use choir practice when it benefits the intended support, and borrow a student through Mission Assistance when you want combat adjacency and support without committing to recruitment yet. Check the Support menu after battles and monastery visits because support conversations can unlock at different points.
Do not rely on the B-support request method for Ferdinand or Caspar during Part 1. Their relevant B supports are not available until Part 2, so recruit them by meeting the applicable skill and stat requirements if you need them before the timeskip. Also remember that support does not override every route-specific restriction, and some characters can leave or become unavailable after a route decision.
- Check the Recruit option for each priority student.
- Record whether the remaining requirement is a stat, skill, support, or availability condition.
- Use gifts, meals, Lost Items, choir, tea, combat, and mission assistance deliberately.
- Recruit Ferdinand and Caspar through their Part 1 requirements if needed.
- Do not assume B support guarantees an immediate invitation.
5. Use birthdays, gifts, meals, and conversations efficiently
When a birthday appears on the calendar, speak with the character during Explore and give a suitable gift if you want the support increase. Keep a reserve of preferred gifts for difficult recruitment targets instead of spending every item on units already guaranteed to remain in your house. Return Lost Items rather than selling them; the correct owner receives a support increase and the item is restored to them.
A shared meal costs an Activity Point, restores the participating students’ motivation, and builds support among the diners and Byleth. Invite a student whose motivation is low or whose recruitment progress is important. Choir practice can serve a similar support purpose while also developing Faith and Authority-related progress for the participants. Open available support conversations before the monthly mission, but check again after story battles because later conversations may unlock only after a chapter or support threshold.
Tea and gifts are most valuable when directed toward a specific recruitment or support goal. Do not spend the whole exploration day on random social actions if a paralogue, quest, or fixed event is about to expire.
- Deliver birthday gifts to priority characters.
- Return Lost Items to their owners.
- Use meals to combine motivation recovery with targeted support growth.
- Check the Support menu after major battles and monastery visits.
- Keep gifts and Activity Points for characters you actually need.
6. Prepare correctly for the Chapter 9 White Heron Cup
The White Heron Cup is a fixed Part 1 event in Chapter 9. Speak to Rhea and accept the related quest, then choose one of your available students as the house representative before the event deadline. The event is not a normal tournament and does not use the regular arena rules.
Choose a unit who will benefit from the Dancer class and who you can spare from another class plan. The representative needs at least 13 Charm at the time of the competition to win reliably. The preparation conversation or dance lesson can raise the candidate’s Charm, and tea or other Charm-raising opportunities can help if the unit is short. A successful representative gains access to the Dancer class, including its ability to let another unit act again through Dance, so treat this as a long-term utility decision rather than merely a cosmetic event.
If you fail to select a representative or do not meet the competition requirement, you lose that playthrough’s opportunity to obtain the Dancer class through the White Heron Cup. The class is optional for completing the campaign, but it is permanently missable on that file.
- Accept the White Heron Cup quest in Chapter 9.
- Choose the representative before the deadline.
- Reach at least 13 Charm for the competition.
- Select a unit whose future role benefits from Dancer access.
- Save before the selection if you are uncertain.
7. Audit the month before the story mission
Before starting the monthly mission, verify that every intended quest and paralogue has been completed or deliberately postponed, every important reward has been collected, and every priority recruit has a clear next step. If the game shows a support conversation that you want, view it before advancing the calendar. Confirm that the White Heron Cup representative has been selected in Chapter 9 and that the candidate is prepared.
Do not spend rare weapons, battalion rewards, promotion items, or valuable gifts on characters you already intend to bench after the timeskip unless the immediate reward is necessary. Permanent core units and difficult recruitments should receive priority. Make a manual save before the story battle. For a Black Eagles campaign, keep an additional save before the late Part 1 decision so you can preserve the option to pursue the route branch you want.
- Complete or consciously skip expiring quests and paralogues.
- Collect tournament and quest rewards.
- Review recruitment requirements and route-specific availability.
- Confirm White Heron Cup preparation when playing Chapter 9.
- Save before the monthly mission and major route decisions.
Before you move on
- Every intended time-limited quest and paralogue is complete, or its omission is deliberate and recorded.
- Any intended tournament has been won, its first-clear reward collected, and its associated quest turned in.
- The White Heron Cup representative has been selected in Chapter 9 and reaches at least 13 Charm for the event, or the Dancer class has been deliberately skipped.
- Priority outside students have joined the house or have a documented remaining requirement and deadline.
- Ferdinand and Caspar have been recruited through valid Part 1 requirements if they are needed before the timeskip.
- A manual save exists before the next monthly mission and before any major route-relevant decision.
References for this chapter
- Nintendo Official Site: Fire Emblem: Three Houses for Nintendo Switch
- Recruitment - Fire Emblem: Three Houses | Serenes Forest
- Calendar — Fire Emblem: Three Houses — Fire Emblem Wiki
- Arena — Fire Emblem: Three Houses — Fire Emblem Wiki
- Tournament — Fire Emblem: Three Houses — Super Cheats
- Chapter 9: Ethereal Moon — Fire Emblem: Three Houses Walkthrough — GameFAQs
- List of quests in Fire Emblem: Three Houses — Fire Emblem Wiki
Point of Divergence: How the Story Branches
Fire Emblem: Three Houses has four main campaign routes, but the branch does not work the same way for every house. Blue Lions leads to Azure Moon and Golden Deer leads to Verdant Wind. Black Eagles can lead to Silver Snow or Crimson Flower, but Crimson Flower requires several Chapter 11 conditions. Before that chapter begins, reach C+ Support with Edelgard and view the available C+ conversation. During Chapter 11 monastery exploration, speak with Edelgard and agree to accompany her to Enbarr. After the Holy Tomb battle, choose to protect her. Missing the support requirement, refusing or skipping the Enbarr trip, or choosing against Edelgard locks the Black Eagles campaign into Silver Snow. Save before the Chapter 11 conversation if you want both Black Eagles endings. That save cannot create Azure Moon or Verdant Wind; those routes require separate playthroughs or a save from before choosing a house. Finish every selected Part 2 campaign through its ending, and track recruitment, supports, paralogues, certifications and route-specific availability separately for optional completion.
Confirm your route family before preparing the split
The house selected at the end of the opening academy setup determines the campaign family. Blue Lions proceeds to Azure Moon, and Golden Deer proceeds to Verdant Wind. Black Eagles is the only house with a major mid-campaign route split: the default result is Silver Snow, while the required Chapter 11 conditions unlock Crimson Flower.
There is no comparable late decision that changes Blue Lions into another route or Golden Deer into another route. Recruitment and support choices can affect party composition, paralogues and scenes, but they do not replace the route established by the house selection.
- Blue Lions selected: prepare for Azure Moon.
- Golden Deer selected: prepare for Verdant Wind.
- Black Eagles selected: follow the Edelgard checklist if Crimson Flower is desired.
- Keep a pre-house-choice save if you want to play all four campaigns without restarting from the beginning.
Complete and view Edelgard’s C+ Support before Chapter 11
For Crimson Flower, reach at least C+ Support with Edelgard before Chapter 11 begins. Do not rely on an invisible accumulation of support points: check the Support menu and view the C+ conversation if it is available. The route check is performed before the Chapter 11 conversation in the monastery, so post-timeskip support progress cannot repair a missed prerequisite.
Use meals, gifts, choir practice, activities that provide support points, combat support and available conversations to reach the requirement. If the C+ conversation is still locked near the end of Part 1, use the remaining exploration opportunities deliberately rather than advancing the calendar and hoping the rank will trigger later.
- Edelgard’s Support menu shows C+ or higher before Chapter 11 starts.
- The available C+ Support conversation has been viewed.
- Do not assume that a high but unviewed support meter satisfies the route check.
- Make a separate save after confirming the requirement.
Make a dedicated Chapter 11 save before speaking to Edelgard
At the start of Chapter 11, create a manual save before speaking to Edelgard during monastery exploration. This is the best practical split point for the two Black Eagles endings. Before triggering her conversation, complete urgent Part 1 activities that you do not want to repeat: time-limited paralogues, recruitment conversations, support scenes, certifications, equipment purchases and battalion preparation.
The invitation to Enbarr is not a harmless conversation that can be postponed indefinitely. Once accepted, it consumes the relevant exploration period, so spend available activity points first if you need to cook, train, shop, recruit or raise supports. Preserve the save even after confirming Crimson Flower, because it lets you return to the Black Eagles branch without replaying the whole academy phase.
- Save before speaking to Edelgard in Chapter 11 exploration.
- Finish urgent Part 1 paralogues and recruitment attempts first.
- Buy or secure equipment and battalions that you want before route-specific availability changes.
- Record recruited characters, viewed supports and completed paralogues.
Accept Edelgard’s Enbarr invitation
During Chapter 11 monastery exploration, locate Edelgard and speak with her. If the C+ requirement and conversation check have been satisfied, she asks Byleth to accompany her to Enbarr. Select the option to go with her. This trip is the second required condition for Crimson Flower and is separate from the later Holy Tomb decision.
If the invitation does not appear, do not begin the Holy Tomb mission expecting the choice to appear anyway. Reload the dedicated Chapter 11 save, verify that Edelgard’s C+ conversation was viewed, and speak with her again. If you refuse or fail to trigger the trip, the campaign proceeds toward Silver Snow.
- Edelgard is spoken to during Chapter 11 exploration.
- The Enbarr invitation appears.
- The option to accompany her is accepted.
- Do not start the Holy Tomb mission until this check is complete.
Choose the Black Eagles route after the Holy Tomb battle
Complete the Chapter 11 battle, Conflict in the Holy Tomb. If the Edelgard support and Enbarr conditions were both met, the story presents the decisive choice after the battle. Choose to protect Edelgard to enter Crimson Flower. Choosing to oppose her, or reaching this scene without the required earlier conditions, results in Silver Snow.
This is the point where the Black Eagles campaigns become committed to different Part 2 chapters. Keep the pre-conversation save rather than saving only after the decision. If you want to test both outcomes, reload that earlier file and repeat the Chapter 11 sequence.
- The Holy Tomb battle is completed.
- The protect-Edelgard choice is selected for Crimson Flower.
- The following story chapter confirms the intended route.
- A separate completed save is made after the route is confirmed.
Secure optional content before the branch whenever possible
Route-specific availability matters more than simply reaching the split. If you want a broad roster, recruit students and faculty before the route locks, complete available paralogues, view important support scenes and finish certifications for units you intend to use. Some characters connected to the Church or to opposing factions have different availability after the Black Eagles split, and some paralogues require particular characters to be present.
A single playthrough cannot provide every route-exclusive character outcome. For optional full completion, maintain a checklist for each route containing recruited characters, support conversations, paralogues, battalions, relics, certifications and surviving playable units. Mark an item complete only after the game confirms it in the roster, Support menu, journal or inventory.
- Confirm desired recruits are present before committing to the route.
- Complete route-sensitive paralogues before their availability expires.
- View important support conversations before characters leave or become unavailable.
- Record certifications, battalions, relics and unique rewards separately for each route.
Verify campaign completion and use the correct save for replay
A route is not complete merely because the branch scene played. Finish every Part 2 chapter of the selected route through its ending and preserve the completed save. For Crimson Flower, verify the Edelgard conditions, the protect choice and the Crimson Flower ending. For Silver Snow, verify that the Black Eagles campaign continues without Edelgard into the Church-led Part 2.
To complete the full base-game campaign, finish Azure Moon, Verdant Wind, Silver Snow and Crimson Flower on separate route saves. The Chapter 11 Black Eagles save can produce only Silver Snow and Crimson Flower. To play Azure Moon or Verdant Wind, reload a save from before the original house selection or begin another playthrough.
- Crimson Flower ending completed on its own route save.
- Silver Snow ending completed on its own route save.
- Azure Moon ending completed on a Blue Lions route save.
- Verdant Wind ending completed on a Golden Deer route save.
- Optional checklist reviewed separately for recruitment, supports, paralogues, certifications and route-specific rewards.
Before you move on
- For Crimson Flower, confirm that Edelgard reached C+ before Chapter 11, the C+ conversation was viewed, the Enbarr trip was accepted, the Holy Tomb battle was completed and Edelgard was protected.
- For Silver Snow, confirm that the Black Eagles campaign continues without Edelgard into the Church-led Part 2 and reaches the Silver Snow ending.
- For Azure Moon and Verdant Wind, confirm that each route began from the corresponding house selection and reached its own ending.
- For full campaign completion, retain separate completed saves for all four routes.
- For optional completion, compare each route save against a checklist of recruits, viewed supports, paralogues, certifications, battalions, unique rewards and route-specific character availability.
References for this chapter
- Nintendo Official Site: Fire Emblem: Three Houses for Nintendo Switch
- Throne of Knowledge — Fire Emblem Wiki
- Edelgard/Supports — Fire Emblem Wiki
- Chapter 11: Pegasus Moon — Fire Emblem: Three Houses Walkthrough & Guide
- Crimson Flower — Fire Emblem: Three Houses Walkthrough & Guide
- FE3H | Point of Divergence | Fire Emblem Three Houses — GameWith
The Five-Year Time Skip: What Changes and What Carries Over
Chapter 12, To War, is the final Part 1 battle on Silver Snow, Azure Moon, and Verdant Wind. Crimson Flower instead uses the post-timeskip battle Outset of a Power Struggle. Before the transition, finish urgent recruitment and paralogues, strengthen every original house member, assign usable weapons and battalions, and make a route backup save. Levels, classes, proficiencies, abilities, supports, inventory and battalions generally carry into Part 2, but route choices can remove characters or change their allegiance. Chapter 13, Reunion at Dawn, begins without the normal preparation menu on the three non-Crimson Flower routes. Only Byleth and the route's early partner begin the battle, while the original house members arrive in groups. Prepare those students before To War, then rebuild the army around durable frontliners, healing, ranged damage, mobility and reliable Gambits.
1. Finish Part 1 preparation before Chapter 12
On Silver Snow, Azure Moon, and Verdant Wind, Chapter 12 is To War, the final Part 1 chapter. Its story battle is the Battle of Garreg Mach. On Crimson Flower, Chapter 12 is instead Outset of a Power Struggle, so do not apply the To War or Reunion at Dawn instructions to that route.
Use the final free days to recruit any remaining students you want, complete urgent paralogues, review support conversations, and train every original member of your house. Reunion at Dawn uses those house members even if you replaced them with recruits during Part 1. A neglected student does not need to become a permanent endgame unit, but must have a serviceable class, weapon, abilities, and enough durability to survive the opening battle.
Create one save before the Chapter 12 mission and another after the time-skip transition. Before deploying, assign battalions that the units can use, replenish endurance, check Authority ranks, and place healing items and backup weapons on likely Reunion participants. Repairing weapons before To War is useful for the mission, but do not assume convoy items will be made battle-ready automatically; inspect the convoy after the transition.
- Recruit desired students before the final Part 1 deadline.
- Complete urgent route-sensitive paralogues and supports.
- Train every original house member for possible forced deployment.
- Assign usable weapons, abilities, battalions, and healing items.
- Create a pre-Chapter 12 route save.
2. Win To War by protecting Rhea and the defended location
To War is won by defeating Edelgard. You lose if Byleth or the relevant route leader falls, the army is routed, Rhea is defeated or captured, or an enemy seizes the defended location. Start by clearing enemies near Rhea rather than sending the whole army toward Edelgard. Keep a durable unit and a healer near the defense area while the rest of the army handles the flanks.
On turn 2, the game directs you toward two strongholds held by Hubert and the Death Knight. Taking those strongholds stops enemy reinforcements from entering through them and allows friendly forces to advance more safely. Divide the army into balanced groups, but keep enough movement available to reinforce whichever side is pressured. The strongholds are optional to the literal victory condition, yet ignoring them makes the defense much more dangerous.
The map contains two-man Ballistae and winged Demonic Beasts. Use ranged units carefully, remove artillery when it threatens your formation, and break monster barriers with Gambits or targeted attacks before committing fragile units. A Gambit that rattles or displaces an enemy can prevent a dangerous counterattack or pull a foe away from a healing tile. The Death Knight's Dark Seal is optional; pursue it only if the attempt does not endanger Rhea or the defended location.
Once the area around Rhea is secure and the strongholds are controlled, advance on Edelgard with your strongest combination of accurate damage, healing, and Gambit support. Defeat Edelgard to end the mission and trigger the five-year transition.
- Defeat Edelgard.
- Keep Rhea safe and prevent an enemy from seizing the defended location.
- Control the two strongholds to stop their reinforcement routes.
- Use Ballistae, Gambits, and monster-barrier breaks deliberately.
- Treat the Dark Seal as optional rather than risking the mission for it.
3. Check what survives the five-year transition
After the final Part 1 battle, your campaign jumps forward five years. Recruited characters generally remain recruited, and their levels, class certifications, skill ranks, learned abilities, supports, combat arts, inventory, and battalions are not reset. The convoy also remains available, but you should inspect it before the first post-timeskip battle rather than assuming every item is equipped to the unit who needs it.
The transition does not guarantee that every character remains playable. On Crimson Flower, Flayn leaves if she had joined you, and Seteth is not part of the route's long-term roster. On Silver Snow, Edelgard and Hubert are unavailable after the route split. Students who were never recruited remain aligned with their original house or faction and cannot be recovered through ordinary Part 2 recruitment.
Some route leaders receive automatic Part 2 class or battalion changes. Dimitri, for example, is set to High Lord at the start of Reunion at Dawn and receives the King of Lions Corps. Treat automatic changes as exceptions to your normal equipment audit. Check the active roster, classes, battalions, equipped abilities, convoy, and paralogue deadlines before proceeding.
- Confirm that the intended recruits remain in the roster.
- Remove departed characters from long-term equipment plans.
- Check classes, abilities, weapons, battalions, and the convoy after the transition.
- Keep the pre-route and post-timeskip saves separate.
4. Prepare for Reunion at Dawn before entering Chapter 13
Silver Snow, Azure Moon, and Verdant Wind all use Chapter 13, Reunion at Dawn. The mission begins without the ordinary preparation screen, so you cannot wait until the map loads to change classes, assign battalions, move equipment, or select a better roster. Complete that work before starting To War and keep a post-timeskip save in case the opening formation needs revision.
Silver Snow begins with Byleth and Seteth. Dorothea, Caspar, and Petra arrive as friendly reinforcements on turn 3; Bernadetta, Linhardt, and Ferdinand arrive later after the map's progression condition is met. Azure Moon begins with Byleth and Dimitri, and Gilbert joins during the battle. Verdant Wind begins with Byleth and Claude, followed by the Golden Deer in stages. The exact arrival positions depend partly on the units and deployment arrangement carried from the previous chapter, so do not leave original house members unarmed or without battalions.
The victory condition is to defeat Pallardó. Defeat of Byleth or the route's starting partner, army rout, or Pallardó's escape causes failure. Move toward the separated allies, use terrain to slow the thieves, and keep the starting pair close enough to support one another. Protect low-defense archers and mages behind a durable unit. Once the house members arrive, regroup before chasing isolated enemies, then surround or corner Pallardó and defeat him before he escapes.
- Set all classes, weapons, abilities, and battalions before the time skip.
- Expect no normal preparation menu in Reunion at Dawn.
- Protect Byleth and Seteth, Dimitri, or Claude as appropriate.
- Keep every original house member combat-ready.
- Defeat Pallardó before he escapes.
5. Use the correct Crimson Flower opening
Crimson Flower does not contain Reunion at Dawn. Its post-timeskip Chapter 12 is Outset of a Power Struggle and uses its own battle map and preparation sequence. Make a route-split save before committing to Edelgard, then prepare a normal deployment for the Crimson Flower Chapter 12 mission.
Do not build this route around Flayn or Seteth if they leave your army. Review which recruits remain available, assign battalions to the units you actually intend to use, and preserve a healer, a strong frontline unit, ranged damage, and at least one useful crowd-control Gambit.
- Confirm that the route is Crimson Flower before planning Part 2.
- Prepare for Outset of a Power Struggle, not Reunion at Dawn.
- Remove Flayn and Seteth from the permanent Crimson Flower plan.
- Keep a route-split save before the commitment point.
6. Rebuild the army for war-phase maps
Part 2 enemies use stronger classes and more dangerous combinations of armor, cavalry, fliers, monsters, archers, and magic. Keep at least one unit that can survive an enemy phase, two dependable healing options when possible, accurate ranged damage, and a mobile unit able to reach distant targets or rescue an exposed ally.
Reclass selectively. A mounted or flying class solves movement problems, Bow access gives a reliable answer to enemy fliers, and a sturdy infantry or armored class can hold a chokepoint while ranged units attack safely. Do not spend rare seals or materials on a character who has left the route or on a class that does not fit the unit's remaining weapon and skill ranks.
When monastery access returns, visit the Battalion Guild, replenish endurance, and confirm Authority requirements. Give area-of-effect or immobilizing Gambits to units with good positioning and reserve at least one emergency support or repositioning Gambit. Repair signature weapons, keep ordinary backup weapons available, and maintain answers for armor, monsters, and evasive enemies. Use early Part 2 exploration to fix urgent gaps before pursuing optional class mastery.
- Maintain frontline, healing, ranged, and mobility roles.
- Review movement and weapon access after every major class change.
- Replenish battalions and check Authority requirements.
- Repair important weapons and keep backups in the convoy.
- Do not let optional mastery delay mandatory Part 2 preparation.
Before you move on
- To War is complete on Silver Snow, Azure Moon, or Verdant Wind: Edelgard is defeated, Rhea survives, and no enemy seizes the defended location.
- The five-year transition has occurred and both a pre-transition route save and a post-transition save exist.
- Reunion at Dawn is complete on Silver Snow, Azure Moon, or Verdant Wind, with Pallardó defeated and Byleth plus the route's starting partner alive.
- Outset of a Power Struggle is complete instead of Reunion at Dawn on Crimson Flower.
- The original house members required for the Reunion opening were prepared before Chapter 12 and appear with usable equipment.
- The active army has dependable frontline, healing, ranged, mobility, battalion, and Gambit coverage.
- Route-specific departures have been checked before assigning rare weapons, battalions, or stat boosters.
- The post-timeskip save records current classes, inventories, battalions, paralogue deadlines, and route-specific availability.
References for this chapter
- Fire Emblem: Three Houses for Nintendo Switch - Nintendo Official Site
- To War - Fire Emblem Wiki
- To War: The Battle of Garreg Mach — Fire Emblem Wiki
- Reunion at Dawn — Fire Emblem Wiki
- Hunting by Daybreak - Fire Emblem Wiki
- FE3H: To War (White Clouds: Chapter 12) - GameWith
- FE3H: Changes After 5 Year Time Skip - GameWith
- Outset of a Power Struggle - Fire Emblem: Three Houses Walkthrough
Part 2 — Silver Snow (Church of Seiros Route) — Strategy to the End
Silver Snow is the default Black Eagles route when Byleth refuses to protect Edelgard after the Holy Tomb battle. Chapter 12, To War, is the final Part 1 battle. After the five-year skip, Silver Snow has nine post-timeskip route battles, Chapters 13 through 21: Reunion at Dawn, A King Without a Kingdom, Valley of Torment, The Rose-Colored River, The Impregnable Fortress, The Chaos of War, Conclusion of the Crossing Roads, The City Without Light, and Following a Dream. Edelgard and Hubert leave permanently. Seteth, Catherine, Cyril, and normally Shamir become available to the Church side in Chapter 12, while Hilda has a conditional Chapter 12 recruitment window. Complete desired recruitment, supports, paralogues, certifications, and inventory preparation before To War. Train every original Black Eagles student for Reunion at Dawn, where Byleth and Seteth begin alone and returning students arrive during the battle. The route is complete when the Immaculate One is defeated and the Silver Snow ending scenes and credits play.
1. Confirm Silver Snow and prepare the route roster
Silver Snow is the default Black Eagles route. After the Holy Tomb battle, choose the option that does not protect Edelgard. Keep a separate save before this decision if you want to preserve the route split. Edelgard and Hubert leave permanently once the Church route begins, so remove any equipment you want to retain before confirming the choice.
Seteth, Catherine, and Cyril become available automatically when the Silver Snow route begins. Shamir also joins automatically if she was not recruited earlier. If Shamir or Catherine was already recruited, the corresponding scripted enemy or allied slot later uses a generic Church unit instead. Hilda is not automatic: as a Black Eagles professor, she can only be recruited during Chapter 12 on Silver Snow, and only if her displayed recruitment requirements are met.
Before starting To War, finish academy-phase recruitment, support conversations, certifications, and deadline-sensitive paralogues that matter to your campaign. Give every original Black Eagles student a functional class, weapon, healing item, and battalion. Do not prepare only your usual deployment team: Reunion at Dawn brings the house roster into the map through timed reinforcements, so an unequipped student can become an immediate liability.
To War restores weapon durability after the battle, but that does not replace preparation for Reunion at Dawn. The next chapter begins without a normal pre-battle deployment screen in which you can freely reorganize every returning student.
- A save exists before the Black Eagles route decision.
- Edelgard's and Hubert's useful equipment has been recovered.
- Desired academy recruits, supports, and expiring paralogues are complete.
- Every original Black Eagles student has a usable class, weapon, and battalion.
- Byleth has healing access and several units can use accurate gambits.
2. Win Chapter 12, To War
The Battle of Garreg Mach requires you to defeat Edelgard while preventing the enemy from taking the defended strongholds. On the opening turns, prioritize reclaiming the eastern and western strongholds while keeping enough units near the center to prevent a sudden loss. Use two supported groups rather than sending the entire army down one side.
Check the ranges of the Onagers, Ballistae, and Fire Orbs before moving fragile units into open ground. Keep healers and ranged attackers behind durable frontliners. Flying Demonic Beasts can threaten a wide area; use gambits to break several barrier squares, then attack the exposed barriers with combat arts or high-damage units.
Defeating Hubert opens the western stronghold and brings Shamir as an allied reinforcement if she was not already recruited; otherwise a generic Sniper fills that slot. Defeating the Death Knight opens the eastern stronghold and brings Catherine only if she was not already recruited; otherwise a generic Swordmaster fills the scripted slot. The Death Knight is optional for the main victory condition, although defeating him awards a Dark Seal. Pursue him only if the detour will not endanger a defended location.
After both strongholds are secure, advance toward Edelgard as a coordinated force. Deal with Randolph and nearby threats before committing to the boss. Check the battle forecast, use gambits to control groups, and heal attackers before they enter Edelgard's range. Defeating Edelgard completes the final Part 1 battle and leads into the five-year time skip.
- Both defended strongholds are reclaimed before enemies seize a marked location.
- Hubert is defeated if you want the western reinforcement and its associated reward.
- The Death Knight is defeated only if the Dark Seal and eastern reinforcement justify the risk.
- Edelgard is defeated and the time skip begins.
3. Prepare for Chapter 13, Reunion at Dawn
Reunion at Dawn contains the Hunting by Daybreak mission. It begins with only Byleth and Seteth available. Dorothea, Caspar, and Petra arrive as friendly reinforcements early in the battle, while Bernadetta, Linhardt, and Ferdinand arrive after the advancing force reaches the required area. You cannot perform ordinary pre-battle deployment and inventory preparation for these returning students, so their Part 1 equipment and class choices matter.
Keep Byleth and Seteth close enough to support one another. Use forest terrain where practical, clear enemies near each arrival area, and avoid sending a returning student into a full enemy range alone. Bring the groups together before taking unnecessary risks. A fast unit, long-range attacker, or accurate gambit is useful for dealing with Pallardó once he begins retreating.
The first Pallardó is a body double. After it is defeated, the real Pallardó appears and attempts to escape. Move toward the second target before the opening force is scattered. The mission is won by defeating the real Pallardó. Byleth or Seteth falling, the army being routed, or Pallardó escaping causes failure.
- Byleth and Seteth survive the opening engagement.
- Returning Black Eagles regroup before making aggressive advances.
- The real Pallardó is defeated before he escapes.
- Seteth is protected as carefully as Byleth.
4. Complete Chapter 14, A King Without a Kingdom
This map begins with a rout objective. Advance through the central approaches while protecting the defended locations and watching enemy ranges around the artillery. Keep healers behind the main line and reserve a mounted or flying unit to intercept enemies that slip toward the objectives.
The objective changes to defeating Randolph after the Swordmaster reaches the marked Onager tile on the right side. Do not rush the boss before the objective changes; first stabilize the map and protect the defended locations. Once Randolph becomes the active target, combine your groups and defeat him with coordinated attacks rather than sending one unit ahead alone.
After the battle, repair weapons, replenish battalions, and replace healing supplies. The next chapters include damaging terrain, mounted enemies, and maps where splitting the army can expose weaker units.
- The initial rout objective is completed without losing a defended location.
- The Swordmaster reaches the marked Onager tile and the objective changes.
- Randolph is defeated.
- The army is healed and resupplied before continuing.
5. Clear Chapters 15 and 16
Valley of Torment takes place in Ailell. Defeat Gwendal while managing the valley's damaging terrain. Keep low-health units off hazardous tiles, use ranged attacks to soften threats, and let durable units lead the advance. Do not separate a healer from the group merely to collect an optional reward.
If Ashe was recruited during Part 1, he appears as an enemy in Chapter 15 after the time skip. Defeat Ashe, then choose Persuade when the game presents that option. Prior Part 1 recruitment is required; defeating Ashe does not recruit him for the first time. If the Persuade option does not appear, do not count him as re-recruited.
The Rose-Colored River is fought on the Great Bridge of Myrddin. The victory condition is to defeat all enemy commanders. Keep the main force together while handling bridge-side enemies, mounted units, and ranged attackers. Chests are optional and should not justify exposing the army or abandoning a healer.
If Lorenz was recruited during Part 1, he appears as an enemy in Chapter 16. Defeat Lorenz and choose Persuade when the option appears. Prior Part 1 recruitment is required here as well; defeating him is not a first-time recruitment method. Confirm his return before ending the chapter.
- Gwendal is defeated in Chapter 15.
- Ashe was recruited in Part 1, appears in Chapter 15, is defeated, and is followed by Persuade if you want him returned.
- All required commanders are defeated on the Great Bridge.
- Lorenz was recruited in Part 1, appears in Chapter 16, is defeated, and is followed by Persuade if you want him returned.
6. Take Fort Merceus in Chapter 17
The Impregnable Fortress is won by defeating the Death Knight. If he escapes, the objective changes to routing the remaining enemy force. Enter with at least one reliable answer to him, such as effective lance damage, strong magic, a high-damage combat art, or an accurate gambit. Check the battle forecast before committing because a failed attack can leave the attacker exposed.
Advance behind durable units and account for artillery and enclosed enemy formations. Do not split the army for a reckless pursuit if doing so allows the rest of the map to collapse. If the Death Knight escapes, stabilize the formation, eliminate the remaining enemy force, and satisfy the revised rout objective.
- A reliable unit or tactic can damage the Death Knight.
- The army can withstand artillery and enclosed enemy groups.
- The Death Knight is defeated, or the army is ready to rout the map after his escape.
7. Survive Chapter 18, The Chaos of War
The Enbarr operation begins with the army divided. Give each starting group a frontline, healing, and a way to handle armored or magical enemies. Clear local threats before trying to reunite the groups, and use gambits to control clusters and break monster barriers.
Hubert and the Death Knight command separate sections of the city. Keep enough force on both sides to defeat them without abandoning the rear. Enemy commanders are the required targets, so do not spend turns on optional treasure or isolated enemies if doing so leaves one starting group unsupported.
The route narrative then moves directly into the Imperial Palace operation. Chapter 19 follows Chapter 18 without a normal monastery month between the two battles. Preserve weapon durability, battalion endurance, healing items, and high-value combat arts rather than spending everything on low-priority enemies.
- Both starting groups survive the divided opening.
- Hubert and the Death Knight are defeated.
- All required Chapter 18 commanders are defeated.
- Healing, battalion endurance, and strong attacks remain for Chapter 19.
8. Defeat Edelgard in Chapter 19
Conclusion of the Crossing Roads is the Imperial Palace battle. It follows Chapter 18 consecutively, so there is no ordinary monastery preparation period between those missions. The victory condition is to defeat Edelgard.
Clear the opening rooms methodically and check enemy ranges before opening new routes. Keep healers behind the main line, use gambits against groups, and reserve a mobile unit for enemies that reach the rear. Do not split the army for optional treasure if the detour would expose a weak unit or consume resources needed for Edelgard.
After Edelgard is defeated, the route advances to Shambhala and a later preparation period becomes available. Use that time for repairs, battalion replenishment, inventory checks, certifications, class changes, healing items, and a separate save before the final battle.
- The army survives the consecutive Chapter 18 and Chapter 19 operation.
- The palace is cleared without isolating the main force.
- Edelgard is defeated.
- A later preparation period and a separate final-battle save are preserved.
9. Clear Chapter 20, The City Without Light
Shambhala contains long-range Viskam firing lanes, Titanus enemies, monsters, barriers, and reinforcements. Advance in mutually supporting groups and check Viskam ranges before crossing open ground. Defeat enemies controlling dangerous sections before sending fragile attackers forward.
Use gambits to break monster barriers and reserve strong combat arts or high-damage spells for priority targets. Keep at least one healer within reach of every advancing group. Avoid allowing a single high-output unit to move beyond rescue range, because the map can punish isolated units with ranged fire and multiple enemy activations.
After Thales is defeated, complete final preparations. Repair and forge weapons, replenish battalions, certify or reclassify units where useful, distribute healing items, and confirm that several units can land accurate gambits. Make a separate save before beginning Following a Dream.
- Viskam firing lanes are identified before the army crosses them.
- Thales is defeated.
- The final roster has functional weapons, healing, and battalions.
- A separate save exists before Chapter 21.
10. Defeat the Immaculate One in Chapter 21
Following a Dream is Silver Snow's final chapter. Deploy reliable healing, durable frontliners, ranged damage, and several battalions with useful gambits. The Immaculate One is a large monster with barrier squares and multiple health bars. Use gambits to break several barrier squares before committing your strongest attackers, and use Gambit Boosts or accuracy support when necessary.
White Beasts and Golems can punish isolated units, so clear nearby threats before surrounding the boss. The Immaculate One can counter at range, and Staggering Blow is dangerous because it covers a large area. Keep weaker units out of unnecessary danger and use defensive gambits or high-HP units when a unit must absorb the attack.
The boss changes into a stronger second form after the first form's transition condition is met. The second form replaces the first rather than inheriting its state: damage dealt to the first form and broken barriers do not carry over. Preserve gambits, healing, and high-damage combat arts for the replacement form. The barriers are restored, so plan another barrier-breaking sequence instead of assuming the first form's openings remain available.
If the formation collapses, reload the final preparation save. Change deployment, battalions, healing assignments, consumables, or classes before trying again. No particular character must deliver the final attack. The campaign is complete when the Immaculate One is defeated and the Silver Snow ending scenes and credits play.
- The final preparation save is available.
- The army includes healing, ranged damage, durable units, and accurate gambits.
- The first Immaculate One form is defeated without exhausting all endgame resources.
- The second form is defeated after its barriers and health are handled again.
- The Silver Snow ending scenes and credits play and a cleared route save is retained.
Before you move on
- The ten required Silver Snow battles are complete in order: Chapter 12 To War, Chapter 13 Reunion at Dawn, Chapter 14 A King Without a Kingdom, Chapter 15 Valley of Torment, Chapter 16 The Rose-Colored River, Chapter 17 The Impregnable Fortress, Chapter 18 The Chaos of War, Chapter 19 Conclusion of the Crossing Roads, Chapter 20 The City Without Light, and Chapter 21 Following a Dream.
- The nine post-timeskip route battles are complete in Chapters 13 through 21, following the Chapter 12 Part 1 battle To War.
- The required targets have been defeated: Edelgard in To War, the real Pallardó, Randolph, Gwendal, all required Great Bridge commanders, the Death Knight or the remaining Fort Merceus army after his escape, all required Chapter 18 commanders, Edelgard in the Imperial Palace, Thales, and the Immaculate One.
- The Silver Snow ending scenes and credits have played, and a cleared-game or route-completion save is retained.
- Optional completion is separate from campaign completion. Before the final battle, verify desired recruits, Church-side units, Ashe and Lorenz re-recruitment, paralogues, support ranks, battalion rewards, personal endings, and class certifications.
- For full recruitment, confirm that academy recruits joined before their deadlines, Church-side units are present, and no character was lost under Classic Mode rules. On Silver Snow, Ashe and Lorenz count as successfully retained only if each joined during Part 1, appeared in the specified post-timeskip chapter, was defeated, and was followed by Persuade.
- For full supports, inspect the Support menu rather than relying only on combat adjacency or unlocked paired endings.
References for this chapter
- Nintendo Official Site: Fire Emblem: Three Houses for Nintendo Switch
- FE3H Silver Snow Chapter Story Walkthrough — GameWith
- To War: The Battle of Garreg Mach — Fire Emblem Wiki
- Reunion at Dawn — Fire Emblem Wiki
- Hilda — Fire Emblem Wiki
- Recruitment - Fire Emblem: Three Houses | Triangle Attack
- Following a Dream - Triangle Attack
- Following a Dream/The Final Battle - Fire Emblem Wiki
Part 2 — Crimson Flower (Edelgard / Black Eagles Route) — Strategy to the End
Crimson Flower is the Black Eagles branch with seven mandatory Part 2 chapters, Chapters 12 through 18. To unlock it, reach C+ Support with Edelgard before Chapter 11, speak with her during the Chapter 11 monastery exploration, accept the Enbarr trip, and choose to protect her after the Holy Tomb mission. Flayn leaves when Byleth sides with Edelgard, while Seteth cannot be recruited on this route. The campaign proceeds through Garreg Mach, the Great Bridge, Derdriu, Garreg Mach again, Arianrhod, Tailtean Plains, and Fhirdiad. Build a durable army with healing, ranged damage, mobility, accurate gambits, and answers to armor and monsters. Finish desired recruitment, support, paralogue, and certification goals before the shortened war phase removes opportunities. Chapters 17 and 18 are consecutive, so the final practical preparation point is before Chapter 17. In Chapter 15, Byleth must defeat either Seteth or Flayn before the other is defeated if you want both to retreat rather than die.
Unlock Crimson Flower in Chapter 11
Before the Chapter 11 Holy Tomb mission begins, Edelgard must have reached at least C+ Support with Byleth. During the Chapter 11 Explore session, speak with Edelgard and accept her request to accompany her to Enbarr. This ends the exploration session and consumes the following lecture day, so make a route-split save first and complete only the activities you consider essential.
Complete the Holy Tomb mission. Afterward, choose the response that protects Edelgard. Choosing the alternative sends the Black Eagles to Silver Snow. If you did not accompany Edelgard to Enbarr, the Crimson Flower choice will not be available even if the Support requirement was met.
Flayn leaves when Byleth chooses Edelgard. Check Flayn's inventory and battalion, finish any Flayn-dependent support or paralogue you want, and recruit any students or faculty you need before making the choice. Seteth is not recruitable on this route. Save again after the route choice so the completed branch has its own file.
- Edelgard has C+ Support or higher before Chapter 11.
- You spoke with Edelgard during Chapter 11 exploration.
- You accepted the Enbarr trip.
- You selected the choice to protect Edelgard after the Holy Tomb mission.
- A save exists before the route choice.
- Flayn's equipment, battalion, and desired optional content have been checked.
Prepare for the seven-chapter war phase
Crimson Flower has seven mandatory Part 2 chapters: Chapter 12, Outset of a Power Struggle; Chapter 13, Beyond Escape; Chapter 14, The Master Tactician; Chapter 15, Tempest of Swords and Shields; Chapter 16, Lady of Deceit; Chapter 17, Field of Revenge; and Chapter 18, To the End of a Dream.
Edelgard benefits from a durable axe-based build with sufficient Authority for a strong battalion. Her Armored Lord class begins in Chapter 13 and Emperor becomes available in Chapter 16, but do not sacrifice movement, weapon ranks, or survivability merely to use a named class. Byleth needs reliable frontline damage and dependable healing support. Hubert supplies long-range magic, while Petra, Ferdinand, Bernadetta, Dorothea, Linhardt, Jeritza, and recruited units can cover flier, cavalry, bow, healing, and magical-support roles.
Before Chapter 12, repair high-use weapons and relics, replenish battalion endurance, buy healing items, and review deployment slots. Give several units accurate gambits rather than concentrating them on only one or two characters. Keep at least one armor answer, one reliable healer, one backup healing option, one long-range attacker, and one mobile unit that can safely rescue an exposed ally or cross the map.
- The seven mandatory Part 2 chapters are understood as Chapters 12 through 18.
- Edelgard and Byleth can survive sustained frontline combat.
- At least one dependable healer and one backup healing option are ready.
- Several units can use accurate gambits.
- Weapons, battalions, and consumables are repaired or replenished.
- A route-split backup save is preserved.
Chapter 12: Battle of Garreg Mach
Crimson Flower's Chapter 12 mission is the Battle of Garreg Mach, titled Outset of a Power Struggle. The objective is to defeat Rhea. Byleth and Edelgard must survive, and the army must not be routed. Advance from the southern approach as a group, clearing the initial defenders before committing to the upper monastery area. Keep healers behind the first line and do not allow fast enemies to reach isolated mages or archers.
Use gambits to control clustered enemies and break monster barriers rather than asking one unit to absorb several attacks. Check siege-weapon and commander ranges before moving fragile units. When Rhea becomes the required target, bring several attackers and a healer into position before starting the final engagement. Do not scatter the army chasing optional enemies if doing so leaves Edelgard or Byleth exposed.
This is the final pre-timeskip mission for the route. After it, the story advances five years and Chapter 13 begins the Crimson Flower war phase. Use the route-split save if you need to revisit Part 1 preparation.
- The Battle of Garreg Mach is cleared.
- Rhea is defeated.
- Byleth and Edelgard survive.
- The army is not routed.
- The post-timeskip Crimson Flower sequence begins.
Chapter 13: Great Bridge Coup
Chapter 13 is Beyond Escape, fought at the Great Bridge. The victory objective is to defeat Judith. Failure also occurs if Byleth or Edelgard falls, the army is routed, or Judith escapes, so do not push her toward the upper-right escape route before the army is ready to intercept her.
Move across the bridge in a compact formation. Use durable units to absorb attacks from the central approach while bows and magic weaken armored units, cavalry, and fliers. When Leonie is defeated, Judith begins trying to escape, so position a fast unit or ranged attacker where it can reach her. If you want chest rewards, collect them without splitting the army so far that Judith becomes unreachable.
The map has narrow approaches and dangerous enemy ranges. Check bow ranges before sending a flier forward, and use a gambit to stop groups blocking the route to Judith. Complete the map by defeating Judith before she escapes, rather than merely clearing nearby enemies.
- Judith is defeated before escaping.
- Byleth and Edelgard survive.
- The army is not routed.
- Fliers and mounted units are kept out of unsafe ranges.
- The Great Bridge Coup is recorded as the Chapter 13 clear.
Chapter 14: Capturing Derdriu
Chapter 14 is The Master Tactician, fought at Derdriu. The objective is to defeat Claude. Establish a safe route for healers before advancing into the city, then clear defenders that can surround your frontline. Use accurate gambits to control groups and effective attacks against armored units. Ranged attacks are useful for removing enemy fliers and weakening commanders before a melee finisher enters their range.
Claude can be spared if Byleth or Edelgard defeats him under the map's surrender condition. If preserving him matters, do not let another unit deliver the final blow. Defeating Claude completes the central objective; clear remaining enemies only after the boss outcome is secured and your formation is safe.
Review the roster after the battle. Reclass units that lack useful roles, forge weapons used by main attackers, and refill battalions before Chapter 15. Crimson Flower's shorter war phase makes it more valuable to maintain a stable core than to distribute experience across every recruit.
- Claude is defeated and the Derdriu mission is cleared.
- Byleth or Edelgard delivered the final attack if you want Claude to surrender.
- Your roster has answers to fliers, cavalry, armor, and magic users.
- Weapons and battalions are ready for Chapter 15.
Chapter 15: Protecting Garreg Mach
Chapter 15 is Tempest of Swords and Shields, the Protecting Garreg Mach mission. The objective is to defeat all enemy commanders. Byleth and Edelgard must survive, the army must not be routed, and an enemy must not seize a defended location. Keep a reserve near the center so the army can respond to both sides without abandoning the objective.
The map includes an enemy fire attack. Defeat the Warrior group on the right side to stop it; otherwise, the forest area is set on fire later in the battle. Treat the fire as a terrain hazard that can restrict movement and damage positioning, not as a reason to rush unsupported units into enemy range.
If you want Seteth and Flayn to retreat rather than die, Byleth must defeat either Seteth or Flayn before the other is defeated. Merely entering combat with one of them is not sufficient. Once Byleth has defeated one of the two while both are still alive, the other may be defeated by another unit and both will retreat into hiding instead of dying. Keep Byleth's route open and prevent any other attacker from defeating either target before Byleth secures the first defeat. Alois and Shamir may also be present depending on recruitment, so check their positions before ending turns near the central area.
- All required enemy commanders are defeated.
- The defended location is not seized.
- The fire attack is stopped if you want the forest to remain usable.
- Byleth defeats Seteth or Flayn before the other is defeated if you want both to retreat.
- Byleth and Edelgard survive and the army is not routed.
Chapter 16: Siege of Arianrhod
Chapter 16 is Lady of Deceit, fought at Arianrhod. Defeat all enemy commanders while keeping Byleth and Edelgard alive and preventing a rout. The fortress contains narrow routes, strong defenders, and trap tiles. Send durable units into the first engagement, then use ranged attacks and magic to weaken defenders before committing high-damage attackers.
The map has levers that convert trap tiles into regular floor tiles. Use them when the route is safe, but do not send a fragile unit across a trap merely to reach a distant switch. Cornelia remains stationary, while some enemy commanders can be baited or attacked from outside their preferred range. Be especially careful around high-speed enemy fliers and weapon users; use gambits or terrain rather than assuming one tank can withstand the entire group.
After this mission, use remaining calendar activity for time-limited paralogues, support conversations, certifications, and inventory work. Review every planned final deployment before Chapter 17. Do not assume another normal monastery preparation window will appear before the final sequence.
- All Arianrhod enemy commanders are defeated.
- Trap tiles are handled with levers or avoided safely.
- Byleth and Edelgard survive.
- The final roster has healing, ranged damage, mobility, and monster-control gambits.
- Desired paralogues, supports, and certifications have been reviewed before Chapter 17.
Chapter 17: Combat at Tailtean Plains
Chapter 17 is Field of Revenge, fought at the Tailtean Plains. The objective is to defeat all enemy commanders. Byleth and Edelgard must survive and the army must not be routed. Begin by identifying safe approaches to the central and enemy commander positions. Keep the formation close enough for healing and linked attacks because the open map allows cavalry and fliers to punish isolated units.
The map's enemy groups transform into Demonic Beasts as the battle progresses. Approaching Dedue or allowing enough turns to pass causes his transformation and adds enemy units near Dimitri. Reaching the area near Dimitri's fortress also triggers Rhea and additional reinforcements near the player starting area. Use gambits to break monster barriers, then concentrate attacks on exposed barrier panels before spending your strongest combat arts.
Do not treat this map as the end of the route. There is no normal monastery preparation between Chapter 17 and Chapter 18. Enter Chapter 17 with final-battle weapons, battalions, healing items, and consumables already assigned. Preserve Divine Pulse charges when possible because the next map follows immediately.
- All Chapter 17 enemy commanders are defeated.
- Demonic Beast transformations and reinforcements are handled without a rout.
- Byleth and Edelgard survive.
- Final battalions, weapons, healers, and consumables remain usable.
- You are ready for Chapter 18 without expecting another monastery or calendar month.
Chapter 18: The Fight for Fhirdiad
Chapter 18 is To the End of a Dream, and its mission is The Fight for Fhirdiad. The objective is to defeat the Immaculate One. Byleth or Edelgard falling, or the army being routed, causes failure. There is no return to Garreg Mach before this battle, so use the deployment screen for final adjustments and preserve the pre-Chapter 17 save if you may need to rebuild the team.
A large portion of Fhirdiad is on fire. Clear nearby enemies before entering dangerous terrain, keep healers behind the frontline, and use fliers or other mobile units to cross bad tiles only when enemy ranges are safe. The Immaculate One does not move, but attacking the boss can activate additional enemy movement and reinforcements. Do not rush the boss while Ashe, Gilbert, Catherine, or other threats can reach an exposed healer.
Break the Immaculate One's monster barriers with coordinated gambits and attacks. Focus on one or two barrier sections at a time, then use effective weapons, combat arts, and high-damage spells while the boss is vulnerable. Keep Byleth and Edelgard within healing and support range. If the formation collapses, reload the Chapter 17 save and alter battalions, deployment positions, class assignments, or consumable distribution before replaying both consecutive missions.
Defeating the Immaculate One completes the mandatory campaign battles. Allow the ending scenes and credits to play, then save the completed file. The route is complete when the Crimson Flower ending sequence has played and the finished campaign file is preserved.
- The Fight for Fhirdiad is cleared.
- The Immaculate One is defeated.
- Byleth and Edelgard survive.
- The army is not routed.
- The Crimson Flower ending sequence and credits play.
- A completed route save is preserved.
Before you move on
- The Chapter 11 decision produced Crimson Flower rather than Silver Snow.
- Chapter 12, Outset of a Power Struggle, is cleared by defeating Rhea at the Battle of Garreg Mach.
- Chapter 13, Beyond Escape, is cleared by defeating Judith at the Great Bridge before she escapes.
- Chapter 14, The Master Tactician, is cleared by defeating Claude at Derdriu.
- Chapter 15, Tempest of Swords and Shields, is cleared by defeating all required commanders at Protecting Garreg Mach without losing the defended location.
- If optional survival matters, Byleth defeated Seteth or Flayn before the other was defeated, causing both to retreat rather than die.
- Chapter 16, Lady of Deceit, is cleared by defeating all required commanders at the Siege of Arianrhod.
- Chapter 17, Field of Revenge, is cleared by defeating all required commanders at Combat at Tailtean Plains.
- Chapter 18, To the End of a Dream, is cleared by defeating the Immaculate One at the Fight for Fhirdiad.
- The Crimson Flower ending sequence and credits play, and the completed file is saved.
- For optional completion, compare the completed file against a personal checklist for recruits, route-available paralogues, desired supports, class masteries, battalions, relics, weapons, and equipment. Treat the Chapter 17 start as the final practical preparation point for the campaign ending.
References for this chapter
- List of chapters in Fire Emblem: Three Houses — Fire Emblem Wiki
- Tempest of Swords and Shields — Crimson Flower Chapter 15
- To the End of a Dream — Crimson Flower Chapter 18
- To the End of a Dream - Fire Emblem Wiki
- Crimson Flower Chapters — route chapter list and objectives
- Crimson Flower — Fire Emblem: Three Houses Walkthrough & Guide
Part 2 — Verdant Wind (Claude / Golden Deer Route) — Strategy to the End
Verdant Wind begins with Chapter 12, To War, then continues through post-timeskip Chapters 13–22. To War requires defeating Edelgard while protecting the defended location. After the five-year skip, Reunion at Dawn gives you only Byleth and Claude at first, so the original Golden Deer members must be prepared before the timeskip. The route then proceeds through Garreg Mach, Ailell, the Great Bridge of Myrddin, Gronder Field, Fort Merceus, Enbarr, Shambhala, and the final Nemesis battle. Claude’s flying bow classes give him mobility and range, but he still needs healing and battalion support. In Chapter 15, Ashe can be re-recruited only if he joined before the timeskip; defeat him and select Persuade. In Chapter 22, defeat the Ten Elites before Nemesis whenever possible, because surviving Elites strengthen him and preserve his once-per-turn damage-negating barrier. Defeat Nemesis, watch the ending and credits, and preserve the route-clear save.
1. Clear Chapter 12, To War, before the five-year skip
Chapter 12, To War, is the final White Clouds battle on Verdant Wind. The objective is to defeat Edelgard. The defeat conditions include Byleth or Claude falling, the army being routed, or an enemy seizing the defended location. Keep a group near that location while the main force advances so that fast enemies cannot slip past your formation.
Before starting, repair the weapons used by Byleth, Claude, Lysithea, Leonie, Hilda, and your other regular attackers. Restore battalion endurance, equip area and control gambits, and confirm that your healers have enough charges. Make a manual save before the battle if you want a fallback for changing your preparation before Reunion at Dawn.
Advance in a compact formation. Use bows, magic, and gambits to soften enemy groups, then surround Edelgard with units that can survive retaliation. Finish her with a reliable attack rather than exposing a fragile unit to a counterattack. Once the map is cleared, the five-year skip begins.
Claude is automatically placed in Wyvern Master for Chapter 13 and receives the Immortal Corps battalion. Because this setup favors physical attacks, prepare him as a physical bow user before the timeskip and do not rely on a magic-oriented build for the opening Reunion at Dawn battle.
- Defeat Edelgard.
- Prevent enemies from seizing the defended location.
- Repair weapons and restore battalion endurance.
- Create a pre-timeskip save if you may need to revise the roster.
2. Survive Chapter 13, Reunion at Dawn
Reunion at Dawn begins with only Byleth and Claude under your control. The objective is to defeat Pallardó, and you lose if Byleth or Claude falls or the army is routed. There is no normal preparation screen, so the classes, weapons, battalions, levels, and equipped items assigned before the timeskip matter immediately.
Keep Byleth and Claude close enough to support one another. Claude’s bow range and Wyvern Master movement let him remove exposed enemies and reposition quickly, while Byleth should hold the starting area against enemies that reach it. Do not send both units in opposite directions; the opening is designed to punish a split formation.
Lorenz, Ignatz, Hilda, and Leonie arrive on turn 3. Raphael, Lysithea, and Marianne appear after a unit reaches column 9 and after turn 3; the exact timing can differ with difficulty and the moment you cross the trigger. Move toward the arriving Golden Deer rather than rushing directly toward the boss.
Put fragile reinforcements behind Byleth, Claude, or a durable ally. Control nearby thieves and archers before advancing. Pallardó’s apparent defeat is not necessarily the end of the encounter, so keep a mobile unit available to pursue him and finish the actual objective. Reach the later reinforcements safely, regroup, and then advance as one army.
- Equip every original Golden Deer member before Chapter 12 ends.
- Use Byleth and Claude to stabilize the opening turns.
- Reach column 9 after turn 3 to trigger the eastern reinforcements.
- Defeat Pallardó while keeping Byleth and Claude alive.
3. Build a flexible Verdant Wind army
Claude’s Barbarossa class combines flight, bow access, high movement, and long-range attacks. Use him to cross terrain, attack exposed enemies, reach siege weapons, and shift between fronts. Do not send him alone into several enemy gambit ranges or concentrated anti-air attacks. His mobility should create safe attack angles for the army, not activate every enemy group before your main force arrives.
Keep Byleth in a durable frontline or mixed-range role, Claude as a flying archer, Lysithea as a high-damage mage, and Marianne or another trained healer available for recovery. Leonie can serve as a bow, mounted, or flying attacker. Hilda is well suited to a strong axe-focused role and can be developed for flight. Raphael is durable but may lose time in forests or cramped interiors.
Do not make the entire army cavalry. Mounted units lose some movement advantages in forests and indoor maps, while infantry remains dependable there. Bring at least one healer, one durable physical unit, one accurate ranged attacker, and one mobile utility unit. Assign battalions for hit, durability, movement, or area control according to the unit’s role.
- Maintain healing, durability, ranged damage, and mobility.
- Use infantry in forests and interiors.
- Reserve gambits for clusters, commanders, monsters, and emergencies.
4. Clear Chapters 14–17
Chapter 14, The Alliance Leader’s Ambitions, requires defeating Randolph while preventing an enemy from seizing the defended location. Keep a response group near the objective and use gambits to stop approaching groups. Do not chase enemies so far that the main force cannot return in time.
Chapter 15, Valley of Torment, requires defeating Gwendal. If Ashe joined your class before the timeskip, he appears as an enemy on Verdant Wind. Defeat Ashe and select Persuade when the option appears to re-recruit him. If Ashe was never recruited before the timeskip, he cannot be recruited for the first time in this battle; defeating him does not add him to your roster. His recovery is optional and is not required for route completion.
Chapter 16, The Rose-Colored River, requires defeating all enemy commanders. Inspect enemy ranges before moving fragile units, use bows or magic to soften commanders, and finish them with attackers that can survive counterattacks. The Lorenz re-recruitment event belongs to routes where a recruited Lorenz deserted. Lorenz remains with Claude on Verdant Wind, so there is no Chapter 16 Lorenz recruitment event on this route.
Chapter 17, Blood of the Eagle and Lion, is the Gronder Field battle against the Empire and Kingdom forces. Check all three armies’ ranges before ending turns. Let hostile forces weaken one another when safe, but keep Byleth and Claude supported and do not allow the army to become divided. Area gambits are especially useful when multiple groups converge.
- Protect the defended location in Chapter 14.
- Re-recruit Ashe in Chapter 15 only if he joined before the timeskip.
- Defeat Ashe and select Persuade if you want him back.
- Do not search for a Lorenz re-recruitment event on Verdant Wind.
- Defeat all required commanders in Chapters 16 and 17.
5. Take Fort Merceus, Enbarr, and Shambhala
Chapter 18, The Golden Scheme, requires defeating the Death Knight. If he escapes, the objective changes to routing the remaining enemy, so track his position and keep a fast group available to intercept him. Fire Orb and ballista positions punish careless advances; use terrain, ranged attacks, screened fliers, and gambits to approach them safely. Caspar and Linhardt may appear as enemies if they were not recruited, but defeating them is not required for route completion.
Chapter 19, The Chaos of War, requires defeating all enemy commanders. Chapter 20, Conclusion of the Crossing Roads, requires defeating Edelgard in the Imperial Palace. Before both maps, repair important weapons, restore battalion endurance, and check that your healers and ranged attackers have enough resources for a sustained fight.
Chapter 21, The City Without Light, is the Shambhala battle against Thales. Advance as a coordinated force and do not split the army merely to claim optional chests or siege weapons. Keep a flier available for safe flanking or siege removal, but avoid activating several enemy groups before the main force can provide healing and gambit support.
- Track the Death Knight’s escape condition in Chapter 18.
- Bring reliable damage against armored enemies and monsters.
- Repair weapons before Chapters 19–21.
- Treat chests and siege weapons as optional objectives.
6. Prepare for Chapter 22, Fódlan’s New Dawn
Chapter 22 is the final Verdant Wind battle and requires defeating Nemesis. Create a manual save immediately before entering. Repair important weapons, restore battalion endurance, distribute healing items, and confirm that every deployed unit has a battalion suited to its role.
Forest terrain makes cavalry less convenient, so use a mixture of infantry, fliers, archers, and magic users. Bring at least one strong healer, one durable frontline unit, several ranged attackers, and a movement-support option if available. Claude’s Barbarossa can cross the map quickly and attack from unusual angles, but keep him within healing and battalion-support range.
Accuracy matters because terrain can reduce hit rates. Preserve gambits for Elite groups, monsters, and the final approach. If the formation collapses, reload the pre-battle save and change deployment order, battalions, weapons, or item assignments. If a unit repeatedly misses, use a more accurate weapon or combat art, add hit support, or have another unit soften the target first.
- Create a manual save before Chapter 22.
- Restore weapons, battalion endurance, and healing supplies.
- Use a mixed formation for forest terrain.
- Reserve gambits and Divine Pulse uses for dangerous turns.
7. Defeat the Ten Elites before Nemesis
Advance through the forest as a supported group and defeat ordinary enemies before engaging the revived Ten Elites. Fight the Elites in manageable groups whenever possible. Claude and other archers can soften targets from range, while Lysithea and other mages handle enemies that resist physical attacks. Use gambits to control clusters and break monster barriers, but avoid spending every charge before reaching the central area.
Each surviving Elite grants Nemesis additional Strength, Magic, Dexterity, Speed, Luck, Defense, Resistance, and Charm. While at least one Elite remains, Nemesis also has a one-use barrier that negates one damaging attack per turn. Defeating the Ten Elites first removes these additional bonuses and the barrier, making the final engagement safer.
After the Elites fall, regroup and check health, weapon durability, battalion endurance, and healing uses. Approach Nemesis with durable units first, then use gambits, effective weapons, combat arts, Claude’s bow attacks, Byleth’s strongest reliable options, and magic as appropriate. Keep a healer within reach. If a miss or unexpected movement exposes the army, use Divine Pulse or reload the pre-final save rather than accepting a failed turn.
Nemesis’s defeat clears the route’s final battle. Continue through the ending scenes and credits, then preserve a route-clear save before beginning another route or New Game Plus.
- Defeat all Ten Elites before attacking Nemesis whenever possible.
- Do not allow surviving Elites to amplify Nemesis unnecessarily.
- Regroup after the Elites fall.
- Defeat Nemesis and watch the Verdant Wind ending and credits.
Before you move on
- Chapter 12, To War, is cleared before the five-year skip.
- Chapters 13 through 22 are all cleared in order.
- The eleven mandatory route battles consist of Chapter 12 plus Chapters 13–22.
- If Ashe was recruited before the timeskip, Chapter 15 ends with Ashe re-recruited after selecting Persuade.
- If Ashe was not recruited before the timeskip, his absence is optional and does not block completion.
- Lorenz is confirmed as a continuing Golden Deer unit on Verdant Wind.
- Chapter 22 is cleared by defeating Nemesis.
- The Verdant Wind ending scenes and credits play after the final battle.
- A route-clear save is created or marked before beginning another route or New Game Plus.
- Optional full completion is checked separately through recruited characters, completed paralogues, support ranks, mastered classes, treasure, and route-sensitive recruitments.
References for this chapter
Part 2 — Azure Moon (Dimitri / Blue Lions Route) — Strategy to the End
Azure Moon begins with Chapter 12, To War, and continues through Hunting by Daybreak in Chapter 13 before ending with Oath of the Dagger in Chapter 22. Prepare every Blue Lions unit before the timeskip because Reunion at Dawn has no normal preparation screen. Dedue is absent from Chapter 13 and returns in Chapter 16 only if War for the Weak was completed during Part 1. Lorenz can return in Chapter 16 only if he was recruited before the timeskip; defeat him and choose the in-game Persuade option. Chapters 14 through 21 reclaim Garreg Mach, Fhirdiad, Derdriu, and Enbarr before Chapter 22's Imperial Palace battle. Chapter 21 is the final monastery month, so finish repairs, purchases, paralogues, supports, certifications, and battalion assignments there. Save at the Chapter 22 preparation screen, defeat Hegemon Edelgard, and confirm that the Azure Moon ending and credits play.
1. Clear Chapter 12, To War, and prepare for the timeskip
Complete the Blue Lions version of Chapter 12, To War, then use every remaining academy-phase opportunity to prepare the roster. Recruitment becomes much more restricted after the timeskip, so recruit desired students before entering the mission. Also finish War for the Weak if you want Dedue to return during the war phase. Dedue's paralogue is the condition that determines his later availability, not his performance in Reunion at Dawn.
Before the battle, repair important weapons, refill battalion endurance, buy healing items, check Authority requirements, and make sure every original Blue Lions unit has a usable weapon and a sensible class. Reunion at Dawn begins without a normal Battle Preparation screen, so students who were left in weak classes or given poor equipment can become liabilities immediately after the time skip. Dimitri automatically gains the High Lord class at the start of Chapter 13, but his equipment and battalion preparation still matter.
If Lorenz was recruited during Part 1, record that fact before the timeskip. On Azure Moon he leaves during the transition and can return in Chapter 16. If he was never recruited, his Chapter 16 appearance is an enemy encounter and does not create a new recruitment opportunity.
- Clear Chapter 12, To War.
- Complete War for the Weak if you want Dedue to return.
- Recruit desired students before the academy-phase recruitment window closes.
- Repair weapons and restore battalion endurance.
- Give every original Blue Lions unit a functional class, weapon, and healing option.
- Confirm whether Lorenz was recruited before the timeskip.
2. Survive Chapter 13, Reunion at Dawn
Reunion at Dawn uses the Hunting by Daybreak map and begins without exploration, instruction, shops, free battles, or an ordinary preparation screen. Byleth and Dimitri start in immediate danger while the returning Blue Lions are distributed around the map. Dedue is not playable in this battle, even if War for the Weak was completed.
Move Byleth and Dimitri toward the returning Blue Lions instead of advancing directly toward Pallardó. Build a compact formation around forest and other defensive terrain, keep a healer behind the front line, and avoid ending turns inside several enemy ranges at once. Bring isolated house members back toward the central group rather than allowing them to fight alone.
The first Pallardó is not the final target. Stabilize the army, eliminate immediate threats, and then identify and defeat the real Pallardó. Opening chests is optional; do it only after the nearby enemies are controlled. The battle ends when Pallardó is defeated, but Byleth and Dimitri must survive.
- Keep Byleth and Dimitri alive.
- Gather returning Blue Lions into a protected formation.
- Use terrain, healing, and gambits to control enemy groups.
- Do not plan around Dedue appearing in this chapter.
- Defeat the real Pallardó.
3. Rebuild the army after the reunion
After monastery access returns, repair weapons, restore battalion endurance, and inspect every unit before spending free days on optional activities. Keep Dimitri as a durable physical frontline unit, but do not let him operate without healing or support. Maintain at least one reliable primary healer and preferably a second source of recovery, such as another healer, a unit with useful healing magic, or a staff-supported support unit.
Retain reliable ranged damage through bows, offensive magic, combat arts, or battalions. A balanced Azure Moon roster should be able to handle armor, fliers, enemy mages, monsters, and high-defense commanders without depending on Dimitri alone. Continue training Authority on units who will carry strong battalions; gambits are valuable for stopping enemy groups, breaking monster barriers, and creating safe turns for frontline attackers.
Check the roster after Chapter 16. Dedue returns automatically during that chapter if his Part 1 paralogue condition was fulfilled. If he is absent, replace his intended role with Gilbert or another trained physical unit instead of assuming he will appear later.
- Confirm whether Dedue returned in Chapter 16.
- Keep a primary healer and a backup recovery source.
- Maintain reliable ranged damage.
- Assign battalions with suitable Authority requirements and useful bonuses.
- Keep Dimitri supported rather than sending him into several enemy ranges alone.
4. Clear Chapters 14 through 16
Chapter 14, The Delusional Prince, initially requires routing the enemy while defending the marked locations. An allied Swordmaster begins moving toward the Onager tile on the right. When the Swordmaster reaches it, the fire attack changes the objective to defeating Randolph. Protect the defended locations throughout the opening phase, then regroup before the fire attack causes much of the map to become hazardous and causes many enemies to advance. Area gambits are useful when the advancing enemies cluster together.
Chapter 15, Valley of Torment, requires defeating Gwendal in Ailell. Advance carefully through the volcanic terrain, check movement restrictions, and avoid allowing several enemies to surround a unit in a low-mobility area. Rodrigue appears as an allied unit after the battle begins; speak to him with Byleth to obtain the associated reward. Open the chests only when doing so will not expose your army to a dangerous enemy phase.
Chapter 16, The Rose-Colored River, requires defeating all enemy commanders. Dedue joins at the start of turn 2 if War for the Weak was completed during Part 1. Lorenz appears only if he was recruited before the timeskip. Defeat Lorenz and choose the in-game Persuade option to bring him back. An unrecruited Lorenz cannot be obtained through this encounter. Lorenz does not move until provoked, so clear a safe approach before engaging him. Watch for reinforcements around the lower-right fortress and near the starting area as your army advances.
- Protect the defended locations in Chapter 14.
- Let the Swordmaster reach the right Onager tile before focusing on Randolph.
- Defeat Gwendal in Chapter 15.
- Speak to Rodrigue with Byleth if you want his reward.
- Check whether Dedue returns in Chapter 16.
- If Lorenz was recruited before the timeskip, defeat him and choose Persuade.
- Do not expect an unrecruited Lorenz to join for the first time in Chapter 16.
5. Win the second Battle of Gronder
Chapter 17, Blood of the Eagle and Lion, requires defeating all enemy commanders. Avoid rushing straight into the central hill and ballista area while the surrounding forces remain active. Advance through a controlled route, clear nearby cavalry and infantry, and keep fragile units away from overlapping siege and spell ranges.
The central fire attack is triggered by defeating Petra or her replacement if she was recruited. Recheck the map after the terrain changes, because the fire restricts movement for non-flying units and several enemy reinforcements can appear when major areas are approached or key enemies are attacked. Use forests and other defensive terrain to reduce the number of enemies that can attack during one enemy phase.
Prioritize enemy spellcasters, fliers, siege users, and dangerous gambit carriers. The other factions may weaken each other, but do not rely on them if Claude, Dimitri, or your own units are endangered. Once all required enemy commanders are defeated, the mission is complete; optional enemies do not need to be pursued after the victory condition is met.
- Approach the central hill only after controlling nearby threats.
- Account for the fire attack after Petra or her replacement is defeated.
- Keep fragile units away from ballista and overlapping spell ranges.
- Use terrain and gambits to prevent an uncontrolled enemy phase.
- Defeat all required enemy commanders.
6. Complete Chapters 18 through 21
Chapter 18, The King's Triumphant Return, requires defeating Cornelia during the assault on Fhirdiad. Watch the central area carefully: approaching it activates additional hazards, including the Viskam weapons. The upper-right lever can deactivate the Viskam and weaken the central Titanus, so use it if your army would otherwise take excessive damage crossing the map.
Chapter 19, The Golden Deer's Plea, requires defeating Lord Arundel while keeping Claude alive. Claude cannot move, so treat him as a protected allied objective rather than expecting him to carry the battle. Advance toward the gates and commanders while controlling recurring reinforcements. If Judith survives, the battle can award additional rewards, so do not ignore the allied units while rushing Arundel.
Chapter 20, The Impregnable Fortress, requires defeating the Death Knight. Bring prepared physical attackers, effective combat arts, strong gambits, or a reliable plan for winning the combat forecast. Do not assume an ordinary attack will be safe if the Death Knight can counterattack. Account for the fortress's ballista, enemy mages, and reinforcements while approaching him.
Chapter 21, Our Chosen Paths, is the assault on Enbarr and the final monastery month. Defeat Hubert, but use the available monastery period before the mission for final supports, purchases, repairs, certifications, battalion assignments, and route-sensitive paralogues. There is no later monastery month before Chapter 22. Create a separate save after Chapter 21 and before confirming the final mission preparation.
- Defeat Cornelia in Chapter 18.
- Use the lever if the Viskam weapons make the central approach unsafe.
- Keep Claude alive in Chapter 19.
- Defeat the Death Knight in Chapter 20.
- Defeat Hubert in Chapter 21.
- Finish final monastery activities before leaving Chapter 21.
- Create a separate save before Chapter 22.
7. Clear Chapter 22, Oath of the Dagger
Chapter 22 is the final Azure Moon mission. The game does not return you to the monastery between Chapters 21 and 22, but it provides a final Battle Preparation screen. Bring Dimitri, Byleth, at least one dependable healer, ranged attackers, and battalions with usable gambits and sufficient endurance. Keep a manual save before confirming the battle so you can change classes, equipment, battalions, or deployment choices after a failed attempt.
The Imperial Palace contains ballista pressure, long-range magic, monsters, and reinforcements. Myson does not move. Defeating Myson causes the Mysterious Soldier Warlocks to leave, so reaching him can reduce pressure if your formation can do so safely. Do not split the army so widely that healers cannot support both groups.
Clear dangerous rooms before entering the throne room unless you have a deliberate boss-rush plan. Entering the throne room activates reinforcements, including powerful physical units and, on higher difficulties, additional spellcasters. Keep the army close enough to support one another and recheck enemy ranges before every end turn.
Altered Demonic Beasts have barriers and can use Anti-Magic Armor. Inspect their displayed weaknesses and use appropriate physical attacks, effective weapons, and non-magic gambits when necessary. Against Hegemon Edelgard, break the barrier before committing your strongest attacks, but remember that breaking the barrier does not prevent her from counterattacking. Her attack range is extremely large, so keep units outside it until you are ready to finish the battle. Defeat Hegemon Edelgard to complete the route.
- Save at the Chapter 22 preparation screen.
- Deploy Byleth, Dimitri, reliable healing, ranged damage, and functional battalions.
- Defeat Myson if doing so is safe and useful.
- Expect reinforcements after entering the throne room.
- Use displayed weaknesses and suitable attacks against altered monsters.
- Break Hegemon Edelgard's barrier before the final assault.
- Defeat Hegemon Edelgard and view the Azure Moon ending.
Before you move on
- Chapter 12, To War, is cleared and the five-year transition begins.
- Chapter 13, Reunion at Dawn, is cleared by defeating the real Pallardó while Byleth and Dimitri survive.
- Chapters 14 through 21 are cleared in order: The Delusional Prince, Valley of Torment, The Rose-Colored River, Blood of the Eagle and Lion, The King's Triumphant Return, The Golden Deer's Plea, The Impregnable Fortress, and Our Chosen Paths.
- If Dedue was intended for the final roster, verify that War for the Weak was completed before the timeskip and that Dedue returned in Chapter 16.
- If Lorenz was intended for optional full recruitment, verify that he was recruited before the timeskip, defeated in Chapter 16, and recovered by choosing Persuade. An unrecruited Lorenz cannot be added for the first time through this encounter.
- Chapter 22, Oath of the Dagger, is cleared by defeating Hegemon Edelgard.
- The Azure Moon ending scenes and credits play after the final battle.
- One Azure Moon clear completes this route. Full base-game campaign completion requires clears of Azure Moon, Verdant Wind, Silver Snow, and Crimson Flower.
- For optional completion, verify that every intended recruit is present, route-sensitive paralogues were completed before their deadlines, desired supports were reached, and the completed campaign save is separate from the Chapter 22 retry save.
References for this chapter
- Fire Emblem: Three Houses for Nintendo Switch — Nintendo Official Site
- Azure Moon Chapters — Triangle Attack
- The Delusional Prince — Triangle Attack
- Valley of Torment — Triangle Attack
- The Rose-Colored River — Triangle Attack
- Blood of the Eagle and Lion — Triangle Attack
- The King's Triumphant Return — Triangle Attack
- The Golden Deer's Plea — Triangle Attack
- Our Chosen Paths — Triangle Attack
- Oath of the Dagger — Triangle Attack
- Reunion at Dawn — Fire Emblem Wiki
- Chapter 22: Clash at the Imperial Capital — Neoseeker
Final Battles and Endgame Boss Strategy (All Routes)
Each route has a different final map and boss. Crimson Flower ends in Fhirdiad against the Immaculate One in Chapter 18; Silver Snow ends at Garreg Mach against the Immaculate One in Chapter 21; Azure Moon ends in the Imperial Palace against Hegemon Edelgard in Chapter 22; and Verdant Wind ends at the Tailtean Plains against Nemesis in Chapter 22. Before the final map, create a separate save, repair weapons, replace depleted battalions, check classes and combat arts, and prepare healing, ranged damage, frontline durability, and movement support. Use gambits to break monster barriers, keep the army connected, and preserve Divine Pulse charges for lethal mistakes. If the attempt fails, reload the preparation save and change the formation, deployment order, equipment, battalions, or class assignments before trying again.
1. Create the final preparation save
Save in a separate slot before entering the final battle. Crimson Flower has no ordinary monthly preparation period between its late Part 2 battles, so complete certifications, reclassing, repairs, inventory changes, and battalion assignments before committing to the final sequence. On Silver Snow, Azure Moon, and Verdant Wind, use the final chapter's preparation screen to make the same checks. Keep this file separate from your normal campaign save so you can retry the map without replaying the preceding chapter.
Inspect every intended deployment slot. Confirm each unit's class, weapon durability, equipped combat arts, battalion endurance, Authority requirement, and healing supplies. Bring at least one dependable healer, several sources of ranged damage, a durable frontliner, and a mobile support option such as Rescue or Stride when available. Use your strongest reliable weapons, relics, combat arts, and consumables; nothing needs to be conserved for a later story battle after the route's final map.
- Create a separate save before the final battle.
- Repair weapons and replace depleted battalions.
- Confirm classes, equipment, combat arts, and healing items.
- Bring healing, ranged attacks, durable frontline units, and movement support.
2. Reserve gambits for barriers and emergency control
Assign battalions for both their stat bonuses and their gambits. Check gambit hit rates against the final boss before depending on a particular attack, and use Gambit Boosts or linked attacks to improve accuracy when possible. Do not spend every offensive gambit on ordinary enemies. Monster barriers reduce incoming damage and can block critical hits, so save enough gambits to expose the boss's barrier tiles and to control nearby monsters during the finishing sequence.
Against a monster, target different barrier tiles from multiple sides when the map allows it. Area-of-effect gambits are valuable because one use can damage several tiles. Defensive gambits also have a purpose: Impregnable Wall can protect a unit while it draws a dangerous attack, Sacred Shield can help against many ranged attacks, and Stride can begin a coordinated assault. Use movement support only when the whole attacking group can follow; sending one attacker ahead of the healer often creates a fatal gap.
- Reserve offensive gambits for the boss and major monsters.
- Use area gambits to damage several barrier tiles at once.
- Check gambit accuracy before the decisive turn.
- Keep at least one defensive or movement gambit available.
3. Advance as a connected formation
Move in a compact formation until the map's active threats are understood. Let a durable unit enter enemy range first, then keep healers, ranged attackers, and support units close enough to respond on the following turn. Enemy-range display is essential: do not send a fast unit into unexplored territory unless it can retreat safely or defeat every enemy that will activate.
Prioritize threats that can collapse the formation rather than merely removing the nearest target. Siege weapons, long-range mages, powerful archers, fast assassins, and enemies with effective damage against your tanks deserve early attention. Use walls, strongholds, terrain, and narrow passages to reduce the number of attacks directed at one unit. Recheck enemy ranges after every major kill because reinforcements, boss phases, or opened routes can change the safe area.
- Keep healers and ranged units within support range.
- Use terrain and choke points to limit enemy attacks.
- Remove siege and long-range threats before exposing fragile units.
- Do not activate the boss while several support enemies remain active.
4. Crimson Flower and Silver Snow: defeat the Immaculate One
Crimson Flower's Chapter 18, To the End of a Dream, takes place in burning Fhirdiad. Fire tiles restrict movement, so flying units and carefully positioned infantry are often more convenient than cavalry. Clear nearby enemies before beginning the final assault, but watch the map's triggers. Defeating certain named enemies or advancing through the upper route can produce groups of Pegasus Knights and Holy Knights, so keep bows, accurate gambits, and a protected back line ready. Golems have barriers and dangerous attack ranges; lure them into a controlled engagement rather than letting them reach isolated mages.
When the approach is secure, use gambits to break the Immaculate One's barrier tiles and then concentrate your strongest combat arts, relics, high-might weapons, and effective dragon damage. Heal before entering counterattack range. If a barrier break fails or a player-phase attack leaves a key unit exposed, use Divine Pulse to restore the formation rather than accepting a death for a small amount of damage.
Silver Snow's Chapter 21, Following a Dream, is also fought against the Immaculate One. Rhea is the character behind this transformation, but the battle target and victory condition are the Immaculate One. The map contains White Beasts, golems, siege positions, and other strong enemies. Advance along one side, draw threats toward the main army, and avoid allowing White Beasts to approach the Immaculate One: nearby White Beasts can restore the boss's health. Remove or control them before beginning the final damage sequence. Use ballistae or Fire Orbs when they let a frail unit contribute without entering lethal range, then break the Immaculate One's barriers with gambits and finish with coordinated attacks. Protect the healer and keep status recovery available if enemy gambits inflict a disabling effect.
- Crimson Flower: account for fire tiles, Pegasus Knight and Holy Knight reinforcements, and golems.
- Silver Snow: control White Beasts, golems, and siege threats before attacking the Immaculate One.
- Remember that Rhea is behind the transformation, but attack the Immaculate One as the battle target.
- Break the Immaculate One's barriers before committing the main damage sequence.
5. Azure Moon: cross the Imperial Palace and defeat Hegemon Edelgard
Azure Moon's Chapter 22, Oath of the Dagger, begins with the army already committed to the Imperial Palace battle. Hegemon Edelgard can attack from long range, and the map produces additional enemies if stair areas remain unsecured. A practical approach is to push through the left side, where the army can bypass Myson rather than fighting every enemy on the map. If you choose a different route and bring Myson into the engagement, defeat him before he can repeatedly use his long-range magic against the support line.
Use the map's special long-range firing tiles when a suitable class can operate them, and leave a durable unit near the starting-side stairs if you need to contain reinforcements. Fortify, Physic, Vulnerary, and Concoction supplies matter because the battle can become an endurance fight. Monitor Hegemon Edelgard's range every turn and avoid relying on a single defensive gambit against attacks you have not checked in the battle forecast.
You do not need to clear every enemy before attacking Edelgard, but regroup before the final approach. Use gambits to break her barrier, then spend your strongest player-phase attacks across her multiple HP bars. Dimitri, Byleth, and other units with reliable combat arts should attack only after the surrounding formation is ready to heal and retreat. Do not send several injured units forward merely to remove one more HP bar; preserve enough movement and healing to survive the next enemy phase.
- Use the left-side approach if you want to bypass Myson.
- Monitor Hegemon Edelgard's long-range attacks and the stairway reinforcements.
- Use long-range firing tiles when they can contribute safely.
- Break Edelgard's barrier, then coordinate attacks across all of her HP bars.
6. Verdant Wind: weaken Nemesis by defeating the Ten Elites
Verdant Wind's Chapter 22, Fódlan's New Dawn, takes place at the Tailtean Plains. Clear the nearest threats before dividing the army, and keep each group within healing or retreat range of another. Flying units can cross difficult terrain and reach isolated enemies, but do not let Claude or another flier outrun support. Ranged attackers can soften enemies before melee units finish them, and central artillery can help if the operator can use it without becoming exposed.
The Ten Elites are not the formal victory condition, but defeating them before attacking Nemesis is the safest plan. Each surviving Elite increases Nemesis's combat stats, and if at least one Elite remains, Nemesis can retain a barrier that negates one damaging attack per turn. Track the remaining Elites and eliminate them methodically rather than splitting the army so widely that one group is overwhelmed. Once the Elites are gone, regroup, heal, and approach Nemesis with gambits, relic combat arts, critical-capable weapons, and high-output spells.
If Nemesis still has protection, use a safe low-damage hit or a gambit to remove it before spending the strongest attacks. Do not let one unit fight him alone unless the forecast clearly guarantees survival. Keep Divine Pulse available for a failed barrier break, an unexpected critical, or a lethal counterattack.
- Sweep nearby enemies before splitting into supportable groups.
- Use fliers for difficult terrain without outrunning healing.
- Defeat the Ten Elites before the final Nemesis assault whenever possible.
- Remove Nemesis's remaining protection, then concentrate the army's strongest attacks.
7. Recover if the final attempt fails
If the army collapses, reload the dedicated preparation save instead of repeating the same opening. Reclass a unit into a role that addresses the failure, move a stronger battalion to a primary attacker, change combat arts, add healing items, and alter the deployment order. Class changes, certifications, battalion reassignment, and inventory changes must be completed before entering the battle; they cannot be performed after deployment.
Identify the first unsafe activation from the failed attempt: a siege range, a reinforcement trigger, a monster barrier that was not broken, an approaching White Beast, or a boss counterattack that killed the formation. On the next attempt, stop one turn earlier, heal before crossing the same threshold, and spend a gambit or Divine Pulse charge to preserve the army's structure. A slower clear is preferable to a fast advance that leaves Byleth, the route lord, or the healer exposed.
- Reload the preparation save when the formation cannot recover.
- Change classes, battalions, equipment, combat arts, or deployment order.
- Identify the first activation that caused the collapse.
- Use Divine Pulse to preserve a stable next turn rather than only to chase damage.
Before you move on
- The final map's victory condition is completed: the Immaculate One is defeated on Crimson Flower or Silver Snow, Hegemon Edelgard is defeated on Azure Moon, or Nemesis is defeated on Verdant Wind.
- The route-ending cutscenes and epilogue begin after the final victory sequence.
- For full campaign completion, clear Crimson Flower, Silver Snow, Azure Moon, and Verdant Wind on separate route saves or playthrough records.
- For optional completion, verify that each intended recruit is present, desired paralogues are complete, selected support ranks and paired endings are achieved, and priority units have obtained their planned advanced or master-class certifications before finishing the route.
- Retain separate route saves if you want to revisit final maps, compare endings, or preserve recruitment and support records.
References for this chapter
Post-Game, New Game Plus and DLC Content
After completing any main route, save the cleared-game data and use it as the source for New Game Plus. The new campaign begins from the start with a new house, new story branch and newly recruited army, but it retains Renown, Saint Statue progress, shop progress, and hired battalions with their experience. Byleth's Journal then lets you spend Renown to restore selected Professor Levels, Byleth support ranks, character skill levels, class mastery abilities and Crest items. The Expansion Pass is optional. Its four DLC waves add auxiliary battles, items, quests, costumes, Abyss, the Ashen Wolves, extra classes and the separate Cindered Shadows campaign. Cindered Shadows does not replace a base-game route, and none of the four main endings requires DLC.
1. Create and protect the cleared-game data
Finish the final chapter of your chosen route, view the ending, and save the cleared-game data when the game prompts you after the credits. The cleared file is marked with a Sothis symbol. Keep a separate ordinary save before the final battle if you want to replay the map, alter your final preparations, or preserve a route-specific record.
From the title screen, choose New Game and select the cleared-game file when the New Game Plus option appears. This does not continue your old army. You return to the opening campaign, choose a house again, and replay the academy calendar. Select another house if your goal is to experience a different route, or select the same house if you want a second build, different recruitments, or another ending choice.
- The final battle has been completed and cleared-game data has been saved.
- A pre-final-battle save remains available if you want to retry the ending.
- New Game Plus is started by loading the cleared file, not by choosing an ordinary blank New Game.
2. Identify the automatic New Game Plus carry-over
New Game Plus automatically retains your accumulated Renown, the upgrade levels of all four Saint Statues, shop progress, and hired battalions with their experience progress. These benefits belong to the new campaign. Shop access and inventory progress can therefore save money and time early in the replay, while carried-over battalions give a new class roster stronger support options once battalion management becomes available.
Do not expect your previous army to appear at its old level. Character levels, current classes, personal statistics, ordinary inventories, gold, story progress and the old house roster do not become a ready-made force. You must replay the academy months, recruit units again, earn gold again and complete the new route's battles. The cleared data records selected skills, class masteries and Byleth support levels so they can be purchased later through the Journal.
- Confirm that the Saint Statue levels are already restored in the new file.
- Check the Battalion Guild after it becomes available and verify that carried-over battalions are present.
- Plan to reacquire gold, equipment and recruits instead of assuming they transferred.
3. Use the Journal without wasting Renown
During an exploration session, visit Byleth's personal quarters and use the Journal. Restore Professor Level first if you want the largest immediate improvement to the replay. A higher Professor Level increases the amount of activity available during exploration and reduces the early campaign's scheduling pressure.
After that, buy only the skill ranks and class mastery abilities that support the new route's actual builds. A restored rank is useful when it immediately enables a certification, weapon plan or combat role; otherwise, leave the Renown available for supports and Crest items. The Journal can also restore Byleth's support ranks with characters from the cleared file, but this does not recreate every support between other characters.
Character skill ranks and class mastery abilities are available for purchase only after that character has joined the new campaign. Recruit the unit first, then return to the Journal. This makes the best order Professor Level, urgent Byleth recruitment supports, recruitment, and only then the new unit's saved skills or masteries.
- Restore Professor Level before buying low-priority bonuses.
- Reserve Renown for Byleth supports needed for recruitment.
- Recruit a character before attempting to restore that character's skills or class masteries.
- Leave a Renown reserve for Crest items or later certification needs.
4. Plan the second route and optional recruitment
Make a recruitment list before choosing the next house. Mark students, faculty and staff who are route-compatible, then use restored Byleth support ranks to reduce the normal recruitment requirements. The character still has to be encountered in the new campaign, and route restrictions still apply. New Game Plus does not make every house leader or route-exclusive character recruitable everywhere.
Recruit optional students during Part 1 rather than postponing the task. Recheck the roster before the timeskip, because some characters have route-specific availability and some support or paralogue opportunities disappear or change after the story advances. Keep a manual save before the route's major decision point if you want to compare outcomes without replaying the entire academy phase.
For a completion-focused run, use the first months to recruit the units needed for paralogues, then complete those paralogues before their deadlines. Raise supports through meals, gifts, choir practice, combat adjacency and shared activities, but do not spend every free day on relationship work if a required certification or story battle is approaching.
- Choose the next house only after deciding which route and recruits you want.
- Recruit route-compatible students during Part 1.
- Complete character paralogues before their displayed deadlines.
- Use the restored Byleth supports as recruitment tools, not as a substitute for checking route availability.
5. Add the Expansion Pass as optional campaign content
The Expansion Pass contains four DLC waves. It adds outfits, auxiliary battles, support items, quests, costumes, Abyss and the Cindered Shadows side story with additional playable characters and classes. These additions sit alongside the base campaign; they do not replace the academy chapters, the timeskip or the four main route endings.
Cindered Shadows is launched from Side Story on the title screen and uses a separate campaign structure with a fixed group and its own progression. Progress made by those units is not a way to import a trained army into the main story. As you complete the side story, its rewards unlock content for the main campaign, including Abyss access, the Ashen Wolves, related quests, paralogues, supports and classes. The Ashen Wolves are recruitable only during Part 1 of the main campaign, so finish enough of Cindered Shadows before the academy phase passes its recruitment window.
The base campaign remains complete without the Expansion Pass. Install the DLC when you want the additional characters, classes, Abyss activities, auxiliary maps or side story—not because it is required for Crimson Flower, Azure Moon, Verdant Wind or Silver Snow.
- Start Cindered Shadows from Side Story rather than treating it as a main-story chapter.
- Complete the necessary Cindered Shadows chapters before attempting to recruit the Ashen Wolves in the main campaign.
- Recruit the Ashen Wolves during Part 1 if you want them available for the war phase.
- Do not count Cindered Shadows as a fifth main-game route ending.
6. Use DLC for training and build testing
The DLC auxiliary battles are the practical training option for a main-campaign roster. Use them when they appear on the battle selection screen to give underused recruits experience, earn additional rewards and test a class or battalion plan before a story map. Treat them as optional activity-point battles, so skip them when you need exploration, certification exams, paralogues or a deadline-sensitive support session.
Use Cindered Shadows itself to learn the Ashen Wolves and their intended tactical roles, but do not expect the side-story party's levels, equipment or map progress to transfer into the main campaign. Once the relevant content is unlocked, test those characters and DLC classes in the main file through ordinary battles, auxiliary maps and paralogues.
Maintain two groups of manual saves: one for the route you intend to finish and one for experiments involving DLC recruits, alternate certifications or unusual battalion assignments. This is especially useful if you are pursuing full recruitment and maximum supports, because optional DLC activities can consume calendar time even though they do not alter the base route choice.
- Use DLC auxiliary maps to train main-campaign units, not Cindered Shadows' fixed party as an import shortcut.
- Test DLC classes in the main campaign after unlocking them.
- Keep separate route-completion and experimentation saves.
- Reserve calendar time for route battles, paralogues and support deadlines.
Before you move on
- A cleared-game file from a completed route exists and was selected when starting New Game Plus.
- The new campaign shows the carried-over Saint Statue progress, Renown, shop progress and hired battalions.
- Professor Level and the intended Byleth recruitment supports were restored through the Journal without exhausting the Renown reserve.
- The desired optional students and DLC characters were recruited during their valid availability windows, if full recruitment was the goal.
- Route-specific paralogues and support conversations were completed before their deadlines where optional completion was intended.
- The chosen second route reached its own ending, confirming that New Game Plus was used to replay a full campaign rather than merely continue the first save.
- If the Expansion Pass is owned, Cindered Shadows, Abyss and DLC battles were accessed as optional content without replacing the chosen main campaign route.
References for this chapter
- New Game + — Fire Emblem Wiki
- FE3H | New Game Plus - New Features, and What Carries Over — GameWith
- Fire Emblem: Three Houses - New Game Plus and Renown Guide — RPG Site
- What DLC Is Available? — Nintendo Support
- Side Story: Cindered Shadows — Nintendo eShop
- Additional Auxiliary Battles — Nintendo UK
Optional Completion: Full Recruitment, Max Supports and Master Classes
Treat optional completion as a route-specific project. Recruit out-of-house students, faculty, Church units, Ashen Wolves and Anna during their available windows, then finish route-eligible paralogues before their deadlines. Student recruitment is easiest in Part 1: check each character’s Recruit screen, raise Byleth’s support and train the displayed stat and skill. Faculty and Church characters use separate level, story or route conditions. Ashen Wolves require progress in Cindered Shadows and must be recruited from Abyss before the timeskip. Ashe and Lorenz have limited Part 2 recovery events only if they were recruited before the timeskip and later re-recruited under the correct route conditions. Plan supports around desired conversations and paired endings rather than attempting every outcome in one run. Certify units for their intended final roles, master useful classes, and preserve a pre-final save for cleanup and ending checks.
1. Build a route-specific completion checklist
After choosing a house, list the characters and content available on that route. Separate house members, out-of-house students, faculty, Church units, Ashen Wolves, Anna and route-exclusive characters. House leaders and their retainers are not ordinary recruits, and some characters become unavailable, leave or turn hostile depending on the route. A single campaign cannot provide every route-exclusive character or every support outcome, so define 100 percent as completing everything obtainable on the chosen route.
For each target, record the current requirement shown by the Recruit command or the condition described in the character’s monastery dialogue. Save before the final academy month. This gives you a recovery point for missed recruitment, support conversations, expiring paralogues and route preparation without replaying the entire campaign.
- Separate route-available characters from route-exclusive characters.
- Record each target’s displayed recruitment condition.
- Create a pre-timeskip save before the final academy month.
2. Recruit outside students during Part 1
From the early academy chapters onward, speak to out-of-house students while exploring and select Recruit to inspect their current requirements. Student recruitment normally checks Byleth’s relevant stat and skill proficiency. Support with the target lowers the requirement, so meals, gifts, returned Lost Items, choir practice, tea and shared battles are usually more efficient than forcing Byleth into an unwanted build. Check the requirement again after support ranks or proficiency increases, because the displayed values are the authority for that save.
Recruit as soon as the requirement is met rather than assuming a later opportunity will appear. Ferdinand and Caspar require special planning because their normal B support shortcut is not available during early Part 1 in a standard run. Raphael’s Heavy Armor requirement can also be inconvenient for an otherwise offensive Byleth. Begin these training goals early and reserve exploration days for recruitment before spending the final months on uncontrolled auxiliary grinding.
- Use Recruit during exploration to confirm the live requirement.
- Raise support before pursuing an awkward stat or skill target.
- Plan early for Ferdinand, Caspar and Raphael.
- Recruit successful targets immediately.
3. Handle limited Part 2 re-recruitment correctly
Do not treat the timeskip as a general recruitment period. Most students who were not recruited before the timeskip cannot be recovered later. Two important exceptions are conditional re-recruitment events. On Silver Snow or Verdant Wind, Ashe can return in Chapter 15 only if he was recruited during Part 1, leaves during the timeskip, is defeated in the chapter battle and is then persuaded rather than killed. On Silver Snow or Azure Moon, Lorenz can return in Chapter 16 under the same previously-recruited, defeat and persuade conditions.
The route and prior recruitment requirements are essential. Defeating an unrecruited Ashe or Lorenz does not create a universal recruitment opportunity. Before the timeskip, mark whether each intended recovery character actually joined your roster, then save before the relevant Part 2 battle. If the persuade option does not appear, do not count the character as recovered.
- Confirm Ashe or Lorenz joined before the timeskip.
- Use the correct route and chapter for the re-recruitment event.
- Defeat the unit and choose Persuade when the option appears.
- Do not count an unrecruited enemy version as recoverable.
4. Recruit faculty, Church units and Expansion Pass characters
Faculty and Church units use different rules from students. Depending on the character, recruitment may require Byleth’s level, story progress, route choice or an automatic event. Check the monastery roster after major chapters and speak to these characters whenever their recruitment option appears. Some Black Eagles route decisions change whether characters such as Flayn, Seteth, Catherine, Cyril or Shamir remain available.
The Ashen Wolves are recruited from Abyss after the required progress has been made in the Cindered Shadows side story. Their main-story recruitment does not use the normal student stat-and-skill formula. After the relevant DLC progress, visit Abyss during Part 1 and speak with Yuri, Balthus, Constance and Hapi. Any Wolf not recruited before the timeskip is lost for that campaign. Anna is a separate Expansion Pass recruit with no Support conversations; recruit her when she becomes available in the monastery, but do not include her in a support or paired-ending plan.
- Recheck the monastery after story milestones.
- Recruit Ashen Wolves from Abyss during Part 1.
- Do not postpone Ashen Wolf recruitment until Part 2.
- Treat Anna as a recruit without Support conversations.
5. Finish paralogues before their deadlines
Review the calendar at the start of every month and note each paralogue’s focus characters, route restrictions and deadline. Some maps require one listed character; others require multiple characters to be recruited and available. A required unit who is missing, unavailable or dead can block the paralogue. The calendar deadline is also significant: after it passes, the map and its unique rewards are generally lost.
Schedule high-value paralogues before auxiliary battles. Bring the required characters, repair weapons and review enemy types before deployment. Rewards may include battalions, Relics, rare weapons, shields and stat boosters. After earning a special weapon, visit the blacksmith or inventory facilities to repair, forge and equip it; unique rewards are not automatically optimized for the unit who received them.
- Record focus characters and deadlines for every paralogue.
- Keep required units recruited, alive and available.
- Complete expiring maps before optional grinding.
- Repair and equip unique rewards afterward.
6. Raise supports and control paired endings
Use exploration activities to build several relationships at once. Meals raise support and restore motivation, choir practice supports participating units, and gifts or recovered Lost Items target specific characters. In battles, deploy intended partners near one another, use linked attacks when practical and let ordinary combat add support points without consuming another activity point.
Do not attempt to maximize every support chain in one campaign. Prioritize recruitment supports first, then route-relevant conversations and the pairings you want reflected in the ending. Some support ranks are story-locked, while others stop at route-dependent levels. Viewing every conversation does not by itself guarantee a paired ending; accumulated relationship points and ending priority matter. Before the last battle, review the Support menu and continue building the intended pair while avoiding accidental overinvestment in another candidate.
- Prioritize supports needed for recruitment.
- Use meals, gifts, choir practice and combat adjacency together.
- Wait for story-locked support ranks instead of wasting activity points.
- Review intended paired endings before the final chapter.
7. Certify and master classes with a defined purpose
Choose each unit’s final role before spending seals. Certification tiers normally unlock at levels 5, 10, 20 and 30 for Beginner, Intermediate, Advanced and Master classes. The exam also requires the appropriate seal and checks the class’s listed skills, such as weapons, Riding, Flying or Heavy Armor. Use the Certification screen’s displayed requirements and success rate rather than relying on a generic chart. A lower proficiency can sometimes pass, but failed exams waste a calendar opportunity and a seal attempt.
Use auxiliary battles to complete a specific mastery bar, train a late recruit, earn funds or obtain materials. Class mastery remains after changing classes, so inspect the mastery progress before switching. Master only abilities that serve the unit’s planned role, then preserve late Part 1 activity points for recruitment, expiring paralogues, mandatory battles and final certifications. Keep funds available for repairs, battalions, weapons and seals rather than attempting to master every class.
- Choose final roles before buying seals.
- Confirm level, seal and proficiency requirements in-game.
- Check mastery progress before changing classes.
- Reserve late-calendar resources for mandatory preparation.
Before you move on
- Every recruitable character planned for the chosen route appears in the roster, including desired faculty, Church, Ashen Wolves and Anna content.
- Any intended Ashe or Lorenz recovery followed the correct route, prior-recruitment requirement, chapter, defeat and Persuade sequence.
- Desired support conversations are complete or available, and the Support menu has been checked for intended paired endings.
- All desired route-eligible paralogues are complete and their unique rewards are secured.
- Priority units have their intended final classes or a documented remaining certification plan, with essential mastery abilities obtained.
- Weapons are repaired or forged, battalions are assigned, and funds remain for final preparations.
- A pre-final save exists with the roster, inventory, supports, battalions and class goals reviewed before the last story sequence.
References for this chapter
- Nintendo Official Site: Fire Emblem: Three Houses for Nintendo Switch
- Recruitment - Fire Emblem: Three Houses | Triangle Attack
- Ashe Ubert - Fire Emblem: Three Houses | Triangle Attack
- Lorenz Hellman Gloucester - Fire Emblem: Three Houses | Triangle Attack
- Recruitment - Fire Emblem: Three Houses | Serenes Forest
- Ashen Wolves - Fire Emblem Wiki
- Constance - Fire Emblem Wiki
- Certifications - Fire Emblem: Three Houses Walkthrough | Neoseeker
Finishing up
Finish one Part 2 route through its final chapter and final boss sequence, then watch that route's ending scenes and credits.
Confirm the chosen route through its ending sequence and cleared-game result: Silver Snow, Crimson Flower, Verdant Wind, or Azure Moon.
Optional completion: recruit every character available on the chosen route, including route-specific re-recruitments where applicable, and complete the support ranks or paired endings you want.
Optional completion: certify primary units into their intended classes and obtain the battalion, combat-art, and class-mastery tools needed for the selected endgame plan.
Save a pre-final-battle backup if you want to retry the final encounter or preserve an alternate route-specific roster.
For New Game Plus or Expansion Pass content, retain cleared-game data and install the required DLC; neither DLC nor New Game Plus is required for a base-game route ending.
Choose your next gameScreenshots & video
Game imagery for reference. Follow the written chapters above for the route and strategies.

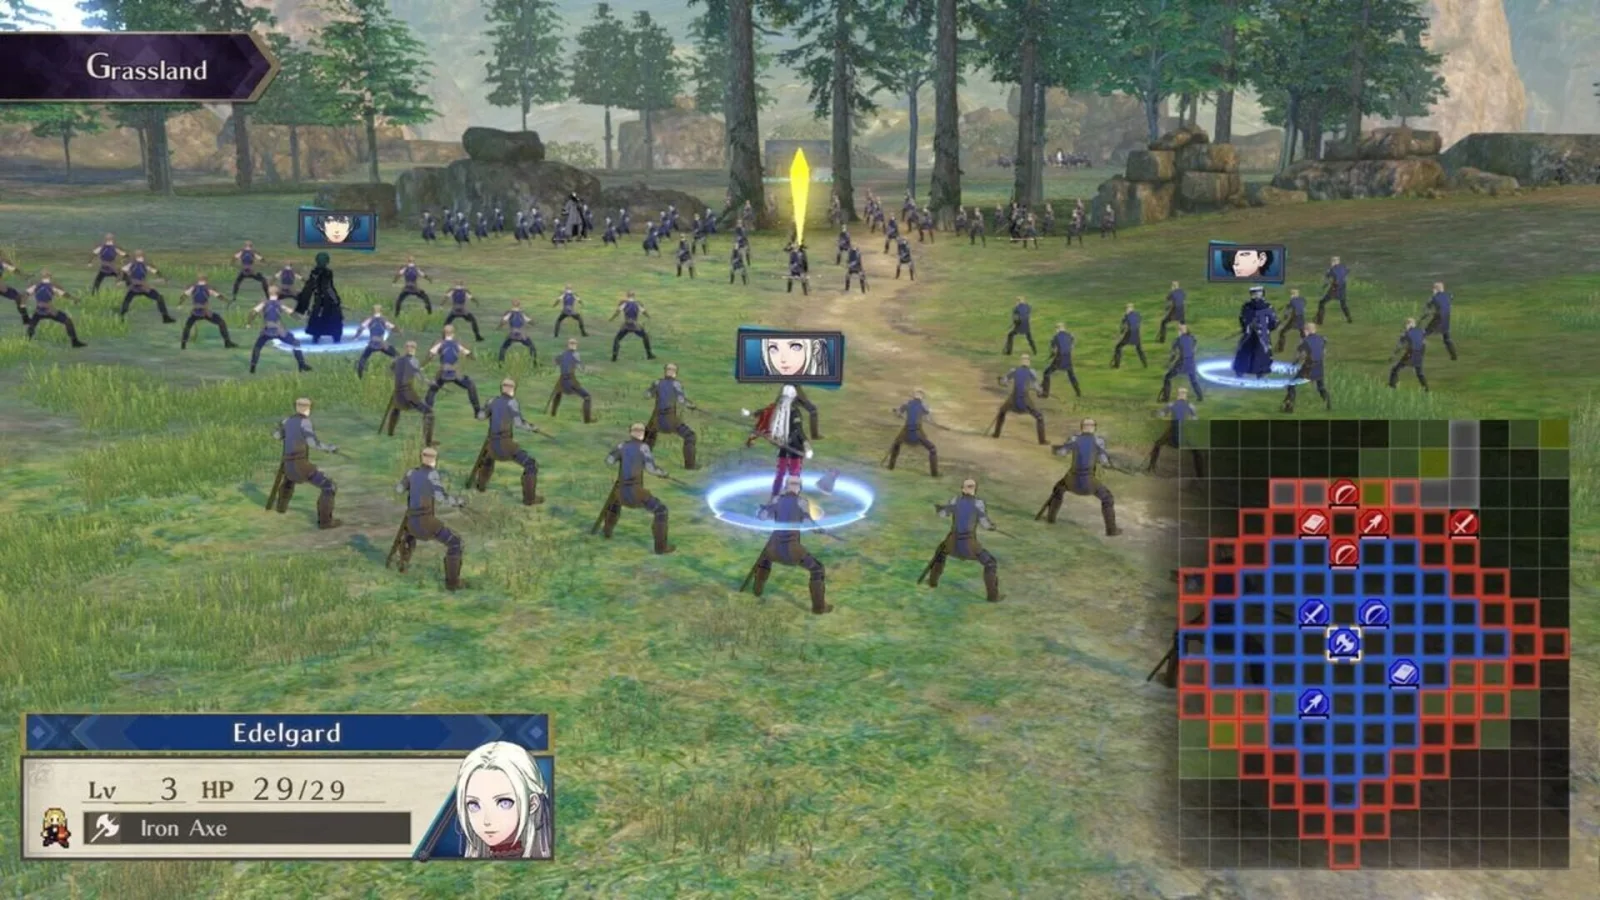
Sources & references
Our original guide draws on the references below. Check the edition at the top of this page before following controls or unlock requirements.
- Fire Emblem: Three Houses for Nintendo Switch - Nintendo Official Site
- An Inevitable Encounter — Fire Emblem: Three Houses — Triangle Attack
- Multiple endings — Fire Emblem Wiki
- Chapter 11: Pegasus Moon — Fire Emblem: Three Houses Walkthrough & Guide
- List of chapters in Fire Emblem: Three Houses — Fire Emblem Wiki
- Fire Emblem: Three Houses 101 - Nintendo
- Calendar — Fire Emblem: Three Houses — Fire Emblem Wiki
- Garreg Mach Monastery — Fire Emblem Wiki
- Exploration - Fire Emblem: Three Houses Walkthrough - Neoseeker
- Fire Emblem: Three Houses - Garreg Mach Monastery Map and Facility List - SAMURAI GAMERS
- Fire Emblem: Three Houses for Nintendo Switch — Nintendo Official Site
- Lesson - Fire Emblem Wiki
- Class change - Fire Emblem Wiki
- Faculty Training - Serenes Forest
- Instructing and Seminars: Skill growth outside battle - Fire Emblem: Three Houses Walkthrough
- Classes - Fire Emblem: Three Houses Walkthrough and Guide
- Nintendo Official Site: Fire Emblem: Three Houses for Nintendo Switch
- Recruitment - Fire Emblem: Three Houses | Serenes Forest
- Recruitment - Fire Emblem: Three Houses | Triangle Attack
- Ashe — Fire Emblem Wiki
- Lorenz - Fire Emblem Wiki
- Downloadable content in Fire Emblem: Three Houses - Fire Emblem Wiki
- Battalions — Serenes Forest
- Gambits — Serenes Forest
- Linked Attacks & Gambit Boost — Serenes Forest
- Adjutants — Serenes Forest
- Class-Change — Serenes Forest
- Classes — Serenes Forest
- Gambit — Fire Emblem Wiki
- Battalion — Fire Emblem Wiki
- Barrier (mechanic) — Fire Emblem Wiki
- Status effects — Fire Emblem Wiki
- Skirmish — Fire Emblem Wiki
- List of quests in Fire Emblem: Three Houses — Fire Emblem Wiki
- Arena — Fire Emblem: Three Houses — Fire Emblem Wiki
- Tournament — Fire Emblem: Three Houses — Super Cheats
- Chapter 9: Ethereal Moon — Fire Emblem: Three Houses Walkthrough — GameFAQs
- Throne of Knowledge — Fire Emblem Wiki
- Edelgard/Supports — Fire Emblem Wiki
- Crimson Flower — Fire Emblem: Three Houses Walkthrough & Guide
- FE3H | Point of Divergence | Fire Emblem Three Houses — GameWith
- To War - Fire Emblem Wiki
- To War: The Battle of Garreg Mach — Fire Emblem Wiki
- Reunion at Dawn — Fire Emblem Wiki
- Hunting by Daybreak - Fire Emblem Wiki
- FE3H: To War (White Clouds: Chapter 12) - GameWith
- FE3H: Changes After 5 Year Time Skip - GameWith
- Outset of a Power Struggle - Fire Emblem: Three Houses Walkthrough
- FE3H Silver Snow Chapter Story Walkthrough — GameWith
- Hilda — Fire Emblem Wiki
- Following a Dream - Triangle Attack
- Following a Dream/The Final Battle - Fire Emblem Wiki
- List of chapters in Fire Emblem: Three Houses — Fire Emblem Wiki
- Tempest of Swords and Shields — Crimson Flower Chapter 15
- To the End of a Dream — Crimson Flower Chapter 18
- To the End of a Dream - Fire Emblem Wiki
- Crimson Flower Chapters — route chapter list and objectives
- Crimson Flower — Fire Emblem: Three Houses Walkthrough & Guide
- Reunion at Dawn — Verdant Wind Chapter 13 — Triangle Attack
- Fódlan's New Dawn/For the Freedom of Fódlan - Fire Emblem Wiki
- Azure Moon Chapters — Triangle Attack
- The Delusional Prince — Triangle Attack
- Valley of Torment — Triangle Attack
- The Rose-Colored River — Triangle Attack
- Blood of the Eagle and Lion — Triangle Attack
- The King's Triumphant Return — Triangle Attack
- The Golden Deer's Plea — Triangle Attack
- Our Chosen Paths — Triangle Attack
- Oath of the Dagger — Triangle Attack
- Chapter 22: Clash at the Imperial Capital — Neoseeker
- Oath of the Dagger - GameWith
- New Game + — Fire Emblem Wiki
- FE3H | New Game Plus - New Features, and What Carries Over — GameWith
- Fire Emblem: Three Houses - New Game Plus and Renown Guide — RPG Site
- What DLC Is Available? — Nintendo Support
- Side Story: Cindered Shadows — Nintendo eShop
- Additional Auxiliary Battles — Nintendo UK
- Ashe Ubert - Fire Emblem: Three Houses | Triangle Attack
- Lorenz Hellman Gloucester - Fire Emblem: Three Houses | Triangle Attack
- Ashen Wolves - Fire Emblem Wiki
- Constance - Fire Emblem Wiki
- Certifications - Fire Emblem: Three Houses Walkthrough | Neoseeker
About the game & collecting notes
- Platform
- Nintendo Switch
A complete, route-by-route campaign walkthrough for Fire Emblem: Three Houses on Nintendo Switch. Covers Part 1 monastery life and time management, the Point of Divergence, each Part 2 route (Silver Snow / Church, Crimson Flower / Edelgard, Verdant Wind / Claude, Azure Moon / Dimitri), endgame preparation, and optional 100% completion tasks.
Darryl Polo
Darryl Polo writes about emulation and retro games. What changes when an old favorite moves to another setup? That question connects his interest in tinkering with the games that made the hardware worth keeping.
Our editorial standardsFound a step that needs another look? Help us improve this guide.