
Final Fantasy VII Remake Intergrade (PS5) — Complete Campaign Walkthrough
Step-by-step walkthrough for Final Fantasy VII Remake Intergrade on PlayStation 5, covering the complete 18-chapter main campaign through the ending of Chapter 18: Destiny’s Crossroads, plus the separate PS5-exclusive Episode INTERmission starring Yuffie. Routes, combat tactics, required objectives, chapter replay tips and completion checks are included.


Find a copy
Final Fantasy VII Remake Intergrade Sony PlayStation 5
We may earn a commission if you buy through these links, at no extra cost to you. As an Amazon Associate I earn from qualifying purchases.
Opens retailer search results. Check the model, edition, seller, availability and current price before buying.
Before you begin
You’re playing Final Fantasy VII Remake Intergrade on PlayStation 5: the enhanced PS5 edition of Final Fantasy VII Remake that includes improved visuals, selectable Graphics and Performance modes, Photo Mode, and the separately structured Episode INTERmission starring Yuffie. Episode INTERmission is included with the Intergrade package.
This walkthrough covers the complete 18-chapter main campaign through the ending of Chapter 18: Destiny’s Crossroads, then provides a dedicated section for Episode INTERmission. The Yuffie episode is optional and does not add a nineteenth main-campaign chapter.
Follow the main chapters in order; each entry lists required objectives, route notes, boss tactics, recovery options and the distinction between mandatory progress and optional rewards.
If you want to skip optional content, the guide identifies what can be ignored without blocking the main ending.
Use the preparation checklist before starting so your platform settings, saves and Materia setup are ready.
Set yourself up for the run
Install the PS5 Intergrade build and confirm Episode INTERmission is available if you plan to play Yuffie’s separate episode.
Intergrade is the PS5 enhanced edition of Final Fantasy VII Remake and includes FF7R EPISODE INTERmission.
Choose a difficulty from the options shown by the installed build. Hard difficulty becomes available after the first main-campaign clear; use Chapter Select for the replay.
Choose Graphics Mode for higher-resolution presentation or Performance Mode for smoother action at 60 frames per second.
If you upgraded from the PS4 version, verify the eligibility and disc requirements for your specific copy before installing the PS5 version.
Back up any PS4 save data you want to transfer before beginning the PS5 version.
Learn the core battle loop before the later chapters: fill ATB, issue abilities through Tactical Mode, pressure and stagger enemies, switch characters to maintain momentum, and keep healing available.
Equip Healing and Revival options early, then adjust elemental, defensive and support Materia for individual encounters.
Use benches and save points before major fights, and preserve the completed save after the ending if you plan to use Chapter Select.
Chapter-specific choices, quests and dress outcomes register through chapter completion when replaying with Chapter Select.
Episode INTERmission is a separate two-chapter PS5 adventure and is optional for the 18-chapter main campaign.
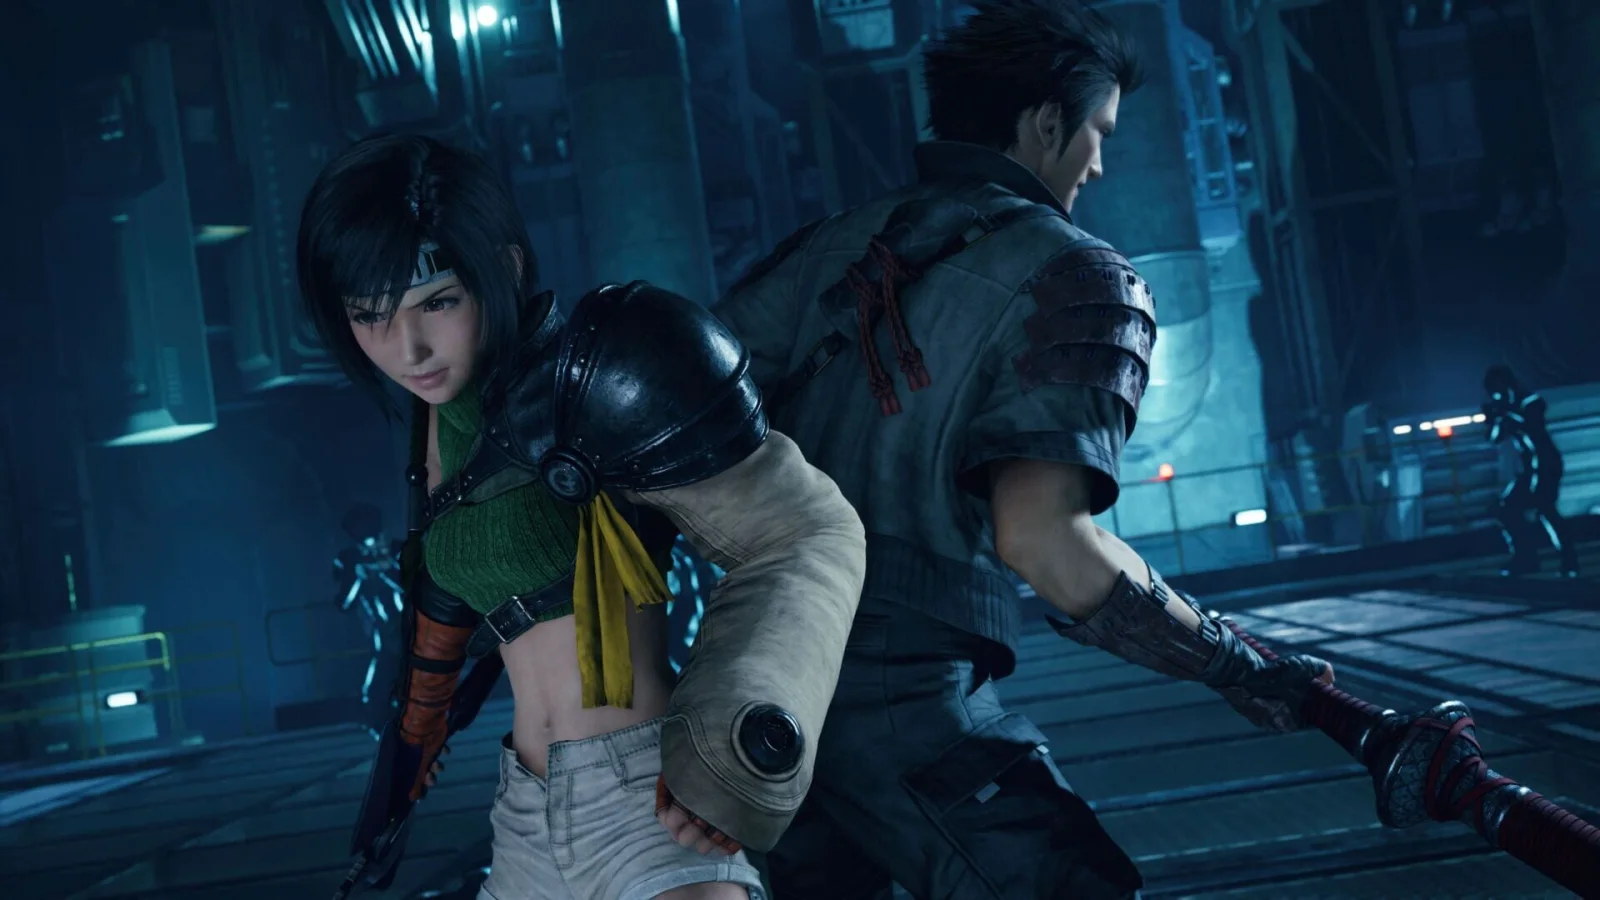
Chapter 1 — The Destruction of Mako Reactor 1: Tutorial and escape
Cloud and Barret infiltrate Mako Reactor 1, plant the bomb and escape while the facility collapses. This chapter teaches movement, targeting, guarding, Punisher Mode, ATB commands, character switching, Pressure and Stagger. Follow the objective marker through the reactor, use the available recovery point before the Scorpion Sentinel, and change tactics when the boss moves between the floor, walls and shielded phases. Tifa is not part of this mission, so the active party is Cloud and Barret. The chapter is complete after the Scorpion Sentinel is defeated and the evacuation sequence reaches its ending result.
1. Enter the reactor and learn Cloud’s basic combat loop
After the opening train sequence, follow Barret through the reactor approach. The route is linear at first, leading through security doors and the opening Shinra encounters. Use the early fights to practice Cloud’s default sword attacks, guarding and evasion. Holding Triangle changes Cloud between Operator Mode and Punisher Mode; Punisher Mode is slower but deals heavier melee damage and can counter certain close attacks while guarding.
When an ATB segment fills, open the command menu and use an ability such as Braver. Tactical Mode slows the battle while you choose a command and target. Do not spend every ATB charge immediately. Keeping one segment available for Cure or another defensive action will make the later boss preparation easier.
- Follow Barret through the first security areas.
- Use at least one ATB ability during the early fights.
- Practice changing between Operator Mode and Punisher Mode.
2. Advance through the reactor interior
Continue through the marked industrial route, using stairs, walkways and doors as they open. The enemies in this section include Shinra troops and other basic security units. Defeat the groups blocking the route, then continue toward the reactor core instead of searching for an alternate path. Obvious side rooms and nearby containers may contain optional supplies, but they are not required for chapter completion.
Use normal attacks to build ATB and spend commands against tougher targets. Guarding is safer than trying to evade every attack in narrow walkways. If Cloud takes moderate damage, wait for a safe moment to use Cure rather than allowing his HP to fall into the critical range.
- Keep following the objective marker toward the reactor core.
- Check nearby side paths for convenient supplies without delaying the main route.
- Preserve MP and healing items for the boss whenever possible.
3. Use Cloud and Barret together
Barret remains in the party during this mission, so switch between Cloud and Barret when the situation changes. Cloud is strongest against nearby grounded enemies. Barret can keep attacking while enemies are distant, positioned on higher ground or moving away from Cloud. Use Barret’s Overcharge when its command is available, then return to regular attacks while it recharges.
The chapter introduces Pressure and Stagger through the early combat encounters. Watch the enemy information display and use abilities that increase the Pressure gauge when an enemy is vulnerable. Once the Stagger gauge fills, the target is temporarily easier to damage. Rotate characters rather than waiting for one character’s ATB to refill while the other stands idle.
- Switch to Barret when a target is outside Cloud’s effective melee range.
- Use Overcharge when it is available during a safe opening.
- Observe how Pressure makes an enemy easier to Stagger.
4. Plant the bomb and begin the escape
At the reactor core, approach the marked target and interact with it to plant the bomb. The game presents a choice between countdown lengths. Choosing the longer countdown gives a first-time player more escape time and does not prevent chapter completion. After the cutscene, retrace the marked route through the reactor as the facility begins to fail.
Several encounters occur during the escape. Clear enemies that block the route, then move when the objective updates. Use Cloud’s Punisher Mode against nearby grounded targets and Barret’s ranged attacks when the battlefield spreads out. Keep at least one ATB charge available for Cure if either character is badly hurt.
- Interact with the marked reactor target.
- Choose the longer countdown if you want the safer first-run option.
- Continue through the opened escape route after each required encounter.
5. Prepare at the recovery point
Proceed until the game provides a recovery and saving opportunity before the Scorpion Sentinel encounter. Use it before entering the large arena. Check both characters’ equipment and Materia, and make sure Cure is equipped on at least one active character. If you have Lightning Materia available, equipping it gives you an additional way to exploit the boss’s weakness, although the fight can be completed with physical attacks and careful positioning.
This is the final preparation opportunity for Chapter 1. The Scorpion Sentinel changes its behavior as the battle progresses, so enter with enough HP and with ATB available for healing and abilities.
- Save or use the available recovery point before the arena.
- Confirm that Cloud or Barret has Cure equipped.
- Equip Lightning Materia if available and convenient.
- Keep ATB available for recovery at the start of the fight.
6. Defeat the Scorpion Sentinel
At close range, attack the Scorpion Sentinel from the side or rear when its attention is elsewhere. Guard or move away from heavy attacks instead of continuing a normal combo through them. When the boss raises its tail and begins preparing Tail Laser, move behind the large concrete debris in the arena. Stay in cover until the laser has passed, then resume attacking when the boss is exposed.
The Sentinel later moves onto the walls and fires missiles from a distance. Switch to Barret and continue dealing ranged damage while the boss is out of Cloud’s reach. Move between cover and open firing positions as the missile attacks end. When the boss returns to the floor, use Cloud for close attacks and switch back to Barret whenever the boss creates distance.
During the shielded portion, do not repeatedly attack into the protected front of the boss. Reposition and attack when an exposed angle is available. In the final portion, the Sentinel’s legs can be targeted. Focus attacks on the legs when they become available; damaging them can Pressure the boss and create a safer opening. Use abilities and Lightning attacks when the boss is vulnerable, then spend offensive ATB during Stagger. Heal before either character is close to being defeated, because reviving in the final phase costs time and resources.
- Use the arena debris to avoid Tail Laser.
- Switch to Barret during wall-mounted and distant phases.
- Avoid wasting attacks against the Sentinel’s protected front.
- Target the legs when they become available in the final phase.
- Spend offensive ATB during Stagger and reserve enough ATB for Cure.
7. Escape the collapsing reactor and confirm completion
After the Scorpion Sentinel is defeated, follow Barret through the evacuation route. The remaining section is mainly movement and short interactions. Use the marked doors, ladders and passageways, and keep moving when the facility begins collapsing. Areas behind the party may become inaccessible, so do not stop to search for optional supplies during the final escape.
If you are defeated by the boss, reload the recovery point before the arena and change your approach rather than grinding. The chapter does not require level grinding. A successful completion is confirmed when the evacuation sequence finishes, the chapter result appears and the game advances to Chapter 2.
- Reach the evacuation route after defeating the Scorpion Sentinel.
- Finish the collapsing-reactor sequence.
- Allow the chapter result to appear.
- Confirm that Chapter 2 becomes the next story chapter.
Before you move on
- The bomb is planted at the reactor core and the countdown sequence begins.
- The Scorpion Sentinel is defeated.
- Cloud and Barret reach the evacuation route.
- The chapter completion result appears.
- Chapter 2 becomes available as the next story chapter.
References for this chapter
Chapter 2 — Fateful Encounters: Sector 8 escape and the last train
Chapter 2 begins immediately after the reactor bombing and follows Cloud through the Sector 8 escape route. The chapter is mostly linear, with optional chests, early Materia pickups, Aerith’s first appearance, several Shinra pursuit battles, and the final fight against The Huntsman. There are no normal Sector 7 Slums sidequest chains here; those begin after Chapter 3 opens. Use the chapter to learn Materia setup, conserve ATB for Cure and Fire, attack shielded enemies from behind or with magic, and keep moving during the rooftop escape. The chapter ends when Cloud reaches the front of the train and speaks with Jessie.
1. Leave the reactor escape route
Chapter 2 starts in the tunnel immediately after Chapter 1. Follow Barret, Jessie, and Biggs through the passage. Squeeze past the collapsed section and continue along the marked route. At the turn after ducking under the rubble, open the chest for two Potions if you want extra recovery items.
Continue through the door Jessie opens. Follow the group toward Sector 8 rather than searching for a side path. The game remains linear during this opening stretch. A chest on the route contains an Ether, and another early chest near the Sector 8 streets can provide additional basic supplies. Pick them up if you want to enter the later battles with more recovery options.
- Reach Sector 8 with the Avalanche group.
- Collect the two Potions in the opening tunnel chest.
- Collect the early Ether if desired.
2. Receive Healing Materia and complete the equipment tutorial
After the group reaches the Sector 8 Business District, follow the stairs and objective marker until Jessie gives Cloud Healing Materia. Complete the tutorial for placing Materia, then equip Healing Materia in Cloud’s weapon or armor slot. Cure is available from the Command Menu when Cloud has enough ATB and MP.
This is the chapter’s main equipment checkpoint. Open the Materia menu and verify that Healing Materia is actually equipped before proceeding. If Cloud has taken damage, heal between encounters rather than carrying low HP into the pursuit sequence. You do not need to buy equipment or begin sidequests here; Chapter 2 has no normal Sector 7 Slums quest hub.
- Accept Healing Materia from Jessie.
- Equip Healing Materia before leaving the tutorial area.
- Confirm that Cure is available in the Command Menu.
3. Cross Sector 8 and meet Aerith
Continue through the Business District and climb the stairs when Jessie calls from above. A chest near this route contains three Grenades. Proceed along the marked streets until the story sequence introduces Aerith. The dialogue choice during this meeting does not block the main campaign, and Aerith gives Cloud a yellow flower during the encounter.
After the scene, Shinra forces begin closing in. Follow the objective marker through the streets. When a group blocks the route, eliminate the enemies in front of you rather than trying to force Cloud through them. The early pursuit fights introduce Security Officers, Grenadiers, and Guard Dogs. Defeat Grenadiers quickly because their explosives can interrupt Cloud while he is building ATB.
- Collect the three Grenades near Jessie if desired.
- Complete Aerith’s first story encounter.
- Prioritize Grenadiers during the first pursuit fights.
4. Collect the optional street Materia and equipment
During the pursuit, the route opens into several short side sections. Defeat the enemies blocking the eastern path, including Security Officers and a Guard Dog, then collect the purple HP Up Materia nearby. This pickup is optional for story completion but useful because it increases Cloud’s maximum HP when equipped.
Continue through the alley shown during the preceding scene and open the nearby chest for a Hi-Potion. Return to the marked route and defeat the next group, then collect the Deadly Dodge Materia from the nearby purple orb. Deadly Dodge changes Cloud’s dodge attack and is optional, but it can help against groups when you need to keep moving.
Proceed to the eastern street and defeat the Security Officer and Guard Dogs. A chest at the end contains Power Wristguards. Equip them if you want a straightforward physical-strength increase for Cloud. Continue south toward the fountain and prepare for several consecutive groups.
- Collect HP Up Materia if desired.
- Open the alley chest for the Hi-Potion.
- Collect Deadly Dodge Materia if desired.
- Open the eastern street chest for Power Wristguards.
5. Survive the fountain battle and reach the rooftops
At the fountain, the game sends several groups against Cloud in succession. The enemies include Security Officers, Guard Dogs, and Shock Troopers. Keep moving around the open area so ranged attacks do not pin Cloud in place. Use normal attacks to build ATB, then spend ATB on Triple Slash or Fire when several enemies are grouped. Heal before leaving the area if Cloud’s HP is low.
Once the route is blocked, look for the marked ladder and open the nearby chest for two Grenades before climbing. On the rooftops, do not stop to fight every pursuing soldier. Keep following the path, cross the exposed sections, and descend the ladder when the route turns back toward street level. The rooftop sequence is an escape route, not a stealth challenge with a special required action.
- Defeat the fountain-area enemy waves.
- Collect the two Grenades near the marked ladder if desired.
- Climb the rooftops and descend toward the next street section.
6. Handle shielded enemies and defeat The Huntsman
After descending from the rooftop route, open the chest near the ladder for an Iron Bangle. Equip it if it improves Cloud’s defense or provides a useful Materia slot, then continue down the remaining ladders. The next battles introduce Riot Troopers. Their shields block frontal sword attacks and can interrupt Cloud, so circle behind them or cast Fire when an ATB charge is available.
Continue along the road and defeat the additional Riot Troopers and Security Officers. An upper side route contains an Ether, and a short blocked section farther along contains a Hi-Potion. Both are optional. Before the final blockade, heal Cloud and keep at least one ATB charge available for Fire or Cure.
The Huntsman appears with additional Shinra troops, including a Riot Trooper and Security Officers. Remove the supporting enemies first, especially any Grenadiers or enemies attacking from range. The Huntsman uses a large shield and should not be attacked repeatedly from the front. Circle behind him, guard his close-range attacks, and cast Fire to pressure him. When he is pressured, use Cloud’s strongest available physical abilities to build stagger. If Cloud is hurt, disengage and cast Cure instead of spending the last ATB charge on damage.
If the fight goes badly, reload the checkpoint and repeat it with a simpler priority: ranged attackers first, then the regular Riot Trooper, then The Huntsman. Do not spend every ATB charge on sword abilities before the boss arrives.
- Equip or inspect the Iron Bangle after the rooftop descent.
- Use Fire or rear attacks against Riot Troopers.
- Defeat the supporting troops before focusing on The Huntsman.
- Pressure The Huntsman with Fire and punish his openings.
7. Board the train and finish Chapter 2
After The Huntsman is defeated, follow the route out of Sector 8 and board the train. Walk toward the front of the train through the passenger cars. After squeezing past the crates, turn around and check the nearby chest for 100 Gil.
You may speak with the Avalanche members in the passenger car. These conversations are optional and do not affect the required chapter outcome. Continue toward the front, watch the scene with Barret, and then speak with Jessie. That conversation completes Chapter 2 and begins Chapter 3, Home Sweet Slum.
- Board the train after defeating The Huntsman.
- Collect the 100 Gil chest if desired.
- Reach the front passenger car.
- Speak with Jessie to complete Chapter 2.
Before you move on
- The Huntsman has been defeated.
- Cloud has boarded the train and reached the front passenger car.
- Cloud has spoken with Jessie.
- The game has transitioned to Chapter 3, Home Sweet Slum.
References for this chapter
Chapter 3 — Home Sweet Slum: Sector 7 setup, sidequests and the Jessie job
Chapter 3 takes place in the Sector 7 Slums, not Wall Market. Cloud settles into Stargazer Heights, helps Tifa collect water-filter payments, clears Scrap Boulevard, and unlocks the chapter’s six Odd Jobs. Complete the optional work before the story’s point of no return, then rescue Johnny, return to Seventh Heaven, defeat the Hoodlums and accept Jessie’s assignment. Completing all six Odd Jobs also unlocks the “Alone at Last” discovery, which lets you choose Tifa’s Chapter 9 dress. Wall Market, its vendors, minigames and the other dress selections belong to Chapter 9.
1. Reach Seventh Heaven and settle into Stargazer Heights
From Sector 7 Undercity Station, follow the objective marker through the slums to Seventh Heaven. Enter the bar, speak with Tifa and Barret, then interact with Marlene when the story prompts you. Before leaving, use the jukebox inside Seventh Heaven to obtain the “Tifa’s Theme” music disc.
Follow Tifa to Stargazer Heights and enter Cloud’s room. After the nighttime scene, leave the apartment and interact with the neighboring room’s door to complete the “Noisy Neighbors” objective. Continue downstairs when the morning sequence begins.
- Collect “Tifa’s Theme” from the jukebox in Seventh Heaven.
- Complete the neighboring-door scene at Stargazer Heights.
2. Collect the water-filter payments and unlock Scrap Boulevard
Speak with Marle, then follow Tifa through the Residential Area to the Item Shop. After the shop conversation, return with Tifa to collect the next payment from Marle. Follow her to the Weapons Shop for the final payment, then accompany her upstairs to meet Biggs and Wedge.
Biggs introduces the weapon-upgrade system, and Tifa joins Cloud as a playable party member. Open the weapon menu and spend upgrade points if you want; no particular upgrade path is required for this chapter. Equip healing and offensive materia on both characters before entering Scrap Boulevard.
- Complete Biggs’s weapon-upgrade tutorial.
- Equip Cure or another healing option before entering Scrap Boulevard.
- Check Tifa’s materia after she joins the party.
3. Clear Scrap Boulevard and unlock the Odd Jobs
Descend the ladder and pass through the gate into Scrap Boulevard. Follow the marked route and defeat the Gorgers and Wererats. Ice materia is effective against the local creatures, but Cloud and Tifa’s physical abilities are enough if your materia supply is limited. Keep one ATB charge available for healing if either character takes heavy damage.
After clearing the required enemies, return through the gate and speak with the Weapons Vendor to receive Cloud’s Iron Blade and unlock his normal stock. Then talk to Wymer outside the building. This unlocks the Chapter 3 Odd Jobs and opens the sidequest area.
- Defeat the required Scrap Boulevard enemies.
- Receive the Iron Blade from the Weapons Vendor.
- Speak with Wymer to unlock the Odd Job board.
4. Complete the six Chapter 3 Odd Jobs before the cutoff
Speak with Chadley beside Wymer. He gives Cloud Assess materia and starts “Chadley’s Report”; assess two different enemy types, then return to Chadley. The other five Odd Jobs are “Rat Problem,” “Nuisance in the Factory,” “Lost Friends,” “On the Prowl” and “Just Flew In from the Graveyard.” “On the Prowl” becomes available after “Rat Problem,” while “Just Flew In from the Graveyard” requires “Nuisance in the Factory.”
Completing at least one Odd Job is sufficient to advance the main story. Completing all six is recommended if you want the Chapter 3 reward and the Tifa dress-choice discovery later in the chapter. After all six are complete, follow the new “Alone at Last” discovery marker to Tifa’s room and answer her question about what would suit her. The choice affects Tifa’s Chapter 9 dress.
The sidequest window remains available through the Johnny sequence, but it closes when you proceed into Seventh Heaven after rescuing him. When the game warns that continuing will end the current free-roaming section, leave the area and finish every desired Odd Job before accepting the warning.
- Assess two enemy types and report back to Chadley.
- Complete “Rat Problem” before attempting “On the Prowl.”
- Complete “Nuisance in the Factory” before attempting “Just Flew In from the Graveyard.”
- Complete all six Odd Jobs if pursuing the Chapter 3 dress-choice discovery.
- Visit Tifa during “Alone at Last” and make the desired dress choice.
5. Obtain the Chapter 3 music disc and rescue Johnny
Before entering Seventh Heaven for the closing story sequence, check the area behind the bar. Follow the path to the small radio-playing location and speak with the nearby NPC to receive the “Hip Hop de Chocobo” music disc. This is separate from the “Tifa’s Theme” disc inside the bar.
When you are ready to continue, follow the main objective toward Seventh Heaven. A crowd near the bar triggers Johnny’s arrest scene. Follow Tifa through the checkpoint and side streets, then pass through the chain-link gates when the route opens. Defeat the Security Officers, Elite Security Officer and Guard Dog, then return with Tifa toward Seventh Heaven.
- Collect “Hip Hop de Chocobo” from the radio-playing NPC behind Seventh Heaven.
- Trigger Johnny’s arrest sequence.
- Defeat the security group and return to Seventh Heaven.
- Finish any remaining Odd Jobs before entering the bar after the rescue.
6. Complete the Hoodlums fight and accept Jessie’s assignment
Inside Seventh Heaven, the darts board is optional, but you can play a round if you want to work toward the darts trophy. Sit at the counter and choose to wait for Tifa to advance the scene. When the story directs you outside, follow the Hoodlums into the nearby lot and defeat all four.
The Hoodlums are vulnerable to Fire. Use Tactical Mode to cast Fire while blocking with Cloud or Tifa, and concentrate on one target at a time rather than spreading damage. Their late-fight behavior can make staggering less reliable, so avoid wasting every ATB charge on melee abilities. After the fight, return to Stargazer Heights and speak with Jessie.
Jessie gives Cloud Ifrit materia and waits for confirmation that he is ready. Restock or adjust equipment first if needed, then select the option to proceed. The transition into Chapter 4 begins after this decision.
- Complete the Seventh Heaven story scene.
- Defeat all four Hoodlums, using Fire when available.
- Return to Stargazer Heights and receive Ifrit materia from Jessie.
- Confirm that you are ready to begin Jessie’s assignment.
Before you move on
- The Chapter 3 Odd Jobs you wanted are marked complete, with all six finished if pursuing the Tifa dress-choice discovery.
- Cloud has received the Iron Blade, Assess materia and Ifrit materia.
- The Hoodlums have been defeated and Jessie has been spoken to at Stargazer Heights.
- After selecting that Cloud is ready, the game transitions to Chapter 4: Mad Dash.
References for this chapter
Chapter 4 — Mad Dash: Jessie’s Job and the Sector 7 Return
Chapter 4 starts in the Corkscrew Tunnel after Chapter 3. Complete the motorcycle chase, defeat Roche, accompany Jessie to the upper Sector 7 Employee Housing Area, and retrieve the Shinra ID card from her parents’ home. In the Sector 7-6 Annex, optional supplies and Sentry Ray training fights are available before the story route continues to the Sector 7 Plate Edge. Pick up the Revival Materia, return to the slums, receive Barrier Materia from Jessie, then sleep at Cloud’s apartment. The next morning, fight through the Mysterious Specters and defeat the Enigmatic Specter. After the battle, collect the story rewards, leave the building, and speak with Barret at the train. Confirm that you are ready to depart to complete the chapter.
1. Finish the Corkscrew Tunnel motorcycle sequence
Chapter 4 opens with Cloud riding through the Corkscrew Tunnel alongside Jessie, Biggs and Wedge. Follow the marked roadway and attack pursuing Shinra units while keeping enough attention on the track to avoid barriers, wreckage and other obstacles. Destroying every minor enemy is not necessary; reaching the end safely is the priority.
The chase ends with Roche. His ranged sword waves can be guarded or avoided by moving across the roadway. When he accelerates ahead or creates distance, use R2 to close in. Guard with R1 when an attack is difficult to evade without colliding with the tunnel walls or debris. Roche also uses attacks that spread across the road, so move away from the affected area rather than staying directly behind him. Use Cloud’s special attack when its gauge is available, but do not sacrifice positioning just to attack during every opening.
The sequence ends after Roche’s health is depleted. The result of the motorcycle section affects the optional praise scene with Jessie, but it does not prevent completion of the chapter.
- Watch the road as closely as the enemy positions.
- Use R1 to guard dangerous attacks and R2 to close distance when Roche pulls away.
- Defeat Roche to end the motorcycle sequence.
2. Search Jessie’s parents’ home
After the chase, climb into the upper Sector 7 Employee Housing Area and follow Jessie, Biggs and Wedge. When the group reaches Jessie’s parents’ home, wait for the objective to update and circle around to the rear entrance.
Enter the room on the right and examine the suit hanging near Jessie’s father. Take the Shinra ID card from its pocket. This is the item required for the next part of the infiltration; it is not a yellow outfit. Leave through the rear exit and rejoin the others outside.
Continue following Jessie through the housing area. The route is controlled by story objectives, so remain with the group when the game asks Cloud to wait rather than searching for an alternate route.
- Enter Jessie’s parents’ home through the rear entrance.
- Inspect the suit in the room and take the Shinra ID card.
- Return outside and follow the Avalanche members.
3. Enter the Sector 7-6 Annex
Follow Biggs and Wedge toward the security building and the Sector 7-6 Annex. Before speaking with Biggs to advance the operation, search the nearby side area. A chest contains two Hi-Potions, and a lower training area contains optional Sentry Ray encounters. These fights are not required for story progress, but they provide combat practice and a chance to test Lightning against mechanical enemies.
When you are ready, speak with Biggs. After Jessie sends the signal, pass through the opened gate and fight through the annex. Shinra security troops and machines appear in confined spaces, so avoid standing in the middle of grenade blasts or turret fire. Use Fire against human opponents when their weakness is available through your current setup, and use Lightning against Sentry Rays and other machinery. Tactical Mode is useful for selecting targets before committing an ATB command.
Advance through the annex after the fights. The vending machine and rest point are useful places to restore and adjust Cloud’s equipment before continuing, but the optional training area does not need to be cleared.
- Open the chest containing two Hi-Potions if you want the supplies.
- Treat the Sentry Ray training area as optional.
- Use the vending machine and rest point before leaving the annex.
4. Reach the Sector 7 Plate Edge
Continue through the marked annex route with Biggs, Wedge and Jessie. The path crosses fences, narrow walkways and short combat areas. If enemies surround Cloud, move toward an open section before using Punisher Mode or an ATB ability; fighting in the center of a narrow group makes grenade and turret damage harder to avoid.
After the rendezvous sequence, follow Jessie through the connecting passage toward the Sector 7 Plate Edge. When you pass through the doorway and reach the stairs, check the left side for a Revival Materia on the ground. Pick it up before descending. It is optional for immediate story progress but remains useful for later battles.
Continue down the stairs and follow Jessie to the end of the plate-edge route. A scene there advances the story and sends Cloud back toward the Sector 7 Slums.
- Look on the left side of the plate-edge route for Revival Materia.
- Separate enemies from the group before spending ATB in a confined area.
- Follow Jessie to trigger the plate-edge scene.
5. Return to the slums and receive Barrier Materia
After returning to the Sector 7 Slums, follow Wedge through the Residential Area toward his home. Continue to Jessie's house when the objective directs you there. Interact with the marked door to trigger the conversation and receive Barrier Materia from Jessie. The dialogue choice that follows changes the conversation but does not block chapter completion.
After the scene, speak with the nearby Avalanche members as the objectives require. When Cloud returns to his apartment, interact with the bed and choose to sleep until tomorrow. This begins the chapter’s final story section. Equip Barrier or Revival Materia if you have open slots, but keep at least one reliable healing option available for the Specter battle.
- Visit Jessie’s marked door and collect Barrier Materia.
- Complete the required conversations around the residential area.
- Choose Sleep until tomorrow at Cloud’s bed.
6. Defeat the Specters and end the chapter
When Cloud leaves the apartment the next morning, Mysterious Specters attack. Fight through the first encounters and follow the objective down the slum route. The Specters move unpredictably and can make ordinary sword attacks miss, so switch between Operator Mode for mobility and Punisher Mode when a Specter commits to close range. Do not spend every ATB charge immediately; preserve enough for Cure or another emergency response.
Continue through the successive Specter encounters. Tifa joins Cloud after the initial encounters, giving the party another close-range fighter. In the final battle, three Mysterious Specters accompany an Enigmatic Specter. The smaller Specters can reappear, so do not waste the entire fight trying to permanently eliminate every minor target. Control the battlefield, clear immediate threats when they surround the party, and use Cloud and Tifa’s abilities on the Enigmatic Specter whenever it becomes vulnerable.
After the battle and following scenes, Barret gives Cloud 500 Gil. If Cloud finished Chapter 3’s darts leaderboard in first place, Wedge also provides Luck Up Materia. Leave the building, follow the objective to the train station, and speak with Barret. Choose that you are ready to go. The departure sequence begins and confirms that Chapter 4 is complete.
- Keep ATB available for healing during the Specter encounters.
- Defeat the Enigmatic Specter while managing the respawning Mysterious Specters.
- Collect the 500 Gil and any conditional Luck Up Materia reward.
- Speak with Barret at the train and confirm readiness to depart.
Before you move on
- Roche has been defeated in the Corkscrew Tunnel motorcycle sequence.
- The Shinra ID card has been taken from the suit in Jessie’s parents’ home.
- The party has passed through the Sector 7-6 Annex and reached the Sector 7 Plate Edge.
- Revival Materia has been collected if the optional pickup is desired.
- Jessie has awarded Barrier Materia at her house.
- The Mysterious Specters and Enigmatic Specter have been defeated.
- Barret has given Cloud 500 Gil, with Luck Up Materia also received if the Chapter 3 darts condition was met.
- Cloud has spoken with Barret at the train and confirmed that he is ready to depart.
Chapter 5 — Dogged Pursuit
Chapter 5 starts aboard the train bound for Sector 4 and continues through the Corkscrew Tunnel, rail yard, and service route toward Mako Reactor 5. Collect the Healing Materia on the train, use the rest areas to restore HP and MP, and check the optional side room containing Lightning Materia and Music Disc 28, Stamp. The chapter’s boss is the Crab Warden, not the Airbuster. Prepare before the final rest area, then cripple the Warden’s legs, avoid its electrified rails, and use Lightning attacks and stagger windows to expose its Generator. After the boss, follow the short route to the elevator to finish the chapter and begin Chapter 6, Light the Way.
1. Search the train and escape the Slug-Rays
After the opening scenes, walk toward the front of the train and speak with Tifa. Enter the next car to trigger the conversation with Barret, then inspect the seat nearby to collect the Healing Materia before returning to Tifa’s car.
The emergency scan leads to a fight with Slug-Rays. In the confined train cars, Cloud’s Punisher Mode is effective when the drones are close, while Barret’s ranged attacks are useful when they remain out of sword range. After the first group, another group enters from behind. Defeat them, then follow the objective out of the train.
Once outside, defeat the remaining Slug-Rays in the tunnel. A rest spot and vending machine are available nearby. Use them if the party has taken damage, then follow the objective marker toward Barret.
- Collect the Healing Materia before leaving the train.
- Use the first rest spot if HP or MP is low.
- Keep Healing Materia equipped on a character you can access reliably.
2. Rejoin Barret in the Corkscrew Tunnel
Continue through the tunnel and inspect the small right-side offshoot for Shinra boxes and a chest. Proceed to the raised walkway and collect the chest containing two Hi-Potions before continuing toward the next encounters.
The route adds Security Officers to the Slug-Rays. Defeat the ground troops while using Barret to pressure drones that remain airborne. When the path leads up the stairs, cross the raised section to reunite with Barret, then fight the Slug-Rays and Grenadiers near the junction. Eliminate Grenadiers early so their explosives do not force you away from the objective.
After regrouping, follow the Stamp graffiti and the objective marker. Side rooms and upper walkways contain chests and Shinra boxes, including an Ether, a Star Pendant, and Antidotes in the tunnel sections. These items are optional, but the route is easier to follow if you check the map whenever the tunnel forks.
- Take the two Hi-Potions from the raised-platform chest.
- Use Barret against airborne enemies.
- Clear Grenadiers before they can keep the party under explosive pressure.
3. Pass the webbed passages and Queen Grashtrike
Continue through the tunnel and climb the stairs indicated by the objective. Fight the Wererats and Grashtrikes, then proceed through the web-blocked passages. Switch characters when a Grashtrike surrounds one fighter, and avoid allowing the Queen Grashtrike’s web attack to bind the party.
The Queen Grashtrike encounter is followed by a rest area and vending machine. Restore HP and MP before moving on. The vending machine can also provide additional supplies and materia, including Poison and Cleansing Materia if you want to expand your status-effect options.
The next battle contains Security Officers and a Flametrooper. Stay out of the Flametrooper’s direct fire, attack from an angle, and use Barret when the machine is awkwardly positioned. After the fight, break nearby Shinra boxes, open the green gate, and return to the tracks.
- Avoid the Queen Grashtrike’s binding webs.
- Rest after the Queen Grashtrike fight.
- Do not stand directly in front of the Flametrooper while attacking.
4. Cross the rail yard and take the service route
Follow Barret and Tifa through the rail yard. A battle against two Flametroopers and two Sentry Launchers follows. Focus on the Sentry Launchers first when their missiles are creating pressure, and use abilities or spells rather than relying only on basic attacks.
Climb the stairs and pass through the connected rooms. The main route eventually reaches two Elite Security Officers. Before fighting them, enter the optional side room shown on the map. It contains a vending machine, rest spot, Lightning Materia, and Music Disc 28, Stamp. Collect the materia and disc if desired, then rest before continuing.
Defeat the Elite Security Officers, climb down the ladder, and clear the nearby Shinra boxes. Follow the Stamp graffiti at the end of the route to trigger the Crab Warden encounter. There is no need to search for another bench after entering the boss arena, so complete your preparation in the side room first.
- Defeat the two Sentry Launchers and two Flametroopers.
- Collect Lightning Materia and Music Disc 28 if desired.
- Rest at the final pre-boss rest spot and confirm Healing and Lightning Materia are equipped.
5. Defeat the Crab Warden
The Crab Warden is weak to Lightning. Begin by targeting its legs rather than repeatedly attacking the main body. Crippling the legs substantially increases the stagger gauge. Use Thunder when you have a safe opening, and attack from the side or rear when possible so the boss’s forward guns are less likely to catch you.
When the Warden summons Slug-Rays, defeat them if they are interrupting healing or making it unsafe to approach the boss. Continue crippling the legs, then use the stagger window to attack the exposed Generator at the front. Save enough ATB for Cure if the party is taking sustained damage.
The Warden uses missiles, flamethrower attacks, and Wildfire. Move away from fire pools and use the crates and debris as cover against missile barrages. When the rails begin to glow and charge with electricity, move between the rails rather than standing on the electrified tracks.
After the legs are disabled, the Auxiliary Weapons become available. Cripple an Auxiliary Weapon and continue attacking the boss. During the final phase, the Pilot can become targetable after the Warden is staggered or an Auxiliary Weapon is disabled. Destroying the Pilot exposes the Generator again. Continue using Lightning attacks and physical abilities on the Generator until the Crab Warden is defeated. A summon can be used once available, but it is optional.
- Cripple the Crab Warden’s legs to build stagger.
- Clear Slug-Rays when they disrupt the fight.
- Avoid the glowing electrified rails.
- Attack the Generator during stagger windows.
- Target the Auxiliary Weapons and Pilot when they become available.
6. Finish the chapter and confirm the transition
After the Crab Warden is defeated, a cutscene plays and Tifa’s Metal Knuckles are obtained as the chapter reward. Follow the linear route beyond the arena, squeeze through the narrow passage, descend the ladder, and continue to the elevator.
Activate the elevator and ride it to complete Chapter 5. The game awards the Plan E trophy for completing the chapter and begins Chapter 6, Light the Way. The post-boss path is short and does not contain another rest area or optional exploration section, so there is no need to conserve resources after the Crab Warden is defeated.
- Receive Tifa’s Metal Knuckles.
- Reach and activate the elevator.
- Confirm the Plan E trophy or the Chapter 6 transition.
- Verify that Chapter 6, Light the Way, has started.
Before you move on
- The train escape and Corkscrew Tunnel objectives are complete.
- The party has passed the rail yard and reached the service route.
- Lightning Materia and Music Disc 28 have been collected if desired.
- The Crab Warden has been defeated by progressing through its leg, Auxiliary Weapon, Pilot, and Generator mechanics.
- Tifa’s Metal Knuckles have been received.
- The elevator has been activated and Chapter 6, Light the Way, has begun.
References for this chapter
- Final Fantasy VII Remake Intergrade — Chapter 5: Dogged Pursuit Guide and Walkthrough, GameFAQs
- Final Fantasy VII Remake Chapter 5: Dogged Pursuit Walkthrough, PowerPyx
- Final Fantasy VII Remake Intergrade Chapter 5 Guide, GameFAQs
- Final Fantasy VII Remake Intergrade arrives on PS5 June 10, 2021
- FINAL FANTASY VII REMAKE INTERGRADE — Available Now, Square Enix
Chapter 6 — Light the Way: Sunlamps, cargo platforms and optional materia
Chapter 6 takes Cloud, Barret and Tifa through the Sector 4 Plate Interior. Restore power by shutting down three sunlamps, operate the cargo platforms and catwalks, and follow the route to the Interplate Utility Access. The chapter has no boss fight; Airbuster is fought in Chapter 7. Two useful optional pickups, MP Up Materia and Elemental Materia, are in the Sun Lamp 3 section and require careful catwalk positioning. A separate timed detour can also reward Chocobo & Moogle Materia. Check the map at every platform junction, rest at benches before extended fights, and do not leave the final lamp area until you have collected the optional items you want.
1. Enter the Plate Interior and reach the first sunlamp
After the opening scene, follow Barret and Tifa through the maintenance passageways. Climb down the ladders, cross the metal walkways and proceed through the control-room area. When a route divides between upper and lower platforms, use the map rather than trying to force a blocked catwalk. The objective path eventually leads into Section G and then toward the first sunlamp.
The early enemies include Grashtrikes, Sentry Rays and turrets. Grashtrikes can burrow, so avoid spending every ATB charge before they reappear. Barret can safely pressure enemies across gaps, while Cloud or Tifa can finish exposed targets at close range. Rest at the first bench before continuing into the sunlamp machinery.
- Follow the maintenance route into Section G.
- Use the map when ladders and platforms create multiple levels.
- Rest at the bench before the first sunlamp area.
2. Disable the first sunlamp and restore local power
From the bench, follow the walkway toward the first sunlamp. The route passes disabled machinery and several enemy groups. Defeat the Grashtrikes and turrets, then circle around the lamp structure to reach its control panel. Interact with the panel to shut down the first sunlamp.
Switching off the lamp restores power to parts of the surrounding maintenance area, but it also activates machinery and turrets that were previously dormant. Move carefully after the cutscene and clear the newly active enemies before operating the nearby cargo-platform controls. The cargo platform is part of the required route, so return to it after the lamp has been disabled instead of searching for a hidden passage.
- Reach the first sunlamp control panel.
- Turn off the first sunlamp.
- Defeat or pass the machinery activated when power returns.
- Use the newly powered cargo platform.
3. Complete the timed fan-room detour if you want Chocobo & Moogle Materia
After the first lamp is disabled, use the powered platform and follow the route toward the side machinery. Look for the console that starts the timed security-room challenge. Activate it, enter the adjoining room and defeat the enemies before the timer expires. Once the second console is available, interact with it to remove the time lock and open the way into the ventilation-fan room.
Enter the fan room and collect Chocobo & Moogle Materia. This is optional and is not required to finish Chapter 6, but it is the chapter’s notable summon pickup and is tied to the Cleanup Crew trophy. If the timer expires, retry the sequence from the nearby area. Continue through the main route after collecting the materia.
- Find the timed security-room console.
- Defeat the enemies before the time lock closes.
- Use the second console to open the fan-room route.
- Collect Chocobo & Moogle Materia if desired.
4. Reach the second and third sunlamps
Return to the main platform and use the available lifts and catwalks to continue through Sections G and H. Some walkways are initially misaligned or unpowered. When a console controls a movable catwalk, use it to place the walkway at the next platform, then cross and continue toward the next lamp. Barret is useful against turrets and Sentry Gun Prototypes positioned across gaps, while Cloud and Tifa can handle enemies that reach the platform.
At each lamp, follow the surrounding path to the control panel and shut it down. The second lamp opens more of the maintenance structure. Continue using the newly powered platforms until you reach the Sun Lamp 3 section. Rest at any bench before the longer sequence there, because the route includes Queen Grashtrikes, Terpsicolts and additional ranged enemies.
- Use the powered lifts and movable catwalks to advance.
- Disable the second sunlamp.
- Reach the Sun Lamp 3 area.
- Rest at the nearby bench before the final lamp sequence.
5. Collect MP Up and Elemental Materia in the Sun Lamp 3 area
In the Sun Lamp 3 section, use the console-controlled catwalk to reach the lower platform. Before lining it up as a bridge, lower the catwalk to its lowest position. This lets you climb onto its frame and collect the MP Up Materia. If you align the catwalk too early, you can operate the console again and lower it before crossing.
After collecting MP Up, reposition the catwalk so it forms the route to the opposite platform. Cross it, follow the path around the structure and collect Elemental Materia. These pickups are optional for story progress, but the catwalk arrangement is important: MP Up requires the lowered position, while Elemental Materia requires the aligned crossing route. Search this section before leaving because these items are not obtained by simply following the objective marker.
Use Elemental Materia in a linked weapon or armor slot when you have a suitable elemental materia to pair with it. In a weapon, the pairing adds elemental damage; in armor, it provides elemental resistance. The effect depends on the linked slot and the element used.
- Lower the catwalk fully and collect MP Up Materia.
- Realign the catwalk to cross to the opposite platform.
- Collect Elemental Materia.
- Do not leave the Sun Lamp 3 area until you have checked the optional routes.
6. Turn off the final lamp and finish at the Interplate Utility Access
After the optional pickups, return to the upper route and use the final movable platform to reach the third sunlamp. Clear the Terpsicolts and turrets around the lamp, then use the control panel to shut it down. Search nearby side paths for any chest or item you want before returning to the main cargo route.
Follow the objective back toward the cargo platform and ride it to the next section. Continue through the final maintenance corridors until you reach the Interplate Utility Access and meet Biggs. The story sequence there awards Barret the Light Machine Gun and provides additional supplies before the chapter transition. Chapter 6 ends after this sequence; the Airbuster preparations and battle begin in Chapter 7.
- Disable the third sunlamp.
- Return to the main cargo-platform route.
- Reach the Interplate Utility Access.
- Complete the scene with Biggs and receive the Light Machine Gun.
- Continue into Chapter 7.
Before you move on
- All three sunlamps have been disabled.
- The party has reached the Interplate Utility Access and completed the Biggs scene.
- Chapter 7 has started, leading into the Airbuster preparation sequence.
- MP Up Materia and Elemental Materia have been collected if optional chapter pickups are being completed.
- Chocobo & Moogle Materia has been collected if the timed fan-room detour and Cleanup Crew trophy are desired.
References for this chapter
Chapter 7 — A Trap Is Sprung: Disable Airbuster and escape Reactor 5
Chapter 7 takes place inside Mako Reactor 5 and ends with the Airbuster battle. Follow the reactor route through the assembly plant, collect the six available keycards, and use them at the terminals to divert Airbuster components. The opening terminal uses the first keycard on an M Unit; subsequent cards let you remove AI Programming Cores, Big Bomber shells, or additional M Units. AI Programming Cores reduce Airbuster’s movement and stun pressure, Big Bomber shells limit its powerful explosives, and M Units provide random recovery items through Waste Disposal without weakening the boss. Complete the optional synchronized-lock challenge to enter Waste Disposal and collect diverted items plus Magic Up Materia, then restore HP and MP at the final bench. Airbuster is weak to Lightning. Split its attention by switching between Cloud, Tifa, and Barret, use cover and ranged attacks during its movement phases, destroy detached hands when safe, and preserve ATB for healing and revival. Defeat Airbuster and finish the escape sequence to advance to Chapter 8.
1. Descend from Mako Storage and clear the reactor interior
At the chapter start, follow the walkway through Mako Storage until you reach the large pipe leading downward. Jump over the railing onto the pipe and slide down. Check beneath the pipe for a chest containing 3 Hi-Potions, then return to the main route and continue down the ladders.
Proceed through the reactor interior and defeat the Monodrives, Slug-Rays, and Sweepers. Use Barret against enemies across gaps or at awkward elevations. Lightning magic is useful against the mechanical enemies, but conserve MP for healing and the Airbuster encounter.
Continue along the catwalks and ladders. On the lower route, check the side platform for a chest containing 2 Echo Mists, then search the far-right side of the next platform for an Ether. After the encounters involving Sweepers and Laser Cannons, descend again and check past the ladder for a chest containing a Bulletproof Vest. These items are optional; do not spend most of your healing supplies recovering minor damage just to collect them.
- Collect the 3 Hi-Potions beneath the pipe if you need extra recovery items.
- Check the lower platforms for 2 Echo Mists, an Ether, and the optional Bulletproof Vest.
- Keep healing Materia equipped on at least one active character.
2. Survive the ambush and enter the assembly plant
Follow the objective marker until the reactor trap is revealed. Continue through the next route and defeat the Elite Shock Trooper and two Shock Troopers. Cloud is effective at close range, while Barret can pressure enemies that retreat or remain outside sword range.
Leave through the door used by the Shock Troopers and enter the assembly plant. In the first Airbuster security area, defeat the guards and search the room for the first Sector 5 Reactor Keycard. Take it to the nearby terminal. The opening terminal requires this first card to divert an M Unit; this is the mandatory first disposal and does not weaken Airbuster’s attacks. The M Unit will later provide random recovery items if you open Waste Disposal.
- Defeat the Elite Shock Trooper and two Shock Troopers.
- Find the first Sector 5 Reactor Keycard in the opening assembly-plant area.
- Use the first card at the opening terminal to divert the required M Unit.
- Avoid spending most of your MP on ordinary enemies.
3. Collect the remaining keycards and choose Airbuster components
There are six obtainable keycards in the assembly-plant section. After the opening card, find the remaining cards in the B7 facilities, the connecting hallway, the B6 facilities, and the B5 facilities. Search room edges, ramps, tables, crates, and corners before activating the next door or leaving an area. The plant is mostly linear, but a card can be easy to overlook after a battle.
The later terminals let you divert three types of Airbuster component. AI Programming Cores reduce relevant movement and stun pressure, including the frequency of its Fingerbeam attacks. Big Bomber shells reduce the number of powerful explosive attacks available during the boss fight. M Units do not reduce Airbuster’s combat capability; they are valuable only because Waste Disposal turns them into random recovery items.
For a straightforward boss setup, spend the later cards on AI Programming Cores and Big Bomber shells rather than additional M Units. Removing AI Programming Cores reduces the frequency of dangerous stun sequences, while removing Big Bomber shells limits the damage Airbuster can deal after those attacks. If you prefer extra supplies, divert an additional M Unit, but this makes the boss no easier.
- Find all six keycards if you want the maximum number of disposal choices.
- After the mandatory opening M Unit, prioritize AI Programming Cores and Big Bomber shells for an easier fight.
- Use additional M Units only for their later recovery-item rewards.
- Search the connecting hallway and room corners before moving on.
4. Open Waste Disposal and recover the diverted components
Near the Front Gate, interact with the console to begin the synchronized lever challenge. Follow the displayed stick directions and match the timing with the other controls. Complete the initial sequence, then use the optional console and complete the additional synchronized sequences to unlock Waste Disposal. Failed inputs can be retried.
Enter Waste Disposal and activate the release switch. The recovered contents depend on your choices. Diverted Big Bomber shells and AI Programming Cores are returned as usable or sellable items, while each diverted M Unit provides a pair of random recovery items such as Hi-Potions, Ethers, or Phoenix Downs. Collect the Magic Up Materia at the far end of the room. Waste Disposal is optional and is not required to reach Airbuster.
- Complete the synchronized-lock challenge before leaving the security section.
- Activate the Waste Disposal release switch.
- Collect the recovered components and Magic Up Materia if pursuing the optional reward.
5. Prepare at the final bench
Follow the opened route toward the Front Gate and stop at the final bench. Restore HP and MP, adjust weapons and Materia, and use the vending machine if you need supplies. Equip Lightning Materia on at least one active character; more than one Lightning user is helpful if your available slots allow it.
Give Cloud, Tifa, or Barret reliable access to Cure. Keep a revival option available through Revival Materia or Phoenix Downs. Barret’s ranged attacks are important because Airbuster eventually moves away from the melee characters. Do not enter the boss route until healing, Lightning, and revival options are ready.
- Restore HP and MP at the final bench.
- Equip Lightning Materia.
- Confirm healing and revival options.
- Keep Barret ready for ranged attacks.
6. Defeat Airbuster and complete the escape
Airbuster is weak to Lightning. Use Thunder spells when you have ATB, but preserve at least one gauge for Cure, revival, or an emergency ability. Switch between Cloud, Tifa, and Barret to divide the boss’s attention. When Airbuster faces one character, attack with another from the side or behind, then switch when it turns.
During the opening phase, avoid the electric bombs it drops and do not stand directly behind the boss while its rear cannon is active. When Airbuster begins using Big Bomber and Tankbuster, leave the marked danger areas immediately. Block Tankbuster when escaping its path is impractical. The detached hands attack independently; destroy them when you have a safe opening, particularly when they are firing electrical attacks.
During the final phase, Airbuster uses its jetpacks and can move across or away from the arena. Barret should continue attacking while the boss is out of melee range. When Airbuster approaches, avoid its electrical punches and hand flames rather than standing directly in front of it. Use cover where available and attack during recovery windows.
Spend ATB and Limit Breaks during stagger windows, but do not sacrifice healing to maintain pressure. If the party is defeated, reload the checkpoint and adjust your equipment, especially if you left several AI Programming Cores or Big Bomber shells active. After Airbuster falls, allow the escape sequence and following cutscenes to finish; the game then advances toward Chapter 8, Budding Bodyguard.
- Use Lightning attacks to pressure Airbuster and build stagger.
- Switch characters to divide its attention and use Barret when the boss is out of melee range.
- Avoid electric bombs, Tankbuster, Big Bomber, and marked blast zones.
- Destroy detached hands when safe.
- Defeat Airbuster and finish the post-battle escape sequence.
Before you move on
- Airbuster has been defeated.
- The post-battle escape sequence and cutscenes have finished, and the game advances toward Chapter 8, Budding Bodyguard.
- If pursuing the optional discovery, Waste Disposal was opened, the diverted components were released, and Magic Up Materia was collected.
References for this chapter
- Chapter 7: A Trap is Sprung Story Guide & Walkthrough | Airbuster Keycard Choices and Locations | FF7 Remake
- Final Fantasy 7 Remake Walkthrough Chapter 7: A Trap Is Sprung
- Final Fantasy 7 (VII) Remake Chapter 7: A Trap Is Sprung Walkthrough
- A Trap is Sprung - Chapter 7 - Main Scenario | Final Fantasy VII Remake Intergrade
Chapter 8 — Budding Bodyguard: Sector 5 Slums side quests
After the main objective Escort the Children, Chapter 8 opens six optional odd jobs in the Sector 5 Slums. Complete them before following the children toward the town gate, because the slums’ side-quest window closes when the chapter advances. The safest order is The Mysterious Moogle Merchant, Kids on Patrol, A Verified Hero, Weapons on a Rampage, Paying Respects, and The Angel of the Slums. Buy the Graveyard Key from Moggie while the Moogle Emporium is open. Completing all six is optional for the ending but worthwhile for their rewards, Cloud’s Nail Bat, Protective Boots, the Studded Bracer, and the 2,000 Gil reward. It also counts toward Chapter 8’s optional dress outcome. Missed quests can be completed later through Chapter Select.
1. Finish Escort the Children, then prepare in the Sector 5 Slums
Continue the main story through the church, the backstreets, and Aerith’s house. Complete the flower-delivery sequence and follow the children during the main objective Escort the Children. Once the objective is complete and you are back in the Sector 5 Slums, the optional odd jobs become available.
Use the nearby bench before starting. Equip Cloud and Aerith with healing materia, and place Lightning materia on at least one character for the machine enemies later in the chapter. Aerith can safely attack from range, while Cloud should handle enemies that are pressured or staggered at close range. Do not begin the next main-story departure until the quest list has been checked.
- Complete the main objective Escort the Children.
- Reach the Sector 5 Slums Center District.
- Rest at the bench and review Cloud’s and Aerith’s materia.
- Leave the slums’ exit route untouched until the desired odd jobs are complete.
2. Open the Moogle Emporium and buy the Graveyard Key
Enter the Children’s Secret Hideout and speak with Moggie, the child dressed as a moogle. Buy the Moogle Membership Card for one Moogle Medal to complete The Mysterious Moogle Merchant and open the Moogle Emporium.
Before leaving the shop, buy the Graveyard Key for one Moogle Medal. It is required for Paying Respects. The shop also sells useful equipment and materia-related items, but do not spend the medal needed for the key unless you already obtained the key earlier. Buying it now prevents a return trip while the other Chapter 8 requests are active.
- Complete The Mysterious Moogle Merchant.
- Buy the Graveyard Key from Moggie.
- Check the Moogle Emporium for equipment or materia you can use immediately.
3. Complete Kids on Patrol and defeat the Hedgehog Pie King
Speak with Ms. Folia outside the Leaf House to begin Kids on Patrol. Find the five children carrying wooden swords. One is near the concrete pipes in the Center District, one is near the busy area by the Item Shop and Chadley, one stands outside the Weapons Shop, one is near the community-center area and jukebox, and the last is at the gate leading toward Station Way. Speak to each child, then return to Ms. Folia.
After the children report the Toad King, enter the Children’s Secret Hideout and go to the far end where the children were rescued during the main story. Fight the Hedgehog Pie King and two Hedgehog Pies. All three are weak to Ice. Blizzard spells quickly pressure them; eliminate the regular Hedgehog Pies first so their Bounce attacks do not repeatedly stun you, then focus on the King. Return to the Leaf House after the fight to receive Cloud’s Nail Bat.
- Find all five children.
- Defeat the Hedgehog Pie King and the two Hedgehog Pies.
- Return to Ms. Folia and receive the Nail Bat.
- Return to the hideout afterward to trigger the next available requests.
4. Complete A Verified Hero through Whack-a-Box
After Kids on Patrol, speak with Sarah in the Children’s Secret Hideout to start A Verified Hero. Enter Whack-a-Box and earn at least 10,000 points; simply starting the minigame is not enough to complete the quest.
Follow the box route rather than stopping to destroy every large box. Break red time-extension boxes whenever they are on your path. Use Triple Slash on groups of large boxes, and use blue boxes when they either refill ATB or block your route. The 10,000-point threshold completes the odd job. Higher scores provide better rewards, but they are optional for Chapter 8’s story progression.
- Start A Verified Hero after completing Kids on Patrol.
- Reach at least 10,000 points in Whack-a-Box.
- Collect the Elixir and any score-based rewards from Sarah.
5. Finish Weapons on a Rampage, then Paying Respects
Start Weapons on a Rampage by speaking with the troubled man in Station Way. Follow the marked route through the Sector 5 Slums and destroy every group of Shinra weapons in the request. Equip Lightning materia before the fights. Aerith can attack from outside the machines’ firing lanes while Cloud closes in after their attacks finish. Guard or move sideways when a machine lines up a frontal attack, and use Assess if you need to confirm the current target’s weakness.
Return to the quest giver after the final group. The reward is Protective Boots, and the game restores the party’s HP and MP. Paying Respects then becomes available from the old man near the Sector 5 Slums Weapon Shop. If you did not buy it earlier, purchase the Graveyard Key from Moggie for one Moogle Medal.
Take the key to the Slum Public Cemetery in Nuts ’n’ Bolts Hill. Defeat the three Venomantis inside; Ice spells are effective, and their poison and close-range attacks make Cure and guarding important. Return to the old man to complete Paying Respects and receive the Studded Bracer, along with an HP and MP restoration.
- Defeat every marked group for Weapons on a Rampage.
- Receive Protective Boots.
- Buy and use the Graveyard Key.
- Defeat all three Venomantis in the cemetery.
- Return to the old man and receive the Studded Bracer.
6. Complete The Angel of the Slums and verify the chapter window
After Kids on Patrol, return to the Children’s Secret Hideout and allow Oates to direct you toward The Angel of the Slums. Speak with Damon near the community-center area, then enter the community center and talk with Mireille. Follow the objective to Lookout Point in the northeast part of the Sector 5 Slums.
Fight Chromogger at Lookout Point. Equip Lightning materia on Cloud and Aerith if possible. Target the wrecking-ball arm rather than repeatedly striking the main body; damaging that arm is the reliable way to pressure and stagger the machine. Move away from the fog attack and dodge its heavy frontal swings. Once Chromogger falls, pick up the Calling Card at the nearby desk and return to Damon. Mireille then provides the 2,000 Gil quest reward.
Open the quest list before resuming the main route. The six completed requests should be The Mysterious Moogle Merchant, Kids on Patrol, A Verified Hero, Weapons on a Rampage, Paying Respects, and The Angel of the Slums. Save, spend remaining Moogle Medals, and only then follow the children toward the Sector 5 exit.
- Complete The Angel of the Slums and collect the Calling Card.
- Receive the 2,000 Gil reward.
- Confirm all six Chapter 8 odd jobs are marked complete.
- Save before beginning the departure from the Sector 5 Slums.
Before you move on
- The quest list shows The Mysterious Moogle Merchant, Kids on Patrol, A Verified Hero, Weapons on a Rampage, Paying Respects, and The Angel of the Slums as complete.
- Cloud has received the Nail Bat.
- Cloud has received Protective Boots and the Studded Bracer.
- The Calling Card has been collected after the Chromogger fight and the 2,000 Gil reward has been received.
- The Graveyard Key was purchased and the three Venomantis in the Slum Public Cemetery were defeated.
- A save exists before the party leaves the Sector 5 Slums for the next main-story sequence.
References for this chapter
- FINAL FANTASY VII REMAKE INTERGRADE — PlayStation official page
- Chapter 8 Side Quests: Odd Jobs — Game8
- Kids on Patrol Walkthrough — PowerPyx
- A Verified Hero Walkthrough — PowerPyx
- The Angel of the Slums Walkthrough — PowerPyx
- Paying Respects Walkthrough — PowerPyx
- The Mysterious Moogle Merchant Walkthrough — PowerPyx
Chapter 9 — The Town That Never Sleeps: Don Corneo infiltration and consequences
Travel through the Collapsed Expressway to Wall Market with Aerith, investigate Don Corneo’s mansion and complete the preparation sequence involving Chocobo Sam, Andrea Rhodea and Madam M. Your choices influence whether Sam’s or Madam M’s odd jobs appear and determine Cloud’s Wall Market dress, while earlier chapter progress determines Tifa’s and Aerith’s dresses. After winning the Corneo Colosseum tournament and defeating Hell House, return to Wall Market to complete the available odd jobs before entering Corneo’s mansion. Find Tifa, survive Corneo’s selection scene and finish the chapter when the party is dropped into the Sector 6 Sewers. Abzu is the opening boss of Chapter 10, not part of this chapter.
1. Cross the Collapsed Expressway and enter Wall Market
Follow Aerith through the Sector 6 Slums and Collapsed Expressway. Continue along the marked route, use the robot-arm controls when the path requires Aerith to cross, and search side alcoves only if you want the optional items. The objective eventually leads to Wall Market.
Once inside Wall Market, activate the nearby bench and inspect the weapon shop, materia shop, inn and other vendors. You may collect music discs, attempt the Wall Market gym’s squat challenge and speak with NPCs before advancing. These activities are optional and do not determine whether the main story can be completed.
- Reach Wall Market through the Collapsed Expressway.
- Use the first Wall Market bench before spending gil or entering the mansion sequence.
- Buy or equip Cure and the elemental materia you plan to use later.
2. Investigate Corneo’s mansion and contact the three helpers
Go to Don Corneo’s mansion at the north end of Wall Market. The guards refuse Cloud and Aerith entry, and the objective changes to finding assistance. Follow the markers to Chocobo Sam, Andrea Rhodea at the Honeybee Inn and Madam M.
Chocobo Sam’s coin toss is fixed rather than a genuine heads-or-tails gamble. Your response contributes to the route calculation, but it does not create a normal win or loss. At the Honeybee Inn, complete Andrea’s dance sequence. The performance is required once you enter it, but its score does not block the story.
After the three contacts have been visited, return to Madam M when the objective directs you. The choices made during these encounters, including the coin-toss response and other Wall Market interactions, help determine which odd-job route appears later.
- Visit Chocobo Sam.
- Complete Andrea Rhodea’s Honeybee Inn dance sequence.
- Speak with Madam M after the other contacts have been resolved.
3. Complete Madam M’s massage scene and prepare for the Colosseum
Choose a massage course at Madam M’s parlor. The course is one of several factors that influence whether Sam’s or Madam M’s odd jobs become available. The cheaper and more expensive choices lead toward different outcomes, but every course allows the main story to continue.
When Madam M asks about Aerith’s outfit, select the response you want for your intended dress route. This choice also contributes to the route calculation. After the scene, follow the objective to the Corneo Colosseum.
Before entering the arena, use the waiting-room bench and vending machine. Equip Cure, Revive and the elemental materia available to you. Keep Aerith’s MP available: she is the party’s safest source of ranged elemental damage during the final fight.
- Finish Madam M’s massage scene.
- Choose your preferred response about Aerith’s outfit.
- Rest and adjust Cloud’s and Aerith’s equipment in the Colosseum waiting room.
4. Win the Corneo Colosseum tournament and defeat Hell House
Speak with the attendant and enter the tournament. The early matches are straightforward if Cloud uses Punisher Mode against melee targets and Aerith attacks from range. Do not spend unnecessary MP on minor enemies; preserve enough for healing and elemental spells in the final round.
Hell House changes its defensive state during the battle. On Easy or Normal, use Assess and cast the elemental spell matching the weakness currently shown by its windows or battle information. Do not repeatedly cast one element after the weakness changes. Aerith should use an Arcane Ward when safe, while Cloud blocks or attacks during openings and avoids standing directly in the house’s path.
When Hell House enters God House Mode, its barrier greatly reduces the value of reckless attacks. Keep moving, heal before either character becomes critical and wait for a safe opening. In the later phase it can summon Cutter and Sweeper units; use Cloud’s area attacks to create space, but continue watching Hell House because defeating it ends the round. On Hard difficulty, do not rely on the normal elemental-weakness cycle; prioritize defense, physical pressure, healing and carefully timed ATB abilities.
- Win the required Colosseum matches.
- Use the active elemental weakness against Hell House on Easy or Normal.
- Defeat Hell House without exhausting all of Aerith’s MP before the final phase.
5. Complete the available Wall Market odd jobs
After the Colosseum sequence, return to Madam M as directed. Aerith changes into her selected outfit, and the chapter’s optional odd jobs become available. Burning Thighs is the common Wall Market gym quest. Depending on the choices made earlier, you will receive either Sam’s route, The Party Never Stops and A Dynamite Body, or Madam M’s route, The Price of Thievery and Shear’s Counterattack.
Complete the route currently shown on the map if you want its rewards, experience and quest completion. You cannot receive both main routes in the same playthrough. The odd jobs are optional for reaching the ending, but they count toward chapter sidequest completion and can affect Cloud’s dress result.
When you are finished, follow the objective to Corneo’s mansion. Make any final purchases and save at the Wall Market bench before entering, because the next sequence contains confined combat and cannot be freely explored once the mansion scene begins.
- Complete Burning Thighs if desired.
- Finish either Sam’s two odd jobs or Madam M’s two odd jobs.
- Save and finalize equipment before entering Corneo’s mansion.
6. Enter the mansion, find Tifa and finish the chapter
Return to Corneo’s mansion and enter after the story conditions are satisfied. Follow Leslie through the mansion, fight the short enemy encounters and continue through the interior route. Use Tactical Mode in narrow rooms if you need time to select Cure or a defensive ability.
Find Tifa and continue to Don Corneo’s room. The party confronts Corneo and the scene ends with Cloud, Aerith and Tifa being dropped into the Sector 6 Sewers. There is no Abzu battle in Chapter 9. Chapter 10 begins in the sewers and opens with the party recovering from the fall before the Abzu encounter.
If you are replaying for alternate dresses or the other Wall Market route, complete the selected chapter through its ending before moving to another chapter. Chapter Select records the completed result; stopping immediately after a choice is not enough to preserve the chapter’s outcome.
- Enter Corneo’s mansion after completing the desired optional route.
- Find Tifa and complete the Corneo scene.
- Reach the sewer drop and confirm that Chapter 10 begins.
Before you move on
- Hell House is defeated in the Corneo Colosseum.
- The desired available Chapter 9 odd jobs are complete, if optional sidequest progress is being tracked.
- Cloud, Aerith and Tifa are dropped into the Sector 6 Sewers after the Corneo scene.
- Chapter 10 begins with the sewer recovery sequence; do not count Abzu as a Chapter 9 objective.
- For alternate Wall Market routes or dress outcomes, replay the relevant earlier chapter and complete the chapter through its ending before leaving Chapter Select.
References for this chapter
Chapter 10 — Rough Waters: The Sector 6 Sewers and Abzu
Chapter 10 begins after Don Corneo drops Cloud, Tifa and Aerith into the Sector 6 Sewers. Wake the party, defeat Abzu, restore power, drain the sewer channels and recover the Sewer Key before crossing toward Sector 7. The chapter contains optional chests and materia, two benches, a wastewater-pump minigame and final Sahagin encounters. Fire helps against Abzu, while Sahagin and Scissorclaws are easier to manage with elemental attacks and deliberate character switching. Use the sewer benches to restore the party, adjust materia and purchase supplies before the longer switch and combat sections.
1. Wake the party and prepare for Abzu
After the opening scene, approach Tifa and Aerith to wake them. Before starting the encounter, check the party's weapons, materia and accessories. Equip Fire Materia where available and make sure at least one character can cast Cure. Star Pendants or Antidotes are useful because Abzu frequently inflicts Poison, but neither is mandatory on the standard difficulty.
Speak to either Tifa or Aerith to begin the fight. The first character you choose affects a later affection calculation, but it does not change the route through Chapter 10 or the requirements for completing it.
- Equip at least one Fire Materia and one healing option.
- Carry Antidotes or equip Poison resistance if available.
- Confirm that Cloud, Tifa and Aerith have usable weapons and materia slots.
2. Defeat Abzu by using Fire and safe openings
Abzu is weak to Fire. Use Fire spells when ATB is available, especially against its horns, while Cloud and Tifa apply physical pressure. Breaking or damaging the horns can place Abzu into a pressured state, giving the party a safer opportunity to use stagger-building abilities. Keep Aerith ready to heal, but have her contribute Fire attacks when the party is healthy.
When Abzu climbs onto the wall, sprint away from the sewer grate before Backwater Blast is released. Do not remain beside the marked opening and rely on blocking alone. Avoid the poisonous pools and whirlpools created by Backwash Spout. If Pounce binds one character, switch to another party member and attack Abzu to make it release the victim.
Abzu becomes more aggressive after reaching roughly half health. Continue rotating between characters so ATB keeps accumulating across the party, and reserve at least one ATB charge for Cure or a revival. Use a Limit Break or summon during a clear opening rather than spending every ATB charge immediately before a major attack.
- Use Fire to exploit Abzu's weakness.
- Run away from the sewer grate during Backwater Blast.
- Avoid the poisonous pools and free characters caught by Pounce.
- Keep one character ready to heal or revive.
3. Follow the waterway and reach the first bench
After Abzu breaks through the wall, enter the opening and turn left to continue. Before moving on, take the right-hand dead end to open the chest containing an Ether. Return to the main corridor, defeat the Sahagin and climb the ladder. Follow the upper path to the chest containing two Hi-Potions.
Continue until you reach the water-level lever. Operate it, descend the stairs and pass beneath the gate. The purple chest immediately ahead contains Feathered Gloves. Continue through the route until you regroup with Tifa and Aerith, then enter the room with the bench and vending machine.
Use this bench before advancing. Restore HP and MP, change materia if necessary and purchase supplies. The next section contains Wererats, Scissorclaws and the power-and-drain sequence, so this is the first useful preparation point after Abzu.
- Collect the Ether and two Hi-Potions if desired.
- Lower the water and collect the Feathered Gloves.
- Rest at the first sewer bench before continuing.
4. Restore power and retrieve the Sewer Key
Proceed through the enemy rooms. Wererats are straightforward, but Scissorclaws guard against ordinary melee attacks and can counter careless strikes. Wait for their guard to end or use Ice and other abilities to pressure them instead of repeatedly attacking into the guard.
Climb the ladder in the Scissorclaw section and pass through the dark room to the southern room. Operate the power generator, then return through the now-lit passage. Enter the eastern room and use its lever to drain the water. Descend into the exposed area and collect the Sewer Key.
Return upward and cross to the western room. Operate its lever to drain that section, then descend and open the chest containing 800 gil. Go back toward the generator room and use the Sewer Key on the locked door opposite the power room. This opens the route to the trunk line.
- Activate the generator before using the other sewer levers.
- Collect the Sewer Key from the drained eastern section.
- Collect the 800 gil chest if wanted.
- Use the key on the locked door opposite the generator room.
5. Cross the trunk line and reach the Sector 7 side
The trunk-line route is mostly linear. Follow the walkways, operate the levers and defeat the enemies blocking the platforms. When you first climb back to an upper platform, check the right-hand side for Poison Materia before continuing.
At the sluice gate, cross the lowered route and descend to the enemies below. Defeat the Sahagin, operate the next lever to raise the platforms and climb the ladder for the story scene. Continue through the storage-tank area with Tifa and Aerith.
A second bench and vending machine are located before the final section. Rest there and confirm that one character has healing magic and that the party is not carrying an unsuitable materia configuration. Optional detours from this area contain Orbs of Gravity, Warding Materia and Revival Earrings. They are not required for chapter completion, but they can be collected before following the main route.
- Collect the Poison Materia if desired.
- Use the second sewer bench before the pump and final battles.
- Optional: collect Orbs of Gravity, Warding Materia and Revival Earrings.
- Keep healing and revival options equipped.
6. Operate the wastewater pump and finish the chapter
From the storage-tank area, take the southern detour first if you want the chest containing two Orbs of Gravity. Return to the main route, climb through the passage and use the western branch after the ladder to reach Warding Materia. Continue farther for the Revival Earrings, then return to the earlier split and take the northern route toward the objective.
At the wastewater pump, interact with the covering near Tifa. The minigame requires three successful target hits. Follow the on-screen control instructions: build the pump pressure, then stop the moving indicator inside the red target area. A failed attempt does not end the chapter; retry it, since the target becomes more forgiving after mistakes.
After three successful pump actions, return to Cloud and activate the pump control. Leave the room and defeat the two Sahagin that ambush the party. Descend to the lower passage, follow it to the opposite ladder and defeat the final group of three Sahagin. After the fight, use the exit ladder. The resulting scene ends Chapter 10 and begins Chapter 11: Haunted.
- Complete three successful wastewater-pump target hits.
- Activate the pump after returning to Cloud.
- Defeat the two Sahagin after the pump.
- Defeat the final group of three Sahagin.
- Use the exit ladder and confirm that Chapter 11: Haunted begins.
Before you move on
- Abzu has been defeated and the party has exited the initial aqueduct.
- The generator has been activated, the sewer water has been drained and the Sewer Key has been collected.
- The locked route to the trunk line has been opened and the sluice-gate crossing has been completed.
- The wastewater blockage has been cleared with three successful pump target hits.
- Both post-pump Sahagin encounters have been defeated.
- The exit ladder triggers the transition into Chapter 11: Haunted.
References for this chapter
Chapter 11 — Dogged Pursuit: Train Graveyard and Eligor
Chapter 11, Haunted, sends Cloud, Tifa and Aerith through the Train Graveyard on the way back to Sector 7. The route is linear but includes optional equipment, materia and chests in the switchyard and Maintenance Facility. Conserve MP because the chapter contains the Ghoul and Eligor, with only a few recovery points between them. Use the benches before each boss, equip Steal before Eligor if you want Aerith’s unique Bladed Staff, and prepare Ice and Wind materia for Eligor’s changing phases. After Eligor falls, follow the marked route and complete the post-battle scene to advance into Chapter 12.
Enter the Train Graveyard and collect the early upgrades
After Chapter 10 ends, follow Tifa and Aerith into the Train Graveyard. Use the opening bench and vending machine, then proceed through the first train car into the switchyard. Defeat the enemies blocking the marked route, but avoid spending MP on every ordinary encounter. Use physical attacks where practical and reserve MP for healing, the Ghoul and Eligor.
In the first large switchyard area, continue east through the train and then search the southern side behind the cargo container for a purple chest containing Aerith’s Mythril Rod. After returning toward the main route, proceed through the next train section. When you reach the area with the Cripshays, search between the train cars on the side path before climbing the next ladder to collect the HP Up materia. These pickups are optional for story progress, but the Mythril Rod gives Aerith access to Ray of Judgment, which is useful against the Ghoul.
- Use the opening bench and vending machine.
- Collect Aerith’s Mythril Rod if you want the weapon and Ray of Judgment.
- Collect the HP Up materia before climbing away from the switchyard section.
Cross the switchyard and enter the Maintenance Facility
Continue through the marked route, fighting Wererats and Cripshays as necessary. When the path leads into the Maintenance Facility, do not immediately follow the objective marker through the first door. Instead, climb the stairs and cross to the opposite side of the walkway, then descend to the chest containing a Gothic Bangle.
Work through the facility’s rooms and walkways. Search accessible side rooms for the chests containing Mega-Potions, an Ether, Echo Mists, gil and a Moogle Medal. A vending machine near the central building sells the Let the Battles Begin! music disc. These items are optional, but the Ether and recovery supplies are useful if you have spent too much MP before the first boss.
- Search the upper walkway for the Gothic Bangle.
- Check the side rooms for recovery items and the Moogle Medal.
- Buy the Let the Battles Begin! music disc only if you want the optional record.
Defeat the Ghoul in the control room
Follow the facility route until the story leads into the control room and starts the Ghoul battle. The Ghoul changes between a normal physical state and a ghostly state. Use physical attacks when it can be hit normally; when it becomes ghostly, use offensive magic or healing and revival spells, which can damage undead enemies in that state. Aerith’s Mythril Rod and Ray of Judgment are useful if you collected the weapon.
When the Ghoul lifts a party member into the air, stop attacking the decoy holding that character. Remove your lock-on and find the real Ghoul elsewhere in the room; damaging the real one forces it to release the captured ally. During the later part of the fight, avoid the blue flame lines, area attacks and the furniture it throws around the arena. Keep moving until the hazards end, then resume spell pressure.
Defeating the Ghoul awards Subversion materia. Before leaving the control room, break nearby crates where possible to recover small amounts of MP, then use the route back to the crane area.
- Use physical attacks in the Ghoul’s vulnerable normal state.
- Use magic or healing-based damage when it becomes ghostly.
- Attack the real Ghoul when a party member is suspended.
- Collect the Subversion materia after the battle.
Lower the train and cross the final switchyard
After the Ghoul is defeated, return to the crane console and operate it to lower the train car. Go downstairs, pass through the newly accessible car and defeat the Lesser Drakes blocking the exit. A chest in this section contains three Echo Mists.
Outside, activate the turntable and defeat the enemies that appear. You can return to the nearby bench afterward if you need to restore HP and MP. Cross the turntable, take the side path to the right of the ladder and collect the Hi-Potion chest before climbing onward.
Continue through the train cars and operate the required switches to move the engines out of the way. After moving the second train, check beside it for a chest containing two Mega-Potions. Defeat the Lesser and Cerulean Drakes on the route, activate the final train switch, then climb the ladder on the previously moved car to reach the far side. A bench and vending machine are directly ahead of the Eligor sequence.
- Operate the crane only after defeating the Ghoul.
- Collect the three Echo Mists and Hi-Potion if desired.
- Take the two Mega-Potions beside the second moved train.
- Use the final bench and vending machine before Eligor.
Prepare for Eligor
Before entering the arena, equip Steal materia on an active character. Eligor carries Aerith’s Bladed Staff, and stealing it is the only way to obtain that weapon during the normal campaign. Use Steal whenever the character has ATB until the item is acquired; a failed attempt does not consume the objective, so continue trying rather than waiting until the end of the battle.
Equip Ice materia on at least one strong spellcaster and bring Wind materia if available. Ice is Eligor’s main weakness while grounded, and Wind is especially effective during the airborne phase. Give Aerith a healing setup, and consider Prayer because Eligor can apply Reflect, which can prevent Cure spells from healing the party while the effect is active. Shiva is a useful summon if available, but do not rely on summoning as a substitute for healing and positioning.
- Equip Steal before the Eligor cutscene.
- Confirm that the Bladed Staff appears in your inventory after a successful theft.
- Bring Ice and Wind materia where available.
- Keep a non-magic healing option ready for Reflect.
Defeat Eligor through the grounded and airborne phases
At the start of the battle, avoid the opening charge and begin using Steal when possible. Eligor’s wheels can deflect melee attacks, and the boss is highly mobile, so do not force Cloud or Tifa to attack from a bad angle. Use Ice magic when Eligor is stationary, and attack from the safer side or rear when a melee opening appears. Guard or move away from Trample, and retreat when Sweeping Gaze targets the area in front of the chariot.
When Eligor takes to the air, switch attention to Aerith for ranged attacks and healing. Use Wind spells when the boss pauses in the air to build stagger quickly. Watch for the Piercing Gaze laser and the falling javelins. If Eligor drops a cargo container into the arena, use it as cover from the javelin attack, but move when the container is no longer safe.
Eligor can cast Reflect during the fight. If the Reflect effect is active on the boss or party, avoid blindly casting Ice, Wind or Cure because reflected magic can hurt the party or heal the boss. Use Prayer, items or physical attacks as appropriate until the effect ends, then resume elemental pressure. If the boss becomes pressured or staggered, spend ATB on high-damage abilities and continue attempting Steal if the Bladed Staff has not yet been obtained.
- Avoid Trample and Sweeping Gaze instead of trading damage.
- Use Ice against grounded Eligor and Wind while it is airborne.
- Use the cargo container for cover from falling javelins.
- Respond to Reflect with Prayer, items or physical attacks.
- Confirm the Bladed Staff was stolen before finishing the boss.
Break the wheels and leave the Train Graveyard
In the final phase, Eligor moves quickly and uses wide lance attacks, javelins and the Wind of Gehenna. Stay mobile and heal characters before they reach critical health. The chariot’s wheels become valid targets during this phase; attack them with magic or safe ranged pressure to build stagger, then punish the boss when the opening appears.
After Eligor is defeated, follow the marked path out of the arena and through the post-battle sequence. Do not leave the game assuming the chapter is complete immediately after the victory screen. Continue until the story scene finishes and the game transitions to Chapter 12: Fight for Survival.
- Target Eligor’s wheels during the final phase.
- Survive Wind of Gehenna and the remaining javelin attacks.
- Complete the post-battle scene.
- Chapter 12: Fight for Survival begins.
Before you move on
- The Ghoul has been defeated and Subversion materia has been awarded.
- The Train Graveyard switchyard has been crossed and the final bench has been used before Eligor.
- Eligor has been defeated, with Aerith’s Bladed Staff stolen if that optional weapon goal matters.
- The post-battle story sequence has finished.
- The game advances to Chapter 12: Fight for Survival.
References for this chapter
Chapter 12 — Fight for Survival: Reach the Pillar and defeat Reno and Rude
Chapter 12 begins at Sector 7 station with Cloud, Tifa and Aerith fighting the Enigmatic Spectre. After the party reaches the pillar, Cloud makes the first ascent alone while Aerith later searches for Marlene. Tifa rejoins Cloud for the final climb, where the four-stage Reno and Rude encounter begins. Use the fourteenth-floor bench before the fight, keep Poison and healing available, exploit Rude’s Wind weakness, destroy Pyramid Mines immediately, and save Limit Breaks or a summon for the ground phase against both Turks. After the battle, circle the collapsing pillar and reach Tifa to finish the chapter and advance to Chapter 13: A Broken World.
1. Defeat the Enigmatic Spectre and reach the pillar
At the start of the chapter, follow the route from Sector 7 station into the open area. The Enigmatic Spectre is accompanied by lesser Spectres. Defeat the lesser Spectres first; this pressures the Enigmatic Spectre and creates the safe opportunity to attack it. When it raises its defenses, return your attention to the surrounding Spectres rather than wasting attacks against its protection.
After the fight, continue along the marked path into Sector 7. A cutscene moves the story to the Support Pillar. Tifa and Aerith stay behind to help Wedge, while Cloud begins the initial climb alone.
- Defeat the surrounding Spectres to pressure the Enigmatic Spectre.
- Continue to the Support Pillar after the cutscene.
- Do not expect Tifa to accompany Cloud during the first part of the ascent.
2. Climb the lower pillar floors as Cloud
Use the bench and vending machine on the lower floor before starting upward. Proceed through the security encounters and circle around the pillar whenever the direct route is blocked. On the second floor, search behind the circular pillar for a chest containing two Orbs of Gravity; opening it triggers an ambush by two Slug-Rays.
Continue to Biggs on the third floor, then take the ladder to the fourth. Helitroopers are weak to Fire and Wind, and Wind is particularly useful for building stagger while they are airborne. After defeating them, search around the opposite side of the central pillar for the Ether chest. Continue through the fifth and sixth floors, then climb past the mostly empty seventh floor to trigger the next story sequence.
- Use the lower-floor bench before the ascent.
- Collect the two Orbs of Gravity if you want the optional item.
- Use Wind or Fire against airborne Helitroopers.
- Collect the Ether chest on the fourth floor.
3. Complete Aerith’s rescue sequence, then rejoin Tifa
After the pillar cutscene, control switches to Aerith. Follow Wedge toward Seventh Heaven. When the fallen helicopter blocks the direct route, turn around and use the alternate path indicated by the objective marker. Continue through the short rescue sequence, carry the child to Marle, then proceed to Seventh Heaven and find Marlene behind the bar.
When control returns to Cloud and Tifa, follow Tifa through the damaged pillar routes. Fight the Sentry Guns, Slug-Rays, Elite Riot Troopers, Grenadier and Helitrooper groups as you climb. Lightning is effective against the Sentry Guns, while Fire and Wind help against the human and airborne enemies. On the twelfth floor, search the circular route for the Elixir chest before continuing upward.
- Follow the alternate route around the helicopter.
- Reach Marlene inside Seventh Heaven.
- Use Lightning against Sentry Guns when available.
- Collect the Elixir on the twelfth floor.
4. Prepare at the fourteenth-floor bench
After the upper-pillar fights, cross the beam and continue to the fourteenth floor. A bench and vending machine are positioned immediately before the final story scene and boss battle. Rest, replenish supplies, and open the equipment menu by holding the prompted button during the scene so you can change Materia before combat.
Equip a reliable healing option and keep Revival available if possible. Poison is useful against both Reno and Rude, while Wind is especially effective against Rude once he is fighting on the ground. Binding Materia can provide Sleep; if you have it equipped, Sleep can briefly separate Rude from the fight. Do not rely on this as the only plan. Keep ATB available for healing, freeing a trapped ally and emergency defense.
- Rest at the fourteenth-floor bench.
- Buy or replenish useful supplies at the vending machine.
- Equip Poison and healing Materia.
- Add Wind for Rude and Revival if available.
- Keep Binding equipped only if you intend to use Sleep.
5. Survive the Reno and Rude battle
The battle opens against Reno. He is fast and difficult to chase, so avoid holding the attack button while pursuing him around the arena. Guard his close-range attacks, then counter during his recovery. Switching between Cloud, Tifa and Barret keeps ATB building and prevents Reno from focusing on one character. Apply Poison during a safe opening rather than interrupting a defensive recovery.
When Rude attacks from the helicopter, stay out of the bombing path and use Barret’s ranged attacks and Overcharge against the aircraft. After Reno returns, continue guarding and watch for Pyramid Mines. If a mine traps a character, immediately switch to another party member and destroy the mine. Do not leave the trapped character unattended, because the mine drains health and removes that character from effective combat.
Rude eventually returns in the helicopter and can be damaged until he crashes and joins Reno on the ground. At this point, use Wind against Rude and consider Sleep at the beginning of the phase if Binding Materia is available. Focus on one Turk, preferably Rude while he is weakened from the crash, rather than splitting damage. Use a Limit Break or summon during a clear opening, but keep enough ATB for healing and mine removal.
- Guard and counter Reno instead of chasing him continuously.
- Move away from the helicopter’s bombing path.
- Use Barret’s ranged attacks and Overcharge on the helicopter.
- Destroy every Pyramid Mine immediately.
- Exploit Rude’s Wind weakness on the ground.
- Focus one Turk at a time.
6. Escape the collapsing pillar and complete the chapter
After Reno and Rude are defeated, watch the post-battle scene. When control returns, the pillar is collapsing and the objective changes to escaping. Run around the outside edge of the structure toward the marked route. Do not stop to search the area; the needed destination is Tifa near the edge of the pillar.
Reach Tifa and allow the concluding scene to play. The game then advances to Chapter 13: A Broken World. If the fight is lost, reload from the pre-battle checkpoint or the fourteenth-floor bench, revise the Materia setup, and repeat the encounter with more emphasis on guarding, mine removal and sustained healing.
- Defeat both Reno and Rude.
- Reach Tifa during the collapse sequence.
- Watch the chapter-ending scene.
- Confirm that Chapter 13: A Broken World begins.
Before you move on
- The Reno and Rude boss battle is complete.
- The post-battle collapse sequence has played.
- Cloud reaches Tifa at the marked destination.
- The game advances to Chapter 13: A Broken World.
References for this chapter
- Final Fantasy 7 Remake Chapter 12: Fight for Survival Walkthrough
- Final Fantasy 7 Remake Intergrade - Chapter 12: Fight for Survival Walkthrough
- Final Fantasy VII Remake Intergrade Guide and Walkthrough: Chapter 12: Fight for Survival
- Final Fantasy VII Remake Chapter 12 Walkthrough and Guide
- Final Fantasy VII Remake Intergrade arrives on PS5 June 10, 2021
Chapter 13 — A Broken World: Through the Collapsed Plate and Underground Test Site
Chapter 13 takes Cloud, Barret, and Tifa from the Sector 6 rubble through the Collapsed Expressway, Evergreen Park, and Shinra’s Underground Test Site. The route is mostly linear, but several side rooms contain useful armor, accessories, gil, consumables, and materia. At Evergreen Park, the Item Shop sells Music Disc 15, On Our Way, and the Weapons Vendor sells Barret’s Big Bertha. In the Underground Test Site, collect the Ice and Warding materia before the boss bench. Failed Experiment is weak to Ice, but the main tactic is to use Barret against its single Appendage. Destroying that Appendage pressures the boss and exposes its Heart, giving Tifa and Barret a safe opportunity to build stagger and spend their strongest abilities. The chapter ends after the facility escape and the return to the Sector 7 ruins, immediately leading into Chapter 14.
1. Leave the rubble and return toward Sector 5
After the opening scenes, move through the rubble until you reunite with Tifa, then push the obstruction to reach Barret. Follow the objective route toward Wall Market and continue north toward Sector 5. Just before the road continues, take the narrow alley near the Item Shop to find a previously inaccessible chest containing a Moogle Medal. This is optional and does not affect story progress.
At the fork on the road to Sector 5, enter the concrete building on the left. Open the chest inside for a Star Pendant, then return to the main route. At Aerith’s house, go upstairs with Barret and inspect the room before leaving to collect the Mythical Amulet. Speak with Chadley in the Sector 5 Slums if you want to turn in completed Battle Intel or adjust materia before the next combat stretch.
- Optional Moogle Medal collected near the Wall Market route.
- Star Pendant collected from the concrete building.
- Mythical Amulet collected upstairs in Aerith’s house.
2. Cross the Collapsed Expressway
Leave the Sector 5 area and follow the road southeast toward the Collapsed Expressway. The previous route through the area is blocked, so use the alternate passage identified by Cloud. Continue through the tunnel, defeat the enemies, and squeeze through the opening in the rubble. Open the chest beyond it for a Mega-Potion.
In the abandoned subway section, enter the doorway near the tracks for a Heavy-Duty Bracer. Continue until the route allows you to cross to the opposite track. Move north and east to the dead end for an Ether, then return to the main path. After defeating Beck, Butch, and Burke again, check the left side of the tunnel near the exit for a chest containing an Orb of Gravity.
The Collapsed Expressway enemies are generally vulnerable to Ice. Use Blizzard against Ringmaws, Varghidpolis, Terpsicolts, and other creatures that remain at range. Against the bandits, Fire materia and attacks from behind help pressure the tougher Grungy Bandit. If you have Steal equipped, the Grungy Bandit can provide an optional Champion Belt opportunity, but this is not required.
- Mega-Potion collected after the blocked tunnel.
- Heavy-Duty Bracer collected near the abandoned subway tracks.
- Ether collected from the opposite-track dead end.
- Orb of Gravity collected after the Beck encounter.
3. Restock at Evergreen Park
Continue through the remaining expressway route, climb the ladders, and pass the Sector 7 survivors to reach Evergreen Park. Use the rest bench before shopping. The Item Shop sells Music Disc 15, On Our Way. The Weapons Vendor sells Big Bertha for Barret and may also offer replacement armor if you missed earlier purchases.
Big Bertha is optional for story completion, but its Maximum Fury ability is useful against groups and the upcoming boss’s summoned enemies. Equip Barret with a healing option and at least one Ice materia before entering the tunnel at the southwest end of the park. Give Tifa a healing or support option as well if your materia supply allows it.
- Music Disc 15 purchased from the Item Shop if collecting records.
- Big Bertha purchased from the Weapons Vendor if desired.
- Evergreen Park bench used before entering the tunnel.
4. Enter the Underground Test Site
Enter the tunnel from the southwest side of Evergreen Park. Follow the linear route until you emerge near the Sector 7 ruins, then move east across the rubble to Seventh Heaven. After the scenes, help Barret clear the debris and follow Wedge’s cat southeast. Drop through the opening and proceed into the Shinra facility.
You control Barret alone for part of this section. Use his gun-arm to destroy marked debris and Shinra crates rather than searching for alternate routes. After the first Bugaboo and Wererat encounters, inspect the side path behind destructible debris for a chest containing 2,000 gil. Continue through the facility, then use the mechanical equipment to drop a walkway and reach a chest containing two Hi-Potions.
When the route divides near the Researcher’s Access area, destroy the northern barrier and open the chest beyond it for a Healing Carcanet. This accessory improves the effectiveness of healing items, spells, and abilities, making it a useful optional pickup before the boss.
- 2,000 gil collected from the side room.
- Two Hi-Potions collected after lowering the walkway.
- Healing Carcanet collected behind the northern barrier.
5. Rejoin Tifa and collect the fan-room materia
Continue through the facility, defeating Bugaboos, Wererats, Bloodhounds, and other enemies until you reunite with Tifa. Follow the catwalks to the three large ventilation fans. Check the southwest fan passage first for an Ether. The northeast passage contains Shinra crates but no required story item.
Destroy the central fan to open the main route, then defeat the Bloodhounds beyond it. After the fight, use Barret to shoot open the two nearby cells. The northeastern cell contains Ice materia. The southwestern cell contains a chest with a Turbo Ether. Continue up the stairs and shoot open the next accessible cell to collect Warding materia.
Proceed through the upper platforms and defeat the remaining enemies. At the break room, use the bench to restore HP and MP. The vending machine on this story route sells Music Disc 14, Main Theme of FFVII. Before advancing, equip Ice on Barret and Tifa if possible, keep healing available, and consider a Star Pendant or Warding materia linked to a suitable status-resistance materia if poison is causing problems.
- Ether collected from the southwest fan passage.
- Ice materia collected from the northeastern cell.
- Turbo Ether collected from the southwestern cell.
- Warding materia collected from the upper cell.
- Music Disc 14 purchased from the break-room vending machine if desired.
- Final bench used before Failed Experiment.
6. Defeat Failed Experiment
The battle begins with waves of Unknown Entities. They are weak to Ice, so Blizzard is effective; pairing Ice with Magnify on Barret can damage multiple enemies at once if you have that combination available. Eliminate enough of the entities to trigger the next phase, then send Tifa to the upper level when the game directs her there.
Failed Experiment has one important targetable weak point: the Appendage on its back. Control Barret and fire at the Appendage with Overcharge, Focused Shot, or regular gunfire until it is destroyed or crippled. This pressures the boss and exposes its Heart. Switch to Tifa when the Heart is vulnerable and use Focused Strike, Starshower, or other high-damage abilities to build stagger. Spend Ice spells and stronger attacks during this opening rather than attacking the main body continuously.
Unknown Entities continue to appear during the fight. Do not waste all your ATB clearing every minion, but defeat enemies that surround a character, interrupt healing, or begin casting Thundaga. A successful Thundaga cast can charge Failed Experiment and enable more dangerous electrical attacks. When the boss uses Toxic Volley, leave the poison pools immediately. For Plasma Discharge or other large attacks, use the cargo containers and nearby debris as cover.
After Tifa returns to the lower level, repeat the same sequence: control Barret, target the Appendage, pressure the boss, then switch to Tifa and attack the exposed Heart. Keep both characters moving, heal before either character is in critical condition, and use the Limit Break when available during a safe damage window. Defeating the boss automatically awards Tifa’s Mythril Claws.
- Assess Failed Experiment if you want its enemy information.
- Use Ice against Failed Experiment and the Unknown Entities.
- Destroy the single Appendage before committing major damage to the boss.
- Attack the exposed Heart to build stagger.
- Interrupt dangerous Thundaga casts when possible.
- Collect Tifa’s Mythril Claws after victory.
7. Complete the escape and end the chapter
After the battle, use Barret to blast through the marked wall and follow the newly opened route. Watch the story scenes, then continue northwest through the remaining facility and surface route. The chapter ends after the group returns to the Sector 7 ruins and the game transitions to Chapter 14, In Search of Hope.
Big Bertha, the music discs, accessories, consumables, and materia are optional for campaign completion. If you miss any of them, Chapter Select after finishing the main campaign allows you to replay Chapter 13 and collect them without restarting the entire game.
- Failed Experiment defeated.
- Mythril Claws added to Tifa’s weapon list.
- Post-boss escape scenes completed.
- Chapter 14 becomes available.
Before you move on
- The Broken Dreams chapter-completion trophy or equivalent completion notification has registered.
- Failed Experiment has been defeated and Tifa has received Mythril Claws.
- The final Sector 7 scenes have played and Chapter 14, In Search of Hope, is available.
- Any selected optional rewards are present: Big Bertha in Barret’s weapon list, music discs in the jukebox collection, and Ice or Warding in the materia inventory.
- If an item was missed, Chapter Select can be used after the campaign is completed to replay Chapter 13.
References for this chapter
- FINAL FANTASY VII REMAKE INTERGRADE — PlayStation official page
- FINAL FANTASY VII REMAKE INTERGRADE – AVAILABLE NOW!
- Final Fantasy 7 Remake Chapter 13 Walkthrough: A Broken World — GameSpot
- A Broken World — Chapter 13 Main Scenario — Final Fantasy VII Remake Intergrade — Gamer Guides
- Chapter 13 — A Broken World — Final Fantasy VII Remake Walkthrough and Guide — GameFAQs
- Final Fantasy 7 Remake All Music Disc Locations — PowerPyx
Chapter 14 — In Search of Hope: Sidequests, Corneo’s Stashes, and the route to the Sewers
Chapter 14 is the last broad exploration chapter before the endgame. After the opening scene at Aerith’s house and Kyrie’s speech in Sector 5, complete the optional requests you want before entering Don Corneo’s mansion. The available activities include Missing Children, Chocobo Search, Secret Medicine, Tomboy Bandit, Corneo’s Secret Stash, Malicious Goons, The Power of Music, Wavering Heart, and Subterranean Menace. The two accessible Corneo stashes can be collected before entering the mansion; the third opens later inside the Sewers. When ready, speak with Leslie at Corneo’s mansion and follow the sewer route. Defeat the Mischievous Shoat, drain the stash area if desired, prepare at the rest bench, and defeat Abzu. Chapter 14 ends after the Abzu sequence and advances to Chapter 15.
1. Trigger the Chapter 14 sidequest period and establish fast travel
Chapter 14 begins after Chapter 13. Leave Aerith’s house and continue into the Sector 5 Slums until Kyrie finishes speaking to the crowd. After this scene, the chapter’s final set of sidequests becomes available. Pick up the Pedometer Materia near the house if you want its later AP Up reward, but it is optional and does not affect story progress.
Speak with the stablehand when leaving the Sector 5 Slums Center District to start Chocobo Search. Follow the marked locations and approach each escaped chocobo when the prompt appears. One encounter leads to a Rust Drake battle; use the nearby rest bench afterward if the fight leaves the party damaged. Completing the request unlocks Chocobo travel and Sam’s Delivery Lifetime Pass, making movement between Sector 5, the church, the station, the Collapsed Expressway, and Wall Market much quicker.
Before starting the longer quest chain, use a bench to restore the party and review equipment. Keep Healing Materia available, and distribute Fire, Ice, and Lightning Materia if you have them. These are preparation recommendations, not mandatory requirements.
- Leave Aerith’s house and trigger Kyrie’s speech in Sector 5.
- Complete Chocobo Search if you want the travel routes and Lifetime Pass.
- Use a bench before beginning the optional combat quests.
2. Complete the Sector 5 requests and collect the first stash rewards
Start Missing Children by speaking with Ms. Folia near the Sector 5 community center. Follow the children to the cemetery and fight the Phantoms. Their movement and temporary resistance can make ordinary attacks unreliable, so wait for openings and use magic or abilities when they become vulnerable. Completing the request awards Time Materia.
Start Secret Medicine by speaking with the doctor south of the Leaf House. The required items are medicinal flowers from the church, a Behemoth Horn from the Type-0 Behemoth in the underground lab, and a Moogle’s Mortar purchased from Moggie in the children’s secret hideout. The Behemoth fight is the major obstacle: cripple its legs to limit its mobility, then attack its horns and avoid its charges. Return the ingredients to the doctor for the quest reward, which includes Telluric Scriptures Vol. III.
Speak with Damon on Station Way to begin Corneo’s Secret Stash. After progressing the related investigation, use the Corneo Vault Key obtained during Tomboy Bandit to open the available stash doors. The first stash is in Steel Mountain and the second is in the Collapsed Expressway. The third stash is in the Sewers and cannot be opened during this initial outdoor portion.
- Complete Missing Children if you want Time Materia.
- Turn in Secret Medicine after obtaining all three ingredients.
- Start Corneo’s Secret Stash and open the Steel Mountain and Collapsed Expressway stashes when available.
3. Finish Tomboy Bandit and recover Johnny’s wallet
Find Johnny near the Sector 5 Undercity Station and follow the quest to the church. Speak with Kyrie, then return to Wall Market and enter the Corneo Colosseum. Select the special match against Beastmaster and Hellhound.
Defeat Beastmaster first. Hellhound is weak to Ice, and Ice attacks extinguish its red flame. Healing magic or healing items extinguish its purple flame; a Cure spell is enough to suppress that flame. The purple flame is the more dangerous effect, so remove it promptly. Stay alert for Hellhound’s close-range counterattack and avoid standing at range when its fire attack is targeting distant party members. After the flames are controlled, use focused attacks and stagger-building abilities to finish the fight.
Return to Kyrie after winning. She gives Cloud the Corneo Vault Key and Johnny’s Wallet. Take the wallet back to Johnny at the Sector 5 Undercity Station. This final handoff is optional unless you are pursuing the Johnny-related trophy, but it is the intended resolution of the discovery.
- Win the Colosseum special match against Beastmaster and Hellhound.
- Obtain the Corneo Vault Key and Johnny’s Wallet from Kyrie.
- Return Johnny’s Wallet at the Sector 5 station if desired.
4. Clear Wall Market’s optional requests before entering the mansion
Travel to Wall Market and check the available request markers. Malicious Goons begins with Madam M and sends the party back toward Aerith’s house. The Power of Music begins with Betty near the jukebox and asks for specified music discs. Wavering Heart begins at Andrea’s gym and is completed through the pull-up contest. Subterranean Menace begins with Wymer at Evergreen Park and leads to a battle against a stronger underground creature. These requests are optional for reaching Chapter 15 but are important for quest completion, rewards, and some trophy goals.
Use the Colosseum rest bench before optional matches and restore the party before returning to Corneo’s mansion. Do not assume that every Wall Market request must be completed in a particular order; complete the available activities you want, then return to the main objective. The exploration areas remain available until you advance the mansion objective far enough to begin the sewer sequence.
- Complete Malicious Goons, The Power of Music, Wavering Heart, and Subterranean Menace if pursuing full Chapter 14 quest completion.
- Finish any desired music, gym, Colosseum, and vendor activities before entering Corneo’s mansion.
- Rest and adjust Materia before beginning the main route.
5. Enter Corneo’s mansion and follow Leslie into the Sewers
When ready, go to Don Corneo’s mansion and speak with Leslie. Explore the mansion’s newly accessible rooms if you want their optional items, then meet Leslie upstairs and follow him into the Sewers. Once the story advances through this transition, the Sector 5 and Wall Market open areas are no longer freely available during the current sequence, so confirm your sidequest list first.
Follow Leslie through the Underground Waterway. The route contains Sahagins, Blugus, and Scissorclaws. Fire is useful against several of these enemies, but keep ATB available for healing rather than spending every charge on damage. When the Abzu Shoat thief escapes, follow the route to the Mischievous Shoat encounter and defeat it to recover Leslie’s key.
After Leslie climbs the ladder, activate the nearby switch to drain the water from the third Corneo stash. Return to the stash door and defeat the two Sahagins and the Sahagin Prince inside before collecting the reward. This is the correct point to complete the third stash; it is not available simply by entering the Sewers for the first time.
- Speak with Leslie at Corneo’s mansion and enter the Sewers.
- Defeat the Mischievous Shoat and recover Leslie’s key.
- Drain the third stash area and defeat the Sahagins and Sahagin Prince if collecting Corneo’s final stash.
6. Prepare for and defeat Abzu
After the stash detour, continue following Leslie until you reach the rest bench before the final combat sequence. Restore HP and MP, then equip Fire Materia on at least one active character. Abzu is weak to Fire, so use Fire-based attacks to pressure and stagger him. Keep moving when he charges or creates hazardous areas, and avoid allowing the party to cluster around his attacks.
Abzu can summon Abzu Shoats during the fight. Eliminate the smaller enemies when they begin interfering with healing or positioning, then return pressure to Abzu. Use Tactical Mode to queue healing safely, and reserve at least one ATB charge for emergency recovery. When Abzu is staggered, spend your strongest available abilities and limit actions rather than wasting the opening on basic attacks.
After Abzu is defeated, follow the closing scenes with Leslie. The chapter ends after this sewer sequence and the game transitions into Chapter 15, The Day Midgar Stood Still. Abzu is the required concluding boss of Chapter 14; the chapter is not complete merely when the party enters the Sewers.
- Rest at the sewer bench before the final encounter.
- Equip Fire Materia and keep healing available.
- Defeat Abzu and confirm that Chapter 15 begins.
Before you move on
- The desired Chapter 14 sidequests are marked complete.
- Tomboy Bandit has been completed, and Johnny’s Wallet has been returned if pursuing its related trophy.
- The first two Corneo stashes have been collected, and the Sewer stash has been opened if desired.
- Abzu has been defeated.
- The game has transitioned to Chapter 15, The Day Midgar Stood Still.
References for this chapter
- FINAL FANTASY VII REMAKE INTERGRADE — Square Enix official product page
- Final Fantasy 7 Remake Chapter 14: In Search of Hope Walkthrough — PowerPyx
- Chapter 14: In Search of Hope — Final Fantasy VII Remake Walkthrough & Guide — GameFAQs
- In Search of Hope — Chapter 14 Main Scenario — Gamer Guides
- Tomboy Bandit — Chapter 14 Quests — Gamer Guides
Chapter 15 — The Day Midgar Stood Still: Climb to the Plate and defeat the Valkyrie
Chapter 15 is a mostly linear climb through the ruined Sector 7 plate. Cloud, Tifa and Barret cross collapsed structures, fight Shinra troops and flying machines, then face the Valkyrie. Use the benches and vending machines along the route to restore the party and adjust materia. Wind is valuable against the chapter’s flying enemies and Valkyrie; on Easy or Normal, Lightning also exploits Valkyrie’s weakness, while Hard difficulty removes that Lightning weakness. The chapter ends after Valkyrie and the following story sequence, when Chapter 16, The Belly of the Beast, begins.
1. Start the climb and use the first bench
After the opening scene, follow the only open path through the wreckage. Move beneath the fallen debris, continue forward and climb the ladder. The route remains linear, with ladders and narrow platforms marking the intended way upward.
The first Byobapolis encounter follows the ladder. Byobapolis is weak to Ice and Wind, so Wind is a useful choice if you already have Wind Materia equipped. Continue across the platforms and defeat the next group before using the higher ladder. When Cerulean Drakes appear, use Wind to pressure them and help fill their stagger gauges. Barret’s ranged attacks are useful if the drakes remain out of reach.
Use the first bench and vending machine before continuing. Restore HP and MP, check your equipment and make sure at least one active character has Cure. Revival is strongly recommended for the Valkyrie attempt, although it is not a story requirement.
- Use the first bench and vending machine.
- Equip Wind Materia if available.
- Keep Cure and preferably Revival on the active party.
2. Cross the upper platforms
Continue along the plank walkways and climb each ladder at the end of the available path. Some side platforms contain chests or Shinra crates, but none is required to reach the chapter objective. Clear the enemies before crossing narrow beams so you are not interrupted while moving.
Against flying enemies, Wind is the most reliable way to pressure them. If a target is difficult to reach, switch to Barret and attack from range while Cloud or Tifa builds ATB. Avoid spending ATB while standing beneath a telegraphed area attack; move to a clear section of the platform first, then issue the command.
The large drone section is an approach sequence rather than a normal boss battle. Move between cover and wait for breaks in its firing pattern before crossing to the next structure. Do not try to trade damage in the open; the objective is to reach the next route forward.
- Use ranged attacks when flying enemies stay away from Cloud and Tifa.
- Cross exposed sections during breaks in the drone’s fire.
- Search side platforms only after the immediate enemies are defeated.
3. Defeat the Blast-Rays and Elite Helitroopers
Follow Tifa and Barret down the stairs after the drone sequence. At the bottom, two Blast-Rays block the route. Blast-Rays are machines and are weak to Lightning, so use Thunder or another Lightning spell when an ATB charge is ready. Barret can continue attacking from a safe distance while the other characters reposition.
After the Blast-Rays are defeated, climb the ladder on the pillar. Two Elite Helitroopers are waiting above. They are weak to Fire, and Wind is especially effective while they are airborne. Use Wind to pressure them in the air, then attack when they are grounded or staggered. If nearby soldiers are present, remove them when they are interrupting spellcasting or healing.
At the next bench and vending machine, restore the party. Before leaving, use the nearby stairs to collect the Antidote chest, then return toward the vending machine and follow the broken-rock path beside the staircase to reach the Remedy chest. These items are optional; the bench and the route upward are required.
- Use Lightning against the Blast-Rays.
- Use Wind against airborne Elite Helitroopers.
- Restore HP and MP at the second bench.
- Collect the Antidote and Remedy only if you want the optional items.
4. Prepare for the Valkyrie
From the bench area, climb the stairs and continue to the upper structure. Follow the marked route and use the two grapple points to reach the top. The approach includes a short sequence in which the party runs between cover while Valkyrie fires. Move from one piece of cover to the next during pauses in the gunfire rather than attempting to cross the entire area at once.
Before starting the battle, make the most of the nearby bench. Equip Wind on a character who can build ATB consistently. On Easy or Normal, Lightning is also effective against Valkyrie; on Hard, use Wind instead because Valkyrie no longer has a Lightning weakness. Keep Cure and Revival available, and consider Barrier or Cleansing if you have room for defensive support. A full MP bar is useful, particularly on Hard, where items cannot restore MP.
There is no need to spend rare upgrades on every weapon. Improve the weapons and armor used by Cloud, Tifa and Barret, then begin the encounter when the party is restored.
- Restore HP and MP at the pre-boss bench.
- Use Wind against Valkyrie on every difficulty.
- Add Lightning against Valkyrie only on Easy or Normal.
- Equip Cure and Revival before triggering the encounter.
5. Defeat Valkyrie
During the opening movement sequence, use the debris and metal shelters as cover while Valkyrie fires. When the battle begins, keep moving and use Barret’s ranged attacks to build ATB without standing directly in front of the boss. Cast Wind when Valkyrie is grounded, stationary or recovering from an attack so the spell is less likely to miss. On Easy or Normal, Lightning is also a valid weakness exploit.
Valkyrie deploys a drone during the fight. Destroy the drone when it begins firing its laser, because leaving it active adds continuous pressure while you are trying to avoid the boss. When Valkyrie uses Drill Dive, run clear of the impact and attack during the brief recovery after it becomes stuck. Guarding is often safer than trying to dodge every rotary-cannon burst.
Later, Valkyrie uses smoke and area-denial attacks, including the spinning Firewheel. Keep away from the center and circle around debris until the attack ends. When the boss raises its barrier, ordinary attacks become ineffective and the stagger gauge will not progress normally. Lure Valkyrie near the large blue laser, stand in its line long enough to make it fire, then move away so the laser strikes the boss. This breaks the barrier and creates the opportunity to build stagger.
Save at least one ATB charge on the party for Cure or Revival. During a stagger, use Tifa’s stagger-enhancing attacks and Cloud’s strongest available commands, while Barret continues damaging the boss from a safe position.
- Use cover during Valkyrie’s gunfire.
- Destroy the deployed drone promptly.
- Use Wind on all difficulties; add Lightning only on Easy or Normal.
- Use the blue laser to break Valkyrie’s barrier.
- Reserve ATB for healing or Revival.
6. Finish the chapter
After Valkyrie is defeated, follow the marked route and allow the post-battle scenes to play. There is no remaining free-roaming objective in Chapter 15. Completion is registered after the ending sequence, when the game proceeds to Chapter 16, The Belly of the Beast.
If Valkyrie defeats the party, reload the nearby checkpoint. Recheck the pre-boss bench, replace less useful offensive materia with Wind, Cure or Revival, and change difficulty before retrying if necessary. The climb does not need to be repeated when the checkpoint is available.
- Valkyrie is defeated.
- The post-battle story sequence finishes.
- Chapter 16, The Belly of the Beast, begins or becomes the next progression point.
Before you move on
- Valkyrie is defeated.
- The post-battle scenes on top of the plate have finished.
- The game advances to Chapter 16, The Belly of the Beast.
- The Chapter 15 objective is marked complete in the chapter or mission progression.
References for this chapter
- Final Fantasy 7 (VII) Remake Chapter 15: The Day Midgar Stood Still Walkthrough
- Final Fantasy 7 Remake Chapter 15 Walkthrough: The Day Midgar Stood Still
- Final Fantasy VII Remake Intergrade Walkthrough & Guide: Chapter 15
- Enemy Intel - Final Fantasy VII Remake Walkthrough & Guide
- How to Beat The Valkyrie | Boss Fight Guide
Chapter 16 — The Belly of the Beast
Infiltrate Shinra Headquarters through the parking garage, secure the Shinra keycard, cross the Exhibition Hall, complete the guided exhibits, and finish Mayor Domino’s required combat-simulator test. Use the bathroom ventilation duct to observe Hojo’s laboratory, then follow the laboratory route to rescue Aerith and Red XIII. Chapter 16’s mandatory boss is Specimen H0512, fought after the laboratory rescue. Prepare at the nearby bench, destroy its Left Claw to pressure it, control the H0512-OPT creatures, and manage poison and area attacks. After defeating H0512, clear the security forces, free Aerith, complete the escape sequence, and wait for the transition to Chapter 17: Deliverance from Chaos.
Enter Shinra Headquarters and clear the parking garage
Follow the exterior route from the service truck, descend the stairs and ladders, and continue toward the parking garage. At the first split, take the path toward the vending machine and rest area. Use the bench if the party needs healing, then collect the nearby Turbo Ether and return to the split for the chest containing two Hi-Potions.
Fight through the security forces and continue through the marked gates. Elite Grenadiers can interrupt the party with explosives, so pressure them quickly with Cloud’s close-range attacks, Tifa’s mobility, or Barret’s ranged fire. After the next garage fights, check the northern side room for the Molotov Cocktail chest and the northeast corner for the chest containing two Mega-Potions. These items are optional, but the bench is useful before leaving the garage.
- Use the first garage bench if HP or MP is low.
- Collect the Turbo Ether and two Hi-Potions if desired.
- Search the northern and northeast garage areas for the optional chests.
Obtain the keycard from the lobby reception booth
Leave the garage and enter the Shinra Building lobby. Search the southwest corner for a Moogle Medal if you want the optional item, then go upstairs and test the northern access door. The party will learn that a keycard is required.
After Tifa falls from the hanging-light sequence, move east and collect the chest containing 2,000 gil. Climb onto the car beside the motorcycle display and cross the display platforms toward the pillar. Before climbing the first ladder, circle around the pillar and cross the lighting rig to reach the purple chest containing Purple Pain, Tifa’s final weapon.
Return to the ladder and climb through the upper lighting section. At the final hanging-light sequence, use the displayed button prompt at the correct moment. Tifa reaches the reception booth and obtains the keycard. Return to Cloud and Barret, then use the card on the central route.
- Collect Purple Pain before climbing the first ladder if you want Tifa’s final weapon.
- Obtain the keycard from the reception booth.
- Use the lobby bench or menu to adjust equipment before continuing.
Visit the Exhibition Hall and choose the ascent route
With the keycard, enter the Exhibition Hall through the eastern route before returning to the central door. Open the chest inside for the Iron Maiden armor. It provides strong defense but has no materia slots, so compare it with your current armor before equipping it.
Return to the central route and choose either the elevator or the emergency stairwell. The elevator is quicker but includes security battles. The stairwell takes longer and is primarily a dialogue sequence. This choice does not alter the story, later objectives, or Chapter 17, so select the route that suits your current resources.
- Collect the Iron Maiden armor from the Exhibition Hall if useful.
- Choose the elevator for speed or the stairwell to avoid the elevator battles.
- Do not treat the route choice as a permanent story decision.
Complete the exhibits and Mayor Domino’s sequence
At the Skyview Lounge, interact with the holographic receptionist and enter Skyview Hall. Ride the escalator to the 60th floor and follow the guided tour. Wait for each exhibit sequence to finish before trying the next available door, then proceed through the President Shinra, Business Division, Mako Energy, and Cosmos Theater displays.
After the theater scene, follow the route to Mayor Domino’s office. When the scene ends, speak with Hart before leaving. Paying Hart 10,000 gil is optional for story progress, but it awards Barret’s EKG Cannon and information. A nearby chest contains 3,000 gil, which does not replace the requirement to pay Hart.
Continue through the archives and return to the escalator hall. Follow the route through the Urban Planning Division and recreation area toward the combat simulator. The nearby bench and vending machine are a useful preparation point. The jukebox in the area can provide Music Disc 31, Scarlet’s Theme, if it is still missing.
- Complete the guided exhibit tour and Mayor Domino’s scene.
- Pay Hart 10,000 gil only if you want the EKG Cannon and his information.
- Use the nearby bench before entering the required simulator challenge.
- Collect Music Disc 31 if desired.
Pass the required combat-simulator challenge
Speak with the contact beside the combat simulator and enter the story challenge Three-Person Team vs. Mayor Is Best. This fight is required to advance. Items cannot be used inside the simulator, so enter with suitable HP and MP and equip Healing materia beforehand.
The opening enemies are Cutters. Lightning can pressure them, but the fight is also manageable through physical attacks and focused ATB abilities. Keep moving away from their saw attacks, switch characters when one is being targeted, and use abilities after a Cutter is pressured or staggered. Do not spend resources on optional simulator challenges during this visit unless you specifically want them.
After winning, speak with the contact again. The party receives the updated keycard, which opens the route toward the upper floors and the reconnaissance objective.
- Complete Three-Person Team vs. Mayor Is Best.
- Do not rely on item use inside the simulator.
- Speak with the contact again after winning to receive the updated keycard.
Use the bathroom duct and reach Hojo’s laboratory
Return to the escalator hall and ascend to the 64th floor. Use the updated keycard to enter the conference area, then go to the southeast bathroom. Enter the rear stall to access the ventilation duct and watch the scenes from the observation points.
At the second branch in the duct, turn left into the dead end to collect the HP Up materia. Backtrack and continue toward the objective marker. After the reconnaissance sequence, leave the bathroom and follow Hojo toward the laboratory. Several fights occur along this route, so use character switching to keep enemies from surrounding the party.
In the laboratory passage, use the bench and vending machine before proceeding. Chests in this area contain two Antidotes, two Celeris, and two Remedies. Equip Healing and Revival materia before entering the testing area. If available, prepare Poison resistance with Star Pendants or use Cleansing materia so Poisona is available during the upcoming boss fight.
- Collect the HP Up materia from the duct’s left dead-end branch.
- Use the laboratory passage bench before entering the testing area.
- Collect the Antidotes, Celeris, and Remedies if useful.
- Equip Healing, Revival, and poison countermeasures before continuing.
Defeat Specimen H0512
After the rescue scenes, enter the Specimen H0512 arena. The nearby bench is the final preparation point before the fight, so restore HP and MP and recheck materia. H0512 has no standard elemental weakness. Barret can attack safely from range while Cloud and Tifa build ATB, but any character can contribute if the party avoids standing directly in front of the boss for too long.
Prioritize the large Left Claw whenever it is exposed. Destroying the claw pressures H0512 and creates the best opportunity to build the stagger gauge. When H0512 is pressured or staggered, spend ATB on focused damage rather than wasting the opening on minor enemies. The claw can regenerate, so repeat this priority whenever it returns.
H0512 summons H0512-OPT creatures throughout the fight. Destroy the first group quickly so they do not surround the party or interrupt healing. Later groups can be ignored briefly if they are far away and H0512 is vulnerable, but eliminate them when they begin blocking movement or threatening a downed character. Keep moving around the arena’s open lanes and use the surrounding structures as separation while Barret attacks from distance.
Watch for Rake and Seize. Guard or move away from the charge, and avoid remaining in front of the boss after it begins a close-range sequence. Noxious Expulsion and Mako Expulsion can inflict poison and other disabling effects, so spread the party instead of clustering around H0512. Heal poison with Poisona, use a Remedy when appropriate, or prevent it with Star Pendants. When H0512’s health drops and its attacks become more aggressive, prioritize survival over another hit. If the party is defeated, reload the laboratory checkpoint, restore at the bench, and reconfigure Healing, Revival, poison protection, and ranged damage before trying again.
- Restore the party at the bench immediately before the arena.
- Target and destroy H0512’s Left Claw to create pressure and stagger opportunities.
- Control H0512-OPT creatures when they interfere with healing or movement.
- Prepare for poison, Rake, Seize, Noxious Expulsion, and Mako Expulsion.
- Defeat Specimen H0512 before treating the chapter as complete.
Clear the laboratory and transition to Chapter 17
After H0512 is defeated, use the nearby bench near the elevator to restore HP and MP. Activate the elevator and continue upstairs. The next fight includes Elite Security Officers, Elite Grenadiers, and Elite Riot Troopers. Defeat them while keeping the party mobile and interrupting grenadiers before their explosives control the area.
Armored Shock Troopers appear in the following encounter and are vulnerable to Lightning. Use Thunder or Thundara when ATB permits, then finish the weakened enemies while watching for the faster units that join the fight. After the battles, free Aerith and follow her up the stairs.
Continue through the laboratory escape and the closing scenes. Chapter 16 is complete only after Specimen H0512 has been defeated, the post-boss security encounters and escape have finished, and the game transitions to Chapter 17: Deliverance from Chaos. Do not leave immediately after the boss or mistake the later Chapter 18 encounters for this chapter’s conclusion.
- Use the post-boss bench before activating the elevator.
- Defeat the security forces and Armored Shock Troopers.
- Free Aerith and complete the laboratory escape.
- Wait for the transition to Chapter 17: Deliverance from Chaos.
Before you move on
- The Shinra keycard was obtained from the reception booth after Tifa’s lighting-platform sequence.
- The Exhibition Hall, guided exhibits, Mayor Domino sequence, and required combat simulator challenge are complete.
- The updated keycard opened the 64th-floor route to the bathroom duct.
- The HP Up materia was collected or intentionally left behind.
- Operation: Save Aerith progressed through the laboratory rescue.
- Specimen H0512 was defeated after targeting its Left Claw and managing its summoned creatures.
- The post-boss security battles and laboratory escape were completed.
- The game transitioned to Chapter 17: Deliverance from Chaos, or Chapter Select records Chapter 16 as completed after the campaign clear.
References for this chapter
- Chapter 16: The Belly of the Beast — Final Fantasy VII Remake Walkthrough & Guide — GameFAQs
- Chapter 16: The Belly of the Beast — Final Fantasy VII Remake Walkthrough — PowerPyx
- Chapter 16: The Belly of the Beast Story Guide & Walkthrough — Game8
- Chapter 16: The Belly of the Beast — Neoseeker
- Final Fantasy 7 Remake Chapter 16 Walkthrough: Specimen H0512 Boss Guide — Millenium
Chapter 17 — Deliverance from Chaos: Hojo’s Lab and the Shinra Battles
Chapter 17 begins in Aerith’s room inside Shinra’s laboratory. Collect the Reinforced Staff, prepare Cloud, Tifa, and Aerith before the party separates, then follow the Drum’s central terminals as Cloud and Barret and Tifa and Aerith alternate. The optional Astral Cuff is in Level 4’s 2nd Ward – Biological Testing after Barret breaks the bulletproof glass; the optional Chain Bangle is in the Level 5 Control Deck. Brain Pod, Swordipede, Jenova Dreamweaver, Rufus with Darkstar, and the Arsenal are required fights. Use the available benches before major encounters, finish Drum exploration before taking the elevator, and change equipment when control switches. After defeating the Arsenal, complete the escape sequence and confirm that Chapter 18: Destiny’s Crossroads begins.
1. Collect the Reinforced Staff and prepare the opening party
When Cloud becomes controllable in Aerith’s room, turn toward the south side and open the purple chest for the Reinforced Staff, Aerith’s final main-story weapon. Complete the scene with Aerith, then check Cloud, Tifa, and Aerith in the party menu before leaving. The chapter soon divides these characters into separate groups, so give each usable equipment, Healing materia, and a revival option if available.
Follow the laboratory route until debris blocks the way. Defeat the Unknown Entities and use the nearby break room bench before entering the Drum. The nearby rooms contain optional supplies, including an Enfeeblement Ring, Phoenix Down, and Ether. Collect them if convenient, but they are not required for chapter progression.
- Open the purple chest for the Reinforced Staff.
- Check Cloud, Tifa, and Aerith before leaving the opening room.
- Use the break room bench before entering the Drum.
2. Search the Drum and reach Brain Pod
Follow the objective markers through the Drum and operate the central terminals when the game prompts a party switch. The route alternates between Cloud and Barret, then Tifa and Aerith. Side rooms contain optional supplies, but the terminals and marked doors are the required route. Keep healing and revival available because the party groups have separate equipment during these sections.
For the optional armor, continue with Cloud and Barret to Level 4, 2nd Ward – Biological Testing. After Barret automatically destroys the bulletproof glass, enter the next room and open the chest on the right to obtain the Astral Cuff. This chest is not on the Robotics Testing route. Continue through the required rooms afterward.
On Level 5, reach 2nd Ward – Control Deck. The Chain Bangle is in an optional chest in the Control Deck, near the route’s stairs and specimen area. Collect it before proceeding if you want the equipment; it is separate from the required Brain Pod path. After the Control Deck, continue through Specimen Refinement to reach Brain Pod.
Brain Pod can create additional copies as its health falls. Keep moving away from poison effects, eliminate copies when they surround the party, and use Lightning attacks when safe. Interrupt dangerous casts rather than allowing the boss to control the arena. The fight ends the required Drum section, but the optional Astral Cuff and Chain Bangle are obtained earlier from their separate chests.
- Operate each required central terminal.
- Open the Astral Cuff chest in Level 4 Biological Testing after Barret breaks the glass.
- Open the Chain Bangle chest in the Level 5 Control Deck if desired.
- Reach and defeat Brain Pod.
3. Rescue Red XIII and defeat Swordipede
After Brain Pod, follow the marked route to the Fourth Ward. Switch to Tifa and Aerith when prompted, defeat the enemies on the platforms, descend to Red XIII, and clear the Unknown Entities around him. Activate the nearby switch and the terminal marked 04 to return control to Cloud and Barret. A side path in the large pipe contains an optional Mega-Potion.
Swordipede begins against Cloud and Barret and later switches to Tifa and Aerith. Use Barret’s ranged attacks during the first phase because Cloud’s melee strikes are unreliable against the machine’s armored body. Watch for the spinning saw, electric projectiles, and lightning arcs around the machine. In the second phase, Aerith can attack from a safer distance while Tifa contributes when the boss is exposed. Preserve healing and avoid standing directly in front of its attack path.
- Rescue Red XIII and activate the 04 terminal.
- Collect the Fourth Ward Mega-Potion if wanted.
- Defeat both Swordipede phases.
4. Complete the laboratory transition and defeat Jenova Dreamweaver
After Swordipede, follow the path back to the elevator and reunite the party. Finish any Drum exploration and optional chest collection before taking the elevator toward the rooftop; this transition ends the earlier laboratory route for the current chapter run. At the rooftop area, use the bench and vending machine before entering the boss fight.
Jenova Dreamweaver’s tentacles are the practical targets. Destroy exposed side tentacles to pressure the boss and build stagger, then attack the body during the opening. Use pillars to avoid purple smoke and other ranged attacks. During the later phase, destroy floor tentacles that restrict movement and watch for attacks that can inflict Stop. Do not waste spells while Reflect is active.
- Finish desired Drum exploration before taking the elevator.
- Use the rooftop bench and vending machine.
- Destroy Jenova’s side and floor tentacles and defeat Dreamweaver.
5. Defeat Darkstar and Rufus
When control returns to Cloud on the rooftop, prepare him for a solo fight. Darkstar supports Rufus and can restore him, so defeat Darkstar first. Use Punisher counters or Counterstance when its attacks are predictable, and avoid Subdue when the dog closes in.
Rufus is most vulnerable after an attack when he reloads. Circle at a safe distance, wait for the reload animation, and use Braver or another strong ATB attack during that opening. Do not repeatedly attack into his guarded stance because he can evade and counter. Healing must come from Cloud’s own equipment and materia because the other party members are absent.
- Defeat Darkstar before Rufus.
- Punish Rufus during reload windows.
- Finish the rooftop battle with Cloud alone.
6. Destroy the Arsenal’s drones and survive Cry Havoc
Before the Arsenal fight, control returns to Barret and Aerith and the menu becomes available. Equip Healing and Revival materia on the two characters. Lightning is useful against the Barrier Drones. The Arsenal’s barrier prevents effective direct damage until all three drones are destroyed.
Use debris and pillars as cover while Barret attacks from range and Aerith supports with spells and healing. Switch characters if one is pinned down. Target drones when they are exposed, then use Barret’s Overcharge or Lightning attacks to finish pressured drones. Once the barrier is gone, attack the Arsenal’s exposed cannon and wheels while continuing to use cover.
Hide from Saturation Fire, Homing Lasers, Voltaic Discharge, and other major attacks. The Arsenal can destroy cover, so move to a new piece of debris when the current position becomes unsafe. When Cry Havoc begins, get behind available cover and wait out the blast. During the later charge, the boss stops attacking for a short period; spend saved ATB, Limit Breaks, summons, and Lightning attacks to defeat it before the attack fires.
- Equip Barret and Aerith before the fight.
- Destroy all three Barrier Drones.
- Use cover against the Arsenal’s major attacks.
- Survive the first Cry Havoc.
- Use saved resources during the final charge and defeat the Arsenal.
7. Finish the escape and verify the chapter transition
After the Arsenal falls, watch the escape scenes and continue through the scripted departure. There is no alternate route that changes Chapter 17’s outcome. The chapter is complete when the escape sequence finishes and the game advances to Chapter 18: Destiny’s Crossroads.
Keep the resulting save or checkpoint if you intend to replay the chapter. Reaching Chapter 18 confirms Chapter 17 completion, but the main campaign is not finished until Chapter 18 and its ending sequence are completed.
- Complete the Arsenal escape sequence.
- Confirm that Chapter 18: Destiny’s Crossroads begins.
- Retain the post-chapter save for replay or cleanup.
Before you move on
- The Reinforced Staff has been collected if desired.
- Brain Pod, Swordipede, Jenova Dreamweaver, Rufus with Darkstar, and the Arsenal have been defeated.
- The Arsenal escape sequence has finished.
- The game has advanced to Chapter 18: Destiny’s Crossroads.
- For full campaign completion, continue through Chapter 18 and allow its ending sequence to finish.
References for this chapter
- Chapter 17 - Deliverance from Chaos - Final Fantasy VII Remake Intergrade Walkthrough & Guide
- Chapter 17 -- Deliverance from Chaos - Final Fantasy VII Remake Walkthrough & Guide
- Deliverance from Chaos - Chapter 17 - Main Scenario | Final Fantasy VII Remake Intergrade
- Final Fantasy VII Remake Intergrade Chapter 17 Collectibles Guide
- Final Fantasy 7 (VII) Remake Chapter 17: Deliverance from Chaos Walkthrough
Chapter 18 — Destiny’s Crossroads: Finish the Remake Campaign
Chapter 18 is Final Fantasy VII Remake Intergrade’s final main-story chapter. It begins with the Midgar Expressway motorcycle sequence, continues through the Motor Ball fight, and ends with the Whisper battles and Sephiroth. Prepare equipment and Materia before starting, then use the rest stop after Motor Ball to restore the party and make final adjustments. During the Whisper sequence, the characters who later assist Cloud against Sephiroth are determined by performance points earned during that battle. Abilities, spells, items, Limit Breaks, staggering Whispers, reducing them to zero HP and certain finishing blows affect those results. Chapter 18 has no separate post-ending epilogue chapter. Episode INTERmission is separate optional PS5 content and is not required for the main campaign.
1. Prepare before starting Chapter 18
Chapter 18 follows Chapter 17 and opens on the Midgar Expressway. Make your final equipment and Materia changes before launching the chapter; there is no normal preparation bench before the motorcycle section. Equip Healing and Revival Materia on more than one character if possible, since the final battles change the available party members. HP Up and defensive Materia are useful general-purpose choices, while a support setup that leaves at least one character able to heal is safer than filling every slot with damage Materia.
If you want a particular character to assist Cloud against Sephiroth, remember that this is not selected by a dialogue choice. During the Whisper sequence, Barret, Tifa and Aerith accumulate performance points when they use abilities, spells or items, use Limit Breaks, reduce Whispers to zero HP and stagger them, or deliver certain finishing blows. The game uses those totals to determine which supporting characters appear and the order in which they join. You can influence the result by actively using the character you want to favor, but do not sacrifice survival merely to force a specific lineup.
- Finish equipment and Materia changes before entering Chapter 18.
- Place Healing and Revival Materia on multiple usable characters.
- Keep at least one reliable healing option available.
- Use the preferred supporting characters actively during the Whisper battle if you want to influence the Sephiroth lineup.
2. Clear the Midgar Expressway motorcycle sequence
Follow the highway route and use the motorcycle’s attacks, guard and movement to protect the group while defeating pursuing Shinra forces. Deal with enemies approaching from behind before focusing on targets farther ahead. Airborne enemies such as Slug-Rays and the M.O.T.H. Unit are easier to handle with the motorcycle’s ranged sword attack when they are outside melee reach.
During the truck encounter, move to the side opposite the gunfire coming from the truck window. When the helicopter marks bombing areas on the road, leave the visible danger zones instead of staying in place to finish an enemy. Hugging the road edges can help avoid some attacks, although scraping the side is preferable to remaining in an impact area. Red XIII periodically restores Cloud during this escape, so prioritize reaching the next section rather than trying to finish the sequence at full health.
- Eliminate enemies attacking from behind.
- Use ranged motorcycle attacks against airborne enemies.
- Move away from helicopter bombing markers and truck fire.
- Prioritize forward movement and survival over perfect damage.
3. Defeat Motor Ball
Motor Ball has multiple wheels that must be destroyed before the main body becomes vulnerable. Attack the exposed wheels from the side and use the opening after they are damaged to strike the vehicle itself. Watch its animations instead of holding the attack continuously: when it raises its wheels, brake before the slam; when it charges the flame attack, brake and create distance; and when it fires sustained gunfire, guard if you cannot move clear safely.
When Motor Ball moves ahead and launches electrical hazards along the road, stay toward a safer side and keep enough distance to react. Continue attacking the wheels whenever the route allows, then repeat the vulnerability cycle until the vehicle is defeated. After the fight, follow the expressway route into the final approach.
- Target the wheels from the side.
- Brake for the wheel slam and flame attack.
- Guard against sustained gunfire when necessary.
- Move toward a safer side when electrical hazards travel down the road.
4. Use the rest stop and enter the final route
After Motor Ball, continue until the party reaches the expressway rest stop. Use the bench and vending machine here. Restore HP and MP, replenish supplies if needed, and inspect Cloud, Barret, Tifa and Aerith’s equipment before proceeding. The upcoming Whisper sequence is followed by Sephiroth, so distribute Healing and Revival Materia to characters who can use them during the party changes.
Continue along the marked route and answer Aerith’s readiness prompt when you are prepared. After the following cutscene, step on the successive arrow pads and follow the path through the pipes. There is no useful side route to search after entering this section; stay on the marked path until the Whispers attack.
- Use the bench after Motor Ball.
- Restore the party and replenish supplies at the vending machine.
- Review the four main party members’ equipment and Materia.
- Confirm readiness only after the final pre-battle check.
5. Defeat Whisper Harbinger, the named Whispers and Whisper Bahamut
The opening fight includes Whisper Harbinger and the smaller named Whispers: Rubrum, Viridi and Croceo. Harbinger cannot be damaged normally at the start, so focus on the smaller Whispers. Target one at a time, block when melee pressure increases and switch characters when the active fighter is surrounded or cannot safely build ATB. When a smaller Whisper is staggered, use the opening to deal damage and advance the encounter.
The battle moves through separated party formations and changes the available characters. Follow the pipe and arrow-pad prompts after the arena shifts. Later, the named Whispers combine into Whisper Bahamut. Move away from its large area attacks, avoid standing beneath dangerous effects and heal before multiple characters become critical. Spend strong abilities and Limit Breaks during safe openings, but preserve enough MP and healing capacity for Sephiroth.
The named Whispers and Harbinger performance also determine the later Sephiroth support lineup. To favor a character, use that character’s ATB abilities, spells or items and Limit Breaks, and allow them to contribute to staggering or finishing Whispers when practical. The point system is based on what happens during this sequence, not on arbitrary story variation. After Bahamut separates again, defeat the remaining Whispers and then damage Whisper Harbinger when the battle permits it.
- Focus on the smaller named Whispers before Harbinger.
- Exploit stagger openings rather than wasting attacks on an invulnerable target.
- Follow the pipe and arrow-pad route changes.
- Move away from Whisper Bahamut’s area attacks.
- Preserve MP and healing resources for Sephiroth.
- Use preferred characters actively if you want to influence who joins Cloud.
6. Defeat Sephiroth and confirm completion
The Sephiroth battle begins with Cloud alone. Sephiroth’s melee attacks punish extended offense, so use Punisher Mode counters, guarding and Counterstance when you can read his approach. Wait for an attack to finish, answer with a short punish or an ATB ability, then return to a defensive position. Keep ATB available for Cure or Revival instead of spending every charge on damage. Support characters join according to the performance points earned during the Whisper sequence, so be ready for Barret, Tifa or Aerith to appear in a lineup that reflects those results.
When an ally joins, switch characters to divide Sephiroth’s attention and make use of that character’s strengths. Ranged attacks help when Sephiroth is difficult to reach, while guarding is safer during his strongest melee strings. During wide-area or elemental attacks, reposition and survive rather than forcing a combo. If a character is pressured, switch away and use the other active party member to build ATB or draw attention.
Defeating Sephiroth triggers the final story scenes and the ending sequence. Continue until the game records the chapter completion result, then return to the main menu and verify that Chapter Select and Hard difficulty are available. Chapter 18 is the final main-story chapter; there is no separate epilogue chapter to clear. Episode INTERmission remains an optional Yuffie episode accessed separately from the Intergrade title menu.
- Guard or counter Sephiroth instead of trading full combos.
- Keep ATB available for healing and revival.
- Adapt to whichever supporting characters join Cloud.
- Complete the final story sequence until the chapter result registers.
- Verify Chapter Select and Hard difficulty from the main menu.
- Treat Episode INTERmission as optional separate content.
Before you move on
- Chapter 18: Destiny’s Crossroads records as complete.
- The final story scenes and ending sequence have been viewed through the chapter completion result.
- Chapter Select is available from the main menu.
- Hard difficulty is available after the main campaign completion.
- Episode INTERmission is available separately if the PS5 Intergrade installation includes it; it is optional and does not replace the main ending.
References for this chapter
- FINAL FANTASY VII REMAKE INTERGRADE — Square Enix official product page
- FINAL FANTASY VII REMAKE INTERGRADE — PlayStation official page
- Chapter 18: Destiny’s Crossroads Story Guide & Walkthrough — Game8
- Final Fantasy 7 Remake Chapter 18: Destiny’s Crossroads Walkthrough — PowerPyx
- Chapter 18 — Final Fantasy VII Remake Walkthrough & Guide — GameFAQs
Episode INTERmission (Yuffie) — PS5-Exclusive Side Adventure
FF7R EPISODE INTERmission is a separate two-chapter story included with Final Fantasy VII Remake Intergrade on PS5. Yuffie infiltrates Midgar with Sonon Kusakabe, first working with Avalanche in the Sector 7 Slums and then entering Shinra’s Advanced Weaponry facility. Complete Wutai’s Finest and Covert Ops to finish the episode. Fort Condor, the Happy Turtle flyer hunt, Shinra Box Buster, Ramuh, and several chests are optional, but they provide trophies, materia, equipment, or useful practice. Chapter 1 ends when Yuffie boards the train, so finish desired Sector 7 activities beforehand. After INTERmission is cleared, its chapters can be replayed and Hard mode becomes available. Clearing both INTERmission and the main campaign also unlocks the Weiss battle in the main game’s Chapter 17 Combat Simulator.
1. Start INTERmission and establish Yuffie’s combat setup
Choose FF7R EPISODE INTERmission from the Intergrade title screen. The episode has its own two-chapter progression and does not replace the main campaign. At the opening, follow the marked route through the Sector 7 outskirts and complete the introductory fights. Enter the building through the opening marked by the Moogle poster, then continue across the bridge and through the factory route.
Yuffie’s shuriken is central to her combat loop. Throw it to attack from range and use her Elemental Ninjutsu to apply an element without needing to stand beside the target. Recall the shuriken when you need close-range attacks or faster access to abilities. Use Tactical Mode to spend ATB deliberately rather than allowing Yuffie to remain exposed while waiting for commands.
Sonon becomes available later in Chapter 1. You do not directly control him like a normal party leader, but you can issue commands and use Synergy when both characters have ATB. Save Synergy for pressured or staggered enemies, or for moments when you need to interrupt a dangerous attack.
- Equip healing materia and at least one elemental option at the first available bench.
- Practice throwing and recalling the shuriken before the first major encounter.
- Use Tactical Mode to issue Sonon commands instead of leaving him idle during dangerous attacks.
2. Complete the opening Sector 7 route and gather useful equipment
Continue through the outskirts, abandoned warehouse, and exterior paths by following the objective markers. During the early exploration, use Yuffie’s thrown shuriken to break distant boxes and activate switches. In the factory section, drop to the lower level when the route branches to collect the chest containing Hi-Potions, then use the elevator to reach the HP Up materia above. After returning to the upper route, check the area near the yellow bin for the Power Wristguards.
Once you reach the Sector 7 Slums, meet the Avalanche contacts and complete the conversations required to advance. Billy Bob introduces the combat-simulator connection, Polk introduces Fort Condor, and Nayo provides the next story direction. Sonon’s Indurate Staff can be collected from a purple chest during the pursuit through the station area. In the shipping-facility route, stop conveyors with Yuffie’s ranged switch throws, and search the lower areas before moving on for the Prayer materia, Fort Condor card, Elixir, Steel Reaper, and Magic Up materia.
At the Main Pillar Maintenance area, use the bench and vending machine before descending toward Gigantipede. The Lightning materia near this preparation point is especially useful for the boss. If your equipment is already adequate, the chests and materia remain optional; they are not required to trigger the story.
- Collect Sonon’s Indurate Staff if you want an early weapon upgrade.
- Stop each conveyor before crossing and check lower platforms for optional chests and materia.
- Prepare healing and Lightning materia before entering the Gigantipede arena.
3. Defeat Gigantipede and finish Chapter 1 before boarding the train
At the start of the Gigantipede fight, use Yuffie’s Elemental Ninjutsu with Lightning and throw the shuriken at the boss’s tail. Normal attacks against the head are safer when the boss is not protected by its spinning machinery, but do not remain in front of it during Containment Laser. Leave the red targeting area immediately; staying inside allows the boss to keep pressuring you with tracking projectiles.
When Gigantipede climbs onto the wall, destroy the Containment Drones quickly with thrown shuriken attacks. Removing them reduces the boss’s ability to keep the arena covered while you are trying to reposition. When the boss returns to the platform, resume the lightning-tail strategy. Later, its head covering opens and direct attacks against the spinning head become dangerous. Focus the tail and the summoned drones until the boss is Pressured or Staggered, then use Sonon’s Synergy attacks and Yuffie’s strongest available abilities.
After the fight, return to Avalanche’s base and complete the required story scenes. Before entering the station and boarding the train, finish any Sector 7 activities you want to do during this chapter. Boarding the train advances to Chapter 2 and prevents normal return to the Chapter 1 Slums during that run.
- Move out of the red Containment Laser area as soon as it appears.
- Destroy Containment Drones during the wall phase.
- Finish desired Fort Condor, Happy Turtle, Box Buster, shop, and Ramuh activities before boarding the train.
4. Use Chapter 1’s optional activities for rewards and trophies
Fort Condor is an optional board game available after speaking with Polk. Place units to counter the opposing unit types, protect your headquarters, and push toward the enemy base when your lane is stable. Winning matches raises Yuffie’s Fort Condor rank and unlocks additional opponents, boards, and units. It is not required for the story, but becoming the Fort Condor grandmaster is an optional completion goal and includes a Hard-mode requirement for the related trophy.
The Happy Turtle campaign has six flyers hidden throughout the Sector 7 Slums. Follow the side objective and search the marked neighborhoods, alleys, and buildings rather than expecting the flyers to be along the main story path. Finding all six completes the flyer objective and awards its associated trophy. Shinra Box Buster is another optional challenge accessed through the Chapter 1 activities. Break high-value crates first, use Yuffie’s ranged attacks to avoid unnecessary detours, and replay stages if you need the materia rewards.
Ramuh is an optional summon battle accessed through Chadley’s combat-simulator content after Sonon joins. Equip healing and suitable elemental materia before attempting it. Losing does not block story progress; return to the bench, adjust the loadout, and retry when ready.
- Find all six Happy Turtle flyers for the optional trophy.
- Complete Box Buster stages if you want all of its materia rewards.
- Challenge Ramuh after Sonon joins if you want the summon materia.
- Raise Fort Condor rank only if pursuing its optional completion goals.
5. Clear Chapter 2: Covert Ops through Scarlet’s facility
After the train sequence and opening scenes, follow Yuffie and Sonon through Shinra’s Advanced Weaponry area. Use the early bench before Scarlet’s test battles. Mechanical enemies are generally easier when pressured with Lightning, while Yuffie’s thrown shuriken is useful against targets that are awkward to reach or that block direct melee attacks.
In the materia-research section, activate the terminal to restore power and collect the accessible Ninja Cannonball, Skill Master, and Steadfast Block materia. Check the tube machine before leaving the room for the Ap Up materia, then use the nearby bench and vending machine. The following encounter route allows choices between different robot groups. Match your approach to the enemies selected: Lightning is useful against several machines, Wind helps against certain Monodrive variants, and exposed cores should be targeted when armored enemies appear.
Before the Crimson Mare fight, heal, refill your items, and verify that Yuffie and Sonon have usable healing and elemental options. Scarlet and the Crimson Mare can be targeted separately. Scarlet is vulnerable to Fire, while the mech is vulnerable to Lightning. Damaging Scarlet can pressure or briefly stun the encounter, but the battle ends only when the Crimson Mare’s full health is depleted. Clear nearby Sentry Rays early so their ranged fire does not combine with the mech’s attacks.
- Collect the three powered-room materia if you want the optional upgrades.
- Use the bench before the Crimson Mare encounter.
- Bring Fire for Scarlet and Lightning for the Crimson Mare.
- Remove Sentry Rays early when they appear.
6. Survive the Crimson Mare and Nero encounters
During the Crimson Mare fight, keep moving around the arena and avoid standing in front of the mech during heavy attacks. Use Lightning against the mech, Fire against Scarlet, and Synergy attacks when the boss is Pressured. Do not spend all ATB immediately; retain enough for healing or a quick defensive response after the mech changes position.
After the facility route and final preparation bench, the episode’s last major fight begins against Nero. His darkness attacks cover lanes and sections of the arena, so rely on Yuffie’s ranged shuriken attacks and dodge laterally when a line attack is aimed at her. Do not remain in front of him while waiting for ATB. Use Sonon’s commands and Synergy during safe openings, then disengage before Nero’s area attacks reach the party.
Nero’s battle changes location and pattern as his health falls. In later phases he becomes more aggressive, uses faster aerial attacks, and can create an arena-wide darkness effect that steadily damages the party. Continue moving, prioritize healing before damage, and use any opening to attack his Abyssal Wings when they become targetable. Destroying the wings can create a valuable interruption window, but survival remains more important than forcing a risky close-range combo.
- Keep Yuffie moving instead of trading damage with Nero at close range.
- Dodge Nero’s line attacks sideways rather than retreating directly backward.
- Use healing ATB before committing to a long Synergy sequence.
- Target the Abyssal Wings when the opportunity is safe.
7. Confirm episode completion and postgame unlocks
Defeating Nero leads into the concluding INTERmission scenes. Let the final scenes finish and allow the episode to register its completion. The two story chapters are Wutai’s Finest and Covert Ops. Completion is separate from the main campaign’s ending and does not replace the Remake’s Midgar conclusion.
After clearing INTERmission, its Chapter Select becomes available and Hard difficulty can be used for the two episode chapters. Hard mode is relevant to the episode’s higher completion goals, including the stronger Fort Condor requirement and Hard-mode episode rewards. Optional activities can be revisited through the appropriate chapter replay instead of repeating the entire episode.
To unlock Weiss the Immaculate in the main game, clear both INTERmission chapters and finish the main campaign. Then load the main game’s Chapter 17 on Hard and use the Shinra Combat Simulator route to access the Weiss challenge. The postgame INTERmission simulator also gains additional challenges after the required story completion. These are optional and are not needed to mark the two-chapter episode as complete.
- Confirm Wutai’s Finest and Covert Ops both show as completed.
- Use INTERmission Chapter Select to revisit missed activities.
- Complete both the main story and INTERmission before looking for Weiss.
- Access Weiss through the main game’s Chapter 17 Hard-mode Combat Simulator.
Before you move on
- Wutai’s Finest is marked complete.
- Covert Ops is marked complete after the Nero battle and closing scenes.
- INTERmission Chapter Select is available after episode completion.
- Optional completion can be verified through the six Happy Turtle flyers, Fort Condor progress, Box Buster materia, and Ramuh materia if those goals were pursued.
- After the main campaign and INTERmission are both complete, the Weiss challenge is available through the main game’s Chapter 17 Hard-mode Combat Simulator.
References for this chapter
- FINAL FANTASY VII REMAKE INTERGRADE – AVAILABLE NOW!
- Notice of FINAL FANTASY VII REMAKE INTERGRADE Updates
- INTERmission: Yuffie Episode DLC Walkthrough
- Intergrade Chapter 1: Wutai's Finest Walkthrough
- Final Fantasy 7 Remake Yuffie Intermission Chapter 1 Walkthrough
- Final Fantasy 7 Remake Yuffie Intermission Chapter 2 Walkthrough
- Weiss Boss Guide and How to Unlock
- Intergrade: Post-Game Content and 100% Clear Guide
Postgame: Chapter Select, Missed Sidequests, and Completion Checklist
After clearing Chapter 18 and watching the ending, keep the completed save and use Chapter Selection for cleanup. Chapter Select is the game's carryover replay system: your levels, weapons, armor, accessories, materia, gil and inventory remain available while the selected chapter's story and quest state are replayed. Use it to finish missed Odd Jobs, collect the nine bridal dresses, complete music discs, weapon abilities, Battle Intel and Enemy Skill objectives, and earn chapter-specific trophies. Hard difficulty also becomes available after the first story clear and must be started through Chapter Select. Episode INTERmission is separate PS5 content and is not required for the 18-chapter main campaign.
Preserve the completed save and open Chapter Selection
Finish Chapter 18 and allow the ending sequence and credits to play. When the game creates the completed-story save, preserve it separately instead of overwriting it with an earlier chapter replay. Load that completed save, open the Options menu, choose System, and select Chapter Selection. Confirm that Chapters 1 through 18 are listed before beginning cleanup.
Chapter Select is the only replay system needed for postgame progression. It carries your character levels, weapons, armor, accessories, materia, gil and inventory into the chapter you choose. The selected chapter's story events, decisions and available quests are then replayed. Keep the completed save available so you can return to the finished campaign without losing your established setup.
- Chapter 18 has been cleared.
- The ending and credits have played.
- The completed-story save is preserved.
- Chapter Selection lists all 18 main chapters.
Complete the 26 Odd Jobs and both Chapter 9 routes
The game's 26 Odd Jobs appear in Chapters 3, 8, 9 and 14. Complete any missed requests through Chapter Select. All 26 cannot be completed in one uninterrupted playthrough because two Chapter 9 routes cancel each other, but both routes can be recorded through chapter replay.
For the Sam route, complete The Party Never Stops and A Dynamite Body. For the Madam M route, complete The Price of Thievery and Shears' Counterattack. Burning Thighs is available on either route. Replay Chapter 9 for the route you missed, complete its available requests, and continue far enough for the chapter results to register before switching chapters.
Chapter 14 contains the final group of optional requests. If you are pursuing Best in the Business, complete every available Odd Job in Chapters 3, 8, 9 and 14. These quests are not required for the main ending.
- All 26 Odd Jobs are complete if pursuing Best in the Business.
- The Sam route has been completed.
- The Madam M route has been completed.
- All available Chapter 14 requests are complete.
Register all nine bridal dresses
Tifa's dress is decided in Chapter 3. Complete all six Chapter 3 sidequests to unlock the Alone at Last Discovery event in Stargazer Heights. During that event, choose Mature, Sporty or Exotic. If the six sidequests are not completed, the Mature result is assigned automatically.
Aerith's dress is determined by the number of Chapter 8 sidequests completed: zero, three or all six. Cloud's dress is determined by the Chapter 9 result: no Chapter 9 sidequests, the Sam route, or the Madam M route. After making each setup, continue through the relevant chapter until the Chapter 9 bridal-dress scene occurs; merely selecting a quest pattern without reaching that scene will not register the viewed dress.
A practical cleanup order is Chapter 3 for the missing Tifa result, Chapter 8 for the required zero-, three- or six-quest result, and Chapter 9 for each missing route. Chapters 4 through 7 do not need to be replayed between these dress setups. The Dressed to the Nines trophy requires viewing all nine outcomes.
- Tifa's Mature, Sporty and Exotic dresses have been viewed.
- Aerith's zero-, three- and six-quest dresses have been viewed.
- Cloud's no-quest, Sam-route and Madam M-route dresses have been viewed.
- Dressed to the Nines is awarded if pursuing the trophy.
Use the Play Log and chapter replay for collectibles
Open the Play Log from the System menu after the story clear and use it to identify missing music discs, weapon abilities, Battle Intel reports, Enemy Skills and chapter-specific records. Select the chapter containing the missing objective, then follow its map, vendor and NPC markers rather than assuming every item is obtained on the main route.
For weapon abilities, equip the weapon containing the missing ability and use that weapon until its proficiency reaches 100 percent. For Enemy Skills, equip Enemy Skill materia before fighting enemies whose listed techniques can be learned. Music discs may require a specific shop, jukebox or NPC interaction, so revisit the relevant chapter and check optional locations before leaving.
There are 20 Battle Intel reports, and Chadley appears at several fixed points including Chapters 3, 8, 9, 14 and 16. Combat challenges and trophy-specific activities are separate from the campaign ending; complete them only if they are part of your goal.
- Missing music discs are identified and collected.
- Weapon abilities are learned.
- Battle Intel and Enemy Skill objectives are complete if required.
- Chapter-specific trophies have been checked.
Start Hard difficulty through Chapter Select
Completing the story once unlocks Hard difficulty. Start it from the completed save through Options, System, and Chapter Selection; do not start a separate New Game and expect the same Hard-mode access. Your existing equipment, levels, materia and inventory remain available for the replay.
Hard mode prevents item use during battles, so Potions, Ethers, Phoenix Downs and other consumable items cannot substitute for healing or recovery. Benches restore HP, but MP management remains important across a chapter. Use Cure, Prayer, Chakra and careful bench planning to preserve resources for mandatory fights.
Hard completion is chapter-based. To earn the Hard-mode completion trophy, clear all 18 main chapters on Hard, not only the chapters containing difficult bosses. Chapter Select permits chapters to be replayed in any order, but clearing them from Chapter 1 through Chapter 18 makes progress easier to track. Preserve the normal completed save before beginning this replay.
- Hard difficulty is available through Chapter Selection.
- A separate completed normal-difficulty save is preserved.
- All 18 chapters are cleared on Hard if pursuing the full trophy list.
- Hard-only trophies and manuscripts have been checked.
Verify completion and handle Episode INTERmission separately
The main Final Fantasy VII Remake campaign is complete when Chapter 18 has been cleared and its ending sequence has played. The practical postgame confirmation is that the completed save opens Chapter Selection with all 18 main chapters available. The ending does not require all 26 Odd Jobs, all nine dresses, every music disc, every Battle Intel report, Hard mode or every trophy.
Episode INTERmission is separate PS5 content included with the Intergrade release. It has its own episode entry, progression and objectives, and it is not an additional main-campaign chapter. Start it from the title menu when you want to complete Yuffie's story and its associated trophies. Its completion does not replace the Chapter 18 campaign clear.
Do not delete the completed save until Chapter Selection opens and your intended cleanup progress is confirmed in the Play Log or trophy list. If your goal is only the campaign, stop after verifying Chapter 18, the ending and the completed save. If your goal is full trophy completion, continue with Odd Jobs, dresses, collectibles, combat objectives and the full Hard replay.
- Chapter 18 is cleared and the ending has played.
- The completed save opens Chapter Selection for Chapters 1 through 18.
- The Play Log reflects the collectibles and records you intended to complete.
- Best in the Business is awarded if all 26 Odd Jobs were completed.
- Dressed to the Nines is awarded if all nine dresses were viewed.
- The Hard-mode completion trophy is awarded if all 18 chapters were cleared on Hard.
- Episode INTERmission is complete only if its separate content is part of your goal.
Before you move on
- Chapter 18 has been cleared and the ending sequence has played.
- The completed save provides Chapter Selection for all 18 main chapters.
- All 26 Odd Jobs are complete if pursuing Best in the Business.
- All nine bridal dresses have been viewed if pursuing Dressed to the Nines.
- The Play Log confirms the intended music discs, weapon abilities, Battle Intel and Enemy Skill progress.
- Hard difficulty is available through Chapter Selection, and all 18 chapters are cleared on Hard if pursuing the complete trophy list.
- Episode INTERmission is completed separately if its story and trophies are desired.
References for this chapter
- FINAL FANTASY VII REMAKE INTERGRADE Available Now for PlayStation 5 Console
- Final Fantasy VII Remake Trophy Guide & Roadmap
- Final Fantasy VII Remake: Is There Chapter Select and New Game Plus?
- Final Fantasy VII Remake Hard Difficulty Guide - Tips & Tricks
- Final Fantasy 7 VII Remake All Side Quest Locations
- Final Fantasy 7 VII Remake Chapter 3: Home Sweet Slum Walkthrough
- Final Fantasy 7 VII Remake Chapter 9: The Town That Never Sleeps Walkthrough
- Final Fantasy 7 VII Remake All Battle Intel Reports
Finishing up
The main campaign is complete when Chapter 18: Destiny’s Crossroads is cleared, the final story scenes and credits have played, and the postgame options become available. There is no separate Epilogue chapter after Chapter 18.
Confirm that Chapter Select is available from the completed save. Use it to replay chapters, complete missed sidequests, change Wall Market dress outcomes and finish optional upgrades or trophies.
If you want the full trophy list, use Chapter Select for missed sidequests, minigames, dresses, collectibles, combat challenges and Hard-mode clears.
To finish Episode INTERmission, complete its separate story chapters and any optional objectives you want. It is not required for the main campaign ending.
Keep the completed save after the Chapter 18 ending so you can verify Chapter Select and perform cleanup without losing the campaign clear.
Choose your next gameScreenshots & video
Game imagery for reference. Follow the written chapters above for the route and strategies.
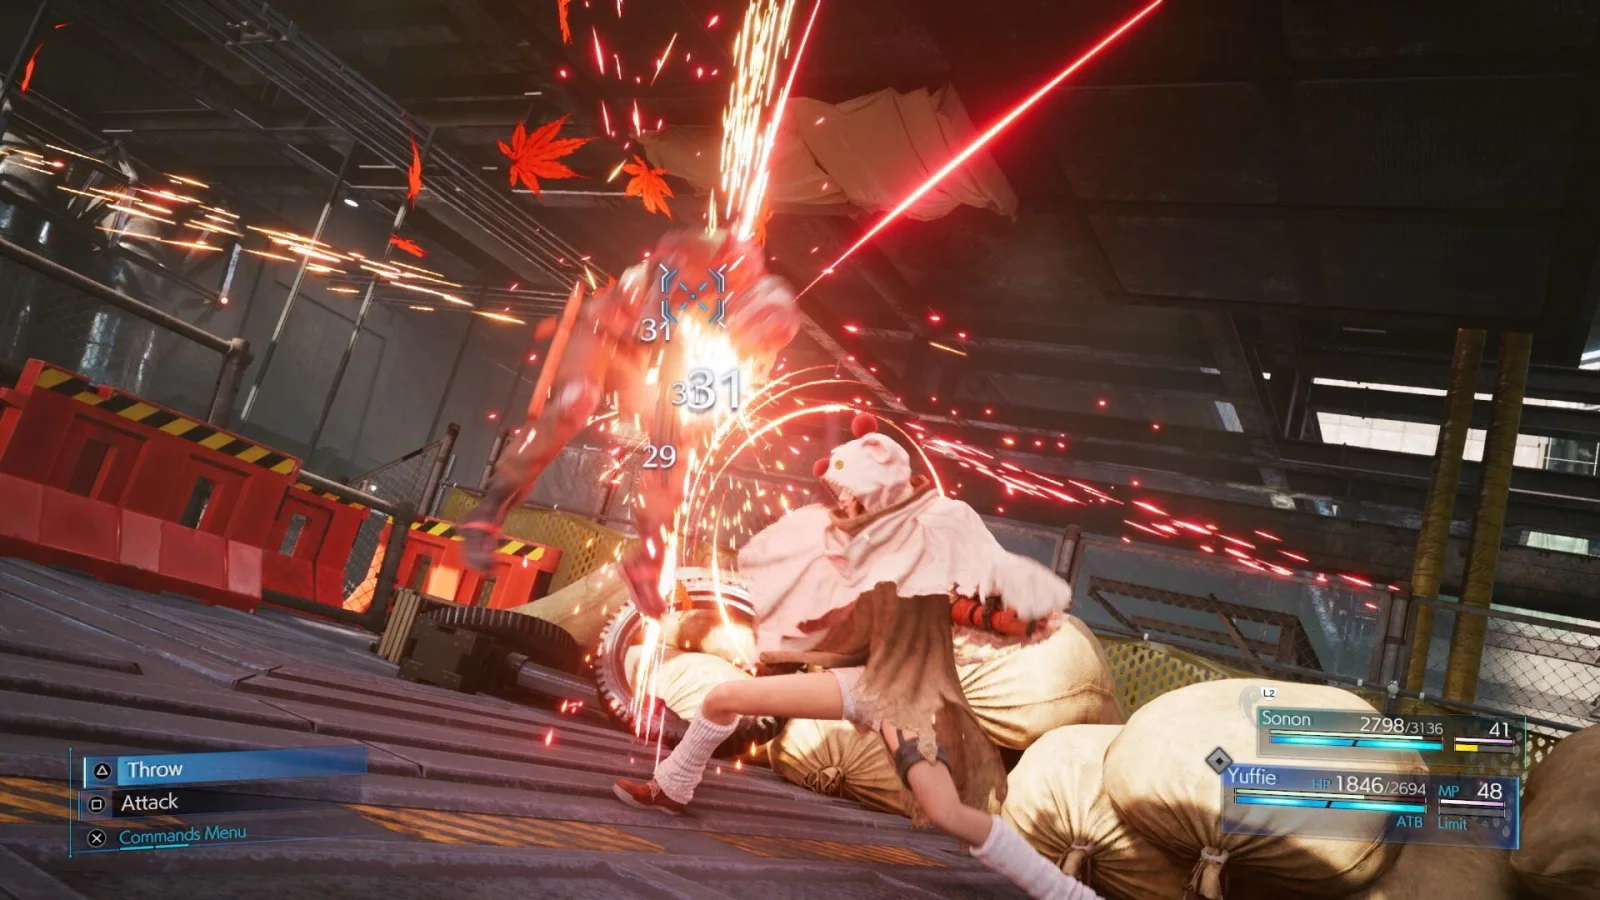
Sources & references
Our original guide draws on the references below. Check the edition at the top of this page before following controls or unlock requirements.
- FINAL FANTASY VII REMAKE INTERGRADE — PlayStation official page
- Chapter 1 - Final Fantasy VII Remake Intergrade Walkthrough & Guide — GameFAQs
- Final Fantasy 7 Remake Chapter 1 Walkthrough: Destruction Of Mako Reactor 1 — GameSpot
- Chapter 1: The Destruction of Mako Reactor 1 — Neoseeker
- Final Fantasy 7 Remake Chapter 2: Fateful Encounters Walkthrough
- Chapter 2: Fateful Encounters Story Guide & Walkthrough | FF7 Remake
- Chapter 2: Fateful Encounters - Final Fantasy VII Remake Intergrade Walkthrough & Guide
- FINAL FANTASY VII REMAKE INTERGRADE – AVAILABLE NOW!
- Final Fantasy 7 VII Remake Chapter 3: Home Sweet Slum Walkthrough
- Chapter 3: Home Sweet Slum Story Guide & Walkthrough — Game8
- Chapter 3 Side Quests (Odd Jobs) — Game8
- Final Fantasy 7 Remake All Collectible Locations Guide — PowerPyx
- Final Fantasy 7 Remake Chadley’s Report Walkthrough — PowerPyx
- Chapter 4: Mad Dash Story Guide & Walkthrough | FF7 Remake
- Final Fantasy 7 Remake Chapter 4: Mad Dash Walkthrough
- Final Fantasy 7 Remake Intergrade - Chapter 4: Mad Dash Walkthrough
- Final Fantasy VII Remake Intergrade — Chapter 5: Dogged Pursuit Guide and Walkthrough, GameFAQs
- Final Fantasy VII Remake Chapter 5: Dogged Pursuit Walkthrough, PowerPyx
- Final Fantasy VII Remake Intergrade Chapter 5 Guide, GameFAQs
- Final Fantasy VII Remake Intergrade arrives on PS5 June 10, 2021
- FINAL FANTASY VII REMAKE INTERGRADE — Available Now, Square Enix
- Final Fantasy 7 Remake Walkthrough Chapter 6: Light The Way
- Chapter 6: Light the Way Story Guide & Walkthrough
- Final Fantasy 7 Remake Chapter 6: Light the Way Walkthrough
- FF7 Remake: Chapter 6 Light the Way Map & Guide
- Chapter 7: A Trap is Sprung Story Guide & Walkthrough | Airbuster Keycard Choices and Locations | FF7 Remake
- Final Fantasy 7 Remake Walkthrough Chapter 7: A Trap Is Sprung
- Final Fantasy 7 (VII) Remake Chapter 7: A Trap Is Sprung Walkthrough
- A Trap is Sprung - Chapter 7 - Main Scenario | Final Fantasy VII Remake Intergrade
- Chapter 8 Side Quests: Odd Jobs — Game8
- Kids on Patrol Walkthrough — PowerPyx
- A Verified Hero Walkthrough — PowerPyx
- The Angel of the Slums Walkthrough — PowerPyx
- Paying Respects Walkthrough — PowerPyx
- The Mysterious Moogle Merchant Walkthrough — PowerPyx
- FINAL FANTASY VII REMAKE INTERGRADE — Square Enix official product page
- Chapter 9 Side Quests (Odd Jobs) | Madam M Route and Sam Route | FF7 Remake
- Final Fantasy 7 VII Remake Chapter 9: The Town That Never Sleeps Walkthrough
- Final Fantasy VII Remake — Chapter 9 Walkthrough and Guide
- Final Fantasy 7 Remake Intergrade - Chapter 10: Rough Waters Walkthrough
- Final Fantasy 7 (VII) Remake Chapter 10: Rough Waters Walkthrough
- Chapter 10: Rough Waters Story Guide & Walkthrough | FF7 Remake
- FF7 Remake | Chapter 10: Rough Waters Map & Guide | Final Fantasy 7 Intergrade
- Final Fantasy 7 Remake Chapter 11: Haunted Walkthrough — PowerPyx
- Chapter 11: Haunted — Final Fantasy VII Remake Walkthrough & Guide — GameFAQs
- Chapter 11 — Haunted — Final Fantasy VII Remake Walkthrough & Guide — GameFAQs
- Final Fantasy 7 Remake Chapter 12: Fight for Survival Walkthrough
- Final Fantasy 7 Remake Intergrade - Chapter 12: Fight for Survival Walkthrough
- Final Fantasy VII Remake Intergrade Guide and Walkthrough: Chapter 12: Fight for Survival
- Final Fantasy VII Remake Chapter 12 Walkthrough and Guide
- Final Fantasy 7 Remake Chapter 13 Walkthrough: A Broken World — GameSpot
- A Broken World — Chapter 13 Main Scenario — Final Fantasy VII Remake Intergrade — Gamer Guides
- Chapter 13 — A Broken World — Final Fantasy VII Remake Walkthrough and Guide — GameFAQs
- Final Fantasy 7 Remake All Music Disc Locations — PowerPyx
- Final Fantasy 7 Remake Chapter 14: In Search of Hope Walkthrough — PowerPyx
- Chapter 14: In Search of Hope — Final Fantasy VII Remake Walkthrough & Guide — GameFAQs
- In Search of Hope — Chapter 14 Main Scenario — Gamer Guides
- Tomboy Bandit — Chapter 14 Quests — Gamer Guides
- Final Fantasy 7 (VII) Remake Chapter 15: The Day Midgar Stood Still Walkthrough
- Final Fantasy 7 Remake Chapter 15 Walkthrough: The Day Midgar Stood Still
- Final Fantasy VII Remake Intergrade Walkthrough & Guide: Chapter 15
- Enemy Intel - Final Fantasy VII Remake Walkthrough & Guide
- How to Beat The Valkyrie | Boss Fight Guide
- Chapter 16: The Belly of the Beast — Final Fantasy VII Remake Walkthrough & Guide — GameFAQs
- Chapter 16: The Belly of the Beast — Final Fantasy VII Remake Walkthrough — PowerPyx
- Chapter 16: The Belly of the Beast Story Guide & Walkthrough — Game8
- Chapter 16: The Belly of the Beast — Neoseeker
- Final Fantasy 7 Remake Chapter 16 Walkthrough: Specimen H0512 Boss Guide — Millenium
- Chapter 17 - Deliverance from Chaos - Final Fantasy VII Remake Intergrade Walkthrough & Guide
- Chapter 17 -- Deliverance from Chaos - Final Fantasy VII Remake Walkthrough & Guide
- Deliverance from Chaos - Chapter 17 - Main Scenario | Final Fantasy VII Remake Intergrade
- Final Fantasy VII Remake Intergrade Chapter 17 Collectibles Guide
- Final Fantasy 7 (VII) Remake Chapter 17: Deliverance from Chaos Walkthrough
- Chapter 18: Destiny’s Crossroads Story Guide & Walkthrough — Game8
- Final Fantasy 7 Remake Chapter 18: Destiny’s Crossroads Walkthrough — PowerPyx
- Chapter 18 — Final Fantasy VII Remake Walkthrough & Guide — GameFAQs
- Notice of FINAL FANTASY VII REMAKE INTERGRADE Updates
- INTERmission: Yuffie Episode DLC Walkthrough
- Intergrade Chapter 1: Wutai's Finest Walkthrough
- Final Fantasy 7 Remake Yuffie Intermission Chapter 1 Walkthrough
- Final Fantasy 7 Remake Yuffie Intermission Chapter 2 Walkthrough
- Weiss Boss Guide and How to Unlock
- Intergrade: Post-Game Content and 100% Clear Guide
- FINAL FANTASY VII REMAKE INTERGRADE Available Now for PlayStation 5 Console
- Final Fantasy VII Remake Trophy Guide & Roadmap
- Final Fantasy VII Remake: Is There Chapter Select and New Game Plus?
- Final Fantasy VII Remake Hard Difficulty Guide - Tips & Tricks
- Final Fantasy 7 VII Remake All Side Quest Locations
- Final Fantasy 7 VII Remake All Battle Intel Reports
About the game & collecting notes
- Platform
- Sony PlayStation 5
Step-by-step walkthrough for Final Fantasy VII Remake Intergrade on PlayStation 5, covering the complete 18-chapter main campaign through the ending of Chapter 18: Destiny’s Crossroads, plus the separate PS5-exclusive Episode INTERmission starring Yuffie. Routes, combat tactics, required objectives, chapter replay tips and completion checks are included.
Darryl Polo
Darryl Polo loves tinkering with emulation and revisiting retro games. He enjoys exploring how old favorites play on different setups and sharing what he learns along the way. At Joking Joystick, he writes about the games, hardware, and small discoveries that keep the hobby fun.
Our editorial standardsFound a step that needs another look? Help us improve this guide.