
Final Fantasy VII Rebirth (PS5) — Campaign Walkthrough
Complete, chapter-by-chapter coverage for Final Fantasy VII Rebirth (PlayStation 5).

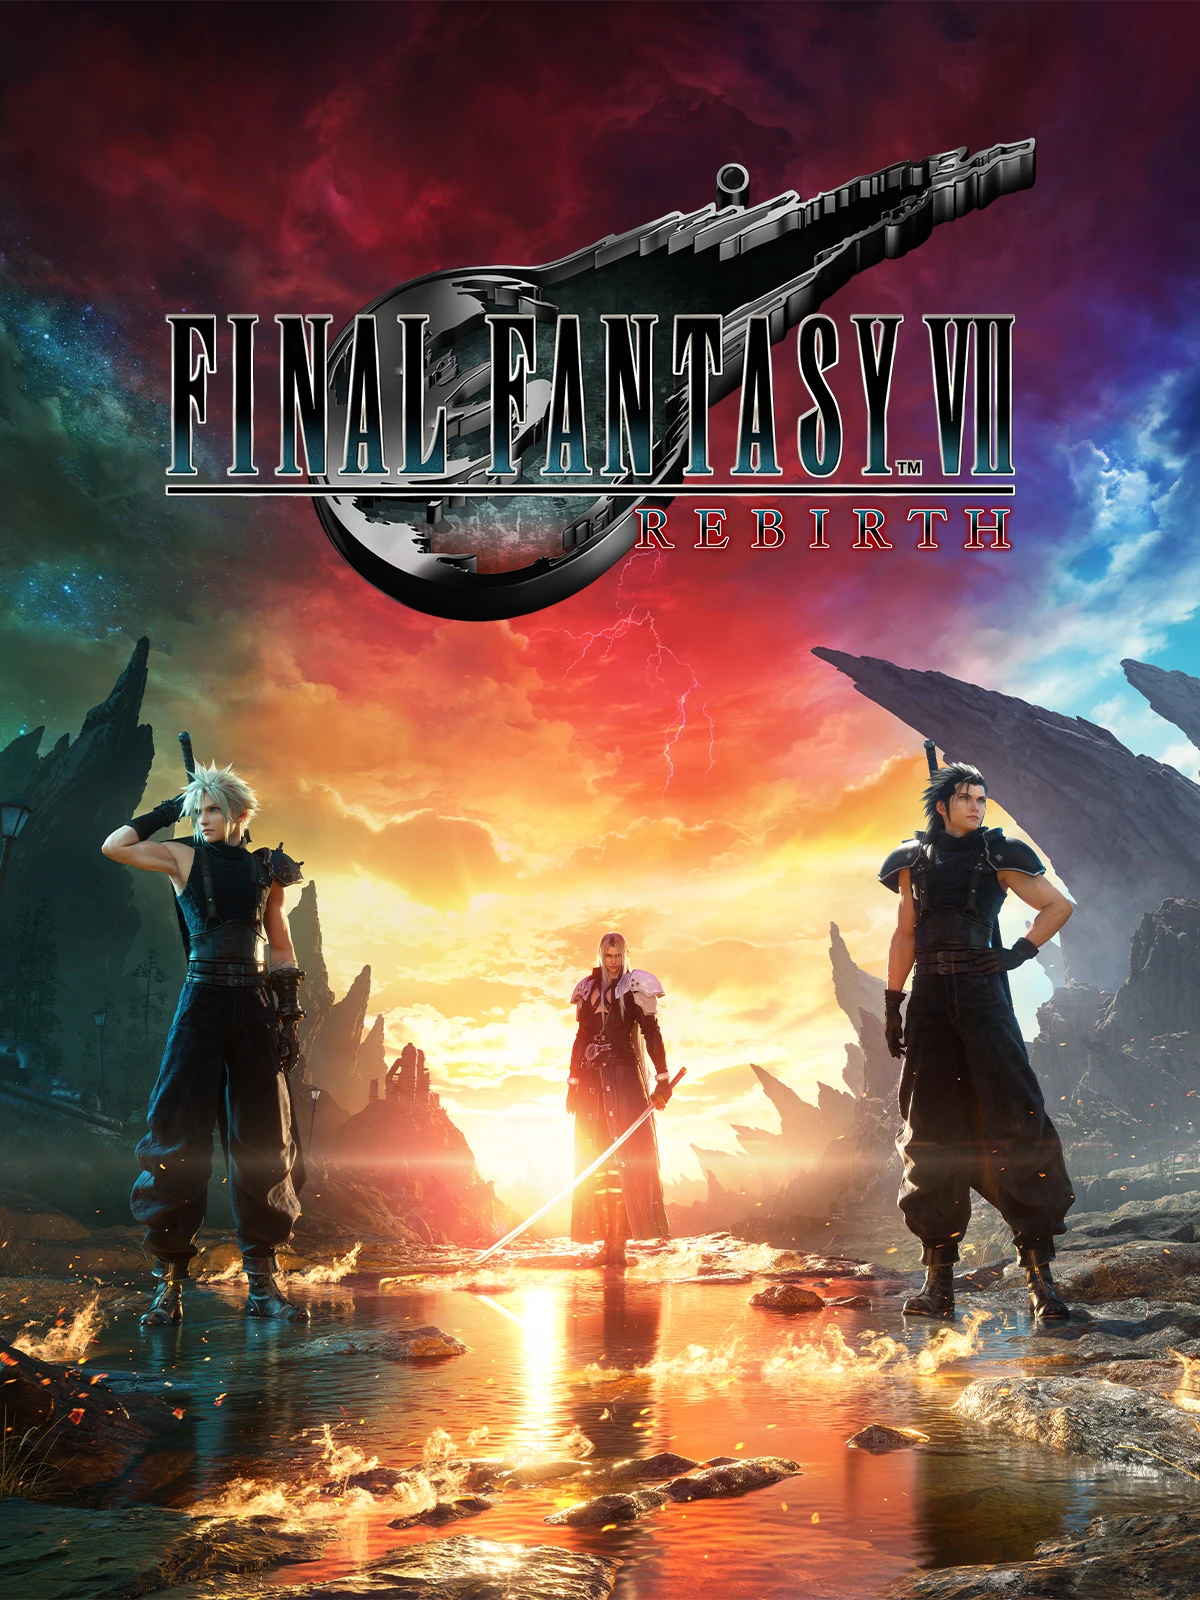
Find a copy
Final Fantasy VII Rebirth Sony PlayStation 5
We may earn a commission if you buy through these links, at no extra cost to you. As an Amazon Associate I earn from qualifying purchases.
Opens retailer search results. Check the model, edition, seller, availability and current price before buying.
Before you begin
You are about to play Final Fantasy VII Rebirth on PlayStation 5.
This walkthrough guides you through the main campaign from Chapter 1 to the story ending, highlighting the things you should complete in each chapter so you won’t lock yourself out of optional content.
Follow the chapter checklists if you want to finish the story efficiently and still be able to return to side content via Chapter Select.
Play the way you enjoy — the game supports a range of playstyles — but this guide assumes you want a clear, low-friction route to the ending while optionally completing sidequests, collecting core resources, and preparing for mandatory and optional boss fights.
If you plan on 100% completion in one run, pay attention to the ‘must cover’ items in each chapter; otherwise use Chapter Select after the ending to clean up anything left behind.
Set yourself up for the run
Install latest PS5 system and game updates before starting.
Rebirth received post-launch updates and quality-of-life features; keep the game patched.
Choose an initial difficulty you’ll enjoy.
If you want story-first, select an easier setting and use QoL boosts when available; if you want challenge, pick Normal or higher.
Learn the basic combat loop: quick attacks, defensive movement, swapping party members, and using Techniques/Abilities/Materia.
Spend the first few hours experimenting with one or two party configurations to find what suits you.
Back up your save (PS Plus cloud or external) before major decisions or long segments so you can restore if something goes wrong.
Complete local odd jobs (side quests) and gather important collectibles in each chapter before leaving the chapter’s open region — some chapters lock forward progress and visiting older zones later is easier through Chapter Select only after finishing the game.
Keep at least one character equipped for healing/support and one for burst damage.
Learn to switch roles mid-battle: the game rewards flexible loadouts.
Track Materia growth and weapon upgrades.
Early investment in supportive Materia (HP/MP recovery, AP gain) makes later fights far smoother.
Don’t neglect the game’s minigames and side activities if you want some rare rewards — many are optional but rewarding; this guide flags the ones that affect progression or important unlocks.
If you use the PC/other-platform updates (post-PS5 launches), note that some later patches introduced optional Streamlined Progression toggles; those are not required for the core walkthrough.
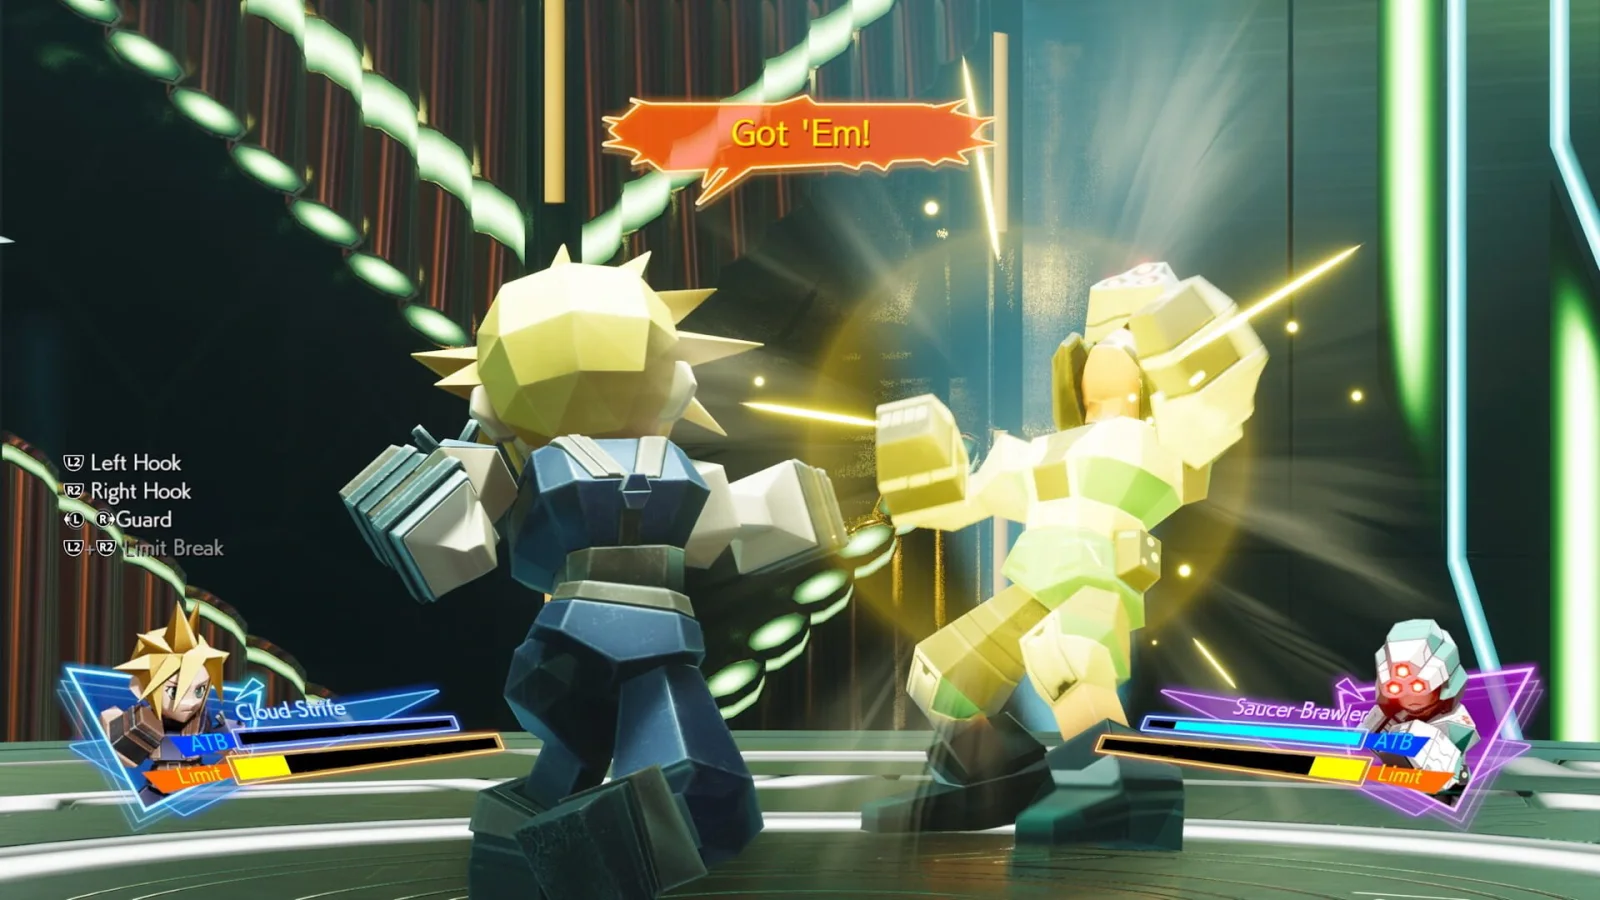
Chapter 1 — Fall of a Hero
Chapter 1 begins with a short Zack interlude before shifting to Cloud’s account of the Nibelheim incident. Follow the guided route through Nibelheim, inspect optional chests and Tifa’s room if desired, then escort the group up Mt. Nibel. The mountain route introduces party switching, Assess, elemental weaknesses, terrain actions, Mako-gas purifiers, Synergy Skills, and several useful Materia pickups. The required boss is the Materia Guardian, which is weak to Fire and must be knocked down from its ceiling phases by attacking its legs. Afterward, complete the reactor valve sequence, investigate Shinra Manor, return through the burning village, and follow the crawling prompt after Sephiroth. The chapter ends in present-day Kalm after speaking with Tifa on the roof and returning to Cloud’s room. There are no Odd Jobs or open-world activities in this chapter.
1. Complete the opening Zack interlude
After the opening scenes, control passes to Zack in the wreckage outside Midgar. Follow the marked path through the debris and damaged buildings. Continue forward whenever the route opens, climbing the stairs and moving through the interior passage until you emerge outside again.
When Shinra troops appear, defeat the first group with basic attacks, then continue along the marked route. A second group appears farther ahead. Defeat them to trigger the next story scene and end the interlude. This section is a short tutorial sequence, so there is no exploration checklist or permanent equipment setup to manage here.
- Follow Zack through the wreckage and building interior.
- Defeat both groups of Shinra troops.
- Wait for control to return to the Nibelheim flashback.
2. Explore Nibelheim before meeting Sephiroth
When the flashback begins, Sephiroth handles the first battle. Use this encounter to try his long-range attacks and abilities, then continue through the story scenes until Cloud is controllable in Nibelheim.
The town is still a guided story area, but you can collect a few optional rewards before going to the inn. From the starting area, take the alley on the left before the stairs to the town square and follow it to the chest near the fenced dead end. Then go up to the square and interact with the water tower when prompted.
Enter Tifa’s house, go upstairs, and inspect her room. The chest contains an Ether, and interacting with the piano introduces the piano activity and provides Tifa’s Theme. These are optional for completing the chapter. Leave the house, enter Cloud’s nearby home for the story scene, then go to the Nidhogg Hotel. Speak with Zangan and go upstairs to continue.
- Collect the optional Mega Potion chest in Nibelheim if wanted.
- Inspect the water tower.
- Visit Tifa’s room for the Ether and optional piano interaction.
- Speak with Zangan at the Nidhogg Hotel.
3. Escort the group through Mt. Nibel
After the next morning’s scenes, follow Tifa up Mt. Nibel. Break Shinra-marked boxes along the route for occasional consumables, but stay on the marked path. The route is linear and uses ledges, ladders, narrow passages, and terrain actions rather than open-world navigation.
When the insectoid enemies attack, use the encounter to practice switching between Cloud’s Operator and Punisher modes. The Insectoid Chimeras are weak to Ice, so Blizzard is useful if it is available. Continue forward and defeat the Velociwings. After this encounter, Assess becomes available; equip it and use it on unfamiliar enemies so their weaknesses and pressure conditions are recorded.
At the dead end where Tifa calls out, turn back and hug the right side of the route. Use the terrain action to reach the Wind Materia on the slope, then return to the crack in the cliff and pass through it. Inside the Mako Measurement Facility, take the Level Boost Materia from the shelf near the first stairs, ride the elevator, and defeat the Screamer. Fire is effective against it. Cross the nearby rails for an Ether chest before continuing upward.
- Use Cloud’s two basic combat modes during the mountain battles.
- Obtain and equip Assess when it becomes available.
- Collect the optional Wind Materia before returning to Tifa.
- Take Level Boost Materia inside the Mako Measurement Facility.
- Use Fire against the Screamer if available.
4. Clear the Mako-gas routes and prepare for the boss
Continue through the facility and operate the Mako Purifier when gas blocks the route. Move the purifier through the accessible opening and clear the gas pockets so the elevator can be used. After crossing the Southern Bridge, inspect the side area near the helipad for an optional Elixir chest before proceeding across the bridge.
After the story scene at the summit, Sephiroth rejoins the party. Climb the handholds and use the first bench to restore HP and MP. The route then passes through the Northern Ridge and Gripahellir Ravine. Pick up HP Up near the bench and Empowerment Materia in the ravine if you want the optional upgrades.
At the Northern Ridge Bluff, cross the narrow wooden walkway, then climb down to the lower ledge for Magnify Materia. Return to the main path and defeat the Zu; Wind is effective. The Precision Defense Focus Materia is on the roof near the Zu arena. Continue to the Appraisal Drilling Site and clear the second Mako-gas area. Open the door so the purifier can reach the remaining gas pockets. Comet Materia is hidden behind stacked crates in the northwest area. After the elevator, collect the two optional Elixir chests if desired, then use the final bench before entering the boss arena.
- Operate both Mako Purifiers to clear blocked routes.
- Use the rest bench before the Materia Guardian.
- Collect Magnify, Precision Defense Focus, or Comet if desired.
- Keep Fire equipped for the upcoming boss.
5. Defeat the Materia Guardian
Begin by using Assess on the Materia Guardian. Its weakness is Fire. During the opening phase, avoid staying directly in front of it through its sweeping attacks. Guard or reposition, then punish the recovery with normal attacks and ATB abilities. If it uses Seizing Claws and restrains a character, target one of the Guardian’s legs. Fire on the leg is a reliable way to free the character and pressure the boss.
When the Guardian is pressured, spend ATB on abilities that increase stagger, such as Focused Thrust, instead of using every resource on raw damage. Synergy Skills and Bravery can improve the damage window if those commands are available. Keep one character ready to heal rather than allowing both characters to fall into critical HP.
The Guardian later climbs onto the ceiling and attacks from above. Its legs become the important targets. Cast Fire at a leg to force it back to the ground, then continue building stagger while it is vulnerable. During the later phase, follow the prompt to use the Double Helix Synergy Ability. Once the boss is down, use strong abilities and Limit Breaks during the stagger window. If you fail, retry from the latest checkpoint and prioritize Fire, leg attacks, guarding, and healing over constant melee pressure.
- Use Assess on the Materia Guardian.
- Exploit its Fire weakness.
- Attack a leg to free a restrained character.
- Use Fire on a leg during the ceiling phase.
- Activate Double Helix when prompted.
- Spend Limit Breaks during a strong stagger window.
6. Finish the reactor and valve sequence
After the boss and the intervening story scene, enter the Mako Reactor with Cloud and Sephiroth. Ride the elevator, pass through the blast doors on the right, and descend the ladder to trigger the next scene.
When Sephiroth tells Cloud to shut off the valve, leave the reactor room and interact with the valve outside. Hold L2 and R2 together as instructed until the valve is closed. Return inside and speak with Sephiroth. The following scenes continue the story and lead into the search for him.
- Enter the reactor after the Materia Guardian encounter.
- Use the elevator and descend to the reactor interior.
- Close the outside valve by holding L2 and R2 together.
- Return to Sephiroth.
7. Investigate Shinra Manor and escape the burning village
After the reactor scenes, investigate Sephiroth’s whereabouts. Speak with Mayor Zander on the first floor if the objective directs you there, then leave and follow the villagers up the stairs toward Shinra Manor.
Inside the manor, enter the dining area on the left and use the green button beside the door to reach the elevator. Ride it down to the underground area and follow the path until the story scene with Sephiroth ends. Return to Nibelheim and go first to Cloud’s house when the village is on fire. Continue toward the marked house as the route changes around the flames and fallen logs.
When Cloud follows Sephiroth, use the prompted crawl movement. Hold L2 and R2 as directed and advance through the narrow route until the next cutscene begins. There is no optional mission cleanup during this sequence; keep following the objective marker.
- Go to Shinra Manor after investigating Sephiroth’s disappearance.
- Use the green-button door and elevator to reach the underground area.
- Return to Cloud’s house after the village catches fire.
- Use the L2 and R2 crawl prompt to follow Sephiroth.
8. End the chapter in present-day Kalm
Control returns to Cloud in Kalm after the Nibelheim sequence. Answer the door when Tifa knocks, then follow her outside and continue up to the roof for the conversation. When the rooftop scene ends, return to Cloud’s room and watch the final cutscene.
Chapter 1 is complete only after the game finishes this Kalm sequence and advances to Chapter 2, A New Journey Begins. There are no Chapter 1 Odd Jobs, Queen’s Blood matches, Chocobo stops, or open-world region objectives to clear. The chests, Materia, and piano interaction in Nibelheim and Mt. Nibel are optional rewards rather than requirements for story completion.
- Speak with Tifa at the door.
- Follow Tifa to the rooftop.
- Return to Cloud’s room after the rooftop conversation.
- Confirm that Chapter 2 begins.
Before you move on
- The opening Zack interlude has been completed.
- The Nibelheim exploration and Mt. Nibel route have been cleared.
- The Materia Guardian has been defeated using its Fire weakness and the post-boss reactor sequence has been completed.
- The reactor valve has been closed and the Shinra Manor underground sequence has been finished.
- Cloud has followed Sephiroth through the burning village using the crawl prompt.
- The Kalm rooftop conversation with Tifa and the return-to-room scene have played.
- Chapter 2: A New Journey Begins has started, confirming Chapter 1 completion.
References for this chapter
- Final Fantasy 7 Rebirth: Chapter 1 Walkthrough - Fall of a Hero
- Final Fantasy 7 (VII) Rebirth Chapter 1: Fall of a Hero Walkthrough
- Ch.1 - Fall of a Hero - Final Fantasy VII Rebirth Walkthrough & Guide
- Final Fantasy 7 Rebirth - Chapter 1: Fall of a Hero Walkthrough
- Final Fantasy VII Rebirth – PS5 Games | PlayStation
Chapter 2 — A New Journey Begins
Chapter 2 moves from Kalm into the Grasslands and establishes the game’s open-world systems. Complete the Kalm preparation scenes, escape through Broden’s route, visit the Abandoned Dock, and travel to Bill’s Chocobo Ranch. After catching Piko and completing Break in the Saddle, all five Grasslands side quests and the region’s World Intel become available. This is the best point to clear the Grasslands before crossing the swamp. The chapter’s final story encounter is Midgardsormr, which is weak to Ice and becomes much more manageable when you pressure it with Blizzard-family spells, use ranged attacks, and take cover from its fire attacks. After defeating it, follow the robed figures into the tunnel to complete the chapter.
1. Complete Kalm’s preparation objectives
Leave the inn room to receive the starter Queen’s Blood deck, then go downstairs and speak with Broden. Red XIII joins the party outside. Before advancing the story, visit Maghnata Books to review Folios and the weapon shop to learn weapon upgrades. Use the weapon menu to equip or begin learning at least one weapon ability so the upgrade system is active for your party.
Kalm also contains early Queen’s Blood opponents, card purchases, and party conversations. These conversations can affect later relationship development, but none is required for Chapter 2 completion. Play the matches now if you want to build a stronger early deck, but do not treat them as main-story objectives.
When ready, meet Aerith near the clock tower and follow her upward. After the Shinra forces arrive, descend the tower using the pole when the route allows it. Follow Broden through the town instead of attempting to fight through the soldiers. When he stops near the climbable pillar, take the elevated route across the rooftops, then descend and return to the inn.
- Review Folios and weapon upgrades in Kalm.
- Equip Healing Materia on a character who will be available for the next major fights.
- Optional: play Kalm Queen’s Blood matches and complete the party conversations before leaving town.
2. Escape Kalm and enter the Grasslands
Inside the inn, Broden opens the hidden route and gives Cloud the Item Transmuter. Review the available recipes, but save rare materials until you know which upgrades you want. Go through the hole in the wall, descend to the lower passage, and reunite with the party. Open the chest along this route before continuing through the double doors into the Grasslands.
Once outside, follow the marked Discovery to the farmer near the Grasslands entrance. The farmer points you toward the Abandoned Dock. Do not spend a long time exploring yet; most regional activities are locked until the Chocobo Ranch sequence is complete. Follow the road south to the dock and open the purple chest beside the building to obtain Cloud’s Sleek Saber.
After the dock scene, turn back toward the marked route to Bill’s Chocobo Ranch. The ranch is northeast of the dock. Road signs and the objective marker make the route straightforward, and early Chocobo Stops can be used as rest points if you have Cushions available.
- Collect the materials chest in Kalm’s escape passage.
- Collect Cloud’s Sleek Saber from the purple chest at the Abandoned Dock.
- Reach Bill’s Chocobo Ranch without attempting the swamp crossing on foot.
3. Catch Piko and unlock Chocobo travel
Speak with Bill outside the ranch, then enter the barn when directed. Before continuing, inspect the ranch chests. The chest behind the barn contains an Aureate Pinion. Inside the barn, the purple chest beside Chloe contains Aerith’s Timeless Rod, and a chest on the upper level contains a Moogle Medal. These are optional rewards, but the Timeless Rod is a useful early weapon for Aerith.
Follow the Chocobo tracks and yellow feathers away from the ranch. The capture section requires stealth. Move through the tall flowers to avoid the nearby Chocobos, wait for openings in their patrols, and approach Piko from the side or rear. At the flower patch, pick up a rock, aim it behind Piko, and throw it only when the targeting marker confirms that the distraction will work. Sneak behind Piko and interact to catch it.
Return to the ranch and speak with Billy. Chloe explains Chocobo gear and Golden Plumes. Gear is cosmetic during normal exploration but affects Chocobo Racing later, so exchange plumes according to your priorities rather than spending them without checking the available pieces.
- Collect the Aureate Pinion behind the barn.
- Collect the Timeless Rod beside Chloe and the Moogle Medal upstairs.
- Use the rock distraction and sneak up on Piko from behind.
4. Complete Break in the Saddle before regional cleanup
After the ranch scenes, follow Chadley to the nearby Remnawave tower and activate it. Towers reveal regional activities on the map, including World Intel locations and other exploration objectives. Return to the ranch, receive the chocowhistle, and summon Piko when prompted.
Mount the Chocobo and complete Hustle de Chocobo, also called Break in the Saddle in the chapter objectives. Follow every checkpoint around the ranch and use the sprint input when the course gives you room to accelerate. Completion does not require an exceptional performance for story progression; the important requirement is finishing the course and returning to Billy.
After Break in the Saddle, the Grasslands side quests become available in Kalm, at Bill’s Ranch, and at Oliver’s Farm. Chocobo travel also lets you cross shallow swamp water and use the Chocobo’s scent ability to locate buried treasure. This is the proper stopping point for optional cleanup.
- Activate the Remnawave tower near Bill’s Ranch.
- Complete Hustle de Chocobo and the Break in the Saddle objective.
- Confirm that side-quest and World Intel markers have appeared on the map.
5. Clear the five Grasslands side quests
Start Flowers from the Hill at Bill’s Ranch. Travel to Wildflower Plateau, defeat the Mandragora, and select flowers to make Chloe’s bouquet. The perfect arrangement is the red gerbera, yellow calendulas, and white daisies. Other selections change the result and relationship gain, but the quest can still be completed without the perfect arrangement.
At Oliver’s Farm, begin Livestock’s Bane. Use Piko’s scent ability when the question mark appears above its head, rotate toward the highlighted trail, and follow the scent to the missing livestock’s location. The quest ends with a White Terror encounter. Keep a healing option available, attack from safer angles, and use ranged party members when the creature’s close-range attacks make melee unsafe.
Lifeline in Peril begins from the Grasslands noticeboard or its associated Kalm objective after Break in the Saddle. Follow the marked maintenance route, collect the required repair materials, then protect Kyrie during the repair sequence. Where the Wind Blows is available from Broden at the inn after Livestock’s Bane. Its windmill repair requires a transmuter chip obtained through Grasslands exploration, along with the listed crafting materials, so complete the required lifespring and excavation Intel if the quest sends you looking for them.
A Rare Card Lost begins at The Rusty Arrow in Kalm. Defeat Vash in Queen’s Blood, then find Virgil at the clock tower and win the Chocobo & Moogle card back. Thorin’s card shop and other Queen’s Blood matches are worthwhile optional activities, but Thorin is not a required opponent for this quest.
While traveling between these objectives, activate towers, visit lifesprings, repair Chocobo Stops, inspect caches, dig up buried treasures, and assess new enemies. The Grasslands contains 30 World Intel objectives, 6 cache locations, 8 Chocobo Stops, and 23 buried treasures. Some enemies needed for the region’s Biological Intel appear during side quests or special activities, so use Assess on unfamiliar enemy types instead of assuming you can complete that record later.
- Complete Flowers from the Hill, Livestock’s Bane, Lifeline in Peril, Where the Wind Blows, and A Rare Card Lost.
- Use Assess on every unfamiliar enemy, especially during side quests and World Intel encounters.
- For a full Grasslands cleanup, review all 30 World Intel objectives, 6 caches, 8 Chocobo Stops, and 23 buried treasures.
6. Cross the swamp and collect Barret’s weapon
When you are ready to continue the story, return to the Abandoned Dock and ride Piko south through the swamp. Follow the objective marker and watch for the story scene involving the robed figure. Shortly afterward, a small island contains a purple chest with Barret’s Hi-Caliber Rifle. Turn toward the island and collect it before following the main route onward.
Use a bench or Rest Stop before the boss route. Make sure at least one active party member has Healing Materia, and equip Ice Materia on one or more characters. Barret and Aerith are useful here because their ranged attacks let them continue contributing when Midgardsormr is across the arena or when fire attacks make close-range positioning dangerous.
You can spend MP freely before the fight because Midgardsormr is the final major encounter of the chapter. Carry Potions and Phoenix Downs if your stock is low, but do not rely on items as a substitute for pressure and positioning.
- Collect Barret’s Hi-Caliber Rifle from the swamp island chest.
- Restore HP and MP before approaching Midgardsormr.
- Equip Ice Materia and keep a reliable healing setup active.
7. Defeat Midgardsormr and finish Chapter 2
Midgardsormr is weak to Ice and resistant to Fire. Cast Blizzard-family spells to pressure it, then use Focus abilities and strong attacks to build stagger. Synergy Abilities can pressure it as well, but do not wait on a Synergy gauge if an Ice spell is immediately available. Continue attacking the body unless the Cranial Dome becomes exposed; when that weak point is available, focus attacks there.
Watch for the boss’s charged fire attacks. When it raises its temperature and prepares a sweeping flame attack, move away or place a burning tree between the party and the breath. Later, the boss burns the surrounding trees and fires projectiles across the arena. Use the remaining tree trunks as cover until the projectile sequence ends, then resume Ice pressure.
Midgardsormr can dive underwater and attempt to seize a party member. If an ally is caught, attack the boss to force it to release the character before the capture becomes more dangerous. Heal the rescued character when they return. Switching to Barret or Aerith can help maintain damage while Cloud or another melee character avoids the boss’s immediate attacks.
At low health, the boss introduces Beta, a large fire attack covering much of the arena. Keep using Ice to lower its temperature and avoid standing in the attack area. If the Cranial Dome has been damaged or broken, continue targeting the exposed weak point while maintaining healing. Defeat the serpent, watch the resulting story sequence, and follow the robed figures through the route beyond the swamp. Entering the tunnel triggers the Chapter 2 completion notice and advances the game to Chapter 3.
- Pressure Midgardsormr with Ice and avoid using Fire attacks.
- Use cover for the sweeping flame and projectile sequences.
- Attack the boss to free swallowed party members, then heal them.
- Enter the tunnel after the ending scene and confirm the Chapter 2 completion notice.
Before you move on
- Piko has been caught and Break in the Saddle has been completed.
- The chapter’s five Grasslands side quests are complete if performing an optional-content clear.
- Cloud’s Sleek Saber, Aerith’s Timeless Rod, the Aureate Pinion, and Barret’s Hi-Caliber Rifle have been collected if optional weapons and nearby rewards are being included.
- Midgardsormr has been defeated and the party has entered the tunnel beyond the swamp.
- The game displays the Chapter 2 completion notice and advances to Chapter 3: Deeper into Darkness.
References for this chapter
- Final Fantasy VII Rebirth Walkthrough & Guide — Ch. 2: A New Journey Begins
- Final Fantasy VII Rebirth Walkthrough — Chapter 2: A New Journey Begins
- Final Fantasy VII Rebirth Walkthrough — Grasslands World Intel Locations
- Grasslands Quests — Final Fantasy VII Rebirth Walkthrough & Guide
- Grasslands Guide — Final Fantasy VII Rebirth Walkthrough & Guide
- Final Fantasy 7 Rebirth: Chapter 2 Walkthrough — A New Journey Begins
Chapter 3 — Deeper into Darkness
Chapter 3 is a linear Mythril Mine dungeon with no normal Odd Jobs or open-region cleanup. Follow the robed figures, manage the split between Cloud’s group and Barret and Red XIII, solve the mine-cart and bridge mechanisms, defeat Rude and Elena, then escape the lower mine and defeat the Mythril Golem. The most important optional pickups are AP Up Materia, Tifa’s Sylph Gloves, Red XIII’s Renegade’s Collar, MP Up Materia, the Bulletproof Vest, and Lightning Materia. After the golem falls, reunite with the others and follow the final tunnel until the party reaches the outside area and Chapter 4 begins.
Enter the Mythril Mine and prepare for the party split
Chapter 3 begins in the mine after the Chapter 2 Midgardsormr sequence. Follow the only available tunnel while tracking the robed figures. The opening route is linear, but use the first Rest Stop, vending machine, and Maghnata Automat before continuing if you need healing items or equipment adjustments. This is also a good time to put Healing Materia on a reliable character and keep Assess available for new enemies and bosses.
Continue until a robed figure falls during the story sequence. At the next broken-stair section, climb the stairs and take the narrow upper path to collect the AP Up Materia. Drop down by the nearby ladder, defeat the Crawlers and Crystalline Crab, then open the purple chest beside the ladder for Tifa’s Sylph Gloves. Equip them if you want to learn their weapon ability and check their available Materia slots.
Proceed through the mine until Barret and Red XIII follow the robed figure away from the upper route. Cloud, Aerith, and Tifa remain together, and fast travel becomes unavailable until the mine sequence is finished. From this point, search side paths as you go, but do not expect an Odd Job board or a return to the Grasslands during the chapter.
- Use the first Rest Stop before advancing if your party needs recovery.
- Collect AP Up Materia from the broken-stair upper path.
- Open the purple chest for Tifa’s Sylph Gloves.
- Confirm that Barret and Red XIII have separated before continuing.
Reach the Turks through the upper mine galleries
Continue with Cloud, Aerith, and Tifa through the Crawler encounters. After the larger group of enemies, open the Ether chest and follow the route toward the Workers sign and the Ogre. Fire is effective against the Ogre, and parrying its ordinary club attacks can pressure it; avoid treating its special attacks as ordinary parry opportunities because they can make the encounter harder.
Defeat or pass the Archdragon farther along the tunnel. Wind is effective against it, and the chest behind it contains five Iron Ore. When a mine cart blocks the tunnel, approach it and hold L2 to pull it backward into the arrow-shaped recess. This is required to clear the route; pushing it forward will not solve the obstruction.
In the next area, take the bridge route and use the nearby cart to reach the broken ladder. When the game presents the choice between the obvious upper route and the side drop, take the side route if you want the nearby Lea Titanium chest and materials. Continue around the structure and climb back toward the Rest Stop before the Turks encounter. The chapter does not require every material pickup, but the visible chests in this section are safe to collect before the boss.
- Defeat the Ogre or pass through its area and continue toward the Archdragon.
- Pull the blocking mine cart backward with L2.
- Use the second cart to reach the broken ladder.
- Collect the Ether, Iron Ore, and Lea Titanium pickups if desired.
- Rest and adjust Materia before following the voices toward the Turks.
Defeat Elena and Rude
The boss battle begins after Tifa gives away the party’s position. Elena is weak to Lightning, while Rude is weak to Wind. Focus on Elena first because she is less durable and her stun grenades can disrupt the entire party. Use Lightning attacks on her when ATB allows, then switch targets or characters instead of allowing her to keep distance and throw grenades freely.
Rude blocks frequently and counters careless attacks with close-range strikes or Shockwave attacks. Wind attacks are the reliable way to pressure him, but wait for openings rather than repeatedly striking his guard. Elena’s Backflip Barrage combines gunfire with stun grenades, and her Stun Grenade patterns are particularly dangerous in the dark arena. Move away from the marked danger areas and do not let the whole party remain clustered.
When one Turk reaches roughly half health, they can begin charging their combined Petite Powerhouse attack. Rude takes the front position in Atlas Stance while Elena stands behind him. Use strong abilities to break the stance and pressure them. If you fail to interrupt it, survive the attack, heal, and return to focusing Elena. Use Assess on both bosses before defeating them if you are recording enemy data.
After Elena falls, finish Rude while respecting his guard and Shockwave patterns. The fight awards a Mega-Potion and Party XP, then a story sequence sends Barret and Red XIII into the lower mine while Cloud’s group remains above.
- Use Lightning against Elena and Wind against Rude.
- Defeat Elena first to remove the stun-grenade threat.
- Break the Turks’ combined stance when Petite Powerhouse is being charged.
- Use Assess on both bosses before the battle ends if needed.
Escape the depths with Barret and Red XIII
Control switches to Barret and Red XIII. Open the nearby purple chest for Red XIII’s Renegade’s Collar, then use the bench and vending machine before moving east. Barret can shoot marked crystals, ladders, rocks, and other environmental objects; whenever the shooting indicator appears, look around for the highlighted target rather than searching for a conventional switch.
Defeat the Flans with Fire attacks or abilities that bypass their physical resistance. Afterward, explore the water on the southern side of the open area and climb the ledges in the southeast corner to collect the MP Up Materia. Return to the main climb, then use Barret’s gun to destroy the boulders blocking the upper route. A side pool contains materials, but the main objective is the climb to the next mine layer.
In the upper layer, deal with the Archdragon and Crawlers, then reach the mine cart and track switch. Push the cart left first so you can climb to the Bulletproof Vest chest. Return to the cart, use the switch to change the track, and push it toward the right ledge so you can continue. At the next Ogre, shoot the large rock to reveal Cloud’s group across the gap. Fire at both ladders on the left, then take the upper ladder first if you want the 1,000 Gil chest before returning to the lower route.
- Collect Renegade’s Collar at the start of the Barret and Red XIII section.
- Use Fire against the Flans.
- Collect MP Up Materia from the southern water route.
- Push the first upper-layer cart left for the Bulletproof Vest, then change the track and push it right.
- Shoot down both ladders near the gap and collect the 1,000 Gil chest if desired.
Repair the bridge and collect Lightning Materia
Take the lower ladder into the area with Crawlers and the Rest Stop. Defeat the enemies, then rest and restock before continuing. Open the northern gate by using the lever beside it. The southern gate remains unavailable until the other party helps from the opposite side.
Follow the narrow path to the southeast for the Hi-Ether chest. On the nearby bridge, shoot the large rock to clear the cart route. Return to the cart and push it across the bridge into the dead end. Once it reaches the end, use the lever to switch the tracks, then push the cart down the new route so it knocks the shipping container out of position. This raises the bridge and lets Cloud’s group proceed.
Return to the Rest Stop. The other party opens the southern gate from above. Enter through that gate and collect the Lightning Materia before advancing into the large chamber. Equip it on Barret or Red XIII if neither currently has a Lightning option. The Mythril Golem is weak to Lightning, so this pickup is especially useful even if you have been conserving MP.
- Rest in the bridge-work area before solving the cart sequence.
- Open the northern gate with the lever.
- Collect the Hi-Ether from the southeast path.
- Push the cart to the dead end, switch tracks, and use it to dislodge the shipping container.
- Enter through the newly opened southern gate and collect Lightning Materia.
Defeat the Mythril Golem
The Mythril Golem battle is fought by Barret and Red XIII. It resists ordinary physical attacks, but damaging its head pressures it and temporarily makes physical damage more effective. Use Lightning attacks whenever practical, especially after building enough ATB, while Barret’s ranged attacks and Red XIII’s mobility help keep one character generating ATB when the other is healing or repositioning.
Make the head your first priority. Breaking it creates a useful pressure window, so use abilities during that opening instead of spending the entire fight attacking the main body. The golem’s slow swings cover a large area, so move away from its front when it raises its arms or begins a sweeping attack. If Barret becomes pinned against the arena wall, switch to Red XIII; the change in target often gives Barret space to recover.
At approximately three-quarters health, the golem uses Mythril Hammer and scatters explosive rocks around the arena. Leave the marked areas instead of trying to roll through them, then resume attacking once they detonate or disappear. Around half health, the golem adds new body parts, including a sword and spine. These appendages are targetable and can be destroyed to reduce its attack options and improve stagger progress. Lightning is effective against the boss, while Red XIII’s Stardust Ray is useful against the sword and other exposed parts if available.
Keep one character at range so you can heal or revive without standing directly beside the golem. Use Limit Breaks, Synergy Abilities, and Summons when they are ready, particularly during a pressure or stagger window. If the party is struggling, prioritize head and appendage destruction over uninterrupted physical combos. The battle ends when the golem’s main health bar is depleted.
- Fight the Mythril Golem with Barret and Red XIII only.
- Target and break the head to pressure the boss and reduce its physical resistance.
- Use Lightning attacks when available.
- Leave the arena when Mythril Hammer scatters explosive rocks.
- Destroy the sword and spine after they appear to reduce the golem’s threat.
- Use healing and revival from outside the golem’s immediate attack range.
Exit the mine and confirm Chapter 4
After the Mythril Golem is defeated, follow the newly opened staircase and turn right to return toward the earlier mine rooms. Collect the Mythril Ore chest near the switch if you want the final visible reward in this section, then continue until Barret and Red XIII reunite with Cloud, Aerith, and Tifa.
Control returns to Cloud for the final pursuit. Follow the linear tunnel, defeat the remaining Ogre groups, and continue toward the fresh-air exit. The chapter concludes when the party reaches the outdoor area and the story transitions toward Junon. There are no Chapter 3 Odd Jobs to complete in the mine, and the chapter’s optional objectives are pickups and enemy-data opportunities rather than a local mission board.
Save after control returns or after the next chapter begins. If you skipped a chest, Materia, weapon, or accessory, do not treat it as a campaign failure; the missed item is optional for the story, and later cleanup can be handled through the game’s broader progression and postgame tools.
- Defeat the Mythril Golem and take the opened staircase.
- Collect the Mythril Ore chest if desired.
- Reunite all five party members.
- Follow Cloud through the final Ogre encounters and exit the mine.
- Confirm that the story has advanced to Chapter 4: Dawn of a New Era.
Before you move on
- The AP Up Materia and, if desired, Tifa’s Sylph Gloves were collected in the upper mine.
- Elena and Rude were defeated, with Elena handled using Lightning and Rude handled using Wind.
- Barret and Red XIII escaped the lower mine route, and the bridge container was moved using the cart and track switch.
- Lightning Materia was collected before the Mythril Golem encounter.
- The Mythril Golem was defeated by targeting its head and later appendages while using Lightning attacks where available.
- The full party reunited, the final Ogre encounters were cleared, and the party reached the outdoor exit.
- The story advanced to Chapter 4: Dawn of a New Era.
Chapter 4 — Dawn of a New Era
Chapter 4 follows Cloud and the party through Junon. Reach Under Junon, investigate the village, defeat Terror of the Deep, and complete the inn sequence. After Roche appears, the game opens the main Junon cleanup window. Complete the five available odd jobs, recruit the mountain Chocobo, explore World Intel, play Queen’s Blood, and collect desired local rewards before speaking with Priscilla at the dock. Speaking with Priscilla starts the one-way story route into Upper Junon. Ride the dolphin, infiltrate the city, recruit the Seventh Infantry, complete the parade, escape with the troops, and defeat Roche as Cloud. The chapter ends when you reach the ship and speak with Captain Titov. Upper Junon is not freely revisitable during the normal first playthrough, so use a save or Chapter Select later if you want its chests or parade results.
Enter Under Junon and complete the investigation
From the Junon starting area, follow the marked route toward the large cliff. Continue around the cliff face and down the path into Under Junon. You may explore the surrounding region, but several shops, quests, and treasures become available only after the inn sequence, so do not worry if the map initially looks incomplete.
Inside the village, speak with the party members marked by objective indicators and inspect the available shops. When the objective directs you to the inn, speak with the innkeeper. A cry for help will send the party back outside toward the docks. Follow Priscilla to the water and prepare for the chapter’s first required boss.
- Reach Under Junon.
- Complete the Fact-Finding objective and speak with the marked party members.
- Enter the inn and trigger the attack at the docks.
Defeat Terror of the Deep
Terror of the Deep is weak to Lightning. Equip Lightning Materia before starting if it is not already available on Cloud, Aerith, or another active character. Aerith is useful because her ranged attacks can hit the boss while it moves around the water, and Prayer or her healing abilities help keep the party stable.
When the boss is in the water, target its head and use Lightning to build pressure. It can rise into the air and create Water Cells that trap party members. Destroy the cells with magic rather than relying only on physical attacks. If a trapped character is in immediate danger, prioritize breaking that cell over continuing damage to the boss.
At roughly the middle of the fight, Terror of the Deep begins preparing Oceanic Tornado. Move away from the central danger area as the attack forms, then avoid the smaller follow-up whirlwinds that appear after the main attack. Continue using Lightning and spend ATB on healing whenever the party is injured. After the boss falls, swim back to shore and return to the inn.
- Use Lightning against Terror of the Deep.
- Break Water Cells quickly when a party member is trapped.
- Move away from Oceanic Tornado and its follow-up whirlwinds.
- Return to the inn after the battle.
Finish the inn sequence and unlock Junon’s cleanup window
During the evening inn sequence, speak with the required party members and complete the assigned conversations. Continue upstairs and enter the lounge at the end of the hallway before going to bed. A Lightning Materia is beside the fireplace there. The inn also contains a purple chest with Aerith’s Empress’s Scepter, so search the rooms carefully before resting.
The next morning, follow the scenes involving Yuffie and Roche. After Roche leaves, Rhonda provides the next direction and the region’s broader optional content becomes available. Do not go directly to Priscilla yet if you want to complete Junon activities during this visit.
- Collect the Lightning Materia from the upstairs lounge.
- Collect the Empress’s Scepter from the inn’s purple chest if you want the weapon.
- Complete the morning scenes and wait until the optional Junon activities are available.
Complete Junon’s optional content before Priscilla’s plan
The five Chapter 4 odd jobs are Stuck in a Rut, When Words Won’t Do, The Hardest Sell, Dreaming of Blue Skies, and Calling All Frogs. Complete Stuck in a Rut early if you want to explore thoroughly: catching Belle unlocks the Mountain Chocobo for Junon. The bird is required for the region’s climbable routes and makes several World Intel objectives accessible.
When Words Won’t Do opens access to Crow’s Nest and its surrounding services. After the necessary quest progression, complete The Hardest Sell, Dreaming of Blue Skies, and Calling All Frogs if you want their rewards and relationship progress. Crow’s Nest contains the On Our Way sheet music and a vending machine with Junon Queen’s Blood booster packs, including Weird & Wicked and Shut Up ’n’ Drive. Challenge the available Queen’s Blood players before leaving.
Junon has 24 World Intel objectives. The region includes towers, fiend assignments, lifesprings, Phoenix Divine Intel, the Moogle activity, excavation and classified intel, and the four-stage Protorelic chain. These are optional for the story. If you are cleaning up now, use the Mountain Chocobo to reach red-arrow climbing walls, follow Chocobo scent trails to excavation sites, and activate towers before tackling difficult combat assignments. Ice is effective against Zemzelett, Ignilisk, and Capparwire; Wind is the listed weakness for Tonadu and Fleetwing.
- Complete the five Junon odd jobs if you want the region cleared now.
- Catch Belle and unlock the Mountain Chocobo.
- Collect On Our Way at Crow’s Nest.
- Buy or collect the desired Queen’s Blood packs and challenge local players.
- Complete the desired World Intel, Protorelic, and regional treasure objectives.
Ride the dolphin and enter Upper Junon
When you are ready to leave Under Junon, speak with Priscilla at the dock. This begins the story route into Upper Junon and temporarily removes access to Under Junon’s normal exploration. Swim to the dolphin and start the Dolphin Show. Follow the arrows, strike the beach balls to maintain speed, and use the indicated controls at the end of the course to launch Cloud onto the ship.
Inside the ship, use the control-room levers to lower the shiplift. Continue through the connected facilities and follow the marked route. Upper Junon is a one-time story area during the normal first playthrough. Search side passages and rooms for the visible chests before advancing, including the Hi-Ether, Survival Vest, Celeris, gil caches, Rune Blade, and Revival Earrings. A missed item can be recovered later with Chapter Select, but the entire Upper Junon route must be replayed.
- Finish the dolphin ride and reach the ship.
- Lower the shiplift with the control-room levers.
- Search Upper Junon for visible chests before continuing.
Recruit the Seventh Infantry and complete the Junon Parade
Follow the city route until Cloud is tasked with assembling the Seventh Infantry. Search the streets, shops, barracks, and connected facilities for the marked groups. Five units are enough to proceed, but recruit all ten if you want the 7th, Assemble! trophy and the maximum formation choices. Speak to every group before returning to the commander.
Save before beginning the parade if you want to pursue the outstanding-performance reward. Use the practice sequence to learn the displayed inputs, then select formations that satisfy the requested unit types. During the performance, follow the on-screen commands accurately and avoid rushed inputs. Completing the parade advances the story; the higher performance result is optional.
- Find at least five Seventh Infantry units to unlock the parade.
- Recruit all ten units for the optional trophy and maximum formation choices.
- Save before the parade if you are pursuing its best result.
- Complete the Junon Parade.
Escape Junon and defeat Roche
After the parade and Yuffie’s failed attempt, Cloud separates from the party and escorts the infantry through the Seaport Facilities. Take the Rune Blade from the purple chest near the first rest stop, then equip Cloud with healing support and Fire Materia. Keep Prayer or another reliable healing option available because the soldiers can be defeated during the escape.
Advance through the linear facility route and prioritize grenadiers and other enemies that can quickly damage the infantry. At the J-Unit Sweeper encounters, Thunder is effective. The Deathwheel is mobile and difficult to hit while moving; wait for it to slow, then use the opening to build ATB and damage it. Use the final rest stop before pulling the lever that opens Roche’s arena.
Roche is a solo Cloud fight and is weak to Fire while grounded. Use Fire to pressure him, but do not cast carelessly when he is on a wall: he can answer with a diving attack called Crash and Burn. Avoid his circular electric fields, guard or dodge his direct charges, and punish him after his attacks. Later he adds projectile pressure and an electrified version of the wall attack. Heal between openings rather than trading damage through the electric hazards.
If all Seventh Infantry members survive the escape, defeating Roche awards the Elixir, Speed Demon Keychain, and Stuffed Stamp. After the fight, enter the room beyond the arena and open the three chests containing 3,000 gil, two Phoenix Downs, and three Armor-Piercing Grenades.
- Equip Cloud with Fire and a healing option before Roche.
- Use Thunder against the J-Unit Sweepers.
- Protect the Seventh Infantry during the facility battles.
- Use Fire on grounded Roche and avoid his electric fields.
- Open the three chests after the boss arena.
Reach the ship and end Chapter 4
Continue through the opened route after Roche and follow the farewell scene with the infantry. Rejoin the party, use the lowered bridge or rear route to reach the ship, and speak with Captain Titov. The final scenes trigger immediately after this sequence.
Wait for the chapter-complete result before closing the game. If Junon side content, Upper Junon chests, parade rewards, or Seventh Infantry recruitment remains unfinished, use Chapter Select after completing the campaign or reload a manual save made before speaking with Priscilla.
- Rejoin the party after Roche.
- Reach the ship and speak with Captain Titov.
- Wait for the Chapter 4 completion result.
- Record any unfinished Junon content for later Chapter Select cleanup.
Before you move on
- The Chapter 4 completion result appears after Cloud reaches the ship and speaks with Captain Titov.
- Terror of the Deep and Roche are defeated.
- The three post-Roche chests have been opened if local treasure completion is desired.
- The five Junon odd jobs, desired Queen’s Blood matches, On Our Way sheet music, and selected World Intel are complete if pursuing regional cleanup.
- The Mountain Chocobo is unlocked if Junon exploration is being completed during this chapter.
- All ten Seventh Infantry units are recruited and the parade is completed if pursuing the related trophy and best parade options.
- A manual save is retained before the Priscilla dock sequence if you want convenient access to the one-time Upper Junon section.
References for this chapter
- Final Fantasy 7 (VII) Rebirth Chapter 4: Dawn of a New Era Walkthrough
- Ch.4 - Dawn of a New Era - Final Fantasy VII Rebirth Walkthrough & Guide (PS5)
- Final Fantasy 7 (VII) Rebirth Junon All World Intel Locations
- Final Fantasy 7 Rebirth: Chapter 4 Walkthrough - Dawn of a New Era
- Junon Region Quests - Final Fantasy VII Rebirth Walkthrough & Guide
Chapter 5 — Blood in the Water
Chapter 5 takes place aboard the Shinra-8 cruise ship traveling from Junon to Costa del Sol. Search the Economy Floor, speak with Aerith, Tifa, Barret, and Red XIII, then decide whether to complete the Queen’s Blood tournament. Winning all five rounds and the bonus match awards the Card Royalty trophy, several cards, and Assess Materia Earrings; forfeiting is allowed if you only want the story. After the tournament, collect the Fortification Materia, Celeris, and later Tifa’s Kaiser Knuckles and a Mega-Potion while moving through the ship’s emergency sequence. The required route ends with Cloud, Tifa, and Barret fighting Jenova Emergent. Destroy its exposed parts to build stagger, avoid its lasers and homing gas, handle the tentacles during the final phase, and finish the post-battle scenes to clear the chapter.
Search the Economy Floor and reach the Royal Lounge
After the opening scenes, Cloud starts on the Economy Floor of the Shinra-8. Follow the objective toward the stairs, but inspect the accessible second-class cabins before leaving. Two chests in this area each contain two Antidotes. These are optional supplies, but they are easy to collect now and the route changes once you advance to the lounge sequence.
Go upstairs to the Royal Lounge when you are ready. The announcement explains that a Queen’s Blood tournament is being held aboard the ship. Speak with Aerith, Tifa, Barret, and Red XIII at their marked positions. After all four conversations are complete, speak with the tournament attendant to register.
- Open both second-class cabin chests if you want the Antidotes.
- Speak with Aerith, Tifa, Barret, and Red XIII.
- Make a manual save before entering the tournament.
Collect Fortification Materia and choose your tournament route
Before registering, or before continuing after the tournament sequence has begun, leave the Royal Lounge through the southern door on the Port side. Follow the outside walkway to the chest containing Fortification Materia, then return to the lounge. Fortification is optional Materia, not a weapon upgrade, so equip it only if its defensive effect suits your setup.
The tournament has five rounds. Each round lets you choose an opponent; after winning, return to the counter to report the result and begin the next round. You can retry a lost match. If you want to skip most of the activity, use the forfeit attendant before the final round. For a full completion run, win all five rounds and then accept the additional challenge that appears afterward.
- Take the Fortification Materia from the southern outside walkway.
- Save between successful Queen’s Blood rounds.
- For the full optional reward, do not forfeit the tournament.
Win the Queen’s Blood tournament
Use a deck that expands territory early and avoids giving the opponent an easy chain of new spaces. Place cards from the center outward, protect lanes you already control, and do not sacrifice several spaces merely to claim one high-value square. If you have been playing Queen’s Blood in earlier chapters, use the deck that has already produced reliable wins rather than changing it immediately before the tournament.
The fifth round is followed by a sixth bonus opponent after the apparent tournament victory. Winning the complete sequence awards the Card Royalty trophy, the Shinra-8 tournament trophy, the Ifrit card, the Terror of the Deep card, and a pair of Assess Materia Earrings. The Queen’s Blood sequence is optional for clearing Chapter 5, but these rewards are important if you are pursuing card-related completion. The bonus opponent uses more disruptive cards, so keep checking the board state even after taking an early lead.
- Win all five tournament rounds if pursuing the rewards.
- Complete the bonus match that follows the tournament.
- Confirm that the tournament rewards have been awarded before leaving the lounge.
Return to the cabins and prepare for the emergency
After the tournament, follow the objective back to the Economy Floor. Before resting, enter the room where Aerith and Tifa changed earlier and open the chest containing a Celeris. Then return to Cloud’s cabin and rest. The night sequence begins after you sleep, so finish any nearby searching before interacting with the bed.
When the alarm sounds, follow the crew member upstairs and continue to the Sundeck. The first emergency fights include Scrutineyes and Experimental Varghidpolis. Scrutineyes evade ordinary physical attacks while inactive, but they can be hit during their attack animation and are weak to Lightning. Use Thunder or another Lightning attack when an ATB charge is available. Experimental Varghidpolis has no listed weakness and cannot be pressured normally, so defeat it quickly before it repeatedly uses its disabling screech.
- Collect the Celeris before resting.
- Rest at Cloud’s cabin to begin the emergency sequence.
- Use Lightning against Scrutineyes when they become vulnerable.
Clear the Sundeck and rescue the crew
Defeat the enemy groups on the Sundeck, prioritizing Experimental Varghidpolis so its screech does not disrupt the fight. After the exterior battles, return indoors as directed. Aerith and Red XIII stay behind during part of this sequence, so do not plan around them being available in the next battles.
Move through the lounge and rescue the crew member from the attacking enemies. Continue below deck, where Tifa joins Cloud for the remainder of the chapter. Use the Rest Stop if necessary, then check Tifa’s Materia, accessories, and weapon abilities before advancing. This is the safest point to restore HP and MP before the longer lower-deck route.
- Defeat all Sundeck waves.
- Use the Rest Stop after Tifa joins.
- Confirm that Cloud and Tifa have healing and offensive Materia equipped.
Fight the mutated robed figures and collect Tifa’s weapon
Proceed through the opening in the door into the lower quarters. The mutated robed figures become Necrotic Entities. They have no simple elemental weakness, but powerful attacks can pressure them while they are casting or using Subastral Fury. Their Onslaught attack is unblockable; evade it instead of attempting to guard through it. Use Cloud to build ATB and Tifa to exploit pressured or staggered targets.
Continue through the ship after the cutscene. In the next large area, Daemonic Entities appear. They are weak to Ice and are pressured more readily from behind, so use Blizzard or an Ice-based ability when practical and attack from the rear. After defeating them, jump to the small ledge on the left and open the purple chest containing Tifa’s Kaiser Knuckles. Equip the weapon if its attack-focused stats and abilities fit your build; this is the chapter’s reliable new weapon pickup.
- Pressure Necrotic Entities during their casting or Subastral Fury attacks.
- Evade Onslaught.
- Use Ice and rear attacks against Daemonic Entities.
- Open the purple chest and collect Kaiser Knuckles.
Cross the Cargo Hold and reach the final Rest Stop
Follow the route into the Cargo Hold. When the path calls for a drop to the right, first take the stairs on the left to reach a chest containing a Mega-Potion. Return to the intended route afterward.
Defeat the Shrieker in the next encounter. Its mace swings make frontal attacks ineffective during the active swing, so wait for the animation to finish, attack from another angle, or guard when appropriate. Shriekers can also warp around the area, so avoid spending all of your ATB on attacks that may miss. After clearing the Cargo Hold, climb the stairs to the Rest Stop. Heal, restock if the shop is available, and adjust Cloud, Tifa, and Barret before opening the next door.
- Collect the Mega-Potion from the upper Cargo Hold chest.
- Avoid attacking a Shrieker directly during its active mace swing.
- Use the final Rest Stop before entering the boss area.
Defeat Jenova Emergent
The Jenova Emergent battle uses Cloud, Tifa, and Barret. At the start, Jenova is positioned at the far end of the arena. Barret can attack safely from range while Cloud and Tifa build ATB and look for openings. When the boss is pressured, its head becomes a target. Attack the head to improve stagger progress, then use Tifa’s Unbridled Strength abilities and other high-damage commands during the stagger window.
After losing part of its health, Jenova detaches and moves around the arena. It adds more targetable body parts, including the shoulders. Destroy reachable parts when the attack is safe, but do not stand in front of lasers or remain inside homing gas. Switch characters when the boss focuses one fighter so the other two can continue attacking or healing. Jenova has no straightforward elemental weakness, so do not spend MP changing elemental plans solely for this boss.
During the late phase, tentacles appear around the arena. They are weak but can interrupt movement and attacks. Clear the tentacles nearest to your party with area attacks when necessary, then return attention to Jenova and its regenerating parts. Keep one ATB charge available for healing, especially if gas or laser attacks have separated the party. Defeat Jenova Emergent, then let the following scenes finish. Chapter 5 is complete once the game advances to the next chapter.
- Use Barret’s range and the boss’s head target to build stagger.
- Destroy exposed Jenova parts during safe openings.
- Avoid lasers, homing gas, and tentacles that block movement.
- Finish the post-battle scenes and confirm the transition to Chapter 6.
Before you move on
- Both second-class cabin Antidote chests and the optional Fortification Materia have been collected if pursuing chapter loot.
- The Queen’s Blood tournament has either been fully completed, including the bonus match, or intentionally forfeited.
- Celeris, Kaiser Knuckles, and the Mega-Potion have been collected if pursuing the chapter’s available chests.
- Jenova Emergent has been defeated with Cloud, Tifa, and Barret.
- The remaining story scenes have finished and the game has advanced from Chapter 5 to Chapter 6.
Chapter 6 — Fool’s Paradise
Chapter 6 takes place in Costa del Sol and temporarily focuses on resort activities rather than open-world exploration. Find a hotel, follow Johnny to the Seaside Inn, and leave Cloud’s weapon in the room when prompted. To obtain Cloud’s beachwear, earn a companion card from either Card Carnival or Pirate’s Rampage. Later, Aerith and Tifa must each earn a card: Aerith can use Run Wild or Cactuar Caper, while Tifa can use Royal Coast Concert or Wheelie Rendezvous. Exchange the cards for outfits, choose matching styles if you want to strengthen a particular relationship, and continue to the beach. After the beach events, choose which party members to assist, then defeat the Lightning-weak Grasptropod. Keep away from its poison mist, avoid Breakneck Spin, and attack when it overheats. Speak with the party after the battle, return to the hotel, and leave Costa del Sol until Yuffie’s recruitment scene finishes and Chapter 7 becomes available.
Find a hotel and follow Johnny to the Seaside Inn
After arriving in Costa del Sol, follow the objective marker to the Tourist Information Center. Speak with the attendant and ask about hotels. Visit both marked hotel locations, the Royal Coast and the Costa del Sol Resort, then continue along the route until Johnny appears and offers the party a place to stay. Follow him to the Seaside Inn rather than trying to leave the resort area.
Before starting the beachwear sequence, use the available shops and save point if you need supplies. This chapter does not open a normal Corel-style region with a required odd-job board or cache route, so do not delay the story searching for side missions that are not present here. A marked interaction with Yuffie near the resort can be completed for relationship progress, but it is optional.
- Visit the Tourist Information Center.
- Ask about hotels.
- Check both the Royal Coast and Costa del Sol Resort.
- Follow Johnny to the Seaside Inn.
- Complete the optional Yuffie interaction if desired.
Store Cloud’s weapon and earn his beachwear card
Inside Johnny’s Seaside Inn, enter Cloud’s marked room and interact with the weapon rack or storage point opposite the door. Cloud must leave his weapon behind before he can participate in the resort’s beach activities. When control returns to Cloud, leave the inn and follow the nearby objective until the companion-card event begins.
You only need one companion card for Cloud’s required outfit. Card Carnival is started by speaking with Regina on the lower dock level. It presents preset Queen’s Blood puzzles with limited cards, so inspect the board and solve the stated objective rather than playing a normal match. Pirate’s Rampage is started by speaking with Barret at the shooting gallery on the northern path. Shoot the displayed targets within the time limit and meet the activity’s required score. Completing both activities lets you buy both of Cloud’s outfit options; completing one is enough to progress.
Take the companion card to a Beachwear Exchange Booth and exchange it for an outfit. Use a nearby changing room to equip the clothing, then go to the marked beach entrance and confirm that you are ready. The outfit choice is optional for combat, but matching Cloud’s style with Tifa or Aerith affects the relevant relationship progress.
- Place Cloud’s weapon in the marked room.
- Complete Card Carnival or Pirate’s Rampage.
- Collect the companion card.
- Exchange it for Cloud’s beachwear.
- Change clothes before going to the beach.
Earn beachwear for Aerith and Tifa
After Cloud’s beach sequence, control shifts to Aerith, Tifa, and Red XIII at Johnny’s hotel. Leave the room and knock on the marked door to meet Tifa, then follow the new objectives into Costa del Sol. Aerith and Tifa each require their own companion card before they can obtain beachwear.
For Aerith’s card, complete either Run Wild or Cactuar Caper. Run Wild begins at the animal-playground booth in the southwest part of town and has Red XIII score goals on the field. Cactuar Caper begins near the girl by the stairs leading toward the Card Carnival area; photograph the four required Cactuars around Costa del Sol. For Tifa’s card, complete either Royal Coast Concert or Wheelie Rendezvous. Royal Coast Concert takes place inside the Royal Coast hotel and requires Tifa to perform the piano activity. Wheelie Rendezvous begins near the red Wheelie station by the town entrance and requires you to locate and return six Wheelies.
You do not need to complete every activity for the main story. Once Aerith and Tifa each have a card, visit the Beachwear Exchange Booths, buy one outfit for each character, and use the changing areas to equip them. Extra minigame ranks and additional rewards are optional and can be pursued for completion later.
- Complete Run Wild or Cactuar Caper for Aerith.
- Complete Royal Coast Concert or Wheelie Rendezvous for Tifa.
- Collect one card for each character.
- Exchange both cards for beachwear.
- Equip the outfits before returning to the beach.
Handle the beach choices and prepare for combat
Follow the objective marker back to the beach after the outfits are equipped. The clothing style you selected can contribute to Tifa’s or Aerith’s relationship progress, so use matching styles if that is your priority. Later, when the beach attack begins, choose which group to assist. This choice determines which two party members accompany Cloud at the start of the Grasptropod fight; it does not prevent the other characters from appearing later.
Before confirming the fight, equip Cloud with healing support and Lightning Materia if available. The Grasptropod is weak to Lightning, and Cloud may spend much of the battle as the reliable controlled character after party members are captured. Keep an Antidote or another way to remove poison available if possible. Use Assess if you want the enemy information recorded, but do not waste ATB while the boss is protected by a special attack.
- Choose the desired beachwear style.
- Select the party members you want beside Cloud initially.
- Equip healing support.
- Equip Lightning Materia if available.
- Keep a way to cure poison ready.
Defeat the Grasptropod and finish the chapter
The Grasptropod can be pressured by dealing damage, using Lightning, and landing Synergy Skills or Synergy Abilities. Build ATB while moving around its attacks, then spend ATB on Lightning spells, healing, and strong abilities during pressure or stagger windows. The boss uses missiles and drones to abduct party members. This is scripted, so do not waste time trying to prevent every capture; switch to the available character and continue fighting. Cloud is also captured around the midpoint of the battle and returns as part of the story.
Watch for the poison mist. It can be released in an arc or spread around the boss, so move away from the affected area rather than attempting close-range attacks through it. When Grasptropod uses Breakneck Spin, stay clear of the spinning attack. Afterward, it overheats and becomes temporarily inoperative; use that opening to attack aggressively and build stagger. If Cloud is hurt during the reduced-party portion, prioritize healing before committing to a long combo.
After the boss is defeated, speak with the party members on the beach if you want their relationship interactions. Tifa is near the bar, Aerith is near the water, Red XIII is beside the stage area, and Barret is on the steps leading back toward the resort. When ready, go up the stairs and confirm that you want to return to the hotel. Leave the hotel afterward and continue toward the marked exit. Yuffie stops the party and asks to join; accept her request if you want the relationship increase, then continue until the chapter-complete transition occurs.
- Use Lightning to pressure the Grasptropod.
- Avoid its poison mist.
- Stay clear during Breakneck Spin.
- Attack while it is overheated.
- Finish the beach conversations if desired.
- Return to the hotel.
- Continue past Yuffie’s recruitment scene.
- Confirm that Chapter 7 is available.
Before you move on
- Cloud has stored his weapon at Johnny’s Seaside Inn and obtained beachwear.
- Aerith and Tifa have each earned a companion card and obtained beachwear.
- The party has completed the beach story sequence and selected an initial support group.
- The Grasptropod has been defeated using its Lightning weakness and overheating window where possible.
- Optional beach relationship conversations have been completed if desired.
- The party has returned to the hotel, departed Costa del Sol, and finished Yuffie’s recruitment scene.
- Chapter 7 is available as the next main-story chapter.
- Any unfinished Costa del Sol minigames, higher ranks, extra outfit purchases, vendor purchases, or relationship interactions are recorded as optional cleanup rather than required Chapter 6 progression.
References for this chapter
- Final Fantasy VII Rebirth – PS5 Games | PlayStation
- FINAL FANTASY VII REBIRTH Available Now on PlayStation 5 | Square Enix
- Final Fantasy 7 (VII) Rebirth Chapter 6: Fool’s Paradise Walkthrough | PowerPyx
- Chapter 6: Fool’s Paradise Walkthrough | FF7 Rebirth | Game8
- Final Fantasy 7 Rebirth: Chapter 6 Walkthrough — Fool’s Paradise | Push Square
- Ch.6 — Fool’s Paradise — Final Fantasy VII Rebirth Walkthrough & Guide | GameFAQs
Chapter 7 — Those Left Behind
Chapter 7 begins in Costa del Sol and leads through Mt. Corel, the Corel Reactor, the Corel Mines, and North Corel. The required route contains two major boss fights: Custom Valkyrie during the mountain ascent and Gigatrice in the mines. Costa del Sol has optional side quests before departure, while North Corel is the last point where you can freely prepare before boarding the ropeway. You can complete Of Robed Men and Ransoms here, play two Queen’s Blood matches, buy a Queen’s Blood booster pack, collect Revive Materia, and inspect the local vendors and notice board. The Saga of the Seaside Inn starts in this chapter but cannot be completed until Chapter 9, when the full Corel Region opens. Board the ropeway only after finishing the optional tasks you want; doing so begins Chapter 8 and prevents a return to North Corel until Chapter 9.
1. Check Costa del Sol before leaving for Mt. Corel
At the start of Chapter 7, you are still in Costa del Sol. Before following the main objective west, check Johnny’s Seaside Inn and speak with Johnny at the desk to start The Saga of the Seaside Inn. This quest sends you into Corel for refurbishment materials and later objectives, but it cannot be fully completed during Chapter 7 because some of the Corel Region remains inaccessible until Chapter 9. Start it now if you want its early objectives recorded, then continue with the main route or return to it later.
The Costa del Sol notice board also offers Rendezvous in Costa del Sol and, after meeting that quest’s requirements, Bodybuilders in a Bind. These are optional. Complete them now if you want to reduce later cleanup, but do not treat them as prerequisites for Chapter 7. Before departing, equip Healing Materia, check weapon abilities, spend available Folios or weapon points, and carry Phoenix Downs and Ether items for the long mountain and mine sections.
Leave through the Chocobo ranch south of Costa del Sol and follow the western route toward Mt. Corel. If you want easier travel through the area, purchase the Rent-a-Bird Membership at the Chocobo Tack Shop. Corel’s eastern open-world area is available, but the southern region and its remaining activities are not fully accessible yet.
- Start The Saga of the Seaside Inn if you want to begin its Chapter 7 objectives.
- Complete Rendezvous in Costa del Sol and Bodybuilders in a Bind only if desired.
- Equip Healing Materia and prepare recovery items.
- Leave through the southern Chocobo ranch and follow the route to Mt. Corel.
2. Climb Mt. Corel and defeat Custom Valkyrie
Follow the linear mountain trail, collecting materials and opening visible chests as you climb. When the route seems to end, look for the yellow climbable ledges indicated by Yuffie’s graffiti. At the first party split, Cloud remains with Aerith and Red XIII while the other characters move ahead. Use the rest stop before continuing, and open the purple chest beside it to obtain Wizard’s Rod for Aerith. The nearby Evenervation Materia is also worth collecting before leaving the area.
Continue up the mountain, using the marked climbing surfaces and avoiding unnecessary detours if you are low on supplies. At the later rest stop and shop, heal and adjust Materia before the boss encounter. The required boss is Custom Valkyrie. Fire and Wind attacks are effective for pressuring it. Its Cooling Protocol creates a useful opening, so spend stored ATB during that period rather than attacking carelessly while it is mobile. When the large laser cannon targets the controlled character, move behind the machine to avoid the shot. Continue building stagger and rotate characters when the boss is out of reach.
After the fight, the game switches to Zack for a short story interlude. Answer the door, go upstairs with Elmyra, and inspect the situation involving Aerith and Cloud. Control then returns to Cloud’s group. Hold the gate lever to open the route, continue upward, and reunite with the rest of the party before entering the Corel Reactor.
- Collect Wizard’s Rod before leaving the first mountain rest stop.
- Heal and change Materia at the rest stop before Custom Valkyrie.
- Use Fire or Wind to pressure Custom Valkyrie.
- Move behind the boss when its laser cannon targets you.
- Complete the Zack interlude and reopen the mountain route.
3. Enter the Corel Reactor and reach the mine control area
Follow Yuffie and then Barret through the Corel Reactor. After the reactor scenes, take the long elevator down to the Coal Mines. Follow the tracks and the marked route until the bridge blocks the party. After the story event, control shifts to Yuffie while Barret and Tifa remain separated from her.
Use Yuffie’s shuriken to break environmental targets, cut wires, and activate distant mechanisms. In the Preparation Plant, take the Grappling Hook from the table, cross to the opposite side, and activate the conveyor. Open the purple chest near the conveyor switch to obtain Twin Viper for Yuffie. Ride the conveyor to the next section, then use the grapple points and shuriken targets to reach the elevator control panel. Activating it brings Barret and Tifa back to Yuffie’s position.
Before using the zipline onward, climb the nearby ledges and cut the wire holding the supply container. Break the dropped boxes for extra items. Continue through the mine, using rest stops whenever available. At the Railway Control Tower, defeat the Cockatrice blocking the route. Fire attacks are useful, while guarding its melee attacks or evading Swoop and Cock-a-Doodle-Kick can create pressure opportunities.
- Follow Yuffie after the party split and use shuriken interactions to open the route.
- Take the Grappling Hook from the Preparation Plant.
- Collect Twin Viper from the purple chest.
- Activate the elevator control panel to reunite with Barret and Tifa.
- Defeat the Cockatrice before continuing through the Railway Control Tower.
4. Restore the mine machinery and defeat Gigatrice
Continue through the mine’s upper sections, using the grapple points that Yuffie lowers or reveals with her shuriken. When a grapple point is positioned incorrectly, move it until the landing prompt leads to the next ledge rather than dropping into the lower area. Use the conveyor switches to restore the mine’s route. An Empowerment Materia is available on boxes along the upper path, and the mine also contains chests with equipment and materials, including Illusionist’s Armband and Barrage Blaster.
After the second elevator sequence, defeat the Bomb inside the machinery area, then heal at the nearby rest stop. Stock up before opening the red door because Gigatrice is the next required boss. Gigatrice can be pressured with Fire, which also helps bring it down for close-range attacks. Tifa can take advantage of the opening once the boss is grounded. When the fight reaches its later phase and cyclones appear around the arena, keep moving away from the tornadoes instead of committing to long attacks in unsafe locations.
When Gigatrice falls, interact with the control console near the nest to lower the drawbridge. Follow the marked route to the mine-cart section. Before starting, review the party’s Materia because the characters are divided during the sequence.
- Restore the conveyor route using the mine switches.
- Collect equipment and Materia from safe side paths if you want the optional upgrades.
- Defeat the Bomb before calling the elevator.
- Heal before opening the red door to Gigatrice.
- Use Fire against Gigatrice and avoid its cyclones.
- Lower the drawbridge after the boss fight.
5. Complete the mine-cart sequence and reach North Corel
At the mine-cart section, use the track switches to choose the route for the carts carrying the other party members. The available choices can reflect Barret’s or Yuffie’s preferred routes, but any route that reaches the end completes the required objective. Keep your attention on the track and hazards while using the mounted weapons to destroy targets and clear obstructions. Do not focus so heavily on enemies that you miss a required steering prompt or collide with the scenery.
After the cart ride, the party reunites. Restore HP and MP at the next rest opportunity, reorganize Materia, and cross the suspension bridge into North Corel. The chapter’s required story route now becomes a short town sequence involving Barret and Tifa. Follow Barret through the settlement, then go uphill when Tifa says she wants to see someone. Approach the clinic to trigger the scene with Doctor Sheiran and continue until the Gold Saucer objective appears.
North Corel is the last practical preparation point before the ropeway. It is possible to leave through the southern gate, but Southern Corel has no new World Intel available at this stage and is not worth treating as required progress. The full Corel Region becomes available later.
- Choose a safe mine-cart route and watch the track while firing.
- Heal and reorganize Materia after the cart sequence.
- Cross the bridge into North Corel.
- Follow Barret through town and trigger Tifa’s clinic scene.
- Do not mistake the southern gate for required Chapter 7 progress.
6. Finish North Corel’s optional content before boarding the ropeway
Visit the North Corel vendors before leaving. The weapon vendor sells the Queen’s Blood booster pack Uncanny Terrors for 500 gil, containing Sandhog Pie, Bloatfloat, and Heatseeker. Check for any weapon you may have missed earlier, and use the rest stop near the lookout before attempting the local matches.
Two Queen’s Blood opponents are available in North Corel at this point. Biff is in the bar near the piano; defeating him awards the Bomb card. Rolf is north of the rest stop in the Settlement - Lookout area; defeating him awards the Cockatrice card. Navalan in the residential area may remain unavailable until later Queen’s Blood progression, so do not treat him as a Chapter 7 omission if he refuses a match.
Collect the Revive Materia near the clinic. From the clinic entrance, go west to the broken fence, drop onto the roof below, and continue down to the glowing Materia. Accept Of Robed Men and Ransoms from the North Corel notice board if it is available, then follow its marked objectives through the Old South Corel Mine and return as directed. This quest is optional, but it is the main North Corel side quest tied to Chapter 7.
When ready, follow the Ropeway signs and board the gondola. Boarding ends Chapter 7 and starts Chapter 8. You cannot return to North Corel immediately, so finish the shopping, Queen’s Blood matches, Revive Materia pickup, and desired side-quest progress first.
- Buy Uncanny Terrors if you want the local Queen’s Blood cards.
- Challenge Biff and Rolf and claim their Bomb and Cockatrice cards.
- Collect Revive Materia from the roof below the clinic.
- Complete Of Robed Men and Ransoms if desired and available.
- Board the ropeway only after finishing the North Corel tasks you want.
Before you move on
- The party has left Costa del Sol, crossed Mt. Corel, defeated Custom Valkyrie, completed the Zack interlude, and entered the Corel Reactor.
- The Corel Mines have been cleared, the machinery has been restored, Gigatrice has been defeated, the drawbridge has been lowered, and the mine-cart sequence is complete.
- The party has crossed into North Corel and completed the clinic story scene.
- Of Robed Men and Ransoms has been completed if desired and available. The Saga of the Seaside Inn is recorded as started or intentionally deferred until Chapter 9.
- Biff and Rolf have been challenged if you want their Queen’s Blood cards, Uncanny Terrors has been purchased if desired, and Revive Materia has been collected.
- The party has boarded the North Corel ropeway and the game has begun Chapter 8: All That Glitters.
References for this chapter
- Final Fantasy VII Rebirth – PS5 Games | PlayStation
- Final Fantasy 7 Rebirth: Chapter 7 Walkthrough - Those Left Behind
- Final Fantasy 7 Rebirth: Chapter 7 Walkthrough - Those Left Behind
- Corel Coal Mines - Chapter 7 - Walkthrough
- North Corel walkthrough - Queens Blood Players & Revive Materia - Chapter 7
- Final Fantasy 7 Rebirth: The Saga of the Seaside Inn Walkthrough
Chapter 8 — All That Glitters
Chapter 8 begins at the Gold Saucer, introduces Cait Sith, and places Cloud in a relationship-dependent attraction tour before the story shifts to Corel Prison. The required route is: collect the Healing Materia, complete the Gold Saucer tour, investigate the Battle Square shooting, follow Cait Sith into the prison, gather three Sylkis Greens for Piko, win the chocobo race, find Barret, defeat Dyne as Barret, defeat the Anuran Suppressor with the full party, survive the buggy escape, and finish Zack’s search for Biggs. Chapter 8 has no conventional regional odd-job board. Its optional rewards are concentrated in Gold Saucer minigames, GP exchanges, Queen’s Blood, Corel Prison activities, extra Sylkis Greens, and treasure chests. The most important preparation points are Barret’s solo battle against Dyne and the Anuran Suppressor’s Lightning weakness.
Arrive at the Gold Saucer and collect the first Materia
After leaving the ropeway carriage, enter the room directly ahead in the Cast Break Room and pick up the Healing Materia on the floor. This is an ordinary Healing Materia, not a story item, but collecting it now avoids having to search for it later. Continue toward the park entrance and watch the arrival scenes.
Cloud then faces Dio in the introductory 3D Brawler match. The match can be won or lost without blocking the chapter. Winning raises Red XIII’s relationship value, so retry it if that relationship matters to your planned Gold Saucer date; otherwise accept the result and continue.
- Collect the Healing Materia in the Cast Break Room.
- Complete the introductory 3D Brawler match.
- Proceed to the Haunted Hotel after the Gold Saucer introduction.
Meet Cait Sith and complete the hotel interlude
Go with Barret to Ghost Square and meet Cait Sith. Follow the hotel staff to the Tonberry Suite, then use the elevator to reach the room. After Barret leaves, interact with the bed to rest and begin the Zack interlude.
During the interlude, check on Aerith and then leave through the indicated door. Follow the objective through the Sector 5 sequence until control returns to Cloud. The companion who visits Cloud is determined by relationship values established earlier in the game; it is not selected from a menu during this chapter.
- Trigger Cait Sith’s introduction in Ghost Square.
- Rest in the Tonberry Suite.
- Finish the Zack interlude and return to Cloud.
Complete the Gold Saucer attraction tour
After Cloud wakes, follow the attraction markers through Wonderment Square, Event Square, Speed Square, Battle Square, Chocobo Square, and Skywheel Square. The chapter uses this tour to introduce the Gold Saucer activities and GP exchanges. Follow the marked objective at each square; you do not need top ranks to advance the story.
The available activities include Musclehead Colosseum, G-Bike, Galactic Saviors, 3D Brawler, and Queen’s Blood-related content. Chocobo Racing is not available as a normal attraction during this first tour. You may earn GP and spend it at the square-specific exchange kiosks, but high scores and most prize purchases are optional. If you want the optional Materia in this area, the chapter treasure list includes Steadfast Block Materia at the Golden Way Bridge and HP Up Materia in the Golden Theatre.
When the Skywheel sequence is interrupted, use the marked route back to Battle Square. Investigate the shooting with Cait Sith and Dio, then accept the mission to find the real shooter. Follow Cait Sith to the Service Entrance and take the elevator down into Corel Prison.
- Visit all six marked Gold Saucer squares.
- Use the attraction markers to advance rather than attempting every optional rank.
- Collect Steadfast Block Materia and HP Up Materia if you want the available Gold Saucer treasure.
- Return to Battle Square after the shooting interrupts the Skywheel sequence.
Enter Corel Prison and collect the key equipment
After the group is taken into custody, follow Garth through the settlement. When he leads you toward the chocobo stables, open the nearby purple chest to obtain Cloud’s Umbral Blade. Continue to the stables and meet Billy, who explains that Piko needs three Sylkis Greens before the race can begin.
Speak with the available NPCs and use the marked objectives to start the prison’s green-gathering activities. You only need three greens to continue, but more are available for optional rewards and Chocobo Gear. The most direct options include Desert Rush, Stalkers?, Swindling Seminar, Queen’s Blood matches, Beast Battleground, and the bartender’s garden request. Use the prison vendors before leaving the settlement if you need potions, Materia, or any previously missed weapon listed for sale.
Desert Rush awards a Sylkis Green at its first target rank and awards Tifa’s Dragon Claws at the highest listed reward tier. The higher score is optional. Queen’s Blood matches and the other prison challenges are also optional except for the number of greens required to restore Piko.
- Open the purple chest containing Umbral Blade in Solemnitude Manor.
- Obtain at least three Sylkis Greens.
- Use the prison vendors before moving on.
- Take extra prison rewards only if you want the optional gear or treasure.
Feed Piko and win the chocobo race
Return to Billy after obtaining three Sylkis Greens and feed Piko. Speak with Garth when you are ready to race. Esther escorts Cloud to the race lobby, where you can complete the practice race before entering the required event.
In the race, use drift turns to maintain speed around corners, collect useful boosts, and avoid damaging obstacles. The story requires first place, not a specific time or advanced racing rank. If you lose, retry from the race sequence rather than leaving the chapter route. Winning causes Gus to release the group and allows the party to pursue Barret.
- Feed Piko three Sylkis Greens.
- Complete the practice option if you need to learn the course.
- Finish the required chocobo race in first place.
- Leave the prison settlement after Gus releases the group.
Find Barret and prepare for Dyne
Follow the birds through the desert and continue toward the scrapyard. You can avoid many desert encounters, so conserve HP and MP if you prefer. A purple chest near the scrapyard prison cell contains Barret’s Vulcan Cannon. Collect it before entering the next clearing and equip it if it improves your setup.
Continue to the rest stop and inspect the compound. Barret insists on facing Dyne alone, so this is the last safe point for his equipment preparation. Equip Barret with his strongest available weapon and armor. Chakra is useful for self-healing, Assess is useful for recording enemy information, and an ATB-supporting Materia can help him recover from mistakes. Save and use the nearby recovery facilities before opening the compound and triggering the fight.
- Collect Vulcan Cannon near the scrapyard prison cell.
- Equip Barret before opening the compound.
- Give Barret a dependable recovery option such as Chakra.
- Save before triggering the Dyne scene.
Defeat Dyne in Barret’s solo battle
Dyne’s fight is a ranged duel. Use the scrap piles as cover against his ordinary gunfire, but keep moving when he uses Firebombs, Paralyzing Shot, Blast Mines, Repentance, or his larger beam attacks. Firebombs and Paralyzing Shot travel in predictable lines or cones; strafe away from them rather than standing still and trading damage.
Keep Barret at a useful distance and use his gun-arm abilities to build pressure. Focused Shot can help pressure Dyne, while Maximum Fury is best used when Dyne is exposed or pressured. Do not spend all ATB immediately if you need Chakra or another defensive action. When Dyne destroys or bypasses cover, move to a new scrap pile instead of trying to finish a low-damage attack in the open.
If Barret falls, retry after changing his equipment and keeping more ATB available for healing. The battle ends the solo section and leads into the story confrontation between Barret and Dyne.
- Use cover against ordinary gunfire.
- Strafe around Firebombs, Paralyzing Shot, and beam attacks.
- Keep ATB available for Chakra or another recovery action.
- Defeat Dyne to continue into the Shinra assault.
Defeat the Anuran Suppressor
After Dyne’s scenes, control returns to the full party and Palmer arrives in the Anuran Suppressor. This is a normal party battle, not a vehicle-gun minigame. Equip Lightning Materia on a character who can cast reliably, because the Anuran Suppressor is weak to Lightning. Assess it if you want the enemy information entry.
Pressure the mech by exploiting openings and using strong Synergy Abilities or Limit Breaks when available. Palmer can leave the cockpit and use Neener, Neener to inflict debilitating effects; attack Palmer directly when the game exposes him and interrupt later uses when possible. Avoid the machine’s ground hazards, electric attacks, tongue-like Amphibian Laser, stun field, grab, and charge attacks.
During the powered-up portion, the Anuran Suppressor exposes targetable left and right legs. Focus those parts to knock the machine down and create a safer damage window. When the Eradication Beam begins, stop chasing damage and move laterally away from the tracking beam. After the mech falls, continue attacking during the opening and repeat the process until the boss is defeated.
- Use Lightning damage against the Anuran Suppressor.
- Interrupt Palmer’s exposed taunts when possible.
- Target both legs during the powered-up phase.
- Move away from Eradication Beam instead of trying to out-damage it.
Survive the buggy escape and finish Zack’s interlude
After the boss and the following scenes, Dio provides the buggy for the escape. This is a separate on-rails shooting sequence. Use Barret’s gun to destroy pursuing motorcycles, helicopters, and other Shinra threats. When Palmer returns in his machine, prioritize the visible laser cannon when it is exposed. Keep firing through the pursuit until the escape sequence ends; there is no free-roaming Corel exploration required here.
The chapter then switches to Zack in the Sector 5 Undercity. Follow the objective marker and speak with residents who have speech bubbles above them to ask about Biggs. Ask four people, then follow the marker toward the explosion. Investigate the explosion and complete the ensuing scene with Biggs. This finishes Chapter 8 and transitions to Chapter 9.
- Complete the buggy escape after defeating the Anuran Suppressor.
- Destroy pursuing Shinra vehicles and Palmer’s exposed laser cannon.
- As Zack, ask four residents about Biggs.
- Follow the explosion marker and finish the Biggs scene.
Before you move on
- The Healing Materia in the Cast Break Room has been collected.
- Cait Sith has joined the story, the hotel rest has occurred, and the Zack interlude is complete.
- The Gold Saucer attraction tour and Battle Square investigation are complete.
- The Umbral Blade and Vulcan Cannon have been collected if pursuing the chapter’s available weapon rewards.
- Piko has been fed three Sylkis Greens and the required chocobo race has been won.
- Dyne has been defeated in Barret’s solo battle.
- The Anuran Suppressor has been defeated in the normal party battle.
- The buggy escape has ended.
- Zack has asked four residents about Biggs and investigated the resulting explosion.
- The game has transitioned to Chapter 9: The Planet Stirs.
References for this chapter
- Final Fantasy VII Rebirth – PS5 Games | PlayStation
- Final Fantasy 7 (VII) Rebirth Chapter 8: All That Glitters Walkthrough
- Final Fantasy 7 Rebirth: Chapter 8 Walkthrough - All That Glitters
- Ch.8 - All That Glitters - Final Fantasy VII Rebirth Walkthrough & Guide
- Chapter 8: All That Glitters Walkthrough | FF7 Rebirth
Chapter 9 — The Planet Stirs
Chapter 9 begins in southern Corel and carries the party into Gongaga. Follow the reactor investigation with Cloud, Barret, Red XIII, and Cait Sith, then return with Tifa, Aerith, and Yuffie after Cissnei provides Forest Chocobos and Grappling Guns. The chapter’s required bosses are Specimen H1024 and Crimson Mare Mk. II. Reactor treasures are easy to miss, especially during the second visit, so collect them before returning the Grappling Gun near the end of the chapter. After State of Things, clear Gongaga’s four odd jobs, Queen’s Blood matches, World Intel, caches, and optional equipment if desired. Finish by reaching the airstrip, collecting Resounding Megaphone behind the telephone booth, and paying 1,000 gil for the flight to Cosmo Canyon.
1. Cross southern Corel and enter Gongaga
Chapter 9 resumes in the southern Corel desert. You have access to the Buggy, so this is a good time to finish any Corel content that was previously blocked by terrain or story progress. The Saga of the Seaside Inn can be completed after obtaining the Tonberry King’s crown, and Missing Mr. Birdie is available in North Corel. These activities are optional and are not prerequisites for entering Gongaga.
Drive south toward the marked reactor route. Cross the river and leave the Buggy when the game places you in the Gongaga jungle. You can explore some of the region immediately, but the area is designed around Forest Chocobo mushroom launches. Do not spend time trying to force every path before the story gives you Chocobos; many routes remain inaccessible or inefficient until then. Save at the nearby rest point and continue toward the village.
- Finish any Corel side content you want before leaving the region.
- Drive south and cross into Gongaga.
- Save at the jungle rest point before continuing on foot.
2. Reach Gongaga Village and collect the early optional items
Follow the jungle route to Gongaga Village and stay with Cissnei during the opening scenes. After the group separates, speak with the available party members if you care about relationship dialogue. Rest at Cissnei’s house when the story requires it; choose the option that advances time until it is time to leave.
Before resting, collect Yuffie’s Bird of Prey from the purple chest inside Cissnei’s house. The chest is in the building containing the rest point. While exploring the village, visit the piano in Laurel Hill, in the building south of Memorial Hill, to obtain the Cinco de Chocobo music sheet. Cait Sith’s Red Megaphone is also available in a southern water cave near the village, although the later Resounding Megaphone is the easier Cait Sith weapon to miss during the airstrip departure.
When the story wakes Cloud after the reactor disturbance, follow Yuffie back toward the monument and then leave through the southern gate. The first reactor trip is linear, but collect its side treasures before advancing beyond the water-level section.
- Collect Bird of Prey from Cissnei’s house.
- Collect Cinco de Chocobo from the Laurel Hill piano.
- Rest at Cissnei’s house using the required story option.
- Leave through Gongaga’s southern gate when the reactor objective appears.
3. Investigate the reactor and defeat Specimen H1024
Follow the objective route to the abandoned reactor. At the entrance, take the side room with the purple chest before squeezing through the passage; this contains Cloud’s Crystal Sword. Continue through the reactor until you reach the generator and water-control section. In the flooded room, follow the cable to the obstructed cart, pull the cart far enough to free the cable, connect the plug, and use the nearby control panel to raise the water level. Climb over the moved cart to reach Red XIII’s Golden Collar.
After crossing the raised water route, search the side passage beneath the rubble for the Subversion Materia before resting. This Materia is especially useful for the boss. Amalgams before the boss are weak to Fire and can revive if they reach zero health without being affected by Fire, so apply Fire to each one before finishing it.
Specimen H1024 is weak to Ice. When it uses Mako Ingestion, do not treat the animation as harmless downtime: spend ATB on Ice attacks or strong abilities to interrupt the follow-up attack and pressure the boss. Near the latter part of the fight, Mako Inhalation strengthens it and gives it defensive effects such as Barrier and Manaward. Use Breach from Subversion Materia to remove those defenses, then continue with Ice, Limit Breaks, and high-damage abilities. Heal before the final exchange rather than saving all MP for later; another rest point is available during the return route.
- Take Crystal Sword from the first reactor purple chest.
- Move the cart, restore power, raise the water level, and collect Golden Collar.
- Take Subversion Materia before the boss room.
- Apply Fire to Amalgams before they are defeated.
- Use Ice to exploit Specimen H1024’s weakness.
- Interrupt Mako Ingestion and use Breach after Mako Inhalation.
4. Return with Tifa’s group and collect every missable reactor treasure
After the first boss and the story scenes, control switches to Tifa, Aerith, and Yuffie. Recheck their equipment before leaving Gongaga Village. Cissnei provides Forest Chocobos, which can bounce from the large jungle mushrooms and launch across the region. Follow the mushroom routes toward the reactor instead of attempting ordinary jumps across gaps.
At the reactor entrance, defeat the Shinra troops and use the Grappling Gun on the marked anchors. In the flooded room, swim to the central platform and grapple upward. Turn around as soon as you reach the upper level and take the purple chest containing Tifa’s Tiger Fangs. Continue searching the return route for the additional chests, including the materials and Sapphire pickups around the gate-generator room. These treasures are missable during this story visit because the Grappling Gun is returned near the end of the chapter.
For the generator puzzle, reach the upper walkway and push the generator unit to the far end of its platform. This brings the hanging cable within reach of the plug below. Take the central pole back down, connect the generator, and pass through the opened gate. Heal at the rest point before using the final grapple route to the reactor core.
- Use Forest Chocobo mushroom launches to reach the reactor.
- Collect Tiger Fangs immediately after grappling into the flooded room.
- Search the return route for the additional reactor chests before leaving.
- Push the generator unit fully along its platform.
- Rest before the Crimson Mare Mk. II fight.
5. Defeat Crimson Mare Mk. II and finish the reactor story
Crimson Mare Mk. II is weak to Lightning, but attacking the main body alone is not the correct pressure method. Target and destroy both arm weapons first. After both weapons are destroyed, Scarlet becomes targetable outside the armor. Damage Scarlet during that opening to pressure the mech and create the best stagger opportunity.
The weapon sets change during the battle. The first phase uses sabers, the second replaces them with Mako cannons, and the final phase uses gauntlets. Keep Lightning available while the current arm weapons display the weakness, but do not waste Thunder spells during the gauntlet phase when the machine no longer has the same Lightning weakness. Arcane Ward lets Aerith cast more efficiently, and Yuffie can use Lightning Ninjutsu while staying away from close-range attacks. Keep a character ready to heal because the cannon phase can punish anyone who stands in a firing line.
After the fight, control Tifa briefly. Use the nearby Grappling Gun points to reach Scarlet’s crane, then complete the prompted interaction sequence. The following underwater section is mostly guided; follow the prompts until the story restores control. When Tifa wakes, leave the room and speak with the others to complete State of Things.
- Destroy both arm weapons before focusing on Scarlet.
- Use Lightning against the saber and Mako cannon phases.
- Block or reposition against the cannon attacks.
- Avoid relying on Lightning during the gauntlet phase.
- Complete the Grappling Gun and crane sequences.
- Leave Tifa’s room and speak with the group after she wakes.
6. Clear Gongaga’s optional content after State of Things
Once State of Things is complete, Gongaga opens for its full optional route and the Forest Chocobo is available for exploration. This is the best time to clear the region rather than wandering before the reactor story. The four Gongaga odd jobs are The Pursuit of Perfection, O Chicken, Where Art Thou, Teach Me, Great Warrior, and The Spice of Life. The Spice of Life requires Teach Me, Great Warrior first. The Pursuit of Perfection rewards Barret’s Fafnir Rifle.
Open the Gongaga notice board and complete the jobs in any order that respects that dependency. Then sweep the region with the Chocobo, using mushroom launches to reach high paths, caches, Excavation Intel, and other World Intel. The confirmed Gongaga World Intel set can be completed at this point. Check the Play Log and map markers rather than assuming every jungle path is part of the main route.
For Queen’s Blood, challenge Oscar and Zhijun in Gongaga to obtain the Griffon and Great Malboro cards. The general store sells the Jungle Arcanum booster pack for 500 gil. If you need status protection or upgraded defenses, check the region’s vending machines and confirmed armor and accessory chests, but do not treat any one resistance item as mandatory for the chapter. The reactor’s Sage Armband, Golden Collar, and other confirmed equipment are useful optional pickups, not story requirements.
- Complete The Pursuit of Perfection if you want Fafnir Rifle.
- Complete O Chicken, Where Art Thou.
- Complete Teach Me, Great Warrior before The Spice of Life.
- Complete The Spice of Life if pursuing all Gongaga odd jobs.
- Win the Oscar and Zhijun Queen’s Blood matches.
- Buy Jungle Arcanum for 500 gil if desired.
- Use Forest Chocobo routes to clear Gongaga World Intel and caches.
7. Reach the airstrip and end Chapter 9
When you are ready to continue, leave Gongaga Village through the southern exit. The previously locked route to the airstrip is now open. Follow the marked path southwest; the road leads across the jungle toward the airstrip and its telephone booth.
Before using the telephone booth, search behind it for Cait Sith’s Resounding Megaphone. This is the chapter’s most easily missed departure pickup because interacting with the booth begins the flight sequence. After collecting it, use the telephone booth to call the pilot. Have at least 1,000 gil available and pay the flight fee. The party then leaves for Cosmo Canyon and Chapter 9 ends.
You can return to Gongaga after the transition, but regional travel may require another payment at this point. Save after reaching Chapter 10 so your completed side quests, equipment pickups, and World Intel progress are preserved.
- Exit through Gongaga’s southern gate.
- Follow the airstrip route southwest.
- Collect Resounding Megaphone behind the telephone booth.
- Pay the 1,000-gil flight fee.
- Confirm that the game advances to Chapter 10.
Before you move on
- Specimen H1024 and Crimson Mare Mk. II are defeated.
- Crystal Sword, Golden Collar, Subversion Materia, Tiger Fangs, and all other desired reactor chests are collected before the Grappling Gun is returned.
- Bird of Prey and Cinco de Chocobo are collected if desired.
- The four Gongaga odd jobs are complete if pursuing full regional side content.
- Oscar and Zhijun have been defeated in Queen’s Blood, and Jungle Arcanum has been purchased if desired.
- Gongaga World Intel, caches, and optional equipment have been cleared to the extent intended for this run.
- Resounding Megaphone is collected behind the telephone booth.
- The 1,000-gil flight fee is paid and the Chapter 10 transition appears.
References for this chapter
- Final Fantasy 7 Rebirth Chapter 9: The Planet Stirs Walkthrough
- Final Fantasy VII Rebirth — Chapter 9 Walkthrough and Guide, PS5
- Final Fantasy 7 Rebirth: Chapter 9 Walkthrough - The Planet Stirs
- Crimson Mare Mk. II Boss Guide - Chapter 9 - Walkthrough
- Final Fantasy 7 Rebirth All Weapon Locations and Weapon Abilities
- All Weapon Locations | FF7 Rebirth
Chapter 10 — Watcher of the Vale
Chapter 10 begins at the Cosmo Canyon airstrip and leads through Kamaria’s Ranch, the Cosmo Canyon settlement, Bugenhagen’s observatory, and the Cave of the Gi. Follow the marked route through Celestory Cavern; even after obtaining the Sky Chocobo, you cannot fly directly into Cosmo Canyon. After the main story events in the settlement, the Cosmo Canyon region opens for optional exploration and four Chapter 10 Odd Jobs: Bonds of Trust, Absence of a Sign, From Whence Life Flows, and Promises to Keep. Complete these before resuming the late story if you want their rewards and relationship progress during this run. The chapter then becomes a mostly linear sequence through the Gi trials, the Ruby, Emerald, and Amber altar objectives, and the Gi Nattak boss battle. Save recovery resources for the trial and boss sequence, and prepare for Soul Flames, statue debuffs, and a final Doom countdown.
Travel from the airstrip to Cosmo Canyon
At the beginning of Chapter 10, leave the airstrip and follow the objective marker toward Kamaria’s Ranch. The route is not a direct flight path: continue along the cliffs and through Celestory Cavern until the road reaches the Cosmo Canyon area. At the ranch, speak with Kamaria if you want to start Bonds of Trust. This Odd Job requires capturing the local Sky Chocobo and completing Kamaria’s three glide-training courses. It is optional for story progress, so you can postpone it and return later through the region’s travel network.
After reaching the ranch, continue along the marked signs toward Cosmo Canyon. The Sky Chocobo does not let you fly straight into the settlement, so do not search for an aerial shortcut. Before starting the observatory sequence, visit the local shops, rest if needed, update weapons and armor, and make sure your active characters have healing and revival options equipped.
- Reach Kamaria’s Ranch by following the marked route through Celestory Cavern.
- Start Bonds of Trust only if you want to complete the Sky Chocobo activity now.
- Restock healing and revival supplies before entering the settlement’s story sequence.
Complete the observatory objectives
Follow Red XIII through Cosmo Canyon and accompany Bugenhagen into the observatory. This portion is linear and advances through conversations, demonstrations, and marked devices. When Bugenhagen asks the party to inspect equipment, examine every highlighted object in the room. The required devices include the observatory’s models, instruments, and viewing equipment; the objective will not advance until the currently marked inspections are complete.
Continue following Bugenhagen’s prompts after the inspections. Several party conversations appear during this sequence. They contribute to relationship development, but there is no single Chapter 10 conversation that alone determines the Chapter 12 Skywheel companion. The relationship system also considers earlier dialogue, completed Odd Jobs, Synergy activity, and other tracked events, so treat these conversations as one part of a larger progression.
- Inspect every highlighted observatory device.
- Follow Bugenhagen until the observatory objective changes.
- Take optional party conversations when available if you are building relationships.
Clear the Chapter 10 Cosmo Canyon Odd Jobs
After the Cosmo Canyon story events, the main objective becomes The Wild, Blue Yonder. This is the appropriate time to check the settlement’s noticeboard and clear the region’s Chapter 10 Odd Jobs before entering the later Gi sequence. The four Chapter 10 quests are Bonds of Trust, Absence of a Sign, From Whence Life Flows, and Promises to Keep. Victim of Circumstance does not belong in this chapter; it is a Chapter 12 Cosmo Canyon quest.
Bonds of Trust starts at Kamaria’s Ranch and consists of the Sky Chocobo glide courses. Accept Absence of a Sign from the Cosmo Canyon noticeboard, then follow its markers to investigate the requested celestial signs and deal with the associated fiends. From Whence Life Flows is Bugenhagen’s request to investigate marked lifesprings around the region; use the map markers and return to him after completing the investigations. Promises to Keep is also accepted in Cosmo Canyon and sends you through a regional request involving the settlement’s local history and characters. Follow the quest markers for the exact destinations rather than assuming that every objective is inside the town.
These quests are optional for finishing Chapter 10, but they provide rewards and relationship progress. If you are attempting a relationship-focused run, complete them before continuing the main objective. This open-world window is also the best time to clear Cosmo Canyon World Intel, Queen’s Blood matches, caches, Chocobo stops, gathering points, and unlocked combat challenges. Those activities are not required for the chapter ending and can be revisited later.
- Complete Bonds of Trust if you want its Chocobo courses and rewards.
- Complete Absence of a Sign, From Whence Life Flows, and Promises to Keep if you want all Chapter 10 Odd Jobs finished.
- Do not list Victim of Circumstance as a Chapter 10 quest; reserve it for Chapter 12.
- Clear optional Cosmo Canyon exploration before resuming the main story if you want fewer return trips.
Prepare before entering the Cave of the Gi
When you are ready to continue, follow the main objective through the story scenes that lead to the Cave of the Gi. The route becomes increasingly linear, with several encounters and altar-related objectives before the boss. Rest at the available recovery point, restore HP and MP, replace worn equipment, and make a manual save before committing to the trial sequence.
Equip dependable healing and revival options. Elemental materia can help against the region’s enemies, while defensive support is useful if your party is taking heavy damage. Red XIII benefits from active use of his Vengeance Gauge, so switch to him often enough to build and spend it rather than leaving him on basic attacks. Keep ATB available for emergency healing and revival instead of spending every bar immediately on offense.
- Restore HP and MP before entering the trial sequence.
- Carry Phoenix Downs and enough healing items for several consecutive encounters.
- Make a manual save before the route becomes linear.
- Give the active party healing, revival, and suitable elemental or defensive materia.
Complete the Gi trials and altar objectives
Advance through the Cave of the Gi by following the current objective marker after each encounter. The trial route is divided into several rooms and gates rather than a freely explorable dungeon. Examine the marked objects, defeat the enemies blocking the route, and continue through each opened passage. Use recovery opportunities when they appear, but do not assume that every chamber is a permanent safe area.
The story eventually directs the party through the Ruby Altar, Emerald Altar, and Amber Altar objectives. Keep the current marker visible because the correct route changes as each trial is completed. Search side rooms while you still have control if you want the chapter’s chests and materials, but prioritize the marked altar objective when the path opens. Continue through the later gates until the game leads you to the Watcher’s Verdict and the Gi Nattak arena.
- Follow each active trial marker instead of backtracking through closed routes.
- Complete the Ruby Altar, Emerald Altar, and Amber Altar objectives as they appear.
- Use recovery points before the final arena when available.
- Do not spend all MP and ATB during the early trial fights.
Defeat Gi Nattak
Gi Nattak uses strong melee attacks, a grab that drains health, area projectiles, and attacks that drain HP or MP. Keep moving when the black orb appears and avoid standing in the path of unblockable charges. Block attacks that can be blocked, but do not remain stationary while waiting for an opening. If you use healing items offensively against Gi Nattak, do not rely on them as your primary damage plan; build stagger and use normal abilities, spells, Synergy Abilities, Limits, and Summons instead.
At roughly three-quarters health, Gi Nattak summons Soul Flames. Destroy them quickly when possible. If they remain active long enough to possess statues, the battle can impose severe effects such as reduced HP, reduced MP, lost ATB, or a smaller battlefield. A similar Soul Flame phase can occur again around half health, so save enough ATB for rapid area damage rather than spending every resource on the boss alone.
During the final portion of the fight, Gi Nattak begins a Doom countdown. This is a damage race: continue attacking and spend the resources you saved, including Limits or a Summon if available. Do not pause for unnecessary item collection or conservative recovery once Doom has started. Defeat the boss before the countdown ends, then continue through the following scenes and objectives. The chapter is not finished immediately when the boss falls; remain in control until the story transitions onward.
- Avoid Gi Nattak’s unblockable charges, grabs, black orb, and HP- or MP-draining attacks.
- Destroy Soul Flames before they can activate statue effects.
- Save burst damage for the Doom phase.
- Continue through the post-battle scenes until the game advances beyond Chapter 10.
Before you move on
- The Ruby, Emerald, and Amber altar objectives are complete and the Watcher’s Verdict sequence has occurred.
- Gi Nattak has been defeated and the subsequent story scenes have finished.
- The game has advanced beyond the final Chapter 10 objectives toward Chapter 11.
- The Chapter 10 Odd Jobs you intended to complete are marked finished in the quest or Play Log records.
- Your party is healed and re-equipped before continuing, especially with revival and elemental materia available for the next chapter.
References for this chapter
- Final Fantasy VII Rebirth – PS5 Games | PlayStation
- FINAL FANTASY VII REBIRTH is available now on PlayStation 5! — Square Enix
- Final Fantasy 7 Rebirth Chapter 10: Watcher of the Vale Walkthrough — PowerPyx
- Chapter 10: Watcher of the Vale Walkthrough — Game8
- Ch.10 - Watcher of the Vale — GameFAQs
- Cosmo Canyon Region Quests — GameFAQs
- Final Fantasy 7 Rebirth Bonds of Trust Walkthrough — PowerPyx
- Final Fantasy 7 Rebirth Absence of a Sign Walkthrough — PowerPyx
- Final Fantasy 7 Rebirth From Whence Life Flows Walkthrough — PowerPyx
- Final Fantasy 7 Rebirth Chapter 10 Walkthrough — Samurai Gamers
Chapter 11 — The Long Shadow of Shinra
Chapter 11 takes the party from the Nibel Airstrip to Nibelheim, Mt. Nibel, the Nibelheim Reactor, and Shinra Mansion. Early conversations in Nibelheim affect party relationships, then the story locks the next major section to Cloud, Tifa, and Yuffie. After the reactor battle, Cait Sith handles a solo mansion sequence before rejoining Aerith and Barret for a sequence of difficult boss fights. The chapter’s two Nibel Region side quests are not available at the same point: Esoteric Secrets of the Elders opens when you reach the region, while My White-Haired Angel becomes available only after the main objective Overstayed Welcomes. Complete the Chocobo Sage’s request by capturing Selena, gathering at least 30 Chocograss, and winning the final race. For the cat quest, travel to Mt. Nibel, defeat the pursuing fiends, escort Fluffy and her kittens back to Nibelheim, and complete the piano performance. Finish by defeating Roche, returning to the airport, and boarding Cid’s Tiny Bronco. The emergency landing sequence marks Chapter 11 complete and leads into Chapter 12.
1. Reach Nibelheim and complete the relationship conversations
From the Nibel Airstrip, follow the marked road northeast to Nibelheim. You can explore the region immediately, but the main route first requires entering the rebuilt town and meeting the party. When the group separates, speak with the available companions at their marked locations before going upstairs in the Nidhogg Inn. These conversations contribute to Cloud’s relationship values for the Chapter 12 Gold Saucer event, so do not rush directly to the inn.
After the conversations, go to the second floor of the Nidhogg Inn for the story scene. Then visit Town Hall and interact with Cait Sith’s terminal objective. When the game directs the party to leave through the northeastern gate, make a separate save and prepare Cloud, Tifa, and Yuffie. They are the fixed party for the Mt. Nibel and reactor section. Equip healing support, at least one Ice Materia, and any defensive or status-removal options you rely on. A vending machine and rest point are available during the approach, but setting up before departure prevents the opening battles from exposing an unprepared character.
- Speak with the available companions in Nibelheim before entering the Nidhogg Inn.
- Complete the Town Hall terminal objective.
- Prepare Cloud, Tifa, and Yuffie before leaving through the northeastern gate.
- Save before starting the Mt. Nibel route.
2. Cross Mt. Nibel and defeat the Diabolic Variant
Follow the marked route through Mt. Nibel toward the reactor. The path includes climbing sections, machinery obstacles, pipes, and ordinary fiend encounters. Continue through the reactor approach until you reach the rest point immediately before the boss elevator. Use it to heal and adjust equipment before entering the arena.
The Diabolic Variant is weak to Ice. Its tentacle arm is the key target: destroying that part pressures the boss and temporarily removes several of its attacks. Cloud can use Ice spells, while Yuffie can apply Ice Ninjutsu from range. Avoid standing in Toxic Mire and move away from the delayed ground attacks. The boss later creates a clone. Defeat the clone if it is disrupting the fight, but identify the real Variant by its glowing tentacles and concentrate damage on the original when it is close to being pressured or staggered.
After the battle, continue through the reactor and complete the story sequence involving the artificial materia facility. The party then proceeds to Shinra Mansion, where the next portion temporarily places Cait Sith at the center of the action.
- Use Ice against the Diabolic Variant.
- Break its tentacle arm to pressure it.
- Distinguish the original from its clone by the glowing tentacles.
- Use the rest point before the reactor elevator.
3. Complete Cait Sith’s mansion route and defeat Yin & Yang
Inside Shinra Mansion, follow the objective through the research and ventilation areas. Cait Sith’s Moogle is required for several interactions. Summon it to activate mechanisms, pull or move objects, distract enemies, and reach switches that Cait Sith cannot operate alone. During the box-throwing sections, stand where the aiming reticle can reach the target and lead moving machinery rather than throwing immediately.
Before activating the terminal at the end of the ventilation route, heal Cait Sith and configure Fire, Healing, and any defensive support you have available. Yin & Yang alternates control between its two heads. Yin uses close-range physical attacks, while Yang uses spells. When one head is incapacitated, the remaining head becomes pressured but uses a more dangerous attack pattern. Keep the Moogle active, but dismount when mobility is more important than direct Moogle attacks. Cait Sith’s ranged attacks are useful while waiting for ATB.
After the fight, continue through the mansion. There is a crate-throwing challenge during the escape route and a combination lock before the Forgotten Specimen area. The combination is found inside the facility as 36-10-59-97. Rest at the nearby bench and reorganize Aerith, Barret, and Cait Sith before opening the restricted room.
- Use Cait Sith’s Moogle for switches and object puzzles.
- Bring Fire and Healing Materia into the Yin & Yang battle.
- Dismount the Moogle when Cait Sith needs to move quickly.
- Enter 36-10-59-97 at the restricted-area lock.
4. Defeat the Forgotten Specimen and Galian Beast
The Forgotten Specimen changes between forms that favor different damage types. The red form is vulnerable to physical attacks and resistant to magic, while the blue form is vulnerable to magic and resistant to physical attacks. Begin by observing the current form, then switch between Barret’s physical pressure and Aerith’s magical damage as the boss changes. Repeatedly attacking with the damage type it resists wastes ATB and delays the pressure condition.
When the boss changes form, stop using the resisted damage type and immediately use the opposite type. Watch for poison pools, lightning spells, sleep, and the blue form’s heavy grab and claw attacks. Cait Sith can contribute with Moogle abilities, dice effects, healing, and stagger damage, but Barret and Aerith should handle most of the form-specific damage. During stagger, spend ATB from all three characters instead of allowing the boss to recover.
The next battle is against the Galian Beast. Equip Fire Materia and keep healing available. The boss is fast and punishes extended close-range attacks. During Inner Turmoil or Chaotic Consumption, hit it with Fire or strong ranged attacks to make it flinch and improve your opportunity to pressure it. Guard or reposition when it begins a long attack sequence instead of chasing it into danger. After the fight, the party leaves the mansion and returns toward Nibelheim.
- Use physical attacks against the red Forgotten Specimen form.
- Use magic against the blue Forgotten Specimen form.
- Watch for poison, sleep, lightning, and grab attacks.
- Use Fire to interrupt the Galian Beast during Inner Turmoil or Chaotic Consumption.
5. Complete Nibel’s optional quests when they unlock
Esoteric Secrets of the Elders becomes available as soon as you reach the Nibel Region. Start it at the Chocobo Sage’s Manor in the southeast. Travel to the marked Chocobo Intel location southeast of the airstrip and capture Selena, the blue regional Chocobo. Use the elevated route and thrown food to guide her through the puffy plants while they are deflated; if the plants strike her repeatedly, the encounter resets. Return to the Sage after mounting Selena.
The quest then requires at least 30 tufts of Chocograss. Selena’s Chocojet lets her rise over the water and collect grass suspended above the region. You do not need all 50 tufts to finish the quest, although the extra grass unlocks additional trade rewards. Return to the Sage after collecting the required amount and complete the final Zoom de Chocobo race. This quest is complete only after winning the race.
My White-Haired Angel is available later, after the main objective Overstayed Welcomes. Start it at the Village Kitchen in Nibelheim or through the noticeboard. Follow the objective to Mt. Nibel, find Fluffy at the Southern Ascent, defeat the Guard Bees, then follow Fluffy back west and defeat the additional Guard Bees and Queen Bee. Escort Fluffy and her kittens back to Nibelheim without sprinting away from them. Follow them into Tifa’s house, interact with the piano, collect Aerith’s Theme, and complete the performance. Any performance rank completes the quest. The reward includes Way of the Fist Vol. V and a relationship increase with Tifa.
After Selena is available, return to the Nibel Region’s previously inaccessible water routes. Chadley’s list is the reliable completion check: Nibel contains 23 World Intel objectives, including one Chocobo Intel, four Activation Intel, four Expedition Intel, four Fiend Intel, three Divine Intel, one Moogle Intel, two Secret Intel objectives, and four Protorelic objectives. Some Secret and Protorelic objectives require earlier Intel or later chapter progress, so do not treat the region as incomplete merely because every category is not immediately available.
- Capture Selena and report back to the Chocobo Sage.
- Collect at least 30 Chocograss and win the Zoom de Chocobo race.
- Start My White-Haired Angel only after Overstayed Welcomes.
- Find Fluffy on Mt. Nibel and escort her kittens to Tifa’s house.
- Complete the piano performance and collect Aerith’s Theme.
- Use Chadley’s Nibel list to track all 23 World Intel objectives.
6. Defeat Roche and finish the chapter
After the mansion events, return toward Nibelheim and recover at the nearby rest point before the Roche fight. Roche battles Cloud alone. His ordinary melee strings can be guarded or perfect-guarded, while his named special attacks should generally be dodged. Wait for a combo to finish, then counter with Cloud’s Punisher attacks or Focused Thrust. When Roche becomes pressured, use Focused Thrust to build stagger rather than attacking recklessly.
Roche becomes permanently pressured at roughly half health and changes to a more aggressive phase. Continue guarding ordinary strikes, dodge his special abilities, and punish the openings after he finishes an attack. Save a Limit Break or high-damage ability for a stagger if possible, but do not sacrifice survival to force damage during his long combos.
After Roche falls, complete the story scenes and follow the objective to the airport. Do not stop at Nibelheim or assume the chapter ends when Cid is first mentioned. At the airport, interact with Cid beside the smoke signal and board the Tiny Bronco when prompted. The flight and emergency landing sequence then plays automatically. The chapter is complete when the game records Chapter 11 as finished and proceeds into the opening of Chapter 12.
- Defeat Roche in the Cloud-only duel.
- Guard or perfect-guard his basic melee strings.
- Dodge his named special attacks.
- Return to the airport and speak with Cid at the smoke signal.
- Board the Tiny Bronco and complete the emergency landing sequence.
Before you move on
- The Diabolic Variant, Yin & Yang, Forgotten Specimen, Galian Beast, and Roche have been defeated.
- The story has continued from Roche to the airport, Cid has been met at the smoke signal, and the Tiny Bronco emergency landing sequence has completed.
- Chapter 11 is recorded as cleared and Chapter 12 begins.
- Esoteric Secrets of the Elders is marked complete if pursued: Selena captured, at least 30 Chocograss delivered, and Zoom de Chocobo won.
- My White-Haired Angel is marked complete if pursued: Fluffy and her kittens returned, Aerith’s Theme collected, and the piano performance finished.
- Chadley’s Nibel list has been checked against the 23 World Intel objectives, with any unavailable later objectives intentionally left for subsequent progression or Chapter Select.
References for this chapter
- Chapter 11: The Long Shadow of Shinra Walkthrough
- Chapter 11: The Long Shadow of Shinra Walkthrough
- Nibel Region World Intel Locations
- My White-Haired Angel Walkthrough
- Esoteric Secrets of the Elders Walkthrough
- Final Fantasy VII Rebirth Walkthrough and Guide — Chapter 11 and Nibel Region Quests
- Nibel Region Quests
- Final Fantasy VII Rebirth Manuscript Locations
Chapter 12 — A Golden Key
Chapter 12 starts with the Tiny Bronco’s voyage to Costa del Sol, then opens the world for side quests, regional Intel, Pirate King’s Treasure, new minigame modes, and Gold Saucer preparation. When ready, fast-travel to the Gold Saucer and investigate Dio’s whereabouts. After the party secures the Keystone, a rest at the Haunted Hotel locks the remainder of Chapter 12 into Gold Saucer story events, including the date, Loveless, the Corneo match, the Cait Sith chase, and three required boss encounters. Save before resting if you want to preserve the option to alter the date later through Chapter Select. After tracking Cait Sith and speaking with Cid at the Costa del Sol dock, Chapter 12 ends. Do not confuse that departure with the final point of no return: in Chapter 13, docking at Northwood and entering the Temple of the Ancients permanently locks the party into the endgame until the story is completed.
1. Sail the Tiny Bronco to Costa del Sol
Chapter 12 begins with Cid piloting the modified Tiny Bronco through shallow water. Follow the navigable channel toward Costa del Sol. This opening is linear; there is no need to search for side areas during the voyage. After docking, the game unlocks broad world access, new regional activities, upgraded minigame modes, and Pirate King’s Treasure.
At the Costa del Sol dock, inspect the available treasure chest if you want to begin Pirate King’s Treasure. This starts the optional treasure hunt and provides the Corsair’s Compass, which assists with locating the marked destinations during Tiny Bronco travel. It is not required for the story.
Before advancing to the Gold Saucer, use the map and quest log to review newly available odd jobs throughout the Grasslands, Junon, Corel, Gongaga, Cosmo Canyon, and Nibel regions. Fast travel is available across the world at this stage. Complete the quests and Intel you want now, while remembering that relationship-affecting quests can influence the Chapter 12 date.
- Reach Costa del Sol and inspect the dock area.
- Start Pirate King’s Treasure if you want its optional rewards.
- Review every region’s quest markers, World Intel, and available activities before going to the Gold Saucer.
2. Complete desired side content before entering the Gold Saucer lock-in
The Gold Saucer becomes temporarily restrictive after the story investigation advances and Cloud is told to rest at the Haunted Hotel. To keep free access to the wider world, finish the regional side content you care about before beginning that sequence. Check noticeboards, settlement NPCs, regional caches, summon activities, Protorelic objectives, and newly unlocked minigame modes through the Play Log rather than assuming every activity is available in the same order for every save.
Gold Cup or Bust is an optional Chapter 12 quest connected to higher-level Chocobo Racing content. Complete it if you want its rewards or the related racing progress, but do not treat it as a main-story requirement. Can’t Stop Won’t Stop is also optional and is not simply an early Chapter 12 quest: it becomes available after the required late-Chapter-12 progress and requires the other side quests and the relevant Gold Saucer minigame conditions.
If your goal is the campaign rather than immediate completion, it is safe to postpone unfinished side content. Chapter Select after completing the game can return you to Chapter 12, and the Play Log helps identify missing quests, minigames, relationship events, and collectibles.
- Finish the odd jobs and regional Intel you want before the Haunted Hotel sequence.
- Complete Gold Cup or Bust only if you want its optional Chocobo Racing rewards.
- Do not spend time searching for Can’t Stop Won’t Stop unless its prerequisites are satisfied.
3. Prepare equipment and relationship progress before searching for Dio
When ready to continue, fast-travel to the Gold Saucer. The party separates while searching for Dio. Visit the party members in their designated Gold Saucer areas if you want their optional scenes or relationship progress, then speak with Aerith in Musclehead Colosseum to advance the main objective. Dio explains that the Keystone is available, but Cloud’s group must fight in the naming-rights contest first.
Before speaking with the Ghost Square concierge to go to bed, make a manual save. Resting at the Haunted Hotel is the soft lock for Chapter 12: after this point, the party remains in the Gold Saucer for the rest of the chapter’s story sequence. Your date partner is selected from the relationship state at this point. If you want a particular partner, complete that character’s relevant quests and relationship-building opportunities before resting.
Equip a dependable healing setup, revival coverage, and at least one physical and one magical damage option. Because the later fights include a fire-vulnerable Abzu, lightning-vulnerable Elena, and a solo Cloud fight against Rufus, make sure Cloud can function without relying on a full party. Save MP if you intend to revisit this chapter on Hard Mode.
- Visit optional party scenes before advancing if you want their relationship effects.
- Save immediately before resting at the Haunted Hotel.
- Give Cloud healing, revival, defensive, and ATB-generating options before the locked story sequence.
4. Complete the date and Loveless sequence
After resting, follow the date partner through the Gold Saucer. The Loveless performance contains interactive prompts and timing inputs. Follow the on-screen instructions carefully if you want the best performance result or related Play Log and trophy progress. The date and Skywheel scenes are story content; they do not alter the main route.
After Loveless and the Skywheel sequence, the group returns to the naming-rights conflict. The character who accompanied Cloud on the date remains part of the required battle party, so adjust the third party slot and materia before the fight begins. Use the available rest points and vending machines when offered.
The story then moves into the Corneo contest. Keep the party healed between rounds and do not enter the boss fight with empty ATB if you can avoid it. This is the final opportunity inside the Gold Saucer sequence to make ordinary preparation changes before the battle chain.
- Complete the Loveless interactive section.
- Confirm the date partner and third party member’s equipment.
- Use rest points and healing items before the Corneo contest.
5. Defeat Abzu, then Rude and Elena
The first major fight is Abzu. Fire attacks pressure Abzu, interrupt its attacks, and cause it to react while trying to extinguish the flames. Exploit that opening with ATB abilities and stagger pressure. During Counterpose, stop using melee attacks until the stance ends or use safe ranged and magical options. At roughly half health, Abzu gains stronger attacks, including Furious Charge and Upheaval. Dodge through the expanding shockwave and avoid standing in its charge path.
The next battle is against Rude and Elena. Elena is weak to Lightning and uses grenades that can paralyze, while Rude is weak to Wind. Focus Elena first if her grenades and rush attacks are disrupting the party, but keep watching Rude because he can revive her after she falls. When the pair begin charging their combined attacks, interrupt them with ATB commands or pressure effects instead of trying to trade damage. Keep the party near full health because the tandem attack can remove a large portion of the party’s HP.
After the battle, the Keystone chase continues. Follow the marked route through the Gold Saucer, use the indicated exits and hiding-place prompts, and proceed until the game places Cloud in the required solo confrontation.
- Use Fire to pressure Abzu and avoid striking during Counterpose.
- Use Lightning against Elena and Wind against Rude.
- Interrupt the Turks’ combined attacks before they complete.
6. Defeat Rufus and finish Chapter 12
The final required boss of Chapter 12 is Rufus, followed by Darkstar during the later phase. Rufus has no elemental weakness and counters ordinary melee attacks, so do not repeatedly swing into his guard. Build ATB with safe movement, ranged attacks, and defensive play, then use an ATB command during or immediately after his attacks to pressure him. His Reload animation is the clearest opening; striking him during Reload can pressure him and some attacks can stagger him immediately.
When Darkstar joins, continue prioritizing Rufus when possible because pressuring Rufus also disrupts their coordination. Darkstar adds aggressive close-range attacks and elemental combinations, so avoid standing in the electric fields created by Rufus’s Tread Softly. If Darkstar is causing too much pressure, stagger and defeat it, then return to Rufus. Heal before committing to a stagger burst so a counterattack does not end the attempt.
After Rufus leaves, follow the story objectives to track Cait Sith through the Gold Saucer. Search the indicated areas, approach the marked exits or hiding places, and continue until the group returns to Costa del Sol. At the dock, speak with Cid when you are ready to end the chapter. The save then advances to Chapter 13.
Chapter 12 does not contain the game’s hard point of no return. In Chapter 13, sail the Tiny Bronco to Northwood and stop when the game warns that docking will prevent return to the previous regions. Finish remaining exploration before accepting that docking prompt, or use Chapter Select after completing the campaign.
- Defeat Abzu, Rude and Elena, and Rufus with Darkstar.
- Complete the Cait Sith chase and return to the Costa del Sol dock.
- Speak with Cid and confirm the save advances to Chapter 13.
- Keep free-roaming cleanup for Chapter 13 only until before docking at Northwood.
Before you move on
- The save has advanced from Chapter 12 into Chapter 13 after the Cait Sith pursuit and the conversation with Cid at Costa del Sol.
- Abzu, Rude and Elena, and Rufus with Darkstar are defeated.
- A manual save exists from before the Haunted Hotel rest if you want to revisit the date setup.
- Desired Chapter 12 odd jobs, relationship quests, Pirate King’s Treasure progress, Gold Cup or Bust progress, World Intel, and Gold Saucer activities are recorded in the quest log or Play Log.
- You understand that Chapter 13’s Northwood docking warning, not the Chapter 12 Tiny Bronco departure, is the last opportunity for unrestricted pre-endgame exploration.
References for this chapter
- Final Fantasy 7 Rebirth Chapter 12: A Golden Key Walkthrough
- Ch.12 - A Golden Key - Final Fantasy VII Rebirth Walkthrough and Guide for PS5
- Chapter 12: A Golden Key Walkthrough | FF7 Rebirth
- Chapter 13: Where Angels Fear to Tread Walkthrough | FF7 Rebirth — Game8
- Temple of the Ancients - Labyrinth - Chapter 13 Walkthrough
- Can’t Stop Won’t Stop Walkthrough — Final Fantasy VII Rebirth
Chapter 13 — Where Angels Fear to Tread
Chapter 13 begins at the Costa del Sol port and takes the party across the Meridian Ocean to the Temple of the Ancients. Finish preferred side content before docking: landing at the temple locks ordinary exploration until the chapter is complete, although Chapter Select makes missed content recoverable later. The temple is a long linear dungeon with gravity puzzles, forced party splits, trials, recovery points, and several required encounters. The boss order is Red Dragon, Ironclad, Reno and Rude, Moss-Grown Adamantoise, Elena and Tseng, then Demon Gate. Keep healing and revival available across the changing groups. Use Ice against Red Dragon, Fire against Moss-Grown Adamantoise, and interrupt Demon Gate whenever it begins drawing the arena walls inward. After Demon Gate, complete the temple escape and concluding scenes; Chapter 13 is not finished until the game advances to Chapter 14.
1. Complete preparation before docking at the Temple of the Ancients
At the start of the chapter, you are at the Costa del Sol port with access to the Tiny Bronco. Sail north while following the western coastline. Continue toward the Northern Continent until Shinra helicopters and the Temple of the Ancients are visible. Before docking, stop and complete any remaining Odd Jobs, World Intel tasks, Queen’s Blood matches, relationship activities, shopping, or equipment adjustments that you want to handle during the normal story run.
Choose the dock option only when ready to enter the temple. This is the practical point of no return for ordinary world exploration: after landing, the story keeps you inside the Temple of the Ancients until the chapter is cleared. The content is not permanently lost because Chapter Select can be used later, but finishing preferred side content now avoids a long return trip. Save before docking. Equip healing, revival, and defensive Materia on more than one character because the game repeatedly changes the active party.
- Finish any preferred side content before docking.
- Save before selecting the temple landing.
- Put healing and revival options on multiple characters.
- Check weapons, armor, accessories, and weapon skills for the characters used most often.
2. Enter the temple, solve the gravity rooms, and defeat Red Dragon
After docking, follow the objective route to the temple entrance and use the nearby bench and vending machines before entering. The opening labyrinth uses rotating gravity chambers and vertical routes. When the direct path appears blocked, inspect the nearby chamber for the gravity mechanism rather than searching for a conventional doorway. Check side platforms and short branches before moving on; several chests sit away from the objective marker.
Red Dragon is weak to Ice. Remove any Fire-focused offensive setup and put Ice Materia on characters who can reliably reach the boss. The arena contains pillars that become targets after the dragon sets them alight. Strike the scorched pillars when the dragon is close enough for them to collapse onto it; this pressures the boss and creates an opening. When Red Dragon takes flight, target a wing to force it back down and pressure it.
When the dragon moves to the upper ledge and exposes its chest, attack the chest to reduce the area covered by Crimson Breath. The breath turns portions of the arena into damaging fire, so move toward safe ground and do not remain beneath the attack. Ranged attacks, Ice spells, and a character with dependable ranged pressure are especially useful during the flying phase. Heal at the next recovery point before continuing.
- Use Ice against Red Dragon.
- Collapse scorched pillars when the boss is positioned over them.
- Destroy a wing when Red Dragon is airborne.
- Attack the exposed chest to reduce Crimson Breath’s coverage.
- Use a bench after the fight before climbing deeper into the temple.
3. Clear the Cloud, Tifa, and Barret sections; defeat Ironclad and Reno and Rude
The party separates after the first major temple section. First control Cloud, Tifa, and Barret. Follow the objective marker through the labyrinth, crossing moving structures and using the available mechanisms. Do not waste time trying to reunite with the other group; the game controls the sequence in a fixed order. Adjust Materia when the menu permits it so this group has healing, revival, and at least one source of ranged damage.
Ironclad is built around pressure and stagger rather than a quick damage race. Avoid its heavy attacks and use focused abilities when an opening appears. Its dangerous Thanatosian Blade can instantly defeat a character, so move sideways as the attack begins rather than trying to trade blows. Use lightning-based offense when the opportunity is available, and do not spend all ATB immediately; retain enough to heal or use a focused attack when the boss becomes vulnerable.
After Ironclad, use the nearby recovery opportunity before facing Reno and Rude. Keep moving to avoid their coordinated attacks and concentrate on one Turk whenever a clear opening appears. Guard or evade instead of standing in the open while both bosses are active. Barret’s ranged pressure is useful when closing distance is unsafe, while Cloud or Tifa can capitalize on stagger windows. Revive a fallen damage dealer promptly rather than trying to finish the fight with only one character.
- Configure the active group before the Ironclad encounter.
- Evade Ironclad’s Thanatosian Blade by moving sideways.
- Heal after Ironclad.
- Focus one Turk at a time when possible.
- Keep Barret available for safe ranged pressure.
4. Switch to Aerith, Red XIII, and Yuffie; collect Lifestream fragments and defeat Moss-Grown Adamantoise
The game then switches to Aerith, Red XIII, and Yuffie. Collect Lifestream fragments from blue crystals, defeated enemies, and floating particles while following the marked route. These sections include wind hazards, movable blocks, collapsing paths, and vessel objectives. When the current route is blocked, search the immediate room for the next mechanism or enemy group rather than backtracking to the previous party.
The first Moss-Grown Adamantoise is a required miniboss and should be treated as a serious threat. It is weak to Fire. Cast Fire or use a Fire-element weapon ability to pressure it, which also interrupts the barrage of homing projectiles it uses when left unchecked. The creature frequently applies Barrier, Manaward, Protect, and Shell; use Dispel when those buffs make it too durable. When it raises its Counter protection, circle to its side or rear before using Fire or a strong ability. Attacking directly into the counter wastes turns and can cause heavy damage.
A second Adamantoise appears later with another enemy. Keep the tortoise pressured with Fire, then remove the companion enemy when the pressure is stable. Use the nearby bench and recovery point after this sequence. Do not enter the next Turk battle with the party damaged or with Aerith’s MP nearly exhausted.
- Collect Lifestream fragments along the route.
- Keep Fire Materia on the active group.
- Use Dispel against the Adamantoise’s defensive buffs.
- Attack from the side or rear during its Counter protection.
- Heal and resupply before continuing to the next boss.
5. Defeat Elena and Tseng, then complete the individual trials
After the Adamantoise sequence, continue through the temple until Elena and Tseng attack. Keep the controlled character moving and avoid standing directly in front of their coordinated assaults. Pressure one target at a time when possible, using ATB for healing only after reaching a safe position. Aerith should maintain the group’s recovery if she is available, while Yuffie can attack from range and change elemental ninjutsu when a target’s resistance makes the current element ineffective.
After the Turks, continue through the Hall of Resurrection and the trial corridors. The party is divided into individual character trials: Red XIII, Tifa, Yuffie, Barret, Aerith, and Cloud each face a short sequence drawn from their memories or past events. Follow the objective marker through each trial and complete the traversal or combat segment before returning to the central route. These sections are mostly linear, but search the sides of larger chambers for chests before activating the next story trigger.
At the final trial sections, distribute Materia before entering the last corridors. The temple keeps rotating which characters are available, so do not leave all healing or revival tools on one person. Continue through the murals and spiral paths until the story directs you toward the Black Materia.
- Defeat Elena and Tseng after the Adamantoise section.
- Complete all six character trials.
- Search larger trial chambers before advancing.
- Keep healing and revival available across the changing party groups.
6. Reach Demon Gate and stop the arena from closing
After the final trial and mural sequence, follow the route through the remaining corridors. You will face additional enemy groups, including another Moss-Grown Adamantoise encounter, before reaching a bench near the end of the Corridor of the Apocalypse. Use it to restore HP and MP, then adjust the final party’s equipment. This is the last required boss battle of the chapter, so spend resources rather than entering with an unused MP reserve.
Demon Gate has no permanent elemental weakness. Its main danger is Encroach, which pulls the side walls inward and reduces the room available for movement. When the boss begins gathering strength for Encroach, spend ATB on strong attacks to interrupt it and pressure it. If the walls reach their minimum position, survival becomes much harder and the boss can use its most dangerous close-range attacks.
During the fight, watch the elemental color on the boss’s hands. When it prepares an elementally aspected attack, use the opposing element to interrupt that assault. At roughly the halfway point, a second Demon Gate joins the battle. Focus the first gate when possible, but watch both enemies for Encroach or elemental attacks. Save a Limit Break or a high-impact ability for the moment when the arena begins to close or when both gates are active. Keep at least one character mobile and revive fallen allies quickly.
- Use the final bench before Demon Gate.
- Interrupt Encroach with strong ATB abilities.
- Use the opposing element against the boss’s aspected hand attacks.
- Expect a second Demon Gate during the later phase.
- Save a Limit Break for the two-gate phase or a dangerous arena closure.
7. Complete the temple escape and verify Chapter 14
Defeating Demon Gate does not immediately finish Chapter 13. Follow the story as Aerith after the battle, watch the required scenes, and run through the temple’s escape sequence when control returns. Continue through the final walking and story segments as Cloud. Do not reload or leave the chapter after the boss expecting the game to count it as complete; the collapse and concluding scenes are part of the chapter’s required progression.
The chapter is complete when the story transitions into Chapter 14 and the next chapter becomes available in the normal story flow. If you are playing for the full campaign, make a new save after the transition. After completing Chapter 14, Chapter Select and postgame cleanup become available, allowing you to revisit earlier chapters for missed Odd Jobs, World Intel, collectibles, minigames, combat challenges, and other optional rewards.
- Finish the post-Demon Gate escape sequence.
- Watch the concluding Chapter 13 scenes.
- Confirm that Chapter 14 begins.
- Save after the Chapter 14 transition.
Before you move on
- Red Dragon, Ironclad, Reno and Rude, the required Moss-Grown Adamantoise encounters, Elena and Tseng, and Demon Gate have been cleared.
- The temple escape sequence and concluding Chapter 13 scenes have been completed.
- The game has advanced into Chapter 14 rather than merely returning to a checkpoint before Demon Gate.
- A new save has been created after the Chapter 14 transition.
- After the full game ending, Chapter Select and postgame features are available for cleanup and optional challenges.
References for this chapter
- Final Fantasy VII Rebirth – PS5 Games | PlayStation
- Chapter 13: Where Angels Fear to Tread Walkthrough | FF7 Rebirth — Game8
- Final Fantasy 7 (VII) Rebirth Chapter 13: Where Angels Fear to Tread Walkthrough — PowerPyx
- Ch.13 - Where Angels Fear to Tread — Final Fantasy VII Rebirth Walkthrough & Guide — GameFAQs
- Moss-Grown Adamantoise Hard Mode Guide — FF7 Rebirth | Game8
- Demon Gate Boss Guide — Final Fantasy VII Rebirth | Gamer Guides
Chapter 14 — End of the World
Chapter 14 is the final story chapter of Final Fantasy VII Rebirth. Complete the opening Zack interlude and Cloud-and-Aerith sequence, then guide the party through the Sleeping Forest and Forgotten Capital. After passing through the Whispers, use the Rest Stop and shops in the Planet’s Sanctuary: this is the last normal preparation point before a sustained finale. The required battles are Jenova Lifeclinger, several connected Sephiroth encounters involving Cloud, Zack, and changing party groups, Sephiroth Reborn, and the final Cloud-and-Aerith confrontation. After the ending and credits, load the completed clear save and verify Chapter Selection, Hard difficulty, and the Play Log before beginning optional cleanup.
1. Complete the opening interlude and dream sequence
Chapter 14 begins with the Episode 7 interlude. Follow Zack through the opening choice, then continue through the scenes involving Zack, Aerith, and Cloud. When control returns to Cloud in Aerith’s house, follow Aerith through the linear route. The choices during this section do not block completion, so select whichever responses you prefer.
The Whispers encounter that follows is deliberately restricted. Basic attacks are sufficient, and the section advances by moving forward through the forest. Do not waste time trying to open the command menu or build a conventional combat setup here. Continue along the marked path until the scene concludes and the game returns to the main party.
- Complete the Zack interlude.
- Follow Aerith through the linear dream sequence.
- Defeat or push through the Whispers with basic attacks.
- Do not search this opening section for optional activities.
2. Walk through the Sleeping Forest to the Forgotten Capital
After the dream sequence, control returns to Cloud and the rest of the party in the Sleeping Forest. Walk north while the party discusses Aerith and the route ahead. This section has no major exploration detour or required combat; stay with the group and continue toward the Forgotten Capital.
Inside the Forgotten Capital, follow the Fated Path and defeat the Whispers blocking the route. Continue through the wall of Whispers when the story directs you to do so. The next destination is the Planet’s Sanctuary, where the game provides the final conventional preparation opportunity before the ending battles.
- Follow the party north through the Sleeping Forest.
- Enter the Forgotten Capital.
- Clear the Whispers on the Fated Path.
- Proceed through the Whispers to reach the Planet’s Sanctuary.
3. Prepare at the Planet’s Sanctuary Rest Stop
Take the elevator down and inspect the Rest Stop and nearby shops before approaching Aerith in the center of the Whispers. Treat this as the last normal equipment and recovery break before the finale. Restore HP and MP, purchase or craft any supplies you still need, and make a manual save if you want a fallback before starting the sequence.
Distribute healing and revival options across the characters who may be assigned to later battles. Include offensive Materia that can pressure stagger gauges, and give the likely rotating party members enough survivability to function without Cloud as the only healer. Keep elemental magic available for the later Sephiroth Reborn wing phase, because those wings require the appropriate opposite-element spells rather than ordinary physical attacks.
When ready, approach Aerith and complete the button prompts. After the cutscene, the boss gauntlet begins. Expect changing party assignments and long scenes between encounters; do not treat the first victory as the end of the chapter.
- Heal and restore MP at the Rest Stop.
- Check weapons, armor, accessories, and Materia on the available roster.
- Equip healing and revival coverage on more than one character.
- Keep suitable elemental spells available.
- Save before approaching Aerith if you want a fallback.
4. Defeat Jenova Lifeclinger
Jenova Lifeclinger changes form and shifts the active party during the battle. Follow the currently exposed or designated target rather than attacking a protected body section. Keep moving when the arena fills with beams, energy bursts, or ground hazards, and use ranged attacks or abilities when closing distance is unsafe. Jenova has no standard elemental weakness, so focus on pressure, stagger building, and avoiding damage instead of trying to force a particular element.
The later portions become more dangerous in confined spaces. Save powerful abilities or Limit Breaks for a phase where movement is restricted and the boss’s attacks can overwhelm the party. Interrupt charged attacks when possible, revive fallen allies promptly, and do not allow the forced party changes to leave the active group without healing or ATB. The encounter restores the party afterward, but do not assume the same resource rules will apply on Hard difficulty.
- Attack the active vulnerable target.
- Move out of beams and area hazards.
- Build stagger instead of wasting attacks on protected sections.
- Interrupt charged attacks when the opening is clear.
- Revive defeated allies before the next phase.
5. Clear the Cloud-and-Zack Sephiroth encounters
After Jenova Lifeclinger, the story moves to the Edge of Creation, where Cloud and Zack confront Sephiroth. Use Cloud to build ATB and punish safe openings, but avoid standing directly in front of Sephiroth during large sword swings or sweeping attacks. Zack’s section follows and uses a different combat rhythm. When the church’s protective barrier becomes available, use it to block attacks that would otherwise be difficult to evade. Wail is especially important: blocking it with the barrier creates an opportunity to attack the resulting object and turn the defense into damage. Cloud and Zack remain linked for a Synergy Ability, so use it during a reliable opening rather than during a forced movement sequence.
- Survive the initial Cloud-and-Zack confrontation.
- Use the church barrier during Zack’s section.
- Block Wail with the barrier when possible.
- Destroy the exposed Wail object after a successful barrier interaction.
- Use the Cloud-and-Zack Synergy Ability during a safe opening.
6. Defeat Sephiroth Reborn
The Sephiroth Reborn sequence is divided among changing groups. In the opening phase, damage the Body to create access to the higher platform and expose the boss properly. Continue attacking the active exposed section and avoid spending resources on protected parts.
When control shifts to Tifa, Red XIII, and Cait Sith, Bahamut Arisen Whisper becomes the immediate threat. Defend through Gigaflare and heal afterward; rushing damage while the attack is being prepared is less important than keeping the group alive. During the following Sephiroth phase, target the exposed wings when they become vulnerable. The phase ends by destroying both wings; reducing Bahamut’s HP is not the sole objective.
Zack then faces Sephiroth again. Use the same principles as the first Zack encounter: stay mobile, use the protective church barrier, and attack openings rather than trading blows. When the party returns for the later Sephiroth Reborn phase, destroy the Left Wing and Right Wing with their opposite elemental weaknesses. The wings resist physical attacks and heavily resist incorrect magic, so match the spell to the wing’s current element. Once both wings are destroyed, attack the Core and then the main body until the phase ends.
- Damage Sephiroth Reborn’s Body first.
- Survive Bahamut Arisen Whisper’s Gigaflare before committing to offense.
- Attack exposed Sephiroth wings during the Bahamut phase.
- Use the church barrier during Zack’s return encounter.
- Destroy both Sephiroth wings with opposite-element spells.
- Attack the Core and main health bar after the wings are removed.
7. Win the final Cloud-and-Aerith battle and finish the chapter
The last required battle is a final confrontation between Cloud, Aerith, and Sephiroth. Maintain healing coverage, keep moving through large attacks, and spend ATB during clear openings. If Heartless Angel reduces a character to critical health, heal immediately after the attack resolves rather than assuming the next exchange will be survivable. Preserve revival capability until the encounter is clearly over.
After Sephiroth’s last health bar is depleted, continue through every cutscene and the credits. The chapter is not fully complete merely because the final combat animation has ended; wait until the game records the clear and produces the completed-save state.
- Keep Cloud and Aerith supplied with healing and revival options.
- Respond immediately to Heartless Angel.
- Use Limit Breaks and high-cost abilities during confirmed openings.
- Continue through the ending scenes and credits.
- Wait for the completed-save result before quitting.
8. Confirm the clear and begin postgame cleanup
Load the completed clear save after the ending. From the main menu, open System and confirm that Chapter Selection and the Play Log are available. Chapter Selection is tied to the completed save and carries your accumulated progression into replayed chapters; it is also the route used to select Hard difficulty.
Use the Play Log to identify unfinished story-related objectives, side quests, minigames, World Intel, Queen’s Blood progress, combat challenges, and other completion categories. Revisit the relevant chapters rather than assuming that the campaign clear means the entire game is complete. If you are pursuing the full trophy or challenge set, plan separate cleanup for Hard-mode chapter clears and the postgame Combat Simulator assignments. Do not start a fresh New Game expecting it to contain the completed-save Chapter Selection options.
- Load the completed clear save.
- Open System and verify Chapter Selection.
- Verify Hard difficulty is selectable through Chapter Selection.
- Open the Play Log.
- Use the Play Log to plan side-content and combat cleanup.
Before you move on
- Jenova Lifeclinger, the connected Sephiroth encounters, Sephiroth Reborn, and the final Cloud-and-Aerith battle are defeated.
- The ending scenes and credits have played.
- A completed clear save is available.
- System contains Chapter Selection.
- Hard difficulty is available through the completed save’s Chapter Selection.
- The Play Log is available and can be used to track remaining optional content.
References for this chapter
- Final Fantasy 7 Rebirth: Chapter 14 Walkthrough - End of the World | Push Square
- Ch.14 - End of the World - Final Fantasy VII Rebirth Walkthrough & Guide | GameFAQs
- Final Fantasy 7 (VII) Rebirth Chapter 14: End of the World Walkthrough | PowerPyx
- Final Fantasy 7 (VII) Rebirth How to Unlock Hard Difficulty & Chapter Select
- Chapter Select and New Game+ Explained | FF7 Rebirth | Game8
- Post-Game Content and How to Get 100% Clear | FF7 Rebirth | Game8
Postgame & 100% Completion
After finishing Chapter 14, load the completed story save and use Chapter Select and the Play Log as the foundation for cleanup. Revisit regions for unfinished odd jobs, World Intel, Chocobo Stops, caches, Queen’s Blood cards, weapons, Materia, manuscripts, minigames, and Johnny’s Treasure Trove items. Chapter Select preserves broad character and inventory progress while letting you choose how previously completed quest data is handled. Hard difficulty, Hard-only manuscripts, advanced combat missions, and several late completion targets require a completed save. Complete normal-difficulty exploration first, then prepare a separate organized Hard run if you want the full Play Log and trophy set. Streamlined Progression is available on updated PS5 installations and can reduce combat or exploration difficulty, but it is optional; leave it off when you want to practice the intended encounters.
1. Load the correct completed save and verify postgame access
Finish the final Chapter 14 sequence, watch the ending far enough for the game to create its completed story save, and save when prompted. Return to the title screen or load the completed file. The correct file is marked for Chapter Selection. From the pause menu, open System and confirm that Chapter Select is available. If you only see an ordinary pre-ending save, load the completed file instead of starting a new game.
Chapter Select is the postgame hub rather than a conventional free-roam continuation. It lets you jump to a chapter while retaining your accumulated level, equipment, Materia, inventory, weapon development, and other permanent progress. The Play Log also becomes available after the story and is the best in-game record of unfinished objectives. Record your current status before beginning a long cleanup route.
- Load the save marked for Chapter Selection.
- Confirm Chapter Select and Play Log are available.
- Make a separate manual save before experimenting with quest-data options.
2. Understand the three quest-data choices
When you select a chapter, the game asks how to handle quest data. Retain Current Quest Completion Data continues from the quest-completion state of your current postgame run. Restore Previously Completed Quest Data restores the most complete previously recorded quest state, which is useful after deliberately resetting quests for a replay. Reset All Quest Data starts the selected chapter with side-quest progress reset so you can replay its odd jobs and earn their outcomes again.
For ordinary cleanup, do not choose Reset All Quest Data unless you specifically want to replay the side quests. Use Retain when building on the progress you have made since the last reset. Use Restore when you need to recover the most complete earlier quest record. An unfinished quest is not the same as a completed quest with a lower-quality result, so check the Play Log and quest outcome before changing chapters. Chapter Select can preserve permanent activity progress even when quest data is being handled separately.
- Choose Retain for normal incremental cleanup.
- Choose Restore when recovering a previously completed quest record.
- Choose Reset only for a deliberate quest replay or Hard-mode manuscript route.
3. Work through the Play Log by region
Open System, then Play Log, and divide the remaining entries into regional exploration, quests, relationships, collectibles, minigames, combat, and equipment. A practical route is to select a chapter that gives access to one region, finish its available objectives, then return to the Play Log before moving elsewhere. Use the map icons to locate activities, but use the Play Log to determine whether the broader category is actually complete.
For a full Play Log target, the normal checklist includes 36 completed side quests, 169 World Intel entries, 48 repaired Chocobo Stops, 49 completed cache locations, 145 Queen’s Blood cards, 88 Johnny’s Treasure Trove items, 230 enemy entries collected and assessed, 49 weapon abilities learned, and 112 manuscripts. These are completion targets rather than instructions to repeat activities already marked complete. Some categories can be finished during normal cleanup; manuscripts and certain combat entries require Hard difficulty or postgame challenges.
- Complete all 36 side quests if pursuing full Play Log completion.
- Use regional maps for World Intel, caches, and Chocobo Stops.
- Check enemy assessment and weapon-ability totals separately from general combat progress.
- Verify Johnny’s Treasure Trove and Queen’s Blood totals.
4. Finish relationships, minigames, and special collections
Review the relationship and Chapter 12 date entries before starting a replay. If a particular companion outcome is incomplete, use Chapter Select and the appropriate quest-data option to replay the required earlier content, then continue to the Chapter 12 date sequence. Do not assume that changing only the final conversation changes every relationship result; earlier dialogue, quest completion, and minigame performance can contribute to the outcome.
Use the Play Log to identify incomplete minigame objectives, high-score requirements, combat objectives, and Hard variants. Revisit card shops and named Queen’s Blood opponents for missing cards. Check the Gold Saucer’s minigames and Musclehead Colosseum, Corel’s Beast Battleground, and Shinra Manor when their entries remain incomplete. Some activities are available only after the relevant story or quest unlocks, so if an icon is absent, confirm that the chapter’s prerequisite events have been completed.
- Review all six Chapter 12 date outcomes if targeting the complete relationship record.
- Finish missing minigame and high-score entries shown in the Play Log.
- Check Gold Saucer, Corel, and Shinra Manor challenge locations.
- Confirm Johnny’s items are registered after turning in the required collection.
5. Unlock and clear advanced combat challenges
Visit Chadley and review the Combat Simulator after completing the World Intel needed for its missions. The full combat target includes 56 Chadley Combat Simulator challenges, eight Shinra Manor challenges, 11 Beast Battleground challenges, and 33 Musclehead Colosseum challenges. The exact availability of some missions depends on story progress, World Intel, side quests, or postgame status, so use the mission list rather than assuming every challenge should be visible immediately.
Prepare separate parties for pressure, stagger, elemental weakness, aerial targets, and long multi-round fights. Save before a difficult challenge, assess unfamiliar enemies, and change Materia according to the mission rules. The hardest Brutal and Legendary missions are optional for simply seeing the ending but are part of the broadest completion and trophy goals. Do not count a challenge as finished because you reached its arena; verify its completion in the Play Log or challenge list.
- Clear all remaining Chadley missions.
- Clear the eight Shinra Manor entries if pursuing full combat completion.
- Complete all Beast Battleground and Musclehead Colosseum entries.
- Verify every advanced challenge after returning to the hub.
6. Prepare and run Hard difficulty
Hard difficulty is selected through Chapter Select on a completed story save. It is not selected by starting an ordinary new game. Levels, equipment, Materia, and inventory carry over, but items cannot be used during Hard battles. Rest Spots restore HP, while MP management remains important, so equip dependable healing, defensive, and MP-efficient options and use cushions or other available recovery opportunities deliberately.
A clean route is to finish normal exploration and most optional combat first, then start Chapter 1 on Hard and clear all 14 chapters in order. An ordered run makes chapter-clear tracking and manuscript planning easier, although Chapter Select allows individual chapters to be replayed. Hard difficulty provides 62 of the 112 manuscripts according to established completion guides; these rewards include chapter, boss, side-quest, and other Hard-mode objectives. If you reset quest data for Hard, keep a manual save or use Restore Previously Completed Quest Data later when you need your normal quest record.
- Start Hard from Chapter Select on the completed save.
- Plan for no item use during Hard battles.
- Track all 14 Hard chapter clears.
- Track the Hard-only portion of the 112-manuscript total separately.
7. Use Streamlined Progression only by choice
On an updated PS5 installation, Streamlined Progression can be toggled in the in-game options. Square Enix describes configurable assistance options that can provide effects such as unlimited HP or MP, greatly increased damage, expanded item availability, and easier progression through selected systems. The individual options can be switched independently rather than functioning as one unavoidable mode.
These settings are useful for accessibility, story replay, practice, or reducing the time needed to revisit completed chapters. They also reduce the intended combat challenge, so leave them off when learning Hard-mode resource management, testing a build, or judging your performance in Brutal and Legendary missions. The feature is optional; do not treat it as a required part of the completion route or assume that enabling it automatically changes your Play Log goals.
- Update the PS5 game if Streamlined Progression is unavailable.
- Review each assistance option before enabling it.
- Turn the options off for normal challenge practice.
Before you move on
- The completed save loads with Chapter Select available in the System menu.
- The Play Log shows the chosen completion categories finished, including quests, World Intel, Chocobo Stops, caches, Queen’s Blood, enemy assessment, weapons, manuscripts, minigames, and combat challenges.
- All 36 side quests are completed if targeting the full quest record, with desired outcomes confirmed where the Play Log distinguishes them.
- Johnny’s Treasure Trove is complete if pursuing the broadest in-game completion target.
- All 14 chapters are cleared on Hard if pursuing the full trophy path and Hard-mode Play Log record.
- The advanced Chadley, Shinra Manor, Beast Battleground, and Musclehead Colosseum entries are complete if pursuing full combat completion.
- The final save can still load with accumulated equipment, Materia, inventory, and postgame progress intact.
References for this chapter
Finishing up
Finish Chapter 14 and view the final story cutscene — this marks the campaign ending and unlocks Chapter Select and postgame options.
Confirm 'Chapter Select' is available from the title/menu; you can return to earlier chapters to finish missed odd jobs, collectibles, and challenges.
Verify postgame features (Hard Mode, Play Log, and Chapter Select) are unlocked in your save’s menu and use them to collect missed items or tackle optional superbosses and VR/modes.
If your goal is 100% completion, use Chapter Select to clear any remaining odd jobs, collectible caches, Queen’s Blood cards, and combat challenges listed in the in-game Play Log.
Check your trophies/achievements list for completion markers tied to story beats, sidequests (there are many odd jobs), and special unlocks; consult the Play Log to track per-chapter progress.
After completion, consider using the postgame to test alternate party setups and unlock any late-game gear or materia for New Game+ or future replays.
Choose your next gameScreenshots & video
Game imagery for reference. Follow the written chapters above for the route and strategies.
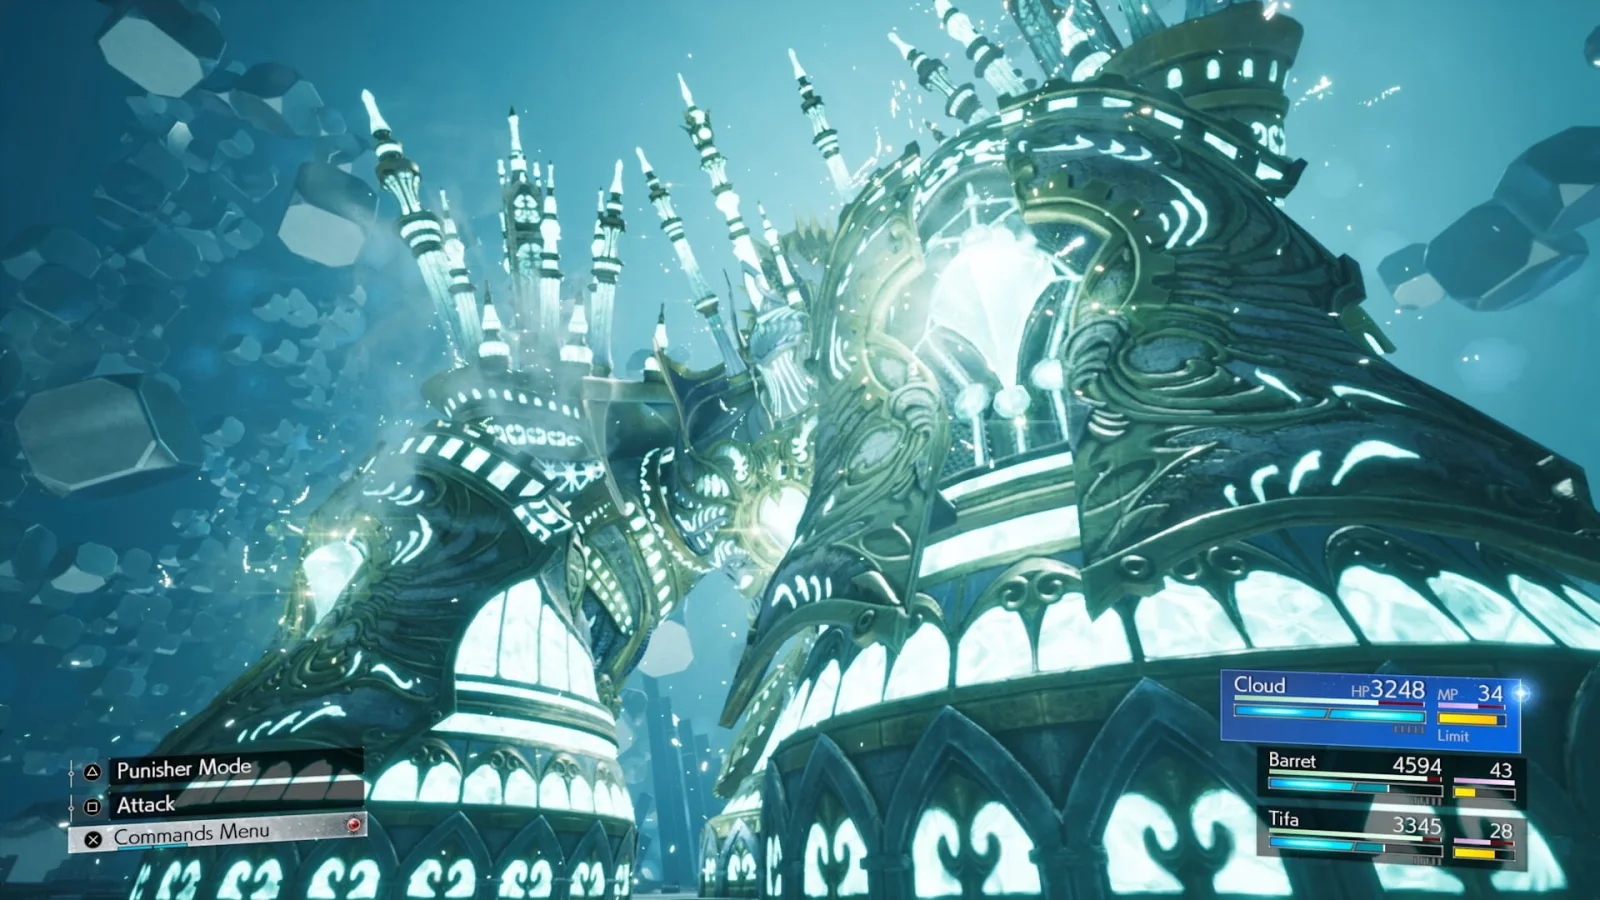
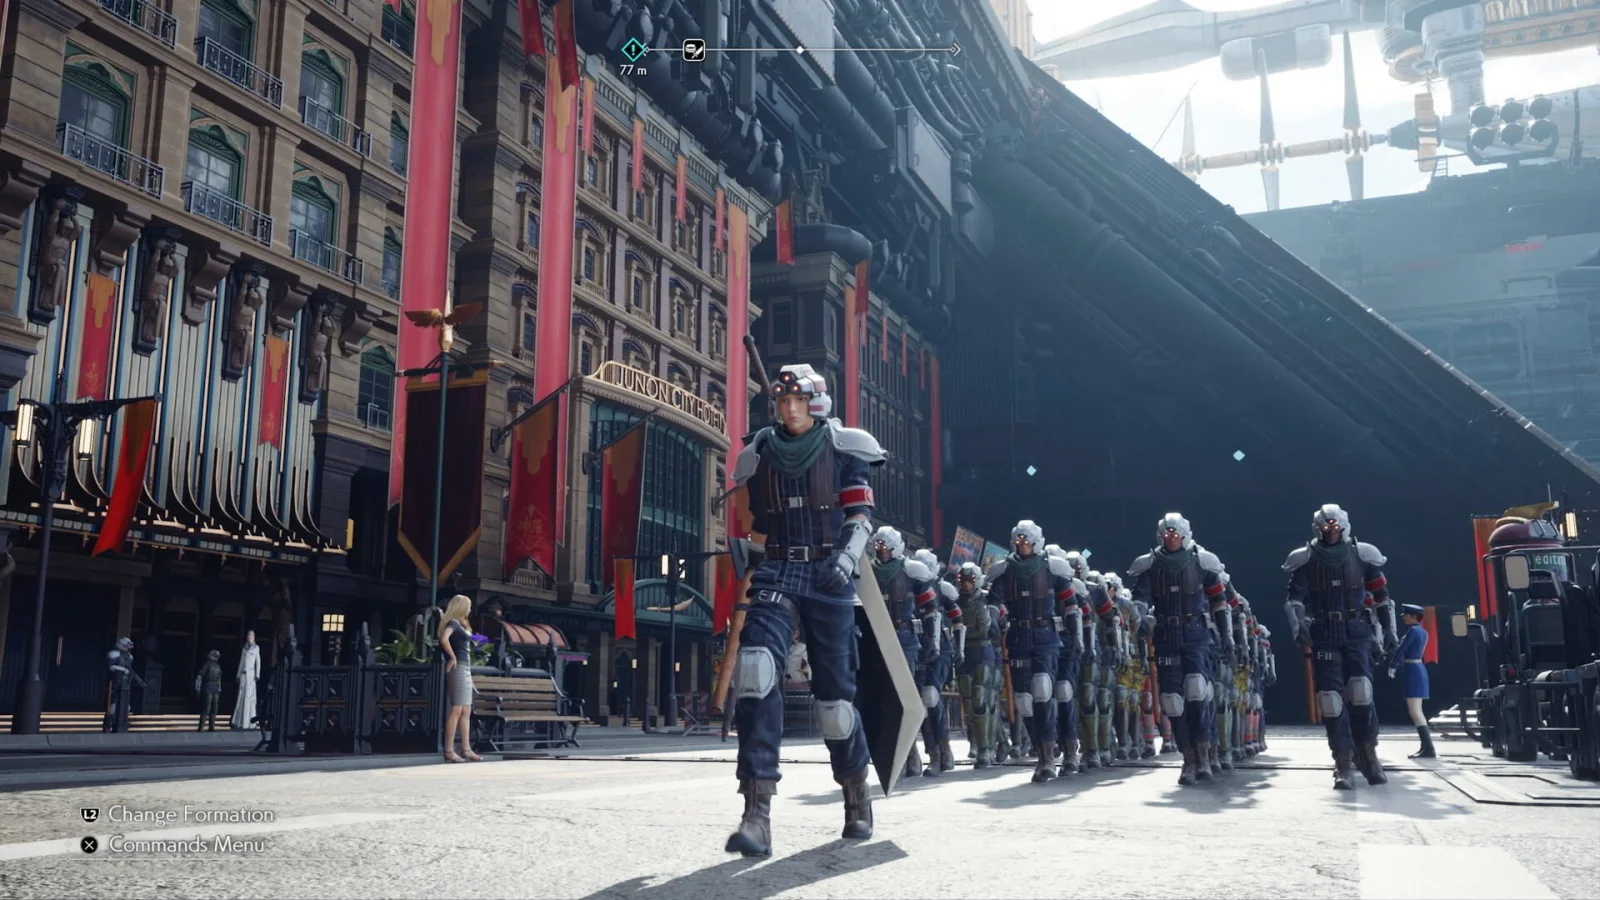
Sources & references
Our original guide draws on the references below. Check the edition at the top of this page before following controls or unlock requirements.
- Final Fantasy 7 Rebirth: Chapter 1 Walkthrough - Fall of a Hero
- Final Fantasy 7 (VII) Rebirth Chapter 1: Fall of a Hero Walkthrough
- Ch.1 - Fall of a Hero - Final Fantasy VII Rebirth Walkthrough & Guide
- Final Fantasy 7 Rebirth - Chapter 1: Fall of a Hero Walkthrough
- Final Fantasy VII Rebirth – PS5 Games | PlayStation
- Final Fantasy VII Rebirth Walkthrough & Guide — Ch. 2: A New Journey Begins
- Final Fantasy VII Rebirth Walkthrough — Chapter 2: A New Journey Begins
- Final Fantasy VII Rebirth Walkthrough — Grasslands World Intel Locations
- Grasslands Quests — Final Fantasy VII Rebirth Walkthrough & Guide
- Grasslands Guide — Final Fantasy VII Rebirth Walkthrough & Guide
- Final Fantasy 7 Rebirth: Chapter 2 Walkthrough — A New Journey Begins
- Final Fantasy 7 Rebirth: Chapter 3 Walkthrough - Deeper into Darkness
- Final Fantasy 7 (VII) Rebirth Chapter 3: Deeper into Darkness Walkthrough
- Mythril Mine Walkthrough - Chapter 3
- Ch.3 - Deeper into Darkness - Final Fantasy VII Rebirth Walkthrough & Guide
- Final Fantasy 7 (VII) Rebirth Chapter 4: Dawn of a New Era Walkthrough
- Ch.4 - Dawn of a New Era - Final Fantasy VII Rebirth Walkthrough & Guide (PS5)
- Final Fantasy 7 (VII) Rebirth Junon All World Intel Locations
- Final Fantasy 7 Rebirth: Chapter 4 Walkthrough - Dawn of a New Era
- Junon Region Quests - Final Fantasy VII Rebirth Walkthrough & Guide
- Final Fantasy 7 Rebirth: Chapter 5 Walkthrough - Blood in the Water
- Final Fantasy 7 (VII) Rebirth Chapter 5: Blood in the Water Walkthrough
- Ch.5 - Blood in the Water - Final Fantasy VII Rebirth Walkthrough & Guide (PS5)
- FINAL FANTASY VII REBIRTH Available Now on PlayStation 5 | Square Enix
- Final Fantasy 7 (VII) Rebirth Chapter 6: Fool’s Paradise Walkthrough | PowerPyx
- Chapter 6: Fool’s Paradise Walkthrough | FF7 Rebirth | Game8
- Final Fantasy 7 Rebirth: Chapter 6 Walkthrough — Fool’s Paradise | Push Square
- Ch.6 — Fool’s Paradise — Final Fantasy VII Rebirth Walkthrough & Guide | GameFAQs
- Final Fantasy 7 Rebirth: Chapter 7 Walkthrough - Those Left Behind
- Final Fantasy 7 Rebirth: Chapter 7 Walkthrough - Those Left Behind
- Corel Coal Mines - Chapter 7 - Walkthrough
- North Corel walkthrough - Queens Blood Players & Revive Materia - Chapter 7
- Final Fantasy 7 Rebirth: The Saga of the Seaside Inn Walkthrough
- Final Fantasy 7 (VII) Rebirth Chapter 8: All That Glitters Walkthrough
- Final Fantasy 7 Rebirth: Chapter 8 Walkthrough - All That Glitters
- Ch.8 - All That Glitters - Final Fantasy VII Rebirth Walkthrough & Guide
- Chapter 8: All That Glitters Walkthrough | FF7 Rebirth
- Final Fantasy 7 Rebirth Chapter 9: The Planet Stirs Walkthrough
- Final Fantasy VII Rebirth — Chapter 9 Walkthrough and Guide, PS5
- Final Fantasy 7 Rebirth: Chapter 9 Walkthrough - The Planet Stirs
- Crimson Mare Mk. II Boss Guide - Chapter 9 - Walkthrough
- Final Fantasy 7 Rebirth All Weapon Locations and Weapon Abilities
- All Weapon Locations | FF7 Rebirth
- FINAL FANTASY VII REBIRTH is available now on PlayStation 5! — Square Enix
- Final Fantasy 7 Rebirth Chapter 10: Watcher of the Vale Walkthrough — PowerPyx
- Chapter 10: Watcher of the Vale Walkthrough — Game8
- Ch.10 - Watcher of the Vale — GameFAQs
- Cosmo Canyon Region Quests — GameFAQs
- Final Fantasy 7 Rebirth Bonds of Trust Walkthrough — PowerPyx
- Final Fantasy 7 Rebirth Absence of a Sign Walkthrough — PowerPyx
- Final Fantasy 7 Rebirth From Whence Life Flows Walkthrough — PowerPyx
- Final Fantasy 7 Rebirth Chapter 10 Walkthrough — Samurai Gamers
- Chapter 11: The Long Shadow of Shinra Walkthrough
- Chapter 11: The Long Shadow of Shinra Walkthrough
- Nibel Region World Intel Locations
- My White-Haired Angel Walkthrough
- Esoteric Secrets of the Elders Walkthrough
- Final Fantasy VII Rebirth Walkthrough and Guide — Chapter 11 and Nibel Region Quests
- Nibel Region Quests
- Final Fantasy VII Rebirth Manuscript Locations
- Final Fantasy 7 Rebirth Chapter 12: A Golden Key Walkthrough
- Ch.12 - A Golden Key - Final Fantasy VII Rebirth Walkthrough and Guide for PS5
- Chapter 12: A Golden Key Walkthrough | FF7 Rebirth
- Chapter 13: Where Angels Fear to Tread Walkthrough | FF7 Rebirth — Game8
- Temple of the Ancients - Labyrinth - Chapter 13 Walkthrough
- Can’t Stop Won’t Stop Walkthrough — Final Fantasy VII Rebirth
- Final Fantasy 7 (VII) Rebirth Chapter 13: Where Angels Fear to Tread Walkthrough — PowerPyx
- Ch.13 - Where Angels Fear to Tread — Final Fantasy VII Rebirth Walkthrough & Guide — GameFAQs
- Moss-Grown Adamantoise Hard Mode Guide — FF7 Rebirth | Game8
- Demon Gate Boss Guide — Final Fantasy VII Rebirth | Gamer Guides
- Final Fantasy 7 Rebirth: Chapter 14 Walkthrough - End of the World | Push Square
- Ch.14 - End of the World - Final Fantasy VII Rebirth Walkthrough & Guide | GameFAQs
- Final Fantasy 7 (VII) Rebirth Chapter 14: End of the World Walkthrough | PowerPyx
- Final Fantasy 7 (VII) Rebirth How to Unlock Hard Difficulty & Chapter Select
- Chapter Select and New Game+ Explained | FF7 Rebirth | Game8
- Post-Game Content and How to Get 100% Clear | FF7 Rebirth | Game8
- Final Fantasy 7 (VII) Rebirth 100% Checklist
- Final Fantasy 7 (VII) Rebirth Wiki & Strategy Guide
- PlayStation 5, Epic Games Store, Steam Notice of Update
- FF7 Rebirth’s ‘Reset’ Side-Quest Menu, Explained
About the game & collecting notes
- Platform
- Sony PlayStation 5
Complete, chapter-by-chapter coverage for Final Fantasy VII Rebirth (PlayStation 5).
Darryl Polo
Darryl Polo loves tinkering with emulation and revisiting retro games. He enjoys exploring how old favorites play on different setups and sharing what he learns along the way. At Joking Joystick, he writes about the games, hardware, and small discoveries that keep the hobby fun.
Our editorial standardsFound a step that needs another look? Help us improve this guide.