
Fallout 4: Game of the Year Edition (PS5) — Complete Campaign Walkthrough
A start-to-finish walkthrough for Fallout 4: Game of the Year Edition on PlayStation 5. This guide covers character setup, progression through the main campaign and faction routes, and complete walkthroughs for the six included expansions (Automatron, Far Harbor, Nuka-World, Vault‑Tec Workshop, Contraptions Workshop, Wasteland Workshop). Practical routing, save strategy and endgame options are included.


Find a copy
Fallout 4: Game of the Year Edition Sony PlayStation 5
We may earn a commission if you buy through these links, at no extra cost to you. As an Amazon Associate I earn from qualifying purchases.
Opens retailer search results. Check the model, edition, seller, availability and current price before buying.
Before you begin
This walkthrough is written for Fallout 4: Game of the Year Edition as offered through the PlayStation Store for PS5 consoles.
The GOTY bundle includes the base Fallout 4 game plus all six official add‑ons (Automatron, Wasteland Workshop, Contraptions Workshop, Far Harbor, Vault‑Tec Workshop and Nuka‑World).
On PS5 the GOTY edition is available from the PlayStation storefront and runs as the published package for the console; if you own or prefer the Anniversary Edition (which bundles Creation Club content) note that this guide focuses on GOTY content and campaign routing rather than Anniversary‑only Creation Club items.
The guide assumes a single playthrough aimed at completing the main campaign and each included DLC mainline.
It emphasizes safe save management, how to avoid irreversible faction locks, recommended quest ordering, companion use and gear preparation for each stage, plus concrete steps to reach each of Fallout 4's final outcomes without losing access to key side content.
Set yourself up for the run
Install all game updates and the six GOTY DLC packages before starting major late-game quests so quest markers, workshop items and DLC content are present.
Use several separate manual-save slots before major branches. Because the PS5 version does not provide custom save names, identify each slot by its quest, location, character level and position in the Save menu. Create recovery saves before The Molecular Level, Mass Fusion or Spoils of War, Tactical Thinking, Rockets’ Red Glare and Defend the Castle.
Keep at least two untouched pre-branch manual saves in separate slots.
Decide whether you want a single playthrough that preserves as many factions as possible, such as a Minutemen ending, or one that fully follows a faction chain to its conclusion.
Play the opening hours with a focus on S.P.E.C.I.A.L. and perks that support your intended playstyle.
Prioritize perks that improve your chosen weapon category and survivability early.
Familiarize yourself with power armor, settlement workbenches and weapon and armor modding before late-game battles.
Bring at least one companion suited to your combat style, and complete desired affinity quests before faction decisions that can remove access.
If you want to complete Automatron, Far Harbor and Nuka-World before the core campaign finale, schedule them before the major Commonwealth faction lock points.
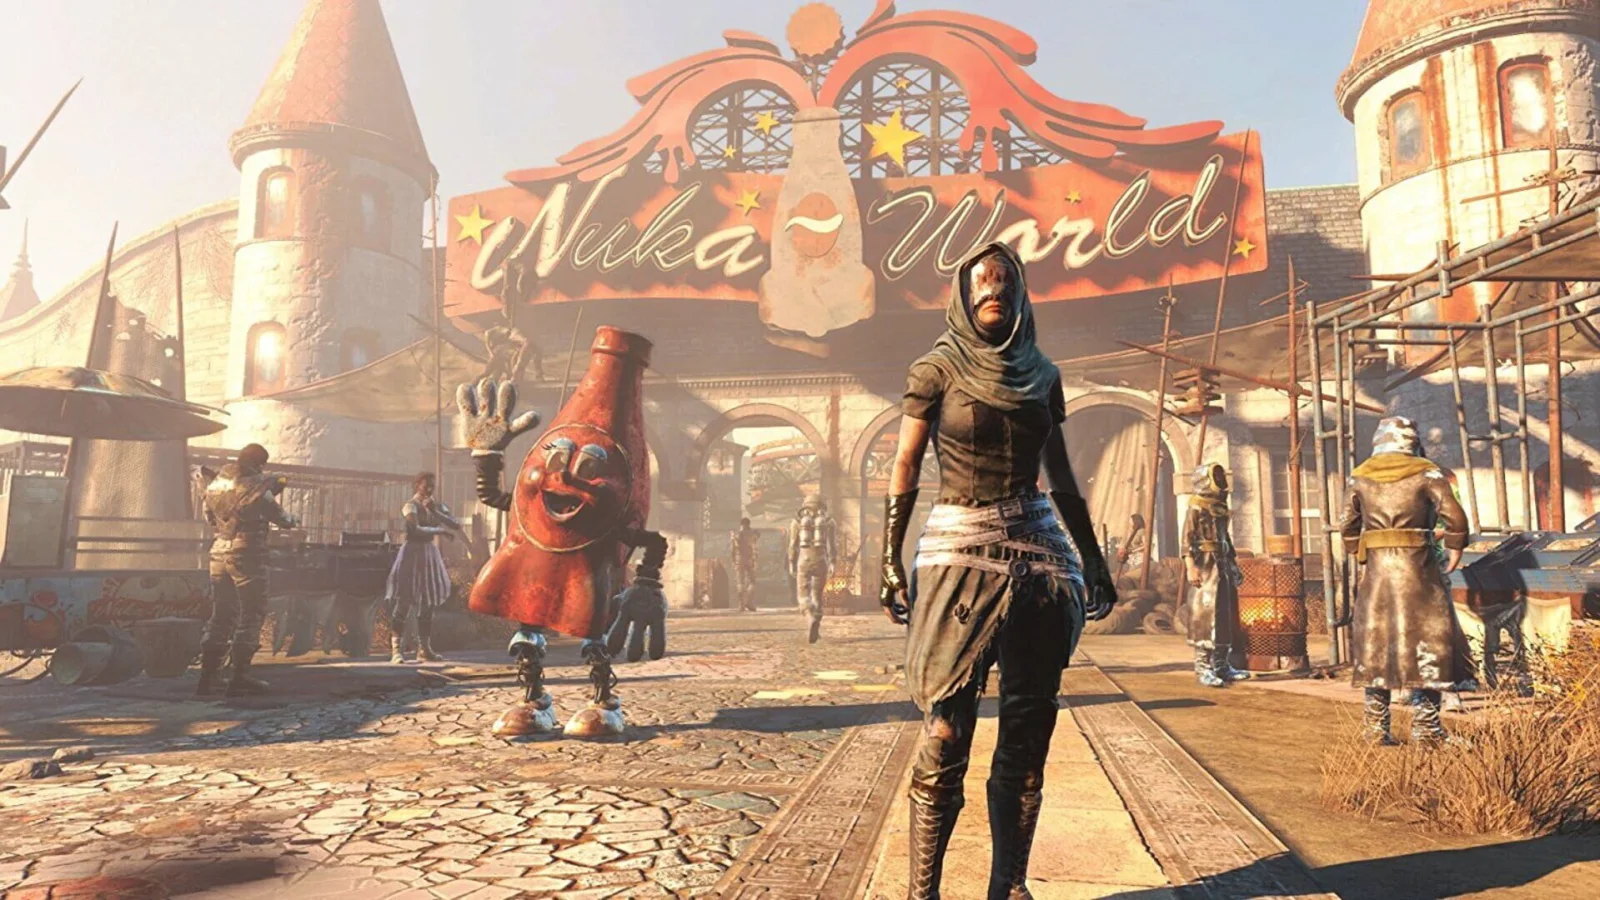
Start Smart — Character Creation, S.P.E.C.I.A.L. and Perks
Fallout 4 has no fixed class, so choose one main combat method before spending your first perk points. Melee favors Strength and Endurance; V.A.T.S. builds favor Perception, Agility and Luck; stealth builds favor Agility, Perception and Luck; heavy-gun builds favor Strength and Endurance, with Intelligence helping weapon and armor crafting. Build around one damage perk instead of dividing points between every weapon category. In the opening, collect the 10mm pistol and security baton in Vault 111, establish Sanctuary’s basic needs through Sturges, and use Red Rocket as an early crafting base. Recruit companions as their quests make them available, but keep faction decisions open while you learn the Commonwealth.
Choose a combat direction before leaving Vault 111
Melee characters should favor Strength for Big Leagues, carry capacity and stronger close-range attacks. Endurance improves durability and makes it easier to survive while closing distance. Melee is efficient against isolated enemies but is vulnerable to turrets, elevated targets, mines and irradiated areas until your armor and resistances improve.
A V.A.T.S.-focused character should favor Perception, Agility and Luck. Perception improves hit chance and unlocks Rifleman, while Agility supplies Action Points and supports Gunslinger, Commando and Action Boy or Action Girl. Luck supports critical-hit generation and later perks such as Better Criticals and Critical Banker. Choose pistols or non-automatic rifles as your main weapon instead of trying to advance both trees immediately.
Stealth and critical characters generally favor Agility, Perception and Luck. Sneak, Ninja and Mister Sandman support concealed attacks, while Gunslinger or Rifleman determines the weapon category. This approach is resource-efficient when you control the engagement, but detection in cramped rooms can quickly turn a planned ambush into a close fight.
Heavy-gun characters should favor Strength and Endurance. Heavy Gunner improves weapons such as miniguns and missile launchers, while Intelligence helps with Gun Nut, Armorer and later Science! crafting access. Heavy weapons are powerful but heavy and ammunition-hungry during the opening hours, so keep a rifle or pistol as a backup without spending perk points on a second damage tree yet.
- Choose one primary weapon category: melee, pistols, automatic firearms, non-automatic rifles or heavy guns.
- Favor the SPECIAL attributes that unlock your chosen damage and survival perks.
- Keep faction choices open; character creation does not require a Minutemen, Railroad, Brotherhood or Institute commitment.
Spend the first ten perk points on a usable build
The main early damage perks are Big Leagues at Strength 2, Rifleman at Perception 2, Gunslinger at Agility 1, Commando at Agility 2 and Heavy Gunner at Strength 5. Select the perk matching the weapon you actually use, then improve that line before investing in unrelated weapon categories. Weapon attachments can change a firearm’s classification, so check the weapon’s current automatic or non-automatic configuration before assuming which perk applies.
Armorer at Strength 3 improves armor modification access, and Gun Nut at Intelligence 3 improves many firearm modifications. These are good second priorities when you have the required components and a weapon or armor piece ready to upgrade. Locksmith at Perception 4 and Hacker at Intelligence 4 open optional routes and loot; take them when you are encountering locks or terminals often rather than automatically at level one.
Lone Wanderer requires Charisma 3 and is a strong choice for a character who will travel alone. Dogmeat is the exception: the perk’s benefits still apply while Dogmeat is your only companion. Human and robot companions disable Lone Wanderer’s benefits while they are traveling with you. Local Leader at Charisma 6 is valuable for settlement supply lines but can wait until settlement logistics become a real priority.
- Advance one damage perk before buying cosmetic or unrelated crafting perks.
- Take Gun Nut or Armorer only when you can immediately use the available modifications.
- Choose Lone Wanderer only if you are willing to travel without human or robot companions.
Collect the opening equipment and establish Sanctuary
Inside Vault 111, take the security baton when the tutorial introduces melee combat. The 10mm pistol and ammunition are in the overseer’s office area; collect the stimpaks and other medical supplies you pass on the route. Take the Pip-Boy from the scientist’s remains near the vault exit, then search the exit rooms for ammunition and useful aid before returning to the surface.
After reaching Sanctuary Hills, speak with Codsworth and search the ruined houses, mailboxes and streets for food, water, chems, ammunition and junk. Store junk in the workshop so its components are available for crafting. Red Rocket Truck Stop, between Sanctuary and Concord, provides an early weapons workbench, armor workbench and power-armor station. It is also where you can recruit Dogmeat. Use Sanctuary or Red Rocket for storage rather than carrying every piece of low-value junk.
The Sanctuary settlement quest begins after the Concord rescue when you speak with Sturges. Complete his requests in order: provide beds, provide clean water, provide food and provide defenses. After each stage, speak to Sturges again to receive or advance the next objective. You do not need to rebuild every house or connect power for this tutorial. A few beds, a water source, planted food and a basic defense arrangement are sufficient for the objectives.
- Vault 111 equipment includes the security baton, 10mm pistol, ammunition, stimpaks and the Pip-Boy.
- Red Rocket has the early crafting stations and serves as a practical equipment base.
- Sanctuary has completed Sturges’s beds, water, food and defense objectives.
Recruit companions and build affinity without closing options
Codsworth is available in Sanctuary after the opening conversation, and Dogmeat is available at Red Rocket. Rescue Preston Garvey and the other survivors in Concord during When Freedom Calls, return them to Sanctuary, and speak with Preston there to make him available as a companion. Preston’s Minutemen quests can be accepted without selecting a final campaign ending.
Most companions react to your actions and dialogue. Helpful choices, civilian assistance, equipment modification and compassionate solutions suit several early companions, while theft, drug use, intimidation or unnecessary violence may upset others. Watch for the companion reaction message and avoid repeatedly performing actions that your selected companion dislikes. Dogmeat is useful for combat and tracking, but he does not use the normal affinity system, so choose another companion when your immediate goal is an affinity perk.
Affinity can eventually unlock a permanent companion perk, and some companions reveal personal quests or important dialogue as their relationship develops. Do not postpone every companion conversation until the endgame: faction endings can make some companions unavailable or hostile. For a first run, explore with companions whose behavior matches your preferred role, while keeping manual saves before major faction missions.
- Recruit Codsworth or Dogmeat before extended exploration and Preston after completing the Concord rescue.
- Use a companion whose likes and dislikes match your normal playstyle.
- Advance personal companion conversations when they appear and keep a manual save before major faction commitments.
Before you move on
- Your chosen weapon category has its first relevant damage perk and at least one dependable upgraded weapon.
- Vault 111’s pistol, melee weapon, ammunition and medical supplies were collected before leaving.
- Sanctuary has completed Sturges’s beds, water, food and defense objectives.
- Red Rocket or Sanctuary provides storage and access to weapon, armor and power-armor workbenches.
- At least one companion is recruited, and you understand whether that companion supports your intended affinity plan.
- No late-game faction ending has been selected or triggered.
Sanctuary, Concord and the First Quests — Setting the pace
Complete Out of Time, claim Sanctuary Hills as your first workshop, recruit Dogmeat if desired, then rescue Preston Garvey and the settlers in Concord through When Freedom Calls. The Concord mission supplies the first T-45 power armour, a minigun and the opening Deathclaw fight. Use the suit for this encounter, but remove its fusion core when you park it around settlers. After Preston’s group reaches Sanctuary, complete Sturges’s four practical tutorial objectives—beds, water, food and defense—without turning the opening into a large construction project. Sanctuary and Red Rocket provide the first useful crafting stations, while Drumlin Diner offers an early merchant after its local dispute is resolved. This route recruits Preston and keeps the Minutemen available without committing you to a final ending.
1. Leave Vault 111, meet Codsworth and claim the first workshop
Exit Vault 111 and return to Sanctuary Hills. Speak with Codsworth outside your old home, then follow him through the neighborhood while he checks for survivors. Search the houses as you go for food, ammunition, weapons and useful junk. In your former home, collect the You're SPECIAL book from Shaun’s room if you want to assign an early bonus point to a S.P.E.C.I.A.L. attribute.
Activate the workshop across from your house. Do not rebuild the entire settlement yet. Scrap only enough nearby debris to place a bed under a roof and keep the workshop usable. Sanctuary’s cooking station, weapons workbench, armour workbench and power-armour station form a sufficient first base. Store spare junk and weapons here, but keep at least one firearm, a melee backup, food, water and several Stimpaks on your character.
- Finish Codsworth’s initial conversation and neighborhood check.
- Activate the Sanctuary Hills workshop.
- Collect the early food, ammunition and crafting junk you can carry safely.
2. Take the road to Red Rocket and Concord
Follow the main road out of Sanctuary toward Concord. Red Rocket Truck Stop lies along this route. Dogmeat is outside the station; speak with him and accept him as a companion if you want an early combat partner and additional carrying capacity. Red Rocket also has a workshop, cooking station and crafting benches, so it can serve as a fallback supply point even if Sanctuary remains your main base.
Continue toward Concord and make a manual save before entering the Museum of Freedom fight. Raiders occupy the streets around the museum. Clear the exterior enemies first, using walls, doorways and the museum frontage as cover. Enter through the main doors and advance room by room rather than rushing up the stairs. Loot raider bodies for ammunition and check containers for healing items before climbing toward the trapped settlers.
- Recruit Dogmeat at Red Rocket if desired.
- Save before entering the Museum of Freedom.
- Reach the upper museum rooms without spending all your ammunition.
3. Rescue Preston Garvey and collect the museum’s useful items
Fight upward through the Museum of Freedom until you reach Preston Garvey, Sturges and the other settlers. Speak with Preston to start When Freedom Calls. In the same room, look for the Perception bobblehead on the desk near the broken terminal. It permanently raises Perception by one and is safe to collect during this quest.
Before leaving the upper floor, search the museum for ammunition and supplies. The objective will direct you toward the basement and the rooftop. Do not leave Concord before completing the mission unless you deliberately want to postpone the Minutemen introduction; Preston and the settlers will not relocate to Sanctuary until the Concord encounter is resolved.
- Speak with Preston after reaching the settlers.
- Collect the Perception bobblehead if the area is safe.
- Search the museum for ammunition before taking the rooftop route.
4. Retrieve the fusion core and use the T-45 in Concord
Follow the objective to the museum basement and take the fusion core from the generator area. Return to the upper route and go onto the roof. Insert the core into the T-45 power armour, then take the minigun from the crashed Vertibird beside the suit. The armour and minigun are intended to make this first large fight manageable, especially if your character has not yet invested in a weapon specialization.
Use the power armour for the Concord battle rather than saving it indefinitely. Movement and especially sprinting consume fusion-core charge, so avoid unnecessary running once the immediate fight is over. After completing the mission, you can exit the suit and park it at a power-armour station. Remove the fusion core from an unattended suit in a populated settlement; otherwise settlers or other NPCs may enter it during an attack.
- Take the fusion core from the museum basement.
- Enter the T-45 and collect the minigun.
- Remove the fusion core when storing the suit near settlers.
5. Clear Concord and defeat the Deathclaw
Descend from the roof and eliminate the remaining raiders. Use short bursts with the minigun and stop firing when a target is already down. Keep moving between cover positions instead of standing in the street. If the minigun runs low on ammunition, switch to your strongest rifle or pistol and let the power armour absorb some incoming damage.
The Deathclaw appears from the street sewer after the raider battle advances. Do not fight it in the open. Circle around the museum and nearby buildings, using corners and doorways to break its charge. Fire while it pauses or turns, then retreat before it reaches you. You can use parked cars and other obstacles to interrupt its approach, but do not stand beside a vehicle that is already burning or likely to explode. Heal behind cover, then return to the fight until the Deathclaw falls.
Return to the Museum of Freedom and speak with Preston after the battle. This completes When Freedom Calls and prepares the move to Sanctuary.
- Kill the raiders around the museum and street.
- Defeat the Deathclaw while using buildings and corners as cover.
- Return to Preston and finish When Freedom Calls.
6. Complete Sanctuary’s practical tutorial
After the Concord conversation, Preston and the settlers travel to Sanctuary Hills. Speak with Preston there to complete the immediate Minutemen introduction. Then speak with Sturges and accept Sanctuary. The quest advances through four separate objectives, and you normally need to speak with Sturges again after each one even if you built some items early.
Build sheltered beds for the settlers first. Next, place a hand-operated water pump or another available water source. For food, plant the available crops and assign settlers to them through workshop mode. Finally, add defense with a guard post or turret. Build only what the objective requires; a small working settlement is enough for this chapter. A recruitment radio beacon can be added later with a generator and wire if you want more settlers, but it is not necessary to finish Sturges’s four-part tutorial.
- Build sheltered beds and report back to Sturges.
- Provide water and food, assigning settlers where needed.
- Build basic defense and complete Sanctuary.
7. Improve one loadout and locate an early merchant
Use the Sanctuary or Red Rocket weapons workbench to improve one primary firearm. Prioritize an available receiver that raises damage, then add a practical sight or magazine only if the components are spare. At the armour bench, apply the best available damage-resistance lining to the pieces you use most. Do not spend early resources on cosmetic modifications or several weapon trees at once.
For an early vendor, visit Drumlin Diner after Concord. The dispute between Trudy and Wolfgang begins Order Up. Resolve it without siding against Trudy if you want her to remain a reliable all-purpose merchant; dialogue checks or defending her from the chem dealers can leave the diner available for purchases. Traveling merchant Trashcan Carla also visits Sanctuary periodically, so check the settlement when you return from nearby exploration.
- Upgrade one primary firearm and several worn armour pieces.
- Keep adhesive, screws, gears, springs and aluminium when found.
- Resolve Drumlin Diner so an early merchant remains available.
Before you move on
- Out of Time and When Freedom Calls are complete in the quest log.
- Preston Garvey, Sturges and the rescued settlers are present in Sanctuary Hills.
- The T-45 power armour and minigun have been collected.
- Sanctuary has sheltered beds, water, food and basic defense.
- At least one primary weapon and several armour pieces have been improved.
- Drumlin Diner has been resolved and an early merchant is available.
References for this chapter
- Fallout 4: Game of the Year Edition — PlayStation Store
- When is the Fallout 4 upgrade coming to Xbox Series X|S and PlayStation 5? — Bethesda Support
- Out of Time - Sanctuary - Walkthrough | Fallout 4 | Gamer Guides
- Perception Bobblehead - Fallout 4 Database | Gamer Guides
- Sanctuary — Fallout Wiki
- Drumlin Diner — Fallout Wiki
- Power armor (Fallout 4) — Fallout Wiki
Settlers, Workshops and The Minutemen
Build a functional settlement network before committing to the Minutemen endgame. Establish beds, food, water and defence, then connect workshops with Local Leader if your Charisma build supports it. Retake the Castle and complete Old Guns to unlock artillery. Recruit enough properly recognized Minutemen settlements for Form Ranks if that quest appears, and delay the final assault until the faction and DLC content you want is complete. Before deliberately becoming hostile to another faction, create an untouched manual save in a distinct PS5 slot and identify it with the current quest, location and character level.
1. Establish a practical first settlement
After completing When Freedom Calls, return to Sanctuary Hills and activate the red workshop. Scrap damaged structures, dead vegetation and loose junk for early wood and steel, but leave crafting stations, useful containers and any structure you intend to use. Build covered beds for the residents, at least one food source, water production and visible defence.
Assign settlers through workshop mode. Use one or more settlers for food, assign another to water or scavenging as needed, and put remaining settlers on defence or shops only after the basic needs are covered. The workshop status panel is the useful check: food and water should meet or exceed population, beds should be available, and defence should not be left at zero. Happiness is helpful for settlement development but is not itself a Minutemen quest requirement.
- Every resident has an available covered bed.
- Food and water production meet or exceed the current population.
- The settlement has functioning defence and at least one accessible crafting station.
2. Recruit settlements through Minutemen support quests
Speak with Preston Garvey or listen to Radio Freedom for settlement-help missions. Follow the objective order for each one: travel to the named settlement, remove the local threat or complete the requested task, speak with the settlers, and activate the settlement workshop when the quest directs you to do so. Return to Preston or the specified contact to complete the mission and allow the game to record the settlement as Minutemen support.
Do not assume that discovering a workshop, building at an empty location or placing a recruitment beacon automatically satisfies the Minutemen count. For reliable Form Ranks progress, recruit the settlement through its owner or a Minutemen objective, turn in the assigned quest, and leave at least one settler there. The relevant count is based on settlements recognized as Minutemen-owned, not merely on map locations you have visited.
- The settlement’s workshop is available for normal use.
- The settlement has at least one resident and was properly recruited through its quest.
- Completed settlement-help missions have been turned in.
3. Link workshops with Local Leader
If your character has Charisma 6, take Local Leader rank 1 when you are ready to invest in settlement infrastructure. In workshop mode, highlight an unassigned settler, use the Command function, and select another settlement as the supply-line destination. That settler becomes a provisioner; no physical caravan object or road is required.
A hub arrangement is easier to maintain than a web of individual connections. For example, connect Sanctuary Hills to Red Rocket or Starlight Drive-In, then connect nearby settlements to that hub. Connected workshops share junk and construction resources, but weapons, armour, ammunition, aid items and personal equipment do not become ordinary shared inventory. Store those items in a clearly marked personal container.
- Local Leader rank 1 is active before attempting to create supply lines.
- At least one provisioner connects your main base to another settlement.
- Weapons, armour and consumables are stored separately from workshop junk.
4. Retake the Castle
Continue the Minutemen chain until Preston gives Taking Independence. The quest sends you to the Castle, where you must enter the fort, eliminate the mirelurks and deal with the mirelurk queen. Use the fort walls and doorways as cover, and do not remain in the open water or in front of the queen’s ranged attacks longer than necessary.
After the threat is removed, use the Castle workshop and restore the radio transmitter by supplying power. Repair or replace gaps in the walls, place defensive guns where they cover the main approaches, and keep beds, food and water available for the garrison. This makes the Castle useful for later Minutemen defence and assault quests.
- Taking Independence is complete.
- The Castle workshop is active.
- The Castle transmitter has power and the garrison has basic supplies and defence.
5. Complete Old Guns and unlock artillery
Old Guns does not necessarily begin immediately after Taking Independence. After the Castle quest is complete, continue the Minutemen chain and allow the required in-game time to pass. When Preston directs you back to the Castle, speak with Ronnie Shaw there to start Old Guns.
Follow Ronnie through the western passage, clear the rubble, enter the underground armory and defeat Sarge. Let Ronnie use the armory controls when required. Take the artillery schematic and smoke grenades before leaving. In the Castle workshop, build an artillery piece from the Special category and assign a settler to operate it.
Follow the test objective to the marked area, equip an artillery smoke grenade, throw it into the target zone, and move away from the impact area. When the test succeeds, return to Preston Garvey to complete Old Guns. The artillery schematic is not available before this quest supplies it.
- The artillery schematic and smoke grenades were collected from the armory.
- A settler is assigned to the Castle artillery piece.
- The test strike succeeds and Old Guns is turned in to Preston.
6. Expand artillery without crippling settlements
Build artillery at settlements that are useful travel hubs or likely defensive targets, but do not assign every available settler to guns and supply lines. Leave enough residents working food, water and ordinary defence. Put artillery behind walls or on elevated platforms with a clear firing direction, while keeping beds and crops away from the likely battle line.
Artillery smoke grenades are support tools for suitable outdoor targets covered by your artillery network. Mark the enemy position, then retreat behind cover and wait for the barrage. Do not throw smoke into interiors, directly beside friendly settlers or where you intend to stand. Artillery does not replace turrets, walls or a sufficient settlement defence rating.
- Each artillery settlement still has enough workers for food, water and defence.
- At least one artillery position protects a major travel route or important settlement.
- You carry or store spare artillery smoke grenades.
7. Prepare for Form Ranks and preserve faction options
If you become hostile to the Institute and have fewer than eight recognized Minutemen settlements, Preston can give Form Ranks. Continue completing settlement-recruitment objectives and turn them in properly. Leave at least one settler at each newly recruited location so the game records it as Minutemen-owned. Once eight recognized settlements are available, Form Ranks can advance toward Defend the Castle. If you already have enough recognized settlements when the quest condition is checked, Form Ranks may be skipped.
Old Guns and a functioning artillery network do not themselves start the Minutemen ending. Finish Automatron, Far Harbor, Nuka-World, companion quests and any faction missions you want before committing to the final sequence. Before deliberately becoming hostile to the Institute, Brotherhood or Railroad, create an untouched manual save in a distinct PS5 save slot. Identify the slot with the current quest, location and character level, and do not overwrite it. Keep a second manual save made after the branch begins.
- Old Guns is complete and Castle artillery is operational.
- Eight recognized Minutemen settlements are available if Form Ranks or the Minutemen ending is planned.
- An untouched, clearly identified PS5 manual save preserves access to the other faction questlines.
Before you move on
- Sanctuary Hills or another chosen base has covered beds, food, water, defence and working crafting stations.
- At least one Local Leader supply line connects the main settlement network, if the perk has been taken.
- Taking Independence and Old Guns are complete.
- The Castle has an assigned artillery operator and the artillery test has succeeded.
- Eight properly recognized Minutemen settlements are ready if the Form Ranks route is required.
- An untouched manual save exists in a distinct PS5 slot before any deliberate faction hostility or final campaign commitment, identified by the current quest, location and character level.
Railroad — Stealth, Cover Identities and Underground Undercover
Find the Railroad beneath Old North Church, complete Tradecraft, and use the headquarters as a safe base without closing the Institute or Brotherhood routes. Boston After Dark, Mercer Safehouse, and PAM’s Jackpot missions unlock Railroad support and can lead to Ballistic Weave. After The Molecular Level, begin Underground Undercover by loading the Network Scanner into an Institute terminal, meeting Patriot, recovering credentials at Cambridge Polymer Labs, and helping Z1-14 prepare a synth uprising. The quest deliberately pauses at Continue working with Father while you complete the Institute’s Mass Fusion, Pinned, and Powering Up. Use separate PS5 manual-save slots before Mass Fusion, Precipice of War, and Rockets’ Red Glare. Early Railroad membership is safe; the later assault missions and End of the Line are the consequential faction choices.
Reach Old North Church and open Railroad headquarters
Travel to Boston Common and follow the red Freedom Trail markers, or go directly to Old North Church in the North End. Enter the church, descend through the catacombs, and clear the feral ghouls blocking the route. At the end of the passage, use the Freedom Trail ring. Rotate the letters until the pointer reaches R, A, I, L, R, O, A, D, confirming each letter at the center of the mechanism. The concealed door opens into Railroad headquarters.
Speak with Desdemona and agree to help the Railroad. If Road to Freedom was already active, this conversation finishes the introduction and begins Tradecraft. Make a separate manual save in a new PS5 save slot before the conversation; identify it afterward using the save-list quest and location information rather than relying on a custom label. Do not fire on the guards or enter while hostile, because that can permanently damage access to the faction on this run.
- Reach Old North Church and clear the catacombs.
- Spell RAILROAD on the Freedom Trail ring.
- Create a separate manual save before speaking with Desdemona.
Complete Tradecraft and join the Railroad
Accept Tradecraft from Deacon and travel to the old highway near Lexington. Follow his instructions and enter the former Switchboard facility through the underground route. Fight through the hostile synths, search the facility as you advance, and retrieve Carrington’s Prototype from the marked interior objective. Carry enough ammunition and healing supplies for the lower sections, where synths can attack from multiple angles.
Return to Old North Church with Deacon and report to Desdemona. Choose a Railroad codename when prompted. Tradecraft then completes, Deacon becomes available as a companion, and the Railroad headquarters becomes a usable fast-travel destination. Joining does not commit you to the Railroad ending. You may still visit the Institute, work with the Brotherhood, and complete neutral exploration. Avoid deliberately attacking named faction members or accepting a mission whose objective explicitly orders the destruction of another faction.
- Finish Tradecraft and recover Carrington’s Prototype.
- Return to Desdemona and select a codename.
- Confirm that Deacon is recruitable and Railroad headquarters is available.
Complete Boston After Dark, Mercer Safehouse, and Jackpot missions
After Tradecraft, speak with Doctor Carrington and accept Boston After Dark. Travel to Bunker Hill, recover Stockton’s holotape from the dead drop, and speak with Old Man Stockton. Follow the objective to the nighttime rendezvous at Cambridge Church, protect H2-22 and High Rise through the escape, and escort them to Ticonderoga. Return to Carrington to finish the quest.
Speak with PAM after Boston After Dark to start Mercer Safehouse. Travel to the assigned settlement, eliminate its attackers, activate the Workshop, and build the defenses requested by the objective. The exact settlement varies, so follow the current marker rather than assuming a fixed location. Return to PAM when the settlement is secured.
PAM then offers Jackpot missions to recover DIA caches. Complete one, return to headquarters, and speak with Tinker Tom before leaving. If he does not yet mention Ballistic Weave, complete another Jackpot and check with him again. Once Tom confirms the technology, use an armor workbench to apply Ballistic Weave to compatible clothing, provided you have the required Armorer perk rank for the modification level. Weathervane missions are optional and are not the requirement for unlocking the armor technology.
- Complete Boston After Dark and escort H2-22 and High Rise to Ticonderoga.
- Finish Mercer Safehouse and build its required defenses.
- Complete Jackpot missions and speak with Tinker Tom after each return.
- Craft Ballistic Weave only after Tom confirms the technology is available.
Start Underground Undercover through The Molecular Level
Underground Undercover requires Railroad membership and access to the Institute through The Molecular Level. When you build the Signal Interceptor, the builder may be the Railroad, Minutemen, or Brotherhood. If you used Sturges or Ingram to construct it, return to Desdemona afterward and agree to help the Railroad. If the Network Scanner holotape is still in your inventory, give it to Tinker Tom; if it was already surrendered to Sturges or Ingram, recover it from that character instead.
Relay into the Institute and use the Network Scanner on an Institute terminal. The objective then directs you to Patriot, Liam Binet. Speak with Liam and follow his instructions to locate Z1-14. Return to Railroad headquarters and follow PAM’s direction to Cambridge Polymer Labs. Inside the lab, find Bergman’s terminal and recover the marked login credentials. Return to Desdemona, relay back into the Institute, and speak with Z1-14 before handing the credentials to Liam. The Network Scanner and the Cambridge Polymer Labs credentials are separate objectives; completing only one does not advance the infiltration.
- Join the Railroad and complete The Molecular Level.
- Use the Network Scanner on an Institute terminal.
- Meet Patriot and recover the credentials at Cambridge Polymer Labs.
- Return to the Institute and speak with Z1-14 before delivering the credentials to Liam.
Prepare Z1-14’s uprising and leave the quest paused correctly
After the credential exchange, speak with Z1-14 again. He asks you to supply weapons for the planned synth uprising. Deposit the requested weapons in the marked maintenance locker, following the on-screen objective carefully. If you are carrying several weapons of the same type in one inventory stack, separate them before depositing them so the objective registers each required item correctly.
When the objective changes, enter the maintenance tunnels and eliminate the Institute-loyal synth guards identified by the quest. Do not attack unrelated scientists, technicians, or friendly synths. Unnecessary kills can expose your cover and create hostility that is not required for the mission. Return to Z1-14 when the tunnels are clear.
Underground Undercover then changes to Continue working with Father. This is the intended pause. Complete the Institute quests Mass Fusion, Pinned, and Powering Up while remaining non-hostile to the Institute. Before accepting Mass Fusion, create a separate manual save in a new slot. Use the PS5 save-list quest and location details to distinguish this copy, such as Mass Fusion at the Institute relay, from your ordinary progress saves. Starting the Institute version of Mass Fusion makes the Brotherhood hostile and closes its normal quest route.
- Deposit the requested weapons so each requirement registers.
- Clear only the marked maintenance-tunnel guards.
- Leave Underground Undercover at Continue working with Father.
- Create a separate manual save before accepting Mass Fusion.
Recognize the Railroad commitment points
After Powering Up, a synth messenger delivers Z1-14’s warning. Go to your Institute quarters, speak with Z1-14, and return to Railroad headquarters to warn Desdemona. Underground Undercover completes and the Railroad awards the Railway Rifle. This is the point where the Railroad’s endgame assault sequence becomes available.
Before speaking to Desdemona to begin Precipice of War, create another separate manual save in a new slot. Use the save-list quest and location information to identify it. Precipice of War turns the Railroad against the Brotherhood at Railroad headquarters. Rockets’ Red Glare follows and attacks the Brotherhood airship; create a further separate manual save before accepting or beginning that mission if you want a clean return point before the airship assault.
Do not start the Institute’s End of the Line on a save intended to preserve the Railroad. That quest orders the destruction of Railroad leadership. Conversely, joining the Railroad, completing Tradecraft, Boston After Dark, Mercer Safehouse, or early Jackpot missions does not force this outcome.
- Complete Powering Up and respond to Z1-14’s warning.
- Create a separate manual save before Precipice of War.
- Create a separate manual save before Rockets’ Red Glare.
- Do not accept End of the Line on a Railroad-preservation save.
Complete the Railroad version of The Nuclear Option
After Precipice of War and Rockets’ Red Glare, follow the Railroad objectives into the Institute. During the reactor operation, reach the reactor terminal and issue the evacuation order when the quest presents that option. This permits Z1-14 and the rebel synths to help non-hostile Institute personnel escape. Follow the on-screen instructions for the reactor charge and do not leave the terminal area until the objective updates.
When Tinker Tom extracts you from the Institute, follow the escape marker and return to Railroad headquarters. Complete Desdemona’s post-mission conversation, then verify that the Railroad remains available and that its principal members survived. The Commonwealth remains playable after the ending, but the Institute is destroyed and Institute personnel and services are no longer available. If you want another faction ending, return to the separate pre-branch manual slot rather than trying to reverse the completed finale.
- Follow the Railroad reactor objectives without mixing in another faction’s finale steps.
- Issue the evacuation order at the reactor terminal.
- Follow the extraction and escape markers.
- Return to Railroad headquarters and verify the post-ending faction state.
Before you move on
- Road to Freedom and Tradecraft are complete, Desdemona has accepted you as a Railroad member, and Deacon is recruitable.
- Boston After Dark and Mercer Safehouse are complete.
- At least one Jackpot mission is complete, and Tinker Tom has confirmed Ballistic Weave if that reward is desired.
- Underground Undercover has reached Continue working with Father, or it has completed after the Powering Up warning sequence.
- Separate PS5 manual-save slots exist before Mass Fusion, before Precipice of War, and before Rockets’ Red Glare, with each slot identifiable by its quest and location metadata.
- If pursuing the Railroad ending, Z1-14’s warning has been delivered, Desdemona has been warned, the Railway Rifle has been awarded, and The Nuclear Option has been completed with the evacuation order issued.
- If preserving alternate endings, the pre-branch manual slots remain intact after confirming the Railroad ending.
References for this chapter
- Fallout 4: Game of the Year Edition — PlayStation Store
- Underground Undercover — SuperCheats
- Underground Undercover — Prima Games Guide
- Underground Undercover — Fallout Wiki
- Jackpot — Gamer Guides
- The Nuclear Option (Railroad) — Fallout Wiki
- The Nuclear Option, Railroad — Prima Games Guide
- Precipice of War — Fallout Wiki
- Mass Fusion — Fallout Wiki
- Tradecraft — Fallout Wiki
Brotherhood of Steel — Joining, Spoils of War and Tactical Thinking
The Brotherhood route begins at Cambridge Police Station with Fire Support and Call to Arms. Completing these quests introduces Paladin Danse, grants access to ArcJet Systems and unlocks the Brotherhood’s early equipment and services without forcing a final allegiance. After Reunions and the Fort Hagen sequence, Shadow of Steel takes you to the Prydwen, where Brotherhood training, power-armour support and vertibird travel become available. The critical timing issue is Blind Betrayal: completing it automatically starts Tactical Thinking and places P.A.M. in Railroad lockdown, which can block Railroad assignments before you ever speak with Captain Kells. Finish Railroad missions, Ballistic Weave, Deacon affinity work and P.A.M.-dependent rewards before completing Blind Betrayal. Make another untouched save before speaking with Kells, because that conversation begins the Brotherhood’s open assault on the Railroad. Create a further save before choosing Mass Fusion for the Institute or Spoils of War for the Brotherhood; those routes make the opposing faction hostile.
Reach Cambridge Police Station and start Fire Support
After leaving Vault 111, travel toward Cambridge. When Military Frequency AF95 appears in the Pip-Boy radio list, tune to it and follow the signal to Cambridge Police Station. If you reach the area before hearing the transmission, help the Brotherhood soldiers fight the feral ghouls around the station, then speak with Paladin Danse after the battle. This encounter starts Fire Support if it has not already begun.
Use the station walls, parked vehicles and doorways as cover. Feral ghouls close distance quickly, so concentrate on enemies attacking the Brotherhood soldiers instead of pursuing targets into side streets. After the fight, speak with Danse and accept Call to Arms. These opening quests do not by themselves make the Railroad or Institute hostile, so they are safe while you are still completing other faction introductions.
Use the station’s workbenches and collect ammunition, healing items and spare components before leaving. Do not spend time building a large settlement yet; the useful objective here is to establish Brotherhood access and complete the ArcJet mission.
- Tune to Military Frequency AF95.
- Help defend the Brotherhood soldiers at Cambridge Police Station.
- Speak with Paladin Danse and accept Call to Arms.
Clear ArcJet Systems and deliver the Deep Range Transmitter
Follow Danse to ArcJet Systems and let him lead through the exterior approach. Search offices and storage rooms for ammunition before entering. When Danse directs you to the engine control room, activate the sequence from the terminal, then move behind machinery or into a doorway before the synths arrive. The engine room is dangerous if you remain in the open.
Advance through the facility with Danse, checking side rooms for supplies without losing the main route. Recover the Deep Range Transmitter at the end of the complex, then return to Danse. Confirm that he has taken the transmitter before following him back to Cambridge Police Station. Completing Call to Arms establishes the Brotherhood contact and unlocks further Brotherhood progression.
This is still a noncommittal stage of the faction route. You can continue the main story, locate the Railroad and complete other compatible content. Keep named weapons, unusual armour pieces and quest-related items until you have checked whether they support a later faction or companion objective.
- Activate the ArcJet engine sequence.
- Recover the Deep Range Transmitter.
- Return to Cambridge Police Station and complete Call to Arms.
Reach the Prydwen after Reunions
Continue the main story through Reunions. After defeating Kellogg and leaving Fort Hagen through the roof, the Prydwen appears over the Commonwealth and Shadow of Steel becomes available. Return to Cambridge Police Station, board the vertibird when instructed and travel to the airship. Call to Arms does not summon the Prydwen; its arrival follows the Fort Hagen portion of Reunions.
On the Prydwen, speak with Elder Maxson and complete the introductory objectives. Visit Proctor Teagan for supplies and power-armour services, Proctor Quinlan in the technical area and Proctor Ingram near the power-armour facilities. These visits and the airship’s normal services do not commit you to the Brotherhood ending.
Store spare weapons, armour parts, fusion cores and quest items in a settlement workshop or another container you control. Do not sell or scrap named power-armour pieces, unique weapons or items marked as quest-related until your faction route is settled.
- Complete Reunions and exit Fort Hagen through the roof.
- Board the vertibird during Shadow of Steel.
- Meet Maxson, Teagan, Quinlan and Ingram.
Complete the useful midgame Brotherhood missions
Follow Tour of Duty and then Show No Mercy when they become available. Show No Mercy sends you to Fort Strong. Bring a medium- or long-range weapon for the exterior super mutants, use the fort’s walls and entrances as cover, and clear the interior room by room so enemies cannot surround you. Completing this stage advances the Brotherhood route and provides access to vertibird signal grenades.
Use a vertibird signal grenade outdoors in an open area where the aircraft can reach you. From Within, Outside the Wire and Liberty Reprimed continue the Brotherhood’s Institute campaign and provide additional Brotherhood equipment and technical support. These quests are useful for progression, but do not rush into the late faction breakpoints merely because they are available.
This is the preferred preparation period for Automatron, Far Harbor, companion affinity work, settlement preparation and compatible Railroad missions. If a quest asks you to attack a major faction, stop before accepting or completing that commitment and create a separate manual save.
- Complete Tour of Duty when it becomes available.
- Finish Show No Mercy for Brotherhood progression and vertibird signal grenades.
- Use the Prydwen for power-armour repair, ammunition and faction equipment.
- Complete desired Railroad work and other compatible content before Blind Betrayal.
Finish Railroad-dependent content before Blind Betrayal
Blind Betrayal is the decisive timing issue for players who want to preserve Railroad content. Before completing Blind Betrayal by reporting the outcome to Elder Maxson, finish the Railroad missions, P.A.M. assignments, Ballistic Weave research and crafting access, Deacon affinity work and any Railroad rewards you want. Make Manual Save Slot 1 before resolving the final Danse conversation, then make a second protected save before turning in the quest if you want an additional fallback.
Completing Blind Betrayal automatically starts Tactical Thinking. At that point P.A.M. enters lockdown, so she may stop giving or accepting Railroad assignments even though you have not spoken with Captain Kells and the Railroad may not yet be openly hostile. Therefore, postponing only the conversation with Kells is not enough to preserve all Railroad side content. Players who need P.A.M. quests or Ballistic Weave must complete them before Blind Betrayal is completed.
Resolve the Danse encounter at Listening Post Bravo according to the companion outcome you want. After reporting back to Maxson, verify Danse’s final status and affinity availability before overwriting your protected save.
- Finish Railroad quests, Ballistic Weave, Deacon affinity work and P.A.M. rewards first.
- Create Manual Save Slot 1 before resolving Blind Betrayal.
- Complete Blind Betrayal only after all desired Railroad-dependent content is finished.
- Verify Danse’s final status before overwriting the save.
Use Tactical Thinking and the later faction breakpoints deliberately
After Blind Betrayal starts Tactical Thinking, do not speak with Lancer-Captain Kells unless you intend to begin the Brotherhood assault on the Railroad. Create Manual Save Slot 2 immediately before the Kells conversation and leave it untouched. Speaking with Kells advances Tactical Thinking into the open Railroad attack and can make the Railroad hostile. For a Brotherhood ending, speak with Kells only when you are ready to attack the Railroad and continue through the Brotherhood finale.
For an Institute or Railroad route, avoid advancing Tactical Thinking through Kells. The Railroad may still be affected by P.A.M.’s lockdown after Blind Betrayal, so this route is safest when all Railroad-dependent work was already completed. Keep the Kells save in case the conversation was triggered accidentally.
Before accepting the Institute’s Mass Fusion route or the Brotherhood’s Spoils of War route, create Manual Save Slot 3. Relaying to Mass Fusion makes the Brotherhood hostile. Informing the Brotherhood and boarding the vertibird for Spoils of War makes the Institute hostile. These are separate commitment paths; choose one only after completing the content you want from the opposing faction.
Do not overwrite Slots 1, 2 or 3 after committing. Create a new post-commitment save so you can continue the selected route while retaining access to the earlier branch points.
- Complete Blind Betrayal only after Railroad-dependent content is finished.
- Create Manual Save Slot 2 before speaking with Captain Kells.
- Speak with Kells only when beginning the Brotherhood assault on the Railroad.
- Create Manual Save Slot 3 before Mass Fusion or Spoils of War.
- Keep all protected pre-branch saves after committing.
Before you move on
- Fire Support and Call to Arms are complete, and the Deep Range Transmitter was delivered to Paladin Danse.
- The Prydwen has arrived, and Maxson, Ingram, Teagan and Quinlan are accessible.
- The Brotherhood missions wanted for equipment, vertibird access and progression are complete without an unintended final faction commitment.
- Railroad quests, Ballistic Weave access, Deacon affinity work and desired P.A.M. rewards were completed before Blind Betrayal was completed.
- Manual Save Slot 1 exists before resolving Blind Betrayal, Manual Save Slot 2 exists before speaking with Kells, and Manual Save Slot 3 exists before Mass Fusion or Spoils of War.
- For a Brotherhood ending, Tactical Thinking has been deliberately advanced through Kells and the Institute commitment has been made through Spoils of War.
- For a preserved Institute or Railroad route, Kells has not been used to begin the Brotherhood’s Railroad assault, and Mass Fusion or Spoils of War has not been committed against the intended faction.
- Danse’s final status has been checked before the protected saves were overwritten.
References for this chapter
- Fallout 4: Game of the Year Edition — PlayStation Store
- Cambridge Police Station — Fallout Wiki
- Military frequency AF95 — Fallout Wiki
- Shadow of Steel — Fallout Wiki
- Show No Mercy — Fallout Wiki
- Blind Betrayal — Fallout Wiki
- Predictive Analytic Machine — Fallout Wiki
- Tactical Thinking — Fallout Wiki
- Spoils of War — Fallout Wiki
- Mass Fusion — Fallout Wiki
- Fallout 4 Guide — Tactical Thinking
The Institute — Reaching the Molecular Level and Meeting Father
Follow the main story from Diamond City to the Institute in its required order: rescue Nick Valentine, investigate Kellogg’s house, track Dogmeat to Fort Hagen, recover Kellogg’s brain augmenter, explore his memories in Goodneighbor, find Virgil in the Glowing Sea, then hunt the courser at Greenetech Genetics. Tinker Tom decodes the courser chip, Virgil provides the Signal Interceptor plans, and you choose Sturges, Tinker Tom or Proctor Ingram to supervise construction. That choice affects faction follow-up objectives but does not alone determine the ending. After teleporting into the Institute, decide whether to cooperate with Father or leave as an enemy. Preserve a manual save before teleportation, another after Institutionalized, and a separate save before the Mass Fusion or Spoils of War decision.
1. Reach Diamond City and start Nick Valentine’s investigation
After completing the opening Sanctuary and Concord sequence, follow the main objective to Diamond City. Enter through the market gate and speak with Piper Wright and Mayor McDonough. Tell Piper that you are searching for Shaun, then follow her lead to Valentine’s Detective Agency. This completes Jewel of the Commonwealth and starts Unlikely Valentine. Diamond City is also a useful resupply point before entering the subway, so buy ammunition, healing items and armor repairs before leaving.
At the agency, speak with Ellie Perkins and learn that Nick is trapped in Park Street Station. Travel to the station near Boston Common and enter the subway. Fight through the Triggermen, using the platforms, ticket booths and side rooms as cover. Reach the locked cell area and free Nick by using the available terminal, key or dialogue route. Do not leave after opening the cell; follow Nick through the escape route and return with him to the agency.
Nick becomes available as a companion during the investigation that follows. Speak with him at the agency to begin Getting a Clue. If you are using another companion, dismiss them or confirm Nick as the active companion before leaving Diamond City. Complete the agency conversation so the next objective directs you to Kellogg’s house. The rescue and return to the agency are the practical prerequisites for Nick’s main-story role.
- Jewel of the Commonwealth is complete.
- You entered Park Street Station and rescued Nick Valentine.
- Nick and Ellie are back at Valentine’s Detective Agency.
- Getting a Clue is active.
- Nick is available to accompany you.
2. Complete Getting a Clue and begin Reunions
Follow Nick to Kellogg’s house in Diamond City. Search the exterior and interior for a way inside, then inspect the clues that reveal Kellogg’s connection to Shaun. Nick can help with the investigation, and the house can be entered through the available lock, key or investigation route. Continue interacting with the marked evidence until the objective changes to follow Dogmeat.
Leave Diamond City and find Dogmeat near the agency or along the marked route. Speak with Dogmeat and give him Kellogg’s cigar when prompted. This starts Reunions. Stay close to Dogmeat while he follows the scent through the Commonwealth; the route includes several combat stops, so keep your weapon ready and heal Dogmeat if necessary. If you lose sight of him, follow the objective marker rather than wandering toward Fort Hagen alone.
Before entering Fort Hagen, make a manual save. Bring a reliable close-range weapon for synths in corridors, a medium- or long-range weapon for turrets, grenades or mines for clustered enemies, and enough stimpaks for a sustained interior fight. Fort Hagen contains hostile synths, turrets and automated defenses. Power Armor is useful but not mandatory; stealth and careful doorway checks work as well.
- Kellogg’s house has been searched.
- Dogmeat has received the cigar.
- Reunions is active.
- A manual save exists before entering Fort Hagen.
- You have healing items, ammunition and a weapon suitable for corridor combat.
3. Enter Fort Hagen and defeat Kellogg
Follow Dogmeat to the exterior of Fort Hagen and enter through the marked route. Move slowly through the command center. Check ceilings and doorways for turrets, and use cover when synths appear. Terminals and locked doors can provide alternate routes, but they are not required if you follow the main objective. Continue downward and inward until the quest directs you to Kellogg’s position.
Kellogg uses cover, grenades and a Stealth Boy during the confrontation. Do not chase him into an open room without healing first. Use VATS when he becomes visible, throw a grenade behind his cover, or wait for the Stealth Boy effect to end while staying behind a wall. Once Kellogg is defeated, loot his body. Take the Cybernetic Brain Augmenter; it is required for Dangerous Minds. Kellogg’s Pistol is optional but worth keeping if you want its unique weapon.
Search the command center before leaving if you want ammunition, terminals or the area’s magazine. Exit Fort Hagen and return toward Diamond City. The quest will direct you to Piper and then to Goodneighbor’s Memory Den. The next required quest is Dangerous Minds, not a faction-ending decision.
- Fort Hagen has been cleared far enough to reach Kellogg.
- Kellogg is dead.
- The Cybernetic Brain Augmenter is in your inventory.
- Reunions has completed.
- Dangerous Minds is active or ready to begin at the Memory Den.
4. Use the Memory Den during Dangerous Minds
Travel to Goodneighbor and enter the Memory Den. Speak with Irma and then Doctor Amari downstairs. Give Amari Kellogg’s Cybernetic Brain Augmenter. Nick Valentine is the compatible participant for the memory procedure, so keep him with you or speak with him when the quest requests his help. Enter the memory lounger when Amari instructs you to begin the sequence.
Inside the memory, follow the glowing path from one scene to the next. You may inspect the highlighted figures and objects for additional dialogue, but the required action is to keep moving forward through Kellogg’s memories. Continue until the final memory reveals that an escaped Institute scientist named Brian Virgil is hiding in the Glowing Sea.
Leave the lounger and speak with Amari. She explains that Virgil may know how to reach the Institute and recommends protection against radiation. Dangerous Minds then leads directly into The Glowing Sea. This is the correct point to stop and prepare rather than immediately traveling south.
- Kellogg’s brain augment has been delivered to Doctor Amari.
- The memory lounger sequence is complete.
- The final memory identifies Brian Virgil.
- The Glowing Sea is active.
- You have returned to the Memory Den’s normal interior.
5. Prepare for and cross the Glowing Sea
Before leaving Goodneighbor, stock Rad-X, RadAway, stimpaks, food and ammunition. Wear Power Armor with a charged fusion core if you have it, or use a hazmat suit if you prefer mobility. Power Armor provides better combat protection against the deathclaws, radscorpions and feral ghouls in the region; a hazmat suit provides strong radiation protection but leaves you vulnerable to damage. Bring a backup armor option if you expect to fight rather than avoid encounters.
Travel southwest toward the Glowing Sea and follow the quest marker to the Crater of Atom. Speak with Mother Isolde if you want directions to Virgil’s Rocky Cave. You can also follow the objective marker through the irradiated terrain without accepting help from the Children of Atom. Avoid unnecessary detours: the region’s radiation is continuous and random encounters can consume healing supplies quickly.
Reach the Rocky Cave and speak with Virgil. Ask about the Institute and how to enter it. Virgil explains that you need an Institute courser chip and identifies a courser at Greenetech Genetics. Do not attack Virgil if you want to keep his later dialogue and optional serum-related content available. The Glowing Sea ends after you obtain this information, and Hunter/Hunted begins.
- Rad-X, RadAway and healing items are stocked.
- You have chosen Power Armor or a radiation suit.
- Crater of Atom has been reached.
- Virgil has been found in the Rocky Cave.
- Virgil has explained the courser-chip requirement.
6. Track the courser at Greenetech Genetics
Travel to the C.I.T. Ruins when Hunter/Hunted directs you there. Open the Pip-Boy radio tab and tune to the Courser Signal. The signal strength increases as you move toward Greenetech Genetics. Enter the building and fight upward through Gunners. Use cover around stairwells and doorways, because enemies occupy several floors and can attack from multiple angles.
Continue toward the strongest signal until you reach the courser, Z2-47. You can fight him directly or use the available dialogue option if you obtained the relevant information earlier, but defeating him is the reliable route. Z2-47 uses a Stealth Boy and can become difficult to track in the open room. Use VATS, area damage, mines or a shotgun when he becomes visible, and keep moving so the Gunners do not surround you.
Loot the courser after the fight and take the Courser Chip. Hunter/Hunted completes when the chip is recovered. Create a manual save before leaving Greenetech Genetics if you want a clean recovery point for the next chain. The chip is not decoded by Virgil; return to the Railroad and have Tinker Tom analyze it.
- The Courser Signal was followed from the C.I.T. Ruins.
- Greenetech Genetics has been entered.
- Z2-47 has been defeated.
- The Courser Chip has been looted.
- Hunter/Hunted is complete.
7. Decode the chip and receive the Signal Interceptor plans
Return to Railroad headquarters and speak with Desdemona and Tinker Tom. If you have not joined the Railroad, follow the Freedom Trail from Boston Common to the Old North Church and complete the introductory conversation before asking Tom to decode the chip. Tinker Tom analyzes the Courser Chip and provides the information required for the next step.
Return to Virgil in the Rocky Cave after the chip has been decoded. Give him the result and receive the Signal Interceptor plans. Create a manual save named The Molecular Level — Rocky Cave — Before Builder Choice. This is the best preservation point for trying a different construction helper without replaying the Glowing Sea and Greenetech sections.
The available construction helpers are Sturges for the Minutemen, Tinker Tom for the Railroad and Proctor Ingram for the Brotherhood of Steel. You must have access to the relevant faction contact. The choice affects the construction conversation and follow-up faction objectives, but choosing one helper does not by itself select your final ending.
- Tinker Tom has decoded the Courser Chip.
- Virgil has received the decoded information.
- Virgil has provided the Signal Interceptor plans.
- A protected pre-builder manual save exists.
- A construction helper has been selected or is ready to be selected.
8. Build and power the Signal Interceptor
Choose an allied settlement with a functioning workshop, a large unobstructed building area and enough settlement build capacity. Home Plate is not suitable because it does not provide the normal workshop setup needed for the construction. Build the Stabilized Reflector Platform first, then place the Molecular Beam Emitter on it. Add the Control Console and Relay Dish nearby.
The completed interceptor requires 27 power. Connect every component to the same power network with settlement wires and confirm that the workshop interface shows the parts as powered. If an item will not place, clear nearby debris, move to flatter ground or use a different allied settlement rather than forcing the structure into an obstruction. Speak with the chosen faction helper when the quest requests additional materials or confirmation.
When the quest confirms that the device is operational, create a second manual save named The Molecular Level — Signal Interceptor Ready — Before Teleport. Step onto the reflector platform to enter the Institute. This teleportation is the actual completion of The Molecular Level’s infiltration objective; the builder choice itself is not a final faction commitment.
- The Stabilized Reflector Platform is built.
- The Molecular Beam Emitter is attached to the platform.
- The Control Console and Relay Dish are built.
- All four components are connected to one power network.
- The interceptor has at least 27 power.
- A manual save exists immediately before teleportation.
9. Enter the Institute and complete Institutionalized
After teleporting, use the nearby terminal if your outside faction supplied a Network Scanner holotape. Load the holotape and choose the network-scan command. If the Railroad helped build the interceptor, also complete the encrypted-message objective shown by the quest before leaving. Do not attack Institute personnel while you are trying to preserve access to the Institute.
Proceed through the relay area and take the elevator to meet Father, who reveals that he is Shaun. You may question him and agree to hear the Institute’s case without permanently selecting the Institute ending. If you refuse the arrangement or attack Institute personnel, the introduction ends on hostile terms and the Institute branch becomes unavailable on that save.
If you cooperate, complete Institutionalized by meeting the division leaders: Clayton Holdren in Bioscience, Allie Filmore in Advanced Systems, Justin Ayo in the Synth Retention Bureau and Madison Li in Advanced Systems. Madison Li modifies your Pip-Boy, enabling regular fast travel to and from the Institute after the quest concludes. The exact order can vary slightly with active faction objectives, so follow the current quest markers.
- The Network Scanner objective is complete when required.
- Father has been met and identified as Shaun.
- You have either accepted the Institute’s cooperation or deliberately refused it.
- The required division leaders have been visited.
- Madison Li has installed the Institute relay if you remained friendly.
- Institutionalized is complete, or you have been redirected to the anti-Institute route.
10. Preserve the branch before Mass Fusion
After Institutionalized, stop and create a manual save named Institutionalized Complete — Institute Concourse — Before Mass Fusion. Do not overwrite it with routine autosaves. This slot preserves Institute access and gives you a reliable base for later faction-ending experiments, companion work, vendor visits and optional Institute objectives.
Do not confuse accepting Institute quests with committing to the Institute ending. The decisive branch occurs when you use the Institute relay to travel to the Mass Fusion building for Mass Fusion. If you report the plan to the Brotherhood and board its vertibird for Spoils of War instead, the Institute becomes hostile. Preserve a separate save immediately before making either travel decision.
If you refused Father, attacked the Institute or triggered the Brotherhood’s opposing route, Institute vendors, fast travel and quests are no longer available on that branch. Reload the protected pre-hostility save if you intended to preserve the Institute. If you deliberately want an anti-Institute ending, report to the faction still available to you and follow its own prerequisite chain rather than mixing objectives from another faction.
Completion of this chapter means you have reached the Institute through the full main-story bridge, finished or deliberately rejected Institutionalized, and protected a save before Mass Fusion or Spoils of War.
- The Molecular Level is complete.
- The Institute has been entered through the Signal Interceptor.
- Institutionalized is complete, or the anti-Institute route has been intentionally selected.
- A protected save exists after Institutionalized and before Mass Fusion.
- You have not used the Institute relay for Mass Fusion or boarded the Brotherhood vertibird for Spoils of War on the preservation save.
- Your intended faction route and next prerequisite are written down before continuing.
Before you move on
- Jewel of the Commonwealth, Unlikely Valentine, Getting a Clue, Reunions, Dangerous Minds, The Glowing Sea and Hunter/Hunted are complete.
- Nick Valentine has been rescued and used for the main investigation.
- Kellogg’s Cybernetic Brain Augmenter was used in the Memory Den.
- Virgil has provided the Signal Interceptor plans after the Courser Chip was decoded.
- The Signal Interceptor has been built with all four components and sufficient shared power.
- The machine has transported you into the Institute.
- Institutionalized is complete with Institute fast travel enabled, or you deliberately refused Father and preserved the anti-Institute route.
- A protected manual save exists after Institutionalized and before Mass Fusion or Spoils of War.
- Your next faction route is identified and has its own pre-assault save.
References for this chapter
- Fallout 4: Game of the Year Edition — PlayStation Store
- Fallout 4 Walkthrough: Main Story Route, Faction Choices and Endings
- The Glowing Sea — Fallout 4 Database
- Hunter/Hunted — Fallout 4 Database
- The Molecular Level — Fallout 4 Database
- Institutionalized — Fallout 4 Database
- The Molecular Level and Institutionalized Walkthrough
- Institutionalized — Prima Games Guide
- Institutionalized — Gamepressure Guide
Points of No Return — How to Handle Branches and Saves
Fallout 4 does not lock the campaign when you enter the Institute, but several later quest actions permanently change faction access. The Institute route turns against the Brotherhood when you confirm the Mass Fusion relay. The Brotherhood route turns against the Institute when you board the Vertibird for Spoils of War. Blind Betrayal automatically starts Tactical Thinking and can put P.A.M. into lockdown before you speak with Kells; speaking with Kells then makes the Railroad permanently hostile. Preserve separate saves before Blind Betrayal and before Kells, not just one save before Tactical Thinking. The Minutemen route becomes the fallback after the Institute is hostile and requires Form Ranks or sufficient settlement support before Defend the Castle. Complete Automatron, Far Harbor, Workshop content, companion quests and desired faction rewards before these commitments. Keep an untouched preparation save, a separate save at each major warning point, and a post-ending save. On PS5, use manual slots and verify PlayStation Plus or USB backups instead of relying on rotating autosaves.
1. Enter the Institute without committing to its ending
Complete The Molecular Level by constructing the Signal Interceptor and using it to reach the Institute. The faction that helps build the interceptor can affect later quest availability, but building it with the Minutemen, Railroad or Brotherhood does not by itself choose the final ending. After teleporting in, speak with Father and complete Institutionalized to unlock ordinary Institute access and its quest structure.
Before activating the interceptor, create a manual save from the pause menu. Use a new slot rather than overwriting an older branch save. Create another manual save after Institutionalized, preferably after returning to the Commonwealth or while standing at the Institute relay. These two saves preserve both the pre-entry state and the post-entry state.
Institute entry is a staging point, not a point of no return. You can still complete Brotherhood, Railroad and Minutemen content afterward, subject to the later faction triggers. Do not begin Mass Fusion merely because it appears in the Institute quest log if you still want Brotherhood access.
- Complete The Molecular Level and Institutionalized if Institute access is needed.
- Create a manual save before activating the Signal Interceptor.
- Create a second manual save after Institutionalized.
- Do not treat Institute entry as acceptance of Nuclear Family.
- Record the save location, level, active quest and date outside the game if useful.
2. Save before Mass Fusion or Spoils of War
Mass Fusion is the Institute-side commitment in the Brotherhood–Institute conflict. When Allie Filmore offers to relay you to the Mass Fusion building, stop before confirming the relay if you still need Brotherhood missions, Brotherhood rewards or unrestricted access to the Prydwen. The game warns that using the relay makes you a permanent enemy of the Brotherhood. Create a fresh manual save in the Institute relay room before accepting the warning.
Spoils of War is the Brotherhood-side alternative. If you inform Proctor Ingram about the Institute plan, the Brotherhood route begins and a Vertibird becomes available on the Prydwen. Boarding that Vertibird is the commitment point: the game warns that continuing makes the Institute permanently hostile. Save beside the Vertibird before boarding if you still need Institute facilities, Institute rewards or Railroad work that depends on Institute access.
Do not assume that merely receiving either quest has already caused the faction break. The decisive actions are confirming the Institute relay for Mass Fusion or boarding the Vertibird for Spoils of War. Keep separate saves for these two states if you intend to test multiple endings.
- Complete desired Institute and Brotherhood rewards before the Mass Fusion or Spoils of War commitment.
- Save immediately before confirming the Mass Fusion relay.
- Save immediately before boarding the Spoils of War Vertibird.
- Understand that Mass Fusion makes the Brotherhood hostile.
- Understand that boarding the Spoils of War Vertibird makes the Institute hostile.
3. Preserve both Tactical Thinking milestones
Blind Betrayal and Tactical Thinking require two separate precautions. First, create a pre-Blind-Betrayal save before turning Blind Betrayal in to Elder Maxson. Completing Blind Betrayal automatically starts Tactical Thinking and can place P.A.M. into lockdown. Once that happens, P.A.M.-dependent Railroad work, including some side quests and ballistic-weave progression, may no longer be available even though the Railroad is not yet permanently hostile.
Use the pre-Blind-Betrayal save if you want unrestricted access to Railroad side quests, P.A.M. missions or Railroad rewards. Complete those objectives before turning in Blind Betrayal. This is the safest save for preserving the Railroad quest menu, because leaving Tactical Thinking unadvanced later does not guarantee that every Railroad quest remains available after P.A.M. has entered lockdown.
Second, if you want to continue the Brotherhood route while avoiding open war with the Railroad, create another manual save after Blind Betrayal has started but before speaking with Lancer-Captain Kells. Do not complete the Kells conversation. Speaking with Kells begins the Brotherhood attack on Railroad headquarters and makes the Railroad permanently hostile. Leaving Tactical Thinking at that stage can preserve the Railroad's faction relationship, but it does not undo P.A.M.'s lockdown or restore every P.A.M.-related quest already blocked by Blind Betrayal.
If you intend to complete Railroad content, use the pre-Blind-Betrayal save rather than relying on the pre-Kells save. If you intend to pursue the Brotherhood ending while keeping the Railroad alive as long as possible, use the pre-Kells save and avoid Kells until you are ready to accept the consequences. Do not rely on an autosave to preserve either milestone.
- Create a pre-Blind-Betrayal save before turning the quest in to Elder Maxson.
- Finish desired P.A.M., ballistic-weave and Railroad side content from that save.
- Create a second save after Tactical Thinking appears but before speaking with Kells.
- Understand that P.A.M. may already be locked down at this second milestone.
- Understand that speaking with Kells makes the Railroad permanently hostile.
- Do not claim that avoiding Kells guarantees access to every remaining Railroad quest.
4. Prepare the Minutemen fallback without starting it early
After becoming hostile to the Institute, speak with Preston Garvey about destroying it. Form Ranks normally requires support from eight Minutemen settlements. If you already control enough qualifying settlements, the recruitment portion may be skipped or completed immediately. Follow Preston's current objective and use settlement recruitment quests or Radio Freedom to reach the required support.
Before beginning Defend the Castle, complete faction-dependent rewards that require the Brotherhood, Railroad or Institute to remain available. Then create a manual save at the Castle before the Institute attack begins. Create a second save after the defense succeeds and before accepting the next Minutemen endgame objective.
Defend the Castle is the Minutemen endgame gateway, not a routine settlement-defense task. It can fail or alter active faction quests, including Tactical Thinking. Start it only after your desired Railroad, Brotherhood, Institute, companion and DLC work is complete.
- Meet the Form Ranks settlement requirement or confirm that the quest has been skipped.
- Complete desired faction rewards before Defend the Castle.
- Save at the Castle before the attack begins.
- Save again after the Castle defense succeeds.
- Do not start the Minutemen finale merely to keep the faction available.
5. Use a layered PS5 save and backup plan
Maintain at least three protected manual-save layers. The preparation save should contain completed DLC conclusions, companion work and desired faction rewards while the major factions are still available. The branch save should be immediately before the commitment you are testing: Mass Fusion, Spoils of War, Kells, or Defend the Castle. The outcome save should be created after the chosen ending and after you have checked the post-ending faction state.
Fallout 4's save list is not a dependable custom-label system. Identify important saves by displayed location, character level, active quest context and date. Do not overwrite the preparation save when creating a branch save. Keep separate slots for pre-Blind-Betrayal and pre-Kells states because they preserve different Railroad possibilities.
On PS5, use the game's manual Save command for the working archive. PlayStation Plus cloud storage and USB backup are additional safeguards, not replacements for labelled planning. Use the console's Saved Data and Game/App Settings area or the game's upload/download controls to transfer the correct save, then verify its date. Automatic synchronization can update cloud data with a newer local state, so upload the branch save deliberately before experimenting with an ending.
- Keep one untouched preparation save.
- Keep separate pre-Blind-Betrayal and pre-Kells saves.
- Keep a Mass Fusion or Spoils of War commitment save if testing those routes.
- Create a post-ending save after checking faction states.
- Verify the date of any PlayStation Plus or USB backup.
6. Complete DLC before Commonwealth faction locks
Automatron and Far Harbor can normally be completed before the Commonwealth finale without forcing a Brotherhood, Railroad, Institute or Minutemen ending. Completing them earlier preserves their quest givers, rewards and crafting access while all major Commonwealth factions remain available. Complete Workshop add-on objectives and desired companion quests during this preparation period as well.
Nuka-World needs a separate precaution. Becoming a raider leader and assigning Commonwealth settlements to raider gangs can damage Preston Garvey's relationship and affect Minutemen access. Create a manual save before assigning the first Commonwealth outpost. If preserving the Minutemen is more important than the raider settlement system, clear the parks and use the anti-raider route, or keep the outpost decision on a separate branch.
A safe general order is to complete Automatron, Far Harbor, Workshop content, companion affinity work and desired faction rewards first. Then create the preparation save, preserve the two Tactical Thinking saves if needed, and create a final branch save immediately before the Commonwealth commitment you intend to test.
- Complete Automatron and Far Harbor before the Commonwealth finale when practical.
- Secure desired Workshop, companion and faction rewards first.
- Save before assigning the first Nuka-World Commonwealth outpost.
- Keep Nuka-World raider decisions separate from the main faction branch saves.
- Use the preparation save to test alternate endings without restarting the campaign.
Before you move on
- A manual save exists before activating the Signal Interceptor.
- A separate save exists after Institutionalized and Institute access.
- A pre-Blind-Betrayal save exists before turning the quest in to Elder Maxson.
- Desired P.A.M., Railroad and ballistic-weave work is complete from the pre-Blind-Betrayal state if those rewards are wanted.
- A separate pre-Kells save exists after Tactical Thinking starts but before speaking with Kells.
- The player understands that the pre-Kells save can preserve Railroad non-hostility but cannot guarantee access to every P.A.M.-dependent quest after lockdown.
- A separate save exists immediately before Mass Fusion or Spoils of War if either route is being tested.
- The Minutemen settlement requirement and Defend the Castle timing are understood before the Minutemen route is selected.
- Automatron, Far Harbor, Workshop objectives and desired companion work are complete before the final Commonwealth commitment.
- A post-ending save has been created without overwriting the preparation or branch saves.
- The player knows which faction becomes hostile after the selected commitment.
- Any PlayStation Plus or USB backup was deliberately created and its date verified.
- The preparation save can be loaded to pursue an alternate ending without restarting the campaign.
References for this chapter
- Fallout 4: Game of the Year Edition — PlayStation Store
- The Molecular Level — Fallout Wiki
- Institutionalized — Fallout Wiki
- Mass Fusion — Fallout Wiki
- Spoils of War — Fallout Wiki
- Blind Betrayal — Fallout Wiki
- Tactical Thinking — Fallout Wiki
- Predictive Analytic Machine — Fallout Wiki
- Form Ranks — Fallout Wiki
- Defend the Castle — Fallout Wiki
- PlayStation Plus cloud storage for PS5 consoles — PlayStation Support
- How to back up and restore PS5 console data — PlayStation Support
Companions — Affinity, Quests and Best Utility Roles
Recruit companions as you encounter them, travel with one while completing ordinary quests, and answer affinity conversations before dismissing them. Most companions award a permanent perk at maximum affinity; some also require a named quest or a faction quest before affinity can finish. Complete those milestones before faction hostility, Nuka-World raider settlement missions, Open Season, or destructive Far Harbor decisions. Dogmeat and Ada do not provide standard affinity perks. Nick, Cait, Curie and MacCready have named personal quests; Danse’s key milestone is Blind Betrayal. Deacon, X6-88, Preston, Porter Gage and Old Longfellow can be lost or become hostile through faction choices. Use separate PS5 manual-save slots before each danger point, recording the quest and location in your own notes or screenshot. Once a perk appears in the Pip-Boy, it remains active even if the companion later leaves.
Recruit companions and build affinity safely
Choose one active companion and keep travelling with them while exploring, completing side quests and making decisions they approve of. Affinity rises from approved actions and dialogue, and the companion will periodically initiate a conversation when a threshold is reached. Stop moving when this happens and finish the conversation before dismissing them. If no conversation starts, complete a short unrelated objective or wait in a safe location, then continue travelling with that companion.
A perk is awarded when the relevant affinity and quest conditions are satisfied. It is permanent after appearing in the Pip-Boy, even if the companion later dislikes your actions, leaves permanently or becomes unavailable. Dogmeat has no affinity perk. Ada can accompany you during Automatron and can be modified at a Robot Workbench, but she does not use the normal affinity-perk system. Codsworth, Preston, Piper, Nick, Cait, Curie, MacCready, Hancock, Deacon, Strong, Danse, X6-88, Porter Gage and Old Longfellow each have a companion perk.
- Use one companion at a time while raising affinity.
- Stop and complete affinity conversations before dismissing the companion.
- Check the Pip-Boy Perks tab after a perk notification.
- Create a distinct manual save before Danse, Deacon, Preston or X6-88 faction decisions.
Finish named companion quests before campaign branches
Nick Valentine’s personal quest is Long Time Coming. Raise his affinity while exploring and investigating, then follow his request when the quest begins. Complete it and continue the resulting affinity dialogue until Close to Metal appears. Cait’s Benign Intervention sends you to Vault 95. Finish the vault objective, then continue travelling with Cait until Trigger Rush is awarded.
Curie’s Emergent Behavior becomes available after her affinity conversations and the required stage of her story. Follow the quest to Doctor Amari in the Memory Den and complete the body-transfer sequence; it is not dependent on choosing the Railroad, Brotherhood or Institute. Continue building Curie’s affinity afterward to receive Combat Medic. MacCready’s Long Road Ahead involves the search connected to his son’s illness. Complete every objective, then continue travelling with him until Killshot is awarded.
Danse’s affinity is tied to the Brotherhood quest Blind Betrayal. Make a manual save in a separate slot immediately before starting Blind Betrayal, with the save identified by the quest name and current Brotherhood location. Resolve the quest before beginning an anti-Brotherhood endgame route. Depending on your decisions, Danse may remain a companion, become unavailable or become hostile.
- Nick: finish Long Time Coming, then obtain Close to Metal.
- Cait: finish Benign Intervention at Vault 95, then obtain Trigger Rush.
- Curie: finish Emergent Behavior through Doctor Amari, then obtain Combat Medic.
- MacCready: finish Long Road Ahead, then obtain Killshot.
- Danse: resolve Blind Betrayal before committing to a Brotherhood-destroying route.
Match perks and companions to your playstyle
Piper’s Gift of Gab improves experience from successful speech challenges and discovering locations, so she is useful during exploration and dialogue-heavy travel. Nick’s Close to Metal improves hacking attempts and reduces the terminal lockout. Deacon’s Cloak & Dagger improves sneak-attack damage and Stealth Boy duration, making him the best general companion choice for a stealth build. X6-88’s Shield Harmonics adds energy resistance.
Cait’s Trigger Rush improves Action Point regeneration when health is low. Curie’s Combat Medic provides an emergency heal with a cooldown. MacCready’s Killshot improves V.A.T.S. headshot accuracy. Hancock’s Isodoped increases critical-meter gain when radiation reaches the perk’s threshold. Strong’s Berserk increases melee damage at very low health. Danse’s Know Your Enemy increases damage against ghouls, super mutants and synths. Preston’s United We Stand improves damage and damage resistance when outnumbered. Codsworth’s Robot Sympathy provides energy resistance against robot energy attacks.
Use Deacon for silent infiltration, Nick or Piper for hacking and exploration, MacCready for V.A.T.S. firearms, Strong for melee and Curie or Codsworth for defensive support. These are recommendations, not requirements: ordinary missions can be completed with any available companion.
- Select Deacon for stealth, MacCready for V.A.T.S. firearms and Strong for melee.
- Use Nick or Piper when hacking and location discovery are frequent.
- Use Preston for large battles if his perk and availability matter.
- Dismiss companions before a silent objective if their weapons or movement can expose you.
Protect companions through faction and DLC decisions
For an Institute reactor mission, Nick, Curie or X6-88 are practical choices for hacking utility, healing or energy resistance. X6-88 becomes unavailable if the Institute is destroyed or becomes permanently hostile. Nick may also be unavailable when a main-story objective requires him elsewhere, so recruit and prepare a backup companion before the final mission. For Brotherhood missions, use Danse only if Blind Betrayal left him friendly and available; otherwise choose Piper, Preston, MacCready or Curie.
Porter Gage is available in Nuka-World after the early raider sequence. Raise his affinity and receive Lessons in Blood before starting Open Season or attacking the raiders. If you establish raider outposts in the Commonwealth during Home Sweet Home, Preston can permanently refuse to become your companion if you are already committed to the Minutemen. Create a separate manual save before accepting or placing the first Commonwealth raider outpost; identify it with the quest name, settlement and current objective.
Old Longfellow joins during Far Harbor and grants Hunter’s Wisdom at maximum affinity. He does not require a conventional personal dungeon quest. Raise his affinity before choosing an island action that can make him hostile, particularly the wind-farm shutdown route that leads to Far Harbor’s destruction. Ada is useful in Automatron but should not be counted when checking standard companion perks.
- Create a manual save before Home Sweet Home’s first Commonwealth raider outpost.
- Finish Gage’s affinity before Open Season if you want Lessons in Blood.
- Finish Old Longfellow’s affinity before destructive Far Harbor decisions.
- Check X6-88 and Deacon before choosing an anti-Institute ending.
- Keep a backup companion ready for the Institute reactor or Brotherhood assault.
Recover from affinity delays and verify completion
If affinity stops advancing, travel with the companion while performing actions they approve of. Complete a short quest, change locations or wait in a safe interior to allow another conversation check. A named quest can hold affinity at a threshold until its objectives are completed, so inspect the active quest list rather than repeatedly forcing unrelated actions.
If a companion becomes hostile because of a faction decision, reload the separate manual-save slot made before that decision. Do not rely on an autosave, because entering a location or beginning a dialogue can overwrite the useful recovery point. A perk already awarded remains active even if the companion later leaves. There is no general post-ending reset that restores a companion who permanently rejects the player.
Before the selected finale, verify the Pip-Boy Perks tab and quest log. Confirm that the desired named quests are complete, the intended final companion is recruited and following, and the relevant faction save still exists. Maintain at least one slot before Mass Fusion, Tactical Thinking or the chosen ending route, plus separate slots before Open Season, Home Sweet Home and any Far Harbor destruction decision.
- The Pip-Boy Perks tab confirms every desired companion perk.
- Long Time Coming, Benign Intervention, Emergent Behavior and Long Road Ahead are complete when their rewards matter.
- Blind Betrayal is resolved before a Brotherhood or anti-Brotherhood commitment.
- Gage and Old Longfellow’s affinity goals are complete if their DLC perks matter.
- The final companion is recruited and following before entering the endgame mission.
- Separate manual saves preserve the pre-branch quest and location states.
Before you move on
- The Pip-Boy Perks tab confirms every desired companion perk.
- Nick, Cait, Curie and MacCready’s named quests are complete when their rewards are required.
- Danse’s status is resolved before Brotherhood or Institute endgame commitments.
- Gage and Old Longfellow’s affinity goals are complete if Nuka-World or Far Harbor rewards are required.
- The intended final companion is recruited and following before the selected endgame mission.
- A distinct PS5 manual-save slot preserves the roster before Mass Fusion, Tactical Thinking, Home Sweet Home, Open Season or the chosen ending route.
References for this chapter
- Fallout 4: Game of the Year Edition — PlayStation Store
- How do I increase Companion Affinity? — Bethesda Support
- Affinity — Fallout Wiki
- Fallout 4 companions — Fallout Wiki
- Fallout 4 perks — Fallout Wiki
- Danse — Fallout Wiki
- Old Longfellow — Fallout Wiki
- Hunter’s Wisdom — Fallout Wiki
- Open Season — Fallout Wiki
- Companion Perks — Fallout 4 Guide, Prima Games
- Porter Gage — Carl’s Fallout 4 Guide
Crafting, Power Armour and Weapon Modding (GOTY workshop coverage)
Establish one compact crafting base before investing in elaborate settlements. Upgrade a primary weapon, a dependable backup and the chest section of your armor first. Maintain one power-armor frame at a known station, repair it before major missions and carry spare fusion cores without leaving a core installed in an unattended suit. Contraptions Workshop adds manufacturing machines, displays and warehouse pieces; Vault-Tec Workshop opens Vault 88 and its vault construction system; Wasteland Workshop adds cages, arenas and creature-management tools. These DLC systems are optional support tools, not replacements for ordinary workbenches, combat perks or settlement defense. Use them after your core equipment and supply network are reliable.
Establish one practical crafting base
After claiming Sanctuary, activate the workshop and keep your main stations close together. Maintain access to a weapons workbench, armor workbench, power armor station, cooking station and chemistry station. Sanctuary is suitable for this early setup, but the same arrangement works at any settlement you regularly use. Put the power armor station beside a sheltered storage area so you can repair and re-equip before leaving.
Store junk in the settlement workshop instead of carrying every component. A settlement’s crafting stations can use materials stored in that settlement, and supply lines can later connect workshop resources between settlements after you obtain the necessary settlement-management perk. This does not make every item universally available for ordinary storage or trading, so keep unique gear in a clearly marked personal container or display.
- Activate a settlement workshop and locate the five basic crafting stations.
- Keep junk and crafting materials in the workshop inventory.
- Use a separate container or display for unique weapons, armor and clothing.
- Create a manual save before dismantling valuable modified equipment.
Upgrade one primary weapon and one backup
Use the weapons workbench to improve the weapon category you actually carry. For automatic firearms, prioritize a receiver that improves damage, a larger magazine and a stock or grip suited to your range. For semi-automatic rifles and pistols, improve the receiver first, then choose a useful barrel and reflex sight or scope. For melee weapons, upgrade the striking component before spending materials on appearance or secondary effects. Keep one backup weapon with a different ammunition type when possible.
Gun Nut supports many conventional firearm modifications, while Science! is important for advanced energy-weapon work. Demolition Expert improves explosive damage but does not replace the weapon-crafting perks required for firearm modifications. Tag adhesive, aluminum, copper, circuitry, nuclear material and other scarce components for search when a required mod is unavailable. Do not spread rare materials over several weapon trees that you will not use.
- Select one primary weapon and one backup weapon.
- Prioritize damage, magazine capacity and handling over cosmetic changes.
- Take Gun Nut or Science! only when it supports the equipment you intend to use.
- Tag missing components for search rather than buying every component immediately.
Build armor for your expected combat
At the armor workbench, improve the chest piece first, then replace the weakest limb pieces. Pocketed or deep-pocketed armor helps a character who carries large amounts of loot. Dense or explosive-resistant protection is more useful when fighting grenades, missiles or clustered enemies. A complete set of reasonably upgraded armor is normally better than one excellent piece surrounded by low-protection parts.
Keep clothing with useful SPECIAL bonuses, but do not sacrifice a major defensive improvement for a minor attribute increase. Check newly looted armor before scrapping it; an enemy piece may contain a modification or provide a better base item than your current gear. Treat named clothing, quest clothing and unique apparel as protected until you have confirmed that its bonus is unnecessary.
- Upgrade the chest before spending resources on every limb.
- Keep one practical clothing option with useful SPECIAL bonuses.
- Inspect modified loot before scrapping it.
- Protect named and unique apparel from accidental dismantling.
Maintain power armor and manage fusion cores
Place the frame at a power armor station and use the station to repair damaged pieces or install available modifications. Repair armor before a faction assault, DLC interior or long expedition instead of waiting for a limb to fail during combat. Carry spare armor pieces when entering a prolonged battle, particularly if you expect heavy gunfire or explosive enemies.
Fusion cores are mission supplies. Carry more than one for a long expedition, but remove the core from an unattended frame if you do not want settlers or other NPCs to use that suit. Use power armor for radiation-heavy areas, major battles and exposed terrain; use normal armor for routine scavenging to reduce core consumption. Power armor modifications can require Armorer, Science! or other perk requirements, so improve the frame gradually rather than spending early materials on every available option.
- Repair all equipped pieces before a major mission.
- Carry spare fusion cores for long interiors and faction operations.
- Store the frame at a known settlement power armor station.
- Remove the fusion core from an unattended frame when NPC access is a concern.
- Keep a normal-armor loadout for ordinary exploration.
Use Contraptions Workshop after your combat needs are covered
Contraptions Workshop is available once you have a settlement with a workshop. It adds warehouse structures, elevators, displays, conveyors and manufacturing machines, including builders and plants that can produce selected clothing, armor, weapons, miscellaneous items and ammunition. The add-on does not supply all required resources or unlock the perks needed for every product, so check the machine requirements before building a factory.
For a first campaign, prioritize a secure warehouse or workshop room, weapon and armor displays, and an ammunition plant only if you can reliably supply its ingredients and power. Place hoppers, conveyors and storage where you can reach the output. Test a single machine before expanding. Manufacturing is optional and should not delay weapon upgrades, armor repairs, settlement beds, food, water or defense.
- Confirm that the settlement has a functioning workshop before using Contraptions objects.
- Build displays only after securing unique equipment.
- Use a dedicated room for conveyors and manufacturing machines.
- Confirm the required perks, materials and power before committing resources.
- Do not treat a factory as a substitute for a weapons workbench.
Add Vault-Tec and Wasteland Workshop support carefully
Vault-Tec Workshop adds Vault 88 and its vault construction system. At level 20 or above, listen for the Vault 88 Radio Beacon and follow the new quest. A lower-level character can begin by exploring Quincy Quarries, although the enemies and underground objectives can be dangerous early. Complete the introductory Vault 88 work before judging the full selection of vault objects, because parts of the workshop catalog are unlocked through that quest sequence.
Wasteland Workshop adds cages, arenas, creature-related objects, lighting, lettering and other settlement pieces. A powered cage has a chance to capture prey after time passes. A captured creature is hostile when released unless the appropriate taming setup is available; the Beta Wave Emitter can tame certain creatures, but raiders, Gunners and Super Mutants cannot be tamed through it. Keep cages and combat arenas away from beds, crops, supply routes and crafting stations. For a Minutemen support settlement, prioritize a clear perimeter, turrets with overlapping coverage, protected food and water, and a settlement alarm or siren positioned where defenders can respond to the attack direction.
- Start Vault-Tec Workshop through the radio beacon at level 20 or through Quincy Quarries earlier.
- Complete enough of the Vault 88 quest chain to unlock the workshop objects you need.
- Power cages and keep their hostile-release area away from essential settlement facilities.
- Use a Beta Wave Emitter only for creatures it can actually tame.
- Build defense and access routes before adding arenas or decorative vault structures.
Before you move on
- A regular settlement contains or provides access to a weapons workbench, armor workbench, power armor station, chemistry station and cooking station.
- Your primary weapon, backup weapon and armor have deliberate upgrades suited to your build.
- At least one power-armor frame is repaired, stored at a known station and supported by spare fusion cores.
- Your main support settlement has adequate beds, food, water and defense, with protected crafting access and a usable alarm or defensive position.
- Any Contraptions machinery has been tested for required materials, power and output storage.
- Vault-Tec objects have been unlocked through the appropriate Vault 88 progress if you intend to use them.
- Any Wasteland Workshop cages or arenas are isolated from settlers, crops, beds and essential workstations.
References for this chapter
Automatron DLC — Robot Hunting and the Final Boss
Automatron starts at level 15 after you gain access to a settlement. Listen to Caravan Distress Frequency, travel to the caravan attack at Wattz Consumer Electronics, and recruit Ada. Follow A New Threat to recover the first radar beacon, then complete Headhunting by collecting a second beacon, entering Fort Hagen Satellite Array, rescuing Jezebel, and building her a robot body. After Jezebel reveals the Mechanist’s location, install M-SAT on Ada or another accompanying robot and enter the Mechanist’s Lair through the RobCo Sales & Service Center. You can fight through the facility, use three supervisor holotapes to reach the Mechanist by an alternate route, or resolve the confrontation through dialogue. Completing Restoring Order unlocks the Mechanist’s Lair as a settlement, expands Automatron robot construction, and does not close any Commonwealth faction campaign.
1. Start Mechanical Menace and rescue Ada
Reach level 15 and make sure you have access to at least one settlement. Open the Pip-Boy Radio tab and select Caravan Distress Frequency. This activates Mechanical Menace and marks Wattz Consumer Electronics on the Commonwealth map. The level and settlement requirements apply to Automatron in the Game of the Year Edition. (Source: Bethesda Support.)
Travel to Wattz Consumer Electronics and approach the wrecked caravan. Ada and the caravan survivors are surrounded by hostile robots. Use cover, destroy robots with heavy weapons first, and avoid standing beside crippled machines because some explode when destroyed. After the fight, speak with Ada and agree to help. She becomes available as a companion and gives you the next objective. Keep her nearby while progressing through the DLC rather than sending her to an unknown settlement.
- Be at least level 15.
- Have access to a settlement.
- Listen to Caravan Distress Frequency.
- Rescue and recruit Ada at Wattz Consumer Electronics.
2. Complete A New Threat and build the Robot Workbench
Follow A New Threat to the marked General Atomics location. Enter the facility and fight through the hostile robots until you reach the marked robobrain. Destroy it and take the radar beacon from the remains, then return to Ada and report what you found. The interior has tight corridors and explosive machines, so carry a close-range weapon in addition to your normal rifle or pistol.
After the quest provides the schematics, build a Robot Workbench at a settlement. In workshop mode, open the Special category and place the workbench where you have enough room to use it. Enter the workbench interface and follow the quest objective to install the required signal-related modification on Ada. Exit the interface fully and speak with Ada again if the objective does not update. A manual save before constructing or modifying the workbench is useful if the quest marker fails to advance.
- Recover the first radar beacon from the marked robobrain.
- Return to Ada and start the next objective.
- Build a Robot Workbench from the Special workshop category.
- Install the requested modification and speak with Ada.
3. Finish Headhunting and recover Jezebel
Headhunting first sends you to a second marked robobrain at a variable Commonwealth location. Follow the active quest marker rather than assuming the target is at Fort Hagen. Defeat the robots guarding the target, loot the radar beacon from the robobrain, and return to Ada. This completes the variable-location portion of the quest.
Ada then directs you to Fort Hagen Satellite Array. Enter the facility and continue into the hangar, where Rust Devils and their modified robots are stationed. Fight through the defenders and locate the robobrain head called Jezebel. Speak with Jezebel, agree to remove her, and take her head. Search the area for useful robot weapons and armor, but keep distinctive parts until you know which custom robots you want to build.
Return to a Robot Workbench and construct a new Automatron body. Select Jezebel’s head in the head slot; the rest of the body can be a basic legal design because Jezebel is needed for information rather than combat. After building the body, speak with Jezebel to complete her part of the objective, then speak with Ada. Ada will explain the M-SAT requirement and begin Restoring Order.
- Recover the second radar beacon at the variable marked location.
- Travel to Fort Hagen Satellite Array.
- Recover Jezebel’s head from the Rust Devil hangar.
- Build Jezebel a body.
- Speak with Jezebel and then Ada.
4. Install M-SAT and enter the Mechanist’s Lair
Use the Robot Workbench to install the M-SAT special modification on Ada or another robot that will accompany you. Ada is the simplest choice because she is already connected to the quest. The modification requires common crafting materials; use the workbench’s component-tagging option if you need help locating adhesive, aluminum, circuitry, or rubber.
Travel to the marked RobCo Sales & Service Center near Boston Airport and make a separate manual save before entering. Identify this slot clearly, for example: Mechanist’s Lair entrance — Restoring Order active. This is the required branch save for the final confrontation and should not be overwritten by quicksaves or ordinary autosaves.
Enter the service center, move through the initial rooms, and locate the strange device in the garage or basement area. Command the robot carrying M-SAT to examine it. The concealed entrance opens only when the properly modified robot interacts with the access point. Keep that robot with you; do not dismiss it, assign it to a settlement, or replace it before passing the required M-SAT doors.
- Install M-SAT on Ada or another accompanying robot.
- Create a separate manual save identified by the Mechanist’s Lair and current quest state.
- Enter RobCo Sales & Service Center.
- Use the M-SAT-equipped robot to open the concealed route.
5. Cross the lair and choose the Mechanist outcome
The Mechanist’s Lair is a long combat area containing turrets, traps, terminals, laser hazards, and repeated robot attacks. Use cover and corners to break line of sight, search side rooms for ammunition, and do not approach disabled machines carelessly because some can detonate. Keep the M-SAT robot within reach of marked access points throughout the facility.
You can fight through the main route until the Mechanist’s defenses are exhausted. If you want the alternate route, collect the Lead Engineer’s holotape, Facilities Director’s holotape, and Chief Scientist’s holotape as you explore. Return to the locked elevator terminal near the earlier security section, load the three supervisor holotapes into it, and confirm the manual security override. The elevator provides a shorter route to the Mechanist and avoids much of the final robot assault. This route requires the relevant terminal access, so use the combat route if you cannot open it.
Before initiating the final conversation, make another separate manual save and label it with the current state, such as Mechanist confrontation — Restoring Order complete up to dialogue. Speak with the Mechanist when prompted. Speech options can resolve the encounter peacefully; wearing the Silver Shroud costume can provide additional dialogue if you completed The Silver Shroud. If negotiations fail or you choose violence, defeat the Mechanist and the remaining hostile robots.
- Advance through the lair while preserving the M-SAT robot.
- Collect all three supervisor holotapes if attempting the alternate route.
- Use the elevator terminal to bypass the main assault when possible.
- Create the labelled pre-confrontation manual save.
- Resolve the Mechanist confrontation through dialogue or combat.
6. Complete Restoring Order and use the new robot facilities
After the confrontation, follow the quest markers to take control of the facility and speak with Ada. If Isabel Cruz, the Mechanist, survives, speak with her afterward. She gives you the Mechanist’s Armor and Mechanist’s Helmet and can start the repeatable Rogue Robot activity. If Isabel is killed, loot the armor and helmet from her body when available; Ada becomes the source of Rogue Robot assignments instead.
Search the control area and nearby rooms before leaving. The facility contains useful workbenches and Automatron-related schematics, including the Eyebot Pod and spotlight-related settlement equipment. Once Restoring Order is complete, the Mechanist’s Lair becomes a settlement with a usable workshop. Robot Workbenches let you create or rebuild Automatrons, equip recovered robot parts, and redesign Ada or other robot companions. Perk and material requirements still apply to modifications where the workbench lists them.
Automatron is not a Commonwealth faction-lock quest. Completing it does not make the Institute, Railroad, Brotherhood of Steel, or Minutemen hostile, and it can be completed before or after entering the Institute. For a campaign focused on preserving faction choices, finish Automatron before deliberate endgame commitments such as Mass Fusion or Tactical Thinking, while keeping the labelled Mechanist’s Lair saves until you have confirmed the DLC has completed correctly.
- Complete Restoring Order.
- Speak with Ada after taking control of the facility.
- Speak with Isabel if she survived, or loot the Mechanist equipment if she did not.
- Confirm that the Mechanist’s Lair has a settlement workshop.
- Verify that the Robot Workbench offers the intended Automatron modifications.
- Confirm that Commonwealth faction quests remain available.
Before you move on
- Mechanical Menace, A New Threat, Headhunting, and Restoring Order are marked complete.
- Ada or another robot has used M-SAT to open the Mechanist’s Lair entrance.
- Jezebel has been given a robot body and the information objective has advanced.
- The Mechanist confrontation has been resolved through dialogue or combat.
- The Mechanist’s Armor and Helmet have been obtained.
- The Mechanist’s Lair is available as a settlement.
- The Robot Workbench provides Automatron construction and modification options.
- The Institute, Railroad, Brotherhood of Steel, and Minutemen routes remain available.
References for this chapter
- How do I get started playing the Fallout 4 Automatron DLC? — Bethesda Support
- Restoring Order — Fallout 4: Automatron Walkthrough — Neoseeker
- Restoring Order — Fallout 4: Automatron Walkthrough — SuperCheats
- Headhunting — Fallout 4: Automatron — Fallout Wiki
- Restoring Order — Fallout 4 — Fallout Wiki
- Mechanist (Automatron) — Fallout Wiki
- Restoring Order — Fallout 4 Guide — Gamer Guides
Far Harbor DLC — Island Questline and Consequences
Begin Far From Home through Nick Valentine’s Detective Agency, investigate Kasumi Nakano’s disappearance, and use the Nakano family boat to reach Far Harbor. Follow Walk in the Park, investigate Acadia and the Children of Atom, and complete the first three required memory simulations during Best Left Forgotten. Before exposing DiMA’s crimes or using either island weapon, create separate manual saves. Reformation is the peaceful outcome: it replaces High Confessor Tektus and can preserve Far Harbor, Acadia, and the Nucleus. Reformation completes the active Cleansing the Land state, but it does not make the launch key harmless; if you still possess it, using the submarine terminal later destroys the Nucleus and changes its residents and services. Disabling the wind-farm condensers destroys Far Harbor instead. Reporting Acadia to the Brotherhood or Institute creates a separate Acadia attack. Complete the DLC before major Commonwealth faction locks if you want maximum flexibility, then finish Close to Home and verify Kasumi’s fate.
1. Start Far From Home and travel to the island
After rescuing Nick Valentine and completing Getting a Clue, speak with Ellie Perkins at Valentine’s Detective Agency. Far From Home becomes available through the agency’s investigation. Travel to the Nakano residence in the northeast Commonwealth and speak with Kenji and Rei. Inspect the house, question the family, and follow the objective to the boat. Use it to travel to Far Harbor. Nick is useful for the investigation but is not required.
Bring radiation protection, healing items, and ammunition. The Island’s fog limits visibility, and gulpers, anglers, and fog crawlers can survive sustained fire and close distance quickly. Make a manual save before boarding the boat if you want to preserve the DLC’s opening state.
- Start Far From Home.
- Investigate the Nakano residence and speak with Kenji and Rei.
- Use the Nakano boat to reach Far Harbor.
2. Reach Far Harbor and complete Walk in the Park
Follow the marked route during Walk in the Park. Stay near the road unless the objective sends you elsewhere, and use V.A.T.S., a scope, or a weapon light to identify creatures through the fog. Fight from cover and avoid allowing gulpers or fog crawlers to surround you.
When you reach the settlement, help defend Far Harbor from the attacking creatures. Afterward, speak with Captain Avery and the residents. This introduces the three island groups: Far Harbor’s residents, Acadia’s synths, and the Children of Atom at the Nucleus. Complete the introductory conversations before deliberately making any group hostile.
- Reach Far Harbor.
- Help repel the creature attack.
- Speak with Captain Avery and learn about Acadia and the Nucleus.
3. Investigate Acadia and recover DiMA’s memories
Travel north to Acadia, speak with DiMA, and locate Kasumi. Continue through Where You Belong until Best Left Forgotten sends you to the Vim! Pop Factory and then the Nucleus. Speak with the Children of Atom and use the command-center terminal to enter DiMA’s memory simulations.
In each simulation, build a route from the memory source to the receiver by placing green-code blocks and redirecting the beam. Defensive turrets can protect the data bugs while they carry memory data. The first three simulations provide the required story progression. The later simulations are optional for the main route, although completing them reveals additional locations and can lead to the Marine armor cache.
The recovered information points to the nuclear launch key, the wind-farm shutdown method, and DiMA’s role in replacing the original Captain Avery. Do not activate either device yet. Make a separate manual save after the memories and evidence are available, before committing to an island outcome.
- Complete the first three required memory simulations.
- Learn the locations of the launch key and wind-farm shutdown control.
- Save before acting on DiMA’s crimes or either island weapon.
4. Finish optional island content before choosing an outcome
Use this period to complete side quests whose rewards or characters you want to preserve. The Mariner’s missions, Cassie Dalton’s Blood Tide line, Children of Atom assignments, and the Vault 118 Brain Dead investigation provide experience, equipment, and dialogue. Finish them before making Far Harbor, the Nucleus, or Acadia hostile, because destructive outcomes can remove quest givers, vendors, and services.
Speak with Kasumi after learning the truth about DiMA. If you want Reformation, do not give DiMA’s evidence to Allen Lee and do not deliberately provoke Far Harbor into attacking Acadia. Reporting Acadia to the Brotherhood of Steel or the Institute can separately begin a Commonwealth faction attack on the refuge, so avoid those reports until you have completed the Acadia content you want.
Keep a manual save immediately before the final decision in The Way Life Should Be. Use a different save slot from the earlier investigation save. That gives you a recovery point for Reformation, the Nucleus route, the Far Harbor route, or an Acadia conflict without replaying the entire DLC.
- Finish desired Mariner, Dalton, Children of Atom, and Vault 118 quests.
- Speak with Kasumi after the memory investigation.
- Create a separate save before the final decision.
5. Choose Reformation for the peaceful island outcome
In The Way Life Should Be, confront DiMA about replacing Captain Avery. Agree to keep his secret and accept his plan to replace High Confessor Tektus. This starts Reformation. Recover Confessor Martin’s holotapes, deliver them to DiMA, and follow the objective to isolate Tektus in the Nucleus command area.
Use the available dialogue options to convince Tektus to leave or otherwise complete the replacement plan. Return to DiMA after Tektus has been dealt with. A synth replacement takes Tektus’s place and gives the Children of Atom a less aggressive message. Speak with the replacement afterward to receive Atom’s Bulwark, a unique Children of Atom armor piece. DiMA also provides his quest reward, including the Protector of Acadia perk.
Reformation is the peaceful local outcome and can leave Far Harbor, Acadia, and the Nucleus functioning. It completes the active Cleansing the Land quest state, removing its normal objectives from the quest log. However, it does not disable a nuclear launch key that you still possess. If you later use that key at the submarine terminal, the Nucleus is destroyed despite Reformation; the peaceful three-faction state is then replaced by the consequences of the explosion.
- Agree to keep DiMA’s secret.
- Complete the Tektus replacement plan.
- Collect Atom’s Bulwark and the Reformation rewards.
- Do not assume Reformation prevents later launch-key use.
6. Resolve the island’s destructive routes from separate saves
Nucleus destruction: if you possess the nuclear launch key, enter the submarine area inside the Nucleus and use the launch terminal. The countdown begins and you must escape the building before the detonation. If the Children are hostile, fight through the exit; if they are not hostile, you still must leave before the countdown ends. The Nucleus is destroyed, its residents and services are removed, and you receive the Far Harbor Survivalist perk. This remains possible after Reformation if you retained the key, but it overturns the peaceful Nucleus outcome and can fail or replace Reformation-related quest state.
Far Harbor destruction: obtain the wind-farm shutdown information from DiMA’s investigation, travel to Wind Farm Maintenance, and use the control system to disable the fog condensers. This removes Far Harbor’s protection from the fog and destroys the settlement’s normal outcome. It is incompatible with preserving peaceful Far Harbor. Do not disable the condensers if your goal is to keep the settlement, its vendors, and its residents active.
The Children’s faction rewards are separate from Far Harbor Survivalist. Crusader of Atom and Inquisitor of Atom are perks associated with different Children of Atom quest outcomes and earlier faction activity; they are not names for Atom’s Bulwark and do not replace the Far Harbor Survivalist perk. Atom’s Bulwark is unique armor, while the other three names are perks. Save before inserting the launch key and again before disabling the condensers.
- Keep a separate save before using the launch key.
- Keep a separate save before disabling the fog condensers.
- For Nucleus destruction, escape the submarine before the countdown ends.
- For Far Harbor destruction, understand that the settlement and its services will be lost.
- Distinguish Atom’s Bulwark armor from Far Harbor Survivalist, Crusader of Atom, and Inquisitor of Atom perks.
7. Account for Acadia conflict, complete Close to Home, and return
An Acadia conflict is a separate outcome from the island’s Nucleus and Far Harbor decisions. Exposing DiMA’s crime to Allen Lee can trigger Far Harbor’s attack on Acadia. Reporting Acadia to the Brotherhood or Institute can also create a Commonwealth faction quest that attacks the synth refuge. These routes can kill Acadia residents and Kasumi, so complete desired Acadia dialogue and rewards first and preserve a save before reporting anything.
After Reformation, a destructive island outcome, or the Acadia confrontation, speak with Kasumi if she survived. Close to Home allows her to decide whether to remain in Acadia or return to her parents. Travel back to the Nakano residence and speak with Kenji and Rei to complete the report. If Kasumi died, return to the residence and report her death instead.
Far Harbor does not automatically force an Institute, Brotherhood, Railroad, or Minutemen ending. The safest scheduling point is before Mass Fusion, Tactical Thinking, or another major Commonwealth faction lock. Completing the island story first preserves its local choices while leaving the Commonwealth campaign available. After returning, inspect your inventory for island rewards and retain the pre-decision and pre-device saves.
- Decide whether Acadia remains intact or is attacked.
- Complete Close to Home if Kasumi survives.
- Confirm Kasumi’s fate with the Nakano family.
- Return to the Commonwealth before a major faction lock unless that lock is intentional.
Before you move on
- Far From Home, Best Left Forgotten, The Way Life Should Be, and the selected island resolution are complete.
- Close to Home is complete, or Kasumi’s death has been confirmed and reported at the Nakano residence.
- The selected state is visible in Far Harbor, Acadia, and the Nucleus: peaceful survivors, Nucleus destruction, Far Harbor destruction, or an Acadia attack.
- The applicable reward has been collected, with Atom’s Bulwark treated as armor and Far Harbor Survivalist, Crusader of Atom, and Inquisitor of Atom treated as separate perks.
- Separate manual saves remain available from before the final island decision, before launch-key use, and before wind-farm shutdown if those routes were attempted.
- You have returned to the Commonwealth before advancing Mass Fusion, Tactical Thinking, or another major faction lock unless that lock was intentional.
References for this chapter
- Fallout 4: Game of the Year Edition — PlayStation Store
- Cleansing the Land — Fallout Wiki
- Reformation — Fallout Wiki
- Best Left Forgotten — Fallout Wiki
- Cleansing the Land / The Way Life Should Be / Reformation — Gamer Guides
- Cleansing the Land — SuperCheats
- Atom’s Bulwark — Fallout Wiki
- Crusader of Atom — Fallout Wiki
- Far Harbor Survivalist — Fallout Wiki
- Close to Home — Gamer Guides
Nuka-World DLC — Raid-style Progression and Park Management
Begin Nuka-World by listening to the Nuka-World radio signal at level 30 or by travelling directly to the Nuka-World Transit Center. Complete All Aboard, survive the Gauntlet, defeat Overboss Colter with the Thirst Zapper, and finish The Grand Tour by securing Galactic Zone, Dry Rock Gulch, Kiddie Kingdom, Safari Adventure, and the Nuka-Cola Bottling Plant. Before claiming a Commonwealth settlement, decide whether to complete the raider route through Home Sweet Home and Power Play or end the gangs with Open Season. The first Commonwealth raider outpost is the major Minutemen consequence: if Preston Garvey is already General, he will permanently reject you as a companion. Preserve separate manual saves at the transit center, after the final park flag, before the first outpost, and before Open Season. Restore Nuka-World’s power after either route to unlock the park’s powered facilities and finish the major optional rewards.
Reach Nuka-World and survive the Gauntlet
At level 30 or higher, listen to the Nuka-World radio signal and activate All Aboard. The signal normally directs you to the Nuka-World Transit Center southwest of the Commonwealth. You may also find the Transit Center and start the DLC without waiting for the radio recommendation. If the monorail route does not update, select All Aboard in the Pip-Boy and let the signal play until the objective changes.
Before entering, carry healing items, RadAway, ammunition, and a dependable close-range weapon. The Gauntlet contains traps, turrets, locked rooms, hostile creatures, and forced combat. Search side rooms for supplies, but avoid spending rare ammunition on enemies that can be bypassed. Make a distinct manual save identified in the save list as All Aboard — Nuka-World Transit Center.
Follow the objective markers through the Gauntlet until Porter Gage gives you the Thirst Zapper. During the Overboss Colter fight, use the Thirst Zapper to disable his electrical protection, then attack while the shield is down. Normal weapons do little or no useful damage while the protection is active. Repeat the disable-and-attack cycle until Colter dies. Speak with Gage afterward to continue Taken for a Ride and become the Nuka-World Overboss.
- Activate All Aboard and reach the Nuka-World Transit Center.
- Create a manual save identified as All Aboard — Nuka-World Transit Center.
- Take the Thirst Zapper into the arena and use it before attacking Colter.
- Speak with Porter Gage after the fight.
Meet the gangs and secure missable rewards
After becoming Overboss, visit the leaders of the Disciples, Operators, and Pack in Nuka-Town U.S.A. Speak with Nisha, Mags Black, and Mason before claiming any park. Their territories and later loyalty determine the Power Play betrayal.
If you want The Problem Solver, speak with Mason during An Ambitious Plan and use the aggressive right-hand dialogue choices throughout the conversation, including the required Charisma check. Failing the required conversation route can remove the opportunity to receive this unique handmade rifle, so create a distinct manual save identified as An Ambitious Plan — Fizztop Grille before starting the conversation.
Mackenzie Bridgeman in the Nuka-Town market can offer Open Season. Do not accept or begin that route until you have collected the raider rewards you want. Starting Open Season or attacking a gang leader makes the Nuka-World raiders hostile and ends the normal raider quest route. Porter Gage can also become unavailable or hostile depending on your choices.
- Speak with all three gang leaders before assigning park territory.
- Create a manual save identified as An Ambitious Plan — Fizztop Grille before Mason’s dialogue.
- Obtain The Problem Solver before leaving the conversation if you want it.
- Keep Open Season available but do not start it prematurely.
Complete The Grand Tour and assign the five parks
The Grand Tour requires five parks to be secured: Galactic Zone, Dry Rock Gulch, Kiddie Kingdom, Safari Adventure, and the Nuka-Cola Bottling Plant. Complete the local quest in each area, then raise a gang flag at that park’s designated flagpole. Park assignments are permanent on that save, so decide before activating each flag.
A practical order is Galactic Zone, Dry Rock Gulch, Kiddie Kingdom, Safari Adventure, and the Bottling Plant. This is a navigation preference rather than a mandatory sequence; the game allows the parks to be completed in another order. Galactic Zone includes Star Control and the Star Core hunt. Dry Rock Gulch contains bloodworms and western-themed attractions. Kiddie Kingdom has radiation, feral ghouls, and confusing interiors. Safari Adventure contains dangerous wildlife, while the Bottling Plant has concentrated combat and is suitable as a final stop.
Distribute the five parks with Power Play in mind. The gang that receives the fewest total territories after the five parks and the later Commonwealth outposts is the gang that rebels. Because five parks cannot be divided evenly among three gangs, record each assignment in your notes or use the active quest and location shown in the save list. Create a distinct manual save identified as The Grand Tour — final park flag before assigning the fifth park.
- Secure Galactic Zone, Dry Rock Gulch, Kiddie Kingdom, Safari Adventure, and the Bottling Plant.
- Raise one gang flag in each park.
- Track the number of territories assigned to each gang.
- Create a manual save identified as The Grand Tour — final park flag before the fifth assignment.
Collect optional weapons, recipes, and park rewards
Complete Cappy in a Haystack if you want the Nuka-Nuke Launcher. Speak with Sierra Petrovita, equip the Cappy glasses, and locate the ten hidden Cappy images across the park. The glasses do not work properly under a power-armour helmet, so remove the helmet or exit the suit while inspecting clues. After entering the code in Bradberton’s office, side with John-Caleb Bradberton and shut off the vault power to open the weapon storage area. This provides the launcher, Nuka-Nuke ammunition, and schematics. Choosing Sierra’s reward instead gives the Nuka-World jumpsuit rather than the launcher.
Use Nuka-Cade games to earn tickets for prizes and ammunition. Check the Nuka-Town vendors for unique stock before making the gangs hostile. Amoral Combat sends challengers to the Cola-Cars Arena after the main quest advances. Continue returning to the arena when the next challenger becomes available. The Rogue Knight can award Aeternus, a unique Gatling laser, so finish this reward route before Open Season or before allowing the raider gangs to become permanently hostile.
Store The Problem Solver, Aeternus, the Nuka-Nuke Launcher, rare ammunition, and gang recipes instead of selling them until you are certain you no longer need them.
- Complete Cappy in a Haystack if you want the Nuka-Nuke Launcher.
- Finish desired Nuka-Cade rewards before attacking the gangs.
- Continue Amoral Combat until the Rogue Knight if you want Aeternus.
- Keep unique weapons and recipes in a secure container.
Choose the raider campaign or Open Season
For the raider route, speak with Shank after The Grand Tour and begin Home Sweet Home. The quest requires three Commonwealth raider outposts. For each target, follow Shank’s instructions, deal with the settlement’s occupants, establish the outpost, and build the required raider infrastructure. Do not choose Sanctuary Hills, a major supply-line hub, or a settlement containing a companion unless you accept the disruption.
Create a distinct manual save identified as Home Sweet Home — before first Commonwealth outpost before establishing the first outpost. If Preston Garvey is already the Minutemen General, the first raider outpost causes him to reject you permanently as a companion and can damage or end normal Minutemen cooperation. Open Season does not automatically restore converted settlements or their supply lines.
After the third outpost, return to Shank to start Power Play. The gang with the fewest total territories rebels and seizes the Nuka-World power plant. Meet the surviving leaders, enter the plant, defeat the traitorous gang, take the plant control-room key from its leader, activate the power, and speak with Gage. The two surviving gangs provide their associated perks and follow-up weapon rewards.
For the anti-raider route, create a distinct manual save identified as Open Season — Nuka-Town market before speaking with Mackenzie or beginning the massacre. Start Open Season before establishing a Commonwealth outpost if preserving Preston and the Minutemen matters more than the raider perks. Kill Nisha, Mags Black, William Black, and Mason, then return to Mackenzie. The raiders become hostile throughout Nuka-World, and unfinished raider quests end.
After Open Season, enter the Nuka-World power plant, reach the upper control area, and activate the main power switch. The plant’s access route is available after Open Season; the raider route instead supplies the control-room key through Power Play. Restoring power unlocks the park’s powered attractions, workshop access, and the final Star Control rewards.
- For the raider route, establish three Commonwealth raider outposts and complete Power Play.
- For the anti-raider route, begin Open Season before establishing any outpost if you want to preserve Preston’s normal relationship.
- Kill Nisha, Mags Black, William Black, and Mason for Open Season.
- Create separate manual saves identified as Home Sweet Home — before first Commonwealth outpost and Open Season — Nuka-Town market.
- Restore power at the Nuka-World power plant after the chosen route.
Before you move on
- The Grand Tour is complete, and all five parks have been secured and assigned: Galactic Zone, Dry Rock Gulch, Kiddie Kingdom, Safari Adventure, and the Nuka-Cola Bottling Plant.
- You have completed either Home Sweet Home and Power Play or Open Season by killing Nisha, Mags Black, William Black, and Mason.
- The Nuka-World power plant has been activated after the chosen route.
- Desired optional rewards have been collected, including The Problem Solver, Aeternus, the Nuka-Nuke Launcher, Cappy rewards, Nuka-Cade prizes, and gang recipes.
- Distinct manual saves remain in the save list as All Aboard — Nuka-World Transit Center, The Grand Tour — final park flag, Home Sweet Home — before first Commonwealth outpost, and Open Season — Nuka-Town market.
- You can continue exploring Nuka-World and return to the Commonwealth with the chosen faction consequences recorded.
References for this chapter
- Fallout 4: Game of the Year Edition — PlayStation Store
- How do I get started playing the Fallout 4 Nuka-World DLC? — Bethesda Support
- Why am I getting a ‘can’t go beyond this point’ message when trying to get into Nuka-World? — Bethesda Support
- The Grand Tour — Fallout Wiki
- Power Play — Fallout Wiki
- Nuka-World power plant — Fallout Wiki
- The Problem Solver — Fallout Wiki
- Cappy in a Haystack — Fallout Wiki
- Amoral Combat — Gamer Guides
- Home Sweet Home — Fallout 4 Guide
- Open Season — Fallout 4 Guide
Workshop DLCs: Contraptions, Vault-Tec and Wasteland Workshop — Useful Builds
Vault-Tec Workshop adds Vault 88, Overseer Barstow’s experiment chain and several settlement objects that remain useful after the main campaign. Contraptions Workshop adds manufacturing machines, conveyors, sorters, storage and structural kits, while Wasteland Workshop adds powered cages, taming equipment and arena pieces. Complete the Vault 88 experiments before a major faction commitment if you want every prototype available, but use separate manual saves before each experiment and before the final faction conversation. Build defenses around entrances, isolate dangerous experiments from civilians, and keep unique rewards outside shared workshop storage until your ending is secure.
Start Vault 88 and activate its workshop
Vault-Tec Workshop can be started during the main game. At level 20 or higher, load into the game and listen for the Vault 88 Radio Beacon, then tune to it in the Pip-Boy to begin Vault-Tec Calling. If the signal is not available, travel to the Vault 88 entrance near Quincy Quarries and enter the site directly. Bring healing supplies and a close-range weapon because the approach and interior contain hostile raiders, feral ghouls and other enemies.
Follow the objective marker through the entrance area, clear the obstruction and continue until you meet Overseer Barstow. Activate the Vault 88 workshop. Before advancing the experiments, place enough beds, food, water and power for the settlers you intend to bring there. Make a separate manual save in a free slot with a name such as Vault 88 workshop activated, and do not overwrite it while testing the quest chain.
- Activate the Vault 88 workshop.
- Provide basic beds, food, water and power.
- Create a separate manual save identified as Vault 88 workshop activated.
Complete the Vault-Tec experiments without losing quest progress
The main sequence runs through Vault-Tec Calling, Better Living Underground and A Model Citizen. During A Model Citizen, follow Barstow, clear the required enemies, interview the candidates and construct the Overseer’s Desk where the objective marker directs you. After the recruitment stage, Explore Vault 88 opens the remaining sealed sectors; follow its markers and activate each sector’s workshop before returning to the experiment chain.
Power to the People begins with the Power Cycle 1000. Build the prototype from the Special section, place a terminal beside it, connect the required power and select the experiment settings through the terminal. Outfit Clem as directed, assign him to the cycle and wait until the objective updates. Before selecting the experiment parameters, create a new manual save in a separate slot named Vault 88 — Power to the People — terminal choice. Some choices can harm settlers, so reload this slot if the result is not acceptable.
The Watering Hole sends you to HalluciGen, Inc. Retrieve the requested chemical research, return to Vault 88, build the soda fountain prototype, connect it to power and configure it through its terminal. Make another manual save identified as Vault 88 — The Watering Hole — before choosing the formula. Vision of the Future requires the phoropter prototype, a terminal and power; after the test subject uses it, report back to Barstow. Lady Luck is the final experiment and requires the slot machine. Complete its terminal instructions and return to Barstow to finish the principal chain.
The completed experiments unlock the Power Cycle 1000, soda fountain, phoropter and slot machine as settlement objects. Lady Luck also provides the Legend of Vault 88 outfit and completes the main experiment sequence. The experiment choices can affect settlement happiness or safety, so use the non-dangerous option when the game presents one if you want Vault 88 to remain a dependable civilian base. Save again in a slot named Vault 88 — Lady Luck complete before leaving the vault.
- Finish Explore Vault 88 before relying on the experiment prototypes.
- Create a separate manual save before each experiment’s terminal choice.
- Complete Power to the People, The Watering Hole, Vision of the Future and Lady Luck.
- Confirm the prototype objects and the Legend of Vault 88 are available before overwriting safety saves.
Turn Vault 88 into a reliable support settlement
Use the central chamber or a cleared side area for the workshop, crafting benches, storage and sleeping quarters. Keep the main entrance and important junctions open so settlers and defenders can move between the workshop and defensive positions. Place generators behind walls or inside a room that attackers cannot reach easily, then use conduits and power connectors to distribute electricity without leaving the generator in the entrance corridor.
Build a defensive funnel at the principal entrance. Use walls to direct attackers toward overlapping turret positions, with guard posts behind or beside the turrets rather than directly in the line of fire. Add lighting and a settlement alarm or siren where you can reach it quickly. Do not seal every corridor with clutter: trapped settlers may stop producing resources, and you still need a clear route to the workshop after an attack.
For a Minutemen-oriented campaign, The Castle or another central settlement is usually a better operational base than Vault 88. At that base, verify beds, food, water, power and defense before a major mission. These preparations support ordinary settlement attacks and keep your logistics stable; they are not a substitute for the specific faction prerequisites required by the Minutemen finale. Create a separate manual save identified by the settlement and current location, such as The Castle — final defense check, before a faction point of no return.
- Protect generators and keep the workshop accessible.
- Use overlapping turret coverage at entrances and junctions.
- Keep a manual save after the settlement’s final defense check.
- Do not treat Vault 88 construction as a replacement for faction quest prerequisites.
Build a small Contraptions production line before expanding it
Contraptions Workshop is available once you have an active settlement workshop. Begin with one machine in a straight line: place an input container, the appropriate builder, a short conveyor section and a collection container. Builders manufacture items from the components or junk supplied to them, but the DLC does not provide the required materials or perk ranks automatically. Check the machine’s displayed requirements before spending rare components.
Power the builder and any conveyor equipment that requires a connection. Use the machine’s terminal when the recipe or production setting requires one. Conveyors and rollers move objects between machines; they do not replace the need to configure the builder or feed it correctly. Test the line with inexpensive materials first, then observe where the finished items stop. Collect valuable weapons, armor or ammunition promptly and store them in your personal inventory or a secure player storage location rather than leaving them in an active workshop production area.
The most practical early uses are a basic builder for settlement supplies, an ammunition plant when you understand its component requirements, and storage or sorting equipment that keeps production separate from ordinary settlement junk. Build the line in a room settlers do not need to cross. This reduces accidental interruptions and makes it easier to repair or reload if a machine jams.
- Place the input container, builder and output container in an accessible line.
- Confirm the builder’s materials and perk requirements.
- Power and configure the machines before diagnosing a production problem.
- Test with cheap materials before using rare components.
Use Wasteland Workshop cages and arenas away from civilians
Wasteland Workshop cages must be built and powered, and they need time away from the player to update. Put them behind a solid barrier, away from beds, crops, merchants, generators and crafting stations. When a cage catches prey, do not open it until the containment area is ready. A released creature is immediately hostile unless a powered Beta Wave Emitter is active. The emitter can pacify eligible captured creatures, but raiders, Gunners and Super Mutants cannot be tamed through this system.
Arena objects are optional testing tools, not replacements for settlement defense. Place opposing-team objects inside a fenced area with a clear route to the controls or siren. Keep deathclaw cages and arena combatants away from normal settler routes. Make a separate manual save identified as the settlement, arena and current location before releasing anything. If the test threatens the settlement, reload that save instead of trying to repair the damage afterward.
- Power each cage and leave it away from civilian areas.
- Build and power a Beta Wave Emitter before releasing a creature you intend to tame.
- Separate arena combatants from beds, crops, generators and crafting stations.
- Create a manual save before opening a cage or starting an arena fight.
Protect DLC rewards before the faction finale
The Vault-Tec prototypes, the Legend of Vault 88 outfit and other named quest rewards are optional for the main campaign ending, but they can be difficult to replace if discarded. Keep them on your character, in a personal home container or in a storage room you do not use as the settlement’s shared workshop inventory. Do not scrap a prototype merely to recover materials before you have confirmed that its build menu entry remains available.
Before starting a final faction sequence, make two separate manual saves: one identified by the exact location and quest objective before the branch, such as Institute entrance — pre-faction decision, and another after the branch begins, such as Castle — final assault started. Keep the Vault 88 — Lady Luck complete slot untouched. This lets you retry a workshop choice, verify the ending’s settlement consequences and return to the DLC base without replaying the entire campaign.
- Confirm all four Vault-Tec prototype objects are unlocked if desired.
- Protect the Legend of Vault 88 and other named rewards.
- Keep separate manual saves for Vault 88 completion and the faction branch.
- Do not overwrite the pre-branch slot until the ending and settlement states are verified.
Before you move on
- Vault 88’s workshop is activated and Explore Vault 88 has been completed.
- Power to the People, The Watering Hole, Vision of the Future and Lady Luck are complete.
- The Power Cycle 1000, soda fountain, phoropter and slot machine are available as settlement objects if the full resource set was desired.
- The Legend of Vault 88 and other important named rewards are protected outside active shared workshop storage.
- At least one operational settlement has working beds, food, water, power and layered turret coverage.
- A Contraptions production line has been tested, or the player has deliberately chosen not to build one.
- Cages and arenas are isolated from civilians, with a powered Beta Wave Emitter available for intended tameable creatures.
- Separate manual saves exist for Vault 88 activation, each experiment choice, Lady Luck completion and the final faction branch.
References for this chapter
- Fallout 4: Game of the Year Edition — PlayStation Store
- Fallout 4: Game of the Year Edition Now Available — Bethesda.net
- What are Builders in the Fallout 4 Contraptions Workshop DLC? — Bethesda Support
- What are Conveyors and Rollers in the Fallout 4 Contraptions Workshop DLC? — Bethesda Support
- What are Cages in the Wasteland Workshop add-on? — Bethesda Support
- Fallout 4 — Contraptions Workshop, Vault-Tec Workshop, and Nuka-World — Bethesda.net
- Vault-Tec Workshop — Fallout Wiki
- Explore Vault 88 — Fallout 4 Guide
- Vision of the Future — Fallout 4 Guide
Midgame to Endgame — Leveling, Gear and Final Prep
Before beginning a faction finale, stabilize the combat build you actually use, complete companion content that depends on faction access, test every weapon you intend to carry, and organize recovery supplies. Fallout 4: Game of the Year Edition on PS5 includes the base game and six official add-ons, but this preparation does not assume Anniversary Edition Creations. Keep separate manual saves before and after preparation. Since PS5 saves do not provide custom labels, identify each protected save by its manual-save slot position, character level, location, and active quest. Minutemen players should also verify settlement assignments and artillery requirements before starting their final operation.
1. Commit to a practical combat loadout
Choose one primary weapon category that matches your perk investment: rifles, automatic weapons, pistols, shotguns, melee weapons, or heavy weapons. The final missions are easier when your main weapon has an improved receiver and the damage perks that support it. Do not divide scarce components among several unfinished weapon trees unless each weapon has a clear role.
Institute interiors and other faction strongholds contain corridors, doorways, stairwells, and medium-sized rooms. A rifle, automatic weapon, pistol, or shotgun with a usable sight is dependable in those spaces. Keep a close-range option if your primary weapon is slow or optimized for distance. A high-damage single-shot weapon can handle tougher targets, while an automatic weapon or shotgun is useful when several enemies close in.
Heavy weapons can be effective against clustered enemies and open-area targets, but their ammunition can be bulky or limited. Prepare only the heavy weapon you can supply. Gatling lasers require fusion cores as ammunition, while miniguns, flamers, missile launchers, and similar weapons require their own specific ammunition. Test the complete loadout against ordinary high-level enemies before entering the finale; an untested weapon that feels weak during routine exploration is unlikely to become reliable inside a faction stronghold.
- Your primary weapon has the damage perks and modifications required for your build.
- Your backup weapon covers a different range or enemy situation.
- You have tested both weapons and confirmed that vendors, loot, or crafting can supply their ammunition.
2. Upgrade regular armour and prepare power armour
At an armour workbench, improve the armour set you actually wear. Prioritize protection and effects that support your build, but keep named, unique, and quest-related equipment in a secure container until you are certain it is safe to scrap. Do not carry several incomplete armour sets into a long mission; that carry weight is more useful as ammunition, healing supplies, or components.
Keep at least one complete power-armour frame at a secure settlement or another known location. At a power-armour station, repair every damaged piece and install only the modifications supported by your available materials and perks. Inspect the suit immediately before a major assault rather than assuming it is ready because the frame is present.
Check the fusion core before entering power armour and carry spares appropriate to the operation. Power armour is valuable for open combat, radiation exposure, heavy enemies, and prolonged fights, but it is not mandatory for every ending. If you leave a frame at a settlement, remove its fusion core or store the suit where settlers cannot take it. A companion can enter power armour without consuming its fusion core, but settlers may claim an accessible suit when a core is left inside.
- Your regular armour is repaired and important pieces are stored safely.
- At least one power-armour frame has repaired pieces and a usable fusion core.
- You have spare fusion cores available without depending on a distant settlement.
3. Finish companion objectives before faction commitments
If a companion’s affinity, personal quest, or faction relationship matters to your run, complete it before making that faction hostile. Travel with the companion whose affinity you are raising and avoid repeatedly performing actions that companion dislikes. The normal interface does not show an exact affinity percentage; wait for companion dialogue or an affinity notification, then confirm the resulting companion perk in the Pip-Boy’s Perks section.
Complete companion-specific quests before the final assault whenever practical. This is particularly important for companions tied to the Brotherhood, Railroad, Institute, or major Commonwealth investigations, because later faction hostility can stop recruitment, dialogue, or quest progression. Once a desired perk has been awarded, create another protected manual save and send the companion to a known settlement if you do not need them in combat.
Do not assume every companion must accompany the finale. Select one whose combat range complements yours, or travel alone if your build relies on stealth or Lone Wanderer. The essential preparation is preserving access to companion content and securing the perk, not taking every companion into the reactor.
- Desired companion quests are complete or intentionally postponed.
- Wanted companion perks are visible in the Pip-Boy.
- Companions whose availability matters are recruited, dismissed safely, or assigned to a known settlement.
4. Stock healing, radiation treatment, ammunition, and chems
At your main settlement, separate ammunition, healing items, chems, food, water, armour, weapons, and crafting components into clearly identified containers. Carry Stimpaks, RadAway, Rad-X, food or purified water, and enough ammunition for both weapons. Bring grenades or mines only if you are comfortable using them in confined rooms; explosive weapons can injure you or your companion at close range.
Psycho, Jet, Med-X, Buffout, and related chems can help during difficult encounters, but do not make a temporary effect the foundation of your build. Keep healing and radiation treatment in your personal inventory rather than storing everything at a settlement. Before departing, remove unneeded junk, restore health, and leave enough carry capacity for weapons, armour, ammunition, and quest items.
Heavy-weapon users should check ammunition weight as well as quantity. Gatling laser users must confirm that fusion cores are available for both the weapon and power armour. Melee users should carry a ranged fallback for turrets, elevated enemies, and targets that cannot be reached safely.
- Healing and radiation treatment are immediately accessible.
- Primary, backup, and heavy-weapon ammunition totals are sufficient for a long mission.
- You have enough carry capacity for mission loot and essential equipment.
5. Verify settlements and Minutemen support
At the settlement you use as a logistics base, assign settlers to beds, food, water, and defence and repair damaged objects. Supply lines make shared workshop materials available between connected settlements, but they do not replace local beds, food, water, or defence. Store unique equipment and spare power-armour components somewhere settlers will not take them.
If you intend to use the Minutemen route, complete Old Guns before relying on artillery. Speak with Ronnie Shaw at the Castle, clear the blocked route to the armory, retrieve the artillery plans and smoke grenades, build an artillery piece, assign a settler to operate it, and complete the test fire. A working artillery network is useful strategic support, but it is optional for Brotherhood, Railroad, and Institute endings and does not replace a prepared personal loadout.
Even when pursuing another faction, keep one secure settlement stocked with ammunition, medical supplies, armour, and a repaired power-armour frame. This gives you a recovery point after a difficult mission and prevents a faction transition from leaving essential equipment scattered across locations that may later become hostile or inaccessible.
- Your logistics settlement has working beds, food, water, and defence.
- Important gear is stored in a secure container or owned workshop location.
- Minutemen players have completed Old Guns and assigned a settler to each artillery piece they intend to use.
6. Create separate preparation and commitment saves
Create a manual save before accepting or entering a major faction commitment. Fallout 4 provides autosaves, a quicksave, and manual saves; autosaves and the quicksave are routinely overwritten, while a manual save remains available unless you choose to overwrite or delete it. Do not rely on an autosave or quicksave as your only branch point.
Keep one protected manual save before final preparation and another after your weapons, armour, companions, supplies, and settlements are ready. Because PS5 saves do not support custom labels, identify them by their visible slot position together with the character level, location, active quest, and faction state. For example, preserve one save at the logistics settlement before preparation and another at the same settlement after preparation, then leave both in separate manual slots.
Do not overwrite either protected save when the final operation begins. If the ending produces a faction state you did not intend, reload the earlier manual slot rather than trying to reverse the result after the campaign has moved beyond its commitment point. Before entering the final mission, review the Pip-Boy objective, confirm the desired faction, and verify that companion perks and unique rewards you care about have already been secured.
- A manual save exists before final preparation, with its slot position, level, location, and quest state recorded.
- A second manual save records the completed preparation state in a different slot.
- You know which faction ending you are pursuing and which companions, rewards, and settlements must remain available.
Before you move on
- Your primary and backup weapons are upgraded, tested, and supplied; heavy-weapon users have checked ammunition weight and fusion-core needs.
- Your regular armour and at least one power-armour frame are repaired, and healing and radiation supplies are organized in your inventory and main settlement.
- Desired companion quests and perks are complete or deliberately postponed, with companions secured before faction hostility.
- Your logistics settlement has functioning basic resources, and Minutemen artillery has been completed and staffed if that route is planned.
- Separate pre-preparation and post-preparation manual saves exist in different slots, and each can be identified by slot position, character level, location, active quest, and faction state.
- You have selected the faction ending before entering its final operation.
References for this chapter
- Fallout 4: Game of the Year Edition — PlayStation Store
- How does the save system work in Fallout 4? — Bethesda Support
- How do I transfer my PS4 save to PS5 for Fallout 4? — Bethesda Support
- Affinity — Fallout Wiki
- Fallout 4 companions — Fallout Wiki
- Artillery piece (Fallout 4) — Fallout Wiki
- Old Guns — Fallout Wiki
- Power armor (Fallout 4) — Fallout Wiki
- Fusion core (Fallout 4) — Fallout Wiki
- Fallout 4 Official Game Manual
The Battle for Bunker Hill, Mass Fusion and Tactical Thinking — Branch Walkthroughs
Use The Battle of Bunker Hill as your last relatively safe Institute assignment before the major faction locks. X4-18 gives the recall codes for the four escaped synths; X6-88 is not the escort for this mission. After Bunker Hill and Mankind—Redefined, create separate saves before Mass Fusion, before boarding the Brotherhood Vertibird for Spoils of War, and before speaking with Lancer-Captain Kells. Institute progress runs through Mass Fusion and Powering Up, then branches into End of the Line, Airship Down and Nuclear Family. The Brotherhood route runs through From Within, Outside the Wire, Liberty Reprimed, Blind Betrayal, Tactical Thinking, Spoils of War, Ad Victoriam, The Nuclear Option and A New Dawn. Tactical Thinking destroys the Railroad when its operation is advanced, so do not speak with Kells until Railroad content is finished unless you deliberately want the Brotherhood to attack. Use manual PS5 saves at every commitment point; loading an earlier save is the dependable way to reverse a faction lock.
1. Preserve the pre-commitment state
Create a manual save before accepting The Battle of Bunker Hill from Father. Keep this slot separate from autosaves and ordinary rotating saves. It preserves access to the Institute, Brotherhood, Railroad and Minutemen branches only if none of those factions has already been made hostile.
Complete Bunker Hill and Mankind—Redefined, then create a second manual save. Make further saves immediately before Institute relay transport for Mass Fusion, before informing Proctor Ingram about Mass Fusion, before boarding the Brotherhood Vertibird, and before speaking with Lancer-Captain Kells. On PS5, the game does not provide useful custom labels for individual save slots, so record the slot position and avoid overwriting it.
- Save before accepting The Battle of Bunker Hill.
- Save again after Mankind—Redefined.
- Keep separate pre-transport, pre-Vertibird and pre-Kells saves.
2. Complete The Battle of Bunker Hill without forcing a faction lock
Accept The Battle of Bunker Hill from Father and meet X4-18 at Bunker Hill. X4-18 supplies the recall codes. The optional warnings to the Brotherhood or Railroad are not required for completion; skip them if you want the least complicated route.
Enter the settlement and move through the fighting toward the underground entrance. Brotherhood, Railroad and Institute forces are hostile to one another during the battle, but you do not need to clear every combatant. Use cover, move around the edges of the firefight and avoid attacking Bunker Hill civilians or named merchants unless they become hostile first.
In the basement, locate the four escaped synths. Speak with each one and use the recall-code dialogue. Once all four are recalled, leave the basement and report to Father on the roof of the C.I.T. ruins. Returning the synths is the most stable result for continued Institute access. Freeing or killing them can provoke a hostile response from Father and may lead to Institute banishment, depending on the dialogue and earlier quest state.
Complete Mankind—Redefined afterward. Do not treat Bunker Hill itself as the main irreversible branch; the major locks in this chapter occur when you commit to Mass Fusion, Spoils of War or Tactical Thinking.
- Meet X4-18, not X6-88, at Bunker Hill.
- Use the recall code on all four synths.
- Report to Father on the C.I.T. ruins.
- Complete Mankind—Redefined before choosing the next faction route.
3. Institute route: Mass Fusion, Powering Up, End of the Line and Nuclear Family
When you are ready to oppose the Brotherhood, accept Mass Fusion from Allie Filmore. Before using the Institute relay, make the dedicated pre-transport save and confirm the on-screen warning. Completing the relay transport makes the Brotherhood hostile and closes its unfinished questline. If you want to preserve the Brotherhood, stop at the relay and reload instead.
In the Mass Fusion building, search the upper executive area for the executive keycard and password, use the executive terminal when required, then descend toward the reactor. Protect yourself from radiation with power armor or a hazmat suit, and carry Rad-X and RadAway. Recover the Beryllium Agitator from the reactor and return through the building to the Institute relay.
Mass Fusion leads into Powering Up. Follow the Institute objectives, record the speech for the reactor broadcast and report to Father. Create a new save after Powering Up before accepting further orders. End of the Line is the Institute operation against the Railroad. Speaking with Father and then advancing the Railroad attack makes the Railroad hostile and closes its remaining faction route. Save before beginning it if you want a separate Institute-only branch.
After End of the Line, complete Airship Down to destroy the Brotherhood. Travel through the Institute, assist the required personnel and use the terminal objective to upload the virus to the Prydwen systems. Airship Down can be skipped in some states if the Railroad or Minutemen have already destroyed the Brotherhood. Finish Nuclear Family by speaking with Father after the Institute victory. That quest, not Mass Fusion or Powering Up, verifies the Institute ending.
- Save before Institute relay transport.
- Complete Mass Fusion and recover the Beryllium Agitator.
- Complete Powering Up.
- Save before End of the Line.
- Complete Airship Down if it is assigned.
- Complete Nuclear Family for the Institute ending.
4. Brotherhood route: From Within through Liberty Reprimed
For the Brotherhood route, complete the earlier Brotherhood chain until From Within and Outside the Wire are available. From Within recruits Doctor Madison Li when the Institute is no longer a safe option for her; Outside the Wire requires you to take Proctor Ingram’s holotape into the Institute and upload it at the marked terminal. Complete both missions before starting Liberty Reprimed.
Begin Liberty Reprimed at Boston Airport. Help Proctor Ingram restore Liberty Prime, gather the required high-powered magnets and construct the electromagnetic actuators at a settlement workshop when instructed. Return the completed parts to Ingram and finish the Prime repair objectives. Liberty Reprimed leads to Blind Betrayal.
Before meeting Elder Maxson to begin Blind Betrayal, create a Brotherhood-route save. Blind Betrayal sends you to Listening Post Bravo to locate Danse. Follow Maxson’s instructions, resolve Danse’s fate, then return to the Prydwen. The outcome removes Danse from normal Brotherhood service, but completing the quest grants the relevant Brotherhood progression and preserves the route to the ending.
After Blind Betrayal, Tactical Thinking is added. Create another save before approaching Lancer-Captain Kells. Speaking with Kells and advancing the operation turns the Railroad hostile and begins the Brotherhood attack on Railroad Headquarters. Do not speak with Kells if you still want Railroad missions, Ballistic Weave access or the Railroad ending.
- Complete From Within.
- Complete Outside the Wire.
- Complete Liberty Reprimed.
- Save before starting Blind Betrayal.
- Complete Blind Betrayal and decide Danse’s fate.
- Save before speaking with Kells.
5. Brotherhood commitment: Tactical Thinking, Spoils of War, Ad Victoriam and the ending
For a direct Brotherhood commitment, speak with Kells after Blind Betrayal and accept Tactical Thinking. Follow the markers to the Old North Church, eliminate the Railroad leadership and complete the P.A.M. objective. Once this operation is advanced, the Railroad is no longer a viable ending faction. Reload the pre-Kells save if that was not intentional.
Continue to Spoils of War when the Brotherhood assigns it. If the quest asks you to inform Proctor Ingram about Mass Fusion, do so and create a save before boarding the Vertibird. Boarding the Vertibird commits the Brotherhood version of the Mass Fusion operation and makes the Institute hostile. If you want to preserve a friendly Institute for a different branch, reload before boarding.
Recover the Beryllium Agitator inside Mass Fusion and return to the Brotherhood. Ad Victoriam then begins the assault preparation. Follow Liberty Prime from Boston Airport toward the Institute, protect the Brotherhood soldiers and keep moving with Prime when the route changes through the waterfront and underground sections. When Prime opens the Institute entrance, enter with the assault force.
The Brotherhood version of The Nuclear Option requires you to reach the reactor, place the Brotherhood fusion charge and escape through the relay sequence. Follow the quest markers rather than trying to return through the Institute’s normal elevator network. After the explosion, complete A New Dawn by returning to the Prydwen and speaking with Elder Maxson. A New Dawn is the concrete Brotherhood-ending completion check.
- Advance Tactical Thinking only if the Railroad can be sacrificed.
- Complete the Railroad attack and P.A.M. objective.
- Save before boarding the Vertibird for Spoils of War.
- Complete Spoils of War and recover the Beryllium Agitator.
- Complete Ad Victoriam.
- Complete the Brotherhood version of The Nuclear Option.
- Return to the Prydwen and complete A New Dawn.
6. Reload procedure and final verification
If the wrong faction becomes hostile, stop playing forward and reload the manual save made immediately before the triggering action. Use the pre-relay save for an accidental Institute Mass Fusion commitment, the pre-Vertibird save for an accidental Brotherhood Mass Fusion commitment and the pre-Kells save for an accidental Railroad attack. An autosave created after the transition may already contain the irreversible faction state.
For the Institute ending, verify that Nuclear Family is complete and that the final Institute conversation with Father has occurred. For the Brotherhood ending, verify that The Nuclear Option and A New Dawn are both complete. For a preserved Railroad or Minutemen route, verify that Tactical Thinking has not been advanced through the Kells conversation and that the intended faction’s next finale quest is active or available. Keep the pre-branch saves until the post-ending faction dialogue and rewards have been checked.
- Verify the exact completed finale quest in the Pip-Boy history.
- Verify A New Dawn for the Brotherhood ending.
- Verify Nuclear Family for the Institute ending.
- Keep pre-branch saves until post-ending access has been confirmed.
Before you move on
- The Battle of Bunker Hill is marked complete.
- Mankind—Redefined is marked complete.
- A manual save remains before Bunker Hill and another after Mankind—Redefined.
- The Institute route has completed Mass Fusion, Powering Up and Nuclear Family; Airship Down is also complete when it was assigned.
- The Brotherhood route has completed From Within, Outside the Wire, Liberty Reprimed, Blind Betrayal, Tactical Thinking, Spoils of War, Ad Victoriam, The Nuclear Option and A New Dawn.
- For a Railroad or Minutemen continuation, Tactical Thinking has not been advanced through the Kells conversation.
- The save list retains separate pre-relay, pre-Vertibird and pre-Kells saves where those branches were tested.
- The game remains playable after the selected finale, with the chosen faction’s post-ending dialogue and locations accessible.
References for this chapter
- Fallout 4: Game of the Year Edition — PlayStation Store
- Fallout 4: Game of the Year Edition Now Available — Bethesda.net
- Fallout 4 Guide/Walkthrough — Factions: Brotherhood of Steel
- The Battle of Bunker Hill — Fallout Wiki
- Tactical Thinking — Fallout 4
- End of the Line — Fallout Wiki
- Airship Down — Fallout Wiki
- Liberty Reprimed — Fallout Wiki
- Ad Victoriam — Fallout Wiki
The Nuclear Option — Minutemen, Brotherhood and Railroad Variants
Fallout 4 has four major campaign conclusions: The Nuclear Option for the Minutemen, Brotherhood or Railroad, and Nuclear Family for the Institute. Keep manual PS5 saves before Mass Fusion, before turning in Blind Betrayal, before accepting Tactical Thinking, and before Rockets’ Red Glare. The Minutemen route requires Institute hostility, Form Ranks if Preston assigns it, and Defend the Castle. The standard Brotherhood route turns in Blind Betrayal, accepts Tactical Thinking from Captain Kells, destroys the Railroad, then completes Spoils of War and Ad Victoriam. To finish with the Brotherhood while preserving the Railroad relationship, do not turn in Blind Betrayal before the Mass Fusion decision: advance the Institute route to Mass Fusion, warn the Brotherhood, begin or complete Spoils of War, then resolve Blind Betrayal and avoid Kells. P.A.M. may still enter lockdown and some Railroad side content may be restricted. The Railroad route requires Underground Undercover and Rockets’ Red Glare. The Institute route uses Mass Fusion, Powering Up, End of the Line or Airship Down, and Nuclear Family. In Minutemen and Railroad finales, issue Engage Evacuation Protocol BD-2 before Master Security Lockdown Override if you want the Railroad relationship preserved.
Create branch saves before committing
Make a manual save in a dedicated PS5 slot before the late faction chains and never overwrite it. Make another before Mass Fusion begins. Keep another before turning in Blind Betrayal, another before accepting Tactical Thinking from Captain Kells, and another before starting Rockets’ Red Glare. These saves let you test endings without replaying the campaign.
Finish Automatron, Far Harbor, companion affinity quests, Railroad preparation work and other optional content before the relevant hostility trigger. Confirm the active quest title before accepting dialogue from Father, Captain Kells, Desdemona or Proctor Ingram.
- Keep an untouched pre-branch save.
- Save before Mass Fusion and Spoils of War.
- Save before turning in Blind Betrayal.
- Save before accepting Tactical Thinking.
- Save before Rockets’ Red Glare.
Minutemen prerequisite chain — Inside Job, Form Ranks and Defend the Castle
Complete Inside Job while the Institute is accessible if it appears in your Minutemen chain. Speak with Sturges and use the Institute data holotape at the Castle when instructed. This prepares Minutemen support but does not destroy the Institute.
Make the Institute hostile by failing or breaking an Institute objective, attacking Institute personnel, or triggering another faction’s anti-Institute operation. Leave safely and speak with Preston Garvey. If the Minutemen need more settlements, Preston assigns Form Ranks. Complete the marked settlement objectives and report back.
When Defend the Castle begins, repair the existing defenses and add turrets around the walls, gate and courtyard approaches. During the attack, clear enemies from the walls and interior, then use the quest-marked terminal to reprogram the relay and enter the Institute through the cooling-water tunnel.
- Complete Inside Job before losing Institute access.
- Become hostile to the Institute.
- Complete Form Ranks if assigned.
- Finish Defend the Castle.
Minutemen route — Reactor assault and evacuation
Follow the marked route through the Institute to the Director’s office. Use Sturges’s holotape or the quest-marked terminal when prompted to bring Minutemen support into the operation.
At the Director’s terminal, choose Engage Evacuation Protocol BD-2 first. Then choose Master Security Lockdown Override. The evacuation command is not needed to reach the reactor, but using it first allows Institute personnel to escape and prevents the Railroad from becoming hostile after the explosion.
Fight through Advanced Systems, enter the reactor chamber and plant the Minutemen fusion pulse charge. Return to the relay-control area, teleport to the Mass Fusion roof and activate the detonator. Speak with Preston afterward and check Railroad Headquarters. If offered the option to take synth Shaun, decide before leaving; it affects later interactions but is not required for completion.
- Use evacuation before the lockdown override.
- Plant the Minutemen fusion pulse charge.
- Activate the exterior detonator.
- Check Preston and Railroad Headquarters afterward.
Brotherhood prerequisites — Liberty Reprimed and Blind Betrayal
Join the Brotherhood and progress until Proctor Ingram assigns Liberty Reprimed. Complete the marked construction and support objectives, gather the required parts, and help activate Liberty Prime at the Sentinel Site.
Continue into Blind Betrayal. Follow Maxson’s orders at Listening Post Bravo, investigate Danse’s position and resolve the final choice. Completing Blind Betrayal grants Brotherhood progression and rewards, but it also starts Tactical Thinking and places P.A.M. into lockdown. Railroad side content can become restricted even if you never accept Kells’s kill orders.
If you want the standard Brotherhood ending, turn in Blind Betrayal, speak with Captain Kells, accept Tactical Thinking and complete the Railroad assault. If you want a Brotherhood ending that preserves the Railroad’s broader faction relationship, do not turn in Blind Betrayal yet. Advance the Institute story to Mass Fusion, warn the Brotherhood through the Mass Fusion conversation, and begin Spoils of War before resolving Blind Betrayal. Completing Spoils of War before turning in Blind Betrayal is the safer sequence. Then resolve Blind Betrayal, avoid Captain Kells and continue with the Brotherhood operation. This preserves the Railroad from the standard destruction route, but it does not guarantee unrestricted Railroad dialogue or every side quest because P.A.M. lockdown and post-Blind-Betrayal restrictions can remain.
- Complete Liberty Reprimed.
- Reach Blind Betrayal and create a save.
- Standard route: turn in Blind Betrayal, then accept Tactical Thinking.
- Preservation route: reach Mass Fusion and begin Spoils of War before turning in Blind Betrayal.
- After resolving Blind Betrayal, avoid Captain Kells.
Standard Brotherhood route — Tactical Thinking, Spoils of War and Ad Victoriam
For the standard Brotherhood ending, turn in Blind Betrayal, speak with Captain Kells and accept Tactical Thinking. Follow the kill-list objectives to Old North Church and Railroad Headquarters. Completing this operation destroys the Railroad and removes its normal services.
After Tactical Thinking, complete Spoils of War. Meet Proctor Ingram, board the Brotherhood vertibird, enter the Mass Fusion building, recover the Beryllium Agitator and return through the marked extraction route. Boarding the vertibird makes the Institute hostile.
Ad Victoriam follows. Protect Liberty Prime as it advances through the Institute, follow the Brotherhood assault route and speak with Elder Maxson at the relay-control area. Receive the Brotherhood fusion pulse charge, reach the reactor, plant the charge, relay out and activate the marked exterior detonator. Complete Maxson’s final dialogue to finish The Nuclear Option.
- Accept Tactical Thinking only for the standard anti-Railroad route.
- Complete Spoils of War and recover the Beryllium Agitator.
- Protect Liberty Prime during Ad Victoriam.
- Plant the Brotherhood charge and activate the detonator.
Brotherhood route that preserves the Railroad relationship
Progress the Institute chain to Mass Fusion without turning in Blind Betrayal. When the Mass Fusion warning appears, choose the option to inform the Brotherhood. Report to Proctor Ingram and begin Spoils of War. Completing the mission before resolving Blind Betrayal is the safest way to establish the Brotherhood’s anti-Institute route while avoiding Tactical Thinking’s Railroad purge.
After Spoils of War, return to the Brotherhood and resolve Blind Betrayal if you need its normal rewards or Danse-related progression. Do not speak with Captain Kells to accept Tactical Thinking. Continue with Ad Victoriam when it becomes available, protect Liberty Prime, plant the Brotherhood fusion pulse charge and detonate the Institute.
This route does not leave the Railroad completely unchanged. Blind Betrayal can put P.A.M. into lockdown and restrict Railroad side quests, so check Railroad Headquarters after the ending rather than assuming every vendor and quest remains available. If preserving unrestricted Railroad content is more important than a Brotherhood ending, use the Minutemen route from a pre-branch save instead.
- Do not turn in Blind Betrayal before the Mass Fusion decision.
- Warn the Brotherhood and begin Spoils of War.
- Prefer completing Spoils of War before resolving Blind Betrayal.
- Avoid Captain Kells afterward.
- Expect P.A.M. lockdown or restricted Railroad side content.
Railroad route — Underground Undercover, Rockets’ Red Glare and The Nuclear Option
Progress Underground Undercover through its preparation objectives and continue working inside the Institute until the Railroad assault plan is ready. When Precipice of War and Rockets’ Red Glare begin, create a manual save before speaking with Desdemona.
In Rockets’ Red Glare, meet Tinker Tom, board the Railroad vertibird and travel to the Prydwen. Plant the explosives at the marked locations, escape and return to Railroad Headquarters. This destroys the Prydwen and makes the Brotherhood unavailable for the remainder of that save.
Begin The Nuclear Option from Desdemona and enter the Institute through the Railroad relay operation. Follow the marked route to the Director’s terminal. Choose Engage Evacuation Protocol BD-2 before Master Security Lockdown Override. Continue through Advanced Systems, enter the reactor, plant the Railroad fusion pulse charge, return to the relay room and activate the detonator from the Mass Fusion roof. Complete Desdemona’s dialogue and check Railroad Headquarters afterward.
- Complete Underground Undercover’s preparations.
- Save before Rockets’ Red Glare.
- Destroy the Prydwen and return to Railroad Headquarters.
- Use evacuation before the lockdown override.
- Plant the Railroad charge and activate the detonator.
Institute route — Mass Fusion, Powering Up and Nuclear Family
Continue the Institute chain through The Battle of Bunker Hill, Mankind - Redefined and Mass Fusion. At Mass Fusion, teleport to the Mass Fusion building for the Institute route. This makes the Brotherhood hostile, so save before choosing. If you want the Brotherhood route instead, inform the Brotherhood and begin Spoils of War.
Recover the Beryllium Agitator, return to the Institute and complete Pinned if it is active. Father then starts Powering Up. Record the speech, install the required equipment at Diamond City Radio, return to the reactor and install the agitator. Attend the Directorate meeting.
End of the Line normally targets the Railroad. If the Railroad has already been destroyed, that portion may be skipped. Airship Down normally targets the Brotherhood and may be skipped if the Brotherhood or Prydwen is already gone. Complete the remaining Institute objectives, then finish Nuclear Family with Father. The Institute remains operational; there is no fusion pulse charge, evacuation terminal or exterior detonator on this ending.
- Save before choosing Mass Fusion or Spoils of War.
- Complete Powering Up and install the Beryllium Agitator.
- Resolve End of the Line if the Railroad remains active.
- Complete Airship Down if the Brotherhood remains active.
- Finish Nuclear Family and verify Institute facilities.
Recovering from an unintended hostility trigger
If a faction warning appears, stop and reload the labelled manual save made before the triggering dialogue, teleport or vertibird boarding. Autosaves created after entering a faction interior may already contain the hostile state.
Teleporting to Mass Fusion for the Institute makes the Brotherhood hostile. Boarding the Brotherhood vertibird for Spoils of War makes the Institute hostile. Accepting Tactical Thinking from Captain Kells makes the Railroad hostile and destroys its normal faction route. Reload the appropriate pre-trigger save if that was not intended.
If you want to preserve the Railroad while finishing with the Brotherhood, reload to before turning in Blind Betrayal if necessary. Reach Mass Fusion, warn the Brotherhood, begin or complete Spoils of War, then resolve Blind Betrayal and avoid Kells. If you omit evacuation during a Minutemen or Railroad finale and the Railroad becomes hostile afterward, reload the pre-assault save and select Engage Evacuation Protocol BD-2 before the lockdown override.
- Use labelled manual saves, not only autosaves.
- Mass Fusion commits against the Brotherhood.
- Spoils of War commits against the Institute.
- Tactical Thinking commits against the Railroad.
- The evacuation command must precede the lockdown override.
Before you move on
- The chosen conclusion is complete: The Nuclear Option for the Minutemen, Brotherhood or Railroad, or Nuclear Family for the Institute.
- The Minutemen route includes Inside Job when available, Form Ranks if required, Defend the Castle and the Minutemen reactor assault.
- The standard Brotherhood route includes Liberty Reprimed, Blind Betrayal, Tactical Thinking, Spoils of War, Ad Victoriam and the Brotherhood reactor assault; the Railroad is destroyed.
- The Railroad-preserving Brotherhood route reaches Mass Fusion, begins or completes Spoils of War before turning in Blind Betrayal, avoids Captain Kells and completes Ad Victoriam; P.A.M. and Railroad side-content restrictions have been checked.
- The Railroad route includes Underground Undercover, Rockets’ Red Glare and the Railroad reactor assault.
- The Institute route includes Mass Fusion, Powering Up, the required End of the Line or Airship Down sequence and Nuclear Family.
- For Minutemen or Railroad victory, Engage Evacuation Protocol BD-2 was selected before Master Security Lockdown Override if Railroad survival was intended.
- The fusion pulse charge was planted and the exterior detonator was activated for the selected anti-Institute ending.
- Post-ending control returns to the Commonwealth and the relevant faction headquarters, vendors, leaders and companions have been checked.
- The untouched pre-branch PS5 manual save remains available for another conclusion.
References for this chapter
- Fallout 4: Game of the Year Edition — PlayStation Store
- Blind Betrayal — Fallout Wiki
- Tactical Thinking — Fallout Wiki
- Institute Concourse Terminal Entries — Fallout Wiki
- The Nuclear Option (Railroad) — Fallout Wiki
- The Nuclear Option — Minutemen Walkthrough
- Mass Fusion — Fallout Wiki
- Spoils of War — Fallout Wiki
- Ad Victoriam — Fallout Wiki
- Powering Up — Fallout Wiki
- End of the Line — Fallout Wiki
- Airship Down — Fallout Wiki
Post-Endgame — Aftermath, Keeping Rewards and Trophies
Fallout 4 continues after the final main-story quest instead of entering a separate New Game Plus mode. When control returns, make a new manual save in a separate slot and record the completed quest, current location, character level and slot position. Visit the faction headquarters that should have survived, confirm companion and settlement locations, recover equipment, and check which services remain available. The Institute ending destroys the Brotherhood and Railroad; Brotherhood and Railroad endings destroy the Institute and the opposing faction; a Minutemen ending can preserve both the Brotherhood and Railroad if their hostility triggers were avoided. Keep a pre-commitment manual save so alternate finales can be attempted without replaying the entire campaign.
1. Make a protected post-ending save
After the final quest concludes and control returns to the Commonwealth, create a manual save in a separate slot. Record the completed quest, the location where the save was made, your character level and the slot position. For example: “The Nuclear Option complete, Castle, level 48, slot 12” or “Nuclear Family complete, Institute, level 51, slot 13.” Do not overwrite the manual save from before the final faction commitment until the world state has been checked.
Fallout 4 does not replace the completed campaign with a separate post-game mode. The same character can continue exploring, completing settlement work, taking repeatable faction assignments, pursuing companions and playing installed DLC content. The ending quest and its trophy are completion markers, but they do not confirm that every faction service, companion reward or DLC objective has been checked.
- Confirm that the final quest is marked complete in the Pip-Boy.
- Create a new manual save in a separate slot after control returns.
- Record the completed quest, location, level and slot position.
- Preserve the manual save made before the final faction commitment.
2. Visit surviving faction headquarters
For a Minutemen ending, visit the Castle and Sanctuary Hills, then speak with Preston Garvey or the Minutemen contact currently offering work. The Institute is destroyed. The Brotherhood and Railroad can remain available, but only if you did not already activate their hostile turning points. Check both locations rather than assuming that the Minutemen route restored every faction. If the Railroad became hostile during the finale, the reactor evacuation decision is one possible cause.
For a Brotherhood ending, return to the Prydwen and speak with Brotherhood personnel for available assignments and services. The Institute and Railroad headquarters are destroyed during this route, so Institute facilities, Railroad contacts and their faction-specific services are no longer available in that completed world.
For a Railroad ending, return to the Old North Church and speak with Desdemona or the surviving Railroad contacts. The Institute and Brotherhood are destroyed, removing access to the Institute interior, the Prydwen and Brotherhood faction services.
For an Institute ending, return to the Institute and speak with its department heads or current quest contacts. The Brotherhood and Railroad are destroyed during this route. The Minutemen are not the faction destroyed by the Institute finale, although their attitude can still reflect earlier choices.
- Visit every headquarters that should survive your chosen route.
- Speak with the faction leader or repeatable-quest contact.
- Check vendors, transport services and faction assignments before assuming they are unavailable.
- Review the Pip-Boy for unfinished faction quests that disappeared after the ending.
3. Locate companions and recover equipment
Check the settlement to which you last sent each companion. If a companion was never assigned to a settlement, check that character’s normal recruitment location. Once found, use companion dialogue to send the character to a settlement you can identify, then create another manual save recording the destination, location, level and slot position. A companion missing from a usual location is not automatically dead; prior assignments, faction battles and quest changes can alter where that character waits.
Power armour, weapons, armor and stored crafting materials normally remain available after the campaign unless a specific quest removed them. Visit the settlements where you keep equipment and inspect every power-armour frame. Remove fusion cores from unattended frames if you do not want settlers or visitors entering them. Store spare parts and unique weapons in a workshop or container at a settlement you use regularly.
Repair defenses, reconnect supply lines and inspect workshop inventories. Ordinary settlements remain usable after every main-story ending, although patrols, traders and faction visitors can change. Nuka-World raider outposts and vassal settlements are governed by the choices made in that DLC and should be checked separately. Completing Open Season also changes which raider characters and activities remain available.
- Check the last assigned settlement for every surviving companion.
- Check the normal recruitment location for companions not assigned to a settlement.
- Recover power-armour frames, fusion cores, unique weapons and stored materials.
- Repair important defenses and verify supply lines.
4. Confirm permanent losses and remaining content
An ending that destroys the Institute makes its headquarters, personnel, unfinished quests and faction services inaccessible in that completed world. The Brotherhood route also removes the Railroad, while the Railroad route removes the Brotherhood. The Institute route removes both of those factions. A Minutemen route can leave the Brotherhood and Railroad standing, but it cannot restore a faction that was already made hostile earlier.
Characters killed during a faction assault cannot be recovered in that world without loading an earlier manual save. Some survivors relocate or change their dialogue after the ending. Check the map, active quests, completed quests and settlement assignments before treating an absent character as permanently lost.
Automatron, Far Harbor, Nuka-World, Vault-Tec Workshop, Contraptions Workshop and Wasteland Workshop remain available as installed GOTY content. They do not require the main story to remain unfinished, although faction-specific interactions and rewards may depend on which Commonwealth groups survived. If a DLC quest was already completed, its rewards remain in the completed world unless a later choice specifically removes access to the associated character or location.
- Confirm which faction bases and services are permanently unavailable.
- Review current and completed quests for missing faction content.
- Check DLC locations and rewards before declaring the campaign complete.
- Keep the pre-commitment manual save until all important rewards are verified.
5. Use separate slots for alternate endings
To attempt another finale, load the manual save made before the relevant irreversible commitment. Identify that save by the completed quest, location, character level and slot position rather than relying on its position in the autosave list. Create a new manual save before beginning the alternate route, and create another after the alternate ending returns control to the Commonwealth.
A practical arrangement uses one separate slot before the major faction branch, one immediately before the final commitment quest, and one post-ending slot for each route. From the pre-branch slot, complete only the prerequisites needed by the alternate faction. Before entering its final quest, make another manual save and record the same four details. This preserves the original route and avoids replaying the entire character.
The Nuclear Option trophy is associated with completing a non-Institute ending. Nuclear Family is associated with completing the Institute ending. Institutionalized marks entry into the Institute, while Ad Victoriam, Rockets’ Red Glare and Underground Undercover are tied to earlier Brotherhood and Railroad progression. Trophies already earned remain on the PlayStation account after loading an earlier save. Do not enable mods on the trophy run, because Bethesda states that Fallout 4 trophies are disabled while a mod is active.
- Load the pre-commitment manual save, not the post-ending slot.
- Create a new slot before each alternate finale.
- Record quest, location, level and slot position for every recovery save.
- Confirm the intended trophy notification before restoring the preferred world state.
6. Complete cleanup and verify the campaign
Open the PlayStation trophy list and separate completed main-story trophies from remaining faction, companion, settlement and DLC objectives. A finished ending does not prove that companion affinity rewards, Automatron objectives, Far Harbor outcomes, Nuka-World content or Workshop-related trophies are complete. Visit surviving faction contacts, finish available repeatable assignments and check important companions before starting a new character.
If a trophy fails to appear, allow the game to save, confirm that the exact quest or objective was completed and verify that no mod was active. If the requirement was definitely fulfilled but the trophy remains absent, preserve the relevant manual save and retry the required route from that save rather than overwriting it.
When the chosen ending, faction state, companions, equipment and remaining DLC objectives have been checked, make one final manual save in a separate slot. Record the completed quest, location, level and slot position. Keep at least one earlier manual save if you still want alternate endings or faction-specific rewards.
- Review base-game and DLC trophy lists.
- Confirm important companion rewards and unique equipment.
- Verify surviving faction services and settlement infrastructure.
- Create a final post-ending manual save with quest, location, level and slot position.
- Retain a pre-commitment manual save for alternate finales.
Before you move on
- The chosen final quest is complete and the appropriate ending trophy has unlocked.
- The faction headquarters and important leaders expected to survive have been checked.
- Power armour, unique weapons, companion rewards and workshop items have been recovered or confirmed available.
- Important companions have been located, reassigned or confirmed unavailable from the chosen world state.
- A protected post-ending manual save and at least one pre-commitment manual save remain intact.
- Remaining base-game and GOTY DLC trophies have been reviewed.
- Alternate endings, if desired, have been attempted from separate earlier manual-save slots.
Completing Optional and Miscellaneous Tasks — Unique Finds and Missable Quests
Use the middle portion of the Commonwealth campaign to finish companion stories, collect faction rewards, resolve Vault 81, and complete major optional DLC objectives before faction hostility removes access. Keep separate manual saves at decision points instead of relying on autosaves. Prioritize permanent companion perks, ballistic weave, faction vendors, unique weapons, bobbleheads, and Vault-Tec Workshop rewards. Automatron and Far Harbor can be completed before the Commonwealth finale. In Nuka-World, explore the parks and collect rewards before deciding whether to establish Commonwealth raider outposts. If Preston is already tied to the Minutemen, beginning Home Sweet Home can permanently remove him as a normal companion. The PS5 GOTY release contains Fallout 4 and the six official add-ons, not the separate Anniversary Edition Creations bundle.
Make separate saves before optional-content lockouts
Before Mass Fusion, Spoils of War, Tactical Thinking, Rockets’ Red Glare, or the late Minutemen assault sequence, create a manual save in a separate slot. Identify it by both quest and location, such as “Before Mass Fusion — Institute relay” or “Before Tactical Thinking — Prydwen.” Keep another save after the decision if you continue. Do not overwrite these with ordinary travel saves.
Make another manual save before Far Harbor’s final island resolution and immediately before Home Sweet Home sends you to claim the first Commonwealth raider settlement. These specific saves are more useful than one general “pre-endgame” backup because they let you retry a particular decision without replaying hours of exploration.
Complete ordinary side quests and companion conversations while the Institute, Brotherhood, Railroad, and Minutemen remain available. Secure desired rewards before deliberately starting a quest that can make one of those factions hostile.
- Use separate manual-save slots rather than one undifferentiated backup.
- Identify every save by its quest and physical location.
- Keep pre-branch saves untouched until rewards and faction states are verified.
Finish companion stories and confirm their perks
Travel with the companions whose permanent perks you want and build affinity through their preferred actions. Complete Cait’s Benign Intervention, Curie’s Emergent Behavior, MacCready’s Long Road Ahead, and Nick Valentine’s Long Time Coming when their affinity and story conditions permit. Recruiting a companion is not enough; complete the personal quest and the final affinity conversation before moving on.
Paladin Danse requires special timing. His Know Your Enemy perk is tied to Blind Betrayal. If you want it, complete Blind Betrayal, make the Danse decision, and confirm the perk appears in the Perks screen. Blind Betrayal leads into the Brotherhood’s later endgame sequence, so make a manual save before its irreversible decisions. If you spare Danse, verify his later availability before beginning an Institute or Brotherhood finale.
Permanent perks remain once awarded, but companions and personal quests can become unavailable after faction conclusions. Do not claim this part complete until every intended perk is visible in the Perks screen.
- Complete each intended companion’s personal quest.
- Finish the companion’s final affinity conversation.
- Confirm every desired perk in the Perks screen before faction lockouts.
Resolve Vault 81 and Hole in the Wall deliberately
Travel to Vault 81 west of Diamond City and complete the initial access sequence. After the vault’s introductory events, return when the clinic reports Austin’s condition. Start Hole in the Wall, follow Bobby DeLuca into Secret Vault 81, and search the laboratory while avoiding the diseased mole rats as carefully as possible. Curie is in the final laboratory area and has the only dose of the cure.
The Medicine bobblehead is on a desk in Curie’s office. Collect it before leaving the secret section. After Curie opens the route back to the main vault, return to Dr. Forsythe and choose who receives the cure. There is only one dose.
Giving the cure to Austin saves him and produces the favorable Vault 81 outcome: Curie becomes recruitable, you receive the Syringer rifle, Overseer McNamara grants you a room in Vault 81, and the residents treat you favorably. However, if you were infected by a diseased mole rat during the quest, giving the cure to Austin leaves you with the permanent Molerat Disease penalty of -10 Health.
If you keep the cure or use it on yourself, you avoid or remove the disease penalty, but Austin dies and you lose the favorable Vault 81 rewards and outcome. The best result is possible only if you avoid every infection during the expedition, then give the uncontaminated player character’s disease-free cure to Austin. Do not assume that simply keeping the cure preserves Curie, the room, the Syringer rifle, and Austin’s survival; it does not.
- Complete Hole in the Wall without turning Vault 81 hostile.
- Avoid mole-rat infection if you want Austin saved without a permanent penalty.
- Collect the Medicine bobblehead from Curie’s office.
- Give the cure to Austin for the favorable rewards, or use it on yourself only if avoiding the disease penalty is more important.
Collect Railroad, Brotherhood, and Institute rewards before hostility
Join the Railroad through Road to Freedom and complete Tradecraft to obtain the Deliverer. After beginning the early Jackpot missions, return to Railroad headquarters and speak with Tinker Tom. Check back after the first or second Jackpot progression until he explains ballistic weave, then apply it at an armor workbench to compatible clothing.
Complete desired Brotherhood training, vendor purchases, power-armour upgrades, and Danse objectives before starting the Brotherhood’s irreversible endgame. If Know Your Enemy matters, finish Blind Betrayal and verify the perk before proceeding. For the Institute, buy or collect interior rewards before Mass Fusion. Save at the Institute relay or near the starting terminal because reporting to the Institute or Brotherhood sends the campaign along different branches.
Do not treat a faction reward as secured merely because its quest is active. Confirm the item, perk, or crafting option in your inventory, Perks screen, or workbench before creating the final branch save.
- Obtain the Deliverer during Tradecraft.
- Unlock and verify ballistic weave with Tinker Tom.
- Confirm desired Brotherhood and Institute rewards before their hostility points.
Explore by region and protect unique finds
When a quest takes you into a district, inspect nearby marked and unmarked locations before fast-travelling away. Distress signals, radio broadcasts, notes, holotapes, terminals, crashed aircraft, military checkpoints, vault entrances, factories, and museums often lead to valuable side content. After the main fight, search offices, locked rooms, rooftops, storage areas, and terminal-controlled doors; magazines, bobbleheads, and named equipment may sit outside the quest marker’s route.
Create a manual save before opening an uncertain terminal, beginning a major conversation, or entering a large interior. Store named weapons, named armour, magazines, bobbleheads, and quest items in a protected settlement container. Do not scrap a unique weapon simply because its base damage is low; inspect its name and legendary effect first.
Finish exploration that depends on Institute access, Brotherhood equipment, Railroad crafting, or a companion who may later become unavailable before the Commonwealth ending. Routine settlement decoration can wait.
- Search side rooms and terminals after completing primary objectives.
- Store unique rewards in a protected container.
- Finish faction-dependent exploration before the relevant ending.
Complete Automatron, Far Harbor, and Nuka-World with decision saves
Automatron can be completed before the Commonwealth finale. Follow the distress signal, build the Robot Workbench, track the Mechanist, and finish the Mechanist’s lair. Save any robot parts or custom robot companions you intend to use before dismantling machines or changing their equipment.
Far Harbor is largely separate from Commonwealth faction lockouts. Complete its investigation, visit Acadia, explore the Nucleus and Far Harbor, and create a manual save before the final island resolution. Use that save if you want to preserve alternative outcomes or retrieve rewards after comparing choices.
In Nuka-World, complete the Gauntlet, establish access to Nuka-Town USA, clear the parks, and finish The Grand Tour before deciding whether to establish Commonwealth raider outposts. Create a manual save immediately before Home Sweet Home assigns the first settlement. If you are already General of the Minutemen, claiming raider settlements can permanently make Preston unavailable as a normal companion, even if you later complete Open Season. If preserving Preston is essential, use the pre-Home Sweet Home save and choose Open Season instead of assigning Commonwealth outposts. Park exploration and Nuka-World rewards remain available without taking the raider-settlement route.
- Complete Automatron’s Mechanist storyline if its rewards are wanted.
- Save before Far Harbor’s final island decision.
- Save before Home Sweet Home’s first Commonwealth outpost.
- Use Open Season if preserving Preston’s normal companion status is essential.
Use Workshop DLC objectives as optional completion goals
For Vault-Tec Workshop, follow the Vault 88 radio signal, enter the vault, clear the initial hostile area, activate the workshop, and work with Overseer Barstow through A Model Citizen and the later experiments. Build the requested prototypes inside Vault 88. The experiment results affect dialogue and rewards, so save inside Vault 88 before the final experiment if you want to compare outcomes.
Contraptions Workshop is optional. Test conveyors, manufacturing, sorting, elevators, and display systems with inexpensive junk before committing valuable components. Wasteland Workshop adds cages, creature displays, and arena equipment. For an arena, separate opposing teams, provide the required power, and keep essential vendors and ordinary settlers outside the combat enclosure.
These workshop projects are not prerequisites for a faction ending, but they count as meaningful GOTY completion goals. Do not place machinery or arena combatants where they can disrupt settlement vendors, quest givers, or essential settlers.
- Activate Vault 88 and complete the desired experiments.
- Test manufacturing systems with inexpensive materials.
- Place arena equipment away from vendors and essential settlers.
Before you move on
- The pre-endgame save contains every intended companion perk, confirmed in the Perks screen.
- Hole in the Wall is resolved, the Medicine bobblehead is collected, and Curie is available if desired.
- The Vault 81 cure decision matches the intended outcome: Austin survives with the favorable rewards, or the cure was used on the player to avoid the disease penalty.
- The Deliverer, ballistic weave, and desired Brotherhood or Institute rewards are secured before faction hostility.
- Automatron and Far Harbor have reached their chosen conclusions, with a separate save before Far Harbor’s final decision.
- Nuka-World’s parks and desired unique rewards are complete, with a separate save before Home Sweet Home’s first Commonwealth outpost.
- Vault 88’s workshop and desired experiments are complete, and any Contraptions or Wasteland Workshop project being counted toward personal completion has been tested.
- Unique weapons, named armour, magazines, bobbleheads, and quest items are stored before continuing into the final Commonwealth branch.
References for this chapter
- Fallout 4: Game of the Year Edition — PlayStation Store
- Vault 81 and Hole in the Wall — Fallout 4 Guide
- Hole in the Wall — Fallout 4 Guide
- Vault 81 — Fallout 4 Guide
- Medicine bobblehead — Fallout Wiki
- Blind Betrayal — Fallout Wiki
- Know Your Enemy — Fallout Wiki
- Ballistic weave — Fallout Wiki
- Home Sweet Home — Fallout 4 Guide
- Open Season — Fallout 4 Guide
- A Model Citizen — Fallout Wiki
- How do I get started playing the Fallout 4 Vault-Tec Workshop DLC? — Bethesda Support
- Fallout 4 Anniversary Edition Now Available — Bethesda.net
One-Run Strategies and Checklist — How to Finish With Your Preferred Ending
For minimal backtracking, finish Automatron, Far Harbor, Nuka-World and the Vault-Tec Workshop quest content before committing to a Commonwealth faction. Contraptions Workshop and Wasteland Workshop add settlement features rather than separate story finales. Keep separate manual saves before The Molecular Level, before the Institute-side Mass Fusion decision and before the final faction commitment. Fallout 4 has four principal conclusions, but one unmodified world cannot preserve every faction while recording all four finales. Complete one ending, make a new post-ending save, verify the surviving factions and companions, then reload the appropriate branch save for another route. The Brotherhood route has two useful orderings: the normal path destroys the Railroad through Tactical Thinking; a more delicate Mass Fusion and Spoils of War ordering can preserve the Railroad’s headquarters and general relationship, but P.A.M. lockdown and some Railroad quest restrictions may remain.
1. Finish DLC story content before Commonwealth faction commitments
Complete Automatron and defeat the Mechanist, then finish Far Harbor’s principal island conflict before deliberately making a Commonwealth faction hostile. Resolve Nuka-World through either the raider campaign or Open Season, depending on whether you want raider outposts and the raider leadership path or the anti-raider conclusion. Complete the Vault-Tec Workshop quest content if it is part of your campaign goal. Contraptions Workshop and Wasteland Workshop mainly add workshop objects, settlement systems and build options rather than separate campaign endings.
If you want Preston Garvey to remain an uncomplicated companion and want to avoid raider-related Minutemen complications, create a separate save before starting Home Sweet Home. The raider settlement assignments can affect Preston’s availability and relationship. Open Season is the route that removes the Nuka-World raiders instead. Store unique DLC weapons, armor and quest rewards at a settlement that will remain accessible after your chosen Commonwealth ending.
- Automatron’s Mechanist storyline completed.
- Far Harbor’s main island conclusion completed.
- Vault-Tec Workshop story content completed if desired.
- Nuka-World resolved through the chosen raider or Open Season route.
- A pre-Home Sweet Home save exists if Preston and the Minutemen must remain unaffected.
- DLC rewards stored safely.
2. Build a manual-save ladder before faction commitments
Create a manual save immediately before beginning The Molecular Level. Record the quest objective, physical location, character level, date and manual-save slot position outside the game. Fallout 4 does not provide custom save-file names, so a note such as ‘The Molecular Level not started; Sanctuary; level 32; slot 3’ is more useful than relying on the in-game save list alone. This is the broad branch save for preserving Institute access and the major faction routes.
Create another separate manual save before accepting or beginning Mass Fusion from the Institute side. This is the critical Institute-versus-Brotherhood decision. Also keep a faction-specific save before Tactical Thinking for the standard Brotherhood route, before Rockets’ Red Glare for the Railroad route, or before Defend the Castle when preparing the Minutemen route. Use different manual slots and do not overwrite them with quicksaves.
After completing an ending, create a new manual save in another slot. Record the completed ending, current location, level, date and slot position. Keep the earlier branch saves until you have checked the post-ending faction state and rewards.
- Manual save before The Molecular Level.
- Manual save before Institute-side Mass Fusion.
- Manual save before Tactical Thinking, Rockets’ Red Glare or Defend the Castle as applicable.
- Quest, location, level, date and slot position recorded externally.
- Separate post-ending manual slot reserved.
3. Institute ending — Nuclear Family
From the save before Mass Fusion, continue the Institute route and complete Mass Fusion from the Institute side. Entering the Mass Fusion site for the Institute makes the Brotherhood hostile, so collect Brotherhood rewards, complete desired Brotherhood training and finish companion work beforehand. Continue the Institute’s required operations against the Railroad and Brotherhood. Nuclear Family is the Institute’s closing quest after that progression; it is not a substitute for the earlier Institute missions.
Before finishing the Institute sequence, collect desired Institute equipment and complete optional Institute errands that require the faction to remain available. Complete Nuclear Family, wait until control returns, and create a new manual save in an unused slot. Confirm that the Institute ending quest is complete before loading an earlier branch slot for another conclusion.
- Institute-side Mass Fusion completed.
- Required Institute operations completed.
- Nuclear Family completed.
- New post-Institute manual save created and verified.
4. Minutemen ending — Defend the Castle and The Nuclear Option
Advance the Minutemen until Preston offers the final sequence. Complete the required settlement and Minutemen progression, including Inside Job where applicable, then complete Defend the Castle when the Minutemen are ready to attack the Institute. Prepare the Castle with ammunition, healing items and practical defenses. A decorated base is unnecessary; the objective is to survive the assault and satisfy the quest prerequisites.
Speak with Preston and Sturges to begin the Minutemen version of The Nuclear Option. Follow the quest-marked route into the Institute, fight to the director’s area and use the marked terminal to lift the lockdown. Activate Evacuation Protocol BD-2 before proceeding. This is the action that prevents the Railroad from becoming hostile after the Institute is destroyed; do not treat it as a cosmetic optional objective if preserving the Railroad matters.
Reach the reactor, complete the purge and shutdown sequence, plant the fusion pulse charge, return through the relay and detonate it. After the final conversations, create a separate post-Minutemen save and inspect the Castle, Railroad Headquarters and important companions.
- Minutemen prerequisites completed.
- Defend the Castle completed.
- Evacuation Protocol BD-2 activated.
- Reactor charge planted and detonated.
- Separate post-Minutemen manual save created.
5. Brotherhood ending — standard route that destroys the Railroad
For the straightforward Brotherhood route, complete Liberty Reprimed and Blind Betrayal. Before speaking to Captain Kells after Blind Betrayal, create a Brotherhood branch save. Turning in Blind Betrayal starts Tactical Thinking; speaking to Kells and accepting its orders makes the Railroad hostile and places P.A.M. into lockdown. Complete Railroad rewards, ballistic-weave work and companion tasks before this point.
Advance Tactical Thinking through Kells, enter Old North Church and eliminate the listed Railroad leadership targets. Handle P.A.M. as the quest directs, then report back to Kells. Continue through Spoils of War if it is offered, then complete Ad Victoriam. Follow the Brotherhood assault to the Institute reactor, plant the Brotherhood charge and complete the Brotherhood version of The Nuclear Option. Finish A New Dawn, then create a new post-Brotherhood save.
This is the reliable standard route, but it does not preserve the Railroad. Do not use it if the Railroad headquarters, Railroad services or Railroad survivors must remain available.
- Liberty Reprimed completed.
- Blind Betrayal completed.
- Manual save created before advancing Tactical Thinking through Kells.
- Tactical Thinking completed and the Railroad commitment accepted.
- Spoils of War, Ad Victoriam and the Brotherhood Nuclear Option completed.
- A New Dawn completed and a separate post-Brotherhood save created.
6. Brotherhood ending — alternate ordering that can preserve the Railroad
If preserving the Railroad’s general faction relationship is more important than receiving the cleanest quest sequence, use a separate early save and follow this order carefully. Progress the Institute storyline until the Mass Fusion decision appears, but do not enter the Mass Fusion building for the Institute. Choose the option to inform the Brotherhood instead. Go to Proctor Ingram and begin Spoils of War; complete it or progress it far enough to establish the Brotherhood’s replacement for Mass Fusion. Boarding the Brotherhood vertibird makes the Institute hostile.
Resolve Blind Betrayal after the Brotherhood operation has been started or completed, then avoid Captain Kells. Do not accept Tactical Thinking from him. Continue with the Brotherhood’s remaining endgame objectives, including Ad Victoriam, and complete the Brotherhood version of The Nuclear Option. This ordering can leave the Railroad alive and avoid the normal Railroad massacre, but it is more sensitive to quest state than the standard route. P.A.M. can remain in lockdown after Blind Betrayal, and some Railroad side-quest hand-ins or new assignments may remain unavailable. Treat this as a faction-preservation route, not a guarantee that every Railroad service works normally.
Create a manual save before informing the Brotherhood at Mass Fusion and another before completing Blind Betrayal. If Spoils of War or Ad Victoriam fails to advance, reload the earlier save rather than forcing the sequence forward. Never speak to Kells after Blind Betrayal if Railroad survival is the priority.
- Manual save created before the Mass Fusion decision.
- Brotherhood warned before entering Mass Fusion for the Institute.
- Spoils of War started or completed.
- Blind Betrayal resolved only after the Brotherhood operation is established.
- Captain Kells not used to start Tactical Thinking afterward.
- Ad Victoriam and the Brotherhood Nuclear Option completed.
- Railroad Headquarters checked for survival, with P.A.M. and side-quest restrictions documented.
7. Railroad ending — Underground Undercover, Rockets’ Red Glare and The Nuclear Option
Complete Underground Undercover’s required Institute objectives and proceed through the Railroad transition into Precipice of War. Before beginning Rockets’ Red Glare, create a separate manual save. Finish Railroad side rewards, ballistic-weave upgrades and companion work before starting the direct Brotherhood assault.
Complete Rockets’ Red Glare, which makes the Brotherhood hostile and removes normal Brotherhood access. Follow the Railroad team through the assault and continue into the Railroad version of The Nuclear Option. In the Institute, use the marked terminals, activate the evacuation order when presented, reach the reactor, plant the fusion charge and return through the relay. The evacuation order allows non-hostile synths to be evacuated and helps preserve the intended Railroad aftermath.
Detonate the charge, speak with Desdemona and create a new post-Railroad save. Confirm that Railroad Headquarters and its surviving services remain available before loading an earlier branch slot.
- Underground Undercover requirements completed.
- Manual save created before Rockets’ Red Glare.
- Precipice of War and Rockets’ Red Glare completed.
- Railroad evacuation order used during the Institute assault.
- Railroad Nuclear Option completed and post-ending slot created.
8. Confirm completion and replay alternatives safely
After the final explosion or Nuclear Family sequence, wait until control returns and create a post-ending manual save in an unused slot. Confirm the appropriate finale: Nuclear Family for the Institute; The Nuclear Option for the Minutemen or Railroad; or the Brotherhood version of The Nuclear Option followed by A New Dawn. Visit the faction headquarters that should remain available, inspect the Castle or another major settlement, check important companions and confirm that the Institute is inaccessible after an anti-Institute ending.
To test another conclusion, load the pre-Molecular-Level save for the broadest replay or the appropriate pre-commitment save for a closer branch. Follow one faction checklist from that point. Do not combine Mass Fusion, Tactical Thinking, Rockets’ Red Glare and Defend the Castle casually, because each changes the available faction routes. Keep each completed ending in its own manual slot with its quest, location, level, date and slot position recorded.
- Selected finale and its follow-up quest are complete.
- Expected faction headquarters and companions checked.
- Post-ending manual save exists in a new slot.
- Pre-Molecular-Level and relevant pre-commitment saves remain untouched.
- Alternate endings can be reached from recorded earlier saves.
Before you move on
- Automatron and Far Harbor have concluded.
- Nuka-World has been completed through the chosen raider or Open Season route.
- Vault-Tec Workshop content has been completed if included in the campaign goal.
- The selected ending is complete: Nuclear Family, the Minutemen or Railroad version of The Nuclear Option, or the Brotherhood version followed by A New Dawn.
- The expected faction headquarters, companions and settlements remain accessible.
- A separate post-ending manual slot confirms the intended faction state.
- The pre-Molecular-Level and relevant pre-commitment slots remain available for alternate endings or missed rewards.
- Each preserved branch slot has its quest, location, character level, date and slot position recorded.
References for this chapter
- Fallout 4: Game of the Year Edition — PlayStation Store
- Fallout 4 — Bethesda official site
- Tactical Thinking — Fallout Wiki
- Blind Betrayal — Fallout Wiki
- Mass Fusion — Fallout Wiki
- Spoils of War — Fallout Wiki
- Ad Victoriam — Fallout Wiki
- A New Dawn — Fallout Wiki
- The Nuclear Option (Minutemen) — Fallout Wiki
- The Nuclear Option (Railroad) — Fallout Wiki
Finishing up
Complete one of the final campaign conclusions: The Nuclear Option for the Minutemen, Brotherhood of Steel or Railroad, or Nuclear Family for the Institute.
Complete the main storylines for Automatron, Far Harbor and Nuka-World. Workshop DLCs have no equivalent single final mission; complete their quest and build objectives if they are part of your goal.
After the ending, visit the faction locations and settlements relevant to your route. Check Preston Garvey or Minutemen contacts, Elder Maxson if the Brotherhood survived, Desdemona if the Railroad survived, or Institute facilities if you chose the Institute ending.
Verify the companion quests and unique rewards you wanted before faction decisions that can block access.
Keep at least one untouched pre-branch manual save in a separate slot, identified by its quest and location, so you can revisit an alternate ending or missed content.
Choose your next gameScreenshots & video
Game imagery for reference. Follow the written chapters above for the route and strategies.
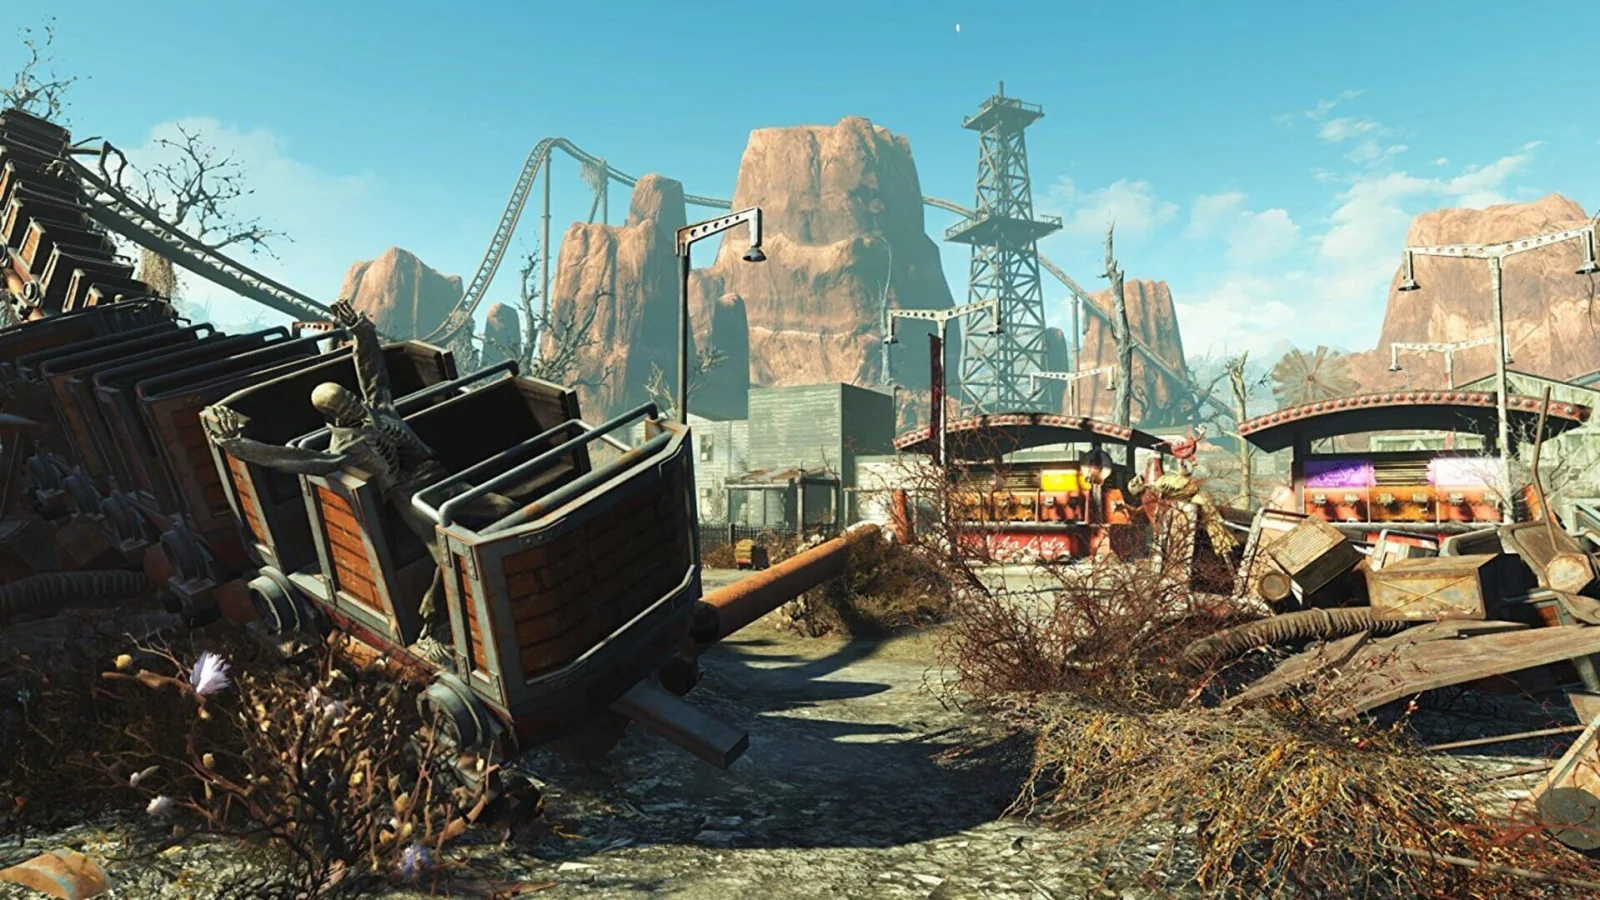
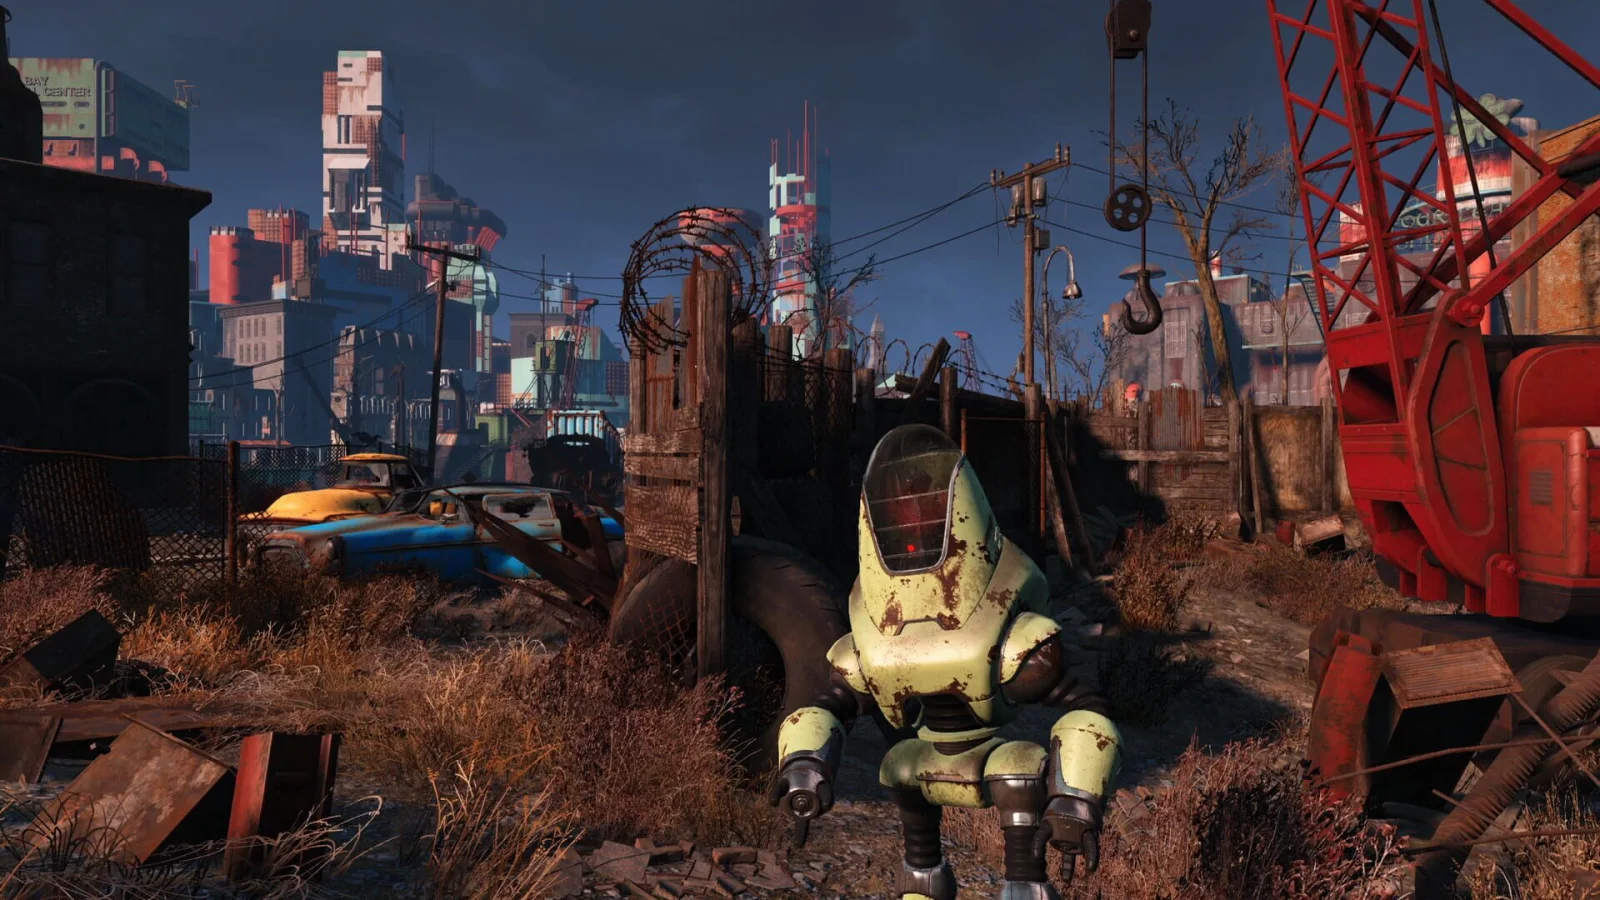
Sources & references
Our original guide draws on the references below. Check the edition at the top of this page before following controls or unlock requirements.
- Fallout 4: Game of the Year Edition — PlayStation Store
- Fallout 4 — Bethesda official site
- Sanctuary — Fallout Wiki
- 10mm pistol — Fallout Wiki
- Dogmeat — Fallout Wiki
- Fallout 4 Companion Affinity Leveling Guide — Neoseeker
- When is the Fallout 4 upgrade coming to Xbox Series X|S and PlayStation 5? — Bethesda Support
- Out of Time - Sanctuary - Walkthrough | Fallout 4 | Gamer Guides
- Perception Bobblehead - Fallout 4 Database | Gamer Guides
- Drumlin Diner — Fallout Wiki
- Power armor (Fallout 4) — Fallout Wiki
- Fallout 4 Guide — Old Guns, Prima Games
- Form Ranks — Fallout Wiki
- Old Guns — Fallout Wiki
- With Our Powers Combined — Cheat Code Central walkthrough
- Local Leader — Fallout Wiki
- Underground Undercover — SuperCheats
- Underground Undercover — Prima Games Guide
- Underground Undercover — Fallout Wiki
- Jackpot — Gamer Guides
- The Nuclear Option (Railroad) — Fallout Wiki
- The Nuclear Option, Railroad — Prima Games Guide
- Precipice of War — Fallout Wiki
- Mass Fusion — Fallout Wiki
- Tradecraft — Fallout Wiki
- Cambridge Police Station — Fallout Wiki
- Military frequency AF95 — Fallout Wiki
- Shadow of Steel — Fallout Wiki
- Show No Mercy — Fallout Wiki
- Blind Betrayal — Fallout Wiki
- Predictive Analytic Machine — Fallout Wiki
- Tactical Thinking — Fallout Wiki
- Spoils of War — Fallout Wiki
- Mass Fusion — Fallout Wiki
- Fallout 4 Guide — Tactical Thinking
- Fallout 4: Game of the Year Edition — PlayStation Store
- Fallout 4 Walkthrough: Main Story Route, Faction Choices and Endings
- The Glowing Sea — Fallout 4 Database
- Hunter/Hunted — Fallout 4 Database
- The Molecular Level — Fallout 4 Database
- Institutionalized — Fallout 4 Database
- The Molecular Level and Institutionalized Walkthrough
- Institutionalized — Prima Games Guide
- Institutionalized — Gamepressure Guide
- The Molecular Level — Fallout Wiki
- Institutionalized — Fallout Wiki
- Defend the Castle — Fallout Wiki
- PlayStation Plus cloud storage for PS5 consoles — PlayStation Support
- How to back up and restore PS5 console data — PlayStation Support
- How do I increase Companion Affinity? — Bethesda Support
- Affinity — Fallout Wiki
- Fallout 4 companions — Fallout Wiki
- Fallout 4 perks — Fallout Wiki
- Danse — Fallout Wiki
- Old Longfellow — Fallout Wiki
- Hunter’s Wisdom — Fallout Wiki
- Open Season — Fallout Wiki
- Companion Perks — Fallout 4 Guide, Prima Games
- Porter Gage — Carl’s Fallout 4 Guide
- Fallout 4: Anniversary Edition Now Available — Bethesda.net
- What are Builders in the Fallout 4 Contraptions Workshop DLC? — Bethesda Support
- How do I get started playing the Fallout 4 Vault-Tec Workshop DLC? — Bethesda Support
- How do I get started playing the Fallout 4 Automatron DLC? — Bethesda Support
- Restoring Order — Fallout 4: Automatron Walkthrough — Neoseeker
- Restoring Order — Fallout 4: Automatron Walkthrough — SuperCheats
- Headhunting — Fallout 4: Automatron — Fallout Wiki
- Restoring Order — Fallout 4 — Fallout Wiki
- Mechanist (Automatron) — Fallout Wiki
- Restoring Order — Fallout 4 Guide — Gamer Guides
- Cleansing the Land — Fallout Wiki
- Reformation — Fallout Wiki
- Best Left Forgotten — Fallout Wiki
- Cleansing the Land / The Way Life Should Be / Reformation — Gamer Guides
- Cleansing the Land — SuperCheats
- Atom’s Bulwark — Fallout Wiki
- Crusader of Atom — Fallout Wiki
- Far Harbor Survivalist — Fallout Wiki
- Close to Home — Gamer Guides
- How do I get started playing the Fallout 4 Nuka-World DLC? — Bethesda Support
- Why am I getting a ‘can’t go beyond this point’ message when trying to get into Nuka-World? — Bethesda Support
- The Grand Tour — Fallout Wiki
- Power Play — Fallout Wiki
- Nuka-World power plant — Fallout Wiki
- The Problem Solver — Fallout Wiki
- Cappy in a Haystack — Fallout Wiki
- Amoral Combat — Gamer Guides
- Home Sweet Home — Fallout 4 Guide
- Open Season — Fallout 4 Guide
- Fallout 4: Game of the Year Edition Now Available — Bethesda.net
- What are Builders in the Fallout 4 Contraptions Workshop DLC? — Bethesda Support
- What are Conveyors and Rollers in the Fallout 4 Contraptions Workshop DLC? — Bethesda Support
- What are Cages in the Wasteland Workshop add-on? — Bethesda Support
- Fallout 4 — Contraptions Workshop, Vault-Tec Workshop, and Nuka-World — Bethesda.net
- Vault-Tec Workshop — Fallout Wiki
- Explore Vault 88 — Fallout 4 Guide
- Vision of the Future — Fallout 4 Guide
- How does the save system work in Fallout 4? — Bethesda Support
- How do I transfer my PS4 save to PS5 for Fallout 4? — Bethesda Support
- Artillery piece (Fallout 4) — Fallout Wiki
- Fusion core (Fallout 4) — Fallout Wiki
- Fallout 4 Official Game Manual
- Fallout 4 Guide/Walkthrough — Factions: Brotherhood of Steel
- The Battle of Bunker Hill — Fallout Wiki
- Tactical Thinking — Fallout 4
- End of the Line — Fallout Wiki
- Airship Down — Fallout Wiki
- Liberty Reprimed — Fallout Wiki
- Ad Victoriam — Fallout Wiki
- Institute Concourse Terminal Entries — Fallout Wiki
- The Nuclear Option — Minutemen Walkthrough
- Powering Up — Fallout Wiki
- Fallout 4: Game of the Year Edition Now Available — Bethesda.net
- Fallout 4 — PlayStation
- Fallout 4 endings — Fallout Wiki
- Fallout 4 Printable Trophy List — PlayStationTrophies.org
- What do I do if a Trophy or Achievement is not unlocking in Fallout 4? — Bethesda Support
- Vault 81 and Hole in the Wall — Fallout 4 Guide
- Hole in the Wall — Fallout 4 Guide
- Vault 81 — Fallout 4 Guide
- Medicine bobblehead — Fallout Wiki
- Know Your Enemy — Fallout Wiki
- Ballistic weave — Fallout Wiki
- A Model Citizen — Fallout Wiki
- Fallout 4 Anniversary Edition Now Available — Bethesda.net
- A New Dawn — Fallout Wiki
- The Nuclear Option (Minutemen) — Fallout Wiki
About the game & collecting notes
- Platform
- Sony PlayStation 5
A start-to-finish walkthrough for Fallout 4: Game of the Year Edition on PlayStation 5. This guide covers character setup, progression through the main campaign and faction routes, and complete walkthroughs for the six included expansions (Automatron, Far Harbor, Nuka-World, Vault‑Tec Workshop, Contraptions Workshop, Wasteland Workshop). Practical routing, save strategy and endgame options are included.
Darryl Polo
Darryl Polo writes about emulation and retro games. What changes when an old favorite moves to another setup? That question connects his interest in tinkering with the games that made the hardware worth keeping.
Our editorial standardsFound a step that needs another look? Help us improve this guide.