
Elden Ring — PlayStation 5 (base game): Main Campaign Walkthrough (Age of Fracture / Elden Lord ending)
Use this walkthrough for a complete, practical route through Elden Ring (PlayStation 5 base game, main progression and an ending route; Shadow of the Erdtree excluded) with required progress, recovery advice and useful optional upgrades kept in context.


Find a copy
Elden Ring Sony PlayStation 5
We may earn a commission if you buy through these links, at no extra cost to you. As an Amazon Associate I earn from qualifying purchases.
Opens retailer search results. Check the model, edition, seller, availability and current price before buying.
Before you begin
You are a Tarnished starting on PlayStation 5.
This guide assumes the PS5 base release of Elden Ring and excludes Shadow of the Erdtree.
It leads through a reliable main-campaign route to the Age of Fracture ending while identifying optional content separately.
Follow the chapters in order for the recommended route. Chapter 8 is an optional Consecrated Snowfield detour; chapter 10 then covers the mandatory Mountaintops and Fire Giant route before chapter 9 covers Crumbling Farum Azula.
The guide distinguishes the recommended Godrick-and-Rennala route from the broader requirement to defeat two qualifying Shardbearers before entering Leyndell.
Alternate-ending quests, optional demigods and DLC content are outside the completion goal.
Set yourself up for the run
Choose a beginner-friendly class that matches your intended playstyle: Vagabond or Hero for Strength, Confessor or Prophet for Faith, Astrologer or Prisoner for Intelligence, and Bandit for a direct Arcane route.
Your class affects starting attributes and equipment but does not permanently lock your build.
Prioritize Vigor, meet the requirements for one main weapon or casting tool, and upgrade that weapon consistently with regular or Somber Smithing Stones as appropriate.
Learn rolling, blocking, guard counters, jumping, stamina management and weapon skills; many mandatory bosses punish overcommitment.
Reach early Limgrave Sites of Grace, accept Melina’s accord, and obtain Torrent before relying on mounted traversal. Torrent is useful for open-world travel and retreats but is unavailable in many dungeons and boss arenas.
Use Sites of Grace as fast-travel anchors, spend Runes regularly, and improve Sacred Flasks with Golden Seeds and Sacred Tears when available.
Prepare status-resistance items for regions that require them, but do not treat Dectus Medallion halves, Haligtree Secret Medallion halves or optional quest items as universal requirements. Altus Plateau can also be reached through the Ruin-Strewn Precipice.
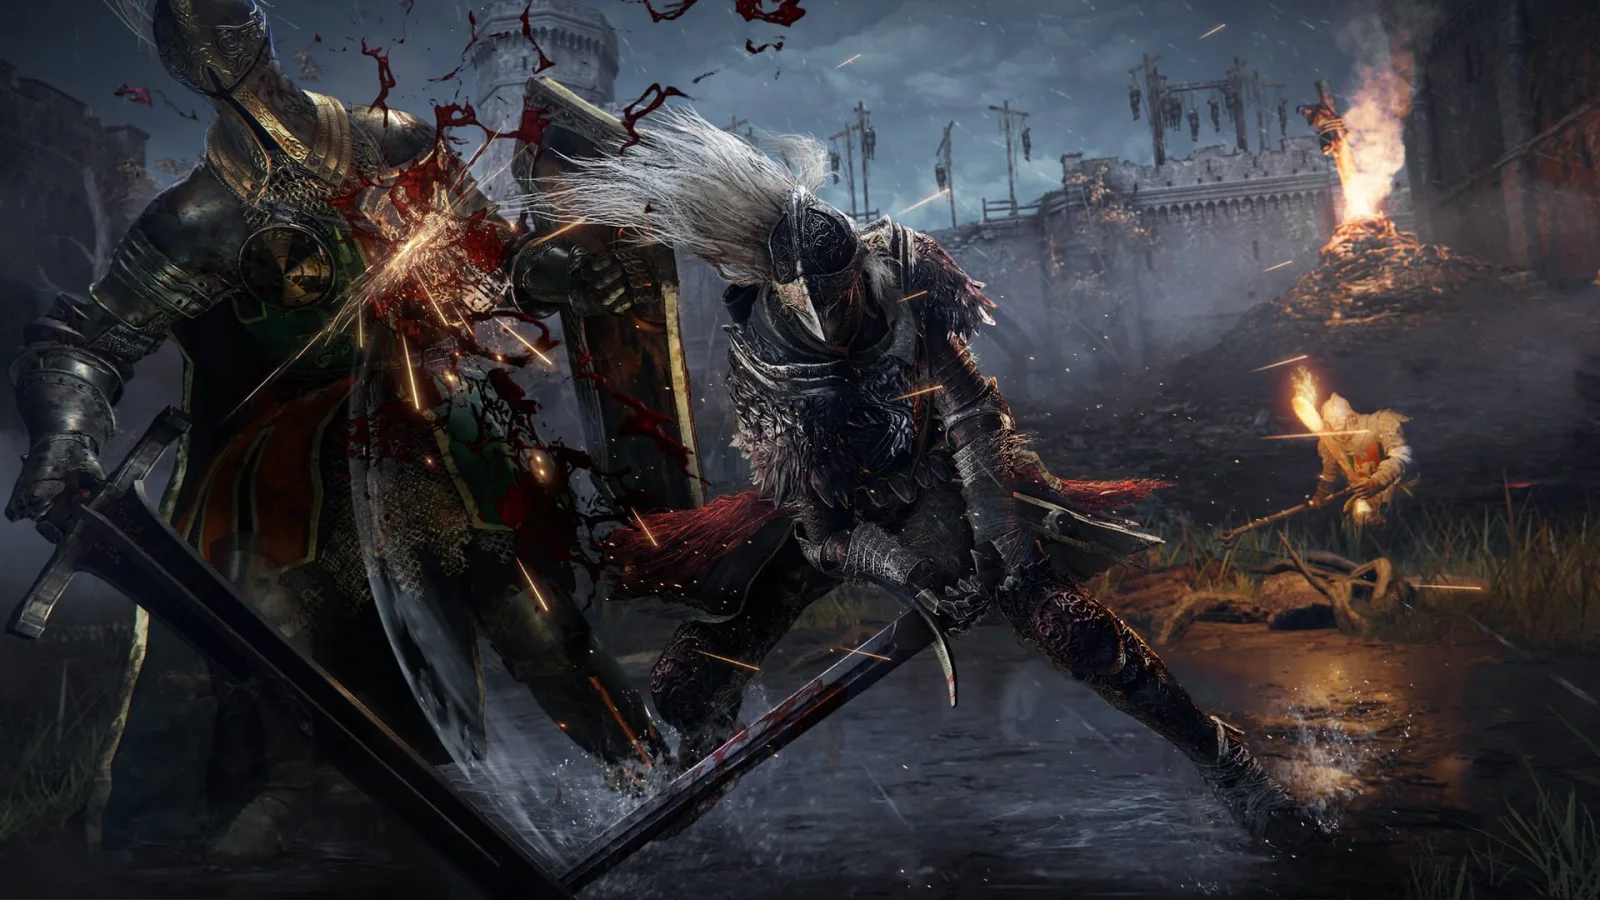
Character start, classes, and early stats for a stable main-route run
Choose a starting class that supports the attributes you will actually use, then spend early levels on survival and weapon requirements instead of spreading points across every damage stat. Vagabond is the safest Strength foundation, Hero suits heavier Strength weapons and can support a Strength/Arcane plan, Bandit is the direct Arcane choice, Confessor or Prophet supports Faith, and Astrologer or Prisoner supports Intelligence. The Golden Seed is the best general keepsake for a first campaign. After the Stranded Graveyard, activate the early Limgrave Sites of Grace, meet Melina, accept her accord, and obtain Torrent. Mounted travel lets you bypass patrols, cross Limgrave quickly, use Spirit Springs, collect map fragments, and retreat from encounters that currently exceed your equipment.
Choose an origin that matches your long-term damage stats
Starting classes are not permanent jobs, but their opening attributes and equipment affect how many levels you must spend before a build becomes comfortable. For a Strength-focused first run, choose Vagabond for its high Vigor, shield, Longsword and Halberd, or Hero if you already want a heavier weapon and more Strength. Vagabond is the safer general recommendation because early survivability matters more than having the largest weapon immediately.
Vagabond begins above the normal medium-load threshold with its full starting equipment. Before relying on normal rolls, remove either the Halberd or the helmet, or otherwise reduce your equipment load. Heavy rolling makes early enemies much harder to avoid. For Faith, Confessor is the balanced melee-and-incantation choice, while Prophet is better when casting and Faith are central from the beginning. For Intelligence, Astrologer is the cleanest sorcery start and Prisoner is suitable for an Intelligence/Dexterity mix.
For Arcane, Bandit is the direct original-game starting class because it begins with the highest Arcane among the standard origins. Hero is a reasonable alternative only when Strength is the main stat and Arcane is a secondary part of the plan. Do not select a class because of one weapon you may replace later; select the class whose early Vigor, Mind, Endurance, Strength, Dexterity, Intelligence, Faith or Arcane best matches your intended spread.
- Strength: Vagabond for the safest opening, or Hero for heavier Strength weapons.
- Faith: Confessor for a mixed build, or Prophet for Faith-first casting.
- Intelligence: Astrologer for sorcery priority, or Prisoner for Intelligence with Dexterity.
- Arcane: Bandit for a direct Arcane route; Hero only when Strength remains the main investment.
- If using Vagabond, reach medium load before depending on standard rolling.
Take the Golden Seed as the default keepsake
Choose the Golden Seed for the most forgiving first campaign. At a Site of Grace, it contributes toward increasing the number of uses available from your Sacred Flasks. More healing or focus-point charges help every class during exploration and boss attempts, and the keepsake does not commit you to a weapon, spell school or quest route.
The Stonesword Key is a valid alternative if you already intend to open an early imp-sealed area and know why you want to enter it. It is not required for the main campaign, and using it without a plan can leave you unable to open another sealed entrance later. The Golden Seed is not permanently unique, so choosing another keepsake does not ruin the character; it simply gives up the most broadly useful early benefit.
- Recommended default: Golden Seed.
- Choose Stonesword Key only for a deliberate early locked-area plan.
- Do not restart solely because the keepsake was not ideal.
Exit the Stranded Graveyard and establish your first safe points
Complete the tutorial section in the Stranded Graveyard if you want practice with movement, attacks, guarding and jumping. The tutorial boss is optional and does not block the campaign. After reaching the lower grave area, use the lift to emerge in Limgrave. Activate The First Step Site of Grace and then travel north toward the Church of Elleh.
The Tree Sentinel patrols the road between the starting area and the church. Ride or run around him rather than treating him as the first required boss. Return after obtaining better equipment if you want to fight him. At the Church of Elleh, activate the Site of Grace and speak with Merchant Kalé. His Crafting Kit is useful for making fire pots, throwing knives and other supplies, but purchasing it is not required for main-route progress.
From the church, continue toward the road and Gatefront Ruins. Activate the Gatefront Site of Grace and collect the Limgrave, West map fragment from the stone stele nearby if you have not already done so. Gatefront is a useful reset point because it sits beside the route to Stormgate and provides quick access to the early Limgrave roads.
- Complete or deliberately skip the optional tutorial boss.
- Activate The First Step and Church of Elleh.
- Bypass the Tree Sentinel until your equipment and confidence improve.
- Speak with Merchant Kalé if you need the Crafting Kit.
- Activate the Gatefront Site of Grace and obtain the nearby western Limgrave map fragment.
Meet Melina and obtain leveling and Torrent
Rest at Gatefront after activating the nearby early graces. Melina can appear there and offer her accord; she can also appear at Agheel Lake North immediately, or after you have activated three different Sites of Grace and rest at one of several other early Limgrave graces. Accept the accord. Melina grants the ability to turn Runes into levels and gives the Spectral Steed Whistle, which summons Torrent.
If Melina does not appear at the first grace you try, activate another early Site of Grace and rest again. You do not need to defeat the soldiers at Gatefront, the Tree Sentinel or Margit to receive Torrent. Once leveling is available, spend Runes regularly rather than carrying a large balance into an unexplored camp or cave. The death-recovery marker returns your lost Runes to the place where you died, but a second death before recovering them removes the unclaimed balance.
- Melina has offered her accord.
- You can select Level Up when resting at a Site of Grace.
- The Spectral Steed Whistle is in your inventory.
- You have activated enough nearby graces to recover quickly after a failed attempt.
Spend early levels on survival, requirements and one main weapon
Raise Vigor consistently during the opening portion of the game. Early attribute damage gains are often less valuable than surviving one additional hit, especially while learning attack ranges. Raise Strength, Dexterity, Faith, Intelligence or Arcane when a specific weapon or spell requires it, but avoid investing in all five damage stats at once. Mind is useful for frequent sorcery, incantation or weapon-skill use. Endurance should be increased when stamina or equipment load is limiting you.
Meet the minimum requirements for one dependable main weapon, then improve it instead of carrying several weak alternatives. Standard weapons use regular Smithing Stones, while unique weapons use Somber Smithing Stones; do not assume the two upgrade paths share materials. Early upgrade levels usually produce a more immediate combat improvement than distributing the same runes across multiple attributes. Keep a shield equipped if blocking helps you learn, and two-hand a Strength weapon when appropriate, remembering that two-handing improves effective Strength for requirements and scaling.
For a simple first-run priority, use your starting weapon or another readily available weapon, meet its requirements, raise Vigor, and upgrade it whenever you have the required stones. Add your primary damage stat after your survivability and equipment needs are stable.
- Meet the requirements for one main weapon or casting tool.
- Raise Vigor regularly instead of scattering points across every damage stat.
- Use the correct regular or Somber Smithing Stone path for the weapon.
- Increase Mind or Endurance only when your playstyle or equipment load requires it.
Practice Torrent’s movement in open Limgrave
Use the Spectral Steed Whistle from your equipment, pouch or usable-item slot in areas where mounting is allowed. On the PlayStation controller, the official starter guidance maps dash to holding Circle, jump to Cross, double-jump to pressing Cross twice, and dismount to L3 or the whistle while riding. Torrent can sprint, jump and double-jump, making him valuable for crossing broken terrain and escaping enemies rather than merely increasing travel speed.
While mounted, ride around the Gatefront outskirts and practice passing patrols without stopping. Use Torrent to reach map fragments, distant Sites of Grace and open-field items, then retreat when a group is too strong. Spirit Springs are ridden by jumping near the spring, allowing rapid movement to higher terrain without fall damage from the spring jump. Torrent cannot be summoned in some caves, legacy dungeons and other restricted areas, so dismount before entering tight interiors and expect to fight on foot.
Torrent can be damaged and knocked down. If he dies, summon the whistle again and accept the prompt to spend one charge of the Flask of Crimson Tears to revive him. You can also dismiss him before a fight when foot combat gives better control. Do not ride into barricades, cliffs or narrow ruins assuming speed will solve every problem.
- Summon and dismiss Torrent successfully.
- Practice sprinting, jumping and double-jumping across open terrain.
- Use a Spirit Spring while mounted.
- Ride past at least one enemy group instead of fighting it.
- Know the nearest Site of Grace before attempting a dangerous detour.
- Understand that reviving Torrent consumes one Crimson Tears charge.
Before you move on
- A starting origin and primary route have been selected: Strength, Faith, Intelligence, Arcane or a deliberate hybrid.
- The Golden Seed or a deliberate alternative keepsake has been chosen.
- The First Step, Church of Elleh and Gatefront Sites of Grace are active.
- Melina has granted leveling and the Spectral Steed Whistle, and Torrent can be summoned in permitted areas.
- Your equipment load permits normal rolling.
- Your main weapon meets its requirements and has begun receiving regular upgrades through the correct Smithing Stone path.
- Vigor is receiving consistent early investment, and you can safely bypass or retreat from enemies that currently outmatch you.
Tutorial, Stranded Graveyard and Limgrave first steps
Complete the Cave of Knowledge, leave the Stranded Graveyard, and activate the First Step and Church of Elleh Sites of Grace. Avoid the Tree Sentinel, meet Merchant Kale, buy the Crafting Kit if affordable, then reach Gatefront Ruins to obtain the Limgrave, West map fragment, the Whetstone Knife, Torrent, and access to leveling. Use the Church of Elleh, Gatefront Ruins, nearby road camps, and optional early caves as a controlled practice and rune loop. Upgrade one main weapon, raise survivability, and retreat from enemies or field bosses that currently consume too many healing charges. The chapter ends when you can travel safely through western Limgrave and approach Stormveil without needing to clear every optional location.
1. Complete the Cave of Knowledge and leave the Stranded Graveyard
After character creation, follow the opening route until you reach the ledge above the tutorial pit. Drop into the pit if you want to learn attacking, blocking, rolling, jumping, stealth, guard counters, and item use in a controlled area. The tutorial ends at the Soldier of Godrick encounter. Defeat it, collect the reward, and continue through the elevator exit to the surface. If you skip the pit, you can still complete the campaign normally.
The Grafted Scion is not the Stranded Graveyard tutorial boss. It appears during the opening Chapel of Anticipation sequence before the character reaches the graveyard, and defeating it is not required. If you die there, the game proceeds to the normal starting route. On the surface, activate the First Step Site of Grace immediately. This is your first dependable return point in Limgrave.
- Complete or skip the Cave of Knowledge according to your preference.
- Defeat Soldier of Godrick if you entered the tutorial pit.
- Do not treat the Grafted Scion as a required early victory.
- Activate the First Step Site of Grace.
2. Reach Church of Elleh and bypass the Tree Sentinel
From the First Step, follow the road north toward the ruined Church of Elleh. The Tree Sentinel patrols the open ground along this approach. Leave it alone for now. Ride or sprint around the western side of the road, using trees and the church ruins to break line of sight if it notices you. The boss remains available later, but defeating it is not needed to unlock any of this chapter’s required objectives.
Activate the Church of Elleh Site of Grace and speak with Merchant Kale. Buy the Crafting Kit when you can afford it; it unlocks crafting from the pause menu. The church also has a small smithing table. With the necessary Smithing Stone materials, it can upgrade standard weapons as far as +3 and somber weapons as far as +1. Spend stones on one weapon that suits your intended build instead of spreading early materials across several backups.
- Activate the Church of Elleh Site of Grace.
- Avoid fighting the Tree Sentinel during the first visit.
- Speak with Merchant Kale.
- Buy the Crafting Kit if affordable.
- Use the church anvil for early weapon upgrades.
3. Reach Gatefront Ruins and unlock Torrent
Travel north-east from Church of Elleh through the woods and follow the road toward Gatefront Ruins. Activate the Gatefront Site of Grace before committing to the camp. Rest there to trigger Melina’s encounter. Accept her accord to unlock leveling at Sites of Grace and receive the Spectral Steed Whistle, which summons Torrent.
Place the whistle in an equipment slot or pouch position that you can access quickly. Torrent lets you bypass patrols, separate enemies, escape ambushes, recover dropped runes, and cross Limgrave much faster. If an attack knocks you from the saddle, create distance before attempting to remount. Do not spend every early rune on equipment; gaining a few levels, especially in Vigor when ordinary enemies kill you quickly, is usually more valuable.
- Activate Gatefront Site of Grace.
- Rest and accept Melina’s accord.
- Confirm that the Spectral Steed Whistle is available.
- Use Torrent for travel and disengagement rather than treating every camp as a mandatory fight.
4. Loot Gatefront Ruins without starting a group battle
Approach the ruins from the south and use crouching to remove isolated soldiers. The camp contains soldiers, wolves, and a tougher knight, so avoid charging through the center. If a soldier reaches the horn, the alarm can draw several enemies into the same fight. Retreat toward the road or use Torrent to create distance instead of trying to defeat the entire group while surrounded.
Collect the Limgrave, West map fragment from the stone monument beside the road. In the southern part of the ruins, descend the stairs into the underground room and open the chest to obtain the Whetstone Knife and the Storm Stomp Ash of War. The Whetstone Knife allows Ashes of War and their compatible affinities to be managed at Sites of Grace. Search the nearby carriages only if the camp is under control; their weapons are useful but are not required for campaign progression.
- Collect Map: Limgrave, West.
- Take the Whetstone Knife and Storm Stomp from the underground chest.
- Use stealth, single-target lures, or mounted retreat against the camp.
- Rest at Gatefront before spending a large rune total.
5. Establish a safe early rune and upgrade loop
Use the route between Church of Elleh, Gatefront Ruins, and the road camps immediately around them as your first repeatable loop. From a Site of Grace, defeat only isolated soldiers, wolves, or guards that you can handle without exhausting your healing. Return to the grace, spend the runes, and repeat after enemies reset. This is safer than carrying a large rune total into an unfamiliar cave or field-boss arena.
When you need Smithing Stone materials or extra practice, explore small Limgrave caves one at a time. Groveside Cave, north of Church of Elleh, is a reasonable early test, but its boss is optional and can be postponed. A southward trip across the Bridge of Sacrifice into Weeping Peninsula is also optional; its roads and early dungeons provide additional practice and upgrade opportunities before Stormveil. Do not continue into an area simply because you can reach it on Torrent. If normal enemies kill you in a few hits, return to a grace, improve Vigor or your weapon, and try again later.
- Use short loops rather than carrying a large unspent rune total.
- Upgrade one main weapon before upgrading several alternatives.
- Explore optional caves only when their ordinary enemies are manageable.
- Treat Weeping Peninsula as preparation, not a required detour.
6. Return to Church of Elleh for optional spirit support
After obtaining Torrent, fast-travel back to Church of Elleh and rest or pass time until night if necessary. A nighttime visitor may appear near the church. Speak with her to receive the Spirit Calling Bell and Lone Wolf Ashes when the encounter is available. These items can help with groups and some boss fights, but they are not required to reach Stormveil or finish the base-game campaign. If the visitor does not appear, continue playing and obtain spirit-summoning access later through normal progression.
Do not confuse spirit ashes with multiplayer summoning. Spirit ashes require an area where summoning is permitted and consume FP or another stated resource. Equip them only when you intend to use them, and remember that Torrent cannot be summoned in every combat area.
- Check Church of Elleh after obtaining Torrent.
- Acquire the Spirit Calling Bell and Lone Wolf Ashes if the nighttime encounter appears.
- Treat spirit ashes as optional assistance rather than a progression requirement.
7. Decide when Limgrave preparation is complete
Before approaching Stormveil, you should be able to defeat or bypass Gatefront enemies consistently, reach Church of Elleh and Gatefront quickly by fast travel, and recover dropped runes without repeatedly dying on the route. Keep enough Endurance for a normal roll in your chosen equipment, but prioritize survivability over minor early damage gains. Meet the attribute requirements of your chosen weapon before investing heavily in offensive scaling.
The Tree Sentinel, Groveside Cave boss, other field bosses, every Limgrave cave, and the Weeping Peninsula are optional for this chapter. If an enemy repeatedly defeats you while you are still learning its attack pattern, mark the location and leave. Your concrete stopping point is an upgraded primary weapon, access to leveling, Torrent, several usable healing charges, and enough confidence to travel from Gatefront toward Stormveil without needing to clear every camp.
- Your primary weapon has at least some early upgrades.
- Torrent and leveling are unlocked.
- Church of Elleh and Gatefront are active fast-travel points.
- The Limgrave, West map fragment and Whetstone Knife are collected.
- You can safely retreat from optional bosses and difficult camps.
- You are ready to begin the Stormveil approach.
Before you move on
- The Cave of Knowledge has been completed or intentionally skipped, and the First Step Site of Grace is active.
- Church of Elleh and Gatefront Ruins Sites of Grace are active.
- Merchant Kale has been visited and the Crafting Kit has been purchased if affordable.
- Melina has been met at Gatefront, unlocking leveling and Torrent through the Spectral Steed Whistle.
- The Limgrave, West map fragment is collected from Gatefront Ruins.
- The Whetstone Knife and Storm Stomp Ash of War are collected from the underground chest in Gatefront Ruins.
- The main weapon has received appropriate early upgrades, using standard or somber stones according to its upgrade type.
- You can use the Church of Elleh–Gatefront area as a safe rune and practice loop.
- You are prepared to approach Stormveil while leaving the Tree Sentinel and other optional bosses for a later return.
Stormveil Castle approach and defeating Godrick the Grafted
Defeat Margit, enter Stormveil Castle through either the main gate or Gostoc’s side route, activate the key Sites of Grace, and reach Godrick’s arena. The side route is safer because it avoids the initial ballista fire. Stormveil is vertical and allows many enemies to be bypassed, so preserve healing for the courtyard and final approach. Godrick is required for this recommended Limgrave-to-Liurnia route and awards a Great Rune and Remembrance, although the wider base game permits alternate shardbearer combinations. Roundtable Hold is unlocked through Melina’s invitation at a Site of Grace, not exclusively by defeating Godrick.
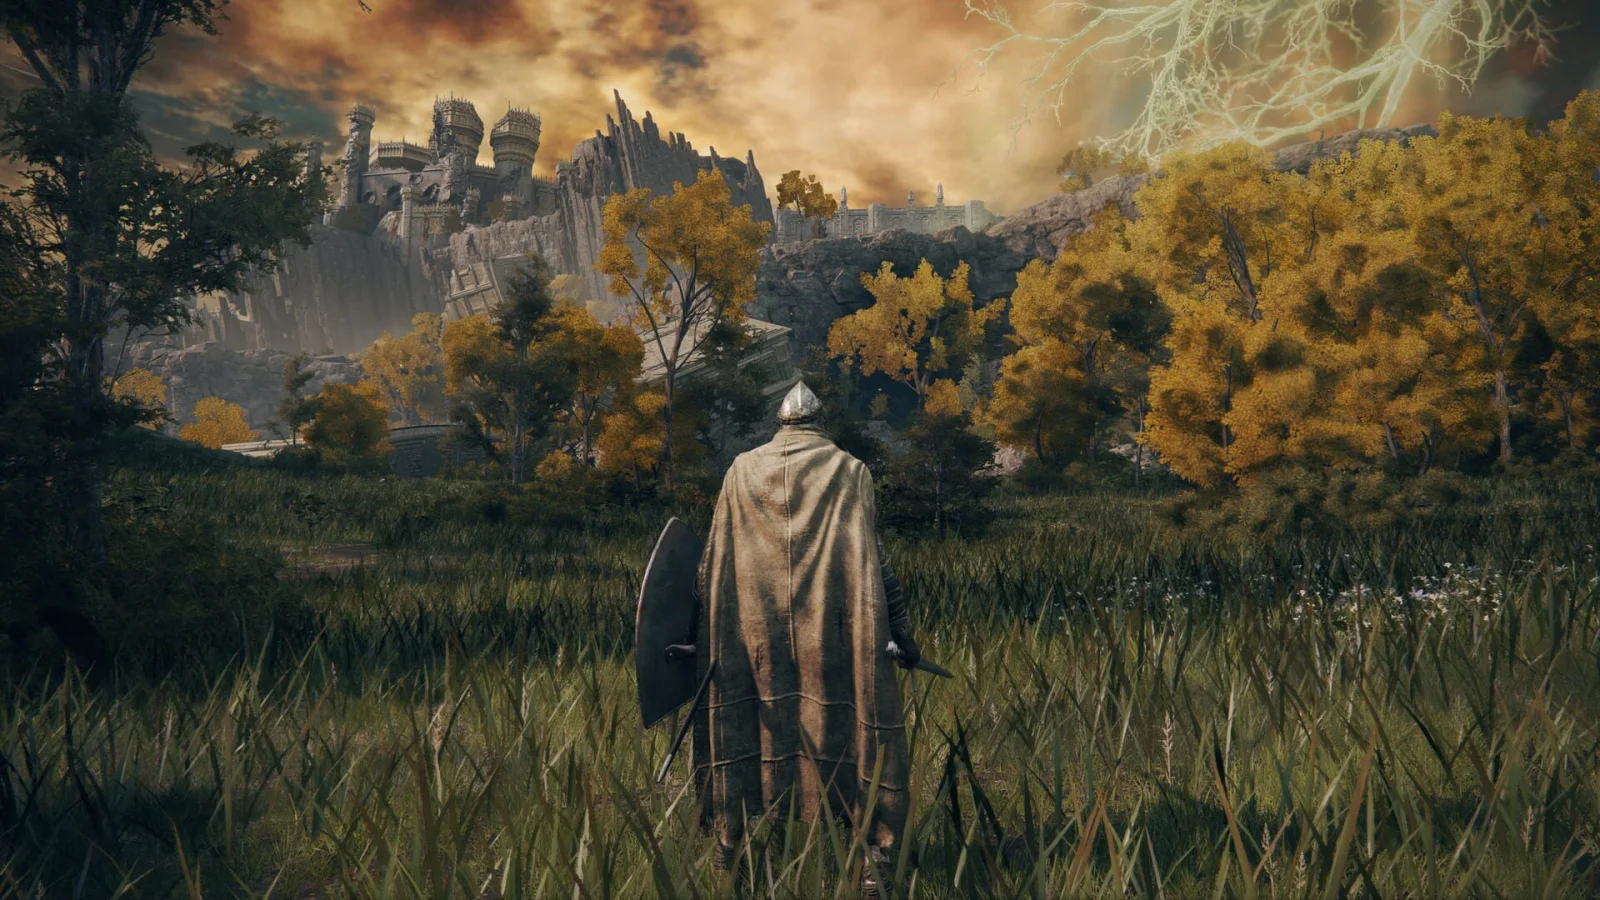
1. Prepare at Stormhill and defeat Margit
Follow the main road north through Limgrave and Stormhill, activating Sites of Grace as you go. Rest at the Margit, the Fell Omen Site of Grace outside the arena, spend any runes you cannot afford to lose, and improve your main weapon with available Smithing Stones before attempting the fight.
Margit uses delayed staff swings, sweeping attacks, a jumping hammer strike, and, in the second phase, additional golden weapons with greater reach. Do not dodge on the first movement of every attack; wait for the strike to begin, then roll through or away from it. Punish the recovery after his longer attacks instead of trading during a chain. If the fight is too difficult, leave through the Site of Grace and explore Limgrave or the Weeping Peninsula for levels, weapon materials, Flask upgrades, and a spirit ash. Margit must be defeated to open the normal approach to Stormveil Castle.
- Activate the Margit, the Fell Omen Site of Grace.
- Spend or bank runes before the attempt.
- Upgrade the main weapon and prepare a spirit ash or multiplayer summon if desired.
2. Choose the main gate or Gostoc’s side entrance
After Margit, follow the uphill road to Stormveil Main Gate. Rest at the Site of Grace and speak with Gatekeeper Gostoc beside the closed gate. His suggested side passage begins through the doorway beside the gate and winds around the castle wall. Use this route for a first clear: it avoids the concentrated ballista fire and gives access to the Stormveil Cliffside checkpoint early.
The main gate is still a valid route. If you use it, open the gate and move immediately through the projectile lane toward the inner doorway or nearby cover. Do not stop in the open to fight every soldier. The gate route is more exposed, not a separate story path, and both entrances ultimately lead into the same legacy dungeon.
- Rest at Stormveil Main Gate.
- Speak with Gostoc before choosing the side path.
- If using the main gate, sprint to cover and avoid prolonged fighting in the firing lane.
3. Reach Stormveil Cliffside and Rampart Tower
From Gostoc’s side passage, follow the exterior ledges and climb toward Stormveil Cliffside. The path narrows in places, so fight enemies one at a time and avoid rolling toward the drop. Activate Stormveil Cliffside as soon as you reach it; this separates the outer-wall approach from the gate section after a death.
Continue up the stairs and platforms. Watch for Exiles above and birds that throw explosive barrels. Move sideways when a bird prepares to release a barrel, then attack only after the hazard has passed. Continue through the interior room, obtain the Rusty Key from the locked-room route if needed, and climb toward the elevator area. The Rampart Tower Site of Grace is reached by taking the lift and entering the room beyond it.
- Activate Stormveil Cliffside.
- Activate Rampart Tower.
- Treat birds and explosive barrels as the primary hazard on the outer wall.
4. Cross the ramparts and reach Liftside Chamber
Leave Rampart Tower through the route leading onto the rooftops. Cross the battlements, descend through the church area, and continue through the rooms toward the large interior section. Banished Knights can kill an underprepared character quickly, so lure them away from groups, use doorways to limit their movement, and retreat to the Site of Grace if your Flask charges are running low.
Continue through the castle until you reach the courtyard-side buildings. The Liftside Chamber Site of Grace is in a room near the courtyard. From this checkpoint, the main route runs back toward the courtyard and then up the stairs and passage on the opposite side. The elevator beside the grace connects to a side route near the boss approach and to the Living Jar area; it is useful for navigation, but it does not replace the courtyard route.
- Use Rampart Tower to reset the outer-wall section.
- Activate Liftside Chamber.
- Do not fight a Banished Knight in the middle of a larger group.
5. Cross the courtyard and activate Secluded Cell
From Liftside Chamber, return toward the courtyard and take the stairs ahead. Fire-spitting birds, Exiles, dogs, and flame turrets can combine their attacks, so move along the edge rather than through the center. You may defeat enemies methodically, or sprint from cover to cover. Prioritize ranged attackers and any enemy blocking the doorway you need.
Continue through the upper passage and the room containing Living Jars, then follow the descending hallway to Secluded Cell. This is the final Site of Grace before Godrick. If you spoke with Nepheli Loux in the castle, her summon sign can appear near the boss entrance. Optional rooftops, the sewer, Stonesword Key rooms, and the Limgrave Tower Bridge are not necessary before the boss.
- Reach and activate Secluded Cell.
- Preserve enough healing for the boss attempt.
- Leave optional castle branches for after Godrick if they are costing too many deaths.
6. Defeat Godrick the Grafted
Godrick’s first phase combines wide axe swings, delayed attacks, lunges, wind projectiles, and a rolling movement. Stay near his side only when his current animation is ending, then land a short attack sequence and disengage. Avoid standing directly in front of him while he chains broad swings. A spirit ash or Nepheli can draw attention away from you, but reposition whenever Godrick turns toward your summon so a sweeping attack does not catch you both.
At about half health, Godrick begins the transition into his second phase by grafting a dragon head to his arm. The dragon-fire attacks cover a broad area. Move laterally or create distance while he aims the head, then approach after the fire ends for a brief punish. Do not continue attacking through the transition or stand directly in front of the fire. If you fail, recover your runes only after confirming the arena is safe, then change one factor at a time: raise Vigor, improve the weapon, use a sturdier spirit ash, adjust your talisman setup, or summon assistance.
- Enter from Secluded Cell.
- Avoid the dragon-fire line and punish only after it ends.
- Confirm the victory reward before leaving the arena.
7. Collect the rewards and leave toward Liurnia
Godrick awards Godrick’s Great Rune, the Remembrance of the Grafted, and runes. The Remembrance can be kept for later exchange or consumed, but keeping it preserves its boss-reward options. The Great Rune is not active merely because it is in your inventory. To use it, restore it at the Divine Tower of Limgrave and then equip it at a Site of Grace; a Rune Arc is required to activate its effect.
After the victory, enter the building beyond the arena, follow the passage down, and exit the castle toward the Lake-Facing Cliffs Site of Grace in Liurnia of the Lakes. The Divine Tower route is optional for immediate campaign progress. If you have not already visited Roundtable Hold, rest at Sites of Grace until Melina offers to take you there. That invitation, rather than Godrick’s death itself, is the relevant access trigger.
- Godrick the Grafted is defeated.
- Godrick’s Great Rune and Remembrance of the Grafted are received.
- The route to the Lake-Facing Cliffs Site of Grace is open.
- Roundtable Hold is available through Melina’s invitation, if it was not unlocked earlier.
Before you move on
- Margit, the Fell Omen is defeated.
- Stormveil Main Gate, Stormveil Cliffside, Rampart Tower, Liftside Chamber, and Secluded Cell have been reached or activated on the route.
- Godrick the Grafted is defeated and both Godrick’s Great Rune and Remembrance of the Grafted are in the inventory.
- The post-boss passage leads out to the Lake-Facing Cliffs Site of Grace in Liurnia of the Lakes.
- Roundtable Hold can be selected from the map after Melina’s invitation has been accepted.
- No Shadow of the Erdtree area, item, boss, or progression requirement is needed for this chapter.
Liurnia of the Lakes and Rennala, Queen of the Full Moon
After Stormveil Castle, enter Liurnia of the Lakes and make Raya Lucaria Academy the next major objective. Travel north through the shallow lake, collect the Academy Glintstone Key from the island guarded by Glintstone Dragon Smarag, and use the seal at the Main Academy Gate to enter. Inside the legacy dungeon, activate the Schoolhouse Classroom Site of Grace, defeat the Red Wolf of Radagon, cross the upper courtyard and rooftops, then take the lift to the Grand Library. Rennala’s first phase requires breaking the golden shield carried by glowing singing students. Her second phase is a mobile sorcery fight supported by temporary spirit summons. Defeat her to obtain the Great Rune of the Unborn and unlock Rebirth at the Grand Library, provided you have a Larval Tear. Rennala is the recommended second Shardbearer for this route, but she is not the only possible source of a second Great Rune. Optional Academy loot, NPC events, hidden rooms, and the locked chest are not needed to complete this chapter.
1. Enter Liurnia and establish the approach
Leave Stormveil Castle through its northern exit and activate the Lake-Facing Cliffs Site of Grace when you reach the overlook. From there, descend toward the shallow lake and travel north or northwest on Torrent. You do not need to climb every cliff or clear every ruin. The direct objective is the Academy of Raya Lucaria, which stands in the western-central part of Liurnia.
Activate Liurnia Lake Shore, Academy Gate Town, and Main Academy Gate if you pass them. Academy Gate Town is a useful navigation landmark, but do not spend all your healing charges fighting groups among the flooded buildings. Mounted travel is best for crossing open water and avoiding isolated enemies; dismount before fighting in narrow ruins or around several casters.
This chapter assumes you are following the common Godrick-then-Rennala route. Rennala is a recommended second Shardbearer because she provides a Great Rune and unlocks Rebirth. However, the game does not require Rennala specifically to open Leyndell. Two Great Runes from eligible Shardbearers are sufficient, so another boss can replace her if you have already taken a different route.
- Stormveil Castle has been exited into Liurnia of the Lakes.
- Lake-Facing Cliffs or another nearby Liurnia Site of Grace is active.
- Your weapon has received several early upgrades, and your Vigor is high enough that ordinary lake enemies do not kill you immediately.
2. Take the Academy Glintstone Key from Glintstone Dragon Smarag
The Academy entrance seals require an Academy Glintstone Key. The key used for your own entry is on a corpse on the small island west of Raya Lucaria Academy, directly behind or near Glintstone Dragon Smarag. Ride to the island from the southern or western side and approach the dragon’s resting place carefully.
You do not need to defeat Smarag. Move behind the sleeping dragon, take the key, and retreat on Torrent as soon as the dragon wakes or begins attacking. If you are knocked from Torrent, prioritize escaping rather than trying to recover the item or finish the fight. The dragon can be challenged later as optional content.
Return to the Main Academy Gate. At the four-way gate platform, activate the Site of Grace, then use the blue seal associated with the Academy entrance. The other seals at this location are travel connections and do not replace the key requirement for entering the dungeon.
- The Academy Glintstone Key is in your inventory.
- The key was taken from the island near Glintstone Dragon Smarag.
- The Main Academy Gate Site of Grace is active, and the blue seal has transported you inside the Academy.
3. Reach the Schoolhouse Classroom Site of Grace
Follow the Academy’s initial exterior path through the graveyard and ruined walkways. Glintstone sorcerers can stagger you with repeated projectiles, while marionette soldiers and ambushers punish players who sprint around blind corners. Use walls, gravestones, and doorways as cover. If several enemies are alerted, retreat to open ground rather than fighting beneath multiple elevated casters.
Continue until you reach the Schoolhouse Classroom Site of Grace. This is the first important checkpoint inside the dungeon and should be activated before attempting the Red Wolf of Radagon. The side rooms and upper paths contain spells, weapons, upgrade materials, and other rewards, but none are required for Rennala.
A physical weapon is useful in this dungeon even for an intelligence build. You can still use sorcery, but do not make the entire route dependent on a single damage type when the Academy contains enemies with strong magic resistance or awkward movement patterns.
- The Schoolhouse Classroom Site of Grace is active.
- You have enough healing, Focus Points, and weapon durability for the next boss attempt.
- Optional side rooms are being treated as rewards rather than required route locations.
4. Defeat the Red Wolf of Radagon and cross the upper Academy
From the Schoolhouse Classroom area, continue toward the Debate Parlor and enter the boss arena for the Red Wolf of Radagon. The wolf combines fast lunges, a spectral sword, glintstone blades, and jumping attacks. Stay mobile and avoid long recovery animations. After it completes a leap, sword sweep, or committed spell, counterattack briefly and then resume a defensive position.
Ranged characters should move sideways instead of retreating directly toward the arena walls. Melee characters can remain near the wolf to encourage physical attacks, but should not chase it after every jump. Spirit Ashes can help create openings if the summon survives long enough to draw the wolf’s attention.
After victory, activate the Debate Parlor Site of Grace. Leave through the courtyard and look for the route across the raised paths and rooftops. Progress upward past Academy soldiers and sorcerers, then continue through the upper section toward the Carian Knight encounter. The lift beyond this part of the Academy takes you to the Raya Lucaria Grand Library and Rennala’s arena.
- The Red Wolf of Radagon is defeated.
- The Debate Parlor Site of Grace is active.
- The upper courtyard, rooftop route, Carian Knight area, and lift toward the Grand Library have been reached.
5. Break Rennala’s golden shield in phase one
At the start of the first phase, Rennala floats above the library while students crawl across the floor, throw objects, and sustain her golden shield. Do not try to kill every student. Search for the students glowing with a golden aura and singing. Strike those students until the shield breaks and Rennala falls.
Use the collapse window for heavy attacks, jumping attacks, charged attacks, or a critical strike if the opening allows it. When the shield reforms, repeat the search. Keep moving while looking for the glowing students because books, projectiles, and falling objects can interrupt you.
The students are distractions rather than the main objective. Spending too long clearing the room increases the chance of taking unnecessary damage and leaves fewer resources for the second phase. Save some healing and stamina for the transition instead of using every charge during the search pattern.
- Glowing singing students are being prioritized over ordinary students.
- Rennala is attacked only after her shield collapses.
- Healing and stamina remain available when the first phase ends.
6. Defeat Rennala in the moonlit arena
The second phase begins in a large moonlit arena. Rennala uses tracking glintstone attacks, a powerful beam, a large moon projectile, and temporary spirit summons. Run laterally when homing projectiles are released. When she commits to the beam or finishes a large spell, sprint toward her and attack during the recovery period.
Rennala has strong magic resistance, so a physical weapon is often the simplest option for a magic-focused character. This does not mean every nonmagical attack is automatically effective; use the weapon you have upgraded most consistently and avoid trading repeated hits. Melee characters should stay aggressive while watching for the end of her casting animations.
When Rennala summons wolves, a Bloodhound Knight, a troll, or another temporary creature, you normally do not need to defeat the summon. Keep Rennala targeted if you can reach her safely, and use the summons as a reason to reposition rather than as a new objective. Spirit Ashes can draw attention away from you, but summon at a safe opening and do not stand still while completing the animation.
If the attempt fails, return from the Raya Lucaria Grand Library Site of Grace. The Red Wolf remains defeated, so the next attempt begins at Rennala rather than requiring the dungeon to be repeated. Upgrade your weapon, improve your physical damage option, or spend accumulated runes before trying again.
- Rennala’s health reaches zero in the second arena.
- Temporary spirit summons are ignored unless one prevents safe movement or blocks access to Rennala.
- The Raya Lucaria Grand Library Site of Grace is activated after victory.
7. Use Rebirth and leave the Academy
Rennala remains in the Grand Library after the fight. Her Great Rune of the Unborn is obtained automatically through the encounter and does not function like an equipable Great Rune with a passive battlefield effect. It also does not require restoration at a Divine Tower.
Speak with Rennala to access Rebirth when you possess a Larval Tear. Rebirth reallocates your attributes while preserving your total character level. Confirm that the revised attributes still meet the requirements for your equipped weapons, armor, spells, and incantations before accepting the change. A Larval Tear is consumed when the rebirth is confirmed.
Rennala also provides an appearance-change service. The Academy’s locked chest, hidden rooms, additional sorceries, NPC interactions, and rooftop loot are optional. Complete them now only if you specifically want their rewards. For the campaign route, rest at the Grand Library and prepare to travel toward Altus Plateau through either the Grand Lift of Dectus or the alternative ravine route.
Defeating Rennala gives this route its second Great Rune if Godrick was defeated earlier. That is the practical progression milestone. It does not mean that every Age of Fracture run must defeat Rennala, because another Shardbearer can provide the second Great Rune instead.
- Rennala and the Red Wolf of Radagon are defeated.
- The Great Rune of the Unborn is obtained.
- Rennala offers Rebirth, and a Larval Tear is available if you want to respec.
- The player is ready to leave the Academy and pursue Altus Plateau without treating optional Academy content as mandatory.
Before you move on
- Liurnia of the Lakes has been entered, and the Academy Glintstone Key has been taken from the island near Glintstone Dragon Smarag.
- The Academy has been entered through the Main Academy Gate seal, and the Schoolhouse Classroom Site of Grace is active.
- The Red Wolf of Radagon and Rennala, Queen of the Full Moon, are defeated.
- The Raya Lucaria Grand Library Site of Grace is available, and Rennala remains there for Rebirth and appearance changes.
- The Great Rune of the Unborn is in the inventory.
- If following the recommended Godrick-then-Rennala route, the character now has two Great Runes and can continue toward Leyndell after completing the Altus Plateau access requirements.
- No Shadow of the Erdtree location, boss, item, or prerequisite is needed for this chapter.
References for this chapter
Altus Plateau access: Grand Lift of Dectus vs. Ruins route
After reaching Liurnia and completing the Academy route, enter Altus Plateau either by using the Grand Lift of Dectus with both medallion halves or by climbing the Ruin-Strewn Precipice and defeating Magma Wyrm Makar. The lift route requires trips to Fort Haight in Limgrave and Fort Faroth in Caelid but avoids a dungeon boss. The Precipice route starts in northern Liurnia, contains a vertical mine-and-cliff dungeon, and ends at an elevator to Altus after Makar’s defeat. Before pushing toward Leyndell, secure a nearby Site of Grace, spend risky runes, and bring your main weapon to a practical midgame upgrade level. A normal weapon around +6 to +10 is a useful target, while somber weapons should be upgraded as far as your available materials and build permit.
Prepare in Liurnia before choosing an entrance
Establish a Site of Grace near the route you intend to use and spend most of your runes before travelling into unfamiliar areas. From the eastern side of Liurnia, the Bellum Highway leads north toward the Grand Lift of Dectus. The ravine farther north leads to Ravine-Veiled Village and the Ruin-Strewn Precipice.
Altus Plateau is not locked behind a specific character level or weapon level. However, enemies deal more damage than most ordinary Liurnia enemies, so a normal weapon around +6 to +10 is a reasonable preparation target for exploration. Somber weapons should be upgraded according to the stones you have found rather than forced to match normal weapon numbers. If enemies can kill you in one or two hits, raise Vigor or improve defensive equipment before moving on. Keep enough healing, stamina, and FP for the tools your build actually uses.
- Activate a nearby Liurnia Site of Grace.
- Spend or secure excess runes before entering the route.
- Upgrade your main weapon and improve survivability if ordinary enemies are overwhelming.
Collect the left half at Fort Haight
Travel to Fort Haight in southeastern Limgrave, on the eastern side of the Mistwood. Enter the fort and climb through its defenders toward the upper section. The chest containing the Dectus Medallion (Left) is at the top of the fort. You do not need to clear every soldier or defeat the fort’s strongest enemy to obtain it; take the chest and retreat if the remaining enemies are costing too many flasks.
The item is recorded as the left half of the Dectus Medallion. It will remain a separate inventory entry until you use both halves at the Grand Lift, so do not expect the two pieces to merge immediately after collection.
- Reach Fort Haight in southeastern Limgrave.
- Open the upper chest containing Dectus Medallion (Left).
- Leave the fort or rest at a safe Site of Grace if your resources are low.
Collect the right half at Fort Faroth
Travel to Fort Faroth in eastern Caelid, within the Dragonbarrow area. The fort’s bats and cramped interior can inflict heavy damage, especially on a character who has not explored Caelid yet. Enter with Torrent available, move directly through the opening area, and use the ladder to reach the upper section and its chest. The chest contains Dectus Medallion (Right).
The large dragon outside Fort Faroth does not need to be defeated to obtain the medallion half. If the fort is too dangerous to fight through, sprint between threats, open the chest, and retreat. Check your inventory afterward for both Dectus Medallion (Left) and Dectus Medallion (Right).
- Reach Fort Faroth in eastern Caelid.
- Open the upper chest containing Dectus Medallion (Right).
- Confirm that both separate medallion halves are in your inventory.
Use the Grand Lift of Dectus
Return to northeastern Liurnia and follow the Bellum Highway north. The road ends at the Grand Lift of Dectus. Stand on the central platform and use the prompt to hoist the completed medallion. The game will play the lift sequence and carry you to Altus Plateau without requiring a dungeon boss fight.
When the lift reaches the top, activate the nearby Altus Plateau Site of Grace before riding away. Move clear of the lift structure before engaging enemies; the nearby golems can hit hard, and the arrival area is not a good place to spend all your healing. From the grace, orient yourself toward the road and Altus Highway Junction. The lift route is the most direct option if you have already collected both halves and want to avoid the Ruin-Strewn Precipice boss.
- Reach the Grand Lift of Dectus from the Bellum Highway.
- Hoist the medallion using the lift’s central platform.
- Activate the Altus Plateau Site of Grace at the top.
Enter the Ruin-Strewn Precipice from northern Liurnia
If you do not want to visit Caelid or cannot safely reach Fort Faroth, travel north through Liurnia’s narrowing ravine. Find Ravine-Veiled Village and activate its Site of Grace near the entrance to the ascent. Climb the ladders and wooden platforms into the mine passages, then continue upward through the Ruin-Strewn Precipice.
The route alternates between mine tunnels and exposed cliffside sections. Glintstone miners, Vulgar Militiamen, bats, and poison-spitting enemies occupy the climb. Many can be bypassed, but check narrow ledges before sprinting because a hit can knock you to your death. Use ranged attacks or a controlled pull to separate enemies, and activate the Ruin-Strewn Precipice and Ruin-Strewn Precipice Overlook Sites of Grace as you find them. The Overlook grace is the final checkpoint before the boss.
- Reach Ravine-Veiled Village in the northern Liurnia ravine.
- Climb through the mine and cliffside sections.
- Activate the Ruin-Strewn Precipice Overlook Site of Grace.
Defeat Magma Wyrm Makar and take the upper lift
Magma Wyrm Makar guards the end of the Precipice. The boss charges forward while leaving pools and trails of magma behind, reducing the safe space in the arena. Stay to the side of the head and avoid standing in the lava while attacking. When Makar lowers or exposes the head, use that opening for stronger damage, then disengage before the next charge. A Spirit Ash or co-op ally can create additional openings, but avoid attacking from a position that leaves you trapped against a wall or in magma.
During the later portion of the fight, Makar uses a large sword and wider attacks. Give the sword swings room, watch the ground rather than focusing only on the boss model, and preserve enough stamina to roll away from the next charge. After victory, activate the Site of Grace in the boss area, then continue beyond the arena to the elevator. Ride it to Altus Plateau and activate Abandoned Coffin. That grace confirms that the alternate entrance has been completed.
- Defeat Magma Wyrm Makar.
- Activate the post-boss Site of Grace before leaving the arena.
- Ride the elevator beyond the boss room.
- Activate Abandoned Coffin in Altus Plateau.
Stabilize your equipment after reaching Altus
Whether you arrived by lift or by the Precipice, spend runes and prepare before heading toward Leyndell. Test your weapon against nearby enemies rather than immediately committing to a major dungeon. If ordinary soldiers take too long to defeat or their attacks remove most of your health, return to a smithing location, improve your weapon, raise Vigor, or adjust your defensive talismans.
The two entrances are independent. Using the Grand Lift does not prevent later exploration of the Ruin-Strewn Precipice, and defeating Makar does not remove access to the Grand Lift. Your immediate completion target is not to clear all of Altus Plateau; it is to establish a reliable grace, secure your runes, and reach Altus Highway Junction with a build capable of surviving the next section.
- Spend or secure your runes after arrival.
- Confirm your main weapon and flask allocation are suitable for Altus enemies.
- Reach Altus Highway Junction when ready to begin the capital approach.
Before you move on
- You have either hoisted both Dectus Medallion halves at the Grand Lift of Dectus or defeated Magma Wyrm Makar and ridden the elevator beyond his arena.
- A Site of Grace in Altus Plateau is active, such as Altus Plateau or Abandoned Coffin.
- Your normal weapon is approximately +6 to +10, or your somber weapon has been upgraded as far as your available materials and build support.
- You can reach Altus Highway Junction with your runes secured and are prepared to continue toward Leyndell.
- No Shadow of the Erdtree area, item, boss, or prerequisite was used for this chapter.
Altus Plateau legacy dungeons and major shardbearer encounters
Altus Plateau and Mt. Gelmir contain valuable optional content, but the standard base-game route has no mandatory legacy dungeon or shardbearer in either region before Leyndell. If you defeated Godrick and Rennala, you already possess two Great Runes and can proceed toward the capital. Your required objective is to reach Altus, activate useful Sites of Grace, improve your weapon and flask setup, and cross the capital’s outer approach. Volcano Manor and Rykard are optional branches with strong rewards, a separate Great Rune, and missable contract content. Clear that branch only if you want its rewards or are prepared for the higher-difficulty route; otherwise, travel east toward Leyndell.
1. Verify the Great Runes that allow the main route to continue
Before leaving Liurnia, open the inventory’s Key Items section and confirm that you have the Great Rune of the Unborn from Rennala and another Great Rune, normally Godrick’s Great Rune from Stormveil Castle. These two runes satisfy the usual progression requirement for the capital. Rennala’s rune is unusual: it supports rebirth at the Grand Library but cannot be equipped at a Site of Grace, restored at a Divine Tower, or activated with a Rune Arc.
If you defeated a different shardbearer instead of Godrick, that rune can fill the second slot. Radahn’s Great Rune and Rykard’s Great Rune are alternatives, not additional requirements for the standard route. You do not need to defeat Rykard, restore every Great Rune, or activate a Great Rune before traveling through Altus toward Leyndell.
At Roundtable Hold, Finger Reader Enia can provide general confirmation that your major rune progress has been recognized. This is a useful check if the capital’s entrance still appears unavailable, but Enia is not required for the Altus route itself.
- Godrick’s Great Rune and Rennala’s Great Rune are in your inventory, or another valid second Great Rune replaces Godrick’s.
- You understand that Rennala’s Great Rune cannot be equipped like Godrick’s.
- You are not delaying Leyndell to search for a mandatory Altus shardbearer.
2. Reach Altus and establish the eastern route toward Leyndell
Enter Altus Plateau either by using the Grand Lift of Dectus with both halves of the Dectus Medallion or by climbing through the Ruin-Strewn Precipice and defeating Magma Wyrm Makar. The lift is the safer route if you already have both halves. The ravine route gives additional runes and equipment but includes platforming, miners, bats, and a boss encounter.
Whichever entrance you use, activate the first nearby Site of Grace and obtain the Altus Plateau map fragment from the roadside monument. Then travel toward Altus Highway Junction and the large outer walls of Leyndell. The main road is a practical landmark: it leads east toward the capital, while the western roads climb toward Mt. Gelmir and Volcano Manor.
Do not spend all your runes immediately before crossing the plateau. Use a Site of Grace to level up, improve your main weapon, and refill your flasks before approaching mounted knights, groups of soldiers, or the capital’s outer defenses. You can ride past field enemies; clearing every patrol is not needed for progression.
- You have reached Altus by the Dectus Lift or Ruin-Strewn Precipice.
- The Altus Plateau map fragment is collected.
- At least one Altus Site of Grace is active, and your current runes are secured before continuing.
3. Understand what is and is not mandatory in Altus
Neither Volcano Manor nor any other legacy dungeon in Altus Plateau or Mt. Gelmir is required to enter Leyndell on the normal route. The next mandatory legacy-dungeon sequence is Leyndell itself. A common eastern approach is blocked by the Draconic Tree Sentinel, so defeat that boss when you are ready, then use the newly opened route into the capital.
The Draconic Tree Sentinel is not a shardbearer and does not provide a Great Rune. Fight from horseback if you are comfortable maintaining distance, or use the road and nearby terrain to create room for healing. His mounted attacks cover a wide area, and the lightning strike punishes standing still at medium range. If the fight is going badly, retreat to the nearby Site of Grace, spend your runes, and return after upgrading your weapon.
The plateau also contains optional locations such as the Shaded Castle, Old Altus Tunnel, minor Erdtree areas, and several caves and catacombs. Explore them for upgrade materials, talismans, or quest items, but do not confuse their rewards with a requirement for the capital.
- You know that no Altus or Mt. Gelmir legacy dungeon is mandatory before Leyndell.
- The Draconic Tree Sentinel is defeated, or you are using a verified alternate access route.
- Your weapon, Vigor, and flask supply are adequate for the capital approach.
4. Enter Volcano Manor only as an optional branch
Volcano Manor lies west of the main plateau route. You can reach it through Mt. Gelmir or arrive at the manor entrance through Rya’s teleport after progressing her interactions. Speak with Tanith and accept the Drawing-Room Key if you want to access the manor’s contract room and the interior dungeon route.
The manor’s assassination contracts award equipment and other rewards, but they are not required for the main ending. Some contracts become available only after further story progress, so reaching Altus does not mean every manor activity can immediately be completed. If you want the manor’s available rewards, finish its current contracts before killing Rykard.
Defeating Rykard, Lord of Blasphemy, ends the manor’s remaining contract progression and changes the dialogue of its inhabitants. This makes Rykard a poor first target if your priority is collecting every available manor reward. If your priority is simply reaching Leyndell and finishing the campaign, skip the branch and follow the eastern road.
- You have decided whether Volcano Manor rewards are worth delaying Leyndell.
- Available manor contracts are completed before Rykard if you want their rewards.
- You understand that Rykard is optional for the base-game ending.
5. Clear Prison Town and defeat Rykard only if you choose the detour
If you take the manor route, use the Drawing-Room Key to open the relevant interior doors and find the passage into Prison Town. Activate the Prison Town Church Site of Grace early. The route contains lava, rooftops, ambushes, and enemies attacking from elevated positions, so advance in short sections and return to the grace after collecting runes or opening a shortcut.
The Godskin Noble is the major boss blocking the deeper route. Keep moving around the arena and use pillars or distance to avoid his rolling attack. After reaching the Temple of Eiglay area, continue through the manor until the Audience Pathway leads to Rykard’s arena.
Pick up the Serpent-Hunter spear inside the arena and equip it for the fight. Its special attacks are designed for the encounter and work from much farther away than ordinary weapons. Stay near the arena’s safer outer space when lava and homing skulls make the center dangerous. After Rykard dies, collect his Remembrance and Great Rune, then decide whether to leave the manor or visit its residents before departing.
- Prison Town Church and Temple of Eiglay Sites of Grace are active.
- The Serpent-Hunter is equipped for Rykard.
- You have completed the manor content you want before defeating the shardbearer.
6. Restore Rykard’s Great Rune only if you need its effect
Rykard’s Great Rune is optional and does not open Leyndell. To restore it, travel to the Sealed Tunnel near Leyndell’s outer wall. The tunnel uses illusory walls and contains miners, ambushes, and a boss. Continue through it until you reach the Divine Tower of West Altus, then climb the tower and interact with the appropriate altar to restore the rune.
After restoration, equip Rykard’s Great Rune at any Site of Grace and use a Rune Arc to activate it. Its effect restores health after defeating enemies, which is more useful while clearing groups than during a single boss attempt. The effect ends when you die. Godrick’s Great Rune is usually the more generally useful choice for a first main-route run because its attribute increase benefits almost any build.
Whether or not you restore Rykard’s rune, your next required destination is Leyndell. Return to the eastern road, prepare your flasks and damage tools, and proceed through the capital entrance after dealing with its outer guardian.
- Rykard’s Great Rune is treated as optional rather than a capital requirement.
- The Sealed Tunnel and Divine Tower of West Altus are used if you choose to restore it.
- You are ready to continue east to Leyndell after finishing or skipping Mt. Gelmir.
Before you move on
- You possess two qualifying Great Runes, normally Godrick’s and Rennala’s.
- You have reached Altus Plateau and activated a local Site of Grace.
- You have either defeated the Draconic Tree Sentinel or secured a valid alternate route into Leyndell.
- Volcano Manor and Rykard have been skipped or completed according to your chosen optional plan.
- You can now proceed east into Leyndell without clearing another Altus legacy dungeon or defeating another Altus shardbearer.
Leyndell approach and the Royal Capital's outer defenses
Enter Leyndell after obtaining two Great Runes, use the standard southern approach through the capital’s outer wall, and defeat the Draconic Tree Sentinel guarding the main gate. Inside, activate the Capital Rampart, East Capital Rampart, Avenue Balcony, and West Capital Rampart Sites of Grace while using the city’s vertical shortcuts instead of fighting every patrol. The required route crosses a petrified dragon wing, climbs into the upper city, and leads to the golden shade of Godfrey, First Elden Lord. After that fight, continue through Erdtree Sanctuary and Queen’s Bedchamber to Morgott, the Omen King. Morgott’s defeat opens the next story region only after you touch the sealed Erdtree entrance, rest at the Elden Throne grace, and accept the Rold Medallion from Melina. The sewers, Fortified Manor, Bolt of Gransax, and other side areas are optional and can be handled before the capital changes later in the campaign.
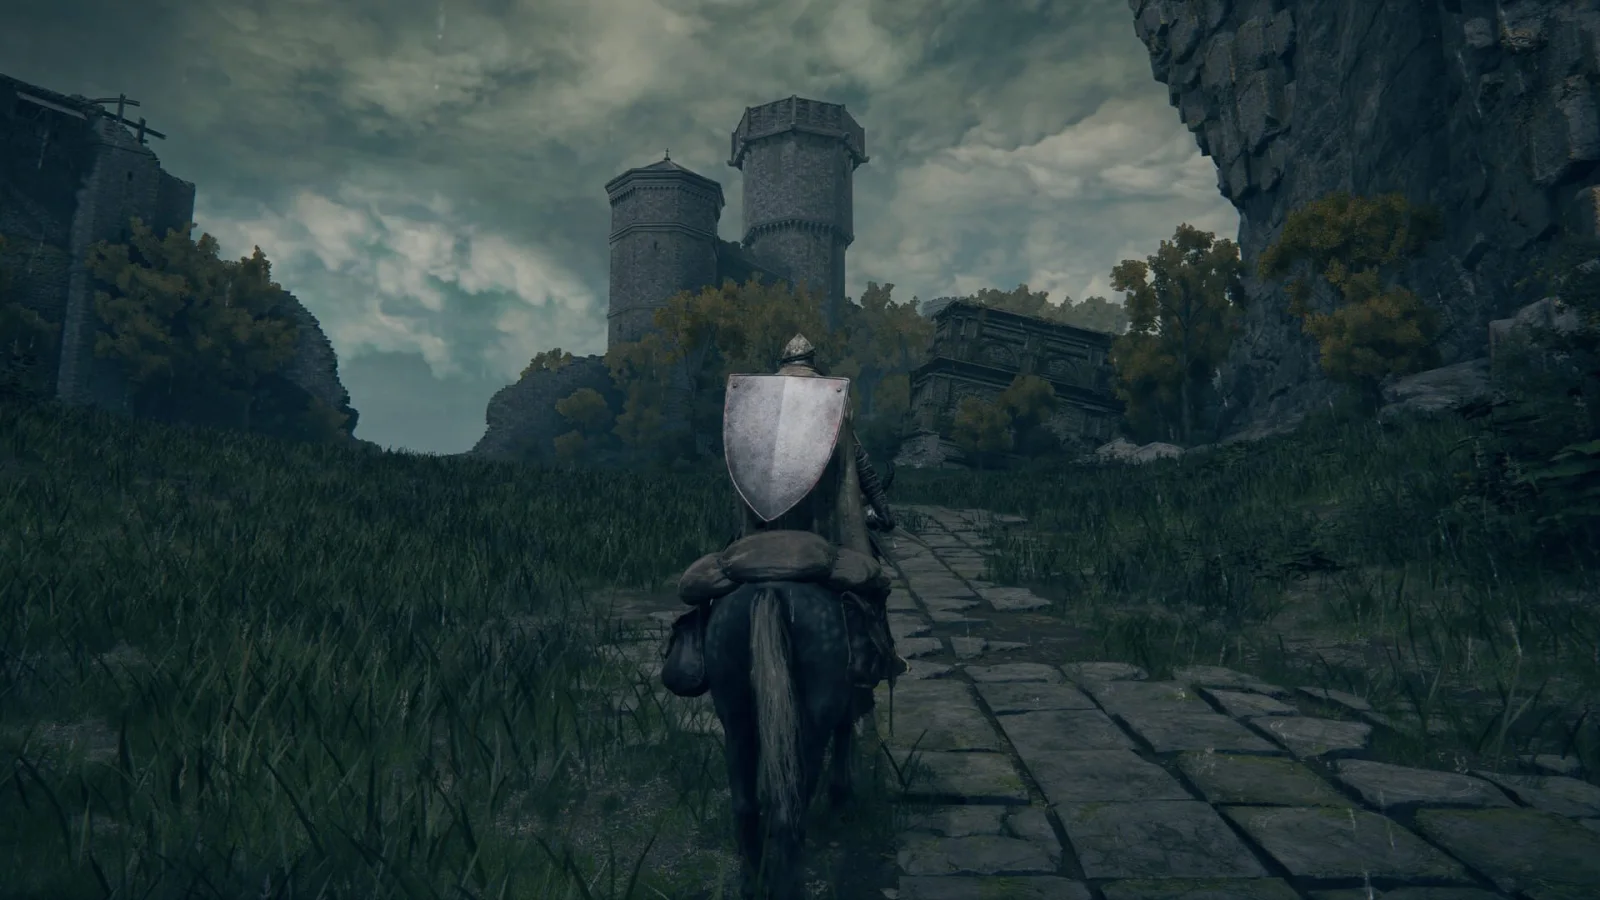
Confirm the entry requirement and prepare outside the capital
Leyndell’s main entrance requires two Great Runes. Godrick and Rennala are the most straightforward pair, although other shardbearer Great Runes can satisfy the requirement. From Altus Plateau, travel east toward the capital and activate the Outer Wall Phantom Tree Site of Grace. The nearby map fragment is useful because Leyndell’s outer roads and walls are easy to confuse.
Spend loose runes before entering, especially if you are carrying enough to lose several levels. Upgrade your main weapon as far as your available materials allow, improve your Sacred Flask, and bring a dependable answer for groups: a shield, bow, spell, throwing item, or spirit ash. Leyndell contains narrow ledges, ambushes, perfumers, pages, knights, and large enemies that can punish rushed movement. The Subterranean Shunning-Grounds, Fortified Manor, and other underground or side areas are not required for the default main route.
- Two Great Runes acquired.
- Outer Wall Phantom Tree Site of Grace activated.
- Runes spent or safely banked before the Draconic Tree Sentinel attempt.
- Main weapon, flask charges, and preferred summon or ranged option prepared.
Take the standard outer-wall approach and defeat the Draconic Tree Sentinel
From the outer-wall grace, follow the roads toward the capital’s southeastern entrance. The dependable main-route approach passes through the outer-wall area and leads to the Draconic Tree Sentinel blocking the gate. You can fight on Torrent in the open space, but dismounting may make close-range dodges and healing easier to control. Keep outside the horse’s immediate turning radius, avoid attacking during its long fire or shield-area attacks, and punish after the rider finishes a committed swing or charge.
Once the Draconic Tree Sentinel is defeated, cross the gate and activate the Capital Rampart Site of Grace. This grace is your recovery point for the first interior section. If the boss is taking most of your healing or repeatedly killing you with fire attacks, retreat to spend runes, raise Vigor, improve the weapon, or return with a stronger spirit ash. There is no need to clear the entire outer wall before attempting the boss.
- Draconic Tree Sentinel defeated on the standard entrance route.
- Capital Rampart Site of Grace activated.
- A safe return route from the grace to the capital entrance established.
Cross Capital Rampart and activate East Capital Rampart
From Capital Rampart, cross the bridge and enter the building. Use the lift, then continue through the upper passage until the route reaches the inner city and the East Capital Rampart Site of Grace. Activate it immediately. Flying pages, soldiers, perfumers, and large constructs occupy the ramparts, but most do not need to be killed. Prioritize the enemies positioned directly on ladders, lifts, or narrow walkways; bypass the rest when possible.
Leyndell’s vertical design makes repeated backtracking dangerous. Check rooftops, ladders, balconies, and lift platforms whenever a street appears to end. Avoid chasing a fleeing enemy over a ledge, and do not sprint through an unfamiliar doorway without checking for an ambush. The East Capital Rampart grace gives you a stable reset point, so advance one platform at a time and return there whenever your healing is low.
- East Capital Rampart Site of Grace activated.
- Lift, ladder, and balcony routes identified.
- Large rune reserves avoided while exploring the upper ramparts.
Reach Avenue Balcony and use the avenue as your navigation anchor
Continue down from the eastern rampart through the connected buildings until you reach the main avenue. Activate the Avenue Balcony Site of Grace. From this point, the road and its surrounding buildings form the best navigation anchor for the required route. If you become disoriented, return to this grace, face the broad avenue, and retrace the route instead of entering random alleys.
The sewer entrances, Subterranean Shunning-Grounds, lower tunnels, and many locked buildings branch away from this area but are optional for reaching Morgott. You can explore them later, although some side content becomes unavailable or changes after the capital is covered in ash. For the main route, use controlled pulls against perfumers and omens, and run past mounted or oversized enemies when they do not block the next doorway.
- Avenue Balcony Site of Grace activated.
- Optional sewer and underground routes recognized but not mistaken for mandatory objectives.
- A reliable return path from Avenue Balcony to East Capital Rampart established.
Open the western shortcut and climb to the golden Godfrey encounter
From Avenue Balcony, move along the main road and continue toward the western side of the capital. Activate West Capital Rampart when you reach it. From this grace, look for the large petrified dragon wing and use it as the route upward. Run across the wing, pass through the upper ruins, and follow the large root that leads toward the central elevated building. The root is narrow and enemies can knock you off, so clear only the attackers that directly threaten the crossing.
The route ends at the golden shade of Godfrey, First Elden Lord. His attacks cover a wide area with heavy axe swings and delayed stomp effects. Stay near enough to punish the recovery after a missed strike, but do not stand directly in front of the axe’s full arc. When the fight is over, enter the building and activate the Erdtree Sanctuary Site of Grace. This grace is the correct checkpoint for the next section; it is not available before the golden Godfrey fight.
- West Capital Rampart Site of Grace activated.
- Petrified dragon wing crossed.
- Golden shade of Godfrey, First Elden Lord defeated.
- Erdtree Sanctuary Site of Grace activated.
Follow Erdtree Sanctuary to Queen’s Bedchamber
From Erdtree Sanctuary, leave through the upper route and use the large root and connected platforms to travel northeast. Follow the elevated path rather than dropping back into the lower streets. This leads to the Queen’s Bedchamber Site of Grace. Rest there before attempting Morgott and spend any runes you do not need for the fight.
The final approach contains guards and omen enemies, but only clear the opponents that interfere with your run to the fog gate. Melina’s summon sign may be available outside Morgott’s arena if her progression has been handled normally; using it is optional. Configure your flask allocation, weapon skill, shield, spell, and spirit ash before entering. If you die, the Queen’s Bedchamber grace provides a short, repeatable route back to the arena.
- Queen’s Bedchamber Site of Grace activated.
- Equipment and flask allocation configured for Morgott.
- Optional summon or spirit ash available before entering the fog gate.
Defeat Morgott, the Omen King
Morgott uses fast sword combinations, thrown blades, holy projectiles, delayed ground attacks, and wide sweeping strikes. The arena is large, so avoid panic rolling and use the space to reset the fight when your stamina or positioning deteriorates. Attack after his longer combinations finish rather than trading into the opening hit. Keep watching the ground when he creates lingering holy hazards, and move away before healing if he is close enough to punish the animation.
At approximately half health, Morgott becomes more aggressive and adds attacks that cover more of the arena. Spirit ashes or Melina can draw his attention, but the basic plan remains the same: separate yourself from the damaging pools, punish recovery windows, and preserve enough healing for the second half. If the fight is consistently ending before you learn the second phase, leave the capital, upgrade your weapon or Vigor, and return through Queen’s Bedchamber rather than repeatedly carrying a large rune total into the arena.
- Morgott, the Omen King defeated.
- Morgott’s Great Rune and Remembrance collected if desired.
- Boss-area Site of Grace activated.
Touch the Erdtree entrance, receive the Rold Medallion, and leave for the Forbidden Lands
After Morgott dies, go forward from the boss grace to the entrance of the Erdtree and touch the wall of thorns. The entrance remains sealed. Return to the Elden Throne Site of Grace and rest there. Melina then appears and gives you the Rold Medallion, which is the required item for the normal route to the Mountaintops of the Giants.
Warp to Avenue Balcony and take the eastern route through the capital. Ride the lift upward, cross the bridge, and take the next lift down into the Forbidden Lands. Activate the Forbidden Lands Site of Grace, then continue east along the dark road toward the Grand Lift of Rold. Use the Rold Medallion at the lift to enter the Mountaintops of the Giants. Morgott’s Great Rune does not need to be activated for this progression, and the sewers are not a prerequisite.
- The sealed Erdtree entrance touched after Morgott’s defeat.
- Melina met at the Elden Throne Site of Grace.
- Rold Medallion received.
- Forbidden Lands reached through Leyndell’s eastern lift route.
- Grand Lift of Rold activated with the Rold Medallion.
Before you move on
- Two Great Runes were obtained before entering Leyndell.
- The standard capital approach was completed by defeating the Draconic Tree Sentinel and activating Capital Rampart.
- East Capital Rampart, Avenue Balcony, and West Capital Rampart were reached on the interior route.
- The golden shade of Godfrey, First Elden Lord, was defeated and Erdtree Sanctuary was activated.
- Queen’s Bedchamber was reached and Morgott, the Omen King, was defeated.
- The sealed Erdtree entrance was touched, Melina gave the Rold Medallion at the Elden Throne grace, and the route through Forbidden Lands to the Grand Lift of Rold was opened.
- No Shadow of the Erdtree area, item, boss, or prerequisite is needed for this chapter.
Optional Consecrated Snowfield detour and Haligtree access
The Consecrated Snowfield is an optional region in the PlayStation 5 base game. It is not required for the Age of Fracture ending, and it is not the route to Crumbling Farum Azula. To enter it, collect the Haligtree Secret Medallion (Right) from Old Albus in the Village of the Albinaurics and the Haligtree Secret Medallion (Left) in Castle Sol. After obtaining the ordinary Rold Medallion through the main story, use the alternate command at the Grand Lift of Rold to reach the Hidden Path to the Haligtree and then the Snowfield. From there, you can pursue optional access to Miquella’s Haligtree through Ordina or reach Mohgwyn Palace through a Snowfield sending gate. Stop this detour whenever you wish and return to the mandatory Mountaintops route. The required path to Crumbling Farum Azula begins later with the Fire Giant and the Forge of the Giants.
1. Decide whether to make this detour
The Consecrated Snowfield is optional for a standard Age of Fracture campaign. You do not need to enter the Snowfield, complete Ordina, reach Miquella’s Haligtree, defeat Malenia, or visit Mohgwyn Palace to finish the base-game main route.
Use this detour if you want optional bosses, weapons, talismans, upgrade materials, spirit ashes, quest progress, or access to the Haligtree and Mohgwyn Palace. If your only goal is the default ending, you can collect none of these items and continue through the ordinary Mountaintops of the Giants route instead.
Do not look for the mandatory Farum Azula transition here. That transition occurs later through the Fire Giant and the Forge of the Giants, which belong to the main-route chapters covering those areas.
- You understand that the Snowfield is optional.
- You have not confused the secret medallion route with the ordinary Mountaintops route.
- You are pursuing the detour for optional rewards or areas rather than mandatory campaign progress.
2. Obtain the Haligtree Secret Medallion (Right)
Travel to the Village of the Albinaurics in southern Liurnia of the Lakes. From the village Site of Grace, move through the settlement and climb toward the upper portion of the village. Look for a large pot that is actually a disguised character. Strike the pot once to reveal Old Albus, then speak with him to receive the Haligtree Secret Medallion (Right).
The item is a key-item half, not the ordinary Rold Medallion. Leave it in your inventory while you continue the main story or travel to Castle Sol. You do not need to combine it manually with the other half.
- Old Albus has been revealed from the pot disguise.
- Haligtree Secret Medallion (Right) is in the Key Items inventory.
- The ordinary Rold Medallion has not been mistaken for this item.
3. Obtain the Haligtree Secret Medallion (Left) at Castle Sol
Reach Castle Sol in the northern Mountaintops of the Giants. Enter the castle and work through its courtyards, rooftops, and interior rooms. Banished Knights and spectral enemies can attack from close range, so activate Sites of Grace and use the castle’s lifts and gates to create a safe return route.
Continue to the castle’s main boss, Commander Niall. Defeating him opens the way to the upper section beyond his arena. After the fight, leave the arena through the newly accessible route and climb toward the castle’s high tower. The Haligtree Secret Medallion (Left) is found at the far end of this upper section.
You do not need both halves before entering Castle Sol. The Right half from Liurnia and the Left half from Castle Sol remain separate key items, but owning both is what unlocks the hidden lift destination.
- Castle Sol has been reached in the Mountaintops of the Giants.
- Commander Niall has been defeated.
- Haligtree Secret Medallion (Left) has been collected.
- Both secret-medallion halves appear in the Key Items inventory.
4. Select the secret destination at the Grand Lift of Rold
The Grand Lift of Rold is reached through the eastern side of Leyndell after the main story opens the route toward the Mountaintops. The ordinary Rold Medallion is required for the standard Mountaintops destination and is obtained as part of mandatory progression after Morgott, the Omen King.
Once both Haligtree Secret Medallion halves are in your inventory, stand at the lift and change the displayed action instead of immediately choosing the standard medallion command. Select the Haligtree Secret Medallion option. The lift then carries you to the Hidden Path to the Haligtree.
If the secret option does not appear, verify that both halves are present and that you are using the Grand Lift of Rold rather than the Grand Lift of Dectus. The two lifts serve different regions and different medallions.
- The ordinary Rold Medallion has been obtained through story progression.
- Both Haligtree Secret Medallion halves are present.
- The Haligtree Secret Medallion command is selected at the Grand Lift of Rold.
- The Hidden Path to the Haligtree has been entered.
5. Cross the Hidden Path to the Haligtree
Proceed through the Hidden Path to the Haligtree until you reach its exterior exit. The dungeon contains optional side rooms, enemies, and loot, but you do not need to clear every branch to reach the Snowfield. Follow the main passage and use Sites of Grace when available.
Some lower areas contain concealed routes and dangerous drops. If you explore them, check platforms carefully before committing to a jump and return to the main passage when you have collected the desired reward. These side areas are optional and should not be allowed to obscure the actual objective: exiting into the Consecrated Snowfield.
- The Hidden Path’s main route has been followed toward the exterior.
- Optional side rooms have been skipped or explored without losing the main route.
- The character has exited into the Consecrated Snowfield.
6. Establish navigation landmarks in the Consecrated Snowfield
The Snowfield begins with severe visibility problems. Activate the first Site of Grace you find, then use the frozen river as a major east-west landmark while the blizzard limits your view. Torrent is useful for crossing the open terrain and avoiding unnecessary fights with roaming enemies.
The Consecrated Snowfield map fragment is near the central portion of the region. Collecting it makes the surrounding roads, cliffs, and landmarks easier to read. Ordina, Liturgical Town is in the northern part of the Snowfield. The Apostate Derelict lies farther north, while Yelough Anix Ruins and the western cliff areas provide landmarks on the southern and western sides.
You can leave immediately after activating a Site of Grace. Nothing in the Snowfield must be cleared before returning to the ordinary Mountaintops route.
- A Consecrated Snowfield Site of Grace has been activated.
- The frozen river has been identified as a navigation landmark.
- The map fragment has been collected if a full map is desired.
- The Snowfield has not been mistaken for a mandatory campaign zone.
7. Recognize the optional Mohgwyn Palace sending gate
A sending gate on the western side of the Consecrated Snowfield transports the player to Mohgwyn Palace. The gate is reached in the western Snowfield near the cliffs and the Yelough Anix area. Approach carefully, because the route includes dangerous terrain and hostile enemies.
Mohgwyn Palace is optional. It contains its own progression, rewards, and a major boss, but it is not required for the Age of Fracture ending and is not an entrance to Crumbling Farum Azula. Use the gate only if you want to pursue that optional area.
Do not confuse this Snowfield sending gate with the Four Belfries sending gate in Liurnia. Four Belfries portals can show isolated destination fragments, but they do not replace the main-game transition through the Forge of the Giants.
- The western Snowfield sending gate is recognized as the Mohgwyn Palace route.
- Mohgwyn Palace is being treated as optional.
- No sending gate is being used as a substitute for the later Forge of the Giants transition.
8. Open Ordina’s optional Haligtree route
Travel north through the Snowfield to Ordina, Liturgical Town. The town contains a sealed passage associated with Miquella’s Haligtree. Enter the Evergaol in Ordina to access the town’s alternate state, then light the four required flames located around the transformed town.
The Evergaol version contains hostile invisible assassins and archers, so move carefully, use rooftops and buildings for cover, and avoid lingering in open streets. Lighting all four flames removes the seal from the town’s Haligtree waygate. Activate the resulting sending gate when you are ready to enter Miquella’s Haligtree.
Ordina and the Haligtree are optional. The route can be left unfinished, and Malenia does not need to be defeated for the default ending. If you only wanted Snowfield landmarks or the Mohgwyn gate, return to a Site of Grace and resume the mandatory campaign elsewhere.
- Ordina, Liturgical Town has been reached.
- The Evergaol has been entered if the Haligtree route is desired.
- All four flames have been lit in the alternate town.
- The Haligtree sending gate is open if that optional area is being pursued.
- Malenia and the Haligtree have not been treated as mandatory objectives.
Before you move on
- Haligtree Secret Medallion (Right) has been obtained from Old Albus in the Village of the Albinaurics.
- Haligtree Secret Medallion (Left) has been obtained in Castle Sol after opening the upper route beyond Commander Niall.
- The alternate Haligtree Secret Medallion option is available at the Grand Lift of Rold.
- The Hidden Path to the Haligtree has been crossed and the Consecrated Snowfield has been reached.
- The Snowfield Site of Grace and relevant landmarks have been identified.
- The Mohgwyn Palace sending gate is recognized as optional content.
- Ordina’s four-flame Evergaol puzzle and the Haligtree sending gate are understood as optional objectives.
- The Snowfield, Ordina, Mohgwyn Palace, Miquella’s Haligtree, and Malenia are not required for Age of Fracture.
- The mandatory route to Crumbling Farum Azula has not been included here; it is covered later through the Fire Giant and Forge of the Giants.
References for this chapter
- ELDEN RING Official Site
- Consecrated Snowfield — Eldenpedia
- Sending Gate - Eldenpedia
- Mohgwyn Palace — Eldenpedia
- Elden Ring: How to Reach Miquella’s Haligtree Using the Grand Lift of Rold — Push Square
- Elden Ring Haligtree Medallion Left and Right Location — PC Gamer
- Miquella’s Haligtree Legacy Dungeon Walkthrough and Location — Game8
Final approach: the Forge of the Giants, Fire Giant, and world triggers
After defeating Morgott in Leyndell, receive the Rold Medallion from Melina and use it at the Grand Lift of Rold in the Forbidden Lands. This opens the Mountaintops of the Giants. Follow the required route through the snowy region to Foot of the Forge, then cross one of the nearby chains to challenge the Fire Giant. After the boss dies, travel around the Forge of the Giants to its Site of Grace, rest, and choose Speak with Melina. Her scene burns the Erdtree and transfers the Tarnished to Crumbling Farum Azula, the next mandatory story region. Castle Sol, the Consecrated Snowfield, Mohg, Malenia, underground areas, and alternate-ending quests are optional. The Forge scene does not yet turn Leyndell into the Ashen Capital; that later world change occurs after Maliketh in Farum Azula.
1. Obtain the Rold Medallion and enter the Mountaintops of the Giants
Defeat Morgott, the Omen King, in Leyndell. After the battle, speak with Melina at the Site of Grace near the Erdtree. She gives you the Rold Medallion and directs you toward the Mountaintops of the Giants. The medallion is a required progression item for the direct main route.
Travel to the Forbidden Lands Site of Grace and continue through the passage toward the Grand Lift of Rold. At the lift, use the normal Hoist Medallion prompt and select the Rold Medallion. Do not choose Hoist Secret Medallion unless you deliberately want to enter the optional Consecrated Snowfield later. The two medallion choices lead to different destinations.
After arriving in the Mountaintops, activate the nearby Site of Grace and collect the regional map fragment if you pass it on the main road. You do not need to clear Castle Sol, defeat Commander Niall, or collect either half of the Haligtree Secret Medallion for this chapter’s required route.
- Morgott, the Omen King, is defeated.
- Melina has given you the Rold Medallion.
- The Grand Lift of Rold has taken you to the Mountaintops of the Giants.
2. Follow the main route to Foot of the Forge
From the Mountaintops entrance, travel east and then south through the region. The exact road is open-ended, but the main landmarks are Zamor Ruins, the long bridge near the frozen lake, Giants’ Gravepost, and the chain bridges leading toward the forge. Activate Sites of Grace as you pass them so a failed crossing or boss attempt does not require repeating the entire journey.
Giants’ Gravepost is a useful checkpoint before the final approach. Continue toward Foot of the Forge, which is positioned beside the chain crossing to the Fire Giant arena. Large giants, spectral enemies, birds, and ranged attacks can punish a careless ride, so use Torrent to cross exposed ground quickly. Do not spend flasks fighting every enemy; riding past optional encounters is usually the safest main-route strategy.
Optional landmarks such as the First Church of Marika, Guardian’s Garrison, Castle Sol, and the frozen lake can provide upgrades or rewards, but they are not required to reach the Fire Giant. If your weapon is below the strength of your available upgrade materials, improve it before committing to repeated boss attempts.
- Giants’ Gravepost or another nearby Mountaintops Site of Grace is activated.
- Foot of the Forge is activated before entering the boss arena.
- Your main weapon, flask charges, and healing supply are ready for a prolonged fight.
3. Prepare for and enter the Fire Giant fight
The Fire Giant arena is reached by crossing one of the large chains near Foot of the Forge. Use the nearby multiplayer summoning option if you want assistance, or equip a Spirit Ash that can survive long enough to draw attention away from you. Bring enough Crimson Tears for several attempts and keep your equipment load at a level that allows reliable dodging.
In the first phase, concentrate on the Fire Giant’s visibly bandaged ankle. Stay near that leg when his attack has finished, strike during recovery windows, and move away when he rolls, raises the shield, or creates a wide fire effect. Torrent is useful for repositioning across the arena, but do not rely on remaining mounted for every attack; dismounting and fighting on foot can make evasive movement more predictable.
The second phase changes his vulnerable areas and adds larger fire attacks. Avoid standing directly in front of his hands or beneath obvious area effects. Circle from the side or rear, attack only after a safe opening, and be prepared to disengage rather than trading hits. The fight rewards patience more than constant aggression because the boss has a large health pool and long-reaching attacks.
- You can return to Foot of the Forge after a failed attempt.
- You know which ankle is covered by the visible bandage.
- You are prepared to fight the second phase from the side or rear rather than directly in front of the hands.
4. Defeat the Fire Giant and reach the Forge of the Giants
Defeating the Fire Giant awards runes and the Remembrance of the Fire Giant. The remembrance is optional: it can be exchanged or duplicated later, but neither action is needed for the story. The boss victory alone does not send you to the next region.
After the fight, return to Foot of the Forge if you need to spend runes, change equipment, or refill your supplies. Then travel toward the enormous forge structure. Cross the large chain beyond the boss arena and follow the outer rim around the forge. Continue around the rim until you find the Forge of the Giants Site of Grace on the upper platform.
Activate the grace before interacting with the forge. This provides a recovery point if you need to leave, prepare further, or return after a failed transition. It also confirms that you have reached the correct story location rather than an optional Mountaintops landmark.
- The Fire Giant is defeated.
- The Remembrance of the Fire Giant is available, if you want to use it later.
- The Forge of the Giants Site of Grace is activated.
5. Rest at the forge and trigger the mandatory transition
Rest at the Forge of the Giants Site of Grace and select Speak with Melina from the grace menu. Confirm the conversation when you are ready to continue. Melina uses the Flame of Ruin at the forge, the Erdtree is set ablaze, and the game transfers you to Crumbling Farum Azula.
This is the mandatory transition after the Fire Giant. You do not need to find a waygate, use the Haligtree Secret Medallion, or complete Castle Sol. The next main objective after loading into Farum Azula is to activate a Site of Grace and progress through the region toward Godskin Duo and Maliketh.
The Forge scene is not the same as the later Leyndell transformation. At this point, Leyndell has not yet become the Ashen Capital. That major world-state change happens after Maliketh, the Black Blade, is defeated in Crumbling Farum Azula.
- You have rested at the Forge of the Giants Site of Grace.
- Speak with Melina is available and has been selected.
- The game loads you into Crumbling Farum Azula.
6. Separate required progression from optional late-game content
The required actions in this chapter are defeating Morgott, receiving the Rold Medallion, using it at the Grand Lift of Rold, reaching Foot of the Forge, defeating the Fire Giant, reaching the Forge of the Giants Site of Grace, and accepting Melina’s forge scene. These events open the next mandatory region for the Age of Fracture route.
The Consecrated Snowfield, Castle Sol, Malenia, Mohg, Lord of Blood, underground regions, legendary equipment hunts, and alternate-ending questlines are optional. They may be completed for rewards or additional endings, but none is required to reach Radagon, the Elden Beast, or the default ending. If you want the shortest main campaign route, proceed directly into Crumbling Farum Azula after the forge scene.
- The transition to Crumbling Farum Azula has completed.
- The next main-route target is Maliketh in Farum Azula.
- No Shadow of the Erdtree area, item, or prerequisite has been used.
Before you move on
- Morgott is defeated and the Rold Medallion has been used at the Grand Lift of Rold.
- The character has reached the Mountaintops of the Giants and activated Foot of the Forge.
- The Fire Giant is dead and the Forge of the Giants Site of Grace is active.
- Speaking with Melina at the forge triggers the Erdtree-burning scene and transfers the character to Crumbling Farum Azula.
- The route toward Maliketh is available without any Shadow of the Erdtree content or optional ending quest.
References for this chapter
Crumbling Farum Azula and Maliketh, the Black Blade
After the Forge of the Giants sequence, the game transports you to Crumbling Farum Azula. Activate the early Sites of Grace, follow the main route through the floating ruins, and reach the Dragon Temple. The Godskin Duo is the area’s mandatory midpoint boss; after defeating them, continue through the rooftop and dragon-lightning section to the Beside the Great Bridge Site of Grace. From there, cross the bridge toward Maliketh’s temple. The Draconic Tree Sentinel outside is an optional approach guardian, while Beast Clergyman and Maliketh are the mandatory boss encounter. Defeating Maliketh releases Destined Death and permanently changes Leyndell into the Ashen Capital, opening the final capital sequence. Optional dragons, hidden loot, Dragonlord Placidusax, and other side paths are not needed for the Age of Fracture ending.
1. Establish the first grace and prepare for Farum Azula
After you use the Forge of the Giants following the Fire Giant, a story sequence transports you to Crumbling Farum Azula. Activate the Crumbling Beast Grave Site of Grace as soon as you regain control. Torrent is unavailable in this legacy dungeon, so every traversal section must be handled on foot.
Spend or secure your runes before pushing into the ruins. Use a strongly upgraded primary weapon, a dependable way to damage groups, and enough healing to survive repeated attempts. Farum Azula combines narrow ledges, hostile Beastmen, aggressive warhawks, dragons, and sudden ambushes. You do not need to defeat every enemy; reaching the next grace is usually safer than clearing each room.
- Activate Crumbling Beast Grave.
- Spend or recover any runes before long traversal sections.
- Confirm that your main weapon, healing flasks, and preferred summon or ranged option are ready.
2. Follow the opening route through the floating ruins
From Crumbling Beast Grave, move through the ruined structures toward Crumbling Beast Grave Depths. Continue onward to Tempest-Facing Balcony. The route uses broken bridges, lower ledges, stairways, and exposed platforms. When you see a gap, look below and around the structure for a lower landing before jumping; many routes descend rather than cross directly.
Use crouching and short retreats to separate Beastmen. Their fast attacks are dangerous in groups, especially near drops. If a dragon or patrol is positioned away from the route, run past it rather than spending healing on an optional fight. Activate every Site of Grace you find, because the dungeon’s checkpoints sharply reduce the cost of failed platforming attempts.
- Reach Crumbling Beast Grave Depths.
- Activate Tempest-Facing Balcony.
- Avoid chasing enemies onto narrow platforms or toward ledges.
3. Reach Dragon Temple and enter the Godskin Duo fight
Continue from Tempest-Facing Balcony toward the Dragon Temple section. Depending on which entrance you take, you can reach the Dragon Temple Site of Grace or the Dragon Temple Transept Site of Grace. The Transept grace is directly useful for the nearby Godskin Duo approach. From Dragon Temple Transept, take the nearby route toward the boss fog rather than wandering into the optional lower rooms.
Godskin Duo uses one shared boss health bar. The Apostle and Noble can return after being defeated while the shared bar remains, so killing one does not permanently remove it. Keep both enemies visible whenever possible, use pillars to interrupt attacks and rolling movement, and avoid standing between them. Sleep Pots are an effective optional tool, but summons, ranged attacks, careful melee, and co-op support can also work. Do not rush damage when both bosses are active.
- Activate Dragon Temple or Dragon Temple Transept.
- Enter the Godskin Duo arena with healing and support resources available.
- Empty the shared health bar completely before leaving the arena.
4. Cross the route to Beside the Great Bridge
After defeating Godskin Duo, continue through the opened route toward Dragon Temple Altar. From the post-boss area, leave through the northern route, drop to the lower section, and follow the stairs and dragon-statue rooms. Continue until the path leads to Dragon Temple Rooftop. Activate the grace there before attempting the exposed crossing.
From Dragon Temple Rooftop, drop to the floating ruins and move toward the large dragon. Lightning strikes and warhawks make this section dangerous, so sprint between solid platforms and do not linger in the dragon’s attack area. After passing the dragon, take the route to the right, cross the broken tower section, and enter the building containing the lift. Ride it to Beside the Great Bridge and activate that grace.
- Activate Dragon Temple Altar if reached.
- Rest at Dragon Temple Rooftop before the exposed crossing.
- Ride the lift and activate Beside the Great Bridge.
5. Cross the Great Bridge and reach Maliketh’s fog gate
From Beside the Great Bridge, leave the building and run up the bridge toward the large temple. The Draconic Tree Sentinel patrols the approach. It is not required to defeat this enemy to complete the dungeon: you can move around it and reach the temple entrance if you avoid its fire and lightning attacks. Defeating it is recommended if you expect several Maliketh attempts, because it makes the route safer and removes a major source of pursuit damage.
Continue into the temple after passing the sentinel. The golden fog leads to Beast Clergyman, the first phase of the mandatory boss encounter. If the sentinel damages you heavily, retreat to Beside the Great Bridge and rest before entering the fog. Do not treat the sentinel as Maliketh or spend all your flasks on it before the actual boss fight.
- Reach the golden fog at the temple entrance.
- Decide whether to bypass or defeat the optional Draconic Tree Sentinel.
- Enter with spirit ashes, healing, and weapon skills ready.
6. Defeat Beast Clergyman and Maliketh
Beast Clergyman uses rapid claw attacks, thrown rocks, and sweeping ground attacks. Stay mobile and avoid being trapped against the arena wall. Move sideways against thrown projectiles, punish only after his longer attacks, and preserve enough healing for the second phase. A spirit summon can draw attention away from you, but reposition if it leaves the boss covering the entire arena with overlapping attacks.
At about half health, the encounter changes to Maliketh, the Black Blade. He is much faster, leaps across the arena, and uses golden blade attacks that can inflict a severe health-draining effect after they connect. Dodge toward or past many lunges instead of retreating in a straight line. The arena pillars can interrupt some attacks and create healing opportunities, but Maliketh can move around them, so do not assume they provide complete safety.
If you obtained the Blasphemous Claw through Recusant Bernahl’s invasion sequence, it can counter certain golden attacks. It is optional and not required. Spirit ashes, ranged attacks, status effects, and patient one- or two-hit punish windows are all valid approaches. If you die, the fight resets at the same fog gate. A defeated Draconic Tree Sentinel remains defeated, shortening later attempts.
- Defeat the Beast Clergyman phase.
- Survive Maliketh’s fast movement and health-draining blade attacks.
- Confirm that the boss victory and Remembrance of the Black Blade appear.
7. Confirm the world-state change
After Maliketh is defeated, a story sequence plays and Leyndell becomes the Ashen Capital. This is a permanent world-state change for the current playthrough. Maliketh is mandatory because his defeat releases Destined Death and allows the game to proceed to the final sequence in the transformed capital.
You can leave optional Farum Azula content unfinished. Dragonlord Placidusax, hidden dragons, extra talismans, side areas, and additional loot are not required for the Age of Fracture ending. Your next main objective is the Ashen Capital’s late-game route, which leads through the final capital bosses and eventually to Radagon and the Elden Beast.
- The post-Maliketh story sequence has finished.
- Leyndell is now labeled and presented as the Ashen Capital.
- The next main route leads toward the transformed capital’s final boss sequence.
Before you move on
- Godskin Duo has been defeated in Dragon Temple.
- Beside the Great Bridge Site of Grace is active, or the Draconic Tree Sentinel has been bypassed or defeated on the way to the temple.
- Beast Clergyman and Maliketh, the Black Blade have been defeated.
- The post-boss sequence has changed Leyndell into the Ashen Capital, confirming that the game has advanced to the final campaign section.
Late-game boss gauntlet: Godfrey, Hoarah Loux, and final preparations
Defeating Maliketh, the Black Blade sends you automatically to Leyndell, Capital of Ash, where the final mandatory sequence begins. The route is not only Godfrey: you must first defeat Sir Gideon Ofnir in the Erdtree Sanctuary, then climb through Queen’s Bedchamber to fight Godfrey, First Elden Lord, who becomes Hoarah Loux, Warrior. After that victory, rest at the Elden Throne Site of Grace, spend runes, finish weapon and flask preparation, and enter the back-to-back Radagon and Elden Beast fights. No optional questline, Great Rune activation, Malenia victory, or Shadow of the Erdtree content is required for the Age of Fracture ending.
1. Arrive in Leyndell, Capital of Ash and activate the first checkpoint
After Maliketh, the Black Blade is defeated in Crumbling Farum Azula, the game automatically transports you to Leyndell, now covered by ash from the burning Erdtree. Activate the Leyndell, Capital of Ash Site of Grace before moving on. The lower city has changed substantially: many former streets, pickups, and routes are buried or inaccessible, so do not try to retrace the entire Royal Capital layout.
From the Site of Grace, travel southwest across the ash-covered remains of the main avenue. Continue toward the large dragon corpse and the route leading upward. Use the lift at the end of this approach to reach the Erdtree Sanctuary. This is the direct mandatory path; the Subterranean Shunning-Grounds and other lower-capital detours are optional and are not needed for the Age of Fracture route.
- Maliketh, the Black Blade is defeated.
- Leyndell, Capital of Ash is activated.
- You are following the southwest route toward the Erdtree Sanctuary rather than searching the buried lower city.
2. Defeat Sir Gideon Ofnir in the Erdtree Sanctuary
Enter the Erdtree Sanctuary after taking the lift. Sir Gideon Ofnir, the All-Knowing, is the first mandatory boss of this final Leyndell sequence and was omitted from the earlier route. Defeat him before attempting to reach Godfrey. Activate the Erdtree Sanctuary Site of Grace after the fight so the approach can be repeated without crossing the ash-covered capital.
Gideon is primarily a ranged spellcaster and can attack from a distance, so keep moving laterally instead of standing still to trade casts. Close the distance when he begins a long casting animation, use quick attacks or short spell casts, and retreat after a brief punish. A Spirit Ash is optional and can draw his attention while you heal or attack, but it is not required for progression. If your build relies on sorcery, incantations, or weapon skills, avoid spending your entire FP supply before the fight ends; the next section contains another mandatory boss.
Gideon drops his equipment and runes rather than a Great Rune. There is no Great Rune to collect or activate here. The important progression action is resting at the newly available Site of Grace and continuing through the sanctuary.
- Sir Gideon Ofnir, the All-Knowing is defeated.
- The Erdtree Sanctuary Site of Grace is activated.
- No Great Rune activation is expected from Gideon.
3. Reach Queen’s Bedchamber and prepare for Godfrey
From the Erdtree Sanctuary, leave through the eastern side and climb the large tree root leading upward. Follow the upper route toward Queen’s Bedchamber and activate that Site of Grace. This root route is the late-game continuation of the path used in the original capital, but it now leads through the altered final sequence.
At Queen’s Bedchamber, rest and spend any runes you are carrying. Check that your main weapon is upgraded as far as your available materials allow. A standard weapon should be near its late-game upgrade limit, while a somber weapon should be advanced with the materials you have obtained; do not repeatedly attempt the boss with a weapon that is clearly behind the rest of your build.
Set your Crimson and Cerulean Flask split for the way you actually fight. Use all available Golden Seeds and Sacred Tears, equip defensive or damage talismans that support your primary strategy, and choose a Spirit Ash that is sufficiently upgraded to survive part of the encounter. Nepheli Loux or other quest-related summon signs may be available, but no NPC quest is mandatory.
- Queen’s Bedchamber is activated.
- Unused runes have been spent or secured.
- Weapon, flasks, talismans, and optional Spirit Ash are ready.
4. Defeat Godfrey, First Elden Lord
Climb from Queen’s Bedchamber to the golden fog door. This is the physical Godfrey, First Elden Lord, not the earlier Golden Shade of Godfrey fought in the original Royal Capital. Godfrey uses a large axe, broad sweeps, stomps, and ground shockwaves. Stay close enough to punish his recovery but avoid standing directly beneath him when he begins a stomp.
Roll through committed axe swings rather than retreating continuously. When the attack is clearly a ground-based shockwave, jumping may avoid the effect; otherwise, roll through the impact or move beyond its area. Take only a short punish after a missed swing or stomp. Ranged characters should cast after his long attacks, while melee characters should favor one or two hits and then reset their spacing.
At approximately half health, Godfrey removes the axe and becomes Hoarah Loux, Warrior. This is the second phase of the same boss encounter, not a new checkpoint. Preserve healing and summon health for this transition. If you die, the Queen’s Bedchamber Site of Grace provides the correct restart point, so you do not need to clear Gideon again.
- Godfrey’s axe phase is defeated.
- The transformation into Hoarah Loux, Warrior has occurred.
- You have retained healing or summon support for the second phase.
5. Survive Hoarah Loux and activate the Elden Throne checkpoint
Hoarah Loux abandons the axe and uses lunges, wrestling grabs, stomps, and expanding ground attacks. His grab is especially dangerous. When he lowers his body and charges, roll sideways or through the attack instead of backing away in a straight line. Do not attack during the grab animation; wait until control returns and re-establish distance.
Watch the ground when he stomps or creates a spreading shockwave. Jumping can avoid some visibly ground-based effects, while a correctly timed roll works against others. After a missed grab, leap, or extended ground attack, use a short punish and disengage. Keep the fight in the open center of the arena so the boss cannot trap you against the edges.
After Hoarah Loux falls, collect the Remembrance of Hoarah Loux and activate the Elden Throne Site of Grace in the room. Neither Godfrey nor Hoarah Loux grants a Great Rune. The Remembrance is optional for the ending and may be exchanged later, but defeating the boss is mandatory.
- Hoarah Loux, Warrior is defeated.
- The Remembrance of Hoarah Loux is received.
- The Elden Throne Site of Grace is activated.
6. Complete the final pre-boss checks
Rest at the Elden Throne Site of Grace and use this checkpoint to level up, resupply, or respec. Rennala’s rebirth option remains available at the Grand Library if your attributes no longer support your chosen weapon or spell setup. Respec only when it solves a clear problem, such as insufficient survivability, an abandoned damage stat, or equipment requirements you cannot meet; otherwise, direct your runes toward levels and consumables.
There is no late-game Great Rune that must be picked up after Maliketh, Gideon, or Godfrey. If you already use a Great Rune from an earlier shardbearer, you may continue using it, but the final sequence does not require a particular selection. Confirm that your main weapon, Spirit Ash, flasks, and preferred damage options are ready before entering the Erdtree.
From the Elden Throne Site of Grace, continue up the stairs and interact with the golden light at the end of the path. This takes you into the final encounter sequence: Radagon of the Golden Order followed immediately by the Elden Beast. There is no normal Site of Grace between these two fights. If you fail, return to the Elden Throne, refill, adjust your equipment or attributes, and repeat the approach.
- The Elden Throne Site of Grace is active.
- Your build has been leveled or respecialized if necessary.
- Your final attempt accounts for two consecutive boss fights without an intermediate Site of Grace.
Before you move on
- Leyndell, Capital of Ash is activated after Maliketh’s defeat.
- Sir Gideon Ofnir, the All-Knowing is defeated and the Erdtree Sanctuary Site of Grace is available.
- Godfrey, First Elden Lord and Hoarah Loux, Warrior are both defeated.
- The Elden Throne Site of Grace is active.
- The route into the Erdtree is open and the character is prepared for the consecutive Radagon and Elden Beast encounters.
Final bosses: Radagon of the Golden Order and the Elden Beast
After defeating Maliketh, Gideon Ofnir, and Godfrey, First Elden Lord, return to the Elden Throne in Leyndell, Ashen Capital and enter the Erdtree. Radagon of the Golden Order and the Elden Beast are fought consecutively with no Site of Grace, flask refill, or equipment screen between them. Prepare for Holy damage, preserve healing for the second fight, and use physical or fire damage rather than a status-focused plan. Radagon rewards close positioning and delayed dodges against golden shockwaves. The Elden Beast repeatedly swims across its large arena, so pursue it on foot, avoid its marked area attacks, and strike the glowing chest when it is safe. After both bosses die, interact with Fractured Marika and choose Mend the Elden Ring for the Age of Fracture ending.
Prepare at the final Leyndell checkpoints
The final approach begins in Leyndell, Ashen Capital. After defeating Gideon Ofnir in the Erdtree Sanctuary, continue through the upper route and defeat Godfrey, First Elden Lord, also known as the golden shade of the first Elden Lord. The Site of Grace that becomes available after this fight is Elden Throne. Rest there before entering the Erdtree.
Spend your Runes before starting the attempt. Runes cannot be stored, so use them for levels, equipment, or consumable Golden Runes. Carry your strongest reliable weapon, preferably fully upgraded or close to its normal maximum. Increase Holy damage negation with armor, talismans, or a defensive incantation if your build allows it, but do not sacrifice so much physical defense that ordinary sword hits become dangerous.
Set your flask allocation, memorized spells, weapon skills, and Spirit Ash before entering. Torrent is unavailable in both final fights. There is no ordinary checkpoint between Radagon and the Elden Beast, and defeating Radagon does not restore your flasks or FP. A Spirit Ash can provide valuable pressure, but do not assume it will survive into the second encounter.
- Defeat Gideon Ofnir and Godfrey before attempting the final pair.
- Activate and rest at the Elden Throne Site of Grace.
- Spend loose Runes and check flask allocation.
- Equip Holy resistance and a dependable physical or fire damage option.
Defeat Radagon of the Golden Order
Enter the Erdtree from the Elden Throne and approach Radagon. Stay near his side or back when possible instead of standing at long range. Close positioning reduces the time he has to use golden projectiles and gives melee characters clearer punish windows after hammer swings, lunges, stomps, and leaps.
Radagon's golden attacks create delayed Holy explosions. Golden cracks or a glowing hammer impact are warnings that the damaging effect may occur after the initial movement. Do not roll as soon as the visual effect appears. Wait for the impact or explosion, then roll through it or move outside its area. When he performs a large aerial hammer strike, dodging toward or across him is generally safer than retreating in a straight line.
He can throw golden spears, use a glowing-arm grab, teleport, and produce wide hammer shockwaves. When he disappears, keep moving and watch for his reappearance rather than immediately attacking an empty space. The grab can still create a damaging shockwave if the actual grab misses. Heal after a completed combo, teleport, or large slam instead of trying to drink during a short pause that may be followed by another strike.
Use short attack strings. Physical damage is dependable, and fire is a useful alternative for many builds. Do not make Bleed, Frostbite, Poison, or Scarlet Rot the foundation of the plan: Radagon is a poor target for status strategies, and the Elden Beast is immune to status ailments. Heavy attacks, jump attacks, and other stance-damaging moves can stagger Radagon, but only commit when his current animation has clearly ended.
- Fight near Radagon rather than giving him unlimited ranged space.
- Delay rolls against golden cracks and Holy shockwaves.
- Dodge through hammer attacks and watch for teleport explosions.
- Preserve healing, FP, and a Spirit Ash if possible.
Pursue and defeat the Elden Beast
Radagon's death immediately begins the Elden Beast encounter. The second boss uses a huge arena and often swims away, so sprint after it on foot. Torrent cannot be summoned. Lock-on is useful while the boss is close, but release it if the camera points away from the body or makes the next attack difficult to see.
The glowing area in the Elden Beast's chest is a valuable target. Attack it only when the boss is stationary and its sword or area attack has ended. Its sword moves include broad sweeps, thrusts, and overhead strikes; roll through the blade or toward the boss rather than repeatedly backing away. When it swims to another part of the arena, pursue along a clear path instead of cutting through golden effects.
The Beast launches golden projectiles, breath-like attacks, delayed explosions, and expanding rings. Keep sprinting during projectile patterns, leave glowing danger zones, and jump over expanding ground rings when their timing reaches you. Do not attempt to tank Holy effects simply because the boss is far away. If it disappears beneath the water, stop attacking and watch for the next position or incoming pattern.
The fight is won through repeated safe cycles rather than constant contact: run toward the Beast, evade the current attack, reach the chest when it settles, and land a short attack sequence. If the boss relocates immediately after you arrive, disengage and pursue again. Physical damage remains reliable, while Holy-focused attacks are a poor choice against this final encounter.
- Pursue the Elden Beast on foot after every relocation.
- Use the glowing chest as the main damage target when safe.
- Roll through sword swings and avoid marked golden effects.
- Jump over expanding rings instead of trying to absorb them.
Interact with Fractured Marika for Age of Fracture
After the Elden Beast is defeated, the final-boss sequence is complete. Fractured Marika appears in the arena, and a nearby Site of Grace becomes available. Approach Marika and interact with the body. The default option is Mend the Elden Ring. Select it to obtain the Age of Fracture ending and complete the standard Elden Lord route.
Alternate ending options require separate quest progress or special items and are not needed for this chapter. Do not choose an alternate summon sign if the goal is specifically Age of Fracture. You can rest at the nearby Site of Grace and postpone the ending, allowing you to leave and finish optional exploration before committing to the choice.
If an attempt fails against either boss, you return to the last active Site of Grace and must fight Radagon again before reaching the Elden Beast. Recheck weapon upgrades, attributes, talismans, flask distribution, and Holy resistance before the next attempt. Rennala can respec the character if the current build is poorly suited to the fight, but a respec is not mandatory. After selecting the ending and viewing the conclusion, the game provides the opportunity to begin New Game Plus; defer that choice if you still want to explore the completed world.
- Defeat Radagon and the Elden Beast in one uninterrupted attempt.
- Approach Fractured Marika after the victory.
- Choose Mend the Elden Ring.
- Confirm the Age of Fracture ending scene or credits before beginning New Game Plus.
Before you move on
- Gideon Ofnir, Godfrey, First Elden Lord, Radagon of the Golden Order, and the Elden Beast are defeated.
- The Elden Throne Site of Grace is active before the final entrance.
- Fractured Marika appears after the Elden Beast dies.
- The interaction option Mend the Elden Ring is selected.
- The Age of Fracture ending scene or credits plays.
- No Shadow of the Erdtree area, item, boss, or progression requirement is used.
References for this chapter
- ELDEN RING PS4 & PS5 - PlayStation Store
- Adventure Arrives for the Brave in ELDEN RING — Bandai Namco Entertainment America
- Radagon of the Golden Order — Elden Ring Wiki
- Elden Beast — Elden Ring Wiki
- Leyndell, Ashen Capital Walkthrough — PowerPyx
- Leyndell, Ashen Capital Walkthrough — Game8
- Endings - Eldenpedia
Post-final decision: choosing the Age of Fracture (Elden Lord) ending
After defeating Radagon of the Golden Order and the Elden Beast in the base-game finale, you return to a chamber beneath the Erdtree containing Fractured Marika and a nearby Site of Grace. Interacting with Marika opens the ending choices. Select the plain Mend the Elden Ring option, without using a Mending Rune, to trigger Age of Fracture, the default Elden Lord ending. Ranni’s summon sign, if available, leads to Age of the Stars instead. A Mending Rune changes the ending, while an active Frenzied Flame condition prevents the normal choices until it is removed. The ending can be postponed by resting at the nearby Grace and leaving the area. After the cinematic and credits, you may begin the next Journey immediately or decline and start New Game+ later from Roundtable Hold. A separate pre-ending save can preserve an opportunity to pursue another ending, but restoring it may require repeating the final encounter.
1. Finish the final boss encounter and confirm the ending chamber
Defeat Radagon of the Golden Order, then defeat the Elden Beast in the same final sequence. There is no separate Site of Grace between these two fights, so a failed attempt sends you back to the final boss entrance and requires defeating Radagon again before another attempt at the Elden Beast.
When the Elden Beast is defeated, the game places your character in the chamber beneath the Erdtree. Fractured Marika is in the center, and a Site of Grace is nearby. This is the ending selection area for the base game. The ending does not begin automatically when you arrive; you must interact with Marika or, if available, a different ending prompt.
Rest at the nearby Site of Grace before making the decision if you need to change equipment, organize your inventory, or leave the area. Resting does not cancel the ending opportunity. You can fast travel away, continue optional exploration, and return to this chamber later through the same Grace.
- Radagon of the Golden Order is defeated.
- The Elden Beast is defeated.
- Fractured Marika and the nearby Site of Grace are visible.
- You have not yet selected an ending.
2. Select the plain Mend the Elden Ring option
Walk up to Fractured Marika and interact with her. The game presents the available ending actions based on the items and quest conditions on your character. For the requested Age of Fracture ending, choose the ordinary Mend the Elden Ring option without selecting or using a Mending Rune.
Age of Fracture requires no optional ending questline and no Mending Rune. It is the straightforward conclusion for a character that reaches the final chamber and repairs the Elden Ring as it is. The wording to look for is Mend the Elden Ring, not an option naming a specific rune.
If you have collected a Mending Rune from Fia, Goldmask, or the Dung Eater, those runes may appear as additional choices when you interact with Marika. Do not choose an option that says to use one of them. Those choices produce their associated Elden Lord variations rather than Age of Fracture.
- Interact directly with Fractured Marika.
- Choose Mend the Elden Ring.
- Do not select Use Mending Rune of the Death-Prince.
- Do not select Use Mending Rune of Perfect Order.
- Do not select Use Mending Rune of the Fell Curse.
3. Avoid the alternate ending prompts
If Ranni’s questline has been completed, a blue summon sign can appear near Fractured Marika. That sign is a separate interaction and begins Age of the Stars. Ignore it for this route and use Marika’s interaction instead.
The Mending Rune choices are also optional. Possessing one does not force you to use it; the plain repair action remains the choice for Age of Fracture as long as your character has not been locked into the Frenzied Flame ending.
The Frenzied Flame is the major exception. If you accepted the Three Fingers’ inheritance and still carry that condition, the normal ending options are locked out and the Lord of Frenzied Flame ending begins when you interact with Marika. To restore access to the other endings, you must use Miquella’s Needle under its required conditions before making the final choice. That removal is optional content and is not needed if you have avoided the Frenzied Flame entirely.
If you are uncertain which choice is highlighted, back out without confirming and inspect the available actions again. The nearby Grace allows you to postpone the decision, so there is no need to select an ending while carrying the wrong equipment or while checking whether a Mending Rune is active.
- Ignore Ranni’s summon sign if it is present.
- Do not use a Mending Rune.
- Confirm that the Frenzied Flame has not been inherited, or remove it before returning to the ending chamber.
- Use the nearby Grace if you need to postpone the decision.
4. Confirm the Age of Fracture cinematic and credits
After selecting Mend the Elden Ring, the game begins the Age of Fracture ending sequence. The Tarnished repairs the Elden Ring and assumes the Elden Lord role. Allow the cinematic to play through the transition into the credits.
On PlayStation 5, this ending qualifies for the Elden Lord trophy. The trophy is associated with the Elden Lord ending group; Age of Fracture is the default way to obtain it without completing an alternate ending questline.
Do not close the game immediately after confirming the choice if you are checking completion. Wait until the cinematic and credits have played, then proceed to the post-ending prompt. The ending decision is final for that Journey. It is not a temporary selection that can be changed by reloading the completed world.
- The Age of Fracture cinematic begins.
- The credits appear.
- The Elden Lord trophy unlocks if trophies are enabled and this is the first qualifying Elden Lord ending on the account.
- The current Journey is complete.
5. Choose whether to begin the next Journey
After the ending sequence, the game offers the opportunity to begin the next Journey, commonly called New Game+. Accepting starts the next playthrough with the character’s carried-over equipment and many character-side resources, while the world’s major progression resets for the new Journey.
You do not have to accept immediately. Decline the prompt if you want to remain in the completed world and finish optional bosses, explore unfinished regions, buy items from merchants, improve weapons, or prepare a build before starting again. The completed world remains available after declining.
When you are ready later, travel to Roundtable Hold and use its Site of Grace. The option to begin the next Journey is available there. Starting it changes the world to the new Journey and does not reopen the previous ending room or let you select a second ending for the completed playthrough.
Before beginning New Game+, spend or bank loose runes, purchase limited stock you still need, upgrade equipment, and check storage for weapons or talismans you want to carry forward. Optional rewards and world pickups will need to be obtained again in the new Journey if they are tied to the reset world.
- Decide whether to begin the next Journey immediately.
- Decline if you still want to explore the completed world.
- If you decline, use the Roundtable Hold Site of Grace later to begin New Game+.
- Prepare equipment, runes, and purchases before starting the reset world.
6. Preserve or pursue another ending
If you want to see another ending on the same character, make a separate save copy before choosing an ending, using the save-management method appropriate to your PlayStation setup. The backup must be made before interacting with Fractured Marika. A save restored from before the final decision may place you before the ending encounter, so be prepared to defeat Radagon and the Elden Beast again.
Without a pre-choice save, Age of Fracture remains the ending for the completed Journey. You can pursue another ending in a later Journey, but its required questline or condition must be completed during that Journey. New Game+ does not provide a menu for changing the ending of the previous playthrough.
For the requested campaign completion, the run is finished once the plain Mend the Elden Ring choice has been confirmed and the Age of Fracture cinematic and credits have played. The later New Game+ decision is a separate metagame choice and is not required for the base-game ending.
- Make any save copy before choosing an ending, not afterward.
- Expect a restored pre-choice save to require the final boss sequence again if necessary.
- Use a later Journey for another ending if no pre-choice save exists.
- Do not treat New Game+ as a way to undo Age of Fracture.
Before you move on
- Radagon of the Golden Order and the Elden Beast are defeated.
- Fractured Marika is visible in the chamber beneath the Erdtree.
- You interact directly with Fractured Marika rather than Ranni’s summon sign.
- You select the plain Mend the Elden Ring option.
- You do not use a Mending Rune.
- The Age of Fracture cinematic and credits play.
- You either decline New Game+ to keep exploring or deliberately begin the next Journey after preparing your character.
Optional but highly recommended midgame and late-game detours
Optional areas are not required for the Age of Fracture ending, but several provide upgrade materials, Spirit Ashes, talismans, flask improvements and build-defining equipment. Clear them in a sensible difficulty order instead of treating every map marker as mandatory. Start with Limgrave and Weeping Peninsula tunnels, then take targeted trips into Caelid and Liurnia. After defeating Starscourge Radahn, explore Nokron for the Mimic Tear Ashes and additional upgrade resources. Mt. Gelmir, Volcano Manor, Mohgwyn Palace, the Consecrated Snowfield and Miquella’s Haligtree are optional late-game content. Leave Malenia until your build, weapon, flask and defensive plan are complete. Upgrade one main weapon and one dependable Spirit Ash rather than scattering resources across a large inventory.
1. Mine early upgrade materials in Limgrave and Weeping Peninsula
Before or alongside your first Stormveil attempts, visit Limgrave Tunnels on the north side of Agheel Lake. From the entrance Site of Grace, follow the mine galleries and collect the visible Smithing Stones from walls and side platforms. Miners resist many slashing attacks but are vulnerable to strike damage, so a mace, hammer or other blunt weapon can make this detour easier. The Stonedigger Troll at the end is optional; defeat it for its reward or leave and return after improving your weapon.
Morne Tunnel in southern Weeping Peninsula is another useful early mine. Ride south from Limgrave, cross the bridge into the peninsula and search the eastern side of the region for the tunnel entrance. Its miners and narrow passages reward patient pulls rather than rushing into groups. A reasonable early target is character level 15–25 with a normal weapon around +3 to +5. If your build uses a unique weapon, spend Somber Smithing Stones on that weapon instead of dividing materials between upgrade systems.
- Collect the visible stones in Limgrave Tunnels and Morne Tunnel.
- Use strike damage against miners when your build permits it.
- Upgrade one main armament consistently before investing in several alternatives.
2. Improve flasks before spending time on difficult optional bosses
Churches and minor landmarks in Limgrave, Weeping Peninsula and Liurnia often sit close to routes you will already travel. Sacred Tears increase the amount restored by each flask, while Golden Seeds increase the number of charges until the current flask capacity reaches its next requirement. Rest at a Site of Grace after collecting them and spend both resources through the Flask menu.
These upgrades benefit every build more reliably than an early detour for equipment whose attribute requirements you cannot meet. Keep raising Vigor while meeting the minimum requirements for your main weapon or spell. Roughly 20–30 Vigor is a useful early-to-midgame survivability target, but the correct amount depends on how often you are being defeated in one or two hits. Damage statistics should not replace basic health investment.
- Use Sacred Tears as soon as you reach a Site of Grace.
- Spend Golden Seeds when the flask menu allows another charge.
- Raise Vigor before chasing a small damage increase that does not change your survivability.
3. Make targeted Caelid trips instead of trying to clear the whole region
Caelid becomes a productive detour once your character is around level 35–50 and your main weapon is upgraded for the region. Travel by Torrent, activate Sites of Grace near objectives and avoid fighting every pack of dogs, birds or soldiers. Scarlet Rot swamps and cramped ruins are often more dangerous than the reward justifies, so mark locations you cannot safely clear and return later.
Redmane Castle and the southern Caelid area are especially worthwhile if you want to challenge Starscourge Radahn. Radahn is optional for the default ending, but defeating him opens the crater in Limgrave and permits access to Nokron, Eternal City. A practical Radahn attempt is often around level 50–70 with a properly upgraded weapon, although player skill, summons and build strongly affect the result. If the fight is consuming your rune reserves, spend them before returning and use the available NPC summon signs during the festival rather than repeatedly attempting underprepared solo runs.
- Ride past hazardous groups when they do not guard your current objective.
- Defeat Radahn only when you want access to Nokron or his optional rewards.
- Spend runes before difficult retrieval runs and activate nearby Sites of Grace.
4. Enter Nokron after Radahn and obtain the Mimic Tear Ashes
After Radahn falls, travel to the large crater in southern Limgrave. Descend carefully along the exposed ledges and follow the route into Nokron, Eternal City. The area contains regular and Somber upgrade materials, Grave and Ghost Glovewort, talismans and several useful weapons. Activate the Nokron Sites of Grace as you advance because the city combines ambushes, ranged enemies and dangerous drops.
To obtain Mimic Tear Ashes, progress through Nokron to Night’s Sacred Ground. From the area’s rooftops and interior platforms, reach the room sealed by an imp statue and use a Stonesword Key. Open the chest inside to collect the Ashes. Mimic Tear uses a copy of your equipped gear, so equip the weapon, shield, spells or consumables you actually want it to use before summoning. Upgrade it with Ghost Glovewort through Roderika; an unupgraded Spirit Ash will not represent its intended strength. Level 60–80, a normal weapon around +12 to +18 or a unique weapon around +5 to +7 are reasonable exploration guidelines, not hard requirements.
- Defeat Radahn before attempting the crater route into Nokron.
- Reach Night’s Sacred Ground and use a Stonesword Key on the imp-sealed room.
- Upgrade Mimic Tear or another dependable Spirit Ash before relying on it in major fights.
5. Clear Caria Manor and choose its rewards according to your build
Caria Manor lies in northwestern Liurnia. Approach through the manor gate and move carefully through the gardens: the hand enemies can emerge from the ground, and the upper walkways contain ranged threats. Fire damage is effective against the hands, but you can also sprint past them after activating the manor’s Sites of Grace. Defeat Royal Knight Loretta at the end if you want access to the Three Sisters and Ranni’s optional quest route.
Caria Manor itself is not required for the main campaign and does not directly award the Carian Filigreed Crest. That talisman is obtained from Smithing Master Iji through related progression after the manor route opens. Treat this as a build-specific benefit rather than a mandatory item. Sorcery users may find the surrounding Carian content especially valuable, while melee characters can simply clear the manor for access to northern Liurnia and then return to the main route.
- Activate the Main Caria Manor Gate and interior Sites of Grace.
- Use fire or careful sprinting to manage the hand enemies.
- Do not list the Carian Filigreed Crest as a direct Caria Manor loot item.
6. Visit Mt. Gelmir and Volcano Manor for optional equipment
Mt. Gelmir becomes a worthwhile midgame detour after you can handle Altus Plateau enemies, usually around level 70–90. Follow the map’s roads and ladders rather than trying to climb every cliff directly. Volcano Manor can be reached through the normal mountain route and offers optional contracts from its residents. These contracts can award weapons, armor and talismans, but they are not required to enter Leyndell or reach the Age of Fracture ending.
Rykard, Lord of Blasphemy, is also optional. If you choose to fight him, use the Serpent-Hunter provided in the arena and take advantage of its special attacks rather than treating the encounter like a normal weapon fight. You can complete the manor’s contracts before confronting him, but do not assume that every reward is worth delaying the mandatory campaign. Shaded Castle is another optional Altus-area detour and is best attempted when its poison, scarlet-rot and humanoid enemies are no longer overwhelming your flask supply.
- Treat Volcano Manor contracts and Rykard as optional content.
- Use the Serpent-Hunter for Rykard instead of relying only on your normal weapon.
- Return to the main route if Mt. Gelmir is consuming more healing and runes than its rewards justify.
7. Secure upgrade bell bearings at the correct stages
Bell Bearings are among the best optional objectives because they let the Twin Maiden Husks sell upgrade materials. The Smithing-Stone Miner’s Bell Bearing comes from Raya Lucaria Crystal Tunnel and unlocks early regular stones. The Smithing-Stone Miner’s Bell Bearing is found in the Sealed Tunnel near Leyndell and unlocks the next tiers. These are valuable before the late-game mandatory bosses because they let you bring a main ordinary weapon toward +24 or +25 without depending on random enemy drops.
Do not expect all bearings before the late game. Smithing-Stone Miner’s Bell Bearing is found at Zamor Ruins in the Mountaintops of the Giants, while Bell Bearing is dropped by the Godskin Duo in Crumbling Farum Azula. Equivalent Somberstone and Ghost-Glovewort bearings follow their own locations. Collect the early bearings when convenient, then obtain the late ones naturally while advancing through the mandatory areas. The final Ancient Dragon Smithing Stone or Somber Ancient Dragon Smithing Stone is limited, so reserve it for the weapon you intend to use against the last bosses.
- Give regular, Somber and Glovewort bearings to the Twin Maiden Husks.
- Obtain early bearings before the Fire Giant when practical.
- Use late-game bearings only after reaching their actual regions and bosses.
8. Leave Mohgwyn Palace, the Snowfield and Malenia until the run is nearly complete
Mohgwyn Palace, the Consecrated Snowfield and Miquella’s Haligtree are optional for the Age of Fracture ending. They are suitable for a character roughly level 110–150 with a strongly upgraded weapon, expanded flask supply and a build that can withstand long fights. Mohgwyn Palace has an efficient rune route and the optional Mohg, Lord of Blood encounter, but neither is needed for the default ending.
Malenia, Blade of Miquella, is located in the Haligtree and is one of the game’s hardest optional bosses. Do not enter the Haligtree merely because the map route is available. Her healing on hit makes careless blocking, trading and repeated low-damage attacks especially costly. Finish the mandatory route first if the detour is delaying the Fire Giant, Maliketh or the final bosses. Return with a fully upgraded weapon, a dependable Spirit Ash if desired, complete flask upgrades and a specific plan for her rapid attacks and second phase.
- Treat Mohgwyn Palace, the Haligtree and Malenia as optional.
- Attempt Malenia only after completing your main build and equipment upgrades.
- Return to the mandatory route if optional endgame content is preventing campaign progress.
Before you move on
- Your main weapon is upgraded for the region you are entering, and most available stones are concentrated on that weapon rather than scattered across an untested arsenal.
- You have used available Sacred Tears and Golden Seeds and have upgraded at least one Spirit Ash if your build benefits from summons.
- You have visited optional areas for specific rewards, such as early stones, Mimic Tear, bell bearings, talismans or build-defining equipment, rather than attempting to clear every optional boss.
- You understand that Radahn is useful for opening Nokron but is not required for the Age of Fracture ending; Rykard, Mohg, Malenia and the Haligtree are also optional.
- You have returned to the mandatory campaign route toward the Fire Giant, Crumbling Farum Azula, Maliketh and the final Leyndell sequence.
- Every recommended detour is part of Elden Ring’s original base-game Lands Between. No Shadow of the Erdtree area, item or progression requirement is used.
Troubleshooting: common stuck points, rune-farming routes, and respec strategies
When progress stalls, identify the actual weakness before farming: low survivability usually calls for Vigor and Flask upgrades, while poor damage often points to weapon upgrades, unmet attribute requirements, or an unsuitable damage type. Spend Runes at a nearby Site of Grace before another dangerous attempt, and use a short, repeatable farm only to fund a specific improvement. Gatefront soldiers are a dependable early practice loop. The Vulgar Militiamen near Bestial Sanctum offer stronger rewards but are dangerous and are reached through a sending gate rather than normal Caelid travel. Later, Palace Approach Ledge-Road in Mohgwyn Palace supports a low-risk Giant Crow loop and a faster Albinauric route for developed builds. Rennala’s Rebirth redistributes existing attribute points, costs one Larval Tear, and should be used for a defined weapon, spell, or survivability plan. None of these farms or respecs is required for the Age of Fracture ending.
1. Diagnose the failure before farming
First decide whether the problem is survivability, damage, stamina management, healing, or route knowledge. If ordinary enemies or a mandatory boss kill you in one hit or a short combo, raise Vigor and improve your Crimson Flask charges or potency before chasing a higher damage stat. If you survive several attacks but the boss loses very little health, check that your main weapon is upgraded, that you meet its attribute requirements, and that you are spending Smithing Stones on the weapon you actually use. Weapon upgrades often produce a larger immediate improvement than several levels in a secondary attribute.
Spend Runes before entering a fog gate, cave, dungeon shortcut, or unexplored area. If you die, recover the dropped Runes only when the route is safe enough to justify the attempt; do not repeatedly cross a dangerous room for a large total. When a boss is the obstacle, use the nearest Site of Grace to change one variable at a time: try a Spirit Ash, a shield, a different damage type, a ranged option, or a weapon skill. If you can reliably reach the second phase, more farming is usually less useful than learning the transition, preserving healing, and identifying safe punish windows.
- Spend or bank Runes before another boss attempt.
- Raise Vigor when deaths come from single hits or short combos.
- Upgrade the principal weapon before heavily investing in minor attributes.
- Change one combat variable at a time so the result is clear.
2. Use a safe Limgrave loop for early upgrades
For an early character, rest at the Gatefront Site of Grace and clear the nearby Godrick soldiers and Godrick Knights in small groups. Approach from stealth when possible, isolate a soldier, and use the camp’s walls and wagons to prevent several enemies from surrounding you. This route is close to a Site of Grace and also provides practice with guard counters, backstabs, jumping attacks, mounted attacks, and retreating through open ground. Return to the Grace before entering the camp again if your health, flasks, or Rune total makes the next attempt uncomfortable.
A second early option is to clear manageable enemies along the roads near the Third Church of Marika, but do not follow the route into stronger territory merely because it gives more Runes. If you have unlocked Roundtable Hold, spend Runes there on leveling, arrows, consumables, or upgrade materials as appropriate. Stop farming once you can afford the next meaningful weapon upgrade, several Vigor levels, a Flask improvement, or a needed spell requirement. Endless low-yield farming delays exploration, which supplies weapons, Golden Seeds, Sacred Tears, and boss Runes naturally.
- Use Gatefront as the default early practice and Rune loop.
- Fight isolated targets instead of drawing the entire camp.
- Return to the Site of Grace before risking a large Rune total.
- Stop once a specific upgrade or level breakpoint is funded.
3. Treat Bestial Sanctum as an optional, high-risk midgame loop
Bestial Sanctum is in northern Caelid’s Dragonbarrow, but it can be reached early through the sending gate behind or near the Third Church of Marika in eastern Limgrave. The teleport places you near the Bestial Sanctum and its Site of Grace. From there, the Vulgar Militiamen outside the building give better rewards than ordinary Limgrave soldiers, but they hit hard, move quickly, and can kill an underprepared character. This makes the area a risk-reward option, not a recommended mandatory stop.
If you use this route, rest at Bestial Sanctum, leave the building, and target one Militiaman at a time. Stealth backstabs, mounted attacks, and attacks that stagger the enemy are safer than standing in the middle of several targets. Keep the Grace behind you and retreat immediately when a second enemy joins the fight. Do not carry a large Rune total into repeated attempts; bank it after a short successful circuit. If you cannot kill a target quickly or escape a failed opening, return to Gatefront or continue campaign exploration instead. A slower loop completed consistently is more useful than a stronger loop that repeatedly loses your Runes.
- Use the Third Church sending gate only as an optional shortcut.
- Rest at Bestial Sanctum before attempting the nearby enemies.
- Fight one Vulgar Militiaman at a time and retreat when the encounter expands.
- Abandon the route if the enemies defeat you before you can reset safely.
4. Unlock and use the Mohgwyn bird loop when it is convenient
Palace Approach Ledge-Road is a Site of Grace in Mohgwyn Palace. You can reach Mohgwyn Palace before the final boss through White-Faced Varre’s quest route, or through the sending gate on the western side of the Consecrated Snowfield. The area is optional and is not a prerequisite for any mandatory base-game boss or for the Age of Fracture ending.
From Palace Approach Ledge-Road, face the blood swamp and look for the large Giant Crow across the gap. Equip a bow or crossbow with ammunition, aim at the bird, and hit it once. Its attack response carries it toward the overlook, where it falls into the chasm. Confirm the Rune reward, then rest at the Grace to reset the enemy. Keep the shot deliberate: firing too early, missing the bird, or walking too far from the Grace can turn a safe loop into an unnecessary fight. Carry enough ammunition for several attempts and bank Runes frequently until the procedure is reliable.
Use this loop to fund a defined goal, such as a weapon upgrade, Vigor breakpoint, spell requirement, or Flask-related purchase. Do not delay normal progression simply to reach this farm. If the route to Mohgwyn Palace is more dangerous than the amount you need to earn, return to the current region and use a nearby farm instead.
- Activate Palace Approach Ledge-Road before farming.
- Carry a bow or crossbow and enough ammunition.
- Shoot the Giant Crow across the swamp and wait for it to fall.
- Rest at the Grace after each successful cycle.
- Use the farm for a planned upgrade rather than indefinite leveling.
5. Switch to the Albinauric hill only when your build can clear it reliably
The hill beside Palace Approach Ledge-Road contains groups of Albinaurics and can yield more Runes than the Giant Crow when your character can defeat groups quickly. It is not automatically safer. Test the nearest group from the Grace and measure whether your normal attack, weapon skill, spell, or Spirit Ash can finish the group before several enemies surround you. Area-of-effect attacks and strong crowd-control skills make this route practical; slow single-target damage often makes it inefficient and dangerous.
Clear only the section that you can reset consistently. Do not chase fleeing Albinaurics down the hill or into the swamp, and avoid carrying the accumulated total from several runs before resting. If you die before completing the group, return to the bird loop. The Albinauric route becomes especially efficient after the final boss for characters using a suitable area attack, but it is not needed to finish the campaign and should not be presented as a base-game requirement.
- Test the nearest Albinaurics before committing to a full circuit.
- Use area damage or reliable crowd control when available.
- Keep the Site of Grace within immediate retreat distance.
- Return to the bird loop if group kills are slow or inconsistent.
6. Access Rennala’s Rebirth option correctly
Defeat Rennala, Queen of the Full Moon, in the Grand Library of Raya Lucaria. After the battle, Rennala remains in the library. Speak with her and choose Rebirth to redistribute your attributes. Rebirth does not grant extra levels or create free points: it reallocates the points already earned, and the result cannot lower an attribute below the starting value of your selected class.
Each Rebirth consumes one Larval Tear. Before confirming, decide what the revised character is meant to use. Examples include meeting the requirements of a specific strength weapon, reaching the Intelligence requirement for a planned sorcery setup, supporting a Faith weapon and incantations, or moving excess points into Vigor, Endurance, or Mind. Equip or identify the intended weapon and spells first, then verify every requirement after the redistribution. Keep enough Vigor to survive the region and enough Endurance or Mind to use the new equipment comfortably; a damage-focused respec that leaves the character unable to survive ordinary attacks is usually a setback.
- Defeat Rennala and return to her in the Grand Library.
- Have a Larval Tear before selecting Rebirth.
- Write down the target weapon, spell, or incantation requirements.
- Respect the starting-stat floor of the chosen class.
- Check Vigor, Endurance, Mind, equipment load, and all requirements after respecing.
7. Choose respec over farming only for a structural problem
Respec when your current attributes prevent the use of a clearly suitable weapon or spell, when many points are trapped in an abandoned stat, when your damage type is badly mismatched to the mandatory encounter, or when the build lacks the Vigor, Endurance, Mind, or equipment load needed for its intended playstyle. A respec is also reasonable when you have a complete replacement plan and the necessary equipment is already available.
Continue leveling instead when the build already functions and the obstacle is weapon level, Flask strength, poor positioning, missed dodges, an unused Spirit Ash, or unfamiliarity with the boss. Do not respec after every failed attempt. A practical recovery sequence is to bank Runes, improve the weapon and Flasks, attempt the boss again, and respec only if the same attribute or equipment problem remains. After a successful respec, return to the campaign and test the build against ordinary enemies before spending another Larval Tear.
- Name the exact weakness the respec will correct.
- Confirm the new build has an immediately usable weapon or spell.
- Keep enough Vigor and Endurance for the next region.
- Use another Larval Tear only for a substantial campaign-wide improvement.
Before you move on
- You have a repeatable Rune loop appropriate to your current region and can return to a Site of Grace without relying on a risky recovery attempt.
- Your main weapon is upgraded for the region, and your Vigor and Flask improvements prevent ordinary enemies from causing constant one-hit deaths.
- If you use Bestial Sanctum or Mohgwyn Palace, you understand that both are optional base-game areas and are not prerequisites for the ending route.
- If you use Palace Approach Ledge-Road, you can complete the Giant Crow cycle reliably before attempting the Albinauric hill.
- If you used Rebirth, the revised attributes meet every requirement of your equipped weapons, spells, incantations, and talismans while preserving workable survivability and stamina.
- You can return to mandatory progression without DLC areas, DLC items, or Shadow of the Erdtree mechanics.
References for this chapter
- ELDEN RING Official Website
- All ELDEN RING video games - Bandai Namco
- Elden Ring – PlayStation 4 and PlayStation 5
- Palace Approach Ledge-Road - Eldenpedia
- Mohgwyn Dynasty Mausoleum - Eldenpedia
- Bestial Sanctum - Eldenpedia
- Sending Gate - Eldenpedia
- Rebirth - Eldenpedia
- Rennala, Queen of the Full Moon - Eldenpedia
Final checklist and completion verification
Use this checklist to finish the PlayStation 5 base game of Elden Ring and obtain the Age of Fracture ending. The recommended early route is Godrick in Stormveil Castle followed by Rennala in the Academy, but the universal requirement before Leyndell is two defeated Shardbearers or Great Rune holders, not those specific bosses. The ordinary late-game sequence is the standard Leyndell approach and Morgott, the Mountaintops of the Giants and Fire Giant, Crumbling Farum Azula and Godskin Duo, Maliketh, then Leyndell, Ashen Capital with Sir Gideon Ofnir, Godfrey/Hoarah Loux, and finally Radagon and the Elden Beast. Consecrated Snowfield, the Haligtree, Mohgwyn Palace, Malenia, Rykard, Radahn, alternate-ending quests, and Shadow of the Erdtree are optional. After the Elden Beast, interact with Fractured Marika and select the plain Mend the Elden Ring option.
1. Verify early progression and the two-Shardbearer requirement
For a straightforward first playthrough, defeat Godrick the Grafted in Stormveil Castle and Rennala, Queen of the Full Moon, in the Academy of Raya Lucaria. This pair is recommended because Stormveil and the Academy provide a natural progression through Limgrave and Liurnia, but neither boss is individually universal for the Age of Fracture route. The game requires two qualifying Shardbearers or Great Rune holders before normal Leyndell progression is available. Other qualifying combinations can replace Godrick or Rennala, although some alternatives are much farther away or more difficult to reach.
Margit the Fell Omen is the normal entrance test for Stormveil, and the Red Wolf of Radagon is the normal route to Rennala inside the Academy. Neither should be treated as an unavoidable requirement for the ending: Godrick can be bypassed, and the Academy route is not the only way to obtain two Great Runes. Confirm your actual progression from defeated bosses and Great Runes rather than assuming the recommended route is mandatory.
Before leaving the early regions, activate nearby Sites of Grace, spend excess runes, and improve your main weapon. Radahn, Rykard, Mohg, and Malenia are not needed for this ending.
- Two qualifying Shardbearers or Great Rune holders have been defeated.
- Godrick and Rennala have been defeated if using the recommended beginner route.
- Margit and the Red Wolf have been defeated only if they were part of the chosen route.
2. Enter Leyndell by the standard route and defeat Morgott
Travel across Altus Plateau to Leyndell, Royal Capital. On the ordinary overland approach, follow the road toward the capital’s outer gate and defeat the Draconic Tree Sentinel guarding the main entrance. This is the standard capital gate encounter and should be included in a conventional ordered checklist. Alternate access methods exist, but they are unnecessary for a normal completion run and should not be mistaken for the expected route.
Inside Leyndell, activate Sites of Grace as you advance through the streets, rooftops, sewerside paths, and upper-city approaches. Continue to the Erdtree Sanctuary and defeat the Golden Shade of Godfrey, First Elden Lord. This is a separate encounter from the later real Godfrey fight in Leyndell, Ashen Capital.
Continue from the sanctuary toward the throne area and defeat Morgott, the Omen King. After the battle, rest at the Site of Grace near the blocked Erdtree entrance and speak with Melina. She gives the ordinary Rold Medallion. Take it to the Grand Lift of Rold and select the normal medallion option to reach the Mountaintops of the Giants.
Do not use the Haligtree Secret Medallion for this required transition. Its two halves open the optional Consecrated Snowfield, while the ordinary Rold Medallion opens the mandatory Mountaintops route.
- Leyndell has been entered through the standard approach, with the Draconic Tree Sentinel defeated on that route.
- The Golden Shade of Godfrey has been defeated.
- Morgott, the Omen King, has been defeated.
- Melina has provided the ordinary Rold Medallion.
- The Grand Lift of Rold has been used to enter the Mountaintops of the Giants.
3. Cross the Mountaintops and defeat Fire Giant
Use the Grand Lift of Rold and follow the main roads and mountain paths eastward through the Mountaintops of the Giants. Activate Sites of Grace near the long bridges, frozen lake, and Flame Peak approaches. The area combines large open spaces, mounted enemies, cliffs, and ambushes, so retrieve or spend your runes before the final approach rather than carrying a large reserve into the boss attempt.
Reach the Fire Giant arena in the eastern Mountaintops and defeat the Fire Giant. His large health pool makes weapon upgrades, flask improvements, and a reliable method of staying near or beneath his attacks especially valuable. Spirit Ashes or cooperative assistance can be used if desired, but neither is required.
After the victory, travel to the Forge of the Giants and rest at its Site of Grace. Follow the available interaction and cinematic sequence involving Melina. Completing this Forge sequence sends the character to Crumbling Farum Azula and advances the world toward the endgame.
Consecrated Snowfield, Mohgwyn Palace, Miquella’s Haligtree, and Malenia remain optional. The mandatory route reaches Farum Azula through the Forge after Fire Giant, not through the Snowfield.
- Fire Giant has been defeated in the Mountaintops of the Giants.
- The Forge of the Giants Site of Grace has been reached.
- The Forge interaction and transition sequence have been completed.
- Crumbling Farum Azula is accessible.
4. Clear Crumbling Farum Azula in the required order
Move through the floating ruins and Dragon Temple areas of Crumbling Farum Azula. Broken walkways, beastmen, explosive birds, dragons, and enemies near ledges make this a poor place to carry unspent runes. Use Sites of Grace frequently and open shortcuts when possible before committing to another major section.
Follow the Dragon Temple route to the Godskin Duo. Defeat both bosses to open the continuing route through the later ruins. Their shared health pool means that defeating one does not permanently end the encounter while the other remains active, so use the arena’s pillars for separation and recovery when necessary.
Continue to the Beast Clergyman arena. The fight begins as Beast Clergyman and changes into Maliketh, the Black Blade during its later phase. Defeat both phases in the same encounter. Maliketh is required for the normal ending route, and his defeat changes Leyndell into Leyndell, Ashen Capital.
Optional Farum Azula encounters such as Dragonlord Placidusax are not part of the completion checklist. Do not leave the dungeon to search for the Consecrated Snowfield; it has no role in opening this transition.
- Godskin Duo has been defeated.
- Beast Clergyman has been defeated as the first phase of the Maliketh encounter.
- Maliketh, the Black Blade, has been defeated.
- Leyndell has changed to Leyndell, Ashen Capital.
5. Finish the Ashen Capital gauntlet
Return to Leyndell, Ashen Capital. The city’s layout is altered by ash, so former routes and landmarks do not always lead to the same destinations. Follow the available streets, rooftops, and interior paths toward the Erdtree. Rest at the new Sites of Grace and spend runes before each boss approach.
The first required boss in the Ashen Capital sequence is Sir Gideon Ofnir, the All-Knowing. Defeat him to open the route to the next arena. Continue onward and fight Godfrey, First Elden Lord. This is the real endgame encounter, not the earlier Golden Shade of Godfrey fought before Morgott. During the battle, Godfrey becomes Hoarah Loux, Warrior; both phases must be defeated.
Before entering Godfrey’s arena, check your weapon upgrade, flask charges and potency, talismans, armor load, Spirit Ash choice, and any ranged or utility options that suit your build. Optional ending questlines, Malenia, Great Rune activation, and DLC content are not required.
- Sir Gideon Ofnir, the All-Knowing, has been defeated.
- Godfrey, First Elden Lord, has been defeated.
- The Hoarah Loux, Warrior phase has been defeated.
- The route into the final Erdtree encounter is open.
6. Defeat Radagon and the Elden Beast
Enter the Erdtree after defeating Godfrey and fight Radagon of the Golden Order. The Elden Beast follows immediately as the second half of the final encounter. There is no normal Site of Grace or flask-rest interval between the two fights, so treat the attempt as one continuous battle and avoid spending every healing resource during Radagon’s phase.
If the Elden Beast defeats you, return to the Site of Grace outside the final arena and repeat the full encounter. Radagon does not need to be cleared permanently in a separate progression step. Improve the next attempt by changing damage-negation talismans, weapon affinity, Spirit Ash timing, flask allocation, stat distribution, or the equipment used for attacks that repeatedly defeat you.
Defeating Radagon alone is not campaign completion. The Elden Beast must also fall before the final interaction becomes available.
- Radagon of the Golden Order has been defeated.
- The Elden Beast has been defeated.
- The final arena contains Fractured Marika and the ending interaction.
7. Choose Age of Fracture
After the Elden Beast dies, approach Fractured Marika. To obtain Age of Fracture, use the ordinary interaction to Mend the Elden Ring. This is the default option available without a special Mending Rune. If a special Mending Rune is available, do not use it for this route. Likewise, do not activate an alternate summon sign associated with another ending.
The ending is not selected merely by killing the Elden Beast. It is selected when you interact with Fractured Marika and confirm the ordinary Mend the Elden Ring choice. Watch the resulting ending sequence and credits. Their appearance confirms that the requested Age of Fracture completion has been achieved.
A pre-ending save can be preserved before making the interaction if another ending is planned later. Without a suitable backup, another ending normally requires another playthrough and, for some endings, its associated questline.
- Fractured Marika is available after the Elden Beast victory.
- The ordinary Mend the Elden Ring option has been selected.
- No special Mending Rune or alternate ending summon sign has been used.
- The Age of Fracture ending sequence and credits have played.
8. Verify completion and decide whether to begin Journey 2
The base-game campaign is complete when the two-Shardbearer requirement has been satisfied, Leyndell and Morgott have been cleared, Fire Giant has been defeated, the Forge transition has been completed, Godskin Duo and Maliketh have been defeated, and the Ashen Capital bosses Sir Gideon Ofnir and Godfrey/Hoarah Loux have been cleared before Radagon and the Elden Beast. The final confirmation is the Age of Fracture sequence after selecting Mend the Elden Ring.
After the credits, choose whether to begin the next journey immediately or remain in the completed world. Continuing the current journey allows optional exploration and preparation. Journey 2 can later be started from the Table of Lost Grace in Roundtable Hold. Starting it resets world progression, defeated bosses, and NPC positions while retaining much of the character’s equipment and development.
Consecrated Snowfield, the Haligtree, Mohg, Malenia, Radahn, Rykard, alternate endings, and Shadow of the Erdtree are not missing completion steps. They are outside this Age of Fracture campaign checklist.
- The complete ordered mandatory sequence is confirmed: two qualifying Shardbearers, standard Leyndell gate route, Morgott, Fire Giant, Godskin Duo, Maliketh, Sir Gideon Ofnir, Godfrey/Hoarah Loux, Radagon, and Elden Beast.
- The ordinary Rold Medallion and Forge of the Giants transition were used for the mandatory Mountaintops-to-Farum route.
- Consecrated Snowfield is recognized as optional.
- Age of Fracture has been selected and the credits have played.
- Journey 2 is treated as optional post-completion content.
Before you move on
- Two qualifying Shardbearers or Great Rune holders have been defeated.
- The standard Leyndell approach has been completed, including the Draconic Tree Sentinel gate encounter, or an alternate access method has been deliberately used.
- Morgott, the Omen King, has been defeated.
- Fire Giant has been defeated and the Forge of the Giants transition has been completed.
- Godskin Duo and Maliketh have been defeated in Crumbling Farum Azula.
- Sir Gideon Ofnir and Godfrey/Hoarah Loux have been defeated in Leyndell, Ashen Capital.
- Radagon and the Elden Beast have both been defeated.
- Fractured Marika has been approached and the ordinary Mend the Elden Ring choice has been confirmed.
- The Age of Fracture ending sequence and credits have played.
- Consecrated Snowfield, the Haligtree, Malenia, Mohg, Radahn, Rykard, alternate endings, and Shadow of the Erdtree were not required.
- The completed save may remain in the current journey, or Journey 2 may be started from the post-ending option or Roundtable Hold.
Finishing up
You reach Leyndell and defeat the mandatory sequence: the Golden Shade of Godfrey, Morgott, Fire Giant, Godskin Duo, Maliketh, Sir Gideon Ofnir, and Godfrey/Hoarah Loux, then defeat Radagon and the Elden Beast.
After the final bosses, you interact with Fractured Marika and choose the plain Mend the Elden Ring option to obtain Age of Fracture.
The route uses only the PlayStation 5 base game and requires no Shadow of the Erdtree content or optional ending item.
The recommended route defeats Godrick and Rennala, but the general requirement before Leyndell is two qualifying defeated Shardbearers; Margit, the Red Wolf of Radagon, Draconic Tree Sentinel, and other normal-route encounters may be bypassed through alternate progression where applicable.
Choose your next gameScreenshots & video
Game imagery for reference. Follow the written chapters above for the route and strategies.
Sources & references
Our original guide draws on the references below. Check the edition at the top of this page before following controls or unlock requirements.
- ELDEN RING Official Website
- ELDEN RING PS4 & PS5 - PlayStation Store
- Walkthrough / The Basics — Eldenpedia
- Melina - Eldenpedia
- Torrent — Eldenpedia
- Vagabond — Eldenpedia
- Golden Seed — Eldenpedia
- Flask of Crimson Tears — Eldenpedia
- FromSoftware Elden Ring product page
- Limgrave and Weeping Peninsula Walkthrough | Game8
- Walkthrough/Limgrave Part 1 | Eldenpedia
- Limgrave - Elden Ring Walkthrough and Guide | GameFAQs
- Adventure Arrives for the Brave in ELDEN RING — Bandai Namco Entertainment America
- Elden Ring Stormveil Castle Walkthrough, PowerPyx
- Stormveil Castle, Eldenpedia
- Elden Ring: How to Complete Stormveil Castle, Push Square
- ELDEN RING Official Site
- Academy of Raya Lucaria Legacy Dungeon Walkthrough and Location — Game8
- Academy of Raya Lucaria — Neoseeker Walkthrough
- Academy of Raya Lucaria Walkthrough — PowerPyx
- Bosses — Eldenpedia
- Ruin-Strewn Precipice - Eldenpedia
- Elden Ring Altus Plateau Walkthrough
- Elden Ring Grand Lift of Dectus Medallion locations and how to use the lift
- Elden Ring Volcano Manor Walkthrough
- Volcano Manor Questline Walkthrough
- How to use Great Runes in Elden Ring
- Leyndell, Royal Capital - Eldenpedia
- Morgott, the Omen King - Eldenpedia
- Leyndell, Royal Capital Legacy Dungeon Walkthrough and Location - Game8
- Elden Ring Leyndell, Royal Capital Walkthrough - PowerPyx
- Forbidden Lands - Eldenpedia
- Consecrated Snowfield — Eldenpedia
- Sending Gate - Eldenpedia
- Mohgwyn Palace — Eldenpedia
- Elden Ring: How to Reach Miquella’s Haligtree Using the Grand Lift of Rold — Push Square
- Elden Ring Haligtree Medallion Left and Right Location — PC Gamer
- Miquella’s Haligtree Legacy Dungeon Walkthrough and Location — Game8
- ELDEN RING Global Release Timings
- Mountaintops of the Giants Walkthrough | Elden Ring
- Complete Walkthrough and Progression Guide | Elden Ring
- Elden Ring Mountaintops of the Giants Walkthrough
- Elden Ring How to Reach Crumbling Farum Azula
- Crumbling Farum Azula Walkthrough - Elden Ring
- Crumbling Farum Azula Legacy Dungeon Walkthrough and Location
- Elden Ring: How to Complete Crumbling Farum Azula
- Leyndell, Ashen Capital Walkthrough — PowerPyx
- Leyndell, Ashen Capital Walkthrough — Game8
- Godfrey, First Elden Lord - Eldenpedia
- Radagon of the Golden Order — Elden Ring Wiki
- Elden Beast — Elden Ring Wiki
- Endings - Eldenpedia
- New Game Plus - Eldenpedia
- Elden Lord Trophy in Elden Ring - PlayStationTrophies.org
- Caria Manor — Eldenpedia
- Volcano Manor — Eldenpedia
- Night’s Sacred Ground — Eldenpedia
- Smithing-Stone Miner’s Bell Bearing — Eldenpedia
- Bell Bearing — Eldenpedia
- All ELDEN RING video games - Bandai Namco
- Elden Ring – PlayStation 4 and PlayStation 5
- Palace Approach Ledge-Road - Eldenpedia
- Mohgwyn Dynasty Mausoleum - Eldenpedia
- Bestial Sanctum - Eldenpedia
- Rebirth - Eldenpedia
- Rennala, Queen of the Full Moon - Eldenpedia
- Main Elden Ring bosses in order
- Elden Ring Boss Checklist and Main Bosses in Order
- How to Beat Maliketh, The Black Blade: Boss Fight Guide
About the game & collecting notes
- Platform
- Sony PlayStation 5
Use this walkthrough for a complete, practical route through Elden Ring (PlayStation 5 base game, main progression and an ending route; Shadow of the Erdtree excluded) with required progress, recovery advice and useful optional upgrades kept in context.
Darryl Polo
Darryl Polo loves tinkering with emulation and revisiting retro games. He enjoys exploring how old favorites play on different setups and sharing what he learns along the way. At Joking Joystick, he writes about the games, hardware, and small discoveries that keep the hobby fun.
Our editorial standardsFound a step that needs another look? Help us improve this guide.