
Dragon Quest XI S: Echoes of an Elusive Age — Definitive Edition (Nintendo Switch) — Complete Campaign Walkthrough
A start-to-finish campaign walkthrough for the Nintendo Switch Definitive Edition of Dragon Quest XI S. This guide leads you through the entire main story to the official ending, including essential beats, party reunions, required dungeons, major boss encounters, and how to recover from setbacks. It also explains Definitive Edition features you can use to speed or tailor your playthrough.

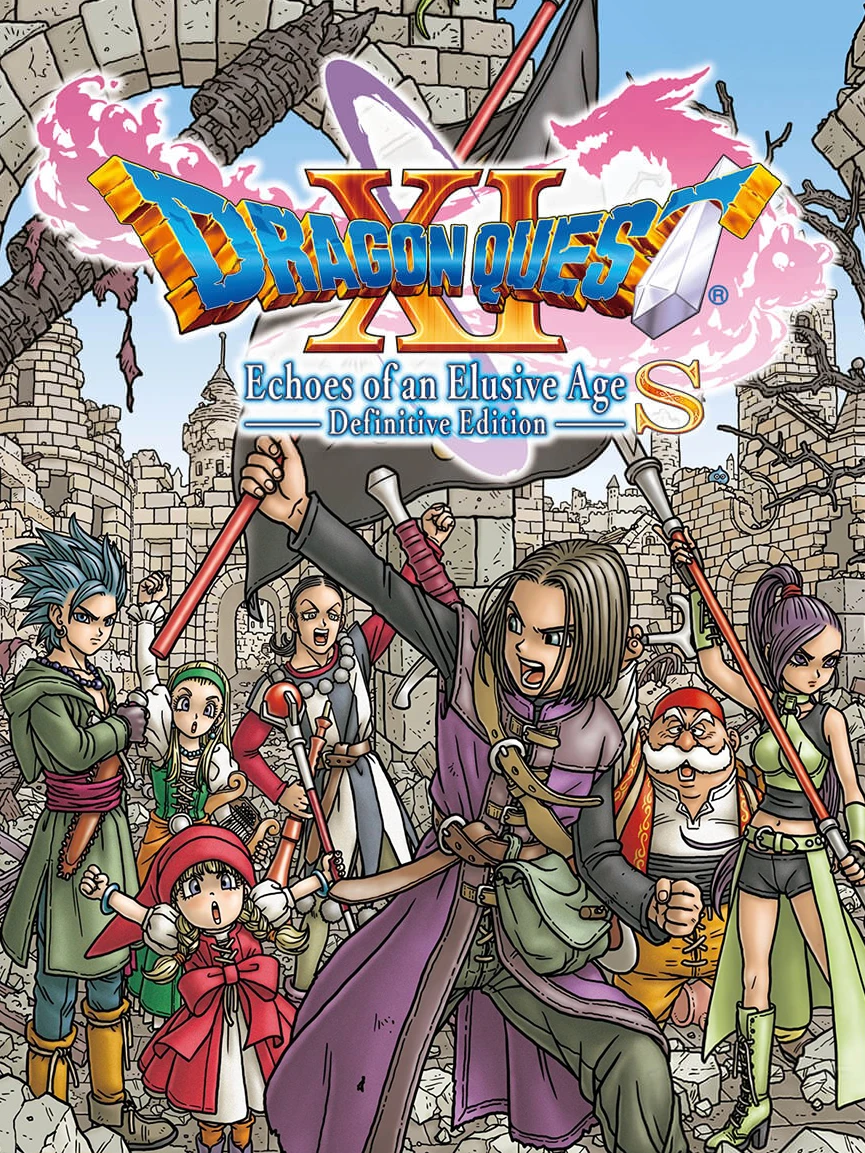
Find a copy
Dragon Quest XI S: Echoes of an Elusive Age — Definitive Edition Nintendo Switch
We may earn a commission if you buy through these links, at no extra cost to you. As an Amazon Associate I earn from qualifying purchases.
Opens retailer search results. Check the model, edition, seller, availability and current price before buying.
Before you begin
This walkthrough follows the Nintendo Switch Definitive Edition in chronological story order.
The guide covers the complete required route through the first ending and the extended Act III conclusion against Calasmos.
Follow the chapters in order. The four Definitive Edition character interludes after Yggdrasil’s fall are mandatory for returning to normal Act II play; side quests, Drustan’s Trials, Tickington, and superbosses are optional.
After the first credits, create and load the cleared Adventure Log to continue into Act III. Do not treat the cleared file as standard New Game+.
Save before major dungeons and bosses, and keep separate files before Mordegon and Calasmos so optional cleanup remains available.
Set yourself up for the run
Confirm that you are playing Dragon Quest XI S: Echoes of an Elusive Age — Definitive Edition on Nintendo Switch.
Use the orchestral or original soundtrack, English or Japanese voices, and battle-speed settings according to preference.
Save at churches, campsites and Goddess Statues before major dungeons and bosses.
Check equipment and craftable gear regularly rather than grinding toward a fixed level target.
The four post-Yggdrasil character interludes are mandatory campaign progression; other character episodes, quests, Drustan’s Trials, Tickington and superbosses are optional.
Rectification can refund skill points at churches or Goddess Statues when a build needs to change.
Treat 2D/3D conversion as a chapter-based restart, not an instant visual toggle. Make a separate backup and read the selected chapter and carryover information before confirming a conversion.
Keep separate saves before Mordegon and Calasmos so the cleared Adventure Log and optional cleanup remain available.
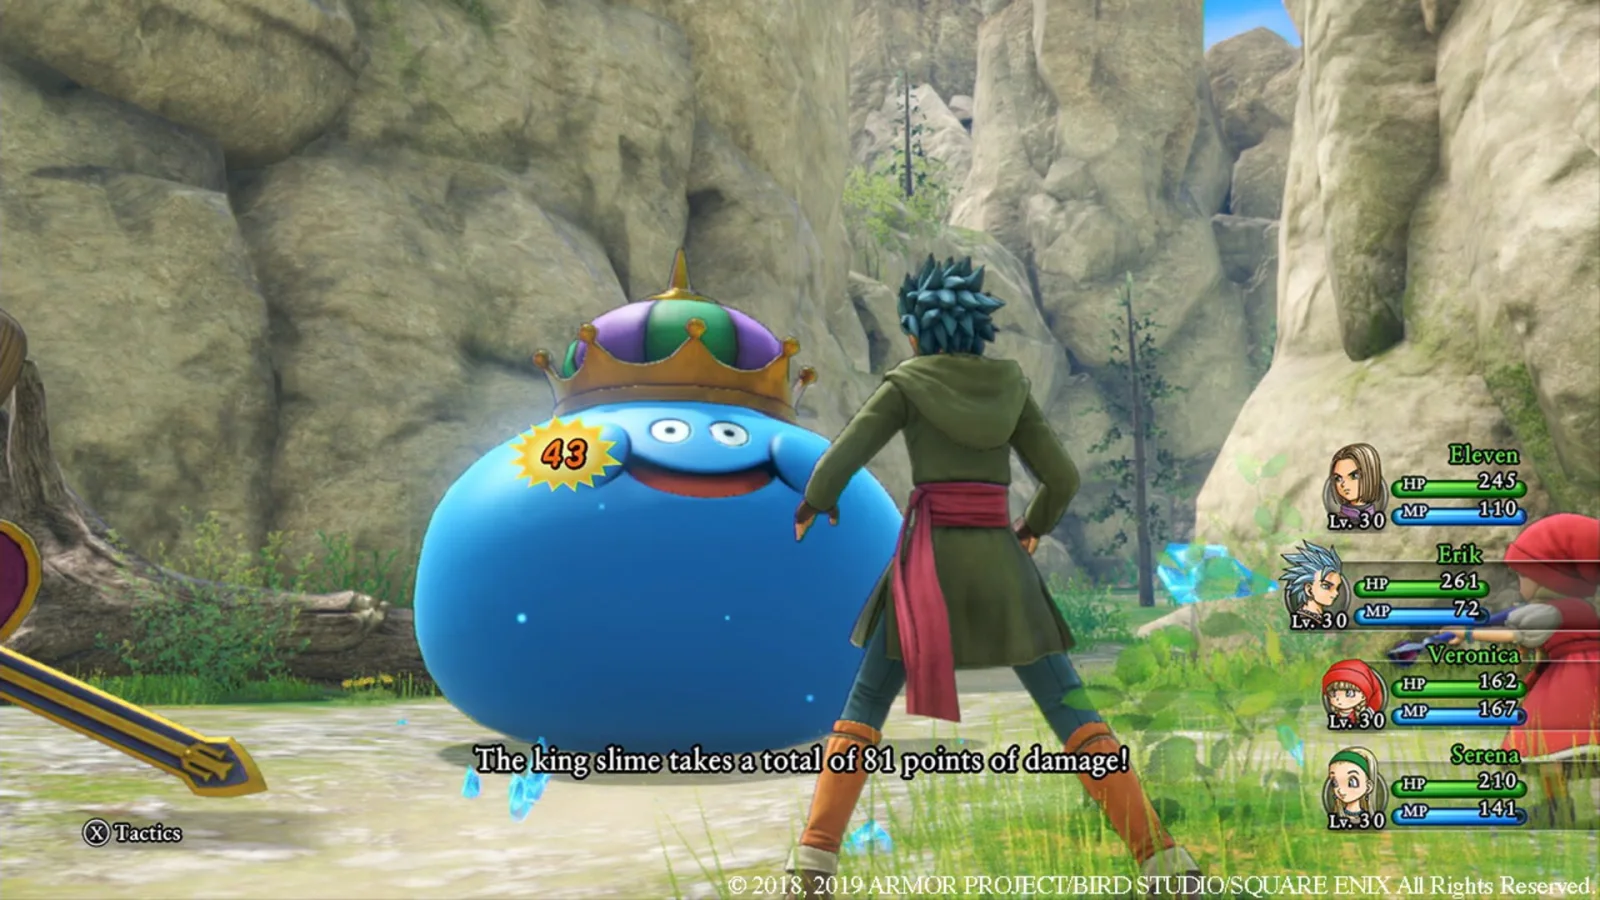
Prologue — Childhood, the Tor, and the Awakening
Begin at the base of Cobblestone Tor with Gemma and Sandy, equip the stronger starting gear, and follow the marked conversations before crossing the bridge. Defeat the opening Slimes, climb through the Tor while learning pre-emptive attacks and basic healing, then defeat the two Smogs on the Face. Reach the summit, complete the coming-of-age ceremony, and return to Cobblestone for the required story scenes. The Luminary revelation occurs during the summit sequence, while the arrest and escape belong to the following Heliodor chapter. Optional treasure, gathering points, and the early village side quest can be skipped without blocking the campaign.
1. Prepare at the base of Cobblestone Tor
After the opening scenes and character naming, control begins at the foot of Cobblestone Tor with Gemma and Sandy. Open the menu and inspect Equipment before following the objective. The starting inventory includes the Trodain Bandana and Trodain Togs; equip them if they are present because they provide better protection than the Plain Clothes. You can also choose between the Cobblestone Sword and Cobblestone Greatsword. The sword allows an off-hand shield, while the greatsword gives stronger early physical attacks. Either choice is suitable for this chapter.
Use the map to identify the marked people and follow Sandy toward the Tor. Speak with the woman indicated by the conversation marker, then go up the nearby stairs and talk to Dunstan, the mayor, and Amber, the Hero’s mother, near the footbridge. These conversations establish the route and must happen before the first battle. You do not need to speak with every villager or complete any optional task here.
- Equip the Trodain Bandana and Trodain Togs if available.
- Choose the Cobblestone Sword or Cobblestone Greatsword.
- Speak with the marked woman, Dunstan, and Amber.
- Follow Sandy toward the footbridge.
2. Cross the bridge and win the opening Slime battle
Cross the footbridge after speaking with the required villagers. A scripted battle against three Slimes begins. Sandy participates in the fight, and Gemma remains behind the Hero and can provide occasional healing. Select Attack and defeat the Slimes one at a time. You can use normal attacks throughout this encounter; there is no need to spend valuable items unless the Hero’s HP becomes unexpectedly low.
This battle introduces the normal turn-based command flow. Attack is the basic physical command, Defend reduces risk when you need to survive a dangerous turn, Skills provide weapon techniques when available, and Items allow the Hero to use healing supplies. After the battle, collect the Pot Lid from the chest behind the shrine at the base if you selected the one-handed sword. It is optional and not needed when using the greatsword.
- Defeat all three Slimes.
- Use the opening battle to learn Attack, Defend, Skills, and Items.
- Collect the Pot Lid behind the shrine if using the one-handed sword.
- Continue into the Tor cavern with Sandy.
3. Traverse the cavern and learn pre-emptive attacks
Enter the cavern and follow the route across the log bridge. Climb the rock wall on the right to reach the nearby sparkling point and collect the Medicinal Herb, then return to the main path. Continue until the game explains how to initiate battles on your terms. When the attack prompt or orange engagement indicator appears, strike an enemy before it reaches you whenever practical. This gives you a safer start to the encounter.
Slimes are the easiest targets in this section. Needlers are tougher and should not be ignored when several enemies are nearby. Fight enemies along the required route so the Hero gains experience naturally, but do not stop to grind extensively. After enough early battles, the Hero learns Frizz. Use Frizz against a single durable enemy when the spell defeats it more efficiently than repeated physical attacks; otherwise conserve MP and use normal attacks.
At the fork, you may briefly take the side route for minor containers before returning to the main path. Continue deeper through the cavern, collect the copper ore from the accessible sparkling point if it is directly on your route, and exit into the Face area. Heal with a Medicinal Herb before the next story encounter if the Hero is low on HP.
- Collect the Medicinal Herb near the climbable rock wall.
- Use pre-emptive attacks when the engagement prompt appears.
- Defeat Needlers carefully rather than treating them like Slimes.
- Use Frizz after it is learned, but conserve MP when normal attacks are sufficient.
- Reach the Face area with the Hero in fighting condition.
4. Defeat the Smogs and reach the summit
A story scene on the Face leads into a mandatory battle against two Smogs. They are substantially more dangerous than the earlier monsters, particularly because of their fire-based attack. Focus attacks on one Smog at a time so the number of incoming actions is reduced. Use Frizz when MP allows and heal with Medicinal Herbs when the Hero’s HP falls low. Gemma’s support healing helps, but do not rely on it as the only recovery plan.
After the Smogs fall, inspect the nearby area only if you want the optional pink pine gathering point. Follow the route to the rope, cross the ledge, and climb down or jump to the lower section as the path requires. Climb the rock face and continue toward the summit. At the top, examine the designated ceremony location and allow the cutscenes to play.
The summit sequence establishes the Hero’s Luminary mark. A Hades’ Condor attacks during the ceremony, but this is a scripted story sequence rather than a normal boss battle that you must win through commands. Continue through the scene until the ceremony is completed, then enter the cavern to return automatically toward the base of the Tor.
- Defeat both Smogs.
- Heal before beginning the Face encounter if necessary.
- Reach the summit by using the ropes, ledges, and climbable rock face.
- Complete the Luminary and coming-of-age ceremony scenes.
- Follow the automatic return route after the summit event.
5. Complete the required Cobblestone scenes
After returning toward the base, continue along the marked route. The game presents the Coming of Age event and then places the Hero back in Cobblestone. You can collect nearby pots, barrels, and chests if desired, but none of these items is required to advance. Avoid spending time searching locked areas or inaccessible doors because they are deliberately reserved for later progression.
Enter the Hero’s house and speak with Amber when the story directs you there. Search the nearby wardrobe for the Plain Clothes if you want the item, then return toward the church and central village area. A required scene with Gemma takes place near the tree. Afterward, the time of day changes and the village’s next objective becomes available.
The early quest offered by the marked villager can be completed immediately if you already collected the required Flurry Feather, but it is optional for the campaign. If you skip it, proceed to the northern village gate. Speak with Dunstan to receive the map of Erdrea and a horse, then speak with Gemma to receive Gemma’s Charm. Equip the accessory if you want its protection; receiving it is the important story progression.
- Return from the Tor and enter Cobblestone.
- Visit the Hero’s house and complete Amber’s scene.
- Attend the required Gemma scene near the village tree.
- Treat the early villager quest as optional.
- Leave through the northern gate after receiving the map, horse, and Gemma’s Charm.
6. Confirm the prologue handoff
The prologue is complete when the Hero has finished the Tor ceremony, witnessed the Luminary revelation, completed the required Cobblestone scenes, and left through the northern gate with the map and horse. At this point, the campaign directs you toward the Heliodor region. Save at a church or campsite when the game next provides the opportunity.
The first arrest and escape do not occur inside Cobblestone Tor or during this prologue. They are part of the following Heliodor sequence, after the Hero reaches the capital and the story advances through Heliodor Castle. Continue into the next chapter when the objective points toward Heliodor rather than trying to force the arrest event early.
If you are recovering after a defeat, return to the nearest church or campsite, restore HP and MP, and recheck equipment before proceeding. The Tor itself has no required optional quest, special crafting task, or difficult repeatable boss. Normal battles, the two Smogs, and the scripted summit sequence are the only mandatory combat progression in this opening section.
- The coming-of-age ceremony has finished.
- The Luminary mark sequence has played.
- Amber and Gemma’s required Cobblestone scenes are complete.
- The Hero has received the map, horse, and Gemma’s Charm.
- The Hero has left Cobblestone and is ready to travel toward Heliodor.
- Begin the next chapter for the arrest and escape sequence.
Before you move on
- The Hero has defeated the scripted three-Slime encounter and the pair of Smogs.
- The Hero has learned the basic combat flow and obtained Frizz through normal early progression.
- The Hero has reached the summit, completed the coming-of-age ceremony, and witnessed the Luminary mark sequence.
- The Hero has returned to Cobblestone, completed Amber’s and Gemma’s required scenes, and left through the northern gate.
- The map, horse, and Gemma’s Charm have been received.
- The next available campaign objective leads toward Heliodor; the arrest and escape are reserved for the next chapter.
References for this chapter
Cobblestone to Heliodor — Accusation, Jail and Escape
Leave Cobblestone through the northern gate and follow the Heliodor Region road to the capital. Enter Heliodor Castle, meet King Carnelian, and endure the accusation that sends the Luminary to prison. Escape the cell with Erik, recover the party’s equipment, and use the hidden passage into the Heliodor Sewers. Cross the guard section, survive the bridge collapse, save at the Goddess Statue in the Dragon’s Lair, and run from the Black Dragon. The escape ends in the Heliodorian Foothills, where a church scene resumes the story and Erik formally joins the party. Town errands and castle loot are optional; the castle audience, prison escape, sewers, pursuit, and foothills church sequence are required.
1. Complete Cobblestone’s departure and reach Heliodor
After the events at Cobblestone Tor, return to Cobblestone and follow the required farewell scenes. Speak with the villagers involved in the event until the game directs you to leave. Any containers, sparkly spots, and the early village side quest can be handled now or postponed; none is needed to unlock the main road.
Exit through Cobblestone’s northern gate. Follow the road across the Heliodor Region toward the capital. The central campsite is a useful optional stopping point because it provides healing and saving, but you do not need to clear the region or defeat every visible monster. Continue north to enter Heliodor.
- The Cobblestone farewell sequence is complete.
- You have exited through the northern gate.
- Heliodor is available as the next main destination.
2. Enter Heliodor Castle and reach the throne room
Inside Heliodor, follow the main route through the lower ward and up toward the castle approach. Speak with the guards at the castle entrance to begin the royal audience. Before entering, use the church if you want to save or restore HP and MP. The city’s shops and early errands are optional, and there is no need to spend heavily because the castle visit quickly becomes a story sequence.
Once inside the castle, start on the lower floor and take the stairs upward. The side rooms, containers, balcony items, and garden exploration are optional. Continue through the middle floor and take either available staircase to the top floor. Follow the upper route back toward the throne room; blocked side doors do not hide a required alternate path.
Enter the throne room and approach King Carnelian. The accusation and arrest follow automatically. Let the dialogue and cutscenes play through until control changes to the prison cell.
- The castle guards have admitted you.
- You have reached the throne room.
- King Carnelian’s accusation has sent the Luminary to prison.
3. Escape the cell and meet Erik
When control returns in the cell, smash the two pots and then examine or approach the cell door. This attracts the attention of the other prisoner, Erik. Follow the resulting escape scene rather than trying to leave through another cell; the surrounding cells and routes are unavailable at this point.
After the escape sequence restores your equipment, speak with Erik again as directed. He reveals the hidden route out of the prison. Enter the opening in his cell and descend into the passage leading to the Heliodor Sewers. Erik is now your companion for the escape, although some of the following encounters use him as an uncontrollable ally.
- Both pots in the cell have been smashed.
- Erik has helped the Luminary escape.
- Your equipment has been returned.
- The hidden passage into the sewers is open.
4. Cross the Heliodor Sewers
At the first sewer intersection, the right-hand route leads to a sparkly spot with a Medicinal Herb and a locked door. The door cannot be used during this first visit, so collect the herb if desired and return to the other route. Continue along the main passage with Erik.
You eventually reach a bridge where Heliodorian guards catch up with you. A guard encounter can be fought or avoided. After the bridge, follow Erik’s lead through the next section. Tall crates provide cover, but detection does not permanently fail the chapter: fight the guards if necessary, heal afterward, and continue forward. The later guard positions can also be bypassed by waiting for patrols to turn away and moving between the crates.
Proceed until the guards surround the pair at the next bridge. The bridge collapses during the mandatory scene, sending everyone into the water below and into the cavern known as the Dragon’s Lair.
- You have taken the open route past the first locked sewer door.
- The guard pursuit has begun.
- The bridge-collapse scene has played.
- You have reached the Dragon’s Lair.
5. Save at the Dragon’s Lair and escape the Black Dragon
When control returns in the cavern, use the nearby Goddess Statue. It provides the important save and recovery point before the pursuit. Then follow the only available passage deeper into the cave. A Black Dragon wakes in the central area and begins the escape sequence.
Do not treat the Black Dragon as a normal early-game boss. Run along the route as soon as control returns and avoid stopping for optional monsters or loot. If the dragon catches you, the resulting battle is not a practical fight at this stage; use Flee and resume the escape. Keep moving through the narrow passages and toward the open ledge.
The pursuit continues outside the dragon’s immediate reach. When the path ends at the cliff, the story forces the Luminary and Erik to make a leap of faith. This is the required conclusion of the sewer escape, not a failure state.
- You have used the Goddess Statue in the Dragon’s Lair.
- The Black Dragon chase has started.
- You have fled or avoided the dragon instead of trying to defeat it.
- The leap from the cliff has occurred.
6. Confirm the escape in the Heliodorian Foothills
The pair awakens in the Heliodorian Foothills, not in Cobblestone. Enter the nearby church and follow the scene with the nun. Leave the church when instructed; the story then confirms Erik’s continued partnership and opens the next objective in the foothills.
At this point, the arrest-and-escape chapter is complete. You may use the church to save, heal, and manage equipment before exploring the foothills. The next required destination is Downtown Heliodor, reached through the northeastern exit of the foothills. The southwestern route toward the Manglegrove is not available as a main-story path at this stage, so do not mistake it for the next objective.
- Control has returned in the Heliodorian Foothills.
- The church scene has completed.
- Erik is established as a continuing party member.
- The next main objective points toward Downtown Heliodor.
Before you move on
- King Carnelian has accused the Luminary and the Luminary has been imprisoned.
- The prison cell escape with Erik has occurred and the equipment has been recovered.
- The Heliodor Sewers have been crossed, including the guard pursuit and bridge collapse.
- The Goddess Statue in the Dragon’s Lair has been reached.
- The Black Dragon chase and leap of faith have completed.
- Control has returned in the Heliodorian Foothills and the next objective leads toward Downtown Heliodor.
References for this chapter
The Red Orb to Hotto — Manglegrove, Kingsbarrow, Door of Departure and the Cryptic Crypt
Begin in Downtown Heliodor after the escape and the return to control. Search Erik’s former hideout, investigate Derk’s shop, and follow the clue about the Red Orb through the Heliodorian Foothills and Manglegrove. Restore the woodcutter, cross the repaired bridge, and use the Fun-Size Forge before entering Kingsbarrow. Defeat the Grim Gryphons, recover the Red Orb, and reach the Door of Departure before Hendrick catches up. Continue into the Hotto Steppe, complete Hotto’s bathhouse and Veronica scenes, then enter the Cryptic Crypt from the steppe’s northeast route. Rescue Serena, examine the Yggdrasil root, defeat Jarvis and his three Shadows, and free Noah. Return to Hotto to make Veronica and Serena permanent party members, receive the Gallopolis Pass, learn Zoom, and cross the checkpoint into the Gallopolis Region. Stop before entering Gallopolis itself.
Investigate Erik’s hideout and locate Derk’s shop
Begin in Downtown Heliodor immediately after the preceding chapter’s escape sequence. Save at the church if needed, then explore the lower streets until you reach Erik’s old stash. Examine it to confirm that the Red Orb is gone and that Erik’s former partner, Derk, took it. This starts the investigation that sends you toward Derk’s current shop.
Follow Erik through the lower district and investigate the lookout area. The guard blocks the route back toward the upper part of Heliodor, so use the nearby item shop to buy Holy Water if you do not already have one. Speak with the girl near the guard and give her the Holy Water and a Buzzberry. Her dog will then scare the guard away, opening the route. Paying the guard is another possible solution, but the dog route avoids the large fee and is the practical choice for a normal campaign.
Climb through the newly opened route to the upper section and enter Derk’s shop. Speak with Derk and complete the cutscene. He explains that he sold the Red Orb to the king and that it was taken to Kingsbarrow. After the conversation, leave Heliodor by the route indicated and return toward the Heliodorian Foothills. Do not head to the Hotto Steppe yet; the Red Orb route must be completed first.
- Examine Erik’s stash in Downtown Heliodor.
- Investigate the lookout and speak with the girl beside the guard.
- Use Holy Water and a Buzzberry to have the dog clear the guard.
- Enter Derk’s shop and learn that the Red Orb was taken to Kingsbarrow.
- Leave Heliodor through the Heliodorian Foothills route.
Cross the Manglegrove and repair the bridge
From the Heliodorian Foothills, take the southwest exit into the Manglegrove. The area contains optional gathering points and treasure, but the required objective is to reach the central camp and investigate the dog near the eastern side. Use the camp to restore HP and MP, save, and access the Fun-Size Forge. In the Switch Definitive Edition, the forge can also be opened from the menu rather than only at a campsite.
Examine the Yggdrasil root near the dog to view the memory explaining what happened to the woodcutter. Return to the central section and take the western path to the chest that contains the Tricky Devil. Defeat it to restore the woodcutter to human form. The Tricky Devil is stronger than normal field enemies but does not require a specialized strategy: keep both characters healed, use the Luminary for damage or emergency recovery, and let Erik attack consistently.
After the battle, speak with the woodcutter and cross the repaired bridge. Use the nearby camp or the forge before leaving. Craft or improve current weapons and armor if you have the materials, especially equipment for the Luminary and Erik. Then take the eastern exit back to the Heliodor Region and continue toward Kingsbarrow. Optional quests and item detours in the Manglegrove can wait.
- Enter the Manglegrove from the Heliodorian Foothills.
- Use the camp to save, recover, and forge equipment.
- Examine the Yggdrasil root near the dog.
- Defeat the Tricky Devil.
- Speak with the restored woodcutter and cross the repaired bridge.
- Exit east toward Kingsbarrow.
Clear Kingsbarrow and recover the Red Orb
Enter Kingsbarrow and follow the temple route downward. The dungeon alternates between interior corridors and exterior ledges, so check both sides when the path opens. Keep the Luminary and Erik healed because Little Devils can attack in groups and the later dungeon enemies are more durable than those in the Manglegrove.
Continue to the lower floors until you reach the area with a sparkling Eggsoskeleton. Defeat it and mount it. Its high jump lets you reach the upper platforms and collect useful equipment and recipe materials. The mount is part of the intended route for the accessible chests, but the important progression is reaching the lower door beyond this section.
Before opening that door, restore HP and MP and save if necessary. The encounter beyond it is against two Grim Gryphons. They can use group wind damage and slow the party, so do not leave either character near defeat. If Erik knows Sleeper Hit, use it to disable one target when possible; otherwise concentrate on one Gryphon at a time and use the Luminary’s strongest reliable damage. A Pep Power is useful but not required.
After both Gryphons fall, Erik recovers the Red Orb. Use Evac to return to the entrance, or walk back if you want additional experience. Rest and save at the nearby campsite before continuing east. Recheck armor and forge stronger pieces if your equipment is still from the early Heliodor section.
- Reach the lower floors of Kingsbarrow.
- Defeat and mount the sparkling Eggsoskeleton.
- Heal and save before the Grim Gryphon battle.
- Defeat both Grim Gryphons.
- Recover the Red Orb and leave Kingsbarrow.
- Rest and save at the nearby campsite.
Reach the Door of Departure and enter the Hotto Steppe
From Kingsbarrow, travel east toward the Door of Departure. Follow the main field route under the large tree and continue to the door. The story triggers a chase involving Hendrik; this sequence is automatic once the party reaches the destination. After the scene, control resumes in the new region, the Hotto Steppe.
Save at the priest near the arrival point and use the nearby merchant or campsite for supplies. Check that the Luminary and Erik have current weapons, armor, and accessories. Healing items are useful because the next dungeon is longer than the early Manglegrove route. Travel north into Hotto village. The Hotto side quests are optional and can be postponed without affecting the story.
- Travel east from Kingsbarrow to the Door of Departure.
- Complete the Hendrik chase sequence.
- Save after entering the Hotto Steppe.
- Restock and check the Luminary and Erik’s equipment.
- Enter Hotto from the north.
Complete Hotto’s bathhouse events and follow Veronica to the Cryptic Crypt
In Hotto, follow the main route uphill to the bathhouse and complete the required scenes. Then return toward the village gate and speak with Veronica. She is searching for Serena and Noah. Veronica joins as a guest at this stage, but her magic is sealed and she cannot yet be treated as a normal controllable party member.
Return to the tavern or inn when the story directs you there, then leave Hotto and return to the Hotto Steppe. The Cryptic Crypt is reached through the northeast route from the steppe. It is not the Gallopolis checkpoint; that gate remains unavailable until after the rescue sequence and the Gallopolis Pass is obtained.
Before entering, use the campsite to recover and save. The crypt contains enemies that can drain MP or inflict sleep, so avoid unnecessary fights when your resources are low. Follow the dungeon’s corridors and examine the Yggdrasil roots when the route presents them. Some floors collapse deliberately; continue through the lower area, use the ladders, and reconnect with the upper passages rather than treating a fall as a mistake.
Reach Serena beyond the large doors. She accompanies the party through the remainder of the crypt. Use the Goddess Statue near the boss route to heal and save. Examine the Yggdrasil root in the next section. In the Switch Definitive Edition, the resulting scene provides the required access to the sealed route automatically; do not waste time trying to enter a password manually.
- Complete Hotto’s bathhouse and Veronica scenes.
- Leave Hotto through the Hotto Steppe.
- Enter the Cryptic Crypt from the steppe’s northeast route.
- Use the collapsing floors and ladders as part of the intended path.
- Reach Serena and use the Goddess Statue.
- Examine the Yggdrasil root before the boss route opens.
Defeat Jarvis and his three Shadows, then rescue Noah
Enter the monster lair and begin the battle against Jarvis and his three Shadows. The Shadows can use Snooze, so remove them early if they repeatedly disable the party. Focus attacks on one Shadow at a time rather than spreading damage across all four enemies. Serena’s healing is important once she is available, while the Luminary should be ready to heal if several characters are asleep or damaged.
Jarvis is the final target. Keep the party’s HP high because his Cool Breath can damage the whole group, and do not commit every turn to attacking if a character is near defeat. Erik can use physical attacks or Sleep attempts when available; the Luminary can attack normally or provide emergency healing. Veronica is still present as a guest with sealed magic, so do not plan the encounter around her later spell repertoire.
After the battle, go through the northern exit into the cell block and speak with Noah. This completes the required rescue. The nearby locked prison chests are not needed for campaign progress and can be ignored during this visit. The story then returns the party automatically to Hotto.
- Defeat all three Shadows.
- Keep Serena or the Luminary ready for group healing.
- Defeat Jarvis after the Shadows are down.
- Enter the cell block and speak with Noah.
- Ignore inaccessible prison chests unless returning later for optional collection.
Recruit Veronica and Serena permanently, then cross the Gallopolis checkpoint
After returning to Hotto, regain control upstairs at the inn and follow the scene downstairs. Continue to the tavern when instructed and complete the conversation there. Veronica and Serena now join as permanent, controllable party members. Veronica’s magic is restored, and Serena becomes the party’s primary early healer.
Before leaving, equip both sisters with current weapons, armor, and accessories. Serena can use a shield, and Veronica benefits from upgraded wands or other available equipment. Spend their available skill points if desired, then use the inn or campsite to restore the party. The optional Hotto quests can still be completed later and are not required for the next story destination.
Speak with the party after the tavern scene to receive the Gallopolis Pass. As you leave Hotto, Veronica teaches the Luminary Zoom. Zoom is useful for returning to unlocked locations, but it does not replace the physical route required for the Gallopolis handoff. Leave Hotto and travel south through the Hotto Steppe to the Gallopolis Region exit.
Present the Gallopolis Pass at the checkpoint and cross into the Gallopolis Region. Stop as soon as the checkpoint is crossed. The Sultanate of Gallopolis, Prince Faris, the horse race, Celestial Sands, and the Slayer of the Sands belong to the following chapter.
- Complete the return-to-Hotto inn scene.
- Complete the tavern scene.
- Confirm that Veronica and Serena are permanent party members.
- Equip the sisters and recover before leaving.
- Receive the Gallopolis Pass.
- Learn Zoom from Veronica.
- Cross the checkpoint into the Gallopolis Region.
Before you move on
- Downtown Heliodor was searched and Derk’s shop investigation was completed.
- The party traveled through the Manglegrove and restored the woodcutter.
- Kingsbarrow was cleared and both Grim Gryphons were defeated.
- The Red Orb was recovered.
- The Door of Departure and Hendrik chase sequence were completed.
- The party entered the Hotto Steppe and completed Hotto’s required bathhouse and Veronica scenes.
- Serena was reached in the Cryptic Crypt.
- Jarvis and all three Shadows were defeated.
- Noah was freed from the prison cell block.
- Veronica and Serena became permanent party members after the return to Hotto.
- The Gallopolis Pass was received and Zoom was learned.
- The party crossed the checkpoint into the Gallopolis Region.
- Gallopolis itself, Prince Faris, the horse race, and the Slayer of the Sands were not included in this chapter.
References for this chapter
- Return to Heliodor - Act I - Walkthrough | Dragon Quest XI: Echoes of an Elusive Age Definitive Edition
- The Manglegrove - Act I - Walkthrough | Dragon Quest XI: Echoes of an Elusive Age Definitive Edition
- The Kingsbarrow - Act I - Walkthrough | Dragon Quest XI: Echoes of an Elusive Age Definitive Edition
- Strange Surroundings - Dragon Quest XI: Echoes of an Elusive Age Walkthrough
- The Cryptic Crypt - Dragon Quest Wiki
Gallopolis to Gondolia — Desert Campaign, Grotta della Fonte, and Jasper
Begin after the party has crossed the checkpoint into the Gallopolis Region and control returns on the Gallopolis side. Complete Prince Faris’s required race and escort sequence, travel to the northern section, and defeat the Slayer of the Sands. Return to Gallopolis, let Sylvando join, and cross the Celestial Sands checkpoint toward Laguna di Gondolia. In Gondolia, follow Doge Rotondo’s request to Grotta della Fonte, defeat the two Coralossus, and collect the water needed for the birdsong nectar. Return to Gondolia, reach the stage through the central-bridge gondola route, defeat Jasper, and watch the escape scenes. The chapter ends when the Salty Stallion is available and Zwaardsrust is the next main destination. Letters, crossbow targets, Puerto Valor, treasure rooms, and other sea exploration are optional.
1. Continue from the Gallopolis-side checkpoint
Start this chapter only after the party has crossed the checkpoint into the Gallopolis Region and control has returned on the Gallopolis side. If the checkpoint guard still blocks the route, speak with the second guard after dealing with Hakim’s request; otherwise, do not send the party back toward Hotto or repeat the earlier checkpoint approach.
Travel to the Sultanate of Gallopolis. Use the nearby campsite or church to restore HP and MP before entering the city. The southern region contains optional monsters, sparkly spots, treasure, and crossbow targets, but none is needed for the main story. Enter the Sultan’s Palace and follow the required scenes involving the Sultan and Prince Faris. Then visit Faris in his chambers when the objective directs you there.
- Begin after crossing into the Gallopolis Region.
- Reach the Sultanate of Gallopolis.
- Complete the required Sultan and Faris palace scenes.
2. Complete Faris’s race and defeat the Slayer of the Sands
After speaking with Faris, follow the objective to the circus and wait for the required nighttime sequence if necessary. Rest at the inn or a campsite when the game requires the time to change. Agree to take part in Faris’s race and complete the mandatory race event. The story does not require repeated races for better results, so continue once the required scene has finished.
Return to the palace and follow the next Faris objective. When the northern section of the Gallopolis Region opens, leave the city with Faris and continue to the northern campsite. Heal there before proceeding north to the Pernicious Peninsula. The Slayer of the Sands battle begins after the next scene.
The Slayer’s confusion attack is the main danger because it can make a party member attack an ally. Cure confusion promptly when possible, keep Serena ready to heal, and use Sap if it lands. Poison can also help, while the Hero and Erik should continue applying their strongest reliable damage. If the party is struggling, defend or heal rather than allowing confused characters to take repeated turns. After the Slayer falls, return to Gallopolis for the required aftermath scenes.
- Finish the required race sequence.
- Reach the northern campsite and restore the party.
- Defeat the Slayer of the Sands.
- Return to Gallopolis.
3. Recruit Sylvando and cross the Celestial Sands checkpoint
Complete the new palace scenes after the Slayer of the Sands. When control returns, leave through the city gate as directed. Sylvando joins the party during this transition. The Celestial Sands checkpoint is now open, so follow the road through it rather than returning to the southern Gallopolis routes.
At the checkpoint, Hakim offers the optional A Lovely Letter quest. Accepting it does not block the story, and you can ignore the letter if you are following only the campaign. The required action is to speak with the guard blocking the exit and continue into Laguna di Gondolia. Activate the campsite and church or Zoom points you pass, then proceed toward Gondolia.
The Laguna di Gondolia route contains optional crossbow targets, monsters, sparkly spots, and treasure. They can be completed now or postponed. Use the western exit only when you are ready to follow the main objective toward Grotta della Fonte, but enter Gondolia first to trigger the town’s required scenes.
- Sylvando has joined the party.
- Cross the Celestial Sands checkpoint.
- Enter Laguna di Gondolia and reach Gondolia.
- Leave A Lovely Letter and crossbow targets optional.
4. Follow Doge Rotondo’s request to Grotta della Fonte
In Gondolia, follow the main objective through the town. Visit the weapon and armour shops if current equipment is outdated, but do not spend time on optional errands. Go to the docks in the southwest and discover that the route is blocked. Then travel to the mayor’s house in the northeast, where the next objective sends the party to obtain birdsong nectar and water from Grotta della Fonte.
Leave through the western route from Laguna di Gondolia and enter Grotta della Fonte. Follow the main path through the cave, using the campsite before the deeper section. Several side chambers contain optional treasure, but the required route continues toward La Fonte Fonda. Before the confrontation, heal and make sure the party has sufficient medicinal items.
The path leads to two Coralossus. Their physical attacks are strong, and their water attack can strike the whole party, so keep HP topped up and avoid allowing Serena to be overwhelmed. Defeat both enemies, then cross the bridge and collect the water. This supplies the ingredient needed for the birdsong nectar. After the scene, use Zoom to return to Gondolia.
- Trigger the Doge-related objective in Gondolia.
- Reach Grotta della Fonte through the western Laguna route.
- Use the grotto campsite before the deeper section.
- Defeat both Coralossus.
- Collect the spring water.
5. Navigate Gondolia’s pursuit and reach the stage
After returning from Grotta della Fonte, watch the Gondolia scene and follow the objective to the stage area in the north of town. The party fights Heliodorian guards, and Erik is taken captive. Control then changes to a pursuit through Gondolia. Your immediate destination is the central bridge, but the direct route is blocked, so use the streets and elevated walkways shown on the map.
Fight guards only as needed and conserve MP for the upcoming boss. When the party reaches the central bridge, do not keep trying to cross the blocked route. Drop down from the middle section of the bridge into the lower canal area and find the gondola. Board it and row to the mooring point in the northeast of Gondolia.
Disembark at the northeastern mooring point and go up toward the stage. The next scene leads directly into Jasper’s battle, so equip useful accessories, place healing items where they are easy to reach, and make sure the party is not entering with depleted HP or MP.
- Complete the post-Grotta Gondolia scenes.
- Reach the central bridge.
- Drop to the canal and board the gondola.
- Row to the northeastern mooring point.
- Reach the stage.
6. Defeat Jasper and confirm the ship route
Jasper uses Sword Stance to deflect physical attacks, so do not spend every turn repeating ordinary weapon strikes while the stance is active. Use Sap if it succeeds, apply buffs when safe, and rely on the Hero’s stronger sword skills or Veronica’s offensive magic during openings. Jasper can use Frizzle to silence spellcasting and also uses Zam and heavy physical attacks. Keep Serena ready to heal, and switch to item-based recovery or non-spell abilities if a caster is silenced.
If the party loses an attacker, stabilize first rather than continuing with an exposed formation. Defeating Jasper triggers the remaining Gondolia scenes, after which Erik rejoins the party and the group gains access to Sylvando’s ship, the Salty Stallion. Let the scenes finish before attempting to sail.
When control returns, save at a church or campsite. Open the sea map and confirm that the ship is available. The immediate main-story destination is Zwaardsrust to the northeast. Puerto Valor, optional sea islands, letters, crossbow targets, treasure routes, and other coastal content can be postponed without affecting this chapter’s completion.
- Defeat Jasper at the stage.
- Watch the escape scenes until Erik rejoins.
- Confirm that the Salty Stallion is available.
- Save after control returns.
- Identify Zwaardsrust as the next mandatory destination.
Before you move on
- The chapter began after the party crossed into the Gallopolis Region from the checkpoint.
- Prince Faris’s required race and escort sequence was completed.
- The Slayer of the Sands was defeated at the Pernicious Peninsula.
- Sylvando joined and the Celestial Sands checkpoint route opened.
- Gondolia’s Doge-related objective was completed.
- The party reached Grotta della Fonte, defeated both Coralossus, and collected the spring water.
- The Gondolia pursuit was completed through the central bridge, canal, and northeastern gondola mooring.
- Jasper was defeated at the stage.
- Erik rejoined the party, the Salty Stallion became available, and a save was made.
- Zwaardsrust is marked as the next main destination; optional letters, crossbow targets, Puerto Valor, and sea exploration remain deferred.
References for this chapter
- Act 1 - Dragon Quest XI S: Echoes of an Elusive Age - Definitive Edition Walkthrough & Guide
- DRAGON QUEST XI S: Echoes of an Elusive Age – Definitive Edition — Square Enix
- DRAGON QUEST XI S: Echoes of an Elusive Age – Definitive Edition — Nintendo Official Site
- Mini Medals Locations — Dragon Quest XI Definitive Edition — Gamer Guides
The Orb Hunt — Party Reunions, Required Regions, and the Road to Yggdrasil
After the ship opens the wider sea, complete the required Act I route through Zwaardsrust, Octagonia, the Ruins of Dundrasil, Puerto Valor, Lonalulu, Nautica, the Eerie Eyrie, Phnom Nonh, Sniflheim, Arboria and the First Forest. Finish the Octagonia tournament and orphanage investigation, recruit Rab and Jade at Dundrasil, obtain Lorelei’s Harp, claim the Green Orb from Nautica, defeat the Elysium Bird and Hades Condors for the Silver Orb, defeat Dora-in-Grey to obtain the Magic Key, use it to recover the Purple Orb, and defeat Krystalinda to resolve Sniflheim and receive the Blue Orb. Erik is already an active party member during the Sniflheim sequence; do not describe him as rejoining there. End at the First Forest summit before activating Yggdrasil’s Altar.
Reach Octagonia through Zwaardsrust
After the ship places the party at the Strand, follow the story marker toward Zwaardsrust. Pass through the region to the Warrior’s Rest Inn, then continue north to Octagonia. Rest and save before entering town if the party is damaged, because the tournament sequence leads directly into several required events.
Register for the Masked Martial Arts Tournament and complete every round with the Luminary and Vince. After the tournament scenes, remain in Octagonia and follow the instructions to investigate the orphanage. Enter the hole in the orphanage garden and proceed through the Caverns Under Octagonia.
Follow the cave route to Arachtagon. Keep Serena or another healer ready, restore fallen characters promptly and avoid spending scarce MP on minor encounters. After Arachtagon is defeated, return to the arena and complete the required Vince battle. The resulting scenes direct the party toward the Ruins of Dundrasil.
- Reach Octagonia through Zwaardsrust.
- Complete every tournament round.
- Investigate the orphanage and enter the Caverns Under Octagonia.
- Defeat Arachtagon and complete the required Vince battle.
- Confirm that the next story destination is the Dundrasil region.
Complete the Ruins of Dundrasil and recruit Rab and Jade
Leave Octagonia by the route leading west toward the Dundrasil region. Follow the marked path to the campsite and ruins. Use the campsite before entering the ruins so the party begins the story sequence healed and with a current save.
Continue through the ruined streets and follow Rab through the grave-related scenes and the Altar of Souls sequence. This portion advances mainly through story events rather than a long conventional dungeon, so follow the objective marker instead of searching every ruined building for an exit.
When the cabin and royal-history events finish, continue through the marked scenes until the party reunites with Jade. Rab and Jade become permanent party members during this sequence, and the story awards the Yellow Orb. Equip current gear for both characters and spend available skill points before leaving.
- Reach the Ruins of Dundrasil from Octagonia.
- Complete the Rab, graves and Altar of Souls scenes.
- Recruit Rab and Jade as permanent party members.
- Receive the Yellow Orb.
Resolve Puerto Valor and Lonalulu to obtain Lorelei’s Harp
Travel to Puerto Valor when the story objective sends the party there. Speak with the required town characters, including Don Rodrigo, and continue through the Costa Valor and Strand scenes. When the route opens the way to the ship, follow the marked conversations rather than sailing to optional islands.
Sail to Lonalulu in the southeast. Follow the events involving Kai and the villagers, then return to the ship when instructed. The story leads to the mandatory Tentacular battle. Tentacular has a main body and separate tentacles; destroy the tentacles when they are creating too much pressure, then focus on the main body. Keep group healing available and revive fallen characters promptly.
After the battle, complete the remaining Kai and Michelle scenes through Saikiki Beach and return to the Strand when directed. Open the chest at the required location to obtain Lorelei’s Harp. The harp is required to pass through the glowing ocean columns. Ship treasure, island detours and most Lonalulu requests are optional.
- Complete the required Puerto Valor and Strand scenes.
- Resolve the Lonalulu and Kai storyline.
- Defeat Tentacular.
- Obtain Lorelei’s Harp.
Visit Nautica and claim the Green Orb
Use Lorelei’s Harp at the glowing ocean column in the Inland Sea to enter Nautica. Follow the underwater route to the palace and speak with Queen Marina. Her required scene awards the Green Orb. Optional underwater exploration can be postponed.
Return to the surface and use the western ocean route to reach the Champs Sauvage. Continue toward the Academy and speak with the required student. Examine the indicated information to identify the Eerie Eyrie as the next story destination. Academy quests and reward collections are not required for the Orb route.
- Use Lorelei’s Harp to enter Nautica.
- Speak with Queen Marina.
- Receive the Green Orb.
- Reach the Academy and identify the Eerie Eyrie objective.
Climb the Eerie Eyrie and recover the Silver Orb
From the Champs Sauvage, follow the route toward the Rocky Ravine and Eerie Eyrie. The upper sections require monster mounts. Defeat a mountable Rotten Eggsoskeleton near the lower route and ride it where the terrain requires a mounted jump or elevated crossing. Farther into the area, obtain and use the required Demonrider mount to scale the larger walls and continue upward.
Use the campsite before the summit approach. The boss encounter is against the Elysium Bird and two Hades Condors. Defeat the Condors first if their extra attacks are overwhelming the party, then concentrate on the Elysium Bird. It can use Sizzle, grab characters and restore itself or its companions with Multiheal, so maintain healing and prevent the battle from becoming a prolonged war of attrition.
After victory, open the chest to obtain the Silver Orb. Leave through the available route and continue the main objective. Optional Academy rewards do not need to be completed before moving on.
- Reach the Eerie Eyrie through the Rocky Ravine.
- Use the Rotten Eggsoskeleton and Demonrider mounts to pass the upper terrain.
- Defeat the Elysium Bird and two Hades Condors.
- Collect the Silver Orb.
Clear Phnom Nonh and use the Magic Key for the Purple Orb
Travel through the southern Champs Sauvage route to Phnom Nonh and follow the mural investigation. Continue into the Other Side and then the Cursed Cloisters. Keep the map visible through the connected stairs and platforms, and use the save statue before the altar area.
At the Accursed Altar, defeat Dora-in-Grey. Her attacks can damage the whole party, and beguilement can cause a character to act against the group. Keep Serena or another healer ready, cure confusion or charm when possible, and use offensive buffs only when they do not interfere with recovery. Victory awards the Magic Key.
Return to the Warrior’s Rest Inn in Zwaardsrust. Enter the nearby ruins and use the Magic Key on the red door. Open the chests beyond it and collect the Purple Orb. This is the required Purple Orb route; it is not part of the Dundrasil sequence.
- Complete the Phnom Nonh mural investigation.
- Defeat Dora-in-Grey in the Cursed Cloisters.
- Receive the Magic Key.
- Open the red Magic Key door near the Warrior’s Rest Inn.
- Collect the Purple Orb.
Resolve Sniflheim, defeat Krystalinda and reach Arboria
Sail north from the Strand to Sniflheim and follow the opening city events. Speak with the required characters and continue through the frozen-city scenes until the story directs the party toward the Viking Hideout and the Hekswood. Erik is already an active party member during this sequence; he does not rejoin here.
Proceed through the Viking Hideout and the Hekswood as directed. After the events involving Snorri, travel to the Royal Library. Activate its green mechanisms to change the layout, use the stairs to reach the central story area and examine the required information about the witch and the enchanted grimoire. Once the library objective is complete, return to the Sniflheim campsite, heal and save.
Return to Sniflheim and confront Queen Frysabel. The queen is revealed to be Krystalinda, beginning the required boss battle. Ice damage and snowman-related disruption are the main hazards, so use ice resistance or Hymn of Ice if available, keep group healing active and cure debilitating conditions when possible. After Krystalinda is defeated, complete the resolution with Snorri and the real queen. Queen Frysabel awards the Blue Orb.
Leave Sniflheim through the Snaerfelt and continue south toward Arboria. Follow the Snærfelt route and enter the Arborian Highlands. In the Pit Cave, defeat the mountable Eggsoskeleton and ride it across the required ledges and footbridge. Continue into Arboria, complete the cathedral conversations and take the eastern exit into the Arborian Highlands. Erik remains with the party as you proceed; there is no Sniflheim recruitment event to record.
- Complete the opening Sniflheim city events.
- Resolve the Viking Hideout and Hekswood objectives.
- Navigate the Royal Library and examine the required information.
- Return to Sniflheim and defeat Krystalinda.
- Complete Queen Frysabel’s resolution and receive the Blue Orb.
- Travel through the Snaerfelt and reach Arboria.
- Use the Eggsoskeleton mount in the Pit Cave to continue toward the First Forest.
Prepare at the First Forest summit and stop before the altar sequence
From Arboria, follow the required route into the Arborian Highlands and First Forest. Continue through the bridges, vines and narrow elevated paths, using the available campsites to heal, restore MP and save. Optional forest branches and treasure can be ignored while following the objective marker upward.
At the upper campsite, heal the entire party, check that Rab, Jade, Erik and the other companions have usable equipment, spend accumulated skill points and carry healing and revival items. Confirm that the Red Orb from the earlier campaign route, the Yellow Orb from Dundrasil, and the Green, Silver, Purple and Blue Orbs are all accounted for.
Stop at the First Forest summit campsite or immediately before approaching Yggdrasil’s Altar. Do not activate the altar, place the Orbs, climb toward the World Tree or begin the Heart of Yggdrasil sequence. Those events belong to the next chapter.
- Reach the First Forest summit campsite.
- Heal, save and update equipment before the altar sequence.
- Confirm possession of all six Orbs.
- Stop before approaching or activating Yggdrasil’s Altar.
Before you move on
- Rab and Jade are permanent party members after the Ruins of Dundrasil sequence.
- Lorelei’s Harp has been obtained after the Lonalulu and Strand events.
- The Green Orb has been collected from Nautica.
- The Yellow Orb has been collected during the Dundrasil sequence.
- The Silver Orb has been collected after the Elysium Bird and Hades Condor battle.
- The Magic Key has been obtained by defeating Dora-in-Grey, and the Purple Orb has been recovered from the red-door ruins near the Warrior’s Rest Inn.
- The Viking Hideout, Hekswood and Royal Library objectives have been completed.
- Krystalinda has been defeated, Queen Frysabel’s resolution has been completed and the Blue Orb has been received.
- Erik has remained an active party member during the Sniflheim sequence; no rejoin event is required.
- The party has traveled through Snærfelt and Arboria and reached the First Forest summit campsite with all six Orbs accounted for.
- The chapter ends before Yggdrasil’s Altar is activated and before the Heart of Yggdrasil sequence begins.
References for this chapter
- Act 1 - Dragon Quest XI S: Echoes of an Elusive Age - Definitive Edition Walkthrough & Guide
- Deep-Sea Diving: The Silver Orb - Dragon Quest XI: Echoes of an Elusive Age Walkthrough
- Dora's No More: The Blue Orb - Dragon Quest XI: Echoes of an Elusive Age Walkthrough
- DRAGON QUEST XI S: Echoes of an Elusive Age – Definitive Edition — Square Enix
The Fall of Yggdrasil — Altar, Heart of the World Tree, and Act I Conclusion
Begin at the First Forest Summit after the six Orbs have been gathered and the preceding regional objectives are complete. Save and prepare the party before approaching Yggdrasil’s Altar. The altar sequence automatically opens the route to the World Tree. Follow the monster-free path, use the well only if you want to return to the First Forest, collect the optional Yggdrasil Dew, climb the vine, and reach the Heart of Yggdrasil. Jasper’s encounter cannot be won through normal damage because the Orb protects him. Heal, defend, and survive until his scripted attack reduces the party to 1 HP. Watch the complete sequence in which Mordegon takes the Luminary’s power and destroys Yggdrasil. Continue through the forced aftermath until the next normal save opportunity becomes available; this chapter ends with the Act I catastrophe and the handoff into the changed world.
1. Begin at the First Forest Summit and make the final preparations
Start at the First Forest Summit with the six Orbs already collected and the story route to Yggdrasil ready to open. Use the campsite before climbing toward the altar. Restore HP and MP, revive anyone who is down, forge the best current equipment, and save in a fresh slot if possible.
The World Tree sequence is short, but the party members who can be separated or used during the immediate aftermath should not be left in outdated equipment. In the Switch Definitive Edition, check Sylvando, Jade, Erik, and Rab in particular, since the post-altar events involve the wider party and those characters may need to fight before the next extended recovery point. This is preparation, not a requirement to change party tactics or complete optional quests.
- Arrive at the First Forest Summit with all six Orbs already obtained.
- Heal, revive, forge, and save at the Summit campsite.
- Check current equipment for Sylvando, Jade, Erik, Rab, and the Luminary.
2. Approach Yggdrasil’s Altar and enter the World Tree
Follow the stairs from the Summit to Yggdrasil’s Altar. Approach the altar to trigger the story sequence in which the collected Orbs open the way to the World Tree. There is no separate Orb-placement puzzle or manual combination to solve at this point; the preceding Orb hunt has already satisfied the requirement.
Before activating the altar, you may search behind it for the optional Mini Medal chest. Take it now if you want it, but it has no bearing on the ending or on the route through Yggdrasil. Once the scene finishes, the party is transported to the foot of the World Tree and the route forward becomes available.
- Approach Yggdrasil’s Altar after the Orb hunt is complete.
- Watch the altar sequence that opens the World Tree route.
- Collect the optional Mini Medal behind the altar only if desired.
3. Follow the linear path at the foot of the World Tree
The foot of the World Tree contains no ordinary enemy encounters, so move forward without trying to grind. Follow the main path across the platforms and up the ledges. A sparkly spot contains Superior Medicine, and another contains Yggdrasil Dew. The Dew restores the whole party and is worth keeping for emergencies, although this route does not require it.
Partway through the area, you will reach a well leading back to the First Forest. Use it only if you need to return to the Summit campsite, recover, forge, or collect the optional chest behind the altar. Otherwise, continue forward. The well is a return route, not a required detour.
- Follow the monster-free path through the foot of the World Tree.
- Collect the Yggdrasil Dew if you want an emergency full-party recovery item.
- Use the well only for optional recovery or backtracking.
4. Climb to the Path to the Heart of Yggdrasil
Continue past the well and follow the route to the vine. Climb it to reach the upper branch section. The path beyond the vine is effectively one-way and contains optional sparkly spots, including Lunaria and a Yggdrasil Leaf. Neither item is required, so do not leave the route or spend resources searching if you are ready for the scripted confrontation.
Run along the branch toward the Heart of Yggdrasil. Approach the Heart to trigger the cutscenes involving the Luminary, Hendrik, Jasper, and the hidden power behind the crisis. Once the scene begins, the party is committed to the Act I conclusion until the aftermath sequence finishes.
- Climb the vine after passing the return well.
- Continue along the upper branch toward the Heart of Yggdrasil.
- Approach the Heart to begin the required story sequence.
5. Survive Jasper’s unwinnable battle
Jasper’s Orb protects him from normal damage, so the purpose of this battle is survival rather than victory. Do not waste the party’s MP on a full offensive setup and do not treat the encounter like an ordinary boss with a damage threshold. Keep the party healed, use defensive buffs or protection when useful, and guard when a character has no urgent action.
Prioritize keeping the Luminary and the active healers alive, but do not spend every Yggdrasil Leaf or Yggdrasil Dew immediately. If someone is knocked out, revive them when practical, yet the fight is ultimately decided by the scripted sequence rather than by your damage total. After several rounds, Jasper uses a forced attack that reduces the party to 1 HP and ends the battle’s normal flow.
If the party is defeated before the sequence occurs, reload the First Forest Summit save, restore the party, and return to the Heart using the same survival-first approach. A successful completion means the Jasper scenes continue, not that his HP reaches zero.
- Do not attempt to defeat Jasper through ordinary attacks.
- Heal and defend while preserving enough recovery items for emergencies.
- Survive until the scripted attack reduces the party to 1 HP.
6. Watch Mordegon take the Luminary’s power
After Jasper’s forced attack, continue watching the mandatory scenes. Mordegon reveals the extent of his control, takes the Luminary’s power, and turns the situation at the Heart of Yggdrasil into the central catastrophe of Act I. Do not pause the route expecting another playable boss fight here; the required progress is delivered through the scripted sequence.
The party’s defeat at this point is intentional. The World Tree is not merely damaged, and this is not a temporary loss that can be reversed by winning another battle in the same location. Remain in the sequence until the destruction of Yggdrasil and the separation of the surviving characters have been shown.
- Watch the complete post-Jasper cutscenes.
- Watch Mordegon take the Luminary’s power.
- Watch the destruction and fall of Yggdrasil.
- Remain in the sequence through the party’s separation.
7. Complete the catastrophe handoff and secure the next save
Continue through the immediate aftermath until the game returns control and begins the next Act II situation. The game may keep you in forced scenes or a restricted sequence before offering a normal campsite, church, or other save point, so do not assume that a save location appears immediately at the moment Yggdrasil falls.
Once ordinary saving becomes available, save in a fresh slot if possible. The correct chapter endpoint is the completed fall of Yggdrasil plus the visible handoff into the changed world, not merely reaching the Heart or finishing Jasper’s battle. If you stop before the new objective and first reliable save opportunity, the Act I transition is not fully secured.
- Continue through the immediate post-catastrophe scenes.
- Confirm that control and the changed-world objective return.
- Save at the first reliable normal save point available after the forced handoff.
Before you move on
- The chapter began at the First Forest Summit after the six Orbs were collected.
- Yggdrasil’s Altar was approached and the World Tree route opened.
- The party crossed the foot of the World Tree and reached the Heart of Yggdrasil.
- The party survived Jasper’s unwinnable battle and reached the forced 1-HP sequence.
- Mordegon took the Luminary’s power and the complete fall of Yggdrasil scenes played.
- The surviving party members were separated and the changed-world handoff began.
- A fresh save was made at the first reliable normal save point after the forced aftermath.
Definitive Edition Interludes — Sylvando, Jade, Erik, and Rab
After Yggdrasil falls, the Nintendo Switch Definitive Edition requires four character interludes before normal Act II control resumes. They occur automatically in this order: Sylvando, Jade, Erik, then Rab. Each section uses only the active character’s available equipment and inventory; the main party’s stored items are inaccessible. Follow the marked objectives, use save points when available, and do not worry about optional treasure or reward errands unless you want the extra items. Jade’s Hare-Raising Suit prevents a gauntlet defeat from ending her section, and Rab’s Grand Master Pang battle can continue even if Rab loses. The sequence ends after Rab’s dream, when the main campaign resumes and the Act II route opens.
1. Let the four interludes begin automatically
Complete the Yggdrasil catastrophe and allow the immediate scenes to finish. Control then shifts to Sylvando. Do not search the main menu for a character-episode selector or attempt to choose the order: on Switch, the story presents the four interludes consecutively as Sylvando, Jade, Erik, and Rab. They are required before the ordinary Act II campaign becomes available.
Each interlude restricts you to the active character’s equipment and personal inventory. The Hero’s stored supplies are not available, so check equipment as soon as control changes and use any healing items or save points the section provides. Optional enemies, chests, and reward errands can be skipped without blocking the story.
- Finish the Yggdrasil-fall scenes.
- Allow Sylvando’s interlude to start.
- Check the active character’s equipment and inventory.
- Do not look for a separate episode selector.
2. Complete Sylvando’s Gondolia, Gallopolis, and Hotto route
In Gondolia, go to the northern plaza and speak with Hercules, then speak with Tetsu near the waterfront. Return to the stall near the town entrance and talk to the men there to begin the Beastly Boys battle. Dave assists Sylvando. Defeat the enemy on the left first because it can raise the group’s attack, then defeat the others. Return Tetsu’s knapsack to him and watch the scenes that recruit the Beastly Boys to Sylvando’s group.
Leave Gondolia through Laguna di Gondolia toward the Gallopolis Region. Stop at the small cave and speak with the tired priest. Talk to the nearby cow to obtain Fresh Milk, then bring it back to the priest so he joins the group. You control Sylvando, while the Beastly Boys and priest act as supporting allies.
In Gallopolis, accept the request to help the circus. Speak with the juggler in the southeastern tavern and choose the red ball when answering his clue. Speak with the drummer outside the church, then go to the northwestern stables and interact with Margarita. Return to the circus area and speak with the ringmaster to trigger the performance. The optional Cactolotl encounter is not needed.
Leave Gallopolis for the Hotto Steppe. Give the horse manure obtained from Margarita to the traveler dealing with the runaway plant. Continue north across the bridge, rest and save at the campsite if needed, then defeat the mandatory Gigantes. The priest can help with recovery and may put the Gigantes to sleep; Sylvando’s Hustle Dance is also useful. Enter Hotto after the battle and watch the closing scenes to complete this interlude.
- Defeat the Beastly Boys and return Tetsu’s knapsack.
- Obtain Fresh Milk and recruit the priest.
- Pass the juggler’s red-ball test.
- Help Margarita and complete the circus performance.
- Give the horse manure to the traveler.
- Defeat Gigantes and enter Hotto.
3. Clear Jade’s Octagonia and Limboo sequence
Enter Octagonia and follow the only available route through the occupied town to the third level. Meet Booga and watch the scene that sends Jade to another dimension and gives her the Hare-Raising Suit. Shops are inaccessible, so continue directly to the next objective.
In the Cells area, check the southeastern cell for a Rockbomb Shard and the north-central cell for Special Medicine. The large prisoner in the northeastern cell functions as a church, so save there. Enter the southwestern cell and speak with the imprisoned tournament fighters. When a guard comes for a participant, volunteer Jade. Collect the medicines, Magic Water, and Rockbomb Shard offered on the way to the exit, then speak with the knight monster to begin the gauntlet.
The three fights are Boodiful Hoodlums, Boodiful Wizard with Boodiful Hocus-Poker, and Boodiful Sootbonce with Boodiful Smogbonnet. Use Party Pooper or another group attack against the first battle. In the second, defeat the Boodiful Wizards before the Hocus-Poker because Frizzle is the more immediate threat. In the third, remove one group quickly and watch for poison and the combined Just Claws attack. The Hare-Raising Suit revives Jade if she is defeated, but winning the fights gives experience.
After the gauntlet, fight Boodica with Vince and the other tournament fighters assisting. Use Multithrust against the Right-Hand Man and Left-Hand Man first because they can cast Acceleratle, Kasap, Kabuff, and Boom. Then attack Boodica. Her flex can charm allies or increase enemy attack, and her multi-hit attack and boulder can deal heavy damage. Use Sinderella’s healing and Oomph support. Watch the scenes after Boodica falls to finish Jade’s interlude.
- Reach Booga on Octagonia’s third level.
- Save at the prisoner-church in the Cells area.
- Volunteer Jade for the tournament gauntlet.
- Complete all three Boodiful battles.
- Defeat Boodica and watch the aftermath.
4. Escape the Rock of Wrong with Erik and Healijah
Erik begins in a cell with Healijah, a Healslime. Let Healijah open the cell and restore Erik’s confiscated equipment. He can heal Erik during the escape. Leave through the southeastern route, crawl through the opening, and listen at the wall to learn where the Hideout Key is located.
Reach the room with five chests and open the center chest for the Hideout Key. The other chests are optional and may include Canniboxes. Return to the first room, unlock the northern door, and follow the upper route. Use the crawl spaces to avoid unnecessary fights before reaching the Ancient Ruins. Healijah can provide healing, Oomphle, and Kasnooze during the route.
At the Ancient Ruins, use the healing save statue before crossing the moving platforms. Continue past the Living Statues to the inactive lift. Healijah attempts to power it, but three enemy groups interrupt him. Defeat all three groups; he restores Erik between the battles. Ride the lift, pass through the Great Hall, and leave through the northern exit.
The preliminary battle before Indignus contains a Dragon Rider, Vicious Chihuawyrm, and Skelegon. Defeat the Chihuawyrm first, then the Skelegon, and finish with the Dragon Rider. Indignus follows immediately. Erik has unusually strong HP and MP regeneration in this encounter, so use Divide with a dependable damage skill and keep attacking while Healijah supports you. Watch the scenes after Indignus is defeated to complete Erik’s interlude.
- Escape Erik’s cell and recover his equipment.
- Open the center chest for the Hideout Key.
- Reach the Ancient Ruins and activate the lift.
- Clear all three lift-defense battles.
- Defeat the preliminary monster group.
- Defeat Indignus and watch the ending scenes.
5. Finish Rab’s dream of Dundrasil
Rab’s section begins in a white dream realm. Follow the Bunny Girl until Rab awakens in old Dundrasil. Go directly to the throne room and sit on the left throne. After the royal scene, leave the throne room and agree to help Irwin, then return to the throne and complete the three audiences. Your answers do not affect story progression.
Rab’s castle errands are optional. The scholar’s quiz answers are True, False, True, False, True and reward a Seed of Magic. The guard’s flower request accepts any valid green-clothed, red-haired recipient and rewards a Pretty Betsy. The eastern middle-floor man accepts one of the indicated pungent substitutes, including the pie or plants, and rewards a Seed of Strength. Skip these tasks if you only want to advance.
Speak with Irwin in the middle-floor garden. Follow the Bunny Girl through the later scenes, enter the indicated room, and speak with the young Hero whenever prompted. Follow his movements around the room, then speak with the Bunny Girl and answer yes to both prompts. Enter the door upstairs to begin the final battle.
Grand Master Pang changes between Swordsman Stance and Spellcaster’s Stance. She can charm Rab, summon a Tantamount, and charge for two turns before using a powerful multi-hit attack. Use Moreheal as needed, use Zammle during the spell-focused phase, defeat the Tantamount if it becomes dangerous, and defend after the second charge. Rab does not have to win: if he loses, the interlude still continues. Watch the final scenes until control returns to the main Act II campaign.
- Reach the dream version of Dundrasil.
- Sit on the left throne and complete the required audiences.
- Follow Irwin and the Bunny Girl through the castle scenes.
- Speak with the young Hero at each required stop.
- Defeat Grand Master Pang or allow the scripted continuation after defeat.
- Confirm that normal Act II control has returned.
Before you move on
- Sylvando has returned Tetsu’s knapsack, recruited the required helpers, completed the circus sequence, defeated Gigantes, and entered Hotto for the closing scenes.
- Jade has reached Limboo, completed the three Boodiful gauntlet battles, defeated Boodica or reached the post-battle scenes, and watched the conclusion.
- Erik has recovered his equipment, obtained the Hideout Key, crossed the Ancient Ruins, defeated the preliminary monster group, and completed the Indignus encounter.
- Rab has completed the dream-Dundrasil throne-room route and reached the Grand Master Pang event.
- The four interludes have ended and control has returned to the ordinary Act II campaign, where the Last Bastion and subsequent reunification objectives become available.
References for this chapter
Last Bastion to Heliodor Castle — Tyriant and Hendrik’s Recruitment
After the fall of Yggdrasil, travel to the Last Bastion and help Hendrik repel the attack at the northern barricade. Defeat Headless Honcho and his four cohorts, then return to King Carnelian for the Sewer Key and the order to reclaim Heliodor Castle. From the Heliodor Foothills church, use the cliffside route and secret entrance to reach the Heliodor Sewers, Castle Dungeon and ruined castle. Follow the Yggdrasil-root memory to the kitchen’s hidden passage, reach the throne room and defeat Tyriant while controlling the danger from Tyriant’s Shadow. Recover the Purple Orb, return to the Last Bastion, confirm Hendrik’s permanent recruitment, and speak with King Carnelian to receive the Shield of Heliodor. The chapter ends when the next mandatory destination is Mount Pang Lai via the Manglegrove.
Reach the Last Bastion and join the defense
Travel through the Heliodor Region to the settlement built around the ruins of Cobblestone. Enter the Last Bastion and follow the scenes with Gemma and the refugees. When control returns, go to the Royal Tent and speak with King Carnelian. He asks the Luminary to help Hendrik repel the attack.
Leave the tent and go to the northern gate. Speak with Hendrik, then follow him outside toward the barricade. The surrounding monsters do not need to be cleared individually. Continue toward Hendrik until the required battle begins against Headless Honcho and four separate cohorts.
- Enter the Last Bastion.
- Speak with King Carnelian in the Royal Tent.
- Meet Hendrik at the northern gate.
- Reach the required battle at the barricade.
Defeat Headless Honcho and receive the Sewer Key
Headless Honcho is accompanied by four individual enemies rather than one combined group. Use attacks that strike all enemies when available; Boom is useful for clearing the supporting enemies, while the Luminary’s strongest dependable single-target skill should be reserved for Headless Honcho. Hendrik can absorb attacks with Forbearance and may use defensive or healing support, but do not rely on him to prevent every hit.
The Honcho can strike one character, hit both party members with a sweeping attack, and inflict disruptive status effects. Keep the Luminary’s HP high enough to survive a sudden heavy hit. Eliminate the cohorts first, then concentrate on Headless Honcho. After the battle, return to the Last Bastion and speak with King Carnelian again.
Carnelian gives the Sewer Key and orders the Luminary and Hendrik to infiltrate Heliodor Castle. The party rests automatically. Leave through the north gate when the following scene begins; control resumes at the church in the Heliodor Foothills.
- Defeat Headless Honcho.
- Defeat all four cohorts.
- Return to King Carnelian.
- Receive the Sewer Key.
- Leave through the Last Bastion’s north gate after the overnight sequence.
Prepare at the Heliodor Foothills church
Use the church to heal, save and adjust equipment before leaving. Hendrik is a guest member for the Heliodor liberation mission, so prioritize equipment and skill choices for the Luminary and Hendrik. The route is not a normal full-party dungeon crawl, and unnecessary encounters can consume resources needed for Tyriant.
Exit the church and follow the foothills route toward the northwest. At the cliff near the waterfall, interact with the rope and climb through the upper path. Continue along the ledges until you reach the secret entrance to the sewers. The nearby field has optional encounters and gathering points; none is required to open the story route.
- Heal at the church.
- Save before leaving.
- Equip the Luminary and Hendrik.
- Use the rope near the waterfall.
- Reach the secret sewer entrance.
Cross the Heliodor Sewers and Castle Dungeon
Follow the long passage from the secret entrance into the Heliodor Sewers. At the first main junction, take the route that crosses the stone bridge and leads to the locked iron door. Use the Sewer Key, then continue into the Castle Dungeon.
In the upper dungeon, use the available church and bed before continuing if the party needs recovery. The route proceeds through the dungeon levels and eventually reaches the bottom floor of Heliodor Castle. Optional chests and containers can be collected, but they are not needed for story completion. Do not spend all MP on avoidable battles.
From the bottom floor, follow the corridor toward the main foyer. Jasper’s Quarters is an optional detour containing useful equipment and a recipe book. After exploring or skipping it, continue toward the ruined central hall and the castle courtyard.
- Use the Sewer Key on the locked sewer door.
- Reach the Castle Dungeon.
- Use the dungeon recovery facilities if needed.
- Enter the bottom floor of Heliodor Castle.
- Reach the courtyard route.
Use the root and hidden passage to reach the throne room
In the castle courtyard, examine the Yggdrasil root. The resulting memory shows Hendrik and Jasper’s past and reveals how to continue. Return through the castle interior and pass through the dining hall toward the kitchen.
In the kitchen’s storage area, search the southern shelving to reveal the hidden passage. Climb the stairs into the royal chambers. The King’s Bedchamber and Queen’s Bedchamber contain optional equipment and recipe rewards; collect them only if you want the extras.
Leave the royal chambers and continue toward the throne room. Recover HP and MP before entering if necessary. The upper route and throne-room approach are the final safe preparation point before the boss encounter.
- Examine the Yggdrasil root in the courtyard.
- Reach the kitchen through the dining hall.
- Reveal the hidden passage in the kitchen storage area.
- Climb into the royal chambers.
- Reach the throne-room approach.
Defeat Tyriant and control Tyriant’s Shadow
Enter the throne room to trigger the confrontation and the battle with Tyriant, a Spectral Sentinel. Tyriant can use heavy physical attacks, an attack that strikes both characters, the dark spell Zammle and Sword Stance, which makes him harder to hit with physical attacks. Hendrik may use Forbearance, Kabuff and Midheal, so let him support the fight while the Luminary attacks or heals as needed.
Tyriant can summon Tyriant’s Shadow. Treat the Shadow as the immediate priority because it can strengthen Tyriant with Oomphle, weaken the party with Kasap and contribute to the dangerous simultaneous-pep sequence. Use area attacks when both enemies are present, or use a strong single-target skill to remove the Shadow quickly. If Tyriant is in Sword Stance, use reliable magic or wait for a safer physical opening rather than wasting repeated attacks.
Keep both characters above a survivable HP threshold and use Defend when a major attack is imminent and healing cannot be completed safely. If both enemies become pepped at the same time, prioritize survival and remove the Shadow or defend through the incoming threat. Once Tyriant falls, the Purple Orb is recovered and the darkness over Heliodor is dispelled.
- Defeat Tyriant’s Shadow whenever it appears.
- Respond to Sword Stance instead of wasting physical attacks.
- Keep the Luminary and Hendrik healed.
- Recover from Zammle and heavy physical attacks.
- Defeat Tyriant.
- Recover the Purple Orb.
Return to the Last Bastion and begin the next regional campaign
After the battle, return to the Last Bastion. Zooming there is the quickest option once travel becomes available. Enter the settlement and go south to the Civilians’ Refuge. The following scene confirms that the attack has been repelled and that Hendrik is now an official permanent party member rather than a temporary guest.
Open the party and character menus after the scene to equip Hendrik and spend any available skill points. Then go to King Carnelian’s Royal Tent. He gives the Luminary the Shield of Heliodor and directs the party toward Mount Pang Lai through the Manglegrove.
Save at the Last Bastion church before leaving. Mount Pang Lai is the handoff to the next mandatory Act II regional campaign. Optional exploration in Cobblestone Tor, including the newly accessible recipe reward, can be completed now or postponed without affecting the main route.
- Return to the Last Bastion after Tyriant.
- Visit the Civilians’ Refuge.
- Confirm Hendrik is a permanent party member.
- Speak with King Carnelian.
- Receive the Shield of Heliodor.
- Confirm Mount Pang Lai via the Manglegrove as the next objective.
- Save before departing.
Before you move on
- The Last Bastion attack has been repelled.
- Headless Honcho and all four cohorts have been defeated.
- King Carnelian has given the Sewer Key.
- The party has reached Heliodor Castle through the secret sewer entrance.
- The Yggdrasil root has been examined.
- The kitchen’s hidden passage has been revealed.
- Tyriant’s Shadow has been defeated during the boss encounter.
- Tyriant has been defeated and the Purple Orb recovered.
- The party has returned to the Last Bastion.
- Hendrik is now a permanent party member.
- King Carnelian has given the Shield of Heliodor.
- Mount Pang Lai via the Manglegrove is the next mandatory destination.
- A save has been created after the Last Bastion aftermath.
References for this chapter
- A Dark New World — Dragon Quest XI S: Echoes of an Elusive Age — Definitive Edition Walkthrough & Guide
- Dawn of a New World — Act II Walkthrough
- Heliodor Sewers — Game of Guides
- The Last Bastion — Dragon Quest XI Walkthrough
- Act Two — Dragon Quest XI S Definitive Edition Walkthrough
- Sewer Key — Dragon Quest Wiki
Act II Reunions and the Road to the Sword of Light
After the Heliodor reclamation and Hendrik’s recruitment, follow the route through Mount Pang Lai and Angri-La to recover Rab. Continue through Champs Sauvage and Phnom Nonh, then complete Sylvando’s reunion in Puerto Valor. Resolve the Dundrasil memories and defeat Gloomnivore before rescuing Jade at Octagonia. From there, travel to Sniflheim, investigate the Gold Fever outbreak, defeat the required gold-enemy encounters, and sail to the Viking Hideout. Recover Erik at his shelter by examining the Yggdrasil root, then enter the Gyldenhal and defeat Gyldygga. After Alizarin opens the northern route, cross Snærfelt and defeat the Auroral Serpent so Serena can fully rejoin the party. Finish at Luminary’s Landing by obtaining the Calamus Flute and summoning Cetacea. Stop before the Temple of Dawn; its Guiding Light, Orichalcum, Forging Hammer, and Sword of Light objectives belong to the next chapter.
1. Take the post-Heliodor route through Mount Pang Lai
Begin after the Heliodor reclamation and Hendrik recruitment. From the Costa Valor area, the direct approach toward Puerto Valor is blocked by a landslide, so follow the available route north through Mount Pang Lai. Register the campsite near the mountain base, heal, save, and use the Fun-Size Forge if your equipment needs updating.
Enter the Base Cave and defeat a glittering Dragon Rider. Mount it and use its flight ability to cross the blocked sections. On the snowy slopes, defeat a glittering Honeyhead Horknight and use that mount to cross the lake and reach the route toward Angri-La. Recipe books, materials, and isolated treasure platforms are optional; reaching Angri-La is the required objective.
- The Heliodor reclamation and Hendrik recruitment are complete.
- The Mount Pang Lai campsite is available.
- The Dragon Rider and Honeyhead Horknight mount sections are complete.
- Angri-La has been reached.
2. Complete Angri-La and recover Rab
Enter Angri-La and go to the High Hall. Follow the High Lama through the required scenes, then continue to the Fields of Discipline and the Grand Master’s Chamber. When the story sends Hendrik and the Luminary to assist the hermit, return toward the middle level. The Understanding Angri-La quest near the notice board is optional.
Leave through the Summit Entrance and enter the Summit Tunnel. Defeat the glittering Dragon Rider inside and use its mount to cross the lake to the Summit Shrine. Activate the campsite and save before approaching the hermit. The following scenes take the Luminary into the Void and unlock Quadraslash.
Rab’s sequence is a solo Luminary battle. Use Quadraslash as your main attack and do not waste turns striking Rab’s copies, because they can be replaced. When Rab prepares Pearly Gates, defend against the incoming attack, then heal before resuming the assault. After the required scenes, Rab permanently rejoins the party.
- The Angri-La High Hall and Fields of Discipline scenes are complete.
- Quadraslash has been learned.
- The solo Void battle has been completed.
- Rab has rejoined the party.
3. Cross Champs Sauvage, defeat Avarith, and complete Sylvando’s reunion
Zoom to the Costa Valor campsite and take the newly opened route into Champs Sauvage. In the southern section, the story begins Sylvando’s rescue sequence. Escort the rescued man toward Phnom Nonh and activate the southern campsite before entering town.
In Phnom Nonh, go to the church square and enter Da’s House. Follow the scenes, then travel to Promontory Cave. Avarith initially restricts spell use, so rely on physical attacks during the opening portion. Use your strongest single-target attacks, have Hendrik provide defensive support, and keep Rab available for healing. Equipment that protects against sleep or spell sealing is useful but not required.
After defeating Avarith, return to Da’s House and follow the next scenes. Leave town when directed and Zoom to Puerto Valor. Enter Don Rodrigo’s house, go upstairs, find Sylvando at the beach, and return with him to Don Rodrigo. The reunion completes Sylvando’s story sequence and restores him to the party. Grotta della Fonte and Academy errands are optional.
- The southern Champs Sauvage campsite is unlocked.
- Avarith has been defeated in Promontory Cave.
- The Phnom Nonh rescue sequence is complete.
- Sylvando has reunited with Don Rodrigo and rejoined the party.
4. Resolve Dundrasil and defeat Gloomnivore
Board the Sea Stallion at Puerto Valor and sail to Zwaardsrust. Approach the Warrior’s Rest area to trigger the required scenes, then spend the night at the inn. The western route into the Dundrasil Region opens afterward.
Activate the southern Dundrasil campsite, enter Dundrasil Ruins, and drop through the well. Follow the opened route into the castle dungeons. Defeat the Restless Knight, then continue through the memory sequence involving Irwin and the ruined kingdom.
After the memory sequence, face Gloomnivore. Keep the party’s health high because sleep and incapacitation can quickly turn the battle against you. Use strong single-target damage, lower the boss’s defenses when practical, and keep Rab available for healing and support. Victory restores the Luminary’s expanded skill access and completes this regional objective.
- Zwaardsrust and the Warrior’s Rest inn scene are complete.
- The Dundrasil well and castle dungeon have been cleared.
- The Restless Knight has been defeated.
- Gloomnivore has been defeated.
5. Rescue Jade at Octagonia
Continue to Octagonia and follow the casino story. Obtain a Love Potion through the available casino games and exchanges, then give it to the Green Dracky blocking the VIP area. Continue upstairs to trigger the Jade sequence.
The required battles are Jinxed Jade followed by Booga. Use protection against sleep and beguilement if available. Keep healing reliable, use Rab for debuffs or support, and remove dangerous status effects promptly. Booga can drain MP and inflict dancing, so Sylvando’s Sobering Slap is useful when available.
Defeat both encounters to recover the Green Orb and restore Jade’s expanded abilities. Casino prizes, roulette, and other gambling rewards are optional and do not replace the required story battles.
- The Octagonia casino sequence is complete.
- Jinxed Jade and Booga have been defeated.
- The Green Orb has been recovered.
- Jade has rejoined the party with her expanded abilities.
6. Travel through Sniflheim and recover Erik at the Viking Hideout
After Octagonia, travel to Sniflheim and approach the town. Enter the castle and speak with Queen Frysabel to learn about Gold Fever. Leave the castle and return to town to trigger the scene involving the gold-stricken residents and Erik’s returning memories. Follow the priest to the church’s back room, then leave and go to the northwestern overlook near the camp to find Erik.
When the gold monsters appear, defeat the required group of Gyldenauts and Gyldenbritches. Prioritize the Gyldenbritches because they can use desperate attacks and call reinforcements. After the battle, return to the priest to learn that the enemies are connected to the Vikings. Rest and save at the nearby camp, then use the Sea Stallion to reach the Viking Hideout area.
Enter the Viking Hideout and proceed to the sealed door. Choose to continue when prompted, then defeat the hideout group of Gyldenauts and Gyldenbritches. After the battle, follow Erik north to his shelter. Examine the nearby Yggdrasil root the required number of times to view his memories, then speak with Erik. He rejoins the party and his Character Builder and expanded abilities become available again; spend his accumulated skill points before continuing.
Leave the shelter through the northern route and approach the Gyldenhal. Optional treasure and the nearby Definitive Edition Tockle can be collected now, but they are not required. Enter the Gyldenhal only after healing and saving.
- The Sniflheim castle and Gold Fever scenes are complete.
- The required Sniflheim Gyldenauts and Gyldenbritches encounter is complete.
- The Sea Stallion has reached the Viking Hideout area.
- The Viking Hideout Gyldenauts and Gyldenbritches have been defeated.
- The Yggdrasil root at Erik’s shelter has been examined.
- Erik has rejoined and his Character Builder has returned.
7. Clear the Gyldenhal, open the northern route, and reunite with Serena
Work through the Gyldenhal’s staircases, doors, and upper floors until you reach the throne-room approach. Use the available recovery point and heal fully before the boss. Defeat Gyldygga, watching for buffs, gold transformation effects, Rake ’n’ Break, and summoned assistance. Remove dangerous buffs when possible, keep the party healed, and defeat summoned enemies when they threaten survival.
After the Gyldygga sequence, sail to the northern vortex near Sniflheim and defeat Alizarin. The victory opens the route into Sniflheim and the Snærfelt. Enter the Snærfelt and proceed toward Arboria. Save at the campsite before the exit because the route triggers the Auroral Serpent.
The Auroral Serpent can deal heavy damage, inflict paralysis, and cause turn loss. Maintain healing, use defensive buffs and breath protection when available, and keep remedies or abilities ready for paralysis. After the battle and the following scenes, Serena rejoins the party.
Continue through the Arborian Highlands to Arboria. Follow Serena to the Grove of Repose, speak with Benedictus in the cathedral, and rest at the inn. The scenes grant Serena Veronica’s spells, abilities, and accumulated skill points.
- The Gyldenhal has been cleared.
- Gyldygga has been defeated.
- Alizarin has been defeated at the northern vortex.
- The Snærfelt route to Arboria is open.
- The Auroral Serpent has been defeated.
- Serena has rejoined and inherited Veronica’s abilities.
8. Obtain the Calamus Flute and stop before the Temple of Dawn
From Arboria, take the mountaintop route to Luminary’s Landing. Climb to the summit temple and follow the required scenes. The party receives the Calamus Flute, which summons Cetacea and opens access to the sky routes.
Use the Calamus Flute once to confirm that Cetacea can be summoned, then save at a convenient campsite or town. Newly accessible sky locations may be explored, but stop before entering the Temple of Dawn if following this chapter boundary. The next chapter begins with the Guiding Light, the three seedlings, Orichalcum, the Forging Hammer, and the Sword of Light preparation.
- Luminary’s Landing has been reached.
- The Calamus Flute has been obtained.
- Cetacea can be summoned.
- A save exists before beginning the Temple of Dawn sequence.
Before you move on
- Rab, Sylvando, Jade, Erik, and Serena have rejoined the party during this chapter; Hendrik was already restored in the preceding chapter.
- Avarith, Restless Knight, Gloomnivore, Jinxed Jade, Booga, the required Sniflheim gold-enemy group, the Viking Hideout gold-enemy group, Alizarin, Gyldygga, and the Auroral Serpent have been defeated.
- The Puerto Valor, Phnom Nonh, Dundrasil, Octagonia, Sniflheim, Viking Hideout, Gyldenhal, Snærfelt, and Arboria story sequences are complete.
- Erik’s Character Builder and expanded abilities have been restored at the Viking Hideout after the Yggdrasil-root memory sequence.
- Serena has inherited Veronica’s spells, abilities, and available skill points.
- The Calamus Flute has been obtained at Luminary’s Landing.
- Cetacea can be summoned.
- A save exists before entering the Temple of Dawn.
- The Temple of Dawn and all Sword of Light preparation remain for the next chapter.
References for this chapter
- Act 2 - Dragon Quest XI S: Echoes of an Elusive Age - Definitive Edition Walkthrough & Guide
- Reuniting with Erik - Act II - Walkthrough — Gamer Guides
- Dawn of a New World - Act II - Walkthrough — Gamer Guides
- Dragon Quest XI S: Echoes of an Elusive Age - Definitive Edition Walkthrough & Guide, Act 2
- DRAGON QUEST XI S: Echoes of an Elusive Age – Definitive Edition — Square Enix
Act II Endgame Preparation — The Battleground, Mount Huji, and the Sword of Light
After the Act II Temple of Dawn sequence, examine the Chamber of the Guiding Light and speak with the remaining Watcher. The Watcher sends the party to The Battleground for the special Orichalcum needed to forge a replacement Sword of Light. Return through Gallopolis to complete the Celestial Sands and Erdwin’s Lantern events, then speak with the Sultan twice to receive the Forging Hammer. Next, travel through Hotto and Mount Huji, defeat Tatsunaga once in Hotto and again in Mount Huji’s Caldera, and collect the Crucible Key from Miko’s Maid. Return to the forbidden entrance at Mount Huji, open the Crucible with the Guiding Light, and forge the Sword of Light. Finish by restoring equipment, spending skill points, stocking recovery supplies and creating a separate save before the Fortress of Fear. Drustan’s Trials, Tickington, superbosses and maximum-level grinding are optional.
1. Leave the Act II Temple of Dawn with the Guiding Light
Begin after the Act II Temple of Dawn visit at the end of the Arboria and Cetacea route. Enter the Temple of Dawn and speak with the remaining Watcher. Examine the Chamber of the Guiding Light when prompted. This awards the Guiding Light, a key item required for both The Battleground entrance and the later Crucible sequence.
Examine the three seedlings in the chamber if you want to view their story scenes, then leave the temple. The Watcher directs you to The Battleground, while Hotto and Gallopolis become available as Zoom destinations. This is the late Act II forging objective; it is not the Act III Temple of Dawn sequence that follows the first ending.
Save before departing. The immediate required items are the special Battleground Orichalcum, the Forging Hammer from Gallopolis and the Crucible Key from Miko’s Maid.
- Obtain the Guiding Light.
- Confirm that The Battleground is the active destination.
- Make a manual save before summoning Cetacea.
2. Descend through The Battleground and obtain the special Orichalcum
Summon Cetacea and fly to The Battleground. Use the Guiding Light on the pillar at the entrance to remove the obstruction. Follow the central descent through B1 and B2. The northwest cavern on B2 is inaccessible at first, so continue downward rather than searching for another entrance.
On B4, defeat a Dragooner and use its mount to reach the previously inaccessible B2 cavern if you want its extra reward. Return to B4, unlock the western campsite and rest before continuing. Follow the western route and descend the vine. The route reaches B8 from above, then leads through B9 and back upward toward the lower levels.
Continue through B9, B8 and B7, following the central route toward B6. On B6, defeat a Dragooner in the southwestern tunnel and use its mount to reach the western side cavern for the optional Brace Yourself recipe book. Return to the main route and take the eastern tunnel toward the Overlooked Cavern. Follow that path to B5 and continue to the end for the story scene that awards the special Orichalcum.
The side caverns, recipe books, Seeds of Skill and treasure are optional. The required material is the story reward at the end of B5. In the Switch Definitive Edition, this special piece may be distinguished from ordinary Orichalcum as rarefied Orichalcum. Ordinary ore from later gathering points cannot replace it for this first Sword of Light forge.
- Use the Guiding Light at the entrance.
- Unlock and use the B4 campsite.
- Use Dragooner mounts where the route requires them.
- Reach the end of B5 and obtain the story Orichalcum.
3. Complete the Gallopolis events and receive the Forging Hammer
After obtaining the Orichalcum, Zoom to the Laguna di Gondolia campsite and take the eastern exit into the Gallopolis Region. The Celestial Sands checkpoint is initially closed, so use the southern route through the region and enter Gallopolis from the south.
Go to the palace and speak with the Sultan to begin the Gallopolis sequence. When the checkpoint opens, travel through the Celestial Sands to the ruins. Watch the scenes involving Prince Faris and the figure at the ruins, then unlock the northern campsite and return to Gallopolis.
Enter the throne room and speak with the Sultan. After the first scene, speak with him again. The second conversation awards the Forging Hammer as a key item. Do not confuse this with the later Platinum Cup race reward, which is a separate way to obtain another hammer after the story.
The Erdwin’s Lantern side quest from the scholar can be completed here for additional rewards, but it is not the condition for receiving the story hammer. If you accept it, collect the Lantern Shard at the marked location and return it to the scholar. Otherwise, proceed to Hotto once the Sultan has given you the hammer.
- Complete the Gallopolis and Celestial Sands story scenes.
- Return to the throne room.
- Speak with the Sultan twice after the ruins events.
- Receive the Forging Hammer.
4. Visit Hotto and complete the first Tatsunaga encounter
Leave Gallopolis through the eastern exit and travel across the Hotto Steppe to Hotto. Visit Miko’s Shrine to begin the Mount Huji objective. You can also speak with the woman near the baths for the optional Hotto side quest, but it does not block the main route.
Enter Mount Huji and follow the children to their hideout. Use the Secret Entrance behind the hideout to enter the mountain’s interior. Follow the path until the scene reveals Tatsunaga. You do not need to defeat the dragon during this first visit; use Zoom to return to Hotto after the scene.
Return to Miko’s Shrine and watch the confrontation. When the roar sounds, leave the shrine and run toward the village gates to begin the first Tatsunaga battle. Tatsunaga can stun several characters with its shout, so keep Serena or another healer ready and restore characters promptly if multiple party members lose turns. The fight is much less dangerous than the rematch.
After the battle, return to Miko’s Shrine and enter the rear room. The story awards the Mountain Gate Key. This key opens the next Mount Huji route.
- Start the Mount Huji objective at Miko’s Shrine.
- Reach Tatsunaga during the first Mount Huji visit.
- Defeat Tatsunaga in Hotto.
- Obtain the Mountain Gate Key from Miko’s Shrine.
5. Defeat Tatsunaga in Mount Huji’s Caldera and collect the Crucible Key
Return to Mount Huji and use the Mountain Gate Key at the mountain gate. Continue into the Caldera and follow the newly opened route through the upper and lower areas. A Visor Kaiser can be used as a mount in this section to break through obstructions and reach parts of the route; defeat it and mount it when the path requires the monster’s abilities.
Continue through the Caldera until the story scene begins the second Tatsunaga battle. This rematch is significantly more dangerous: Tatsunaga can attack several times in one turn, may score critical hits and can reduce the party’s defence. Keep HP high, remove or compensate for defence reductions when possible and restore fallen characters rather than trying to finish the fight while the party is weakened. Rab is useful as a backup healer and can support the party with debuffs, while Hendrik can help protect the group and restore defensive buffs.
After the victory, return to Miko’s Shrine in Hotto. Enter the rear room and speak with Miko’s Maid. She gives you the Crucible Key. The key is awarded after the second Tatsunaga encounter, not after the first battle in Hotto.
- Use the Mountain Gate Key at Mount Huji.
- Reach the Caldera rematch.
- Defeat Tatsunaga for the second time.
- Receive the Crucible Key from Miko’s Maid.
6. Enter the Crucible and forge the Sword of Light
With the Guiding Light, the special Battleground Orichalcum, the Forging Hammer and the Crucible Key in hand, return to Mount Huji. At the foot of the mountain, use the Crucible Key on the entrance marked as forbidden. Follow the route to the forge and use the Guiding Light when the game prompts you to open the final passage.
Interact with the Crucible and begin forging. The game automatically uses the Forging Hammer and the special Orichalcum to create the Sword of Light. If the forge refuses to proceed, check that you obtained the story reward at the end of The Battleground rather than ordinary Orichalcum from a gathering point or a later optional area.
Once the Sword of Light is created, equip it on the Hero. Use the nearby recovery opportunity before leaving Mount Huji. You may improve equipment at the Fun-Size Forge, but +3 upgrades and rare materials are not required to unlock the Fortress of Fear.
- Open the forbidden Mount Huji entrance with the Crucible Key.
- Use the Guiding Light at the Crucible.
- Forge the Sword of Light.
- Equip the Sword of Light on the Hero.
7. Prepare for the Fortress of Fear and create the handoff save
Spend available skill points before approaching the Fortress of Fear. Ensure each active attacker has a dependable damage option and that the party retains reliable healing and revival access. Respec at a church only if a character’s current weapon no longer matches the skill panels you intend to use; no single build is required.
Replace obviously outdated armor and consider resistance or status-protection accessories where they provide a practical benefit. Carry healing items, revival items, MP recovery and status cures. Keep at least one dependable healer in the active party and do not rely exclusively on Zing when Yggdrasil Leaves or other revival items are available.
Make a separate manual save before flying toward the Fortress of Fear. If ordinary battles near the entrance consume most of the party’s MP or force repeated emergency healing, return to the last campsite and adjust equipment or tactics. Do not delay the story for a fixed level target: the game can be completed with different party builds, and Draconian Quest restrictions can change the required preparation.
The nearby Battleground branches, recipes and treasure are the meaningful optional upgrades available during this chapter. Drustan’s Trials, Tickington, the Hall of Remembrance, the Timewyrm and other superboss preparations belong outside this required Act II route.
- Spend or respec skill points as needed.
- Confirm reliable healing, revival and MP recovery.
- Update weak equipment and carry status cures.
- Create a fresh manual save before the Fortress of Fear approach.
Before you move on
- The Act II Temple of Dawn sequence has provided the Guiding Light.
- The Battleground has been completed through B5 and the special story Orichalcum has been obtained.
- The Gallopolis and Celestial Sands story events are complete.
- The Sultan has provided the Forging Hammer.
- Tatsunaga has been defeated once in Hotto and once in Mount Huji’s Caldera.
- Miko’s Maid has provided the Crucible Key.
- The Sword of Light has been forged at the Crucible and equipped on the Hero.
- The party has current practical equipment, functioning skill setups and stocked recovery supplies.
- A separate manual save exists immediately before the Fortress of Fear approach.
Fortress of Fear — Indignus, Dungeon Route, and Jasper Unbound
Summon Cetacea and fly to the Fortress of Fear above Erdrea’s center. Use the Sword of Light to break the barrier, defeat Indignus, and reclaim the Blue Orb he carries. Heal and save at the entrance Goddess Statue, then work through the fortress by activating switches, using teleporters, and riding the required mounted monsters across separated platforms. Open the lower-floor shortcut and return to the entrance to recover before the final stretch. Collect the four Sage’s Elixirs, cross the Level 4 exterior bridge, and defeat Jasper Unbound. Keep Jasper as the main target while responding to his Balhib summons and heavy dark and lightning attacks. After the battle, Jasper leaves the Silver Orb. Use the teleporter to reach the Palace of Malice approach and stop at its doors; entering begins the Mordegon sequence covered next.
Reach the Fortress of Fear and reclaim the Blue Orb from Indignus
Use the Calamus Flute to summon Cetacea, then fly to the Fortress of Fear floating above the center of Erdrea. Approach the dark barrier and use the Sword of Light when prompted. The barrier opens, but a Spectral Sentinel blocks the entrance route. Defeat it to reach the fortress entrance and trigger the mandatory battle against Indignus.
The Blue Orb was obtained from Krystalinda during the Act I events in Sniflheim. Indignus possesses that same orb at the fortress, so defeating him returns the Blue Orb to the party; it is not a new orb discovered here.
Indignus uses strong physical attacks, Blade Flurry, Inferno Slash, Swift Stab, Kacrack, Gigathrow, and an orb attack that removes beneficial party effects. Keep the party above critical health, because his multi-hit attacks can cripple a character before the next turn. Use healing consistently and avoid spending every turn rebuilding buffs that may be erased. Sap, Blunt, Kabuff, or comparable support can help when they land, but steady damage and survival are more important than maintaining a complete buff setup.
After the battle, collect the Blue Orb and use the Goddess Statue in the entrance courtyard to restore HP and MP. Make a normal save here. This is the fortress’s dependable recovery point, and the later shortcut makes returning to it practical.
- Fly Cetacea to the Fortress of Fear.
- Break the barrier with the Sword of Light.
- Defeat the Spectral Sentinel at the entrance.
- Defeat Indignus.
- Reclaim the Blue Orb he was holding.
- Restore the party and save at the entrance Goddess Statue.
Clear Level 1 and open the route to Level 2
Enter the fortress and defeat the Dark Dullahans in the opening passage. Continue to the central room on Level 1, which serves as the dungeon hub. From there, take the eastern door and follow the route to the intersection. The northern Evencloth spot and southern Molten Globules chest are optional.
From the intersection, continue east past the Metal Dragon and activate the mechanism in the room beyond it. Return to the central room and take the western passage, which is now open. The recipe book, Liquid Metal Jacket, and Pandora’s Box disguised as a chest are optional rewards; defeat the Pandora’s Box promptly if you open it so it cannot use Kathwack.
Follow the upper western route through the connected passages until you reach Level 2. The required objective on this floor is the mechanism that opens the western route from the central room.
- Reach the Level 1 central room.
- Activate the eastern mechanism beyond the Metal Dragon.
- Use the opened western route.
- Reach Level 2.
Use the Level 2 mounts to reach Level 3
On Level 2, travel through the central area until you reach the sigil and the route involving the Dragooner mounts. Use the Luminary’s power at the sigil to shatter the crystals, then defeat and ride a Dragooner to reach separated platforms. The Savvy Sapphire, Platinum Ore, Chronocrystal, and other sparkly spots are optional.
Return to the central route and take the eastern exit. Follow the chamber past the Golden Girl and Manticores to the exterior. Continue along the linear path to the portal that carries you to another exterior section. Defeat a Hard-Boiled Eggsoskeleton and ride it across the bouncing platforms. This mounted route leads to the Level 3 entrance.
- Reach the Level 2 central room.
- Use the Luminary’s power to clear the crystal obstruction.
- Defeat and mount a Dragooner.
- Cross the separated platforms.
- Use the exterior portal.
- Ride a Hard-Boiled Eggsoskeleton to Level 3.
Cross Level 3 and climb the exterior walls
At Level 3, follow the main route to the central room. Use the Luminary’s power to clear the next crystal obstruction, then defeat a Dread Dragooner and use it to reach the separated platforms. The General Directives recipe book, Saint’s Ashes, Sainted Soma, and other rewards are optional, although General Directives is useful for forging Hendrik’s Act II equipment.
Continue through the southern route and defeat a Visor Kaiser when it blocks the path. Ride it across the electrified platforms and proceed to the Level 3 exterior. Use the portals to move between platforms. The Mini Medal, Gold Bar, and In Fine Fettle with Liquid Metal recipe book are optional.
Near the final exterior section, defeat a Hellrider and mount it to climb the fortress walls. The 50,000 Gold chest is optional. Continue upward, cross the route guarded by the Great Dragon, and enter the Level 4 section.
- Reach the Level 3 central room.
- Clear the crystal obstruction.
- Defeat and mount a Dread Dragooner.
- Defeat and ride a Visor Kaiser across the electrified platforms.
- Use a Hellrider to climb the exterior walls.
- Defeat or pass the Great Dragon blocking the upper route.
- Enter Level 4.
Activate the Level 4 switches and prepare for Jasper
On Level 4, move toward the central room. Defeat a Dread Dragooner and use it to reach the eastern platform containing the Agate of Evolution. From the central room, use the portal network to access the eastern and western sections.
Activate the switches in the eastern and western sections. The raised platforms allow access to the remaining mechanism and the Great Dragon area. Defeat the Great Dragon blocking the route and activate the switch behind it. Another switch opens the northern door on the lower floor of the Level 1 central room. The Stardust Sword, Poker, and Meteorite Bracer are optional rewards.
Return to the central room and use the newly opened northern route to drop to the lower floor. Follow the shortcut back to the entrance courtyard, heal at the Goddess Statue, and make another normal save. Return through the shortcut when ready.
Before the final bridge, open the chest containing four Sage’s Elixirs. Restore MP, carry revival items, and use equipment that improves dark or lightning resistance when the defensive tradeoff is reasonable. Do not sacrifice major defensive upgrades for a small resistance increase.
- Reach the Level 4 central room.
- Activate the required eastern and western mechanisms.
- Defeat the Great Dragon blocking the switch route.
- Open the lower-floor northern door.
- Use the shortcut to return to the entrance statue and save.
- Collect the four Sage’s Elixirs before the Jasper route.
Defeat Jasper Unbound and stop at the Palace of Malice
Continue through the Level 4 route and cross the exterior bridge to trigger Jasper Unbound. Jasper uses heavy physical attacks, dark-element attacks, a lightning attack through his orb, buff-disrupting abilities, and can call a Balhib to assist him. Prepare for large party-wide damage rather than relying on a damage-only formation.
Keep Jasper as the main target, but defeat a Balhib quickly when its presence creates too much additional pressure. Hendrik can protect the party, maintain defensive support, or use Scrap Mettle when recovery is stable. The Hero should provide consistent damage while retaining enough MP for emergency healing. Serena should prioritize healing and revival, and reserve characters should be ready to replace a disabled or fallen member.
Keep the party comfortably above half health because Jasper’s area attacks can remove large amounts of HP at once. Reapply buffs only when their benefit is worth the action, since the fight can erase or disrupt support effects. Dark- and lightning-resistant equipment is useful, but reliable healing and revival matter more than a minor resistance improvement.
After the battle, Jasper disappears and leaves the Silver Orb. This is the Act II recovery of the Silver Orb, not the Purple Orb. Continue through the next door to the teleporter and use it to reach the Palace of Malice approach. Follow the route until you stand before the Palace doors, then stop. Do not enter: crossing those doors begins the Lord of Shadows and Mordegon sequence assigned to the next chapter.
- Cross the Level 4 exterior bridge.
- Defeat Jasper Unbound.
- Respond to Balhib summons without losing focus on Jasper.
- Recover the Silver Orb Jasper leaves behind.
- Use the teleporter after the Jasper scene.
- Reach the Palace of Malice doors.
- Stop before entering the Mordegon sequence.
Before you move on
- Indignus has been defeated at the Fortress entrance.
- The Blue Orb originally obtained from Krystalinda in Act I has been reclaimed from Indignus.
- The Level 1 mechanism has opened the western route and the party has reached Level 2.
- The Level 2 and Level 3 mounted-monster routes have been completed.
- The Level 4 mechanisms have opened the lower-floor route and the Palace approach.
- The party has returned to the entrance Goddess Statue, restored, and created a normal save.
- Four Sage’s Elixirs have been collected before the Jasper route.
- Jasper Unbound has been defeated and the Silver Orb has been recovered.
- The party is standing at the Palace of Malice entrance without entering the Mordegon battle.
First Ending and Act III Route — From Mordegon to the Calasmos Approach
Defeating Mordegon produces the first ending but does not complete Dragon Quest XI S. Watch the first credits, create and load the cleared Adventure Log, and begin Act III. Obtain the Wheel of Time in the ruins south of Octagonia, cross the first Tower of Lost Time, return to the past, defeat Jasper, and resolve the renewed Heliodor sequence. Restore the Guiding Light in Havens Above and investigate the three Yggdrasil Seedlings. After the Watcher revelations, return to Havens Above for the Wheel of Time a second time. Revisit the Tower of Lost Time, complete the second Timekeeper sequence, and let Cetacea receive her upgraded power. Only then is the route to the Black Star open. This chapter ends at the final approach, before Calasmos. Optional Drustan Trials, Cobblestone rebuilding, Tickington, and Supreme Sword of Light forging are not required.
Finish Mordegon’s ending and create the Act III file
Defeat Mordegon in the Fortress of Fear and allow the victory scenes, Arboria memorial scenes, first ending, and credits to finish. The first credits are not the final completion point. When the game offers the opportunity to record cleared progress, create the cleared Adventure Log. Keep the last pre-Fortress save in a separate slot until the new file has been confirmed.
Return to the title screen, choose Continue, and load the cleared Adventure Log. The restored world begins the Act III sequence. The four character interludes, Tickington, ordinary side quests, Drustan’s Trials, and other optional content do not need to be completed before continuing the required story route.
- Mordegon is defeated.
- The first ending and credits have finished.
- A cleared Adventure Log has been created and loads successfully.
Obtain the first Wheel of Time in the ruins south of Octagonia
After the opening Act III scenes in Arboria, follow the objective toward the ruins south of Octagonia. Travel through the Dundrasil Region and approach the land bridge near the marked ruins to trigger the relevant scene. Enter the dome and speak with Rab.
Examine the red book on the bookshelf in Rab’s area, then go west to Serena near the damaged wall. Follow her scene, pass through the opening, and examine the glowing point farther south. The Wheel of Time is added to the Important Items list.
This is the Act III Wheel of Time location. Do not confuse it with the earlier Dundrasil story scenes from Act II. Optional visits to locations such as the Last Bastion, Puerto Valor, or the Viking Hideout can wait.
- Rab has been found in the dome south of Octagonia.
- Serena’s damaged-wall scene is complete.
- The first Wheel of Time is in the Important Items list.
Cross the first Tower of Lost Time and return to the past
Use the Calamus Flute to summon Cetacea and fly to the Lost Land north of the World Tree. Land at the pillar of light and use the Wheel of Time at the northern tower entrance. The tower contains moving gears and platforms rather than ordinary roaming encounters.
Follow the ramps and moving platforms upward through the tower. Intermediate chests and the recipe book are optional; the required objective is reaching the Altar of Ages. At the altar, approach the figure and continue the scenes. Speak with the companions when prompted, leaving Erik until the game’s final prompt, then speak with the Timekeeper and confirm the decision to return to the past.
Use the save opportunity during the transition if desired. Control resumes at Arboria in the earlier timeline. Enter the cathedral when directed, reunite with the companions, and follow the route through the Arborian Highlands and First Forest toward Yggdrasil.
- The first Tower of Lost Time visit is complete.
- The Timekeeper sequence has sent the party into the past.
- The party has reached the renewed World Tree route.
Defeat Jasper and resolve the renewed Heliodor sequence
At the Heart of Yggdrasil, fight Jasper. His opening barrier must be removed with the Sword of Shadows used by the Luminary. Once the barrier is gone, the rest of the party can damage him normally. Keep healing and revival options ready for his physical and dark attacks, and use a save before the approach if necessary.
After Jasper’s defeat and the following scenes, take the Super Sword of Light from the Heart of Yggdrasil. Travel to Heliodor Castle and follow the direct story route. Rest in the guest room when instructed, then save with the priest before returning to the throne-room sequence.
During the renewed Mordegon battle, respond carefully to Purple Mist. Avoid using healing while the effect reverses recovery; wait until it clears before restoring HP or reviving allies. Remove the summoned staffs with attacks that can hit multiple targets while maintaining normal defensive and healing routines. Complete the battle and balcony scenes; Hendrik then rejoins the party and the story sends you toward the Emerald Coast.
- Jasper’s barrier has been broken with the Sword of Shadows.
- Jasper has been defeated.
- The renewed Heliodor Castle sequence and Mordegon battle are complete.
- Hendrik has rejoined the party.
Restore the Guiding Light and investigate all three Seedlings
Travel through the Emerald Coast and follow the scene that restores access to Cetacea’s flight route. Fly to Havens Above and take the main island path to the Place of Legends. Speak with the Elder Watcher, enter the Temple of Dawn, and talk to the mayor. The Guiding Light is restored and Act III progression continues.
The Watchers direct you to three Yggdrasil Seedlings. Examine the Seedling at Angri-La, then visit the Seedlings at the Laguna di Gondolia and Zwaardsrust Whale Way Stations. Allow each memory scene to finish before leaving. The visions concern the legendary sword, Cetacea, and the threat connected to Calasmos.
After all three memories, return to Havens Above and speak with the Watchers as directed. Complete the revelations involving Veronica and Serena. This required sequence also unlocks Mighty Magic Burst for Veronica and Serena. Drustan’s Trials beneath Zwaardsrust, Cobblestone rebuilding, character side quests, Tickington, and other Act III challenges remain optional.
- The Guiding Light has been restored.
- The Angri-La Seedling has been examined.
- The Laguna di Gondolia Seedling has been examined.
- The Zwaardsrust Seedling has been examined.
- The Watcher revelations involving Veronica and Serena are complete.
Receive the second Wheel of Time and revisit the Tower
After the three Seedling memories and the Watcher revelations, return to Havens Above rather than flying directly toward the Black Star. Speak with the Elder Watcher again. The elder gives the Wheel of Time a second time and directs the party back to the Tower of Lost Time.
Use Cetacea to fly to the Lost Land and enter the tower with the newly received Wheel. This is a second required visit, separate from the earlier trip that returned the Luminary to the past. Follow the tower route to the Timekeeper and continue the scenes there.
Complete the Timekeeper sequence. The Timekeeper upgrades Cetacea’s power so she can pierce the darkness protecting the final destination. Do not treat the first tower visit as sufficient; the Black Star route does not open until this second Wheel, second tower, and Timekeeper sequence have been completed.
- The party has returned to Havens Above after all three Seedling memories.
- The second Wheel of Time has been received from the Elder Watcher.
- The second Tower of Lost Time visit is complete.
- The second Timekeeper sequence has upgraded Cetacea’s power.
Open the Black Star route and stop before Calasmos
After Cetacea’s upgrade, return to the world map and summon her. The powered-up flight route now allows access to the Black Star, the final destination associated with Calasmos. Approach the destination only after confirming that the second Tower and Timekeeper sequence is complete.
Before flying to the Black Star, heal at a church or campsite, restore MP, repair equipment with the Fun-Size Forge, and stock revival and status-curing items. Keep the Super Sword of Light available in the Luminary’s inventory; it is the item used during the Calasmos battle to remove his protective darkness. The Supreme Sword of Light is an optional upgrade and is not required to open this route.
Save manually before approaching the Black Star. Stop once the final battle is available. Do not initiate Calasmos, enter the final Yggdrasil epilogue, or watch the second credits in this chapter; those events belong exclusively to the final-confrontation chapter.
- Cetacea has received her upgraded power from the second Timekeeper sequence.
- The Black Star is reachable.
- The party is healed, equipped, and stocked for the final battle.
- A manual save exists immediately before approaching Calasmos.
- Calasmos has not yet been fought in this chapter.
Before you move on
- The first Mordegon ending and credits have been watched.
- A cleared post-credits Adventure Log was created and loaded.
- The first Wheel of Time was obtained in the ruins south of Octagonia.
- The first Tower of Lost Time visit and return to the past were completed.
- Jasper was defeated at the Heart of Yggdrasil.
- The renewed Heliodor sequence, including the Mordegon battle and balcony scenes, was completed.
- The Guiding Light was restored in Havens Above.
- All three Yggdrasil Seedlings were examined and their required memory scenes were completed.
- The Watcher revelations involving Veronica and Serena were completed.
- The Elder Watcher gave the Wheel of Time a second time.
- The second Tower of Lost Time visit and second Timekeeper sequence were completed.
- Cetacea received the power needed to reach the Black Star.
- The party is saved and prepared immediately before Calasmos.
- Calasmos, the final epilogue, and the second credits have not yet been completed in this chapter.
References for this chapter
- Act 3 - Dragon Quest XI: Echoes of an Elusive Age Walkthrough & Guide
- Post-Game - Making Up for Lost Time - Dragon Quest XI S: Echoes of an Elusive Age - Definitive Edition Walkthrough & Guide
- Tower of Lost Time | Dragon Quest Wiki
- Wheel of time - Dragon Quest Wiki
- Searching for Seedlings - Dragon Quest XI: Echoes of an Elusive Age Walkthrough
Act III Optional Story — Cobblestone Rebuilding and Derk
After Act III begins and normal party control returns, Cobblestone remains a ruin. Visit Gemma to begin the optional rebuilding line, then travel to Heliodor’s Royal Square to ask Derk’s wife where he went. Follow her directions to Cobblestone Tor, rescue Derk from the Malicious Hades Condor, and ask him to help restore the village. Derk gives you Spectralite and establishes the first rebuilding reward, but Cobblestone’s restoration continues through additional optional objectives. The route can be completed while Act III’s wider objectives remain open; it does not replace or precede the Act II Fortress of Fear sequence. On the Switch Definitive Edition, Mister Vista is a separate optional quest that begins at Mount Pang Lai, sends you to the summit of Cobblestone Tor to inspect a large tree trunk, and rewards the Fantastick when you return to Hugo.
1. Begin this detour after Act III opens
Start this chapter only after the first Act III sequence has concluded and the game has returned control of the reunited party. Cobblestone rebuilding is an Act III activity. It is not part of the Act II route to the Fortress of Fear, and it is not required to reach the first ending or to begin Act III.
Complete enough of Act III’s opening scenes for travel around Erdrea to be available again. The exact point at which you visit Cobblestone is flexible: you can begin rebuilding before handling every seedling, or return later while working through the Act III objectives. If Cobblestone does not yet show its Act III state, continue the opening story until normal travel and the relevant town markers are active.
When ready, Zoom to Cobblestone. The village is still destroyed in this timeline. Save at the church and check the forge before entering the ruins, because the enemies around Cobblestone Tor are much stronger than their Act I versions.
- Reach Act III and regain normal party control.
- Confirm that free travel around Erdrea is available.
- Zoom to ruined Cobblestone and save before beginning the detour.
2. Ask Gemma to begin rebuilding Cobblestone
Enter the ruined village and find Gemma near the remains of the protagonist’s former home. Speak with her and agree to help restore Cobblestone. She explains that the village needs specific people and other helpers before it can be rebuilt; this is a sequence of named objectives, not a general request to gather construction materials.
Gemma identifies Derk as the first person to locate. Once the conversation ends, the required destination is Heliodor. You do not need to repair individual houses, collect a material quota, or complete every Act III side quest before looking for him.
The rebuilding line is optional campaign content. It provides later benefits, including a better shop in restored Cobblestone, but it does not unlock the route to Calasmos and does not force a particular order for the main Act III objectives. Keep it as a useful detour when you want better supplies or a hometown-focused story sequence.
- Speak with Gemma in ruined Cobblestone.
- Agree to help restore the village.
- Confirm that finding Derk is the active objective.
3. Follow Derk’s trail from Heliodor
Zoom to Heliodor and enter the Royal Square. Find Derk’s wife outside the family home and speak with her. She tells you that Derk has gone to Cobblestone Tor. This conversation establishes the required destination; do not assume that Derk will be waiting in the village itself.
You can complete optional business in Heliodor while you are there, including the Harmachis request, the conversation with Carnelian that concerns Jade, and Ultimate Key treasure in the dungeon. None of those activities advances the Cobblestone rebuilding objective, so skip them if you are following the shortest route.
After speaking with Derk’s wife, heal at the church or inn, restock recovery items, and return to Cobblestone. Leave the village through the southern route and enter Cobblestone Tor. Save at the nearby campsite before climbing toward the upper area, because the rescue scene leads directly into a difficult battle.
- Speak with Derk’s wife in Heliodor’s Royal Square.
- Treat the Heliodor errands and Ultimate Key treasures as optional.
- Return to Cobblestone and enter Cobblestone Tor.
4. Rescue Derk from the Malicious Hades Condor
Follow the Tor’s route through the cavern toward the upper section. The scene with Derk begins as you approach him, followed by the Malicious Hades Condor encounter. Restore HP and MP at the campsite before triggering the scene, and make sure the party has fire protection available if you can forge or equip it.
The condor combines hard physical attacks with Kasizzle and can use Moreheal when wounded. Fire damage is the main reason to prepare Magic Barrier, Hymn of Fire, or equipment that reduces fire damage. Kabuff and Hendrik’s defensive tools help against its physical attacks. Keep the healer ready to restore the party after every damaging round instead of allowing several characters to remain near critical HP.
Use dependable single-target attacks and apply Sap or other debuffs when they land. Do not waste turns changing targets; concentrate on the condor until it falls. Moreheal makes the battle last longer, but it does not change the target priority. If you lose, reload the campsite save, improve fire resistance, replace weak armor, and begin with defensive buffs before committing to damage.
- Reach Derk in the upper section of Cobblestone Tor.
- Prepare fire mitigation and reliable healing before the battle.
- Defeat the Malicious Hades Condor and return to Derk.
5. Recruit Derk and continue the rebuilding line
Speak with Derk after the battle and ask him to help rebuild Cobblestone. He gives you Spectralite as thanks. This completes the first required rebuilding objective, but it does not finish the entire restoration sequence.
Return to Cobblestone and speak with Gemma or inspect the village to confirm that Derk has joined the rebuilding effort. Derk’s presence establishes the village shop and advances the restoration line, while later helpers are handled through separate objectives. The chapter does not require a fortress-defense battle, a town-defense battle, or a special material-gathering event.
If you are prioritizing the main ending, you can stop here and resume Act III’s seedling, Tower of Lost Time, or Calasmos preparation route. If you want the complete Cobblestone detour, continue with the additional named helper objectives that Gemma makes available. Those later tasks are optional and should not be presented as conditions for reaching Calasmos.
- Receive Spectralite from Derk.
- Ask Derk to help rebuild Cobblestone.
- Confirm that the next rebuilding objectives are available.
- Do not search for a nonexistent mandatory fortress-defense event.
6. Complete Mister Vista separately on the Switch Definitive Edition
Mister Vista is optional and is not part of rescuing Derk. In Dragon Quest XI S: Echoes of an Elusive Age — Definitive Edition, travel to the summit of Mount Pang Lai and speak with Hugo to start the quest. This location differs from the original-edition route, so do not search Insula Centralis for the questgiver.
After accepting the quest, travel to the summit of Cobblestone Tor. At the highest point, examine the large tree trunk or its inscription to record the vista Hugo wants. The objective is at Cobblestone Tor’s summit, not at the Mount Pang Lai questgiver’s location.
Return to Hugo at the summit of Mount Pang Lai and report what you found. The reward is the Fantastick. You may complete Mister Vista before or after rescuing Derk, provided the relevant Act III travel access is available. If you are following only the campaign route, skip it without affecting Cobblestone rebuilding or the official ending.
- Speak with Hugo at the summit of Mount Pang Lai.
- Examine the large trunk and inscription at the summit of Cobblestone Tor.
- Return to Hugo and receive the Fantastick.
Before you move on
- Act III is open and normal party travel is available.
- Gemma has accepted your help restoring ruined Cobblestone and identified Derk as the first helper.
- Derk’s wife has been consulted in Heliodor’s Royal Square.
- The Malicious Hades Condor has been defeated in Cobblestone Tor.
- Derk has given you Spectralite and agreed to help rebuild Cobblestone.
- The next rebuilding objectives are available, or you have deliberately returned to the main Act III route.
- For optional Mister Vista completion, Hugo was visited at Mount Pang Lai, the summit inscription at Cobblestone Tor was examined, and Hugo was visited again for the Fantastick.
References for this chapter
Final Confrontation — Calasmos, Yggdrasil, and the Complete Ending
Calasmos is the final required battle in the Act III route of Dragon Quest XI S: Echoes of an Elusive Age — Definitive Edition. Before entering, heal the party, prepare revival and healing items, and make sure the Super Sword of Light is in the Luminary’s personal inventory. During the battle, choose Item on the Luminary’s turn and use the Super Sword of Light on Calasmos to remove his dark aura. This is an item action, not a normal weapon attack, and the Supreme Sword of Light is not the correct item. After the aura is gone, control the dangerous arms and cannon, destroy Darklings quickly when they appear, and keep healing ahead of Calasmos’s group attacks. When the boss falls, the story is not finished immediately: regain control in Cobblestone, leave through the village exit, speak with Serena and Veronica, agree to accompany them, climb to the Heart of Yggdrasil, and watch the concluding scenes and credits. Optional postgame activities remain outside this chapter’s completion requirement.
Prepare before flying to Calasmos
Before using the Calamus Flute to reach the Dark Star over Gallopolis, heal the entire party and check the active characters’ equipment. Make a manual save at a church or campsite so a failed attempt does not erase your preparation. Bring strong revival and healing supplies, including Yggdrasil Leaves and high-grade healing items. Keep those supplies in the personal inventories of characters who may need to act; do not rely on equipment or items stored elsewhere.
Use the party members whose healing, revival, damage, and defensive options are developed in your file. Serena is a dependable primary healer, while the Luminary can cover healing when necessary. Erik, Veronica, Jade, Hendrik, Rab, and Sylvando can all contribute useful damage or support depending on their skills and equipment. No single four-character lineup is required for the normal campaign route, and no specific Pep Power is mandatory.
- Heal the whole party.
- Make a manual save before the encounter.
- Put revival and healing supplies in active characters’ personal inventories.
- Confirm that the Super Sword of Light is in the Luminary’s personal inventory.
Remove Calasmos’s dark aura immediately
At the start of the battle, select the Luminary’s Item command and choose the Super Sword of Light. Use it on Calasmos as you would any other battle item. The sword must be available in the Luminary’s personal inventory; simply leaving it in general storage will not help. The intended action is selecting the item during combat, not attacking with the sword as an ordinary weapon.
Do not substitute the Supreme Sword of Light, the Sword of Light, or another upgraded weapon. The dark aura greatly increases Calasmos’s threat and reduces the party’s effective damage. If the Luminary is unable to act on the first turn, stabilize the party with another character and use the Super Sword of Light at the next safe opportunity. Once the aura is removed, the battle becomes substantially more manageable.
- Select Item during the Luminary’s turn.
- Choose Super Sword of Light by its exact name.
- Use it on Calasmos.
- Do not use the Supreme Sword of Light or an ordinary weapon attack.
Control the arms, cannon, and main body
After the aura is removed, watch which parts are producing the immediate danger. The arms can inflict heavy physical damage and status problems, while the cannon can pressure the whole party and summon Darklings. If an arm or the cannon is repeatedly attacking and your party cannot safely withstand it, concentrate damage on that part until the threat is removed. Area attacks are useful when they damage several dangerous targets without sacrificing too much damage.
Once the dangerous parts are disabled, turn your strongest reliable attacks toward Calasmos’s main body. The boss may regenerate disabled parts, particularly later in the battle. If the arms return while the party is stable and Calasmos is near defeat, continuing to damage the main body can be more efficient than restarting the limb sequence. Reassess after every major attack rather than following a rigid damage order.
- Remove an arm or the cannon when it is creating immediate pressure.
- Use area attacks when they efficiently hit multiple threats.
- Focus the main body after the dangerous parts are controlled.
- If parts regenerate near the end, prioritize finishing Calasmos when survival allows.
Eliminate Darklings before they finish praying
When Calasmos summons Darklings, change the immediate target priority. Defeat them with a reliable group attack such as the Luminary’s area attacks, Veronica’s group spells, or another multi-target option available to your party. Do not continue attacking the main body while the Darklings are safely completing their support action unless eliminating them would leave the party unable to survive the current turn.
Darklings add damage and can support Calasmos if they are left active. Their prayer sequence can lead to a powerful attack against the whole party, so remove them quickly. If the summon appears immediately after a devastating group attack, heal with one character and use the remaining safe actions to clear the adds. Resume boss damage only after the Darklings are gone or no longer pose an immediate threat.
- Switch to Darklings when they appear.
- Use efficient multi-target damage.
- Do not let the Darklings complete their prayer sequence unchecked.
- Heal first if the summon arrives during a party-wide crisis.
Maintain recovery through Calasmos’s disruption
Calasmos uses elemental attacks, breath attacks, debuffs, disruptive effects, and other actions that can interrupt a prepared plan. Keep the party above immediate knockout range instead of waiting until everyone is critically injured. Use multi-target healing after a group attack and single-target healing when only one character is endangered. Serena’s Omniheal is useful when she can safely act, but another character can use an Yggdrasil Dew if Serena is busy or incapacitated.
Revive the healer promptly if the party has no dependable recovery remaining. Replace a fallen attacker with a reserve member when that preserves the party’s ability to heal and revive. Reapply only the buffs that justify their action cost, because Calasmos can remove beneficial effects. Guard when a weakened character has no safe offensive action. Survival takes priority over maintaining a damage rotation.
- Heal before several characters reach knockout range.
- Revive essential support characters quickly.
- Expect buffs and Pep effects to be removed.
- Guard when attacking would leave a weakened character exposed.
Recover from defeat and verify the item mistake
If the party loses, reload the manual save and change the preparation before trying again. First verify that the item is named Super Sword of Light and that it is in the Luminary’s personal inventory. During the retry, confirm that the Luminary selected Item and used the sword on Calasmos. Equipping the sword is not the aura-removal action by itself, and using the wrong sword leaves the battle unnecessarily difficult.
If the aura was removed but the party still failed, change one factor at a time. Improve defensive equipment, replace a fragile attacker with a healer or support character, move revival items to the characters most likely to act, or eliminate Darklings more aggressively. If expensive spells exhaust your MP, use efficient physical attacks after the aura disappears and reserve stronger abilities for dangerous adds or the finishing phase.
- Reload the pre-battle save.
- Verify the exact sword name and inventory location.
- Confirm the Item command was used during combat.
- Change party roles, equipment, or target priority before repeating the attempt.
Complete the Cobblestone and Yggdrasil epilogue
After Calasmos is defeated, the game returns control to the Luminary inside his house in Cobblestone. You may speak with villagers, but those conversations are not required to advance the ending. Walk toward the village exit. At the north exit, approach Serena and Veronica and trigger their scene. Agree to go with them when prompted; this begins the final return to Yggdrasil.
When control resumes at the World Tree, follow the path forward and climb the vine at the end. Continue along the route to the Heart of Yggdrasil. The concluding scenes there resolve the Sword of Light’s journey and provide the story’s final outcome. Do not quit after the boss victory or after the Cobblestone scene; the required ending sequence is still in progress until the Heart of Yggdrasil scenes and credits have finished.
- Regain control inside Cobblestone after Calasmos.
- Reach the village exit and speak with Serena and Veronica.
- Agree to accompany them to Yggdrasil.
- Climb to the Heart of Yggdrasil.
- Watch the final scenes and credits.
Before you move on
- Calasmos is defeated after the Act III approach.
- The Super Sword of Light was used through the Luminary’s Item command to remove the aura, if following the intended strategy.
- Control returns in Cobblestone and the Serena and Veronica scene at the village exit is completed.
- The party reaches the Heart of Yggdrasil and the concluding story scenes play.
- The final credits have been viewed, including the post-credit material that follows them.
- If the game presents a save opportunity, save to an Adventure Log; if continuing later loads the pre-Calasmos state, that is normal and does not invalidate the completed ending.
- Calasmos is not optional for the stated full Act III completion goal. Drustan Trials, Tickington, Hall of Remembrance, Timewyrm, and other superbosses remain optional.
References for this chapter
- DRAGON QUEST XI S: Echoes of an Elusive Age – Definitive Edition — Nintendo Official Site
- DRAGON QUEST XI S: Echoes of an Elusive Age – Definitive Edition — Square Enix
- Post-Game - To The Dark Star - Dragon Quest XI: Echoes of an Elusive Age Walkthrough & Guide
- Act 3 - Dragon Quest XI: Echoes of an Elusive Age Walkthrough & Guide
- How to defeat Calasmos in Dragon Quest XI
Post-Game — Optional Trials, Tickington, Superboses and Completion Targets
Use this chapter only after the required Act III conclusion has been completed: Calasmos is defeated, the extended ending has been viewed, and the cleared Adventure Log is available. This chapter covers optional content from that cleared file, including Drustan’s Labyrinth, the remaining restored-world quests, Wheel of Harma challenges, Tickington’s Pastword quests, the Hall of Remembrance, and Timewyrm. None of these activities is required to reach or complete the Act III story ending. They are separate completion goals, and several unlock only after earlier optional objectives are finished. Keep a manual save before difficult trials, use the Fun-Size Forge to improve equipment, and treat each superboss as a preparation-and-testing exercise rather than a single continuation of the main route.
1. Begin from the cleared Adventure Log and secure your working saves
Load the cleared Adventure Log created after the Act III ending. This is the file used for optional exploration; do not start a new game if your goal is to continue with the completed party and equipment. Make a fresh manual save at a church or other available save point, then create another save before entering a trial or beginning a superboss attempt.
Review the map, quest list, equipment, skill panels, and item bag before choosing an activity. The post-game objectives do not have to be completed in one fixed order. If a quest or trial feels too difficult, leave it, improve equipment through the Fun-Size Forge, restore consumables, and return later. Keep one untouched save so a failed experiment does not remove your preferred post-game state.
- Load the cleared Adventure Log.
- Create a regular backup save before optional content.
- Check equipment, skills, healing items, and available quests.
2. Clear Drustan’s Labyrinth and choose its wishes
Travel to Trial Isle when its post-game access is available, then enter Drustan’s Labyrinth. The labyrinth uses altered versions of familiar areas connected by portals. Follow the available route to each trial, use the recovery and save points when offered, and begin every boss encounter with the party healed and carrying enough healing and revival supplies.
After a successful trial, Drustan offers a wish. The available choices include powerful equipment recipes, a horse-racing reward, Oogler’s Digest, Serena’s hairstyle, and the Definitive Edition living-arrangement choice. Further completed trials allow additional wishes, so select rewards according to your remaining goals rather than assuming one choice completes every reward. The trials and their wishes are optional; they are useful preparation for later challenges but do not alter the required story ending.
- Reach Trial Isle and enter Drustan’s Labyrinth.
- Complete the trials you can currently clear.
- Claim wishes that support your chosen equipment or completion goals.
3. Finish remaining restored-world quests and equipment objectives
Visit towns and locations with unresolved quest markers, then speak with the named NPCs who provide the remaining post-game objectives. These quests can award recipes, materials, equipment, forging components, or additional scenes. Read each quest description and follow its stated destination; do not treat every restored-world event as a prerequisite for the optional dungeons.
Use the Fun-Size Forge between activities. Upgrade weapons, armor, and accessories when the materials are available, and keep separate equipment sets for physical damage, magic damage, elemental resistance, and disabling-status resistance. Reassign skill points when a character lacks an essential healing, support, or damage option. This preparation is more valuable than repeatedly attempting a superboss with unchanged equipment.
- Resolve the restored-world quests you want to complete.
- Forge and improve equipment before difficult optional battles.
- Prepare separate resistance and damage-focused equipment sets.
4. Complete the Wheel of Harma, including its secret trial
Go to the Wheel of Harma and work through its trial stages using the stated turn limits. These challenges test party composition and efficient damage rather than ordinary exploration. Save before each attempt, identify which characters can clear the required enemy groups quickly, and change the party or equipment when a trial repeatedly exceeds its limit.
The Definitive Edition adds a secret Wheel of Harma trial that becomes available only after the required Drustan’s Trials and the other Wheel of Harma trials have been completed within their designated limits. Treat this as an advanced optional objective. Finish the ordinary trials first, then return with your strongest forged gear and a plan for each battle group.
- Complete the standard Wheel of Harma trials within their limits.
- Clear Drustan’s required trials.
- Attempt the Definitive Edition secret trial only after its prerequisites are met.
5. Collect Pastwords and complete Tickington
Find Tockles in the 3D world and collect the Pastwords they provide. When you have access to Tickington, use the appropriate altar in the Echo Chamber to enter each Pastword area. Complete the quest attached to that altar, then return to Tickington and check the Pastword information list for unfinished entries. Pastwords can be obtained at different points in the adventure, so use the in-game list rather than expecting every altar to be available immediately.
The Tickington quests are short Dragon Quest tribute scenarios involving exploration, dialogue, and battles. Complete every available altar quest, including entries that require the cleared game state. After all Tickington quests are finished, the Hall of Remembrance opens in the Echo Chamber. Tickington and the Hall are optional post-game content and are not required for the Act III ending.
- Collect the remaining Pastwords from Tockles.
- Complete every available Tickington altar quest.
- Return to the Echo Chamber and confirm that the Hall of Remembrance has opened.
6. Clear the Hall of Remembrance and unlock Timewyrm
Enter the Hall of Remembrance from the Echo Chamber after completing the Tickington quest set. Treat each level as a superboss sequence: save beforehand, equip protection against sleep, paralysis, confusion, and other effects where practical, and carry enough healing and revival items. The fights are separate encounters, so recover fully before continuing and adjust tactics after each failed attempt.
Complete every available Hall level rather than stopping after the first successful room. Finishing the Hall’s required content opens the route to the final optional superboss, Timewyrm. Timewyrm is not a story requirement and should be attempted only after the party has its strongest practical equipment, reliable revival, and a tested plan for repeated full-party damage.
- Enter the Hall of Remembrance after clearing Tickington.
- Complete all available Hall levels.
- Use the unlocked route to attempt Timewyrm if pursuing the highest optional challenge.
7. Confirm optional completion without confusing it with the campaign ending
The campaign completion check was already satisfied in the preceding chapter when Calasmos, the final epilogue, and the extended credits were completed. This chapter has a separate optional checklist. Mark Drustan’s Trials, restored-world quests, Wheel of Harma, Tickington, the Hall of Remembrance, and Timewyrm independently, because clearing one does not automatically clear the others.
After each major achievement, save again and verify the relevant in-game reward, quest result, recipe, or unlocked area. Keep a backup save before Timewyrm and before any final equipment experiment. If you are stopping after the story ending, no further activity in this chapter is necessary; if you are pursuing Definitive Edition endgame completion, continue until every selected optional category is explicitly cleared.
- Keep the Act III ending and optional-content checks separate.
- Verify rewards and unlocks after each completed activity.
- Save a final post-game file after completing the desired optional goals.
Before you move on
- A cleared Adventure Log is loaded after the required Act III ending.
- The desired Drustan’s Labyrinth trials and wishes are complete.
- The selected restored-world quests and equipment objectives are complete.
- The ordinary Wheel of Harma trials are complete, with the secret trial cleared if pursuing the full Definitive Edition challenge set.
- All available Tickington Pastword quests are complete.
- The Hall of Remembrance is unlocked and cleared if pursuing its optional content.
- Timewyrm is defeated only if pursuing the highest optional superboss goal.
- A final save preserves the completed optional-content state.
References for this chapter
- Tickington - Dragon Quest XI: Echoes of an Elusive Age Walkthrough
- The Drustan Trials - Act III - Post Game - Walkthrough
- Drustan's Labyrinth - Dragon Quest Wiki
- The Disciple's Trial - Dragon Quest XI Walkthrough
- Dragon Quest XI S Tockles & Pastword Locations Guide
- Hall of Remembrance Level 2 - Tickington
- Hall of Remembrance - Dragon Quest Wiki
- Wheel of Harma's Secret Trial - Definitive Edition Endgame
Wrap-Up — Cleared Adventure Log, Saves, Rectification, and Mode Switching
Dragon Quest XI S has no conventional New Game+ mode. The credits after Mordegon mark the first ending, but the cleared Adventure Log continues into Act III. Load that marked file and complete the required Act III route before facing Calasmos. After Calasmos is defeated, allow the Cobblestone and Yggdrasil epilogue scenes and the concluding credits to finish, then save when prompted. Loading the completed file can return you to the position before the Calasmos battle; this is normal and lets you continue optional activities or repeat the final battle. Keep separate manual saves before major bosses, skill experiments, and 2D/3D conversion. Rectification at a church or goddess statue refunds skill points for a fee. The Definitive Edition also provides adjustable battle speed. Switching between 2D and 3D is not an instant visual toggle: you select the current chapter or a previously completed chapter and resume from that story point. Create a separate backup before converting modes.
1. Confirm the first ending and load the Act III file
Defeat Mordegon, then let the first ending sequence and credits play without quitting early. When the game offers the opportunity to save your completed adventure, record it in a separate slot instead of overwriting your last pre-Mordegon backup. Return to the title screen and load the newly marked Adventure Log. This is the file that opens the continued Act III route; selecting New Adventure would begin the campaign again.
Once the file loads, follow the new objective rather than treating the first credits as the complete campaign. Act III contains the required continuation through the Tower of Lost Time, the renewed regional objectives, the route toward the final confrontation, and the preparations for Calasmos. Tickington, Drustan’s Trials, the Wheel of Harma, character episodes, and superboss challenges are optional unless you choose to pursue them. The cleared file is the correct starting point for the full ending.
- The first credits after Mordegon have finished.
- A separate cleared Adventure Log has been saved.
- Loading that file resumes the Act III story.
- You selected Load rather than starting New Adventure.
2. Protect the working file before Calasmos
Before entering the final battle, make a manual save at a church or campsite in a separate slot. Keep another slot for ordinary Act III progress if possible. This gives you a recovery point if you change equipment, redistribute skills, or need to retry the fight. The Switch version supports up to nine separate saved games in addition to an autosave slot.
Check the Hero’s inventory before beginning. The required item is the Super Sword of Light. During Calasmos’s battle, select the Hero’s Item command and use the Super Sword of Light. This is an item action, not merely an instruction to equip the weapon, and it is different from using the Supreme Sword of Light. The action removes Calasmos’s protective darkness and makes the encounter substantially more manageable.
Bring reliable healing, revival, and MP recovery. If the party repeatedly falls, reload the protected pre-battle save and adjust equipment, skill allocation, or party tactics rather than overwriting the only useful backup.
- The Hero has the Super Sword of Light in the inventory.
- A separate pre-Calasmos save exists.
- Healing, revival, and MP recovery are available.
- You know to use the sword through the Hero’s Item command.
3. Complete the final epilogue and understand the returned save
After Calasmos falls, continue through every automatically presented scene. Follow the direction back to Cobblestone, complete the required farewell events, and proceed with Veronica and Serena toward Yggdrasil. Continue through the Heart of Yggdrasil sequence and allow the final narrative scenes and credits to finish.
Your completion check is not just the victory message. Calasmos must be defeated, the Cobblestone and Yggdrasil epilogue must play, and the concluding credits must be watched. When the game later returns you to a playable save, it can place the party before the Calasmos battle. That does not mean the ending failed. The game preserves the completed status while keeping the ordinary playable world at the pre-battle point, allowing optional cleanup and another attempt at the finale. Supporting references describe Calasmos as the conclusion of the Switch campaign while confirming that play can continue from before the final encounter.
- Calasmos has been defeated.
- The Cobblestone farewell scenes have played.
- The Heart of Yggdrasil sequence has completed.
- The concluding credits have finished.
- A returned pre-Calasmos position is not mistaken for a failed ending.
4. Use separate save slots as recovery points
Keep one save before Calasmos, one current Act III save, and one spare slot for experiments. Check the displayed location and objective before overwriting anything. Do not rely on the newest autosave as your only backup, especially before a mode conversion or a difficult boss.
If loading after the final credits shows the party before Calasmos, do not replay the entire Act III route. Use the cleared file’s completion status and continue optional content from that state, or challenge Calasmos again when you want to repeat the ending. If the expected cleared marker or postgame access is missing, close the file without overwriting it and load the earlier cleared Adventure Log.
- The pre-Calasmos backup remains untouched.
- The current Act III file is separate from experiments.
- You check the location and objective before overwriting a slot.
- You understand why Calasmos can reappear in the playable world.
5. Rebuild characters with Rectification
Visit a church or goddess statue and open the skill-point menu. Choose Rectification, select the skill tree to reset, and confirm the refund. The refunded points can then be assigned to a different weapon, spell, passive, or support route. Rectification is useful after a difficult boss or when changing a character’s role; it does not require beginning a new game.
Rectification does not change equipment automatically. After refunding points, inspect the character’s weapon, shield, armor, and accessories. Weapon-specific abilities require the matching weapon type, so an ability may remain unavailable until the correct weapon is equipped. Check the revised build before returning to Calasmos or another high-level challenge.
- Rectification was performed at a church or goddess statue.
- Returned points were assigned to the intended skill trees.
- The required weapon type is equipped.
- Equipment and accessories were checked after the reset.
6. Adjust battle speed and switch between 2D and 3D safely
Use the Definitive Edition’s battle-speed setting for routine encounters, then return to a slower setting while learning a difficult boss. The available speeds change battle pacing and presentation; they do not replace healing, resistance planning, or defensive tactics. Square Enix describes three battle-speed choices: normal, fast, and ultra-fast.
At a church or campsite, choose the option to switch between 3D and 2D. The game requires you to select either the current chapter or a chapter already completed, then begins the new mode from that story point rather than preserving the exact moment of conversion. Most information, including levels, attributes, inventory, battle history, quest completion, and accolades, carries over unless a story-related exception applies; Drustan’s Labyrinth progress does not carry over.
Create a separate manual backup before converting. Do not overwrite the only cleared Adventure Log or Act III save until you have confirmed that the converted file contains the progress you intend to keep.
- Battle speed matches the encounter or farming task.
- A separate backup exists before changing modes.
- The selected chapter was checked carefully.
- The original cleared or Act III file remains protected.
Before you move on
- The first Act II credits were viewed and the cleared Adventure Log was loaded.
- The required Act III route was completed.
- Calasmos was defeated after the Hero used the Super Sword of Light through the Item command.
- The Cobblestone farewell and Heart of Yggdrasil epilogue were completed.
- The concluding credits were watched.
- A cleared Adventure Log or pre-Calasmos working file remains available for optional content and rematches.
- Rectification and any 2D/3D experiment were performed without destroying the protected campaign save.
- You understand that the playable file may return to the point before Calasmos while retaining the completed status.
References for this chapter
- Dragon Quest XI S Official FAQ — Multiple Saves and 2D/3D Switching
- Dragon Quest XI S Official Battle Speed Feature Page
- Dragon Quest XI S Walkthrough — Calasmos Preparation
- Dragon Quest XI — Super Sword of Light Reference
- Dragon Quest XI S Q&A — What Remains After Calasmos
- Dragon Quest XI S — Calasmos Reappearing After the Ending
- Dragon Quest XI Loading Tips — Rectification
Finishing up
Mordegon has been defeated and the first ending and credits have been viewed.
The cleared Adventure Log has been loaded and the required Act III route has been completed.
Calasmos has been defeated, the final Yggdrasil epilogue has been viewed, and the final credits have finished.
A cleared Adventure Log remains available for optional postgame content. Do not describe this state as standard New Game+.
Choose your next gameScreenshots & video
Game imagery for reference. Follow the written chapters above for the route and strategies.
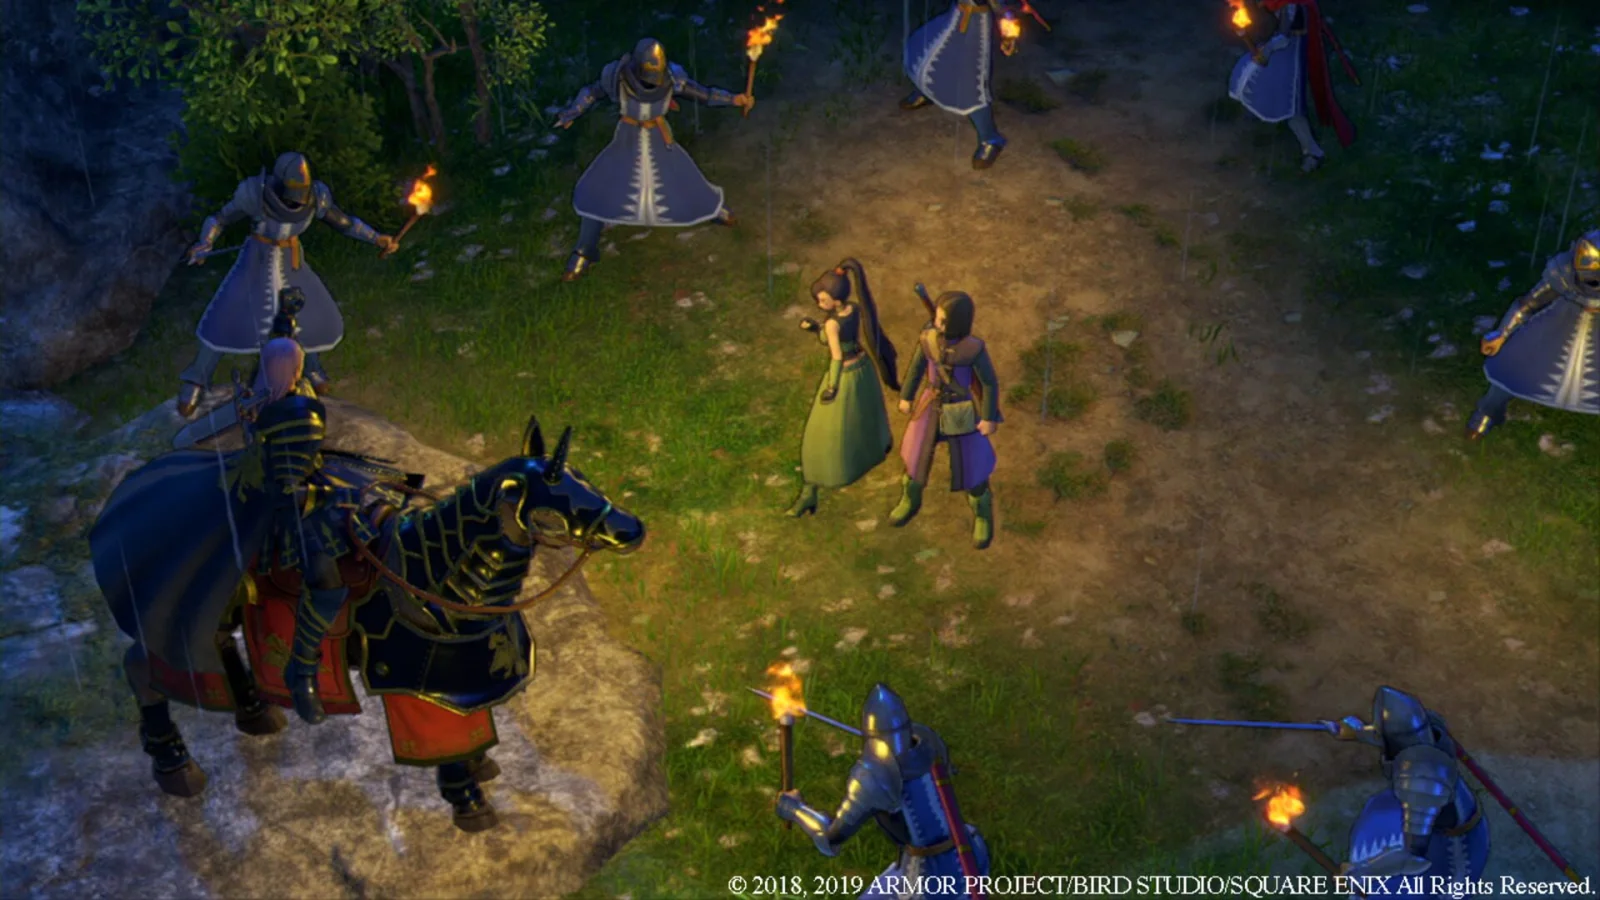
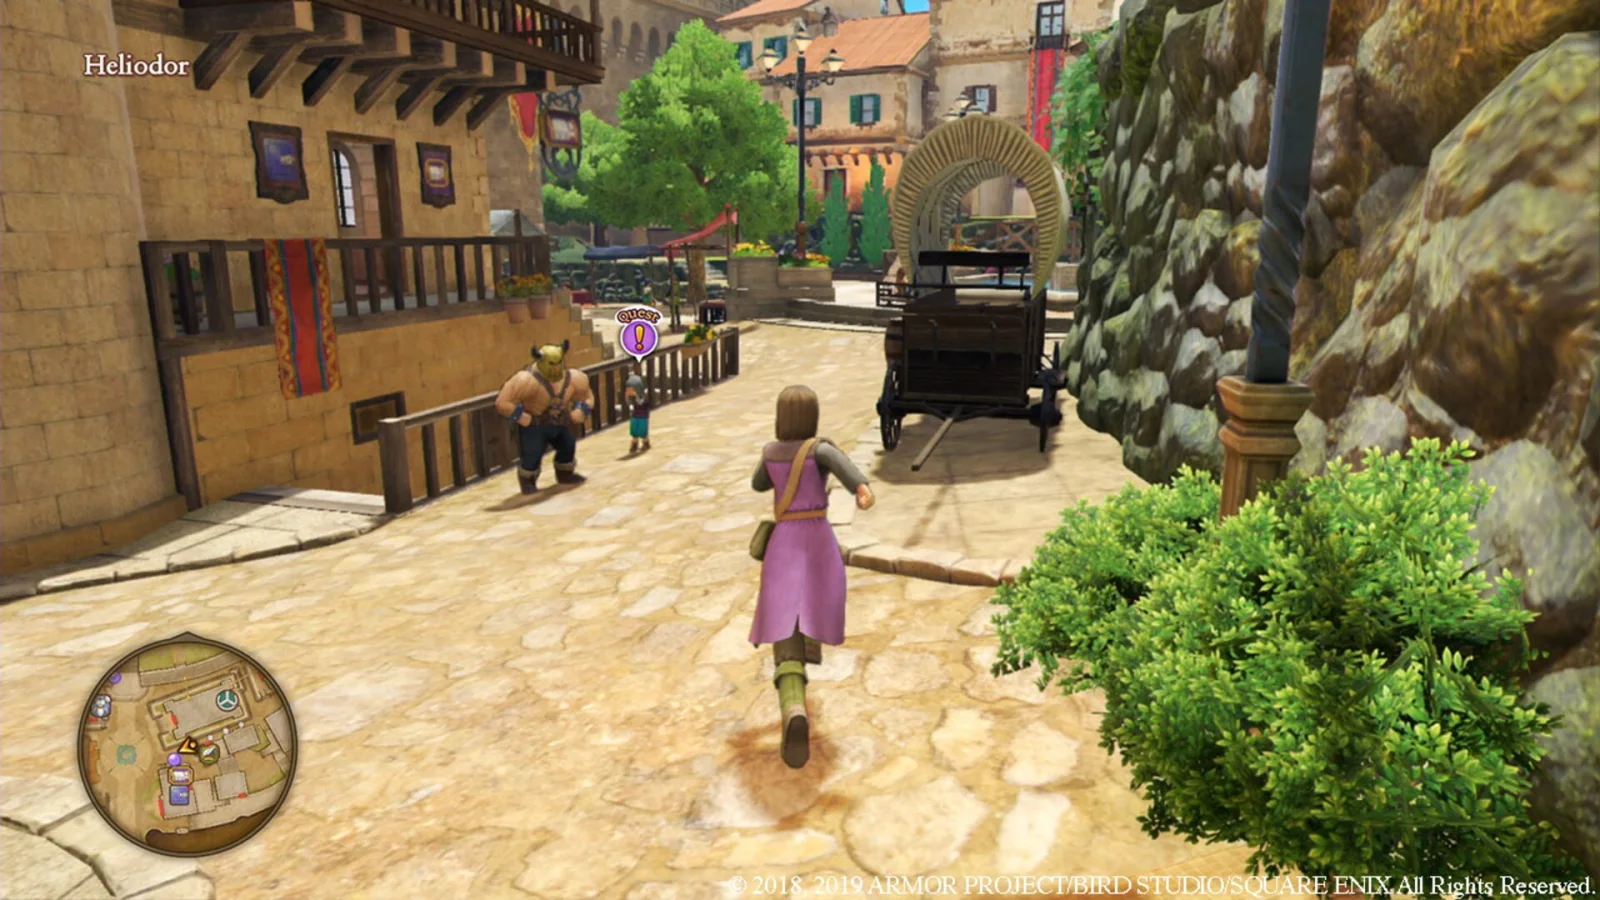
Sources & references
Our original guide draws on the references below. Check the edition at the top of this page before following controls or unlock requirements.
- Act 1 - Dragon Quest XI S: Echoes of an Elusive Age - Definitive Edition Walkthrough & Guide
- Cobblestone Tor - Dragon Quest XI Wiki
- Coming of Age: The Prologue - Dragon Quest XI: Echoes of an Elusive Age Walkthrough
- Dragon Quest XI S Nintendo Switch release information - Square Enix
- Dragon Quest XI S: Heliodor Sewers Walkthrough
- Heliodor Sewers - Act I - Walkthrough | Dragon Quest XI: Echoes of an Elusive Age Definitive Edition
- Heliodor Sewers - Dragon Quest Wiki
- Return to Heliodor - Act I - Walkthrough | Dragon Quest XI: Echoes of an Elusive Age Definitive Edition
- The Manglegrove - Act I - Walkthrough | Dragon Quest XI: Echoes of an Elusive Age Definitive Edition
- The Kingsbarrow - Act I - Walkthrough | Dragon Quest XI: Echoes of an Elusive Age Definitive Edition
- Strange Surroundings - Dragon Quest XI: Echoes of an Elusive Age Walkthrough
- The Cryptic Crypt - Dragon Quest Wiki
- DRAGON QUEST XI S: Echoes of an Elusive Age – Definitive Edition — Square Enix
- DRAGON QUEST XI S: Echoes of an Elusive Age – Definitive Edition — Nintendo Official Site
- Mini Medals Locations — Dragon Quest XI Definitive Edition — Gamer Guides
- Deep-Sea Diving: The Silver Orb - Dragon Quest XI: Echoes of an Elusive Age Walkthrough
- Dora's No More: The Blue Orb - Dragon Quest XI: Echoes of an Elusive Age Walkthrough
- Onward to Yggdrasil - Act I - Walkthrough | Dragon Quest XI: Echoes of an Elusive Age Definitive Edition
- Rainbough Road - Dragon Quest XI: Echoes of an Elusive Age Walkthrough
- In Search of Hope — Character Interludes walkthrough
- Jade Journeys Forth — Character Interludes walkthrough
- Erik’s New Acquaintance — Character Interludes walkthrough
- Lord Robert and the Kingdom of Dreams — Character Interludes walkthrough
- In Search of Hope — Neoseeker walkthrough reference
- A Dark New World — Dragon Quest XI S: Echoes of an Elusive Age — Definitive Edition Walkthrough & Guide
- Dawn of a New World — Act II Walkthrough
- Heliodor Sewers — Game of Guides
- The Last Bastion — Dragon Quest XI Walkthrough
- Act Two — Dragon Quest XI S Definitive Edition Walkthrough
- Sewer Key — Dragon Quest Wiki
- Act 2 - Dragon Quest XI S: Echoes of an Elusive Age - Definitive Edition Walkthrough & Guide
- Reuniting with Erik - Act II - Walkthrough — Gamer Guides
- Dawn of a New World - Act II - Walkthrough — Gamer Guides
- Dragon Quest XI S: Echoes of an Elusive Age - Definitive Edition Walkthrough & Guide, Act 2
- Searching with Cetacea: Forging the Sword — Dragon Quest XI Walkthrough
- Mount Huji — Dragon Quest XI Guide and Walkthrough
- The Fortress of Fear - Act II - Walkthrough | Dragon Quest XI: Echoes of an Elusive Age Definitive Edition
- Fortress of Fear
- Dragon Quest XI Switch Any% Speedrun Notes
- Act 3 - Dragon Quest XI: Echoes of an Elusive Age Walkthrough & Guide
- Post-Game - Making Up for Lost Time - Dragon Quest XI S: Echoes of an Elusive Age - Definitive Edition Walkthrough & Guide
- Tower of Lost Time | Dragon Quest Wiki
- Wheel of time - Dragon Quest Wiki
- Searching for Seedlings - Dragon Quest XI: Echoes of an Elusive Age Walkthrough
- Cobblestone's Comfort - Dragon Quest XI: Echoes of an Elusive Age Walkthrough
- 50 Mister Vista - Dragon Quest XI S: Echoes of an Elusive Age — Definitive Edition
- A Tour of Erdrea - Act III - Post Game - Walkthrough
- Post-Game - To The Dark Star - Dragon Quest XI: Echoes of an Elusive Age Walkthrough & Guide
- How to defeat Calasmos in Dragon Quest XI
- Tickington - Dragon Quest XI: Echoes of an Elusive Age Walkthrough
- The Drustan Trials - Act III - Post Game - Walkthrough
- Drustan's Labyrinth - Dragon Quest Wiki
- The Disciple's Trial - Dragon Quest XI Walkthrough
- Dragon Quest XI S Tockles & Pastword Locations Guide
- Hall of Remembrance Level 2 - Tickington
- Hall of Remembrance - Dragon Quest Wiki
- Wheel of Harma's Secret Trial - Definitive Edition Endgame
- Dragon Quest XI S Official FAQ — Multiple Saves and 2D/3D Switching
- Dragon Quest XI S Official Battle Speed Feature Page
- Dragon Quest XI S Walkthrough — Calasmos Preparation
- Dragon Quest XI — Super Sword of Light Reference
- Dragon Quest XI S Q&A — What Remains After Calasmos
- Dragon Quest XI S — Calasmos Reappearing After the Ending
- Dragon Quest XI Loading Tips — Rectification
About the game & collecting notes
- Platform
- Nintendo Switch
A start-to-finish campaign walkthrough for the Nintendo Switch Definitive Edition of Dragon Quest XI S. This guide leads you through the entire main story to the official ending, including essential beats, party reunions, required dungeons, major boss encounters, and how to recover from setbacks. It also explains Definitive Edition features you can use to speed or tailor your playthrough.
Darryl Polo
Darryl Polo writes about emulation and retro games. What changes when an old favorite moves to another setup? That question connects his interest in tinkering with the games that made the hardware worth keeping.
Our editorial standardsFound a step that needs another look? Help us improve this guide.