
Demon's Souls (PS5 Remake) — Complete Campaign Walkthrough
Step-by-step campaign walkthrough for Bluepoint Games’ PlayStation 5 remake of Demon's Souls. This guide covers the required routes through all five Archstones, every required boss, practical boss strategies, World and Character Tendency management, Fractured World, Nexus customization, NPC assistance, the two ending choices, and preparation for New Game+. It does not claim that the remake provides ordinary stat respec or alternate leveled-character storage.

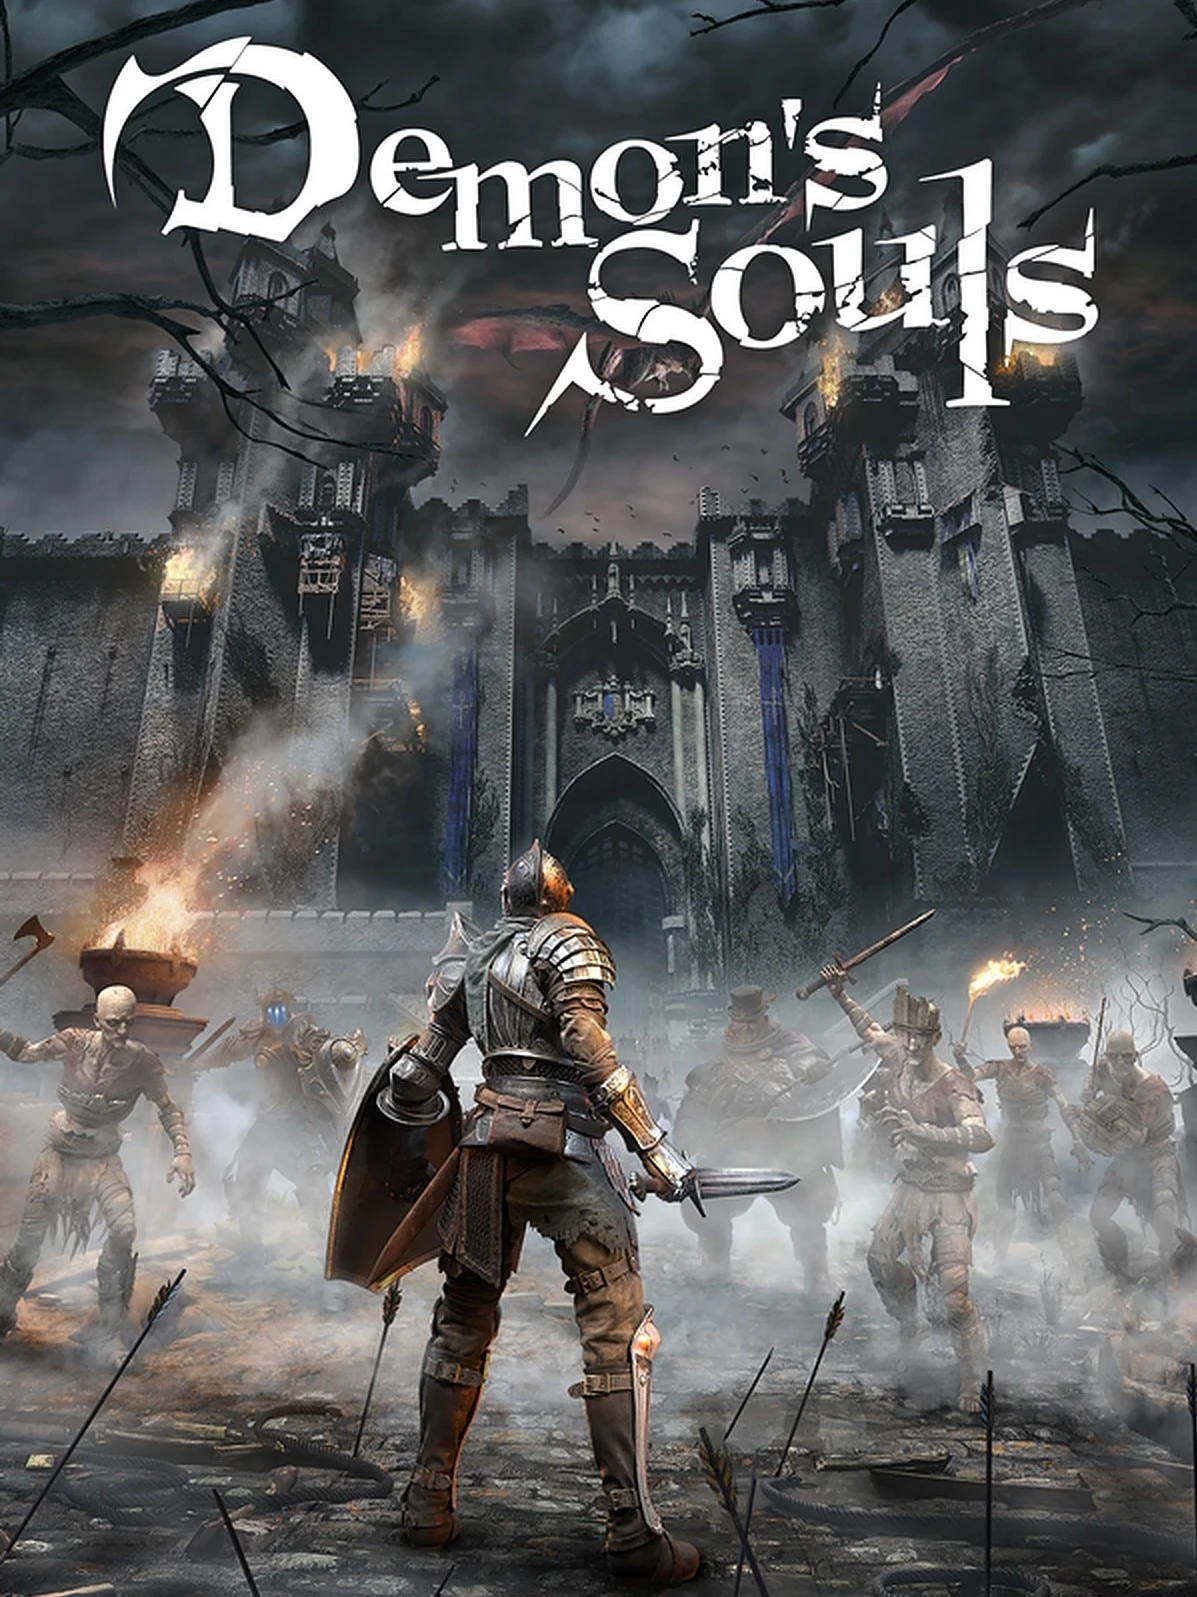
Find a copy
Demon's Souls Sony PlayStation 5
We may earn a commission if you buy through these links, at no extra cost to you. As an Amazon Associate I earn from qualifying purchases.
Opens retailer search results. Check the model, edition, seller, availability and current price before buying.
Before you begin
You’re about to play Bluepoint’s PS5 remake of Demon’s Souls: a faithful, modernized version of the PS3 classic that keeps the core challenge intact while adding clarity and quality-of-life improvements.
This walkthrough assumes no prior experience with the original title and guides you from character creation through every Archstone, showing safe routes, required triggers, boss tactics, and the tendency-related events that affect optional content.
Follow the chapters in order for a reliable single-play campaign that reaches the true final boss and explains both ending paths.
Where events can be missed, the guide flags prerequisites and recovery options.
Use the preparation checklist before you begin, manage souls conservatively, and refer to the World Tendency chapter when pursuing optional rewards or altered enemy behavior.
Set yourself up for the run
Choose a starting class that fits how you want to approach the game; Knight, Temple Knight, Priest, and Royalty are practical first-run choices.
Prioritize survivability and one coherent offensive plan rather than spreading levels across every damage statistic.
Learn the PS5 controls, camera options, lock-on, blocking, two-handing, and omnidirectional rolling in the Nexus.
Reserve souls for repairs, healing, ammunition, and early weapon upgrades instead of spending every soul immediately.
Upgrade one reliable weapon early and use Stockpile Thomas to store spare equipment, materials, and consumables.
Avoid needlessly attacking NPCs. Important characters may provide services, quest rewards, or boss assistance.
Use Soul Form when protecting World Tendency; deaths in Body Form inside a world move that world toward Black.
Treat Fractured World as an optional mirrored-map mode, not as a separate campaign or a replacement for the normal map.
Do not expect the Statue of Reflection to refund attributes or store alternate leveled characters. It provides appearance, forgiveness, and Fractured World functions.
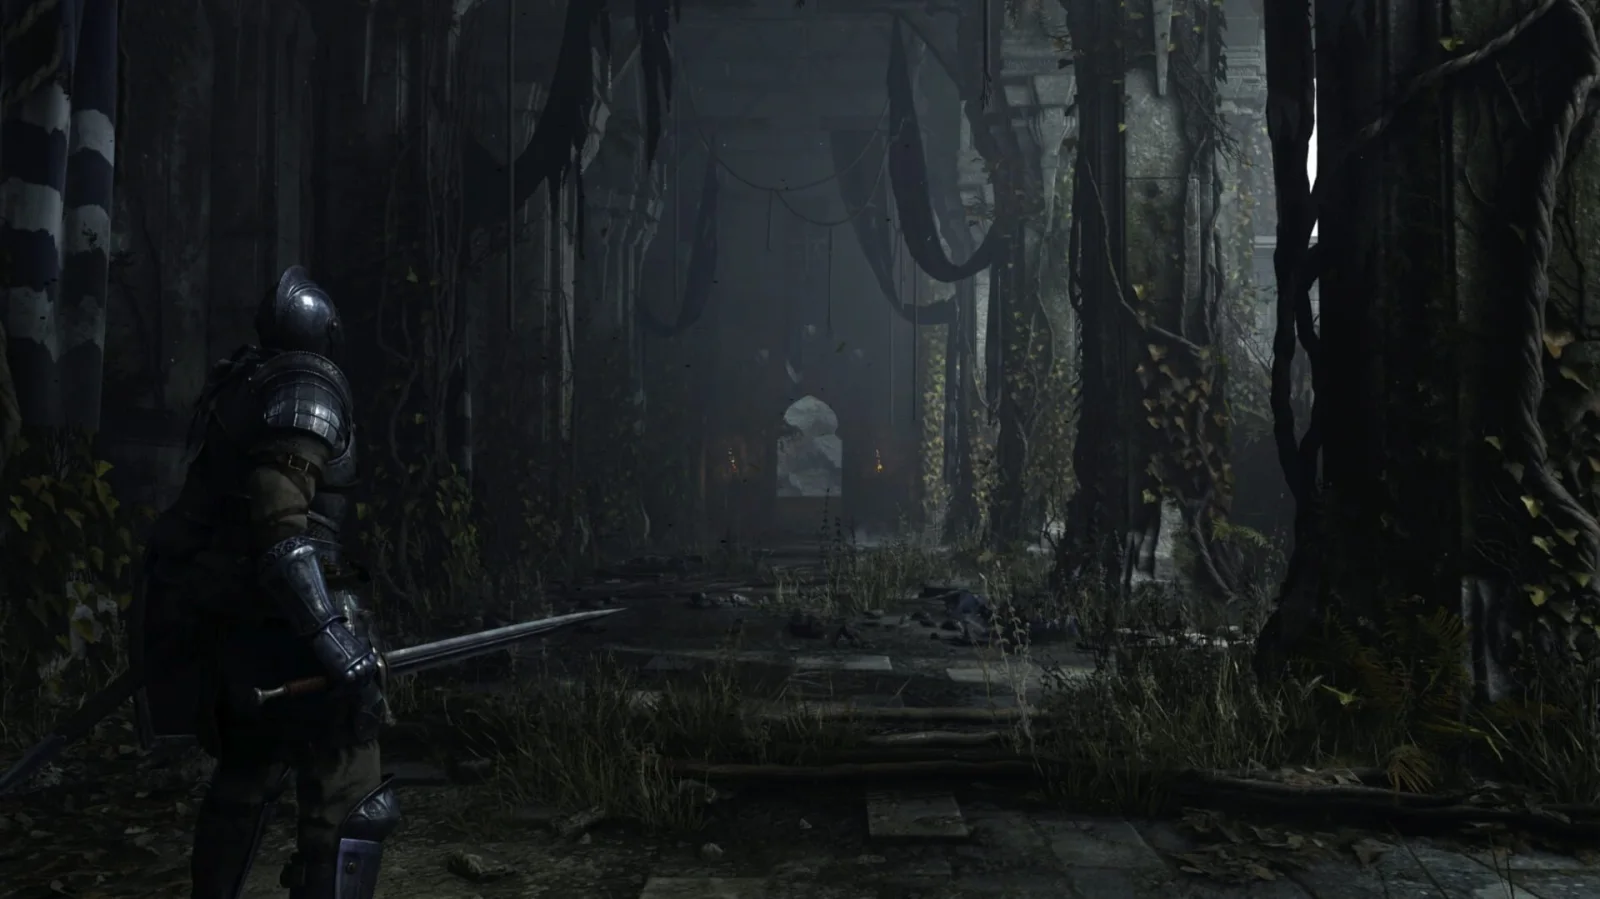
Preparation & Character Creation
Choose a starting class for the way you want to fight, test the PS5 remake’s camera and movement in the Nexus, and establish a safe routine for souls, equipment, and early upgrades. Classes only determine starting attributes and equipment, so they do not permanently lock your build. Knight and Temple Knight are sturdy physical options; Priest supports faith and healing; Royalty is the most forgiving ranged-magic start. The remake supports eight-direction rolling and lets you switch to the original-style camera. Stockpile Thomas stores items, but the remake does not offer a normal stat-respec or a character-storage system that lets you rebuild a leveled character. Treat early attributes as permanent decisions, and reserve souls for supplies and equipment instead of spending every soul on levels.
Choose a class and starting gift for your first build
Demon’s Souls has ten starting classes. Your choice affects starting statistics, equipment, spells, and Soul Level, but it does not determine your final build. Any class can eventually use a weapon or spell if you raise the required attributes, so choose for the opening equipment and the direction you intend to develop.
Knight is the safest straightforward melee class. It starts with a sword, shield, and protective armor, making it a reliable choice for learning blocking, stamina management, and close-range attacks. Temple Knight is another strong physical option, with a halberd-oriented opening and better early Faith potential; choose it if you want a sturdy melee character who may later use miracles. Soldier emphasizes vitality and conventional frontline equipment, while Barbarian has strong physical attributes but begins with poorer protection and is less forgiving for a newcomer.
Priest is the game’s faith-oriented class. It begins with healing access and durable physical attributes, but its starting weapon and equipment are less universally comfortable than the Knight’s. Royalty is the most forgiving class for cautious players: it begins at a low Soul Level with Soul Arrow, a catalyst, and the Fragrant Ring, which gradually restores MP. This lets you weaken enemies before they reach melee range, although you still need a shield or escape plan when enemies close in.
Hunter favors bows and Dexterity. Wanderer favors fast Dexterity weapons and mobility. Thief specializes in Dexterity, Luck, and critical or status-oriented play, but its low early durability makes mistakes costly. Magician is a direct spellcasting alternative to Royalty, with stronger magical orientation but less of Royalty’s convenient opening package. For a first campaign, select Knight or Temple Knight for melee, Priest for a faith-and-healing plan, or Royalty for the safest ranged opening.
If the starting-gift menu is available in your edition, the Providential Ring is a useful long-term choice because it improves item discovery. It is not required to finish the campaign, so do not restart solely because you chose another gift.
- Choose Knight for the simplest shield-and-sword opening.
- Choose Temple Knight for sturdy melee with Faith potential.
- Choose Priest for a faith-and-healing plan, or Royalty for the safest ranged start.
- Do not spread early levels across every offensive attribute.
Test controls, lock-on, and rolling in the Nexus
After the opening sequence places you in the Nexus, use the central floor as a safe practice area. Move with the left stick, rotate the camera with the right stick, and press R3 to lock onto a nearby character or target. Practice changing targets, releasing lock-on, sprinting by holding Circle, blocking with L1, and attacking with R1 and R2. Triangle switches between one-handed and two-handed weapon use, which changes damage, stamina consumption, and whether your shield is available.
The PS5 remake adds omnidirectional rolling. While locked on, move the left stick in different directions and press Circle to confirm that your character can roll around the target rather than being limited to the original game’s narrower roll directions. Test this away from the Nexus ledges; falling from the platforms can kill you even though the area is otherwise safe.
Open Options and enter the game settings while standing in the Nexus. Adjust camera sensitivity and distance until you can keep an enemy visible without fighting the camera. The remake also includes an option to switch to the original-style camera. Use that option only if the modern camera feels uncomfortable; the classic setting is a preference choice, not a gameplay requirement. The classic visual filter is separate from the camera setting, so change only the control option you actually want.
Menus do not normally pause the game. The Nexus is the correct place to adjust settings, sort equipment, and read the Help Menu. In an active level, use Photo Mode if you need a genuine pause, or move to a safe room before opening inventory and settings.
- Practice R3 lock-on and manual camera control.
- Confirm eight-direction rolling in both locked and unlocked movement.
- Adjust camera settings in the Nexus, including the optional classic camera.
- Remember that ordinary menus do not pause gameplay.
Learn the Nexus layout and activate your travel routine
The Nexus contains five usable Archstones arranged around the hub. Each one leads to a different region: Boletarian Palace, Stonefang Tunnel, Tower of Latria, Shrine of Storms, and Valley of Defilement. The broken Archstone is not a sixth campaign route in the PS5 remake. Touch an intact Archstone and select an available destination to travel there; return to the Nexus through an Archstone or by using the appropriate return item when you need to spend souls, repair equipment, or change your loadout.
The first destination in each region is available from the beginning, but later areas within an Archstone open through campaign progress. For example, the next Boletarian Palace area becomes available after Phalanx. This means you can test different regions early, but a newcomer should normally begin with Boletarian Palace and use the other Archstones when a route becomes too dangerous or when a specific upgrade is needed.
Find Stockpile Thomas near the Nexus storage area and speak with him before your inventory becomes overloaded. His storage is for items, not souls, levels, or alternate character builds. Send spare armor, duplicate weapons, excess grasses, and materials to him, then retrieve only the equipment you intend to carry. Item burden affects movement and carrying capacity, so storage is a practical combat tool rather than a cosmetic convenience.
After defeating Phalanx, return to the Nexus and speak with the Monumental as required by the story. Once that sequence is complete, the Maiden in Black can raise your attributes in exchange for souls. Before that point, do not worry that you are wasting a permanent opportunity; simply use the opening area to learn the controls, gather supplies, and decide whether your initial weapon feels comfortable.
- Touch each of the five intact Archstones to confirm the travel interface.
- Remember that the broken Archstone does not open a normal campaign area.
- Use Stockpile Thomas for item burden, not for storing levels or characters.
- Defeat Phalanx and complete the required Nexus conversation before expecting the Maiden in Black to level you.
Spend souls deliberately and protect your early progress
Souls are both experience and currency. The Maiden in Black uses them for levels, while merchants and blacksmiths require them for equipment, ammunition, repairs, and supplies. A death leaves your current unspent souls at a bloodstain in the area where you died. Reach that bloodstain before dying again if the route is safe; a second death removes the unrecovered total.
Do not empty your entire soul total into levels every time you return to the Nexus. Keep enough for the next weapon repair, a supply of healing grass, arrows or bolts if you use ranged attacks, and a modest purchase from a merchant. When you are carrying more souls than you are comfortable risking, spend them on a useful level or necessary equipment before attempting an unfamiliar route. Consumable soul items remain in your inventory until used, so they can serve as a reserve without appearing in your active soul total.
For a first physical build, prioritize Vitality for health and Endurance for stamina and equipment burden, then raise the offensive attribute used by your chosen weapon. Strength and Dexterity are not interchangeable for every weapon, and quality, magic, faith, and luck paths each require a more deliberate plan. Meeting a weapon’s minimum requirements is useful, but investing in five different damage statistics at once usually leaves the character weak.
Equip only what you can move with comfortably. Watch the equipment-burden indicator and test your roll after changing armor. Heavy armor does not compensate for a roll that is too slow to escape attacks, especially while you are still learning enemy timing.
- Keep a soul cushion for repairs, healing, ammunition, and weapon purchases.
- Spend or secure a large soul total before a risky new route.
- Prioritize Vitality, Endurance, and one coherent damage plan.
- Check your roll after changing armor or adding heavy equipment.
Understand what the Statue of Reflection can and cannot do
The PS5 remake adds the Statue of Reflection on the lower level of the Nexus. It is not a stat-respec station and it does not let you store a leveled character for later rebuilding. The early developer description of character storage led to confusion, but the in-game functions do not provide a conventional way to reclaim spent attribute points or swap between saved builds.
After offering the required souls to unlock its functions, the statue can let you customize your character’s appearance, seek forgiveness for certain hostile-NPC situations, and enter Fractured World. Fractured World mirrors the level layouts; it does not create a new campaign, remove the original routes, or reset your attributes. The soul offering is optional for a normal first campaign, so do not reserve an early upgrade budget specifically for it.
Stockpile Thomas is the only relevant storage option for ordinary preparation, and he stores equipment and consumables. If you later decide that your character’s attributes are fundamentally wrong for the weapon or spell plan you want, the dependable solution is to create a new character rather than expecting the Nexus to rebuild the old one. You can still change equipment, spells, rings, and armor freely, so a modest early mistake does not automatically ruin the run.
Before leaving the Nexus, equip one dependable primary weapon, a shield or other defensive tool, healing items, and any ranged option you can use. Keep spare equipment with Thomas, but do not carry every weapon you find into the field. A focused loadout makes the first Archstone easier to read and leaves your soul reserve available for actual progression.
- Use the Statue of Reflection for appearance, absolution, and Fractured World functions only.
- Do not mistake item storage for character storage or stat respec.
- Treat early attribute spending as permanent and keep your build focused.
- Leave the Nexus with a primary weapon, defensive option, healing, and a manageable equipment burden.
Before you move on
- You selected Knight, Temple Knight, Priest, Royalty, or another class with a clear first-build plan.
- You tested lock-on, manual camera control, sprinting, blocking, one- and two-handed attacks, and omnidirectional rolling.
- You located all five usable Nexus Archstones and confirmed that the broken Archstone is not a campaign route.
- You spoke with Stockpile Thomas and understand that he stores items rather than souls, levels, or characters.
- You know that leveling begins after the required early Boletaria progression and Nexus conversation.
- You understand that the Statue of Reflection does not provide a normal stat respec, so future levels will be spent deliberately.
- You can maintain a practical soul reserve and move with a roll speed that suits your equipment.
References for this chapter
- Demon's Souls game tips for beginners – PlayStation
- First look: Demon's Souls character creator and Photo Mode – PlayStation Blog
- Demon's Souls PS5: Fractured Mode, Respec, World Tendency Details – GameSpot
- Demon's Souls PS5 Remake Lets You Save And Store Characters – GameSpot
- Settings & Controls – Demon's Souls Walkthrough & Guide
- Character Creation – Demon's Souls Walkthrough & Guide
The Nexus, Travel, and Your First Archstone (1-1)
The tutorial leads into the Nexus, the game’s safe hub and starting point for five Archstones. At first, only the Archstone of the Small King allows entry to Gates of Boletaria, commonly called 1-1. Follow that level’s looping route, activate its gates and shortcuts, collect enough healing grass and fire items, then defeat Phalanx. The boss’s defeat opens the remaining Archstones after you complete the Monumental conversation. Healing grass is a consumable rather than a rechargeable flask, and deaths leave your carried souls at the death location. World Tendency is affected by dying in Body Form within a world; deaths in Soul Form and deaths in the Nexus do not shift a world toward Black.
Finish the tutorial and enter the Nexus
Follow the opening path and use it to practice light attacks, heavy attacks, guarding, dodging, two-handing, and item use. The Vanguard encounter is intentionally beyond the expected strength of a new character. Winning is possible, but dying or defeating Vanguard both ends the tutorial sequence and brings you to the Nexus; do not treat an early death as a failed save.
The Nexus is your permanent hub. Stockpile Thomas stores equipment, merchants sell supplies, and the Maiden in Black eventually allows leveling. Speak to the available NPCs, but do not consume named Demon Souls merely to gain ordinary souls. Boss souls can later be exchanged for spells, miracles, or special weapons, so keep them until you know which rewards your build needs.
While exploring, keep a usable weapon equipped, carry a shield if your build supports one, and retain several pieces of healing grass. The game has no rechargeable healing flask: grass is consumed from the item bar and each variety restores a set amount of health. The recovery animation leaves you exposed, so create distance before using it.
- Reach the Nexus after the tutorial.
- Find Stockpile Thomas and place spare equipment in storage.
- Keep healing grass, firebombs, and boss Demon Souls rather than selling or consuming them automatically.
Identify the Archstones and unlock your first destination
Five Archstones stand around the central structure of the Nexus. They represent the Archstone of the Small King for Boletarian Palace, the Archstone of the Burrow King for Stonefang Tunnel, the Archstone of the Tower Queen for Tower of Latria, the Archstone of the Shadowmen for the Shrine of Storms, and the Archstone of the Chieftain for the Valley of Defilement.
Touch an Archstone and choose a destination from the list shown. At the beginning, Gates of Boletaria is the only playable destination. The other four Archstones are visible in the Nexus but remain sealed until Phalanx is defeated and you complete the required conversation with the Monumental. Later boss victories add additional destinations to their Archstone, allowing you to return directly to those sections.
You can return to the Nexus through an Archstone whenever you need to spend souls, repair equipment, restock, or change your loadout. Before a risky attempt, spend enough souls that a death will not erase a major upgrade or purchase.
- Touch the Archstone of the Small King.
- Select Gates of Boletaria.
- Confirm that the other four Archstones are still sealed rather than assuming they are missing.
Make the first loop through Gates of Boletaria
From the Gates of Boletaria Archstone, move through the opening battlements and ruined gatehouse. Ordinary soldiers are dangerous mainly when they surround you, so approach corners with your shield raised, draw enemies into open ground, and finish one target before starting another. Do not repeatedly swing until your stamina is empty; leave enough stamina to block or roll away.
Search side rooms and dead ends for healing grass, firebombs, and Pine Resin, but do not force a pickup while enemies are active. Firebombs can damage groups and ignite explosive barrels, so throw from outside the blast radius. Pine Resin temporarily adds fire damage to a compatible weapon and is useful if your supply of firebombs is limited.
The level contains ambushes from doors, stairs, rooftops, and elevated platforms. A large rolling boulder can kill an unprepared character, so let it pass before moving through its path. Blue-eyed knights are stronger than the regular soldiers: fight them in a broad area, block or evade their opening attack, and punish only after their swing has finished. A red-eyed knight encountered on the upper route is much more dangerous at this stage; bypassing it is the safe choice unless you deliberately want the challenge.
Look for the Cling Ring on the early route. It improves the amount of health retained in Soul Form and is especially useful for a first campaign. You do not need every item before Phalanx. Prioritize the route forward, a reserve of grass, and enough fire damage for the boss.
- Use open spaces instead of fighting groups in narrow stairwells.
- Collect the Cling Ring if you can do so without committing to the red-eyed knight.
- Keep a reserve of healing grass and at least one fire-based option.
Operate the gates and reach Phalanx’s courtyard
Continue upward through the battlements until the route bends around the fortified section. One lever opens the large main gate near the starting area; another opens a side gate that creates a shorter return route. Pull every lever you reach, then use the newly opened passage to reduce the distance between the Archstone and the boss approach.
The route eventually crosses areas watched by ranged attackers and passes a bridge threatened by the dragon’s fire. Observe the attack pattern before crossing, move during the safe interval, and avoid stopping to fight in the middle of the exposed bridge. If you are carrying many souls, return to the Nexus before the final approach rather than gambling them on one more room.
At the end of the route, enter the large fog gate leading to Phalanx’s courtyard. The Hoplites surrounding the boss carry broad shields. Their shields blunt frontal weapon attacks, so circle behind them, strike their exposed sides, backstab when appropriate, or burn them with firebombs and Pine Resin. Lure a small number toward the entrance instead of stepping into the center of the mass.
- Pull the main gate lever and the side-gate shortcut lever.
- Cross exposed sections only after watching the hazard pattern.
- Clear or separate several Hoplites before committing to Phalanx’s central mass.
Defeat Phalanx and complete the opening chapter
Phalanx is a large slow-moving blob protected by multiple Hoplites. The surrounding enemies are the immediate threat: they can pin you against the walls, surround you, and make the boss’s body difficult to reach. Stay near the arena perimeter, back away when the group compresses, and use firebombs or a fire-coated weapon to remove Hoplites efficiently. Do not stand in front of several shields and trade attacks.
After the outer protection has been reduced, move in for short attacks against Phalanx and retreat before the remaining Hoplites surround you. Fire is the most straightforward damage type for this encounter, but a careful melee character can win by attacking exposed portions and repeatedly repositioning. Heal only after creating space or when the immediate enemies have been cleared.
If you die, your carried souls remain at the bloodstain on the route. On the next attempt, reopen the shortcut and proceed methodically; do not sprint through every enemy merely because the souls are waiting. If the recovery attempt becomes unsafe, accept the loss and make the next run with fewer souls at risk.
Phalanx’s defeat awards its Demon Soul and restores Body Form. Touch the Archstone that appears in the boss area to return to the Nexus. Speak with the Maiden in Black, then find the Monumental in the upper part of the Nexus and complete the conversation he requests. Return to the Maiden in Black afterward. The four remaining Archstones will then be available, and she can level your character.
- Defeat Phalanx without spending every healing item during the approach.
- Touch the boss-area Archstone and return to the Nexus.
- Speak with the Maiden in Black and the Monumental, then confirm that leveling and the four remaining Archstones are unlocked.
Before you move on
- The tutorial has ended and the character can freely use the Nexus.
- Gates of Boletaria is complete and Phalanx is defeated.
- The boss-area Archstone has returned the character to the Nexus.
- The Maiden in Black and Monumental conversations have been completed.
- Stonefang Tunnel, Tower of Latria, Shrine of Storms, and Valley of Defilement are selectable from their Archstones.
- The Maiden in Black offers level upgrades.
Boletarian Palace — Bridge, Tower Knight and the King's Tower Approach
Clear Boletarian Palace 1-2, called the Lord’s Path, and defeat the Tower Knight. The level has a long return route rather than a conventional checkpoint shortcut, so learn the bridge timing before committing your healing items. The Red Dragon’s fire can be avoided by moving between tower interiors and the under-bridge route, while the Tower Knight’s six archers should normally be removed before the boss. Attack the Tower Knight’s ankles until he falls, then punish his exposed head from ground level. Biorr cannot be freed during this visit: the Iron Ring of Keys comes from a Fat Official in 1-3 after that area becomes accessible. Return to the cell later if you want Biorr’s help against the Penetrator and the Blue Dragon.
Enter the Lord’s Path and secure the first interior
Touch the Tower Knight Archstone in the Nexus and select The Lord’s Path. Bring a dependable melee weapon, a shield if you use one, and enough healing grass for both the level and the boss. Firebombs, Pine Resin, magic, or a bow are useful but not required. Spend souls before entering if losing them would leave you unable to replace basic healing or repair an important weapon.
Move through the opening castle rooms carefully. Soldiers can use shield bashes and can surround you if you rush past them. Raise your shield while checking corners, then lower it between attacks to recover stamina. Pull enemies into a room or hallway where you have space instead of fighting beside stair rails or door frames. Ostrava can be encountered during the route; if you want his later quest events, rescue him when he is in danger and do not attack him.
- Enter 1-2 with healing and a weapon that does not consume your entire stamina bar.
- Keep Ostrava alive if you intend to follow his Boletarian quest.
- Do not spend every soul before the boss run is secure.
Cross the dragon bridge without treating loot as mandatory
The outdoor section is patrolled by the Red Dragon, which makes repeated bombing runs along the bridge. Watch for the fire pass, then move toward the next tower entrance or protected section. Do not remain on the bridge to fight every soldier while the dragon is active. If an enemy survives in a tower, clear it before using that tower as cover on a later attempt.
The route also has an under-bridge passage. It is not a permanent checkpoint and does not create a normal shortcut from the Archstone to the boss, but it lets you avoid portions of the dragon’s fire route and can be useful when collecting items or repositioning. Use the covered path rather than stopping in the open for a glowing item. You can return for bridge loot after defeating the Tower Knight or after the dragon is no longer a threat in that section.
Advance only after the fire has passed. Sprint through exposed sections and stop inside the next doorway or sheltered area. If you die, the full route must normally be repeated; no lever in 1-2 opens a shortcut comparable to the later shortcuts found in other areas.
- Use tower interiors and covered passages as fire protection.
- Treat bridge items as optional until the route is safe.
- Remember that 1-2 has no conventional mid-level checkpoint shortcut.
Clear the final approach and manage the Blue Eye Knights
After the bridge sequence, continue through the castle toward the Tower Knight arena. Deal with soldiers individually and watch for ambushes around corners. When you reach the final approach, do not fight two Blue Eye Knights together in a narrow passage. Pull one backward into a wider area, block or dodge its attack, and punish after the recovery animation.
The Dregling Merchant can be found beneath the bridge route after the Phalanx has been defeated. This is an optional resupply stop, not a checkpoint. If the runback is consuming too much grass, buy or gather replacements before attempting the boss again. The safest objective is to reach the fog gate with enough healing for mistakes rather than stopping to collect every nearby item.
- Separate Blue Eye Knights before fighting.
- Use the merchant beneath the bridge for optional supplies.
- Reach the fog gate with healing remaining.
Remove the six archers before fighting the Tower Knight
Enter the arena and immediately take one of the side stairways to the battlements. Six archers are positioned around the upper perimeter, three on each side. Kill them one at a time while using the walls and stair structures to block the Tower Knight. Keep your camera aware of the edge; a careless roll can send you off the battlement or into the arena while arrows are still active.
There is no offline NPC summon sign for this boss. Online players can be summoned if you are using multiplayer, but a solo player should rely on removing the archers, controlling the arena’s center, and using the stairs as cover. Leaving the archers alive is possible and is required for the related challenge trophy, but it exposes you to arrows from multiple directions and is not the safest first completion.
- Kill all six archers for a normal first clear.
- Use walls and stair structures to break arrow line of sight.
- Avoid rolling near the battlement edges.
Break the Tower Knight’s ankles and punish the fall
Return to the arena floor and keep the fight away from the walls and ledges. Lock on if that helps you circle him, then stay near one ankle or move behind him after he commits to an attack. Strike once or twice and retreat before your stamina is empty. The Tower Knight’s shield slam creates a damaging shockwave, so do not remain at his feet when he raises the shield and prepares to strike the ground. His forward shield bash and wide weapon swings are also safer to avoid by circling toward his rear rather than rolling directly backward into a wall.
Continue attacking the ankles until the Tower Knight loses balance and falls. When he is down, move to his head and attack the exposed weak point from ground level. Do not attempt a plunging attack from the surrounding stairs; simply run to the head and use your strongest reliable attacks. Leave the head area before he rises, restore your stamina, and repeat the ankle cycle.
The Tower Knight can also use a long-range Soul Ray while you are at a distance or on the upper level. Use a stair structure or arena wall to block it, then approach after the attack has finished. Ranged and magic builds can target the ankles and head from safer distances, but they still need to watch stamina, arrows, and the shockwave. Fire damage or a weapon buff can help, but positioning matters more than a particular element.
Heal only after the Tower Knight has committed to a long recovery animation or when a stair structure blocks his line of attack. If you die, the safest recovery is to repeat the bridge with the same fire timing rather than rushing and losing a second supply of grass.
- Attack the ankles after a committed boss attack.
- Move away when the shield slam is telegraphed.
- Strike the head only after the Tower Knight falls.
- Reset your position before he stands up.
- Heal behind cover or during a clear recovery window.
Rescue Biorr after obtaining the Iron Ring of Keys
Biorr is not available to rescue during the initial 1-2 visit. After defeating an Archdemon elsewhere, 1-3 opens from the Boletarian Palace Archstone. In 1-3, defeat the relevant Fat Official and obtain the Iron Ring of Keys. Return to the area immediately before the Tower Knight arena and use the key on the locked door near the Blue Eye Knight route.
Go downstairs, defeat the Fat Official guarding the prison area, and collect the key he drops. Use it to open Biorr’s cell, then speak with Biorr until his dialogue is exhausted. He relocates to the Nexus after being freed. Keeping him alive allows him to assist during the Penetrator fight and later distract the Blue Dragon in 1-4. This rescue is optional for clearing 1-2, but it is important if you want those companion assists or the associated trophy.
Do not confuse the Iron Ring of Keys with the later key obtained from the prison official. The first key opens the route to Biorr; the prison official’s drop is used for another Boletarian rescue. You can safely leave the locked door alone during this chapter and return once 1-3 is accessible.
- Defeat the Tower Knight and receive the Iron Demon’s Soul.
- Open 1-3 by defeating an Archdemon elsewhere.
- Return with the Iron Ring of Keys and free Biorr.
- Keep Biorr alive if you want his Penetrator and Blue Dragon assistance.
Before you move on
- The Tower Knight is defeated and the Iron Demon’s Soul has been awarded.
- The Tower Knight Archstone is available in the arena for travel.
- The six archers have been removed unless you deliberately pursued the archerless challenge.
- You can repeat the bridge route while preserving enough healing to reach the fog gate.
- Biorr remains alive, with his rescue deferred until the Iron Ring of Keys is obtained in 1-3.
References for this chapter
- The Lord’s Path (1-2) — Demon's Souls Remake Walkthrough
- The Lord’s Path — Demon's Souls Remake Walkthrough
- Boletaria 1-2 Walkthrough — Demon's Souls English Wiki
- Tower Knight — Demon's Souls English Wiki
- Biorr, of the Twin Fangs – Demon's Souls English Wiki
- Demon's Souls Remake: Biorr — How to Save
- Demon's Souls PS5 Remake Trophy Guide & Roadmap – PowerPyx
Penetrator, 1-3 Route and Reaching Old King Allant (1-3 → 1-4)
Defeat any one Archdemon outside Boletaria to open 1-3, Inner Ward. In 1-3, obtain the Iron Key Ring, return to the Tower Knight area, and use it to free Biorr before fighting Penetrator. Biorr is an especially useful ally because he can distract Penetrator and, if he survives, assist against the Blue Dragon in 1-4. After Penetrator, The King's Tower is available; you do not need all four other Archdemons merely to enter 1-4. However, every Archstone's Archdemon must be defeated before the Nexus opens the final path below the Nexus. Prepare a reliable upgraded weapon, healing items, and a safe way to cross the Blue Dragon's fire. Old King Allant's Soul Drain can remove one Soul Level, so fight patiently and avoid carrying an unnecessarily large soul total.
Open Inner Ward and prepare for the 1-3 route
The fog gate beyond the Tower Knight area opens after you defeat any Archdemon outside Boletarian Palace. Valid examples include the Armor Spider, Flamelurker, Fool's Idol, Old Monk, Adjudicator, Old Hero, Storm King, Leechmonger, or Maiden Astraea, depending on your route. Touch the Boletarian Archstone in the Nexus and select Inner Ward, 1-3.
Before entering, repair your equipment and spend souls that you would be unhappy to lose. A normal upgraded weapon is enough for this area. A shield, bow, spell, or other ranged option is useful for separating soldiers and Red Eye Knights, but do not spread upgrade materials across several unrelated weapons. Carry enough healing for the level and the boss attempt.
- At least one Archdemon outside Boletaria is defeated.
- Your main weapon is repaired and upgraded for your current build.
- You have healing items and have spent or secured unnecessary souls.
Reach the Iron Key Ring in Inner Ward
Leave the Archstone and work through the streets, courtyards, and official checkpoints. Expect crossbow soldiers, shielded soldiers, Blue Eye Knights, Red Eye Knights, dogs, and Fat Officials. Clear enemies in small groups rather than sprinting through the open streets, because a Fat Official's fire attacks can stagger you into crossbow fire or a knight's follow-up.
Continue through the official-controlled route until you reach the Fat Official positioned above the later part of the level. Defeat him and collect the Iron Key Ring. This key is not the key that opens Biorr's cell directly; it opens the locked prison access in the Tower Knight area. If you die after obtaining it, the key remains in your inventory, so you do not need to repeat that part of the route.
- The Fat Official carrying the Iron Key Ring is defeated.
- The Iron Key Ring is in your inventory.
- Biorr remains alive and has not been attacked in the Nexus.
Return to 1-2 and free Biorr before Penetrator
Warp to the Tower Knight Archstone and move through the start of The Lord's Path toward the Tower Knight arena. Near the arena entrance, use the Iron Key Ring on the locked prison door and descend into the cells. A Fat Official is inside or near the prison route. Defeat him and take the Bloody Iron Key, then use it to open Biorr's cell.
Speak to Biorr after opening the cell. He will leave for the Nexus and later appear outside the Penetrator fog gate. Entering the Penetrator arena with Biorr available gives you access to the Brothers-in-Arms trophy condition and provides a powerful distraction. Biorr can also help against the Blue Dragon in 1-4 if he survives the Penetrator battle, so avoid striking him with area attacks or allowing Penetrator to focus on him continuously.
- Biorr's cell is open.
- You have spoken to Biorr after freeing him.
- Biorr is available before entering the Penetrator fog gate.
Use the Inner Ward shortcuts and reach Penetrator
Return to Inner Ward and continue beyond the first official barricades. Pull the available levers and open the gates that connect the later streets back toward the beginning. One route also lets you deal with the official and soldier ambushes without repeatedly crossing the most exposed section. Rescue Ostrava if he is present on your route and you intend to preserve his quest, but do not confuse his rescue with the requirement for freeing Biorr.
Near the end, expect Red Eye Knights, archers, Fat Officials, and narrow approaches where retreating can be safer than trading hits. Open every gate or lever you pass before entering the boss area. These shortcuts are especially valuable if Penetrator defeats you and you need another attempt.
- The major Inner Ward gates and return routes are open.
- You have reached the Penetrator fog gate without killing Biorr or other intended allies.
- Your healing supply is sufficient for the boss attempt.
Defeat Penetrator with short punishments
Penetrator uses fast forward thrusts, broad sword sweeps, and a charged piercing attack. Stay close enough to see his animations but do not remain directly in front of his sword. When he commits to a lunge, roll to the side and answer with one or two attacks. His recovery windows are useful, but they do not justify emptying your stamina bar; keep enough stamina for the next evasive roll.
If Biorr is present, let him attract Penetrator's attention. Attack from the side or rear, then disengage before Penetrator turns. Fire damage, magic, weapon buffs, and ranged attacks can help, but consistent physical damage from an upgraded weapon is reliable. Do not stand in front of Biorr and Penetrator exchanging hits, because Penetrator's thrusts and sweeps can still catch you through the distraction.
After the victory, touch the Penetrator Archstone to receive the Silver Demon Soul. There is no separate Penetrator's Demon Soul reward. Biorr should survive if you want his later assistance against the Blue Dragon.
- You evade the charged thrust and broad sweeps instead of blocking every exchange.
- You preserve stamina for movement and healing.
- Penetrator is defeated and the Silver Demon Soul is collected from his Archstone.
Enter The King's Tower after Penetrator
After Penetrator dies, the Penetrator Archstone provides access to 1-4, The King's Tower. The remaining four Archdemons are not required merely to enter this area. They are required before the game's final Nexus sequence can begin, so you may clear 1-4 now or return later after completing the other worlds.
If you plan to use Biorr, confirm that he survived Penetrator. Repair your weapon, carry healing, and consider using a bow or spell for the Blue Dragon and distant enemies. Do not spend a boss soul on a spell or weapon immediately before deciding whether you still need it for another upgrade path.
- The Penetrator Archstone is active.
- You understand that 1-4 is accessible before all other Archdemons are dead.
- Biorr is alive if you want his Blue Dragon assistance.
Cross the Blue Dragon section and open the remake shortcut
Advance through The King's Tower while separating the Black Phantoms and Red Eye Knights. In the first Blue Dragon section, wait for the fire to pass, then run along the burned roadway toward the safe doorway. If Biorr is alive, he will engage the dragon and draw its attention. Use that opening to cross, or attack the dragon from a safe position with a bow or spell if you intend to kill it.
After reaching the interior tower, look for the lever that opens the side door. This is a PS5 remake shortcut that reduces the dangerous Blue Dragon approach on later attempts. Continue upward through the tower, handling the remaining soldiers and Black Phantom enemies one at a time. Enter the final fog when you are ready for Old King Allant.
- You have reached the protected interior beyond the first dragon-fire crossing.
- The PS5 remake shortcut is opened from its interior side.
- You have enough healing and durability for Old King Allant.
Defeat Old King Allant and avoid Soul Drain
Old King Allant combines rapid sword chains, a forward charge, a jumping shockwave, and a close-range Soul Drain. Fight in the open center of the arena and avoid being trapped against the stairs or walls. When he raises his sword for a charge, dodge to the side or block if your shield can handle the impact. When he leaps, move sideways to avoid the shockwave rather than retreating in a straight line.
His most dangerous move begins when his hand glows blue. Soul Drain has a short tell, then lunges forward; if it connects, it deals heavy damage and removes one Soul Level. Roll sideways as soon as the grab begins and do not heal beside him unless he is clearly recovering. After a missed charge, land only a short attack string before resetting your distance. If you are defeated, the lost soul level is not a separate soul pile that can be recovered, so do not treat the attack as ordinary damage.
Old King Allant awards the False King's Demon Soul. If the other four Archdemons are still alive, continue clearing them before expecting the final endgame seal in the Nexus. Once all five Archdemons are defeated, return to the Nexus and follow the Maiden in Black's instructions to begin the ending sequence.
- You evade the blue-handed Soul Drain rather than trading through it.
- You punish charges and shockwaves only after avoiding their full recovery sequence.
- Old King Allant is defeated and the False King's Demon Soul is in your inventory.
Before you move on
- Penetrator is defeated and the Silver Demon Soul has been collected from his Archstone.
- Biorr was freed before the Penetrator fight if his assistance or the related trophy condition was desired.
- The King's Tower has been entered, and its PS5 remake shortcut has been opened if repeated attempts are expected.
- Old King Allant is defeated and the False King's Demon Soul is in the inventory.
- All five Archdemons are defeated before attempting to begin the final Nexus sequence.
- The player has returned to the Nexus and is ready to follow the Maiden in Black toward the chosen ending.
References for this chapter
- W1-3: Inner Ward - Demon's Souls Walkthrough & Guide
- Boletaria 1-3 Walkthrough - Demon's Souls English Wiki
- Penetrator — Demon's Souls English Wiki
- Boletaria 1-4 Walkthrough - Demon's Souls English Wiki
- Demon's Souls Remake: The King's Tower (1-4) - walkthrough
- Demon's Souls Remake: Old King Allant - boss, how to defeat?
- End Game - Below The Nexus - Demon's Souls English Wiki
- Biorr, of the Twin Fangs – Demon's Souls English Wiki
Stonefang Tunnel — Armor Spider, Flamelurker and Forge Access
Stonefang Tunnel is the second Archstone and the game’s main early test of damage types, fire resistance and careful movement around ledges. In 2-1, use thrust or magic against armored Scale Miners, activate the machinery that opens the route to Blacksmith Ed, then reach the Armor Spider through the outer mine. In 2-2, choose between a short but dangerous route and a longer mine-cart path before preparing for Flamelurker. Magic damage, a light equipment load and fire protection are especially valuable. After defeating Flamelurker, touch the Archstone to receive the Searing Demon Soul and give it to Ed so he can perform advanced upgrades.
1. Enter 2-1 and use the right damage against miners
Take the Stonefang Archstone in the Nexus and enter Smithing Grounds. The early area is filled with Scale Miners wearing heavy protective gear. Thrust attacks and magic are reliable answers; a spear, rapier, thrusting sword, catalyst or other magic source can be more effective than repeatedly striking their armor with a weak slashing weapon. If you use a normal melee weapon, attack from the side or rear and stop before your stamina is exhausted.
The miners throwing rocks from raised positions can alter their aim, so move between cover rather than standing in the open. Pickaxe miners have slow but damaging swings; keep your shield ready, let them commit, then land a short attack string. Dogs can burst from breakable pottery in the adjoining rooms, and Fat Officials can throw firebombs from a distance. Pull enemies into wider ground whenever possible instead of fighting several targets beside a drop.
Keep your primary weapon repaired and carry a ranged option for enemies across gaps or on ledges. Do not treat every ore pickup as a reason to change weapons. Concentrating materials on one dependable weapon will make both Stonefang bosses easier.
- Bring a weapon or spell that can deal thrust or magic damage.
- Use ranged attacks against miners throwing rocks from above.
- Do not fight beside ledges, explosive objects or breakable pottery without checking for ambushes.
2. Open the route to Blacksmith Ed
From the 2-1 Archstone, climb the opening stairs and pass the Filthy Man. The elevator behind him is initially inactive. Continue through the mining rooms, pull the nearby levers and cross the section with the Fat Official and the broken wooden bridge. One lever opens the gate, while the route beyond the fog door leads outside to the machinery that controls the elevator.
When you reach the exterior platform, pull the lever to activate the elevator. Ride it carefully; do not sprint or roll while the platform is moving, because a misplaced step can send you to your death. The elevator route leads down to Blacksmith Ed. He can perform ordinary upgrades using ore, while Boldwin in the Nexus handles only the simpler upgrade services. Ed is the smith you will need for advanced elemental and Demon Soul weapon paths.
You can use Ed before defeating Flamelurker for ordinary upgrades, so stop here if your weapon needs improvement. Do not consume a Demon Soul casually. Several boss souls are also used for spells, miracles or special weapons, and the Searing Demon Soul has a specific purpose in unlocking Ed’s advanced services.
- Activate the exterior machinery and ride the elevator safely.
- Locate Blacksmith Ed before committing to deeper Stonefang exploration.
- Keep Demon Souls in storage until you have checked their upgrade or spell uses.
3. Reach and defeat the Armor Spider
Continue through the outer mine toward the 2-1 fog gate. Fire Lizards appear in the later section, and a lava-filled passage cannot be crossed until the appropriate mechanism is activated. Break through the wagons after the fog gate and use the exterior elevator as a shortcut back toward Ed and the lower part of the level. Before entering the boss tunnel, repair your weapon, restore your healing supply and spend or bank a large soul total if necessary.
The Armor Spider’s tunnel is long and narrow. Its web projectiles can slow you, while its fire attacks cover much of the approach. Small recesses along the walls and the wooden supports near the arena provide useful cover. A bow or spell lets you attack from safety; if you use melee, advance only after the current projectile pattern has ended and keep enough stamina for an immediate retreat.
The spider’s sweeping limb attack can be blocked or avoided by rolling toward the attack at the correct moment. Stay near the center of its body when you have reached melee range to reduce the danger from the crushing strike, then retreat when it begins a new ranged pattern. When it spits black liquid across the floor, do not continue attacking in the burning area. Break away toward the entrance or a safe section of the tunnel and wait for the flames to clear. Defeating the Armor Spider activates the 2-2 Archstone.
- Use wall recesses or wooden supports to reduce incoming fire.
- Do not stand in the black liquid when it ignites.
- Touch the Armor Spider’s Archstone after victory to unlock the next Stonefang travel point.
4. Choose a route through 2-2
Enter the Tunnel City from the Armor Spider Archstone. The first open chamber presents two broad options. The left-hand route follows the mine-cart tracks and is longer but provides a more conventional path with additional ore and items. The right-hand route contains more Scale Miners and leads toward a dangerous series of drops that reaches the boss area more quickly. For a first campaign, use the left route unless you already know the drop sequence.
On the mine-cart path, glowing explosive charges move toward the junction. Keep to one side of the track, let the carts approach, then sprint past them with a full stamina bar. A Fat Official waits beyond the tunnel exit; use the large wooden beam between you and him as cover while attacking from the opposite side.
Continue to the central elevator and descend when the route permits. Expect rock worms, miners and narrow ledges. Rock worms can be attacked safely by targeting the exposed mouth with arrows, magic or an overhead melee strike. When you reach the lava caverns, equip fire protection before collecting optional items. The Purple Flame Shield or Hoplite Shield is particularly useful, but fire resistance does not eliminate the need to avoid the lava and enemy attacks.
The right-hand shortcut is safe to defer. It involves carefully dropping from platform to platform and can kill you through a single mistimed step. It is mainly useful for optional treasure or for players who already know the route.
- Use the left mine-cart route for the safer first-clear path.
- Sprint past explosive carts while staying to one side of the track.
- Equip fire protection before entering the lava sections.
- Ignore the platform-drop shortcut until you are prepared to accept its fall risk.
5. Prepare for Flamelurker
Before the final approach, clear the rock worms and follow the lit path toward the fog door. There is a branching passage containing the Hands of God, but those weapons require high Strength and Faith and are not necessary for a normal first playthrough. Return to the main path, collect the nearby healing items if your inventory allows, and enter the fog only after repairing your weapon and choosing a light enough equipment load for consistent dodging.
Flamelurker is weak to magic and strongly resistant to fire. A Crescent Falchion, Soul Arrow or another magic source is effective. If your main weapon is physical, Enchant Weapon or Sticky White Slime can improve your damage. Do not rely on firebombs, fire weapons or other fire-based offense as your primary plan.
Wear fire-resistant equipment if available, especially the Purple Flame Shield or Hoplite Shield. The shield helps with fire damage but will not save you from his physical swings, leap impacts or explosive attacks. Keep sufficient grass or other healing items for multiple attempts, since the run back through 2-2 can be hazardous.
- Use magic damage whenever practical.
- Avoid fire-based offense against Flamelurker.
- Stay light enough to roll reliably.
- Carry fire protection and enough healing for a sustained fight.
6. Defeat Flamelurker with short exchanges
Flamelurker attacks at close range and can cross the arena quickly. Keep one of the large pillars between you and him whenever you need to recover stamina, reposition or prepare a spell. The pillars are temporary cover, not permanent protection: he can move around them or leap over them, so leave as soon as he gains a clear angle.
When he leaps or slams the ground, roll away from the impact and avoid attacking until the explosive effect has ended. After a missed swing or completed leap, take only one or two attacks, then retreat behind a pillar. Melee fighters should roll at the last practical moment, move to his side and punish the recovery rather than trading blows directly in front of him.
Magic users should cast after Flamelurker has committed to an attack. Fire a spell, then relocate before he closes the distance. If he reaches the pillar, roll away and create space instead of trying to cast at point-blank range. As his health decreases, his aggression becomes more dangerous; shorten your attack strings during the final portion and do not rush because the boss is nearly defeated.
If you die, return through the activated Armor Spider Archstone and use the 2-2 shortcuts you have already opened. Spend excess souls before repeating the attempt, and adjust one factor at a time: lighter equipment, more magic damage, stronger fire protection or additional healing.
- Keep a pillar between yourself and Flamelurker whenever you need space.
- Roll away from leap impacts and ground explosions.
- Punish only after a completed attack, then disengage.
- Use shorter exchanges when Flamelurker’s health is low.
7. Claim the Searing Demon Soul and unlock advanced forging
After Flamelurker dies, touch the Archstone in the boss arena. This grants the Searing Demon Soul and activates the next Stonefang travel point. Return to 2-1 and speak with Blacksmith Ed. Continue speaking with him until he accepts the soul; if he does not accept it immediately, leave the conversation and talk to him again.
Once Ed has accepted the Searing Demon Soul, he can perform advanced upgrades involving Demon Souls and special weapon paths. The soul is not merely a normal upgrade material, so do not sell or consume it elsewhere before visiting Ed. Check the required Demon Souls and ore for any desired weapon before spending additional boss rewards.
Finish Stonefang with one repaired main weapon and, if possible, a backup damage type. A physical weapon paired with a magic weapon or spell is more useful than several partially upgraded weapons. You are ready to move on when both Stonefang boss Archstones are active and Ed’s advanced services are available.
- Touch Flamelurker’s Archstone and receive the Searing Demon Soul.
- Deliver the Searing Demon Soul to Blacksmith Ed in 2-1.
- Confirm that Ed offers advanced Demon Soul weapon upgrades.
- Keep one primary weapon repaired and upgraded for the next Archstone.
Before you move on
- Armor Spider and Flamelurker are defeated.
- The Armor Spider and Flamelurker Archstones are active for Nexus travel.
- Blacksmith Ed is accessible in 2-1.
- The Searing Demon Soul has been delivered to Ed and advanced upgrade services are available.
- Your main weapon is repaired and upgraded, with a reliable magic, thrust or ranged option available for the next Archstone.
References for this chapter
Tower of Latria — Prison of Hope, Maneater and Old Monk
Tower of Latria is divided into three required areas. Prison of Hope, 3-1, is a locked-cell maze where Mind Flayers, arrow traps and missing keys punish rushed exploration. Reach Fool’s Idol, but first kill the worshipper hidden above the boss entrance or the demon can revive. Upper Latria, 3-2, is built around two towers and a suspended heart. Cut both chains, then cross the opened route to the Maneater arena. In 3-3, the Old Monk summons either an online player-controlled Black Phantom or an AI opponent when playing offline. Lord Rydell’s rescue, Yurt’s fate and Latria’s tendency events are optional for campaign completion.
3-1: Enter the Prison of Hope and establish a safe route
Touch the Tower of Latria Archstone in the Nexus and choose Prison of Hope. Move through the first cell corridors slowly. Mind Flayers are the main threat: their soul ray punishes long straight approaches, while their close-range grab can kill a character who stays in front of them. Keep a shield ready, attack from behind when possible, and retreat around a corner whenever the enemy begins casting or raises its tentacles.
The level’s keys hang on walls or sit near bodies in side rooms. Check both sides of every cell block before advancing. Several doors remain locked until you obtain a key from a later section, so mark the location mentally and return after opening the upper routes. Arrow traps are triggered by pressure plates. They cannot normally be removed from the level; instead, approach carefully, use walls and doorways as cover, or trigger the volley from a safe angle before crossing.
- Carry a shield, bow, crossbow or spell for Mind Flayers.
- Search cell walls and side rooms for keys before leaving each section.
- Use corners and doorways to break line of sight from soul rays and arrow volleys.
Open the upper prison and prepare the Fool’s Idol fight
Continue through the prison by collecting keys and activating the levers that open heavy gates. These shortcuts connect previously visited sections and make recovery attempts less dangerous. Before entering the Fool’s Idol fog gate, search the elevated route near the boss entrance. A worshipper is responsible for the Idol’s resurrection mechanic; kill him before committing to the boss fight. If he survives, the real Fool’s Idol can return after being defeated.
Inside the arena, the Idol creates copies that imitate her attacks. Watch for the genuine target and avoid wasting time attacking decoys. Keep moving around the pillars and walls to interrupt incoming magic, and clear supporting enemies when doing so does not expose you to the Idol’s spells. Once the worshipper is dead, defeat the real Fool’s Idol to activate the 3-2 Archstone.
- Kill the hidden worshipper above the Fool’s Idol entrance.
- Keep healing available for the prison approach and boss arena.
- Defeat the genuine Fool’s Idol after removing the resurrection condition.
Optional 3-1 and 3-2 objectives: Freke, Rydell and Yurt
Rescuing Sage Freke is optional but useful if you intend to use sorcery. His cell requires the appropriate key found in the upper prison route. Lord Rydell is also optional. When Latria reaches Pure White World Tendency, a bridge and key become available in 3-2 near the first chain tower. Take that key back to 3-1 to open Rydell’s cell. Do not treat this as required progress toward the Maneaters.
Yurt, the Silent Chief, is suspended in a cage in 3-2. Freeing him is optional and begins a later Nexus event that can lead to NPC deaths if ignored. For a straightforward campaign run, leave him imprisoned until you are ready to manage that consequence. Neither Rydell’s rescue nor Yurt’s release is needed to reach or defeat the Old Monk.
- Rescue Freke only if you want his spell services.
- Pursue Rydell only while deliberately working toward Pure White World Tendency rewards.
- Leave Yurt imprisoned if you want to avoid his optional Nexus sequence.
3-2: Cross Upper Latria and cut both chains
From the Fool’s Idol Archstone, enter Upper Latria and follow the walkways around the first tower. Gargoyles can carry you and drop you onto narrow platforms, so fight away from ledges and keep a ranged weapon or spell ready for airborne enemies. Cross bridges with the camera aimed along the path, and do not begin attacks while standing at an edge.
The suspended heart is held by two large chains. Follow the tower routes to reach each chain mechanism, then strike the chain until it breaks. The routes contain drop-offs, gargoyles and ambushes, so heal before crossing exposed bridges rather than stopping in the middle of them. After both chains are destroyed, the heart falls and the route to the Maneater Archstone opens.
- Bring ranged damage for airborne Gargoyles.
- Stay near the center of bridges and solid platforms.
- Destroy both chains before searching for the Maneater fog gate.
Defeat the Maneaters on the rooftop
The Maneater encounter begins with one demon and adds a second during the fight. The rooftop has lethal drops and a central brazier that serves as a useful positioning landmark. Keep the brazier between you and a charging Maneater when possible, but do not assume it makes you invulnerable; attacks can still reach around it. Let the demon return to the center instead of chasing it toward an edge.
Maneaters can leap, fire a ranged soul attack and strike with their snake tails at close range. Punish the recovery after a landing or missed lunge, then disengage before the next leap. When the second Maneater arrives, stop attacking whenever both demons have a clear line to you. Circle toward open ground, heal only after creating distance, and attack the isolated demon briefly before retreating. Magic, weapon buffs and ranged attacks can shorten the period in which both are active, but survival and escape space matter more than maximum damage.
- Use the brazier as a landmark, not as a guaranteed shield.
- Do not roll or chase toward the rooftop edge.
- During the two-enemy phase, attack only with a visible retreat route.
3-3: Enter and complete the Old Monk encounter
After defeating the Maneaters, use their Archstone to reach the Ivory Tower. Climb the spiral approach and proceed until the Old Monk summons you into the boss arena. With online play enabled, the boss slot can be filled by a real player acting as a Black Phantom. Treat this as a player-versus-player fight: maintain spacing, punish missed heavy attacks, and avoid slow attacks when the phantom is already within striking range.
If no player occupies the slot, the game uses an AI-controlled Black Phantom. The offline opponent is more predictable than a human invader, so keep your shield ready, bait an attack, then punish its recovery. Magic and ranged attacks are useful only when you have room to reposition; do not stand in a doorway or narrow stair where the phantom can trap you. If you want the predictable AI version, start the game in offline mode before entering the Old Monk approach. Defeating the encounter awards the Yellow Demon’s Soul and completes Latria’s required progression.
- Expect a human Black Phantom online or an AI opponent offline.
- Fight in open space and preserve a route around the opponent.
- Collect the Yellow Demon’s Soul after the Old Monk encounter.
Before you move on
- Fool’s Idol has been defeated after its hidden worshipper was killed, and the Fool’s Idol Archstone is active in the Nexus.
- Both chains in Upper Latria have been destroyed, the suspended heart has fallen, and the Maneater Archstone is available.
- The Maneaters have been defeated and the route to the Ivory Tower is open.
- The Old Monk encounter has been cleared and the Yellow Demon’s Soul has been collected.
References for this chapter
- World 3 — Tower of Latria — Demon's Souls English Wiki
- Tower 3-1 Walkthrough — Demon's Souls English Wiki
- Old Monk — Demon's Souls English Wiki
- Black Phantoms - Demon's Souls English Wiki
- Demon's Souls Walkthrough: Tower of Latria 3-1 — GamesRadar+
- W3-2: Upper Latria — Demon's Souls Walkthrough & Guide
- Demon's Souls Trophy Guide & Road Map
Valley of Defilement — Disease, Leechmonger and the Dragon God lead-in
The Valley of Defilement contains 5-1, the Depraved Chasm; 5-2, the Swamp of Sorrow; and 5-3, the Rotting Haven. Poison, plague, poor visibility, narrow platforms and slowed swamp movement reward careful pulls, ranged attacks and controlled retreats. Complete the required Valley route by defeating Leechmonger, Dirty Colossus and Maiden Astraea. The Dragon God is not in the Valley: it is the Archdemon of Stonefang Tunnel 2-3, reached from the Flamelurker Archstone after clearing 2-1 and 2-2. Valley tendency events, including Istarelle, Selen Vinland and Black Phantom Garl Vinland, are optional and can be deferred during a normal campaign completion run.
Prepare cures, mobility and a way to separate enemies
Before entering 5-1, place Royal Lotuses and Widow’s Lotuses in an item slot. Royal Lotus cures poison, which is common in 5-2, while Widow’s Lotus cures plague, which becomes especially important in 5-3. Carry healing grass and a bow, crossbow or offensive spell so you can pull enemies one at a time on narrow walkways.
Use equipment that preserves normal movement and stamina. Heavy armor can help against physical hits, but it does not prevent falls, poison buildup or being trapped in the swamp. The Sodden Ring is an optional remake item that improves movement through deep swamp; use it if you have obtained it, but do not postpone campaign progress to chase tendency-specific equipment. Keep a fire-damaging option available for Leechmonger and Dirty Colossus.
- Royal Lotuses for poison
- Widow’s Lotuses for plague
- Healing items and a ranged option
- A weapon upgraded for your main attribute
- Sodden Ring if available
Descend 5-1 and open the Depraved Chasm shortcut
From the Archstone, follow the wooden platforms downward and inspect each landing before crossing. Depraved Ones can attack with poisoned weapons, Giant Depraved Ones can stagger or knock you from platforms, and rats can leave a plague cloud after they die. Keep your shield ready around corners, but avoid blind backpedaling because most fights occur beside fatal drops.
Proceed through the plank and platform sections until you reach the wooden obstruction that can be pushed down to form the 5-1 shortcut. Open it before attempting the boss. Clear enemies on bridges before fighting, and lure Giant Depraved Ones onto wider landings whenever possible. Continue downward through the tick and rat sections to the Leechmonger fog gate.
- Scout each landing before crossing
- Separate Giant Depraved Ones with ranged attacks
- Avoid fighting on narrow bridges
- Push down the wooden shortcut
- Stay away from plague clouds after killing rats
Defeat Leechmonger while limiting its regeneration
Leechmonger is vulnerable to fire. Turpentine, fire spells and fire-based weapons can shorten the fight, although an upgraded physical weapon remains sufficient. The boss regenerates when left alone, so maintain pressure rather than retreating for long periods.
For melee, stay near the body, circle around its attacks and strike during recovery. For ranged combat, use the lower wooden platforms at the side of the arena and keep enough distance to avoid its leech projectiles. Do not stand so far away that the boss becomes idle and restores its health. After victory, touch the Leechmonger Archstone to unlock 5-2.
- Use fire damage if available
- Keep pressure on the boss
- Use the side platforms for a controlled ranged fight
- Avoid standing in the sludge pools
- Activate the Leechmonger Archstone
Cross 5-2 by treating every dry platform as a checkpoint
The opening swamp section restricts normal rolling, slows movement and allows enemies to move more freely than you can. Follow the outer edge when possible and use islands, wooden structures and raised platforms as staging points. If poison activates, keep moving toward dry ground and use Royal Lotus there instead of trying to fight a group in the water.
Draw Giant Depraved Ones individually with arrows or spells. Do not fight them in deep water unless there is no alternative. A Thief’s Ring or stealth spell can help when recovering souls, but do not sprint through an unexplored section while poisoned: identify the next island, ladder or platform first. Continue past the first fog gate and follow the raised route toward the shanty settlement.
- Stay near the swamp’s edge when practical
- Use islands and platforms to cure poison
- Pull Giant Depraved Ones individually
- Do not rely on normal rolling in deep water
- Use stealth for soul recovery if necessary
Lower the 5-2 shortcut before challenging Dirty Colossus
Continue through the shanty and raised-platform sections until you reach the later swamp route. Find the wooden walkway that can be knocked down near the end of the level. Lowering it creates the important shortcut back toward the 5-2 Archstone and saves most of the swamp crossing after a death.
Dirty Colossus is weak to fire. Turpentine, fire spells and fire weapons are useful, while an upgraded physical weapon also works. Stay behind or beside the boss, attack after its slow swings and retreat when it releases a cloud around its body. If flies or plague effects cover you, move away before healing. Ranged attacks can be used from behind solid objects, but reposition whenever the boss’s projectiles change angle. Collect the Eroded Demon’s Soul after victory.
- Reach the later shanty route
- Lower the wooden shortcut
- Bring fire damage if available
- Leave the cloud before healing
- Collect the Eroded Demon’s Soul
Complete 5-3 and defeat Maiden Astraea
Carry Widow’s Lotuses into 5-3 and avoid prolonged contact with plague-inflicting enemies. Follow the route through the swamp and narrow ground, using wide attacks or ranged damage to prevent groups from surrounding you. The path ends in the arena containing Garl Vinland and Maiden Astraea.
For the direct campaign route, approach Garl, defeat him, then follow the path behind his position down to Astraea. Garl has strong attacks and a large shield, so preserve stamina, punish missed swings and avoid being pushed into the swamp. You can also kill Astraea from range without first killing Garl, but this requires careful positioning and may cause Garl to pursue you. When Astraea dies, touch her Archstone to return to the Nexus and collect the Pureblood Demon’s Soul.
The Valley’s tendency objectives are optional. At high White World Tendency, Istarelle and Selen Vinland become available through their respective events. At high Black World Tendency, Black Phantom Garl can appear in 5-3 after Astraea has been defeated and her soul collected. None of these events is required for the main ending.
- Carry Widow’s Lotuses into 5-3
- Use arena edges and ranged attacks to control plague enemies
- Defeat Garl or kill Astraea from range
- Collect the Pureblood Demon’s Soul
- Return to the Nexus through Astraea’s Archstone
From the Flamelurker Archstone, enter Stonefang 2-3
The Dragon God is a separate Stonefang objective, not a Valley boss. Return to the Nexus, touch the Archstone of the Burrow King and select the Flamelurker Archstone. Enter the fog gate at the bottom of the stairs. The short entrance hall contains crystal lizards and leads directly into the Dragon God arena; there is no ordinary enemy route to clear before the encounter begins.
Equip a reliable weapon and place healing items in an accessible slot. The Dragon God sequence is primarily about remaining outside its line of sight, not trading attacks. Its eyes indicate awareness: when they are bright red, it has detected you; when they are yellow, you are hidden. Use the large stone pillars and other solid cover as movement anchors.
- Return to the Nexus after Astraea
- Choose the Archstone of the Burrow King
- Select the Flamelurker Archstone
- Enter the 2-3 fog gate
- Use pillars and rubble as cover
Reach and activate the first ballista
At the start of the arena, move to the right while staying behind the available cover. The first route is blocked by rubble. Wait until the Dragon God looks away, step out only long enough to attack the rubble, then immediately retreat behind the previous pillar. Repeat this movement rather than trying to break the obstruction in one exposed attempt.
Once the rubble is destroyed, continue along the cleared right-side route to the first ballista. Interact with it to fire the harpoon into the Dragon God. The shot pins the demon and changes the encounter, but it does not finish the fight. Do not assume the arena is safe afterward; the second ballista still must be reached.
- Move right from the entrance
- Break rubble only during a safe opening
- Return behind cover after each exposed action
- Reach the first ballista
- Fire the first harpoon
Cross to the second ballista and fire it
After the first harpoon fires, use the opened route and cross toward the opposite side of the arena. Continue using pillars and walls to break the Dragon God’s line of sight. If its eyes turn red, stop advancing and retreat to the last cover position rather than attempting to outrun the attack in the open.
Clear the second rubble blockage during another safe opening. The route leads to the second ballista on the opposite side. Activate it to fire the second harpoon. With both harpoons embedded, the Dragon God collapses and its head becomes reachable. If you die before firing both, the encounter resets, but you can repeat the same cover route from the Flamelurker Archstone without replaying 2-1 or 2-2.
- Use the first ballista route to reach the opposite side
- Retreat whenever the eyes turn red
- Break the second rubble obstruction
- Activate the second ballista
- Remember that death resets the ballista sequence
Damage the Dragon God’s head and finish Stonefang
Once the Dragon God is pinned, follow the newly safe path toward its head. Attack the glowing vulnerable areas on the head with your strongest reliable weapon, spell or ranged attack. Stay alert for remaining environmental hazards and avoid wasting time on ineffective body strikes. Continue damaging the head until the demon dies.
Touch the Archstone that appears after victory. Confirm that you received the Dragon Demon’s Soul and that the Shrine of the Dragon God is now available from the Stonefang Archstone. The Dragon God’s defeat completes Stonefang’s Archdemon objective; it does not replace the Valley’s required Leechmonger, Dirty Colossus and Maiden Astraea encounters.
- Reach the pinned Dragon God’s head
- Attack the vulnerable head area
- Defeat the Dragon God
- Collect the Dragon Demon’s Soul
- Activate or confirm the Shrine of the Dragon God Archstone
Before you move on
- Leechmonger, Dirty Colossus and Maiden Astraea have been defeated.
- The 5-1 wooden shortcut and 5-2 lowered walkway have been opened.
- The Pureblood Demon’s Soul and Eroded Demon’s Soul have been collected or deliberately reserved.
- The Valley Archstone returns you to the Nexus after Astraea’s defeat.
- The Dragon God has been defeated from the Flamelurker Archstone route.
- Both Dragon God ballistae were activated before the final head-damage phase.
- The Dragon Demon’s Soul has been collected and the Shrine of the Dragon God Archstone is available.
- Istarelle, Selen Vinland and Black Phantom Garl objectives have been completed or intentionally deferred.
References for this chapter
Shrine of Storms — Storm blasts, Adjudicator and Maiden Astraea connections
The Shrine of Storms is cleared through 4-1 Island’s Edge, 4-2 The Ritual Path, and 4-3 Altar of Storms. Its required bosses are the Adjudicator, Old Hero, and Storm King. Flying Storm Beasts fire crystal projectiles across exposed ground, so use rock formations, walls, and narrow approaches as cover. A bow is valuable throughout the Archstone, while the Thief Ring makes Old Hero much safer. The Shrine also contains tendency-dependent content involving Satsuki and the Magic Sword “Makoto.” Maiden Astraea is not part of this Archstone: she is the final boss of the Valley of Defilement, where Garl Vinland guards her. Her death is required to complete the Valley, but it does not directly decide the game’s final Maiden in Black ending choice.
Enter Island’s Edge and control the Storm Beast fire
Touch the fourth Archstone in the Nexus and choose Island’s Edge. Bring healing grass, a shield if your build uses one, and a bow or other ranged weapon. Silver Skeletons are dangerous at close range because they roll quickly and can follow the roll with a strong slash. Blunt weapons are effective against them, but any reliable weapon works if you punish their recovery instead of trading hits.
Storm Beasts circle above the cliffs and fire crystal spikes in straight lines. Do not fight skeletons in the middle of an exposed firing lane. Pull ground enemies behind walls or rock formations, then deal with them before crossing. When several Storm Beasts are active, wait for a volley to pass and sprint diagonally from one solid obstruction to the next. Keep your ranged weapon ready for a Storm Beast that repeatedly covers the route you need.
- Carry a bow, crossbow, spell, or another ranged option.
- Use walls and rock formations to interrupt Storm Beast projectiles.
- Clear enemies near ledges before collecting nearby items.
Clear 4-1 and reach the Adjudicator
Continue uphill through the ruined buildings and stairways. Watch corners for ambushing skeletons and avoid backing toward cliffs. The path eventually opens near the Adjudicator’s fog gate. Clear the immediate area before entering so that a failed attempt does not require another fight through the same ambushes.
The Adjudicator’s arena is a vertical room. Once the boss is defeated, touch the Archstone to unlock the Adjudicator Archstone, which provides access to 4-2 The Ritual Path. The Swollen Demon’s Soul is awarded for the victory and can later be used for certain spells, miracles, or weapons, so do not consume it casually if you plan to use boss-soul rewards.
- Keep enough healing for the boss rather than spending everything on the approach.
- Open the route to the fog gate before attempting repeated fights.
- Touch the Adjudicator Archstone after victory.
Defeat the Adjudicator by targeting the wound
The Adjudicator’s main melee vulnerability is the large bleeding wound on his left side. From the lower floor, circle around his body and strike the wound after the cleaver swing finishes. Avoid standing directly in front of him, where the cleaver and tongue attacks are easiest to connect. Do not remain underneath the boss longer than necessary; use the open space to reset your position when the camera or his body blocks your view.
When enough damage is dealt to the wound, the Adjudicator collapses. Move to the head and attack the bird, which is the clearest damage target while he is down. Ranged and magic characters can instead attack the bird from the upper level, but the fight is usually slower. Heal only after moving away from the boss’s body and confirming that the next cleaver swing is not already beginning.
- Circle toward the wounded side rather than striking the armored body.
- Bait or evade the cleaver before attacking.
- Attack the bird when the Adjudicator collapses.
- Confirm that the Swollen Demon’s Soul has been awarded.
Use the Ritual Path’s side routes before facing Old Hero
Enter 4-2 through the Adjudicator Archstone. The opening route contains Reapers, Silver Skeletons, Storm Beasts, and several dangerous drops. Pull enemies with arrows when possible instead of fighting multiple targets in the open. If you find Patches the Hyena’s trap, survive the drop and speak with him afterward; he can return to the Nexus. The pit area also contains Saint Urbain. Rescue him by defeating the Black Phantom guarding the area, then speak with Saint Urbain so he returns to the Nexus and becomes available for miracle services.
A side route also provides access to a White Bow, which is useful if your build has enough Dexterity to use it effectively. Continue through the tunnels, the Storm Beast-exposed cliff route, and the slug-filled passages until you reach the Old Hero’s fog gate. Equip the Thief Ring before entering if you have it.
- Rescue Saint Urbain if you want his later miracle services.
- Use ranged attacks to pull Reapers and skeletons individually.
- Equip the Thief Ring before entering Old Hero’s arena.
Defeat Old Hero with stealth and short punishments
Old Hero is blind and primarily locates you through sound. With the Thief Ring equipped, walk rather than sprint, avoid unnecessary rolling, and do not attack repeatedly. Approach from behind, wait for a completed swing, land one or two attacks, then retreat and resume walking. If he begins searching, create distance and let him lose your position before approaching again.
His sword swings deal heavy damage and can catch a greedy follow-up. Keep the arena’s open space between you and the boss, and heal only after he has committed to a distant swing or lost track of you. A bow or spell can work from the entrance or behind cover, but you still need to stop attacking and let him settle after he reacts to the sound. Defeating him grants the Hero Demon’s Soul and opens the route to 4-3.
- Walk whenever possible.
- Use the Thief Ring to reduce detection range.
- Limit each opening to one or two attacks.
- Retreat when Old Hero begins searching or enraging.
Enter Altar of Storms and defeat the Storm King
After Old Hero, enter 4-3, the Altar of Storms. The arena is a broad open shoreline with ruined structures and rock formations. Pick up the Stormruler from the raised rocky area before committing to the fight. Equip it in a convenient weapon slot. Its special attack produces the large sweeping strikes needed to hit airborne Storm Beasts and the Storm King, but each swing consumes substantial stamina and leaves you exposed if used without spacing.
The smaller Storm Beasts attack from different angles and can make the arena difficult to read. Stay near the ruins or rock formations when a volley approaches, step into open space only long enough to swing Stormruler, then return to cover. If the Storm King is not yet presenting a safe target, eliminate nearby Storm Beasts with Stormruler, a bow, or strong ranged magic. A ranged build can ignore Stormruler and attack from cover, but must still keep moving as the flock changes direction.
After the Storm King is defeated, touch the Archstone to receive the Storm Demon’s Soul. The Shrine’s required sequence is now complete.
- Collect Stormruler before beginning the main exchange.
- Use cover between attacks instead of standing in the open.
- Manage stamina before each Stormruler swing.
- Touch the final Archstone after victory.
Handle Satsuki, Makoto, and tendency events deliberately
Shrine of Storms has a Pure White World Tendency event involving Satsuki. At Pure White World Tendency, Satsuki appears near the beginning of 4-1 and asks about the Magic Sword “Makoto.” In 4-2, the sword becomes available through the tendency-dependent route in the area where Patches sends you into a pit. Return to Satsuki with Makoto in your inventory and give it to him to complete the event. Because Satsuki’s behavior and the sword’s accessibility are tied to World Tendency, check the World Tendency screen before making deaths in body form, killing tendency NPCs, or handing over the sword.
The Pure Black version of the Shrine also has its own danger and rewards, including a Black Phantom Satsuki route and a Primeval Demon route. Do not mix a first campaign clear with tendency farming unless you have recorded your current state and understand which event you are pursuing. These events are optional for reaching the Storm King and completing the main campaign.
- Check Shrine of Storms World Tendency before pursuing Satsuki.
- Do not give Makoto away until you are ready to resolve the event.
- Treat Pure White and Pure Black objectives as separate planned routes.
Understand the separate Maiden Astraea connection
Maiden Astraea is not located in the Shrine of Storms. She is the archdemon of 5-3, Rotting Haven, in the Valley of Defilement. Garl Vinland guards her, and the Valley’s main progression requires Astraea to die. You can fight Garl first and then Astraea, or use a route that allows Astraea to be attacked from range while avoiding a direct fight with Garl. Her death awards the Pureblood Demon’s Soul and completes the Valley’s final stage.
Garl’s sister, Selen Vinland, appears in Valley of Defilement tendency events. Preserve NPCs and record Valley World Tendency if you intend to pursue those rewards. Astraea’s encounter is not the game’s final ending decision. The decisive ending interaction occurs later with the Maiden in Black after Old King Allant, so completing or postponing Valley tendency events does not by itself select the good or bad ending.
- Do not search Shrine of Storms for Astraea.
- Preserve Garl and Selen if pursuing Valley tendency content.
- Treat Astraea’s death as Valley progression, not as the final ending choice.
Before you move on
- The Swollen Demon’s Soul has been awarded after defeating the Adjudicator.
- The Hero Demon’s Soul has been awarded after defeating Old Hero.
- The Storm Demon’s Soul has been awarded after defeating Storm King.
- The Nexus can travel to the Adjudicator Archstone and the Storm King Archstone.
- The Shrine of Storms boss sequence is complete: Adjudicator, Old Hero, then Storm King.
- Any planned Satsuki, Makoto, or Pure Black Shrine events have been recorded before changing World Tendency.
- Any planned Garl or Selen Vinland objectives have been recorded separately for the Valley of Defilement.
References for this chapter
- W4-2: The Ritual Path - Demon's Souls Walkthrough & Guide
- W4-3: Altar of Storms - Demon's Souls Walkthrough & Guide
- World 4 — Shrine of Storms - Demon's Souls English Wiki
- Satsuki - Demon's Souls English Wiki
- Selen Vinland - Demon's Souls English Wiki
- Strategy Guide for Demon's Souls Bosses on PlayStation 5
World & Character Tendency, Fractured Mode, and Respec/Character Storage
Demon’s Souls tracks two separate alignment systems. World Tendency belongs to one Archstone at a time and changes enemy difficulty, rewards, NPC appearances, routes, and special events. Character Tendency follows your character across every Archstone and is affected mainly by named Black Phantom victories, invasions, and killing important friendly characters. For a safer first campaign, explore in Soul Form: dying in Body Form inside a world shifts that world toward Black, while dying in the Nexus does not. The PS5 remake adds Fractured World, a mirrored version of the stages that reverses navigation without replacing the main campaign or fundamentally changing boss rules. The Nexus statue also offers appearance customization and forgiveness. It does not provide a normal stat respec, and the finished remake does not offer a practical character-storage system for swapping alternate builds. Use Stockpile Thomas for item storage and plan any major build change around a new character or a fresh long-term investment.
Read both tendency displays before changing an Archstone
Pause the game and open the Tendency tab. The World Tendency display shows the condition of the five Archstones separately, while the Character Tendency display shows the alignment of your current character. Do not use the eye-shaped HUD symbol as a replacement for these screens; it represents a different mechanic.
Each world moves along a spectrum from Pure White through neutral shades to Pure Black. The brighter the Archstone icon, the closer that world is to White Tendency; the darker it is, the closer it is to Black Tendency. Character Tendency uses its own indicator and does not automatically match the state of the world you are exploring.
- Open the pause menu and locate the Tendency tab.
- Check the individual Archstone before attempting a White or Black event.
- Check Character Tendency separately before pursuing character-specific rewards.
Protect World Tendency by exploring in Soul Form
A death in Body Form outside the Nexus moves the Archstone where you died toward Black Tendency. This can make enemies tougher and can eventually activate Black World events. A death in Soul Form does not apply that World Tendency penalty, so the safest routine after regaining your body is to return to the Nexus and die there before resuming ordinary exploration.
After defeating a boss, you regain Body Form. If you are trying to preserve a bright or Pure White world, return to the Nexus before entering another area and deliberately die there if necessary. This costs the temporary Body Form health benefit, but it prevents an accidental death in the next Archstone from darkening that world.
World Tendency changes may not look different until the area is reloaded. After a boss victory, Body Form death, or other tendency-affecting event, return to the Nexus or travel through the Archstone, then check the Tendency tab again. Keep a written note of each world if you are attempting several events in one playthrough.
- Use Soul Form for normal level attempts when tendency matters.
- After a boss restores Body Form, die in the Nexus before risky exploration.
- Reload or revisit the Archstone before judging whether its tendency changed.
Understand what White and Black World Tendency actually change
White World Tendency generally reduces enemy threat and can unlock special NPC encounters, passages, items, and interactions. Several named characters, including Ostrava, Scirvir, Lord Rydell, Satsuki, and Selen Vinland, have events connected to particular world states. These events usually require a very bright state, often Pure White, rather than merely a slightly lighter neutral shade.
Black World Tendency increases the danger of ordinary enemies and improves some soul and item rewards. At the darkest states, named Black Phantoms and a Primeval Demon can appear in specific locations. These are optional encounters, not requirements for completing the campaign, and they should be attempted only after you have identified the spawn location and secured a route back to a shortcut.
Do not assume that killing one special Black event automatically completes every Black reward. The named Black Phantom and Primeval Demon are separate encounters, and travelling away or reloading at the wrong point can disrupt a planned sequence. If you are not following a complete tendency plan, leave these events for a later run.
- Treat tendency events as optional unless your collection goal requires them.
- Confirm the exact Archstone and required tendency shade before searching for an NPC.
- Prepare healing, equipment, and a shortcut before entering a Black Phantom route.
Keep Character Tendency separate from the world meters
Character Tendency travels with your character and affects the whole save rather than one Archstone. Defeating named Black Phantoms generally moves it toward White. Killing certain friendly or quest-related NPCs, invading other players and winning, and other hostile actions can move it toward Black. A Body Form death by itself changes World Tendency, not Character Tendency.
Character Tendency can affect certain character-specific events and the performance of equipment tied to alignment. Avoid attacking Nexus residents as a test, and do not kill a helpful NPC merely to obtain souls. If an NPC becomes hostile because you struck them accidentally, the Statue of Reflection can offer a forgiveness service after it has been unlocked; forgiveness repairs hostility but does not undo a dead NPC, reverse a completed tendency event, or restore spent levels.
- Do not infer Character Tendency from an Archstone’s brightness.
- Keep important NPCs alive until their dialogue and rewards are finished.
- Use forgiveness only for hostility that can still be repaired.
Unlock and use Fractured World at the Nexus statue
After the statue becomes available in the Nexus, approach the Statue of Reflection on the ground floor near the central area. Interact with it and choose the Fractured World option. In the launch version, the statue required an offering of 25,000 souls to unlock its services. Later PS5 updates may change or remove that charge, so use the amount displayed by your current game build rather than assuming the launch price is still required.
Fractured World mirrors the stages horizontally. Familiar doors, turns, item approaches, enemy positions, and landmarks can appear on the opposite side from the standard layout. It is an optional navigation challenge and is not needed to reach the ending. The main bosses remain part of the campaign, and the mode does not turn the game into a separate story route.
Leave Fractured World by returning to the same statue and selecting the option to disable it. When following a standard walkthrough, turn the mode off first; otherwise directions based on the normal map will appear reversed. Ceramic Coins and the remake’s hidden-door content are associated with Fractured World, but they are optional collection objectives rather than campaign requirements.
- Find the Statue of Reflection in the Nexus.
- Pay the displayed offering if the current build requests one.
- Toggle Fractured World off before following normal-map directions.
Do not mistake appearance and forgiveness services for stat respec
The Statue of Reflection can alter your character’s appearance and provide a forgiveness service. It does not refund levels or let you redistribute Vitality, Intelligence, Endurance, Strength, Dexterity, Magic, Faith, or Luck. The remake therefore has no ordinary Nexus menu where a completed melee build can be converted into a full magic build by reclaiming spent points.
If your attributes no longer suit your weapon, first choose equipment that matches the statistics you already have. A new weapon path is usually cheaper than scattering upgrade materials across several incompatible weapons. If the character has become unsuitable for your intended build, continue with a revised plan or create a new character; do not spend souls at the statue expecting a conventional respec screen.
A separate character-storage or build-swapping service is not available in the finished PS5 remake. Early reports about storing alternate characters should not be used as a gameplay instruction. The PS5 system save-data tools manage the game’s save data externally and are not an in-game character-management feature.
- Use the statue only for its displayed appearance, forgiveness, or Fractured World services.
- Do not expect spent level-up points to be returned.
- Choose a new weapon or new character if your build needs a fundamental change.
Use Stockpile Thomas for items and verify tendency events
Stockpile Thomas in the Nexus stores weapons, armor, ammunition, materials, and consumables. Deposit spare equipment before a tendency run so your active inventory remains manageable, but remember that this is item storage rather than character storage. The Maiden in Black remains your level-up contact, and neither Thomas nor the statue can switch you between alternate builds.
Before entering a tendency-dependent route, confirm the intended Archstone’s meter, your Character Tendency if the event is character-based, and the exact requirement for the NPC, Black Phantom, Primeval Demon, or passage. After the event, collect the reward before leaving and check the tendency display again. This prevents a mistaken reload or accidental Body Form death from invalidating the next objective.
- Deposit excess equipment with Stockpile Thomas.
- Verify World Tendency and Character Tendency before the event.
- Confirm that the required NPC, special enemy, item, or passage actually appeared.
Before you move on
- You can open the Tendency tab and distinguish the five separate World Tendency indicators from the Character Tendency display.
- You know to explore in Soul Form when protecting an Archstone from accidental Black Tendency.
- You can identify the White and Black consequences that matter to your planned NPC, route, reward, or optional encounter.
- You have found the Statue of Reflection and understand that its services cover appearance, forgiveness, and Fractured World rather than ordinary stat respec.
- You can enter and leave Fractured World without confusing mirrored navigation with the standard campaign map.
- You have stored spare equipment with Stockpile Thomas and understand that the remake does not provide in-game character storage or free stat redistribution.
- Before each tendency-dependent objective, you verified the relevant meter and confirmed that the required event, enemy, NPC, item, or passage appeared.
References for this chapter
- Demon’s Souls game tips for beginners - PlayStation
- Demon's Souls Remake - World Tendency Guide - SAMURAI GAMERS
- World Tendency - Demon's Souls English Wiki
- Demon's Souls PS5 - How to Change World Tendency
- Demon's Souls World Tendency explained | GamesRadar+
- How to unlock Fractured Mode in Demon’s Souls remake
- Demon's Souls Remake: Fractured world - what is it?
- Demon's Souls: Can You Respec Stats? Answered
- Demon's Souls On PS5 Changes Rolling, the Nexus, And More But Keeps The Old Monk Fight And Some Of The Original Cast
Souls, Levels, Upgrading, and the Blacksmith
Spend souls before dangerous attempts, retrieve bloodstains only when the route is safe, and use Stockpile Thomas to keep ore and spare equipment out of your active inventory. After Phalanx, the Maiden in Black can level you. Boldwin in the Nexus handles basic Hardstone, Sharpstone, and Clearstone work. Blacksmith Ed in Stonefang Tunnel provides the complete upgrade service; after Flamelurker, give him the Searing Demon’s Soul to unlock boss-soul forging, Colorless Demon’s Soul upgrades, and the remaining advanced paths. Choose one main weapon, match its path to your attributes, and inspect the required branch level before spending rare materials.
Spend souls before risky expeditions
Souls serve as both experience and currency. Use them to level with the Maiden in Black, buy equipment and consumables, repair gear, or upgrade weapons. Leveling is unavailable at the start of the game. Defeat Phalanx, speak with the Maiden in Black, follow the Nexus conversation involving the Monumental, and return to the Maiden. From then on, she can raise your attributes whenever you are in the Nexus.
When you die, your unspent souls are left at the death location as a bloodstain. Touch the bloodstain to recover them. If you die again before recovering it, the earlier bloodstain and its souls are lost. Before entering an unexplored area or a boss fog, spend enough souls that a failed attempt will not delay your next level or weapon upgrade. If you are carrying a large balance, use the Nexus as a banking stop rather than forcing a recovery run through an unfamiliar enemy group.
Soul Remains and consumable soul items are not the same as your active soul total. They remain in your inventory after death, so they can be saved for a later purchase or level. Keep boss Demon’s Souls intact until you have checked their possible spell, miracle, and weapon uses; consuming one for ordinary souls can prevent that use for the rest of the playthrough.
- Level up or purchase supplies before a high-risk run when possible.
- Recover a bloodstain only after judging the route safer than the original attempt.
- Keep boss Demon’s Souls unconsumed until your build plan is settled.
Use Stockpile Thomas to organize ore and equipment
Stockpile Thomas is in the Nexus beside Blacksmith Boldwin. He stores spare weapons, armor, ammunition, consumables, and upgrade materials. In the PS5 remake, you can also send items to storage from inventory when weight becomes a problem. This lets you leave an Archstone with only the weapon, shield, ammunition, and healing items needed for the next objective.
Ore stored with Thomas remains available to both Boldwin and Ed when you open their upgrade menus. You therefore do not need to carry every shard, chunk, or pure stone to the blacksmith. Deposit duplicate weapons and excess ore after a farming trip, but leave your chosen weapon and any immediately needed supplies accessible. Thomas’s storage is also retained into New Game Plus, so it is safe to use as a long-term materials bank.
Storage protects physical items, not active souls. A large soul balance is still lost on death unless you recover the bloodstain. Do not kill Thomas: doing so prevents access to his storage for the remainder of that playthrough.
- Deposit spare ore and duplicate equipment before entering a new Archstone.
- Keep your primary weapon, shield, catalyst or talisman, ammunition, and healing items available.
- Use Thomas for long-term storage instead of filling your character inventory with every drop.
Use Boldwin for early repairs and basic upgrades
Blacksmith Boldwin stands in the Nexus next to Thomas. He repairs equipment and provides the early upgrade service for the normal Hardstone and Sharpstone paths, plus the Clearstone Quality path when the weapon supports it. His service is enough to strengthen a dependable starting weapon through the opening areas, but he cannot replace Ed for the full upgrade system.
Hardstone and Sharpstone are the ordinary physical upgrade materials. Depending on the weapon, one of these paths can continue to +10. Clearstone creates a Quality weapon that balances Strength and Dexterity scaling and normally reaches +5. Do not assume that every weapon accepts every path: the upgrade menu is the authority for the weapon in your hands.
Use Boldwin for repairs and inexpensive early improvements while you are learning your weapon’s moveset. Do not spend rare stones on several experimental weapons. A single weapon at a useful upgrade level will usually help more than a collection of unupgraded alternatives.
- Repair your equipment before a long Archstone run or boss attempt.
- Use Hardstone, Sharpstone, or Clearstone only after confirming that the resulting path suits your character.
- Keep one primary weapon upgraded ahead of novelty weapons.
Reach Blacksmith Ed and unlock his complete service
Blacksmith Ed works in Stonefang Tunnel, World 2-1. From the Stonefang Archstone, progress through the mining complex until you activate the revolving platform that reaches the lower section where Ed is stationed. Once the platform is operating, Ed becomes the practical destination for serious weapon planning because his menu covers far more paths than Boldwin’s.
Ed can repair equipment and perform ordinary upgrades using ore held by Thomas. He can also continue certain upgrade paths that have already been started, even before receiving the special demon soul. The Searing Demon’s Soul, obtained from Flamelurker in World 2-2, is required for Ed’s advanced services. Return to Ed with the soul in your inventory, choose Talk repeatedly, and continue until he accepts it. If he does not take it, leave the conversation and speak with him again until the dialogue is exhausted.
After accepting the Searing Demon’s Soul, Ed can forge weapons from appropriate boss Demon’s Souls, improve special weapons with Colorless Demon’s Souls, and open the remaining advanced upgrade options for regular weapons. Do not consume the Searing Demon’s Soul for ordinary souls if you intend to use boss weapons or advanced paths.
- Activate the revolving platform in 2-1 so Ed is accessible.
- Defeat Flamelurker and keep the Searing Demon’s Soul in your inventory.
- Exhaust Ed’s dialogue until he accepts the soul before expecting boss-forging options.
Match one upgrade path to your attributes
Choose a main weapon with a moveset you can use consistently, then invest materials into that weapon rather than spreading resources across every chest find. Strength builds commonly favor Crushing weapons, which improve Strength scaling and remove Dexterity scaling. Dexterity builds can favor Sharp weapons, which use Bladestone and emphasize Dexterity. Quality weapons use Clearstone and share their scaling between Strength and Dexterity, so they are most useful when both attributes receive meaningful investment.
Magic-oriented characters can choose Moon weapons using Moonlightstone or Crescent weapons using Darkmoonstone. Moon adds magic damage and Magic scaling. Crescent also scales from Magic and provides gradual MP regeneration, while removing the weapon’s Strength and Dexterity bonuses. Faith-oriented characters can use Blessed weapons made with Faintstone; these add magic damage, scale with Faith, and provide HP regeneration. Dragon weapons use Dragonstone to add fire damage but remove normal attribute scaling, so they are useful for fixed early damage but are not a universal answer for a long-term stat build.
The names are easy to confuse: Sharpstone is the ordinary physical material, while Bladestone creates the Dexterity-focused Sharp path. Similarly, Darkmoonstone creates Crescent weapons, whereas Moonlightstone creates Moon weapons. Check the blacksmith menu and your attribute scaling before confirming a transformation.
- Choose Strength, Dexterity, Quality, Magic, or Faith based on the attributes you actually plan to raise.
- Distinguish Sharpstone from the Sharp path made with Bladestone.
- Do not choose a path only because its early attack number is higher; check scaling and damage type.
Check the branch level before confirming an upgrade
Upgrade paths do not all branch at the same weapon level. Some weapons can enter Crushing or Sharp at +0, Quality and several elemental or status paths commonly branch at +3, and Moon, Crescent, and Blessed paths commonly branch at +6. The exact options depend on the weapon. If the desired path is missing, inspect the weapon’s current level and the requirements shown in Ed’s menu rather than assuming the ore is unavailable.
Basic Hardstone and Sharpstone paths can reach +10. Most special regular-weapon paths, including Crushing, Sharp, Quality, Moon, Crescent, Blessed, and Dragon, reach +5. Their materials are not interchangeable, and their damage may be split between physical, magic, or fire types. Split damage can perform differently against enemy defenses, so retain a normal physical weapon if your specialized weapon struggles in a particular world.
A weapon can be reversed with Meltstone, but reversing does not refund the materials already spent. Treat a path change as a resource loss, not as a free respec. Before committing chunks or a Pure stone, verify the weapon, branch, scaling, and final path you want.
- Read the required base level in Ed’s menu before farming a stone type.
- Remember that ordinary paths generally reach +10 while special paths generally reach +5.
- Use Meltstone only when you accept losing the previous upgrade materials.
Reserve rare materials and boss souls
Common shards and large shards are appropriate for testing a weapon early. Chunks and Pure stones are much more limited, so reserve them for the weapon you expect to carry through the campaign. Upgrade a bow only if you regularly use ranged attacks, and upgrade a shield only when its stability or defensive properties matter to your build. Keep a backup weapon at a lower investment level only when it serves a clear purpose, such as a different damage type or a safer moveset in narrow terrain.
Boss Demon’s Souls can be consumed for ordinary souls, exchanged for spells or miracles, or used by Ed to forge unique weapons. Many have more than one possible use, and boss weapons require specific base weapons at specific upgrade levels. Store every boss soul with Thomas until you have checked the option relevant to your character. If you only want to finish the campaign, a well-upgraded normal, Crushing, Sharp, Quality, Moon, Crescent, or Blessed weapon is usually simpler than rebuilding your character around a rare boss weapon.
Before each boss attempt, repair your main weapon and confirm that you have enough healing and the correct ammunition or casting equipment. After Flamelurker, unlock Ed’s services before deciding how to spend later demon souls.
- Spend rare chunks and Pure stones only on the weapon you intend to keep.
- Store boss souls until their spell, miracle, and weapon uses are known.
- Enter major boss fights with a repaired weapon and a clear damage plan.
Before you move on
- You have one dependable primary weapon upgraded consistently, and its scaling matches your main offensive attributes.
- You have reached Blacksmith Ed in Stonefang Tunnel and activated the route to his workshop.
- After defeating Flamelurker, you delivered the Searing Demon’s Soul to Ed if you want boss weapons or the full advanced upgrade menu.
- Your spare ore, duplicate equipment, and unneeded weapons are stored with Stockpile Thomas.
- You know the next branch level, ore type, and attribute requirements for your planned weapon path.
- Before the final areas, your main weapon is repaired and your boss Demon’s Souls are reserved for the uses you actually want.
References for this chapter
- Upgrade: How to upgrade weapons – Demon's Souls English Wiki
- Blacksmith Ed — Demon's Souls English Wiki
- Stockpile Thomas — Demon's Souls English Wiki
- Upgrade: Crushing — Demon's Souls English Wiki
- Upgrade: Quality — Demon's Souls English Wiki
- Upgrade: Sharp — Demon's Souls English Wiki
- Upgrade: Moon — Demon's Souls English Wiki
- Upgrade: Crescent — Demon's Souls English Wiki
- Demon's Souls PS5 Remake Trophy Guide & Roadmap – PowerPyx
- Blacksmithing — Demon's Souls Walkthrough & Guide
Magic, Miracles, Ranged Tactics and Hybrid Builds
Sorceries, miracles and ranged weapons let you control encounters before enemies reach melee range, but each tool has a different role. Sorceries require a catalyst, miracles require a talisman, and both must be learned and remembered through Nexus teachers before use. Intelligence increases maximum MP and sorcery memory, Magic improves sorcery damage, and Faith governs miracle memory and effectiveness. A bow is valuable even on a non-Dexterity build because it pulls individual enemies from groups and lets you exploit cleared sightlines. For a first campaign, choose one main damage plan: Magic for direct spell damage, Faith for healing and defensive support, or melee with limited casting. Keep one upgraded physical weapon equipped because demons can resist particular damage types and many arenas punish slow casting or retreating.
1. Choose one casting direction before spending levels
Sorcery is the most direct ranged-damage path. Intelligence raises maximum MP and provides sorcery memory, while Magic is the main attribute that improves sorcery damage. Faith provides miracle memory and improves miracle effectiveness. Miracles are generally strongest as healing, recovery or defensive tools early in the game rather than as a complete offensive spell list.
For a first campaign, Royalty is the simplest magic opening because it begins with a catalyst, Soul Arrow and the Fragrant Ring. Magician is another direct sorcery start. Priest and Temple Knight begin with miracle access, but a Faith character should still carry a physical weapon because early miracles do not replace ordinary melee damage. A melee character can add casting later without rebuilding the entire character.
Do not raise Strength, Dexterity, Magic and Faith equally unless you are intentionally making a high-level experimental build. Select one primary weapon-stat plan and one casting direction. Put early levels into Vitality and Endurance whenever your character is dying in a few hits or losing mobility because of equipment burden.
- Magic build: prioritize Vitality, Intelligence, Magic and enough Endurance to preserve mobility.
- Faith build: prioritize Vitality, Endurance and Faith, using a physical or Blessed weapon for routine damage.
- Hybrid build: select Magic or Faith as the secondary path instead of investing heavily in both.
- Keep enough Strength or Dexterity to use the chosen physical weapon effectively.
2. Obtain and equip the correct casting tool
Sorceries require a catalyst, while miracles require a talisman. Equip the tool in either hand in place of a weapon or shield. With the appropriate tool equipped, the light attack button for that hand casts the currently selected ability. Press Up on the directional pad to cycle through remembered spells or miracles.
A Wooden Catalyst can be found near the start of 1-2 on top of the first bridge tower, and a Silver Catalyst is available in 3-1. Royalty begins with a Silver Catalyst, while Magician begins with a Wooden Catalyst. A Talisman of God can be found near the start of 4-1 or 5-1, and Priest and Temple Knight begin with one.
Finding a spell or buying it is not enough. First learn it from a spell or miracle teacher, then speak with that teacher again and choose the option to remember it. Check the ability’s stat requirement, memory cost and current MP before entering a level. The Talisman of Beasts, obtained much later through specific conditions, can cast both sorceries and miracles, but it is not required for a normal first playthrough.
- Catalyst equipped before attempting sorcery.
- Talisman equipped before attempting a miracle.
- The ability has been learned and remembered in the Nexus.
- The correct Intelligence or Faith requirement is met.
- Enough maximum and current MP remains for the planned route.
3. Use the Nexus teachers and protect Demon’s Souls
After completing 1-1, the basic magic teacher, Freke’s Apprentice, can provide ordinary sorceries. Sage Freke becomes available after you rescue him from a cell in 3-1. Yuria the Witch becomes available after her rescue in Boletaria’s third area and teaches several high-value spells. Saint Urbain becomes available after you rescue him in 4-2 and teaches the advanced miracles.
Rescuing these NPCs expands the available shops but does not automatically remember or equip anything. Return to the Nexus after each rescue, buy or trade for the ability you want, then use the teacher’s Remember option to prepare it for combat.
Do not consume a boss Demon’s Soul merely for ordinary souls until you have checked the spell, miracle and weapon options attached to it. The Doll Demon’s Soul can provide Soul Ray, the Hero Demon’s Soul can provide Second Chance, and several other boss souls have competing uses. One playthrough cannot provide every spell and miracle because some abilities use the same Demon’s Soul, so preserve uncertain souls and record the reward you select.
- Complete 1-1 to unlock the basic magic-teaching progression.
- Rescue Sage Freke before buying his advanced sorceries.
- Rescue Yuria before spending boss souls on her exclusive spells.
- Rescue Saint Urbain before spending boss souls on advanced miracles.
- Store unneeded Demon’s Souls until their available exchanges are checked.
4. Manage MP, Spice and ordinary healing
Both sorceries and miracles consume MP. Fresh Spice and other Spice items restore MP, while the Fragrant Ring provides gradual MP regeneration. Use Spice after clearing a safe room or behind cover rather than in an enemy’s attack range. The Nexus is a reliable place to restock and reconfigure your remembered abilities, but returning there does not replace carrying enough recovery items for the level itself.
Grass remains the normal way to recover lost health. A miracle such as Heal can conserve Grass when you have the required Faith, memory and MP, but casting it still requires enough distance to complete the animation safely. Evacuate can return you to the Nexus while preserving your carried souls, making it useful after a successful exploration run, but it consumes MP and occupies a miracle slot.
Before a boss, refill MP, confirm the desired ability is selected and remove any spell that you will not use from the active memory list if its memory cost is preventing a more useful choice. For a hybrid character, reserve enough MP for the boss approach instead of spending every cast on optional enemies.
- Carry Spice for long routes or difficult boss approaches.
- Use Grass for routine damage unless a safe Heal window is available.
- Confirm current MP before passing through a boss fog gate.
- Remember only the spells and miracles needed for the current area when memory is limited.
5. Pull enemies and exploit cleared sightlines
A bow is one of the safest ranged tools for a first campaign. Its primary job is often to pull one enemy away from a group, not to replace your main weapon. Fire a single arrow from outside detection range, then retreat to a doorway, stairwell or already-cleared room. Fight the isolated target where you have room to roll and where a second enemy cannot attack from behind.
In Boletaria, use arrows to remove or pull archers and to separate shielded soldiers from formations. In Latria, corners, railings and cell bars can interrupt line of sight while you prepare a spell or recover MP. In the Shrine of Storms, avoid standing in open ground longer than necessary; use ranged attacks from cover or elevated positions when the area’s flying threats are active. In the Valley of Defilement, elevated or dry ground is preferable to entering poison or plague hazards merely to finish a distant target.
Free aiming is useful when the lock-on camera points at the wrong body part or when a target is partially hidden behind another enemy. Do not kite through unexplored ground. Clear the retreat lane first, because a ranged attack is dangerous if it causes you to back into a hidden enemy, a ledge or a status hazard.
- Pull one enemy before entering a group.
- Keep a clear retreat lane behind your character.
- Use cover before restoring MP or healing.
- Carry enough arrows or MP for the return route.
- Avoid retreating into unexplored rooms or ledges.
6. Decide when to kite and when to close
Kite large or slow enemies when their approach is predictable and your retreat route is already safe. Cast or fire once, move backward without locking yourself against a wall, and attack again after the target completes its recovery animation. This works best in open rooms and long corridors where you can see every approach.
Close to melee when the arena is cramped, when the enemy resists your damage type, or when your casting animation leaves you exposed. Some demons resist magic, fire or other elements, so do not assume Soul Arrow, Flame Toss, a weapon buff or a bow will be equally effective against every target. If your spell damage is poor, use the spell for pulling or finishing and rely on physical weapon damage for the main exchange.
Do not heal or drink Spice at a predictable distance while the enemy is still able to cross the gap. Break line of sight, force a recovery animation, or create enough space with a doorway before using an item. Against fast enemies, a short melee punish after their attack is often safer than trying to create a long casting window.
- Identify the retreat space before starting a ranged exchange.
- Switch to melee when the target resists the selected damage type.
- Do not backpedal toward an uncleared doorway or ledge.
- Heal or restore MP only after creating a genuine opening.
- Use different damage types rather than forcing one spell against every demon.
7. Build a practical melee-and-casting hybrid
A dependable hybrid uses one upgraded melee weapon, one catalyst or talisman, and a bow when the character can carry it without losing mobility. Raise Vitality and Endurance until ordinary mistakes are survivable and the character retains a normal roll. Then invest primarily in either Magic or Faith. A Magic hybrid can soften enemies with Soul Arrow or later Soul Ray before finishing with a weapon. A Faith hybrid can use Heal, regeneration or defensive miracles while relying on a physical or Blessed weapon for damage.
Avoid carrying several heavy catalysts, talismans, shields and armor sets at once. Equipment burden can make a melee-critical encounter harder even if the casting tools themselves are useful. Keep the casting setup light enough that you can roll normally, and change equipment at an Archstone or in a safe area rather than during combat.
Upgrade one main weapon instead of distributing materials across every weapon found. Keep a lighter backup or a weapon with a different damage profile for resistant enemies, but do not let backup gear consume the materials needed for the weapon you use most. A hybrid that stops improving both its weapon requirements and its chosen casting stat will eventually deal mediocre damage everywhere.
- One primary upgraded melee weapon.
- One catalyst or talisman matched to the build.
- A bow or other ranged option when weight and requirements permit.
- Normal roll preserved for melee-focused encounters.
- Enough MP, arrows and healing items for the boss approach.
- A backup damage type for enemies resistant to the main plan.
Before you move on
- You can cast at least one remembered sorcery or miracle without returning to the Nexus to correct the setup.
- You have the correct catalyst or talisman, an upgraded melee weapon and a ranged option suited to your build.
- You understand that both casting systems use MP and have carried enough Spice or another recovery plan for the current route.
- You have rescued or unlocked the spell and miracle teachers needed for the abilities you intend to buy.
- You have preserved uncertain boss souls until their spell, miracle and weapon exchanges have been checked.
- You can pull a single enemy with a bow or spell, retreat through cleared terrain and switch to melee when the target resists your ranged damage.
- Your casting equipment does not prevent the normal roll needed for melee encounters.
Boss Strategies — Phalanx, Tower Knight, Penetrator, Armor Spider, Flamelurker
These five bosses require different answers. Phalanx is a fire-and-crowd-control fight; Tower Knight is defeated by attacking his ankles and then his exposed head; Penetrator is a mobile duel that becomes much easier if Biorr is rescued; Armor Spider is safest when you advance through its ranged attacks and retreat from the flame carpet; and Flamelurker rewards magic damage, light equipment, disciplined dodging, and careful use of the arena pillars. Repair your main weapon, carry healing grass, and spend or bank excess souls before entering a fog gate. Penetrator is unavailable until you defeat one of the other Archstone archdemons.
Phalanx — burn away the shielded Hoplites before attacking the core
Enter the courtyard and begin by thinning the smaller shielded Hoplites around the main Phalanx. They are weak to fire, so Fire Bombs, Turpentine, and other fire damage are useful if you have them. Do not spend every fire item immediately; keep enough damage available for the central body if the smaller enemies regroup.
Work around the outside of the formation instead of walking into its center. Strike an exposed side or rear when a Hoplite turns away, then retreat before several spear attacks overlap. A shield helps against stray spears, but stamina is more important than blocking every hit. Keep moving around the open courtyard and use the outer edges to create room for healing rather than standing in the middle of the mass.
You do not need to kill every smaller Hoplite. Once enough of them are removed to expose the large central Phalanx, attack the central body from behind or from an uncovered side. Fire and area attacks can clear several small enemies, but confirm that the central body is exposed before committing to a long attack string. If the boss begins to recover its protection, return to crowd control instead of trading blows in the formation.
- Bring fire damage if you have it.
- Remove enough Hoplites to expose the central Phalanx.
- Use the courtyard perimeter to create healing and stamina windows.
Tower Knight — decide whether safety or the archer challenge matters more
Tower Knight’s archers are optional. For the safest normal clear, immediately use either staircase, reach the wall walkways, and defeat the archers before returning to the arena floor. This removes the arrows that can interrupt your healing and ankle attacks. If you want the One Shall Fall trophy, leave every archer alive and keep moving while you fight; the trophy requires defeating Tower Knight without killing any of them.
On the floor, stay beside or behind one ankle rather than directly in front of the shield. Attack the ankle in short strings, then move away when he lifts a foot, raises the shield, or begins a wide sweep. His stomp and shield slam punish players who stay under him too long. When he falls backward, run toward his head and attack the exposed weak point. Leave before he rises fully so you are not caught beneath his body.
Keep the camera angled toward the open floor. The arena walls and edges can trap you when a spear sweep or shield attack forces you backward. Roll across the open space rather than backing into a corner. Ranged characters can fire from the upper walkways or from a safe angle on the floor, but the ankle weakness remains the most direct method for melee builds.
- Kill the archers for the safer route, or leave all of them alive for One Shall Fall.
- Attack an ankle until Tower Knight falls.
- Punish the head, then retreat before he stands.
Penetrator — preserve mobility and punish the blue-glowing thrust
Penetrator is in the Inner Ward, but the fight is locked until you defeat one of the other Archstone archdemons: Dragon God, Old Monk, Storm King, or Maiden Astraea. Before entering, rescue Biorr if you want the strongest available NPC distraction. To free him, obtain the Iron Ring of Keys in the Inner Ward from the Fat Officials, then return to the cell area near the Tower Knight route and unlock his cell.
With or without Biorr, keep the center of the room available for dodging. Penetrator’s attacks are strongly telegraphed, but his sword reaches farther than expected. Strafe while watching his shoulders and weapon, then roll to the side as a thrust or sweeping attack is about to connect. Do not heal merely because you created a small gap; wait until he completes an attack or Biorr has clearly drawn his attention.
When Penetrator pulls back and the blade glows blue, treat the charged penetrating attack as a lethal threat. Move away and roll aside at the last moment rather than trying to block it. After a missed thrust, use one or two attacks, then reset your distance. Biorr can occupy Penetrator for much of the fight and may deal substantial damage on a first playthrough. Attack from behind while Biorr has aggro, but do not cast area spells through both characters. Repeated or significant friendly fire can make Biorr hostile.
- Defeat one other Archstone archdemon before attempting Penetrator.
- Rescue Biorr if you want his assistance.
- Dodge the blue-glowing thrust and punish only completed attacks.
Armor Spider — advance through the tunnel and retreat from the flame carpet
Armor Spider controls a straight mining tunnel, so the opening is dangerous because every projectile travels along your approach. Move laterally while advancing and avoid stopping to trade shots. Magic, a bow, or another ranged weapon lets you attack from the entrance, but melee characters should close the distance during gaps between fireballs, webs, and other ranged attacks.
Once you reach the boss, stay near one side instead of directly in front of its face. Watch for the short-range leg sweeps and ground strikes, then attack after the animation finishes. Keep enough stamina for an immediate retreat. The boss’s web attack can slow you, and the black liquid or flame carpet across the tunnel signals that you should run back toward the entrance rather than remain in melee range.
Do not try to heal beside the boss. Retreat down the tunnel until the attack has ended, then use the distance to heal or restore stamina. If you are using ranged attacks, continue moving between casts and use the length of the tunnel to avoid fireballs. The main environmental advantage is the straight retreat path, not permanent cover. After opening the Stonefang shortcut, a failed attempt has a more manageable return route, but retrieve your souls only when the approach is safe.
- Move sideways while closing on the boss.
- Attack after its leg sweeps or ground strikes finish.
- Run down the tunnel when the flame carpet appears.
Flamelurker — use magic, light equipment, and pillars to reset the fight
Flamelurker is weak to magic and resistant to fire, so Soul Arrow, Soul Ray, a magic weapon, or another dependable non-fire option is preferable. Melee characters can use a magic weapon or Sticky White Slime if their build permits it. Water Veil, fire-resistant equipment, and a suitable shield can reduce mistakes, but a heavy load that prevents a fast roll is usually more dangerous than lighter armor.
The arena contains large pillars that can interrupt his path briefly. Use them to create separation, recover stamina, or heal after a completed attack, but do not assume a pillar makes you permanently safe. Flamelurker can circle around it and punish a predictable recovery. Step out, bait a leap or ground attack, dodge at the last moment, and answer with one or two hits before returning behind the pillar or moving into the open space.
For melee, roll through or to the side of the attack rather than beginning a long retreat too early. After he jumps backward, use the pause to recover stamina and reapply a weapon buff if needed. For magic, maintain enough distance to cast without being caught by the next leap; if he closes the gap, stop casting and dodge away before trying again.
As his health decreases, his flames and pressure become more dangerous. Treat this as a late-fight escalation rather than relying on a guaranteed scripted phase. Shorten your combos, reserve stamina for a second dodge, and never heal immediately after entering the arena or after only a minor evasive roll. If a failed attempt leaves a large soul stain outside the fog, decide whether retrieval is worth the risk before starting another fight.
- Use magic damage or a magic weapon; avoid relying on fire.
- Use the pillars to reset spacing, not as permanent protection.
- Leave stamina for repeated dodges during the late portion of the fight.
Before you move on
- Phalanx is defeated and its Archstone is available in the Nexus.
- Tower Knight is defeated, with the archers either cleared for safety or deliberately left alive for the One Shall Fall challenge.
- Penetrator is defeated after the required Archstone archdemon prerequisite, and Biorr assists if that optional objective was chosen.
- Armor Spider is defeated and the Smithing Grounds Archstone progression is complete.
- Flamelurker is defeated and the Searing Demon Soul is collected from the Archstone.
- The Searing Demon Soul is delivered to Blacksmith Ed in Stonefang so advanced boss-soul weapon upgrades become available.
- Your primary weapon is repaired, your healing supply is replenished, and your remaining souls are spent or safely banked before continuing.
References for this chapter
- Demon's Souls — Official PlayStation PS5 Game Page
- Demon’s Souls PS5 Remake Boss Guide (All Bosses)
- Demon's Souls PS5 Remake Trophy Guide & Roadmap – PowerPyx
- Penetrator — Demon's Souls English Wiki
- W2-2: The Tunnel City — Demon's Souls Walkthrough & Guide — GameFAQs
- Demon's Souls: How to Beat the Penetrator Boss — Push Square
Boss Strategies — Maneater(s), Old Monk, Dragon God, Maiden Astraea and Late-Game Fights
These late-game encounters test crowd control, positioning and scripted movement rather than raw damage alone. Maneater is fought on a narrow bridge where the central brazier provides useful terrain, but knockback and poor camera control can still send you over the edge. Old Monk changes depending on your connection state: online, another player may control the boss; offline, an AI Black Phantom takes the role. Dragon God is an environmental encounter requiring concealment and two ballistae before its damage window opens. Maiden Astraea is the required Valley of Defilement archdemon, but she is not the Maiden in Black and does not decide the final ending. Old Hero and Storm King complete the late Shrine of Storms sequence. Before each attempt, spend souls you cannot afford to lose, repair your main weapon, and carry healing and status cures.
1. Maneater: control the bridge and prepare for the second demon
Enter 3-2 with a weapon that lets you recover quickly after an attack. Light or medium weapons are safer than very slow weapons because the arena is a narrow bridge and missed swings can leave you exposed to a leap or knockback. Fire, magic and ranged attacks are useful, but do not stand still to cast while a Maneater is closing in.
The first Maneater begins alone. Keep the central brazier between you and the demon when possible, while leaving yourself enough room to roll away from the bridge edges. Attack after it lands from a charge, finishes a claw sequence or completes a leap. Its dive and pounce attacks can push you backward, so move toward the center before attempting to punish them.
When the first Maneater is badly damaged, or when enough time has passed, the second Maneater joins the fight. Try to finish the wounded demon if both enemies are separated, but do not chase it toward the outer ledge. If both demons land near you, stop attacking and circle the brazier defensively until one moves away. When a Maneater pauses to strengthen itself, use the opening to create distance or interrupt it if your attack is safe.
- Keep both demons away from the outer edges whenever possible.
- Use short attack strings and preserve stamina for an emergency roll.
- Prioritize the first Maneater, but do not trade your life for a final hit.
2. Recovering from a Maneater failure
After a death, do not automatically rush back through Upper Latria while carrying a large soul reserve. Reopen the shortcut route, recover your bloodstain only if the approach is safe, and return to the Nexus to spend souls before another attempt. The fog gate does not create a checkpoint, so learning the route back is part of preparing for the boss.
If the second demon arrives before you can finish the first, improve one focused part of the plan. Upgrade your main weapon, add a reliable ranged option, use a suitable weapon coating or change to a faster attack pattern. Avoid solving the problem with a slow weapon that leaves you trapped in recovery. A death caused by the bridge edge usually means you are fighting too far from the center, rolling without checking your landing space or allowing a dive attack to hit you from behind.
- Recover the bloodstain only when the bridge route is under control.
- Spend a dangerous soul stack before retrying.
- Treat the brazier as terrain, not as guaranteed protection from every attack.
3. Old Monk: identify the boss version before choosing a strategy
At the end of 3-3, the Old Monk encounter can assign the boss role to another online player. That opponent may use any suitable weapons, spells and equipment, so there is no guaranteed pattern. Keep enough stamina for a retreat, avoid predictable healing in the opponent’s attack range and punish missed lunges or long attack strings instead of pursuing recklessly across the room.
For a consistent single-player encounter, enter while the game is offline. The boss then uses an AI Black Phantom. Equip a quick weapon and answer its approach with one or two attacks rather than relying on a slow heavy swing. The AI can roll away, use melee attacks and occasionally cast from range, so remain ready to disengage after your stamina falls low.
When yellow homing projectiles appear around the boss, stop attacking and create space. Begin rolling away after the projectiles start tracking you, then resume combat once they have passed. Blocking the entire sequence is less reliable than moving, especially if your shield does not fully absorb the damage. A backstab can provide a strong punish when the AI exposes its back, but do not force one against an online opponent who is watching for the attempt.
- Use a fast weapon and keep stamina available for movement.
- Roll away from the Old Monk’s homing projectiles before attacking again.
- Expect online opponents to use feints, ranged attacks and unfamiliar timing.
4. Dragon God: reach both ballistae without staying exposed
Dragon God in 2-3 is an environmental encounter rather than an ordinary damage race. At the start, move toward the first rubble barrier while using the stone structures as cover. The demon’s eyes help signal its awareness: move only when its attention is elsewhere and its head is not watching the route you need to cross.
Break the first rubble from a protected position, then continue to the first ballista. Do not remain in the open after destroying the barrier. Fire the ballista, then use the newly opened route to cross toward the opposite side. Break the second rubble barrier only when you are again positioned near cover, reach the second ballista and fire it.
After both ballistae have struck the Dragon God, the demon collapses and exposes its head. Approach carefully and attack with your strongest dependable weapon or ranged option. Take a few attacks, then retreat when the recovery window ends, especially if the head begins to move or the boss prepares its breath. If you die, repeat the concealment sequence rather than trying to sprint through the arena.
- Destroy rubble only from positions that give you cover.
- Activate both ballistae before committing to the damage phase.
- Watch the Dragon God’s head and eyes before every exposed crossing.
5. Old Hero and Storm King in the Shrine of Storms
Old Hero in 4-2 is blind. Equip the Thief’s Ring if you have it, move slowly and attack from behind or from the side. After several hits, retreat when the boss reacts or roars, then wait for it to lose your position before approaching again. Running, repeated attacks and careless healing make more noise and can cause the boss to locate you. Without the ring, use ranged attacks from a safe distance and avoid standing in front of the greatsword.
Storm King in 4-3 is fought in the open altar area after the Storm Beasts have been cleared or reduced. Use a bow or magic from the entrance and surrounding cover to remove the smaller flying enemies first. Once the area is manageable, collect the Stormruler near the far end of the arena and use its ranged shockwave against the Storm King. Stand near the large stone structures when necessary to avoid incoming projectiles, and do not chase the boss into an exposed position without checking for remaining Storm Beasts.
- Use quiet movement and the Thief’s Ring against Old Hero when available.
- Reduce Storm Beast numbers before focusing on Storm King.
- Collect Stormruler and use its ranged attack rather than normal sword swings.
6. Maiden Astraea and Garl Vinland in 5-3
Maiden Astraea is the required archdemon of the Valley of Defilement’s final area, but she is not the Maiden in Black and does not determine the game’s final ending. Enter the swamp with plague cures, healing and enough room to retreat. Garl Vinland stands between the entrance and Astraea and is the immediate melee threat.
You may defeat Garl directly, bypass him and reach Astraea, or use a ranged approach from a position that avoids a prolonged duel. If you fight Garl, bait one of his heavy swings, evade it, then punish during recovery. Use the nearby terrain carefully because the swamp and obstacles can trap you. Do not assume that a shield will make his attacks harmless; preserve stamina for repositioning and healing.
After Garl is defeated, speak to Astraea if you want the safer story route. She can end the encounter without requiring a direct battle. If you attack Astraea directly, expect her to defend herself and heal during the confrontation. Once she dies or the encounter concludes, touch the Archstone beside her and confirm that the Pureblood Demon’s Soul has been awarded. Garl’s survival is not required for campaign completion.
- Carry plague cures before entering the 5-3 swamp.
- Do not confuse Maiden Astraea with the Maiden in Black.
- Choose deliberately whether to fight Garl, bypass him or use the dialogue route.
7. Failure recovery and late-game completion checks
Before every late-game attempt, spend souls that would seriously hurt to lose, repair your main weapon and confirm that your healing supply is adequate. After a failed attempt, identify the actual cause: a bridge-edge knockback, an exposed Dragon God crossing, an Old Monk projectile sequence, a status effect or an overextended attack. Change that part of the plan instead of abandoning a functioning build.
For this chapter’s required encounters, confirm that Maneater in 3-2, Old Monk in 3-3, Dragon God in 2-3, Old Hero in 4-2, Storm King in 4-3 and Maiden Astraea in 5-3 have all been defeated. Their rewards should include the Mixed Demon’s Soul, Yellow Demon’s Soul, Dragon Demon’s Soul, Hero Demon’s Soul, Storm Demon’s Soul and Pureblood Demon’s Soul respectively. The Old Monk reward is the same whether the boss was controlled by a player or by the offline AI.
Astraea’s defeat does not trigger the final ending choice. Continue the remaining campaign route and reserve the final Maiden in Black decision for the end sequence after Old King Allant. Leave Astraea’s area only after the Archstone has registered the victory and you have collected the boss reward.
- All six encounters covered in this chapter are defeated.
- The Dragon God arena was completed by activating both ballistae.
- Astraea’s Archstone and Pureblood Demon’s Soul are confirmed.
- The Maiden in Black ending choice remains reserved for the final sequence.
Before you move on
- Maneater, Old Monk, Dragon God, Old Hero, Storm King and Maiden Astraea are defeated in the PS5 remake campaign.
- The Dragon God encounter is complete because both ballistae were activated before the final damage phase.
- The Old Monk reward is present regardless of whether the encounter used an online player or offline AI.
- Maiden Astraea’s encounter is complete and the Pureblood Demon’s Soul has been awarded.
- The final ending choice has been deliberately reserved for the later Maiden in Black sequence.
- Souls, healing, weapon durability and plague cures are prepared before the next major attempt.
Key NPCs, Rescue Routes and Companion Usage (Biorr, Maiden, Ed, etc.)
Keep the Nexus NPCs alive, rescue Biorr before fighting the Penetrator, and preserve the Searing Demon’s Soul for Blacksmith Ed. Biorr’s rescue begins in 1-3: defeat the Fat Official carrying the Iron Ring of Keys, then return to the locked dungeon entrance near the Tower Knight arena in 1-2. Kill the Fat Official inside and open Biorr’s cell. Once freed, Biorr automatically assists when the Penetrator fight begins and can later distract the Blue Dragon in 1-4 if he survives. Blacksmith Ed is reached through the elevator shortcut in Stonefang Tunnel 2-1. After defeating Flamelurker in 2-2, give Ed the Searing Demon’s Soul to unlock boss-soul weapons and other advanced upgrades. The Maiden in Black is safe to use for leveling throughout the campaign. After Old King Allant, speak with her and descend to the final area; leave her alive for the good ending or kill her for the bad ending.
1. Protect the friendly NPCs and preserve demon souls
Do not attack friendly characters while testing weapons or controls. This includes the Maiden in Black, Blacksmith Boldwin, Blacksmith Ed, Biorr, Yuria, Saint Urbain, Sage Freke, and rescued merchants. A hostile NPC may remain dangerous for the rest of the playthrough unless you pay for absolution at the Monumental’s statue, and a dead NPC cannot provide services or assistance.
Use the Maiden in Black normally for leveling once that service is available. Her ordinary Nexus dialogue has no hidden ending trap. The decisive interaction occurs only after Old King Allant is defeated and you enter the final area below the Nexus.
Keep boss Demon’s Souls in storage until you know whether they are needed by Ed, Yuria, Freke, Saint Urbain, or a special weapon. The Searing Demon’s Soul from Flamelurker is particularly important because Ed requires it to unlock his advanced work.
- Leave friendly NPCs alive and non-hostile.
- Do not consume the Searing Demon’s Soul before visiting Ed.
- Store other boss souls until their uses are confirmed.
- Use the Maiden in Black for leveling without fear of changing the ending.
2. Obtain the Iron Ring of Keys in Boletarian Palace 1-3
You must first make 1-3 available by defeating an Archdemon in another world. Enter the Inner Ward from its Archstone and follow the route until a Fat Official closes a gate and forces you through a detour. Continue through that detour instead of trying to return immediately to the sealed route.
The detour leads to another Fat Official supported by archers. Defeat the archers or draw them away, then kill the Fat Official and loot the Iron Ring of Keys. This is the key required for Biorr’s prison entrance. Do not confuse it with the Bloody Iron Key, which comes from a different Fat Official and is used for Yuria’s rescue.
Once you have the Iron Ring of Keys, you can either continue through 1-3 or return to the Tower Knight Archstone to free Biorr before attempting the Penetrator.
- Unlock access to 1-3 by defeating an Archdemon elsewhere.
- Find the Fat Official in the 1-3 detour after the first major gate.
- Loot the Iron Ring of Keys.
- Keep the key in your inventory until Biorr is freed.
3. Free Biorr from the dungeon in 1-2
Travel to the Tower Knight Archstone in 1-2. Move toward the Tower Knight arena, but stop in the enclosed section immediately before the boss fog. Look for the locked door leading down into the dungeon. The Iron Ring of Keys opens this door.
Descend into the prison and locate the Fat Official inside. Kill him before opening Biorr’s cell; his fire attacks are dangerous in the confined passage, and defeating him clears the immediate rescue area. After he dies, search the cells for Biorr, who is sitting in darkness in one of them. Open the correct cell and speak with him until his rescue dialogue finishes.
Biorr is then available for the Penetrator encounter. Depending on the game’s current NPC dialogue state, he may remain in the prison area briefly or relocate to the Nexus after you reload or travel. The reliable requirement is that the cell has been opened, the Fat Official is dead, and Biorr’s dialogue has been completed.
- Use the Iron Ring of Keys on the dungeon door before the Tower Knight arena.
- Kill the Fat Official inside the dungeon.
- Open Biorr’s cell.
- Speak with Biorr until he acknowledges his rescue.
- Check the Nexus if you want to confirm that he has relocated.
4. Let Biorr assist against the Penetrator
Enter 1-3 and follow the route to the Penetrator’s fog gate. If Biorr was freed correctly, he joins the fight automatically when you cross the fog. There is no NPC summon sign that must be activated, and you do not need to be in Body Form for him to appear.
At the start of the battle, allow Biorr to draw the Penetrator’s attention. Stay to the side or behind the boss, attack only after the Penetrator finishes a thrust or extended blade sequence, and retreat before the next combo begins. Biorr creates safe opportunities to heal, use spells, fire arrows, or land a few melee strikes, but he can still die if the fight drags on.
If Biorr dies during the battle, he will not be available to distract the Blue Dragon later in 1-4. If you want that additional help, keep your damage steady and prevent the Penetrator from repeatedly trapping Biorr against the arena walls.
- Free Biorr before entering the Penetrator fog.
- Cross the fog gate; Biorr should enter automatically.
- Use Biorr’s distraction to attack safely.
- Keep Biorr alive if you want his later Blue Dragon assistance.
5. Reach Blacksmith Ed and activate his advanced services
Blacksmith Ed is in Stonefang Tunnel 2-1, in the building behind the Filthy Man. From the 2-1 Archstone, progress through the Smithing Grounds until you reach the upper machinery and the lever that activates the revolving elevator. Pull the lever, then ride the elevator down to Ed’s forge. Once the shortcut is active, Ed is a quick return point just above the Archstone area.
Ed can perform broader weapon upgrades than Boldwin, including several special ore paths. He does not need the Flamelurker soul for ordinary ore upgrades. His advanced services require the Searing Demon’s Soul, also called the Red Hot Demon’s Soul in some references, obtained by defeating Flamelurker in 2-2.
After the Flamelurker fight, return to Ed with the soul available. Exhaust his dialogue and continue speaking with him until he asks for or accepts the soul. Give it to him rather than consuming it. This unlocks the ability to forge eligible weapons from boss Demon’s Souls and to perform upgrades that use Colorless Demon’s Souls. The correct base weapon and upgrade level are still required for each individual weapon.
Boldwin remains useful for routine repairs and basic upgrades, but ignoring Ed prevents access to these advanced paths during the current playthrough.
- Activate the elevator shortcut in Stonefang 2-1.
- Find Ed at the bottom of the elevator near the beginning of the world.
- Defeat Flamelurker in 2-2.
- Return with the Searing Demon’s Soul.
- Continue Ed’s dialogue until he accepts it.
- Use Ed for boss-soul forging and other advanced upgrades.
6. Handle the Maiden in Black and choose the ending
The Maiden in Black can be used for leveling throughout the main campaign. Do not attack her in the Nexus, and do not treat the final sequence as another routine conversation. After defeating Old King Allant in 1-4, return to the Nexus and speak with the Maiden in Black when she is waiting at the final progression point. Follow her into the area below the Nexus.
In the final area, allow the Maiden to complete her dialogue and begin the sequence involving the Old One. For the good ending, do not attack her. Leave her alive after the conversation and follow the scene to its conclusion. This awards the Maiden in Black’s Demon’s Soul.
For the bad ending, attack and kill the Maiden in Black in the final area after the Old King Allant sequence. She does not need to be fought as a conventional boss. This choice awards the Beast Demon’s Soul and the Red Eye Stone instead, and it cannot be changed within that completed playthrough without using another save or beginning another cycle.
- Use the Maiden for leveling before the finale.
- Defeat Old King Allant.
- Enter the final area with the Maiden in Black.
- Leave her alive for the good ending and her Demon’s Soul.
- Kill her for the bad ending, Beast Demon’s Soul, and Red Eye Stone.
Before you move on
- The Iron Ring of Keys was taken from the correct Fat Official in 1-3.
- Biorr’s prison door in 1-2 was opened, the dungeon Fat Official was defeated, and Biorr’s rescue dialogue was completed.
- Biorr automatically entered the Penetrator battle, or the player confirmed the rescue before fighting him.
- The Stonefang elevator shortcut was activated and Blacksmith Ed was located.
- Ed received the Searing Demon’s Soul after Flamelurker was defeated.
- The Maiden in Black remained alive through the campaign until the final choice.
- After Old King Allant, the player deliberately left the Maiden alive for the good ending or deliberately killed her for the bad ending.
References for this chapter
- Biorr, of the Twin Fangs – Demon's Souls English Wiki
- Iron Ring of Keys – Demon's Souls English Wiki
- Demon's Souls: Where to Find Biorr – Push Square
- Upgrade: How to upgrade weapons – Demon's Souls English Wiki
- Stonefang 2-1 Walkthrough – Demon's Souls English Wiki
- Walkthrough: Epilogue - Demon's Souls Walkthrough & Guide
- End Game - Below The Nexus - Demon's Souls English Wiki
- Demon's Souls PS5 Remake Trophy Guide & Roadmap – PowerPyx
Final Act: Old King Allant, Final Mechanics and Endings
Defeat any one non-Boletarian Archdemon to open Boletaria’s Inner Ward and gain access to the Penetrator route. After Penetrator is defeated, the 1-4 King’s Tower route is accessible. However, the final area below the Nexus does not open until Dragon God, Old Monk, Storm King, Maiden Astraea, and False King Allant have all been defeated. In 1-4, clear the bridge approach, deal with Ostrava’s Black Phantom if present, cross the Blue Dragon passage, and ride the elevator to False King Allant. Avoid his blue-handed Soul Drain grab, which removes one Soul Level. After defeating him, use the boss-area Archstone to return to the Nexus, then follow the Maiden in Black below the Nexus and defeat the weakened King Allant. Walk away after the Maiden’s speech for the good ending, or attack her afterward for the bad ending.
1. Confirm access requirements and prepare for 1-4
Defeating any one of the four non-Boletarian Archdemons opens the fog-sealed route from the Tower Knight Archstone into Boletaria’s Inner Ward, also called 1-3. The eligible Archdemons are Dragon God in Stonefang Tunnel, Old Monk in the Tower of Latria, Storm King in the Shrine of Storms, and Maiden Astraea in the Valley of Defilement. You do not need to defeat all four before entering or completing 1-3.
Complete the Penetrator route in 1-3. Once Penetrator is defeated, the Penetrator Archstone provides access to 1-4, The King’s Tower. This is separate from the final sequence below the Nexus. To open that sequence, you must defeat all five Archdemons: Dragon God, Old Monk, Storm King, Maiden Astraea, and False King Allant. False King Allant is the final Boletarian Archdemon and is defeated in 1-4.
Repair your main weapon, restock healing grass, and keep enough stamina for repeated dodges. A bow, crossbow, or ranged spell is valuable during the Blue Dragon passage and can also punish Allant after committed attacks. Keep your weapon upgraded and avoid entering with a large soul stock that would make you play recklessly. Do not consume the False King’s Demon’s Soul until you have checked whether you want to trade it for a spell or weapon.
- Defeat at least one non-Boletarian Archdemon to open 1-3.
- Defeat Penetrator to access 1-4.
- Defeat Dragon God, Old Monk, Storm King, Maiden Astraea, and False King Allant to open the final sequence below the Nexus.
- Repair your main weapon and restock healing items.
- Bring a ranged option if available.
2. Advance through the opening approach and resolve Ostrava’s events
From the Boletarian Archstone, move through the soldiers and crossbowmen by drawing enemies backward into cleared space. Do not run through the formation while trying to recover a bloodstain or collect nearby items. The bridge and stair edges leave little room for a recovery roll, so keep the fight away from the drop-offs.
If Ostrava survived his earlier events, speak with him during this approach. He gives you the Mausoleum Key. Continue forward and his Black Phantom appears on a later bridge. Lure the phantom toward the stairs or another wider section before fighting. The bridge has exposed sides, and a missed dodge can be more dangerous than the phantom’s sword attacks.
If Ostrava is already dead, the Black Phantom encounter still appears as part of the route. Defeat it, then continue toward the Blue Dragon passage. Clear nearby soldiers before collecting items, since enemies can stagger you while the dragon’s fire is covering the route.
- Separate soldiers and crossbowmen instead of fighting the whole group at once.
- Speak with Ostrava if he is alive.
- Move Ostrava’s Black Phantom away from the exposed bridge before fighting.
- Collect nearby items only after the area is safe.
3. Cross or defeat the Blue Dragon
The Blue Dragon repeatedly covers the approach with fire. Watch the breath pattern, wait for the flames to pass, and move through the opening without stopping in the exposed section. The Fat Official near the approach can be defeated with ranged attacks or drawn into the dragon’s fire. Do not stand beside him while waiting for another breath.
If Biorr survived the Penetrator fight, he appears near the palace entrance and draws the dragon’s attention. Use that distraction to move beneath the dragon or reach a protected firing position. Water Veil, fire resistance, and ranged attacks can improve your margin for error, but you still need to time each crossing around the breath.
You can bypass the dragon and continue toward the castle. If you do, defeat the remaining enemies promptly and enter the castle. Once False King Allant is defeated, the Blue Dragon and Biorr will not return during that playthrough. If you want the dragon’s Demon’s Soul or Biorr’s equipment, resolve that objective before entering the final boss arena. Biorr is helpful but not required for completing the campaign.
- Move only after each fire breath ends.
- Use Biorr as a distraction if he survived.
- Choose whether to kill or bypass the Blue Dragon before entering the castle.
- Do not stop in the dragon’s fire path to fight ordinary enemies.
4. Clear the final bridge and reach the boss elevator
Inside the castle, continue through the remaining soldiers and reach the final bridge. If Ostrava’s quest remained active, his Rune Sword Black Phantom appears on this section. Pull him toward the stairs or a wider landing instead of fighting on the narrow catwalk. Dodge his swings, answer with one or two attacks, and avoid extended combinations near the edge.
After the bridge is clear, activate the elevator and ride it upward. Heal before entering the fog, check weapon durability, and use equipment that preserves the movement and stamina recovery you rely on. Heavy armor is usable, but it does not make standing in Allant’s attack strings safe.
- Move the final Black Phantom away from the catwalk edge.
- Activate the elevator after clearing the bridge.
- Heal and confirm weapon durability before entering the fog.
5. Defeat False King Allant
False King Allant uses quick Soulbrandt swings, forward lunges, jumping attacks, wind pressure, and extended sword strings. Stay at a controllable medium distance and circle rather than retreating directly into a wall. After he completes a committed attack, land one or two hits and reset your position. Ranged attacks and spells are safest after a missed lunge or another recovery animation.
When his hand glows blue and he reaches toward you, immediately roll away or sprint out of range. This is Soulsucker, commonly called Soul Drain. If it connects, it damages you and removes one Soul Level, including the level’s associated stat increase. Do not continue an attack string while the blue hand is active.
When Allant plants his sword and charges a large area attack, interrupt him only when you are already close and can strike without trading. Otherwise leave the blast radius. Dodge his forward rush sideways rather than backing straight away, and do not repeatedly block his long multi-hit sequences unless your stamina is safely available.
Heal only after creating distance or after a clearly missed lunge. Defeating him awards the False King’s Demon’s Soul. Leave it unused if you may want its spell or weapon exchange.
- Circle at medium range and punish completed attacks.
- Escape the blue-handed Soulsucker grab immediately.
- Move outside the large area attack if you cannot safely interrupt it.
- Preserve stamina for the next dodge.
- Keep the False King’s Demon’s Soul until you decide how to use it.
6. Return to the Nexus and enter the final area
After defeating False King Allant, use the Archstone in the boss area to return to the Nexus. The ending sequence does not begin simply because the boss dies. The required Archdemons must have been defeated, and you must complete the Nexus transition before entering the final area.
Speak with the Maiden in Black in the Nexus when she is present. Follow her into the newly opened passage below the Nexus. If the final Archdemon requirement has not been met, this area will not be available yet, so return to the Archstones and complete any remaining Archdemon fights.
Continue through the passage until you reach the weakened true King Allant. This is a separate encounter from False King Allant. He has little effective resistance and can be defeated with ordinary weapon attacks. Do not spend rare consumables or Demon’s Souls on this fight.
- Use the boss-area Archstone after defeating False King Allant.
- Return to the Nexus.
- Confirm that Dragon God, Old Monk, Storm King, Maiden Astraea, and False King Allant are defeated.
- Speak with the Maiden in Black.
- Follow her below the Nexus.
- Defeat the weakened true King Allant.
7. Choose the good ending by sparing the Maiden in Black
After the weakened King Allant is defeated, the Maiden in Black appears and the final choice begins. For the good ending, do not attack her. After her speech, turn around and walk away rather than striking her. The Old One returns to slumber, and the credits follow.
The Maiden in Black’s Demon’s Soul is awarded after the credits. This ending is the safer choice if you want that Demon’s Soul for later use. The ending does not complete optional tendency events, missed NPC quests, optional rewards, or unvisited areas, so record those goals before beginning New Game+.
- Defeat the weakened King Allant first.
- Do not attack the Maiden in Black.
- Walk away after her speech.
- Complete the ending and credits.
- Confirm that the Maiden in Black’s Demon’s Soul was awarded.
8. Choose the bad ending by killing the Maiden in Black
After defeating the weakened King Allant, attack the Maiden in Black if you want the bad ending. She does not put up a meaningful fight. Continue until she dies, then allow the sequence and credits to finish.
The bad ending awards the Beast Demon’s Soul and the Red Eye Stone. This choice is irreversible within the completed sequence unless you have a legitimate prior save backup. Without one, obtain the other ending during another playthrough. Do not attack the Maiden before defeating the weakened King Allant; the decisive ending choice occurs afterward.
- Defeat the weakened King Allant.
- Attack the Maiden only after that encounter.
- Complete the sequence and credits.
- Confirm the Beast Demon’s Soul and Red Eye Stone.
Before you move on
- At least one non-Boletarian Archdemon was defeated and Inner Ward was opened.
- Penetrator was defeated.
- Dragon God, Old Monk, Storm King, and Maiden Astraea were defeated.
- The King’s Tower route was completed.
- False King Allant was defeated and his Demon’s Soul was obtained.
- The boss-area Archstone was used to return to the Nexus.
- The Maiden in Black was followed below the Nexus.
- The weakened true King Allant was defeated.
- The Maiden was spared for the good ending or killed for the bad ending.
- The ending sequence and credits completed.
- The expected reward is present: Maiden in Black’s Demon’s Soul for the good ending, or Beast Demon’s Soul and Red Eye Stone for the bad ending.
References for this chapter
- Boletaria 1-4 Walkthrough - Demon's Souls English Wiki
- Blue Dragon - Demon's Souls English Wiki
- Old King Allant - Demon's Souls English Wiki
- End Game - Below The Nexus - Demon's Souls English Wiki
- The Maiden in Black - Demon's Souls English Wiki
- W1-3: Inner Ward - Demon's Souls Walkthrough & Guide
- Demon's Souls Remake - Endgame Walkthrough - Neoseeker
Optional Content, New Game+ and Completion Checklist
Finish the required campaign before beginning tendency cleanup or entering New Game+. The complete main route includes the four non-Boletarian Archdemons—Dragon God, Old Monk, Storm King, and Maiden Astraea—as well as the earlier bosses that lead to them: Armor Spider, Flamelurker, Fool’s Idol, Maneater, Adjudicator, Old Hero, Leechmonger, and Dirty Colossus. You must also defeat Phalanx, Tower Knight, Penetrator, and Old King Allant. One non-Boletarian Archdemon opens 1-3, but all four must be defeated before the final ending sequence. Pure White and Pure Black events should be handled one world at a time. New Game+ preserves your developed character, equipment, spells, materials, inventory, and tendency states, while keys, doors, shortcuts, NPC positions, and world progression reset.
1. Confirm the required campaign route before cleanup
The required route begins with Phalanx and Tower Knight in Boletarian Palace. In Stonefang Tunnel, defeat Armor Spider and Flamelurker, then complete the Dragon God Archdemon fight. In Tower of Latria, defeat Fool’s Idol and Maneater, then complete the Old Monk Archdemon fight. In Shrine of Storms, defeat Adjudicator and Old Hero, then complete the Storm King Archdemon fight. In the Valley of Defilement, defeat Leechmonger and Dirty Colossus, then complete the Maiden Astraea Archdemon fight.
These are separate progression categories. Fool’s Idol, Maneater, Adjudicator, Old Hero, Leechmonger, and Dirty Colossus are required earlier bosses; they are not interchangeable with the four non-Boletarian Archdemons. The four Archdemons are Dragon God, Old Monk, Storm King, and Maiden Astraea. Defeating any one of those four removes the Archstone requirement blocking 1-3, allowing access to the Penetrator route. However, the remaining Archdemons must also be defeated before the game permits the final sequence beneath the Nexus.
After the four Archdemons are dead, finish 1-3 and defeat Penetrator, then enter 1-4 and defeat Old King Allant. Before starting the final sequence, spend or store your souls, exchange Demon’s Souls for any spells, miracles, or weapons you want, and record unfinished tendency events. Once the last required Archdemon and Old King Allant are defeated, the game proceeds toward the ending rather than opening a conventional postgame area.
- Phalanx and Tower Knight are defeated.
- Armor Spider, Flamelurker, Fool’s Idol, Maneater, Adjudicator, Old Hero, Leechmonger, and Dirty Colossus are defeated.
- Dragon God, Old Monk, Storm King, and Maiden Astraea are defeated.
- Penetrator and Old King Allant are defeated before the ending choice.
2. Complete Pure White World Tendency events before lowering worlds
For a controlled first cleanup pass, remain in Soul Form while exploring each world. Dying in Body Form inside a world lowers that world’s tendency, while defeating bosses and certain named enemies can raise it. After a boss restores your Body Form, return to the Nexus and use the Nexus suicide method if you want to continue exploring without risking a World Tendency decrease in that Archstone. Reload the relevant Archstone or return to the Nexus before checking whether the displayed tendency has updated.
The principal Pure White events involve Executioner Miralda in 1-1, Scirvir the Wanderer in 2-2, Lord Rydell in 3-1, Satsuki in 4-1, and Selen Vinland in 5-2. Their objectives are not identical: some become hostile encounters, while others require dialogue, rescue actions, or a specific item. Pure White states also open special routes and rewards, including the Dragon Bone Smasher route in Stonefang and tendency-specific NPC or item events in the other Archstones.
Work through one world completely before changing its tendency. Check the World Tendency icon in the Nexus, enter the relevant Archstone, complete the event, and collect its reward before deliberately creating Body Form deaths. If a route or NPC is absent, do not assume the event failed; first verify that the world reached the required tendency and that any prerequisite boss, rescue, or item condition has been completed.
- World Tendency is checked before entering each special-event route.
- Miralda, Scirvir, Rydell, Satsuki, and Selen are visited when their conditions are active.
- Pure White routes and rewards are completed before deliberate Body Form deaths begin.
3. Handle Pure Black events one Archstone at a time
After finishing a world’s Pure White objectives, use Body Form deaths in that world to move it toward Pure Black. Spend your souls and prepare healing, status resistance, ranged options, or a reliable escape route before starting. Pure Black makes enemies more dangerous and adds a named NPC Black Phantom to each world: Miralda in 1-1, Scirvir in 2-2, Lord Rydell in 3-1, Satsuki in 4-1, and Selen Vinland in 5-2.
Pure Black also places one Primeval Demon in each Archstone. Defeating a Primeval Demon awards a Colorless Demon’s Soul and moves that world back toward white. If you intend to combine the named Black Phantom and Primeval Demon changes efficiently, locate both before beginning and defeat both during the same loaded visit. Do not return to the Nexus or use an Archstone between the two kills, because updating the world can remove the second encounter from the current tendency state.
The exact routes differ by world. Plan the named phantom and Primeval Demon locations before entering, then complete one Archstone and verify its new tendency before moving to the next. This prevents accidental tendency changes from closing an event and keeps the five Colorless Demon’s Soul opportunities organized.
- Pure White objectives are finished before lowering the world.
- The named Black Phantom and Primeval Demon locations are known before entering Pure Black.
- Both encounters are completed without returning to the Nexus between them when using the combined tendency route.
4. Finish optional bosses, NPC outcomes, and Demon’s Soul purchases
The Vanguard Demon in 4-1, the Red Dragon, the Blue Dragon, and Old King Doran are optional encounters. They can provide souls, equipment, or unique rewards, but none is required to reach the ending. The dragons can be postponed until your build is stronger. If you want Ostrava’s quest rewards and the Mausoleum Key, preserve him through his required rescue events. If you want Biorr available for the Penetrator fight, rescue him before entering that boss attempt.
Rescue or preserve Yuria, Sage Freke, and Saint Urbain if you want their full spell and miracle services. Stockpile Thomas remains the correct place to organize weapons, armor, upgrade stones, and consumables; storage is not an alternate leveled-character system. Before starting another cycle, review every Demon’s Soul in your inventory. Several souls have competing uses for spells, miracles, and unique weapons, so consuming one for ordinary souls can force a later playthrough.
Optional content is safest after the required campaign only if you have already decided which Demon’s Souls and tendency rewards matter most. If a trophy, ring, spell, miracle, or weapon requires a specific NPC state, complete that objective before killing or antagonizing the NPC.
- The Vanguard Demon, Red Dragon, Blue Dragon, and Old King Doran are defeated or deliberately deferred.
- Ostrava and Biorr outcomes are recorded.
- Yuria, Sage Freke, and Saint Urbain remain available for planned purchases.
- Demon’s Souls are reserved for desired spells, miracles, and unique weapons.
5. Prepare for New Game+ and avoid misusing the Statue of Reflection
After the ending and credits, the character automatically enters New Game+. Soul Level and stats carry over, along with weapons, armor, shields, rings, spells, miracles, consumables, upgrade materials, Demon’s Souls, ordinary inventory, and items stored with Stockpile Thomas. World Tendency and Character Tendency also carry over. If a world is Pure Black or Pure White when the cycle ends, that tendency state remains when the next cycle begins.
Keys reset. Opened doors, shortcuts, rescue states, NPC positions, and world progression also reset, so you must replay the campaign route and reopen access through the Archstones. The character is powerful and fully equipped, but the world is not a cleared postgame map. Write down missed rings, weapons, tendency events, NPC rewards, and boss-soul purchases before accepting the next cycle.
The Statue of Reflection in the Nexus supports appearance customization, saved character presets, forgiveness-related services, and access to Fractured World. It does not provide ordinary free stat redistribution or a separate storage slot for another leveled character. Use Stockpile Thomas for items, and plan your attributes before spending levels because New Game+ does not turn the Statue into a conventional respec menu.
- Character level, equipment, spells, miracles, materials, inventory, and Demon’s Souls are organized.
- World Tendency and Character Tendency states are recorded.
- Keys, doors, shortcuts, NPC positions, and quest progression are understood to reset.
- The Statue of Reflection is used for customization and its remake-specific services, not assumed to be a normal stat respec.
Before you move on
- Phalanx and Tower Knight are defeated.
- Armor Spider, Flamelurker, Fool’s Idol, Maneater, Adjudicator, Old Hero, Leechmonger, and Dirty Colossus are defeated.
- Dragon God, Old Monk, Storm King, and Maiden Astraea are defeated.
- Penetrator and Old King Allant are defeated.
- The desired ending is recorded: leave the Maiden in Black alive for the good ending, or kill her after the final sequence for the bad ending.
- Pure White events for Miralda, Scirvir, Lord Rydell, Satsuki, and Selen Vinland are completed or deliberately deferred.
- Pure Black named Black Phantoms and Primeval Demons are completed or deliberately deferred.
- Biorr, Ostrava, Yuria, Sage Freke, and Saint Urbain outcomes are recorded, and desired Demon’s Soul rewards are purchased.
- The Vanguard Demon, Red Dragon, Blue Dragon, and Old King Doran are defeated or intentionally left for later.
- Before New Game+, equipment, materials, spells, miracles, rings, consumables, and remaining Demon’s Souls are organized, with next-cycle objectives written down.
Finishing up
You have defeated the required campaign bosses: Phalanx, Tower Knight, Armor Spider, Flamelurker, Dragon God, Fool’s Idol, Maneater, Old Monk, Adjudicator, Old Hero, Storm King, Leechmonger, Dirty Colossus, Maiden Astraea, Penetrator, and False King Allant.
You have defeated the weakened King Allant below the Nexus and completed one ending: leave the Maiden in Black alive for the good ending, or kill her for the bad ending.
You understand that one non-Boletarian Archdemon opens Boletaria 1-3, while Dragon God, Old Monk, Storm King, and Maiden Astraea must all be defeated, along with False King Allant, before the final sequence below the Nexus becomes available.
You have either completed or deliberately deferred tendency events, optional bosses, NPC quests, and unique rewards with their requirements recorded for a later cycle.
You understand that Stockpile Thomas stores items and that the Statue of Reflection does not provide ordinary stat respec or alternate leveled-character storage.
Choose your next gameScreenshots & video
Game imagery for reference. Follow the written chapters above for the route and strategies.
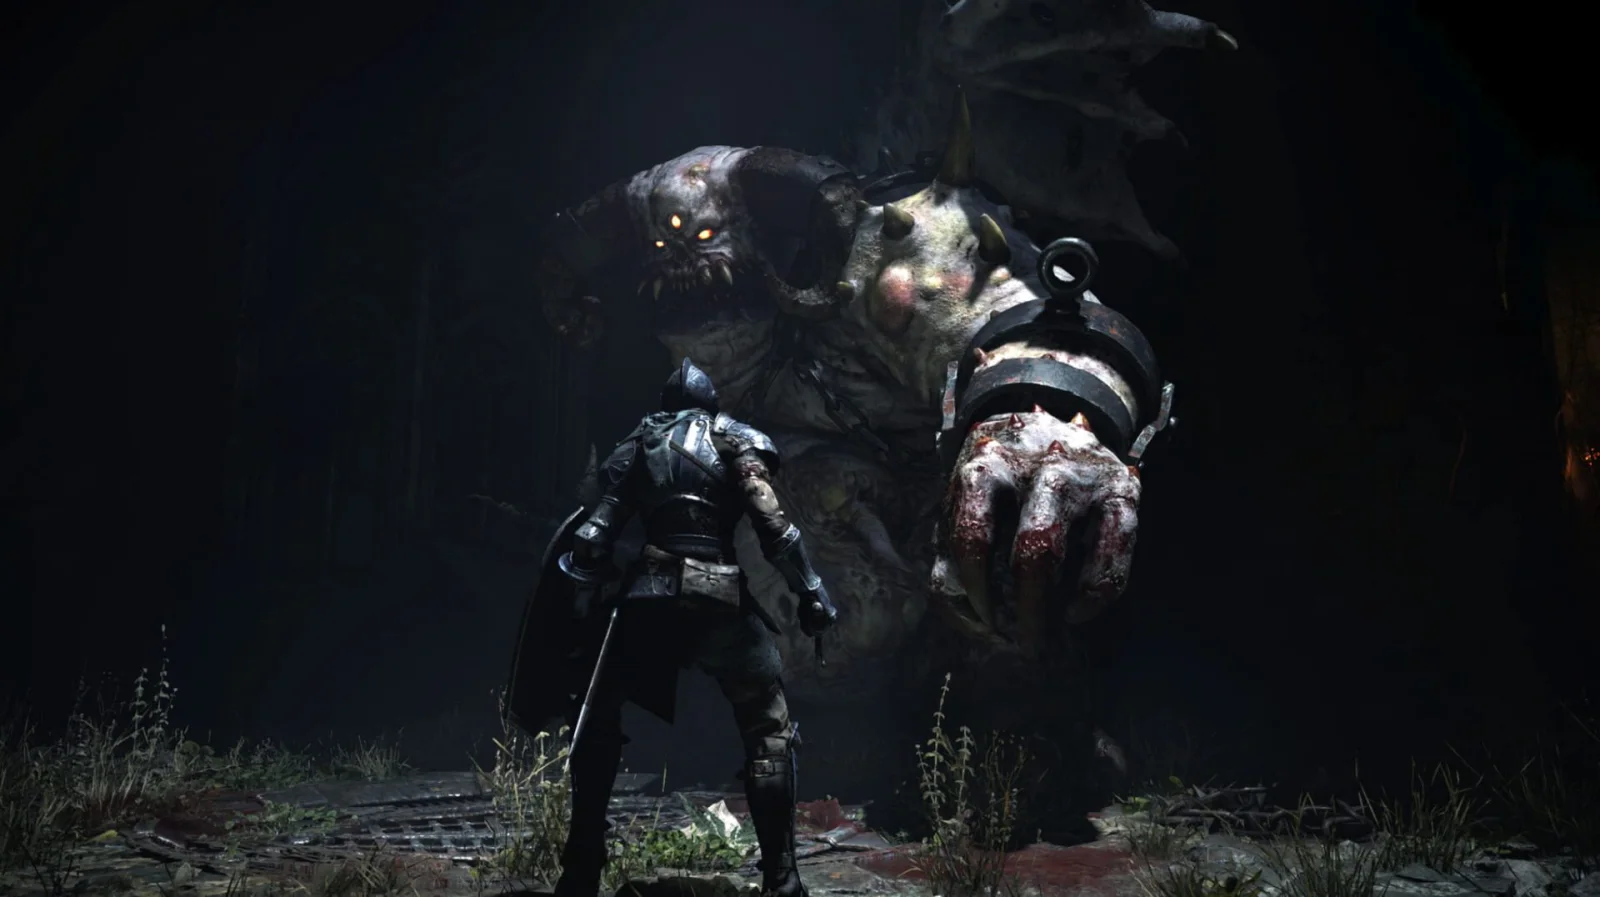
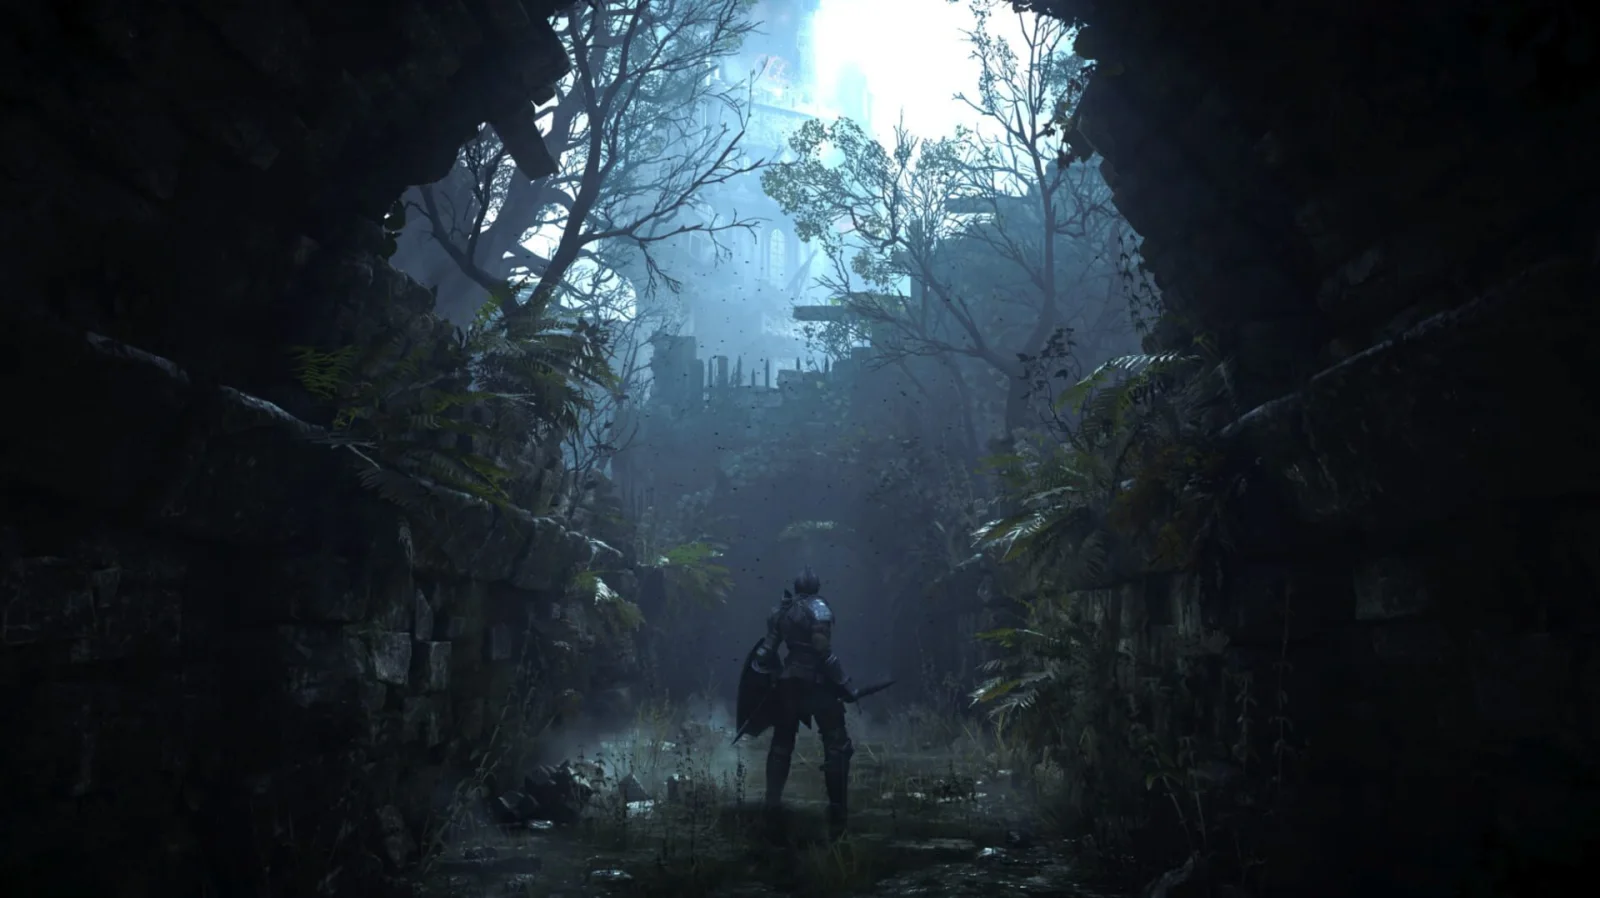
Sources & references
Our original guide draws on the references below. Check the edition at the top of this page before following controls or unlock requirements.
- Demon's Souls game tips for beginners – PlayStation
- First look: Demon's Souls character creator and Photo Mode – PlayStation Blog
- Demon's Souls PS5: Fractured Mode, Respec, World Tendency Details – GameSpot
- Demon's Souls PS5 Remake Lets You Save And Store Characters – GameSpot
- Settings & Controls – Demon's Souls Walkthrough & Guide
- Character Creation – Demon's Souls Walkthrough & Guide
- Demon's Souls Walkthrough & Guide — W1-1: Gates of Boletaria
- Boletaria 1-1 Walkthrough — Demon's Souls English Wiki
- The Monumental — Demon's Souls English Wiki
- Demon’s Souls PS5 Remake Boss Guide (All Bosses)
- Demon's Souls World Tendency explained | GamesRadar+
- The Lord’s Path (1-2) — Demon's Souls Remake Walkthrough
- The Lord’s Path — Demon's Souls Remake Walkthrough
- Boletaria 1-2 Walkthrough — Demon's Souls English Wiki
- Tower Knight — Demon's Souls English Wiki
- Biorr, of the Twin Fangs – Demon's Souls English Wiki
- Demon's Souls Remake: Biorr — How to Save
- Demon's Souls PS5 Remake Trophy Guide & Roadmap – PowerPyx
- W1-3: Inner Ward - Demon's Souls Walkthrough & Guide
- Boletaria 1-3 Walkthrough - Demon's Souls English Wiki
- Penetrator — Demon's Souls English Wiki
- Boletaria 1-4 Walkthrough - Demon's Souls English Wiki
- Demon's Souls Remake: The King's Tower (1-4) - walkthrough
- Demon's Souls Remake: Old King Allant - boss, how to defeat?
- End Game - Below The Nexus - Demon's Souls English Wiki
- Upgrade: How to upgrade weapons – Demon's Souls English Wiki
- Stonefang 2-1 Walkthrough – Demon's Souls English Wiki
- Armor Spider - Demon's Souls English Wiki
- W2-2: The Tunnel City — Demon's Souls Walkthrough & Guide — GameFAQs
- Strategy Guide for Demon's Souls Bosses on PlayStation 5
- World 3 — Tower of Latria — Demon's Souls English Wiki
- Tower 3-1 Walkthrough — Demon's Souls English Wiki
- Old Monk — Demon's Souls English Wiki
- Black Phantoms - Demon's Souls English Wiki
- Demon's Souls Walkthrough: Tower of Latria 3-1 — GamesRadar+
- W3-2: Upper Latria — Demon's Souls Walkthrough & Guide
- Demon's Souls Trophy Guide & Road Map
- World 5 — Valley of Defilement — Demon's Souls English Wiki
- Valley 5-1 Walkthrough — Demon's Souls English Wiki
- Stonefang 2-3 Walkthrough — Demon's Souls English Wiki
- Demon's Souls Remake — Underground Temple Walkthrough
- W4-2: The Ritual Path - Demon's Souls Walkthrough & Guide
- W4-3: Altar of Storms - Demon's Souls Walkthrough & Guide
- World 4 — Shrine of Storms - Demon's Souls English Wiki
- Satsuki - Demon's Souls English Wiki
- Selen Vinland - Demon's Souls English Wiki
- Demon’s Souls game tips for beginners - PlayStation
- Demon's Souls Remake - World Tendency Guide - SAMURAI GAMERS
- World Tendency - Demon's Souls English Wiki
- Demon's Souls PS5 - How to Change World Tendency
- How to unlock Fractured Mode in Demon’s Souls remake
- Demon's Souls Remake: Fractured world - what is it?
- Demon's Souls: Can You Respec Stats? Answered
- Demon's Souls On PS5 Changes Rolling, the Nexus, And More But Keeps The Old Monk Fight And Some Of The Original Cast
- Blacksmith Ed — Demon's Souls English Wiki
- Stockpile Thomas — Demon's Souls English Wiki
- Upgrade: Crushing — Demon's Souls English Wiki
- Upgrade: Quality — Demon's Souls English Wiki
- Upgrade: Sharp — Demon's Souls English Wiki
- Upgrade: Moon — Demon's Souls English Wiki
- Upgrade: Crescent — Demon's Souls English Wiki
- Blacksmithing — Demon's Souls Walkthrough & Guide
- Spells - Magic and Miracles - Demon's Souls English Wiki
- Demon's Souls PS5 Remake Spells & Miracles Locations
- Merchants - Demon's Souls Walkthrough & Guide
- Walkthrough: The Nexus - Demon's Souls Walkthrough & Guide
- Demon's Souls — Official PlayStation PS5 Game Page
- Demon's Souls: How to Beat the Penetrator Boss — Push Square
- Demon's Souls boss guide to defeat them all
- Iron Ring of Keys – Demon's Souls English Wiki
- Demon's Souls: Where to Find Biorr – Push Square
- Walkthrough: Epilogue - Demon's Souls Walkthrough & Guide
- Blue Dragon - Demon's Souls English Wiki
- Old King Allant - Demon's Souls English Wiki
- The Maiden in Black - Demon's Souls English Wiki
- Demon's Souls Remake - Endgame Walkthrough - Neoseeker
- New Game Plus - Demon's Souls English Wiki
- World Tendency - Demon's Souls Walkthrough & Guide
- Demon's Souls Remake - World Tendency Explained
About the game & collecting notes
- Platform
- Sony PlayStation 5
Step-by-step campaign walkthrough for Bluepoint Games’ PlayStation 5 remake of Demon's Souls. This guide covers the required routes through all five Archstones, every required boss, practical boss strategies, World and Character Tendency management, Fractured World, Nexus customization, NPC assistance, the two ending choices, and preparation for New Game+. It does not claim that the remake provides ordinary stat respec or alternate leveled-character storage.
Darryl Polo
Darryl Polo writes about emulation and retro games. What changes when an old favorite moves to another setup? That question connects his interest in tinkering with the games that made the hardware worth keeping.
Our editorial standardsFound a step that needs another look? Help us improve this guide.