
Death Stranding Director's Cut (PS5) — Complete Campaign Walkthrough
Complete Death Stranding Director's Cut on PS5 through the Prologue and Episodes 1–14, including Order No. 70 and the full ending, then access Episode 15: Tomorrow Is in Your Hands. The guide also covers the optional Director's Cut Ruined Factory story orders 77–79, the later Director's Cut equipment orders, and optional ranked, racing and firing-range activities. It distinguishes mandatory story progress from optional facility development, standard orders, infrastructure and challenges.

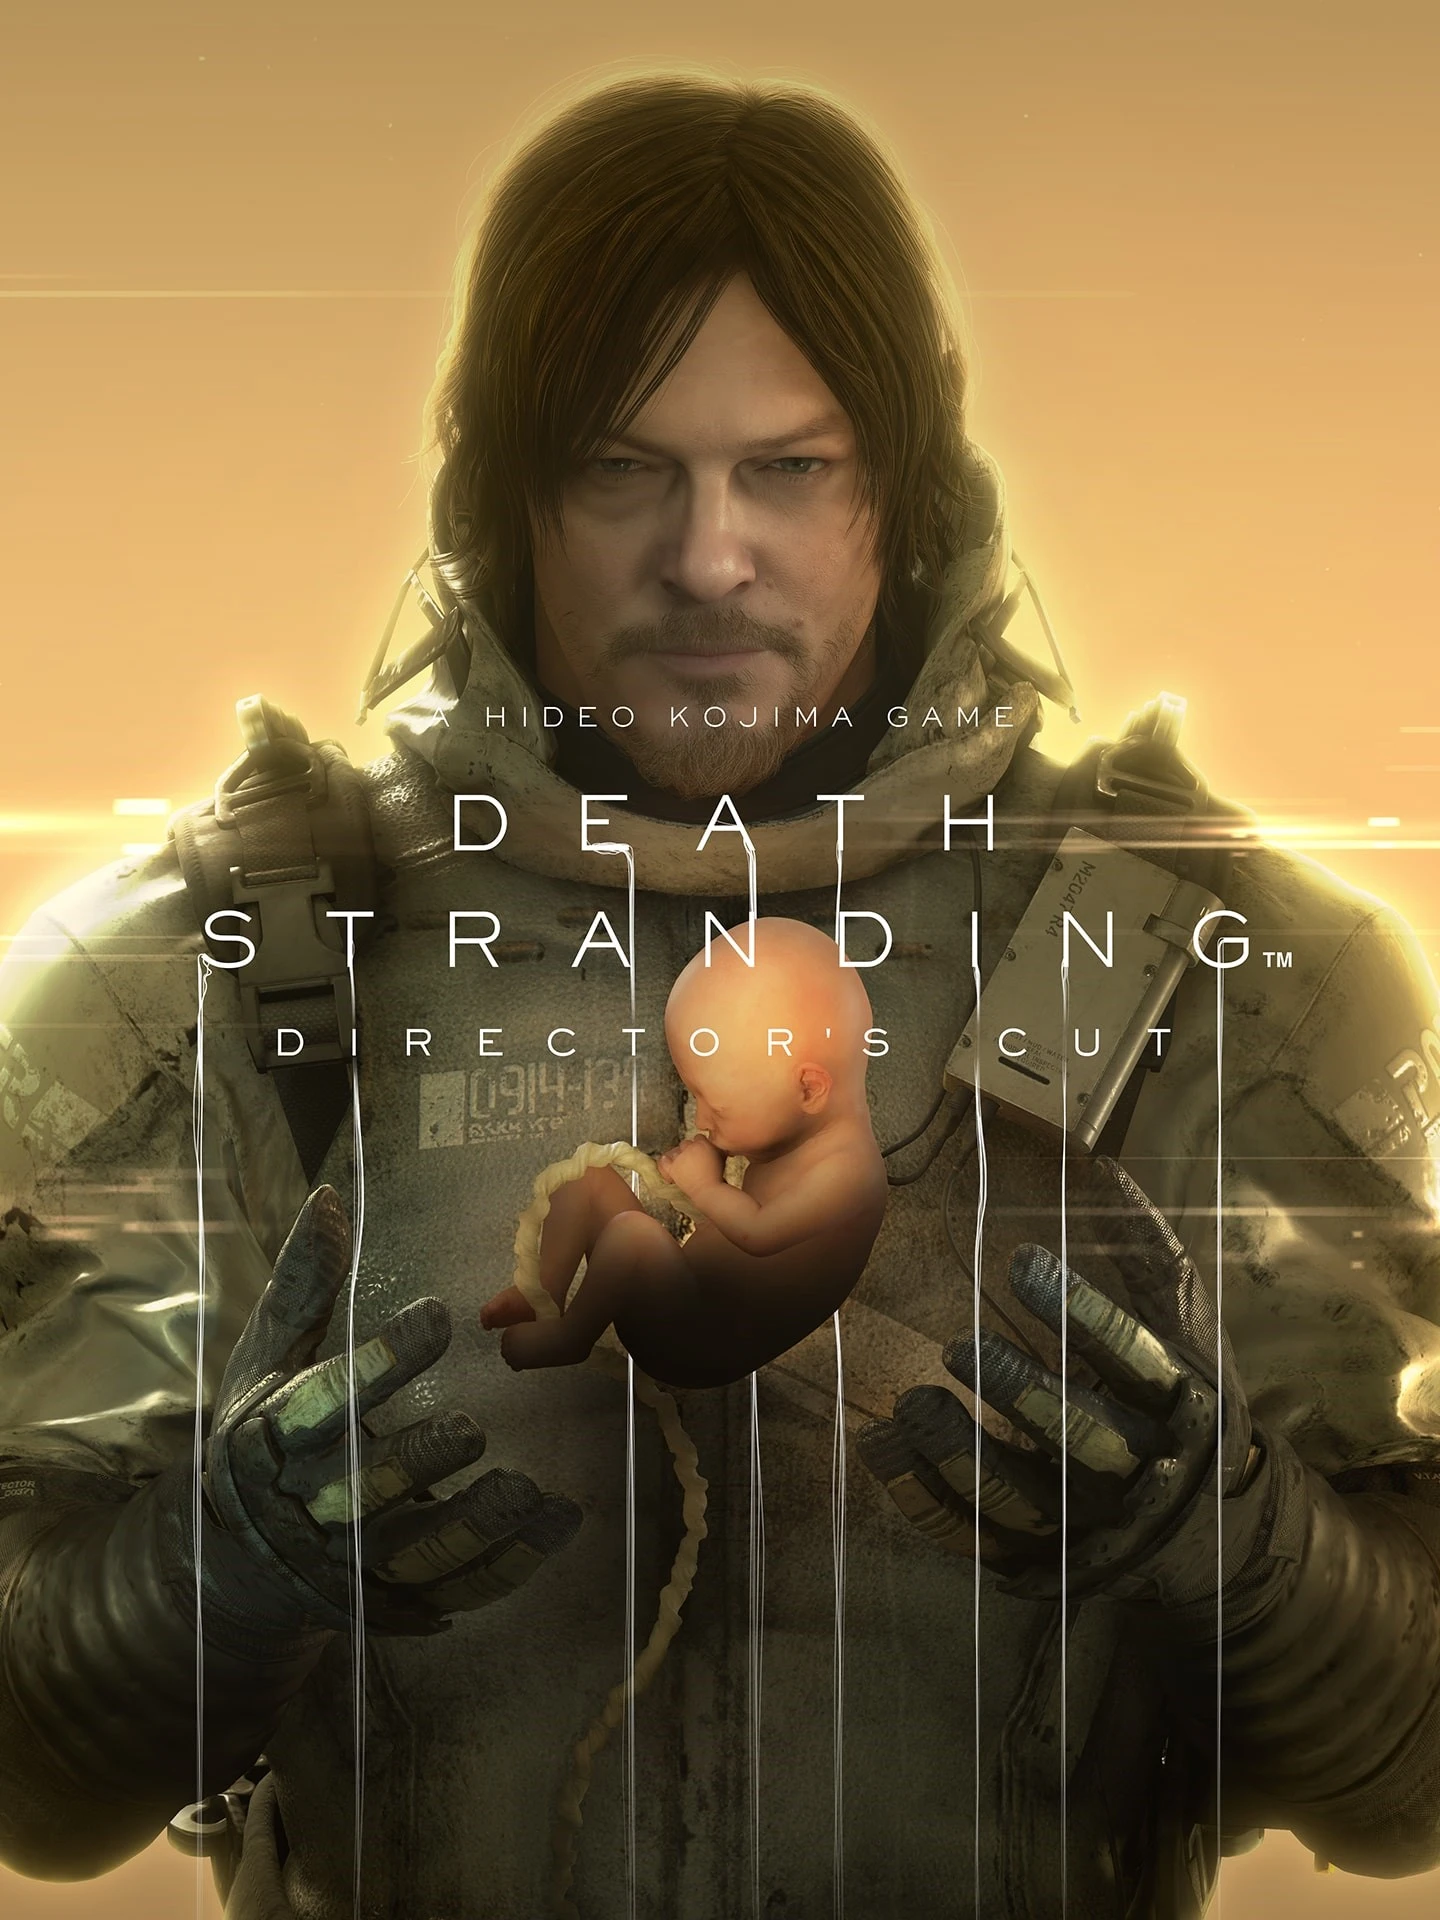
Find a copy
Death Stranding Director's Cut Sony PlayStation 5
We may earn a commission if you buy through these links, at no extra cost to you. As an Amazon Associate I earn from qualifying purchases.
Opens retailer search results. Check the model, edition, seller, availability and current price before buying.
Before you begin
This PS5 guide follows Sam through the Prologue and Episodes 1–14, then explains the Episode 15 postgame state.
Mandatory story Orders are separated from optional standard deliveries, facility development, roads, structures and ranked challenges.
Director's Cut additions unlock at different points: the Ruined Factory begins with Orders 7 and 8 and continues through Orders 77–79; Orders 80–82 are separate vog-preserved resource deliveries; Order 83 unlocks the Buddy Bot; and the Jump Ramp, Chiral Bridge, Firing Range and Racetrack have their own prerequisites.
Follow the chapters in order, but use the optional-content sections only when you want those rewards or a broader completion target.
Episode 15 is free roam after the ending, not a second mandatory story episode.
Set yourself up for the run
Learn balance, cargo placement, crouch movement, ladders, climbing anchors, PCCs, vehicles and BT avoidance before attempting long deliveries.
Prioritize the Orders for Sam that advance the story. Standard Orders, facility relationship levels, roads and most structures are optional unless a specific order asks for them.
Carry repair spray, blood bags, PCCs and climbing equipment according to the active route; do not assume every chapter requires a vehicle or a particular structure.
Director's Cut equipment is optional for the main campaign. Complete Order 77 for the Maser Gun and Support Skeleton, Order 80 for the Jump Ramp, Order 81 for the Chiral Bridge, Order 82 for its vog-preserved fuel-resource delivery, and Order 83 for the Buddy Bot when those orders become available.
Use Episode 15 for optional cleanup, remaining facilities, Director's Cut content and ranked activities.
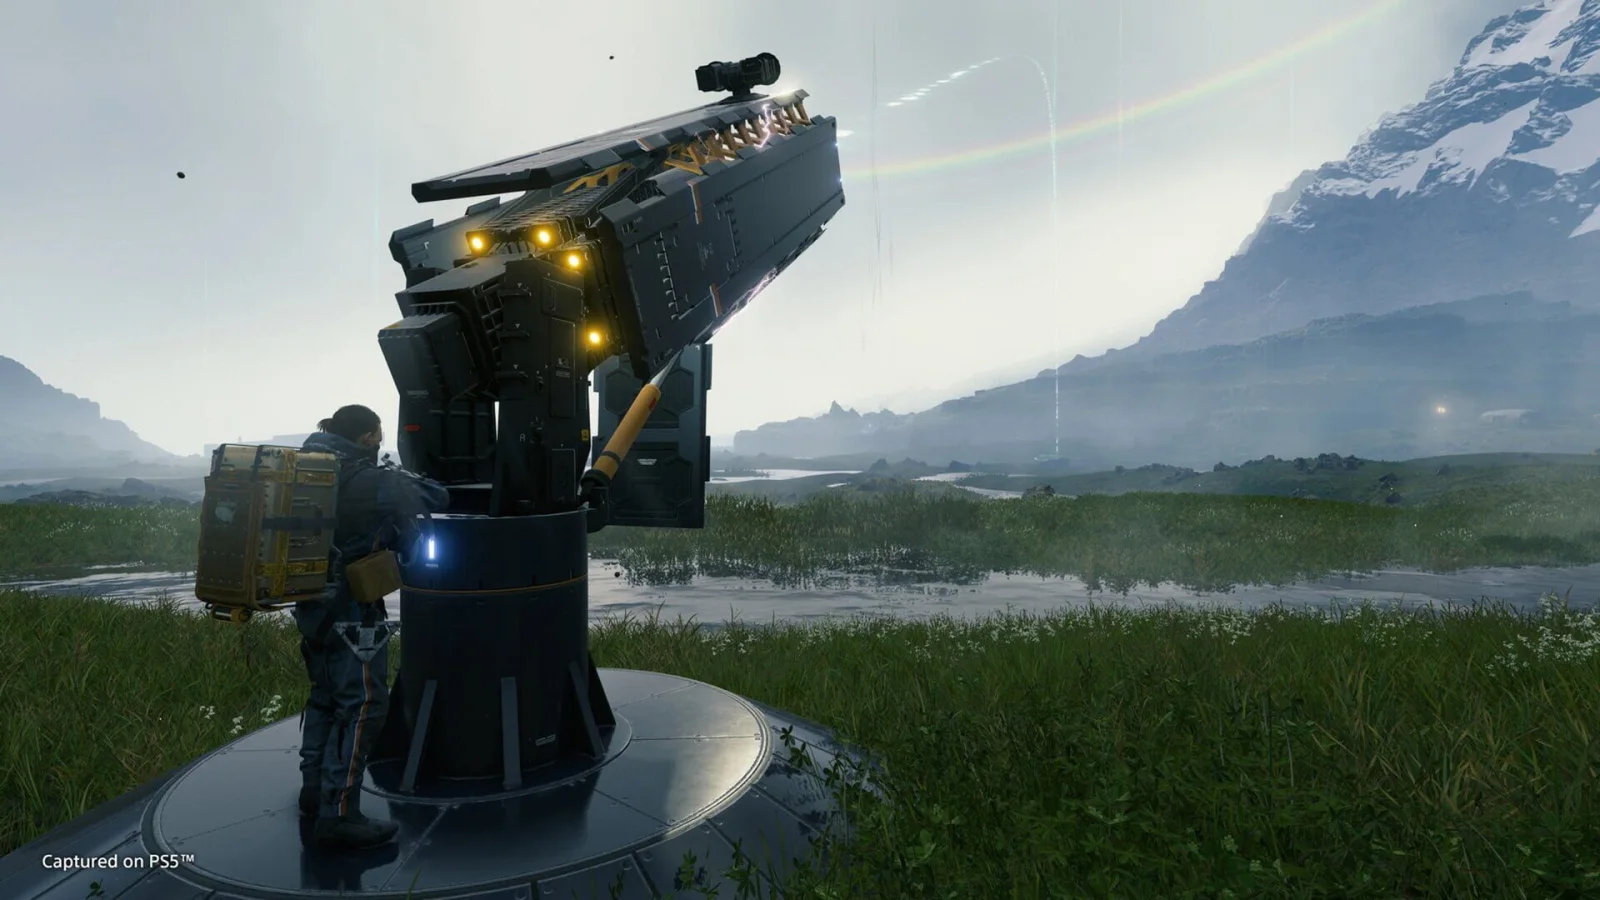
Prologue — Porter: First Deliveries and Essentials
Death Stranding Director’s Cut opens with Order No. 1, Smart Drug Delivery, which serves as the entire Prologue: Porter. Recover the smart-drug cargo, travel to Central Knot City, and complete the delivery while learning balance, cargo handling, route planning, slopes, and river safety. After the Prologue ends, the game moves into Episode 1: Bridget. Orders No. 2 and 3 are not part of the Prologue, although they follow it immediately in the opening presentation. Order No. 2 sends morphine to the Bridges isolation ward. Order No. 3 requires Sam to take the president’s body to the incinerator and then return to the Capital Knot City Distribution Center. Do not attempt to build PCC structures, generators, bridges, or roads here, and do not search for Lake Knot City or Director’s Cut missions. Those systems and locations belong to later progression.
1. Start Order No. 1: Smart Drug Delivery
After the opening scenes and the loss of Sam’s motorcycle, take control of Sam and collect the smart-drug cargo. Order No. 1, Smart Drug Delivery, is automatically accepted and is the required delivery for the Prologue. Keep the assigned cargo as your priority. Do not fill the remaining carrying capacity with unrelated lost cargo while the game is introducing its movement systems.
Open the map and use the marked destination to orient yourself toward Central Knot City. The route does not require a vehicle, PCC, generator, bridge, road, or other constructed structure. Travel on stable ground whenever possible, even if that means taking a wider route around steep drops, rock fields, or deep water.
- Order No. 1, Smart Drug Delivery, is active.
- The smart-drug cargo is loaded.
- Central Knot City is the marked destination.
2. Control Sam’s balance before cargo is damaged
Uneven ground causes Sam to lean, and the cargo can be damaged if he falls or repeatedly loses his footing. When the balance warning appears, use the indicated balance controls and slow down. Correct the lean before continuing instead of sprinting through it. Crouching can help you move more carefully across rough terrain and during cautious descents.
Treat rivers as hazards rather than automatic shortcuts. Follow the bank until you find a shallow crossing. If the current is strong or Sam begins losing his footing, stop advancing and move back toward stable ground. A longer route is safer than forcing a crossing that damages the smart drugs.
- Balance warnings are corrected promptly.
- Steep slopes are crossed under control.
- Deep or fast-moving water is avoided unless a safe crossing is clear.
3. Deliver the smart drugs at Central Knot City
Follow the destination marker to Central Knot City and use the delivery terminal when prompted. Confirm that you are submitting the smart-drug cargo before completing the delivery. This finishes Order No. 1 and completes the Prologue: Porter.
Allow the resulting scenes and instructions to finish. The next required objectives are presented as Episode 1: Bridget, even though the transition follows immediately after the Prologue. Do not treat the next delivery as a continuation of Order No. 1.
- The smart drugs are delivered at Central Knot City.
- Order No. 1 is marked complete.
- The story has advanced to Episode 1: Bridget.
4. Accept and complete Episode 1 Order No. 2: Morphine Delivery: Isolation Ward
When the Episode 1 sequence makes the morphine delivery available, accept Order No. 2, Morphine Delivery: Isolation Ward. Check the delivery preparation screen to confirm that the morphine is loaded before leaving. This is a short, story-required delivery in the Capital Knot City area, so prioritize the marked route and cargo condition over optional exploration.
Travel to the Bridges isolation ward and submit the morphine at the designated delivery point. Wait for the delivery confirmation and following story scenes before looking for another objective. Order No. 2 belongs to Episode 1: Bridget, not to the Prologue.
- Order No. 2 is accepted.
- The morphine reaches the Bridges isolation ward.
- The delivery confirmation and following scenes have finished.
5. Accept Episode 1 Order No. 3 and prepare the cremation route
After the isolation-ward sequence, accept Order No. 3, [TOP SECRET] Cremation: President’s Body. Load the president’s body and leave Capital Knot City through the marked exit. Because this cargo is substantial, leave unrelated optional cargo behind and avoid unnecessary detours.
Use controlled movement on descents and correct Sam’s balance before a lean becomes a fall. Follow the objective marker to the incinerator rather than trying to reach later-game facilities or construct infrastructure. The opening does not require a PCC or any other fabrication tool.
- Order No. 3 is active.
- The president’s body is loaded.
- Unrelated optional cargo has been left behind.
- The incinerator is the current destination.
6. Deliver the body at the incinerator
Reach the incinerator and complete the required delivery interaction. Remain at the location until the cremation sequence, delivery confirmation, and resulting story scenes have finished. The objective does not end merely when Sam reaches the building.
After the cremation sequence, check the new objective. Order No. 3 continues by requiring Sam to return to the Capital Knot City Distribution Center.
- The president’s body is delivered to the incinerator.
- The cremation sequence has completed.
- A return objective to the Capital Knot City Distribution Center is displayed.
7. Return to the Capital Knot City Distribution Center and finish the opening sequence
Follow the new objective back to the Capital Knot City Distribution Center. Complete the return objective and allow the next scenes and episode transition to finish. This return is part of Order No. 3 and is required for the opening sequence to advance.
Once the game presents the next main-story objective, the Prologue and the first Episode 1 opening orders are complete. Lake Knot City, Chiral Network expansion, PCC construction, generators, bridges, roads, and Director’s Cut additions are outside this chapter’s scope and should be handled only when later episodes introduce them.
- Sam has returned to the Capital Knot City Distribution Center.
- Order No. 3 is complete.
- The next main-story objective is available.
- No later construction or Director’s Cut objective has been incorrectly assigned to this opening chapter.
Before you move on
- Order No. 1, Smart Drug Delivery, is complete at Central Knot City.
- Episode 1 Order No. 2, Morphine Delivery: Isolation Ward, is complete.
- Episode 1 Order No. 3, [TOP SECRET] Cremation: President’s Body, is complete at the incinerator and after the required return to the Capital Knot City Distribution Center.
- The story has advanced beyond the opening sequence and the next main-story objective is available.
- The player has not attempted to complete Lake Knot City, network-construction, or Director’s Cut objectives in this chapter.
Episode 1 — Bridget: Continuity Checkpoint and Transition to Episode 2
This chapter begins after the preceding Prologue chapter has already covered Order No. 1 and Episode 1 has already covered Orders No. 2 and 3. Do not accept, replay or repeat either Order here. Confirm that Sam returned to the Capital Knot City Distribution Center after the cremation and BT escape, then allow the concluding Episode 1 scenes to finish. Once the episode completion notification appears, proceed into Episode 2: Amelie and follow the newly available mandatory objective from the Capital Knot City terminal. This checkpoint contains no vehicle, generator, PCC, Chiral Network construction or Director's Cut mission. If the game still shows Order No. 3 as incomplete, use the order log and the active story marker to identify the correct saved objective rather than beginning this chapter's route again.
1. Begin only after Episode 1's return sequence is complete
The preceding chapters have already handled the opening progression: the Prologue covered Order No. 1, and Episode 1: Bridget covered Order No. 2, Morphine Delivery: Isolation Ward, followed by Order No. 3, Cremation: President's Body. This chapter is not another walkthrough of those deliveries.
Your checkpoint is the return to the Capital Knot City Distribution Center after the cremation sequence and the BT escape. Sam should be back at the facility, with the Order No. 3 completion state recorded. Do not travel back to the isolation ward or incinerator, and do not select either completed order from a replay or fabrication menu.
- Order No. 1 was completed in the Prologue chapter.
- Orders No. 2 and 3 were completed in the preceding Episode 1 chapter.
- Sam has returned to the Capital Knot City Distribution Center.
- No duplicate delivery is active.
2. Allow the Episode 1 conclusion to register
At the Capital Knot City Distribution Center, finish any dialogue, briefing or automatic story interaction that is still pending. The episode is complete only after the return from the cremation objective has been recorded and the concluding story scenes have played.
If the terminal shows no new objective immediately, leave the interaction screen, check the order log, and wait for the next communication or story prompt. Do not assume that a missing prompt means Orders No. 2 or 3 must be repeated. The correct recovery action is to confirm the last completed objective and reload the latest valid save only if the completion state did not register.
- The return to Capital Knot City is recorded.
- The concluding Episode 1 scenes have finished.
- The order log no longer treats Order No. 3 as the current mandatory objective.
- Episode 1: Bridget is marked complete or its completion notification has appeared.
3. Start Episode 2 from the new story objective
After Episode 1 closes, the game advances to Episode 2: Amelie. Use the Capital Knot City terminal and follow the newly issued mandatory objective shown under Orders for Sam. This is the correct point to continue the campaign; do not select Orders No. 2 or 3 again.
Episode 2 begins the westward campaign and introduces the next set of story deliveries and destinations. Follow the active order marker and briefing rather than trying to reproduce the previous episode's route. The next chapter should provide the detailed Episode 2 route, including its required deliveries and the first expansion of Sam's available logistics.
- Episode 2: Amelie is displayed in the story or order interface.
- A new mandatory objective is available at Capital Knot City.
- The active objective is not Order No. 2 or Order No. 3.
- You are ready to proceed to the Episode 2 chapter.
4. Keep later systems out of this checkpoint
Do not add vehicle routes, generator placement, PCC construction, Chiral Network expansion or Director's Cut-exclusive missions to this transition. Those systems and missions belong to later progression and should not be used to fill the gap between Episode 1 and Episode 2.
You may review Sam's equipment and save before starting the next mandatory objective, but there is no need to build infrastructure or prepare a long expedition for this chapter. The purpose of this checkpoint is to verify continuity and send the player forward to the correct episode.
- No vehicle objective has been assigned here.
- No generator or PCC construction is required here.
- No Chiral Network construction is required here.
- No Director's Cut mission has been incorrectly inserted here.
Before you move on
- The Prologue's Order No. 1 is already complete.
- Episode 1 Orders No. 2 and 3 are already complete.
- Sam has returned to the Capital Knot City Distribution Center after Order No. 3.
- The Episode 1 concluding scenes or completion notification have appeared.
- Episode 2: Amelie is available.
- A new Episode 2 mandatory objective is shown at the Capital Knot City terminal.
- No duplicate Order No. 2 or Order No. 3 route remains in this chapter.
References for this chapter
Episode 2 — Amelie: Lake Knot City and Expanding the Network
Episode 2 sends Sam west from Capital Knot City, establishes the first eastern facilities and introduces the tools needed for longer deliveries. The mandatory campaign route is Orders 4, 5, 6, 7, 8, 9, 14 and 16. Orders 10, 11 and 12 are optional Orders for Sam and are not required to reach Episode 3. In the Director’s Cut, completing Orders 7 and 8 also unlocks optional Order 77 at the Distribution Center West of Capital Knot City, beginning the Ruined Factory sequence. Use the western Distribution Center as your main resupply point, protect cargo from falls and Timefall, and approach BT territory on foot when vehicles become unsafe. Episode 2 ends after the Port Knot City sequence and the Order 16 BT battle.
1. Complete Order 4 at the Waystation West of Capital Knot City
After the opening events at Capital Knot City, accept Order No. 4, Smart Drug Delivery: Waystation West of Capital Knot City. Prepare the supplied cargo, then travel west toward the Waystation. Use the route markers to identify steep slopes and river crossings before committing to them. When Sam’s load shifts, steady him rather than forcing him forward; a fall can damage the smart drugs and make the delivery harder.
The Waystation is the first western facility in this episode. Deliver the smart drugs at its terminal, then use the facility to fabricate equipment and prepare for the next order. Keep the ladder available for uneven ground, but do not overload Sam with unnecessary equipment.
- Accept Order No. 4 at Capital Knot City.
- Deliver the smart drugs to the Waystation West of Capital Knot City.
- Use the Waystation terminal before leaving.
2. Deliver Order 5 and build the postbox for Order 6
Accept Order No. 5, Rare Metal Delivery: Distribution Center West of Capital Knot City, from the Waystation. This order begins at the Waystation and ends at the Distribution Center farther west. Follow the marked route and use the terrain rather than taking steep shortcuts. Keep the cargo centered on Sam’s back and use both shoulder buttons whenever the ground becomes unstable.
At the Distribution Center, deliver the rare metals and activate the facility. Then return to the Waystation terminal for Order No. 6, Construction: Postbox. Take the PCC to the marked construction site and build the designated postbox. The postbox is a cargo locker for storing or retrieving deliveries; it is not a facility connection and does not replace the Chiral Network activation of a settlement.
- Accept and complete Order No. 5 from the Waystation.
- Activate the Distribution Center West of Capital Knot City.
- Construct the marked postbox for Order No. 6.
3. Complete the mandatory Distribution Center orders
At the Distribution Center West of Capital Knot City, accept Order No. 7, Recovery: Chiral Printer Interface. Enter the marked MULE area cautiously. Scan the camp, use cover and avoid carrying unnecessary cargo into the recovery zone. Retrieve the interface from the indicated postbox, then leave the camp by the safest route. If the MULEs become alert, retreat and break their search rather than allowing a prolonged fight to damage the order cargo.
After Order No. 7, accept Order No. 8, Collection: Chiral Crystals. Travel to the marked collection area and gather the required crystals. Return to the Distribution Center and recycle them through the terminal as instructed. These two orders are part of the mandatory Episode 2 campaign route, not optional errands.
In the Director’s Cut, completing both Orders 7 and 8 makes Order No. 77 available at this Distribution Center. Order 77 begins the optional Ruined Factory content. You may accept it now for its early equipment and story material, or postpone it without blocking Episode 3.
- Recover the Chiral Printer Interface for Order No. 7.
- Collect and recycle the required chiral crystals for Order No. 8.
- Confirm that the Distribution Center is connected.
- Check for optional Director’s Cut Order No. 77.
4. Deliver Order 9 to the Wind Farm
Accept Order No. 9, Power Supply Unit Delivery: Wind Farm, at the Distribution Center. The Wind Farm lies southeast across rough terrain and a BT-affected area. Carry only the equipment you need for the delivery, and consider fabricating a spare ladder or climbing anchor if the route has not been reinforced by other porters.
Use a vehicle on the safer approach if terrain allows, but leave it outside the active BT area when the Odradek begins warning and the environment becomes hazardous. Proceed on foot, crouch when necessary and move deliberately. Do not sprint through a BT field simply to save time; losing control or triggering a Catcher encounter can damage the power unit.
Deliver the power supply unit at the Wind Farm and complete the facility connection. Afterward, check the terminal for the next mandatory objective. The campaign does not require you to complete Orders 10, 11 or 12 before returning to Capital Knot City.
- Accept Order No. 9 at the western Distribution Center.
- Deliver the power supply unit to the Wind Farm.
- Complete the Wind Farm connection and prepare to return east.
5. Optional Orders 10, 11 and 12
Orders 10, 11 and 12 are optional Orders for Sam. They can provide useful rewards, music, interviews or additional delivery practice, but none is required for the Episode 2 campaign transition. Do not construct the Order 10 bridge or recover Order 12’s confidential documents merely to unlock the next story order.
If you want to complete Order No. 11, Resins Delivery: Distribution Center West of Capital Knot City, accept it at the Wind Farm after completing Order No. 9. The resin shipment is delivered back to the Distribution Center West of Capital Knot City. Use the established route, protect the cargo on steep ground and avoid unnecessary detours through BT territory.
Order No. 12, Recovery: Confidential Documents, is also issued from the western Distribution Center and sends Sam into a MULE-controlled area. Treat it as optional recovery work: scout first, retrieve the documents, then withdraw rather than extending the fight. Order No. 10, Construction: Bridge, is likewise optional and should not appear in the mandatory completion checklist.
- Leave Orders 10, 11 and 12 for optional cleanup if desired.
- If completing Order No. 11, accept it at the Wind Farm and deliver it to the western Distribution Center.
- Do not treat the bridge or confidential-document recovery as campaign prerequisites.
6. Return to Capital Knot City for Order 14, then finish Order 16
After completing Order No. 9, return to Capital Knot City and accept Order No. 14, Aid Package Delivery: Port Knot City. Repair the cargo before departure and bring container repair spray, a ladder, a climbing anchor and blood-based supplies if available. This is the required long-distance delivery that leads to the Port Knot City story sequence.
Travel west through the established route. Use the western Distribution Center as a resupply point if needed, but do not take risky shortcuts across steep ground or deep water. When the Odradek detects BTs, dismount any vehicle and continue carefully on foot. Deliver the aid package at Port Knot City and complete the resulting scenes.
After the Port Knot City sequence, accept and complete Order No. 16, Elimination: BT. Bring hematic equipment and blood bags if available. During the encounter, keep moving when tar rises, use openings to attack, and avoid spending every blood-based item at once. If Sam is dragged into the tar, regain solid footing before resuming the fight. The order is complete only after the BT has been defeated and the resulting story scenes have finished.
Episode 2 is complete when the game advances to Episode 3: Fragile. At that point, the mandatory Episode 2 checklist is Orders 4, 5, 6, 7, 8, 9, 14 and 16. Orders 10, 11 and 12, Order 77, Firing Range activities and other optional work can be completed later.
- Accept Order No. 14 at Capital Knot City.
- Deliver the aid package to Port Knot City.
- Complete the Port Knot City sequence.
- Defeat the BT in Order No. 16.
- Confirm that Episode 3: Fragile has begun.
Before you move on
- Orders 4, 5, 6, 7, 8 and 9 are complete.
- The Waystation, Distribution Center West of Capital Knot City and Wind Farm are connected.
- Order No. 14 has been accepted at Capital Knot City and delivered to Port Knot City.
- The Port Knot City story sequence has finished.
- Order No. 16 has been completed and its BT has been defeated.
- The game has advanced to Episode 3: Fragile.
- Orders 10, 11 and 12 are correctly treated as optional rather than campaign requirements.
- For Director’s Cut content, Orders 7 and 8 are complete and optional Order 77 is available at the western Distribution Center.
- Firing Range drills and other optional activities remain outside the Episode 2 completion requirement.
Episode 3 — Fragile: Central Region Routing and Fragile’s Orders
Episode 3 begins at Lake Knot City with mandatory Order 18, an aid-package delivery to the Distribution Center South of Lake Knot City. That arrival opens the main Central Region route through Orders 19–24, followed by Orders 27, 28, 30, 32, 33, 34 and 38. Orders 29, 31, 35, 36 and 37 are optional. Order 35 is a separate prototype delivery for the Director’s Cut racetrack and is not the same mission as mandatory Order 24. Use ladders, anchors, PCC structures, vehicles and floating carriers because ziplines are not yet available. Episode 3 ends after the Order 38 bomb sequence is resolved, the emergency provisions reach South Knot City and the game advances to Episode 4.
1. Start Episode 3 with Order 18
After the story arrival at Lake Knot City, accept Order 18: Aid Package Delivery: Lake Knot City. The destination is the Distribution Center South of Lake Knot City, located south of the city across rough Central Region terrain. This order is mandatory and must be completed before the Engineer, Elder and Craftsman sequence begins.
Take a ladder, climbing anchor, spare boots and a PCC. A vehicle can help on the approach, but rocky slopes and river crossings can make it slower than travelling on foot. Keep the aid package protected, avoid unnecessary falls and use existing bridges or ladders when they provide a safer crossing.
Deliver the aid package at the Distribution Center South of Lake Knot City. This arrival establishes the forward facility and serves as the transition into the next required sequence. Return to Lake Knot City or use the available terminal network as the game directs, then accept Orders 19, 20 and 21.
- Order 18 has been accepted at Lake Knot City.
- The aid package has been delivered to the Distribution Center South of Lake Knot City.
- The Engineer, Elder and Craftsman orders are now available.
2. Complete Orders 19, 20 and 21
Complete Order 19 to the Engineer, Order 20 to the Elder and Order 21 to the Craftsman. These destinations form the first major delivery loop in the Central Region. You can choose the order of the three destinations if the terminal allows it, but completing all three is required.
The Engineer’s delivery provides access to the Power Skeleton. Fabricate one when carrying heavy cargo or travelling through steep ground, but monitor its battery and recharge near a generator or another suitable power source. The Elder’s shelter sits on difficult elevated terrain, so use ladders and anchors instead of forcing Sam up unstable slopes.
The Craftsman’s route passes through a dangerous ruined area. Watch the Odradek’s scan behavior, move slowly when BTs are nearby and keep an escape route toward open ground. Hematic grenades and blood bags are useful if the BT encounter becomes unavoidable.
- Orders 19, 20 and 21 are complete.
- The Power Skeleton is available from the Engineer.
- The Engineer, Elder and Craftsman have been added to the route.
3. Finish Orders 22, 23 and 24
Accept Order 22 from the Craftsman and recover the toolbox from the marked area before returning it. The terrain around the ruined zone is awkward, so use a ladder or anchor rather than risking a fall with the toolbox. After delivery, accept Order 23 and retrieve the system server from the indicated MULE territory.
Scout the MULE camp before entering. If a clean approach is possible, avoid the camp; otherwise use stealth and the Bola Gun to incapacitate guards, then retrieve the server and leave before reinforcements surround Sam. Return the server to the required destination.
Order 24 is the mandatory prototype-bot delivery to the Distribution Center South of Lake Knot City. Complete it to unlock the next stage of the Central Region route and vehicle-related progression. Do not confuse this mission with optional Order 35, which is a separate prototype delivery used for the racetrack prerequisite.
- The Craftsman’s toolbox has been recovered for Order 22.
- The system server has been retrieved for Order 23.
- Mandatory Order 24 has been delivered to the Distribution Center South of Lake Knot City.
- Order 24 and optional Order 35 are clearly treated as different missions.
4. Connect the Weather Station and Timefall Farmers
After Order 24, accept Order 27 at the Distribution Center South of Lake Knot City and deliver the chiralium gauge to the Weather Station. Completing this order connects the Weather Station, provides PCC Level 2 and unlocks the regional weather forecast. Check the forecast before committing to long Timefall crossings.
Accept Order 28 at the Weather Station and deliver the wheat seed cargo to the Timefall Farmers. Protect the cargo from falls and avoid taking unnecessary detours through severe weather. Order 29, Construction: Safe House, may be available during this portion of the episode, but it is optional and does not block story progression.
A Safe House can be useful for resting, repairing equipment and creating a recovery point, but do not treat its construction as a mandatory Episode 3 objective.
- Order 27 has connected the Weather Station.
- The weather forecast and PCC Level 2 are available.
- Order 28 has connected the Timefall Farmers.
- Order 29 is marked optional.
5. Complete the Junk Dealer and Chiral Artist sequence
Accept Order 30 for the Junk Dealer and deliver the requested cargo. Then complete Order 32 by collecting the marked old components and returning them to the Junk Dealer. A floating carrier is useful for heavy loads, but do not overload it with unrelated cargo that could make the return trip unstable.
Accept Order 33 and carry the fragile chiral hourglass to the Chiral Artist’s Studio. Remove unnecessary equipment, keep the load balanced and avoid deep water, steep drops and combat. Afterward, accept Order 34 and transport the Chiral Artist back to the Junk Dealer.
Order 31 for the Film Director is optional. It can advance that facility and provide rewards, but it is not required for reaching South Knot City or completing Episode 3.
- Orders 30 and 32 are complete.
- The chiral hourglass has been delivered for Order 33.
- Order 34 has returned the Chiral Artist to the Junk Dealer.
- Order 31 remains optional.
6. Handle Orders 35, 36 and 37 as optional content
Order 35 is an optional prototype delivery from the Junk Dealer to the Distribution Center South of Lake Knot City. It is not mandatory Order 24 and should not be included in the required Episode 3 route. Complete it if you want to unlock the Director’s Cut racetrack.
After completing Order 35, read the message from Thomas Sutherland. Go to the racetrack terminal south of the Timefall Farm and provide 650 Chiral Crystals, 2,240 Metal and 1,960 Ceramics. The terminal then restores access to the racetrack and its time-trial and ranked activities.
Order 36, the sticky-gun retrieval, and Order 37, the sewing-kit delivery to the Cosplayer, are also optional. They provide equipment, facility progress or rewards, but neither is required before Order 38.
- Order 35 is optional and separate from Order 24.
- Thomas Sutherland’s racetrack message has been read if the racetrack is desired.
- The racetrack materials are 650 Chiral Crystals, 2,240 Metal and 1,960 Ceramics.
- Orders 36 and 37 are not being used as mandatory completion conditions.
7. Resolve Order 38 before entering South Knot City
Accept Order 38 at Lake Knot City and prepare for the delivery to South Knot City. Carry blood bags, a PCC and repair supplies. A vehicle or floating carrier can help, but abandon a vehicle if rocks, steep ground or rivers make it a liability.
When the suspicious package is added to the delivery, do not take it into South Knot City. Travel first to the Distribution Center South of Lake Knot City and enter the private room. This triggers the Fragile sequence that identifies the package as a bomb and gives Sam the correct disposal objective.
Follow the objective to the tar lake north of South Knot City. Throw the bomb package into the tar using the prompted interaction. Once the disposal sequence is complete, continue to South Knot City with the remaining emergency provisions and follow the delivery and story prompts until the city is connected and the episode-ending scenes begin.
- Order 38 is active with the emergency provisions intact.
- The private-room sequence at the Distribution Center South of Lake Knot City has triggered.
- The bomb package has been thrown into the tar lake.
- The remaining provisions have reached South Knot City.
- Episode 4 has begun.
8. Keep Director’s Cut extras separate
Ruined Factory Orders 77 and 78 are optional Director’s Cut missions unlocked after the relevant early-game progress at the K2 West Distribution Center. Order 79 is later postgame content. None of Orders 77–79 is part of mandatory Episode 3 completion.
The Firing Range, racetrack, ranked drills, facility upgrades, roads and other infrastructure projects are also optional. They can improve equipment and travel, but they do not replace or add to the required Episode 3 order list.
Ziplines are not available during this episode. Plan routes with ladders, anchors, PCC structures, generators, vehicles, floating carriers and roads that have already been built.
- Orders 77 and 78 are labeled optional Director’s Cut content.
- Order 79 is not assigned to Episode 3.
- No ziplines are required or assumed.
- Racetrack, Firing Range, ranked activities and infrastructure are clearly optional.
Before you move on
- Mandatory Order 18 has been completed from Lake Knot City to the Distribution Center South of Lake Knot City.
- Mandatory Orders 19, 20, 21, 22, 23 and 24 are complete.
- Mandatory Orders 27, 28, 30, 32, 33, 34 and 38 are complete.
- The Weather Station and Timefall Farmers are connected through the required story deliveries.
- Order 29 is optional and is not being used as a mandatory completion condition.
- Orders 31, 35, 36 and 37 are clearly optional.
- Order 35 has been completed only if the racetrack is desired, followed by Thomas Sutherland’s message and the required material donation.
- The Order 38 Fragile private-room sequence has been triggered at the Distribution Center South of Lake Knot City.
- The suspicious package has been thrown into the tar lake, the remaining provisions have reached South Knot City and Episode 4 has begun.
- Any remaining standard orders, facility upgrades, Ruined Factory missions, racetrack work, Firing Range drills and infrastructure projects are optional rather than unfinished Episode 3 requirements.
References for this chapter
- DEATH STRANDING DIRECTOR'S CUT: Beginner's Guide
- What new and returning players can expect in Death Stranding Director’s Cut, out today on PS5 — PlayStation.Blog
- Death Stranding Missions List — PowerPyx
- Death Stranding All UCA Facility Locations — PowerPyx
- Death Stranding Director’s Cut: How to Unlock the Racing Track
- Death Stranding Director’s Cut: How to Access the Ruined Factory
- Order No. 38: Emergency Provisions Delivery: South Knot City — Death Stranding Wiki
- Death Stranding - Story Mission Walkthroughs
Episode 4 — Unger: Deepening Story and BT Threat Management
Episode 4 consists of Order No. 39: Escape the Battlefield, a linear combat sequence triggered after the events surrounding South Knot City. A chiral storm carries Sam to a battlefield associated with the mysterious man later identified as Clifford Unger. This is not a normal BT zone or delivery route: Sam must follow wooden walkways and battlefield trenches, use temporary weapons and blood bags, and fight through several encounters while tracking Unger’s position. The Odradek indicates the direction of the next objective, while flaming tracks help identify Unger’s route after each retreat. Use trenches, wreckage and walls as cover, eliminate soldiers who can flank or suppress Sam, and heal before beginning each new pursuit. Unger is defeated across four confrontations. After the final battle and story scenes, Sam returns outside South Knot City. Recover the cargo and equipment scattered at the return point, then follow the next story objective to Mama’s lab and Episode 5.
1. Start Order No. 39 and leave the normal delivery mindset behind
Order No. 39, Escape the Battlefield, begins as a scripted story mission after the preceding South Knot City events. Sam is transported to a battlefield and is no longer navigating the ordinary Central Region map. There are no terminals, standard delivery destinations or normal route-planning objectives inside this sequence. Your two objectives are to find a way out of the battlefield and find the mysterious man.
At the opening position, move along the wooden walkways toward the battlefield interior. Pick up useful dropped cargo and nearby equipment as you go, but keep moving toward the first shelter and cutscene rather than exploring every side area. The mission’s weapons and supplies are placed for this sequence, so you do not need to load Sam with a normal-world combat kit before starting it.
- Confirm that Order No. 39: Escape the Battlefield is active.
- Follow the wooden walkways toward the first shelter.
- Collect nearby weapons, ammunition and blood bags when the route is safe.
- Do not search for a normal terminal or open-world delivery destination.
2. Use trenches and cover during the first armed encounters
After the initial scene, continue through the battlefield trenches. The soldiers use firearms and can throw grenades, so open ground is dangerous even when the route ahead appears short. Crouch behind trench corners, ruined walls, wreckage and other solid cover. Move between protected positions instead of sprinting through exposed areas.
An assault rifle is a dependable choice for the battlefield fights because it can deal with soldiers at useful range. A handgun can work, but it is less efficient when several enemies are firing at once. Keep a blood bag available and use it before Sam’s health becomes critical. Reload only while protected, and avoid standing in the open to collect ammunition while enemies still have line of sight.
- Stay inside trenches or move from cover to cover.
- Use an assault rifle or another reliable firearm when available.
- Watch for grenade throws and reposition around corners.
- Heal before entering the next exposed section.
3. Follow the Odradek and the mysterious man’s flaming tracks
The Odradek points toward the next objective, and the battlefield layout provides a more direct visual clue after Unger retreats: follow the flaming tracks left along the ground. These tracks lead through the trenches and ruined battlefield toward the next confrontation. If the route seems unclear, return to the last safe trench position and look for the Odradek’s direction rather than crossing the battlefield randomly.
Unger is protected by ordinary soldiers. Do not chase him into an exposed area while ignoring nearby enemies. First use cover to remove soldiers who are aiming at Sam or trying to flank him. Once the immediate firing angles are controlled, move toward Unger and fire when he is visible. When he retreats, stop spending ammunition on empty terrain and resume following the Odradek and flaming tracks.
- Use the Odradek to confirm the direction of travel.
- Follow the flaming tracks after Unger retreats.
- Deal with soldiers who can shoot or flank Sam before pursuing Unger.
- Advance only after the next section is identifiable.
4. Survive the successive battlefield encounters
The mission repeats the same basic pattern: advance through trenches and ruined positions, fight soldiers, locate Unger, damage him, and follow his retreat. Later sections contain heavier pressure and more dangerous firing lanes. Approach each area from cover and avoid crossing the center of a battlefield unless no protected route is available.
If several soldiers detect Sam at once, retreat to the nearest trench corner or solid wall instead of trying to win the exchange in the open. Let enemies approach a controlled angle, then fire from cover. Grenades can help against grouped enemies, but preserve enough ammunition and blood bags for the later encounters. The battlefield supplies can be collected between fights; do not risk a pickup while soldiers are actively watching the location.
- Treat every pursuit as a separate combat encounter.
- Retreat when multiple enemies gain clear firing angles.
- Use grenades selectively against groups or entrenched threats.
- Collect additional blood bags and ammunition between fights when safe.
5. Defeat Unger for the fourth time and return to South Knot City
Continue the pursuit until the fourth and final confrontation. Unger must be defeated across four encounters; defeating one group of soldiers does not complete Order No. 39. Keep using cover, control the surrounding soldiers first, and fire on Unger during clear openings. The mission advances automatically after the final battle, so do not leave the area or search for a separate exit once the encounter is won.
After the final confrontation, allow the following scenes to finish. Sam returns to the normal world outside South Knot City, where cargo and battlefield equipment are scattered on the ground. Pick up whatever you want to keep before continuing. The next story progression directs Sam toward Mama’s lab, beginning Episode 5: Mama.
- Defeat Unger in the fourth confrontation.
- Let the post-battle scenes complete.
- Recover useful cargo and equipment outside South Knot City.
- Follow the next story objective to Mama’s lab.
- Confirm that Episode 5: Mama has begun.
Before you move on
- Order No. 39: Escape the Battlefield is complete.
- Unger has been defeated during the fourth confrontation.
- The post-battle story scenes have finished.
- Sam has returned outside South Knot City and the dropped cargo is available for recovery.
- The next story objective leads to Mama’s lab and Episode 5: Mama.
- The Episode 4 completion trophy or notification has appeared, if trophy notifications are enabled.
References for this chapter
- [Order No. 39] Escape the Battlefield Walkthrough — Neoseeker
- Death Stranding — Order No. 39 Escape the Battlefield Mission Walkthrough — Samurai Gamers
- Death Stranding Walkthrough Guide: Episode 4 — Unger — GameSpot
- Chapter 4: Unger Walkthrough — Gamepressure
- DEATH STRANDING DIRECTOR'S CUT Trophy Guide & Roadmap (PS5)
Episode 5 — Mama: Boss Introduction and Equipment Upgrades
Episode 5 moves Sam into the mountain region. Complete Orders No. 41, 43 and 44 to connect the Waystation North of Mountain Knot City, the Distribution Center North of Mountain Knot City and Mountain Knot City itself. Then return to Mama’s Lab, receive the Cord Cutter upgrade, transport Mama toward Lockne and defeat the Chiral Catcher before completing the episode at Mountain Knot City. Armour Plate, upgraded assault rifles and blood-based weapons make the route safer. Director’s Cut Order No. 77 is optional: it belongs to the Ruined Factory content and can be completed earlier from the K2 West Distribution Center to unlock the Maser Gun and Support Skeleton.
1. Start Episode 5 at Mama’s Lab and prepare for the mountain route
After the Clifford Unger sequence, travel to Mama’s Lab north of South Knot City and enter the facility. The visit starts the Episode 5 story scenes, but the next mandatory order is accepted at the Distribution Center South of Lake Knot City. If your blood, stamina or equipment is low, use a private room before beginning the route.
Do not fill Sam’s available cargo space with optional deliveries. Bring a PCC, ladder, climbing anchor, container repair spray and blood bags. A floating carrier is useful for the mountain approaches, but ladders and anchors remain important because the route includes steep slopes and broken ground. Vehicles are helpful on flatter sections but become awkward on rough inclines.
- Visit Mama’s Lab and finish the opening story scene.
- Rest and replenish blood before accepting the next order.
- Carry climbing tools, repair spray and at least one blood bag.
2. Complete Order No. 41 at the Waystation North of Mountain Knot City
At the Distribution Center South of Lake Knot City, accept Order No. 41, Building Materials Delivery: Waystation North of Mountain Knot City. Load all required materials and follow the marked route north toward the Waystation. Keep the materials secured on Sam’s back or on a carrier, and avoid unnecessary falls because the order has a cargo-condition requirement.
MULE territory lies along the approach. Use the Odradek to identify scans, crouch or stop when a scan is about to pass over Sam, and move around the camp instead of entering its center. If avoiding the camp is impossible, isolate enemies and use non-lethal takedowns rather than lethal weapons. Deliver the materials and connect the Waystation to the Chiral Network.
This connection unlocks the Armour Plate and Non-Lethal Assault Rifle Lv. 1. Fabricate the armour if you expect to cross enemy territory, and carry the non-lethal rifle if you prefer to disable MULEs instead of bypassing them.
- Accept Order No. 41 at the Distribution Center South of Lake Knot City.
- Deliver the building materials to the Waystation North of Mountain Knot City.
- Connect the Waystation and fabricate Armour Plate or a non-lethal rifle if needed.
3. Complete the urgent blood delivery to the northern distribution center
At the Waystation, accept Order No. 43, the urgent Blood Delivery to the Distribution Center North of Mountain Knot City. This order is timed, so select a direct route and avoid detours. The delivery must be completed within the stated time limit, but do not sacrifice the cargo by repeatedly falling or forcing Sam through unsafe water.
Use established paths, ladders and any nearby player structures. When passing MULE territory, watch the Odradek and skirt the camp rather than stopping to fight everyone. If enemies detect Sam, keep moving toward the destination and use non-lethal fire only to clear a path. Deliver the blood at the northern distribution center and connect the facility to the network.
The connection grants the Assault Rifle Lv. 2 and Non-Lethal Assault Rifle Lv. 2. The upgraded non-lethal rifle can use different ammunition types, making it useful for both human threats and some BT situations, but conserve blood-based ammunition for areas where it is needed.
- Accept Order No. 43 at the Waystation.
- Reach the Distribution Center North of Mountain Knot City before the timer expires.
- Connect the distribution center and obtain the upgraded assault-rifle schematics.
4. Deliver Order No. 44’s antimatter bomb to Mountain Knot City
After the northern distribution center sequence, accept Order No. 44, Antimatter Bomb Delivery: Mountain Knot City. The bomb is sensitive cargo. Plan the route before leaving, avoid falls and rough vehicle impacts, and do not rush down steep slopes simply to save a few minutes. A vehicle can help on suitable ground, but abandon it when rocks or sharp inclines make collisions likely.
Use the route through the Waystation area and then continue southeast toward Mountain Knot City. Stop to restore stamina and repair containers when necessary. The objective is not only to arrive but to preserve the bomb’s condition, so use bridges, roads, ladders and stable terrain rather than improvising across cliffs or deep water.
Deliver the bomb at Mountain Knot City. The resulting scenes explain why Lockne will not join the UCA and direct Sam back to Mama’s Lab. Order No. 45, Fresh Pizza Delivery for Peter Englert, may appear after this point, but it is optional and does not replace Order No. 46.
- Accept Order No. 44 at the northern distribution center.
- Protect the antimatter bomb from falls and vehicle impacts.
- Deliver it to Mountain Knot City and complete the Lockne scenes.
5. Return to Mama’s Lab and receive the Cord Cutter upgrade
Travel back to Mama’s Lab after the Mountain Knot City sequence. The lab scenes provide Sam with upgraded Cuff Links containing the Cord Cutter. This is a required story upgrade, not an optional fabrication item. It allows Sam to sever BT umbilical cords when the game presents the appropriate stealth opportunity.
Before accepting the next order, use the terminal to fabricate blood bags, hematic grenades and a blood-based firearm if available. Repair cargo and save room for Mama, who must be carried during the next story order. Do not leave the lab with a large stack of unrelated deliveries.
Order No. 42, Collection: Scattered Rare Mineral Resources, is an optional delivery associated with this part of the game. Complete it only if you want the extra resources; it is not required to advance Episode 5.
- Return to Mama’s Lab after Order No. 44.
- Receive the upgraded Cuff Links with the Cord Cutter.
- Prepare blood bags, hematic weapons and free cargo capacity.
6. Start Order No. 46 and defeat the Chiral Catcher
Accept Order No. 46, Mama Delivery: Mountain Knot City. Sam must take Mama to meet Lockne. When the story encounter begins outside the lab, a Chiral Catcher appears. This is a mandatory boss encounter, not merely a hazard to run past.
If you need to fight without protecting Mama’s carried condition, place her safely inside the lab before engaging the Catcher, then return for her after the battle. Use hematic grenades or a blood-based assault rifle against the Catcher’s exposed head and body. Keep moving sideways when it fires black tar or lunges, and watch the ground when it burrows so you can react to its reappearance.
Blood bags let Sam continue using hematic weapons without exhausting his own blood supply. Pick up weapons supplied in the arena when your ammunition runs low. If Sam is overwhelmed, concentrate on creating distance, recovering blood and attacking only when the Catcher is exposed; the fight ends after it takes enough damage.
- Accept Order No. 46 at Mama’s Lab.
- Bring blood bags and hematic weapons into the Catcher encounter.
- Defeat the Chiral Catcher before continuing with Mama.
7. Carry Mama to Mountain Knot City and finish the episode
After the Catcher is defeated, collect Mama and resume the trip to Mountain Knot City. Use the northern Waystation and distribution center as resupply points if needed. A Reverse Trike is useful on established routes, but switch to careful foot travel or a carrier when the terrain becomes rocky and steep.
Protect Mama’s cargo from falls, deep water and unnecessary combat. You do not need to clear every MULE camp; bypass patrols whenever possible and keep moving toward Mountain Knot City. Once you reach the city, deliver Mama and complete the Lockne and Mama story scenes.
Episode 5 is complete when the laboratory and Mountain Knot City scenes finish and the game advances to Episode 6: Deadman. The episode also provides access to later mountain-region work and the Director’s Cut Cargo Catapult structure through the appropriate PCC level.
- Recover Mama after the Catcher battle.
- Deliver her safely to Mountain Knot City.
- Confirm that Episode 6: Deadman appears after the final story scenes.
8. Optional Director’s Cut equipment: Order No. 77
Director’s Cut Order No. 77 is separate from Episode 5’s required orders. At the K2 West Distribution Center, complete the prerequisite early orders that make the Ruined Factory mission available, then accept Order No. 77, Collection: Cargo Discovered in the Ruined Factory. The mission uses stealth and the Maser Gun recommendation is tied to this new content.
Completing the Director’s Cut Ruined Factory order chain unlocks the Maser Gun and Support Skeleton for fabrication. The Maser Gun stuns human enemies, while the Support Skeleton reduces the burden of heavy cargo and includes a battery-consuming movement boost. These items can make Episode 5 easier, but neither is required for Orders No. 41, 43, 44 or 46.
- Visit the K2 West Distribution Center if pursuing Director’s Cut extras.
- Complete the prerequisite Ruined Factory orders and Order No. 77.
- Fabricate the Maser Gun and Support Skeleton if you want the optional upgrades.
Before you move on
- Order No. 41 has connected the Waystation North of Mountain Knot City and unlocked Armour Plate and Non-Lethal Assault Rifle Lv. 1.
- Order No. 43 has connected the Distribution Center North of Mountain Knot City and unlocked the upgraded assault-rifle schematics.
- Order No. 44’s antimatter bomb has been delivered to Mountain Knot City.
- Mama’s Lab has provided the Cord Cutter upgrade.
- The Chiral Catcher has been defeated during Order No. 46, and Mama has been delivered to Mountain Knot City.
- The final Mama and Lockne scenes have finished and Episode 6: Deadman is now active.
- If pursuing Director’s Cut extras, Order No. 77 and its Ruined Factory chain have been completed and the Maser Gun and Support Skeleton are available for fabrication.
References for this chapter
- DEATH STRANDING DIRECTOR’S CUT: Beginner’s Guide
- What new and returning players can expect in Death Stranding Director's Cut, out today on PS5
- Episode 5: Mama — Game of Guides
- Death Stranding Missions List — PowerPyx
- Order No. 43: Blood Delivery: Distribution Center North of Mountain Knot City — Neoseeker
- Order No. 44: Antimatter Bomb Delivery: Mountain Knot City — Neoseeker
- Order No. 46: Mama Delivery: Mountain Knot City — Neoseeker
- Death Stranding Director’s Cut: How to Unlock the Maser Gun and Support Skeleton
Episode 6 — Deadman: Labs, Vehicles and Tactical Mobility
Episode 6 begins after Order 46, with BB unavailable while Sam reconnects the mountain facilities. The mandatory campaign route is Orders 47, 48, 50, 51, 52 and 53. Order 49, the antibiotics delivery to the Mountaineer, is optional facility-development content and is not required to advance to Episode 7. Use the All-Terrain Skeleton, climbing equipment, blood supplies and powered mountain gear to cross steep snowfields safely. Vehicles are useful on roads and broad approaches but are unreliable on the steepest terrain. Finish Order 53, then follow the objective to Deadman’s cabin to trigger the Episode 7 transition.
1. Prepare at Mountain Knot City
After completing Order 46 and the Private Room scenes, check the Orders for Sam terminal at Mountain Knot City. The mandatory Episode 6 route is Orders 47, 48, 50, 51, 52 and 53. Order 49 can be accepted if you want to improve the Mountaineer’s facility connection, but it is optional and is not needed to complete Episode 6 or begin Episode 7.
BB is unavailable for the chapter’s mountain deliveries, so prepare for BT territory without relying on BB’s normal warning assistance. Carry a PCC, ladders, climbing anchors, container repair spray, blood bags and spare footwear. Hematic grenades or another available anti-BT weapon are useful for unavoidable encounters. Avoid filling the carrier with optional construction materials unless you are deliberately building routes.
- Begin Episode 6 after Order 46.
- Accept Order 47 or Order 48 at Mountain Knot City.
- Prepare climbing equipment, repair spray, blood supplies and a PCC.
- Treat Order 49 as optional rather than part of the campaign requirement.
2. Complete Order 47 for the Roboticist
Accept Order 47 at Mountain Knot City and deliver the high-bounce spring to the Roboticist’s shelter. The route climbs through rough, mountainous terrain and may include Timefall or BT activity. Follow broad contours rather than cutting directly across the steepest slopes. When the Odradek reacts, crouch and move carefully, or use anti-BT equipment if the route becomes unavoidable.
Complete the delivery at the Roboticist’s terminal and claim the Level 1 All-Terrain Skeleton. Equip it before the next major snow crossing. It improves handling on uneven ground and supports heavier loads, but powered equipment consumes battery. Recharge at a generator, vehicle or terminal before leaving for a long climb.
- Deliver the high-bounce spring to the Roboticist.
- Claim the Level 1 All-Terrain Skeleton.
- Equip it and recharge before the next mountain crossing.
3. Complete Order 48 for the Doctor
Accept Order 48 at Mountain Knot City and deliver all three medicine-sample containers to the Doctor’s shelter. Keep the cargo balanced and use ladders or climbing anchors on exposed shelves and steep descents. Repair damaged containers before entering the worst weather, because a fall during the final approach can damage several containers at once.
Deliver the samples at the Doctor’s terminal. Once the order is complete, return to a safe terminal and review the available story orders. Do not treat Order 49 as a mandatory step: the campaign route continues with Order 50 when the Mountaineer’s order is available.
- Deliver all three containers for Order 48.
- Protect the samples during the descent and return route.
- Confirm that Order 50 is the next required medical delivery.
4. Complete Order 50 for the Mountaineer
Accept Order 50 from the Mountaineer. This urgent delivery sends Sam to the Doctor’s shelter to collect the medical equipment and return it to the Mountaineer. The order has a displayed time limit, so begin with a light, stable load and use the All-Terrain Skeleton. Follow established ladders, anchors and zip-lines where they provide a safe line, but do not trade cargo damage for a slightly shorter route.
Collect the medical equipment at the Doctor’s shelter and make the return trip without rushing across unstable snow. Monitor stamina and balance, and recharge powered equipment before a long ascent if necessary. Deliver the equipment to the Mountaineer before the timer expires. The order provides the Power Gloves and Level 3 Bridges Boots, which are valuable for the remaining mountain routes.
- Accept Order 50 from the Mountaineer.
- Collect the medical equipment at the Doctor’s shelter.
- Return within the displayed time limit.
- Claim the Power Gloves and Level 3 Bridges Boots.
5. Deliver the photograph in Order 51
Accept Order 51 from the Mountaineer and carry the photograph to the Photographer’s shelter. This delivery is less demanding than Order 50, but the approach still contains steep slopes and possible Timefall. Use the All-Terrain Skeleton, keep the load centered and avoid unnecessary detours through deep snow.
Deliver the photograph at the Photographer’s terminal. After the delivery, the Photographer offers the next required order. Check the terminal immediately rather than leaving the area to search for another story trigger.
- Accept Order 51 from the Mountaineer.
- Deliver the photograph to the Photographer.
- Open the Photographer’s terminal for Order 52.
6. Recover the camera in Order 52
Accept Order 52 from the Photographer. The camera is held at the hostile camp northeast of the Photographer’s shelter. Approach from cover and scout the camp before crossing its sensor perimeter. Stealth is preferable, but non-lethal weapons are available if guards detect you. You do not need to eliminate every guard; the objective is to recover the marked camera cargo and leave the camp.
Once the camera is secured, return to the Photographer and complete the order. Use the route you established on the approach, avoid unnecessary combat and repair the cargo if it was damaged. After Order 52, the next required order is issued by the Mountaineer, not the Photographer.
- Accept Order 52 at the Photographer’s shelter.
- Recover the camera from the hostile camp.
- Return the camera to the Photographer.
- Travel back to the Mountaineer for Order 53.
7. Complete Order 53 for the Spiritualist
Accept Order 53 from the Mountaineer. The cargo consists of four containers of stone fragments for the Spiritualist. Prepare for another snow crossing with the All-Terrain Skeleton, Power Gloves, climbing anchors and ladders. Use existing zip-lines when they reach the correct side of the mountain; otherwise place equipment at shelves and descents where a fall would threaten the cargo.
Snowstorms can reduce visibility, so use the map, Odradek reactions and placed markers to maintain your direction. Keep Sam’s stamina above empty before steep climbs, and do not sprint across unstable slopes. Deliver all four containers to the Spiritualist’s shelter. Completion provides the Thermal Pad and finishes the final required story order of Episode 6.
- Accept Order 53 from the Mountaineer.
- Deliver all four stone-fragment containers to the Spiritualist.
- Claim the Thermal Pad.
- Confirm that the required Episode 6 deliveries are complete.
8. Reach Deadman’s cabin and begin Episode 7
After completing Order 53, follow the new objective to Deadman’s cabin near Mountain Knot City. Store or abandon optional cargo before approaching if you do not want it involved in the scripted transition. Follow the cabin scenes and dialogue; no additional mountain delivery is required to finish Episode 6.
When the story advances to Order 54, Escape the Battlefield, the game has entered Episode 7: Clifford. Episode 6 does not require a new vehicle chassis. If you used a Reverse Trike or Truck, leave it at a road, generator or terminal rather than attempting to force it across steep snowfields.
- Complete Order 53.
- Reach Deadman’s cabin and finish the scripted scenes.
- Confirm the transition to Order 54 and Episode 7: Clifford.
Before you move on
- Orders 47, 48, 50, 51, 52 and 53 are completed in the Orders for Sam record.
- Order 49 is not required for Episode 6 completion and may remain unfinished.
- Sam has obtained the Level 1 All-Terrain Skeleton from Order 47, Power Gloves and Level 3 Bridges Boots from Order 50, and the Thermal Pad from Order 53.
- The Roboticist, Doctor, Mountaineer, Photographer and Spiritualist have been connected through the required story deliveries.
- Sam has reached Deadman’s cabin after Order 53.
- Order 54 and Episode 7: Clifford have begun.
Episode 7 — Clifford: Battlefield Escape and the Mountain Delivery
Episode 7 contains one battlefield mission and one required delivery. Order 54, Escape the Battlefield, sends Sam through a wartime battlefield and sewer before a multi-stage fight against Clifford Unger and his soldiers. After the cutscenes, accept Order 55 at Mountain Knot City and transport Mama’s corpse to Heartman’s Lab. Enter Heartman’s room with the corpse to finish the episode’s required progression. Order 56, Recovery: Winter Clothes, is an optional Order that can appear around this transition and is not required to complete Episode 7. Ordinary MULE camp clear-outs, standard deliveries, and additional network construction are also optional.
1. Prepare for Order 54: Escape the Battlefield
After completing Order 53 and meeting Deadman at the cabin near Mountain Knot City, use the Private Room and save before proceeding. Order 54 is a scripted battlefield sequence, not an ordinary delivery. Sam is transported away from the normal map and cannot use his usual route-planning approach.
When the battlefield loads, collect the weapons and supplies placed in the area. Keep healing resources available and do not waste time searching for a delivery vehicle, lost cargo, or optional structures. The mission is completed by following its battlefield objectives and surviving the combat sequence.
- Rest and save before starting Order 54.
- Collect the available battlefield weapons and supplies.
- Do not plan Order 54 as an open-world delivery.
2. Reach the sewer entrance
Follow the objective marker across the battlefield toward the sewer entrance near the tower. Move between trenches, sandbags, damaged structures, and other solid cover rather than crossing exposed ground while soldiers are firing. Short controlled advances are safer than sprinting through the entire area.
You do not need to eliminate every soldier encountered on the way. Fire from cover when enemies block the route, then continue toward the marked sewer entrance once the immediate path is open. If grenades or concentrated fire force you away from a position, relocate instead of trying to hold the same cover.
- Keep solid cover between Sam and rifle fire.
- Advance toward the tower and sewer marker.
- Ignore optional searching once the route is open.
3. Follow the sewer and regroup with Deadman
Enter the sewer and follow the available passage toward Deadman. The sewer route is primarily a linear objective sequence; use the marker when the path bends or opens into another chamber. Continue until Sam reaches Deadman and the objective changes to escaping the sewer.
After leaving the sewer, follow the new objective through the battlefield. The story then directs Sam into another confrontation. Collect nearby weapons, ammunition, grenades, and blood bags before moving deeper into the encounter area when supplies are available.
- Reach Deadman in the sewer.
- Continue until the escape objective is completed.
- Gather nearby combat supplies before the Clifford encounter.
4. Defeat Clifford and complete Order 54
During the fight, use the Odradek and objective direction to locate Clifford when he relocates. Clifford is supported by armed soldiers, so clear the enemies immediately threatening Sam before concentrating on Clifford. Use cover, fire in short bursts, and change position when enemies begin surrounding the current location.
The encounter proceeds through multiple battlefield positions. Do not remain in one spot after Clifford disappears or the soldiers regroup. Follow the objective to the next area, collect replacement supplies when they appear, and repeat the process. If Sam’s blood level drops, break line of sight and heal behind cover; spending blood bags is safer than attempting to finish the fight while critically wounded.
Watch the ground around Sam for hazardous effects during later portions of the encounter. Move away when a damaging or immobilizing effect appears instead of continuing to attack from the same position. Order 54 ends after the final confrontation and its following scenes.
- Use the Odradek and objective marker to locate Clifford.
- Deal with nearby soldiers before committing to a prolonged attack on Clifford.
- Change position when the battlefield shifts or a ground hazard appears.
- Heal behind cover when blood loss becomes severe.
5. Accept and deliver Order 55
After the Order 54 scenes and the required private-room sequence, access the terminal at Mountain Knot City and accept Order 55, Corpse Delivery: Heartman’s Lab. Prepare the corpse cargo carefully, repair damaged equipment, and bring climbing equipment suited to the mountain route. A vehicle can help across gentler ground, but do not force it onto steep, narrow slopes.
Travel from Mountain Knot City toward Heartman’s Lab using safe roads, bridges, ladders, anchors, and available ziplines. Park before terrain becomes too steep or uneven for reliable vehicle control, then continue on foot. Keep Sam balanced on inclines and avoid falls, since damage to corpse cargo can reduce the delivery result or force a retry.
At Heartman’s Lab, deliver Mama’s corpse at the terminal. After the delivery, carry the corpse to Heartman’s room when the objective appears. The room interaction is required for Episode 7 progression and triggers the next story transition.
- Accept Order 55 at Mountain Knot City.
- Protect the corpse cargo during the mountain journey.
- Use a vehicle only on terrain it can safely traverse.
- Deliver Mama’s corpse and take it to Heartman’s room.
6. Treat Order 56 as optional Episode 8 content
Order 56, Recovery: Winter Clothes, is not required to finish Episode 7. It can become available around the transition into Episode 8 at Mountain Knot City. If you accept it, recover the marked winter-clothing cargo from the indicated mountain location and return it to Mountain Knot City using the safest available route.
Use a vehicle for the lower, more open portion when practical, then switch to foot travel if the final approach becomes steep or rocky. Ladders, anchors, and ziplines can reduce fall risk, but do not abandon the Order to pursue it if the route is already safe on foot. Complete it as optional preparation or return to it later; the main story continues through Episode 8 without treating Order 56 as an Episode 7 requirement.
- Confirm that Order 56 is optional.
- Recover the marked winter-clothing cargo if you accept it.
- Return the cargo to Mountain Knot City.
- Do not use Order 56 as the Episode 7 completion requirement.
Before you move on
- Order 54, Escape the Battlefield, is complete and the Clifford confrontation has ended.
- Order 55, Corpse Delivery: Heartman’s Lab, has been accepted at Mountain Knot City and delivered.
- The corpse has been taken to Heartman’s room after the delivery.
- The resulting scenes finish and the game advances to Episode 8: Heartman.
- Order 56 is either completed as optional content or left for later without blocking Episode 7 completion.
Episode 8 — Heartman: Mountain Deliveries and the Tar-Belt Crossing
After Episode 7’s Order No. 55 brings Mama’s corpse to Heartman’s Lab, Episode 8 begins with the Heartman introduction and a new story order at the lab. The required sequence is Orders No. 58–62: deliver anti-chiralium medication to the Geologist, deliver an antimatter bomb to the Paleontologist, recover five ammonite containers, deliver tar-extraction devices and an ammonite to the Evo-devo Biologist, then repair the Chiral Relay. Order No. 57 is an optional Fresh Pizza Delivery for Peter Englert and is not required for Episode 8. Prepare for steep snowy terrain, Timefall, BT areas and tar. Use shelters, generators, ladders, climbing anchors and ziplines where available, while keeping cargo balanced and carrying repair, healing and anti-BT supplies. After Order No. 62, trigger the Catcher encounter near the relay and cross the tar belt by moving across the raised structures. Edge Knot City is not connected during this episode; Order No. 63 performs that activation in Episode 9.
1. Begin Episode 8 at Heartman’s Lab
Complete Episode 7’s Order No. 55, Corpse Delivery: Heartman’s Lab, and finish the resulting scenes at Heartman’s Lab. When control returns and a new Order for Sam is available, use the terminal to begin Episode 8’s required sequence. The game does not require Order No. 57 to start or finish this episode.
Order No. 57 is an optional Fresh Pizza Delivery for Peter Englert. It may be accepted when available from Mountain Knot City, but it is unrelated to the mandatory Heartman route and can be postponed without blocking Orders 58–62.
Before leaving Heartman’s Lab, repair damaged containers, choose an appropriate skeleton and carry Container Repair Spray, blood bags and anti-BT equipment. A floating carrier can reduce the burden of heavy cargo, but avoid loading Sam beyond a comfortable limit for snowy slopes. Check the map for shelters, generators, bridges and ziplines; a route using several moderate crossings is safer than a direct climb over a ridge.
- Finish Order No. 55 and the Heartman’s Lab story scenes.
- Accept the new required Order at Heartman’s Lab.
- Do not treat optional Order No. 57 as an Episode 8 prerequisite.
- Prepare cargo repair, healing and anti-BT supplies.
2. Complete Order No. 58 for the Geologist
Accept Order No. 58, Anti-chiralium Medication Delivery: Geologist, at Heartman’s Lab. The order requires all eight containers of anti-chiralium medication to be delivered to the Geologist. Keep the load centered and avoid unnecessary falls, sprinting over uneven rock and steep shortcuts through deep snow.
Use a timefall shelter or Container Repair Spray when the containers begin taking damage. If the Odradek detects BTs, crouch, move slowly and use the gaps between their positions. Do not enter a marked BT area merely to save distance; losing cargo can reduce the delivery result or force a retry. Confirm that all eight containers are accepted before leaving the Geologist’s shelter.
- Accept and complete Order No. 58.
- Deliver all eight anti-chiralium medication containers.
- Confirm the Geologist accepts the complete shipment.
3. Deliver the antimatter bomb in Order No. 59
After Order No. 58, accept Order No. 59, Antimatter Bomb Delivery: Paleontologist. Plan a stable route before departing. Use established ladders, bridges, ziplines and gradual mountain passes where they are available, but do not force a vehicle across slopes that are too rough or steep. Walking carefully is preferable to stranding a vehicle or damaging the bomb.
Deliver the antimatter bomb to the Paleontologist and allow the post-delivery conversation to finish. The next required mission is issued from this location, so check the terminal or order prompt before leaving if the progression marker is not immediately obvious.
- Accept Order No. 59 after completing Order No. 58.
- Deliver the antimatter bomb to the Paleontologist.
- Finish the delivery scene and accept the next order there.
4. Recover and return all five ammonite containers
Accept Order No. 60, Recovery: Ammonites, from the Paleontologist. Enter the marked search area with enough stamina and cargo capacity to carry all five containers. Follow the cargo markers and favor solid ground, rock shelves and existing structures over deep tar or unstable slopes.
Tar slows Sam and makes falls more dangerous. If BT activity escalates while you are carrying cargo, retreat toward solid ground instead of fighting while overloaded. Recover all five ammonite containers and return them to the Paleontologist. The next story order will not advance until the complete recovery shipment has been delivered.
- Accept Order No. 60 from the Paleontologist.
- Recover all five ammonite containers.
- Deliver all five containers back to the Paleontologist.
- Accept Order No. 61 after the delivery scene.
5. Deliver the tar-extraction devices to the Evo-devo Biologist
Order No. 61, Tar Extraction Device & Ammonite Delivery: Evo-devo Biologist, requires four containers of tar-extraction devices and one ammonite container. Collect the four marked device containers and carry the ammonite assigned by the order. Arrange the load so heavier cases remain low and centered.
Use generators to preserve equipment power and shelters to repair cargo when the network provides them. Ziplines can shorten exposed sections, but retain enough battery capacity for the final approach. Deliver all five containers to the Evo-devo Biologist, then return to Heartman’s Lab and accept Order No. 62.
- Collect four tar-extraction device containers.
- Carry the required ammonite container with the devices.
- Deliver all five containers to the Evo-devo Biologist.
- Return to Heartman’s Lab and accept Order No. 62.
6. Repair the Chiral Relay and cross the tar belt
Accept Order No. 62, Repair: Chiral Relay, at Heartman’s Lab. Deliver all five relay-repair-unit containers to the Chiral Relay. Prepare blood bags, Container Repair Spray and anti-BT equipment before departing because the objective after the repair leads directly into the tar-belt transition.
After the repair is accepted, do not try to build an ordinary bridge across the tar belt. Move toward the BT activity near the relay and allow the Catcher encounter to pull Sam into the tar. During the resulting sequence, climb onto the buildings and other elevated structures that emerge from the tar. Move from one raised surface to the next while heading west, spending as little time as possible in the tar and using the structures as stepping points toward the far side.
Reaching the west side and completing the mandatory scenes finishes Episode 8. The game then proceeds into Episode 9. Edge Knot City itself is not connected as part of the Episode 8 completion check; Order No. 63, Network Activation Key: Edge Knot City, is the Episode 9 order that activates its network.
- Deliver all five relay-repair-unit containers to the Chiral Relay.
- Trigger the required Catcher encounter and tar-belt crossing.
- Traverse the raised-tar structures toward the west.
- Reach the far side and confirm that Episode 9 begins.
- Do not count Edge Knot City’s network activation until Order No. 63.
Before you move on
- The Heartman introduction is complete after Order No. 55 and the associated scenes at Heartman’s Lab.
- Order No. 58 is complete with all eight anti-chiralium medication containers delivered to the Geologist.
- Order No. 59 is complete with the antimatter bomb delivered to the Paleontologist.
- Order No. 60 is complete with all five ammonite containers recovered and delivered to the Paleontologist.
- Order No. 61 is complete with four tar-extraction device containers and one ammonite container delivered to the Evo-devo Biologist.
- Order No. 62 is complete with all five relay-repair-unit containers delivered to the Chiral Relay.
- The Catcher encounter and raised-tar crossing are complete, with Sam reaching the west side.
- Episode 9 or its opening objective appears. Order No. 57 is not required, and Edge Knot City does not need to be connected for Episode 8 completion.
References for this chapter
Episode 9 — Higgs Encounter: BT Boss Tactics and Recovery
Episode 9’s mandatory route is Orders 63, 64 and 65. First, complete Order 63 by taking the network activation key at the Distribution Center North of Edge Knot City, crossing the western BT-infested route and delivering the key to Edge Knot City to activate its Chiral Network connection. Order 64 begins after that delivery and pits Sam against the giant BT carrying Higgs. Prepare Blood Bags and blood-based weapons, track Higgs as he moves from the chest toward the shoulder, and clear jellyfish-like BTs when they restrict movement. After the scripted death and repatriation, use Fragile’s umbrella in the Edge Knot City Private Room to begin Order 65. Defeat Higgs through his gun, knife and final hand-to-hand phases, then complete the second scripted repatriation and continue through the scenes into Episode 10.
Complete Order 63: cross the western BT route
After Order 62 is complete, read the message that advances the story and follow the marked route toward the tar belt. The first section leads through a BT area toward Amelie. Move cautiously, use crouching and Odradek scans to identify threats, and follow the route across the buildings and debris that rise from the tar. Approach Amelie to trigger the cutscene that opens the network-activation delivery.
After the cutscene, go to the Distribution Center North of Edge Knot City and accept Order No. 63, Network Activation Key Delivery: Edge Knot City. Take a Ladder, Climbing Anchor, Anti-BT Handgun and Blood Bags if available. The route toward Edge Knot City passes through a western BT zone, and jellyfish-like BTs can float after Sam and explode at close range. Avoid unnecessary fights, keep moving between safe surfaces, and use the terrain to create distance when the floating BTs converge.
- Order 62 is complete and the story message has been read.
- Order 63 is accepted at the Distribution Center North of Edge Knot City.
- A Ladder, Climbing Anchor, Anti-BT Handgun and Blood Bags are packed if available.
- The western BT route and floating jellyfish-like BTs are accounted for.
Deliver the network activation key to Edge Knot City
Continue south toward Edge Knot City while keeping the activation-key cargo secure. In the ruins and BT approach, crouch and move carefully rather than sprinting through every scan warning. Use ladders and anchors to avoid steep or exposed sections, and give floating BTs room to pass instead of allowing them to detonate beside Sam.
When you reach the Edge Knot City facility, enter the terminal and deliver the key. The order is not complete merely because Sam reaches the city: the terminal interaction activates Edge Knot City on the Chiral Network. The completion of Order 63 unlocks the next mandatory story order, Order 64.
- The activation key reaches the Edge Knot City facility.
- The delivery is confirmed at the terminal.
- Edge Knot City is connected to the Chiral Network.
- Order 64 becomes available.
Prepare at Edge Knot City for Order 64
Before leaving the Edge Knot City Private Room or terminal area, prepare for the giant BT encounter. Carry Blood Bags and fabricate blood-based weapons such as Hematic Grenades, an Anti-BT Handgun or a Remote-Detonation Grenade Launcher when available. The Quadruple Rocket Launcher is particularly useful if it is available in the fabrication menu after the preceding progression.
Do not carry optional fragile cargo into the fight unless you accept the risk. Deliver it first, place it in a locker, or leave it behind through the Order menu. Keep enough carrying capacity for weapons and supplies, and use the terminal to restock before triggering the encounter.
- Order 63 has been delivered and Edge Knot City is connected.
- Blood Bags are equipped or stored in the Utility Pouch.
- At least one blood-based weapon is ready.
- Optional cargo is delivered, stored or intentionally left behind.
Defeat the giant BT in Order 64
Leave Edge Knot City to begin Order No. 64, Elimination: BT. The giant BT has limited movement but attacks with large hands and tar-based hazards. Fight from solid ground, rocks, wreckage or raised debris whenever possible. Do not stand in open tar while firing, and retreat when the hands close in or Sam’s endurance begins to fall.
Higgs is the target. At first he is exposed around the BT’s chest and stomach area; fire blood-based weapons or the Quadruple Rocket Launcher at him rather than wasting ammunition on empty sections of the creature. After enough damage, Higgs moves higher toward the shoulder. Adjust your aim to the new exposed position and continue firing when the angle is safe.
- Higgs is visible before each major volley.
- Sam is firing from solid ground or useful debris.
- The giant BT’s hands and tar attacks are monitored between attacks.
- Higgs is targeted at both the chest and later shoulder position.
Control the giant BT arena and survive the scripted repatriation
The giant BT can release smaller jellyfish-like BTs while continuing its main attacks. Destroy or evade the smaller BTs when they block the route between safe positions, then return attention to Higgs. The objective is to defeat Higgs, not to clear every threat in the arena. Collect dropped weapons or supplies only when the surrounding ground is safe.
Use a Blood Bag before Sam’s blood reserve becomes critical. If the arena becomes crowded, relocate first and attack second. Continue alternating between firing at Higgs, clearing immediate obstructions and repositioning until the giant BT is defeated.
A story sequence follows the victory and Sam dies. This death is scripted and is not a failed attempt. Follow the repatriation instructions and return to the living world. Then enter the Edge Knot City Private Room to begin the next order.
- The giant BT is defeated.
- Sam completes the first scripted repatriation.
- The game returns Sam to Edge Knot City.
- The Edge Knot City Private Room is available for the next transition.
Begin Order 65 from Fragile’s umbrella
In the Edge Knot City Private Room, highlight Fragile’s umbrella and select Fragile Jump. This transports Sam to the Beach and starts Order No. 65, Elimination: Higgs. The Beach fight does not use Sam’s normal expedition loadout, so do not delay the transition while trying to preserve conventional weapons for the duel.
Order 65 has three combat phases. The first uses terrain and cargo, the second uses the Strand against Higgs’s knife attacks, and the final phase is a close-range hand-to-hand fight. Cryptobiotes around the Beach can restore health when Sam needs recovery, but only collect them when the route is safe.
- Fragile’s umbrella is highlighted in the Private Room.
- Fragile Jump is selected.
- Order 65 begins on the Beach.
- Sam understands that the normal expedition inventory is unavailable.
Defeat Higgs through the gun and knife phases
During the gun phase, use rocks and scattered cargo to break Higgs’s line of fire. Pick up nearby cargo and throw it when he is reloading or exposed, then close in and punch him. Do not remain in the open while waiting for an opportunity; move from cover to cover and use cryptobiotes when health is low.
When Higgs switches to the knife, ready the Strand with L2. Watch for his committed strike and press R2 to parry, then use the follow-up bind prompt or Strand action to restrain him. Move in and attack while he is bound. Higgs can teleport and throw explosives, so disengage after each attack sequence and reset your position rather than trading repeated blows.
- Terrain is used as cover during the gun phase.
- Thrown cargo creates openings for close-range attacks.
- The Strand is readied before knife attacks connect.
- Higgs is parried, bound and attacked during his openings.
Finish the hand-to-hand phase and enter Episode 10
The final Beach phase is a direct hand-to-hand exchange. Attack with Square when Higgs is open, defend or evade committed strikes, and allow Sam’s stamina to recover instead of attacking continuously. Cryptobiotes can restore health during the exchange, but do not cross the arena carelessly to reach one.
Continue until the final button prompts appear and complete them. The resulting scenes include the Misanga and a second scripted death. Repatriate Sam again when prompted, then let the following scenes play through. Episode 9 is complete when the story advances into Episode 10 and the next mandatory story order becomes available.
- Higgs is defeated in the gun phase.
- Higgs is defeated in the knife phase using Strand parries and binds.
- The final hand-to-hand exchange and button prompts are completed.
- Sam completes the second scripted repatriation.
- Episode 10 begins and the next story order is available.
Before you move on
- Order 63 has been accepted at the Distribution Center North of Edge Knot City.
- The activation key has been carried through the western BT route and delivered at Edge Knot City.
- Edge Knot City has been activated on the Chiral Network and Order 64 has been completed.
- The giant BT carrying Higgs has been defeated and Sam has completed the first scripted repatriation.
- Fragile Jump from the Edge Knot City Private Room has started Order 65.
- Higgs has been defeated through the gun, knife and final Beach phases.
- Sam has completed the second scripted repatriation and the story has advanced to Episode 10.
Episode 10 — Die-Hardman: Mid-to-Late Game Logistics
Episode 10 starts at the Chiral Relay Point after Order No. 65. Sam has been stripped of his usual equipment, so the first task is to use the nearby safehouse and any available shared gear to rebuild a travel kit. The mandatory objective is the long return east: travel toward Capital Knot City, then continue to Lake Knot City, where the episode’s story transition begins. There is no required cargo for this journey. Use a vehicle, roads, generators and existing structures when available, but do not force a vehicle through BT territory, deep water or steep terrain. Order No. 66 is an optional final pizza delivery. It starts at the First Prepper and sends the pizza to Peter Englert’s shelter; accept it only if you are prepared to protect fragile cargo during the mountain detour. Director’s Cut Ruined Factory Orders are separate content that should be started earlier from the K2 West Distribution Center, after Orders No. 7 and No. 8.
1. Rebuild Sam’s travel kit at the safehouse
After the opening scenes, Sam is placed at the Chiral Relay Point with no normal weapons, PCCs, skeleton or vehicle. Check the nearby safehouse mentioned in the incoming messages. Use its terminal to fabricate the equipment needed for a long overland trip; do not assume the relay itself is available as a normal delivery terminal.
A Speed Skeleton is a strong general choice for the return journey because it reduces the time spent crossing open ground. Carry PCCs for generators, a few ladders or climbing anchors, blood bags and anti-BT weapons. If the safehouse has insufficient materials, use any functioning nearby facility or recover abandoned player equipment. There is no mandatory cargo to protect at this stage, so prioritize mobility and power management over a heavy combat loadout.
Charge the skeleton and any vehicle before leaving. If you find a usable vehicle, inspect its battery and cargo condition first. A vehicle is helpful but not essential; the route can be completed on foot with a powered skeleton and staged rests.
- Fabricate a Speed Skeleton or another suitable travel aid.
- Carry PCCs, climbing equipment, blood bags and anti-BT weapons.
- Charge Sam’s equipment and inspect any vehicle before departure.
2. Choose a route back toward Capital Knot City
The game does not impose one fixed road sequence for this return. A practical low-risk route follows the southern edge of the Central Region, using the beach and flatter approaches to avoid repeating the most difficult mountain crossings. GameSpot’s Episode 10 route advice also identifies the southern beach as a useful way to bypass the mountains and reach the Timefall Farm area.
Use the map before moving. Set waypoints through known facilities and existing roads rather than drawing a straight line to the destination. The online world may provide different roads, generators, bridges and vehicles, so use what exists in your version of the map instead of relying on a structure being present.
The Chiral Relay Point area and the route east can include BT activity. When the Odradek begins scanning rapidly, slow down and decide whether to skirt the zone, leave the vehicle and crouch through it, or fight a caught BT with blood-based equipment. Do not drive blindly into tar just because the road appears to continue.
- Plot a route through known facilities and powered structures.
- Prefer the southern approach when it avoids unnecessary mountain crossings.
- Leave vehicles before deep tar, unstable slopes or dangerous water.
3. Use the Timefall Farm as the main central-region resupply stop
Once the southern route brings you near the Timefall Farm, stop if your batteries, boots, blood bags or PCC supply are running low. The farm provides a useful point to recharge, fabricate equipment and replace a vehicle if the first one was abandoned. Repair Sam and damaged cargo before continuing east.
If roads are available beyond the farm, use them. Roads reduce rough-terrain wear and make the remaining return much faster. If a section is incomplete, contribute materials only when you have enough remaining for generators and emergency equipment. Do not spend every available metal or ceramic reserve on road construction during this one-way story trip.
The farm is also a reasonable place to decide whether to detour for Order No. 66. If you are not carrying the pizza yet, continue toward the main objective rather than taking a long mountain diversion simply because the optional order is available.
- Recharge and repair at the Timefall Farm when needed.
- Use completed roads for the eastern portion of the journey.
- Keep PCC and material reserves for emergency power and repairs.
4. Complete Order No. 66 only when the mountain detour is practical
Order No. 66 is the final pizza delivery in Peter Englert’s chain and is optional for completing Episode 10. The order begins at the First Prepper’s shelter, not at Peter’s destination. Accept it from the First Prepper’s terminal when the order is available, then load the pizza flat on the top of Sam’s cargo stack.
Travel carefully from the First Prepper to Peter Englert’s shelter. Avoid falls, rough vehicle impacts and unnecessary combat because the pizza is fragile. Use a vehicle on stable roads where possible, but dismount for steep snow, broken ground or BT territory. If the route becomes unsafe, protect the order by moving slowly rather than trying to force a shortcut.
At Peter Englert’s shelter, access the terminal to complete the delivery. Afterward, resume the return to Lake Knot City. If you are attempting only the main campaign, you may skip Order No. 66 and complete it later only if the game still offers the relevant order state.
- Accept Order No. 66 at the First Prepper if you intend to do it.
- Keep the pizza level and avoid falls or hard impacts.
- Deliver it at Peter Englert’s shelter before continuing east.
5. Cross the remaining Central Region without overcommitting to combat
After the resupply area or the pizza detour, continue toward Capital Knot City and then Lake Knot City. Use roads, generators, safehouses and distribution centers as relay points. If a MULE camp blocks the direct route, skirt its perimeter or park outside the scanning area before proceeding on foot. This episode does not require clearing a camp.
If you are detected, retreat toward your vehicle or a known structure rather than fighting every enemy. Non-lethal weapons are preferable for MULEs, but there is no reason to spend your best equipment on optional encounters during this return. In BT areas, keep blood bags and anti-BT weapons accessible, and leave enough stamina to escape if the encounter escalates.
Save or rest whenever the route offers a safe private room. The objective is the story transition, not a perfect delivery rating, a fully upgraded road network or a cleared map.
- Avoid unnecessary MULE fights and BT encounters.
- Keep an escape route to a vehicle, generator or facility.
- Rest and restock before the final approach to Lake Knot City.
6. Trigger the Episode 10 transition at Lake Knot City
Follow the active story marker through the eastern region. The episode’s objectives describe the return toward Capital Knot City and then the continuation to Lake Knot City. Once Sam reaches the required approach point at Lake Knot City, the storm and story sequence begin. Do not leave the area to start optional deliveries once the transition is clearly underway.
Allow the scenes and automatic transition to finish. Episode 11 follows this sequence, so the chapter is complete when the next episode’s objective appears. You do not need to connect every facility, finish every standard order or construct every road section before entering Lake Knot City.
For Director’s Cut planning, do not treat the Ruined Factory as an Episode 10 requirement. Its initial chain is unlocked much earlier: complete Orders No. 7 and No. 8 at the K2 West Distribution Center, then accept Order No. 77. Later Factory orders may be gated by broader story progress, but they are separate from the Episode 10 return.
- Complete the return objective through the Lake Knot City approach.
- Let the storm and story transition finish.
- Confirm that Episode 11: Clifford Unger becomes active.
Before you move on
- The active story objective has been followed toward Capital Knot City and then Lake Knot City.
- Sam reaches the required Lake Knot City approach and the storm/story transition begins.
- The transition finishes and Episode 11: Clifford Unger appears as the next active story chapter.
- If Order No. 66 was attempted, Peter Englert’s shelter terminal confirms delivery completion.
- Director’s Cut Factory content is tracked separately: Orders No. 7 and No. 8 are complete at the K2 West Distribution Center, or Order No. 77 is visible there.
References for this chapter
- Death Stranding Walkthrough: Episode 10 — GameSpot
- Chapter 10: Die-Hardman Walkthrough — Neoseeker
- DEATH STRANDING DIRECTOR’S CUT: Beginner’s Guide — Official PC mirror
- Death Stranding Director’s Cut: How to Access the Ruined Factory
- What new and returning players can expect in Death Stranding Director's Cut, out today on PS5
- Death Stranding — Order No. 66 Fresh Pizza Delivery Walkthrough — Samurai Gamers
Episode 11 — Clifford Unger & Late-Game Story Beats
Episode 11 begins after the Episode 10 return sequence brings Sam back to Lake Knot City. Order No. 66: Fresh Pizza Delivery is optional and may be skipped. A chiral supercell then sends Sam to Clifford Unger’s battlefield for Order No. 67: Escape the Battlefield. This is a linear combat mission rather than a normal delivery: follow the battlefield path, collect the weapons and recovery items placed along the route, and defeat Cliff four times. Use grass, ruins, hills, and other cover to avoid being surrounded. When Cliff retreats, scan to reveal the burning red trail and follow it to the next arena. After the fourth defeat, allow the concluding scenes to finish. Sam returns to the normal world at Port Knot City, where Episode 12 begins and Order No. 68 sends cryptobiotes to the Capital Knot City Isolation Ward.
Reach Lake Knot City and prepare for the forced battlefield sequence
Episode 11 starts after the mandatory Episode 10 return sequence reaches Lake Knot City. Do not treat Order No. 66, Fresh Pizza Delivery, as a prerequisite. That pizza delivery is optional content and can be completed later if you want its reward or related side content. The story proceeds without it when Sam reaches Lake Knot City and the next cutscene begins.
Before approaching the city, finish or suspend any optional delivery you do not want interrupted. Store unwanted cargo in a private locker if necessary. This is a convenience precaution, not a story requirement. Order No. 67 does not require a vehicle, a connected facility, a road network, or a particular side Order. Saving at a private room before triggering the sequence gives you a clean retry point.
- Complete the Episode 10 return sequence to Lake Knot City.
- Remember that Order No. 66 is optional and may be skipped.
- Store unwanted cargo and save before approaching the story trigger.
Cross the battlefield from the crashed helicopter to the jungle
The chiral supercell transports Sam to a battlefield. Move toward the crashed helicopter at the start of the area and collect the dropped equipment, especially blood bags and usable firearms. Continue along the straightforward route through the village and into the jungle. The opening section is not a delivery route, so do not search for a terminal, private room, vehicle garage, or route back to the Central Region.
Use the Odradek to scan for supplies as you advance. Additional weapons, ammunition, grenades, blood bags, and cryptobiotes are placed around the battlefield. Cryptobiotes can restore health during the later encounters, so collect them when you see them rather than spending all of your blood bags immediately. A shack along the route can provide a brief safe place to settle BB if the journey has caused stress.
- Search the crashed-helicopter area for weapons and blood bags.
- Follow the linear path through the village and jungle.
- Collect battlefield supplies and cryptobiotes when available.
Start the first Cliff encounter using stealth and cover
After the jungle route and its cutscene, enter the first combat area. Tall grass allows Sam to approach soldiers without immediately starting a firefight. Crouch through the grass, use the Odradek to locate threats, and keep the Strand ready for silent takedowns when an enemy exposes their back. Stealth is not mandatory, but it reduces incoming fire and preserves ammunition for Cliff.
Cliff is the primary target. You do not need to clear every soldier before attacking him. When possible, approach Cliff through grass or from behind cover, then use the strongest available firearm or other supplied weapon. If the soldiers surround Sam, retreat through the grass or around solid terrain before reloading or healing. Heal behind cover rather than standing in the open.
- Use tall grass to reduce detection and incoming fire.
- Prioritize Cliff instead of attempting to clear every soldier first.
- Reload and use blood bags or cryptobiotes from behind cover.
Track Cliff’s relocations and defeat him four times
When Cliff takes enough damage, he retreats and the encounter moves to another part of the battlefield. Do not keep searching the previous arena. Briefly expose Sam and use an Odradek scan to highlight Cliff’s burning red footprints, then follow that trail toward the next combat area. If the trail is difficult to see, climb or move toward higher ground and scan again for a clearer view.
Each new area supplies another opportunity to recover ammunition and healing items. Search before committing to the next exchange when the soldiers are not pressuring you. Use grass for stealth when practical, or combine grenades and firearms against grouped soldiers and Cliff. If Sam is overwhelmed, disengage, recover health, and re-enter from a different angle rather than trying to win while surrounded.
Order No. 67 requires four successful defeats of Clifford Unger in this sequence. The first arena is followed by three further relocations, so continue tracking the burning trail until the fourth defeat is registered. The battlefield’s supplied equipment is sufficient; lacking a fully stocked loadout from Lake Knot City does not prevent completion.
- Scan for and follow Cliff’s burning red footprints after each retreat.
- Recover ammunition, grenades, blood bags, and cryptobiotes between encounters.
- Defeat Clifford Unger four times in total.
Finish the cutscenes and begin Episode 12
After the fourth defeat, remain in the mission and allow the concluding cutscenes to play. Do not quit merely because the final combat has ended. The story returns Sam to the normal world at Port Knot City and advances to Episode 12: Bridges.
The next mandatory objective is Order No. 68: Cryptobiote Delivery: Capital Knot City Isolation Ward. It begins from Port Knot City and sends Sam back east with the cryptobiote cargo. The Capital Knot City Isolation Ward is the destination, not the place where Order No. 68 becomes available. Once the order is displayed and the Port Knot sequence has finished, Episode 11 is complete.
- Allow the post-battle cutscenes and return sequence to finish.
- Confirm that Sam is back at Port Knot City.
- Confirm Episode 12: Bridges and Order No. 68 are active.
- Verify that Order No. 68 lists the Capital Knot City Isolation Ward as its destination.
Before you move on
- The Episode 10 return sequence has reached Lake Knot City and Order No. 67: Escape the Battlefield has started.
- Clifford Unger has been defeated four times during Order No. 67.
- The concluding battlefield cutscenes have finished and Sam has returned to Port Knot City.
- Episode 12: Bridges is displayed.
- Order No. 68: Cryptobiote Delivery: Capital Knot City Isolation Ward is available from Port Knot City.
- Order No. 66 is not required for Episode 11 completion.
References for this chapter
Episode 12 — Bridges: Order 68 and the Final BT Encounter
Episode 12 is built around Order No. 68, which sends Sam from Port Knot City to the Capital Knot City Isolation Ward with cryptobiotes. The route restricts normal preparation, so leave with blood bags, container repair spray and suitable anti-BT weapons already in your inventory. Existing roads, vehicles and shared structures can shorten the trip, but avoid unnecessary fights and protect the cargo from falls, Timefall and deep water. Earlier Catcher encounters can be avoided when the route allows it. Near Capital Knot City, however, the whale BT is a required boss encounter: collect the weapons placed in the tar arena, defeat the whale, then continue to the Isolation Ward and deliver the cryptobiotes. The order is not complete when the whale falls; wait for the delivery result and story transition into Episode 13.
1. Prepare at Port Knot City and accept Order No. 68
After Episode 11 concludes, return to the terminal at Port Knot City and accept Order No. 68, Cryptobiote Delivery: Capital Knot City Isolation Ward. Use the private room first if Sam needs health or blood recovery.
Prepare before departure because the order restricts normal network support. You cannot rely on the Chiral Printer to fabricate replacement weapons, Blood Bags or other equipment during the route. Bring the equipment you expect to need, including Blood Bags, container repair spray and hematic or anti-BT weapons.
A vehicle can reduce the length of the overland journey when a practical route is available, but do not let vehicle speed dictate the route. The cryptobiote cargo must be protected from severe impacts and submersion. Choose stable ground and use existing roads, bridges, shelters, generators and other structures where they are helpful.
- Accept Order No. 68 at Port Knot City.
- Restore Sam's health and blood before departure.
- Bring Blood Bags and container repair spray.
- Carry hematic or anti-BT weapons before leaving.
- Use a vehicle only when its route is safer than traveling on foot.
2. Cross the route with existing infrastructure
Follow the order marker east toward Capital Knot City. Use roads and already available player or online structures to reduce exposure to Timefall and difficult terrain. Because new fabrication is unavailable during this order, plan around what is already in the world rather than stopping to replace a missing bridge or generator.
Keep the cryptobiotes out of deep water and avoid steep drops. If a vehicle becomes damaged, loses power or reaches terrain where it is likely to overturn, stop and continue on foot instead of risking a cargo-damaging crash. Check the cargo condition after major falls, rough driving or prolonged Timefall.
When the Odradek begins scanning, crouch and move carefully through BT territory. Earlier Catcher encounters are not the main objective of the order. If the terrain permits, use a wide detour, higher ground or a route around the tar zone. Preserve ammunition and blood for the required whale encounter near Capital Knot City.
- Follow the Order No. 68 marker toward Capital Knot City.
- Use roads and existing structures whenever practical.
- Avoid deep water, steep drops and unnecessary vehicle collisions.
- Check cargo condition after rough sections.
- Detour around avoidable earlier Catcher encounters.
3. Survive earlier Catcher sections without draining supplies
The journey can place Sam in BT areas containing large Catchers, including a squid-like encounter on the approach to the city. These sections can be handled cautiously rather than treated as mandatory boss fights. When the Odradek detects danger, slow down, crouch and use the terrain to move around the active area whenever a safe detour exists.
If Sam is pulled into tar, prioritize reaching stable ground, a vehicle or another elevated surface. Do not spend all available ammunition on an encounter that can be bypassed. A failed escape or repeated knockdown can damage the cryptobiote cargo and consume the Blood Bags needed for the whale.
After leaving an earlier BT area, inspect the delivery cargo. Apply container repair spray during a safe pause if the container has taken damage. Continue only after confirming that Sam still has enough blood and equipment for the final encounter.
- Crouch and move carefully when the Odradek detects BTs.
- Use detours for earlier Catchers whenever the terrain allows.
- Reach stable or elevated ground if tar begins pulling Sam down.
- Preserve ammunition and Blood Bags for the whale BT.
- Repair damaged containers before continuing.
4. Defeat the whale BT near Capital Knot City
Near the entrance to Capital Knot City, a large tar arena forms and the whale BT appears. This encounter is required for Order No. 68. Do not attempt to leave the arena and treat the order as complete; the whale must be defeated before the cryptobiotes can be delivered.
Collect the weapons and ammunition placed around the arena. Hematic weapons, grenade launchers and the quadruple rocket launcher are effective choices when available. Floating vehicles and buildings provide platforms that keep Sam above the tar and make it easier to reposition.
Attack when the whale surfaces or becomes exposed, then relocate before its next pass. Watch the direction of its head and avoid its golden beam. Move sideways when it flies through the arena and use floating structures as cover when the whale fires projectiles or summons additional BT attacks.
If supplies appear in the arena, collect them while moving between platforms. Keep at least one Blood Bag if possible, but do not remain passive while waiting for perfect positioning. Continue attacking until the whale is defeated and the boss encounter clears.
- Enter the whale arena near Capital Knot City.
- Collect the supplied weapons and ammunition.
- Use floating vehicles and buildings as platforms and cover.
- Avoid the whale's beam and airborne attacks.
- Defeat the whale BT before leaving the arena.
5. Deliver the cryptobiotes at the Isolation Ward
After the whale BT is defeated, inspect the cryptobiote cargo and repair its container if necessary. The boss encounter is only one objective of Order No. 68; the delivery handoff still lies ahead.
Continue toward Capital Knot City and follow the order marker to the Capital Knot City Isolation Ward. Do not stop at the city entrance or assume that defeating the whale completes the order. Enter the marked delivery destination and hand over the cryptobiotes.
Wait for the order-complete results and the following story scenes. The successful handoff advances the campaign into Episode 13, Sam Strand. If the order fails before completion, reload the latest save or retry from Port Knot City with more blood, repair spray and anti-BT ammunition. Use the same route while avoiding optional earlier Catcher fights.
- Confirm that the whale BT has been defeated.
- Check and repair the cryptobiote cargo.
- Follow the marker to the Capital Knot City Isolation Ward.
- Deliver the cryptobiotes at the marked destination.
- Wait for the order-complete screen and Episode 13 transition.
Before you move on
- Order No. 68 is marked complete in the Order Log.
- The whale BT near Capital Knot City has been defeated.
- The cryptobiotes have been delivered to the Capital Knot City Isolation Ward.
- The order-complete results screen has appeared.
- The following story sequence has played and Episode 13: Sam Strand has begun.
Episode 13 — Sam Strand: Order No. 69 and the Beach
Episode 13 is almost entirely a scripted sequence built around Order No. 69, “Go to Her Beach.” After completing Order No. 68 at the Capital Knot City Isolation Ward, accept the next story order and follow the Beach objectives. The first critical interaction is not a combat choice: when Sam receives Die-Hardman’s revolver and Amelie moves toward the water, holster the weapon with the Right D-pad and approach her until the R2 hug prompt appears. Shooting her triggers a game-over sequence. After the cutscene, Sam is placed on another Beach. Walk around and continue toward the boundaries whenever control returns; the game intentionally resets Sam to the starting area while the story unfolds. When the reconnect prompt appears, use it. Sam then returns to the Beach, where five dark figures and a trail of handprints indicate the route. Follow the handprints toward Amelie to finish Order No. 69 and advance to Episode 14. Director’s Cut Ruined Factory orders are optional and do not need to be completed here.
1. Finish or postpone optional content before Order No. 69
Episode 13 follows Order No. 68, Cryptobiote Delivery: Capital Knot City Isolation Ward. Before accepting Order No. 69, decide whether to finish optional deliveries, standard orders, ranked challenges, or other Director’s Cut activities that you want to do before the final story sequence. Nothing in the Episode 13 Beach section requires a vehicle, a cargo load, a PCC, weapons, or a combat preparation run.
The Ruined Factory is optional for the campaign. In Director’s Cut, its first mission becomes available as Order No. 77 at the Distribution Center West of Capital Knot City after Orders No. 7 and No. 8 have been completed. If you have not started that chain, you have not missed an Episode 13 requirement; you can return to it during a later free-roam phase.
- Order No. 68 has been completed at the Capital Knot City Isolation Ward.
- Optional pre-ending deliveries are finished or intentionally postponed.
- No required cargo or vehicle is being carried into the Beach sequence.
2. Start Order No. 69 and find Amelie
Accept Order No. 69, “Go to Her Beach,” when it becomes available after Order No. 68. Follow the active objective and the on-screen prompts. The order does not send Sam on a normal open-world delivery route, so do not waste time looking for a road, terminal, vehicle route, or alternate map destination.
When Sam regains control on the Beach, move around the area until the next story scene begins. The first section is intentionally sparse and provides no conventional cargo-delivery task. Continue toward the visible shoreline and nearby landmarks until the game places Sam in front of Amelie.
- Order No. 69 is active.
- The objective is to find Amelie on the Beach.
- Sam is not expected to deliver cargo or reach a UCA facility.
3. Holster the revolver and hug Amelie
After the cutscene, Sam is given a revolver and Amelie moves toward the ocean. Do not fire. Press Right on the D-pad to holster the weapon, then run or walk toward Amelie. When Sam is close enough, press R2 when the hug prompt appears.
This is the required progression action. Shooting Amelie causes the Last Stranding and a game-over result, after which the encounter must be repeated. If the prompt does not appear, confirm that the revolver has been holstered and continue approaching her rather than attacking or searching for another objective.
- The revolver is holstered.
- The R2 hug prompt appears beside Amelie.
- Amelie is hugged instead of shot.
- The following cutscene begins.
4. Continue through the extended Beach sequence
After the hug and its cutscenes, Sam regains control on a different Beach. Walk around and continue moving toward the edges or across the open area when control returns. The game deliberately sends Sam back to the starting point several times while additional scenes and dialogue occur. This is scripted behavior, not a failed route or a missing ladder.
There is no terminal, vehicle, enemy camp, cargo inspection, or alternate path to discover during this section. Keep moving whenever Sam can move and watch for the reconnect instruction that eventually appears. Do not reload merely because the Beach seems to loop.
- Sam is returned to the Beach starting area by scripted transitions.
- No normal combat or delivery objective is displayed.
- The reconnect prompt eventually appears.
5. Reconnect and follow the handprints
When Sam raises the gun and the game displays the reconnect instruction, use the prompted reconnect action. This advances the sequence and returns Sam to the Beach. After control resumes, look toward the water for the group of dark figures suspended above the ocean.
Move toward the figures. Handprints will appear on the ground and provide the route. Follow the handprints across the Beach rather than walking aimlessly or trying to reach the boundary. Continue until Sam reaches Amelie, then allow the remaining scenes to play without skipping away from the active sequence.
- The reconnect prompt has been completed.
- The dark figures above the water are visible.
- The handprints are being followed toward the ocean.
- Sam reaches Amelie and the concluding scenes begin.
Before you move on
- Order No. 69, “Go to Her Beach,” is complete.
- The revolver encounter was resolved by holstering the weapon and hugging Amelie.
- The reconnect sequence and the handprint-following section have been completed.
- The concluding Episode 13 scenes have played and the game advances toward Episode 14, “Lou.”
- The Ruined Factory remains available separately if its Director’s Cut order chain was postponed.
Episode 14 — Lou: Final Story Mission and Postgame Transition
Episode 14 has one mandatory gameplay objective: complete Order No. 70, Cremation: BB. After Episode 13 ends and control returns to Sam, leave the Capital Knot City Isolation Ward and travel to the incinerator used during the opening delivery. The map is unavailable, so follow the visible route toward the mountain range, cross the river where the land begins to rise, and climb using the ladders and rope left on the original path. Enter the incinerator, follow the prompted interactions, and complete the delivery. The game then continues through its final story scenes, a brief interactive section, and the ending credits. Afterward, Episode 15, Tomorrow Is in Your Hands, returns Sam to an earlier point in the timeline so the open world, Director's Cut missions, structures, deliveries, Firing Range, and Racetrack remain available.
1. Finish Episode 13 and accept Order No. 70
Complete the final Episode 13 sequence before attempting this chapter. When Sam returns to the Capital Knot City Isolation Ward, the game begins Episode 14 and assigns Order No. 70, Cremation: BB. The episode's mandatory objective is to deliver BB to the incinerator; there is no additional story delivery or facility-connection chain to complete first.
This is a reasonable point to finish any optional activity you specifically want done before the ending, such as a currently available Director's Cut order or a delivery already prepared at a nearby facility. Nothing in Episode 14 requires you to bring weapons, vehicles, repair materials, or spare equipment. The final route is a scripted walk with no normal preparation menu.
- Complete Episode 13's final sequence.
- Confirm that Order No. 70, Cremation: BB, is active.
- Finish or abandon optional deliveries that you do not want left active before the ending.
2. Leave Capital Knot City and head toward the incinerator
From the Isolation Ward, move back up toward the Distribution Center and continue out through the city gates. The incinerator's smokestack can be visible in the distance from the early part of the route. Keep traveling across the open plain toward the mountain range rather than searching for a terminal or attempting to open the regular map.
The route is deliberately recognizable from the opening of the game. Use the landscape and the destination direction as your navigation aids. There are no normal delivery hazards or enemy encounters that require a combat loadout during this approach, but Sam can still stumble or fall, so avoid sprinting blindly across uneven ground.
- Leave the Isolation Ward.
- Pass through the Distribution Center area and exit Capital Knot City.
- Travel across the plain toward the mountain range and the visible incinerator.
3. Cross the river at the rising terrain
Continue toward the mountains until you reach the river. Do not follow the river indefinitely. Cross at the narrower section where the ground begins to elevate and the open terrain changes into the mountain approach. After crossing, keep to the relatively clear uphill path rather than attempting to circle around the range.
If Sam falls or loses his footing, recover on stable ground and realign yourself with the mountain route. The objective is not reached by returning to the city or by looking for a new road network. This section is a landmark-based version of the first incinerator journey.
- Locate the river at the foot of the mountain range.
- Cross where the terrain starts to rise.
- Continue uphill on the clear route toward the rocky cliff face.
4. Climb using the preserved ladders and rope
When the slope becomes too steep and rocky for a safe direct ascent, look for the ladders left on the original path. Climb the first ladder, continue across the upper section, and use the second ladder where it bridges the next gap. The climbing rope near the final difficult face provides the remaining route to the incinerator approach.
Do not waste time trying to free-climb the entire cliff. If the route seems blocked, backtrack a short distance and scan the rock face for the ladder rungs or the rope anchor. The intended path is still present, and the industrial structure becomes clear as you reach the top.
- Use the first preserved ladder.
- Cross the upper gap with the second ladder.
- Use the preserved rope for the final ascent.
- Reach the incinerator entrance.
5. Enter the incinerator and complete the final delivery
Approach the incinerator entrance to trigger the next story scene. After the scene, continue inside as directed and interact with the terminal when the prompt appears. Confirm the delivery to complete Order No. 70 and Episode 14's required gameplay objective.
After this interaction, the game takes control for the concluding story sequence. There is no alternate route, combat strategy, or optional delivery choice that changes the required completion of the episode. Follow the prompts during the brief interactive section and allow the narrative scenes to continue.
- Trigger the scene at the incinerator entrance.
- Enter and interact with the terminal when prompted.
- Confirm completion of Order No. 70.
- Follow the prompts during the final interactive section.
6. Let the ending finish, then use Episode 15 for remaining content
Continue through the ending presentation and credits rather than treating the first major scene as the end of the game. Once the ending sequence is complete, the game displays Episode 15, Tomorrow Is in Your Hands, and returns Sam to a playable world set before the final events of the story.
Episode 15 is not a second mandatory ending. It is the postgame state for continued deliveries and cleanup. Your open-world progression remains available, including structures, facilities, roads, ziplines, Director's Cut missions, the Ruined Factory content, Firing Range activities, and Racetrack challenges. Use this state for optional orders, facility development, ranked challenges, and any other completion goals left unfinished.
- Allow the concluding scenes and credits to proceed.
- Confirm that Episode 15, Tomorrow Is in Your Hands, appears.
- Enter the restored open world from the Private Room.
- Complete remaining Director's Cut and optional activities as desired.
Before you move on
- Order No. 70, Cremation: BB, is marked complete.
- Sam has entered the incinerator and completed the final interactive story sequence.
- The ending scenes and credits have progressed to the postgame transition.
- Episode 15, Tomorrow Is in Your Hands, is displayed.
- Sam can return to the open world and accept ordinary or Director's Cut optional content.
The Ending and Episode 15 — Tomorrow Is in Your Hands
Finish the mandatory story through Episode 14 and Order No. 70, then let the complete ending sequence and credits finish. When control returns, verify Episode 15: Tomorrow Is in Your Hands. Episode 15 is postgame free roam and is not required for the canonical ending. In the Director’s Cut, Orders 77–79 are the optional Ruined Factory chain. Orders 80, 81, and 82 are separate vog-preserved resource deliveries with different issuing facilities and destinations. Order 83 is a separate rescue mission that unlocks the Buddy Bot. Treat the Firing Range, Racetrack, Ranked Orders, Ranked Drills, Ranked Nightmares, Ranked Races, Premium Deliveries, facility upgrades, roads, structures, and other infrastructure as optional completionist content.
1. Finish Episode 14 and allow the complete ending to play
Complete the mandatory story objectives through Episode 14: Lou and Order No. 70. Do not interpret every numbered Order as mandatory: optional Standard Orders, Premium Deliveries, facility development, roads, structures, and Director’s Cut side content are not required to reach the canonical ending.
Follow the final sequence without quitting when control changes or when the credits begin. Continue until the complete ending sequence and credits have finished and the game returns to normal play. The main campaign is complete when Sam is returned to the postgame state rather than when the first credit section appears.
Open the cufflinks after control is restored and verify that the chapter display reads Episode 15: Tomorrow Is in Your Hands. This is the postgame free-roam state, presented as a continuation of Sam’s world rather than a second mandatory ending. The original game’s episode structure ends with Episode 14, followed by Episode 15 free roam.
- All mandatory story Orders through Order No. 70 are complete.
- Episode 14: Lou is complete.
- The full ending sequence and credits have finished.
- The chapter display shows Episode 15: Tomorrow Is in Your Hands.
2. Use Episode 15 for optional cleanup and Director’s Cut content
Review Orders for Sam at terminals after entering Episode 15. Continue with optional deliveries, facility connections, infrastructure, Premium Delivery grades, collectibles, and challenge activities only if they belong to your target. Episode 15 itself does not require another story finale.
Before a long optional delivery, repair Sam’s equipment, restore BB if necessary, check cargo condition and time limits, and choose a truck, zip-line route, or other network support appropriate to the load. Save at a facility before accepting a difficult trip so a failed attempt can be retried without losing completed story progress.
The Director’s Cut adds separate Orders for Sam beyond the main campaign. Their numbering does not mean they form one uninterrupted sequence: some are tied to the Ruined Factory, some to specific facilities, and some to the Buddy Bot storyline.
- Episode 15 free roam is active.
- New Orders for Sam have been reviewed at available terminals.
- Cargo, equipment, vehicles, and recovery routes are prepared for optional missions.
3. Complete the optional Ruined Factory chain: Orders 77–79
Orders 7 and 8 at the Distribution Center West of Capital Knot City unlock access to the Director’s Cut Ruined Factory content. Once those prerequisites are complete, check that terminal for Order No. 77. The official Director’s Cut guide identifies Orders 7 and 8 as the unlock condition for Order 77.
Accept Order No. 77 and follow the objective to the Ruined Factory near the Ludens Fan area. Human enemies guard the approach, so scout the camp, avoid patrols where possible, or use non-lethal equipment to create a safe route. Completing Order 77 unlocks the Maser Gun and Support Skeleton fabrication options.
Accept Order No. 78 when it appears after Order 77. It sends Sam back into the Ruined Factory to recover interior data. Use the Maser Gun supplied or unlocked by the previous order, keep the cargo secure, and return to the listed destination. Order 78 also provides Director’s Cut story and customization rewards.
Order No. 79 is the concluding Ruined Factory mission and becomes available after the main campaign ending. In Episode 15, check the terminal where the earlier Ruined Factory orders were issued. If it is absent, confirm that Orders 77 and 78 are complete, rest in a Private Room, and recheck Orders for Sam after the postgame state has advanced. Order 79 is optional and is not required for the canonical ending.
- Orders 7 and 8 at the Distribution Center West of Capital Knot City are complete.
- Orders 77 and 78 are complete.
- Order 79 is complete if the Ruined Factory storyline is part of the target.
4. Complete Orders 80, 81, and 82 as separate resource deliveries
Order No. 80 is issued at the Weather Station. Carry the vog-preserved liquid metal resources to the Distribution Center South of Lake Knot City. Completing it unlocks the Jump Ramp blueprint for a PCC Level 2.
Order No. 81 is issued at the Chiral Artist’s facility. Deliver the vog-preserved water-soluble resources to the Distribution Center South of Lake Knot City. Completing it unlocks the Chiral Bridge blueprint for a PCC Level 2. The Chiral Bridge can be useful in narrow or difficult terrain, but it becomes unusable during Timefall, so it is an optional route tool rather than a campaign requirement.
Order No. 82 is a separate delivery issued by the Spiritualist. Take the vog-preserved fuel resources to the Distribution Center North of Mountain Knot City. Do not send it to the southern distribution center and do not merge it into the Order 80 or Order 81 chain. Available exact-edition references confirm the issuer and destination, but do not establish a unique new structure reward that should be stated as fact. Submit the order, read the completion screen, and record any reward the PS5 Director’s Cut actually lists.
Orders 80, 81, and 82 are optional Director’s Cut resource deliveries. Check each order independently in the terminal list; completing one is not, by itself, a substitute for the others.
- Order 80 from the Weather Station to the Distribution Center South of Lake Knot City is complete if the Jump Ramp is wanted.
- Order 81 from the Chiral Artist to the Distribution Center South of Lake Knot City is complete if the Chiral Bridge is wanted.
- Order 82 from the Spiritualist to the Distribution Center North of Mountain Knot City is complete if the resource-delivery set is part of the target.
- No unsupported reward has been assigned to Order 82.
5. Complete Order 83 separately for the Buddy Bot
Order No. 83 is a separate rescue mission associated with the Order No. 41 availability sequence. It is issued at the Distribution Center South of Lake Knot City and involves recovering a porter carrying bot research data. Accept it when it appears in Orders for Sam, follow the rescue marker, recover the required data, and return it to the listed destination.
Completing Order 83 unlocks the Buddy Bot. The Buddy Bot can assist with cargo and transport, but it is limited by the Chiral Network and is not needed for the main ending. Do not describe Order 83 as part of the Ruined Factory chain or as a reward from Order 82.
If Order 83 does not appear, check that the relevant Order No. 41 sequence is available or complete, revisit the Distribution Center South of Lake Knot City, and review Orders for Sam after resting. The mission may be completed before or after the ending, so track it separately from Episode 15-only Order 79.
- Order 83 is available at the Distribution Center South of Lake Knot City.
- The bot research data has been recovered and delivered.
- The Buddy Bot is available if it is part of the completion target.
6. Treat racing, firing-range, ranked activities, and infrastructure as optional
The Firing Range is optional and does not advance the main ending. Use it after its unlock appears in the terminal or Private Room menus. Firing Range drills and Ranked Drills are challenge content, so record their scores only if your goal includes them.
The Racetrack requires Episode 3, the Junk Dealer connected to the Chiral Network, Order No. 35 completed to the K4 South Distribution Center, Thomas Sutherland’s message read, and the racetrack rebuilt south of the Timefall Farm. The listed construction contribution is 650 Chiral Crystals, 2,240 Metal, and 1,960 Ceramics. Order 35 is optional and is not required for Episode 3 completion.
After the Racetrack is built, regular races and Ranked Races are available through its terminal. Ranked Orders, Ranked Drills, Ranked Nightmares, and Ranked Races award scores and optional rewards; none is required for the canonical ending or Episode 15 access. Roads, facility connection levels, structure upgrades, Premium Delivery grades, collectibles, and general infrastructure are likewise optional unless the chosen completion target includes them.
- The Firing Range is unlocked if drills are required.
- The Racetrack is rebuilt if racing content is required.
- Ranked Orders, Ranked Drills, Ranked Nightmares, and Ranked Races are completed only if specifically included in the target.
- Optional infrastructure and facility upgrades match the selected completion standard.
Before you move on
- All mandatory story Orders through Order No. 70 are complete.
- Episode 14: Lou is complete and the full ending sequence and credits have played.
- The game has returned Sam to Episode 15: Tomorrow Is in Your Hands.
- Orders 77–79 are complete if the Director’s Cut Ruined Factory storyline is required.
- Orders 80, 81, and 82 have been checked and completed independently if the resource-delivery content is required.
- Order 83 has been completed if the Buddy Bot is required.
- Firing Range, Racetrack, Ranked activities, facility upgrades, infrastructure, collectibles, and optional deliveries match the selected completion goal.
References for this chapter
- DEATH STRANDING DIRECTOR’S CUT: Beginner’s Guide
- DEATH STRANDING DIRECTOR’S CUT: Beginner’s Guide — Official PC mirror
- Orders (DS1)
- Chiral Bridge — Death Stranding Wiki
- Order No. 78 — Death Stranding Wiki
- Order No. 79 — Death Stranding Wiki
- Death Stranding Director’s Cut: How to Access the Ruined Factory
- Death Stranding Director’s Cut: How to Unlock the Maser Gun and Support Skeleton
- Death Stranding Director’s Cut — Ruined Factory Orders Guide
- Director’s Cut roadmap for achievement hunters — Steam Community Guide
Director's Cut Extras — Ruined Factory, New Orders, Racing and Ranked Challenges
Death Stranding Director’s Cut adds the optional Ruined Factory storyline, new structures, the Buddy Bot, the Fragile Circuit, Firing Range activities, Ranked events, and Roadster rewards. Orders 77 and 78 become available at the K2 West Distribution Center after Orders 7 and 8. Order 79 continues the factory story in Episode 15 after the main ending. Orders 80, 81, 82, and 83 are separate Director’s Cut deliveries with independent availability: Order 80 unlocks the Jump Ramp, Order 81 unlocks the Chiral Bridge, Order 82 carries vog-preserved fuel resources from the Spiritualist to the Distribution Center North of Mountain Knot City, and Order 83 unlocks the Buddy Bot alongside Order 41. The Racetrack requires Episode 3, optional Order 35, the related message, and a separate materials donation. All activities in this chapter are optional unless your goal includes Director’s Cut story content, structures, vehicles, Ranked records, or completionist progress.
1. Begin the Ruined Factory missions with Order 77
At the K2 West Distribution Center, complete Orders 7 and 8 if they are still pending. Once both are complete, check the terminal for Order 77, the Director’s Cut mission that introduces the Ruined Factory. This mission is optional and can be completed during Episode 2 without affecting the mandatory route to the ending.
Travel to the Ruined Factory near the Ludens Fan area. The exterior is guarded by MULEs, so use the terrain and Odradek warnings to avoid patrols or disable enemies non-lethally. Carry only the equipment and cargo needed for the order so Sam remains mobile if the alarm rises.
Retrieve the marked package and return it to the K2 West Distribution Center. Order 77 unlocks the Maser Gun and Support Skeleton for fabrication. These rewards are optional but useful for later human encounters and long deliveries.
- Orders 7 and 8 are complete at the K2 West Distribution Center.
- Order 77 has been accepted and delivered.
- The Maser Gun and Support Skeleton appear in the fabrication menus.
2. Complete Order 78 inside the factory
After Order 77, check the K2 West Distribution Center again for Order 78, Stealthy Collection: Data from the Ruined Factory Interior. Bring a reliable non-lethal weapon, blood bags, and a PCC if you have room, but prioritize stealth and a clear escape route over a heavy loadout.
Return to the factory and enter the newly accessible interior. Move between cover points, monitor the Odradek, and avoid open areas while guards are nearby. If an alarm begins, break line of sight and reposition rather than staying in a prolonged fight.
Collect the marked data and leave the facility with every required container. Return the cargo to the issuing terminal. If no further factory order appears immediately, continue the main campaign and revisit the K2 West Distribution Center after additional story progress.
- Order 78 is available after Order 77.
- All required interior data has been collected.
- The data has been returned to the issuing distribution center.
3. Return in Episode 15 for Order 79
Complete the main campaign through Episode 14, allow the full ending sequence and credits to finish, and enter Episode 15 free roam. Order 79 is postgame content and is not required to reach the canonical ending. After the credits, check the K2 West Distribution Center for the next Ruined Factory mission.
Accept Order 79 and return to the factory using the route established by Orders 77 and 78. Bring healing supplies and a combat-capable loadout because this mission advances the factory storyline beyond the earlier collection work.
Follow the order markers through the accessible factory sections, complete the stated objective, and return the required cargo to the issuing facility. Once Order 79 is complete, the Ruined Factory chain is finished. Orders 80, 81, 82, and 83 are separate deliveries and are not automatic follow-ups to this chain.
- Episode 15 has been reached after the ending and credits.
- Order 79 has been accepted from the K2 West Distribution Center.
- The Order 79 objective and return delivery are complete.
4. Unlock the Jump Ramp through Order 80
Order 80 is a separate delivery issued through the Weather Station when it becomes available. It is not the next step in the Ruined Factory sequence. Read the terminal entry carefully before accepting it so you know the cargo condition and destination shown for your save.
Deliver the vog-preserved liquid-metal resources to the listed destination while protecting the cargo from falls, Timefall, and unnecessary combat. After submitting the order, check the completion screen and fabrication menu.
Completing Order 80 unlocks the Jump Ramp blueprint. The Jump Ramp is optional; build it with a PCC Lv. 2 where a repeated vehicle route benefits from a controlled launch over a gap or difficult crossing.
- Order 80 has been accepted from the Weather Station when available.
- The Order 80 delivery is complete.
- Jump Ramp fabrication is available.
5. Unlock the Chiral Bridge through Order 81
Order 81 is a separate delivery issued through the Chiral Artist’s Studio. Check that facility’s Orders for Sam list when the order appears. Do not treat it as a required continuation of Orders 77–79.
Deliver the requested vog-preserved water-soluble resources to the Distribution Center South of Lake Knot City, protecting the cargo from rough terrain and Timefall. Use a vehicle or established roads when they provide a safer route.
After completing Order 81, fabricate a Chiral Bridge with a PCC Lv. 2 and test it on a narrow crossing. The structure is situational and can be disabled temporarily by Timefall, so it is not a permanent all-weather replacement for ordinary bridges.
- Order 81 has been accepted from the Chiral Artist’s Studio when available.
- The cargo has been delivered to the Distribution Center South of Lake Knot City.
- Chiral Bridge fabrication is available.
6. Complete Order 82 for the Spiritualist
Order 82 is a separate Director’s Cut delivery that becomes available at the Spiritualist’s shelter when the order is offered by her terminal. It is not unlocked by completing Order 81, and it does not form a unified sequence with Orders 80, 81, or 83. If it is absent, connect the Spiritualist and continue checking her Orders for Sam list after further story or facility progress.
Accept Delivery: Vog-Preserved Fuel Resources for Material Development. Carry the fuel-resource cargo from the Spiritualist to the Distribution Center North of Mountain Knot City. The route crosses mountainous terrain, so use a vehicle where the road network reaches the area, or bring climbing equipment and protect the containers during snow and falls.
Submit the cargo at the Distribution Center North of Mountain Knot City. Order 82 is an optional resource delivery; do not assign it an unsupported Jump Ramp, Chiral Bridge, or Buddy Bot reward. Its completion is tracked separately from those named Director’s Cut unlocks, while normal facility likes and relationship progress still apply.
- Order 82 is accepted at the Spiritualist’s shelter when available.
- Vog-preserved fuel resources have been delivered to the Distribution Center North of Mountain Knot City.
- Order 82 is recorded as complete without treating it as a prerequisite for Orders 80, 81, or 83.
7. Unlock the Buddy Bot through Order 83 alongside Order 41
Order 83 is made available at the K4 South Distribution Center alongside Order 41. It is a separate Director’s Cut rescue or research-data order, not a continuation of the Ruined Factory missions or the resource deliveries. Check the terminal when Order 41 becomes available and select Order 83 if you want the Buddy Bot.
Follow the destination markers and complete the rescue or research-data objective shown by the terminal. Return the required cargo or data to the issuing facility and confirm the reward on the completion screen.
After Order 83 is complete, the Buddy Bot becomes available for fabrication. It can accompany Sam, carry cargo, or perform deliveries within Chiral Network coverage. A delivery performed by the Buddy Bot cannot receive higher than an A rating, so use Sam when the highest delivery rank matters.
- Order 83 is accepted at the K4 South Distribution Center alongside Order 41 when available.
- Order 83 is complete.
- Buddy Bot fabrication and deployment are available.
8. Enter the Firing Range and Ranked activities
The Firing Range becomes available after completing Order 14 at Capital Knot City or Order 77 at the K2 West Distribution Center. Once access is available, use a delivery terminal at a distribution center or safe house and select the Firing Range option.
Complete ordinary drills first to learn the weapon restrictions, target layouts, and enemy types. Ranked Drills are separate score-based challenges. Ranked Orders also include Ranked Deliveries, Ranked Nightmares, and Ranked Races, whose events are presented through the game’s Ranked Orders system.
These activities are optional and are not prerequisites for the main ending, Episode 15, or the Director’s Cut story missions. Attempt them only when an eligible event is available if you are pursuing scores, medals, banners, or Ranked rewards.
- Firing Range access has been unlocked through Order 14 or Order 77.
- At least one ordinary drill has been completed.
- A Ranked event has been attempted when an eligible event is available.
9. Rebuild the Fragile Circuit and pursue Roadster rewards
Reach Episode 3, connect the Junk Dealer to the Chiral Network, and complete optional Order 35 by delivering the prototype to the K4 South Distribution Center. Order 35 is not required to finish Episode 3. After completing it, leave the facility and read Thomas Sutherland’s message about the Racetrack before traveling to the Racetrack terminal south of the Timefall Farm.
At the Racetrack terminal, select the rebuild option and provide 650 Chiral Crystals, 2,240 Metal, and 1,960 Ceramics. These are construction materials, not ordinary delivery cargo. Use distribution-center reserves, vehicles, and existing roads to gather them without overloading Sam.
After the track is rebuilt, use regular races to learn the courses and vehicles. Ranked Races are separate optional events. An S rank in a Roadster race unlocks the standard Roadster; earning S ranks in all Roadster races unlocks the Long Range Roadster. Neither vehicle is needed for campaign completion.
- Episode 3 has been reached and optional Order 35 is complete.
- The Racetrack has been rebuilt with 650 Chiral Crystals, 2,240 Metal, and 1,960 Ceramics.
- At least one race has been completed.
- The Roadster rewards have been earned through their stated S-rank requirements if pursuing vehicle completion.
10. Use optional Director’s Cut structures strategically
The Cargo Catapult becomes available at the end of Episode 5 after Order 46. Equip a PCC Lv. 2 at a terminal, select Cargo Catapult, and place it where the launch and landing areas are clear. It is useful for sending cargo across crevasses or difficult mountain routes, but it does not replace normal delivery planning.
The Jump Ramp and Chiral Bridge become available through Orders 80 and 81 respectively. The Buddy Bot becomes available through Order 83. Order 82 is a separate fuel-resource delivery and should not be folded into that unlock chain.
Bandwidth is limited, so build only where a structure will save time on repeated routes. Upgrade structures when their durability or additional features justify the material cost. Cargo Catapult, Jump Ramp, Chiral Bridge, Buddy Bot deployment, facility upgrades, infrastructure, racing, Firing Range drills, and Ranked activities are optional completionist content.
- Cargo Catapult fabrication is available after Order 46.
- Cargo Catapult, Jump Ramp, and Chiral Bridge have each been fabricated and used if pursuing structure completion.
- Order 82 is complete if the Director’s Cut resource-delivery set is in scope.
- Buddy Bot has been fabricated or deployed after Order 83.
- Optional structures have been placed on useful repeat-delivery routes.
Before you move on
- Orders 77 and 78 are complete at the K2 West Distribution Center.
- Episode 15 has been reached and Order 79 is complete if the Ruined Factory story is required.
- Order 80 is complete and Jump Ramp fabrication is available.
- Order 81 is complete and Chiral Bridge fabrication is available.
- Order 82 is complete, with vog-preserved fuel resources delivered from the Spiritualist to the Distribution Center North of Mountain Knot City.
- Order 83 is complete and the Buddy Bot is available.
- The Firing Range has been entered and at least one ordinary drill has been completed.
- At least one Ranked event has been attempted when an eligible event is available.
- The Racetrack has been rebuilt with 650 Chiral Crystals, 2,240 Metal, and 1,960 Ceramics, and at least one race has been completed.
- The standard Roadster and, if desired, Long Range Roadster have been unlocked through their S-rank requirements.
- The Cargo Catapult, Jump Ramp, and Chiral Bridge have each been fabricated and used if pursuing Director’s Cut structure completion.
References for this chapter
- DEATH STRANDING DIRECTOR’S CUT: Beginner’s Guide
- DEATH STRANDING DIRECTOR’S CUT: Beginner’s Guide — Official PC mirror
- Death Stranding Director’s Cut: How to Access the Ruined Factory
- Death Stranding Director’s Cut: How to Unlock the Maser Gun and Support Skeleton
- Death Stranding Director’s Cut: How to Unlock the Cargo Catapult
- Death Stranding Director’s Cut — Ruined Factory Orders Guide
- Death Stranding Director’s Cut: How to Unlock the Racing Track
- DEATH STRANDING DIRECTOR’S CUT Ranked Orders
- Orders (DS1)
Finishing up
Story completion: Complete all mandatory story Orders through Order No. 70 and Episodes 1–14, allow the full ending sequence and credits to finish, and confirm that Episode 15 is accessible.
Director's Cut story completion: Complete Orders 77, 78 and postgame Order 79 if the Ruined Factory storyline is included in the target.
Optional Director's Cut completion: Orders 80–83 and their associated unlocks, the Firing Range, Racetrack, desired ranked activities, infrastructure and facility upgrades are completed only if included in the player's chosen completion target.
Do not require every numbered order through Order No. 70, every facility, every structure, every Standard Order or every ranked event for the canonical ending.
Choose your next gameScreenshots & video
Game imagery for reference. Follow the written chapters above for the route and strategies.
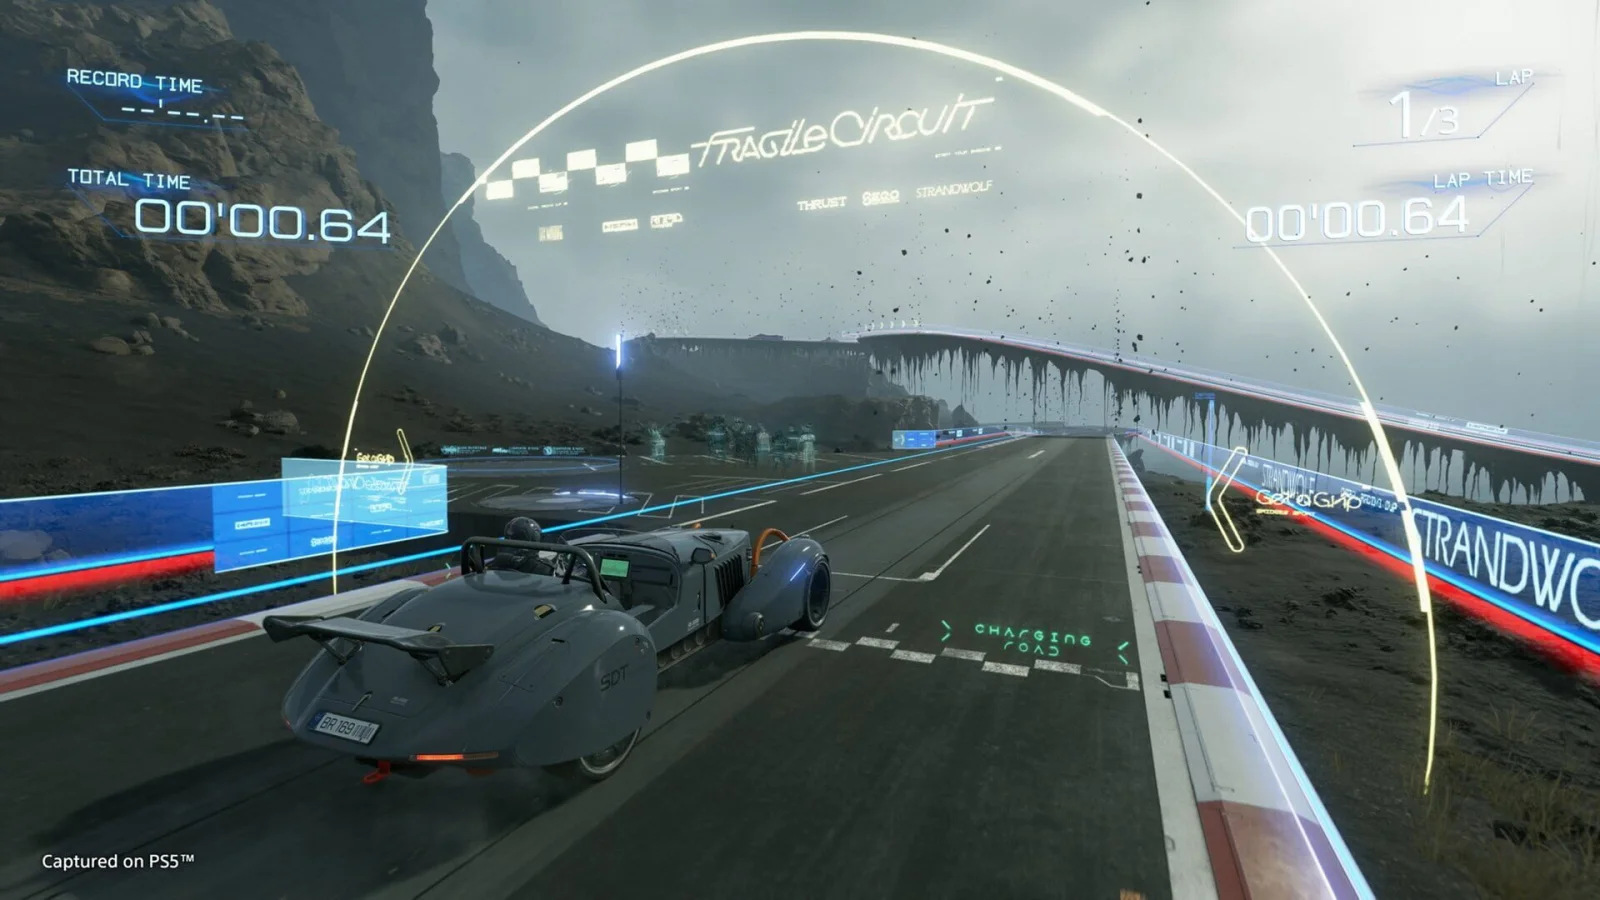
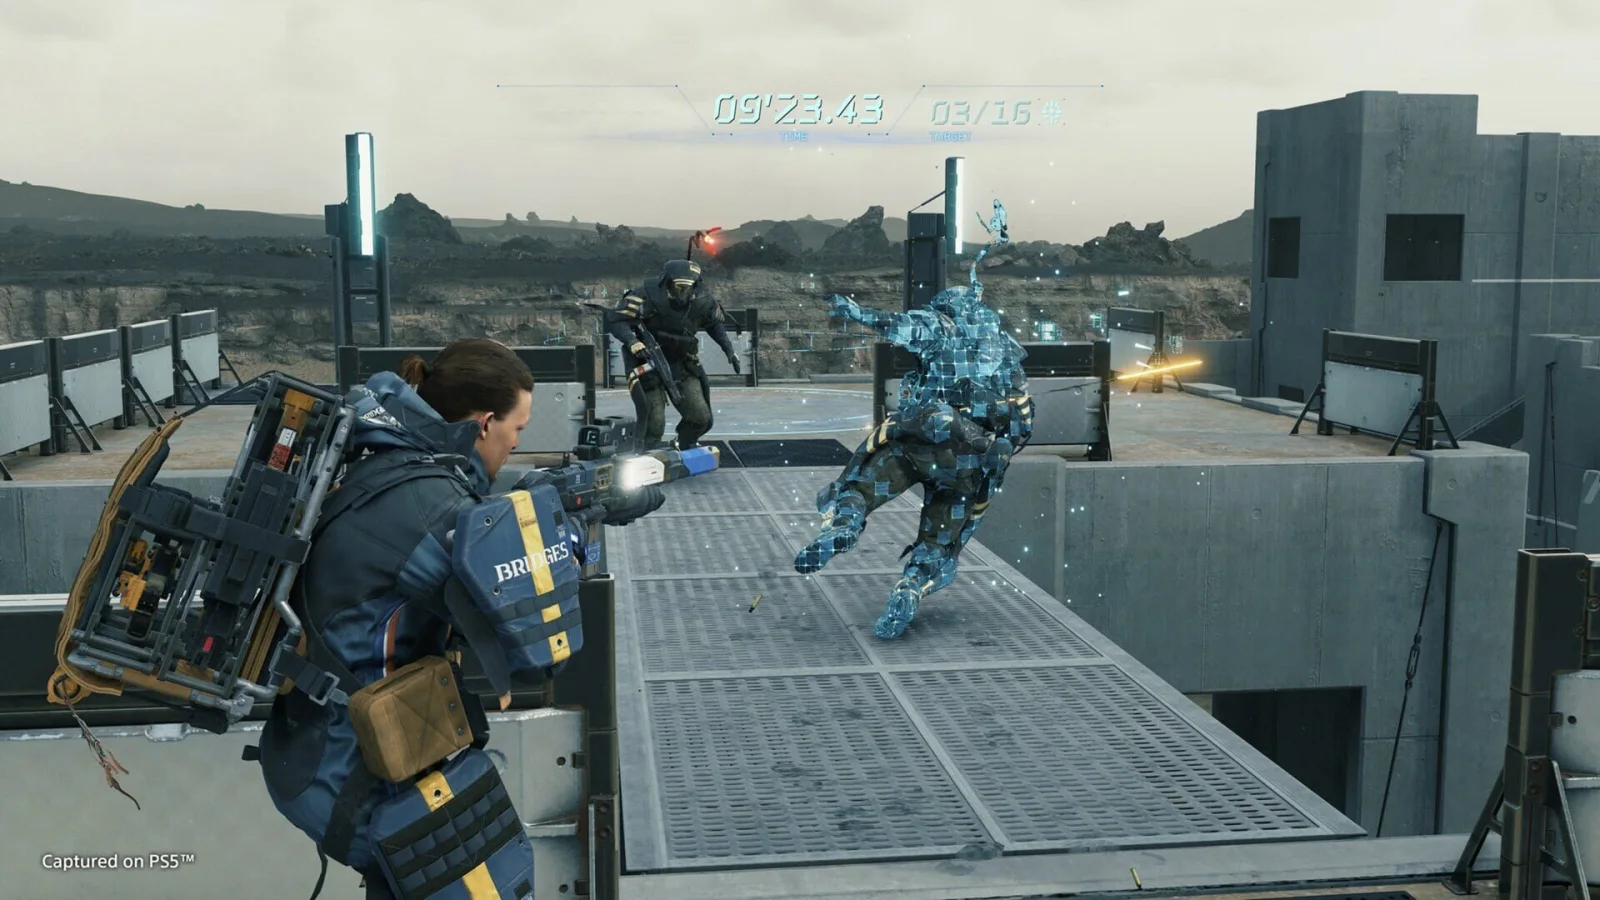
Sources & references
Our original guide draws on the references below. Check the edition at the top of this page before following controls or unlock requirements.
- Death Stranding Missions List — PowerPyx
- Death Stranding - Order No. 3 Cremation Mission Walkthrough
- Death Stranding Quest Guide: Order 1 Smart Drug Delivery
- Episode 1: Bridget — Death Stranding Wiki
- DEATH STRANDING DIRECTOR’S CUT: Beginner’s Guide
- Episode 2: Amelie — Game of Guides
- Episode 1 Section 1: The President of Jack Shit — Death Stranding: Director's Cut Walkthrough & Guide
- Death Stranding - PS5 and PS4 Games — PlayStation official product page
- Order No. 11 Resins Delivery: Distribution Center West of Capital Knot City Walkthrough
- Death Stranding Director’s Cut: How to Unlock the Maser Gun and Support Skeleton
- DEATH STRANDING DIRECTOR'S CUT: Beginner's Guide
- What new and returning players can expect in Death Stranding Director’s Cut, out today on PS5 — PlayStation.Blog
- Death Stranding All UCA Facility Locations — PowerPyx
- Death Stranding Director’s Cut: How to Unlock the Racing Track
- Death Stranding Director’s Cut: How to Access the Ruined Factory
- Order No. 38: Emergency Provisions Delivery: South Knot City — Death Stranding Wiki
- Death Stranding - Story Mission Walkthroughs
- [Order No. 39] Escape the Battlefield Walkthrough — Neoseeker
- Death Stranding — Order No. 39 Escape the Battlefield Mission Walkthrough — Samurai Gamers
- Death Stranding Walkthrough Guide: Episode 4 — Unger — GameSpot
- Chapter 4: Unger Walkthrough — Gamepressure
- DEATH STRANDING DIRECTOR'S CUT Trophy Guide & Roadmap (PS5)
- What new and returning players can expect in Death Stranding Director's Cut, out today on PS5
- Episode 5: Mama — Game of Guides
- Order No. 43: Blood Delivery: Distribution Center North of Mountain Knot City — Neoseeker
- Order No. 44: Antimatter Bomb Delivery: Mountain Knot City — Neoseeker
- Order No. 46: Mama Delivery: Mountain Knot City — Neoseeker
- Death Stranding: Chapter 6 - Deadman Walkthrough
- Death Stranding — Delivery Order List
- Order No. 50 Medical Device Delivery Walkthrough
- Order No. 52 Retrieval: Camera Walkthrough
- Death Stranding - Preppers Guide
- DEATH STRANDING DIRECTOR’S CUT — PlayStation Store
- Episode 7: Clifford — Game of Guides
- Order No. 54: Escape the Battlefield Walkthrough — Neoseeker
- Order No. 56: Recovery: Winter Clothes Walkthrough — Neoseeker
- DEATH STRANDING DIRECTOR’S CUT: Beginner’s Guide — Kojima Productions
- Death Stranding — Trophy Guide and Roadmap: Episode 8
- Death Stranding Walkthrough: Episode 8 — Heartman
- Death Stranding - Order No. 63 Network Activation Key Delivery Mission Walkthrough
- Death Stranding: Chapter 9 - Higgs Walkthrough
- Order No. 64 Elimination: BT Walkthrough
- Order No. 65 Elimination: Higgs Walkthrough
- Death Stranding Walkthrough: Episode 10 — GameSpot
- Chapter 10: Die-Hardman Walkthrough — Neoseeker
- DEATH STRANDING DIRECTOR’S CUT: Beginner’s Guide — Official PC mirror
- Death Stranding — Order No. 66 Fresh Pizza Delivery Walkthrough — Samurai Gamers
- Death Stranding — Order No. 67 Escape the Battlefield Mission Walkthrough
- [Order No. 67] Escape the Battlefield Walkthrough
- Death Stranding: Chapter 11 - Clifford Unger Walkthrough
- Death Stranding Walkthrough: Episode 11 — Clifford Unger
- Order No. 68 - Death Stranding Walkthrough - Neoseeker
- Episode 12: Bridges - Death Stranding Wiki
- Chapter 12 - Bridges Walkthrough - Gamepressure
- [Order No. 69] Go to her Beach Walkthrough — Neoseeker
- Episode 13: Sam Strand — Death Stranding Wiki
- Death Stranding Full Walkthrough: Episode 14 Guide - Lou
- [Order No. 70] Cremation: BB Walkthrough
- Episode 14: Lou
- Orders (DS1)
- Chiral Bridge — Death Stranding Wiki
- Order No. 78 — Death Stranding Wiki
- Order No. 79 — Death Stranding Wiki
- Death Stranding Director’s Cut — Ruined Factory Orders Guide
- Director’s Cut roadmap for achievement hunters — Steam Community Guide
- Death Stranding Director’s Cut: How to Unlock the Cargo Catapult
- DEATH STRANDING DIRECTOR’S CUT Ranked Orders
About the game & collecting notes
- Platform
- Sony PlayStation 5
Complete Death Stranding Director's Cut on PS5 through the Prologue and Episodes 1–14, including Order No. 70 and the full ending, then access Episode 15: Tomorrow Is in Your Hands. The guide also covers the optional Director's Cut Ruined Factory story orders 77–79, the later Director's Cut equipment orders, and optional ranked, racing and firing-range activities. It distinguishes mandatory story progress from optional facility development, standard orders, infrastructure and challenges.
Darryl Polo
Darryl Polo writes about emulation and retro games. What changes when an old favorite moves to another setup? That question connects his interest in tinkering with the games that made the hardware worth keeping.
Our editorial standardsFound a step that needs another look? Help us improve this guide.