
Dead Space (PS5 remake) — Complete Campaign Walkthrough
Step-by-step campaign walkthrough for the Dead Space PS5 remake by Motive Studios. Covers every main-chapter objective, essential routes, boss strategies, zero‑G sequences, optional side missions, upgrade / shop guidance and how to reach both the standard ending and the remake’s alternate New Game+ ending. Designed for PS5 controls and DualSense features.

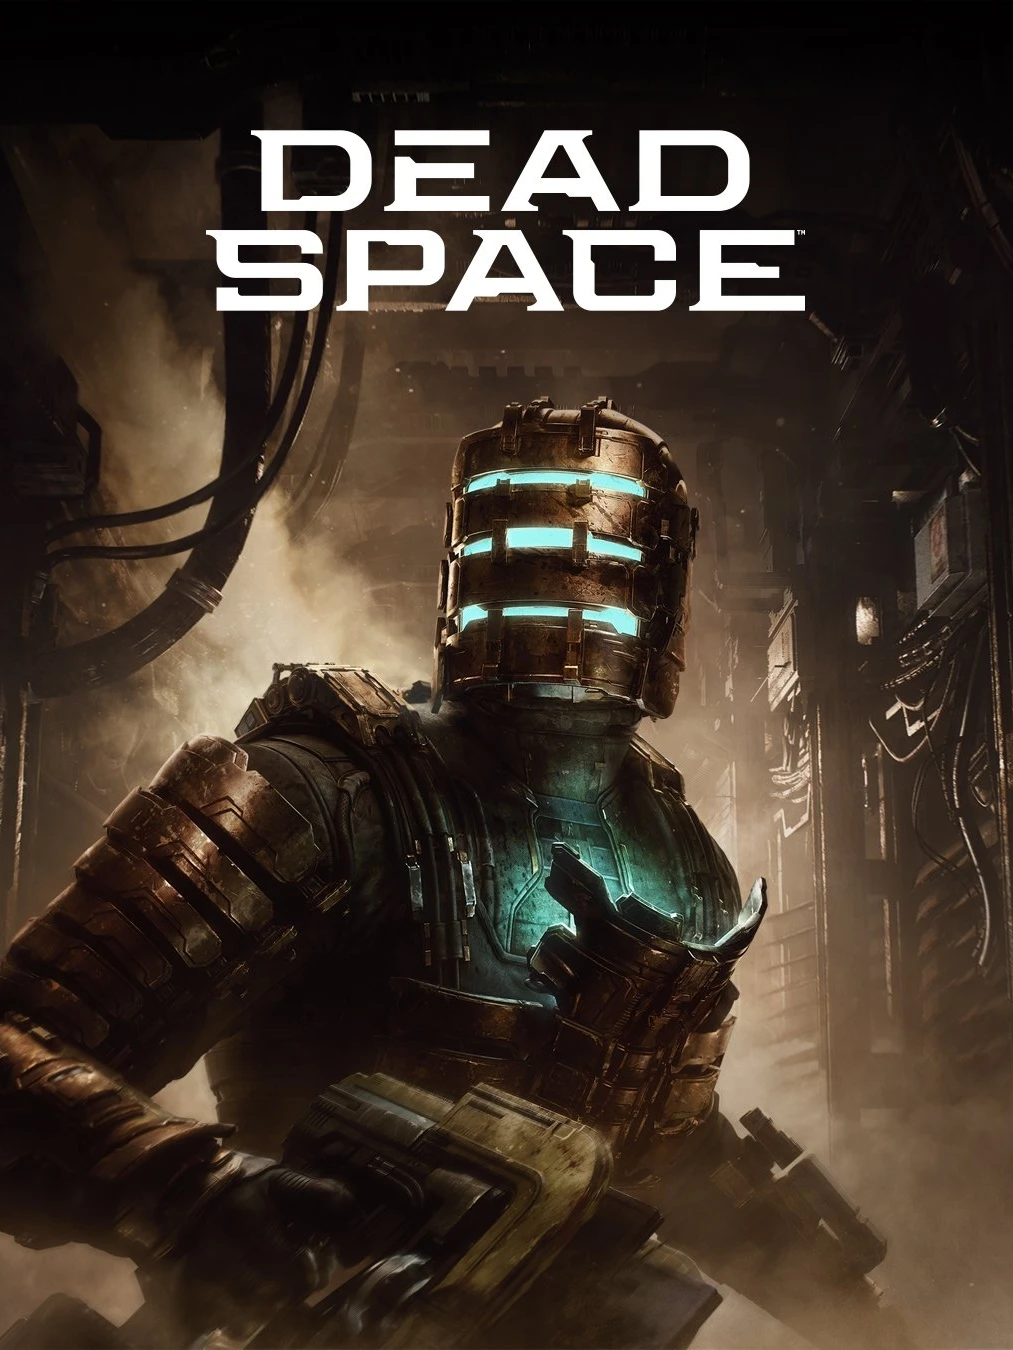
Find a copy
Dead Space Sony PlayStation 5
We may earn a commission if you buy through these links, at no extra cost to you. As an Amazon Associate I earn from qualifying purchases.
Opens retailer search results. Check the model, edition, seller, availability and current price before buying.
Before you begin
You are Isaac Clarke: an engineer who arrives at the mining ship USG Ishimura to investigate a distress call.
This guide assumes you are playing the Motive Studios PS5 remake and will walk you through every main objective in each of the twelve chapters, point out where optional side missions and upgrades are worth the detour, and explain how the remake’s new systems (360° zero‑G segments, security clearances, weapon upgrade items, and New Game+) affect progression.
Follow the route instructions in each chapter, use the preparation checklist before you begin, and treat the 'must cover' items as required progresses to avoid backtracking.
Where combat tactics are needed, I state the reliable approach (target limbs, use stasis to stop attacks, use environmental weapons).
This walkthrough does not list every collectible by coordinate but will show when and where to pursue optional schematics, nodes, and marker fragments so you can reach the remake’s alternate ending in New Game+.
Play carefully: the Ishimura punishes haste.
Set yourself up for the run
Familiarize yourself with the PS5 control presets in Options; the remake provides Default, DS1 and DS2 presets and full remapping—set whichever feels natural and enable DualSense haptics if you prefer tactile feedback (Controls page).
Set difficulty based on how much resource scarcity you want; Normal/Hard balance challenge and resource gain.
If you intend to hunt the alternate ending, plan for at least one full playthrough and a New Game+ run.
Learn core mechanics: aim for limb dismemberment to incapacitate necromorphs; stasis slows enemies and moving machinery; kinesis throws props and opens shortcuts.
Use stasis to interrupt attacks and kinesis for environmental kills and ammo conservation.
Keep a balanced inventory: prioritize the Plasma Cutter and one versatile secondary weapon early (pulse or contact) and buy suit/weapon upgrades at machines when nodes or upgrade schematics are available.
Save frequently at benches if you play on lower difficulties.
Track side missions with the mission log and wayfinder.
Side missions reward credits, nodes, and schematics; most are safe to complete as you encounter them and are flagged clearly in the mission UI.
Manage credits: sell excess goods you don’t need to afford level 2 suit and early weapon upgrades.
Don’t hoard every crafting material—prioritize nodes and a single key weapon upgrade path first.
Expect vertical/zero‑G sections: oxygen is a resource in some sequences; move deliberately, use the propulsion boost, and avoid uncontrolled spins by correcting with small thruster bursts.
If aiming for the alternate New Game+ ending, note that Marker Fragments are New Game+ collectibles and must be gathered and placed in the Captain’s quarters shrine during a NG+ run; plan not to expect those on your first playthrough (New Game+ mechanics and secret ending confirmed by EA coverage).
Chapter 1 – New Arrivals
Repair the Ishimura’s tram system, recover the replacement Data Board, and return to the USG Kellion for its diagnostics report. Chapter 1 introduces the Plasma Cutter, Stasis, limb dismemberment, circuit breakers, benches, Stores, and the locator. The tram cannot be called until both the damaged tram has been replaced and the Data Board has been installed in Tram Control. The Plasma Cutter is in the Service Workshop, Stasis is near the malfunctioning door by Tram Station Hall, and the Level 2 suit can be bought for 10,000 credits near the end of the chapter. During New Game Plus, the first Marker Fragment is in the Maintenance Bay Office beside the Data Board; it is optional on the first campaign and contributes to the alternate ending route only in NG+.
Leave the Kellion and survive the opening escape
When Isaac becomes controllable aboard the USG Kellion, search the starting area before leaving if you want the nearby Background Request text log. Follow Hammond, Daniels, and Johnston through the ship until you reach the Flight Lounge security checkpoint. Interact with the security console when prompted, then continue after the failed docking sequence.
Isaac begins the escape without a weapon. Do not stop to fight the first necromorphs. Run through the dark corridor, follow the crew’s route, and use doors and turns to create distance. In the Flight Lounge, continue toward the indicated exit when the vents open and the attack begins. After the immediate chase, search the accessible lounge area for the Sponsored Article: The USG Ishimura log if you want the optional entry. The locator will direct you toward the Service Workshop.
- Collect Background Request inside the Kellion if desired.
- Activate the Flight Lounge security console.
- Run from the opening necromorph attack instead of trying to fight without a weapon.
- Collect the Flight Lounge article log if desired.
Take the Plasma Cutter and reach Tram Control
Enter the Service Workshop and take the Plasma Cutter from the workbench. This is the first weapon and remains useful for the entire campaign. Aim at necromorph limbs instead of their torsos. Shooting a leg slows many enemies, while removing arms reduces or eliminates their main attacks. Use the weapon’s alternate firing orientation when a limb is positioned awkwardly.
Continue through the security route toward Tram Control. The Send Help log is on the security phone along the way, and entering Tram Control starts the Repair the Tram System objective. Search containers and side areas for ammunition, credits, and healing items, but do not spend all of your ammunition before entering the tram maintenance areas. Treat motionless bodies as threats until you have confirmed that they are dead.
- Take the Plasma Cutter from the Service Workshop workbench.
- Use limb dismemberment as your main combat method.
- Reach Tram Control and activate the Repair the Tram System objective.
- Collect Send Help if desired.
Obtain Stasis and wait for the Stasis Door communication
From Tram Control, follow the route toward Tram Station Hall and descend to the lower tram area. The Stasis Module is positioned near a malfunctioning door. Pick it up, then locate the nearby recharge station so you can restore Stasis without spending a refill item.
After obtaining Stasis, pause beside the malfunctioning door and wait for the communication associated with the Stasis Door log before proceeding. The communication is the reliable trigger; using Stasis on the door is not itself the dependable way to make the log appear. When you are ready to continue, aim Stasis at the moving door mechanism and cross while it is slowed.
Proceed into the Tram Repair Room. The Stasis Module Request log is on a bench near the claw controls. Search the room for ammunition and the nearby wall-mounted Power Node before beginning the repair. Necromorphs can enter during this objective, so use the Stasis recharge station when possible and reserve consumable Stasis packs for emergencies.
- Collect the Stasis Module near the malfunctioning door.
- Wait at the door for the Stasis Door communication.
- Use Stasis to slow the door and cross it.
- Collect Stasis Module Request and the nearby Node if desired.
Replace the damaged tram and trigger Autoloader correctly if desired
In Tram Repair, operate the controls for the two mechanical claws. Attach the left claw to the replacement tram first. The right claw must also latch on, but it retracts unless you slow it with Stasis. Once the right claw has grabbed the tram, fire Stasis at the claw, return to the central control panel, and confirm the repair before the effect ends. Recharge Stasis between attempts if necessary.
If you want the optional Autoloader communication, do not complete the right-claw sequence immediately. After the left claw is attached, repeatedly attempt to attach the right claw without using Stasis and allow it to retract. The related call provides the hint for the correct procedure. After the communication plays, use Stasis on the right claw and complete the repair. This log is action-dependent and is not needed for campaign progress.
When both claws are secured, use the central terminal to replace the damaged tram. Defeat the necromorphs that appear during the procedure, then search the room before leaving. The Replaced the Tram Car story log is awarded when the replacement is completed.
- Attach the left claw normally.
- Let the right claw latch, then slow it with Stasis.
- Optional: allow the right claw to fail repeatedly until Autoloader triggers.
- Complete the tram replacement at the central terminal.
Recover the Data Board from Maintenance Bay and collect the NG+ Marker Fragment
Return toward Tram Control and follow the locator through Cargo and Baggage Hall. At the first circuit breaker, power Maintenance Bay so the required route opens. Cargo Hall Storage can be powered instead if you want to enter that room for its supplies, but switch the breaker back to Maintenance Bay before continuing.
Enter Maintenance Bay and use the lift to reach the upper level. Follow the walkway to the circuit breaker. It controls the lights, elevators, and the Maintenance Office door, but only two can be powered simultaneously. Keep the elevators powered so you can return to the lower floor, then power the Maintenance Office. This turns off the lights. Use Isaac’s RIG illumination and weapon flashlight while moving through the darkened bay, and listen for necromorph movement.
Return by elevator to the lower floor and enter the Maintenance Bay Office. The Data Board is on the desk. The room also contains a bench, supplies, and a Power Node. During New Game Plus only, move or break through the shelf or bookcase obstruction beside the Data Board and collect the Marker Fragment hidden behind it. This fragment does not appear during the first campaign and is optional unless you are pursuing the alternate ending in NG+. The fragment can be collected before taking the Data Board.
Take the Data Board back to Tram Control and install it at the inactive console. Then use the main tram terminal near the windows to call the tram. The call becomes available only after both requirements are complete: the damaged tram must have been replaced, and the Data Board must be installed.
- Power Maintenance Bay at the first breaker.
- At the upper breaker, keep the elevators and Maintenance Office powered.
- Return to the lower floor with the lights disabled.
- Take the Data Board from the Maintenance Bay Office.
- New Game Plus only: clear the shelf or bookcase beside the Data Board and collect the Marker Fragment.
- Install the Data Board and call the tram from Tram Control.
Return to the Kellion, run diagnostics, and enter Medical
After calling the tram, follow the locator back through the Flight Lounge toward the USG Kellion. The return trip includes necromorph encounters. Fight from doorways when possible, use Stasis on enemies that close distance quickly, and remove legs before cutting additional limbs. Story communications during this sequence may add logs automatically.
Approach the Kellion and interact with the diagnostics terminal beside Johnston’s seat when the prompt appears. The report reveals the condition of the ship’s Singularity Core. The following destruction is scripted; Isaac cannot save the Kellion. Survive the necromorph attack after the explosion and continue along the walkway.
Follow the locator toward the Medical Deck tram station. A Store Kiosk and bench are available along this route. If you have 10,000 credits, buy the Level 2 suit for increased armor and inventory capacity. Selling spare valuables can provide credits, but retain ammunition and healing supplies needed for the next section. Use the bench to spend Nodes if you have a clear upgrade priority.
Continue down the indicated lift and corridor toward Medical. Reaching the Medical Deck begins Chapter 2: Intensive Care and completes New Arrivals.
- Return to the Flight Lounge after calling the tram.
- Reach the Kellion and run the diagnostics report.
- Survive the scripted Singularity Core explosion sequence.
- Optional: buy the Level 2 suit for 10,000 credits.
- Follow the locator to the Medical Deck.
Before you move on
- The damaged tram has been replaced at Tram Repair.
- The Data Board has been recovered from the Maintenance Bay Office and installed in Tram Control.
- The tram has been called and the crew has been sent toward the Bridge.
- Isaac has returned to the Kellion, run the diagnostics report, and survived the Singularity Core explosion sequence.
- The locator now directs Isaac toward the Medical Deck, beginning Chapter 2: Intensive Care.
- Optional first-playthrough check: Stasis Door and Autoloader appear in the Chapter 1 log list if their action-dependent triggers were completed.
- Optional New Game Plus check: the Chapter 1 Marker Fragment has been collected from behind the shelf or bookcase beside the Data Board.
References for this chapter
Chapter 2 – Intensive Care
Enter the Medical Deck, collect Kinesis, and recover the Hydrazine Tank and Shock Pad needed to destroy the Security Station barricade. Continue through the Emergency Room and Intensive Care Unit, then power the morgue elevator and defeat the Infector and Captain Mathius’s reanimated body. Taking the Captain’s RIG grants Security Clearance Level 1. Scientific Methods begins when you watch Nicole’s hologram in the Emergency Room; its Shower objective is optional. During the Shock Pad route, New Game Plus players can collect the chapter’s Marker Fragment from Dr. T. Kyne’s CSO office after clearing Main Lab. Finish by returning to the Medical Tram Station, selecting Flight Deck, and following the Locator toward Engineering.
1. Enter Medical and collect Kinesis
At the start of Chapter 2, follow the Locator into the Medical Deck. In the first accessible area, collect the Kinesis Module from the body near the route ahead. Equip it and use Kinesis to pull the containers out of the passage. Continue up the ramp toward the Medical Tram Station.
The Pulse Rifle is lying beside a fallen security officer in the Medical Tram Station. Pick it up if you want a second weapon; it is useful against groups but is not required for chapter progress. Activate the tram station terminal when possible so Medical becomes available for later travel. Move through the next blocked passage with Kinesis and enter Security Station. Reaching the station changes the objective to constructing a bomb for the barricade.
The bomb requires a Hydrazine Tank and a Shock Pad. The two retrieval objectives can be completed in either order. Save at the station and check your inventory before leaving. Keep enough ammunition and healing items for the Main Lab quarantine and the morgue fight rather than spending all of your supplies on optional rooms.
- Collect and equip the Kinesis Module.
- Optionally collect the Pulse Rifle.
- Reach Security Station.
- Receive the Hydrazine Tank and Shock Pad objectives.
2. Retrieve the Hydrazine Tank in Zero-G Therapy
From Security Station, follow the Locator toward Imaging Diagnostics. Move the obstruction from the route with Kinesis. In the following room, find the loose power cell and carry it to the socket beside the elevator. Use the circuit breaker to power the elevator, then ride it upward. The other breaker setting opens an optional room, so investigate it only if you want its supplies.
Continue through Imaging Diagnostics and enter the zero-gravity route. The remake uses free-flight movement here, so use short propulsion bursts to line Isaac up with doors and platforms instead of holding movement continuously. Watch the oxygen gauge in vacuum and use an oxygen refill station before the meter becomes critical.
Follow the Locator to Zero-G Therapy Maintenance. The Hydrazine Tank is on a table in this area. Collect it and retrace the route toward Security Station. Necromorphs can appear during the return trip. Use Stasis on anything that blocks the way, then sever a leg or arm before finishing the target. If the entrance route is no longer available, continue through the open upper passage and follow the Locator back through the coolant-pipeline area.
- Power the Image Diagnostics elevator with the loose cell.
- Cross the Zero-G Therapy route without exhausting oxygen.
- Collect the Hydrazine Tank.
- Return toward Security Station.
3. Retrieve the Shock Pad and collect the NG+ Marker Fragment
From Security Station, take the Research Wing route toward Main Lab. A malfunctioning door blocks the way; use Stasis on the door and pass through before the effect ends. Entering Main Lab triggers a quarantine. Stay near open space, keep track of the exits, and target limbs rather than firing repeatedly into torsos. Lurkers attack with exposed tentacles, so cut the tentacles or use Stasis to create a safe firing window.
After the quarantine ends, go down to the lower level and continue through the Biological Prosthetics Center toward Limb Stimulation Therapy. On this lower level, New Game Plus players have an optional collectible: enter Dr. T. Kyne’s CSO office, also identified as Terence Kyne’s office in some guides. Find the bookcase or shelf along the far wall and move it to the side with Kinesis. This reveals a hidden room. Enter the room and collect the Marker Fragment from the desk. The fragment is unavailable during a first playthrough and is one of the twelve items required for the remake’s alternate New Game Plus ending.
Continue to Limb Stimulation Therapy and locate the patient connected to the electrical apparatus. Use the nearby circuit breaker to shut off power to the apparatus, then collect the Shock Pad. Return to Security Station with both bomb components. Place them on the barricade, activate the charge, and move behind cover before the explosion. Do not remain beside the barricade after starting the detonation.
- Clear the Main Lab quarantine.
- In New Game Plus, enter Dr. T. Kyne’s CSO office.
- Move the bookcase or shelf with Kinesis and collect the Marker Fragment from the hidden room.
- Deactivate the Limb Stimulation Therapy apparatus.
- Collect the Shock Pad.
- Return both bomb components to Security Station and detonate the barricade.
4. Enter the Emergency Room and start Scientific Methods
Go through the destroyed barricade into the Ishimura Clinic and enter the Emergency Room. Nicole’s hologram plays here. Watch it to start the optional Scientific Methods side mission. The mission is not required to obtain the Captain’s RIG or complete Chapter 2, but starting it records the objective in the Missions menu and allows you to follow its later steps during the campaign.
To complete the Chapter 2 portion of Scientific Methods, use the Emergency Room circuit breaker to send power to the Shower. Move the shower with Kinesis to uncover the concealed therapy room, then enter and watch the recording. This advances the side mission; later objectives occur in subsequent chapters.
The required route uses a separate power-cell action. Disable the appropriate breaker functions, remove the available cell with Kinesis, and place it in the socket for ER Hallway A. If the door remains without power, check that the cell was taken from the breaker area rather than leaving the Shower configuration active. The Shower objective and the ER Hallway A route are related to the same breaker room but are not the same task.
- Reach the Emergency Room.
- Watch Nicole’s hologram if you want to start Scientific Methods.
- Optionally power the Shower and inspect the hidden therapy room.
- Move the correct power cell to the ER Hallway A socket.
- Open the required route toward the ICU.
5. Cross the ICU and power the morgue elevator
Follow the Locator through ER Hallway A and ER Hallway B into the Intensive Care Unit. Expect attacks in the corridors. Use doorways to control your retreat and avoid backing into rooms you have not checked. If an enemy closes quickly, apply Stasis first, then remove its leg or an attacking arm. Kinesis can throw sharp debris when suitable objects are available, but do not stop moving just to search for one.
Near the morgue route, locate the second power cell in the hallway. Carry it to the socket beside the morgue elevator and insert it. This is a separate cell from the one used to open ER Hallway A. Ride the elevator down and enter the Morgue. Search for supplies before the encounter, but leave enough inventory space for the Captain’s RIG and ammunition or healing items found nearby.
Enter the Autopsy Room and approach Captain Mathius’s body. The scene triggers the fight. If the morgue door or elevator has no power, return to the hallway and confirm that the second power cell was inserted into the correct socket.
- Follow the Locator through ER Hallway A and B.
- Enter the Intensive Care Unit.
- Carry the second power cell to the morgue elevator socket.
- Ride down to the Morgue.
- Approach Captain Mathius’s body in the Autopsy Room.
6. Defeat the Infector and retrieve the Captain’s RIG
The Captain reanimates during the autopsy sequence, and an Infector appears. Prioritize the Infector when it moves toward nearby corpses because it can convert those bodies into additional Slashers. Use Stasis to halt it or to give yourself time to sever its limbs. If it has already reached a corpse, create distance and remove the newly active threats one at a time rather than standing in the middle of the room.
Against the Captain’s reanimated form, use normal dismemberment tactics. Cut a leg to reduce mobility, then remove an arm or claw to limit attacks. Keep circling the morgue and avoid trapping yourself against the walls or equipment. If several enemies approach at once, Stasis the nearest target and move through the opening instead of attempting a prolonged melee exchange.
When the room is clear, collect Captain Mathius’s RIG from the table. This is the required story reward and grants Security Clearance Level 1. Level 1 doors, lockers, and containers throughout the Ishimura can now be opened. You may backtrack for nearby supplies, but no additional action is required to complete the chapter’s main objective.
- Stop the Infector before it reaches more corpses when possible.
- Use Stasis to create space during the morgue fight.
- Defeat the Infector and the Captain’s reanimated form.
- Collect Captain Mathius’s RIG.
- Confirm that Security Clearance Level 1 is active.
7. Leave Medical and travel to Flight Deck
After collecting the RIG, use the elevator next to the Autopsy Room to return to the upper level. Follow the new Locator objective toward the Medical Tram Station. You can open nearby Level 1 containers now, but do not spend so many credits or slots that you cannot carry ammunition and healing items for the next chapter.
At the Medical Tram Station, select Flight Deck. This is the correct destination for leaving Medical; the tram destination is not Hangar–Cargo. At Flight Deck, follow the Locator through Flight Lounge toward the landing bay where the Kellion was destroyed. The chapter ends after Isaac travels through the exterior zero-gravity section toward the Flight Deck route to Engineering.
If the tram door fails to open after selecting Flight Deck, reload the most recent save and try the station again. Once you reach the landing bay and the game directs Isaac toward Engineering, Chapter 2 is complete. Scientific Methods remains active in the Missions menu if you started it, and the optional Marker Fragment remains collectible only in New Game Plus.
- Leave the Morgue by the powered elevator.
- Return to the Medical Tram Station.
- Select Flight Deck.
- Follow the Locator through Flight Lounge to the landing bay.
- Begin the route toward Engineering and Chapter 3.
Before you move on
- The Hydrazine Tank and Shock Pad have been collected and used to destroy the Security Station barricade.
- The Emergency Room has been reached, and Scientific Methods appears in the Missions menu if Nicole’s hologram was watched.
- ER Hallway A has been opened with its required power cell.
- The second power cell has powered the morgue elevator.
- The Infector and Captain Mathius’s reanimated form have been defeated.
- Captain Mathius’s RIG is in Isaac’s inventory and Security Clearance Level 1 is active.
- In New Game Plus, the optional Chapter 2 Marker Fragment has been collected from the hidden room in Dr. T. Kyne’s CSO office if pursuing the alternate ending.
- The Medical Tram Station has been used to select Flight Deck, and the Locator now directs Isaac toward the landing bay and Engineering.
Chapter 3 – Course Correction
Chapter 3 takes Isaac through Engineering to refuel the Ishimura’s engines, restart the Gravity Centrifuge, and manually ignite the main engines. From the Engineering Control Room, complete the South and North refueling objectives in either order, then connect the centrifuge’s two generator modules with Stasis and Kinesis. After escaping the centrifuge, pass the slowed fans, collect the optional Flamethrower, restore Power Substation 03 with a battery, and confirm engine ignition from the elevated console. The Ripper and Flamethrower are optional weapons. In New Game Plus, collect Marker Fragment 3 in the Engine Room behind Power Substation 03 before leaving. Scientific Methods can also be advanced by viewing Nicole’s autopsy hologram near the Machine Shop.
Reach the Engineering Control Room
Leave the tram and follow the locator through the Engineering access route. Continue through the access corridors until you reach the Engineering Control Room. Interact with the console to load the diagnostic report and speak with Hammond. The chapter’s primary objectives become Refuel the Engines: South, Refuel the Engines: North, and Activate the Centrifuge. The two refueling objectives may be completed in either order.
Save before committing to the longer Engineering routes. Check the Store if you need ammunition, healing, or a node, but keep enough credits and supplies for the centrifuge and Engine Room encounters. Search unlocked side rooms for lockers, credits, ammunition, and logs without allowing optional exploration to empty your inventory.
Take the route toward the Preparation Room and Machine Shop. The Ripper is beside a corpse in the Machine Shop. Pick it up if you want the optional weapon; it is not required to finish the chapter. The Plasma Cutter remains reliable for removing specific limbs, while the Ripper is useful when enemies reach close range. If you are pursuing the optional You Are Not Authorized mission, locate Voelker’s RIG during this Engineering exploration and examine it to advance the mission.
The Scientific Methods side mission can be advanced in this chapter by viewing Nicole’s autopsy hologram near the Machine Shop. This is optional and does not replace any of the three primary objectives.
- Reach the Engineering Control Room.
- Load the diagnostic report and receive the three primary objectives.
- Save and restock before the main Engineering encounters.
- Collect the Ripper if desired.
- Collect Voelker’s RIG if pursuing You Are Not Authorized.
- View Nicole’s autopsy hologram if pursuing Scientific Methods.
Refuel the South and North engines
From the central Engineering area, follow the objective marker toward the Refueling Control Stations. Use Kinesis to pull the moving platform toward Isaac, board it, and ride it to the appropriate refueling station. Necromorphs can appear during the trip and after reaching the platform, so dismember nearby enemies before attempting to operate the station or search the room.
At the fuel-management circuit breaker, choose which system to sacrifice. Disabling Lights leaves the area dark but preserves oxygen. Disabling Life Support preserves visibility but drains the available oxygen, requiring you to move efficiently and use recharge stations. Neither choice is a permanent chapter-wide setting. Choose the option that best suits your supplies, then follow the powered route to the refueling mechanism.
Use Kinesis on the movable mechanism at the South station to lower it into position and complete Refuel the Engines: South. Return to the platform and travel to the North station. Clear the enemies there, then use Kinesis to lower the North mechanism and complete Refuel the Engines: North. If the area is dark, use the locator and the blue power lines to maintain your direction rather than searching blindly.
After both stations are active, return to the Engineering Control Room. Search nearby rooms for supplies and use the bench before starting the centrifuge if you have nodes available. Do not spend every Stasis charge during the refueling fights; the centrifuge and fan sections require controlled Stasis use.
- Reach the South refueling station.
- Choose Lights or Life Support at the circuit breaker.
- Lower the South refueling mechanism with Kinesis.
- Reach and activate the North refueling station.
- Return to the Engineering Control Room after both objectives update.
- Restock before activating the centrifuge.
Activate the Gravity Centrifuge
Take the elevator toward the centrifuge level and enter the Decontamination Room. Activate the room’s console, then survive the quarantine encounter until the exit opens. Fight from open positions and avoid allowing multiple enemies to surround Isaac in the narrow decontamination area.
Enter the centrifuge chamber and identify the two detached generator modules. In zero gravity, fly close to one module and use Stasis to slow its rotation. While it is slowed, use Kinesis to pull the module into an empty connection point on the central centrifuge. Repeat the process with the second module. Position yourself near the receiving socket before applying Stasis so the effect does not expire while you cross the chamber.
Enemies can attack during the repairs. Move to a wall or stable surface before engaging them, and keep the oxygen route in mind because the chamber is a vacuum. Use Stasis on a charging enemy or retreat to a safe surface rather than trying to fight while drifting without a clear firing angle.
Once both generator modules are attached, fly to the balcony console and restart the centrifuge. When the mechanism begins turning, leave the chamber rather than lingering for optional pickups. In the rotating machinery section, use the side recesses and safe gaps to avoid the moving assembly. A collision can kill Isaac immediately, so wait for a safe opening instead of trying to force the passage.
- Survive the Decontamination Room quarantine.
- Attach both generator modules with Stasis and Kinesis.
- Restart the centrifuge from the balcony console.
- Track oxygen while crossing the vacuum chamber.
- Use recesses and safe gaps to pass the rotating machinery.
Escape the centrifuge and restore the airlock route
Continue through the vacuum route after the centrifuge restarts. Monitor the oxygen indicator and use the recharge station when necessary. Apply short propulsion bursts to line up with walls, platforms, and openings. Do not stop for optional loot if oxygen is low or if enemies are closing in.
Return to the Control Room area and enter the next zero-gravity section. Follow the power lines to the circuit breaker. A large fan blocks the route, so use Stasis to slow the blades, then propel Isaac through the opening. Once on the far side, operate the breaker to disable Airlock 1 and the Fans while powering Airlock 2. This configuration opens the route toward the Engine Room.
Proceed through the powered airlock and destroy the orange growths blocking the passage. The Flamethrower is beside a corpse in this section. Collect it if desired; it is optional for campaign completion but effective against Swarmers and useful for creating space in close quarters. Continue through the fleshy corridor, use the small elevator, and destroy additional growths to clear the route.
Swarmers appear in the lower areas. The Flamethrower can handle groups efficiently, but Kinesis and nearby environmental hazards can also conserve ammunition. When fighting a Pregnant Necromorph, avoid shooting its abdomen unless you deliberately want to release the Swarmers inside. Target its limbs or use controlled fire to prevent the encounter from becoming a close-range swarm fight.
- Reach the fan section without exhausting oxygen.
- Slow the fan with Stasis before crossing.
- Disable Airlock 1 and the Fans, then power Airlock 2.
- Collect the Flamethrower if desired.
- Destroy the growths blocking the Engine Room route.
Restore Power Substation 03 and manually ignite the engines
Enter the Engine Room and follow the objective marker. Clear the initial enemies before searching for the battery and beginning the final procedure. The room contains machinery and hazardous areas, so fight from the walkways and avoid crossing active hazards merely to recover low-value items.
Locate the battery power cell on the raised route near the Engine Room’s machinery. Lift it with Kinesis and carry it to the empty socket at Power Substation 03. Insert the battery to restore power to the engine controls. The substation is the required power step; do not waste time trying to disable individual engine hazards as though they were separate ignition objectives.
If you are playing New Game Plus, collect Marker Fragment 3 before leaving the Engine Room. After reaching Power Substation 03, search behind the substation in the dark rear corner near the pipes and bench area. The fragment is tucked into the shadowed alcove behind the substation. It does not appear during a standard first playthrough, so do not search for it outside New Game Plus.
After installing the battery, climb to the elevated platform and use the engine ignition console. Confirm ignition when prompted. Necromorphs attack while the procedure runs, so prepare the arena before activating the console where possible. Use Stasis to slow a dangerous target, Kinesis to throw explosive or sharp objects, and the Ripper or Flamethrower to control enemies that reach the walkway. Keep clear of active flames and moving machinery.
When the ignition procedure completes, follow the locator out of the Engine Room and back toward the Control Room. Use the Store or Save Station if needed. The weapon upgrades associated with the Plasma Cutter, Pulse Rifle, Ripper, and Flamethrower become available for purchase after acquiring the relevant weapons; they are optional and can be installed later at a bench. Reach the Engineering Tram Station to complete the chapter and trigger Chapter 4, Obliteration Imminent.
- Reach the Engine Room.
- Insert the battery power cell into Power Substation 03.
- In New Game Plus, collect Marker Fragment 3 from the dark alcove behind the substation.
- Use the elevated console to confirm engine ignition.
- Survive until the ignition procedure completes.
- Return toward the Control Room and reach the Engineering Tram Station.
- Purchase or install optional weapon upgrades if desired.
Before you move on
- Refuel the Engines: South is complete.
- Refuel the Engines: North is complete.
- Both centrifuge generator modules are attached and the centrifuge has been restarted.
- Isaac has escaped the centrifuge and passed the fan section.
- The battery is installed in Power Substation 03.
- The engine ignition procedure has completed at the elevated console.
- In New Game Plus, Marker Fragment 3 has been collected from behind Power Substation 03 if alternate-ending progress is desired.
- Isaac has reached the Engineering Tram Station and the game has advanced to Chapter 4, Obliteration Imminent.
- Optional progress is complete if the Ripper, Flamethrower, Voelker’s RIG, Nicole’s autopsy hologram, and desired weapon upgrades were collected or activated.
Chapter 4 – Obliteration Imminent
Chapter 4 starts on the Bridge and requires Isaac to meet Hammond in the Captain’s Nest, defeat a Brute, activate the Bridge elevators, reroute power from Mining Administration, Electrical Systems, and Water Purification, then manually calibrate all three ADS cannons outside the Ishimura. Security Clearance Level 2 becomes available during the Captain’s Nest sequence. The Electrical Systems route also contains the Chapter 4 Marker Fragment, but it appears only in New Game Plus and is separate from the power-routing logs. Each ADS cannon must destroy five incoming debris targets. After calibration, collect White’s RIG if pursuing You Are Not Authorized, return to the Captain’s Nest, and complete the concluding Bridge sequence before proceeding toward Chapter 5.
1. Reach the Captain’s Nest and receive Level 2 clearance
From the Bridge Tram Station, follow the locator through the Main Atrium and across the Bridge. Search the nearby rooms for ammunition, healing items, and a save station, but keep the central route in mind because the next required objective is inside the Captain’s Nest. A story event occurs in the Atrium during this approach; allow it to finish before continuing.
Enter the Captain’s Nest and meet Hammond. The story sequence grants Security Clearance Level 2 and updates the objective to activate the Bridge elevators. This clearance is different from the Master Override system used by certain later doors. Before leaving, interact with the console beside Captain Mathius’s body if you want to begin the You Are Not Authorized side mission. The console starts that mission; it does not provide the normal Level 2 clearance.
Save before returning to the Main Atrium. Level 2 clearance now opens several locked rooms across the Ishimura, while Master Override doors remain unavailable until the relevant side-mission RIGs have been collected. You can explore optional Level 2 rooms now, but the campaign route proceeds through the Bridge Security Room.
- Reach the Captain’s Nest.
- Complete Hammond’s story sequence.
- Receive Security Clearance Level 2.
- Activate the You Are Not Authorized console if pursuing the side mission.
- Save before returning to the Main Atrium.
2. Defeat the Brute and activate the Bridge elevators
Return to the Bridge Security Room. A Brute attacks during this route. Keep the fight near doorways or the elevator approach so Isaac has room to sidestep a charge and avoid being trapped against the open Atrium floor. Apply Stasis when the Brute begins a charge or turns toward Isaac, then move behind it and fire at the orange weak points on its back.
If you want the optional Shoot It in the Back log, do not kill the Brute immediately. Evade it until Hammond explains that its back is vulnerable, then finish the fight. This log is tied to the combat sequence and cannot be obtained by simply killing the Brute before Hammond’s call.
After the Brute dies, collect the Power Node from its corpse and search the Security Room for supplies. Use the control panel inside the room to activate the Bridge elevators. These elevators provide access to the three required power-routing areas: Mining Administration, Electrical Systems, and Water Purification.
- Use Stasis to create an opening.
- Attack the Brute’s back weak points.
- Wait for Hammond’s weak-point call if collecting Shoot It in the Back.
- Collect the Power Node from the corpse.
- Activate the elevators from the Bridge Security Room.
3. Reroute power through Mining Administration
Take the central Atrium elevator to the Mining Administration level and follow the locator through the corridors. Watch for electrical hazards near the route and use the safe side of the room rather than crossing an active floor. A bench and supplies are available nearby, so use the opportunity to reload and heal before operating the junction box.
At the Mining Administration circuit breaker, move power away from Mining Administration and into the ADS Cannons. Read the labels on the panel before confirming the switch. The objective is complete when the ADS Cannons receive power. A Necromorph attack follows the reroute, including Slashers and Infectors; retreat through the route you used to enter and eliminate Infectors before they revive nearby corpses.
The Contact Beam is available in the Records Office during this chapter. It is optional, but it is a strong high-damage weapon for heavy targets. Its ammunition schematic is obtained later, so do not discard your normal weapon ammunition merely to support the Contact Beam.
- Reach Mining Administration.
- Reroute power from Mining Administration to the ADS Cannons.
- Defeat the Slashers and Infectors that appear afterward.
- Collect the Contact Beam from the Records Office if desired.
4. Reroute power through Electrical Systems and collect the NG+ fragment
Return to the Atrium elevator and descend to Bridge Deck Floor 3 for Electrical Systems. The Break Room is along this route. Enter it before operating the circuit breaker if you are collecting optional records or the New Game Plus item. The room contains a Marker display, a ritual circle, supplies, and an optional text log.
The Chapter 4 Marker Fragment is on the floor inside the Break Room, near the ritual circle and Marker display. It appears only during New Game Plus. Pick it up directly; it is a separate collectible from the power-routing logs and does not require entering the circle, performing a melee-and-stomp sequence, or changing the order of the three power destinations. If you are on a first playthrough, the fragment will not be present.
Continue to Electrical Systems. A Brute attacks on the way to the breaker. Use Stasis, circle behind it, and shoot the orange weak points. Near the circuit breaker, two exposed electrical cables block the approach. Use Stasis on the live cables, then cross while they are slowed and operate the breaker. Reroute power from Electrical Systems to the ADS Cannons.
The order of the three reroutes controls which optional power-routing logs you receive. The first two locations produce their associated logs; the location completed third does not. If you want the Water Purification log, complete Water Purification first or second. The Marker Fragment is unaffected by this order.
- Enter the Break Room on Bridge Deck Floor 3.
- Collect the Marker Fragment if this is New Game Plus.
- Defeat the Electrical Systems Brute.
- Use Stasis on the exposed live cables.
- Reroute Electrical Systems power to the ADS Cannons.
- Keep Water Purification out of the third position if collecting its conditional log.
5. Reroute power through Water Purification
Return to the Main Atrium and use the second elevator to reach Water Purification. Expect a small enemy encounter around the elevator route, so reload before leaving the lift and avoid standing in the center of the waiting area. Follow the locator to the junction box and search the surrounding room for supplies before interacting with it.
At the breaker, move power from Water Purification to the ADS Cannons. If this is the third reroute, the main power objective completes and the game updates the next task. If this is the first or second reroute, the corresponding Water Purification log can play. The campaign does not require all three optional rerouting logs, and only two can be obtained in one playthrough because the third location completed does not provide its log.
After all three systems have been rerouted, return toward the ADS cannon route. Before entering the exterior section, visit a bench and prepare a practical loadout: one dependable weapon with ammunition, healing items, Stasis Packs if available, and enough inventory space to collect optional items.
- Reach Water Purification.
- Reroute Water Purification power to the ADS Cannons.
- Confirm that all three power destinations are complete.
- Use a bench before entering the exterior route.
6. Collect the Intermediate Engineer RIG schematic and calibrate the ADS cannons
Follow the locator through the EVA Prep Room route. Search the EVA Prep Room for the Intermediate Engineer RIG schematic before entering the airlock. The schematic is optional for immediate progress, but collecting it makes the associated suit upgrade available at a Store. Check Isaac’s oxygen supply and reload weapons before leaving the pressurized area.
Outside the Ishimura, use short zero-gravity propulsion bursts to move between the three ADS cannon towers. Each tower has an interaction panel. Interact with the panel to take control of the cannon, then aim the cannon at incoming asteroid debris and fire the cannon itself. Isaac’s equipped weapon is not used for this task.
Destroy five debris targets at each cannon. The Ishimura continues taking hull damage while debris strikes the ship, so calibrate the cannons promptly instead of spending the entire sequence searching containers. Oxygen refill stations are positioned along the exterior route near the cannons. Use them before the oxygen gauge becomes critical, particularly if you are forced to move around enemies.
Two Lurkers appear after the second cannon is calibrated. Leave the cannon interface and deal with them before attempting the third cannon if they are attacking Isaac. Use the cannon structure as cover, apply Stasis to create an opening, and shoot the Lurkers’ exposed tentacles. Return to the third cannon once the immediate route is safe.
- Collect the Intermediate Engineer RIG schematic if desired.
- Check oxygen before exiting the airlock.
- Calibrate all three ADS cannons.
- Destroy five debris targets at each cannon.
- Use oxygen refill stations as needed.
- Defeat or control the Lurkers after the second cannon.
7. Collect White’s RIG and finish the Bridge sequence
After the third cannon is calibrated, continue along the exterior trench past the final cannon instead of turning back immediately. Search the left side near the end of the route for the purple item containing White’s RIG. Collecting it advances the You Are Not Authorized side mission. If it does not appear, confirm that the third cannon objective has completed and search beyond the cannon along the marked route.
Return through the airlock and follow the locator back inside the Ishimura. The next objective sends Isaac back toward the Captain’s Nest. Complete the concluding Bridge sequence there; this is the chapter’s actual story endpoint, after which the campaign advances toward Chapter 5: Lethal Devotion.
Save after the transition and review the Mission Log. Security Clearance Level 2 should remain available. If this is New Game Plus, confirm that the Chapter 4 Marker Fragment is recorded before leaving the Break Room route; it cannot be collected on the current run after returning to a first-playthrough state.
- Calibrate the third ADS cannon.
- Collect White’s RIG if pursuing You Are Not Authorized.
- Return through the marked airlock.
- Reach the Captain’s Nest.
- Complete the concluding Bridge sequence.
- Confirm that the objective advances toward Chapter 5.
Before you move on
- Hammond’s Captain’s Nest sequence is complete.
- Security Clearance Level 2 is active.
- The Bridge elevators have been activated.
- Power has been rerouted from Mining Administration, Electrical Systems, and Water Purification.
- The Contact Beam has been collected from the Records Office if desired.
- The Intermediate Engineer RIG schematic has been collected if desired.
- The New Game Plus Marker Fragment has been collected from the Break Room if applicable.
- All three ADS cannons have been calibrated by destroying five debris targets at each cannon.
- White’s RIG has been collected if pursuing You Are Not Authorized.
- The return to the Captain’s Nest and concluding Bridge sequence have completed.
- The campaign objective advances toward Chapter 5: Lethal Devotion.
References for this chapter
- Dead Space Remake (2023) - Chapter 4: Obliteration Imminent Walkthrough
- Dead Space Remake All Marker Fragment Locations
- Dead Space Remake Collectibles Guide
- Dead Space Remake Chapter 4 Walkthrough
- Dead Space Remake: Obliteration Imminent
- Chapter 4: Obliteration Imminent Walkthrough | Dead Space Remake
Chapter 5 – Lethal Devotion
Return to the Medical Deck and follow Nicole’s signal through Imaging Diagnostics and the Chemical Lab. Dr. Mercer releases the regenerating Hunter, so the first encounter is an escape rather than a permanent boss fight. Reach the Emergency Room, use the battery to open the route, and enter Emergency Equipment Storage with the Security Clearance Level 2 earned in Chapter 4 to collect the optional Line Gun. Override the lockdown in Mercer’s office, then restore the air supply at the Security checkpoint when poison gas fills Medical. Return through Imaging Diagnostics to Cryogenics, take the Liquid Nitrogen, lure the Hunter into the central chamber, use dismemberment and stasis to hold it there, and activate the observation console to freeze it. Chapter 5 has two Marker Fragments, both exclusive to New Game+: one is on Mercer’s office desk and the other is above the central cryogenic chamber. After the Hunter is frozen, collect its tissue sample to begin Premeditated Malpractice before continuing toward Hydroponics.
Return to Medical and reach the Chemical Lab
After Chapter 4, take the tram to the Medical Deck and follow the locator toward Imaging Diagnostics. Previously visited rooms can contain new enemies, so check corners and vents before opening lockers or using a save station. Keep a few inventory slots open for ammunition, healing items, and the Line Gun if you intend to collect it.
In Imaging Diagnostics, shoot the glowing clusters on the fleshy growths blocking the route. The Guardian can fire pods while you work, so attack its exposed limbs from an angle and use stasis if it prevents you from reaching the next growth. Use the elevator and follow the locator to the Chemical Lab.
At the Chemical Lab, interact with Nicole’s hologram and deactivate the broadcast at the console. Mercer then appears and uses his enhanced stasis module on Isaac. When Mercer leaves, the Hunter is released and the doors lock. This starts the first Hunter encounter of the chapter.
- Return to the Medical Deck by tram.
- Clear the growths in Imaging Diagnostics.
- Deactivate the broadcast in the Chemical Lab.
- Prepare for the first Hunter encounter.
Escape the first Hunter encounter
The Hunter regenerates limbs, so do not spend your entire ammunition supply trying to kill it. Shoot a leg to force it to crawl, then use stasis to create enough time to reach the exit. Remove another limb only when it blocks your route or closes the distance. The encounter is completed by escaping the Chemical Lab, not by permanently defeating the Hunter.
Follow the route toward the Emergency Room after the exit opens. Use the locator rather than searching side rooms while the Hunter is active. Stasis is most valuable at doorways, corners, and during interactions that leave Isaac stationary. Kill only enemies that block the next door or objective.
Reach the security area and accept the updated objective to lift the Medical lockdown. The Hunter remains a recurring hazard during the next escape sequence, so conserve ammunition and avoid treating this encounter as a normal arena fight.
- Cut a leg or use stasis to slow the Hunter.
- Escape the Chemical Lab instead of attempting a permanent kill.
- Reach the security area and activate the Lift the Lockdown objective.
Power the Emergency Room route and collect the Line Gun
Proceed toward the Emergency Room. Use kinesis to pick up the nearby battery and place it into the receptacle that powers the ER Hallway route. If enemies attack while you are carrying it, drop the battery in a safe position, clear the immediate threat, then finish placing it.
Emergency Equipment Storage is protected by Security Clearance Level 2. Isaac already received that clearance during Chapter 4, so Chapter 5 does not grant a new clearance level here. Enter the room to collect the Line Gun from the floor. The weapon is optional for campaign completion, but its wide cutting beam is useful for controlling corridors and removing several limbs along a firing line. The room also contains ammunition and a node, so make inventory space before entering.
Continue toward Mercer’s office. If you are playing New Game Plus and collecting Marker Fragments, do not leave the office without checking the desk after the lockdown interaction. The first of Chapter 5’s two fragments is sitting on Dr. C. Mercer’s office desk. Marker Fragments do not appear on a first playthrough; this item is available only in New Game Plus.
- Place the battery in the ER Hallway receptacle.
- Use the existing Level 2 clearance to enter Emergency Equipment Storage.
- Collect the optional Line Gun and supplies.
- In New Game Plus, take the Marker Fragment from Mercer’s office desk.
Lift the lockdown and restore the air supply
Enter Dr. C. Mercer’s office and use the console to lift the Medical lockdown. Reload and identify your escape route before activating it because the following sequence fills the Medical Deck with poison gas. If you are collecting the New Game Plus fragment, take it from the desk before or after using the console.
Leave the office and follow the objective toward the Security checkpoint. Move through ER Hallway B and be ready for a Pregnant necromorph. Attack its limbs from the side and back away when its abdomen opens, since Swarmers can emerge if the body is exposed. Use an oxygen refill station if the meter becomes dangerous.
The Hunter appears again during this escape. Do not attempt to finish it. Slow it with stasis, cut a leg if necessary, and run past it while prioritizing the route to the Security checkpoint. At the checkpoint, interact with the control console to filter the poison gas and restore the air supply. Once the air is safe, follow the newly available route back toward Imaging Diagnostics and Cryogenics.
- Use Mercer’s office console to lift the lockdown.
- Reach the Security checkpoint before oxygen is depleted.
- Filter the poison gas at the checkpoint console.
- Collect the office Marker Fragment first if playing New Game Plus.
Reach Cryogenics and collect both the Liquid Nitrogen and second fragment
From the Security checkpoint, follow the locator through Imaging Diagnostics and return to the Chemical Lab. Use the newly available door leading toward Cryogenics. Save, reload, and refill stasis before entering the chamber. The Cryogenics room contains stasis recharge equipment and enough space to maneuver, but Lurkers can enter during the Hunter encounter.
If you are playing New Game Plus, collect the second Chapter 5 Marker Fragment before taking the Liquid Nitrogen if possible. Stand outside the central cryogenic chamber and look upward around its upper rim. The fragment is resting on top of the chamber, beyond normal reach. Use kinesis to pull it down. If the Hunter sequence has already started, you can still retrieve it after freezing the Hunter. Chapter 5 therefore contains two Marker Fragments total: one in Mercer’s office and one above the Cryogenics chamber. Both are New Game Plus-only collectibles.
Take the Liquid Nitrogen from the central apparatus to trigger the final Hunter encounter. Shoot one of the Hunter’s legs so it crawls, then lead it into the central chamber. Remove additional limbs to force regeneration, apply stasis during that regeneration window, and run to the observation console. Activate the cryogenic controls while the Hunter is inside the chamber. Ordinary dismemberment does not complete this objective; the console is required to freeze it.
- Enter Cryogenics after restoring the air supply.
- In New Game Plus, use kinesis to pull the fragment from the top of the central chamber.
- Take the Liquid Nitrogen.
- Lure the Hunter into the chamber and activate the observation console.
Collect the tissue sample and finish Chapter 5
After the Hunter is frozen and removed from the immediate fight, wait for the communications and objective updates. The story directs Isaac toward Hydroponics, which begins Chapter 6: Environmental Hazard. Do not continue attacking the frozen Hunter as though it were a conventional boss.
Return to the central cryogenic chamber and collect the Hunter’s tissue sample. This item starts the Premeditated Malpractice side mission. The sample is available after the Hunter has been frozen and can be collected at the end of Chapter 5 or immediately after Chapter 6 begins, depending on the save transition. Missing it before the tram transition does not permanently cancel the mission; return to Cryogenics at the start of Chapter 6 if necessary.
Set Premeditated Malpractice as the active mission and follow the locator to the DNA scanner on the lower level of the Main Lab. Scan the sample, then go to the Intensive Care Unit and play the hologram recording associated with Harris’s bed. These Medical Deck objectives can be completed now, while the later Ore Storage, Bridge, and Hydroponics objectives continue in subsequent chapters.
Before leaving Medical, use a bench to spend nodes on weapons you actually carry and make room for recovered supplies. Damage, capacity, and reload improvements are practical priorities, but no particular weapon is mandatory. The Line Gun and Plasma Cutter are a dependable combination, while the chapter remains completable with another effective loadout.
- Confirm that the Hunter has been frozen and the objective points toward Hydroponics.
- Collect the tissue sample from the central Cryogenics chamber.
- Scan the sample in the Main Lab if pursuing Premeditated Malpractice.
- Play the Harris recording in Intensive Care if completing the available Medical objectives.
- Verify that Chapter 6: Environmental Hazard has begun.
Before you move on
- Medical lockdown has been lifted.
- Poison gas has been filtered at the Security checkpoint.
- The optional Line Gun has been collected or deliberately skipped.
- Liquid Nitrogen has been taken from Cryogenics.
- In New Game Plus, both Chapter 5 Marker Fragments have been collected.
- The Hunter has been frozen using the Cryogenics observation console.
- The tissue sample has been collected from Cryogenics if pursuing Premeditated Malpractice.
- The objective has advanced toward Hydroponics and Chapter 6: Environmental Hazard.
References for this chapter
Chapter 6 – Environmental Hazard
Chapter 6 begins in Cryogenics and sends Isaac through Hangar-Cargo, the Tram Repair Room and Hydroponics. Create the enzyme at the Hydroponics Central Hub, then inject eight Wheezers spread across the West Grow Chamber, Refrigeration Tower, Hydroponics Control, East Grow Chamber, Air Filtration Tower and East Seedling Room B. The route includes poison-filled rooms, zero-gravity traversal, electrical turbines, flame vents, a Drag Tentacle and a Brute. In New Game+, collect the chapter’s only Marker Fragment from the upper East Grow Chamber after reaching the Wheezer 06 area. Once all eight Wheezers are treated, return to the central hub, open Food Storage and defeat the Leviathan by destroying its tentacle weak points and returning its projectiles with Kinesis. The chapter ends after Isaac returns inside and receives the Mining Deck objective.
Leave Cryogenics and reach Hydroponics
Chapter 6 starts in the Cryogenics room after the Hunter has been frozen. Before leaving, you may examine the Tissue Sample inside the chamber to begin the optional Premeditated Malpractice side mission. The sample is not required for the chapter’s main route. Save your game, check your inventory and use the tram station to select Hangar-Cargo.
When the tram arrives, follow the locator through the Hangar-Cargo-Tram Control area and return to the Tram Repair Room. This is the same general area visited in Chapter 1, but the remake’s connected layout now provides an eastern passage that leads toward the Hydroponics Tram Station. Expect new necromorph encounters along the way. At the Hydroponics station, you may clear the local lockdown if you want easier later travel, then follow the locator into the growing chambers.
From the station, head east through the Sapling Room and continue to Hydroponics Central Hub. Interact with the enzyme synthesis terminal to create the enzyme, then interact again to take the completed enzyme syringe. The game will then assign the Wheezer objectives. If you care about the action-dependent logs, creating the enzyme before entering Food Storage produces a different log from entering Food Storage first; the two logs cannot both be obtained in one playthrough.
- Examine the Tissue Sample only if you want to begin Premeditated Malpractice.
- Take the tram to Hangar-Cargo.
- Use the eastern passage from Tram Repair toward Hydroponics.
- Create and collect the enzyme at the Hydroponics Central Hub terminal.
Inject Wheezers 01 through 04 in the west section
From Hydroponics Central Hub, take the northern passage toward the West Grow Chamber. The corridor contains timed spray hazards. Wait for each spray cycle to stop, cross to the next safe section and use side rooms as shelter if enemies arrive. In the West Grow Chamber, clear the large necromorph group before searching the adjacent rooms. West Seedling Room A contains the Force Gun if you have not already collected it; this weapon is optional, but its area-control abilities can help in the crowded grow chambers.
Enter West Seedling Room B to find Wheezer 01. The room is filled with poisonous air, so go directly to the Wheezer and inject it rather than stopping to search every container. You do not need to dismember the Wheezer first. If you want the optional action-dependent log associated with damaging the first Wheezer, perform that action before injecting it; otherwise, simply use the enzyme.
Return to the elevator and travel to the upper level leading to Dr. E. Cross’s office. Enter the office from the eastern balcony and inject Wheezer 02. Then return to the elevator and use the lower level route toward Refrigeration Tower. The corridor introduces explosive necromorphs with large glands. Shoot those glands from a distance and check behind Isaac frequently so a second enemy does not close in from behind.
Refrigeration Tower is a zero-gravity area. Use short propulsion bursts to rise through the tower and use Kinesis to move objects that block the route. Land on stable surfaces when possible. Eliminate the wall-mounted tentacle enemy before searching the upper section, then inject Wheezer 03. Return through the tower to the circuit breaker you passed earlier. Turn off the nonessential Jungle Ambiance circuit and power the door leading to Hydroponics Control. Enter the unlocked room and inject Wheezer 04. Enemies attack after the injection, so be ready to retreat into the doorway and funnel them.
- Inject Wheezer 01 in West Seedling Room B.
- Inject Wheezer 02 in Dr. Cross’s office.
- Use short movements and Kinesis in Refrigeration Tower.
- Inject Wheezer 03 in the upper Refrigeration Tower area.
- Reroute the circuit breaker to open Hydroponics Control.
- Inject Wheezer 04 in Hydroponics Control.
Reach the East Grow Chamber and inject Wheezers 05 and 06
From Hydroponics Control, take the southern route into East Grow Chamber. Destroy the corruption growths that block the balconies and reveal the route to the elevator. Ride down to the lower level and prepare for a Brute. Slow it with Stasis, circle to its exposed back limbs and use the nearby Stasis resources if necessary. After the fight, enter East Seedling Room A and inject Wheezer 05.
Return to the East Grow Chamber area where the Brute appeared and find the loose power cell. Use Kinesis to carry it to the red receptacle in the upper part of the room. Then go to East Seedling Room B and collect the Deck Systems Keycard. Do not try to operate the circuit breaker before restoring this power route and obtaining the keycard.
Use the keycard at the nearby circuit breaker and activate the zero-gravity setting required for the upper chamber. The exact label can vary with the interaction state, but the objective is to remove normal gravity so Isaac can fly upward. Use short propulsion bursts, watch for Leapers and other floating enemies, and reach the highest balcony. Inject Wheezer 06 there.
New Game+ only: after reaching the upper East Grow Chamber and completing the Wheezer 06 objective, look toward the upper corner opposite your starting position. The Chapter 6 Marker Fragment is floating near corruption in that corner. Use zero-gravity movement to approach it, or pull it toward Isaac with Kinesis when it is within range. Chapter 6 contains one Marker Fragment, and it does not appear during the first campaign.
- Inject Wheezer 05 in East Seedling Room A.
- Move the loose power cell to the red receptacle.
- Collect the Deck Systems Keycard in East Seedling Room B.
- Use the circuit breaker to activate the zero-gravity route.
- Inject Wheezer 06 on the upper East Grow Chamber balcony.
- In New Game+, collect the single Chapter 6 Marker Fragment near the upper Wheezer 06 area.
Cross Air Filtration and inject Wheezers 07 and 08
From the East Grow Chamber balconies, follow the locator toward Air Filtration Hall. A Drag Tentacle attacks in the long corridor. When Isaac is seized, shoot the exposed orange weak point quickly to break free. Continue into Air Filtration Tower and recharge Stasis before entering the electrical machinery section.
Use Stasis on each rotating electrical discharge before flying past it. The remake allows free movement in zero gravity, but continuous thrust makes Isaac difficult to control, so make small corrections and aim for stable surfaces. Watch for smaller tentacles that fire projectiles. Follow the route to the upper opening and use the console when the game requires the turbine to be shut down.
The Filtration Tubes contain timed flame vents. Destroy or activate the required consoles, then retreat to a safe section while the flames cycle. Do not fight in the center of the hazard if you can withdraw to a doorway; enemies caught in the flames can be damaged or killed while you wait. Continue to Filtration Tube Annex and take the passage to Annex Storage. Inject Wheezer 07 there.
After injecting Wheezer 07, head east and use the elevator to reach the previously inaccessible section of East Seedling Room B. This is where Wheezer 08 is located. Inject it, then destroy the nearby growth if you want to open the additional exit. Once the final Wheezer is treated, the objective changes and the route to Food Storage becomes available.
- Break free from the Drag Tentacle by shooting its orange weak point.
- Use Stasis on every electrical discharge before crossing.
- Wait out flame cycles in the Filtration Tubes.
- Inject Wheezer 07 in Annex Storage.
- Use the elevator to reach the new section of East Seedling Room B.
- Inject Wheezer 08.
Open Food Storage
Return to Hydroponics Central Hub using the locator. The trip back can contain new necromorph encounters, so do not assume the route is safe simply because it was previously cleared. Save, heal, recharge Stasis and use the shop or bench before starting the boss route. Food Storage is a zero-gravity arena, so carry ammunition and healing items rather than filling the inventory with unnecessary loot.
At the central hub, take the eastern airlock route to Food Storage. Interact with the lockdown release terminal when prompted and enter the airlock. Let the communications and objective updates play; the chapter does not advance merely because Wheezer 08 has been injected. The Leviathan fight begins after Isaac enters the storage chamber.
- Confirm that all eight Wheezer objectives have cleared.
- Return to Hydroponics Central Hub.
- Save and restock before opening Food Storage.
- Use the eastern airlock and enter the Leviathan arena.
Defeat the Leviathan
The Leviathan fight has three phases. In the opening phase, three tentacles attack from different parts of the arena. Stay in motion and boost sideways when a tentacle telegraphs a sweep or thrust. After it finishes the attack, turn toward the exposed orange growth at the base of the tentacle and damage it with a weapon. Red explosive canisters can also be grabbed with Kinesis and thrown into the orange weak point. Destroy all three tentacle weak points to advance.
The second phase exposes the Leviathan’s central mouth. It fires explosive projectiles toward Isaac. Use Kinesis to catch an incoming projectile and throw it back into the open mouth. Keep drifting laterally while waiting for the next projectile; do not hover directly in front of the mouth or remain stationary after a successful throw. Ammunition can damage the mouth, but returning the projectiles conserves resources.
The final phase combines the tentacle attacks and mouth projectiles. Continue catching and returning the projectiles while watching for the tentacles to telegraph their strikes. Toxic fumes eventually reduce Isaac’s oxygen, so do not pause to collect every item once the arena becomes hazardous. Prioritize the mouth and any exposed orange weak points, heal while moving and finish the fight before the oxygen supply becomes critical.
- Destroy the three opening tentacle weak points.
- Use Kinesis to return the Leviathan’s explosive projectiles.
- Keep moving throughout the mouth phase.
- Survive the combined tentacle and projectile attacks.
- Defeat the Leviathan before poison and oxygen loss become overwhelming.
Return inside and begin Chapter 7
After the Leviathan is defeated, wait for the post-battle communications. Follow the route back through the Food Storage airlock and continue until Isaac is inside the Ishimura again. The chapter’s completion transition includes further communications and updates the objective to Go to the Mining Deck.
Collect drops, save and use the shop if needed. Then travel to the tram and select Mining Deck. Chapter 6 is complete once the Mining Deck objective is active and Isaac proceeds into the next chapter. If the objective still asks for Wheezers or the Leviathan, the post-boss transition has not finished; use the locator and return through Food Storage rather than taking the tram early.
- Wait for the post-Leviathan communications.
- Return through the Food Storage airlock.
- Receive the Go to the Mining Deck objective.
- Take the tram toward Mining Deck to begin Chapter 7: Into the Void.
Before you move on
- All eight Hydroponics Wheezers have been injected and the Wheezer objective has cleared.
- In New Game+, the Chapter 6 Marker Fragment has been collected from the upper East Grow Chamber if pursuing the alternate ending.
- The Food Storage lockdown has been released.
- The Leviathan has been defeated.
- Isaac has returned through the Food Storage airlock and received the Go to the Mining Deck objective.
- Isaac has taken the tram toward Mining Deck and Chapter 7: Into the Void has begun.
References for this chapter
- Dead Space Remake: Environmental Hazard Walkthrough, Gamepressure
- Dead Space Remake Chapter 6: Environmental Hazard Collectibles Locations, PowerPyx
- Dead Space Marker Fragments: Locations and secret ending guide
- How to Defeat the Leviathan Boss in Dead Space Remake, Gamer Guides
- Dead Space Remake Chapter 6 Walkthrough, VULKK
Chapter 7 – Into the Void
Chapter 7 takes Isaac through the Mining Deck to activate the launch tubes, recover Dallas’s Admin RIG, gain Security Clearance Level 3, and retrieve the SOS Beacon. After loading the beacon in Mining Control, move the required power cell to Mining Bay, destroy two interior and two exterior gravity tethers, attach the beacon to the asteroid, and launch it. The chapter includes instant-kill laser traps, zero-G debris, oxygen limits, fire, and a regenerating Hunter. The Intermediate Miner RIG schematic, Contact Energy schematic, Flamethrower upgrade, nodes, and Level 3 rooms are optional. In New Game Plus only, return to Mineral Samples after obtaining Dallas’s RIG to collect Chapter 7’s Marker Fragment. The chapter ends when Isaac reaches Deck A: Preparation and takes the tram toward Communications.
1. Reach Mining Control and activate the launch tubes
After Chapter 6 ends, follow the locator from the Mining Tram Station into Mining Operations. Override the tram-station lockdown if the option is available, then move the stacked cargo boxes with Kinesis to open the route toward the RIG Room and the Central Cargo Lift. Take the lift to Deck C: Mining. Necromorphs can appear inside the lift, so keep a short-range weapon ready and avoid being trapped against the walls.
The corridor ahead contains moving laser traps. Contact with a beam is instantly fatal. Use Kinesis to move the available cargo box into the beam path, then advance the box as the laser arrangement changes. The same box can be repositioned for successive sections. Do not attempt to sprint through the gaps; wait until the box blocks the relevant beam and cross behind it.
Continue to the Extraction Area and clear the Necromorphs. Find the power cell near the elevator and place it in the red socket to activate the small elevator. Ride up, enter Mining Control, and interact with the launch-tube terminal. The launch cannot proceed yet, so the objective changes to finding the Mining Supervisor’s Admin RIG. Optional side-mission logs and the Ore Storage route can be handled here if their objectives are active.
- Enter Mining Operations from the Mining Tram Station.
- Cross the laser corridor by moving a cargo box with Kinesis.
- Place the power cell in the Extraction Area elevator socket.
- Attempt the Mining Control launch and receive the Admin RIG objective.
2. Recover Dallas’s Admin RIG and collect the NG+ fragment if applicable
Return to the Central Cargo Lift and travel to Deck B: Processing. In the Processing Chamber, gravity is disabled and four large debris pieces obstruct the area. Grab each piece with Kinesis and throw it into the bright processing beam. The debris is destroyed when it enters the beam. Necromorphs attack while the puzzle is active, so stop moving debris whenever an enemy reaches firing range and clear the immediate threat first.
After all four debris pieces are destroyed, fly to the gravity-control terminal and restore gravity. This triggers another attack from multiple directions. Use the room’s walls, balconies, and doorways to avoid being surrounded. Explosive canisters can be repositioned before restoring gravity and used against groups afterward. When the area is secure, continue to Mineral Processing Control and collect Dallas’s Admin RIG beside the supervisor’s body. This grants Security Clearance Level 3 and is required for the campaign.
If this is New Game Plus and you are pursuing the alternate ending, do not leave the area immediately. From the Mineral Processing Area, return to the Level 3 Mineral Samples room near the shop. Enter the room and collect the Marker Fragment resting on a shelf. This fragment is optional, appears only in New Game Plus, and is one of the twelve required for the alternate ending. It does not appear during a first playthrough.
The Contact Energy schematic and nearby nodes are optional. Take them if you have inventory space, but the Admin RIG and Level 3 clearance are the required progression items.
- Destroy all four debris pieces in the Processing Chamber.
- Restore gravity and survive the resulting attack.
- Collect Dallas’s Admin RIG in Mineral Processing Control.
- Verify Security Clearance Level 3.
- In New Game Plus, enter Mineral Samples and collect the Chapter 7 Marker Fragment.
3. Travel through Maintenance and obtain the SOS Beacon
Return to the Central Cargo Lift and select Deck D: Maintenance. A short blackout may occur before the route becomes available; wait for power to return. Proceed through Maintenance and use explosive canisters with Kinesis against tentacled Necromorphs rather than approaching them. Continue south toward Equipment Maintenance Bay.
Pull the gondola toward Isaac with Kinesis and ride it across the gap. Enemies attack from both sides, including projectile-spitting Necromorphs and creatures with exposed tentacles. Use the gondola’s edges and nearby explosive containers to control the approach, but do not remain at the platform’s edge if enemies close in.
Enter the Repair Room and clear the attack before continuing. When Nicole appears near the western route, defend the area and watch the shelves and side entrances for additional enemies. Use limb damage to reduce threats and save Stasis for a fast attacker that reaches melee range. Once the defense sequence ends, proceed into Equipment Workshop and collect the SOS Beacon.
The Intermediate Miner RIG schematic is on a desk opposite the beacon. Registering it unlocks Suit Level 4 at a shop; the suit purchase is optional and is not needed to launch the asteroid.
- Reach Equipment Maintenance Bay.
- Pull the gondola across the gap and survive the ambush.
- Complete the defense sequence involving Nicole.
- Collect the SOS Beacon.
- Take the Intermediate Miner RIG schematic if desired.
4. Load the beacon and reach Mining Bay
After collecting the beacon, use the nearby small elevator to return toward the Mining Deck. At the circuit breaker, disable the gondola system and activate Zero Gravity. Float north through the open route. Minor enemies may appear, but you do not need to clear every creature; kill anything blocking the path and conserve ammunition for the tether chamber and escape.
Return to the Central Cargo Lift and select Deck C: Mining. The lift may stop during the ride while Necromorphs attack from the walls. Use deliberate ranged shots and do not waste time trying to search the lift. Once you arrive, return to Mining Control and interact with the terminal to load the SOS Beacon.
Leave Mining Control and return to the Extraction Area. The eastern route toward Mining Bay is now available. Follow it while watching for explosive Necromorphs. When you reach the out-of-service elevator, return to the previous room and remove the power cell from the earlier socket with Kinesis. Carry or throw it forward to the new red socket that powers the Mining Bay elevator. Set the cell down whenever combat begins, then resume moving it once the route is safe.
- Change the circuit breaker to Zero Gravity.
- Return to Mining Control and load the SOS Beacon.
- Use the newly opened eastern route from Extraction Area.
- Move the power cell to the Mining Bay elevator socket.
5. Destroy the four gravity tethers and plant the beacon
Ride the Mining Bay elevator down and replenish oxygen before entering the large zero-G chamber. The asteroid is held by four gravity tethers: two inside the chamber and two outside. Each tether has a moving mechanism and an exposed weak point. Use Kinesis on the tether mechanism to slow it, then shoot the weak point. Do not rely on Stasis for the tether itself; reserve Stasis for Necromorphs that interrupt the procedure.
Clear enemies before attempting a tether if they are actively attacking Isaac. For the interior tethers, wait for the moving parts to align and fire only when the weak point is exposed. Keep the central processing beam and surrounding machinery clear of Isaac’s flight path. If your orientation becomes confused, use the asteroid, platforms, and visible structures as reference points rather than making large uncontrolled turns.
After destroying both interior tethers, fly outside through the opening in the chamber. Two working rings rotate around the asteroid and kill Isaac on contact. Wait for a safe opening, use a full propulsion burst to pass beyond the rings, and locate the exterior tethers by following their visible energy connections. Find the oxygen refill station before your gauge becomes critical. Destroy both exterior tethers with the same Kinesis-and-weapon procedure.
When all four tethers are gone, fly to the marked placement point on the asteroid and attach the SOS Beacon. The game then directs Isaac back inside. The beacon cannot be planted until all four tether objectives are complete.
- Refill oxygen before entering the tether chamber.
- Destroy both interior tethers by slowing them with Kinesis and shooting their weak points.
- Pass the rotating rings and destroy both exterior tethers.
- Attach the SOS Beacon to the asteroid.
6. Launch the asteroid and escape the Mining Deck
Return through the Mining Bay route toward the small elevator. Fire and damaged machinery obstruct the way. A power cell must be moved through the fire-damaged section to the red socket on the western side. Use Kinesis to pull the cell forward or throw it between safe positions. The fire does not destroy the cell, but Isaac can still be attacked while moving it, so stop carrying it and deal with enemies whenever necessary.
Once the cell is in the western socket, use the restored elevator and return to Mining Control. Interact with the central launch terminal to release the asteroid. Isaac is trapped immediately afterward, and a Hunter appears with other Necromorphs. The Hunter regenerates, so do not spend all your ammunition trying to kill it permanently. Use Stasis and damage its legs to make it crawl, then keep distance and wait for the lockdown to lift.
When the route unlocks, continue through the fire and damaged corridors. Avoid flames, use the locator after each major transition, and do not linger in vacuum sections. Take the cargo lift to Deck A: Preparation, then follow the route east toward the Mining Tram Station. Clear small enemies only when they block the path. Board the tram to leave the Mining Deck; the next chapter begins with the objective to go to Communications.
If you die during the escape, reload the checkpoint, restock at nearby containers, and prioritize movement over optional kills. Keep Stasis available for the Hunter and use the locator immediately after the lockdown opens.
- Move the power cell through the fire-damaged route.
- Place the cell in the western socket and return to Mining Control.
- Launch the asteroid from the central terminal.
- Survive the regenerating Hunter encounter.
- Reach Deck A: Preparation and board the tram toward Chapter 8.
Before you move on
- The Mining Control launch terminal has been attempted and the Admin RIG objective has appeared.
- Dallas’s Admin RIG has been collected and Security Clearance Level 3 is active.
- The SOS Beacon has been collected and loaded at Mining Control.
- All four gravity tethers have been destroyed and the beacon has been attached to the asteroid.
- The asteroid has been launched and Isaac has survived the Hunter encounter and fire-damaged return route.
- Isaac has reached Deck A: Preparation and boarded the tram, beginning Chapter 8: Search and Rescue.
Chapter 8 – Search and Rescue
Chapter 8 begins at the Mining tram station and sends Isaac to the Bridge. Survive the Main Atrium quarantine, activate the recording panel on the room’s right side, then optionally visit Hydroponics to advance Premeditated Malpractice and collect the Prototype Stasis Module. Return to Communications Control, recover Bailey’s RIG if pursuing You Are Not Authorized, and repair the Communications Array in zero gravity by connecting powered satellite nodes to the central receiver. In New Game Plus, pull the Marker Fragment from the corruption-covered opening left of the Communications Control sign before leaving the array room. Continue through the Maintenance Gondola to Comms Maintenance, where deploying the antenna triggers the Leviathan Remnant encounter. Destroy its three exposed body sections with the ADS Cannons or other available tools, deploy the antenna after the fight, then fly to the USM Valor and enter its airlock to begin Chapter 9.
1. Travel from Mining to the Bridge and clear the Main Atrium
At the start of the chapter, you are facing the Mining tram station. Take the tram to the Bridge, then follow the Locator toward the Main Atrium. The atrium enters quarantine, so your immediate objective is to survive the lockdown rather than reach the next door.
Keep moving around the open room instead of standing beneath one walkway. Enemies can approach from different levels, including Exploders, Slashers and Leapers. Remove a leg or another mobility limb from ordinary Necromorphs before finishing them. Handle Exploders before they reach you by shooting their glowing sacs or using Kinesis on a suitable environmental object. Use Stasis when an enemy reaches melee range and you need time to reload or reposition.
When the quarantine ends, go to the eastern side of the Main Atrium and activate the panel on the right side of the room. Watch the holographic recording involving Nicole and Captain Mathias. This interaction advances the optional Premeditated Malpractice investigation and establishes the Hydroponics objective.
- Take the tram from Mining to the Bridge.
- Survive the Main Atrium quarantine.
- Activate the recording panel on the right side of the Main Atrium.
2. Visit Hydroponics for Premeditated Malpractice
If you want to complete the available side-mission step, return to the tram and travel to Hydroponics. From the Hydroponics tram station, reach the West Tower and take the elevator to Floor 2. Follow the Locator to the Diagnostic Lab. The route includes areas affected by toxic gas, so move through contaminated rooms without lingering and use the objective marker to avoid unnecessary detours.
Search the Diagnostic Lab for Dr. Mercer’s final audio log. The Prototype Stasis Module is on a desk in the same room. Pick it up to complete the currently available portion of Premeditated Malpractice. The upgrade causes Stasis to inflict electrical damage over time, making affected Necromorphs easier to weaken while they are immobilized.
This detour is optional for the campaign. If you are following only the main story, return to the tram after viewing the Main Atrium recording and go back to the Bridge. If you are completing the side mission, select Premeditated Malpractice in the Mission menu so the Locator tracks the correct objective.
- Reach the Diagnostic Lab in Hydroponics.
- Collect Dr. Mercer’s audio log if completing the side mission.
- Collect the Prototype Stasis Module from the desk.
3. Reach Communications Control and recover Bailey’s RIG
Back on the Bridge, follow the Locator toward Communications Control. Necromorphs, including Guardians, obstruct the route. Guardians are dangerous at close range because their growths limit movement, so keep a clear firing angle on their exposed limbs and avoid walking directly into their frontal attacks. Stasis can hold one in place while you remove vulnerable appendages. Kinesis is useful when severed limbs or explosive objects are available.
Before solving the Communications Array puzzle, approach the Communications Control panel. This triggers the related communications sequence. Then enter E. Bailey’s office beside the save station. Bailey’s audio log and RIG are inside. Take the RIG if you are pursuing You Are Not Authorized; it is not required for the campaign.
Use the nearby save station and organize your inventory before entering the array chamber. Carry a reliable limb-cutting weapon, healing and enough ammunition for the encounters after the puzzle. Spend nodes if you have a clear upgrade priority, but do not sell healing or ammunition merely to create space. Sell semiconductors when you need credits.
- Approach the Communications Control panel.
- Enter Bailey’s office and collect Bailey’s RIG if pursuing You Are Not Authorized.
- Save and prepare your inventory before entering the array chamber.
4. Repair the Communications Array and collect the New Game Plus fragment
Enter the Communications Array chamber through the airlock. Clear any enemies before inspecting the board. The puzzle is solved with Kinesis: active blue satellite nodes must be positioned so their white connection lines create an uninterrupted route to the central receiver. Inactive orange pieces do not carry power and should not be treated as valid links.
Work outward from the powered side and rotate or move the blue nodes until each connection meets the next compatible node. The completed route can zigzag across the chamber. When the central display shows a continuous connection, leave the zero-gravity room and return to the Communications Control terminal to activate the repaired array.
If this is New Game Plus, search the wall to the left of the Communications Control sign before leaving the array room. A corruption-covered opening contains a Marker Fragment. Use Kinesis to pull the fragment out of the opening. It appears only in New Game Plus and counts toward the 12 fragments required for the alternate ending. It is not available during the first campaign.
After collecting the fragment if applicable, return to the Communications Control terminal. Interact with it to activate the array, listen to the transmission and continue toward the newly opened route.
- Clear the Communications Array chamber.
- Use Kinesis to position the active blue satellite nodes.
- Create a continuous connection to the central receiver.
- In New Game Plus, pull the Marker Fragment from the corruption-covered opening left of the Communications Control sign.
- Activate the Communications Array terminal.
5. Reach Comms Maintenance and trigger the Leviathan Remnant fight
After the array is activated, follow the newly accessible route through the Communications area. Move the obstructing chests with Kinesis and continue to the Maintenance Gondola. Search around the gondola for supplies before riding it across the Bridge section, because a larger Necromorph encounter occurs along this route.
After the ride, continue through the maintenance route and take the elevator toward Comms Maintenance. Check the corridor near the airlocks for ammunition and other supplies before interacting with the antenna controls. Attempting to deploy the antenna triggers the Leviathan Remnant encounter and forces Isaac outside.
Confirm your oxygen supply before entering the exterior area. Refill stations are available outside, but one is concealed behind fleshy growths. Destroy the growth blocking that station before relying on it. The encounter is fought in zero gravity, with Isaac moving between ADS Cannons positioned around the platform.
- Move the chests blocking the route to the Maintenance Gondola.
- Ride the gondola and continue to Comms Maintenance.
- Search the airlock corridor for supplies.
- Attempt to deploy the antenna and trigger the Leviathan Remnant encounter.
6. Destroy all three sections of the Leviathan Remnant
Three ADS Cannons are positioned around the exterior platform. The central cannon is available immediately. One side cannon is covered by fleshy growth; destroy the growth cluster to expose it. Clear the growth covering the nearby oxygen station as well so you have a dependable refill point during the fight.
Take control of a cannon and aim at the orange armored section on the Leviathan Remnant. Destroy the outer shell protecting the orange target, then continue firing at the exposed body section. Repeat this process for all three sections. The cannons provide the safest way to damage the Remnant, but the boss can destroy a cannon after you use it, so move promptly after completing an attack.
The Remnant uses sweeping tentacles, direct strikes, explosive mines and orange projectiles. Fly over or away from sweeping attacks rather than remaining stationary at a cannon. Avoid explosive clusters. Kinesis can catch and throw orange projectiles back when the timing is safe. Keep checking the oxygen meter and refill before it becomes critical.
If a cannon becomes unusable, move to another one. If the available cannons are destroyed before the final section is finished, continue attacking the exposed weak point with handheld weapons and use Kinesis against projectiles. The encounter ends after all three orange body sections are destroyed; there is no separate central-mass phase that must be awaited.
- Expose and use the ADS Cannons around the exterior platform.
- Destroy the shell and orange weak point on each of the three body sections.
- Avoid tentacle sweeps, mines and projectiles.
- Refill oxygen before the meter becomes critical.
- Use a handheld weapon or Kinesis if a cannon is destroyed before the fight ends.
7. Extend the antenna and board the USM Valor
After the Leviathan Remnant is destroyed, return through the airlock to Comms Maintenance and interact with the antenna controls again. This time the antenna deploys successfully. The resulting emergency sends the USM Valor toward the Ishimura and changes the objective to reaching the ship.
Follow the Locator back outside through the exterior access route. Fly toward the damaged Valor and look for the large USM Valor markings. The ship’s circular airlock is beside those markings. Approach it and enter the airlock to trigger the chapter transition.
Boarding the Valor begins Chapter 9, Dead on Arrival. Before entering, finish any Bridge-based optional activity you still want to do, including Bailey-related side-mission progress, and spend nodes or reorganize your inventory if necessary. Once Isaac enters the Valor’s airlock, the immediate campaign route moves to the next chapter.
- Return to Comms Maintenance after defeating the Remnant.
- Deploy the antenna successfully.
- Fly to the wrecked USM Valor.
- Enter the Valor’s circular airlock and begin Chapter 9.
Before you move on
- The Main Atrium quarantine has ended and the Nicole and Captain Mathias recording has played.
- The Communications Array has been repaired and activated.
- In New Game Plus, the Chapter 8 Marker Fragment has been pulled from the corruption-covered opening left of the Communications Control sign, if collecting fragments for the alternate ending.
- The antenna deployment attempt has triggered and the Leviathan Remnant has been defeated.
- The antenna has been extended successfully after the boss encounter.
- Isaac has flown to the wrecked USM Valor and entered its circular airlock.
- The game has transitioned to Chapter 9 – Dead on Arrival.
References for this chapter
- Dead Space Remake Chapter 8 Walkthrough – VULKK
- Dead Space Remake Chapter 8: Search and Rescue Collectibles Locations – PowerPyx
- Dead Space Remake All Marker Fragment Locations
- Dead Space Remake (2023) - Chapter 8: Search and Rescue Walkthrough – Neoseeker
- Dead Space Remake: How to Beat the Leviathan Remnant with the ADS Cannons in Chapter 8 – Attack of the Fanboy
- How to Fix the Comms Array in Dead Space Remake – Prima Games
Chapter 9 – Dead on Arrival
Chapter 9 moves Isaac onto the wrecked USM Valor to recover its Singularity Core. The Valor is a one-time area, so collect its four Power Nodes, Orders and Alien Boarders logs, Large Med Pack schematic, and the Front Toward Enemy trophy before escaping. The critical route is to replace the Cargo Lift battery, disable the nuclear warhead without detonating the Exploders, survive the Shooting Range and Cargo Bay quarantine fights, cross the Engine Room fuel leaks with Kinesis crates, and recover the Singularity Core. Twitchers are not handled like normal Necromorphs: target the Stasis module fused into their chests, then dismember them. The chapter ends when Isaac escapes the Valor and returns to the Ishimura for Chapter 10.
Enter the USM Valor and restore the Cargo Lift
After Chapter 8, follow the objective through the Ishimura’s Cargo Bay and enter the wrecked USM Valor. Search the first Valor room before moving on; a Power Node is in the room on the right, accessible from the Briefing Room side. This is the first of four confirmed Chapter 9 nodes. Chapter 9 collectibles on the Valor cannot be recovered later, so do not treat this area as a simple story corridor.
Proceed through the Barracks. The first fast soldier Necromorph is a Twitcher. In the remake, ordinary Isaac-fired Stasis is not the dependable answer against these enemies. Shoot the blue Stasis module fused into the Twitcher’s chest to trigger its slowing effect, then cut its legs or arms while it is vulnerable. A precision weapon such as the Plasma Cutter is useful, and environmental projectiles can help when several Twitchers attack together.
Enter the Briefing Room near the end of the hall. Collect the Orders log from the table and the Alien Boarders log from the corpse near the second door. Take the replacement battery from the room, carry it back to the Cargo Lift, and install it in the socket. Before riding the lift, go through the second door toward the airlock and collect the Power Node on the wall. The elevator will take you to the Torpedo Bay.
- Power Node collected from the Valor’s first room.
- Orders log collected in the Briefing Room.
- Alien Boarders log collected near the second door.
- Replacement battery installed in the Cargo Lift.
- Twitcher chest modules targeted rather than relying on ordinary Stasis.
Disable and eject the nuclear warhead
In the Torpedo Bay, do not shoot the explosive sacs of the Exploders. Their detonations can trigger the nuclear warhead and kill Isaac immediately. Instead, sever their limbs, shoot them from a safe angle, or use Kinesis and Stasis-related control options without striking the sacs. Your first objective is to destroy the six fuse boxes connected to the warhead controls.
After the fuse boxes are destroyed, deal with the remaining enemies and find the battery in the room. Use Kinesis to carry it to the wall socket near the front of the Torpedo Bay. Return to the central console and activate it to eject the warhead. A story log triggers after this action, confirming that the route toward the Singularity Core is open.
Save before entering the Armory if you want a recovery point for the Shooting Range trophy. Follow the Locator through the Armory route. The Shooting Range is an optional room on the way to the Infirmary, but its trophy and node are missable because the Valor cannot be revisited.
- Six Torpedo Bay fuse boxes destroyed.
- Exploder sacs not detonated during the warhead sequence.
- Battery installed at the Torpedo Bay console.
- Nuclear warhead ejected.
- Manual save made before the Shooting Range, if desired.
Complete the Shooting Range and cross the Infirmary
Enter the Shooting Range and activate its panel. The red-target score is not the requirement for Front Toward Enemy. Continue the exercise until the quarantine begins, then kill every Necromorph that enters the room. Keep Isaac near the center or an open firing lane, turn to watch the entrances, and use the room’s available space instead of backing into a corner. Surviving the live assault awards the trophy. The lockers unlock afterward; search them for the second Chapter 9 Power Node and the other rewards.
Continue toward the Infirmary. Collect the Large Med Pack schematic from the desk just inside the entrance, before the malfunctioning surgical lasers. This schematic is optional for campaign completion but missable for collection goals. When the laser assembly sweeps across the route, use Stasis on the device and move through the safe opening. If a Twitcher enters, prioritize its chest module and keep the laser hazard between Isaac and the enemy where possible.
After leaving the Infirmary, continue toward Cargo Bay. If you explore side recesses, do so before triggering the main quarantine encounter, but do not leave the route without checking your inventory and healing. The next fight is one of the chapter’s largest combat sequences.
- Shooting Range live Necromorph assault completed.
- Front Toward Enemy trophy earned, if desired.
- Power Node collected from the Shooting Range lockers.
- Large Med Pack schematic collected before the laser corridor.
- Infirmary lasers crossed using Stasis and safe movement.
Survive Cargo Bay quarantine and defeat the Brute
Enter Cargo Bay and advance until quarantine begins. The room can spawn Slashers, Exploders, Lurkers, Twitchers, and a Brute. Several Stasis canisters are available around the bay, so use them to create space rather than saving every charge. Keep moving around the open floor and avoid being pinned against walls or cargo structures. Dismember ordinary enemies quickly, then focus on the Brute when it appears.
Against the Brute, wait for a charge or attack recovery, apply Stasis if available, and circle behind it. Shoot the exposed yellow sacs and sever its vulnerable limbs instead of wasting ammunition on its armored front. If Stasis wears off, retreat across the open floor and reset the engagement. Do not stand between the Brute and a wall, and do not let smaller Necromorphs trap you while you aim.
When the quarantine ends and the Brute is dead, collect the Power Node it drops. Search the Cargo Bay before following the Locator toward the Engine Room. A story log triggers as you leave the area, confirming the next stage of the chapter.
- Cargo Bay quarantine survived.
- Brute defeated by attacking its exposed rear weak points and limbs.
- Power Node collected from the Brute.
- Cargo Bay searched before leaving.
Cross the Engine Room and recover the Singularity Core
The Engine Room is not cleared by simply waiting for a fire-suppression console. Fuel leaks create alternating flame jets along the route. Use Kinesis to move the available crates into the flame paths. Carry or reposition them so Isaac can advance behind cover, and move through intermittent flames only when they are inactive. Do not sprint blindly through the fire.
Continue using the crates until you reach the circuit breaker. Activate it to power both the elevator and the fire-suppression system. Once the flames are extinguished, return to the left-side recess past the former fire barrier and collect the fourth Chapter 9 Power Node. This node is not obtained automatically from the story, so check the recess before taking the elevator.
Ride the elevator to the upper level and follow the Locator through the next quarantine sequence. Reach Hammond and the Singularity Core, then wait for the story event to clear the area. Pick up the Singularity Core only after the fight and scene have finished. A story log triggers when the core is recovered.
- Fuel flames crossed with Kinesis crates.
- Circuit breaker activated.
- Elevator and fire suppression powered.
- Power Node collected from the Engine Room recess.
- Singularity Core recovered.
Escape the Valor and confirm Chapter 10
Once Isaac takes the Singularity Core, the Valor enters its destruction sequence. Follow the Locator through the linear escape route. Fight only enemies that block a doorway, control, or narrow passage; otherwise keep moving and use sprint to clear collapsing or burning sections. At the airlock, complete the required interaction and continue through the escape sequence.
Before leaving, confirm that you have the four Power Nodes, both manually collected logs, the Large Med Pack schematic, and the Shooting Range trophy if those are part of your goals. The Chapter 9 collectibles on the USM Valor are missable, while the Ishimura itself remains available for later cleanup until the Point of No Return near the end of Chapter 11.
Isaac returns to the Ishimura after the Valor is destroyed. The chapter is complete when the escape sequence ends and the game advances to Chapter 10, End of Days, with the next objective sending Isaac toward the Crew Deck and shuttle installation.
- Valor escape sequence completed.
- Four Chapter 9 Power Nodes collected, if pursuing the chapter sweep.
- Large Med Pack schematic and desired logs secured before departure.
- Isaac returned to the Ishimura.
- Chapter 10: End of Days or its new Crew Deck objective appears.
Before you move on
- The nuclear warhead has been safely ejected from the Torpedo Bay.
- The Shooting Range assault has been completed if the trophy and node are wanted.
- The Large Med Pack schematic and all desired Valor logs have been collected.
- The Cargo Bay quarantine is cleared and the Brute’s Power Node is in Isaac’s inventory.
- The Engine Room circuit breaker has powered the elevator and fire suppression, and the Engine Room Power Node has been collected.
- The Singularity Core has been recovered and Isaac has escaped the USM Valor.
- Isaac is back on the Ishimura and Chapter 10: End of Days has begun.
Chapter 10 – End of Days
Chapter 10 sends Isaac through the Crew Deck to obtain the Crew Deck Keycard, destroy four Marker-blocking tendrils, move the Marker to the Executive Shuttle and install the Singularity Core. The Hunter returns during the shuttle engine test and must be positioned in the engine exhaust before the test is triggered. Chapter 10 also contains two Marker Fragments, but both are New Game Plus-only: one is in the lower Deluxe Shift Bunks after the circuit breaker is powered, and the other is in Inquiry Desks near the Chief Steward’s Office tendril. Optional activities include recovering Benson’s RIG for Master Security Override, advancing Scientific Methods and playing Z-Ball. The chapter ends after Isaac destroys the orange growths on the tentacle that grabs him, leading into Chapter 11: Alternate Solutions.
1. Enter the Crew Deck and prepare for the chapter
From the Bridge Main Atrium, go to the Store and take the newly opened route into the Tram Tunnels. Follow the signs to the Crew Deck Tram Station, lift the lockdown at the station and continue into the Crew Deck. Save before entering the Common Area, then organize your inventory around limb damage, Stasis, healing and ammunition. Leave several inventory spaces open because this chapter provides supplies during repeated trips through the same hub areas.
The Tram Tunnels contain Benson’s RIG for the You Are Not Authorized side mission. Recovering it is optional and is not required for the main campaign. If you have collected the other required RIGs, return to the Captain’s Nest on the Bridge and use the terminal to create Master Security Override. Override doors and containers provide extra resources, but they are not required to obtain the Crew Deck Keycard or complete the chapter.
Scientific Methods can also be advanced during this chapter. Follow its mission objective to Mercer’s Quarters and activate the hologram when the mission directs you there. Treat this as optional story and reward content; do not delay the main route if your supplies are low.
- Reach the Crew Deck Tram Station.
- Save and restock before entering the Common Area.
- Optionally recover Benson’s RIG and create Master Security Override.
- Keep inventory space available for ammunition and quest items.
2. Power the Zero-G Gym elevator and get the Crew Deck Keycard
Enter the Common Area and follow the objective toward the Zero-G Gym. Locate the loose power cell inside the gym and use Kinesis to carry it to the red receptacle near the elevator. Once power is restored, ride the elevator to the upper level and search the body there for the Crew Deck Keycard.
Return through the gym and adjoining corridors toward the Common Area. A combat encounter can occur during this return trip, so clear enemies before stopping at the elevator. Use the keycard at the locked elevator route, ride to the upper level and continue into the Central Nexus.
The Zero-G Gym also contains the optional Z-Ball activity. It is not needed for story progress. Attempt it only after the area is safe, and do not spend healing or ammunition on it if you are preparing for the chapter’s Hunter encounters.
- Find the Zero-G Gym power cell.
- Place the cell in the red receptacle.
- Search the upper-level body for the Crew Deck Keycard.
- Use the keycard to reach the Central Nexus.
3. Escape the Hunter and destroy the Standard Quarters tendril
A Mercer scene in the Central Nexus leads into the first Chapter 10 Hunter chase. The Hunter regenerates and cannot be killed by ordinary weapon damage during this encounter. Use Stasis to create distance, remove a leg only when it blocks your escape and follow the open route toward the Mess Hall rather than trying to clear every enemy.
From the Mess Hall, take the small elevator toward Standard Quarters. In the Standard Quarters route, use Kinesis to move the obstruction blocking the northern passage. Continue into the toxic area, where wall-mounted enemies and gas limit your safe positioning. Keep moving, use ranged shots to remove threats that block the route and avoid remaining in the gas longer than necessary.
Locate the orange growth attached to the Marker tendril and destroy it. The growth is the required target; killing ordinary enemies alone will not advance the objective. Leave the area after the destruction because the Hunter can reappear during the escape route.
- Escape the Hunter instead of attempting to kill it with weapons.
- Reach Standard Quarters through the Mess Hall.
- Move the obstruction with Kinesis.
- Destroy the orange growth in Standard Quarters.
4. Clear Deluxe Quarters and collect its New Game Plus fragment
After leaving Standard Quarters, locate the power cell in the nearby Storage Room. Carry it with Kinesis to the red receptacle near the save station and elevator. Use the powered elevator to return to the Central Nexus, then take the upper balcony route toward Deluxe Quarters.
Deluxe Quarters begins with a quarantine lockdown. Move around the room’s perimeter, keep the entrances in view and defeat the necromorphs until the lockdown ends. Destroy the second orange growth after the room is secure.
If this is a New Game Plus run, power the circuit breaker in the Deluxe Quarters hallway to enable the required doors. Enter the lower Deluxe Shift Bunks, the southern room that becomes accessible after the breaker is configured. The tenth Marker Fragment is on a desk inside. Collect it before leaving the area. Chapter 10 has two Marker Fragments, and both are available only in New Game Plus; neither will appear during the first campaign playthrough.
If Scientific Methods is active, enter Mercer’s Quarters when directed and activate the hologram involving Nicole and Mercer. This side-mission progress is optional and does not replace the tendril objective.
- Carry the Storage Room power cell to the red receptacle.
- Survive the Deluxe Quarters quarantine.
- Destroy the Deluxe Quarters growth.
- In New Game Plus, power the circuit breaker and collect the fragment from the lower Deluxe Shift Bunks desk.
- Optionally advance Scientific Methods in Mercer’s Quarters.
5. Clear Executive Quarters and Inquiry Desks
Return to the Central Nexus and use the upper western balcony route to reach Executive Quarters. Enter the Executive Bathrooms and destroy the orange growth there. Be ready for enemies in the adjoining corridors, and keep your route back to the Nexus open instead of fighting with your back to multiple doors.
Return to the Central Nexus and clear the next lockdown before attempting to use the following passage. Take the southwestern route to the Chief Steward’s Office. A scene with Dr. Kyne plays there, after which the route into Inquiry Desks opens. Enter Inquiry Desks and destroy the fourth orange growth.
During a New Game Plus run, search Inquiry Desks before leaving. The eleventh Marker Fragment is on the desk opposite the entrance, partly obscured by the items on the desk. It is the second and final Chapter 10 fragment. If you are on a first playthrough, this fragment will not be present.
The four required tendril targets are Standard Quarters, Deluxe Quarters, Executive Quarters and the Chief Steward’s Office area, specifically Inquiry Desks. If the objective remains active, return to the named area and look for the orange growth attached to the tendril rather than searching for another enemy.
- Destroy the Executive Quarters growth.
- Clear the Central Nexus lockdown.
- Reach the Chief Steward’s Office and enter Inquiry Desks.
- Destroy the Inquiry Desks growth.
- In New Game Plus, collect the fragment from the desk opposite the Inquiry Desks entrance.
6. Move the Marker and install the Singularity Core
Return to the Central Nexus and take the elevator to the lower level. A final lockdown begins in this section. Defeat the enemies, then approach the Marker and use the terminal. The terminal moves the Marker toward the Executive Shuttle; Isaac does not manually carry it through the Crew Deck.
Follow the locator to the Executive Shuttle Bay. Search nearby rooms for supplies, then use the available bench or Store before entering the shuttle sequence. Prioritize weapon damage, reload speed, Stasis capacity and suit survivability over unnecessary purchases. Keep healing and ammunition available for the Hunter encounter.
Enter the shuttle and install the Singularity Core at the marked receptacle. The sequence is terminal first, shuttle installation second and engine test third. Do not activate the engine test before the core is installed.
- Use the Central Nexus terminal to move the Marker.
- Reach the Executive Shuttle Bay.
- Install the Singularity Core in the shuttle.
- Restock before beginning the engine test.
7. Kill the Hunter with the shuttle engines
Go to Shuttle Bay Controls and activate the engine-test terminal. Identify the exhaust area behind the shuttle before committing to the fight. The Hunter is not defeated by normal weapon damage; limb shots and Stasis only slow or reposition it.
When the Hunter appears, use Stasis if it is close enough to interrupt you. Shoot a leg when necessary, then circle through the hangar and lead it behind the shuttle into the engine exhaust zone. Ignore enemies that are not blocking your route, but remove nearby threats if they are preventing you from reaching the controls.
When the Hunter is positioned in the exhaust, apply Stasis if it begins to move away. Return to Shuttle Bay Controls and activate the engine test again. The engine blast permanently kills the Hunter when it is standing in the exhaust. If it escapes the zone, repeat the positioning process rather than wasting ammunition on it.
- Activate the first engine test.
- Lead the Hunter behind the shuttle into the exhaust.
- Use Stasis to hold it in position if needed.
- Trigger the second engine test with the Hunter in the exhaust.
- Confirm that the Hunter has been permanently destroyed.
8. Destroy the tentacle growths and begin Chapter 11
After the Hunter sequence, leave the control area and follow the objective. A large tentacle grabs Isaac. When control returns, aim at the orange growths attached to the tentacle and destroy them. Concentrate fire on the visible growths rather than the surrounding flesh, and reposition when the tentacle’s movement obscures a target.
After the growths are destroyed, the tentacle releases Isaac and the story scenes continue. This is the end of Chapter 10. The game transitions directly into Chapter 11: Alternate Solutions.
If you are completing optional side missions or Master Override exploration, finish them before advancing through Chapter 11’s point-of-no-return sequence whenever the game still permits travel. The two Chapter 10 Marker Fragments must be collected during New Game Plus, and the complete set of twelve must eventually be placed in the Captain B. Mathius office labeled Lt Commander V. Holt on the map before the Chapter 12 transition if you want the alternate ending.
- Destroy every visible orange growth on the tentacle.
- Watch the post-battle story sequence.
- Confirm that Chapter 11: Alternate Solutions has started.
- If pursuing the alternate ending, verify that both Chapter 10 fragments were collected in New Game Plus.
Before you move on
- Isaac has obtained the Crew Deck Keycard and reached the Central Nexus.
- The Standard Quarters, Deluxe Quarters, Executive Quarters and Inquiry Desks tendrils have all been destroyed.
- In New Game Plus, both Chapter 10 Marker Fragments have been collected: one from the lower Deluxe Shift Bunks desk and one from the desk opposite the Inquiry Desks entrance.
- The Central Nexus terminal has moved the Marker to the Executive Shuttle.
- The Singularity Core has been installed in the shuttle.
- The Hunter has been killed by the shuttle engine blast.
- The orange growths on the final tentacle have been destroyed and Chapter 11: Alternate Solutions has started.
References for this chapter
- Dead Space Remake All Marker Fragment Locations
- Dead Space Marker Fragments: Locations and secret ending guide
- All Marker Fragment Locations in Dead Space Remake: How to Get Secret Ending
- Dead Space Remake Chapter 10 Walkthrough
- Dead Space Remake: End of Days
- How to Kill The Hunter in Dead Space Remake - Chapter 10 - End of Days - Walkthrough
Chapter 11 – Alternate Solutions
Move the Marker from Cargo Bay through the bridge machinery, route power through the Main Hangar, guide the Marker along the cargo rails, and load it onto the Executive Shuttle. After Kyne’s plan collapses, reach Flight Deck Control and use the Emergency Shuttle Recall Console. Boarding the recalled shuttle is the point of no return for Ishimura exploration, so finish desired side missions, clearance rooms, upgrades, and collectibles first. In New Game Plus, collect the Chapter 11 Marker Fragment from the southeast Cargo Bay shelves or walkway corner. After collecting all twelve fragments, place them on the twelve-pedestal table in Captain B. Mathius’s office, labeled Lt Commander V. Holt on the Crew Deck map, before boarding the shuttle. Chapter 9’s USM Valor content is already missable and cannot be recovered here.
1. Travel from the Bridge tram station to Cargo Bay
Chapter 11 starts at the Bridge tram station after the previous chapter’s events. Break the fuse box that blocks the route if necessary, then use the tram and select Hangar–Cargo–Tram Control. The Shop, Save Station, and Upgrade Bench near the tram route give you a useful preparation point. Reload your weapons, clear excess inventory, and keep space for ammunition, healing items, and mission rewards before descending into Cargo Bay.
Follow the locator through the connecting corridor and take the elevator down. Cargo Bay is an open room with several levels, tendrils, explosive enemies, and containers. Before activating the main objective, search the area around the elevator and nearby platforms. If you are collecting optional rewards, move the kinesis crates beside the elevator to reach the locker containing the Peng Treasure. This is optional and does not affect the chapter objective. Clear visible corruption and nearby enemies before using the Cargo Control console so the first objective does not begin with threats already surrounding Isaac.
- Travel from Bridge tram to Hangar–Cargo–Tram Control.
- Save, restock, and use the nearby Shop or Upgrade Bench if needed.
- Descend into Cargo Bay and clear the immediate area.
- Optionally move the crates near the elevator to collect Peng.
2. Collect the New Game Plus fragment before moving the Marker
The Chapter 11 Marker Fragment exists only in New Game Plus. If this is a normal first campaign, there is no fragment to collect here. In New Game Plus, descend into Cargo Bay and search the southeast side of the room before or during the Cargo Control objective. The fragment is sitting on the southeast shelves or in the adjacent walkway corner, near the cargo-storage structures rather than on the main console itself. Use the map orientation and the room’s outer platforms to keep the search focused; do not leave Cargo Bay assuming the fragment will appear later in the chapter.
Pick up the fragment before advancing if you are pursuing the alternate ending. The game does not automatically place it in your inventory merely because the Marker-transfer scene has begun. If the fragment is difficult to see, check the shelving and the corner from multiple angles after clearing the local necromorphs. Once collected, confirm that your inventory count has increased before continuing. This is the last fragment assigned to Chapter 11, but missed fragments from earlier chapters can still be collected during New Game Plus before the Ishimura departure, provided their areas remain accessible.
- Confirm that the run is New Game Plus.
- Search the southeast Cargo Bay shelves and walkway corner.
- Collect the Chapter 11 Marker Fragment before leaving Cargo Bay.
- Verify that the fragment was added to the inventory.
3. Start the Cargo Control transfer and raise the bridge sections
Go to the Cargo Control console on the lower level and activate it. Isaac uses Kinesis to move the Marker along the cargo route. Starting the transfer summons a large group of necromorphs, including enemies attacking from different levels and tendrils that can strike across the room. Do not remain locked to the console once the attack begins. Move around the perimeter, use the open floor to create distance, and return to the Marker controls after the immediate threats are down or slowed.
As the Marker advances, it reaches bridge sections that block its route. Follow the locator to the marked Bridge Controls and interact with each console to raise the required section. These controls are part of the normal progression; shooting nearby corruption will not replace the bridge interaction. Watch for attacks from upper walkways and the lower cargo lanes while operating the machinery. Stasis is valuable against a fast target closing on Isaac, while Kinesis can turn explosive objects or severed blades into damage without spending ammunition. Continue following the Marker and activating the marked bridge controls until the Marker leaves the Cargo Bay route and the objective sends you back toward the Flight Deck.
- Activate Cargo Control to begin moving the Marker.
- Survive the Cargo Bay ambush without staying fixed at the console.
- Follow the locator to each marked Bridge Control.
- Raise every bridge section needed for the Marker to continue.
4. Reach Main Hangar and route power to the cargo rails
Return through the Flight Deck route toward Main Hangar. A quarantine encounter can occur in Flight Lounge, so reload before entering and use the room’s entrances to control the approach. When you reach Main Hangar, follow the locator to the Gravity Controls and deactivate gravity. Isaac can then float down to the lower level where the cargo machinery is located.
At the lower level, locate the circuit breaker and the nearby battery. Use Kinesis to place the battery into the breaker if it is not already installed. The breaker provides several destinations. Route power to the Cargo Rail Tracks or Cargo Rail Controls, which is the setting required to move the Marker. Other settings can open optional access or supply routes, but they do not complete the primary objective. If you want the optional valuables, check the nearby opened room before proceeding, but do not lose track of oxygen while exploring the zero-gravity hangar.
- Return to Main Hangar after the Marker clears Cargo Bay.
- Deactivate gravity and float to the lower level.
- Place the nearby battery into the circuit breaker if required.
- Route power to Cargo Rail Tracks or Cargo Rail Controls.
- Monitor oxygen while exploring optional rooms.
5. Guide the Marker through the Cargo Rail Controls
Find the Marker and activate the Loader Controls to start the cargo rail. The Marker advances along the hangar route but stops at several junctions. When it stops, follow the locator to the next Cargo Rail Control console and interact with it. The consoles rotate or reposition the rail sections; continue using the marked controls until the Marker is aligned with the shuttle-loading route. If the Marker does not move, look for the next control along the route instead of repeatedly activating the previous console.
Leapers and Lurkers attack while Isaac works in zero gravity. Use the upper platforms and perimeter structures as stable firing positions whenever possible. Small propulsion bursts are easier to control than long boosts, and reorient Isaac against a wall or platform before firing if the battle makes aiming difficult. Stasis can hold an enemy away from a console long enough to finish the interaction. Avoid remaining directly underneath the Marker’s path, and check oxygen before starting each new rail adjustment. Continue until the Marker is positioned beneath the shuttle.
- Activate the Loader Controls after powering the cargo rails.
- Use each marked Cargo Rail Control as the Marker reaches a junction.
- Fight from platforms or the hangar perimeter when possible.
- Keep track of oxygen and reposition before firing in zero gravity.
- Move the Marker beneath the shuttle.
6. Load the Marker, restore gravity, and recall the shuttle
When the Marker reaches the loading position, finish the loading interaction to send it aboard the Executive Shuttle. Afterward, return to the Gravity Controls and restore gravity. Follow the locator toward the shuttle area. The story sequence includes communications involving Kyne, Kendra, and Nicole; after the shuttle leaves the immediate area, the objective changes and directs Isaac to Flight Deck Control.
Do not treat loading the Marker as the end of the chapter. Reach the Flight Deck Control Room and locate the Emergency Shuttle Recall Console. Interact with it to bring the shuttle back to the hangar. Combat can occur during the return route and around the control-room approach, so clear nearby enemies before using the console. The recall is a required story action, separate from loading the Marker and separate from boarding it.
- Complete the Marker-loading interaction.
- Restore gravity in Main Hangar.
- Follow the new objective to Flight Deck Control Room.
- Use the Emergency Shuttle Recall Console.
- Clear the control-room approach before interacting if enemies are present.
7. Complete Ishimura cleanup before boarding
After the shuttle has been recalled, return to the hangar and approach it only when you are ready to leave. The boarding prompt is the point of no return for Ishimura exploration. Before accepting departure, use the Tram, Mission menu, locator, Shops, Benches, and unlocked security-clearance rooms to finish the activities you want on this campaign. Complete remaining side-mission objectives, collect available schematics and logs, spend Power Nodes, sell unnecessary valuables, and organize your final weapon loadout.
Most Ishimura areas and their collectibles remain available during this late Chapter 11 cleanup, but Chapter 9’s USM Valor section is an exception. Items or events missed on the Valor cannot be recovered by returning to the ship in Chapter 11. Make a manual save before boarding so you can return to the pre-departure state if you remember an optional objective. The alternate-ending fragments must also be deposited before departure, so do not board while the New Game Plus fragment objective remains incomplete.
- Finish desired side missions and clearance-based exploration.
- Collect remaining available Ishimura items and schematics.
- Spend nodes and restock weapons, ammunition, and healing items.
- Remember that USM Valor content from Chapter 9 cannot be recovered.
- Make a manual save before boarding.
- Do not accept the shuttle departure prompt until cleanup is complete.
8. Deposit all twelve fragments for the alternate ending
The alternate ending is available only in New Game Plus after completing the campaign once. Collect all twelve Marker Fragments during the New Game Plus run. The Chapter 11 fragment is the one in Cargo Bay’s southeast shelves or walkway corner; the other fragments are distributed through earlier chapters and can be collected as you progress or during the late Ishimura cleanup when their areas are accessible.
After all twelve are in your inventory, travel to Crew Deck and enter Executive Quarters. Open the room identified as Captain B. Mathius’s office; the map labels this location Lt Commander V. Holt. Inside is a table with twelve pedestals. Interact with the table and place every Marker Fragment on the pedestals. Collecting all twelve without placing them does not activate the alternate route. Count the filled pedestals before leaving the room, then return to Chapter 11 and finish the shuttle sequence normally. Once the fragments have been deposited, completing Chapter 12 produces the remake’s alternate ending instead of the standard ending.
- Finish the original campaign and start New Game Plus.
- Collect all twelve Marker Fragments.
- Travel to Crew Deck → Executive Quarters.
- Enter Captain B. Mathius’s office, labeled Lt Commander V. Holt on the map.
- Place all twelve fragments on the twelve-pedestal table.
- Board the shuttle only after the table is complete.
- Finish Chapter 12 to see the alternate ending.
Before you move on
- The Marker has been moved through Cargo Bay and every required Bridge Control has been activated.
- Power has been routed to Cargo Rail Tracks or Cargo Rail Controls in Main Hangar.
- The Marker has been guided through the cargo rail system and loaded onto the Executive Shuttle.
- The Emergency Shuttle Recall Console in Flight Deck Control Room has been activated.
- Desired Ishimura exploration, side missions, upgrades, and shopping are complete, or a pre-departure save exists.
- The shuttle boarding transition has played and Chapter 12 has begun.
- For the alternate-ending route, the run is New Game Plus, all twelve fragments are collected, and all twelve are placed on the table in Captain B. Mathius’s office before boarding.
References for this chapter
- Dead Space Remake Chapter 11 Walkthrough
- Dead Space Remake Chapter 11: Alternate Solutions Collectibles Locations
- Dead Space Remake How to Get Alternative Ending
- Dead Space Remake All Marker Fragment Locations
- Dead Space Remake (2023) – Chapter 11: Alternate Solutions Walkthrough
- Dead Space Remake: Marker Fragment Locations and Alternate Ending Guide
Chapter 12 – Dead Space (Aegis VII)
Chapter 12 begins when the Executive Shuttle lands on Aegis VII with the Marker. Move it through the colony by restoring shutter power, lifting bridges, powering the West, Central, and East Generators, and using stasis to cross the zero-gravity fan passage. Destroy the flesh clusters and connected tendrils blocking the exterior route, then load the Marker onto its pedestal. After the story sequence, return through the Living Quarters for the final save, shop visit, and bench visit before entering the Hive Mind arena. Destroy its exposed face weak points, then the five chest weak points across separate openings, and finally the weak point inside its mouth. Reach the shuttle and allow the ending sequence to complete. The first campaign provides the standard ending and unlocks New Game Plus. The alternate ending requires a New Game Plus run, all 12 Marker Fragments, and placing them in Captain B. Mathius’s office in Executive Quarters, which is labeled Lt Commander V. Holt on the map, before leaving the Ishimura at the end of Chapter 11. Chapter 12 contains no Marker Fragment.
1. Land on Aegis VII and restore shutter power
Chapter 12 starts at the Aegis VII Landing Zone after the Executive Shuttle arrives. Before activating the Loader Controls, reload your weapons, heal, and organize your inventory. The Living Quarters contains a bench, store, save station, and supplies, making it the last convenient preparation area before the Marker route begins. Carry an accurate weapon for shooting yellow weak points and keep enough ammunition for both the final boss and the Necromorph waves during the Marker transport.
Activate the Loader Controls in front of the shuttle. The Marker begins moving but stops at a shutter that has no power. Follow the objective route into the Living Quarters and enter the Server Room. Pick up the battery inside, then deal with the two Infectors and the Slasher that attacks from behind as you leave. Carry the battery with Kinesis to the empty socket beside the Shutter Controls, insert it, and activate the controls. The shutter opens and the Marker can continue.
- Use the nearby save station, store, and bench before starting the transport.
- Activate the Loader Controls.
- Take the battery from the Server Room.
- Install it beside the Shutter Controls and activate the shutter.
2. Move the Marker through the interior route
Continue following the Marker rail. When the route stops, use the nearby consoles to raise bridges or open the next section, then return to the Marker and use Kinesis to pull or guide it forward. A quarantine lockdown occurs in one of the larger rooms. Clear the Necromorphs before trying to move the Marker again; advancing while enemies are active leaves you exposed while the interaction animation is running.
Use doorways and railings to control the approach angles. Cut legs or arms from standard Necromorphs, throw nearby objects with Kinesis, and use stasis on anything that reaches the rail. Prioritize Exploders before they get close to the Marker. Continue until the route reaches the unpowered junction guarded by two Guardians.
- Raise the bridges with their nearby consoles.
- Clear each quarantine wave before moving the Marker.
- Defeat both Guardians at the unpowered junction.
- Enter the generator area through the door between the Guardians.
3. Restore power with three generators
Take the elevator in the generator room to the lower level. Remove the battery from the elevator’s power socket. Two additional batteries are in the room. Carry all three with Kinesis and insert them into the West, Central, and East Generators. The generators must all be powered before the control console can be used.
Activate the console after installing the batteries. Gravity is disabled in the vertical machinery area and the fans begin turning. Float upward toward the exit. When a spinning fan blocks the route, use stasis on it immediately before passing through. Keep moving through the slowed opening instead of drifting beside the blades. At the upper level, follow the route back to the door and return to the Marker junction.
- Remove the elevator battery.
- Find the other two batteries in the generator room.
- Power the West, Central, and East Generators.
- Activate the console.
- Use stasis to pass every spinning fan safely.
4. Clear the final interior rail section
The return route triggers another quarantine fight, including a Brute. Keep moving around the room rather than fighting with your back against the Marker rail. Use stasis when the Brute closes in, then target its exposed limbs. Once the lockdown ends, continue until a flesh-covered room blocks the cargo rail.
The tendril across the rail is connected to flesh clusters elsewhere in the room. Do not waste ammunition shooting the tendril itself. Find and destroy the lower cluster to reveal the ramp upstairs. Go up the ramp, defeat the Slashers and Divider, then locate and destroy the upper cluster connected to the rail obstruction. The tendril retracts and the Marker can proceed toward the exterior.
- Survive the quarantine wave.
- Defeat the Brute by targeting its limbs.
- Destroy the lower flesh cluster to open the upstairs route.
- Destroy the upper cluster connected to the cargo rail.
5. Clear the exterior and load the Marker
Follow the exterior objective route around the excavation area. Several tendrils block the path, and each is linked to a flesh cluster that must be destroyed. Work on one cluster at a time. Destroying one can release Necromorphs, so finish the resulting fight before damaging the next cluster. Use explosive objects and stasis when they are available, but avoid standing beside an explosive object when a wave begins.
Tentacles attack across the open route. Shoot their exposed yellow sections when they appear, then reposition before the next attack. After the clusters and tentacles are cleared, return to the Marker and activate the loader. Necromorphs attack while it moves toward the pedestal. You can fight them or use environmental hazards to create space, but the pedestal interaction completes this section and removes the immediate Marker objective.
- Destroy every flesh cluster blocking the exterior route.
- Shoot the yellow weak sections of the attacking tentacles.
- Activate the loader and place the Marker on its pedestal.
6. Reactivate the tethers and make final preparations
After the Marker reaches the pedestal, follow the objective to the Gravity Tether Control Room and activate the controls. The room locks down during the story sequence. When control returns to Isaac, use the indicated door and follow the route back toward the Living Quarters and shuttle area.
The Living Quarters is the final normal preparation point. Save, heal, restock ammunition, and spend remaining power nodes at the bench. Upgrade the weapon you use most comfortably against exposed weak points, but keep a weapon suitable for groups because Slashers appear during the Hive Mind encounter. Once you leave for the exterior arena, you cannot return to the Ishimura for more supplies.
- Activate the controls in the Gravity Tether Control Room.
- Return to the Living Quarters.
- Save, heal, restock, and spend useful power nodes.
- Leave only when your boss inventory is ready.
7. Defeat the Hive Mind
The Hive Mind first exposes five yellow weak points around its face. Strafe continuously while aiming and fire when the openings are visible. Its tentacle slams are telegraphed, so lateral movement is safer than standing in the middle of the arena. When the face weak points are destroyed, Slashers enter the arena. Defeat them or use stasis to create enough space for the next phase.
The Hive Mind then opens its chest and exposes five yellow weak points across separate openings. Damage the weak point shown during each opening, then prepare for another tentacle attack. Acid lines restrict parts of the arena during this phase. Do not cross the acid; move through the remaining clear area and continue strafing. Use stasis on a close Necromorph only when it threatens to interrupt your aim at an exposed chest weak point.
After the five chest weak points are destroyed, the Hive Mind grabs Isaac and pulls him toward its mouth. Aim immediately at the final yellow weak point inside the maw and fire until it breaks free. This final target ends the fight. If ammunition is limited, favor accurate shots over continuous fire and use explosive objects against summoned enemies when it is safe to do so.
- Destroy the five exposed face weak points.
- Control or defeat the summoned Slashers.
- Destroy all five chest weak points during their separate openings.
- Avoid tentacle slams and acid lines.
- Shoot the final weak point inside the Hive Mind’s mouth.
8. Reach the shuttle and finish the campaign
After the Hive Mind dies, follow the objective route through the colony to the shuttle. This is an escape sequence rather than an opportunity to explore. Move through the marked doors and ramps, use quick dismemberment or stasis if a Necromorph blocks the route, and avoid optional detours. Continue until Isaac reaches the shuttle and the ending sequence begins.
Allow the ending sequence and credits to run until the campaign completion registers. The completed save unlocks New Game Plus. The standard ending is available on the first campaign and does not require Marker Fragments.
- Follow the marked escape route after defeating the Hive Mind.
- Reach the shuttle.
- Allow the ending and campaign completion to register.
- Confirm that New Game Plus is available from the completed save.
9. Set up the alternate ending in New Game Plus
Begin New Game Plus after completing the first campaign. The new run contains 12 Marker Fragments: one in Chapters 1, 2, 3, 4, 6, 7, 8, and 11, and two in Chapters 5 and 10. Chapters 9 and 12 contain no Marker Fragments. Collect all 12 before leaving the Ishimura. The final practical opportunity is in Chapter 11, before the point of no return that begins the Aegis VII descent.
After collecting the last fragment in Chapter 11, travel to Crew Deck and enter Executive Quarters. The relevant room is Captain B. Mathius’s office, but the map labels it Lt Commander V. Holt’s quarters. Interact with the shrine table and place all 12 fragments on the available spaces around the larger Marker. Verify that every space is filled before proceeding. Do not start Chapter 12 until this has been done; Chapter 12 contains no fragment and does not provide another route back to the Ishimura.
Complete Chapter 12 normally after activating the shrine: transport the Marker, restore the tethers, defeat the Hive Mind, and reach the shuttle. The alternate ending plays after the final sequence when all 12 fragments were collected in New Game Plus and placed at the shrine before leaving the Ishimura.
- Use New Game Plus rather than the first campaign.
- Collect all 12 Marker Fragments.
- Place them in Captain B. Mathius’s office in Executive Quarters, labeled Lt Commander V. Holt on the map.
- Complete this shrine interaction before starting Chapter 12.
- Finish Chapter 12 and confirm that the alternate ending plays.
Before you move on
- The Marker is placed on its pedestal at Aegis VII.
- The Hive Mind is defeated.
- Isaac reaches the Executive Shuttle.
- The standard ending sequence completes and the campaign registers as finished.
- New Game Plus is available from the completed save.
- For the alternate ending, all 12 Marker Fragments were collected in New Game Plus and placed in Captain B. Mathius’s office, labeled Lt Commander V. Holt’s quarters, before starting Chapter 12.
- The second completion ends with the alternate sequence rather than only the standard ending.
Finishing up
Complete all 12 main chapters and reach the standard ending sequence in Chapter 12: Dead Space.
Optional side missions, clearance-based exploration, weapon and suit upgrades, and ordinary collectibles can be completed before the Chapter 11 shuttle departure point of no return; the USM Valor remains an earlier one-time area.
For the alternate ending, finish the first campaign, start New Game Plus, collect all 12 Marker Fragments, and place them on the 12-pedestal table in Captain B. Mathius’s office in Executive Quarters, labeled Lt Commander V. Holt on the map. Then finish Chapters 11 and 12.
New Game Plus provides the new Marker Fragments and carries over the game’s documented NG+ rewards and prior collectible context; do not describe every save file or every shop state as carrying over.
A complete 100% collectible checklist is outside this walkthrough’s scope unless the chapter repairs add the exact ordinary collectible route. Use the listed supporting collectible references only as supplemental resources.
Choose your next gameScreenshots & video
Game imagery for reference. Follow the written chapters above for the route and strategies.
Sources & references
Our original guide draws on the references below. Check the edition at the top of this page before following controls or unlock requirements.
- Dead Space Remake Chapter 1: New Arrivals Collectibles Locations
- Dead Space Remake Chapter 1 Walkthrough - VULKK
- Where to Find the Data Board - Chapter 1 - New Arrivals - Walkthrough
- Dead Space Marker Fragments: Locations and secret ending guide
- Dead Space Remake Chapter 1 Logs: All Locations
- Dead Space Remake Chapter 2: Intensive Care Collectibles Locations
- Dead Space Remake Chapter 2 Walkthrough
- Chapter 2: Intensive Care Walkthrough | Dead Space Remake
- Dead Space Remake Marker Fragments
- Dead Space Control Settings for PS5
- Dead Space Remake Chapter 3 Walkthrough
- Dead Space Remake: Course Correction
- Dead Space Remake Chapter 3: Course Correction Collectibles Locations
- Dead Space Marker Fragment locations: How to get the secret ending
- Dead Space Remake All Weapon Upgrade Locations
- Dead Space Remake (2023) - Chapter 4: Obliteration Imminent Walkthrough
- Dead Space Remake All Marker Fragment Locations
- Dead Space Remake Collectibles Guide
- Dead Space Remake Chapter 4 Walkthrough
- Dead Space Remake: Obliteration Imminent
- Chapter 4: Obliteration Imminent Walkthrough | Dead Space Remake
- Dead Space Remake Chapter 5 Walkthrough - VULKK
- Dead Space Remake Chapter 5: Lethal Devotion Collectibles Locations
- Dead Space Remake: Premeditated Malpractice - gamepressure.com
- Dead Space Remake Chapter 5 Walkthrough
- Dead Space Remake: Environmental Hazard Walkthrough, Gamepressure
- Dead Space Remake Chapter 6: Environmental Hazard Collectibles Locations, PowerPyx
- How to Defeat the Leviathan Boss in Dead Space Remake, Gamer Guides
- Dead Space Remake Chapter 6 Walkthrough, VULKK
- Dead Space Remake: Into the Void - Gamepressure Walkthrough
- Dead Space Remake Chapter 7: Into the Void Collectibles Locations - PowerPyx
- Dead Space Remake Chapter 7 Walkthrough - VULKK
- Dead Space Remake Chapter 8 Walkthrough – VULKK
- Dead Space Remake Chapter 8: Search and Rescue Collectibles Locations – PowerPyx
- Dead Space Remake (2023) - Chapter 8: Search and Rescue Walkthrough – Neoseeker
- Dead Space Remake: How to Beat the Leviathan Remnant with the ADS Cannons in Chapter 8 – Attack of the Fanboy
- How to Fix the Comms Array in Dead Space Remake – Prima Games
- Dead Space Remake Chapter 9: Dead on Arrival Collectibles Locations
- Dead Space Remake Chapter 9 Walkthrough
- Dead Space Remake Trophy Guide & Roadmap
- Power Nodes – Chapter 9
- Dead Space Remake: Chapter 9 (Dead on Arrival) - list of secrets
- Twitcher | Dead Space Wiki
- All Marker Fragment Locations in Dead Space Remake: How to Get Secret Ending
- Dead Space Remake Chapter 10 Walkthrough
- Dead Space Remake: End of Days
- How to Kill The Hunter in Dead Space Remake - Chapter 10 - End of Days - Walkthrough
- Dead Space Remake Chapter 11 Walkthrough
- Dead Space Remake Chapter 11: Alternate Solutions Collectibles Locations
- Dead Space Remake How to Get Alternative Ending
- Dead Space Remake (2023) – Chapter 11: Alternate Solutions Walkthrough
- Dead Space Remake: Marker Fragment Locations and Alternate Ending Guide
- Dead Space Remake Chapter 12 Walkthrough
- Dead Space Remake Chapter 12: Dead Space Collectibles Locations
About the game & collecting notes
- Platform
- Sony PlayStation 5
Step-by-step campaign walkthrough for the Dead Space PS5 remake by Motive Studios. Covers every main-chapter objective, essential routes, boss strategies, zero‑G sequences, optional side missions, upgrade / shop guidance and how to reach both the standard ending and the remake’s alternate New Game+ ending. Designed for PS5 controls and DualSense features.
Darryl Polo
Darryl Polo writes about emulation and retro games. What changes when an old favorite moves to another setup? That question connects his interest in tinkering with the games that made the hardware worth keeping.
Our editorial standardsFound a step that needs another look? Help us improve this guide.