
Crash Bandicoot 4: It's About Time — Complete Campaign Walkthrough (Windows)
Step-by-step Windows walkthrough for the required 34-stage story route: 29 Main Path levels and 5 Boss levels, ending with The Past Unmasked and the campaign credits. The 9 Timeline levels, 21 Flashback Levels, N. Verted stages, gems and relics are optional follow-up content unless separately pursued.


Find a copy
Crash Bandicoot 4: It's About Time Windows
We may earn a commission if you buy through these links, at no extra cost to you. As an Amazon Associate I earn from qualifying purchases.
Opens retailer search results. Check the model, edition, seller, availability and current price before buying.
Before you begin
This guide is written for the Windows edition of Crash Bandicoot 4: It's About Time, covering the Battle.net PC release and the later Steam release.
It focuses on completing the required story route: 29 Main Path levels and 5 Boss levels, ending with The Past Unmasked and the campaign credits.
The walkthrough gives practical directions for required level progression, Quantum Mask use, boss encounters, checkpoint recovery and safe first clears.
You do not need to collect every gem, Flashback Tape, relic or Timeline level to reach the normal ending.
The 9 Timeline levels, 21 Flashback Levels, N. Verted versions, colored gems, Clear Gems and Time Trial relics are optional completion targets covered as follow-up content.
Use the postgame chapters for broader completion goals after the normal story ending is secured.
Set yourself up for the run
Update your Windows installation and test the jump, slide, spin and mask inputs in the opening level before committing to longer sessions.
Choose a controller or keyboard layout you can use comfortably, and keep your bindings consistent while learning difficult sections.
Use a stable frame rate and adjust graphics settings if stuttering makes jumps difficult to judge.
For your first playthrough, focus on reaching the normal ending. Save optional collectible and relic attempts for separate runs.
Practice each Quantum Mask as it is introduced. Its effect applies to the designated sections where the level supplies it.
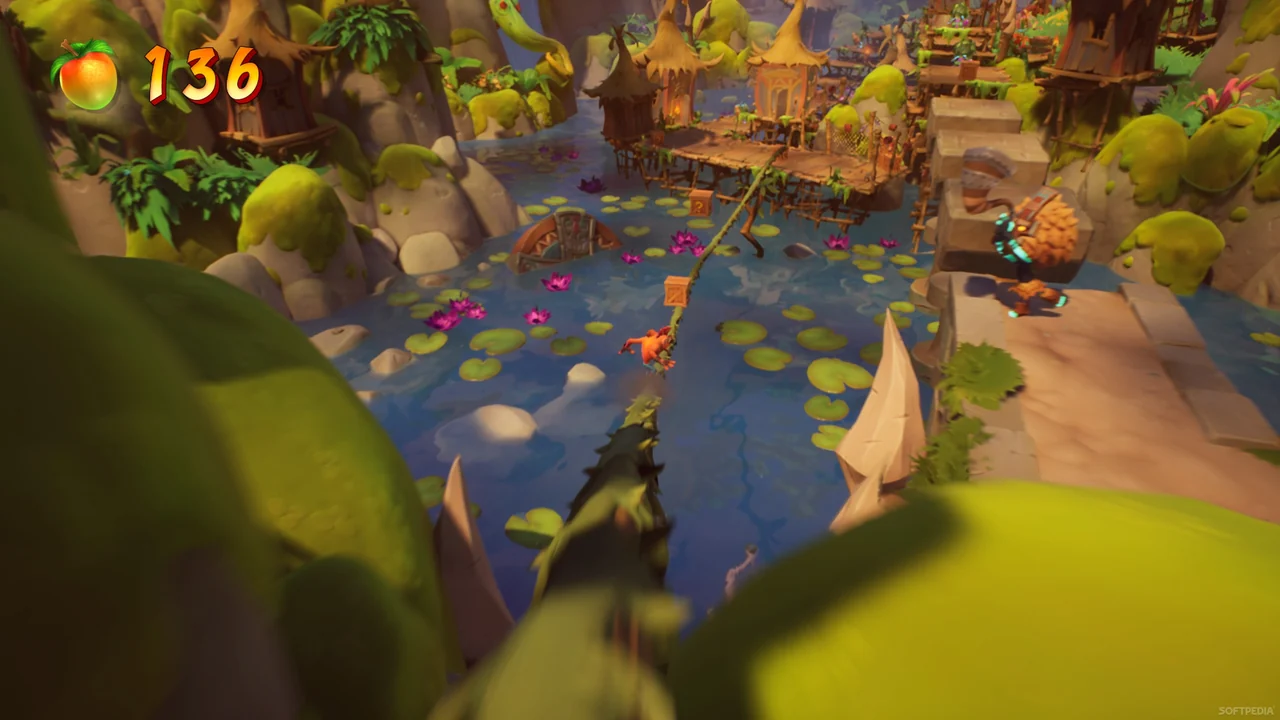
Windows edition checklist and PC setup
Prepare the correct Windows installation of Crash Bandicoot 4: It’s About Time, compare your PC with the published requirements, confirm reliable controller or keyboard input, and stabilize display settings before beginning serious progress. The ordinary campaign requires 29 Main Path levels and 5 boss levels, for 34 core stages. The 9 Timeline levels are optional alternate-character stages and are not required to reach the normal ending. Use Rude Awakening to verify ordinary movement, then test Quantum Mask input only after the game introduces a mask.
Identify the storefront and update the correct installation
Crash Bandicoot 4: It’s About Time first released on Windows through Battle.net on March 26, 2021. The Steam edition followed on October 18, 2022. Check which storefront owns the copy you intend to play, then launch that installation through Battle.net or Steam rather than relying on an old desktop shortcut that might point to a different copy.
Open the appropriate launcher and allow it to complete its update check before troubleshooting performance or controls. Activision’s PC support information warns that mandatory updates may be required, and the Steam listing repeats that requirement. If the launcher shows an update, install it and restart the game before evaluating input response or frame pacing. There is no need to identify a particular patch number for this setup step; the launcher’s own update status is the relevant check for the installed build.
The campaign structure is the same basic progression target for either Windows storefront. The required route consists of 29 Main Path levels and 5 boss levels, totaling 34 core stages. The 9 Timeline levels are alternate-character side stages that appear as additional content after certain Main Path levels. They can be played later, but they are not required for the ordinary ending. Flashback levels, N. Verted stages, gems and relics are also optional for this chapter’s campaign goal.
- Confirm whether the game is installed through Battle.net or Steam.
- Launch the game from the matching storefront client.
- Allow all available mandatory updates to finish before testing performance.
- Track 34 core stages as the normal-ending requirement, not all 43 non-Flashback stages.
- Treat Timeline, Flashback, N. Verted, gem and relic objectives as optional until the campaign is complete.
Compare the computer with the published Windows requirements
Activision lists Windows 10, an Intel Core i3-4340 or AMD FX-6300 processor, 8 GB of RAM, an Nvidia GTX 660 or AMD Radeon HD 7950 graphics card, 30 GB of storage and a broadband internet connection as the minimum desktop specification. Mouse and keyboard or a supported controller are listed as input options. Activision also notes that ARM64 installation is not recommended and that laptop graphics hardware can use different models from the desktop cards named in the requirements.
The recommended specification raises the processor to an Intel Core i5-2500K or AMD Ryzen 5 1600X, memory to 16 GB and graphics to an Nvidia GTX 970 or AMD R9 390. Activision lists a controller with vibration feedback as the recommended input method. The Steam listing adds the requirement for a 64-bit processor and operating system while repeating Windows 10, 30 GB of available storage and the same processor, memory and graphics targets.
Check your operating system, processor, graphics card, memory and free disk space before starting a long campaign session. Keep extra storage available beyond the stated 30 GB so the launcher can download updates and use temporary files. An SSD can reduce loading delays, but it is not listed as a minimum or recommended requirement. If the game stutters or renders incorrectly, update the graphics driver and retest before changing several in-game settings at once.
- Verify Windows 10 and 64-bit support.
- Compare the CPU, GPU and RAM with both minimum and recommended specifications.
- Keep more free space than the listed 30 GB requirement.
- Use current graphics and audio drivers when diagnosing crashes, rendering faults or hitching.
- Do not treat the recommended specification as a guarantee of identical performance in every scene.
Connect and verify the controller or keyboard
A wired or dependable wireless controller is the safest starting point for precision platforming. Activision specifically lists a controller with vibration feedback in the recommended specification. Keyboard and mouse are supported, but use whichever device produces consistent jump, spin and directional inputs rather than changing layouts repeatedly during a difficult level.
Before launching a stage, disconnect unused controllers, racing wheels and virtual-input devices. Multiple active devices can make it unclear which profile is receiving input. If you use a wireless controller, confirm that its battery, receiver or Bluetooth connection is stable. On Steam, also check that the controller configuration is not translating one physical button into multiple game actions. On Battle.net, use the game’s own control options and the operating system’s device test if an input is missing.
Test the controls in a safe part of Rude Awakening. Move left and right, stop without sliding, jump several times, and spin a nearby crate or enemy deliberately. Confirm that jump and spin are separate actions and that the character does not continue moving after you release the direction. Test slide or crouch when the current character section makes that action available. Do not interpret the absence of a Quantum Mask action in Rude Awakening as a controller fault; the mask abilities are introduced later in the campaign.
- Confirm that only the intended controller or keyboard profile is active.
- Test left, right, forward and backward movement.
- Verify jump and spin as separate repeatable inputs.
- Test slide or crouch after the move becomes available to the current character.
- Disconnect unused controllers, wheels and virtual-input utilities during diagnosis.
- Wait for the first mask tutorial before testing Quantum Mask input.
Choose stable resolution, synchronization and frame-rate settings
Begin at the monitor’s native resolution and use the game’s normal display mode. The Battle.net PC announcement describes support for 4K resolution and an uncapped frame rate, but uncapped output is useful only when the computer can deliver it smoothly. If the frame rate rises and falls sharply, use a limit that the system can hold consistently. Stable frame delivery is more helpful for repeated jumps than a higher number that fluctuates during camera movement or effects-heavy sections.
Compare V-Sync enabled and disabled if you see tearing or the controls feel delayed. V-Sync can improve presentation while adding latency on some systems, so test both options in the same short section rather than judging them from separate levels. Keep the setting that provides predictable response and acceptable image quality on your display.
Change one setting at a time. First repeat a short movement and jump sequence, then alter resolution, frame limit, V-Sync or a graphics option individually. Close unnecessary overlays and background applications if they cause focus loss, hitching or delayed input. Do not change the control layout and several graphics settings together, because you will not know which change affected the result.
- Start at native monitor resolution.
- Use a frame cap if uncapped output fluctuates noticeably.
- Compare V-Sync on and off when tearing or latency is a problem.
- Close overlays and background programs that interfere with focus or frame delivery.
- Change one display or performance setting at a time and repeat the same test section.
Perform the Rude Awakening calibration run
Start Rude Awakening as a control and display test, not as a collectible sweep. In the opening section, move in both directions, stop cleanly, perform several ordinary jumps and spin a nearby crate or enemy. Repeat a short sequence after reaching a checkpoint or restarting. The purpose is to confirm that movement begins and stops predictably, the jump registers immediately and the camera remains readable while you make small directional corrections.
If a jump feels late or the character appears to respond inconsistently, pause the campaign and check the controller connection, active device profile, frame delivery and whether another application has taken focus. Make one adjustment, then repeat the same movement test. Do not compensate for delayed input by radically changing the control layout before checking the technical cause.
When a Quantum Mask is introduced later in the campaign, stop in a safe area and test its assigned action separately. Confirm that the mask activates when intended, that ordinary movement resumes correctly afterward and that no other button is being triggered at the same time. Recheck this input after changing controller hardware, storefront installation, frame-rate behavior or display mode.
- Reach an early Rude Awakening checkpoint without unexplained missed inputs.
- Break a nearby crate with one deliberate spin.
- Repeat a short jump sequence after restarting or retrying.
- Confirm that movement and camera response remain predictable.
- Test the first Quantum Mask only after its tutorial introduction.
- Begin serious campaign progress only after the calibration checks feel consistent.
Before you move on
- The intended Battle.net or Steam installation launches from its matching client with no pending mandatory update.
- The computer has been compared with Activision’s published Windows requirements and has sufficient free space for the game and updates.
- The player understands that 34 core stages are required for the ordinary ending and that the 9 Timeline stages are optional.
- The selected controller or keyboard profile responds correctly to movement, jump and spin.
- Slide or crouch has been tested after becoming available to the current character.
- Rude Awakening has been used to repeat basic movement and jumping without unexplained missed inputs.
- The first Quantum Mask action has been tested after the game introduces that mask.
- The chosen resolution, frame-rate behavior and V-Sync setting provide predictable response.
References for this chapter
- Minimum and Recommended System Requirements for Crash Bandicoot 4: It's About Time
- Crash Bandicoot 4: It’s About Time — Available now on Battle.net, Activision
- Crash Bandicoot 4: It's About Time on Steam
- Dimensions and Level Types in Crash Bandicoot 4, Activision Support
- Crash Bandicoot 4: It’s About Time, Bandipedia
- How Many Levels Does Crash Bandicoot 4 Have? Levels List, PowerPyx
Controls, core mechanics and camera habits
Crash Bandicoot 4: It’s About Time uses a small set of movement actions, but the order and timing of those actions determine whether a difficult landing succeeds. Learn ordinary jumps first, then add the double jump, crouch, slide, slam and spin as deliberate tools. A controller is a strong choice for the Windows edition because movement and camera control can be handled independently, but keyboard and mouse input are supported. Before learning a difficult route, confirm every binding, enable Enhanced Shadows if depth is hard to judge, and keep the same layout during story, Flashback Tape and relic attempts.
Confirm the Windows controls before starting a serious run
The Windows edition supports mouse and keyboard input as well as a supported controller. Activision lists a controller with vibration feedback in its recommended input setup, but the best choice is the device that gives you reliable, repeatable jump and movement inputs. A controller is usually easier for 3D platforming because the left stick handles movement while the right stick handles the camera. Keyboard players can still complete the game, provided the bindings feel comfortable and remain consistent.
Open Options, then Controls, and verify the actions for Move, Jump, Primary Action, Secondary Action, Mask Power and camera movement. Do not rely on a remembered PlayStation or Xbox layout: the Windows prompts and any launcher or controller profile may differ. Reassign a button before practicing rather than changing it after you have learned a route. Activision confirms that controller actions can be customized, including movement, jump, primary action, secondary action, mask power and the HUD command.
Use the opening portion of Rude Awakening as an input test. Walk in each direction, stop without drifting, jump, double jump, spin, crouch, slide while moving, and perform a ground slam after jumping. Move the camera with the right stick or its keyboard equivalent. If the character continues walking after you release the input, or the camera moves when you do not expect it, fix the profile before attempting a difficult sequence.
- Confirm Move, Jump, Primary Action, Secondary Action and Mask Power.
- Test both movement and camera input in Rude Awakening.
- Check for stick drift or a key that fails to register.
- Use one control layout for an entire practice session.
- Enable Enhanced Shadows if judging depth or landing position is difficult.
Use the ordinary jump and double jump as separate tools
The ordinary jump is the default choice for gaps, low crates and routine platform changes. Begin by aiming Crash or Coco toward the destination, then use small directional corrections while airborne. The character’s pronounced shadow can help show the projected landing position; use it to place the character over the platform rather than steering only by the character’s body.
The double jump is available while airborne. It can add height, distance or a final correction, but it should not be pressed automatically on every jump. Start the first jump, observe the target and then decide whether the second jump is necessary. On a short gap, saving the second jump may give you a recovery option if the first arc is misaligned. On a long gap or a higher platform, use the double jump when the first jump will not reach the target.
For a narrow landing, reduce directional input as you approach the platform. Holding the stick toward the destination throughout the entire arc can carry Crash or Coco beyond the safe surface. If you are overshooting, release or reduce the direction earlier. If you are falling short, keep the first jump’s direction longer or add the double jump after confirming that the target remains ahead.
- Clear a short gap with an ordinary jump only.
- Repeat it while deliberately saving the double jump until the descent.
- Use the second jump to correct one missed alignment rather than pressing it reflexively.
- Reduce directional input before landing on a narrow platform.
Learn crouch, slide, slam and spin separately
The secondary action crouches while standing and starts a slide while running. Use crouch to pass beneath low hazards and to set up a higher jump from a stationary position. While moving, slide under low obstacles or attack suitable ground-level enemies. A slide can be followed by a jump near the end of the movement, creating the slide-jump technique used by many longer gaps and elevated crate routes. The slide does not replace careful aiming: begin it on solid ground, keep the destination visible and press jump when the slide has carried you into the correct launch position.
A slide jump is especially useful when a normal running jump is just short of a ledge or elevated box. If the destination is still beyond reach, use the double jump after the slide-jump launch. If the target is close, do not spend the double jump without need. The safest sequence is slide, jump near the end of the slide, assess the arc, then double jump only if the remaining height or distance demands it.
The primary action is the spin. Use it to break ordinary crates and defeat enemies that can be hit by a standard spin. Spin from a safe position rather than holding it beside a pit or platform edge. A spin is an attack, not a substitute for a jump, and using it at the wrong moment can interfere with steering or hide the landing point.
After jumping, the secondary action performs a ground slam. Use it for crates or targets directly below Crash or Coco, including strong crates that cannot be broken by a normal spin. Do not press the slam while trying to preserve an airborne route; it commits the character downward and may remove the opportunity to correct toward the next platform.
- Crouch beneath a low obstacle without jumping.
- Perform a moving slide and then jump near its end.
- Add the double jump only after the slide jump needs more height or distance.
- Use spin against an ordinary enemy from a safe landing area.
- Use ground slam only when the target below is the intended destination.
Protect your position on moving platforms and rails
Moving platforms reward small corrections. Step onto the center of the platform when possible, then face the next landing before the platform reaches its launch position. Avoid large last-second stick movements; they often turn a successful landing into a slide off the far edge. If the target is above, use an ordinary jump and reserve the double jump for the final height adjustment. If the target is below, release forward input before landing so Crash or Coco does not run beyond the platform.
On rotating or shifting platforms, wait for the destination to become clearly exposed. A jump made at the first possible moment may have less landing space than a jump made after the platform completes part of its movement. Watch the shadow and the platform edge together: the shadow shows where the character is descending, while the edge shows how much surface will remain when the character arrives.
Rail sections are forward-moving sequences, so make corrections earlier than you would in a stationary room. Look ahead for switches, gaps, crates and hazards. Use small lateral inputs to line up with the next safe section, and do not spin randomly while grinding. A spin should be reserved for an actual target or an interaction that requires it. If a rail death repeats, identify whether the failure came from late steering, a missed transfer or a jump made without the next rail in view.
- Stand near the middle of a moving platform before preparing the next jump.
- Face the next landing before leaving the platform.
- Use small corrections on rotating platforms and rails.
- Look beyond the immediate obstacle to identify the next safe surface.
- After a rail death, identify the exact failed transfer before retrying.
Use the camera and shadow to prepare each landing
The right stick controls the camera on a controller, with the corresponding camera command available through the Windows control setup. In open areas, turn the camera toward the next platform before jumping. In narrow corridors or chase sections, make brief nudges rather than constantly rotating the view. Excessive camera movement can hide the platform edge and make the character’s forward direction harder to judge.
When the game takes control of the camera during a chase or rail sequence, allow the view to settle before making a large steering change. Keep Crash or Coco near the center of the screen where possible. If scenery blocks the destination, stop at the next safe surface, make a small camera adjustment and identify the landing before moving again.
Enhanced Shadows are especially useful in 3D sections where the platform appears separated from the character by perspective. The pronounced circle beneath Crash or Coco gives a clearer indication of the landing point. Line that circle up with the usable part of the platform, not merely with its visible front edge. This is useful for ordinary jumps, slide jumps and moving-platform landings.
Mouse input should not be treated as a cursor that directly aims a jump. The character still moves according to the movement controls and the camera’s orientation. Use the mouse only if its assigned camera or action behavior feels precise; otherwise use a controller or remap the controls before practicing.
- Center the camera on the destination before committing to a blind jump.
- Use short camera nudges in corridors and chase sections.
- Let scripted camera movement settle before making a major correction.
- Use Enhanced Shadows to line up the landing point.
- Do not change camera or action bindings during a practiced attempt.
Create a repeatable practice routine
Practice a route in layers. First clear it with ordinary jumps and no collectibles. Next repeat it while identifying where the double jump is genuinely needed. Then add the slide-jump sequence, spin attacks and ground slams only where the route requires them. This prevents every action from becoming a panic input and makes it easier to diagnose a death.
If you die, name the failed action before restarting. A short landing means the first jump direction or the timing of the double jump must change. An overshoot means you held direction too long or jumped from the wrong position. A death beside a moving platform may indicate that you made a late correction rather than waiting for a better cycle. A camera-related death means the view should be adjusted from the previous safe platform.
Use the same control layout and display settings for story runs, Flashback Tape attempts and Time Trials. The goal is not to make every attempt fast immediately; it is to make the same input produce the same result. Once a short sequence is reliable, connect it to the next checkpoint and continue extending the practiced route.
- Clear a short route without collectibles or risky detours.
- Repeat it using only the actions the route actually requires.
- After each death, identify one specific input or setup error.
- Keep controls, camera behavior and Enhanced Shadows unchanged while practicing.
- Connect practiced sections from one checkpoint to the next.
Before you move on
- You can clear a short gap with an ordinary jump and use the double jump only when the first arc needs correction or extension.
- You can perform a slide, jump near the end of it and add a double jump only when the destination requires more height or distance.
- You can crouch beneath a low hazard, slide under a ground-level obstacle and use ground slam on a target below.
- You can defeat a basic enemy with a controlled spin without drifting toward a platform edge.
- You can land on a moving platform using small corrections and wait for a favorable movement cycle.
- You can use the camera to reveal a destination while keeping Crash or Coco aligned with the usable landing area.
- You can complete a short rail section by making early, small lateral corrections and identifying the next transfer before it arrives.
References for this chapter
- Minimum and Recommended System Requirements for Crash Bandicoot 4: It's About Time
- Crash Bandicoot 4: It’s About Time Accessibility
- Crash Bandicoot 4: It’s About Time – Official Steam Guide
- Exploring the familiar yet evolved platforming of Crash Bandicoot 4: It’s About Time – PlayStation.Blog
- Controls for Crash Bandicoot 4: It’s About Time
- Crash Bandicoot 4: It’s About Time Guide: Tips, Tricks, and All Collectibles
Quantum Masks: mechanics and first encounters
The four Quantum Masks are required story tools in the original Crash Bandicoot 4: It’s About Time campaign. Each mask appears in specific level sections and grants one ability that solves the obstacles immediately around it. They are not permanent equipment and are not general protection like Aku Aku. Learn the intended use of each power during the story before attempting Flashback Tapes or Time Trials, where hesitation and late activation are heavily punished.
Meet Lani-Loli in N. Sanity Peak
Lani-Loli is the first Quantum Mask and appears near the top of N. Sanity Peak, the second main story level. The level introduces the mechanic through objects marked by a blue, sparkling aura. These objects can be shifted between existing and non-existing states when Lani-Loli’s power is activated.
Use the power before committing to a jump. If a blue-aura platform blocks your route, phase it out so you can pass through its space. If the next landing platform is absent, phase it back in before you reach the landing point. The same principle applies to crates, barriers and hazards: do not activate the mask simply because it is available; first decide whether the next obstacle must exist or disappear.
The required route is the priority on your first clear. Ignore the optional gem path until you can complete the mask section without stopping to reconsider each platform. A checkpoint gives you a safe place to repeat the sequence and build the timing needed for later levels.
- Look for the blue aura that identifies objects affected by Lani-Loli.
- Choose the required state before activating the mask.
- Treat the N. Sanity Peak section as movement practice, not a collectible run.
Use Lani-Loli for controlled transitions
Later Lani-Loli sections combine phaseable objects with enemies, lasers and moving platforms. Read the next landing before switching states. Removing one obstacle can expose a gap, while restoring a platform too early can place it directly in your path or interrupt your jump.
Lani-Loli does not make Crash or Coco invulnerable. Ordinary enemies, missed jumps and non-phaseable hazards can still cause a death. When the level provides a stable platform, use it to stop, inspect the next sequence and activate the mask from a controlled position rather than changing the state while already airborne.
- Identify the next safe landing before changing an object.
- Do not assume every hazard can be phased away.
- Use checkpoint retries to isolate one transition at a time.
Obtain Akano through Give It a Spin
Akano is the purple Dark Matter Mask. The story grants access to Akano after the Jetboard Jetty progression, with the mask obtained in Give It a Spin. This is the first point where the campaign teaches the Dark Matter Spin, so the draft’s earlier association with an N. Brio section should not be used as the progression marker.
When Akano is active, the normal spin becomes a sustained Dark Matter Spin. Use it to extend horizontal jumps, glide across gaps and deflect certain green magical projectiles. Begin with a jump toward a visible landing, then activate or maintain the spin while steering toward that landing. The ability improves distance and air control, but it does not automatically correct an approach that is too high, too low or aimed at the wrong platform.
The Dark Matter Spin can destroy crates and other objects in its path, including dangerous explosive crates. Do not spin blindly through TNT or Nitro when the route requires you to preserve the crate or land nearby. In combat, deflect projectiles only when the attack is clearly aimed at you; otherwise, use the power primarily for safe traversal.
- Practice the glide toward a visible landing before searching for optional crates.
- Keep steering during the Dark Matter Spin; distance alone is not enough.
- Avoid uncontrolled spins near TNT, Nitro and narrow platforms.
Receive Kupuna-Wa after Run It Bayou
Kupuna-Wa is the yellow Time Mask and becomes available after completing Run It Bayou. Her power slows the surrounding world while Crash or Coco continues moving. Use it for falling platforms, rapidly moving hazards, timed blocks and other sequences whose normal timing leaves too little room for a jump.
Activate Kupuna-Wa shortly before the obstacle enters its dangerous movement, then use the extra reaction time to make deliberate jumps. The slowdown is temporary and does not freeze the entire level permanently, so plan for one defined sequence and aim to reach stable ground before normal speed returns.
A major story mechanic is that slowed Nitro crates can be bounced on safely. This does not make Nitro harmless in every situation: the slowdown must be active, and touching or landing on Nitro outside the intended slowed interaction can still be fatal. Use the mask from a stable position, watch the remaining duration and do not begin a long route unless the next checkpoint or platform is within reach.
- Activate the mask before, not after, the hazard reaches its dangerous position.
- Use the slowdown for one planned obstacle sequence.
- Remember that slowed Nitro can be used as a temporary platform.
Meet Ika-Ika after Dino Dash
Ika-Ika is the green Gravity Mask and the last of the four masks introduced in the campaign. The story encounter follows Dino Dash and leads into the space-station levels, including Out for Launch. Ika-Ika reverses gravity rather than creating a general free-floating state, allowing Crash or Coco to run along the ceiling and use the opposite surface as the route.
Before activating Ika-Ika, identify which surface becomes the next floor and check it for Nitro, lasers or other instant-death hazards. A gravity reversal changes where Crash or Coco lands, but it does not remove the danger on that surface. Use short, controlled movements after each reversal and avoid making another switch beside a hazard unless the level clearly requires it.
The later levels build sequences by combining gravity with the other masks. Ika-Ika determines the surface you travel on, Lani-Loli changes whether marked objects exist, Kupuna-Wa changes the speed of moving hazards and Akano provides extended Dark Matter movement. Solve the current obstacle with the correct mask instead of activating masks reflexively.
- Read the destination surface before reversing gravity.
- Check the ceiling for Nitro and lasers before landing there.
- Use small corrections after every gravity change.
Practice before Flashback Tapes and Time Trials
Quantum Masks appear in fixed sections and are supplied by the level when their powers are required. You cannot carry one through unrelated areas to bypass the campaign route. Treat each pickup as a short lesson: identify the power, clear the immediate obstacle, then look ahead for the next checkpoint or mask transition.
Flashback Tapes disappear if you die before reaching and collecting them, so do not combine a first-time mask lesson with a tape attempt. First clear the story route safely. Then replay from the beginning with the tape location in mind, using known checkpoints and abandoning the attempt if the early section becomes unstable. Time Trials should likewise wait until normal jumps, mask activation and camera positioning are consistent.
- Finish the required mask route before searching for collectibles.
- Practice from checkpoints during ordinary story attempts.
- Start Flashback Tape or Time Trial runs only after the mask sequence is reliable.
Before you move on
- You can identify Lani-Loli, Akano, Kupuna-Wa and Ika-Ika by name, color and function.
- You have cleared the required Lani-Loli sequence in N. Sanity Peak.
- You have completed the Jetboard Jetty progression and obtained Akano through Give It a Spin.
- You have completed Run It Bayou and reached the first Kupuna-Wa sections that follow it.
- You have completed Dino Dash and reached the Ika-Ika space-station introduction in the following story sequence.
- You can respond correctly to each obstacle type: phase objects with Lani-Loli, slow hazards with Kupuna-Wa, glide or deflect with Akano, and reverse gravity with Ika-Ika.
- You can reach a mask checkpoint and finish its required section without attempting optional collectibles during the first practice run.
References for this chapter
- Crash 4 masks locations and how Quantum Masks work — GamesRadar+
- Crash Bandicoot 4: It’s About Time launches on PS4 October 2 — PlayStation.Blog
- Crash 4: Akano - mask, how to unlock? — Gamepressure
- Crash 4: Kupuna-Wa - mask, how to unlock? — Gamepressure
- Crash Bandicoot 4: It's About Time Trophy Guide and Roadmap
- Out for Launch walkthrough — Neoseeker
- Crash Landed walkthrough — Neoseeker
Early campaign — Rude Awakening to Stage Dive
Complete the first six core story levels in this order: Rude Awakening, N. Sanity Peak, A Real Grind, Crash Compactor, Hit the Road, and Stage Dive. These levels teach the standard movement set, grind rails, chase sections, Lani-Loli’s phasing ability, and the first boss fight against N. Gin. Stage Dive is the sixth core story level and the first boss stage in the campaign. Truck Stopped is an optional Timeline version of Hit the Road featuring Tawna; it is not required for Stage Dive or for continuing the main story. For a first Windows clear, use checkpoints as practice boundaries, follow the safest obvious route, and postpone Hidden Gems, Colored Gems, perfect crate clears, and low-death objectives until you know each stage.
1. Rude Awakening: establish safe movement
Use Rude Awakening to confirm that your Windows inputs are responding correctly. Test jump, double-jump, spin, slide, crouch, and body-slam actions on safe ground before committing to difficult gaps. Stay on the main beach route during the first clear. Before each jump, stop on the preceding solid platform, face the landing area, and use a controlled run-up instead of holding the movement direction throughout the entire jump.
The first grind-rail sequence is a movement lesson. Keep Crash or Coco near the center of the rail and make small corrections early. Jump before raised obstacles rather than waiting until the character is beside them. Look toward the next landing platform while grinding, because late steering changes are difficult to recover from. If you die, repeat the same checkpoint and change one timing decision rather than attempting a completely different route.
After the rail section, the route reaches a hut that requires crawling underneath. The regular Hidden Gem is above this crawl space. Stop beneath the hut and jump to collect it. The gem is optional, so ignore it if the jump costs lives. Continue through the main route and use every checkpoint as a deliberate stopping point: pause, identify the next hazard, then move.
- Reach the exit by the main route.
- Use the rail section to practice early jumps and small directional corrections.
- Leave the hut Hidden Gem and complete crate objective for a later replay if necessary.
- Confirm the completed level-result screen before returning to the map.
2. N. Sanity Peak: learn Lani-Loli and the Red Gem puzzle
N. Sanity Peak introduces Lani-Loli, the Phase Mask. It makes designated objects appear or disappear. When the mask becomes available, stand on a stable platform and study the whole sequence before toggling anything. For the alternating-platform sections, decide which object must exist for the next landing, activate the mask from solid ground, and jump only after the route is clear. If a platform vanishes at the wrong moment, return to the previous stable surface rather than improvising in midair.
The optional Red Gem is in the room containing nine phasing platforms. Before entering, check the wall drawing beside the checkpoint. Starting from the lower-left platform, follow this order: right, right, up, up, left, left, down, right. The Red Gem appears after the sequence is completed. It is not required for level completion or story progression, so skip it during a survival-focused run if the order is costing attempts.
After the Lani-Loli encounter, a large skeleton begins a forward-facing chase. Focus on the next landing instead of Wumpa fruit or side pickups. The regular Hidden Gem is near the beginning of this chase on the left, behind a wooden barrier. Collect it only after you are comfortable with the chase. Treat each landing as a separate decision and avoid holding one direction continuously.
- Practice phasing from a stable platform before using Lani-Loli during a jump.
- Use the wall drawing for the Red Gem sequence rather than guessing.
- Prioritize survival during the skeleton chase.
- Use the checkpoint before the chase as the restart boundary for later practice.
3. A Real Grind: preserve momentum through rails and phasing platforms
A Real Grind combines ordinary platforming, grind rails, and Lani-Loli sections. On rails, correct your position before an obstacle rather than attempting a large rescue movement at the last second. When a rail gap requires a jump, line up with the continuation of the rail and try to land facing along its direction. If you die, replay from the latest checkpoint and adjust one timing decision at a time.
In the phasing sections, wait for a cycle that gives you a complete route from one stable surface to the next. Lani-Loli is not a limited-use item, so use it whenever the level presents a phase puzzle. Toggle deliberately from solid ground, confirm which platform is present, and then commit to the jump. Repeated toggling while airborne makes the sequence harder to read and can remove the platform you need.
Near the end, the regular Hidden Gem is reached during the vertical phasing-platform sequence. From the highest phase platform, slide-jump toward the upper-left ledge. At the end of the slide, double-jump to reach the ledge with crates, then bounce from the top crate to the higher ledge containing the gem. This is an optional precision route. For story progress, remain on the main path and continue to the exit.
- Make rail corrections early and keep them small.
- Read each phasing cycle before committing to a jump.
- Treat the late Hidden Gem as a separate objective.
- Restart from the latest checkpoint after identifying the specific jump that failed.
4. Crash Compactor: read the machinery before crossing
Crash Compactor adds denser machinery, rail hazards, Nitro crates, and large mechanical enemies. When a crusher or moving mechanism blocks the route, watch a complete cycle from a safe platform before crossing. Waiting for the next opening is safer than squeezing through a closing gap. On conveyors and narrow platforms, use short directional inputs; holding a direction can carry you beyond the landing area.
During the first clear, break crates directly on the story route and ignore difficult side groups unless you are deliberately pursuing a crate gem or full collectible clear. An Aku Aku mask can absorb a mistake, but it is not a reason to walk into a hazard. Preserve your position and let each checkpoint define the next practice segment.
The regular Hidden Gem is reached after the first rail-grind section. At the end of the rail, drop into the small area beneath the checkpoint and spin the metal exclamation crate. Double-jump back to the upper ledge, then continue around the next corner. The crate activation opens the compartment containing the gem. This route is optional and can be left for a replay. Do not waste lives searching for it during the first story clear.
- Observe a full crusher or machinery cycle before crossing.
- Use short corrections on conveyors and narrow platforms.
- Activate the metal exclamation crate beneath the checkpoint before following the optional Hidden Gem route.
- Do not combine a first story clear with a full crate attempt unless the level is already familiar.
5. Hit the Road: survive the chase and collect the optional Green Gem
Hit the Road alternates standard platforming with a forward-moving monster-truck chase. During the chase, stay near the center of the available lane unless an obstacle forces a side change. Jump over low barriers and spin only when the landing space is clear. After landing, make one deliberate correction instead of immediately holding the opposite direction.
After the first chase, you reach a safe area with a checkpoint and trash cans. The vibrating trash can on the left contains a remote-control device. Spin the can, move to the device, and keep spinning it until the toy car reaches and detonates the nearby Nitro crate. The Green Gem appears after the explosion. This is optional and has no bearing on reaching Stage Dive.
The regular Hidden Gem is in the later vertical Lani-Loli section. At the checkpoint near the upward-moving platforms and flamethrowers, look for the Nitro crate on the left. Slide through the gap, use the arrow crate above it to bounce to the upper platform, and collect the gem. During a first clear, ignore this route if the chase or platform timing is still unfamiliar.
Use each checkpoint as a separate exercise. Identify whether the next threat is a barrier, enemy, gap, or combination before reaching it. Do not search for every crate during the chase; lateral detours are more likely to cause a death than improve the story run.
- Center the character after each chase landing.
- Use the checkpoint after the chase to practice the later sequence.
- Use the trash can, remote control, and toy car only when deliberately collecting the Green Gem.
- Leave the Hidden Gem and full crate total for a later replay if they interrupt survival.
6. Stage Dive: defeat N. Gin and finish the opening story route
Stage Dive is the first boss level and the sixth core story level. N. Gin pilots the Weapon of Mass Percussion and attacks from a large arena built around conveyor platforms. Enter the fight to learn the cycle rather than to pursue collectibles. The boss arena does not use the normal Hidden Gem objective.
During the opening phase, keep moving on the conveyor so it does not carry you into the hazard behind you, but do not run blindly toward the spike-covered end. N. Gin’s speaker sends Ramblers toward you. Spin or slide-kick each Rambler back toward the active speaker. Three successful Rambler hits disable that speaker and cause the conveyor to retract, opening a route toward the boss’s weapon.
Cross the exposed route and climb to the revealed target, then attack it. Later phases add another conveyor and additional speaker attacks. When green and red discs are fired, jump over the green discs and duck under the red discs. Clear the immediate threats before attempting to cross; the attack openings are short and the boss arena punishes rushing.
Lani-Loli is required during later routes to the attack position. Activate it from a stable platform, determine which objects must be present, and move through the opening. If a phase defeats you, restart from the boss checkpoint and focus on the failed task: staying on the conveyor, returning Ramblers, avoiding the discs, or reading the phasing route. Repeat the speaker-disable and weapon-attack cycle until the final target is destroyed.
- Enter Stage Dive after Hit the Road is complete on the campaign map.
- Return three Ramblers to the active speaker during each cycle.
- Keep moving on the conveyor while avoiding the hazard and projectiles.
- Jump over green discs and duck under red discs in the later phase.
- Use Lani-Loli deliberately when the route to the weapon requires phasing.
- Strike the exposed weapon target after each speaker shutdown.
- Confirm N. Gin’s defeat and the route into the next dimension.
Optional return: Truck Stopped and the Timeline route
Truck Stopped is the optional Timeline version of Hit the Road. It is not the sixth required story level and does not replace Stage Dive. It becomes available later after completing Hook, Line, and Sinker. When its Timeline marker appears, play it for optional content, Tawna practice, collectibles, or completion goals; otherwise continue with the main campaign route after Stage Dive.
Truck Stopped uses Tawna’s grappling hook and wall-jump movement rather than Crash or Coco’s standard route. Use grapple points to cross gaps and treat each wall-jump sequence as a checkpoint-sized practice section. The regular Hidden Gem is in the outdoor section after a rope swing and grapple sequence. After defeating the flying enemy and beginning the wall jumps, look for the black-and-yellow-edged platform to the right instead of following the crane route. The gem and full crate clear are optional.
- Access Truck Stopped from its later Timeline marker.
- Complete Tawna’s grapple and wall-jump sections using checkpoints as reset boundaries.
- Inspect the right-side platform after the rope-swing and grapple sequence if collecting the optional Hidden Gem.
- Return to the main campaign route after the level-result screen.
Before you move on
- Rude Awakening, N. Sanity Peak, A Real Grind, Crash Compactor, and Hit the Road each show a completed level-result screen.
- Stage Dive is completed and its result confirms N. Gin’s defeat.
- The campaign map shows the route into the next dimension after Stage Dive.
- You can use Lani-Loli to phase objects in N. Sanity Peak, A Real Grind, and the later routes in Stage Dive.
- You were not required to collect a Hidden Gem, Colored Gem, full crate total, or deathless reward to advance.
- Truck Stopped is treated as optional Timeline content and is completed only if you deliberately return to it later.
- Any Red Gem, Green Gem, or regular Hidden Gems collected during these levels appear in the relevant level or collection displays.
References for this chapter
- Crash Bandicoot 4: It's About Time on Steam
- Stage Dive — Crash Bandicoot 4: It’s About Time Walkthrough — Neoseeker
- N. Sanity Peak — Crash Bandicoot 4: It’s About Time Walkthrough
- Crash Bandicoot 4: It's About Time: All Hidden and Colored Gems Locations
- Crash Bandicoot 4 All Hidden Gem Locations
- Truck Stopped — Crash Bandicoot 4: It’s About Time
Stage Dive through Give It a Spin
The required route after Hit the Road is Stage Dive, Booty Calls, Hook, Line, and Sinker, Jetboard Jetty, and Give It a Spin. Stage Dive is the first required boss level and opens Salty Wharf after N. Gin is defeated. Truck Stopped and Thar He Blows! are optional Timeline levels; they do not need to be cleared to continue the main campaign. On a first story run, use checkpoints to learn the route and leave hidden gems, bonus stages, Flashback Tapes, and complete-crate attempts for dedicated returns.
1. Clear Stage Dive and defeat N. Gin
Select Stage Dive after Hit the Road. This is the required next level; do not detour into Truck Stopped unless you are deliberately completing optional Timeline content.
N. Gin’s fight has four phases. Each phase places you on a conveyor while a speaker sends Ramblers toward you. Spin or slide-kick each Rambler back into the speaker. Three successful Rambler hits disable that phase’s speaker and open the route toward the boss’s exposed target.
The second and later phases add colored energy discs. Jump over green discs and crouch beneath red discs. Watch the disc color before committing to a movement, because jumping at a red disc or crouching under a green one will usually cost the attempt. Keep moving with the conveyor, but do not rush into the spike-lined end of the belt.
After each Rambler sequence, cross the newly opened route and damage the exposed target. The last three phases use Lani-Loli to create a path through temporary platforms or boxes. Phase objects in a controlled order, check where the next solid landing is, and avoid phasing away the platform you need. Defeat N. Gin through all four phases to open Salty Wharf.
- Complete all four N. Gin phases.
- Return three Ramblers to the speaker during each phase.
- Jump green discs and crouch beneath red discs.
- Use Lani-Loli during the later routes to reach each exposed target.
- Finish the exit transition so Salty Wharf becomes available.
2. Follow the required Salty Wharf route through Booty Calls
Choose Booty Calls first. The level mixes ordinary platforming with sword enemies, timed fire hazards, and rope travel. Look at the next platform before attacking; clearing every enemy is less important than landing safely and reaching the next checkpoint.
The Booty Calls Flashback Tape is shortly after the first checkpoint. Enter the cave, deal with the two patrolling enemies, and look to the left on the next platform. The tape is available only if you have not died before reaching it. If it appears transparent, restart the level from the beginning or return later for a clean attempt. After collecting it, dying does not remove the tape, but finish the level so the collection registers.
During the rope section, make jumps early rather than waiting until an obstacle is directly beside Crash or Coco. Use the main route for the first clear. The bonus stage, hidden gem, and full-crate objective are optional and can be attempted after the level geometry is familiar.
- Clear Booty Calls after Stage Dive.
- Reach the first checkpoint without dying if collecting the tape.
- Find the tape on the left platform inside the cave after the first checkpoint.
- Use early jumps during rope travel.
- Reach the exit before returning for optional objectives.
3. Complete Hook, Line, and Sinker with Tawna
Hook, Line, and Sinker is the next required level and uses Tawna. Before leaving each platform, identify the next hook anchor and determine whether it is above, below, or across the gap. Aim the hookshot deliberately rather than firing while moving toward an uncertain target.
Tawna’s hookshot handles traversal and can remove selected enemies or interact with objects from a distance. When a hook misses, immediately look for a lower platform instead of holding the same direction and assuming the fall is fatal. Around ships, masts, and narrow ledges, keep the camera aimed toward the next anchor so the route remains visible.
Do not interrupt the first clear for the hidden gem or bonus stage. Use checkpoints to divide the level into short practice sections, then return for collectibles once the hook timing and landing points are familiar. Reach the end marker with Tawna to complete the level and continue to Jetboard Jetty.
- Use Tawna’s hookshot to reach each required anchor.
- Check for lower recovery platforms after a missed hook.
- Keep the next anchor visible before making a jump.
- Prioritize the exit over the hidden gem and bonus stage.
- Complete the level to unlock the next required stage.
4. Cross Jetboard Jetty and defeat Louise
Jetboard Jetty alternates normal platforming, floating-boat platforms, and forward-moving jetboard sections. On the board, make steering corrections early and keep your line centered before ramps, mines, cannons, and whirlpools. The boost is useful for clearing danger, but slowing down is often safer when the route is narrow. There is no ordinary attack button on the jetboard, so survival depends on steering, positioning, and using hazards against pursuing enemies.
The Jetboard Jetty Flashback Tape is after the first jetboard section, at the entrance to the bonus path. As with the other tapes, you must reach it without dying earlier in that attempt. If you die before the tape, restart the level or return later rather than trying to collect its transparent version.
Louise is defeated indirectly. During the fight, keep moving and watch for a tentacle rising from the water. Lure the floating Rat Pirate enemy so the raised tentacle strikes it. Position yourself so the enemy is between Crash and the tentacle, then move away from the marked impact area before the strike lands. Repeat this for three successful Rat Pirate-to-tentacle collisions. Louise’s tentacle attacks can defeat Crash in one hit, so do not stand in a marked strike zone while waiting for the enemy to line up.
After the third successful collision, continue through the exit sequence and finish the level. The hidden gem and complete-crate route are optional.
- Make early steering corrections on the jetboard.
- Use boost for dangerous crossings but slow down for narrow approaches.
- Reach the Jetboard Jetty tape without dying beforehand if collecting it.
- Lure Rat Pirates into three raised tentacle attacks.
- Avoid the tentacle impact markers and complete the exit.
5. Treat Thar He Blows! as optional Timeline content
Thar He Blows! is associated with the Salty Wharf Timeline content and is not required between Booty Calls and Hook, Line, and Sinker. Complete it separately if you are pursuing optional levels, collectibles, or broader map completion. It does not block the main route to Jetboard Jetty or Give It a Spin.
For a progression run, ignore the optional marker and continue along the required route. Return after learning the standard campaign stages, since Timeline levels introduce different character sections and routes.
- Do not wait for Thar He Blows! before continuing the campaign.
- Complete it later for optional Timeline progress.
- Treat its collectibles as separate objectives.
6. Finish the chapter with Give It a Spin
After Jetboard Jetty, select Give It a Spin. Akano appears near the beginning and grants the dark-matter spin. While spinning, Crash or Coco can destroy strong crates, extend jumps, hover across gaps, and deflect certain projectiles. Akano also detonates TNT and Nitro on contact, so release the spin before landing beside explosives or when precise footing is required.
Use Akano for the gap or hazard immediately in front of you, then deactivate it before entering a tight explosive section. The level includes water crossings, snapping lily-pad creatures, lion statues, green lantern projectiles, wind, and Nitro. Keep moving on the snapping platforms and use Akano to reflect the green lantern projectiles toward their source when the route requires it.
The Give It a Spin Flashback Tape is just after the first checkpoint and before the first water-lily crossing. Reach that point without dying if you want to collect it. The hidden gem is on an elevated Akano route to the right after the first TNT section. Both are optional for story completion.
Complete Give It a Spin and reach the exit. This opens the remaining Tranquility Falls route, including Potion Commotion and the later campaign stages.
- Acquire Akano near the beginning of Give It a Spin.
- Deactivate Akano before contacting TNT or Nitro unless the explosive is intentionally being triggered.
- Keep moving across snapping lily-pad creatures.
- Reach the tape after the first checkpoint without dying beforehand.
- Finish the level to open the remaining Tranquility Falls route.
Before you move on
- Stage Dive is cleared through all four N. Gin phases.
- Salty Wharf opens after Stage Dive.
- Booty Calls is completed first on the required Salty Wharf route.
- Hook, Line, and Sinker is completed with Tawna.
- Jetboard Jetty is completed after Louise is hit by three Rat Pirates through her raised tentacles.
- Give It a Spin is completed and the remaining Tranquility Falls route becomes available.
- Truck Stopped and Thar He Blows! remain correctly treated as optional Timeline stages.
- Any Flashback Tape collected in these levels was reached without dying earlier in that attempt.
References for this chapter
- Stage Dive — Crash Bandicoot 4: It’s About Time Walkthrough — Neoseeker
- Give It a Spin — Crash Bandicoot 4: It’s About Time Walkthrough — Neoseeker
- Crash Bandicoot 4: It’s About Time: All Flashback Tapes Locations
- Crash Bandicoot 4 All Flashback Tape Locations
- Crash Bandicoot 4 – Jetboard Jetty Tips and How to Beat Louise — Attack of the Fanboy
- Stage Dive — Bandipedia
- Crash Bandicoot 4: It’s About Time — Levels — Speedrun.com
Potion, platforming and brewery challenges
Clear the required Tranquility Falls route through Give It a Spin, Draggin’ On, Off-Balance and Trouble Brewing. Potion Commotion is an optional Timeline stage unlocked after Give It a Spin; complete it for its alternate-character challenge, but do not confuse it with a required story level. This chapter introduces Akano’s Dark Matter Spin, expands the use of Lani-Loli and combines several Quantum Masks in Off-Balance before the N. Brio boss fight.
Follow the required Tranquility Falls route
On the main path, complete Give It a Spin, then Draggin’ On, Off-Balance and Trouble Brewing. Potion Commotion becomes available after Give It a Spin as a Timeline level starring Tawna. It is useful practice and contains its own rewards, but you can leave it for later without blocking the main route.
The Tranquility Falls stages are numbered 12 through 16 in the overall level list when the Timeline stage is included. The story continues after Trouble Brewing, so do not spend time clearing every crate or gem before entering the boss level. A normal level completion is enough to advance.
- Complete Give It a Spin to open the next Tranquility Falls options.
- Treat Potion Commotion as optional Timeline progress, not a required Main Path stage.
- Clear Draggin’ On and Off-Balance before entering Trouble Brewing.
Learn Akano in Give It a Spin
Give It a Spin is Akano’s tutorial level. After acquiring the purple Quantum Mask, activate the Dark Matter Spin to glide across wide gaps, destroy crates and deflect certain projectiles. The spin remains active until you cancel it, so release it before a short landing or a cluster of TNT and Nitro crates. Akano destroys crates on contact, including dangerous crates, so do not drift through TNT or Nitro simply because the vortex is active.
Use the first checkpoint as a rehearsal boundary. Cross the water and lillypad sections with Akano, but keep moving when you land on the tooth-like creatures; they are unsafe places to pause. Later, use the wind gusts to gain height, then enter the temple area and deal with the lion statues. While spinning, Crash or Coco can survive contact with some of the statue attacks and can approach from behind to defeat them.
The green magical lanterns fire projectiles. Face the projectile and keep the Dark Matter Spin active to deflect it back toward the lantern. When a path alternates between normal platforms and Akano crossings, cancel the vortex for the small platforms and reactivate it at the next stable launch point. This launch-crossing-landing rhythm is safer than holding the spin through the entire section.
- Use Akano for long gaps and wind-assisted routes.
- Cancel the vortex before short platforms and explosive crates.
- Deflect the green lantern projectiles instead of rushing past them.
- Use checkpoints to practice one Akano sequence at a time.
Complete or postpone Potion Commotion
Potion Commotion is played as Tawna and unlocks after Give It a Spin. Tawna cannot use Crash’s slide, but she can throw her hook from a distance, attach to marked hook points and cling to walls during wall-jump sequences. Use the hook point whenever it is visible rather than attempting a blind running jump across the same gap.
The opening portion uses Tawna’s hook and wall movement. Jump toward the wall, use the second jump to cling, then bounce between the walls while watching for enemies that can knock her loose. Magical creatures kill on contact, so stop on a secure wall or platform and wait for a clear opening instead of forcing the next movement.
After the Tawna section, the level switches back to Crash or Coco and sends you through a familiar route. The switch is part of the level design, not a failure state. If you are completing the story only, leave this Timeline stage after reaching the exit and return later for its crates, gems and relic.
- Use hook points before attempting long jumps.
- Clear dangerous enemies from range when Tawna has room to aim.
- Expect the character switch near the upper building section.
- Do not delay the campaign for Potion Commotion collectibles.
Handle Draggin’ On’s creatures, bells and Akano routes
Draggin’ On combines ordinary platforming with repeated Akano crossings. Move carefully through the sections guarded by magical creatures, lions and sound-wave hazards. These enemies are positioned to push you from narrow platforms, so approach them from a stable landing rather than jumping into the group while still carrying horizontal momentum.
Use Akano to glide between the separated platforms and to deflect projectiles from magical lanterns. Keep the vortex active across a long crossing, then cancel it before landing on a small wooden platform. If the next platform is low or narrow, make the landing first and only then activate Akano again.
The level includes a checkpoint near the destroyed bridge and a later climb involving small terrain pieces and wooden platforms. Use each checkpoint as a reset point. On a first story run, take the safest visible route and ignore the hidden gem, Flashback Tape and crate detours unless you have already practiced the section without dying.
- Use safe platforms as launch points for Akano.
- Approach magical creatures and lions from stable ground.
- Cancel Akano before narrow landings.
- Use the destroyed-bridge checkpoint to rehearse the final climb.
Use every required mask type in Off-Balance
Off-Balance is the most demanding stage in this cluster because it combines several Quantum Mask mechanics. Akano handles the early vortex crossings and long gaps. Keep the spin active through the crossing, but cancel it before TNT or Nitro crates and before landing on a platform with little room.
When Kupuna-Wa appears, slow time before moving through fast hazards or moving platforms. The slowdown gives you more reaction time, but it does not make a bad landing safe; line up the target platform first, then activate the mask. When Ika-Ika changes gravity, check whether the next safe surface is above or below before switching direction. Avoid changing gravity during a blind jump unless the route clearly requires it.
Lani-Loli sections require you to phase platforms, walls or hazards in and out. Stand on a secure surface, inspect which objects will exist after the switch and activate the mask before committing to the jump. Some routes are arranged so that an object is safe in one state but dangerous in the other. If a platform appears unreachable, check above and below the current route before assuming a missed jump is the problem.
The stage also contains mask transitions close together. Do not hold spin without aiming or activate a mask simply because it is available. Stop at the checkpoint before each new mechanic, identify the landing surface and use the mask only for the obstacle it solves.
- Use Akano for long crossings and cancel it around explosives.
- Slow moving hazards with Kupuna-Wa before committing to the jump.
- Check the destination surface before reversing gravity with Ika-Ika.
- Change Lani-Loli’s state from a secure platform whenever possible.
- Inspect alternate upper and lower routes before forcing a jump.
Recover from missed platforms and low-area drops
If you miss a moving platform, hold toward the nearest visible solid surface and save the double jump until the first jump has brought you close enough to reach it. A premature double jump removes your best correction option. If the lower area contains a clearly solid ledge, land there and move to the next stable platform instead of immediately jumping back toward the missed target.
If the lower route is an instant-death area, stop trying to salvage the jump and use the checkpoint restart. During a normal story run, it is better to repeat a short section than to improvise through a mask puzzle while falling. Crash and Coco can use slide-jumps for extra reach, but only when there is enough room to begin the slide and a clear landing line.
Modern Mode is the safer setting while learning this cluster because checkpoint progress is retained after deaths. For collectible or relic attempts, restart the relevant level after a death rather than mixing a damaged run with a precision objective.
- Save the double jump for the actual landing correction.
- Use visible lower ledges as recovery platforms.
- Restart immediately when the missed jump leads to instant death.
- Practice mask sections separately from collectible attempts.
Defeat N. Brio in Trouble Brewing
Trouble Brewing is the second major boss level and the final story level of Tranquility Falls. N. Brio begins by throwing pink potions. When a pink potion lands, it creates a spreading shockwave; jump over the expanding ring rather than trying to spin through it. Keep moving around the arena so the next potion does not land directly on your position.
Brio then throws a green potion that creates a blob monster. Spin the blob so it travels back into N. Brio. Later he produces two green blobs, and the next sequence produces three. Clear the pink shockwaves first, then line up each blob and send it toward the boss. The green creatures are the objects that damage Brio in these phases; ordinary spins against Brio himself do not replace this counterattack.
After the potion phases, Brio drinks his mixture and transforms into a large monster. Dodge his body movement and ground shockwaves until he becomes dizzy. Akano then appears in the arena. Activate the Dark Matter Spin and push Brio toward the edge. Do not attack him before the opening is available, and do not carry the vortex blindly across the arena. Repeat the dodge, dizzy and push sequence three times to finish the fight.
If you lose a life, treat the first pink-potion sequence as a warm-up. Concentrate on surviving until the green blob appears, then make the counterattack deliberate. In the monster phase, stay near the center enough to preserve room for dodging, but approach the edge only after Brio is stunned and Akano is available.
- Jump over pink potion shockwaves.
- Spin each green blob back toward N. Brio.
- Survive the three-blob sequence before entering the monster phase.
- Wait for Brio to become dizzy before using Akano.
- Push the monster form over the arena edge three times.
Confirm story progress before replaying extras
The chapter is complete when Trouble Brewing ends, N. Brio falls from the arena and the level-clear transition returns you to the dimension map. The next story destination should be available. If the map advances, continue the campaign instead of immediately replaying the boss.
Gems, crates, the Timeline stage, Flashback Tapes and Time Trials are optional for story completion. Return for them after you can clear the mask sections consistently. A deathless collectible attempt should be treated as a separate run from the first campaign clear.
- Give It a Spin is complete.
- Draggin’ On and Off-Balance are complete.
- Potion Commotion is either cleared as an optional Timeline stage or deliberately postponed.
- Trouble Brewing shows as completed.
- The next story destination is unlocked on the map.
- Optional gems, crates and relics have not been mistaken for campaign requirements.
Before you move on
- The required route through Give It a Spin, Draggin’ On and Off-Balance is cleared.
- Trouble Brewing has been completed and N. Brio has been pushed from the arena three times in his monster form.
- The level-clear transition has played and the Tranquility Falls map has advanced to the next story destination.
- Potion Commotion is correctly recorded as optional Timeline content rather than a campaign gate.
- The player can identify when to use Akano, Kupuna-Wa, Ika-Ika and Lani-Loli in their respective puzzle sections.
- Optional gems, crates, Flashback Tapes and Time Trials remain available for later replay.
References for this chapter
- Dimensions and Level Types in Crash Bandicoot 4: It's About Time
- How Many Levels Does Crash Bandicoot 4 Have? Levels List, PowerPyx
- Give It a Spin — Crash Bandicoot 4: It’s About Time Walkthrough — Neoseeker
- Potion Commotion Walkthrough — Gamepressure
- Draggin’ On Walkthrough — Gamepressure
- Off-Balance Walkthrough — Gamepressure
- Crash Bandicoot 4: It's About Time: All Bosses and How to Beat Them
Bayou, cookin' and the swamp runs
Complete the three required Mosquito Marsh levels in order: Off Beat, Home Cookin’, and Run It Bayou. These stages shift between narrow rooftop platforming, Dingodile’s slower vacuum-based movement, jetboard sections, and the Armadillo burger-boat escort. Prioritize safe checkpoint-to-checkpoint progress on the first clear. Gems, hidden crates, the Yellow Gem, and the Off Beat and Run It Bayou Flashback Tapes are optional objectives and should be handled on dedicated return attempts once the routes are familiar. After Run It Bayou, return to the map and enter Snow Way Out to continue the main campaign.
1. Enter Mosquito Marsh and follow the required route
The Mosquito Marsh main-path sequence is Off Beat, Home Cookin’, and Run It Bayou. Complete them in that order. Home Cookin’ is a Dingodile stage, so do not expect to control Crash or Coco throughout the level. Run It Bayou returns to Crash or Coco and combines ordinary platforming with two jetboard sections and the burger-boat escort.
No Dillo Dallying becomes available as a Timeline level connected to this section. It is optional and uses Dingodile; it is not a replacement for Home Cookin’ or Run It Bayou. Leave it for a later character-stage session unless you specifically want the extra Timeline content.
For the story clear, activate every checkpoint crate and ignore a side route when its landing is uncertain. If a missed crate or gem forces a risky recovery, let the character fall and restart from the latest checkpoint rather than making several blind corrections near an edge.
- Complete Off Beat first.
- Complete Home Cookin’ with Dingodile.
- Complete Run It Bayou after Home Cookin’.
- Treat No Dillo Dallying as optional Timeline content.
- Enter Snow Way Out after Run It Bayou is marked complete.
2. Cross Off Beat with measured jumps and mask timing
Off Beat uses compact rooftops, moving pink platforms, fire bursts, enemies on narrow ledges, and later rail sections. Do not sprint into a jump simply because the next platform is visible. Stop at the edge, wait for the moving surface or flame cycle to settle, and aim for the middle of the destination. Small directional corrections after landing are safer than holding a direction through the entire jump.
The large pink platforms are safe when you are on top of them but can crush the character if you remain underneath as they descend. Move onto the platform only when its vertical cycle gives you room, then leave before the next downward movement closes the gap. When a juggler or other enemy patrols a narrow platform, either spin it from a stable position or wait for it to move away. Do not attack while already sliding toward the edge.
Later, the level introduces Lani-Loli during rail travel. Use the mask when the route requires objects or enemies to be phased in or out, but do not activate it automatically before every obstacle. On rails, watch for helicopters, jugglers, Nitro, and gaps. Jump over hazards, duck beneath them, or hang from the underside of the rail when that is the safer option. The camera can make the next obstacle appear late, so keep Crash or Coco near the center of the rail whenever the route is clear.
The Off Beat Flashback Tape is reached after the section with four Nitro crates, a checkpoint, and a dumpster. Move behind the dumpster to find the tape. It is an optional no-death objective: if the character dies before reaching it, restart the level and make a dedicated tape attempt after practicing the preceding rooftops. Do not sacrifice the story clear to search for hidden crates around this area.
- Wait for moving platforms and flame cycles before jumping.
- Avoid standing below descending pink platforms.
- Use Lani-Loli only when phasing is required.
- Use rail jumps, crouching, or rail-hanging according to the approaching hazard.
- Return behind the dumpster for the Off Beat Flashback Tape after the route is consistent.
- Finish the level before attempting hidden gems or a complete crate run.
3. Use Dingodile’s spacing and vacuum in Home Cookin’
Home Cookin’ changes the movement rhythm because Dingodile is slower and less agile than Crash or Coco. His spin has a broad range, while the vacuum gun can pull in crates and TNT barrels and fire them back as projectiles. The vacuum can also keep him moving across longer gaps, ending with an upward thrust. Practice these abilities in open areas before relying on them beside a hazard.
When approaching a narrow platform, stop vacuuming or firing before the landing. Dingodile’s attack animation can carry him farther than expected, and his larger body leaves less room for correction. Use the broad spin against an isolated enemy when there is space, but against a group, stand on a stable section and remove the closest threat first. A TNT barrel is useful for breaking a wooden barrier or clearing a distant target, but do not carry one into a cramped landing unless the route requires it.
The level’s hazards are easier to manage when treated as separate pauses rather than one continuous run. After a checkpoint, let the camera reveal the next platform arrangement, then move. If Dingodile misses a landing but a lower platform is visible, steer toward that recovery surface. If no recovery surface is visible, stop making large movements and accept the checkpoint restart.
Home Cookin’ has no Flashback Tape. Its optional objectives include crate routes and character-specific challenges, but they are not needed to advance the main story. Complete the exit first. Timeline content connected to Dingodile can be attempted afterward without disturbing the required route.
- Use Dingodile’s vacuum to pull and fire crates or TNT from a stable position.
- Release the attack before landing on narrow platforms.
- Use the vacuum’s movement ability for long gaps only after checking the landing.
- Clear the nearest enemy before crossing a crowded platform.
- Use checkpoints as deliberate reset points.
- Do not search for a Flashback Tape in Home Cookin’; this level does not contain one.
4. Ride Run It Bayou’s jetboard and burger boat safely
Run It Bayou begins with ordinary platforming before sending Crash or Coco onto a jetboard. During the first jetboard section, steer early around mines, rushing water, whirlpools, and currents. Stay near the center when there is no immediate hazard, then make a broad correction before the obstacle reaches the board. A late sideways movement is dangerous because the board continues moving while the correction is being made.
The river’s current can make the board travel faster than expected. If a crate is positioned beside a mine or whirlpool, skip the crate on a story attempt. Optional crates are never worth converting a safe line into a collision. Approach ramps from a stable angle and commit to the landing once the destination is visible. If a missed crate leaves a safe route behind the ramp, continue forward instead of trying to reverse in midair.
The middle section places Crash or Coco on top of the Armadillo’s burger boat. The boat stops at several points while you clear obstacles ahead. When it stops, jump to the nearby platforms and use TNT barrels to break the barriers, then return to the boat before it resumes moving. During the moving sections, jump over Nitro and use TNT to bounce through the intended openings. Nitro remains dangerous even when a mask or slow timing is involved, so never treat a slowed sequence as permission to touch it.
Several low pipes require crouching or sliding. Begin the crouch before reaching the pipe instead of reacting underneath it. In the later pipe sequence, use the TNT stacks to reach the upper crates and Flashback Tape while remaining clear of the Nitro below. The Run It Bayou Flashback Tape appears during this burger-boat section, above the boat near the TNT obstacles. Because it is reached after multiple hazards, practice the full escort first and return for a dedicated no-death attempt.
After the boat section, a checkpoint leads to the final downhill jetboard run. Avoid the bats, dropped Nitro, mines, and TNT piles. Use the ramps as the intended line, then leave the board at the end and activate the green exclamation crate to detonate the remaining Nitro before entering the exit.
- Make jetboard corrections before mines and whirlpools are alongside you.
- Skip unsafe crates during the first completion.
- Use TNT barrels to clear the burger boat’s barriers.
- Return to the boat after each stopped section.
- Crouch or slide under low pipes.
- Use TNT stacks to reach the elevated route near the Run It Bayou tape.
- Activate the final green exclamation crate before leaving the level.
- Do not expect a boss at the end of Run It Bayou.
5. Transition from Mosquito Marsh to Snow Way Out
Once Run It Bayou is complete, return to the world map and select Snow Way Out in the 11th Dimension. Snow Way Out is the next required main-path level. Do not enter No Dillo Dallying first unless you intentionally want to complete the optional Dingodile Timeline stage.
Record any unfinished Mosquito Marsh objectives separately: the Off Beat Flashback Tape, the Run It Bayou Flashback Tape, hidden gems, the Run It Bayou Yellow Gem, and missed crates are optional return targets. Leaving them unfinished does not block the main story route.
Before starting Snow Way Out, reset your controller layout if you changed it for Dingodile. The next level returns to mask-based platforming and moving environmental hazards, so begin with your normal Crash or Coco controls and treat the first checkpoint as a fresh practice section.
- Confirm that Off Beat, Home Cookin’, and Run It Bayou are marked complete.
- Leave No Dillo Dallying listed as optional if unfinished.
- Record missed tapes, gems, or crates as post-clear objectives.
- Select Snow Way Out from the 11th Dimension map to continue the campaign.
Before you move on
- Off Beat is marked complete in Mosquito Marsh.
- Home Cookin’ is marked complete in Mosquito Marsh.
- Run It Bayou is marked complete in Mosquito Marsh.
- No Dillo Dallying is treated as optional Timeline content rather than a required story level.
- Any unfinished Flashback Tapes, gems, or crates are recorded as optional return objectives.
- Snow Way Out is available as the next required main-path destination in the 11th Dimension.
References for this chapter
- Dimensions and Level Types in Crash Bandicoot 4: It's About Time
- Off Beat - Crash Bandicoot 4: It’s About Time Walkthrough
- Home Cookin - Crash Bandicoot 4: It’s About Time Walkthrough
- Run It Bayou - Crash Bandicoot 4: It’s About Time Walkthrough
- Crash Bandicoot 4: It’s About Time: All Flashback Tapes Locations
- Crash Bandicoot 4 All Flashback Tape Locations
- Guide for Crash Bandicoot 4: It’s About Time - Off Beat
Snow, ship and freight levels — midgame escalation
The 11th Dimension section begins with Snow Way Out, continues through Stay Frosty and Bears Repeating, and ends with the Neo Cortex boss level 4th Time’s A Charm. Defeating Cortex unlocks Blast to the Past in the Eggipus Dimension. Ship Happens and Building Bridges are alternate timeline levels connected to this section, but they are not required for the direct route through the three main snow levels and the boss. For a first campaign clear, prioritize safe movement and checkpoint progress. Hidden gems, bonus rooms, Flashback Tapes and complete crate routes can be handled on later attempts.
1. Clear Snow Way Out and learn Kupuna-Wa
Snow Way Out is the first required level in the 11th Dimension and introduces the Kupuna-Wa Time Mask. When the mask pickup is available, activate it before entering a sequence of moving ice, falling platforms, countdown crates or fast-moving enemies. Slowing time gives you more reaction time, but it does not replace careful positioning; begin each jump from a stable part of the platform and face the intended landing before leaving the ground.
Ice preserves momentum after you release the movement direction. Start braking before reaching an edge and use short directional corrections rather than holding the stick toward the destination. If you need to change direction during a jump, make that correction early. Late, full-strength corrections are more likely to send Crash or Coco past the next floe.
After the shipwreck sequence, follow the route through the waterfall and floating-ice sections. Use Kupuna-Wa before the falling platforms begin their dangerous cycle, then cross one stable landing at a time. Do not attempt to clear the entire gap in one movement. If you miss the intended floe, look for a lower recovery platform instead of immediately reversing direction.
The hidden gem is on an optional route in the first major floating-ice section, above a platform with crates on the far side. It is not needed for the exit. On the first clear, take the safest route to the checkpoint and leave the gem for a return attempt if reaching it costs repeated lives.
- Activate Kupuna-Wa before the timing sequence, not after the platforms are already falling.
- Brake early on ice and make small directional corrections.
- Use lower recovery platforms when available instead of forcing a reversal.
- Ignore the hidden-gem route during a survival-focused first clear.
2. Complete Stay Frosty without overcommitting to collectibles
Stay Frosty follows the snow-route progression. It mixes ordinary platforming with Kupuna-Wa puzzles and a grind-rail section. On rails, keep Crash or Coco near the center and make small corrections before a jump, gate or camera turn. Large last-second movements are dangerous because the next rail or platform can leave the immediate camera view.
In the moving-ice sections, wait for the next platform to approach instead of always taking the longest possible jump. Use Kupuna-Wa before the ice begins separating or before falling hazards overlap the landing area. If you miss the intended platform, check for a lower surface and use the double jump only after you have established the direction of recovery.
The later rail sequence rewards anticipation. Watch the rail ahead rather than focusing only on the character, and prepare for transitions before reaching the end of the current rail. If a rail death repeats, replay only from the latest checkpoint until the jump rhythm is familiar, then continue the level normally.
The hidden gem is in the platforming route after the bonus entrance and before the later time-mask hazards. It is optional. The level is complete when you reach the exit, whether or not the hidden gem, bonus room or full crate count has been obtained.
- Use restrained stick movements on grind rails.
- Activate Kupuna-Wa before the dangerous ice sequence begins.
- Look for lower recovery surfaces after a missed jump.
- Treat the hidden gem and bonus route as separate return objectives.
3. Survive Bears Repeating and the Polar ride
Bears Repeating is the next required level. Its opening platforming uses snow surfaces, enemies, spring crates and moving ski-lift platforms. When linked platforms change height, wait until the destination side is high enough for a controlled jump. Keep the camera aimed toward the next landing so you can judge both distance and elevation before committing.
The level later changes into a forward Polar ride. Steer early through bends and use broad, shallow movements rather than repeated sharp corrections. Aim Crash or Coco at the line of crates and obstacles rather than at Polar’s body. Jumping too early can make Polar pass beneath elevated crates or collide with the next hazard.
For a story clear, prioritize remaining on the track. The side routes and edge crates are not worth sacrificing a checkpoint attempt. If you die during the ride, use the restart point to learn the next bend and obstacle pattern, then make the same approach with earlier steering. Do not wait until an obstacle fills the screen before changing direction.
A checkpoint begins the final chase sequence, making it useful for practice. Once the ride is complete and the exit is reached, Bears Repeating counts as cleared. The normal hidden gem and any gem-path rewards can be collected later without affecting access to the boss.
- Wait for moving platforms to align before jumping.
- Steer Polar before each bend rather than reacting at the last moment.
- Aim for the obstacle or crate line, not Polar’s center.
- Choose the open survival route before attempting edge collectibles.
4. Handle the alternate timeline levels separately
Ship Happens is the alternate timeline level associated with Snow Way Out. It is not a required replacement for Snow Way Out on the direct route to Stay Frosty and the Cortex boss. Its Cortex sections use his ranged weapon and boost jump: shoot flying enemies to change their state, then use the resulting bounce setup to cross gaps or reach higher platforms. If a bounce setup is missed, stop and reset the position rather than forcing the next jump.
Building Bridges is the alternate timeline level associated with Bears Repeating. It begins with Tawna and uses her hookshot to reach marked points and distant platforms. Approach the electric-wall sequences slowly and wait for the safe cycle before jumping. The later Polar section uses the same early-steering principle as Bears Repeating.
Both levels are useful for alternate-story completion, gems and other rewards, but neither should be inserted into the required order for this chapter. Complete them after the main campaign route is familiar, or when pursuing broader completion goals.
- Treat Ship Happens and Building Bridges as optional timeline levels for this route.
- Use Cortex’s ranged attacks and boost jump deliberately in Ship Happens.
- Wait for safe electric-wall cycles when playing Tawna in Building Bridges.
- Do not delay the boss route for optional alternate-level collectibles.
5. Defeat Neo Cortex in 4th Time’s A Charm
4th Time’s A Charm is the required boss level. Kupuna-Wa is available during the fight, and the mask is most useful when missile markers and electrical hazards overlap. Cortex cannot be damaged by ordinary spinning or jumping attacks. Each successful hit comes from redirecting a Punchbot into him after the Punchbot becomes dizzy and vulnerable.
At the start of each cycle, watch the floor for missile impact markers and move away from the marked areas. When a Punchbot enters, avoid it until its attack sequence ends and it becomes dizzy. Only then spin or slide-kick it toward Cortex. Do not attack it while it is still active, because the timing window has not opened.
After the first successful impact, additional electrical attacks appear. Jump over green ground waves and move through the gaps in the purple tornado-like patterns. When missile markers overlap with electrical hazards, activate Kupuna-Wa early to create a larger reaction window rather than waiting until Crash or Coco is already boxed in.
Later phases remove sections of the arena. Stay on intact floor and follow the remaining perimeter instead of cutting across gaps. Cortex adds red attacks that must be avoided with a jump or a slide depending on their height. Continue the same cycle: evade the arena hazards, wait for the Punchbot to become dizzy, then redirect it into Cortex. Four successful Punchbot impacts defeat him and trigger the level-ending sequence.
- Move away from the missile impact markers.
- Redirect Punchbots only after they become dizzy.
- Use Kupuna-Wa before overlapping hazards remove your reaction time.
- Remain on intact floor as the arena shrinks.
- Land four successful Punchbot impacts.
6. Continue into Blast to the Past
After the boss-ending sequence, Blast to the Past becomes available as the first story level of the Eggipus Dimension. If continuing immediately, begin that level with the same survival-first approach: learn the timing of lava geysers, slide beneath low overhangs and avoid forcing jumps through carnivorous plants or dinosaur hazards.
Blast to the Past includes a grind-rail section and optional crate, gem and Flashback Tape routes. The hidden gem is off the main route during the rail section, and the Flashback Tape requires reaching it without dying earlier in the level. These objectives are better handled on dedicated return attempts after the main path is familiar.
For this chapter, it is enough to defeat Cortex and confirm that Blast to the Past is unlocked on the map. Clearing Blast to the Past continues the campaign but belongs to the next dimension’s progression.
- Watch the boss-ending sequence after the fourth Punchbot impact.
- Confirm Blast to the Past appears as the next story destination.
- Leave its rail gem and Flashback Tape for a practiced return run if necessary.
- Do not confuse unlocking Blast to the Past with completing it.
Before you move on
- Snow Way Out is cleared on the map.
- Stay Frosty is cleared on the map.
- Bears Repeating is cleared on the map.
- Neo Cortex is defeated in 4th Time’s A Charm after four successful Punchbot impacts.
- The boss-ending sequence plays.
- Blast to the Past becomes available on the map.
- Ship Happens and Building Bridges may remain uncleared without blocking this direct story progression.
References for this chapter
- Crash Bandicoot 4 All Hidden Gem Locations
- Crash Bandicoot 4: It’s About Time Walkthrough — TrueAchievements
- Guide for Crash Bandicoot 4: It’s About Time — Stay Frosty
- Guide for Crash Bandicoot 4: It’s About Time — Ship Happens
- Crash 4: Ship Happens walkthrough
- Crash Bandicoot 4: It’s About Time: All Flashback Tapes Locations
- Crash 4 Hidden Gems Location Guide: Where To Find Every Hidden, N.Verted, And Colored Gem
Dino and fossil zones — fossil fueled section
After completing the boss level 4th Time’s a Charm in The 11th Dimension, enter Eggipus Dimension and clear its three required story stages: Blast to the Past, Fossil Fueled and Dino Dash. Building Bridges belongs to the alternate timeline connected to Bears Repeating and is not required here. Rock Blocked is the alternate timeline version of Dino Dash, with a long Dingodile section, and can be deferred without stopping the story. The three required stages combine rails, vines, Cortex’s transformation puzzles, dinosaur chases, lava and narrow recovery windows. Use checkpoints as practice boundaries, learn enemy and obstacle cycles before searching for crates, and treat each chase landing as a separate commitment.
Enter Eggipus Dimension in the correct order
Finish 4th Time’s a Charm before entering Eggipus Dimension. Building Bridges is not part of this prerequisite sequence: it is the alternate timeline level associated with Bears Repeating. Completing it is optional for a first campaign clear and does not replace the boss level.
On the dimensional map, select Blast to the Past first. The normal story route then continues to Fossil Fueled and Dino Dash. Rock Blocked appears as the alternate timeline level associated with Dino Dash. It is useful for later timeline completion and relic practice, but it is not required to unlock the next normal story destination.
- 4th Time’s a Charm is complete.
- Building Bridges is treated as optional timeline content.
- Blast to the Past is selected first.
- Rock Blocked is not used as a replacement for Dino Dash.
Clear Blast to the Past with short, deliberate commitments
Blast to the Past introduces the main prehistoric hazards. Avoid making blind full-distance jumps from platform edges. Move far enough to reveal the next landing, center the character toward that surface, then commit to the jump. When a dinosaur head, moving platform or other timed object controls the route, watch one complete movement cycle before crossing if the landing area is safe enough to wait.
The level includes rail-grinding and vine sections. On rails, use small directional corrections and look ahead for the next transfer or obstacle instead of making large last-second movements. During vine traversal, aim toward the next safe landing rather than holding one direction continuously. If the story objective is simply completion, stay on the obvious forward route and leave side paths, crate puzzles and the hidden gem for a later replay.
After a death, use the latest checkpoint as a short training segment. Identify whether the failed attempt involved a jump, a rail transfer, a vine release or a timed hazard. Repeat that specific action with a slower approach before trying to regain speed.
- Reveal the next landing before committing to a long jump.
- Make small corrections on rails and vines.
- Use checkpoints to isolate individual hazards.
- Ignore optional gem and crate routes during the first survival-focused clear.
Solve Fossil Fueled through Cortex’s enemy transformations
Fossil Fueled is played as Neo Cortex. His blaster changes enemies into forms that function as temporary platforms or bounce objects, while his dash provides repositioning and gap-crossing movement. Treat every enemy as part of the route rather than as a target to eliminate immediately. Before firing, identify what the next section requires: a solid platform, a bounce surface or a cleared line for the dash.
Some puzzles require the same enemy to be transformed more than once. Move to a safe firing position first, then change the enemy only when the resulting form will support the next movement. If the enemy is transformed too early, do not force a dash through an active hazard. Wait for another safe setup or deliberately allow the checkpoint to reset the puzzle.
Cortex’s side-on sections can place the required target behind a platform edge or outside the immediate center of the screen. Keep the character aligned with the next objective before firing. For a story clear, prioritize the exit over complete crate destruction. Cortex’s unusual movement is better learned on a normal completion run than during a perfect-relic attempt.
- Determine the required enemy form before firing.
- Use a safe firing position when a transformation must be repeated.
- Use the dash to reposition after solving the form puzzle.
- Leave difficult crate routes for a later replay.
Handle Dino Dash as separate platforming and chase drills
Dino Dash alternates ordinary platforming with dinosaur escape sequences. In standard sections, wait for straight-line enemies to pass, then jump over them. Venom-spitting enemies require careful jump timing and should not be approached assuming that a spin alone will make the passage safe.
When the dinosaur chase begins, maintain forward movement and target the next solid surface. Do not stop for crates unless they clearly block the route. During the chase, slide beneath low rock formations and delay the following jump until the obstacle has been cleared. Jumping early can make the character strike the underside of the rock or fall short of the next platform.
The later chase includes lava and moving platforms. Treat each visible platform as its own landing rather than trying to cross the entire sequence in one leap. Preserve the double jump for correcting the final part of a jump or reaching the next platform, rather than using it automatically at takeoff. If a platform is missed over lava, recovery is usually not possible; focus on the next restart instead of trying to drift back toward the previous surface.
- Wait for predictable enemy passes in ordinary sections.
- Keep moving during dinosaur chases.
- Slide under low rock obstacles.
- Treat lava platforms as individual landings.
- Reserve the double jump for correction or final reach.
Use checkpoints to learn extended enemy lines
These stages are long enough that repeating the entire level after every death is inefficient. After respawning, regard the latest checkpoint as the start of a separate drill. First observe the obstacle order or platform cycle that caused the death. On the next attempt, repeat the successful movement and slow down again at the next unfamiliar section.
Do not rely on Aku Aku to repair a missed landing. Protection can absorb some contact damage, but it cannot prevent a fall into lava or replace a failed jump. Quantum Masks are also not a stored resource. They appear at designated points for local puzzle sequences, so use the mask for the obstacle it accompanies and continue normally after that sequence ends.
If the same chase repeatedly causes deaths, stop searching for crates and side routes. Clear the forward path first. Once the level is complete, replay it with the checkpoint locations and hazard order already familiar.
- Record the specific hazard responsible for each death.
- Treat each checkpoint as a separate rehearsal section.
- Do not depend on Aku Aku after a missed landing.
- Use Quantum Masks only for the local sequence where they appear.
- Defer crate searches until the route is reliable.
Treat Rock Blocked as optional timeline content
Rock Blocked is the alternate timeline version of Dino Dash. It begins with a substantial Dingodile section before returning to a modified dinosaur-focused route. Dingodile’s vacuum can remove or reposition hazards, but holding it continuously can slow movement and make the next landing harder to read. Use the vacuum for the immediate obstacle, release it, then reposition before continuing.
The later Crash or Coco section reuses the general chase principles from Dino Dash: maintain forward momentum, read low obstacles, slide beneath rock formations and land on solid platforms over lava. Enemy, crate and platform placement changes mean that knowledge from Dino Dash helps with the general rhythm but does not provide an exact route for Rock Blocked.
Rock Blocked does not need to be completed to unlock Out for Launch. Leave it for after the normal story route if the goal is campaign completion. For relic work, first complete the entire level without stopping for crates or alternate routes, then practice the Dingodile and chase sections independently.
- Use Dingodile’s vacuum for immediate hazards rather than continuously.
- Expect altered placements after the Dingodile section.
- Treat Rock Blocked as optional timeline content.
- Delay relic attempts until the route is consistent.
Confirm the fossil section is complete
The required Eggipus section is complete when Blast to the Past, Fossil Fueled and Dino Dash show completion on the dimensional map. Rock Blocked may remain unfinished without blocking the story. After Dino Dash, the next normal destination is Out for Launch in Bermugula’s Orbit.
Do not use collectible progress as the story test. Hidden gems, Flashback Tapes, crate totals, N. Verted objectives and relics are optional for reaching the campaign ending. A Flashback Tape collected during a no-death run unlocks a separate Flashback challenge; it does not replace the normal level or change the required order.
- Blast to the Past is complete.
- Fossil Fueled is complete.
- Dino Dash is complete on the normal route.
- Rock Blocked is either deferred intentionally or completed as optional timeline content.
- Out for Launch is visible as the next required destination.
- No gem, crate total, Flashback Tape or relic is being treated as required for this chapter.
Before you move on
- 4th Time’s a Charm has been defeated before entering Eggipus Dimension.
- Blast to the Past, Fossil Fueled and Dino Dash are marked complete.
- Rock Blocked is correctly identified as optional timeline content.
- Out for Launch is unlocked as the next normal story destination.
- The chapter is considered complete even if its gems, crates, Flashback Tape and relics remain unfinished.
References for this chapter
- Dimensions and Level Types in Crash Bandicoot 4: It's About Time
- How Many Levels Does Crash Bandicoot 4 Have? Levels List, PowerPyx
- Crash Bandicoot 4: It’s About Time Walkthrough — TrueAchievements
- Fossil Fueled Walkthrough — TrueAchievements
- Dino Dash Walkthrough — TrueAchievements
- Rock Blocked Walkthrough — TrueAchievements
- Crash 4: Dino Dash Walkthrough — Gamepressure
- Crash Bandicoot 4 All Hidden Gem Locations
Bermugula’s Orbit and Food Run (Levels 31–36)
Complete the Bermugula’s Orbit route in this order: Out For Launch, optional Timeline level Shipping Error, Stowing Away, Crash Landed, and the required boss level A Hole in Space. The story then moves to The Sn@xx Dimension for Food Run. For an ordinary campaign clear, only Out For Launch, Stowing Away, Crash Landed, A Hole in Space, and Food Run are required here. Shipping Error is optional and can be postponed without blocking the story. Ignore crates, gems, Bumpa Berries, Flashback Tapes, N. Verted objectives, and relics until the route is familiar unless you specifically want those optional goals.
1. Level 31: Out For Launch
Out For Launch begins the Bermugula’s Orbit sequence and combines ordinary platforming with wall-running, elevators, shifting gravity, and rotating hazards. During wall-runs, hold the direction of travel steadily and make small corrections instead of repeatedly flicking the stick. Spin only when an enemy or crate is directly in the route; an unnecessary spin can alter your position and send Crash or Coco away from the wall.
When the route changes gravity, first identify which surface now carries your character. Continue along that surface until the next stable platform rather than jumping immediately after every gravity change. In the inverted wall-running sections, prioritize staying on the route over breaking every crate. If a wall section feels unstable, reach the next checkpoint and use later attempts to learn the crate positions and jump timing.
Treat each checkpoint as a separate practice boundary. After a death, replay only the section after the most recent checkpoint and use a deliberate pace. If a gem, crate line, or side route is beside a moving hazard or a large drop, skip it during the first story attempt. The level exit is the only required objective.
- Make small directional corrections during wall-runs.
- Identify the active floor or wall after each gravity change.
- Wait for elevators and moving platforms to line up before jumping.
- Prioritize the exit over crates and gems on the first clear.
2. Level 32: Shipping Error, optional Timeline content
Shipping Error is the optional Timeline level associated with Bermugula’s Orbit, not a required replacement for Out For Launch. It uses an altered version of the route and includes character-specific sections, so completing it is not necessary to unlock Stowing Away, Crash Landed, A Hole in Space, or Food Run.
For a campaign-clear run, leave Shipping Error until after the required route is complete. If you play it immediately, expect a separate challenge rather than a short continuation of Out For Launch. Its opening includes laser hazards and wall-running, while the character sections require you to adapt to the current character’s attack and movement tools. Do not spend continues trying to perfect its crates during the story push.
Return later for its own completion, gems, Flashback Tape if available on your run, N. Verted goals, relics, or achievement requirements. Dying in Shipping Error does not prevent progress through the main Bermugula route.
- Mark Shipping Error as optional Timeline content.
- Do not count it as a required story stage for campaign completion.
- Postpone its collectibles and relics until the required route is finished.
3. Level 33: Stowing Away
Stowing Away follows Out For Launch on the required Bermugula route. Its cargo passages and air ducts leave little room to correct a poor entry, so center Crash or Coco with the next opening before leaving a platform. When a rotating obstacle approaches, wait for a clean cycle instead of trying to squeeze past its edge.
Learn the first hazard after every checkpoint. Enter ducts at controlled speed, make the required jump or slide, and avoid unnecessary spinning in confined spaces. If a miss drops you onto a lower ledge, look for a recovery route before jumping again; a lower platform may return you to the main path. Do not immediately restart unless the character has no safe route back.
Mask sections have specific purposes. Activate the supplied mask when its effect changes the obstacle or timing in front of you, then concentrate on positioning and the next landing. A mask that solved one room may not solve the following room. During optional searches, remember that the hidden gem route uses a gravity-mask section and is substantially riskier than the normal story path.
- Center Crash or Coco before entering an air duct.
- Watch the first moving obstacle after each checkpoint.
- Use the supplied mask for the current puzzle rather than holding its effect without a plan.
- Ignore risky gem routes during the first completion.
4. Level 34: Crash Landed
Crash Landed alternates regular platforming with underwater and riding sections involving an alien creature. Begin steering toward the next landing before the current platform ends. The mount carries momentum, so waiting until the last instant and then holding a direction can cause an overshoot. Aim for the center of the next safe platform whenever possible.
During riding sections, keep the next landing as the primary target. Crates and fruit near an edge are optional and are not worth sacrificing a long attempt for while learning the sequence. If you are thrown into a lower recovery area, stop trying to force the original jump and look for the return route. A controlled recovery is preferable to turning a survivable mistake into a death.
Ika-Ika appears during the stage and allows movement between the floor and ceiling. Before switching surfaces, look beyond the immediate obstacle and identify the next safe landing. A gravity change that avoids one hazard can place Crash or Coco directly into the next enemy or platform edge if you switch without looking ahead.
After a death, use the nearest checkpoint to rehearse the current riding pattern. Focus on the next landing, enemy, and surface change instead of trying to reproduce the whole level perfectly.
- Steer toward the next landing before the current platform ends.
- Ignore edge collectibles during the first clear.
- Check the next hazard before switching between floor and ceiling.
- Use checkpoints to practice one riding segment at a time.
5. Level 35: A Hole in Space, required boss level
A Hole in Space is the Bermugula’s Orbit boss level. The opening contains three energy-rail sections with Bumpa Berries. Surviving the rails is required; collecting the full Bumpa Berry set is optional. Keep your character centered on the rail, make controlled lane changes, and prioritize the next transition rather than chasing a berry near a dangerous edge.
In the first boss approach, Akano provides the Dark Matter Spin for crossing moving platforms in the asteroid field. Use the spin to cover gaps and avoid hazards, but release it when you need precise landing control. Watch the N. Tropies’ laser fire and do not remain on a platform longer than necessary. After the Akano section, Kupuna-Wa replaces it. Activate slow motion before a platform cycle becomes difficult, then make one deliberate jump at a time toward the shielded station.
At the station, Ika-Ika lets Crash or Coco run on the floor or ceiling. N. Tropy fires energy projectiles across different heights, so switch surfaces or jump according to the projectile lane. Laser walls are removed by spinning the yellow-and-black generator at the end of each barrier. Reach the generator, destroy it, and continue; the N. Tropies are not defeated by direct attacks.
After reaching the far side, an energy wall chases you back across the station. Reverse direction, avoid the projectiles, and destroy each generator. Some projectiles form linked barriers, so use floor-and-ceiling changes to enter the open lane. One N. Tropy is removed during this sequence. The remaining N. Tropy then begins another chase in the opposite direction. Repeat the same dodge-and-generator process until the final barrier is destroyed and the encounter ends.
If the opening rails are causing repeated deaths, practice until you can reach the asteroid field consistently. Once a chase begins, focus on the next projectile lane and generator rather than trying to attack whenever a boss is visible.
- Survive all three rail sections; complete Bumpa Berry collection is optional.
- Use Akano for the first moving-platform approach.
- Use Kupuna-Wa to slow difficult platform cycles.
- Use Ika-Ika to switch between the floor and ceiling.
- Destroy each spinning laser generator during the chases.
- Do not try to spin or strike the N. Tropies directly.
6. Level 36: Food Run
After A Hole in Space, the map advances to The Sn@xx Dimension and Food Run becomes the next required stage. Food Run uses fast transitions, moving vehicles, wall-running, mask changes, and narrow landings. Identify the next landing before leaving the current platform instead of rushing toward every visible crate.
Keep Crash or Coco near the center of the route whenever possible. In the vehicle sequences, jump toward the next vehicle early enough to account for its movement, then use the mask effect when the route requires it. Do not make a last-second lateral jump simply to reach an optional crate. During wall-running sections, aim for the wall you need next and avoid excessive directional input once the run begins.
The level uses multiple mask effects in sequence. Treat each mask section as its own puzzle: first identify whether the obstacle requires phasing, time control, gravity changes, or dark-matter movement, then activate the relevant mask and plan the next two or three actions. If a platform is missed, immediately check for a lower recovery surface. A controlled recovery is better than holding jump and turning a survivable mistake into a death.
On the first clear, ignore dangerous side paths and optional crates. The hidden gem is available near the beginning of the normal stage, but collecting it is not required for progression. Completing Food Run opens Rush Hour, the next required Sn@xx stage; it does not complete the entire dimension.
- Read the next landing before jumping.
- Stay centered during fast-moving vehicle sections.
- Use the mask that matches the obstacle instead of assuming one mask solves every puzzle.
- Use lower recovery platforms when available.
- Leave the hidden gem and risky crates for a later replay.
- Confirm that Rush Hour is available after Food Run.
Before you move on
- Level 31, Out For Launch, is marked complete in Bermugula’s Orbit.
- Level 32, Shipping Error, may remain incomplete because it is optional Timeline content.
- Level 33, Stowing Away, is marked complete.
- Level 34, Crash Landed, is marked complete.
- Level 35, A Hole in Space, is marked complete and both N. Tropies are defeated.
- The game returns to the dimensional map after A Hole in Space.
- Level 36, Food Run, is marked complete in The Sn@xx Dimension.
- Rush Hour is available from the map.
References for this chapter
- Dimensions and Level Types in Crash Bandicoot 4: It's About Time
- How Many Levels Does Crash Bandicoot 4 Have? Levels List, PowerPyx
- Neoseeker: A Hole in Space Walkthrough
- Neoseeker: Shipping Error Walkthrough
- Crash Bandicoot 4 All Hidden Gem Locations
- Gamepressure: Crash 4 Food Run Walkthrough
- Crash 4 Flashback Tapes
Late game: Rush Hour through Cortex Castle (Levels 37–41)
Food Run is level 36 and belongs to the previous chapter. This chapter begins with the required level 37, Rush Hour, and covers the remaining required platforming route: The Crate Escape at level 38, Nitro Processing at level 39, Toxic Tunnels at level 40 and Cortex Castle at level 41. After Cortex Castle, continue to The Past Unmasked, the final boss level. Seeing Double is level 42, an optional Timeline stage connected to Cortex Island; it is not required for The Past Unmasked or the normal campaign ending. On a first completion, prioritize safe movement and checkpoint learning over crates, gems, Flashback Tapes, N. Verted versions and relics.
Begin at Rush Hour, level 37
Enter Rush Hour after completing Food Run. Rush Hour is a required Main Path level, not a Timeline stage. The level is divided between Dingodile's opening section and a later Tawna section, so reaching the character transition does not complete the level. You must finish both portions and reach the final exit.
During Dingodile's route, use solid platforms as observation points before crossing traffic. Watch the movement of vehicles and platforms, then commit to one landing at a time. Aim for the middle of each platform rather than its edge, because the next movement often begins immediately after landing. Dingodile's vacuum can interact with objects and enemies, but a first-clear run does not require clearing every Nitro crate or taking every side route.
When a checkpoint follows a difficult crossing, treat it as the start of a practice segment. If you die later, repeat the checkpoint section rather than replaying the entire opening at full speed. Avoid experimenting with vacuum interactions beside Nitro crates until you already know the safe route.
- Enter Rush Hour as the required level after Food Run.
- Remember that Dingodile's section is only the opening portion.
- Use solid platforms to observe traffic cycles.
- Avoid optional Nitro and crate detours on the first clear.
- Use checkpoints to isolate difficult crossings.
Finish Rush Hour with Tawna
After the character transition, Tawna takes over for the remainder of Rush Hour. Her route combines wall jumps, hookshot targets, traffic, rails and narrow landings. Approach each hookshot target from controlled movement rather than firing while already falling. Make the jump first, then use the hookshot when the target is lined up and the destination is visible.
In wall-jump shafts, redirect after each wall contact. Holding one direction for the entire sequence can send Tawna too far past the next surface. For traffic crossings, wait for the vehicles to create a usable opening and make small corrections after landing. On rails, stay centered and jump only when an obstacle reaches the danger area; settle back onto the rail before preparing for the next obstacle.
Do not leave the level when the Tawna section begins. Continue through the late traffic and hookshot sequences until the level-ending transition appears. If a late segment repeatedly causes deaths, practice it from the nearest checkpoint until the movement pattern is consistent, then make a complete run.
- Aim hookshots from stable, controlled positions.
- Redirect wall jumps after each wall contact.
- Read traffic movement before crossing.
- Stay centered on rails and jump for specific obstacles.
- Reach the final exit to complete Rush Hour.
The Crate Escape, level 38: complete Cortex's section
The Crate Escape follows Rush Hour and is also required Main Path progress. The level begins with Neo Cortex. His ray changes suitable enemies into temporary bounce platforms, allowing him to reach higher ledges, vents and rooftops. These platforms are temporary, so identify the next landing before transforming an enemy and move through the route without hesitation.
When TNT appears near a required platform, first check where the blast will leave Cortex standing. Activate it only when the resulting explosion will not remove the platform or force an unsafe landing. Cross crushers between their attack cycles and continue decisively once the opening appears. Nitro crates cause immediate failure on contact, so jump over them and avoid testing Cortex's ray beside them.
Optional crates, the hidden gem and other side objectives can be postponed. The Cortex portion is not the end of The Crate Escape. Continue until control changes to Crash or Coco, then prepare for the closing section.
- Begin The Crate Escape with Neo Cortex.
- Use Cortex's ray to create temporary bounce platforms.
- Plan the landing before transforming an enemy.
- Check TNT blast consequences before activating it.
- Cross crushers during their safe openings.
- Continue after control changes from Cortex.
The Crate Escape: complete the Crash or Coco closing route
The second portion of The Crate Escape returns control to Crash or Coco and uses forward-moving platforms, containers, airborne obstacles and explosive hazards. Keep the camera aimed at the next landing and avoid backtracking for missed crates during the progression run. Wide, central landings are safer than trying to catch the nearest edge of a platform.
If an explosive enemy or crate occupies the next platform, move to the safe side and jump over it when the route allows. When a platform begins to collapse, commit to the next solid surface instead of waiting for the current one to become safe again. Preserve momentum, but do not jump before the destination is visible.
This section can be frustrating because a late death sends you back to an earlier part of the level. Learn the final sequence separately from its checkpoint, then combine it with the opening once the landing pattern is familiar. The Crate Escape is complete only after the closing Crash-or-Coco route reaches its exit; the earlier Cortex transition is not the completion point.
- Expect a second playable section after Cortex's portion.
- Aim for wide, central landings.
- Jump around explosive hazards when possible.
- Do not detour for optional crates during the first clear.
- Reach the final exit to complete The Crate Escape.
Nitro Processing, level 39: control slopes, cogs and gravity
After The Crate Escape, enter Nitro Processing. This required level combines watery slopes, electric enemies, collapsing platforms, rotating cogs, Nitro crates and Quantum Mask sections. At each checkpoint, pause long enough to identify whether the next route rises over a slope, crosses a cog or changes between floor and ceiling.
Watery slopes carry Crash or Coco farther than ordinary ground. Use short jumps and reduce momentum before a crest so the landing does not carry into an enemy or gap. Bypass enemies when the required path is open beside them. Nitro crates are not automatically objectives, so leave them untouched unless they block the main route or are part of a required detonator sequence.
When Ika-Ika is available, confirm which surface is the destination before changing gravity. On rotating cogs, remain near a controllable central area and wait for the next platform to align. Do not jump toward a Nitro lane until the landing beyond it is visible. Kupuna-Wa is most useful when a specific cog, slope or moving hazard needs a longer reaction window; activate it for the obstacle itself rather than wasting its duration before the approach.
If TNT and Nitro appear together, trigger TNT only when the explosion leaves the required landing usable. Follow the main factory route, use checkpoints to divide the level into manageable sections and continue to the exit without searching for hidden crates.
- Reduce momentum before watery-slope crests.
- Bypass enemies and Nitro when they do not block progress.
- Confirm the destination surface before changing gravity.
- Wait for cogs to align before committing to a jump.
- Use Kupuna-Wa for a specific timing window.
- Reach the Nitro Processing exit.
Complete Toxic Tunnels, level 40
Toxic Tunnels follows Nitro Processing and is required campaign progress. It contains long hazard sequences, narrow platforms and repeated timing cycles. Treat each checkpoint as a separate section: identify the next safe platform, observe the hazard cycle and move only when the route is open.
Do not let collectible routes distract you from the first clear. Toxic Tunnels has optional gem paths and side objectives, including a colored-gem route that is separate from ordinary story completion. If a jump fails repeatedly, return to the nearest checkpoint and practice the timing without attempting to collect anything extra.
Keep the camera directed toward the next landing and use small directional corrections after touching down. When environmental hazards leave only a narrow safe area, wait for the complete opening rather than trying to squeeze through the edge of the cycle. Reach the level exit before returning for gems or other completion targets.
- Enter Toxic Tunnels after Nitro Processing.
- Use each checkpoint as an independent practice section.
- Prioritize safe landings over collectible routes.
- Wait for complete hazard openings.
- Reach the exit before pursuing optional objectives.
Complete Cortex Castle, level 41
Cortex Castle is the final required platforming level before The Past Unmasked. Its later sections combine Lani-Loli, Kupuna-Wa, Akano and Ika-Ika in rapid succession. Warm up before entering if your timing feels inconsistent, because the level expects quick transitions between phasing, time control, dark-matter movement and gravity changes.
Use Lani-Loli to phase required platforms and laser hazards in or out. Use Kupuna-Wa when spinning blades or other moving hazards need to be slowed for a precise crossing. Akano is for controlled dark-matter movement across longer gaps, while Ika-Ika should be used only after confirming whether the next landing is above or below Crash or Coco. In mask chains, identify the next mask and landing before activating the current ability.
Later sections can place TNT, Nitro, lasers and multiple masks close together. Do not rush simply because a mask is available. Move from a stable platform, execute the immediate action and re-center before the next transition. At the final Nitro barrier, use the required activation crate when the route is safe, then pass through the exit. Optional crates, the Flashback Tape and hidden routes can be revisited later.
- Treat Cortex Castle as required level 41.
- Identify the next mask and landing before moving.
- Phase lasers and platforms with Lani-Loli.
- Use Kupuna-Wa for specific blade or timing windows.
- Confirm the destination surface before using Ika-Ika.
- Reach the Cortex Castle exit.
Proceed to The Past Unmasked and leave Seeing Double optional
Once Cortex Castle is complete, proceed to The Past Unmasked for the final boss and the ordinary campaign ending. Seeing Double appears as level 42 and is a separate optional Timeline level. It is not a replacement for Nitro Processing, Toxic Tunnels or Cortex Castle, and it is not required before the final boss.
If the map offers Seeing Double, postpone it unless the goal is to clear optional Timeline content. The required route remains Rush Hour, The Crate Escape, Nitro Processing, Toxic Tunnels and Cortex Castle, followed by The Past Unmasked. Collectibles, N. Verted versions, Flashback Tapes and relics are separate goals and do not need to be completed during this progression run.
- Finish Cortex Castle before leaving the required platforming route.
- Proceed to The Past Unmasked for the final boss.
- Do not substitute Seeing Double for any required level.
- Treat Timeline, gem, tape, N. Verted and relic objectives as optional for the normal ending.
Before you move on
- Food Run, level 36, was completed in the preceding chapter.
- Rush Hour, level 37, is cleared through both Dingodile's and Tawna's sections.
- The Crate Escape, level 38, is cleared through Cortex's opening and the closing Crash-or-Coco section.
- Nitro Processing, level 39, is cleared and its exit transition is reached.
- Toxic Tunnels, level 40, is cleared after Nitro Processing.
- Cortex Castle, level 41, is cleared before The Past Unmasked.
- Seeing Double, level 42, is not counted as required story progress.
- The Past Unmasked is selected next for the final boss and normal campaign ending.
References for this chapter
- Dimensions and Level Types in Crash Bandicoot 4: It's About Time
- Crash Bandicoot 4: It's About Time Walkthrough and Guide
- Rush Hour Walkthrough, Neoseeker
- The Crate Escape Walkthrough, Neoseeker
- Nitro Processing Walkthrough, Neoseeker
- Cortex Castle - Crash Bandicoot 4: It's About Time Walkthrough - Neoseeker
- How Many Levels Does Crash Bandicoot 4 Have? Levels List, PowerPyx
Toxic Tunnels and the Cortex Castle approach
The required late-game route after Nitro Processing is Toxic Tunnels, then Cortex Castle, followed by The Past Unmasked. Seeing Double is an optional timeline level connected to Cortex Castle and is not required to trigger the normal ending. Clear the two regular platforming levels first, then treat The Past Unmasked as a separate boss level with its own fixed sequence.
1. Follow the required route and ignore optional timeline content
After completing Nitro Processing, travel to Toxic Tunnels. Finish its ordinary route, then continue to Cortex Castle. You do not need to complete Seeing Double, every Flashback level, every N. Verted level, or every collectible objective before entering The Past Unmasked. Seeing Double is an alternate timeline level associated with Cortex Castle; save it for postgame or a separate completion route.
The campaign-ending route is therefore straightforward: clear Toxic Tunnels, clear Cortex Castle, enter The Past Unmasked, defeat Neo Cortex, and allow the ending sequence to play. Optional gems, tapes, relics, and timeline stages do not replace any of those required steps.
- Complete Nitro Processing before starting this route.
- Clear Toxic Tunnels through its ordinary exit.
- Clear Cortex Castle through its ordinary exit.
- Treat Seeing Double as optional timeline content.
- Do not delay the ending for collectibles or Flashback challenges.
2. Clear Toxic Tunnels through the ordinary exit
Toxic Tunnels is built around rotating drums and cogs, electric fences, shielded rats, electric enemies, wall-running, and mine-cart sections. On the first story attempt, prioritize reaching the next checkpoint and learning the safe route. Ordinary crates, the bonus path, the Flashback Tape, and the Colored Gem route can all be handled later.
At rotating drums and cog platforms, wait until the next surface is aligned before committing to the jump. Near electric fences, make small directional corrections instead of holding the stick or movement key continuously. If an enemy occupies the landing platform, remove it before jumping; a blind landing into a shielded rat or electric enemy is usually more dangerous than losing a few crates.
When the level enters a mine-cart or side-scrolling section, watch one movement cycle before crossing. Use a stable ledge, background lane, or safe recess whenever the route provides one. Do not assume that remaining on the most obvious rail is always safest. Some crossings require jumping between moving carts or using a cart to reach the next platform. If you die, use the checkpoint as a practice boundary and repeat only the failed movement sequence rather than rushing the whole section.
- Watch rotating machinery before crossing.
- Prioritize solid platforms over ordinary crates.
- Clear enemies from landing zones.
- Use checkpoints to rehearse mine-cart and wall-running sections.
- Reach the normal exit before attempting optional objectives.
3. Leave the Toxic Tunnels Colored Gem gauntlet for later
The large vault door near the early checkpoint opens only after you have collected all four Colored Gems elsewhere in the campaign. This is an optional challenge route, not the way forward to Cortex Castle. It contains several linked obstacle sections with rotating drums, mine-cart tracks, floating crates, TNT, Nitro, swinging lamps, and cog platforms. The route ends at Toxic Tunnels' Hidden Gem.
If you return for it, practice each Colored Gem section separately in your mind before attempting a full run. Do not break crates merely because they are visible if doing so forces an unsafe jump. Watch the timing of carts and swinging lamps, and use TNT or enemy movement only when the next landing area is clear. The route has no role in unlocking The Past Unmasked, so a failed attempt should not interrupt your story progress.
The safest order is to finish Toxic Tunnels normally, continue through Cortex Castle and The Past Unmasked, then return with the Colored Gems when you are deliberately working toward completion objectives.
- All four Colored Gems are needed to open the vault door.
- The vault route is optional.
- The route awards the Hidden Gem rather than story progression.
- Do not combine a first story clear with a difficult crate or gem attempt.
4. Divide Cortex Castle into checkpoint-sized mask drills
Cortex Castle is the required regular level immediately before The Past Unmasked. Its later sections combine the Quantum Masks, so approach it as a series of short drills rather than one uninterrupted reaction test. In the early Lani-Loli sections, identify which platforms must be phased before activating the mask. Phasing a surface too soon can remove the platform you need for the landing.
When Ika-Ika appears, locate the destination platform before changing gravity. Use the visual position of the next safe surface rather than switching repeatedly while moving. Akano is used for long dark-matter spins and wide gaps; begin the spin only when the landing direction is clear. Kupuna-Wa slows nearby action and is especially useful when moving through fast blades, bouncing hazards, or Nitro-related sequences.
The late section cycles through the masks and is the part worth rehearsing before attempting the Flashback Tape or a perfect relic. Stop at each checkpoint and identify the next mask pickup, the next landing surface, and the hazard that will move when the mask is activated. Wait for a favorable cycle instead of forcing a transition at the worst possible moment. Near the end, use the provided mask sequence to pass the laser and Nitro obstacles, activate the green exclamation crate when it is part of the route, and continue to the exit.
The Cortex Castle Flashback Tape is located in the late mask-and-laser gauntlet. It is not required for the normal clear, and collecting it requires reaching that point without dying since entering the level. Leave it for a dedicated attempt after the ordinary exit is consistent.
- Use Lani-Loli only after identifying the required solid and phased surfaces.
- Locate the landing platform before changing gravity.
- Use Akano for planned long crossings, not emergency improvisation.
- Use Kupuna-Wa to widen reaction windows around fast hazards.
- Practice the final mask gauntlet before hunting the Flashback Tape.
5. Defeat Neo Cortex in The Past Unmasked
The Past Unmasked is a separate boss level. Neo Cortex is not defeated by directly attacking him. You must destroy his weapons and redirect rocket-launching enemies into him. The arena loses floor space throughout the fight, so stay near the active platform or weapon and avoid unnecessary movement across gaps.
In the opening phase, the metal grid loses its first rows and a weapon appears in the center. Avoid the circular energy blasts and jump on the weapon three times to destroy it. Two more weapons then appear near the corners; jump on each three times. The floor continues to shrink, so make every landing deliberate. When the rocket enemy appears at the lower right, avoid its rockets, spin the enemy, and send it into Cortex.
Cortex next uses Lani-Loli. The arena expands, but waves of platforms disappear as they approach. Jump over each disappearing wave and stay on a platform that remains visible. After the waves, destroy the returning weapons with three jumps each and redirect the next rocket enemy into Cortex.
During the laser phase, Cortex fires three horizontal lasers while moving across the arena. Jump over red lasers and duck or slide under blue lasers. When gravity reverses, keep the same color rules but reassess the direction of the hazard instead of repeating the previous jump rhythm. After the laser sequence, destroy the weapons that appear and send the resulting rocket enemy into Cortex.
The next section uses Kupuna-Wa. Platforms fall away while time periodically slows. Use the slow-time effect to make controlled jumps, destroy the weapons, and redirect the rocket enemy that follows. In the final phase, four weapons appear while rotating lasers sweep the arena. Destroy each weapon with three jumps, then spin all four rocket enemies into Cortex. The final enemy completes the fight.
If you fail, identify the phase that caused the death and rehearse that pattern on the next attempt. There is no need to replay Seeing Double or collect optional objectives before trying again. After the final rocket enemy reaches Cortex, let the ending and credits play before checking the map.
- Destroy each weapon with three jumps.
- Redirect rocket enemies into Neo Cortex.
- Jump over red lasers.
- Duck or slide under blue lasers.
- Relearn the pattern after gravity reverses.
- Use Kupuna-Wa during the falling-platform section.
- Redirect all four final rocket enemies.
Before you move on
- Toxic Tunnels has been cleared through its ordinary exit.
- Cortex Castle has been cleared through its ordinary exit.
- Seeing Double remains optional and does not block the ending.
- The Past Unmasked has been completed by destroying the final weapons and redirecting the four final rocket enemies into Neo Cortex.
- The campaign ending and credits have played, and the game returns to the postgame map or completion state.
References for this chapter
- Toxic Tunnels - Crash Bandicoot 4: It's About Time Walkthrough - Neoseeker
- Cortex Castle - Crash Bandicoot 4: It's About Time Walkthrough - Neoseeker
- Crash Bandicoot 4: It's About Time: All Bosses and How to Beat Them
- Crash 4: Neo Cortex, final battle - how to beat?
- Guide for Crash Bandicoot 4: It's About Time - Seeing Double - TrueAchievements
- Crash 4 Hidden Gems Location Guide: Where To Find Every Hidden, N.Verted, And Colored Gem
Bosses: common patterns and counterplay
Crash Bandicoot 4: It’s About Time uses six required boss or boss-style encounters on the normal story route. N. Gin, Louise, N. Brio, Neo Cortex, the N. Tropy twins, and the final Neo Cortex fight each use a different counterattack rule. You generally cannot damage the boss by touching or spinning the boss directly. Instead, survive the active hazard, manipulate the summoned enemy or machine, and use it against the target during the brief opening. These encounters are the same original-release fights on the Windows versions distributed through Battle.net and Steam.
Prepare for a boss attempt
Enter the arena with the progression objective in mind: survive the pattern and perform the required counter, not collect crates or gems. Optional rewards near a boss can be replayed later, so do not turn a first clear into a collectible attempt. Before the cutscene ends, confirm that jump, spin, slide or crouch, and the Quantum Mask button all respond correctly. A controller is useful for analog movement, but the important requirement is that your chosen bindings are consistent.
Use the first attempt to identify the arena’s safe lanes and the warning animation for each attack. When a life is lost, select the available restart or checkpoint option and begin by re-establishing the position that kept you safe during the previous cycle. Do not immediately repeat the same failed movement. Identify whether the failure came from a missed telegraph, a late jump, an unsafe counter, or a platform committed to too early.
- Test movement, jump, spin, slide or crouch, and mask inputs before committing to the fight.
- Ignore optional crates and gems during the first story clear.
- After a death, restart from the boss checkpoint and correct the specific failed action.
Use the read-dodge-counter rhythm
The reliable pattern for most Crash 4 bosses is read, dodge, counter, reset. Read the color, projectile, summoned enemy, or platform movement that announces the attack. Dodge without trying to attack at the same time. Counter only after the hazard has created a safe opening, then return to a stable position before the next cycle begins.
A win window is the short period in which the counter object can reach the boss or the boss is exposed after completing an attack. Missing that window is safer than chasing it through an active hazard. Keep Crash or Coco near the portion of the arena that gives access to both sides, but move away from the center when the center becomes the danger zone. Do not assume that a pattern is finished merely because the first projectile has passed; several encounters add a second hazard before the counter object appears.
- Watch for the warning before moving.
- Separate survival from the counterattack.
- Take one controlled counter opportunity rather than panic-spinning through hazards.
Stage Dive: defeat N. Gin
N. Gin’s Rawk-It Head fight has four phases built around conveyors, energy beats, attacking minions, and short platforming routes. At the start of each phase, minions rush toward Crash or Coco. Spin the minions back into the large speakers. You need to destroy the required speaker targets before N. Gin becomes reachable.
On the wider conveyor sections, green beats must be jumped and red beats must be avoided by ducking or sliding underneath them. Keep moving with small corrections instead of repeatedly jumping; unnecessary jumps make it harder to read the next beat. Once the minions have been returned and N. Gin is stunned, climb the temporary route immediately. Use Lani-Loli to phase the relevant objects and reach him before the opening closes.
The final section replaces the stable conveyor with small moving platforms. Do not rush the first jump. Land securely, then continue across the platforms while handling the minions. After the last speaker sequence, use Lani-Loli again to reach N. Gin and deliver the final hit. The important correction for this fight is that Lani-Loli, not Akano, is the mask used for the approach sections.
- Spin the incoming minions into the speakers.
- Jump green beats and slide or duck under red beats.
- Use Lani-Loli during each platforming route to reach N. Gin.
- Reset your position after every successful hit.
Jetboard Jetty: defeat Louise
Louise is a required boss-style encounter at the end of Jetboard Jetty. Crash or Coco remains on the jetboard and cannot attack Louise directly. Instead, guide the knife-wielding rat enemies into Louise’s upright tentacles. When a tentacle slams down, its landing area is highlighted first. Use that warning to move out of the marked zone while keeping the pursuing enemies close enough to be caught by the next tentacle strike.
The encounter escalates from one tentacle to two and then three. Continue riding in broad loops rather than making abrupt lateral movements near the arena edge. The jetboard boost is useful when the rats are too close or when a tentacle warning forces a quick escape. Your objective is to have the tentacles destroy the pursuing enemies; do not try to collide with Louise or the tentacles yourself.
- Keep the pursuing enemies near an upright tentacle.
- Leave every highlighted slam area before the tentacle lands.
- Use the jetboard boost to recover space when the enemies close in.
- Complete all three tentacle sections to finish Jetboard Jetty.
Trouble Brewing: defeat N. Brio
N. Brio begins by throwing pink potions. When a potion lands, jump over the expanding energy ring. Stay close enough to the landing area that a short hop clears the ring, but do not stand directly on the potion impact point. The damaging counterattack comes from the green potions: each creates a blob creature that can be spun back into Brio.
The first sequence creates one blob, the next creates two, and the following sequence creates three. Return every blob to Brio before the next phase begins. Keep your attacks deliberate; a missed spin can leave a blob active while the next potion pattern starts. After the potion phase, Brio drinks the potions and becomes a large green creature. Lure him toward one side, avoid his ground slams and expanding rings, then pass around him with a double jump when he commits to an attack.
When Brio becomes dizzy, the Akano mask appears. Activate Akano’s Dark Matter Spin and use it to push Brio off the arena edge. Repeat this process for each dizzy opening. Akano is required for the final phase, so do not treat the mask as optional or waste the opening by attacking with an ordinary spin.
- Jump over the rings from the pink potions.
- Spin each green blob back into Brio: one, then two, then three.
- During the monster phase, lure Brio away from your escape route.
- Use Akano’s Dark Matter Spin only when Brio is dizzy and exposed.
4th Time’s a Charm: defeat Neo Cortex
The first Neo Cortex fight begins with Kupuna-Wa available. Cortex fires green missiles into the arena. Keep moving and watch the impact locations. When the spinning robot enters, avoid it until it becomes dizzy. Then spin the robot into Cortex. The robot, not Cortex himself, is the counter object.
The next phase adds electricity pylons that fire energy projectiles. Jump the green attacks and avoid the smaller projectiles by moving to a safe part of the square arena. Kupuna-Wa can slow the sequence when the projectiles overlap, but slowing time does not make an unsafe position safe, so activate it while already positioned away from an impact zone.
Later phases combine missiles, electric projectiles, shrinking floor sections, and red attacks that must be ducked or slid under. When the robot appears, wait for its dizzy state and send it back to Cortex. The fight requires four successful robot counters. As the arena shrinks, prioritize a stable landing over reaching the robot immediately; another opening is preferable to a death caused by crossing a disappearing section.
- Use Kupuna-Wa to create reaction time during overlapping attacks.
- Avoid missiles and energy projectiles before approaching the robot.
- Send the dizzy robot into Cortex four times.
- Slide or duck under the red attacks in the final phase.
A Hole in Space: defeat the N. Tropy twins
The N. Tropy encounter begins with a rail section. Complete it without treating the opening as a direct fight. Afterward, use Akano’s Dark Matter Spin to cross the moving platforms while avoiding the twins’ laser fire. Keep the spin controlled near platform edges; the goal is to reach the central station, not to remain airborne indefinitely.
At the next section, Kupuna-Wa slows the fast-moving platforms. Land on a platform before releasing the slow effect. If a platform is moving left, aim for its right side, and reverse that positioning when it moves right, giving yourself a better chance to remain on it after the movement resumes.
The final section uses Ika-Ika to reverse gravity. Destroy the red laser conduits by spinning their bases, first while moving away from one N. Tropy and then during the return chase from the other. Keep moving after every conduit and switch gravity promptly when the safe route changes. The conduits provide useful cover from some attacks, but do not stop in their vicinity longer than necessary.
- Use Akano to cross the first moving-platform route.
- Land before releasing Kupuna-Wa’s time slow.
- Use Ika-Ika to reach conduits on the floor or ceiling.
- Destroy the conduits during both chase sections.
The Past Unmasked: defeat the final Neo Cortex
The final fight starts on a metal grid. Red sections indicate floor that is about to fall. In the first phase, dodge the circular energy blasts and jump on the central blaster turret three times. After it is destroyed, the floor changes and two more turrets appear in the corners. Jump on each corner turret three times while preserving a route across the remaining grid.
After the turret sequence, a rocket-launching enemy appears. Dodge its rockets, then spin the enemy into Cortex for the first direct damage point. The next phase uses Lani-Loli. The arena expands, and waves of platforms that phase out travel across the field. Jump over each disappearing-platform wave, then destroy the two turrets that appear while continuing to watch the missing floor. A second rocket enemy must be spun into Cortex.
Cortex then fires red and blue lasers while moving across the arena. Jump over red lasers and slide or duck under blue lasers. When gravity reverses, keep the same laser rules relative to Crash’s current footing and avoid committing to a jump until the floor is visible. Destroy the next pair of turrets and return the rocket enemy to Cortex.
The following section combines falling platforms with intermittent time slow. Move through the platform route without rushing the next jump, destroy the turrets, and return the rocket enemy to Cortex. In the final wave, four turrets appear while rotating lasers sweep the arena. Destroy all four turrets, then handle the four rocket enemies. Defeat them by spinning them into Cortex, one at a time, while waiting for the rotating lasers to clear. The final minion sequence is the completion point for the boss fight.
- Jump on each turret three times before attempting the rocket counter.
- Use Lani-Loli during the phase-out platform waves.
- Jump red lasers and slide or duck under blue lasers.
- Recheck your footing after gravity reverses.
- Destroy the four final turrets, then return all four rocket enemies to Cortex.
Before you move on
- N. Gin is defeated at the end of Stage Dive.
- Louise is defeated at the end of Jetboard Jetty and the level completion sequence begins.
- N. Brio is defeated at the end of Trouble Brewing.
- Neo Cortex is defeated in 4th Time’s A Charm.
- Both N. Tropy bosses are defeated in A Hole in Space.
- The final Neo Cortex encounter in The Past Unmasked is completed by defeating the final rocket enemies.
- The post-fight story sequence begins and the Windows campaign proceeds to its ending sequence or credits.
- Optional boss crates, gems, Flashback Tapes, N. Verted rewards, and relics are left for replay sessions if they interfere with the main-story clear.
Flashback Tapes: finding, collecting and no-death techniques
Crash Bandicoot 4: It’s About Time contains 21 Flashback Tapes hidden in selected main-story levels. Each tape unlocks a separate side-scrolling Flashback Level. Flashback content is optional for completing the normal campaign, defeating the final boss and reaching the standard ending, but the tapes and their challenge stages matter for higher completion goals. The key rule is strict: you must reach the tape before dying in that attempt. A death after collecting the tape does not invalidate it, but you must still finish the containing level so the game records the unlock. The same gameplay rule applies to the original-release gameplay on Windows through Battle.net and Steam.
Identify tape levels before starting a dedicated run
Open the level statistics from the dimension map before launching a stage. A level with an uncollected Flashback Tape shows a grayed-out tape silhouette in its statistics. Once collected and registered, the indicator changes to show the tape as obtained. Not every story level contains one, so use the list below rather than searching every stage.
The 21 tape levels are Crash Compactor, Hit the Road, Booty Calls, Jetboard Jetty, Give It a Spin, Draggin’ On, Off-Balance, Off Beat, Run It Bayou, Snow Way Out, Stay Frosty, Bears Repeating, Blast to the Past, Dino Dash, Out for Launch, Stowing Away, Crash Landed, Food Run, Nitro Processing, Toxic Tunnels and Cortex Castle.
Tapes are not permanently missable. Completed levels remain replayable from the dimension map, so a normal story run can prioritize reaching the exit and learning the route. Return later for a dedicated tape attempt after you know the hazards and character or mask mechanics in that section.
- Check the level statistics for an uncollected tape silhouette.
- Confirm that the selected level is one of the 21 tape stages.
- Treat the tape as an optional objective during the first story clear.
Prepare a no-death tape attempt
Practice the level once before attempting the tape whenever possible. Learn the route to the collectible, identify the checkpoint before it, and note any rail, vehicle, mask or camera transition that can cause a sudden death. Checkpoints are useful for practice, but they do not preserve tape eligibility. If you die before reaching the tape, the tape becomes inactive for that run even if you respawn at a checkpoint.
On the dedicated attempt, prioritize survival and the tape. Ignore crates, gems, bonus stages and Wumpa targets unless they are directly on the safe route. Slow down before moving platforms, Nitro crates, rail exits, ice, watercraft landings and perspective changes. A controlled jump with a small directional correction is safer than rushing or holding spin continuously.
Keep the same controller, keyboard bindings and display settings used during practice. If you die in the difficult section, restart the level from the beginning. Do not continue from the checkpoint expecting the tape to reactivate.
- Warm up the difficult section before beginning the full attempt.
- Ignore unrelated collectibles until the tape is secured.
- Restart from the beginning after any death before the tape.
Collect the first eight tapes
Crash Compactor: the tape is directly ahead at the start of the level. Move forward carefully and collect it before entering unnecessary hazards.
Hit the Road: after the first fire-box section, cross the tire sequence while avoiding the swinging obstacles. The tape is immediately afterward and before the next checkpoint.
Booty Calls: after the first checkpoint, enter the cave and deal with the two pacing enemies. The tape is on the next platform to the left.
Jetboard Jetty: finish the first jetboard section and return to the deck. The tape is on the left side. Stabilize the landing before moving toward it.
Give It a Spin: continue past the first checkpoint and climb the waterfall. The tape is on the main path shortly afterward, before the first water-lily sequence.
Draggin’ On: after obtaining Akano for the second time, reach the area with three stone-cat enemies beneath the golden gong. Use the Dark Matter Spin deliberately, then collect the tape just beyond them.
Off-Balance: in the first dragon-statue section, obtain Akano and cross the platforms while avoiding fire. The tape is just after the fire-breathing dragon heads.
Off Beat: jump over the four Nitro boxes, pass the second checkpoint and use the dumpster on the right as a landmark. The tape is shortly ahead.
- Do not confuse the earlier approach in Hit the Road with the tape location after the first fire-box section.
- On Jetboard Jetty, land safely before changing direction toward the left-side tape.
- Use Akano for controlled movement and enemy clearance rather than continuous, blind spinning.
Collect the snow, swamp and fossil-section tapes
Run It Bayou: late in the level, ride on the roof of the airborne food boat. The tape is on the roof. Stay aligned with the moving boat and make only the correction needed to collect it, because drifting off the vehicle can cause a fall.
Snow Way Out: use Kupuna-Wa to cross the first slow-motion ice-platform sequence. After dropping to the checkpoint, continue a short distance. The tape is on the main route beside boxes.
Stay Frosty: at the checkpoint where Kupuna-Wa is obtained, activate slow motion and cross the river. The tape is on the next platform. Activate the mask before the crossing becomes urgent.
Bears Repeating: during the Polar riding section, pass the checkpoint and prepare for the large jump. The tape is positioned on the right side of that jump. Line up before accelerating and make only small airborne corrections.
Blast to the Past: after the long rail grind, enter the side-scrolling lava section. The tape is along this route in the area where lava hazards shoot from the ground.
Dino Dash: after the second T-Rex chase, reach the beginning of the following lava section. The tape is on the main route there.
- Track the food boat’s roof in Run It Bayou instead of focusing only on the tape.
- Use Kupuna-Wa before committing to ice and river crossings.
- On Polar, line up the right-side jump before entering the jump at full speed.
Collect the final-region tapes
Out for Launch: after the second rail-grind section, continue toward the enemy carrying a laser weapon. The tape is just beyond the rail section near that enemy. Land safely before making the final correction.
Stowing Away: progress through the ship, take the lift in the cockpit and pass the late checkpoint. Enter the red tunnel ahead. The tape is in this late section near the purple-mask sequence; do not quit searching at the first mask pickup if it has not appeared yet.
Crash Landed: after the checkpoint inside the tunnel, continue through the Ika-Ika gravity-mask section. When the route turns upside down, the tape is ahead and to the right on the main path.
Food Run: in the gravity-powered traffic section, look for the tape above boxes arranged in cross shapes with TNT in their centers. Temporarily disable the anti-gravity effect while positioned over the correct arrangement, then drop onto the boxes and collect the tape.
Nitro Processing: very late in the stage, obtain Kupuna-Wa and go down and then up the two water slides. The tape is on the platform after this sequence and before the final rotating water-wheel area.
Toxic Tunnels: near the end of the level, look before the rotating platform with the shielded rat hazard. The tape is to the left, above a bouncy box.
Cortex Castle: during the final laser-grid gauntlet, use the gravity mask to move upward. You will reach the slow-motion mask and a small platform containing the tape. Learn the laser sequence before attempting this no-death run.
- Treat the late Out for Launch, Nitro Processing, Toxic Tunnels and Cortex Castle tapes as full-stage attempts.
- In Food Run, disable anti-gravity only when positioned over the correct box arrangement.
- In Cortex Castle, practice the gravity and laser transitions before committing to the collectible.
Recover correctly after a failed attempt
If Crash, Coco or another playable character dies before touching the tape, the tape becomes a gray or transparent silhouette and cannot be collected during that attempt. Restart the level from the beginning. A checkpoint respawn does not restore eligibility.
If you die after collecting the tape, the tape remains valid. Continue through the containing level and reach the exit. The game records the unlock when the level is completed; quitting immediately after pickup can leave the progress unconfirmed.
If you pass the tape without collecting it, the attempt is not invalidated. Finish safely or restart intentionally, then replay the section with the correct landmark in mind. Do not turn a missed tape into a dangerous recovery attempt.
- Death before the tape: restart from the beginning.
- Death after the tape: continue to the level exit.
- After returning to the map, verify that the tape indicator is filled.
Enter and practice the unlocked Flashback Level
A registered tape unlocks a separate Flashback Level represented by a green television marker on the dimension map. Select that marker to enter the corresponding side-scrolling challenge. The Flashback Level is separate from the main stage and does not use the main-level no-death tape rule.
For the first clear, concentrate on reaching the exit. Deaths are allowed, so use repeated attempts to learn fixed crate layouts, enemy spacing and moving-platform timing. Flashback stages award medals for completing the level, collecting at least 90 percent of its crates and collecting all of its crates. There is no need to combine the first clear with a perfect crate run.
The tapes and Flashback Levels are not required to defeat the final boss or view the normal campaign ending. They are optional completion targets. Work through them in separate sessions rather than combining an unfamiliar Flashback challenge with a no-death tape hunt.
- Confirm that the green television marker appears on the dimension map.
- Clear the Flashback Level once before attempting its crate medals.
- Use repeated attempts to learn the fixed sequence; deaths are permitted there.
Before you move on
- The containing level’s statistics show a filled Flashback Tape indicator.
- The corresponding green television marker appears on the dimension map.
- The unlocked Flashback Level opens independently of the main story route.
- For all-tape progress, each of the 21 listed levels shows its tape as collected.
- For Flashback medal progress, replay each unlocked challenge and complete its completion, 90-percent-crate and all-crate objectives as desired.
Gems, colored gems, N. Verted and skins: optional but structured targets
Gem collection is optional for reaching the normal story ending, but it opens bonus routes, contributes to Crash and Coco skin unlocks, and is part of full completion. Finish the normal campaign first, then return to familiar levels for Clear Gems, the four colored gems, N. Verted objectives, and the harder gem gauntlets. Treat each objective as a separate replay target instead of trying to force every collectible into the first story run.
1. Separate story completion from gem completion
You can defeat the final boss and see the normal ending without collecting every gem. The four colored gems are also optional for the ordinary campaign route. They open matching gem platforms in later levels and unlock the large Color Gem Gauntlet in Toxic Tunnels, which contains extra crates and a hidden gem.
On a first story pass, prioritize reaching each exit and learning the level layout. Collect fruit and crates that are safely on your route, but do not repeatedly restart because of a missed side path. The dimensional map records the gem progress for each level, so use it to choose targeted replays after the campaign rather than relying on memory.
The standard gem structure is six Clear Gems in each of the 38 non-boss levels. These levels include the regular non-boss stages and the timeline stages. The five boss levels do not award that ordinary six-gem set. N. Verted versions of boss stages exist, but they likewise do not turn the boss fights into six-gem collectible stages.
- Finish the ordinary story route before beginning a full gem sweep.
- Use the dimensional map to identify missing normal, colored, or N. Verted gems.
- Remember that boss stages can have N. Verted versions without having the six-gem Clear Gem set.
2. Collect the four colored gems
Red is in N. Sanity Peak. Continue until the chamber containing nine phasing platforms. Before entering, inspect the wall drawing for the route. Start on the bottom-left platform and follow the sequence right, right, up, up, left, left, down, right. Completing the sequence makes the red gem appear. If the sequence fails, let the platforms reset and try again instead of jumping randomly.
Green is in Hit the Road during the chase section after leaving the large machine and reaching the checkpoint. Spin the trash can on the left to release an RC car and its controller. Continue spinning the controller so the car moves into the nearby Nitro crate. The explosion reveals the green gem. Do not destroy that Nitro crate directly with Crash or Coco.
Blue is in Draggin’ On. Reach the end of the level without breaking any crate, including checkpoint crates, TNT, Nitro, or crates that could be destroyed accidentally while using Akano. The blue gem appears after the clean run. Use the bonus-room entrance and checkpoints to practice movement, but do not break crates during the qualifying attempt.
Yellow is at the beginning of Run It Bayou. Do not board the jetboard immediately. Take the long jump to the alternate route on the right, use the moving platform, and reach the stack of four crates. Keep the setup intact and bounce from the crates to collect the yellow gem above.
- Red: N. Sanity Peak, using the wall-drawing platform sequence.
- Green: Hit the Road, by directing the RC car into Nitro.
- Blue: Draggin’ On, without breaking a crate.
- Yellow: Run It Bayou, using the alternate path before the jetboard.
3. Use colored gems to open bonus routes
Colored gems open matching gem platforms in later levels. The red gem opens a route in Crash Compactor, the green gem opens one in Jetboard Jetty, the yellow gem opens one in Bears Repeating, and the blue gem opens one in Crash Landed.
Replay the receiving level only after obtaining the matching color. When you reach the colored platform, take the route if you are working on crates or the hidden gem; otherwise, skip it and finish the level. Do not assume these routes are shortcuts. Several are harder than the main path and are best learned separately before attempting a low-death or all-crate run.
The colored routes are optional for a normal level clear, but they can be necessary for that level’s complete crate total. If a route causes repeated deaths, finish the level first, then return with the sole objective of learning the gem-platform section.
- Red route: Crash Compactor.
- Green route: Jetboard Jetty.
- Yellow route: Bears Repeating.
- Blue route: Crash Landed.
4. Build normal Clear Gem progress in separate passes
Each of the 38 non-boss levels with the standard Clear Gem set has six normal gem objectives. They are earned through the level’s Wumpa-fruit targets, breaking all crates, finishing with no more than three deaths, and collecting the hidden gem. The fruit objectives award multiple gems at the displayed thresholds, with the highest fruit target requiring at least 80 percent of the level’s fruit.
Use three practical passes. First, learn the safe route and collect fruit without forcing risky detours. Second, perform a crate run, checking high ledges, corners, areas behind the camera, bonus rooms, and colored-gem paths. Third, attempt the hidden gem and the three-death objective once you know the hazards. A death does not remove gems earned during earlier completed runs, so replaying is safer than combining every requirement immediately.
Boss stages are excluded from this six-gem accounting. Do not search a boss arena for a missing Clear Gem when the map’s total is correct; focus your collectible work on the non-boss stages.
- Check the level card to identify the missing objective.
- Use colored-gem paths when working toward all crates.
- Attempt the three-death gem after learning the route.
- Do not count boss stages as six-gem Clear Gem levels.
5. Unlock and approach N. Verted mode
N. Verted mode unlocks after completing Trouble Brewing in the Tranquility Falls dimension. It provides alternate versions of the regular levels, boss levels, and timeline levels. The route is mirrored, each dimension applies a different visual effect, and Wumpa fruit is replaced by Bumpa Berries. These changes affect how familiar landmarks, hazards, and fruit routes look, so do not rely completely on normal-mode muscle memory.
The six additional N. Verted Clear Gems apply to each of the 38 non-boss levels. In other words, the 38 non-boss levels can each supply six normal gems and six N. Verted gems. Boss stages can be replayed in N. Verted mode, but they do not provide the ordinary six-gem N. Verted set. N. Verted boss clears can still matter for progression rewards and completion objectives, so do not ignore them when pursuing broader completion.
Complete the normal version first, then treat N. Verted as a new route. Begin with short or familiar non-boss levels and leave long late-game stages until you have a reliable normal path. Search separately for each N. Verted hidden gem because it is moved from the normal location.
- Complete Trouble Brewing to unlock N. Verted access.
- Expect mirrored routes and dimension-specific visual effects.
- Track six N. Verted gems only for the 38 non-boss levels.
- Remember that N. Verted boss stages do not award the ordinary six-gem set.
- Search separately for every N. Verted hidden gem.
6. Use gems efficiently for skins and full completion
Skins are cosmetic rewards tied to gem totals for their associated level or progression point. Early rewards may require six gems, while later rewards can require more and can use the full set of normal and N. Verted gems available for that level. Gems from both versions count toward relevant skin requirements, so N. Verted is not merely a visual extra.
Start with fruit gems and easy hidden gems in early levels. Add crate gems after learning the complete route, then attempt the three-death gem. If a later skin needs more gems than you can safely obtain in the normal version, use N. Verted objectives to fill the remaining total instead of repeatedly forcing one difficult normal objective.
For full gem completion, collect the four colored gems, clear every matching colored-gem route, complete the normal and N. Verted gem objectives for the 38 non-boss levels, and then pursue relics and other advanced challenges separately. In Toxic Tunnels, the large vault door opens only after all four colored gems are collected. Inside is a sequence of difficult sections without ordinary checkpoints, ending at the level’s hidden gem. Practice that gauntlet as its own challenge rather than combining it with an early crate attempt.
- Use the map and skin requirement to choose the next replay.
- Count normal and N. Verted gems only on levels that actually award those sets.
- Enter the Toxic Tunnels vault after collecting all four colored gems.
- Leave relic attempts for a separate session from gem hunting.
- Include N. Verted boss clears separately when pursuing broader completion goals.
Before you move on
- The four colored gems are registered: red, green, blue, and yellow.
- The matching colored-gem routes are accessible in Crash Compactor, Jetboard Jetty, Bears Repeating, and Crash Landed.
- The large colored vault door in Toxic Tunnels opens, and the Color Gem Gauntlet can be entered.
- Trouble Brewing has been completed and N. Verted versions are available on the map.
- The map shows normal and N. Verted gem progress for the non-boss levels being completed.
- The five boss stages are not being counted as six-gem Clear Gem stages.
- At least one Crash or Coco skin has unlocked through level gem progress. Full gem completion requires continuing until the normal and N. Verted objectives for all 38 non-boss levels are complete.
- N. Verted boss clears have been handled separately if pursuing broader completion beyond the gem sets.
References for this chapter
- Crash Bandicoot 4: It's About Time Game Modes
- Crash Bandicoot: It’s About Time Available Now — Save the Multiverse in this New Original Adventure
- Crash Bandicoot 4: It's About Time: All Hidden and Colored Gems Locations
- Crash Bandicoot 4 All Hidden Gem Locations
- Crash 4 Hidden Gems Location Guide: Where To Find Every Hidden, N.Verted, And Colored Gem
Time Trials, Relics and the Platinum push
Time Trials are optional speedrun versions of completed levels. Crash Bandicoot 4: It’s About Time has 38 eligible Time Trial stages: the five boss stages do not offer them. The relic ladder is Sapphire, Gold, Platinum, then Purple developer time. For the standard Platinum goal, Purple is not required, but a Purple result counts as Platinum. The reliable route is to learn the ordinary level first, practise difficult sections, then build a deathless Time Trial run around safe movement, time crates, and consistent settings.
Clear the level and activate its Time Trial
Complete the level normally once. On a later replay of an eligible stage, collect the stopwatch near the beginning to activate Time Trial mode. If you do not collect it, the level remains in its regular mode and its checkpoints function normally.
The five boss stages are excluded, so do not search them for a stopwatch or a relic target. The remaining 38 stages can be replayed at any time during or after the campaign. Relics are not permanently missable, and improving a result replaces the earlier result for that level.
Once the stopwatch is active, the run is checkpoint-free. A death sends Crash or Coco back to the beginning of the level rather than to the most recent checkpoint. Time Trial attempts do not consume ordinary lives, so deliberate restarts are safe, although the complete stage must be finished in one uninterrupted attempt to receive a relic.
- Clear the stage normally before attempting its Time Trial.
- Collect the stopwatch at the beginning of the replay.
- Confirm that the level is not one of the five boss stages.
- Expect every death during the active trial to return you to the start.
Understand the relic ladder before choosing a target
Crash 4 uses four Time Trial grades: Sapphire, Gold, Platinum, and Purple. Bronze and Silver relics are not part of this game’s Time Trial system. Platinum is the required high target for the usual full-relic objective, while Purple is a harder developer-time result above Platinum.
Treat Sapphire as a route-learning result and Gold as a consistency milestone. A Gold result shows that your movement and crate route are becoming stable, but it does not complete the standard Platinum relic push. Move to Platinum attempts after you can complete the stage without deaths and understand the major transitions.
Purple relics are optional challenges for this chapter’s goal. If you earn Purple, it automatically counts as having met the Platinum result for that stage, so there is no reason to repeat the level solely to replace Purple with Platinum.
- Remember the order: Sapphire, Gold, Platinum, Purple.
- Use Gold to confirm that the route is becoming reliable.
- Do not spend time pursuing Purple until the required Platinum results are complete.
Learn the route before trying to save time
Replay the level normally and divide it into landmarks such as the opening platforming, the first major hazard, a vehicle or rail section, a Quantum Mask sequence, and the final approach. Learn where enemies spawn, which platforms move, and which jumps require a slide, double jump, spin, or mask action. A Time Trial is much easier when navigation is already automatic.
For a troublesome section, practise it during ordinary replays before making another full-speed attempt. This lets you study the approach without combining route discovery and speed pressure. Note the first landmark where the run loses time or where deaths occur repeatedly. Fix that section before changing the entire route.
Time Trials have no checkpoints, so there is no mid-level recovery point to exploit. If an early death or a major missed transition makes the target unrealistic, allow the run to reset or intentionally die and begin again. Because Time Trial deaths do not cost lives, restarting is preferable to carrying a broken run through the rest of the stage.
- Name the major sections using visible landmarks.
- Identify the first repeated failure rather than only examining the final time.
- Practise difficult sections in normal mode before attempting another full trial.
- Restart a run that can no longer reach the chosen target.
Use fast movement only when it remains controlled
The slide-attack is the most accessible speed technique for Time Trials. Use it across safe, level ground and through sections where the slide will not alter your landing position. Once the timing is reliable, add slide-spins to transitions where the extra movement does not compromise a jump.
After completing the story, Triple Spin becomes available and can improve speed in suitable sections. It requires rhythmic repeated spins and is less forgiving than the slide-attack. Do not assume it is automatically faster everywhere: test it on a safe portion of the route, then keep it only where it produces a repeatable gain.
Keep the same controller or keyboard layout, camera settings, display mode, and frame-rate configuration throughout a practice session. If Windows performance changes introduce stutter or inconsistent input, fix that before comparing times. A slower route that can be repeated cleanly is more valuable than a faster technique that causes frequent deaths.
- Start with slide-attack on safe ground.
- Introduce Triple Spin only after its rhythm is consistent.
- Use the same input and performance settings for comparison runs.
- Prefer repeatable movement over risky speed demonstrations.
Plan the time-crate route
Time crates pause the clock for their displayed duration when destroyed. They are central to Platinum routes, but breaking one is useful only if you can do so without losing more time through a detour, hesitation, or bad landing. Approach each group on a rehearsed line and leave immediately after securing the time freeze.
During early runs, identify whether each crate group is best reached from above, from the side, or with a spin while passing through. If a crate requires an awkward setup, practise that approach separately. Do not assume every crate must be collected on every exploratory run; first learn the route and then compare the final times of competing lines.
When a route contains Nitro, TNT, enemies, or environmental hazards, only take a direct line if the movement is controlled. A missed time crate combined with a death costs more than the time saved by rushing. Once the safe line is stable, refine the entry and exit so the crate freeze is gained without stopping.
- Map every time-crate group during route study.
- Test the safest entry and exit for each group.
- Compare alternate crate routes across several clean attempts.
- Do not trade a reliable finish for a single unrepeatable shortcut.
Move from Gold to Platinum systematically
Use a three-part practice session. First, warm up with a normal replay or a partial rehearsal of the hardest section. Second, make several focused Time Trial attempts using the same route and settings. Third, stop when fatigue begins causing repeated late jumps, missed spins, or poor landings. Platinum runs are long enough that tired inputs can erase otherwise good progress.
If you regularly die in the opening third, return to section practice rather than grinding full attempts. If you reach the final third and miss Platinum by a small margin, optimise the transition costing the most time: a jump setup, a time-crate approach, a rail entry, or a mask change. Do not rebuild sections that are already consistent.
A sensible overall order is to complete easier Platinum stages first, then tackle levels with long vehicle sequences, rapid mask changes, or narrow late-game platforming. Keep a written list of the 38 eligible levels and mark the result earned in each one. This prevents confusing an ordinary clear, a Sapphire result, or a Gold result with a completed Platinum target.
- Warm up before serious attempts.
- Practise the earliest repeated failure first.
- Optimise one measurable transition at a time.
- Track all 38 eligible stages and their best relic grade.
- Take breaks when fatigue causes repeated execution errors.
Before you move on
- The Time Trial has been attempted on every cleared eligible stage, with the five boss stages correctly excluded.
- The relic ladder is understood as Sapphire, Gold, Platinum, and Purple, with no Bronze or Silver tier expected.
- Platinum has been earned on every eligible level where the Platinum push is the goal; a Purple result also satisfies that stage’s Platinum requirement.
- The best runs were completed without deaths during the active trial and used deliberate time-crate collection.
- Controller or keyboard settings and Windows performance settings remained stable during the final practice attempts.
- Failed attempts can be traced to a specific landmark or transition, and the corrected movement can be reproduced in practice.
References for this chapter
Final boss and campaign ending: The Past Unmasked
The Past Unmasked is the final story level and the second fight against Neo Cortex. It is a five-phase boss encounter. Each phase combines a disappearing or changing grid, Shoot-o-Matics that must be destroyed by repeated jumps, and a Lab Assistant that must be spun toward Cortex. The normal story ending plays after the final successful hit. Collectibles, N. Verted completion, Flashback Levels, and relics are separate goals and are not required for this ending.
1. Prepare for the final attempt
Enter The Past Unmasked after Cortex Castle, but do not treat it as a continuation of a long collectible run. The level is a dedicated boss stage, and the safest first clear ignores crates and optional rewards. Use the character and control layout that carried you through the preceding levels. Before starting, confirm that jump, spin, crouch or slide, and directional movement all respond correctly. On Windows, a controller is useful for small corrections on the grid, but keyboard controls are also sufficient if they are already familiar.
If you are using Modern mode, deaths return you to the latest boss checkpoint. Completing a boss phase establishes the next checkpoint, so a death later in the fight normally does not require repeating every earlier phase. Do not change bindings or switch input devices between attempts; consistency matters more than a theoretically faster control setup.
- Test movement, jumping, spinning, and crouching before entering.
- Use the control method already familiar from the campaign.
- Leave crates and other optional collectibles for a later replay.
- Use Modern mode if you want phase checkpoints after deaths.
2. Complete the opening grid
The fight begins on a metal grid. Some rows fall away, and the first Shoot-o-Matic appears in the middle. Avoid its circular energy waves by jumping over them, then land on the machine and jump on it three times. Each bounce damages the machine; after the third successful bounce it is destroyed. Make sure Crash or Coco lands on a solid square after the final bounce instead of drifting toward the next target immediately.
The floor changes again and two more Shoot-o-Matics appear in different parts of the arena. Reach them one at a time, using the remaining solid squares as landing points. Destroy each with three jumps. The arena becomes smaller as the machines disappear, so do not cross a gap simply because the next target is visible. Wait for a usable route and make one committed jump rather than several small corrections near an edge.
After the three machines are gone, a Lab Assistant carrying a rocket launcher appears. Avoid its rockets until it comes within a controlled spinning distance, then spin the Assistant so it travels into Cortex. Do not chase it across an unstable section. If the angle is poor, keep moving safely and wait for it to return. That hit completes the first phase.
- Jump over the circular energy waves.
- Destroy the middle and two corner Shoot-o-Matics with three jumps each.
- Spin the rocket-launching Lab Assistant into Cortex.
- Use stable squares as landing points before pursuing the Assistant.
3. Survive the Lani-Loli phase
Cortex next uses Lani-Loli's phasing power. You do not activate the mask yourself in this encounter. Instead, watch for a wave of platforms that phases out as it travels through the arena. Jump over the missing-platform wave and land on the solid section beyond it. The wave arrives from multiple directions, including the left, rear, and right, so keep Crash or Coco near the middle of the usable area rather than committing to one edge.
Two Shoot-o-Matics return during this phase. Destroy them individually with three jumps each while continuing to watch for the phasing wave. After landing on a machine, immediately identify the next solid square; the floor may remove the platform you expected to use for recovery.
When both machines are destroyed, another rocket-launching Lab Assistant appears. Spin it toward Cortex to finish the phase. If the Assistant is moving toward a disappearing edge, do not follow it blindly. Hold a safe position and wait for a return pass that gives you a direct spin.
- Jump over each wave of platforms that phases out.
- Destroy both Shoot-o-Matics with three jumps each.
- Avoid following the Lab Assistant into a disappearing section.
- Spin the Assistant into Cortex to complete the phase.
4. Read the laser and gravity phase
Cortex then moves across the arena while firing horizontal lasers. Red lasers are jumped over. Blue lasers are avoided by crouching or sliding underneath. Keep the response tied to the laser color rather than Cortex's position. Unnecessary spinning can move you into the next beam, so use only the movement needed for the current attack.
The gravity effect reverses the arena after the initial laser sequence. The controls and visual orientation feel less natural in this section, but the color rule remains the same: jump over red and crouch or slide under blue. Make small directional adjustments and avoid running toward the outside edge while the view is inverted.
After the laser run, two Shoot-o-Matics appear. This is a required part of the phase and was omitted from the earlier version of this chapter. Destroy both machines with three jumps each. Once they are gone, the Lab Assistant appears; spin it toward Cortex to finish this phase.
- Jump over red lasers.
- Crouch or slide under blue lasers.
- Apply the same responses after gravity reverses the arena.
- Destroy the two Shoot-o-Matics that appear after the laser sequence.
- Spin the Lab Assistant into Cortex.
5. Clear the time-slowed platform phase
Cortex uses Kupuna-Wa's time effect next. As with Lani-Loli, the mask effect is imposed by the boss rather than activated from the player's mask controls. Platforms disappear beneath you while the pace intermittently slows. Use the slower moments to read the next solid platform and choose a landing area with room for a correction.
The Shoot-o-Matics return. Reach them without rushing through a platform cycle, then jump on each machine three times. The changing speed can make a familiar jump feel early or late, so use the visual position of the destination rather than relying on the timing from the previous phase.
After both machines are destroyed, the Lab Assistant becomes the counterattack target. Spin it into Cortex. Completing this phase gives the next boss checkpoint in Modern mode. If you die afterward, you can rehearse the final sequence without repeating the earlier mask phases.
- Watch the platform cycle during the intermittent time slowdown.
- Use solid platforms as observation points.
- Destroy both Shoot-o-Matics with three jumps each.
- Spin the Lab Assistant into Cortex.
- Expect the next phase checkpoint after completion in Modern mode.
6. Finish the combined final phase
The final phase combines a changing grid with rotating lasers. Move from one solid platform to the next and jump over the laser lines. When several routes are available, choose the platform with the widest landing area instead of the shortest route to the target. A stable landing gives you time to identify the next machine and reset your position.
Four Shoot-o-Matics appear during this sequence. Destroy them one at a time with three jumps each. Every destroyed machine removes or changes part of the floor, so stop after each landing and locate the next safe square. Do not leap toward the next machine while the surrounding grid is still disappearing.
Four Lab Assistants then appear as the final counterattack. Spin each one toward Cortex. Work on one Assistant at a time and avoid crossing the arena just to reach a distant target. If a spin sends an Assistant away from Cortex, survive the next attack cycle and wait for it to return. The final successful hit defeats Neo Cortex and ends the boss fight.
- Use wide platforms as reset points between laser patterns.
- Destroy all four final Shoot-o-Matics with three jumps each.
- Send all four Lab Assistants into Cortex.
- Allow the final hit to trigger the story resolution.
7. Confirm the normal campaign ending
After Cortex is defeated, let the ending cutscenes play. The normal story conclusion does not require Flashback Levels, colored gems, N. Verted versions, hidden gems, or relics. Those are postgame completion objectives and can be pursued from the map after the campaign victory.
A failed attempt is recoverable through the phase checkpoints provided by Modern mode. Identify the phase that caused the death, then repeat that phase's fixed order: destroy the Shoot-o-Matics first and use the Lab Assistant to damage Cortex afterward. The fight does not require a different character build or a special collectible loadout.
Completion is confirmed when the final boss has been defeated, the normal ending has played, and the game returns you to the map with The Past Unmasked available for replay as a cleared story level. The Windows PC edition does not require a separate campaign to see this ending. A later replay may pursue the optional rewards or higher completion percentages.
- Let the post-boss cutscenes play.
- Confirm that the game returns to the map after the ending.
- Verify that The Past Unmasked is cleared and replayable.
- Treat gems, Flashback Levels, N. Verted stages, and relics as separate postgame goals.
Before you move on
- The opening three Shoot-o-Matics have been destroyed and the first Lab Assistant has been spun into Cortex.
- The Lani-Loli phase has been cleared, including its two Shoot-o-Matics and Lab Assistant.
- The laser and reversed-gravity phase has been cleared, including its two required Shoot-o-Matics.
- The Kupuna-Wa time-slowed phase has been cleared.
- The final four Shoot-o-Matics and four Lab Assistants have been completed.
- Neo Cortex is defeated and the normal story ending has played.
- The Past Unmasked is marked as cleared or remains available for replay on the Windows map.
- Optional gems, Flashback Levels, N. Verted stages, and relics are not required for this campaign-ending check.
Postgame: 100% roadmap, troubleshooting and PC-specific fixes
Finish the ordinary campaign first, then work through the complete 106% checklist as separate projects. The normal story ending requires the 29 Main Path levels, the 5 Boss levels, the final boss level The Past Unmasked, and the campaign credits. For the full 106% target, complete all 43 non-Flashback stages, replay all 43 of those stages in N. Verted Mode, collect all 456 Clear Gems and four colored gems, earn all 21 Platinum Flashback Relics, all 38 N.Sanely Perfect Relics and all 38 Platinum Time Trial Relics.
1. Separate the ordinary ending from the 106% target
The ordinary campaign is complete when you clear the 29 Main Path levels and 5 Boss levels, with The Past Unmasked serving as the final required boss stage. Defeat Neo Cortex there, continue through the ending sequence and reach the credits. You do not need Timeline stages, Flashback Levels, N. Verted stages, gems or relics to see the normal story ending.
The full non-Flashback level count is 43: 29 Main Path levels, 5 Boss levels and 9 Timeline levels. The Timeline stages are Truck Stopped, Thar He Blows!, Potion Commotion, No Dillo Dallying, Ship Happens, Building Bridges, Rock Blocked, Shipping Error and Seeing Double. They are alternate-character stages, not part of the 34-stage ordinary story route.
Once you choose the 106% goal, none of those 43 non-Flashback stages is optional. Mark every one as cleared in the normal version and again in N. Verted Mode. Keep a separate checklist for level clears, Clear Gems, colored gems and relics so a completed stage is not mistaken for complete 106% progress.
- Clear the 29 Main Path levels.
- Clear all 5 Boss levels, including The Past Unmasked.
- Defeat Neo Cortex in The Past Unmasked and reach the credits for the ordinary ending.
- Clear the 9 Timeline stages for the complete 43-stage non-Flashback target.
- For 106%, clear all 43 non-Flashback stages in both normal and N. Verted versions.
2. Finish ordinary and Timeline stages before precision grinding
Use the first campaign run for reliable completion rather than collecting everything under pressure. After reaching the credits, return to the Dimensional Map and finish any Timeline stages you skipped. These stages use Tawna, Dingodile or Neo Cortex, so their movement and attack options require separate practice from Crash and Coco.
Replay normal stages before attempting relics. Identify the bonus platform, hidden gem route, crate groups, Flashback Tape location, vehicle sections and rail sections. A checkpoint helps you practice a section, but it does not preserve a full-level deathless attempt or a Time Trial run.
Use different sessions for different objectives. A story clear prioritizes survival, a Clear Gem replay prioritizes exploration, a Flashback Tape attempt prioritizes reaching the tape without dying, an N.Sanely Perfect run prioritizes crates and fruit without a main-route death, and a Time Trial prioritizes uninterrupted movement.
- Complete the 34 required story stages before serious relic grinding.
- Complete all 9 Timeline stages for all 43 normal non-Flashback clears.
- Map difficult sections during ordinary replays.
- Restart a full-level deathless attempt after a qualifying main-route death.
3. Clear every stage in N. Verted Mode
N. Verted Mode unlocks after Trouble Brewing. It mirrors the level horizontally and changes the visual presentation, so learn the normal route first whenever possible. The mode is not proof that the campaign is complete; it is a separate progress category.
For the 106% target, replay all 43 non-Flashback stages in N. Verted Mode. This includes the 29 Main Path levels, all 5 Boss levels and all 9 Timeline levels. Select N. Verted from the replay option for each stage and confirm the result in the level statistics or map progress display.
The Clear Gem portion applies to the 38 non-boss levels. Each has six normal Clear Gems and six N. Verted Clear Gems, producing 228 normal gems plus 228 N. Verted gems for 456 total. Boss stages still count toward the 43 N. Verted stage clears, but they do not contribute six-gem sets to the 456 total.
- Unlock N. Verted Mode by completing Trouble Brewing.
- Clear all 43 non-Flashback stages in N. Verted Mode, including Boss and Timeline stages.
- Collect 228 normal Clear Gems from the 38 non-boss levels.
- Collect 228 N. Verted Clear Gems from those same 38 levels.
- Confirm the combined Clear Gem total reaches 456.
4. Collect all Flashback Tapes and earn Platinum Flashback Relics
There are 21 Flashback Tapes in normal levels. Reach each tape without dying earlier in that attempt. If you die before reaching it, restart the containing level from the beginning; the tape becomes transparent for that failed attempt. After collecting a tape, finish the level so the unlock is recorded. A death after the tape does not invalidate the collection, but finishing the level is the safer way to ensure the result saves correctly.
Each tape unlocks one Flashback Level. These are separate side-scrolling crate challenges and do not count as part of the 43 non-Flashback stage clears. For the 106% target, complete all 21 Flashback Levels and earn a Platinum Flashback Relic in each one.
A Flashback Platinum requires destroying every crate in one completed run. Use the in-level checkpoints to learn the route, then replay the entire challenge for the recorded relic. Reaching the exit alone is not enough.
- Collect all 21 Flashback Tapes.
- Finish each containing level after collecting its tape.
- Complete all 21 Flashback Levels.
- Earn and confirm all 21 Platinum Flashback Relics.
5. Earn all 38 N.Sanely Perfect Relics
There is one N.Sanely Perfect Relic for each of the 38 non-boss levels. Boss stages do not award this relic. In one run, earn the five required non-hidden Clear Gems: the 40%, 60% and 80% fruit gems, the all-crates gem and the fewer-than-three-deaths gem. The hidden gem is not required for the N.Sanely Perfect Relic.
The run must be deathless on the main route. Destroy every crate, including crates in bonus paths and vehicle or rail sections, and reach at least 80% of the level's fruit. Deaths in the bonus stages entered through a question-mark platform do not count against the main-level death total, but a main-route death ends the attempt.
Learn the route first and collect hidden gems separately if their paths create unnecessary risk. During the final relic run, choose dependable jumps over dangerous shortcuts. Restart after a qualifying death rather than trying to salvage the attempt.
- Attempt all 38 N.Sanely Perfect Relics on non-boss levels.
- Break every crate in the level and its bonus or vehicle sections.
- Reach at least 80% of the fruit requirement.
- Avoid all main-route deaths.
- Collect hidden gems separately when necessary.
6. Earn all 38 Platinum Time Trial Relics
Time Trials are available on the 38 non-boss levels after each level has been cleared once. On a replay, collect the golden stopwatch near the beginning to activate the trial. Numbered crates freeze the timer when destroyed, so learn their locations during ordinary replays and include them in the speed route.
Complete the story before serious Platinum attempts so Triple Spin is available. Keep the same controller bindings, display mode, frame-rate limit and performance settings during practice and recorded attempts. First establish a safe route, then add slide-spins, Triple Spin movement and numbered-crate breaks while preserving momentum.
Platinum is the required high normal relic tier for 106%; Purple Developer Relics are higher but are not required. There are no ordinary checkpoint recoveries in a Time Trial, and a death normally costs too much time for a Platinum result. Restart quickly after a failed opening or a major mistake.
- Clear the story to unlock Triple Spin.
- Activate Time Trials on all 38 non-boss levels.
- Earn a Platinum Time Trial Relic on each of the 38 levels.
- Do not count Purple Developer Relics as an additional 106% requirement.
- Keep one stable controller and performance setup during practice.
7. Stabilize Windows performance before difficult attempts
Activision's listed Windows requirements specify Windows 10, 8 GB of RAM, 30 GB of storage, an Intel Core i3-4340 or AMD FX-6300-class processor and a GTX 660 or Radeon HD 7950-class graphics card at minimum. The recommended specification lists 16 GB of RAM, a Core i5-2500K or Ryzen 5 1600X-class processor and a GTX 970 or Radeon R9 390-class graphics card. The recommended input is a controller with vibration feedback.
Test the controller in a normal completed level before attempting a deathless relic. Confirm jump, spin, slide, crouch, direction changes and mask inputs under ordinary gameplay. If using keyboard and mouse, test the same actions during moving-platform and rail sections rather than assuming the default bindings are comfortable.
Update graphics and audio drivers, close unnecessary background applications and disable overlays or recording tools while diagnosing stutter, crashes or input delay. If frame pacing is unstable, lower resolution or visual settings and use a stable frame limit. Do not change the display or controller setup between route practice and a recorded attempt.
- Compare the PC with the official minimum and recommended requirements.
- Test every important input in a normal level.
- Update graphics and audio drivers.
- Close unnecessary overlays and background applications while testing.
- Use stable frame pacing before deathless or Time Trial attempts.
8. Repair the installed storefront separately
Identify whether the installed build is the Steam version or the Battle.net version before repairing files. Use the launcher that owns the installation; Steam file verification cannot repair a Battle.net installation, and Battle.net repair cannot repair a Steam installation.
In Steam, use the game's Properties and Installed Files area to verify the integrity of the installed files. In Battle.net, use the Crash Bandicoot 4 launcher entry's built-in Scan and Repair or equivalent repair command. Menu wording can change with launcher updates, so allow the process to finish before starting the game.
If crashes continue, reboot Windows, install available game and launcher updates, check drivers, close overlays and confirm that the machine meets the requirements. Back up local configuration before deleting files or reinstalling. If a controller is not detected, test it in Windows first and configure only one remapping layer. Avoid stacking Steam Input, manufacturer software and a third-party remapper unless testing shows that one specific layer is required.
- Repair Steam installations through Steam's file-verification tool.
- Repair Battle.net installations through Battle.net's Scan and Repair or equivalent tool.
- Allow updates and repairs to finish before retesting.
- Keep separate notes for Steam and Battle.net configuration files.
- Use only one controller-mapping layer when diagnosing detection problems.
Before you move on
- Ordinary campaign complete: all 29 Main Path levels and all 5 Boss levels are cleared, Neo Cortex is defeated in The Past Unmasked, and the credits have been reached.
- Full normal non-Flashback coverage complete: all 43 stages are cleared, consisting of 29 Main Path levels, 5 Boss levels and 9 Timeline levels.
- Full N. Verted coverage complete: all 43 non-Flashback stages, including all Boss and Timeline stages, are cleared in N. Verted Mode.
- All 456 Clear Gems are collected: 228 from the 38 normal non-boss levels and 228 from their N. Verted versions.
- All four colored gems are collected.
- All 21 Flashback Tapes are collected, all 21 Flashback Levels are completed and all 21 display Platinum Flashback Relics.
- All 38 non-boss levels display N.Sanely Perfect Relics.
- All 38 non-boss levels display Platinum Time Trial Relics.
References for this chapter
- Dimensions and Level Types in Crash Bandicoot 4: It's About Time
- Minimum and Recommended System Requirements for Crash Bandicoot 4: It's About Time
- Crash Bandicoot 4: It's About Time Trophy Guide and Roadmap
- Crash Bandicoot 4 Platinum Time Trial Relics Guide
- Crash Bandicoot 4: It's About Time Walkthrough and Guide
Finishing up
You have cleared all 29 Main Path levels and 5 Boss levels, including The Past Unmasked.
Neo Cortex has been defeated in The Past Unmasked and the normal ending and credits have played.
The map or profile records the required story route as complete.
N. Verted, Timeline, Flashback, gem and relic progress may remain unfinished; those are optional completion targets rather than requirements for the ordinary ending.
If pursuing broader completion, use the postgame roadmap to track the 9 Timeline levels, 21 Flashback Levels, Clear Gems, colored gems, N. Verted objectives and relics separately.
Choose your next gameScreenshots & video
Game imagery for reference. Follow the written chapters above for the route and strategies.
Sources & references
Our original guide draws on the references below. Check the edition at the top of this page before following controls or unlock requirements.
- Minimum and Recommended System Requirements for Crash Bandicoot 4: It's About Time
- Crash Bandicoot 4: It’s About Time — Available now on Battle.net, Activision
- Crash Bandicoot 4: It's About Time on Steam
- Dimensions and Level Types in Crash Bandicoot 4, Activision Support
- Crash Bandicoot 4: It’s About Time, Bandipedia
- How Many Levels Does Crash Bandicoot 4 Have? Levels List, PowerPyx
- Crash Bandicoot 4: It’s About Time Accessibility
- Crash Bandicoot 4: It’s About Time – Official Steam Guide
- Exploring the familiar yet evolved platforming of Crash Bandicoot 4: It’s About Time – PlayStation.Blog
- Controls for Crash Bandicoot 4: It’s About Time
- Crash Bandicoot 4: It’s About Time Guide: Tips, Tricks, and All Collectibles
- Crash 4 masks locations and how Quantum Masks work — GamesRadar+
- Crash Bandicoot 4: It’s About Time launches on PS4 October 2 — PlayStation.Blog
- Crash 4: Akano - mask, how to unlock? — Gamepressure
- Crash 4: Kupuna-Wa - mask, how to unlock? — Gamepressure
- Crash Bandicoot 4: It's About Time Trophy Guide and Roadmap
- Out for Launch walkthrough — Neoseeker
- Crash Landed walkthrough — Neoseeker
- Stage Dive — Crash Bandicoot 4: It’s About Time Walkthrough — Neoseeker
- N. Sanity Peak — Crash Bandicoot 4: It’s About Time Walkthrough
- Crash Bandicoot 4: It's About Time: All Hidden and Colored Gems Locations
- Crash Bandicoot 4 All Hidden Gem Locations
- Truck Stopped — Crash Bandicoot 4: It’s About Time
- Give It a Spin — Crash Bandicoot 4: It’s About Time Walkthrough — Neoseeker
- Crash Bandicoot 4: It’s About Time: All Flashback Tapes Locations
- Crash Bandicoot 4 All Flashback Tape Locations
- Crash Bandicoot 4 – Jetboard Jetty Tips and How to Beat Louise — Attack of the Fanboy
- Stage Dive — Bandipedia
- Crash Bandicoot 4: It’s About Time — Levels — Speedrun.com
- Dimensions and Level Types in Crash Bandicoot 4: It's About Time
- Potion Commotion Walkthrough — Gamepressure
- Draggin’ On Walkthrough — Gamepressure
- Off-Balance Walkthrough — Gamepressure
- Crash Bandicoot 4: It's About Time: All Bosses and How to Beat Them
- Off Beat - Crash Bandicoot 4: It’s About Time Walkthrough
- Home Cookin - Crash Bandicoot 4: It’s About Time Walkthrough
- Run It Bayou - Crash Bandicoot 4: It’s About Time Walkthrough
- Guide for Crash Bandicoot 4: It’s About Time - Off Beat
- Crash Bandicoot 4: It’s About Time Walkthrough — TrueAchievements
- Guide for Crash Bandicoot 4: It’s About Time — Stay Frosty
- Guide for Crash Bandicoot 4: It’s About Time — Ship Happens
- Crash 4: Ship Happens walkthrough
- Crash 4 Hidden Gems Location Guide: Where To Find Every Hidden, N.Verted, And Colored Gem
- Fossil Fueled Walkthrough — TrueAchievements
- Dino Dash Walkthrough — TrueAchievements
- Rock Blocked Walkthrough — TrueAchievements
- Crash 4: Dino Dash Walkthrough — Gamepressure
- Neoseeker: A Hole in Space Walkthrough
- Neoseeker: Shipping Error Walkthrough
- Gamepressure: Crash 4 Food Run Walkthrough
- Crash 4 Flashback Tapes
- Crash Bandicoot 4: It's About Time Walkthrough and Guide
- Rush Hour Walkthrough, Neoseeker
- The Crate Escape Walkthrough, Neoseeker
- Nitro Processing Walkthrough, Neoseeker
- Cortex Castle - Crash Bandicoot 4: It's About Time Walkthrough - Neoseeker
- Toxic Tunnels - Crash Bandicoot 4: It's About Time Walkthrough - Neoseeker
- Crash 4: Neo Cortex, final battle - how to beat?
- Guide for Crash Bandicoot 4: It's About Time - Seeing Double - TrueAchievements
- Crash 4: How To Beat All Bosses | Neo Cortex, N. Tropy & More
- Crash Bandicoot 4: It’s About Time — Arrives on Battle.net on March 26
- Crash Bandicoot 4: It’s About Time on Steam
- Crash 4: Flashback Levels - how to unlock?
- Crash Bandicoot 4 Its About Time Collectibles
- Crash Bandicoot 4: It’s About Time on Steam
- Crash Bandicoot 4: It's About Time Game Modes
- Crash Bandicoot: It’s About Time Available Now — Save the Multiverse in this New Original Adventure
- Crash Bandicoot 4 Platinum Time Trial Relics Guide
- Guide for Crash Bandicoot 4: It’s About Time - All Time Trials
- Crash Bandicoot 4 Its About Time Game Modes
- TIME TRIALS
- Crash Bandicoot 4 How to Unlock & Use Triple Spin
- The Past Unmasked
- Checkpoint Crate
About the game & collecting notes
- Platform
- Windows
Step-by-step Windows walkthrough for the required 34-stage story route: 29 Main Path levels and 5 Boss levels, ending with The Past Unmasked and the campaign credits. The 9 Timeline levels, 21 Flashback Levels, N. Verted stages, gems and relics are optional follow-up content unless separately pursued.
Darryl Polo
Darryl Polo loves tinkering with emulation and revisiting retro games. He enjoys exploring how old favorites play on different setups and sharing what he learns along the way. At Joking Joystick, he writes about the games, hardware, and small discoveries that keep the hobby fun.
Our editorial standardsFound a step that needs another look? Help us improve this guide.