
Control Ultimate Edition (PS5) — Complete Campaign Walkthrough
Step-by-step campaign walkthrough for Control Ultimate Edition on PlayStation 5. Covers the core story from your first arrival in the Oldest House through the final mission, PS5-specific settings, Combat and Supernatural Ability builds, the two story expansions (The Foundation and AWE), and a postgame completion checklist.


Find a copy
Control Ultimate Edition Sony PlayStation 5
We may earn a commission if you buy through these links, at no extra cost to you. As an Amazon Associate I earn from qualifying purchases.
Opens retailer search results. Check the model, edition, seller, availability and current price before buying.
Before you begin
You play as Jesse Faden, newly-appointed Director of the Federal Bureau of Control (FBC), fighting the Hiss and exploring the shifting Brutalist interiors of the Oldest House.
This walkthrough assumes you are using the PlayStation 5 Control Ultimate Edition release and explains PS5-specific options, how to approach every main mission in sequence, and how to prepare for the expansions and the ending.
Follow the chapters in order for a straightforward run to the ending.
Optional chapters describe side missions, collectibles and postgame tasks if you want completionist coverage after beating the campaign.
Set yourself up for the run
Install the latest available PS5 update and confirm that the native PS5 application is selected rather than the backward-compatible PS4 application.
The PS5 release offers Performance and Graphics modes. Performance targets smoother response for aiming, Evade, Levitate and Launch timing; Graphics prioritizes ray-traced reflections and transparency. Update 1.30 also adds options including Unlock Frame Rate, HDR and VRR/120 Hz support on compatible displays.
Enable or adjust DualSense vibration and adaptive-trigger effects according to comfort. These provide feedback only and do not change damage, inputs or ability behavior.
Consider reducing motion-related effects if camera movement is uncomfortable.
Control does not use a conventional selectable combat difficulty in the same way as a traditional difficulty-based action game; use Assist Mode options when you need accessibility or survivability adjustments.
Learn the distinction between Service Weapon forms and supernatural abilities. Grip is the starting Service Weapon form; Launch and Levitate are required story abilities; Evade, Shield and Seize are optional side-mission abilities.
Spend early Ability Points primarily on Launch, then Health and Energy improvements that support repeated power use and survivability.
Use Control Points to construct or upgrade Service Weapon forms, equip Mods and spend Ability Points. Requirements and Mod effects vary, so follow the values shown in the current menus.
A PS4 save carries over only when continuing the backward-compatible PS4 application on PS5. It does not transfer into the native PS5 application; treat the native PS5 campaign as a separate save unless an applicable official transfer path is confirmed.
Keep Board Countermeasures active for materials, Mods, Source and combat objectives. They do not directly award Ability Points.
Bureau Alerts are optional timed activities that provide combat practice and resources. Accept them when Jesse is healthy and the route is manageable; they are not required for story completion.
If you plan to complete the expansions in one playthrough, AWE becomes available after The Face of the Enemy, while The Foundation becomes available after Take Control and the postgame Hotline sequence.
The current PS5 update also makes Dr. Yoshimi Tokui’s Guided Imagery Experience available to Ultimate Edition players. Treat it as optional side content rather than a main-story prerequisite.
PS5 setup, modes and early options
Prepare the native PS5 version of Control Ultimate Edition before beginning the campaign. Confirm that the base game and both expansions, The Foundation and AWE, are installed, then apply the latest available update. The original PS5 presentation offers Performance mode, targeting 60 frames per second at a 1440p render resolution with 4K output, and Graphics mode, targeting 30 frames per second with ray-traced reflections and transparency at the same render and output resolutions. Performance is the best starting choice for players who prioritize responsive aiming, camera movement, Launch throws, and Evade timing. Graphics is preferable if ray-traced reflections and transparency matter more than response speed. Update 1.30 adds Unlock Frame Rate, HDR, and VRR/120 Hz support for compatible PS5 displays. DualSense vibration and trigger effects can remain enabled for weapon feedback, or their intensity can be reduced in the PS5 controller settings. A PS4 save carries over only when using the backward-compatible PS4 application; it does not transfer into the native PS5 application.
1. Select the native PS5 application
From the PS5 home screen, highlight Control and open the Options menu. If both applications are installed, use the version selector to launch the PS5 version rather than the PS4 version. Confirm the PS5 label before starting the game. The native application is the one that provides the PS5-specific Performance and Graphics modes, DualSense support, and PS5 Activities and Help cards.
The PS4 application can remain installed beside the native version, and the two applications use separate save environments. Do not launch the backward-compatible version by habit if this chapter's PS5-specific settings are your goal. If you are continuing an existing PS4 campaign, decide which version you intend to use before creating a new save.
- The PS5 application is selected.
- The PS4 application has not been launched accidentally.
- The game opens without a version or license warning.
2. Confirm the Ultimate Edition content
Control Ultimate Edition includes the base campaign, The Foundation, and AWE. From the PS5 home screen, highlight the game and inspect the available downloads, add-ons, or Manage Game Content screen. Menus can differ slightly between digital and disc installations, so the important check is that the base application and both expansion packages are installed or queued.
The PlayStation Store listing should identify the PS4/PS5 Ultimate Edition and list both expansions. If an expansion is owned but not installed, open its store entry and start the download before troubleshooting the game itself. Installing the add-ons does not make their missions appear immediately. The Foundation becomes available after completing the base campaign, while AWE requires later main-story progression, so a new-game save will not show every expansion objective at the start.
- The base game is installed.
- The Foundation is installed or queued.
- AWE is installed or queued.
- The active PlayStation account owns the Ultimate Edition license.
3. Update before judging performance or DLC access
Highlight Control on the PS5 home screen, press Options, and choose Check for Update. Install the latest update offered by the console before comparing frame rate, image quality, HDR, loading, or stability. After the download and installation finish, close the game completely and relaunch it so the updated build is used.
Update 1.30 is the October 2025 console update. It adds Unlock Frame Rate, HDR, improved temporal anti-aliasing, and VRR/120 Hz output support on PS5 and PS5 Pro, while also removing the fixed frame-rate limitations from the Quality and Performance settings when the new option is used. If a purchased expansion still does not appear after its story prerequisite, recheck the installed add-ons, restart the game, and verify that the correct account is active. Do not treat the absence of an early DLC mission as an installation failure.
- The latest available game update is installed.
- The game has been closed and relaunched after updating.
- Both expansions are installed before DLC troubleshooting begins.
4. Choose the display mode
Choose Performance mode if you value smoother aiming, quicker camera response, easier Evade timing, and more consistent control in crowded fights. Its original target is 60 frames per second with a 1440p render resolution and 4K output. This is the recommended default for a first campaign because Control's combat frequently asks you to turn quickly, throw objects, and react to incoming attacks.
Choose Graphics mode if you prefer ray-traced reflections and transparency effects and are comfortable with the original 30-frames-per-second target. The visual difference is most noticeable on reflective and transparent surfaces, but the mode does not change enemy placement, puzzles, routes, or combat rules.
After installing update 1.30, check Unlock Frame Rate. Use it only if the PS5 and display support the resulting output correctly. Enable HDR and VRR/120 Hz only when the television or monitor, HDMI connection, and PS5 settings support them. If you see flicker, unstable output, or an image that feels less consistent, disable Unlock Frame Rate or VRR and return to the capped mode that feels best.
- Performance is selected for responsiveness, or Graphics for ray-traced visuals.
- Unlock Frame Rate has been checked after updating.
- HDR and VRR/120 Hz match the display's capabilities.
5. Configure DualSense feedback
Control supports DualSense vibration and trigger effects. Leave them enabled if you want the intended PS5 feedback, including tactile weapon and charge sensations. The support documentation specifically identifies vibration and trigger support; these effects are feedback only and do not alter weapon damage, cooldowns, or ability behavior.
To adjust them, open Settings from the PS5 home screen, select Accessories, then Controller (General). Reduce or disable Vibration Intensity or Trigger Effect Intensity if the resistance becomes uncomfortable. You can also change these settings from the Control Centre while playing by opening Accessories and selecting the controller. Disabling either effect does not disable Pierce, Grip, or any other Service Weapon function.
- Vibration is enabled or adjusted to a comfortable level.
- Trigger Effect Intensity is enabled if adaptive resistance is wanted.
- Controller software is current if the PS5 reports an available update.
6. Decide how to handle a PS4 save
A PS4 save carries over when Control Ultimate Edition is played through the backward-compatible PS4 application on PS5. It does not transfer into the native PS5 application. 505 Games attributes this limitation to the newer Northlight Engine version used by the PS5 release.
If preserving the existing PS4 campaign is more important than native PS5 features, deliberately launch the PS4 application. If you want the PS5 modes, ray tracing, DualSense support, and Activities or Help cards, start or continue the campaign in the native PS5 application and expect to use a separate save. Back up the old save before switching versions so the two installations are not confused.
- You have deliberately chosen the PS4 or PS5 application.
- Any existing PS4 save is backed up.
- You are not expecting a PS4 save to appear in the native PS5 save list.
Before you move on
- The native PS5 application launches successfully.
- The base game, The Foundation, and AWE are installed or ready to install.
- The latest available update is installed.
- Performance or Graphics mode has been tested, and Unlock Frame Rate has been considered.
- HDR, VRR, and 120 Hz settings match the display's capabilities.
- DualSense vibration and trigger preferences are configured.
- You know whether the campaign is using a PS4-compatible save or a separate native PS5 save.
First contact: arrival, tutorial and gaining the Service Weapon
Welcome to the Oldest House is a mostly linear opening mission. Follow the route from the lobby through the shifting Bureau offices, meet Ahti, ride the elevator, and enter Director Trench’s Office. Interacting with the Service Weapon beside Trench’s body sends Jesse to the Astral Plane. Complete the required platforming and melee tutorial there, then pick up the hovering weapon to bind it. After returning to the Oldest House, defeat the Hiss guards, cleanse the Central Executive Control Point, use the Safe Room intercom, attempt to cleanse the suspended agent, and speak with Emily Pope in the Board Room. The mission is not complete immediately after cleansing the Control Point. Launch and weapon-form switching are not available as opening-mission abilities; save your early upgrade planning for the next mission, when Launch becomes obtainable.
Enter the Oldest House and follow the opening route
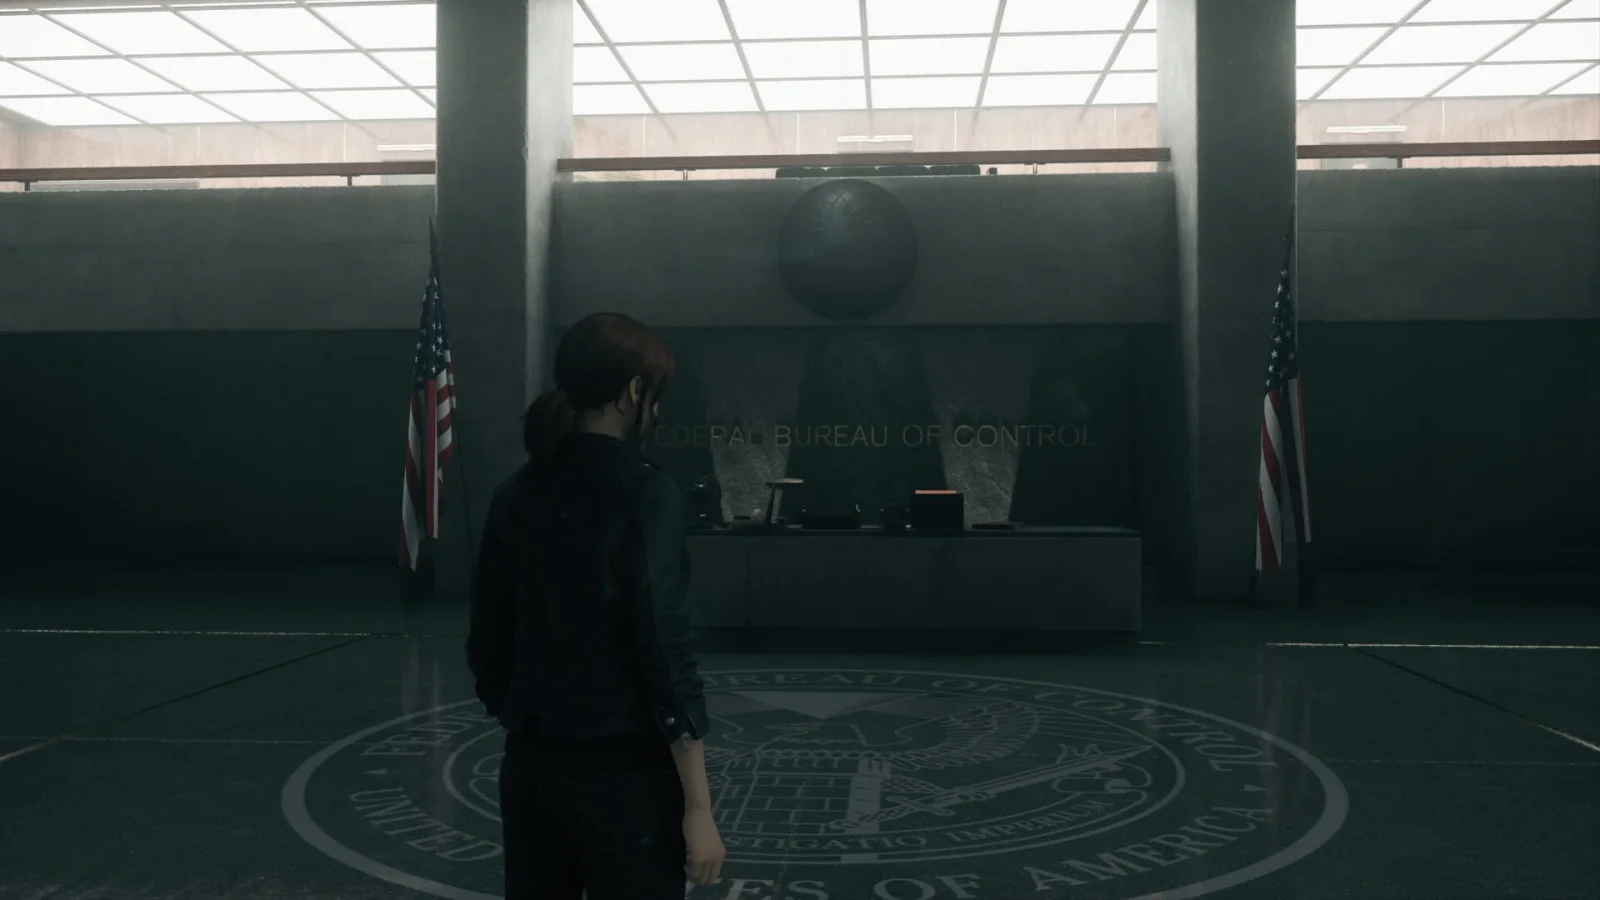
Start in the lobby and walk into the Federal Bureau of Control. The opening path is linear, although the building shifts behind Jesse and can make the route feel less direct. Follow the accessible corridors and signs rather than trying doors marked with clearance requirements. Those locked doors are not mistakes and cannot be opened during this mission.
Continue through the offices until Jesse meets Ahti, the janitor. His conversation points you toward the elevator. Before using it, the game may let you inspect nearby offices and documents, but these are optional and are not needed to advance. Take the elevator and follow the signs toward the Director’s Office. The route eventually leads through the security area and a corridor ending at the Director’s Office doors.
- Leave the lobby and follow the accessible office corridors.
- Meet Ahti and use the elevator route he indicates.
- Ignore doors that require clearance Jesse does not yet possess.
- Reach the double doors leading to Director Trench’s Office.
Trigger the Astral Plane sequence in Director Trench’s Office
Enter the Director’s Office after hearing the disturbance. Trench is lying on the floor, with the Service Weapon beside him. Interact with the weapon to trigger the vision and transfer Jesse to the Astral Plane. This interaction is the opening trigger; it is not the complete binding step.
Do not turn around and search for another exit after interacting with the weapon. The office sequence is designed to transition immediately into the required tutorial. The trophy and mission progress associated with obtaining the Service Weapon are completed during the Astral Plane section, when Jesse reaches and takes the weapon there.
- Enter Director Trench’s Office.
- Interact with the Service Weapon beside Trench’s body.
- Wait for the transition into the Astral Plane.
- Do not leave the office expecting a separate route to open first.
Cross the Astral Plane and bind the Service Weapon
Move forward through the Astral Plane and follow the pale platforms. The first gap teaches the basic jump and traversal rhythm. A hostile figure appears on an elevated platform; approach it and use the prompted melee attack. Melee is the main combat action introduced in this tutorial, and the enemy can hurt Jesse at close range, so attack and move away rather than standing directly in front of it.
After the melee encounter, look upward for the Service Weapon hovering above a higher platform. Use the nearby platforms to climb toward it and interact with it. This is the point where Jesse binds the Service Weapon. The weapon is now permanently available as her primary firearm.
Continue across the next platforms and use the Service Weapon against the enemies below. Defeat the hostile group, collect the blue health elements they leave behind when necessary, and then approach the white rope. Interact with the rope to return to the material world. If Jesse falls during the platforming, follow the restarted route and repeat the same climb; the tutorial does not require a hidden path or optional collectible.
- Cross the initial Astral Plane platforms.
- Use melee against the first hostile figure.
- Climb to and pick up the hovering Service Weapon.
- Defeat the enemies below the weapon platform.
- Use the white rope to return to the Oldest House.
Learn the opening firearm and melee rhythm
Back in the Oldest House, Jesse must defeat three Hiss Guards. Use the Service Weapon at range, move between cover, and let its ammunition recharge instead of waiting for a conventional reload. If a guard closes in, use melee to create space, then resume firing after moving to a safer angle.
This mission does not yet provide Launch, Seize, Shield, Levitate, or other supernatural abilities. It also does not teach mid-combat weapon-form switching. Those systems arrive through later story and side-mission progression. At this stage, concentrate on aiming, movement, melee spacing, and recognizing that the Service Weapon’s ammunition regenerates automatically.
- Defeat the first group of three Hiss Guards.
- Use cover and keep moving during the firefight.
- Practice firing, allowing ammunition to recharge, and using melee for nearby threats.
- Do not search this area for Launch or additional weapon forms.
Reach and cleanse the Central Executive Control Point
Follow the red-carpet route toward Central Executive. The next fight contains several Hiss waves, including a more heavily protected Hiss Ranger. Use the surrounding offices, railings, and upper landing for cover. You can begin the encounter from the landing and fire downward, but retreat if grenades force you out of position. Deal with the weaker guard first when possible, then keep circling the Ranger rather than standing in front of it.
Once the room is clear, go to the Control Point in the center of the red room and interact with it to cleanse it. Cleansing restores the area’s normal layout and unlocks the Control Point’s basic functions, including fast travel and access to progression menus as they become available. This is a checkpoint and a useful recovery location, but it is not the final mission-completion trigger.
- Follow the signs toward Central Executive.
- Defeat the Hiss waves and the Hiss Ranger.
- Approach the Control Point in the center of the room.
- Cleanse the Control Point.
- Use the Control Point afterward if you need to recover or inspect available menus.
Finish the mission through the intercom, agent, and Emily Pope
After cleansing Central Executive, go toward the Board Room area and locate the Safe Room at the back. Interact with the intercom to contact Emily Pope. The conversation establishes Jesse as the new Director and opens the next objective.
Leave the intercom area and approach the Hiss-corrupted agent suspended nearby. Interact with the agent and attempt the cleanse. The attempt fails, and the agent dies; this is a required story event, not an optional rescue that can be solved with a different ability.
Return to Emily near the Board Room and speak with her again. Follow the conversation into the Board Room. The mission completes after this exchange, and the next main mission becomes available. Only then should you begin planning Ability Point spending. Ability Points come from missions and certain hidden locations. Launch is the first major supernatural ability to prioritize, but it is obtained during Unknown Caller rather than during Welcome to the Oldest House. Once Launch is unlocked, invest toward its early upgrades; until then, do not waste time looking for a Launch prompt in the opening areas.
- Use the Safe Room intercom to speak with Emily Pope.
- Attempt to cleanse the suspended Hiss-corrupted agent.
- Return to Emily and enter the Board Room.
- Confirm that Welcome to the Oldest House is marked complete.
- Begin the next mission before expecting Launch or broader ability upgrades.
Before you move on
- Jesse has picked up the hovering Service Weapon in the Astral Plane and returned to the Oldest House.
- The first Hiss Guards and the Central Executive combat encounter have been defeated.
- The Central Executive Control Point has been cleansed.
- The Safe Room intercom conversation with Emily Pope has occurred.
- Jesse has attempted to cleanse the suspended Hiss-corrupted agent.
- Jesse has spoken with Emily Pope in the Board Room and Welcome to the Oldest House is marked complete.
- The next main objective, Unknown Caller, is available.
References for this chapter
- Welcome to the Oldest House - Control: Ultimate Edition Walkthrough & Guide - GameFAQs
- Walkthrough: Welcome to the Oldest House - Control - Neoseeker
- Neoseeker — Control Walkthrough: Unknown Caller
- Control Ultimate Edition Beginner Tips: Combat, Abilities, Mods, Control Points and What to Do First
- CONTROL Ultimate Edition — PlayStation Store
Understanding the Service Weapon and core forms
The Service Weapon is Jesse Faden’s regenerating firearm and an Object of Power that changes shape for different combat roles. Grip is available immediately; additional forms become available as the story advances and must be constructed through Astral Constructs at cleansed Control Points. Build one dependable form before spreading resources across every option, but keep two contrasting forms equipped so you can answer close-range, long-range, armored, and grouped threats. Use Launch, Shield, movement, and cover during the weapon’s recharge cycle, and choose Mods that improve survival, Energy, or the specific job of the equipped form.
Use Grip as the starting form and learn its ammunition cycle
Grip is the default Service Weapon form and becomes available as soon as Jesse binds the weapon during the opening story. It behaves like a precise semi-automatic pistol, making it a reliable choice against ordinary Hiss at short and medium distances. Aim for heads, exposed weak points, or targets whose shields and armor have already been removed.
The Service Weapon does not use a conventional reserve of bullets. Every form draws from the same regenerating ammunition meter. When the meter is nearly empty, stop firing and use Launch, melee, movement, or cover while it recovers. If you completely drain the meter, the recovery delay is longer, so controlled bursts are safer than firing continuously until the weapon locks out.
- Keep Grip equipped while learning enemy behavior and weapon recovery.
- Fire in controlled bursts instead of emptying the shared ammunition meter.
- Use Launch, melee, movement, or cover while the weapon regenerates.
Reach a cleansed Control Point before constructing or upgrading forms
Cleanse every Control Point you encounter and interact with it afterward. A Control Point acts as a checkpoint and fast-travel node, and it also provides access to Astral Constructs. Open the Weapon Forms section to construct newly available forms or upgrade forms that you already own.
Construction requires Source and materials. Source is mainly earned by defeating enemies and can also be gained by dismantling unwanted Mods. Materials come from defeated enemies, supply containers, and exploration. The exact requirement is displayed in the Astral Constructs menu and can vary by purchase, so use the current menu cost instead of relying on a fixed number from another playthrough.
Control Points do not automatically give Jesse a free set of Mods. Instead, they let you equip collected Mods and use Astral Constructs to craft certain random Mods when you have the required Source and materials. Check the menu after major missions, because new forms, upgrades, and Mod options become worthwhile as your inventory grows.
- Cleanse and activate each newly discovered Control Point.
- Check the displayed Source and material requirements before confirming a purchase.
- Use Control Points to equip collected Mods and review Astral Constructs regularly.
Unlock the forms in story order and assign each a clear job
Grip is available from the beginning. After completing Main Mission 2, Unknown Caller, Shatter becomes available for construction. Shatter is a close-range spread weapon. Move near aggressive melee enemies or rushing Hiss, fire at short range so more pellets connect, then Evade or retreat before nearby enemies surround Jesse.
After completing Main Mission 4, Old Boys’ Club, Pierce becomes available. Pierce charges a high-impact precision shot and is useful against armored, shielded, or distant enemies when you have cover and a clear firing window. Charging in the open is dangerous, so use it after Launch, Shield, or a repositioning maneuver rather than while surrounded.
After completing Main Mission 5, Threshold, Spin becomes available. Spin fires rapidly and is useful for sustained pressure against moving targets, weaker groups, and exposed Hiss Clusters. It consumes weapon energy quickly, so fire in controlled periods and switch to powers while the meter refills.
After completing Main Mission 6, My Brother’s Keeper, Charge becomes available. Charge fires explosive projectiles that are effective against groups and enemies behind cover. Fire from a safe distance because its explosions can injure Jesse, especially when used against enemies standing immediately beside her.
The AWE expansion adds Surge, a separate Service Weapon form built around sticky explosives. Surge is not required for the base-game progression in this chapter and should not be confused with Charge.
- Grip: accurate general-purpose fire.
- Shatter: close-range burst damage against enemies that rush Jesse.
- Pierce: charged precision damage against distant or durable targets.
- Spin: sustained fire against moving or weaker targets.
- Charge: explosive area damage against groups and enemies behind cover.
- Surge: optional AWE expansion form, not part of the base-game unlock order.
Equip two contrasting forms and change roles during encounters
Use the Loadout menu at a Control Point to place two constructed forms in the active weapon slots. Grip plus Shatter is a straightforward beginner pairing: Grip handles distant or exposed targets, while Shatter answers enemies that close the distance. Grip plus Pierce is better if you prefer cover and deliberate shots. Spin is useful when enemies move constantly, while Charge is valuable when several enemies cluster behind cover.
Change forms according to the room instead of forcing one weapon to handle every target. Open with Grip or Pierce against distant threats, use Launch to stagger or eliminate a priority enemy, then switch to Shatter when melee units breach your position. During a weapon recharge, continue attacking with Launch or use Shield to survive the exposed moment.
Do not treat forms as replacements for Jesse’s abilities. Launch is often the most efficient way to damage or stagger enemies, while the Service Weapon finishes weakened targets and handles enemies that are difficult to reach with thrown objects. Form switching is most effective when it follows a power attack, a dodge, or a change in enemy distance.
- Equip two forms with different ranges or damage roles.
- Use powers while the weapon meter regenerates.
- Switch when enemies close in, spread out, take cover, or gather together.
- Combine weapon fire with Launch, Shield, Evade, and cover.
Spend early resources on one reliable form without neglecting abilities
Each form can be upgraded through Astral Constructs. Upgrades improve the form and eventually provide additional Weapon Mod capacity. Grip is the safest first investment because it remains useful in nearly every sector. Shatter is a strong alternative for players who prefer close-range combat and are comfortable using Evade or Shield to create safe openings.
Do not spend every early Source payment on weapon construction. Launch upgrades usually provide a larger early improvement than a small weapon increase because Launch damages, staggers, and displaces enemies without using the Service Weapon’s ammunition meter. Keep enough resources for supernatural ability development, then upgrade the form that matches the way you actually fight.
Construct a second form when it solves a real range or enemy-type problem. You do not need to purchase every form immediately, especially if doing so delays Launch or other core ability upgrades. The forms remain available later, and most missed construction opportunities can be handled at a Control Point after progressing the story.
- Upgrade Grip first unless Shatter clearly fits your preferred style.
- Keep Source available for important ability progression.
- Construct a second form when it adds a useful range or damage role.
- Avoid buying every available form before improving essential abilities.
Install practical Weapon and Personal Mods
Open Loadout at a Control Point and fill every available Weapon Mod and Personal Mod slot. Mods are obtained from defeated enemies, supply containers, missions, Bureau Alerts, Board Countermeasures, hidden activities, and Astral Constructs. Their quality and bonuses vary, so compare the actual effects in your inventory instead of assuming that a higher rarity is always better for your build.
For Personal Mods, health-on-kill or another reliable health bonus helps stabilize early rooms while you learn enemy attack patterns. Energy Recovery, Energy Boost, or Launch Efficiency supports repeated power use when Launch is your main damage and crowd-control tool. If Jesse is surviving comfortably, replace one defensive slot with a damage, Energy, or ability-support bonus.
For Weapon Mods, match the bonus to the form. Damage, accuracy, and headshot improvements suit Grip. Close-range damage and spread-related bonuses suit Shatter. Rate of fire and weapon recovery help Spin. Damage and projectile-related bonuses improve Charge. Pierce benefits from precision and damage improvements, but do not charge it in an exposed position merely to take advantage of a stronger Mod.
Dismantle Mods that are clearly weaker or redundant to recover Source, but keep unusual or high-quality bonuses until you know whether they support a later build. Mod slots expand through form upgrades, so return to Astral Constructs when a form reaches a new upgrade level.
- Use a health-focused Personal Mod if ordinary enemies are wearing Jesse down.
- Use Energy Recovery, Energy Boost, or Launch Efficiency when relying heavily on Launch.
- Match Weapon Mods to the form’s range and combat role.
- Compare actual bonuses instead of judging only by rarity.
- Dismantle only Mods that are clearly weaker, duplicated, or no longer useful.
Before you move on
- You have reached a cleansed Control Point and opened its Astral Constructs menu.
- Grip is upgraded or paired with another constructed form suited to a different range or enemy type.
- At least two active forms are equipped and you can change between them during combat.
- You understand the correct unlock order through Charge: Shatter after Unknown Caller, Pierce after Old Boys’ Club, Spin after Threshold, and Charge after My Brother’s Keeper.
- Weapon and Personal Mods are installed, including at least one useful survival, Energy, or ability-support bonus.
- You can alternate weapon fire with Launch, Shield, movement, or cover while the Service Weapon regenerates ammunition.
Core supernatural abilities: Launch, Shield, Seize, Evade and Levitation
Control’s abilities are strongest when rotated with Service Weapon fire instead of used as isolated tools. Launch provides early damage and stagger pressure, Evade moves Jesse through danger, Shield blocks exposed approaches, Seize turns weakened enemies into temporary allies, and Levitate adds aerial mobility and access to previously unreachable routes. Launch and Levitate are required story abilities. Evade, Shield and Seize come from optional Object of Power missions. Begin by completing Unknown Caller: speak with Emily Pope in Central Executive, travel through Dead Letters and Communications to the Floppy Disk in Pneumatics, finish its Astral Plane challenge, then continue through the Mail Room, Tommasi encounter, Hotline Chamber and Oceanview Motel. Return to Emily afterward to complete Unknown Caller and unlock Directorial Override. Spend early Ability Points mainly on Launch, then add Health and Energy improvements before specializing.
1. Complete Unknown Caller and obtain Launch
Start Unknown Caller in Central Executive after the opening briefing. Speak with Emily Pope through the Shelter near the Board Room, then leave the Board Room and use the ground-floor door leading toward Dead Letters. Follow the mission marker through Dead Letters and into the Cafeteria. Clear the Hiss, drop to the lower floor when necessary, and leave through the door at the northwest side of the cafeteria. Continue through the red-lit area, defeat the Hiss waves and cleanse the Control Point at the far side.
Use the double doors toward the Communications Department. Follow the corridor until the signs direct you to Pneumatics. Enter the room where an object is being thrown through the air, then use the staircase and cross the upper gangway to reach the Floppy Disk Object of Power. Approach it and cleanse it. This is the exact story point where Jesse receives Launch.
The Floppy Disk sends Jesse into the Astral Plane. Follow the visible platforms, use the newly introduced Launch interactions to clear the tutorial obstacles and reach the Control Point at the end. Binding the Floppy Disk completes the challenge and returns Jesse to the Bureau. A combat encounter begins shortly afterward. Use Launch on large loose objects while the Service Weapon is recovering, then leave through the indicated door and continue toward the Mail Room.
In the Mail Room, Hiss-corrupted Tommasi appears in the open central space. Stay near cover, shoot him while he is exposed and use Launch when he is preparing or recovering from a projectile attack. He can evade thrown objects, so do not depend on Launch alone. Eliminate ordinary Hiss on the floor when they appear, because their health pickups are useful during the fight. Tommasi escapes rather than being permanently defeated here; the later side mission Mr. Tommasi is separate.
After the encounter, follow the route through the door Tommasi used and continue into the Hotline Chamber. Walk toward the ringing phone and pull the hanging cord three times. Jesse is transported to the Oceanview Motel. Go to the far end of the motel corridor, enter the accessible room and take the key from the table. Return to the opposite end, use the key on the interactable door and pull the cord three times again.
Back in the Bureau, cross the walkway to the Hotline and interact with the ringing rotary phone. Complete the short Hotline Astral sequence by moving across the path and avoiding or stunning the flickering entities with Launch. When Jesse returns, cross back over the walkway, turn toward the Director’s Office and then return to Emily Pope in the Board Room. Speak with her to finish Unknown Caller. Directorial Override is then unlocked as the next main mission.
- Speak with Emily Pope in Central Executive and enter Dead Letters.
- Travel through the Cafeteria and Communications Department to Pneumatics.
- Cleanse the Floppy Disk and complete its Astral Plane tutorial.
- Use Launch in the post-tutorial fight and continue to the Mail Room.
- Survive Tommasi’s encounter, then reach the Hotline Chamber.
- Solve the Oceanview Motel key sequence and interact with the Hotline.
- Return to Emily Pope and confirm that Directorial Override is active.
2. Build around Launch before spreading Ability Points
Launch should be the first major investment because it damages enemies without consuming Service Weapon ammunition, staggers many standard Hiss and lets Jesse exploit desks, chairs, carts and other debris. Buy Launch damage improvements first, then add Health or Energy upgrades. Do not distribute every early point across all five ability branches; a stronger Launch gives immediate value in nearly every sector.
Continue using weapon fire whenever Launch is recharging. A reliable early rotation is Service Weapon fire, Launch when a heavy object is available, movement to a new angle and another weapon burst. Launch Explosives becomes useful once enemies begin throwing grenades or rockets. Watch for the projectile warning, seize the explosive before it lands and throw it back only when Jesse has enough space to avoid the blast.
Launch also works defensively. It can interrupt ordinary enemies, remove pressure from a doorway and punish Hiss that are standing behind partial cover. Against flying enemies such as Tommasi, use cover and weapon fire more heavily because airborne targets can dodge thrown objects.
- Prioritize Launch damage upgrades.
- Add at least one practical Health or Energy improvement afterward.
- Alternate Launch with Service Weapon fire during ammunition recovery.
- Use Launch Explosives when projectile warnings appear, but avoid returning explosives in cramped spaces.
3. Obtain Evade from A Merry Chase
A Merry Chase becomes available after Unknown Caller when Jesse reaches Maintenance during Directorial Override. Travel toward Ahti’s Janitor’s Office through Ventilation. Opposite or near the office is a Break Room with a blinking red light. Enter it to trigger the mission and let the floor collapse into the Astral Plane.
Follow the route to the Merry-Go-Round Horse Object of Power and cleanse it. The Astral challenge teaches Evade through shifting walls, gaps and incoming hazards. Use the dash close to the moment an attack or wall would hit Jesse. In the longer gaps, jump first and Evade during the crossing. After the tutorial, follow the exit route and use Evade to avoid the hazards until Jesse returns to Maintenance.
Evade consumes Energy, so keep enough available for an emergency escape. It is especially useful against grenades, melee attackers and marked impact zones. Evade can cross small gaps, but it should not replace cover or careful landings. Shield Rush is a separate Shield-tree upgrade and is not part of Evade.
- Reach the Maintenance Janitor’s Office area during Directorial Override.
- Enter the blinking Break Room to start A Merry Chase.
- Cleanse the Merry-Go-Round Horse.
- Complete the shifting-wall and gap tutorial to retain Evade.
4. Obtain Shield from A Good Defense
A Good Defense is found in Maintenance’s Field Training area. The mission can be started by entering Field Training, although the Home Safe Tests collectible can also provide the lead. If the entrance is blocked by Hiss Nodes, destroy them first. Complete the timed Field Training course by shooting targets and using Launch to move objects or open the route. If the attempt fails, return to the entrance and restart it.
At the end of the course, cleanse the Home Safe Object of Power and complete its Astral Plane tutorial. Shield pulls nearby debris into a barrier in front of Jesse. Hold it while crossing an exposed sightline, recovering from a reload or approaching a dangerous group, then release it before Energy is exhausted and attack or reposition.
Shield is most effective as a short defensive bridge rather than a permanent stance. Shield Barrage and Shield Rush are later upgrades that add offensive options, but neither replaces Launch. Use Shield to reach a safer angle, release it, then combine Launch or weapon fire with Evade.
- Enter Field Training in Maintenance or follow the Home Safe Tests lead.
- Complete the Field Training route and cleanse the Home Safe.
- Finish the Shield Astral tutorial.
- Release Shield before Energy is completely depleted.
5. Use Seize against weakened enemies
A Captive Audience becomes available in Research’s Parapsychology area. The Astralnauts Information collectible near the Parapsychology Control Point can trigger the mission if it does not appear automatically. Travel east into the Hypnosis Lab and enter the control room. The console requires the symbol shown beside the locked Object of Power room; copy that shape into the console to open the way to the X-Ray Lightbox.
Cleanse the X-Ray Lightbox to enter the Astral Plane. The tutorial requires Jesse to weaken ordinary enemies and Seize them when they become vulnerable. The seized enemies then attack the gold enemy. Repeat the process until the challenge ends and return to the Bureau with Seize unlocked.
In normal combat, do not attempt Seize against a healthy target. Use Launch or weapon fire first, wait for the Seize prompt, then take control of a weakened enemy. A seized Hiss can distract stronger opponents while Jesse attacks from cover. Seize works particularly well with Launch because Jesse can spend the opening created by the temporary ally on a heavier target.
- Reach Parapsychology and locate the Hypnosis Lab.
- If needed, collect Astralnauts Information near the Parapsychology Control Point.
- Copy the symbol beside the X-Ray Lightbox room into the console.
- Cleanse the X-Ray Lightbox and complete the Seize tutorial.
- Weaken targets before attempting Seize in ordinary combat.
6. Obtain Levitate during My Brother’s Keeper
Levitate is a required story ability obtained during My Brother’s Keeper in Containment. Travel by Sector Elevator to the Panopticon and speak with Frederick Langston. Follow the route through the Panopticon, activate Control Points and reach the fourth floor. The Benicoff TV Object of Power leads into a fight involving Salvador and additional Hiss. Use cover and elevated platforms while dealing with the enemies, then approach and cleanse the television.
The Astral Plane tutorial teaches Levitate. Move from platform to platform, use visible ledges as landing points and reach the Control Point at the end. Binding the Benicoff TV grants Levitate. Return to the Panopticon and use it to reach the upper route toward Dylan’s cell, which continues the story.
Levitate is both a traversal and combat ability. Jesse can fire the Service Weapon and use Launch while airborne, but aerial movement does not make her invulnerable. Release Levitate only over a visible platform or floor. Afterward, revisit earlier sectors for balconies, upper ledges, holes and Hidden Locations that were inaccessible before. Ground Slam is useful later, but early points are generally better spent on Launch, Health, Energy or Levitate duration.
- Reach the Panopticon during My Brother’s Keeper.
- Defeat the enemies around the Benicoff TV.
- Cleanse the Benicoff TV and complete its Astral tutorial.
- Use Levitate to reach the upper Panopticon route and continue toward Dylan.
- Revisit earlier sectors for elevated paths and Hidden Locations.
Before you move on
- Unknown Caller is complete and Directorial Override is listed as the next main mission.
- Launch is available from the Floppy Disk and has at least one useful damage upgrade.
- Evade is available after completing A Merry Chase.
- Shield is available after completing A Good Defense, if the optional mission has been undertaken.
- Seize is available after completing A Captive Audience, if the optional mission has been undertaken.
- Levitate is available after cleansing the Benicoff TV during My Brother’s Keeper.
- The active build includes a practical Health or Energy improvement and can combine Launch with weapon fire, movement and defensive abilities.
Navigating the Oldest House sectors and Control Points
Control Points are the backbone of progression through the Oldest House. Cleanse every point you reach, then interact with it again so it becomes a checkpoint and fast-travel destination. Its menu provides access to abilities, Astral Constructs, Service Weapon forms, mods and Board Countermeasures. Main missions progressively open sectors, raise security clearance and unlock major traversal abilities; side missions and Hidden Locations provide optional routes and additional rewards. Directorial Override opens Maintenance and the NSC Power Plant, while Old Boys’ Club sends Jesse to Research and ends with the HRA Lab sequence. When a door refuses access, read its clearance requirement and compare it with Jesse’s current authorization rather than repeatedly searching the same corridor. Establish a nearby Control Point before difficult fights, but remember that active combat healing comes from collecting health elements dropped by defeated enemies.
Cleanse and activate every Control Point
Control Points appear as red, Hiss-corrupted structures in hubs, rooms and corridors. Approach the central point and hold the prompted button to cleanse it. Some are guarded by Hiss, while others become available only after a local event or objective is completed. If the cleanse prompt does not appear, search the immediate room, upper walkways and adjoining platforms for a surviving enemy or an unfinished encounter.
After the corruption disappears, interact with the Control Point again to open its menu. This confirms that it is operational and adds it to the fast-travel network. Discovery alone is not enough: make the second interaction before leaving so the point becomes a reliable checkpoint and recovery location.
Make this routine whenever you enter a new wing. A newly activated point lets you restore Jesse, change equipment and return after death. It is especially important before a boss arena, Threshold, long hallway fight or objective that leads away from the current hub.
- Clear enemies or finish the local event controlling the point.
- Hold the cleanse prompt until the red corruption disappears.
- Interact with the cleansed point again before continuing.
Use Control Points to prepare Jesse
Interact with an active Control Point to open Fast Travel and move between previously cleansed locations. Destinations are organized by sector and area. Activate points in Executive, Maintenance, Research and Containment as you encounter them, then use Fast Travel when a mission sends you across the Oldest House or when you need to return to Central Executive.
The menu also provides access to Abilities, Astral Constructs, Board Countermeasures and loadout management. Spend Ability Points on the ability tree, construct or improve Service Weapon forms when their requirements are met, and equip stronger weapon and personal mods before a major objective. Control Points do not award abilities by themselves. Missions, side missions and Hidden Locations provide abilities or Ability Points; the Control Point is where you manage those rewards.
A Control Point restores Jesse when used, but it does not heal her inside an active fight. During combat, move toward defeated enemies when safe and collect the health elements they leave behind. Keep moving rather than trying to retreat to a point while enemies are still spawning.
- Use Fast Travel only between cleansed points.
- Review abilities, forms and mods before a major story objective.
- Use the point for recovery before leaving, then collect health elements during combat.
Directorial Override: reach Maintenance and find Ahti
Directorial Override follows Unknown Caller. From Central Executive, follow the signs toward the Sector Elevator near the Director’s Office and choose Maintenance. At the Maintenance Sector Access Corridor, move toward Ventilation and follow the signs for the Janitor’s Office. Fight the Hiss in the open ventilation area, then cleanse the Ventilation Control Point before continuing.
The route is easier if you use the signs and the map together. From the Ventilation area, proceed toward the upper walkways and Janitor’s Office. Speak with Ahti to update the mission. He gives Jesse Clearance Level 2 and asks her to repair the NSC Power Plant systems before he helps with the lockdown. The clearance lets you open nearby Level 2 doors, but most of those rooms contain optional loot or documents rather than required progress.
Before leaving Ahti’s area, activate the nearby Control Point and note the service elevator route. You may also accept What a Mess: Burn the Trash from Ahti’s noticeboard or complete A Merry Chase if it is available. These are optional; neither is required to finish Directorial Override. Return through the Level 2 door behind or near Ahti and take the service elevator down toward the NSC Power Plant.
- Start Directorial Override after speaking with Emily at the end of Unknown Caller.
- Take the Sector Elevator to Maintenance and cleanse the Ventilation Control Point.
- Speak with Ahti to receive Clearance Level 2.
- Use the service elevator route toward the NSC Power Plant.
Directorial Override: speak with Arish and repair the Energy Converters
At the NSC Power Plant, exit the elevator and cleanse the NSC Power Plant Control Point on the raised platform before exploring. Enter the Security Booth and speak with Security Chief Arish. This updates the mission with two repair objectives: the NSC Energy Converters and the NSC Coolant Pumps. Their order is flexible, but repairing the Energy Converters first gives a clear route through the plant and opens the elevator connection needed later.
From the Power Plant, follow the signs toward NSC Energy Converters. Fight the Hiss around the approach and cleanse the Energy Converters Control Point. A loose power core lies near the entrance. Use Launch to place it into the empty receptacle, which opens the gates leading into the converter area. Do not enter the Mold-infested room unless you are deliberately pursuing optional content; it is not required for the main objective.
Advance up the ramps and eliminate the Hiss, including elevated enemies and heavier ranged units. At the large converter, pick up the loose power cores with Launch and place them into the empty receptacles. You must move between levels, so clear enemies before carrying a core through an exposed walkway. Replacing the required cores completes the converter repair and opens the route back toward the plant’s elevator. Activate any Control Point you pass before beginning the next repair.
- Cleanse the NSC Power Plant Control Point.
- Speak with Arish in the Security Booth.
- Cleanse the NSC Energy Converters Control Point.
- Use Launch to replace the converter power cores.
- Keep the Mold room optional unless pursuing side content.
Directorial Override: repair the Coolant Pumps and clear the lockdown
Return to the NSC Power Plant and follow the signs for NSC Coolant Pumps. Expect waves of Hiss Charged enemies and other close-range threats in the approach. Back away from charging enemies and use Launch or the Service Weapon before they reach you; their explosions can damage Jesse and interrupt the route. Cleanse the Control Point near the pump area before starting the repair sequence.
The three pumps require power cores. Locate each receptacle around the pump chamber, then use Launch to place a core into it. Enemies appear as the repairs progress, so stop carrying cores and clear the room whenever the arena becomes unsafe. Use the walkways for elevation and avoid standing beside explosive objects when a wave begins.
One pump is blocked by the Clog. Enter the Pipe Works and shoot the Clog’s exposed yellow growths. Follow it through the passage, evade the streams of hazardous material, and shoot the growths again whenever it retreats. Repeat the pursuit until the obstruction withdraws, then return to the pump chamber and finish the repair.
After the pumps are operational, return toward the main plant area. A heavily armoured Hiss Trooper appears during the route. Use Launch to strip health and armour, then finish with weapon fire while keeping cover between attacks. When the area is clear, take the elevator beside the NSC Energy Converters entrance to the NSC Control Room. Cleanse the Control Point there, interact with the override panel and complete the lockdown objective.
- Reach NSC Coolant Pumps and cleanse the nearby Control Point.
- Repair all three pumps with power cores.
- Pursue the Clog and destroy its exposed growths.
- Defeat the armoured Hiss Trooper.
- Take the elevator to NSC Control Room and activate the override panel.
Finish Directorial Override and unlock Research
After activating the override, follow the route back to the Sector Elevator. Use the shortcut opened during the mission if it is available, then ride the elevator to Central Executive. Speak with Emily in the Board Room to complete Directorial Override. Emily gives Jesse Clearance Level 3, and the Research destination becomes available at the Sector Elevator.
Clearance Level 3 opens more rooms in Executive and Maintenance, but do not stop the main route to search every newly accessible door. Activate the Central Executive Control Point and use it as the hub for the next mission. You can now return to Maintenance or revisit Level 2 and Level 3 rooms for optional documents, containers and side missions.
- Activate the NSC Control Room Control Point before leaving.
- Return to Central Executive through the Sector Elevator.
- Speak with Emily in the Board Room.
- Confirm Clearance Level 3 and Research access.
Old Boys’ Club: travel to Research and reach Parapsychology
Old Boys’ Club begins after the Central Executive conversation with Emily. From the Sector Elevator, choose Research. On arrival, move into Central Research and cleanse the first Control Point you encounter. Follow the mission marker toward the large courtyard, then descend the stairs toward Parapsychology.
A red Hiss barrier blocks the direct route. Search the nearby courtyard and shoot the Hiss nodes or red growths surrounding the obstruction. Once the nodes are destroyed, the barrier opens. Continue through the corridor toward Parapsychology rather than trying to force a clearance door elsewhere.
In the approach to Parapsychology, use the available side route and clear the Hiss before entering the Astral Exhibition. Cleanse the Astral Exhibition Control Point. This is the important recovery point for the next set-piece, so interact with it before proceeding. Follow the route into the containment area where an invulnerable Hiss creature blocks the passage.
- Take the Sector Elevator to Research.
- Cleanse the Central Research or courtyard Control Point.
- Destroy the Hiss nodes blocking the route.
- Reach and activate the Astral Exhibition Control Point.
Old Boys’ Club: trap the Parapsychology creature and contact Marshall
In the containment room, do not try to defeat the creature directly. Use Launch to place the two gold power blocks into the receptacles on either side of the large holding-cell door. This opens the route. Enter the holding area and allow the creature to follow, then move through the smaller exit and reach the control panel above the passage. Activate it to close the cell and trap the creature.
Continue through the opened route back toward Parapsychology. Clear the Hiss in the large room, then cleanse the Parapsychology Control Point. Approach the intercom beside the elevator and contact Marshall. Enemies attack while the elevator arrives, so use the room’s pillars and upper levels as cover rather than standing beside the intercom.
Ride the elevator to the upper Research area. On arrival, cleanse the nearby Control Point, then follow the marker to Luck and Probability. Speak with Marshall to receive the Director’s Office objective and the route toward Darling’s HRA Lab. Marshall opens the way into Ritual Division.
- Place both gold blocks into the holding-cell receptacles.
- Lure the creature into the cell and activate the control panel.
- Cleanse the Parapsychology Control Point.
- Contact Marshall at the elevator intercom.
- Ride up, cleanse the next Control Point and speak with Marshall in Luck and Probability.
Old Boys’ Club: Ritual Division, Protective Studies and the HRA Lab
Follow Marshall’s opened route from Luck and Probability into Ritual Division. Clear the Hiss battle in the open area, then cleanse the Ritual Division Control Point. A further group may appear when the cleanse begins, so keep distance from the central platform and use Launch against exposed enemies. When the area is secure, follow the mission marker north through Protective Studies.
At the marked door, reproduce the symbol shown on the nearby card or panel. Match the displayed lines and shapes rather than guessing from the room layout. When the door opens, enter the HRA Lab and interact with the central machine to trigger Marshall’s scene.
Search the lab for five punch cards. Insert each card into the terminal whose displayed pattern matches it; the terminals are numbered and the correct arrangement is indicated by the shapes on the cards and boards. If a card appears to fit more than one station, compare the complete pattern, including the filled section and orientation, before inserting it. Once all five cards are placed, activate the HRA machine.
The machine sequence completes Old Boys’ Club and transitions the story to Threshold. The next mission begins in Research, and Jesse receives Clearance Level 4 according to the mission reward sequence. Before leaving, activate the HRA Lab or nearby Control Point if available, then use the Sector Elevator and map to plan the next objective rather than wandering through blocked Research corridors.
- Clear and cleanse the Ritual Division Control Point.
- Follow the marker through Protective Studies.
- Solve the symbol door using the displayed pattern.
- Collect all five HRA Lab punch cards.
- Place the cards in matching terminals and activate the machine.
- Confirm that Threshold begins and Clearance Level 4 is available.
Use Control Points, clearance and the Sector Elevator as a route system
The Sector Elevator is the main link between Executive, Maintenance, Research and later Containment destinations. New destinations appear through story progression; do not assume a locked destination is a missing side mission. After Directorial Override, Research becomes available. After Old Boys’ Club, Jesse’s higher clearance and the following Threshold objective expand access further, while later missions open Containment and additional routes.
A clearance door is a progression marker, not usually a puzzle. Read the number on the door and compare it with Jesse’s current authorization. If the required level is higher, follow the active mission and return later. If a blocked route has no clearance number, inspect side corridors, upper walkways, breakable panels and alternate approaches; some routes require a traversal ability or a mission event instead.
Before a long fight, cleanse and access the nearest Control Point, spend Source if a useful construct is available, and review weapon forms, personal mods and abilities. If Jesse dies, retry from the recent point with a changed plan: increase health or energy support, use Launch from cover, switch weapon forms or travel to another hub for upgrades. During the retry, collect health elements from defeated enemies instead of expecting the checkpoint to heal Jesse inside the encounter.
- Use the Sector Elevator to select only destinations currently unlocked by story progress.
- Return to higher-clearance doors after receiving the required authorization.
- Activate a nearby Control Point before every major set-piece.
- Change the build after a failed attempt instead of repeating the same tactic.
Before you move on
- Every Control Point encountered on the Directorial Override and Old Boys’ Club routes has been cleansed and activated.
- Directorial Override is complete: the NSC Energy Converters and Coolant Pumps are repaired, the NSC Control Room override panel is activated, Emily has been consulted and Clearance Level 3 is available.
- Research is available at the Sector Elevator.
- Old Boys’ Club is complete: Jesse has reached Parapsychology, trapped the creature, contacted Marshall, reached the HRA Lab, placed the five punch cards and activated the HRA machine.
- Threshold has started and the next story route is available.
- After a failed encounter, Jesse can return to a recent Control Point, revise the loadout and retry without replaying unrelated sectors.
Sector combat: Executive, Research, Maintenance and Containment tactics
Executive rewards disciplined movement between desks, railings and solid cover. Research combines multi-level sightlines, Snipers, Hiss Clusters and hazardous Mold areas. Maintenance alternates between machinery rooms and narrow corridors where explosive objects and Hiss Charged enemies are dangerous. Containment links Logistics, Security, Medical and the Panopticon through long catwalks and vertical routes. Activate every Control Point, keep a fallback route open, and combine Service Weapon fire with Launch, Shield, Evade, Seize and Levitate instead of relying on one form. The main Threshold mission is a Maintenance-to-Black-Rock-Quarry operation; Active Threshold and the Mold route are separate Research objectives. The Face of the Enemy then returns you to Research and Containment before opening AWE after Story Mission 7.
1. Prepare at a Control Point
Before entering a combat area, activate the nearest Control Point and equip two forms with different jobs. Pierce is valuable for clear long-range shots against Snipers and exposed officers. Grip, Spin or another rapid-fire option is more forgiving when enemies move between cover. Keep Launch available even when Service Weapon ammunition is full: thrown objects stagger enemies, damage shields and let you keep attacking while ammunition regenerates.
Use practical Mods during the campaign instead of waiting for a perfect endgame inventory. A weapon-damage or ammo-efficiency Mod suits the form you use most. Health recovery on weapon kill helps in ordinary rooms, while energy recovery supports repeated Launch, Shield and Seize use. Spend ability points on upgrades that improve Launch, health or energy before buying narrow bonuses. If a fight goes badly, return to the Control Point and change one major factor rather than repeating the same approach.
- Activate the nearest Control Point.
- Equip one accurate form and one flexible form.
- Carry at least one survivability or energy-focused Mod.
- Identify an open fallback room before triggering combat.
2. Executive: control the tiers and crossfire
Central Executive and Executive Affairs use desks, railings, upper walkways and adjoining office lanes. Start beside a doorway, pillar or desk cluster rather than in the center. Scan upper levels first for Rangers and other ranged enemies, then remove the most exposed threat before ordinary guards surround you.
Use Pierce or another accurate form across long sightlines. When enemies gather behind desks or at a doorway, use Launch to break their formation and fire while ammunition regenerates. Move between solid cover points instead of retreating in a straight line. Evade sideways through the edge of a group when available, then continue toward a safer lane.
Do not remain on an upper perch once grenades or crossfire cover multiple approaches. Drop to a lower tier or pass through a side office. After cleansing a Control Point in Central Executive, use it as your return point before attempting a newly opened route or story interaction.
- Prioritize ranged enemies on upper walkways.
- Use desks, pillars and doorways as short-term cover.
- Break groups with Launch before they occupy several lanes.
- Move when grenades or crossfire cover the current tier.
3. Threshold: complete the Maintenance and Black Rock route
The main Threshold mission begins after Old Boys’ Club sends Jesse to obtain more Black Rock. From Central Executive, follow the mission marker to Central Maintenance. Cross toward the Black Rock Processing access route and clear the Hiss around the entrance. In the Turbine Room, use Launch to move the power cores into the sockets that stop the turbines. Carry or throw the cores across the gaps as the route rises, then pull the light cord three times to reach the Oceanview Motel.
At the motel, ring the desk bell and reproduce the arrangement shown in the first open room in the next room: the painting straight, the radio on the right, the chair pulled out and the plant on the left. Cycle the doors until the third room opens, take the key, unlock the motel door and pull the cord three times to return to the Oldest House. Continue through the Firebreak and cross to the Atlas Chamber.
In Atlas Chamber, help the Rangers defeat the Hiss and cleanse the Control Point. Speak with Arish in the control room, then enter Black Rock Processing. Interact with the damaged prism equipment to trigger the Hiss Distorted encounter. This enemy becomes difficult to see when it is not attacking; watch for distortion or movement, use Shield to survive its approach, and fire during its visible attack window. Enter Dr. Darling’s Black Rock Lab and take the Clearance Level 5 card.
Use the new clearance to reach the NSC Energy Converters route and the elevator to Black Rock Quarry. Descend through the broken elevator route, enter the quarry and collect three power cores from around the area. Place them in the sockets at the excavation equipment, activate the console, defeat the resulting Hiss and collect the Black Rock Prism. Return to a Control Point and fast-travel to Central Executive, then speak with Marshall to complete Threshold and begin My Brother’s Keeper.
- Stop the Turbine Room turbines with the power cores.
- Solve the Oceanview Motel room arrangement.
- Cleanse the Atlas Chamber Control Point.
- Defeat the Hiss Distorted in Black Rock Processing.
- Take the Clearance Level 5 card from Darling’s lab.
- Power the quarry explosives with three cores.
- Collect the Black Rock Prism and report to Marshall.
4. Research and the Active Threshold Mold route
Active Threshold is not a step inside the main Threshold mission. It is a separate Research-sector route tied to Mold-related side content. Once the relevant Research objectives are available, travel to Central Research and activate its Control Point. Follow the mission marker toward the Active Threshold, using stairs and ledges rather than dropping into unexplored lower areas. Research combat is multi-level: look up for Snipers and Hiss Guards before committing to a heavy target.
Yellow Mold areas damage Jesse quickly and should not be treated as ordinary shortcuts. Enter them only when the Mold objective is active and the route is clear. Eliminate Mold Hosts from range when possible, use Launch to disrupt groups and retreat to clean ground if health begins falling faster than it can be recovered. The Active Threshold, Active Threshold Sublevel and The Pit are distinct Control Point landmarks in this region; activate each one you reach.
For the Mold-related objective, collect the required samples or clear the marked Mold groups, then return to Dr. Underhill or the mission’s named Research destination as directed. Do not leave the sector assuming the main Threshold mission has failed: the Black Rock Prism objective and the Research Mold objectives are separate progression lines.
- Treat Active Threshold as separate Research content.
- Activate the Research Control Points as you reach them.
- Avoid yellow Mold zones unless the relevant objective is active.
- Use clean ground as a retreat route during Mold fights.
- Return to the named Research mission giver after completing the marked objective.
5. My Brother’s Keeper: Containment, Salvador, Levitate and Dylan’s cell
After reporting to Marshall, travel to the Containment Sector and follow Logistics signs to Security. Interact with the central console, then use the Oceanview Motel route: pull the light cord three times, ring the desk bell, turn the painting in the far room, ring the bell again, take the key from the first room, unlock the motel door and pull the cord three times to return.
Cross the Firebreak and speak with Frederick Langston at the Panopticon entrance. Enter the Panopticon, cleanse its Control Point and follow the bridge to the elevator. Ride to the fourth floor, activate the next Control Point, cross the bridge and enter Fortified Unit 716, where the Benicoff TV has been taken into the Twisted Passage.
In the altered area, clear the Hiss hanging from the architecture before dropping into Salvador’s arena. Salvador uses a shield and throws objects while Hiss support enemies pressure Jesse. Use Launch to strip his shield, then fire with a high-damage form during his exposed window. Keep pillars between Jesse and incoming attacks, and defeat support enemies when they provide health or threaten to surround you. After Salvador falls, use the console to cleanse the Benicoff TV.
The TV sends Jesse to an Astral Plane tutorial that awards Levitate. Follow the platforms with controlled jumps and use Levitate to cross the gaps; do not rush landings while enemies remain nearby. Back in the Panopticon, leave the fortified room and Levitate across the broken route toward the fifth-floor bridge. Climb toward the large swan landmark, turn right and follow the signs to Section 04 and the P6 Cell. Enter the cell, wait for the door sequence to finish, then use the control console to trigger the story scene and complete My Brother’s Keeper.
- Reach Panopticon through Security and the motel.
- Activate the Panopticon Control Points.
- Enter Fortified Unit 716 and cleanse the Benicoff TV.
- Defeat Salvador with Launch, cover and focused fire.
- Complete the Levitate Astral Plane tutorial.
- Use Levitate to reach the fifth-floor P6 Cell.
- Interact with the cell control console.
6. The Face of the Enemy: HRA-related Research progression and AWE unlock
After My Brother’s Keeper, return to Central Executive and speak with Emily in the Board Room. Then enter the secured area and interact with Dylan. The conversation grants Level 6 clearance and opens the Prime Candidate Program route in Containment.
Fast-travel to Logistics and follow the signs through Security to the Level 6 entrance for Prime Candidate Program. Clear the offices and lower combat rooms, then climb toward the P7 area. When enemies attack from several elevations, use the room edges and Launch ammunition rather than standing in the center. Continue until the mission directs you to the Turntable.
In the Turntable, remove the Hiss obstructions and reach the Bridge Operator Room. Use the console to rotate the bridge toward Transit Corridor North. In the hangar, locate the gold power cubes, including the cube in the side room, and place all three into the wall sockets to power the elevator.
Ride down to Ordinary AWE and clear each sealed combat area before searching for the route onward. The mission’s Research progression includes the HRA and Darling material that points Jesse toward the Slide Projector’s location in Dimensional Research. Follow the objective markers through the Prime Candidate and Ordinary AWE areas, inspect the required HRA-related rooms and recordings, then reach the Ordinary Dump. Fight from the upper level when possible, especially against Hiss Charged enemies, and enter the Mobile Lab on the south side to view Darling’s recording.
Completing The Face of the Enemy finishes Story Mission 7, awards Level 6 clearance and starts Finnish Tango. It also unlocks the AWE entry mission. Return to Executive and use the Sector Elevator when the new Investigations destination appears; 505 Games identifies completion of Story Mission 7 as the prerequisite for AWE.
- Speak with Emily and then Dylan.
- Use Level 6 clearance to enter Prime Candidate Program.
- Reach P7 and the Turntable.
- Rotate the bridge from the operator room.
- Place three gold cubes into the hangar sockets.
- Clear the Ordinary AWE combat areas.
- Reach the Ordinary Dump Mobile Lab.
- Complete Story Mission 7 and confirm the AWE mission appears.
7. Sector-specific recovery and combat priorities
Research balconies and laboratory consoles provide useful Launch ammunition, but glass and furniture are temporary obstructions rather than permanent cover. Eliminate Snipers and Hiss Clusters before committing to durable enemies. A Cluster can heal nearby Hiss, so damaging a heavy target while leaving the Cluster active wastes ammunition and energy.
Maintenance corridors punish stationary attacks. Use Shield only long enough to cross a dangerous opening, then move toward a wider room. Throw explosive objects from an angle and check the space behind Jesse first; point-blank blasts can remove both health and cover. Stop Hiss Charged enemies before they reach close range, then separate heavy enemies from faster units.
Containment’s Logistics and Panopticon routes emphasize long sightlines, catwalks and vertical movement. Break line of sight against Snipers with pillars or doorways, then return fire with Pierce or Launch. Keep moving around Panopticon platforms and use Levitate to change elevation, but remember that airborne Jesse can still be hit by projectiles and explosions.
If you die, return to the nearest Control Point and change positioning, target order or one major Mod. A reliable priority is Snipers, Hiss Clusters, Hiss Charged or explosive enemies, airborne threats, then durable melee units. Do not rush back into the center of an arena with the same loadout and route.
- Research: scan balconies and destroy Clusters early.
- Maintenance: use safe throwing angles and stop Hiss Charged.
- Containment: preserve movement around catwalks and pillars.
- After failure, change one major tactical factor.
- Use Control Points as recovery and loadout-change locations.
Before you move on
- You can complete Threshold by traveling through Maintenance, the Turbine Room, Oceanview Motel, Atlas Chamber, Black Rock Processing and Black Rock Quarry, then returning the Prism to Marshall.
- You can distinguish the separate Research Active Threshold and Mold route from the main Threshold objectives.
- You can reach Salvador through the Panopticon, cleanse the Benicoff TV, earn Levitate and use it to reach Dylan’s P6 Cell.
- You can complete The Face of the Enemy through Prime Candidate Program, the Turntable, the hangar cube puzzle, Ordinary AWE and Darling’s Mobile Lab.
- You have completed Story Mission 7 and can access AWE from the Executive Sector Elevator.
- Your combat setup includes a reliable accurate weapon form, a flexible close-to-mid-range form, Launch, and at least one practical health or energy Mod.
- After a failed encounter, you know which Control Point to use and which target priority or loadout change to try next.
Platforming, the Astral Plane and the Ashtray Maze
Levitate is awarded during My Brother’s Keeper after Jesse cleanses the Benicoff TV and completes its Astral Plane sequence. Finnish Tango begins with the blocked Ashtray Maze, then sends Jesse through Maintenance, the Janitor’s Office, the NSC Coolant Pumps, the Oceanview Motel, Black Rock Quarry, and Nowhere, where Ahti gives her the cassette player. Polaris uses that player to open the Ashtray Maze and continues through Dimensional Research, the Projector Room, the Hedron Resonance Lab, the HRA-sealed door, and six Siphons. Three Siphons are cleansed on the lower floor; Hedron then rises and reveals three more on elevated platforms. Clear enemies before attempting precision movement, use Control Points as recovery anchors, and treat hidden Levitate routes as optional unless the current objective requires them.
Unlock Levitate during My Brother’s Keeper
Continue My Brother’s Keeper through the Containment Sector and the Panopticon. Follow the mission route to Fortified Unit 716 on the fourth floor, where the Benicoff TV Object of Power is located. Interact with the TV to enter its altered environment.
Defeat Salvador and the Hiss around him, then cleanse the Benicoff TV. Use Launch against exposed enemies and move between the surrounding structures for cover when Salvador attacks. After the cleansing, Jesse enters an Astral Plane sequence. Complete its platforming route and follow the exit back to the Bureau. Levitate becomes available when this sequence is complete.
- Reach Fortified Unit 716.
- Defeat Salvador and the supporting Hiss.
- Cleanse the Benicoff TV.
- Complete the Astral Plane sequence.
- Confirm that Levitate is available.
Use Levitate to reach Cell P6
After returning to the Panopticon, follow the mission marker toward the elevated opening above the large block. Levitate through the opening and continue along the altered route. Clear the enemies in the next room before attempting the higher crossing, especially any ranged Hiss that can interrupt movement.
Continue upward through the fifth-floor route and follow the objective to Cell P6. Begin each crossing from stable ground, line up the destination, and aim for the near portion of the landing platform. Levitate has limited airtime, so use short, deliberate bursts rather than holding it continuously without a landing plan.
- Use the elevated opening created by Levitate.
- Clear enemies before the next crossing.
- Reach the fifth-floor route.
- Enter Cell P6 to advance My Brother’s Keeper.
Recover from a missed platform
If Jesse misses a platform, turn toward the nearest lower ledge before attempting a last-second correction. A lower ledge is usually safer than trying to reach the original destination while falling. If no surface is reachable, allow the fall or defeat to resolve and reload from the resulting checkpoint or encounter restart.
On the next attempt, stop at the edge, face the target directly, and begin a fresh Levitate burst. Evade can correct a short mistake, but it is better reserved for emergencies or incoming attacks. Do not cross an exposed gap for a health element while ranged, airborne, or explosive Hiss are still active.
- Look for a lower ledge during a fall.
- Retry from stable ground.
- Remove ranged threats before precision movement.
- Use the nearest activated Control Point after a defeat or reset.
Begin Finnish Tango and confirm the Ashtray Maze is blocked
After completing The Face of the Enemy, take the Sector Elevator to Research. Clear the Hiss in the reception area, proceed toward Dr. Darling’s Office, and continue through Dimensional Research toward the Firebreak and Ashtray Maze. Activate the Ashtray Maze Control Point before entering so the area is available as a return point.
Enter the maze and follow the available route. The passage eventually returns Jesse to the entrance. This loop is intentional and is not caused by a missing clearance level. Once the mission objective changes to finding Ahti, fast travel to Ventilation in Maintenance and go to the Janitor’s Office.
- Reach Research by Sector Elevator.
- Cross toward Dimensional Research and the Ashtray Maze.
- Activate the Ashtray Maze Control Point.
- Confirm that the initial maze attempt loops back.
- Travel to the Janitor’s Office in Maintenance.
Follow Ahti’s visions through Maintenance and the Oceanview Motel
In the Janitor’s Office, the noticeboard can begin the optional What a Mess side mission. For the story route, examine the painting opposite the board. It opens a hidden passage into the maintenance tunnels above the NSC Coolant Pumps. Defeat the Hiss in the tunnel and continue until you reach a ledge overlooking broken Firebreaks.
At the ledge, note the locked door on the right. Levitate to the recess beyond it if you want the optional Hidden Location and loot container, then unlock the door and return to the ledge. Drop to the broken Firebreak below, follow the light to the intact Firebreak, and continue into the NSC Coolant Pumps Upper Level area. Activate that Control Point.
Proceed across the Mold-infested upper ledges. Destroying the Mold growths is optional unless you are completing What a Mess, but the area must still be crossed for Finnish Tango. Follow the light-pull location and pull the cord three times to reach the Oceanview Motel.
At reception, ring the bell to open the first room. Ring it again for the next room and turn on every radio inside. Repeat the process for the third room. Return to the first room and take the key that appears there, then use it on the Janitor’s door. Pull the light cord inside until the scene changes.
- Open the hidden passage through the Janitor’s Office painting.
- Reach NSC Coolant Pumps Upper Level.
- Activate its Control Point.
- Cross the Mold-infested ledges.
- Complete the Oceanview bell, radio, key, and light-cord sequence.
Cross Black Rock Quarry and receive the cassette player
The Oceanview sequence returns Jesse near the Black Rock Quarry Control Point. Activate it, then follow the light across the quarry. Continue to the deep lift shaft and use Levitate while descending so the drop does not kill you. At the bottom, enter the control room and press the button to summon the gondola.
The button starts several waves of Hiss. Stay near cover and prioritize ranged, explosive, and Warped enemies. Collect health elements only after the immediate area is safe. When the ambush is defeated, enter the gondola and activate it to reach the unmapped area called Nowhere.
At Nowhere, descend the stairs and follow the light. The folder at the bottom is optional. Continue forward until the scene with Ahti begins. Ahti gives Jesse the cassette player, completing Finnish Tango and enabling the successful Ashtray Maze route. If you are still on the objective to find Ahti, do not return to the maze expecting it to open yet.
- Activate the Black Rock Quarry Control Point.
- Descend the lift shaft with Levitate.
- Defeat the gondola ambush.
- Ride to Nowhere.
- Follow the light and receive Ahti’s cassette player.
Enter the Ashtray Maze during Polaris
Start Polaris after Finnish Tango is complete and return to the Ashtray Maze. Use Ahti’s cassette player at the entrance. The maze now reforms as Jesse advances, so follow the newly opened route instead of trying to reproduce the earlier loop.
The passage is largely linear but contains combat and platforming. Clear Hiss before crossing exposed sections, watch for Hiss Charged during movement, and use Levitate for elevated platforms and gaps. When the maze ends, continue through the Firebreak into Dimensional Research and activate the Dimensional Research Control Point.
- Start Polaris after receiving the cassette player.
- Use the cassette player at the maze entrance.
- Follow each newly revealed passage.
- Clear Hiss before exposed platforming.
- Activate the Dimensional Research Control Point.
Reach the Projector Room and Hedron Resonance Lab
From the Dimensional Research Control Point, go up the stairs toward the illusion. At the end of the route, turn around and Levitate to the platform on the left. Cross to the opposite balcony and enter the door leading to the Projector Room. Press the wall button to advance the objective and view the Slidescape-36 presentation.
Continue through the following rooms and follow the signs to the Hedron Resonance Lab. Enter the lab’s control room and interact with the terminal. The puzzle presents a pattern made from symbols in the room. Examine the displayed arrangement and match the terminal’s input to that pattern; do not rely on a fixed directional sequence, because the required arrangement is presented visually during the puzzle.
After the puzzle is solved, return toward the Projector Room. The previously inactive elevator is now usable. Ride it down, turn left, and approach the large door secured by four bolts. Use Launch to remove all four bolts, then enter the Hedron Chamber.
- Reach the opposite balcony with Levitate.
- Enter the Projector Room and view Slidescape-36.
- Reach the Hedron Resonance Lab.
- Match the terminal pattern to the symbols shown in the room.
- Use Launch to remove the four HRA door bolts.
- Enter the Hedron Chamber.
Cleanse the three lower Siphons
The Hedron Chamber begins with three Siphons on the lower floor. These are the structures projecting red Hiss resonance toward Hedron. Clear the surrounding enemies before cleansing each structure. Use cover, Launch, and the Service Weapon while watching for ranged attacks and Hiss Clusters.
Cleanse the first lower Siphon, defeat the reinforcements, and then move to the second. Repeat the process for the third. Do not assume the mission is complete after these three objectives. Hedron rises only after all three lower Siphons have been cleansed, revealing a second phase of elevated platforms.
- Clear the initial chamber enemies.
- Cleanse lower Siphon one.
- Defeat the reinforcement wave.
- Cleanse lower Siphon two.
- Cleanse lower Siphon three.
- Wait for Hedron to rise.
Cleanse the three upper Siphons and reach Polaris
After Hedron rises, Levitate to the first raised platform on the left and cleanse the newly revealed Siphon. Remove the nearby Hiss Cluster and other enemies before beginning the cleanse so the uninterrupted interaction is not canceled by damage.
When Hedron rises again, use the moving pillar or a high point to reach the next elevated section. A direct route may leave Jesse exposed, so Levitate from the highest safe point toward cover when possible. Watch for a Sniper and a powerful Hiss Trooper, and check behind you for enemies that spawn on the previous platform.
The final raised platform contains the sixth and last Siphon. Expect Hiss Warped enemies and additional reinforcements. Thin the group from cover, cleanse the final structure, and wait for the chamber to change. Newly raised pillars create the route upward. Levitate from pillar to pillar until Jesse reaches the top and triggers the Polaris sequence.
- Cleanse upper Siphon one.
- Use the raised route to reach upper Siphon two.
- Defeat the Sniper, Hiss Trooper, and reinforcements.
- Reach the final raised platform.
- Cleanse upper Siphon three.
- Confirm that six Siphons have been cleansed in total.
- Levitate up the raised pillars and trigger the Polaris sequence.
Keep optional aerial routes separate from story gates
Levitate opens hidden locations, loot areas, collectibles, and shortcuts throughout the Oldest House. These are optional unless the current mission objective points directly to them. The Astral Tower pillar in The Foundation is not part of the base-game Polaris route.
For a smoother campaign run, complete the required story route first and revisit difficult aerial secrets after obtaining longer Levitate duration or stronger combat upgrades. Do not abandon a mission because an unrelated ledge, pillar, or hidden room appears reachable.
- Treat hidden aerial areas as optional unless required by the objective.
- Return later for difficult Levitate secrets.
- Do not confuse Foundation hidden routes with the required Polaris platforms.
Before you move on
- Levitate is unlocked after the Benicoff TV Object of Power sequence in My Brother’s Keeper.
- Jesse reaches Cell P6 after using Levitate in the Panopticon route.
- Finnish Tango begins with the blocked Ashtray Maze and continues through Maintenance, the Oceanview Motel, Black Rock Quarry, and Nowhere.
- Ahti gives Jesse the cassette player in Nowhere and Finnish Tango completes.
- Polaris enters the Ashtray Maze successfully with the cassette player.
- Jesse reaches and activates the Dimensional Research Control Point.
- The Projector Room and Hedron Resonance Lab objectives are complete.
- The terminal pattern puzzle is solved by matching the symbols shown in the room.
- The four-bolt HRA door is opened with Launch.
- Three lower-floor Siphons and three subsequently revealed raised Siphons are cleansed.
- Jesse reaches the upper pillars and triggers the Polaris narrative sequence.
- Optional elevated locations remain available for later exploration and do not block campaign completion.
Boss encounters and mid-to-late-game fight patterns
Control’s boss encounters reward movement, target priority and disciplined resource use more than uninterrupted firing. Before entering an arena, activate the nearest Control Point, equip a dependable ranged form such as Grip or Pierce, keep Launch ready, and use Personal Mods that improve health, energy or damage. Break shields and armor first, then spend Launch and weapon ammunition during the recovery window after a telegraphed attack. Salvador is a required mid-campaign fight; Former, Mold-1, esseJ, The Anchor and the full Tommasi rematch are optional base-game bosses. Hartman is the major AWE boss and requires generator management before damage is safe. If you fail, use the encounter’s available checkpoint or Control Point, change one part of the build, and retry with a specific answer to the attack that killed you.
Prepare the arena-specific loadout
At the nearest Control Point, inspect both Service Weapon slots and all Personal Mods before crossing the encounter trigger. Grip is a reliable general-purpose ranged form. Pierce is useful when a boss exposes a core, shield or other precise weak point. Shatter is valuable at close range against enemies that let Jesse stay near them, while Launch remains the most flexible ability for stagger, burst damage and interrupting dangerous attacks.
A dependable general setup is Grip or Pierce, upgraded Launch, and a defensive option such as Shield or Evade. Add Personal Mods that increase health, improve energy recovery or strengthen Launch efficiency. Weapon Mods that improve damage, projectile speed, charge speed or recharge are generally more useful than highly situational effects. There is no universal mod that bypasses every boss resistance or mechanic, so do not build around an assumed armor-bypass effect. Match the form to the opening the boss actually gives you.
- Activate the nearest Control Point before starting an optional boss.
- Equip a reliable ranged form and a second form for the arena’s weak point or distance.
- Keep at least one health, energy or Launch-focused Personal Mod equipped.
- Confirm that Launch, Evade, Shield or Levitate is available when the encounter requires it.
Use telegraphs and recovery windows instead of trading damage
Boss attacks normally have a readable preparation: a thrown object, a shield, a charge, a portal, a ground effect, a power failure or a change in arena lighting. Move while the attack is being prepared, then attack after the boss commits and finishes the motion. Grip is safest for sustained pressure during a recovery animation. Launch is strongest after the boss has spent its attack or when an incoming explosive object can be returned. Do not empty the energy meter at the start of a phase; reserve enough energy for Evade, Shield, Launch or Levitate when the next attack arrives.
Strip armor or a shield before expecting normal health damage to be efficient. Salvador’s shield, Tommasi’s shield and several optional bosses give a brief vulnerable period after their defenses break. Use that period for charged Pierce shots, Grip fire, Shatter bursts or multiple Launch throws. Health drops from defeated support enemies are part of the combat economy, so collect them when the arena is safe rather than chasing the boss through an incoming attack.
- Watch the boss complete an attack before committing energy.
- Break shields and armor before spending the strongest damage sequence.
- Keep a route open for Evade or a safe landing.
- Collect health drops only after checking the boss’s next telegraph.
Clear the required Salvador fight in the Panopticon
During My Brother’s Keeper, Salvador uses heavy armor, a shield and sustained gunfire. Stay near pillars or other solid cover while he is firing, but do not remain stationary when grenades or summoned Hiss pressure your position. Pierce can damage or break his shield efficiently; if Pierce is unavailable or underpowered, use strong Launch throws, preferably with large objects, then attack as soon as the shield drops.
Deal with nearby Hiss when they block your escape route or provide health drops, but do not lose the shield-break window by chasing every enemy. If Salvador catches Jesse in the open, Shield can absorb the immediate burst while you move toward cover. Explosive containers in the arena can also be used with Launch when Salvador is near them. After the fight and the following sequence, Jesse obtains Levitate, which changes the approach to later airborne and environmental bosses.
- Use pillars or cover against Salvador’s sustained fire.
- Break his shield with Pierce or strong Launch throws.
- Attack immediately during the shield-break opening.
- Keep support enemies under control without abandoning a safe position.
Handle airborne, teleporting and multi-stage arenas
The first Tommasi encounter occurs during Unknown Caller, while the full Mr. Tommasi rematch is an optional side mission available later. Tommasi flies, throws projectiles and uses a shield. Grip is dependable after he commits to a movement, while Launch can break the shield or interrupt him. In the rematch, support enemies and a Distorted enemy can make the arena unsafe; use Levitate for positioning, clear threats that can reach you, and do not throw objects repeatedly at a target that is actively dodging.
Former’s Fridge Duty arena has dangerous floor hazards and a large eye-like weak point. Use Levitate to stay clear of the floor when necessary, return its slow projectiles with Launch when the timing is safe, and attack the exposed eye rather than attempting melee. The Anchor opens portals and exposes its core periodically while summoning Hiss. Move between platforms, avoid standing in the portal’s damaging or slowing area, clear nearby Hiss when they threaten to surround you, and use Launch or Pierce only when the core opens.
- Tommasi: wait for his movement to finish, then use Grip or Launch.
- Former: prioritize safe elevation and the exposed eye.
- The Anchor: move between platforms and attack the exposed core.
- Use Levitate for safety and positioning, not as a substitute for watching energy.
Defeat Mold-1 and esseJ by controlling their openings
Mold-1, reached through the Old Growth side mission, surrounds the arena with corrosive hazards and attacks with projectiles, ground threats and Mold Hosts. Stay airborne or move laterally when the floor becomes dangerous. Aim at the glowing weak points and use Launch for burst damage when several targets are exposed. Eliminate Mold Hosts when they threaten to box you in or when you need health drops; do not stand still trying to finish a damage sequence while a projectile is tracking Jesse.
esseJ is a mirror-match encounter in Self-Reflection. She uses Jesse’s general toolkit, including Launch, Evade and Shield. Maintain distance, dodge her thrown objects, and punish her after she spends Launch or Shield. Launch is useful for breaking her defense, while Pierce gives accurate damage when she is exposed. Shield can save a failed exchange, but disengage before energy is exhausted.
- Mold-1: avoid corrosive ground and target the glowing weak points.
- Clear Mold Hosts when they threaten your movement or recovery.
- esseJ: dodge her Launch attacks and punish the end of her ability sequence.
- Do not hold Shield until the energy bar is empty.
Treat Hartman and the final Astral sequence as objective fights
In AWE, Hartman’s encounter is controlled by light. When generators go dark, prioritize restoring them with power cores before attempting sustained damage. Darkness is a hazard, so do not stay in it to finish a low-health phase. Once the arena is lit, use Surge if available, or Grip, Pierce and Launch, while Evade handles Hartman’s fast attacks. The correct order is safety and light first, damage second.
The final base-game mission is not a conventional single-target boss fight. In the Astral sequence, Jesse must cleanse the Siphons while surviving waves of Hiss and navigating gaps. Use Levitate carefully, preserve energy for movement, and prioritize Elevated enemies that can knock Jesse from platforms. You do not need to eliminate every enemy before advancing; clear enough threats to reach and cleanse each objective safely.
- Hartman: restore light before committing to damage.
- Do not remain in darkness to finish a damage phase.
- Final Astral sequence: cleanse the Siphons and preserve Levitate energy.
- Prioritize enemies capable of knocking Jesse from platforms.
Recover intelligently after a failed attempt
After death, use the restart point provided for that encounter when available; later versions of Control added additional boss-area checkpoints and soft checkpoints, so the exact return location differs by fight. If the game returns Jesse to a Control Point, change the loadout there before trying again. Change one major variable at a time: switch from close range to Grip or Pierce, replace a weak Personal Mod with Health or Energy Recovery, or reserve Launch for interruption rather than opening damage.
On the next attempt, spend the first phase learning the attack order. Identify which attack caused the death, keep energy for that attack’s counter, and only then increase damage output. Optional bosses can be postponed while Jesse gains ability points, Levitate upgrades or better weapon forms. Required encounters should be retried with a concrete adjustment rather than by repeating the same empty-energy sequence.
- Use the encounter’s checkpoint or nearest Control Point after death.
- Change one weapon, ability or mod variable before retrying.
- Reserve energy for the attack that caused the previous death.
- Postpone optional bosses if the arena requires abilities you have not developed.
Before you move on
- The required Salvador encounter is complete, and the base-game final mission remains available through Take Control.
- The full Mr. Tommasi rematch, Former, Mold-1, esseJ and The Anchor are defeated if the player is clearing major base-game side-boss content.
- Hartman is defeated if completing the AWE story.
- The loadout includes a dependable ranged form, a precision or burst alternative, upgraded Launch and practical health or energy Mods.
- After a failed attempt, the player can identify the killing attack and has changed a specific weapon, ability, mod or positioning plan for the retry.
References for this chapter
- CONTROL Ultimate Edition | Boss Guide — CONTROL Ultimate Edition Help Center
- Control Ultimate Edition Walkthrough: Mission Order, Bosses, Side Missions, Bureau Alerts, The Foundation and AWE
- 100% Achievements & Trophies Guide — Remedy Entertainment Support
- Control: Ultimate Edition Walkthrough & Guide — GameFAQs
Board Countermeasures, Bureau Alerts and side missions
Optional activities strengthen Jesse without requiring aimless grinding. Board Countermeasures become available after Unknown Caller and are selected at Control Points; keep practical objectives active while exploring so normal combat supplies materials, mods and weapon-upgrade resources. Bureau Alerts begin after Directorial Override, appear randomly during exploration, and impose a short completion window. They are useful but risky because dying before the final objective fails the alert. The best early side missions are A Merry Chase for Evade, A Good Defense for Shield and A Captive Audience for Seize. Complete them when their sectors are accessible, then use Ahti’s What a Mess tasks, Fridge Duty and later side missions to gain ability points, materials and combat practice. None of these optional activities is required to reach the base-game ending, but the ability missions make later encounters much more manageable.
Keep useful Board Countermeasures active
After completing Unknown Caller, visit any cleansed Control Point and open the Board Countermeasures menu. You can keep three countermeasures active at a time. Choose objectives that match the area and equipment you are already using, such as defeating Hiss in a named sector, killing a particular enemy type, using Launch, or getting eliminations with a Service Weapon form you already carry.
Countermeasures are best treated as background objectives rather than separate farming assignments. Select three before leaving a Control Point, then complete them during story missions, side missions and ordinary exploration. Their rewards are materials, mods and other useful resources for weapon-form upgrades and loadout maintenance; they are not a reliable source of direct ability points.
When a countermeasure is complete, return to a Control Point and claim the reward before selecting a replacement. If an objective demands an awkward weapon form, an enemy that is not currently spawning, or a long detour from your route, replace it rather than distorting your campaign progress. Prioritize quick objectives that can be completed in areas you expect to revisit.
- Activate Board Countermeasures after Unknown Caller.
- Keep three practical objectives active whenever possible.
- Claim completed rewards at a Control Point before choosing replacements.
Handle Bureau Alerts as optional emergencies
Bureau Alerts become available after Directorial Override. They appear randomly while Jesse explores, usually with an alarm and a mission notification naming the affected sector. An alert gives you a limited window, commonly about 20 minutes, to reach the location and finish its objectives. Fast travel from a nearby Control Point is often the safest way to begin.
Alert objectives can involve destroying Hiss Nodes, eliminating named Major Targets or protecting FBC personnel. For Hiss Nodes, move quickly between marked targets and use Launch or a high-damage weapon form to destroy them. Against a Major Target, use walls, pillars and elevation to separate the named enemy from ordinary Hiss. During personnel-protection objectives, eliminate enemies attacking the agents first and avoid explosive Launch throws near the people you must keep alive.
Prepare before accepting the fight: refill health where possible, check your weapon forms and equip practical Health, Energy or damage mods. Dying before all objectives are complete fails the active alert, so do not begin one while already committed to a difficult boss encounter or while Jesse is critically injured. Letting an alert expire has no campaign-ending consequence; survival and story progress take priority.
- Check health, energy and equipped mods before travelling.
- Use fast travel when a nearby Control Point offers a safer route.
- Treat death as a failed alert and avoid starting one during another dangerous encounter.
Unlock Evade through A Merry Chase
During Maintenance progression, investigate the flashing Break Room near the Janitor’s Office. This starts A Merry Chase and leads to the Merry-Go-Round Horse Object of Power. Follow the horse into the Astral Plane, cleanse it and complete the traversal challenge to bind the object and receive Evade.
The challenge introduces a rapid directional dash that is useful for crossing gaps, escaping melee attacks and repositioning around cover. Afterward, use Evade laterally instead of retreating in a straight line. A practical sequence is to dodge a projectile or charging enemy, throw nearby debris with Launch, then move behind cover while energy recovers. Evade is one of the strongest early survivability upgrades, so complete this detour once Maintenance access makes it convenient.
- Find the flashing Break Room near the Janitor’s Office.
- Cleanse the Merry-Go-Round Horse.
- Use Evade to move laterally around projectiles and melee attacks.
Unlock Shield through A Good Defense
A Good Defense begins in Maintenance’s Field Training area near Central Maintenance. The Home Safe Tests material points toward the activity, and entering the training area lets you start the timed course. Run through the targets and obstacles, use your weapon to clear targets quickly, and place the required power blocks into their sockets with Launch. At the end, cleanse the Home Safe Object of Power and complete its Astral Plane challenge to receive Shield.
Shield is most effective as a short defensive window rather than a permanent stance. Raise it while crossing an exposed room, blocking a heavy projectile or approaching a ranged enemy, then release it before Jesse’s energy is exhausted. Shield is especially useful in open Bureau Alert arenas and mixed groups where cover is limited. Improve it later if you regularly use Shield Barrage, but do not postpone core Launch, Health or Energy upgrades solely to maximize its duration.
- Reach Field Training in Maintenance.
- Complete the timed course and cleanse the Home Safe.
- Use Shield briefly to cross danger or create an opening.
Unlock Seize through A Captive Audience
After Research access is available, travel to Parapsychology and enter the Hypnosis Lab. The X-Ray Light Box Object of Power starts A Captive Audience. Use the control-room terminal and reproduce the symbol displayed beside the locked chamber; the correct shape is visible near the door. Enter the opened room, cleanse the light box and complete the Astral Plane challenge.
The challenge teaches Seize. Weaken eligible enemies until the Seize prompt appears, then use the ability from a safe position. A controlled enemy draws attention away from Jesse and can attack nearby Hiss. Prioritize dangerous ranged enemies or support units when the group allows it. Do not waste energy attempting Seize on a full-health target, and remember that the ability is crowd control rather than a substitute for damaging stronger enemies.
- Reach the Hypnosis Lab in Research’s Parapsychology area.
- Use the displayed symbol to open the chamber.
- Weaken targets before attempting Seize.
Use Ahti’s tasks and later side missions
Check the noticeboard near Ahti’s office in Maintenance after Directorial Override. The What a Mess missions send Jesse through focused cleanup, combat and exploration tasks. Complete them when their sectors are already open, but do not force a lengthy detour through clearance-locked doors. They are optional and can be completed alongside normal campaign progression.
When Fridge Duty becomes available in the Panopticon, investigate it if you want additional combat practice and story content. The mission leads to the Former encounter and then opens Langston’s Runaways, which sends Jesse to contain several Altered Items. These missions are not required for the base-game ending. If Former overwhelms your current build, leave through a Control Point, improve Launch, Health or Energy, and return with a different weapon-form and mod setup.
- Check Ahti’s noticeboard for available What a Mess tasks.
- Start Fridge Duty when the Panopticon route is open.
- Return later if a side mission requires unavailable access or abilities.
Balance optional work with campaign progress
A practical route is to complete A Merry Chase and A Good Defense when Maintenance opens the relevant areas, unlock Seize after reaching Hypnosis Lab, and then continue the main story whenever an optional task would require a long backtrack. Between story missions, complete one or two nearby side activities and keep three easy Board Countermeasures active.
Do not accept every Bureau Alert automatically. Take one when Jesse is healthy, the route is familiar and the current loadout suits the objective. If an alert conflicts with a boss attempt or a long side mission, ignore it and continue; missing an alert does not block the campaign. For trophy goals, five completed Bureau Alerts are required for Crisis Management, while Astral Tactician requires 25 completed Board Countermeasures. These are optional completion targets, not story prerequisites.
- Unlock the three ability-granting side missions when their areas are accessible.
- Use countermeasures to fund upgrades during ordinary combat.
- Leave an alert alone when its route conflicts with a dangerous objective.
Before you move on
- Evade has been unlocked through A Merry Chase, or its Maintenance area has been marked for a later return.
- Shield has been unlocked through A Good Defense, or Field Training has been located for a later attempt.
- Seize has been unlocked through A Captive Audience, or the Hypnosis Lab route is recorded for a later return.
- Three suitable Board Countermeasures are active whenever practical, and completed contracts have been claimed at a Control Point.
- Available What a Mess missions and the accessible Fridge Duty chain have been completed or deliberately postponed.
- If pursuing related trophies, progress has reached five completed Bureau Alerts and 25 completed Board Countermeasures.
- The active build includes useful Health, Energy, Launch or weapon-damage improvements instead of only novelty mods.
References for this chapter
- Control Trophy Guide and Roadmap — PowerPyx
- Directorial Override — Control: Ultimate Edition Walkthrough and Guide
- A Captive Audience Guide — Hold To Reset
- Control: A Captive Audience Walkthrough — Gamepressure
- How To Get All Optional Abilities — Evade, Shield and Seize Guide
- Control Ultimate Edition Walkthrough: Mission Order, Bosses, Side Missions, Bureau Alerts, The Foundation and AWE
- Control Walkthrough — Neoseeker Case Files
The AWE expansion — Investigations Sector and Alan Wake tie-ins
AWE becomes available after you complete main Story Mission 7, The Face of the Enemy. Return to Central Executive, use the Sector Elevator, and select Investigations to begin A Dark Place. The expansion follows Jesse through Active Investigations, Eagle Limited AWE, Fra Mauro AWE, and Bright Falls AWE. Its central hazard is Hartman’s darkness: remain in illuminated areas, restore generators, and carry power cores to marked sockets before attacking. The Third Thing requires both Eagle Limited AWE and Fra Mauro AWE, but you may complete them in either order. The three main AWE missions are A Dark Place, The Third Thing, and It’s Happening Again. Surge is an optional adhesive-grenade Service Weapon form constructed at Control Points once its entry and materials are available. Dead in its Tracks, Gerbil Took the Top Head, Return to Sender, SHÜM, and Another Fine Mess provide optional rewards and activities. You can play AWE before the base-game finale or return after Take Control during Endgame.
Unlock AWE and enter the Investigations Sector
Complete main Story Mission 7, The Face of the Enemy. A new mission, A Dark Place, then appears in Jesse’s mission list and directs you to the Sector Elevator in the Central Executive hub. Enter the elevator and choose Investigations. The PS5 Ultimate Edition includes AWE, but the destination and mission still require this story trigger.
In Investigations, cleanse the first Control Point before continuing toward Active Investigations. Control Points provide respawn locations, fast travel, loadout changes, Astral Constructs, and weapon-form management. Claim each one you pass so a failed encounter does not force a long return trip.
Continue to Active Investigations and follow the objective to Frederick Langston’s intercom. The expansion introduces Hartman, the darkness hazard, Hiss Airborne Rangers, and the Alan Wake-related investigation material. The story remains separate from Take Control and does not replace the base-game finale.
After the AWE weapon-form option becomes available, check Astral Constructs at a Control Point. Surge fires adhesive explosive projectiles that stick to enemies or surfaces and can be detonated manually. Construct it only if you have the required Source and materials; Grip, Pierce, Charge, Shatter, and other established forms are sufficient for the entire expansion.
- Complete The Face of the Enemy.
- Start A Dark Place from the Sector Elevator.
- Select Investigations.
- Cleanse the first Investigations Control Point.
- Reach Active Investigations and follow Langston’s objective.
- Check Astral Constructs for Surge.
Complete A Dark Place and learn the darkness mechanic
Follow A Dark Place through Active Investigations. When darkness blocks a route, do not cross it casually. Jesse takes damage while exposed, and the safe area around her becomes limited. Stand in an illuminated zone, identify the next lamp or generator, and clear nearby Hiss before moving forward.
Use portable lamps to create temporary safe areas. When the game provides power cores, carry or Launch them into the sockets connected to generators, lifts, or fixed lights. Look for the marked socket and follow cables or the objective indicator when the correct placement is unclear. An incorrectly placed core can usually be retrieved and moved to the connected device.
Keep Energy available for Evade, Launch, and Levitate. Do not spend all Energy attacking if the next objective requires crossing darkness or escaping Hartman. Launch is especially useful for moving cores without exposing Jesse for as long, while Levitate helps reach elevated generators and platforms.
Use one reliable ranged weapon form and a second form for close-range or armored enemies. Energy recovery, Launch efficiency, weapon recharge, Health, and Shield-related personal mods are practical choices. Continue until A Dark Place ends and The Third Thing begins.
- Restore the required lights and generators.
- Use lamps as temporary safe zones.
- Place power cores only in marked sockets.
- Reserve Energy for movement and emergency defense.
- Begin The Third Thing.
Clear Eagle Limited AWE and Fra Mauro AWE
The Third Thing sends Jesse to two investigations: Eagle Limited AWE and Fra Mauro AWE. They can be completed in either order, and both are required before the final mission continues. In each location, clear enemies around the next objective before transporting a core or operating a switch. Hartman is not meant to be chased through unlit areas; advance the light sequence instead.
At Eagle Limited AWE, follow the objective through the train-related chambers. Use the available switches, lamps, generators, and power cores to extend the illuminated route. Levitate helps with elevated platforms and suspended train equipment, while Launch can remove enemies or move cores from safer positions. When Hartman is driven away, the Dead in its Tracks side mission becomes available at the train car.
At Fra Mauro AWE, cleanse the area’s Control Point and use the portable spotlight when it is provided. Move the spotlight to remove darkness from doors and paths, then place power cores in their correct sockets. Clear Hiss before carrying a core through an exposed section. After Hartman is driven away from Fra Mauro, Gerbil Took the Top Head becomes available at the holding cell.
Once both investigations are complete, return to Active Investigations and follow the objective for It’s Happening Again.
- Complete Eagle Limited AWE.
- Complete Fra Mauro AWE.
- Use lamps, spotlights, switches, and power cores to extend safe routes.
- Start Dead in its Tracks if desired.
- Start Gerbil Took the Top Head if desired.
- Return to Active Investigations.
Restore Bright Falls AWE and defeat Hartman
Follow It’s Happening Again to Bright Falls AWE and cleanse the entrance Control Point. Before the final arena, you can use the control-room terminal to summon a Ranger ally. The Ranger is optional, but can distract enemies while Jesse transports power cores.
The arena contains four generators. Find the four power cores, carry or Launch each one into an empty generator socket, and then activate the central switch on the raised platform. The resulting light exposes Hartman and creates the main damage window. Fight from the illuminated area rather than pursuing him into darkness.
Use Launch and a high-damage weapon form during the light phase. Shield can help against incoming projectiles, and Evade is useful when Hartman closes distance or reappears nearby. Keep an escape route open and avoid spending all Energy before the next core movement becomes necessary.
During the later phase, Hartman knocks cores out of their sockets and darkens the arena. Stop trying to damage him, return to the remaining safe light, and restore the displaced cores. Defeat immediate Hiss threats only when they block the route. After the generators are active again, use the central switch to restore the light and resume attacking. Defeat Hartman to complete It’s Happening Again and the AWE main narrative.
- Cleanse Bright Falls AWE Entrance.
- Summon the Ranger if desired.
- Place all four power cores in the generators.
- Activate the central switch.
- Restore displaced cores when Hartman darkens the arena.
- Defeat Hartman.
Complete the principal optional AWE missions
Dead in its Tracks begins after Hartman is driven away from Eagle Limited. Enter the train car and interact with the objects in this order: leather bag, conductor’s hat, violin, dinner plate, hammer, and engine parts. Completing the sequence opens the route out and awards the One-Way Track Shatter mod.
Gerbil Took the Top Head begins at the Fra Mauro holding cell after that area’s Hartman sequence is complete. Activate the intercom, collect the requested objects from the two Fra Mauro mobile laboratories, and travel to Sector Head Office. Take the astronaut helmet from the required encounter and return it to the prisoner in Fra Mauro. The reward is the Thin Space Charge weapon mod.
Return to Sender begins when you collect the chain letter near the AWE Loading Bay and pneumatic tubes. Take it to the copy machine beneath the control room in Operations Center. Mail copies from Abandoned Offices, Utility Corridor, and Observation Deck, then return to the altered mail item near Shifted Offices and cleanse it to receive the Spam Mail Spin mod.
SHÜM is accessed through the arcade machines in Active Investigations and offers Crowd Control and Deadline activities. The Another Fine Mess missions come from the Investigations notice board and include optional chores such as burning darkness, clearing mold, and nourishing plants. These activities are not required to defeat Hartman, but they provide rewards, practice, and additional completion progress.
- Complete Dead in its Tracks for One-Way Track.
- Complete Gerbil Took the Top Head for Thin Space.
- Complete Return to Sender for Spam Mail Spin.
- Play SHÜM for its arcade activities and rewards.
- Check the Investigations notice board for Another Fine Mess missions.
Choose when to play AWE and recover from failure
AWE can be played immediately after The Face of the Enemy, before Take Control, or during Endgame after the base-game finale. Playing it earlier gives access to Investigations resources and Surge sooner. Waiting until Endgame lets Jesse enter with more ability upgrades, weapon slots, and stronger personal mods. Neither choice prevents completion of the other campaign content.
After a failed Hartman attempt, return to a Control Point and change the loadout instead of repeating the same approach. Keep Launch, Levitate, one dependable ranged form, and a second form for close or armored targets. Favor Energy recovery, Launch damage or efficiency, weapon recharge, Health, or Shield-related bonuses.
During every darkness encounter, clear enemies near the next light before moving a core. Keep the next safe zone visible and avoid carrying a core farther than necessary. If the objective does not update, fast-travel out of Investigations and back in, or reload the available AWE checkpoint through the game’s mission or checkpoint options.
The AWE narrative is complete when A Dark Place, The Third Thing, and It’s Happening Again are marked complete and Hartman has been defeated. The base-game finale and The Foundation remain separate missions.
- Choose whether to play AWE before Take Control or during Endgame.
- Rebuild the loadout at a Control Point after failure.
- Keep Energy available for movement and core transport.
- Confirm all three main AWE missions are complete.
- Return to the base-game finale or The Foundation when ready.
Before you move on
- A Dark Place is marked complete.
- The Third Thing is marked complete after Eagle Limited AWE and Fra Mauro AWE are cleared.
- It’s Happening Again is marked complete after Hartman is defeated in Bright Falls AWE.
- Surge is constructed if pursuing all AWE Service Weapon content.
- Dead in its Tracks is complete if the One-Way Track Shatter mod is desired.
- Gerbil Took the Top Head is complete if the Thin Space Charge mod is desired.
- Return to Sender is complete if the Spam Mail Spin mod is desired.
- SHÜM and Another Fine Mess are complete if pursuing their optional rewards.
- The base-game finale and The Foundation remain available as separate objectives.
References for this chapter
- How do I access the AWE content in Control? — 505 Games
- AWE Expansion FAQ Guide — official Control site
- CONTROL Ultimate Edition — PlayStation Store
- Walkthrough: The Third Thing — Control
- Walkthrough: It’s Happening Again — Control
- Side Quest: Dead in its Tracks — Control Walkthrough
- Side Quest: Gerbil Took the Top Head — Control Walkthrough
- Side Quest: Return to Sender — Control Walkthrough
- Control: AWE DLC — How To Find All 7 Side-Missions
- AWE — Control Walkthrough & Guide
Final mission and the endgame sequence
Take Control is the tenth and final main-story mission. Prepare at the Central Executive Control Point, spend Ability Points, and equip practical damage, Health, and Energy Mods before entering the altered office. The opening routine is fixed: complete enough distinct prompted office tasks for the first Director’s Mail to appear, normally two tasks, deliver it, complete one prompted task during the second cycle and deliver the second letter, then collect the already waiting third letter without doing another task. Pick up the Service Weapon and use it on Trench. Afterward, pull Darling’s Office light cord three times, complete the Oceanview Motel sequence, turn off the Slide Projector, and fight through the Astral Plane to cleanse Dylan. The finale uses several Hiss arenas and traversal sections rather than one conventional named boss. After the credits, Jesse returns to the Oldest House for free exploration, unfinished side missions, and access to The Foundation and AWE.
Prepare before starting Take Control
Before entering Take Control, use the Central Executive Control Point to spend available Ability Points and change your loadout. Levitate is required for the final traversal, so do not begin this mission before Polaris has granted it. Equip weapon forms that cover both distant targets and close-range emergencies, then slot practical damage, Energy, Health, or weapon-recharge Mods instead of novelty effects.
Launch is valuable throughout the finale because it removes ranged enemies, interrupts dangerous targets, and lets Jesse use nearby objects as weapons. Keep Shield or Evade available for exposed crossings and crowded arenas. Performance mode is the practical PS5 choice if you prioritize responsiveness: the official PS5 version targets 60 frames per second in Performance mode. Graphics mode targets 30 frames per second and adds ray-traced reflections and transparency. Either mode follows the same mission route.
- Confirm that Levitate is unlocked.
- Spend Ability Points and equip practical combat Mods.
- Choose weapon forms for both ranged and close-range fights.
- Use Performance mode if faster response is more important than ray-traced effects.
Complete the first altered-office cycle
Take Control begins with Jesse inside an altered Bureau office. Check the noticeboard and follow the prompted work objectives. The first Director’s Mail does not appear immediately: complete enough distinct prompted office tasks for the pneumatic tube to activate, normally two tasks. The usual sequence involves tasks such as delivering letters to desks and tidying coffee cups, but follow the objectives currently displayed rather than assuming every run must use the same task names.
Do not repeat a completed task if another distinct task is available. When the red pneumatic tube is active and the Director’s Mail is waiting, collect it. Follow the signs to the Director’s Office and place the delivery in Trench’s inbox. A scene follows, then Jesse returns to the altered office for the next cycle.
- Read the noticeboard objectives.
- Complete enough distinct prompted tasks for the tube to appear, normally two tasks.
- Collect the first Director’s Mail from the pneumatic tube.
- Deliver it to Trench’s inbox in the Director’s Office.
Complete the second and third office cycles
After the first scene, return to the noticeboard and begin the second cycle. Complete one prompted office task. A task such as scanning forms may be assigned, but use the objective shown on screen. Once that task is complete, collect the Director’s Mail from the waiting pneumatic tube and deliver it to Trench’s inbox. Listen to the scene, then return to the office again.
On the third cycle, do not start another ordinary office task. The Director’s Mail is already waiting in the tube. Collect it immediately and deliver it to Trench’s office. After Trench’s final scene, pick up the Service Weapon from the desk when the objective directs you to do so, then shoot Trench. This breaks the altered routine and advances the mission.
- On the second cycle, complete one prompted office task.
- Collect and deliver the second Director’s Mail.
- On the third cycle, collect the waiting letter without doing another office task.
- Pick up the Service Weapon when prompted.
- Use it on Trench to end the office sequence.
Find Darling’s Office and traverse the Oceanview Motel
When the objective changes, leave the Director’s Office and return to the main Executive Affairs area. Enter Darling’s Office near the large office section and pneumatic tubes. Pull the hanging light-switch cord three times to reach the Oceanview Motel.
At the motel reception desk, ring the bell once. Go to the third room on the left and watch the Darling presentation. Afterward, collect the key that appears and use it on the locked door across the corridor. This opens the route onward; the other motel rooms are not required for Take Control.
- Return to Executive Affairs after the Trench scene.
- Enter Darling’s Office.
- Pull the light cord three times.
- Ring the Oceanview Motel bell once.
- Enter the third room on the left.
- Take the key and unlock the door across the corridor.
Turn off the Slide Projector
Continue beyond the motel into the shifting altered area. The route requires Levitate, and Dash or Evade can help correct your position while crossing. Avoid unstable walls, floors, and red Hiss energy. Favor wide stable surfaces, and allow Jesse’s movement to settle before beginning another crossing if your Energy is low.
Follow the available platforms and elevated surfaces until you reach the structure containing the Slide Projector. Climb to it and interact with the projector to turn it off. Reaching the structure is not enough; the interaction itself is required to update the objective and open the final route toward Dylan.
- Use Levitate to cross the shifting room.
- Avoid unstable surfaces and red Hiss hazards.
- Reach the elevated Slide Projector.
- Interact with it and turn it off.
Fight through the Astral Plane and reach Dylan
The final section alternates between Hiss combat arenas and platforming. Clear each arena before attempting the next crossing. Prioritize ranged enemies, flying enemies, and enemies capable of knocking Jesse from platforms. Use Launch to remove priority targets, then switch to weapon fire while Energy regenerates. Keep moving between cover and elevated positions so enemies cannot surround you.
When platforms appear, use Levitate in controlled bursts and land on broad surfaces before Energy is exhausted. Shield can protect you during an exposed crossing, but it should not replace movement when enemies remain active. Collect Health elements after combat and wait for the next route to become clear before leaving a safe platform.
Continue through the arenas until you reach Dylan’s suspended body. Interact with Dylan to cleanse him of the Hiss. The ending scenes and credits follow. Take Control does not culminate in a conventional named final boss; its final challenge is the combined sequence of enemy waves, exposed platforms, and limited recovery space.
- Clear each Hiss arena before crossing onward.
- Prioritize ranged, flying, and knockback-capable enemies.
- Alternate Launch, weapon fire, Shield, and movement.
- Reach Dylan and complete the cleansing interaction.
Recover from failure and confirm campaign completion
If Jesse dies during the office sequence, motel route, projector traversal, or Astral Plane fights, choose Restart from Last Checkpoint. Re-equip the Mods that address the failed section: Health or Health Recovery for prolonged arenas, Energy or ability-recharge Mods for repeated Launch use, and weapon damage or ranged accuracy for distant targets. If a checkpoint returns you to an earlier part of the current sequence, repeat the objectives methodically rather than rushing toward the marker.
The base campaign is complete when Dylan’s cleansing interaction, the ending scenes, and the credits finish and the Take Control story trophy or achievement is awarded. Jesse then returns to the Oldest House in the postgame state. Use Control Points to continue exploring, complete remaining side missions, and start The Foundation or AWE if they were not completed earlier. Both expansions are separate from the tenth main-story mission but are included in Control Ultimate Edition.
- Use Restart from Last Checkpoint after a failed attempt.
- Adjust damage, Health, and Energy Mods before retrying.
- Complete Dylan’s cleansing interaction.
- Watch the ending scenes and credits.
- Confirm that Jesse returns to the Oldest House.
- Verify that unfinished side missions and both expansions remain available.
Before you move on
- Take Control, the tenth main-story mission, is completed.
- The first office cycle includes enough distinct prompted tasks for the first Director’s Mail to appear, normally two tasks.
- The second cycle includes one prompted task followed by the second Director’s Mail delivery.
- The third waiting letter is collected and delivered without completing another office task.
- The Service Weapon is picked up and used on Trench.
- The Oceanview Motel route is completed and the Slide Projector is turned off.
- Jesse reaches Dylan and completes the cleansing interaction.
- The ending scenes and credits finish, and the Take Control trophy or achievement is awarded.
- Jesse returns to the Oldest House for postgame exploration, with remaining side missions, The Foundation, and AWE available.
Unlocking The Foundation after the base-game ending
Complete the base-game mission Take Control and allow its ending sequence to finish. The Foundation does not unlock merely because Ultimate Edition is installed, because Levitate is available, or because Jesse has reached the late sectors. After postgame free exploration begins, fast travel to Central Executive, enter the Director’s Office and reach the Hotline Chamber. Interact with the Hotline to receive the Foundation objective, then follow it to Maintenance’s Restricted Area. The fastest route is to use the Foundation fast-travel destination if it appears. Otherwise, reach the entrance through Black Rock Quarry, the elevator shaft and the cable cart. Prepare Launch, Levitate, a reliable medium-range Service Weapon form and practical Health, Energy or weapon-performance Mods. The Foundation’s Shape skill has two forms, Create and Fracture. The first Astral Plane challenge lets you obtain one form according to the route you choose; the other is awarded later during The Nail. Activate Control Points as you advance, and return to the Oldest House through fast travel whenever you need to change equipment or spend Ability Points. Do not delay the expansion for a complete collectible sweep.
Finish Take Control and activate the postgame state
Complete the base-game mission Take Control and let its ending sequence finish. The Foundation becomes available after the main campaign reaches this postgame state; owning Control Ultimate Edition or unlocking Levitate earlier does not start the expansion by itself. The Ultimate Edition includes The Foundation and AWE, but the Foundation story still begins through the in-game Hotline sequence.
Load the normal postgame save rather than using Mission Select to replay an earlier story mission. If the Foundation objective is missing, confirm that Take Control is marked complete, reload the postgame save and travel to Central Executive. The expansion’s starting conversation is triggered from the Hotline Chamber.
- Take Control is marked complete.
- The base-game ending sequence has finished.
- The postgame save is active.
- Central Executive and the Hotline Chamber are accessible.
Contact the Board in the Hotline Chamber
Fast travel to the Central Executive Control Point. Follow the signs and corridors toward the Director’s Office, pass through the office and enter the Hotline Chamber. Interact with the Hotline when the objective is active and allow the Board conversation to finish. The resulting objective directs Jesse to the Foundation entrance in Maintenance’s Restricted Area.
Do not search Executive for a normal door marked The Foundation, and do not expect a separate expansion campaign option on the main menu. The Hotline call is the narrative handoff from the completed base campaign to The Foundation. If the call does not trigger, leave the chamber, use the Central Executive Control Point, reload the postgame save and return.
- You reached the Hotline Chamber through the Director’s Office.
- The Board conversation has played.
- The mission objective has changed to finding the Foundation entrance.
Reach the Foundation entrance in Maintenance
Use a Control Point and check whether Foundation is listed as a fast-travel destination under Maintenance’s Restricted Area. If it is available, select it and interact with the marked entrance or wall at the destination. This is the quickest approach. Walkthrough references consistently place the entrance in Maintenance rather than Executive.
If fast travel is not available, follow the objective through Maintenance to Black Rock Quarry. Use Levitate to cross to the quarry’s required upper area, then descend through the large elevator shaft while steering Jesse toward the lower level. Locate the Cable Cart control room, activate the switch, wait for the cart and ride it toward the Foundation entrance. Follow the marked route through the Restricted Area and interact with the entrance.
Clear enemies before attempting the elevator and cable-cart sections. If Jesse dies, restart from the latest activated Control Point and repeat only the unfinished approach. There is no need to redo Take Control or the Hotline conversation.
- The Foundation fast-travel destination has been used, or the physical Maintenance route has been completed.
- Levitate was used to cross the quarry’s vertical route safely.
- The cable cart was activated and ridden when required.
- The entrance transferred Jesse into the Foundation sector.
Prepare a practical late-game loadout
The Foundation has no published minimum Ability Point requirement, but its combat and traversal are more manageable with a balanced late-game setup. Keep Launch upgraded for damage, capacity and repeated use. It removes standard enemies, interrupts attacks and lets Jesse use nearby objects without committing to close range.
Keep Levitate equipped because the Foundation contains vertical gaps, floating platforms and drops that cannot be crossed safely from the ground. Shield is useful when crossing exposed areas or waiting for weapon ammunition to return. Seize can disable a weakened enemy and reduce pressure during mixed encounters. Equip a dependable medium-range Service Weapon form so airborne or distant targets do not force unnecessary close combat.
Before entering, visit a Control Point and spend available Ability Points. Prioritize Launch, Health, Energy, weapon damage or weapon-recovery improvements. Equip practical Health, Energy or weapon-performance Mods rather than novelty effects. You do not need every ability fully upgraded before starting. If a later fight exposes a weakness, use fast travel to return to an Oldest House Control Point, change one or two Mods and resume the active Foundation mission.
- Launch has useful damage, capacity or recovery upgrades.
- Levitate is unlocked and available.
- Shield or Seize is ready for defensive control.
- A medium-range Service Weapon form is equipped.
- Health, Energy or weapon-performance Mods are active.
Follow the opening route to the Crossroads and the Nail
After entering the Foundation, follow the cave route until the first blocked gate. Locate the nearby power core and use Launch to place it in the generator socket. The gate opens after the generator is powered. Continue through the caves and activate the first Control Point you reach. The Foundation walkthrough route then leads toward the Crossroads.
Activate Control Points before pushing into optional rooms or difficult encounters. They provide respawn locations and let you change Jesse’s abilities, weapon forms and Mods. If Health or Energy is depleted after a fight, return to the latest point instead of risking the next arena with a damaged build.
At the Crossroads, cleanse the Control Point and approach the damaged Nail in the central area. Interact with the Nail to begin the Astral Plane sequence. This is the transition into the Foundation skill tutorial and the first Create-or-Fracture choice.
- The power core is installed in the generator.
- The opening gate is open.
- The available early Foundation Control Points are cleansed.
- The Crossroads Control Point is active.
- The Nail has been investigated.
Choose the first Shape form and obtain the other during The Nail
Shape is one Foundation skill with two forms: Create and Fracture. Create produces or extends environmental structures used for ledges, platforms and certain mechanisms. Fracture destroys or breaks the black crystal formations that block routes, support objects or affect encounters. The initial Astral Plane challenge lets you choose which form to obtain first according to the route you take; it is not a choice between two separate skills.
Complete the tutorial route for the form you selected and return to the Foundation. The other form is not awarded during the same initial choice. It is obtained later during The Nail after Jesse completes the required progression and rituals. If you selected Create first, later mission progress awards Fracture; if you selected Fracture first, later progress awards Create. Both forms are needed for the full expansion route.
Continue the active mission instead of stopping for a complete collectible sweep. At any activated Control Point, fast travel back to the Oldest House to spend Ability Points, change Service Weapon forms, replace Mods or complete a nearby side activity. Return to Foundation afterward and resume the mission. The expansion remains available for revisiting, so optional cleanup can wait until both Shape forms and the main Foundation objectives are complete.
- The Astral Plane challenge has been completed.
- The Shape skill’s first form, Create or Fracture, has been obtained.
- The selected form’s tutorial route is complete.
- The Nail mission has begun or is available for continued progression.
- The second Shape form is reserved for later progress during The Nail.
- Control Point fast travel is available for equipment changes and return trips.
Before you move on
- Take Control is complete.
- The base-game ending sequence has finished and postgame free exploration is active.
- The Board has been contacted in the Hotline Chamber.
- The Foundation entrance in Maintenance’s Restricted Area has been reached.
- The opening Foundation Control Points have been activated, including Crossroads.
- Launch and Levitate are available, with Shield or Seize ready for defensive control.
- A dependable medium-range Service Weapon form and practical Health, Energy or weapon-performance Mods are equipped.
- The Shape skill has awarded either Create or Fracture during the initial Astral Plane challenge.
- The Nail mission has begun, and the other Shape form is reserved for later progression during The Nail.
References for this chapter
The Foundation expansion — core route and objectives
Start The Foundation after completing Take Control and triggering the base-game ending. Use the Hotline in the Hotline Chamber, follow Maintenance into the Foundation and reach Crossroads. After investigating the damaged Nail, the Board lets Jesse choose one form of the new Shape skill: Create or Fracture. These are two forms of one skill, not separate abilities. The other form is awarded later during The Nail. Complete the four required rituals in the Warehouse, Collapsed Department, Deep Cavern and Astral Plane areas. Their order depends on the form chosen first. Use Levitate for the Foundation’s vertical routes, Shape to create or destroy crystal structures, Launch for combat and Shield or Seize when Hiss Sharpened or ranged enemies close in. After The Nail, begin The Pyramid, descend to Lower Crossroads, cleanse its Control Point and use the Ranger terminal before fighting Hiss-corrupted Helen Marshall. Defeat Marshall, cleanse the Nail and return to Crossroads. Side missions, collectibles and hidden locations remain available afterward.
1. Unlock The Foundation and reach Crossroads
Complete the base-game mission Take Control and trigger the ending sequence. The Foundation is then available in postgame exploration. Travel to the Hotline Chamber and interact with the Hotline to receive the Board’s call. Follow the marked route through Maintenance and enter the Foundation. The PS5 Ultimate Edition includes the base game, The Foundation and AWE, but check the PS5 game hub or installed add-ons if the expansion does not appear.
Proceed through the opening route until you reach Crossroads. Cleanse the Crossroads Control Point as soon as you arrive. This hub is your main recovery and preparation area, so use it to change weapon forms, equip personal and weapon mods, spend Ability Points and fast-travel. Keep Launch and Levitate equipped for the expansion’s early traversal and combat. Shield is especially useful against Hiss Sharpened, whose fast melee attacks punish stationary players.
- Complete Take Control and trigger the base-game ending.
- Use the Hotline in the Hotline Chamber.
- Enter the Foundation.
- Reach Crossroads and cleanse its Control Point.
2. Investigate the Nail and choose the first Shape form
Follow the mission marker from Crossroads toward the damaged Nail. The route uses separated ledges, large drops and crystal formations. Clear nearby enemies before attempting a long crossing. When your energy is low, land on a solid platform and wait for it to recover instead of trying to complete the entire gap in one Levitation.
During the Astral challenge, the Board presents the Shape skill and lets you choose one of its two forms. Create grows or extends Foundation crystals into platforms and structures and can also be used offensively in appropriate situations. Fracture destroys designated crystal formations and can remove barriers or collapse surfaces beneath enemies. These are forms of the same Shape skill, not two unrelated abilities.
Choose either Create or Fracture, complete the challenge and test the selected form on the nearby crystal structures. The first choice changes which routes are immediately convenient, but it does not permanently prevent access to the other form. Do not waste time trying to open every blocked route or chest at this point; some require the form that you have not yet received.
- Reach the damaged Nail.
- Complete the Astral challenge.
- Choose either Create or Fracture, the first form of Shape.
- Test the selected Shape form.
- Leave blocked routes that require the other form.
3. Complete the four Nail rituals
Continue The Nail by following the currently active objective. The game presents the four ritual destinations in an order determined by the Shape form chosen first. Do not treat the first listed destination as a universal sequence. The required areas are the Warehouse, Collapsed Department, Deep Cavern and Astral Plane; all four rituals must be completed before the mission can conclude.
In the Warehouse, activate the available Control Points while climbing through the tower and surrounding structures. Expect enemies at multiple elevations. Use Launch against exposed Hiss, move between cover and check upper platforms before committing to the ritual objective. The elevator and power-core route requires careful positioning, so look for the marked interaction points rather than attempting to force a jump.
In the Collapsed Department, clear the upper levels before standing at the ritual site. Broken offices and open gaps make Levitate, Launch and Shield safer than remaining in close quarters. If a Ranger terminal is available during the route, use it before a large multi-level encounter and let the Ranger draw attention from enemies below.
The Deep Cavern contains narrow passages, vertical drops and attacks from several elevations. Activate the nearby route Control Point, watch for Hiss Sharpened and avoid backing into crystal hazards. In the Astral Plane section, follow the marked crystal sequence. Some platforms or paths appear only after the required Shape interaction, so do not try to fly directly to distant ledges before completing the local objective.
- Follow the active objective rather than forcing a fixed ritual order.
- Complete the Warehouse ritual.
- Complete the Collapsed Department ritual.
- Complete the Deep Cavern ritual.
- Complete the Astral Plane ritual.
- Use Control Points before major ritual fights or vertical traversals.
4. Receive the second Shape form and finish The Nail
Continue The Nail after the initial rituals. The mission eventually awards the other form of Shape, so Jesse ends the expansion’s central progression with both Create and Fracture available. If a crystal route or container remains inaccessible, check whether it is marked for the form you have not yet obtained instead of searching for an unmarked route.
Use Create to grow crystal structures for platforms, cover or suitable offensive opportunities. Use Fracture to destroy marked crystal formations and open paths or drop surfaces beneath enemies. Keep Launch ready for grenades and loose objects, but avoid throwing explosives at point-blank range in enclosed passages. Levitate is the safest way to control the Foundation’s large drops, while Shield gives you time to recover when enemies surround you.
After all four rituals are complete and both Shape forms are available, follow the remaining objective through the Nail’s concluding sequence. The mission then transitions to The Pyramid. Before advancing, return to a Control Point if you need to spend the Ability Points and rewards earned during the rituals, replace weak mods or change weapon forms. A collectible sweep is not required to finish The Nail.
- Receive the second Shape form during The Nail.
- Confirm that both Create and Fracture are available.
- Finish all four rituals.
- Complete The Nail.
- Begin The Pyramid.
5. Descend to Lower Crossroads and prepare for Marshall
When The Pyramid begins, speak with Emily Pope at Crossroads if the objective requires it. Enter the large opening near the Nail and descend through the unexplored route. Use Levitate to avoid fall damage. The passage includes sharp crystal hazards: destroy stationary formations when safe and wait for the opening between formations that protrude on a cycle.
Follow the linear route to Lower Crossroads and cleanse its Control Point. This is the important recovery point before the Foundation finale. Use the Ranger summoning terminal beside the Control Point before entering the boss area; the Ranger can distract Marshall and occupy ordinary Hiss while Jesse concentrates on the main threat.
Equip a practical loadout before proceeding. Launch and Levitate remain useful, while Shield helps during emergency pressure and Seize can convert weakened enemies into temporary allies. Use a weapon form that can maintain damage while Marshall moves. Favor weapon damage, energy recovery, health or recharge mods over novelty effects.
- Begin The Pyramid.
- Descend through the Nail route with Levitate.
- Avoid or destroy the Foundation crystal hazards.
- Cleanse the Lower Crossroads Control Point.
- Use the Ranger summoning terminal.
- Check weapon forms, abilities and combat mods.
6. Defeat Helen Marshall and complete The Foundation
Enter the large cavern and approach Helen Marshall to begin the boss fight. Marshall moves frequently, uses a ranged weapon and throws grenades. Keep moving around the arena instead of standing in her direct line of fire. Catch and return grenades with Launch when the timing is safe. Marshall avoids the first object thrown at her in some exchanges, so follow an initial throw with additional objects when the arena provides them.
Use the sharp crystal formations as hazards rather than treating the arena as a flat shooting gallery. When Marshall stands near them, trigger or expose the crystal hazards without sacrificing Jesse’s position. If she uses the crystal bridge, fire at the supporting area when the opportunity is clear. Do not chase her into an unsafe path simply to activate terrain damage.
Additional Hiss appear during the encounter. Locate and eliminate snipers quickly because their shots can remove most of Jesse’s health. Let the Ranger distract ordinary enemies where possible, use Shield if several threats converge and Seize weakened durable enemies to create extra pressure on Marshall. Continue alternating weapon fire, Launch and safe movement until her health is depleted.
After Marshall is defeated, approach the Nail and cleanse it. Follow the newly opened route back to Crossroads and allow the concluding scenes to play. An April 2020 update addressed an issue in which Marshall could disappear during the final Foundation boss fight. If the encounter fails to progress or Marshall vanishes, reload the latest checkpoint and make sure the game is patched before trying again.
The Foundation story is complete after Marshall is defeated, the Nail is cleansed and Jesse returns to Crossroads for the concluding scenes. The Foundation remains open afterward. Complete Found Footage, Jesse Faden Starring in Swift Platform, Pope’s Collection, hidden locations, collectibles and other optional encounters during cleanup; none is required for The Nail or The Pyramid.
- Defeat Hiss-corrupted Helen Marshall.
- Prioritize snipers and use the Ranger as a distraction.
- Cleanse the Nail.
- Return to Crossroads.
- View the concluding Foundation scenes.
- Leave optional missions and collectibles for post-expansion cleanup if desired.
Before you move on
- Take Control is complete and the base-game ending has been triggered.
- The Foundation was started through the Hotline in the Hotline Chamber.
- Crossroads and Lower Crossroads Control Points were cleansed.
- The Astral challenge awarded the first form of Shape.
- The second Shape form was awarded during The Nail.
- Both Create and Fracture are available.
- The Warehouse, Collapsed Department, Deep Cavern and Astral Plane rituals are complete.
- The Nail mission is complete.
- The Pyramid mission is complete.
- Helen Marshall was defeated.
- The Nail was cleansed.
- Jesse returned to Crossroads and the concluding Foundation scenes played.
- Optional Foundation content remains available for post-expansion cleanup.
References for this chapter
- Expansion 1: The Foundation Available Today — Control official site
- Control April 2020 Update Notes — Control official site
- CONTROL Ultimate Edition — PlayStation Store
- Control: The Nail, Warehouse and Collapsed Department — Gamepressure
- Control: The Nail, Canyon Rim and Research Site Gamma — Gamepressure
- Control: The Pyramid — Gamepressure
- Walkthrough: The Nail — Control The Foundation DLC — Neoseeker
Postgame, collectibles, and achieving completion goals
After Take Control and the ending sequence, continue from the postgame save and use Central Executive as the cleanup hub. Control Ultimate Edition allows you to return to the Oldest House and finish remaining side missions, Control Points, Hidden Locations, Board Countermeasures, Bureau Alerts, collectibles and expansion objectives. The FBC Crisis Solution Task Force trophy requires 15 optional side missions, but the complete current base-game side-content target is 20 missions, including Dr. Yoshimi Tokui’s Guided Imagery Experience. For ability-point cleanup, plan to discover all 34 base-game Hidden Locations across Executive, Maintenance, Research and Containment after Levitate and high clearance are available. Complete Old Growth before entering hazardous Mold routes. Track the 34 base-game locations, The Foundation’s separate 10 locations and AWE’s 80-percent Hidden Location requirement on separate checklists.
1. Establish the postgame cleanup route
After completing Take Control and its ending sequence, continue with the postgame save instead of starting a new game. Return to Central Executive, activate the Control Point if necessary, and open the Mission menu. Record every unfinished named mission before beginning a collectible sweep. The Oldest House remains available after the credits, so you can finish side missions, Bureau Alerts, Board Countermeasures, collectibles and both expansions without replaying the campaign.
The FBC Crisis Solution Task Force trophy requires 15 completed optional side missions. That is only the trophy threshold, not the complete current base-game side-content target. For a full base-game cleanup, work toward 20 side missions. Complete the ability missions first: A Good Defense grants Shield, A Merry Chase grants Evade and A Captive Audience grants Seize. Continue with Fridge Duty, Self-Reflection, Old Growth, The Enemy Within, Mr. Tommasi, Langston’s Runaways, the What a Mess missions, Old Friends, Mold Removal and the other named missions until the Mission menu shows no remaining base-game side mission.
Also complete Dr. Yoshimi Tokui’s Guided Imagery Experience. Travel to the Research Sector and enter the Extrasensory Lab. Find and collect the Dr. Tokui Tapes document near the sensory-deprivation equipment; collecting it starts the mission on the updated Ultimate Edition. Follow the objective to the tape player and complete the guided sequence. If the document is missing, confirm that the PS5 game is fully updated before assuming the mission is unavailable.
Some missions begin from documents, altered objects, NPC conversations or a location rather than a permanent marker in Central Executive. If a mission is absent, revisit the relevant sector trigger and speak to the associated character again. Do not treat an absent marker as proof that the mission is permanently lost.
- Continue from the postgame state after Take Control.
- Activate Central Executive’s Control Point.
- Record every unfinished named base-game mission.
- Complete the Shield, Evade and Seize ability missions.
- Collect the Dr. Tokui Tapes in the Research Sector’s Extrasensory Lab.
- Complete all 20 current base-game side missions.
2. Cleanse Control Points sector by sector
Use fast travel to organize cleanup by sector: Executive, Maintenance, Research and Containment. At each Control Point, inspect nearby rooms, side corridors, elevators, upper balconies and routes opened by Levitate before moving on. Control Points provide fast travel, loadout management, weapon-form and Mod construction, Board Countermeasure access and Ability Point spending, making them the safest starting points for each sweep.
The base-game trophy threshold is 25 cleansed Control Points. For full exploration, continue until every reachable base-game Control Point has been checked rather than stopping as soon as the trophy requirement is met. A blocked route may require a higher clearance level, a story mission, a side mission or a traversal ability. Record the sector and landmark of anything inaccessible, then return after its prerequisite is complete.
The Foundation and Investigations Sector contain their own Control Points. Cleanse them while completing each expansion, but track them separately from the base-game total so the expansion routes do not obscure your base-game checklist.
- Executive Control Points checked.
- Maintenance Control Points checked.
- Research Control Points checked.
- Containment Control Points checked.
- At least 25 base-game Control Points cleansed.
- Foundation Control Points tracked separately.
- Investigations Control Points tracked separately.
3. Complete ability work before the Hidden Location sweep
Spend Ability Points at Control Points and work toward Master Parautilitarian, which requires spending 100 Ability Points on Jesse’s ability upgrades. Story missions and side missions provide many points, but Hidden Locations supply the additional points normally needed. Prioritize Launch and Energy for general combat, then complete defensive and traversal branches that suit your build.
Leave the main Hidden Location sweep until Levitate is available. Levitate is obtained during My Brother’s Keeper after the Benicoff TV sequence, and many Hidden Locations are easier to reach after its duration and movement upgrades have been developed. Complete Old Growth before entering Mold-damaged routes. If a Mold-filled room begins draining health, leave and return after obtaining the protection associated with that mission.
The base game contains 34 Hidden Locations across Executive, Maintenance, Research and Containment. Search by sector and mark each location immediately. Useful landmarks include Central Executive, the Mail Room, the NSC Power Plant, Black Rock Quarry, Active Threshold, Logistics, Firebreak, Upper Panopticon and Transit Corridor South. Check vertical routes, ceiling openings, ledges and apparently empty rooms; a Hidden Location may be above the normal path or behind a breakable surface.
The Foundation contains 10 additional Hidden Locations, while AWE uses its own percentage-based Hidden Location requirement. Keep three separate totals: 34 for the base game, 10 for Foundation and 80 percent of Investigations Hidden Locations for AWE.
- Levitate unlocked.
- Old Growth completed before Mold-route cleanup.
- All 34 base-game Hidden Locations checked.
- Ability Points spent toward 100 total.
- All base-game supernatural ability upgrades completed.
- Foundation Hidden Locations tracked separately.
- AWE Hidden Location progress tracked separately.
4. Complete Board Countermeasures and Bureau Alerts separately
At Control Points, keep practical Board Countermeasures active while exploring. Choose objectives that match your current weapons and route, such as ordinary Hiss kills, Launch kills or kills with a frequently equipped Service Weapon form. Claim each completed reward before replacing it. If a countermeasure requires an uncommon enemy or an awkward weapon-specific condition, discard it and choose a more convenient objective.
The base-game trophy requires 25 completed Board Countermeasures. Board Countermeasures and Bureau Alerts are separate systems, so record their totals independently. Enemy groups encountered during side missions, expansion visits and postgame respawns can contribute to suitable combat objectives.
Bureau Alerts appear as timed notifications with a marked sector objective. Open the alert, identify the nearest Control Point and travel directly to the target area. Do not spend the timer collecting documents or exploring unrelated rooms. Equip practical health, energy or defensive Mods before entering. Use Launch, cover and elevation to finish the objective efficiently. If an alert expires or you die before completing it, wait for another notification and try again; a failed alert does not require a new campaign.
- 25 Board Countermeasures completed.
- Five Bureau Alerts completed.
- Countermeasure and Bureau Alert totals tracked independently.
- Timed alerts approached through the nearest fast-travel point.
- Practical combat Mods equipped before difficult alerts.
5. Finish The Foundation and its completion requirements
The Foundation has its own story, side missions, collectibles and Hidden Location checklist. Complete the expansion’s story first, then revisit its Control Points for cleanup. The expansion contains 57 collectibles and 10 Hidden Locations. Search the caves, Crossroads routes, astral passages and vertical platforms systematically rather than relying only on visible map markers.
The Make/Unmake requirement concerns the Shape skill and its two forms, Create and Fracture. They are forms of the same expansion ability, not two separate base-game abilities. Use both forms during traversal and combat until their combined use count reaches 100. The order in which you receive Create or Fracture does not permanently lock away the other form; the remaining form becomes available during the expansion’s Nail progression.
If a Foundation route is inaccessible, continue the main expansion objectives until the required Shape or Fracture form is introduced. Return to the Oldest House through fast travel whenever you need to change Mods, construct weapon forms or replenish resources. You do not need to complete every Foundation collectible during the first pass, but finish the cleanup before declaring the expansion complete.
- Foundation story completed.
- Foundation side missions completed.
- All 57 Foundation collectibles found.
- All 10 Foundation Hidden Locations found.
- Create and Fracture used a combined 100 times.
6. Finish AWE and perform the final audit
Complete AWE in the Investigations Sector, including its story and named side missions, then perform a separate sector sweep. The AWE trophy targets are percentage-based: find 80 percent of the Investigation Sector collectibles, 80 percent of its Hidden Locations and 80 percent of Altered Vending Machine instances. Use the trophy progress display rather than guessing from visible map icons.
When you encounter vending machines in Investigations, attack them briefly. An Altered Vending Machine moves and must be destroyed; ordinary machines do not count. Because altered instances are not guaranteed to appear at every visit, use a repeatable route through areas such as Abandoned Offices, Operations Centre and the Fra Mauro AWE Entrance. Fast-travel away and return when necessary to refresh the search.
Equip Surge and use its sticky grenades to kill 50 enemies for Surge Protector. Combine these kills with AWE missions, Bureau Alerts and postgame enemy respawns so you do not need a separate extended grind. At the final audit, confirm Take Control, all 20 base-game side missions, at least 25 base-game Control Points, 25 Board Countermeasures, five Bureau Alerts, all 34 base-game Hidden Locations, 100 spent Ability Points, all base-game ability upgrades, the Foundation requirements and the AWE percentage targets.
Save at a Control Point and reload the postgame file. Confirm that Central Executive, fast travel and the unfinished-mission list remain available. If every checklist item is complete and the relevant trophy progress has updated, the PS5 Ultimate Edition campaign and expansion cleanup is finished.
- AWE story and named side missions completed.
- 80 percent of Investigation Sector collectibles reached.
- 80 percent of AWE Hidden Locations reached.
- 80 percent of Altered Vending Machine instances destroyed.
- 50 enemies killed with Surge.
- All 20 base-game side missions completed, including Dr. Yoshimi Tokui’s Guided Imagery Experience.
- All 34 base-game Hidden Locations checked.
- Foundation and AWE checklist entries reviewed.
- Postgame save reloads with Central Executive and fast travel available.
Before you move on
- Take Control is complete and the postgame state is available.
- All 20 current base-game side missions are complete, including Dr. Yoshimi Tokui’s Guided Imagery Experience.
- The Dr. Tokui Tapes document was collected in the Research Sector’s Extrasensory Lab and the Guided Imagery Experience was completed.
- At least 25 base-game Control Points are cleansed, with every reachable point checked for full exploration.
- 25 Board Countermeasures and five Bureau Alerts are complete.
- All 34 base-game Hidden Locations have been checked.
- 100 Ability Points have been spent and the base-game ability upgrades are complete.
- The Foundation story and side content are complete, with 57 collectibles and 10 Hidden Locations found.
- Create and Fracture, the two forms of Shape, have been used a combined 100 times.
- AWE story and side content are complete, with 80 percent of Investigation Sector collectibles, 80 percent of Hidden Locations and 80 percent of Altered Vending Machine instances reached.
- 50 enemies have been killed with Surge.
- The final postgame save reloads into the Oldest House with Central Executive, fast travel and no remaining checklist item marked incomplete.
References for this chapter
- 100% Achievements & Trophies Guide — CONTROL Ultimate Edition Help Center
- Hidden Locations Checklist — CONTROL Ultimate Edition Help Center
- Hidden Secrets & Locations Guide: Abilities, Mods, and Collectibles — CONTROL Ultimate Edition Help Center
- Control Ultimate Edition Walkthrough: Mission Order, Bosses, Side Missions, Bureau Alerts, The Foundation and AWE
- Control Ultimate Edition Trophy Guide & Roadmap — Platinum in ~25 h
PS5-specific performance tips and troubleshooting
Control Ultimate Edition on PS5 is a native next-generation release with Performance and Graphics modes, DualSense feedback, faster loading, PS5 Activities and Game Help, and both story expansions. Performance Mode targets 60fps at a 1440p render resolution with 4K output and is the best general choice for aiming, Evade timing, Levitation and Launch-heavy combat. Graphics Mode targets 30fps at the same render resolution and adds ray-traced reflections and transparency effects. Before troubleshooting, confirm that you launched the native PS5 application, the game is updated, and The Foundation and AWE are installed or attached to the account being used. AWE becomes available after Story Mission 7, The Face of the Enemy. The Foundation requires completion of the base-game finale and appears during postgame exploration. A PS4 save continues on the backward-compatible PS4 application, but it does not transfer into the native PS5 version.
Choose the native PS5 application and display mode
From the PS5 Home screen, highlight Control and check that you are launching the PS5 version rather than the backward-compatible PS4 application. This chapter covers the native PS5 edition, which uses a newer Northlight Engine version and has different save compatibility from the PS4 release.
Open the game’s display or graphics options and choose between Performance Mode and Graphics Mode. Performance Mode targets 60 frames per second, uses a 1440p render resolution and outputs at 4K. Graphics Mode targets 30 frames per second, uses a 1440p render resolution and adds ray tracing for reflections and transparency.
Choose Performance Mode if you value responsive aiming, rapid camera movement, Evade timing and quick Launch follow-ups. It is the safer general recommendation for combat, especially when several Hiss enemies are attacking or when you are learning Levitation. Choose Graphics Mode if you prefer visual effects over responsiveness. Ray tracing is most noticeable on reflective surfaces, transparent materials and glass-fronted areas such as the Research Sector.
Changing modes does not alter Jesse’s abilities, mission progress, Service Weapon forms or save data. If you are undecided, test both modes in Central Executive or another safe area. Do not expect Graphics Mode to feel like a 60fps setting; its target is 30fps.
- Launch the native PS5 application, not the PS4 application.
- Use Performance Mode for responsiveness or Graphics Mode knowingly for ray-traced effects.
- Remember that Graphics Mode targets 30fps.
Configure DualSense feedback for comfort and combat awareness
The native PS5 edition supports DualSense vibration and trigger effects. These features provide tactile information but do not change damage, ammunition, Energy costs, cooldowns, ability points or Service Weapon behavior.
Remedy identifies vibration feedback for Pierce when the shot is fully charged. When Grip enters cooldown, the right trigger becomes loose, giving you another indication that the form cannot currently fire. Test these effects near an activated Control Point before a difficult encounter so you know what the feedback means.
If trigger resistance or vibration makes aiming uncomfortable, reduce or disable the effects through the available game or PS5 controller settings. Menu wording can vary with the installed game build and system software, so use the current labels shown on your console rather than relying on one exact menu path. Reducing these effects removes presentation feedback only; it does not disable Pierce, Grip or any other weapon function.
- Test Pierce’s charge feedback before a major encounter.
- Learn how Grip’s loose right trigger indicates cooldown.
- Reduce or disable vibration and trigger effects if they interfere with aiming or comfort.
Use Activities and Game Help when an objective is unclear
Press the PS button while Control is running and inspect the available Activity or Game Help cards. Control Ultimate Edition supports PS5 cards, progress tracking and Game Help content, including textual hints and videos for supported main-mission sections.
Use these cards when the Oldest House map is difficult to interpret or when a cutscene changes your objective. After returning to the game, confirm the active objective in Control’s mission menu. A card can point you toward a mission or explain a step, but it cannot cleanse a Control Point, open a door locked by story progression or complete a combat encounter for you.
Cards are context-sensitive. A card may be absent after changing menus, in a particular room or when the relevant content is not currently supported. The absence of a card does not prove that the save or installation is damaged. Continue using the in-game mission screen, map, Control Points and sector signs.
- Open the PS5 Control Centre if you lose track of a main-mission objective.
- Confirm the objective again in Control’s own mission menu.
- Do not treat a missing Activity or Game Help card as proof of a broken installation.
Verify Ultimate Edition content and expansion milestones
Control Ultimate Edition includes the base game, The Foundation and AWE. From the PS5 Home screen, highlight Control and inspect the installed-content or game-management information available for the title. Confirm that the native PS5 application has finished downloading and that both expansions are associated with the account being used. If an expansion is listed separately, allow its download to finish before launching the game again.
AWE does not appear at the start of the campaign. Complete Story Mission 7, The Face of the Enemy. A new mission then guides Jesse to the Sector Elevator in the Executive Sector hub and onward to the Investigations Sector. If no AWE objective exists before The Face of the Enemy is complete, that is normal progression rather than evidence of missing DLC.
The Foundation is a post-campaign expansion. Complete the base-game finale, Take Control, and trigger the ending sequence. Once postgame exploration is available, follow the Board-related objective to the Hotline Chamber and answer the Hotline to begin the Foundation route. Do not diagnose missing Foundation content during the main campaign simply because no Foundation marker is visible.
- Confirm that the native PS5 application and all downloads are complete.
- Confirm that The Foundation and AWE are attached to the active PlayStation account.
- Complete The Face of the Enemy before troubleshooting a missing AWE objective.
- Complete Take Control before troubleshooting a missing Foundation objective.
Update safely and keep PS4 and native-PS5 saves separate
Install the latest available game update before diagnosing crashes, missing content or unusual performance. After an update finishes, fully close and relaunch Control instead of relying only on Rest Mode. If the problem concerns DLC, also confirm that the add-on download has completed and that you are signed into the account that owns the content.
The official save guidance distinguishes the two applications. A PS4 save carries over when continuing the backward-compatible PS4 version on PS5. A PS4 save does not transfer to the native PS5 version because that version uses a much newer Northlight Engine build. If you are beginning the native PS5 edition, plan on starting a new save rather than expecting cloud storage to convert the PS4 data.
If an expansion remains unavailable after its correct story requirement, close the game and check installed content, account ownership and completed downloads. Restart the application after installation and use the console’s current license-restoration option if appropriate. Keep the PS4 application and its save until you have decided whether you still want to continue that version; deleting it will not convert its save for the native PS5 edition.
- Update the game before investigating technical problems.
- Keep the backward-compatible PS4 save and native PS5 save conceptually separate.
- Verify downloads, ownership and installed add-ons before reinstalling.
- Do not delete a PS4 installation until any desired continuation there is confirmed.
Before you move on
- Control launches as the native PS5 edition and the selected display mode is applied.
- Performance Mode is being used for responsiveness, or Graphics Mode is being used knowingly for ray-traced effects.
- DualSense vibration and trigger effects work as intended or have been deliberately reduced or disabled.
- The Ultimate Edition installation contains the base game, The Foundation and AWE.
- After The Face of the Enemy, the AWE objective directs Jesse toward the Executive Sector elevator and Investigations Sector.
- After Take Control, the Foundation-related Board objective leads to the Hotline Chamber during postgame exploration.
- The game is updated, and you know whether each existing save belongs to the PS4 or native PS5 application.
- PS5 Activities or Game Help appear when supported, while normal in-game mission tracking remains functional.
References for this chapter
- What is ‘next gen’ about Control Ultimate Edition on PlayStation 5 and Xbox Series X|S? — 505 Games
- Will my save files transfer over from Xbox One/PS4 to Xbox Series X|S/PS5? — 505 Games
- How do I access the AWE content in Control? — 505 Games
- Control Ultimate Edition comes to PlayStation 5 and Xbox Series X|S today — Remedy Entertainment
- CONTROL Ultimate Edition — PlayStation Store
- The Oldest House awaits: Control Ultimate Edition comes to PlayStation Plus tomorrow — PlayStation.Blog
Recommended late-game builds, mods and recovery tactics
Late-game Control rewards a combat loop that alternates Service Weapon fire, Launch, movement, and defensive abilities. A ranged Launch build built around Pierce and Grip is reliable against bosses, shields, armor, and exposed weak points. A close-range Shield build built around Shatter and Grip is better when enemies press into the arena. Energy Recovery, Launch Efficiency, Energy Boost, Health Boost, Shield Efficiency, and Aerobics are practical priorities, but the best combination depends on the forms and abilities you actually use. Do not rely on a fixed list of rare Mods: compare the effects and values available in your own inventory, and change the loadout at a Control Point before retrying a difficult encounter.
Prepare your forms, abilities, and Mods at a Control Point
Before entering a difficult story arena or optional boss room, activate the nearest Control Point and open the Loadout menu. Equip two Service Weapon forms that cover different ranges rather than carrying two forms with the same purpose. Grip is the safest general-purpose option because it provides accurate medium-range damage. Pierce delivers charged precision shots that are effective against shields, armor, bosses, and enemies behind cover. Shatter is a close-range shotgun form that becomes much stronger when several pellets connect. Charge provides explosive area damage but can hurt Jesse if fired too close to walls or enemies.
Use the Astral Constructs at a Control Point to unlock or upgrade the forms you intend to keep using. Service Weapon energy recharges automatically, but emptying the meter causes a longer delay. Fire in controlled bursts, then use Launch, Shield, Evade, or Levitate while the weapon recovers. This keeps damage flowing without leaving Jesse unable to respond.
Personal Mods affect Jesse's survivability, Energy, movement, and abilities; Weapon Mods affect individual forms. Keep at least one practical Personal Mod equipped. Energy Recovery and Energy Boost support Launch, Shield, Seize, Evade, and Levitate. Health Boost is a straightforward defensive choice. Launch Efficiency lets a Launch-focused build attack more often. Shield Efficiency is useful when Shield is part of the main combat loop. If you have Aerobics from the AWE expansion, it restores health when Jesse successfully Evades and can be valuable in mobile boss encounters.
- Activate the nearest Control Point before changing forms or Mods.
- Equip one dependable form and one form that solves a different combat problem.
- Compare actual Mod effects and values instead of assuming the highest rarity is automatically best.
- Avoid entering an extended fight with every Personal Mod dedicated to damage.
Build A: ranged damage with Launch support
Use Pierce as the primary form and Grip as the fallback. Open against a shielded or armored target with Launch, then follow with a charged Pierce shot when the enemy is exposed. Pierce can attack through shields and cover, making it useful against priority enemies that are difficult to approach. Grip is the dependable option while Pierce charges, while the Service Weapon recovers, or when ordinary enemies are moving too quickly for a precise shot.
Prioritize Launch Strength and, when available, Multi-Launch. Increase Maximum Energy and Energy Recovery so Jesse can continue throwing objects without becoming helpless between attacks. Launch Efficiency is an excellent Personal Mod for this plan. Add Health Boost or Aerobics if the fight punishes failed movement. For Pierce, use damage, headshot, or charge-speed improvements when available. For Grip, use damage, headshot, or ammunition-recovery effects that match the Mods in your inventory.
The basic loop is Launch, Pierce, Grip, then Launch again after Energy returns. Do not spend the entire Energy bar at the beginning of a boss phase. Keep enough Energy for Evade, Shield, or a defensive Launch if the boss moves toward you. Against groups, Launch the most dangerous target or a nearby environmental object first, then use Grip to finish weakened enemies and collect the Health Elements they drop.
- Build around Launch Strength, Energy capacity, and Energy recovery.
- Use Pierce for shields, armor, bosses, and clear weak points.
- Use Grip while Pierce or Jesse's Energy is recovering.
- Keep an escape option instead of spending every point of Energy offensively.
Build B: close-range control with Shield and Shatter
Use Shatter as the primary form and Grip as the ranged backup. Shatter is strongest when enemies enter close range, especially aggressive melee Hiss or groups fighting in a confined area. Grip prevents the build from becoming helpless when an enemy stays on a distant platform or when approaching it would expose Jesse to unnecessary damage.
Invest in Shield upgrades that improve its strength and support Shield Rush or Shield Barrage if you use those abilities. Pair Shield with Maximum Energy, Energy Recovery, and Shield Efficiency. Raise Shield to cross dangerous ground or interrupt incoming pressure, then release it before Energy is completely drained. Once Jesse reaches effective Shatter range, fire, reposition, and collect Health Elements rather than standing still and trying to absorb every attack.
Seize is a support tool in this build, not an opener against every enemy. Weaken a suitable target first, then use Seize to distract the remaining group or create a temporary opening against a priority enemy. Seize duration can help specialized setups, but it is generally less universally useful than Energy or defensive Mods. Keep Grip equipped for flying enemies, distant targets, and any boss phase where closing the distance is unsafe.
- Use Shield to advance or reposition, not to remain stationary until Energy is empty.
- Pair Shatter with Grip so the build still works at medium range.
- Weaken targets before attempting Seize.
- Use Shatter only when the enemy is close enough for its spread to connect reliably.
Adjust the loadout for bosses and long encounters
Change the build according to the arena rather than forcing one form everywhere. Pierce is well suited to bosses with exposed weak points or shield phases. Grip is a reliable fallback when the boss moves constantly. Shatter works best when the arena forces enemies into close quarters. Charge is useful against groups and enemies behind cover, but maintain distance because its explosions can damage Jesse.
If abilities are unavailable too often, replace a general damage Personal Mod with Energy Recovery, Energy Boost, or Launch Efficiency. If Jesse dies while moving between cover or platforms, use Health Boost, Shield Efficiency, or Aerobics instead of adding another offensive effect. Health Elements are created by defeated enemies and must be collected directly, so push forward carefully after a kill rather than waiting indefinitely behind cover.
- Use Pierce for precision and armor, Grip for consistency, and Shatter for close-range pressure.
- Replace damage Mods when the actual problem is Energy, movement, or survivability.
- Collect Health Elements during combat when the route is safe.
- Keep moving; static cover alone will not prevent Hiss from flanking Jesse.
Recover after a failed attempt
After death, return to the last activated Control Point and rebuild the loadout before trying again. Control does not use one universal mission-checkpoint rule for every encounter, so do not assume that a failed fight always reloads at the room entrance. If the nearest Control Point is distant, activate it before beginning another attempt whenever the route allows.
Change one category at a time so you know what solved the problem. If Pierce charge time caused the death, use Grip or a Pierce charge-speed Mod. If Jesse ran out of Energy, remove one damage Mod and add Energy Recovery, Energy Boost, or Launch Efficiency. If close-range pressure was the problem, replace Shatter with Pierce or Grip for the next attempt and use Shield only to cross exposed ground. If projectiles or area attacks caused the death, prioritize Evade, Levitate, Shield, and constant repositioning.
On the next attempt, identify the attack that killed Jesse and prepare specifically for it. Clear weak enemies when they threaten to surround you, preserve throwable objects for dangerous moments, and use health drops as part of the attack cycle. Once the encounter is complete, return to the Control Point to repair the loadout before continuing into the next section.
- Reactivate the nearest Control Point before retrying when possible.
- Identify the direct cause of death instead of changing every Mod at once.
- Use a ranged form when the arena makes close combat unsafe.
- Do not replay unrelated areas unless the game actually requires it.
Before you move on
- You can alternate Service Weapon fire with Launch, movement, Shield, or Evade without repeatedly becoming empty on both weapon energy and Jesse's Energy.
- Your two equipped forms cover different ranges, such as Pierce plus Grip or Shatter plus Grip, and each has compatible Weapon Mods.
- Your Personal Mods address the actual demands of the fight: Energy, Launch cost, Shield use, health, or Evade recovery.
- After a failed encounter, you can name the attack or resource problem that caused the death and make a targeted change at the nearest Control Point.
Finishing up
You have completed all 10 main story missions and seen the final narrative sequence and credits.
You have progressed through the Oldest House sectors required by the story and completed the objectives that unlock later sectors and the expansions.
You have acquired the story-required Service Weapon and supernatural abilities, including Launch and Levitation, needed to finish the base campaign.
Optional combat abilities—Evade, Shield and Seize—have been obtained if you want their side-mission rewards and additional combat options; none is required for the base-game ending.
You can access the postgame Oldest House state after the ending and use it to finish side missions, collectibles and unfinished expansion content.
Optional completion: You have completed The Foundation and AWE for full Ultimate Edition narrative coverage.
Optional completion: You have a practical late-game Service Weapon and ability build for difficult encounters and boss fights.
Choose your next gameScreenshots & video
Game imagery for reference. Follow the written chapters above for the route and strategies.
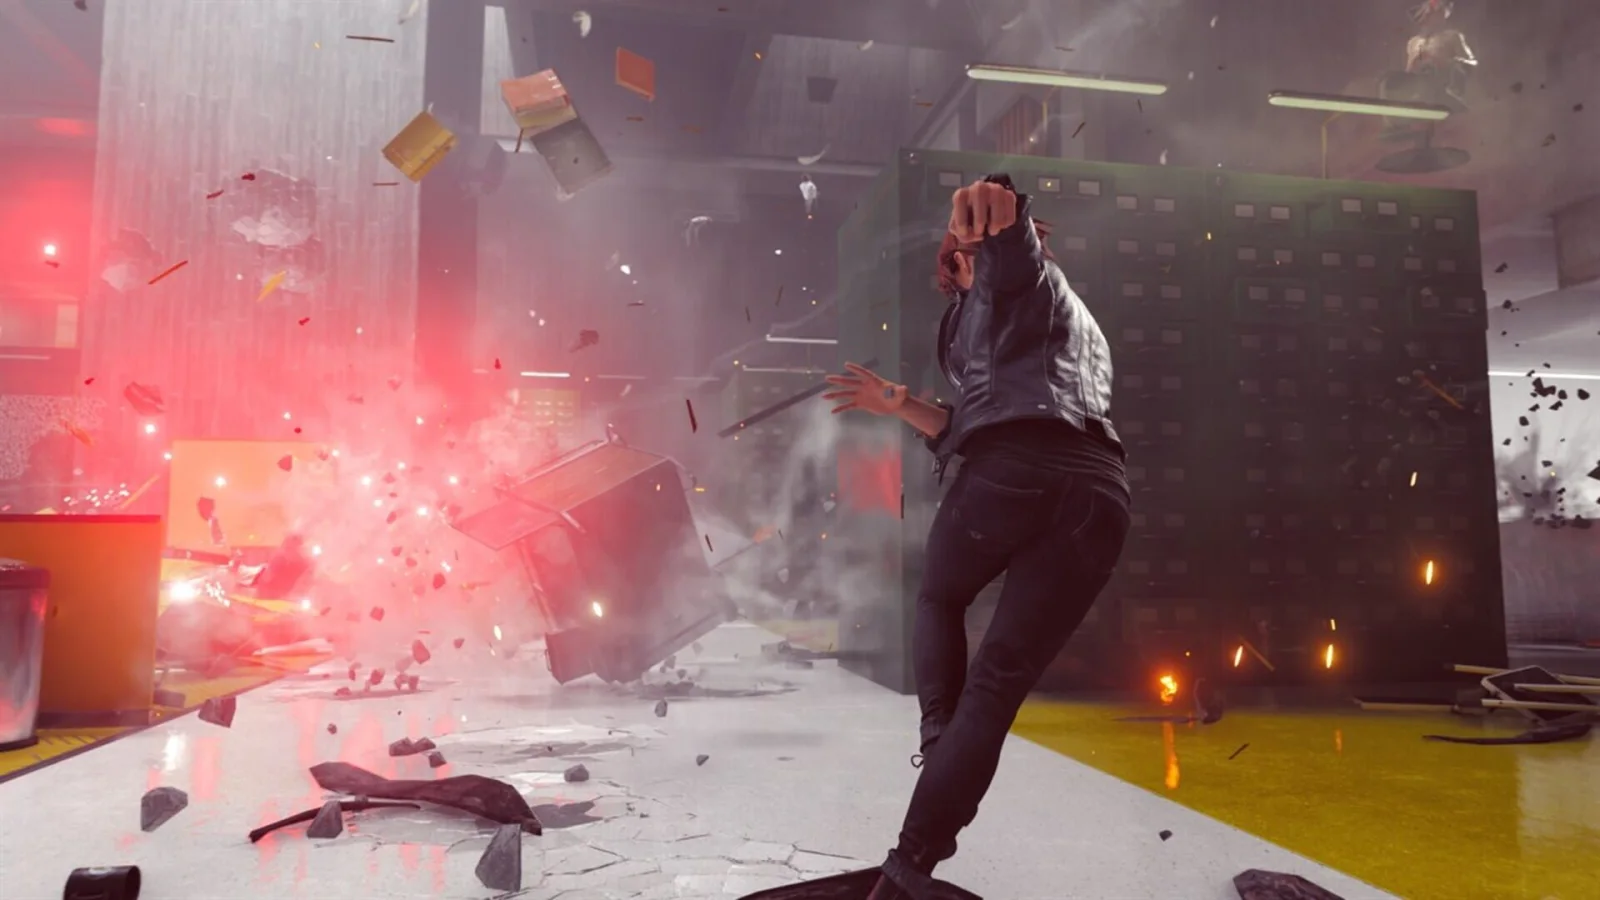

Sources & references
Our original guide draws on the references below. Check the edition at the top of this page before following controls or unlock requirements.
- CONTROL Ultimate Edition — PlayStation Store
- CONTROL Ultimate Edition - October 2025 Console Update v1.30
- How to adjust general controller settings on PS5 consoles
- Welcome to the Oldest House - Control: Ultimate Edition Walkthrough & Guide - GameFAQs
- Walkthrough: Welcome to the Oldest House - Control - Neoseeker
- Neoseeker — Control Walkthrough: Unknown Caller
- Control Ultimate Edition Beginner Tips: Combat, Abilities, Mods, Control Points and What to Do First
- Mods Guide | Collection, Effects & Tier List — CONTROL Ultimate Edition Help Center
- Service Weapon Forms Guide - Control
- Maintenance Sector – Control: Loot | Quest Compendium
- Control Trophy Guide and Roadmap — PowerPyx
- GamesRadar — Control Walkthrough: Unknown Caller
- A Captive Audience Guide — Hold To Reset
- Neoseeker — Control Side Quest: A Merry Chase
- What is ‘next gen’ about Control Ultimate Edition on PlayStation 5 and Xbox Series X|S?
- Directorial Override - Control Walkthrough & Guide
- Control: Directorial Override - walkthrough
- Control: Old boy's club - walkthrough
- Old Boys’ Club Guide – Control
- Walkthrough: Threshold - Control - Neoseeker
- Threshold Guide – Control
- My Brother’s Keeper - Control walkthrough to help you complete the game - Page 6
- Walkthrough: The Face of the Enemy - Control - Neoseeker
- How do I access the AWE content in Control? — 505 Games
- Finnish Tango - Control Walkthrough & Guide
- Polaris - Control: Ultimate Edition Walkthrough & Guide
- Control: Finnish Tango - walkthrough
- What is ‘next gen’ about Control Ultimate Edition on PlayStation 5 and Xbox Series X|S? — 505 Games
- CONTROL Ultimate Edition | Boss Guide — CONTROL Ultimate Edition Help Center
- Control Ultimate Edition Walkthrough: Mission Order, Bosses, Side Missions, Bureau Alerts, The Foundation and AWE
- 100% Achievements & Trophies Guide — Remedy Entertainment Support
- Control: Ultimate Edition Walkthrough & Guide — GameFAQs
- Directorial Override — Control: Ultimate Edition Walkthrough and Guide
- Control: A Captive Audience Walkthrough — Gamepressure
- How To Get All Optional Abilities — Evade, Shield and Seize Guide
- Control Walkthrough — Neoseeker Case Files
- AWE Expansion FAQ Guide — official Control site
- Walkthrough: The Third Thing — Control
- Walkthrough: It’s Happening Again — Control
- Side Quest: Dead in its Tracks — Control Walkthrough
- Side Quest: Gerbil Took the Top Head — Control Walkthrough
- Side Quest: Return to Sender — Control Walkthrough
- Control: AWE DLC — How To Find All 7 Side-Missions
- AWE — Control Walkthrough & Guide
- Take Control - Control: Ultimate Edition Walkthrough & Guide
- Take Control Guide - Control
- Walkthrough: Take Control - Neoseeker
- Expansion 1: The Foundation Available Today — Control official site
- Guide for Control - DLC: The Foundation — TrueAchievements
- Control: The Foundation walkthrough — Gamepressure
- Control The Foundation Walkthrough — Ludo
- The Nail mission — Control Wiki
- Control April 2020 Update Notes — Control official site
- Control: The Nail, Warehouse and Collapsed Department — Gamepressure
- Control: The Nail, Canyon Rim and Research Site Gamma — Gamepressure
- Control: The Pyramid — Gamepressure
- Walkthrough: The Nail — Control The Foundation DLC — Neoseeker
- 100% Achievements & Trophies Guide — CONTROL Ultimate Edition Help Center
- Hidden Locations Checklist — CONTROL Ultimate Edition Help Center
- Hidden Secrets & Locations Guide: Abilities, Mods, and Collectibles — CONTROL Ultimate Edition Help Center
- Control Ultimate Edition Trophy Guide & Roadmap — Platinum in ~25 h
- Will my save files transfer over from Xbox One/PS4 to Xbox Series X|S/PS5? — 505 Games
- Control Ultimate Edition comes to PlayStation 5 and Xbox Series X|S today — Remedy Entertainment
- The Oldest House awaits: Control Ultimate Edition comes to PlayStation Plus tomorrow — PlayStation.Blog
- Weapons Guide | Collection, Effects, and Tier List — CONTROL Ultimate Edition Help Center
- Mods Guide | Collection, Effects & Tier List — CONTROL Ultimate Edition Help Center
About the game & collecting notes
- Platform
- Sony PlayStation 5
Step-by-step campaign walkthrough for Control Ultimate Edition on PlayStation 5. Covers the core story from your first arrival in the Oldest House through the final mission, PS5-specific settings, Combat and Supernatural Ability builds, the two story expansions (The Foundation and AWE), and a postgame completion checklist.
Darryl Polo
Darryl Polo writes about emulation and retro games. What changes when an old favorite moves to another setup? That question connects his interest in tinkering with the games that made the hardware worth keeping.
Our editorial standardsFound a step that needs another look? Help us improve this guide.