
Clair Obscur: Expedition 33 — PS5 Complete Campaign Walkthrough
Step-by-step campaign walkthrough for Clair Obscur: Expedition 33 on PlayStation 5. Covers the prologue, Acts 1–3, required bosses, companion recruitment, builds, overworld navigation, key puzzles, alternate endings and post-game content so you can complete one ending route and then clean up the original PS5 campaign without confusing optional rewards or later-update content with required story progress.

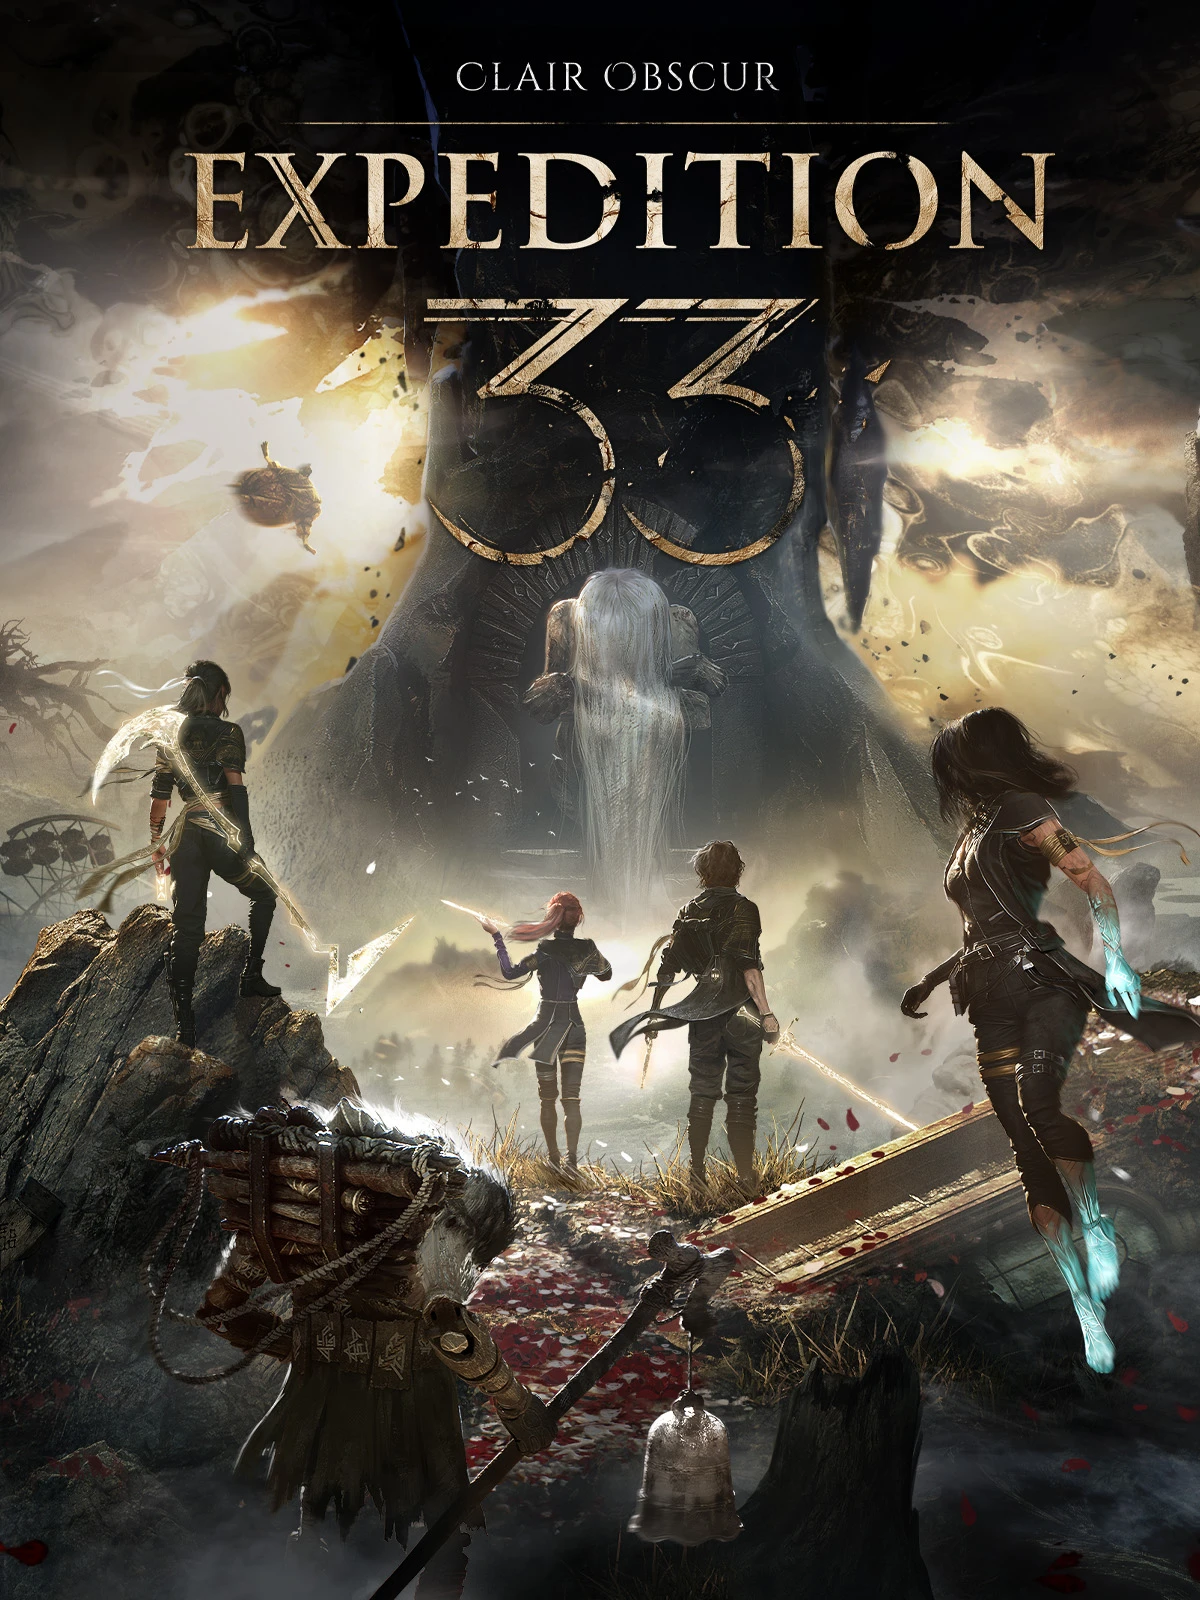
Find a copy
Clair Obscur: Expedition 33 Sony PlayStation 5
We may earn a commission if you buy through these links, at no extra cost to you. As an Amazon Associate I earn from qualifying purchases.
Opens retailer search results. Check the model, edition, seller, availability and current price before buying.
Before you begin
You are playing the original PS5 edition of Clair Obscur: Expedition 33.
This guide walks through the required campaign areas and sequences, explains the hybrid turn-based and real-time combat systems, covers companion recruitment and practical builds, and identifies optional content without presenting either ending as canonical.
Follow the chapter order for the main route. Act 1 is comparatively linear; Act 3 opens the Continent and is best approached through progressively harder areas.
Use Expedition Flags and the game's autosave system for recovery. The game does not provide conventional manual save slots.
Post-game contains optional high-difficulty areas, collection cleanup and the opportunity to pursue the other final route. The ending is selected by the final Maelle-or-Verso choice after Renoir, not by hidden Act 2 morality decisions.
Set yourself up for the run
Set difficulty to Expeditioner for a balanced first campaign, changing difficulty if necessary.
Learn the combat rhythm: command selection, Action Points, timed attacks, dodge, parry, jump, Break and Gradient Attacks.
Practice defensive timing in the Prologue before tackling long dungeons.
Use Expedition Flags and autosaves as recovery points. Do not promise manual save slots or conventional manual saves.
Do not treat a 90,000-Chroma target as an Act 1 vendor exchange. Save Chroma only for purchases or objectives you have actually reached, including the later Bénisseur quest if you choose to complete it.
Unlock Esquie's traversal abilities as the story and relationship quests provide them; use each new ability to revisit previously blocked routes.
Prioritize companion conversations, missable records and journals according to the relevant chapter checklists.
Buy useful Pictos and upgrade materials, but avoid spending rare catalysts on every temporary weapon.
Weapons found in areas often outpace early merchant stock.
For collectibles, maintain an external checklist by area because the game does not provide a reliable per-area completion counter.
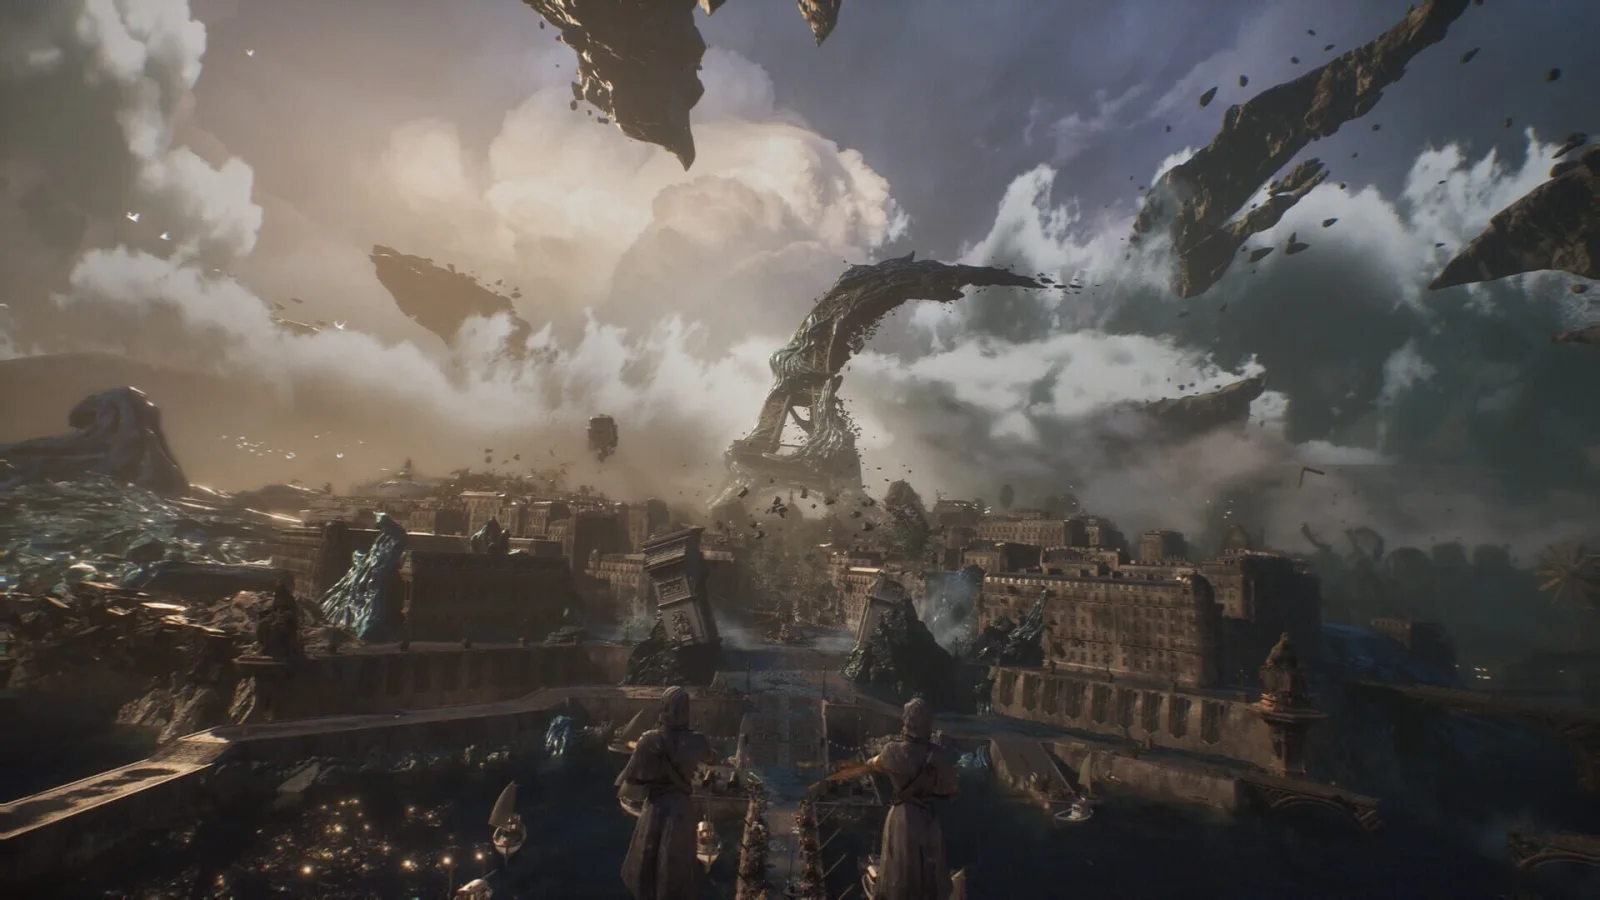
Prologue — Lumière: Learn the Rhythm
The Lumière prologue teaches movement, turn selection, Action Points, timed attacks, dodges, parries, and Gustave’s Lumière Assault and Overcharge abilities. Before speaking with Emma to leave the festival, defeat the optional Lumière Mime, win Maelle’s rematch, answer Antoine’s questions, collect all three Festival Tokens, and obtain the Old Key. In the original release, the Old Key is needed later to open the Old Lumière gate and collect the Fracture Survivor journal entry, so treat it as a Prologue priority. The original PS5 release does not provide conventional manual save slots. Rely on autosaves, and once Expedition Flags become available, rest at one whenever you want to force a reliable save before continuing.
1. Follow Maelle across the rooftops and complete the first combat lesson
After the opening scenes, control Gustave and follow Maelle across the rooftops of Lumière. Pick up the Flower for Sophie from the nearby bench, then use the marked grapple point to cross the gap. Sprint across the next rooftop and continue until Maelle proposes a duel. Accept the fight; it is the tutorial for the Battle Wheel, Action Points, turn order, attacks, dodges, and parries.
Use Gustave’s normal attack, then select Lumière Assault from the Skills menu when it becomes available. Follow the attack prompts to improve the strike and build the resource needed for Overcharge. When Maelle attacks, wait for the impact timing and press the displayed defense input. Dodging is the safer first response, while a successful parry can interrupt the attack and produce a counterattack. Complete the duel, then follow Maelle into the streets and meet Sophie beside the red-and-white tree.
- Collect the Flower for Sophie.
- Complete Maelle’s rooftop duel.
- Use Lumière Assault and Overcharge during the tutorial.
- Test both a dodge and a parry before leaving the rooftop route.
2. Explore Lumière before going to the harbour
After meeting Sophie, the objective points toward the harbour. Before accepting that transition, explore the nearby streets and courtyard. Speak with available residents and collect visible Chroma so you can learn the layout and gather the early resources without pressure.
From the courtyard near the red-and-white tree, continue toward the festival stage where people are dancing. On the right side of the stage, look for an alcove with scaffolding. Examine the strange wooden figure there to start the optional Lumière Mime fight. Complete this encounter before entering the harbour sequence. In the original-release route, leaving this section without defeating the Mime means losing access to its Prologue encounter on that playthrough.
- Explore the streets and courtyard before the harbour transition.
- Find the Mime in the scaffolding alcove near the festival stage.
- Do not enter the harbour sequence until the Mime has been defeated.
3. Defeat the Lumière Mime
The Mime begins behind a protective wall that sharply reduces incoming damage. Build Gustave’s Overcharge gauge with Lumière Assault, then use Overcharge when it is ready. This breaks the Mime’s protection and creates the opening needed to finish the fight with further attacks.
The Mime uses close-range combinations and a heavier hammer attack. While learning the timing, dodge rather than attempting to parry every hit. Watch the enemy’s motion and press the dodge input as each strike is about to connect. If Gustave is defeated, interact with the Mime again and retry the encounter. Defeating it awards the Lumière record and completes the special Prologue Mime objective.
- Use Overcharge to break the Mime’s protective wall.
- Defeat the Mime before proceeding to the harbour.
- Verify that the Lumière record has been added to the collection.
4. Complete the Gommage sequence and begin the festival
Return to the marked route after the Mime and proceed to the harbour. The story then forces the Gommage sequence and returns control to Gustave at the Festival de l’Expédition. One Festival Token is granted automatically when the festival begins.
Do not speak with Emma to leave yet. The festival is the final free-roaming section of the Prologue, and its activities should be completed before confirming the departure. Keep the automatic token available while you collect the two additional tokens from Antoine and Maelle.
- Complete the harbour and Gommage scenes.
- Confirm that the automatic Festival Token is in the inventory.
- Return to Gustave at the Festival de l’Expédition.
5. Earn the other two Festival Tokens
Find Antoine near the festival tables and answer his questions about the expedition. The correct answers are 67 years ago, Expedition Zero, and that abilities are internalized by using a Pictos in battle enough times. Correct answers award one Festival Token.
Next, find Maelle on the pier near the boats and accept her rematch. Her attacks follow the patterns introduced during the rooftop duel, but the tutorial no longer supplies the defensive prompts. Dodge or parry each attack and win the duel to receive the final token. If you lose, speak with Maelle again and retry; the rematch remains available while the festival is active.
- Answer Antoine’s three questions correctly.
- Defeat Maelle in the pier rematch.
- Hold three Festival Tokens before visiting the reward stalls.
6. Buy the Old Key before spending the remaining tokens
Go to the three reward stalls behind Antoine. Exchange one Festival Token at Colette’s stall for the Old Key before purchasing the optional rewards. In the original release, this key is used later in Old Lumière to open a locked gate leading to the Fracture Survivor journal entry. Because this chapter targets the original-release campaign route, do not rely on a later patch adding a second acquisition location.
After taking the Old Key, use the other tokens on the Weird Pictos and Gustave’s Bun appearance item if you want them. These rewards are optional for campaign completion. Saving tokens for New Game Plus rewards is also optional and should not take priority over the Old Key on a first completion-focused run.
- Exchange a Festival Token for the Old Key.
- Confirm that the Old Key remains in the inventory.
- Buy the Weird Pictos and Bun appearance only after securing the key, if desired.
7. Collect the apprentices’ journal and leave for Act 1
Before ending the festival, travel to the far end of the area and speak with Gustave’s three apprentices. Their conversation awards A Journal from Gustave’s Apprentices. Check the journal or collection record if you are tracking every Prologue entry.
There is no conventional manual-save command or manual-save slot system to use for creating named recovery points. Progress is handled through autosaves. After Expedition Flags become available in Act 1, rest at one to force a dependable save before difficult fights or major transitions. Do not assume that leaving the festival creates a reusable manual checkpoint.
When the Mime, token rewards, Old Key, and apprentice journal are complete, speak with Emma at the base of the stairs and confirm that you are ready to depart. Watch the departure sequence. The Prologue ends when Gustave awakens on the continent in Spring Meadows, beginning Act 1.
- Collect A Journal from Gustave’s Apprentices.
- Confirm that the Old Key and desired festival rewards are present.
- Allow the game to complete its autosave before confirming Emma’s speech.
- Reach Spring Meadows after the departure sequence.
Before you move on
- The Lumière Mime has been defeated and the Lumière record is present.
- Three Festival Tokens were obtained: the automatic token, Antoine’s token, and Maelle’s token.
- The Old Key was collected before leaving the festival.
- A Journal from Gustave’s Apprentices was collected.
- Emma’s departure sequence has been completed and Gustave has awakened in Spring Meadows.
- The player has confirmed an autosave and understands that Expedition Flags can be used to force saves after the Prologue.
References for this chapter
- Clair Obscur: Expedition 33 - PS5 games
- Lumière (Prologue) - Clair Obscur: Expedition 33 Walkthrough
- Mime Locations - Clair Obscur: Expedition 33 Walkthrough
- Old Lumière - Clair Obscur: Expedition 33 Walkthrough
- Prologue: Lumière - Clair Obscur: Expedition 33 Walkthrough & Guide
- How to use the old key in Clair Obscur: Expedition 33
Act 1 — Spring Meadows & Flying Waters: First Expedition Route
Complete Spring Meadows before crossing the Continent to Flying Waters. Gustave meets Lune, learns Free Aim and elemental stains, activates the Meadows Corridor, Grand Meadow and Indigo Tree Expedition Flags, completes or postpones the Jar Nevron quest, and defeats the required Évêque boss. On the Continent, defeat the group near the Flying Waters route to obtain Lune’s Lighterim weapon upgrade, collect useful Colours of Lumina, rest at camp and enter Flying Waters. The dungeon introduces Maelle, Paint Cages, Lusters, Démineurs, Noco’s Hut and The Manor before leading to Flower Field. Defeat Goblu, complete the exit scenes and confirm that Ancient Sanctuary is available as the next main destination. Abbest Cave, Mime, Bourgeon and Chromatic Troubadour are optional and may be postponed.
1. Enter Spring Meadows and meet Lune
From the Spring Meadows starting point, follow the main woodland route toward the Indigo Tree. Search the opening side paths for the nearby Chroma before continuing; these early pickups are useful, but there is no fixed Act 1 savings target. Spend Chroma when it improves your current party rather than hoarding it for a supposed 90,000-Chroma exchange.
The first Lancelier encounters teach the basic rhythm of the combat system. Watch the enemy’s weapon animation and use dodge or parry according to the timing you can read. If you miss a parry, do not continue pressing the input in panic; recover on the next attack and use a normal dodge when necessary. When Free Aim becomes available, use the on-screen prompt to target exposed weak points rather than relying on an exact button mapping.
Continue through the cave and meet Lune. The Portier encounter introduces elemental stains. Use Gustave’s Free Aim attack on the glowing target, then have Lune apply Ice and follow the tutorial’s instruction to consume the resulting stain with an elemental attack. This is the first practical lesson in combining character actions instead of spending every turn on ordinary attacks. The encounter also provides an early Picto and upgrade materials.
- Follow the main Spring Meadows route to Lune.
- Practice Free Aim against visible weak points.
- Use Lune’s Ice-based stain tutorial during the Portier encounter.
- Spend Chroma flexibly on useful early upgrades rather than pursuing a fixed currency milestone.
2. Activate the Spring Meadows Expedition Flags
After leaving the cave, continue until you can crouch beneath the low arch and reach the Meadows Corridor Expedition Flag. Activate it and use the rest point to restore the party, allocate available Attribute Points and review equipped Pictos. Expedition Flags are your recovery and travel anchors, so activate every required flag even when you do not need an immediate heal.
Advance through the meadow and search the nearby slopes, caves and ruined building for early materials. The area contains weapon upgrades, Chroma, an Energy Tint Shard and the Critical Burn Picto. These rewards are useful for the opening route but are not required in a single prescribed order. If a fight leaves the party weakened, return to Meadows Corridor instead of consuming limited healing resources unnecessarily.
Follow the route toward the lower meadow and activate Grand Meadow. This flag is the important preparation point for the late Spring Meadows sequence. Rest there, spend any saved points and make sure Gustave and Lune have Pictos suited to their current roles. Nearby encounters can provide optional experience, but grinding is not required for Évêque.
- Activate Meadows Corridor.
- Search the early side paths for upgrade materials and Pictos.
- Activate and rest at Grand Meadow before continuing toward the story boss.
- Treat Chroma spending as flexible preparation.
3. Handle the Jar quest and defeat Évêque
The Jar Nevron appears along the Spring Meadows route and begins an optional side quest. Continue past the first conversation until you find the Resin farther into the area, near the route beyond the bridge and the surrounding crates. Return the Resin to Jar, then follow the prompt to light the tip of his staff. Completing the interaction awards a Healing Tint Shard. You may also choose to fight Jar afterward, but that battle is optional and should not be confused with the required area boss.
Before entering the Évêque arena, activate the Indigo Tree Expedition Flag and rest. Évêque begins protected by shields, so use low-cost attacks and multi-hit actions to remove them before committing your strongest damage. Once the shields are gone, target the glowing central weak point with Free Aim for increased damage.
Évêque is weak to Ice and absorbs Earth damage, so favor Lune’s Ice abilities and avoid Earth attacks during this encounter. The boss can summon two Abbests; eliminate them promptly by targeting their weak points before returning your attention to Évêque. Its spear attacks have deliberate windups, while its projectile sequence requires careful timing. Dodge unfamiliar attacks until their rhythm is clear, then add parries when you can recognize the impact point. Near the end of the fight, Évêque raises additional shields and begins charging an attack. Break the shields again, expose the weak point and finish the boss.
Complete the story scenes after the victory. Évêque ends the required Spring Meadows sequence and opens the Continent route toward Flying Waters.
- Return Jar’s Resin and light his staff if you want the Healing Tint Shard.
- Activate Indigo Tree before the boss encounter.
- Remove Évêque’s shields before using major damage skills.
- Use Ice against Évêque and avoid Earth attacks.
- Defeat Évêque and finish the following story scenes.
4. Prepare on the Continent and enter Flying Waters
After the Spring Meadows scenes, travel across the Continent toward Flying Waters. Northeast of Spring Meadows, defeat the Portier, Abbest and Volester group near the camp. This encounter awards Lighterim, Lune’s early weapon upgrade. Do not list Lighterim as a Gustave weapon or as loot from inside Flying Waters.
Search the camp and nearby debris for Colours of Lumina. Another Colour of Lumina can be found near the route by Abbest Cave, and another is available south of the Flying Waters entrance. These pickups are useful for building the party, but they are optional and do not represent a mandatory Chroma exchange.
Abbest Cave is an optional high-difficulty branch during this part of Act 1. Mark it for a later return if the enemies are overwhelming. Before entering Flying Waters, use the nearby camp to speak with the party, examine the campfire and complete the available journal or rest prompts. Then approach the giant coral structures and enter the portal.
- Defeat the Continent group near the Flying Waters route.
- Obtain Lighterim for Lune.
- Collect nearby Colours of Lumina if desired.
- Postpone Abbest Cave if the enemies are too strong.
- Rest at camp and enter Flying Waters.
5. Cross Flying Waters and recruit Maelle
At the beginning of Flying Waters, approach the wreckage for the opening scene. Take the side path near the anchor to collect SOS Shell, then return to the main route. Paint Cages are opened by shooting their visible locks; search around the whale statue, seaweed and rock surfaces for the required targets. Open any cage you can reach, but do not leave the main route to chase difficult optional pickups if the party is struggling.
Continue through the area and learn the attack patterns of the Lusters. At the first major branch, explore the side route for the Marking Shots Picto before returning to the progression path. Démineurs carry explosive mines that can be targeted; shooting a mine can damage nearby enemies and is safer than allowing the enemy to control the fight with repeated lightning attacks. Use the rest flags whenever the party’s healing or Pictos need to be refreshed.
Reach Noco’s Hut and activate the Expedition Flag outside it. This begins the Manor sequence. Activate the Entry Hall flag, follow the story route through The Manor and continue until Maelle joins the expedition. Inspect her equipment and place suitable Pictos on her before proceeding.
The Manor and the connected Flying Waters routes contain records, outfits, Pictos and optional encounters. Mime, Bourgeon and Chromatic Troubadour are not required to cross the area. Bourgeon and the other optional fights can be postponed until the party has stronger weapons, more skills and better defensive options.
- Collect SOS Shell if following the early side route.
- Open reachable Paint Cages without abandoning the main path.
- Activate Noco’s Hut and the Manor Expedition Flags.
- Use Démineur mines against groups when practical.
- Recruit Maelle and review her equipment.
- Postpone Mime, Bourgeon and Chromatic Troubadour if necessary.
6. Defeat Goblu at Flower Field and finish the chapter
Continue through the Lumièran Streets route and follow the story path until you reach the Flower Field Expedition Flag. Rest there before entering the boss area. Allocate Attribute Points, check that Lune has a dependable healing or recovery option and ensure the party is not carrying Pictos that are useless for the current fight.
Goblu is the required Flying Waters boss. It is weak to Lightning and begins protected by shields. Goblu periodically grows flowers around the battlefield. The flowers can be targeted through their glowing weak points; closing them prevents Goblu from consuming them to restore health and strengthen its attacks. Reserve enough action economy to deal with the flowers instead of focusing exclusively on the boss.
Goblu’s jump attack lands several times and has delayed impacts, so do not dodge on the first movement alone. Listen for the impact rhythm and delay the later dodge or parry inputs. Its basic arm combination is more clearly telegraphed, while the longer combination appears after it has consumed flowers. When the battlefield becomes crowded, prioritize surviving the next attack and closing the most dangerous flowers rather than forcing an unsafe damage turn. Lightning attacks from Lune and other reliable damage skills are effective once the shields are removed.
If the party is defeated, return to Flower Field and adjust Pictos, healing and turn order before trying again. After Goblu falls, collect the boss rewards and follow the path beyond the arena to the swirling exit portal. Complete the resulting camp and story prompts, then rest as directed. Ancient Sanctuary is the next main destination, while Flying Waters remains available for optional cleanup.
- Activate Flower Field before entering the boss area.
- Remove Goblu’s shields before committing major attacks.
- Close its flowers to prevent healing and stronger attacks.
- Use Lightning damage when available.
- Defeat Goblu and complete the exit scenes.
- Confirm that Ancient Sanctuary is available next.
Before you move on
- Meadows Corridor, Grand Meadow and Indigo Tree have been activated.
- The Jar interaction has been completed if the Healing Tint Shard is desired.
- Évêque has been defeated and the Spring Meadows story scenes are complete.
- The Continent group near Flying Waters has been defeated.
- Lighterim has been obtained for Lune.
- Flying Waters has been entered and Maelle has joined the party.
- Flower Field has been activated.
- Goblu has been defeated and the exit sequence is complete.
- Ancient Sanctuary is available as the next main route.
References for this chapter
- Act 1: Gustave - Clair Obscur: Expedition 33 Walkthrough & Guide - GameFAQs
- Chapter 2: Flying Waters - Clair Obscur: Expedition 33 Walkthrough & Guide, PS5
- Spring Meadows - Clair Obscur: Expedition 33 Walkthrough
- Flying Waters - Clair Obscur: Expedition 33 Walkthrough
- To the Flying Waters - Clair Obscur: Expedition 33 Walkthrough
- How to help the Jar in Clair Obscur: Expedition 33
- How to help Demineur in Clair Obscur: Expedition 33
- How to beat the Bourgeon and get its skin in Clair Obscur: Expedition 33
Act 1 — Ancient Sanctuary, Gestral Village and Progression Check
Travel through Ancient Sanctuary, defeat the Sakapatate defenders and collect the area’s useful weapons and Pictos before entering Gestral Village. Activate all four Ancient Sanctuary Expedition Flags, including the optional Gestral Totem flag, then defeat Ultimate Sakapatate. In Gestral Village, speak with Golgra, complete the required Legendary Tournament, recruit Sciel after the final bout and return to Golgra for the password that opens Esquie’s Nest. The Ono Puncho damage challenge and Golgra’s personal duel are optional and should not be confused with the required tournament. Esquie is not recruited in this chapter; the password only prepares the next objective.
Enter Ancient Sanctuary and secure its rest points
From the Continent, enter Ancient Sanctuary and activate the Entrance Expedition Flag immediately. Follow the route to the Sanctuary Maze flag after the early Robust Sakapatate encounter. Near this section, inspect the side paths before advancing: the area contains weapon upgrades, Chroma, Lumina resources and several Pictos.
Ancient Sanctuary has four Expedition Flags: Entrance, Sanctuary Maze, Giant Bell Alley and Gestral Totem. Gestral Totem is off the main route behind the Paint Spike near the Sanctuary Maze section. It is optional for story progression, but activate it if you want complete fast travel coverage for this area. Do not treat the three obvious route flags as the full total.
- Activate Entrance and Sanctuary Maze.
- Activate Gestral Totem if pursuing a thorough area clear.
- Activate Giant Bell Alley before approaching Ultimate Sakapatate.
- Use flags to restore health and reorganize Pictos before difficult encounters.
Collect the early Sanctuary weapons and Pictos
At the first major fork, take the lower river path to reach Burning Mark, then return and follow the upper route toward the Robust Sakapatate. That enemy begins with shields and exposes its right-arm weak point briefly while bashing with its shield. Do not attack into its raised shield because the counter can stun the party. Defeating it awards Sakaram for Gustave and advances the route toward Gestral Village.
At Sanctuary Maze, take the right-hand path beneath the rock formation and search the side routes before continuing. The Ranger and Catapult Sakapatate encounter awards Trebuchim for Lune. Their projectiles have delayed timing, and defeated enemies can crash into the party, so continue defending until their death animation is finished.
The surrounding side paths contain Energising Start II, Attack Lifesteal and Piercing Shot, along with Chroma and healing resources. Piercing Shot is in the Gestral Totem section. A Mime near the ruined building is optional; it starts with shields and can inflict Silence, so defeat it only when the party can handle a longer fight.
- Obtain Sakaram from the Robust Sakapatate encounter.
- Obtain Trebuchim from the Ranger and Catapult Sakapatate fight.
- Collect Burning Mark, Energising Start II and Attack Lifesteal if desired.
- Search Gestral Totem for Piercing Shot.
Defeat Ultimate Sakapatate at Giant Bell Alley
Rest at Giant Bell Alley, then follow the lantern-marked route into the final clearing. Ultimate Sakapatate is weak to Fire, so Lune’s Immolation or Maelle’s Spark can help while you build Break. Once the Break gauge is filled, use a Break skill to expose the boss’s shoulder weak point.
During the vulnerability phase, use Free Aim on the exposed shoulder and destroy the arm. Removing the shield arm disables the cannon-fire and shield-slam options, making the remainder of the fight safer. The boss also uses a multi-hit partner attack: defend against the first two strikes and jump the final airborne hit. Watch for the pause before ground and shield slams, and defend against the sequence of cannon projectiles when the shield lights up.
Victory awards the Breaker Picto and Polished Chroma Catalysts. After the battle, climb toward the left side of the clearing for a Colour of Lumina, then cross to the opposite side and crouch through the opening. Follow that passage to collect Stun Boost. Return to the boss area and take the route onward to the world map and Gestral Village.
- Exploit Fire weakness while building Break.
- Break the boss and destroy the exposed shoulder arm.
- Collect Breaker from the victory reward.
- Collect Stun Boost from the nearby cave after the fight.
Enter Gestral Village and complete the required story sequence
Activate the Gestral Village Entrance Expedition Flag, then go to the Chief House and speak with Golgra. Explore the bazaar and side paths if you want merchants, Chroma or optional errands, but the main progression requires returning to Golgra and following her instructions.
The Legendary Tournament is required for the story route to Esquie’s Nest. Speak with the arena attendant, Limonsol, and enter the one-on-one tournament. The bouts are against Bertrand Big Hands, Dominique Giant Feet, Matthieu the Colossus and the final opponent, Sciel. Parry or dodge each opponent’s attack patterns rather than trying to trade damage, since only one character fights at a time.
Use Maelle for the final bout if you want Medalum, one of her strongest weapons. Gustave and Lune receive level-five weapon upgrades instead, while deliberately losing the final bout can provide Sciel’s Hevason. Medalum is generally the more valuable choice for a normal campaign route, but the tournament outcome does not prevent the main story from continuing.
- Speak with Golgra before entering the arena.
- Complete all four Legendary Tournament bouts.
- Use Maelle for the final bout if you want Medalum.
- Do not confuse the tournament with Ono Puncho’s separate 9,999-damage challenge.
Recruit Sciel and obtain Golgra’s password
After the final tournament bout, the Stranger is revealed as Sciel. Complete the following scene and the short tutorial battle that introduces her Foretell mechanics. Sciel then becomes the expedition’s fourth playable party member. Visit the nearby flag to assign her attributes, skills, Pictos and Lumina before leaving the village.
Return to Golgra after Sciel joins. The required conversation gives you the password phrase Get outta my way, which is the access condition for Esquie’s Nest. The password is the important progression result of the village sequence; the optional errands do not substitute for this conversation.
Before leaving, you can rescue Purumi for Alexsoundro, wake Victorifo by shooting the mirror and inspect the village’s merchants. These activities provide optional outfits, Chroma or other rewards. Ono Puncho’s challenge and Golgra’s high-level personal duel are also optional. Save the duel for much later unless you specifically want a difficult solo fight.
- Confirm Sciel is selectable in the party.
- Assign Sciel’s skills and Pictos at the Expedition Flag.
- Return to Golgra after the tournament and Sciel’s introduction.
- Confirm that the password objective is complete before traveling to Esquie’s Nest.
Leave with the correct Act 1 preparation
Review weapon levels and reserve rare catalysts rather than upgrading every early weapon. Sakaram, Trebuchim and Medalum can cover the immediate Act 1 needs, but your long-term choices will change as new weapons appear. Spend ordinary Chroma and lower-tier materials freely enough to remain effective, while keeping Polished Chroma Catalysts for weapons you expect to continue using.
Esquie is not recruited in Ancient Sanctuary or Gestral Village. Travel to Esquie’s Nest only after the password conversation is complete. The next chapter continues with the Nest sequence, where Esquie’s recruitment requires an additional objective rather than simply presenting the password at the entrance.
- Keep rare catalysts available for later Act 1 weapons.
- Confirm all four Ancient Sanctuary flags if completing the area thoroughly.
- Confirm Sciel’s recruitment and Golgra’s password before leaving.
- Travel to Esquie’s Nest only after the village sequence is complete.
Before you move on
- Ancient Sanctuary Entrance, Sanctuary Maze and Giant Bell Alley flags are activated; Gestral Totem is also activated if pursuing full area coverage.
- Ultimate Sakapatate is defeated and Breaker is in the inventory.
- Sakaram and Trebuchim have been collected, if the corresponding encounters were completed.
- The Legendary Tournament is finished and Sciel has joined the party.
- Medalum is in the inventory if Maelle was used for the final tournament bout.
- Golgra has provided the password phrase Get outta my way, enabling the next Esquie’s Nest objective.
- Rare catalysts have not been spent indiscriminately on every early weapon.
References for this chapter
Act 1 Finish — Esquie’s Nest, Yellow Harvest and Stone Wave Cliffs
Finish Esquie’s Nest, defeat François and return to Esquie to unlock the next stage of Continent travel. Take the blue mushroom from the first large cavern if you want to complete Karatom’s Act 1 quest and earn Gustave’s Pure outfit. Yellow Harvest is optional, but it offers useful equipment, currency and upgrade materials. Stone Wave Cliffs is the required Act 1 route. Follow it through the Paintress Shrine, Old Farm, Tide Caverns, the Manor and Flooded Buildings, activating flags and opening shortcuts as you go. The Hexga in Tide Caverns can be restored with three Rock Crystals for the Auto Shell Pictos, but this reward is optional. Before entering Basalt Waves, upgrade the active party and finish any Act 1-limited errands you want to keep. Defeat Lampmaster by disabling its four lanterns with Free Aim and matching the lamp order during Sword of Light. The following White-Haired Man sequence is scripted. Let the scenes play, allow the autosave to complete, and confirm that Act 2: Verso has begun.
Complete Esquie’s Nest and unlock Esquie’s travel assistance
Enter Esquie’s Nest after completing the Gestral Village progression and receiving access to the area. Follow the main cavern route past the guard and continue until you reach the large chamber with water below the walkway. Search the right side of this chamber before advancing. The blue mushroom for Karatom is on the lower level beside a group of glowing mushrooms. Pick it up now if you want the related Gustave outfit quest; it is easy to overlook if you only follow the central path.
Continue through the nest, using the handholds and grapple points to reach the cave where François is located. Activate the François Cave Expedition Flag before approaching the encounter so you have a nearby recovery point. Defeat François and collect the reward, then return to Esquie. The rock you recover is not the final solution to Esquie’s problem: François reveals that Florrie is still in Stone Wave Cliffs. After the scene, Esquie agrees to help the expedition reach the next area and knocks down a pillar that creates the exit route.
Cross the fallen pillar, use the grapple point and inspect the abandoned camp on the route for the Expedition 66 journal if you are collecting records. Energising Start III is also found along this return path. Leave the nest and visit Camp when prompted. Speak with the party and allow the required scenes to finish before continuing toward the Continent. Esquie’s new travel assistance is the progression reward here; the later Stone Wave Cliffs sequence is where Florrie is actually recovered.
- François defeated.
- Blue mushroom collected if pursuing Karatom’s quest.
- Esquie’s Nest route completed and Esquie’s travel assistance unlocked.
- Camp scenes completed before moving to Stone Wave Cliffs.
Complete Karatom’s optional Act 1 quest
Return to Gestral Village and speak with Karatom after collecting the blue mushroom. He uses it to improve the Sakapatate he is building, then asks Gustave to test the result. This encounter is optional for the campaign, but it should be completed before the Act 1 finale if you want its outfit reward.
The Ultimate Sakapatate uses patterns similar to the earlier Sakapatate encounter. Fight it as Gustave, build Overcharge through his normal actions and use the skill when the boss is vulnerable or close to a Break. Keep parry and dodge timing conservative rather than spending every turn on damage. The reward includes upgrade materials and a Recoat, followed by Gustave’s Pure outfit when Karatom finishes the quest.
If you are not collecting outfits, you can skip this fight without affecting Esquie, Stone Wave Cliffs or Act 2. If you do want the reward, do not postpone the quest until after the Lampmaster route. Treat the next visit to Basalt Waves as your final practical reminder to return to Gestral Village and resolve it.
- Karatom received the blue mushroom.
- Ultimate Sakapatate defeated as Gustave, if pursuing the quest.
- Pure outfit obtained, if required for your collection.
- Optional rewards collected or deliberately deferred.
Route through Stone Wave Cliffs and prepare the optional cleanup
Enter Stone Wave Cliffs and activate the first Expedition Flag. The early route climbs around the large crystal-filled Nevron and crosses several grapple points. Search the upper ledges for the early journal and Paint Cage if you are collecting records and weapons, then return to the main path. Activate the Paintress Shrine Flag when you reach it; nearby side paths contain Tint capacity upgrades and optional Chroma.
Continue toward Old Farm. Activate its flag and visit Jerijeri if you need Sciel’s weapon, Colours of Lumina, upgrade materials or a Recoat. The farm also contains a Paint Cage whose reward is Duenum for Maelle. These rewards are optional, but this is a good place to check the active party’s equipment before the deeper route.
From Old Farm, enter Tide Caverns. Use Free Aim on the glowing Rock Crystal deposits and collect all three if you want to restore the friendly Hexga. The path continues downward past the Gold Chevalière and into the Manor. Search the wardrobe in the Manor bedroom for Maelle’s Skirt outfit, then leave through the front door to return to the caverns.
Back in Tide Caverns, follow the lantern-marked route toward Basalt Waves. Return to the friendly Hexga and place the three Rock Crystals in its back to receive Auto Shell. This is an optional defensive reward, not a requirement for Lampmaster. Before the boss, use the grapple route near Basalt Waves to enter Flooded Buildings. Activate its flag, open the building shortcuts and collect its optional Tint, Pictos and Lune weapon rewards. Then return to Basalt Waves.
- Stone Wave Cliffs entrance and major flags activated.
- Old Farm visited and its optional Paint Cage completed or marked for cleanup.
- Three Rock Crystals collected if pursuing Auto Shell.
- Manor searched for Maelle’s outfit.
- Flooded Buildings explored or deliberately deferred.
- Active weapons, Pictos and Tint capacity reviewed before Lampmaster.
Defeat Lampmaster at Basalt Waves
Rest at the Basalt Waves Expedition Flag and use Camp to upgrade the weapons of the characters you expect to field. Equip reliable healing and defensive Pictos, and make sure the party is not entering with depleted Tint resources. This is also the last convenient point to complete Karatom’s mushroom quest before the Act 1 closing sequence.
Follow the grass-covered tunnel until Lampmaster blocks the route. Four lanterns surround the boss. Use Free Aim to shoot and disable them rather than allowing them to remain active. The first phase includes a single-target jump attack, a Dark attack and an energy wave affecting the party. Use the attack telegraphs to practise the parry or dodge timing you will need for the second phase.
After the first health bar is removed, the fight resumes. When Lampmaster begins Sword of Light, watch the lanterns as they illuminate and shoot them in that same order. Matching the order cancels the ritual and prevents its heavy party-wide damage. Lampmaster also uses four-hit sequences and a light wave that must be jumped. After successful defenses or a cancelled ritual, use your strongest damage skills, but preserve enough resources to recover from a missed input.
Lampmaster drops At Death’s Door, Shape of Life and upgrade materials. Collect the rewards before proceeding. Do not assume the boss ends Act 1 immediately; the story sequence after the battle is still required.
- All four surrounding lanterns disabled with Free Aim.
- Sword of Light cancelled by matching the illumination order.
- Lampmaster defeated.
- Boss rewards collected.
Finish the White-Haired Man sequence and confirm Act 2
After Lampmaster, the expedition recovers Florrie, allowing Esquie to cross the sea. The story then moves directly into the White-Haired Man encounter. This is not a conventional victory condition. Attack if you wish to follow the battle flow, but do not spend rare resources trying to defeat him; the sequence advances after its scripted turns and scenes.
Continue through the intervening scenes until the Stranger appears and the chapter closes. Once control returns, let the game complete its autosave. For recovery, rely on the latest Expedition Flag and the available autosave entry rather than expecting a manual save slot or a named manual save.
Confirm that the world map and objective now identify Act 2: Verso. At this point Act 1’s required progression is complete. If you postponed Yellow Harvest, the Hexga reward, outfit searches or other optional flags, keep them on your cleanup list and return when the route permits. Do not treat those optional rewards as prerequisites for the next act.
- Florrie recovered in the post-Lampmaster scenes.
- White-Haired Man sequence allowed to complete.
- Autosave completed after the chapter transition.
- Act 2: Verso confirmed on the map or objective display.
- Optional Act 1 cleanup recorded for later.
Before you move on
- Esquie’s Nest and François are complete.
- Esquie’s travel assistance is unlocked.
- Karatom’s mushroom quest is complete if Gustave’s Pure outfit is required.
- Stone Wave Cliffs has been traversed through Basalt Waves.
- Lampmaster is defeated and its rewards are collected.
- Florrie is recovered during the post-boss scenes.
- The White-Haired Man sequence has finished.
- The autosave has completed and Act 2: Verso is active.
References for this chapter
Companions — Recruitment, Roles and Bond Progression
Recruit the six playable battle characters in story order: Gustave, Lune, Maelle, Sciel, Verso and Monoco. Gustave is available from the opening, Lune joins after the expedition is scattered, Maelle joins during the Manor sequence in Flying Waters, Sciel becomes playable after the required Gestral Village arena progression, Verso joins at the beginning of Act 2, and Monoco joins during the Monoco’s Station storyline. Each character has a distinct combat system, so change the active trio according to the enemy and your preferred setup rather than assigning permanent tank, healer or damage classes. Camp relationships begin after Verso is present and Forgotten Battlefield has been cleared. Esquie is a relationship target but not a playable battle character, while Gustave has no Camp relationship route. Check Camp after major story dungeons, spend time with every available companion, and keep Monoco in the active party when you want to learn his enemy-based skills.
Recruit Gustave and learn the opening combat systems
Gustave is the starting playable character during the Lumière prologue and opening expedition. Use the early encounters to practice selecting turn actions, aiming attacks, and responding to enemy attacks with dodges or parries. The game combines turn-based commands with real-time defensive inputs, so do not treat the battle menu as the entire combat system.
Gustave’s defining mechanic is Overcharge. His attacks build the Overcharge gauge, and the related ability can be used before the gauge is full or saved for a stronger fully charged version. Build the gauge during ordinary fights, but do not delay healing or defense merely to force a maximum charge. Gustave is removed from the active campaign roster during the early story, so keep his equipment practical and avoid spending every rare upgrade material on him.
- Use Gustave’s early battles to practice attack timing, dodging and parrying.
- Test Overcharge at both partial and full charge levels.
- Do not build the entire campaign around Gustave, because he is not a permanent member of the later roster.
Recruit Lune after the expedition is scattered
After the opening disaster on the mainland, follow the immediate story route through the first region until Lune reunites with the surviving expeditioners. Lune is a required story recruit; she is not an optional reward hidden in Spring Meadows. Once she joins, visit the party and skill screens before continuing toward the next major encounter.
Lune uses Stains. Her skills generate elemental Stains, while other skills consume or exploit the available palette for stronger effects. Light Stains can support several combinations, but do not spend every turn trying to complete a planned sequence if the party needs healing or defense. Equip at least one dependable Stain generator and one skill that converts the palette into damage, recovery or utility.
Lune is a useful early partner for both direct attackers and setup-based characters. Keep her capable of recovery while learning her elemental interactions, because a simple heal or defensive action is often more valuable than preserving an unfinished Stain combination.
- Confirm that Lune is in the roster after the mainland regrouping sequence.
- Equip a Stain-generating skill and a Stain-consuming or Stain-enhanced skill.
- Keep at least one recovery option available while learning her system.
Find Maelle during the Manor sequence in Flying Waters
Continue through Flying Waters and follow the main objective into the Manor. Maelle joins after her introduction sequence is completed; entering the region alone does not recruit her. Finish the Manor events before treating Flying Waters as cleared or reorganising the party around her.
Maelle uses Stances. Her skills can move her between Stanceless, Offensive, Defensive and Virtuose states, and the current Stance changes how she handles damage and defense. Offensive Stance increases pressure but also makes mistakes more costly. Defensive Stance is safer while learning enemy patterns, while Virtuose is a powerful offensive state that should be reached with a plan rather than forced during every opening.
A dependable early trio can combine Lune’s recovery and elemental setup with Maelle’s close-range damage. Keep a defensive or healing option equipped until parry and dodge timings become familiar. Maelle’s stance bonuses do not replace reading enemy telegraphs.
- Complete the Manor introduction before leaving Flying Waters.
- Practice switching Maelle’s Stances in ordinary encounters.
- Keep one defensive or recovery option available for difficult fights.
Recruit Sciel through the Gestral Village arena progression
Advance the required Gestral Village events and complete the arena progression. Sciel becomes playable after the required sequence culminates in her arena encounter; optional Gestral activities are not the recruitment requirement. If she has not joined, continue the village objective chain instead of searching earlier zones for a separate recruitment item.
Sciel builds Foretell on enemies and consumes it to improve the effect of her attacks. She also uses Sun and Moon Charges, and alternating those systems can lead into Twilight. Against a durable target, establish Foretell first, build the appropriate charge state, then spend the mark when the target is vulnerable or ready for a burst turn. Against weak enemies, use simpler attacks rather than spending several turns on setup.
Sciel can provide damage, setup and support. Her Intervention skill can pass the turn to another character, which is useful when a teammate has a high-impact action ready. Add her to the active trio for bosses and other fights where delayed burst is more valuable than immediate damage.
- Complete the required Gestral Village arena progression.
- Confirm that Sciel appears in the playable roster afterward.
- Practice applying and consuming Foretell without overbuilding against weak enemies.
Recruit Verso at the beginning of Act 2
Verso joins when Act 2 begins and the story shifts to the surviving expedition’s next phase. When control changes to Verso, revisit the Camp and party management options before entering the next story dungeon. Verso cannot use Gustave’s Overcharge system, so inspect his skills and redistribute points or equipment rather than assuming Gustave’s setup transfers unchanged.
Verso uses Perfection ranks, progressing from D toward S as he deals damage and performs successful defensive actions. Taking damage reduces the rank. Build Perfection through safe attacks, dodges and parries, then spend a high rank on a stronger ability. If defensive timing is still inconsistent, use survival-focused Pictos and accept a lower rank instead of risking the party to preserve S rank.
Verso’s arrival also changes Camp progression. Speak with the companions regularly, but remember that not every relationship interaction is available immediately.
- Confirm Verso is available at the start of Act 2.
- Rebuild his skills and equipment instead of treating him as a replacement Gustave.
- Practice raising Perfection without sacrificing survival.
Recruit Monoco during the Monoco’s Station progression
Continue the Act 2 route through Forgotten Battlefield and into the Monoco’s Station storyline. Monoco joins during this progression rather than during the earlier Gestral Village events. Once recruited, place him in the active trio and inspect his Bestial Wheel before entering new areas.
Monoco’s Bestial Wheel changes as he uses skills, and matching a skill to the wheel’s current colour can improve its result. His long-term progression differs from the other playable characters: he learns additional skills from enemy types defeated while he is in the active party. Monoco does not need to deliver the final hit, but he must be present when the relevant enemy is defeated.
For broad skill coverage, add Monoco when exploring a new enemy group, especially before clearing an unfamiliar dungeon or optional area. If a desired skill is missed, return to an area containing that enemy and defeat it again with Monoco active. Do not assume his entire moveset will unlock automatically through level-ups.
- Recruit Monoco during the Monoco’s Station progression.
- Use the Bestial Wheel when selecting his skills.
- Keep Monoco active while defeating new enemy types if you want their associated skills.
Begin Camp relationships after Forgotten Battlefield
Camp relationship progression becomes available after Verso has joined and Forgotten Battlefield has been cleared. At first, Esquie may be the only companion available for a relationship interaction. As the story advances, additional companions become available. Speak to everyone at Camp after each major story dungeon rather than repeatedly resting at the same point and expecting every route to appear immediately.
The relationship targets are Lune, Maelle, Sciel, Monoco and Esquie. Gustave does not have a Camp relationship route. Esquie is not a playable battle character, but his relationship is still part of the companion completion checklist. When a companion offers a spend-time interaction, accept it to raise the relationship level, then complete any later combat objective, companion quest or story requirement attached to that route.
Relationship rewards can include scenes, outfits, Gradient Attacks and companion quests. A first conversation does not automatically grant a universal passive, and relationship ranks are not the general key to every Act 3 optional zone. Save at the Camp Expedition Flag before important conversations if you want a safe restore point for trophy tracking or dialogue choices.
- Clear Forgotten Battlefield before expecting the full relationship system to open.
- Check Camp after every major story dungeon.
- Track Lune, Maelle, Sciel, Monoco and Esquie separately.
- Exclude Gustave from the Camp relationship list.
- Complete later companion quests and combat requirements when they become available.
Use the roster as a flexible three-person team
Only three characters fight at once, but all six playable characters can be recruited and switched outside battle. The game does not require permanent tank, healer, ranged and damage assignments. Instead, build each trio around the encounter: one character should provide reliable damage or setup, another should cover recovery or defense, and the third should convert the setup into pressure or burst.
Lune is a convenient early recovery and elemental option. Maelle supplies close-range pressure through Stances, Sciel prepares targets with Foretell, Verso rewards accurate defense through Perfection, and Monoco adapts through enemy-derived skills. Rotate Pictos and weapons between characters when a boss demands more survivability, AP, Break power or elemental damage.
Keep reserve characters equipped well enough to substitute into the party. This matters especially for Monoco, because leaving him at Camp prevents him from learning skills from enemies defeated without him. Companion relationships are valuable for their scenes and rewards, but do not treat a first bond event as a required passive for opening Act 3 locations.
- Maintain a damage plan and a recovery or defense plan in the active trio.
- Keep reserve characters equipped enough to substitute.
- Rotate Pictos according to the encounter rather than locking them permanently to one character.
- Use Monoco actively when pursuing his full skill collection.
Before you move on
- The roster contains Gustave, Lune, Maelle, Sciel, Verso and Monoco.
- You can identify and use Overcharge, Stains, Stances, Foretell and Charges, Perfection and the Bestial Wheel.
- Forgotten Battlefield has been cleared and Camp relationship progression is available.
- You have checked Camp after the latest major story dungeon and completed every currently available interaction.
- Lune, Maelle, Sciel, Monoco and Esquie are tracked for relationship progression, while Gustave is correctly excluded.
- Monoco has been active when defeating relevant new enemy types if you are pursuing his full skill collection.
- Your active trio has a damage plan, a recovery or defense plan and enough equipment on reserve characters to change the party when needed.
References for this chapter
- Clair Obscur: Expedition 33 - PS5 Games
- Clair Obscur: Expedition 33 — Official Characters
- Clair Obscur: Expedition 33 — Walkthrough & Guide, Companions
- Act 2: Verso - Clair Obscur: Expedition 33 Walkthrough & Guide - GameFAQs
- Relationship Guide — All Ranks and Rewards
- Monoco, Skills List — Clair Obscur: Expedition 33 Walkthrough & Guide
- Clair Obscur: Expedition 33 All Monoco Skill Locations
- To the Forgotten Battlefield — Clair Obscur: Expedition 33 Walkthrough
Combat Deep Dive — Turn-Based Core, Parry/Dodge, QTEs and Pictos
Clair Obscur: Expedition 33 uses command-based turns for planning, then real-time inputs for attacks, skills and enemy defenses. On PS5, Circle dodges and R1 parries; some attacks also require a jump. Dodge has the more forgiving timing, while parry is stricter but can lead to a powerful counterattack when you correctly handle an enemy's full sequence. Build fights around the turn order, Action Points, Break, Free Aim, elemental effects and character-specific mechanics rather than repeated basic attacks. Pictos are equipped bonuses that become permanent Lumina options after four victories while equipped. Learn ordinary attacks safely, use Expedition Flags to restore supplies and respawn enemies, and change the loadout when a boss exposes a different weakness or demands stronger defense.
1. Read the turn order and plan Action Points before confirming a command
At the start of each round, inspect the turn order on the left side of the battle screen. It shows which allies and enemies are likely to act next, so use it to decide whether the current character should attack, apply a status, heal, build a resource or prepare for an incoming threat. You can take time while selecting commands; the real-time pressure begins after you confirm an action or when an enemy attacks. This pause is the foundation of the combat system, so do not rush through the command menu.
Track Action Points before choosing an expensive Skill. Basic attacks are useful for conserving resources, but they are deliberately weaker than Skills and special abilities. If a character has spare AP, Free Aim can add damage or hit a weak point without ending that character's turn, although each shot costs 1 AP. Use that option before a finishing Skill when the target is exposed, or when a flying enemy is easier to hit with ranged fire than with a normal attack. If an enemy will act before your healer, prioritize survival or disruption instead of spreading low damage across several targets.
- Check the next enemy and ally turns before confirming an action.
- Reserve enough AP for the Skill or Free Aim shot that the situation requires.
- Use basic attacks mainly when conserving AP or setting up a safer later turn.
2. Learn dodge, parry and jump as different defensive answers
On the standard PS5 layout, press Circle to dodge and R1 to parry during the active timing window. Dodging has the larger timing window and completely avoids the incoming damage when successful. Parrying is stricter, but a successful parry avoids damage and can lead to a powerful counterattack. Some attacks require a jump instead of a dodge or parry, so watch the attack animation and the on-screen instruction rather than committing to one defensive input for every enemy.
Begin with dodge against an unfamiliar attack. Once you recognize the wind-up, practice parrying that same move in ordinary encounters. Watch the enemy's body and weapon, not the damage result or your character's movement. Multi-hit strings need continued attention: do not relax after the first successful response, because the enemy may still have additional hits in the same sequence. A complete parry sequence is more valuable than an isolated early parry, so use dodge when the pattern is not yet familiar.
If timing remains difficult, switch temporarily to Story difficulty. The game allows difficulty changes during the campaign, and Story provides more generous dodge and parry windows. You can also enable the option that automates certain timed combat inputs while learning. These settings are practical training aids, not a replacement for understanding the attack patterns.
- Use Circle first against attacks whose timing you do not recognize.
- Practice R1 parry after learning the attack's complete rhythm.
- Jump when the attack's prompt or animation indicates that dodging and parrying are not the correct response.
- Continue watching through every hit in a multi-hit sequence.
3. Build Break and spend the opening deliberately
Break is a combat state that you build through attacks and Skills with Break potential. Watch the enemy's Break gauge and favor the abilities that advance it when the gauge is nearly full. Do not spend every resource on immediate HP damage if a Break is one successful sequence away. The best turn is often the one that sets up the next character or preserves enough AP to capitalize after the target becomes vulnerable.
When Break occurs, switch immediately to your highest-value damage sequence. Use the character's strongest reliable Skill, timed attack inputs and available buffs while the enemy cannot respond normally. Combine Break with an elemental interaction or an exposed weak point when possible, but do not abandon a nearly defeated target merely to chase a theoretical setup. The goal is a safe burst, not a complicated rotation that leaves the party exposed.
Use Free Aim whenever the enemy presents a weak point or a separate object that is strengthening the encounter. The early Flying Waters material specifically demonstrates disabling Goblu's flowers, which weakens the boss and changes the fight. Against other enemies, Free Aim can hit exposed weak points or finish targets without consuming the character's whole turn.
- Watch the Break gauge and prepare the next attacker when it is nearly full.
- Spend major Skills during Break or against a clearly exposed weakness.
- Use Free Aim on weak points and dangerous support objects before returning to normal attacks.
4. Use Pictos and Lumina as a rotating progression system
Pictos are equipped accessories that grant a bonus and can improve a character's stats or combat behavior. Review new Pictos after exploration and equip them on the character who benefits most from the effect. Defensive bonuses are useful while learning parry patterns; damage, AP, Break or status effects become more valuable once the party can survive ordinary enemy turns consistently. Do not give every character the same bonus simply because it has the highest displayed number.
A Pictos becomes mastered after four victories while it is equipped. Once mastered, its associated effect can be equipped as Lumina by characters who have enough Lumina capacity, allowing you to remove the original Pictos and continue using the passive. Keep cycling in useful unmastered Pictos during normal battles, then convert the effects you want into Lumina. Because Lumina costs vary, prioritize effects that support your actual plan instead of filling capacity with minor bonuses.
Pictos are not a generic crafting or shopping tier that you should farm before every area. Treat them as exploration and battle rewards, then compare their effects with your current Skills, weapon and character mechanic. If a boss punishes failed defenses, use defensive or recovery effects; if you can avoid its attacks reliably, shift capacity toward Break, AP or damage. Recheck the setup after mastering several new Pictos rather than leaving the opening-game loadout untouched.
- Equip new Pictos instead of storing every untested effect.
- Win four battles with a useful Pictos equipped to master it.
- Spend Lumina capacity on effects that match the character's role and the current encounter.
- Rebuild the loadout after a major area, boss or change in party composition.
5. Convert defense into a repeatable boss rotation
Use this sequence for difficult encounters: read the turn order, identify the next threat, defend with dodge, parry or jump, build Break with the appropriate Skill, then spend the Break window on reliable high-damage actions. Keep character mechanics in the plan. Gustave can charge his mechanical arm toward Overcharge, while Lune uses Stains to create elemental interactions; other characters have their own resource or stance systems that reward deliberate sequencing.
Do not spend every resource in the opening turns unless the boss is already close to Break or defeat. Preserve healing, AP and defensive options for later phases, especially if the enemy changes its attack pattern. If a character falls, stabilize the party before continuing a damage rotation that depended on that character. After a defeat, change one variable at a time: defensive input, target priority, Pictos, Lumina, Skill order or party slot. That makes it clear which adjustment solved the problem.
If you need recovery, return to an Expedition Flag or campsite. These restore healing and respawn items, and resting can repopulate encounters for safe practice and experience. Difficult optional enemies can also be postponed; dying generally returns you nearby rather than destroying campaign progress. Treat a failed attempt as pattern information, then return with a revised loadout instead of repeatedly using the same sequence.
- Defend first, build Break second, and burst only when the opening is real.
- Keep healing and AP for later boss phases.
- Use Expedition Flags or campsites to restore supplies and practice attack patterns.
- After a defeat, change one major part of the plan and test it again.
Before you move on
- You can read the turn order and choose whether to attack, defend, heal, build a resource or save AP.
- You can reliably dodge common attacks, recognize attacks that require a jump, and occasionally parry familiar sequences without button-mashing.
- You can build Break, exploit the Break opening with high-value Skills and use Free Aim against exposed weak points or support objects.
- You have mastered at least one useful Pictos by winning four battles with it equipped and have assigned its effect as Lumina where capacity allows.
- Each active character has a deliberate Pictos and Lumina setup, and you have tested a defensive alternative after a failed boss attempt.
- You know how to recover at an Expedition Flag or campsite and can return to a difficult encounter with restored supplies.
References for this chapter
- Clair Obscur: Expedition 33 - PS5 games
- New Clair Obscur: Expedition 33 gameplay – fighting and exploring the Flying Waters region
- Clair Obscur: Expedition 33 devs discuss classic turn-based RPG inspiration and real-time mechanics
- 8 Tips to Help You Get Started in Clair Obscur: Expedition 33
- Clair Obscur: Expedition 33 - A Detailed Breakdown of its Painterly RPG Combat
Overworld Navigation, Collectibles and Expedition Flags
Activate Expedition Flags as you find them. They create Rest Points for healing, party management, skill and attribute changes, item restocking and local fast travel. They do not provide a global Continent travel network and they are not planted manually or required for either ending. Sweep each named area from its Rest Point, recording Journals, Music Records, Lost Gestrals, Monoco Skills, Nevron quests, Gestral Games and relationship events in separate lists. Esquie unlocks traversal abilities throughout the story, so mark deep water, coral, flight gaps and underwater routes rather than repeatedly searching for a path that is not available yet. For the original PS5 release, secure the Prologue Old Key, the Act 2 Lettre à Maelle camp scene and Maelle’s final Truth response if you want a complete trophy-oriented run. Ordinary collectibles and side content can be cleaned up after the finale, but those warnings should be handled during their original windows.
Activate Expedition Flags and use the resulting Rest Points
Interact with the first Expedition Flag you encounter in every named location. Activation creates a Rest Point that can restore the party, refill appropriate resources, change the active party, manage skills and attributes, and provide access to other unlocked Rest Points in that location. Resting also refreshes ordinary enemies, so use the point deliberately before a difficult branch or boss approach.
Expedition Flags are already placed in the world. Do not describe them as objects to plant, and do not treat them as a collectible quota. Activate additional flags near major forks, long traversal sections and boss routes. If a fight goes badly, return to the latest Rest Point, change equipment or party roles, and try the route again. The game uses autosaves rather than a normal manual-save command, so resting at a Rest Point is also a dependable way to establish a recent recovery point.
- Interact with each flag instead of merely walking past it.
- Use a Rest Point before an elite, boss or long platforming route.
- Expect ordinary enemies to return after resting.
- Use Rest Points as recovery and local travel points, not as an ending requirement.
Plan Continent travel around Esquie’s abilities
Fast travel through Expedition Flags is local to the named location. It is not a replacement for crossing the Continent, and a flag in Spring Meadows cannot directly transport you to Flying Waters or Ancient Sanctuary. Return to the Continent from the area’s Rest Point, then travel normally or use Esquie to cross long distances and bypass terrain that walking cannot reach.
Esquie’s movement abilities arrive at different story and relationship milestones. Rough terrain traversal is available when Esquie joins. Water traversal follows Stone Wave Cliffs, coral traversal follows the Old Lumière progression, flight begins in Act 3, and underwater diving requires the appropriate Esquie relationship progress. When you meet a blocked route, record its landmark and the type of obstruction: deep water, coral, a flight gap or an underwater entrance. Revisit it after the relevant ability is unlocked instead of wasting time searching for a ground route.
- Separate local Rest Point travel from Continent travel.
- Mark blocked landmarks by obstacle type.
- Use Esquie for long crossings and precise on-foot movement near entrances.
- Return during Act 3 or after the required relationship milestone to clear traversal-gated areas.
Sweep every named area before taking its exit
After activating a flag, advance far enough to identify the next objective, boss route or exit. Then return to each unexplored fork and inspect side platforms, upper paths, lifts, ropes, dead ends and optional encounters. This route is safer than following the objective continuously because many Journals, Records, chests, Lost Gestrals and Nevron interactions sit away from the critical path.
Keep a separate note for each location. Record the area name, nearest Rest Point, collectible or quest name, and whether the item came from exploration, a chest, a fight, an NPC, a puzzle or a side route. If a route is blocked, mark it as postponed rather than assuming the item was missed. Pictos, weapons, materials and outfits are useful rewards, but they are not universal requirements for the campaign’s ending.
- Search both sides of every fork before leaving.
- Inspect upper routes, side platforms, lifts and ropes.
- Write down blocked routes and the ability they appear to require.
- Separate story progress from optional rewards.
Track collectible and quest categories independently
For a trophy-focused original-release run, track 49 Journals, 33 Music Records, 9 Lost Gestrals, 44 Monoco Skills, 5 Gestral Games, 10 Nevron quests and 35 relationship interactions as separate lists. The game does not provide a complete per-area collectible counter, so a combined note can hide which category is incomplete.
Journals appear as blue prism-like pickups. Music Records come from pickups, fights, story events and character interactions; check the gramophone at Camp after major milestones. Lost Gestrals are found around the Continent and in optional locations, then reported to Sastro at Camp. Monoco Skills are learned by defeating the relevant enemy while Monoco is in the active party, so review his skill list after unusual, named or boss encounters. Relationship interactions are handled at Camp and become available through story progress; return after major areas and Axon victories before advancing.
- Maintain seven separate tracking lists.
- Check the gramophone after important story and Camp events.
- Report recovered Lost Gestrals to Sastro.
- Review Monoco’s Skills after distinctive enemy encounters.
- Return to Camp whenever new relationship conversations may have opened.
Handle the original-release missable warnings
During the Prologue festival, use the Festival Token to obtain the Old Key from the rear-left stall before leaving the second Prologue section. In the original PS5 release, this key opens a later Old Lumière Journal route and should be treated as permanently missable for that edition. If you also want the encounter trophy, defeat the optional Prologue Mime before proceeding to the harbour; that specific Mime is the encounter that counts.
After defeating the first Axon in Act 2, return to Camp and check the optional conversations before completing the Act 2 finale. Continue checking the available interactions until the Verso and Maelle piano scene occurs, awarding Lettre à Maelle. Do not assume that ordinary Camp dialogue and this event are interchangeable. In Act 3, complete Maelle’s relationship progression and choose Truth, not Lie, in the level six-to-seven conversation. Truth raises the relationship and unlocks the associated final relationship reward; Lie prevents completion on that run unless an earlier autosave can be loaded.
- Trade the Prologue Festival Token for the Old Key.
- Defeat the specific Prologue Mime before going to the harbour if pursuing its trophy.
- Visit Camp after the first Axon and complete the Verso and Maelle piano event.
- Complete Maelle’s final relationship conversation with Truth.
- Use the game’s available autosaves rather than relying on a manual-save slot.
Complete Act 3 and post-game exploration
When Act 3 opens the Continent and Esquie gains flight, revisit the postponed list in grouped routes. Activate overlooked flags, inspect newly reachable islands and raised platforms, finish Nevron requests, collect Lost Gestrals, learn remaining Monoco Skills and resolve available Camp interactions. Leave high-difficulty optional areas until your equipment and defensive options are ready; they are not required to finish the main story.
After completing the final confrontation, load the continuing post-finale state to return near the final approach. Use that state for ordinary cleanup: missed Journals that were not tied to the original-release Old Key, Music Records still available elsewhere, Lost Gestrals, Nevron quests, optional bosses, Gestral Games and relationship conversations. The post-game state is not a substitute for the Prologue Old Key, the limited Act 2 piano scene or the Maelle Truth choice, so secure those during the campaign.
For an ending-focused run, retain the continuing autosave state before replaying the final choice. Expedition Flags, collectibles and optional rewards do not decide whether the Maelle or Verso route is available. Finish one ending, verify the post-finale state, then use the available late autosave or replay route to view the other ending without treating either as canon.
- Revisit blocked landmarks after Esquie gains the required abilities.
- Activate overlooked flags during the Act 3 sweep.
- Complete ordinary collectible, quest and optional-boss cleanup after the finale.
- Verify all seven tracking categories independently.
- Keep the post-finale autosave state before replaying the ending choice.
Before you move on
- Every named area visited during the campaign has at least one activated Expedition Flag, with extra flags activated near important forks and boss routes.
- The Continent has been revisited after Esquie receives the traversal abilities needed for previously blocked landmarks.
- The tracking lists separately account for 49 Journals, 33 Music Records, 9 Lost Gestrals, 44 Monoco Skills, 5 Gestral Games, 10 Nevron quests and 35 relationship interactions.
- The Prologue Old Key was obtained, and the Prologue Mime was defeated if its encounter trophy is being pursued.
- The Act 2 Verso and Maelle piano scene was completed after the first Axon and before the Act 2 finale.
- Maelle’s final relationship conversation was completed with Truth.
- The final confrontation was completed and the continuing post-finale autosave state was used for ordinary cleanup.
- Remaining exploration items are identified by category, without confusing trophy completion or Expedition Flag activation with the requirements for either ending.
References for this chapter
- Clair Obscur: Expedition 33 Trophy Guide & Roadmap
- Clair Obscur: Expedition 33 Complete Guide and Collectible Counts
- All Expedition Flags | Clair Obscur: Expedition 33
- Expedition 33: How to Save Your Game
- Clair Obscur: Expedition 33 Prologue Collectible Locations
- Clair Obscur: Expedition 33: The Continent Walkthrough
Act 2 — The Forgotten Battlefield and Monoco’s Station
Act 2 begins after Gustave’s death and places Verso in command of the expedition. Rest at camp to trigger the next-morning scene, which unlocks Esquie’s swimming ability, then travel north to the Forgotten Battlefield. Activate Expedition Flags as you advance, practise Gradient Counter against the early enemies and follow the ruined defensive route to the Ancient Bridge. Dualliste is the required boss and is weak to Light while resisting Fire and Dark. The fight gains a second sword and longer attack strings after its first health bar, and Inverted can make healing harmful, so prepare recovery before the later phase. After Gustave’s burial, return to camp, use the Curator and rest again. Travel through the Ice Corridor to Monoco’s Station, defeat Monoco, then defeat the Stalact outside the station. Monoco joins afterward and introduces Gradient Attacks and the Bestial Wheel. Station quests, poetry quizzes, camp interactions, overworld exploration and Monoco skill hunting are optional. This chapter has no permanent Act 3 or ending decision.
1. Rest at camp and unlock Esquie’s swimming route
After the Act 2 opening scenes, the expedition returns to camp with Verso. Follow the available camp dialogue, then use the campfire and choose Go to sleep. This triggers the next-morning sequence between Maelle and Verso and unlocks Esquie’s swimming ability. You will then appear on a small island on the world map, with the Forgotten Battlefield accessible to the north.
Speak with any available companions before resting if you want the current camp dialogue, but do not treat these scenes as required boss preparation. Visit the Curator to review weapons, Pictos and Luminas. When you are ready, mount Esquie and travel north across the water toward the Forgotten Battlefield. If you want a safer recovery point before entering the area, rest at the nearest Expedition Flag; this records a recent autosave without creating a manual save slot.
- Complete the Act 2 camp sequence.
- Unlock Esquie’s swimming ability.
- Reach the Forgotten Battlefield with a recent autosave or rested Expedition Flag available.
2. Enter the Forgotten Battlefield and practise Gradient Counter
Activate the first Forgotten Battlefield Expedition Flag immediately after entering. The opening encounter introduces Gradient Counter, a timing response used against attacks marked for that mechanic. Watch the enemy’s animation rather than pressing the input as soon as the prompt appears. If the timing is unfamiliar, use a normal dodge while studying the attack, then practise the counter on later battlefield enemies.
Follow the ruined defensive route and activate each Expedition Flag you pass. The battlefield contains branches with Colour of Lumina, Pictos, journals and upgrade materials. Explore them if you want the rewards, but return to the main route before spending too much healing or recovery capacity. The goal is to arrive at the Ancient Bridge prepared for Dualliste, not to clear every optional encounter on the first visit.
- Activate the available Forgotten Battlefield Expedition Flags.
- Successfully perform or deliberately practise a Gradient Counter.
- Keep enough healing and recovery capacity for Dualliste.
3. Defeat Dualliste at the Ancient Bridge
At the Ancient Bridge Expedition Flag, rest to create a current autosave and restore the party. Attempt to cross the bridge to begin the required Dualliste fight. Dualliste is weak to Light and resists Fire and Dark, so use Light attacks when available and avoid building the plan around Fire or Dark damage. Physical attacks remain usable if your Light options are limited.
The boss uses several sword strings and a party-wide burst attack. Some sequences include a jump-timed response, so do not assume every prompt should be answered with a normal parry. Dodge when the rhythm is unclear, especially if a missed parry would expose the whole party. After the first health bar is depleted, Dualliste restores its health, draws a second sword and uses longer combinations. Continue defending through the full string rather than attacking between hits.
During the later phase, Dualliste can inflict Inverted. Under this effect, healing can damage the affected character instead of restoring health. Avoid automatic healing and regeneration while Inverted, and use a Chroma Elixir if you need to remove the condition. Preserve enough health before this phase so that the party can survive while waiting for the status to end or be cleansed. Dualliste’s required rewards include Verso’s Dualiso weapon and upgrade materials.
After the fight, follow the newly opened route through the wreckage. Use the shimmer points to create the rope path across the destroyed bridge, then continue upward to the burial ground. The Gustave burial scene and the exit from the battlefield complete this part of Act 2.
- Use Light damage where practical.
- Survive Dualliste’s second health phase and longer attack strings.
- Prepare for Inverted before relying on healing or regeneration.
- Reach the burial ground and leave through the battlefield exit.
4. Return to camp before travelling to Monoco’s Station
The story sends the expedition back to camp after the battlefield sequence. Check for new companion dialogue, use the Curator to spend appropriate upgrade materials and rest at the campfire. Resting also gives you a reliable recent autosave point before the next major route.
After the following morning, the overworld opens additional optional travel. The areas around the Forgotten Battlefield, Stone Quarry and Boat Graveyard contain resources, records, weapons and optional enemies. Frost Évêque and Grosse Tête are not required for Monoco’s recruitment; leave them for later if they are consuming too many healing items or defeating the party. The only required destination is the route through the Ice Corridor to Monoco’s Station.
- Complete the second camp sequence if desired.
- Upgrade the party before entering the station.
- Do not mistake nearby optional bosses for required Act 2 progression.
5. Travel through the Ice Corridor and defeat Monoco
Follow the snowy route to the Ice Corridor and activate its Expedition Flag. Continue through the cavern until you reach Monoco’s Station, then activate the station flag before exploring further. This gives you a nearby recovery and autosave point for the station encounters.
Proceed through the station until Monoco challenges the expedition. He changes forms and imitates attacks associated with different Nevrons, so identify the form before committing to a defensive response. Watch the attack rhythm for each form and use dodge or parry according to the animation. The Chalier form includes a dangerous multi-hit sequence with pauses, so do not release your guard or stop timing after the first impact.
Defeat Monoco to advance the story. The battle is a required encounter and is separate from the later recruitment scene. Collect nearby station resources after the fight if desired, then follow the warning that a Stalact is approaching.
- Activate the Ice Corridor Expedition Flag.
- Activate the Monoco’s Station Expedition Flag.
- Defeat Monoco as an opponent.
6. Defeat Stalact and recruit Monoco
Leave the station area when the story directs you toward the approaching Stalact. The encounter introduces Gradient Attacks. These consume Gradient Charges, which are built by using abilities during combat. When a charge is available, open the Gradient Attack option from the combat menu and use one if the fight permits it.
Stalact begins with a sequence of ground-stomping shockwaves. The correct response uses jump timing rather than treating every wave as a standard parry. It also uses rushing headbutts and additional ground attacks. Watch the tell, answer the shockwaves with the appropriate jump response and use ordinary dodge or parry timing for the remaining attacks.
After Stalact falls, Monoco joins the expedition. Complete the Bestial Wheel tutorial so you understand how his masks rotate as he uses abilities. Monoco does not develop through the same conventional skill-tree process as the other characters. He learns attacks by participating in battles against specific Nevrons, so place him in the active party after recruitment if you want to develop his available forms and skills.
- Use at least one Gradient Attack if a Gradient Charge is available.
- Defeat Stalact and complete the recruitment scene.
- Finish the Bestial Wheel tutorial and confirm that Monoco is available in the party.
7. Record optional station activities and continue toward Old Lumière
After Monoco joins, revisit the station and check its NPCs. The Grandis shopkeeper can begin the Frozen Hearts Eternal Ice request. The Grandis Fashionist offers optional poetry quizzes whose rewards depend on the active character. Other station interactions can provide dialogue, records or cosmetic rewards. None of these activities is required to unlock the next main route.
Return to camp if you want to distribute Luminas, raise relationships or begin hunting Monoco skills from enemy types already encountered. When ready, leave through the route toward Old Lumière. This chapter does not contain a permanent Act 3 region decision or an ending selection. Keep that distinction in mind when choosing whether to complete the optional quests now or revisit them later.
- Record or accept the Frozen Hearts request if you intend to complete it.
- Attempt the optional poetry quizzes with the appropriate active character.
- Leave Monoco’s Station through the route toward Old Lumière.
Before you move on
- The Act 2 camp sequence has been completed and Esquie’s swimming ability is available.
- The Forgotten Battlefield has been entered, its Gradient Counter tutorial has been encountered and the latest autosave or a rested Expedition Flag recovery point is available.
- Dualliste has been defeated, including the second-sword phase, and the Gustave burial scene has played.
- The expedition has returned to camp, then reached the Ice Corridor and activated the Monoco’s Station Expedition Flag.
- Monoco has been defeated as an opponent, Stalact has been defeated and Monoco has joined the expedition.
- The Bestial Wheel and Gradient Attack tutorials have been completed, and the route toward Old Lumière is open.
- Optional station quests, quizzes, camp interactions and Monoco skill targets have been recorded separately if they were not completed immediately.
- No permanent Act 3 or ending choice has been made in this chapter.
References for this chapter
- Clair Obscur: Expedition 33 - PS5 Games
- ACT 2 Verso Forgotten Battlefield - Clair Obscur: Expedition 33 Walkthrough & Guide
- ACT 2 Verso Monoco Station - Clair Obscur: Expedition 33 Walkthrough & Guide
- Clair Obscur: Expedition 33 Act 2 - Forgotten Battlefield Walkthrough
- Clair Obscur: Expedition 33 Act 2 – Monoco’s Station Walkthrough
- How to Save Your Progress | Clair Obscur: Expedition 33 - Game8
- How to Beat Dualliste | Clair Obscur: Expedition 33
- Monoco’s Station - Clair Obscur: Expedition 33 Walkthrough
Act 2 — Old Lumière, Falling Leaves, Visages and Sirène: Puzzles & Stakes
Act 2 routes the expedition through Old Lumière and then into the two required Axon areas, Visages and Sirène. The Old Key from the Prologue opens a missable Old Lumière journal in the original release. After the main Old Lumière sequence, re-enter through the northern portal to collect the Renoir Music Record and Renoir journal in The Manor, then return to the final area for Expedition 42. Falling Leaves is optional. Visages offers Joy, Sadness and Anger Vale detours before its central route; defeating their mid-bosses weakens the area’s final encounter. Sirène uses elevators, platforms, ropes, grapples, Paint Nails and Paint Cages, with Tisseur as an optional boss. After both Axon routes are complete, return to Camp, handle available conversations, rest at the latest Expedition Flag and confirm the autosave before entering The Monolith.
1. Enter Old Lumière and collect the Old Key journal
Follow the Act 2 objective into Old Lumière. When control shifts to Maelle and Verso, continue until the path divides and a glowing sword marks the left-hand route. Take the right-hand route instead and drop into the large pipe. Turn around, use the Old Key on the gate, and collect the journal behind it. In the original release, the Old Key is obtained during the Prologue’s festival sequence; without it, this journal is missable on that campaign file.
Return to the main route and continue through the ruined streets. Use ladders, elevated walkways, ropes and grapples to stay on the forward path. Activate Expedition Flags whenever you reach them and rest before difficult encounters. Expedition 58 is not a physical pickup: Lune finds it during the Old Lumière story sequence, and it is added automatically when the party returns to Camp.
- Collect the journal behind the Old Key gate.
- Activate and rest at the Expedition Flags you pass.
- Confirm Expedition 58 appears after returning to Camp.
2. Re-enter Old Lumière for The Manor and the remaining collectibles
After completing the main Old Lumière sequence, leave through the northern exit. Enter Old Lumière again through the north portal and begin at the Rest Point. Look across from the Rest Point for a gap in the wall, cross the hedge and enter The Manor. In the bathroom, take the Renoir Music Record from the sink. Continue into the next room and collect the Renoir journal beside the bed.
Return to the final Old Lumière area. Face away from the exit portal and follow the route with the large slope. Climb to the top, descend the rope and continue toward the glowing sword. Expedition 42 is beside it. These collectibles are separate from the Old Key journal and the automatically awarded Expedition 58 entry.
- Re-enter Old Lumière through the northern portal.
- Collect the Renoir Music Record in The Manor.
- Collect the Renoir journal in the room beside the bathroom.
- Collect Expedition 42 near the glowing sword.
3. Clear Falling Leaves as optional exploration
Falling Leaves is optional and is not one of the two required Axon areas. Visit it before either Axon route or use it as a break between Visages and Sirène. Enter Resinveil Grove, activate its Expedition Flag and follow the wooded route through the platforms and clearings. Search around ponds, raised roots and side paths for its journal, Colours of Lumina and other rewards.
Chromatic enemies, Mimes and other side encounters are not required to unlock The Monolith. If they consume too many healing resources, mark their locations and return later. Falling Leaves does not provide a mandatory traversal ability for Sirène, so do not delay the main route while searching for a river-puzzle reward.
- Activate the Resinveil Grove Expedition Flag.
- Collect the Falling Leaves journal if pursuing a thorough journal run.
- Leave difficult optional enemies for a later return if necessary.
4. Explore Visages and weaken its final encounter
On the Act 2 overworld, Visages is the left-hand Axon destination and Sirène is on the right. Enter Visages and follow the gorge to its first Rest Point. From the hub, the central route leads toward the area’s required progression, while the side paths lead to Joy Vale, Sadness Vale and Anger Vale. Enter each side path through the corresponding giant mask, activate its Expedition Flag and follow the route to its mask encounter.
The side routes are optional, but their mid-bosses weaken the final Visages encounter and provide useful weapons, skills or other rewards. Sadness Vale also contains a journal on a raised side path near the mask route, so do not stay only on the direct route. After clearing the side areas you want, return to the hub and take the central path. Activate the later flag, restore your party and defeat the required final Visages encounter. Use Fire or Dark options when practical, and prioritize defensive timing against multi-enemy attacks.
- Enter Visages from the left-hand overworld route.
- Activate the first Rest Point and the side-area flags.
- Search Joy Vale, Sadness Vale and Anger Vale if you want their weakening effects and rewards.
- Collect the Sadness Vale journal if pursuing journal completion.
- Defeat the required final Visages encounter.
5. Follow Sirène’s traversal route and defeat the second Axon
Enter Sirène from the large yellow island and follow the opening sequence. Use the masked device to ride the elevator, then inspect the early side tunnel before returning to the main route. At the Dancing Classes section, continue upstairs to the open area with Ballets. Expedition 55 is on the right, and a Colour of Lumina is behind the large torch.
Take the detour down the rope, cross the grapple point and reach the Paint Cage. Find and destroy all three locks before opening the cage to obtain Shield Affinity. Sirène’s required traversal uses elevators, platforms, ropes, grapples and Gestral platforms. Paint Nails and Paint Cages mark rewards or shortcuts; inspect nearby walls and elevated ledges whenever the route appears to stop.
Continue through the underground and atelier sections, checking the lower and upper branches for Colours of Lumina and other upgrades. Tisseur is an optional boss. Fighting it can provide rewards, including Anti-Charm support, but skipping it does not block the required Sirène encounter. If you fight it, restore the party afterward before proceeding.
At the Dancing Arena, equip Anti-Charm support if available and enter the final encounter. Sirène uses Ballets, Glissandos and a Seduction gradient attack. Watch the screen and wait for the gradient timing before countering. When the dance becomes frantic, five elemental Ballets attack in sequence; prioritize parries and dodges rather than extending a risky damage turn. Defeat Sirène to complete the second required Axon route.
- Collect Expedition 55.
- Open the Paint Cage and collect Shield Affinity.
- Activate the later Sirène Expedition Flags.
- Decide whether to fight optional Tisseur.
- Defeat Sirène.
6. Return to Camp and prepare for The Monolith
After Visages and Sirène are complete, return to Camp when the story makes the transition available. Speak with companions who have new dialogue, inspect friendship prompts and check the camp interactions. These scenes may provide relationship progress, records or rewards, but defeating an Axon does not automatically guarantee a new joint attack.
At Camp or the latest available Expedition Flag, upgrade weapons, spend Colours of Lumina and adjust Pictos and Luminas for the Monolith. Then rest at the latest Expedition Flag and wait until the save-in-progress indicator confirms the autosave. The game has no conventional manual-save button; resting at an Expedition Flag is the reliable way to force a current recovery save. Use that autosave state before entering The Monolith.
- Defeat both required Axon encounters.
- Complete available Camp conversations and friendship prompts.
- Confirm the intended Old Lumière and side-area collectibles are recorded.
- Rest at the latest Expedition Flag.
- Wait for the save-in-progress indicator before entering The Monolith.
Before you move on
- The Old Key journal is collected if the Prologue Old Key was obtained.
- The Old Lumière story sequence is complete and Expedition 58 has been added automatically.
- The Renoir Music Record, Renoir journal and Expedition 42 are collected if pursuing thorough journal and record completion.
- Falling Leaves is cleared as far as intended, including its Expedition Flag and journal if desired.
- The required Visages encounter is defeated, with the three optional Vale routes handled according to the chosen cleanup plan.
- Expedition 55 and Shield Affinity are collected in Sirène.
- Sirène is defeated, with Tisseur handled according to the chosen cleanup plan.
- Available Camp conversations and friendship prompts have been checked.
- The latest Expedition Flag has been rested at and the save-in-progress indicator has appeared before entering The Monolith.
References for this chapter
- Clair Obscur: Expedition 33: Old Lumiere Walkthrough - Journals, Music Records
- Clair Obscur: Expedition 33 All Journal Locations
- Act 2: Verso - Clair Obscur: Expedition 33 Walkthrough & Guide - GameFAQs
- ACT 2 Verso Sirene - Clair Obscur: Expedition 33 Walkthrough & Guide
- Visages Walkthrough | Clair Obscur: Expedition 33
- Clair Obscur: Expedition 33 Sirene Walkthrough
- Expedition 33: How to Save Your Game
Act 2 Finale — The Monolith: Complete the Trial and Prepare for Act 3
After completing the Act 2 route through Visages and Sirène, return to camp and receive Maelle’s Barrier Breaker weapon. Sail to the northern barrier, break it, and enter The Monolith. The first Paintress encounter is scripted: your attacks cannot hurt her, so let the battle transition naturally. Inside, follow the recreated regions from the entrance through Tainted Meadows, Tainted Waters, Tainted Sanctuary, Tainted Cliffs, Tainted Battlefield, The Manor, Tainted Hearts and Tainted Lumière. Activate Expedition Flags as you reach them and rest at each one to recover and create an autosave. The route ends at Tower Peak, where Renoir is followed by the real Paintress battle at Monolith Peak. The Monolith contains no ending choice. The two ending routes are selected later in Act 3, after the final Renoir sequence. Use the game’s rotating autosaves and Expedition Flags rather than looking for conventional manual-save slots.
1. Complete the Act 2 prerequisites and prepare at camp
Finish the required Act 2 story through Visages and Sirène, including both Axon encounters. After the Sirène progression, Maelle receives Barrier Breaker. This is a weapon reward used to open the northern route; it is not a separate overworld skill that you equip from a traversal menu.
Return to camp before sailing to The Monolith. Spend available Attribute and Skill Points, upgrade weapons and Lumina, review Pictos, and choose a party with reliable healing, revival access and strong Break or Stagger tools. Monolith encounters are longer and more demanding than ordinary route battles, so avoid entering with unused upgrade resources or an untested party setup. If camp relationship activities are available, complete them before sleeping, then check that the relevant expeditioners have been updated.
The game does not provide a conventional manual-save system. Expedition Flags are the dependable progress points: activate each flag, rest there when appropriate, and wait for the save indicator before moving on. The game also creates rotating autosaves during progression. Create a fresh autosave at camp or at the last available Expedition Flag before sailing north, but do not describe this as a named manual slot.
- Visages and Sirène are complete.
- Both Act 2 Axons have been defeated.
- Maelle has received Barrier Breaker.
- Weapons, attributes, Lumina and Pictos have been reviewed.
- The latest autosave has been created before entering The Monolith.
2. Break the barrier and pass the scripted Paintress encounter
Travel to the northernmost barrier on the Continent and approach it with Maelle in the expedition. The story uses Barrier Breaker to open the route. Continue across the water, enter The Monolith and activate The Monolith Entrance Expedition Flag immediately.
Follow the slope toward the Paintress. The first battle is intentionally unwinnable: attacks are nullified and the boss cannot be damaged. Do not spend rare items or build a complicated attack sequence. Use a few ordinary turns, defend or skip as needed, and allow the story transition to end the encounter. The party is then transported inside the Monolith.
Activate the Inside the Monolith or Entrance Expedition Flag when control returns. Rest there to recover and establish the first reliable autosave point inside the dungeon. The black-and-white sections that follow are environmental and narrative transitions, not choices that branch the campaign.
- The northern barrier is broken with Barrier Breaker.
- The Monolith Entrance Flag is active.
- The opening Paintress fight has ended through its scripted transition.
- The interior entrance flag has been activated and used as a recovery point.
3. Clear the tainted regions and collect the route rewards
Follow the grapple points from the interior entrance to the waterfall. Defeat the three Lanceliers to receive Verso’s Lanceram weapon reward, then continue through the monochrome section and the picture frame that restores colour. At the first major split before Tainted Meadows, take the left route down the magic ropes. The first Paint Cage is at the bottom. Break its three locks around the rock and rope area to claim the Revive Tint Shard, then return to the main route and activate the Tainted Meadows Flag.
In Tainted Meadows, take the side path at the first split for the lower Colour of Lumina, then return toward the Évêque encounter. This version uses eight shields, so bring attacks that can remove shields efficiently. Continue through the Clair encounter and enter Tainted Waters. The optional Chromatic Bourgeon is not needed for story progress; attempt it only if the party has enough Break damage and recovery resources, because Consume can remove two characters until the boss is Broken.
Activate the Tainted Waters Flag, then continue through Tainted Sanctuary. The second Paint Cage is reached from the left branch after the crawl space. Its three locks are in the totem and nearby ledge area; the route reference does not require Lost Gestral for this cage, so do not postpone it on that assumption. Opening it grants Random Defense. Continue through the lantern-lit path to Tainted Cliffs, activate its flag, and treat the Pétank and Monolith Mime routes as optional cleanup. For the Mime, defeat Clair and Obscur first, then use Maelle’s shield-breaking tools against the Mime’s shields.
Proceed to Tainted Battlefield and activate the flag. Follow the main road through the wreckage, then enter The Manor through the cave by the tombstone. In the greenhouse, collect the L’Amour D’une Mère Music Record and the Aline Journal before leaving through the stairs. Continue to Tainted Hearts, activate the flag, and take the optional Gargant branch only if the party is prepared to switch between fire and ice attacks. The main route then leads to Tainted Lumière. Search its side routes for the remaining journal and Paint Cage items you want before committing to Tower Peak.
- The first Paint Cage has been opened.
- The second Paint Cage in Tainted Sanctuary has been opened if pursuing Monolith cleanup.
- Tainted Meadows, Tainted Waters, Tainted Sanctuary and Tainted Cliffs Flags are active.
- The L’Amour D’une Mère record and Aline Journal are collected from The Manor.
- Optional Chromatic Bourgeon, Pétank, Mime and Gargant fights have been attempted only if desired.
4. Prepare at Tower Peak and defeat Renoir
Continue through Tainted Battlefield, The Manor, Tainted Hearts and Tainted Lumière until Tower Peak. Activate the Tower Peak Expedition Flag and rest. This is the correct recovery point before Renoir; use the flag rather than relying on a supposed manual slot. Review equipment, healing items and Pictos, and ensure the active party has a way to answer Gradient attacks.
Renoir uses ranged and close-range combinations and can attempt Vanish. Dodge or parry the preceding energy blast, then use the prompted Gradient Counter against Vanish. Failing this sequence can remove a character from the fight, so prioritize survival over damage when the attack begins. When Renoir reaches roughly half health, he summons the Dark Creature and restores his health. The creature adds multi-hit attacks, a party-wide Launch sequence and a tail attack that requires a Gradient Counter. Keep a revive or emergency healing option available and save strong damage for safe openings.
Defeating Renoir awards Renoir’s Suit for Verso, the Second Chance Pictos and three Resplendent Chroma Catalysts. Story scenes follow. When a portal appears after those scenes, enter it to reach Monolith Peak.
- Tower Peak Flag is active and has been used for recovery.
- Vanish is answered with the required dodge or parry followed by the Gradient Counter.
- The Dark Creature phase is survived.
- Renoir is defeated.
- Renoir’s Suit, Second Chance and the Resplendent Chroma Catalysts are collected.
5. Defeat the Paintress at Monolith Peak
On Monolith Peak, look to the right immediately after arriving and activate the Expedition Flag. Rest, adjust the party and continue up the path to the summit. The Paintress battle here is the real required boss fight; unlike the entrance encounter, she can be damaged and defeated. She has no elemental weakness in the opening phase, so use the damage and status setup that best fits the party.
In the first phase, learn the rhythm of Void Meteors, Gradient Attacks, Chroma Waves, Chroma Scatter and Rock Throw. Follow the visual or audio cues for each attack, but dodge when the timing is uncertain rather than forcing a failed parry. The phase ends through a story transition when her health is nearly depleted, and the giant Paintress avatar appears.
During the second phase, Brush of Light uses a three-hit rhythm, aerial attacks require parries as she swoops down, and curved projectiles should be countered only after they begin to bend toward the party. Unleash targets one character repeatedly before ending with a party-wide hit, so heal the target before the final strike if necessary.
At about half health, Corrupted Chroma applies Powerless and Defenceless, places nine shields on the Paintress and gives the party a death curse. Normal damage will not resume until the shields are removed. Use Free Aim attacks on the black orbs to gain extra turns, then spend those turns on rapid shield breaking. Successful counters also help. If the primary party is lost to the curse before the shields are removed, send in reserve characters immediately; the additional turns can still be enough to finish the phase.
- Monolith Peak Flag is active.
- The first-phase attack patterns are being parried or safely dodged.
- The second-phase Brush of Light, aerial and projectile attacks are under control.
- Corrupted Chroma’s nine shields are broken before the death curse ends the fight.
- The Paintress is defeated.
6. Confirm Act 3 and preserve the ending autosave state
After the Paintress battle, let the story scenes finish and follow the transition until Act 3 becomes available. The Monolith does not contain an ending-selection branch, and its colour shifts, Paint Cages and boss rewards do not determine the final route.
The decisive choice occurs later in Act 3, after the final Renoir sequence. The game creates an autosave before the conversation with the faceless boy and the final Maelle-or-Verso decision. To view both endings in one campaign, finish one route, return to the title screen, and load the earlier autosave from before that conversation. Do not advance so many unrelated activities that the desired pre-choice autosave rotates out of the available list. Expedition Flags and the game’s autosave system are the practical way to preserve progression; there is no normal manual-save slot to create at The Monolith.
After completing one ending, the post-ending continuation returns you to the late-game world state near the final Expedition Flag, allowing optional areas and cleanup. Keep the pre-choice autosave available until both ending routes have been viewed if that is part of the completion goal.
- Renoir at Tower Peak and the Paintress at Monolith Peak are defeated.
- Act 3 and its next main objective are available.
- Monolith collectibles are either collected or recorded for later cleanup.
- The late-game autosave before the final Renoir sequence and ending conversation has been preserved.
- The Maelle-or-Verso choice is understood as an Act 3 decision, not a Monolith decision.
Before you move on
- The northern barrier is broken and the scripted entrance Paintress encounter is complete.
- The interior route through Tainted Meadows, Tainted Waters, Tainted Sanctuary, Tainted Cliffs, Tainted Battlefield, The Manor, Tainted Hearts and Tainted Lumière has been cleared or logged for cleanup.
- Both Monolith Paint Cages are opened if pursuing the area’s rewards.
- The Manor Music Record and Aline Journal are collected or marked for later retrieval.
- Renoir at Tower Peak and the Paintress at Monolith Peak are defeated.
- Act 3 is unlocked.
- The pre-choice Act 3 autosave is retained for the alternate ending route.
References for this chapter
- Act 2: Verso - Clair Obscur: Expedition 33 Walkthrough & Guide - GameFAQs
- Clair Obscur: Expedition 33 The Monolith Walkthrough - QuestDuo
- Clair Obscur: Expedition 33 Monolith Peak Walkthrough - QuestDuo
- How to Save Your Progress | Clair Obscur: Expedition 33 - Game8
- Clair Obscur: Expedition 33 Guide: A 100% Collectibles Walkthrough - Push Square
Act 3 Opening — Crimson Forest & The Reacher: Adjust for Open World
After The Monolith, complete the Act 3 opening scenes until Esquie can fly. The Continent then opens into several optional areas with different difficulty levels. Crimson Forest and The Reacher are suitable early Act 3 destinations around levels 60–70, but The Reacher is gated by Maelle’s Level 6 relationship quest: speak with her at camp and use the portal in the cliffs west of Visages and north of The Crows. Crimson Forest contains a useful progression route, several Expedition Flags and an optional Chromatic Gold Chevalière encounter. The Reacher advances Maelle’s quest, teaches Monoco Orphelin Cheers and contains several useful Pictos and upgrades. Use flags to recover and rebuild your party, and postpone harder islands if ordinary encounters are already overwhelming.
1. Unlock flight and prepare the Act 3 map
Continue through The Monolith’s ending sequence and the opening Act 3 scenes. Esquie’s flight ability becomes available during this transition. Once you regain control on the Continent, use the nearest Expedition Flag before making a long flight. Flags provide recovery, party and equipment management, and fast travel, so activate every one you pass rather than treating them as decorative checkpoints.
Crimson Forest and The Reacher are both reasonable early Act 3 targets for a party in roughly the level 60–70 range. That is a route recommendation, not a hard entry requirement. If ordinary enemies are taking several turns to defeat or repeatedly breaking your formation, leave the area and improve weapons, Luminas and Pictos elsewhere before attempting its optional challenges.
- Esquie can fly on the Continent.
- A nearby Act 3 Expedition Flag is active.
- Weapons, Pictos and Luminas have been reviewed for the current party.
2. Enter Crimson Forest and unlock its route
Fly to the red floating island southwest of the Continent and enter the portal to Crimson Forest. From the portal, follow the platforms forward and pass the Chevalière statues. On the left, collect the Chroma on the lower platform, then use the handholds to return to the main route. Grapple to the higher ledge and activate the Crimson Perch Expedition Flag.
Use the rope beyond the clearing to descend. At the bottom, check the hole in the rock face for another Chroma, then crawl back through and descend the next rope. Pick up the Colour of Lumina on the right and cross the columns and masonry to continue upward. At the upper fork, take the lower right boards first for a Colour of Lumina, return to the main route, then follow the left path toward another Colour of Lumina and a Resplendent Chroma Catalyst. Continue across the platforms and activate the Three Blades Expedition Flag.
The Three Blades route contains several statue interactions and Gold Chevalière encounters. These encounters are optional for campaign progress, but defeating them can provide a Level 18 upgrade for Perilous Parry and additional materials. Rest at the flag before attempting the final optional encounter in this section.
- Crimson Perch is unlocked.
- Three Blades is unlocked.
- The visible Chroma, Colour of Lumina and early catalyst rewards have been collected if you are clearing the area thoroughly.
3. Decide whether to fight the Chromatic Gold Chevalière
At Three Blades, interact with the statues and clear the surrounding Gold Chevalières and Obscurs to reach the energy pedestal. Interact with it and choose the option to begin the Chromatic Gold Chevalière fight. This battle is not required to open The Reacher or continue the Act 3 story, so postpone it if your party is struggling.
The boss is accompanied by Clair and Obscur. Defeat those support enemies first because they can shield or enrage the Chromatic Gold Chevalière. The boss uses long fire or ice attack strings; watch the entire sequence before committing to a parry or dodge pattern. It is weak to both light and dark attacks. Breaking the boss and exploiting its vulnerability windows is safer than trying to finish it with unplanned burst damage.
Victory awards the Chevalam weapon for Verso, a Level 20 Perilous Parry upgrade, two Resplendent Chroma Catalysts and five Colour of Lumina. Chevalam disables healing while equipped, so do not treat it as a universal upgrade. Use it only with a build that can survive without ordinary healing or that has an appropriate Lumina setup.
- Clair and Obscur are defeated before focusing on the Chromatic Gold Chevalière.
- The Chromatic encounter is marked optional if postponed.
- Chevalam’s healing restriction is understood before equipping it.
4. Unlock The Reacher through Maelle’s relationship quest
Leave Crimson Forest and fly north, then northwest from Falling Leaves. You can stop at Floating Cemetery to activate its flag and complete the available Nevron interaction. Continue north toward the Crows, then look for the platform immediately north of that area. The Reacher entrance is not opened simply by reaching the platform: speak with Maelle at camp and begin her Level 6 relationship quest. The quest portal in the cliffs west of Visages and north of The Crows is the required access point.
If Maelle’s relationship quest is not available, return to camp and speak with her again after completing the required earlier relationship progress. Do not waste time searching for a normal overworld entrance while the quest is inactive. Once the portal is available, enter The Reacher and activate the Reacher - Entrance Expedition Flag after the opening scene with the third Axon.
- Maelle’s Level 6 relationship quest is active.
- The portal west of Visages and north of The Crows has been used.
- Reacher - Entrance is unlocked.
5. Follow The Reacher’s opening platforms
From Reacher - Entrance, follow the walkway to the grapple point and cross to the next walkway. Climb the rope, defeat the pair of Orphelins and destroy the Paint Spike blocking the second rope. At the top, collect the Colour of Lumina near the crates, then return to the previous level.
Defeat the next Orphelin groups and descend the ramp on the right for another Colour of Lumina. When you reach the distant grapple point, do not attempt to use it from the lower platform. Return up the ramp and cross by the elevated walkway; this is the route that gives you the correct height. Grapple to the main structure, collect the Chroma near the Orphelin and climb down the rope.
After descending, turn around and defeat the Orphelins guarding the Draining Cleanse Pictos. Return to the walkway, collect the Chroma on the raised platform and continue through the remaining Orphelin groups. Before riding the balloon, check the crates for another Colour of Lumina. Ride it upward and activate the Mountain Expedition Flag.
At Mountain, bring Monoco into the active party if necessary. Cross the grapple points and defeat the two Échassiers to obtain the Sniper Pictos and unlock Monoco’s Échassier Stabs skill. Continue through the mountain route, collecting the Longer Shell upgrade and the Charging Counter and Charging Attack Pictos where accessible. Ride the later balloon to reach the Ladder Area.
- Monoco has learned Orphelin Cheers from the first Orphelin pair.
- Draining Cleanse has been collected.
- Mountain is unlocked and Monoco can use Échassier Stabs.
- The elevated walkway was used to reach the distant grapple point.
6. Establish the next Act 3 route
At Ladder Area, activate the flag and clear the nearby route. The Reacher continues through several flags and vertical sections, including a Manor detour and the Foggy Area. The Manor contains journal entries and a portrait interaction that depends on the portrait obtained in the Canvas area, so return there later if that prerequisite is missing rather than forcing the door.
Use The Reacher to build experience and obtain its Pictos before attempting higher-difficulty islands. Keep one reliable damage source, one defensive or healing option and one character who can exploit Break or elemental weaknesses. Move Luminas between characters at flags instead of spending scarce upgrade materials on every temporary weapon.
Act 3 has no requirement to clear every optional zone before the final Lumière route, and ordinary companion relationship scenes are not universal alternate-ending requirements. Complete them for their quests, skills and rewards, but prioritize the active quest objective and your party’s readiness.
- The Reacher’s opening flags and route are cleared.
- The party has been rebuilt around damage, defense and Break support.
- Optional Chromatic fights and harder islands are recorded for a later return if necessary.
- Maelle’s relationship quest progression has been advanced rather than skipped.
Before you move on
- Esquie’s flight is unlocked.
- Crimson Perch, Three Blades and Reacher - Entrance are available as Expedition Flags.
- The Chromatic Gold Chevalière has been defeated or deliberately postponed.
- Maelle’s Level 6 relationship quest has opened The Reacher.
- Monoco has learned Orphelin Cheers and, after the Échassier encounter, Échassier Stabs.
- Draining Cleanse, Sniper and the early Reacher upgrades have been collected or marked for cleanup.
- The party is prepared for further Act 3 areas without relying on a single damage type or one permanent character lineup.
Act 3 Mid — Sirène’s Dress, Sacred River and Frozen Hearts: Optional High-Risk Rewards
These Act 3 areas are optional, but they provide companion progression, journals, strong Pictos, weapons and access to useful merchant inventories. Start each relationship dungeon from camp: Lune’s Level 6 quest opens Sirène’s Dress, while Monoco’s Level 6 quest opens Sacred River. Both entrances require Esquie’s Flight ability. Frozen Hearts is reached through Monoco’s Station and can be entered earlier, but its enemies are much stronger than the surrounding Act 2 content; returning around level 60 or later is the safer route. For a complete cleanup, clear Sirène’s Dress and collect its journal, finish Sacred River’s merchant and Noco objectives, then complete Frozen Hearts through Gargant. Give Gargant’s Eternal Ice to Grandis at Monoco’s Station afterward.
1. Activate the quests and prepare the party
Return to Camp and speak with Lune until her Level 6 relationship quest is active. Speak with Monoco as well if you intend to clear Sacred River during the same trip. The portals for both areas are reached from the Continent with Esquie’s Flight; they are not ordinary land-route entrances. Frozen Hearts is different: enter Monoco’s Station, use the eastern exit inside the station and travel east across the Continent.
Use a party that can remove or prevent status effects and that includes dependable healing. Lune is particularly useful in these areas because she can exploit elemental weaknesses and recover the party, but the exact lineup is flexible. Before each major encounter, activate the nearest Expedition Flag and adjust Pictos for the specific hazard rather than carrying one fixed setup through every zone. Frozen Hearts is a poor early-game farming target: its enemies can be defeated with excellent parries, but returning later is more efficient and less punishing.
- Lune’s Level 6 relationship quest active
- Monoco’s Level 6 relationship quest active before Sacred River
- Esquie’s Flight available
- A healing or status-removal plan prepared
2. Clear Sirène’s Dress and collect the journal
Fly to the portal behind Sirène and enter Sirène’s Dress. Activate the Entrance Expedition Flag, then interact with the large ornate gate. Choose Look around before choosing to Play music; this opens the gate. Rest at the Glissando Flag before entering the next arena.
Fight Chromatic Glissando as a control encounter rather than rushing damage. Its tail is a weak point: use Free Aim to shoot it and reduce the length of its Tail Slam sequence. The boss is weak to Dark and Ice, so Sciel and Lune can contribute especially well when those elements are available. Watch for its Blinding Attack and avoid allowing a fallen character to remain down, because the upgraded Gobble can restore a substantial amount of the boss’s health. After Chromatic Glissando falls, defeat the three Ballets that appear to finish the encounter. The rewards include Choralim for Lune, Ballaro for Monoco, Grandiose Chroma Catalysts and Colours of Lumina.
Continue past the arena and collect Expedition Journal 46 before leaving. Return to the Expedition Flag and travel back to the Continent; the game returns you to Camp for the relationship scene. Speak with Lune again afterward to continue her relationship progression. This journal is part of Lune’s later relationship requirements, so do not treat it as disposable optional loot.
- Entrance and Glissando Flags activated
- Chromatic Glissando and the three Ballets defeated
- Choralim and Ballaro collected
- Expedition Journal 46 collected
- Lune’s post-area Camp scene completed
3. Complete Sacred River and unlock the Gestral Merchant
With Monoco’s Level 6 quest active, fly to the Sacred River portal north of Monoco’s Station. At the beginning of the area, move toward the large pink Gestral but do not interact with it immediately. Take the left path first for the Colour of Lumina, then return and take the right path toward the Gestral Merchant.
The Merchant can be challenged in a one-character brawl. Select a character with reliable damage and use the fight to learn the opponent’s short attack strings; you cannot rely on the normal full-party action economy. Winning unlocks the Merchant’s expanded Picto inventory, which includes options such as Critical Stun, Energising Turn, Shield Affinity, Solidifying and other high-level purchases. Inspect the shop after the fight rather than assuming its full stock is available beforehand.
Return to the pink Gestral and choose to resurrect Noco. This triggers Golgra and restricts the battle to Verso and Monoco. Monoco’s Break-building skills are valuable, while Verso supplies the direct damage. Prioritise survival and Break progress over greedy attacks; if either character is underused, equip them before entering. After Golgra is defeated, return to Camp and confirm Monoco’s relationship scene.
- Sacred River left and right branches explored
- Gestral Merchant brawl won
- Expanded Merchant shop unlocked
- Noco resurrected
- Golgra defeated with Verso and Monoco
- Monoco’s Camp scene completed
4. Traverse Frozen Hearts and clear its optional branches
Enter Frozen Hearts from Monoco’s Station and activate Icebound Train Station. Collect the Colour of Lumina near the crates, then follow the tracks beyond the frozen locomotive for the second Colour of Lumina and cross the chasm. At Glacial Falls, activate the Flag and take the left-side route toward the Danseuse Teacher. Her challenge asks Lune to parry five three-hit dance combinations, for 15 total attacks; dodging or taking a hit fails the attempt. Completing it awards the Danseuse Outfit for Lune. Do not attack her unless you specifically want the separate combat rewards.
From Glacial Falls, explore the side route toward the cavern and Manor door. The Chromatic Veilleur is optional but worthwhile: its unavoidable Blighted Wave makes Anti-Blight effects, Lune’s healing, Verso’s cleansing options or Free Aim shots at its lantern valuable. Defeating it awards Energising Burn, Grandiose Chroma Catalysts and Colours of Lumina. Beyond the cavern, look for Anti-Freeze in the Paint Cage; it is useful before the final Frozen Hearts boss.
Continue through the train and cliff routes, activating Iced Heart and then Icebound Terminal. Collect Expedition Journal 51 in the Icebound Train Station area. Braselurs can appear in pairs and some players have reported battles that fail to resolve after the enemy’s burn effect. If a battle stops progressing, use Abandon Battle and retry later rather than spending resources indefinitely.
- Icebound Train Station, Glacial Falls, Iced Heart and Icebound Terminal Flags activated
- Danseuse Teacher challenge completed
- Chromatic Veilleur defeated if pursuing full area rewards
- Expedition Journal 51 collected
- Anti-Freeze obtained if available
5. Defeat Gargant and finish the Frozen Hearts reward chain
At Icebound Terminal, prepare for Gargant. Its stance determines its weakness: in Fire stance, use Ice; in Ice stance, use Fire. Do not attack it with the active stance element because Gargant absorbs that element. Its Freeze attack can disable a character and leave them exposed, so equip Anti-Freeze where possible or parry and dodge the attack rather than accepting the status. Gargant’s punch strings and full-party slams have deliberate pauses; learn the timing before committing to long offensive turns.
When Gargant is defeated, collect Snowim for Lune, Anti-Burn, Grandiose Chroma Catalysts and Eternal Ice. Return to Monoco’s Station and give Eternal Ice to Grandis inside the station. This completes Grandis’s request and unlocks the shop’s additional Pictos, weapons, upgrade materials, Colours of Lumina and Recoat. This return trip is the concrete end of the Frozen Hearts quest chain; merely reaching the Iced Heart Flag is not enough.
- Gargant defeated at Icebound Terminal
- Snowim obtained
- Anti-Burn and Grandiose Chroma Catalysts obtained
- Eternal Ice collected
- Eternal Ice delivered to Grandis
- Grandis’s expanded inventory unlocked
Before you move on
- Lune’s Sirène’s Dress quest, Chromatic Glissando encounter, Expedition Journal 46 and follow-up Camp scene are complete.
- Sacred River’s Gestral Merchant shop is unlocked, Noco has been resurrected and Golgra has been defeated.
- Frozen Hearts’s four Expedition Flags are active, the Danseuse Teacher reward has been obtained, and the optional Chromatic Veilleur route has been cleared if pursuing area completion.
- Gargant has been defeated and Snowim, Anti-Burn and Eternal Ice are in the inventory.
- Eternal Ice has been delivered to Grandis at Monoco’s Station, unlocking the additional merchant stock before continuing with Act 3’s remaining content.
References for this chapter
- Sirène’s Dress — Clair Obscur: Expedition 33 Walkthrough
- Sirene’s Dress 100% Guide — Clair Obscur: Expedition 33
- Sacred River — Clair Obscur: Expedition 33 Walkthrough
- Frozen Hearts — Clair Obscur: Expedition 33 Walkthrough
- Frozen Hearts 100% Guide and All Locations — Clair Obscur: Expedition 33
- Boss: Gargant — Clair Obscur: Expedition 33 Walkthrough
- Grandis — Clair Obscur: Expedition 33 Walkthrough
- Gestral Merchant Shop Items — Clair Obscur: Expedition 33
- How to Help Danseuse Dance — Clair Obscur: Expedition 33
Act 3 Finale — Endless Night Sanctuary and Lumière Approach
Endless Night Sanctuary is optional Act 3 content. You can defeat Ultimate Sakapatate for Monoco’s Joyaro weapon and high-tier materials, or leave the sanctuary and travel directly to Lumière. The required finale begins at Lumière’s Harbour and proceeds through Central Plaza, Shattered Alley, the Opera House, Lumière’s Gardens and the Crooked Tower Walkway. Activate the Expedition Flags, inspect the final weapon and Pictos rewards, and prepare before the last flag because Renoir is followed by a second, ending-defining fight. After Renoir and the following scenes, approach the Young Boy at the canvas and choose “It’s time to stop painting.” Then choose whether to fight as Maelle or Verso. That selection determines the ending route and its associated rewards. The game creates or preserves a pre-choice autosave, allowing you to reload and view the other ending without replaying the campaign. After the credits, reload that save to continue remaining Act 3 and post-game activities.
1. Decide whether to clear Endless Night Sanctuary
Endless Night Sanctuary is an optional Act 3 dungeon, not a required key area for entering Lumière. Reach it with Esquie’s flight ability and activate the entrance Expedition Flag. Use the flags inside the sanctuary as recovery and travel points while you explore.
Continue through the sanctuary until you reach Ultimate Sakapatate. The boss combines close-range attacks with ranged pressure, so watch both its weapon motions and projectile setup. Use the defensive response indicated by each telegraph, then build toward a break or stagger before spending your strongest damage abilities. Free Aim is useful when a vulnerable target is exposed.
Defeating Ultimate Sakapatate awards Monoco’s Joyaro weapon and valuable upgrade materials. These rewards are optional and do not open the route to Lumière. If the dungeon is consuming too many healing resources, leave through the available route and return later after improving the party.
- Activate the sanctuary Expedition Flags as you advance.
- Treat Ultimate Sakapatate as optional rather than a story gate.
- Confirm Joyaro in Monoco’s weapon inventory after victory.
2. Prepare before entering Lumière
Before starting the final city route, use an Expedition Flag to review the three characters you expect to use. Upgrade their current weapons, move Luminas and Pictos to fit the planned party, and restore health and combat resources. Bring a dependable healing plan and at least one defensive option for Renoir’s attacks. The amount of preparation needed depends on difficulty and how consistently you parry or dodge, so do not rely on a fixed consumable count.
Equip any late-game Pictos that improve damage beyond the earlier damage cap, along with defensive or healing effects that your party can trigger reliably. Check that your active characters have suitable skills for single-target damage, stagger or break pressure, and recovery.
You do not need to create a manual backup for the ending choice. After Renoir and the following story scenes, the game provides a pre-choice save state before the final Maelle-or-Verso selection. Do not overwrite or delete that save if you intend to view both endings. Complete one ending, return to the menu when the credits finish, then reload the pre-choice state for the other route.
- Upgrade the weapons used by the planned final party.
- Recheck healing, defensive Pictos and Luminas.
- Leave the pre-choice autosave intact if you want both endings.
3. Enter Lumière through the Harbour
Travel to Lumière from the Continent and enter through the Harbour. After the opening scene, activate the Harbour Expedition Flag. Search the dock and stair areas for nearby Colours of Lumina and other rewards before climbing farther into the city. Aberration encounters in this section can provide the Shortcut Pictos.
Continue through the marketplace and use the light rope to reach the rooftops. Take the right-hand route first to return to the prologue area and collect the Energising Powerful Pictos. Backtrack to the rope, take the left-hand route, grapple across, and continue to the Central Plaza Expedition Flag.
Drop into Central Plaza and clear the Lumière Citizen encounters. Follow the street toward the red-and-white tree and speak to the Young Boy when the conversation becomes available. Examine the nearby area for its reward, then activate the Central Plaza flag before moving on.
- Activate the Harbour and Central Plaza flags.
- Search the Harbour and marketplace side paths before leaving.
- Visit the prologue rooftop route for the Energising Powerful Pictos.
4. Cross Shattered Alley and the Opera House
From Central Plaza, follow the route into Shattered Alley. Collect the nearby Colours of Lumina, then defeat the Chromatic Échassier blocking the main path. Use the battle to practice defensive timing and stagger pressure rather than spending every high-value resource immediately.
After the fight, inspect the nearby edge and use Esquie when the prompt appears to recover the submerged journal reward. Continue into the Opera House and activate its Expedition Flag. Search the stage and side areas before exiting through the rear route.
The rooftops and grapple sections after the Opera House contain additional rewards and mixed enemy groups. Use stagger attacks on durable targets and keep emergency healing available. Création and Renoir are still ahead, so avoid exhausting your strongest recovery items on ordinary encounters.
- Defeat Chromatic Échassier in Shattered Alley.
- Collect the submerged journal reward with Esquie.
- Activate the Opera House flag and search its side areas.
5. Clear Lumière’s Gardens and reach the final flag
Exit the Opera House through the rear route and follow the grapples toward Lumière’s Gardens. Search both sides of the garden path for Colours of Lumina and the Gradient Fighter Pictos. Continue through the garden until you reach Création.
Defeat Création before advancing. Maintain your defensive rhythm and watch your party’s recovery resources; this fight is the final substantial encounter before the Renoir approach. Afterward, activate the Expedition Flag at the Crooked Tower Walkway.
This flag is the correct place to make final preparations. Change the active party, adjust weapons and Pictos, and confirm that you are ready for Renoir. Activating the flag does not force the boss immediately, so you can leave Lumière and complete other available Act 3 or post-game content before returning.
- Search both sides of Lumière’s Gardens.
- Defeat Création.
- Activate the Crooked Tower Walkway flag and make final preparations there.
6. Defeat Renoir and choose the ending route
From the Crooked Tower Walkway, follow the final route and defeat Renoir. His later phase adds a rapid aerial sequence combining slashes, a Chroma projectile and a ground attack. Watch for the attack telegraphs and parry or dodge each hit rather than treating the sequence as one uninterrupted strike. Save your strongest damage tools for reliable openings, and recover promptly after mistakes.
After Renoir and the following scenes, approach the Young Boy at the canvas and choose “It’s time to stop painting.” The game then asks which character you will use in the final confrontation. Choose Maelle to fight as Maelle against Verso and receive the Maelle route, or choose Verso to fight as Verso against Maelle and receive the Verso route.
The final character fight is more controlled and less demanding than Renoir’s battle, but continue using the selected character’s defensive timing and normal attack rhythm. Defeat the opponent, watch the epilogue, and let the credits play. When you return to the menu, reload the pre-choice autosave to select the other route if desired. Reloading also returns you to the campaign state needed to continue remaining exploration and post-game content.
- Defeat Renoir.
- Choose “It’s time to stop painting.”
- Select Maelle or Verso for the final confrontation.
- Defeat the opponent and watch the credits.
- Reload the preserved pre-choice autosave to view the other ending or continue post-game exploration.
Before you move on
- Lumière has been entered through the Harbour and the city route has been completed through the Crooked Tower Walkway flag.
- Création and Renoir have been defeated.
- The canvas dialogue has been completed and either the Maelle or Verso final battle has been won.
- The epilogue and credits have played, confirming completion of one ending route.
- For both endings, reload the preserved pre-choice autosave and complete the other final battle.
- If optional completion is desired, Ultimate Sakapatate has been defeated and Joyaro has been added to Monoco’s weapon inventory.
- After completing an ending, the reloadable save has been used to resume remaining Act 3 or post-game activities.
References for this chapter
- Clair Obscur: Expedition 33 - PS5 Games
- Chapter 17: Lumiere - Clair Obscur: Expedition 33 Walkthrough & Guide
- ACT 3 Maelle Lumiere - Clair Obscur: Expedition 33 Walkthrough & Guide
- Clair Obscur: Expedition 33 Act 3 - Back to Lumière Walkthrough
- Clair Obscur: Expedition 33 Missables Guide — Safe 100% Route
Final Bosses, Alternate Endings and Tactical Methods
This chapter is a tactical reference for the finale already reached through The Monolith and the Act 3 Lumière route. Use the Paintress and Renoir sections to prepare for a rematch after defeat, to review a difficult pattern, or to replay from an available autosave. The only ending selection occurs after Renoir, when the Young Boy allows you to choose whether to fight as Maelle or Verso. Maelle's victory produces A Life to Paint; Verso's victory produces A Life to Love. Earlier Act 2 choices do not select either ending. On the original PS5 release, the useful pre-choice recovery point is an autosave rather than a player-created manual slot. Autosaves rotate, so reload the relevant entry promptly if it is still present. The ordered route through The Monolith, Renoir and the final duel belongs in the campaign chapters; this chapter supplies combat reference, failure recovery and completion checks.
1. Final-preparation reference: Crooked Tower Walkway
The Crooked Tower Walkway Expedition Flag is the last practical preparation point on the Act 3 Lumière route. If you are replaying the approach after a defeat or loading an earlier autosave, activate the flag and review every active character before proceeding. Check weapons, Pictos, Luminas, skills and healing options rather than entering the final sequence with a build left over from an earlier zone.
Renoir does not offer a simple elemental weakness that replaces defensive timing. Build around reliable neutral damage, Break generation, healing, shields and a method for removing shields. Free Aim is useful when shields appear, while Maelle's Breaking Rules can also help remove them. Keep at least one dependable shield-breaking option equipped instead of relying only on ordinary attacks.
Resting at the flag provides a recent recovery point for the approach, but it is not the ending-choice save. After Renoir, the game creates an autosave before the Young Boy presents the Maelle-or-Verso prompt. Because autosaves rotate as you continue playing, check the in-game load history promptly if you intend to view both endings. This is an optional replay method, not a guarantee that the entry will remain available indefinitely.
- Use Crooked Tower Walkway as the final preparation reference point.
- Review weapons, Pictos, Luminas, skills and recovery options.
- Equip Free Aim or another reliable shield-breaking method.
- Understand that the ending-choice autosave occurs after Renoir.
- Check the available autosave history before advancing through further post-game activity.
2. Paintress reference: The Monolith encounter
The Paintress is the Act 2 finale at The Monolith, not the campaign's final battle. Use this section when reviewing the encounter after a defeat or preparing for a replay from an earlier save. Her attack strings reward the same discipline required later against Renoir: watch the animation and audio cue, defend through the complete sequence, then use the opening to attack.
Dodge first while learning an unfamiliar pattern. Once the timing is reliable, convert selected dodges into parries to build pressure and create safer opportunities for Break. Do not spend every high-impact ability at the start of the fight. Work toward a Break, then use the vulnerable period for concentrated damage while retaining enough recovery for the later portion.
The transition into the later part of the fight is story-driven. Stabilize characters who are close to defeat before committing to another offensive cycle. If the encounter is lost, reload the available autosave and adjust defensive timing, healing allocation or Break generation rather than treating the Paintress as a route requirement for the later ending choice. Defeating her advances the campaign to Act 3, but it does not determine whether the eventual final duel is fought as Maelle or Verso.
- Treat the Paintress as an Act 2 tactical reference, not the campaign's last boss.
- Learn her attack timing with safe dodges before attempting consistent parries.
- Save major abilities for Break and vulnerability windows.
- Retain recovery for the later portion of the fight.
- Remember that her defeat does not select an ending.
3. Renoir first phase and Axon effects
For a rematch or replay of the Act 3 finale, learn Renoir's opening attacks separately. His first phase includes a two-hit combo, a five-hit combo, Void Cross and Black Hole. Void Cross has delayed timing, so do not react to its initial visual cue as though the impact is immediate. If the timing is not yet familiar, defend safely and use the next turn to recover or prepare Break.
When Renoir reaches roughly half health, the Axons become the critical part of the encounter. Sirène can restore Renoir's health, Visages can grant five shields, Reacher supplies a random buff and Hauler attacks with a thrown building. These effects matter more than maintaining a fixed damage rotation. Watch which Axon effect is active and respond to the immediate threat.
When Visages creates the shield layer, remove it promptly with Free Aim or a shield-breaking skill such as Breaking Rules. Continuing to spend major damage attacks into the shields wastes the strongest part of your turn economy. If Hauler's attack is approaching or an Axon effect has placed the party in danger, use a defensive turn to keep all three active characters alive. Once the shields are gone, return to Break generation and concentrated damage.
- Learn the two-hit and five-hit attack rhythms.
- Delay your response to Void Cross until the impact timing is clear.
- Watch for Sirène, Visages, Reacher and Hauler around the halfway point.
- Remove Visages' five shields before resuming ordinary damage.
- Prioritize survival when an Axon effect creates an immediate hazard.
4. Canvas phase and Renoir recovery
After Renoir's first health bar is emptied, Sirène restores him as part of the transition. The second phase begins with the Dessendre Canvas and gives Renoir permanent Powerful, Rush and Shell effects. If your party can apply useful counter-debuffs, use them; otherwise focus on safe defense and sustained damage instead of spending turns on effects your build cannot remove.
The second phase adds Swift, Frenetic, Pool of Darkness and Void Meteor. Learn these patterns independently. Pool of Darkness is not the same sequence as the first-phase Black Hole. Void Meteor sends five projectiles toward the party in sequence, so continue defending through the full pattern rather than attacking after the first projectile. Frenetic ends with a Gradient Attack, meaning the first hits are not the end of the sequence.
Preserve healing, shields and revival capacity for the late section, including Renoir's powerful airborne attack against the party. If a character falls, stabilize the remaining party before chasing another Break. On the original release, a defeat does not provide the later Battle Retry prompt; that quality-of-life feature was added in patch 1.4.0. Reload the available autosave instead.
- Expect Sirène to restore Renoir after the first health bar.
- Account for Powerful, Rush and Shell in the Canvas phase.
- Treat Pool of Darkness and Black Hole as different patterns.
- Defend through all five Void Meteor projectiles.
- Preserve recovery for the airborne attack and late-fight pressure.
- Reload an available autosave after defeat on the original release.
5. Young Boy choice and the two endings
The ending selection happens after Renoir has been defeated and the story reaches the Canvas sequence with the Young Boy. This is the only required choice between the two final routes. Act 2 decisions, ordinary Act 3 dialogue and optional companion activities do not replace this prompt.
Choose to fight as Maelle to enter the final duel against Verso. Winning produces A Life to Paint. Choose to fight as Verso to enter the final duel against Maelle. Winning produces A Life to Love. The duel is separate from Renoir's battle, so read the selected opponent's repeated patterns, defend before attacking and avoid spending every resource during the opening exchange.
If the relevant post-Renoir autosave is still present, load it from the in-game autosave history to replay the choice for the other ending. Do this before continuing through several post-game saves, because the entries rotate. If that entry is no longer available, New Game Plus is the dependable alternative for seeing the other route. Do not describe either ending as developer-designated canon.
- Defeat Renoir before looking for the ending-choice entry.
- Reach the Young Boy after the Renoir sequence.
- Choose Maelle for A Life to Paint or Verso for A Life to Love.
- Use defensive timing in the selected-character duel.
- Reload the post-Renoir autosave promptly if it remains available.
- Use New Game Plus if the relevant entry has rotated away.
6. Completion and post-game check
For the main-campaign completion target, confirm that the Paintress was defeated at The Monolith, Renoir's first phase and Canvas phase were cleared, one Maelle-or-Verso final duel was won, and the selected ending scenes and credits were viewed. The chapter is complete once one ending route has been finished; viewing the alternate ending is optional.
After the credits, Continue returns you to the post-game state. Use that state for remaining records, Lost Gestrals, companion events, optional bosses and exploration. Check the records list for Our Drafts Collide after completing the final duel if you are tracking the campaign's finale records.
Do not start New Game Plus before current-run cleanup if you want to preserve the present post-game state. Later update features such as Battle Retry should not be counted as original-release completion requirements. The ordered campaign route remains covered by the earlier Monolith and Lumière chapters; this chapter is only the tactical and alternate-ending reference.
- The Paintress is defeated.
- Renoir's Axon transition and Canvas phase are complete.
- One final duel and ending route are complete.
- The ending scenes and credits have played.
- Continue returns to the post-game state.
- Our Drafts Collide is checked in the records list if tracking finale records.
- Current-run cleanup is completed before starting New Game Plus.
- Battle Retry and other later-update features are excluded from the original-release target.
Before you move on
- Paintress defeated at The Monolith.
- Renoir defeated through the Axon transition and Canvas phase.
- One final Maelle-or-Verso duel won.
- Selected ending scenes and credits viewed.
- Continue returns to the post-game state.
- Our Drafts Collide checked in the records list when tracking finale records.
- Alternate ending replay attempted from the post-Renoir autosave only if the entry remains available.
- New Game Plus used as the fallback for the alternate ending if the relevant autosave has rotated away.
- Later update content such as Battle Retry excluded from original-release completion.
References for this chapter
- Clair Obscur: Expedition 33 | Latest Patch 1.4.0 Now Live
- Expedition 33: How to defeat the final boss, the real Renoir?
- Renoir - Act 2 & 3 Boss Guide
- Clair Obscur: Expedition 33 Back to Lumiere Walkthrough (Final Chapter)
- Cant get the other ending? Clair Obscur: Expedition 33 discussion
- Clair Obscur: Expedition 33 dev confirms there is no canon ending
Post-Game — Flying Manor, Renoir’s Drafts and the Endless Tower
After completing either ending, choose Continue from the title screen to load the available completed-campaign autosave. Its exact location is not guaranteed: it may place you near Crooked Tower Walkway or another late final-route point. If you need the alternate ending and the loaded state is not before the Young Boy choice, replay the final route and Renoir before choosing the other character. Once post-game exploration is available, use Esquie’s flight to reach the Flying Manor, clear its four branch encounters and defeat Clea. Then enter Renoir’s Drafts southeast of Visages and defeat Simon. Finish the original-release Endless Tower through Stage 11, Trial 3. Verso’s Drafts and the extra Endless Tower bosses added in the December 11, 2025 Thank You Update are separate from this checklist.
1. Reload the completed campaign through Continue
After the ending and credits, select Continue from the title screen rather than starting New Game. Continue loads the available completed-campaign autosave, but its exact position is not fixed. Depending on the save state, you may return near Crooked Tower Walkway or at another late point in the final Lumière route rather than directly before or after the final encounter.
Check the surrounding area and the available travel options before planning your post-game route. If the loaded state is already at the Crooked Tower Walkway Expedition Flag, travel back to the Continent normally. If it places you earlier in the final route, finish the remaining route and Renoir again before the game exposes the completed-campaign exploration state.
If you still need the other ending, inspect the loaded position before progressing. The useful state is the autosave made before speaking with the Young Boy. If Continue does not return there, replay the final route and Renoir, then make the alternate Maelle or Verso choice. Do not describe this as a manual-save backup: the game uses its autosave system and Expedition Flags rather than conventional player-created save slots.
Visit Camp before entering the high-difficulty areas. Review weapons, Pictos, Lumina, healing and revival options, and any companion improvements already available. Ordinary relationship rewards are optional for this chapter, but they can make the post-game fights more manageable.
- Completed campaign loaded through Continue.
- Loaded position checked instead of assuming a fixed location.
- Alternate-ending autosave state inspected if needed.
- Final route and Renoir replayed if the alternate-choice state was unavailable.
- Camp equipment and recovery options reviewed.
2. Clean up practical Act 3 content before the superboss areas
Use Esquie to revisit unfinished Continent locations and optional Act 3 zones. Prioritize rewards that improve the party directly, such as weapons, Pictos, Colours of Lumina, Chroma Catalysts and companion upgrades. Activate Expedition Flags when you find them so a failed attempt does not require a long return trip from Lumière.
The cleanup order is flexible. If a high-difficulty encounter repeatedly defeats the party before its attack patterns can be read, leave through an Expedition Flag and return after changing the party, damage types or defensive Lumina. You do not need to spend all healing and revival resources on a fight that currently exceeds your preparation.
Flying Manor, Renoir’s Drafts and the later Endless Tower trials are optional post-game challenges, not prerequisites for completing either campaign ending. Treat them as the final original-release combat checklist.
- Unfinished Act 3 locations reviewed.
- Useful equipment and upgrade materials collected where practical.
- Expedition Flags activated in cleaned areas.
- Difficult encounters postponed when the party lacks suitable defenses.
3. Reach the Flying Manor and activate Central Plaza
The Flying Manor is a floating island above the Continent, south of Monoco’s Station and west of a Painting Workshop. Esquie must be able to fly before you can land there. Approach the island from the overworld and enter the manor.
Follow the entrance route across the broken bridge and use the grapple point to reach the central area. Activate the Central Plaza Expedition Flag as soon as you reach it. The main building is north of the plaza, while the flag is on the western side.
The manor displays four branch routes connected with Évêque, Goblu, Lampmaster and Dualliste. These routes can be completed in flexible order. Use Central Plaza as your recovery and preparation point between branches.
- Esquie’s flight ability unlocked.
- Flying Manor reached.
- Central Plaza Expedition Flag activated.
- Four branch routes identified.
4. Defeat the four branch encounters
Clear the four displayed branches: Goblu, the Évêque encounter, Lampmaster and Dualliste. The branch names and the manor displays are the reliable landmarks. When a route offers a return through the Young Boy, use it to go back to Central Plaza and prepare for the next fight.
The Évêque branch includes multiple elemental enemies and shielded targets. Focus a target you can damage reliably and avoid wasting attacks against an active shield. Lampmaster is a rematch, but its telegraphed attacks still punish missed defensive inputs. Dualliste has a very large health pool and can reduce the value of many ordinary attacks, so use Break opportunities and high-impact skills during safe openings. Goblu’s branch contains additional encounters before the boss; recover at the flag whenever the route allows it.
Rest at Central Plaza after difficult victories to recover and establish a recent autosave. The route to Clea opens only after all four displayed branch encounters have been defeated.
- Goblu defeated.
- Évêque encounter defeated.
- Lampmaster defeated.
- Dualliste defeated.
- Recent Central Plaza recovery point established.
- Clea route opened after the four victories.
5. Defeat Clea and collect the Flying Manor reward
Follow the newly opened route from Central Plaza to Clea. Her battle uses summoned Nevrons in attack sequences, so prioritize dependable parries and dodges during summon patterns instead of taking unsafe damage turns. Keep healing and revival options available for the later sequences.
Use Breaks and high-impact attacks during safe openings. If the summons repeatedly overwhelm the party, retreat to an Expedition Flag, change defensive Lumina or party roles, and return after improving the build. There is no need to force the fight immediately after opening the route.
After defeating Clea, return to Central Plaza and speak with the Young Boy. He offers an outfit reward for a female party member. Collect the reward, then search the manor for missed Pictos, weapons, records, haircuts and other optional items before leaving through the Expedition Flag.
- Clea defeated.
- Young Boy spoken to after Clea’s defeat.
- Available female-character outfit reward collected.
- Flying Manor rewards and optional collectibles reviewed.
- Recent recovery point established before leaving.
6. Complete the original-release Endless Tower
Fly to the Endless Tower entrance on the Continent and activate its Expedition Flag. The original-release tower contains 11 stages with three trials per stage. Trials unlock in order, and the later stages are sustained endgame challenges rather than ordinary story content.
You do not have to clear the tower in one sitting. Leave through the Expedition system between attempts, improve weapons or Lumina, and return to the entrance. Bring dependable healing or revival support, preserve Gradient Attacks for dangerous combinations, and remove the enemy creating the greatest immediate threat instead of automatically targeting the enemy with the most health.
Progress from Stage 1, Trial 1 through Stage 11, Trial 3. The final original-release trial is Painted Love, the Renoir and Paintress encounter sharing one health bar. Defeating it completes the base-game tower target. Do not include later update bosses in this endpoint.
- Endless Tower entrance Expedition Flag activated.
- Stages 1 through 10 completed.
- Stage 11, Trial 1 completed.
- Stage 11, Trial 2 completed.
- Stage 11, Trial 3 completed.
- Original-release tower completion reward collected.
7. Enter Renoir’s Drafts and defeat Simon
Renoir’s Drafts is in the ocean southeast of Visages. Fly to the entrance, activate the Renoir’s Drafts - Entrance Expedition Flag and follow the route through the area. Explore side paths for Pictos, records, catalysts and weapon upgrades before committing to the final approach.
Use the available flags to divide the dungeon into sections. If ordinary encounters force repeated revives, leave through an Expedition Flag and strengthen the party before returning. Simon can stun characters, reduce a character’s health to 1, steal shields and erase a character who remains KO’d when his turn arrives. Equip suitable anti-stun, revival or death-prevention options where available.
At the Golden Tree, continue through the tunnel and enter the Abyss. Approach the nearby figure to begin Simon’s battle. The fight has two phases. In the second phase, Simon adds longer sword combinations and can erase the active party unless he is defeated before that attack resolves. Prepare Gradient Attacks and reliable damage for the opening turns after the phase transition.
After Simon falls, collect the Simoso weapon, Colours of Lumina, Perfect Chroma Catalysts and Simon’s journal. Interact with the sword if you want a rematch, or use the Expedition Flag to return to the Continent.
- Renoir’s Drafts entrance reached.
- Entrance Expedition Flag activated.
- Golden Tree reached.
- Abyss entered.
- Simon defeated.
- Simon’s rewards collected.
- Simon journal collected.
8. Apply the original-release post-game completion check
For this chapter’s original-release target, confirm that Flying Manor is cleared through Clea, Renoir’s Drafts is cleared through Simon and Endless Tower Stage 11, Trial 3 is complete. Review weapons, Pictos, outfits, records, journals, companion scenes, Expedition Flags and optional activities against your personal cleanup list.
The December 11, 2025 Thank You Update added Verso’s Drafts and additional late-game Endless Tower bosses, along with new rewards and other features. A current PS5 installation may include that update, but Verso’s Drafts and those added tower encounters must be tracked separately and must not be counted toward the original-release target.
Before beginning New Game Plus, let the game autosave at an Expedition Flag after cleanup. If you still need the alternate ending, use the available recent autosave history before the final choice. If that state is no longer available, replay the late final route and Renoir before choosing the other character.
- Flying Manor cleared through Clea.
- Renoir’s Drafts cleared through Simon.
- Endless Tower cleared through Stage 11, Trial 3.
- Original-release collectibles and optional activities reviewed.
- Thank You Update content tracked separately.
- Recent post-game autosave created at an Expedition Flag before New Game Plus or further update content.
Before you move on
- The completed campaign has been loaded through Continue and the actual loaded position has been checked.
- The Flying Manor is cleared, including Évêque, Goblu, Lampmaster, Dualliste and Clea.
- The Young Boy’s post-Clea outfit reward has been collected.
- Renoir’s Drafts is completed through Simon, with Simon’s rewards and journal recorded.
- Endless Tower is complete through Stage 11, Trial 3.
- Remaining original-release flags, weapons, Pictos, outfits, records, journals, companion scenes and optional activities have been reviewed.
- Verso’s Drafts and Thank You Update Endless Tower bosses are listed separately rather than counted.
- A recent post-game autosave has been created at an Expedition Flag before New Game Plus or further update content.
- If an alternate ending is required, the pre-choice autosave has been confirmed or the final route and Renoir have been replayed.
References for this chapter
- Post Game - Clair Obscur: Expedition 33 Walkthrough & Guide
- Act 3: Maelle - Clair Obscur: Expedition 33 Walkthrough & Guide
- Endings Guide | Clair Obscur: Expedition 33
- Return to Lumière (Act 3) - Clair Obscur: Expedition 33 Walkthrough
- New Clair Obscur: Expedition 33 content available today, including Verso’s Drafts level
Sidequests, Minigames and Trophy Guidance
For the original PS5 release, complete side activities as their regions become available, then perform a broad Act 3 and post-game cleanup after Esquie gains flight. The trophy-linked targets are ten Nevron quests, five Gestral Games, nine Lost Gestrals, the Painting Workshop mystery, 49 journals, 33 music records, 44 Monoco Skills and the required relationship interactions. At launch, the Old Key in the prologue was the critical journal warning. The prologue Mime record, the Act 2 Verso-and-Maelle camp scene and Maelle’s final Truth choice also require attention. This chapter uses rotating autosaves and Expedition Flags rather than manual-save slots. The later Thank You Update may add recovery methods or extra content, but those changes are outside this original-release checklist.
1. Finish all ten Nevron quests before the final Blanche conversation
Talk to each white Nevron before attacking it. The ten quests are Jar at the Abandoned Expeditioner Camp in Spring Meadows; Démineur in the Noco’s Hut section of Flying Waters; Bourgeon in The Small Bourgeon; Hexga near Old Farm in Stone Wave Cliffs; Troubadour in Stone Quarry; Portier in Esoteric Ruins; Bénisseur in Red Woods; Danseuse in Glacial Falls within Frozen Hearts; Chalier in Floating Cemetery; and Blanche in The Fountain.
Jar needs Resin. After giving it to him, shoot the top of his staff or lantern with free aim and speak to him again for the reward. Démineur needs the Intact Mine found on the nearby jumping-platform route. Bourgeon needs a Bourgeon Skin from a Bourgeon enemy; leave and re-enter the area after giving it the skin, then collect what it drops and speak to it again. Hexga needs three Rock Crystals from the cave route beyond Old Farm.
Troubadour’s trial reverses the usual rule: dodge the red notes and allow the green notes to hit you. Portier needs the Wooden Boards beyond the Esoteric Ruins maze. Bénisseur requires four Chroma contributions of 5,000, 10,000, 25,000 and 50,000. Danseuse requires Lune to parry the complete attack sequence; retrying is allowed. Chalier asks you to choose its weapon, fight it, then agree to its request afterward to receive its reward. That specific defeat does not spoil Blanche’s better outcome.
After every delivery or challenge, speak to the Nevron again until the reward is actually awarded. For the best Blanche result, leave the other quest Nevrons alive after completing their requests. Blanche is the final check and awards Aiding the Enemy after the prior interactions have been fully completed.
- Complete all ten Nevron requests.
- Speak to each quest giver again after fulfilling the request.
- Keep the white Nevrons alive except for Chalier’s required post-fight decision if you want Blanche’s better reward.
2. Rescue all nine Lost Gestrals and report to Sastro
The nine Lost Gestrals are scattered across the Continent. The early rescues are near the entrance to Esquie’s Nest, on the route beside Stone Wave Cliffs after a Bourgeon, near the White Tree area northwest of Gestral Beach, and in the green area between Forgotten Battlefield and Monoco’s Station.
Later rescues are on a beach north of Coastal Cave, on the red island northwest of Old Lumière beyond two Mimes, on a high floating island south of Endless Tower, northeast of The Reacher after flight is available, and in the red forest area opposite the entrance to Endless Night Sanctuary. The exact order can vary because several locations become reachable at different points in Act 3.
Interact with each Lost Gestral and agree to send it back to Camp. The Lost Gestrals trophy is tied to finding all nine, but Sastro is in the Camp side area and must be visited to collect the individual rewards. If a location seems inaccessible, mark it for the Act 3 flight cleanup rather than assuming the Gestral is absent.
- Rescue all nine Lost Gestrals.
- Use Esquie’s water, coral and flight abilities when required.
- Visit Sastro after the final rescue and collect the remaining rewards.
3. Win all five Gestral Beach games
Each Gestral Beach contains one game. The five activities are Obstacle Course, Beach Raft Volley, Gestral Ascension, Gestral Race and Climbing Wall. In the Obstacle Course, reach the final platform and answer 17 when prompted. Lune’s movement can make the terrain easier to manage, but any character can be used.
In Beach Raft Volley, use melee attacks to return the baby Gestrals. Attack slightly before contact because the swing has a short delay and covers a forward cone. The game has multiple difficulty levels. The highest level grants the best reward, but completing every level is not required for the Gestral Games trophy according to the original trophy guidance; the earlier levels are sufficient if the final difficulty is blocking progress.
For Gestral Ascension, climb to the top without falling. Approach ledges straight on so the automatic climb is more reliable. For Gestral Race, finish under 38 seconds to receive the complete reward set. In Climbing Wall, remain near the centre and shift toward an open side when pairs of flaming orbs descend. Each game must be completed and rewarded; merely visiting all five beaches does not count.
- Complete the Obstacle Course and answer 17.
- Win enough Beach Raft Volley levels to register the game.
- Reach the top of Gestral Ascension and Climbing Wall.
- Finish Gestral Race under 38 seconds for its full reward.
4. Complete the Painting Workshop and unlock Noir et Blanc
Painting Workshop is one side area with three separate entrances, each leading to a platforming route. Complete all three routes and speak with the boy at the end of each route to receive an item. Return to the central statue after each route and place the corresponding item.
Use the fixed platforms and ropes to control your jumps instead of rushing camera turns. If a route becomes frustrating, leave through the nearby flag and return later; progress through the rest of the campaign does not invalidate the workshop. Once all three items are placed, the rear passage opens.
Defeat the Lampmaster rematch beyond the opened passage. Its key pattern remains tied to the lamps it lights: watch the order, then shoot the lamps in the matching order during your turn to cancel its attack sequence. Blight can persist through a failed attempt, so bring status-cleansing or recovery options. The victory awards Noir et Blanc and completes the workshop mystery.
- Complete all three workshop routes.
- Place all three received items at the statue.
- Defeat the Lampmaster rematch and confirm Noir et Blanc.
5. Protect journals, records and relationship interactions
The original-release journal target is 49. During the second section of the prologue, use the Festival Token at the back-left stall to obtain the Old Key. That key opens the later Old Lumière journal route. Do this before leaving the festival area if you are following the launch-version missable rules. Pick up every blue journal prism and track the total externally because the map does not provide a dependable area completion counter.
The original-release record target is 33. Defeat the optional Mime in the first prologue section to obtain the Lumiere record and its related trophy. In Act 2, after defeating the first Axon, repeatedly check Camp and complete the optional Verso-and-Maelle piano interaction to obtain Lettre a Maelle before finishing the Monolith sequence. The record list contains a duplicate later, but missing both of these early opportunities can prevent reaching 33 records on the launch rules.
After Act 3 opens, complete Maelle’s final relationship interaction and choose Truth rather than Lie. Check Camp after major story milestones, exhaust new dialogue and complete each character’s available scenes. Relationship rewards and most ordinary dialogue choices are optional, but the final Maelle interaction is required for her relationship trophy and related progression.
- Obtain the Old Key during the prologue under the original-release rules.
- Reach 49 journals and 33 records.
- Defeat the prologue Mime if pursuing the launch-version record and trophy route.
- Complete the Act 2 Verso-and-Maelle piano scene.
- Choose Truth during Maelle’s final relationship interaction.
6. Use autosaves and flags for cleanup, not manual save slots
This guide does not assume conventional manual-save slots. The game uses rotating autosaves, and Expedition Flags provide recovery, fast travel and a reliable point at which to rest before continuing. When a new Camp scene, missable interaction or major transition appears, stop at the flag or Camp, complete the available dialogue, then continue. If you discover a missed item quickly, inspect the available autosaves before replaying a large section.
The launch-version warnings above describe the original PS5 release. Later patches, including the Thank You Update, may provide recovery content such as a later Old Key source and may alter which collectibles are permanently missable. Those recovery additions are outside this original-release chapter and should not be counted as part of the launch checklist.
For final cleanup, use Act 3 flight to revisit every Gestral Beach, Lost Gestral route, Nevron location and Painting Workshop entrance. Trophy-focused completion does not require every weapon, outfit, Picto, Lumina or upgrade material. If pursuing the complete original trophy list, also collect the required Monoco Skills and defeat Simon in Renoir’s Drafts for Peace At Last. Keep update-only locations, added bosses, added cosmetics and later Endless Tower content in a separate checklist.
- Use Expedition Flags and the rotating autosaves as recovery points.
- Complete all launch-version missable checks before finishing the relevant act.
- Clean up Lost Gestrals, Nevrons, Gestral Games, Painting Workshop, journals, records, relationships and Monoco Skills.
- Defeat Simon only if the full original trophy list is the goal.
- Keep Thank You Update content separate from the original-release target.
Before you move on
- Aiding the Enemy unlocks after all ten Nevron quests are fully resolved.
- Lost Gestrals unlocks after rescuing all nine Lost Gestrals.
- Gestral Games unlocks after completing all five Gestral Beach games.
- Noir et Blanc unlocks after placing the three Painting Workshop items and defeating the Lampmaster rematch.
- Follow the Trail reaches 49 journals under the original-release target.
- Connoisseur reaches 33 music records under the original-release target.
- The relevant relationship trophies are complete, including Maelle’s final Truth interaction.
- Peace At Last is unlocked after defeating Simon in Renoir’s Drafts if the full original trophy list is required.
- The final platinum trophy, The Greatest Expedition in History, appears after all required trophies register.
- Update-only recovery content and later-added endgame activities are tracked separately rather than counted toward this original-release chapter.
References for this chapter
- Clair Obscur: Expedition 33 All Nevron Quests Locations
- Clair Obscur: Expedition 33 All Lost Gestral Locations
- Clair Obscur: Expedition 33 All Gestral Games Locations
- Clair Obscur: Expedition 33 All Collectible Locations Guide
- Clair Obscur: Expedition 33 All Journal Locations
- Clair Obscur: Expedition 33 All Record Locations
- Clair Obscur: Expedition 33 Trophy Guide & Roadmap
- Patch and Completion Changes — Clair Obscur: Expedition 33
Completion Checklist & 100% Cleanup
Defeat Renoir, make one final choice as Maelle or Verso, and complete that ending. After the credits, use Continue to return to the late endgame autosave, usually around the Crooked Tower Walkway or the final approach. Do not assume it will place you directly before the Young Boy choice: if the save is earlier, replay the final route and Renoir before choosing the other character. For the original PS5 release, track 49 Journals, 33 Music Records, 10 Nevron Quests, 5 Gestral Games, 9 Lost Gestrals, 44 Monoco Skills and 35 Relationship Interactions. Finish the five relationship tracks, unlock Esquie’s full traversal set, clean up the Continent, then clear Renoir’s Drafts, Flying Manor and the base Endless Tower. Exclude Verso’s Drafts, added equipment and update-only Tower trials. The route is selected after Renoir; no earlier choice determines which ending is available.
1. Complete one ending, then preserve the late endgame autosave
Finish the final Lumière route and defeat Renoir. After the following scenes, the game takes you to the Young Boy and presents the actual ending decision: choose Maelle to fight as Maelle against Verso, or choose Verso to fight as Verso against Maelle. Defeat the opponent and watch the complete epilogue. This is the only ending selection covered by this checklist. Earlier Act 2 decisions and hidden Act 3 choices do not select the route.
After the credits, choose Continue. Do not expect a conventional save-slot prompt or a guaranteed return to the exact moment before the Young Boy. Depending on the available autosave, Continue may place you at the Crooked Tower Walkway or at a late point before the final approach. If the Young Boy is no longer immediately available, follow the final route again and defeat Renoir again; the choice comes after that battle. Use the restored state to complete the other ending. The game rotates autosaves rather than providing ordinary manual save slots, so keep this campaign intact until both endings and cleanup are finished.
- Renoir is defeated.
- At least one ending is complete.
- Continue returns to a late endgame autosave.
- The final route can be replayed from that autosave, even if Renoir must be fought again.
- Both Maelle and Verso routes are complete if alternate-ending viewing is required.
- New Game+ has not been started.
2. Finish the five relationship tracks and Esquie’s traversal abilities
Return to Camp after major story and side-area progress. Speak with Lune, Maelle, Sciel, Monoco and Esquie whenever an interaction is available. Each of these five characters has seven relationship levels, producing the 35-interaction target. Gustave and Verso are not additional seven-level relationship tracks for this checklist. Relationship rewards include scenes and character progression; Esquie’s track also provides the final traversal ability.
For Maelle’s level 7 interaction, choose Truth rather than Lie. Truth allows the relationship to reach its maximum and unlocks her final Gradient Attack. The ordinary dialogue choices for the other relationship tracks are not being used here as ending requirements. Confirm that Esquie has Rough Terrain Traversal, Water Traversal, Coral Traversal, Flying and Underwater Diving. Most abilities come from story progression; Underwater Diving is tied to Esquie relationship progress. Do not begin the final map sweep until diving and flight are available.
- Lune is relationship level 7.
- Maelle is relationship level 7 and Truth was selected.
- Sciel is relationship level 7.
- Monoco is relationship level 7.
- Esquie is relationship level 7.
- Maelle’s level 7 Gradient Attack is unlocked.
- All Esquie traversal abilities, including Underwater Diving, are available.
3. Confirm every original-release collectible and activity total
Use the Journal, Music Record and Monoco menus together with a written location list. The original-release targets are 49 Journals, 33 Music Records, 10 Nevron Quests, 5 Gestral Games, 9 Lost Gestrals and 44 Monoco Skills. There is no reliable area-by-area completion counter, so mark each location as you verify it instead of relying only on the final total.
For the original release, obtain the Old Key during the Prologue festival before leaving. It opens the Old Lumière route containing a Journal, and missing it can make the 49-Journal target impossible on that campaign. Also defeat the Prologue Mime and view the optional Camp scene involving Verso and Maelle after the first Axon. Those are the two original-release Music Record opportunities most likely to be missed. Complete each Nevron request, speak to the Nevron again afterward and finish the dialogue. Do not kill white Nevrons after accepting their requests if you want the full reward chain and its final outcome.
- All 49 Journals are recorded.
- All 33 original Music Records are recorded.
- The Prologue Old Key was obtained.
- The Prologue Mime record was collected.
- The post-first-Axon Verso-and-Maelle Camp scene was viewed.
- All 10 Nevron Quests and their follow-up rewards are complete.
- All 5 Gestral Games are won.
- All 9 Lost Gestrals are rescued.
- All 44 Monoco Skills are learned.
4. Sweep the Continent after unlocking every route
Start in Lumière and work through the major regions in a fixed order. At each Expedition Flag, rest to recover and establish a convenient travel point, but do not treat the flag as a manual save slot. The game’s autosave history is the recovery system. When you need to force a recent autosave, use Return to Title Screen or another confirmed in-game autosave trigger such as changing an outfit, then reload only after checking that the intended state was recorded.
Revisit areas that were blocked during the campaign. Use Esquie’s water, coral, flying and underwater routes to reach isolated islands, submerged passages and elevated ledges. Check every side path for Journals, Records, Lost Gestrals, Paint Cages, weapons, Pictos and enemies that teach Monoco Skills. Visit every Gestral Beach and win its required game. Complete the Painting Workshop routes and any remaining Camp interactions before moving to the high-level post-game zones.
- Every intended Expedition Flag has been activated and used as a recovery or travel point.
- All blocked routes have been revisited after the relevant Esquie ability is unlocked.
- Journals, Records, Lost Gestrals and Monoco enemies match the written location list.
- All five Gestral Games are complete.
- Painting Workshop routes and remaining side activities are complete.
5. Clear the original post-game areas in a sensible order
Enter Renoir’s Drafts after the Continent sweep and after Underwater Diving is available. Unlock its Expedition Flags, collect the original-release rewards and reach the route into the Abyss. Defeat Simon only after the party has strong weapons, sufficient Lumina capacity and reliable revival or death-prevention options. Simon is among the hardest original-release encounters and can punish an unprepared party with shield disruption, severe health reduction and late-fight pressure, so keep a reserve build rather than spending every resource on the approach.
Next, fly to the Flying Manor and restore its paintings to open the route toward Clea. Clear its encounters while adjusting Pictos and resistances between fights. Finally, enter the base Endless Tower and complete its original-release stages and trials, including Stage 11, Trial 3. Treat the tower as a gauntlet: after difficult trials, return to a safe point, revise weapons and Luminas, and confirm the autosave before continuing. Do not count Verso’s Drafts or later-added Endless Tower bosses and trials toward this original-release checklist.
- Renoir’s Drafts is explored and its original rewards are collected.
- Simon is defeated.
- Flying Manor is completed.
- Clea is defeated.
- The original Endless Tower stages and trials are complete, including Stage 11, Trial 3.
- Verso’s Drafts and update-only Tower content are excluded.
6. Verify the file before starting New Game+
Review the Journal, Music Record, Monoco, relationship and trophy menus against the written checklist. Confirm one or both ending routes, the five level 7 relationship tracks, all Esquie abilities, the seven collectible and activity totals, the original post-game areas and the named optional bosses. If a total is short, use the location list and the autosave history before beginning another campaign.
Only start New Game+ after original-release cleanup is complete. Collection and world progress do not remain available in the same form for a clean first-playthrough checklist, so beginning New Game+ early can require another full sweep. Keep the completed campaign available for ending replays, boss rematches and trophy troubleshooting. Expedition Flags remain useful for travel and recovery, but they are not substitutes for preserving the correct autosave state.
- At least one ending route is complete; both are complete if alternate-ending viewing is desired.
- Lune, Maelle, Sciel, Monoco and Esquie are all relationship level 7.
- Maelle’s final interaction used Truth.
- Esquie’s complete traversal set is unlocked.
- The totals are 49 Journals, 33 Music Records, 10 Nevron Quests, 5 Gestral Games, 9 Lost Gestrals, 44 Monoco Skills and 35 Relationship Interactions.
- Renoir’s Drafts, Flying Manor and the base Endless Tower are complete.
- Simon and Clea are defeated.
- Verso’s Drafts and all post-launch additions are excluded.
- The completed campaign autosave remains available before New Game+.
Before you move on
- Renoir is defeated and at least one ending route is complete.
- The other route is also complete if both endings are required.
- Continue reaches a usable late endgame autosave, with Renoir replayed if necessary.
- Lune, Maelle, Sciel, Monoco and Esquie are all relationship level 7.
- Maelle’s final relationship interaction used Truth.
- All Esquie traversal abilities, including Underwater Diving, are unlocked.
- The original-release totals are complete: 49 Journals, 33 Music Records, 10 Nevron Quests, 5 Gestral Games, 9 Lost Gestrals, 44 Monoco Skills and 35 Relationship Interactions.
- The Old Key, Prologue Mime record, post-first-Axon Camp record and Nevron rewards are confirmed.
- Renoir’s Drafts, Flying Manor, the original Endless Tower, Simon and Clea are complete.
- Verso’s Drafts and all post-launch additions are excluded.
- The completed autosave remains intact and New Game+ has not been started prematurely.
References for this chapter
- Clair Obscur: Expedition 33 - PS5 Games
- Clair Obscur: Expedition 33 Trophy Guide & Roadmap
- Clair Obscur: Expedition 33 All Collectible Locations Guide
- Post Game - Clair Obscur: Expedition 33 Walkthrough & Guide
- Act 3: Maelle - Clair Obscur: Expedition 33 Walkthrough & Guide
- Clair Obscur: Expedition 33 Act 3 - Back to Lumière Walkthrough
Finishing up
You have cleared the required Acts 1–3 story objectives, defeated the Paintress and Renoir encounters required by the route, won the concluding Maelle-or-Verso duel, and watched the credits for one ending.
If pursuing both endings, you have preserved a verified pre-choice autosave or completed a second route through the game's available replay method. Neither ending is identified as canonical.
Optional original-release areas such as Flying Manor, Renoir's Drafts and Endless Tower are either completed or explicitly deferred.
Original-release collectibles, relationships, Nevron quests, Gestral activities and Monoco skills are either complete or tracked against the cleanup checklist. Later post-launch content is outside the original-edition completion target.
Choose your next gameScreenshots & video
Game imagery for reference. Follow the written chapters above for the route and strategies.
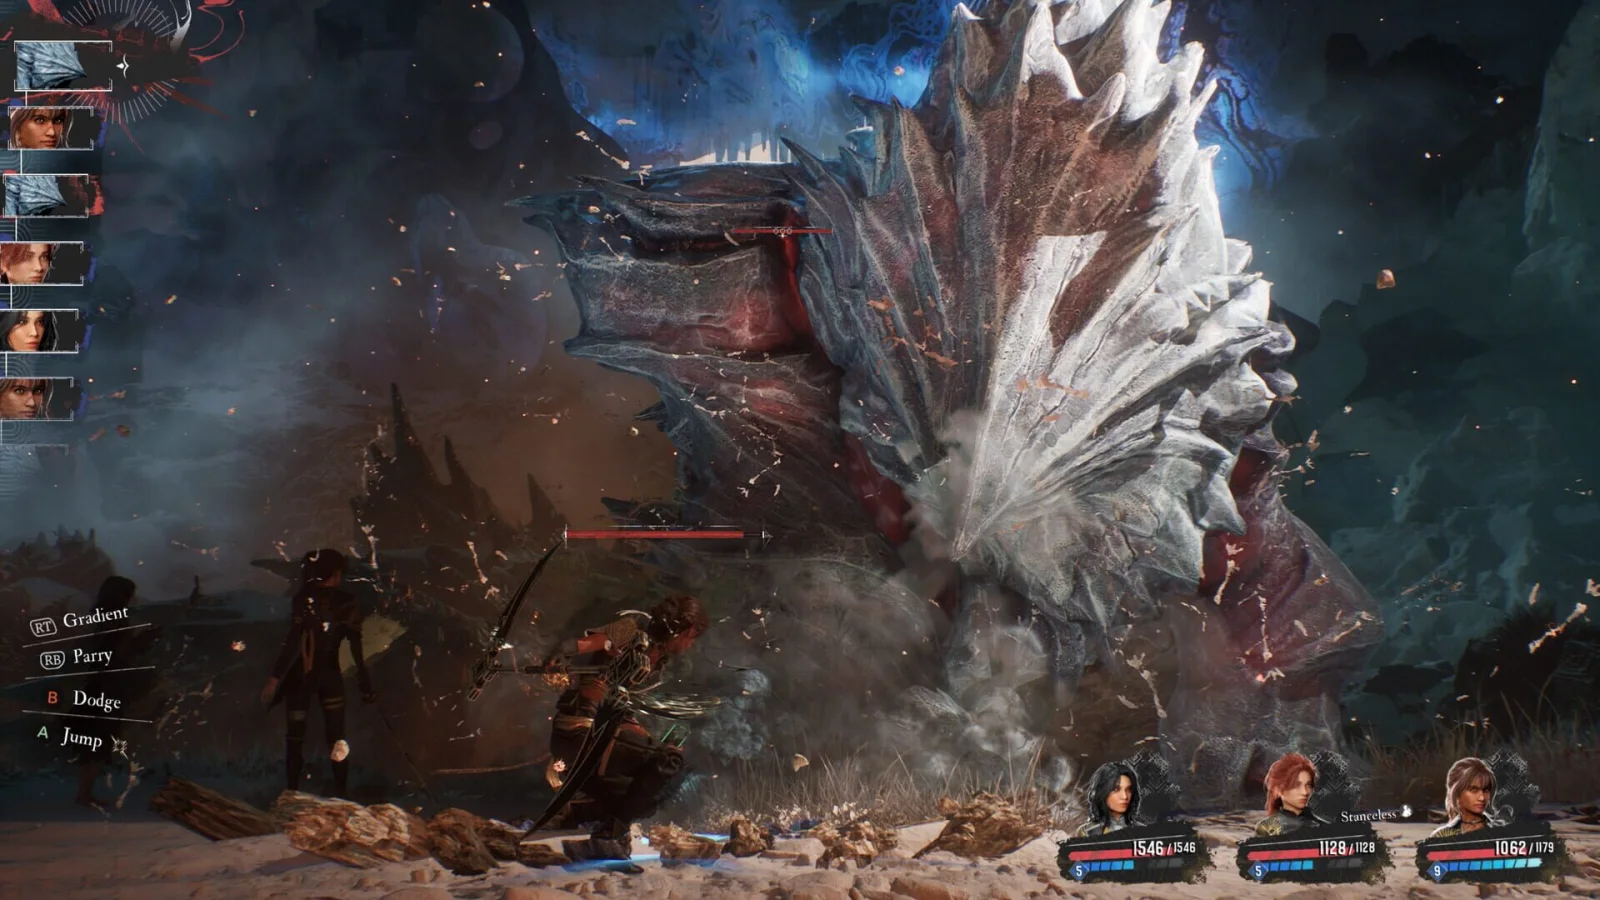
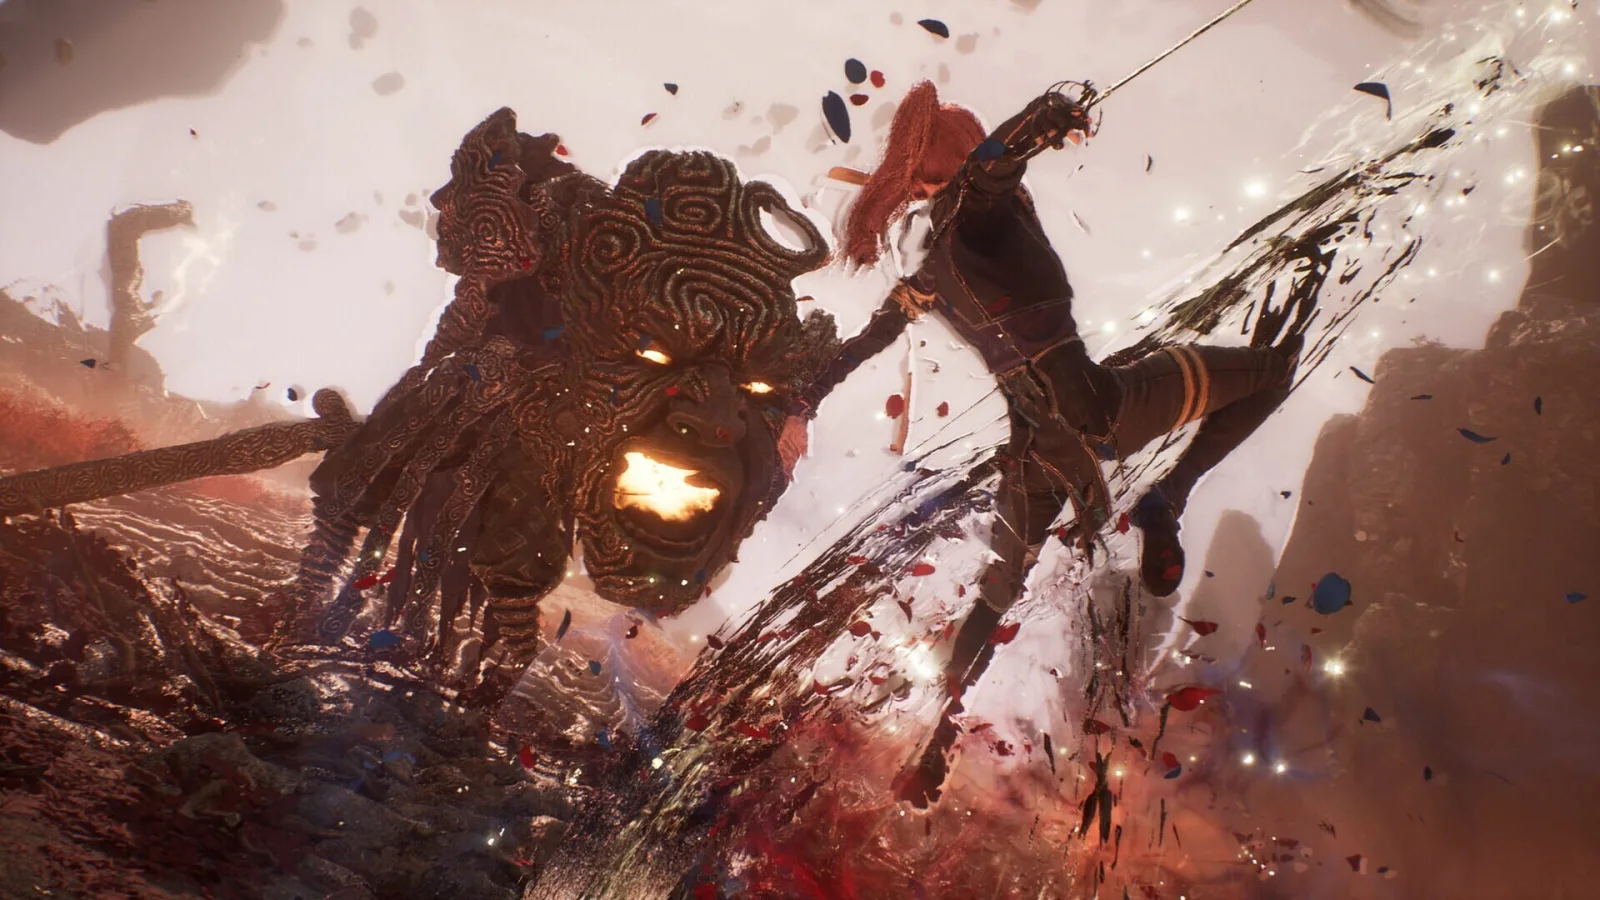
Sources & references
Our original guide draws on the references below. Check the edition at the top of this page before following controls or unlock requirements.
- Clair Obscur: Expedition 33 - PS5 games
- Lumière (Prologue) - Clair Obscur: Expedition 33 Walkthrough
- Mime Locations - Clair Obscur: Expedition 33 Walkthrough
- Old Lumière - Clair Obscur: Expedition 33 Walkthrough
- Prologue: Lumière - Clair Obscur: Expedition 33 Walkthrough & Guide
- How to use the old key in Clair Obscur: Expedition 33
- Act 1: Gustave - Clair Obscur: Expedition 33 Walkthrough & Guide - GameFAQs
- Chapter 2: Flying Waters - Clair Obscur: Expedition 33 Walkthrough & Guide, PS5
- Spring Meadows - Clair Obscur: Expedition 33 Walkthrough
- Flying Waters - Clair Obscur: Expedition 33 Walkthrough
- To the Flying Waters - Clair Obscur: Expedition 33 Walkthrough
- How to help the Jar in Clair Obscur: Expedition 33
- How to help Demineur in Clair Obscur: Expedition 33
- How to beat the Bourgeon and get its skin in Clair Obscur: Expedition 33
- Ancient Sanctuary 100% Guide and all Locations | Game8
- How to Beat Ultimate Sakapatate | Game8
- Gestral Village 100% Guide and all Locations | Game8
- How to Get Medalum and Locations | Game8
- Esquie’s Nest Walkthrough | Game8
- ACT 1 Gustave Stone Wave Cliffs - Clair Obscur: Expedition 33 Walkthrough & Guide - GameFAQs
- Clair Obscur: Expedition 33 mushroom location for Karatom
- Karatom Walkthrough | Clair Obscur: Expedition 33
- Clair Obscur: Expedition 33 - PS5 Games
- Clair Obscur: Expedition 33 — Official Characters
- Clair Obscur: Expedition 33 — Walkthrough & Guide, Companions
- Act 2: Verso - Clair Obscur: Expedition 33 Walkthrough & Guide - GameFAQs
- Relationship Guide — All Ranks and Rewards
- Monoco, Skills List — Clair Obscur: Expedition 33 Walkthrough & Guide
- Clair Obscur: Expedition 33 All Monoco Skill Locations
- To the Forgotten Battlefield — Clair Obscur: Expedition 33 Walkthrough
- New Clair Obscur: Expedition 33 gameplay – fighting and exploring the Flying Waters region
- Clair Obscur: Expedition 33 devs discuss classic turn-based RPG inspiration and real-time mechanics
- 8 Tips to Help You Get Started in Clair Obscur: Expedition 33
- Clair Obscur: Expedition 33 - A Detailed Breakdown of its Painterly RPG Combat
- Clair Obscur: Expedition 33 Trophy Guide & Roadmap
- Clair Obscur: Expedition 33 Complete Guide and Collectible Counts
- All Expedition Flags | Clair Obscur: Expedition 33
- Expedition 33: How to Save Your Game
- Clair Obscur: Expedition 33 Prologue Collectible Locations
- Clair Obscur: Expedition 33: The Continent Walkthrough
- ACT 2 Verso Forgotten Battlefield - Clair Obscur: Expedition 33 Walkthrough & Guide
- ACT 2 Verso Monoco Station - Clair Obscur: Expedition 33 Walkthrough & Guide
- Clair Obscur: Expedition 33 Act 2 - Forgotten Battlefield Walkthrough
- Clair Obscur: Expedition 33 Act 2 – Monoco’s Station Walkthrough
- How to Save Your Progress | Clair Obscur: Expedition 33 - Game8
- How to Beat Dualliste | Clair Obscur: Expedition 33
- Monoco’s Station - Clair Obscur: Expedition 33 Walkthrough
- Clair Obscur: Expedition 33: Old Lumiere Walkthrough - Journals, Music Records
- Clair Obscur: Expedition 33 All Journal Locations
- ACT 2 Verso Sirene - Clair Obscur: Expedition 33 Walkthrough & Guide
- Visages Walkthrough | Clair Obscur: Expedition 33
- Clair Obscur: Expedition 33 Sirene Walkthrough
- Clair Obscur: Expedition 33 The Monolith Walkthrough - QuestDuo
- Clair Obscur: Expedition 33 Monolith Peak Walkthrough - QuestDuo
- Clair Obscur: Expedition 33 Guide: A 100% Collectibles Walkthrough - Push Square
- Act 3: Maelle - Clair Obscur: Expedition 33 Walkthrough & Guide
- The Reacher — Clair Obscur: Expedition 33 Walkthrough
- Area Progression Route — Clair Obscur: Expedition 33 Walkthrough
- Sirène’s Dress — Clair Obscur: Expedition 33 Walkthrough
- Sirene’s Dress 100% Guide — Clair Obscur: Expedition 33
- Sacred River — Clair Obscur: Expedition 33 Walkthrough
- Frozen Hearts — Clair Obscur: Expedition 33 Walkthrough
- Frozen Hearts 100% Guide and All Locations — Clair Obscur: Expedition 33
- Boss: Gargant — Clair Obscur: Expedition 33 Walkthrough
- Grandis — Clair Obscur: Expedition 33 Walkthrough
- Gestral Merchant Shop Items — Clair Obscur: Expedition 33
- How to Help Danseuse Dance — Clair Obscur: Expedition 33
- Chapter 17: Lumiere - Clair Obscur: Expedition 33 Walkthrough & Guide
- ACT 3 Maelle Lumiere - Clair Obscur: Expedition 33 Walkthrough & Guide
- Clair Obscur: Expedition 33 Act 3 - Back to Lumière Walkthrough
- Clair Obscur: Expedition 33 Missables Guide — Safe 100% Route
- Clair Obscur: Expedition 33 | Latest Patch 1.4.0 Now Live
- Expedition 33: How to defeat the final boss, the real Renoir?
- Renoir - Act 2 & 3 Boss Guide
- Clair Obscur: Expedition 33 Back to Lumiere Walkthrough (Final Chapter)
- Cant get the other ending? Clair Obscur: Expedition 33 discussion
- Clair Obscur: Expedition 33 dev confirms there is no canon ending
- Post Game - Clair Obscur: Expedition 33 Walkthrough & Guide
- Endings Guide | Clair Obscur: Expedition 33
- Return to Lumière (Act 3) - Clair Obscur: Expedition 33 Walkthrough
- New Clair Obscur: Expedition 33 content available today, including Verso’s Drafts level
- Clair Obscur: Expedition 33 All Nevron Quests Locations
- Clair Obscur: Expedition 33 All Lost Gestral Locations
- Clair Obscur: Expedition 33 All Gestral Games Locations
- Clair Obscur: Expedition 33 All Collectible Locations Guide
- Clair Obscur: Expedition 33 All Record Locations
- Patch and Completion Changes — Clair Obscur: Expedition 33
About the game & collecting notes
- Platform
- Sony PlayStation 5
Step-by-step campaign walkthrough for Clair Obscur: Expedition 33 on PlayStation 5. Covers the prologue, Acts 1–3, required bosses, companion recruitment, builds, overworld navigation, key puzzles, alternate endings and post-game content so you can complete one ending route and then clean up the original PS5 campaign without confusing optional rewards or later-update content with required story progress.
Darryl Polo
Darryl Polo loves tinkering with emulation and revisiting retro games. He enjoys exploring how old favorites play on different setups and sharing what he learns along the way. At Joking Joystick, he writes about the games, hardware, and small discoveries that keep the hobby fun.
Our editorial standardsFound a step that needs another look? Help us improve this guide.