
Baldur's Gate 3 (PS5) — Complete Campaign Walkthrough (PS5 edition)
Step-by-step campaign walkthrough for the PlayStation 5 edition of Baldur's Gate 3. This guide covers PS5-specific setup, character creation, Acts 1–3 main routes, essential side quests, companion resolutions, boss approaches, and a final completion checklist so you can reach a valid campaign ending, the ending sequence and credits on PS5, while preserving saves for alternate outcomes.


Find a copy
Baldur's Gate 3 Sony PlayStation 5
We may earn a commission if you buy through these links, at no extra cost to you. As an Amazon Associate I earn from qualifying purchases.
Opens retailer search results. Check the model, edition, seller, availability and current price before buying.
Before you begin
This walkthrough is written for the PlayStation 5 release of Baldur’s Gate 3 and follows the campaign from character creation through the ending sequence.
It uses PS5 controller terminology where useful, but exact prompts can vary with the selected control scheme and installed version; follow the labels shown on screen.
Cross-save and Larian account setup are optional support features, not requirements for completing the campaign.
Follow the chapters in order: preparation, Prologue, Act 1 Wilderness, Underdark and Mountain Pass content, Act 2, companion preparation, Act 3 and the final sequence.
Each major chapter separates required progression from optional rewards, companion arcs, romances and faction outcomes.
The final chapters explain how to reach the ending and credits, view the available epilogue, and preserve saves for alternate endings.
Set yourself up for the run
Install the current PS5 system and game updates before starting, then confirm the game reaches its main menu normally.
Link a Larian account and enable cross-save only if you want supported save transfer or recent-save recovery between platforms; retain important saves locally on PS5.
Use the DualSense prompts and radial-menu labels shown by the installed build. Arrange inventory, attacks, spells, healing and movement actions so they are easy to reach.
Keep several named manual saves before major dialogue choices, area transitions, companion decisions and points of no return.
Choose a difficulty appropriate to your experience; the route does not require one specific difficulty.
Use camp and rests for recovery and companion scenes, while checking active time-sensitive quests before taking unnecessary long rests.
For co-op, confirm the host’s save ownership and keep a separate local backup before major story decisions.
Preparation and PS5 Setup
Prepare the PS5 installation before beginning Baldur's Gate 3. Update the console and game, link the PlayStation account to a Larian account, and enable the cross-save service only after confirming that the accounts are connected. Cross-save is useful for transferring or recovering recent saves, but it is not a permanent archive: keep important campaign files on the console and rotate several manual saves. Learn the DualSense radial, map, journal, Examine, Jump, rest, and camp controls before the Nautiloid. Performance mode is the frame-rate-focused option for standard PS5 play, while Resolution or Quality mode can be preferable for image quality or troubleshooting. Use only the compatible in-game mod system on PS5; do not assume PC mods or PC save behavior will transfer safely.
1. Update the PS5 and Baldur's Gate 3 before creating saves
Connect the PS5 to the internet. Highlight Baldur's Gate 3 on the home screen, press the Options button, and choose Check for Update. Starting the game also checks for an available game update, but checking from the home screen is useful before you commit to a new campaign. Record the build number shown on the title or main-menu screen if you need to report a problem later. PlayStation's current instructions use Options, Check for Update for installed games and Settings, System, System Software, System Software Update and Settings for the console itself.
In Settings, enable automatic game updates through Saved Data and Game/App Settings, Automatic Updates if you want downloads or installations handled in Rest Mode. Under Settings, System, Power Saving, Features Available in Rest Mode, enable Stay Connected to the Internet if you want Rest Mode updates to work. Close a suspended game before installing an update when the console requests it; do not begin the campaign from an outdated suspended session.
- PS5 system software is current.
- Baldur's Gate 3 passes Check for Update.
- The game reaches its main menu after updating.
- The installed build number is recorded if troubleshooting may be needed.
2. Link PlayStation and Larian accounts, then enable cross-save
If you do not already have a Larian account, create one on another device through Larian's account page. On the account website, open Connected Accounts and link the PlayStation account that you use to launch Baldur's Gate 3. Larian's PS5 support instructions say to restart the game after linking so the connection takes effect.
In Baldur's Gate 3, open Options, select Gameplay, and open Save Options. Look for the cross-save service toggle. Larian's current account documentation calls the feature Cross-save, while a console support article labels the relevant toggle Cross-play; use the equivalent cross-save toggle shown by your installed build. Enable it, then make a new manual save and wait for synchronization. Return to the Save or Load screen and confirm that the new file is listed among the saves available through Larian's service. That list is the practical confirmation that the save has synchronized; simply seeing your account name is not enough.
Treat the online copy as temporary transfer and recovery storage. Larian currently states that the service syncs a copy of the last ten saves and stores those copies for up to six months. It does not replace the local PS5 files, and it should not be your only archive for a campaign you intend to revisit.
- The correct PlayStation account is linked under Larian Connected Accounts.
- The cross-save or cross-play toggle is enabled in Save Options.
- A fresh manual save appears in the cross-save Save or Load list.
- Important saves remain available locally on the PS5.
3. Select graphics, accessibility, and stability preferences
Open the game's Options menu before starting character creation. On a standard PS5, use Performance mode if smoother camera movement and general responsiveness matter most. Use Resolution or Quality mode if image sharpness is your priority. Do not treat an advertised or previously documented frame-rate target as a guarantee in every scene; display settings, game updates, and demanding areas can affect the result. If you experience freezes or radial-menu instability, switching away from Performance mode is an officially documented troubleshooting step.
If you are using a PS5 Pro, confirm which enhanced options the installed version exposes rather than applying standard-PS5 advice blindly. The PlayStation product listing identifies Baldur's Gate 3 as PS5 Pro Enhanced. For either console, turn on subtitles and speaker names, and adjust interface or text accessibility options until dialogue, conditions, and inventory labels are readable from your normal seating position.
For a stable first campaign, leave third-party PC modifications out. PS5 has access to the game's compatible in-game Mod Manager, but a PC mod, manually altered save, or PC-specific troubleshooting procedure should not be assumed to work on console. Keep the first campaign unmodded if you want the simplest save recovery and troubleshooting path.
- Your chosen graphics mode remains selected after restarting.
- Subtitles, speaker names, and interface text are readable.
- You know whether the campaign is unmodded or uses only compatible in-game content.
- You know which alternate graphics mode to try if freezes or input lag occur.
4. Learn the DualSense interface before entering the Nautiloid
Use the left stick for direct movement and the right stick for camera control. Press the touch pad to enter cursor-style control when you need precise selection of a small object, container, or position. Zoom the camera out fully with the right stick to enter the top-down Tactical View, which makes cliffs, surfaces, hazards, and interactable objects easier to read.
The trigger-accessed radial gives quick access to the map, journal, spellbook, character sheet, combat log, alchemy, short rest, long rest, camp, level-up screen, and Illithid Powers. Action radials contain attacks, spells, cantrips, consumables, equipment actions, and class features. Reorganize these wheels whenever you gain an ability so healing, Jump, Dash, Examine, and your most-used attacks do not become buried several wheels deep.
The D-pad provides direct access to frequently used functions including Jump and Examine. During combat, inspect enemies before spending an action: check resistances, conditions, reactions, movement range, and nearby hazards. In dialogue, use Dialogue History when a long conversation introduces several names or instructions. These controller features are part of the PS5 interface, not keyboard shortcuts transplanted from the PC version.
- You can open the map and journal from the radial.
- You can find inventory, Examine, Jump, short rest, long rest, and camp.
- Your main attacks, healing items, and movement actions are easy to reach.
- You can inspect a target and read its conditions before acting.
5. Establish a manual-save routine before the first major choice
Create a named manual save at the start of the campaign and another immediately after leaving the Nautiloid. Before an important dialogue choice, entering a dangerous area, starting a major fight, or accepting an obvious point of no return, make a fresh manual save. Keep several rotating decision saves instead of overwriting one file. Autosaves are useful recovery points, but they should not be your only record of a branching choice.
Use one stable local save as the main campaign backup and separate saves for experiments. Save after healing and finishing nearby conversations, then make another save immediately before the decision itself. If you use cross-save to move between platforms, confirm that the intended save appears in the cross-save list, but keep the local PS5 copy because Larian's service retains only the recent synchronized set and is subject to its storage period.
Name important files by purpose rather than relying on an autosave timestamp, for example Campaign Start, Before Grove Choice, or Before Act Transition. Do not delete the local copy after seeing it online. This routine lets you test dialogue, combat, companion outcomes, and alternate endings without sacrificing the main run.
- A named local campaign-start save exists.
- A second manual save exists after leaving the Nautiloid.
- At least two rotating manual-save slots are available for major choices.
- Any cross-save copy has appeared in the Save or Load list before the game is closed.
- The local PS5 save remains the primary archive.
Before you move on
- The PS5 and Baldur's Gate 3 both report current update status.
- The PlayStation account is linked to the correct Larian account.
- Cross-save is enabled when desired, and a test manual save appears in the cross-save Save or Load list.
- Performance or Resolution mode is selected intentionally, with a fallback mode known for troubleshooting.
- The player can reach the map, journal, inventory, radial menus, camp, rests, Examine, Jump, cursor mode, and Tactical View with the DualSense.
- A named local manual save exists before the Nautiloid, with additional rotating saves for future decisions.
- Any online cross-save copy is treated as supplementary rather than the only campaign archive.
References for this chapter
- Larian Account Information
- Troubles with Larian Account & Linking PS5
- Retrieving Requested Files
- Disappearing Save Files on Xbox
- How Baldur’s Gate 3 adapts its expansive RPG gameplay for your DualSense controller
- How to check for updates on PS5 consoles and PS4 consoles
- How to set up auto-downloads and updates on PlayStation console
- Baldur’s Gate 3 — PS5 Games | PlayStation
- Baldur's Gate 3 Official Support
- Hotfix #34 Now Live: Steam Deck Native Build
Character Creation and Party Setup on PS5
Choose a protagonist whose abilities and personal storyline fit the way you want to play, then recruit the early Origin companions before committing to the Emerald Grove conflict. A Custom character gives you control over race, class, background and appearance. An Origin character provides a predefined identity and personal storyline, while the Dark Urge is a special Origin with its own campaign events rather than a companion who can be recruited later. On PS5, learn the DualSense radial menus immediately: they provide access to attacks, spells, items, character management, the map, journal, camp and rest commands. Build an active party with frontline durability, support, exploration skills and ranged or control options. Save after character creation, after recruiting companions, and before respecs or major faction decisions.
Choose Custom, Origin or Dark Urge
Select Custom if you want to define your protagonist’s race, class, background, appearance and general role. A Custom character does not have a separate Origin companion quest, but still participates fully in the main story and can receive class-, race- and background-specific dialogue.
Select one of the six recruitable Origin characters if you want to play directly through that character’s perspective and personal storyline. Astarion, Gale, Karlach, Lae’zel, Shadowheart and Wyll can otherwise appear in the world as companions. The Dark Urge is different: it is a special Origin with a distinct personal storyline and can be customized during creation, but it does not appear later as a recruitable party member if you choose another protagonist.
Choose a background for a Custom character based on the skills and Inspiration opportunities you expect to use. There is no universally required background for completing the campaign. Make your first manual save as soon as you enter the game after character creation, rather than expecting to save from the creation screen.
- Decide whether you want a blank-slate Custom protagonist or an authored Origin perspective.
- Remember that the Dark Urge is not a companion who can be recruited later.
- Save immediately after arriving in the opening area.
Set a primary ability and a manageable class plan
During ability allocation, give your highest relevant score to the ability your class uses most. Strength generally supports heavy melee attacks, Dexterity supports finesse weapons, ranged attacks and initiative, Wisdom supports Clerics and many perception-based checks, Charisma supports Bards, Paladins, Sorcerers and Warlocks, and Intelligence supports Wizards. Constitution remains valuable because it improves durability and helps maintain concentration.
Fighter, Barbarian, Paladin, Ranger, Cleric and Warlock are accessible first-run choices because their core actions are easy to understand. Wizards, Sorcerers, Druids, Bards and Rogues are also effective, but ask you to manage more spells, prepared options, reactions or skill tools. Do not multiclass simply because it is available. Play through several early encounters first and learn the difference between actions, bonus actions, reactions, concentration and spell slots.
Withers can later respec party members, changing class, ability scores, skills, spells and other level-up choices for a fee. This makes experimentation safe, but it does not make the first build irrelevant: a clear early role will make the opening fights easier to read.
- Prioritize the class’s main attack or spellcasting ability.
- Keep Constitution useful instead of treating every ability as equally important.
- Learn your class before experimenting with multiclassing.
Learn the PS5 radial menus before the first major fight
On PS5, use the trigger and the on-screen prompt for the radial menu. The menu contains attacks, spells, items, class features and utility actions, while the broader controller interface provides access to the map, journal, character sheet, spellbook, combat log, camp and rest functions. Exact prompts can vary with the selected control scheme, so follow the labels shown in your game rather than relying on a fixed button list.
After every level-up, inspect each character’s radial menu. Newly learned actions may not be placed where you expect them. Keep basic attacks, Dash, Jump, Help, Hide, Disengage, potion use and commonly used spells easy to reach. Put emergency healing and movement tools in locations you can recognize quickly during turn-based combat.
Use the character sheet to review equipment, proficiencies, prepared spells, concentration effects and reactions. Known-spell casters and prepared casters manage their options differently, so check the spell interface after each level rather than assuming all new abilities are ready automatically. Practice selecting one party member, moving them independently, jumping and opening the radial menu in a safe area.
- Open every active character’s radial menu before entering a dangerous area.
- Place healing, movement and frequently used attacks where they are easy to identify.
- Review prepared spells, reactions and concentration effects after leveling.
Recruit the early companions without closing off options
If you freed Shadowheart from the Mind Flayer pod during the Prologue, she is unconscious on the Ravaged Beach after the crash. Speak with her to recruit her. If she was not freed, she can instead be found near the entrance to the Dank Crypt. Ignoring her does not immediately delete her recruitment opportunity, but she later moves to other story locations, so recruiting her on the beach is the simplest route.
Astarion is on the trail west of the crashed Nautiloid. Gale is trapped in the Ancient Sigil Circle near the Roadside Cliffs waypoint. Lae’zel is temporarily available during the Prologue and can later be freed from the cage south of the Emerald Grove entrance. Handle the tiefling confrontation carefully if you want her in the party.
Wyll first appears during the fight outside the Emerald Grove. Afterward, find him inside the Hollow training tiefling children and speak with him there. Karlach is on the Risen Road near and south of the Toll House. Speak with her before siding with the Goblins or allowing the Grove situation to resolve without her, because those choices can make her unavailable. If Wyll and Karlach are both involved, their confrontation can be resolved through dialogue rather than violence.
- Recruit Shadowheart, Astarion, Gale and Lae’zel early if you want the broadest companion choice.
- Find Wyll in the Hollow after the gate battle.
- Meet Karlach near the Toll House before finalizing the Grove conflict.
Assemble and manage the active party
Only four characters can travel in the active party at once, including the protagonist. A reliable beginner arrangement is the protagonist, Shadowheart, one frontline character such as Lae’zel or Karlach, and either Astarion or Gale. Shadowheart provides healing, Guidance and support; Lae’zel and Karlach handle close combat; Astarion covers locks, traps, stealth and ranged attacks; Gale provides area damage, control and utility.
Change the lineup when a companion’s personal quest or a location makes their presence useful. Bring Lae’zel for Githyanki-related scenes, Wyll for parts of his personal storyline, and Karlach when dealing with people connected to her past. The game does not require one permanent party, and rotating companions also gives you more opportunities to see their camp conversations and approval reactions.
To remove someone from the active group, speak with that companion and ask them to remain at camp. Then speak with the companion you want and invite them to join. At camp, party members can be swapped, spoken to and equipped from stored gear. The character selected as the leader controls movement and normally initiates conversations, so choose the party member with the strongest relevant skill before opening an important dialogue or examining a trap.
- Cover frontline defense, support, exploration skills and ranged or control options.
- Rotate companions when their personal knowledge or quest is relevant.
- Confirm the intended party leader before important conversations and skill checks.
Before you move on
- The protagonist has a chosen race, class, background and ability spread, and a manual save exists after entering the game.
- Shadowheart, Astarion, Gale and Lae’zel have been recruited or intentionally left behind.
- Wyll has been recruited from the Emerald Grove Hollow or deliberately excluded, and Karlach has been contacted before the Grove conflict is finalized.
- The active party covers frontline durability, support, exploration skills and ranged or control options.
- Every active character’s radial menu has been checked after leveling, with healing, movement and essential attacks easy to reach.
- You can select individual party members, change the party leader, split and regroup the party, open the map and journal, and reach camp or rest commands without searching.
References for this chapter
- How Baldur’s Gate 3 adapts its expansive RPG gameplay for your DualSense controller
- Gameplay Information – Larian Studios Support
- Character creation – BG3 Wiki
- Origins – BG3 Wiki
- Companions – BG3 Wiki
- Shadowheart – BG3 Wiki
- The Blade of Frontiers – BG3 Wiki
- Karlach – BG3 Wiki
- Campsite – BG3 Wiki
- Respec — bg3.wiki
Prologue — Nautiloid and the Escape
Escape the Nautiloid by recruiting Lae’zel, freeing Shadowheart if possible, and reaching the transponder in the Helm. This opening teaches movement, turn-based actions, conditions, death saves, party control and the tadpole premise. Us, Commander Zhalk and the Everburn Blade are optional; none is required to survive the prologue. On PS5, use the DualSense radial menus, R3 world-information highlighting, the held-X nearby-object search and the D-pad shortcuts to avoid missing interactables. After the crash, recruit Shadowheart on the Ravaged Beach if she is available, then create a clearly labeled manual save before exploring the wider wilderness.
1. Learn the PS5 controls and leave the opening chamber
After the opening cinematic, move through the damaged Nautiloid nursery. The left stick controls movement and the right stick controls the camera. Use R2 to open the shortcut radial containing entries such as the map, journal, character sheet, spellbook, rests and camp. Your actions, spells, items and equipment are placed on customizable radial wheels; rearrange them whenever a command is difficult to reach during combat.
Hold R3 to display world information, including nearby item labels and relevant sight lines. Hold X while near objects to open a local search list of interactable items, containers and bodies. L3 switches to cursor mode when direct movement is awkward. The D-pad supplies quick actions such as Jump and Examine. These are safer PS5 habits than trying to reproduce keyboard shortcuts.
Use the restoration device in the first room if the party takes damage. Inspect the tutorial prompts about actions, bonus actions and movement. When a character reaches zero hit points during combat, they are generally downed and begin death saving throws rather than disappearing immediately. Use Help or healing to bring them back up; a dead character requires a resurrection method instead.
- Open the R2 shortcut radial and identify the map, journal, camp and rest commands.
- Test R3, held X, L3 cursor mode and the D-pad Examine or Jump command.
- Use the restoration device if needed before entering the next room.
2. Recruit Lae’zel and fight toward the Helm
Follow the organic walkway into the next section. Lae’zel becomes available during the early escape and should be kept in the party for the tutorial unless you are deliberately taking an alternate route. Let her demonstrate melee attacks while your protagonist attacks from range, uses spells or assists with positioning.
Do not stand beside every enemy simply because a target is visible. Move Lae’zel into a useful frontline position, keep fragile characters behind her, and use high ground or cover when it is available. If an attack misses, spend the remaining action economy on movement, a bonus action, a shove, an item or a defensive position rather than ending the turn in danger.
- Lae’zel is recruited or you have deliberately accepted the alternate outcome.
- At least one character has enough hit points to continue toward the next chamber.
- You have used both a movement command and a basic attack from the controller interface.
3. Free Shadowheart from the pod
In the room with the captive, interact with Shadowheart’s Mind Flayer pod. Some classes can attempt a class-based check at the pod, including an Arcana option for suitable spellcasting characters or a Strength option for a barbarian. If those options are unavailable, travel east into the other Ceremorphosis Chamber and search the dead thrall on the far side for the Eldritch Rune.
Return to the device beside Shadowheart’s pod and insert the rune. The character who uses it makes a low Wisdom check. If that attempt fails, try again with Lae’zel or the other available githyanki companion. If both attempts fail, Shadowheart remains in the pod during the prologue but can still be encountered after the crash.
Freeing Shadowheart is the preferred route for a companion-focused campaign because she then joins the Nautiloid escape. Read the surrounding dialogue about the tadpole and the characters’ infection; the scene establishes the central problem without requiring an immediate decision to use or reject illithid powers.
- Shadowheart is freed and recruited, or you have recorded that she remains trapped.
- The Eldritch Rune was taken from the eastern Ceremorphosis Chamber when required.
- The party has read or advanced through the parasite explanation.
4. Decide whether to rescue Us
Near the route to the Helm, investigate the injured intellect devourer known as Us. Examining the exposed brain and choosing to help can add Us as a temporary follower for the Nautiloid sequence. Us provides another body for attacks, flanking, movement and Help actions, but it is not a permanent party member for the campaign.
Us is entirely optional. If an ability check fails, you choose to leave the creature, or you do not want to spend time on the interaction, continue toward the Helm. Do not delay the required escape objective for this reward.
- Choose whether to assist Us without treating it as required progression.
- Keep the party moving if the optional interaction becomes costly or risky.
5. Reach the transponder at the Helm
Before entering the Helm, make a quicksave or manual save if you want to attempt the optional Everburn Blade reward. Commander Zhalk is fighting a Mind Flayer in the room. The required objective is the transponder on the far side, not Zhalk’s defeat. Two Lesser Imps and a Lesser Hellsboar obstruct the approach, and additional cambions can arrive after several rounds.
The safest beginner plan is to move toward the transponder while eliminating only enemies that block the route. If you want the Everburn Blade, Shadowheart or another suitable character can use Command: Drop, allowing the weapon to be picked up without defeating Zhalk. Defeating Zhalk is also possible, but it consumes time and exposes the party to reinforcements. Either attempt can fail, so do not let the optional weapon prevent the escape.
When a character reaches the console, connect the transponder nerves to trigger the escape. If the fight is collapsing, Dash, use movement abilities, ignore loot and activate the console immediately. You do not need to kill every enemy or wait for the Mind Flayer to win.
- A character can reach the transponder this turn or on the next safe opportunity.
- The Everburn Blade attempt has been abandoned if it threatens the escape.
- The transponder is activated before the party is overwhelmed.
6. Recruit Shadowheart after the crash and create the chapter save
After the Nautiloid crashes, your character awakens on the Ravaged Beach. Locate Shadowheart near the opening shoreline and speak with her. If she was freed during the prologue, she can join immediately. If she was left in the pod, follow the nearby post-crash route and recruit her when you encounter her there instead.
Once Shadowheart is recruited or her alternate location is confirmed, open the pause menu and create a manual save in a clearly named slot such as Beach — Prologue Complete. This save is the recovery point for replaying the opening, testing the Shadowheart rescue, attempting the Everburn Blade and revisiting the first wilderness decisions. The Nautiloid chapter is complete when the crash has finished, the transponder objective is resolved and this save exists.
- The Ravaged Beach is accessible after the crash.
- Shadowheart is recruited or her alternate post-crash encounter is confirmed.
- A labeled manual save exists after the crash and before wider wilderness exploration.
Before you move on
- The Nautiloid has escaped Avernus after the transponder was activated.
- Lae’zel and Shadowheart are recruited, or their alternate recruitment outcomes are intentionally accepted.
- You understand that the tadpole is the central infection and story problem, not an immediate timer forcing one dialogue choice.
- The Ravaged Beach is accessible and a clearly labeled manual save exists after the crash.
- You can use PS5 radial menus, R3 highlighting, held-X searching and D-pad actions without relying on PC-only shortcuts.
Act 1 — Wilderness: Emerald Grove and Druid’s Grove
Use the Emerald Grove as your first major Act 1 hub. Protect the refugees, save Arabella, investigate Kagha before rescuing Halsin, and complete the grove’s immediate rescue and faction quests before entering the Mountain Pass or Shadow-Cursed Lands. This chapter follows the route that preserves the tiefling refugees, their merchants, and the grove’s later allies. Make manual saves before Arabella’s trial, opening Kagha’s chest, entering the Putrid Bog, entering the Goblin Camp, and resolving the goblin leaders’ fate. The grove is not only a trading stop: several conversations, companion scenes, and later rewards depend on whether you leave its central conflicts unresolved.
1. Defend the gate and establish the grove as your working hub
Follow the road from the crash site to the Emerald Grove. At the gate, help the defenders defeat the attacking goblins instead of trying to bypass the encounter. Prioritize goblins threatening the gate machinery and ranged enemies on the walls, then use elevation, ranged attacks, shoves, and area effects to reduce pressure on the defenders.
After the fight, enter the Hollow and activate the Emerald Grove waypoint. Speak with the refugees, guards, and merchants before moving deeper into the settlement. Arron near the entrance is an early trader. Dammon is in the tiefling area and is important if Karlach is recruited, so do not attack, pickpocket, or provoke either merchant while learning the area.
Make a manual save after entering the Hollow. This gives you a clean recovery point if a dialogue choice, theft attempt, or faction confrontation turns the grove hostile.
- Defeat the goblin attackers at the gate.
- Activate the Emerald Grove waypoint.
- Speak with Arron, Dammon, and Zevlor.
- Create a manual save inside the Hollow.
2. Save Arabella before leaving the Inner Sanctum
Enter the Inner Sanctum near the Sacred Pool. A scene begins in which Kagha is judging the tiefling child Arabella for attempting to take the Idol of Silvanus. Intervene immediately. Persuasion, intimidation, class-specific options, and other dialogue checks can prevent Kagha’s snake, Teela, from killing Arabella. If a check fails, reload the manual save made before entering the scene rather than attacking blindly.
Once Arabella is safe, speak with her parents, Komira and Locke, in the tiefling area. This advances the rescue quest and preserves Arabella for later content. If Arabella dies, tell her parents what happened; do not assume the game will resolve the conversation automatically.
After the scene, speak with Rath about Halsin and the grove’s situation. This introduces the broader conflict between the refugees, Kagha’s Rite of Thorns, and the goblin camp. Do not leave the grove for the Mountain Pass while these opening events are still unresolved.
- Intervene in Arabella’s trial.
- Confirm that Arabella survives.
- Speak with Komira and Locke.
- Speak with Rath about Halsin and the grove.
3. Investigate Kagha before rescuing Halsin
Search the Inner Sanctum for the Rite of Thorns and Kagha’s personal chest. The chest is tucked behind bookcases in a secluded corner of the sanctum and is locked. Open it while out of sight if you want to avoid a theft confrontation; a character with suitable Sleight of Hand is useful, and destroying the chest is an alternative if you accept the consequences.
Read the Half-Torn Note inside. It points toward a meeting in the Putrid Bog, part of the Sunlit Wetlands south of the grove. Travel there, follow the evidence, and confront the Shadow Druids. When you return to Kagha with proof, dialogue can expose the conspiracy and may persuade her to abandon the Shadow Druids before the fight begins. If you fail the dialogue, the confrontation becomes combat.
Complete this investigation before rescuing Halsin from the Goblin Camp. After Halsin is rescued, the Investigate Kagha quest can be cancelled early, removing the opportunity to resolve the conspiracy in its normal sequence. The investigation is optional for reaching the grove’s basic objective, but it is the strongest route for preserving both druids and tieflings.
- Read the Rite of Thorns or otherwise begin the Kagha investigation.
- Search Kagha’s chest and read the Half-Torn Note.
- Visit the Putrid Bog and collect proof of the Shadow Druids’ involvement.
- Return to the grove and confront Kagha before rescuing Halsin.
- Save before the confrontation.
4. Complete the grove’s local rescues and recruit-related conversations
Explore the Hollow and speak with Zevlor, Wyll, Dammon, the tiefling children, and other refugees. Wyll’s conversations connect the grove’s goblin crisis to Karlach, while Dammon can later work on Karlach’s personal problem if he survives and you retain Infernal Iron. Keep Infernal Iron and other named quest materials rather than selling them.
Travel to the Secluded Cove in the northeastern part of the grove when the beach quest is available. A tiefling child is under the effect of the harpies’ song. Reach the child, interrupt the song by defeating or controlling the harpies, and rescue him before leaving the area. Triggering the scene and then resting or departing can allow the child to die, so resolve it promptly.
Speak with Mol and the tiefling children if you want their optional quests. Their requests are not all required for the grove’s main resolution, but they can affect later interactions. Treat any theft or trespassing request as a deliberate choice: failure can create a confrontation with the adults or guards.
- Speak with Zevlor and Wyll.
- Speak with Dammon if Karlach may join the party.
- Keep Infernal Iron and named quest documents.
- Rescue the child in the Secluded Cove after triggering the harpy scene.
- Check the children’s area and decide whether to accept Mol’s requests.
5. Preserve the refugees and prepare for the Goblin Camp
For the protection route, do not reveal the grove’s location to Minthara and do not agree to guide her forces to the settlement. The decisive resolution comes from dealing with the goblin leadership and rescuing Halsin, not from attacking Kagha at the first opportunity.
Before entering the Goblin Camp, speak with Zevlor again and finish the conversations you still need in the Hollow and Inner Sanctum. Buy or steal only what you can use, record the grove waypoint, and make a manual save. The camp can be approached through dialogue, stealth, disguise, or combat, so do not assume that reaching its leaders requires an immediate large battle.
If you instead side with Minthara, the grove’s refugees and several merchants and allies can be killed or removed. That route is valid for an alternate campaign, but it cannot preserve the refugee storyline described in this chapter.
- Do not disclose the grove’s location to Minthara on the protection route.
- Speak with Zevlor before leaving.
- Finish any active grove rescue scene.
- Save manually before entering the Goblin Camp.
- Keep a separate save if testing the raid route.
6. Use camp deliberately after major grove scenes
Return to camp after saving Arabella, completing the Kagha investigation, recruiting a companion, or resolving a major rescue. Speak with companions before resting, then take a Long Rest when resources or quest pacing require it. Companion approval and personal scenes can change after grove decisions, and some conversations appear only after the party has time to discuss recent events.
Store spare weapons, scrolls, Infernal Iron, unusual letters, and other quest materials in camp storage rather than discarding them. Not every document is required, but named notes and materials are safer to preserve until the related quest is complete. Keep one manual save before resting if you are trying to see a particular camp scene.
Do not treat the grove as permanently safe until the goblin threat has been resolved. Before moving through the Mountain Pass or into the Shadow-Cursed Lands, confirm that Arabella’s rescue, the Kagha investigation, the beach rescue, and your intended grove faction outcome are complete.
- Visit camp after each major grove development.
- Review available companion conversations before resting.
- Store quest materials instead of selling or discarding them.
- Keep separate saves for Arabella, Kagha, and the grove’s final fate.
- Confirm the grove route before entering a new Act 1 transition area.
Before you move on
- Arabella survived Kagha’s trial, and Komira and Locke were told that she is safe.
- The Harpies’ beach rescue was completed if the scene was triggered.
- The Kagha investigation was completed before Halsin was rescued, or its unresolved consequences were intentionally accepted.
- Zevlor, Wyll, Dammon, and the major refugee merchants were contacted.
- Infernal Iron and relevant named quest materials are stored safely.
- A manual save exists before the Goblin Camp and before the grove’s final faction decision.
- The party has visited camp after the major grove scenes and checked companion conversations.
- The intended protection or raid route is recorded before entering the next major Act 1 region.
References for this chapter
- Investigate Kagha — Baldur’s Gate 3 Wiki
- Kagha — Baldur’s Gate 3 Wiki
- Save Arabella — Baldur’s Gate 3 Wiki
- Emerald Grove — Baldur’s Gate 3 Wiki
- Investigate the Beach — Baldur’s Gate 3 Wiki
- Any tips and tricks for saving Tieflings and making peace — Larian Studios Forums
- Baldur’s Gate 3: How To Save Arabella And Investigate Kagha Guide — GameSpot
Act 1 — Blighted Village, Goblin Camp and Key Side Quests
Clear the Blighted Village, Risen Road and Waukeen’s Rest before committing to the Goblin Camp. These areas provide experience, companions, merchants, rescue opportunities and routes into the Underdark. Use dialogue, stealth and positioning to avoid unnecessary fights, but make a manual save before the Goblin Camp, the goblin leaders and the Grove decision. Rescue Halsin if you are protecting the Grove, handle Volo before advancing the Grove quest, and finish the Zhentarim shipment decision before leaving the Wilderness. Do not enter the Mountain Pass until the Grove conflict is resolved, because that route can advance or close the Grove storyline. The Underdark can be explored as an alternate Act 1 route, but entering the Shadow-Cursed Lands begins the Act 2 transition.
1. Resolve the Blighted Village and rescue Barcus Wroot
Travel west from the Emerald Grove to the Blighted Village. The goblins at the entrance can be bypassed with dialogue, deception, intimidation or suitable racial dialogue. If combat starts, use the rooftops, ladders and elevated platforms instead of fighting in the open streets. Unlock the Blighted Village waypoint before moving on.
Investigate the apothecary and its cellar. The cellar connects to the Whispering Depths, which are optional but provide experience, loot and a route beneath the village. You can reach them through the well or by breaking into the cellar’s weak sections. Make a manual save before reading the Necromancer’s book or entering the spider lair if you want to test those encounters safely.
At the northern windmill, speak with Fezzerk’s group or defeat them. After the area is safe, enter the windmill and use the Brake lever to stop it. Do not use Release Brake: that lever launches Barcus Wroot from the windmill and kills him. Speak with Barcus after freeing him so his later storyline remains available.
- Unlock the Blighted Village waypoint.
- Use the Brake lever to rescue Barcus Wroot.
- Decide whether to explore the Whispering Depths before leaving.
2. Recruit Karlach and investigate the Risen Road
From the village, travel north toward the Risen Road. Recruit Karlach near the river crossing if you want her as a companion and to preserve her personal quest. Wyll’s related dialogue is easier to manage if he is present in the active party, but the recruitment and quest progression do not require you to solve the area through combat.
At the tollhouse, question Anders rather than accepting his claim that Karlach is a dangerous servant of Zariel. The paladins are not what they first appear to be. You can support Karlach, side with Anders, or leave the confrontation unresolved, but create a save before committing because this decision changes companion approval and the fate of the tollhouse group.
Continue to the gnoll cave on the Risen Road. Rescue Rugan and Olly or enter the cave from another angle and use the terrain against the gnolls. If you approach the cave and then leave for a long rest, the two Zhentarim agents can die, so handle this encounter before resting once you have started it. Preserve the Caravan Strongbox if you want the Zhentarim reward path; opening it gives different loot and can remove their goodwill.
- Recruit Karlach or intentionally leave her unavailable.
- Resolve the tollhouse confrontation before moving on.
- Save before opening or surrendering the Caravan Strongbox.
3. Rescue the trapped people at Waukeen’s Rest immediately
Approach Waukeen’s Rest only when you are ready to act. Once you reach the inner yard and begin the rescue sequence, do not return to camp, fast-travel or take a long rest. The fire progresses, and trapped characters can die. Enter turn-based mode if needed so one character can break through the main door while the rest of the party reaches the upper floors.
Free the people trapped inside first, including Benryn and the Flaming Fist survivors. Flammable surfaces and collapsing routes make movement more dangerous than the enemies themselves, so use water, ice, jumps and forced movement where helpful. Search the building after the rescues are secure; valuable items can be collected safely once the immediate fire sequence has ended.
The Zhentarim entrance is in a barn on the western side of Waukeen’s Rest, west of the main inn. Speak with Salazon using the password learned from Rugan, a successful dialogue option or another appropriate solution. Descend into the Zhentarim Basement, speak with Zarys and Brem, and unlock the Zhentarim Hideout waypoint. Returning the unopened shipment preserves the strongest Zhentarim trade rewards; opening it instead provides the Iron Flask route.
- Rescue Benryn and the other trapped survivors before resting or fast-traveling.
- Enter the Zhentarim Basement through the western barn.
- Speak with Zarys and Brem before leaving if you want their quest and special stock.
4. Enter the Goblin Camp peacefully and finish its noncombat business first
Create a manual save before approaching the Goblin Camp. The outer checkpoint can be passed through dialogue, deception, intimidation, racial options or combat. Once inside, speak with the traders and explore the courtyard before starting a fight. Volo is performing on the stage; speak with him and allow the sequence to move him into captivity if you want to rescue him. Do not poison the camp’s drinks before triggering his scene, because that can prevent the normal rescue opportunity.
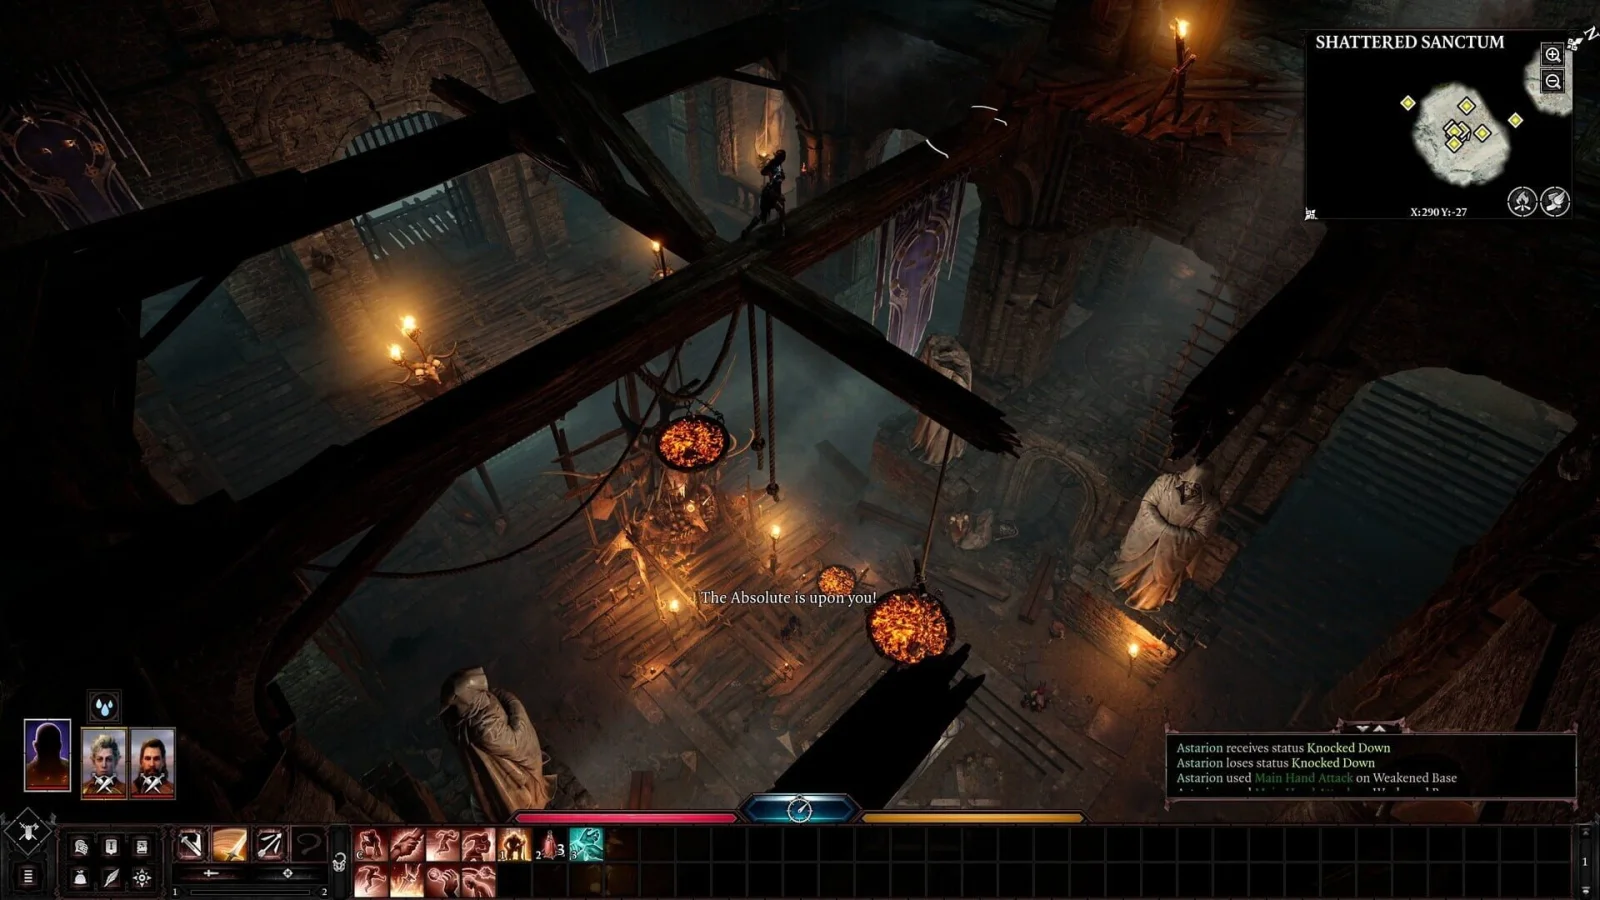
Enter the Shattered Sanctum and locate Priestess Gut, Minthara and Dror Ragzlin. Priestess Gut can be isolated for a private interaction. Minthara can be questioned, deceived or confronted. Before attacking Dror Ragzlin, rescue Volo, speak with traders, investigate Halsin’s location and collect the Selûnite Outpost waypoint beneath the sanctum if possible.
Killing Dror Ragzlin, by any method, makes the Goblin Camp and Shattered Sanctum broadly hostile. Treat his room as the final major goblin-camp fight on a Grove-protection run. Close doors, block entrances, use high ground and prevent enemies from surrounding the party. If the camp becomes hostile early, retreat through the sanctum’s alternate routes rather than chasing every enemy into the courtyard.
- Rescue Volo before poisoning the camp or starting a broad assault.
- Locate Halsin, Gut, Minthara and Dror Ragzlin.
- Unlock the Selûnite Outpost waypoint before killing Dror Ragzlin if possible.
5. Rescue Halsin and decide the Grove outcome
Follow the prison route inside the Shattered Sanctum to the Worg Pens. Speak with the bear and free Halsin by defeating or bypassing his guards. Afterward, speak with him again so the journal records the plan to deal with the goblin leaders. On a Grove-protection run, remove the leaders separately and return to Halsin after the required enemies are defeated.
Minthara and Priestess Gut can be handled without immediately alerting the whole camp if you isolate them, close doors and use surprise. Dror Ragzlin is different: killing him triggers the camp-wide hostility described above. If you intend to protect the Grove, finish your conversations, purchases, rescues and exploration before that fight.
If you side with Minthara, speaking with her and revealing the Grove’s location begins the raid route. This sacrifices or changes several refugee, companion and merchant outcomes. If you protect the Grove, report the leaders’ defeat to Halsin and then return to the Grove to complete the associated dialogue. If you pursue the raid, do not use the Grove-protection checklist as though Halsin’s recruitment path still applies.
- Halsin is rescued or intentionally left behind according to the chosen route.
- Gut, Minthara and Dror Ragzlin are resolved in the intended order.
- Report the result to Halsin, Minthara or the Grove leaders as appropriate.
6. Finish camp scenes and prepare the Act 1 route
Long rest after major milestones so companions can comment on Karlach, Wyll, Halsin, the goblin leaders and the Grove decision. Investigate the owlbear cave if it remains unresolved; sparing the adult owlbear can create a later camp opportunity. Visit Volo at camp if he was rescued. These scenes are optional for campaign completion but preserve companion content and useful rewards.
Before leaving the Wilderness, check that the Blighted Village, Risen Road, Waukeen’s Rest, Goblin Camp and Zhentarim waypoints you intend to use are available. The Zhentarim Hideout has its own waypoint, while the Selûnite Outpost provides a separate fast-travel point beneath the Goblin Camp.
Do not enter the Mountain Pass until the Grove conflict is complete. Entering that route can resolve the Grove quest line and close unfinished outcomes. The Underdark is another Act 1 route and can be explored after the Grove decision, but entering the Shadow-Cursed Lands begins the Act 2 transition and should wait until remaining Act 1 objectives are complete. Create a clearly named manual save before taking either transition route.
- Complete intended companion, rescue and camp scenes.
- Confirm the required waypoints are unlocked.
- Resolve the Grove conflict before entering the Mountain Pass.
- Create a manual save before entering the Mountain Pass or Shadow-Cursed Lands.
Before you move on
- The Blighted Village, Risen Road and Waukeen’s Rest have been explored, or their content has been deliberately skipped.
- Barcus Wroot, Karlach, Wyll, Volo, Halsin and the Zhentarim have been handled according to the intended campaign route.
- The Caravan Strongbox decision has been made and recorded in a manual save if an alternate reward is desired.
- The Goblin Camp leaders have been resolved, the Grove outcome is complete, and the appropriate follow-up dialogue has been exhausted.
- The Zhentarim Hideout and any intended Goblin Camp or Selûnite Outpost waypoints are unlocked.
- A clearly named manual save exists after the Grove decision and before entering the Mountain Pass or Shadow-Cursed Lands.
References for this chapter
- Blighted Village — BG3 Wiki
- Barcus Wroot — BG3 Wiki
- Whispering Depths — BG3 Wiki
- Waukeen’s Rest — BG3 Wiki
- Find the Missing Shipment — BG3 Wiki
- Zhentarim Basement — BG3 Wiki
- Caravan Strongbox — BG3 Wiki
- Rescue Volo — BG3 Wiki
- Defeat the Goblins — BG3 Wiki
- Save the First Druid — BG3 Wiki
- Chapter One — BG3 Wiki
- Mountain Pass — BG3 Wiki
- Travel through the Mountain Pass
- Waypoints — BG3 Wiki
Act 1 — The Underdark Hubs: Myconids, Grymforge, and Arcane Sites
The Underdark is optional Act 1 content, not an Act 2 region, but it is one of the strongest preparation routes for the next act. Establish Ebonlake Grotto as your base, resolve the Myconid and duergar threads you want, investigate the Arcane Tower and Sussur Tree, then enter Grymforge through the boat at the Decrepit Village docks. Handle the Nere cave-in before taking unnecessary long rests or leaving Grymforge. The boat connects Grymforge with the Underdark beach; the elevator in Grymforge is the route toward the Shadow-Cursed Lands. Use turn-based mode around mushrooms, turrets, ledges and lava, and keep manual saves before the Nere sequence, the Myconid sovereign decision and the Adamantine Forge.
1. Reach Ebonlake Grotto and establish your safe hub
From any Underdark entrance, unlock the nearby waypoint and travel to Ebonlake Grotto, the Myconid Colony. Speak with Sovereign Spaw, Sovereign Glut, Blurg, Omeluum, Derryth Bonecloak and Thulla before committing to major fights. Spaw introduces the duergar threat, Glut offers a competing sovereign storyline, Omeluum begins the parasite investigation, and Derryth and Thulla open useful rescue and reward quests.
Restock at the colony, prepare healing and movement options, and make a manual save. Keep at least one character able to jump reliably or use Misty Step, and carry ranged attacks for enemies that begin on ledges. Darkvision helps with visibility, but it does not prevent environmental hazards or reveal every concealed route.
- Unlock the Ebonlake Grotto waypoint.
- Speak with the principal colony NPCs before choosing a sovereign allegiance.
- Save before accepting or resolving the duergar conflict.
2. Resolve the Myconid and mushroom quests in a safe order
Accept Spaw's request concerning the duergar near the lake, but do not rush directly into the fight if your party is low on resources. Glut can accompany the party and later asks for help against Spaw. Refusing Glut avoids the coup; supporting it changes control of the colony. Neither sovereign choice is required to reach Act 2, so preserve a save if you want to test both outcomes.
For Derryth's mushroom picker quest, enter the bibberbang field in turn-based mode. Avoid stepping on the glowing mushrooms or creating fire near them. Separate the character making the rescue, then use jumping, Misty Step or another movement tool to reach Baelen and retrieve his pack without setting off the field. Noblestalk is optional, but its later value makes a careful rescue worthwhile.
- Decide whether Spaw or Glut should control the colony.
- Rescue Baelen before triggering the bibberbang chain reaction.
- Return to the colony after the duergar fight for the relevant rewards and journal updates.
3. Investigate the Sussur Tree and Arcane Tower
Explore the Sussur Tree area when the party has sufficient healing and ranged damage. Hook Horrors can attack from elevation, so do not send one character ahead in real-time exploration. Collect Sussur Bark if you still intend to finish the Blighted Village forge project, then continue toward the Arcane Tower.
The tower's Arcane Cannons fire during exploration, not only during combat. Use turn-based mode and move between cover, disable the cannons with a Sussur Bloom where practical, or reach the lower garden by using the exterior mushroom platforms. Insert a Sussur Bloom into the Power Generator on the ground floor. This powers the tower, disables its defenses and activates the elevator. Search the floors and read the books before speaking with Bernard; the discovered poetry provides the safest peaceful dialogue options. The tower and Omeluum investigation are optional, but they provide useful experience, equipment and story information.
- Collect Sussur Bark if the village forge remains unfinished.
- Use cover, turn-based mode or Sussur Blooms against the Arcane Cannons.
- Power the tower before relying on its elevator and inspect the books before addressing Bernard.
4. Prepare for Grymforge before starting the Nere timer
Travel to the Underdark beach and take the duergar boat to Grymforge. The boat is a local connection between Grymforge and the beach; it is not the Act 2 transition. Unlock the Grymforge waypoint, speak with the deep gnomes and duergar, and locate Philomeen before clearing the rubble trapping Nere if you want her Runepowder Vial. Clearing the cave-in first can make Philomeen leave with her supplies.
Once the Nere quest has begun, long rests and leaving the Grymforge region advance its timer. Find explosives, then create a manual save before placing them. Smokepowder Satchels, Philomeen's Runepowder Vial and suitable force or bludgeoning effects can clear the rubble. Avoid placing a large Runepowder Barrel near the gnomes unless you accept the possible casualties.
- Find Philomeen before clearing Nere's rubble if you want the Runepowder Vial.
- Save immediately before triggering the cave-in rescue.
- Do not take unnecessary long rests or leave Grymforge after the Nere sequence begins.
5. Resolve Nere, the deep gnomes and the duergar
Before freeing Nere, position the party on high ground or stable platforms and identify the lava edges. Duergar can use invisibility and forced movement, while the battlefield's drop-offs can remove characters from the fight. If you plan to oppose Nere and the duergar, speak with the relevant faction members first so you can arrange support or avoid fighting everyone at once.
After the rubble is cleared, handle Nere's confrontation and the deep gnome outcome according to your intended story. These choices are optional for the main campaign but important for companion reactions, faction outcomes and rewards. Use turn-based mode when residual fire or explosive surfaces remain so the party does not accidentally trigger combat before the dialogue is complete.
- Position the party away from lava and ledges before the confrontation.
- Resolve Nere and the deep gnome situation before leaving Grymforge.
- Create a second save after the faction outcome is established.
6. Complete the Adamantine Forge and leave through the correct route
The Adamantine Forge is optional but one of the Underdark's best reward areas. Collect Mithral Ore and moulds, then operate the forge only after positioning the party around the platform. When Grym appears, lure it onto the lava so it becomes vulnerable and use the forge hammer controls deliberately. Avoid trading attacks in the center while ignoring the lava and hammer mechanics.
Finish any remaining colony, Arcane Tower, Grymforge or companion objectives before leaving. The boat returns to the beach. To proceed toward Act 2 through this route, use Grymforge's elevator toward the Shadow-Cursed Lands and prepare for the shadow curse. You may instead leave through another Act 1 route, and the Underdark itself is not mandatory for campaign completion.
- Claim the Adamantine Forge rewards if your party can safely complete the encounter.
- Confirm the Grymforge waypoint and intended quest outcomes are recorded.
- Save before using the Grymforge elevator toward the Shadow-Cursed Lands.
Before you move on
- Ebonlake Grotto, Grymforge and the Arcane Tower route are recorded on the map.
- The intended Spaw or Glut outcome is complete, or the choice is intentionally unresolved in a backup save.
- Baelen, Nere and the deep gnome situation are resolved according to the intended campaign path.
- The Adamantine Forge is complete or intentionally skipped.
- A manual save exists after Grymforge preparation and another exists before using the elevator toward the Shadow-Cursed Lands.
- The party carries healing, movement tools, ranged damage, crowd control and a safe retreat option before entering Act 2.
References for this chapter
Act 1 — Githyanki Crèche and Rosymorn Monastery
Rosymorn Monastery and Crèche Y’llek are Mountain Pass locations in Act 1, before the Shadow-Cursed Lands transition. Bring Lae’zel if you want her central companion scenes, create saves before the Zaith’isk, Inquisitor, and Vlaakith encounters, and obtain the Dawnmaster’s Crest before taking the Blood of Lathander. Solve the monastery’s stained-glass weapon puzzle, then use the Crest in the crèche’s hidden chamber to prevent the monastery’s destructive failsafe. The crèche is optional for reaching Act 2 and does not unlock Moonrise Towers or the Act 2 finale, but its decisions strongly affect Lae’zel, Vlaakith, the githyanki, and the Dream Visitor.
Reach the Mountain Pass and prepare the party
Enter the Mountain Pass from the Wilderness or by following the route out of the Underdark, then travel toward the Rosymorn Monastery Trail waypoint. Rosymorn Monastery and Crèche Y’llek are Act 1 content. The transition into the Mountain Pass is not the same as entering the Shadow-Cursed Lands, so you can normally return to earlier Act 1 regions. Finish Grove, goblin, and Underdark objectives before entering the Shadow-Cursed Lands if you want to preserve the widest range of outcomes.
Bring Lae’zel as an active party member for her most direct crèche scenes. A practical group has one durable melee character, one support or healing caster, and one ranged or control-focused character. Prepare healing, a repositioning spell such as Misty Step if available, and area damage for clustered githyanki. On PS5, arrange important actions on the radial menus before starting a fight and use turn-based mode when sneaking, jumping, or positioning party members near a hostile group.
- Bring Lae’zel if you want her primary crèche dialogue and quest reactions.
- Carry healing, crowd control, and at least one reliable repositioning option.
- Create a manual save before exploring the monastery and another before the Zaith’isk.
Explore the monastery and solve the Dawnmaster puzzle
Use broken walls, climbable surfaces, and jumpable gaps to explore the ruined monastery. Kobolds, gremishkas, giant eagles, and the Guardian of Faith encounter can be fought, bypassed, or approached from advantageous positions. In confined rooms, keep the party together and position everyone before combat. Avoid sending a single character through a doorway while the rest of the group remains outside the encounter area.
In the stained-glass room, examine the window and the four named pedestals. The Ceremonial Longsword is already placed at Dawnmaster Welkinglory. Collect the Ceremonial Warhammer from the giant-eagle nest, the Ceremonial Battleaxe from the Guardian of Faith room, and the Ceremonial Mace from the kobold-infested Firewine storage. Place the weapons as follows: Warhammer on Dawnmaster Seed, Mace on Dawnmaster Stockhold, Battleaxe on Dawnmaster Vaseid, and leave the Longsword on Dawnmaster Welkinglory. A normal weapon of the matching type can substitute for a ceremonial weapon, but using the named weapons makes the solution easier to track. Correct placements open the compartment containing the Dawnmaster’s Crest.
The puzzle can be completed before entering the crèche. Take the Crest with you rather than leaving it in the monastery, because it is used later in the hidden chamber beneath the crèche. The puzzle is optional for completing the campaign, but obtaining the Crest is the safest way to claim the Blood of Lathander.
- Leave the existing Longsword on the Welkinglory pedestal.
- Place the Warhammer on Seed, the Mace on Stockhold, and the Battleaxe on Vaseid.
- Take the Dawnmaster’s Crest before descending into the crèche.
Enter Crèche Y’llek and resolve the Zaith’isk
Descend through the monastery into Crèche Y’llek and speak with the githyanki guards. Lae’zel can influence the initial conversation, but respectful dialogue does not guarantee that every later scene remains peaceful. Follow the crèche route to the infirmary and speak with Ghustil Stornugoss about the Zaith’isk. Create a separate manual save before anyone enters the machine.
Choose deliberately who undergoes the procedure. Allowing Lae’zel to lead keeps the scene centered on her personal quest; entering the machine with the protagonist changes the dialogue and approval consequences. The Zaith’isk does not remove the parasite. Skill checks during the procedure can reduce the harm or produce a beneficial result, but the scene remains a major story decision. Afterward, complete the infirmary conversations and inspect available supplies before proceeding toward the Inquisitor.
Keep the active speaker selected during dialogue on PS5 and do not rush through the response choices. After the scene ends, regroup the party, restore health and spell resources as needed, and save again before entering the Inquisitor’s area.
- Save immediately before the Zaith’isk.
- Choose whether Lae’zel or the protagonist undergoes the procedure.
- Finish the infirmary conversations before advancing.
Meet the Inquisitor and protect the Astral Prism
Take Lae’zel into the Inquisitor’s chamber if you want her central version of the scene. The Inquisitor demands information about the Astral Prism. Dialogue can delay combat or change who becomes hostile, but prepare for a confrontation and create a manual save before speaking to him.
Githyanki in this area combine strong melee attacks, mobility, and disabling effects. Spread the party instead of clustering at the entrance, keep fragile characters away from the first leap targets, and use control effects on the most dangerous melee attackers. Examine enemies before committing high-level spells, then use the PS5 radial menus to reach area effects, consumables, and reactions without repeatedly opening the full inventory. If the fight goes badly, retreat toward cleared rooms, revive fallen characters, and reload the pre-dialogue save if the encounter has already consumed too many resources.
Do not surrender the Astral Prism unless you intentionally want that route. The Inquisitor sequence and the events that follow are important to Lae’zel’s story, but they are not required to unlock Moonrise Towers or the Act 2 endgame dungeon.
- Create a separate save before speaking with the Inquisitor.
- Spread the party before combat begins.
- Prioritize mobile enemies capable of stunning, disarming, or isolating characters.
Respond to Vlaakith and enter the Astral Prism
After the Inquisitor sequence, Vlaakith appears and orders the party to enter the Astral Prism and kill the entity inside. This is a major Lae’zel and githyanki faction decision. Agreeing, refusing, or openly challenging Vlaakith can alter Lae’zel’s trust and the crèche’s attitude. Create a pre-Vlaakith save before selecting a response if you want to test alternate outcomes.
Enter the Astral Prism and speak with the Dream Visitor rather than attacking automatically. The conversation explains why the artifact has protected the party and establishes information that becomes important later in the campaign. Complete the scene before leaving. Depending on the choices made earlier, the crèche may become hostile afterward. Keep party members together, use control effects in narrow corridors, and retreat toward cleared rooms if the first attempt fails.
The crèche is optional for reaching Act 2. You do not need to complete the Zaith’isk, persuade the Inquisitor, obey Vlaakith, or enter the Astral Prism to unlock the Shadow-Cursed Lands, Moonrise Towers, or the later Shadowfell sequence. These scenes are primarily companion, faction, lore, and reward content.
- Save before responding to Vlaakith.
- Choose the intended Lae’zel and githyanki direction deliberately.
- Speak with the Dream Visitor before leaving the Astral Prism.
Claim the Blood of Lathander and leave Act 1 Mountain Pass content
From the Inquisitor’s area, follow the route into the hidden chamber containing the Blood of Lathander. Insert the Dawnmaster’s Crest into the device before taking the weapon. The Crest disables the monastery’s destructive failsafe and allows the mace to be collected safely. If you take the weapon without the Crest, the Solar Lance sequence activates and the monastery begins collapsing; escape immediately through the available route if that happens.
After taking the mace, regroup at camp and verify that the Blood of Lathander is in the party inventory. Confirm that Lae’zel’s current reaction, the Astral Prism conversation, and any chosen faction direction are recorded in a manual save. Keep a separate pre-Inquisitor or pre-Vlaakith save if you intend to test alternate outcomes.
When ready, travel onward to the Shadow-Cursed Lands. This begins Act 2 and is separate from the Mountain Pass entry. Before making that transition, finish any Act 1 objectives you still want to preserve, because later progression can resolve or close unfinished regional quests.
- Use the Dawnmaster’s Crest in the hidden Blood of Lathander chamber.
- Take the mace and confirm it is in the party inventory.
- Create a final Mountain Pass save before entering the Shadow-Cursed Lands.
- Keep an earlier save before the Inquisitor or Vlaakith scene for alternate outcomes.
Before you move on
- This chapter’s content is complete as Act 1 Mountain Pass progression before the Shadow-Cursed Lands transition.
- The Dawnmaster’s Crest is in the party inventory and the Blood of Lathander has been safely obtained.
- The Zaith’isk, Inquisitor scene, Vlaakith encounter, and Astral Prism conversation are complete if pursuing the full crèche route.
- Lae’zel’s current reaction and the chosen githyanki faction direction are recorded in a manual save.
- A separate pre-Inquisitor or pre-Vlaakith save exists for alternate outcomes.
- The party is ready to enter the Shadow-Cursed Lands, with Moonrise Towers and the later Shadowfell progression still ahead.
References for this chapter
- Rosymorn Monastery
- Find the Blood of Lathander
- Mountain Pass: Rosymorn Monastery Maps and Points of Interest | Baldur’s Gate 3
- Creche Y'llek Maps and Points of Interest | Baldur’s Gate 3
- Dawnmaster Puzzle (Rosymorn Monastery Puzzle) | Baldur’s Gate 3
- How to Get the Blood of Lathander | Baldur’s Gate 3 (BG3)
Mountain Pass and Entry to Act 2 — Route Choices and Preparation
The Underdark, Grymforge and Mountain Pass are still Act 1 content, but the game uses warning screens because entering the Rosymorn Monastery Trail or the Shadow-Cursed Lands advances time-sensitive quests. For the most complete route, finish the Wilderness and Emerald Grove decisions first, then explore the Underdark and Grymforge, followed by the Mountain Pass, Rosymorn Monastery and Crèche Y'llek. The Grymforge elevator and the road beyond Rosymorn Monastery both lead to the Shadow-Cursed Lands, which officially begins Act 2. Before crossing that final threshold, complete or deliberately abandon outstanding rescues, companion objectives and faction decisions, reach roughly level 5 or 6, stock healing and resurrection supplies, and create a labeled manual save. The two Act 2 entrances remain available until you commit to one, so choose based on which opening encounter and story presentation you prefer rather than assuming one route replaces the other.
1. Resolve the Wilderness and Emerald Grove before entering the Mountain Pass
Make a manual save before entering the Rosymorn Monastery Trail from either the Mountain Pass or the Goblin Camp side. This region is still associated with Act 1, but crossing into it advances several time-sensitive situations. Finish the grove and goblin decision you intend to keep, resolve Kagha if you are investigating the Rite of Thorns, and make sure the tiefling refugees, Halsin, Karlach and Wyll are not waiting on a required objective.
Also check Waukeen's Rest before leaving the Wilderness. If you have approached the burning inn, rescue the trapped survivors before advancing to the Mountain Pass or taking the relevant long rests. If the windmill rescue in the Blighted Village has been started, complete it before entering Grymforge, the Rosymorn Monastery Trail or the Shadow-Cursed Lands so Barcus Wroot is not lost.
Do not treat the warning as a harmless level recommendation. Entering the Rosymorn Monastery Trail can automatically resolve unfinished quests even though you have not yet entered Act 2.
- Grove and goblin outcomes are complete or intentionally chosen.
- Halsin, Karlach, Wyll and the refugees have no required unresolved Act 1 objective.
- Waukeen's Rest and the windmill rescue are handled if triggered.
- A manual save exists before entering the Rosymorn Monastery Trail.
2. Complete the Underdark and Grymforge before using the elevator
Travel through the Underdark using the waypoint network. Visit the Myconid Colony, investigate the Omeluum objective if desired, and unlock the Myconid Colony, Selûnite Outpost, Underdark Beach, Grymforge and Ancient Forge waypoints as you explore. The Sussur Tree and Arcane Tower are optional, but they provide experience, equipment and useful materials before Act 2.
At Grymforge, handle the gnome and True Soul Nere objectives promptly once you interact with the rubble. The situation is time-sensitive: repeated long rests or fast travel can cause Nere and the trapped gnomes to be lost. Explore the forge and collect the Adamantine equipment you want before leaving, but do not postpone the rubble encounter indefinitely while resting.
The elevator is east of the Underdark - Grymforge waypoint. Before using it, return to camp, heal the party, restore spell slots, prepare resurrection resources and save. The elevator opens into the Shadow-Cursed Lands, not another optional Underdark sub-area.
- Underdark waypoints needed for return travel are unlocked.
- Nere and the Grymforge gnome situation is resolved or deliberately abandoned.
- Desired Adamantine equipment and Grymforge rewards are collected.
- The party is healed and a save exists before the elevator.
3. Enter the Rosymorn Monastery Trail and unlock its waypoints
The Mountain Pass can be reached from the Wilderness near the Goblin Camp or through the road by Waukeen's Rest. After entering, follow the Rosymorn Monastery Trail and activate Trielta Crags. The trail also contains Rosymorn Monastery and Crèche Y'llek waypoints, giving you reliable fast-travel access while you complete the area.
If Lae'zel is in the party, keep her present for the githyanki encounters and conversations. The Mountain Pass is the main Act 1 location for The Githyanki Warrior and Discover the Artefact's Secrets. If you have not yet encountered the githyanki patrol, do so before advancing farther into the trail, because entering the region can affect that encounter.
At Trielta Crags, speak with Lady Esther if you want her equipment or the githyanki egg quest. This is optional. Continue toward the monastery using the cable car if you activate it, or take the lower path around the cliffs. Use turn-based mode around repulsion mines and narrow drops; being pushed from the trail can kill a character even when the mine itself deals little or no damage.
- Trielta Crags waypoint unlocked.
- Lae'zel has been given the opportunity to address the githyanki storyline.
- Lady Esther has been visited if her optional quest or stock is wanted.
- The party has crossed the trapped monastery approach safely.
4. Explore Rosymorn Monastery and Crèche Y'llek
Search the monastery before descending to the crèche. The Blood of Lathander quest begins in the monastery and leads through the ceremonial weapons and stained-glass puzzle. If you intend to take the legendary mace, obtain the Dawnmaster's Crest and follow the quest's safety instructions before removing the weapon. Without the proper protection, taking it can trigger the monastery's destructive security sequence.
Reach Crèche Y'llek through the monastery basement and make a separate save before the zaith'isk, the Inquisitor's chamber and the Vlaakith-related conversations. Bring Lae'zel for the strongest companion context, but be prepared for the crèche to become hostile depending on your choices. Use high ground, chokepoints and control effects in its confined rooms; githyanki mobility makes isolated characters especially vulnerable.
Complete the crèche conversations and the outcome you want for Lae'zel before leaving. Afterward, return to camp and take the conversations that become available. The crèche remains reachable for part of Act 2, but postponing its major decisions makes the story route less clear and can remove opportunities tied to the initial githyanki encounter.
- Rosymorn Monastery has been explored to the extent you want.
- The Blood of Lathander puzzle and safety procedure are complete or intentionally skipped.
- Crèche Y'llek's major conversations and Lae'zel decisions are resolved.
- A save exists before the crèche's irreversible story choices.
5. Choose the Shadow-Cursed Lands entrance
After completing both Act 1 branches, choose either the Grymforge elevator or the route from the Rosymorn Monastery Trail. Both lead to the Shadow-Cursed Lands, and entering that region officially begins Act 2. The entrances place you in different parts of the opening area and present different early encounters, but neither entrance is required to erase the other branch's content.
The completionist order is Underdark, Grymforge, Mountain Pass, Rosymorn Monastery and Crèche Y'llek, followed by the Shadow-Cursed Lands. If you enter Act 2 before visiting one of these areas, you can generally return to Act 1 locations for a while, but do not rely on that as a way to preserve quests already advanced by the transition.
Once inside the Shadow-Cursed Lands, immediately pursue a dependable form of protection from the curse. Ordinary torches and ambient light are not a universal solution. A Moonlantern, pixie blessing or another quest-appropriate protection method is needed for deeper cursed regions.
- Both Act 1 routes have been explored as far as intended.
- The desired entrance has been selected after a final manual save.
- The party has a plan to obtain reliable Shadow Curse protection.
- No rescue or companion objective is being left accidentally unresolved.
6. Prepare the party for the transition
Aim to enter the Mountain Pass and crèche around level 5 if possible; level 6 gives a more comfortable margin for the harder githyanki encounters and early Act 2 fights. The exact level depends on how much optional content you completed, but entering these areas well below level 5 makes their saving throws, extra attacks and mobility much harder to manage.
Bring healing potions, at least one dependable healing spell or class feature, Scrolls of Revivify or equivalent resurrection access, and a mixture of ranged and area-control options. Prepare ways to remove or avoid restraints, prone effects and difficult terrain. Keep thieves' tools, trap-disarming supplies, elixirs, scrolls and utility items in accessible party inventories rather than buried in camp storage.
Sell excess loot and move spare weapons and armor to camp, but retain any quest item, Moonlantern, Dawnmaster's Crest, githyanki-related item or unique equipment you may need. Label the final save with the route and level, such as 'Act 1 complete - before Shadow-Cursed Lands'. Keep a second save before the Mountain Pass warning in case you want to revisit a missed Act 1 decision.
- Party is approximately level 5 or higher, preferably level 6 for a comfortable route.
- Healing, resurrection and escape tools are available.
- Core weapons, armor and utility items are equipped.
- A pre-Mountain Pass save and a pre-Shadow-Cursed Lands save are clearly labeled.
Before you move on
- Trielta Crags, Rosymorn Monastery and Crèche Y'llek waypoints are unlocked.
- The Underdark, Grymforge and Ancient Forge content is complete or intentionally skipped.
- Grove, goblin, refugee, Waukeen's Rest and companion decisions are resolved before the transition.
- Nere and the trapped Grymforge gnomes were handled before leaving if those objectives were started.
- The crèche and Lae'zel's intended story decisions are complete or deliberately deferred with a backup save.
- The party is around level 5 or higher, carries reliable healing and resurrection resources, and has key utility items available.
- A labeled manual save exists before the Rosymorn Monastery Trail and another immediately before entering the Shadow-Cursed Lands.
- The party has a concrete plan for obtaining Shadow Curse protection after entering Act 2.
Act 2 Entry — Shadow-Cursed Lands, Last Light Inn and Early Moonrise Towers
After completing the Act 1 areas covered in the previous chapters, enter the Shadow-Cursed Lands through either the Underdark or Mountain Pass route. Act 2 begins as the party reaches the cursed region, and the immediate priorities are obtaining protection from the shadow curse, finding a safe hub, visiting Last Light Inn and reaching Moonrise Towers before committing to the Gauntlet of Shar’s final sequence. Moonrise is an infiltration hub rather than a location that must wait until the end of Act 2. Use its merchants, dialogue, prison and companion-related opportunities while the tower remains accessible without the assault. Rescue the tiefling and deep gnome prisoners if those objectives are part of your run, and resolve any applicable Minthara content before proceeding. Keep separate manual saves before the Act 2 transition, before major Last Light decisions, before the Moonrise assault and at the Shadowfell warning. Do not pass that warning in this chapter; the next chapters should complete companion, romance and equipment preparations first.
Create the Act 1 handoff save and enter the Shadow-Cursed Lands
Before leaving the final Act 1 region, make a named manual save such as Act 1 Complete. This should be separate from the rolling autosave and should preserve your finished Grove, goblin, Underdark, Grymforge, Mountain Pass and Rosymorn Monastery decisions. If you intend to test different Act 2 outcomes, keep this file untouched and use a new save slot for the campaign continuation.
Travel into the Shadow-Cursed Lands through the route chosen in the previous chapters. The Underdark and Mountain Pass entrances lead into the same Act 2 region, although the opening encounters and first available route can differ. Once the transition loads, make another manual save named Act 2 Entry. Do not assume that reaching Act 2 means Moonrise Towers has been completed; Moonrise is one of the region’s main destinations and should be visited before the final Gauntlet of Shar sequence.
- Create a separate Act 1 Complete save.
- Enter the Shadow-Cursed Lands through the selected route.
- Create an Act 2 Entry save after the new region loads.
- Keep the original Act 1 save available for alternate outcomes.
Secure protection from the shadow curse
Do not explore the darker parts of the region without checking whether the party has effective protection. Ordinary light is not sufficient for every area. Depending on your route and choices, protection can come from a Moonlantern, a blessing or another effect recognized by the game. Follow the first escort or encounter available to your route, then confirm the protection in the character or condition interface before moving farther from safety.
Keep the source of protection on a character who is likely to remain in the active party. If you use a Moonlantern, remember that its carrier may need to keep it equipped or available for the effect to remain useful. On PS5, place the protection item, healing options, movement abilities and emergency escape actions on easy-to-reach radial-menu positions. This reduces menu searching when the party is attacked in darkness or when a character becomes separated.
- Confirm that the party has effective shadow-curse protection.
- Check the protection status before entering darker areas.
- Keep the Moonlantern or equivalent source available to the active party.
- Put protection, healing and escape options on accessible radial-menu positions.
Reach Last Light Inn and establish a safe hub
Follow the protected route to Last Light Inn when the settlement is available in your playthrough. Speak with the residents, merchants and faction representatives before starting major conversations. The inn provides a safe base for resupply, companion interactions and several Act 2 quests. Unlock its waypoint and use it as your return point while exploring Reithwin Town, the ruined battlefield and the roads leading toward Moonrise Towers.
Make a manual save before conversations involving Isobel, the Harpers or other major faction decisions. Some events at the inn can become combat encounters, and the survival of important residents affects later allies, merchants and companion-related content. Keep the party grouped before initiating a high-risk conversation, position characters where they can protect vulnerable NPCs, and inspect the area for enemies that can reach the inn from above or from the edges of the battlefield.
- Reach Last Light Inn when available.
- Speak with its key residents before triggering major events.
- Unlock the Last Light Inn waypoint.
- Save before Isobel, Harper or other faction decisions.
- Keep intended allies and important merchants alive.
Visit Moonrise Towers before making it hostile
Travel to Moonrise Towers early rather than waiting until the assault. The tower’s inhabitants can initially treat the party as potential allies or members of the Absolute’s organization, allowing conversations, purchases and investigation before the main battle. Speak with the important characters in the entrance and central areas, inspect merchants, collect quest information and avoid attacking guards merely because the location is hostile to the party’s long-term goals.
Use dialogue and stealth to isolate problems when possible. If a conversation turns into combat, pull enemies into doorways, stairs or rooms where only part of the tower can reach you. Keep a ranged character on a balcony or protected elevation, place melee characters near the approach route and protect concentration casters from being surrounded. On DualSense, pause after each turn to rotate the camera and inspect elevation, line of sight and enemy reactions before selecting another action.
- Unlock the Moonrise Towers waypoint.
- Speak with major tower NPCs before beginning an assault.
- Check merchants and quest-givers while the tower is accessible.
- Use rooms, stairs, doorways and elevation to control fights.
- Save before any conversation that may make the tower hostile.
Complete the Moonrise prison objectives
Go to Moonrise Towers Prison while infiltration is still possible. The prison is the location for the Rescue the Tieflings and Rescue Wulbren objectives. If the tieflings, deep gnomes or Wulbren are part of your intended campaign, speak with the prisoners and prison contacts, then plan the escape before opening cells or starting a fight. Breaking walls, manipulating guards and using a coordinated exit can prevent the rescue from becoming a prolonged battle across the entire prison.
Resolve Minthara-related content if it applies to your run. Her availability depends on your Act 1 choices and whether she survived or was handled in a way that allows the Act 2 prison sequence. Do not assume the objective exists in every campaign. After the rescue or prison confrontation, return to the upper tower, update the journal and check that the rescued characters reached the intended safe location before continuing.
- Visit Moonrise Towers Prison before the Shadowfell warning.
- Complete Rescue the Tieflings if intended.
- Complete Rescue Wulbren if intended.
- Resolve applicable Minthara content.
- Confirm rescued characters reached safety.
- Create a prison-complete manual save.
Explore Act 2 without crossing the final warning
Use Last Light Inn and Moonrise Towers as anchors while completing the Shadow-Cursed Lands content you want. This is the time to investigate Reithwin Town, speak with Halsin if he is present, pursue the curse-related objectives available to your party and finish optional rewards that depend on the region remaining in its current state. Continue to use long rests for companion scenes, but check the journal after each major rest so that new conversations are not buried under unrelated objectives.
The Gauntlet of Shar is the route toward the Shadowfell. You may enter and explore its earlier sections as part of Act 2 preparation, but stop when the game displays the warning before the irreversible transition. That warning is the handoff point for the next chapters. Before accepting it, finish Moonrise prison work, desired Last Light events, companion conversations and equipment shopping. Entering the Shadowfell later prevents returning to Act 1 locations and can automatically resolve or fail unfinished quests connected to those areas.
- Complete desired Last Light Inn and Shadow-Cursed Lands objectives.
- Resolve available Halsin or curse-related preparations.
- Finish Moonrise conversations and prison work.
- Explore the Gauntlet of Shar only as far as intended.
- Stop at the Shadowfell warning.
Archive equipment and prepare the next chapter
Open inventory and send surplus armor, duplicate weapons, spare camp supplies and situational items to camp storage. Keep quest objects, permanent bonuses, useful scrolls, healing potions, resistance elixirs and equipment for companions who may appear in upcoming scenes. A less cluttered inventory makes radial-menu selection faster and reduces the chance of selling or discarding an item needed for a quest.
Before stopping at the Shadowfell warning, create separate saves named Moonrise Prepared and Shadowfell Warning. Confirm that curse protection is working, the Last Light Inn and Moonrise waypoints are unlocked, the desired prisoners are rescued, intended allies are alive and every active companion has suitable equipment. Leave the warning unconfirmed until the companion and late-Act 2 preparation chapters are complete.
- Move surplus equipment and camp supplies to camp storage.
- Keep quest items, permanent bonuses and essential consumables.
- Create Moonrise Prepared and Shadowfell Warning saves.
- Confirm protection, waypoints, rescues and ally survival.
- Do not pass the Shadowfell warning in this chapter.
Before you move on
- A named Act 1 Complete save exists before leaving the previous region.
- The party has entered the Shadow-Cursed Lands and created an Act 2 Entry save.
- Effective shadow-curse protection is active and a safe waypoint is unlocked.
- Last Light Inn has been visited when available, with a save before major faction decisions.
- Moonrise Towers has been visited before the final Act 2 sequence, with its merchants and key conversations checked.
- Desired tiefling, deep gnome, Wulbren and applicable Minthara objectives are complete.
- The party has stopped at the Shadowfell warning without passing it.
- Separate Moonrise Prepared and Shadowfell Warning saves exist for the next chapters.
- Surplus equipment is stored, intended allies are alive and the party is ready for companion and late-Act 2 preparation.
Act 2 — Companion Quests, Romance and Consequence
Complete time-sensitive companion and romance preparations before entering the Shadowfell, but do not delay the main finale simply because every optional companion objective is unfinished. Visit Last Light Inn, protect the routes you intend to keep, resolve Karlach’s Dammon progression, advance Halsin’s Shadow Curse quest, and complete the Moonrise prison rescues before the point of no return. Bring Shadowheart into the Shadowfell if she is intended to decide the Nightsong’s fate. After that decision, Moonrise Towers becomes a battlefield and leads to Ketheric Thorm’s rooftop encounter. The Mind Flayer Colony follows immediately after the first Ketheric encounter. Wyll’s Mizora rescue takes place inside that colony, alongside other prisoner and companion-related objectives; it cannot be completed by searching the ordinary Moonrise rooms. Finish the colony, defeat Ketheric and the Apostle of Myrkul, take Ketheric’s Netherstone, return through the portal and make a final Act 2 save before proceeding toward Baldur’s Gate.
Finish time-sensitive companion preparation before the Shadowfell
Use Last Light Inn as the preparation hub. Speak with every recruited companion after arriving in Act 2, after major revelations and after completing personal objectives. Long rests can queue several camp scenes, so use additional rests when no urgent world event is active. A partial rest is useful when you want to advance camp dialogue without spending supplies.
Complete the objectives that depend on Last Light Inn surviving. If Karlach is being romanced, have Dammon perform the second engine upgrade while Karlach is present, then return to camp for the resulting relationship scene. If you intend to lift the Shadow Curse, wake Art Cullagh, have Halsin defend the portal while he retrieves Thaniel, then find Oliver and reunite the two halves. These are important optional outcomes, not prerequisites for defeating Ketheric.
Advance Astarion’s Act 2 route through Raphael and Yurgir, and bring Astarion to Araj Oblodra at Moonrise Towers if that conversation is part of the intended relationship. Keep Lae’zel available for her githyanki and Astral Prism conversations. Let Gale receive Elminster’s visit and speak with him afterward. If Minthara is recruited, check her camp dialogue as well.
Before entering the Shadowfell, rescue the prisoners in Moonrise Towers if you want those outcomes. The prison route is separate from the later tower assault. Free Wulbren and the tiefling prisoners through the prison escape route, then confirm that the survivors reached Last Light Inn. If Zevlor’s rescue is intended, it occurs later in the Mind Flayer Colony, not in the prison.
- Karlach received the intended second Dammon upgrade before Last Light Inn becomes unavailable.
- Halsin’s portal defense and Thaniel- Oliver reunion are complete if lifting the Shadow Curse is intended.
- Astarion, Lae’zel, Gale and other recruited companions have no urgent preparation left.
- Desired Moonrise prison rescues are complete.
- Make a manual save named Pre-Shadowfell.
Enter the Shadowfell only after the Gauntlet and preparation are ready
Complete the Gauntlet of Shar’s trials and obtain the Spear of Night before entering the water portal at the bottom of the Verge of Shadows. The route normally uses four Umbral Gems, although the final door has alternative solutions. Do not treat the portal as ordinary travel: entering the Shadowfell cuts off access to Act 1 areas and can automatically resolve or fail unfinished quests. If Moonrise Towers has not been properly explored, significant content there may be lost.
Choose the active party before entering. Bring Shadowheart if she is intended to confront the Nightsong and remain with the party. Inside the Shadowfell, reach the Nightsong and allow the intended decision to occur. Shadowheart’s outcome changes her identity, equipment, faction direction and later companion content. If Shadowheart is absent when her personal confrontation is expected, she may leave permanently after the party returns.
Create another save immediately before the Nightsong conversation. After the decision, return to the Shadow-Cursed Lands and visit camp. Let the post-Nightsong companion scenes resolve before beginning the assault, but do not assume that every romance scene must occur before the Shadowfell. Some camp events depend on earlier Act 1 flags, approval and competing event priorities, and cannot be recreated by repeated resting.
- The Spear of Night is in the inventory before entering the Shadowfell.
- Shadowheart is present for the Nightsong decision if her route is intended.
- The Nightsong outcome is deliberate.
- Make a manual save named Post-Nightsong.
Prepare for and begin the Moonrise Towers assault
After the Shadowfell sequence, return to Moonrise Towers. The cult forces are no longer a normal infiltration target, and the tower assault begins through the main approach. Speak with Jaheira and other allied characters before moving forward. On PS5, use the party portraits and radial menus to place characters on high ground, spread them away from clustered hazards and select reactions before combat begins.
The first assault contains multiple enemies and can become easier if you eliminate vulnerable casters and ranged attackers quickly. Keep concentration spells active on the most dangerous group, use doors and elevation to limit incoming fire, and avoid spending every high-level spell before reaching the rooftop. A short rest is useful between battles, but do not rely on it to replace a long-rest preparation if spell slots or healing resources are low.
Save before crossing into the rooftop sequence. Ketheric’s first real combat encounter takes place on the roof. Depending on earlier choices, dialogue checks may weaken or bypass part of the encounter, but failure does not prevent completion. Defeat Ketheric and the enemies supporting him. This is not yet the final kill: Ketheric retreats into the tower and the party follows him into the Mind Flayer Colony.
- Jaheira and intended allies are ready for the assault.
- The party has healing, elixirs, scrolls and area-control spells available.
- Make a manual save named Before Rooftop Ketheric.
- Ketheric’s rooftop encounter is resolved and the colony entrance is available.
Enter the Mind Flayer Colony and rescue Mizora and intended prisoners
Before jumping from the rooftop into the colony, finalize the active party. The colony sequence continues through the second Ketheric encounter, so bring the companions whose dialogue or rescue rewards matter. Wyll should be present if you want his direct Mizora dialogue and the opportunity to receive the Infernal Rapier. Entering the colony is the correct time for this rescue; Mizora is not found in the ordinary Moonrise prison or tower rooms.
Follow the colony route toward the Tadpoling Centre. In the room with the pods, locate Mizora’s pod and choose the option that frees her rather than annihilating her. Killing or annihilating Mizora kills Wyll as well. If Wyll is present, he receives the most direct scene, and a successful persuasion can produce the Infernal Rapier. Zevlor can also be found among the colony’s captives if his rescue is intended. Use the colony controls carefully and keep a save before interacting with the pod controls.
Continue through the colony instead of trying to return to camp. Search the side rooms for optional rewards and information, but prioritize the route to the Neural Apparatus. A restoration pod near the final descent provides a full-rest benefit to the active party. Use it before entering the last Ketheric sequence, then make a manual save if the game allows it immediately before the descent.
- Wyll is present for the Mizora scene if his unique dialogue or Infernal Rapier is wanted.
- Mizora is freed rather than annihilated.
- Zevlor and any other intended colony prisoners are rescued.
- The party uses the restoration pod before the final descent.
- Make a manual save named Before Final Ketheric.
Defeat Ketheric Thorm and the Apostle of Myrkul
At the bottom of the colony, approach the captive Nightsong and use the Help action when the battle requires her release. Freeing her removes the protection that keeps Ketheric’s final encounter from being completed. If a character can reach her safely through invisibility or careful positioning, rescue her early; otherwise clear a path while controlling the surrounding enemies.
The fight has two major stages. In the first, focus on Ketheric and prevent supporting enemies from accumulating. In the second, he becomes the Apostle of Myrkul. The Apostle’s central platform applies Bone Chilled, which prevents healing nearby, so heal and revive characters before they approach the platform. Eliminate or control Necromites because they can fuel the Apostle’s most dangerous attacks. Ranged attacks, summons, terrain control and damage that does not require standing beside the Apostle are safer than prolonged melee exposure.
If the attempt fails, reload the Before Final Ketheric save or the colony save rather than replaying the entire act. Change one variable at a time: replace a weak damage type, bring more area control, prepare resistance elixirs, move the party before triggering dialogue or reserve emergency healing for the second stage. Once the Apostle falls, combat ends. Take Ketheric’s Netherstone and use the portal to return to Moonrise Towers.
- The Nightsong is free or the intended final outcome is resolved.
- Ketheric’s first stage is defeated or bypassed through the available dialogue route.
- The Apostle of Myrkul is defeated.
- Ketheric’s Netherstone is taken.
- The party returns to Moonrise Towers through the portal.
Resolve the Act 2 aftermath and leave for Act 3
After Ketheric’s death, speak with surviving companions, Jaheira, rescued prisoners and any recruited companion who has new dialogue. Take the available rewards from Moonrise Towers and review the journal. Confirm that the Shadowheart, Karlach, Wyll, Astarion, Lae’zel, Gale and Halsin outcomes are either complete or intentionally left unresolved. The entire companion roster does not need every optional objective completed for Act 2 to count as finished.
Before leaving, make a manual save named Act 2 Complete - Before Act 3. This is the best save for alternate companion outcomes, romance testing and different Act 3 preparations. Check that Ketheric’s Netherstone is in the inventory, the Mind Flayer Colony was completed, Mizora’s rescue was resolved if Wyll is alive, and the party has returned to the surface of Moonrise Towers.
Travel toward the road to Baldur’s Gate only after the journal and camp review is complete. The transition into Act 3 removes access to the Shadow-Cursed Lands, so do not use the travel prompt merely to test a route if a companion or prisoner objective remains important. Keep the pre-Shadowfell and post-Nightsong saves even after creating the final Act 2 save.
- Post-Moonrise camp and companion scenes have been reviewed.
- Ketheric’s Netherstone is secured.
- The journal records the intended companion, romance, Shadow Curse and faction outcomes.
- Make and preserve Act 2 Complete - Before Act 3.
- Proceed to Baldur’s Gate only after the final review.
Before you move on
- The Gauntlet of Shar and Shadowfell sequence are complete, with the intended Nightsong outcome recorded.
- Desired Last Light, Karlach, Halsin, Astarion, Lae’zel, Gale and romance objectives are complete or deliberately declined.
- Moonrise prison rescues were completed if wanted before the assault.
- The Moonrise Towers assault and rooftop Ketheric encounter are complete.
- The party entered the Mind Flayer Colony after the first Ketheric encounter.
- Mizora was rescued in the colony, and intended prisoners such as Zevlor were handled.
- The final Ketheric encounter and Apostle of Myrkul are defeated.
- Ketheric’s Netherstone is in the party inventory and the group returned through the Moonrise portal.
- Post-Moonrise camp scenes were reviewed.
- A preserved save named Act 2 Complete - Before Act 3 exists before traveling to Baldur’s Gate.
Act 3 Handoff — Leveling, Spells and Gear
Begin this chapter after Act 2 is complete: Ketheric Thorm has been defeated, the Mind Flayer Colony has been cleared, the Astral Plane sequence has concluded, and the party has reached Wyrm’s Lookout. Leave that camp location to enter Rivington and establish Act 3. Before exploring deeply, level every available companion, review respec options with Withers, replace obsolete spells and distribute healing, revival and utility supplies across the active party. Organize camp storage without hiding items needed for immediate quests or combat. Treat level 9 on arrival as a comfortable preparation target rather than a requirement; the game does not require a specific level to enter Act 3. Preserve one named save after the Act 2 conclusion and another after reaching Rivington. The second save becomes the clean branch point for Act 3 companion, faction and ending decisions.
Confirm the Act 2 completion state
Start from the save created at the end of the previous chapter, after the Act 2 finale rather than before it. The relevant sequence is complete when Ketheric Thorm has been defeated, the Mind Flayer Colony has been resolved, the party has dealt with the Astral Plane events and the game has placed you at Wyrm’s Lookout. Do not travel back to the Gauntlet of Shar or pause this chapter to repeat pre-Shadowfell preparation; that cutoff belongs to the earlier Act 2 chapter.
Speak with companions and camp characters at Wyrm’s Lookout before leaving. This is a transition camp, so allow the available post-Act-2 conversations and scenes to occur before moving on. Review the journal for quests that have just advanced, note any companion who has joined or changed status, and make sure the active party is the group you want to use for the first Rivington encounters.
Create a manual save named Act 2 Complete — Before Rivington. Keep it separate from autosaves and from the earlier pre-Shadowfell branch. This save preserves the completed Act 2 state and provides a reliable restart point if you later want to test a different Act 3 party, romance direction or faction response.
- Ketheric Thorm and the Mind Flayer Colony sequence are complete.
- The Astral Plane and Wyrm’s Lookout transition scenes have occurred.
- Post-Act-2 companion conversations have been checked.
- A manual save named Act 2 Complete — Before Rivington exists.
Enter Rivington and establish the Act 3 handoff
From Wyrm’s Lookout, use the available transition to leave camp and travel to Rivington. This is the practical start of Act 3 for the campaign route. Rivington is an open area outside the city proper; Wyrm’s Crossing and the Lower City follow later, so do not treat the first arrival as the final approach to the endgame.
On arrival, activate the Rivington waypoint as soon as it is safe to do so. Open the map and confirm that the new region is available for fast travel. Take a moment to inspect nearby exits, the campsite location and the journal markers before committing to a long chain of conversations or fights.
Create a second manual save named Act 3 Handoff — Rivington Arrival. Do not overwrite the Act 2 Complete save. The Rivington save should be the starting point for experiments with party composition, equipment, companion conversations and the order in which you handle city quests.
Act 3 contains a large amount of optional content and does not require you to rush directly toward the city. Start with nearby exploration and information gathering, then use the map and journal to decide which quests fit your intended companion and faction outcomes.
- Rivington has been reached from Wyrm’s Lookout.
- The Rivington waypoint has been activated.
- The map and journal show the new Act 3 region and current objectives.
- A separate manual save named Act 3 Handoff — Rivington Arrival exists.
Apply level-ups and repair party roles
Open the character and party screens before beginning difficult Rivington encounters. Resolve every pending level-up, including companions currently at camp if you intend to recruit them later. Check class resources, prepared spells, equipment proficiency and concentration options after each level rather than assuming the previous Act 2 setup is still optimal.
Level 9 on entry to Act 3 is a comfortable practical target, but it is not a mandatory gate. A lower-level party can continue with careful exploration and strong equipment, while a higher-level party may have earned more experience through optional quests. The campaign’s level cap is 12, so leave room for later improvements instead of rebuilding the entire party around reaching a particular number immediately.
Visit Withers in camp if a character has redundant abilities, poor ability scores or a role that no longer fits the group. Respec can change a character’s class-related choices, ability scores and prepared class options, but it does not erase the character’s story identity. After respecing, re-equip the character, prepare spells again and inspect the radial menu because class changes can leave outdated actions assigned.
Aim for overlapping roles rather than one rigid specialist per job. The party should be able to deal reliable weapon or spell damage, survive focused attacks, remove or prevent dangerous conditions, move vertically or across gaps, and attack enemies that cannot be reached in melee. A dedicated healer is optional, but emergency healing, revival and condition removal must be available somewhere in the group.
- All available level-ups have been applied.
- The party has a practical damage, defense, support, control and mobility plan.
- Withers has been used if a respec would correct a weak or redundant build.
- Respecced characters have been re-equipped and their spells and radial actions reviewed.
Prepare spells, reactions and emergency actions
Review prepared spells for the environments ahead rather than carrying only damage options. Keep at least one reliable concentration control effect, one mobility option and one method of removing or preventing common conditions. Depending on class, useful choices may include a control spell, Misty Step, Counterspell, Dispel Magic, Aid, protection effects or restoration magic. These are examples of functions to cover, not mandatory spells for every party.
Check reaction settings and class resources before leaving camp. Make sure the player understands which characters can interrupt spells, reduce incoming damage, impose disadvantage, protect an ally or make an opportunity attack. Controller combat becomes slower and less reliable when important reactions are left disabled or buried in an unfamiliar menu.
Keep Revivify scrolls or an equivalent revival method distributed among more than one character. Give at least one mobile character the ability to reach a downed ally, cross difficult terrain or retreat from a threatened position. Place frequently used healing, mobility, control and revival items near accessible radial positions on PS5 so they can be selected without searching through the full inventory during a turn.
- The group covers control, mobility, magical defense and condition recovery.
- Reaction settings have been reviewed and are enabled where appropriate.
- Revival tools are distributed rather than stored on only one character.
- High-priority spells and emergency items are easy to reach from the PS5 radial menus.
Distribute gear and organize camp storage
Assign equipment by function, not only by the largest displayed armor class or damage number. Initiative, movement, concentration protection, spell save difficulty, defensive reactions, ability-score scaling and resistances can determine whether an item is useful in Act 3. Keep a spare ranged weapon or another fallback attack for characters who may be unable to reach a target.
Distribute healing potions, scrolls, coatings, special arrows, grenades and resistance elixirs among the characters who may need them. Do not place every emergency item on the protagonist. A character who cannot access that inventory during the current turn cannot reliably solve a crisis.
Use the Traveller’s Chest for duplicate weapons, surplus armor, excess crafting materials and equipment that is not part of a current build. Keep quest objects, keys, unique gear, revival supplies and immediate-use consumables on characters until their related objectives are finished or until you have confirmed that they are safe to store. Leave carrying capacity open for Rivington and Wyrm’s Crossing rewards.
After the cleanup, save again only if you want a working preparation copy. Preserve Act 2 Complete — Before Rivington and Act 3 Handoff — Rivington Arrival as the two permanent branch saves. If cross-save is enabled, confirm that the desired save has synchronized, but also retain the local PS5 copy; Larian describes cross-save as a copy of recent saves rather than a replacement for local storage.
- Equipment has been assigned to the intended builds.
- Healing and revival supplies are distributed across the active party.
- Quest objects and emergency tools have not been buried in camp storage.
- Duplicate gear and excess materials have been moved to the Traveller’s Chest.
- The two permanent handoff saves remain intact and separately named.
Before you move on
- The party begins this chapter after Ketheric Thorm, the Mind Flayer Colony, the Astral Plane sequence and the Wyrm’s Lookout transition are complete.
- A named manual save called Act 2 Complete — Before Rivington is preserved.
- Rivington has been entered from Wyrm’s Lookout and its waypoint has been activated.
- A separate manual save called Act 3 Handoff — Rivington Arrival is preserved.
- All intended level-ups have been applied, with level 9 treated as a practical target rather than a mandatory gate.
- The party has reliable damage, survivability, healing or restoration, revival, mobility, control and ranged capability.
- Prepared spells, reactions, class resources and PS5 radial-menu assignments have been reviewed.
- Healing, revival tools and other high-priority consumables are distributed across the party.
- Camp storage contains duplicates and long-term items without hiding quest objects or emergency supplies.
- The Act 2 completion save and Act 3 handoff save remain available for alternate companion, faction and ending routes.
Act 3 — Entering Baldur’s Gate: City Districts and Key NPCs
Act 3 begins in Rivington, continues through Wyrm’s Crossing and Wyrm’s Rock Fortress, and then opens into the Lower City, its sewers and the Undercity. Do not treat the city as a straight route to the finale. Establish waypoints, handle time-sensitive rescues, attend Gortash’s coronation, and make manual saves before faction decisions. Rivington and Wyrm’s Crossing contain several opportunities that can disappear when you enter the Lower City, while the Lower City contains companion quests, faction conflicts and the information needed to choose your route through the endgame. The Steel Watch, Ironhands, Gondians, Flaming Fist, Harpers, Guild and Gortash’s government overlap, but no single alliance is required for every ending. Keep a dedicated Act 3 backup save before destroying a major stronghold or entering the deepest sewer routes.
1. Secure Rivington before crossing into Wyrm’s Crossing
After leaving the Shadow-Cursed Lands, activate the Rivington waypoint and survey the Circus of the Last Days, Open Hand Temple, Gur Camp, Requisitioned Barn and nearby refugee camps. Speak to quest-givers before moving north. The Open Hand Temple murder investigation and circus events provide leads that later connect to Lower City content, while the Gur camp is important if Astarion’s personal quest is active.
If the Strange Ox survived the Emerald Grove and Last Light Inn, find it in the stable near the Requisitioned Barn before entering the Lower City. Speaking with it can begin Help the Devilish Ox; if you agree to help, carry the resulting Strange Apple when entering the city. Entering the Lower City before starting this interaction can remove the opportunity. This is optional campaign content, but it can add an ally to the final battle.
- Rivington waypoint activated.
- Open Hand Temple, circus and Gur Camp opportunities checked.
- Strange Ox quest handled before entering the Lower City, if the Ox survived earlier acts.
2. Explore Wyrm’s Crossing and make a fortress save
Travel north from Rivington into Wyrm’s Crossing. Activate the Wyrm’s Crossing waypoint and inspect the shops, bridge structures, upper walkways and side entrances rather than following only the central road. Wyrm’s Crossing is a compact district with alternate approaches, dialogue opportunities and routes that reward jumping, stealth, disguise or persuasion.
Before entering Wyrm’s Rock Fortress, create a manual save in a separate slot. Keep mobility, invisibility, persuasion bonuses and crowd-control spells available. The guards and checkpoints can often be bypassed or managed through dialogue, and a failed conversation can create a fight that is avoidable with a reload. Review Jaheira and Minsc-related objectives here if they are active, but do not assume every party must receive the same Danthelon’s Dancing Axe sequence.
- Wyrm’s Crossing waypoint activated.
- Major bridge businesses and side routes inspected.
- Manual save created before entering Wyrm’s Rock Fortress.
3. Attend Gortash’s coronation before attacking his government
Enter Wyrm’s Rock Fortress and proceed to the Audience Hall for Enver Gortash’s coronation. Speak with Gortash and hear his offer before initiating hostilities. Accepting or tolerating the offer does not permanently determine your ending; it preserves time to investigate Orin, the Steel Watch, the Grand Duke and the city’s other factions.
Speak with Duke Ravengard after the ceremony and read the surrounding dialogue carefully. If the coronation or an execution notice starts Free Counsellor Florrick, rescue her within five long rests. Her prison is inside Wyrm’s Rock, and the quest can be located through the execution notice, the gallows area or the prison records. Save before attacking Gortash, because assaulting him early can turn the fortress hostile and change the Steel Watch and Ravengard-related routes.
- Gortash’s coronation witnessed or deliberately opposed.
- Gortash’s offer and the Duke Ravengard situation recorded in the journal.
- Florrick’s rescue timer checked and a fortress backup save created.
4. Enter the Lower City and unlock several travel points
Pass through Wyrm’s Rock Fortress and exit through the North Span to reach the Lower City. Activate waypoints as you travel, especially Basilisk Gate, Lower City Central Wall, Heapside Strand, Baldur’s Gate and Grey Harbour Docks. These waypoints divide the city into manageable travel loops and reduce repeated walks between companion quests, faction buildings and sewer entrances.
Visit the Elfsong Tavern early. It functions as a useful Lower City base, provides camp access and introduces several important conversations. Bring the relevant companion when entering a personal quest location, then return to camp after major discoveries. The House of Grief, Cazador’s Palace, Sorcerous Sundries, the Guildhall, the Counting House and the Steel Watch Foundry are not all required for the same ending, but they can determine companion outcomes, allies and available solutions to the Netherstone conflict.
- Several Lower City waypoints activated.
- Elfsong Tavern visited and camp conversations checked.
- Companion quest locations marked on the map.
5. Investigate civic factions before choosing a side
Treat the Steel Watch, Gondians, Ironhands, Flaming Fist, Harpers, Guild and Gortash’s government as connected quest groups. Investigate the Steel Watch and the Grand Duke situation before destroying the Foundry or attacking Gortash. The Ironhands and Gondians offer different objectives and rewards, and their conflict can affect the city’s final allied forces without requiring one universal solution.
Visit the Basilisk Gate Barracks and check the gallows area for the Florrick notice and the murder investigation lead. If Stop the Presses begins, complete it before taking a long rest if you want its citywide reputation and trader effects. For Investigate the Murders, speak with Devella when the opportunity appears rather than repeatedly resting after advancing the killer’s plot. Save before faction confrontations, test dialogue or stealth approaches, and reload if a needed NPC becomes hostile or a quest objective fails.
- Steel Watch, Grand Duke, Ironhand and Gondian objectives compared.
- Florrick and Stop the Presses timers checked.
- Manual save made before destroying a faction stronghold or starting a large public fight.
6. Resolve urgent rescues and companion arcs before deep sewer progress
Before following the Netherstone objectives into the deepest sewer and Undercity routes, handle any urgent rescue, execution or kidnapping objective currently displayed. Complete the personal quests you want for Shadowheart, Astarion, Gale, Wyll, Jaheira, Minsc and other active companions with the relevant character present. Camp after each major quest advancement because Act 3 companion scenes frequently appear there rather than at the quest location.
Use the Lower City’s multiple entrances rather than assuming there is one required route. Sewer access is available through locations including the Elfsong Tavern, Basilisk Gate area, Flymm Cargo and other buildings. The sewers are an exploration network, not automatically the final route. Enter them only after creating a save and confirming that unresolved companion or faction objectives are intentional.
- Urgent executions, rescues and kidnappings resolved or deliberately abandoned.
- Relevant companions present for their personal quest locations.
- Camp visited after major discoveries and faction decisions.
7. Create a dedicated city-state save before the endgame route
When Rivington, Wyrm’s Crossing and the Lower City have been surveyed, create a clearly named manual save such as Act 3 City — Before Netherstones. Keep a second save before killing Gortash, destroying the Steel Watch Foundry, entering major companion dungeons or committing to the deepest Undercity objectives.
Your prepared state should include active city waypoints, Gortash’s coronation completed, Florrick’s fate decided, intended companion quests advanced, and the Steel Watch, Grand Duke, Ironhand and Gondian situations understood. Then choose your route through the remaining quests. The campaign does not require clearing every Lower City building, but entering the final Act 3 progression before handling desired companion and alliance content can remove scenes or change available allies.
- Dedicated Act 3 city backup save created.
- Principal city waypoints active.
- Gortash, Florrick, companion and faction objectives reviewed.
- Unresolved content is either completed or deliberately reserved for another run.
Before you move on
- Rivington, Wyrm’s Crossing, Wyrm’s Rock Fortress and multiple Lower City waypoints are active.
- Gortash’s coronation and offer have been handled, with a manual save before any major confrontation.
- Florrick’s fate is resolved or intentionally accepted, and all active time-sensitive objectives have been checked.
- Desired companion quests and camp scenes have been advanced before the final sewer and Netherstone progression.
- Steel Watch, Grand Duke, Ironhand, Gondian and intended ally outcomes are understood.
- A clearly labeled Act 3 city save exists for alternate faction choices and ending routes.
References for this chapter
- Act Three — BG3 Wiki
- Wyrm’s Crossing — bg3.wiki
- Lower City — bg3.wiki
- Time-sensitive activities — BG3 Wiki
- Free Counsellor Florrick — bg3.wiki
- Help the Devilish Ox — bg3.wiki
- Basilisk Gate Barracks — bg3.wiki
- Lower City Sewers — bg3.wiki
- How Baldur’s Gate 3 adapts its expansive RPG gameplay for your DualSense controller
Act 3 — Major Confrontations and Final Dungeons
Resolve the order-sensitive Gortash chain before committing to the final route: attend the coronation, rescue the Iron Throne prisoners, complete the Steel Watch Foundry, and then defeat Gortash. Keep manual saves before each transition. The Foundry is a rescue-and-combat sequence rather than one ordinary boss fight, while Gortash’s arena adds traps and defensive devices. Orin’s Temple of Bhaal fight revolves around removing Unstoppable stacks and interrupting the Reapers who refresh them. Cazador, Raphael, and the House of Grief are optional for the main ending but important for companion arcs, rewards, and possible final allies. Once you enter the Morphic Pool, most remaining city content is unavailable. The final assault runs through High Hall, the Crown of Karsus, and the Netherbrain’s collapsing platforms. The High Hall restoration pod is available on Explorer and Balanced, but not on Tactician or Honour.
1. Establish the safe Act 3 order
Make a manual save before entering Wyrm’s Rock Fortress. Attend Gortash’s coronation and avoid starting the audience-hall battle if you want the widest range of rescue and quest options. You can accept his temporary alliance without committing to the final outcome.
Reach the Iron Throne through the submersible at Flymm Cargo before destroying the Steel Watch Foundry or killing Gortash. The prison uses a turn limit, so divide the party between cell areas and use Dash, Misty Step, Dimension Door, Fly, Haste, speed potions, and ranged interactions to open cells and escort prisoners. Prioritize Duke Ravengard and the Gondians relevant to your intended outcome. You do not need to defeat every enemy; evacuate the prisoners and leave before the final turns expire. Save after returning to the city.
- Gortash’s coronation completed without starting the main fight
- Iron Throne visited before Foundry destruction or Gortash’s death
- Duke Ravengard and intended prisoners rescued
- Manual save made after the submarine sequence
2. Rescue the Gondians and disable the Steel Watch
Enter the Steel Watch Foundry in the Lower City and protect the Gondians during the opening encounters. Banite enemies can activate Motivators. Select and disable each Motivator as soon as it appears instead of allowing its countdown to finish. Keep party members near endangered Gondians, but avoid grouping everyone tightly because Watcher explosions and area attacks punish clustered characters.
Continue through the laboratory to the control centre. If Zanner Toobin survives and the Gondian quest is active, he can help initiate the Foundry’s destruction. The Steel Watch Titan and Hellfire Watchers guard the control room. Lightning damage can be useful against the Titan on lower difficulties, but do not rely on a fixed vulnerability on Tactician or Honour. When Defensive Protocol: Bulwark appears, remove the temporary protection before the following Hellfire Missile attack. Move away when Self-Destruct or Self-Detonate effects are announced, since the blast can kill nearby allies and Gondians.
After the control-centre fight, reach the Neurocitor. Zanner can start the destruction, or you can use the Runepowder Bomb or the appropriate control-panel route. Invisibility may bypass some watchers, but it does not replace resolving the Neurocitor objective. Save after the Foundry quest is complete.
- Motivators disabled before their countdowns finish
- Gondian outcome resolved according to the intended run
- Steel Watch Titan defeated or bypassed
- Neurocitor destroyed
- Manual save made after the Foundry quest resolves
3. Defeat Gortash after the Steel Watch is gone
Return to Wyrm’s Rock only after the Iron Throne and Foundry objectives are complete. With the Steel Watch disabled, Gortash’s support is reduced, but the approach and arena still contain Flaming Fists, force curtains, grenade impellers, incineration casters, and stunner vents. Save before re-entering the fortress because the route can involve linked combat.
In Gortash’s chamber, spread the party and inspect the walls before committing to attacks. Micromodron Force Curtains reinforce his defenses; destroying active curtains makes him easier to damage. Some force curtains can expose him to an elemental vulnerability for a short opening. Reflectoguards can throw explosives toward characters, and bombs can sometimes be thrown back, but check the blast radius before using them.
During the later phase, Gortash gains Bane empowerment, temporary hit points, and the Hand of Bane attack. Do not spend every high-level resource immediately. Remove nearby manifestations or dangerous lieutenants when they threaten concentration, then attack Gortash during a clear opening. Move characters out of marked impact areas rather than forcing an attack. Loot his Netherstone and save before leaving.
- Steel Watch disabled before the main Gortash battle
- Force curtains and active traps accounted for
- Bane empowerment survived
- Gortash’s Netherstone obtained
4. Resolve companion dungeons before the point of no return
Complete companion-critical locations before travelling to the Morphic Pool. At Cazador’s Palace, bring Astarion if you are resolving his personal quest. In the ritual chamber, free him with Help or interrupt the ritual by killing a ritual participant. If the ritual proceeds too far, Astarion can be permanently lost. After Cazador falls, decide whether Astarion ascends or rejects the ritual.
The House of Grief is the major Shadowheart confrontation. Protect concentration, control the central area, and prevent the Sharrans from surrounding weaker party members. The House of Hope is optional for the main campaign, but it is needed for the Orphic Hammer route and provides valuable rewards. Before opening the final portal, position the party because Raphael’s fight begins after the portal interaction. Destroy or disable the Soul Pillars while controlling Raphael’s cambions. Hope and, if the prerequisites were met, Yurgir can assist.
Take long rests before entering these dungeons rather than assuming a rest will be available inside. Use short rests and consumables between linked encounters, and save immediately before each final chamber.
- Cazador’s outcome resolved if pursuing Astarion’s arc
- House of Grief completed if pursuing Shadowheart’s arc
- House of Hope completed if its rewards, allies, or Orphic Hammer are required
- Separate saves made before each companion-critical boss
5. Defeat Orin and create the final city save
Follow the murder investigation to the Murder Tribunal and Temple of Bhaal. Save before entering Orin’s confrontation, especially if a companion has been kidnapped. In the group battle, Orin begins with Unstoppable stacks. The Reapers of Bhaal chant to refresh those stacks at the end of each round, so interrupt or disable them with Silence, Stun, Prone, Fear, Hypnotic Pattern, area damage, or another dependable condition before spending your strongest attacks.
After the chanting stops, use multi-hit attacks such as Magic Missile, Scorching Ray, or repeated weapon attacks to remove the remaining Unstoppable charges. Then use control and burst damage during Orin’s vulnerable window. Keep characters away from the arena edge because knockback can cause deaths. The Dark Urge version is a distinct duel with different support conditions, so make a separate save if that storyline applies.
After both Netherstones are secured, finish the city quests, alliance work, and companion scenes you still intend to see. Stock healing, scrolls, mobility tools, Counterspell, Globe of Invulnerability, and area control. Create a final manual save before travelling to the Morphic Pool; that transition is the last practical opportunity to return to most of the city.
- Orin’s Netherstone obtained or the chosen alternative route completed
- Kidnapped companion recovered or the intended outcome accepted
- Remaining city and companion content finished
- Pre-Morphic-Pool manual save created
6. Advance through High Hall and finish the linked final fights
The final route begins at High Hall after the Morphic Pool and Astral Plane sequences. Use gathered allies where appropriate, but keep the active party moving toward the High Hall instead of clearing every enemy. The courtyard can be fought directly or bypassed through northern, southern, or sewer routes. Prioritize enemies that disable, silence, summon reinforcements, or mark areas for Nautiloid strikes.
A restoration pod is available in the High Hall route on Explorer and Balanced. It restores the party’s health and resources before the brainstem, so use it after the courtyard sequence when available. The corresponding pod is not available on Tactician or Honour. On those difficulties, conserve spell slots and class resources during High Hall, consider stealth or alternate routes, and prepare Angelic Slumber potions, scrolls, consumables, and other recovery tools. The party can also find useful supplies near the final approach, but do not assume they replace a full restoration.
Atop the Netherbrain, reach the Crown of Karsus and channel Karsus’s Compulsion. Use Misty Step, Dimension Door, Arcane Gate, Fly, or other movement tools to cross the platforms. Once the portal opens, bring the party and permitted allies close before entering. Inside, the Netherbrain destroys marked platforms after Orb of Negation resolves, so move off threatened platforms immediately and concentrate damage on the brain. Survival and movement take priority over unfinished enemies outside the portal.
- High Hall reached through the final route
- Restoration pod used on Explorer or Balanced, or alternative resources prepared on Tactician or Honour
- Crown of Karsus channel completed
- Party entered the Netherbrain portal
- Netherbrain defeated and ending sequence reached
Before you move on
- The Iron Throne, Steel Watch Foundry, and Gortash sequence is resolved according to the intended run.
- Orin and Gortash’s Netherstones are secured, or the selected alternative final route is complete.
- Intended companion dungeons and companion-critical choices are resolved.
- A manual save exists before the Morphic Pool and is stored separately from ordinary autosaves.
- High Hall, the Crown of Karsus, the Netherbrain, and the final ending scenes are completed.
- The game proceeds into the ending and credits sequence.
References for this chapter
- The High Hall Courtyard — bg3.wiki
- Restoration Pod — BG3 Wiki
- Confront the Elder Brain — BG3 Wiki
- Disable the Steel Watch — BG3 Wiki
- Steel Watch Foundry — BG3 Wiki
- Get Gortash’s Netherstone — BG3 Wiki
- Iron Throne — BG3 Wiki
- The Netherstones — Baldur’s Gate 3 Walkthrough & Guide
- Fighting the Steel Watcher Titan — BG3 Wiki
- Fighting Enver Gortash — BG3 Wiki
- Fighting Orin the Red — BG3 Wiki
- Fighting Cazador — BG3 Wiki
- Fighting Raphael — BG3 Wiki
- Fighting The Netherbrain — bg3.wiki
Final Sequence — Choices, Showdown and Ending
Finish all desired Act 3 content before entering the Morphic Pool, then create a named manual save for alternate endings. The final route passes through the High Hall, the brainstem ascent, the Crown of Karsus and the Netherbrain’s psyche. The High Hall approach has Nautiloid bombardment hazards, but the separate four-turn counter begins only at the start of the fight atop the Netherbrain, after the brainstem ascent. Reach the Crown instead of clearing every enemy, protect the illithid carrying the Netherstones while Karsus’ Compulsion channels, then send each party member through the portal. In the final arena, move away from pink-marked platforms before they collapse and focus damage on the Netherbrain. After victory, choose whether to destroy or control it, then preserve the pre-Morphic Pool save for alternate outcomes. Watch the ending scenes and epilogue, allow the credits to appear, and archive the completed save separately.
1. Complete preparation and create the branching save
Finish any Act 3 quests, companion resolutions, faction decisions, purchases and equipment changes that you want to include in this run before entering the Morphic Pool. Treat entry into the Morphic Pool as the practical Act 3 point of no return: the normal route back to Baldur’s Gate is closed, and you should not expect ordinary camp access, party changes, stored equipment retrieval or Withers respec to remain available. Make a named manual save before committing to the boat and keep it in a separate slot from routine autosaves.
Prepare healing, resurrection, movement and defensive tools. Misty Step, Dimension Door, Fly, Feather Fall, invisibility, resistance effects and high-damage attacks are all useful, but no particular class build is mandatory. Put healing potions, revives, movement abilities and each character’s strongest attacks on accessible radial-menu pages. On PS5, the DualSense radial interface is customizable, so use a layout that avoids searching through several pages during a timed combat turn. Make a second manual save if you want an additional untouched copy of the branch.
- A named save exists before the Morphic Pool commitment.
- Desired companion and faction decisions are complete or intentionally abandoned.
- Healing, revival, movement and defensive options are prepared.
- Frequently used actions are easy to reach on the PS5 radial menus.
2. Cross the High Hall approach without wasting resources
After the Morphic Pool sequence, move through the High Hall toward the brainstem. This approach contains enemies, reinforcements and marked areas targeted by Nautiloid bombardment. The objective is to reach the route upward, not to defeat every hostile creature. Use invisibility, stealth, crowd control, flight, teleportation and summoned or allied support when available. If combat is necessary, remove enemies that block the stairs, doors or the direct route, then continue rather than spending every high-level resource on side targets.
The High Hall bombardment is separate from the four-turn counter in the final Netherbrain arena. Keep moving out of marked impact zones and avoid ending turns in exposed areas when a safer route is available. Once a party member reaches the brainstem entrance, the High Hall combat ends and the party is moved forward. Use the opportunity to regroup, select the intended active characters and restore resources where the game provides the appropriate restoration option for the difficulty setting. Do not assume that clearing the courtyard makes the later fight easier enough to justify exhausting the party.
- The party reaches the brainstem route.
- Characters avoid marked bombardment zones whenever possible.
- Only blocking enemies are fought during the approach.
- High-level resources remain for the Crown and Netherbrain encounters.
3. Reach the Crown and protect the illithid caster
Climb the brainstem and begin the fight atop the Netherbrain. The four-turn counter starts at the beginning of this fight, after the High Hall approach and brainstem ascent. When that counter expires, a Nautiloid arrives and begins the bombardment attacks seen during the approach. Prioritize reaching the Crown of Karsus before the counter expires; do not clear enemies that are not preventing progress.
An illithid character holding all three Netherstones must cast Karsus’ Compulsion. Depending on earlier decisions, this may be the player character, the Emperor, Orpheus or another transformed companion. Move that character into range of the Crown and activate the spell. The channel lasts until the caster’s next turn and can be interrupted by incapacitation, death or other disruptions. Protect the caster with positioning, defensive spells, healing, crowd control and, where practical, temporary invisibility or damage prevention. If the caster is killed, revive that same character; another ordinary party member cannot simply replace the required caster.
Bring the other party members close to the Crown before the spell completes. Use allied summons and recruited support to occupy enemies or provide extra damage, but do not delay the channel to pursue targets that do not block the Crown.
- The correct illithid holds the Netherstones.
- The four-turn Netherbrain timer has been recognized as separate from the High Hall hazards.
- The caster is within range of the Crown and protected from interruption.
- The other intended party members are near the portal location.
4. Send every intended party member through the portal
When Karsus’ Compulsion succeeds, a portal opens into the Netherbrain’s psyche. Select each surviving party member individually and interact with the portal. Do not end the sequence after sending only the caster: the final fight is designed around bringing the active party inside. If a character is downed, revive them before entering when possible. Keep the pre-Morphic Pool save untouched in case the chosen illithid or final party arrangement produces an unwanted outcome.
Once the party is inside, stop spending turns on creatures outside the psyche unless they directly prevent entry. The portal is the transition to the actual Netherbrain fight. Use the radial menu to select movement, buffs and attacks quickly, and check each character’s position before ending the turn. If the interface remains focused on another character, manually select the intended party member rather than assuming the turn has advanced correctly.
- Every intended living party member has interacted with the portal.
- The party has not left the illithid caster behind outside.
- The branching save remains available.
- The party enters with enough movement and damage resources for the final arena.
5. Defeat the Netherbrain before the arena collapses
The final arena consists of floating platforms. The Netherbrain marks platforms for destruction with pink outlines. Move any character off a marked platform before it disappears; a character standing on a destroyed platform is killed immediately. Treat movement as the first priority whenever the warning appears. Misty Step, Dimension Door, Fly, Feather Fall and similar abilities are valuable because they prevent a character from losing a turn while crossing gaps.
Focus the party’s strongest attacks on the Netherbrain. Use allied support and summons for extra damage, distractions or emergency help, but do not spend the limited window clearing enemies that do not stop the brain from taking damage. The Netherbrain’s attacks can destroy additional platforms, so spread characters enough to avoid losing the whole party to one hazard while keeping support and healing ranges practical. If a character is isolated, move them toward a stable platform before attempting a low-value attack.
The Netherbrain fight has its own failure timer. If it expires before the brain is defeated, the run reaches a game-over state and you must reload. Commit high-impact resources once the party is safely positioned, and do not postpone the kill to loot or finish minor targets.
- All party members are inside the Netherbrain’s psyche.
- Characters leave every pink-marked platform before it collapses.
- The party concentrates damage on the Netherbrain.
- The Netherbrain is defeated before its final combat timer expires.
6. Choose the ending and preserve alternate outcomes
After the Netherbrain is defeated, the final dialogue determines whether it is destroyed or controlled. The exact conversation options depend on earlier events, including the fate of Orpheus, the Emperor’s role, which character became illithid, companion quests and character deaths. Read the dialogue carefully: the choices are not interchangeable, and the surrounding outcomes can determine whether companions are free, transformed, dead or committed to a particular future.
For a destruction ending, select the clearly worded option that destroys the Netherbrain. For a control ending, choose the option that takes command instead. These decisions are effectively locked once confirmed. Reload the pre-Morphic Pool save for a different final route rather than expecting the game to rewind the choice after the ending scenes begin. If the game allows a save immediately before the final dialogue, create one without overwriting the earlier branch.
- The final decision is made from a recoverable save.
- The player has identified which character is making the illithid and Netherbrain decisions.
- The selected dialogue explicitly matches the intended destruction or control outcome.
- The original pre-Morphic Pool save remains untouched.
7. Watch the ending sequence, epilogue and credits
Continue through the dock scenes and companion reactions after the final choice. These scenes reflect major earlier decisions, including faction alliances, companion quests, transformations, deaths and the Emperor or Orpheus outcome. Do not close the game immediately after the first ending scene if you want to verify the full conclusion.
The game can continue into a six-month epilogue sequence in which Withers and surviving companions discuss what happened and reveal additional resolutions. The exact conversations depend on the route and characters still available, so not every player receives the same scenes. Speak with the available companions and Withers before leaving the epilogue area. Then allow the credits to appear; the credits provide a clear completion checkpoint for this campaign guide.
Afterward, save in a new slot with a label such as Completed Ending. Keep the pre-Morphic Pool branch and any final-decision save separate. If using PS5 cloud storage or Larian cross-save, verify that the intended completed file has uploaded before deleting or overwriting local saves.
- The chosen destruction or control ending has resolved.
- The dock scenes and applicable companion outcomes have played.
- The available six-month epilogue scenes have been viewed.
- The ending credits have appeared.
- A completed save and an independent pre-Morphic Pool branch are retained.
Before you move on
- The High Hall approach and brainstem ascent are complete.
- Karsus’ Compulsion was successfully channeled by an eligible illithid holding the Netherstones.
- Every intended party member entered the Netherbrain’s psyche.
- The Netherbrain was defeated before the final arena timer expired.
- The selected destruction or control ending resolved.
- The applicable dock scenes and epilogue were viewed.
- The ending credits appeared on PS5.
- A named completed save and an independent pre-Morphic Pool save remain available.
References for this chapter
Epilogue, Post-Game and Companion Resolutions
Baldur’s Gate 3’s playable epilogue is a six-month-later reunion at a camp in High Hall, overlooking Baldur’s Gate. It is not a separate menu or dungeon, and it is not reached by loading a completed save after the credits. To see it, load a save from before the final fight, defeat the Netherbrain again and continue through the immediate ending scenes. The reunion reflects your recruited companions, completed personal quests, romances, faction decisions, deaths, departures and final transformations. Speak with everyone present, inspect the available letters and continue until the epilogue sequence is complete. Keep a manual save before the final assault for alternate endings and a separate completed save once the reunion has loaded. Larian cross-save is useful for moving between platforms but stores only a copy of the latest ten saves; it is not permanent archival storage, so retain the important files locally on the PS5.
1. Reach the playable reunion epilogue
The epilogue begins after the Netherbrain’s defeat and the immediate final dialogues. It takes place at camp in High Hall, with a view over the city, and is set six months after the main story. It is part of the ending sequence rather than a separate post-game activity that can be selected from the main menu.
For a campaign completed before the epilogue was available, load a save from before the final fight and replay the ending. For a current campaign, continue through the final combat, aftermath cinematics and party dialogue instead of quitting as soon as the boss is defeated. Continue until the game transitions to the High Hall reunion. The reunion is the point at which the game presents the campaign’s final companion and world-state reflections.
- Load a save from before the final fight if the reunion is missing from an older completed run.
- Defeat the Netherbrain and continue through the immediate aftermath.
- Confirm that the six-month-later camp reunion in High Hall has loaded.
2. Review companions, letters and reactive world details
Walk through the reunion camp and speak with every companion who is present. Available conversations depend on the campaign state: recruitment, survival, approval, personal quest progress, romance decisions, faction outcomes, transformations and final-act choices can all affect what is shown. Some characters receive extended conversations or cinematics, while others may be represented by shorter dialogue, letters or other epilogue material.
Inspect the available letters and the camp’s interactive elements before ending the sequence. Larian’s epilogue content includes correspondence from characters outside the active party and updates that reflect the state of Baldur’s Gate. A companion who is absent is not automatically a bug or an incomplete arc: they may have died, departed, become unavailable through a choice, or have no reunion scene under that campaign’s conditions. Record the result rather than assuming an absent character should appear.
- Speak with every companion present at the reunion.
- Read the available letters and inspect notable camp interactions.
- Record companions who are alive, absent, transformed, departed or unresolved.
- Do not treat the absence of a dedicated cinematic as proof that a quest failed.
3. Check romances and personal resolutions
Review each intended romance through the dialogue available at the reunion. A romance scene is conditional on earlier relationship progress, the companion’s survival and eligibility, and the decisions made during the final acts. Likewise, companion quests can end in different ways: a character may remain with the party, accept a new role, leave, undergo a transformation, return to a faction or have an intentionally open-ended future.
Let each conversation and cinematic finish before deciding that a resolution is missing. Some outcomes are communicated through several exchanges or through a letter rather than one large scene. The epilogue is reactive, so two completed campaigns can have different combinations of scenes even when they share the same final battle.
- Confirm the protagonist’s intended romance status.
- Check the final state of each companion whose personal quest mattered to your run.
- Read companion reactions fully before leaving the reunion.
- Note unresolved outcomes separately from confirmed deaths or departures.
4. Preserve saves for alternate endings
Maintain a manual save immediately before the final assault. This is the most useful replay point for testing final alliances, sacrifice decisions, protagonist transformations and alternate companion outcomes without replaying Act 3. Name it clearly, such as Final Assault - Branch Point, and do not overwrite it with ordinary autosaves or later manual saves.
After the reunion loads, create a second manual save in a different slot, such as Completed - High Hall Reunion. This file represents the finished campaign and lets you return to the epilogue without repeating the final battle. Keep both files even if you do not currently intend to make another ending; the final decisions cannot all be changed from inside the completed epilogue.
- Keep one manual save before the final assault.
- Keep a separate manual save after the High Hall reunion has loaded.
- Use named manual slots rather than relying on autosave timestamps.
- Do not delete the pre-final branch point until alternate endings are no longer needed.
5. Archive the PS5 campaign with Larian cross-save
To use cross-save, link the PlayStation account to a Larian account and enable the feature in Baldur’s Gate 3’s game options. After synchronization completes, the recent saves should be available through the game’s save and load interface when the linked account is active. Larian describes this as syncing a copy of the latest ten saves, not moving the only copy away from the console.
Keep the completed and pre-final saves stored locally on the PS5 even after cross-save is working. Larian’s current support information states that server copies older than six months can expire when inactive. That limitation does not delete the local console save, but it makes cross-save unsuitable as the only long-term archive. If changing platforms, verify the desired save appears on the destination before deleting or resetting the PS5 data.
- Confirm the correct PlayStation and Larian accounts are linked.
- Enable cross-save and wait for synchronization.
- Verify that both important saves appear through the linked service.
- Retain the local PS5 copies as the primary archive.
Before you move on
- The Netherbrain was defeated and the six-month-later High Hall reunion loaded.
- All available companion conversations were completed, and letters or other reunion interactions were checked.
- Romance and personal-quest outcomes were recorded as present, absent, resolved, departed or unresolved.
- A manual save exists before the final assault.
- A separate completed save exists after the reunion loaded.
- The completed campaign remains stored locally on the PS5, with Larian cross-save retained only as an additional copy.
Combat Tactics and Builds for PS5 (Controller-Focused)
Build your PS5 party around clear roles and compact radial menus rather than trying to expose every spell and item at once. Use the DualSense action radials for attacks, movement, defense, recovery and consumables; keep reactions deliberate; protect concentration; and use Tactical View to inspect elevations, routes and hazards before committing. Martial characters benefit from simple frontline or mobile damage roles, casters should emphasize control and reliable concentration spells, and support characters should preserve actions for buffs, healing and emergency movement. Against ambushes, ranged formations and environmental hazards, win the opening through positioning and target priority before spending limited resources.
1. Organize the action radials before entering combat
Open each character’s action radial and remove abilities that you rarely use in ordinary fights. Keep the attacks, movement tools, defenses, potions, Help and important class resources near the first radial pages. Put commonly shared actions in similar positions across the party so changing characters does not require relearning the layout.
The PS5 interface provides a broader character radial for tools such as the map, journal, spellbook, character sheet, combat log, alchemy, rests, camp and level-up functions. Character actions, spells, cantrips and items are placed in customizable action radials. A light trigger pull previews a radial, while pressing through the trigger resistance selects it, which is useful when checking an option under pressure.
After leveling, changing equipment or learning spells, inspect the affected character’s radials before the next encounter. Spell variants can appear as separate choices, and the game provides warnings when an action cannot be performed. Read those warnings instead of repeatedly confirming an invalid target.
- Keep the main attack, Jump, Dash, Disengage, Help and potion access easy to reach.
- Place concentration spells and emergency defenses where they can be selected quickly.
- Inspect radials after every level-up, respec, equipment change or major spellbook update.
2. Inspect the battlefield before spending actions
Use the right stick to zoom out fully and enter Tactical View when you need to check the whole encounter area. Before combat, look for elevation, cover, narrow passages, explosive objects, damaging surfaces, ledges and routes that allow a retreat. Put ranged characters on useful high ground when it is safe, keep fragile casters behind cover, and place durable characters where enemies must pass them to reach the back line.
Do not group the whole party beside a volatile object or on a surface that can be weaponized against you. When you detect a hostile group first, separate characters only when that creates a clear advantage. A stealth attacker, dialogue character or high-initiative combatant can begin from a better position while another party member remains outside the first danger zone.
- Check enemy numbers, elevations and escape routes before ending the opening turn.
- Keep melee characters between threats and vulnerable allies when possible.
- Avoid clustering the party where one area attack, shove or surface effect can hit everyone.
3. Choose low-friction roles for the controller
Fighter, Paladin, Barbarian and weapon-focused Ranger are straightforward martial choices because their essential turns usually involve a small group of attacks, movement options and defensive abilities. Fighters can hold a frontline or focus a priority target. Paladins should decide whether a spell slot is needed for support or a decisive smite before committing it. Barbarians should enter Rage when the encounter is worth the resource and then concentrate on positioning and reliable attacks.
Wizard, Sorcerer, Warlock and Cleric can be made controller-friendly by preparing a focused set of dependable spells. Prioritize area control, defensive reactions, Counterspell where available, and concentration effects that continue providing value after the casting turn. You do not need every possible damage spell on the first radial. Keep a few damage types available, but let the party’s positioning and control tools do most of the work.
Druids and summoner-heavy builds are effective but create more turns, portraits and radial choices. Use summons when their bodies, actions or special abilities will materially change the fight. Rogues and Monks should begin from advantageous positions and exploit mobility rather than standing in the middle of a crowd. Bards provide a flexible controller-friendly role because one character can contribute dialogue, support, control and emergency recovery.
- Give each character a primary role: frontline, ranged damage, control, support or infiltration.
- Prepare complementary damage and control options instead of duplicating the same narrow function.
- Use summons selectively when their extra actions justify the additional management.
4. Make reactions and concentration intentional
Review each character’s reaction settings before a difficult area. Reactions can trigger against several possible events, and some consume spell slots or other limited resources. Set confirmation for expensive reactions or effects whose timing matters. When the reaction interface appears, inspect the listed action or spell that caused it and choose deliberately; the PS5 interface supports scrolling through reactions and provides a skip option when you do not want to respond.
Treat concentration as a continuing objective. After casting a concentration spell, move the caster behind cover, avoid unnecessary opportunity attacks and keep hostile ranged attacks away from them. Check the concentration icon at the beginning of each caster turn. If the effect is still controlling the battlefield, do not replace it simply because another spell is available. If concentration breaks, reassess whether recasting is worth the action or whether defense, movement or a different control effect is more important.
- Confirm expensive reactions instead of allowing them to trigger automatically.
- Check concentration before selecting another spell that also requires it.
- Protect the concentrating character with cover, distance, defensive spells or body blocking.
5. Use a repeatable opening for ambushes
When the party sees enemies first, enter Turn-Based Mode if you need precise positioning. Spread characters across safe angles and begin with the action that changes the fight most: a stealth attack, conversation, control spell, shove, surface effect or focus-fire sequence. Keep at least one character outside the initial danger zone so they can Help a downed ally, throw a potion, revive someone or break an enemy’s concentration if the first plan fails.
On the first full round, prioritize an enemy who can disable a party member, heal allies or deal severe ranged damage. If no target can be eliminated, restrict that enemy with blindness, fear, prone, silence or another appropriate control effect. Do not spend the whole party’s actions finishing a target that can be removed by a bonus action, environmental effect or one low-cost attack.
- Reserve a recovery option when the encounter is uncertain.
- Prioritize enemy controllers, healers and high-damage ranged attackers.
- End turns in positions that remain safe if initiative order produces an unexpected enemy turn.
6. Solve ranged and environmental encounters through separation
Against archers and spellcasters, advance under cover and avoid presenting the entire party in one open line. Send one durable character toward the nearest elevated position while ranged allies attack from different angles. Difficult terrain, darkness, grease, ice, vines and walls can divide enemies, but inspect the targeting preview first so the effect does not trap or damage your own party.
For a shove, Thunderwave, weapon attack or environmental interaction, verify the target, range, action cost and landing position before confirming. Examine the object or enemy when its behavior is unclear. The controller interface provides target previews and warnings, but it does not replace checking whether a ledge, explosive object or surface can actually affect the intended target. Use environmental damage when it removes a dangerous enemy or saves actions, not merely because the environment is interactive.
- Separate ranged characters so one area effect cannot disable all of them.
- Inspect surfaces and objects before committing a spell or forced-movement action.
- Check where a shoved or knocked enemy will land before confirming.
7. Recover from a failed opening
If the first round goes badly, stop trying to preserve the original plan. Fall back behind a doorway, block a route with a body or control effect, and spend actions on healing, Help, disengaging, breaking concentration or repositioning. The official controller updates improved spell-variant selection, reaction presentation, targeting behavior and radial-menu reliability, but the safest response is still to read the prompt and examine the battlefield before choosing the next action.
If the encounter is unwinnable, use available teleportation, invisibility, Dash, Disengage or an exit route to break contact. Reloading is most useful when paired with one meaningful change. Alter party placement, initiative order, resistance gear, prepared control spells or target priority rather than repeating every action identically. After the fight, restore spell slots, review concentration plans, reorganize any new radial entries and make a manual save before continuing.
- Keep a manual save before major boss rooms and risky dialogue-led encounters.
- Change party placement or target priority before rebuilding the entire party.
- After combat, restore resources and verify that important actions remain easy to reach.
Before you move on
- Every active character has a compact radial containing a main attack, movement, defense, recovery and resource actions.
- You can identify the highest-priority enemy and safest repositioning route before ending the first turn.
- Reactions are set intentionally, concentration spells are protected and the party can recover from a failed opening without immediately reloading.
- You have practiced one ambush, one mixed ranged encounter and one environmental encounter using Tactical View, target previews, surfaces and controller radials.
- You can inspect a reaction, spell variant or invalid-action warning before committing a limited resource.
Boss Tactics, Recovery from Failure and Save Discipline
Boss fights in Baldur’s Gate 3 are usually lost through poor positioning, exhausted resources, uncontrolled supporting enemies, or an overlooked resistance rather than one bad attack roll. On PS5, create a named manual save before opening a boss door or starting a decisive conversation, then make a separate combat-ready save before triggering the encounter whenever the game allows it. Use turn-based positioning, line of sight, control effects, defensive reactions, and the DualSense radial menus to keep failed attempts recoverable. If a fight begins to collapse, retreat only when the encounter permits it; otherwise preserve surviving characters and reload the combat-preparation save. After a defeat, identify the actual failure and change the party, formation, defenses, or target priority instead of repeating the same plan. Keep several named local saves because Larian cross-save synchronizes only a copy of the most recent 10 saves and is not permanent archival storage.
Create separate story and combat saves
Before opening a suspicious door, crossing a dramatic threshold, or speaking to an NPC who may begin combat, open the pause menu and create a named manual save. Use a description such as Act 2 Boss Before Dialogue or Act 3 Arena Entrance instead of relying on an automatic-save timestamp. Keep this file untouched so it remains available for alternate dialogue choices or a different approach.
If the game gives you a safe moment before the encounter, create a second manual save after arranging the party, changing equipment, preparing spells, and checking consumables. Do this before initiating the fight rather than assuming that a new save will always be available once combat has started. On Honour Mode and in certain scripted situations, save options are more restricted, so the pre-trigger file is especially important.
- One untouched save exists before the boss conversation or arena entrance.
- A second save exists before the fight after preparation, when permitted.
- At least one separate rolling manual save is maintained elsewhere in the campaign.
Prepare the battlefield before initiative
Inspect the room in turn-based mode when possible. Spread characters so one area attack cannot disable the entire party, place ranged characters on usable high ground, and keep a healer or support character out of the first enemy attack lane. Use pillars, doorways, corners, darkness, and other line-of-sight breaks against enemy spellcasters, but do not assume cover makes a character undetectable or immune to area effects.
Check each character’s reactions, concentration spells, ammunition, elixirs, scrolls, and healing items before committing. On PS5, hold the appropriate trigger to open the radial menus and put emergency actions such as healing, movement, control, and escape tools on easy-to-reach slots. Examine the boss and important adds before spending a limited spell or condition; resistances, immunities, and saving throws determine whether the plan is worth the resource.
- Party members begin in separated attack lanes where the arena permits it.
- Concentration and reaction choices are confirmed.
- Healing, mobility, control, and resistance tools are accessible through the radial menus.
Identify the reason for failure before reloading
After a defeat, do not immediately repeat the encounter with the same formation. Decide whether the loss came from excessive boss durability, grouped characters, an active support enemy, failed concentration, poor target priority, an unfavorable resistance, or a phase change that caught the party unprepared. Review the combat log and examine enemy conditions, resistances, immunities, and special actions before selecting the next plan.
Change one or two major variables on the next attempt. Replace a low-impact damage dealer with a controller or support character, use a different damage type, prepare resistance elixirs, bring weapons that bypass defenses, or alter the opening positions. If the fight was lost to action economy, remove dangerous adds and summons before committing every resource to the boss. If a scripted phase defeats the party, reserve high-level spells, reactions, healing, and mobility for that phase instead of spending them all in the opening round.
- The specific cause of the failed attempt is written down or clearly identified.
- Party composition, positioning, control, defenses, or target order changes on the retry.
- Resources are reserved for later phases rather than spent indiscriminately at the start.
Use control and defensive timing deliberately
Open with effects that reduce the boss’s ability to act, such as prone, restrained, frightened, blinded, slowed, silenced, stunned, or banished conditions when the target is vulnerable to them. Do not spend a limited control effect on a target that is immune or has a strong relevant saving throw unless it is part of a deliberate setup. Control supporting enemies when that removes more incoming actions than damaging the boss for a single turn.
Defensive reactions and concentration protection can be more valuable than another minor damage action. Counter a decisive spell, break line of sight, protect a concentrating caster, or use a defensive effect before the enemy’s next turn. When the boss changes phase, stop and reassess the arena, new hazards, summoned enemies, and remaining resources before committing rare scrolls, once-per-rest abilities, or high-level spell slots.
- Enemy immunities, resistances, and condition vulnerabilities are checked first.
- Actions that remove enemy turns or protect concentration receive priority.
- At least one emergency movement, healing, or defensive option is reserved for the next phase.
Retreat only when the encounter permits it
If the fight allows movement away, use Disengage before crossing threatened ground, or use Jump, Misty Step, Dimension Door, flight, or another available mobility effect to break contact. Invisibility can help a surviving character leave line of sight, but it is not guaranteed to work: enemies may detect the character, and attacking or taking other actions can end the condition. Move one character at a time toward a doorway, corner, or safe elevation rather than sending the whole party through the same hazard.
Once a character is safe and the encounter has ended or no longer threatens that position, recover downed allies with Help. Dead characters require a suitable revival method, such as a Revivify scroll or another available resurrection option; Help does not restore a dead character. If the game permits camp or fast travel, return to safety, restore hit points and spell slots, change prepared spells, and approach again. Some boss arenas and scripted encounters block escape, resting, or travel. In those cases, reload the combat-preparation save instead of wasting resources on an impossible retreat.
- Disengage or teleportation is used instead of unnecessary opportunity attacks.
- Line of sight is broken before attempting to recover a downed ally.
- Camp and fast travel are confirmed available before leaving the encounter area.
Protect the campaign archive on PS5
Keep separate named saves for major boss outcomes, companion decisions, and irreversible endgame choices. Autosaves and quicksaves are useful safety nets, but they should not replace a named manual archive. After a successful boss fight, create another manual save before looting, leaving the area, or starting the next dialogue chain so the result is preserved.
With cross-save enabled, Larian synchronizes a copy of the most recent 10 saves. Those copies can remain on Larian’s servers for up to 6 months, while the original saves remain stored locally on the PS5. Confirm that the intended save appears in the Save or Load menus after synchronization, but keep important campaign points locally as well. Treat the last pre-boss save as a replay point for alternate outcomes, not as a file to overwrite after every attempt.
- A successful boss result has its own named manual save.
- The pre-fight file remains available for alternate choices.
- Important saves are visible locally and, if used, in the cross-save list.
- Any save kept only through Larian cross-save is also preserved locally before the six-month server period matters.
Before you move on
- You can reload a named save immediately before each major boss conversation or arena entrance.
- After a failed attempt, you can identify whether the needed adjustment is party composition, crowd control, positioning, resistance, target priority, or resource management.
- You have at least one successful post-boss save and one untouched pre-boss save for future branches.
- You know whether the current encounter permits retreat, camp, or fast travel before committing to withdrawal.
- If cross-save is enabled, the expected save is visible after synchronization while the local PS5 archive remains intact.
Optional Completion: Missables, 100% Checklist and New-Game Planning
Use this as a functional missables checklist rather than a collectible count. Before leaving Act 1, resolve the Emerald Grove conflict, recruit the companions you want, visit the Underdark and Grymforge, and complete Rosymorn Monastery and the githyanki creche if those arcs matter to your run. Entering the Mountain Pass or Shadow-Cursed Lands advances some Grove, refugee and goblin-related quests, while entering the Shadowfell is the major Act 2 lockout: finish Moonrise Towers, Last Light Inn, Halsin’s curse quest and companion preparations first. In Act 3, complete rescue missions, companion quests and desired faction content before entering the Morphic Pool, which begins the irreversible finale sequence. Keep named manual saves before each warning, record major decisions, and preserve local saves separately from Larian cross-save. Baldur’s Gate 3 has no built-in New Game Plus, so alternate endings require a new campaign or an earlier save.
1. Create a save archive and decision log
Use descriptive manual saves instead of relying on autosaves. Keep separate slots for Act 1 Before Transition, Act 2 Before Shadowfell, Act 3 Before Finale, and Final Ending Backup. Add another save before any conversation that can kill, dismiss or permanently alter a companion, including major decisions involving Lae’zel, Shadowheart, Gale, Astarion, Wyll, Karlach and Halsin.
On PS5, confirm that the save appears in the Load Game list before continuing. If cross-save is enabled, wait for synchronization and check that the intended save is visible on another linked platform or in the Larian account interface. Cross-save is not unlimited archival storage: Larian synchronizes the latest ten saves, and inactive server copies can expire. Keep important saves locally on the console as well.
- Use named manual saves at every major warning screen.
- Keep a written record of companion recruitment, deaths, dismissals and defining choices.
- Record which allies, factions and quest rewards you intend to carry into the finale.
- Do not overwrite the pre-transition save after branching into a new outcome.
2. Complete Act 1 before advancing the Grove timeline
Resolve the Emerald Grove and goblin conflict before entering the Mountain Pass or travelling into the Shadow-Cursed Lands. Entering the Rosymorn Monastery Trail, Mountain Pass route or Shadow-Cursed Lands can advance the Rite of Thorns and automatically resolve several refugee, goblin and druid quests. This does not immediately erase every Act 1 map: many Wilderness and Underdark locations remain available until the later Shadowfell lockout, but quests tied to the Grove crisis may fail or complete without further input.
Before crossing, recruit the companions you want. Check the beach and Wilderness for Gale, Lae’zel and Astarion; visit the Grove for Wyll; find Karlach on the Risen Road; and resolve Halsin’s situation at the Goblin Camp if you want his later companion arc. Complete the quests you value at Waukeen’s Rest, the Risen Road, the Blighted Village, Auntie Ethel’s area, the Zhentarim hideout and the Goblin Camp. Then visit the Myconid Colony and Grymforge, activate their waypoints and finish the forge or prisoner content you intend to keep.
After that, travel through the Mountain Pass and clear Rosymorn Monastery, the monastery trail and Crèche Y’llek if you want Lae’zel’s githyanki storyline, the Blood of Lathander reward or the creche’s faction decisions. Make a new save before entering the creche’s deepest areas and another before leaving Act 1.
- The Emerald Grove conflict is resolved before the transition warning is accepted.
- Karlach and Wyll are recruited or intentionally rejected.
- Halsin’s rescue and the Goblin Camp outcome are settled.
- Desired Underdark, Grymforge, Mountain Pass and creche waypoints are active.
- The Act 1 Before Transition save is preserved.
3. Establish the safe route through Act 2
When you reach the Shadow-Cursed Lands, travel first to Last Light Inn if possible. Speak with Jaheira, Isobel, the Harpers and the refugees, then identify the quests you want to complete before the area becomes dangerous. Obtain a reliable way to move through the curse and do not leave the inn’s defenders exposed while pursuing unrelated objectives.
If you want Halsin’s companion arc and the Shadow Curse resolution, find Art Cullagh at Last Light Inn, wake him through the appropriate quest step, then return to Halsin. Defend Halsin’s portal while he retrieves Thaniel, locate Oliver and complete the resulting reunion. If Jaheira and the Harpers matter to your Act 3 party, protect Last Light Inn during its major crisis and keep Jaheira alive through the Moonrise assault.
Visit Moonrise Towers before entering the Shadowfell. The tower is not only a final dungeon: while it remains an enemy stronghold, you can speak with its residents, rescue prisoners from the prison, meet vendors and investigate the cult. Complete the prisoner rescue before the lockout, because entering the Shadowfell can automatically resolve or fail those quests.
- Last Light Inn has been visited and its important conversations are complete.
- Art Cullagh and Thaniel’s storyline is active or intentionally declined.
- Halsin is recruited or deliberately left as a camp follower only.
- Moonrise prison rescues, vendor purchases and desired tower conversations are complete.
- Jaheira is alive if you want access to Minsc in Act 3.
4. Use the Shadowfell warning as the Act 2 checkpoint
Before entering the Shadowfell from the Gauntlet of Shar, create the Act 2 Before Shadowfell save. Finish the Gauntlet’s trials, collect the Umbral Gems needed for your chosen route and speak with any companion whose personal quest is tied to the area. Confirm that Moonrise Towers, Last Light Inn and the Shadow-Cursed Lands have no remaining objectives you care about.
Only then enter the Shadowfell and proceed through the Nightsong sequence. The result of that decision changes Shadowheart’s story, Aylin’s availability, Moonrise Towers and several companion outcomes. Afterward, complete the assault on Moonrise Towers and the Mind Flayer Colony. Before leaving the Shadow-Cursed Lands for Baldur’s Gate, make another manual save. This is the most useful Act 2 branch point for testing different Nightsong, Shadowheart, Jaheira and faction outcomes.
- The Gauntlet of Shar trials and desired exploration are complete.
- Shadowheart has a dedicated backup save before her major decision.
- Moonrise prisoners and vendors were handled before entering the Shadowfell.
- The Shadow Curse is lifted if that resolution is part of your run.
- A second save exists before travelling onward to Act 3.
5. Sweep Act 3 by companion, rescue and faction
At Rivington, activate the waypoint, speak with arriving allies and recruit or protect every available companion. If Jaheira survived Act 2, complete the steps that allow Minsc to become available later. Visit camp after major discoveries and bring the relevant companion into their personal quest locations rather than leaving every quest to the final party.
Complete time-sensitive rescue content before taking long rests casually. Free Counsellor Florrick before the execution deadline, and handle the Iron Throne, Gondian and Duke Ravengard threads before destroying or committing to choices that make the prison inaccessible. Investigate the Open Hand Temple murders, the Lower City murder investigation, the hag survivors and the refugee-related quests before the finale if you want their allies or rewards.
Finish the companion arcs you want represented in the ending. Typical late-game checkpoints include Astarion’s confrontation at Cazador’s Palace, Shadowheart’s House of Grief, Gale’s Mystra-related decisions, Wyll and Karlach’s choices involving the Hells, Lae’zel and Orpheus-related objectives, and Raphael’s House of Hope bargain. Preserve a save before each irreversible confrontation. Complete Gather Your Allies objectives and collect desired equipment before taking the final route.
- Every intended companion is recruited and has no unresolved camp event you are waiting for.
- Florrick, Ravengard, the Gondians and other desired rescue targets are safe or intentionally sacrificed.
- Companion quests are complete or deliberately left unresolved.
- Desired faction allies, rewards and legendary equipment are secured.
- The Act 3 Before Finale save is preserved.
6. Enter the finale only after the Morphic Pool checklist
Obtain the Netherstones and finish all remaining city content before travelling to the Morphic Pool in the Undercity. Make sure the active party is fully equipped, prepared with spells and consumables, and joined by the companions you want for the final sequence. Store or retrieve equipment before boarding the skiff, because entering the Morphic Pool prevents returning to camp, changing party members, respecing or accessing stored gear during the finale sequence.
After entering, follow the endgame route and make a final manual save whenever the game permits. Final decisions can determine companion fates, the Netherbrain outcome and the epilogue, but they cannot be freely undone after the relevant scene without returning to an earlier save. Watch the complete ending and credits, then keep both the completed save and the pre-Morphic Pool save.
There is no built-in New Game Plus mode. For a second run, start a new campaign and change a small number of deliberate branches: the Grove outcome, the Nightsong decision, a companion’s defining choice, a major bargain, the Orpheus path or the final transformation. Keep the original saves untouched, use a new campaign folder or clearly separated save names, and maintain a short log under Act 1, Act 2, Act 3, companions, romances, allies and ending choice. This lets you compare outcomes without trying to reproduce every side quest.
- The Netherstones and desired Gather Your Allies objectives are complete.
- All desired Act 3 rescues, companion quests and faction investigations are finished.
- The party is equipped before entering the Morphic Pool.
- A save exists immediately before the Morphic Pool.
- The ending sequence and credits have been viewed.
- The completed campaign and pre-finale saves are archived separately.
Before you move on
- You have recorded the Grove, Goblin Camp, Shadow Curse, Nightsong, major companion and final-choice outcomes.
- You have activated the waypoints needed to revisit every region that remains accessible.
- You have completed or intentionally declined the companion arcs and faction quests you wanted represented.
- You have preserved manual saves before the Act 1 transition, Shadowfell, Act 3 finale route and Morphic Pool.
- You have seen the ending sequence and credits.
- You have archived the completed save separately from the pre-finale save.
- If cross-save is enabled, the intended saves are visible in the synced list, while important saves also remain stored locally on PS5.
References for this chapter
Final Campaign Completion Checklist (PS5)
Finish the final sequence, view the playable epilogue and credits, then preserve the save that lets you replay the ending. The most important archive is a manual save made before the final fight or other irreversible endgame choices. Record companion fates, romances, faction results and the final decision separately because the game does not return you to normal free-roam after the campaign. If Larian cross-save is enabled, verify that the correct account is linked and that the save appears in the synchronized save list, but keep the original PS5 save as the permanent copy. Use separate save slots for the completed run record and alternate-ending experiments.
1. Complete the ending sequence, not only the final battle
After defeating the Netherbrain, continue through every remaining dialogue and cinematic. The battle victory alone is not the end of the campaign. Follow the final conversations until the playable epilogue begins, if your choices qualify for the available epilogue content, and continue until the ending credits appear.
The epilogue takes place at the High Hall camp six months after the main events. Speak with the available companions, review letters and other closing material, and let the sequence finish before quitting. If you stop before the epilogue or credits, reload the latest save before the final fight and complete the sequence again rather than assuming the run has been fully viewed.
- The Netherbrain and final confrontation are complete.
- The final dialogue and cinematics have played.
- The High Hall epilogue was viewed when available.
- The ending credits appeared.
2. Record companion and faction outcomes
Review every companion who was recruited, including characters who were left at camp or removed from the active party. Record whether each companion survived, left, changed allegiance, completed a personal objective or received an unresolved outcome. Include romance status and any final companion scene that appeared during the ending sequence.
Also record major faction results, such as the fate of the allied groups you brought into the final battle and the outcome of important Act 3 alliances. Do not assume an absent scene means the game failed to register an arc: companion endings depend on recruitment, survival, earlier quest decisions, approval, romance progress and final dialogue choices.
- Every recruited companion has a recorded final state.
- Romance conclusions were viewed or intentionally left unresolved.
- Important faction alliances and betrayals are written down.
- Any companion or quest intentionally abandoned is clearly marked.
3. Keep a clean pre-final manual save
The most useful replay point is a manual save made before the final irreversible sequence. Ideally, keep one before entering the final approach and another immediately before the last major decision or final battle. Name them clearly, such as Before Final Battle and Before Final Choice.
Do not overwrite this save after testing an ending. Baldur’s Gate 3’s epilogue is accessed by loading a save from before the final fight, so a post-battle save is not a substitute for the pre-final archive. If you want to test a different final decision, load the preserved pre-final slot and save the experiment into a new slot.
- A manual save exists before the final fight.
- A second pre-choice save exists if the ending decision can be changed later.
- The original pre-final saves are not overwritten during testing.
- Save names identify the decision point rather than showing only an autosave timestamp.
4. Archive the completed run on PS5
After the credits, return to the Load Game screen and confirm that the pre-final saves are still present. Because the normal campaign does not resume as ordinary free-roam after the ending, treat the preserved pre-final save and your written outcome record as the archive of the completed run.
Keep at least one additional Act 3 save from before the final dungeon or major endgame quest if you may want to revisit companion or faction decisions. Use separate slots for Before Final Battle, Before Final Choice and Ending Notes. Do not delete the local PS5 files merely because a cloud copy exists.
- The pre-final save is visible on the PS5 Load Game screen.
- An earlier Act 3 fallback save is preserved if desired.
- The ending record is stored separately from the game saves.
- No important slot is identified only by an autosave time.
5. Verify Larian cross-save when enabled
If you use cross-save, link the PlayStation account to the intended Larian account. In the game options, open the Gameplay save settings and confirm that cross-save is enabled. Create or update a manual save, wait for synchronization to finish, then check the Load Game list for the synchronized copy.
Larian describes cross-save as a copy of the ten most recent saves, not as the original local file. The synchronized copies can expire after six months, so use the feature for moving between supported platforms or recovering recent saves, but retain the important files on the PS5. You can also check the Larian account’s My Saves area from a computer when the account is linked.
- The intended Larian account is linked to PlayStation.
- Cross-save is enabled in the game options.
- The latest manual save appears among synchronized saves.
- The local PS5 copies remain intact.
- Important saves are not stored only on Larian’s servers.
6. Prepare an alternate-ending plan
Write down the final choice, companion outcomes, romance state and faction results before starting another run. If you only want to change the conclusion, begin from the preserved pre-final save. If you want to change recruitment, Act 1 or Act 2 decisions, or the development of a companion quest, start a new campaign because those earlier conditions generally cannot be reconstructed at the finale.
For each experiment, use a new manual slot and keep the original completed-run archive untouched. After viewing an alternate ending, return to the original pre-final save or begin the planned new campaign from its own save group.
- The final ending choice is recorded.
- Companion, romance and faction outcomes are recorded.
- Alternate tests use separate save slots.
- The original pre-final archive remains untouched.
Before you move on
- The final confrontation, ending scenes and credits were reached.
- The playable epilogue was viewed when available.
- Every recruited companion’s final state was checked and recorded.
- Romance, faction and major endgame choices were documented.
- A pre-final manual save and, preferably, an earlier Act 3 fallback save remain on the PS5.
- Alternate endings will be tested from separate save slots.
- If cross-save is used, the correct Larian account is linked, synchronization completed and local saves were retained.
Finishing up
You reached the campaign’s ending sequence and saw the ending credits on PS5.
The main route progressed through Act 1, Act 2 and Act 3, including the required final Act 2 and Act 3 story sequences for the chosen ending route.
Optional companion, romance, faction and alliance outcomes were either completed as intended or deliberately left unresolved; none is presented as universally required for campaign completion.
You retained a named manual save before the final irreversible sequence and, preferably, an earlier Act 3 save for alternate outcomes.
If cross-save is used, the intended save was confirmed in the synchronized list; otherwise, the completed and branch-point saves remain archived locally on PS5.
Choose your next gameScreenshots & video
Game imagery for reference. Follow the written chapters above for the route and strategies.
Sources & references
Our original guide draws on the references below. Check the edition at the top of this page before following controls or unlock requirements.
- Larian Account Information
- Troubles with Larian Account & Linking PS5
- Retrieving Requested Files
- Disappearing Save Files on Xbox
- How Baldur’s Gate 3 adapts its expansive RPG gameplay for your DualSense controller
- How to check for updates on PS5 consoles and PS4 consoles
- How to set up auto-downloads and updates on PlayStation console
- Baldur’s Gate 3 — PS5 Games | PlayStation
- Baldur's Gate 3 Official Support
- Hotfix #34 Now Live: Steam Deck Native Build
- Gameplay Information – Larian Studios Support
- Character creation – BG3 Wiki
- Origins – BG3 Wiki
- Companions – BG3 Wiki
- Shadowheart – BG3 Wiki
- The Blade of Frontiers – BG3 Wiki
- Karlach – BG3 Wiki
- Campsite – BG3 Wiki
- Respec — bg3.wiki
- Escape the Nautiloid — bg3.wiki
- Baldur’s Gate 3 Walkthrough & Guide — Escape the Nautiloid — GameFAQs
- How to Free Shadowheart — Gamer Guides
- Basic Controls — Baldur’s Gate 3 — EIP Gaming
- Investigate Kagha — Baldur’s Gate 3 Wiki
- Kagha — Baldur’s Gate 3 Wiki
- Save Arabella — Baldur’s Gate 3 Wiki
- Emerald Grove — Baldur’s Gate 3 Wiki
- Investigate the Beach — Baldur’s Gate 3 Wiki
- Any tips and tricks for saving Tieflings and making peace — Larian Studios Forums
- Baldur’s Gate 3: How To Save Arabella And Investigate Kagha Guide — GameSpot
- Blighted Village — BG3 Wiki
- Barcus Wroot — BG3 Wiki
- Whispering Depths — BG3 Wiki
- Waukeen’s Rest — BG3 Wiki
- Find the Missing Shipment — BG3 Wiki
- Zhentarim Basement — BG3 Wiki
- Caravan Strongbox — BG3 Wiki
- Rescue Volo — BG3 Wiki
- Defeat the Goblins — BG3 Wiki
- Save the First Druid — BG3 Wiki
- Chapter One — BG3 Wiki
- Mountain Pass — BG3 Wiki
- Travel through the Mountain Pass
- Waypoints — BG3 Wiki
- Underdark — bg3.wiki
- Grymforge
- Travel through the Underdark
- Free True Soul Nere — bg3.wiki
- Find the Explosives — bg3.wiki
- Arcane Tower — bg3.wiki
- Adamantine Forge — bg3.wiki
- Avenge Glut's Circle — bg3.wiki
- BG3 Underdark Guide: Complete Walkthrough, Secrets & Best Items for Beginners
- Rosymorn Monastery
- Find the Blood of Lathander
- Mountain Pass: Rosymorn Monastery Maps and Points of Interest | Baldur’s Gate 3
- Creche Y'llek Maps and Points of Interest | Baldur’s Gate 3
- Dawnmaster Puzzle (Rosymorn Monastery Puzzle) | Baldur’s Gate 3
- How to Get the Blood of Lathander | Baldur’s Gate 3 (BG3)
- Rosymorn Monastery Trail
- Time-sensitive activities — BG3 Wiki
- Crèche Y'llek
- Shadow-Cursed Lands — bg3.wiki
- Act Two — BG3 Wiki
- Shadowfell — BG3 Wiki
- Moonrise Towers — bg3.wiki
- Moonrise Towers Prison — bg3.wiki
- Rescue Wulbren — bg3.wiki
- Act 2: Infiltrate Moonrise Towers Walkthrough — Game8
- Baldur’s Gate 3: How to Reach Moonrise Towers — GameSpot
- Act Two/Camp Events - bg3.wiki
- Gauntlet of Shar - bg3.wiki
- Mind Flayer Colony - bg3.wiki
- Mizora’s Pact - bg3.wiki
- Defeat Ketheric Thorm - bg3.wiki
- Fighting Ketheric Thorm - bg3.wiki
- Wulbren Bongle - bg3.wiki
- Karlach’s Romance - bg3.wiki
- Act Three — BG3 Wiki
- D&D 5e rule changes — bg3.wiki
- Wyrm’s Crossing — bg3.wiki
- Lower City — bg3.wiki
- Free Counsellor Florrick — bg3.wiki
- Help the Devilish Ox — bg3.wiki
- Basilisk Gate Barracks — bg3.wiki
- Lower City Sewers — bg3.wiki
- The High Hall Courtyard — bg3.wiki
- Restoration Pod — BG3 Wiki
- Confront the Elder Brain — BG3 Wiki
- Disable the Steel Watch — BG3 Wiki
- Steel Watch Foundry — BG3 Wiki
- Get Gortash’s Netherstone — BG3 Wiki
- Iron Throne — BG3 Wiki
- The Netherstones — Baldur’s Gate 3 Walkthrough & Guide
- Fighting the Steel Watcher Titan — BG3 Wiki
- Fighting Enver Gortash — BG3 Wiki
- Fighting Orin the Red — BG3 Wiki
- Fighting Cazador — BG3 Wiki
- Fighting Raphael — BG3 Wiki
- Fighting The Netherbrain — bg3.wiki
- Destroy the Elder Brain — bg3.wiki
- Endings — bg3.wiki
- Community Update 25: Ain’t No Party Like a Withers Party
- Patch 5 Now Live
- Baldur’s Gate 3 Patch 6 Now Live
- Baldur’s Gate 3 Patch 2 Now Live
- Baldur’s Gate 3 Patch 4 Now Live
- The Final Patch: New Subclasses, Photo Mode and Cross-Play
- Options
- Sight mechanics
- Morphic Pool — BG3 Wiki
- New details on Baldur’s Gate 3 character creation and companions, out September 6 — PlayStation Blog
About the game & collecting notes
- Platform
- Sony PlayStation 5
Step-by-step campaign walkthrough for the PlayStation 5 edition of Baldur's Gate 3. This guide covers PS5-specific setup, character creation, Acts 1–3 main routes, essential side quests, companion resolutions, boss approaches, and a final completion checklist so you can reach a valid campaign ending, the ending sequence and credits on PS5, while preserving saves for alternate outcomes.
Darryl Polo
Darryl Polo loves tinkering with emulation and revisiting retro games. He enjoys exploring how old favorites play on different setups and sharing what he learns along the way. At Joking Joystick, he writes about the games, hardware, and small discoveries that keep the hobby fun.
Our editorial standardsFound a step that needs another look? Help us improve this guide.