
Assassin's Creed Shadows (PS5) — Complete Campaign Walkthrough
Step-by-step campaign walkthrough for Assassin's Creed Shadows on PS5. This guide leads you through the main story from the opening prologue to the canonical ending, teaching both protagonists' playstyles, essential progression choices, mission approaches, and how to finish the campaign while covering optional content and post‑credit tasks.

Find a copy
Assassin's Creed Shadows Sony PlayStation 5
We may earn a commission if you buy through these links, at no extra cost to you. As an Amazon Associate I earn from qualifying purchases.
Opens retailer search results. Check the model, edition, seller, availability and current price before buying.
Before you begin
Assassin's Creed Shadows follows Naoe, a stealth-focused shinobi, and Yasuke, a combat-focused samurai.
The campaign assigns some missions to a specific protagonist and allows broader switching only after the relevant story progress.
Character level, experience, Mastery Points and Knowledge are shared, while weapons, armor, tools and character or weapon abilities are managed separately for Naoe and Yasuke.
Use Naoe for stealth, vertical infiltration, tools and silent takedowns; use Yasuke for direct combat, armor breaking and crowd control, unless a mission requires a specific character.
This walkthrough covers the original PS5 base-game campaign from the prologue through the required Act 3 objectives and the Out of the Shadows epilogue.
It distinguishes mandatory Shinbakufu, Naoe, Yasuke and Junjiro objectives from optional allies, regional activities, Claws of Awaji, Black Tides and other post-launch content.
The guide also explains scouting, Hideout preparation, skill planning, recovery after failed approaches and the exact completion check for the original campaign ending.
Set yourself up for the run
Install the current PS5 game update and keep a manual save before major story missions.
Choose a difficulty you can sustain; combat and stealth settings can be adjusted if a particular mission becomes a bottleneck.
Complete the fixed prologue missions for Yasuke and Naoe. They introduce the combat, stealth, light-and-shadow, prone movement, tools and grappling systems used throughout the campaign.
Do not expect unrestricted character switching during the prologue. Broader switching becomes available later after the required story progression.
Learn the Hideout, Objective Board, scouting, Kakurega and equipment menus as they unlock.
Invest early Mastery Points in abilities that match the weapon or role you actually use, and remember that Knowledge gates later Mastery tiers.
Maintain usable equipment for both protagonists because later story objectives may require or favor one of them.
Save before major assassinations, rescues, castle missions and dialogue decisions you may want to revisit.
Use nearby Knowledge activities, contracts or regional encounters for experience and materials when the current story objective leaves you under-equipped; do not rely on a fixed completion-time estimate.
Track mandatory story objectives separately from optional allies, collectibles, regional cleanup, Claws of Awaji and Black Tides.
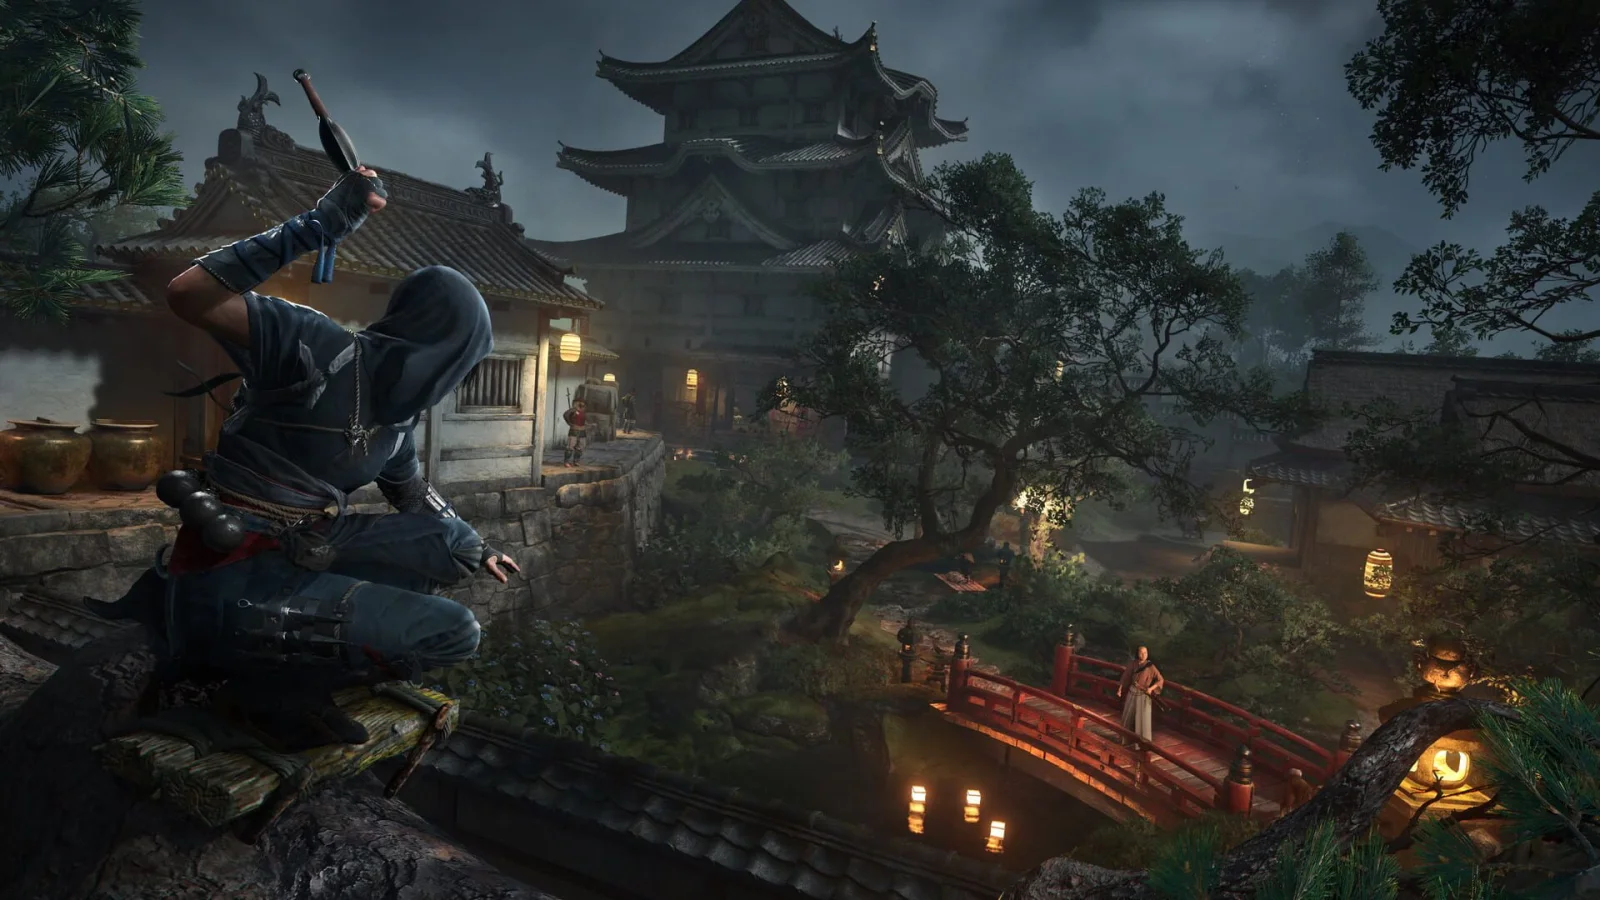
Prologue: Controls, Protagonist Basics and First Steps
Assassin’s Creed Shadows’ prologue is a fixed five-mission sequence: The Lord’s Favor, Spirit of a Warrior, Flames of War, Fight of the Kakushiba Ikki and The Onryo Samurai. The first three missions use Yasuke to teach movement, melee defense, posture damage and finishers. The fourth and fifth switch to Naoe and teach stealth, prone movement, shadow concealment, tools, grappling and assassination. Do not expect free character switching during this opening section. Yasuke appears briefly, then the game keeps you with Naoe until much later, when Mibuno Showdown permanently unlocks Yasuke and free switching. Complete every marked objective, use the prompted actions instead of bypassing the tutorials, and open the Mastery menus once the game makes them available. The prologue is complete after Naoe escapes Katano Castle and the story transitions into An Unpayable Debt.
1. Start The Lord’s Favor as Yasuke and follow Akechi Mitsuhide
After the opening scenes, control Yasuke. Follow Akechi Mitsuhide and the group ahead of you through the opening route. Stay on the marked path until you reach the temple and the meeting with Oda Nobunaga. The early conversation choices do not alter the prologue’s required objectives, so choose any response you prefer and continue through the scene.
This section is deliberately short and establishes Yasuke’s identity before the first battle. Do not search for open-world activities or try to change characters here; the campaign is still running through its scripted introduction. The Lord’s Favor ends after the Nobunaga conversation, and Spirit of a Warrior begins immediately with a large battlefield encounter.
- Follow Akechi Mitsuhide to the temple.
- Complete the Nobunaga conversation.
- Allow Spirit of a Warrior to begin.
2. Complete Spirit of a Warrior and practice Yasuke’s combat fundamentals
Advance through the battle as Yasuke and follow the objective markers through the fighting. Use light attacks for regular pressure, then test heavy attacks when an enemy’s posture is weakened or the tutorial presents an opening. When the game prompts blocking, parrying or a finisher, perform the action against the nearby enemy instead of sprinting past it.
Yasuke is designed for direct combat, but he can still be surrounded. Keep enough room to see incoming attacks, block when the tutorial teaches the action, and reposition if several enemies close in at once. The important early pattern is defend, create a posture opening and then answer with a heavy attack or finisher. Spirit of a Warrior is a combat lesson rather than a build check, so do not worry about optimizing equipment yet.
- Reach the battle objectives as Yasuke.
- Use the prompted defensive action.
- Break an enemy’s posture or complete the prompted finisher.
- Finish Spirit of a Warrior.
3. Push through Flames of War and learn armor, parries and recovery
Continue the assault in Flames of War. At the first reinforced door, sprint into it to break through. A group of shinobi attacks immediately afterward; use blocking and controlled attacks rather than repeatedly swinging into the group. If Yasuke’s health drops, use a ration when the prompt or HUD allows it before moving deeper into the castle.
Follow the route east through the open gate, then take the stairs toward the allies who destroy the next obstruction. The Igan leader has a yellow armor bar above the health bar. The mission uses this enemy to demonstrate parrying and armor-breaking: respond to the attack prompts, then punish the opening once the armor is compromised. Afterward, continue up the western ramp and smash through the closed door to reach the inner yard and trigger the Nobunaga scene.
Flames of War ends with a transition to Fight of the Kakushiba Ikki, where control changes to Naoe.
- Break the first reinforced door.
- Defeat the attacking shinobi.
- Use a ration if necessary.
- Parry the Igan leader’s attacks when prompted.
- Reach Mibuno Castle’s inner yard.
4. Complete Fight of the Kakushiba Ikki as Naoe
Follow Nagato northeast on horseback. Continue across the wooden bridges until you reach the burning Aekuni Shrine Town. When Naoe’s horse is shot and the first soldier attacks, pay attention to attack colors: strong red attacks cannot be blocked, so dodge them; use a parry when the attack is parryable. This is Naoe’s first practical lesson in surviving combat rather than relying only on stealth.
Follow the road east and help Sandayu against the elite soldiers. After the story scene, Nagato sends Naoe to recover a box from a nearby kofun. Leave the shrine town by the southern route. Crouch through the bushes, assassinate the first isolated enemies and use the down direction on the D-pad to whistle one target closer when the prompt is available.
At the next stretch, hold the crouch input to go prone and crawl through the grass on the right. Move up the muddy slope, use the fallen log as cover and perform the air assassination when the soldier below is exposed. Continue south, jump across the large gap and follow the valley path to Mihata Kofun. Enter the kofun, interact with the stone door marked with the Assassin symbol and take the box. The scene then begins The Onryo Samurai.
- Follow Nagato to Aekuni Shrine Town.
- Defeat the first soldier using dodge and parry correctly.
- Help Sandayu defeat the elite soldiers.
- Reach Mihata Kofun.
- Open the Assassin-marked stone door.
- Retrieve the box.
5. In The Onryo Samurai, infiltrate Katano Castle and identify the target
Begin by reaching the tower on the right using the bridge. Cross the gap quickly so the nearby guard does not expose you, then use the grappling hook to climb to the tower. From the vantage point, hold the focus or marking input to identify guards and inspect the castle before descending.
The objective box is inside an unfinished building near the center of Katano Castle. Move north from the tower and perform a Leap of Faith into the hay below. Immediately crouch after landing and assassinate the archer ahead. Before leaving the elevated route, refill Naoe’s tools at the nearby supply point, then use a kunai on the next exposed target if a silent ranged kill is useful.
Climb the scaffolding and cross to the next building with the grappling hook swing. Mark the enemies in the next area, air assassinate the guard below and crawl prone through the hole in the wall. Stay on the shadowed side of the building while moving north. You can extinguish a lantern with a kunai, but the impact may attract nearby attention, so only do this when it improves the route.
Enter the building and use Eagle Vision to locate objects through the walls. The first box you find is not the objective box. Return toward the previous guard position, climb the ladder, cross the wall while crouched and eliminate the elite guard ahead. From the southern end of the next building, mark the Onryo Samurai. Swing from the tree with the grappling hook and trigger the assassination prompt at the far end of the swing.
- Reach the tower without allowing the nearby guard to stop the approach.
- Mark enemies from the tower.
- Reach the unfinished building.
- Refill tools and use a kunai when helpful.
- Find the correct route through the shadows and scaffolding.
- Observe the Onryo Samurai from the high position.
- Assassinate the Onryo Samurai.
6. Escape Katano Castle and finish the linear prologue
Once the assassination is complete, several samurai recognize Naoe. You can fight, but escape is the safer and more reliable option. Climb an exterior castle wall, jump into the moat and keep running away from the castle until the cutscene begins. When control returns, follow the objective and crawl toward Nagato to trigger the next scene.
The Onryo Samurai ends the prologue and transitions into the intermission quest An Unpayable Debt. At this point, the game begins moving toward the hideout and broader campaign systems. The next section is no longer the opening tutorial sequence.
- Leave Katano Castle after the assassination.
- Escape through the exterior wall and moat.
- Reach Nagato after control returns.
- Trigger the transition into An Unpayable Debt.
7. Open both Mastery menus when they become available and prepare the two protagonists
Do not assume the prologue gives you unrestricted access to both characters’ full progression systems. The Mastery system uses separate character and weapon or archetype trees, and available nodes also depend on Knowledge Rank. When the game makes the Mastery menu available after the opening sequence, inspect Naoe’s and Yasuke’s trees separately.
Spend available Mastery points on abilities that match the equipment you are actually using. For Naoe, begin with a stealth, tool or assassination option if available. For Yasuke, use a combat, weapon or survivability option. Do not spend points on a weapon tree and then equip a different weapon expecting the active ability to transfer. If a desired node is locked, raise Knowledge Rank through the activities the game introduces rather than treating the locked node as a mistake.
Naoe and Yasuke do not become freely interchangeable at the end of this prologue. Yasuke is only briefly playable in the opening missions. Permanent free switching becomes available later after the Mibuno Showdown quest, so the scripted handoffs here are normal and do not indicate a missing menu option.
- Open Naoe’s Mastery menu when available.
- Open Yasuke’s Mastery menu when available.
- Spend practical points without assuming all nodes are unlocked.
- Equip Naoe for stealth and tools.
- Equip Yasuke for direct combat and a suitable weapon.
Before you move on
- The Lord’s Favor is complete.
- Spirit of a Warrior is complete.
- Flames of War is complete.
- Fight of the Kakushiba Ikki is complete.
- The Onryo Samurai is complete.
- Naoe has used crouch movement, prone movement, shadow concealment and a silent assassination.
- Yasuke has used attacks, defense, posture damage and a finisher.
- The Onryo Samurai has been assassinated and Katano Castle has been escaped.
- The story has transitioned into An Unpayable Debt.
- Both Mastery menus have been inspected when unlocked, with available points assigned to usable abilities.
- The player understands that unrestricted switching is unlocked later by Mibuno Showdown, not during the prologue.
References for this chapter
- Assassin's Creed Shadows - PS5 Games
- Assassin’s Creed Shadows The Lord’s Favor Walkthrough
- Assassin’s Creed Shadows Flames of War Walkthrough
- Assassin’s Creed Shadows Fight of the Kakushiba Ikki Walkthrough
- Assassin’s Creed Shadows The Onryo Samurai Walkthrough
- Assassin’s Creed Shadows Walkthrough: Main Story Order, All 12 Shinbakufu Target Boards, When Yasuke Joins, Credits and Epilogue
- How to Change Character | Assassin’s Creed Shadows
- Assassin’s Creed Shadows – Deep Dive Into Progression
Iga Province: Early World, Stealth Windows and Safe Routes
After The Onryo Samurai, the campaign enters Act 1 through An Unpayable Debt. That quest is temporarily interrupted by Wake Up Call, a flashback in which Naoe trains with Nagato, helps Matsu investigate a dead deer and defeats the poachers. When Wake Up Call ends, resume An Unpayable Debt by following Junjiro, speaking with him at the temple and cutting bamboo. Only after An Unpayable Debt is complete does From Spark to Flame begin and lead Naoe to Tomiko’s Hideout in Izumi Settsu. Build the Kakurega at the worktable, inspect the Hideout services and use early scouts carefully. Practice observation, darkness, cover, distractions and controlled disengagements before taking on larger compounds. Kuji-Kiri, Lost Pages, contracts and nearby resource activities are useful but optional unless the Objective Board specifically makes one part of an active quest.
1. Finish The Onryo Samurai, then begin An Unpayable Debt
Complete The Onryo Samurai first. After the mission’s castle infiltration, assassination and escape sequence, Naoe wakes injured and the next main objective is An Unpayable Debt. The game does not immediately send you into Hideout construction. Follow the active objective until the story shifts into Naoe’s earlier memory and Wake Up Call appears as an interruption.
The early free-roam region is Izumi Settsu. Do not travel to Iga Province expecting the first Hideout tutorial there. Iga is Naoe’s homeland and is introduced through the story, but the initial practical route around Tomiko’s homestead takes place in Izumi Settsu. Use the Objective Board to confirm which quest is active whenever the title changes during this sequence.
- Complete The Onryo Samurai.
- Accept or follow An Unpayable Debt after the prologue.
- Confirm that Wake Up Call has appeared as the active interruption.
- Remain in the marked Izumi Settsu story area rather than searching distant Iga activities.
2. Complete Naoe’s training duel with Nagato in Wake Up Call
Wake Up Call begins during An Unpayable Debt and sends Naoe into a flashback. Approach Nagato and complete the training prompts. First collect Naoe’s wooden practice sword from the nearby ground, then perform the requested guard breaks and deflections. The game uses this encounter to teach the timing for charged attacks that break a guard and defensive parries against incoming strikes.
The duel is a tutorial rather than a normal lethal fight. Follow the on-screen prompts and continue attacking after the required defensive exercises are complete. When the duel ends, follow Nagato instead of wandering away. He leads Naoe toward Matsu and the next investigation objective.
- Pick up the bokken when the objective appears.
- Complete the required guard-breaking exercises.
- Deflect the required attacks during Nagato’s lesson.
- Defeat or finish the training duel and follow Nagato.
3. Speak with Matsu, investigate the deer and find the poachers
Follow Nagato along the path until he directs Naoe to Matsu. Speak with Matsu at her home, then continue toward the nearby tower. Use the broken tree and branches to reach the tower, climb up and look across the area. The objective leads you to a dead deer below. Drop into the hay or nearby safe landing area, approach the carcass and investigate it.
After examining the deer, use Observe from its location to locate the two marked poachers. Follow the objective toward their camp and confront them. The dialogue choice does not change the required outcome: the encounter becomes a fight. Use the defensive timing learned from Nagato, avoid being surrounded and defeat the poachers.
Return to Matsu’s house after the fight. Enter when prompted and complete the conversation. Nagato then arrives with news of an approaching threat. The available dialogue responses do not alter this route. Finish the conversation and let the flashback continue until Naoe wakes in the present. This completes Wake Up Call and returns the active quest to An Unpayable Debt.
- Follow Nagato to Matsu.
- Speak with Matsu.
- Climb the nearby tower and investigate the dead deer.
- Observe the area and locate the marked poachers.
- Defeat the poachers.
- Return to Matsu and complete the follow-up conversation.
- Wait for the mission to return to An Unpayable Debt.
4. Resume An Unpayable Debt with Junjiro and cut bamboo
When control returns to the present, follow Junjiro. He leads Naoe through the temple area and teaches her how to approach an animal for a painting. Stay crouched, move slowly and use Observe when the game prompts you to focus on the animal. Complete the painting sequence, then follow Junjiro again to the next objective.
At the temple, speak with Junjiro when prompted. The story then gives Naoe a sword and teaches her to use it by cutting bamboo. Find the bamboo growing along the temple paths and slash it until the progress objective is complete. You do not need to leave the temple or search for a special weapon. If the counter does not advance, move to another nearby bamboo cluster and continue cutting.
The Lost Pages in the temple can be collected during this section, but they are optional Knowledge activities. They are not a substitute for cutting the required bamboo. Finish the bamboo objective and complete the remaining An Unpayable Debt prompts. From Spark to Flame does not begin until An Unpayable Debt is fully complete.
- Follow Junjiro after Wake Up Call ends.
- Complete the animal-painting tutorial.
- Speak with Junjiro at the temple.
- Cut bamboo until the objective completes.
- Finish An Unpayable Debt before looking for From Spark to Flame.
5. Follow From Spark to Flame to Tomiko’s Hideout
After An Unpayable Debt is complete, select From Spark to Flame from the Objective Board. Follow the marker to Tomiko and remain with the mission route until the Hideout tutorial begins. This is the point at which the game introduces the wider campaign board and the facilities that support Naoe’s later missions.
When the mission sends you to gather construction materials, search the marked area south of the Hideout first. Use the game’s resource highlight to identify the required supplies near the homestead and beyond the fence. Then follow the path toward the stable and search around it, including its northern side, for the remaining construction material. The required items are placed close to the objective area, so do not ride across the region looking for unrelated stockpiles.
Return to the Hideout worktable and build the Kakurega in the available placement area. Confirm the construction and wait for the mission objective to update. If the construction prompt appears not to register, interact with the worktable again, reopen the building menu and exit it normally before moving on.
- Start From Spark to Flame only after An Unpayable Debt is complete.
- Meet Tomiko and reach the Hideout tutorial.
- Collect the construction supplies south of the Hideout.
- Search around and north of the stable for the remaining material.
- Build the Kakurega at the Hideout worktable.
6. Establish the safehouse network and protect your early scouts
Once the Kakurega is built, inspect its services and the Hideout menu. Kakurega locations provide practical support such as access to gear, supplies, contracts, ammunition and fast travel when discovered. Use the available services to restore essential tools and rations before leaving the area.
Open the Objective Board before spending scouts. Early investigations are more useful when they reveal a precise search area for a required mission or identify a stockpile connected to an upgrade you intend to build. Avoid spending every scout on random points of interest. If you have a choice of Hideout improvements, read each building’s description and prioritize the function that solves your immediate shortage rather than treating every available building as mandatory.
The Study can improve scout capacity and investigation usefulness, while the Stables support stockpile handling and later improvements. These are preparation options, not requirements for completing From Spark to Flame. Build them when you have the materials and a clear reason to use them.
- Open the Kakurega and Hideout service menus.
- Restore essential tools, ammunition and rations.
- Use a scout only for a precise objective or useful stockpile.
- Review Study and Stables functions before spending materials.
- Keep scouts available for upcoming required investigations.
7. Practice stealth and handle optional early activities without delaying the route
Before entering a camp, compound or castle, reach a raised position and use Observe to mark guards, supplies and the objective. Identify an entry route and a retreat route. Darkness generally gives Naoe better stealth opportunities, but lanterns, torches and overlapping patrols can still expose her. Move between connected shadow patches, foliage, rooftops, ledges and other cover instead of crossing open illuminated ground.
Use a Shinobi Bell to pull an isolated guard away from a group. Environmental shuriken can also create a distraction, while shuriken can stun an enemy. Treat kunai as precision throwing tools for a selected target rather than your main patrol-luring device. If several enemies become alert, break line of sight by reaching a roof, grapple point, tall grass or shadowed interior. Use smoke when necessary, then circle back from another angle instead of fighting a large patrol in the open.
The first four Kuji-Kiri meditations completed by Naoe trigger her early flashback quests. Complete those flashback quests when they appear, but do not confuse Kuji-Kiri with the mandatory route from The Onryo Samurai through From Spark to Flame. Lost Pages, nearby contracts and resource activities are optional preparation unless the active Objective Board explicitly includes them.
- Observe a guarded location before entering.
- Use darkness and connected cover without assuming every shadow is safe.
- Separate guards with a Shinobi Bell or environmental distraction.
- Reserve kunai for deliberate ranged attacks.
- Disengage through a roof, grapple point or line-of-sight break when detection spreads.
- Complete early Kuji-Kiri flashbacks when encountered, without delaying the main route.
Before you move on
- The Onryo Samurai is complete.
- Wake Up Call is complete and the game has returned to An Unpayable Debt.
- Naoe completed the Nagato training duel, followed him, spoke with Matsu, investigated the deer, defeated the poachers and returned to Matsu.
- Naoe followed Junjiro, completed the temple interaction and cut enough bamboo to finish An Unpayable Debt.
- From Spark to Flame has started or is complete after An Unpayable Debt ended.
- Naoe reached Tomiko’s Hideout and built the Kakurega at the worktable.
- Kakurega and Hideout services are available, and essential tools and rations have been restored.
- At least one scout remains available, or a scout has been spent on a precise investigation or useful stockpile rather than a random discovery.
- You have practiced observation, shadow movement, distraction and controlled disengagement before advancing to larger campaign objectives.
References for this chapter
- Assassin's Creed Shadows Walkthrough – All Main Quests
- Assassin’s Creed Shadows: An Unpayable Debt Walkthrough
- Assassin’s Creed Shadows: Wake Up Call Walkthrough
- AC Shadows: All quests, walkthrough
- Assassin’s Creed Shadows – Exploration Gameplay Overview
- Assassin’s Creed Shadows – Stealth Gameplay Overview
- Assassin’s Creed Shadows PS5 Digital Deluxe Edition
- Assassin’s Creed Shadows now releases March 20, 2025 – Ubisoft
Build Your Hideout and Spy Network — The Campaign's Information Backbone
After the story unlocks the Hideout in Izumi Settsu, use it as the campaign's preparation center rather than treating every room as mandatory. Tomiko's Hiroma and the Stables are already present. From Spark to Flame, the eighth main quest, introduces Hideout construction and requires you to build the Kakurega. The next quest, Way of the Blacksmith, is the required ninth main quest and begins automatically after From Spark to Flame. Complete it, recruit Heiji in Sakai and build the Forge; this is the mandatory route to weapon and gear upgrades. Finding New Allies adds two scouts but is optional for story completion. The Study, Stables upgrades, Nando and other rooms are also optional, although the Study is the most useful early investment for objective searches. Use scouts to narrow down quest locations, smuggle stockpiles and manage certain regional systems, but do not expect them to clear enemy bases or reveal every guard and entrance. When scouts are unavailable, follow the clue area and investigate on foot.
1. Unlock the Hideout and build the Kakurega
Continue the opening campaign until Naoe returns to Tomiko and the Hideout becomes available in Izumi Settsu. Tomiko's Hiroma is already built, and the Stables are part of the starting Hideout layout. Do not waste materials trying to construct either room again.
Start From Spark to Flame from the Objective Board and gather the crops, wood and minerals requested by the construction tutorial. Open the Hideout building menu and place the Kakurega. This is the first required Hideout structure and unlocks the safehouse network, including distant fast-travel points and services such as scout replenishment.
When the Kakurega is complete, interact with the Hideout facilities and confirm that scout management is available. The Kakurega is mandatory because the story requires it; additional Kakurega safehouses around Japan are useful but optional unless you want more travel points and refill locations.
- Reach the Hideout through the main story.
- Confirm that Hiroma and Stables are already present.
- Start From Spark to Flame from the Objective Board.
- Gather the requested materials and build the Kakurega.
- Open the Kakurega or Hideout interface and verify scout management.
2. Complete Way of the Blacksmith before planning the Forge
Do not postpone Way of the Blacksmith or describe it as an optional equipment quest. It is the required ninth main quest, and it automatically follows From Spark to Flame. The quest appears under The League and Tomiko on the Objective Board.
Track the quest and read its clue: Heiji is in Sakai, in southwestern Izumi Settsu, east of the Port of Sakai. If Guided Exploration is off, select the scouting command on the World Map and send a scout to the Sakai search area. If Guided Exploration is on, the game marks the destination automatically, so no scout is required for this step.
Travel to Sakai and enter the Investigation Zone. Use the objective marker and scanning prompt to locate the hostile group near Heiji. Approach through the alley and surrounding cover, then eliminate the guards before speaking to Heiji. You can use Naoe's stealth tools, but detection does not invalidate the quest; clear the enemies and return to Heiji.
After Heiji agrees to join the Hideout, return to the Hideout. Open the building menu at the workbench and place the Forge. The quest is not complete merely because Heiji has joined; the Forge must actually be constructed. Once it is built, Heiji can upgrade and dismantle equipment, and the Forge's related functions become available.
- Confirm From Spark to Flame is complete.
- Start Way of the Blacksmith from The League and Tomiko.
- Travel to Sakai and reach Heiji's Investigation Zone.
- Defeat or bypass the guards protecting the area and speak with Heiji.
- Return to the Hideout and build the Forge.
- Verify that Heiji is available for equipment upgrades.
3. Add scouts with Finding New Allies, then use them on revealed objectives
After leaving the Hideout, complete Finding New Allies if you want a larger early scout pool. This short side quest is near the Hideout and rewards two additional scouts. It is not required to finish the main campaign, but it is one of the most efficient early preparations because it gives you more room for both objective searches and resource smuggling.
To use a scout, track a quest whose exact location is hidden, open the World Map and compare the clue card with the named province, settlement or landmark. Select the scouting command, position the search area over the most likely region and dispatch the number of scouts needed for the desired coverage. Adding scouts enlarges the search area, but every scout sent is spent even if the objective is not inside the selected zone.
When the objective is found, travel to the revealed marker and complete the mission yourself. A scout only narrows down the location. It does not assassinate targets, remove guards, identify every entrance or provide a complete fortress layout. Before dispatching, make sure you are using the correct clue area rather than spending scouts on random map regions.
- Complete Finding New Allies if you want its two-scout reward.
- Track a quest with a hidden or uncertain location.
- Read the clue before opening the scouting search.
- Dispatch scouts over the most likely area.
- Travel to the revealed marker and complete the objective manually.
4. Build the Study as the first useful optional upgrade
The Study is not a campaign prerequisite, but it is the strongest early optional investment for the spy network. Building it increases the maximum number of scouts and improves the search zone used when scouts investigate an objective on the World Map. This reduces wasted deployments when several story and ally quests are active.
Construct the Study after the Kakurega and Forge whenever your available materials support it. Do not halt the main story to obtain every upgrade level. A basic Study is enough to improve your scouting routine; later levels can be purchased when you have surplus resources.
Use the Study's benefit for required story clues first. If a quest location is already visible, save the scouts for a hidden target or for smuggling. You can also travel to a clue area without scouts and search manually, especially when the clue names a specific town, port or landmark. This is slower but prevents an unsuccessful dispatch from consuming your remaining scouts.
- Treat the Study as optional rather than mandatory.
- Build it when practical materials are available.
- Use its improved search zone for important story or ally objectives.
- Reserve scouts when a future quest has incomplete location clues.
- Search manually when the clue area is narrow and scouts are scarce.
5. Use the Stables for stockpiles and seasonal rewards
The Stables are available in the starting Hideout. During an infiltration of an enemy camp, castle or other wealthy hostile location, look for a large resource stockpile that can be tagged for smuggling. Tag it only when you can do so safely; the action does not require you to carry the entire stockpile away.
A normal stockpile costs two scouts to retrieve, and the materials are delivered at the end of the current season. Upgrading the Stables reduces that cost to one scout. The upgrade is optional, but it is worthwhile if you regularly use enemy locations to fund Hideout construction or equipment improvements.
Unused scouts can also contribute items to the Stables stash at the end of a season. Check the stash after the season changes instead of assuming that every scout must be spent immediately. In the early game, prioritize required objective searches and useful stockpiles over minor seasonal rewards.
- Find a valid stockpile during an enemy-area infiltration.
- Check your remaining scout count before tagging it.
- Remember that an unupgraded Stables stockpile costs two scouts.
- Wait for the season-end delivery.
- Collect the reward from the Stables stash or storage point.
6. Replenish scouts and prepare each major mission
Scouts return when the season changes. If you need them sooner, visit a Kakurega and purchase a refill with Mon. The Nando is an optional Hideout room that reduces the cost of recalling used scouts, while civilian encounters can sometimes offer Scout Intel as a reward. These are recovery options, not substitutes for reading a quest's clue before dispatching scouts.
Before a major target, castle or camp mission, reopen the Objective Board and inspect the active quest. Confirm whether the destination is already revealed. If it is hidden, either dispatch scouts into the clue area or travel there and investigate manually. Do not spend every scout on stockpiles immediately before a story objective that requires a search.
Once the destination is known, inspect the site before committing to the assault. For Naoe, identify rooftops, dark cover, ladders, water routes and a retreat path. For Yasuke, identify open ground, chokepoints and locations where a fight will not draw unnecessary reinforcements. Return to the Hideout or a Kakurega if you need to change equipment, refill tools or recover scouts, then begin the mission with both an approach and fallback route.
- Check the Objective Board before every major mission.
- Confirm whether the destination is revealed or still needs investigation.
- Refill scouts at a Kakurega when waiting for the season is impractical.
- Use Nando or civilian Scout Intel only as optional recovery support.
- Inspect the target site and choose Naoe or Yasuke for the planned approach.
- Begin the mission with a usable escape or fallback route.
Before you move on
- From Spark to Flame is complete and the Kakurega has been built.
- Way of the Blacksmith is complete as the required ninth main quest.
- Heiji has joined the Hideout and the Forge has been physically constructed.
- At least one quest location has been revealed through scouting or manually investigated from its clue area.
- Finding New Allies is complete if you want its two additional scouts; this is optional for campaign completion.
- The Study is built or you have consciously deferred it as an optional upgrade.
- The Stables are available, and you know how stockpile smuggling and seasonal delivery work.
- You can refill scouts at a Kakurega or recover them by waiting for a season change.
- Before the next major mission, you have read its clue, confirmed its location and prepared an approach and fallback route.
References for this chapter
- Assassin's Creed Shadows - Deep Dive into the Hideout
- Assassin's Creed Shadows Way of the Blacksmith Walkthrough
- Assassin’s Creed Shadows Finding New Allies Walkthrough
- How to use Scouts in Assassin's Creed Shadows and get more
- Assassin's Creed Shadows - PS5 Games
- Assassin's Creed Shadows: From Spark to Flame Walkthrough
Yasuke: Samurai Combat Fundamentals and Weapon Choices
Yasuke is the campaign's durable frontline fighter, but his strength comes from choosing the correct response to each attack rather than holding attack continuously. Learn to use block against ordinary attacks and projectiles, parry to push enemies back and create counterattack windows, and dodge red-glint unstoppable attacks unless a later skill or engraving changes that rule. His long katana is the balanced choice, the naginata controls groups, and the kanabo trades speed for armor-breaking power. Yasuke can carry two weapons, switch between them during combat after unlocking Link Attack, and use the yumi or teppo to open encounters. Horse archery is a separate Yasuke activity; use it for practice and Knowledge, but build your core combat habits on the ground.
1. Prepare Yasuke's loadout and mastery points
Open Yasuke's inventory and Mastery menus whenever the campaign makes them available. Equip two weapons that solve different problems instead of duplicating the same role. The long katana is the safest general-purpose choice, the naginata is designed for reach and crowd control, and the kanabo is the slow heavy option for breaking defenses and armor. Yasuke can also equip a yumi bow or teppo rifle as a ranged weapon.
Spend early Mastery Points on the weapon you expect to use most, but do not treat the first build as permanent. Mastery points can be reset, so you can test a weapon tree and change direction later. Keep Yasuke's equipment close to the level of the region. Gear level, weapon statistics and abilities all affect how efficiently he damages enemies and breaks through their defenses.
- Equip one primary melee weapon and one contrasting secondary weapon.
- Keep either the yumi or teppo available when a ranged opening is useful.
- Read the weapon tree before spending points and remember that mastery can be reset.
2. Establish the light, heavy and posture rhythm
Begin with an isolated ashigaru, outlaw or ronin rather than a castle group. Use light attacks to start a combo, then allow the sequence to finish when the enemy is within range. Yasuke's combo-enders can break an enemy's guard without requiring a posture attack, so avoid cancelling every combo after the first hit.
Use heavy or charged posture attacks after a successful defense, against a staggered opponent or when an enemy is committed to a long recovery. These attacks are powerful but expose Yasuke during their preparation and recovery. If another enemy is moving into striking distance, stop the attack and reposition instead of forcing the animation.
Against a single opponent, the long katana gives the clearest introduction to this rhythm. Against an armored enemy, switch to the kanabo only when you have enough space or a clear opening. Its damage and armor-breaking strength come with slower movement and timing demands.
- Complete a light-attack combo against an isolated enemy.
- Use a heavy or posture attack after creating a safe opening.
- Allow a katana combo-ender to land and observe its guard-breaking effect.
- Avoid charging a slow attack while another enemy is already attacking.
3. Learn block, dodge and Yasuke's parry
Use block as the emergency defense for ordinary melee strikes and incoming arrows or kunai. Yasuke's block lets him hold ground more effectively than Naoe's defense, but it does not make standing in the middle of a formation safe. Block the immediate threat, then move toward open space or the edge of the group.
Time a parry immediately before a normal attack connects. Yasuke's parry works along a straight line: a successful parry pushes the attacker back and opens a counterattack window without giving up ground. Follow with a short light combo, a heavy strike or a weapon ability while the enemy is vulnerable. Do not keep pressing parry after the opening has passed.
Yasuke's dodge is a directional step rather than Naoe's roll. Use it to leave the line of an incoming attack, especially when the attack is red-glint or when several opponents are converging. A second consecutive dodge-step has recovery, so avoid spending both steps automatically when one is enough.
- Block an ordinary melee strike and then move toward open ground.
- Parry the same enemy in separate encounters until the timing is familiar.
- Follow a successful parry with damage.
- Use a single directional dodge to escape a red-glint attack.
4. Read white, blue and red attack cues
A normal attack can be blocked or parried. Watch the enemy's weapon and animation rather than reacting only to the final frame. A successful parry creates the best opportunity for Yasuke's counterattack, while a block is the safer choice when multiple threats make precise timing unreliable.
A blue-glint attack is a flurry. It is a sequence of attacks, not one strike. Blocking the first hit does not end the sequence, so continue defending until the chain finishes. If you are confident in the timing, parry each successive blow; the completed defense creates the opening. If you miss the rhythm, keep your guard up or step away rather than attacking between hits.
A red-glint attack is unstoppable under the normal rules. Dodge it instead of relying on block, because a blocked red attack can break Yasuke's defense and leave him open. Some later equipment or abilities can change Yasuke's options against red attacks, but until that feature is explicitly unlocked, treat every red cue as a dodge signal.
- Parry a normal attack and counter immediately.
- Defend through an entire blue flurry instead of attacking after its first hit.
- Dodge every red-glint attack during early practice.
- Do not assume a later red-parry perk is active before checking the item or skill description.
5. Match Yasuke's weapons to the encounter
Use the long katana for duels, narrow spaces and mixed groups. It balances attack, defense and mobility, making it the best weapon for learning enemy patterns. Its sheathed posture attack is also a useful ambush-style opener when you have time to charge it before the opponent notices Yasuke.
Use the naginata when several enemies are approaching from different angles. Its long reach helps Yasuke keep opponents outside immediate striking distance and damage multiple enemies around him. Keep turning with the group so the weapon controls the perimeter instead of allowing an enemy to reach his back.
Use the kanabo against armored or heavily defended targets. Its slower attacks require a parry, dodge or recovery window, but it is especially effective at breaking defenses and pulverizing armor. Do not chase fast enemies with repeated kanabo swings; let them commit first, then punish the recovery.
Yasuke is the only protagonist who can unlock Link Attack weapon switching during a combo. Once available, practice starting with the katana, switching after a confirmed hit and finishing with the naginata or kanabo according to the enemy's position. Do not force the switch while surrounded.
- Use the long katana in a one-on-one fight.
- Use the naginata against a small group.
- Use the kanabo against an armored target.
- Test Link Attack only after its mastery ability is unlocked.
6. Use ranged weapons as openers
The yumi bow lets Yasuke attack from a significant distance with precision and different arrow options. Use it to remove an isolated lookout, soften a target or start an encounter on your terms before drawing a melee weapon.
The teppo rifle has greater destructive power and armor penetration than the bow, but its firing and reload cycle is slow. Fire it before enemies reach Yasuke, then move to cover or switch to melee rather than trying to reload in the center of a crowd. A teppo opener is loud and may attract attention, so choose it when direct combat is already acceptable.
Ranged attacks support Yasuke's frontline style; they do not replace parrying, blocking or spacing. After the first shot, return to ground combat and apply the defense-to-counter rhythm from the earlier steps.
- Open one safe encounter with the yumi or teppo.
- Reload the teppo only after reaching a safe position.
- Switch to melee when enemies close the distance.
- Do not build the entire Yasuke practice routine around ranged attacks.
7. Control crowds and recover from a failed exchange
Before engaging a large group, identify a lane, doorway, wall or slope that prevents enemies from surrounding Yasuke. Move so most opponents remain in front of him. Use the naginata to maintain space, the katana to focus a priority target and the kanabo when an armored enemy exposes itself.
If several enemies attack together, stop attacking. Block the immediate ordinary strikes, dodge red attacks, and move toward the chosen recovery lane. Once the formation stretches out, turn back toward the nearest isolated enemy. Yasuke can survive prolonged combat, but his durability is not a reason to remain surrounded.
Against an elite or legendary opponent, watch one complete attack pattern before spending active abilities. Red attacks, blue flurries and delayed weapon swings are easier to handle after you know the sequence. If a fight repeatedly fails, upgrade or replace the weapon, check Yasuke's gear level and reset Mastery Points if the build is not supporting your preferred weapon.
- Enter a large fight with a visible escape direction.
- Keep enemies in front of Yasuke whenever possible.
- Recover from a failed attack by disengaging instead of immediately attacking again.
- Use gear upgrades or a mastery reset when a weapon does not suit the encounter.
8. Treat mounted activities as supplemental practice
Yasuke can use a horse for travel, and the game includes horse archery activities associated with him. These activities help you practice aiming while moving and can contribute to exploration progression, but they are not a substitute for learning ground combat. Complete one when it becomes available if you want to develop ranged control, then return to an ordinary encounter to practice parries, flurry defense and red-attack dodges.
When a combat situation begins near your mount, prioritize the immediate ground threat and use the mount for repositioning only when the route is clear. Do not invent a mounted-combat strategy around the horse's cosmetic saddle options; the horse and saddle customization is not a core Yasuke damage system.
- Try a Yasuke horse archery activity when one is available.
- Use the mount to create distance only when the route is safe.
- Return to ground combat and demonstrate the parry and dodge routines afterward.
Before you move on
- You can defeat an isolated opponent with a light combo, a heavy or posture attack and a successful parry.
- You have tested the long katana, naginata and kanabo and understand their roles in duels, groups and armored encounters.
- You can identify normal, blue flurry and red unstoppable attacks and choose parry, continued defense or dodge appropriately.
- You have used a yumi or teppo opener without trying to reload in the middle of a crowd.
- You have practiced Link Attack after unlocking it, or confirmed that the ability is not yet available in your campaign.
- You can enter a larger fight with a clear escape route, keep enemies in front of Yasuke and recover after a failed attack.
- You have tried a Yasuke horse archery activity if one is available and understand that it is supplemental rather than core ground-combat training.
Naoe: Shinobi Stealth Toolkit, Light & Shadow and Grappling
Naoe’s stealth is built around controlling visibility, sound, elevation and enemy attention. At night, ambient shadows can conceal her when guards do not have a direct view, while shuriken can extinguish lanterns and create new routes through otherwise exposed areas. Study patrols before entering, use crouching and prone movement when the situation requires a low profile, and pull isolated enemies away with distractions or Naoe’s grab-based takedown options. Her grappling hook provides vertical access, swinging routes and emergency escapes, but every landing must be checked for enemy sightlines. Smoke bombs are the most reliable way to break contact when several guards converge. The Tanto and Hidden Blade combination also unlocks Double Assassinations, allowing Naoe to eliminate two suitable nearby targets when their positions and health states permit it.
1. Establish a stealth position before entering a guarded area
Switch to Naoe before approaching a castle, fort, camp or crowded objective. Stop outside the perimeter and spend a moment reading the area instead of crossing the first wall immediately. Identify the objective, patrol routes, lanterns, rooftops, bushes, crawl spaces and usable grapple points. Before moving, choose one route into the area and one route away from it.
Darkness is especially valuable because Naoe can hide in ambient shadows when enemies cannot see her directly. Do not assume that every dark patch is safe: a guard facing toward the shadow, a nearby lantern or a patrol entering from another angle can expose her. Weather and seasonal changes alter the environment, but treat them as situational advantages rather than guaranteed concealment. Move only after confirming that the next cover position is available.
- Approach the objective as Naoe.
- Find a shadowed entry route and a separate escape route.
- Watch at least one patrol cycle before crossing an exposed gap.
2. Use crouch, prone movement and low routes to preserve concealment
Use crouching when moving near guards, across interiors or between nearby cover positions. When a patrol turns toward Naoe, prone movement can reduce her profile and help her remain hidden in suitable terrain, beneath structures or along low rooftop routes. It is often safer to stop and lower your profile than to sprint immediately and create a visible movement path.
Naoe’s smaller frame also allows her to use narrow openings and low passages that are unavailable to Yasuke. Look for these routes around buildings and fortifications before attempting a direct crossing. Keep the next hiding place close enough to reach without running through a lit area. If a search begins, remain still or crawl toward cover rather than continuing along the route that caused the suspicion.
- Crouch when passing close to patrols or crossing interiors.
- Use prone movement when a guard is searching nearby.
- Prefer narrow openings and low routes when the main approach is exposed.
3. Create darkness and distractions with shuriken, kunai and smoke
Shuriken are useful for preparing an approach. Throw one at a suitable lantern or other light source to darken part of the route, then wait for nearby guards to settle before moving through the new shadow. Removing a single light can connect two safe areas and is often more useful than throwing a weapon at a distant enemy.
Use distractions to separate a guard from a group or to turn a sentry away from a doorway. Kunai are best used when the target is isolated and the body will not be immediately visible to another enemy. Smoke bombs serve a different purpose: they create a temporary cloud that can let Naoe escape, reposition or assassinate an appropriate low-rank enemy without remaining exposed. Do not spend smoke merely to cross a route that can be solved by waiting or extinguishing a lantern.
- Extinguish lights that divide your intended route.
- Distract one guard at a time and observe where the target walks.
- Reserve kunai for isolated targets and smoke for emergencies or close-quarters resets.
4. Use the grappling hook for entry, elevation and escape
Aim for a valid grapple point on a ledge, roof or other marked surface, then follow the on-screen prompt to attach and move along the rope. While hanging, Naoe can change between vertical movement and swing movement. Use vertical ascent to reach an upper route and swing movement when the next platform is separated by a gap. Check the landing area before jumping; a roof is not safe if guards can see it.
The hook is also an escape tool. If a patrol discovers Naoe, grapple over a wall, climb into rafters or swing beyond the enemy’s immediate route instead of fighting a group in the open. Plan the escape before beginning the infiltration, and avoid using the only visible grapple point if the landing position has no follow-up cover. Naoe can combine wall-running and grappling to reach ledges that do not offer a normal handhold.
- Practice both vertical ascent and swing movement in a safe area.
- Check the landing point for guards before committing to a grapple.
- Keep a usable grapple route available when entering a restricted area.
5. Turn distractions into silent takedowns
When a guard is isolated, approach from cover and use the available grab interaction if you need to move the enemy. Pull the target into a bush, shadow, narrow side passage or other secluded position before completing the takedown. Hiding the body is important: a clean assassination can still cause a search if another patrol discovers the victim immediately.
For two nearby enemies, equip the Tanto and Hidden Blade combination after the relevant Double Assassination ability is available. Position Naoe so both targets are within the opportunity’s effective space and check for a third guard watching the pair. Do not force the attack if one target is walking away, if the pair is separated by cover or if either target has too much health for the planned assassination. Wait for a better alignment or remove the observer first.
- Separate targets or move them away from patrol lanes.
- Hide bodies before the next patrol reaches the area.
- Use Double Assassination only when both targets and the surrounding sightlines are favorable.
6. Recover immediately when stealth breaks
When the detection warning begins, stop trying to finish the original attack. Break line of sight by moving behind a wall, over a low obstacle or into a different building. If a safe grapple point is available, use it to change elevation and leave the pursuit route. Smoke bombs are the most dependable emergency option when several enemies are closing in; deploy one, move through the cloud and continue until Naoe reaches a separate shadowed or enclosed position.
Do not remain beside the body or wait in the same hiding place while enemies search. Once the alert has spread, circle around the objective and re-enter from another side. A kunai can remove a lone pursuer, but repeated ranged attacks are risky when multiple enemies can see Naoe. If the area remains fully alerted, withdraw far enough for the search to end, then reassess the lights, patrols and escape route before trying again.
- Break line of sight instead of trading attacks with a group.
- Use smoke to create distance and relocate.
- Re-enter from a different direction after the search ends.
Before you move on
- You can enter a guarded location at night by moving between valid shadows without triggering a search.
- You can extinguish a lantern, distract a guard, move an isolated target and complete a takedown without leaving the body in a patrol lane.
- You can use the grappling hook to reach a ledge or cross a gap, then use a second grapple route to escape after detection.
- You can deploy smoke, break line of sight and resume the infiltration from a different position.
- After unlocking the Tanto and Hidden Blade Double Assassination ability, you can eliminate two suitable nearby targets without alerting observers.
First Major Outpost: Planning, Execution and Fallbacks
The first major outpost-style mission covered here is The Killing Field, a required Naoe mission in The Wounded questline. After completing The Fatherless Monk, track the quest from the Onryo section of the Objectives Board. Travel to Nanatsumatsu in western Izumi Settsu, west of Amagasaki Castle and near Nakayama Peak. Your objectives are to kill Shindo Hiroshii, the Executioner, and free the three prisoners held at the site. Detection before the Executioner is defeated can cause him or the guards to kill the captives, so treat this as a stealth rescue rather than a normal camp clear. Scout from the east or north side, mark patrols, remove isolated guards, and attack Hiroshii from behind when possible. The assassination weakens him but does not necessarily finish the fight. If combat begins, separate him from the remaining guards and use parries against attacks that can be parried while evading unblockable attacks. After he dies, free all three prisoners and confirm the objective update. The mission reveals that Wada Koretake has returned to Amagasaki Castle; clearing every optional resource in Nanatsumatsu is unnecessary.
1. Unlock and track The Killing Field
Complete The Fatherless Monk first. The Killing Field then appears under the Onryo group, within The Wounded questline, on the Objectives Board. The mission is intended for Naoe and has a recommended level of 7. Select it before travelling so the investigation clues and destination remain visible.
This is a focused main quest, not a province-liberation activity. You do not need to capture Nanatsumatsu, defeat every optional enemy, or collect every resource in the surrounding area. Prepare Naoe with your preferred assassination tools, healing supplies and a ranged distraction or concealment option if available. A manual save before entering the restricted area is useful because the prisoners can be killed if the camp becomes alerted.
- Complete The Fatherless Monk.
- Track The Killing Field under Onryo and The Wounded.
- Use Naoe rather than treating this as a Yasuke combat mission.
- Carry healing and stealth supplies before entering Nanatsumatsu.
2. Reach Nanatsumatsu without entering Amagasaki Castle
Nanatsumatsu is in western Izumi Settsu, west of Amagasaki Castle and east of Nakayama Peak. The site is a small execution ground surrounded by barriers. Do not detour into Amagasaki Castle while travelling there; it is a separate heavily guarded location and is not the objective for this mission.
If the landmark is still hidden, follow the investigation clues and use a Scout to narrow the search. When you arrive, circle the outside of the barriers instead of approaching the obvious front entrance. The east side has a nearby tree and haystack that provide a practical stealth entry. The north side also has a short section of wall without sharp wooden defenses, which can be climbed for an elevated approach.
- Travel to Nanatsumatsu in western Izumi Settsu.
- Stay outside Amagasaki Castle.
- Circle the camp before entering.
- Identify the east-side tree, haystack or climbable north wall.
3. Scout the camp and protect the prisoners
Use Observe from the tree, wall or another concealed position to identify the Executioner, nearby guards and the prisoner area. Mark enemies before moving through the camp. The prisoners are the mission's failure point: detection before the Executioner is dealt with can lead to their deaths. Keep the fighting away from them and avoid throwing attacks through their position.
There is no requirement to eliminate every guard before reaching Hiroshii. Your goal is to create a safe route to the named target and leave enough space to fight him without drawing the entire settlement. Prioritize guards who can see your entry route, patrol beside the Executioner, or cover the path back to the prisoners.
- Use Observe before crossing the barrier.
- Mark Shindo Hiroshii and the closest patrols.
- Locate all three prisoners.
- Keep combat and thrown tools away from the captives.
4. Infiltrate from the east or north side
For the east-side route, climb the nearby tree and jump into the haystack to eliminate the first guard from concealment. From the haystack, move through bushes toward the northern part of the camp. A marksman or guard can be found near a building; use the banner-side cover and surrounding vegetation to approach without exposing yourself.
For the north-side route, climb the short unreinforced wall after the nearby patrol moves away. Air-assassinate the guard below, then move quickly toward the guard positioned behind or near the Executioner. Whichever entry you use, pause after each takedown and check whether a patrol has seen the body. If an enemy begins investigating, remain hidden until the route is clear or lure the investigator away before attacking.
- Use the east tree and haystack or the north climbable wall.
- Eliminate the first isolated guard quietly.
- Remove the nearby marksman or patrol blocking the route.
- Hide bodies or wait for investigations to pass.
5. Weaken and defeat Shindo Hiroshii
Approach Hiroshii from behind when the assassination prompt is available. The opening assassination substantially reduces his health but may not kill him, so be ready for a direct fight. Before committing, remove or separate the closest guards whenever possible. A named target surrounded by ordinary enemies is much more dangerous than the same target fought alone.
During the duel, use parries against attacks that can be parried and follow successful defenses with a short counterattack. Evade attacks marked as unblockable rather than attempting to parry them. Do not overextend with repeated strikes; keep enough stamina and space to respond to his next attack. If other guards join, circle toward cover and prioritize Hiroshii instead of chasing weaker enemies across the camp.
- Assassinate Hiroshii from behind if possible.
- Expect the assassination to weaken rather than guarantee a kill.
- Parry normal attacks and evade unblockable attacks.
- Separate Hiroshii from nearby guards before committing to the duel.
6. Recover if the camp becomes alerted
If a patrol discovers a body before Hiroshii is engaged, stop advancing and retreat through the bushes, haystack route or over the outer wall. Break line of sight behind a building or outside the barrier, then wait for the alert to settle. Re-enter from the opposite side rather than forcing your way through the center.
If Hiroshii has already started fighting, focus on surviving and keep the prisoners out of the battle. Use smoke or another concealment tool to create distance when available, then reposition around the camp's edge. If the prisoners are killed, reload the manual save and restart with a faster route to the Executioner. Do not treat a full alert as a reason to charge through the prisoner area.
- Break line of sight when detection spreads.
- Retreat outside the barrier if necessary.
- Re-enter from another side after the alert cools.
- Reload if the prisoners die.
7. Free the prisoners and confirm completion
After defeating Shindo Hiroshii, return to the prisoner area and interact with each of the three captives. The mission does not finish when the Executioner falls; all three prisoners must be freed. Watch the objective tracker after the final interaction to confirm that the rescue objective has updated.
Hiroshii's letter reveals that Wada Koretake has returned to Amagasaki Castle. This information advances The Wounded storyline and points toward the next objective. Leave Nanatsumatsu once the mission confirms completion. Nearby resources and remaining guards are optional and can be ignored until later.
- Defeat Shindo Hiroshii.
- Free all three prisoners.
- Confirm the objective tracker updates.
- Read or acknowledge the letter clue if prompted.
- Leave Nanatsumatsu after the quest completes.
Before you move on
- The Killing Field is tracked under the Onryo section of The Wounded.
- Shindo Hiroshii is defeated at Nanatsumatsu.
- All three prisoners are freed without a mission failure.
- The objective tracker confirms completion after the final prisoner interaction.
- The recovered letter identifies Wada Koretake's return to Amagasaki Castle.
- The next Wounded objective becomes available or the quest board reflects the completed mission.
References for this chapter
Provincial Objectives, Allies and Side Story Threads
Use the Objective Board—not a universal province-liberation meter—as the main campaign route. Complete the required prologue mission The Onryo Samurai separately, then resolve all 12 Shinbakufu target cards: The Golden Teppo, The Wounded, Oda Nobunaga, The Fool, The Mourner, The Naginata, The Noble, The Ox, The Wise, The Fox, The Two-Faced and The Horseman. Follow each card’s complete clue chain, including investigation missions and the final target objective. Alongside the Shinbakufu route, finish the required Naoe, Yasuke and Junjiro story groups. Yasuke’s complete required route includes An Education, Nobutsuna Sensei, Lady of Whispers, Lords of Azuchi, Dark Waves, Black Ships, My Name is Yasuke, The Path He Walks, Fighting for the Cause, The Silver Queen, A Promise and End of the Line. Ordinary castles, contracts, viewpoints, collectibles, province activities and most allies are optional unless the active board explicitly names one as a prerequisite.
Use the Objective Board as the campaign route
Open the Objective Board after every major mission and target resolution. Check the Shinbakufu group first, then the Naoe, Yasuke and Junjiro story groups. The League contains both required Junjiro and Tomiko progress and optional ally content, so read each card title and its displayed prerequisite instead of treating every League entry as mandatory.
The campaign becomes flexible after the prologue. Select an available required card, read its clue chain, travel to the named region and complete every sub-objective until the target or personal quest resolves. When free exploration resumes, reopen the board and confirm the completed state. A nearby castle, contract or regional activity is not automatically the next story step. The campaign’s critical act progression is tied to the Shinbakufu board and the required personal questlines, not to a universal province-liberation meter.
- Check Shinbakufu, Naoe, Yasuke and Junjiro-related groups first.
- Read the active clue chain before travelling or spending scouts.
- Confirm the target or personal quest is marked complete.
- Use the next highlighted required card as the route forward.
Track the prologue separately from the 12 targets
Complete The Onryo Samurai during the linear prologue. It is required campaign progress, but it is not one of the 12 Shinbakufu targets. Do not add it to the target count when checking the board.
The exact 12-target checklist is The Golden Teppo, The Wounded, Oda Nobunaga, The Fool, The Mourner, The Naginata, The Noble, The Ox, The Wise, The Fox, The Two-Faced and The Horseman. Check the board titles directly. Do not replace Oda Nobunaga with The Samurai, and do not count The Horseman as a thirteenth target or as the ending mission.
- The Onryo Samurai: required prologue mission, separate from the target total.
- The Golden Teppo
- The Wounded
- Oda Nobunaga
- The Fool
- The Mourner
- The Naginata
- The Noble
- The Ox
- The Wise
- The Fox
- The Two-Faced
- The Horseman
Complete each target through its full clue chain
Select one available target card and read every visible clue before deploying scouts. The Golden Teppo chain includes Searching Sakai, The Perfect Gift, Dress for Success and The Tea Ceremony before its closing target objective. The Wounded likewise uses linked investigation missions, including The Fatherless Monk, The Killing Field, Stolen Faith and Heads Will Roll. These examples show the required pattern: a target name is not complete until all displayed investigation missions and the final resolution objective are finished.
The Fool, The Mourner, The Naginata, The Noble, The Ox, The Wise and The Fox also use linked investigation chains. The Two-Faced unlocks after later Naoe and Shinbakufu progress. Oda Nobunaga belongs on the required target checklist even though his missions overlap the political transition around Friend of My Enemy, Belly of the Beast, Temple of the Horseman, Lightning and Thunder and Mibuno Showdown. Treat those transition missions as campaign steps connected to the target route, not as extra Shinbakufu members.
- Finish every sub-mission shown beneath the active target card.
- Record Oda Nobunaga separately from The Horseman.
- Do not count transition missions as additional targets.
- Confirm the final target mission and its completion state before selecting another card.
Use scouts only after reading the clue
Read the card’s region, settlement and landmark information before spending a scout. If the clue identifies the location precisely, travel there directly. Use a scout when the search area is broad or the active objective specifically requires locating an unknown point. A scout reveals information or a search location; it does not replace the required conversation, investigation, infiltration or target mission.
If more scouts are needed, replenish them through the available Hideout or Kakurega systems and use optional activities only when they solve a practical preparation problem. Finding New Allies can improve preparation or scouting capacity, but it is not a universal ending requirement. Follow it only when the active required board card explicitly names it as part of the chain.
Use this loop for every mandatory investigation: read the card, deploy only the necessary scout, travel to the revealed area, complete the clue mission, confirm the next clue and repeat. After the final encounter, complete any escape or closing objective and wait for the mission-complete notification before returning to the board.
- Read the clue before using a scout.
- Travel directly when the location is already known.
- Replenish scouts when necessary.
- Wait for mission completion before moving to another card.
Complete Naoe’s required story progression
Naoe’s mandatory personal route is Before the Fall, Wolves and Foxes, Secrets of the Blade and The Meaning of the Blade. Complete these cards when they appear and return to the Objective Board after each one. Before the Fall and Wolves and Foxes establish Naoe’s personal campaign thread; Secrets of the Blade advances the Assassin storyline; The Meaning of the Blade is the concluding required Naoe quest for the base-game route.
The four Assassin Outpost quests—Iga Assassin Outpost, Omi Assassin Outpost, Yamato Assassin Outpost and Kii Assassin Outpost—are optional side content for the original campaign ending. They can provide rewards and additional context, but do not count them as mandatory Naoe completion items. If the active Objective Board explicitly places one inside a required chain or lists it as a prerequisite on the current save, follow that displayed prerequisite; otherwise, leave the outposts for optional exploration.
If a Naoe card is missing, complete currently available Shinbakufu progress, return to the Hideout and check the board again. Do not assume that an unavailable Assassin Outpost card is blocking the ending.
- Before the Fall
- Wolves and Foxes
- Secrets of the Blade
- The Meaning of the Blade
- Optional unless explicitly required by the active board: Iga Assassin Outpost, Omi Assassin Outpost, Yamato Assassin Outpost and Kii Assassin Outpost
Complete Yasuke’s full required personal journey
Yasuke’s required story route has two connected portions. First complete An Education, then Nobutsuna Sensei, Lady of Whispers and Lords of Azuchi as those cards become available through the Objective Board and the surrounding campaign progress. An Education begins Yasuke’s personal-history sequence and leads into Nobutsuna Sensei. Use Yasuke for quests that specify him as the required protagonist, and reopen the board after each completion rather than assuming the next card will appear immediately.
After the early Yasuke progression, complete the later personal quests Dark Waves, Black Ships; My Name is Yasuke; The Path He Walks; Fighting for the Cause; The Silver Queen; A Promise; and End of the Line. These entries may appear under Yasuke’s personal group or a related League or story section, and they may unlock only after Shinbakufu or Naoe progress. Yasuke’s route is required for the finale gate even if Naoe remains your preferred character. If a Yasuke card is absent, finish the currently available required target or personal quest, return to the Hideout and inspect the board again.
- An Education
- Nobutsuna Sensei
- Lady of Whispers
- Lords of Azuchi
- Dark Waves, Black Ships
- My Name is Yasuke
- The Path He Walks
- Fighting for the Cause
- The Silver Queen
- A Promise
- End of the Line
Finish Junjiro’s required League chain
Junjiro’s required sequence is Raise a Cup, Eyes on the Future, A Different Kind of Samurai, Soup for Sorin, The Pilgrimage and Leaving a Mark. Raise a Cup follows Against the Koga-ryu. Several later entries can require a season change, so if the next card does not appear, return to the Hideout, verify that the previous quest is complete and advance the season when the board indicates it.
Do not confuse Junjiro’s named quests with optional League allies. Recruitable companions, contracts and unrelated League cards are not substitutes for this chain. Complete each named Junjiro quest, then reopen the board and confirm the next required entry. Leaving a Mark is especially important for the endgame checklist because Junjiro’s completed personal chain contributes to the unlock of Out of the Shadows.
- Raise a Cup
- Eyes on the Future
- A Different Kind of Samurai
- Soup for Sorin
- The Pilgrimage
- Leaving a Mark
- Advance the season when the board prerequisite requires it.
Keep optional regional content in its proper place
Ordinary castles, contracts, viewpoints, Kakuregas, collectibles, province activities, Finding New Allies and most recruitable League allies are optional for the original base-game ending. They can provide experience, gear, fast travel, supplies and combat support, but they do not replace a required target or personal quest.
Use optional activities when they solve a practical problem: synchronize a viewpoint to shorten travel, visit a Kakurega for supplies, clear a castle for experience and gear, or recruit an ally whose ability helps with a difficult mission. Province control or liberation can make travel and patrol management easier, but it is not the campaign’s universal completion meter.
Apply the same rule to connected side chains. The active required board card decides whether an activity is mandatory. Do not spend scouts on random discoveries before reading the required clue, and do not clear every regional icon merely because a province remains active on the map.
- Treat province liberation as optional preparation.
- Use castles and side activities for levels, gear and resources when needed.
- Follow a side chain only when a required card names it.
- Do not count optional allies or regional activities toward the 12-target total.
Verify the chapter’s mandatory state
This chapter is complete when the Objective Board confirms all 12 Shinbakufu targets: The Golden Teppo, The Wounded, Oda Nobunaga, The Fool, The Mourner, The Naginata, The Noble, The Ox, The Wise, The Fox, The Two-Faced and The Horseman. Separately confirm that The Onryo Samurai is complete as the required prologue mission.
Confirm Naoe’s four mandatory personal quests—Before the Fall, Wolves and Foxes, Secrets of the Blade and The Meaning of the Blade. Confirm the complete Yasuke route: An Education, Nobutsuna Sensei, Lady of Whispers, Lords of Azuchi, Dark Waves, Black Ships, My Name is Yasuke, The Path He Walks, Fighting for the Cause, The Silver Queen, A Promise and End of the Line. Confirm Junjiro’s six named League quests: Raise a Cup, Eyes on the Future, A Different Kind of Samurai, Soup for Sorin, The Pilgrimage and Leaving a Mark.
After the 12 targets and required personal journeys are complete, return to the Hideout and check The League section. Out of the Shadows should become available from Tomiko. Preserve a manual save before starting it. Credits or an Act transition alone are not enough; verify the required cards and the quest-complete state before proceeding to the finale chapter.
- The Onryo Samurai is complete as a separate prologue mission.
- All 12 Shinbakufu target cards are complete.
- Naoe’s required route is complete: Before the Fall, Wolves and Foxes, Secrets of the Blade and The Meaning of the Blade.
- Yasuke’s required route is complete: An Education, Nobutsuna Sensei, Lady of Whispers, Lords of Azuchi, Dark Waves, Black Ships, My Name is Yasuke, The Path He Walks, Fighting for the Cause, The Silver Queen, A Promise and End of the Line.
- Junjiro’s required route is complete: Raise a Cup, Eyes on the Future, A Different Kind of Samurai, Soup for Sorin, The Pilgrimage and Leaving a Mark.
- Out of the Shadows appears under The League after the Shinbakufu, Naoe, Yasuke and Junjiro requirements are satisfied.
- Iga Assassin Outpost, Omi Assassin Outpost, Yamato Assassin Outpost and Kii Assassin Outpost remain optional unless the active board explicitly marks one as required.
- Optional castles, contracts, collectibles, viewpoints, Kakuregas, province activities and unrelated ally chains may remain unfinished without blocking this campaign chapter.
Before you move on
- The Onryo Samurai is marked complete as the required prologue mission and is not counted toward the Shinbakufu total.
- The 12 required Shinbakufu targets are complete: The Golden Teppo, The Wounded, Oda Nobunaga, The Fool, The Mourner, The Naginata, The Noble, The Ox, The Wise, The Fox, The Two-Faced and The Horseman.
- Naoe’s mandatory route is complete: Before the Fall, Wolves and Foxes, Secrets of the Blade and The Meaning of the Blade.
- Yasuke’s complete required route is complete: An Education, Nobutsuna Sensei, Lady of Whispers, Lords of Azuchi, Dark Waves, Black Ships, My Name is Yasuke, The Path He Walks, Fighting for the Cause, The Silver Queen, A Promise and End of the Line.
- Junjiro’s required route is complete: Raise a Cup, Eyes on the Future, A Different Kind of Samurai, Soup for Sorin, The Pilgrimage and Leaving a Mark.
- Out of the Shadows is visible under The League after the Shinbakufu, Naoe, Yasuke and Junjiro requirements are satisfied.
- Iga Assassin Outpost, Omi Assassin Outpost, Yamato Assassin Outpost and Kii Assassin Outpost are not required unless the active Objective Board explicitly lists one as a prerequisite.
- Optional castles, contracts, collectibles, viewpoints, Kakuregas, province activities and unrelated ally chains may remain unfinished without blocking this campaign chapter.
References for this chapter
- Quick-Guide: The Road To Awaji
- Assassin's Creed Shadows Walkthrough – All Main Quests
- Assassin’s Creed Shadows Quests Lists and Progression Guide
- Starting Act 3 – Assassin’s Creed Shadows Walkthrough
- Story of a Samurai - Assassin’s Creed Shadows Walkthrough
- Assassin's Creed Shadows: The Shinbakufu Walkthrough
- Assassin’s Creed Shadows: The Assassins Walkthrough
- Assassin’s Creed Shadows: Assassin Outpost Locations
Political Intrigue: Nobunaga, Daimyo Relations and Story Choices
This chapter covers Friend of My Enemy, Belly of the Beast, Temple of the Horseman, Lightning and Thunder, and Mibuno Showdown. These quests expose the Shinbakufu’s connection to Oda Nobunaga, reveal Mitsuhide’s betrayal and unlock Yasuke for open-world switching. This is an Act 1 transition, not the campaign finale. Afterward, use the Objective Board to finish all twelve Shinbakufu target cards, then complete the required Naoe, Yasuke and Junjiro story categories. Yasuke’s required route contains eleven quests: An Education, Nobutsuna Sensei, Lady of Whispers, Lords of Azuchi, Dark Waves, Black Ships, My Name is Yasuke, The Path He Walks, Fighting for the Cause, The Silver Queen, A Promise and End of the Line. Dark Waves, Black Ships is one quest, not two. Optional Oda activities, contracts, Assassin Outposts, ordinary castles and recruited allies do not replace mandatory board objectives.
1. Start Friend of My Enemy after the opening Shinbakufu targets
Complete The Golden Teppo and The Wounded, including Heads Will Roll. Return to the Hideout and open the Objective Board. Select The League, then Tomiko, and track Friend of My Enemy. If it is missing, confirm that both target chains are marked complete rather than relying on the last cutscene having played.
Travel to Katano Castle and enter the marked hostile area. The meeting with Akechi Mitsuhide takes place inside one of the castle’s houses, so approach through concealment and avoid treating the castle as a mandatory full-clear assault. Speak with Mitsuhide to learn that the Onryo organization is called the Shinbakufu and that Oda Nobunaga is believed to lead it.
Finish the conversation and wait for the quest-complete update. The dialogue responses do not create an alternate campaign ending. Reopen the Objective Board and confirm that Belly of the Beast is available under the Shinbakufu objectives.
- The Golden Teppo is complete.
- The Wounded and Heads Will Roll are complete.
- Friend of My Enemy is complete.
- Belly of the Beast is visible on the Objective Board.
2. Retrieve the documents in Belly of the Beast
Track Belly of the Beast and travel to Yamashiro. Meet Ise Sadaoki beside the river south of Kyoto. He sends you to recover documents from a building in the city center, west of the Nanban Temple area.
Use Naoe’s rooftop routes to reach the marked building. The practical objective is document retrieval, not clearing every nearby guard. From the roof, drop into the building, take the papers and leave through the safest available route. If detection begins, break line of sight and return to the rooftops rather than prolonging a street fight.
Bring the documents back to Sadaoki and remain until the handoff completes the quest. Open the Objective Board again and select Temple of the Horseman. Tea Bowls for Rikyu, contracts and other Oda-related activities are not substitutes for this mission.
- Sadaoki has assigned the document objective.
- The papers have been collected.
- The papers have been returned to Sadaoki.
- Temple of the Horseman is available.
3. Complete Temple of the Horseman at Honnoji
Travel to the meeting with Mitsuhide in the small settlement south of Kyoto. After the readiness conversation, follow the mission route to Honnoji. Once inside the operation area, turn back toward the tower and use the elevated route across the roofs instead of crossing the main courtyard unnecessarily.
Continue toward the main temple. Use the grappling hook to reach the roof and enter through the rear approach. Entering the main building triggers the story confrontation, after which stealth is no longer required.
Fight Oda Nobunaga and watch for burning timber falling from the ceiling. The impact locations are not always clearly marked, so keep moving and dodge away from falling debris. Nobunaga uses short attack strings; wait for the end of a sequence before counterattacking. Continue through the cutscene after the fight. Mitsuhide’s betrayal is revealed, and the game then advances to Lightning and Thunder.
- The meeting with Mitsuhide is complete.
- Naoe has entered the Honnoji operation.
- The Nobunaga confrontation is complete.
- Temple of the Horseman is marked complete.
4. Play Lightning and Thunder as Yasuke
Lightning and Thunder automatically changes control to Yasuke and sends him through Katano Castle to find Naoe. Use Yasuke’s direct combat style: break through the small groups, use heavy attacks against armored enemies and avoid allowing several opponents to surround you.
Follow the objective route toward the tenshu. There are several groups on the approach, including an elite enemy, but the mission is short and does not require a complete castle clear. Defeat the enemies blocking the route, climb the stairs and sprint through the marked tower door.
Reaching Naoe completes Lightning and Thunder and starts Mibuno Showdown. If the next mission does not begin, open the Objective Board and confirm that Lightning and Thunder is complete rather than returning to the castle entrance.
- Yasuke is under your control.
- Katano Castle’s blocking groups are defeated.
- Yasuke reaches Naoe in the tenshu.
- Lightning and Thunder is complete.
5. Defeat Momochi Sandayu in Mibuno Showdown
Mibuno Showdown is a focused boss fight against Momochi Sandayu. Keep enough space to see his movement, especially when he throws smoke bombs. He can conceal himself in the smoke before throwing poisoned knives; the knives can be blocked, but dodging is safer if you have lost sight of him.
Do not attack through his kusarigama combinations when the attack indicator signals an unblockable sequence. Dodge the red attacks and punish him after the chain finishes. Watch his body as well as the warning flash because he can occasionally make a quick attack without the usual obvious signal.
Defeating Sandayu completes the Nobunaga handoff and makes Yasuke available for open-world switching. This is the end of the early transition, not the end of the campaign. Reopen the Objective Board before choosing the next target chain.
- Mibuno Showdown has started.
- Momochi Sandayu is defeated.
- The quest-complete state has appeared.
- Yasuke can be selected in open-world play.
6. Cross-check the twelve Shinbakufu target cards
The complete target-card checklist is The Golden Teppo, The Wounded, Oda Nobunaga, The Fool, The Mourner, The Naginata, The Noble, The Ox, The Wise, The Fox, The Two-Faced and The Horseman. Oda Nobunaga is included in the twelve. The Onryo Samurai is the separate required prologue mission and must not be counted as one of these cards.
The remaining chains are The Naginata: An Evening in Otsu, Against the Koga-ryu and Showdown in Sakamoto; The Fool: The Bad Brother, Missing Missive, The Rising Tide, Inside Help and Lost Honor; The Mourner: A Talk with a Lady, Nagahama Black Powder, A Prayer for Omi, The Price of Rice and The Wheel Unmasked; The Noble: The Rengakai, Losing Hand, The Scent of War, A Peculiar Guest and Spring and Fall; The Ox: A Voice in Anger, Astray, Brothers in Arms, Of My Enemy and Broken Horn; The Wise: A Chance Encounter, Temple Stories, Restless Spirits, The Lost Envoys and Darkness Falls; and The Fox: Red Walls, Chef Hong, Smuggler’s Gambit, Revenge, The Music and The Performer.
The Two-Faced chain uses The Peasant Who Would Be King and Topple the Traitor after the relevant Naoe and Shinbakufu progression. The Horseman is resolved through The Man Behind the Mask after the other eleven target cards are complete. These chains can overlap, so return to the Objective Board after each target mission, read the next clue and spend scouts only after checking the mandatory entry.
- The Golden Teppo is complete.
- The Wounded is complete.
- Oda Nobunaga is resolved.
- The Fool is complete.
- The Mourner is complete.
- The Naginata is complete.
- The Noble is complete.
- The Ox is complete.
- The Wise is complete.
- The Fox is complete.
- The Two-Faced is complete.
- The Horseman is complete.
- The Onryo Samurai has been tracked separately as the prologue mission.
7. Complete the required Yasuke, Naoe and Junjiro story categories
Yasuke’s required route contains eleven quests: An Education, Nobutsuna Sensei, Lady of Whispers, Lords of Azuchi, Dark Waves, Black Ships, My Name is Yasuke, The Path He Walks, Fighting for the Cause, The Silver Queen, A Promise and End of the Line. Dark Waves, Black Ships is one quest title, so do not count it as two quests. Nobutsuna’s Students is optional and is not the required Nobutsuna Sensei mission.
Naoe’s required progression includes the four flashback missions triggered by completing four Kuji-kiri, followed by Wolves and Foxes, Secrets of the Blade and The Meaning of the Blade. Complete Before the Fall when it appears and finish the four Kuji-kiri flashbacks; they are required for Naoe’s later story. The four Assassin Outpost quests are optional unless the active Objective Board explicitly marks one as a prerequisite.
Junjiro’s required League route is Raise a Cup, Eyes on the Future, A Different Kind of Samurai, Soup for Sorin, The Pilgrimage and Leaving a Mark. Junjiro’s quests may be separated by season changes. After each quest, return to the Hideout, inspect the board and advance the season if the next card is not available.
- Yasuke’s eleven-quest required route is complete: An Education, Nobutsuna Sensei, Lady of Whispers, Lords of Azuchi, Dark Waves, Black Ships, My Name is Yasuke, The Path He Walks, Fighting for the Cause, The Silver Queen, A Promise and End of the Line.
- Naoe’s required story is complete through The Meaning of the Blade.
- Junjiro’s required story is complete through Leaving a Mark.
- Optional Assassin Outposts and Nobutsuna’s Students have not been mistaken for required finale missions.
8. Verify the Act 3 gate and continue to Out of the Shadows
After every target or personal quest, reopen the Objective Board and inspect The Shinbakufu, Naoe, Yasuke and The League. Completing the Nobunaga sequence alone does not unlock the finale. The campaign gate requires all twelve Shinbakufu target cards and the required Naoe, Yasuke and Junjiro story categories.
When Act 3 is complete, Out of the Shadows appears as a League quest from Tomiko. Track it from the board, speak with the required companions at the Hideout and let the quest reach its completion state. Depending on quest order, credits can appear after the final Naoe or Yasuke personal quest before every Junjiro quest has been finished, so credits alone are not a reliable completion check.
Treat dialogue choices and the choice of protagonist for applicable missions as route variations, not alternate canonical endings. Tea Bowls for Rikyu, unrelated contracts, Assassin Outposts, ordinary province activities and recruited League allies do not replace the required board cards. Claws of Awaji, A Critical Encounter, A Puzzlement, Black Tides and New Game Plus remain outside this original base-game campaign check.
- All twelve Shinbakufu target cards are resolved.
- The required Naoe, Yasuke and Junjiro categories are complete.
- Out of the Shadows appears under The League and Tomiko.
- Out of the Shadows is completed.
- The resulting save state is preserved before starting optional post-launch content.
Before you move on
- Friend of My Enemy, Belly of the Beast, Temple of the Horseman, Lightning and Thunder and Mibuno Showdown are complete.
- Yasuke is selectable for open-world play.
- All twelve required Shinbakufu cards are resolved: The Golden Teppo, The Wounded, Oda Nobunaga, The Fool, The Mourner, The Naginata, The Noble, The Ox, The Wise, The Fox, The Two-Faced and The Horseman.
- Yasuke’s required route is complete through eleven quests: An Education, Nobutsuna Sensei, Lady of Whispers, Lords of Azuchi, Dark Waves, Black Ships, My Name is Yasuke, The Path He Walks, Fighting for the Cause, The Silver Queen, A Promise and End of the Line.
- Naoe’s required route is complete through The Meaning of the Blade, including the required four Kuji-kiri flashbacks and Wolves and Foxes.
- Junjiro’s required route is complete through Leaving a Mark.
- Out of the Shadows appears under The League and is completed.
- Claws of Awaji, A Critical Encounter, A Puzzlement, Black Tides and New Game Plus remain separate from the original base-game campaign completion check.
References for this chapter
- Assassin's Creed Shadows Walkthrough – All Main Quests
- Assassin’s Creed Shadows Friend of My Enemy Walkthrough
- Assassin’s Creed Shadows Belly of the Beast Walkthrough
- Assassin’s Creed Shadows Temple of the Horseman Walkthrough
- Assassin’s Creed Shadows Lightning and Thunder Walkthrough
- Assassin’s Creed Shadows Mibuno Showdown Walkthrough
- Assassin’s Creed Shadows Lords of Azuchi Walkthrough
- Assassin’s Creed Shadows Before the Fall Walkthrough
- Assassin’s Creed Shadows Secrets of the Blade Walkthrough
- Assassin's Creed Shadows Trophy Guide & Roadmap
- Quick-Guide: The Road To Awaji
- AC Shadows: All quests, walkthrough
Midgame: Skill Trees, Gear Upgrades and Resource Priorities
Use the middle portion of Assassin’s Creed Shadows to establish two dependable builds instead of buying every available skill. Naoe is best developed around stealth, assassination, tools and mobility, while Yasuke benefits from a chosen weapon specialty, posture damage, defense and crowd control. Their level, experience, Mastery Points and Knowledge are shared, but their Mastery trees and weapon abilities are separate, so spend points according to the role each protagonist actually fills. Raise Knowledge through nearby non-violent activities to unlock more skill tiers, and keep favorite equipment close to the level of the current region. The required Way of the Blacksmith quest introduces Heiji and enables Forge construction in the Hideout; only later Forge upgrades, crafting and equipment spending are optional preparation. Use the Study to improve scout capacity and objective searches, and the Stables to have scouts smuggle stockpiles from enemy camps and castles. Reserve scouts for campaign objectives when information matters more than materials.
1. Establish a separate role for each protagonist
Open the character, Mastery and inventory menus for both protagonists before spending a large group of points. Naoe and Yasuke share level, experience, Mastery Points and Knowledge, so changing characters does not leave one permanently behind. Their weapon trees and archetype abilities are separate, however, and points spent on an unused weapon may provide little immediate value.
Build Naoe around the way you normally enter restricted areas. Prioritize assassination damage, stealth-related abilities, tool improvements, mobility or skills that help her disengage after detection. Build Yasuke around one weapon category that you use confidently, then support it with posture damage, defensive abilities, parry or counterattack options and tools for controlling groups. Keeping Naoe as the infiltration specialist and Yasuke as the open-combat specialist gives each character a distinct job without requiring duplicate investments.
Before a difficult story mission, confirm that each character has suitable armor, a usable weapon and access to recovery items. This is a readiness check, not a requirement to own a particular named set.
- Naoe has a clear stealth, assassination or mobility priority.
- Yasuke has a chosen weapon specialty and a defensive or crowd-control priority.
- Both inventories have been reviewed before spending the next large batch of Mastery Points.
2. Choose anchor skills before filling minor nodes
Select one or two anchor goals for each protagonist. For Naoe, choose the ability that most improves your normal infiltration route: stronger assassinations, better tool use, safer movement or improved access to elevated approaches. For Yasuke, select weapon abilities and combat upgrades that create openings against guarded enemies or let him control several opponents without relying on constant healing.
Active weapon abilities belong to the weapon tree and are assigned through the weapon interface. Make sure the abilities you unlock match the weapon you are carrying. Do not spend points across every weapon tree merely because the nodes are affordable. Mastery Points can be reset, so test a new ability in a small encounter and continue investing only if it supports your actual playstyle.
Some advanced skills remain unavailable until you raise Knowledge Rank, and certain high-end upgrades can require a specific in-game action. If a desired node is locked, continue campaign activities and nearby Knowledge objectives rather than buying unrelated skills just to spend points.
- Each protagonist has one primary Mastery direction.
- Weapon abilities match the weapon currently being used.
- Locked skills are being treated as Knowledge or activity goals rather than reasons to scatter points.
3. Raise Knowledge naturally while moving between objectives
Knowledge is shared by Naoe and Yasuke and unlocks additional tiers in their Mastery trees. Gain it from nearby non-violent activities such as Lost Pages, shrine prayers, Naoe’s Kuji-kiri meditation and Yasuke’s learning activities. The exact activity depends on the location and protagonist, but the practical rule is the same: complete convenient Knowledge objectives while you are already nearby.
Before leaving a province or traveling to the next major story objective, inspect the map for a small group of nearby Knowledge activities. Complete those that fit your route, then return to the campaign. Do not clear every marker immediately or cross the entire map for one isolated activity unless you need the next Knowledge Rank for a specific skill. By Knowledge Rank 6, the normal Mastery trees have made their skills available, so steady progress is more efficient than a late grinding session.
- Knowledge progress is checked before difficult main missions.
- Nearby Knowledge activities are completed when they fit the current route.
- You are not making long detours solely to remove isolated map markers.
4. Complete Way of the Blacksmith and unlock the Forge
Treat Way of the Blacksmith as required campaign progression, not optional preparation. Complete the quest when it becomes available during the early campaign route. Its progression brings Heiji to the Hideout and enables construction of the Forge. Do not continue the main campaign assuming that the Forge quest can be safely skipped.
After the quest is complete and the Forge has been built, speak with the blacksmith and select See Shop. Use the Upgrade tab to choose an equipment category, select the item and hold Upgrade. Improvements consume Mon and crafting materials, so maintain a reserve instead of upgrading every temporary item. The quest and Forge construction are required for access to this system; improving gear, dismantling unwanted equipment, engraving perks and using transmog are optional preparation choices.
Keep one dependable primary weapon and one practical alternative for each protagonist. The alternative should cover a different situation: for Naoe, it may support a failed-stealth encounter or provide another range; for Yasuke, it may offer a different speed, reach or crowd-control profile. Replace or upgrade equipment when it falls behind the current area, but do not repeatedly improve an item you expect to replace after the next chest or story reward.
- Way of the Blacksmith is complete.
- Heiji is present at the Hideout and the Forge is built.
- Each protagonist has a maintained main weapon and a practical alternative.
- Mon and crafting materials remain available for an unexpected upgrade.
5. Match perks and engravings to the job
Review loot at the Hideout or another appropriate inventory location instead of carrying every low-level item forward. Dismantle equipment you have rejected when you need raw materials, but compare its stats and perks first. A higher-quality item is not automatically better if its bonuses do not support your build.
For Naoe, favor effects that improve assassination damage, stealth, tools, mobility or survival during a retreat. For Yasuke, favor damage, posture or guard pressure, defense and bonuses that support the weapon category you use most. Engravings should reinforce a clear purpose; avoid paying for a bonus that applies to a situation you rarely create. When a story reward or legendary item replaces a core piece, compare its level and perks before dismantling the old item.
- Rejected equipment is dismantled or retained for a specific reason.
- Naoe’s perks support infiltration, assassination or recovery after detection.
- Yasuke’s perks support his chosen weapon and group control.
- Engravings are spent on equipment you expect to keep.
6. Improve the Hideout according to your bottleneck
The Study increases scout capacity and improves the search zone when scouts investigate an objective on the World Map. Prioritize it when you frequently lack scouts or when objective searches require too much effort. The Stables let scouts smuggle stockpiles from enemy camps or castles, with resources delivered at the end of a season. Prioritize them when construction materials are slowing Hideout development and you have enough scouts to spare.
Scouts are most valuable when they reveal a main-mission objective, enemy position or important search area. Do not automatically spend every scout on a stockpile. Before a difficult mission, reserve enough capacity for information that will make the approach safer. Use Kakurega and other Hideout support functions when available to replenish supplies, but do not treat those conveniences as replacements for choosing the right protagonist and equipment.
- The Study is upgraded when scout capacity or objective searches are limiting progress.
- The Stables are considered when stockpile resources are delaying Hideout construction.
- Enough scouts remain available for important campaign objectives.
7. Run a readiness test before the next major mission
Test Naoe against ordinary enemies near a safe travel point. She should be able to observe a target, approach through cover or shadow, perform her intended takedown or tool sequence and retreat when detection begins. If she cannot finish the approach, improve assassination damage, stealth, tools, mobility or the relevant equipment rather than purchasing unrelated Mastery nodes.
Test Yasuke against a small group rather than one isolated enemy. Practice blocking or parrying, breaking posture and finishing one target before becoming surrounded. If he takes excessive damage, improve the weapon level, defensive options or posture pressure. If both characters pass, check that their equipment is close to the current area level, replenish consumables and save before beginning the next major story commitment.
- Naoe can complete an infiltration attempt and recover when stealth partially fails.
- Yasuke can control a small group without exhausting recovery items.
- Both protagonists’ main equipment suits the current region.
- A current save exists before the next major story mission.
Before you move on
- Naoe and Yasuke each have a defined role, an anchor skill direction, a maintained primary weapon and a practical alternative.
- Way of the Blacksmith is complete, Heiji is available at the Hideout and the Forge is built.
- Core equipment has been upgraded or replaced so it is suitable for the current region.
- Knowledge progress is being raised through convenient nearby activities.
- At least one Hideout preparation upgrade has been selected according to your bottleneck, with the Study used for scout and objective support or the Stables used for stockpile smuggling.
- You have tested both protagonists in ordinary encounters, corrected obvious weaknesses and created a current save before continuing the campaign.
Large-Scale Engagements: Commanding Battles and Scaling Difficulty
Assassin’s Creed Shadows does not use a separate army-command mode for ordinary campaign battles. Its largest engagements are castle assaults, fortified compounds and story missions that combine infiltration, direct combat, reinforcements and changing objectives. Treat them as layered operations: read the current task, scout the approach, remove escalation threats, then choose the protagonist suited to the next stage. Naoe excels at reaching objectives through darkness, rooftops and narrow routes. Yasuke is better when the mission forces a sustained melee or asks you to break through a defended position. Some story missions explicitly alternate between them, while ordinary open-world activities generally let you use whichever character is available. Weather, season, terrain and darkness can make an approach easier, but they never replace scouting. Your goal is to complete the marked objective and any required extraction, not automatically defeat every guard in the location.
1. Classify the encounter before entering the area
Open the Objective Board or mission log and read the active task before approaching the marked location. Large encounters can be castle infiltrations, target assassinations, rescues, sabotage operations or battles that begin only after a scripted event. The mission may ask you to reach a target, open a gate, rescue someone or escape after an action. Do not assume that every hostile soldier in the compound must be defeated.
The campaign uses this structure in missions such as Lost Honor, which leads into Yamazaki Castle and allows a character choice before the assassination objective, and A Promise, which sends Yasuke to Kameyama Castle to rescue Akechi Mitsuyoshi. These are not interchangeable free-form battles: follow the objective marker and expect the mission to dictate when a protagonist change or new phase occurs.
Before crossing the boundary, identify the visible entrance, an alternate route and a place where you can break contact. Look for walls, ladders, rooftops, water access, gates and narrow doorways. A retreat route matters more than finding the perfect opening attack.
- Read the current mission objective and recommended level.
- Determine whether the next task favors stealth, combat or an explicit character switch.
- Locate an entry route and a fallback route before entering the hostile area.
2. Scout bells, ranged enemies and the strongest defenders
Use Observe from outside the compound to identify guards, elites, archers and any bell or alarm device visible from the perimeter. The exact defenses vary by location, so do not expect every castle or camp to use the same layout. Alarm devices and nearby sentries deserve priority because they can turn a controlled approach into a wider fight before you reach the target.
Mark or remember the positions of elevated archers and heavily protected enemies. If you are using Naoe, map a route that moves from shadow to cover instead of crossing the center of a courtyard. If you are using Yasuke, note where the strongest enemies are standing before committing to melee. Removing one isolated defender or alarm guard first can prevent several enemies from joining the opening exchange.
Do not begin by attacking the largest visible group unless the objective specifically starts a battle. In a castle mission, the most efficient first action is usually to create access to the next section, not to clear every outer guard.
- Identify bells or other alarm devices when present.
- Locate archers and elite defenders.
- Remember the route to the next objective before starting combat.
3. Use Naoe to dismantle the perimeter
Choose Naoe when the route contains walls, roofs, dark interiors, tall cover or isolated sentries. Approach from the edge and remove guards who can expose your route or activate an alarm. Her ability to go prone, extinguish lights and use the grappling hook makes vertical and low-visibility approaches especially valuable. Use the hook to cross gaps, reach a roof or leave a crowded ground route; do not treat it as a reason to enter an exposed courtyard.
Thrown tools and environmental noise are useful for separating one guard from a group. Wait until the distraction creates a real gap, then move decisively. If an assassination does not finish the target, do not remain in the open trying to force a second attack. Retreat into cover and reassess the route.
If Naoe is partially detected, break line of sight before the search becomes a full compound response. Move behind a wall, into darkness, through tall cover or onto a roof. Darkness helps, but a torch, patrol or elevated lookout can still expose you. Rain can make Naoe harder to detect and muffle movement, but weather is not a substitute for cover.
- Remove isolated sentries and alarm threats before entering the center.
- Keep a smoke bomb or another escape option available.
- Use grappling for access and escape, not only for climbing toward the objective.
4. Use Yasuke to break defended positions
Choose Yasuke when the mission places you in a confined courtyard, requires a direct assault or leaves little room for stealth. His armor, weapon variety and combat-focused abilities make him the stronger option for prolonged engagements, but he still benefits from preparation. Enter only after locating archers and the most dangerous elites, and fight near a wall, doorway or narrow approach so fewer enemies can surround you.
Use defensive timing rather than holding the attack button continuously into a group. Yasuke’s weapons provide different ways to pressure guards and break their defense, while combo enders and weapon abilities can create openings. Focus on enemies currently attacking you instead of chasing a retreating guard toward another group.
Preserve a major ability, healing resource or strong weapon option for an elite or the reinforcements that may appear after the objective changes. A large fight becomes much easier when Yasuke controls the space immediately around him rather than pursuing enemies across the entire compound.
- Fight from a doorway, wall or narrow approach when possible.
- Prioritize archers, alarm carriers and elites.
- Keep a retreat path behind Yasuke and reserve resources for the next phase.
5. Follow objective changes instead of clearing the map
After an assassination, rescue, sabotage interaction or gate-opening action, stop and read the updated objective. The next task may be to leave the compound, reach another building, survive an ambush or meet an ally. The game’s completion condition is tied to these mission tasks, not necessarily to killing every remaining guard.
Some story missions explicitly alternate between Naoe and Yasuke. In Lost Honor, the Yamazaki Castle sequence includes a planned transition and separate character roles. When the game gives you a switch prompt, finish the current character’s stated task and follow the new marker. Do not assume you can freely swap at every point inside a hostile mission area.
Ordinary open-world castle or compound activities generally do not require simultaneous control of both protagonists. If the game allows a character change, use it from a safe permitted context rather than abandoning an objective midway through a restricted sequence.
- Read every objective update immediately.
- Follow the marker for the new task rather than unrelated enemies.
- Treat extraction, escape and regroup instructions as required objectives.
6. Use terrain, season and weather without waiting for perfect conditions
Night, rain and fog can improve a stealth approach by reducing practical visibility or making movement harder to hear. Seasonal changes can also alter the environment: foliage, water access and snow conditions may affect which routes are useful. These benefits are situational, so do not delay a required mission simply to wait for a particular weather state unless the objective specifically calls for it.
For Naoe, prefer connected shadowed routes and use extinguished lights to extend them. Avoid crossing a bright open space because the weather is unfavorable to detection. For Yasuke, terrain remains valuable after combat begins. Fight under cover, near walls or inside narrow passages so the enemy formation cannot attack from every direction.
Weather does not create a special large-battle command system or automatically stop reinforcements. Its practical value is that it can improve concealment or restrict sightlines while you execute the same objective.
- Use night, rain or fog when they naturally support your route.
- Do not treat darkness as invisibility.
- Use walls, doorways and elevation to control enemy access.
7. Recover from an alarm or failed assault
When Naoe’s stealth collapses, create distance immediately. Use smoke or another gap-creating ability, move behind solid cover and grapple upward if a roof provides a clear escape. Do not keep circling the same courtyard while the search expands. Once the immediate search weakens, approach from a different side or continue directly toward the objective if the mission has already advanced.
When Yasuke is losing health, retreat through the prepared route instead of trading blows in the center. Heal only after breaking contact, then re-enter through a doorway or flank. If archers are controlling the area, reach them before returning to the main group, provided doing so does not abandon the active objective.
Reload the latest manual or mission autosave when the encounter has become inefficient or an alarm has produced an overwhelming force before the objective is complete. If the mission has already changed stages, follow the new stage rather than trying to recreate the previous fight. You have succeeded when the objective updates, the required target or action is marked complete and the game gives you the next destination, extraction instruction or story transition.
- Break line of sight before healing or regrouping.
- Use the prepared fallback route instead of the main gate.
- Reload only when the current state cannot be recovered efficiently.
Before you move on
- The active mission objective changes after the required target, sabotage, rescue, gate or combat task is completed.
- Any encounter-specific alarm or compound objective required by the mission is resolved.
- The game provides a new destination, extraction instruction, character-transition prompt or story scene.
- The mission displays its completion state or advances to the next confirmed campaign objective.
References for this chapter
- Assassin’s Creed Shadows Shows Off New Combat and Stealth Gameplay
- Assassin's Creed Shadows - Stealth Gameplay Overview
- Assassin’s Creed Shadows: 20 minutes of new castle gameplay, launches March 20 – PlayStation.Blog
- Assassin's Creed Shadows Lost Honor Walkthrough
- Assassin's Creed Shadows A Promise Walkthrough
- Assassin's Creed Shadows: The Shinbakufu Walkthrough
Optional Content: Pre-order Bonuses and Expansion Notes
On PS5, neither “Thrown to the Dogs” nor Claws of Awaji is required to complete the base-game campaign or reach its canonical ending. Title Update 1.0.5 made “Thrown to the Dogs” available to every player after “From Spark to Flame,” with the quest starting at Tennoji Temple outside Osaka and rewarding Tsuki-maru Hideout content. Claws of Awaji is a separate expansion. It was included with qualifying preorders and selected editions, while other PS5 owners must purchase it separately. The expansion becomes accessible after the required Naoe and Yasuke story progress and completion of “Out of the Shadows.” Start it when “News from Hattori Hanzo” appears at the Settsu Hideout, or postpone it and finish the base-game ending first. Keep a manual save before beginning either optional content path.
1. Confirm what your PS5 edition actually includes
From the PS5 home screen, highlight Assassin’s Creed Shadows, press the Options button, and open Manage Game Content. Check whether Claws of Awaji is installed rather than relying only on the name printed on a physical case, a retailer listing, or an edition label. On the PlayStation Store, the Premium Edition lists Claws of Awaji, while the Standard and Deluxe listings do not include the expansion by default. Preorder ownership can also grant the expansion, so check the account that purchased or redeemed the game.
Launch the game while connected to the internet after installing or redeeming content. If you bought the expansion separately or redeemed a preorder entitlement and it does not appear in the journal later, close the game, verify the add-on installation in PS5 settings, and relaunch. Claws of Awaji requires the base game; it is not a standalone PS5 title.
Do not treat Deluxe, Premium, Collector’s, or retailer bundle names as campaign requirements. Cosmetic packs, bonus mastery points, gear sets, and the expansion affect available rewards, not the required route to the base-game ending.
- Update Assassin’s Creed Shadows before looking for optional quests.
- Check Manage Game Content for Claws of Awaji if your purchase or preorder included it.
- Confirm that the active PS5 user owns or redeemed the relevant entitlement.
- Keep the console online during the first launch after installing or redeeming content.
2. Complete “Thrown to the Dogs” if you want its Hideout reward
“Thrown to the Dogs” was originally presented as a preorder quest, but Title Update 1.0.5 made it available to all players. The update notes place its availability after “From Spark to Flame” and identify Tennoji Temple outside Osaka as the starting location.
After completing “From Spark to Flame,” open the journal and travel to Tennoji Temple. If the activity is available, track “Thrown to the Dogs,” follow its objectives, and finish the quest chain. Its reward unlocks Tsuki-maru the One-Eyed Dog content for the Hideout. This is optional Hideout content: it does not unlock Naoe, Yasuke, the final act, or the canonical ending.
If the quest marker is missing, first confirm that the game is updated to a version containing Title Update 1.0.5 or later. Then check the journal, return to Tennoji Temple, and verify that you completed “From Spark to Flame” rather than merely starting it. Do not restart the campaign or abandon required story missions solely because this bonus quest is absent.
- Complete “From Spark to Flame.”
- Search Tennoji Temple outside Osaka for the activity.
- Finish the quest and confirm that Tsuki-maru’s Hideout content is available if you want the reward.
- Mark the quest optional in your planning; it is not part of the ending requirements.
3. Choose whether to start Claws of Awaji before or after the base-game ending
Claws of Awaji adds a separate story set on Awaji with new missions, enemies, hazards, equipment, skills, and rewards. It is optional for the base-game campaign. You can postpone it until after the ending if you want the main Naoe-and-Yasuke narrative to remain uninterrupted, or begin it as soon as the access quest appears if you want to use expansion rewards during later play.
For the shortest route to the canonical base-game ending, finish the required base-game missions and leave Claws of Awaji untouched until the post-ending state. For a broader first playthrough, begin the expansion when the game presents its access quest, but make a manual save first so you can return to the pre-expansion route if you change your mind.
Do not delay the base-game finale merely because Awaji objectives remain unfinished. The expansion is additional content, not a prerequisite for the base-game conclusion. Conversely, do not assume that owning the expansion makes it immediately available; the story gate still applies.
- Treat Claws of Awaji as optional for base-game completion.
- Create a manual save before accepting the expansion’s opening quest.
- Choose either a post-ending expansion run or an integrated run deliberately.
- Keep the base-game journal visible so optional Awaji objectives are not mistaken for required campaign missions.
4. Unlock “News from Hattori Hanzo” through the verified story gate
The expansion does not unlock simply because the add-on is installed. Ubisoft’s access guidance requires completion of the main story arcs for both Naoe and Yasuke, followed by “Out of the Shadows.” The official expansion guidance describes “Out of the Shadows” as becoming available after the relevant personal and League story work is complete; current Ubisoft guidance specifically identifies the Naoe, Yasuke, and Junjiro requirements, while the expansion release notes also identify Tomiko’s League quests as part of the route.
Finish the required protagonist and League quest chains until “Out of the Shadows” is available. Complete “Out of the Shadows” fully; having it active is not enough. Then return to the Hideout in Settsu and look for Konatsu, the contact associated with the expansion. The access quest is “News from Hattori Hanzo.” Speak with Konatsu, accept the briefing, and follow the new objective to begin the journey to Awaji.
If “News from Hattori Hanzo” does not appear, check the following in order: Claws of Awaji is installed; the correct PS5 account owns the content; both protagonist story arcs are complete; “Out of the Shadows” is completed; and the game has been restarted after installation. Do not use a missing expansion marker as evidence that the base-game save is broken until these checks are complete.
- Complete the required Naoe and Yasuke story arcs.
- Complete the relevant personal and League quests leading to “Out of the Shadows.”
- Finish “Out of the Shadows.”
- Return to the Settsu Hideout and speak with Konatsu.
- Start the expansion through “News from Hattori Hanzo.”
5. Keep the final-campaign checklist separate from optional content
Before launching the base-game finale, use the journal to identify required main missions. “Thrown to the Dogs” may remain unfinished, and Claws of Awaji may remain unstarted, without preventing the canonical ending. Do not substitute expansion completion for checking the actual main-story objectives.
If you have begun Awaji and want to return to the base campaign, select the required base-game mission in the journal and use the world map when the game permits travel. Keep the pre-expansion manual save until you have confirmed that the intended base-game objective is active. Expansion equipment can be used where the game allows it, but no Awaji weapon, skill, or reward is required to trigger the ending.
After completing the base-game ending, retain the save until you have checked whether you want to continue into Awaji. This preserves a clean post-ending state and avoids replaying the final required missions merely to access the optional expansion.
- The journal identifies the remaining required base-game missions separately from optional content.
- “Thrown to the Dogs” is complete only if you want its Hideout reward.
- Claws of Awaji is either deliberately postponed or has been started through “News from Hattori Hanzo.”
- A manual save exists before the final mission and before the expansion opening.
Before you move on
- “Thrown to the Dogs” is complete and Tsuki-maru’s Hideout content is visible if the optional bonus was chosen.
- Claws of Awaji is installed and accessible through “News from Hattori Hanzo,” or the expansion has been intentionally postponed.
- The journal distinguishes required base-game missions from the bonus quest and Awaji objectives.
- You can launch and complete the base-game finale without Claws of Awaji, its equipment, or Tsuki-maru’s reward.
- A manual save remains available before the finale and before beginning optional expansion content.
Final Prep: Requirements Checklist Before the Endgame
Before beginning Assassin’s Creed Shadows’ original PS5 campaign finale, verify the Objectives Board instead of relying on level, map completion or side-quest progress. Resolve all 12 Shinbakufu target cards: The Golden Teppo, The Wounded, Oda Nobunaga, The Fool, The Mourner, The Naginata, The Noble, The Ox, The Wise, The Fox, The Two-Faced and The Horseman. Track The Onryo Samurai separately as the required prologue target mission. Then complete every required Naoe, Yasuke and Junjiro personal quest. The mandatory Yasuke checklist contains 11 quest titles: An Education, Nobutsuna Sensei, Lady of Whispers, Lords of Azuchi, Dark Waves, Black Ships, My Name is Yasuke, The Path He Walks, Fighting for the Cause, The Silver Queen, A Promise and End of the Line, with Dark Waves, Black Ships counted as one title. When these prerequisite groups are complete, confirm that Out of the Shadows appears under The League. Prepare both protagonists, refill useful supplies, create a manual save before launching the finale and keep post-launch content outside this original-campaign completion check.
1. Verify every mandatory story group
Open the Objectives Board and inspect The Shinbakufu. Confirm that each of the 12 required target cards has reached its resolved or completed state: The Golden Teppo, The Wounded, Oda Nobunaga, The Fool, The Mourner, The Naginata, The Noble, The Ox, The Wise, The Fox, The Two-Faced and The Horseman. Do not replace this check with a general statement such as “clear the target board.” Read the individual cards so you can identify a remaining investigation or target mission.
Resolution is the requirement; do not assume that every card must be treated as a simple assassination. The Mourner can have a spare outcome, so a non-kill resolution must not automatically be treated as a missing objective. The Onryo Samurai belongs to the required opening progression but is separate from the 12 Shinbakufu target cards. Record it as completed independently rather than adding it to the target count.
Next inspect the personal-story sections for Naoe, Yasuke and Junjiro. Complete every required entry that remains active. Ordinary contracts, castles, collectibles, viewpoints, most ally chains and general province activities are not substitutes for a missing personal-story quest. Use those activities for experience, equipment, materials or travel support only when necessary.
- Confirm The Golden Teppo is resolved.
- Confirm The Wounded is resolved.
- Confirm Oda Nobunaga is resolved.
- Confirm The Fool is resolved.
- Confirm The Mourner is resolved; a spare result can still satisfy the objective.
- Confirm The Naginata is resolved.
- Confirm The Noble is resolved.
- Confirm The Ox is resolved.
- Confirm The Wise is resolved.
- Confirm The Fox is resolved.
- Confirm The Two-Faced is resolved.
- Confirm The Horseman is resolved.
- Confirm The Onryo Samurai separately as the required prologue target mission.
- Check all required Naoe story entries.
- Check all required Junjiro story entries.
2. Cross-check the complete Yasuke route
Use the Yasuke section of the Objectives Board for an exact cross-check. The required route contains 11 quest titles, not 12. The complete list is An Education; Nobutsuna Sensei; Lady of Whispers; Lords of Azuchi; Dark Waves, Black Ships; My Name is Yasuke; The Path He Walks; Fighting for the Cause; The Silver Queen; A Promise; and End of the Line.
Dark Waves, Black Ships is one quest title, not two separate missions. Do not count it as both Dark Waves and Black Ships. Conversely, do not omit it from the route: it is a required Yasuke story entry. The first four entries are also mandatory when they remain on the board; they are not optional background missions that can be skipped in favor of later target investigations.
If a later Yasuke quest is unavailable, reopen the board after completing the current active quest and inspect the target-related requirements. Yasuke’s story can progress alongside the Shinbakufu route rather than appearing as one uninterrupted chain. Continue checking the board after every completed Yasuke mission instead of assuming that the next quest will be placed at the same location.
- An Education is complete.
- Nobutsuna Sensei is complete.
- Lady of Whispers is complete.
- Lords of Azuchi is complete.
- Dark Waves, Black Ships is complete as one quest title.
- My Name is Yasuke is complete.
- The Path He Walks is complete.
- Fighting for the Cause is complete.
- The Silver Queen is complete.
- A Promise is complete.
- End of the Line is complete.
- Confirm that the Yasuke checklist contains 11 titles, with no separate duplicate entry for Dark Waves or Black Ships.
3. Confirm that Out of the Shadows has appeared
After the 12 Shinbakufu cards and all required Naoe, Yasuke and Junjiro personal quests are complete, reopen the Objectives Board and inspect The League. Confirm that Out of the Shadows is present before beginning the final sequence. Level, gear rarity, map completion and the number of optional activities completed are not reliable substitutes for this board check.
Track Out of the Shadows and follow its active objective. When the quest directs you to the Hideout, speak with Tomiko and then follow the board’s specific instructions for the protagonist choice and the named companion conversations. Complete the interactions identified by the active objective before leaving the Hideout. Extra conversations may provide optional dialogue, but they do not replace the required objective markers.
If Out of the Shadows is absent, do not spend scouts on random discoveries or clear unrelated castles first. Return to The Shinbakufu, Naoe, Yasuke and Junjiro sections and inspect each card individually. In particular, verify the four early Yasuke entries—An Education, Nobutsuna Sensei, Lady of Whispers and Lords of Azuchi—before assuming that only a late target card is missing.
- Find Out of the Shadows under The League.
- Track the quest from the Objectives Board.
- Speak with Tomiko when directed.
- Choose the protagonist when the quest presents that decision.
- Complete the two companion conversations named by the active objective.
- Confirm that the quest advances before leaving the Hideout.
4. Prepare separate loadouts for Naoe and Yasuke
Inspect Naoe’s equipment independently from Yasuke’s. Give Naoe a familiar stealth setup with the tools, healing items and ranged or thrown options you already know how to use. Confirm that her usable slots are filled and that you have a plan for escaping if an assassination turns into open combat.
Then inspect Yasuke’s weapons, armor, healing supply and usable tools separately. Choose a weapon whose reach, attack rhythm and defensive timing you understand. Do not assume that preparing Naoe automatically prepares Yasuke, or that equipment choices from one protagonist will cover every character-specific section of the finale.
Spend unassigned mastery points if they support tested builds. Do not postpone the finale for every optional legendary item, Hideout project or map activity. A familiar, functional setup is more useful than an unpracticed specialist build assembled immediately before the final mission.
- Inspect Naoe’s weapons, armor, tools and healing items.
- Inspect Yasuke’s weapons, armor, tools and healing items.
- Replace empty or unfamiliar equipment slots.
- Spend useful unassigned mastery points.
- Confirm that both protagonists can recover health during difficult encounters.
5. Refill supplies and complete active preparation objectives
Use the Hideout to craft or refill the healing items and tools you actually use. Top up Naoe’s stealth and ranged supplies and Yasuke’s combat resources according to your chosen approaches. You do not need to complete decorative Hideout construction or collect every material before launching Out of the Shadows.
Read the active quest text after crafting. If the board or quest log asks you to report to a character, attend a meeting or travel to a named location, follow that instruction before attempting to launch the finale. The active objective is the authority for the next step; do not substitute a presumed quest order for what the game currently displays.
- Craft or refill preferred healing items.
- Refill Naoe’s stealth and ranged tools.
- Refill Yasuke’s combat supplies.
- Complete any active report, meeting or travel instruction.
- Leave optional construction and resource projects for later unless pursuing broader completion.
6. Create and preserve a manual save
Make a manual save after the story checks are complete and both protagonists are equipped. Use a separate slot from ordinary exploration saves when possible. This provides a return point if you want to alter equipment, change the protagonist choice or retry a difficult section without repeating the entire preceding campaign.
Keep the preparation save until the finale and the resulting post-epilogue save state have been verified. Do not rely only on autosaves, and do not immediately overwrite the preparation slot after entering Out of the Shadows. Confirm that the save operation has completed before selecting or accepting the final quest.
- Create a manual save immediately before starting Out of the Shadows.
- Use a separate slot when possible.
- Verify that the save operation completed.
- Keep the preparation save until the post-epilogue state is checked.
7. Keep post-launch content outside the original-ending check
For the original base-game campaign endpoint, Out of the Shadows is the required final quest to verify. Claws of Awaji is not required for that original ending. A Critical Encounter and A Puzzlement are separate post-launch quests, while Black Tides is later post-launch content. Do not treat any of those entries as proof that a base-game prerequisite is missing.
If you later pursue Black Tides, use the installed game’s current briefing and prerequisite notices. Ubisoft’s post-launch guidance identifies completion of the main story and the preceding A Critical Encounter and A Puzzlement quests as requirements for that later content. Finish and verify the original campaign first, then begin the optional post-launch route from the completed save.
- Decide whether your endpoint is the original campaign or later content.
- For the original campaign, complete Out of the Shadows.
- Keep Claws of Awaji outside the base-game prerequisite list.
- Complete A Critical Encounter and A Puzzlement before attempting Black Tides if pursuing that later content.
- Preserve the pre-finale save until your intended endpoint is verified.
Before you move on
- The Golden Teppo, The Wounded, Oda Nobunaga, The Fool, The Mourner, The Naginata, The Noble, The Ox, The Wise, The Fox, The Two-Faced and The Horseman are resolved on the board.
- The Onryo Samurai is completed separately as the prologue target mission.
- All required Naoe story entries are complete.
- All required Junjiro story entries are complete.
- The complete Yasuke route is confirmed as 11 quest titles: An Education, Nobutsuna Sensei, Lady of Whispers, Lords of Azuchi, Dark Waves, Black Ships, My Name is Yasuke, The Path He Walks, Fighting for the Cause, The Silver Queen, A Promise and End of the Line.
- Out of the Shadows appears in The League section.
- Tomiko has been spoken to and the companions named by the active finale objective have been spoken to.
- Naoe and Yasuke both have usable equipment, healing items and preferred tools.
- A manual save exists immediately before starting Out of the Shadows.
- Out of the Shadows and its closing sequence are complete for the original campaign goal.
- A Critical Encounter and A Puzzlement are complete before attempting Black Tides, if pursuing that later content.
References for this chapter
Act 3 Finale: Out of the Shadows and the Original Base-Game Ending
Out of the Shadows is the final required epilogue quest for the original Assassin’s Creed Shadows campaign on PS5. It becomes available after the 12 Shinbakufu target objectives are resolved and the required Naoe, Yasuke and Junjiro personal quests are complete. The Onryo Samurai is a separate required prologue mission and must not be counted as one of the 12 Shinbakufu objectives. Find Out of the Shadows on the Objective Board under The League. The entry is associated with Tomiko, although the board may group it beneath Junjiro. At the Hideout, speak with Tomiko, select Naoe or Yasuke, speak with two qualifying friends, then return to Tomiko southeast of the main house. Let the closing scene finish, verify that the quest is recorded as complete, and confirm the post-quest save before beginning expansion or replay content.
1. Confirm every prerequisite before travelling to the Hideout
Open the Objective Board and verify the individual completion or resolution states for all 12 Shinbakufu target objectives: The Golden Teppo, The Wounded, Oda Nobunaga, The Fool, The Mourner, The Naginata, The Noble, The Ox, The Wise, The Fox, The Two-Faced and The Horseman. Use the card states as your checklist rather than assuming that finishing a province or clearing a castle has completed its target objective.
Do not count The Onryo Samurai as one of these 12 entries. It is a required prologue target mission and should be complete separately. The finale gate is based on the 12 Shinbakufu objectives together with the required personal-story progression, not on a generic province-liberation percentage.
Review the character and League sections separately. The required Yasuke route should be cross-checked by exact title: An Education, Nobutsuna Sensei, Lady of Whispers, Lords of Azuchi, Dark Waves, Black Ships, My Name is Yasuke, The Path He Walks, Fighting for the Cause, The Silver Queen, A Promise and End of the Line. Dark Waves and Black Ships are one combined quest title, not two separate entries.
If any required card is still active, follow that card’s marker and complete it before searching for Out of the Shadows. Optional contracts, viewpoints, ordinary castles, collectibles, ally recruitment and general province activities do not substitute for an unfinished Shinbakufu or personal-story objective.
- The Golden Teppo objective is complete or resolved.
- The Wounded objective is complete or resolved.
- Oda Nobunaga objective is complete or resolved.
- The Fool objective is complete or resolved.
- The Mourner objective is complete or resolved.
- The Naginata objective is complete or resolved.
- The Noble objective is complete or resolved.
- The Ox objective is complete or resolved.
- The Wise objective is complete or resolved.
- The Fox objective is complete or resolved.
- The Two-Faced objective is complete or resolved.
- The Horseman objective is complete or resolved.
- The Onryo Samurai is complete as a separate prologue mission.
- Required Naoe, Yasuke and Junjiro story entries are complete.
- Yasuke’s required route has been checked by exact title.
2. Locate Out of the Shadows and preserve a pre-finale save
Create a manual save before launching the epilogue and keep it until the completed quest and post-quest save have been verified. This gives you a return point if you want to inspect optional conversations or recover from a progression or save problem.
Open the Objective Board and inspect The League. Look for Out of the Shadows in the Tomiko grouping, but also check whether the board displays the entry beneath Junjiro. The quest is given by Tomiko even when the board’s grouping places it under Junjiro, so do not reject the quest because of that category label.
Select and track Out of the Shadows before leaving the board. If it is absent, do not spend scouts on unrelated discoveries. Recheck the 12 Shinbakufu cards, then inspect the Naoe, Yasuke and Junjiro sections for an unfinished personal quest. The quest becomes available only after the required target and personal-story progression is complete.
- A manual pre-finale save exists.
- The League section has been inspected.
- Tomiko and Junjiro groupings have both been checked.
- Out of the Shadows is selected and tracked.
- No required target, character or League quest remains active.
3. Speak with Tomiko at the Hideout and choose a protagonist
Travel to the Hideout while Out of the Shadows is tracked. Follow the quest marker to Tomiko and begin the conversation. This is the closing League sequence, not another Shinbakufu investigation, fortress assault or target mission.
When the game presents the protagonist choice, select Naoe or Yasuke. The choice determines which character you control during the concluding sequence; it does not remove the other protagonist or undo completed personal quests. Allow the conversation and objective update to finish before leaving the Hideout.
- Tomiko’s opening conversation is complete.
- The protagonist-selection prompt has appeared.
- Naoe or Yasuke has been selected.
- The next Hideout objective is visible.
4. Speak with two available friends at the Hideout
The next objective requires conversations with two available friends at the Hideout. Walk through the settlement and interact with characters who offer the qualifying conversation prompt. The available characters depend on the League and ally content you completed, but the game does not require every possible ally recruitment for this step.
Continue until the objective updates after the second qualifying conversation. Extra conversations are optional and can provide additional character closure, but they do not replace the required two interactions. If the objective does not advance, reopen the journal to confirm that Out of the Shadows remains active, then speak with another available friend.
- The first qualifying friend conversation is complete.
- The second qualifying friend conversation is complete.
- The objective has updated.
- Optional ally recruitment has not been mistaken for a prerequisite.
5. Return to Tomiko southeast of the main house
After the friend objective updates, follow the new marker back through the Hideout. Tomiko is southeast of the main house, leaning over a rock. Use the active quest marker rather than searching for another target or leaving the settlement.
Interact with Tomiko and let the complete closing conversation and scene play. Do not quit when the cinematic begins. Remain in control until the journal or objective display confirms completion and the game has had time to save. This interaction completes Out of the Shadows; it is not a setup for another required base-game assassination.
- Two qualifying friend conversations are complete.
- Tomiko is found southeast of the main house at the rock.
- The final Tomiko conversation is complete.
- Out of the Shadows is marked complete.
- A save has been written after completion.
6. Verify the original campaign ending before starting later content
Open the journal or Objective Board after the final scene and confirm that Out of the Shadows is listed as complete. For an additional safety check, load the newly written save and confirm that the completed quest state remains visible. The completed quest entry is the decisive gameplay check for this chapter; do not rely on a cinematic or credits sequence alone.
The original base-game campaign is complete once the required Shinbakufu objectives, Naoe, Yasuke and Junjiro progression, and Out of the Shadows are complete. Keep the pre-finale save until this verification succeeds.
Claws of Awaji is separate expansion content. Ubisoft identifies it as requiring Out of the Shadows and the personal quests for Naoe, Yasuke and Junjiro before its Hideout contact appears. Black Tides, A Critical Encounter, A Puzzlement and New Game Plus are likewise outside the original base-game completion goal. Do not count any of them as required for this chapter.
- Out of the Shadows is complete in the journal.
- The post-quest save loads successfully.
- The original base-game campaign completion state is verified.
- The pre-finale save has been preserved.
- Expansion and replay content remain outside the original campaign checklist.
Before you move on
- All 12 Shinbakufu target objectives are complete or resolved: The Golden Teppo, The Wounded, Oda Nobunaga, The Fool, The Mourner, The Naginata, The Noble, The Ox, The Wise, The Fox, The Two-Faced and The Horseman.
- The Onryo Samurai is complete as the separate required prologue mission.
- Required Naoe personal-story entries are complete.
- Required Junjiro progression is complete.
- Yasuke’s required route is complete: An Education, Nobutsuna Sensei, Lady of Whispers, Lords of Azuchi, Dark Waves, Black Ships, My Name is Yasuke, The Path He Walks, Fighting for the Cause, The Silver Queen, A Promise and End of the Line.
- Out of the Shadows has been found under The League, including any Junjiro grouping used by the Objective Board.
- Tomiko’s opening Hideout conversation is complete.
- Two qualifying Hideout friend conversations are complete.
- Tomiko’s final conversation southeast of the main house, beside the rock, is complete.
- Out of the Shadows is marked complete.
- The post-quest save loads successfully before later expansion or replay content is started.
After Out of the Shadows: Ending Verification and Optional Post-Launch Content
For the original PS5 campaign, Out of the Shadows is the final required main quest and epilogue. It becomes available after the 12 Shinbakufu target objectives and the required Naoe, Yasuke and Junjiro quest groups are complete. The Mourner can be resolved without a mandatory kill, so use the completed Objective Board card rather than a body count as the check. Track the quest under The League, speak with Tomiko at the Hideout, choose a protagonist, talk to two qualifying friends, then return to Tomiko southeast of the main house, where she is leaning over a rock. Finish the scene and confirm that the quest is marked complete before treating the campaign as finished. Preserve a separate manual save, then keep Claws of Awaji, A Critical Encounter, A Puzzlement, Black Tides and New Game Plus outside the original March 20, 2025 base-game completion requirement.
1. Confirm the required campaign groups before starting the epilogue
Open the Objective Board and inspect the required groups separately. Out of the Shadows is the final main quest, and it becomes available after the 12 Shinbakufu targets and the required personal-story or League quests for Naoe, Yasuke and Junjiro are complete. Ordinary castles, contracts, viewpoints, collectibles, optional allies and general province activities do not substitute for these entries.
Cross-check the Shinbakufu cards by exact title: The Golden Teppo, The Wounded, Oda Nobunaga, The Fool, The Mourner, The Naginata, The Noble, The Ox, The Wise, The Fox, The Two-Faced and The Horseman. The Onryo Samurai is a required prologue target mission, but it is separate from the 12-target list. Count a target only when its card or objective chain has registered as resolved.
The Mourner is not a mandatory kill-count test. A spared resolution can satisfy that objective, so confirm the completed board state instead of assuming the target must be dead.
Check the personal-story groups separately. Yasuke’s required route includes An Education, Nobutsuna Sensei, Lady of Whispers, Lords of Azuchi, Dark Waves, Black Ships, My Name is Yasuke, The Path He Walks, Fighting for the Cause, The Silver Queen, A Promise and End of the Line. Dark Waves, Black Ships is one quest title, not two separate entries.
Continue Junjiro’s chain beyond Raise a Cup. Confirm the later required entries, including Eyes on the Future, A Different Kind of Samurai, Soup for Sorin, The Pilgrimage and Leaving a Mark. Also complete Naoe’s required story group, including Secrets of the Blade and The Meaning of the Blade, plus any other Naoe cards the Objective Board marks as required.
- The Golden Teppo is resolved.
- The Wounded is resolved.
- Oda Nobunaga is resolved.
- The Fool is resolved.
- The Mourner is resolved; a spared outcome can qualify.
- The Naginata is resolved.
- The Noble is resolved.
- The Ox is resolved.
- The Wise is resolved.
- The Fox is resolved.
- The Two-Faced is resolved.
- The Horseman is resolved.
- The Onryo Samurai prologue mission is complete separately.
- Naoe’s required story group is complete.
- Yasuke’s required story group is complete.
- Junjiro’s required League group is complete.
2. Use the Objective Board, not the credits alone, as the campaign check
After the required groups are complete, open the Objective Board and select Out of the Shadows under The League. The quest is the final required main-story mission. Its availability is the useful prerequisite signal; do not infer completion merely from an Act 3 notification, a cinematic or credits sequence.
If Out of the Shadows is missing, inspect Shinbakufu, Naoe, Yasuke and Junjiro separately. Look for one unresolved required card, including personal quests that are easy to overlook after the major target missions. If the game gives you a travel, waiting or progression instruction, complete that instruction and reopen the board before spending scouts or beginning optional content.
Do not begin Claws of Awaji to solve a missing base-game requirement. Ubisoft identifies Out of the Shadows as the prerequisite gateway to the expansion, alongside completion of the required Naoe, Yasuke and Junjiro story content.
- Any triggered cinematic or credits sequence has finished.
- Control has returned to normal exploration.
- Shinbakufu, Naoe, Yasuke and Junjiro have each been checked separately.
- Out of the Shadows appears under The League.
3. Start Out of the Shadows at the Hideout
Track Out of the Shadows from the Objective Board and travel to the Hideout in Izumi Settsu. Speak with Tomiko when the quest marker directs you there. This is the final base-game epilogue, not another Shinbakufu investigation.
When the quest asks which protagonist to play, choose Naoe or Yasuke according to your preference. The choice selects the playable character for this epilogue sequence; it does not replace either protagonist’s required story quests and does not require completing the epilogue twice.
Follow the active Hideout objective after the opening conversation. Do not leave after the first discussion, because the quest still requires the companion conversations and a final interaction with Tomiko.
- Out of the Shadows is tracked.
- Tomiko’s opening conversation is complete.
- A protagonist has been selected if prompted.
- The next Hideout objective is active.
4. Speak with two friends, then return to Tomiko
Follow the objective to speak with your friends at the Hideout. Complete conversations with two qualifying companions. Additional conversations may be available and can provide extra dialogue, but two completed companion conversations are enough to advance the required objective.
When the objective changes, return to Tomiko southeast of the main house. She is leaning over a rock. Use the objective marker and this landmark rather than searching the front of the homestead generally. Interact with Tomiko at that location and remain through the closing scene.
Do not assume the quest has completed as soon as the companion conversations finish. The final Tomiko interaction is the decisive gameplay step, and Out of the Shadows should register as complete afterward.
- Two qualifying companion conversations are complete.
- The objective to return to Tomiko is active.
- Tomiko is found southeast of the main house, leaning over a rock.
- Tomiko’s final conversation is complete.
- The closing scene has finished.
- Out of the Shadows is registered as complete.
5. Create and verify a completed-campaign save
After Out of the Shadows registers as complete, create a new manual save in a separate slot. Keep the pre-epilogue save instead of overwriting it so you can replay the ending or investigate a missing prerequisite without losing your earlier state.
Load the completed save, or continue from it, and reopen the Objective Board. Optional allies, contracts, collectibles, viewpoints, Assassin Outposts and post-launch activities may remain. Their presence does not mean that the original campaign failed to finish.
Use several checks together: all 12 Shinbakufu target objectives are resolved; Naoe, Yasuke and Junjiro’s required groups are complete; Out of the Shadows is marked complete; any applicable epilogue trophy or completion notification has registered; and the manual save loads into free exploration. Closing codex entries can provide additional confirmation, but they are not the decisive test.
- Out of the Shadows is marked complete.
- Any applicable epilogue trophy or completion notification has registered.
- A separate post-epilogue manual save exists.
- The completed save loads into free exploration.
- No required original-campaign ending objective remains.
6. Keep post-launch and replay content outside the original ending checklist
Claws of Awaji is optional expansion content. Ubisoft states that access requires the main story, Out of the Shadows and the required Naoe, Yasuke and Junjiro quest groups. After verifying the base-game save, begin the expansion through the Hideout contact and the News from Hattori Hanzo quest if you own the content.
A Critical Encounter and A Puzzlement are optional post-launch story quests. Black Tides is later free story content that requires the main story and the preceding post-launch quests. These additions are not required to finish the original PS5 campaign ending represented by Out of the Shadows.
New Game Plus is optional replay content. Ubisoft describes it as becoming available after the final story mission and credits, with story and Objective Board progression reset while selected character, gear, skill-point and Hideout progress carries over. Start it only after creating and testing the completed original-campaign save.
- The completed base-game save is preserved separately.
- Claws of Awaji is treated as optional expansion content.
- A Critical Encounter and A Puzzlement are treated as optional post-launch story content.
- Black Tides is excluded from the original-campaign requirement.
- New Game Plus is not started before the completed save is secured.
Before you move on
- The 12 Shinbakufu target objectives are resolved: The Golden Teppo, The Wounded, Oda Nobunaga, The Fool, The Mourner, The Naginata, The Noble, The Ox, The Wise, The Fox, The Two-Faced and The Horseman.
- The Onryo Samurai prologue mission is complete and remains separate from the 12 Shinbakufu targets.
- Naoe’s required story group is complete.
- An Education, Nobutsuna Sensei, Lady of Whispers and Lords of Azuchi are complete.
- Dark Waves, Black Ships; My Name is Yasuke; The Path He Walks; Fighting for the Cause; The Silver Queen; A Promise; and End of the Line are complete.
- Junjiro’s required League quests are complete, including the entries after Raise a Cup.
- Out of the Shadows is available under The League and is completed at the Hideout.
- Two required companion conversations are complete.
- Tomiko’s final conversation southeast of the main house, beside the rock, is complete.
- The closing scene has finished.
- Any applicable epilogue trophy or completion notification has registered.
- A post-epilogue manual save loads into free exploration.
- No unfinished required original-campaign ending objective remains.
Optional Completion: Recommended Tasks for a Full Run
Assassin’s Creed Shadows does not require broad exploration, every ally, or every regional activity to reach the original PS5 campaign ending. Separate your goals into three checklists: the original campaign and Out of the Shadows, optional base-game cleanup, and post-launch or replay content. Recruit useful allies, improve the Hideout systems that support scouting and gear, and postpone large collectible sweeps until traversal and information gathering are efficient. After the ending, audit each province systematically through the journal, map, Hideout menus and a written checklist. Keep Claws of Awaji, free story quests, crossover material and New Game Plus separate from the original-ending checklist.
1. Define the completion target before beginning cleanup
Create three separate checklists before starting a full run. The first is the original PS5 campaign: resolve the required story objectives, complete Out of the Shadows, watch the ending sequence and verify the resulting save. The second is optional base-game completion: ally chains, The League activities, regional quests, castles, shrines, temples, kofun, viewpoints, contracts, knowledge activities, collectibles, Hideout projects and equipment goals. The third is post-launch or replay content, such as Claws of Awaji, free story quests, crossover material and New Game Plus.
Do not use a trophy percentage, an apparently empty map, or the absence of an active quest marker as proof that everything is complete. Shadows separates the main story route from optional exploration, while later updates add content that is not part of the original campaign. Keep each category in separate notes so a post-launch quest does not appear to be a missing base-game objective.
- Original campaign ending and epilogue verified
- Base-game optional objectives listed separately
- Ally and scout recruitment recorded
- Post-launch and replay content listed separately if owned
2. Resolve ally chains while they are available
Prioritize missions connected to The League and any objective that introduces, tests or recruits an ally. These quests provide character material and can unlock allies for field support. When a conversation presents a meaningful decision, create a manual save first if you want the option to retry the outcome. Do not assume that every ally result can be changed after the quest chain ends.
After a recruitment chain, return to the Hideout or a Kakurega and open Manage Allies. Confirm that the character appears in the roster before moving on. If the ally is missing, review the completed quest state and your earlier save instead of assuming the recruit will be added automatically later. Ally customizations and roster management are handled through this Hideout interface.
Complete Finding New Allies when it becomes available if you want a stronger completion setup. It is optional, but the quest adds scouts and therefore improves the scouting system. Do not treat every League ally or companion objective as mandatory for the original ending unless the Objective Board explicitly places it in the required story route.
- Review The League objectives when new entries appear
- Save before important ally decisions
- Confirm recruits in Manage Allies
- Complete Finding New Allies if you want additional scout support
3. Upgrade the Hideout for practical completion support
Build and improve the Study when scouting is central to your route. The Study increases maximum scout capacity and refines the search zone used when scouts locate an objective on the World Map. This is particularly useful when a quest gives you a broad search area instead of an exact destination.
Use the Stables for scout-related resource operations. Once available, they let scouts smuggle stockpiles from enemy camps and castles so you can receive additional resources at the end of a season. Build the Forge when your weapons or armor are falling behind the level of the region. It lets you upgrade equipment, dismantle unwanted gear and engrave perks. The Dojo becomes valuable after recruiting allies because it lets you train them and improve their unique support abilities.
The Jinja strengthens the temporary boons earned by praying at shrines. Kakurega extend practical Hideout services into distant regions: they provide safe fast travel, replenish supplies and scouts, open access to contracts, and let you manage summoned allies. You do not need every upgrade before the ending, but a completion run should record unfinished construction, Projects and training objectives instead of assuming that the Hideout is complete because its main rooms have been built.
- Improve the Study for scout capacity and search support
- Use the Stables for resource operations
- Upgrade the Forge for equipment and perk management
- Build and use the Dojo after recruiting allies
- Review Jinja benefits
- Unlock useful Kakurega near cleanup routes
4. Clear provinces with a repeatable route
Work through one province at a time instead of following every icon encountered during travel. First reveal the area through viewpoints, observation and available information. Next complete ally and regional quest chains. Then clear major activities such as castles, temples, shrines, kofun and other marked locations. Finish with contracts, chests, valuables, minor landmarks and remaining collectibles.
Send scouts when an objective’s exact location is unknown or its search zone is too broad. Once the destination is identified, use normal navigation or Pathfinder to reach it. Record whether an activity is undiscovered, discovered but unfinished, or complete. This prevents a hidden activity from being mistaken for a cleared one. Kakurega are useful staging points because they provide safe travel, supplies and scout management away from the Hideout.
At the end of each session, write down the province, activity type and remaining locations. If you are also following the campaign checklist, confirm that all 12 Shinbakufu target objectives are resolved and their cards are complete. This is an objective-state check, not a requirement that every target die.
- Reveal the province before beginning a full sweep
- Complete nearby ally and regional quests first
- Clear major locations before minor loot
- Use scouts for unrevealed or uncertain objectives
- Record unfinished activity categories by province
- Confirm all 12 Shinbakufu target objectives are resolved and their cards are complete
5. Delay large collectible sweeps until traversal is efficient
Collectibles are inefficient to pursue in large numbers at the start. First develop both protagonists, improve scouting and learn the terrain. Naoe is generally suited to vertical routes, dark approaches and narrow infiltration paths. Yasuke is more convenient when armored enemies, open combat or heavy opposition make stealth inefficient. Choose the protagonist that matches the activity instead of forcing one character through every cleanup task.
When clearing a temple, shrine, kofun, castle or similar location, complete the actual activity and verify its reward before leaving. Some locations contain elevated routes, multiple rooms or underground sections. If the location remains marked or the expected reward has not appeared, search again and consult the journal rather than assuming that reaching the entrance completed it.
For gear collection, keep equipment that supports your chosen builds and postpone cosmetic or duplicate-item sweeps. The Forge lets you dismantle unwanted equipment and manage perks, so inventory cleanup can be combined with a gear-upgrade session instead of interrupting every exploration route.
- Use Naoe for vertical or stealth-heavy cleanup
- Use Yasuke for armor-heavy or open combat
- Confirm the activity reward before leaving
- Revisit locations that remain marked
- Separate useful gear from cosmetic collection goals
6. Perform the final province-by-province audit
After completing the original campaign and epilogue, open the World Map and journal. Audit one province at a time against your written list. Check ally quests, The League entries, castles, viewpoints, shrines, temples, kofun, knowledge activities, contracts, collectibles, Kakurega and Hideout projects. Separate undiscovered locations from discovered but unfinished objectives.
Use short sessions with a measurable stopping point: one ally chain, one castle, one activity category or one province. Make a manual save before a large cleanup route. Preserve the completed campaign save before beginning New Game Plus or entering an expansion, especially if you may later decide that your completion target excludes that content.
Return to the Hideout before declaring the base game complete. Confirm that intended allies are present, desired Dojo training is finished and planned construction or Projects are recorded. Then mark Claws of Awaji and other post-launch content complete only if you intentionally included them. Claws of Awaji is accessed through News from Hattori Hanzo after Out of the Shadows and remains additional content rather than part of the original ending.
- Audit each province separately
- Compare the journal with the map and written checklist
- Confirm intended allies in Manage Allies
- Review unfinished Hideout projects and training
- Make a final manual save before New Game Plus or DLC
- Track free story quests and expansions separately
Before you move on
- The original PS5 campaign ending and epilogue have been completed and the post-ending save loads correctly.
- All 12 Shinbakufu target objectives are resolved and their cards are complete; this does not require every target to die.
- Every intended ally has been recruited, appears in Manage Allies and has any desired Dojo training completed.
- Finding New Allies and intended scout-related upgrades have been completed or deliberately excluded from the target.
- Each province has been audited for remaining quests, castles, viewpoints, shrines, temples, kofun, knowledge activities, contracts, Kakurega and collectibles.
- The Hideout construction, Projects, Forge, Study, Stables, Dojo and Jinja goals have been reviewed.
- Claws of Awaji, free story quests, crossover content and New Game Plus are listed separately and marked complete only if intentionally included.
References for this chapter
- Assassin’s Creed Shadows - Deep Dive into the Hideout
- Assassin’s Creed Shadows – Exploration Gameplay Overview
- Assassin’s Creed Shadows – Deep Dive Into Progression
- Assassin’s Creed Shadows Finding New Allies Walkthrough
- Assassin’s Creed Shadows Collectibles Guide (100% Completion)
- Accessing Claws of Awaji in Assassin's Creed Shadows
- Assassin’s Creed Shadows Summer Roadmap Update
Troubleshooting: Recovering from Stealth Breaks, Combat Failures and Save Issues
A failed infiltration or difficult fight does not require restarting Assassin’s Creed Shadows. When Naoe is detected, break line of sight, use darkness, prone movement, smoke or vertical routes to escape, then re-enter from a different angle. Smoke is useful for disengaging and for assassinating suitable low-rank enemies, but samurai evade it and require another plan. When Yasuke is surrounded, retreat toward terrain that limits enemy access, defend until the group separates, and eliminate the highest immediate threat before advancing. If the same encounter keeps stopping progress, change equipment, active abilities, Mastery allocation or the combat and stealth difficulty settings. Mastery points can be reset, so an ineffective build is not permanent. Protect progress with manual saves before major missions and retain a separate successful save when possible. On PS5, check internal storage and PlayStation Plus synchronization. PS5 saves cannot be copied individually to a USB drive, but a full console backup can be made to a compatible USB device.
1. Break contact immediately when Naoe is detected
Once several guards have a clear view of Naoe, stop trying to finish the original takedown in the same courtyard, corridor or rooftop. Move behind a building corner, wall, interior partition or other solid obstruction that blocks direct sight. If a grappling anchor is available, use it to gain height or cross to another roof rather than running through an open street. The goal is not to defeat the entire patrol; it is to end the immediate line of sight and create enough distance for the search to move away.
Going prone reduces Naoe’s visibility on the ground, rooftops and underwater, and it can help her pass through grass or approach a low opening. It does not make her immune to detection. Nearby guards, bright light and exposed movement can still reveal her, so use prone movement while moving toward real cover rather than stopping in the middle of an illuminated area. If a guard reaches your hiding place, use the prone dodge-roll to move away and continue toward the escape route.
- Break direct sight before attempting another takedown.
- Use cover, vertical separation or a grappling route to leave the search area.
- Treat prone movement as concealment assistance, not complete invisibility.
2. Use smoke as an escape tool, not a universal assassination button
Throw a smoke bomb when enemies are closing and you need a short window to reposition. Smoke can let Naoe escape without being seen and can enable an assassination against a suitable low-rank enemy inside the cloud. Do not spend the tool expecting every target to remain vulnerable. Samurai react differently: they can evade the smoky area, and alerted samurai are harder to lure or trick than ordinary guards.
After using smoke, leave the original position. Grapple to a roof, cross behind a wall or move through a side passage before the cloud clears. Once the search ends, return from a different entrance and reassess the camp. If the target is a samurai, wait for an isolated opportunity, improve assassination damage if the prompt shows the attempt would be denied, or switch to a direct combat plan rather than repeatedly throwing smoke.
- Use smoke to create an escape window or handle a suitable low-rank enemy.
- Do not rely on smoke to assassinate samurai.
- Move away from the smoke cloud before beginning the approach again.
3. Prepare an escape route before entering a guarded area
Before the first assassination, identify one route that does not depend on crossing the center of the compound. Good options include a roofline, grappling anchor, narrow alley, water route or nearby building with multiple exits. If detection occurs, retreat toward that route instead of improvising around the objective. A successful fallback ends with Naoe hidden at an observation point, the enemy search separated from her position and enough distance to study patrol movement again.
Do not immediately reuse a watched doorway, roof edge or bush. Circle the compound and look for a lower entrance, an unlit side or a route that approaches from above. Night, rain and other environmental conditions can improve stealth opportunities, but they do not replace observing patrols and light sources. Wait for a guard to move rather than spending every tool to force an opening.
- Choose an extraction direction before the first takedown.
- Avoid the entrance or hiding place where the alarm started.
- Rebuild the infiltration from a safe observation point.
4. Stabilize Yasuke by controlling enemy access
When Yasuke is surrounded, stop advancing into the formation. Back toward a doorway, wall, slope, bridge or other position that limits the number of enemies able to reach you at once. Use his block against ordinary attacks and watch for unblockable attacks that require a different response. A successful parry sends the attacker backward and creates an opening for a counterattack, while posture attacks are useful for breaking an enemy’s blocking stance.
Prioritize the closest dangerous attacker instead of constantly switching between distant targets. Use a heavy attack or weapon ability after an enemy’s guard has been pressured, not while several opponents are positioned to interrupt you. If an ally is present, let that ally draw attention while you finish a vulnerable enemy, then reposition before the next group closes. Narrow terrain and elevation changes are valuable because they reduce the angles of attack and make it easier to recover between exchanges.
- Retreat to terrain that limits enemy access.
- Use block and parry deliberately instead of attacking into a surrounding group.
- Defeat the nearest high-threat enemy before pursuing distant targets.
5. Change the build before repeating the same failed attempt
If the same mission defeats you twice, identify the actual failure: detection, assassination damage, incoming damage, guard pressure, missing tools or lack of healing. Change equipment and active abilities to address that specific problem. Naoe may need stronger assassination damage, more reliable disengagement tools or equipment that improves stealth. Yasuke may need a weapon and armor combination that gives him better control of prolonged melee encounters.
Mastery points can be reset, so you can move points toward a useful skill instead of accepting an early build forever. The game’s progression is shared between Naoe and Yasuke, which means a progression adjustment can support both characters even though their equipment and combat roles differ. If the mission remains a barrier, complete nearby activities for upgrades or change the combat and stealth difficulty settings independently. Lowering one setting is a practical recovery option, not a requirement to restart the campaign.
- Separate the cause of failure from the symptom of losing health.
- Change a major skill, ability, weapon or armor choice before retrying.
- Reset Mastery points or adjust combat and stealth difficulty when necessary.
6. Save before major missions and protect PS5 save data
Use the in-game manual-save option before a major story mission, before entering a difficult target area and after completing a successful mission. Keep a pre-mission save until the next story transition is safely finished. When possible, retain more than one useful manual save rather than overwriting the only fallback point. After reloading, confirm the intended equipment, consumables and mission objective before beginning the approach again.
For PS5 storage problems, open Settings, then Storage, and check available console space. Do not confuse game storage with saved data management. PlayStation Plus members can upload or download PS5 saves through Settings, Saved Data and Game/App Settings, or by highlighting the game on the home screen, pressing the Options button and choosing Upload/Download Saved Data. Check the save timestamp before downloading so a newer local file is not replaced accidentally.
Individual PS5 saved data cannot be copied to a USB drive. For a broader emergency safeguard, use Settings, System, System Software, Back Up and Restore, then Back Up Your PS5 with a compatible FAT32 or exFAT USB device. This is a full console backup rather than a quick single-save export, and the console must not be turned off during the process. If a save problem persists, close the game normally, verify storage and cloud timestamps, and restore only the version you have confirmed is correct.
- Create a manual save before major missions and preserve the pre-mission fallback.
- Check PS5 storage separately from saved-data management.
- Verify cloud timestamps before downloading.
- Use a full PS5 USB backup rather than expecting individual PS5 saves to copy to USB.
Before you move on
- You can recover a detected Naoe infiltration by breaking line of sight, reaching cover or vertical separation, and re-entering from a different route.
- You understand that smoke supports escape and low-rank assassinations but does not reliably disable samurai.
- You can stabilize an overwhelming Yasuke fight by limiting enemy access, using block or parry, and prioritizing high-threat attackers.
- You have changed equipment, abilities, Mastery allocation, difficulty or route when the same mission repeatedly fails.
- You maintain a manual pre-mission save and have verified PlayStation Plus synchronization when available.
- You know that PS5 saved data requires cloud storage or a full console USB backup rather than individual USB copying.
References for this chapter
- Assassin's Creed Shadows - Stealth Gameplay Overview
- Assassin's Creed Shadows: Combat Gameplay Overview
- Assassin's Creed Shadows - Deep Dive Into Progression
- Assassin's Creed Shadows - PS5 Games
- Assassin's Creed Shadows - Accessibility Spotlight
- PlayStation Plus cloud storage for PS5 consoles
- How to manage PS5 console storage space
- How to back up and restore PS5 console data
- Transfer data from a PS4 console or PS5 console to your PS5 console
Finishing up
All 12 Shinbakufu target objectives are resolved, all required Naoe, Yasuke and Junjiro story quests are complete—including An Education, Nobutsuna Sensei, Lady of Whispers, Lords of Azuchi, Dark Waves, Black Ships, My Name is Yasuke, The Path He Walks, Fighting for the Cause, The Silver Queen, A Promise, End of the Line, and the required Junjiro sequence—Out of the Shadows is completed, the main campaign conclusion and credits have played where applicable, and the completed post-epilogue save loads successfully.
Both protagonists’ required campaign segments have been completed where the story assigns them, including the complete required Yasuke progression before and after his personal-story quests.
All mandatory campaign prerequisites shown on the Objectives Board have been fulfilled; optional Assassin Outpost quests, ally quests, Claws of Awaji, Black Tides and other post-launch content are not required for this completion goal.
You can load the final save, verify that Out of the Shadows is marked complete, and confirm that no required base-game ending objective remains.
Optional post-launch content may be completed afterward and should be tracked separately from the original campaign ending.
Choose your next gameScreenshots & video
Game imagery for reference. Follow the written chapters above for the route and strategies.
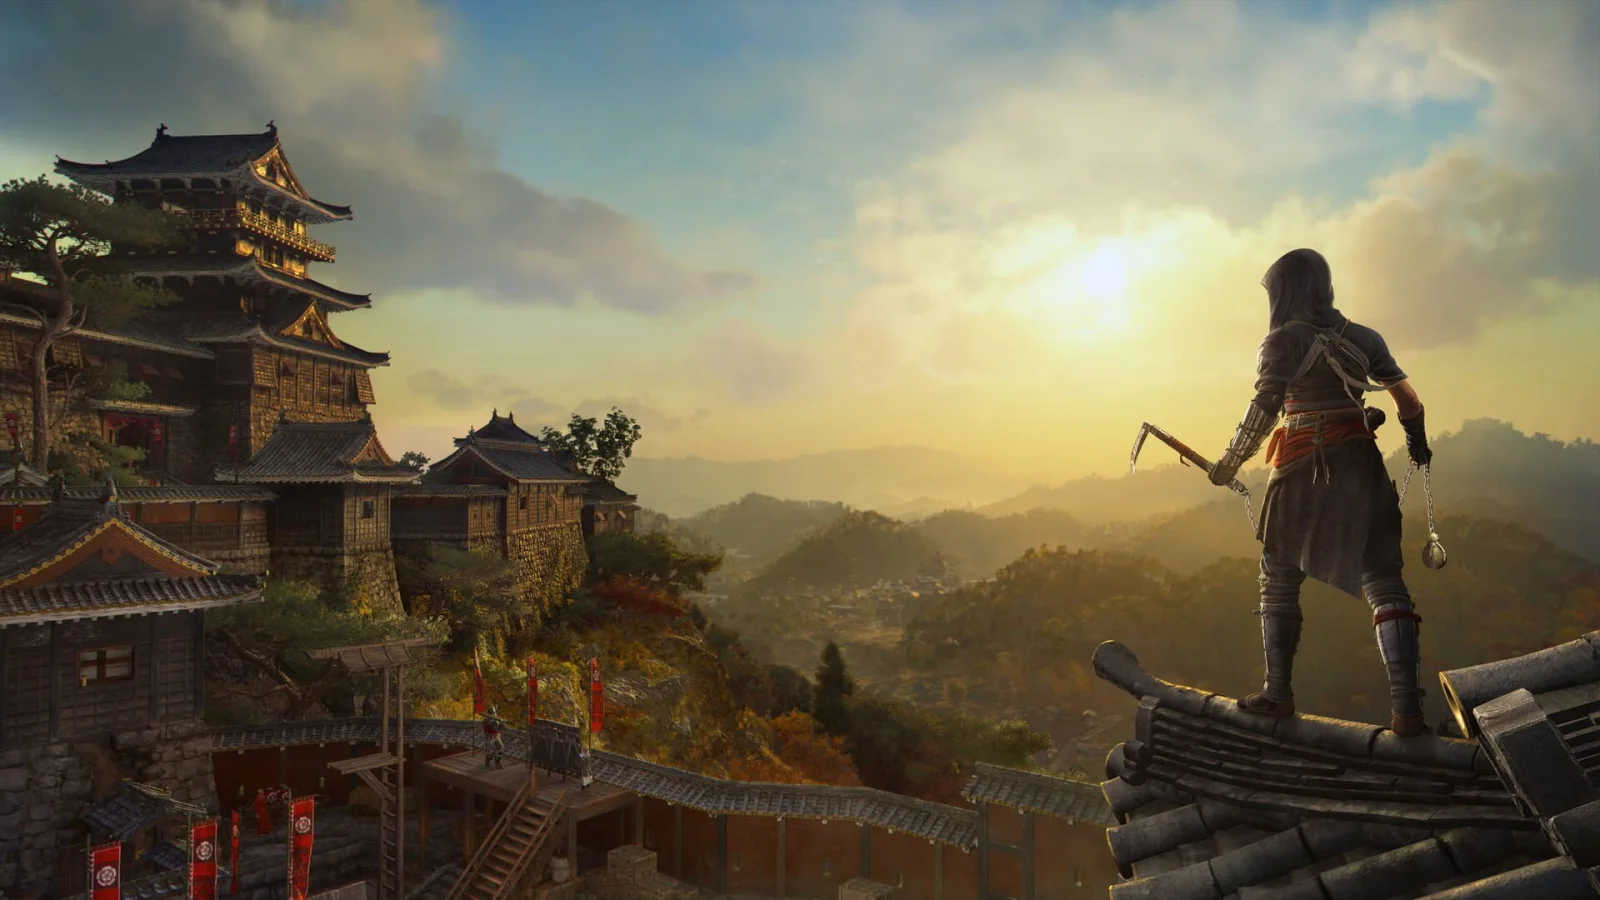
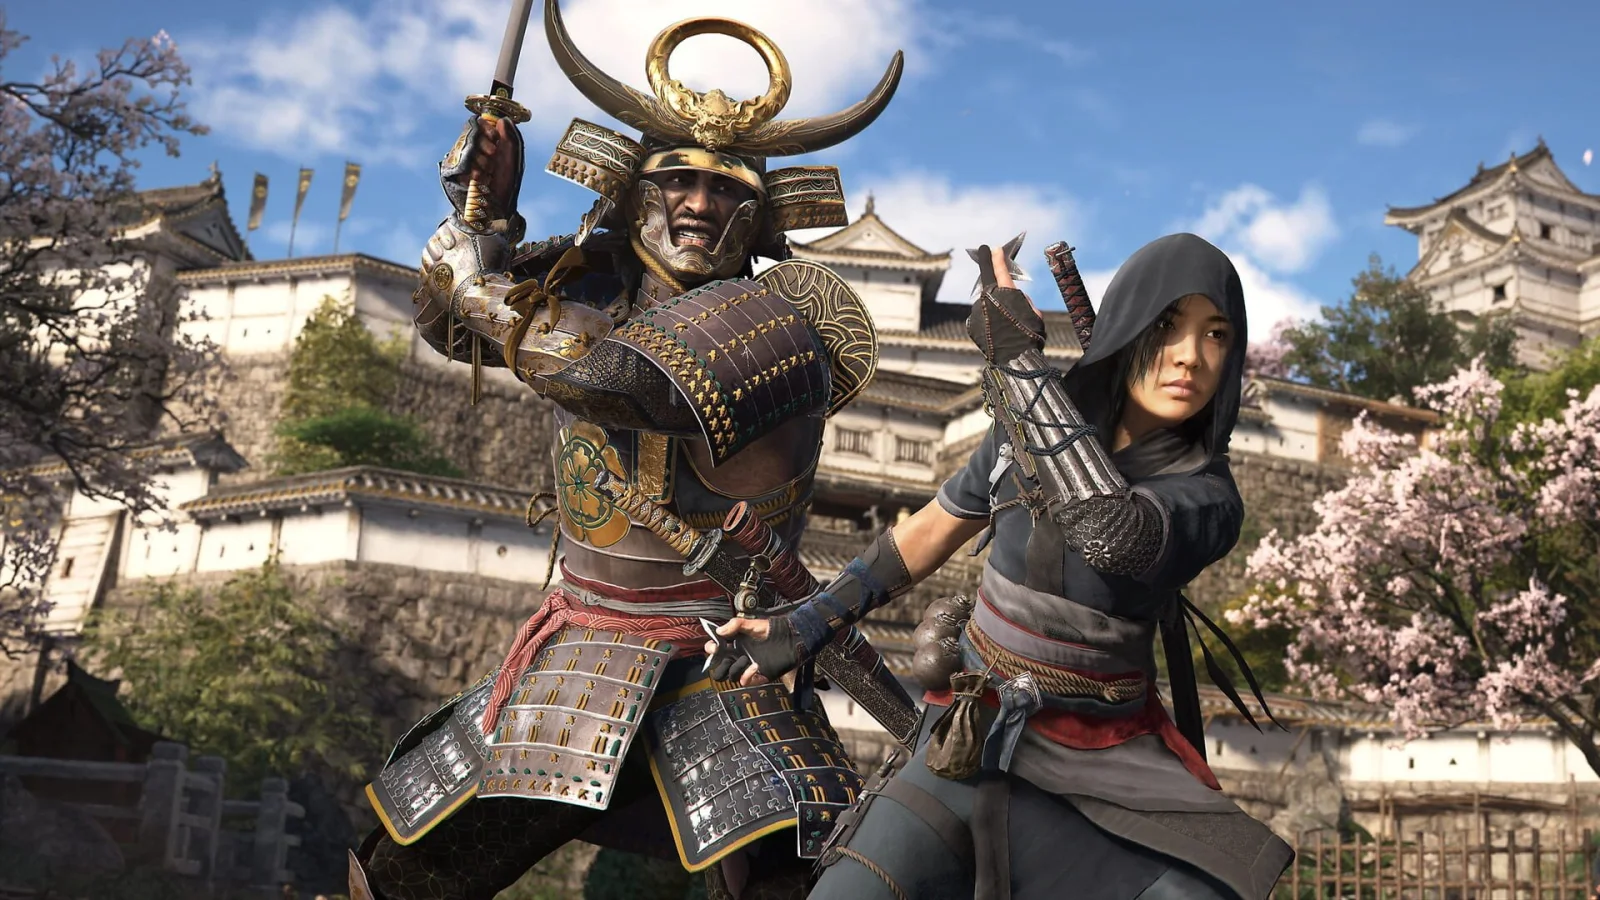
Sources & references
Our original guide draws on the references below. Check the edition at the top of this page before following controls or unlock requirements.
- Assassin's Creed Shadows - PS5 Games
- Assassin’s Creed Shadows The Lord’s Favor Walkthrough
- Assassin’s Creed Shadows Flames of War Walkthrough
- Assassin’s Creed Shadows Fight of the Kakushiba Ikki Walkthrough
- Assassin’s Creed Shadows The Onryo Samurai Walkthrough
- Assassin’s Creed Shadows Walkthrough: Main Story Order, All 12 Shinbakufu Target Boards, When Yasuke Joins, Credits and Epilogue
- How to Change Character | Assassin’s Creed Shadows
- Assassin’s Creed Shadows – Deep Dive Into Progression
- Assassin's Creed Shadows Walkthrough – All Main Quests
- Assassin’s Creed Shadows: An Unpayable Debt Walkthrough
- Assassin’s Creed Shadows: Wake Up Call Walkthrough
- AC Shadows: All quests, walkthrough
- Assassin’s Creed Shadows – Exploration Gameplay Overview
- Assassin’s Creed Shadows – Stealth Gameplay Overview
- Assassin’s Creed Shadows PS5 Digital Deluxe Edition
- Assassin’s Creed Shadows now releases March 20, 2025 – Ubisoft
- Assassin's Creed Shadows - Deep Dive into the Hideout
- Assassin's Creed Shadows Way of the Blacksmith Walkthrough
- Assassin’s Creed Shadows Finding New Allies Walkthrough
- How to use Scouts in Assassin's Creed Shadows and get more
- Assassin's Creed Shadows: From Spark to Flame Walkthrough
- Assassin's Creed Shadows: Combat Gameplay Overview
- Assassin’s Creed Shadows – Deep Dive Into Progression
- Assassin’s Creed Shadows: 20 minutes of new castle gameplay, launches March 20 – PlayStation.Blog
- Assassin’s Creed Shadows – Parkour System Overview
- Assassin’s Creed Shadows Shows Off New Combat and Stealth Gameplay
- Assassin's Creed Shadows Walkthrough – The Killing Field
- How to complete The Killing Field in Assassin's Creed Shadows
- The Killing Field – Assassin's Creed Wiki
- Assassin's Creed Shadows – PS5 PlayStation Store Listing
- Quick-Guide: The Road To Awaji
- Assassin’s Creed Shadows Quests Lists and Progression Guide
- Starting Act 3 – Assassin’s Creed Shadows Walkthrough
- Story of a Samurai - Assassin’s Creed Shadows Walkthrough
- Assassin's Creed Shadows: The Shinbakufu Walkthrough
- Assassin’s Creed Shadows: The Assassins Walkthrough
- Assassin’s Creed Shadows: Assassin Outpost Locations
- Assassin’s Creed Shadows Friend of My Enemy Walkthrough
- Assassin’s Creed Shadows Belly of the Beast Walkthrough
- Assassin’s Creed Shadows Temple of the Horseman Walkthrough
- Assassin’s Creed Shadows Lightning and Thunder Walkthrough
- Assassin’s Creed Shadows Mibuno Showdown Walkthrough
- Assassin’s Creed Shadows Lords of Azuchi Walkthrough
- Assassin’s Creed Shadows Before the Fall Walkthrough
- Assassin’s Creed Shadows Secrets of the Blade Walkthrough
- Assassin's Creed Shadows Trophy Guide & Roadmap
- Assassin's Creed Shadows - Deep Dive Into Progression
- Upgrading your gear and weapons in Assassin’s Creed Shadows
- Assassin’s Creed Shadows – Deep Dive into the Hideout
- AC Shadows Title Update 1.1.11 Release Notes
- Assassin's Creed Shadows - Stealth Gameplay Overview
- Assassin's Creed Shadows Lost Honor Walkthrough
- Assassin's Creed Shadows A Promise Walkthrough
- AC Shadows Title Update 1.0.5 - Release Notes
- Accessing Claws of Awaji in Assassin's Creed Shadows
- Claws of Awaji Expansion
- Quick-Guide: The Road To Awaji
- Redeeming your pre-order code for Assassin’s Creed Shadows
- Assassin’s Creed Shadows Dark Waves, Black Ships Walkthrough
- Assassin’s Creed Shadows Final Update Launches Today
- Assassin’s Creed Shadows Out of the Shadows Walkthrough
- Quick-Guide: The Road To Awaji
- AC Shadows Title Update 1.1.1 - Release Notes
- Assassin’s Creed Shadows Final Update Launches Today
- Assassin’s Creed Shadows Summer Roadmap Update
- Assassin’s Creed Shadows - Deep Dive into the Hideout
- Assassin’s Creed Shadows Collectibles Guide (100% Completion)
- Assassin’s Creed Shadows Summer Roadmap Update
- Assassin's Creed Shadows - Stealth Gameplay Overview
- Assassin's Creed Shadows - Accessibility Spotlight
- PlayStation Plus cloud storage for PS5 consoles
- How to manage PS5 console storage space
- How to back up and restore PS5 console data
- Transfer data from a PS4 console or PS5 console to your PS5 console
About the game & collecting notes
- Platform
- Sony PlayStation 5
Step-by-step campaign walkthrough for Assassin's Creed Shadows on PS5. This guide leads you through the main story from the opening prologue to the canonical ending, teaching both protagonists' playstyles, essential progression choices, mission approaches, and how to finish the campaign while covering optional content and post‑credit tasks.
Darryl Polo
Darryl Polo writes about emulation and retro games. What changes when an old favorite moves to another setup? That question connects his interest in tinkering with the games that made the hardware worth keeping.
Our editorial standardsFound a step that needs another look? Help us improve this guide.