
Armored Core VI: Fires of Rubicon — PS5 Campaign Walkthrough
Complete the original 2023 Armored Core VI: Fires of Rubicon campaign on PS5 across five chapters and 59 Replay Mission entries. Obtain Fires of Raven and Liberator of Rubicon in separate campaign cycles, then complete Alea Iacta Est during the third active campaign cycle on the same progression file. The route also covers mutually exclusive missions, New Game+ and New Game++ additions, Arena, parts, containers and Combat Logs. Prisoner Rescue and Stop the Secret Data Breach are route-dependent later-cycle replacement missions: the qualifying Accept route can make them available in New Game+, and they may also be obtained in New Game++; neither is an independent Alea Iacta Est prerequisite.


Find a copy
Armored Core VI: Fires of Rubicon Sony PlayStation 5
We may earn a commission if you buy through these links, at no extra cost to you. As an Amazon Associate I earn from qualifying purchases.
Opens retailer search results. Check the model, edition, seller, availability and current price before buying.
Before you begin
This guide is written for the PS5 edition of Armored Core VI: Fires of Rubicon and walks you through campaign progression from your first sortie on Rubicon 3 through all three endings.
It explains which missions to pick, how decision points change later mission availability, how New Game+ and New Game++ interact with ending unlocks, and how to prepare your AC for the heavy fights that decide the story.
You will find concrete objectives for each chapter, practical build suggestions, Arena and parts-completion advice, boss-fight approaches, container and Combat Log routes, and a final completion checklist.
Follow the campaign chapters for story progression. Use Mission Replay for cleanup, and use the second and third campaign cycles—not isolated replays—to obtain the opposite standard ending and then Alea Iacta Est.
Set yourself up for the run
Confirm the PS5 installation and game regulation are updated, then check the title-screen App Ver. and Regulation Ver. rather than relying on an old patch number.
Complete Training and the opening missions, then build a flexible AC and retain COAM for mission-specific changes.
Use Arena and OS Tuning after either Retrieve Combat Logs or Investigate BAWS Arsenal No. 2 unlocks them.
Record active campaign decisions. Mission Replay cannot rewrite a decision or create a cycle-specific mission that was never unlocked.
Complete one standard ending, the opposite standard ending in the next campaign cycle, and Alea Iacta Est in the third active campaign cycle on the same progression file.
Track Prisoner Rescue and Stop the Secret Data Breach as route-dependent later-cycle catalogue missions. Accepting the altered Attack the Dam Complex route can make them available in New Game+, and they can also be obtained in New Game++; do not treat either as an independent Alea Iacta Est requirement.
Use Mission Replay for already-unlocked missions, ranks, parts, containers, Combat Logs and practice.
Start Here: PS5 Setup, Save Behaviour and Early Training
Prepare the original 2023 Armored Core VI release on PS5, complete the opening missions and use the early rewards to build a flexible AC. Illegal Entry teaches movement, targeting, boosting, weapon switching, melee pressure and stagger combat against the AH12 HC Helicopter. Destroy Artillery Installations opens the Parts Shop and Beginner Training 2. After Operation Wallclimber, clear either Retrieve Combat Logs or Investigate BAWS Arsenal No. 2 to unlock both the Arena and OS Tuning. Use checkpoints when a section goes badly, interact with supply stations before major encounters and keep enough COAM available for equipment changes rather than buying parts without checking weight and EN load.
1. Update and verify the PS5 installation
On the PS5 home screen, highlight Armored Core VI: Fires of Rubicon, press the Options button and choose Check for Update. Install any available official update before starting. This guide covers the original 2023 Armored Core VI release running on the native PS5 version, not another Armored Core title, a remake or a later expanded edition.
Launch the game and let it reach the title screen normally. Keep the campaign save after completing the story because the same progression file is used for later New Game+ cycles. If PlayStation Plus cloud storage is available, backing up the save after a major ending is useful, but do not delete the completed campaign file if you intend to obtain all three endings on one file.
- Use PS5 Check for Update before beginning.
- Confirm that the game reaches the title screen normally.
- Keep the campaign save for later New Game+ cycles.
2. Clear Mission 01: Illegal Entry
Start New Game and select Mission 01: Illegal Entry. Follow the objective markers and use this sortie to learn ground movement, jumping, Quick Boost, Assault Boost, target lock, weapon switching and melee attacks. Scan the marked wrecks as instructed, but do not waste time clearing every optional enemy. Your main objective is to reach and defeat the AH12 HC Helicopter.
Close distance with Assault Boost rather than trying to win a prolonged long-range exchange. Jump and Quick Boost to change elevation and direction, then use the left-arm melee weapon when the helicopter is within reach. Melee pressure helps build ACS strain. When the helicopter staggers, continue attacking during the direct-hit window instead of immediately retreating.
If you fail, use the defeat menu to retry or adjust the AC before trying again. A longer-range weapon can help with approach damage, but the opening fight is designed to teach aggressive closing movement and melee punishment. After the sortie, visit Garage and open AC Design so you know where weight, EN load, weapon slots and assembly warnings are displayed.
- Clear Illegal Entry.
- Practice Assault Boost, Quick Boost and vertical movement.
- Attack the helicopter during its stagger window.
- Visit AC Design after the sortie.
3. Complete Beginner Training 1
After Illegal Entry, enter Garage, choose Sortie and open Training. Complete Beginner Training 1: Basic Controls before advancing far into Chapter 1. This lesson reinforces the movement and combat inputs introduced in the opening sortie and awards the MG-014 Ludlow machine gun.
Pay attention to the energy gauge while boosting. Combine jumps, Quick Boosts and Assault Boosts, then allow energy to recover before committing to another long movement. The useful skill here is recognizing when you have enough EN left to evade or climb, not merely reaching the end of the lesson.
- Complete Beginner Training 1: Basic Controls.
- Collect the MG-014 Ludlow reward.
- Practice energy recovery and elevation changes.
4. Clear Mission 02: Destroy Artillery Installations
Select Mission 02: Destroy Artillery Installations and follow the marked route. Destroy each artillery emplacement required by the mission objectives. Use Assault Boost across open ground, but slow down near each emplacement so you can identify incoming fire and avoid unnecessary damage while locating the next target.
Nearby enemies are not automatically required objectives. Destroy them when it is safe or when they obstruct the route, but do not spend all your ammunition or Repair Kits on detours. Once every required artillery installation is destroyed, follow the remaining markers to extraction and complete the sortie.
Clearing this mission opens the Parts Shop and Beginner Training 2: Combat Fundamentals. Complete the lesson before spending heavily, then inspect the shop while checking your current weight and EN limits. The lesson awards the LR-036 Curtis linear rifle.
- Destroy every marked artillery installation.
- Avoid unnecessary fights when AP or ammunition is low.
- Confirm that the Parts Shop is available.
- Complete Beginner Training 2: Combat Fundamentals.
- Collect the LR-036 Curtis reward.
5. Use checkpoints, resupply points and Repair Kits correctly
A checkpoint is a restart location reached during a mission. If the defeat or pause menu offers Restart from Checkpoint, use it to return to the later section instead of replaying the entire sortie. Restarting from a checkpoint refreshes the resumed attempt’s AP, ammunition and Repair Kits, so you can approach the encounter with full resources. This is a recovery tool, not a permanent campaign save.
A resupply point is a separate location inside certain missions. Interact with it before a major encounter whenever possible. It fully restores AP and ammunition and replenishes the mission’s Repair Kits. Because a resupply point is consumed when used, do not activate it immediately if you are already at full resources unless the upcoming fight requires the preparation.
Repair Kits restore AP during a mission but do not replace ammunition. If you are repeatedly failing a section, restart from the latest checkpoint when available, change the AC if necessary and treat the refreshed attempt as a new resource cycle. Do not assume that closing the application preserves a temporary checkpoint as a permanent save.
- Use Restart from Checkpoint after a failed section when available.
- Interact with resupply points before major encounters.
- Distinguish checkpoint recovery from a full resupply point.
- Remember that Repair Kits restore AP but do not refill ammunition.
- Do not treat a temporary checkpoint as a permanent campaign save.
6. Spend early COAM on adaptable equipment
When the Parts Shop becomes available, buy equipment to solve a specific weakness rather than purchasing every inexpensive item. Keep one dependable primary weapon, a contrasting secondary for another range or damage pattern and a close-range weapon for stagger punishment. Check total weight and EN load after every assembly change; a weapon is not an upgrade if the completed AC becomes overloaded or performs poorly on energy.
Retain some COAM for mission-specific adjustments. Training rewards and story progress provide useful equipment, while later progress expands the shop. Parts can be sold for their purchase value, but keeping alternatives is more practical than repeatedly buying and selling. If your available inventory allows it, save both a lighter configuration and a heavier configuration.
Your early AC should handle ordinary MT groups, carry enough ammunition for required targets and have a reliable answer when an enemy is staggered. Reconfigure between sorties when an enemy mix exposes a weakness instead of forcing one assembly through every mission.
- Check weight and EN-load warnings after changes.
- Keep one reliable primary weapon.
- Keep a contrasting secondary or back-unit option.
- Keep a melee or close-range stagger punish.
- Leave COAM available for later adjustments.
7. Complete Operation Wallclimber and unlock Arena and OS Tuning
Continue the Chapter 1 campaign until Operation Wallclimber is available, then clear it. After that mission, the campaign provides the early branch containing Retrieve Combat Logs and Investigate BAWS Arsenal No. 2. Completing either of these missions unlocks both the Arena and OS Tuning; the unlock is not exclusive to Retrieve Combat Logs.
Choose whichever of the two missions you want to clear first, complete it and then check Garage for the Arena and OS Tuning menus. The other mission remains a separate campaign entry and should still be cleared later if you want complete mission coverage, its rewards and its data or Combat Log opportunities. Do not confuse the mission unlock with the optional decision to postpone one of the pair.
Arena victories award OST Chips. Spend those chips in Garage → OS Tuning on upgrades that support your current style, such as weapon damage, defensive tuning, Boost Kick, Weapon Bay or a Core Expansion when those options are useful to your build. OST Chips are upgrade currency, not ammunition and not a consumable stockpile. Continue clearing newly available Arena programs and Training lessons as they appear, but return to the campaign so optional practice does not interrupt route progression.
- Clear Operation Wallclimber.
- Complete either Retrieve Combat Logs or Investigate BAWS Arsenal No. 2.
- Confirm that Arena and OS Tuning are visible in Garage.
- Clear the other Chapter 1 mission later for full coverage.
- Spend the first OST Chips on deliberate OS Tuning priorities.
- Complete newly available Training lessons when practical.
Before you move on
- Illegal Entry and Destroy Artillery Installations are marked cleared in Sortie.
- Beginner Training 1 and Beginner Training 2 are complete, with the MG-014 Ludlow and LR-036 Curtis rewards collected.
- The Parts Shop is available and the AC passes its weight and EN-load checks.
- You can distinguish a checkpoint restart from a full resupply point and know that Repair Kits restore AP only.
- Your early assembly has a reliable primary weapon, a contrasting secondary and a close-range stagger punish.
- Operation Wallclimber is complete.
- At least one of Retrieve Combat Logs or Investigate BAWS Arsenal No. 2 is complete.
- Arena and OS Tuning are visible in Garage, and the first OST Chips have been assigned deliberately.
- You retain enough COAM for a later equipment adjustment rather than only narrow-use purchases.
Chapter 1 — Early Contracts: Earning Credits, Parts and Rank
Chapter 1 teaches the core combat loop and opens the Garage systems used throughout the campaign. Clear the opening missions, complete available Training exercises, and spend COAM on parts that solve current problems instead of building several specialized ACs immediately. Learn the difference between AP damage and ACS strain, use vertical movement to reach weak points, and reconfigure when a mission exposes a range, mobility or ammunition problem. Operation Wallclimber introduces a one-use Supply Sherpa before the Juggernaut. Afterward, Retrieve Combat Logs and Investigate BAWS Arsenal No. 2 become available in either order; clearing either mission unlocks OS Tuning and the Arena. The normal route ends with Attack the Watchpoint and BALTEUS. In New Game++, a separate alternate Attack the Watchpoint appears through active later-cycle progression. It adds four GHOST units to the Sulla encounter but still ends with the control device and BALTEUS. Record that variant separately before treating Chapter 1 as complete for the full mission catalogue.
1. Finish Illegal Entry and establish a workable assembly
Complete Illegal Entry first. The opening sortie teaches scanning, target lock, Assault Boost, Quick Boost, weapon cycling and the importance of attacking from useful angles rather than standing in front of a target. Against the AH12: HC Helicopter, stay mobile, use vertical movement to close the height gap, and attack during openings instead of attempting a prolonged frontal exchange. If the tutorial boss defeats you, change your approach before changing every part: maintain altitude, close distance decisively and use the pulse blade when the boss is exposed.
After the mission, the Garage becomes available. Change at least one part in Assembly so you understand Load, EN Load, AP and weapon compatibility checks. Purchased parts can be sold back for their purchase value, so limited experimentation is safe. Keep a balanced starting build rather than buying every newly available item. A sustainable arm weapon for ordinary targets and a higher-impact option for staggered enemies are more useful than four slow weapons with overlapping ammunition problems.
- Illegal Entry is cleared.
- Garage and Assembly are available.
- Your AC is within both Load and EN Load limits.
- You have tested weapon cycling and Quick Boost in a safe mission or Training exercise.
2. Complete the early missions and unlock the Parts Shop
Clear Destroy Artillery Installations and Grid 135 Cleanup as they appear. In Destroy Artillery Installations, use Assault Boost to cross open ground and approach the marked artillery from angles that expose their vulnerable sides or rear. Do not spend the entire sortie fighting enemies that are not part of the objective. Grid 135 Cleanup is a close-quarters fundamentals mission. Scan before entering unfamiliar spaces, watch for enemies above and below your current level, and use the facility geometry to avoid being surrounded.
The Parts Shop and early Loghunt functions become available during this part of Chapter 1. Check the shop after major mission unlocks, but spend COAM only on changes that solve a problem you are actually having. A better booster, generator, FCS or weapon can matter more than replacing the whole frame. Before each sortie, verify that the proposed assembly still has enough energy and carrying capacity after every change.
- Destroy Artillery Installations and Grid 135 Cleanup are cleared.
- Parts Shop access is visible in the Garage.
- You have checked carrying capacity and energy output after changing parts.
- You have not spent the entire COAM balance on narrow-use weapons.
3. Use Training, then clear Destroy the Transport Helicopters and Destroy the Tester AC
Complete the currently available Training exercises before progressing too far. The early lessons cover basic controls, combat fundamentals, assembly, reverse-jointed ACs, tetrapod ACs and tank ACs, with several exercises awarding parts. Use them to practice Assault Boost, Quick Boost, target switching, weapon cycling and stagger follow-ups. Return to Training when additional lessons appear instead of waiting until the end of the chapter.
In Destroy the Transport Helicopters, prioritize the marked helicopters and cross the map efficiently. Use vertical movement to reach their altitude and avoid wasting ammunition on unrelated enemies unless they obstruct the route. The tetrapod is optional for normal progression and can be left for later if your build is not ready. Clear Destroy the Tester AC afterward as a focused duel. Keep moving laterally, vary your elevation and stop using weak pressure when the ACS gauge is nearly full; prepare a high-impact shot, kick or melee attack so the stagger window begins with a damaging follow-up ready.
- Available Training missions are cleared or intentionally deferred.
- Destroy the Transport Helicopters is cleared.
- Destroy the Tester AC is cleared.
- You can distinguish ACS strain from direct AP damage.
4. Clear Attack the Dam Complex and Destroy the Weaponized Mining Ship
Complete Attack the Dam Complex, then clear Destroy the Weaponized Mining Ship on the normal first-playthrough route. In the Dam mission, follow the objective markers and use the dam structures for elevation and cover. Eliminate the required targets without chasing every distant MT after the objective advances. Assault Boost is useful for crossing open sections, but preserve energy for incoming missiles and for reaching higher platforms.
Destroy the Weaponized Mining Ship is an objective-speed mission. Stay on the marked route, destroy the required targets and use Assault Boost to cross gaps rather than taking a long ground route. Do not substitute a later-cycle mission here. In New Game+, Attack the Dam Complex can present an alternate decision route, and in New Game++ the campaign can replace Destroy the Weaponized Mining Ship with Escort the Weaponized Mining Ship when the qualifying choice is active. Those are separate catalogue entries and should be recorded by cycle.
- Attack the Dam Complex is cleared.
- Destroy the Weaponized Mining Ship is cleared on the normal route.
- Your current build can defeat objective targets without exhausting its ammunition.
- You have recorded any later-cycle Dam Complex choice you intend to make.
5. Take the Wall and defeat the Juggernaut
Before Operation Wallclimber, bring a loadout that can clear groups of MTs and then maintain pressure against a large armored target. The wall’s gatling turrets are strongly protected from the front, so approach from above or behind and remove them before crossing exposed sections. Use wall structures as cover, watch for incoming fire and avoid dropping into a lower area unless the objective requires it.
After reaching the upper section and progressing through the interior route, locate the Supply Sherpa before the HA-T-102: JUGGERNAUT encounter. It is optional but restores AP and ammunition, and it can be used only once in this mission. During the boss fight, the Juggernaut’s front and tracked body are heavily armored; attack the weaker rear whenever possible. In the first phase, use the battlefield and Rusty’s assistance to get behind it. When the boss falls below roughly half health and Rusty leaves to handle reinforcements, continue using vertical movement and wait for safe rear-angle attacks. The boss adds mines during the later phase, so do not remain on the ground directly behind it when it begins restricting the arena.
- Operation Wallclimber is cleared.
- The Supply Sherpa has been located and used if AP or ammunition requires it.
- You are attacking the Juggernaut’s rear rather than trading against its frontal armor.
- You have tested another weapon or frame if your first build cannot maintain rear-angle pressure.
6. Complete both post-Wallclimber missions and unlock OS Tuning and Arena
After Operation Wallclimber, Retrieve Combat Logs and Investigate BAWS Arsenal No. 2 become available. They are not a fixed-order pair, so complete either one first and then clear the other. Retrieve Combat Logs is a timed search mission. Scan wreckage and recover the required logs while following the route through the Wall area. Do not rush past every side platform if you are pursuing Loghunt progress, but keep the time limit in mind.
Investigate BAWS Arsenal No. 2 is an infiltration mission. Scan frequently, watch for concealed enemies and avoid committing to a corridor until you have identified the next threat. Hidden targets can punish a player who advances with the lock-on pointed in the wrong direction, so use the scan pulse before entering an unfamiliar section. Clearing either Retrieve Combat Logs or Investigate BAWS Arsenal No. 2 unlocks OS Tuning and the Arena. Use the first Arena victories to earn OST Chips, then buy a system upgrade that supports your preferred approach, such as Boost Kick, a Core Expansion or a weapon-related tuning option.
- Retrieve Combat Logs is cleared.
- Investigate BAWS Arsenal No. 2 is cleared.
- OS Tuning and Arena are visible in the Garage.
- At least one F-Rank Arena evaluation has been completed, and its OST Chips have been spent or deliberately saved.
7. Prepare for and clear the normal Attack the Watchpoint
Before the normal Attack the Watchpoint, check the Parts Shop again and complete newly available Training or Arena evaluations if you need practice. Bring one method for pressuring pulse protection and another for capitalizing on a stagger. Avoid filling every weapon slot with slow, expensive ammunition unless you already know the mission’s engagement rhythm.
Advance through the Watchpoint, destroy the required squads and turrets, and defeat Sulla in Sector 3. Once Sulla is down, continue into the control center and destroy the control device. Locate the Supply Sherpa on the right-hand side before dropping into the final arena; it restores AP and ammunition once. Against BALTEUS, keep moving through the missile patterns, use vertical repositioning instead of predictable horizontal circling, and pressure its Pulse Armor with a suitable weapon before committing your strongest stagger damage. When the shield is depleted and the boss is staggered, use the prepared high-damage option rather than continuing with a low-impact weapon.
- The normal Attack the Watchpoint is cleared.
- Sulla and the control device have been defeated or destroyed.
- The Supply Sherpa after Sulla has been located and used if necessary.
- Your loadout can pressure Pulse Armor and exploit a stagger window.
- Chapter 2 missions are available from Sortie.
8. Record the New Game++ alternate Attack the Watchpoint
The alternate Attack the Watchpoint is a separate Chapter 1 catalogue entry reached through active New Game++ progression. It is not created by replaying the standard mission and is not part of the Chapter 2 route. Follow the qualifying altered campaign route until the alternate mission title appears in Sortie, then start that version from the active campaign rather than relying on Mission Replay to unlock it.
The opening sectors retain the normal objective flow: move through the Watchpoint, eliminate the required defenses and reach the encounter with Sulla. The alteration occurs when Sulla is supported by four IA-27: GHOST units. These cloaked attackers add long-range pressure and can make Sulla’s AC difficult to track. After the encounter begins, turn toward the GHOST units behind your starting position and destroy those two before Sulla reaches you if possible. Then drop to the lower water level and use the bridge supports and pillars to break the remaining GHOSTs’ firing lines while keeping Sulla within attack range. If all four are left active, their combined fire can overwhelm a light AC before it can finish the duel.
Once Sulla is defeated, proceed to the control center and destroy the control device as in the standard version. Use the Supply Sherpa before the final drop if you need a full recovery. The BALTEUS encounter follows; its Pulse Armor, missile patterns and stagger windows require the same fundamentals as the standard mission, although the earlier GHOST encounter may have consumed more ammunition or repair capacity. If the alternate mission offers a checkpoint after Sulla, use it only as recovery practice; for catalogue purposes, the active alternate sortie must be completed and recorded in the mission list.
- The alternate Attack the Watchpoint appears through active New Game++ progression.
- All four GHOST units in the altered Sulla encounter have been destroyed.
- Sulla has been defeated.
- The control device has been destroyed.
- BALTEUS has been defeated and the alternate mission has completed.
- The alternate Attack the Watchpoint is recorded separately from the standard Chapter 1 mission in Mission Replay.
Before you move on
- The normal first-playthrough Chapter 1 mission sequence is complete: Illegal Entry, Destroy Artillery Installations, Grid 135 Cleanup, Destroy the Transport Helicopters, Destroy the Tester AC, Attack the Dam Complex, Destroy the Weaponized Mining Ship, Operation Wallclimber, Retrieve Combat Logs, Investigate BAWS Arsenal No. 2 and the standard Attack the Watchpoint.
- The New Game++ alternate Attack the Watchpoint has also been completed through active later-cycle progression.
- The alternate Watchpoint record confirms four GHOST units were defeated during the Sulla encounter, followed by the control-device objective and BALTEUS.
- Garage access, Parts Shop access, OS Tuning and Arena access are available.
- At least one F-Rank Arena evaluation has been completed, and you understand that OST Chips are earned from first-time Arena victories and spent in OS Tuning.
- Your AC remains within Load and EN Load limits and has both a sustainable general-purpose attack and a high-impact stagger follow-up.
- Chapter 2 is available in Sortie after the normal route, confirming completion of standard Chapter 1 progression.
- For the broader 59-entry objective, use Replay Mission and the mission list to track the standard and alternate Chapter 1 entries, later-cycle missions, Combat Logs and parts. A single first-playthrough completion does not prove that the alternate Watchpoint has been unlocked.
References for this chapter
Chapter 2 — Grid 086, the Smart Cleaner and Arena Progress
Clear Chapter 2 in order: Infiltrate Grid 086, then Eliminate the Doser Faction on the standard route or Stop the Secret Data Breach on its qualifying later-cycle route, followed by Ocean Crossing. Grid 086 contains four WRECKER part containers and nine Combat Logs. Search the optional side areas after defeating Invincible Rummy, collect the containers and logs, use the Supply Sherpa, and attack Smart Cleaner’s upper exhaust before punishing its exposed furnace intake during stagger windows. Ocean Crossing contains four drone Combat Logs, a laser-covered approach, the Sea Spider encounter, and a required second cargo-launcher interaction after the boss. Stop the Secret Data Breach is catalogue entry 19 and replaces Eliminate the Doser Faction only when its qualifying active route is available. The Accept route can unlock it in New Game+, and it may also appear during New Game++ progression. Mission Replay cannot create it before active progression unlocks it.
Infiltrate Grid 086: defeat Rummy, then search the opened route
Follow the objective marker through the industrial passage until Invincible Rummy attacks. Defeat him, then pause before continuing toward the next marker. The gate opened by the encounter leads to optional Combat Log enemies, so use Scan and search the platforms around the route you have just entered.
Clear the two log-bearing enemies on the upper platform and the two on the nearby lower platforms. These enemies are away from the direct objective path and are easy to miss if you immediately follow the marker. Confirm the Combat Log notifications before proceeding deeper into Grid 086. The mission contains nine Combat Logs in total: Rummy, two upper-route enemies, two lower-route enemies, Nosaac, and three enemies in the final exterior section.
- Invincible Rummy defeated.
- Two upper-route Combat Log enemies defeated.
- Two lower-route Combat Log enemies defeated.
- The first five Grid 086 Combat Logs are registered.
Collect the four WRECKER containers before the Smart Cleaner arena
After entering the main building and dropping into the lower room, turn around and search the rear area for the HC-3000 WRECKER head. Continue through the building and inspect the furnace room for the CC-3000 WRECKER core.
Near the smelting section, do not follow only the red objective marker. Look for the side opening and pipe route near the furnace. Follow it to Nosaac, defeat him for his Combat Log, and open the nearby container for the AC-3000 WRECKER arms. The enemy and container are separate records.
In the final exterior area, search the side platform near the vertical catapult before destroying the marked group. The 2C-3000 WRECKER legs are in the fourth container. The nearby enemies provide the final three Combat Logs. Check the parts and log totals before entering the boss route.
- HC-3000 WRECKER head collected.
- CC-3000 WRECKER core collected.
- AC-3000 WRECKER arms collected.
- 2C-3000 WRECKER legs collected.
- Nosaac defeated and his Combat Log registered.
- Three final exterior Combat Log enemies defeated.
- All nine Grid 086 Combat Logs recorded.
Use the Supply Sherpa and defeat Smart Cleaner
Locate the Supply Sherpa immediately before the Smart Cleaner encounter and use it before entering the arena. It restores AP, ammunition, and Repair Kits, so entering the fight without using it makes retries needlessly difficult.
Smart Cleaner’s broad armored front is not the most efficient target. Attack the exposed upper exhaust from above or while hovering, but keep enough EN available for Quick Boosts and vertical repositioning. Impact-focused attacks help build ACS strain; do not remain directly in front of the machine while it begins a grinder-arm sweep or frontal charge.
When Smart Cleaner staggers, move to the front furnace intake and use your strongest direct-damage attack. Leave the front when the stagger expires or the boss begins a broad saw attack. Repeat the exhaust-to-intake cycle until the boss is destroyed.
- Supply Sherpa used before the boss.
- Upper exhaust targeted to build ACS strain.
- Front furnace intake attacked during stagger windows.
- Smart Cleaner defeated.
Complete Eliminate the Doser Faction on the standard route
On the ordinary campaign route, Eliminate the Doser Faction follows Infiltrate Grid 086. Assault Boost between the marked beacons and prioritize the enemies named by the current objective. Clear the marked groups at the first beacon before moving to the second, then destroy the marked final group to complete the sortie.
Use the industrial structures to interrupt missile lines and prevent close-range enemies from surrounding you. This is a required active campaign mission on the standard route. Arena matches, shop visits, and Mission Replay do not replace it.
- Marked Doser groups at the first objective cleared.
- Marked Doser groups at the second objective cleared.
- Eliminate the Doser Faction completed on the standard route.
Track Stop the Secret Data Breach on its qualifying later-cycle route
Stop the Secret Data Breach is catalogue entry 19 and occupies the same active Chapter 2 slot as Eliminate the Doser Faction. It is not played alongside that mission in one active route. The qualifying Accept route can unlock Stop the Secret Data Breach in New Game+, and the mission may also be obtained during New Game++ progression when the relevant route is active. Availability is therefore route-dependent rather than guaranteed in every New Game+ or New Game++ campaign.
Do not try to create the mission by replaying Eliminate the Doser Faction. Mission Replay only lists missions already unlocked through active campaign progression. If the mission is absent from Mission Replay, record the missing entry and obtain it during a qualifying active cycle instead.
The opening objective is time-sensitive: destroy all five hacking drones before the breach completes. Prioritize the marked drones over ordinary enemies. One is in the opening area, another is behind the furnace-side cargo section, and the remaining drones are reached through upper and side corridors. Use Scan when structures hide a target, and do not spend time clearing every ordinary enemy before the breach timer is stopped.
After the drones are destroyed, continue through the reinforcements and defeat G5 Iguazu and the remaining hostile units. For Combat Log cleanup, return to the furnace area after completing the drone objective. Enter the side opening by the smelting machinery, follow the pipe route, and descend into the lower corridor, where three additional log-bearing MTs can be found. A tetrapod MT encountered during the hacking-drone section also carries a Combat Log. Finish the sortie after the records appear so the results register.
- The qualifying active route has unlocked Stop the Secret Data Breach.
- The mission is recorded as catalogue entry 19.
- Five hacking drones destroyed before the breach completes.
- G5 Iguazu and the remaining hostile units defeated.
- The furnace-area Combat Logs recorded if pursuing full log completion.
- The tetrapod Combat Log recorded if pursuing full log completion.
- Mission completion confirmed in the results and Mission Replay records.
Traverse Ocean Crossing and collect the four drone Combat Logs
Ocean Crossing begins with an exterior route watched by PCA satellite lasers. Stay below the main sightlines and use the industrial structures, railcars, and under-platform route as cover rather than crossing exposed platforms unnecessarily.
After leaving the starting elevator, search the right-side and lower route near the first open area. Two PCA drones carry Combat Logs. Continue through the adjoining tunnel or rail corridor to find two more log-bearing drones. Use Scan if they are hidden behind structures and confirm all four drone records before continuing toward the cargo launcher.
- Laser-covered exterior crossed using cover.
- First two drone Combat Logs collected.
- Two tunnel or rail-corridor drone Combat Logs collected.
- All four Ocean Crossing drone Combat Logs recorded.
Board the cargo launcher, defeat Sea Spider, and board it again
Continue to the intercontinental cargo launcher and clear the nearby PCA units. Use the Supply Sherpa before activating the launcher if it is available on your route. The launcher interaction is a mission objective, not a Part Container.
Interact with the cargo launcher to begin the Sea Spider encounter, then move away from the launch point. Build ACS strain with reliable impact attacks and spend stagger windows on direct damage. Sea Spider’s leg attacks, beams, and shock-wave attacks make the ground dangerous, so keep moving and preserve EN for Quick Boosts. During its airborne phase, gain altitude and avoid remaining directly beneath the boss.
After Sea Spider is destroyed, return to the cargo launcher and interact with it a second time. This second boarding action is required to finish Ocean Crossing and unlock Chapter 3.
- Supply point used before Sea Spider when available.
- Cargo launcher boarded before the boss.
- Sea Spider defeated.
- Cargo launcher boarded again after the boss.
- Ocean Crossing cleared and Chapter 3 unlocked.
Handle Arena, OS Tuning, the Parts Shop, and Mission Replay after the route
After completing the active Chapter 2 route, visit Arena and clear the available programs for OST Chips. Spend the chips through OS Tuning on systems that support your current builds, such as weapon access, damage improvements, or a Core Expansion. OST Chips are upgrade currency, not ammunition or a consumable stockpile.
Check the Parts Shop after major campaign advances and keep the WRECKER parts even if you are not currently using that frame. Test revised assemblies in AC Test before returning to a difficult mission.
Use Mission Replay for practice, ranks, credits, missed containers, and Combat Log cleanup after the relevant mission has been unlocked. Replay cannot create Stop the Secret Data Breach, entry 19, or another cycle-specific mission that has not first been obtained through active campaign progression. The altered Attack the Watchpoint is a Chapter 1 later-cycle entry; complete and track it in the Chapter 1 mission slot, not in Chapter 2.
- Arena progress checked after the active Chapter 2 route.
- Available OST Chips spent through OS Tuning.
- Parts Shop checked after campaign advances.
- Standard and alternate Chapter 2 mission records tracked separately.
- Mission Replay used only for unlocked missions and cleanup.
- Altered Attack the Watchpoint tracked under Chapter 1, not Chapter 2.
Before you move on
- Infiltrate Grid 086 is cleared.
- All four WRECKER containers are collected.
- All nine Grid 086 Combat Logs are recorded.
- Smart Cleaner is defeated after using the Supply Sherpa.
- Eliminate the Doser Faction is cleared if the standard route was selected.
- Stop the Secret Data Breach is cleared as catalogue entry 19 if its qualifying active route was selected.
- The qualifying Accept route is noted if Stop the Secret Data Breach is being obtained in New Game+.
- The optional Stop the Secret Data Breach Combat Logs are recorded if full log completion is intended.
- Ocean Crossing is cleared.
- All four Ocean Crossing drone Combat Logs are recorded.
- The cargo launcher was used before and after the Sea Spider fight and was not counted as a Part Container.
- Sea Spider is defeated and Chapter 3 is available.
- Arena, OS Tuning, Parts Shop, Mission Replay, containers, Combat Logs, and alternate campaign missions are tracked separately.
- The altered Attack the Watchpoint is checked in the Chapter 1 mission slot when pursuing later-cycle mission coverage.
References for this chapter
Chapter 3 — Midgame Escalation and New Enemy Types
Complete Chapter 3’s shared active route in this order: Steal the Survey Data, Attack the Refueling Base, Eliminate V.VII, Tunnel Sabotage, Survey the Uninhabited Floating City, Heavy Missile Launch Support, one Wall decision mission, Attack the Old Spaceport, Eliminate “Honest” Brute, Defend the Old Spaceport, Historic Data Recovery and Destroy the Ice Worm. Collect containers and Combat Logs while progressing, but use Mission Replay later for cleanup. Tunnel Sabotage is replaced by Prevent Corporate Salvage of New Tech on a qualifying New Game+ or later route. The remaining later-cycle entries, including Defend the Dam Complex, Coral Export Denial and the altered Survey mission, belong to the separate branch chapter. Complete this shared route once before auditing those variants.
Prepare your AC and record the active route
Use a balanced assembly with dependable impact buildup, a weapon that can exploit stagger, and enough mobility for open industrial areas. Keep a second AC design available for close AC duels and large-machine encounters. Chapter 3 alternates between stealth, defense, open-field combat and boss-scale targets, so avoid building around only one range or damage profile.
Make decisions from the active Sortie menu, not Mission Replay. When a mission has a Decision icon, selecting one option can remove the other from the current campaign cycle. Mission Replay is for missions already unlocked in the file; it cannot create a missing branch or change a completed campaign choice.
- Prepare a general-purpose stagger-focused AC.
- Keep a faster or more evasive design available.
- Record every Decision mission separately from collection progress.
Steal the Survey Data
At Hjalmar Mine, follow the objective markers to the marked survey wrecks and interact with each one. Move between them using rock formations, mine structures and elevation to break missile locks. Destroy only the enemies that block the route unless you are deliberately pursuing a higher payout or Combat Log completion.
Search the area around the route for the tetrapod MT carrying a Combat Log. It is positioned away from the simplest line between the survey objectives, so do not leave as soon as the final data point is collected. A supply point is available before the concluding engagement; use it before advancing if your ammunition or repair kits are low.
During the final phase, the PCA Heavy Warship and supporting units enter the area. Keep moving across the arena, prioritize dangerous ground units and avoid remaining in one exposed lane where the warship’s missiles and railgun can overlap. Defeat the required PCA force and wait for the clear screen.
- Retrieve every required survey record.
- Search the side area for the tetrapod Combat Log.
- Use the supply point before the final engagement.
- Defeat the required PCA force and confirm mission completion.
Attack the Refueling Base
Enter the Jorgen Refueling Base and destroy the marked refinery objective. Optional fuel-base targets can improve the payout or help with rank conditions, but they are not required for ordinary story progression. If ammunition becomes tight, complete the refinery first and return through Mission Replay for optional destruction.
Before triggering the final fight, search the bridge and valley approaches for the laser-equipped LC enemies carrying Combat Logs. One is near the bridge route and another is positioned below the far end of the main crossing. Use vertical movement and cover to avoid their long-range fire while closing the distance.
Destroying the refinery brings in EKDROMOI EP and EKDROMOI PG. Keep both in view, avoid allowing their plasma and lance attacks to overlap, and concentrate on one unit until it is destroyed. Then finish the second and confirm the clear screen.
- Destroy the marked refinery.
- Collect optional targets only if needed for payout or rank goals.
- Defeat both EKDROMOI units.
- Search the bridge approaches for the Combat Logs.
Eliminate V.VII
Approach The Wall through the surveillance section. Stay below the camera drones when possible and use buildings, walls and other structures to break line of sight. If a camera begins tracking you, move behind cover or destroy the surveillance unit before detection completes. Unnecessary fights increase the chance of being exposed, so follow the objective route carefully.
When V.VII Swinburne appears, continue attacking until he uses his repair kit and raises his Pulse Armor. At that point he offers to withdraw. Refusing the offer lets you finish Swinburne and obtain his Combat Log. Accepting allows Swinburne to leave and brings in the RLF AC Rokumonsen instead. Defeating Rokumonsen clears the mission and awards the alternate Combat Log.
These outcomes are separate records. Choose the outcome appropriate to this campaign route, then use Mission Replay or another active cycle for the other encounter. If Swinburne leaves, follow the new objective marker; the replacement AC is part of the mission and does not indicate failure.
- Reach the target without being destroyed by surveillance detection.
- Choose the Swinburne or Rokumonsen encounter.
- Record the unselected AC encounter for later cleanup.
Clear Tunnel Sabotage
On the standard route, enter Engebret Tunnel and follow the objective toward the PCA installation. The corridors are narrow, so avoid backing into machinery or explosive objects. Use short boosts and grounded movement to preserve energy for emergency dodges and vertical repositioning.
Search the elevated machinery platforms during the route for the IA-C01W1: NEBULA container. It is optional for story progress but required for the complete parts catalogue. Collect it before leaving the tunnel rather than assuming it will be awarded automatically at mission completion.
Continue to the marked PCA objective and destroy the required target. Once the mission-clear screen appears, the shared Chapter 3 route continues to Survey the Uninhabited Floating City.
On a qualifying later-cycle campaign route, Prevent Corporate Salvage of New Tech can appear as an alternative to Tunnel Sabotage. It is a separate active mission record, not an additional requirement for the standard route. Follow ch04-ch3routes for its prerequisite and directions.
- Clear Tunnel Sabotage in the standard cycle.
- Collect the NEBULA container if completing the parts catalogue.
- Record Prevent Corporate Salvage of New Tech separately when it becomes available later.
- Do not use Mission Replay to substitute for the active-cycle alternative.
Survey the Uninhabited Floating City
Proceed through Xylem’s ECM fog and follow the markers to each required fog-control device. Use rooftops, large structures and changes in elevation to interrupt incoming fire. Avoid repeated straight-line boosts across exposed platforms; preserve energy for sudden helicopter attacks and the next objective.
Search the standard route for the IA-C01G: AORTA container. It is separate from the ECM objective, so you must deliberately leave the marked path to collect it. The mission also contains a Combat Log target associated with the city’s hostile units. Clear the required devices and confirm the extraction objective before leaving.
A later New Game++ cycle can present an altered Survey the Uninhabited Floating City with a different objective sequence and a final encounter involving Thumb Dolmayan in ASTGHIK. Treat that as a separate mission record with separate collection requirements. Its detailed route belongs in ch04-ch3routes, not in this shared mission walkthrough.
- Deactivate every required ECM device.
- Collect the AORTA container if pursuing all parts.
- Search for the standard mission’s Combat Log target.
- Track the altered Survey mission separately in a later cycle.
Defend the missile launch
At Watchpoint Delta, move between the marked defense areas and destroy enemies threatening the RaD missile battery. Prioritize attackers close to the launch site rather than chasing distant targets. Stay mobile around the battery and use vertical movement when missiles enter the arena.
The main missile’s launch is the essential objective. Protect the subsidiary missiles when practical because they can affect rewards or completion quality, but do not abandon the main launch position to pursue enemies that are not an immediate threat.
Fixed Gatling platforms can help against lighter attackers, but they do not replace your AC’s damage output and can be exposed from several angles. When the launch sequence completes, eliminate any remaining required enemies and wait for the mission-clear confirmation.
- Protect the main missile until launch completes.
- Prioritize enemies attacking the launch site.
- Protect subsidiary missiles when practical.
- Confirm the sortie-clear screen.
Choose one Wall decision mission
The Wall decision offers Eliminate the Enforcement Squads or Destroy the Special Forces Craft. Select one from the active Sortie menu and complete it before continuing. The two missions are mutually exclusive in that campaign cycle; the unselected mission requires another qualifying active campaign.
For Eliminate the Enforcement Squads, follow the marked PCA positions, defeat the required enforcement units and search side areas for its Combat Log target before completing the final objective. For Destroy the Special Forces Craft, advance on the marked craft and clear the surrounding PCA resistance while preventing the primary target from escaping.
Do not expect Mission Replay to make the unselected option appear automatically. Replay can clear or improve a mission already recorded in the save; it cannot undo the decision that removed the other mission from the active cycle.
- Select one Wall mission.
- Clear its required objective.
- Record the unselected mission for another active cycle.
- Collect the selected mission’s Combat Log if needed.
Attack the Old Spaceport
Enter Old Bertram Spaceport and clear the marked sectors methodically. Use hangars, cargo structures and other cover to prevent the PCA Captain and PCA Lieutenant from maintaining a crossfire. Search cleared combat areas for Combat Logs before advancing to the final objective.
This is a regular spaceport operation, not the Ice Worm battle. Complete the marked PCA objective, destroy the required opposition and wait for the mission-clear confirmation before moving on. Do not confuse it with the separate defense mission that follows later in the chapter.
- Clear the marked spaceport sectors.
- Search the combat areas for Combat Logs.
- Defeat the required PCA forces.
- Confirm mission completion before leaving.
Eliminate “Honest” Brute
Launch Eliminate “Honest” Brute as a separate sortie. Search the mission deliberately for the three containers: WB-0010 DOUBLE TROUBLE, BC-0600 12345 and WB-0000 BAD COOK. They are optional for story progress but necessary for the complete parts catalogue.
Brute’s flamethrower attacks make prolonged point-blank exchanges dangerous. Keep moving laterally, use vertical movement to escape the flame arcs and punish him after committed swings or missed close-range attacks. Build enough impact to create a stagger, then spend the opening with your strongest direct-damage weapon rather than remaining in front of the flamethrower.
After Brute is defeated, confirm the separate mission-clear screen. If a container was missed, replay this mission later rather than delaying the campaign route.
- Search for DOUBLE TROUBLE, 12345 and BAD COOK.
- Avoid sustained point-blank flamethrower exposure.
- Stagger Brute and punish his recovery.
- Confirm the mission-clear screen.
Defend the Old Spaceport and recover historic data
Defend the Old Spaceport is the standard defense mission. Protect the spaceport by prioritizing enemies attacking the base and the active defense area. Do not pursue distant targets so far that the next wave reaches the objective unattended. Search for the mission’s Combat Log target when the defense situation is stable.
Historic Data Recovery follows on the standard route. Enter the underground passage and follow the blue data markers to the required records. Yellow data points provide additional payout but are not required for the basic clear. Use the tunnel geometry to avoid unnecessary fights, collect the required data and return to the marked extraction objective.
Later-cycle content such as Defend the Dam Complex and Coral Export Denial is handled in ch04-ch3routes. These entries should be tracked as separate cycle-specific records and should not be added to the shared standard Chapter 3 checklist.
- Protect the Old Spaceport through the required waves.
- Collect its Combat Log if needed.
- Recover the required blue data records.
- Clear Historic Data Recovery and confirm extraction.
Destroy the Ice Worm
Before this mission, equip the VE-60SNA Stun Needle Launcher, which is made available before the Ice Worm operation. Mount it on a back slot and keep a second high-impact or direct-damage weapon available for the opening after the shield breaks. The VE-60SNA is the intended tool for breaking the Worm’s shield.
Track the Worm across the ice field and wait for its head to emerge. Fire the Stun Needle into the exposed face, not the buried body. A successful hit breaks the shield and triggers Rusty’s Overed Rail Cannon sequence. When the Worm is disabled, rush into the opening and spend your strongest attacks before retreating from its electrical discharge and burrowing follow-up.
Repeat the head-shot and punish sequence through the later phases. When the Worm rises and begins charging a large Coral-energy attack, create distance and continue moving rather than standing beneath it. If you miss the face, wait for the next exposure instead of wasting ammunition on the protected body. After the clear screen, Chapter 4 unlocks.
- Equip the VE-60SNA before sortie.
- Hit the exposed Ice Worm head.
- Use the Rusty-assisted stagger window for direct damage.
- Retreat before the Worm’s discharge and Coral attacks.
- Confirm the Chapter 4 transition.
Before you move on
- Steal the Survey Data is cleared and all required survey records are completed.
- Attack the Refueling Base is cleared and both EKDROMOI units are defeated.
- Eliminate V.VII is cleared, with the Swinburne or Rokumonsen outcome recorded.
- Tunnel Sabotage is cleared on the standard route and the NEBULA container is collected if required.
- The standard Survey the Uninhabited Floating City mission is cleared and the AORTA container is collected if required.
- Heavy Missile Launch Support is cleared with the main missile surviving its launch sequence.
- One Wall decision mission is cleared and the opposite mission is recorded for another active campaign cycle.
- Attack the Old Spaceport and Eliminate “Honest” Brute are both cleared as separate sorties.
- Defend the Old Spaceport and Historic Data Recovery are cleared on the standard route.
- Destroy the Ice Worm is cleared and Chapter 4 is unlocked.
- Complete this shared Chapter 3 route once in active progression.
- Audit Prevent Corporate Salvage of New Tech, Defend the Dam Complex, Coral Export Denial, the altered Survey mission and other variants separately through ch04-ch3routes.
- For the full 59-mission catalogue, compare Mission Replay against the standard, New Game+, New Game++ and mutually exclusive entries; one ordinary campaign clear does not prove that every mission record is unlocked.
Chapter 3 — Decision Routes That Affect Endings
The shared Chapter 3 route belongs entirely to ch03-ch2. Do not replay it here unless you are improving a rank or collecting a named log, data entry, container or part. This chapter covers the mutually exclusive Wall missions, later-cycle alternatives and the New Game++ Coral route. Active campaign choices create missions; Mission Replay can revisit a mission only after that mission has been unlocked. For the recommended Alea Iacta Est cycle, accept the altered Attack the Dam Complex offer, complete Escort the Weaponized Mining Ship, then choose Prevent Corporate Salvage of New Tech, Eliminate the Enforcement Squads, Coral Export Denial and later Eliminate V.III. Defend the Dam Complex belongs to a different qualifying later-cycle route and should be recorded separately.
1. Use this chapter only for branches and variants
Steal the Survey Data, Attack the Refueling Base, Eliminate V.VII, Tunnel Sabotage, Survey the Uninhabited Floating City, Heavy Missile Launch Support, Attack the Old Spaceport, Eliminate “Honest” Brute, Defend the Old Spaceport, Historic Data Recovery and Destroy the Ice Worm are covered by the shared route or by their own cleanup entries. Do not repeat their full directions here.
Mission Replay is suitable for ranks, credits, missed logs, parts and practice after a branch is unlocked. It cannot create an unchosen decision mission or alter the active campaign state. Keep standard Survey the Uninhabited Floating City separate from its later Thumb Dolmayan variant; keep standard Unknown Territory Survey separate from the Middle Flatwell version.
- Use ch03-ch2 for the sole shared Chapter 3 route.
- Record every branch as an active-campaign objective before relying on Mission Replay.
- Do not count standard Survey the Uninhabited Floating City as the Thumb Dolmayan variant.
2. Choose Eliminate the Enforcement Squads or Destroy the Special Forces Craft
These are mutually exclusive Wall decision missions. Only one appears as the active choice in a campaign cycle, and the other must be obtained in another qualifying active cycle. The decision is separate from the Chapter 5 ending choice.
For Eliminate the Enforcement Squads, begin on the exterior rock approach and clear the PCA units around the valley before climbing toward the Wall entrance. Check the side of the approach for the optional AC encounter if you are hunting its combat record. Enter through the marked door, defeat the melee-equipped squad inside, then continue through the facility to Heavy Cavalry. Keep enough stagger output for the final tank and avoid staying directly in front of its main weapon.
For Destroy the Special Forces Craft, follow the objective marker across the approach and prioritize the named PCA craft rather than wasting ammunition on every regular unit. Fight around the craft’s flanks, where you can avoid its frontal fire and maintain a better angle for repeated stagger pressure. Finish the target and confirm mission completion; this entry has its own reward and combat-record status.
Choose Eliminate the Enforcement Squads for the recommended Alea Iacta Est cycle. Choose Destroy the Special Forces Craft in another active cycle if you need both catalogue entries.
- Complete exactly one Wall decision mission in the current cycle.
- Record the selected entry in Mission Replay.
- Obtain the other Wall mission through another active campaign cycle.
- Do not confuse either Wall mission with Defend the Dam Complex.
3. Unlock Prevent Corporate Salvage of New Tech
Prevent Corporate Salvage of New Tech is a later-cycle alternative to Tunnel Sabotage. Select it when it appears in active progression; selecting Tunnel Sabotage instead leaves this branch unavailable for that cycle. The mission is completed by destroying the marked PCA recovery force, including the LC and HC units supporting the salvage operation.
Move between the marked recovery areas rather than clearing every unrelated enemy. The open ice-field terrain gives the PCA units room to fire missiles and long-range weapons, so use quick vertical boosts and cover from industrial structures to break lock-on. Prioritize the marked craft, then clean up remaining enemies only when they block the objective or threaten your repair reserve.
This mission is required for the recommended Alea Iacta Est route and is also part of the qualifying route used to obtain the Middle Flatwell Unknown Territory Survey. After active completion, Mission Replay can be used for rank or reward cleanup.
- Select Prevent Corporate Salvage of New Tech during active later-cycle progression.
- Do not select Tunnel Sabotage when preparing this route.
- Confirm the mission appears in Mission Replay after clearing it.
- Keep its record separate from Tunnel Sabotage.
4. Obtain Defend the Dam Complex on a separate later-cycle route
Defend the Dam Complex is a later-cycle replacement for Defend the Old Spaceport. To unlock it, take the qualifying RLF offer during the altered Attack the Dam Complex sequence and complete Prevent Corporate Salvage of New Tech in that campaign route. The exact Attack the Dam Complex choice is therefore part of the prerequisite; Mission Replay cannot substitute for it.
Return to the dam and destroy King and Chartreuse. Use the dam buildings to break lines of fire, separate the two ACs when possible and avoid allowing both to attack from opposite sides at once. Focus one target until it is close to destruction, then finish it quickly before switching. Preserve repair kits for the later portion of the fight rather than trading damage against both enemies in the open.
A further Raven encounter can occur during the mission. Defeat every required opponent and verify the combat-record results afterward. Do not count Raven as a third Defend the Dam Complex log unless the in-game record specifically marks one; the mission’s named log targets are King and Chartreuse.
This route is not the recommended Alea Iacta Est route. The Alea route uses the altered Dam Complex decision for Escort the Weaponized Mining Ship instead, so plan Defend the Dam Complex for another active cycle.
- Use the qualifying altered Attack the Dam Complex choice.
- Complete Prevent Corporate Salvage of New Tech in that route.
- Clear Defend the Dam Complex instead of Defend the Old Spaceport.
- Confirm King and Chartreuse’s records separately.
- Track the Raven encounter separately from the mission’s named log targets.
5. Clear the Coldcall version of Underground Exploration — Depth 2
From the second campaign cycle onward, Underground Exploration — Depth 2 can contain the Coldcall variant instead of the usual G5 Iguazu encounter. The variant is associated with qualifying prior progression: accepting the altered Attack the Dam Complex offer or completing Escort the Weaponized Mining Ship. Because this is campaign-state dependent, verify the opponent and the Mission Replay entry rather than assuming the variant appeared.
Advance through Depth 2 until the midpoint AC encounter. In the alternate version, fight Coldcall in DEADSLED. Keep a short reaction distance rather than committing to a predictable close-range exchange; watch for kicks, melee attacks and Assault Armor. Build ACS strain with repeated impact attacks, then switch to direct-damage weapons during the stagger window.
After the duel, inspect the encounter area for the STV Sketch (5) data log before continuing. Finish the remainder of Depth 2 and defeat ENFORCER. Coldcall’s encounter supplies the variant’s Platinum Combat Log. If G5 Iguazu appears, you cleared the standard entry, not the alternate.
- Record standard Depth 2 and the Coldcall variant separately.
- Confirm Coldcall and DEADSLED appeared in the active mission.
- Collect STV Sketch (5).
- Verify Coldcall’s Platinum Combat Log.
- Use Mission Replay only after the alternate has been unlocked.
6. Clear the Middle Flatwell Unknown Territory Survey variant
The Middle Flatwell version is a single alternate Unknown Territory Survey entry. It is not created by Eliminate V.III and is not the same as the Thumb Dolmayan version of Survey the Uninhabited Floating City. The qualifying route requires Prevent Corporate Salvage of New Tech and Defend the Dam Complex to have been completed in the relevant campaign progression.
Proceed to the normal Rusty encounter. During the fight, Middle Flatwell joins Rusty, turning the battle into a two-AC engagement. Use the surrounding structures to interrupt one opponent’s approach while keeping both on your radar. If possible, stagger and finish one quickly; allowing both ACs to maintain uninterrupted pressure makes the fight substantially more dangerous.
Both Rusty and Middle Flatwell must be defeated. The mission then uses an altered completion sequence that avoids the standard long descent. Record both combat logs and verify that the alternate mission entry is present in Mission Replay.
If only Rusty appears, you cleared the standard Unknown Territory Survey. If Thumb Dolmayan appears in the floating-city mission, you cleared a different variant.
- Complete Prevent Corporate Salvage of New Tech.
- Complete Defend the Dam Complex in the qualifying route.
- Record standard Unknown Territory Survey separately.
- Defeat both Rusty and Middle Flatwell in the alternate.
- Confirm both combat records and the distinct replay entry.
7. Complete Coral Export Denial on the Alea route
Coral Export Denial is Chapter 3 New Game++ content and a decision mission paired with Historic Data Recovery. On the recommended Alea Iacta Est cycle, complete Escort the Weaponized Mining Ship first, then select Coral Export Denial when it appears. It is a route-enabling choice for that ending cycle, not an ending by itself.
The objective is to destroy Coral transport helicopters before they leave the combat zone. Ignore ordinary enemies unless they block a transport or threaten your movement. Fly directly between marked launch areas and use fast, reliable ranged attacks so you can change targets immediately. Destroyed transports and Coral storage tanks can produce large explosions, so move away after a kill instead of hovering beside the wreck.
The mission fails when five or more transports escape. One through four escapes still allow completion, but zero escapes is the appropriate target for optional rank cleanup. After the final wave, confirm the mission in Mission Replay. Track Destroy the Ice Worm and Eliminate V.III separately; neither is part of Coral Export Denial’s completion record.
- Complete Escort the Weaponized Mining Ship before selecting Coral Export Denial on the recommended route.
- Destroy the marked transports as the first priority.
- Do not allow five transports to escape.
- Use zero escapes as an optional rank-cleanup target.
- Record Coral Export Denial separately from Historic Data Recovery and Destroy the Ice Worm.
Before you move on
- The shared Chapter 3 route is complete or is being replayed only for a named cleanup target.
- One Wall decision mission is recorded for the current campaign cycle.
- The opposite Wall decision mission is recorded from another active cycle.
- Prevent Corporate Salvage of New Tech is cleared through active progression.
- Defend the Dam Complex is recorded separately from Defend the Old Spaceport.
- King and Chartreuse’s records are confirmed.
- The standard and Coldcall Depth 2 entries are both recorded.
- Coldcall’s Platinum Combat Log and STV Sketch (5) are confirmed.
- The standard and Middle Flatwell Unknown Territory Survey entries are both recorded.
- The Middle Flatwell entry is tied to the qualifying Prevent Corporate Salvage of New Tech and Defend the Dam Complex progression.
- The Thumb Dolmayan floating-city variant is tracked separately.
- Coral Export Denial is recorded as Chapter 3 New Game++ content.
- Escort the Weaponized Mining Ship precedes Coral Export Denial on the recommended Alea cycle.
- Fewer than five transports escaped; zero escapes are confirmed if rank cleanup is complete.
- Eliminate V.III and the Chapter 5 ending missions remain tracked in their own chapters.
References for this chapter
Chapter 4 — Heavy Bosses and Stage Control
Chapter 4 covers Underground Exploration — Depths 1, 2 and 3, one mutually exclusive decision mission, Unknown Territory Survey and Reach the Coral Convergence. The standard Unknown Territory Survey is the Rusty-only version. A single later-cycle variant adds Middle Flatwell after the qualifying Prevent Corporate Salvage of New Tech and Defend the Dam Complex route. New Game++ adds Eliminate V.III as a separate decision mission and can alter Reach the Coral Convergence, but it does not create another Unknown Territory Survey entry. Record the standard and Middle Flatwell versions separately. The standard Coral Convergence contains IA-C01W3: AURORA and IA-C01W2: MOONLIGHT; IB-C03W4: NGI 028 is found later in New Game++ Regain Control of the Xylem.
Prepare for the underground and Coral missions
Use an assembly that can build ACS strain consistently while retaining enough EN for repeated Quick Boosts and vertical movement. A mid-range firearm, a high-Impact weapon and a close-range stagger punish tool cover most Chapter 4 fights. Check load capacity before each sortie; an overloaded AC is especially vulnerable in the Depths and against CEL 240.
The standard Chapter 4 decision offers Intercept the Redguns or Ambush the Vespers. In New Game++, Eliminate V.III appears as a separate decision when the Alea Iacta Est route has been established through the earlier altered missions. Do not treat Eliminate V.III as another version of Unknown Territory Survey. The Middle Flatwell Unknown Territory Survey is the single later-cycle variant and is enabled by the qualifying Prevent Corporate Salvage of New Tech and Defend the Dam Complex route. Active campaign choices determine which entry appears; Mission Replay cannot create a missing branch. The chapter’s ordinary mission order and decision structure are listed separately in the mission catalogue.
After opening a container or defeating a log-bearing target, finish the sortie and allow the clear result to register. A failed or abandoned mission can prevent the acquisition from being recorded.
- Check load, generator output and Quick Boost performance.
- Identify whether the active run is standard, NG+ or NG++.
- Use active campaign sorties for branch and cycle-specific missions.
- Finish every sortie containing a part, Data Log or Combat Log.
Clear Underground Exploration — Depth 1
Enter Watchpoint Alpha and descend through the facility, following the objective markers. At the first lower shaft area, search the large hangar opening and the surrounding platforms before using the access point. The container holds IA-C01L: EPHEMERA, the Ephemera legs. This part is optional for story progression but required for a complete parts collection.
Continue downward to the NEPENTHES arena. Avoid remaining directly in front of the weapon platform during its long firing sequences. Use shaft walls, ledges and changes in elevation to interrupt its firing lanes, then attack during recovery periods. Move before the next volley begins instead of trading damage. Destroy NEPENTHES, follow the post-battle marker and wait for the mission-clear result.
- Reach the lower NEPENTHES arena.
- Collect IA-C01L: EPHEMERA if parts completion is intended.
- Use walls and ledges to interrupt direct firing lanes.
- Confirm that the mission has fully cleared.
Clear standard Underground Exploration — Depth 2
Advance through Watchpoint Alpha until G5 Iguazu attacks in HEAD BRINGER. Defeat him and continue through the underground canyon. Restore power through the control panel in the side room reached from the vertical shaft. The nearby room contains the Data Log STV Sketch (3), so collect it before proceeding.
When the route reaches the security section with blue lasers and the locked partition, enter the side room containing the PCA enemies. Open the container holding IA-C01B: GILLS, the booster, then continue to the ventilation duct. Use the vertical catapult to reach the upper platform, defeat the guards and open the container holding IA-C01A: EPHEMERA, the arms part. These containers and the associated log targets are optional for story progress but important for collection goals.
Activate the control panel and use the supply station before entering the Enforcer chamber. Build ACS strain without spending every weapon at once, preserve EN for diagonal evasion and punish confirmed staggers with your strongest direct-damage option. Defeat the Enforcer and confirm the standard mission entry.
- Defeat G5 Iguazu in HEAD BRINGER.
- Collect STV Sketch (3), IA-C01B: GILLS and IA-C01A: EPHEMERA if required.
- Use the supply station before the Enforcer.
- Defeat the Enforcer and register the clear.
Clear the later-cycle Depth 2 variant
From the second campaign cycle onward, the qualifying altered route can replace the standard Iguazu encounter with Coldcall in DEADSLED. The mission remains Underground Exploration — Depth 2, but the altered encounter has its own Combat Log record. The route’s part containers remain relevant, so collect IA-C01B: GILLS and IA-C01A: EPHEMERA if they are missing.
The alternate encounter also contains STV Sketch (5). Coldcall uses reverse-joint mobility, kicks, Assault Armor and a charged WUERGER attack. Fight in the open section rather than directly underneath the jump arc. Quick Boost sideways when the charged shot is telegraphed, then punish the landing or a missed attack. Do not chase Coldcall vertically if doing so leaves you without EN.
After Coldcall is defeated, continue through the control-panel route, use the supply station and defeat the Enforcer. Check the mission list and Loghunt records afterward. Do not count the Coldcall entry as a separate Unknown Territory Survey mission; it is the later-cycle Depth 2 variant.
- Launch the altered Depth 2 version only when it appears in the active campaign.
- Defeat Coldcall in DEADSLED.
- Collect STV Sketch (5), the two Depth 2 containers and Coldcall’s Combat Log if required.
- Finish the Enforcer section and verify the altered Depth 2 record.
Clear Underground Exploration — Depth 3
Move around the reactor’s outer platforms instead of crossing the exposed center. In the laser-covered area, search the outer platform near the circular structure for IA-C01F: OCELLUS, the FCS. Continue around the structure and inspect the bridge and outer-wall platforms for IA-C01C: EPHEMERA, the core. Both containers are optional for story progression.
Advance to the reactor and destroy the pressure chamber. The Ephemera encounter begins afterward. Concentrate Impact damage to create a stagger, use the opening for direct damage and return to the marked escape route when the objective changes. During the escape, prioritize doors, launch pads and objective markers over optional enemies. The mission is complete only after the escape reaches its clear result.
- Collect IA-C01F: OCELLUS if required.
- Collect IA-C01C: EPHEMERA if required.
- Destroy the pressure chamber and defeat Ephemera.
- Reach the escape objective and confirm completion.
Complete the Chapter 4 decision route
On a standard or ordinary NG+ route, choose either Intercept the Redguns or Ambush the Vespers. These missions are mutually exclusive during that campaign cycle. Intercept the Redguns is a prolonged battle ending with G1 Michigan; use ammunition-efficient weapons and avoid wasting Repair Kits on enemies that can be bypassed. Ambush the Vespers is a concentrated AC engagement, so use terrain to separate targets and focus one opponent at a time. The unchosen mission will not be available in that cycle’s Mission Replay list.
On the Alea Iacta Est route, Eliminate V.III appears as a separate New Game++ decision mission. Defeat V.III O’Keeffe to obtain the mission’s Platinum Combat Log and preserve the route into the altered Reach the Coral Convergence. Choosing Intercept the Redguns or Ambush the Vespers instead abandons that third-ending route. Eliminate V.III does not produce a third Unknown Territory Survey entry.
- Clear Intercept the Redguns or Ambush the Vespers on the standard route.
- On the Alea route, clear Eliminate V.III when it is offered.
- Collect the decision mission’s Combat Log if required.
- Keep this decision separate from the Unknown Territory Survey variant and the Chapter 5 ending choice.
Clear the two Unknown Territory Survey entries
The standard Unknown Territory Survey is the Rusty-only version. Move through the tunnel with the mealworms and collect IA-C01H: EPHEMERA from the container on the left after the large chasm and drop. Continue into the cavern and fight V.IV Rusty. Preserve EN for diagonal evasion and punish committed melee attacks or a confirmed stagger. When Rusty activates Assault Armor and retreats, follow the objective down through the pit and reach the overlook above the ruined city.
The only later-cycle Unknown Territory Survey variant adds Middle Flatwell to the Rusty encounter. It is enabled by the qualifying Prevent Corporate Salvage of New Tech and Defend the Dam Complex route. This is one altered mission record, not a second NG++ variant tied to Eliminate V.III. Keep both ACs visible, focus one target at a time and use the cavern’s space to avoid an off-screen melee hit. Defeat both hostile ACs, then follow the objective to complete the mission and register Flatwell’s Combat Log.
Track exactly two entries: the standard Rusty-only Unknown Territory Survey and the later-cycle Middle Flatwell version. Eliminate V.III belongs to the Chapter 4 decision slot and leads to the altered Coral Convergence mission; it must not be added to the Unknown Territory Survey checklist.
- Clear the standard Rusty-only entry.
- Collect IA-C01H: EPHEMERA if required.
- Clear the Middle Flatwell variant after the qualifying route and record Flatwell’s Combat Log.
- Verify that Mission Replay shows the standard and later-cycle entries separately.
- Do not search for a nonexistent third Unknown Territory Survey entry.
Finish standard or altered Reach the Coral Convergence
The standard mission begins with V.VI Maeterlinck and G3 Wu Huahai in Institute City. Defeat both ACs and secure the area before following the Coral objective. Near the opening city area, search the roof of the small building for IA-C01W3: AURORA. Later, at the large basin and damaged suspension bridge, descend to the far side and open the container holding IA-C01W2: MOONLIGHT. The containers and several Loghunt targets are documented along this route.
Continue toward the Vascular Plant and use the supply station before the CEL 240 arena. CEL 240 makes rapid aerial passes, diving attacks, sweeping energy-blade attacks and abrupt repositioning. Stay near the arena’s central space, evade diagonally across committed attacks and preserve EN after each stagger punish so the next dive or blade sweep can be avoided. Defeat CEL 240 and wait for the clear result.
If the Alea Iacta Est prerequisites are complete, the altered version redirects you after the Maeterlinck and Wu Huahai battle. Follow the new waypoint to V.II Snail instead of entering the standard CEL 240 sequence. Defeat Snail, then defeat G5 Iguazu when he joins. This altered mission is caused by the Eliminate V.III route; it is not an additional Unknown Territory Survey. IB-C03W4: NGI 028 is found later in New Game++ Regain Control of the Xylem, not here.
After either version, wait for the clear result before continuing. The standard version leads into the ordinary Chapter 5 route. The altered version leads into MIA and the remaining Alea Iacta Est missions.
- Defeat Maeterlinck and Wu Huahai in the opening battle.
- Collect IA-C01W3: AURORA and IA-C01W2: MOONLIGHT if required.
- Use the supply station before CEL 240.
- Defeat CEL 240 in the standard version.
- On the Alea route, defeat V.II Snail and G5 Iguazu instead.
- Verify the correct Reach the Coral Convergence entry and clear result.
Before you move on
- Underground Exploration — Depth 1, standard Depth 2 and Depth 3 are cleared.
- IA-C01L: EPHEMERA, IA-C01B: GILLS, IA-C01A: EPHEMERA, IA-C01F: OCELLUS, IA-C01C: EPHEMERA and IA-C01H: EPHEMERA are collected if parts completion is intended.
- The standard Iguazu Depth 2 entry and its records are registered.
- The later-cycle Coldcall Depth 2 entry, STV Sketch (5) and Coldcall’s Combat Log are registered if full later-cycle coverage is intended.
- One standard Chapter 4 decision is cleared, or Eliminate V.III is cleared on the Alea Iacta Est route.
- The standard Rusty-only Unknown Territory Survey entry is cleared.
- The single later-cycle Middle Flatwell Unknown Territory Survey variant is cleared separately, with Flatwell’s Combat Log recorded.
- No third Unknown Territory Survey entry is added to the checklist.
- IA-C01W3: AURORA and IA-C01W2: MOONLIGHT are collected from standard Reach the Coral Convergence if parts completion is intended.
- The standard Reach the Coral Convergence mission is cleared with CEL 240, or the Alea variant is cleared by defeating V.II Snail and G5 Iguazu.
- IB-C03W4: NGI 028 is collected from New Game++ Regain Control of the Xylem if parts completion is intended.
- Mission Replay shows the intended standard and later-cycle Unknown Territory Survey entries separately.
- Chapter 5 unlocks only after the appropriate Chapter 4 mission-clear result appears.
References for this chapter
- Armored Core 6: All Missions
- Armored Core 6 Missions & Collectibles Guide
- Armored Core 6 (VI) All Part Container Locations
- Armored Core VI Fires of Rubicon New Game Plus reference
- Armored Core VI — Reach the Coral Convergence
- Armored Core VI — Eliminate V.III
- Armored Core 6 Fires of Rubicon — Endings
Chapter 5 — The Final Decision and Endgame Branching
Chapter 5 starts with Escape and Take the Uninhabited Floating City, then offers one mutually exclusive decision mission. Choose Intercept the Corporate Forces for the Fires of Raven route, followed by Breach the Kármán Line and Shut Down the Closure Satellites. Choose Eliminate “Cinder” Carla for the Liberator of Rubicon route, followed by Destroy the Drive Block and Bring Down the Xylem. The unchosen decision mission does not become available in Mission Replay during that campaign, so record your choice and take the opposite branch in a later campaign. Prepare several complete AC configurations before the decision, because the route missions include long sorties and demanding AC fights. OST Chips are used for OS Tuning upgrades; there are no separate endgame consumables to stockpile.
1. Prepare your AC before the Chapter 5 decision
Before launching the first Chapter 5 sortie, spend available credits on parts that support more than one build, but do not sell equipment merely to fund a small upgrade. You can change parts freely between missions, and the final route contains both open-area engagements and close AC duels. Keep one mobile configuration with dependable mid- or long-range fire and one heavier configuration that can build stagger quickly and exploit a direct-hit window.
Review OS Tuning before sorting out the equipment. OST Chips unlock and improve OS functions; they are not ammunition or a consumable reserve. Equip the expansion and system upgrades that match your preferred approach, then confirm your generator, booster and weight limits before every sortie. A close-range weapon, melee weapon or other high-impact option is valuable for stagger follow-ups, but retain a ranged weapon so you can continue dealing damage while repositioning.
If you want the opposite first-playthrough ending later, write down which Chapter 5 decision you select. The two decision missions are mutually exclusive for that campaign, and their associated combat logs and mission entry remain tied to the route you actually completed.
- Keep a reliable ranged weapon for sustained damage.
- Keep a close-range or high-impact stagger follow-up.
- Confirm OS Tuning, expansion, generator and weight limits.
- Record which ending route you intend to take.
2. Clear Escape with the supplied AC
Escape takes place in Institute City and temporarily assigns you an old, poorly equipped AC instead of your normal machine. The objective is to reach the designated destination, not to clear the map. Move from waypoint to waypoint, use buildings and vertical terrain to break enemy fire, and avoid unnecessary fights. The supplied machine is not intended for prolonged engagements, so preserving AP and ammunition is more important than collecting extra kills.
Follow the objective marker through the route and use Quick Boost to cross exposed spaces when hostile units are already tracking you. If the mission fails, take a more direct line between markers and stop turning aside to fight enemies that do not block the route. Completing Escape returns you to your regular AC and opens the next Chapter 5 sortie.
- Follow the destination markers.
- Avoid optional battles with the temporary AC.
- Use cover and vertical movement across exposed areas.
- Complete the mission before changing your endgame loadout.
3. Defend the tower in Take the Uninhabited Floating City
Take the Uninhabited Floating City requires you to defend the Xylem control tower while the systems takeover progresses. Stay close enough to return to the tower quickly, but intercept incoming enemies before they reach the objective. Do not pursue a retreating target so far that another wave reaches the tower unchallenged. Use vertical movement to reach airborne threats and return to the defended area as soon as the immediate danger is removed.
Prioritize enemies that can inflict large amounts of damage or attack from outside your normal range. A weapon setup with dependable ammunition is safer than one built entirely around slow burst attacks, because the mission sends multiple waves rather than presenting one isolated duel. If the tower is taking damage, stop chasing minor enemies and clear the attackers nearest to the objective. Once the takeover is complete, sortie again and prepare specifically for the mutually exclusive mission.
- Remain within quick reach of the control tower.
- Intercept waves before they accumulate at the objective.
- Prioritize dangerous ranged or heavy attackers.
- Reconfigure your AC after the mission ends.
4. Choose Intercept the Corporate Forces for Fires of Raven
Select Intercept the Corporate Forces if you want the Fires of Raven ending. The mission objective is to eliminate corporate forces and eventually defeat V.I Freud, whose AC is Locksmith. Follow the marked objectives through the Xylem Upper Districts. Destroy the required targets, proceed through the shielded route, and rescue Chatty Stick when the mission directs you there. Do not spend all of your ammunition clearing every distant enemy if those units are not part of the current objective.
Freud is a mobile AC opponent, so maintain enough distance to read his attacks while continuing to build ACS strain. Use a high-impact weapon or melee attack after his stagger rather than trading low-damage shots throughout the entire encounter. If supporting enemies or surrounding fire make the fight difficult, reposition toward cover and re-establish the duel instead of remaining in the open. Defeating Freud completes the decision mission and sends the campaign to Breach the Kármán Line.
Breach the Kármán Line is a forward-moving assault against the Arquebus interceptor fleet. Destroy the marked warships and keep advancing rather than stopping to fight every optional target. The route ends with an AC battle against STEEL HAZE ORTUS, Rusty’s upgraded machine. Watch for his rapid melee pressure and punish the recovery after an avoided strike or a stagger. After this mission, complete Shut Down the Closure Satellites.
Shut Down the Closure Satellites is the final mission of the Fires of Raven route and ends with the fight against Ayre in IB-07: SOL 644. Ayre moves rapidly and can attack from unexpected angles, so keep the camera oriented toward her and avoid committing to long attack animations while she is moving. Dodge through or diagonally away from melee passes, maintain pressure during her exposed recovery windows, and use your strongest burst option after her ACS gauge breaks. If she escapes vertically, regain visual contact before firing so you do not waste limited ammunition.
- Select Intercept the Corporate Forces.
- Defeat V.I Freud and complete the route objectives.
- Clear Breach the Kármán Line and defeat STEEL HAZE ORTUS.
- Clear Shut Down the Closure Satellites and defeat Ayre.
- Wait for the ending and completion save.
5. Choose Eliminate “Cinder” Carla for Liberator of Rubicon
Select Eliminate “Cinder” Carla if you want the Liberator of Rubicon ending. Follow the objective route through the Xylem Upper Districts. V.II Snail can be encountered during the mission before the final confrontation, and the later fight includes Chatty Stick and Carla. If you are collecting combat logs, defeat every marked AC before leaving the mission; if you are only pursuing the ending, prioritize the required route and preserve enough ammunition for the final sequence.
During the final AC encounters, avoid letting the opponents surround you. Focus on one target when possible, build stagger with consistent high-impact attacks, then spend the direct-hit window on the same target. If missiles and supporting fire fill the arena, keep moving vertically and use the arena geometry to separate the enemies before re-engaging. Completing the mission unlocks Destroy the Drive Block.
Destroy the Drive Block requires you to destroy the large skyrmion generators throughout the Xylem’s drive block. Move from one marked generator to the next and eliminate enemies that can interrupt the objective, but do not waste ammunition on distant units that are not blocking progress. After the generator sequence, the mission includes an encounter with the EC-0804 SMART CLEANER. Attack its exposed upper or rear sections rather than repeatedly firing into its armored front, and use vertical movement to avoid its ground-level attacks.
The route ends with Bring Down the Xylem. First destroy the two ramjet engines, then continue to the final battle against Handler Walter. Walter uses a coral weapon and can deploy Assault Armor, so avoid standing directly in front of him during his approach. Maintain enough space to react to the coral melee attack, build ACS strain with repeated high-impact hits, and reserve your strongest burst for a stagger. After Walter is defeated, complete the final objectives and allow the Liberator of Rubicon ending sequence and save to finish.
- Select Eliminate “Cinder” Carla.
- Defeat the required Carla-route ACs if collecting combat logs.
- Complete Destroy the Drive Block and defeat the EC-0804 SMART CLEANER.
- Destroy the ramjet engines in Bring Down the Xylem.
- Defeat Handler Walter and wait for the completion save.
6. Recover from a failed route mission
If you fail a boss encounter, use Retry or the available checkpoint when it places you near the current phase. A failed attempt is usually a reason to alter the build rather than repeat the same equipment unchanged. Replace one low-ammunition weapon, adjust your frame weight, or change the balance between stagger buildup and direct damage. A lighter frame can improve evasion in the Rusty or Ayre fights, while a heavier frame can make it easier to survive a close-range exchange with Freud, Carla or Walter.
Use the mission preparation screen to reconfigure without selling parts. If the problem is ammunition, reduce optional fights and prioritize marked targets. If the problem is stagger timing, equip a more reliable high-impact option and save it for the boss’s recovery rather than firing it during a long movement sequence. When a boss leaves the arena or moves above you, regain visual contact before committing to a melee strike or limited-use projectile.
- Change at least one major loadout factor after repeated failures.
- Use checkpoints when available.
- Prioritize marked objectives over optional enemies.
- Retain parts instead of selling them after a failed attempt.
7. Confirm the ending and plan the next campaign
After the final mission, allow the ending sequence to play and wait until the game finishes saving before closing the application. Record whether the result was Fires of Raven or Liberator of Rubicon. The completed campaign carries your parts, OS Tuning progress and other progression into the next campaign state, allowing you to prepare for the remaining endings without discarding the current save.
The unselected Chapter 5 decision mission is not automatically completed by finishing the other branch, and it is not a substitute for a second campaign route. To obtain the opposite first-playthrough ending, continue with the retained save and choose the other decision mission when Chapter 5 is reached again. The later Alea Iacta Est route is handled through New Game++-specific mission choices and belongs to a subsequent chapter of the overall guide, not this normal Chapter 5 branch.
- The final mission has been cleared.
- The ending sequence has completed.
- The save has finished writing.
- The ending name is recorded.
- The opposite decision mission is planned for a later campaign.
Before you move on
- Escape is cleared with the supplied temporary AC.
- Take the Uninhabited Floating City is cleared and the control tower defense is complete.
- One Chapter 5 decision mission has been selected and cleared.
- The corresponding two-mission finale has been completed.
- Fires of Raven or Liberator of Rubicon has appeared in the ending sequence.
- The completed save has finished writing.
- The selected ending is recorded for planning the opposite route.
References for this chapter
- Armored Core VI Fires of Rubicon — Official Site
- FromSoftware Products — Armored Core VI Fires of Rubicon
- Armored Core 6: Intercept the Corporate Forces | Push Square
- Armored Core VI Fires of Rubicon — Missions
- Armored Core 6 (VI) All S-Ranks Guide
- Bring Down the Xylem — Armored Core Wiki
- Destroy the Drive Block — Armored Core Wiki
Endings — Fires of Raven (First-Playthrough Route)
For the recommended first campaign used to establish the broad three-cycle mission catalogue, choose Eliminate the Enforcement Squads in Chapter 3, Intercept the Redguns in Chapter 4, and Intercept the Corporate Forces in Chapter 5. The Chapter 3 and Chapter 4 choices determine which mutually exclusive mission entries are recorded in that active campaign, while the Chapter 5 choice is the direct ending branch: Intercept the Corporate Forces leads to Breach the Kármán Line and Shut Down the Closure Satellites, ending in Fires of Raven. Mission Replay can recover ranks, rewards, combat logs and practice opportunities, but it cannot create an unchosen active-cycle decision mission. Prepare for open-space combat, keep a stagger punish available for Ayre, and allow the result and ending sequence to finish before starting New Game+.
1. Use the recommended Fires of Raven catalogue route
Progress through the campaign normally until the decision missions appear. For the recommended first cycle used by this guide, select Eliminate the Enforcement Squads in Chapter 3. This records that side of the Chapter 3 mutually exclusive pair and keeps the route aligned with the planned three-cycle catalogue.
When Chapter 4 presents the decision between Intercept the Redguns and Ambush the Vespers, select Intercept the Redguns. This choice is recommended for mission-list coverage, not because it is the sole requirement for Fires of Raven. The Chapter 5 decision is the branch that determines which of the two standard endings you receive.
Do not assume Mission Replay can replace a decision that was not selected during active campaign progression. Replay is useful for cleared missions, ranks, rewards and combat-log cleanup, but an unchosen decision entry must be obtained during a suitable campaign cycle. Confirm the selected mission title before launching.
- Chapter 3: Eliminate the Enforcement Squads is selected and cleared.
- Chapter 4: Intercept the Redguns is selected and cleared.
- The route choices are recorded before proceeding to Chapter 5.
2. Select the Fires of Raven ending branch
Continue through Chapter 5 until the decision between Intercept the Corporate Forces and Eliminate “Cinder” Carla becomes available. Select Intercept the Corporate Forces. Do not select Eliminate “Cinder” Carla on this campaign; that branch leads to Liberator of Rubicon instead.
Earlier decisions should be treated as catalogue and route-planning choices, not as a promise that the ending can be changed later through Mission Replay. Once the Chapter 5 decision is launched and completed in active campaign mode, continue through the missions it unlocks rather than leaving to replay a different branch.
Before starting the sortie, save at least two Assembly presets. Keep one balanced or mobile configuration for the corporate encounters and another with dependable impact output plus a strong direct-damage punish. Preserve enough credits and parts to change weapons, legs, boosters or FCS settings after a failed attempt.
- Chapter 5: Intercept the Corporate Forces is selected.
- Eliminate “Cinder” Carla is not selected on this campaign.
- At least two usable Assembly presets are saved.
3. Clear Intercept the Corporate Forces
Follow the mission markers and destroy the assigned corporate targets. When several enemies have line of sight, keep moving with vertical repositioning, Assault Boost and short directional boosts rather than hovering in one predictable lane. Prioritize mission-critical ACs and marked objectives; do not waste all ammunition on distant enemies that do not advance the sortie.
Build ACS strain with your most reliable impact weapons, then reserve a high-damage firearm or melee attack for the stagger window. If a slow weapon repeatedly misses, change the FCS or engagement distance instead of firing it at maximum range against a moving target.
If the mission fails, use the checkpoint or return to Assembly when available. Increase impact if enemies refuse to stagger, improve effective range if closing is the problem, or use lighter legs and stronger mobility if you cannot escape concentrated fire. Wait for the completion result before leaving the mission.
- All mission-critical corporate targets are destroyed.
- Ammunition is preserved for the final engagement where practical.
- The mission-complete result is displayed.
4. Complete Breach the Kármán Line
Breach the Kármán Line follows the corporate-forces branch and takes place in open aerial space. Maintain three-dimensional movement instead of circling at one altitude. Use Assault Boost to close or change angles, then use quick directional boosts to evade incoming fire and avoid being trapped at the arena boundary.
Keep the primary objective locked whenever possible. Fire during approach windows, reposition during reloads and avoid remaining stationary while waiting for a weapon to recover. A balanced loadout is more reliable than a build that depends on one close-range attack, because the mission rewards consistent pressure while moving.
Concentrate on the marked or mission-critical enemies and only clear additional targets when they obstruct the objective or create unsafe crossfire. The sortie is complete when the assigned forces are destroyed and the result screen appears. Confirm that Shut Down the Closure Satellites is the next route mission.
- Three-dimensional movement is maintained throughout the aerial engagements.
- Marked objectives are prioritized over nonessential targets.
- Shut Down the Closure Satellites becomes available.
5. Defeat Ayre in Shut Down the Closure Satellites
The final mission on this route is the direct AC battle against Ayre in IB-07: SOL 644. Use a frame that can maintain pressure without exhausting EN during every approach. Mid-range weapons provide repeated opportunities to build stagger, while a melee weapon or high-impact firearm can convert a stagger into substantial direct damage.
During the opening phase, watch Ayre’s attack commitment and punish recovery windows instead of emptying every weapon immediately. When ACS strain is nearly full, coordinate your attacks so the final impact and the damage punish arrive together. Avoid spending limited ammunition on low-probability shots during long repositioning sequences.
Ayre’s later attacks combine rapid movement with close-range or sweeping energy strikes. Change altitude and direction when she commits, then re-engage after the sequence ends. Do not retreat predictably into the arena edge. Use Repair Kits before health becomes critical; preserving one can help, but refusing to heal may remove the margin needed for the final phase.
If the boss repeatedly defeats the same build, change the Assembly between attempts. Increase impact, improve direct-hit damage, use a more suitable FCS, or select boosters and legs that let you leave the boss’s attack line quickly. When Ayre is defeated, remain through the mission result and ending sequence.
- Ayre is defeated in IB-07: SOL 644.
- Shut Down the Closure Satellites is confirmed cleared.
- The result screen and ending sequence are allowed to complete.
6. Confirm the ending and preserve the campaign
After the ending sequence, verify that the completed campaign state has returned and record Fires of Raven in your route checklist. New Game+ becomes available after the first campaign completion, while acquired parts and other major progression remain available for subsequent cycles. Cleared missions can be accessed through replay options.
Use Mission Replay later for ranks, credits, rewards, combat logs and practice, but do not use it as a substitute for active campaign decisions. To obtain Liberator of Rubicon, complete another campaign cycle and select Eliminate “Cinder” Carla at the Chapter 5 branch. To pursue Alea Iacta Est, finish both standard endings and then follow the New Game++ route decisions and altered missions.
Keep the save intact until the ending, mission entries and post-completion state are visible. Record the three route choices from this cycle so the remaining mutually exclusive entries can be targeted deliberately in later campaigns.
- Fires of Raven is recorded as the completed ending.
- New Game+ is available.
- Cleared missions remain accessible through replay menus.
- The save is retained before beginning another campaign cycle.
Before you move on
- Eliminate the Enforcement Squads is cleared during the recommended Chapter 3 route.
- Intercept the Redguns is cleared during the recommended Chapter 4 route.
- Intercept the Corporate Forces is cleared during Chapter 5.
- Breach the Kármán Line is cleared.
- Shut Down the Closure Satellites is cleared.
- Ayre’s IB-07: SOL 644 encounter is defeated.
- The Fires of Raven ending sequence completes.
- The campaign save returns to its post-completion state.
- New Game+ is available and cleared missions remain accessible for replay.
Endings — Liberator of Rubicon (Alternate First-Playthrough Route)
Choose Eliminate “Cinder” Carla in Chapter 5 to obtain the Liberator of Rubicon ending. This decision leads to Destroy the Drive Block and then Bring Down the Xylem. It is separate from the Accept or Refuse decision in the altered Attack the Dam Complex mission. Accept is a catalogue-routing choice that can make Prisoner Rescue and Stop the Secret Data Breach available during a qualifying New Game+ route, and those missions may also be obtained during New Game++ progression. Neither mission is required for the Liberator ending or for Alea Iacta Est. Mission Replay is useful only after an entry has been unlocked through active campaign progression; replaying a standard mission cannot create a missing cycle-specific replacement.
1. Select Eliminate “Cinder” Carla in Chapter 5
When Chapter 5 presents Intercept the Corporate Forces and Eliminate “Cinder” Carla, select Eliminate “Cinder” Carla. This is the direct ending decision for Liberator of Rubicon. Intercept the Corporate Forces leads to the Fires of Raven branch instead, and completing that branch does not also award Liberator on the same campaign cycle.
After selecting Carla’s mission, the active route continues through Destroy the Drive Block and then Bring Down the Xylem. The unselected Chapter 5 decision mission is not added to Mission Replay for that cycle, so record the choice if you intend to obtain both standard endings across separate campaigns.
Do not use the earlier Attack the Dam Complex decision as a substitute for this choice. Accept or Refuse in the altered version of Attack the Dam Complex affects later mission availability and catalogue routing, but it does not decide whether the current campaign ends with Liberator of Rubicon.
- Select Eliminate “Cinder” Carla
- Do not select Intercept the Corporate Forces on this route
- Record the Chapter 5 choice for the next campaign cycle
- Keep the Attack the Dam Complex decision in a separate route log
2. Complete Eliminate “Cinder” Carla
The mission contains several combat stages before the ending-route battle. Advance through the marked objectives and eliminate the hostile AC encounters, including V.II Snail. Use the surrounding structures and elevation to avoid taking simultaneous fire from multiple directions. If a target is pressuring you with missiles or a shield, keep moving rather than spending all of your EN on repeated vertical boosts.
The final major encounter is a two-AC fight against Cinder Carla and Chatty Stick. Concentrate on one target instead of dividing damage between both ACs. Chatty’s missiles can keep pressure on you while Carla closes for heavier attacks, so removing either opponent quickly is safer than trading damage with the pair indefinitely. A high-impact weapon, explosive option or melee attack gives you a reliable way to capitalize on stagger windows.
When one AC is staggered, use your strongest direct-damage attack immediately, then reposition before the other opponent can punish you. If you are repeatedly losing the fight, improve impact output or use a heavier frame with greater stability and AP. Do not leave until the mission-clear result appears.
- V.II Snail is defeated
- Cinder Carla is defeated
- Chatty Stick is defeated
- The mission-clear result appears
- Destroy the Drive Block becomes available
3. Clear Destroy the Drive Block’s generators
Enter Destroy the Drive Block with a dependable impact source and a separate high-damage stagger punish. The mission requires you to destroy marked skyrmion generators inside the Xylem’s drive block. Follow the objective markers through the structure and prioritize the generators rather than clearing every enemy in the area.
Several sections contain strong defensive fire and hazards that can drain repair charges before the boss encounters. Use platforms, walls and changes in elevation to break lines of fire. If an enemy blocks the route or can attack you while you interact with an objective, eliminate it; otherwise, continue toward the marked generator and preserve ammunition.
The generator route is not completed by destroying only the first visible targets. Continue following the objective markers after each destruction until the game advances the mission. Watch for laser fire while crossing open sections, and keep enough EN available to reach the next platform instead of committing to an attack that leaves you stranded.
- All marked drive-block generator objectives are destroyed
- The route to the Smart Cleaner encounter is open
- Repair charges and ammunition are preserved where possible
- The mission objective advances after the generator sequence
4. Defeat the Smart Cleaner rematch
The EC-0804 Smart Cleaner is encountered again during Destroy the Drive Block. Its front is heavily protected, so repeatedly attacking the frontal armor is an inefficient way to build damage. Move above or to an offset angle and target the exposed upper chimney or furnace opening when it is visible.
Use vertical movement to approach the vulnerable area, but do not remain directly above the machine when it begins a sweeping or upward attack. Once the Smart Cleaner is staggered, shift to the exposed mouth or another vulnerable opening and spend the stagger window with your highest direct-damage weapon. Withdraw after the punish rather than standing in front of the furnace.
If the boss keeps exhausting your repair kits, reduce the number of optional enemies fought before the arena and choose weapons with enough ammunition to finish the encounter without repeated misses. A heavy build can trade more safely, while a light build should circle, rise above the machine and attack only during clear openings.
- The Smart Cleaner rematch is defeated
- The upper chimney or exposed intake is used as the primary target
- A stagger punish is delivered during the opening
- The route to the final boss section is available
5. Resupply before Arquebus Balteus
Continue through the marked route after the Smart Cleaner. A Supply Sherpa and checkpoint are available before the final boss section. Use the supply point when necessary; entering the next fight with restored AP, ammunition and repair charges is more valuable than preserving a damaged attempt.
The final encounter is AAP07A: Arquebus Balteus, piloted by V.II Snail. Its pulse armor is a boss barrier, not the player’s Core Expansion. Pressure it with consistent impact damage, then use direct-damage weapons during the stagger window. Keep a range where your weapons connect reliably and avoid chasing when Balteus moves away.
Missile patterns and large attacks punish predictable horizontal movement. Use quick boosts, vertical changes and deliberate retreats, while preserving enough EN to evade the next attack. If the pulse armor does not break before your ammunition becomes low, replace a low-impact weapon with a more efficient impact option or use a heavier loadout that can maintain pressure without sacrificing survivability.
- The Supply Sherpa is used when needed
- Arquebus Balteus is defeated
- V.II Snail is defeated
- Destroy the Drive Block is recorded as complete
6. Prepare for Bring Down the Xylem
Before starting the final sortie, reconfigure without selling parts. Use a frame that remains within weight and EN limits while providing enough stability, AP and defenses for a long mission. Equip one consistent impact weapon and one burst-damage option for stagger punishments. Core Expansions are optional tools; no particular expansion is required for the ending.
Bring Down the Xylem begins with an assault through the Xylem. Follow the mission markers and destroy the two ramjet-engine objectives. Move between platforms and use the structure for cover when it reduces incoming fire. Optional enemies can be ignored when they are not blocking the route, because spending repair charges before the final encounter makes the last fight less forgiving.
Do not rush across a gap with an empty EN bar. Land, recover energy and then boost toward the next objective. Complete both engine objectives before committing to the final encounter.
- The AC is within weight and EN limits
- A reliable impact weapon is equipped
- A direct-damage or melee punish is equipped
- Both ramjet engines are destroyed
7. Defeat Handler Walter and confirm Liberator of Rubicon
Handler Walter appears in IB-C03: HAL 826 after the ramjet objectives. He uses Coral-based ranged attacks and a Coral melee weapon, so preserve EN for evasion instead of spending every available boost on pursuit. Maintain a range where your weapons connect, punish the recovery after his committed attacks and use vertical movement or quick boosts against the Coral blade.
When Walter is staggered, use your strongest direct-damage attack immediately. If he activates Assault Armor, disengage and wait for the blast to finish rather than attempting a routine melee punish at close range. If the fight remains difficult, change one factor at a time: increase impact, improve direct damage, add AP or stability, or use a more efficient weapon combination.
After Walter is defeated, complete the ending sequence and allow the game to save. Confirm that Liberator of Rubicon is displayed. Mission Select should retain the cleared Carla, Drive Block and Xylem missions, while the alternate Chapter 5 ending mission remains unavailable for active replay until it is earned in another campaign cycle.
- Handler Walter is defeated
- Walter’s Assault Armor blast is avoided or survived
- Bring Down the Xylem is recorded as complete
- Liberator of Rubicon is displayed
- The completed save finishes writing before the game is closed
8. Track the later-cycle catalogue route correctly
The altered Attack the Dam Complex mission is a separate catalogue decision. In a qualifying later campaign, choosing Accept can make Prisoner Rescue available in place of Retrieve Combat Logs and can lead to Stop the Secret Data Breach replacing Eliminate the Doser Faction later in the route. These are active campaign replacements, not missions created by replaying their standard counterparts.
Their availability is route-dependent. Accept can make them available in New Game+, and they may also be obtained during New Game++ progression, but they are not generic additions to every New Game+ route. Neither Prisoner Rescue nor Stop the Secret Data Breach is required for Liberator of Rubicon, and neither is an independent requirement for Alea Iacta Est.
Use active Sortie progression to unlock a missing replacement. Mission Replay can then be used for practice, credits, Combat Logs, parts and ranks, but it cannot change the earlier decision or create an entry that was never unlocked.
- Accept or Refuse is recorded separately from the Liberator choice
- Prisoner Rescue is tracked as catalogue entry 12 when unlocked
- Stop the Secret Data Breach is tracked as catalogue entry 19 when unlocked
- The qualifying route is completed through active progression
- Mission Replay is used only after the entry appears in the mission list
Before you move on
- Eliminate “Cinder” Carla is completed in Chapter 5.
- Destroy the Drive Block is completed with all generator objectives, the Smart Cleaner rematch and Arquebus Balteus defeated.
- Bring Down the Xylem is completed with both ramjet engines destroyed and Handler Walter defeated.
- Liberator of Rubicon is displayed after the final mission.
- Mission Select contains the three missions earned by this ending route.
- The Attack the Dam Complex Accept or Refuse choice is logged separately if pursuing the full catalogue.
- Prisoner Rescue is recorded as entry 12 only after its qualifying active route unlocks it.
- Stop the Secret Data Breach is recorded as entry 19 only after its qualifying active route unlocks it.
- The completed save remains intact before starting the Fires of Raven or Alea Iacta Est campaign route.
References for this chapter
- Armored Core 6 (VI) All Endings Guide
- Armored Core 6 (VI) All Missions List & Rewards
- Armored Core 6 (VI) All Part Container Locations
- Armored Core 6 (VI) All Collectible Locations
- Armored Core VI Fires of Rubicon New Game Plus reference
- Armored Core VI Fires of Rubicon — Missions
- Armored Core 6 Fires of Rubicon — Endings
New Game++ — How to Reach Alea Iacta Est
Alea Iacta Est is reached during the third active campaign cycle after Fires of Raven and Liberator of Rubicon have both been completed on the same progression file. Follow the New Game++ route through the altered Attack the Dam Complex decision, Escort the Weaponized Mining Ship, Prevent Corporate Salvage of New Tech, Eliminate the Enforcement Squads, Coral Export Denial and Eliminate V.III. The final sequence is MIA, Regain Control of the Xylem and Coral Release. Prisoner Rescue and Stop the Secret Data Breach are separate catalogue missions at entries 12 and 19. They are not required for Alea Iacta Est. A qualifying Accept choice in Attack the Dam Complex can unlock them during New Game+, and they may also be obtained during New Game++ if they were missed earlier. Use active campaign progression to unlock them; Mission Replay only handles missions already registered. Record the ending separately from the 59-mission catalogue, Combat Logs, Data Logs, Hunter Class, parts, Arena progress and S-Ranks.
1. Begin the correct third campaign cycle
Start this route only after Fires of Raven and Liberator of Rubicon have both been completed on the same progression file. Select the normal option to begin another campaign from that completed save. This is the third active cycle commonly called New Game++. Do not use Mission Replay as a substitute for starting the campaign. Replay preserves cleared missions and supports practice, credits, containers, Combat Logs and S-Ranks, but it does not advance the active decision state.
Parts, credits, OS Tuning, Arena progress and shop access carry over, so prepare before the first sortie. Keep one mobile build with good EN recovery and one heavier build with reliable impact output and a strong stagger punish. The Alea route contains several large encounters, but no single weapon setup is mandatory. If the expected alternate briefings never appear, verify that both earlier endings were completed on this save rather than merely replayed.
- Fires of Raven is complete on the progression file.
- Liberator of Rubicon is complete on the same progression file.
- A new active campaign was started from that completed save.
- Carried-over parts, credits, OS Tuning and Arena progress are available.
2. Choose Accept during the altered Attack the Dam Complex mission
When the altered Attack the Dam Complex mission appears, advance through the generator objectives until the offer is presented. Choose Accept, then fight the Redgun forces that become hostile and finish the remaining generator objectives. Keep moving between targets rather than staying in the open, and use the mission's wide spaces to separate the heavier enemies before committing to a stagger punish.
This choice is part of the qualifying route used for the later-cycle catalogue missions and is the required choice for the route described here. It also explains why Prisoner Rescue may replace Retrieve Combat Logs and why Stop the Secret Data Breach may replace Eliminate the Doser Faction in a qualifying active cycle. Accept does not by itself produce Alea Iacta Est. The later Alea decisions still have to be completed.
- The altered Attack the Dam Complex mission appeared during active progression.
- Accept was chosen at the offer.
- The Redgun encounters and generator objectives were completed.
- The mission results screen confirmed completion.
3. Select Escort the Weaponized Mining Ship
At the Chapter 1 decision involving Destroy the Weaponized Mining Ship and Escort the Weaponized Mining Ship, choose Escort the Weaponized Mining Ship. This is the essential opening mission for the Alea route. Stay close enough to respond to threats around the mining ship, use Assault Boost to return after chasing an enemy and destroy attackers that are damaging the objective before pursuing distant targets.
Watch the objective markers after each enemy wave. If the ship moves ahead, do not assume the mission is over; continue following it until the sortie gives its completion result. Escort the Weaponized Mining Ship is distinct from Prisoner Rescue. The former is a core Alea-route decision, while the latter is a separate catalogue mission that may already have been unlocked in New Game+ through the qualifying Accept route.
- Escort the Weaponized Mining Ship was selected during active progression.
- The mining ship survived the escort sequence.
- The sortie was completed and the results screen appeared.
- Prisoner Rescue is tracked separately from the Alea route.
4. Handle Prisoner Rescue and Stop the Secret Data Breach correctly
Prisoner Rescue occupies catalogue entry 12 and replaces Retrieve Combat Logs on the qualifying active route. It can appear in New Game+ after the appropriate Accept choice in Attack the Dam Complex, and it may also be obtained in New Game++ if it was not unlocked earlier. When playing it, clear the first landing zone quickly, then stay ahead of the rescue helicopter and remove threats at each marked landing area. Protect the prisoners and helicopter through the extraction sequence, then complete the final encounter before leaving the mission.
Stop the Secret Data Breach occupies catalogue entry 19 and replaces Eliminate the Doser Faction on the qualifying active route. It can likewise be unlocked in New Game+ after the qualifying route decision or obtained during a later New Game++ progression. Enter Grid 086, destroy the marked hacking drones and follow the objective route through the facility. After the drone objectives, search the nearby side paths for Combat Log enemies if collection is a goal, then finish the ambush and extraction objectives.
Neither mission is an independent Alea Iacta Est requirement. If either is already present in Mission Replay, do not replay it expecting to change the current campaign route. If either is missing, complete the appropriate active campaign branch in the current or a later cycle. The missions must be recorded separately from Retrieve Combat Logs and Eliminate the Doser Faction.
- Prisoner Rescue is recorded as catalogue entry 12 if obtained.
- Stop the Secret Data Breach is recorded as catalogue entry 19 if obtained.
- Both missions are classified as route-dependent later-cycle entries rather than universal New Game++ requirements.
- Neither mission is being used as an Alea ending gate.
5. Follow the Chapter 3 Alea decisions
Complete Prevent Corporate Salvage of New Tech when it appears on the active route. Destroy the marked hostile units and complete the objective without confusing this mission with Coral Export Denial. Prevent Corporate Salvage of New Tech is a later-cycle route mission that can be encountered in New Game+ and in the qualifying New Game++ path.
At the decision involving Eliminate the Enforcement Squads and Destroy the Special Forces Craft, choose Eliminate the Enforcement Squads. Focus on the marked targets first, then clear optional Combat Log enemies only if you can do so without wasting Repair Kits or ammunition. Finish the mission through active progression and wait for the results screen.
At the later Chapter 3 decision, choose Coral Export Denial rather than Historic Data Recovery. Follow the marked operation and destroy the required corporate forces. Coral Export Denial is a New Game++ route mission and is one of the decisions that must be present for the Alea path. It is separate from the earlier catalogue missions and is not created by replaying Historic Data Recovery.
- Prevent Corporate Salvage of New Tech was completed through active progression.
- Eliminate the Enforcement Squads was selected and completed.
- Coral Export Denial was selected and completed.
- Historic Data Recovery was not selected at that decision.
6. Record optional altered missions without confusing them with Alea requirements
For complete mission coverage, record the altered Attack the Watchpoint, Obstruct the Mandatory Inspection and the altered Survey the Uninhabited Floating City when they appear. The altered Survey version has a different final encounter involving Thumb Dolmayan. Defeat the required target and allow the mission to finish before checking its exact title in Mission Replay.
Also track the altered Underground Exploration — Depth 2, the altered Unknown Territory Survey and the altered Reach the Coral Convergence separately from their standard versions. The altered Unknown Territory Survey adds Middle Flatwell to the encounter. These missions support full catalogue and Combat Log completion, but they do not replace the core Alea choices of Escort the Weaponized Mining Ship, Coral Export Denial or Eliminate V.III.
Mission Replay is useful after an entry is registered. It cannot make a missing later-cycle mission appear, convert a standard version into an alternate version or change an active decision already made in the campaign.
- The altered Attack the Watchpoint entry is recorded separately.
- Obstruct the Mandatory Inspection is recorded separately.
- The altered Survey, Depth 2, Unknown Territory Survey and Reach the Coral Convergence entries are tracked separately from standard versions.
- Catalogue cleanup is not being mistaken for Alea-route progression.
7. Choose Eliminate V.III and complete the altered Coral Convergence route
At the Chapter 4 decision, choose Eliminate V.III instead of Intercept the Redguns or Ambush the Vespers. Use a build that can apply steady ACS strain while retaining enough EN for vertical evasion. When V.III is staggered, use the strongest reliable direct-damage attack rather than spending ammunition on low-impact fire. Complete the mission through active progression and confirm the results screen.
Continue to Reach the Coral Convergence. After the initial encounters, follow the altered objective sequence if the previous Alea decisions were completed. The route redirects the mission away from the normal CEL 240 sequence and sends you after V.II Snail. Keep moving vertically around the arena, avoid exhausting EN before a landing or dodge and punish Snail during recovery windows.
If the standard Coral Convergence sequence remains active, review the decisions made in this campaign cycle. Mission Replay can practice whichever version has already been unlocked, but it cannot convert the standard mission into the altered route or repair an earlier missed Alea decision.
- Eliminate V.III was selected during active New Game++.
- V.III was defeated and the mission result was confirmed.
- The altered Reach the Coral Convergence route activated.
- V.II Snail was defeated on that route.
8. Complete the Alea finale
MIA replaces the ordinary Chapter 5 opening on the Alea route. Complete the primary objective first, then pursue Combat Log targets only if Hunter Class progress is still needed. Preserve ammunition and Repair Kits for the later encounters instead of spending all resources on optional enemies.
Continue to Regain Control of the Xylem. Before launching the mission, configure for reliable impact output, direct damage and enough EN recovery to handle vertical hazards. A consistent stagger weapon combined with a strong punish is generally safer than stacking several slow weapons that compete for the same range.
Finish Coral Release and allow the final sequence and save process to complete. The displayed ending should be Alea Iacta Est. This confirms the third ending only. It does not prove that every Replay Mission, Combat Log, Data Log, container, part, Arena opponent or S-Rank has been completed.
- MIA was completed through active campaign progression.
- Regain Control of the Xylem was completed afterward.
- Coral Release was completed.
- The displayed ending is Alea Iacta Est.
- The 59-entry catalogue and other collection goals were audited separately.
Before you move on
- Fires of Raven and Liberator of Rubicon are complete on the same progression file.
- The third campaign was started through normal active progression.
- Accept was selected in the altered Attack the Dam Complex mission.
- Escort the Weaponized Mining Ship was completed in active New Game++.
- Prisoner Rescue is recorded at catalogue entry 12 if it was missing before this cycle.
- The altered Attack the Watchpoint entry was checked separately from the standard version.
- Stop the Secret Data Breach is recorded at catalogue entry 19 if it was missing before this cycle.
- Stop the Secret Data Breach is tracked as the qualifying replacement for Eliminate the Doser Faction, not as a universal New Game++ mission.
- Obstruct the Mandatory Inspection is recorded separately.
- Prevent Corporate Salvage of New Tech was completed on the active route.
- Eliminate the Enforcement Squads was selected and completed.
- Coral Export Denial was completed in Chapter 3.
- Eliminate V.III was completed in Chapter 4.
- The altered Reach the Coral Convergence route was followed and V.II Snail was defeated.
- MIA, Regain Control of the Xylem and Coral Release were completed in order.
- The displayed ending is Alea Iacta Est.
- The Mission Replay list was compared against the canonical 59-entry checklist.
- Combat Logs, Data Logs, Hunter Class, containers, parts, Arena rewards and S-Ranks were audited separately.
- The final save remains available with the desired endings and collection progress intact.
Major Boss Tactics — Stagger Windows, Shields and Attack Windows
Boss fights in Armored Core VI are won by managing ACS strain, EN and attack range rather than firing every weapon whenever it is ready. Build impact with a reliable pressure weapon, then convert a confirmed stagger into direct damage with a melee strike, charged weapon or heavy volley. Use Target Assist on fast bosses, change altitude against missiles and melee sweeps, and preserve EN for the next escape instead of Quick Boosting continuously. Pulse armor and pulse shields are specialized defenses, not universal boss mechanics: break a barrier when the encounter uses one, then resume ACS pressure. Before a difficult arena, use the mission checkpoint or Supply Sherpa if provided, repair, refill ammunition and change the build in Assembly if the matchup is poor.
1. Build a clear pressure-and-punish loadout
The official manual describes ACS strain as impact that accumulates when attacks connect. When an enemy reaches its limit, it becomes staggered, temporarily loses the ability to act, and takes increased direct-hit damage. Build your AC around that sequence: use one or two weapons to maintain impact, then reserve a high-damage option for the stagger window.
A practical setup has a continuous pressure weapon, an impact tool and a separate punish weapon. Examples include a firearm paired with missiles or a shoulder cannon, followed by a pulse blade, pile bunker, shotgun, charged rifle shot or explosive volley. The exact parts are optional; the important point is that the build has a repeatable way to raise ACS strain and a dependable way to exploit the opening. Four low-impact weapons can deal damage but may struggle to create a stagger before the boss resets its strain.
- Keep at least one weapon available for sustained impact.
- Reserve melee, charged attacks or heavy explosives for a confirmed stagger.
- Watch the ACS gauge and strain recovery instead of firing every weapon on cooldown.
2. Use PS5 lock-on and movement deliberately
With the default Type A controls, R3 toggles Target Assist, Square performs a Quick Boost, Cross jumps or ascends while held, and L3 starts Assault Boost. Target Assist is useful against bosses that pass rapidly across the arena because it keeps the camera and AC oriented toward the selected target. Once it is active, avoid unnecessary right-stick movement if doing so would disrupt your tracking or target selection.
Quick Boost should answer a specific attack, not replace normal movement. Jump and gain altitude against ground-level shockwaves, sweeping melee attacks and missile spreads. A purely horizontal strafe is easy for a boss to read, especially when several projectiles converge on your previous position. Combine a change of height with a diagonal drift or a timed Quick Boost, then let the EN gauge recover before the next major attack.
Assault Boost is useful for closing distance and crossing an attack pattern, and the manual notes that it adds impact to certain small-firearm attacks while reducing incoming impact during the movement. It still consumes EN, so do not begin an approach that leaves no energy for the boss’s immediate counterattack.
- Use R3 Target Assist for fast targets and keep the boss centered.
- Change height as well as direction when avoiding missiles or sweeps.
- Leave enough EN for the escape after firing a cannon or starting a melee attack.
3. Identify the defense before attacking it
Do not assume every large enemy has a pulse barrier. Most encounters are primarily ACS-and-AP fights. Some specific enemies and bosses use pulse armor or another defensive system that changes the opening sequence. Balteus in Attack the Watchpoint is the clearest early example: its pulse armor must be stripped before you can treat the encounter like a normal stagger fight. Pulse weapons can be effective for this job, but rapid-fire, close-range and other high-impact options can also work when used within their effective range.
A pulse shield is different from the player’s Pulse Armor expansion and from Balteus’s boss barrier. The game also contains deployed pulse shields that function as defensive objects or obstacles. Treat any visible barrier as a separate problem, but do not claim that all bosses require one to be removed. If a shield or armor effect is active, avoid spending a full punish rotation into it. Apply the appropriate impact or pulse-interference pressure, wait for the defense to fail, and then resume ACS buildup or damage according to the encounter.
- Determine whether the target has a boss barrier, deployed shield or only an ACS gauge.
- Use close-range or pulse-capable pressure when the encounter rewards it.
- Do not waste your strongest direct-damage attack while a defensive layer is active.
4. Convert stagger into reliable damage
Move into punish range before the ACS gauge fills. If you wait until the stagger animation has already begun, a melee weapon may leave you too far away, while a heavy cannon may spend much of the opening in recoil or recovery. Approach under normal boost or Assault Boost, keep the target centered, and let the final impact connect when your punish weapon is ready.
During stagger, prioritize attacks that can actually land. A charged melee strike is valuable only if the boss will remain in range. Against a rapidly moving aerial target, a shotgun burst, charged firearm shot or shoulder volley may produce better real damage than a missed blade swing. After the first hit, use the next available direct-damage attack rather than waiting for a perfect sequence. When stagger ends, immediately return to impact pressure so the boss cannot fully recover its ACS strain.
- Enter punish range before the final impact connects.
- Use a reliable hit over a more damaging attack that is likely to miss.
- Resume ACS pressure as soon as the stagger ends.
5. Handle missiles, delayed attacks and vertical threats
When the warning indicator appears, identify whether the attack is a direct projectile, a spread or a delayed volley. Do not automatically Quick Boost in the same direction every time. Jump, rise, drift diagonally and use a Quick Boost at the point where the projectiles converge. If the boss is approaching with a broad frontal attack, moving above or past it can be safer than backing through the entire pattern, provided your EN reserve supports the maneuver.
Keep Target Assist active while changing altitude, but continue watching the boss’s position rather than only the reticle. Large targets may pass below or above the camera, and some melee attacks punish an AC that remains at the same height. If the boss leaves the ground, use vertical movement to create a firing angle and avoid being trapped beneath a descending strike. Predictable movement is usually more dangerous than slow movement with a clear escape plan.
- Break a repeated horizontal pattern during missile barrages.
- Use jump and ascent before spending several consecutive Quick Boosts.
- Track the boss’s height and approach line, not just its last position.
6. Prepare the checkpoint, resupply and retry correctly
Before a difficult arena, use the mission checkpoint or Supply Sherpa when the mission provides one. These systems restore the resources needed for the attempt, including AP and ammunition; a resupply can also restore repair-kit and expansion charges. A Supply Sherpa is a preparation point, not a general healing item that can be called repeatedly during the boss fight. If the encounter begins without one, restart from the checkpoint when appropriate rather than entering with depleted ammunition and damaged AP.
After a failed attempt, classify the failure. If you die before building meaningful ACS strain, increase impact, shorten the engagement range or change the FCS. If you stagger the boss but cannot survive the punish, use a heavier frame, better defensive parts or a defensive Core Expansion. If you run out of ammunition, replace a low-efficiency weapon or reduce unnecessary fights before the arena. If EN depletion causes most deaths, change the booster or generator and stop chaining evasive actions without recovery.
Pulse Armor gives the player a temporary defensive barrier. Assault Armor instead creates a close-range burst and can help an aggressive build create space or add pressure. Choose between them for the mission and build; neither replaces learning the boss’s attack cycle.
- Use the checkpoint or Supply Sherpa before the boss when available.
- Change at least one meaningful build element after repeated failure.
- Confirm AP, ammunition, repair kits and EN before entering the final arena.
Before you move on
- You can identify whether a difficult boss is primarily an ACS fight or also requires removal of a pulse barrier.
- Your AC has a repeatable impact plan and a separate stagger-punish attack.
- You can use R3 Target Assist, Square Quick Boost, Cross ascent and L3 Assault Boost without confusing their roles.
- You know whether the mission provides a checkpoint or Supply Sherpa before the boss.
- After a failed attempt, you can name the problem as impact, direct damage, EN management, survivability or ammunition economy and change the build accordingly.
- You can reach the arena with full or intentionally prepared AP, ammunition, repair kits and expansion charges.
References for this chapter
Builds and Loadouts — From Mobility to Heavy Brawlers
Create two saved AC designs instead of forcing one machine to handle every mission. A mobility build controls distance, uses quick boosts and vertical movement to avoid attacks, and steadily builds stagger with efficient fire. A heavy brawler accepts more incoming damage, carries high-impact weapons and converts stagger into decisive burst damage. Both designs must remain within the leg load limit and the generator’s EN output; excess weight or insufficient EN output prevents deployment. Use AC Test after each major change, then save the finished machine in AC Data so you can switch configurations before a sortie. The PS5 version uses the same assembly rules as the original release, with the PS5 manual confirming the relevant frame, inner-part, weapon and save-data functions.
1. Begin in Assembly and define the machine’s job
Open Garage, choose AC Design, then Assembly. Start from the mission’s enemy mix and terrain rather than from a favorite weapon. Open areas and opponents that punish predictable movement favor a lighter or medium frame with dependable boost and aerial control. Close arenas, durable AC enemies and missions that reward direct stagger pressure can justify a heavier chassis with more AP, stability and carrying capacity.
Check the two deployment restrictions before leaving Assembly. The completed AC must stay within the load limit provided by its legs, and its total EN load must be supported by the generator’s EN output. If either condition remains unresolved, the game will not allow that configuration to deploy. Legs also change movement behavior: reverse-joint legs improve jumping, tetrapods can hover, and tanks have distinct ground movement and drift-turn behavior.
Save a working version in AC Data before experimenting. From the Garage, AC Data stores and loads the complete part configuration and appearance, allowing you to preserve a functional design before making risky changes. Name the slots by purpose, such as Mobility Harasser and Heavy Stagger.
- Create one mobility slot and one heavy slot in AC Data.
- Confirm the assembly has no excess-weight or insufficient-EN restriction.
- Keep an earlier working version before making large changes.
2. Assemble the high-mobility harasser
Use light or medium bipedal legs for a general-purpose fast machine. Choose reverse-joint legs when repeated jumps, high arcs or aerial repositioning are central to the plan. Pair the legs with a core and generator that leave enough EN capacity for quick boosts and upward movement; a light frame that constantly empties its EN gauge will lose the advantage that its weight is supposed to provide. The manual identifies boosters as a major influence on basic movement, Quick Boost and Assault Boost thrust, while the generator affects EN capacity and recovery.
Give the right arm a weapon you can use consistently at your normal fighting distance. A rapid-fire weapon, rifle or another efficient option can handle routine targets, while the left arm should add a different function: stronger impact, close-range burst or melee damage. Shoulder weapons can maintain pressure while the hand weapons reload, but do not fill every slot with weapons that all suffer long simultaneous reload periods.
Choose the FCS by the distance at which you actually intend to fight. FCS parts change distance-based aim assistance and missile lock or multi-lock behavior; they do not make a weapon perform well outside its effective range. Keep the machine moving in arcs around the target, fire while strafing, and use quick boost through an incoming attack or toward a new angle rather than spending the entire EN gauge on constant flight. The PS5 manual lists R2 as the right-hand weapon, L2 as the left-hand weapon, R1 as the right shoulder and L1 as the left shoulder under the default Type A controls.
When the target’s stagger gauge is close to full, use the impact weapon or shoulder salvo to finish building stagger, then close only far enough to use the strongest reliable follow-up. Return to movement immediately after the opening ends; the mobility build should not remain stationary trying to trade damage with a heavier opponent.
- Use a leg type that supports the intended movement pattern.
- Keep the FCS aligned with the actual engagement distance.
- Reserve enough EN for at least one emergency quick boost.
- Pair an efficient routine weapon with a clear stagger tool and punish option.
3. Assemble the heavy brawler
Choose heavy bipedal, tetrapod or tank legs based on the weapons and movement you intend to use. Heavy bipeds provide a conventional ground-based frame with strong AP and stability. Tetrapods are appropriate when you want to hover and continue using heavy weapons in the air. Tanks provide high carrying capacity and strong ground movement, but their handling and turning differ from ordinary bipedal movement. These are structural differences documented by the manual, not merely cosmetic categories.
Install a generator with enough EN output for the complete assembly and enough recovery performance to let the AC reposition after firing. A large EN-capacity number alone is not sufficient: test how quickly the gauge returns after boosting, jumping or using Assault Boost. Choose arms for the weapons you are actually carrying. Arm parts affect hand-weapon weight capacity and firearm tracking, so a heavy weapon paired with arms that cannot control it efficiently can waste the brawler’s supposed advantage.
A dependable heavy layout combines one impact source, one direct-damage or close-range option, and shoulder weapons that either continue building stagger or punish a staggered target. Avoid four weapons with identical reload timing. Fire one side while the other recovers, approach with Assault Boost when the enemy is exposed, and use kicks or close pressure only when the target cannot immediately punish the commitment. During a stagger window, spend the highest-damage attack that you can land consistently rather than choosing the weapon with the largest displayed number but an unreliable firing opportunity.
Against a boss, trade damage only when your remaining AP and repair kits justify it. If the enemy begins a major sequence, move behind available cover, rise above the attack when the arena allows it, or disengage far enough to restore control. Heavy does not mean immobile; it means the build can tolerate more mistakes while creating a shorter, more decisive damage window.
- Use legs that can carry the intended weapons without deployment restrictions.
- Match arm tracking and recoil characteristics to the hand weapons.
- Keep at least one weapon usable while another reloads.
- Test whether the heavy frame can escape after committing to an attack.
4. Tune the inner parts and OS functions
Change the generator, booster and FCS according to the problem you are trying to solve. The generator controls EN-related behavior, the booster changes movement and boost performance, and the FCS changes aim assistance by range as well as missile lock behavior. Replace one inner part at a time, then test the result in AC Test so you know which change improved the machine.
Use OS Tuning to reinforce the build’s repeated weakness. OST Chips are spent in OS Tuning, and the game allows those investments to improve actions or machine performance. A mobility machine may benefit more from movement or defensive options after repeated failed dodges, while a brawler may prefer offensive or stagger-oriented options. Core expansions are useful when their effect matches the mission, but do not destabilize the basic assembly merely to equip a situational tool.
Use AC Test from Operation after each major revision. Test against a moving target as well as a durable target. Measure whether the machine can reach its preferred range, build stagger without exhausting ammunition, punish the stagger window and escape afterward. AC Test exists specifically to check the assembled machine’s performance and behavior before a real sortie.
- Match the FCS to your real firing distance.
- Test EN recovery after repeated boosts and aerial movement.
- Spend OS Chips on the weakness causing actual mission failures.
- Use AC Test before committing the design to a boss mission.
5. Plan ammunition and mission endurance
A high-damage weapon is not automatically the best primary for a long mission. Keep an efficient source of routine damage for ordinary enemies and reserve limited ammunition for durable targets, enemy ACs and bosses. Melee weapons do not consume firearm ammunition, but they require a safe approach and a frame that can survive close range. Shoulder missiles can maintain pressure against distant or evasive targets, but their value depends on the FCS and the mission’s enemy behavior.
Check the mission for supply points and use them deliberately. Supply units restore AP and ammunition, so you can spend strong attacks before a confirmed resupply rather than hoarding everything until the end. The manual confirms that AP can be restored with repair kits or mission supply units, and that cleared missions can be replayed to recover missed parts.
If a design repeatedly reaches the final encounter with empty weapons, replace one specialist weapon with a more efficient option, reduce unnecessary shoulder weight or change the weapon roles so that routine enemies are not consuming boss ammunition. If the problem is survival rather than ammunition, add AP or stability before adding more damage.
- Keep one efficient weapon for ordinary targets.
- Identify the next supply point before spending limited ammunition.
- Use a different weapon role if all four slots reload together.
- Adjust AP or stability when repeated deaths occur before the boss.
6. Save, test and switch designs before every sortie
Before launching a mission, load the design that matches the terrain and enemy behavior, then verify that every part is still installed and the assembly remains deployable. Use Mobility Harasser when you need distance control, aerial repositioning or repeated harassment. Use Heavy Stagger when the mission gives you reliable close or medium-range firing windows and the enemy can be punished after stagger.
If the mobility design dies before it can build stagger, add stability or AP before simply adding more firepower. If the heavy design cannot reach the target, reduce weight, change the booster, use a more suitable FCS or add pressure from missiles so the opponent approaches your preferred range. Do not rebuild the entire AC after one defeat; identify whether the failure came from range, EN recovery, ammunition, stagger output or survivability, then change the relevant part.
After the final test, overwrite the intended AC Data slot only when the design is ready. Keep both saved machines available so a failed sortie can be followed by a targeted swap rather than a complete rebuild. The goal is not to create the highest-stat machine on the assembly screen; it is to create two machines whose combat plans can be repeated under campaign conditions.
- Save both completed designs in AC Data.
- Confirm each design has a clear stagger method and stagger punish.
- Use the mobility design for distance and repositioning.
- Use the heavy design for stability, close pressure and burst damage.
- After defeat, change the part responsible for the failure instead of replacing the whole build.
Before you move on
- A mobility harasser and a heavy brawler are both saved in AC Data.
- Both machines deploy without excess-weight or insufficient-EN restrictions.
- Each design has an efficient routine weapon, a reliable stagger tool and a clear stagger punish.
- The mobility design can reposition and recover EN without becoming helpless after repeated boosts.
- The heavy design can carry and fire its weapons while retaining enough movement to escape major attacks.
- You have tested both designs in AC Test against moving and durable targets.
- You can identify which design to use for distance control and which to use for stability, close pressure and burst damage.
- A representative mission section can be completed without exhausting the build’s useful ammunition before the next confirmed supply point.
Containers, Parts and Vendor Priorities
Armored Core VI parts come from the fixed Parts Shop inventory, Training missions, story rewards, Combat Logs, Arena programs, endings and 19 hidden Part Containers. The shop does not rotate stock; new items are added after particular progression or unlock conditions. Containers begin in Chapter 2 and are not shown as a simple collected counter in Mission Select, so verify ownership in Assembly after opening each chest and completing the sortie. For complete parts ownership, clear Training missions, claim Hunter Class rewards, defeat all required Arena opponents, obtain all three endings, collect all 19 containers and buy every available shop part. The standard Reach the Coral Convergence contains IA-C01W3 AURORA and IA-C01W2 MOONLIGHT. The two Xylem containers, IB-C03W3 NGI 006 and IB-C03W4 NGI 028, are in the later-cycle Regain Control of the Xylem mission. Complete the alternate Underground Exploration – Depth 2 route and its final Analysis opponents before Coral Release if you want every reward without adding another campaign cycle.
1. Track containers and verify each part
Part Containers are physical chests placed inside missions. Use the scanner whenever you enter a large room, cross a multi-level structure or reach an objective that appears to have side routes. Check upper platforms, lower ledges, side rooms, dead ends and areas behind the direction indicated by the objective marker. A head with strong Scan Distance and Scan Effect Duration makes these searches easier.
Open the chest and finish the sortie before treating the pickup as complete. After returning to the Garage, open Assembly and confirm that the named part is present. Mission Select does not provide a reliable per-mission container count, so your Assembly inventory is the final authority. A written checklist helps you identify the location to revisit, but it is not a substitute for checking the actual part list.
Once a mission is cleared, use Sortie and then Replay Mission to search it again. The official PS5 manual states that cleared missions can be replayed repeatedly and that missed parts can be recovered during replay. Replay also awards a mission rank based on performance, but rank and part ownership are separate objectives.
Containers are only one part source. Main-mission rewards, Training missions, Hunter Class Combat Log rewards, Arena rewards, ending rewards and Parts Shop purchases must all be checked separately. Replay can recover a missed item in a cleared mission, but it cannot create a cycle-specific mission that was never unlocked during the active campaign.
- Scan side routes before following the objective marker out of an area.
- Open the chest and complete the sortie.
- Confirm the named part in Assembly before marking it complete.
- Keep container collection separate from Combat Logs, Arena rewards and shop purchases.
2. Collect all four containers in Infiltrate Grid 086
After dropping through the first hole into the building, turn around before advancing and search the back of the room for HC-3000 WRECKER. Continue toward the large metal furnace. At ground level in the room beside the furnace, among the MTs, collect CC-3000 WRECKER.
Return to the furnace and use the side without molten metal entering it. Follow the interior route and drop into the small room containing the Gold Log enemy. AC-3000 WRECKER is in that same room. Defeat the enemy or create enough space to open the chest safely.
Later, when the objective becomes Annihilate enemy MT squad, do not immediately drop onto the marked targets. Turn toward the sloping platform route and follow it around the structure to the fourth chest. Collect 2C-3000 WRECKER before dropping to the objective area. These four chests account for the complete Grid 086 container set.
- HC-3000 WRECKER head
- CC-3000 WRECKER core
- AC-3000 WRECKER arms
- 2C-3000 WRECKER legs
3. Search the Chapter 3 container missions
In Tunnel Sabotage, continue until the warning says that the PCA force is returning early. Do not follow the tunnel’s normal descent. Move upward and left into the side room with ground enemies and the laser-equipped Combat Log target. Pass that enemy and continue to the dead-end ledge for IA-C01W1 NEBULA.
In the standard Survey the Uninhabited Floating City, shut down the first fog-control device and follow the red beacons. When the fast flying enemy attacks, land on or near the rooftop associated with that encounter and search the roof for IA-C01G AORTA. It is above the normal travel line on the way toward the second fog-control device.
These are the standard missions and their standard containers. Later-cycle alternate versions of Survey the Uninhabited Floating City do not add replacement container parts to this list.
- Tunnel Sabotage: IA-C01W1 NEBULA
- Standard Survey the Uninhabited Floating City: IA-C01G AORTA
4. Sweep Eliminate “Honest” Brute from the exterior platforms inward
On the first exterior platform covered by red laser traps, drop to the lower platform rather than continuing along the main route. Collect WB-0010 DOUBLE TROUBLE, then return to the upper platform.
When Brute begins speaking near the large platform with the central turntable, cross to the far opposite end before following the objective marker. The BC-0600 12345 chest is near that far edge.
Continue through the exterior platforming section and cross the green energy barrier. After dropping into the interior room with red lasers, check the right-hand corner for WB-0000 BAD COOK. Clear nearby enemies first if necessary, then open the chest and finish the mission.
- WB-0010 DOUBLE TROUBLE
- BC-0600 12345
- WB-0000 BAD COOK
5. Collect the five containers in Underground Exploration – Depths 1, 2 and 3
In Depth 1, descend through the shaft until the shutters close and the objective marker directs you into a side room. Complete the required interaction, then search the room behind the objective point for IA-C01L EPHEMERA before continuing downward.
In the standard Depth 2 mission, defeat the G5 Iguazu Combat Log encounter and proceed through the underground canyon. After the blue laser fires and the door ahead closes, turn right into the small side room for IA-C01B GILLS. Later, enter the ventilation shaft and use the jump pad. IA-C01A EPHEMERA is directly ahead at the upper level.
In Depth 3, enter the large chamber covered by blue sniper lasers and drop to the bridge. Follow the bridge to the right, cross the gap to the next bridge and turn right for IA-C01F OCELLUS. Then fly to the roof of the large central building and search behind the silver Combat Log enemy for IA-C01C EPHEMERA.
The standard Depth 3 containers are separate from the Intercept the Redguns and Ambush the Vespers decision missions. The later alternate Underground Exploration – Depth 2 mission is also a separate entry. It is important for its Combat Logs and final Analysis unlock, not for another replacement container.
- Depth 1: IA-C01L EPHEMERA
- Standard Depth 2: IA-C01B GILLS
- Standard Depth 2: IA-C01A EPHEMERA
- Depth 3: IA-C01F OCELLUS
- Depth 3: IA-C01C EPHEMERA
6. Finish the standard Chapter 4 containers
In the standard Unknown Territory Survey, search the left side of the tunnel containing the C-Weapons. IA-C01H EPHEMERA is offset from the direct objective route and can be missed if you leave the passage immediately.
In the standard Reach the Coral Convergence, fly forward from deployment until you reach the two Gold Log enemies. Move to the far-right island-like section with broken ground and buildings, then search the rooftop of the smaller building for IA-C01W3 AURORA.
After the opening AC encounter, continue to the large bridge and fly over it to the far end. Drop below the bridge into the area with the rolling grinder enemies. IA-C01W2 MOONLIGHT is on the lower island among them. It is not on the bridge deck.
Do not place IB-C03W4 NGI 028 on the Reach the Coral Convergence checklist. The standard Reach mission contains AURORA and MOONLIGHT only. The alternate later-cycle Reach mission has no replacement container.
- Standard Unknown Territory Survey: IA-C01H EPHEMERA
- Standard Reach the Coral Convergence: IA-C01W3 AURORA
- Standard Reach the Coral Convergence: IA-C01W2 MOONLIGHT
7. Collect the two Xylem containers and finish the remaining part sources
Regain Control of the Xylem contains the final two Part Containers. Immediately after deployment, turn left and drop into the lower area. IB-C03W3 NGI 006 is in front of you. Near the mission’s end, enter the room with the two modules and search between them for IB-C03W4 NGI 028 before leaving through the mission exit.
The Parts Shop has a fixed inventory rather than rotating stock. New items become available after specified missions, chapter progress, Training missions, Hunter Class rewards, Arena progress and other unlock conditions. Check the shop after major advances and buy newly available parts when your COAM allows. Keep alternate parts instead of selling them merely because they have similar statistics; they may support different weight, EN-load or weapon configurations.
For complete parts ownership, clear every Training mission, collect Combat Logs until all Hunter Class rewards are claimed, defeat all standard and later-cycle Arena opponents, obtain all three endings, collect all 19 containers and purchase every available shop part. The final three Analysis opponents are later-cycle content. Complete the alternate Underground Exploration – Depth 2 route and defeat those opponents before Coral Release if you want their parts without needing another campaign cycle.
- Regain Control of the Xylem: IB-C03W3 NGI 006
- Regain Control of the Xylem: IB-C03W4 NGI 028
- Clear every Training mission.
- Claim every Hunter Class Combat Log reward.
- Complete the alternate Underground Exploration – Depth 2 route.
- Defeat the final three Analysis opponents before Coral Release.
- Buy every part added to the fixed Parts Shop inventory.
Before you move on
- Assembly contains all 19 container parts: four from Infiltrate Grid 086, one from Tunnel Sabotage, one from standard Survey the Uninhabited Floating City, three from Eliminate “Honest” Brute, five from Underground Exploration – Depths 1–3, one from standard Unknown Territory Survey, two from standard Reach the Coral Convergence and two from Regain Control of the Xylem.
- The standard Reach the Coral Convergence checklist contains IA-C01W3 AURORA and IA-C01W2 MOONLIGHT.
- The Regain Control of the Xylem checklist contains IB-C03W3 NGI 006 and IB-C03W4 NGI 028.
- Every applicable Parts Shop item has been unlocked and purchased.
- Every Training mission has been cleared and every Combat Log Hunter Class reward has been claimed.
- All required Arena opponents have been defeated, including the final three Analysis opponents before Coral Release.
- All three endings have been completed and their story rewards are present.
- Assembly ownership, rather than only a handwritten checklist, confirms the collection.
Mission Select, Replay Strategy and 100% Completion
Armored Core VI: Fires of Rubicon has 59 Replay Mission entries across five chapters. Completing the full catalogue requires multiple active campaign cycles because some decisions are mutually exclusive, some additions first appear in later cycles, and the Alea Iacta Est route has its own missions. Use Sortie progression to unlock missing entries; use Mission Replay afterward for practice, credits, parts, Combat Logs, containers and S-Ranks. Prisoner Rescue is entry 12, Stop the Secret Data Breach is entry 19, and Defend the Dam Complex is entry 34. Prisoner Rescue and Stop the Secret Data Breach are route-dependent later-cycle missions: the qualifying Accept route can make them available in New Game+, and they may also appear during later New Game++ progression. They are not guaranteed in every New Game+ run and are not created by replaying related missions.
1. Unlock branches through active Sortie progression
Finish the first campaign cycle, then continue the completed progression file into New Game+ and New Game++. The campaign’s Missions menu advances the active story; Replay Mission only launches missions already unlocked. Every decision, alternate mission and cycle-specific replacement must therefore be selected while advancing through Sortie in the relevant cycle.
For the first two endings, use separate campaign cycles and take the required opposite late-game choices. For a complete catalogue, also record the Chapter 3 and Chapter 4 decision missions even when they do not determine the ending by themselves. In the qualifying later-cycle route, choose Accept when the altered Attack the Dam Complex decision presents that option. This can open the route containing Prisoner Rescue and Stop the Secret Data Breach in New Game+, while later New Game++ progression can also provide them. Do not assume that any New Game+ run will show both missions automatically.
On the third active cycle, select the newly offered New Game++ missions and follow the Alea Iacta Est route. The route includes Escort the Weaponized Mining Ship, Obstruct the Mandatory Inspection, the alternate Attack the Watchpoint, the alternate Survey the Uninhabited Floating City, Coral Export Denial, the alternate Underground Exploration – Depth 2, the alternate Unknown Territory Survey, Eliminate V.III, and the Chapter 5 Alea finale. Record each completed sortie before moving to cleanup.
- Cycle 1: complete one standard ending and record the active decisions.
- Cycle 2: complete the other standard ending and obtain the needed New Game+ additions.
- Cycle 3: select the qualifying New Game++ route and complete Alea Iacta Est.
- If Prisoner Rescue or Stop the Secret Data Breach is absent, return to active Sortie progression rather than relying on Replay Mission.
2. Use Mission Replay for cleanup, not route creation
Open Sortie, then Replay Mission, to practice missions that are already present in the save. Replay Mission is the correct place to earn mission ranks, including S-Ranks, recover missed parts, collect containers and Combat Logs, and farm credits without advancing the campaign. The PS5 manual also confirms that cleared missions can be replayed and that replay results track performance and missed parts.
Replay does not replace campaign progression. Replaying Attack the Dam Complex does not unlock its alternate entry. Replaying Eliminate the Doser Faction does not create Stop the Secret Data Breach. Replaying a standard mission does not create its later-cycle variant, and replaying an already unlocked mission cannot change a previous decision. If an expected entry is missing, stop cleanup and continue the active campaign route in the cycle that qualifies it.
A newly completed branch should appear in Replay Mission only after the sortie has cleared and the save has updated. Check the menu after returning to the Garage or title screen if the entry is not immediately visible. Count the actual entries in your save, not entries listed in an external checklist.
- Use Replay Mission for practice, parts, Combat Logs, containers, credits and S-Ranks.
- Use active Missions for endings, decisions, replacements and later-cycle additions.
- Confirm a newly unlocked mission appears in the save before beginning cleanup.
3. Canonical Replay Mission order: entries 1–20
1 Illegal Entry; 2 Destroy Artillery Installations; 3 Grid 135 Cleanup; 4 Destroy the Transport Helicopters; 5 Destroy the Tester AC; 6 Attack the Dam Complex; 7 Attack the Dam Complex [ALT MISSION] — New Game+; 8 Destroy the Weaponized Mining Ship; 9 Escort the Weaponized Mining Ship — New Game++; 10 Operation Wallclimber; 11 Retrieve Combat Logs; 12 Prisoner Rescue — route-dependent later-cycle entry; 13 Investigate BAWS Arsenal No. 2; 14 Obstruct the Mandatory Inspection — New Game++; 15 Attack the Watchpoint; 16 Attack the Watchpoint [ALT MISSION] — New Game++; 17 Infiltrate Grid 086; 18 Eliminate the Doser Faction; 19 Stop the Secret Data Breach — route-dependent later-cycle entry; 20 Ocean Crossing.
The labels for entries 12 and 19 describe their route qualification, not a universal cycle guarantee. The qualifying Accept route can make them available during New Game+, and later New Game++ progression can also provide them. Keep entry 7 separate from the normal Attack the Dam Complex entry, and keep entry 16 separate from the standard Attack the Watchpoint mission. Their replay entries represent different active-route outcomes.
- Entry 7 is Attack the Dam Complex [ALT MISSION].
- Entry 9 is Escort the Weaponized Mining Ship.
- Entry 12 is Prisoner Rescue.
- Entry 16 is Attack the Watchpoint [ALT MISSION].
- Entry 19 is Stop the Secret Data Breach.
- Entry 20 is Ocean Crossing.
4. Canonical Replay Mission order: entries 21–40
21 Steal the Survey Data; 22 Attack the Refueling Base; 23 Eliminate V.VII; 24 Tunnel Sabotage; 25 Prevent Corporate Salvage of New Tech — New Game+; 26 Survey the Uninhabited Floating City; 27 Survey the Uninhabited Floating City [ALT MISSION] — New Game++; 28 Heavy Missile Launch Support; 29 Eliminate the Enforcement Squads; 30 Destroy the Special Forces Craft; 31 Attack the Old Spaceport; 32 Eliminate “Honest” Brute; 33 Defend the Old Spaceport; 34 Defend the Dam Complex — New Game+; 35 Historic Data Recovery; 36 Coral Export Denial — New Game++; 37 Destroy the Ice Worm; 38 Underground Exploration – Depth 1; 39 Underground Exploration – Depth 2; 40 Underground Exploration – Depth 2 [ALT MISSION] — New Game++.
Entries 29 and 30 are mutually exclusive Chapter 3 decision missions. Entry 25 is a New Game+ addition and entry 34 is a separate New Game+ mission; neither should be merged with the Chapter 1 Attack the Dam Complex entries. Entry 36 is the New Game++ Coral Export Denial mission and must remain separate from Historic Data Recovery. Entries 39 and 40 are the standard and alternate Depth 2 missions, not two names for one replay entry.
- Record both Chapter 3 decision missions at entries 29 and 30.
- Record Prevent Corporate Salvage of New Tech at entry 25.
- Record Defend the Dam Complex at entry 34.
- Record Historic Data Recovery and Coral Export Denial separately.
- Record both Underground Exploration – Depth 2 entries.
5. Canonical Replay Mission order: entries 41–59
41 Underground Exploration – Depth 3; 42 Intercept the Redguns; 43 Ambush the Vespers; 44 Eliminate V.III — New Game++; 45 Unknown Territory Survey; 46 Unknown Territory Survey [ALT MISSION] — New Game++; 47 Reach the Coral Convergence; 48 Reach the Coral Convergence [ALT MISSION] — New Game++; 49 Escape; 50 Take the Uninhabited Floating City; 51 Intercept the Corporate Forces; 52 Breach the Kármán Line; 53 Shut Down the Closure Satellites; 54 Eliminate “Cinder” Carla; 55 Destroy the Drive Block; 56 Bring Down the Xylem; 57 MIA — New Game++; 58 Regain Control of the Xylem — New Game++; 59 Coral Release — New Game++.
Entries 42 and 43 are mutually exclusive Chapter 4 decision missions. Entries 45 and 46 are the standard and later-cycle Unknown Territory Survey versions. The later version is one distinct alternate entry; do not add another Unknown Territory Survey entry for the Eliminate V.III decision. Entries 47 and 48 are likewise separate Reach the Coral Convergence versions. Entries 51 through 56 are divided across the two standard ending routes, while entries 57 through 59 belong to the New Game++ Alea Iacta Est finale.
- Record both Unknown Territory Survey entries.
- Record both Reach the Coral Convergence entries.
- Do not add a third Unknown Territory Survey entry.
- Record Eliminate V.III at entry 44.
- Record MIA, Regain Control of the Xylem and Coral Release only after the New Game++ finale route.
6. Final cleanup and completion audit
After the three campaign cycles, compare the actual Replay Mission menu with the 59-entry checklist. If an entry is absent, identify the missing active decision or later-cycle route before attempting S-Ranks. A replayed standard mission proves only that the standard mission is available; it does not prove that a cycle-specific replacement was unlocked.
Once all 59 entries are present, replay missions for S-Ranks, remaining Combat Logs, containers and parts. Mission Replay is also useful for practicing bosses and farming COAM, but it does not advance the story or alter ending decisions. Check the save after clearing each missing branch, then use the in-game menu as the final authority for catalogue completion.
The Alea Iacta Est route should be treated separately from the route-qualified status of Prisoner Rescue and Stop the Secret Data Breach. Neither of those two missions is an independent requirement for the third ending. They are catalogue and Combat Log objectives that may be obtained through the qualifying later-cycle route, while the Alea ending requires its own New Game++ decisions and finale missions.
- Replay Mission contains exactly 59 named entries.
- Entry 12 is Prisoner Rescue and entry 19 is Stop the Secret Data Breach.
- Entry 34 is Defend the Dam Complex.
- All three story endings are complete.
- The standard and alternate Survey, Depth 2 and Reach the Coral Convergence entries are separate.
- All New Game++ finale entries are present.
- Remaining parts, Combat Logs, containers and S-Ranks have been audited through Replay Mission.
Before you move on
- The Replay Mission menu contains exactly 59 named entries in the canonical order.
- Entry 7 is Attack the Dam Complex [ALT MISSION].
- Entry 9 is Escort the Weaponized Mining Ship.
- Entry 12 is Prisoner Rescue.
- Entry 19 is Stop the Secret Data Breach.
- Entry 34 is Defend the Dam Complex.
- Prisoner Rescue and Stop the Secret Data Breach were obtained through a qualifying active later-cycle route, not created by replay.
- New Game+ additions are recorded separately from New Game++ additions.
- All three story endings are complete.
- The standard and alternate Unknown Territory Survey entries are both present, with no nonexistent third variant.
- Mission Replay has been used for remaining parts, Combat Logs, containers and S-Ranks only after their missions were unlocked through active progression.
Patches, Performance and Troubleshooting on PS5
Before beginning a new route or testing a difficult boss, update Armored Core VI and the PS5 system software, then confirm the game reaches the title screen normally. Check the App Ver. and Regulation Ver. shown on the title screen rather than relying on an old patch number. Test controls and display settings in a cleared mission before changing your final-boss build. If a crash, launch error or suspicious save state occurs, preserve the save first and use the least destructive repair available. PlayStation’s Safe Mode provides Repair Console Storage, Clear System Software Cache and Rebuild Database before the data-erasing Reset PS5 choices. Restore licenses only for access or licensing problems. Campaign progress, parts, endings and Mission Select are separate from Ranked Match rank and leaderboard data, which can be reset by online season updates.
1. Update the game and confirm the installed version
From the PS5 home screen, highlight Armored Core VI, press the Options button and select Check for Update. Also open Settings, then System, System Software, and System Software Update and Settings. Install any pending update before beginning a fresh campaign route, replaying an ending branch or testing a boss build.
After launching the game, check the lower-right corner of the title screen for the displayed App Ver. and Regulation Ver. Bandai Namco patch notices identify the platforms covered by each release and describe balance changes, added parts, online features and mission fixes. Use the current title-screen values as your installed-version check instead of assuming a launch disc or old digital installation is current. If the game is set to boot offline, reconnect it to the network when checking for regulation updates; Bandai Namco notes that some console patches will not download while offline.
- Armored Core VI reports no pending game update.
- PS5 system software reports that it is current.
- The title screen displays App Ver. and Regulation Ver. and loads the intended save.
2. Stabilize controls and display settings before a major sortie
Choose the PS5 display and game settings that make target lock, missile warnings, vertical movement and weapon-switch prompts easiest to read. Armored Core VI does not require a special graphics configuration for campaign completion. Make one change at a time, then test it in a low-risk cleared mission before attempting a chapter boss or finale.
Confirm that Quick Boost, Assault Boost, jump or ascend input, target switching and weapon changes respond normally. If inputs feel delayed or the display behaves incorrectly, close the game completely and restart the PS5 before changing several unrelated settings. If the problem occurs only with a particular display, inspect the HDMI connection and test another cable or display before treating it as save corruption.
- A short replay confirms normal movement and target tracking.
- Weapon switching and Quick Boost inputs respond consistently.
- Display changes were tested in a cleared mission rather than during a final-boss attempt.
3. Preserve the save before investigating suspicious progress
If credits, parts, mission clears, endings or Mission Select entries appear to have changed unexpectedly, stop making further campaign progress. Record the mission name, approximate time, error message, App Ver., Regulation Ver. and whether the problem followed a crash, forced shutdown or interrupted update. Do not overwrite the only known-good copy while testing repairs.
For PlayStation Plus cloud storage, go to Settings, Saved Data and Game/App Settings, then Saved Data. Confirm whether automatic synchronization is enabled and inspect the timestamps before downloading or uploading a copy. For a broader backup, connect a FAT32- or exFAT-formatted USB drive and use Settings, System, System Software, Back Up and Restore, then Back Up Your PS5. A full console restore can erase current data, so verify the backup contents and timestamp first.
- The affected save and its timestamp are identified.
- A cloud copy or USB backup exists before destructive troubleshooting.
- No new sorties have overwritten the suspicious state.
4. Repair launch, download or licensing problems in the least destructive order
For a game that will not launch or an update that will not install, restart the PS5 and test the connection under Settings, Network, then Test Internet Connection. Check PlayStation service status if downloads or account access fail. If the game shows a padlock, missing ownership or add-on error, sign in to the purchasing account and restore licenses through Settings, Users and Accounts, Other, Restore Licenses. License restoration does not remove Armored Core VI campaign progress.
If a download remains stuck, open Downloads/Uploads from the Control Center and pause and resume it. If that fails, cancel and delete the failed download, then retry it from Game Library. Reinstall the game only after confirming the save is safely backed up or synchronized. Do not delete saved data when removing the application.
- Network and service status were checked.
- Restore Licenses was used only for an access or license symptom.
- The save backup was confirmed before deleting and reinstalling the application.
5. Use Safe Mode without selecting an unnecessary reset
Turn the PS5 off completely by holding the power button for about three seconds. Once it is off, hold the power button again and release it after the second beep. Connect the controller with a USB cable and press the PS button. Start with the non-erasing options that match the symptom: Repair Console Storage for startup or storage trouble; Clear System Software Cache for system-feature problems or performance drops; and Rebuild Database when the console’s content index or game icons behave incorrectly.
Do not choose Reset PS5 or Reset PS5 (Reinstall System Software) as a routine Armored Core VI repair. PlayStation states that both reset paths delete user data. If Safe Mode itself will not appear, check the USB, HDMI and power cables, power-cycle the console, and then use PlayStation Repairs or official support if the problem persists.
- The PS5 was fully powered off before Safe Mode was entered.
- Repair Console Storage, cache clearing or database rebuilding was considered before a reset.
- Reset PS5 options were avoided unless official support specifically required them.
6. Keep Ranked Match status separate from campaign completion
Armored Core VI Ranked Match is an online NEST feature and is separate from single-player mission progress. Bandai Namco’s November 21, 2024 season notice described rank and leaderboard resets at a season update, including the end of ongoing promotion phases and replacement of leaderboard standings. Such a reset does not by itself indicate that campaign missions, parts, endings, credits or Mission Select data were erased.
When an online rank or leaderboard result looks different, check the latest Bandai Namco notice before troubleshooting the save. When reporting a genuine campaign problem, provide the console model, game edition, App Ver., Regulation Ver., error code, affected mission and repeatable steps. This gives support enough information to distinguish an online reset from local save or installation trouble.
- Ranked Match standing and single-player progress were checked separately.
- The relevant current publisher notice was consulted before treating a rank change as corruption.
- A support report includes version information, timestamps and reproducible steps.
Before you move on
- Armored Core VI and PS5 system software have no pending updates, and the title screen displays the installed App Ver. and Regulation Ver.
- A cleared mission confirms stable target lock, movement, weapon switching and display performance before a difficult boss or ending mission.
- A verified cloud synchronization or USB backup exists before reinstalling the game or entering destructive Safe Mode options.
- The campaign save still shows the expected credits, parts, endings and Mission Select entries after troubleshooting.
- Ranked Match rank and leaderboard status has been verified separately from single-player completion.
References for this chapter
- Armored Core VI Fires of Rubicon Patch Notes Version 1.08.1
- Armored Core VI Fires of Rubicon Patch Notes Version 1.05
- Armored Core VI Fires of Rubicon — Ranked Match Season Update Notice, November 2024
- FromSoftware Products — Armored Core VI Fires of Rubicon
- How to Use Safe Mode on PS5 Consoles and PS4 Consoles
- PlayStation 5 Support
- How to Back Up and Restore PS5 Console Data
- How to Troubleshoot Game Downloads from PlayStation Store
- How to Fix CE-106487-6 on PS5
- How to Troubleshoot Safe Mode Issues on PlayStation Consoles
Final Checklist, Verification and Postgame Tasks
Use this audit after completing the campaign cycles needed for all three endings and the full Replay Mission catalogue. Armored Core VI: Fires of Rubicon has five chapters and 59 Replay Mission records. Several records are mutually exclusive during one active campaign, while later-cycle replacements and alternate versions remain unavailable until their qualifying route is played. Confirm Fires of Raven, Liberator of Rubicon and Alea Iacta Est separately, then audit the mission list, Arena, Training, OS Tuning, parts, containers, Combat Logs, Data Logs, Hunter Class and S-Ranks. Prisoner Rescue and Stop the Secret Data Breach are route-dependent later-cycle replacements: choosing Accept in the altered Attack the Dam Complex mission can unlock them during New Game+, and they can also be obtained during later New Game++ progression. Mission Replay is for already-unlocked missions and cannot repair an unmade campaign decision. The list below uses the in-game Replay Mission order, not the order of a single uninterrupted story run.
Confirm the three endings before deleting or overwriting saves
Confirm Fires of Raven, Liberator of Rubicon and Alea Iacta Est in the trophy list or ending records. The first two endings come from different Chapter 5 choices: Intercept the Corporate Forces leads to the Fires of Raven branch, while Eliminate “Cinder” Carla leads to the Liberator of Rubicon branch. Alea Iacta Est is the third-cycle route that ends with MIA, Regain Control of the Xylem and Coral Release. A completed ending confirms only that ending; it does not confirm every mutually exclusive mission or alternate version.
After each ending, wait for the completion save to finish before closing the game. Continue from the completed file when beginning the next cycle. Do not start a separate New Game file if your goal is a single progression file containing all endings and Replay Mission records. Mission Replay preserves cleared entries, but it cannot reproduce a decision that was never made during active campaign progression.
- Fires of Raven is confirmed.
- Liberator of Rubicon is confirmed.
- Alea Iacta Est is confirmed after Coral Release.
- The save completed after each ending.
- The progression file and backups are preserved until the audit is finished.
Check the canonical 59-entry Replay Mission list
Open Sortie, select Replay Mission and compare the displayed records with this order. Mark each entry separately, including alternate versions. The complete catalogue is: Chapter 1 — 1 Illegal Entry; 2 Destroy Artillery Installations; 3 Grid 135 Cleanup; 4 Destroy the Transport Helicopters; 5 Destroy the Tester AC; 6 Attack the Dam Complex; 7 Attack the Dam Complex, alternate version; 8 Destroy the Weaponized Mining Ship; 9 Escort the Weaponized Mining Ship; 10 Operation Wallclimber; 11 Retrieve Combat Logs; 12 Prisoner Rescue; 13 Investigate BAWS Arsenal No. 2; 14 Obstruct the Mandatory Inspection; 15 Attack the Watchpoint; 16 Attack the Watchpoint, alternate version.
Chapter 2 — 17 Infiltrate Grid 086; 18 Eliminate the Doser Faction; 19 Stop the Secret Data Breach; 20 Ocean Crossing. Keep Infiltrate Grid 086, Eliminate the Doser Faction and Ocean Crossing even when Stop the Secret Data Breach has been unlocked. Prisoner Rescue and Stop the Secret Data Breach occupy their own Replay Mission records; neither replaces the standard records permanently.
Chapter 3 — 21 Steal the Survey Data; 22 Attack the Refueling Base; 23 Eliminate V.VII; 24 Tunnel Sabotage; 25 Prevent Corporate Salvage of New Tech; 26 Survey the Uninhabited Floating City; 27 Survey the Uninhabited Floating City, alternate version; 28 Heavy Missile Launch Support; 29 Eliminate the Enforcement Squads; 30 Destroy the Special Forces Craft; 31 Attack the Old Spaceport; 32 Eliminate “Honest” Brute; 33 Defend the Old Spaceport; 34 Defend the Dam Complex; 35 Historic Data Recovery; 36 Coral Export Denial; 37 Destroy the Ice Worm.
Chapter 4 — 38 Underground Exploration – Depth 1; 39 Underground Exploration – Depth 2; 40 Underground Exploration – Depth 2, alternate version; 41 Underground Exploration – Depth 3; 42 Intercept the Redguns; 43 Ambush the Vespers; 44 Eliminate V.III; 45 Unknown Territory Survey; 46 Unknown Territory Survey, alternate version; 47 Reach the Coral Convergence; 48 Reach the Coral Convergence, alternate version.
Chapter 5 — 49 Escape; 50 Take the Uninhabited Floating City; 51 Intercept the Corporate Forces; 52 Breach the Kármán Line; 53 Shut Down the Closure Satellites; 54 Eliminate “Cinder” Carla; 55 Destroy the Drive Block; 56 Bring Down the Xylem; 57 MIA; 58 Regain Control of the Xylem; 59 Coral Release. This is the catalogue order used for the 59-mission completion and S-Rank checks.
- All 16 Chapter 1 records are present.
- All four Chapter 2 records are present.
- All 17 Chapter 3 records are present.
- All 11 Chapter 4 records are present.
- All 11 Chapter 5 records are present.
- The total is 59 records.
- Stargazer is unlocked after the catalogue is complete.
Unlock missing later-cycle and branch entries through active progression
If a record is missing, do not repeatedly replay an unrelated mission. Continue the active campaign cycle that qualifies for the missing route, select the required decision and complete the mission. The altered Attack the Dam Complex mission appears in a later cycle and presents Accept or Refuse. Choosing Accept can cause Retrieve Combat Logs to be replaced by Prisoner Rescue during New Game+, and the same route-dependent replacement can also be encountered during later New Game++ progression. The exact entry is unlocked only when that active route is played; replaying the ordinary Retrieve Combat Logs mission cannot create Prisoner Rescue.
Apply the same rule to Stop the Secret Data Breach. It is a later-cycle replacement for Eliminate the Doser Faction when its qualifying active route is selected. It can be unlocked in New Game+ after the relevant Accept route and can also appear during later New Game++ progression. It is not an automatic reward for every New Game+ file, and completing Eliminate the Doser Faction in Mission Replay does not unlock it retroactively.
For the third ending, follow the New Game++ route through Escort the Weaponized Mining Ship, the required alternate decisions, Coral Export Denial, Eliminate V.III, MIA, Regain Control of the Xylem and Coral Release. Prisoner Rescue and Stop the Secret Data Breach are useful catalogue and Combat Log targets when available, but neither is an independent requirement for the Alea Iacta Est ending. Escort the Weaponized Mining Ship, Obstruct the Mandatory Inspection, the alternate Attack the Watchpoint, Coral Export Denial, the alternate Underground Exploration – Depth 2, Eliminate V.III, the alternate Unknown Territory Survey, the alternate Reach the Coral Convergence and the three Alea finale missions are the separate New Game++ additions to track.
- Every missing branch was unlocked through active campaign progression.
- Prisoner Rescue is present as entry 12 through a qualifying later-cycle route.
- Stop the Secret Data Breach is present as entry 19 through a qualifying later-cycle route.
- The standard Chapter 2 records remain present.
- Escort the Weaponized Mining Ship and Obstruct the Mandatory Inspection are present.
- Prevent Corporate Salvage of New Tech and Defend the Dam Complex are present.
- Coral Export Denial and Eliminate V.III are present.
- MIA, Regain Control of the Xylem and Coral Release are present.
Audit Arena, Training, OS Tuning and parts
Complete all Training lessons and the Arena programs that have unlocked. Later campaign progression adds Analysis opponents, so check the Arena again after completing the later cycles. Arena completion is separate from the 59-mission catalogue and does not prove that every mission has been cleared.
Spend OST Chips on OS Tuning upgrades and confirm the purchased panels. Check the Parts Shop after major story advances, but do not treat a full shop inventory as proof of complete parts collection. Mission containers, Combat Log rewards, Arena rewards, Training rewards and story rewards must be checked separately. Confirm newly obtained parts in Assembly before selling duplicates or dismantling anything.
- Training Complete is unlocked.
- All available Arena and Analysis programs are cleared.
- Master of Arena is unlocked if full Arena completion is intended.
- Every intended OS Tuning upgrade is purchased.
- Tuning Expert is unlocked.
- All intended parts are present in Assembly.
- Asset Holder is unlocked if full parts completion is intended.
Audit Combat Logs, Data Logs, containers and Hunter Class
Use Replay Mission for cleanup only after the corresponding mission record is visible. Defeat marked Combat Log targets and finish the sortie so the result is saved. Check the alternate Attack the Watchpoint, alternate Survey the Uninhabited Floating City, Prisoner Rescue, Stop the Secret Data Breach, Defend the Dam Complex, alternate Underground Exploration – Depth 2, Eliminate V.III, alternate Unknown Territory Survey and alternate Reach the Coral Convergence individually.
Keep Data Logs separate from Combat Logs. The alternate Survey the Uninhabited Floating City contains Thumb Dolmayan; defeating him awards Dolmayan’s Writings (4) and the associated Combat Log. Do not infer completion from the ordinary Survey mission. Likewise, an ordinary mission clear, complete shop inventory or completed Arena does not prove that every container was opened.
Revisit every container-bearing mission and confirm each reward in Assembly. Review Hunter Class after all marked targets and route-specific logs have been collected. If a log is still missing, compare the mission’s log indicator and the route that produced it rather than assuming a replay of the standard version covers the alternate version.
- Every marked Combat Log target was defeated.
- Hunter Class reached the intended maximum rank.
- Combat Log Collector is unlocked if all logs are complete.
- Thumb Dolmayan was defeated in the alternate Survey mission.
- Dolmayan’s Writings (4) is present.
- Every container-bearing mission was checked.
- Every container reward appears in Assembly.
- Optional Data Logs were tracked separately.
Earn S-Ranks last and perform the final save check
Earn S-Ranks from Sortie or Replay Mission after all route and collectible cleanup is complete. Review all 59 records separately, including both Attack the Dam Complex records, both Attack the Watchpoint records, both Survey the Uninhabited Floating City records, both Underground Exploration – Depth 2 records, both Unknown Territory Survey records and both Reach the Coral Convergence records. An S-Rank on one version does not automatically cover its alternate version. The Perfect Mercenary trophy requires S-Ranks on all 59 missions.
When finished, return to the Garage or main menu and allow the autosave to complete. Recheck the endings, Replay Mission catalogue, Arena and Analysis screens, Hunter Class, OS Tuning and Assembly inventory before deleting older saves or backups.
- All 59 mission records were reviewed for S-Rank progress.
- Every alternate version was checked separately.
- Perfect Mercenary is unlocked if every mission has an S-Rank.
- Fires of Raven, Liberator of Rubicon and Alea Iacta Est are confirmed.
- Stargazer and all other intended completion trophies are confirmed.
- The local save and backups were preserved until verification finished.
Before you move on
- Fires of Raven, Liberator of Rubicon and Alea Iacta Est are unlocked.
- Alea Iacta Est is confirmed after Coral Release and save completion.
- Stargazer is unlocked.
- Replay Mission contains all 59 named records in the canonical order.
- Infiltrate Grid 086, Eliminate the Doser Faction, Stop the Secret Data Breach and Ocean Crossing are all present.
- Prisoner Rescue is present as entry 12 through qualifying active progression.
- The standard Chapter 3 route and both mutually exclusive Chapter 3 decision missions were recorded across completed cycles.
- Prevent Corporate Salvage of New Tech and Defend the Dam Complex are present.
- Obstruct the Mandatory Inspection and Escort the Weaponized Mining Ship are present.
- Coral Export Denial, the alternate Underground Exploration – Depth 2, Eliminate V.III and the alternate Unknown Territory Survey are present.
- Both Reach the Coral Convergence records are present.
- MIA, Regain Control of the Xylem and Coral Release are present.
- The alternate Attack the Watchpoint and alternate Survey the Uninhabited Floating City are present.
- Thumb Dolmayan was defeated and Dolmayan’s Writings (4) was recorded.
- All intended containers, parts, Combat Logs, Data Logs, Arena programs, Training lessons, OS upgrades and Hunter Class progress were verified.
- All 59 mission records were checked individually for S-Rank progress.
Appendix: Key Reference Sources Used
Armored Core VI: Fires of Rubicon on native PlayStation 5 hardware has five story chapters and 59 named Replay Mission entries. The complete catalogue requires multiple active campaign cycles because decision missions, alternate versions and ending missions replace or exclude one another during individual runs. Complete Fires of Raven and Liberator of Rubicon on separate cycles, then follow the New Game++ route for Alea Iacta Est. Prisoner Rescue is Replay Mission entry 12 and Stop the Secret Data Breach is entry 19. Their availability is route-dependent: the qualifying Accept choice in the altered Attack the Dam Complex sequence can make them available during New Game+, while later New Game++ progression can also obtain them. They are not independent requirements for the Alea ending. Mission Replay is for missions already unlocked, plus practice, credits, collectibles, Combat Logs and S-Rank attempts. Check the installed App Ver. and Regulation Ver. on the PS5 title screen after updating instead of relying on a hardcoded version number.
Confirm the PS5 release, update state and save plan
Use Armored Core VI: Fires of Rubicon on native PlayStation 5 hardware. This appendix covers the original 2023 release and its campaign structure, not a different Armored Core title, platform-specific control guide or later remake. Install the available official update before beginning or resuming the campaign. If the game is configured to start offline, launch it online at least once so the current regulation data can be obtained. The official update notice specifically warns that an offline startup setting can prevent the latest Regulation Ver. from downloading.
After updating, read the App Ver. and Regulation Ver. shown in the lower-right corner of the title screen and record the values for troubleshooting. Do not copy a version number from an older guide into a permanent checklist; installed versions can change through later updates. Keep all three endings on one progression file. After each ending, allow the post-ending save and automatic New Game+ transition to finish before closing the application. A cloud or console backup can protect progress, but it cannot turn Mission Replay into an active route or rewrite a decision already made in the current cycle.
- Confirm the title is Armored Core VI: Fires of Rubicon on PS5.
- Install the available official update.
- Start online if the current regulation data is not appearing.
- Record the App Ver. and Regulation Ver. displayed on the title screen.
- Keep all three endings on one progression file.
- Wait for the post-ending save to complete after each campaign cycle.
Use active Sortie progression for every branch and ending
Make campaign choices from Sortie, then Missions, during the active playthrough. When a decision mission is completed, the competing assignment is normally unavailable in that cycle. Mission Replay is a separate cleanup tool: it allows a cleared mission to be practiced again and can be used for credits, parts, containers, Combat Logs and S-Rank attempts, but it does not create an unplayed branch, change the ending route or unlock a missing cycle-specific entry.
For the two standard endings, complete separate campaign cycles. Fires of Raven requires the Chapter 5 choice Intercept the Corporate Forces, followed by Breach the Kármán Line and Shut Down the Closure Satellites. Liberator of Rubicon requires Eliminate “Cinder” Carla, followed by Destroy the Drive Block and Bring Down the Xylem. The Chapter 5 choice is mutually exclusive within a single cycle, so replaying one of these missions from Mission Replay does not award the opposite ending.
For Alea Iacta Est, begin the third active cycle after both standard endings are complete on the same progression file. Follow the new route missions as they appear. A reliable route uses Accept in the altered Attack the Dam Complex sequence, then Escort the Weaponized Mining Ship, Prevent Corporate Salvage of New Tech, Eliminate the Enforcement Squads, Coral Export Denial and Eliminate V.III. Continue through MIA, Regain Control of the Xylem and Coral Release. These missions and decisions form the core Alea route.
Prisoner Rescue and Stop the Secret Data Breach are separate catalogue and Combat Log objectives, not mandatory Alea ending gates. After the qualifying Accept decision in the altered Attack the Dam Complex mission, Prisoner Rescue can replace Retrieve Combat Logs in a later active cycle, while Stop the Secret Data Breach can replace Eliminate the Doser Faction on the qualifying route. They occupy Replay Mission entries 12 and 19. Some guides group them with New Game++ content because that is where many players collect them, but route references also document qualifying New Game+ access. Do not assume either mission appears in every New Game+ run. If an entry is absent from Replay Mission, complete the required active route; replaying its standard counterpart will not create it.
- Complete Fires of Raven in one active campaign cycle.
- Complete Liberator of Rubicon in another active campaign cycle.
- Begin the Alea route only after both standard endings are complete.
- Choose Accept in the altered Attack the Dam Complex sequence for the qualifying route.
- Complete Escort the Weaponized Mining Ship.
- Complete Prevent Corporate Salvage of New Tech.
- Complete Eliminate the Enforcement Squads.
- Complete Coral Export Denial.
- Complete Eliminate V.III.
- Complete MIA, Regain Control of the Xylem and Coral Release.
- Check entry 12 for Prisoner Rescue.
- Check entry 19 for Stop the Secret Data Breach.
- Use Mission Replay only after the required entry has been unlocked.
Audit the complete 59-entry Replay Mission catalogue
The following is the canonical fully unlocked Replay Mission order. The numbers identify catalogue positions, not the order in which every mission appears during one active campaign. A later-cycle label describes the usual route context and does not by itself prove that the mission is unavailable in New Game+. Decision missions and alternate entries must be completed through active Sortie progression before they are added to Replay Mission.
Chapter 1, entries 1–16: 1 Illegal Entry; 2 Destroy Artillery Installations; 3 Grid 135 Cleanup; 4 Destroy the Transport Helicopters; 5 Destroy the Tester AC; 6 Attack the Dam Complex; 7 Attack the Dam Complex, alternate; 8 Destroy the Weaponized Mining Ship; 9 Escort the Weaponized Mining Ship, New Game++ route mission; 10 Operation Wallclimber; 11 Retrieve Combat Logs; 12 Prisoner Rescue, qualifying later-cycle replacement for Retrieve Combat Logs; 13 Investigate BAWS Arsenal No. 2; 14 Obstruct the Mandatory Inspection, New Game++ content; 15 Attack the Watchpoint; 16 Attack the Watchpoint, alternate New Game++ entry.
Chapter 2 and Chapter 3, entries 17–37: 17 Infiltrate Grid 086; 18 Eliminate the Doser Faction; 19 Stop the Secret Data Breach, qualifying later-cycle replacement for Eliminate the Doser Faction; 20 Ocean Crossing; 21 Steal the Survey Data; 22 Attack the Refueling Base; 23 Eliminate V.VII; 24 Tunnel Sabotage; 25 Prevent Corporate Salvage of New Tech, later-cycle decision mission; 26 Survey the Uninhabited Floating City; 27 Survey the Uninhabited Floating City, alternate later-cycle entry; 28 Heavy Missile Launch Support; 29 Eliminate the Enforcement Squads; 30 Destroy the Special Forces Craft; 31 Attack the Old Spaceport; 32 Eliminate “Honest” Brute; 33 Defend the Old Spaceport; 34 Defend the Dam Complex, later-cycle alternate; 35 Historic Data Recovery; 36 Coral Export Denial, New Game++ decision mission; 37 Destroy the Ice Worm.
Chapter 4 and Chapter 5, entries 38–59: 38 Underground Exploration — Depth 1; 39 Underground Exploration — Depth 2; 40 Underground Exploration — Depth 2, later-cycle alternate; 41 Underground Exploration — Depth 3; 42 Intercept the Redguns; 43 Ambush the Vespers; 44 Eliminate V.III, New Game++ decision mission; 45 Unknown Territory Survey; 46 Unknown Territory Survey, later-cycle alternate with Middle Flatwell; 47 Reach the Coral Convergence; 48 Reach the Coral Convergence, New Game++ alternate; 49 Escape; 50 Take the Uninhabited Floating City; 51 Intercept the Corporate Forces; 52 Breach the Kármán Line; 53 Shut Down the Closure Satellites; 54 Eliminate “Cinder” Carla; 55 Destroy the Drive Block; 56 Bring Down the Xylem; 57 MIA, New Game++; 58 Regain Control of the Xylem, New Game++; 59 Coral Release, New Game++.
Keep this 59-entry mission catalogue separate from Training missions, Arena programs, Arena Analysis opponents, Hunter Class, OS Tuning, Combat Logs, Data Logs, parts, containers and S-Ranks. Having all 59 Replay Mission entries proves mission-catalogue coverage only. It does not prove that every collectible, Combat Log, Arena reward or S-Rank has been obtained.
- Confirm entries 1–16.
- Confirm entries 17–37.
- Confirm entries 38–59.
- Keep standard and alternate entries separate.
- Confirm Prisoner Rescue at entry 12.
- Confirm Stop the Secret Data Breach at entry 19.
- Confirm Obstruct the Mandatory Inspection as New Game++ content.
- Confirm the alternate Attack the Watchpoint entry.
- Confirm the alternate Survey the Uninhabited Floating City entry.
- Confirm the alternate Underground Exploration — Depth 2 entry.
- Confirm the alternate Unknown Territory Survey entry with Middle Flatwell.
- Audit Arena, Training, Combat Logs, parts, containers, Hunter Class and S-Ranks separately.
Before you move on
- The PS5 edition is confirmed and the installed App Ver. and Regulation Ver. are recorded.
- The available official update is installed.
- Fires of Raven is confirmed.
- Liberator of Rubicon is confirmed.
- A third active campaign cycle is completed on the same progression file.
- The Alea route includes Accept in the altered Attack the Dam Complex sequence.
- Escort the Weaponized Mining Ship is complete.
- Prevent Corporate Salvage of New Tech is complete.
- Eliminate the Enforcement Squads is complete.
- Coral Export Denial is complete.
- Eliminate V.III is complete.
- MIA, Regain Control of the Xylem and Coral Release are complete.
- All 59 named entries are checked against the in-game Replay Mission list.
- Prisoner Rescue is present at catalogue entry 12 and was unlocked through the qualifying active route.
- Stop the Secret Data Breach is present at catalogue entry 19 and was unlocked through the qualifying active route.
- Obstruct the Mandatory Inspection is recorded as New Game++ content.
- Defend the Dam Complex is recorded separately from the standard Chapter 3 missions.
- The alternate Attack the Watchpoint and Survey the Uninhabited Floating City entries are recorded separately.
- The alternate Underground Exploration — Depth 2 entry is recorded separately.
- The alternate Unknown Territory Survey entry with Middle Flatwell is recorded separately from the standard version.
References for this chapter
- ARMORED CORE VI FIRES OF RUBICON Official Site: Update File Notice
- ARMORED CORE VI Online Manual: Basic Game Flow and Replay Mission
- Armored Core 6 (VI) All Missions List & Rewards
- How Many Missions and Chapters Are in Armored Core VI?
- Armored Core 6: All Missions
- Armored Core VI Fires of Rubicon New Game Plus reference
- Prisoner Rescue reference
Finishing up
Complete the first campaign cycle and confirm Fires of Raven or Liberator of Rubicon.
Complete the second campaign cycle with the opposite standard ending.
Begin the third campaign cycle and follow the added Alea Iacta Est route.
Unlock and complete Prisoner Rescue and Stop the Secret Data Breach through their qualifying active later-cycle route; Accept can make them available in New Game+, while they may also be obtained in New Game++.
Complete Obstruct the Mandatory Inspection, Escort the Weaponized Mining Ship and the other cycle-specific additions through active progression.
Verify Mission Replay, Arena, Combat Logs, containers, parts and desired trophies separately.
Use active progression in the qualifying cycle for missed branches; Mission Replay cannot create a missing cycle-specific mission or change an ending route.
Choose your next gameScreenshots & video
Game imagery for reference. Follow the written chapters above for the route and strategies.
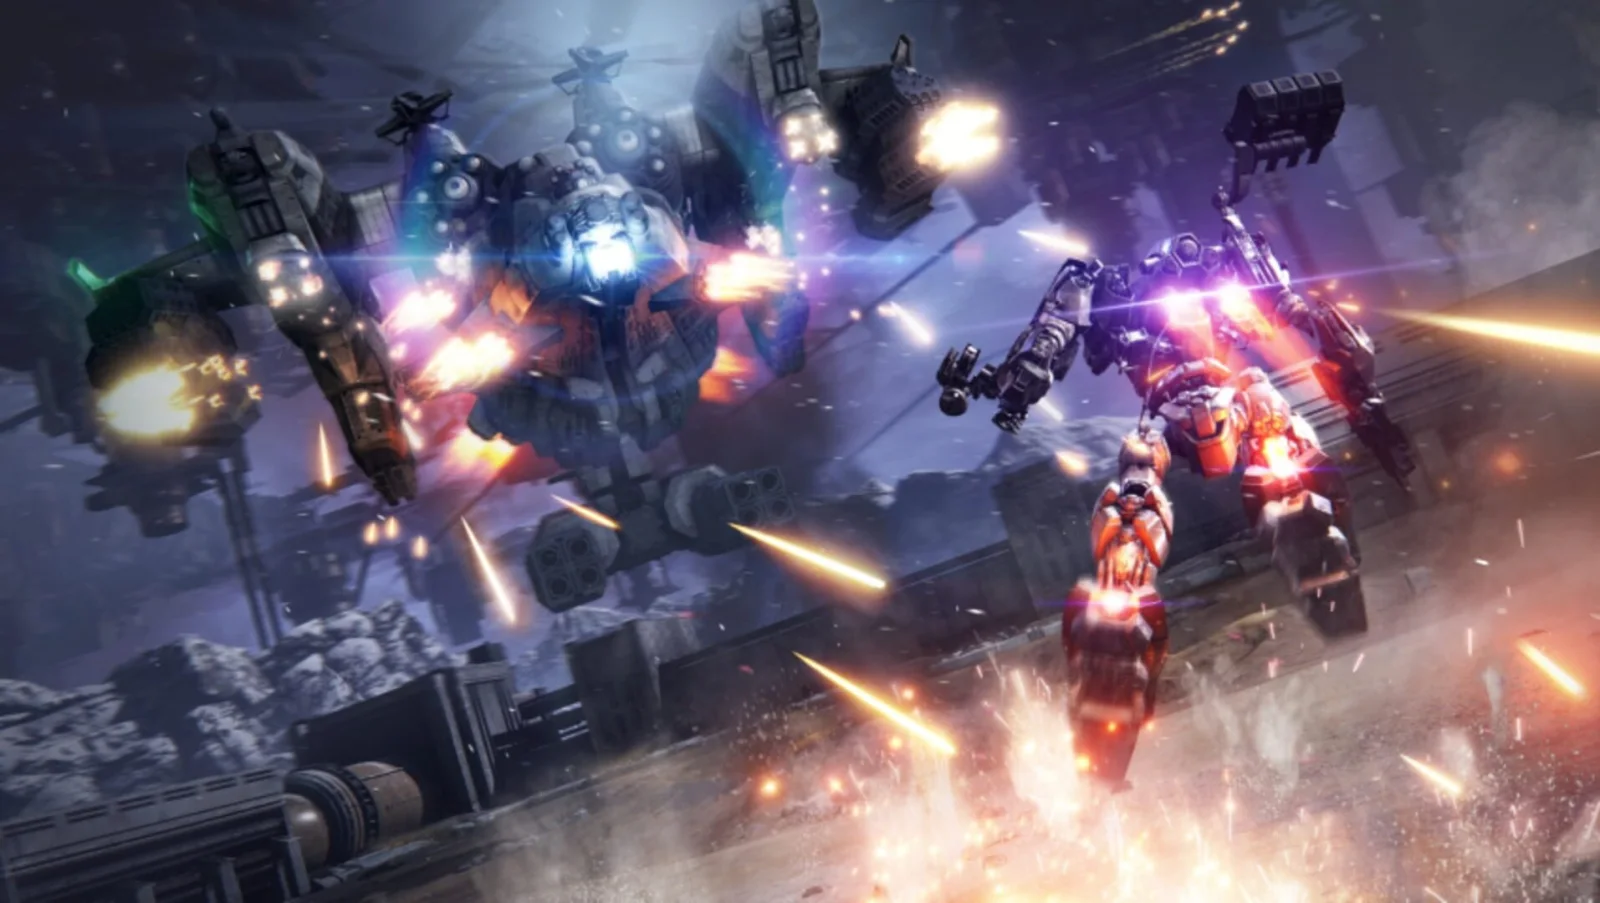
Sources & references
Our original guide draws on the references below. Check the edition at the top of this page before following controls or unlock requirements.
- Armored Core VI Fires of Rubicon — Official Site
- ARMORED CORE VI FIRES OF RUBICON PS4 and PS5 Standard Edition
- Armored Core 6 (VI) All Missions List & Rewards
- Arena and OS Tuning in Armored Core 6 Explained
- Armored Core VI Online Manual: Basic Game Information
- Armored Core VI Fires of Rubicon Chapter 1 Missions
- Attack the Watchpoint — Armored Core Wiki
- The Perfect Mercenary Achievement Guide
- Armored Core VI Fires of Rubicon 100% Achievement Guide
- Armored Core 6: Attack the Watchpoint
- Armored Core VI — Infiltrate Grid 086 Mission Guide, Neoseeker
- Armored Core 6: Ocean Crossing, Push Square
- Armored Core 6 (VI) All Combat Log Locations, PowerPyx
- Stop the Secret Data Breach, Armored Core Wiki
- Armored Core 6: New Game Plus Walkthrough, TeamBRG
- Armored Core 6: All Missions
- Armored Core 6 (VI) Trophy Guide & Roadmap
- Armored Core 6 (VI) Ice Worm Boss Guide
- Armored Core VI Fires of Rubicon — Missions
- Eliminate V.VII — Armored Core Wiki
- Armored Core VI Fires of Rubicon New Game Plus reference
- Eliminate the Enforcement Squads
- Defend the Dam Complex
- Unknown Territory Survey
- Coral Export Denial
- Armored Core 6 Missions & Collectibles Guide
- Armored Core 6 (VI) All Part Container Locations
- Armored Core VI — Reach the Coral Convergence
- Armored Core VI — Eliminate V.III
- Armored Core 6 Fires of Rubicon — Endings
- FromSoftware Products — Armored Core VI Fires of Rubicon
- Armored Core 6: Intercept the Corporate Forces | Push Square
- Armored Core 6 (VI) All S-Ranks Guide
- Bring Down the Xylem — Armored Core Wiki
- Destroy the Drive Block — Armored Core Wiki
- Armored Core 6 (VI) All Endings Guide
- Armored Core VI Walkthrough: Missions, Decision Missions and All Endings
- Armored Core 6 (VI) All Collectible Locations
- ARMORED CORE VI — Online Manual: Controls
- ARMORED CORE VI Online Manual — PS5 Action and ACS Stagger Mechanics
- FromSoftware and Bandai Namco: Armored Core VI Release Information
- Armored Core 6 (VI) Balteus Boss Guide
- ARMORED CORE VI FIRES OF RUBICON Regulation Update 1.03.1
- ARMORED CORE VI — Online Manual: Main Menu 1
- ARMORED CORE VI Online Manual: Basic Game Flow and Replay Mission
- ARMORED CORE VI — Online Manual: Customization
- Armored Core 6 (VI) All Parts List & Unlock Requirements
- Armored Core VI Official Pilot’s Manual Updates
- Armored Core 6 (VI) All Data Log Locations
- All Armored Core 6 missions
- Armored Core VI Fires of Rubicon Patch Notes Version 1.08.1
- Armored Core VI Fires of Rubicon Patch Notes Version 1.05
- Armored Core VI Fires of Rubicon — Ranked Match Season Update Notice, November 2024
- How to Use Safe Mode on PS5 Consoles and PS4 Consoles
- PlayStation 5 Support
- How to Back Up and Restore PS5 Console Data
- How to Troubleshoot Game Downloads from PlayStation Store
- How to Fix CE-106487-6 on PS5
- How to Troubleshoot Safe Mode Issues on PlayStation Consoles
- How Many Missions and Chapters Are in Armored Core VI?
- How To Get All Combat Battle Logs
- Retrieve Combat Logs — Armored Core Wiki
- ARMORED CORE VI FIRES OF RUBICON Official Site: Update File Notice
- Prisoner Rescue reference
About the game & collecting notes
- Platform
- Sony PlayStation 5
Complete the original 2023 Armored Core VI: Fires of Rubicon campaign on PS5 across five chapters and 59 Replay Mission entries. Obtain Fires of Raven and Liberator of Rubicon in separate campaign cycles, then complete Alea Iacta Est during the third active campaign cycle on the same progression file. The route also covers mutually exclusive missions, New Game+ and New Game++ additions, Arena, parts, containers and Combat Logs. Prisoner Rescue and Stop the Secret Data Breach are route-dependent later-cycle replacement missions: the qualifying Accept route can make them available in New Game+, and they may also be obtained in New Game++; neither is an independent Alea Iacta Est prerequisite.
Darryl Polo
Darryl Polo writes about emulation and retro games. What changes when an old favorite moves to another setup? That question connects his interest in tinkering with the games that made the hardware worth keeping.
Our editorial standardsFound a step that needs another look? Help us improve this guide.