Super Mario Sunshine (Nintendo GameCube, USA) — Complete Campaign Walkthrough
This guide leads you through the original Nintendo GameCube (USA) release of Super Mario Sunshine. It covers everything needed to reach and beat the Corona Mountain final battle, explains FLUDD controls and nozzles, details each main world’s episodes and bosses, and provides a complete 100% checklist (all 120 Shine Sprites and 240 Blue Coins) with practical routes and recovery tips.


Find a copy
Super Mario Sunshine Nintendo GameCube
We may earn a commission if you buy through these links, at no extra cost to you. As an Amazon Associate I earn from qualifying purchases.
Opens retailer search results. Check the model, edition, seller, availability and current price before buying.
Before you begin
You are playing the original Nintendo GameCube (USA) release of Super Mario Sunshine.
This walkthrough assumes standard GameCube controls and covers the full single-player campaign through Corona Mountain’s final showdown, plus optional 100% completion (all 120 Shine Sprites and all 240 Blue Coins).
Follow the step-by-step objectives, learn where hazards and checkpoints are, and use the FLUDD techniques explained here to recover from mistakes and reach every required goal.
Work through the chapters in order on your first run to avoid missing story-triggered events (Shadow Mario appearances, nozzle unlocks, and access to Corona Mountain).
If you aim for 100%, use the dedicated blue-coin and secret-episode chapters as checklists; they explain the game’s coin-trade mechanic and the order that minimizes backtracking.
Set yourself up for the run
Save hardware and files using an original Nintendo GameCube memory card or equivalent compatible save method.
Save after collecting permanent rewards such as Shine Sprites, Blue Coins and nozzle unlocks; saves protect campaign progress but do not create ordinary in-level checkpoints.
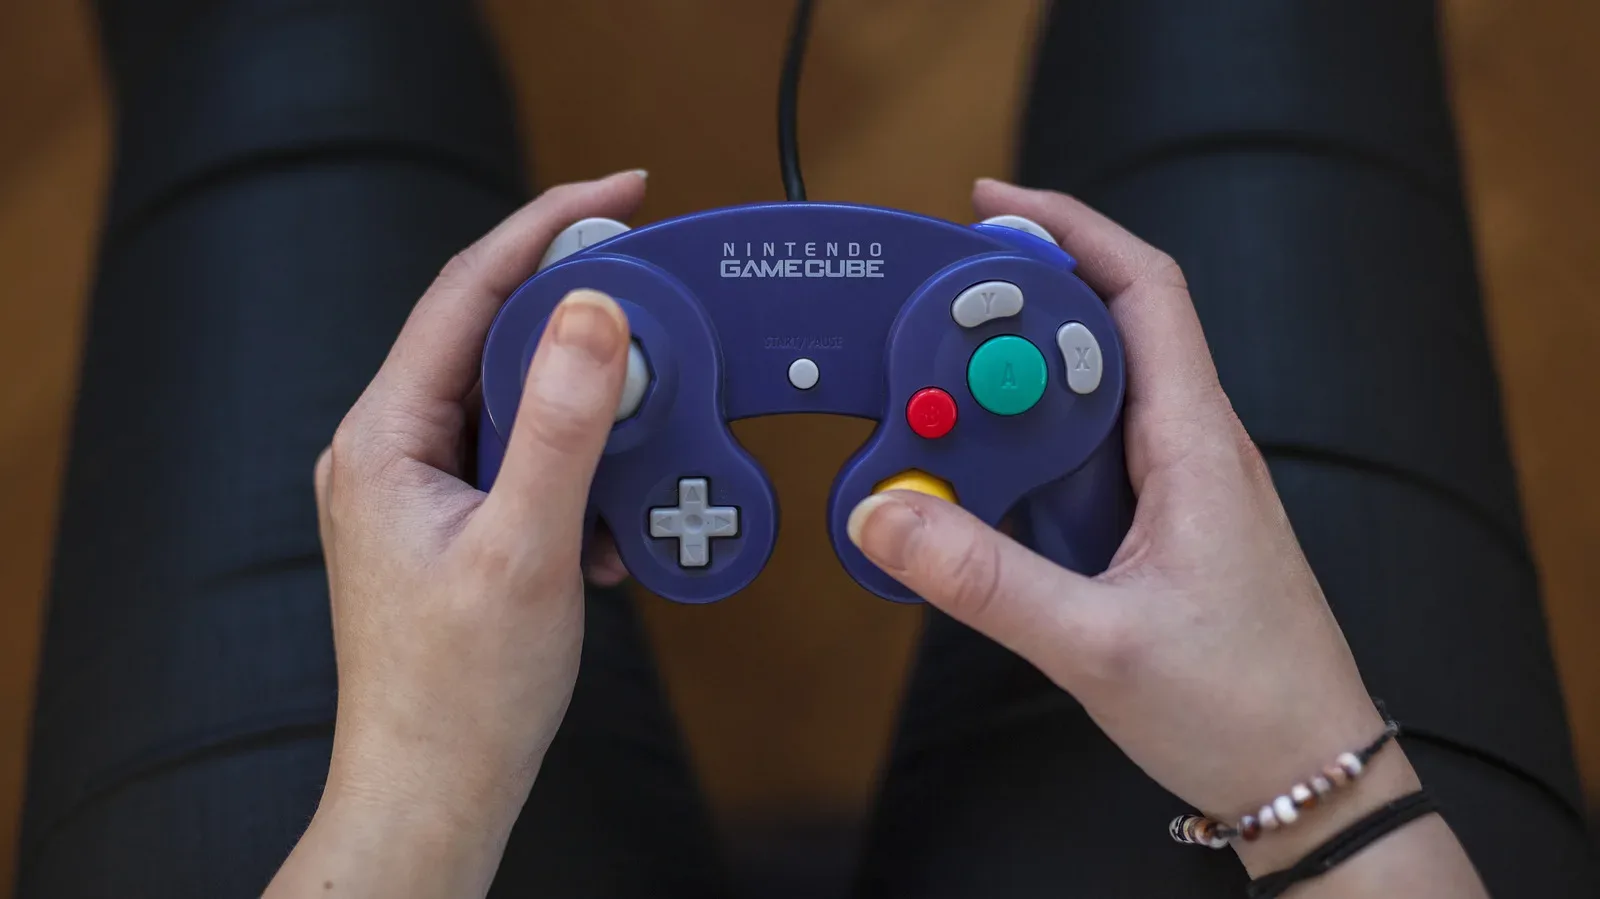
Learn the original GameCube controls: R sprays or refills FLUDD, X swaps nozzles, Y enters Mario Cam, L centers the camera and performs the airborne ground pound, A jumps, B dives or interacts, the C Stick controls the camera, and Z opens the Guidebook.
Practice the pressure-sensitive R trigger: a light press allows moving spray, while a full press makes Mario stop and aim.
Use Squirt for cleaning and enemy interactions, Hover for ordinary platforming, Rocket for vertical launches and the final boss, and Turbo for high-speed travel, water movement and certain barriers.
Turbo and Rocket are story-gated nozzle events associated with the 25-Shine and 30-Shine milestones, with their required preceding events and Yoshi conditions.
Delfino Plaza is the hub for course entrances, local Shines, Blue Coin trading and story events. The guide must also cover Pianta Village as the seventh main area, not only its Episode 7 chase.
Each of the seven main areas has eight numbered episode Shines, two secret-course Shines and one 100-coin Shine. Delfino Plaza and Delfino Airstrip share one 100-coin Shine, while the Airstrip has two dedicated Shines.
Use area counters and a written episode-by-episode ledger for Blue Coins. The total is 240: 30 in each main area, 19 in Delfino Plaza, 1 at Delfino Airstrip and 10 in Corona Mountain.
Complete Episode 7 in Bianco Hills, Ricco Harbor, Gelato Beach, Pinna Park, Sirena Beach, Noki Bay and Pianta Village to open Corona Mountain. Optional Shines and Blue Coins can be completed before or after the final battle.

Controls, FLUDD Basics and Survival
The original North American Nintendo GameCube release uses pressure-sensitive L and R triggers. R controls FLUDD, with a light press allowing Mario to move while spraying and a full press making him stop and aim. Learn camera control, basic jumps, ground pounds, sliding and Hover before relying on advanced nozzles. Water is limited, but it can be restored at water sources and with water bottles. Gold coins restore health and also count toward the separate 100-coin Shine earned within an area or episode.
Learn the original GameCube controller layout
Use the Control Stick to move Mario and the C Stick to rotate or zoom the camera. Press L to center the camera behind Mario. Press Y to enter Mario Cam, an over-the-shoulder aiming view that keeps Mario in place; press Y again to return to the normal view. Press Z to open the in-game guidebook. Start pauses the game.
Press A to jump and to swim faster underwater. Press B to talk, pick up or throw objects, dive, and perform a slide while running. The manual lists the ground pound as A + L: while Mario is airborne, press A and L together. Use it to break crates, activate some objects, attack certain enemies, and reduce the danger from a high landing. Do not confuse L’s ground-pound function with Z, which opens the guidebook.
The GameCube controller’s analog R trigger has two important FLUDD behaviors. Press R lightly to spray while continuing to move. Press R fully to make Mario stop and aim the stream. Practice both pressures immediately, because cleaning broad areas is easier while moving, while targets above, below or beside Mario are easier to hit when stationary.
- Move with the Control Stick and rotate the camera with the C Stick.
- Press L to recenter the camera and use A + L in midair for a ground pound.
- Use Y for Mario Cam and Z for the guidebook.
- Test both a light R press and a full R press.
Use the Squirt Nozzle and refill FLUDD
The Squirt Nozzle is available from the beginning and is always retained. Use it to clean graffiti and goop, douse enemies, activate water-sensitive objects, and experiment with objects that react to being soaked. A full R press lets you aim from a stationary position. A light R press lets Mario walk or run while spraying, which is useful when cleaning a large polluted area.
Watch the water meter in the lower-right corner. Spraying consumes water, so use short bursts on small stains and avoid holding R against clean ground. To refill normally, stand in water and hold R. The manual specifically describes refilling while Mario is in water. Water bottles dropped by some enemies are temporary pickups: small bottles partially refill FLUDD and large bottles refill it completely.
Before starting a long platforming section, locate the nearest pool, fountain or other dependable water source. Refill before a difficult sequence rather than assuming that the next platform will contain water. Water restores FLUDD, not Mario’s health, so do not mistake an empty water meter for a depleted life meter.
- Clean a small patch with short bursts.
- Refill by standing in water and holding R.
- Use full R for stationary aiming and light R for moving spray.
- Check the water meter before beginning a long movement section.
Practice Hover and Mario’s recovery moves
The Hover Nozzle is Mario’s starting secondary nozzle. Press X to switch between Squirt and Hover. Jump first, then hold R while airborne to hover for a limited time. Hover extends a jump, slows a fall and can rescue a slightly short landing, but it does not replace the initial jump. Keep Mario aimed toward the destination and make small Control Stick adjustments while hovering.
Do not activate Hover too early without a reason. Starting it near the top of the jump usually preserves more of the movement window for the gap itself. Release R when the destination is secure so you do not waste water. If Mario is already falling toward a reachable platform, activate Hover immediately rather than waiting until he is close to the bottom of the drop.
Use A while moving to perform a running jump, and chain jumps for the triple jump. For a side somersault, hold L with a left or right direction and press A. A back somersault is performed by turning or moving backward and pressing A; while spraying, the manual also lists R + A for a back somersault. Rotate the Control Stick and press A for a Spin Jump when you need broad horizontal movement or extra height.
- Jump, then hold R to hover across a short gap.
- Practice a triple jump, side somersault and Spin Jump in an open area.
- Release Hover before landing when the destination is secure.
- Use the C Stick to inspect the landing platform before committing.
Add ground pounds, slides and camera control to routes
Use the ground pound on a safe crate or marked target before relying on it during a boss or platforming challenge. While airborne, press A + L together. A ground pound can break objects, strike some enemies and reduce damage from certain high falls, but it cannot protect Mario from bottomless pits or other instant-death hazards.
To make a water slide on ordinary ground, lightly press R while moving so Mario sprays water ahead of himself. Then press B to dive onto the wet surface and steer with the Control Stick. On slopes or other liquid-covered surfaces, pressing B while running can begin a slide without first creating a separate patch of water. Press A during a slide for a forward somersault when the route is clear.
Before a narrow jump, press L to put the camera behind Mario and use the C Stick to inspect the landing area. Use Y when a target is difficult to reach from the normal view and you need Mario to remain stationary while aiming. Recenter the camera after leaving Mario Cam, especially before a wall kick or a moving-platform jump.
- Break a safe crate with a ground pound.
- Create a short water slide and stop before a hazard.
- Use L and the C Stick to line up a precision jump.
- Use Mario Cam to aim at a difficult target without walking forward.
Use Rocket and Turbo only when they are available
Rocket and Turbo are not available at the start. They are obtained through story progression and are normally found in colored nozzle boxes. The nozzle taken from a box replaces Hover for the current area or sub-area, while Squirt remains available. Returning to Delfino Plaza restores the standard Squirt and Hover setup, although unlocked Rocket and Turbo boxes can be used there when present.
The Rocket Nozzle launches Mario vertically. Hold R to charge it, then release or complete the charge when Mario is aligned beneath the target. It consumes water quickly, so refill before a climb that requires several launches. Rocket is valuable for vertical access and for the final boss, but it is not a substitute for learning ordinary jumps and Hover landings.
The Turbo Nozzle gives Mario a high-speed ground or water dash. Hold R to charge it and press A during the dash to jump. Turbo is useful for fast travel, crossing water and breaking through certain barriers or doors. Check the route before charging because turning and stopping are less forgiving than normal movement. If a box replaces Hover with Rocket or Turbo, look for a blue Hover box when you need the standard hovering behavior again.
- Press X to verify which secondary nozzle is equipped.
- Check the landing or stopping route before charging Rocket or Turbo.
- Refill FLUDD before a multi-launch or high-speed section.
- Remember that Squirt is always retained and Hover is the normal secondary nozzle.
Manage health, coins and failed attempts
Mario’s life meter decreases from enemy attacks, hazards and falls. Gold coins restore one section of health, while Blue and Red Coins restore more. A 1-Up Mushroom gives an extra life and restores Mario and FLUDD. If the life meter reaches zero, Mario loses a life and restarts according to the current area’s rules.
Gold coins also count toward the 100-coin Shine. The count is made within the current area or episode and does not carry into a separate episode. Collect safe coins first, then attempt risky routes only after the total is high enough that a failure will not waste a long run. Reaching 100 gold coins creates the area’s 100-coin Shine, which is separate from Blue Coin exchanges and ordinary episode objectives.
When a movement attempt fails, identify the cause before retrying: poor camera alignment, an early or late jump, insufficient Hover time, an empty water tank, or a missed ground-pound input. Refill FLUDD, restore the camera with L, and retry the specific movement from the nearest stable platform. In a coin run, avoid unnecessary deaths because losing a life ends the current attempt and resets the coin total for that episode.
- Use gold, Blue or Red Coins for health when collecting them is safe.
- Track 100 gold coins within one area or episode for the separate 100-coin Shine.
- After a failure, correct the specific camera, timing or water-management problem.
- Use 1-Up Mushrooms when available to increase the life reserve.
Before you move on
- You can identify the original GameCube actions: R sprays or refills FLUDD, X switches nozzles, Y enters Mario Cam, L centers the camera, A jumps, B dives or interacts, the C Stick moves the camera, and Z opens the guidebook.
- You can perform a full-stop spray, moving spray, Hover-assisted jump, ground pound, side somersault, Spin Jump and water slide.
- You can refill FLUDD at a water source and distinguish the water meter from Mario’s life meter.
- You understand that Rocket and Turbo replace Hover temporarily in the area where their boxes are used, while Squirt is always retained.
- You can reach 100 gold coins within one area or episode and understand that this reward is separate from Blue Coin trades and ordinary episode Shines.
Delfino Plaza & Delfino Airstrip — Hub Navigation and Early Goals
Delfino Plaza is the central hub for Isle Delfino. Use it to reach the seven main areas, collect hub Shines, trade Blue Coins, and respond to story events. The original Nintendo GameCube release contains 240 Blue Coins. Ten Blue Coins can be exchanged for one Shine Sprite at the Boathouse, producing 24 Shines in total. Delfino Plaza has 19 Blue Coins, while the single Airstrip Blue Coin is counted with the Plaza total on the game's map screen.
1. Complete the opening Airstrip mission
After the opening sequence, Mario begins at Delfino Airstrip with FLUDD. Follow the polluted trail toward the large Piranha Plant. Spray the black sludge around the plant until it emerges, then continue spraying the creature itself. When the plant is exposed, keep your distance from its stomps and sprays, and attack with water whenever it is vulnerable. Defeating it awards the first Shine Sprite and sends Mario to Delfino Plaza.
This first Airstrip visit is a required introduction rather than a normal selectable episode. Do not expect to find the full Airstrip challenge immediately. The later Red Coin mission and the Airstrip Blue Coin become available only after the story reopens the area.
- Defeat the Polluted Piranha Plant at Delfino Airstrip.
- Collect the first Shine Sprite.
- Arrive in Delfino Plaza and identify the major entrances and landmarks.
2. Open the Boathouse and begin Blue Coin trading
After Mario reaches Delfino Plaza and the initial events progress, a Polluted Piranha Plant blocks the route near the western side of the Plaza. Spray away the sludge and defeat this second plant. This clears the obstruction and makes the nearby Boathouse available, along with the route toward Ricco Harbor.
Enter the Boathouse and speak to the Raccoon behind the counter. The exchange is fixed at ten Blue Coins for one Shine Sprite. The Blue Coins are consumed when traded, so record the coins you have collected if you are following a 100% checklist. You can trade whenever you reach ten; there is no story requirement to save them for a particular threshold.
The game contains 240 Blue Coins overall, so all Blue Coin trades provide 24 Shines. The map groups 19 Plaza coins and the one Airstrip coin together as the Plaza total. Each of the seven principal worlds contributes 30 coins, and Corona Mountain contributes the remaining ten.
- Defeat the Polluted Piranha Plant blocking the western Plaza route.
- Enter the Boathouse.
- Confirm the exchange rate of ten Blue Coins for one Shine Sprite.
- Track Plaza and Airstrip Blue Coins as one 20-coin hub group.
3. Collect practical Plaza Shines while exploring
Several Plaza Shines can be collected without the Rocket Nozzle. On the beach near the lighthouse, spray the sand until the Shine outline is revealed, then collect the Shine. Near the Shine Gate, enter the accessible crate house and complete the timed crate-breaking challenge. Return to the same house later for the second version of the challenge and its second Shine.
The large bells on the west and east sides of the Plaza are separate Shine tasks. Spray the grime from a bell, then reach the Shine that appears above it using the surrounding rooftops, platforms and FLUDD movement. The two bell tasks may require different approaches depending on which side of the Plaza you are using, so refill FLUDD before beginning a long climb.
A Pianta on a rooftop above the crate house can throw Mario into a tower for another Shine. Pay the requested one-coin fee, then aim the throw so Mario lands inside the opening. If you miss, return to the Pianta and try again. Other Plaza rewards, including the Turbo Nozzle building, the lighthouse roof, the Pachinko area, the Lily Pad route and the golden bird, are best treated as later cleanup because they require specific nozzles, story progress or more difficult movement.
- Reveal the Shine buried in the beach sand.
- Complete both crate-breaking Shines.
- Clean and reach both Plaza bells.
- Use the rooftop Pianta throw to enter the tower.
- Leave nozzle-dependent challenges for the appropriate unlocks.
4. Follow story triggers instead of searching randomly for Shadow Mario
The first major Plaza Shadow Mario event occurs after the opening Airstrip sequence and leads Mario toward the first main world. Chase Shadow Mario through the Plaza and spray him until the scene advances. The purpose of this encounter is to establish the main-world route; it is not a repeatable random event that appears every time Mario enters the hub.
Later Plaza appearances are tied to specific progression events. When Shadow Mario appears carrying an egg, chase him to obtain access to Yoshi. After the required Shine total and earlier story conditions are met, further Shadow Mario encounters provide the Turbo and Rocket Nozzles. The Turbo Nozzle is associated with 25 Shine Sprites and the Rocket Nozzle with 30, but the corresponding Shadow Mario event also requires the preceding story unlocks.
If Shadow Mario is not present, enter a main course and complete another available episode or meet the relevant unlock condition. Repeatedly circling the Plaza does not force the next event to appear. If Mario falls during a chase, re-enter the Plaza area and attempt the event again; the chase itself does not require restarting the campaign.
- Complete the opening Plaza Shadow Mario encounter when it appears.
- Use main-course progress and the displayed Shine total to unlock later events.
- Obtain Yoshi, Turbo Nozzle and Rocket Nozzle only when their story conditions are active.
5. Record Blue Coins by landmark and episode
Delfino Plaza Blue Coins are distributed around rooftops, sewer tunnels, graffiti panels, NPC tasks and small side areas. Some appear only after spraying an M-shaped graffiti mark, while others require a particular episode state or a later nozzle. A coin absent from one visit is not necessarily permanently missed; try another episode or return after the required story event.
The Airstrip has exactly one Blue Coin. During the later Airstrip visit, use the Turbo Nozzle to break through the doors at the start of the runway, then melt the ice inside to reveal the coin. Because this coin is counted with the Plaza group, a complete hub sweep should show 20 Blue Coins even though only 19 are physically located in Delfino Plaza.
Record each coin by area and landmark rather than relying only on the global total. Trading ten coins removes them from Mario's current Blue Coin inventory but does not erase the fact that they were collected. A written checklist prevents repeated searches when only one or two coins remain.
- Track 19 physical Plaza Blue Coins.
- Collect the single Airstrip Blue Coin during cleanup.
- Check graffiti, sewer tunnels, rooftops and NPC tasks.
- Use episode changes and later nozzles for conditional coins.
6. Reopen the Airstrip and complete its optional goals
The Airstrip cannot be revisited immediately after the introduction. First enter Corona Mountain for the first time. After that story milestone, speak to the Pianta near the Boathouse and pay ten regular coins for transport to Delfino Airstrip.
At the Airstrip, activate the red switch and take the Turbo Nozzle. Enter the building before the timer expires, then follow the visible coin route through the water section, over the boats, beneath the bridge and back toward the runway. Collect all eight Red Coins within the time limit. The Airstrip Shine appears on the runway after the final Red Coin is collected.
The Plaza and Airstrip share one 100-coin Shine. The Shine appears according to where the 100th gold coin is collected, so there is no need to avoid reaching 100 coins at the Airstrip. In fact, the Airstrip route is a convenient place to earn the shared reward. The coins collected before or during the trip remain useful for reaching the threshold, although the ten regular coins paid for transport are deducted when boarding.
- Enter Corona Mountain once to reopen the Airstrip.
- Pay the Pianta near the Boathouse ten regular coins for transport.
- Complete the eight-Red-Coin Airstrip challenge.
- Collect the Airstrip Blue Coin from the ice inside the runway building.
- Earn the shared Plaza/Airstrip 100-coin Shine wherever the final coin is easiest to obtain.
Before you move on
- The opening Airstrip Polluted Piranha Plant has been defeated and its Shine collected.
- The western Plaza Polluted Piranha Plant has been defeated, the Boathouse is open, and the Raccoon offers the ten-Blue-Coin exchange.
- The beach-sand Shine, both crate Shines, both bell Shines and the rooftop Pianta tower Shine are either collected or recorded for later cleanup.
- The first Plaza Shadow Mario event has been completed and the next main-course route is available.
- The Plaza Blue Coin checklist records 19 physical Plaza coins plus the one Airstrip coin for a 20-coin hub total.
- After entering Corona Mountain, the Airstrip has been revisited and its eight-Red-Coin Shine and Blue Coin have been collected.
- The shared Plaza/Airstrip 100-coin Shine is marked complete, regardless of whether the 100th coin was collected in the Plaza or at the Airstrip.
References for this chapter
- Nintendo GameCube Instruction Manual - Super Mario Sunshine
- Delfino Plaza — Super Mario Wiki
- Delfino Airstrip — Super Mario Wiki
- Super Mario Sunshine/Delfino Plaza — SDA Knowledge Base
- Super Mario Sunshine - Guide and Walkthrough - GameFAQs, Dev
- Super Mario Sunshine/Delfino Plaza blue coins — StrategyWiki
Bianco Hills (World 1) — Episodes, Platforms and Petey Piranha
Bianco Hills contains eight episode Shines, two secret-course Shines and one 100-coin Shine. The early missions teach cleaning, tightrope movement, Hover corrections and boss timing. Complete the required episodes in order, defeat Petey Piranha in both encounters, then replay the secret courses and a coin-rich episode for the remaining three Shines. The chapter is based on the original Nintendo GameCube release.
Enter Bianco Hills and reach the windmill
Enter Bianco Hills through the statue entrance in Delfino Plaza and follow the stone path toward the large windmill. Episode 1, Road to the Big Windmill, is primarily a cleaning and route-learning mission. Spray the goop from the road, enemies and approach to the windmill, then continue upward through the village and hillside paths.
Use the lake and nearby water barrels to refill FLUDD before long climbs. The main landmarks are the starting village, the lake and waterwheel, the ropes and platforms across the hillside, and the large windmill at the upper end of the stage. Use short sprays when cleaning instead of holding R continuously. This preserves water for enemies and for the final approach to the windmill.
When the path divides around the lake, follow the platforms and ropes toward the windmill rather than trying to cross dangerous gaps directly. Hover is best used to correct a jump or bridge a short gap; it is not a replacement for normal jumps because the tank can empty before Mario reaches solid ground.
- Complete Episode 1: Road to the Big Windmill.
- Refill FLUDD at the lake or a water barrel before the upper climb.
- Practice using the ropes, wall jumps and short Hover corrections.
Defeat Petey Piranha in Episode 2
Episode 2, Down with Petey Piranha, takes Mario to the top of the windmill. Use the rotating platforms to climb toward the roof, then approach Petey to start the battle. After the opening sequence, Mario falls into the windmill interior and fights Petey on the lower arena.
Clean nearby goop and eliminate dangerous enemies if you need room to move. Wait for Petey to open his mouth, then spray water into it until he becomes waterlogged and falls onto his back. Run onto his exposed belly and ground-pound the center. This is the damaging attack; ordinary spray does not defeat him by itself.
After the ground-pound, Petey gets up and resumes his attack pattern. Repeat the mouth-spray and belly-ground-pound sequence until the battle ends. Keep the camera angled so you can see both Petey and the edge of the arena. If Mario is knocked down to a lower section, use the surrounding platforms to climb back and refill from the water around the arena before attempting another cycle.
- Wait for Petey’s mouth to open before spraying.
- Fill him with water until he falls onto his back.
- Ground-pound his belly and repeat the sequence until he is defeated.
Complete the Hillside Cave secret course
Episode 3, The Hillside Cave Secret, begins at the lake. From the waterwheel area, use the tightrope and platforms across the lake, then follow the arrow signs and climb to the cave entrance. The intended route uses ropes, platforms and Hover; avoid dropping into the lake while crossing.
Shadow Mario removes FLUDD inside the secret course, so the first completion is a pure platforming challenge. Cross the moving platforms, then work through the moving-block section and the spinning-star platforms. Watch the next landing before jumping, and use backflips or wall jumps when they provide a safer height than a running leap. Completing the course awards the first secret Shine.
After the course has been completed once, re-enter it during a later Bianco Hills episode. FLUDD is restored and a red switch appears near the start. Ground-pound the switch to activate the timer and eight red coins. Collect the nearest coins first, then use Hover across the block maze and spinning stars. The Shine appears beside the first secret Shine after all eight red coins are collected.
- Finish the initial Hillside Cave platform course without FLUDD.
- Replay the course after its first completion.
- Ground-pound the red switch and collect all eight red coins for the secret Shine.
Clear Windmill Village and defeat Petey again
Episode 4, Red Coins of Windmill Village, places eight red coins throughout the village. Search the lower tightropes, rooftops, white wall, windmill platforms and the buildings near the village exit. Cross ropes slowly and jump over moving red gears rather than trying to outrun them. Use Hover only after the jump has started so the tank is available for the next gap.
Episode 5, Petey Piranha Strikes Back, begins with the village covered in goop. Reach the high cliff at the far side of the village. You can climb with backflips and wall jumps, or clean the nearby Pianta and use his throw to reach the ledge. From the cliff, pick up a Poink by approaching it, hold R to inflate it, and release R while aiming toward Petey on the distant island. Hitting him wakes him and starts the boss encounter.
Petey flies around the village and pauses in the air. Stay on the cliff or white wall and spray him while he is stationary to knock him down. Avoid the twister attack, then approach the fallen Petey and spray water into his open mouth. Ground-pound his exposed belly when he falls onto his back. Repeat the knockdown and belly attack until he is defeated. If a Poink misses, return to the cliff area and use another one rather than attempting a blind jump across the gap.
- Collect all eight red coins in Episode 4.
- Use a Poink to hit Petey and wake him in Episode 5.
- Spray Petey while he pauses in the air, then use the mouth-and-belly attack sequence.
Complete the Dirty Lake course and its red-coin replay
Episode 6, The Secret of the Dirty Lake, sends Mario across contaminated water to Cliff Spring Cave on the far wall. The dirty lake rapidly damages Mario when he is swimming at the surface, and the lily pads deteriorate if Mario remains on them too long. Ride the lily pads by spraying in the direction opposite the desired movement. Move from pad to pad, then use the logs near the cave to reach the entrance with a jump or Hover.
A Turbo Nozzle pickup is available near the cave route, but it is not required to complete the episode. Enter Cliff Spring Cave and cross the obstacle course. The red and blue platforms flip in alternating patterns, rotating cubes require Mario to walk against their movement, and the final platform section repeats the alternating-color timing. Take the 1-Up if it is safe, but do not risk the Shine for it.
After completing the course once, return to Cliff Spring Cave in Episode 6, 7 or 8. Ground-pound the red switch near the start to activate eight red coins and a timer. Move through the flipping platforms, rotating cubes and triangle hazards methodically. If a platform cycle is unfavorable, wait for the next safe alignment rather than forcing a jump. Collecting all eight red coins produces the second secret Shine.
- Reach Cliff Spring Cave without staying on the dirty lake or lily pads too long.
- Complete the initial Dirty Lake obstacle course.
- Replay Cliff Spring Cave in Episode 6, 7 or 8 and collect its eight red coins.
Finish Episodes 7 and 8
Episode 7 is Shadow Mario on the Loose. Shadow Mario runs through the village and hillside route. Follow the shortest visible path and lightly hold R while moving so the spray reaches him without stopping Mario completely. When he is hit, close the distance and continue spraying until he falls and releases the episode Shine. If he rounds a corner, continue along the established route instead of searching unrelated parts of the stage.
Episode 8, The Red Coins of the Lake, places eight red coins around the lake, ropes, windmill route and elevated platforms. Begin with the accessible lake-area coins, then move toward the ropes and windmill platforms. Watch for Gusties and moving red gears, and refill before attempting the upper route. The Shine appears after all eight red coins are collected.
- Defeat Shadow Mario in Episode 7.
- Collect all eight red coins in Episode 8.
- Use Episode 8 as the preferred episode for the 100-coin Shine.
Collect the Bianco Hills 100-coin Shine
The Bianco Hills 100-coin Shine can be earned in any eligible episode, but Episode 8 offers the most reliable supply. Collect coins from the village paths, rooftops, lake area, trees, tightropes, enemies and flower rings before attempting the riskiest upper-platform jumps.
In Windmill Village, spray the small Pokeys into walls for additional coins, spray the flower circles quickly, and collect coins from rooftops and nearby paths. Around the lake, defeat the small Pokeys, inspect the treetops and spray trees that have no visible coin to reveal hidden coins. The bridge and tightrope structures also contain coins beneath and around their platforms.
Do not leave the episode after reaching 100 coins. The Shine appears in the stage, commonly on a windmill near the white wall when the total is reached. If the Shine appears in a different available location because of the route used, follow the stage marker and collect it before exiting. Coins collected in a failed attempt do not carry over, so restart the route with a safer plan rather than relying on a previous total.
- Reach 100 gold coins in one Bianco Hills episode.
- Use Episode 8’s village, lake, tree, Pokey and flower-ring coins first.
- Collect the Shine that appears immediately after the counter reaches 100.
Before you move on
- All eight Bianco Hills episode Shines are collected: Road to the Big Windmill, Down with Petey Piranha, The Hillside Cave Secret, Red Coins of Windmill Village, Petey Piranha Strikes Back, The Secret of the Dirty Lake, Shadow Mario on the Loose and The Red Coins of the Lake.
- Both secret Shines are collected: The Hillside Cave’s Red Coins and The Dirty Lake’s Red Coins.
- A Bianco Hills episode contains the 100-coin Shine.
- The Bianco Hills total is 11 Shines: eight episode Shines, two secret Shines and one 100-coin Shine.
- Petey Piranha has been defeated in both Bianco Hills encounters, and the associated Delfino Plaza progression is available.
Ricco Harbor (World 2) — Boats, Gooper Blooper and Shadow Mario Episodes
Enter Ricco Harbor after opening its portal from Delfino Plaza. The harbor contains eight episode Shines, two secret Shines, one 100-coin Shine, and 30 Blue Coins. Its main challenges are vertical scaffolding, moving cargo ships, Blooper surfing, Gooper Blooper fights, and an Episode 8 Yoshi route over the water. For reliable progress, complete the episodes in order, collect the two secret Shines after their associated episodes are available, and use Episode 1 for the 100-coin run.
Enter Ricco Harbor and establish the main route
Enter through the painted portal in Delfino Plaza. The starting freight area is the safest place to orient yourself. Look for the cargo ships, the tall Ricco Tower, the scaffolding maze, the red-arrow platforms, and the water route leading toward the far platforms. Ricco Harbor is more open vertically than Bianco Hills, so do not try to cross the entire area in one jump. Use the broad ship decks and metal platforms as intermediate landings.
Refill FLUDD before long crossings and use short Hover bursts over water. If Mario falls into the harbor, swim toward a ship, wall, or low platform instead of repeatedly jumping in open water. A controlled recovery is usually faster than attempting a blind Hover jump from the surface. Moving ships are useful transport, but board them from a low side platform and wait for their position to stabilize before jumping again.
- Identify the freight area, cargo ships, Ricco Tower, scaffolding maze, and red-arrow platforms.
- Refill FLUDD before entering a timed or elevated section.
- Use ships and broad metal platforms as staging points rather than attempting long open-water jumps.
Episode 1: Gooper Blooper Breaks Out
Run forward toward the black cargo ship and continue to the north end of the harbor. You do not need to explore every side passage first. At the freight area near the tower, look for a stack of colorful crates with a tentacle protruding from it. Pull the tentacle to begin the Gooper Blooper fight.
Gooper Blooper cannot be defeated by simply spraying its body. Spray the tentacles when necessary, approach one from the side, and grab it. Pull until it snaps back into the boss, then move away so the recoil does not throw Mario into the water. Repeat until the boss’s face and belly are exposed. Spray the exposed face to create an opening, then ground-pound the vulnerable center. Repeat the pull, retreat, spray, and ground-pound sequence until Gooper Blooper is defeated.
The fight is safest from an angle rather than directly in front of the boss. Keep a clear section of arena behind Mario before pulling a tentacle. If you fall into the water, swim to the nearby outer platform, refill FLUDD, and return instead of rushing back with an empty tank.
- Reach the crate stack at the north end of the harbor.
- Pull tentacles and retreat from their recoil.
- Spray the exposed face and ground-pound the vulnerable center until the Shine appears.
Episode 2: Blooper Surfing Safari and its secret replay
Go to the Blooper-racing area and speak to Big Daddy to begin the course. Choose a Blooper and follow the marked water route. Bloopers turn widely, so begin steering before a corner rather than waiting until Mario reaches it. Stay away from the walls and course edges, which slow the Blooper and make recovery difficult. Complete the course in under 45 seconds to earn the episode Shine.
Replay Episode 2 for the first secret Shine. The replay requires a finish under 40 seconds. A clean line is more important than constant risky shortcuts: hold forward through open sections, release or adjust before sharp turns, and avoid jumping unless the landing is clearly safe. If you crash, restart the attempt rather than trying to recover from a poor line.
- Finish the initial Blooper course in under 45 seconds.
- Replay Episode 2 after earning its regular Shine.
- Finish the replay in under 40 seconds for the secret Shine.
Episode 3: The Caged Shine Sprite
Follow the arrows toward the cargo ship and take the ramp on the right. Board the ship, then jump onto the moving vertical pole. Stay attached while it carries Mario toward the opposite end. Rotate around the pole as it moves so Mario is positioned on the side facing the next platform when you are ready to jump.
Continue through the elevated route toward the large mesh cage. Use Hover to correct small gaps, but avoid holding it continuously when a solid platform is available. The cage is reached from the upper ship and scaffolding route; if you miss a jump, use the lower ship decks or nearby platforms to climb back rather than restarting immediately. Collect the Shine inside the cage after reaching it.
- Take the right-hand ramp to the cargo ship.
- Ride the moving pole to the far side and jump toward the elevated route.
- Reach the mesh cage and collect the Shine Sprite.
Episode 4: The Secret of Ricco Tower
Follow the harbor’s upper route toward Ricco Tower. Use the scaffolding and rotating platforms to climb rather than crossing the water directly. The episode’s secret course removes FLUDD, so enter the course only after positioning Mario carefully and committing to the platform sequence.
Inside the course, use the rotating rectangular platforms and wall jumps to move upward. The platforms rotate around fixed points, so wait for a broad face to come toward Mario before jumping. The regular episode Shine is at the end of this obstacle course. After collecting it, return to Episode 4 later for the second Ricco Tower Shine.
- Climb to Ricco Tower through the scaffolding route.
- Complete the FLUDD-less obstacle course for the regular Episode 4 Shine.
- Replay Episode 4 after its first completion to unlock the red-coin version.
Episode 5: Gooper Blooper Returns
Return to the harbor and follow the route toward the second Gooper Blooper arena. The rematch uses the same core interaction as Episode 1: pull the tentacles, avoid the snapback, spray the exposed face, and ground-pound the vulnerable center. Approach from the side and leave room behind Mario before grabbing a tentacle.
The surrounding platforms make falls more costly, so do not chase the boss across a dangerous edge. If Mario is knocked into the water, swim to the outer platform, refill FLUDD, and wait for a safe opening. Defeat the boss with repeated ground-pounds to receive the episode Shine.
- Approach the rematch from the side.
- Leave space behind Mario before pulling a tentacle.
- Recover at an outer platform if knocked into the water, then repeat the attack sequence.
Episode 6: Red Coins on the Water
Find Big Daddy and activate the red switch by ground-pounding it. This starts a two-minute timer and places eight red coins along the Blooper-surfing route. Select a Blooper and follow the trail of yellow coins through the harbor. The yellow-coin trail is the safest navigation aid and leads through the red-coin circuit.
Do not panic when the timer starts. The route loops, so missing one coin does not require an immediate restart; turn around and follow the trail back toward the missed section. Make broad turns, avoid the harbor walls, and use the open water around the ships to line up the next coin. Collect all eight red coins and then reach the Shine while still controlling the Blooper. A collision can cost the attempt, so prioritize stable steering over aggressive shortcuts.
- Ground-pound the red switch near Big Daddy.
- Collect all eight red coins within two minutes.
- Reach the Shine after the final coin without crashing.
Episode 7: Shadow Mario Revisited
Chase Shadow Mario through the freight area and onto the harbor’s girders. Hold the spray button steadily when he is within range. He pauses or slows after creating distance, giving Mario an opportunity to cut across a platform rather than follow every turn. Use the lower direct route when it is available; a missed Hover jump over water is slower than taking the longer solid path.
Shadow Mario is defeated by sustained FLUDD spray, not by a normal attack. Keep the camera centered before the chase and spray as he runs along a narrow girder or reaches a dead end. Once he falls, collect the Shine he leaves behind. If the chase fails, restart the episode and repeat the route; there is no need to redo another Ricco Harbor mission.
- Cut across open platforms instead of tracing every corner.
- Spray Shadow Mario until he falls.
- Collect the Episode 7 Shine to complete Ricco Harbor’s story-critical chase.
Episode 8: Yoshi’s Fruit Adventure
Episode 8 requires Yoshi to have been unlocked earlier in the game. Go to the market area and find the Yoshi egg. Defeat Shadow Mario if he is carrying the egg, then check the fruit shown in Yoshi’s thought bubble. Use the fruit dispensers on top of the nearby tanks and ground-pound a dispenser until the required fruit appears. Kick the fruit to the egg and mount Yoshi.
Take Yoshi toward the water’s edge and spray a jumping Cheep Cheep. The spray transforms it into a temporary platform. Ride it to the nearby steel platform, then move to the ledge with the coconut tree. Feed the coconut to Yoshi to change his juice color, then use the transformed Cheep Cheep platforms to climb higher. Repeat the platform sequence until Mario reaches the caged Shine.
The cage is sealed by spongy goop that ordinary FLUDD spray cannot remove. Have Yoshi spray the goop, then ground-pound the cage’s movable panel and collect the Shine. Keep Yoshi away from deep water; if he disappears, return to the egg and repeat the fruit process.
- Bring the required fruit to the Yoshi egg.
- Use Yoshi’s juice to remove the spongy goop from the cage.
- Reach the upper steel platforms and collect the Shine.
100-coin Shine and Blue Coins
Episode 1 is a strong choice for the 100-coin Shine because it contains coins in the sewers, on the cargo ships, around the scaffolding, above the crane, from defeated enemies, and in the Gooper Blooper arena after the boss is triggered. Collect safe coins before starting the boss, then return to the sewers and freight area if you still need more. The Shine appears in the freight area when Mario reaches 100 gold coins; Blue Coins and Red Coins do not count toward the total.
Ricco Harbor contains 30 Blue Coins. Some are available in most episodes, while others depend on a particular episode, route, graffiti mark, enemy, ship, or Yoshi access. Sweep the starting garage and nearby walls first, then check the cargo ships, tower route, crane, red-arrow platforms, water, and Episode 8 Yoshi platforms. Record each coin by location and episode. If a coin is absent, replay the episode associated with that location rather than assuming it was collected in another version of the game.
- Use Episode 1 for a methodical 100-coin attempt.
- Confirm the Ricco Harbor counter reaches 100 before leaving the episode.
- Mark all 30 Blue Coins against an episode-specific checklist.
Before you move on
- The Ricco Harbor episode list shows all eight regular episodes completed: Gooper Blooper Breaks Out, Blooper Surfing Safari, The Caged Shine Sprite, The Secret of Ricco Tower, Gooper Blooper Returns, Red Coins on the Water, Shadow Mario Revisited, and Yoshi’s Fruit Adventure.
- Both Ricco Harbor secret Shines are collected: the Episode 2 Blooper Surfing Time Test under 40 seconds and the Episode 4 Ricco Tower red-coin replay.
- The 100-coin Shine has been collected in a single Ricco Harbor episode.
- The Ricco Harbor Blue Coin count reaches 30 on the area counter or matches a completed location checklist.
- Gooper Blooper has been defeated in both harbor encounters, and Episode 7 Shadow Mario has been sprayed and defeated.
References for this chapter
- Super Mario Sunshine/Ricco Harbor — StrategyWiki
- Super Mario Sunshine/Ricco Harbor blue coins — StrategyWiki
- Super Mario Sunshine - Guide and Walkthrough - GameFAQs
- Super Mario Sunshine — Guide and Walkthrough — GameFAQs, black_hole_sun
- Super Mario Sunshine - Guide and Walkthrough - GameFAQs, Crazyreyn
- Ricco Harbor — Super Mario Sunshine Walkthrough
Gelato Beach (World 3) — Sand, Red Coins and the Wiggler
Gelato Beach contains eight episode Shines, two hidden Shines and one 100-coin Shine, for eleven total. Its key landmarks are the central Tower, the Sand Cabana, the Surf Cabana, the three palm-tree islands, the coral reef and the Dune Buds around the beach. Complete Episodes 1 through 7 for the normal progression, then return for the secret Shines and the 100-coin challenge. Episode 8 is optional for story progress but is the recommended setting for the 100-coin attempt.
Enter Gelato Beach and establish the main landmarks
Enter Gelato Beach through the lighthouse entrance in Delfino Plaza. The central Tower rises above the beach and is the destination for several episodes. The Sand Cabana is the hut near the starting area; the Surf Cabana is the hut farther along the shore where watermelons are delivered. Offshore, the palm-tree islands provide coins and a swing route, while the coral reef lies in the water near the Surf Cabana.
Loose sand slows Mario and makes long ground movement less reliable. Favor jumps, backflips and short Hover Nozzle bursts when crossing large sandy areas. Do not spray every patch of beach during ordinary progression, but remember that spraying sand is useful during the 100-coin attempt because coins and fruit can appear. Refill FLUDD from the surrounding water before entering a secret course or starting a timed platforming section.
- Locate the Tower, Sand Cabana, Surf Cabana, coral reef and palm-tree islands.
- Refill FLUDD before entering a secret stage or beginning a difficult route.
- Use short Hover Nozzle bursts to correct landings instead of holding the nozzle continuously.
Complete Episode 1: Dune Bud Sand Castle Secret
Find the Dune Bud on the beach and spray it until the sand castle forms. Enter the opening before the castle disappears. The bonus stage removes FLUDD, so the route must be completed with normal jumps. Move across the temporary sand blocks decisively, but wait for a stable block when a jump would otherwise be blind. The stage’s first completion awards the Episode 1 Shine.
This secret course is also the entrance for Gelato Beach’s first hidden Shine. After Episode 1 has been cleared once, replay it and enter the same bonus stage. Cross the opening sand blocks until you reach the red switch, then ground-pound the switch to start the timed red-coin challenge. The eight coins are spread across the next sand-block route and the three-dimensional maze. Use backflips for height and Hover Nozzle corrections when FLUDD is available during the replay. The Shine appears near the maze’s starting area after all eight red coins are collected.
- Complete the Sand Castle course once for the Episode 1 Shine.
- Replay Episode 1 after clearing it and ground-pound the red switch.
- Collect all eight red coins in the secret course to receive the hidden Shine.
Complete Episode 2: Mirror Madness! Tilt, Slam, Bam!
Climb to the Tower and approach the three large mirrors. Each mirror has a Plungelo standing on it. Spray a Plungelo to make it slide across the mirror; the goal is to move it toward the far edge so the mirror’s tilt launches it away. Position your spray carefully rather than flooding the mirror, because sending a Plungelo too far can make the next adjustment awkward.
Repeat the process for all three mirrors. Once the Plungelos have been removed, the mirrors return to position and knock Wiggler from the Tower. The Episode 2 Shine is awarded after the objective is complete, and Episode 3 becomes available.
- Reach the three mirrors at the Tower.
- Use controlled sprays to slide each Plungelo toward the launch side.
- Remove all three Plungelos and collect the resulting Shine.
Defeat Wiggler in Episode 3
In Wiggler Ahoy! Full Steam Ahead!, Wiggler runs around the beach after falling from the Tower. Watch his route and identify the head before approaching. Spray the Dune Bud near the starting island as Wiggler moves toward it. The resulting sand eruption flips him onto his back, exposing the marked segment on his underside.
Jump onto the exposed segment and ground-pound it. Wiggler recovers and changes his route, so move back toward the open center of the beach rather than getting trapped near the shoreline. Use the next Dune Bud to flip him again, then repeat the ground-pound. The third setup occurs near the circular sand area, where Wiggler moves faster and is easier to hit if Mario approaches from the side. Three successful ground-pounds defeat him and produce the Shine.
Ordinary water spray does not damage Wiggler. The required sequence is Dune Bud eruption, exposed-body ground-pound, then repositioning for the next attack. If Mario is knocked away, collect nearby coins for health and approach the next Dune Bud from open ground.
- Use a Dune Bud to flip Wiggler.
- Ground-pound the exposed body segment after each flip.
- Repeat the sequence three times and collect the Shine at the circular sand area.
Complete Episodes 4 through 7
Episode 4, The Sand Bird Is Born, begins at the base of the Tower. Spray the Dune Bud in the small wall-jumping area until the staircase rises, then follow the route to the trampoline and enter the Sand Bird stage. The bird carries seven red coins: two on each wing, one on the neck, one at the center and one on the tail. Stay near the middle of its back and avoid edge jumps while it banks. During the route, the bird flips gradually onto its side and then returns to level flight. Move onto a wing block or the tail before the flip leaves Mario standing on a dangerous slope. Collect the final coin on the Tower when the bird carries Mario above it.
Episode 5 is Il Piantissimo’s Sand Sprint. Speak to Il Piantissimo near the race start and reach the finish flag at the Tower before his 35-second target. A direct route is faster than following the beach perimeter: slide across sprayed ground, backflip toward the Tower, then use the wall-jump route near the raised staircase area to reach the finish.
Episode 6, Red Coins in the Coral Reef, places all eight red coins underwater in the reef left of the Surf Cabana. Sweep the reef from the beachward section through the middle and far sections, then check the two schools of red fish for the final coins. The Shine appears above the standable reef section farthest from the beach after all eight are collected.
Episode 7, It’s Shadow Mario! After Him!, is the story-critical chase. Shadow Mario runs around the beach and Tower. Cut across open sand instead of tracing every turn, then spray him when Mario is close enough to keep him from escaping. Continue the chase until he falls and leaves the Shine.
- Stay centered on the Sand Bird and collect its seven red coins plus the final Tower coin.
- Beat Il Piantissimo’s 35-second race using the Tower shortcut.
- Collect all eight underwater coral-reef red coins in Episode 6.
- Catch and spray Shadow Mario in Episode 7.
Claim the second hidden Shine: Stairway to a Shine
This hidden Shine is available in any Gelato Beach episode. At the base of the Tower, beside one of the large mirrors, find the Dune Bud. Spray it until a staircase rises from the sand. Follow the stairs down to the wall at the bottom and spray the wall continuously until the Shine image is revealed. The actual Shine appears back in the stadium area; return there and collect it.
This Shine is separate from the Sand Castle red-coin Shine. If the stairway wall has already produced the Shine image, the reward has been collected and does not need to be repeated.
- Find the Dune Bud beside the Tower and large mirror.
- Spray it until the staircase appears.
- Reveal the Shine image at the bottom wall and collect the Shine in the stadium.
Complete Episode 8 and attempt the 100-coin Shine
Episode 8, The Watermelon Festival, requires delivering the large watermelon to the Surf Cabana. Roll it down the hill and use the route that avoids the densest Cataquack traffic. If a Cataquack approaches on sand, spray it to stun it briefly, then continue rolling the watermelon. Take the fruit across the pier slowly; if it is destroyed, return for another watermelon and try again. Delivering the large watermelon to the Surf Cabana awards the Episode 8 Shine.
For the 100-coin Shine, Episode 8 is the recommended episode. Begin with the palm-tree island behind the starting area: collect the coins from the trees and use the swing to reach the nearby coin trail. Search the Sand Cabana and the Surf Cabana, including the coins beneath the Surf Cabana’s outside platform. Defeat beach and upper-ledge Cataquacks by spraying them and jumping on them, and spray or break watermelons for their coin drops. Other useful groups are the coins above the wooden umbrella near the Tower, the coins on the upper ledges and ropes, and coins along the path leading toward the stadium.
Once Mario reaches 100 gold coins in the same episode, the 100-coin Shine appears in the southwest circular-sand area. It is separate from the Episode 8 watermelon Shine and from Blue Coin exchanges. Collect it before leaving the episode; dying or exiting without taking it loses the current attempt.
- Deliver the large watermelon to the Surf Cabana for the Episode 8 Shine.
- For the 100-coin attempt, search the palm islands, cabanas, upper ledges, watermelons, Cataquacks, ropes and Tower area.
- Collect the Shine that appears at the southwest circular-sand area after reaching 100 gold coins.
Before you move on
- All eight episode Shines are collected: Dune Bud Sand Castle Secret, Mirror Madness! Tilt, Slam, Bam!, Wiggler Ahoy! Full Steam Ahead!, The Sand Bird Is Born, Il Piantissimo’s Sand Sprint, Red Coins in the Coral Reef, It’s Shadow Mario! After Him!, and The Watermelon Festival.
- Both hidden Shines are collected: the Dune Bud Sand Castle red-coin Shine and Stairway to a Shine.
- The Gelato Beach 100-coin Shine has been collected and taken from the southwest circular-sand area.
- Gelato Beach’s total is eleven Shines: eight episode Shines, two hidden Shines and one 100-coin Shine.
Pinna Park (World 4) — Amusement Park Mechanics and Mecha-Bowser
Pinna Park opens after Mario has collected 10 Shine Sprites and follows Shadow Mario through the cannon on Delfino Plaza’s northwest shore. The world contains eight episode Shines, two secret Shines and one 100-coin Shine. Episode 4 also triggers the Delfino Plaza event that unlocks Yoshi, which is required for Episode 6 and many later cleanup tasks.
Unlock Pinna Park and begin Episode 1
Collect 10 Shine Sprites, then go to the cannon on the northwest shore of Delfino Plaza. Follow Shadow Mario into the cannon to reach Pinna Park. Enter through the main gate and follow Shadow Mario along the central path toward the pool at the far end of the park. The cutscene there begins Episode 1, Mecha-Bowser Appears!
The opening area has several broad paths and pools, but the roller-coaster battle is not a normal walking section. Before starting it, make sure you understand that the coaster moves automatically and that FLUDD’s water rockets are picked up from the track. The battle gives you no ordinary platforming route back to safety, so focus on aiming and avoiding projectiles once the ride begins.
- Collect 10 Shine Sprites.
- Enter the northwest cannon and follow Shadow Mario.
- Reach the pool inside the park to start Episode 1.
Defeat Mecha-Bowser
Mario rides a roller-coaster car around the track while Mecha-Bowser remains near the center of the arena. Water rockets appear along the route. Pick one up as the car passes it, then aim at Mecha-Bowser’s head and fire when the robot is in a clear line of sight. The rocket is launched with FLUDD’s spray control, not by jumping or throwing it manually.
Bullet Bills can approach from either direction. If one is closing in and Mecha-Bowser is not aligned with the car, spray the Bullet Bill with FLUDD to destroy or stop it. If a rocket is already loaded and the Bullet Bill is dangerously close, using the rocket on the Bullet Bill is safer than taking a hit. Near the section where Mecha-Bowser breathes fire, spray water into the flame or its mouth to clear the hazard before the car passes.
Keep collecting rockets and landing direct hits on Mecha-Bowser’s head until the battle ends. The exact number of required hits is not stated consistently across available walkthrough references, so do not stop after a presumed fixed count; continue until the cutscene begins. The episode awards a required Shine after the reveal of Bowser Jr.
- Collect rockets from the track.
- Aim at Mecha-Bowser’s head rather than the body.
- Spray Bullet Bills when they threaten the car.
- Douse the fire section with FLUDD.
- Continue attacking until the defeat cutscene and Shine appear.
Clear Episode 2 and its secret Shine
Episode 2, The Beach Cannon’s Secret, takes place on the beach outside the park. Go toward the cannon, where Monty Mole fires Bullet Bills from a distance and throws Bob-ombs when Mario approaches. Spray a Bob-omb until it is safe to handle, pick it up, and throw it into the cannon. Repeat this three times to defeat Monty Mole and open the cannon entrance.
Jump into the cannon to enter the secret course. FLUDD is unavailable here. Cross the fading platforms by watching for them to darken; a dark platform is about to disappear. Move from one stable platform to the next instead of committing to a long blind jump. At the trampoline section, bounce vertically to gain height, then use short jumps, dives and repeated jumps to cross the temporary orange platforms. The Shine is at the end of the course.
Replay the same secret course after completing Episode 2. Ground-pound the red switch near the second platform, then collect all eight Red Coins before the timer expires. Six are in the opening platform section; the remaining coins are reached through the trampoline and disappearing-platform route. The second clear awards Pinna Park’s first secret Shine.
- Defeat Monty Mole with three Bob-omb hits.
- Clear the secret course once for the Episode 2 Shine.
- Replay it, activate the red switch and collect all eight Red Coins.
- Claim the first secret Shine.
Complete the pirate ships and the sunflower beach
Episode 3, Red Coins of the Pirate Ships, is reached by entering the park and following the signs toward the swinging pirate-ship attraction. Collect the first Red Coin at the stairs, then use the two ships as moving launch points for the coins along their swings. Wait until a ship is moving toward the next platform before jumping. Hover only to correct a short miss; do not jump early across the entire gap.
The remaining coins are on the ride’s overhead frames and wire nets. From the ship structure, climb to the mesh platforms, use wall grabs and Hover to reach the underside of the higher net, then move across the platforms containing Electro-Koopas. Spray or avoid the enemies, collect the Red Coins quickly and use the wooden plank and lower ship as recovery routes. When all eight are collected, the Shine appears on the upper catwalk.
Episode 4, The Wilted Sunflowers, does not require entering the park. Go to the sunflower area on the beach. The fake Yoshi eggs around the flowers are disguises for Koopas. Spray an egg to expose the enemy, then bait the Koopa onto sandy ground. When it becomes stuck after its shell attack, ground-pound its exposed stomach. Repeat this for all five enemies. Defeating them restores the sunflowers and awards the episode Shine.
- Collect all eight pirate-ship Red Coins.
- Use the wire nets and wooden plank as recovery landmarks.
- Expose all five disguised Koopas in the sunflower area.
- Make each Koopa land in sand before ground-pounding it.
Unlock Yoshi and finish the Ferris wheel
After collecting the Episode 4 Shine, return to Delfino Plaza. Shadow Mario appears near the Grand Pianta Statue carrying a Yoshi Egg. Chase him and spray him until he drops the egg. Feed the egg the fruit shown in its thought bubble; fruit can be found around the Plaza market stalls and nearby stands. The egg then hatches, and Yoshi becomes available for future episodes. Completing Episode 4 alone does not place a rideable Yoshi at the Plaza until this chase and hatching step is completed.
For Episode 5, The Runaway Ferris Wheel, return to the pool where Mecha-Bowser was fought and take the brick-paved path to the right, behind the Ferris wheel. Climb the first wire net, spray or traverse the connected nets, and move left across the upper route. Electro-Koopas occupy several nets. Knock them away with a jump attack when they are vulnerable, then return to the nearby platform rather than attempting a risky direct leap.
Continue across the green wire and vertical catwalks. Spray the green wire when it is retracted, wait for it to return, then use it to reach the next platform. Near the top, kick the square block to reach the rope, bounce upward and defeat the final Electro-Koopa. The Ferris wheel slows to its normal speed. Hover to the arch, land on a cabin and ride it upward to the Shine.
- Defeat Shadow Mario in Delfino Plaza after Episode 4.
- Feed the displayed fruit to the Yoshi Egg.
- Reach the upper Ferris wheel nets from behind the attraction.
- Defeat the Electro-Koopas and ride a cabin to the Shine.
Clear the Yoshi-Go-Round and Shadow Mario episodes
Episode 6, The Yoshi-Go-Round’s Secret, requires the orange Yoshi to fill the empty seat on the attraction. Enter the park and locate the egg on the ledge near the wooden carving below the pirate ships. Hatch it with the required fruit, then feed Yoshi a pear to turn him orange. Fruit can be found around the nearby ledges, fountain and wooden carving. Yoshi cannot swim, so stay on land and avoid dropping into the water.
Bring orange Yoshi to the Yoshi-Go-Round. Shadow Mario removes FLUDD when the secret course begins, so use Yoshi’s jumping ability and carefully follow the moving blocks. In the later section, use wall jumps and side somersaults to reach the rising platforms. The first clear awards the Episode 6 Shine. Replay the course, ground-pound the red switch after the rotating blocks and collect all eight Red Coins within the time limit for the second secret Shine.
Episode 7, Shadow Mario in the Park, begins near the park entrance. Follow Shadow Mario through the central paths rather than taking hazardous shortcuts. Spray him while running, using a jump combined with a broad spray when he is just ahead. If he climbs to a higher platform, use Hover to recover across the small gaps and continue the chase. Catching him awards the episode Shine and counts toward the eventual Corona Mountain unlock requirement.
Episode 8, Roller Coaster Balloons, starts at the roller-coaster entrance. Follow the bridge to the green Noki attendant and begin the ride. Use the water rockets placed along the track to destroy all 20 Bowser Jr. balloons before the coaster completes three laps. Aim along the curve instead of waiting until a balloon is directly beside the car; several balloons can be lined up for one shot. If a shot misses, stay focused on the next group and keep collecting rockets. The Shine appears after all 20 balloons are destroyed.
- Bring orange Yoshi to the empty Yoshi-Go-Round seat.
- Clear the secret course once for Episode 6.
- Replay it and collect all eight Red Coins for the second secret Shine.
- Catch Shadow Mario in Episode 7.
- Destroy all 20 balloons within three coaster laps in Episode 8.
Collect the optional 100-coin Shine
Pinna Park’s 100-coin Shine can be collected in any episode, but Episode 2 is a practical choice. Stand near Monty Mole so Bullet Bills continue to spawn, then spray the Bullet Bills before they hit Mario. Each destroyed Bullet Bill provides coins, allowing you to build the total without relying only on scattered level coins. Spray the beach sand as well, since additional coins can appear there.
Do not leave the episode after reaching 100 coins. The Shine appears in the level, so collect it before entering a death hazard or returning to the Plaza. This reward is separate from the eight episode Shines, two secret Shines and Blue Coin trades.
- Choose an episode with a reliable coin route, preferably Episode 2.
- Reach 100 gold coins in one episode.
- Collect the Shine that appears before leaving or dying.
Before you move on
- All eight Pinna Park episode Shines are recorded: Mecha-Bowser, Beach Cannon, Pirate Ships, Wilted Sunflowers, Runaway Ferris Wheel, Yoshi-Go-Round, Shadow Mario and Roller Coaster Balloons.
- Both secret Shines are recorded: the Red Coins in the Beach Cannon course and the Red Coins in the Yoshi-Go-Round course.
- The separate Pinna Park 100-coin Shine has been collected.
- Yoshi has been unlocked in Delfino Plaza by defeating Shadow Mario after Episode 4 and hatching the egg.
- Episode 7 has been completed if Pinna Park is being used for the main-story progression toward Corona Mountain.
Sirena Beach (World 5) — Casino Areas, Hotel Puzzles and Bosses
Sirena Beach contains eight episode Shines, two hidden Shines from secret-course red-coin challenges, one 100-coin Shine, and 30 Blue Coins. The resort is reached through the red pipe above the building north of the Shine Gate after Yoshi is available; Yoshi must eat the pineapple blocking the pipe. Complete the Manta Storm first to uncover Hotel Delfino, then work through the hotel, casino, cleanup, Shadow Mario, and red-coin episodes. Use the ocean, barrels, hotel water, and casino water features for refills, and use short Hover corrections instead of blind jumps around the hotel and secret courses.
Enter Sirena Beach and prepare the resort route
After Yoshi has been unlocked, go to the building north of the Shine Gate in Delfino Plaza. The red pipe above its roof is blocked by a pineapple. Bring Yoshi to the pipe and have him eat the pineapple, then enter the pipe to reach Sirena Beach. This is the required entrance for the original Nintendo GameCube release.
The ocean at the beach is the most dependable refill point. Water barrels are especially useful during Episode 1 and Episode 6, while the hotel and casino contain smaller water sources for interior work. Before a narrow jump, move the C Stick to set the landing in view. Use Hover only after a properly aimed jump; holding it through an entire sequence can leave Mario without enough water for the next correction.
- Unlock Yoshi before attempting to open the Sirena Beach pipe.
- Have Yoshi eat the pineapple above the building north of the Shine Gate.
- Identify the beach, barrel, hotel, and casino refill locations.
Episode 1: defeat The Manta Storm
Follow the signs up the central stairs and speak to the Pianta at the top to begin the encounter. The large electric manta sweeps across the beach and leaves dangerous electric goop behind it. Spray the manta as it approaches. Water makes it split into smaller manta pieces; continue spraying one piece until it divides or disappears, then concentrate on the next instead of allowing several small pieces to spread across the beach at once.
The safest open space is the beach, with the covered huts and palm-tree shade providing temporary protection from the electric trails. Keep Mario moving sideways while spraying. If a trail cuts off the route, use a short Hover jump to cross clean ground and retreat toward the ocean for a refill. When every section of the manta has been destroyed, the resort is cleaned enough for Hotel Delfino to appear and the Shine is awarded.
- Speak to the Pianta at the top of the central stairs.
- Spray the large manta until it splits, then eliminate the smaller pieces.
- Use shade or rooftops to escape spreading electric goop.
- Collect the Shine after the entire manta has disappeared.
Episode 2: complete The Hotel Lobby’s Secret
Speak to the hotel manager at the entrance to enter Hotel Delfino. Work through the lobby and upper rooms until you reach the large Boo at the top of the central hotel area. Enter the Boo’s mouth to reach the secret platforming course. White Boos can be defeated by jumping on them, transparent Boos become vulnerable after being sprayed, and pink Boos can be turned into temporary platforms. Treat coins that do not rotate normally as possible ghosts and test them cautiously.
FLUDD is unavailable inside the secret course. The normal completion rewards the Episode 2 Shine. For the hidden Shine, replay this course and hit the red switch near the middle section. A 90-second timer begins. Collect the eight red coins through the sand blocks, suspended gaps, and final block sections, using Hover to correct individual jumps. The hidden Shine appears after the last red coin, so reach it without falling after the timer challenge.
- Enter the hotel through the manager after Episode 1 reveals it.
- Reach and enter the giant Boo’s mouth.
- Complete the secret course once for the Episode 2 Shine.
- Replay it, activate the red switch, and collect all eight red coins for the hidden Shine.
Episode 3: solve Mysterious Hotel Delfino
The objective is in the third-floor spa, but the direct route is blocked. Enter the hotel and reach the upper rooms through the bathroom route: jump through the water leaking from the last stall to reach the room above. Spray the ocean painting until it changes, then jump through it. In the next room, spray the wooden doors until the Boo outline appears and the doors open. Continue through the bathroom, use the pink Boos as platforms, and spray the bookcase to reveal the concealed passage.
Ground-pound the lighter floor tile to drop into the room containing crates. Break the crates to obtain the pineapple, then carry it back to the lobby and feed it to the Yoshi egg. Ride Yoshi back to the third floor through the open route near the spa. Use Yoshi to eat the Boos blocking the ventilation passages, then follow the vents toward the spa and ground-pound the cracked floor tile above the target area. If Yoshi is lost, return to the lobby egg and repeat the fruit delivery.
- Reach the upper hotel rooms through the leaking bathroom stall.
- Open the painting, Boo-door, pink-Boo, and bookcase routes.
- Break the crates to obtain the pineapple.
- Feed the pineapple to Yoshi and use him in the ventilation passages.
- Ground-pound the correct cracked tile above the spa.
Episodes 4 and 5: open Casino Delfino and defeat King Boo
In Episode 4, enter the casino through the attendant near the hotel doors. At the two large slot machines, spray the reels until both display 777. The central curtain opens to a large Shine puzzle. Spray the puzzle tiles until the Shine image faces Mario, revealing the pipe to the casino secret course. Complete that course for the Episode 4 Shine.
Replay Episode 4 and enter the same secret course again. Hit the red switch to start a 60-second timer, then collect the eight red coins across the moving blocks, orange logs, nails, and final rotating log. The resulting Shine is Sirena Beach’s second hidden Shine.
For Episode 5, return to the casino and ground-pound the purple tile on the roulette wheel. King Boo cycles through slot-machine results. Spray him to force the result, then react to what appears. When fruit appears, pick up a chili pepper and throw it at King Boo’s face. His tongue catches fire and he becomes vulnerable to another chili pepper. Repeat this sequence for three successful hits. Move around the arena to avoid small Boos and other slot results, and do not remain directly in front of King Boo while waiting for the next fruit.
- Make both large slot machines show 777.
- Complete the casino course for the normal Episode 4 Shine.
- Replay the course and collect its eight timed red coins for the second hidden Shine.
- Ground-pound the purple roulette tile in Episode 5.
- Hit King Boo with chili peppers three times.
Episodes 6 and 7: clean the beach and chase Shadow Mario
Episode 6 gives Mario three minutes to clean the beachfront. Use water barrels for broad sections of goop and sweep the beach systematically rather than repeatedly crossing the same area. The objective requires the main contamination to be removed; tiny remaining specks are less important than the large patches. When the beach is sufficiently clean, speak to the Pianta on the beach to receive the Shine.
Episode 7 is Shadow Mario Checks In. Chase the real Shadow Mario around the resort and spray him at close range. Several Boos can imitate Shadow Mario, so continue pursuing the target that runs away from Mario and use short sprays when he reaches a wall, building, or turn. The chase is completed when the real Shadow Mario is sprayed enough to fall. Collect the Shine that appears.
- Finish the three-minute cleanup before time expires.
- Use barrels to clear large sections quickly.
- Speak to the beach Pianta after cleaning the required area.
- Ignore fake Shadow Marios created by Boos and spray the fleeing real target.
Episode 8: collect the hotel’s eight red coins
Enter the hotel and hit the red switch in front of the central lobby pole. The five-minute timer starts. A reliable route begins with the coin near the lobby pole, then the women’s bathroom on the first floor. In the men’s bathroom, jump through the ceiling opening near the leaking water, bounce on the bed, and reach the pool area for another coin.
Return to the lower room beneath the pool and spray the painting to open the passage to the next room. Continue to the second-floor lobby and then the third-floor lobby for the next coins. On the third floor, enter the room without a normal door, bounce on the bed into the attic, and go left of the Pianta. Break through the attic tile, fall into the room below, and spray the poster to open the route to another red coin. Return to the previous room, ground-pound the oddly colored tile, and walk through the opening below for the final coin. The Shine appears after all eight are collected.
- Activate the red switch in the hotel lobby.
- Reach the bathrooms, pool room, second-floor lobby, and third-floor lobby.
- Use the attic tile and sprayable poster to reach the later coins.
- Ground-pound the oddly colored tile for the final route.
- Collect all eight red coins within five minutes.
Sirena Beach 100-coin Shine and Blue Coins
Episode 4 is the most practical 100-coin attempt because the hotel and casino are both available. Gold coins from torches, hotel rooms, the lobby water, the attic, crate rooms, the pool area, and casino machines provide the main supply. Spray and ground-pound the small slot machines to make them release coins, and use the casino roulette coin pattern if the hotel route leaves you short. Red Coins and Blue Coins do not count toward the 100 gold coins. Once the counter reaches 100, collect the Shine before taking unnecessary risks.
Sirena Beach contains 30 Blue Coins. They are spread across the beach, resort grounds, hotel, and casino, with some tied to particular episodes or conditions. Use a dedicated episode-by-episode sweep rather than assuming every coin is available in Episode 1. Record each coin as it is collected, especially coins released by cleaning residents, spraying environmental objects, or using Yoshi. For full completion, the Sirena Beach total must reach 30 before the 240-coin game total is exchanged at the Delfino Plaza boathouse.
- Choose Episode 4 for the 100-coin attempt.
- Collect gold coins from the hotel before taking casino risks.
- Confirm the coin counter reaches 100 and collect the Shine.
- Track all 30 Sirena Beach Blue Coins across their required episodes.
- Redeem the Blue Coins later at the Plaza boathouse in groups of ten.
Before you move on
- The Sirena Beach episode list shows Shines for Episodes 1 through 8.
- The normal Episode 2 secret course Shine and normal Episode 4 casino-course Shine are collected.
- The hidden Shine from the Episode 2 red-coin replay is collected.
- The hidden Shine from the Episode 4 casino red-coin replay is collected.
- The Sirena Beach 100-coin Shine is collected from one episode without dying or leaving the stage.
- The Sirena Beach Blue Coin count reaches 30 if pursuing full completion.
- The complete Sirena Beach total is therefore 11 Shine Sprites: eight episode Shines, two hidden Shines, and one 100-coin Shine.
References for this chapter
Noki Bay (World 6) — Underwater Cleanup, Eely-Mouth and Breath Mechanics
Noki Bay becomes available after Mario has collected 20 Shine Sprites. Enter from the Shine symbol in Delfino Plaza by standing in the light and looking up at the sun. The bay contains eight episode Shines, two hidden Shines, one 100-coin Shine, and 30 Blue Coins. Its most important hazards are vertical rope and wall-jump routes, underwater oxygen management, toxic bubbles around Eely-Mouth, and the long FLUDD-less Shell's Secret course. The chapter's required objective is not to clean every underwater platform: in Noki Bay, the major cleanup task is Eely-Mouth's teeth, while the other missions focus on cliff routes, submerged navigation, races and red-coin challenges.
Enter Noki Bay and establish the main route
After reaching 20 Shine Sprites, go to the Shine symbol in the center of Delfino Plaza, near the Shine Gate and the water. Stand in the light, enter the over-the-shoulder view with Y, and look at the sun to enter Noki Bay. The stage begins above the bay. The main route uses floating platforms, suspended ropes, wall jumps, springy platforms and painted cliff sections. Keep the Hover Nozzle equipped for normal navigation, but refill before long climbs or underwater entries.
Learn the landmarks before attempting difficult missions. The waterfall source and cannon area are high on the cliff. The first major wall-jump maze and two shallow puddles are on the upper-left side of the opening route. The Noki settlement and Eely-Mouth's underwater arena are reached through the waterfall. The purple shell near the upper route is the entrance to Episode 6's secret course. Noki Bay's ordinary water restores FLUDD, but it does not replace Mario's underwater oxygen supply; gold coins restore oxygen while submerged.
- Have at least 20 Shine Sprites before entering.
- Locate the waterfall source, the upper-left wall-jump maze and the purple shell.
- Use shallow water to refill FLUDD before an extended climb or secret course.
Complete Episode 1: Uncork the Waterfall
Cross the floating platforms and climb around the central pillar to the suspended gold platform. Spray the jug opposite the platform to raise it, then use the higher ledges and wall jumps to continue right. Spray the painted sections on the cliff to reveal ledges and platforms. Clean the dolphin-shaped paint and the other blocking patches, then climb toward the cannon at the top. A pool near the cliff is a useful full refill before the final approach.
The cannon fires Bob-ombs. Spray a Bob-omb until it is disabled, pick it up and throw it back toward the cannon. Repeat this three times. Throw from a position that gives the Bob-omb enough distance to reach the cannon, and avoid standing close to the cliff edge while handling it. Destroying the cannon uncorks the waterfall and produces the episode Shine.
- Raise the suspended platforms by spraying their jugs.
- Reveal the painted cliff ledges and reach the cannon.
- Disable and throw three Bob-ombs into the cannon.
- Collect the Shine after the waterfall is uncorked.
Complete Episode 2: The Boss of Tricky Ruins
Cross the opening platforms to the far ledge and speak with the purple Noki. Spray the brown wall section to reveal the passage network, then wall-jump through the passages and climb to the upper ruins. Defeat the small octopus enemies on the route and reveal the next set of passages by spraying the brown wall section.
At the summit, fight Gooper Blooper. Let a tentacle extend, then grab it and pull until it snaps off. If the tentacle is difficult to catch, jump on its tip to flatten it briefly. Remove the front tentacles, spray the dark grime around Gooper Blooper's mouth, then grab the cork in its mouth and pull it back to damage the boss. Repeat the tentacle-removal and cork-pulling process until Gooper Blooper is defeated. Stay away from the edge while pulling, because falling forces you to repeat the climb. Afterward, drop through the hole where the boss stood, clean the two large jars for optional Blue Coins, and collect the Shine in the room below.
- Reveal and climb the upper ruin passages.
- Remove Gooper Blooper's tentacles and clean the area around its mouth.
- Pull the cork from its mouth until the boss is defeated.
- Collect the Shine below the arena.
Complete Episode 3: Red Coins in a Bottle
Episode 3 places Mario inside a bottle filled with water. This is a practice mission for Noki Bay's later underwater sections. Swim upward with the Hover Nozzle, and collect ordinary gold coins whenever the oxygen meter needs replenishing. Do not treat FLUDD water as an oxygen refill; the gold coins are the important recovery resource.
The eight red coins are distributed through the bottle: one is near the top, two are on the sides around the middle, one is above the tall vertical line of gold coins, one is suspended above the bottle floor, one is beside the arrow sign on the floor, one is in the rock formation's alcove, and one is behind that formation on a rock. Work from the top downward, then inspect the floor and the rock formation before leaving. The Shine appears in front of the rock formation on the bottle floor after all eight red coins are collected.
- Use Hover to control vertical movement inside the bottle.
- Restore oxygen with gold coins when necessary.
- Collect all eight red coins, including the two behind or inside the floor rock formation.
- Take the Shine from the bottle floor.
Defeat Eely-Mouth in Episode 4
Climb the ropes and ledges to the waterfall source and speak with the old purple Noki. Jump into the waterfall to be sent to the underwater arena. Dive straight down, avoiding the toxic bubbles on the way. The fish bowl supplied for this episode protects Mario while he is underwater, but it does not remove the need to manage oxygen and avoid hazards.
Swim into Eely-Mouth's open mouth and use the Squirt Nozzle to clean the black teeth until they are white. Eely-Mouth eventually closes its mouth and ejects Mario. When that happens, move to the side ledges and collect gold coins to restore oxygen while the eel turns around. Return when its mouth opens and continue cleaning. The required action is cleaning the teeth; spraying the eel's eyes or trying to detoxify individual bubbles is not a separate boss phase. Repeat the entry, cleaning and recovery cycle until the teeth are clean. Eely-Mouth retreats and leaves the Shine on the seabed. Collect it before exiting.
- Speak with the old Noki at the waterfall source.
- Dive through the toxic bubbles without losing the route.
- Clean Eely-Mouth's black teeth until they are white.
- Collect gold coins for oxygen when the eel closes its mouth.
- Take the Shine from the seabed after Eely-Mouth retreats.
Complete Episodes 5 through 8
Episode 5, Il Piantissimo's Surf Swim, is a race to the flag on the far side of the bay. From the starting ledges, take a direct line across the platforms and use Hover to correct gaps. Do not follow the longer route around the houses. Touch the flagpole before Il Piantissimo to receive the Shine.
Episode 6, The Shell's Secret, leads to the purple shell near the upper route. Reach it by crossing the floating platforms and ropes, using the springy platform and Hover to gain height. Inside the shell, FLUDD is removed. Complete the obstacle course with normal jumps, wall jumps, poles, ropes and the rotating platforms. Stay near the center of rotating platforms, use the poles to gain height, and make deliberate side jumps across the moving tower section. The Shine is at the end. Optional green mushrooms can be collected by ground-pounding the indicated nails, but they are not required.
Episode 7, Hold It, Shadow Mario!, is a chase. Follow Shadow Mario up the bay, spray him whenever he is within range, and take shortcuts across the central platforms instead of tracing every turn. Watch for the boxing-glove hazard and avoid being knocked from narrow ledges. When Shadow Mario falls, approach him to finish the chase and claim the Shine.
Episode 8, The Red Coin Fish, begins with the younger Noki placing the fish bowl on Mario again. Jump into the waterfall to reach the underwater arena. The red coin fish is made of gold coins with eight red coins embedded in its body. It separates and reforms as it moves. Swim close enough to collect the red coins in its eye, dorsal fin, tail and other body sections, but do not chase one into a wall. Use nearby gold coins to recover oxygen or health when needed. The Shine appears after all eight red coins are collected.
- Beat Il Piantissimo by touching the far flag first.
- Complete the FLUDD-less Shell's Secret course.
- Catch Shadow Mario while avoiding the boxing-glove hazard.
- Collect all eight red coins embedded in the Red Coin Fish.
Collect both hidden Shines
The first hidden Shine is the Shell's Red Coins. Replay Episode 6 and enter the purple shell again. Complete the opening portion of the course until reaching the red switch beyond the first wall-jump and rotating-platform sections. Ground-pound the switch to begin the timed eight-red-coin challenge. FLUDD is available during this replay.
Use backflips and Hover for the first two elevated coins. Continue up the ramp for the next pair, then use wall jumps and Hover to reach the following coins. One coin is just before the first spinning rectangle; after crossing it, backflip from the safe area for the last coin instead of immediately entering the next rectangle. The Shine appears on the safe platform after the second spinning rectangle. The challenge gives 1 minute and 30 seconds, so avoid unnecessary detours and restart if a fall leaves too little time.
The second hidden Shine is the Golden Bird of the Bay and is not another Red Coin Fish challenge. Enter any ordinary Noki Bay episode and go left of the first wall-jump maze, near the two puddles. Wall-jump up to the doorway in the cliff, enter the passage and follow it to the far opening. Backflip into that opening to land on a hidden spring, then use the spring to reach the highest point. Find the golden bird near the tree and spray it three times. It changes into a Shine, which appears beside the nearby tree.
- Replay Episode 6 and ground-pound the red switch in the secret course.
- Collect all eight red coins within the 1:30 limit.
- Reach the hidden spring route left of the first wall-jump maze.
- Spray the golden bird three times and collect the Shine beside the tree.
Earn the 100-coin Shine and sweep Noki Bay
Episode 6 is a practical 100-coin choice if you prefer to avoid the deep-water route. Episode 8 has even more available coins if you are comfortable underwater. In Episode 6, collect coins through the ordinary bay route, the wall-jump passages, the hidden spring area and the rest of the obstacle-course approach before taking unnecessary risks. In Episode 8, collect the long underwater coin trail, the coins around the Noki settlement, the wall-jump passages, the hidden spring area and the coin-producing switch near the waterfall view. Do not leave the episode after reaching 100 coins: the Shine appears in the stage and must be collected there.
For a methodical Blue Coin sweep, remember that Noki Bay contains 30 Blue Coins. Check the open-water platforms, the cliff alcoves, the painted wall passages, the underwater Noki settlement, the waterfall area and the jars in the Episode 2 Shine room. Several coins are tied to particular episodes or environmental arrangements, so record the episode used for each pickup rather than assuming every location is present in every mission. The golden bird route also contains ordinary coins useful for the 100-coin attempt, but its Shine is separate from the 100-coin reward.
If a mission fails, select the same episode again from the Noki Bay entrance. A failed secret course restarts from its own entrance when re-entered. For Eely-Mouth, refill your oxygen with side-ledge gold coins and return through the eel's mouth rather than trying to remain in the arena during every closed-mouth cycle.
- Reach 100 gold coins in one Noki Bay episode and collect the Shine that appears.
- Check Noki Bay's 30 Blue Coins by episode and location.
- Revisit Episode 2's Shine room for the optional jar coins.
- Record the Golden Bird Shine and Shell's Red Coins Shine separately from the 100-coin Shine.
Before you move on
- The Noki Bay episode list shows completed Shines for Episodes 1 through 8: Uncork the Waterfall, The Boss of Tricky Ruins, Red Coins in a Bottle, Eely-Mouth's Dentist, Il Piantissimo's Surf Swim, The Shell's Secret, Hold It, Shadow Mario!, and The Red Coin Fish.
- Both hidden Shines are collected: Shell's Red Coins and Golden Bird of the Bay.
- The Noki Bay 100-coin Shine has been collected from a single episode.
- The Noki Bay Blue Coin total has been checked against the 30-coin target, including episode-specific placements.
- The chapter contributes eleven Noki Bay Shines in total: eight episode Shines, two hidden Shines and one 100-coin Shine.
Shadow Mario Chases and Interlinked Episodes
Shadow Mario appears in two different progression systems. His Delfino Plaza appearances unlock the Turbo and Rocket Nozzles after specific requirements are met. His Episode 7 appearances in the seven main courses provide the story-critical Shine Sprites needed to open Corona Mountain. These are separate objectives: collecting 25 or 30 Shines does not open the final course, and completing Episode 7 in one course does not replace the others.
Separate the Plaza nozzle events from the story chases
The Turbo Nozzle event requires at least 25 Shine Sprites and access to Yoshi. Yoshi becomes available after completing Pinna Park Episode 4, then defeating Shadow Mario in Delfino Plaza and feeding the requested fruit to the Yoshi egg. Once those conditions are met, Shadow Mario appears in the Plaza carrying the Turbo Nozzle. Chase him and spray him until he drops it.
The Rocket Nozzle event requires the Turbo Nozzle and at least 30 Shine Sprites. Shadow Mario appears on the rooftops near the lighthouse, close to the route toward Gelato Beach. Spray him until he stops and drops the Rocket Nozzle. Afterward, the corresponding nozzle box near the Grand Pianta Statue remains available in Delfino Plaza.
These nozzle events help with exploration and cleanup, but neither one is the requirement for Corona Mountain. The final course opens only after the Episode 7 Shadow Mario Shine has been collected in Bianco Hills, Ricco Harbor, Gelato Beach, Pinna Park, Sirena Beach, Noki Bay and Pianta Village.
- Have Yoshi unlocked before expecting the 25-Shine Turbo event.
- Collect the Turbo Nozzle before attempting the 30-Shine Rocket event.
- Track the seven Episode 7 Shines separately from the total Shine counter.
Prepare before entering an Episode 7 chase
Select the relevant course and choose Episode 7. These missions generally begin with Shadow Mario already visible or immediately available, so do not spend time collecting optional coins before starting the pursuit. Refill FLUDD at the course entrance or a nearby water source, then follow him with the standard Squirt Nozzle.
Hold Shadow Mario in view and spray in controlled bursts. You do not need to copy every turn he makes. When the course provides a parallel path, use it to cut off his route, especially if he is climbing toward a ledge or narrow platform. Keep enough water for the final approach rather than holding the spray continuously from a distance.
A successful spray knocks Shadow Mario down. Walk into him after he falls to finish the episode and collect the Shine. Spraying him without approaching does not complete the mission.
- Start each chase with a filled FLUDD tank.
- Use short, directed sprays while staying close enough to see Shadow Mario.
- Approach him after he falls instead of waiting for the Shine to appear automatically.
Complete the seven required missions
Bianco Hills Episode 7 is Shadow Mario on the Loose. Follow him through the hills and avoid wasting time on the burning goop he leaves behind. Spray the trail only when it blocks a necessary route; otherwise take a nearby clean path and continue the pursuit.
Ricco Harbor Episode 7 is Shadow Mario Revisited. Shadow Mario runs around the harbor’s girders and raised structures. Use the wide lower routes when possible, then climb toward him rather than attempting risky jumps across distant platforms.
Gelato Beach Episode 7 is It’s Shadow Mario! After Him! Stay on the open beach and cut across the sand instead of tracing every turn. Hover is useful for correcting a jump, but the chase can be completed with the standard movement and Squirt Nozzle.
Pinna Park Episode 7 is Shadow Mario in the Park. Enter the park and pursue him through the amusement-park grounds. He takes more sprays than in several earlier chases, so stay near him and continue using controlled bursts until he falls.
Sirena Beach Episode 7 is Shadow Mario Checks In. Speak to the hotel owner and enter the hotel before beginning the chase. Several Boos imitate Shadow Mario inside; identify the real target by following the active chase and its music rather than spraying every dark figure.
Noki Bay Episode 7 is Hold It, Shadow Mario! Shadow Mario is more acrobatic here, and the course includes narrow ledges and hazards. Do not rely on a single long jump to catch him. Use ordinary jumps, backflips and Hover corrections to stay on the same level, then spray when he reaches a landing.
Pianta Village Episode 7 is Shadow Mario Runs Wild. He leaves a trail of burning goop while running. Spray continuously only when necessary, or use a parallel route that avoids the trail. After he falls, approach him for the Shine.
- Bianco Hills: Shadow Mario on the Loose.
- Ricco Harbor: Shadow Mario Revisited.
- Gelato Beach: It’s Shadow Mario! After Him!
- Pinna Park: Shadow Mario in the Park.
- Sirena Beach: Shadow Mario Checks In.
- Noki Bay: Hold It, Shadow Mario!
- Pianta Village: Shadow Mario Runs Wild.
Recover from a failed chase
If Mario falls, loses all health or otherwise fails the mission, select the same course and Episode 7 again from the course-selection screen. The episode is a fresh attempt; failed pursuit does not permanently remove Shadow Mario or invalidate earlier Shine Sprites.
Before retrying, identify the specific cause of failure. In Ricco Harbor and Noki Bay, replace risky shortcut jumps with the lower route and climb again. In Sirena Beach, enter the hotel and confirm that you are following the real Shadow Mario rather than a Boo. In Pianta Village, stop following the burning trail directly and cut across clean ground.
Do not collect Blue Coins or attempt unrelated secrets during the chase. Finish the Episode 7 objective first, then replay the course later for optional cleanup.
- Re-enter the same Episode 7 after a failure.
- Refill FLUDD before restarting the pursuit.
- Use a safer parallel route rather than repeating the jump that caused the failure.
Confirm the final unlock and enter Corona Mountain
After the seventh required Episode 7 Shine is collected, return to Delfino Plaza. The Plaza becomes flooded and the entrance behind the Shine Gate opens. This flood is the practical confirmation that all seven main-course Shadow Mario missions have been completed.
Move toward the raised area behind the Shine Gate and reach the cave entrance. The Rocket Nozzle makes the route easier by launching Mario onto the elevated structure, but the important requirement is completion of all seven Episode 7 missions, not a separate Shine total. Enter the cave to begin Corona Mountain.
Entering and leaving Corona Mountain returns Delfino Plaza to its normal state, so do not mistake the disappearance of the flood after leaving for a lost unlock. The final course remains available.
- Confirm all seven Episode 7 Shines are recorded.
- Look for the flooded Delfino Plaza and opened entrance behind the Shine Gate.
- Enter the cave behind the Shine Gate to start Corona Mountain.
- Do not search for an additional ordinary Shadow Mario Shine at the final entrance.
Before you move on
- The file contains Episode 7 Shines from Bianco Hills, Ricco Harbor, Gelato Beach, Pinna Park, Sirena Beach, Noki Bay and Pianta Village.
- Delfino Plaza floods after the final required Episode 7 completion.
- The entrance behind the Shine Gate is open and Corona Mountain can be entered.
- The Turbo Nozzle is unlocked if Yoshi and the 25-Shine requirement have been met.
- The Rocket Nozzle is unlocked if the Turbo Nozzle and 30-Shine requirement have been met.
- The player can begin Corona Mountain without completing Episode 8 missions, collecting all Blue Coins or reaching a separate campaign Shine threshold.
Corona Mountain — Unlock Requirements and Route to the Final Stage
Corona Mountain becomes available after Mario completes Episode 7 in each of the seven main areas. The plaza then floods and Shadow Mario leads Mario toward the entrance behind the Shine Gate. The stage is a single hazardous route through spike platforms, flaming platforms, a lava boat section and a cloud climb. The Rocket Nozzle is collected inside Corona Mountain, so it is not necessary to own it before entering.
Complete Episode 7 in all seven main areas
Corona Mountain does not unlock from reaching a fixed Shine Sprite total. Complete the Shadow Mario chase in Episode 7 of Bianco Hills, Ricco Harbor, Gelato Beach, Pinna Park, Sirena Beach, Noki Bay and Pianta Village. Each chase awards that area’s seventh Shine Sprite when Shadow Mario is caught and sprayed until he falls.
After the seventh Episode 7 chase, return to Delfino Plaza. The plaza floods and Shadow Mario runs toward the Shine Gate. This flood is the reliable progress signal that the final route is open. If the plaza remains in its normal state, revisit the seven areas and check the episode-selection screens for the missing Shadow Mario Shine.
- Bianco Hills Episode 7 is complete.
- Ricco Harbor Episode 7 is complete.
- Gelato Beach Episode 7 is complete.
- Pinna Park Episode 7 is complete.
- Sirena Beach Episode 7 is complete.
- Noki Bay Episode 7 is complete.
- Pianta Village Episode 7 is complete.
Prepare before entering the mountain
Corona Mountain can be entered without first unlocking the Rocket Nozzle. The stage provides the Rocket Nozzle later, after the lava-boat section. The Turbo Nozzle is also unnecessary for the route, so do not delay the story because either special nozzle is missing from Delfino Plaza.
You may complete optional Plaza, Airstrip and world objectives before entering if you want a clean final approach. This includes Blue Coin trades, secret Shine attempts and 100-coin Shines. These are not prerequisites for Corona Mountain, and the other areas remain available for cleanup after the ending.
Use the plaza’s water to refill FLUDD before climbing toward the entrance. Select the Hover Nozzle for the approach behind the Shine Gate. Hover is the important tool for reaching the ledges; having a separate Rocket Nozzle already equipped is not required.
- The plaza has flooded.
- All seven Episode 7 Shadow Mario Shines are complete.
- FLUDD is refilled before beginning the climb.
- Optional pre-final cleanup is complete if desired.
Reach the entrance behind the Shine Gate
From the flooded Delfino Plaza, go to the left side of the Shine Gate. Use the umbrella tops near the gate as springy platforms, then jump and Hover toward the green ledges behind the gate. Work upward along the ledges rather than trying to jump directly to the cave in one movement.
When Shadow Mario reaches the cave, follow him inside. This transition begins Corona Mountain. If Mario misses a ledge, return to the plaza water, refill FLUDD and try again from a stable umbrella or platform. Avoid starting a Hover jump from the water or from the edge of a moving umbrella, since the initial jump may not give enough height.
The entrance route is separate from the final battle. Once inside the cave, the stage begins with its own platforming sequence and the next chapter covers the Bowser and Bowser Jr. fight.
- The flooded plaza is visible.
- Mario has climbed behind the Shine Gate.
- The cave entrance has been entered.
Cross the spike and flaming platforms
Switch to the Hover Nozzle for the opening cavern. The route alternates between safe rock, retracting spike platforms and flaming platforms. Wait for the spikes to withdraw before landing. A platform with spikes that are only slightly raised is still dangerous, so use the full retraction as your visual cue.
Hover over the flaming platforms and spray downward to extinguish the flames while crossing. The flames return after a short time, so do not stop on a platform longer than necessary. Preserve enough water to correct the next jump, and refill at the water pipe when you reach the broad safe platform later in the section.
Use short, controlled jumps between nearby platforms. Some gaps are easier if Mario begins moving while the spikes are extended, then lands after they retract. Keep the camera aimed at the next landing area and favor the broad central platforms over optional Blue Coins when learning the route. Falling into the lava costs a life and sends Mario back to restart the stage attempt.
- Spike platforms were crossed during their safe cycle.
- Flames were extinguished with Hover Nozzle spray.
- FLUDD was refilled at the safe platform before the boat section.
- Optional coins were ignored when collecting them would risk the route.
Steer the lava boat and climb to the final entrance
At the large safe platform, refill FLUDD and break the nearby crate if you want the extra life. Board the wooden boat only after checking its direction. The boat is controlled with FLUDD: spray the rear to move forward, spray the front to move backward, and spray the left or right side to rotate. Use brief sprays rather than holding the trigger, because even a small collision with the rock pillars can overturn the boat and drop Mario into the lava.
Guide the boat around the pillars and other rock formations, correcting its heading before each narrow passage. Do not attempt sharp last-second turns. If the boat begins drifting toward a pillar, stop spraying, let it settle, then use a short side spray to rotate away. Reach the broad platform at the far end and jump off before the boat touches the shoreline obstacles.
A Rocket Nozzle is waiting on the far platform. Pick it up, then use Rocket boosts to reach the cloud platforms above. Aim each launch at the next visible cloud or solid ledge, and reorient Mario after landing instead of chaining blind launches. The clouds form a rising route; continue from cloud to cloud until Mario reaches the upper opening and the cutscene leading to the final arena begins.
The Corona Mountain approach is complete when Mario reaches that upper transition. The next objective is the final battle, not another selectable episode. If you fall during the cloud climb, restart the climb from the available lower platform and make separate, deliberate Rocket launches rather than trying to steer across the entire gap.
- The lava boat reached the far platform without striking the rock formations.
- The Rocket Nozzle was collected after the boat section.
- The cloud platforms were crossed with separate Rocket launches.
- The upper transition to the final arena was reached.
Before you move on
- The Shine counter includes the seventh Shadow Mario Shine from each of Bianco Hills, Ricco Harbor, Gelato Beach, Pinna Park, Sirena Beach, Noki Bay and Pianta Village.
- Delfino Plaza has flooded and the cave behind the Shine Gate has been entered.
- The spike and flaming-platform section has been crossed.
- The lava boat has reached the far platform and Mario has collected the Rocket Nozzle.
- Mario has crossed the cloud platforms and reached the transition into the final Bowser and Bowser Jr. battle.
References for this chapter
- Super Mario Sunshine - Guide and Walkthrough - GameFAQs
- Super Mario Sunshine — Guide and Walkthrough, GameFAQs
- Super Mario Sunshine - Guide and Walkthrough - GameFAQs, Crazyreyn
- Super Mario Sunshine — Corona Mountain, StrategyWiki
- Super Mario Sunshine/Delfino Plaza - StrategyWiki
- Nintendo GameCube Instruction Manual - Super Mario Sunshine
Corona Mountain Final Battle — Bowser and Bowser Jr.
Complete Episode 7 in all seven main areas to flood Delfino Plaza and open the route into Corona Mountain. Cross the volcanic approach, steer the boat through the lava channel, use the Rocket Nozzle to reach the summit, and defeat Bowser and Bowser Jr. by destroying five marked platforms around the bathtub. On the original Nintendo GameCube controller, use L for the airborne ground pound; Z opens the Guidebook.
Unlock Corona Mountain and enter the final course
Clear Episode 7, the Shadow Mario chase, in Bianco Hills, Ricco Harbor, Gelato Beach, Pinna Park, Sirena Beach, Noki Bay, and Pianta Village. You do not need 120 Shine Sprites, all 240 Blue Coins, or every optional episode to unlock the final course.
Return to Delfino Plaza after the seventh Episode 7 clear. The Plaza floods, removing the obstruction at the cave behind the Shine Gate. Follow Shadow Mario into that cave to enter Corona Mountain. The course contains the final campaign episode and awards one Shine Sprite when Bowser and Bowser Jr. are defeated.
- Episode 7 is complete in all seven main areas.
- Delfino Plaza has flooded.
- The cave behind the Shine Gate is open and leads into Corona Mountain.
Cross the volcanic platform section
Use short jumps across the opening sequence of lava platforms. The route includes retracting spike platforms, flaming platforms, and hazardous enemies over lava. Watch each platform’s movement before committing to a jump instead of trying to cross at full speed.
Spray flames that block a necessary landing or route, then move across while the platform is safe. Use the Hover Nozzle for small midair corrections, but do not hold it over the lava until the tank is empty. A missed jump is usually unrecoverable unless Mario is already close to a solid platform.
Refill whenever a water source is available. The later boat and Rocket Nozzle sections are safer with a substantial amount of water remaining, so avoid spraying harmless surfaces or distant enemies during the approach.
- Wait for retracting spikes to create a landing window.
- Extinguish flames only when they obstruct the route.
- Use Hover for corrections rather than prolonged hovering over lava.
- Reach the boat area with enough water for later sections.
Steer the boat through the lava river
At the lava channel, board the wooden boat. The boat turns in response to FLUDD spray, so make brief corrections rather than holding R continuously. Spray from the side opposite the direction in which you want the boat to turn, then release R and let the boat straighten.
Keep the boat near the center of the channel. Begin each turn before the boat reaches a wall or obstacle; waiting until the bow is already against a hazard makes the correction much harder. Avoid scraping the sides and do not make large rapid steering inputs unless the route clearly requires a sharp turn.
At the end of the channel, guide the boat to the broad safe platform and step off. Refill FLUDD there before continuing. If the boat is destroyed, Mario must repeat the boat section after returning to Corona Mountain.
- Use short, directional sprays.
- Correct early instead of waiting until the boat reaches an obstacle.
- Step onto the large safe platform at the end of the channel.
- Refill FLUDD before the Rocket Nozzle climb.
Take the Rocket Nozzle and climb to the summit
Locate the Rocket Nozzle box on the large platform after the boat ride. Pick it up and refill FLUDD before starting the ascent. Charge the Rocket Nozzle and release it to launch Mario upward onto the cloud route.
Aim each launch so Mario lands near the center of the next cloud. Continue from cloud to cloud, using the Rocket Nozzle again whenever the next elevation requires it. The upper route includes additional hazards and limited landing space, so charge the nozzle only when Mario is positioned safely and the intended landing is visible.
If you fall during the climb, Mario loses a life and must repeat the approach. The Rocket Nozzle platform is the practical last refill and save location before the final ascent, but it does not create a persistent boss-arena checkpoint. When you reach the summit, enter the dark cloud to trigger the final cutscene and battle.
- Pick up the Rocket Nozzle.
- Refill before beginning the cloud ascent.
- Land centrally on the clouds whenever possible.
- Enter the dark cloud at the summit.
Understand the final arena hazards
The final arena is a circular platform around Bowser’s bathtub. Five narrow branches extend outward from the circular area. Each branch ends at a marked platform with a flame symbol. These five marked platforms are the required targets; Bowser and Bowser Jr. are not defeated by ordinary direct attacks.
Bowser breathes fire across portions of the arena and can create dangerous waves when he moves in the tub. Bowser Jr. fires homing Blue Bullet Bills from the bathtub. Keep moving around the circular platform and change direction before fire or liquid blocks your current route.
Use the Squirt Nozzle on Bullet Bills to destroy or clear them. Spraying Bowser Jr. can briefly interrupt his firing pattern, giving Mario a safer opening to move. Water does not replace the required Rocket-assisted ground pounds, however, and attacking the bosses directly is not the method that completes the fight.
- Locate the five marked branch platforms.
- Keep moving around the circular arena.
- Spray incoming Blue Bullet Bills when they threaten Mario.
- Use FLUDD for short interruptions and defense, not as the main damage method.
Destroy all five marked platforms
Choose a branch with a clear return path and move toward its marked end. Charge the Rocket Nozzle, release it to launch upward, and press L while Mario is airborne to perform the ground pound. On the original GameCube release, Z opens the Guidebook; it is not the ground-pound button.
Land the Rocket-assisted ground pound on the marked platform. The impact cracks and breaks that section of the arena. Immediately jump or Rocket back toward the intact circular center. Do not remain on the broken branch: it collapses, and the green liquid from the bathtub can spread across the area around it.
After returning to stable ground, wait for a safe opening around Bowser’s fire and Bowser Jr.’s Bullet Bills, then approach another intact branch. Repeat the Rocket launch and airborne L ground pound on the remaining four marked platforms. The arena becomes more dangerous as branches disappear, so always identify the retreat direction before attacking.
The fifth successful impact overturns the bathtub and ends the battle. Mario does not need to strike Bowser or Bowser Jr. directly.
- Approach an intact marked branch.
- Rocket upward from the branch.
- Press L in midair to ground-pound the marked platform.
- Retreat before the branch collapses or liquid reaches Mario.
- Repeat for all five marked platforms.
Collect the final Shine and verify campaign completion
After the fifth platform breaks, the bathtub overturns and the ending sequence begins. A Shine Sprite emerges as the final reward. Collect it when it becomes available, then allow the ending sequence and credits to play.
This Shine is an ordinary Shine Sprite awarded for Corona Mountain and is counted with the Delfino Plaza total. It is not necessary to have every optional Shine or Blue Coin before entering the course. After the ending, the remaining worlds, secret courses, 100-coin challenges, Blue Coins, and missed Shines remain available for cleanup.
- All five marked platforms have been destroyed.
- Bowser and Bowser Jr. are defeated.
- The Corona Mountain Shine Sprite has been collected.
- The ending sequence or credits have played.
Before you move on
- The five flame-marked platforms have broken and the bathtub has overturned.
- Bowser and Bowser Jr. have been defeated.
- The final Corona Mountain Shine Sprite has been collected.
- The ending sequence or credits have played.
- The Shine counter has increased by one. Remaining 120-Shine and 240-Blue-Coin completion is optional cleanup after the campaign ending.
References for this chapter
- Nintendo GameCube Instruction Manual - Super Mario Sunshine
- Super Mario Sunshine — Guide and Walkthrough, GameCube, Planet GameCube/GameFAQs
- Super Mario Sunshine - Guide and Walkthrough - GameFAQs
- Super Mario Sunshine — Boss Guide, GameCube, BlueWizard13/GameFAQs
- Corona Mountain — Super Mario Wiki
- Super Mario Sunshine — Super Mario Wiki
Blue Coins — Collection, Episode-Specific Coins and Efficient Redemption
Super Mario Sunshine has 240 Blue Coins in the original Nintendo GameCube release. Ten Blue Coins can be exchanged for one Shine Sprite at the boathouse in Delfino Plaza, allowing all 240 coins to produce 24 additional Shines. The seven main courses contain 30 Blue Coins each, Delfino Plaza proper contains 19, Delfino Airstrip contains 1, and Corona Mountain contains 10. Because many coins are tied to particular episodes, a reliable collection route requires written tracking rather than searching one episode and assuming the course is complete.
Unlock and use the boathouse exchange
The Blue Coin exchange is inside the boathouse beside the Ricco Harbor entrance in Delfino Plaza. The shop is run by two Tanukis: the adult handles the exchange and his son is also inside the building. The shop becomes available after you defeat the Polluted Piranha Plant on the pier side of Delfino Plaza during the opening progression.
Enter the boathouse with at least 10 unredeemed Blue Coins and speak to the adult Tanuki. Each complete group of 10 becomes one Shine Sprite. The game does not require you to wait until the end of the adventure, and exchanging coins does not remove access to any remaining Blue Coins.
The exchange is optional for ordinary course progression. Story-critical objectives, including the Shadow Mario episodes and access to later areas, are not replaced by Blue Coin trades. Use the trades for extra Shine Sprites and for reaching the total of 120 Shines.
- Defeat the Polluted Piranha Plant that blocks the pier-side Plaza area.
- Enter the boathouse beside the Ricco Harbor portal.
- Speak to the adult Tanuki when you have 10 or more unredeemed Blue Coins.
- Record both your collected total and your redeemed total.
Track the correct area totals
Use the course-selection screen as a progress record. Highlight a course or hub location and check its Blue Coin count before leaving. The seven regular courses are Bianco Hills, Ricco Harbor, Gelato Beach, Pinna Park, Sirena Beach, Noki Bay, and Pianta Village. Each has 30 Blue Coins.
The Plaza grouping has 20 coins altogether: 19 are in Delfino Plaza proper and 1 is on Delfino Airstrip. Corona Mountain has 10. This produces the complete total: 210 coins in the seven main courses, 20 in the Plaza and Airstrip grouping, and 10 in Corona Mountain.
Do not assume the map will always display the Airstrip as a completely separate 1-coin category. For checklist purposes, record it separately, but treat the Plaza and Airstrip together as a 20-coin hub total. The Airstrip coin is a late collectible: return there after entering Corona Mountain at least once. You do not have to defeat Bowser before the return trip becomes possible.
- Bianco Hills: 30 Blue Coins.
- Ricco Harbor: 30 Blue Coins.
- Gelato Beach: 30 Blue Coins.
- Pinna Park: 30 Blue Coins.
- Sirena Beach: 30 Blue Coins.
- Noki Bay: 30 Blue Coins.
- Pianta Village: 30 Blue Coins.
- Delfino Plaza proper: 19 Blue Coins.
- Delfino Airstrip: 1 Blue Coin.
- Corona Mountain: 10 Blue Coins.
Sweep permanent-area coins before mission-specific coins
When entering a course for cleanup, first search the main area around the starting point and course entrance. Check rooftops, towers, docks, bridges, cliff ledges, water channels, platforms, and the undersides of raised walkways. Blue Coins are frequently hidden behind structures or placed where the camera does not show them from the normal approach.
Wash visible graffiti, M marks, O marks, X marks, signs, dirty panels, suspicious wall sections, and other marked surfaces with FLUDD. Some marks make the Blue Coin appear at the same spot; others create a timed event or make the coin appear elsewhere. After spraying a mark, stop and search the surrounding route immediately instead of assuming the coin will remain beside the mark.
Also inspect breakable crates, baskets, fruit-related areas, NPCs covered in goop, underwater ledges, and isolated platforms near refill pools. Rocket Nozzle boxes, wires, wall-jump passages, and springboards often indicate the intended route to a high or distant coin. If a coin is visible but unreachable, identify the nearby refill or movement aid before attempting repeated jumps.
- Search the course entrance and main hub before beginning the episode objective.
- Inspect behind buildings, below bridges, and beneath raised platforms.
- Spray every suspicious mark or dirty surface.
- Break crates and investigate baskets, pipes, wires, and nozzle boxes.
- Look both above the waterline and underwater in water-heavy courses.
Record episode-specific coins one mission at a time
Many Blue Coins are not available in every episode. Their appearances can depend on the current mission, a boss arena, a race route, a temporary platform arrangement, the hotel or casino state, the Sand Bird sequence, a Yoshi task, or an underground area opened during a particular episode. Searching Episode 1 and finding no coin in a familiar location does not prove that the location is empty for the entire course.
Choose one episode and write down every Blue Coin collected during that visit. Handle the episode’s unique locations first, then collect any permanent-area coins that are convenient. For cleanup, later episodes are often more useful because they may provide access to additional nozzles, altered platforms, Yoshi, or areas opened by earlier objectives, but no single episode should be assumed to contain all 30 coins.
If the course counter is incomplete, compare your notes against an episode-by-episode checklist. Revisit races, boss arenas, hotel and casino rooms, Sand Bird routes, Yoshi sections, and secret sub-areas separately. This is faster than repeatedly searching the entire course without knowing which episode was used.
- Write the episode number beside each collected Blue Coin.
- Check boss arenas and race routes separately from the normal course area.
- Revisit hotel, casino, Sand Bird, Yoshi, and underground sections in their required episodes.
- Confirm that the area counter changed after each coin is collected.
- Do not mark a location complete solely because you remember visiting it.
Choose an efficient redemption schedule
There is no penalty for exchanging Blue Coins as soon as you reach 10. Immediate redemption gives a Shine Sprite and can be useful when you want to increase your Shine total before later story events. It also reduces the number of unredeemed coins you must remember.
For a full-collection run, many players find it easier to keep a written tally and redeem after finishing a course or hub sweep. This reduces repeated trips to Delfino Plaza, while the collected and redeemed totals remain easy to reconcile. Either method is safe; unredeemed coins are not lost and Blue Coin trades do not permanently alter the campaign route.
A practical compromise is to redeem whenever you return to the Plaza after completing a course section, but record the transaction immediately. For example, note that 30 collected and 30 redeemed means that course is complete, while 30 collected and 20 redeemed means 10 coins are still waiting to be exchanged. Never use only the Shine total to track Blue Coins, because the game does not identify which individual coins produced a traded Shine.
- Redeem groups of 10 whenever convenient.
- Keep collected and redeemed totals in separate columns.
- Use course totals to locate the region containing missing coins.
- Do not delay redemption because of a story requirement; trades are optional Shines.
- Reconcile the written tally with the in-game course counter after every cleanup session.
Before you move on
- The seven main course counters each show 30 Blue Coins.
- The Delfino Plaza and Airstrip checklist together contains 20 coins: 19 from Plaza proper and 1 from the Airstrip.
- The Corona Mountain checklist contains 10 Blue Coins.
- The written total is 240 collected Blue Coins.
- All 240 coins have been exchanged in groups of 10, producing 24 Blue Coin Shine Sprites.
- The collected and redeemed totals agree; no coins remain unaccounted for in the written checklist.
- Episode-specific locations have been checked by mission rather than by a single general course sweep.
References for this chapter
- Super Mario Sunshine/Delfino Plaza - StrategyWiki
- Super Mario Sunshine/Delfino Plaza blue coins — StrategyWiki
- Super Mario Sunshine/Blue Coins — StrategyWiki
- Super Mario Sunshine/Shines — StrategyWiki
- Super Mario Sunshine - Blue Coins FAQ - GameFAQs
- Super Mario Sunshine - Guide and Walkthrough - GameFAQs, Dev
- Nintendo GameCube Instruction Manual - Super Mario Sunshine
100-Coin Shines, Red Coin Challenges and Secret Episodes
Each of the seven main worlds has eight numbered episode Shines, two additional secret Shines, and one 100-coin Shine. Delfino Plaza and Delfino Airstrip are different locations, but they share a single 100-coin Shine and a combined coin pool. The Airstrip also has two dedicated Shine Sprites unrelated to the 100-coin reward. Yellow Coins count toward a 100-coin Shine; Blue Coins are exchanged separately for Shine Sprites, and Red Coins normally belong to timed challenges or other fixed objectives.
Understand the 100-coin Shine
A 100-coin Shine requires Mario to collect 100 ordinary yellow Coins during one continuous visit to the relevant area. The counter is lost if the episode ends or Mario loses a life. Blue Coins do not increase the yellow-Coin total, and Red Coins are not substitutes for yellow Coins. When Mario reaches 100 yellow Coins, the Shine appears in that area; collect it to finish the attempt and bank the reward.
Bianco Hills, Ricco Harbor, Gelato Beach, Pinna Park, Sirena Beach, Noki Bay, and Pianta Village each have their own 100-coin Shine. Delfino Plaza and Delfino Airstrip share one additional 100-coin Shine. Coins collected in the Plaza and Airstrip contribute to the same objective, so do not add a separate Airstrip 100-coin reward to your checklist.
The Airstrip is accessible again late in the game after Corona Mountain has been entered. You must pay the Pianta near the boat by the Plaza docks ten yellow Coins to travel there. The coin total carries into the Airstrip for this objective, making the Airstrip route a convenient way to complete the shared Plaza/Airstrip Shine. The Shine appears above the water tank when the combined total reaches 100, regardless of whether the final Coins were collected in the Plaza or at the Airstrip.
The Airstrip also contains two dedicated Shine Sprites that are separate from the shared 100-coin Shine. One is earned during the opening Airstrip sequence, and the other comes from the later Airstrip Red Coin challenge. Track those two rewards independently, but record only one Plaza/Airstrip 100-coin Shine.
- Count only yellow Coins toward a 100-coin Shine.
- Record one 100-coin reward for each of the seven main worlds.
- Record one combined Delfino Plaza/Airstrip 100-coin reward, not two.
- Track the two dedicated Airstrip Shines separately from the shared 100-coin reward.
- Collect safe ground-level Coins before attempting dangerous platforming, underwater routes, or secret courses.
Use practical 100-coin routes
Bianco Hills is well suited to Episode 8. Sweep the lake, village paths, ropes, ledges, windmill approaches, and ordinary enemy groups before attempting the upper rope route. Collect Coins from enemies and scenery only when Mario has a safe landing. If Yoshi is available, eating bees and spraying beehives can provide additional Coins, but these should supplement rather than replace the safer route.
Ricco Harbor works well in Episode 3 or Episode 8. Collect visible Coins on the harbor platforms, shipyard structures, ships, and elevated walkways. Use the surrounding water for FLUDD refills. Do not chase an isolated Coin over deep water when Mario already has a high total and no reliable landing.
Gelato Beach is commonly handled in Episode 8 because the beach, palm trees, huts, enemies, and surrounding sand provide a broad route. Sweep the beach and nearby structures first. Leave difficult dune, mirror, and elevated-platform Coins until the total is close to 100. If the episode objective goes badly, abandon the attempt and restart rather than risking the Coins already collected.
Pinna Park can be routed through the beach and park entrances before attempting the roller-coaster balloon section. Sirena Beach has Coins around the exterior beach, hotel rooms, casino, balconies, and enemy groups. Inspect side rooms and upper ledges instead of relying on the casino alone.
Noki Bay offers useful routes in Episodes 2, 6, and 8. Collect cliffside and cave Coins before entering long underwater sections, and monitor Mario’s air supply while following underwater trails. Pianta Village is practical in Episode 8: sweep the village paths, tree platforms, enemy groups, and underside routes before attempting Chuckster sections or high-tree jumps.
For the shared Delfino Plaza/Airstrip Shine, begin in the Plaza and collect safe Coins from the underground tunnels, rooftops, signs, windows, crates, ocean rings, birds, and other exposed areas. Once you have at least ten yellow Coins, pay the Pianta near the Plaza boat to reach the Airstrip. Continue collecting there without ending the visit. The runway, perimeter, and enemy groups provide enough additional Coins to finish the combined total. If the final Coin is collected at the Airstrip, the shared Shine appears above the water tank.
- Start with safe ground Coins and breakable objects.
- Refill FLUDD before entering risky platform sections.
- Use separate attempts for 100-coin routes and timed secret courses.
- Treat Plaza and Airstrip Coins as one combined objective.
Complete Bianco Hills, Ricco Harbor, and Gelato Beach secrets
Bianco Hills has secret courses connected to Episodes 3 and 6. Complete The Hillside Cave Secret in Episode 3, then replay it and ground-pound the red button to begin the timed eight-Red-Coin challenge. The second course is tied to The Secret of the Dirty Lake in Episode 6. Re-enter the special course and activate its red button for the second secret Shine. Use brief Hover Nozzle corrections rather than holding the nozzle continuously.
Ricco Harbor’s two secret rewards use different formats. In Episode 2, Blooper Surfing Safari, complete the Blooper race, then replay the episode and finish within the required time for the first secret Shine. Choose a fast Blooper, take the established shortcut, and make controlled turns near walls. The second secret is tied to Episode 4, The Secret of Ricco Tower. Re-enter its special course and ground-pound the red button to begin the timed Red Coin challenge.
Gelato Beach’s two secret rewards are both connected to Episode 1. In Dune Bud Sand Castle Secret, spray the dune bud near the mirror structures to reveal the stairs. Descend into the hidden area and spray the sand-covered Shine image until it is completely revealed; collect the Shine above it. Then replay the sand-castle course and ground-pound its red button to start the timed eight-Red-Coin challenge.
- Bianco Hills: Episode 3 secret and Episode 6 secret replay.
- Ricco Harbor: Episode 2 Blooper time trial and Episode 4 tower Red Coins.
- Gelato Beach: Episode 1 hidden Shine image and Episode 1 sand-castle Red Coins.
Complete Pinna Park, Sirena Beach, and Noki Bay secrets
Pinna Park’s first secret is tied to Episode 2, The Beach Cannon’s Secret. Complete the special course, replay it, and activate the red button for the timed Red Coin challenge. The second is tied to Episode 6, The Yoshi-Go-Round’s Secret. Re-enter that special course and ground-pound the red button after the opening rotating-block section. Position Mario before each jump and use short Hover Nozzle taps only for corrections.
Sirena Beach’s secrets come from Episodes 2 and 4. Complete The Hotel Lobby’s Secret, then replay the course and activate the red button after the wall-jump section and before the sand-block route. For the second, complete The Secret of Casino Delfino and re-enter its special course. Find the red button in the casino course and complete the timed Red Coin route. These challenges are episode-specific, so entering the hotel or casino during the wrong episode may not reveal the intended course.
Noki Bay has one hidden Shine obtained from a golden bird and one secret-course replay. In a normal Noki Bay episode, travel through the cliffside passages toward the upper area near the large tree. Find the golden bird and spray it until it changes into a Shine, then collect the reward below. For the second secret, complete Episode 6, The Shell’s Secret, replay its special course, ground-pound the red button, and collect all eight Red Coins before time expires.
- Pinna Park: replay Episodes 2 and 6.
- Sirena Beach: replay Episodes 2 and 4.
- Noki Bay: spray the golden bird and replay Episode 6’s secret course.
Complete Pianta Village secrets and retry timed courses
Pianta Village’s first secret is linked to Episode 5, Secret of the Village Underside. Complete the special course, replay it, and ground-pound the red button to start the timed eight-Red-Coin challenge. The route uses narrow platforms, rotating sections, and Pianta throws. Keep the camera directed toward the next landing and make deliberate jumps instead of rushing.
The second Pianta Village secret is in Episode 8, Fluff Festival Coin Hunt. Reach the top of the large central tree, obtain the Rocket Nozzle from the nearby ledge, and use it to reach the tall wooden structure. Enter look mode and spray the sun image until it is fully revealed. The Shine appears after the image is cleaned. This is a hidden environmental Shine, not another red-button course.
For every timed Red Coin course, first complete the course without concentrating on speed. Learn the route, locate the red button, and identify safe landing points. On the timed attempt, follow a fixed order and avoid unnecessary enemies or detours. If Mario falls or the timer expires, restart the episode for a clean attempt. Do not combine a timed secret with a 100-coin run: collecting a Shine ends the episode, while death or exiting discards the current yellow-Coin total.
- Pianta Village: Episode 5 Red Coin replay and Episode 8 sun image.
- Learn each timed route before attempting the Shine run.
- Use separate visits for secret Shines and 100-coin collection.
Before you move on
- Bianco Hills, Ricco Harbor, Gelato Beach, Pinna Park, Sirena Beach, Noki Bay, and Pianta Village each show eight episode Shines, two secret Shines, and one 100-coin Shine completed.
- The single shared Delfino Plaza/Airstrip 100-coin Shine is collected.
- Both dedicated Delfino Airstrip Shines are collected.
- The checklist distinguishes secret-course Shines from world 100-coin Shines, Airstrip rewards, and the 24 Shines obtained by trading 240 Blue Coins.
- The Shine total can be reconciled against 120 without counting a separate Airstrip 100-coin reward.
- For a final verification, confirm the in-game Shine counter and check the Plaza/Airstrip entries together rather than expecting separate 100-coin markers.
References for this chapter
- Super Mario Sunshine - Guide and Walkthrough - GameFAQs
- Super Mario Sunshine - 100 Coin Shine FAQ - GameFAQs
- Super Mario Sunshine - Guide and Walkthrough - GameFAQs, Dev
- Super Mario Sunshine/Delfino Plaza - StrategyWiki
- Super Mario Sunshine/Delfino Plaza — SDA Knowledge Base
- Nintendo GameCube Instruction Manual - Super Mario Sunshine
Recovery, Checkpoints and Saving Strategies
The original Nintendo GameCube version of Super Mario Sunshine does not use modern checkpoint flags in its ordinary episodes. A life loss normally restarts the current level from its beginning, while the game preserves only progress that has been collected and saved. Secret courses restart at their own entrance after a life loss, and a Game Over returns you to the plaza using the latest saved campaign state. Use manual saves between risky attempts, and treat every red-coin, 100-coin, Yoshi and Corona Mountain run as a complete attempt.
Know what a life loss resets
In a standard area episode, losing a life sends Mario back to the beginning of that level. The game does not place him beside the platform, switch, boss arena or refill point where he failed. This applies to ordinary missions, boss fights, Shadow Mario chases and most timed challenges.
Secret courses have a different restart behavior. When Mario loses a life in a secret course, he restarts at that course's starting point rather than being sent immediately to Delfino Plaza. If the failure causes a Game Over, the game returns him to the plaza and uses the latest saved campaign state. Do not confuse this special-course restart with a conventional checkpoint flag.
A life loss ends temporary activity from the failed attempt. The current gold-coin total, red-coin timer, unfinished 100-coin run and boss damage are not retained. A Blue Coin or Shine that has already been collected and saved is different: it is permanent campaign progress.
- Before entering a difficult episode, identify the episode entrance and a dependable water source near the route.
- Assume that a fall into a bottomless pit, lava or another instant-death hazard means restarting the relevant stage.
- Do not begin a red-coin or Yoshi challenge expecting the game to preserve your current platforming position after a failure.
Use manual saves without mistaking them for checkpoints
Press START during gameplay to open the pause screen. The original GameCube manual lists Continue, Save and Leave the Episode. Save records the campaign at the current save point, but it does not create a restart marker inside the level. Reloading after a power loss or Game Over will not place Mario on the platform where he paused.
The game also displays automatic save prompts after important permanent events. These include collecting a Shine Sprite, collecting a Blue Coin and unlocking a FLUDD attachment. Choose Save and Continue or Save and Quit when you want the event protected on the Memory Card. Choosing Continue Without Saving leaves that event vulnerable to being lost if the system is reset before another save occurs.
The safest rhythm is to save immediately after a difficult Shine, after collecting a Blue Coin that you do not want to repeat, and after unlocking a nozzle. Never remove the Memory Card, switch off the console or reset the GameCube while the save operation is active.
- Use the pause-menu Save option before leaving a difficult session.
- Accept the automatic save prompt after every Shine, Blue Coin or nozzle unlock you intend to keep.
- Remember that a save protects campaign progress, not Mario's location, water supply, temporary gold coins or an active timer.
Protect 100-coin attempts
The 100-coin Shine requires 100 gold coins in one episode. The counter is temporary, so dying before the Shine is collected ends that attempt. Build the total through safe sources first: coins along the main route, breakable objects, defeated enemies and accessible side platforms. Only take dangerous detours when the remaining total justifies the risk.
When the counter reaches 100, the Shine appears in the stage, but the attempt is not complete until Mario reaches and collects it. Stop treating the stage as a coin hunt at that point. Take the safest route to the Shine, collect it, and complete the save prompt. Quitting before collecting the spawned Shine wastes the attempt.
If Mario is damaged while the counter is high, use ordinary gold coins to restore health where possible, but do not keep searching for optional coins after the Shine has appeared. A failed 100-coin run is restarted by selecting the episode again; it is not resumed from the point where the counter was lost.
- Choose a normal episode with many safe coins instead of combining the attempt with a difficult secret course.
- Keep the counter visible and avoid optional hazards once the Shine has spawned.
- Confirm that the Shine was collected and saved, rather than merely appearing in the level.
Recover from failed Hover landings
In ordinary stages, use Hover to correct a planned jump rather than to improvise every landing. Start from a stable surface, aim Mario toward the destination, then use a controlled burst of Hover to extend the jump. If you miss the target but can land on a lower platform, stop spraying immediately, stabilize Mario and refill before trying the next jump.
Water sources such as pools, fountains, barrels and refill pipes restore FLUDD. Refill before a long sequence of Hover corrections and avoid spraying harmless scenery while preparing for a jump. A full tank does not protect you from a bad landing, but it gives you more options if the destination is slightly farther away than expected.
In a FLUDD-less secret course, there is no Hover recovery. After each landing, stop and align the camera before attempting the next jump. If Mario is already falling beyond the route, do not spend the remaining movement trying to reach an impossible platform; accept the life loss and restart the course from its entrance.
- Center the camera before narrow jumps and use first-person view only when it genuinely improves alignment.
- Refill before a long Hover sequence or a jump with no lower safety platform.
- Practice difficult secret routes in sections, using known solid landing surfaces as mental markers.
Handle Corona Mountain as a full-run challenge
Corona Mountain should be approached as one demanding final-stage attempt, not as a sequence of guaranteed save points. The reliable strategy is to learn its sections and repeat the route from the beginning after a fatal fall, a failed boat crossing or another life-ending mistake. Do not rely on an assumed checkpoint unless you have personally confirmed the behavior on the exact original release.
At the opening spike and flame platforms, wait for a safe spike cycle, then cross with short Hover bursts. Extinguish flames from a stable edge before committing to the next landing. At the large platform before the boat, refill FLUDD completely and prepare the Squirt Nozzle before boarding.
The boat responds sharply to FLUDD sprays. Use short, deliberate bursts in the opposite direction from the turn you want, and avoid holding the spray continuously. Aim to reach the next safe platform rather than collecting optional Blue Coins during a first clear. If the boat begins to swing toward a wall or lava edge, stop spraying and let its movement settle before correcting.
After leaving the boat, use the available Rocket Nozzle from stable ground. Set Mario's direction before launching, and do not begin a boost while sliding sideways or recovering from damage. If the final arena is reached, the remaining progress is the Bowser and Bowser Jr. fight; a fatal mistake there requires another attempt through the course.
- Refill FLUDD before boarding the boat.
- Use short steering sprays and prioritize survival over optional Blue Coins on the first successful clear.
- Treat every fatal Corona Mountain mistake as a restart of the full approach, not as a guaranteed mid-course continuation.
Retry bosses and timed missions methodically
Boss episodes generally return Mario to the episode's beginning after a life loss. The boss's damage state is not preserved, so identify the interaction that causes damage and conserve FLUDD for that action. Before starting a retry, note the nearest refill point and the safest place to recover health with gold coins.
For red-coin missions, divide the route into repeatable sections: the entrance, the first hazard group, the central platforming area and the final coin route. If the same section causes repeated failures, replay that section deliberately rather than rushing through the entire course. In FLUDD-equipped secret courses, use the red switch only when you are ready for the timed attempt; the red-coin timer does not survive a death.
For Yoshi missions, prepare the required fruit and route before starting a risky jump. If Yoshi is lost, the objective normally has to be attempted again from the episode entrance. Complete the Shine, watch the collection animation and accept the save prompt before moving on to another high-risk task.
- After a boss or secret-course Shine, verify that the Shine counter increased.
- Re-enter a failed mission only after identifying whether the cause was camera alignment, water shortage, timing or route choice.
- For timed red-coin attempts, practice the route before activating the switch.
Before you move on
- After a difficult mission, verify that the Shine counter increased and complete the save prompt.
- For a Blue Coin, confirm the automatic save prompt has finished before resetting or quitting.
- For a 100-coin mission, confirm that Mario collected the spawned Shine rather than only reaching 100 coins.
- After a Game Over, reload the file and verify that the last saved Shine, Blue Coin and nozzle progress remains available.
- After clearing Corona Mountain, confirm that the final Shine and ending sequence have registered before beginning post-game cleanup.
Post-Game, Replay Routes and Yoshi Tasks
After the Corona Mountain ending, the original North American GameCube release leaves the island available for cleanup. Revisit completed episodes for missing Shines, secret stages, 100-coin attempts, Blue Coins and Yoshi objectives. The most useful addition to a late-game route is a complete Pianta Village sweep, because its eight ordinary episodes, two secret Shines, 100-coin Shine and 30 Blue Coins are spread across different time states and episode conditions.
1. Finish the ending and establish a cleanup record
Defeat Bowser and Bowser Jr. in Corona Mountain, let the ending sequence finish, and save when control returns to Delfino Plaza. The final battle awards the Corona Mountain Shine, but it does not complete the 120-Shine collection by itself. Completed areas and episodes remain available after the ending.
Open the in-game guidebook and write down the Shine total for Delfino Plaza and each course. Use a separate list for Blue Coins, recording the episode and landmark as soon as a coin is collected. The guidebook confirms totals but does not identify every missing coin.
- Corona Mountain and the final battle are complete.
- The ending has finished and control has returned to Delfino Plaza.
- A separate Shine and Blue Coin checklist has been started.
2. Confirm Yoshi and nozzle access before cleanup
Check the sunglasses Pianta after reaching 30 Shines. After the final boss, the same reward character can provide Mario's Hawaiian shirt. Both rewards are cosmetic and do not add stages or movement abilities.
Confirm that Turbo and Rocket are available. Turbo is obtained by defeating Shadow Mario near the boathouse after the required Shine threshold. Rocket is obtained from the Shadow Mario event on the rooftop behind the jail or courthouse. Rocket is important for several late-game routes, including the intended entrance to Pianta Village and the upper-tree work in Pianta Village Episode 8.
Yoshi becomes available after completing Pinna Park Episode 4, The Wilted Sunflowers. Shadow Mario then appears behind the Grand Pianta Statue in Delfino Plaza with the Yoshi Egg. Spray him, feed the hatched Yoshi the fruit shown in the thought bubble, and save if desired. Eggs then appear in designated episodes.
- The post-game cosmetic rewards have been checked.
- Turbo and Rocket are available, or their missing unlock events are recorded.
- The Plaza Yoshi Egg has been unlocked and hatched.
3. Clear ordinary course episodes, including Pianta Village
Work through the seven main courses in this order: Bianco Hills, Ricco Harbor, Gelato Beach, Pinna Park, Sirena Beach, Noki Bay and Pianta Village. Check all eight episode slots in each course and collect only the ordinary Shines still missing. A replayed boss episode does not award a second ordinary Shine.
Pianta Village is normally reached through the red pipe on top of the Shine Gate after Rocket is available. The original game also permits an early access route by wall-jumping up the Shine Gate, but that route is optional and unnecessary for a normal cleanup plan. Once inside, clear its episodes in the following practical order.
- All eight ordinary Shines in the first six main courses have been checked.
- Pianta Village has been entered with the Rocket route or the optional early-access route.
- No completed episode is being replayed unless its Shine or an episode-specific Blue Coin is still missing.
4. Complete Pianta Village Episodes 1 through 8
Episode 1, Chain Chomplets Unchained: Cross the bridge and reach the central tree's pool. Hose each flaming Chain Chomplet until it becomes black and calm, grab its chain, and pull it so the animal launches into the pool. Bring all three Chain Chomplets into the water. The Shine appears on a nearby mushroom.
Episode 2, Il Piantissimo's Crazy Climb: Meet Il Piantissimo near the bridge and accept the 30-second race. Spray water ahead of Mario, dive into the water slide, cross toward the large tree at the far side, climb it and touch the flag. The route is faster when the slide is used instead of running the full path.
Episode 3, The Goopy Inferno: FLUDD is removed at the start. Move around the outside of the village to the rear pit, ground-pound through the door, and follow the underside mesh route. Strike the movable hanging panels to cross the gaps, use the ropes and mushrooms to climb, then wall-jump out of the lava area. Recover FLUDD from the wooden structure and reach the golden mushroom in the center. Clean the mayor and speak to him for the Shine. While FLUDD is restored, collect the three episode-specific Blue Coins: clean the FLUDD platform, wash the large signature near the starting bridge and extinguish the burning Pianta on the far-right side before speaking to him.
Episode 4, Chain Chomp's Bath: Release the giant Chain Chomp at the right side. Place a water barrel on the junction near the hot spring, then wait near the rounded fruit tree so the Chain Chomp charges into the barrel. Grab its chain after it cools and pull it around the pool into the hot spring. The Shine appears on the cooled Chain Chomp.
Episode 5, Secret of the Village Underside: Hatch Yoshi using the fruit tree opposite the hot spring. Ride across the bridge, use the lower mushrooms to reach the yellow slime platform, and have Yoshi dissolve the slime covering the hole. Enter the underside secret course. Line up each Chuckster carefully before speaking, because the Pianta throws Mario directly opposite his current facing. The first visit awards the secret Shine.
Episode 6, Piantas in Need: Rescue ten Piantas trapped in small patches of fiery goop within three minutes. Sweep the paths around the central tree, the right side, the hot spring, the fruit tree and the bridge-side routes. Spray each patch until the Pianta is free, then return to the mayor near the starting bridge for the Shine. Afterward, speak to the rescued adult Piantas to receive eight Blue Coins; later replays provide 1-Up Mushrooms instead.
Episode 7, Shadow Mario Runs Wild: Chase Shadow Mario through the village and spray him whenever the path opens. His trail of fiery goop can damage Mario, so clear the ground while pursuing him. Catching him awards the Shine and counts toward the Corona Mountain unlock condition.
Episode 8, Fluff Festival Coin Hunt: Collect eight Red Coins through the village, lower mushroom routes, the hot spring, the fruit tree, the crate area and the upper tree platforms. Use the Rocket Nozzle near the central tree to reach the high wooden structure for the final Red Coin. The Shine appears on a distant cloud; use the fluff carried by the wind from the leaf near the large tree to reach it.
- Pianta Village Episodes 1 through 8 are complete.
- The three Episode 3 Blue Coins and eight Episode 6 rescue Blue Coins have been recorded.
- Episode 7 has been completed for the story progression ledger.
- Episode 8's Red Coin Shine has been collected.
5. Finish Pianta Village's two secret Shines
For Secret Shine 1, replay Episode 5 and enter the Village Underside secret course again. Ground-pound the Red Switch and collect all eight Red Coins before the 1:30 timer expires. Use the Chucksters only after aligning Mario precisely with the intended landing platform. The route becomes more reliable if you clear nearby enemies before beginning the timed attempt.
For Secret Shine 2, replay Episode 8 and reach the top of the large central tree. Take the Rocket Nozzle from the upper village platform, rocket from the leaf near the large tree and land on the tall wooden structure. Face the sun in first-person view and spray it until the hidden Shine appears.
- Pianta Village Secret Shine 1 is complete.
- Pianta Village Secret Shine 2 is complete.
- The two secret Shines are not confused with Episode 8's ordinary Red Coin Shine.
6. Collect Pianta Village's 100-coin Shine
Use Episode 1 for a straightforward 100-coin attempt. Break the crate groups around the village, especially those near the central tree and on the far-right side. Extinguish the burning mushrooms and ground-pound them; each releases a large group of coins. Ground-pound the stone Pianta statue's nose near the hot spring for its coin burst, then ground-pound the center of the sauna bowl for another large group.
Collect the 100th coin only after checking the safer village routes. The Shine appears over the sauna bowl. Do not leave the episode before collecting it, and remember that dying before the Shine is collected resets the attempt.
- The Pianta Village 100-coin Shine has appeared and been collected.
- The Shine was collected before leaving the episode.
- Pianta Village now has eight episode Shines, two secret Shines and one 100-coin Shine accounted for.
7. Perform a practical 30-Blue-Coin Pianta Village sweep
Use a written 1-to-30 ledger and select the episode named below. In the general village sweep, collect the signature behind the starting point, the coin in the left grass, the hot-spring statue nose coin, the coin atop the tall tree at far left, the signature near the small bridge, the coin from the central tree's water hole, the coin beneath the bridge, the coin at the end of the central-tree stream, the signature on the front wooden building, the coin on the leaf reached from the lower-left tree, the underside signature reached through the mesh route, and the hidden moon image coin from the golden mushroom.
In Episode 3, after recovering FLUDD, collect the coin on the FLUDD platform, the large signature revealed after cleaning lava near the starting bridge and the coin awarded by the Pianta whose flames you extinguish. In Episode 5, use Yoshi to defeat the bee swarms at the hive near the starting bridge and the hive beneath the far-left tree, then eat the blue butterflies near the rounded fruit tree.
In Episode 6, spray the arrow sign after crossing the starting bridge. After rescuing all ten villagers, speak to the eight adult Piantas who provide the remaining eight coins. In Episode 8, reach the Rocket Nozzle platform around the central tree and spray the blue bird until it becomes the final Blue Coin. This accounts for all 30 Pianta Village Blue Coins without relying on a memory-only sweep.
- Blue Coins 1 through 12 from the general village landmarks are checked.
- Episode 3 Blue Coins 13 through 15 are checked.
- Episode 5 Blue Coins 16 through 20 are checked.
- Episode 6 Blue Coins 21 through 29 are checked.
- Episode 8 Blue Coin 30 is checked.
- The Pianta Village ledger shows 30 of 30 Blue Coins.
8. Finish the remaining courses, trade Blue Coins and verify 120 Shines
After Pianta Village, clear remaining secret courses and 100-coin attempts in the other six main areas. A secret course awards its first Shine on the initial challenge and usually has a timed Red Coin replay for the second; record the exceptions separately rather than assuming every hidden Shine uses the same trigger.
Complete the broad Blue Coin sweep only after episode-specific objectives are finished. The original game contains 240 Blue Coins, and the boathouse exchange gives one Shine for each ten coins, producing 24 trade Shines. Include Delfino Plaza, the seven main areas, Corona Mountain and the returnable Delfino Airstrip in separate checklist sections.
The Delfino Plaza and Delfino Airstrip 100-coin route awards one shared Shine, not one Shine per location. The Airstrip has its own other rewards, including its timed Red Coin challenge and Blue Coin, but it does not add a second 100-coin Shine.
- The Blue Coin total reaches 240.
- All 24 Blue Coin exchanges have been completed.
- The shared Plaza/Airstrip 100-coin Shine is counted once.
- Delfino Plaza, Delfino Airstrip and Corona Mountain have been checked separately.
9. Perform the final completion check
Confirm that the Shine counter reads 120. Verify the seven main courses individually: each must have eight ordinary episode Shines, two secret Shines and one 100-coin Shine. Then verify the hub, Airstrip, Corona Mountain and all 24 Blue Coin-trade Shines against the written ledger.
Save after the last exchange or Shine. If the special completion presentation is desired, replay Corona Mountain and defeat Bowser after reaching 120 Shines. This adds no new collectible and does not open a new campaign; post-game progression remains replay and cleanup.
- The final Shine counter reads 120.
- All 240 Blue Coins have been collected and exchanged.
- Pianta Village is complete at 11 Shines and 30 Blue Coins.
- A final save was made after the complete collection total was reached.
- Corona Mountain was replayed after 120 Shines if the special ending presentation was desired.
Before you move on
- The final Shine total is 120.
- All 240 Blue Coins have been collected and converted into 24 Shine Sprites.
- Each main course has eight ordinary episode Shines, two secret Shines and one 100-coin Shine.
- Pianta Village Episodes 1 through 8, both secret Shines, its 100-coin Shine and all 30 Blue Coins are complete.
- Ricco Harbor Episode 8, Pinna Park Episode 6, Pianta Village Episode 5 and the Sirena Beach Yoshi access route have been checked.
- Delfino Plaza, Delfino Airstrip and Corona Mountain rewards are recorded separately.
- The final save was made after the complete collection total was reached.
References for this chapter
- Super Mario Sunshine - Guide and Walkthrough - GameFAQs, Crazyreyn
- Super Mario Sunshine - Guide and Walkthrough - GameFAQs, Dev
- Pianta Village - Super Mario Sunshine Walkthrough
- Pianta Village Blue Coins - Super Mario Sunshine Walkthrough
- Super Mario Sunshine/Pianta Village - StrategyWiki
- Super Mario Sunshine/Pianta Village blue coins - StrategyWiki
- Nintendo GameCube Instruction Manual - Super Mario Sunshine
Final 100% Checklist and Walkthrough Completion Checks
For the original North American Nintendo GameCube release of Super Mario Sunshine, a complete file has 120 Shine Sprites and 240 Blue Coins. The safest final route is to record every reward in a separate ledger, finish all non-final objectives, enter Corona Mountain with 119 Shines, defeat Bowser and Bowser Jr., collect the final Shine, save, and verify the full-completion ending presentation.
1. Use the correct 120-Shine breakdown
The seven main areas are Bianco Hills, Ricco Harbor, Gelato Beach, Pinna Park, Sirena Beach, Noki Bay, and Pianta Village. Each contributes 11 Shines: eight numbered episode Shines, two secret-course Shines, and one 100-coin Shine. The seven areas therefore provide 77 Shines. This structure is also reflected in the game's course listings.
The 240 Blue Coins produce 24 additional Shines because the boathouse exchange gives one Shine for every ten Blue Coins. The remaining 19 Shines are the non-Blue-Coin hub and final rewards: the Delfino Plaza/Airstrip hub objectives, the single shared Plaza/Airstrip 100-coin Shine, the two dedicated Airstrip Shines, and the single Shine awarded for completing Corona Mountain's Bowser and Bowser Jr. battle. This is the additive total: 77 + 24 + 19 = 120.
Do not add a separate Plaza 100-coin Shine to a list that already treats the Airstrip and Plaza reward as shared. The game allows the 100-coin Shine to be earned in either Delfino Plaza or Delfino Airstrip, but it can be collected only once. Delfino Airstrip also has two dedicated episode rewards, and Corona Mountain has one final episode reward.
- Seven main areas: 77 Shines total.
- Blue Coin exchanges: 24 Shines from 240 Blue Coins.
- Hub and final rewards: 19 Shines total.
- Delfino Plaza and Delfino Airstrip share one 100-coin Shine.
- Delfino Airstrip has two dedicated Shines in addition to the shared 100-coin reward.
- Corona Mountain contributes one final-battle Shine, not a second Shine for the same battle.
2. Complete and record all seven main areas
Enter each main area and finish Episodes 1 through 8. Episode 7 is the Shadow Mario chase required for Corona Mountain access, while Episode 8 is still required for 100% completion. The episode-selection list confirms the numbered rewards, but it does not by itself prove that the secret-course or 100-coin rewards are complete.
Enter each secret course through its associated episode or entrance. Each secret course has a regular completion Shine and a separate Red Coin Shine earned on a replay with FLUDD available. Some areas use a second secret location rather than two identical-looking course entrances, so record the Shine when it is collected instead of assuming every area has the same entrance layout.
Collect one 100-coin Shine in each main area. The coins must be gathered during one episode, and the Shine appears after the 100th coin. Write down the episode used for each successful attempt so you do not repeat the same search when checking the ledger. Each main area has 30 Blue Coins as well; track those separately from the 11 Shine rewards.
- Bianco Hills: eight episode, two secret, and one 100-coin Shine recorded.
- Ricco Harbor: eight episode, two secret, and one 100-coin Shine recorded.
- Gelato Beach: eight episode, two secret, and one 100-coin Shine recorded.
- Pinna Park: eight episode, two secret, and one 100-coin Shine recorded.
- Sirena Beach: eight episode, two secret, and one 100-coin Shine recorded.
- Noki Bay: eight episode, two secret, and one 100-coin Shine recorded.
- Pianta Village: eight episode, two secret, and one 100-coin Shine recorded.
3. Reconcile all 240 Blue Coins
Track Blue Coins by course rather than only by the total shown after exchanges. Bianco Hills, Ricco Harbor, Gelato Beach, Pinna Park, Sirena Beach, Noki Bay, and Pianta Village each contain 30 Blue Coins. The hub group contains 19 in Delfino Plaza, one at Delfino Airstrip, and ten in Corona Mountain. These groups total 240.
Many Blue Coins are episode-specific. If a course is short of 30, re-enter its episodes one at a time and check temporary events, cleanup targets, enemy sprays, timed challenges, secret areas, and coins that appear only after a particular objective. Searching only the free-roaming version of a stage will not find every episode-dependent coin.
Exchange the coins at the raccoon in the Delfino Plaza boathouse whenever convenient, but record each ten-coin exchange. The exchange count should reach 24. Trading coins early does not reduce the eventual total, but a written record prevents confusion between unredeemed coins and a missing Shine.
- Each of the seven main areas shows 30 Blue Coins collected.
- Delfino Plaza has 19 Blue Coins recorded.
- Delfino Airstrip has its one Blue Coin recorded with the hub group.
- Corona Mountain has all ten Blue Coins recorded.
- The boathouse ledger contains 24 ten-Blue-Coin exchanges.
- The overall Blue Coin total is 240.
4. Finish Delfino Plaza and Delfino Airstrip without double counting
Complete the local Delfino Plaza rewards, including the sand Shine, crate games, bell towers, lighthouse objectives, building challenges, Chuckster task, Yoshi-related secret, Turbo and Rocket Nozzle challenges, Pachinko, Lily Pad Ride, Turbo Track, and the Plaza Red Coin Field. Record the shared 100-coin Shine once, whether you earned it in the Plaza or at the Airstrip.
Delfino Airstrip has two dedicated Shines. The first is the opening Airstrip objective. The second becomes available when the later Airstrip visit is unlocked; pay the boat captain in Delfino Plaza, return to the Airstrip, activate the Red Coin Waterworks challenge, and finish the timed Red Coin route. The Airstrip's Blue Coin belongs to the shared hub ledger.
The game’s in-game location accounting can place the Corona Mountain final Shine and Blue Coin-trade Shines under the Delfino Plaza count. For practical checking, keep separate ledger headings but rely on the overall totals so that the same final reward is not counted once under Corona Mountain and again under Delfino Plaza.
- All local Delfino Plaza rewards are recorded.
- The shared Plaza/Airstrip 100-coin Shine is recorded exactly once.
- Both dedicated Airstrip Shines are recorded.
- The Airstrip Blue Coin is recorded.
- All 24 Blue Coin-trade Shines are included in the total, not added as extra local Plaza objectives.
5. Unlock Corona Mountain and prepare the final run
Complete Episode 7 in Bianco Hills, Ricco Harbor, Gelato Beach, Pinna Park, Sirena Beach, Noki Bay, and Pianta Village. After the seventh Shadow Mario chase, Delfino Plaza floods and the obstruction behind the Shine Gate is removed. Corona Mountain then becomes accessible.
The usual minimum route reaches 50 Shines before entering the final stage: the opening Airstrip Shine plus the seven Episode 7 Shines gives 1 + 49 = 50. This number is a normal route total, not a second unlock test that must be satisfied after the seven chases.
For the cleanest 100% finish, complete every other Shine objective and redeem all 240 Blue Coins before the final battle. Aim to enter Corona Mountain with 119 Shines. During the mountain route, collect its ten Blue Coins, using the refill sprinkler in the first platforming section and the later sprinkler near the boat route. The mountain contains one episode and one final Shine.
- Episode 7 is complete in all seven main areas.
- Delfino Plaza has flooded and the Corona Mountain entrance is open.
- All non-final Shines are complete.
- The counter reads 119 before the final battle.
- All ten Corona Mountain Blue Coins are collected.
- The final Shine is the only Shine still missing.
6. Defeat Bowser and verify the completed file
At the top of Corona Mountain, use the Rocket Nozzle to launch Mario above the hot tub. Ground-pound the flame-marked weak points on the tub, repeating the Rocket boost and ground-pound sequence until all five points are broken. Avoid Bowser's fire, the tub's sludge hazards, and Bowser Jr.'s projectiles. Spray Bullet Bills or Bowser Jr. when necessary to create a safe opening.
After the battle, collect the Shine that appears. This is the 120th Shine on the recommended route. Accept the save prompt or otherwise confirm that the completed file is saved before leaving the result sequence.
Watch through the ending and credits. The normal ending image changes when the game has all 120 Shines: the extended completion presentation uses a group image of the game's friendly characters and the vacation message. The definitive checks are the in-game Shine counter, the 240-Blue-Coin total, the completed ledger, and the changed post-credits image.
- Bowser and Bowser Jr. are defeated.
- The final-battle Shine is collected.
- The counter reads 120.
- The Blue Coin total reads 240.
- The completed file is saved.
- The extended 120-Shine ending presentation appears after the credits.
Before you move on
- The overall Shine counter reads 120.
- The overall Blue Coin total reads 240.
- All 24 Blue Coin exchanges are recorded.
- Each main area has 11 recorded Shines: eight episode, two secret, and one 100-coin.
- The shared Plaza/Airstrip 100-coin Shine is recorded once.
- Both dedicated Delfino Airstrip Shines are recorded.
- All local Delfino Plaza rewards are recorded.
- All ten Corona Mountain Blue Coins are recorded.
- Bowser and Bowser Jr. have been defeated and the final Shine has been collected.
- The completed file has been saved.
- The extended 120-Shine post-credits image appears.
Finishing up
Primary campaign clear: complete Episode 7 in all seven main areas, enter Corona Mountain, defeat Bowser and Bowser Jr., collect the final Shine Sprite and watch the ending sequence.
Campaign access is based on completing Episode 7 in Bianco Hills, Ricco Harbor, Gelato Beach, Pinna Park, Sirena Beach, Noki Bay and Pianta Village; it is not based on collecting every optional Shine or Blue Coin.
Full completion: the in-game counter reads 120 Shine Sprites and the complete Blue Coin ledger contains all 240 Blue Coins, with all 24 groups of ten redeemed at the Delfino Plaza boathouse.
For Shine accounting, record 11 Shines in each of the seven main areas, the 24 Blue Coin-trade Shines, the 15 remaining local Delfino Plaza rewards, the shared Plaza/Airstrip 100-coin Shine, the two dedicated Airstrip Shines and the Corona Mountain final-boss Shine without double counting any category.
The Delfino Plaza/Airstrip 100-coin objective is one shared Shine, not two separate rewards. The Airstrip’s two dedicated Shines are separate from that shared 100-coin reward.
Verify every numbered episode, both secret Shines and the 100-coin Shine in all seven main areas, plus local Plaza rewards, both Airstrip Shines, all Blue Coin trades, the Corona Mountain Blue Coins and the final-boss Shine.
For the 120-Shine presentation, reach 119 Shines before the final battle when possible, defeat Bowser for the 120th, save, and verify the extended ending or post-credits completion image.
Choose your next gameScreenshots & video
Game imagery for reference. Follow the written chapters above for the route and strategies.


Sources & references
Our original guide draws on the references below. Check the edition at the top of this page before following controls or unlock requirements.
- Super Mario Sunshine - Nintendo GameCube Instruction Manual
- Nintendo GameCube Instruction Manual - Super Mario Sunshine
- Super Mario Sunshine - Guide and Walkthrough - GameFAQs
- Super Mario Sunshine - Guide and Walkthrough, GameFAQs, Rolent_X
- Delfino Plaza — Super Mario Wiki
- Delfino Airstrip — Super Mario Wiki
- Super Mario Sunshine/Delfino Plaza — SDA Knowledge Base
- Super Mario Sunshine - Guide and Walkthrough - GameFAQs, Dev
- Super Mario Sunshine/Delfino Plaza blue coins — StrategyWiki
- Super Mario Sunshine — Gold Coin Locations Guide, GameFAQs
- Super Mario Sunshine/Ricco Harbor — StrategyWiki
- Super Mario Sunshine/Ricco Harbor blue coins — StrategyWiki
- Super Mario Sunshine — Guide and Walkthrough — GameFAQs, black_hole_sun
- Super Mario Sunshine - Guide and Walkthrough - GameFAQs, Crazyreyn
- Ricco Harbor — Super Mario Sunshine Walkthrough
- Super Mario Sunshine - 100 Coin Shine FAQ - GameFAQs
- Gelato Beach — Super Mario Sunshine Walkthrough
- Super Mario Sunshine — Guide and Walkthrough — GameCube — Kirby021591
- Pinna Park — Super Mario Sunshine Walkthrough
- Episode 1: Mecha-Bowser Appears! — Super Mario Sunshine
- Sirena Beach - Super Mario Sunshine Walkthrough
- Super Mario Sunshine – Guide and Walkthrough, GameFAQs
- Super Mario Sunshine Sirena Beach Blue Coins - Super Mario Sunshine Walkthrough
- Super Mario Sunshine/Noki Bay — StrategyWiki
- Noki Bay — Super Mario Sunshine Walkthrough
- Corona Mountain — Super Mario Wiki
- Super Mario Sunshine/Delfino Plaza - StrategyWiki
- Super Mario Sunshine Guide and Walkthrough, GameFAQs — KeyBlade999
- Super Mario Sunshine — Guide and Walkthrough, GameFAQs
- Super Mario Sunshine — Corona Mountain, StrategyWiki
- Super Mario Sunshine — Guide and Walkthrough, GameCube, Planet GameCube/GameFAQs
- Super Mario Sunshine — Boss Guide, GameCube, BlueWizard13/GameFAQs
- Super Mario Sunshine — Super Mario Wiki
- Super Mario Sunshine/Blue Coins — StrategyWiki
- Super Mario Sunshine/Shines — StrategyWiki
- Super Mario Sunshine - Blue Coins FAQ - GameFAQs
- Super Mario Sunshine – Secret/Special Stages FAQ, GameFAQs
- Super Mario Sunshine/Gameplay – StrategyWiki
- Pianta Village - Super Mario Sunshine Walkthrough
- Pianta Village Blue Coins - Super Mario Sunshine Walkthrough
- Super Mario Sunshine/Pianta Village - StrategyWiki
- Super Mario Sunshine/Pianta Village blue coins - StrategyWiki
About the game & collecting notes
- Platform
- Nintendo GameCube
This guide leads you through the original Nintendo GameCube (USA) release of Super Mario Sunshine. It covers everything needed to reach and beat the Corona Mountain final battle, explains FLUDD controls and nozzles, details each main world’s episodes and bosses, and provides a complete 100% checklist (all 120 Shine Sprites and 240 Blue Coins) with practical routes and recovery tips.
Darryl Polo
Darryl Polo loves tinkering with emulation and revisiting retro games. He enjoys exploring how old favorites play on different setups and sharing what he learns along the way. At Joking Joystick, he writes about the games, hardware, and small discoveries that keep the hobby fun.
Our editorial standardsFound a step that needs another look? Help us improve this guide.